ea6driver
Community Member
-
Joined
-
Last visited
Everything posted by ea6driver
-
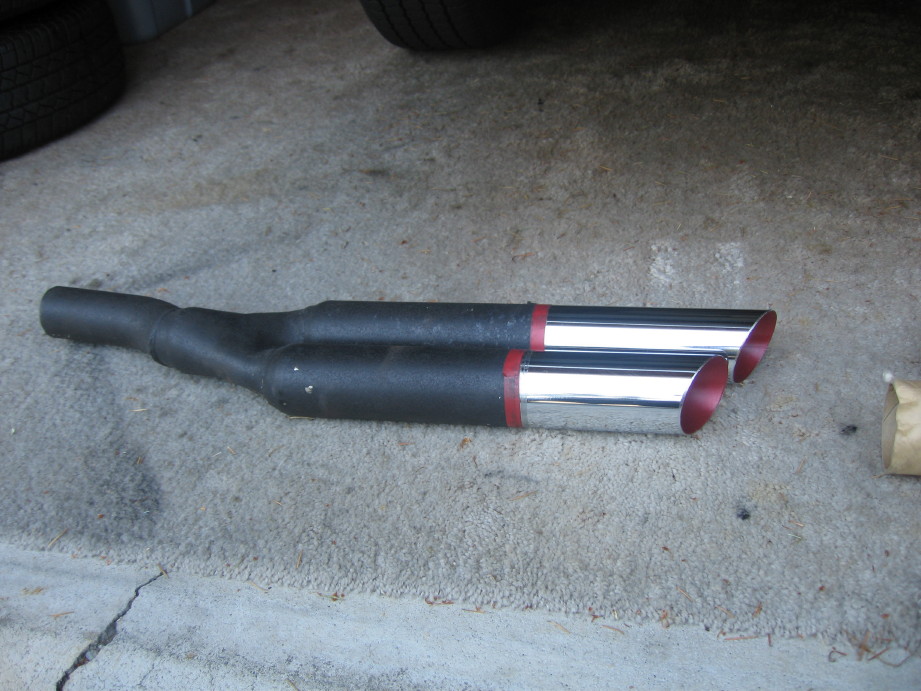
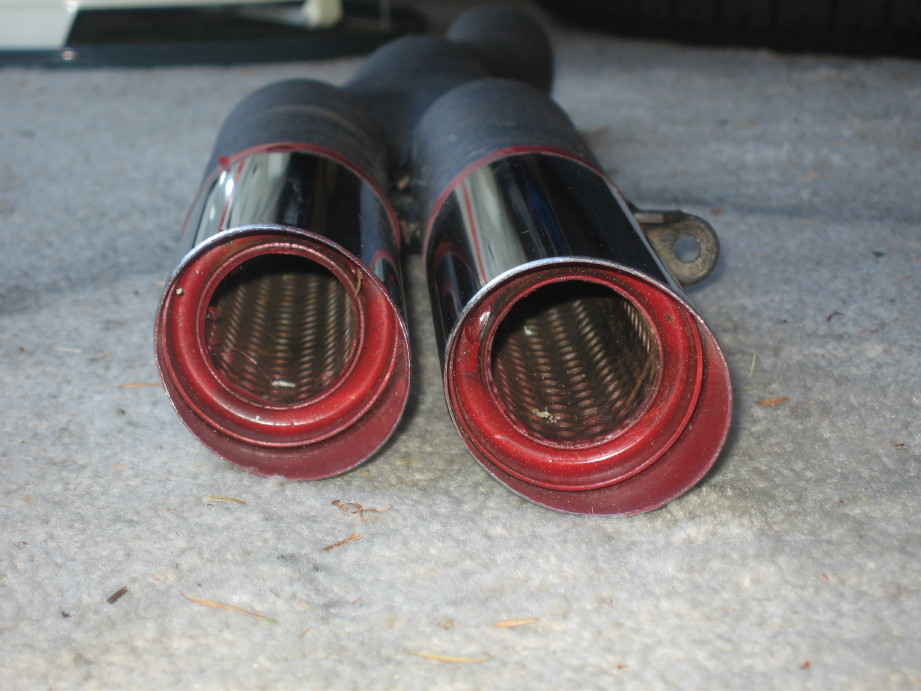
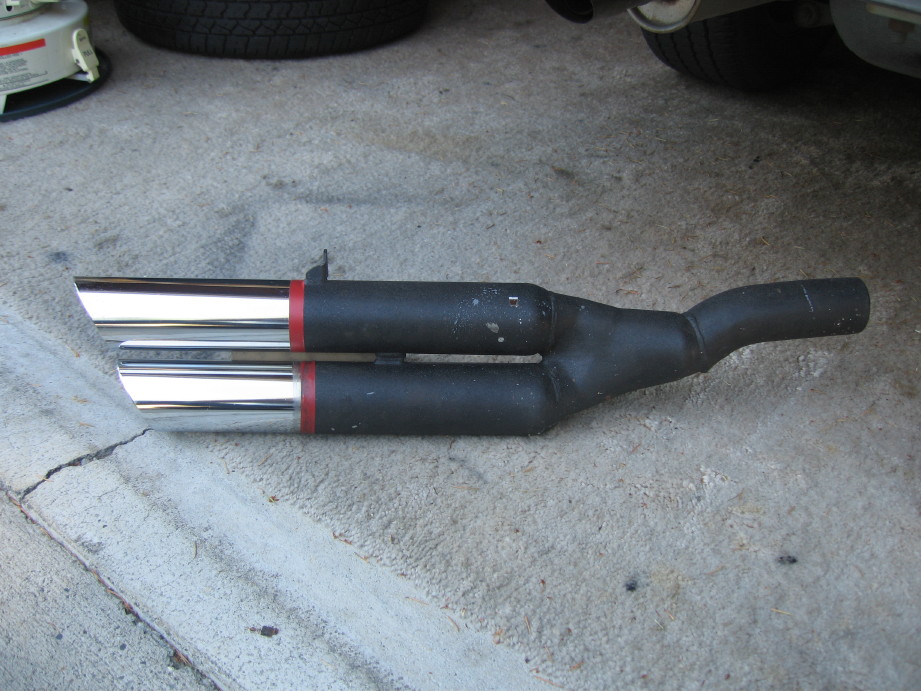
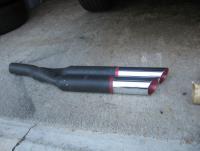
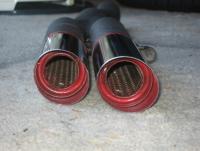
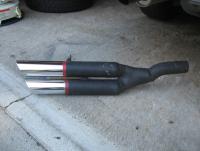
So I'm going through all the miscellaneous Z stuff in my garage yesterday and I come across this (see attached photos). I reckon I knew it was there all along, but had simply forgotten about it. I've had it at least 20 years. Not really sure who the manufacturer was/is, but I seem to recall I bought it from Motorsport Auto. My questions are: 1) What do I need to consider before simply replacing my existing muffler with this (78Z with stock exhaust system). Any performance issues? 2) What will be the difference in the sound of the exhaust with this mod? Will my wife ever want to drive the car again (she's not impressed with excessively loud exhausts)? Will law enforcement take interest in me when I drive by? 3) I've seen similar tips displayed here on other threads. One of these tips in particular seemed to have more of a "crook" or bend in the pipe where it attaches to the exhaust pipe. So are these tips year model specific? I think the chrome tips look alot cooler than the one tip coming out of the current muffler, so I'd like to make the change - I'd just like to be armed with as much knowledge as possible in advance. Thanks in advance for your insight.
-
That was a good idea. I wasn't comfortable trying to cram a 3/8" barb into a 5/16" fuel line. And changing out the whole fuel line to 3/8" just to accomodate the 3/8" tee fitting was problematic as well. So I went to Ace. Got a brass tee fitting with 1/8" NPT holes (since this was what the threads on the gauge had). Screwed a couple 5/16" barb fittings into both ends and problem solved!
-
I'm trying to install an inline fuel pressure gauge. This afternoon I cut the fuel line to insert the gauge fitting but could not get it to fit. My fuel line is 5/16" ID. The fitting is 3/8" OD. I've read that this should work, ie, that I should be able to force the 3/8" fitting into the slightly smaller fuel hose. However, if this is so, I've yet to figure out how. I've looked around online for a 5/16" fitting but couldn't find one anywhere (the fitting needs to have a 1/8 NPT port for the gauge). So my questions are: Should this work? Do I just need to apply more "elbow grease"? If the answer to the above is "no", is the best alternate solution to simply replace the 5/16" fuel hose with 3/8" hose? The concern I have with this solution is that the fuel filter outlet nipple and the nipple to the fuel line running over to the fuel rail are not made for 3/8" hose. Here's a couple links with photos of the fitting and the gauge I'm using: http://www.jegs.com/webapp/wcs/stores/servlet/ProductDisplayPopup?storeId=10001&catalogId=10002&productId=763500&itemId=90480&langId=-1&showValue=1 http://www.jegs.com/webapp/wcs/stores/servlet/ProductDisplayPopup?storeId=10001&catalogId=10002&productId=763500&itemId=360725&langId=-1&showValue=1 I've read here that many have successfully made this mod, so I know the answer is close at hand. Any help/advise is most appreciated.
-
If I were a bettin' man, I'd say that installing a carpet similar to the link you posted would be described as anything except "hassle-free". I paid well over $200 for my replacement "molded carpet kit" and it was pretty basic. The rear deck carpet was pretty nice. It fit well and already had the jute (under) padding attatched. All the edges were bound. It was by far the best piece of the kit although it did not have the finished "slits" for the luggage straps. The piece that installs vertically behind the seats was simply designed to be jammed under the metal trim bar. On my old OEM carpet one single piece was used for both the rear deck and forward "wall" As for the floor area, the kit basically came with 4 large rectangles of carpet (2 per side). Not the same layout as the OEM carpet. Both the front sections included a sewn seam on the inboard side so the carpet would conform to the contours of the floor where it meets the tranny tunnel at the extreme forward end. No finished cutouts for seatbelts, no snaps for the leather emergency brake cover, no "heel pad" along tranny tunnel (to right side of accelerator pedal) as in the OEM carpet. No "jute" padding included for these floor sections. I had to take my carpet to an upholsterer to get all these mods done. In short, lots of extra work.
-
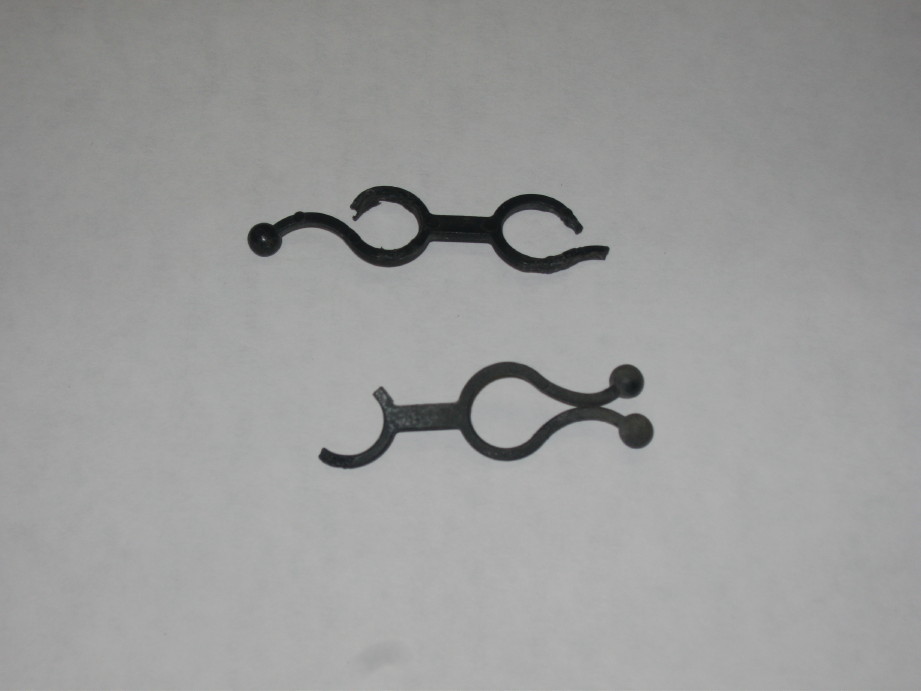
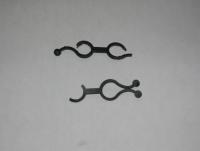
I know it's an engine bay fastener, but specifically what is it used to fasten? One of the fasteners in the photo was attached to the battery-starter cable. The other one was laying on the right frame rail. I'm thinkin' they are vacuum hose fasteners, but that's just a guess. Also, since these are broken, where can I buy some replacements? Thanks in advance.
-
I'm replacing all the vacuum hoses in my '78Z. The FSM is very helpful for showing what components attach to the ends of all the the hoses, but I'm having a litttle trouble trying to figure out how to route the hoses in the engine compartment. Two of the vacuum hoses attach to the intake manifold and run aft then along the top of the firewall (with 3 plastic clips) over to the passenger side where they (and a third hose coming out of the firewall) then run forward to the magnetic valve assembly and vacuum tank. This last part of the run is where I'm not too sure of the routing. In the FSM there is a diagram that shows these 3 hoses running forward and attaching to the engine bay with 3 more clips. I can't find these clips in my car, and I don't want to just leave the hoses dangling in the air. If you've got a 280Z with the stock vacuum hose configuration could you please post a few photos showing exactly how these vacuum hoses attach in the engine bay for this last part of their run forward? Two other short questions: What is the size of the vacum hoses? I'm thinking about ordering some silicone vacuum hoses online and just want to be sure to order the correct size. Where can I get a replacement OEM one-way vacuum check valve (the black circular one that installs into the lower hole of the magnet valve assembly)? Thanks in advance.
-
Went out this afternoon and bought two squeeze tubes of silicone sealer. By squeezing my arm through the holes in the panel I was able to run a thick bead of sealer all along the top of the reinforcement beam. The only part I couldn't reach was about 6 inches at the extreme forward end of the door. Even got my son out to the garage and he couldn't reach that part either. Thanks for all the advice!
-
Thanks beandip, that's quite helpful. The main reason I'm trying to separate the glass from the mounting plate is that I can see quite a bit of rust down in the bottom of the channel that the glass sits in. The only way to attack this rust is to remove the window glass from the mounting plate. Once I get the glass out I plan on using a wire brush on a drill to eradicate the rust. Then I'm thinking of coating the whole area with POR-15 before reattaching the glass to the backing plate. If you've got any better ideas, I'm all ears!
-
Ok. Thanks for all the replies and tips. But beandip I gotta ask you: How did you run a bead of silicon sealer along the top edge of that reinforcement beam? I've been lookin' at that all afternoon and there is no way to squirt it in there with a caulk gun - just not enough clearance to get the caulk gun in there. Parts of it I'm pretty sure I can't even reach with my hands, particularly in the forward part of the door (I've removed the door window and regulator mechanism).
-
I've spent the last 2 days applying "eDead" brand sound deadener mats in the floors, tranny tunnel, and rear deck of my 78 Coupe. Now it's time to do the doors. I've read all the posts in the archives, but still am unsure exactly how to proceed with this part of the job. Several of you have said that you installed the mats to the "inside of the outer door panel." To me that means you had to cut the mats into small pieces and stick them onto the outer panel by squeezing your hands through the small holes of the inner door panel. Even then, there are areas of the outer panel that I don't see how you can possibly reach due to no holes within reach. What am I missing here? Did you remove the complete window crank mechanism and window guide rails to complete this job? Finallly, did you cover the inside door panel (the surface that the trim panel attaches to) with the mats as well? Thanks in advance.
-
How do you remove the window glass from it's bracket/backing plate (78 Coupe)? I've removed the 4 fasteners that appear to secure the glass to the bracket, but I can't seem to pry the glass loose from the groove it fits into. There appears to be 5 or 6 black rubber guides that "pinch" the glass tight into the groove, but the glass is wedged into them so tight that I'm afraid I'm going to break the glass if I keep trying to pry it out. The main reason I'm trying to remove the glass is that the backing plate is pretty rusted in numerous places, and the only way to attack the rust is to remove the glass. I'm going to have to do this for both windows. Thanks in advance for any ideas.
-
I'm having a seriously difficult time finding a replacement "bridge" wiring harness to connect a factory Hitachi AM/FM radio to the console wiring harness. This part is specific to the 78 280Z only. The bridge wiring harness is about one foot long and connects to the console wiring harness with a large black plastic electrical connector. The other end has two smaller electrical connectors that plug directly into the stock Hitachi radio. If anyone knows where I might find one of these harnesses I'd certainly appreciate the help. Thanks in advance!