zKars
 Subscriber
-
Joined
-
Last visited
Everything posted by zKars
-
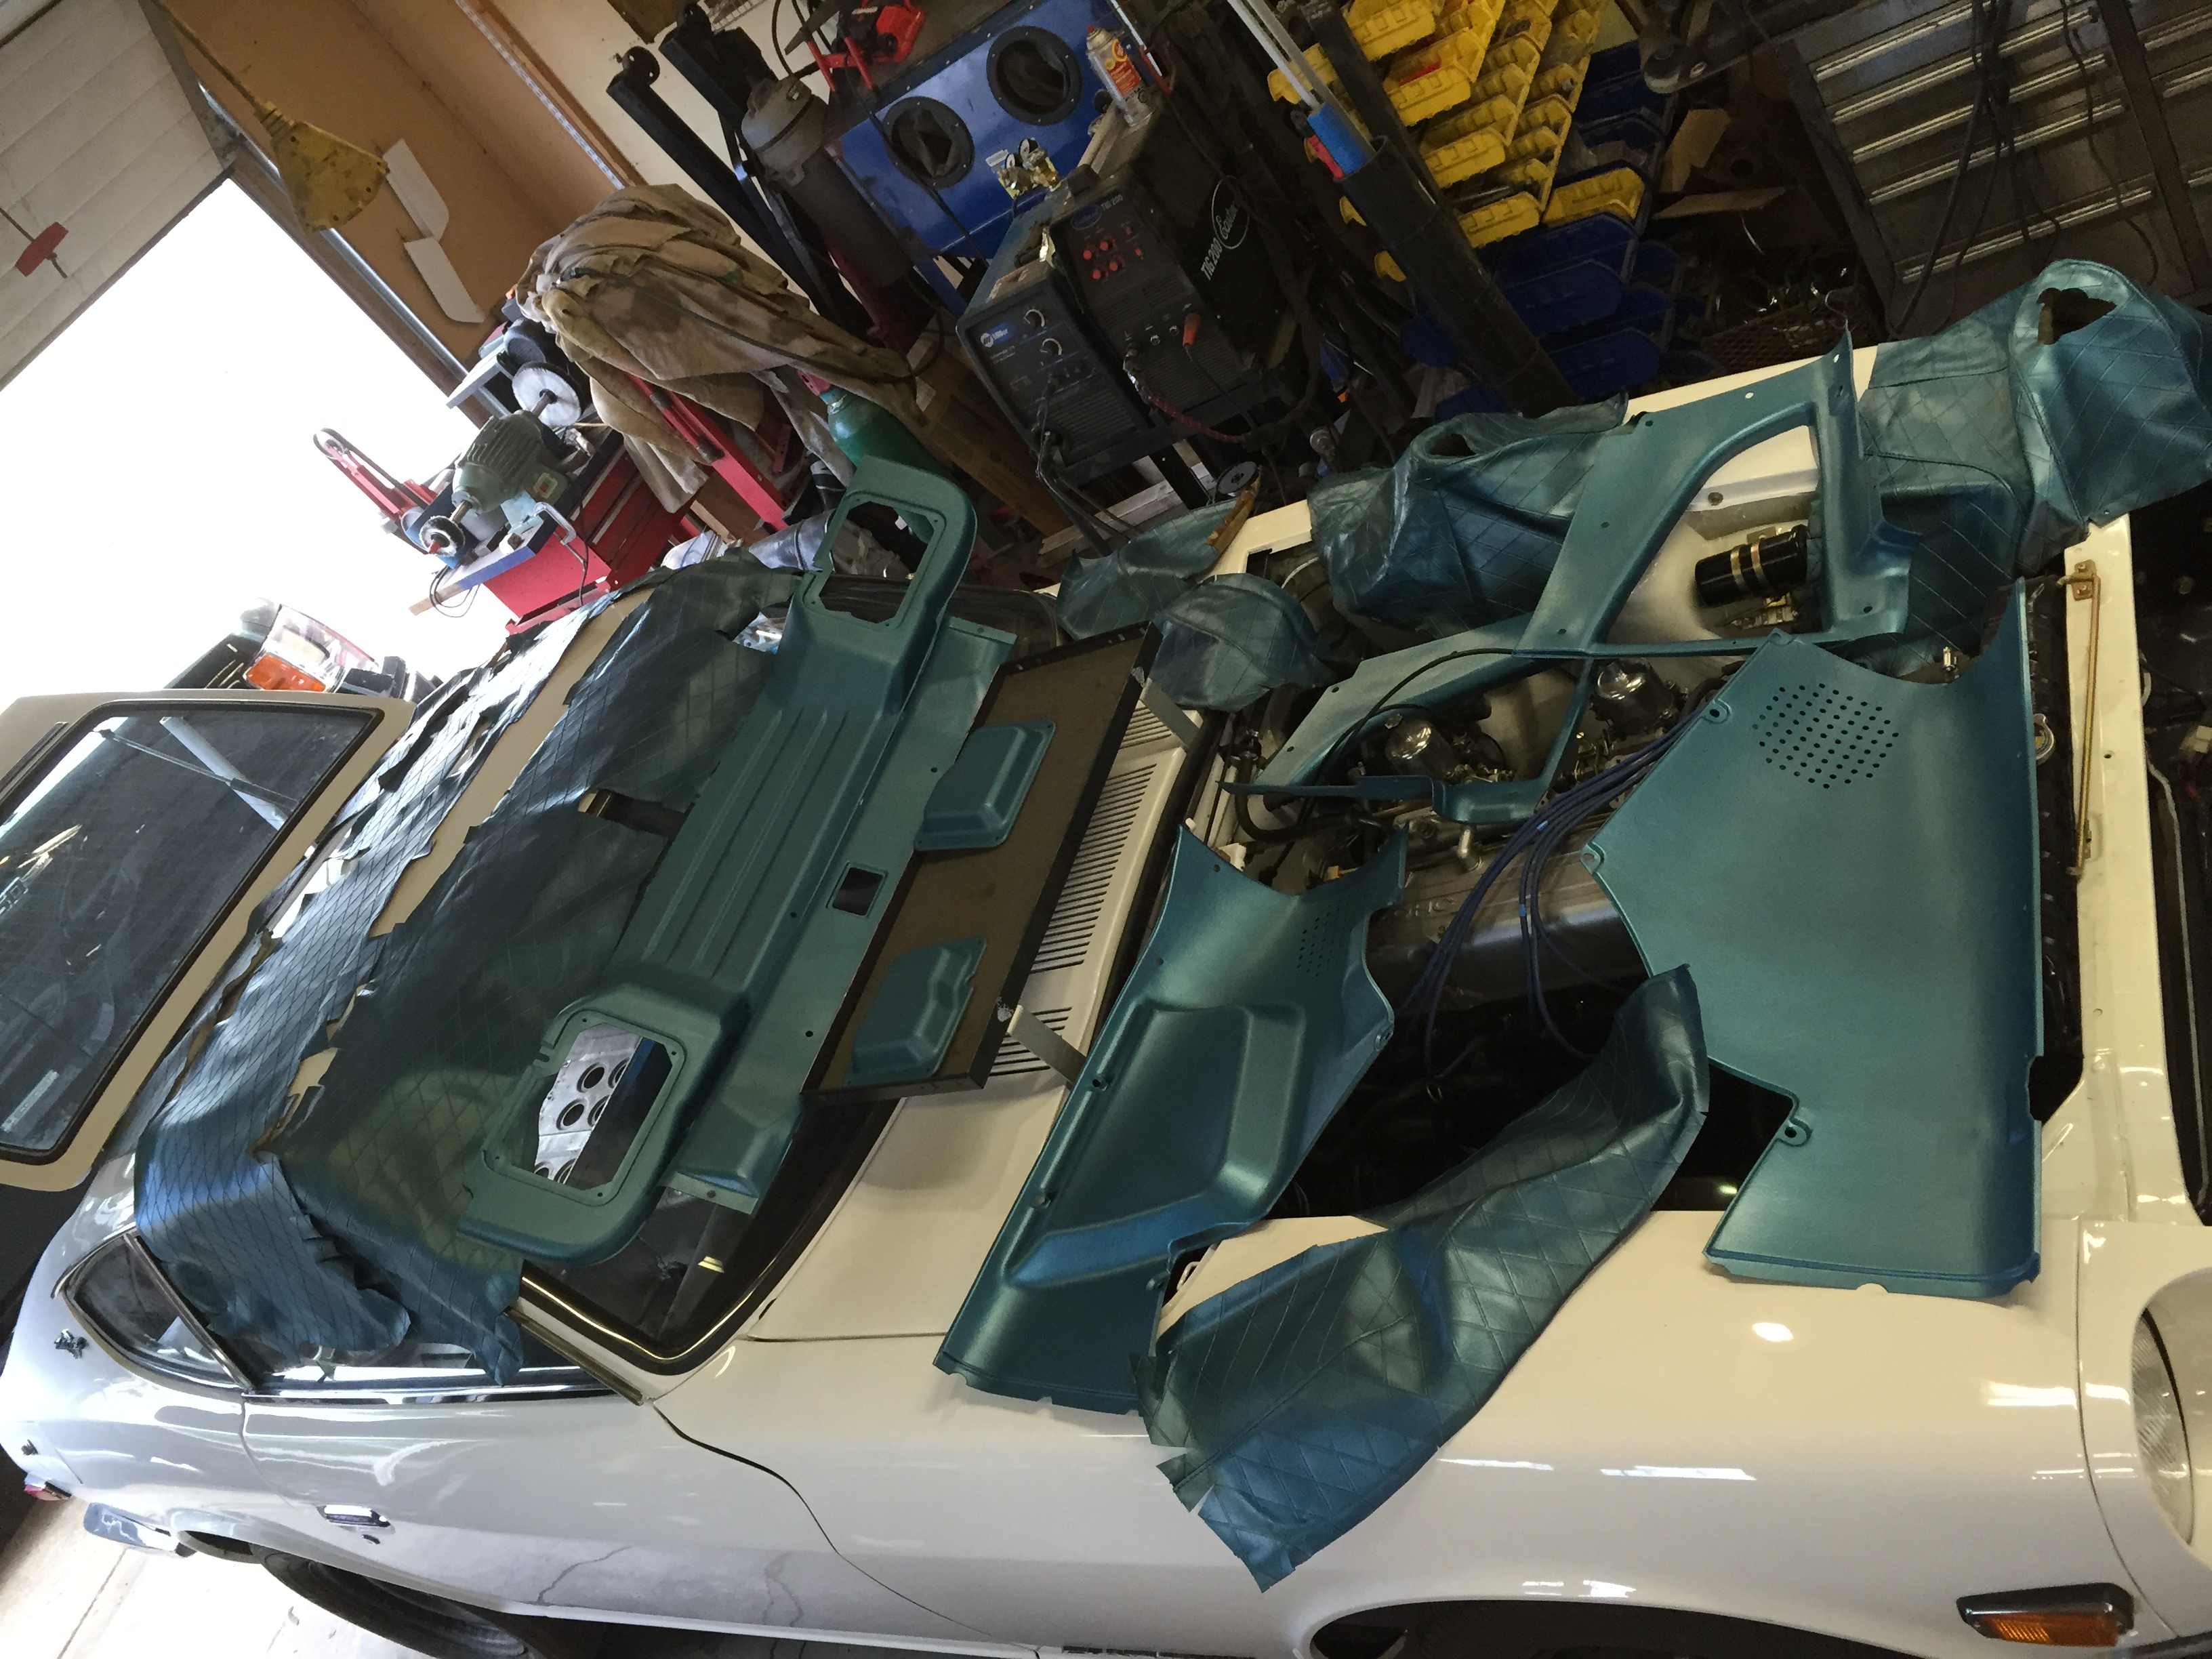
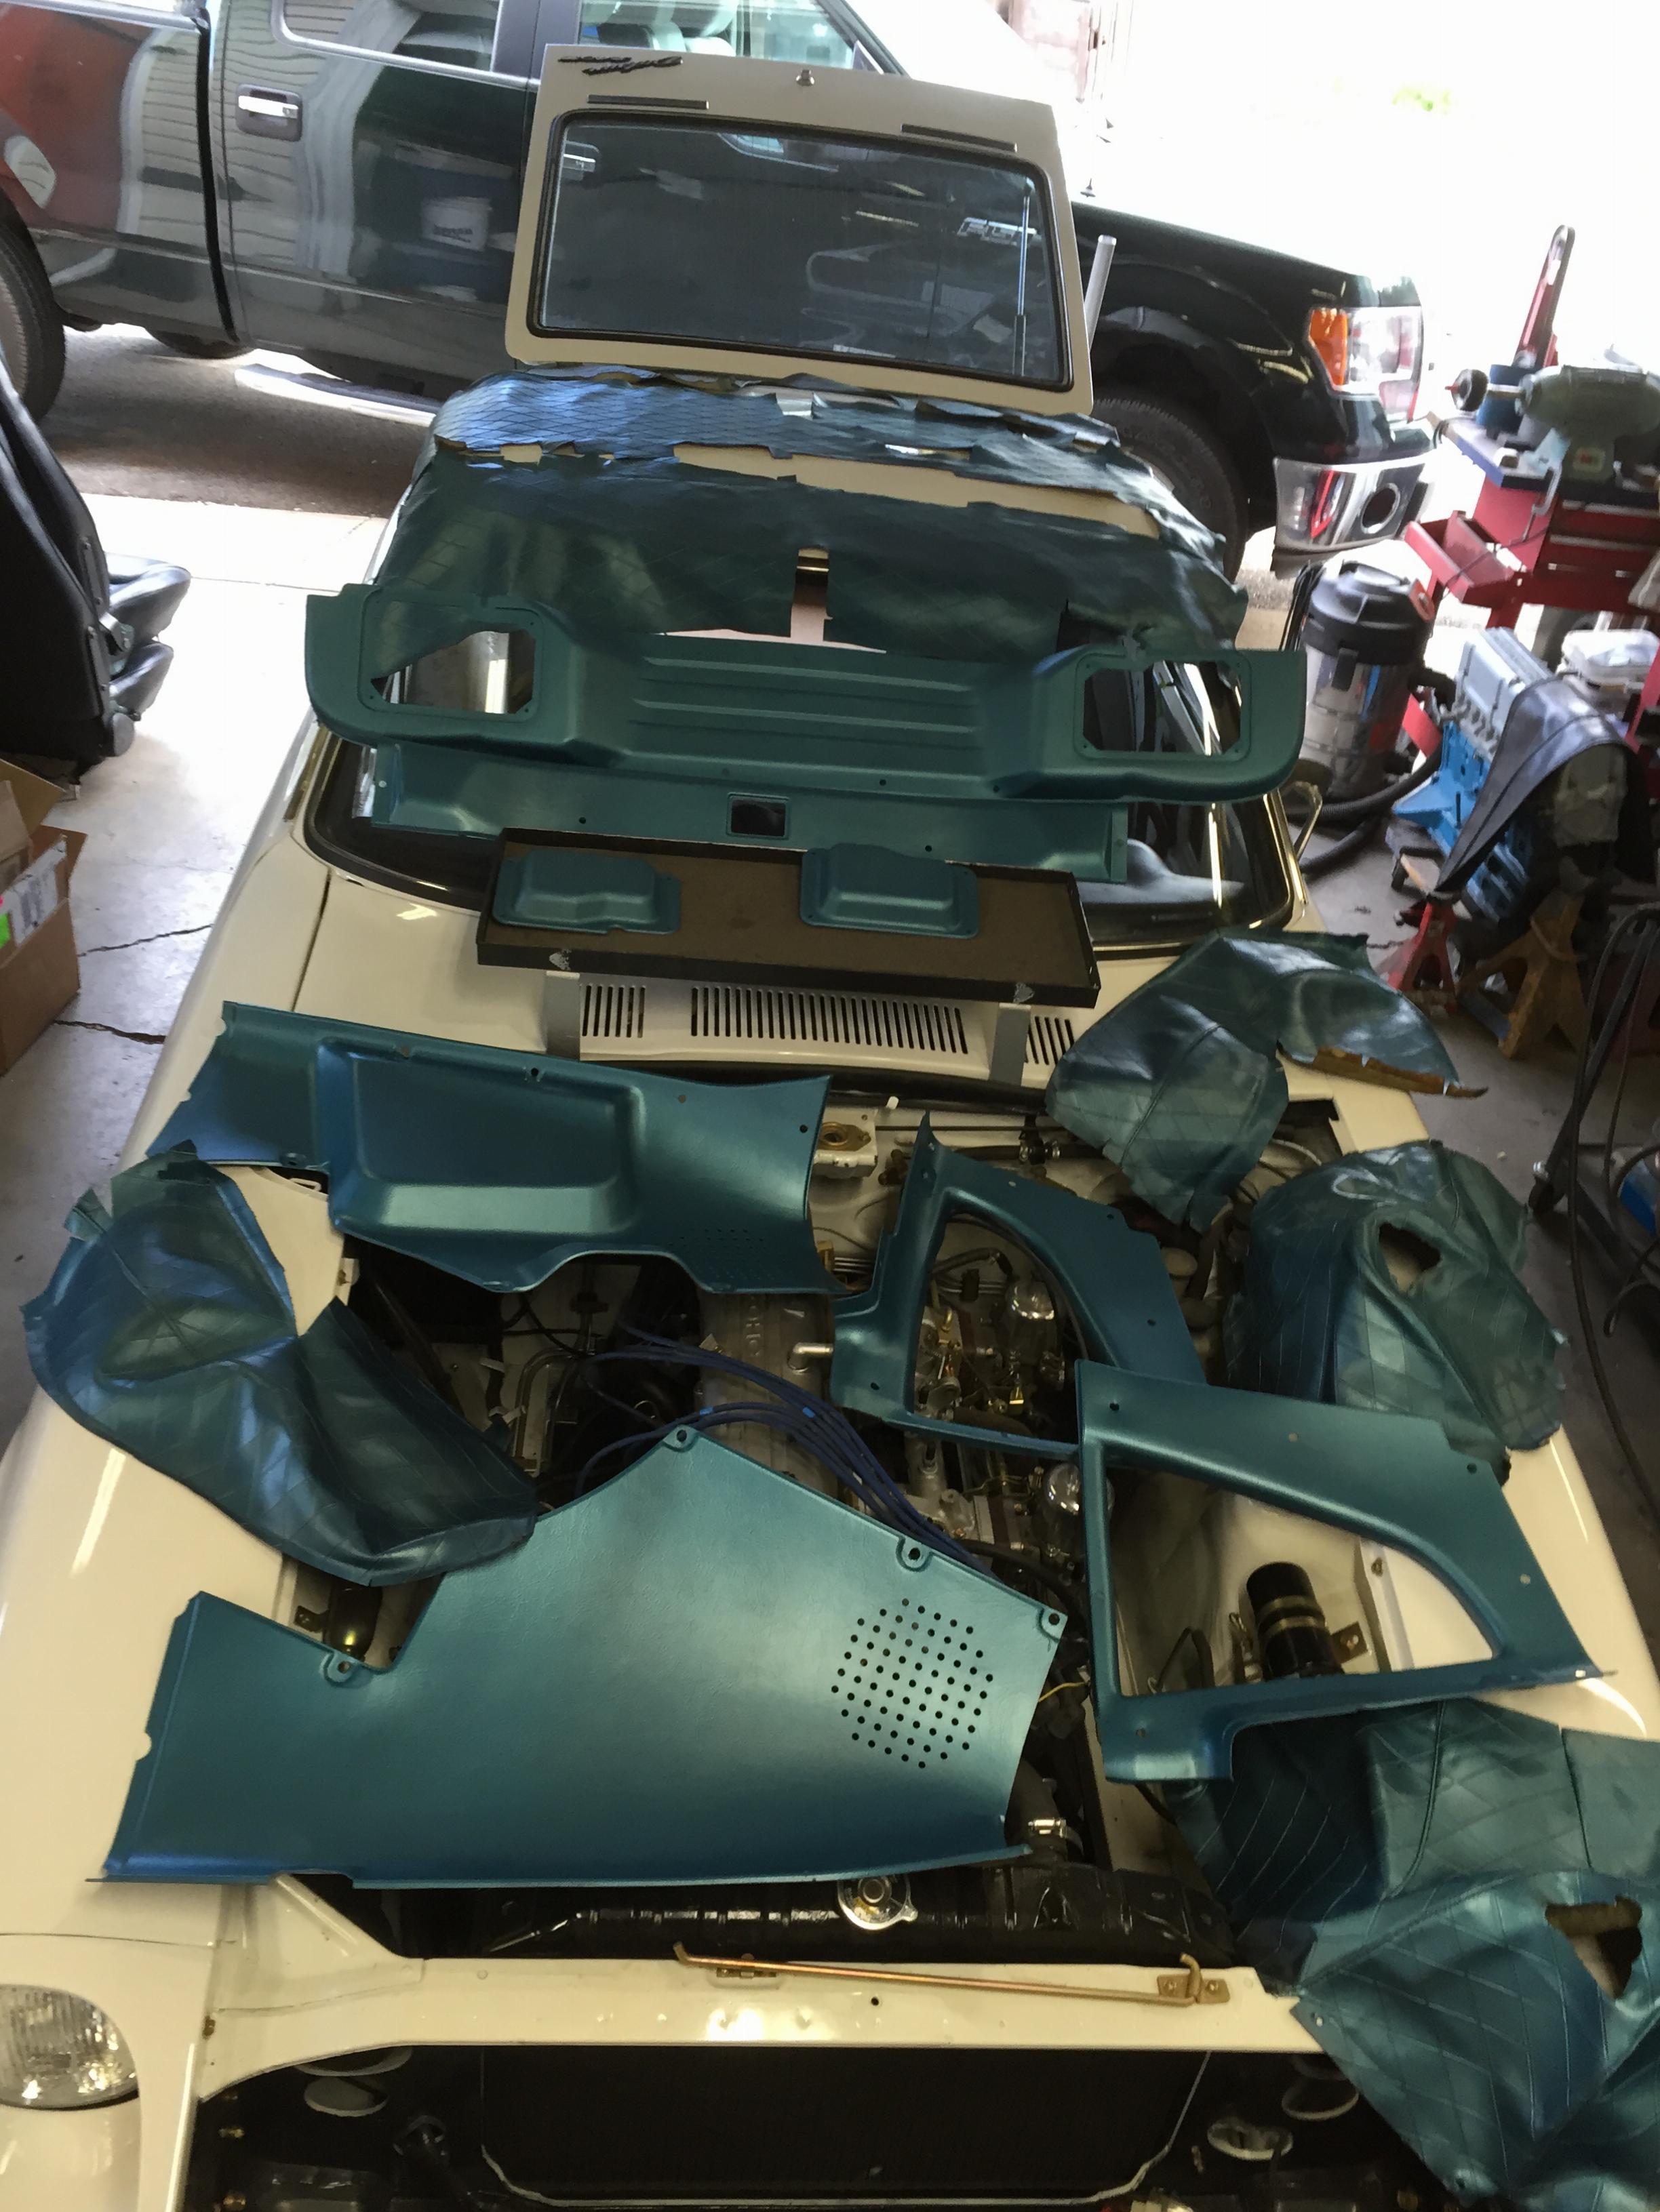
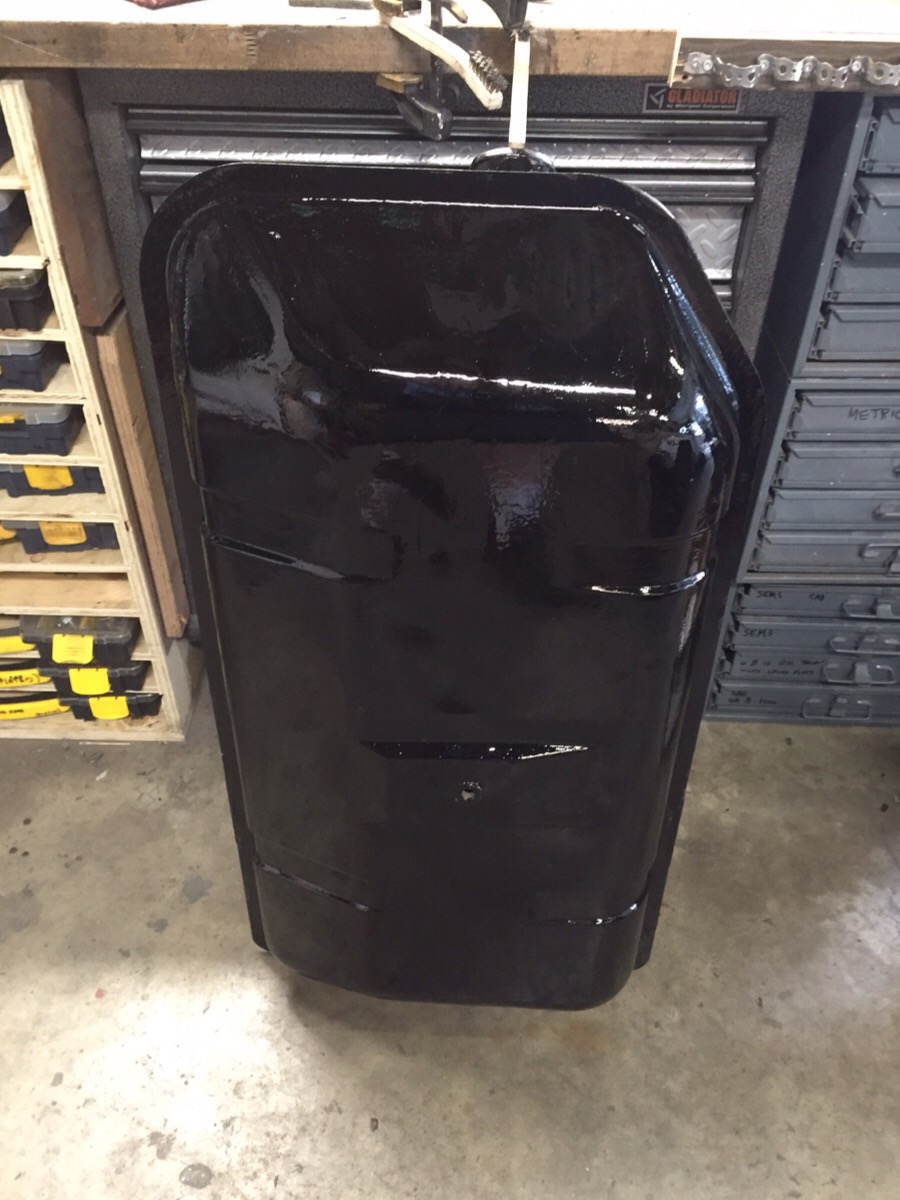
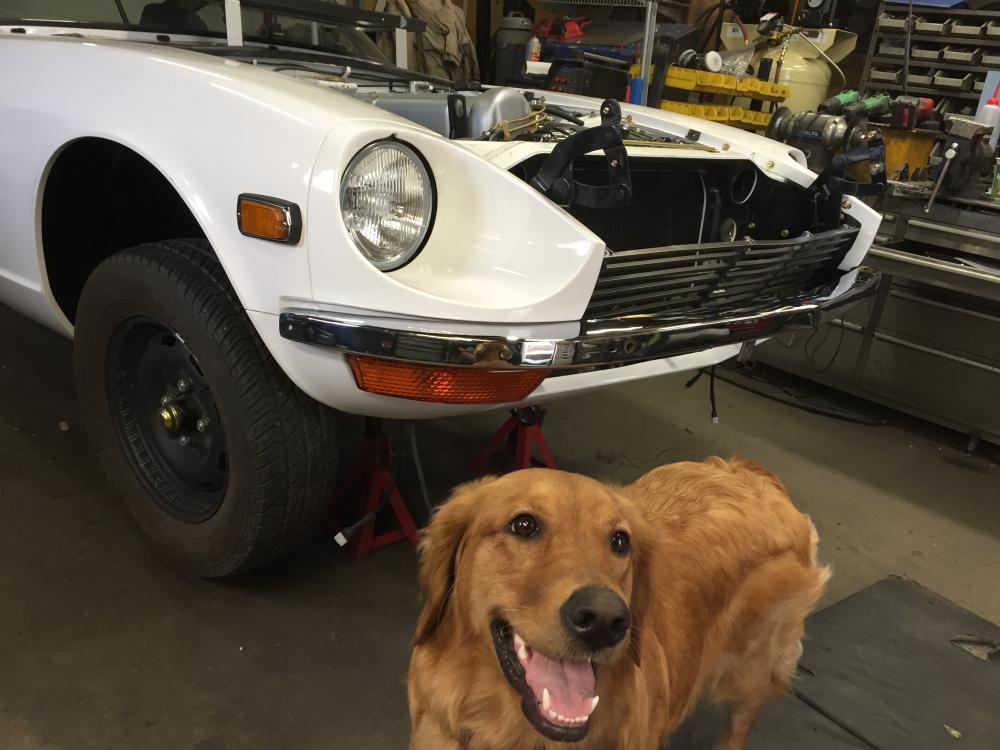
 I've just about had enough of cleaning, scrubbing, prepping, coating and painting BLUE stuff for this Z project. I am having a little bit of trouble trying to remember where it all goes. Am I close?


-
These hints have worked well for me in the past. Remove the weatherstripping until AFTER you get the door to fit. Use wedges/shims under the door to position it and prevent rubbing the door on the inside of the door opening harming paint. Remember the adjustment is on the hinge/body interface, not at the hinge/door bolts. Loosen hinge bolts, close the door, use shims to position the door, then tighten the bolts. Won't work well unless your hinge pins don't have any play. Good idea to take care of that first. It sucks that 280's have the hinge body bolts accessible from the outside, requiring the fender to be removed to access them. Mind you with the door closed on the 240 its tricky to contort yourself to get access to the bolt heads from the inside.
-
Excellent. There is one exact sweet spot where I mounted it on top that was both flat and that cleared the stock fuel sender arm movement. If you do get in a bind so to speak with the sender arm, there is a great alternative sender sensor that I discovered while working on the 510 last year that you could install at the same time as the pump. Check this baby out! http://shop.classicinstruments.com/sn38t-3 They come in various lengths, and the ohm range for this one is darn near perfect for a stock gauge.
-
Exceptional. Stirs my rally loving soul for sure. But did they have to use the "G" word in the very first paragraph of description? Kinda spoils it for me....
-
The best (?) part of this is that there WILL be a two legged grand "daughter" coming in November too! It will be a toss up which one I'll let in the shop the most, at least for a couple years. At least the child will bring the right wrench when I ask for it...
-
I know,she's stunning ain't she? And the Z behind her ain't so shabby either!
-
And to conclude this thread, here is @Zup 's center valence all done up real purdy and on the car. Thanks dude! That's my grand-dogger Ruby expressing her approval.
-
I put an in-tank EFI pump conversion (fit real slick) from TanksInc in my tank a few years back when I switched to a 280 tank for my 73. I had these same thoughts about "when I go EFI" but so far, have only gone from triple 44's to SU's, which are pretty darn nice. Hope that in-tank pump marinades ok.... Certainly heard of lots of folks with a stock EFI pump with a reg to get it down to carb levels being really happy too.
-
Most people would just make a new post with one word, "Bump", but no, not me.... Really? Not a soul? Hello, anybody out there? Is it me? I showered this morning, come on! Don't you people realize the risk you're taking? There are evil people out there right now with bags of sugar or those siphon pumps you can buy for almost nothing at any auto part store just searching for their next victim. You've seen the zombie shows, they're EVERYWHERE. Oh I get it, I showed you where to put the blob and revealed the cap part number, so you are all out there buying your own caps and trying to get some little blobs of solder or JB weld (that $hit fixes anything, right?) to stick to your fuel filler rings. Fine. If you try welding that blob on with the filler ring still on your car, don't blame ME when it all goes KABOOM. Fine then, I'm going to advertise on that FaceBook thing and all of THOSE folks will buy my caps and shiny filler rings. They aren't as smart or mature as you guys. Don't come crying to me when all the cheap ones I bought are gone or BWM finally sells their last one. How many caps do you think they have for the nearly extinct 45 year old cars these fit, anyway? Humph, maybe I should have paid more for those "how to sell stuff on the Internet classes". Maybe it IS me.....
-
Don't go too big. You're asking for premature burnout or noisy pump. Pumps like to flow, not sit there buzzing trying to pump through their bypass or cavitating. Bad. A nice Nismo low pressure fuel pump or a Facet FEP60SV (2.5-4psi) are my favorites.
-
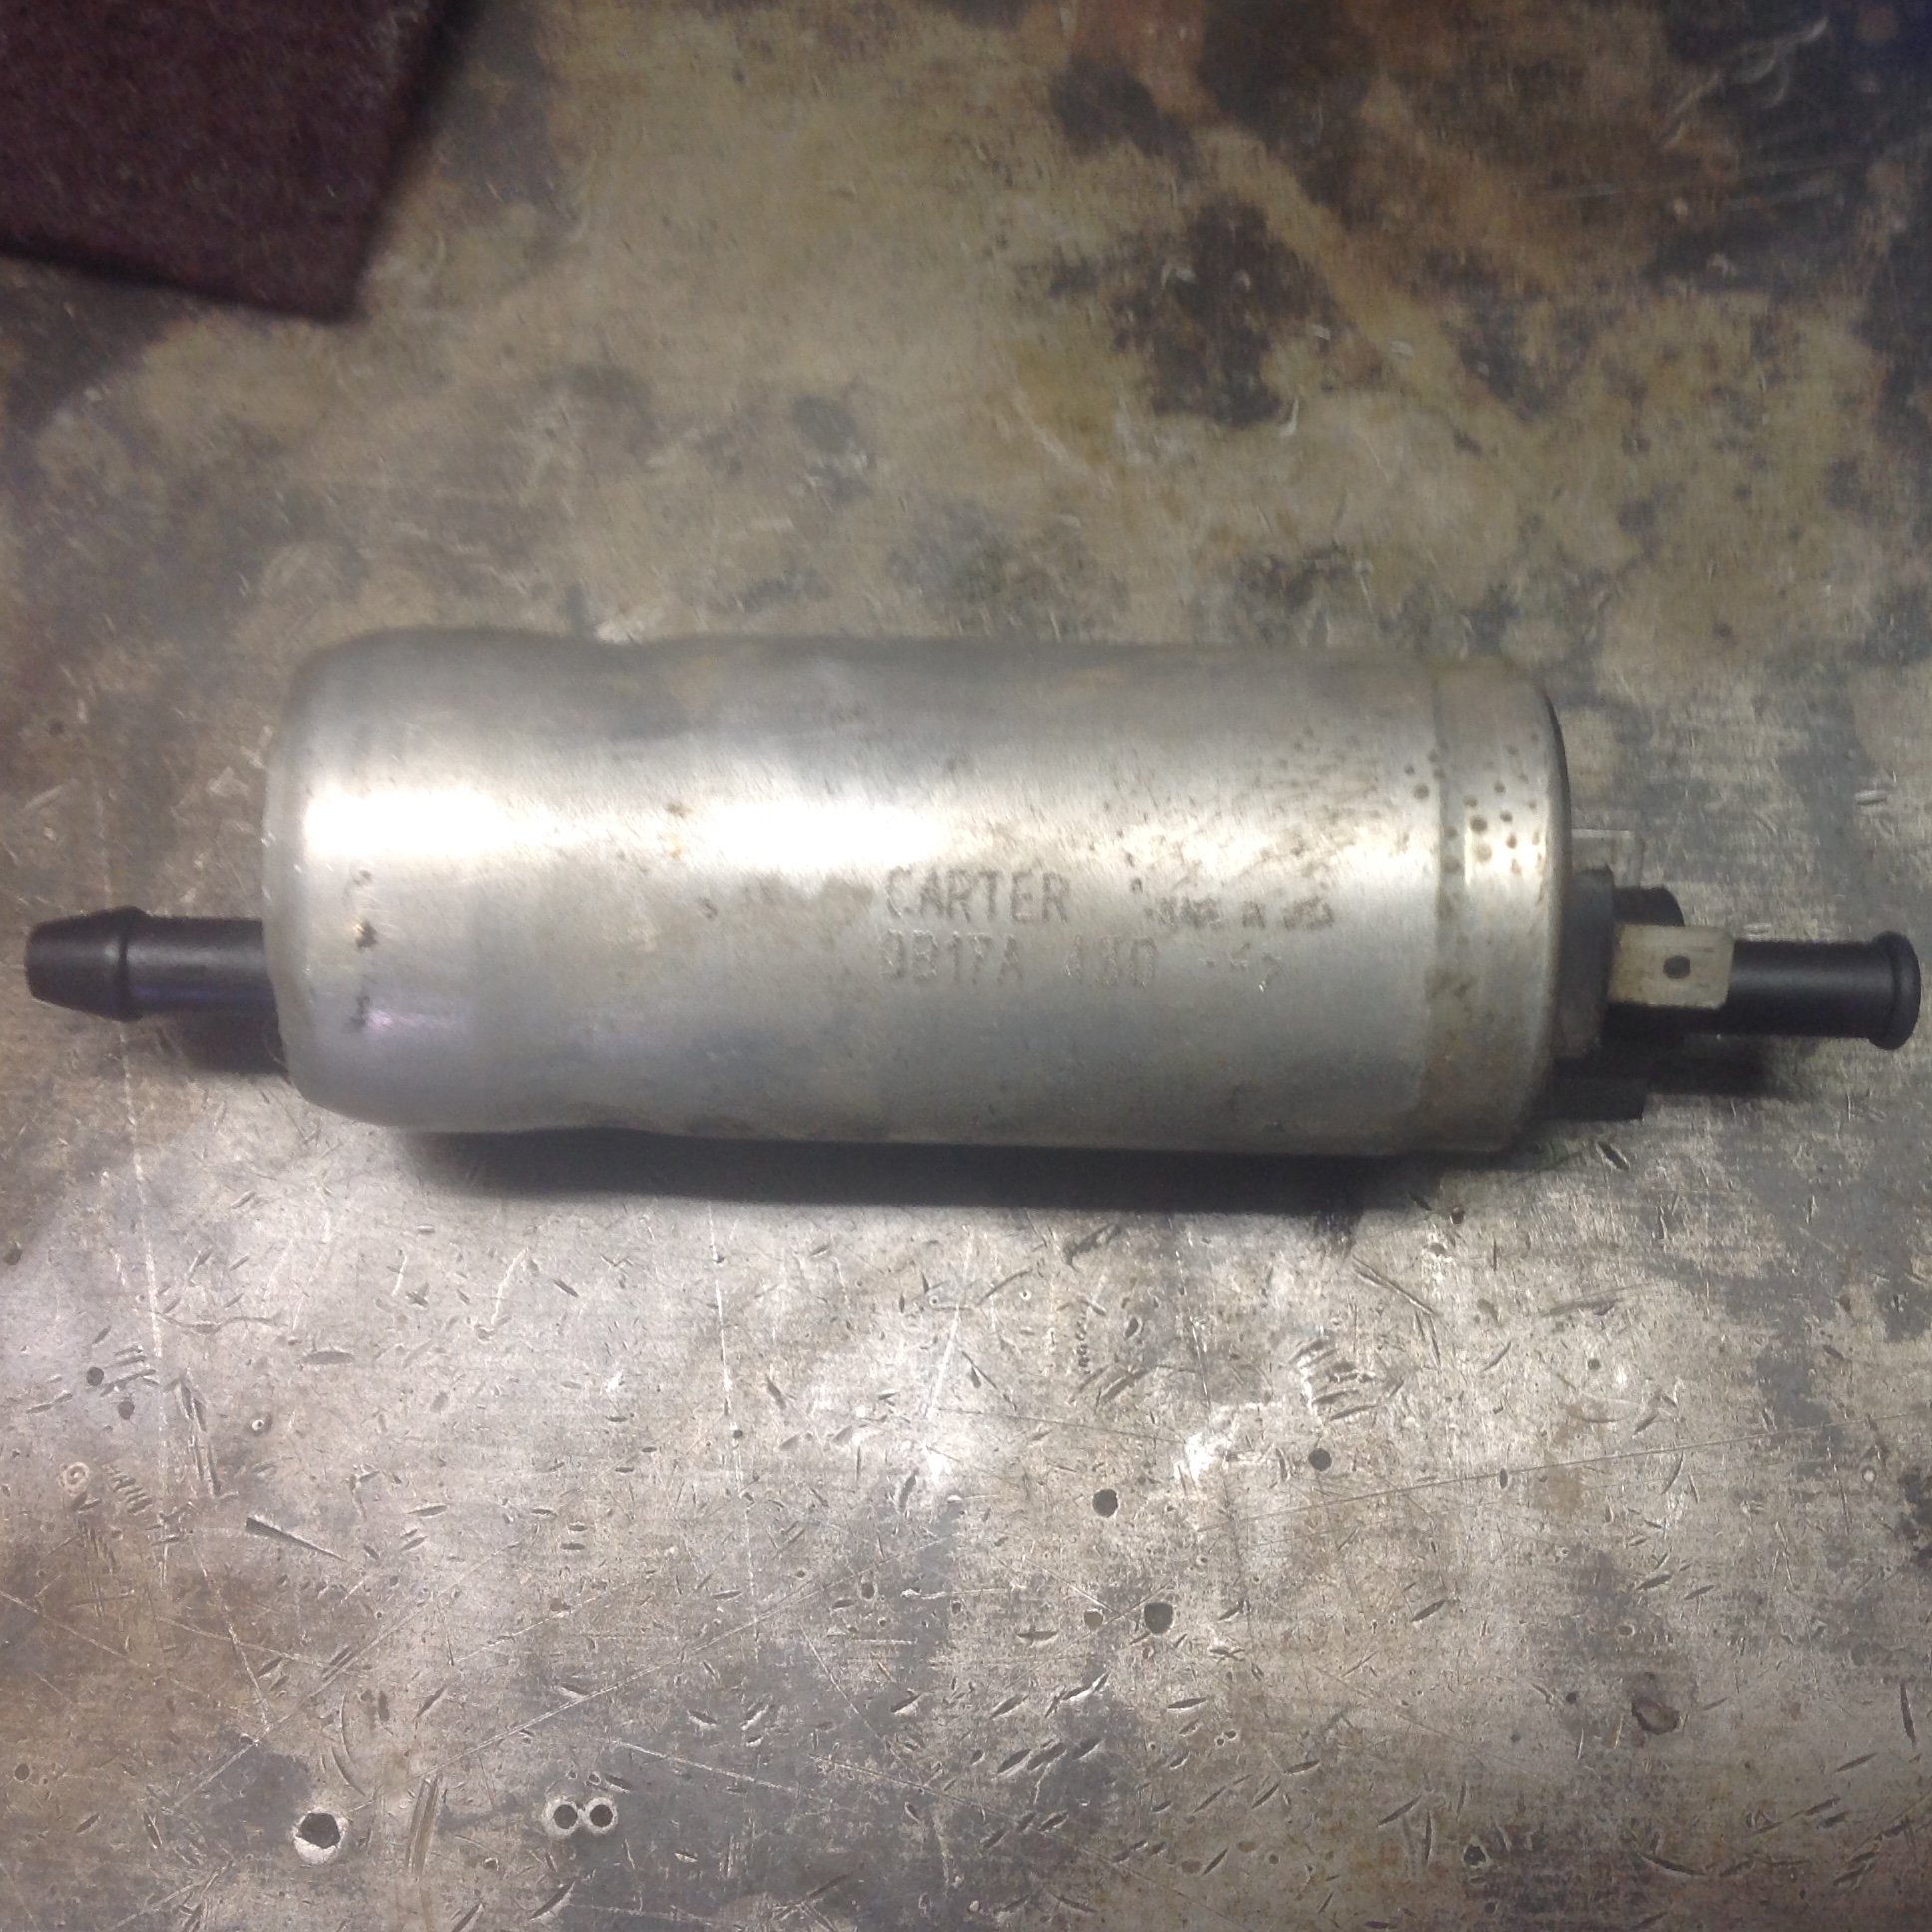
The old pump was different than the new one. Both are your basic parts store CheapO pumps.... The new one is a AirTex E8012S, the old one was a Carter 9217A.

-
So let's review. The old pump appeared to work fine, but actually it does not work worth crap. It could provide the needed volume only under no load. When pouring open into a pail, it has tons of volume, but I did one important test that proved the point. I turned the pump on and put my finger over the end of the hose trying to stop the flow. It was easy to stop it dead with no squirt trying to get past my finger. No jam. With the new pump, it was almost impossible to stop flow with my finger. The wide open into a pail flow looked EXACTLY like the bad pump, but it has the power to provide volume while working against a closed needle valve. Now the carbs have proper fuel level in the bowls at all time and are not being starved with the resulting lean condition So we learn the difference and inter-relationship between pressure and flow rate. One more diagnostic nugget. At the end of the job, I remembered to remove my little manifold with the fuel pressure gauge before it drove away back to Edmonton never to be seen again. Car had been off for about 10 minutes while we were celebrating. I pulled the hose off and got a nice residual pressure squirt of fuel all over my hands and sleeves and in my face (safety glasses on, no problem). THIS NEVER happened with the old pump. It was unable to maintain a check valve seal when off.
-
Somewhere around this time, I glanced at the fuel pressure gauge .. WTF???? It's reading 0!. The engine is still running (if you call this running....).. Zero ???. Turn the car off, turn the pump on. Gauge reads a touch off 0, but not much. Dang the pump has died. Or is the gauge fried. The car is running, and long enough to empty the bowls too, so the pump MUST be supplying enough gas. Pressure can't be zero.. We stop and take the hose off the gauge and try to pump fuel into a pail to test it. Turn on the pump, yup, nice steady stream into the pail. It's not the pump, it's just fine. Stupid pressure guage.... Put the fuel line back on. Back to scratching my head about what the real problem might be. We cleaned the plugs, tried a different coil, drank beer, nothing helped. Okay enough torture. The fuel pump pressure being suspiciously low is bugging me. Never had a problem with this gauge before. Could it be the pump after all? Let's swap it out and see what happens. Changed the pump and like magic, the car runs like it's new. Smooth, powerful, no lag, torque out of the hole is amazing, this dang little Roadster is actually fun to drive!
-
Hey gang, thought I'd share an interesting Mikuni troubleshooting session that occured this past weekend. A good friend from Edmonton has a Datsun roadster 2000 with a pair of Mikuni 44's. After converting to them a few years ago, he's had nothing but trouble trying to get them run properly. Bought them fresh from Wolf Creek, so had no reason to think the carbs themselves were the problem. He's had several local "experts" try to get them working properly with no luck. In what can only be called a final desperate act, he asked me if I'd give this a shot. Being a sucker for punishment, I agreed. Now I did find the problem, but it was not anything that I'v encountered before, so I felt I had to pass on the details, as I think this type of problem may be more common than we might want to believe. I won't bore you with the all the details, but I checked ALL the common issues such as fuel pressure, pump flow into a pail, float levels, jettings, balance, as well as "related" items like spark strength, timing and plug condition. Even checked idle vacuum. Decent 15 inHg, no big vacuum leaks at least. To jump to the answer a bit, the problem was with "fuel delivery" so I'll concentrate on the specific steps we took to track down the actual problem. First thing "Dave" said was that he has an electric pump but no regulator. "Aha" I'm thinking. So we stick a fuel pressure guage in line and turn on the pump, car not running. Solid 4psi. This should be no problem. MAYBE is the needle seats are ancient, they might have a problem sealing 4, but these are virtually new. We then proceeded to go through a carb balancing act, and turns out they were SO out of balance at idle it was laughable. front carb was OFF while back carb was so far open to get the thing to idle it was sad. It did require that we remove the air horns to get a good seal on the throats to get a good flow reading, I couldn't get the same reading from both barrels on a single carb using the snyc plate on air horns. Maybe previous troubleshooters were fooled by this. After much idle screw adjusting and idle tweaking and balancing games it still ran like crap. No throttle response, massive misfire, no power. Lean lean lean. Jetting? 140 main, 200 airs, 60 pilots, idle screws out 1.25 turns, visual confirmation all barrels can squirt accel pump jets, nothing crazy here.
-
Not even my friends at clips and fasterners have them... There are lots items that might be made to work though. http://www.clipsandfasteners.com/Headlight_Adjusting_Screw_Assemblies_s/106.htm
-
Tough one, never seen a thread about that. Seeing how tightly they are snapped in the bucket flange, I'm wondering if they only come as part of a entire new bucket. Easy enough to just use an insert nut to make threads, but you totally lose the tension that the nylon threaded thingy provides. Which you need!
-
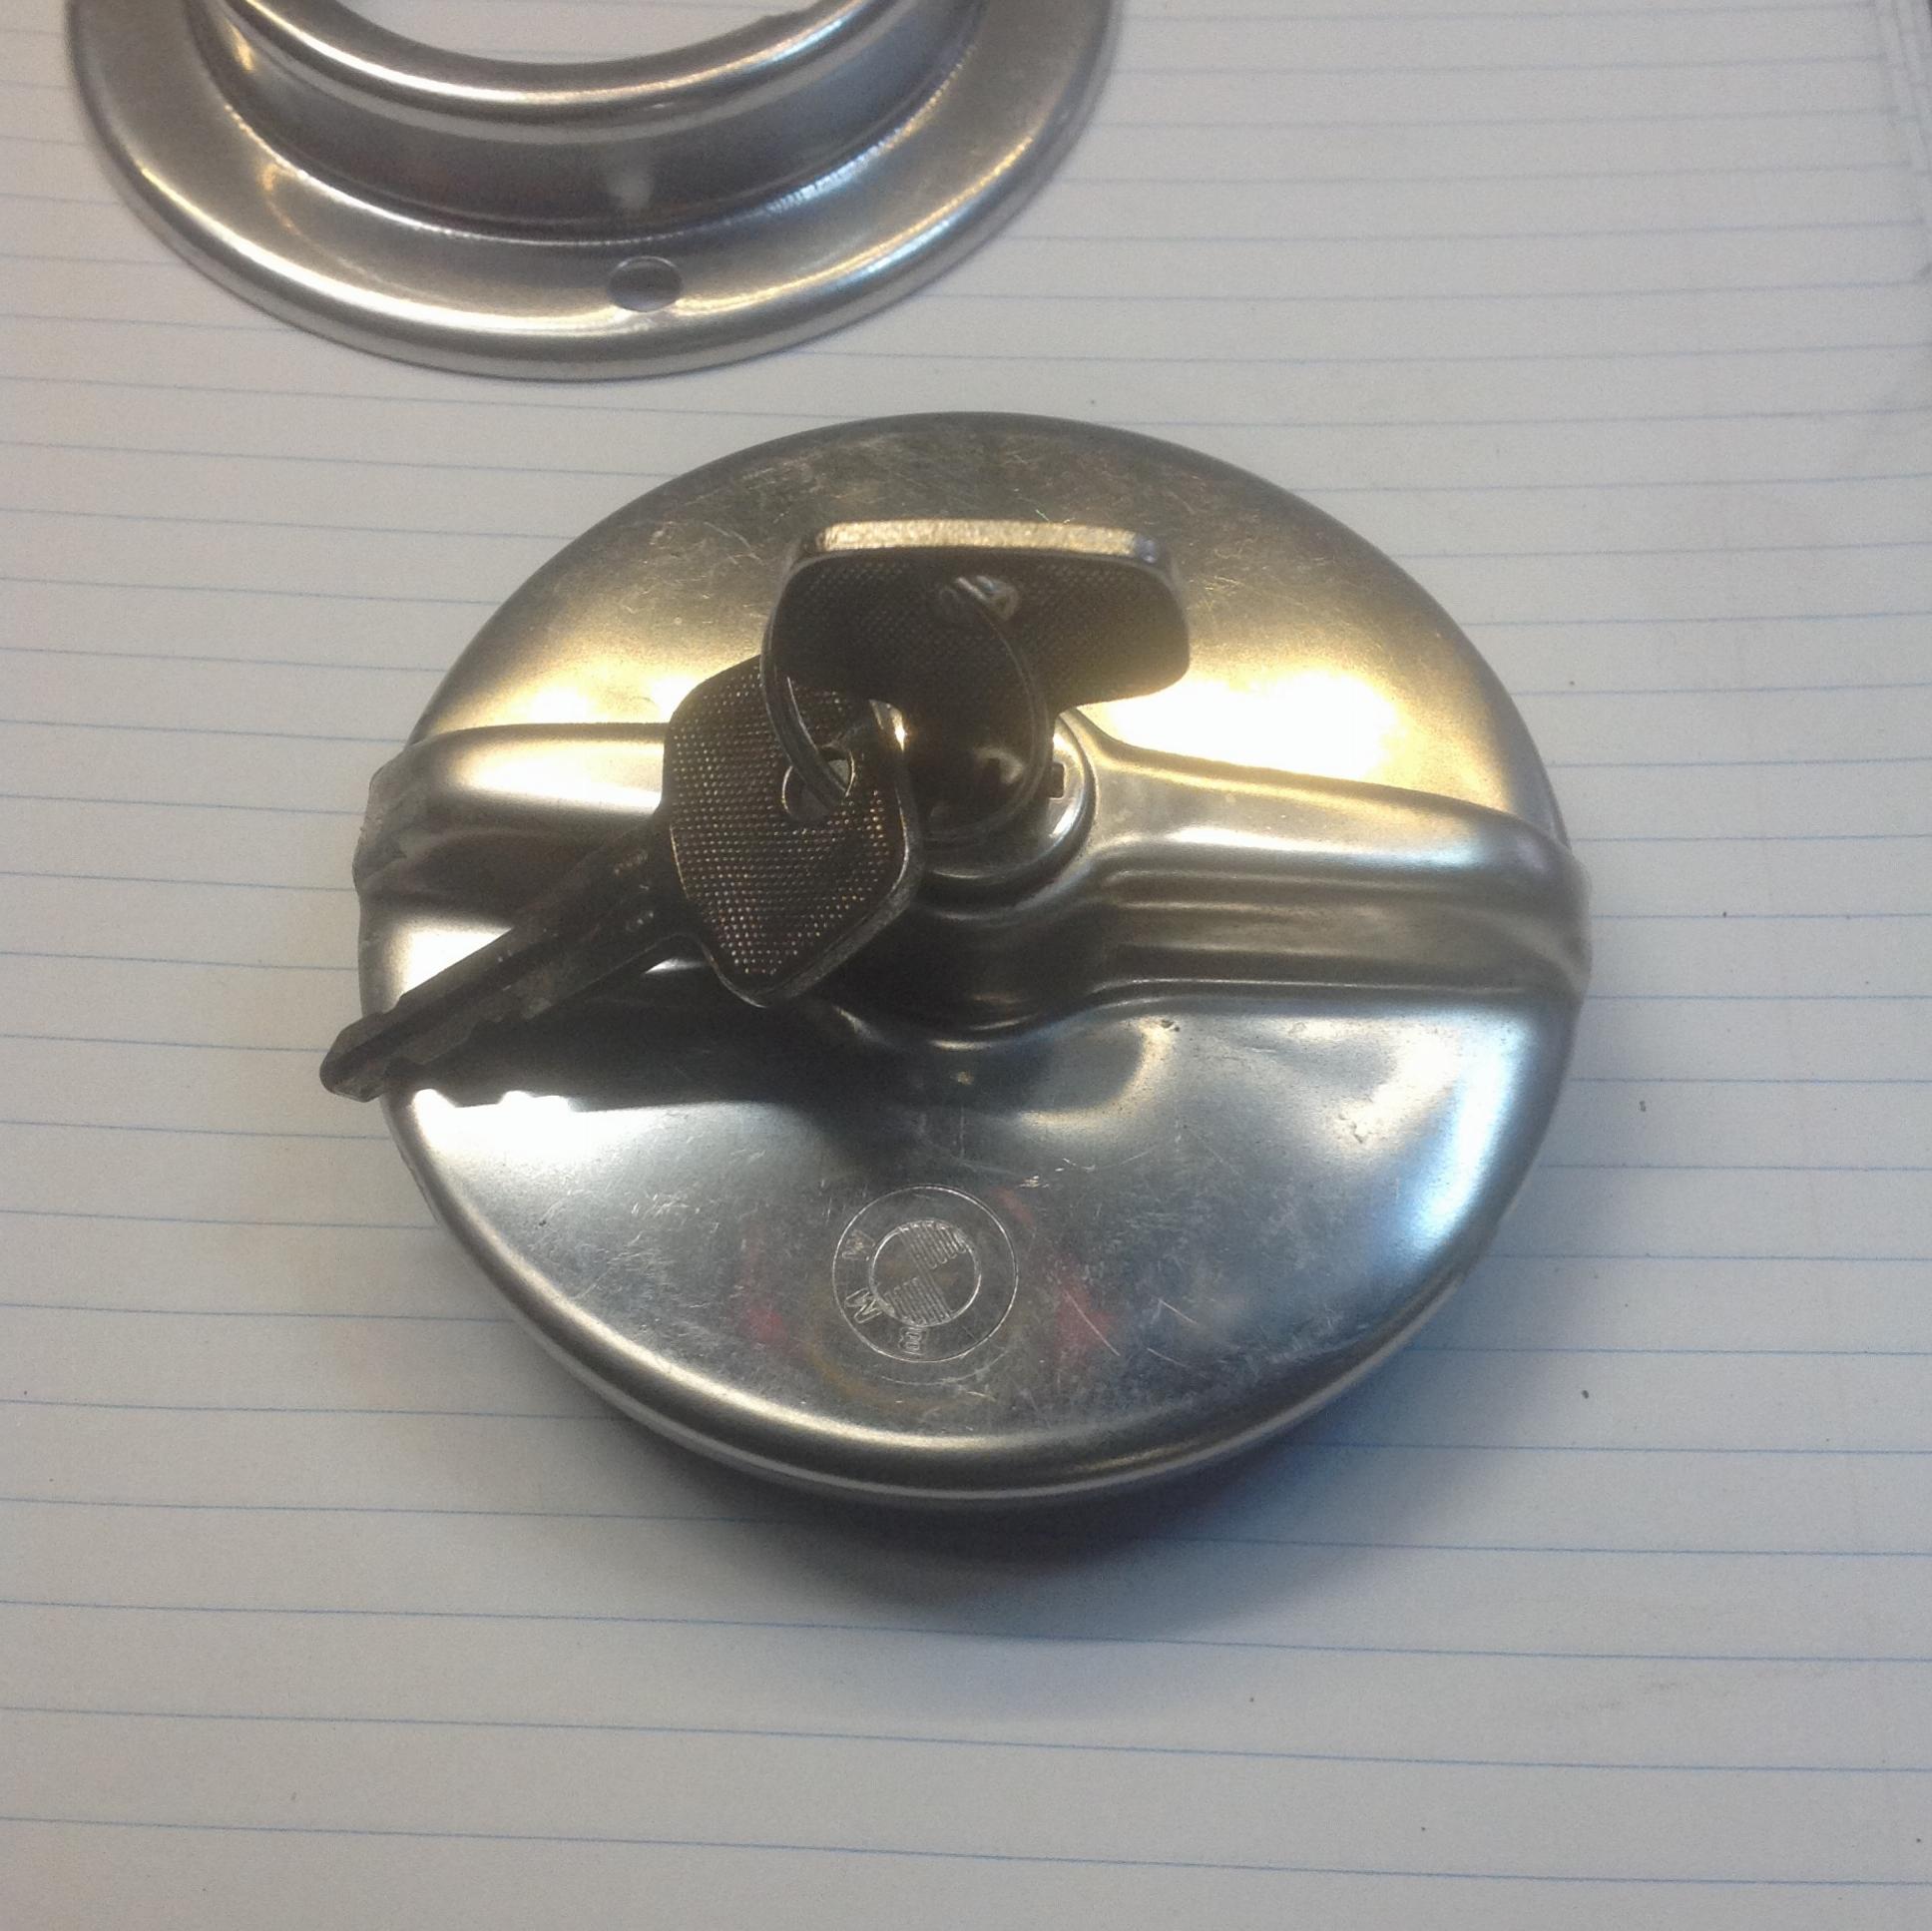
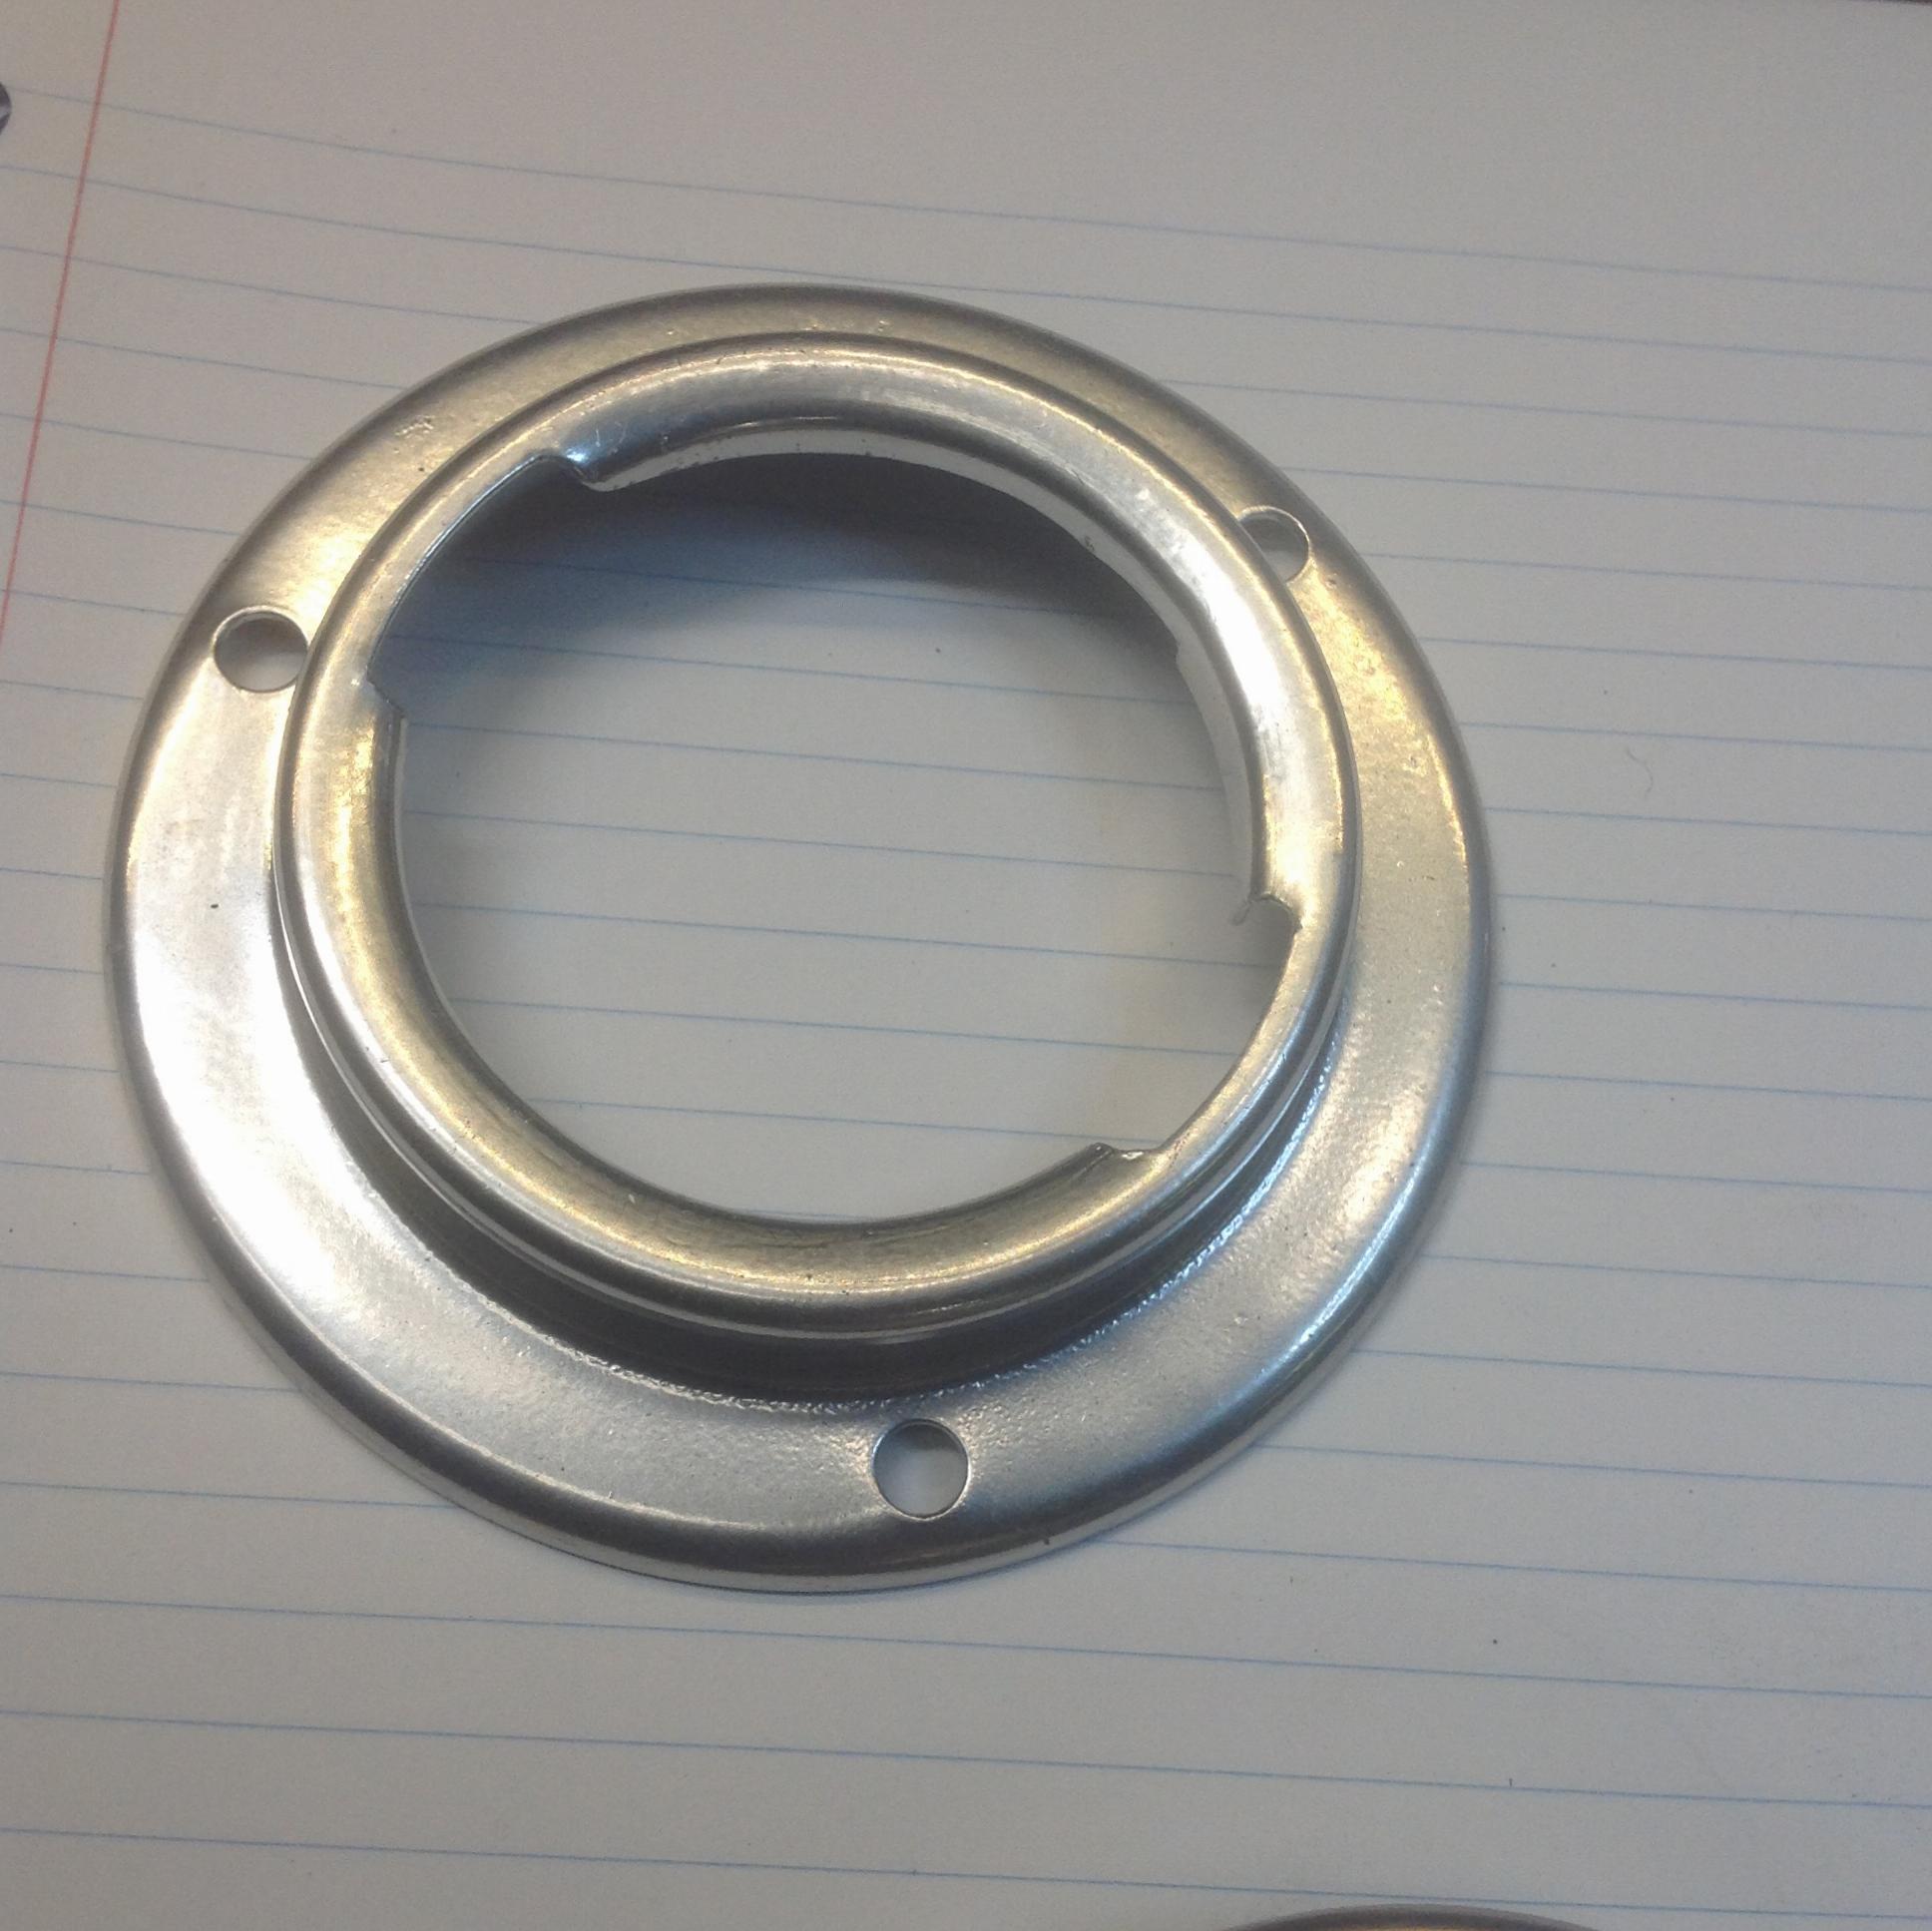
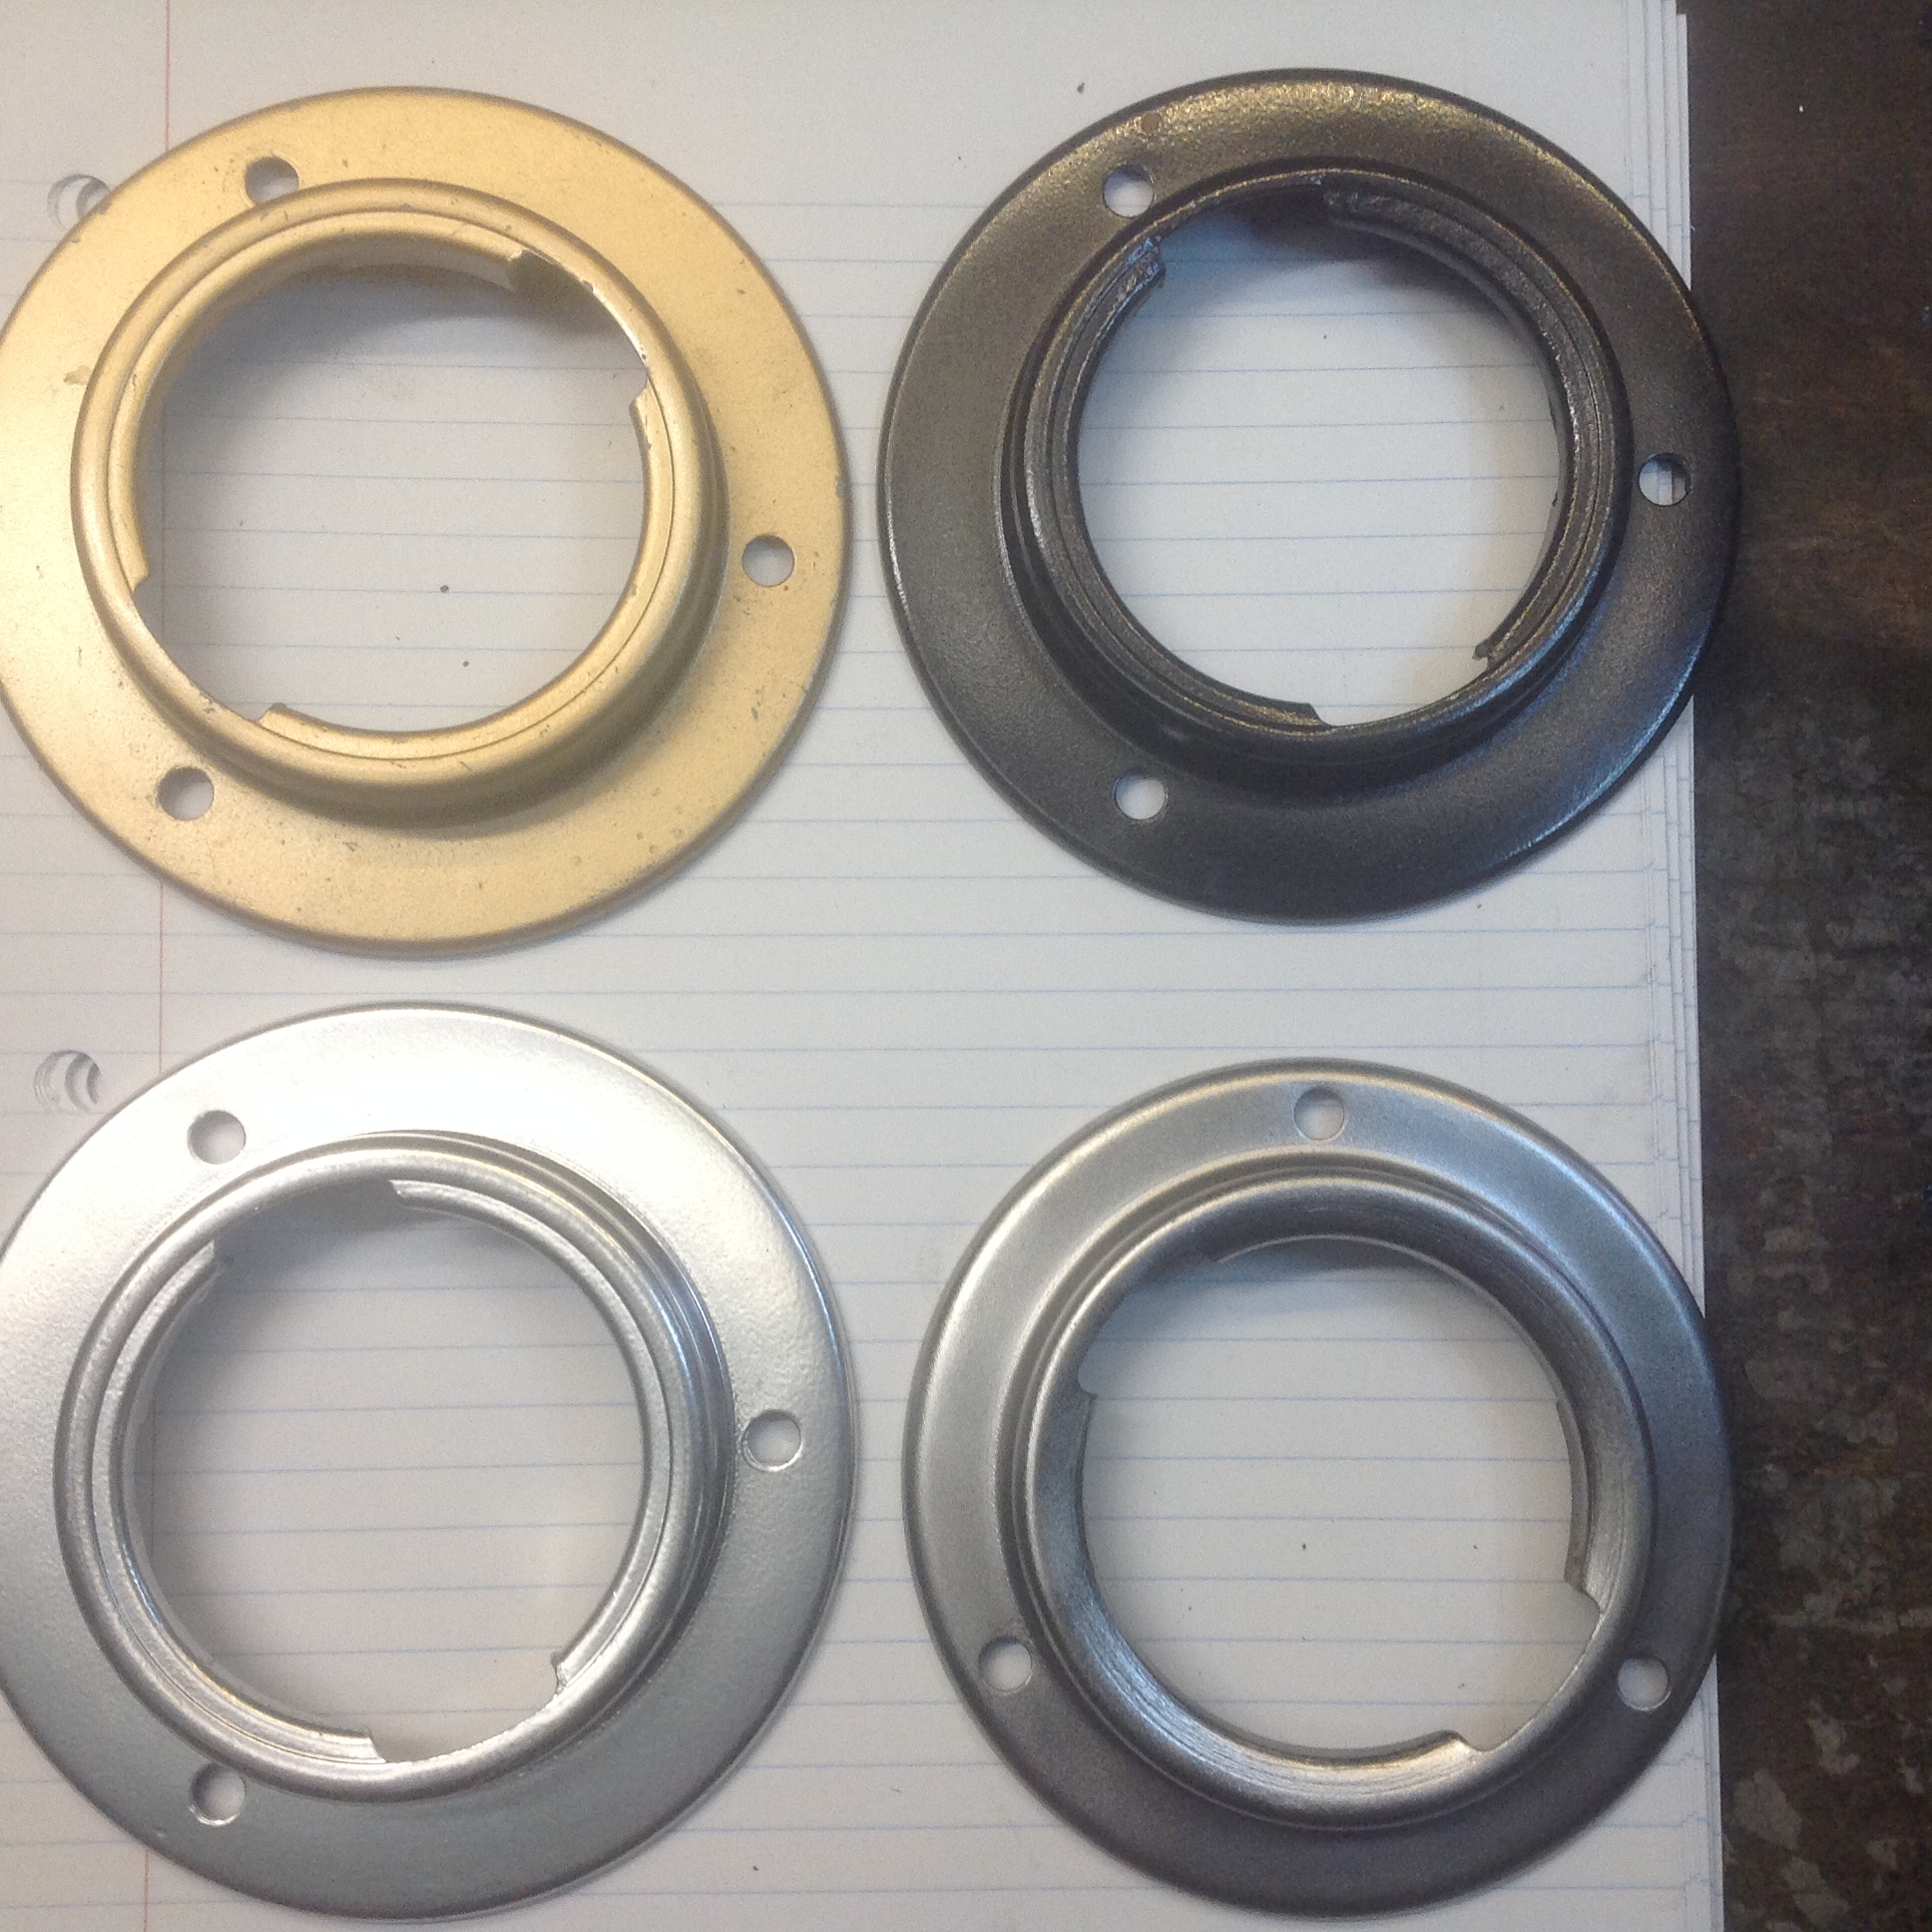
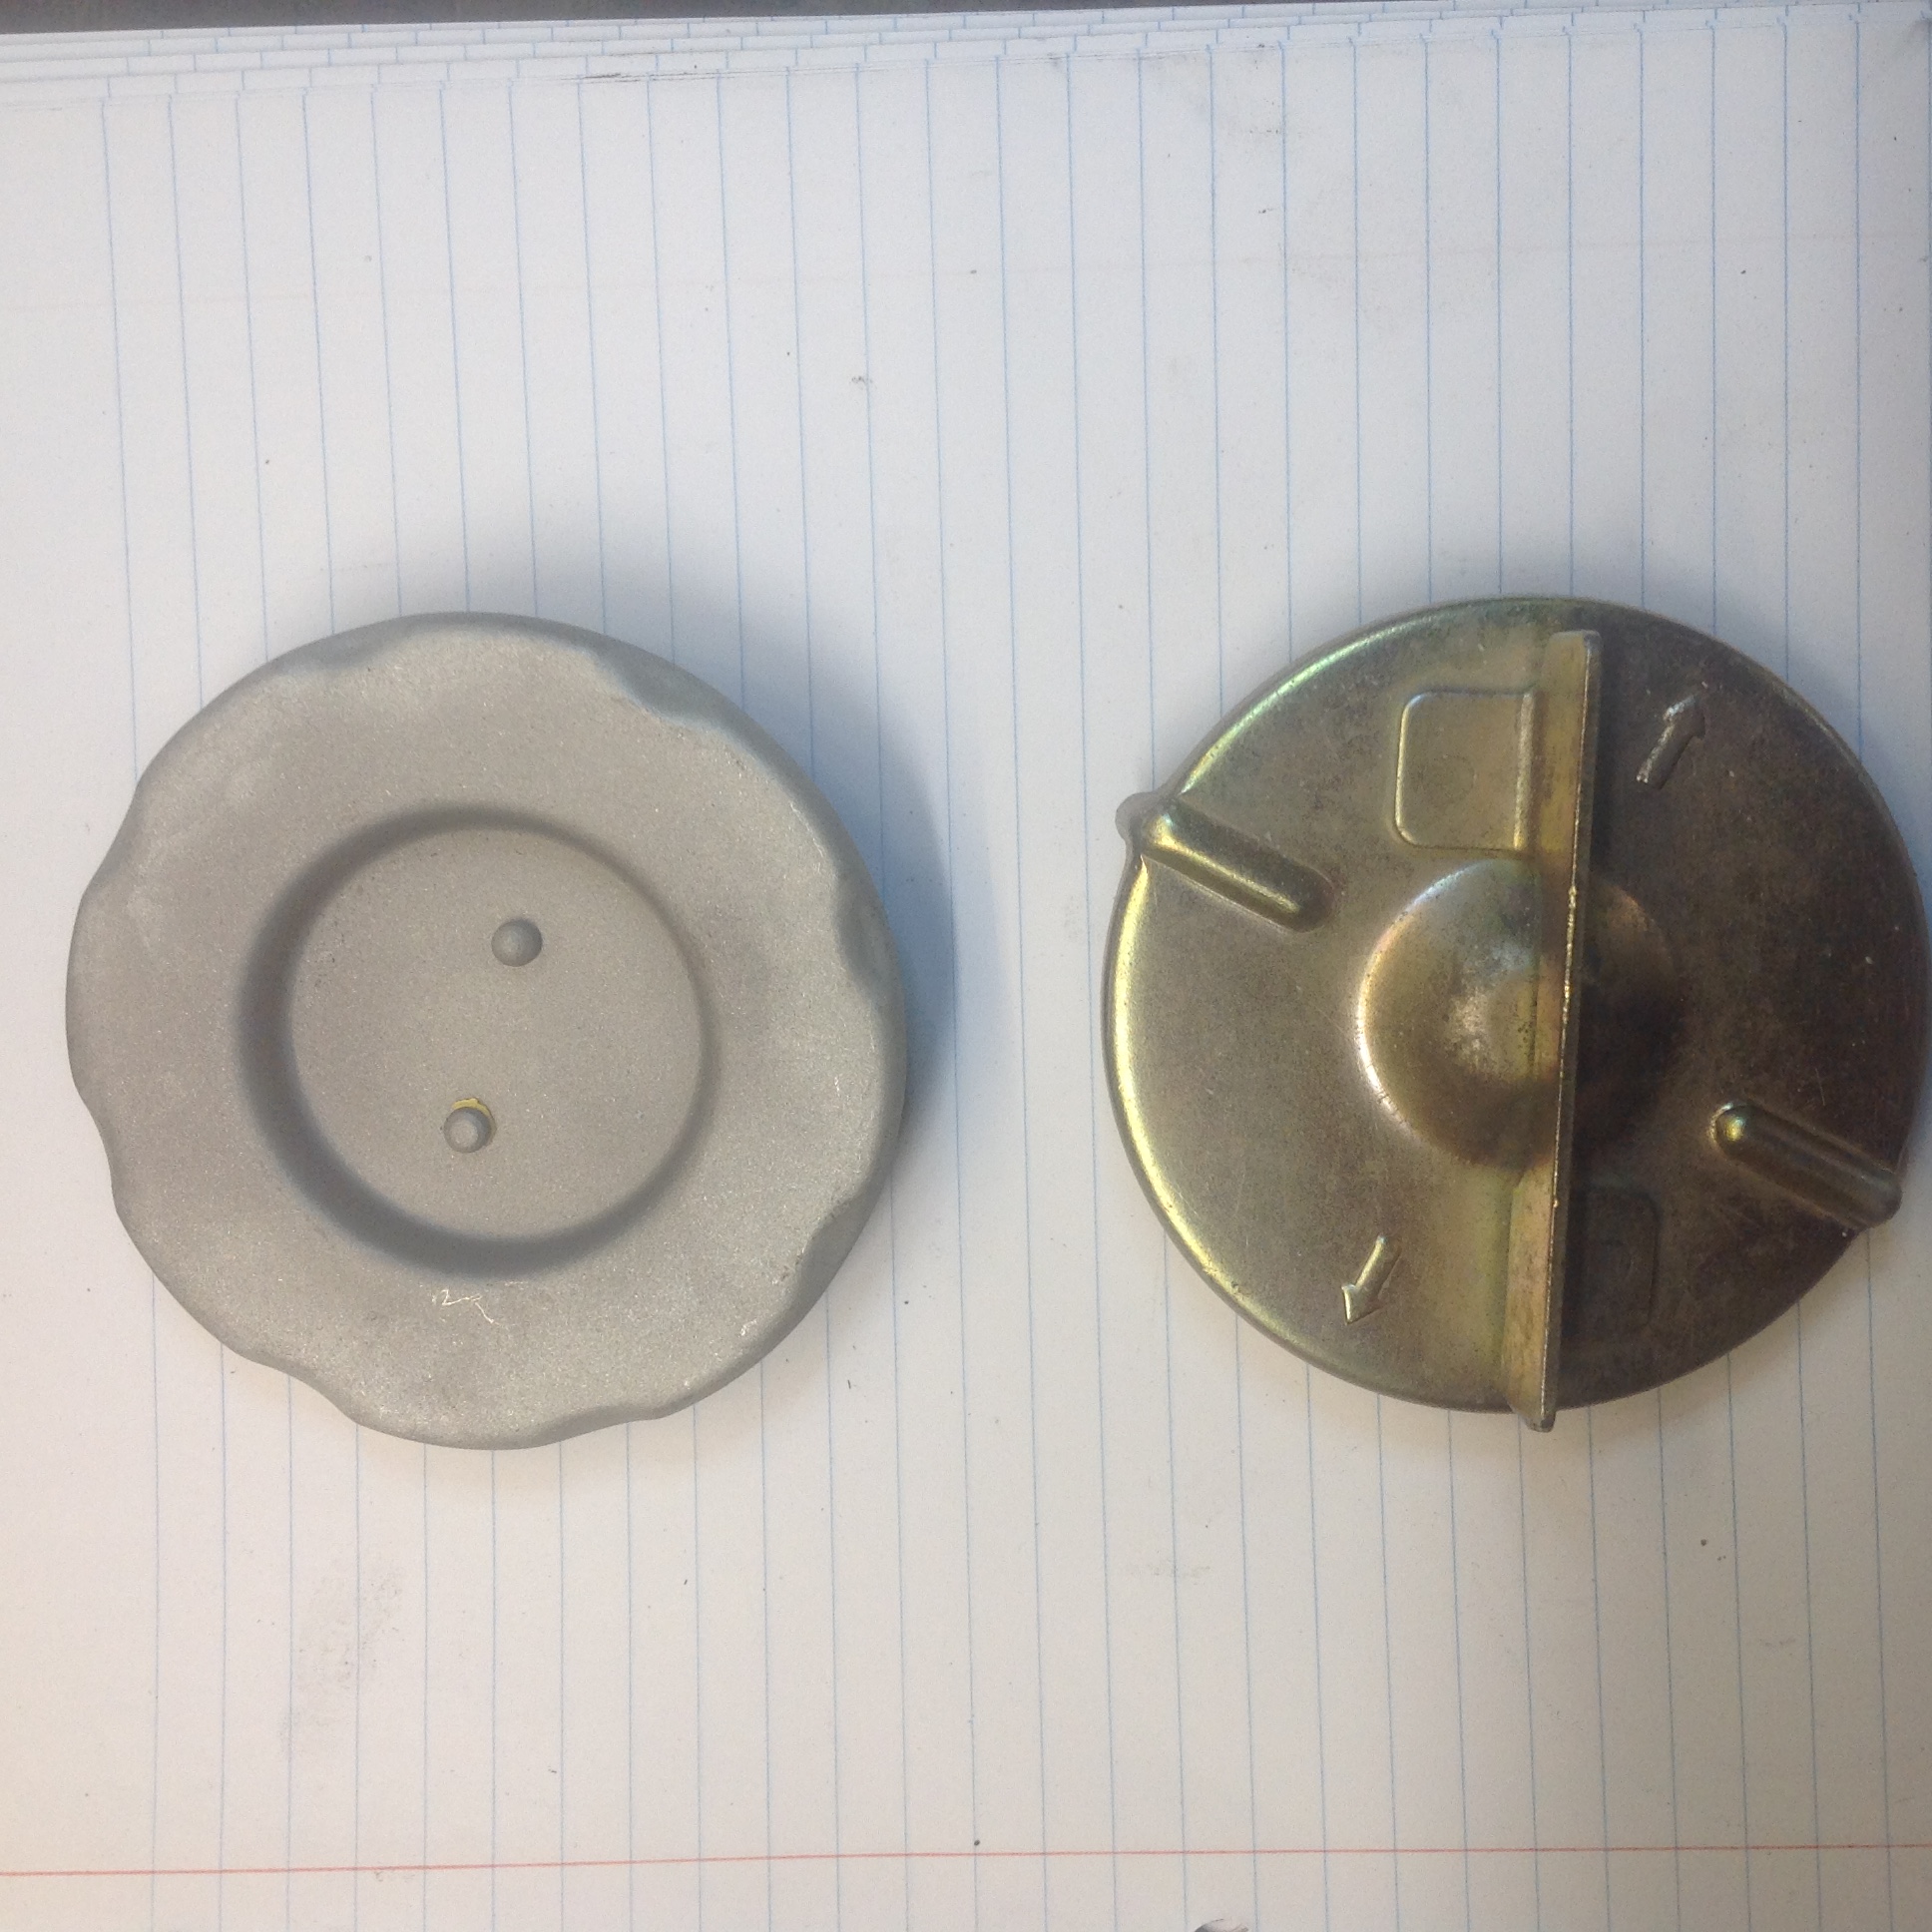
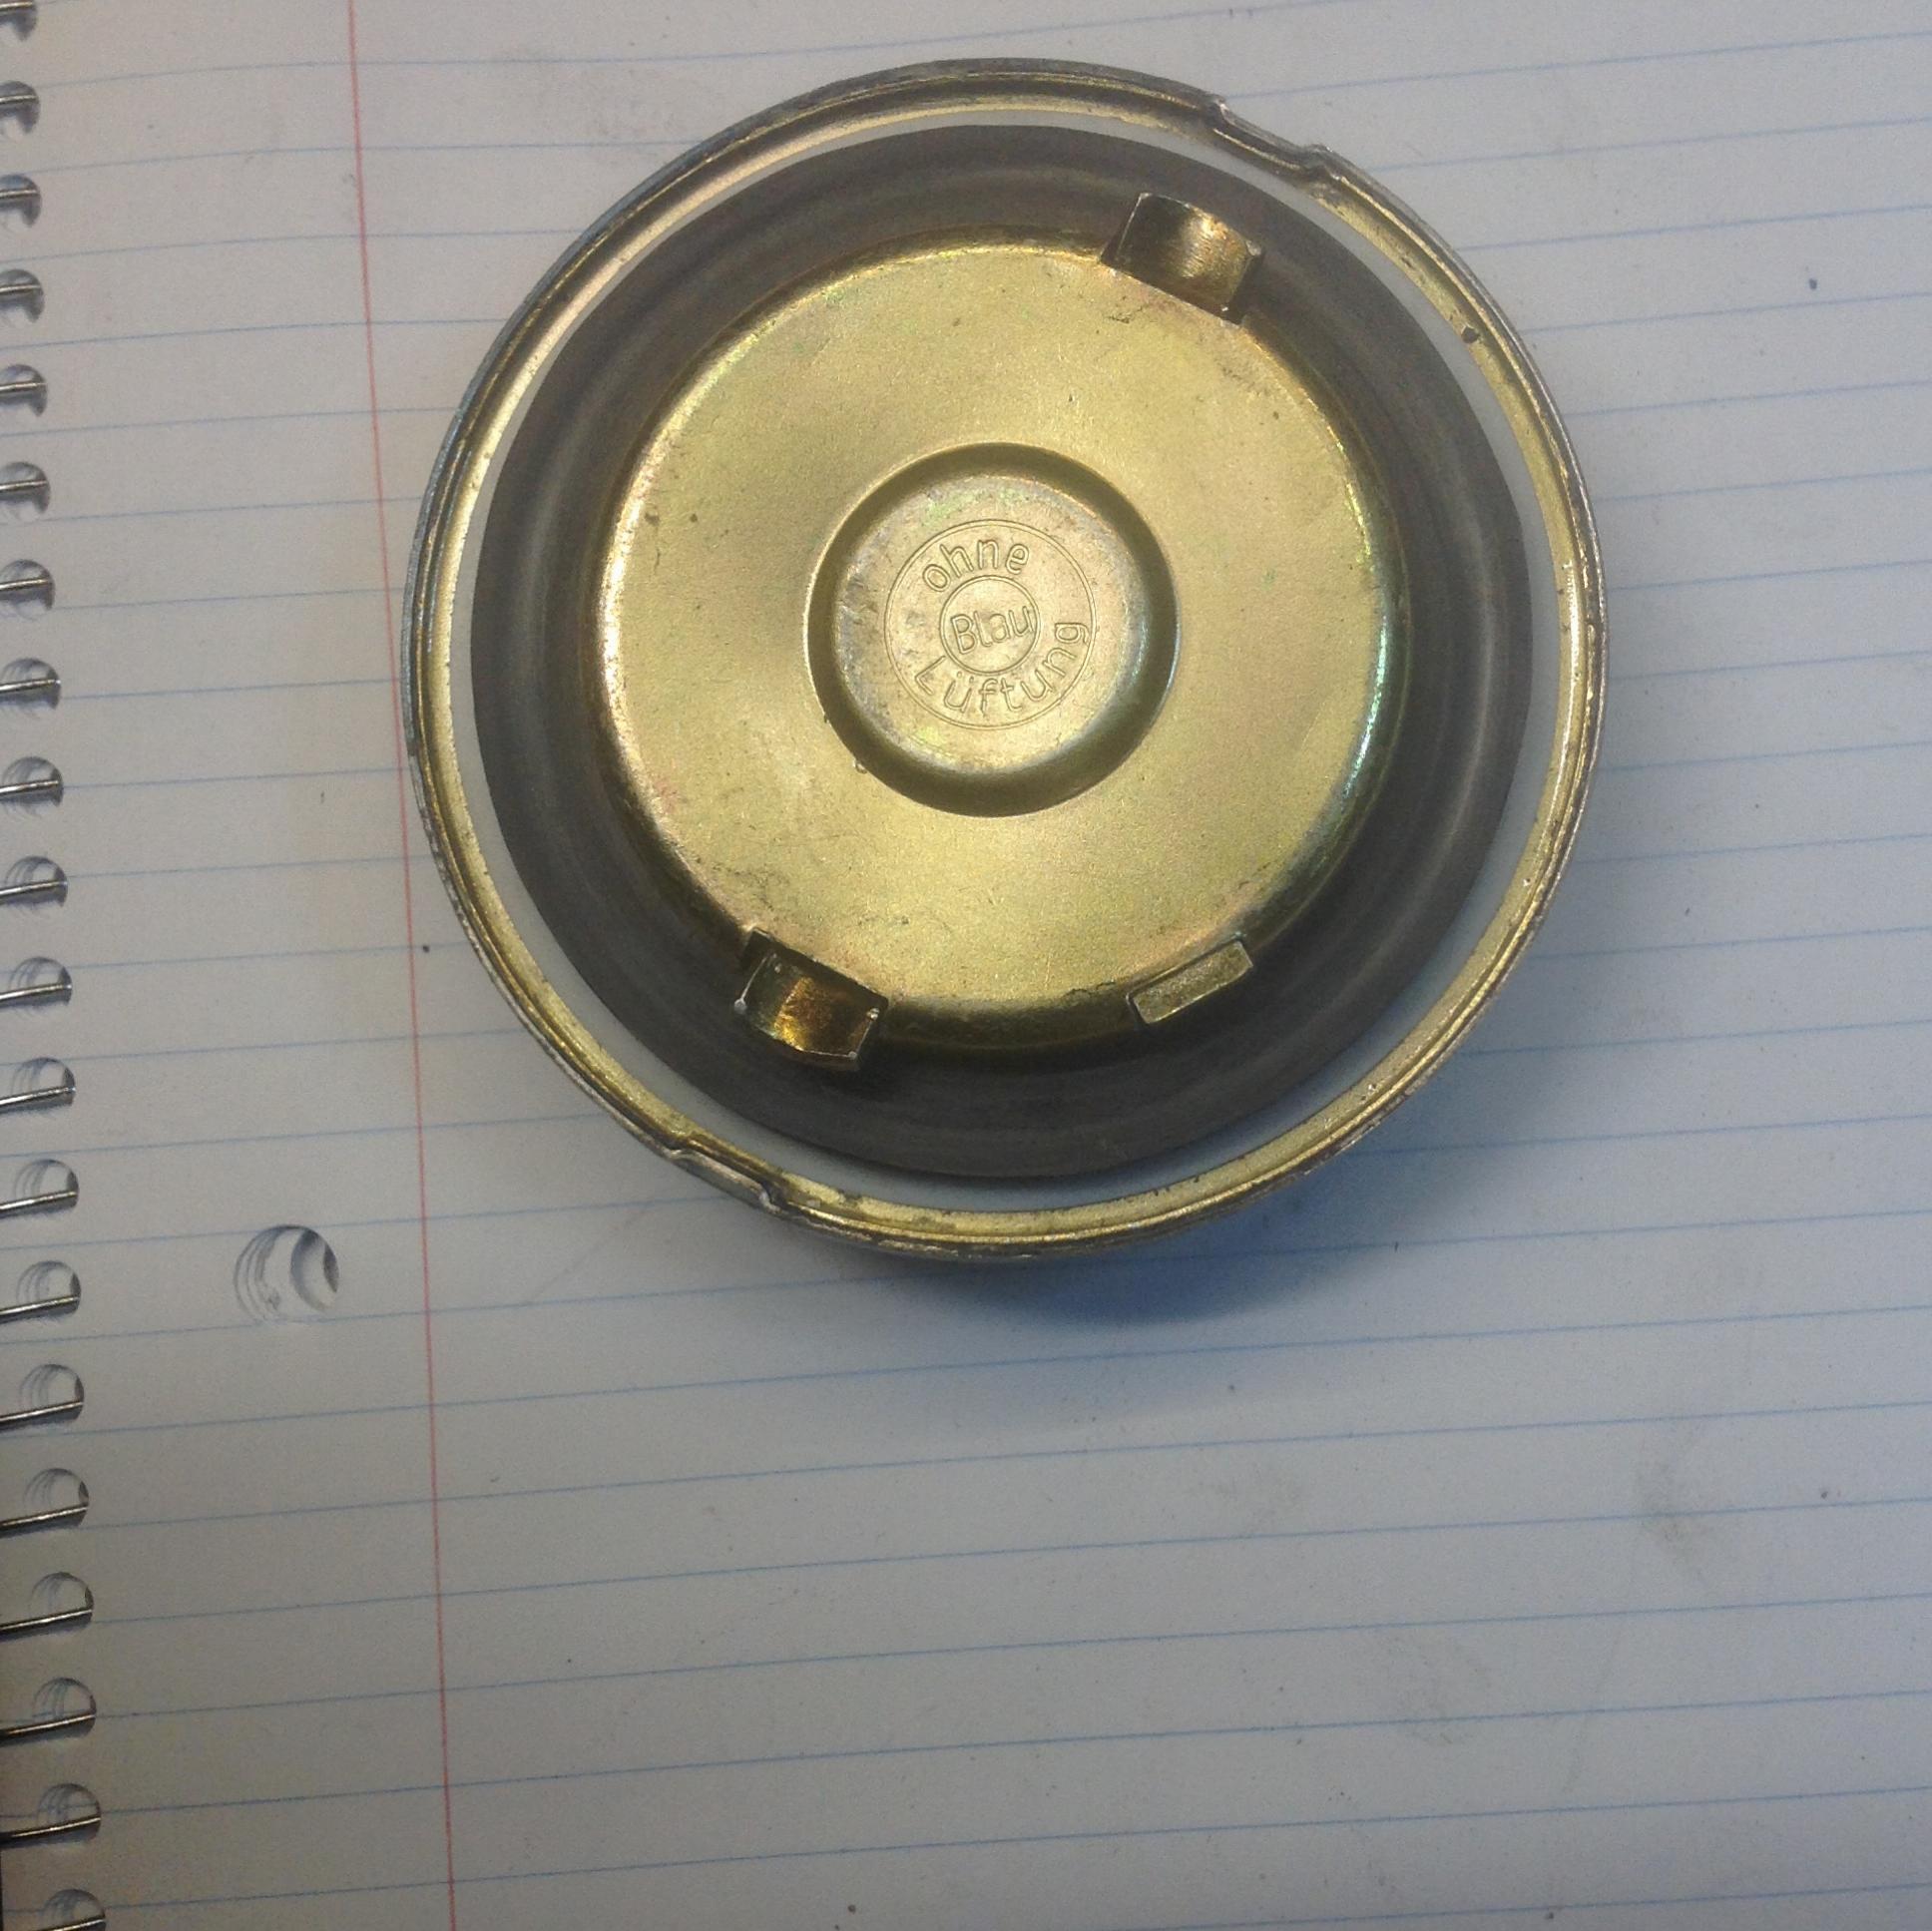
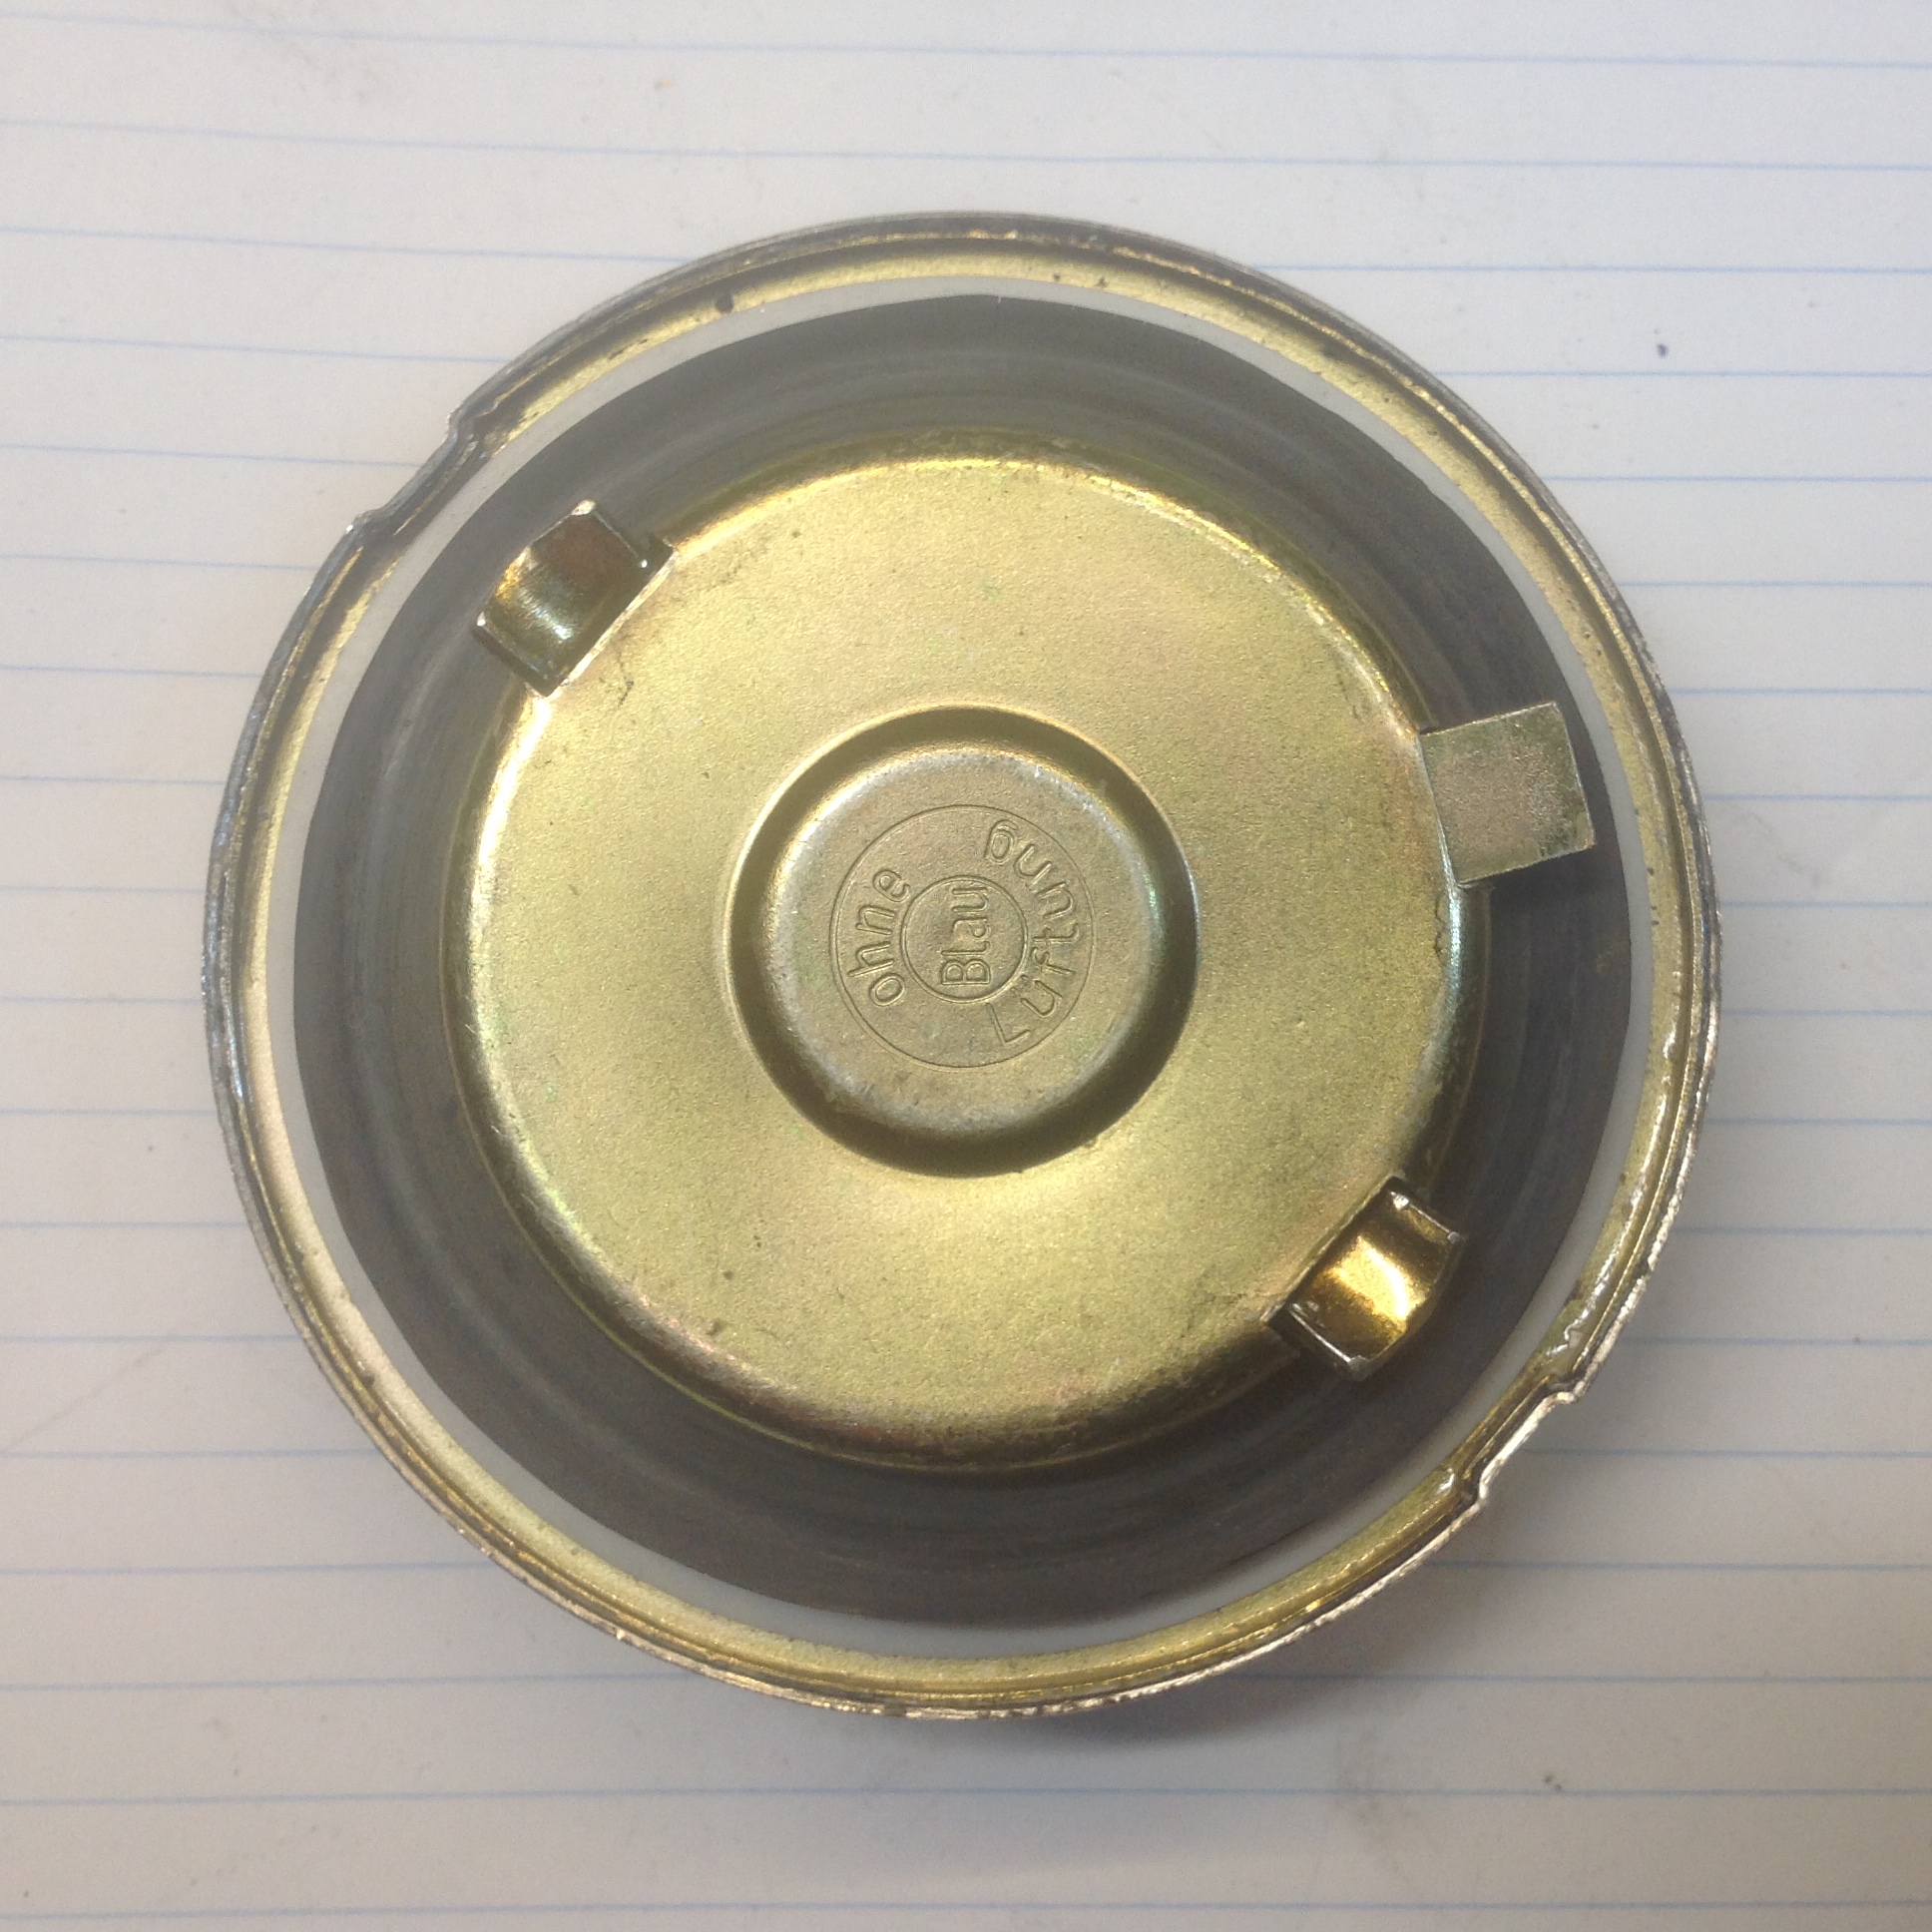
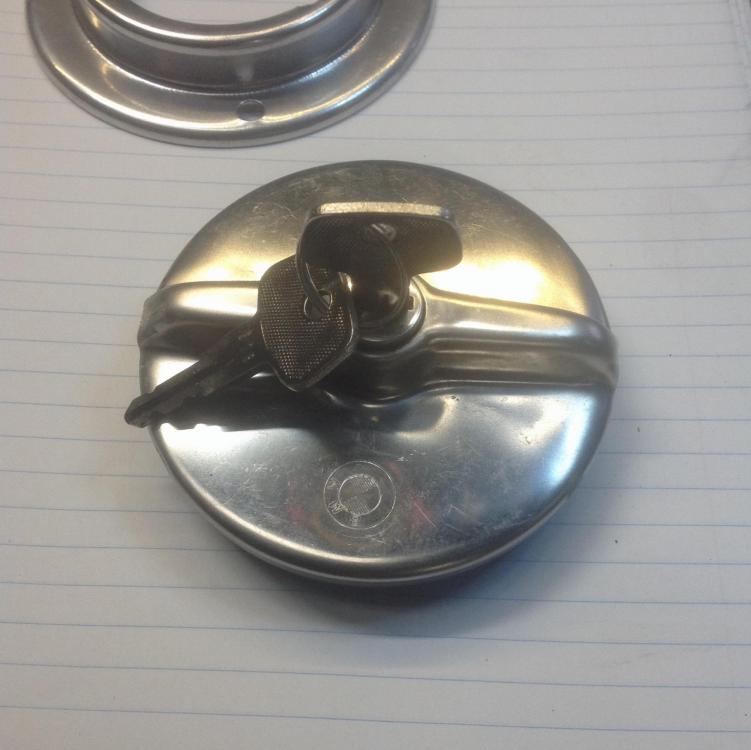
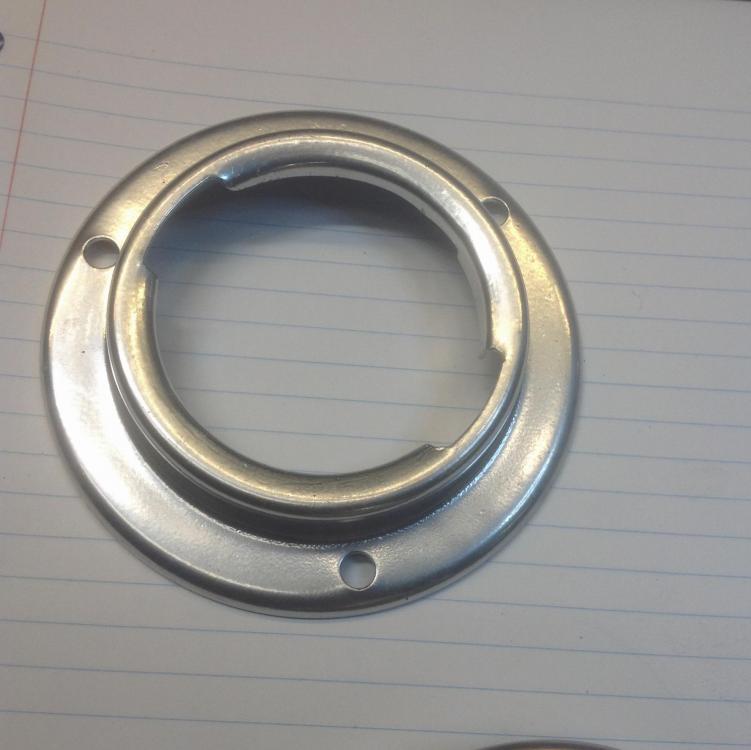
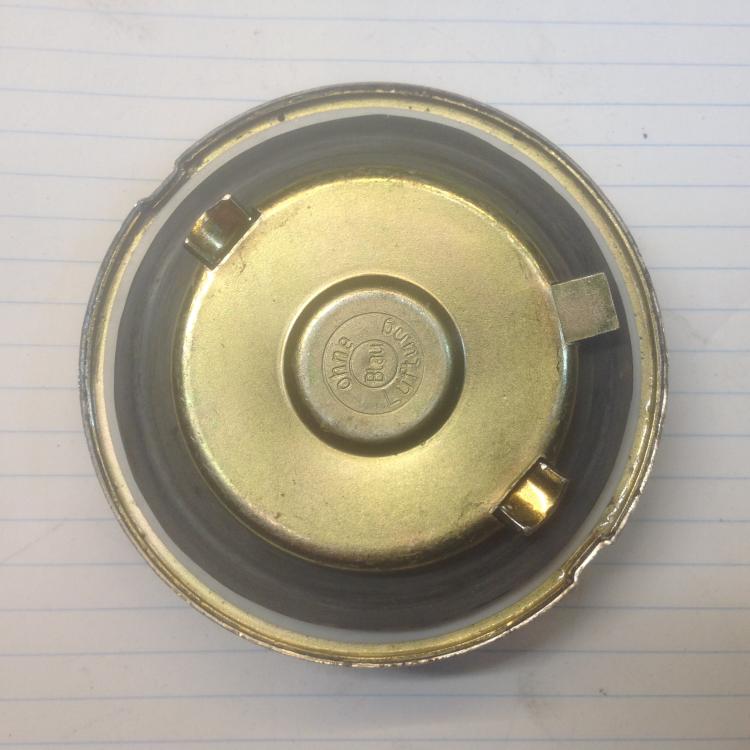
This is BMW locking gas cap. Unlocked. Tab at 2 oclock is retracted. Locked. Tab at 2 oclock is extended. Some fuel filler rings with color choices The back side with the welded on blob at the right spot to give the locking cap tab a place to lock behind The rubber flaps that I can supply. 1/32" thick new rubber.


-
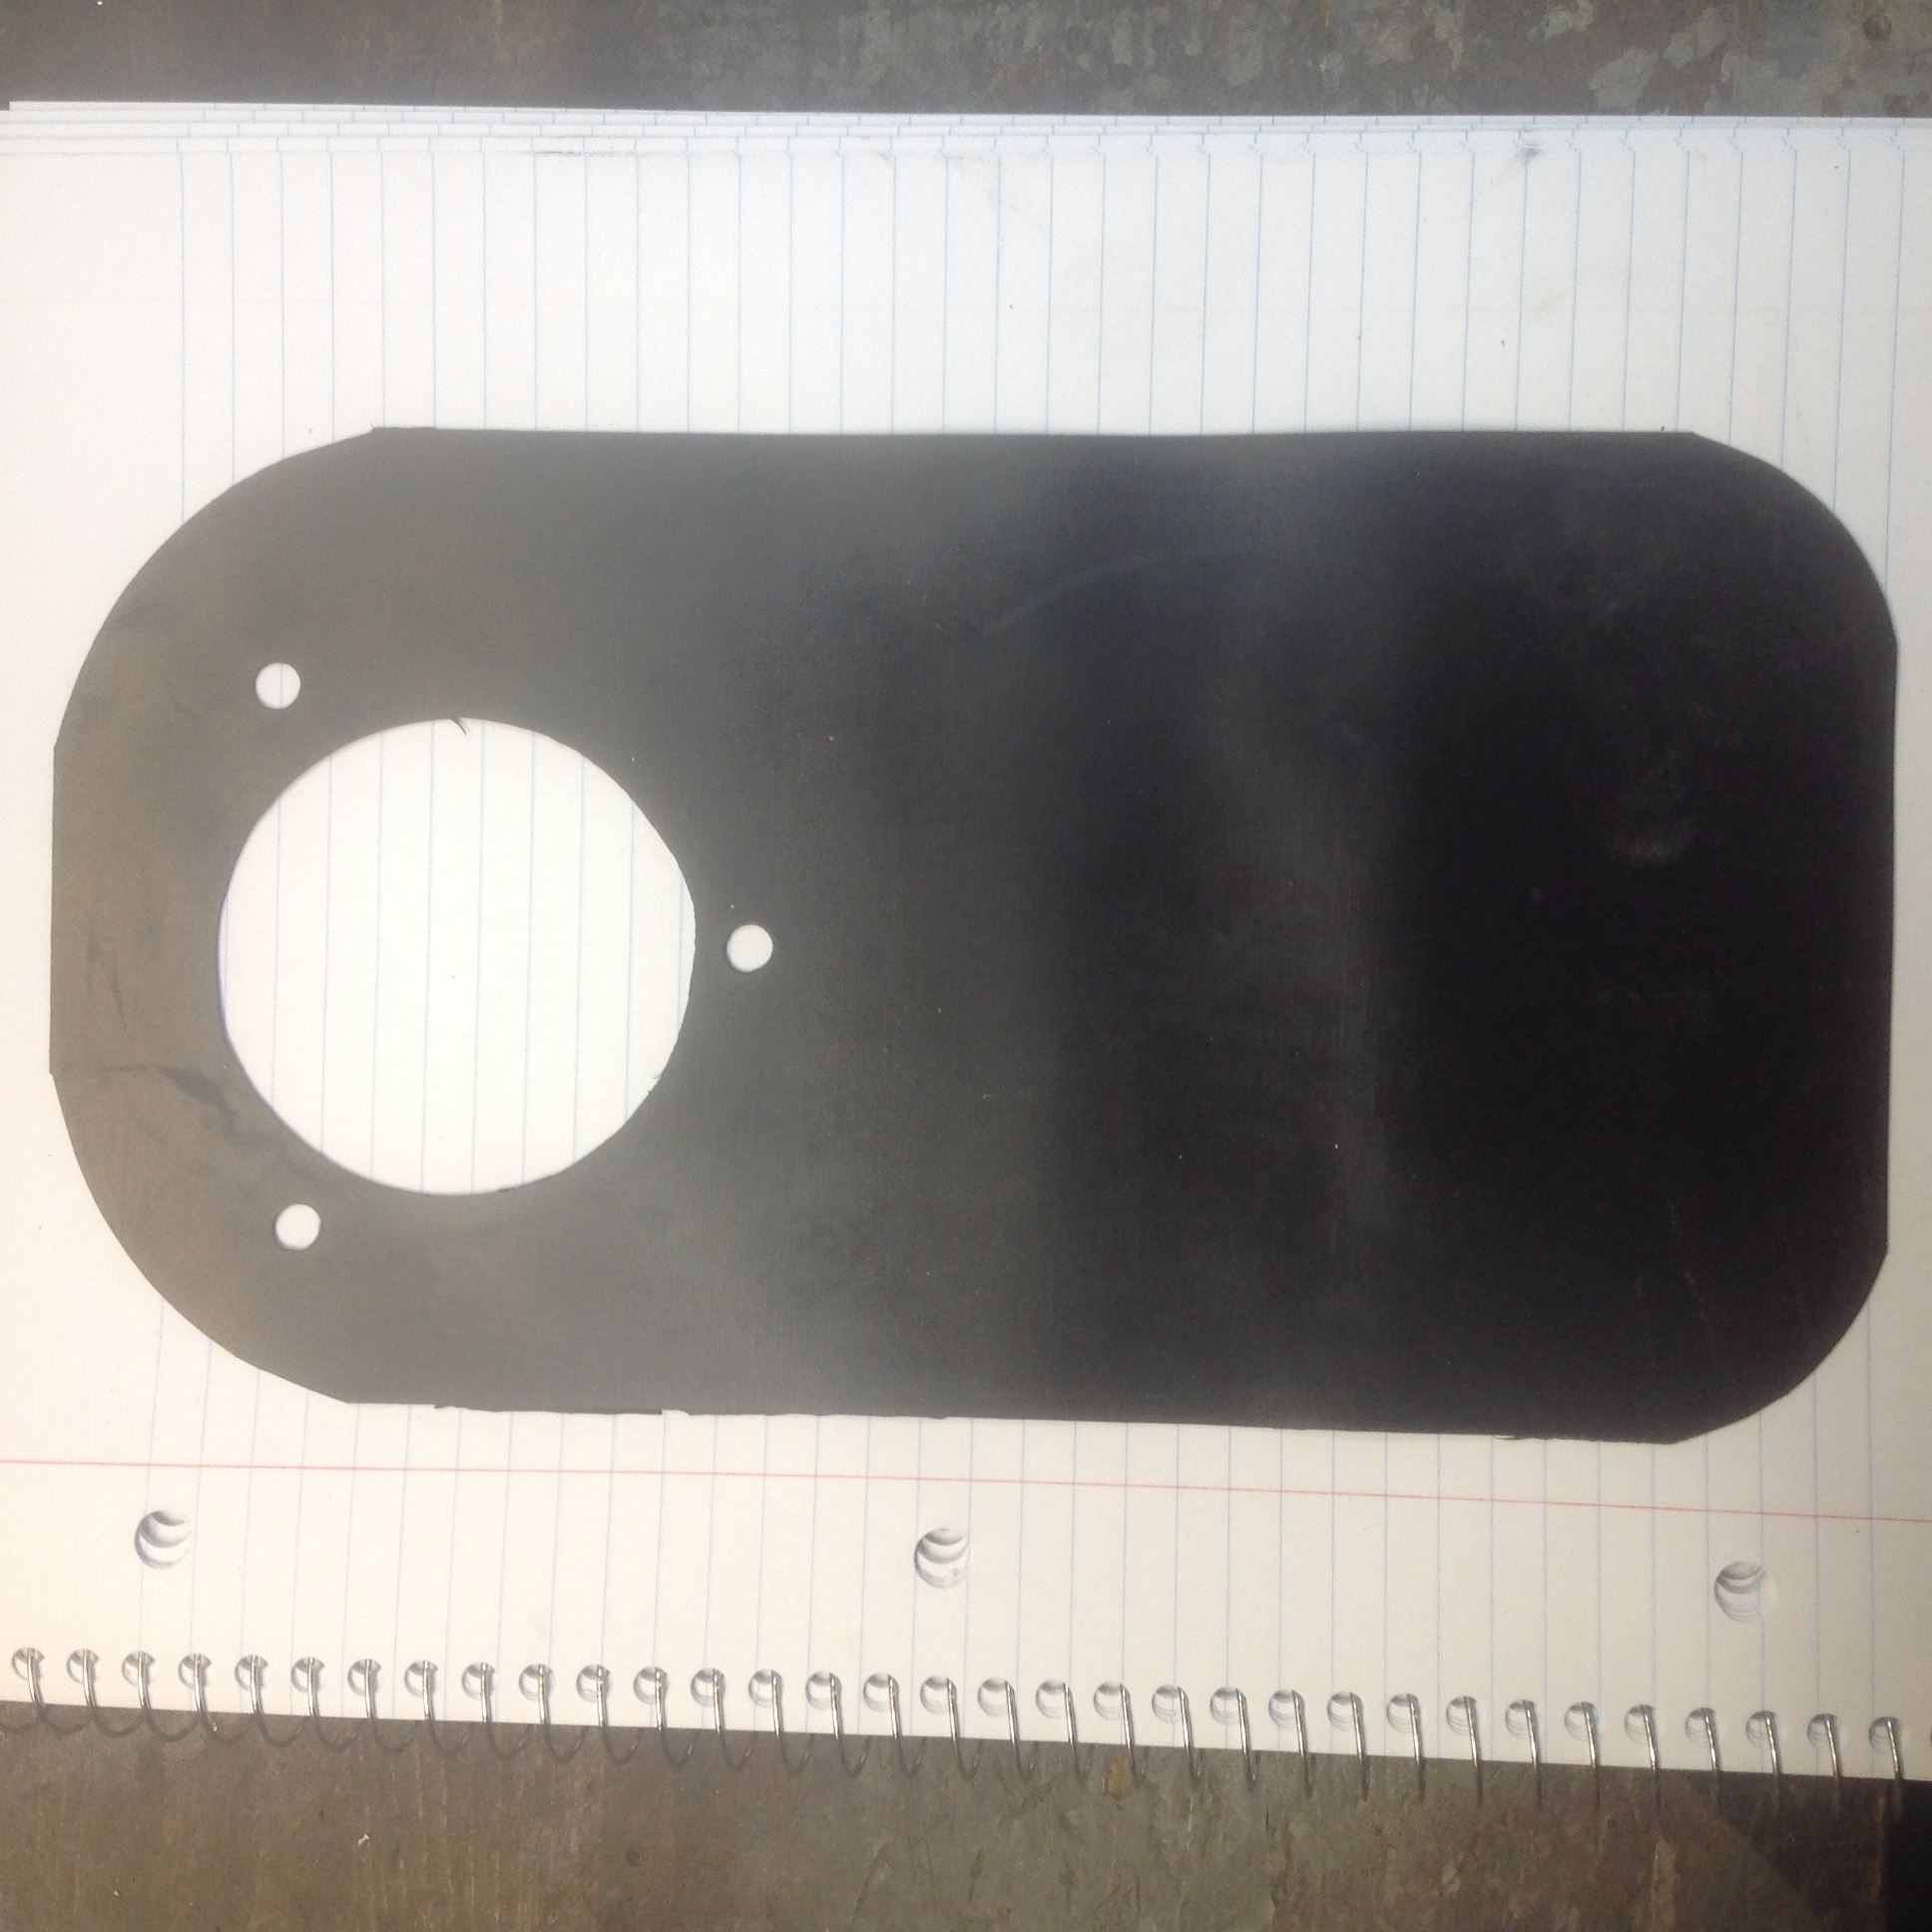
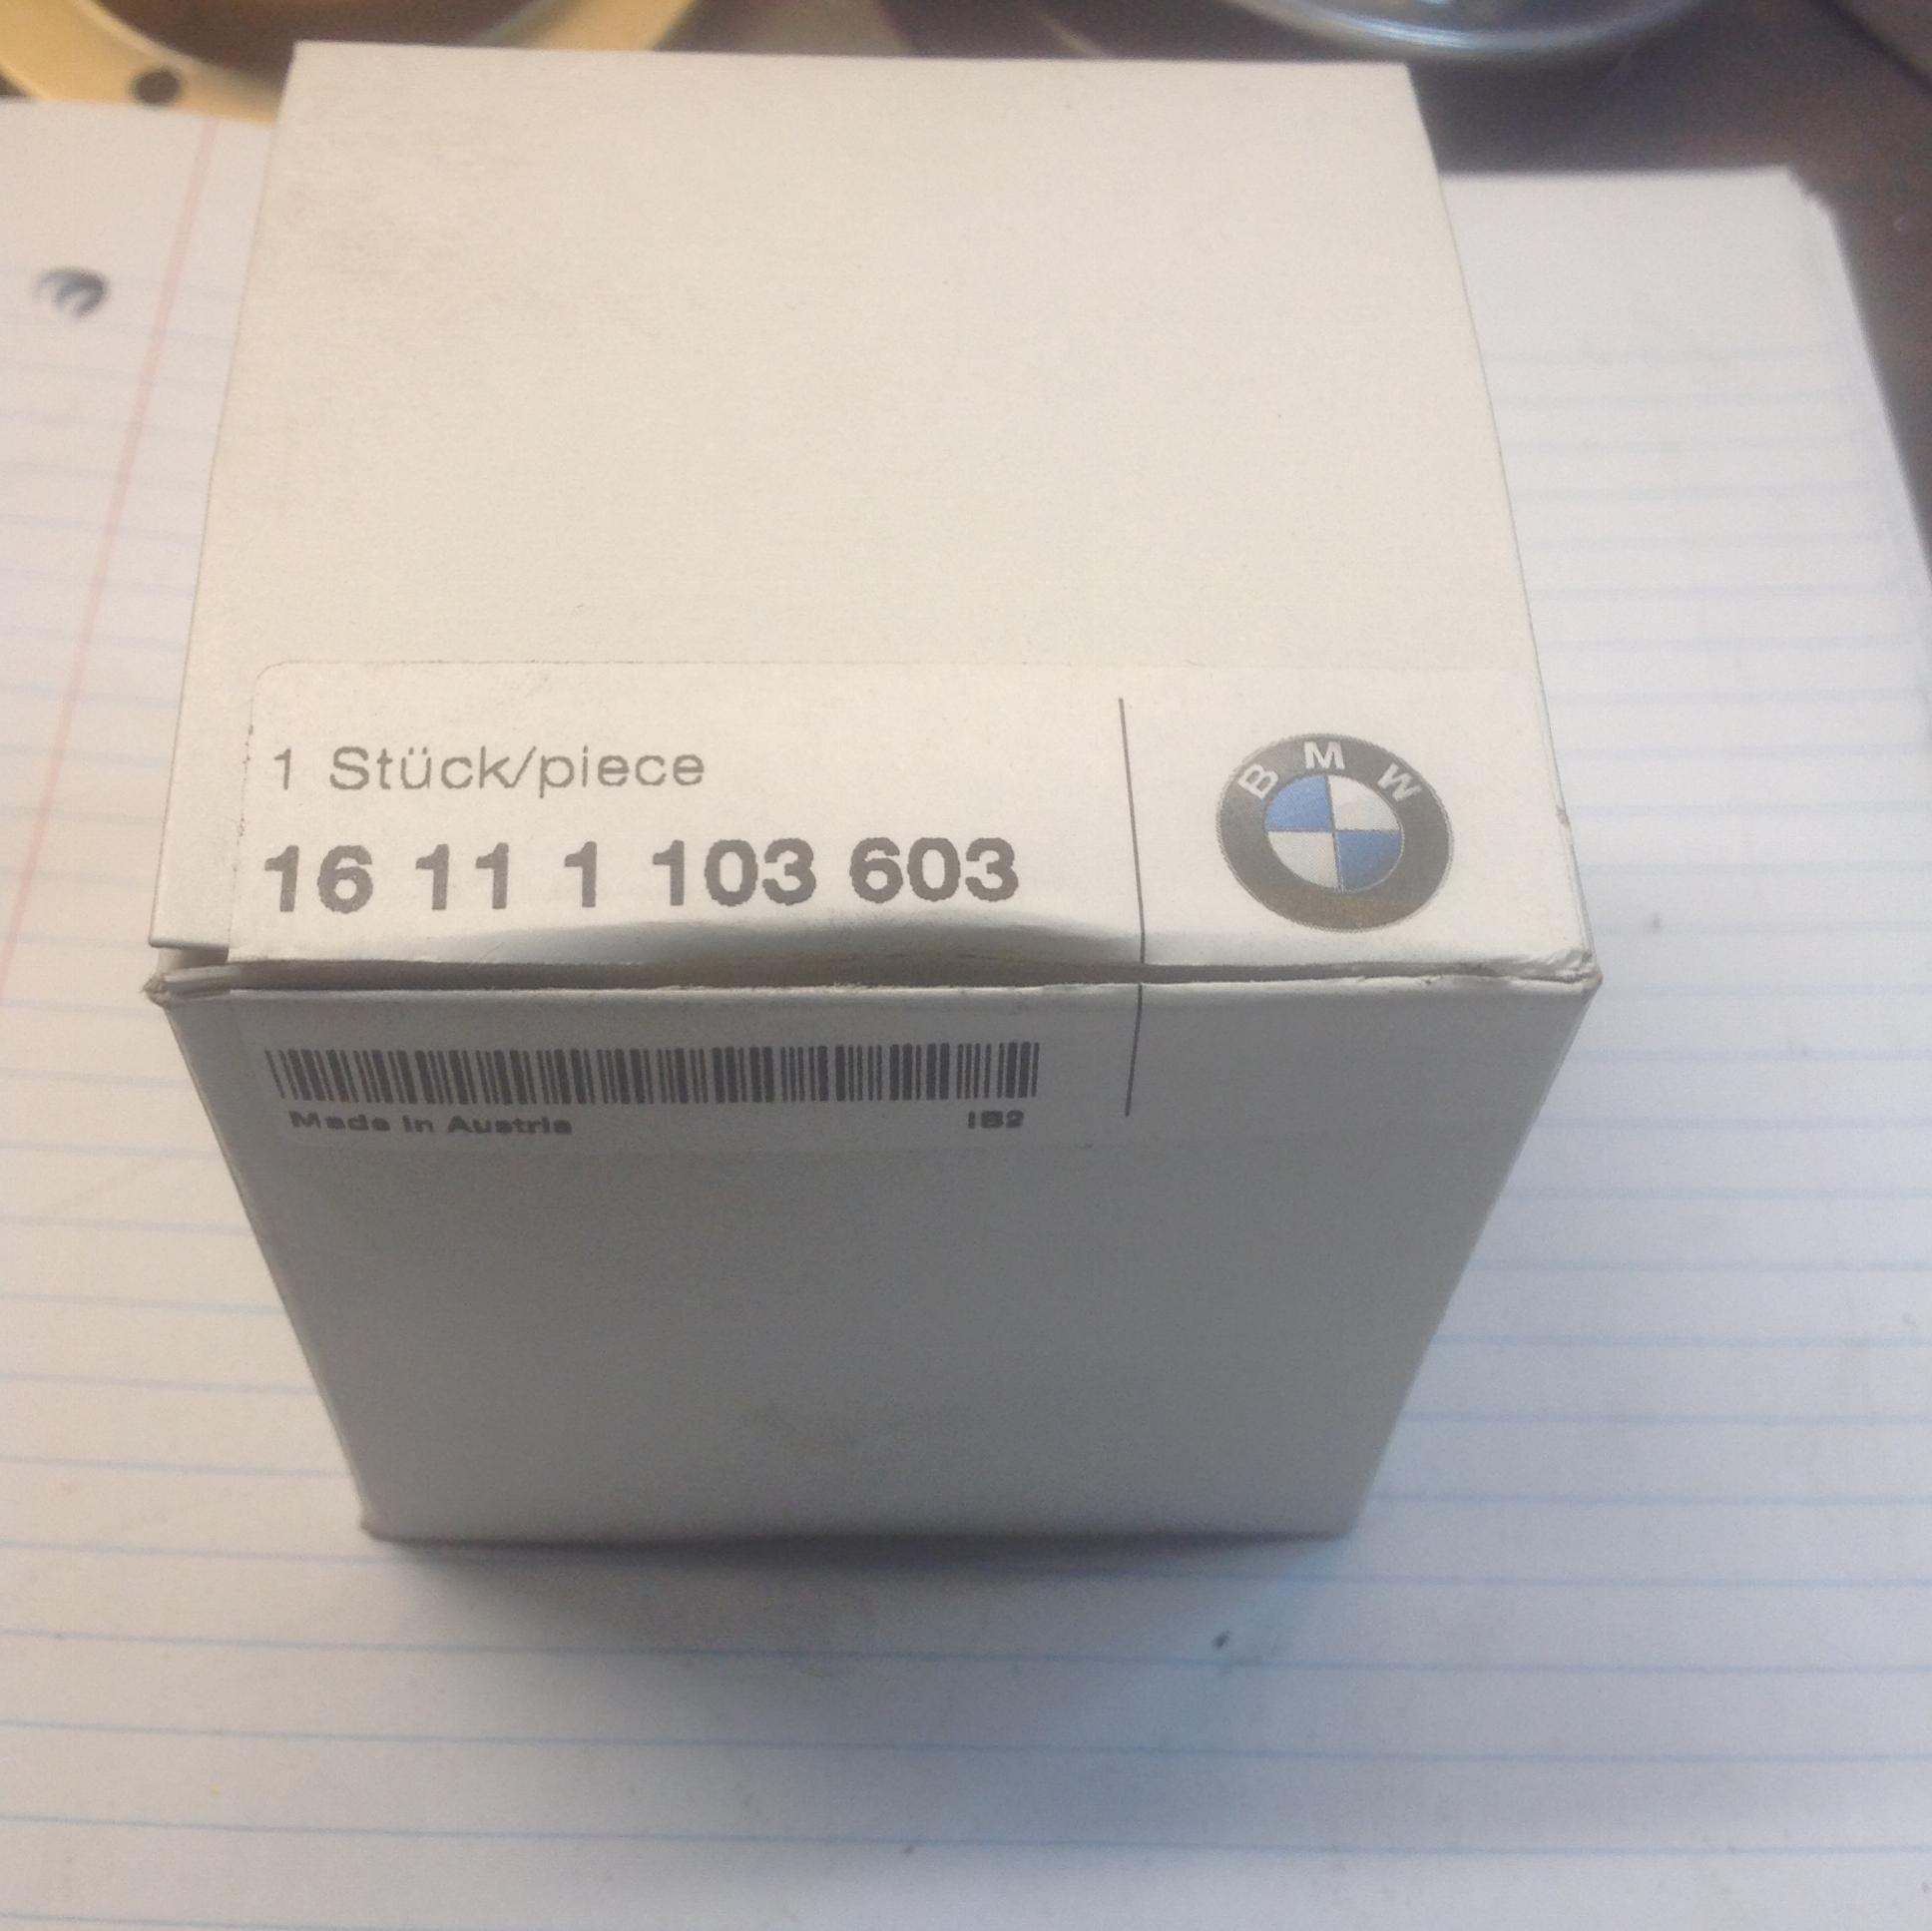
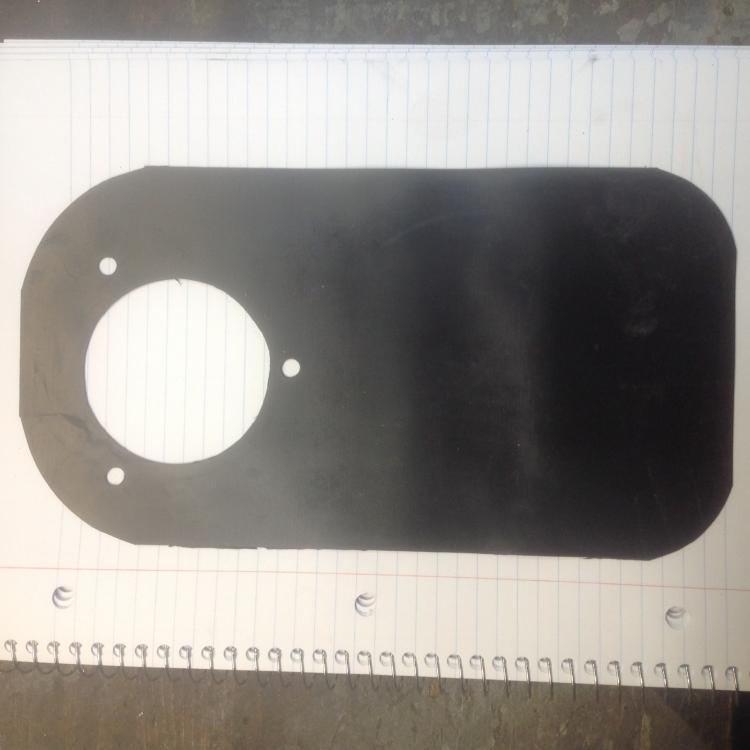
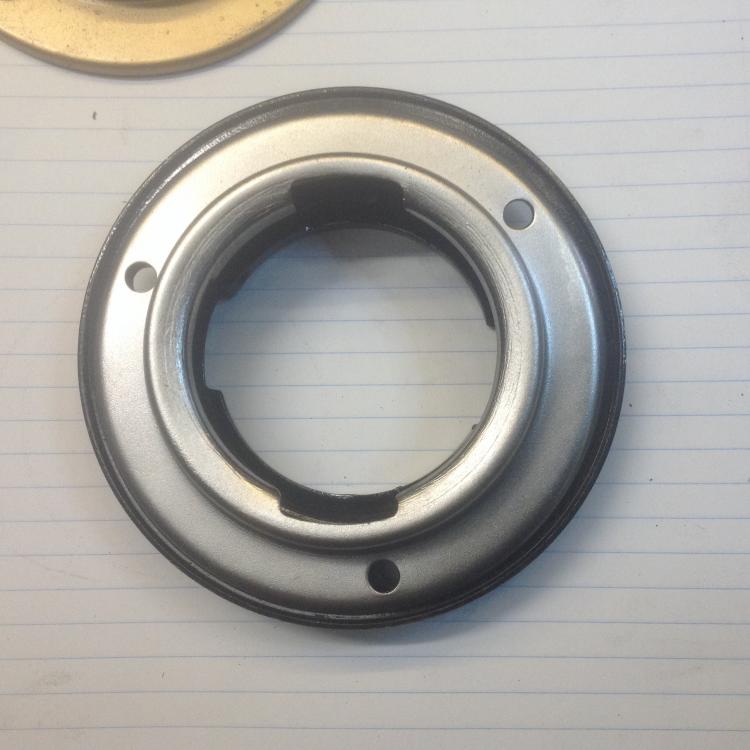
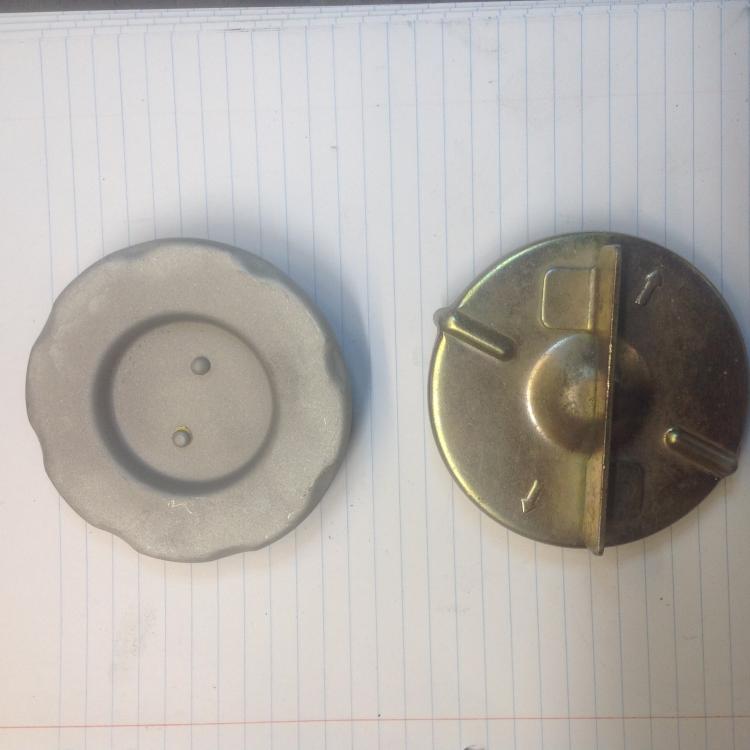
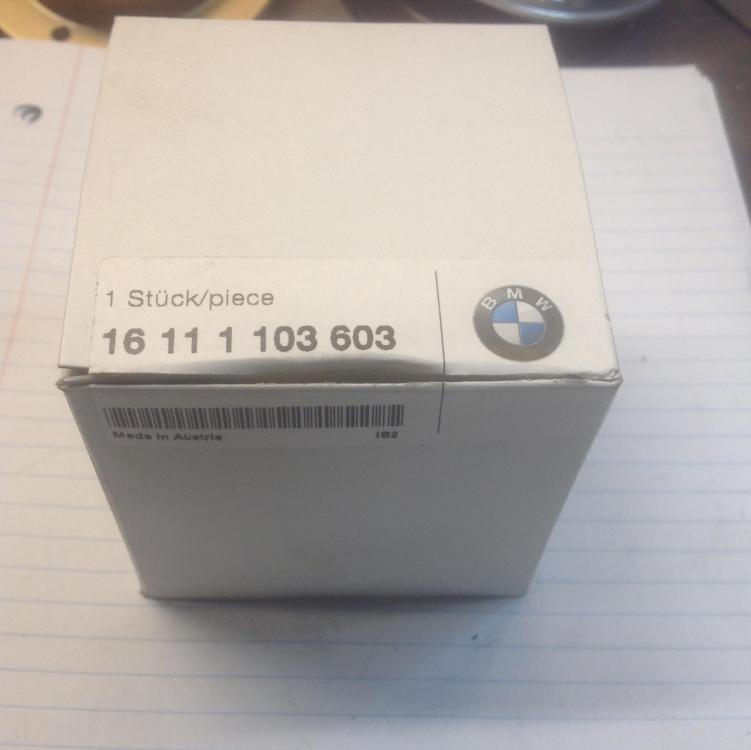
Recently a thread appeared that discussed locking gas caps, or more specifically the lack of a solution. The only known cap (from 70's BMW 2002) fits and appears to lock, but doesn't actually lock to the car. I was able to come up with a solution that modifies the fuel filler ring to allow the locking tab on the BMW cap to have a place to lock against. My locking gas cap solution works for the Z's up to the 74 260. The key is to look and see how many screws hold the filler ring to the body. If it has three screws, the solution is simple. If it has four, then the solution still works but is more difficult to implement. Note this solution does not work on the smaller caps found on 77-78 280's. I have a small collection of fuel filler rings that I have modified to work with the BMW locking caps that can offer for sale. I can paint, powder coat or have them CAD plated. I also made a pretty good deal on some of these locking gas caps. This allows me to offer a complete solution at a pretty good price. I'm asking $99 USD for a modified powder coated filler neck ring + new locking BMW cap with 2 keys AND a new hand made rubber gas cap protection flap. Shipping is on you. While supplies last. Here is what I am doing so can understand the value of what I'm offering for the $$. Sandblast the filler ring, weld on the lock stop blob in "just" the right spot. Do a little hammer work around the inside ID to open it slightly so the cap fits better. Powder coat. The new locking caps I just bought need a little shining up to look good, so a quick trip past the buffing wheel. The two locator tabs on these new caps are slightly long and don't fit into our filler ring as is, so grind off a tad of their length and dress them up. Test fit. Slice up a new rubber flap. Package and ship. You will have to use the flat rubber sealing ring from your old stock cap in place of the BMW sealing ring. It's too thin. One interesting note. There are two different outer diameters of the filler neck rings. Same bolt circle and same size where the cap fits, just the outer diameter of the mounting flange is different by about 1/8". Early and Late? The caps with the pie crust edge (early non-vented) verses the caps with the angle iron handle (late)? Anybody know for sure? If you care, let me know which one you want. If you have a 280 and have a four screw filler neck, you have to remove the entire neck and its one-piece upper hose tubing (see above pics) to do the "mod" to get the cap to fit. If you want to know what to do, let me know, I'll share a solution to add the "stop" to make the BMW cap work. If you're really desparate send me your neck I'll do it. I can supply the BMW locking cap or tell you where to get one. You can contact best by dropping me an email to z240@shaw.ca. Let me know if you have any questions. Pictures of the items in question follow.
-
Well let's get this thread back on track. My locking gas cap solution works for the Z's up to 74. The key is to look and see how many screws hold the filler ring to the body. Three is good, four is bad. I want to offer a few of my modified 3-screw rings for sale. I also made a pretty good deal on some of these locking gas caps. I'm asking $99 USD for a modified powder coated filler neck ring + new locking BMW cap AND a new hand made rubber flap. Shipping is on you. Here is what I am doing so can understand the value of I'm offering for the $$. Sandblast the filler ring, weld on the blob in "just" the right spot. Do a little hammer work around the inside ID to open it slightly so the cap fits better. Powder coat. The new locking caps I just bought need a little shining up to look good, so a quick trip past the buffing wheel. The two locator tabs on these new caps are slightly long and don't fit into our filler ring as is, so grind off a tad of their length and dress them up. Test fit. Slice up a new rubber flap. You will have to use the flat rubber sealing ring from your old stock cap in place of the BMW sealing ring. It's too thin. One interesting note. There are two different outer diameters of the filler neck rings. Same bolt circle and same size where the cap fits, just the outer diameter of the mounting flange is different by about 1/8". Early and Late? The caps with the pie crust edge (early non-vented) verses the caps with the angle iron handle (late)? Anybody know for sure? If you care, let me know which one you want. If you have a 280 and have a four screw filler neck, you have to remove the entire neck and its one-piece upper hose tubing (see above pics) to do the "mod" to get the cap to fit. If you want to know what to do, let me know, I'll share a solution to add the "stop" to make the BMW cap work. If you're really desparate send me your neck I'll do it. Let me know if you have any questions.
-
Holes too small, enlarge hole. Who would have thunk it. I was also wondering why they didn't punch those holes from the inside, then, oh yeah, right.....
-
well lookie what facebook found! Actually Bill Morgan. http://www.yoesheadporting.com/#!product-page/fuhi2/687b6dfd-1bc5-8b50-6674-2e4f8b055f90
-
So I finished up all the cleaning, caulking and coating application (bed liner) up behind the tank yesterday and went out this morning to put the tank back in. Got it jacked up in place, back on the fill hose (thank you heat and vaseline for another helpful service!) and started thinking about putting the straps on, then WHAM it hit me.. Forgot to put the ground lug and new bolt back in place...... Take it back down, clean the coating off the lug that got sprayed, ran a tap into the threads to clean it out, and put in a new pretty bolt.. THEN put the tank back in.. Sheesh....
-
I absolutely agree its worth fixing. I haven't removed all the old epoxy to see just how bad the situation is, but even if I have to weld in a new plate that holds the two tubes, no biggy. We have the technology. I'm just lucky I have spare tanks to use instead. Had to strip this one and put a deleted return line back in (which is a breeze to solder as noted above BTW) and do a wee bit of dent repair, but other wise lovely. Here she is with a fresh coat of Chassis Saver.

-
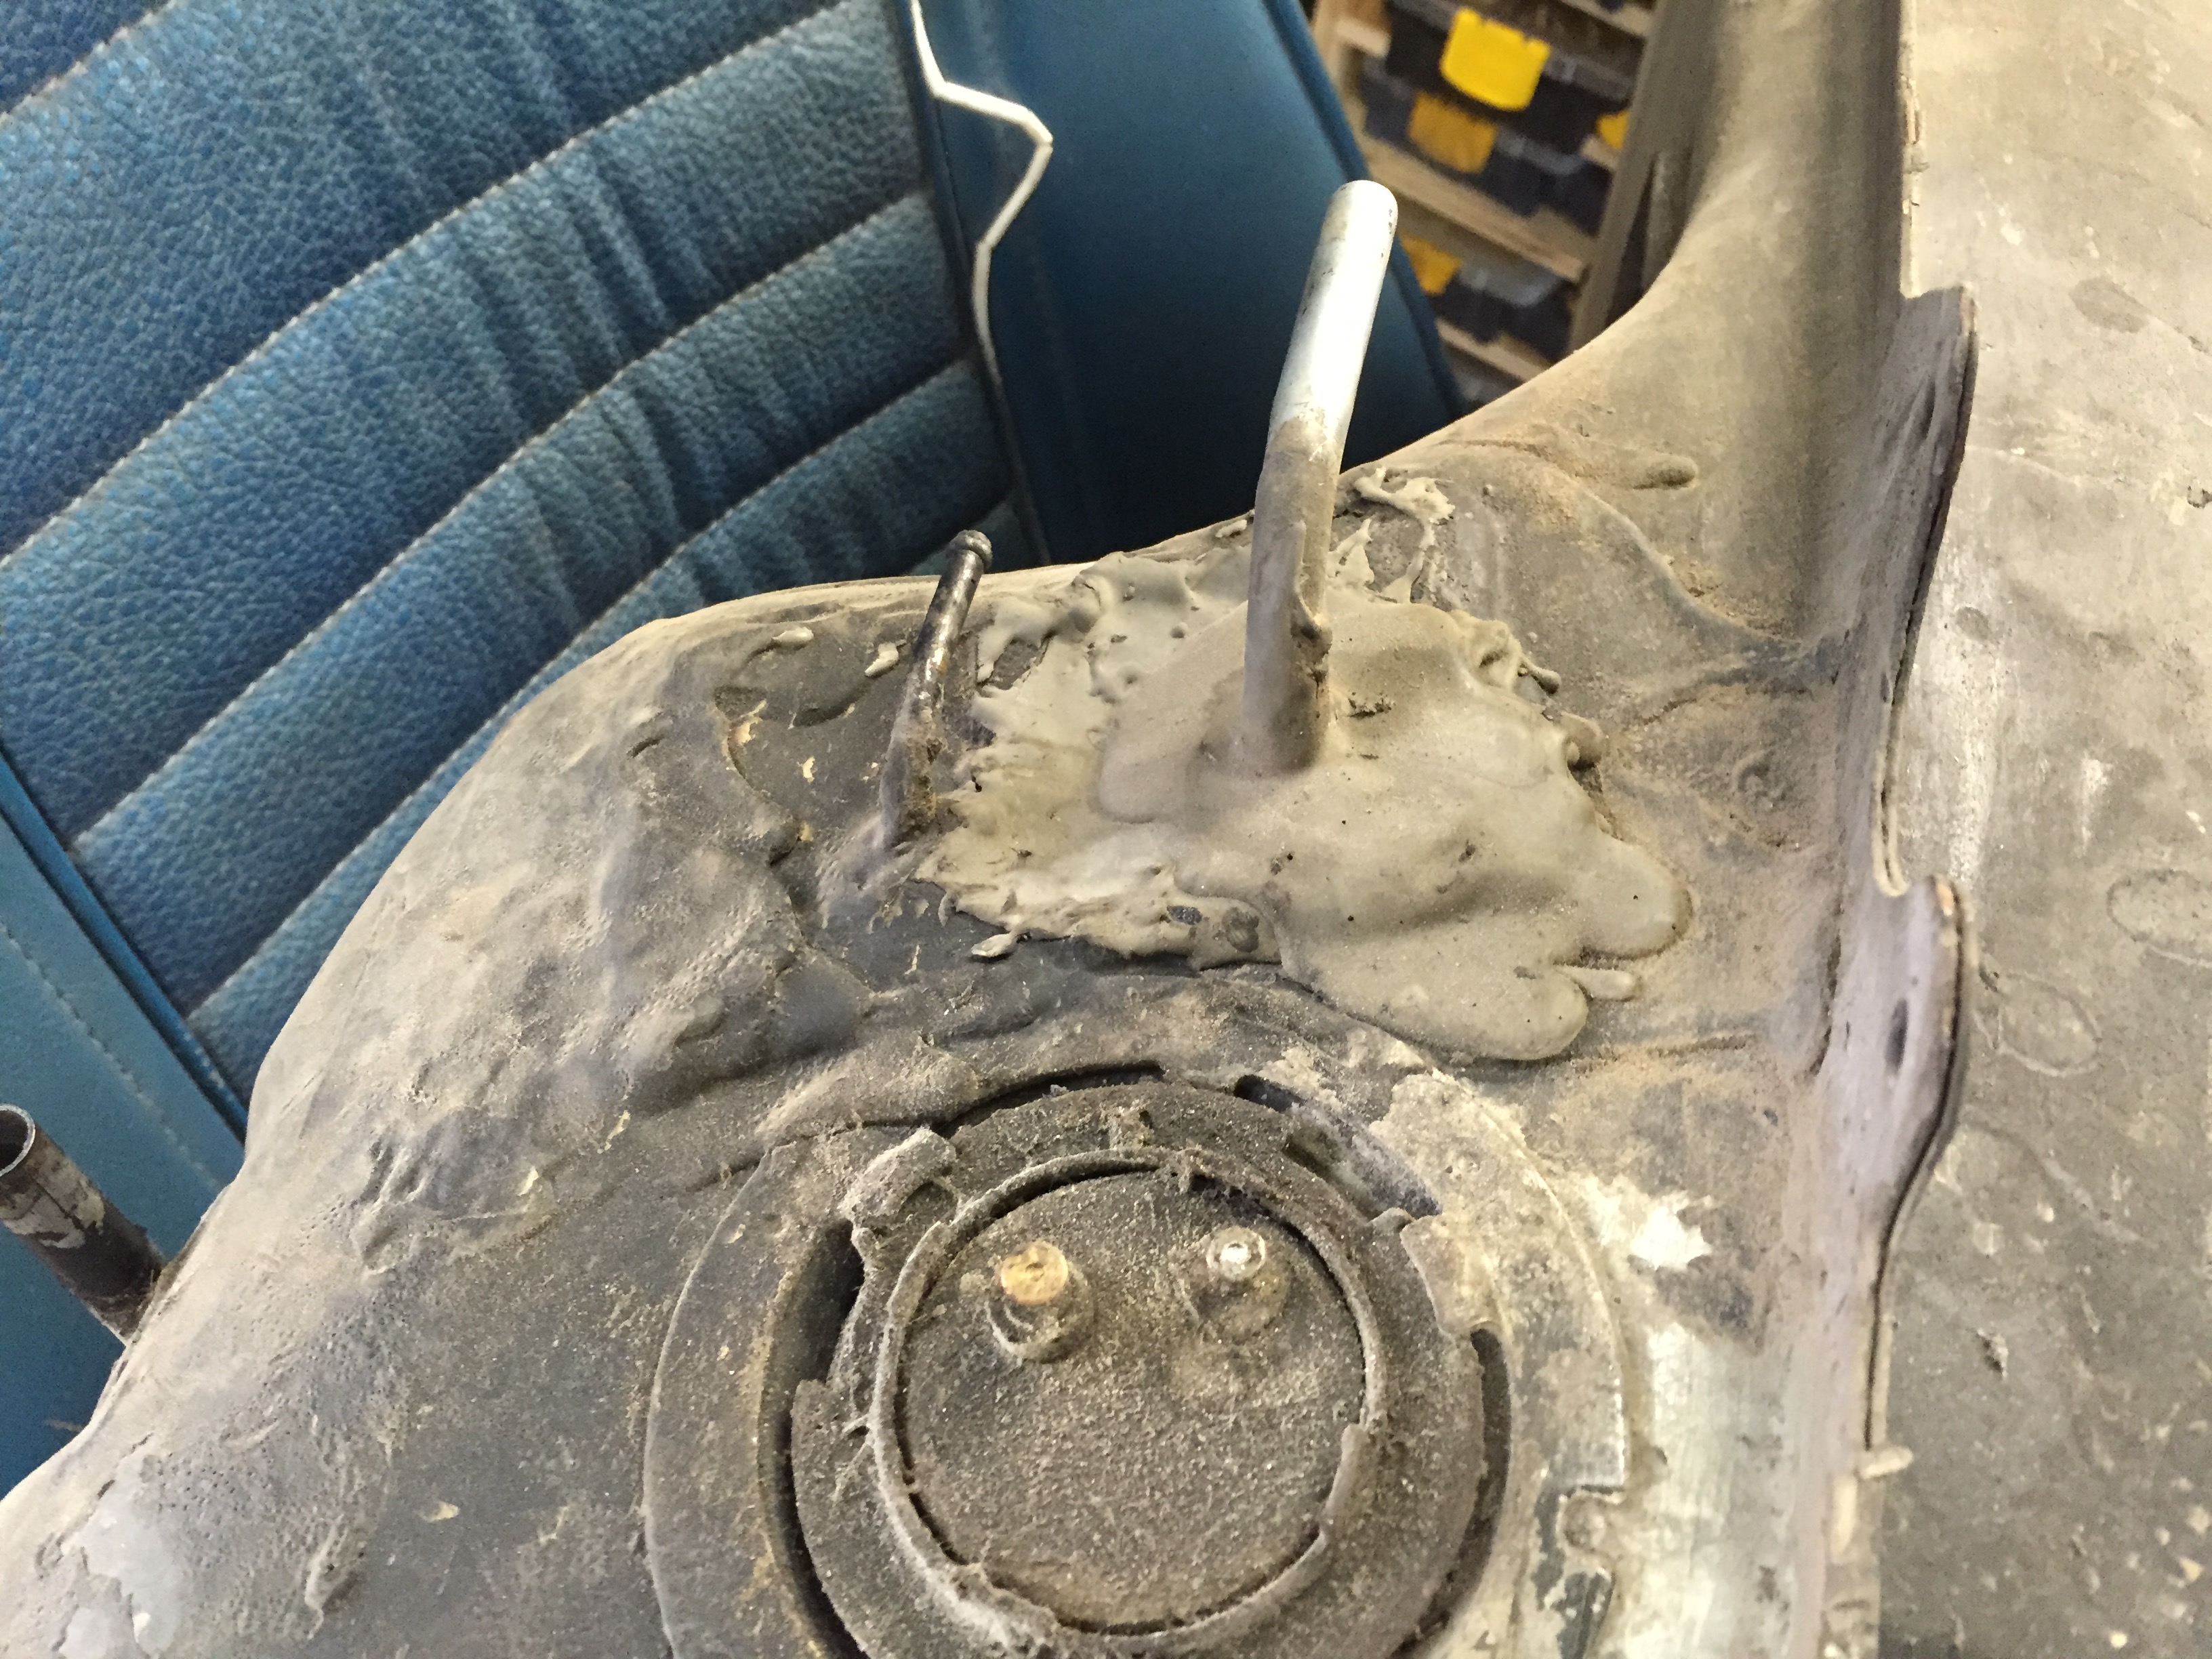
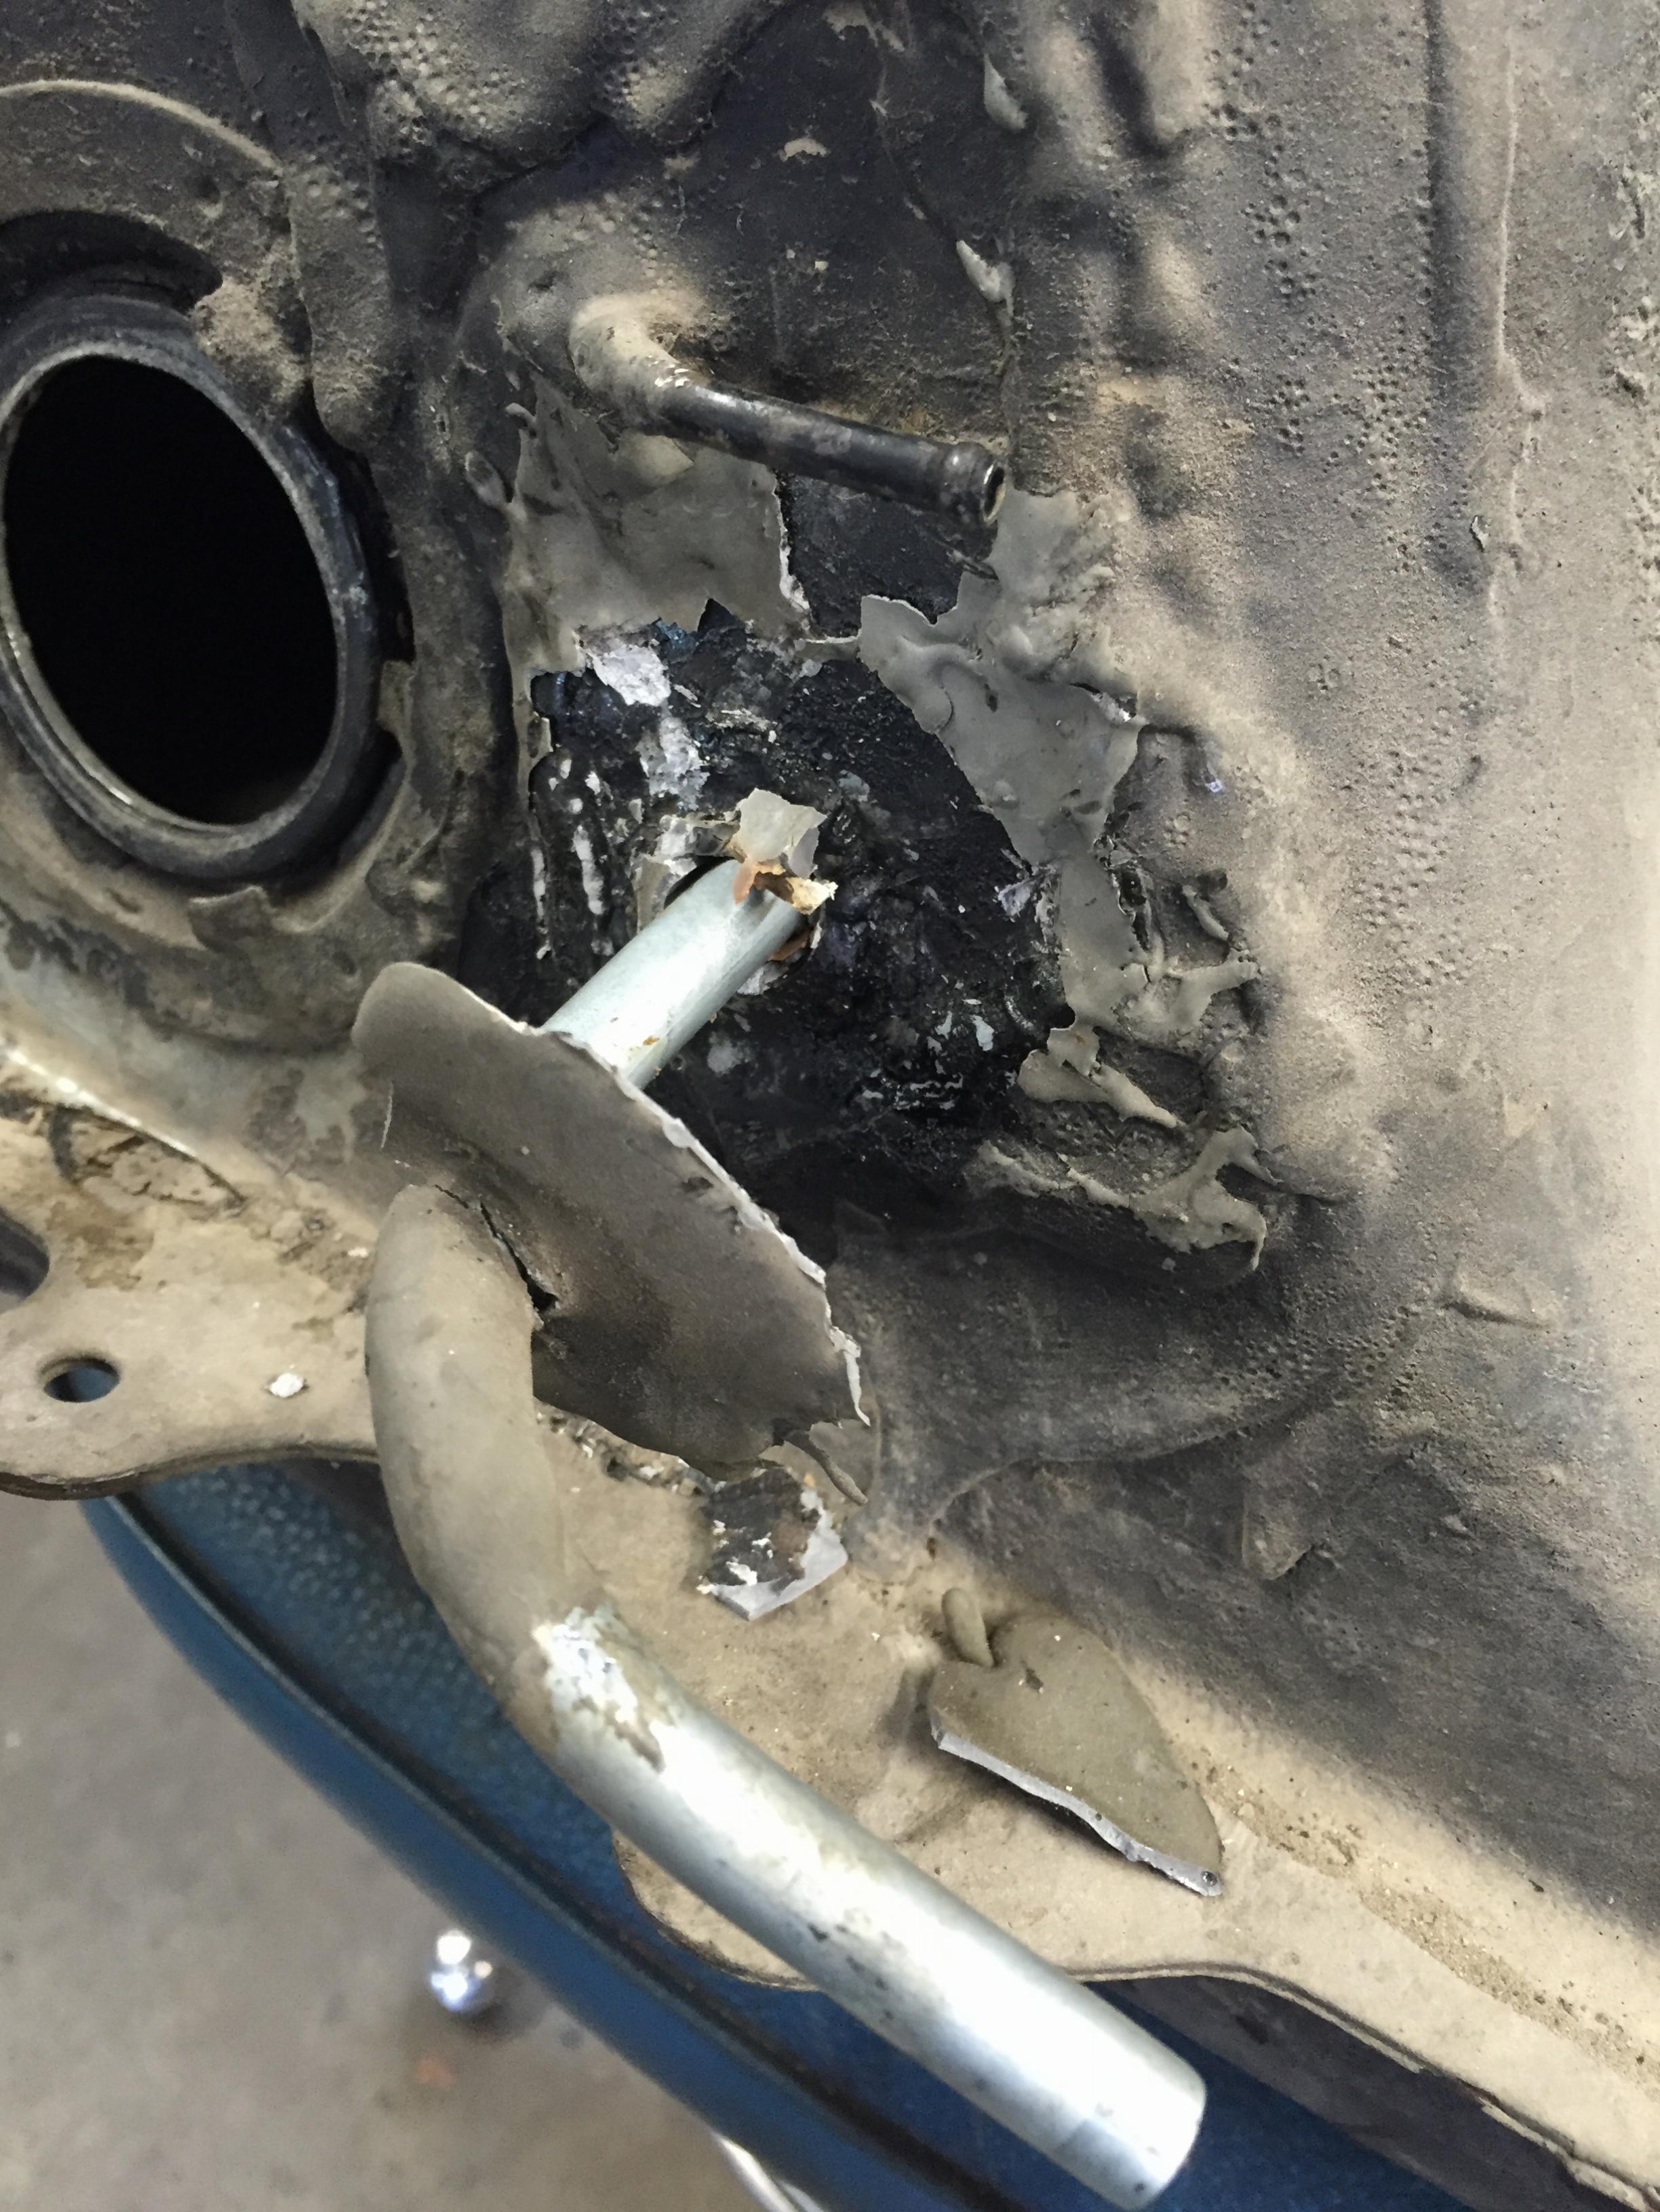
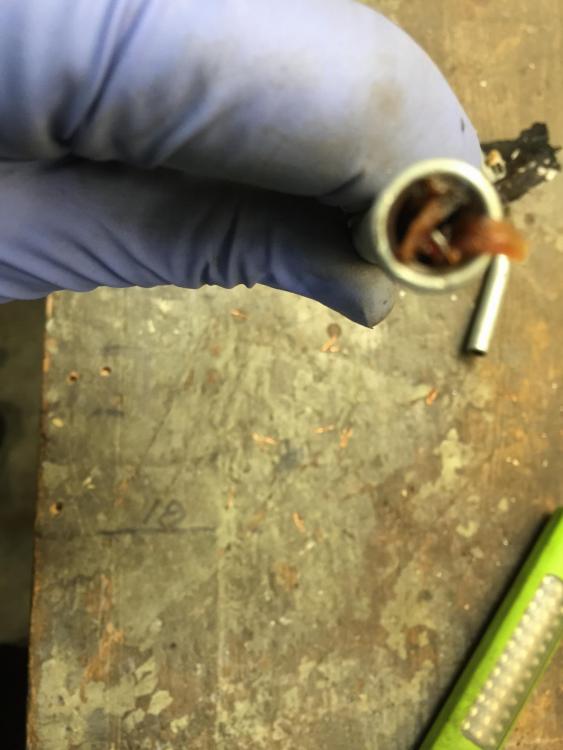
I was hemming and hawing and about taking the tank out of the 71 I'm working on to see what's going on underneath it mostly. This car is so nice and rust free I didn't expect much problem but I needed to deal with plugging off the far left vent line anyway (evap tank delete) so out it comes. Chance to clean up all the bits and pieces back there and make it look all pretty. So I'm undoing the fuel lines and notice something. Is this a bad thing? Did something throw up on my gas tank? how about this? Or even this? That line that's blobbed in with silly putty is a replacement pickup. Check out what's in the end Time to get a another tank and try again. Too bad, the inside is nice is clean, other than the varnish crystals....


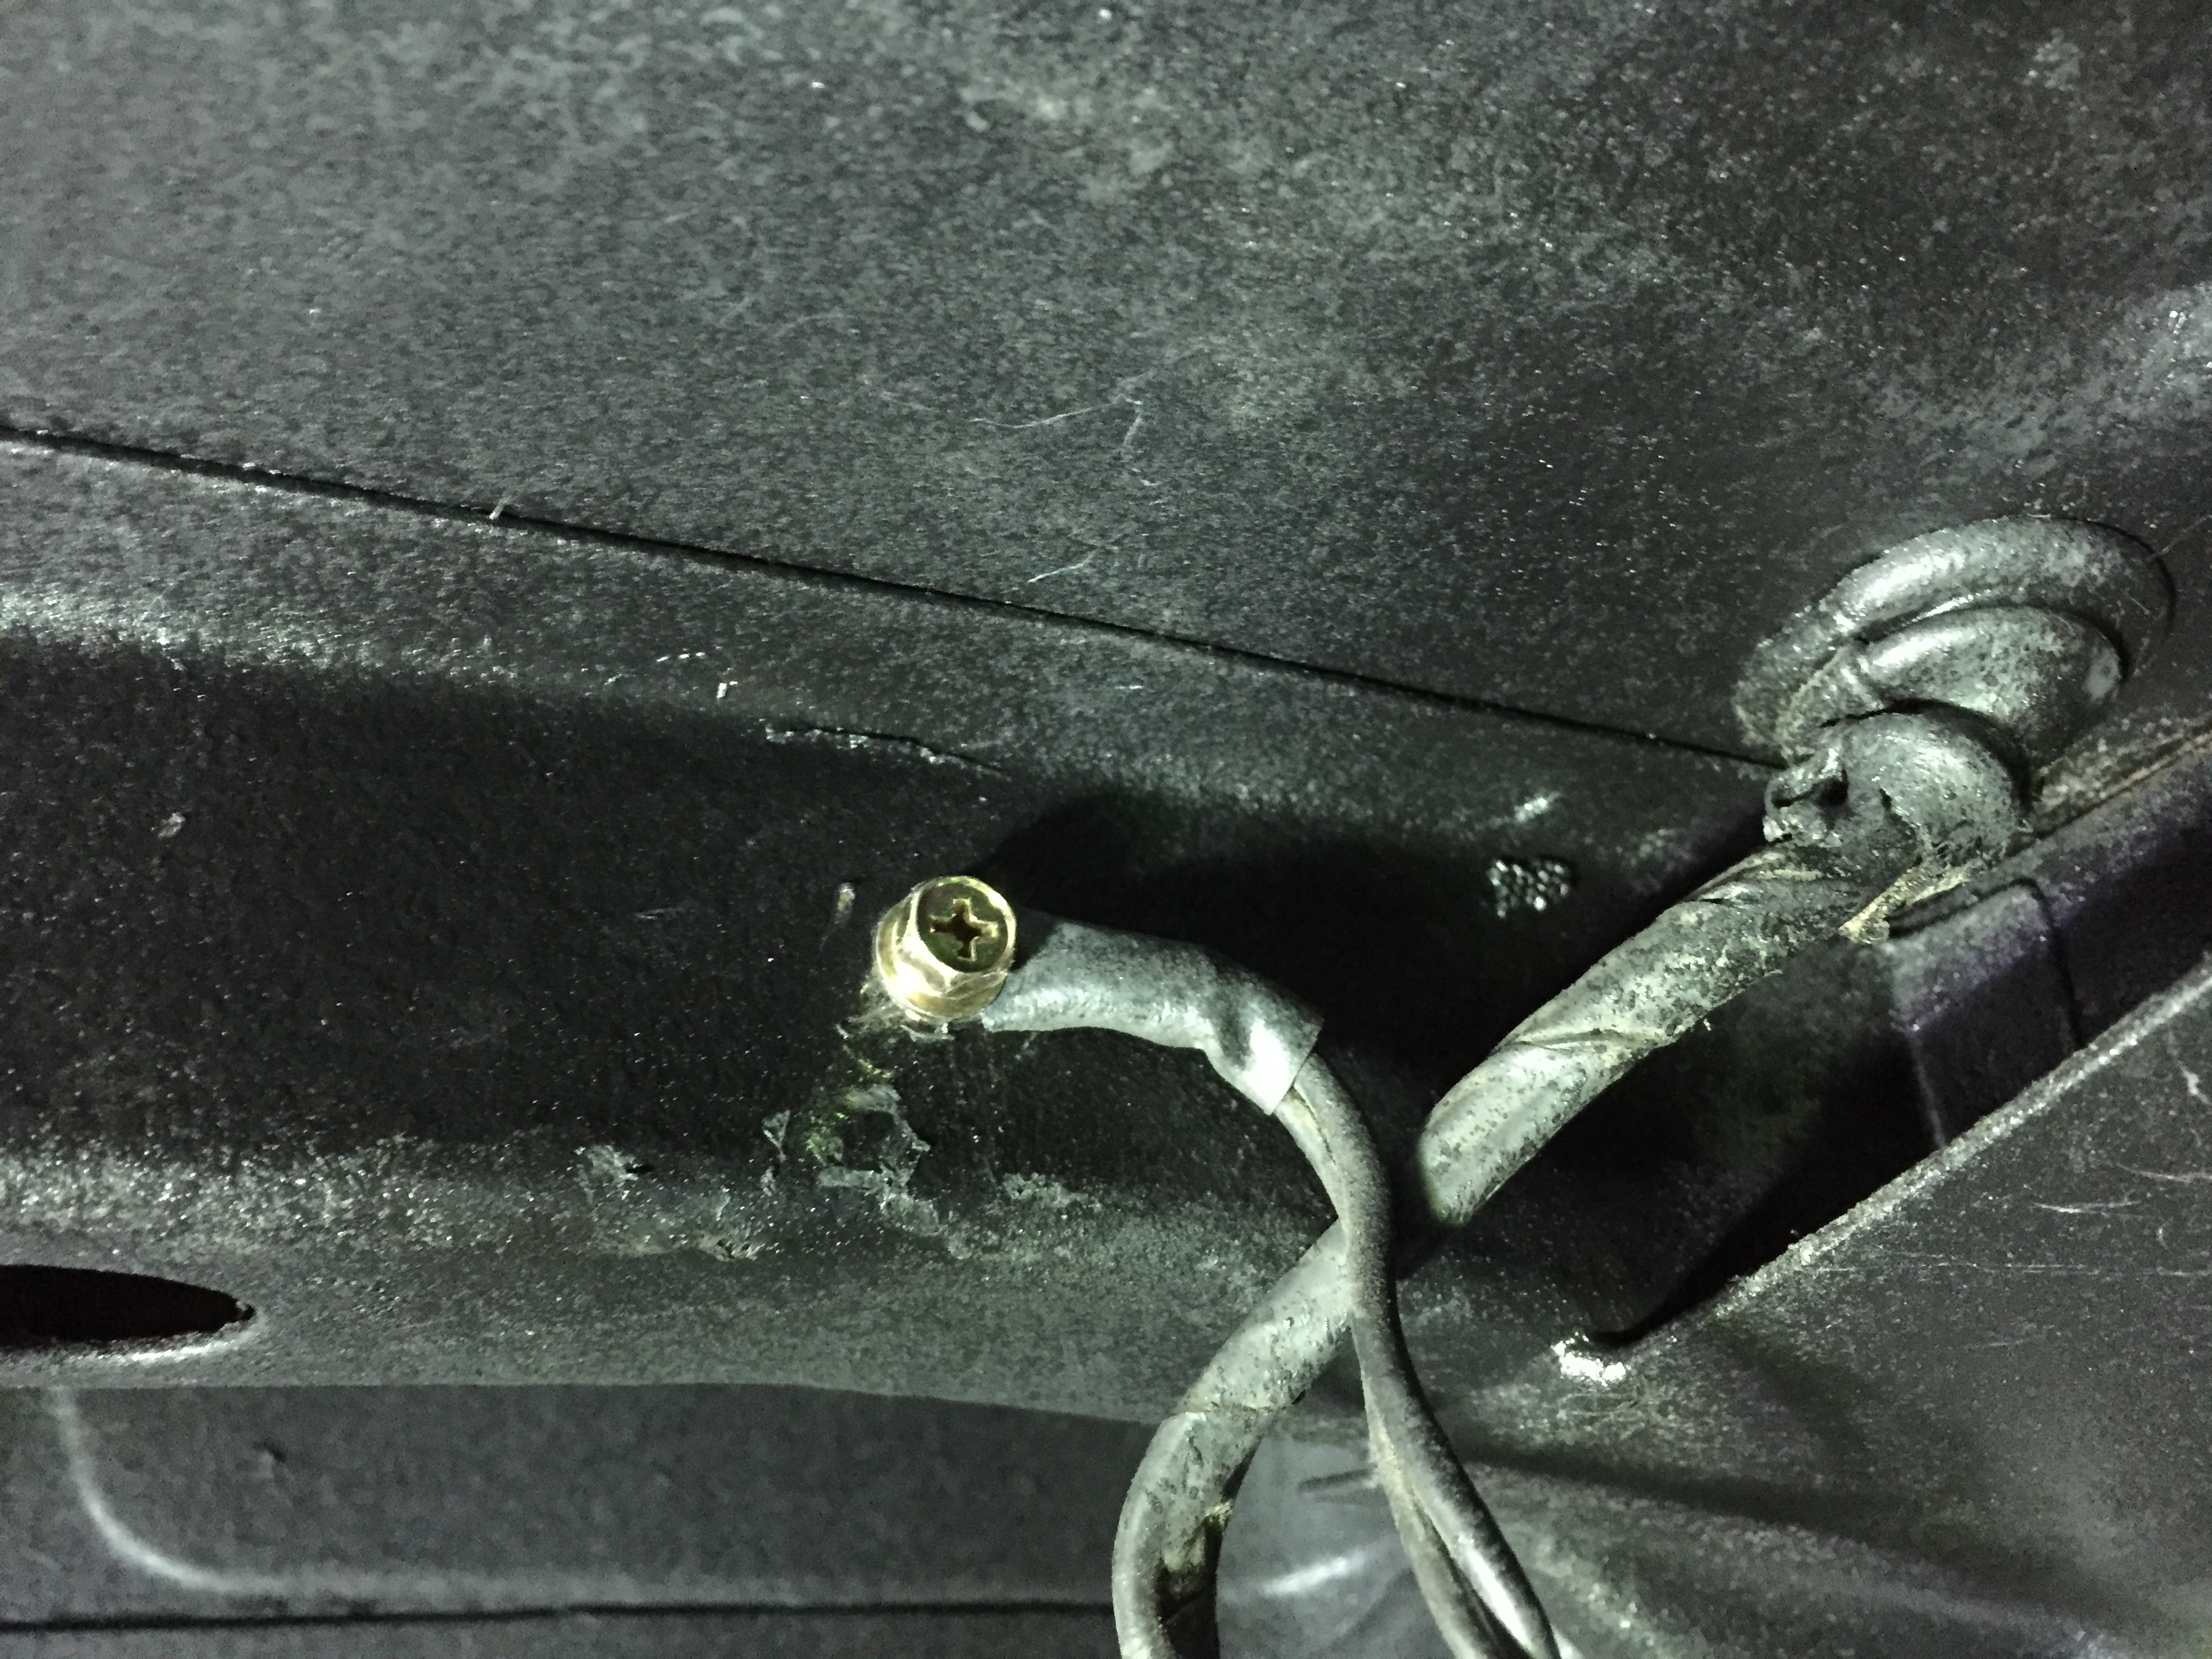
-
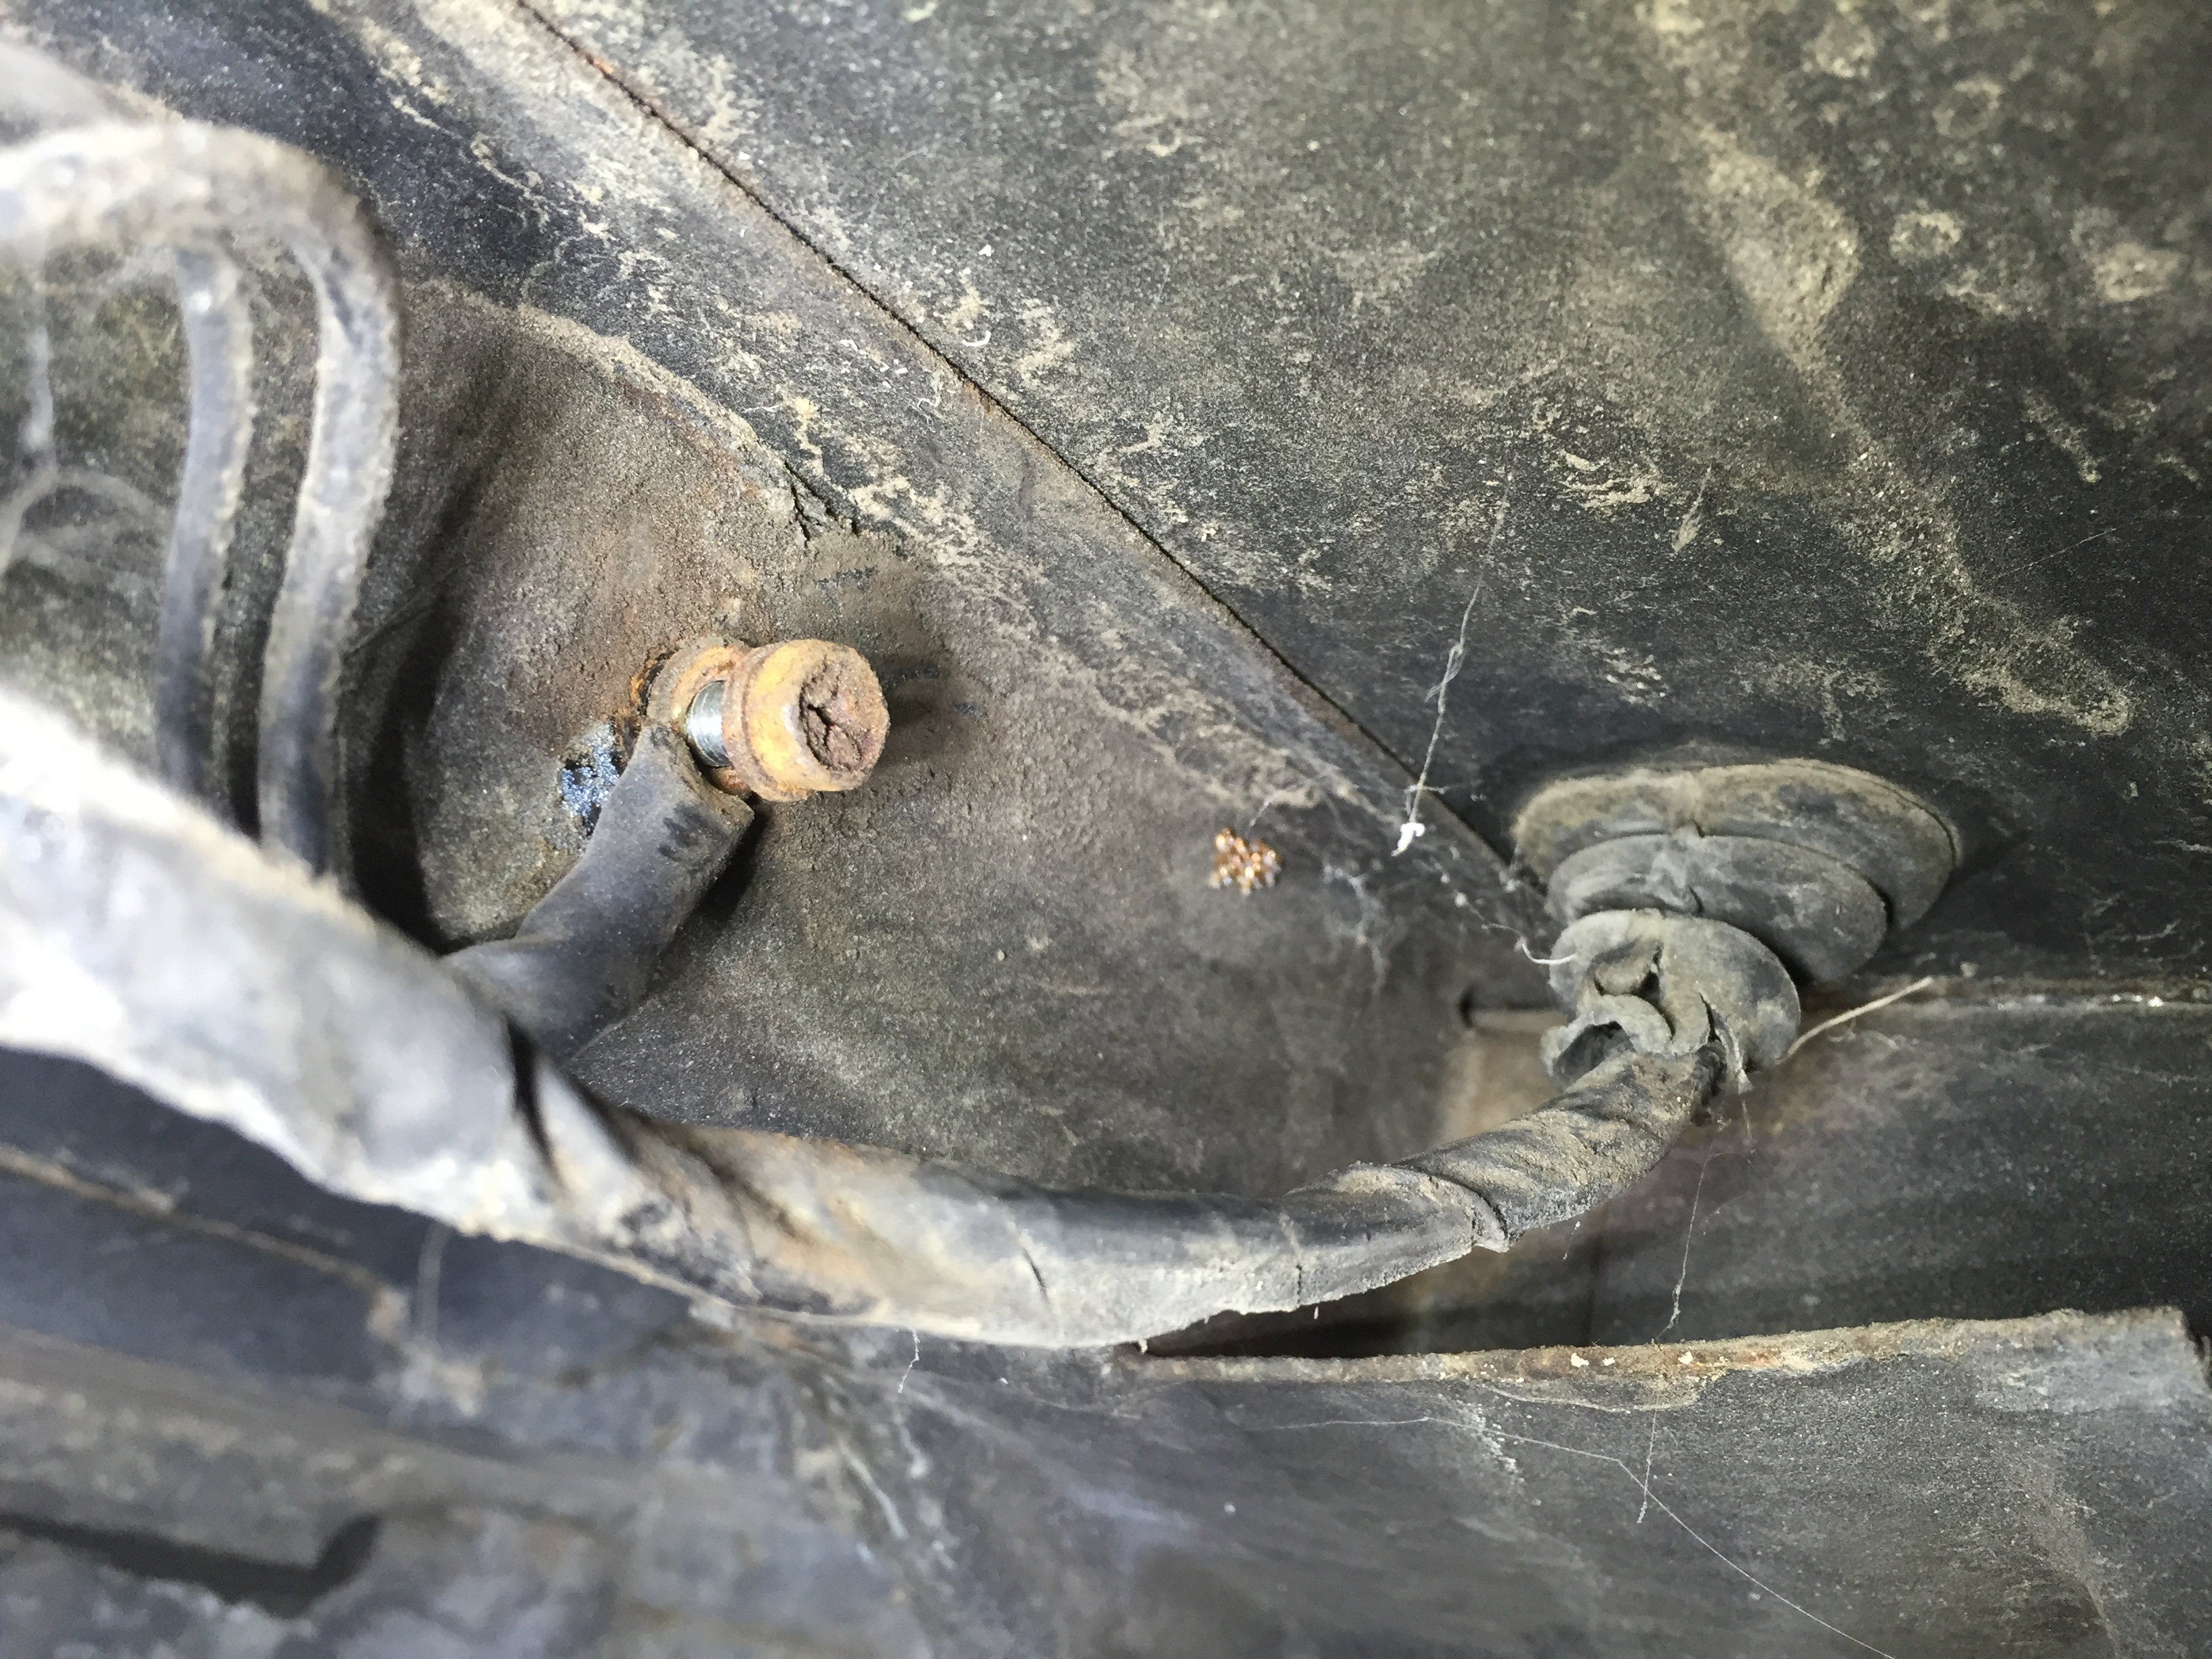
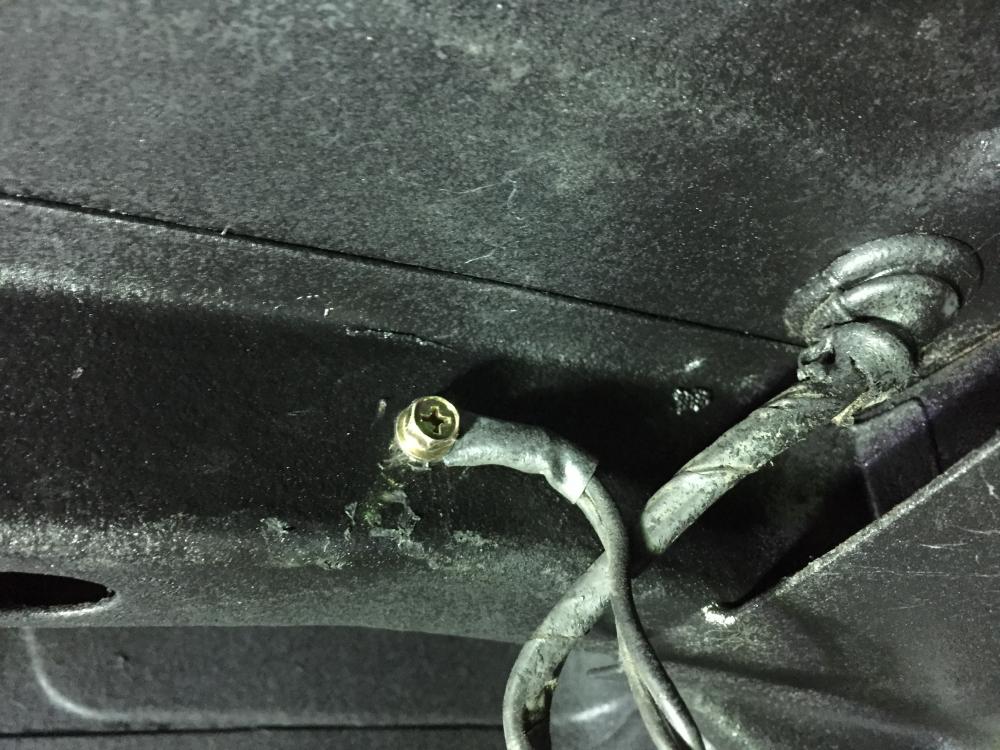
So I happen to have the gas tank out of the 71 I'm working on (a whole nother post on its own....) and remembered to clean the ground point in the wiring harness that is only accessible when the tank is out. Perhaps some of you don't even know it's there. Thought I'd show it's location and how to service it. The wiring harness that runs from the hatch through the floor to the fuel level sending unit and fuel pump is the one we are talking about. After it goes through the floor, the ground wires terminate at a 5mm ring terminal that attaches to a threaded hole on the side of a frame member on the right side. The bolt is a 5mm hex head. Remove it, clean the face of the ring terminal with a wire brush until it shines. My suggestion is to use a new clean bolt and lock washer, stainless if possible, but you can clean and re-use the stock one. Paint it or smear seam sealer over it once you get it backtogether and tight. No more bad ground. Now on to the "while you're at it...." department Exhaust leaks. You have a chance with the tank out to take car of some exhaust leak areas. Notice the state of the rubber grommet where the harness passes through. Repair or replace as needed. Clearly I need to do some maintenance on mine. Run a bead of seam sealer along the seam where the horizontal hatch floor meets the vertical rear valence at the very back. There may be some there now, but on my 73, and on this 71, the factory bead does not run far enough to each side. Others have reported exhaust leaks through this seem in the past, maybe you remember the thread about the smoke machine. I think you can add sealer from the top too, but's real hard to get into the two side pockets from the top. Piece of pie (I prefer pie over cake) from the bottom.