zKars
 Subscriber
-
Joined
-
Last visited
Everything posted by zKars
-
 This will be a discovery trip for all of us. I'll keep the thread populated as best I can. EFI fuel supply is the next topic. Many options are available, but there are two main competitors. 1. External swirl pot with internal EFI pressure pump, fed by exisiting low pressure carb pump. Two pumps, lots of connections, extra can to mount and hide, not ideal. Something like this. http://www.burtonpower.com/efi-fuel-pump-and-swirl-pot-assembly-wfp600.html 2. Install an Internal hi pressure EFI pump. Quiet, cool running, just one pump, but need to add some baffling or swirl pot and of course cut up a good tank. Definitely the cheapest solution but requires the tank be modified. Have lots of tanks to hack up. Will also install modern fuel level sender at the same time. TanksInc.com has a good option. http://www.tanksinc.com/index.cfm/page/ptype=product/product_id=84/mode=prod/prd84.htm Holley just came out with a fuel tank "mat' (HydraMat) that covers the bottom of the tank and soaks up fuel like a sponge. Any fuel in the tank is soaked up and available to the pump. The ultimate in anti-slosh, anti-starvation device. Not cheap, but an excellent solution for putting efi pumps in non-or minimally baffled tanks. https://www.holley.com/products/fuel_systems/hydramat/hydramats/
 -
Knowing my luck, I'll STILL have vapor lock...
-
The EMS is a bit up in the air. Mega Squirt is good, but there are others that do this well as well. Most of local support (other fools who have done this before) have used MegaSquirt, so that's the likely choice. SDS is based in Calgary. They are tempting too, but not as versatile. My friend with dyno that will tune it is a Haltech expert, so that may win. We'll see.
-
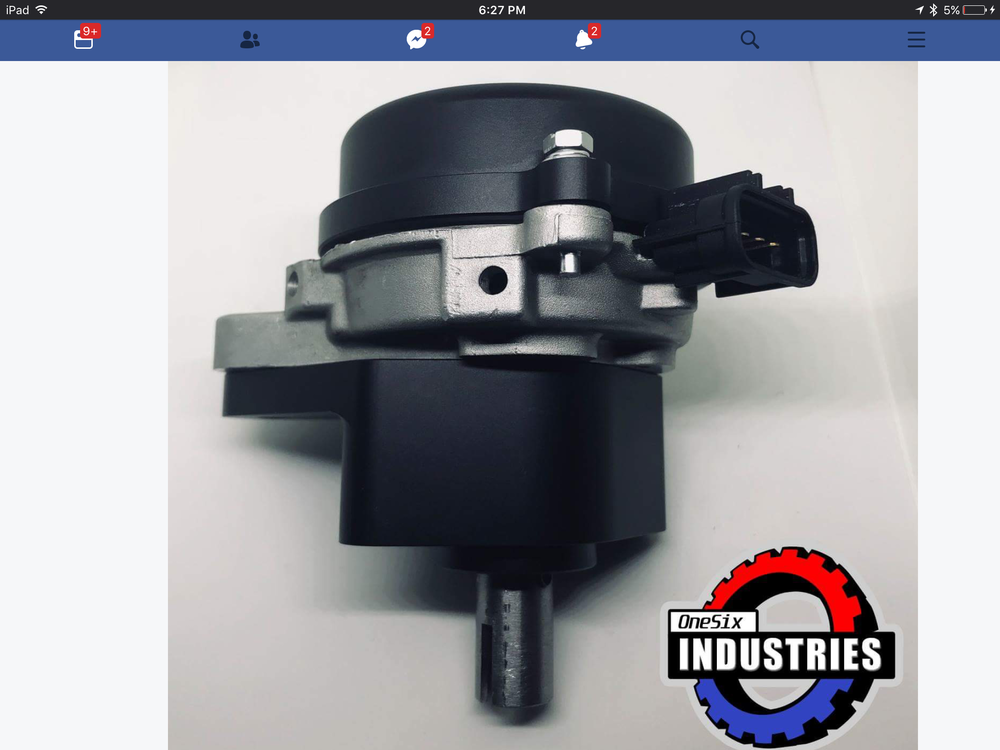
On the other side of the motor I plan to tuck a set of LS Coil-on-plug coils and time it all with a OneSix Industries new distributor replacement 'Crank Angle Sensor ' that has a pair of trigger wheels for full sequential injection. No holes barred, this thing is going modern. I may have to glue a dizzy cap on it to keep the old look going. Bad enough to do COP on the plug side. https://www.onesixindustries.com/products One might this a bit pricey, but once again the Canadian - Aussie connection wins as it is $400 AUD, which is actually just under par with CAD, so I win! Any of you yanks can cash in even better with your 35% advantage.
-
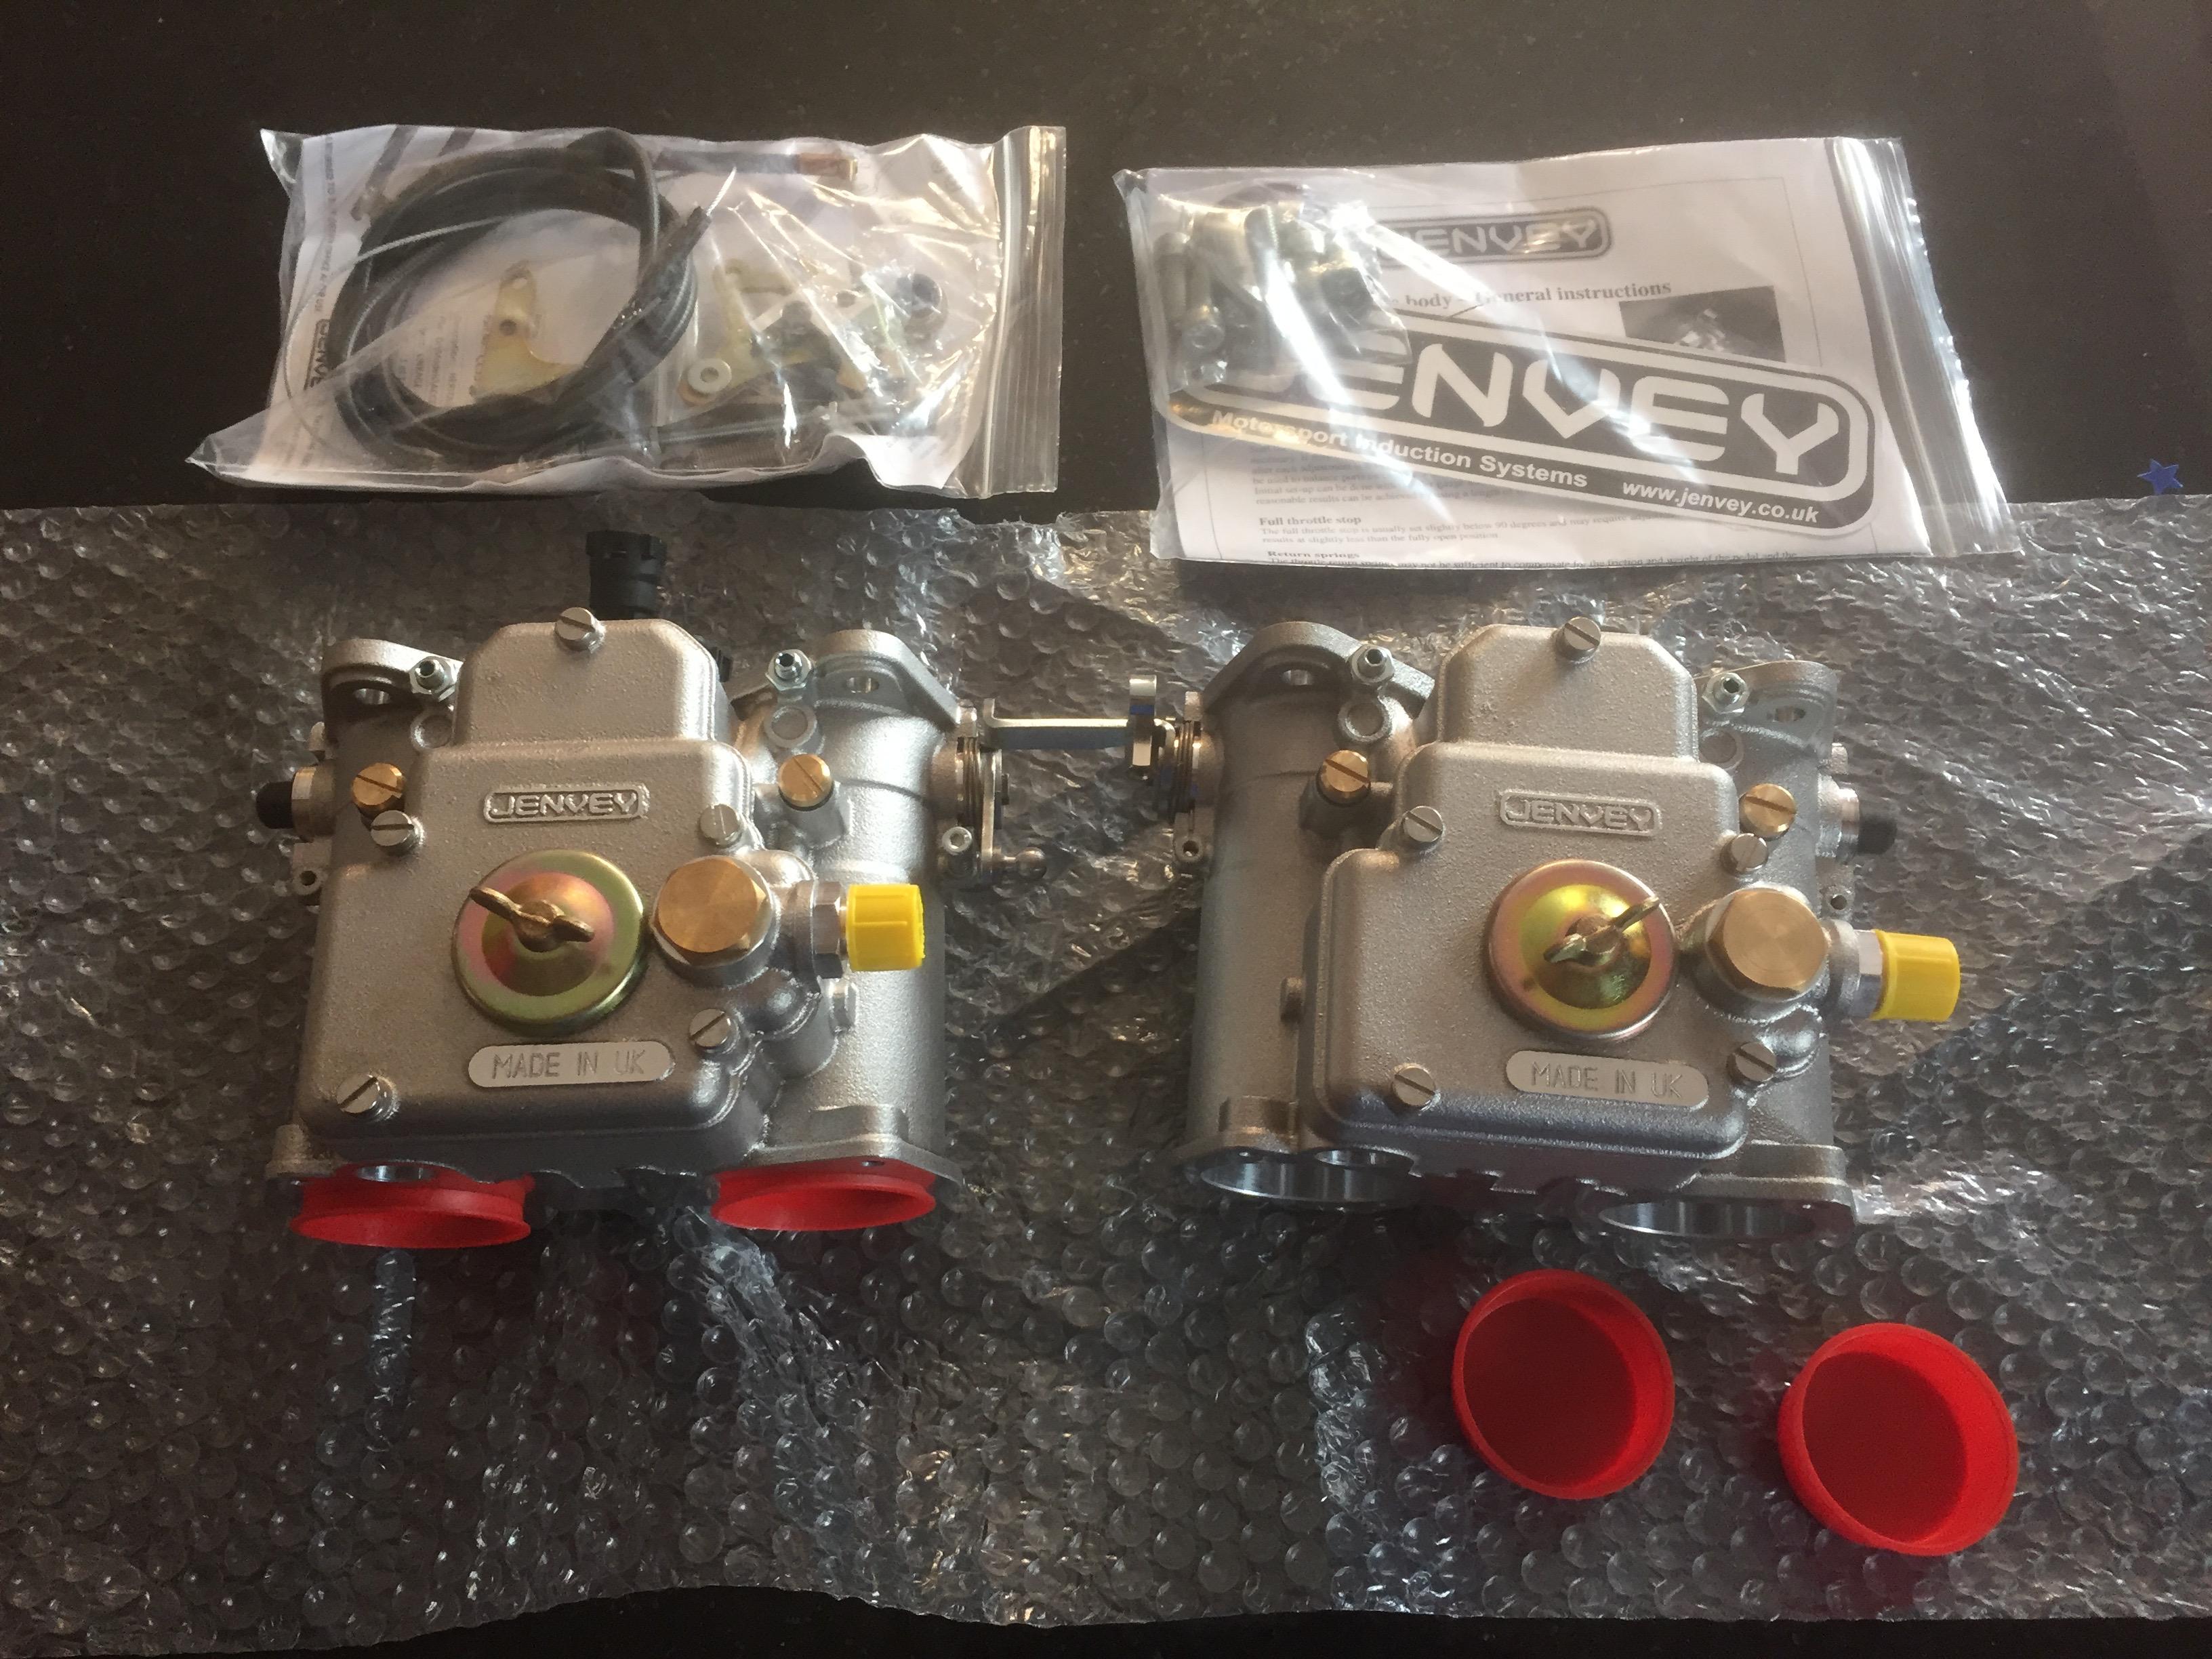
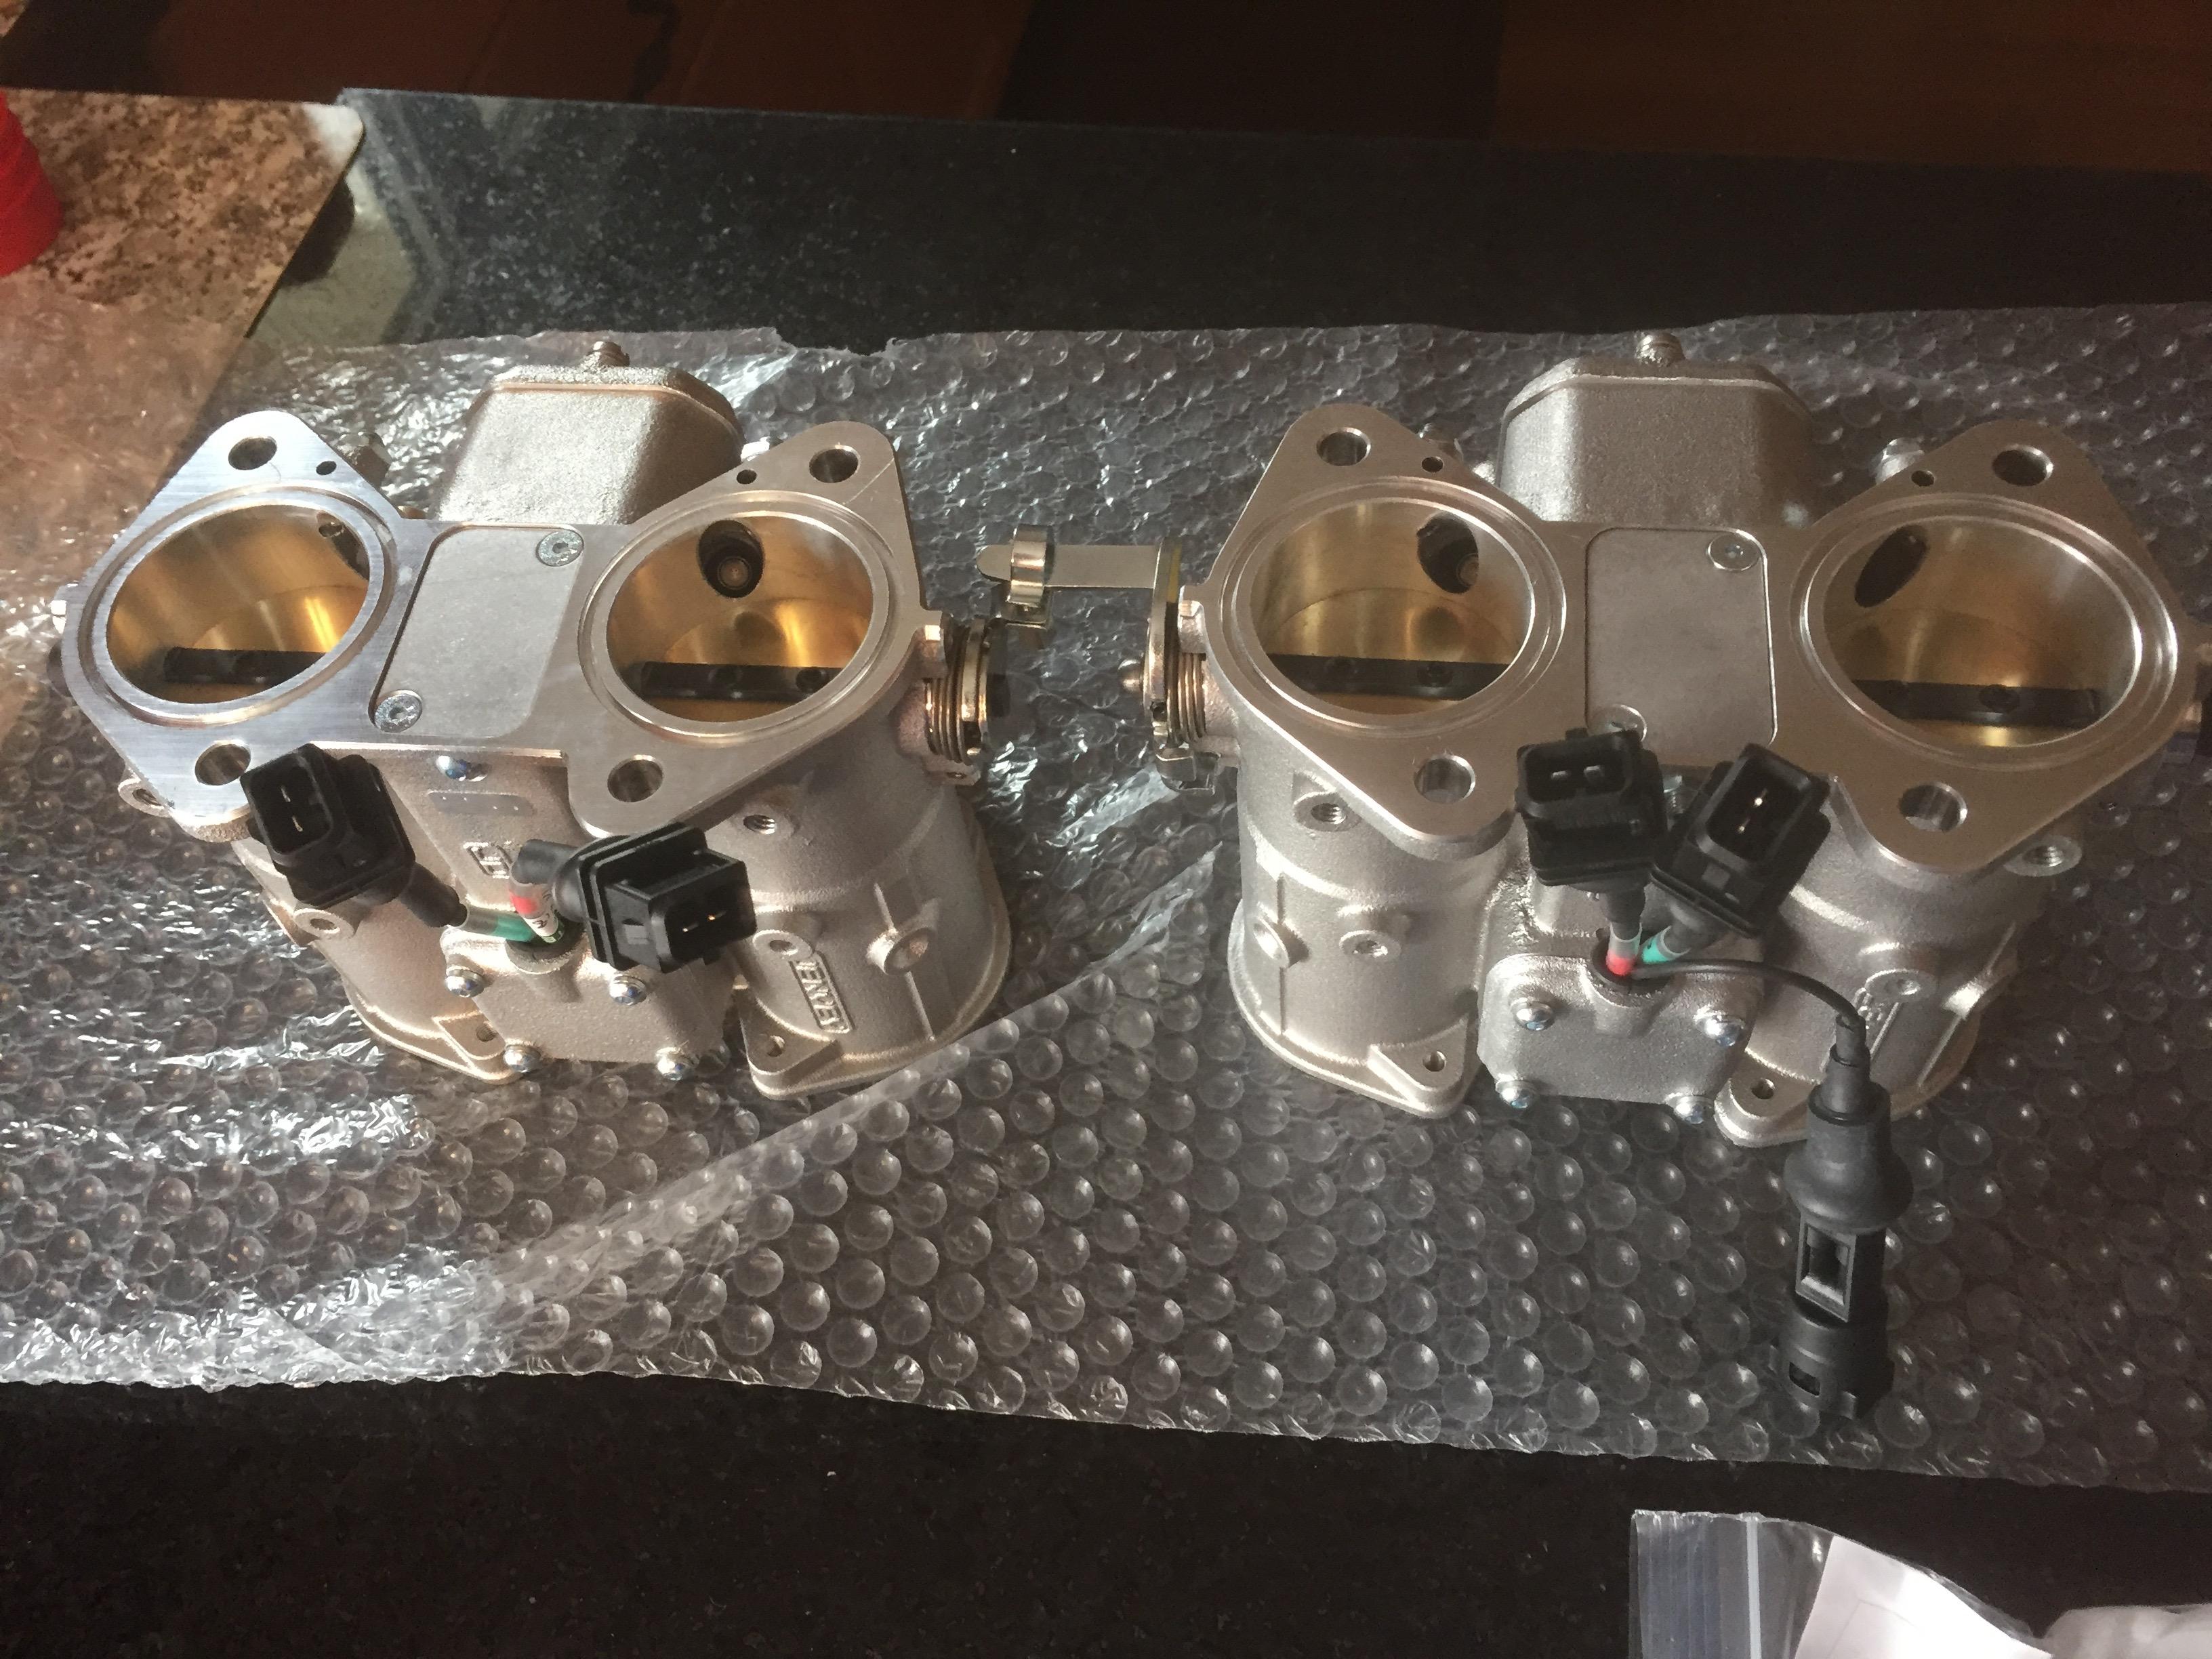
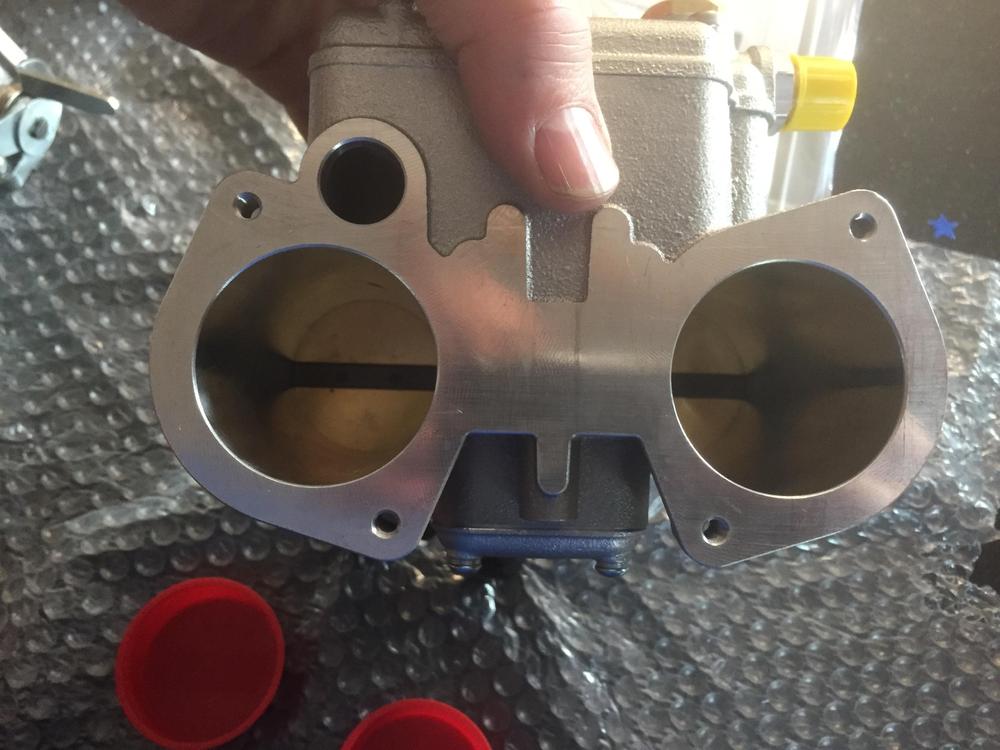
Well I decided to jump into the EFI game with both feet. Here is what changed this "old school" boy's mind. Weber look-a-like throttle bodies with built in injectors and TPS. Jenvey Heritage Throttle bodies is what they go by. I get the old look I can't seem to do without, with all the modern advantages of EFI. You may notice that there are only two, and this is a Z forum, but as most of you know there is 510 lady in my life that I'm currently enfatuated with. I can always buy another one if I ever come to my senses. These are 45mm with 350cc/hr injectors. Should do. https://www.onesixindustries.com/products


-
I suspect many of us have this problem, or are about to have it. What causes deterioration of this rubber part? Heat? Well not engine or exhaust levels, just ambient exposure based on where you live. UV exposure? Nope, pretty dark up in there. Mechanical stress? That thing is in compression a huge amount of the time and under tension almost never. So what's left? Front ones might be prone to some twist and eventual tear if your steering bearings up at the top in there are seized so you are turning the rubber. I think it's just time that eventually lets whatever environmental factors that eat rubber to finally weaken it to the point of failure. A bunch of my joints are getting prett creaky after 61 years too.. When I got my coil overs done, the company I bought them from insisted I send them my insulators so they could 'modify' them to work with their upper mounts. Turns out they only drilled the D hole out a bit and cut away some extra rubber around the edges, but what got me was, I didn't get the ones I sent back. I marked them. And shortly two of them failed just like this while hanging around in the shop on jack stands. Enough whining today....
-
https://www.customautotrim.com/body-side-moldings/body-side-moldings/chan75/83/
-
This has been discussed here before do some searching. There an outfit that still makes it, just can't find my link right away. It's something obvious like body molding.com or doortrimstuff.com or something. Maybe trim-guard.com?
-
There is an easy mod where you use a Timesert thread adapter to enable you to thread in mechanical adjuster posts instead of the hydraulic ones.
-
I would just fix your current damper. damperdoctor.com
-
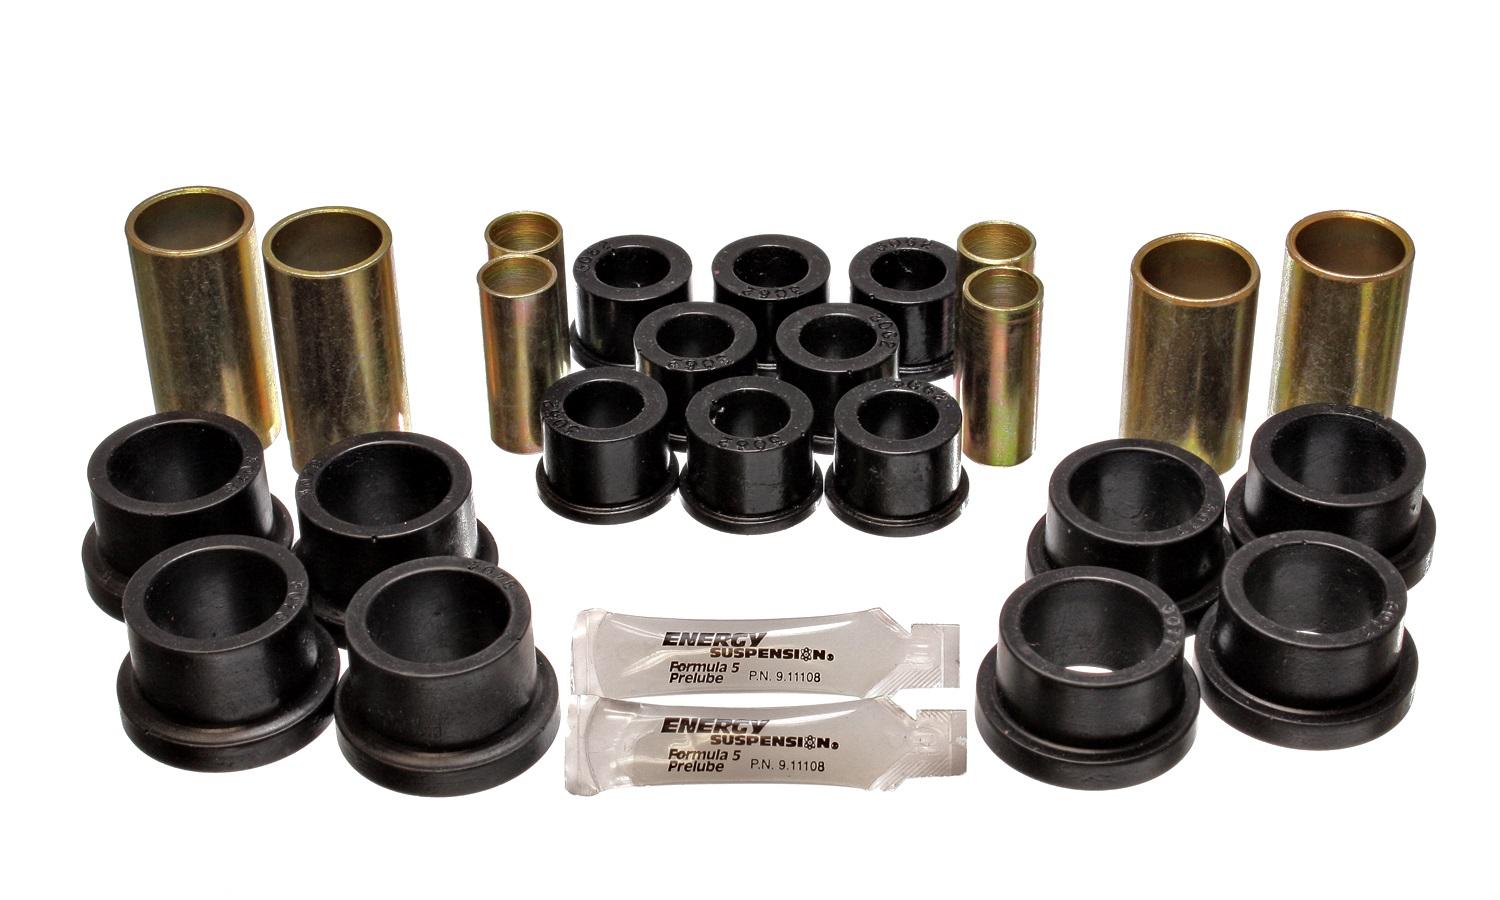
Perhaps I have an insite. Fact. He had a set of poly bushings installed. If you have done this job, you will remember that the inner and outer half of each of the pairs of outer rear control arm bushings have a thin lip on them. Here is a picture of rear control bushings from energy suspension. The outer set is in the center of the picture. When installed that thin lip would visible/present in that gap, unlike stock where the inner bushing is completely different and has no lips. That's what is damaged in his picture, part of the lip is gone. Does it matter? No. If the pin bolt is properly torqued, the inner metal tube in the control arm is locked to the face of the strut where the pin goes through. Since the control rotates with respect to the strut at this point, that lip can get damaged. Does not matter. As long as that horrible sticky grease the bushings come with is generously used on the spindle pin, it will last for ever.

-
https://midwestcontrol.com/shop/DMCBH-5?search=Ball joint M5 They have several styles and they fit on the stock 8mm ball ends. I've used them to create custom throttle solutions for triples and cable throttle replacements for SU's and triples. Unfortunately they don't have anything with M4 threads like the originals, so you have to buy M5 threaded rod and make up completely new rods. You could fill the M5 threads in these ball ends with epoxy and re-drill and tap to M4 I suppose if you just HAD to use the stock rods.
-
Not sure if you know him. I'll PM you his name. He's not a member here.
-
Disconnect the wire from the sender, and ground it to the block. Turn on the ignition (no need to start it) and see if the gauge goes to full pressure. If it does, the gauge is good.
-
Good news. The car is now sold to a friend that is going to restore it to OEM glory. It will live again.
-
Did it work before and now suddenly went hay wire, or is this the way it has always been? What year Z are we talking here? I had a similar thing happen with a 240. It was a pushed in pin on the 4 pin connector at the back of the tach and incorrect wiring at the coil. Short BW to the + coil, long BW and long GW to the ballast resistor (240z only)
-
I've seen these all over FB lately. I'm skep-tickle that the low temp 'solder' bonds to the wire the same way that regular solder does. And it would be subject to failure in high temp under hood conditions as ZED Head warns. It's the "Adgesive" that I'm really worried about.....
-
There is no stock rubber or seal between the control arm and strut. It appears that someone did try to put something in there on this car.
-
The threaded holes are 1/8 BSPT (ID) and the pipe is 1/4 OD. Does seem rather paltry. But let this be a lesson to you-all who think you need 3/8 feed and supply to feed lines with monster noisy 200 gal/hr pump to feed our massive 2.4l 150 HP engines. NOT. -4 fuel lines in the engine bay are just fine. -6 is massive overkill, but they look so darn purdy!
-
The banjo fittings on the early SU's are 12x 1.25, as they are on Mikuni side drafts. Webers use 12x1.50 just to be different. Earl's and the other AN suppliers have these banjo's as stock items. I've done lots of SU's with them.
-
So I finally got to take this thing for decent drive last night. Other than a loose fuel inlet fitting on the fancy kyosanki thingy fuel pump that stopped me for a few minutes to figure out (sucking air is apparently not a good thing), this thing is freaking amazing! I rarely get to drive a bone stock, far from new L24 in a bone stock chassis,, but I have to tell you, this thing is not slow or boring. Torquey as hell! It's not my stroker, but its quiet and smooth and very well behaved. Well the Maxtor 185/75-14 tires make cornering a bit of a squeal and howl affair, but they spin real easy off a stop light which totally makes up for the cornering drama! Then there's that slightly crunchy 2-3 shift, that slightly wobbly A-Type trans stick feel, and the stock AM/FM radio blasting tinny tunes through a single speaker in the back, and I'm in old man heaven! Ahhhhhh I am totally not trying to sell it, I am actually quite surprised with how fun this old clunker is to drive. Maybe having a mostly stock 240 with body work you don't care about, isn't such a bad thing after all.
-
Well I didn't make to the Edmonton show with the Z. Just ran out of time on Saturday solving a little ignition problem. Took the 510, had fun. Today I worked through the ignition problem. Very interesting problem and solution. I had an intermittent spark miss as you apply throttle under load, getting worst as the RPM's rise. Long story short, it boiled down to bad connections. Even though I used brand new spade connector crimps with brand new terminals and a pro crimper to connect to various spades on the ballest resistor and terminal strips on the coil terminals, they were making poor connections when pushed onto the terminals. The fix was stop using them and go to soldered on ring terminals on the coil posts, and soldering on wires to the ballast resistor to completely remove the use of the spade connectors. They seem to press on tightly, but if you wiggle them once all the way one, they are NOT tightly connected. And they get worse each time you disconnect them. These are terminals purchased from Vintage Connections. They sell two qualities of the female 1/4" spade connectors. One are made of thin brass, the other is much thicker and stiffer, BUT they latch SO tightly that you pretty much can't push a 4 or more terminal connector together with pliers. The thinner ones are great, BUT if you mate them more than once or twice, they FM side loosen up and the connection goes to pot. Both have their issues. Along the way I also discovered two, yes two bad NEW mechanical fuel pumps. At one point I was wondering about fuel volumes under load and if that maybe part of the "missing" problem, ie going lean. I had installed one of these "tin can" style replacements that I foolishly bought a while ago, when I first got this thing running again. Maybe it is as bad as they say, I think. So I recently bought a GMB brand pump that looks like the original, so I put it on. It worked for about 10 min of test and tune driving. Suddenly the car wouldn't restart. As I was in the throws of solving ignition problems, I was about to light a fire under it all, wonder WTH could possibly be wrong now. It usually starts instantly with the slightless touch of the key. So I take a hose off of one carb, and crank the motor. Not even a dribble. You've GOT to be kidding me. Take the hose off the pump outlet. Still not even a dribble. So I put the tin can back on. I leave the hose off to see what it is doing. Well it's dribbling, but sure as hell not pumping properly. Ok, that's it, off it comes, both go in the scrap metal bin, and I pull out my NOS Kyoto or whatever pump I've been hoarding and bolt that on. OMG that thing pumps like a freaking fire hose. I'm still stinking of gas from the bombardment. So, DO NOT use that tin can thing (didn't we already know that?) and don't bother with the $37 GMB pump, it's trash too. I'll have to take it apart and see what ripped. So today's lesson? Even when you have a bunch of NEW parts, no matter how carefully installed, don't trust nothing. And now I can go for a decent little toodle around town this evening and get some proving miles on this thing and GET IT SOLD.
-
SEM vinyl dyes are another approach to the problem. They can be customs mixed by a paint shop to match pretty much anything.
-
Heat is to ensure adhesion. It helps with conforming it to tight radii as well, Without a perfectly clean pristine metal surface, I find this B-Quiet Extreme doesn't adhere well without heat. On a hot day with a roller it's pretty good, but a little heat gun ensures a forever bond.
-
The right price is a tough call. Aim high, wait, lower the price, wait, repeat might work. I also feel that emphasizing the basic 'good' in the advertising, like rust free, straight, length of ownership, and having a very thorough set of photo's that back up the quality and details will help. Other than that it really is just waiting for the right buyer to show up.