zKars
 Subscriber
-
Joined
-
Last visited
Everything posted by zKars
-
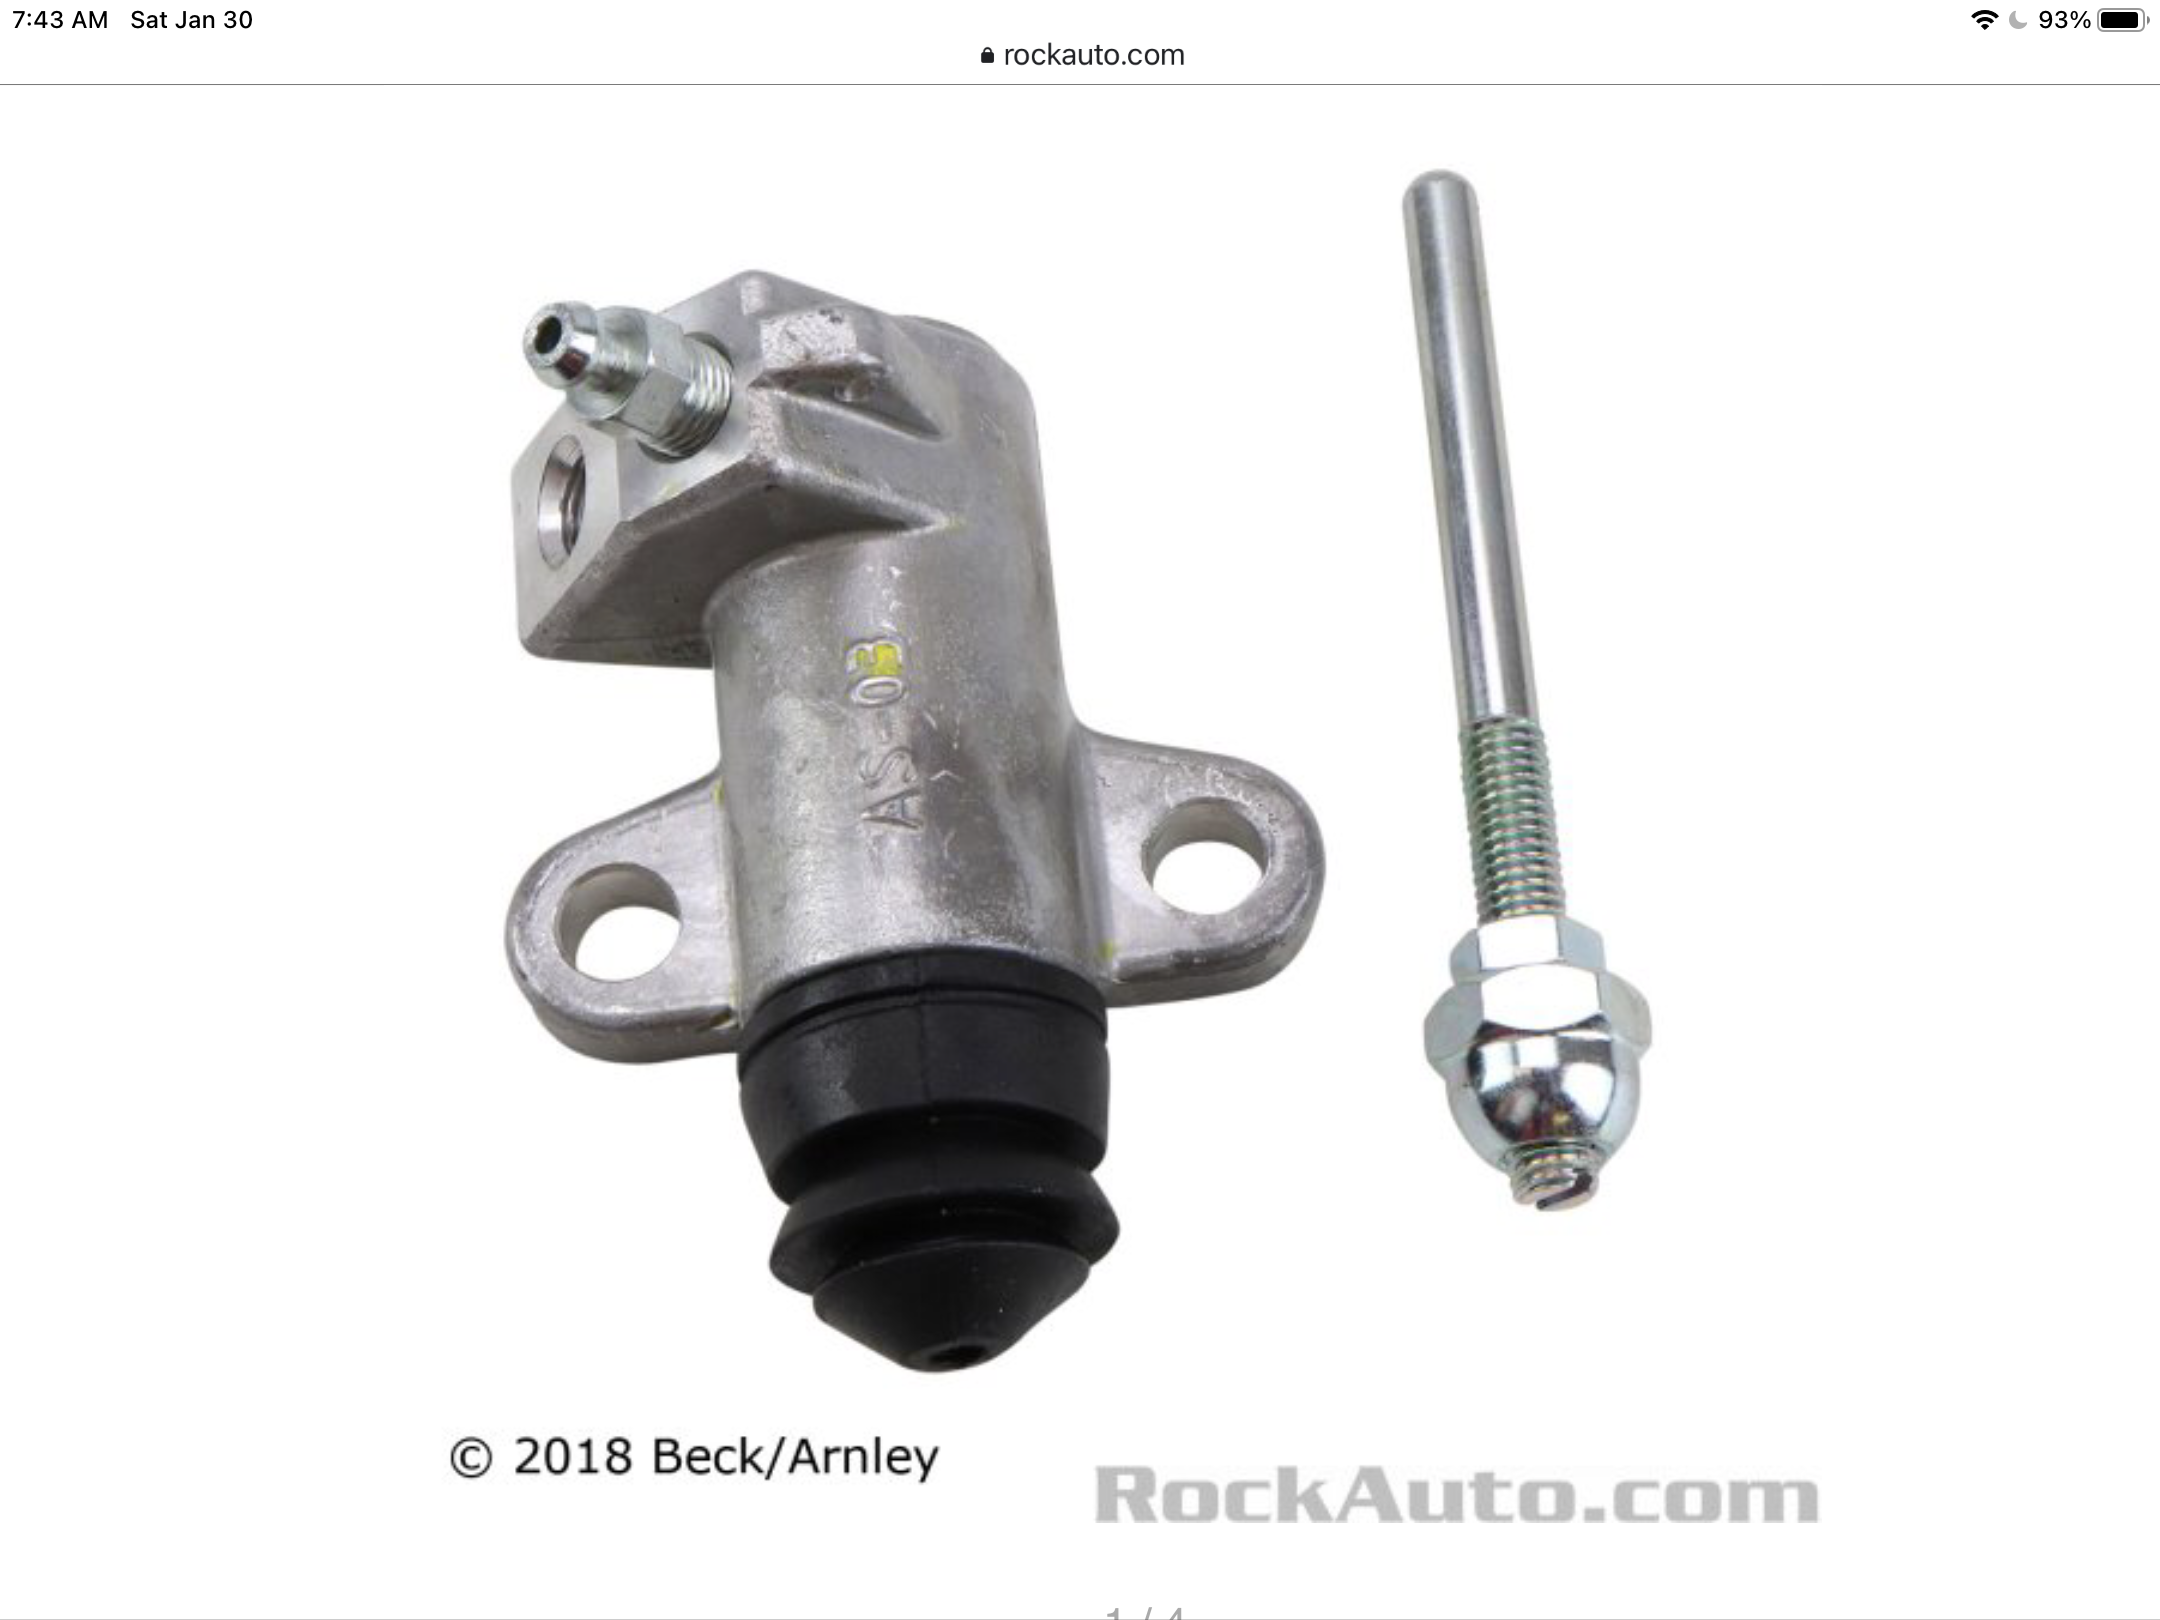
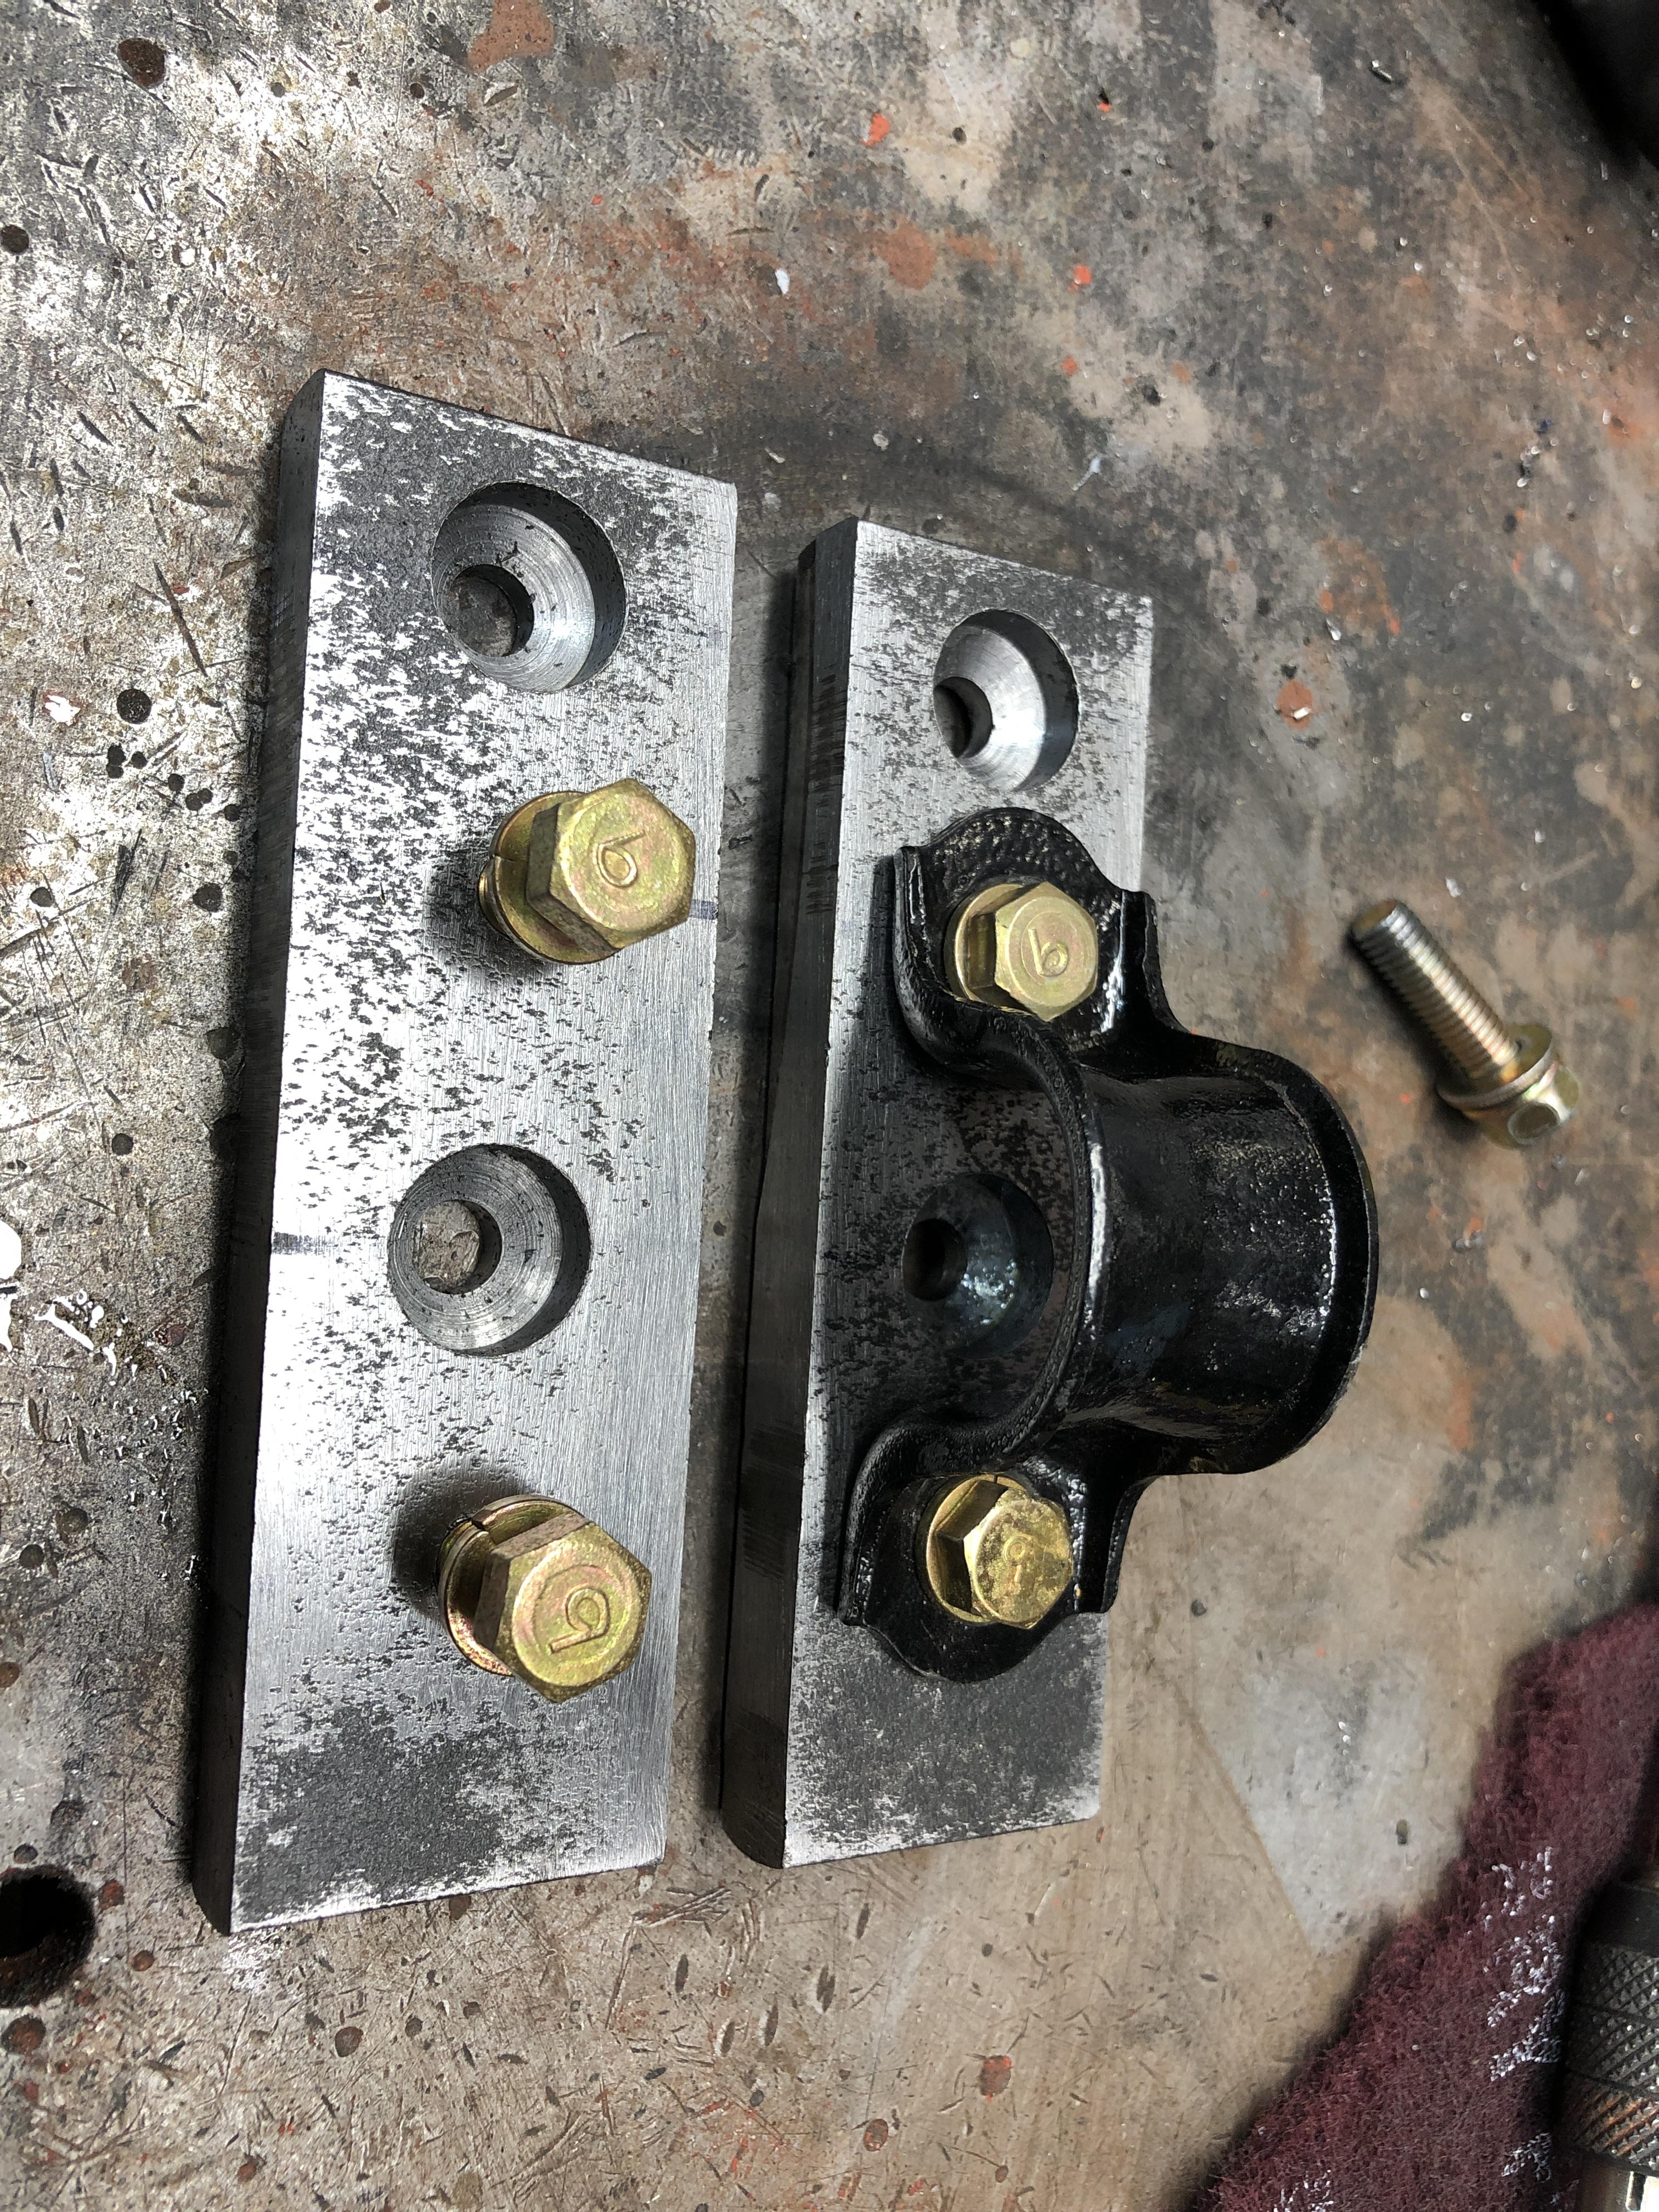
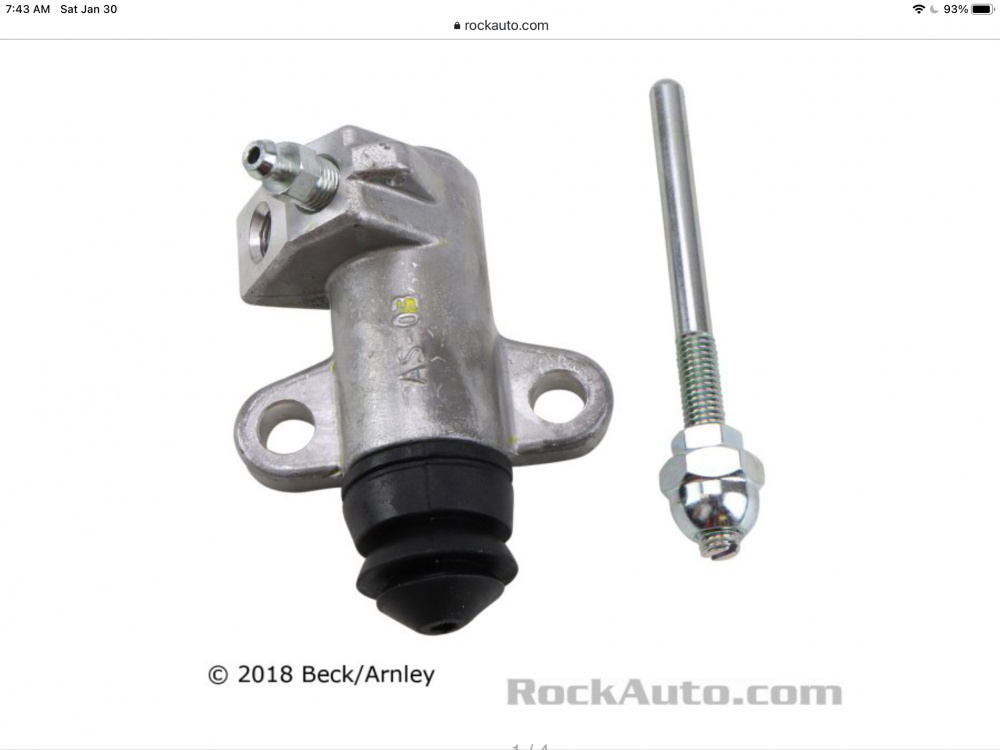
 I have to note while we are here. There is also another way to get whatever clutch cover and throw out collar you have to work. There is an adjustable length push rod clutch slave cylinder option and a matching clutch fork with a hole. I’ve found cars with very long collars and very thick clutch covers who’s clutches were working just fine with a very short push rod on the slave courtesy of the adjustable length rod arrangement. The Rule of 92 isn’t as hard and fast a rule as I’ve gone to great lengths to champion. BTW these slaves are spec’ed on the 70 Z’s if you’re looking for one on Rock-Auto. Nothing stopping you from just hack sawing off your fixed length rod as well. Just more of a trial and error thing.
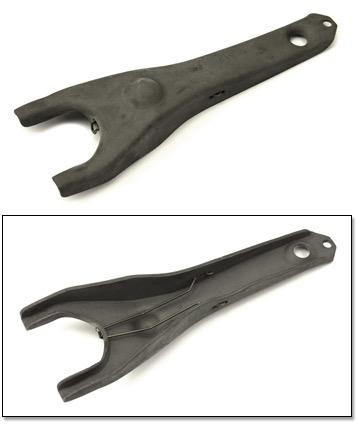

-
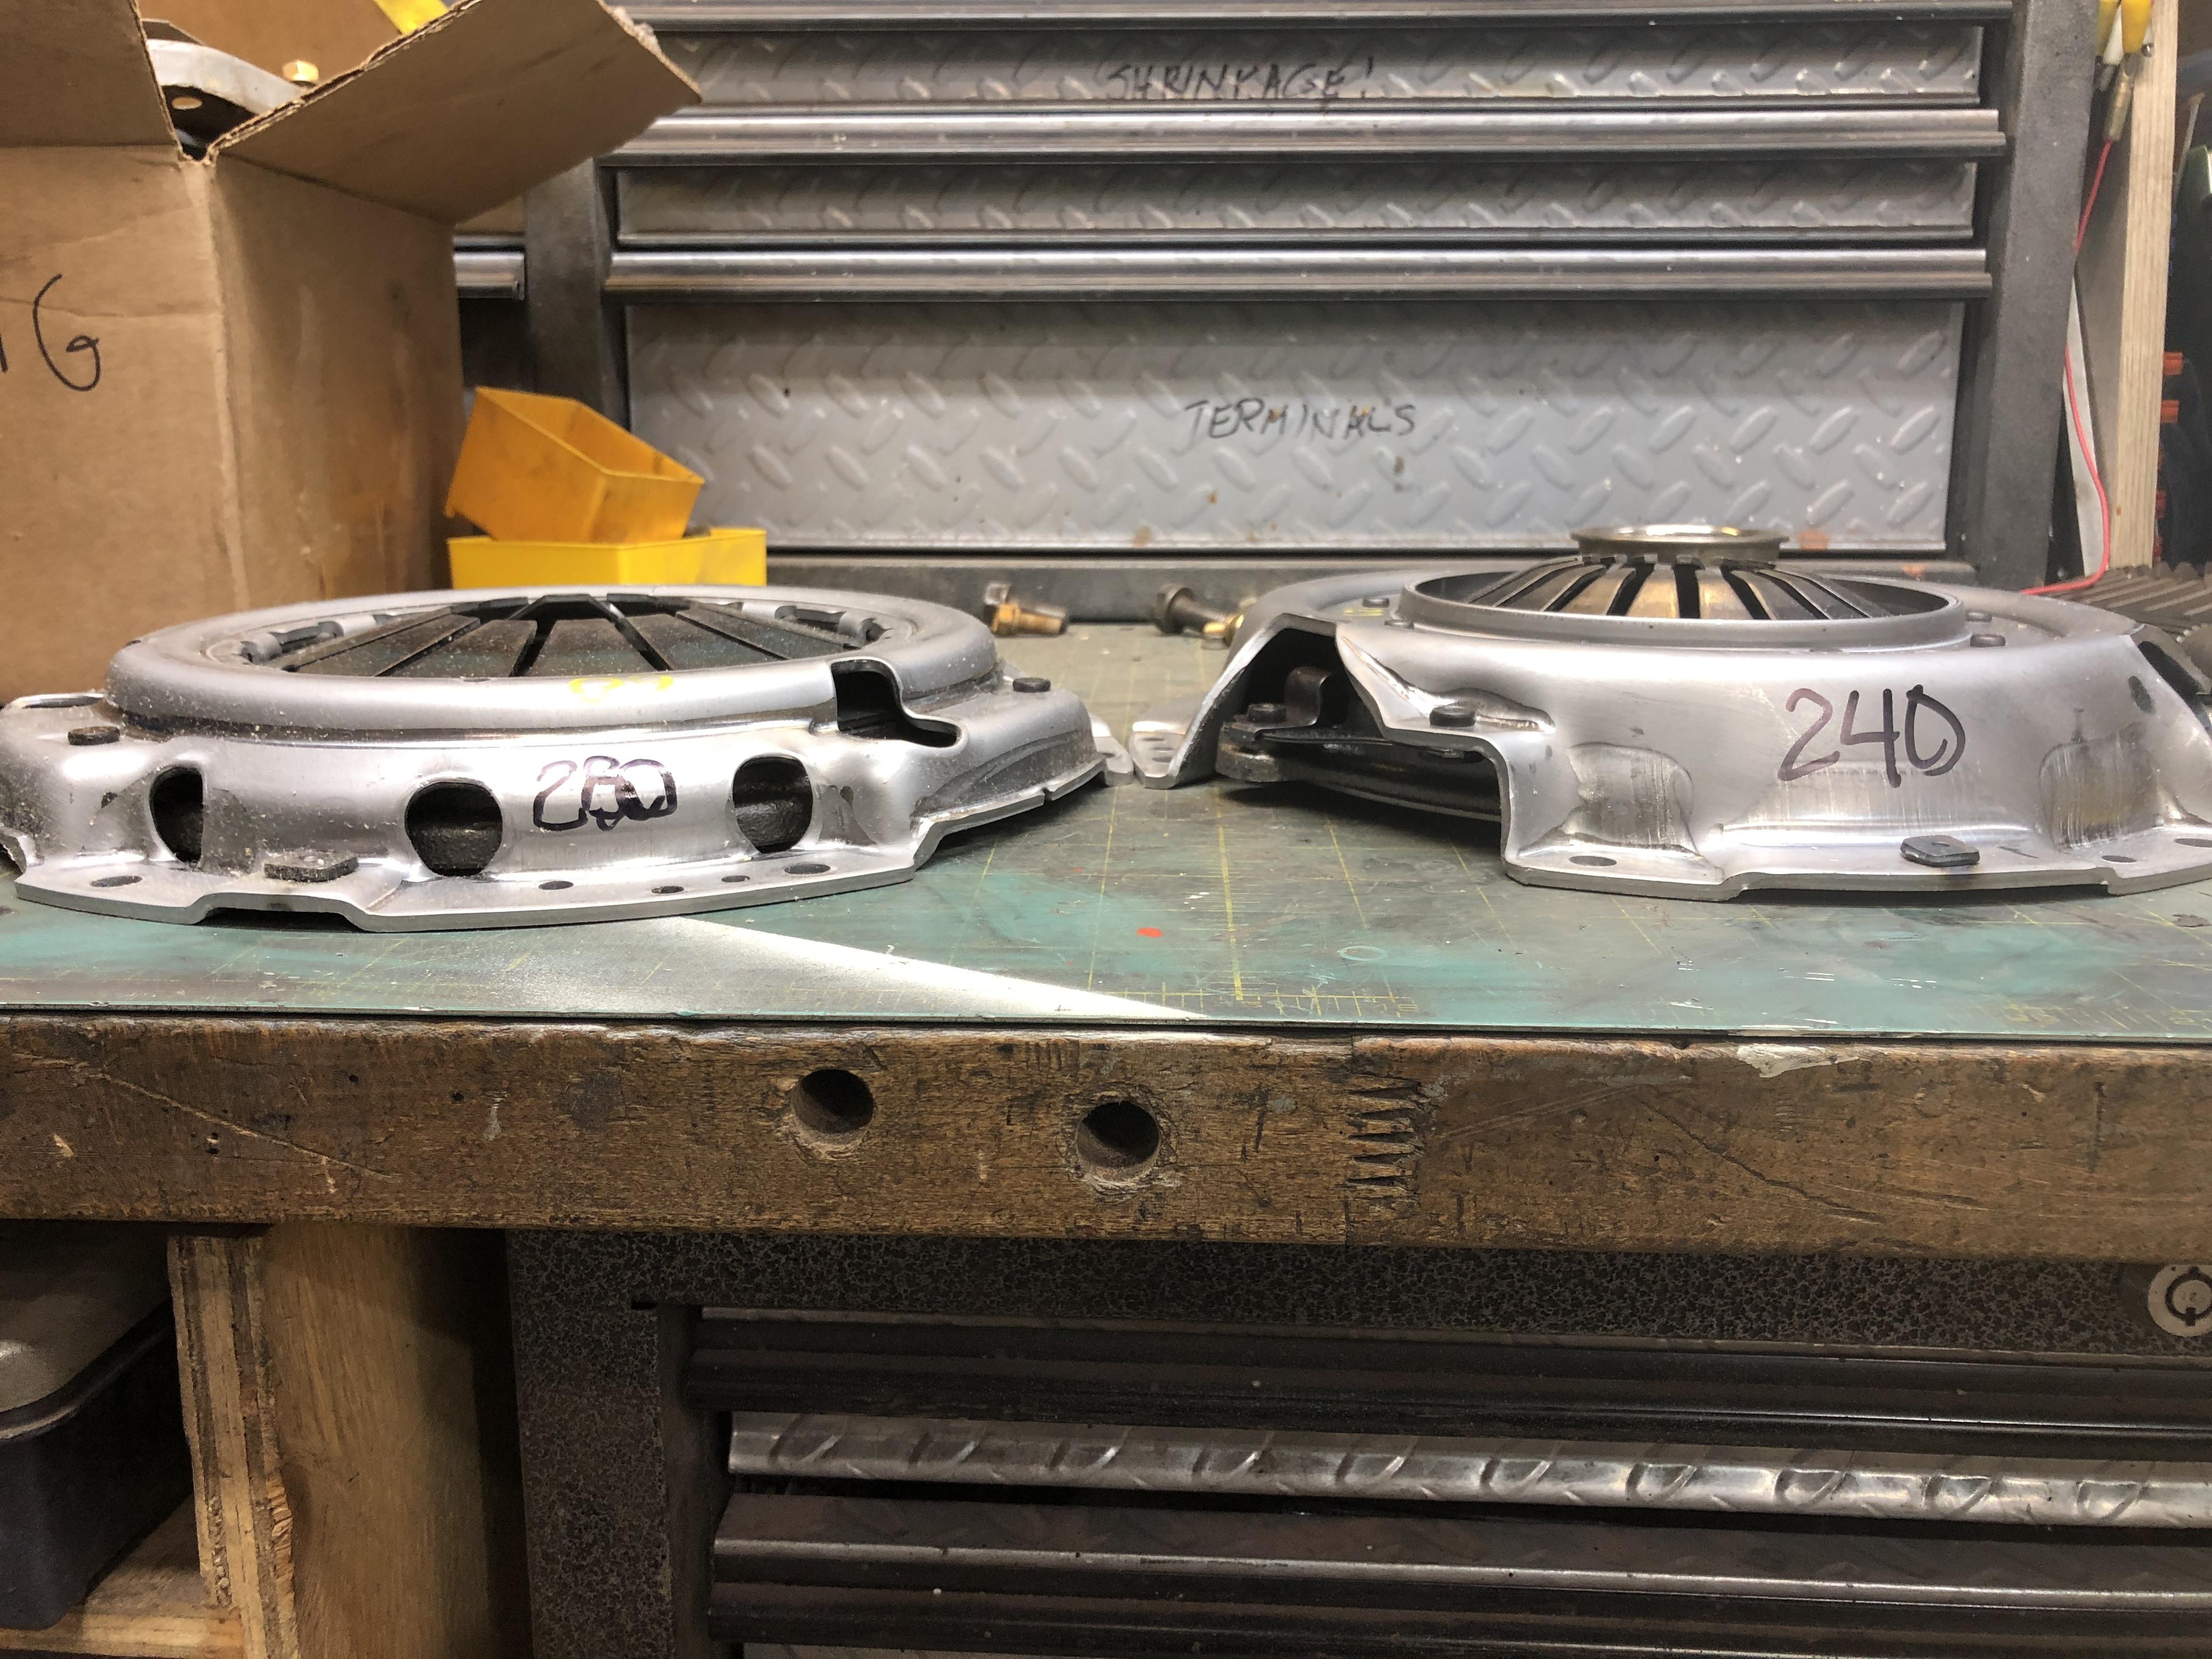
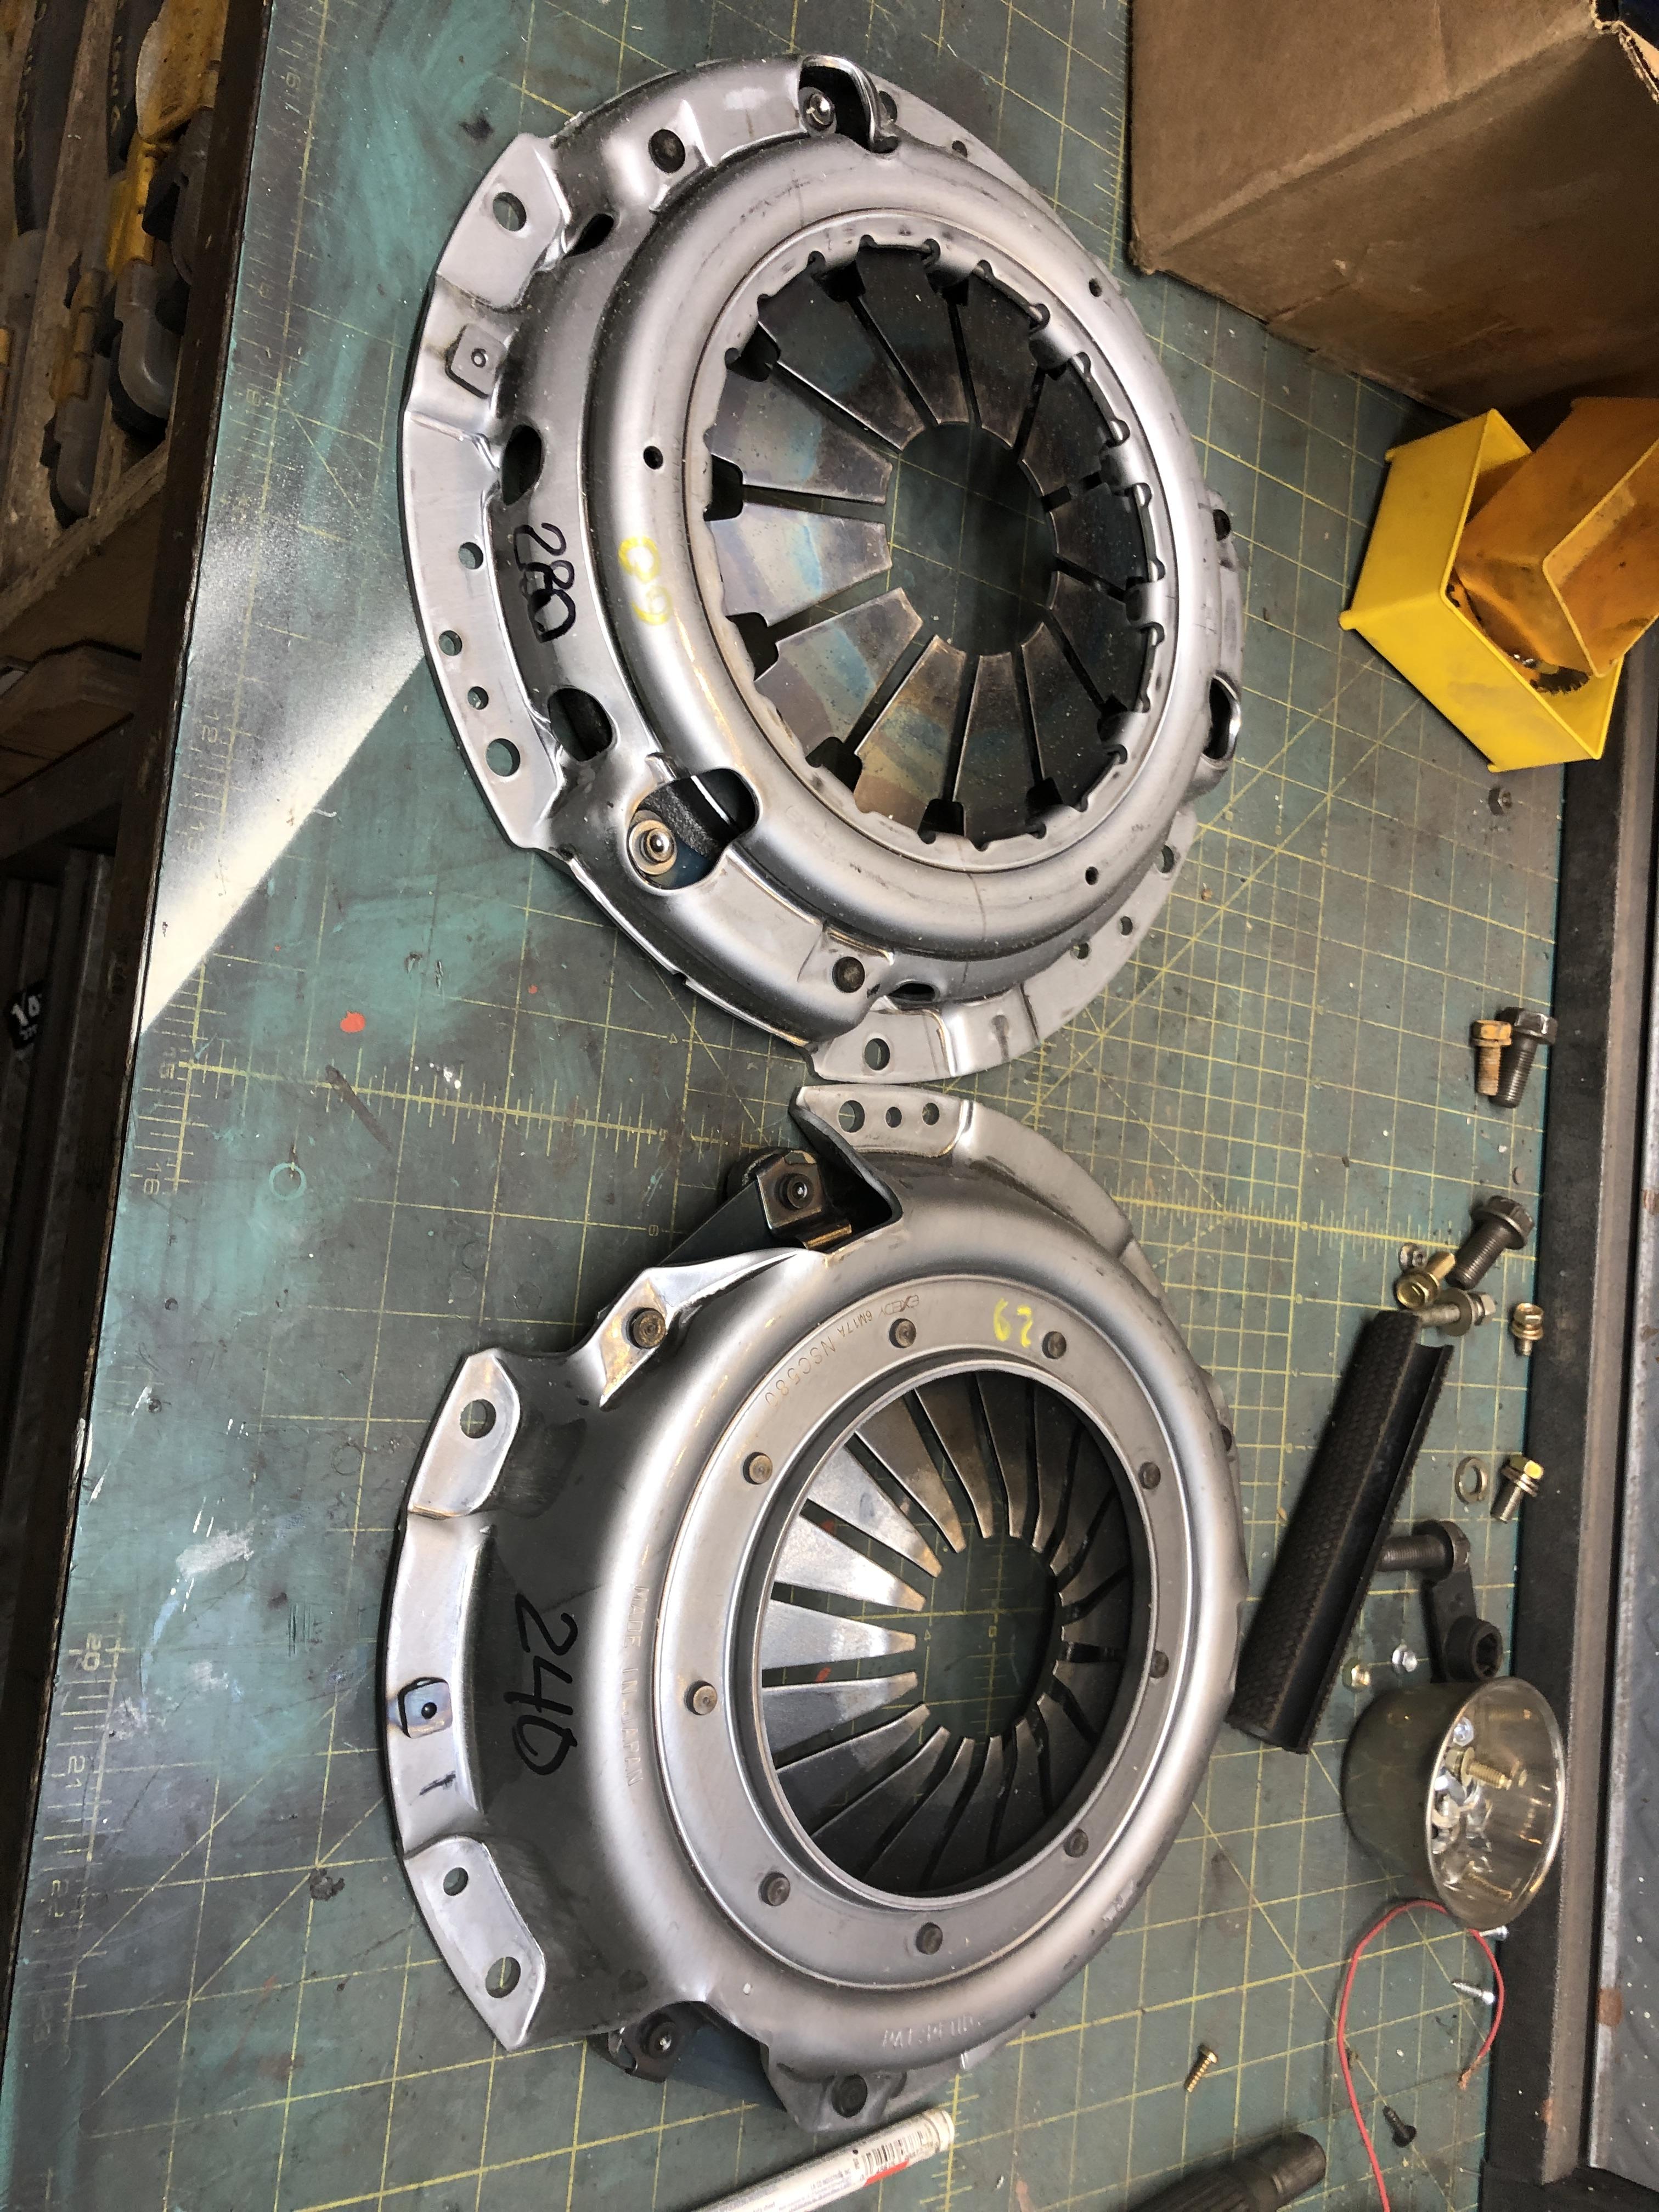
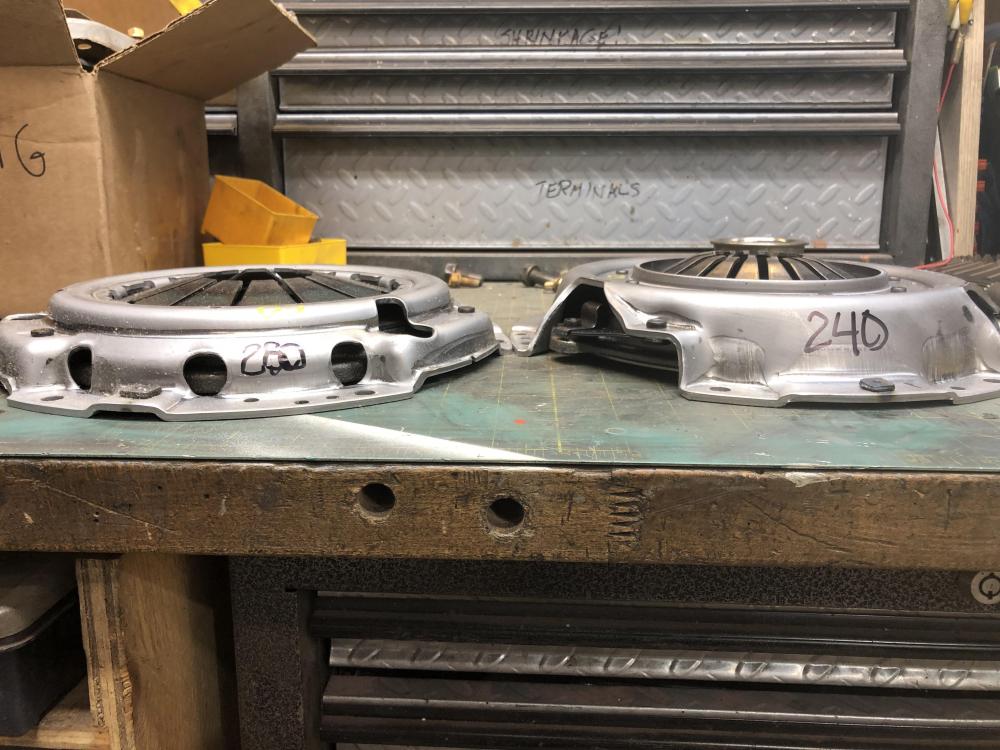
The height of the fingers with the clutch cover bolted to the flywheel (with the disk in place) is what is really needed to properly compare. The free height of the springs may or may not be useful as noted above, the way the fingers move is determined by internal geometry of the moving parts. The fingers on the left cover sure do stick up more than the ones on the right, or so it appears, AND the cover itself appears thinner.
-
Here are some pictures of the two covers.

-
So I discovered something interesting over the past week regarding the age old issue of clutch throw out bearing collar height selection. We have discussed many many times how to determine what height the throwout collar has to be to achieve the now well accepted total 92 mm total height, based on your particular choice of clutch cover. What I remember in the many discussions I heard, is how the struggle to get a long enough collar almost always comes up. This lead me to assume that all that was available in new parts are clutch covers that are much thinner than the old stock 240z covers. What is new here, is that I have definitive measurements on two popular Exedy Clutch kits with very different heights! You can now choose the one that most closely matches your existing cover, and not worry much about finding a “matching” collar. In my recent experience of replacing several clutches for various cars, I have been buying the 280z spec clutch, 06009 part number, and it is much thinner (requiring a longer collar) than any of the stock OEM 240 clutch covers I’ve seen in the past (requiring a short-ish collar). My parts hoard has accumulated several of the shorter collars, and I’m always struggling to find longer collars to go with the thin pressure plates. I’ve even considered designing a two piece adjustable length collar to handle any situation. Well it turns out I ordered a 06029 kit the other day for a customer after having an old age brain fade, spec’ed for 240 and early 260. Got it out of the box and found the clutch cover is nearly 3/8 -1/2” inch taller than the 06009 kit. I will add the exact height of the spring finger tips with the cover bolted to a flywheel (yes, it very different) to use in your 92mm collar selection calculations shortly. Clearly Exedy has it straight since most 240 owners would have shorter collars, and need a thicker cover. 280’s have longer collars, needing thinner clutch covers. Not sure how I missed this, but what it means, is that there is a choice in clutch cover heights out there, you don’t always have to go hunting down the right(er) length collar. Just by the right clutch! I should note that the clutch disk in both kits are identical. Technically they have different part numbers, I can not see or measure any difference in the disks. Note this handles only the 225mm clutches, not the 2+2 240mm clutches. There were no 240mm spec clutches for 240z. It would be great to have a database of all the popular clutch brands and their clutch cover heights, something you can’t find in their published specs. So every time you replace your clutch, measure the cover height and record it here. Thank you.
-
Quick screen capture of the spread sheet.
-
This is the cheapest online source of the overhaul kit I have bought and used many times. https://www.rockauto.com/en/parts/usa+standard+gear,ZMBK104WS,bearing+&+seal+overhaul+kit,8676 All other sources I’ve bought from shipped exactly the same kit, but at higher prices. I have the part numbers for the bearings in a spreadsheet somewhere
-
That there is one well ventilated and holey 73.....yes 73. Purdy color mind you. All I see if a pile of heavenly parts too far away to do anything about. Sigh.....
-
-
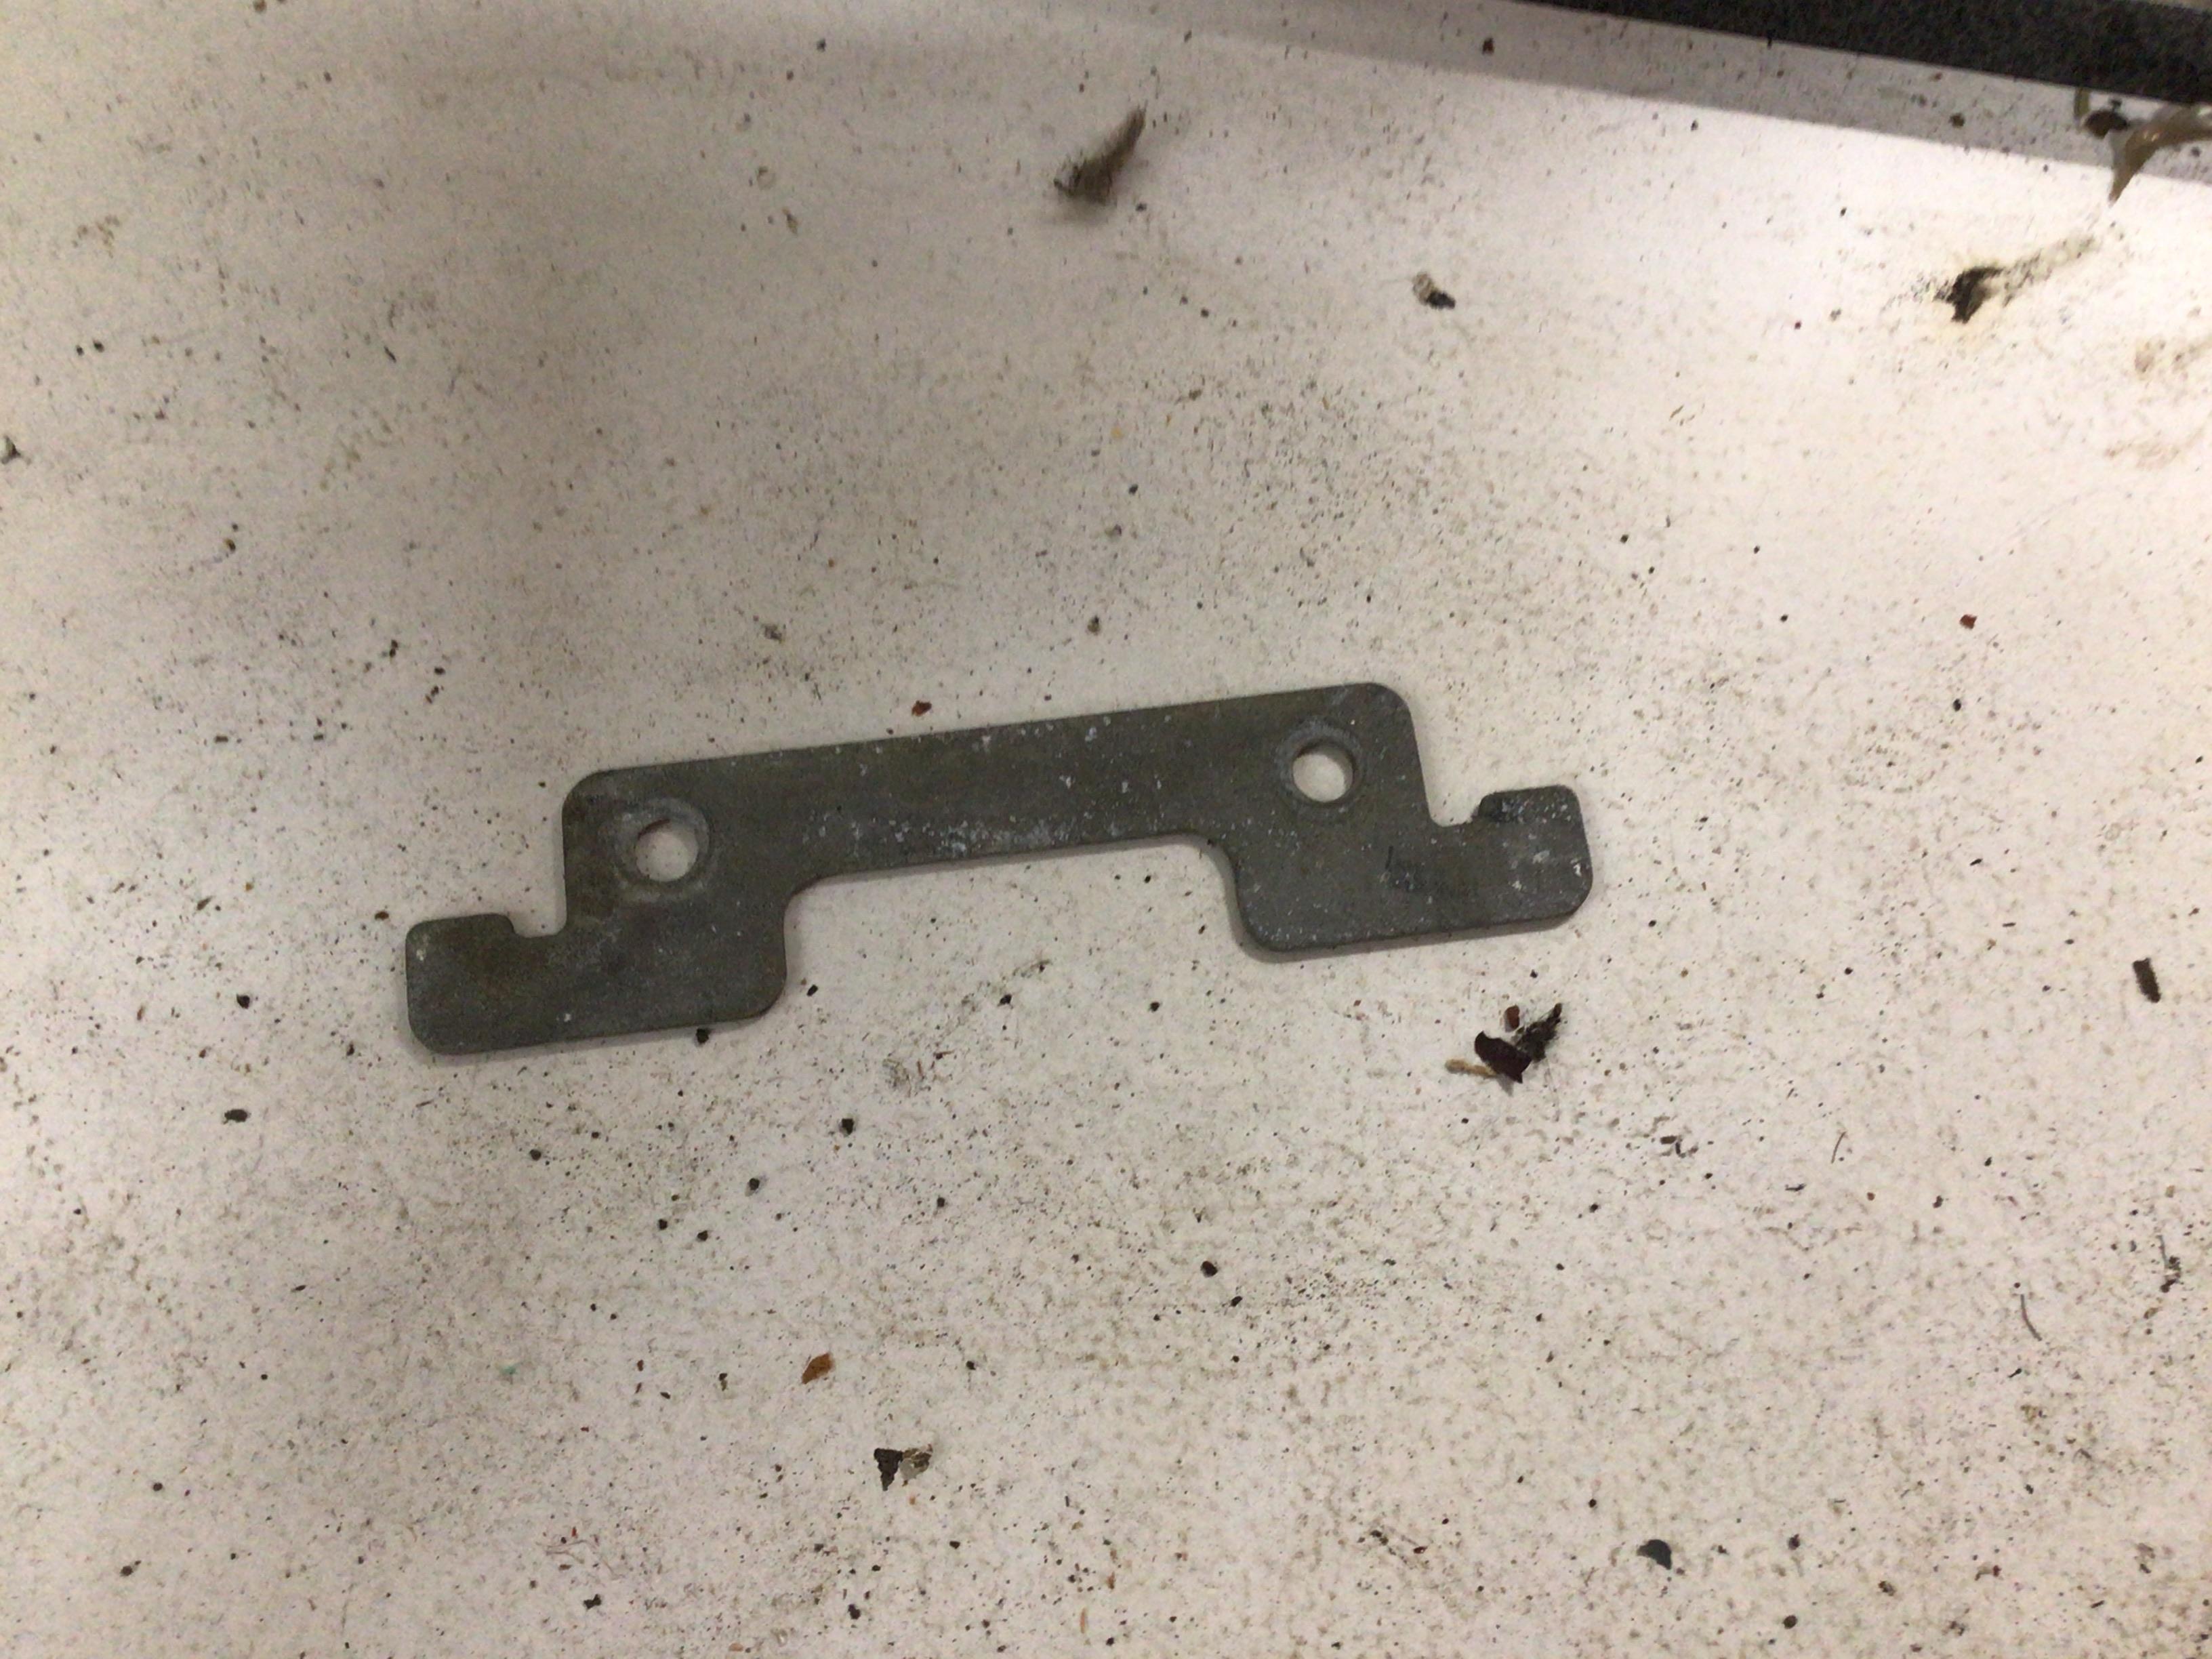
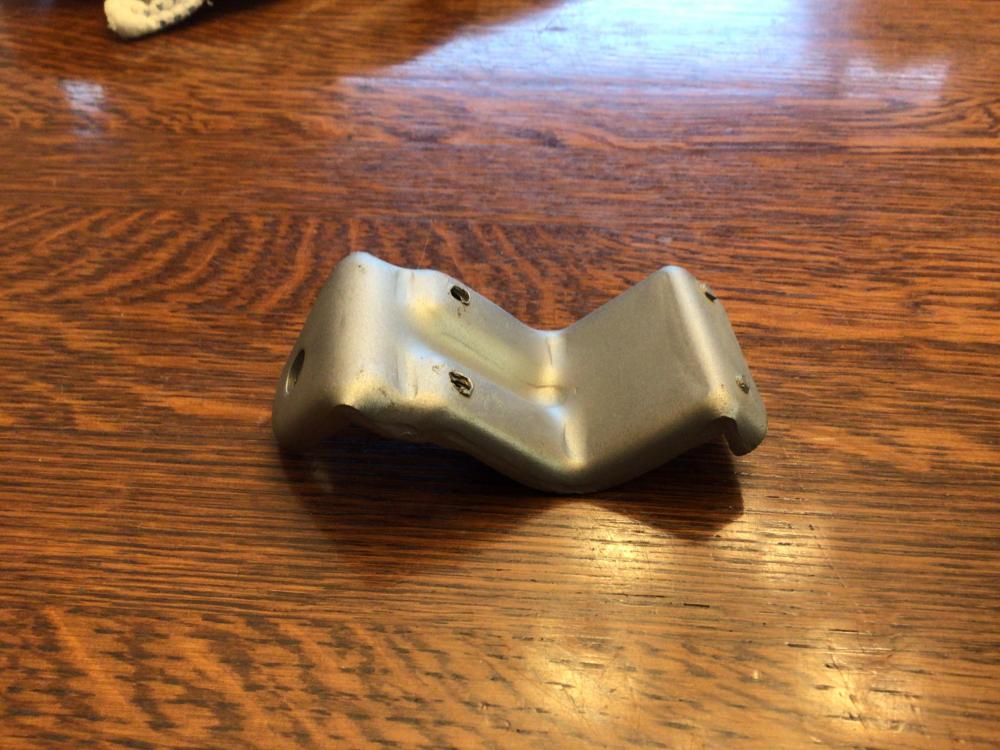
And I’m pretty sure that bracket is a fuel pump mounting bracket back by the tank up behind right wheel.
-
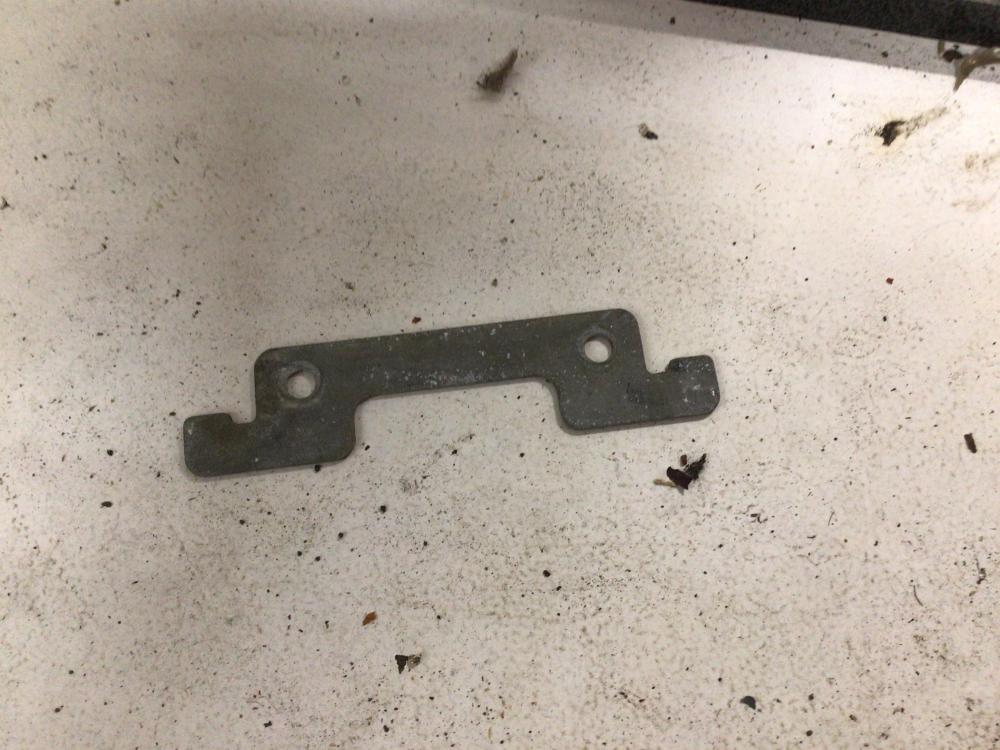
You have to find someone that scavenged them off a wreck. They are spot welded to the body. I have one. Let me know. I have the other part that bolts to this piece that the strut hydraulic attaches to as well if you’re missing that too
-
Maybe? Not much explaination.... Date range spans the LH nuts on the 80-81’s that I know of https://www.thezstore.com/page/TZS/PROD/20-1640
-
Assuming your threads are ok on your old nut, you can also just make a thin shim washer to put between it and the spacer behind it to move the place where the peen gap in the shaft lines up with the nut sleeve in a fresh spot when the nut torques up.
-
Aha
-
There is indeed someone making freshly locally machined RH main shaft nuts. Now I have to remember where I saw it...... Check godzillaraceworks first....
-
It’s a replacement washer pump. If you want to keep your windshield squirters working, yes, you need it.
-
Heard good things about damperdoctor.com doing great rebuilds.
-
Yes, no welded plate, you need the baffle. It’s a flat plate with two holes, bit of shape, but if didn’t have them, I’d make them them a sheet of 20 gauge sheet metal. Hardly worth the postage to send you a pair. I can take measurements and post that if you like
-
The early cars, have a welded doubling plate that serves the purpose of this plate in later cars. If you have that plate, (it has a 90 degree sticking out part at the bottom) then you don’t need this “baffle”. It won’t fit anyway with the welded angled plate.
-
https://zcardepot.com/products/door-panel-card-set-black-240z-1970-73-new?_pos=2&_sid=fa947020c&_ss=r
-
I shipped one of those once. I felt compelled to attach it (tape, screws, packing material support etc) to a thin sheet of plywood to ensure it arrived in one piece. Anything less and you are about guaranteed to have a “problem”. The repo pieces are nice and thick. ABS cement and fibreglass matt will work wonders. Then fill the crack(s), re-texture, SEM black, repeat until happy. Or get a new one.
-
Oh for heaven’s sake. 1. TC rods will be Techno toy tuning adjustable ones to gain the extra length. I just lengthened a pair of stock one so we can move the car around until the new ones show which might be a while given Xmas and shipping delays. Just cut a pair of stock ones in half and add a 5/8 ID tube welded over with about 2” overlap. 2. Sway bar mount is now a 1/2” thick 1.5x4” bar, with a pair of recessed holes to mount the bar to the stock in-frame captured nuts, then two holes 1” further forward, threaded, to accept the sway bar U-clamps in their new position. 3. Drill one new hole in the frame rail 1” forward of the rear existing hole, and drill one new hole in the K member 1” BACK of it’s front hole. Drill matching holes in the two re-enforcing plates top and bottom, actually shorten the top one by 1” since its that skinny thing. Re-apply K member to frame rail with stock bolts in new holes. New bolts are 1” closer together, K member is 1” forward. Fill abandoned rear frame rail hole with bubble gum. Juicy Fruit of course. 4. Re-insert engine and put the drive shaft, that how fits, back on. Done. 5. No wait. My fancy shortened/offset trans mount is now all wrong, get his original one and just cut a bit off the ends to get it fit in the skinnier tunnel, and drill two new holes closer together to fit the mount holes. Now done. Yes the next owner will have questions, but the current owner is likely to keep it for another 30 years. He is happy to have Caster adjustment he didn’t have before.

-
Okay, not only are Saturn and Jupiter aligned today, but also the suspension, engine and body on this poor little Z. TC rods lengthened, frame rail holes redrilled and K member moved ahead, sway bar mounts shifted, and yes finally the steering shaft fits as it should. Everyone can relax now. Back to regular programming. Nothing to see here.
-
The alternator isn’t charging strongly at idle, but seems to be fine above idle, and that’s not reason to do anything. Yet. Keep an eye on it. If you ever get into a “needle on the negative side” while driving around, then think about doing something.
-
Flywheel is fine. A 225 mm clutch penalty is extra weight over the 200mm version. Water pump fits front cover fine, BUT the pulley groove position is not the same as the L20 pulley. You can use a Z pulley if you also use a Z damper to get the grove in the same plane. Then you have to play with the alternator pulley position as well.
-
It’s a 4/70. I think a new set of K member holes, a set of extendable T/C rods, and we’re good to go. Don’t really want to cut off and re-attach the T/C pockets. Yuch.