zKars
 Subscriber
-
Joined
-
Last visited
Everything posted by zKars
-
 Official release tonight at ZCON. 8 Eastern
 -
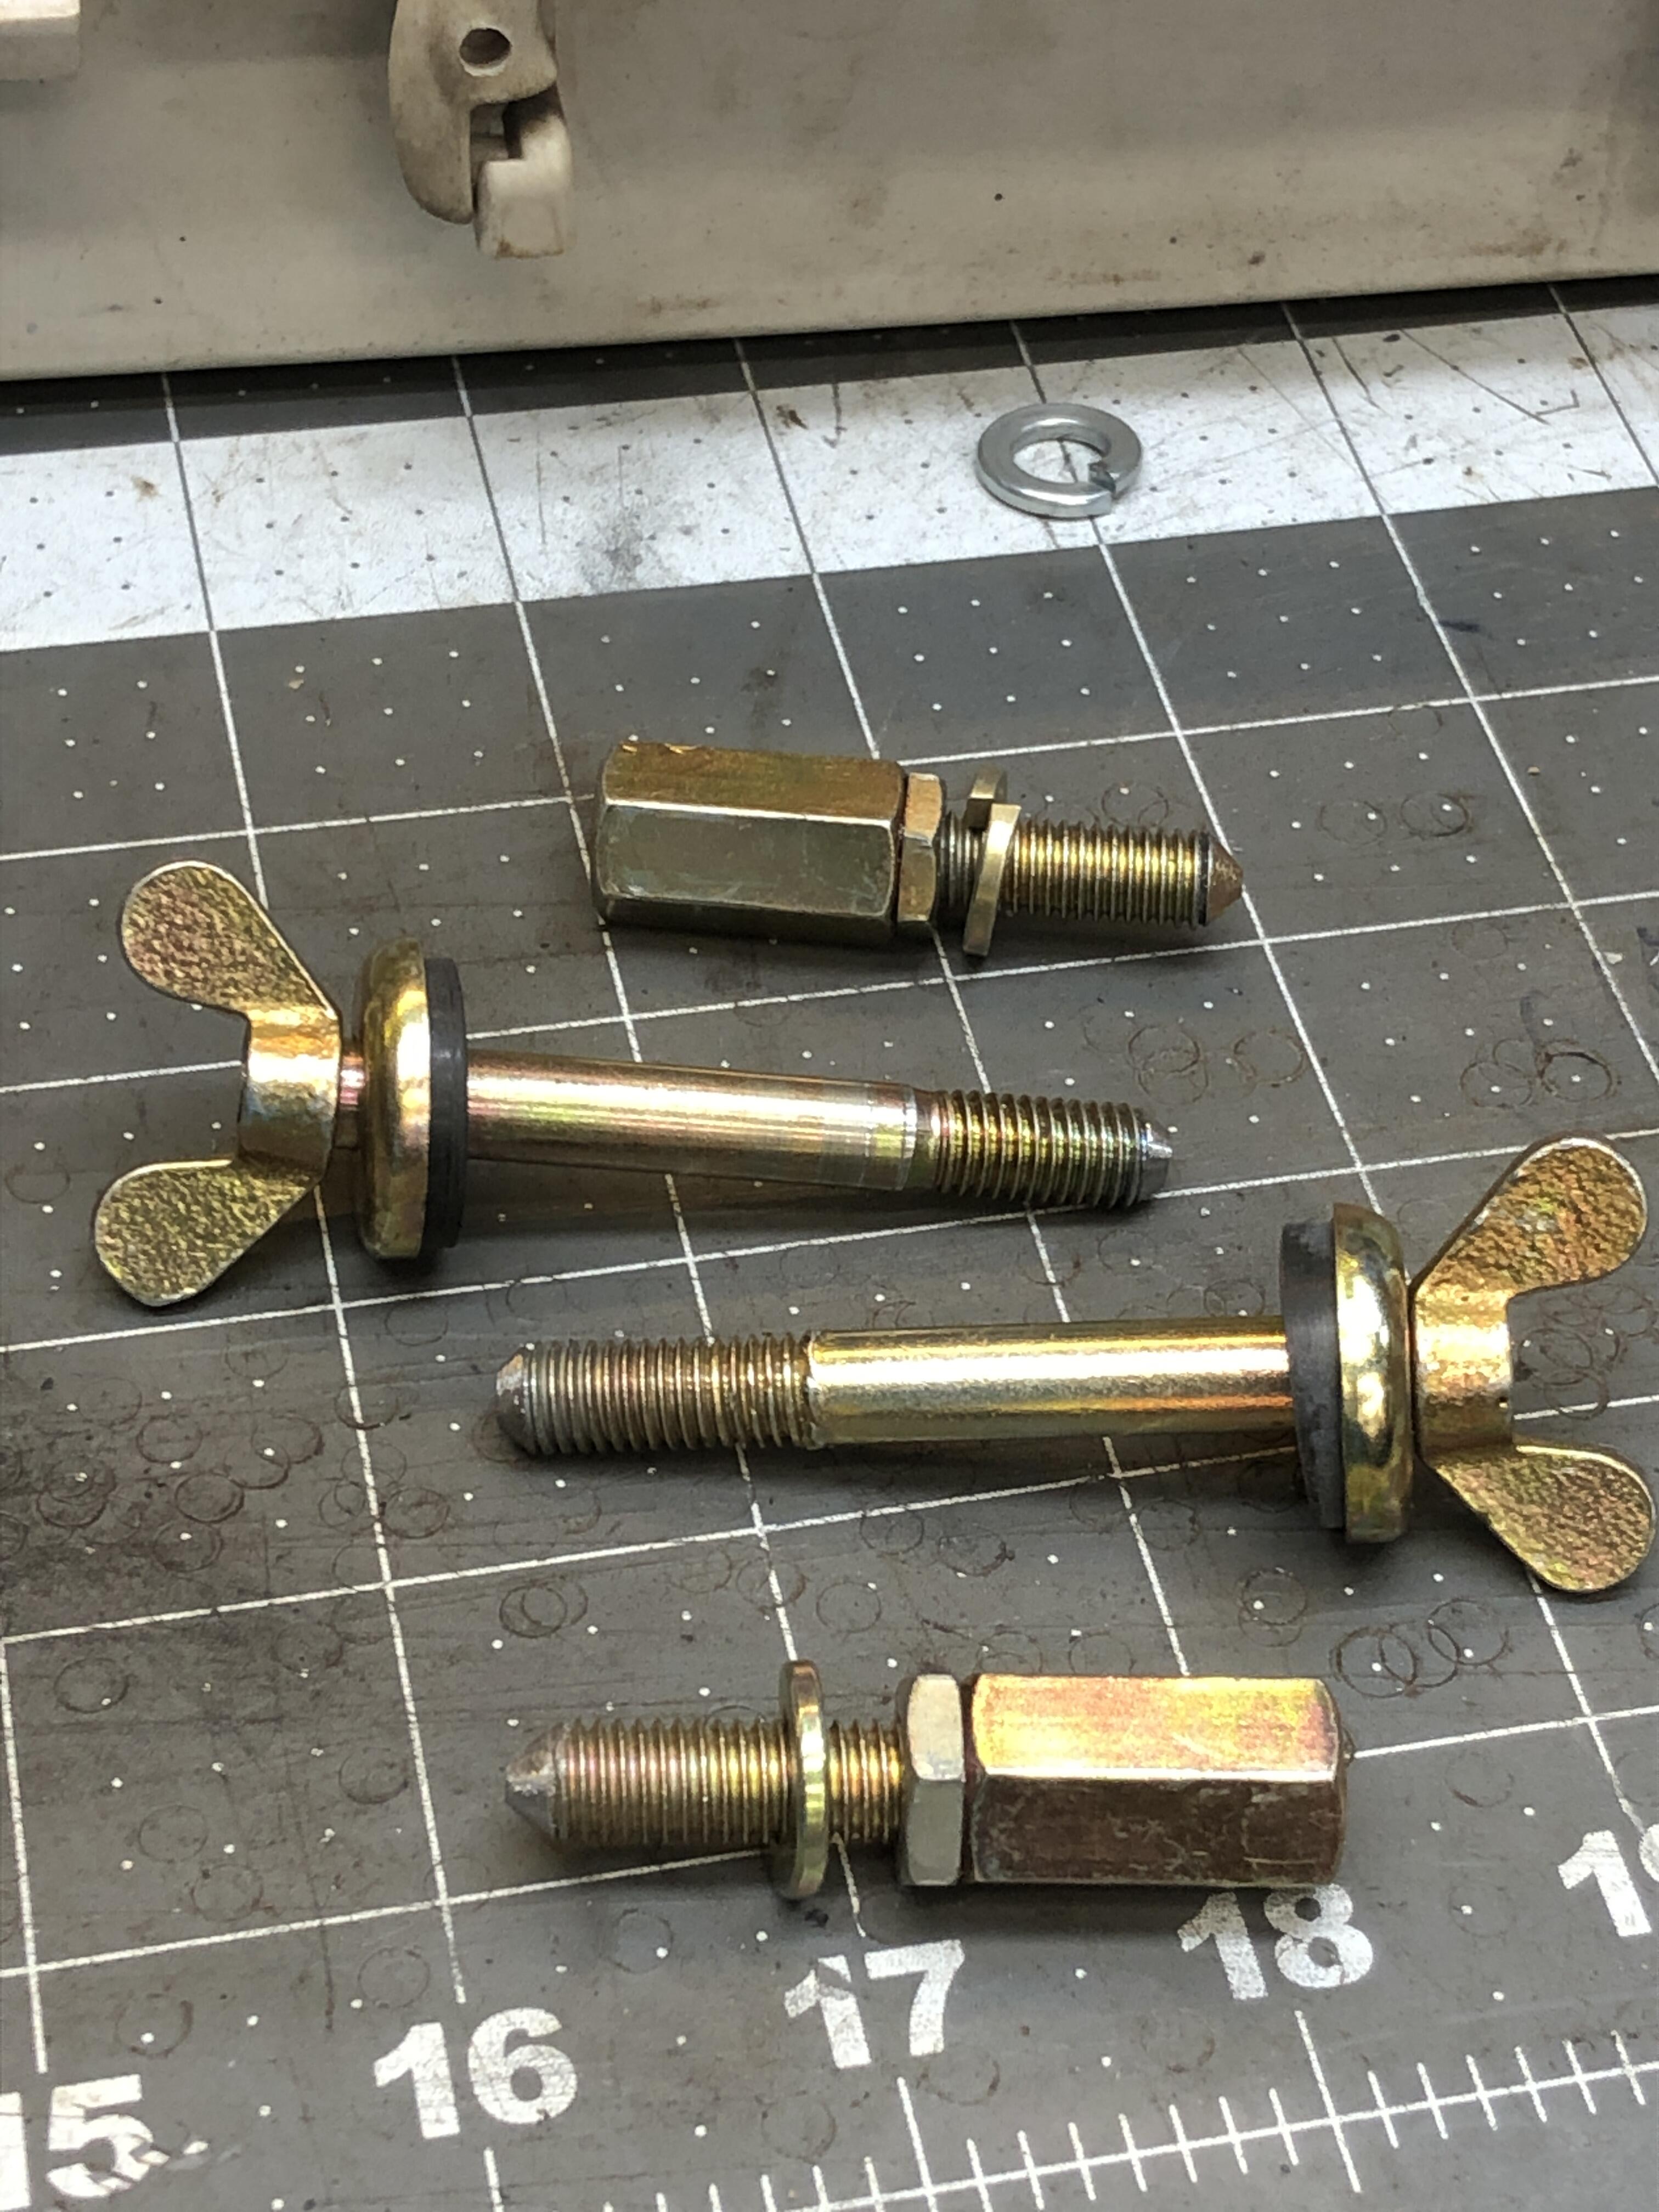
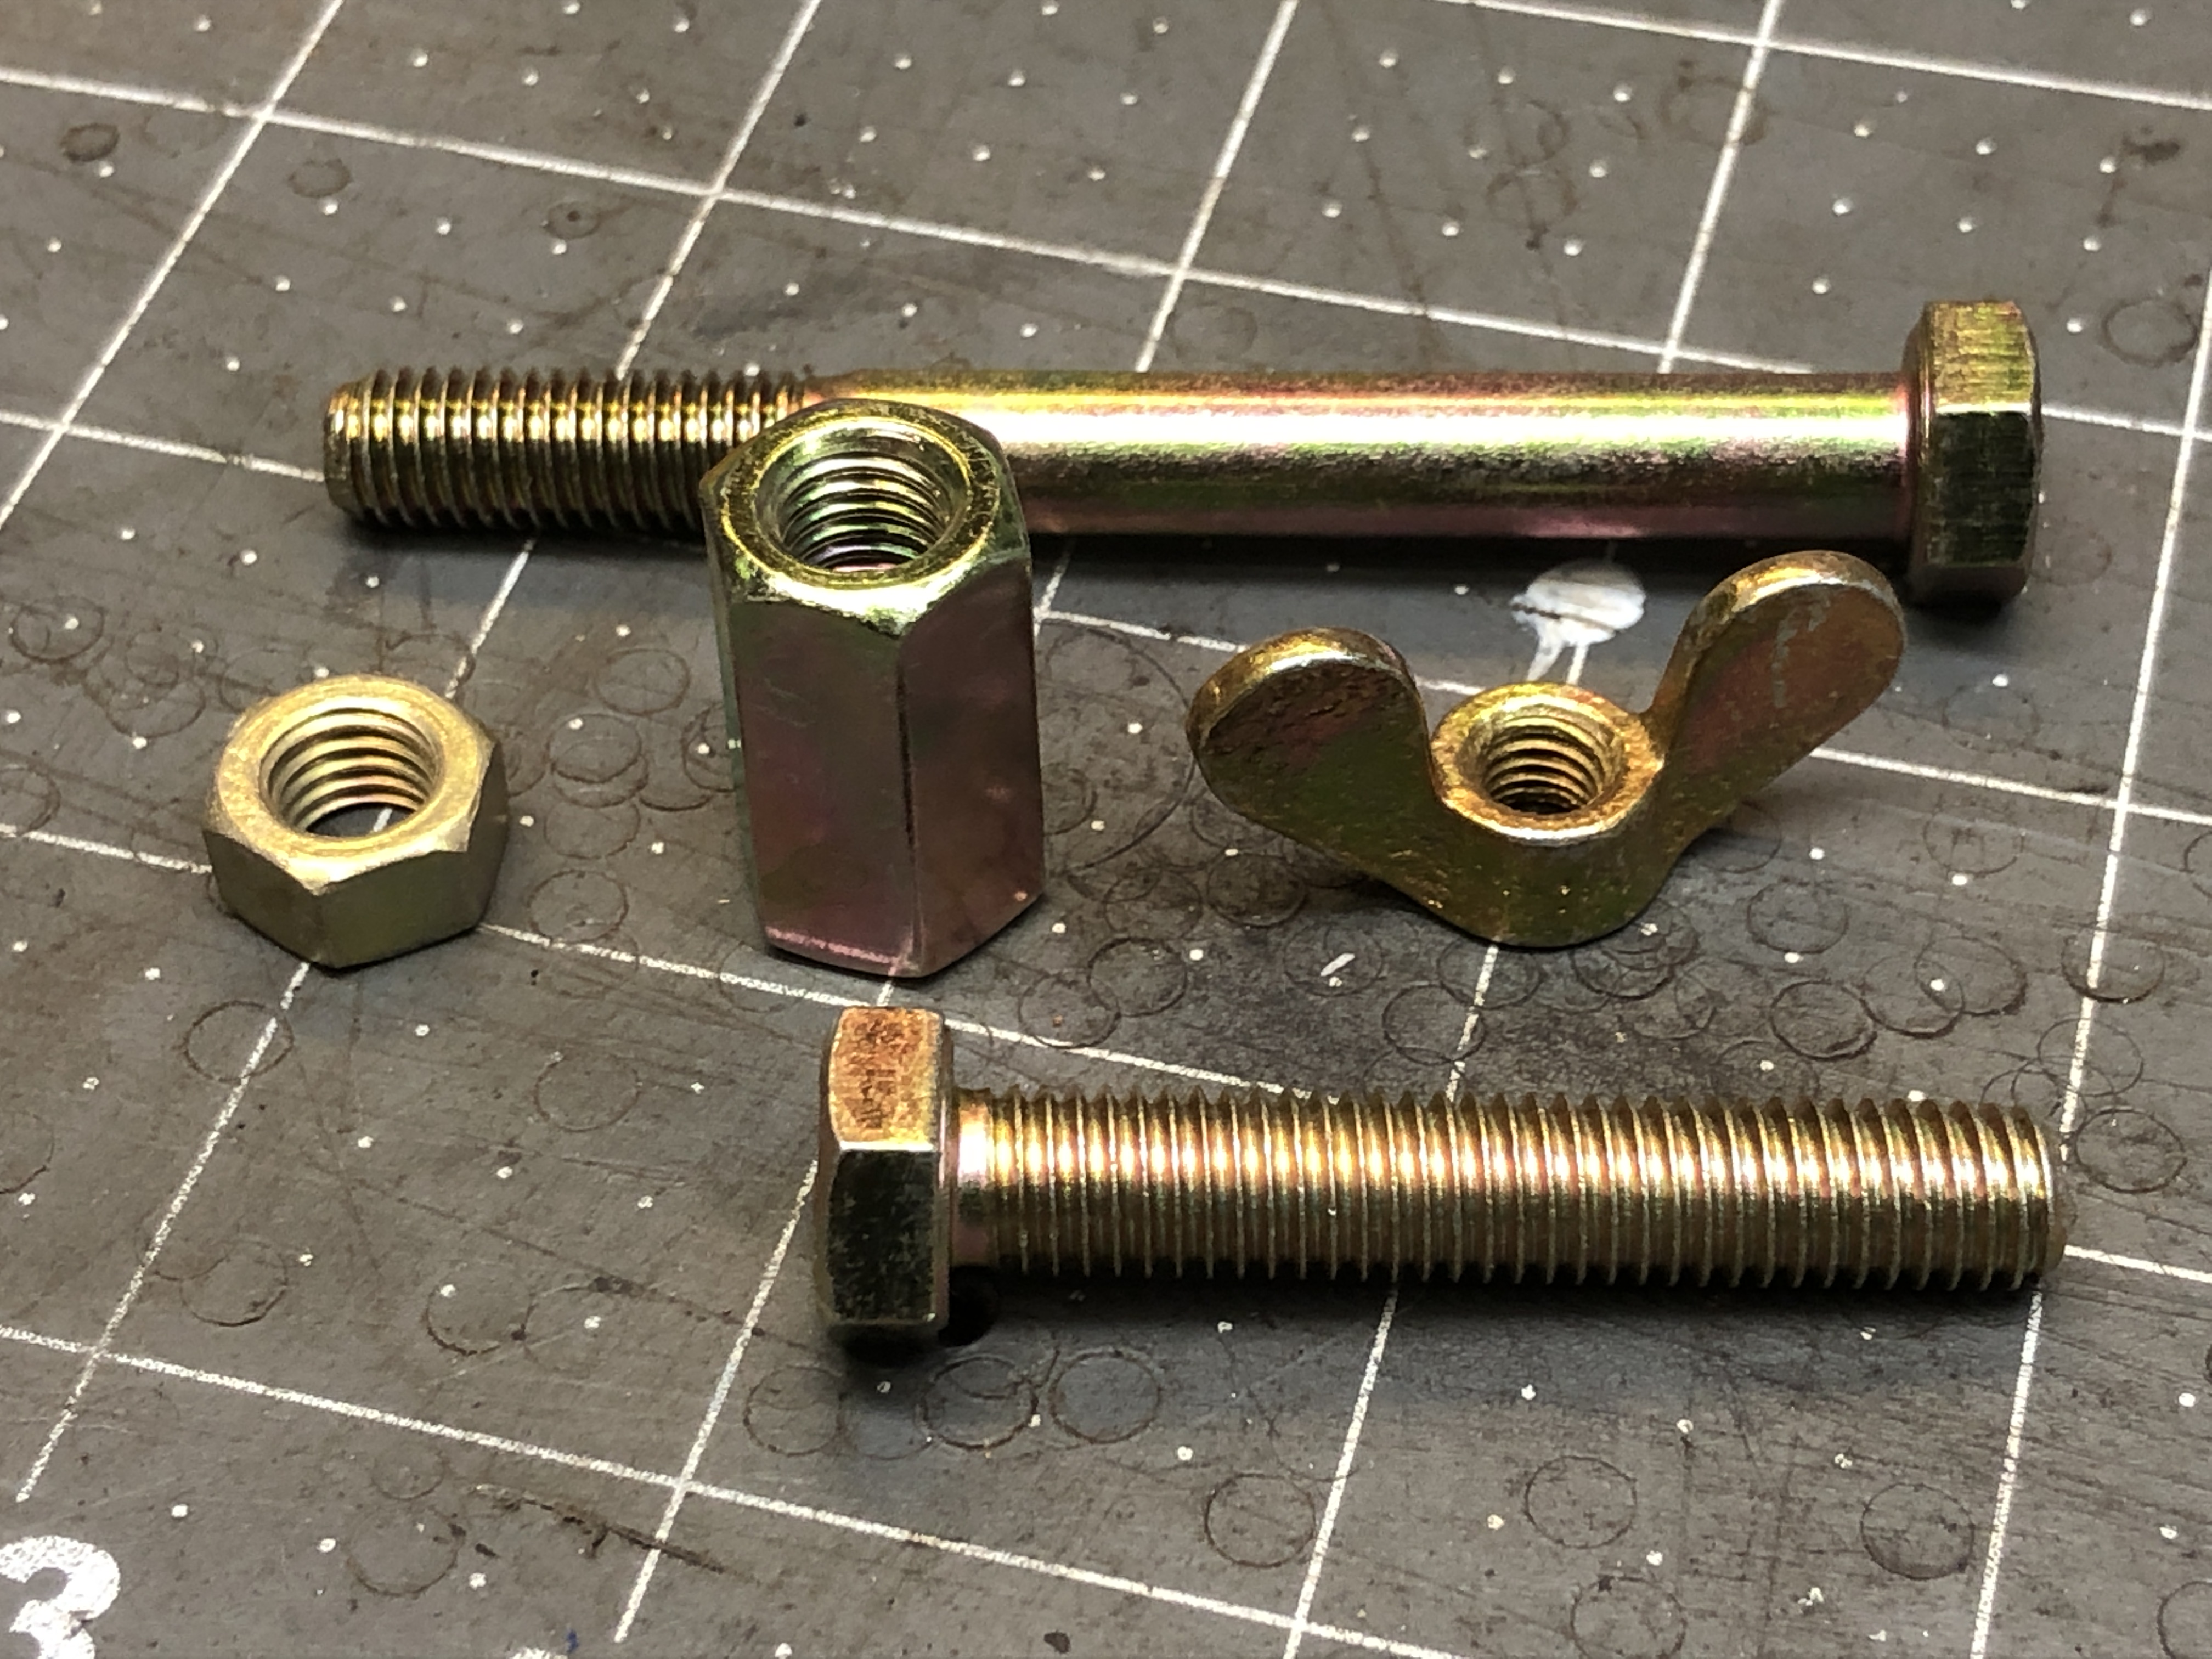
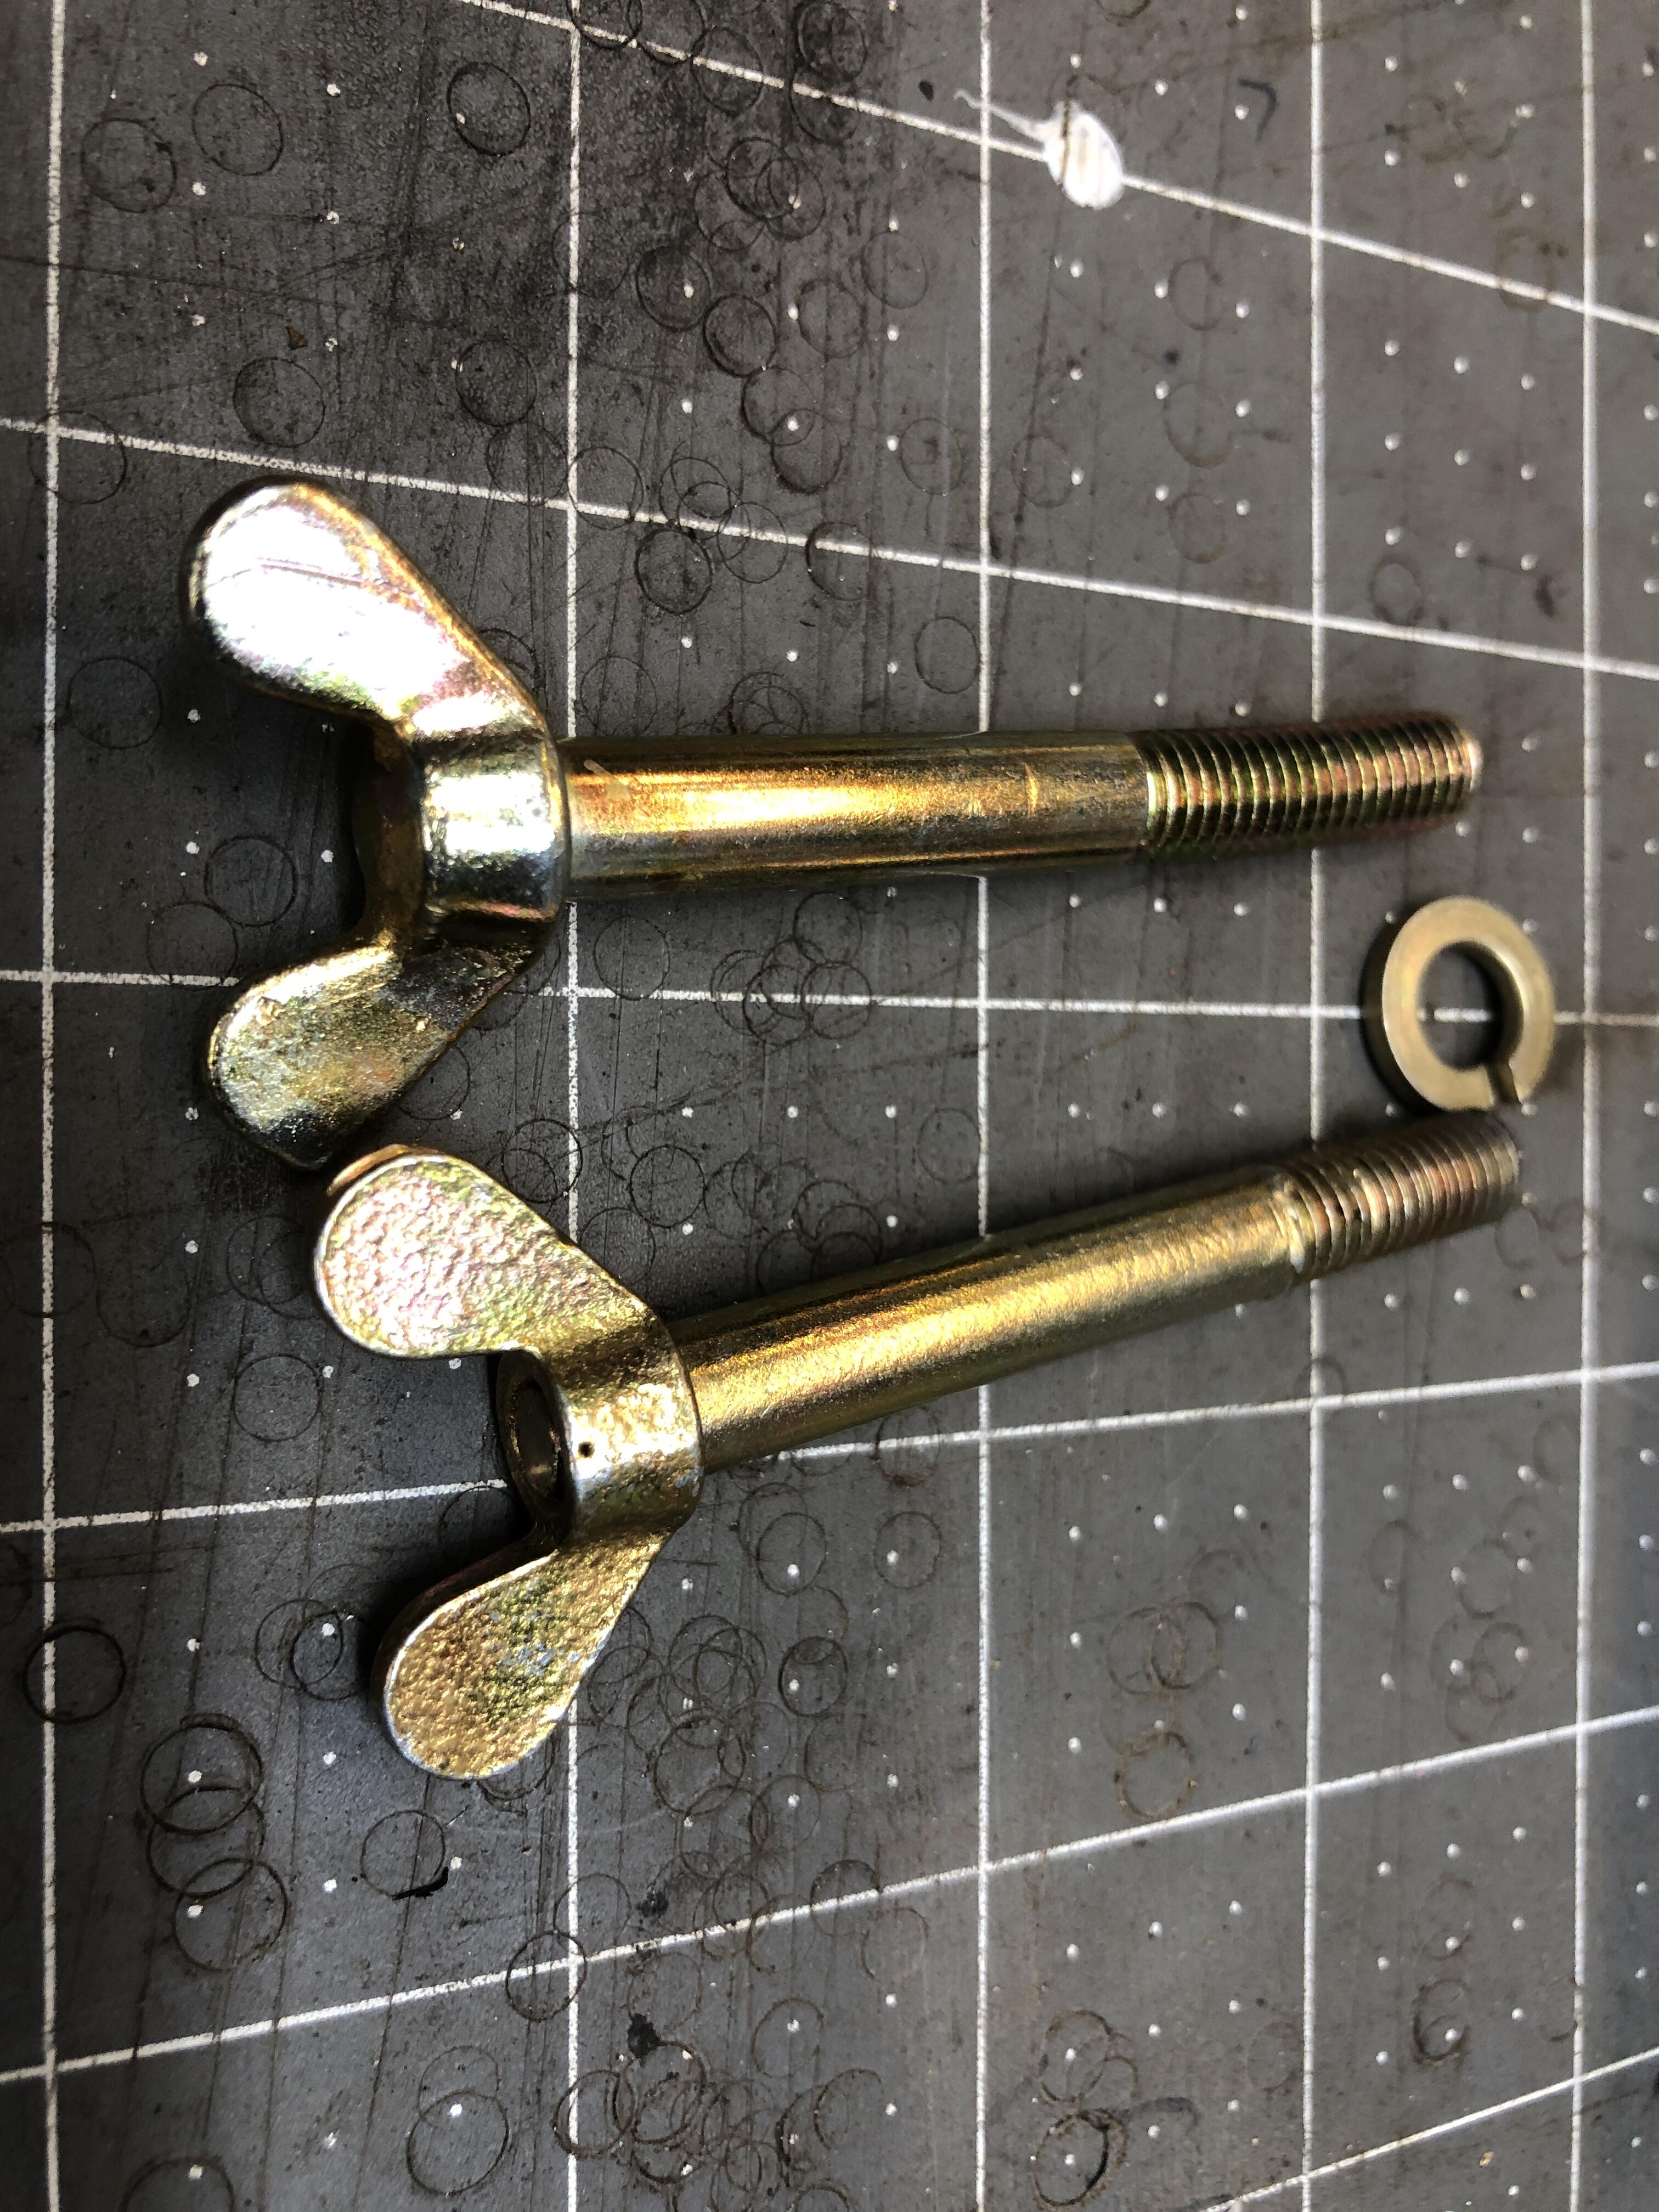
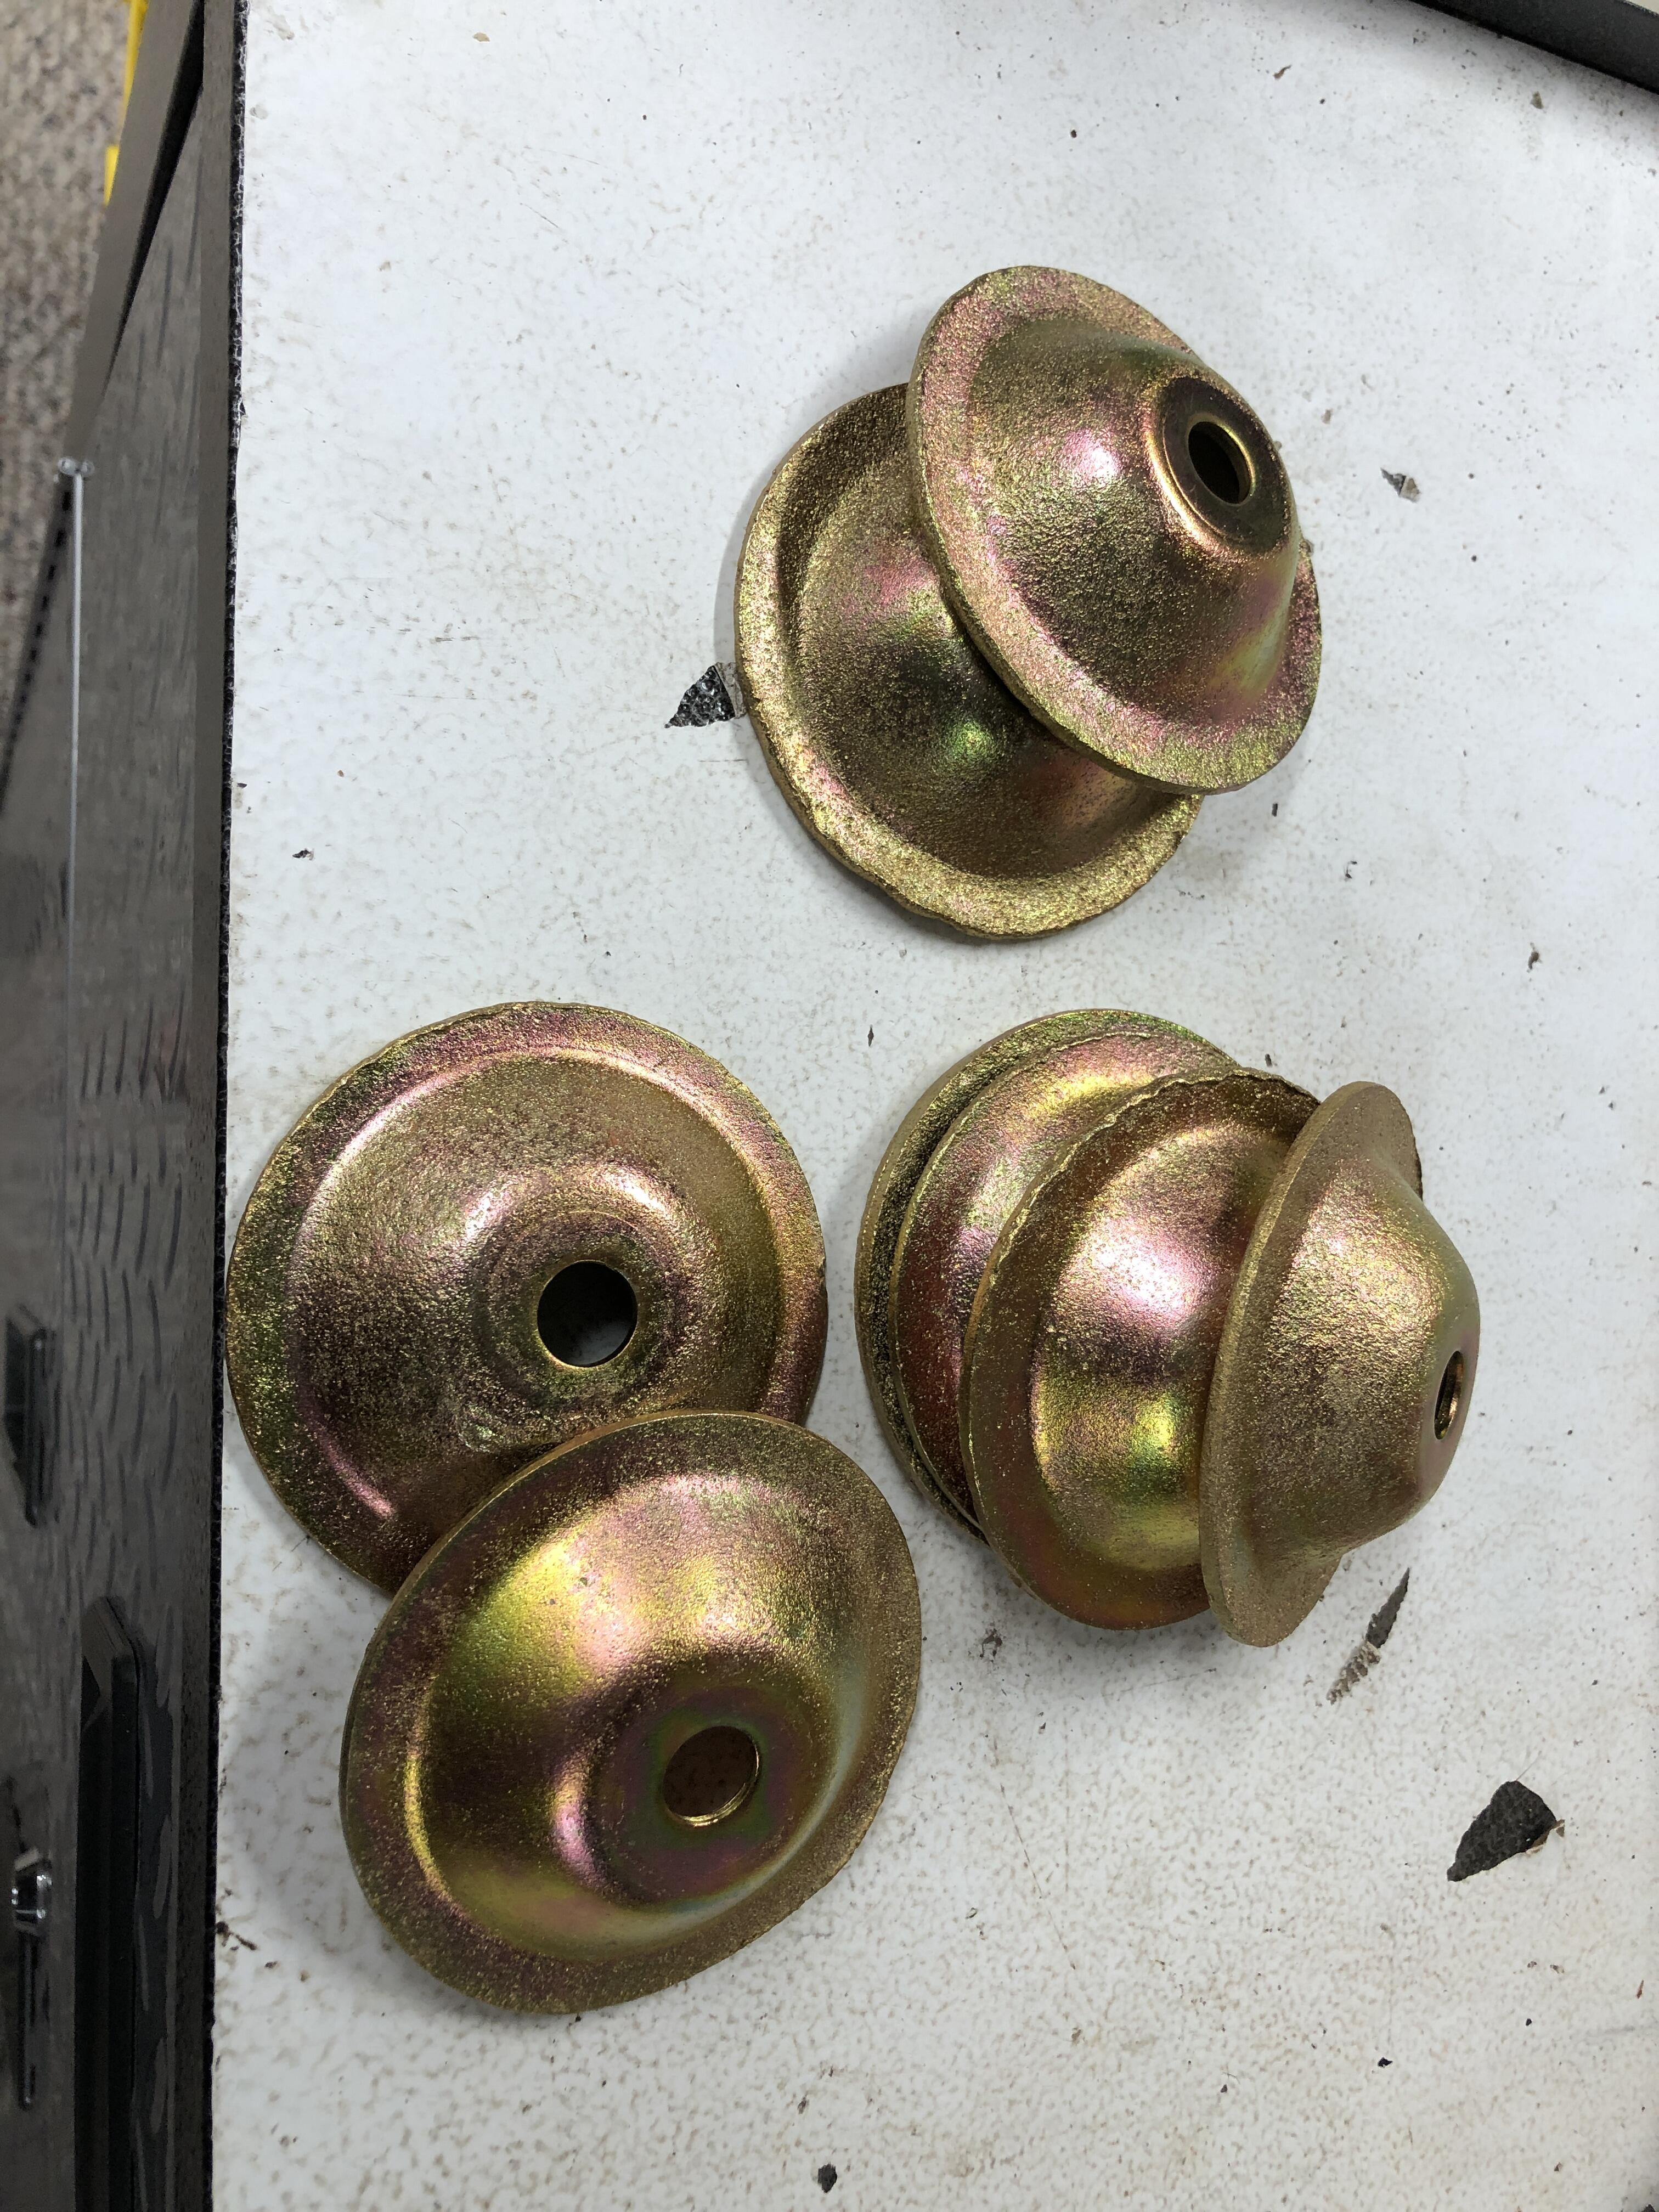
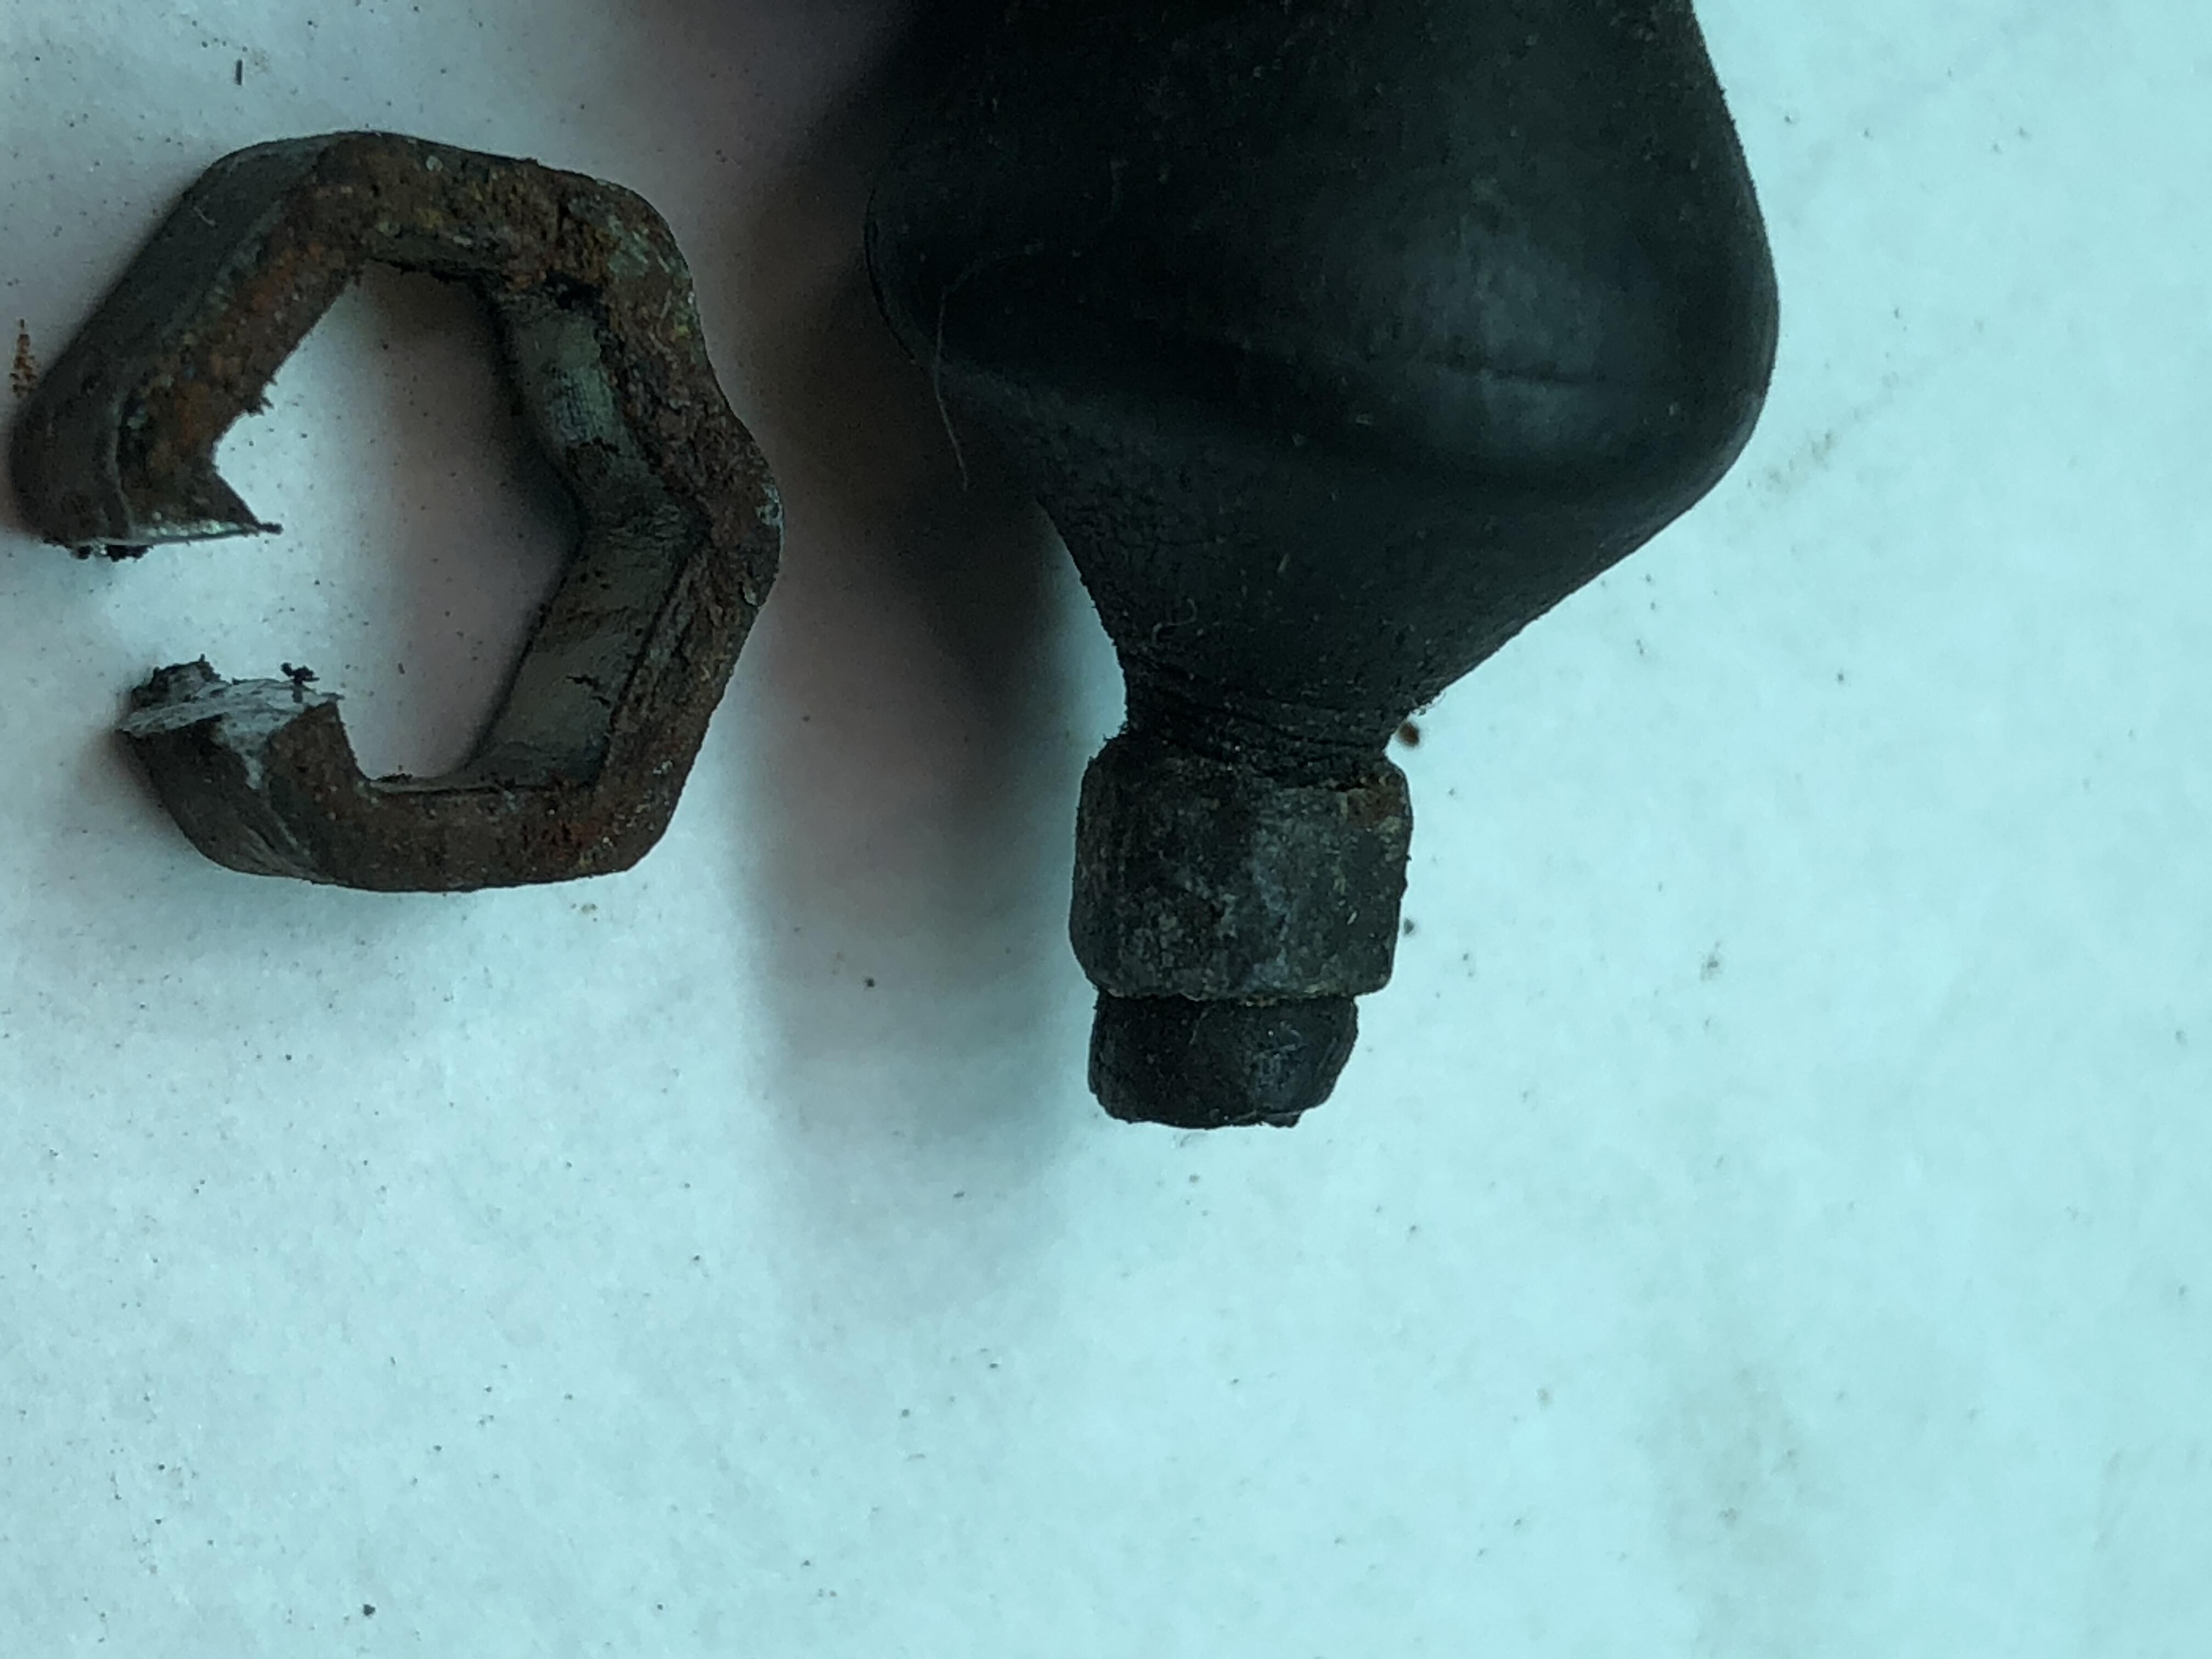
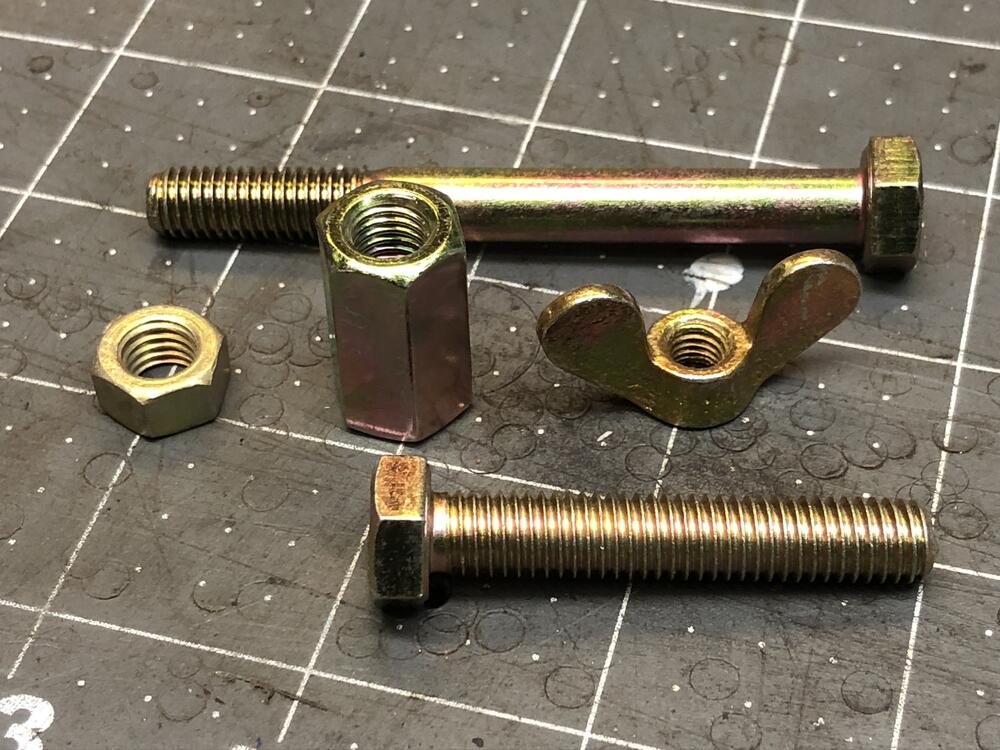
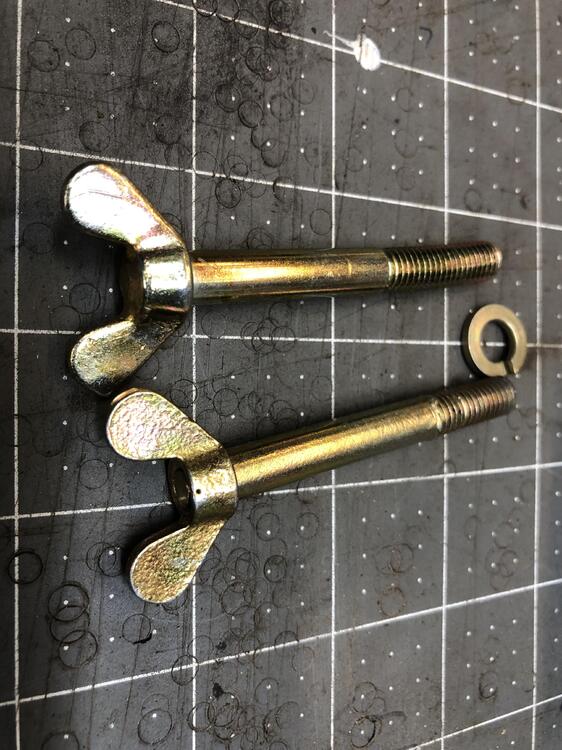
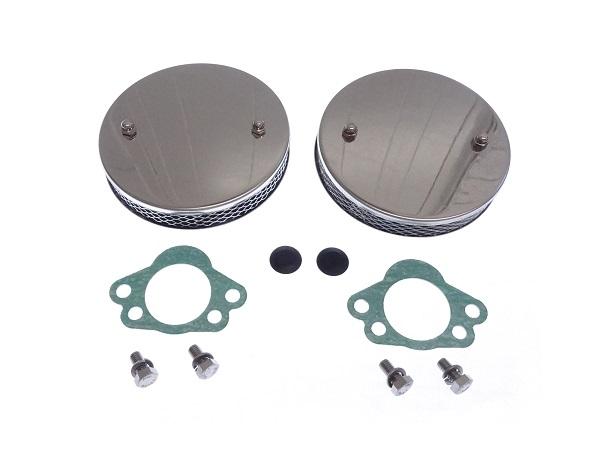
I’ve made Wally a set of my “new” reproduction air cleaner hardware. We he gets them, he can report on appearance and functionality. The hex coupling nuts I used are 13mm wrench rather than the stock 14mm, and I make them by threading in an M8 bolt and locking it in place with a thin jam nut and red lock tight. The wing bolts are made from a M6 wing nut and an M8 bolt that has the end removed and turned down and threaded for M6 to attach the wing bolt. Red locktite and torque lock it in place. My reproduction cup washer are included. These are the raw materials. Comparison of an OEM wing bolt (top) and mine. Ears are dang close to the same size and shape wize. Slightly different surface finish.

-
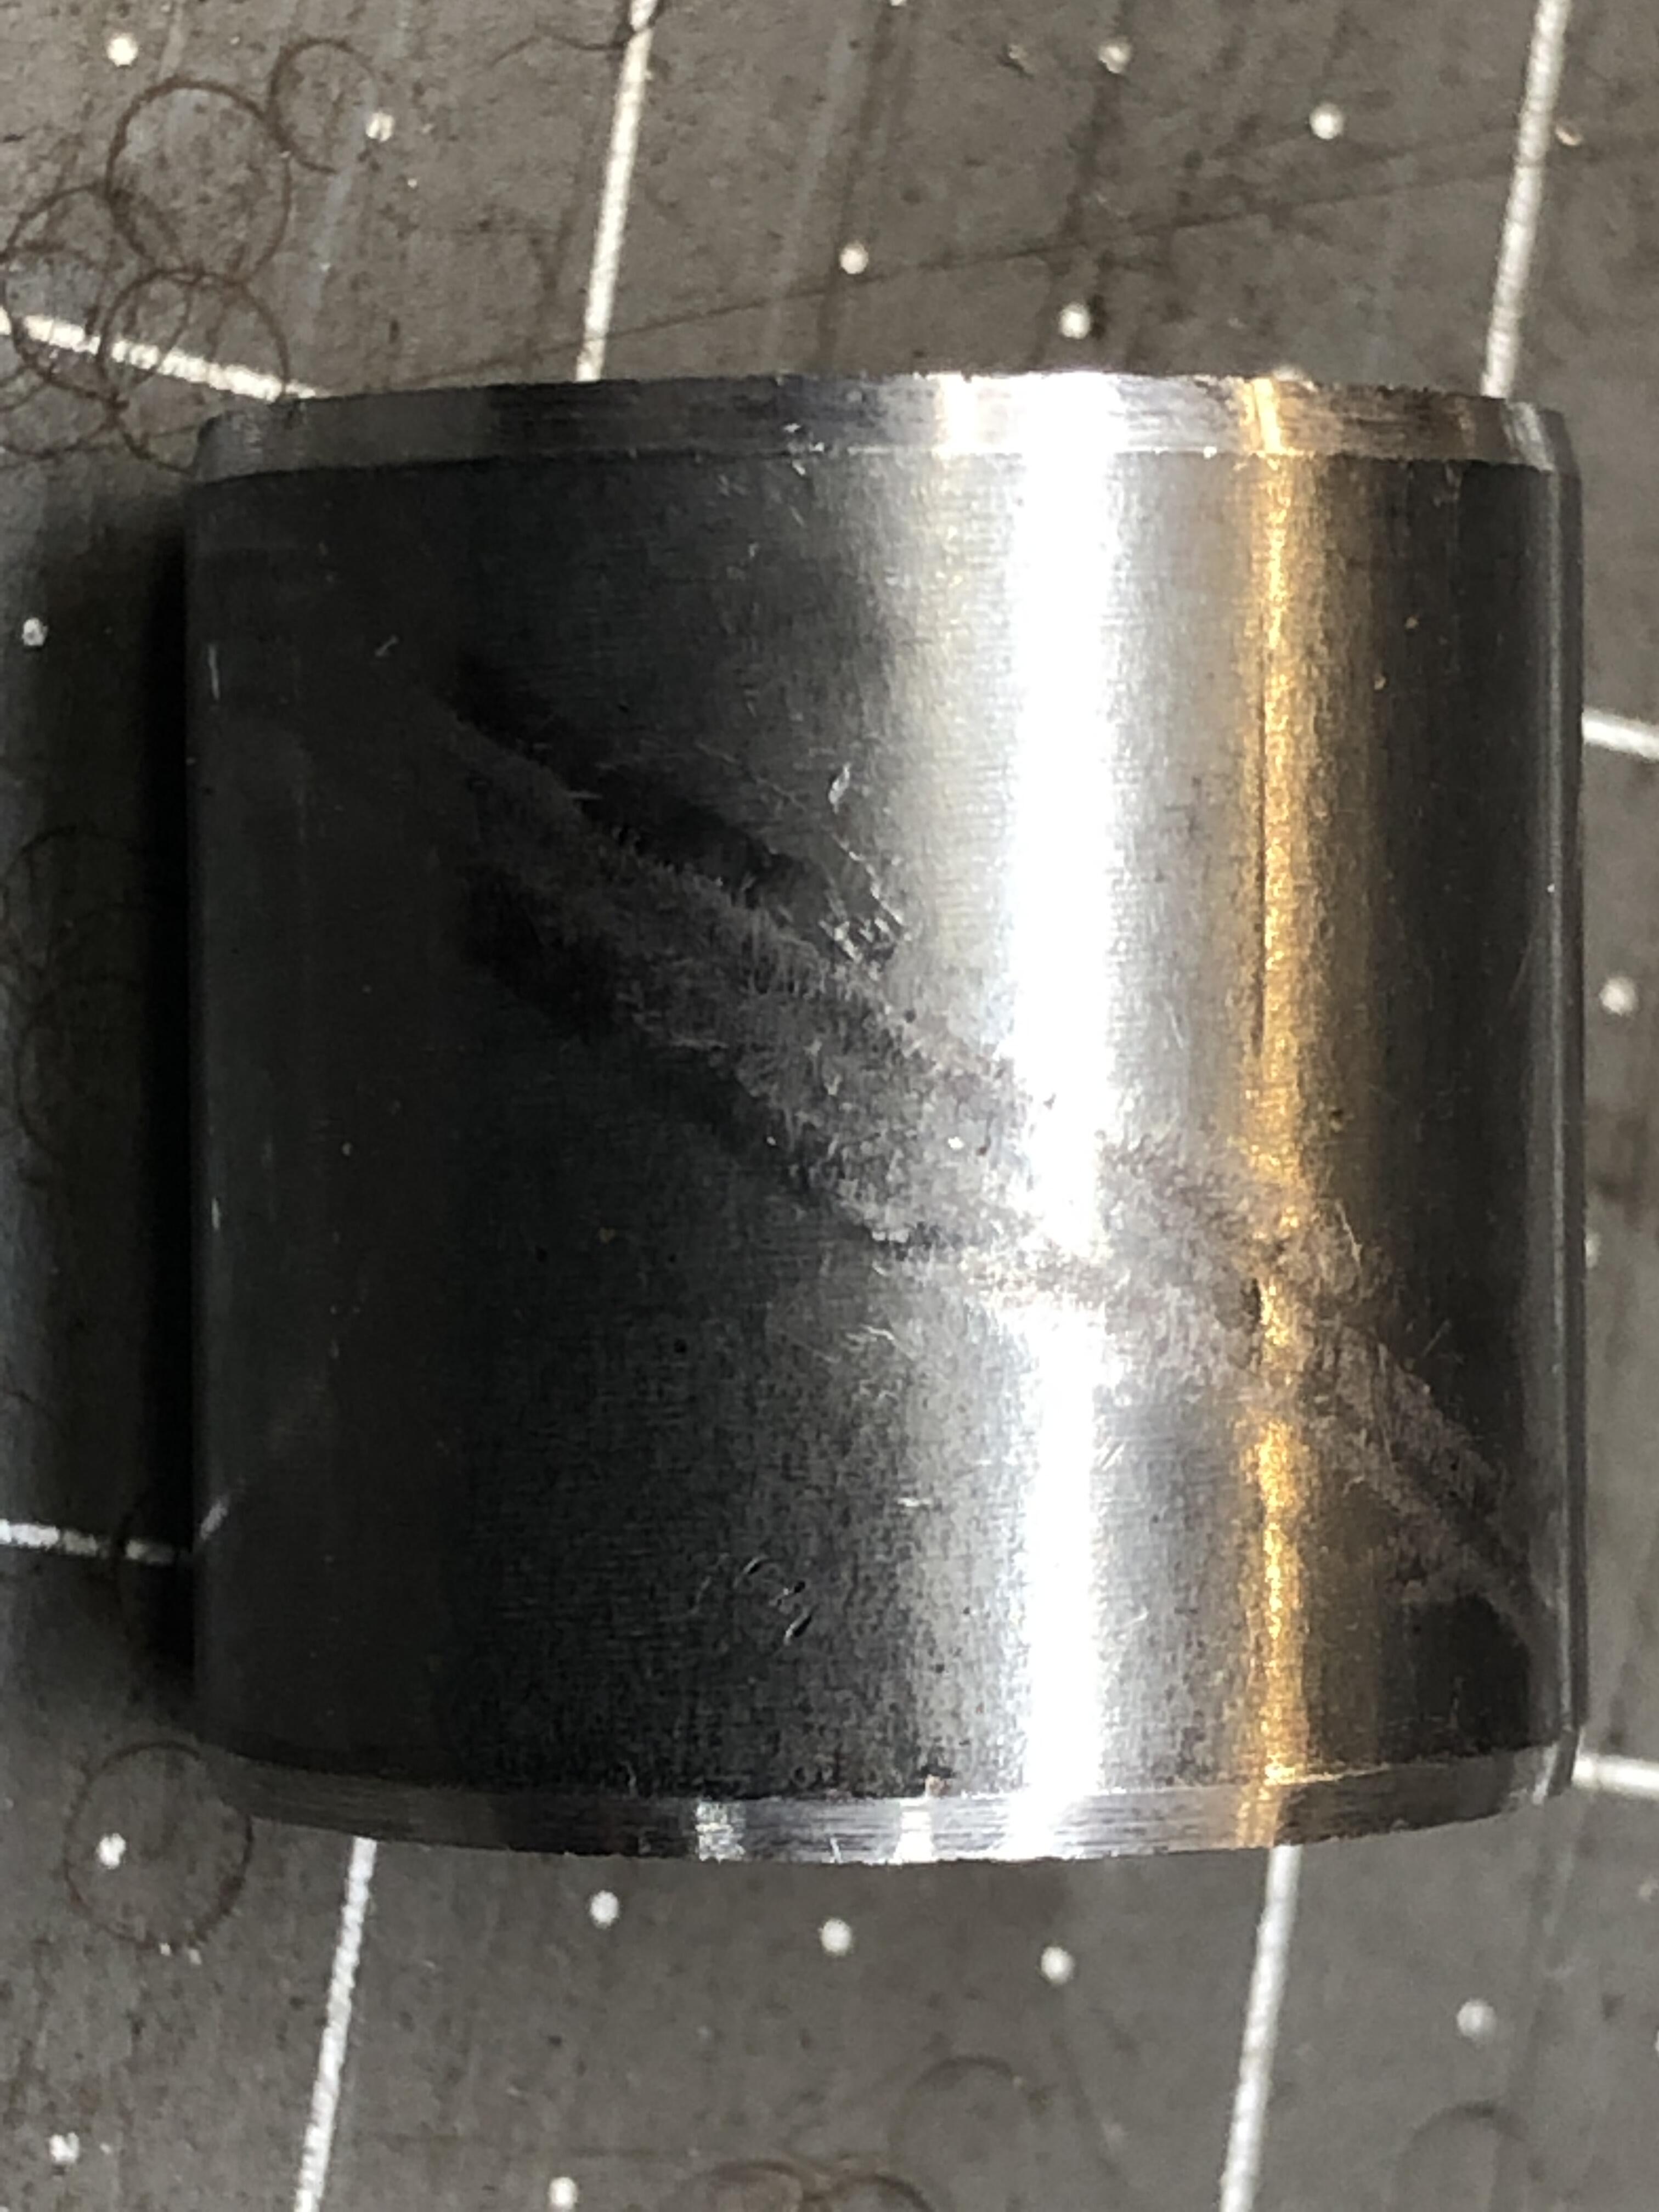
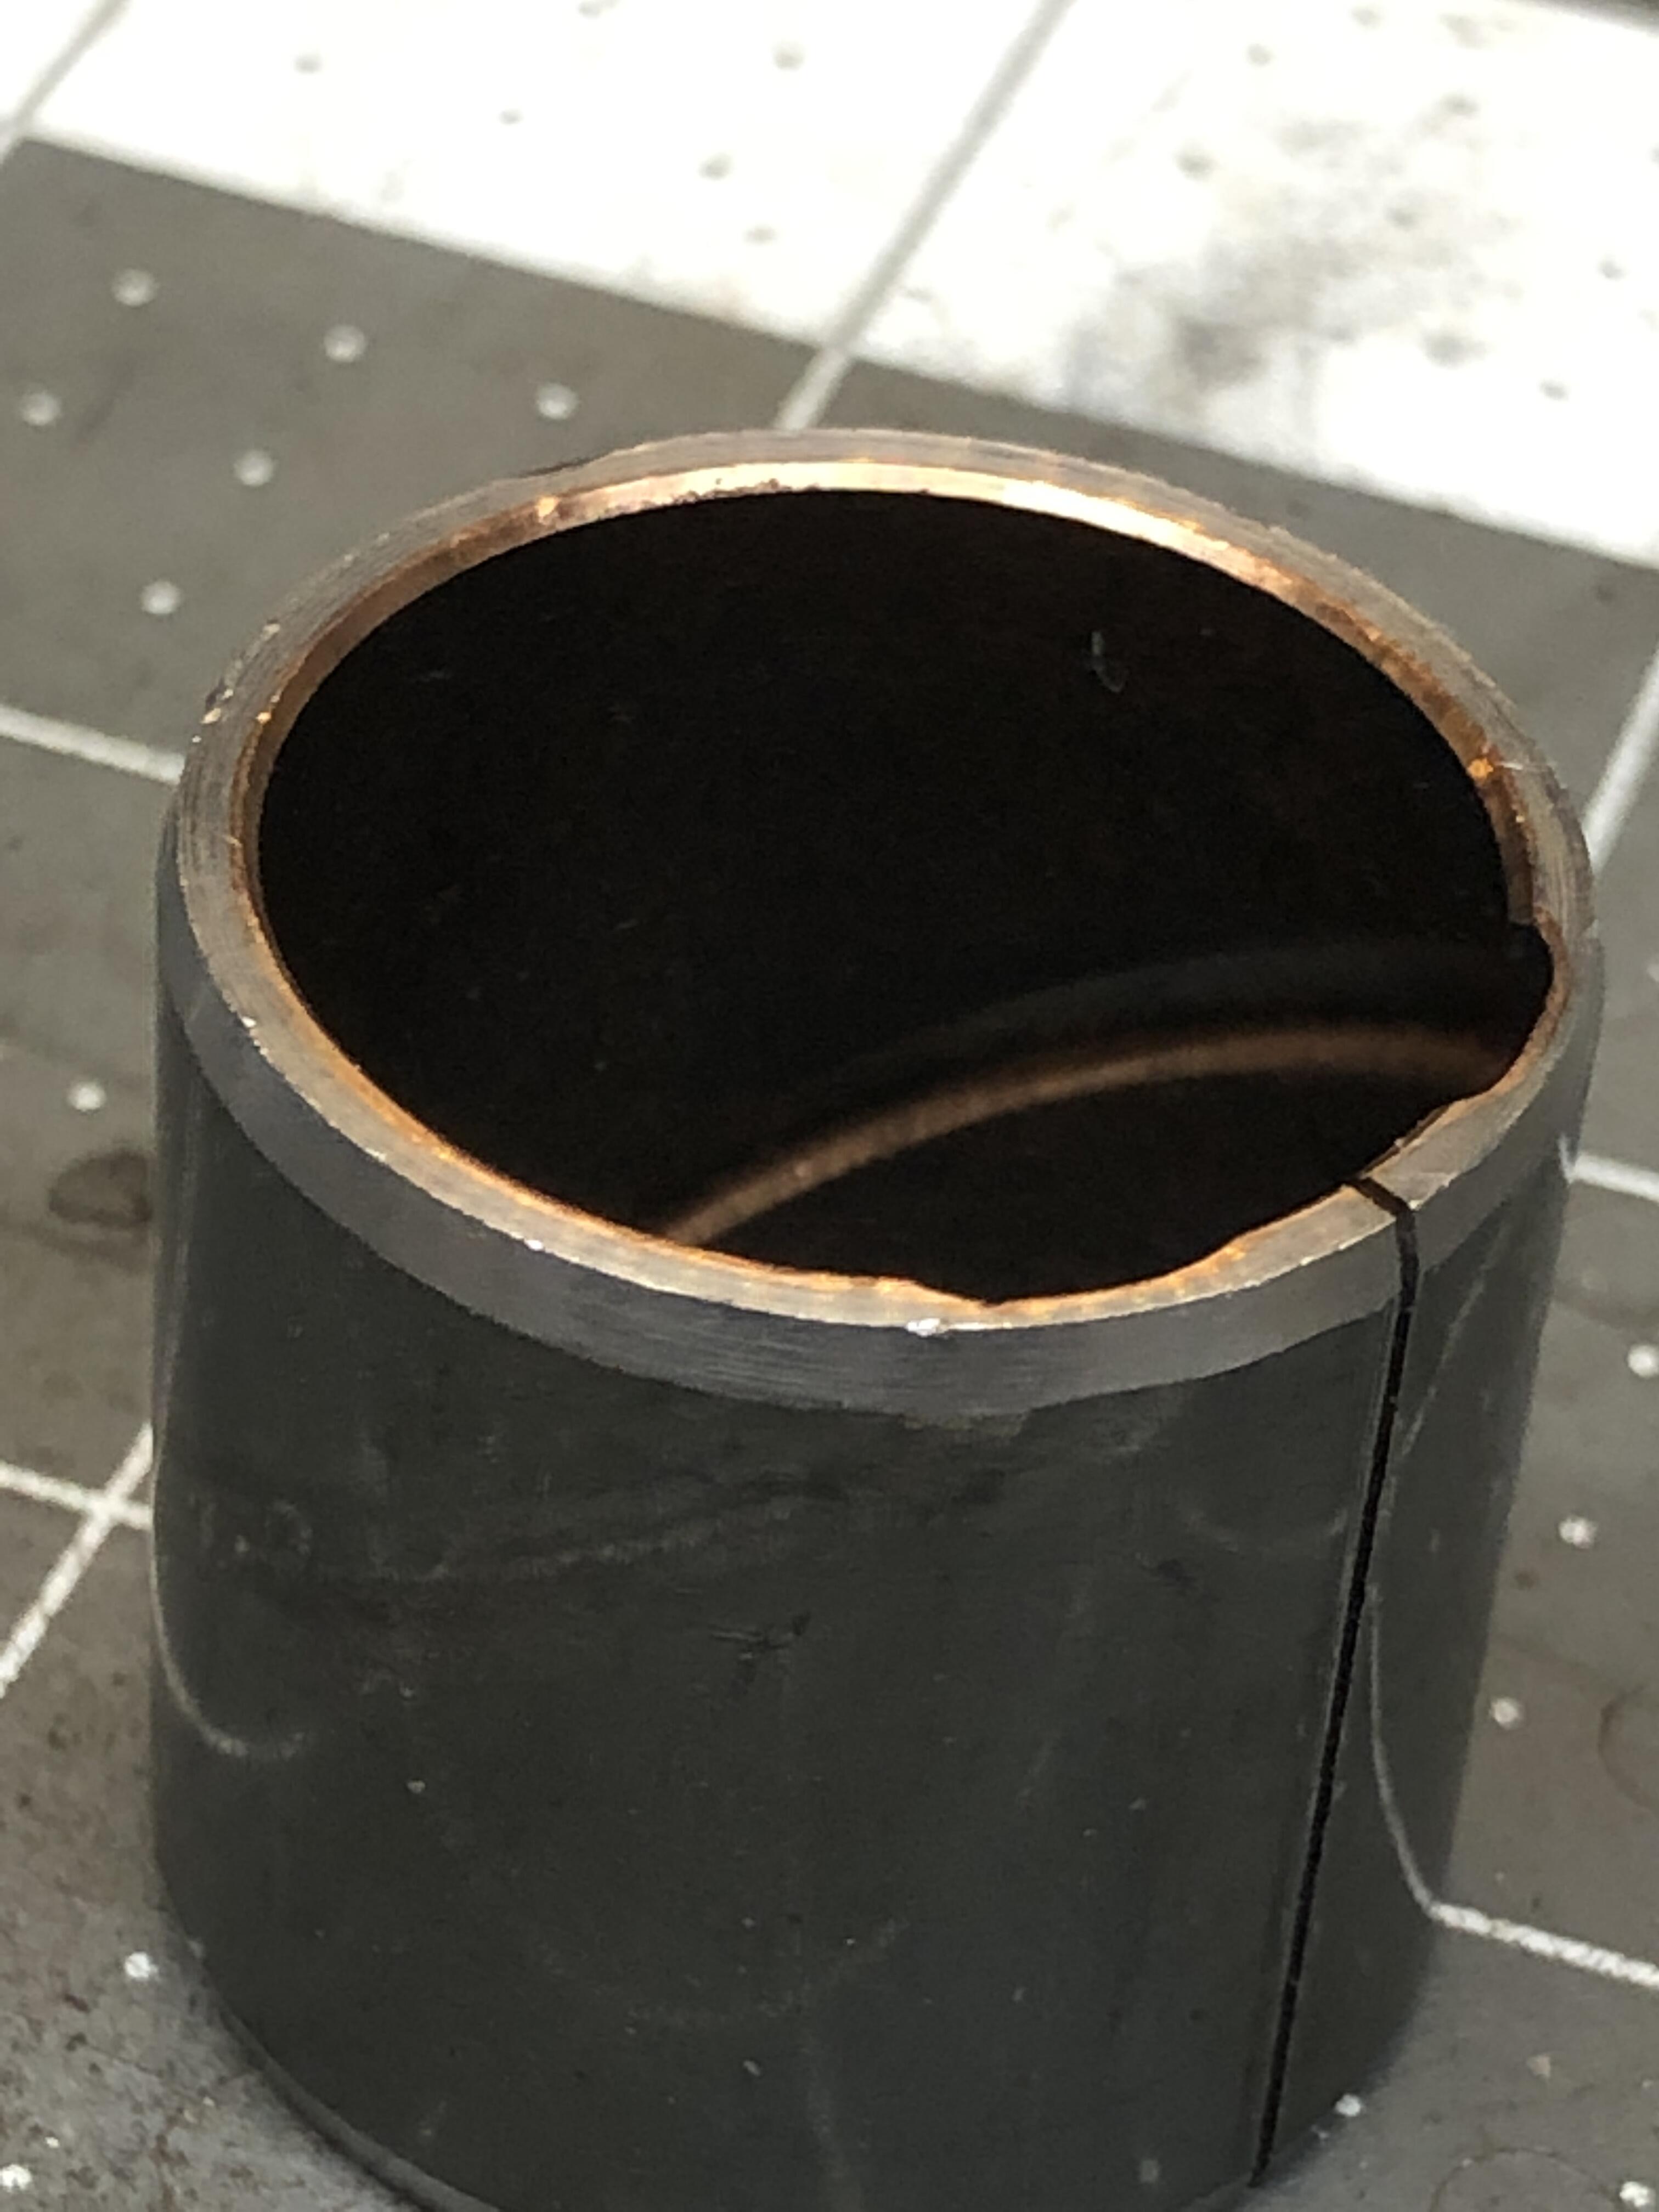
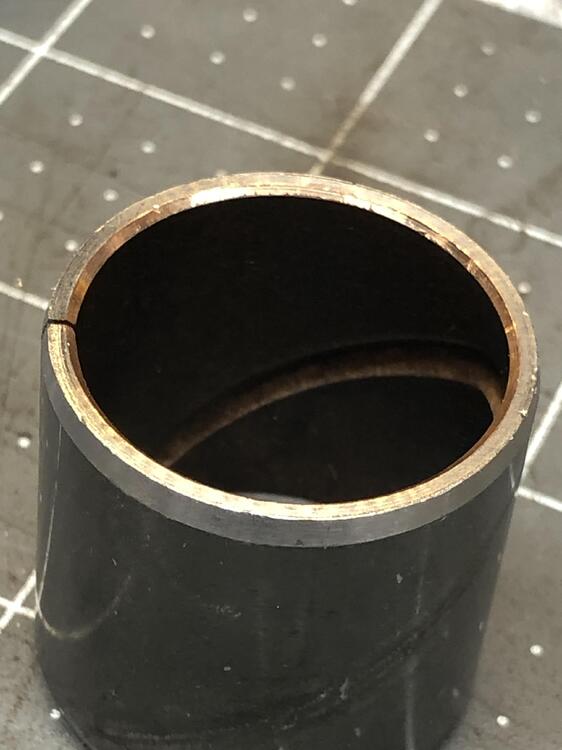
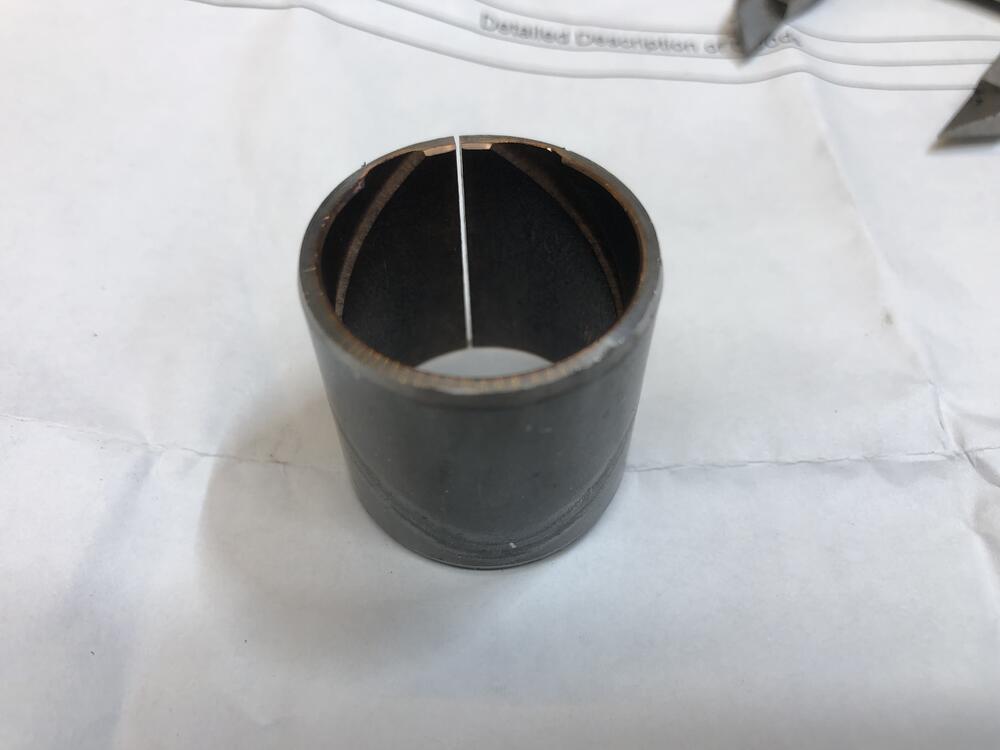
Took a couple more close up pics of the new bushing.


-
Quick look at the horde suggests if there are differences they are slight. I did find some that are bent from apparent over tightening, perhaps that accounts for the asymmetry you’re seeing?
-
I have several rack hold down straps. I’ll look carefully at all of them and report what shape variations i see. The bushings don’t have any unique front/back shape that I’ve noticed, or do they?????
-
Well an interesting little something showed up in the mail today. This is neither of the above mentioned possible sources for raw materials. This is a real Nissan part. What I did was search for the part number of the right hand longer bushing (48128-78500), rather than the number for the shorter left side that always wears out. Easy to make something shorter….. I got one, let me see how many more are actually available before I reveal my source No sense gets hopes up too high.
-
I am indeed working on a replacement set of air cleaner hardware. It is not a perfect replica, but is 100% strong and functional as the original. The parts that show (wing nut and cup washer) as close enough to “correct” that most won’t notice without detailed inspection. I have a couple of sets made up if anyone would like to acquire one, let me know
-
I think its most important to ensure the compressor drive axis is parallel to the crank shaft to make sure the pulleys run true, I was un-aware that the sanden compressor cared much about being level in any plane. Did I miss something in the past Vintage installs I’ve done? I can think of some comment about the ports needing to be vertical ish, or within some degree swing either way of vertical, but it wasn’t all the critical. Depending on how you plan to tighten the belt ,ie are you swinging the compressor in slots in the mounting brackets or using an idler pulley, the compressor will rotate anyway. And yes, as if Derek needs any confirmation, the engine leans 12deg east if you’re driving north.
-
Assuming the wipers were properly parked when the motor was last turned off, then the first picture shows the correct orientation. The stub arm is in line with the long arm, not doubled back as the seen in the last two pictures. To check after assembly, don’t put the wiper arms on the splines, just turn the motor on and watch it run. Turn it off and let it park. Then put a little masking tape flag on one spline in place of a wiper arm and turn on the motor, and watch the tape flag to see if its doing the right thing when running and when parked. THEN you can feel confident putting the real arms on and letting it run. I have in the past done this wrong, put the wiper arms on and had them crash into the wiper cowl spoiling a nice fresh paint job, so I always use the flag method after re-assembling this mechanism.
-
I’ve had guys come to me with the fuel supply plumbed into the vent lines, The vent lines T’d and joined to the fuel supply lines, and every other combination of crazy things It’s not like 4-5-6 were dead, they were alive, BUT the imbalance of richness or lean-ness or power was not making the engine run all that bad, it was just making such an interest exhaust note. Anyway, file this one away. Either leave your fuel vents open, or connect them to the air cleaner through hose with an actual hole that does all the way through.
-
Over about the next 10 seconds, at idle, the engine went from sounding like bad rap concert to the most beautiful symphony orchestra playing a soothing waltz!! The transition was the most astonishing thing I’d ever experienced working on these things. Like I’d laid a hand on it and it’s cancer was cured. I’m sure I heard angels harps too. Well, maybe that was the sound of my breath as I sighed a huge sigh of relief. So the rear vent hose was kinked closed. It was very short and ran out the back of the plate horizontally, then 90 degree up, then 180 back down to the breather nipple. Kinked right there at the 180.
-
Ok, what madness is this? I touched nothing else, what the **** did I disturb? Ok, what did I do befween the time it ran fine and when it went to crap…. Think….. Well I put the air cleaners on. Notice I said cleaner”S”. They look more or less like this. I did not take pictures of the actual situation. Anyway, These flat pancake air cleaners fit just fine, AND they have a knipple ob the back for a rubber hose to run to the fuel bowl vents. I had faithfully put these back on with the air cleaner bodies of course, good little boy that I am. Little short black vacuum like thick walled hoses. So on spec, with the car idling madly, roaring away, and not from high RPM, I pull the rear fuel vent hose off the top of the fuel bowl. And then the most magical thing happened.
-
Three minutes later he’s back. And the sound of the thing is something quite atrocious! The exhaust note is distinctly different than when he left. He has this crazy system where the muffler tip is turned down 90 degrees BEHIND the rear valance, which has had the exhaust exit hole filled it. It’s slighty overlappig the underturned lip, so I’m wondering if the exhaust shifted. The exhaust note is now easily TWICE as loud as before and extremely sharp and staccato is how I describe it. Like a 13:1 race engine! Something isn’t right, so I start scratching my head thinking what did I do or forget to put back? It revs up and runs not back, but there is a hint of misfire in the sound. Is it the new rich mixture that’s just burning more distinctly for the first time in a long time, Is it plugs that were burned up from the lean mix that are now misfiring from the new mixture? I change the plugs to some fresh BPR6ES and while it’s a bit smoother, it’s still making the intense racket out the rear.
-
Greetings! I’m in the sharing mood again, so thought I’d share an episode from the series “I have no idea what just happened, but you won’t believe what the solution was”. Yesterday, local Z owner wants to drop by for an SU tune on a recently acquired late 71. It’s “running” but is overheating and doesn’t run “Well” overall. Suspect mixture too lean or fuel supply lacking. So do the usual, no need to bore you with details, but here is the overview, no order intended. Bowl fuel level Fuel pressure air flow sync linkage evaluation. How many turns down for the knozzles, Nozzles were down 1 turn on the front and 1.5 turns on the rear. Aha. Too simple. Turn them down 2.5 each. As I have decided in the past, got the AFR gauge out finally, stuff it in the tail pipe, 12.5-13 at idle. Much better. That should do it. Get the owner to go for a quick around the block test to see if there is a noticeable change in performance. Goes around the block and comes back with big smile. I could here him enjoying the hell out it, the exhaust is not subtle on the car. Says there is 50 more HP and while it was short drive, the engine temps were much lower than before. We are DONE I say. About this time another friend drops by, so the inevitable conversations ensue and finally I decide the put the air cleaners back on and send the young man on his way. I do so, he starts the car, and it sounds a bit rough, but off he goes.
-
First I respect the level of effort put into your process. The results are enviable. I will use the screw head reforming idea, thanks for that. Another day, another new thing learned. I am very lucky. I have a plater that does all the prep work for me. I feel like a cheater now…
-
Yes, I have some spares…. At least they are shiny, most have rust pitting but not enough to affect strength. The threads at the bottom end of those pins are just M12x1.25. Easy to find a washer and nylock or Stover lock nuts. Send me a PM, we’ll get what you need on the way.

-
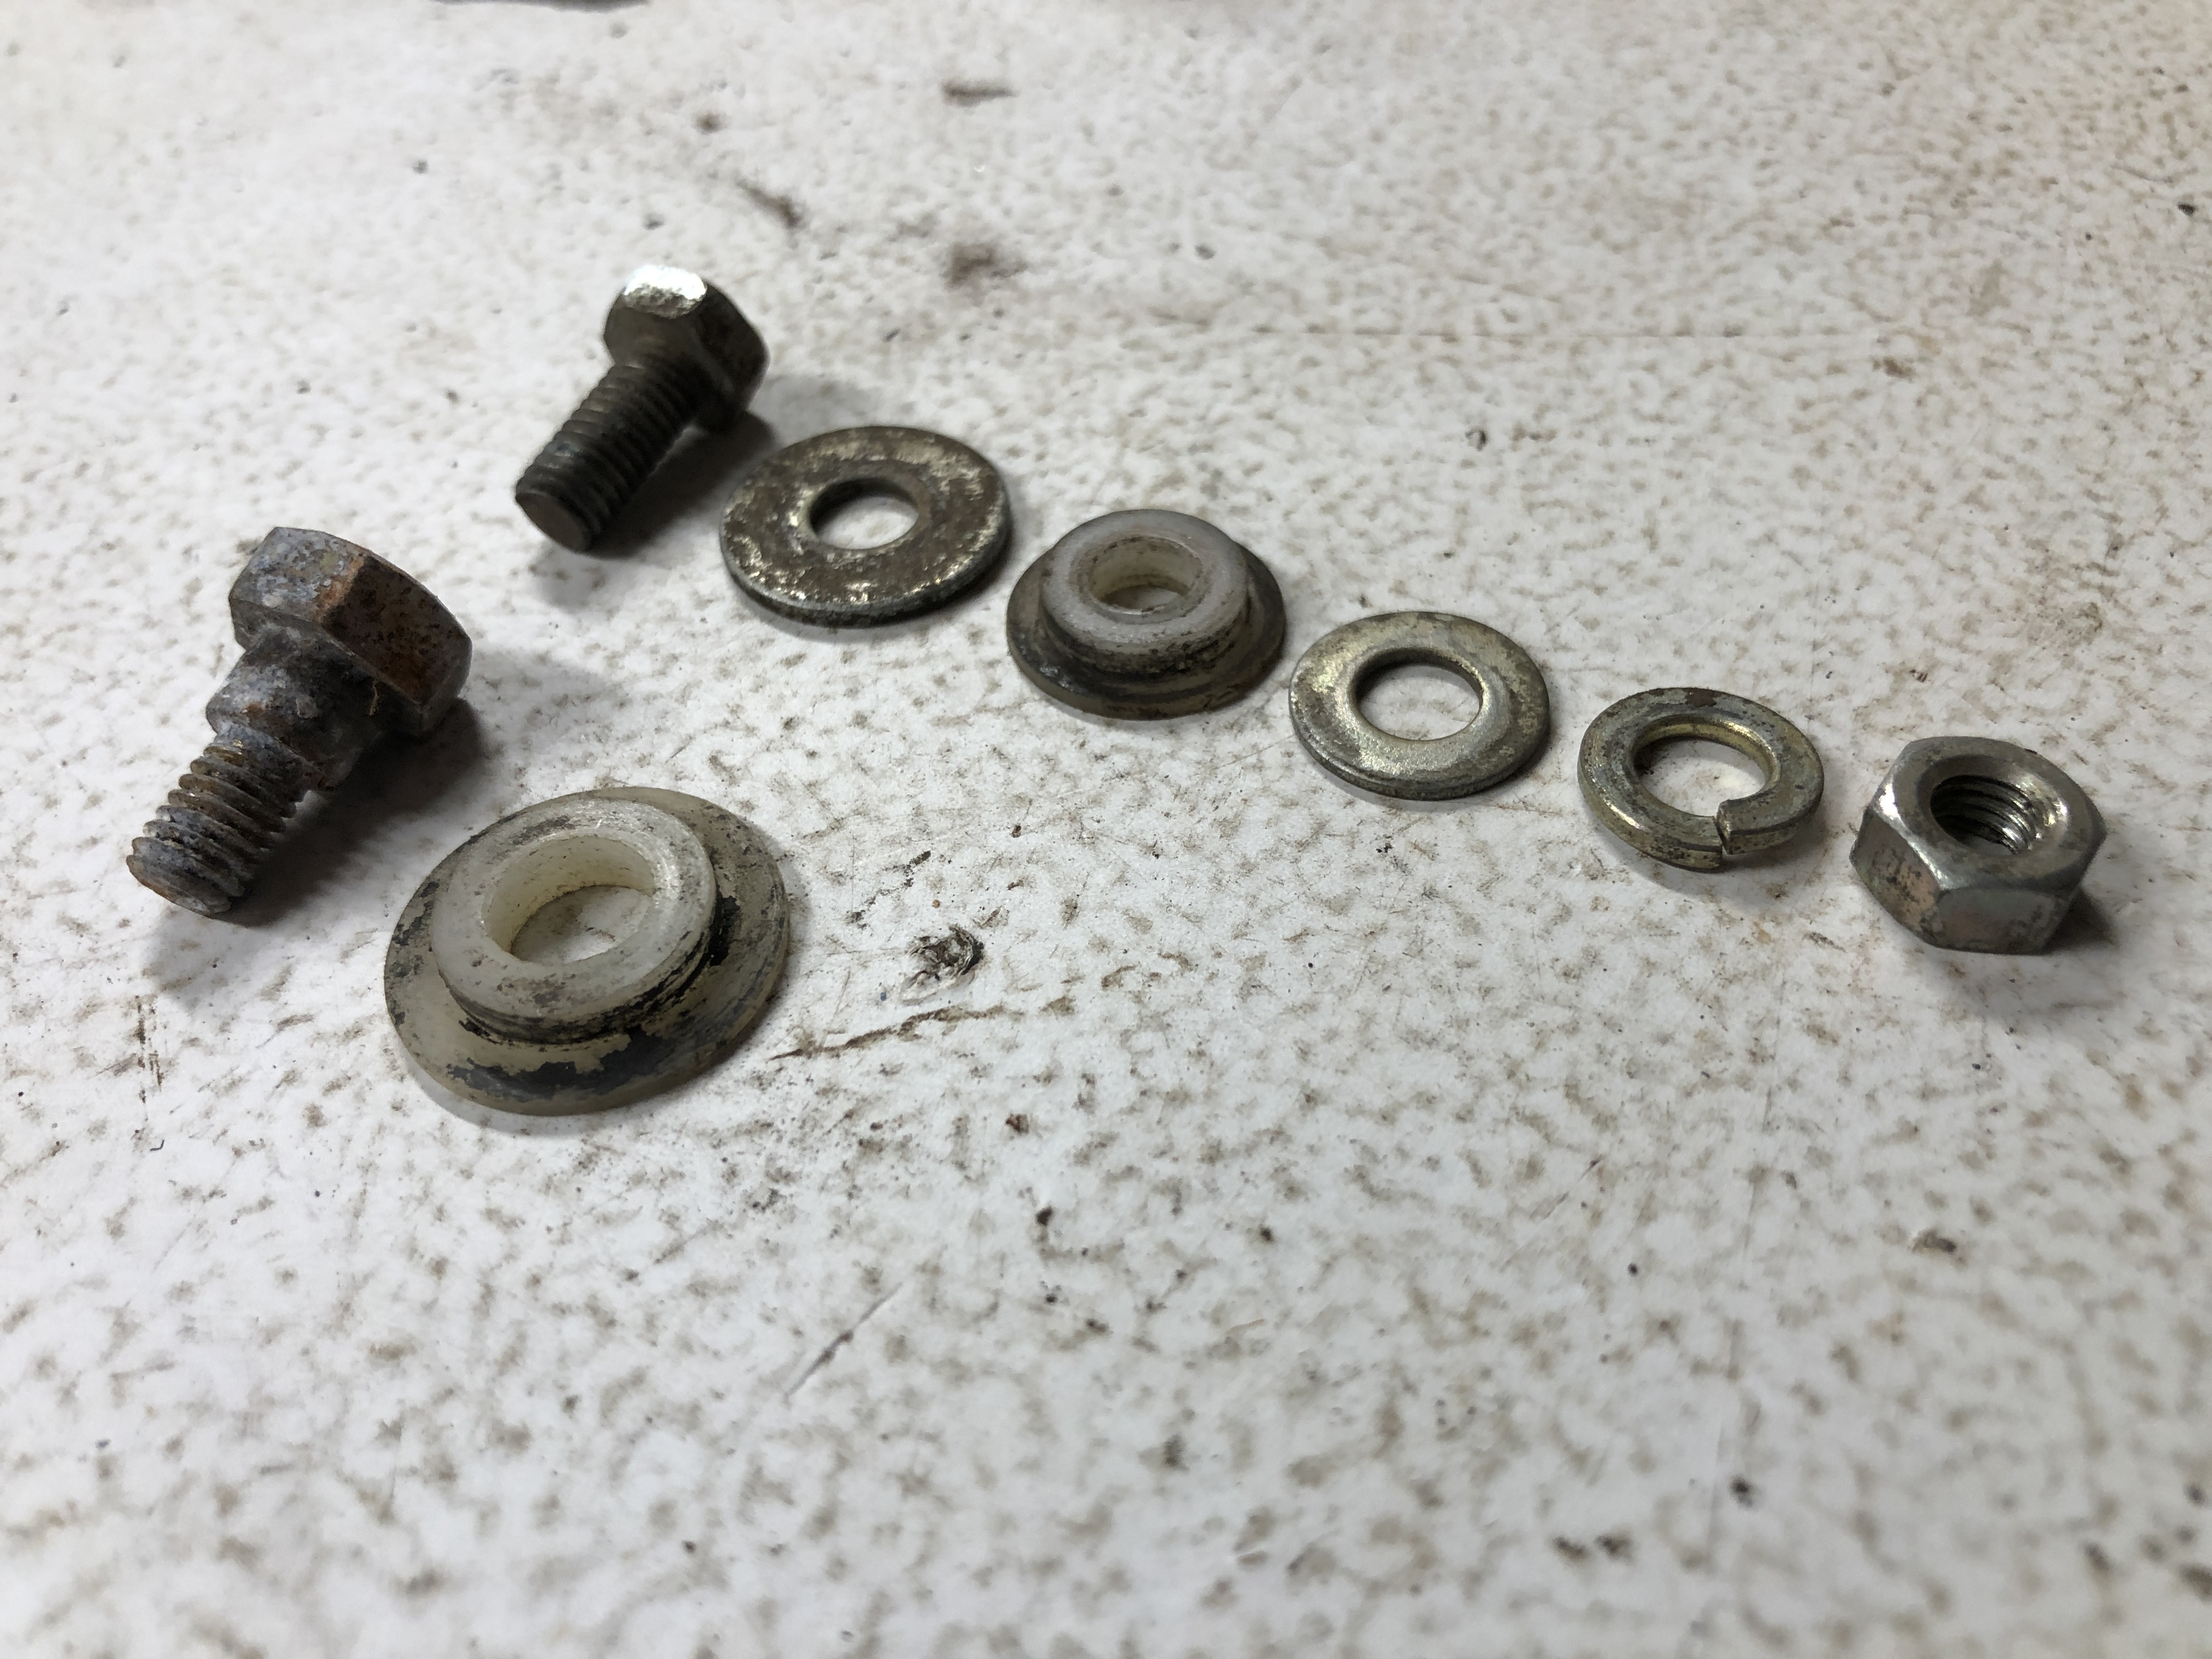
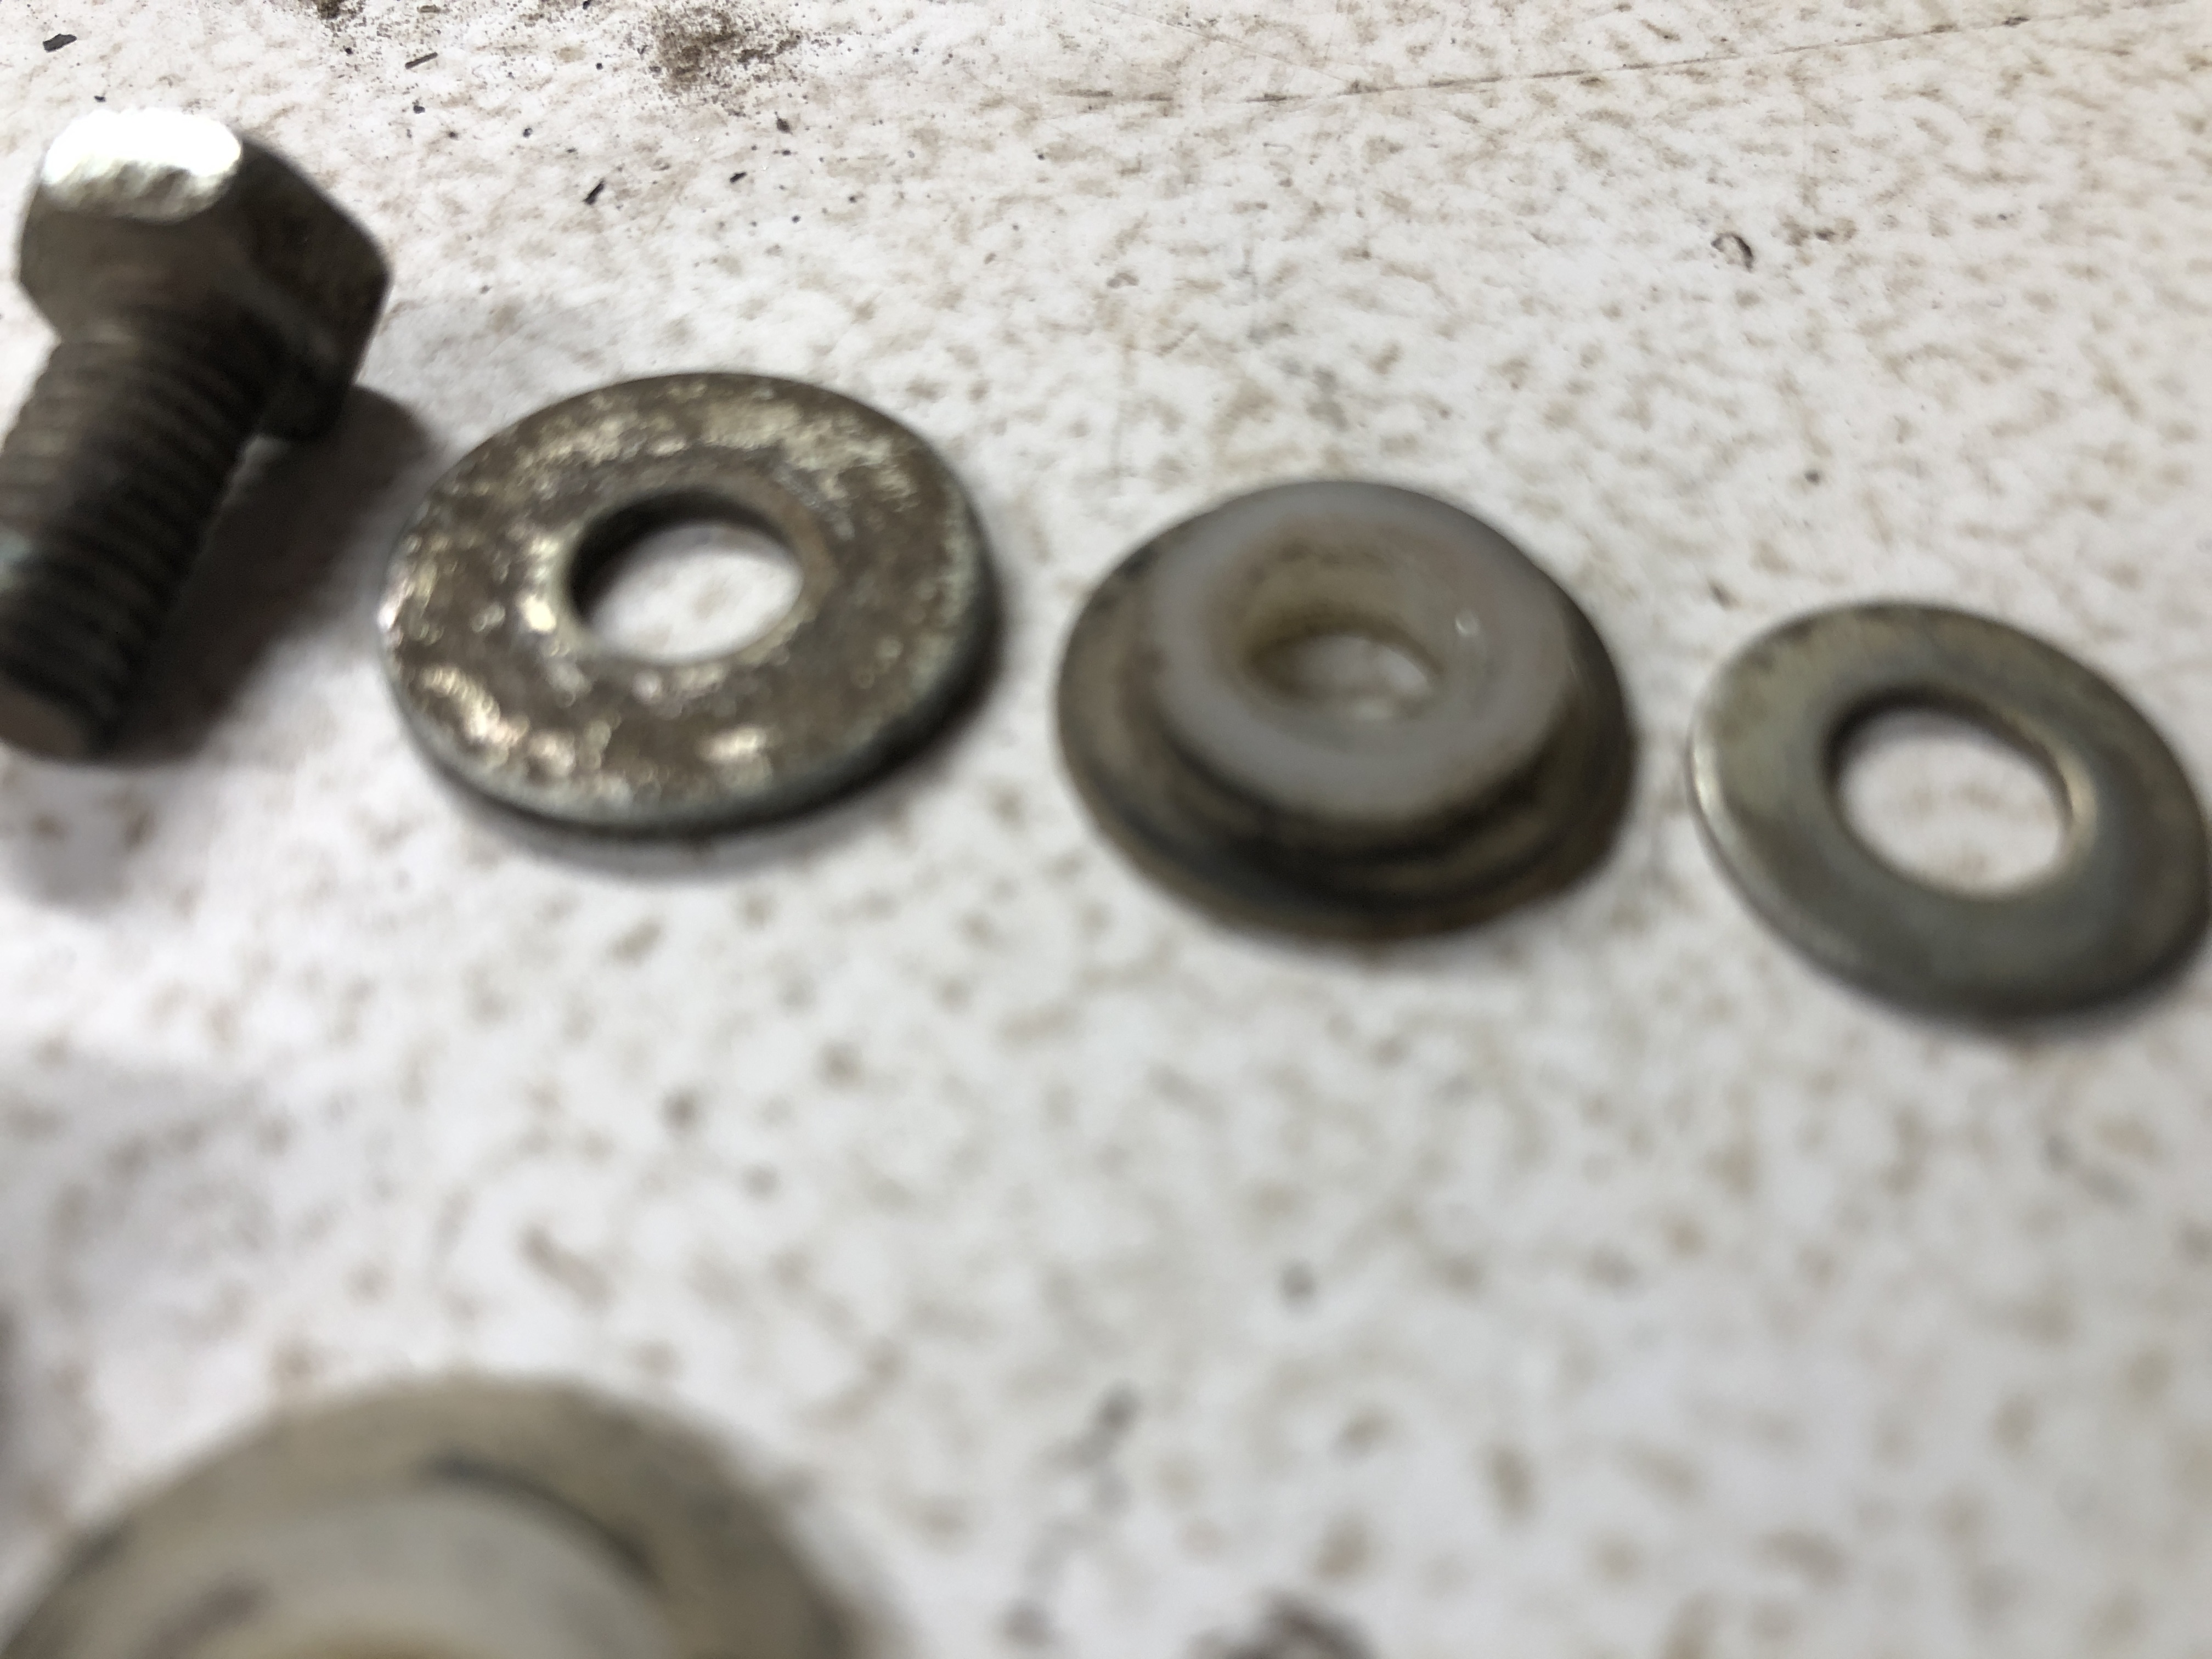
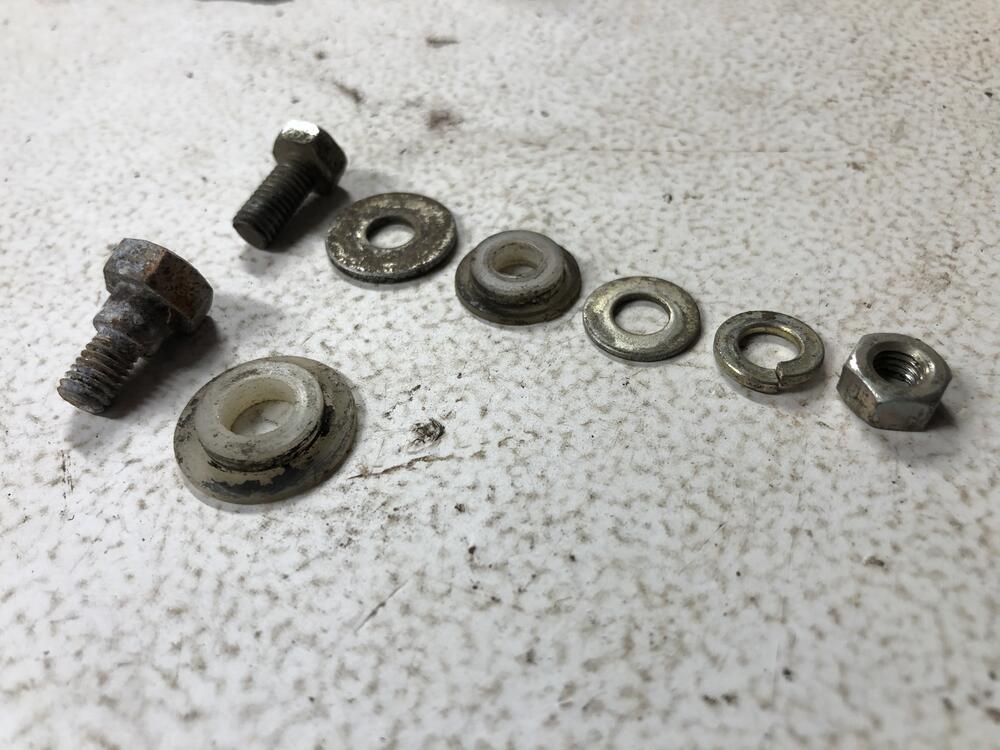
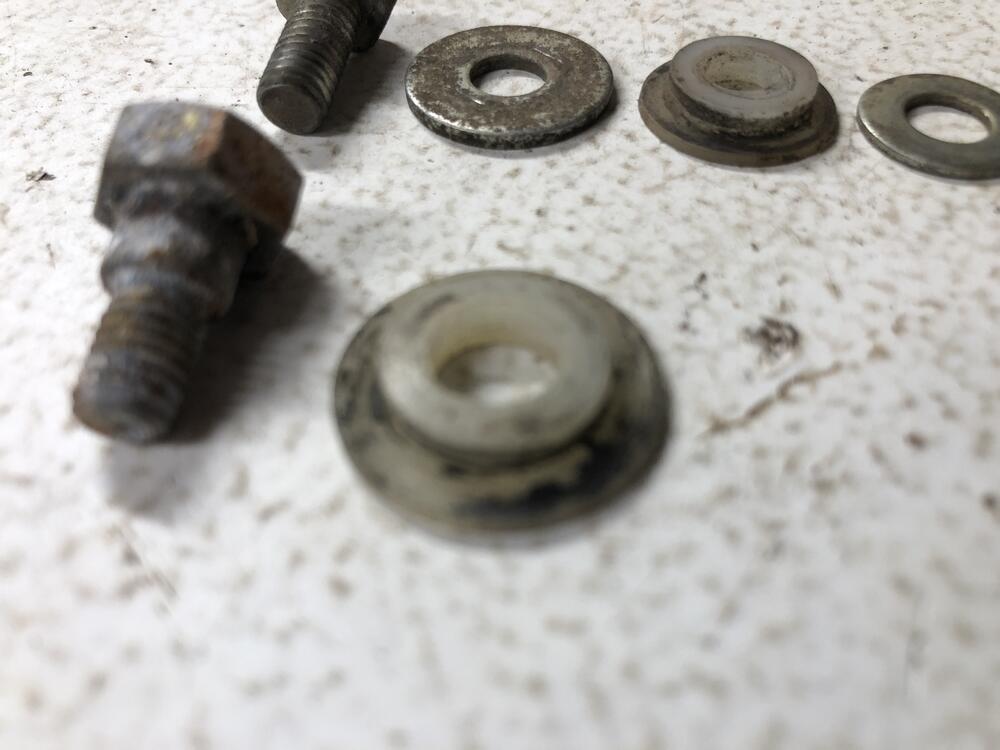
I seem to have one of each type. Small type uses a simple bolt, larger type uses a shoulder bolt. Both are M6 Now you’re going to make me measure everything, aren’t you? PS. The bottom row larger style would have the same flat/lock/nut as shown in the top set I’ve certainly found all manner of “user selected” hardware that more or less functions as a rotation point. Not all that critical as long as there is little slop and pivots freely. And will continue to do that for a long time.

-
Here is the FSM for the Body Electrical of a 74 260. And the picture that tells most of the story. LR is power the motor, B is the ground and you ground either L or LW to get low or high. LY has something to do with the park function. BE Body electrical.pdf

-
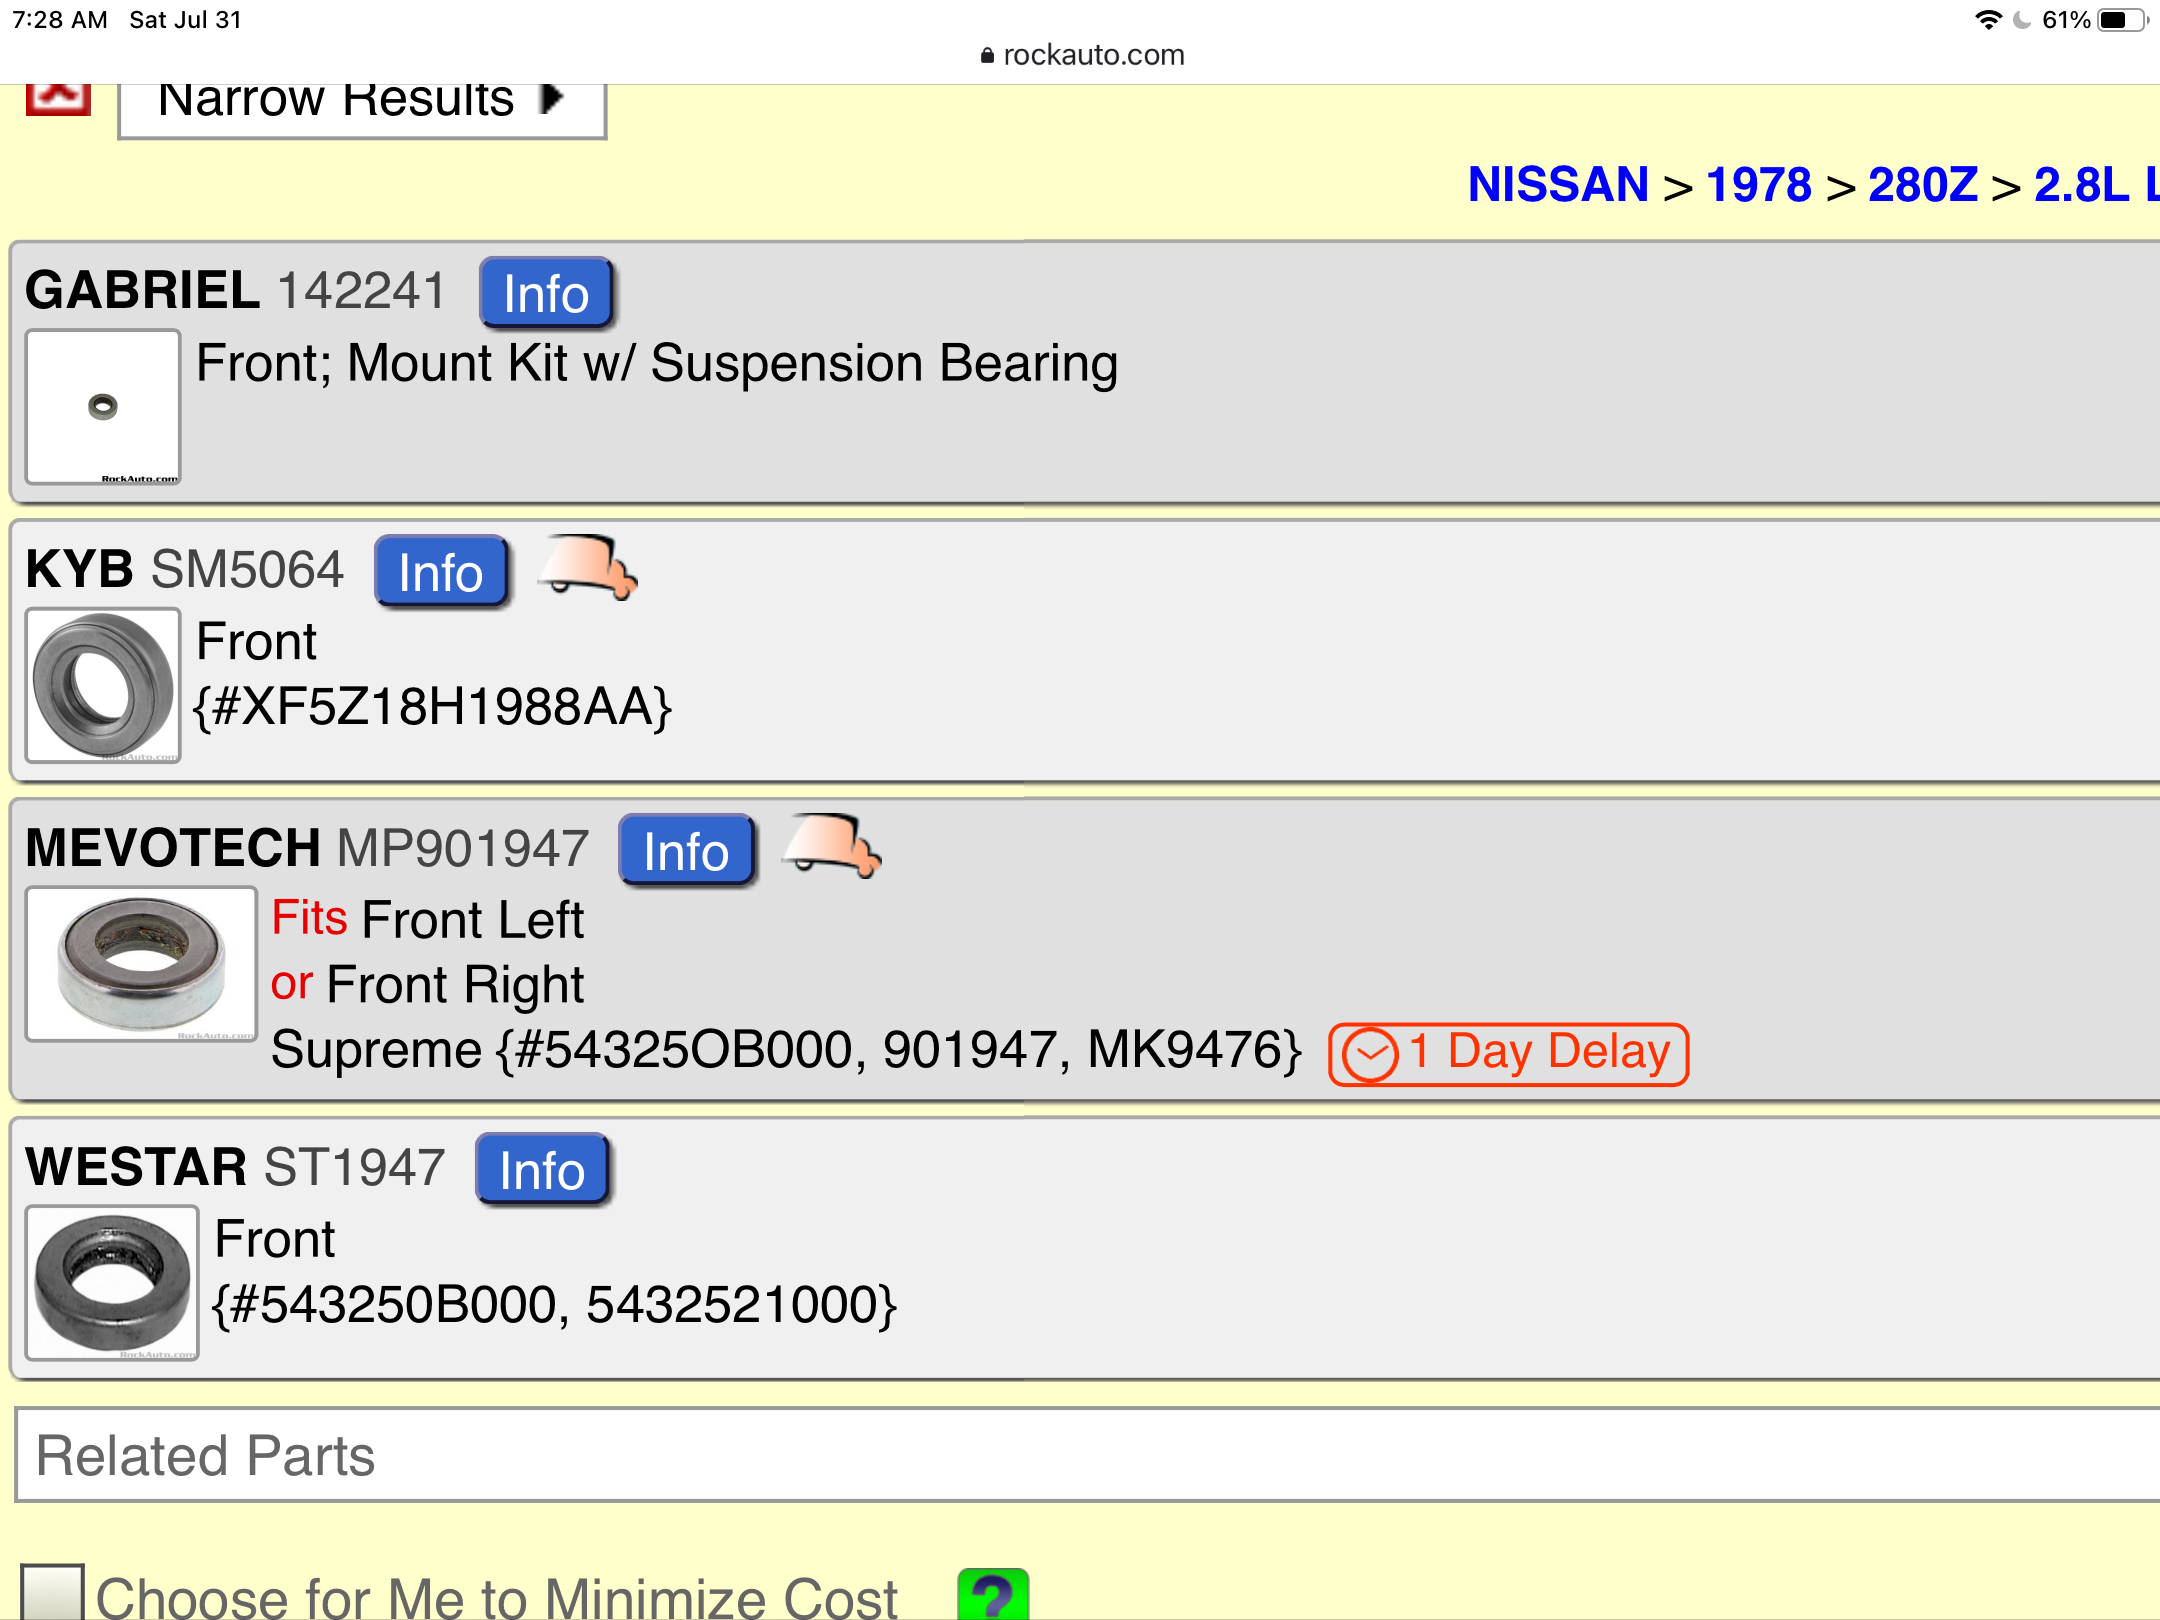
I’m far away, so tough to get them to you quick, but I have a set. Let me know. Another option is to just get a pair of the front bearings from RockAuto, and put those in the rear isolators. That is all the rubber ones really are, just substitution to fill the space in the isolator that the bearing does in the front. It will not cause your rear struts to tend to steer or anything strange. Will add about 1/2 lb of weight

-
Took a break from stub axle assembly. My favorite after a fresh thick powder coating and it rubs EVERYWHERE!!!! Grrrrr.. Let me know if you need more details


-
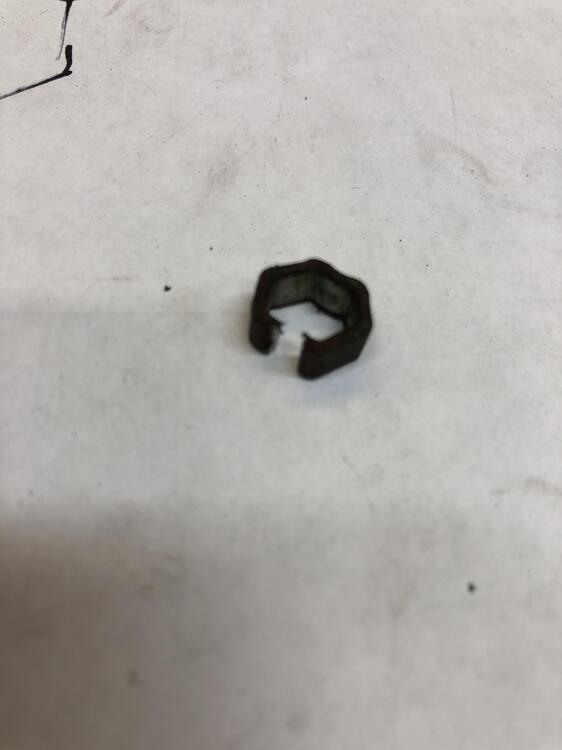
I’ll give details in the morning. The collars are all hexagonal, some variety in them for sure. Bet they were round then crimped with a hex shaped crimper, kinda like a TV coax crimper.
-
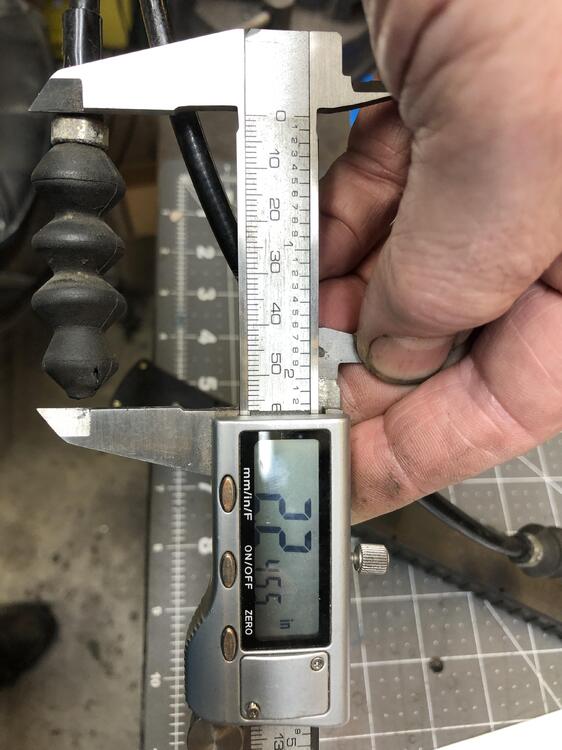
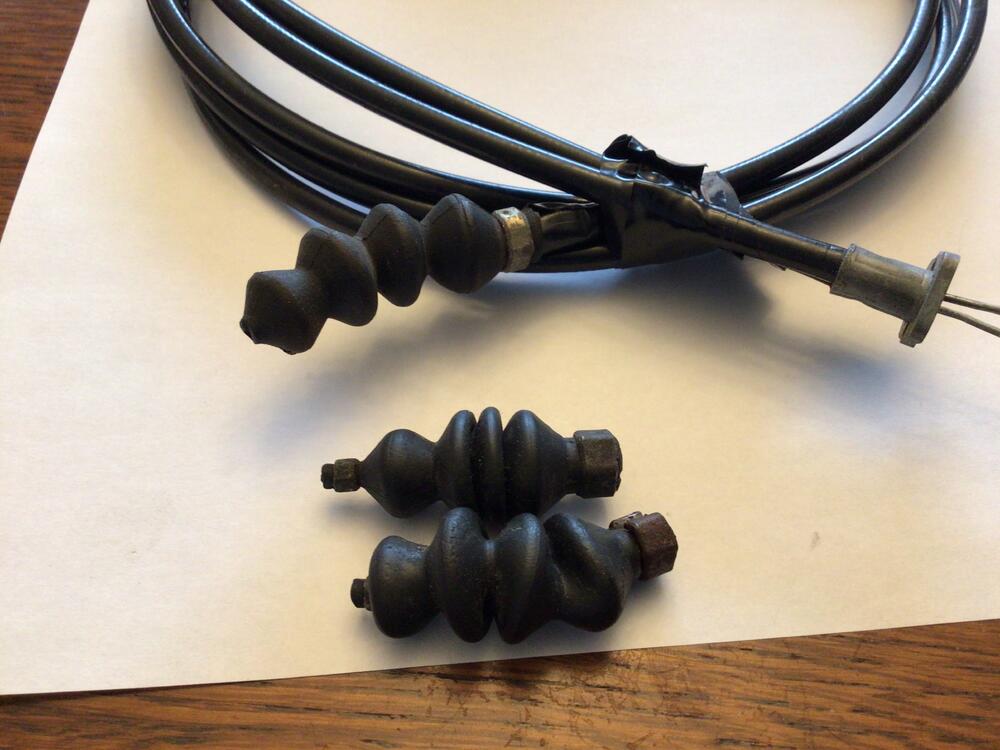
The sum total of my choke cable boot collection.
-
I think one of my spare sets still has bellows. I'll look.
-
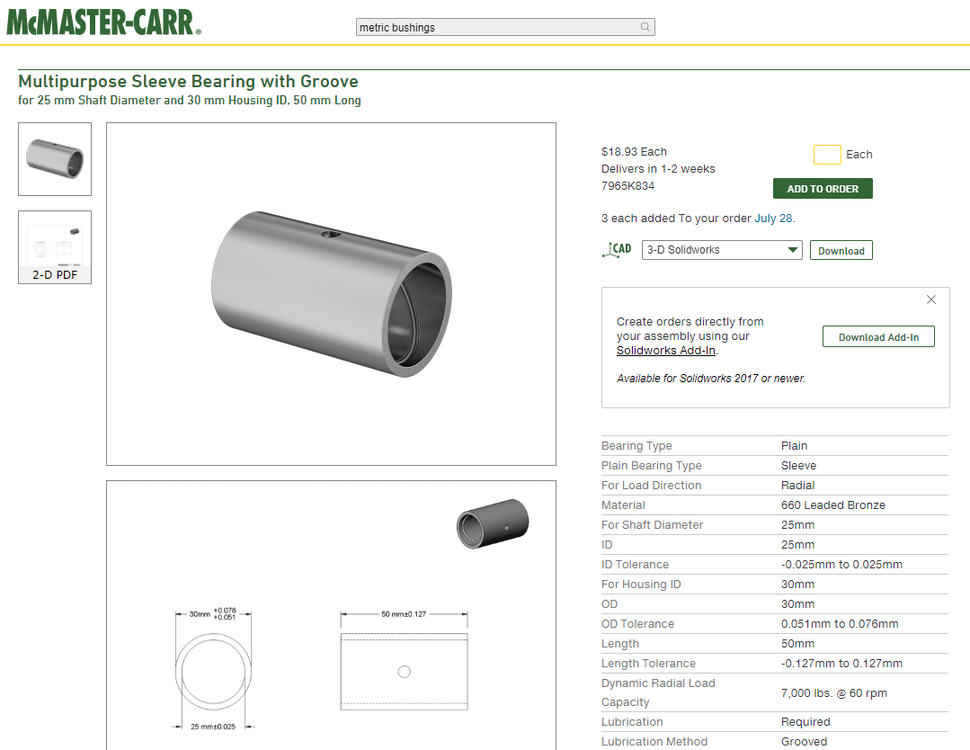
Better yet these! https://www.mcmaster.com/7965K834/ Groove and all! What do you think now?
-
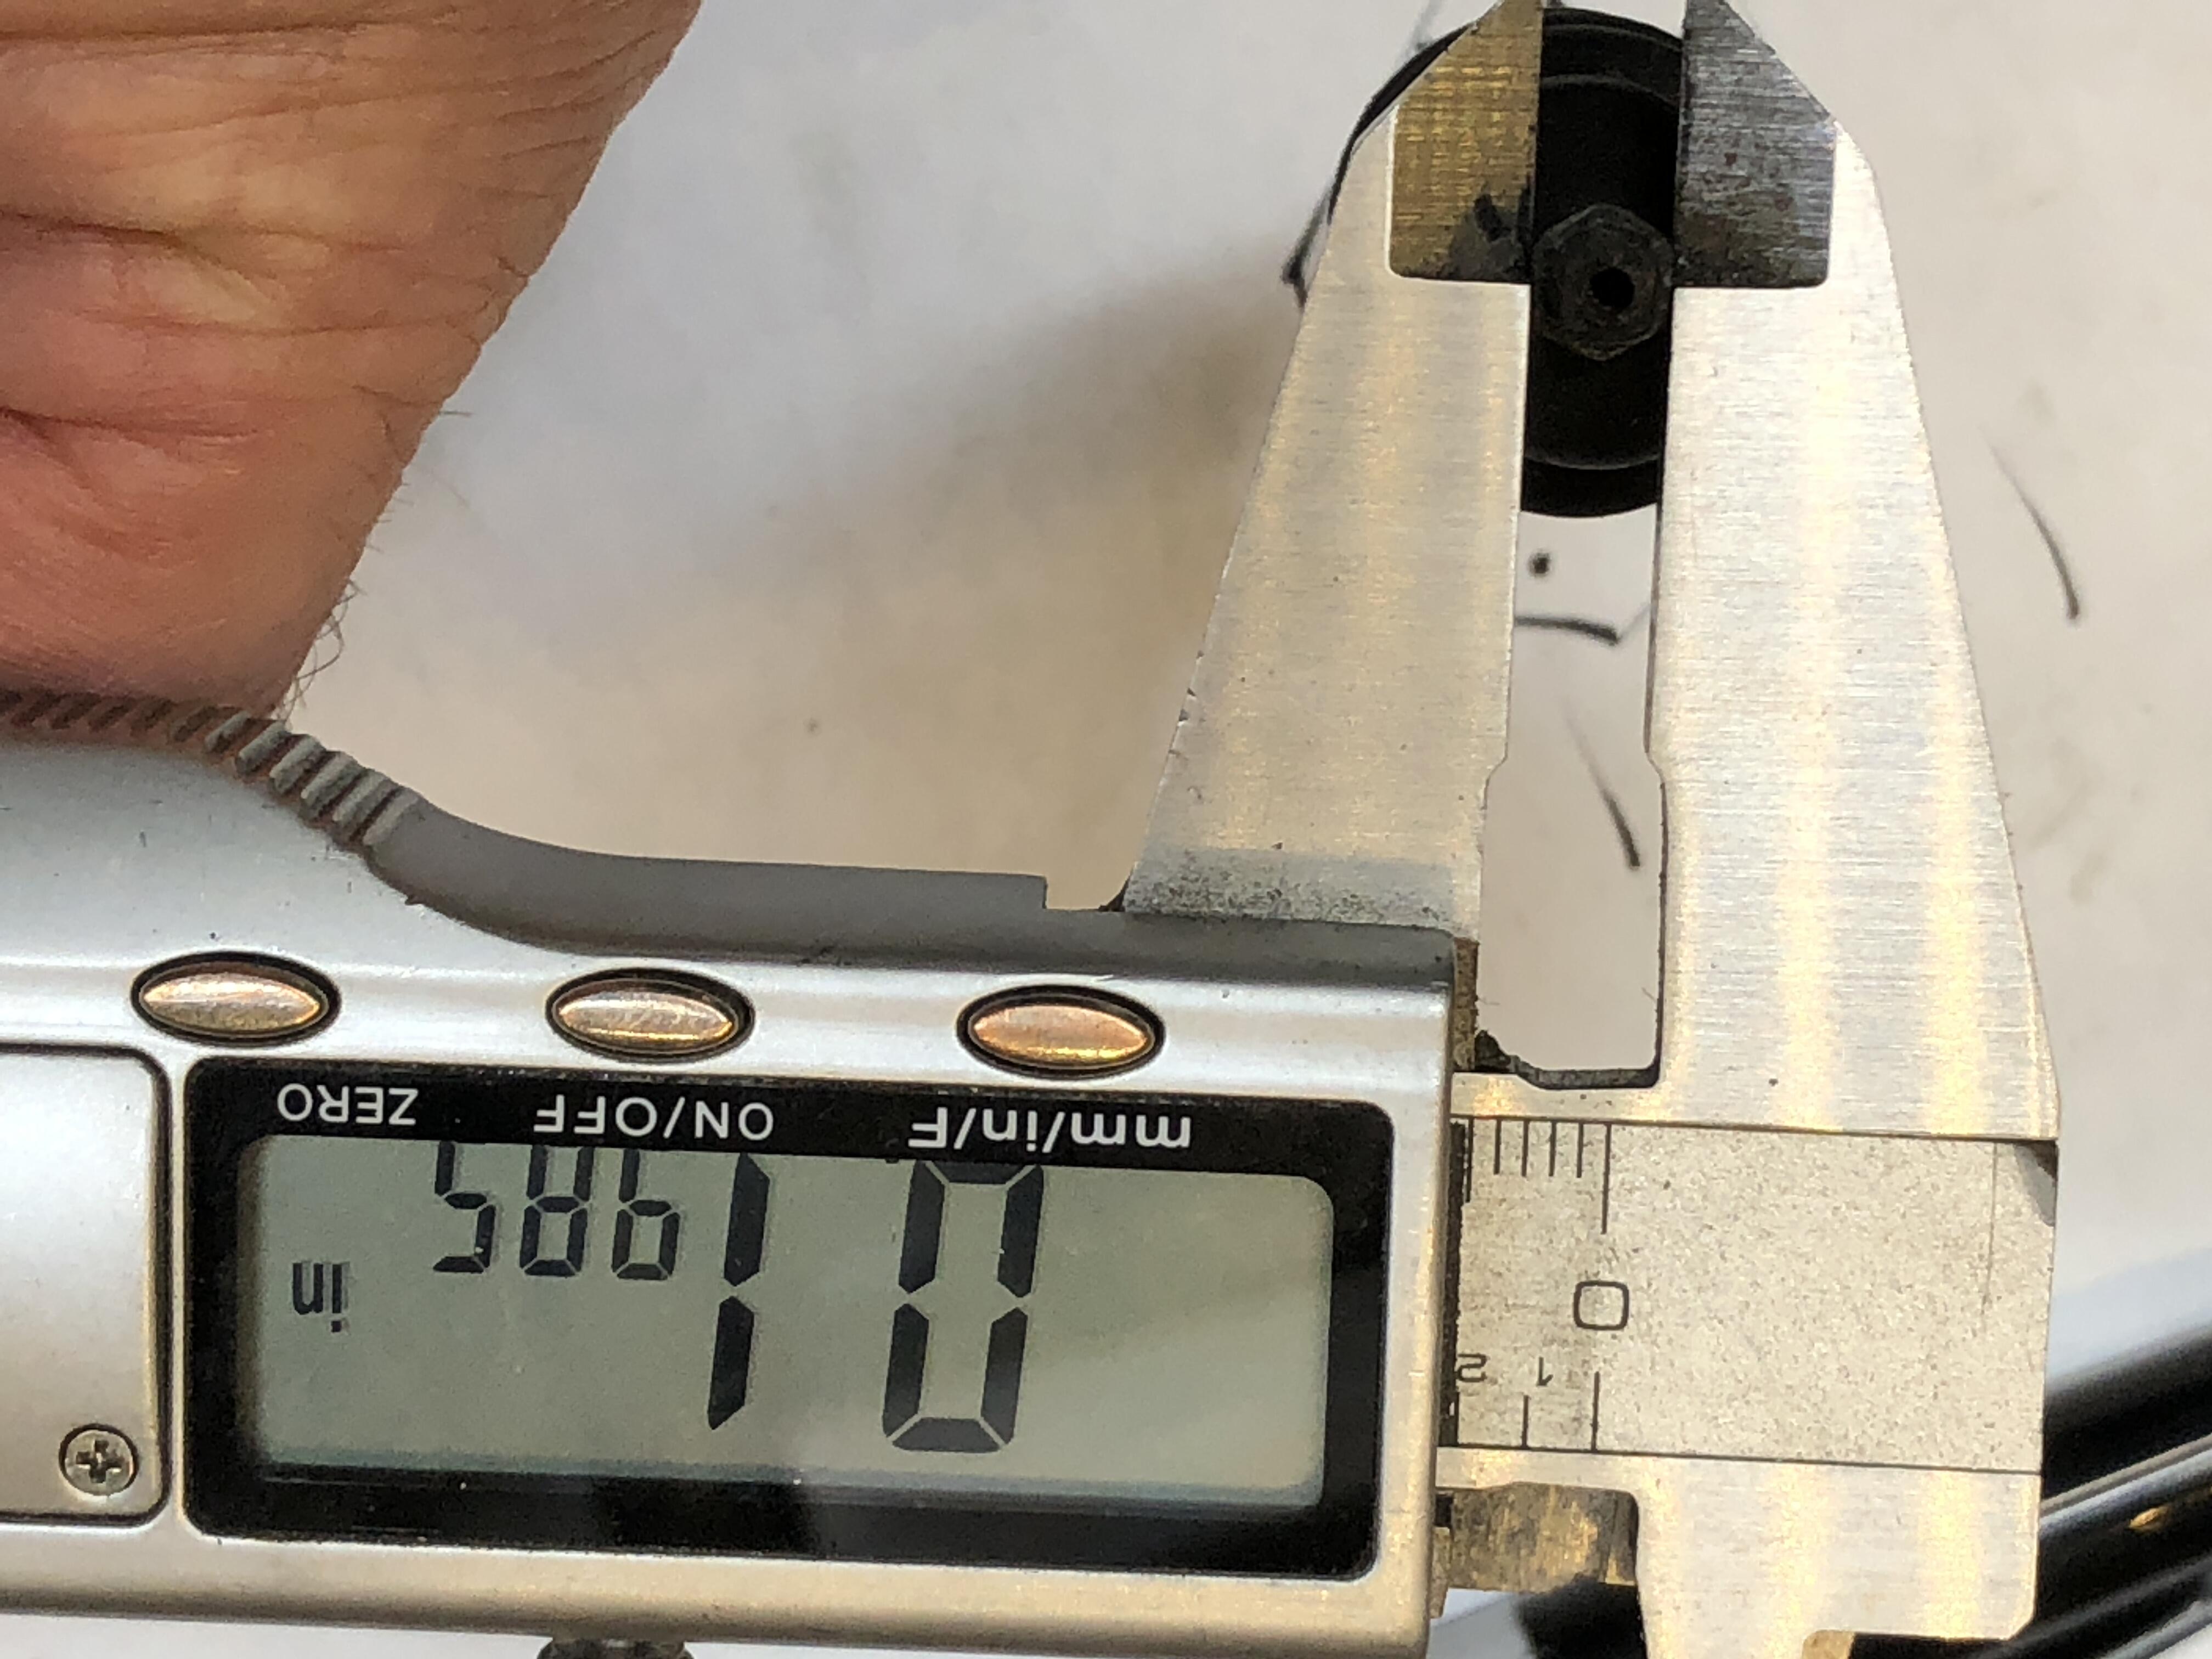
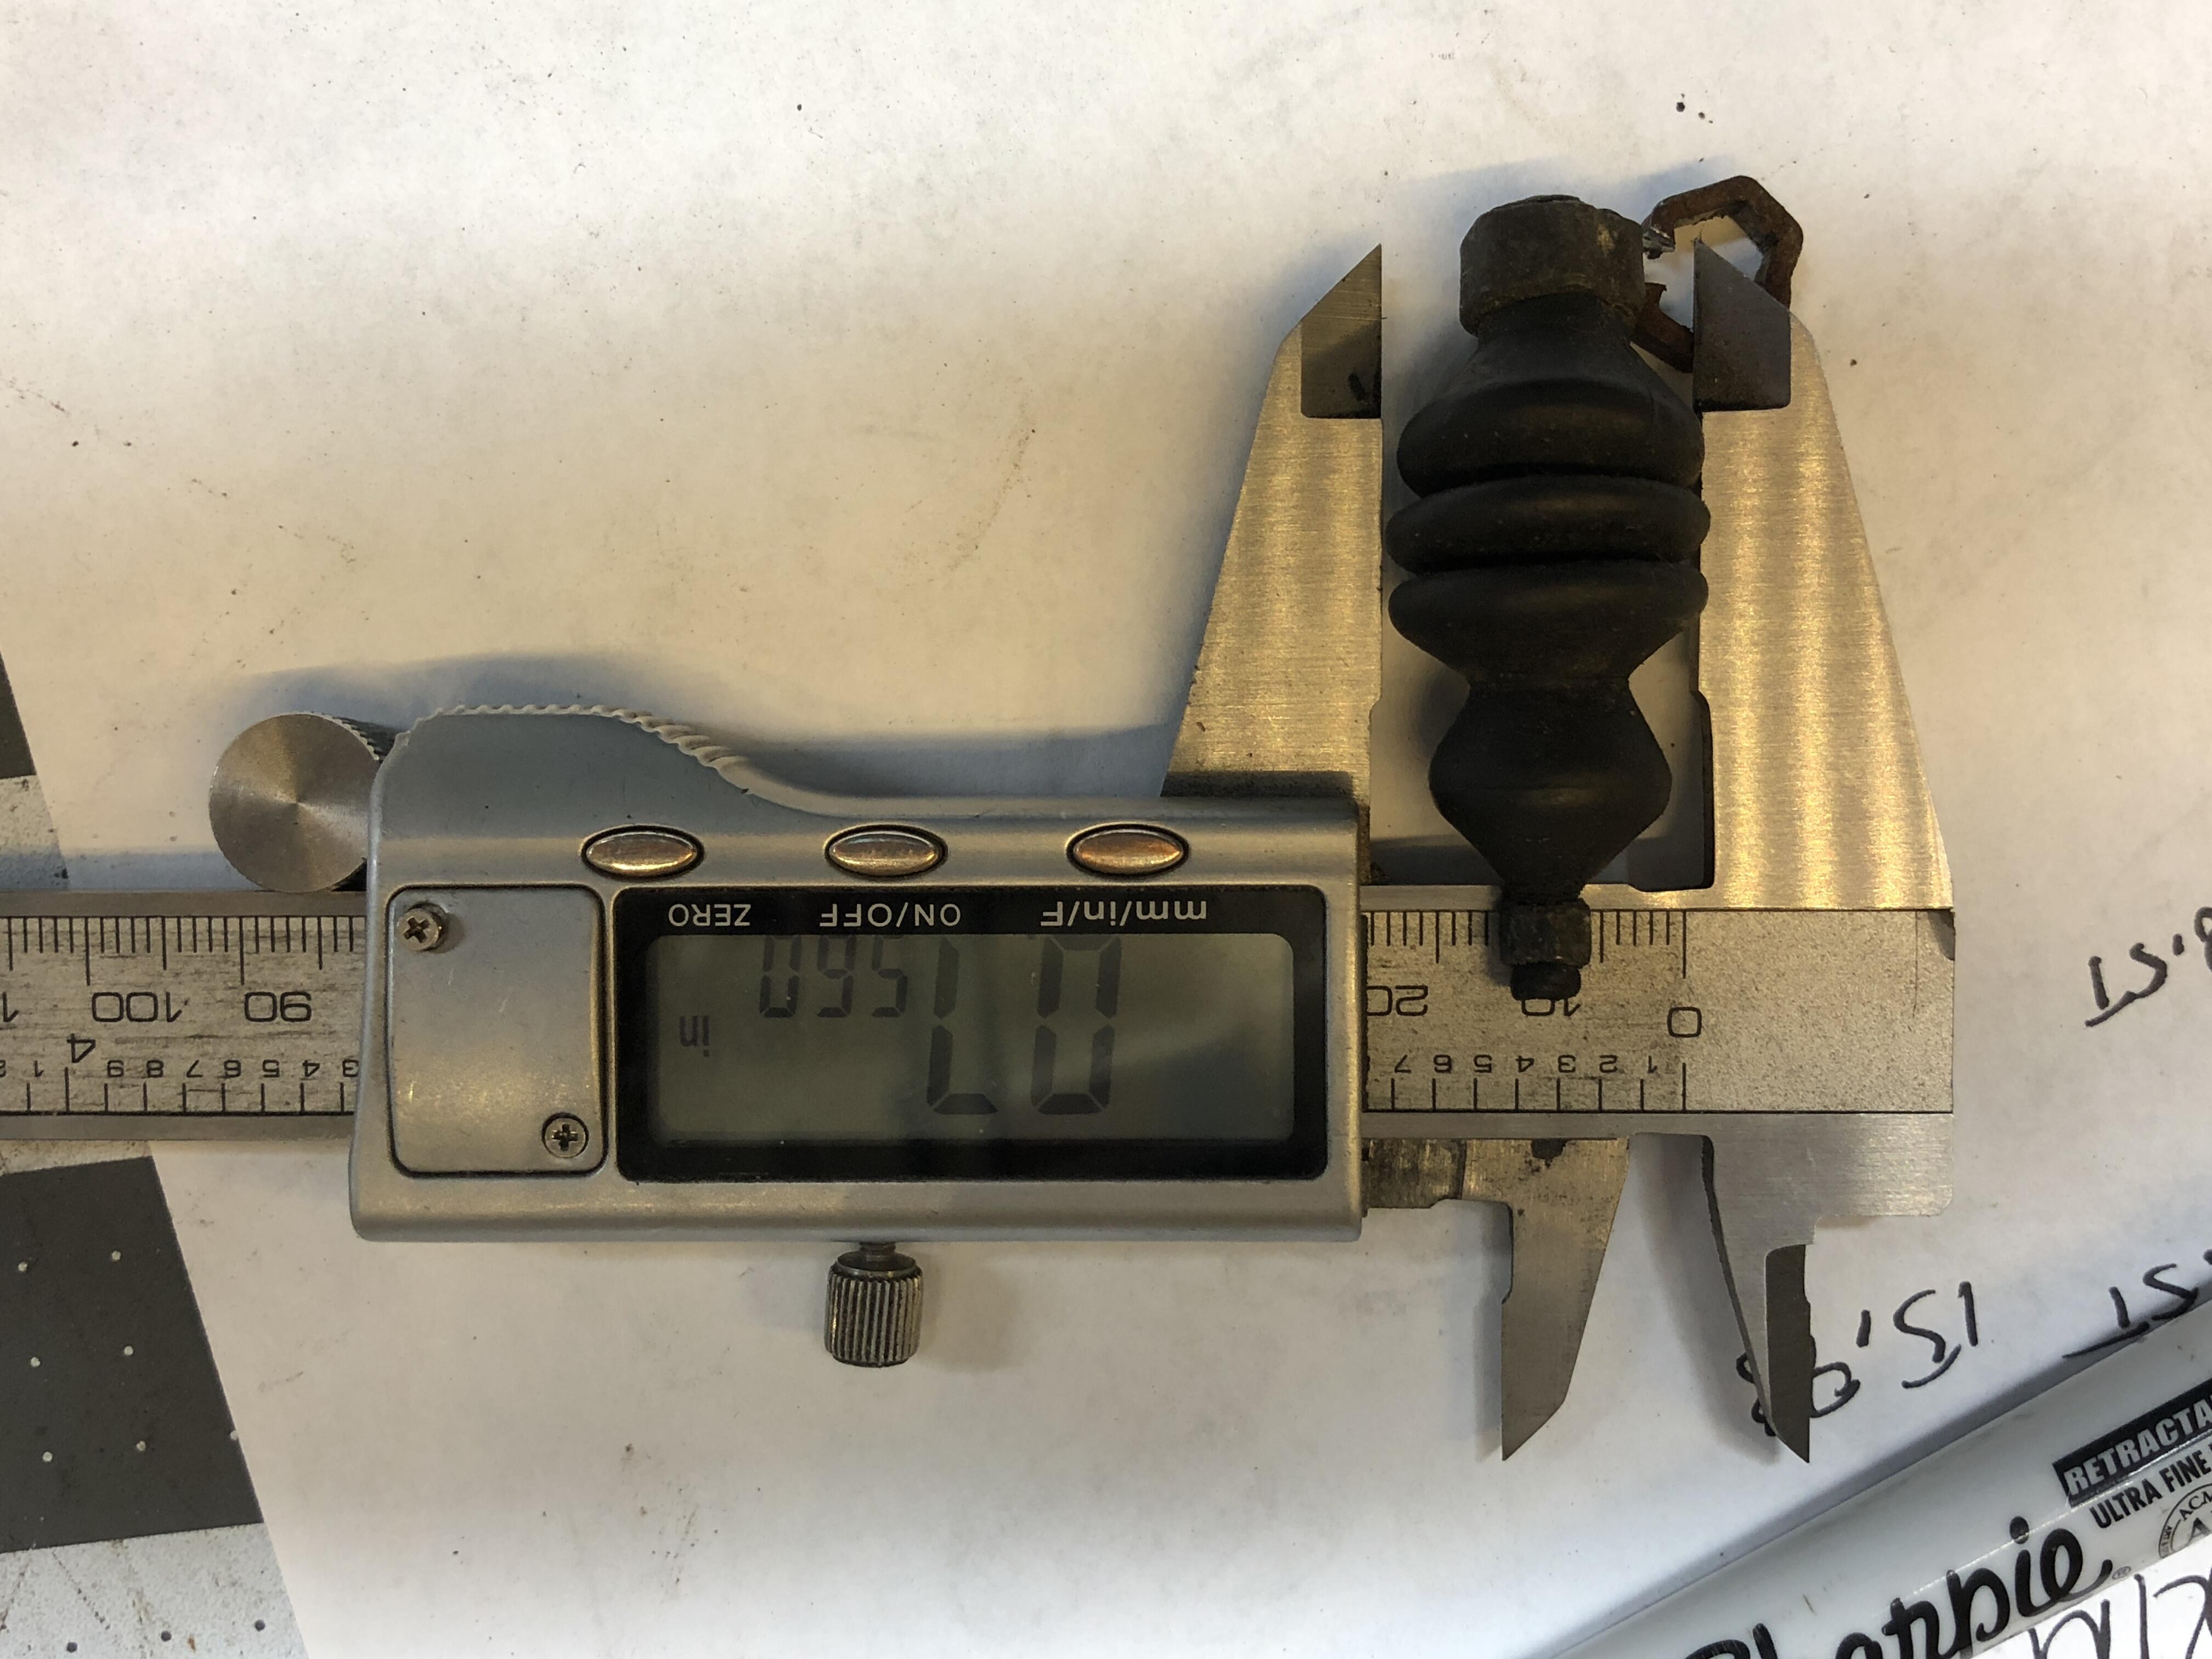
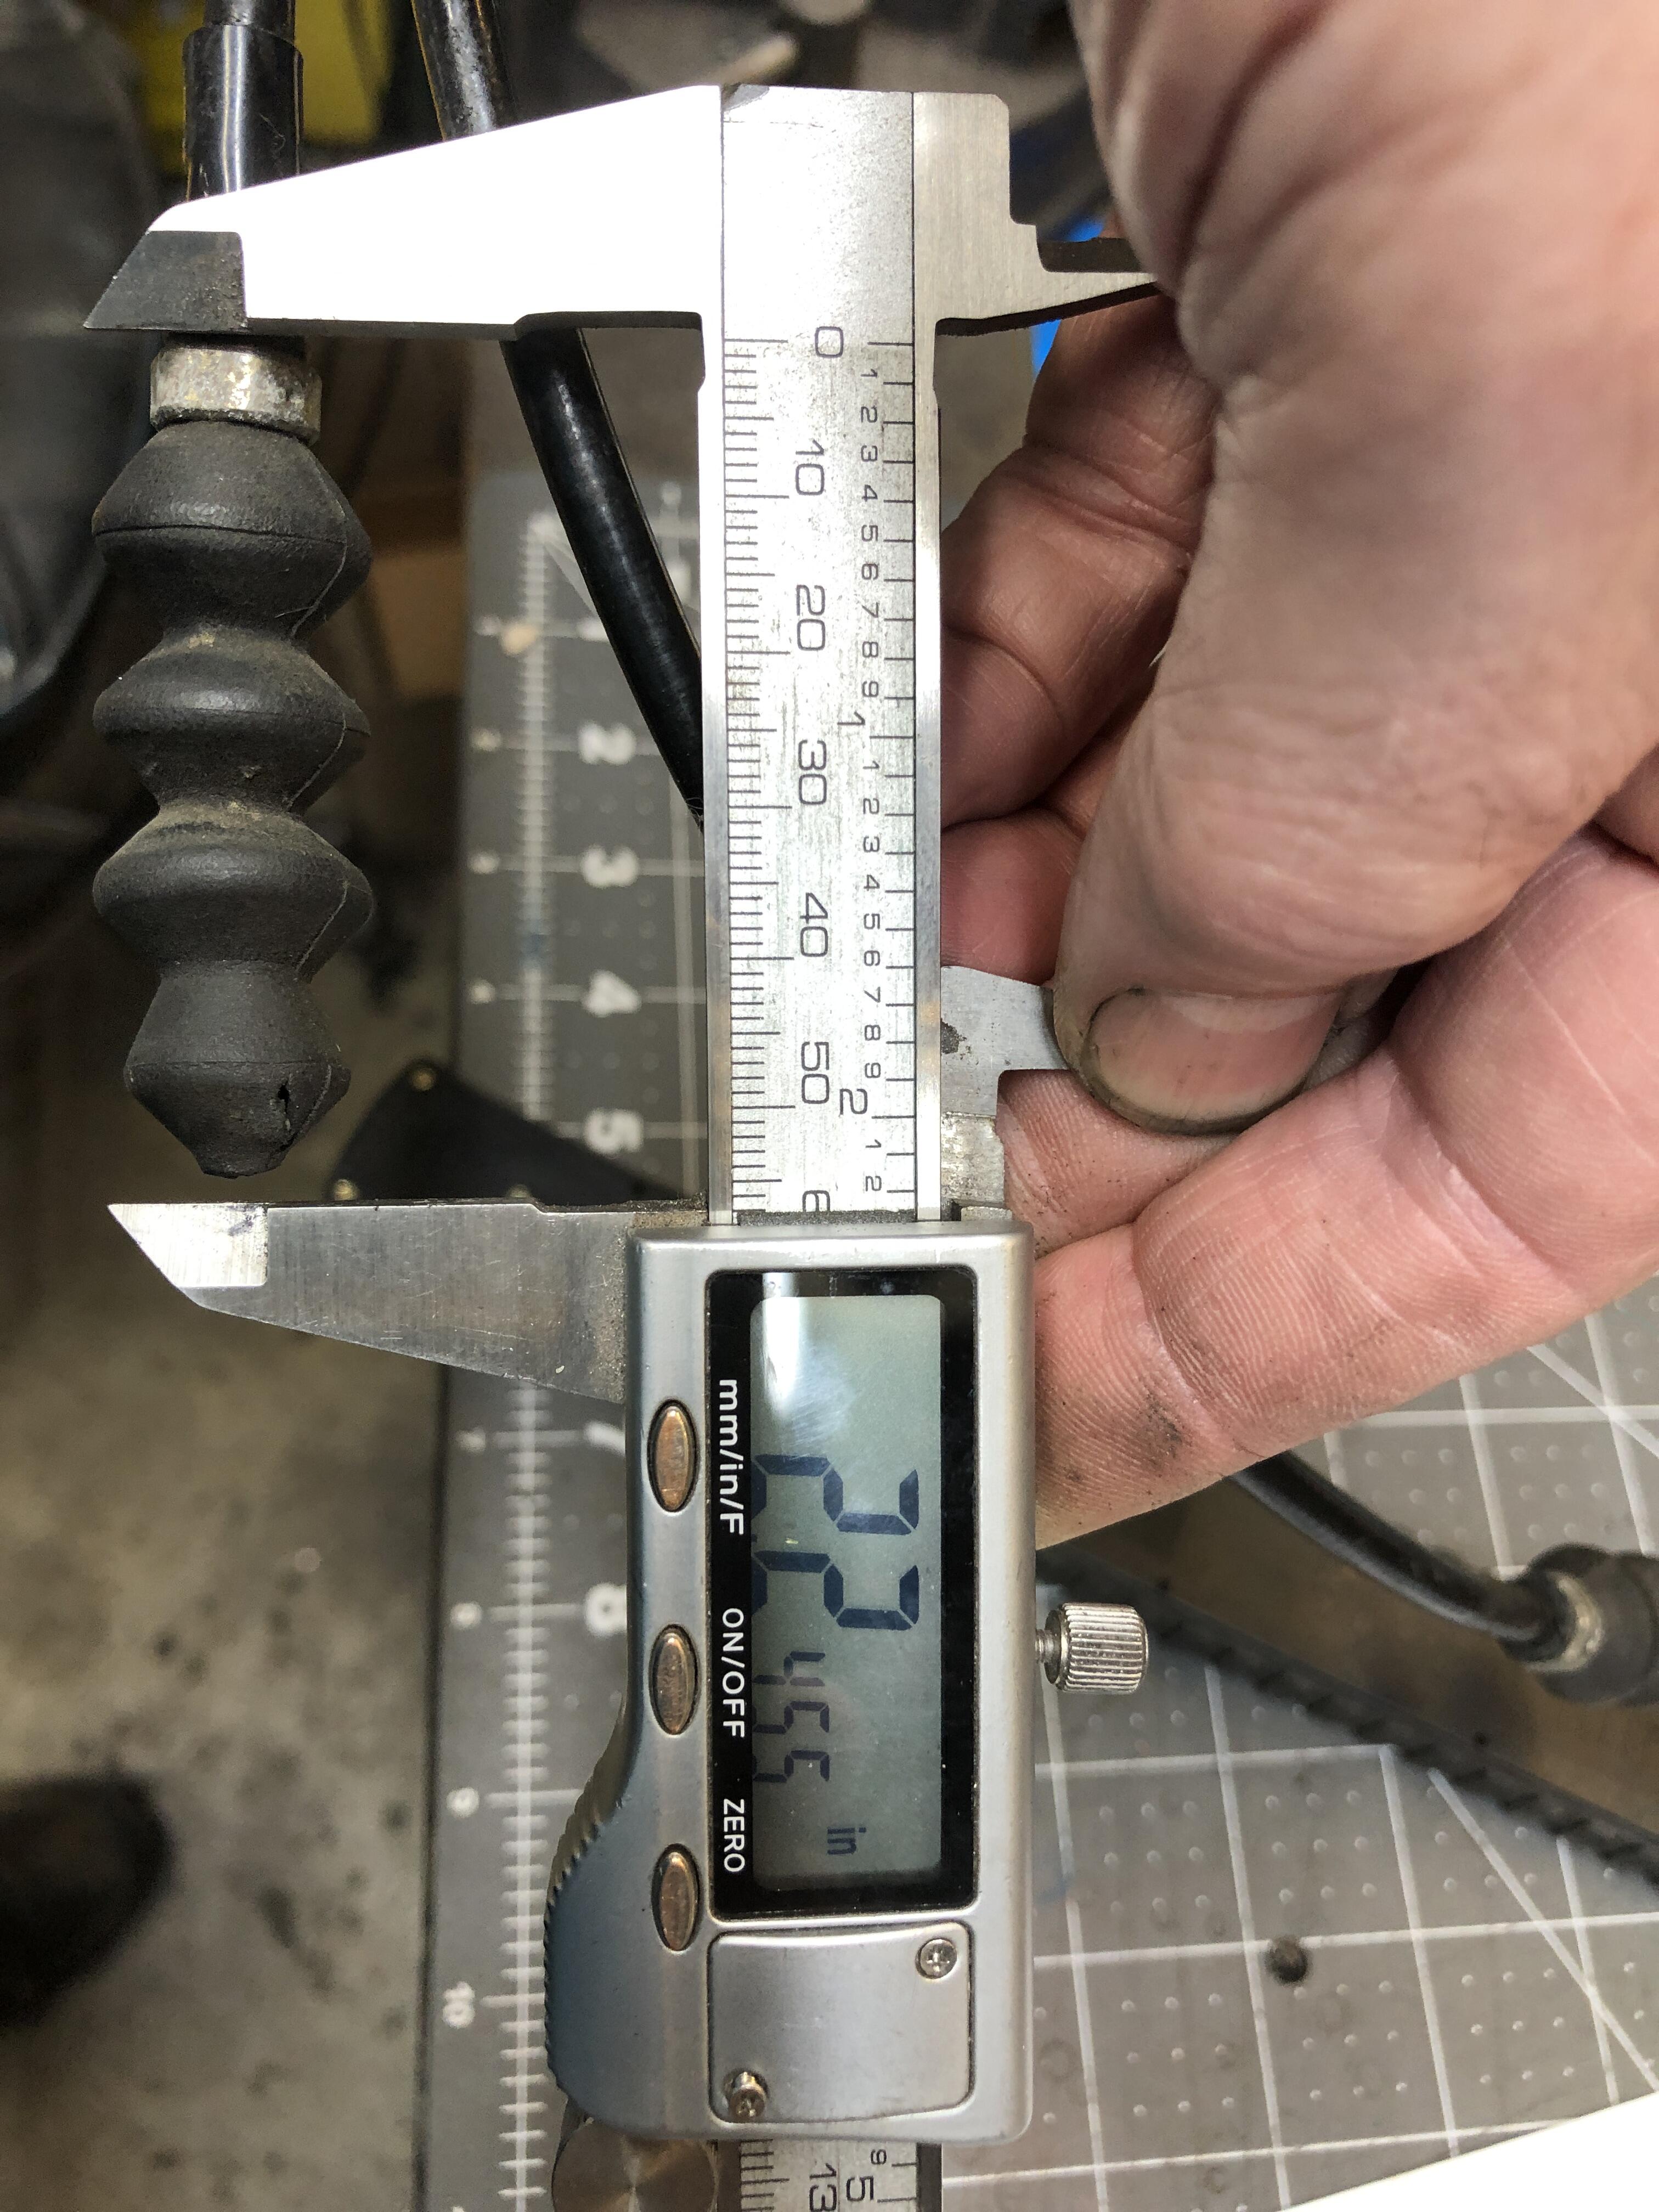
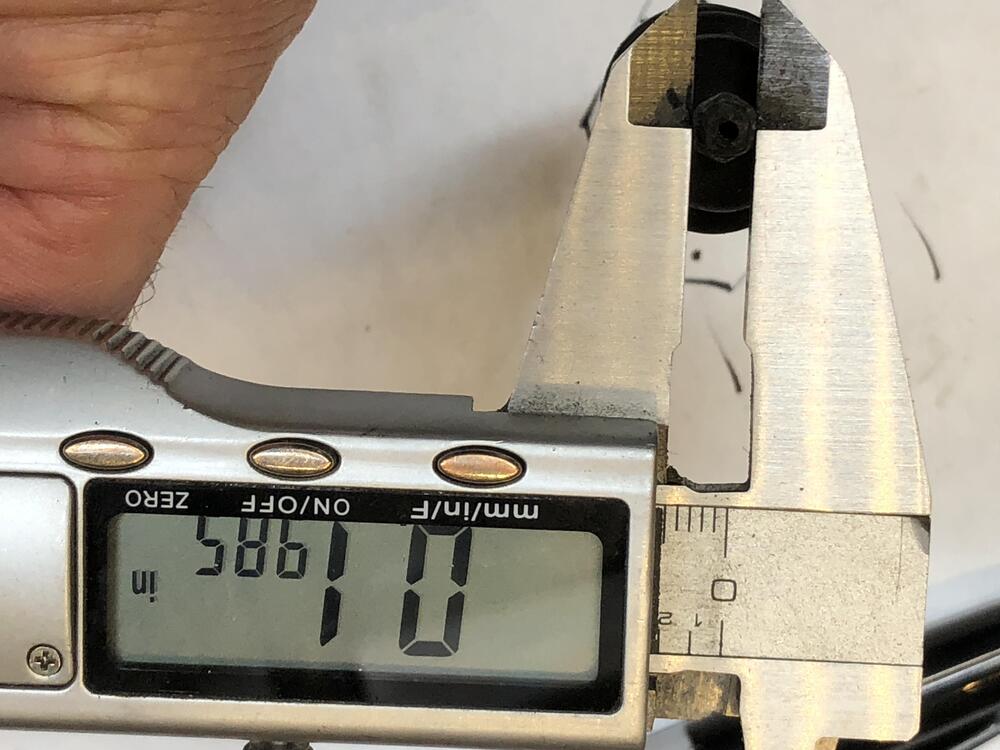
Got a rack with a worn short bushing, then started searching.... Found this thread, the size needed. Thanks Mike W. I'm going to buy a few of these and turn the OD ID to the right number. ID = 24.98, these are 25mm. OD = 28.55, these are 30mm. Got the 50mm length so I have something to chuck up. Or up chuck..... What do you think? Guess it depends on if I'm happy with the ID fit. Got to better than the sloppy noodle I have now