zKars
 Subscriber
-
Joined
-
Last visited
Everything posted by zKars
-
 Put the “pin-stopper” back in and put the C clip back on. After you find it or get another of course. Simple! FS5W71B BTW Don’t ask me where the old one went. Put some sealer on either end as well, it could leak oil.
-
Welcome back. You never left, the Z-Force is strong within you and you can simply no longer resist it’s call. Resistance is futile. No wait…
-
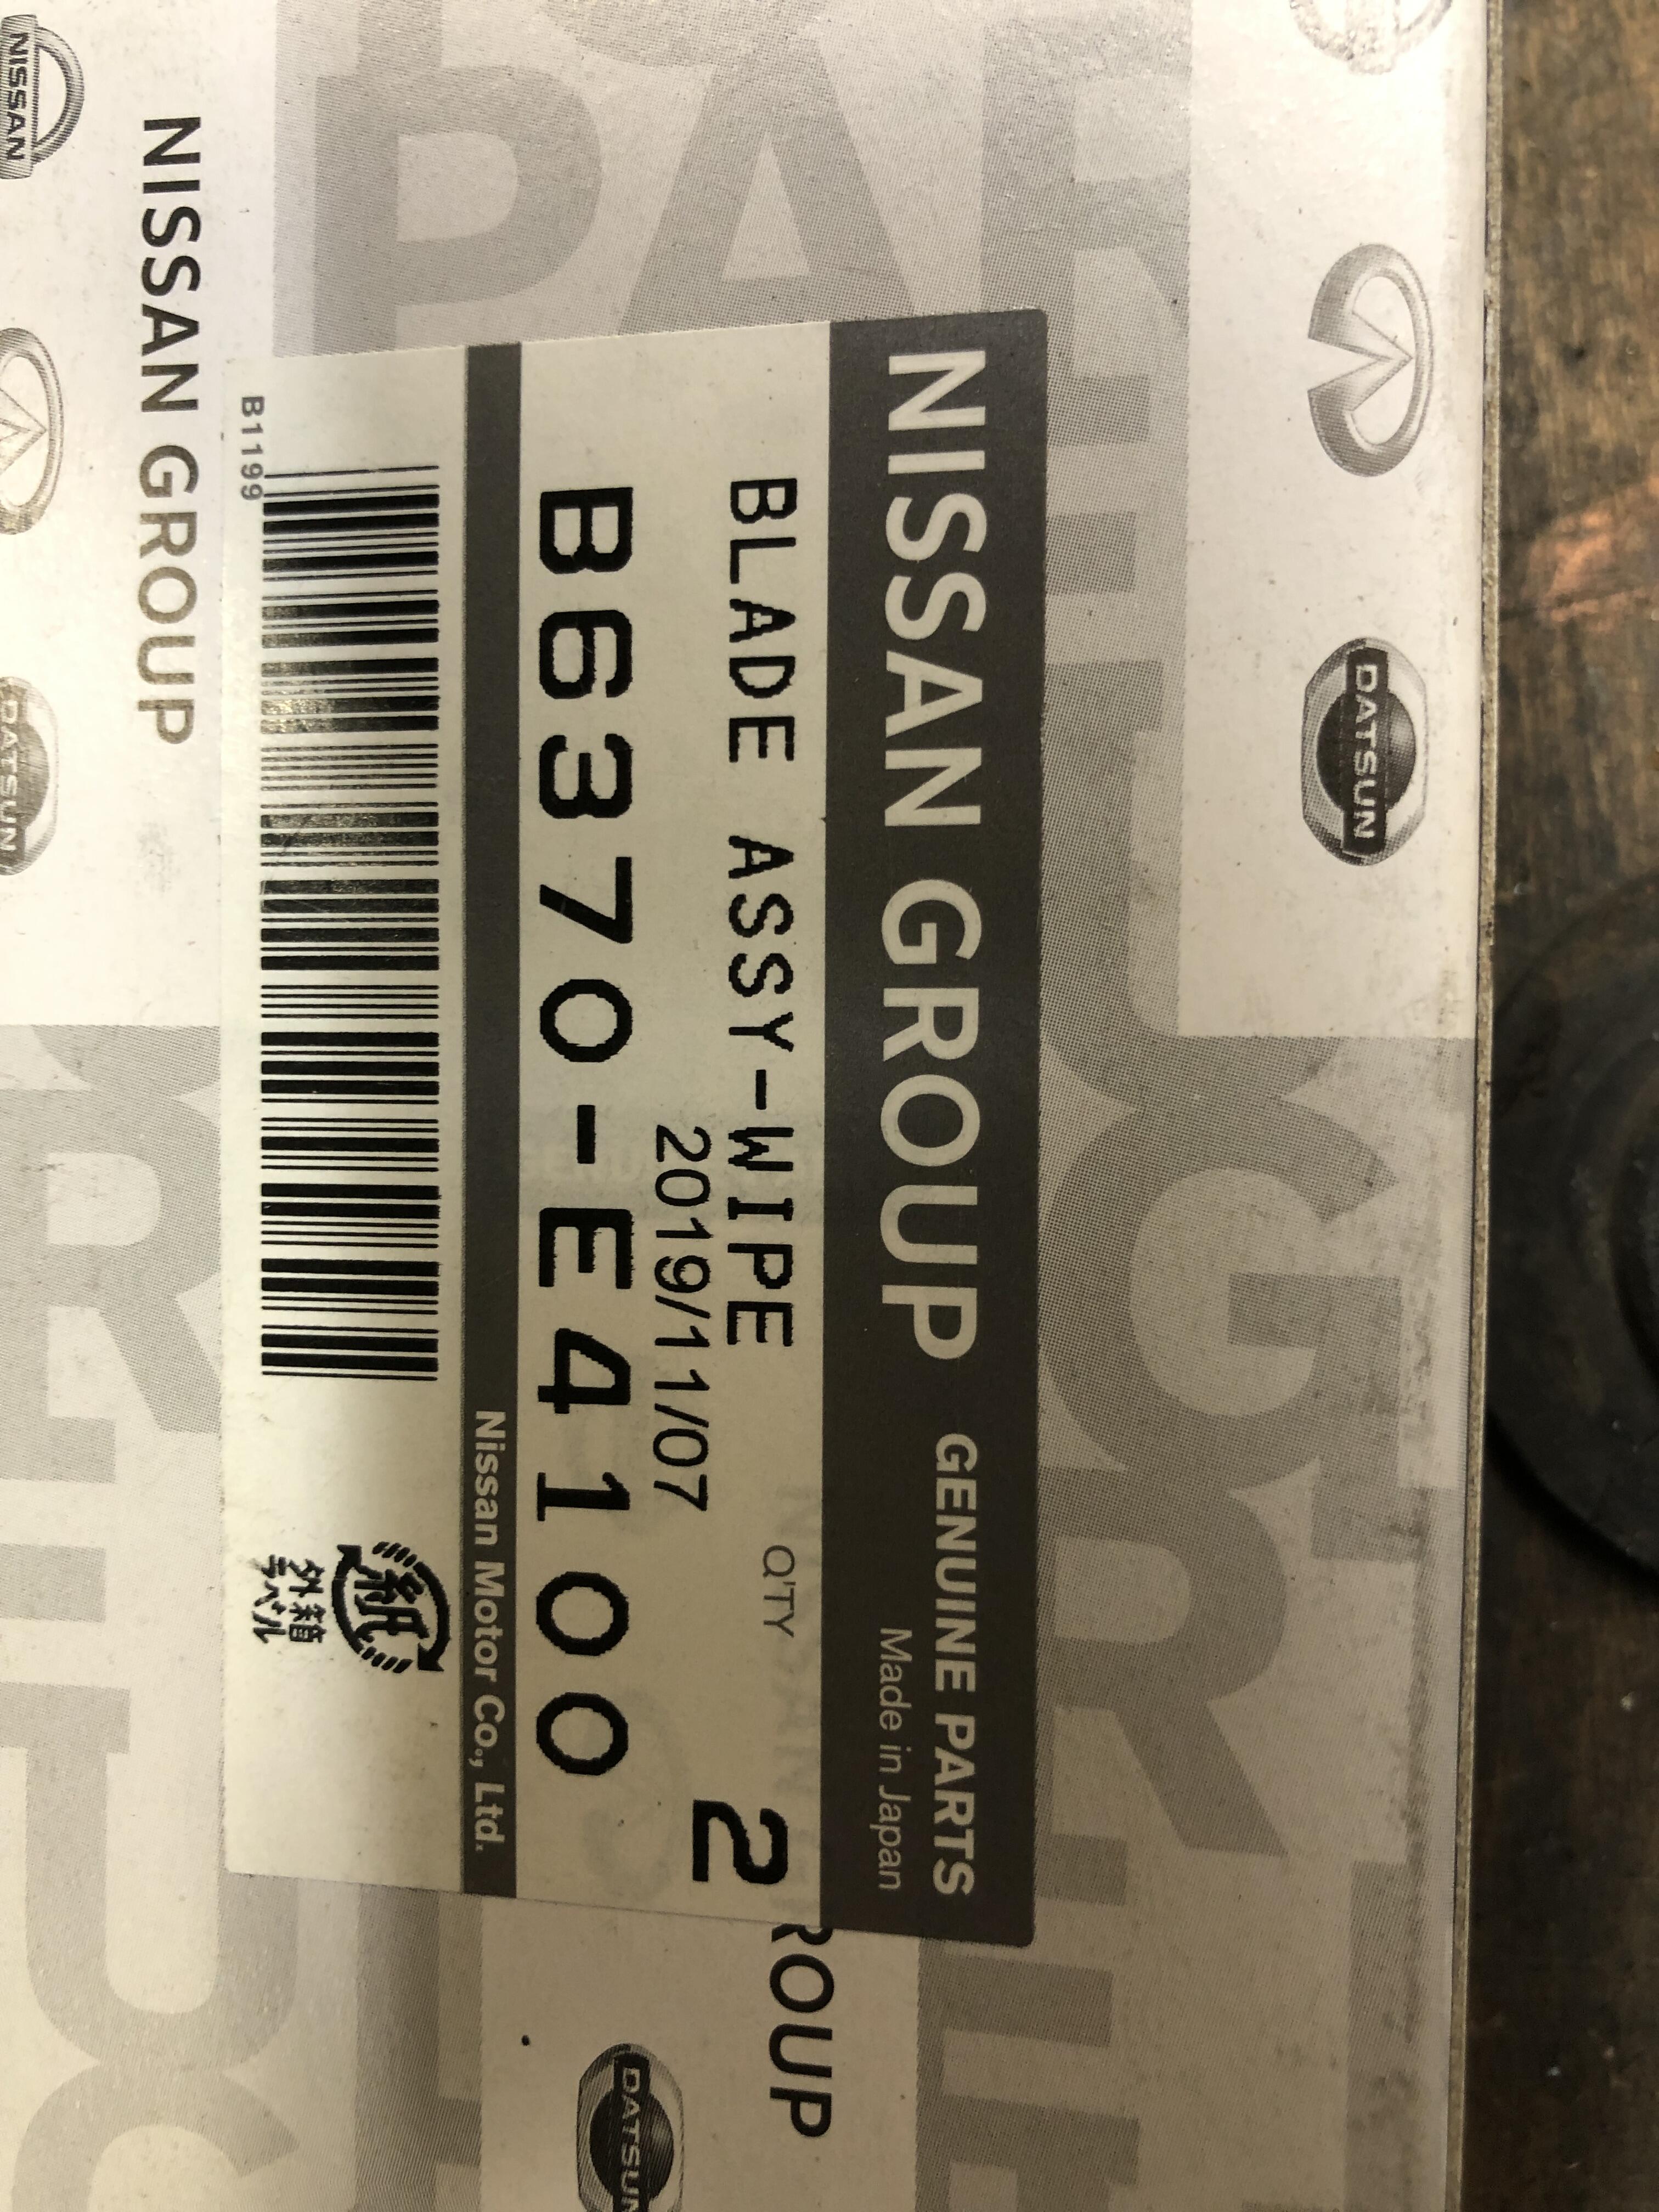
Recenty bought some directly from Nissan.

-
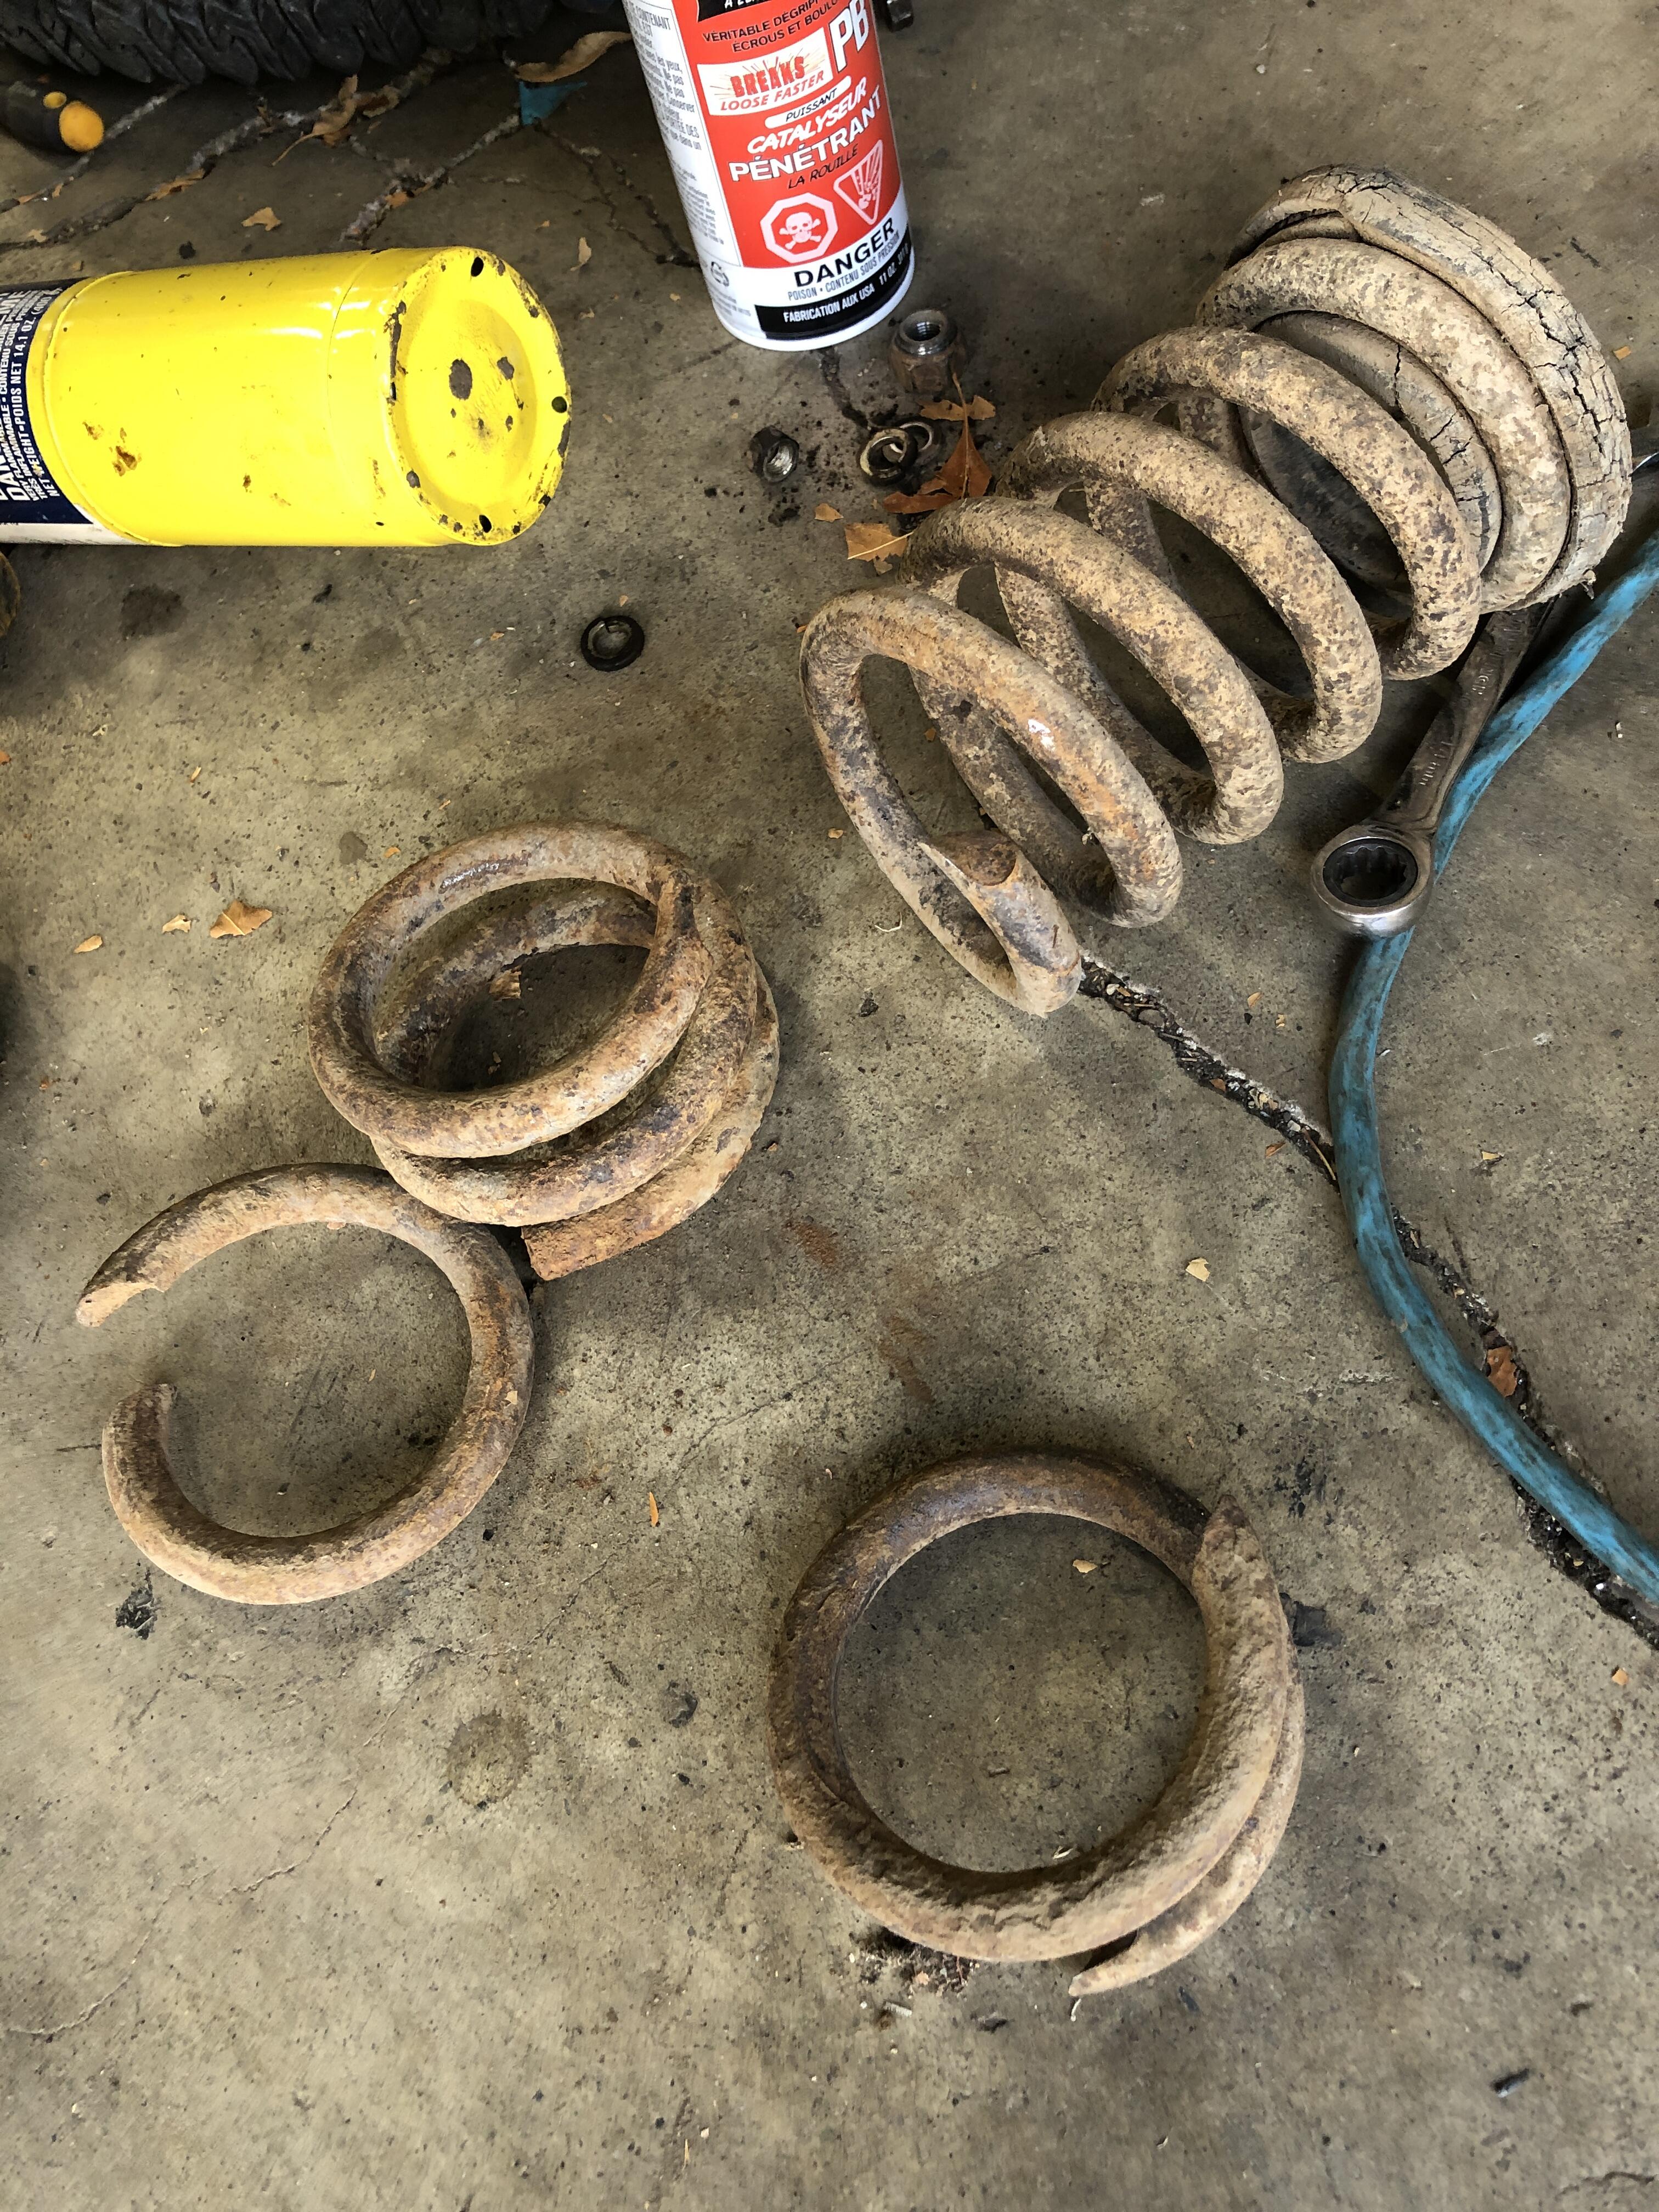
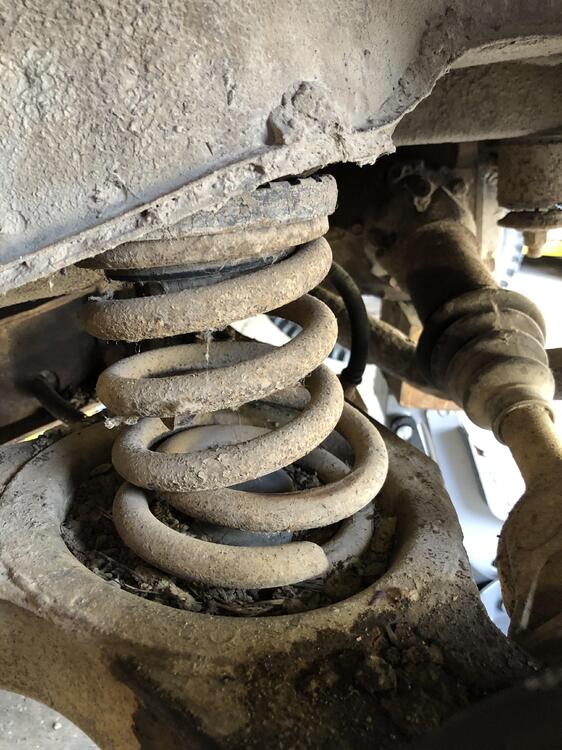
Sp the question is, under what conditions would the springs break into so many pieces? The first break is above the packed mud. The remainder were all buried in the terra-very-firma
-
First clue is the vehicle mileage 50.000 miles. Second clue is the condition of spring pockets. Both are filled with very hard packed, very dry mud. I had to literally excavate the mud by chipping and digging with pointy tools to extract the broken ring segments. Third is a usage history. 1969-1980 used by a rural north BC dwelling mother of three. Car was then parked after a low speed front end accident. The car was moved around very sporadically over the remainder of its life. There is no admitted history of extreme driving, though you can just imagine. No other part of the car suggests any General Lee type stunts. Forth is the definite lack of rust in the spring pocket metal or surrounding area. Not like the springs were immersed in water for forty years nor is the spring material shows more than minor rust damage.
-
Ok, todays challenge is to help me understand how the following broken coil spring situation may have happended. First, a picture is worth a thousand words. 1969 510 rear springs. First two are left and right springs “pieces” on the floor after extraction. Third is the left rear as I saw it initially.


-
Yes. bought several. Cheapest by a long shot and EXACTLY what I got from a couple of other suppliers that just use the BK104WS part number. Brass synchro's for all five gears, works on all the 77-83 Z and ZX FS5W71 trans. Well except that goofy 5th gear synchro thingy in the 77-78 trans. (double exhaust hanger, short shifter ears, no reverse lock out case). No source for that thing no how.
-
The originals are curved to fit the door curvature, but the new ones aren’t. Yet. Without the correct curvature you will likely experience what you are seeing. I have found the new ones are softer than the originals and will bend if you “help” them, but be careful not to cause any kinks.
-
Absolutely outstanding decision! Congratulations on taking the leap. You already know how happy you are now, just wait. It gets better.
-
the only differences I noticed is in the presence or absence of "stops" that prevents the hinge from opening past a certain position. they all bolt to the car and hood the same way. Gnose hinges are different and are not interchangeable
-
Fun story! Thanks for sharing. Just imagine the finagling and posturing and likely shenanigans going on to own that Z with the VIN ending in “240” And dibs on calling those first 240 “Series 1” Z35’s. !!!!! Hahahahaha Going to get rich selling fake “hatch vent” pairs of stickers to put on the Z35 hatches…. “Limited Edition only 240 signed sets available. $2400.a set”.
-
I am currently out of the early cross members. Parts cars are getting purdy thin around these parts….
-
And then I found this! https://resurrectedclassics.com/collections/brake-components/products/1970-1972-datsun-240z-complete-steel-brake-line-kit Might be worth the money. $300 bucks. It’s the early set too. And I’m loving what these guys are doing with reproduction body parts! Check them out!
-
Welded that seam and even the two seams between the three valance panels. Absolutely no downside, fender comes off and on just fine, no issue other than handling length as mentioned. Same for the valance. The look is much cleaner and more modern.
-
That hand flaring tool that Tweed linked to at summit is the best hand tool I’ve used. Works fantastic. Use the copper nickel tubing you can bend 90% with your hands. I love buying it and nuts from thestopshop though amazon. Tubing prep is the secret. Internal deburr and external chamfering. This https://www.eastwood.com/eastwood-tubing-deburring-tool.html?gclid=Cj0KCQjw-NaJBhDsARIsAAja6dMfxmxKJNlKjBV_RuyxduUX2yo3UbNMKMbgMFcZvW-Ir7V7sHT7Y_gaAjtFEALw_wcB&wickedid=345665394423&wickedsource=google&wv=3.1 Works very well. And blow the chips out of the tube before you use it!
-
Got the 4mm thickness ring in there now, bearing pressed on just fine. engines in the car, we’ll see how it goes. I put in an adjustable length slave rod as well so I can tweak free play. I have to say, given all the clutch/ throwout collar combo’s I’ve seen that are quite different from the 92mm ideal (all working just fine), that there is more room for error than we give it credit for. I’m not saying “put anything in there you like, but you can clearly do a bad thing by having too long of a collar, but you can make up a lot if it’s too short by just coming up with a longer slave rod.
-
I could just make a few spacers and put them underneath the throw out and gain a bit of length. The mounting collar is 14mm high, the bearings are a bit thicker, all the force is on-axis, I bet I could space that bearing out by 6mm (1/4”) and not cause any problems. So. Off the lathe I go. I have some 1.75 OD / 1.5” ID aluminum pipe, need to turn the inside to 40mm ID. The OD is perfect at 1.75mm (45mm)
-
Working on another engine the other day, assembling a new transmission to the engine, and I checked the throwout bearing collar tab height off the flywheel face to see how close it was to the 92mm ideal. Clutch was working fine when we took it apart. It was short by a good 10-12mm!!! Ok, so I go to the well as it were to look for a longer collar to get it closer to the ideal and low and behold, mother Hubbard’s cupboard is bare. Of longer collars at least. So what’s a guy to do? I’ve been dreaming of making adjustable length collars at some point so I never have to suffer this “no stock” indignity again, but haven’t quite gotten there yet, but I starred at the collar wondering how to make it longer. Cut it in half, machine and weld in a new ring of steel to lengthen it? Sure, I have all day to play that game, not…. Then an idea struck me. I wonder…..
-
Have to take another apart to look. BTW, no problem getting more of the longer bushings. Haven’t tried to do anything about actually put it in or any other other than restoration re-assembly, but someday I’ll have a few racks with new bushing available.
-
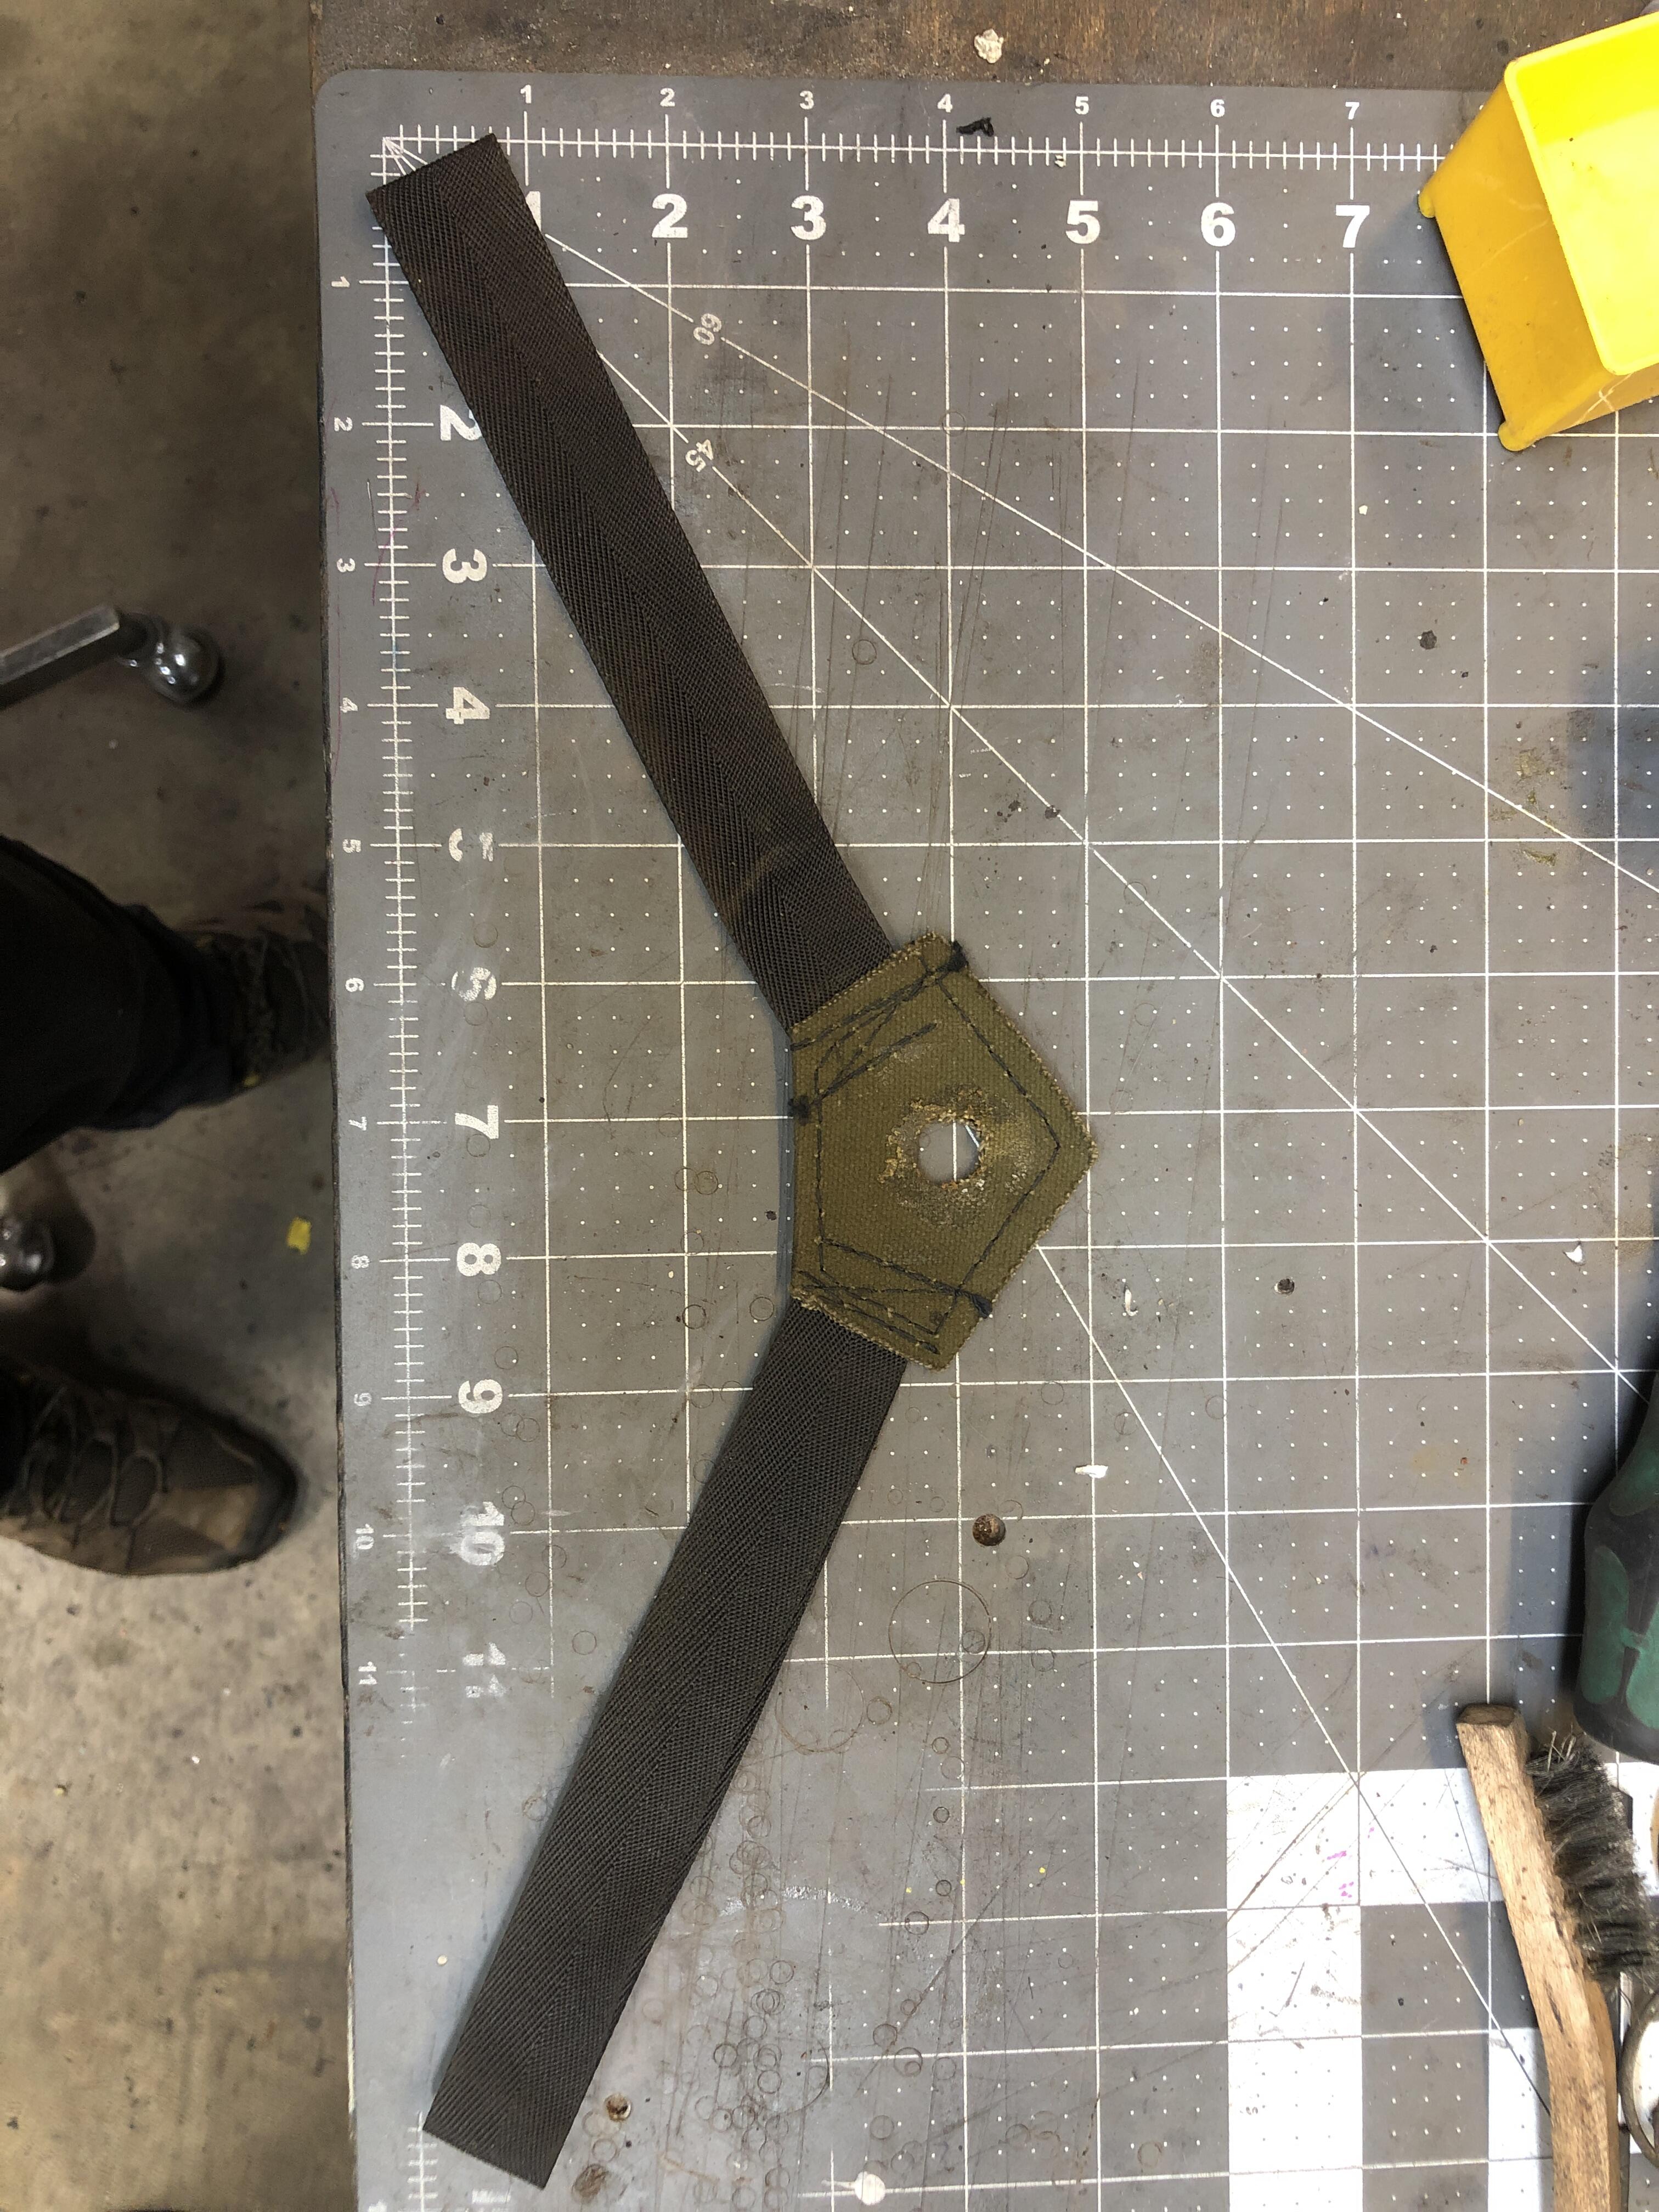
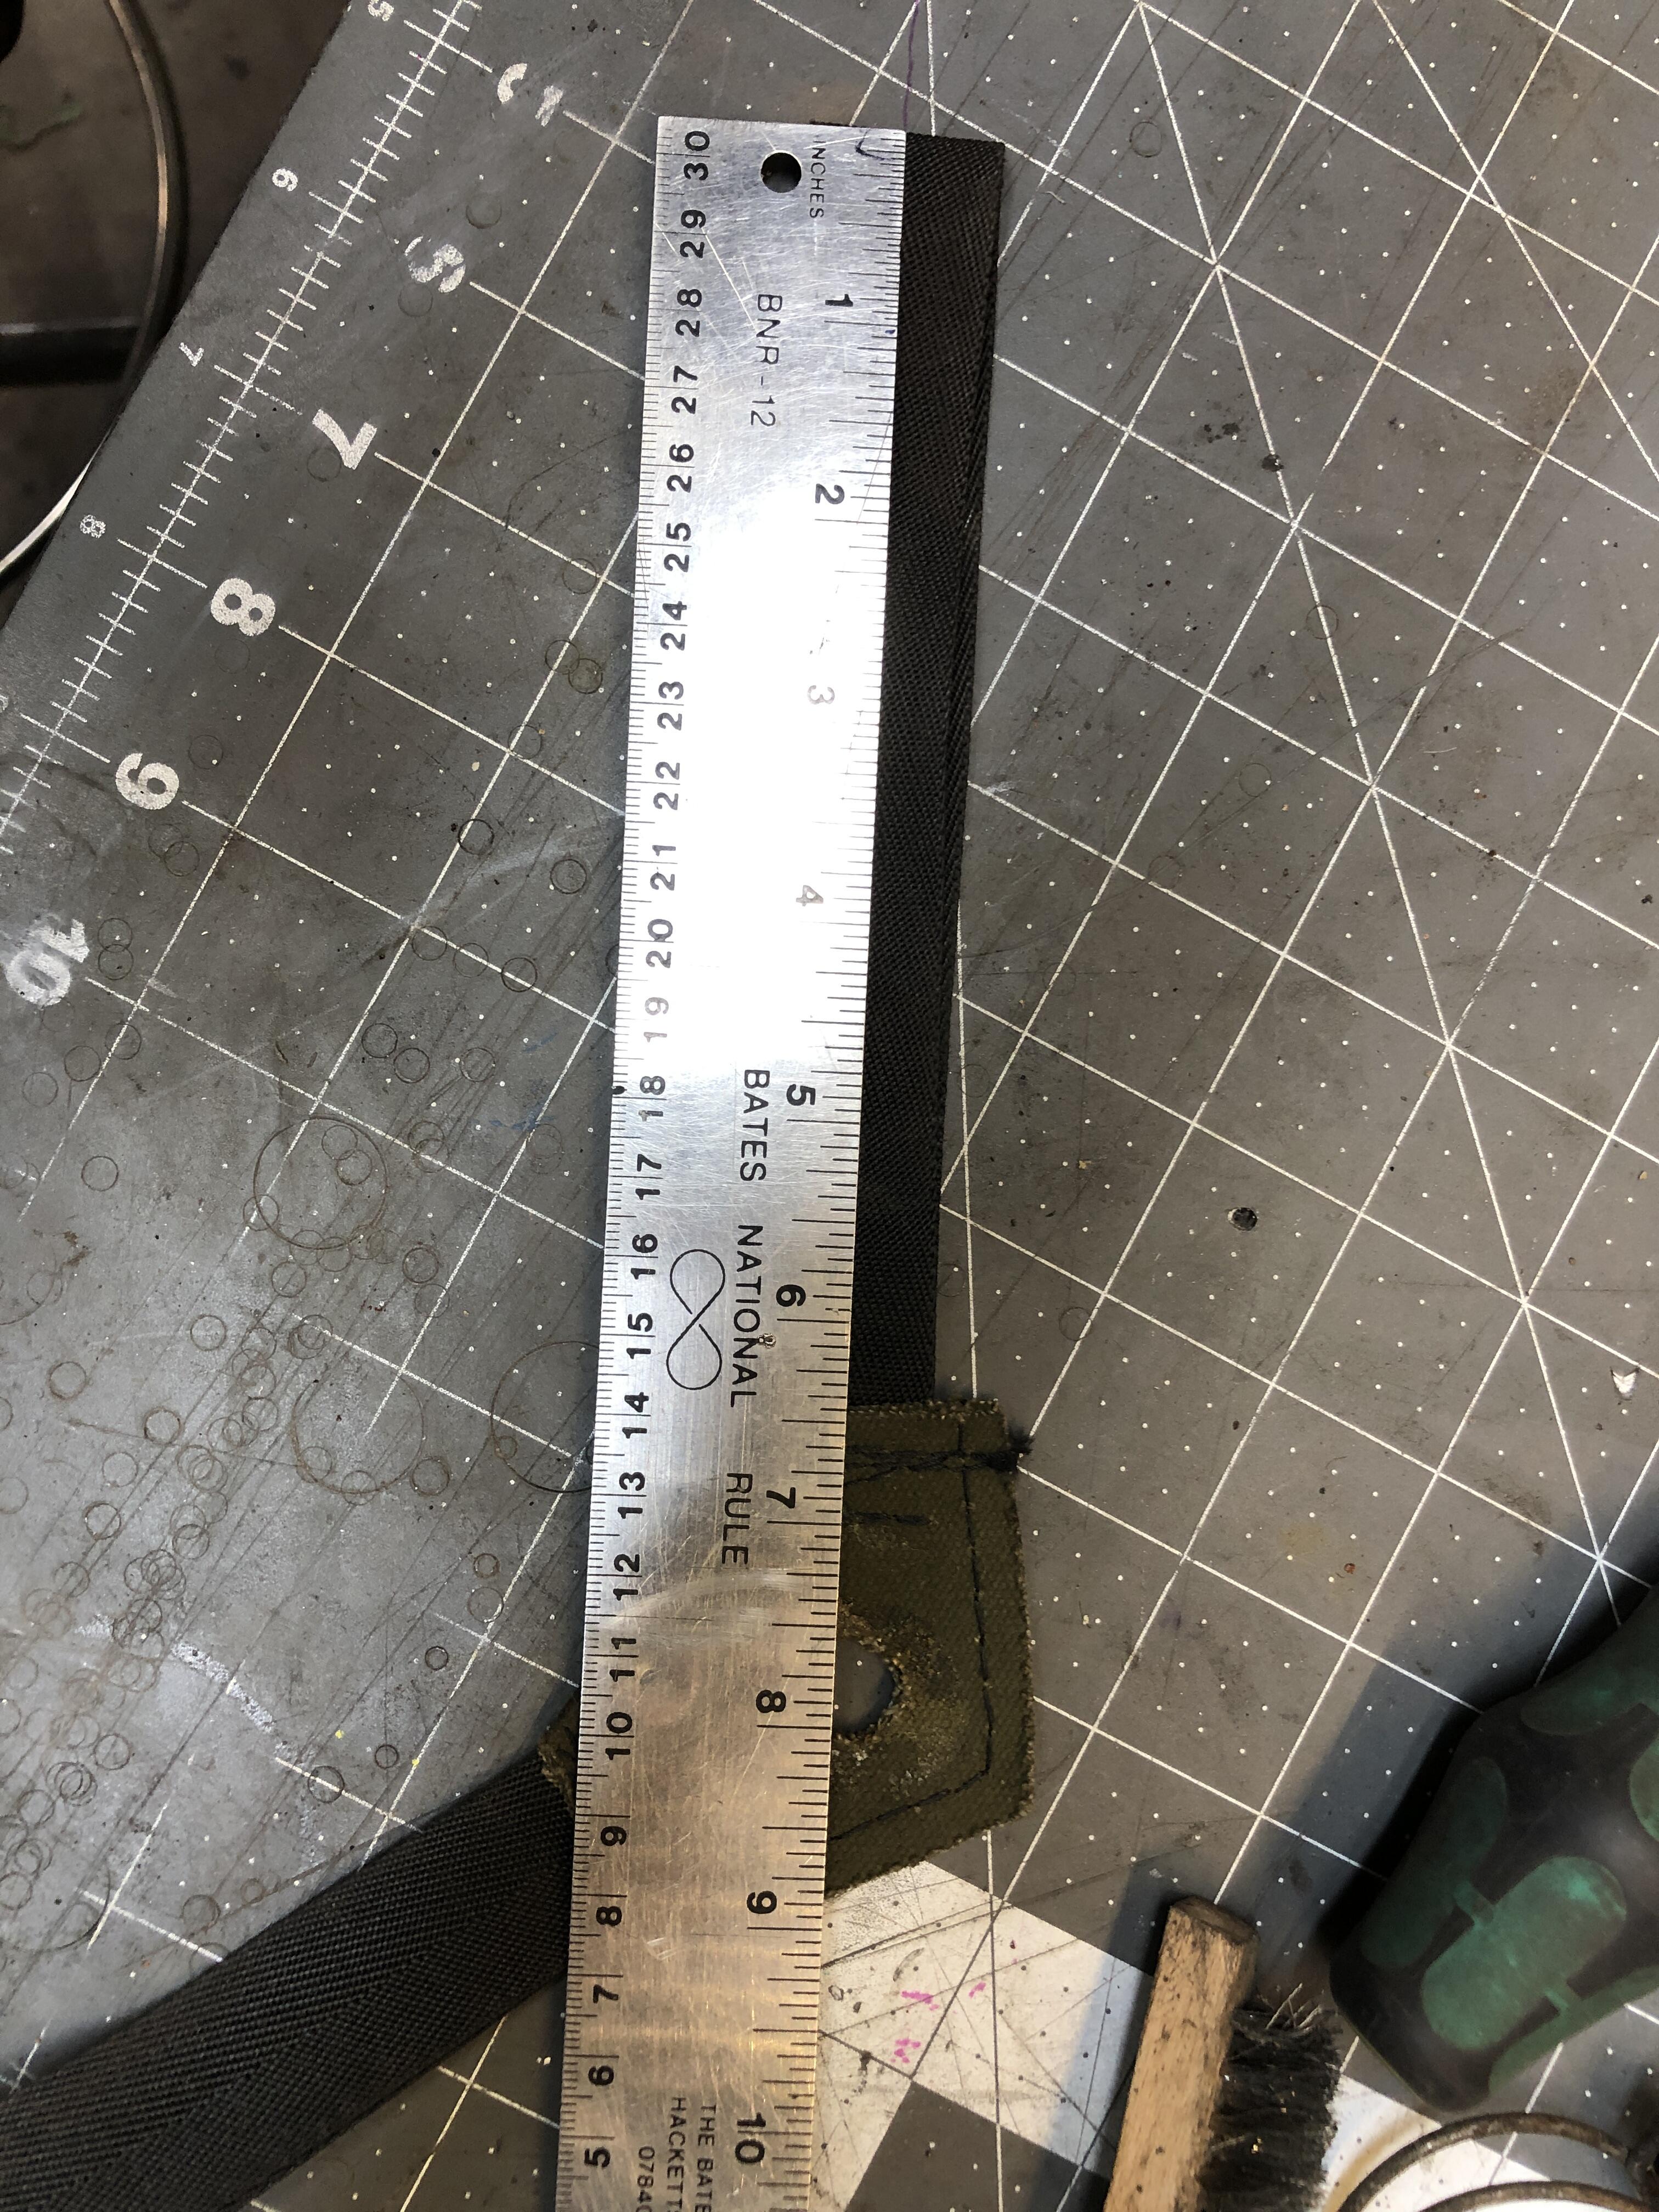
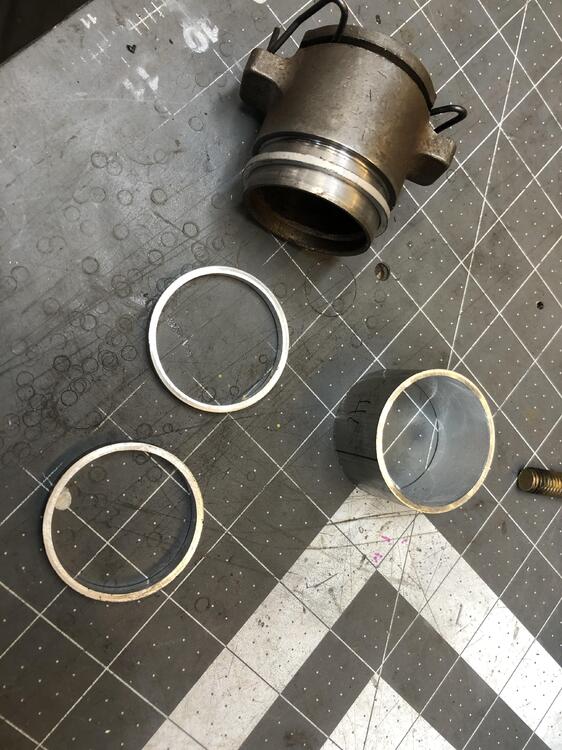
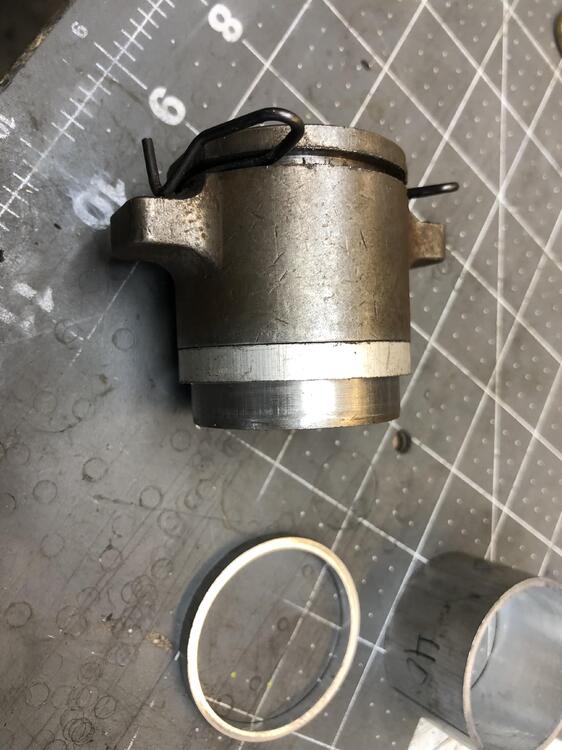
These should give you all the measurements you need to recreate one. Sorry for the washed off numbers on my cheap cutting board work surface. The last one at the bottom edge is 15


-
I will measure it up shortly.
-
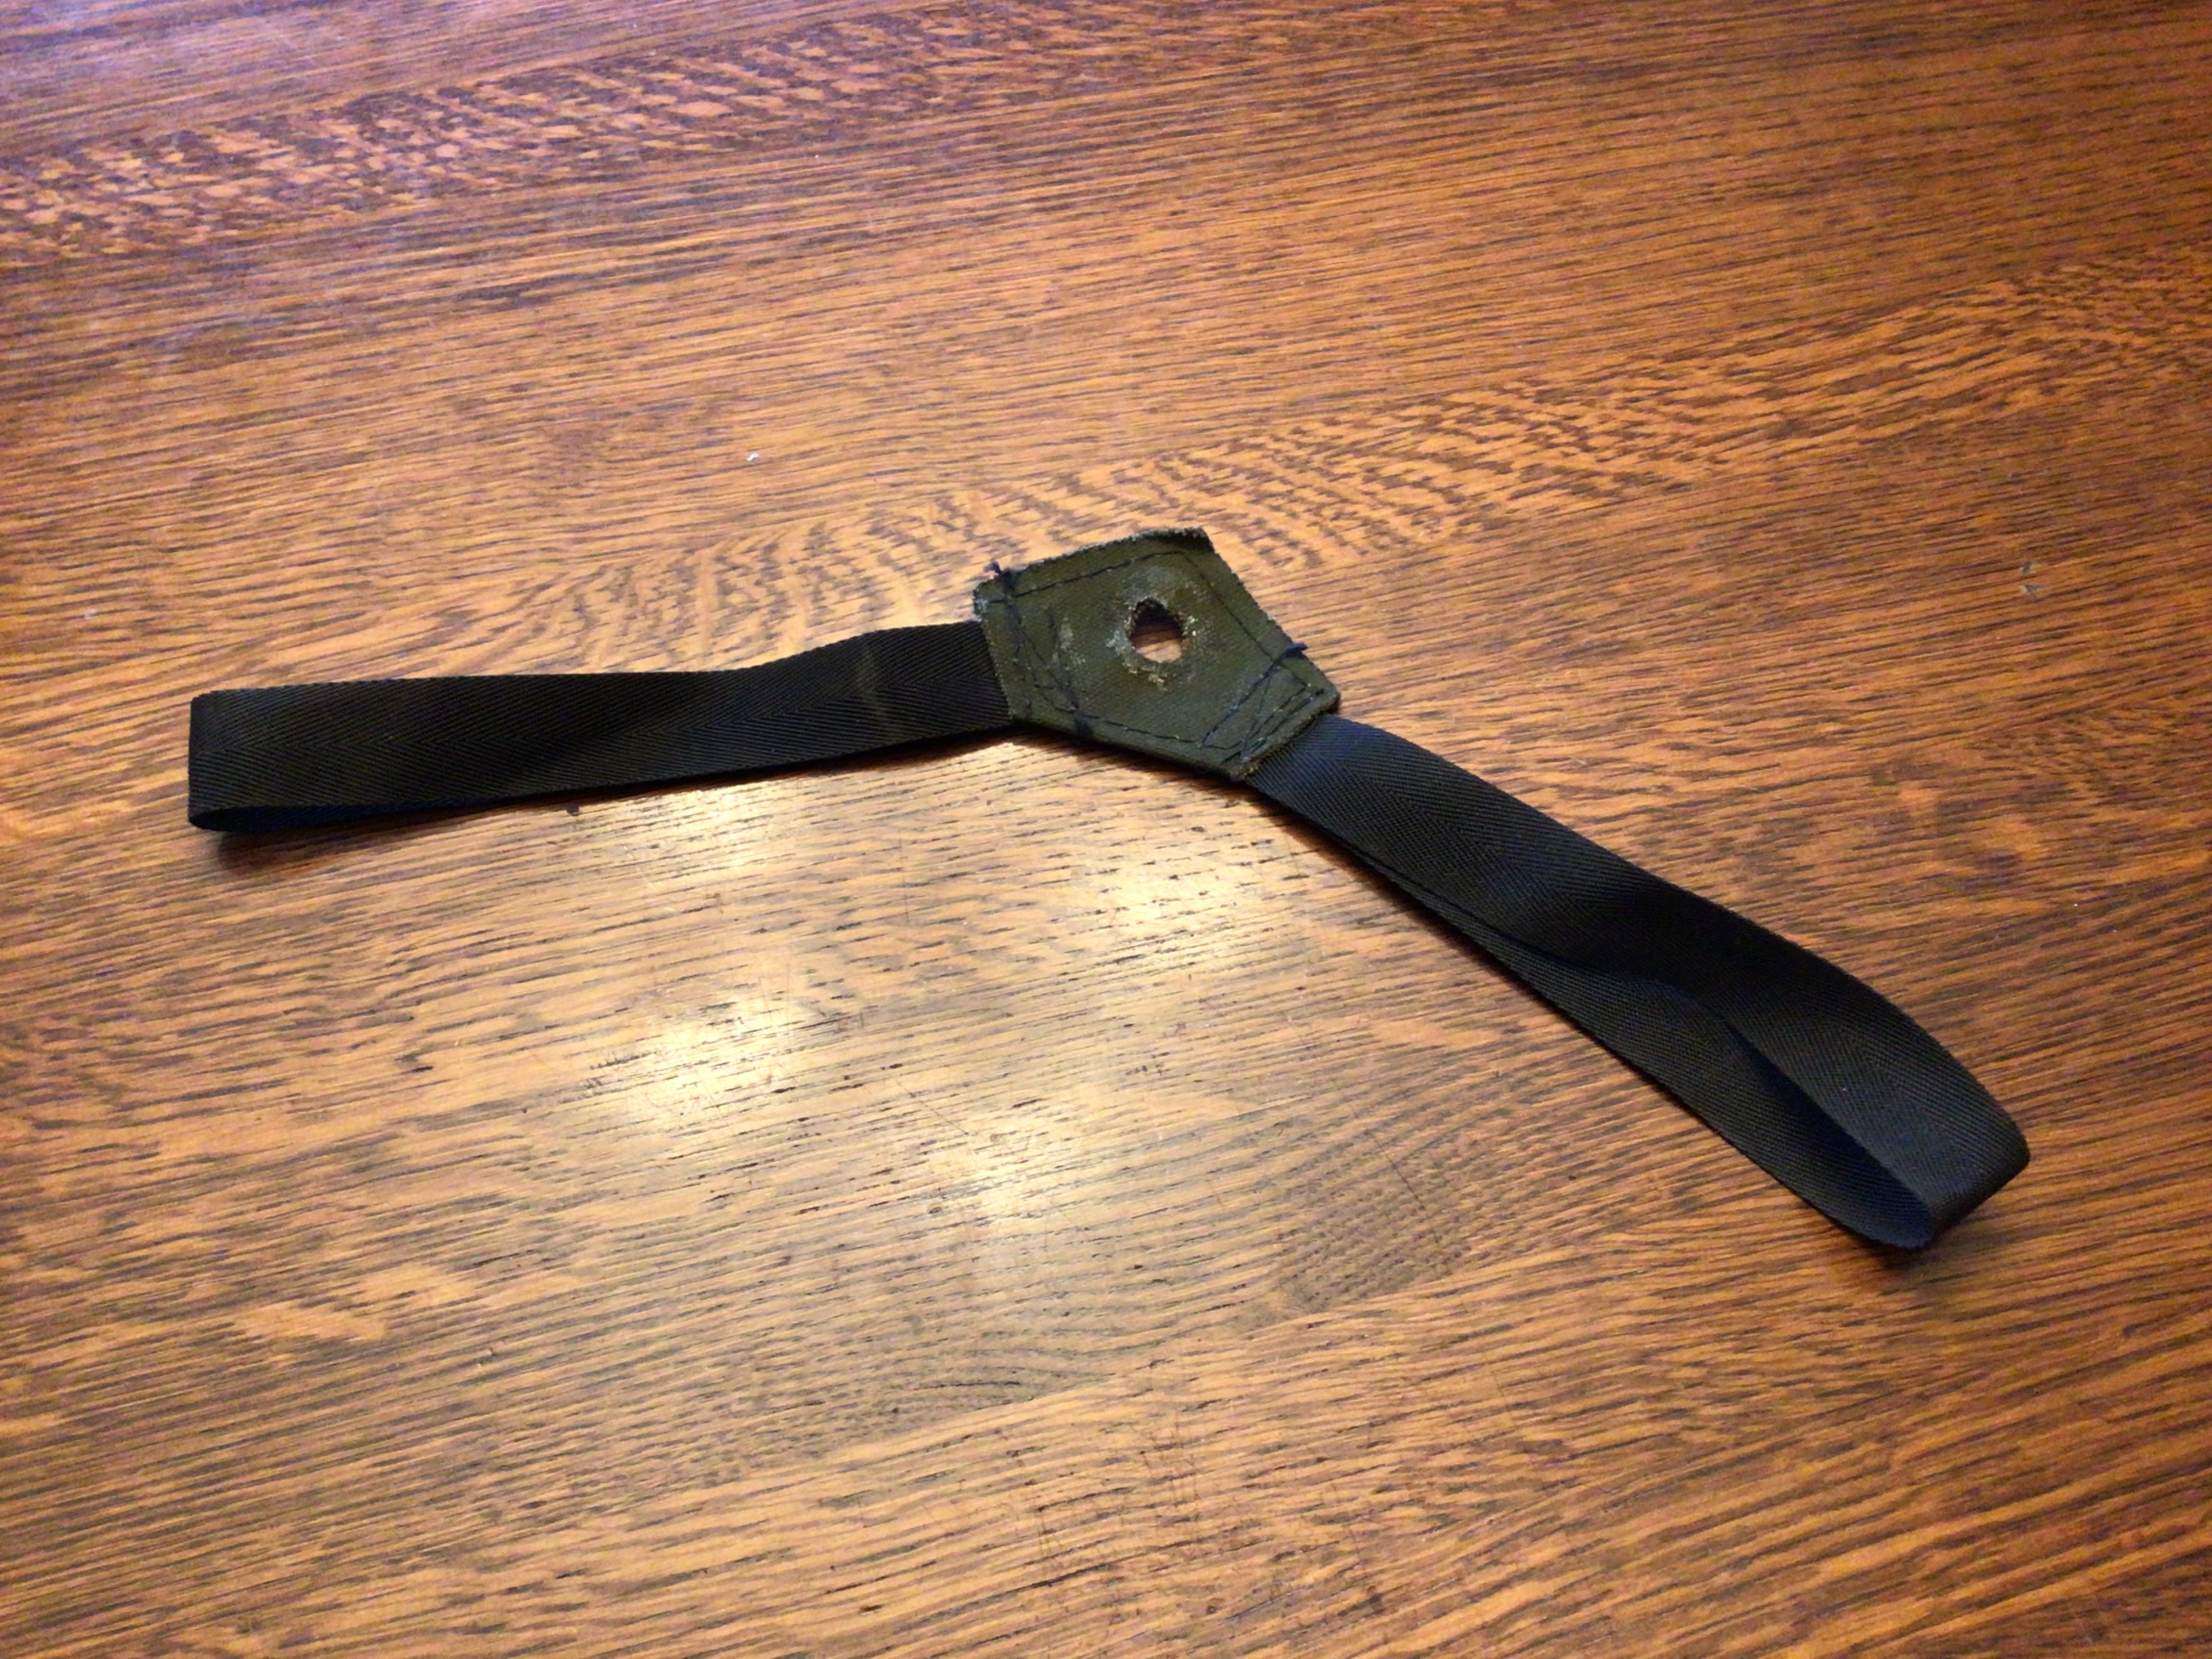
Dark green canvas, black webbing, crude sewing. Pretty basic

-
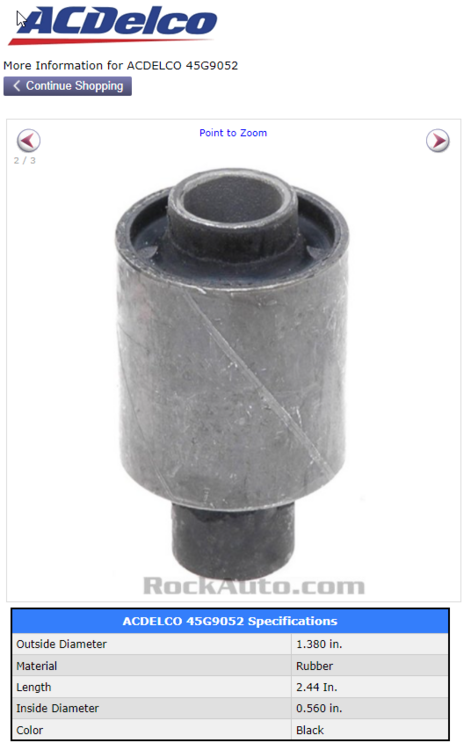
No findy no-where. 11345-N3000 USA or overseas that I can find. Did a bit of measuring this morning. Front control arm bushings are the right diameter, 35mm OD. and could be pressed into service (sorry). Not exactly the right dimensions but.... They have a 14mm hole rather than the required 10mm hole. The stick out of the two ends of the center tube is too much on on side and not enough on the other, but since you'd have to have a 10/14 bushing made anyway, you could make it the right length, just has to spot welded in place. Over all body length is a bit short, but depending on where you position it in the body of the mount tube, you could put Anyway, there is a way to make these work and get stock rubber in the trans mount. Actually a bit stiffer perhaps, the stock bushing doesn't fill the entire volume with rubber (looks about half), there are some voids, where as the front control arm bushing has solid rubber. And Rockauto shows an aftermarket source from ACDelco for $6.72 CAD!!! A small fortune. About 17 cents USD
-
Still working out a price, and very tight time wise to make any for awhile with the on-going restorations here. Thinking about $40-$50 per set. I have to make them, then take them to the plater to get the areas that are machined re-coated. The raw parts come from the US, so I get exchange shipping and brokerage fees slapped on, many steps to create, couple of week turn around from the plater. I’ll try to add them to other plater parts to keep the cost of that incremental, but that adds turn around time. Like all custom parts, that seems like a boat load of $$ for a couple of bolts, but that’s the reality.
-
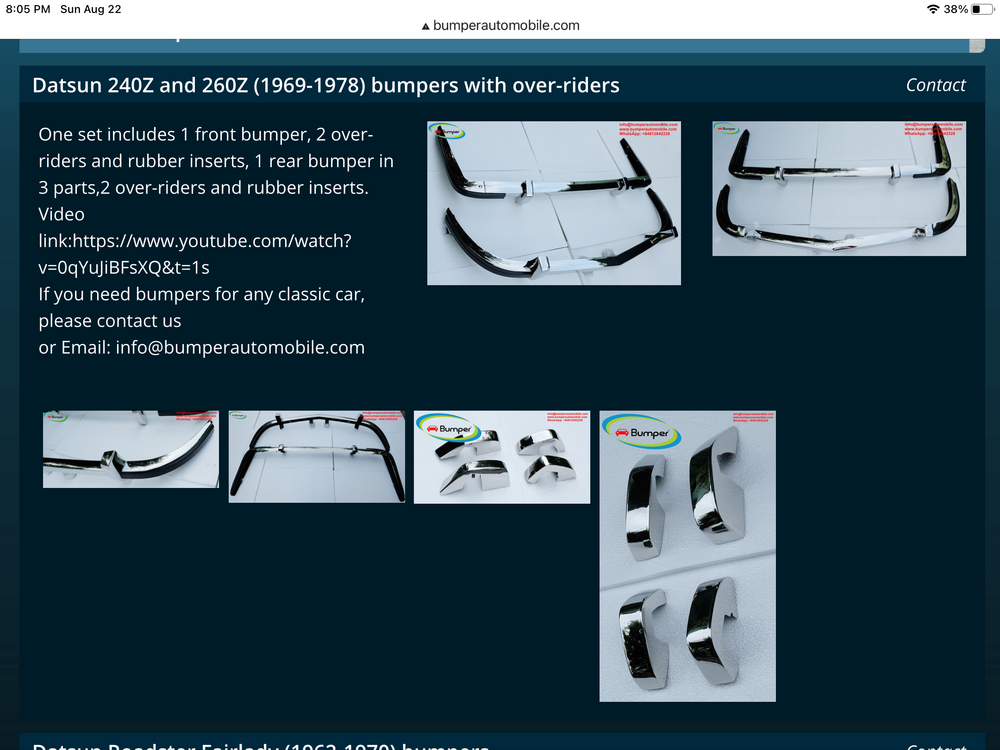
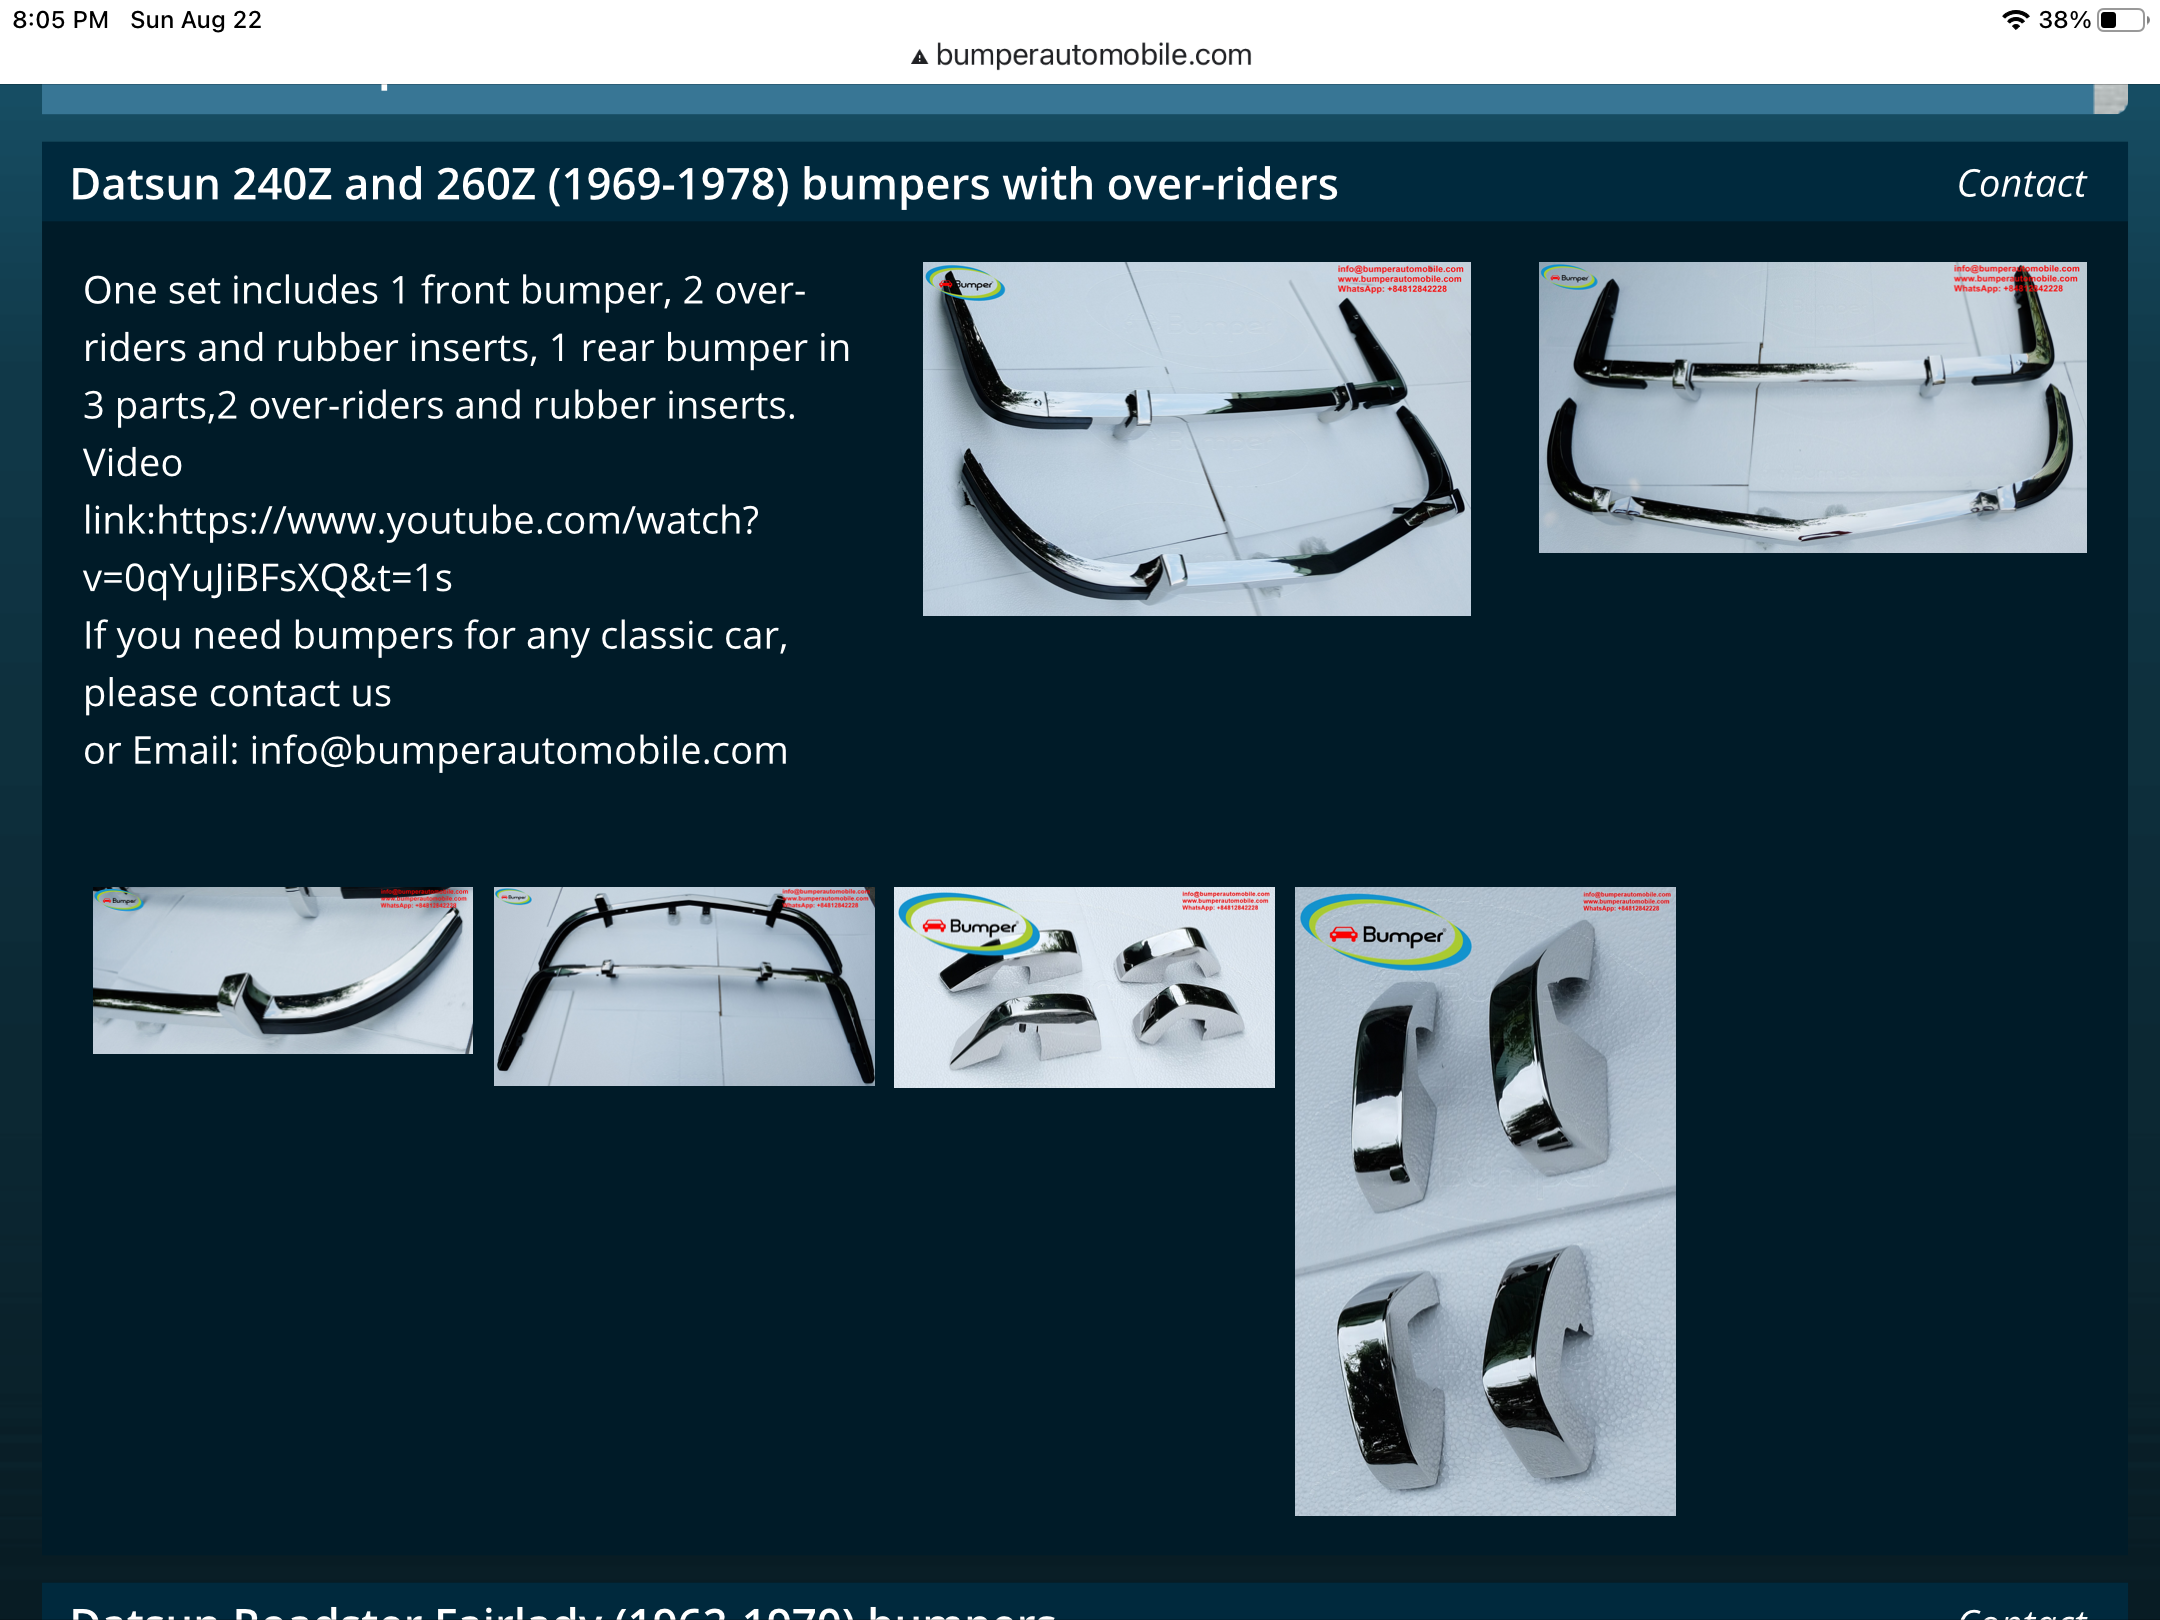
I really like the look of those bumpers! http://bumperautomobile.com/datsun-bumpers.html Maybe the new bumpers from these guys with their new rubber-less. over riders would make the perfect starting point. Hate to chop up an original if you don‘t have to.