JLPurcell
Free Member
-
Joined
-
Last visited
Everything posted by JLPurcell
-
 OK, I have two sets apart at this time. I have had the cradles blasted and powder coated (gloss black). They look great! (photos in a day or two) I am having rubber stamps made to match the R & L stamped on the black cradles (can you say anal-retentive). I started getting the zinc plated parts ready for plating, wire brushing corrosion and old plating off. So I call the company which is going to plate the parts for my seat belt project to get an estimate of cost:paranoid:. He made the following statement.... "if you bring me 8 parts or a 5 gallon bucket of parts it is going to be the same cost".:tapemouth Needless to say in dismantling numerous Z's over the years I have lost of nuts, bolts, pins, brackets, screws, covers washers... you get the picture. The problem is that I have now spent over 8 hours wire brushing all of the pieces getting them ready for plating and I am not even close to done. When I get the yellow zinc plating done I get to start on the parts for clear zinc plating. This is why all of my projects seem to drag out!
 -
Exchanged emails with the seller, another great long time Z enthusiast. Has a great 72 restore-mod invited him to this site. I know he will feel welcome and be among kindred spirits. jlp
-
Just received additional photos of these belts. The ad photos would lead you to believe that they are in nice condition but in the additional photos all but one of the boots are torn etc... these are definitely a parts only set with only one possible good boot. jlp
-
thanks Steve
-
Sent a queston to the seller, Thanks.
-
Thanks for the heads up. Made an offer. JLP
-
Tom, Welcome to the site! Many kindred spirits here! JLP
-
My latest mission! I am looking for original re-tractable seat belts. The first year for these belts was 1972 model year. I am looking for parts and would be interested in anything from a mint setLOL to sets which would be good for parts only. jerrypurcell@frontier.com
-
The aluminum drums have a steel sleeve inside for the braking surface and your fire department should carry Class "D" extinguishers.
-
I am looking for someone in the South Los Angeles area that might be going to visit Vista (Classic Datsun Motorsports). I found a NOS TOYO 175R14 tire:) for my spare in the 72 in South Pasadena. The guy will not ship or take it to Les:ermm: for shipment but will meet someone in the South LA area. Thanks Jerry Purcell
-
As I dropped off the cradle for blast and powder coat today I was asking myself the same question. As I said earlier I was a little surprised at the original estimate but it was worth it to me for a "restoration". But just polishing up the buckles and replacing the labels and webbing $782.00 is beginning to seem a little pricey. But I have already authorized the work so I will follow through at this point.
-
Working on my to-do list today as well as put the Z to bed for the winter. I dropped off my seat belt mechanism cradle for media blast and powder coat today. Went over to my car storage and changed wheels on the Z (put stock set on for winter), took out the windshield washer bottle to drain dry and store for the winter, pulled battery, and put the car under cover and in a Car Jacket. First time out of the box for the Car Jacket seems to be a neat product, we will see! I now have all winter to get all of my goodies gathered up for spring. I just purchased another set of NOS rear quarter panels don’t need them anymore but could not pass them up.
-
Once the wheel is removed there is nothing else holding the drum in place but friction. You need to make sure the Emergency brake is off and back off the brake lining adjusters. Then hit the center of the drum between the wheel studs with a flat sledge hammer. Not so hard as to break the drum but hard enough to loosed the corrosion holding it in place it should pull off at that point
-
This is the perfect example of why this site is so great! Thanks Carl. DONE!
-
After my to-do list I received an email from Les. Les follows this site and read my to-do list. Les, emailed me concerned that he had not met my expectations in some areas. This is not the case. I am anal-retentive when it comes to certain things and this project is one of them. I want to be very clear about this Les is the man! Seriously, Les was more than fair in our dealings and more than met my expectations. Everyone needs to understand that it is one thing to take a survivor and restore it but a whole different thing to take a basket case and put it back together. This car had been in different stages of disassembly for 30 years when he received it. Although I had tons of NOS parts not all of the basic nuts and bolts were there so to speak. So it is no reflection on Les when I post the continuation of work on my 1972. If not for Les and his offer to restore my 1972 when he saw it in the background while viewing photos of the 29 car, it would probably have been scraped by now. Thanks Les! Now put a smile on both our faces and get yourself and the 29 car back on the track.
-
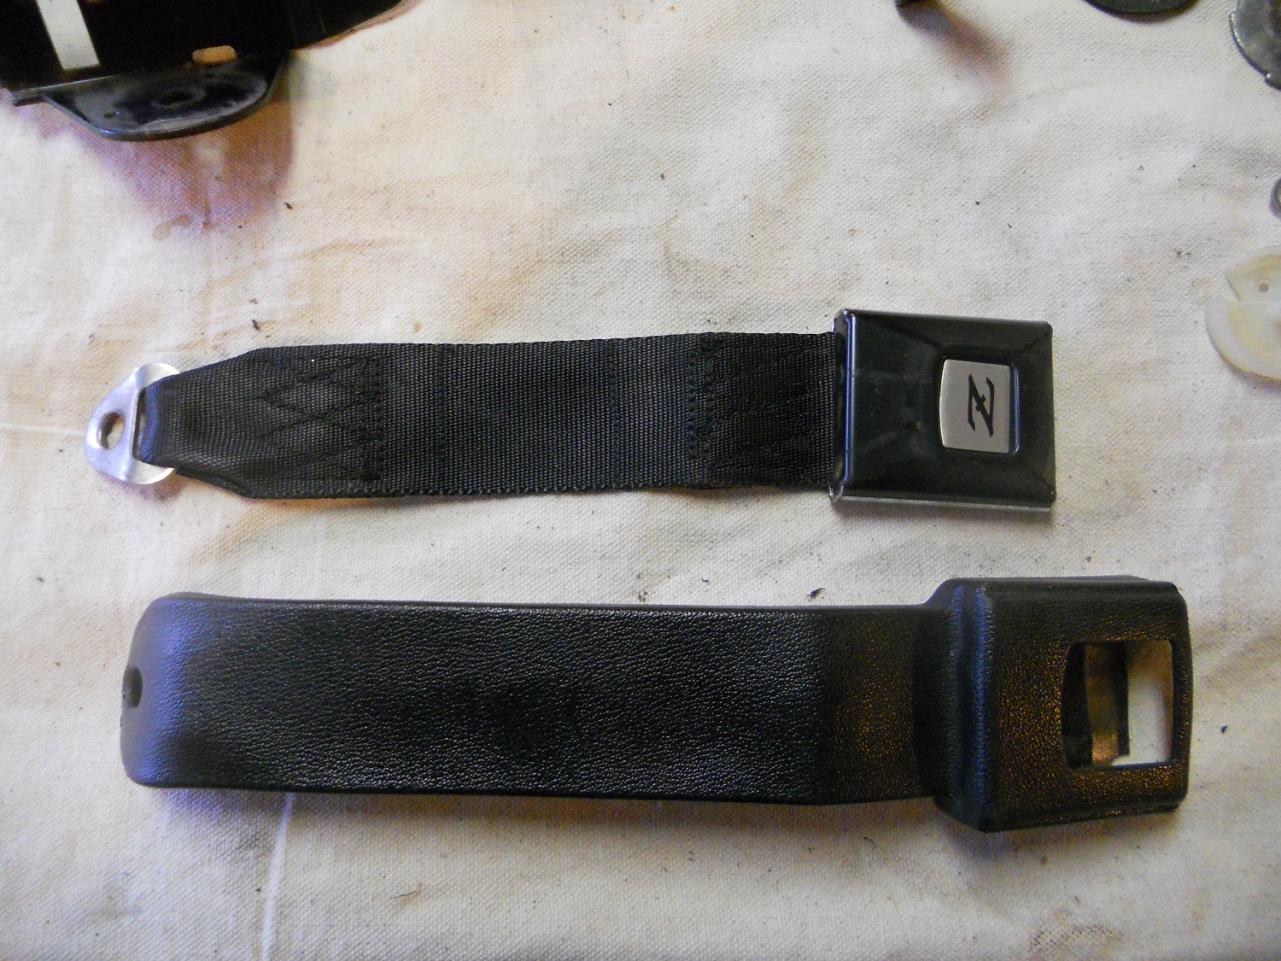
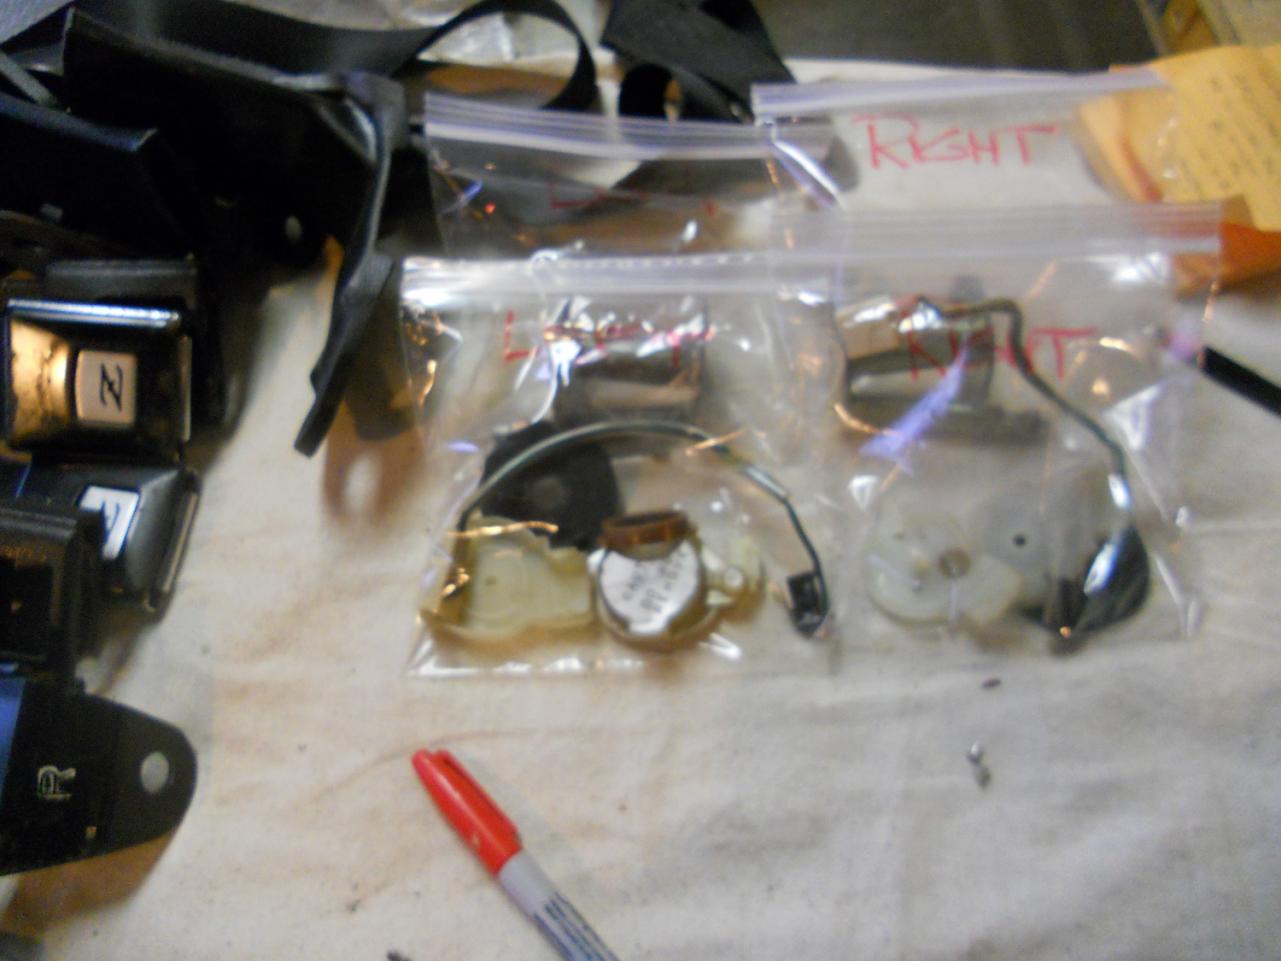
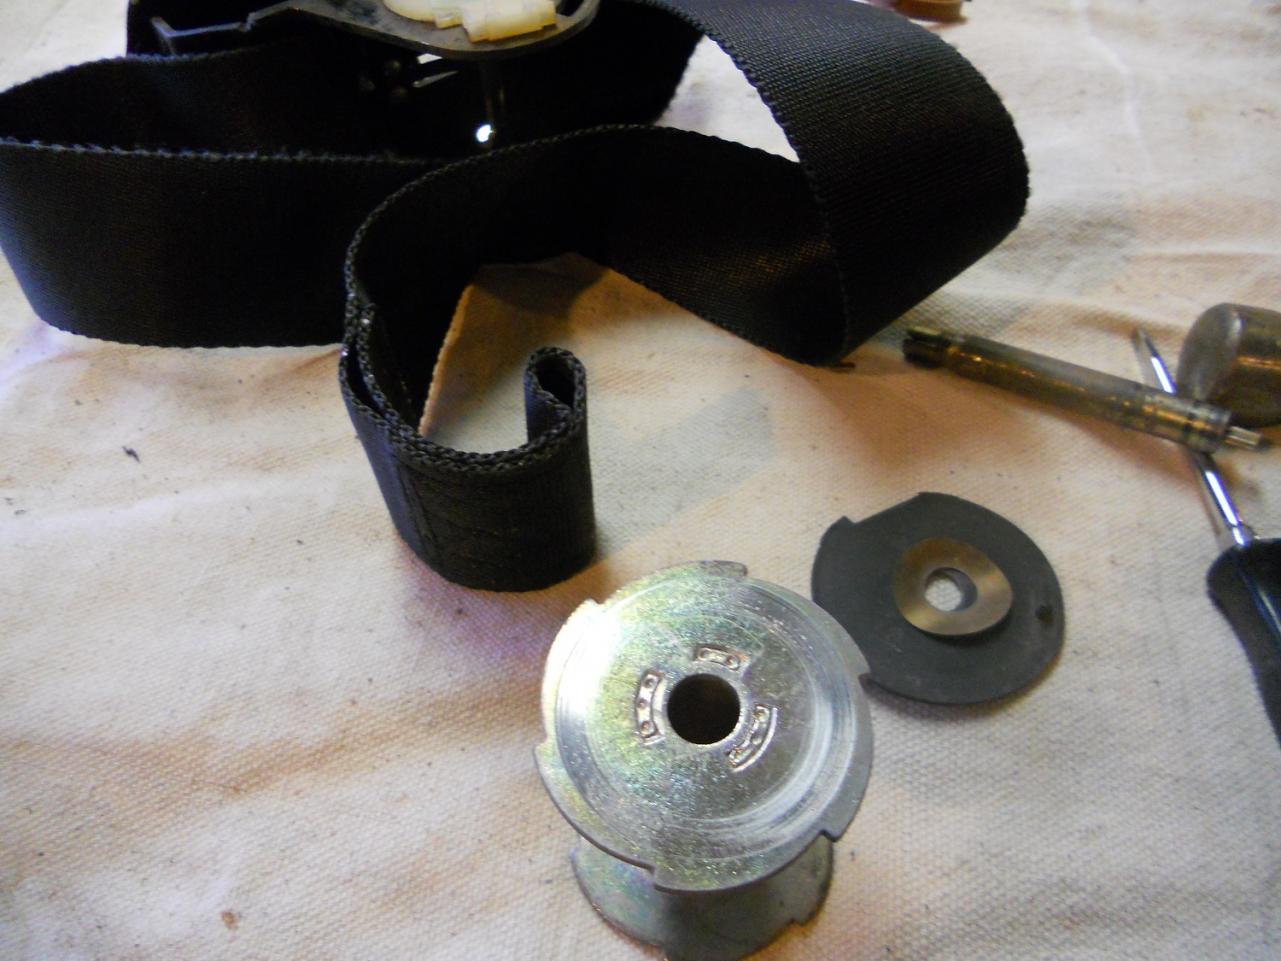
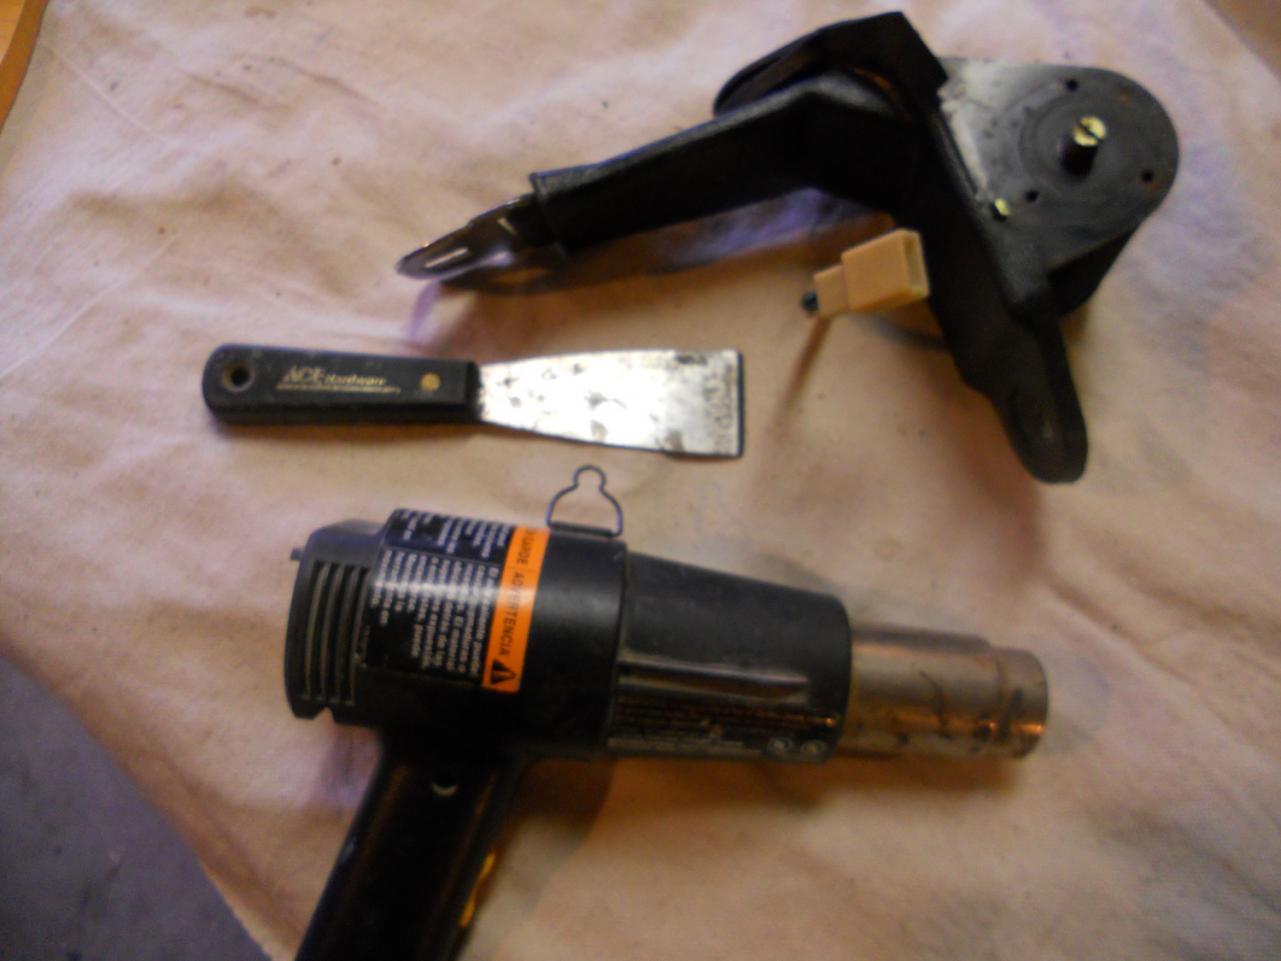
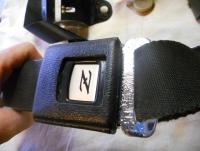
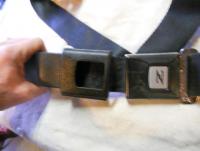
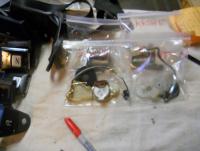
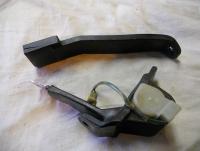
Removal of the latch side of the belt assembly from the boot can be completed as follows. I once again heated the boot to make it more supple then slipped the tongue of the seat belt into the latch and pulled as I made sure the lower bolt retainer moved smoothly through the boot. All parts bagged and tagged. I will follow up with next step when the blasting, painting, and plating are complete. At this point it will probably be after the holidays. I hope that someone finds this information useful in the future.
-
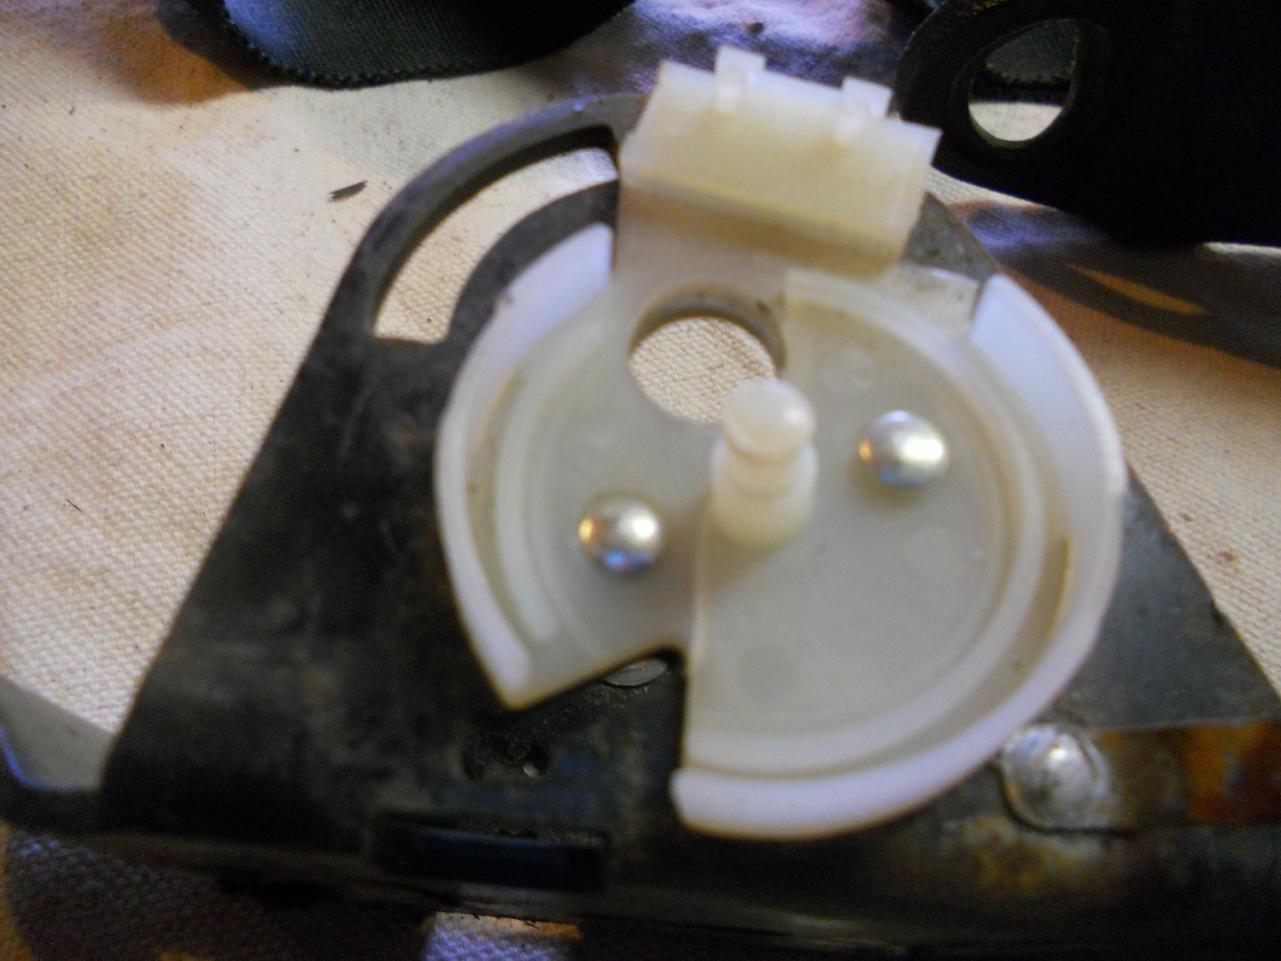
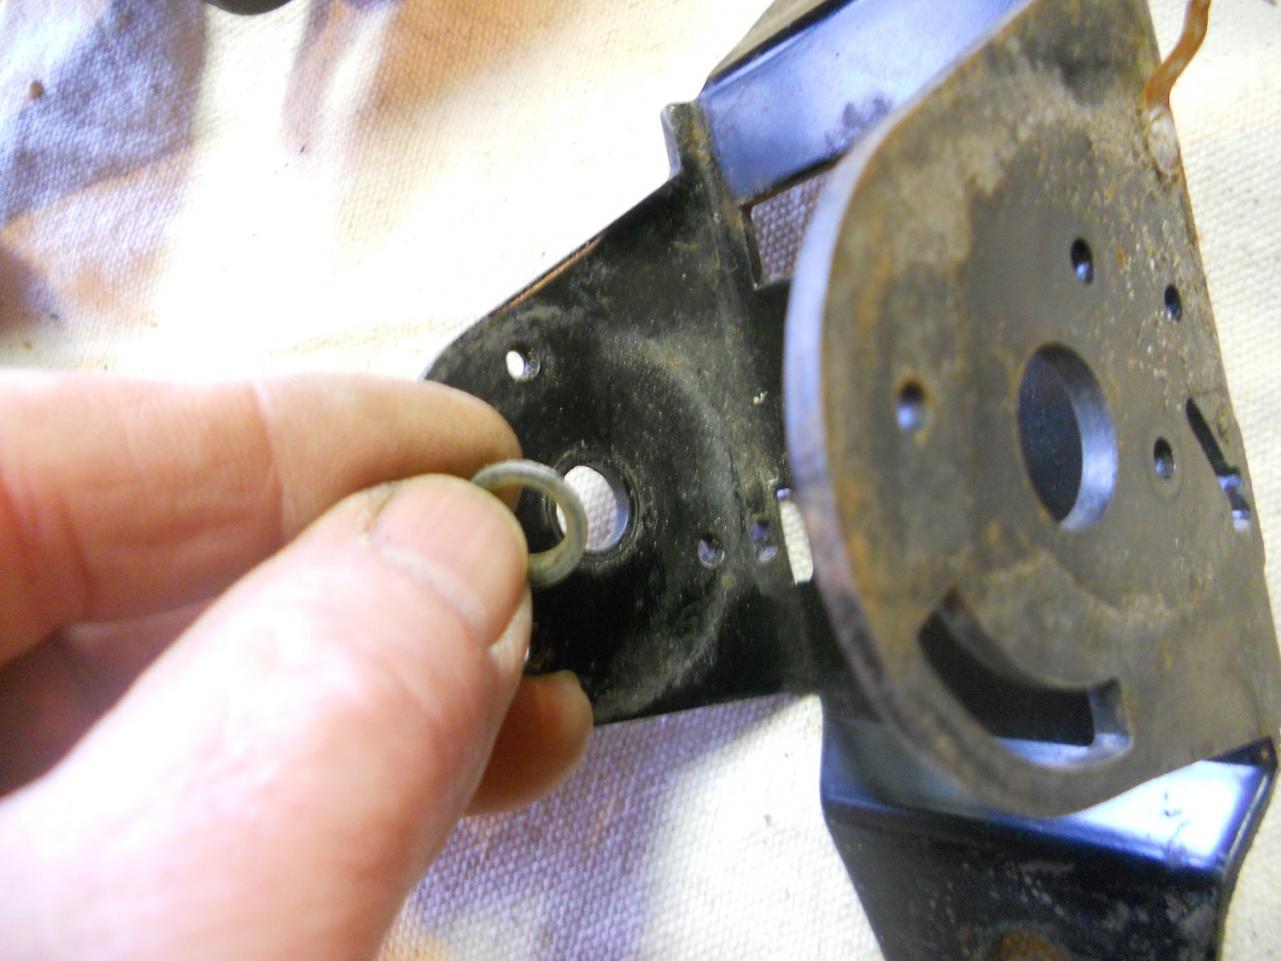
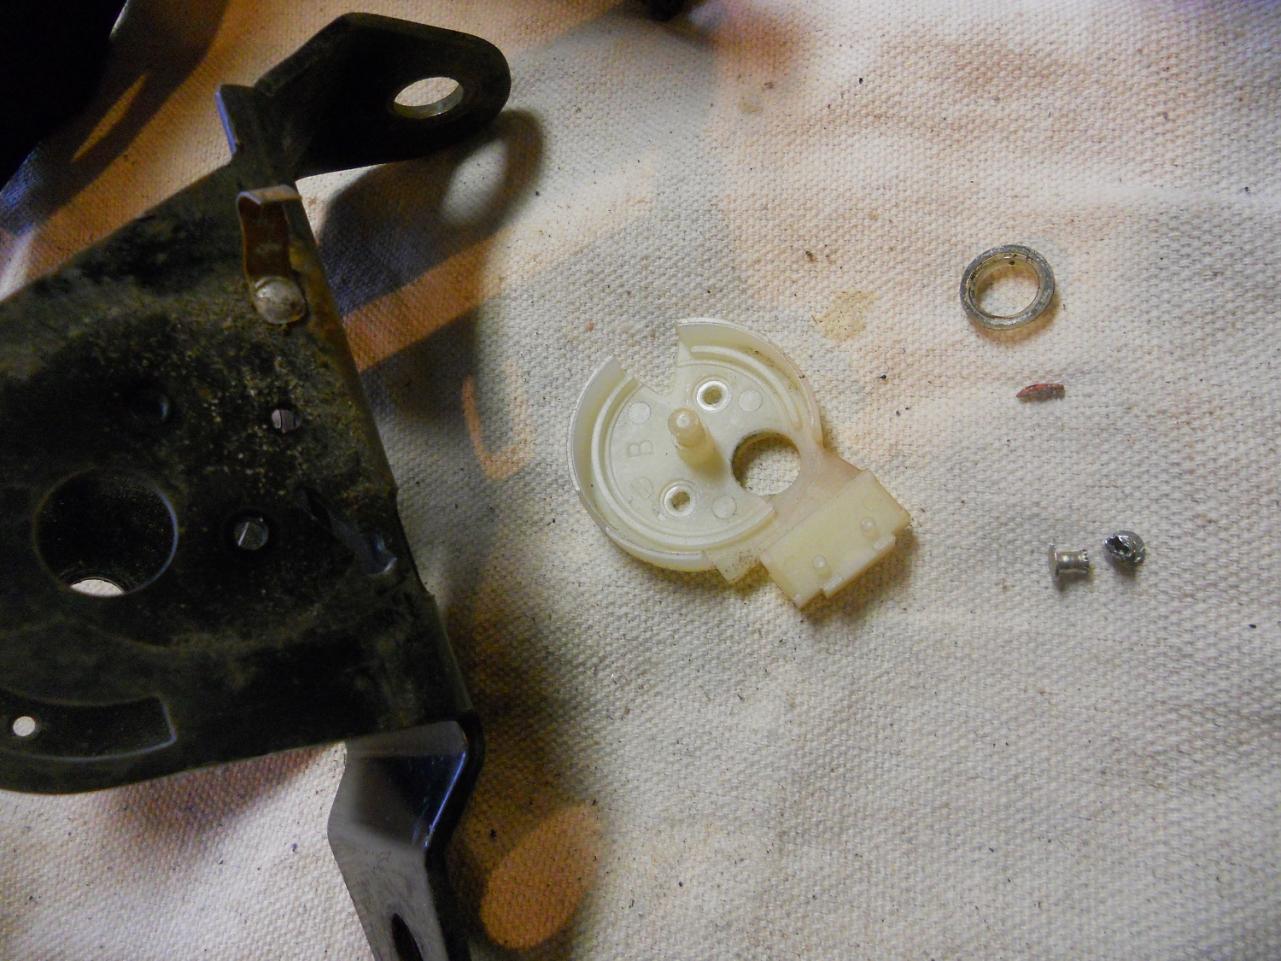
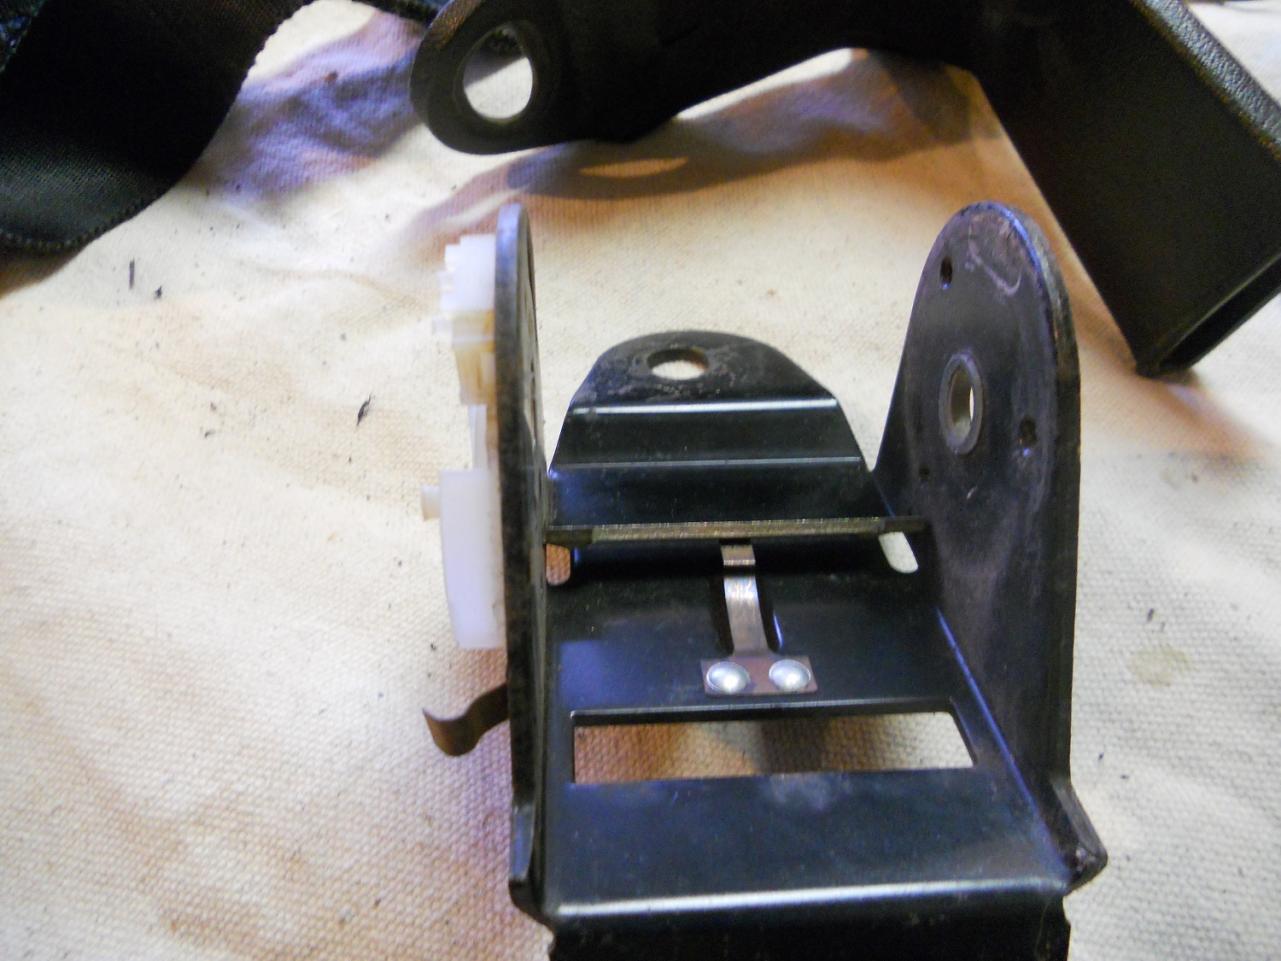
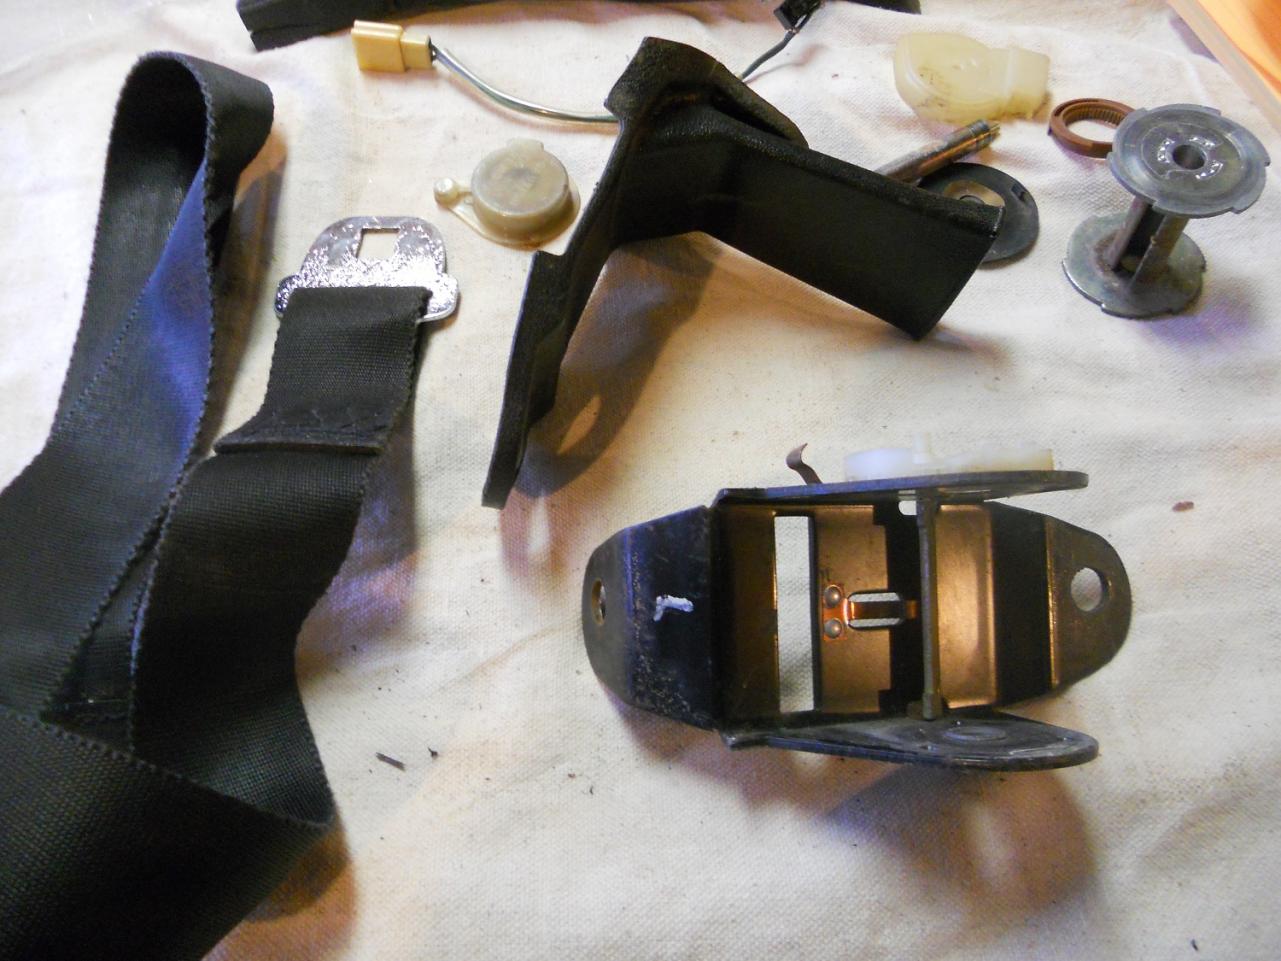
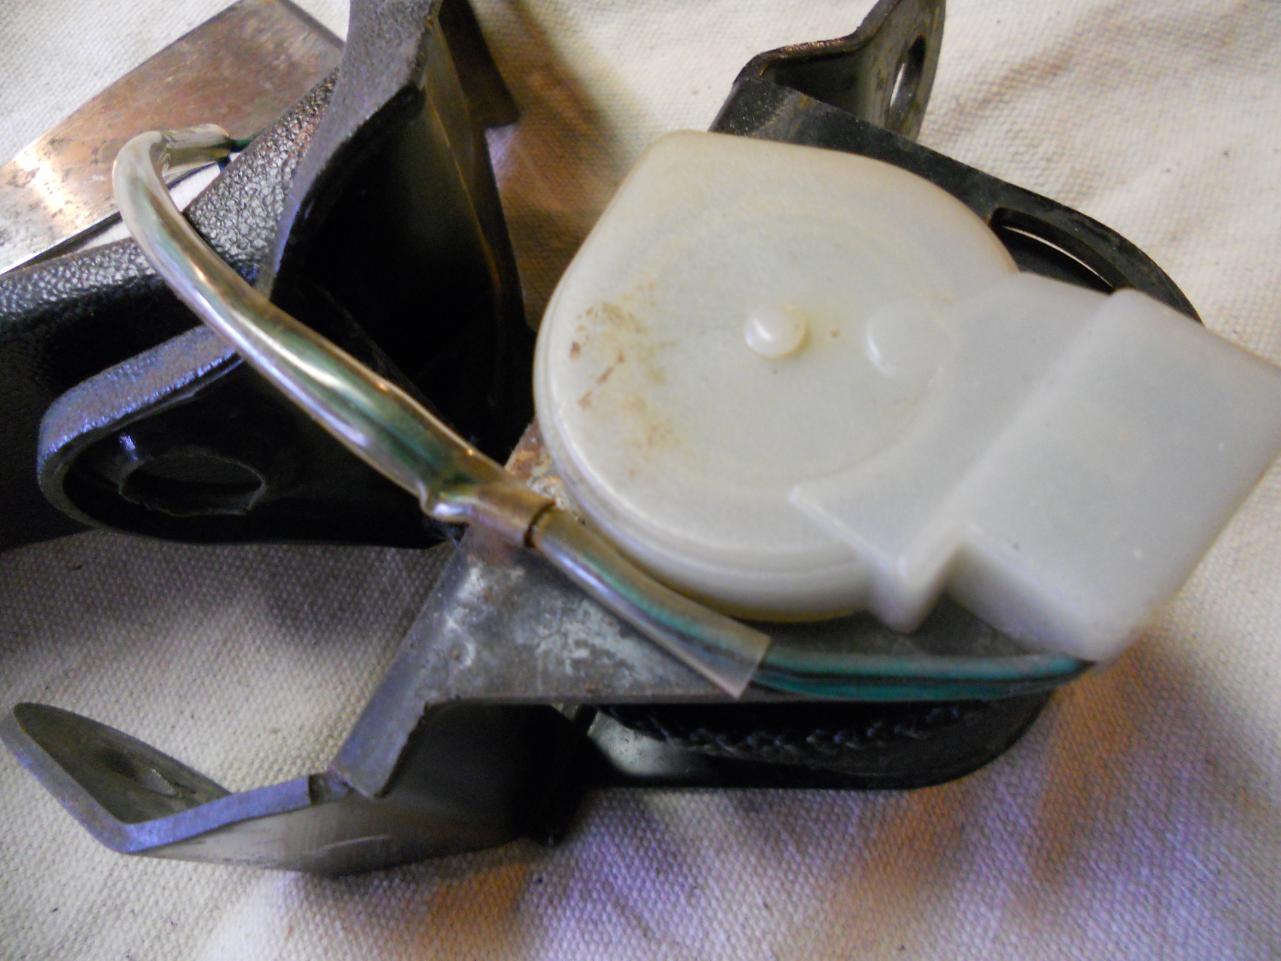
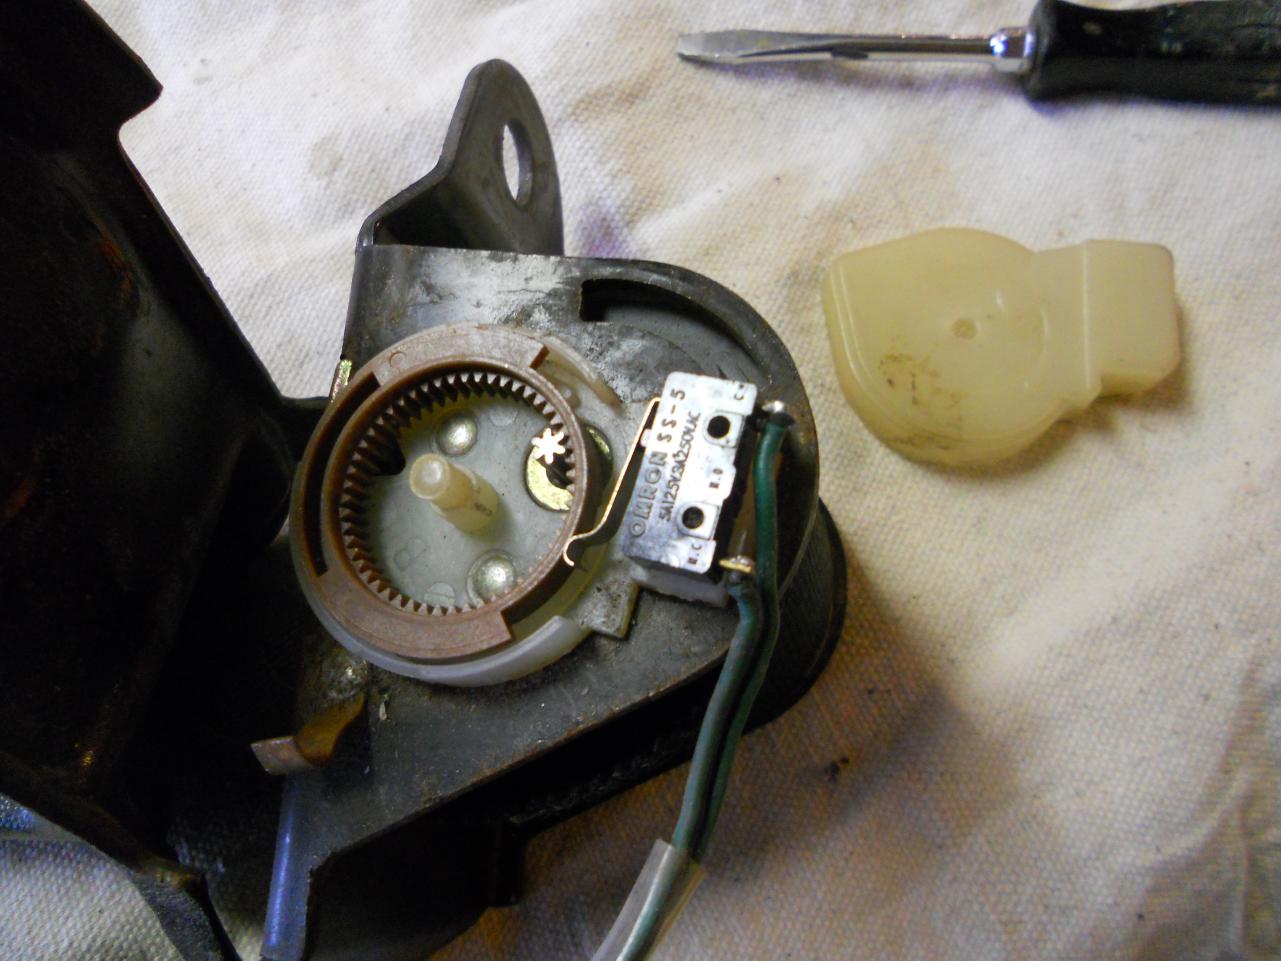
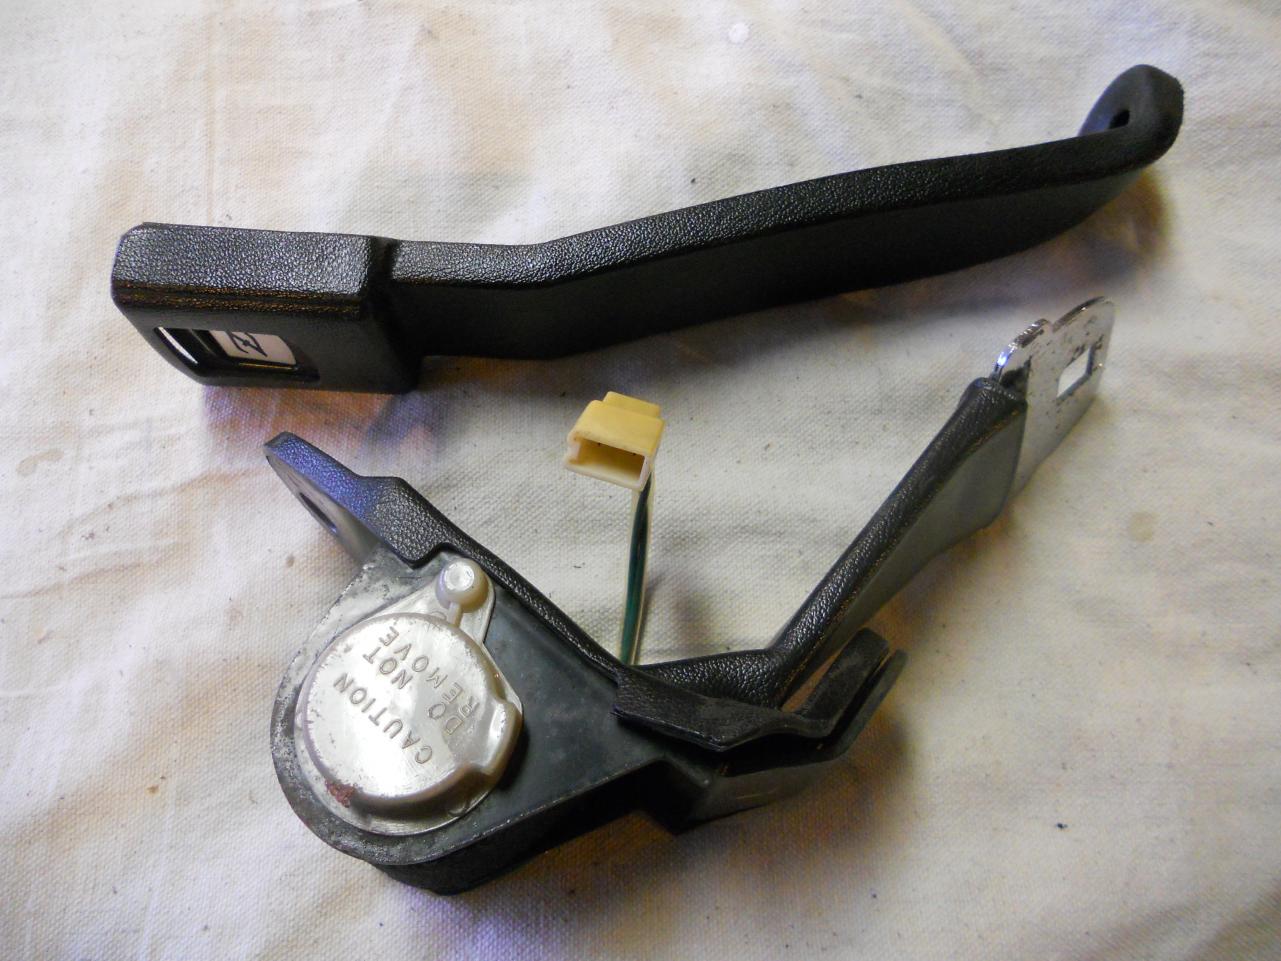
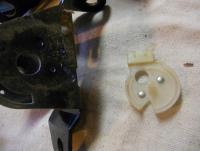
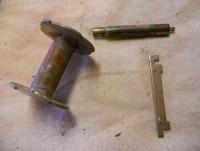
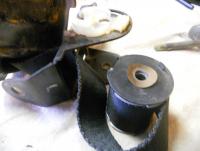
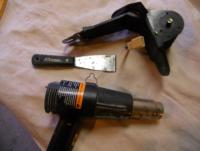
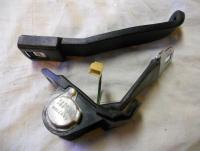
The final step of dis-assembly of the retractor assembly is to remove the nylon bushing on the spring side and the warning switch plastic retainer. The nylon bushing on the spring side of the cradle can be easily removed. The plastic warning switch retainer is held in place by two metal rivets. I placed an awl through the retainer pin hole from the spring side into the back of the rivets and drove them out. Once the plastic piece has been removed the rivets can be removed. At this point the metal pieces are off to media blast. The cradle will be powder coated and the remaining pieces will be yellow cadmium plated.


-
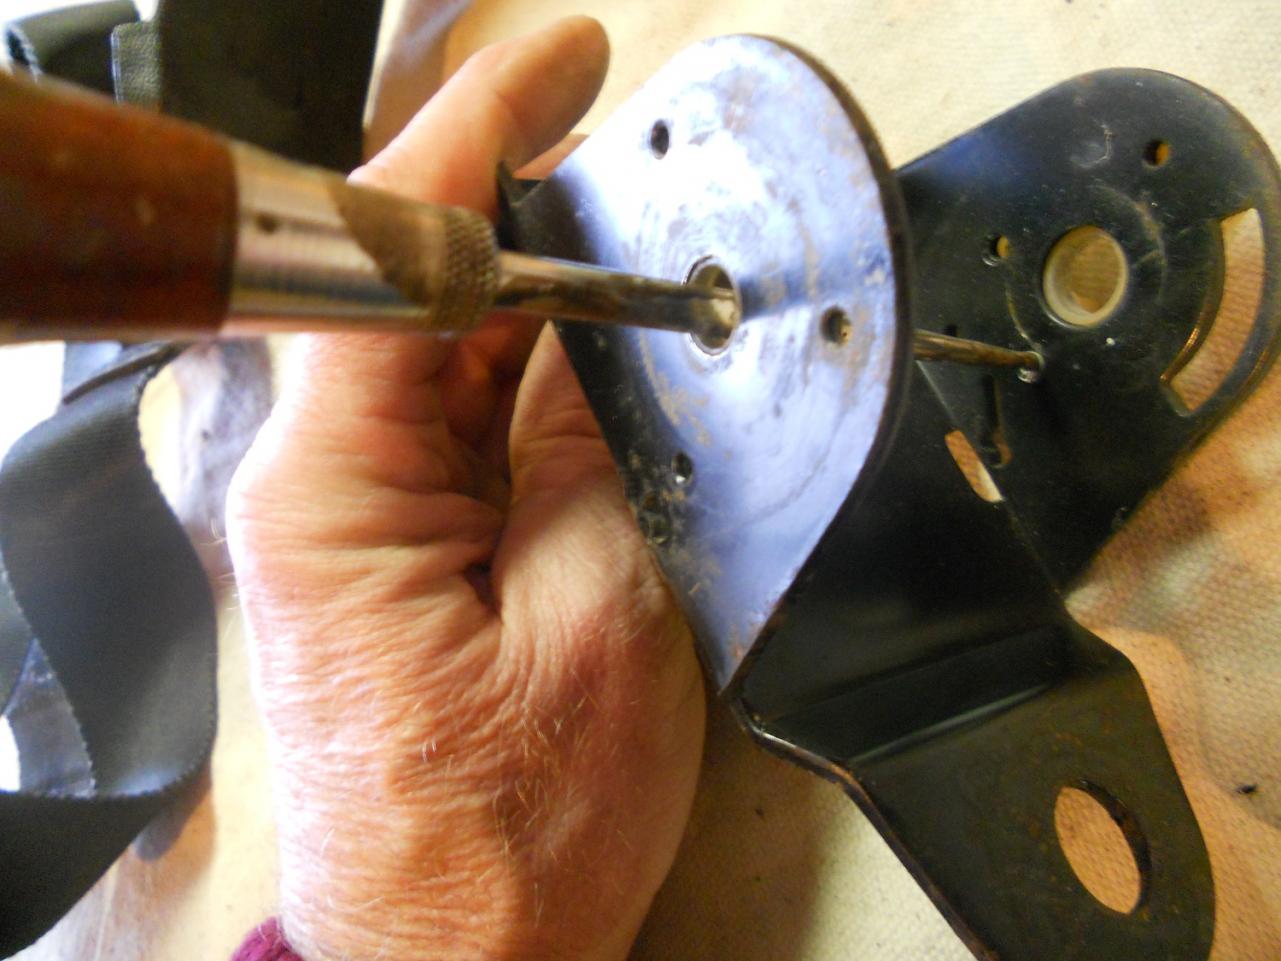
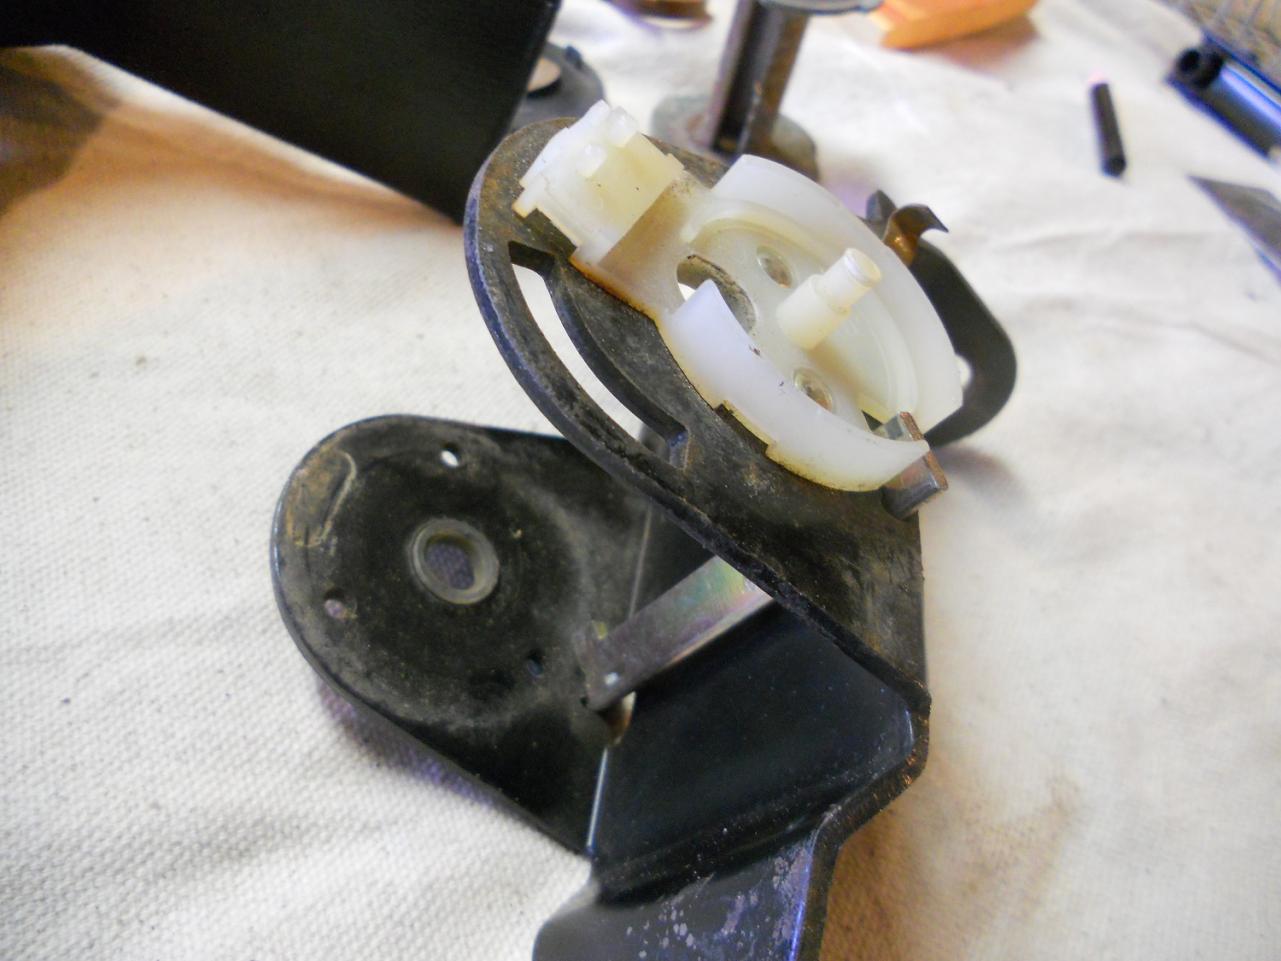
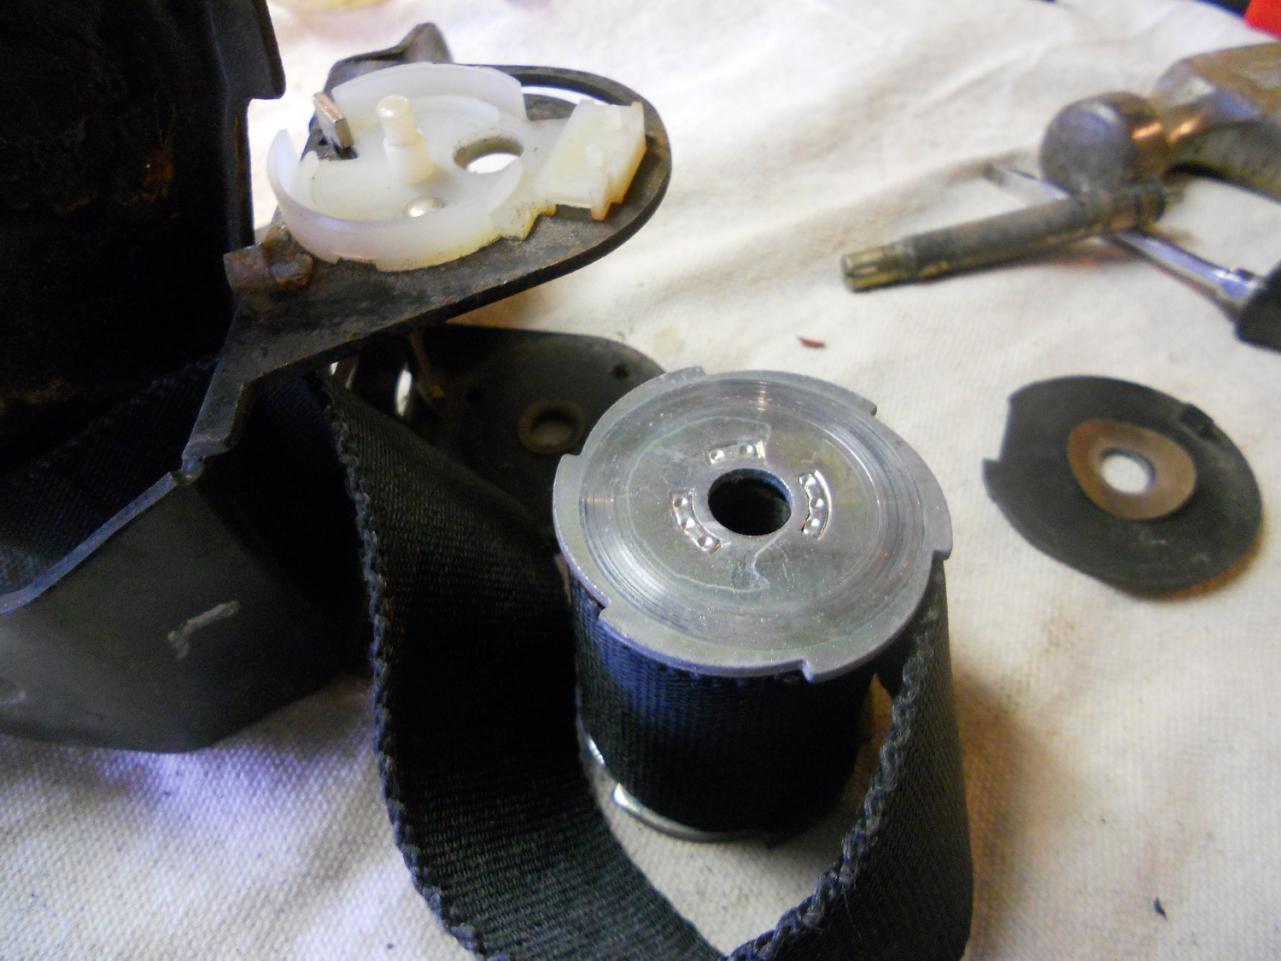
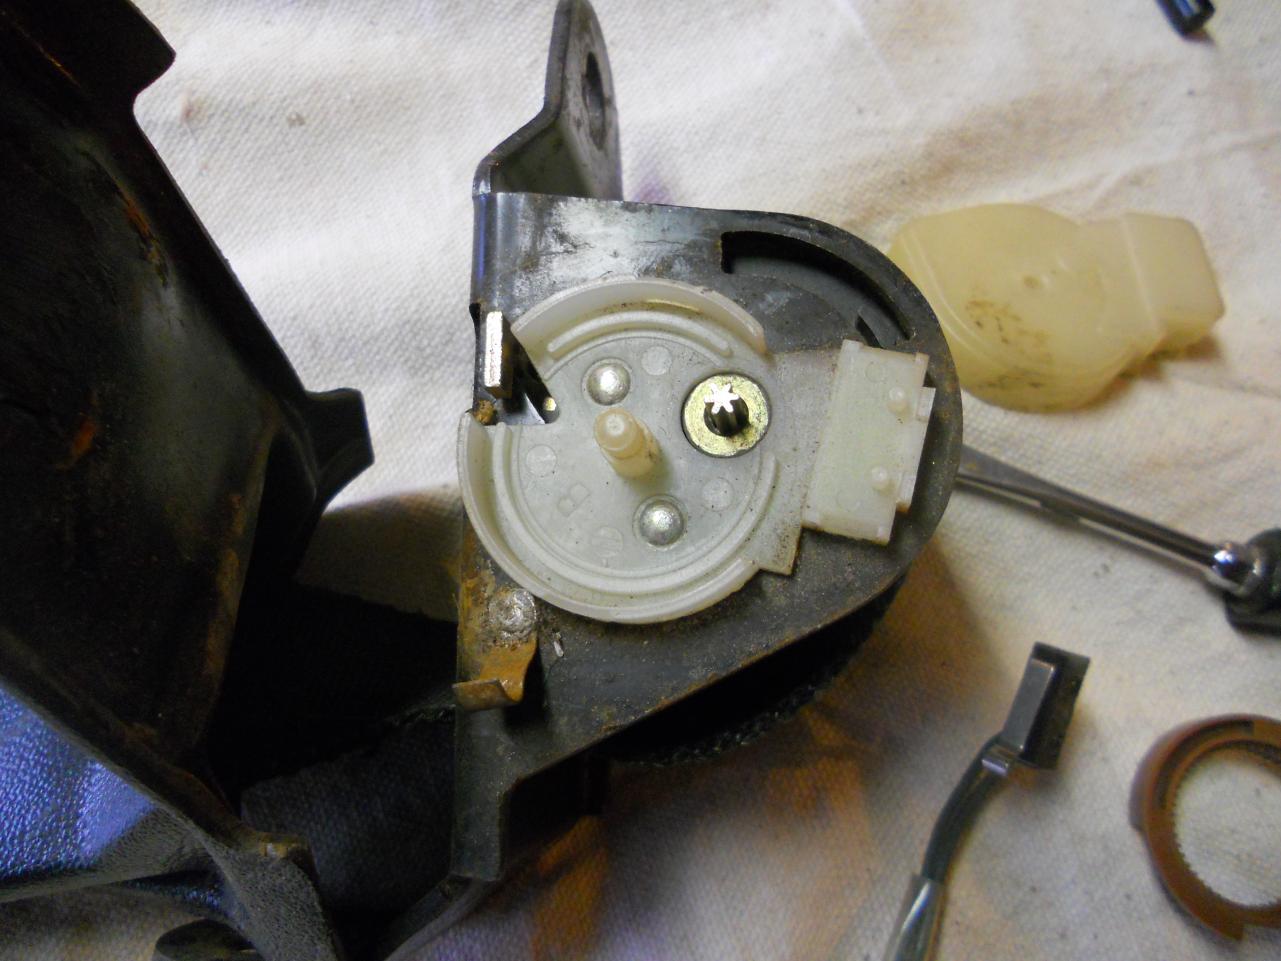
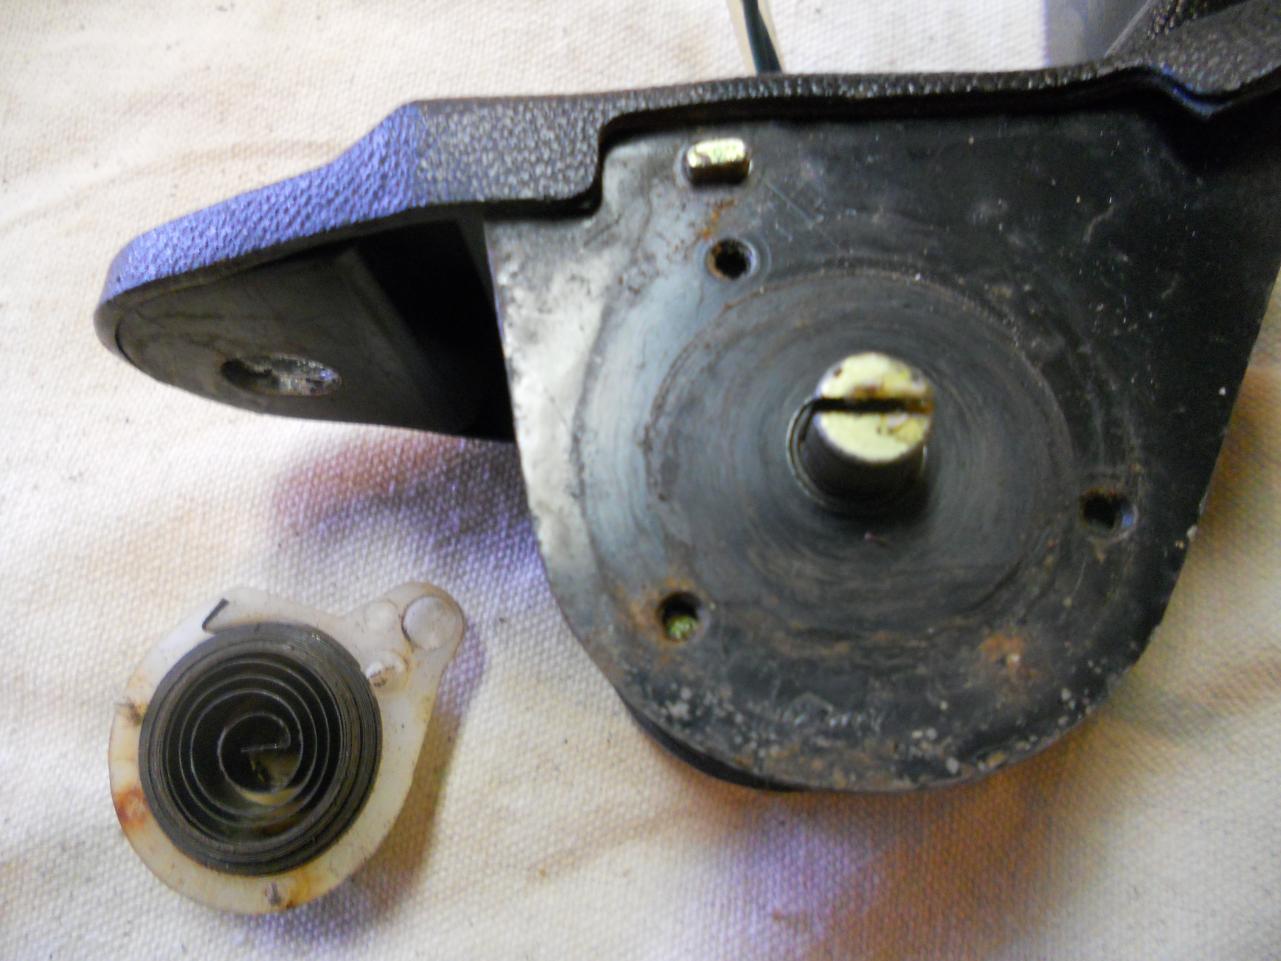
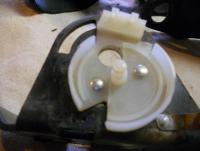
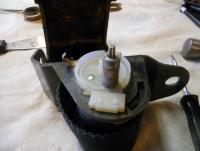
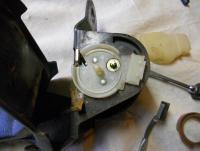
Next I removed the inertia locking assembly. This is easily completed by pushing down on the tension spring and them sliding the metal bar toward out of the metal cradle through the warning switch side of the cradle.


-
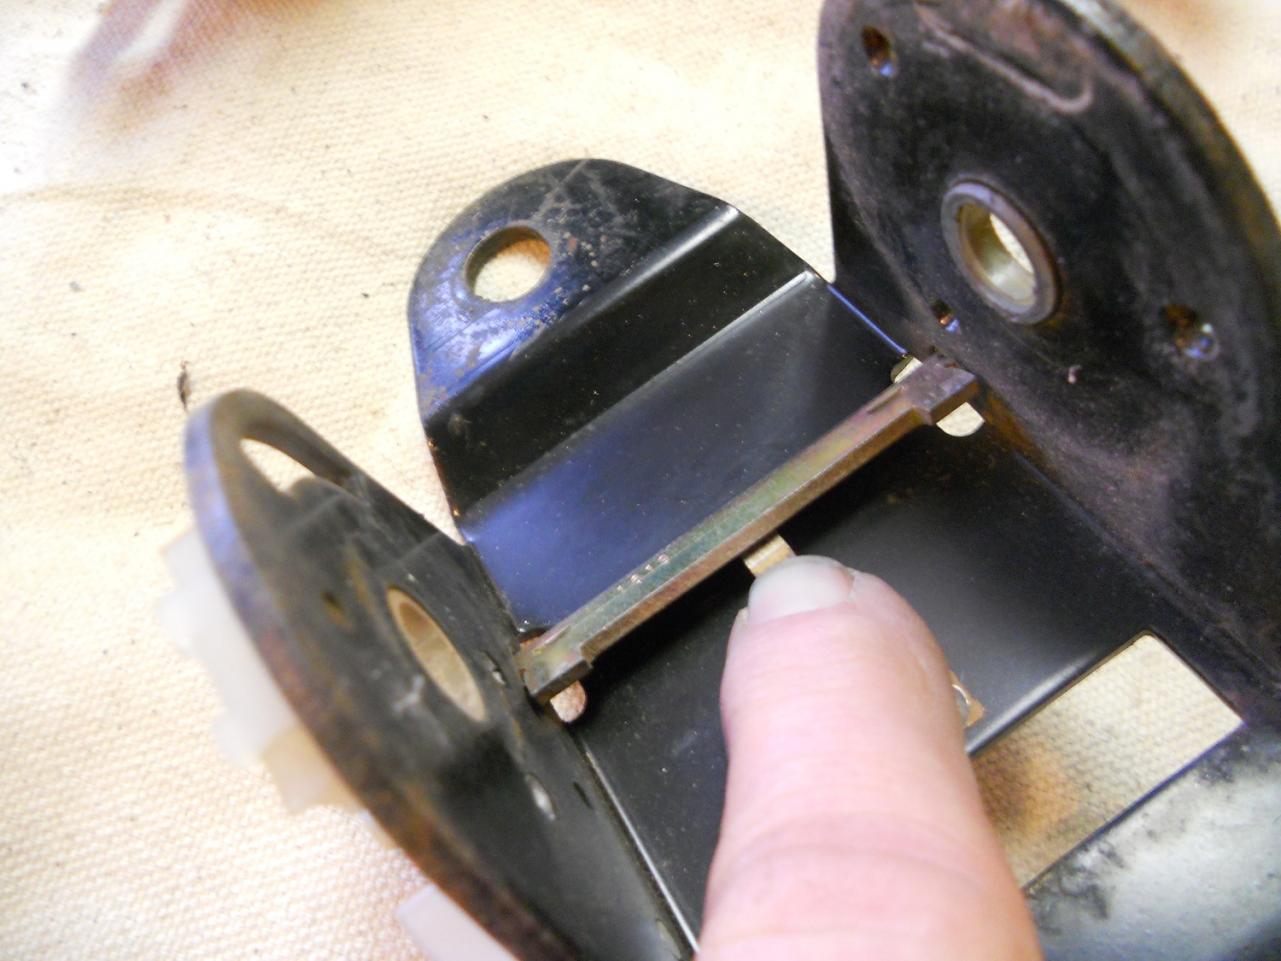
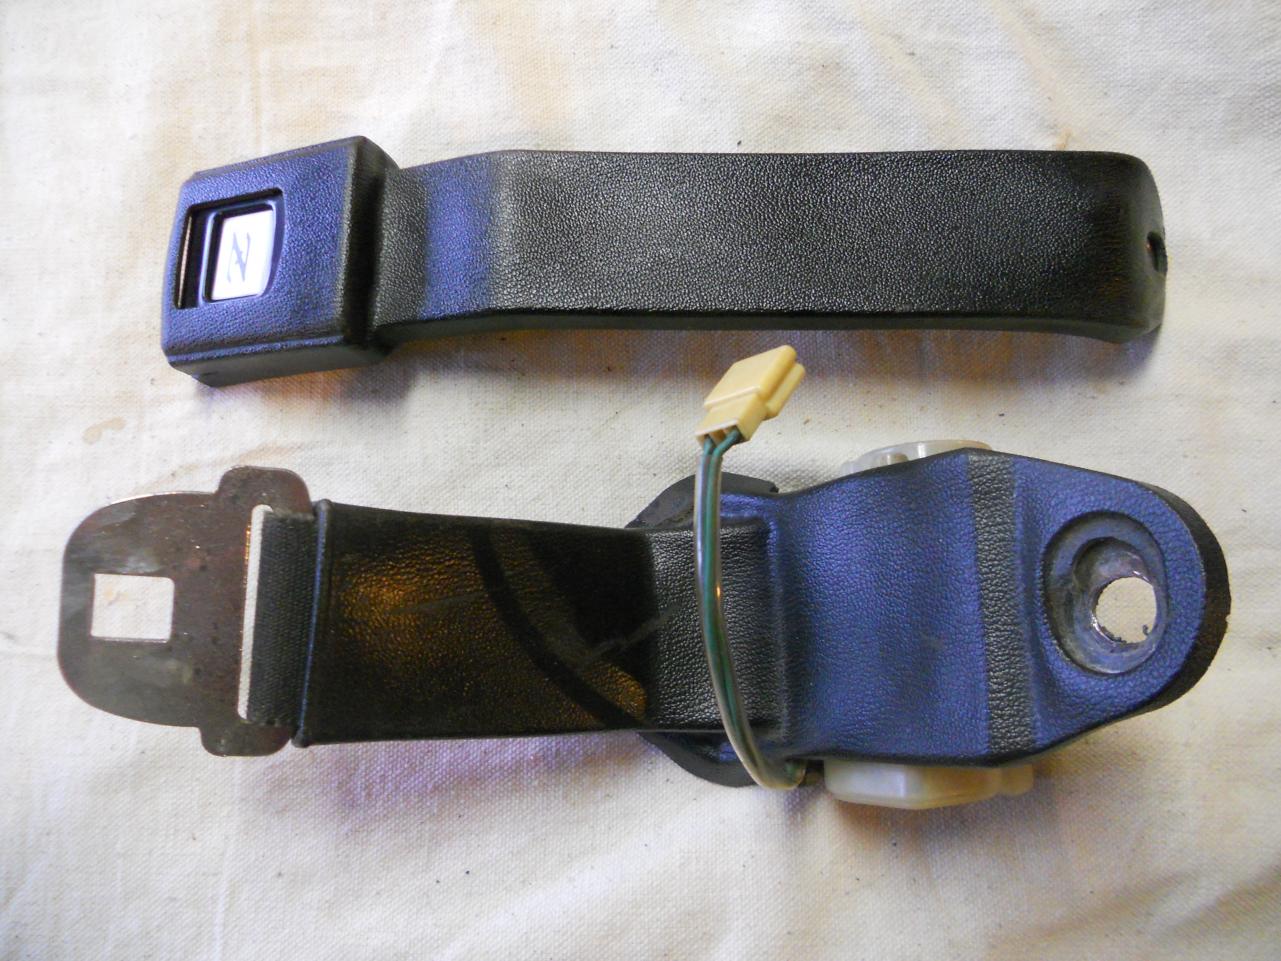
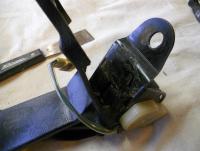
Dis-assembly of the belt mechanism from the metal cradle is the next step. The center retainer pin is removed by pushing the pin through the metal cradle pushing from the split end of the pin. I did this with a small socket taping with a hammer. The pin sits in nylon bushings so it is not hard to drive it through. The pin has a shoulder so it can only be removed from one direction. Once pin is removed the seat belt mechanism can be removed from the cradle and the seat belt webbing removed from the mechanism. At this point you can pull the webbing through the rubber boot separating the boot from the assembly. Be sure to note the order of assembly.


-
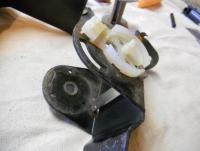
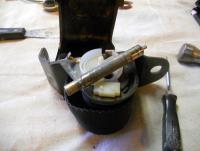
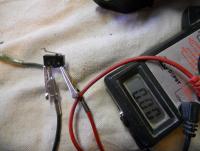
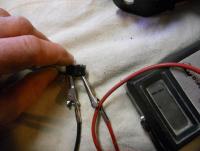
Next I removed the electric warning system plastic cover on the reverse side of the spring. This cove snaps on to its plastic backing. You will need to pop the cover lose all around then carefully place a flat blade screw driver up and under the cover to the middle and pop the center button lose. The cover is not removed exposing the warning switch and mechanism. At this point I tested the switch to make sure it was in working order. The switch is a normally closed switch (contactors making continuity) and the circuit is broken when the switch is pressed. The test is made with a simple volt ohm meter.


-
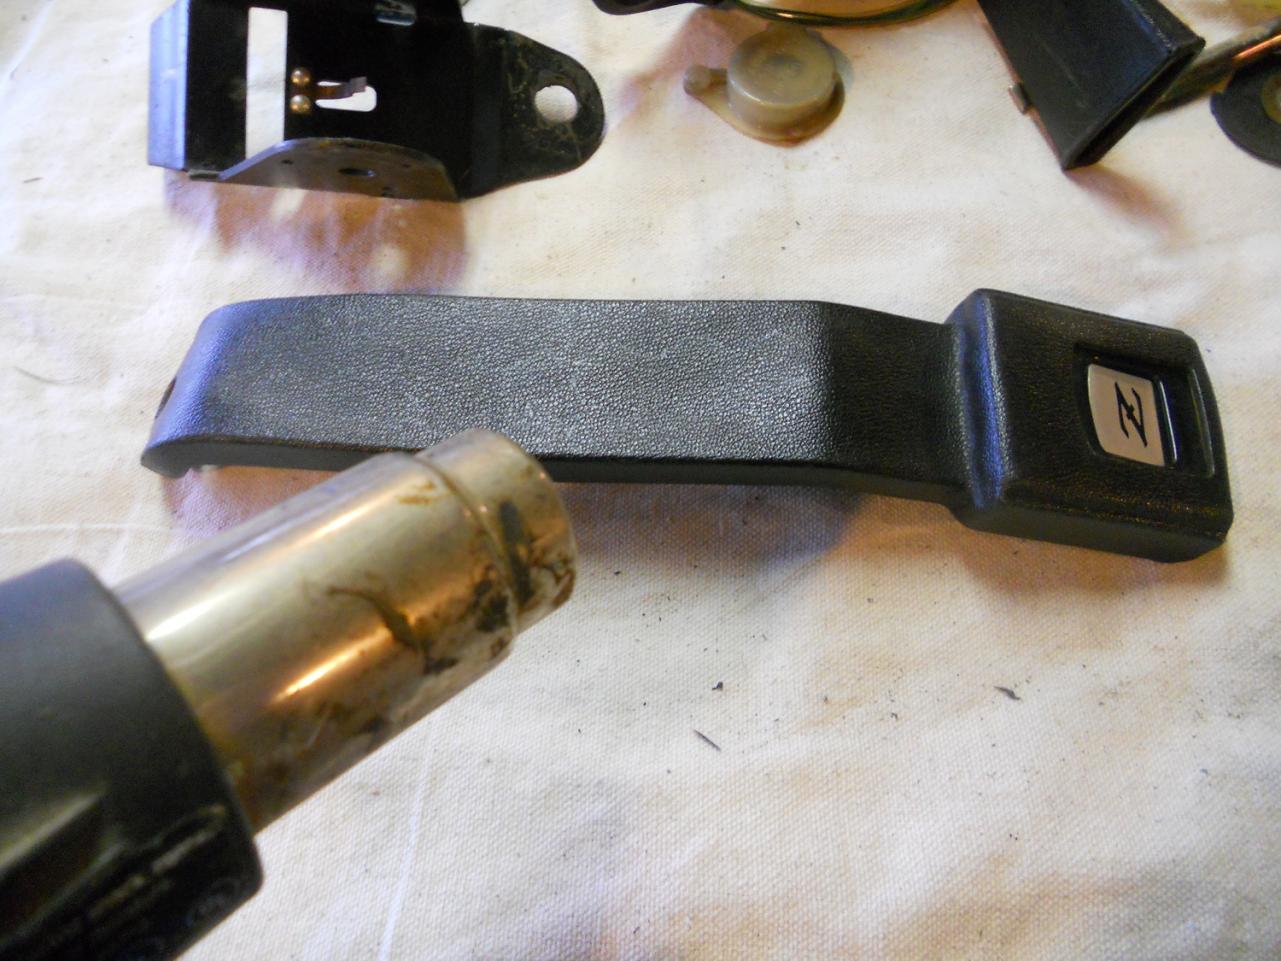
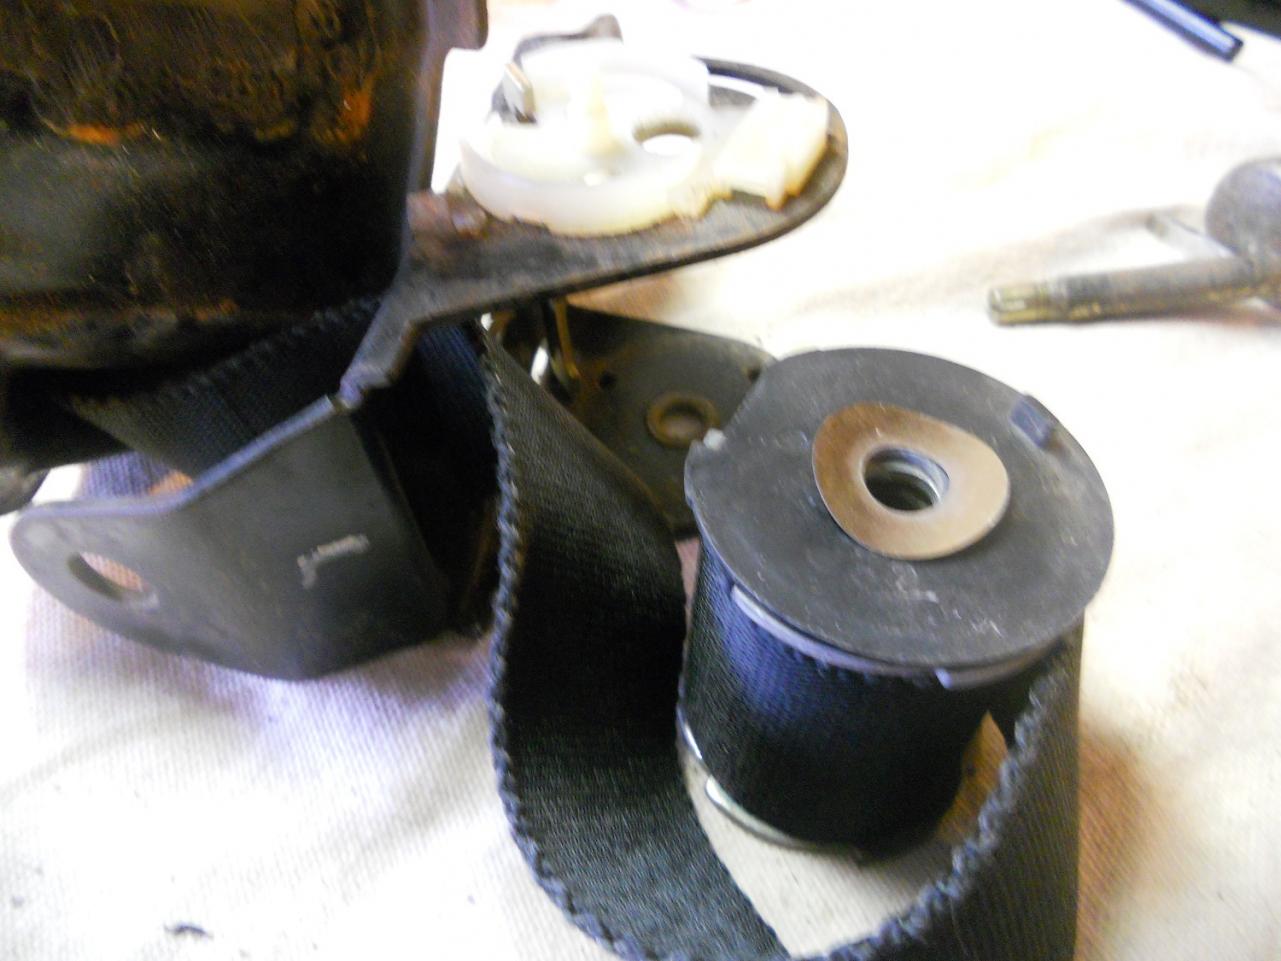
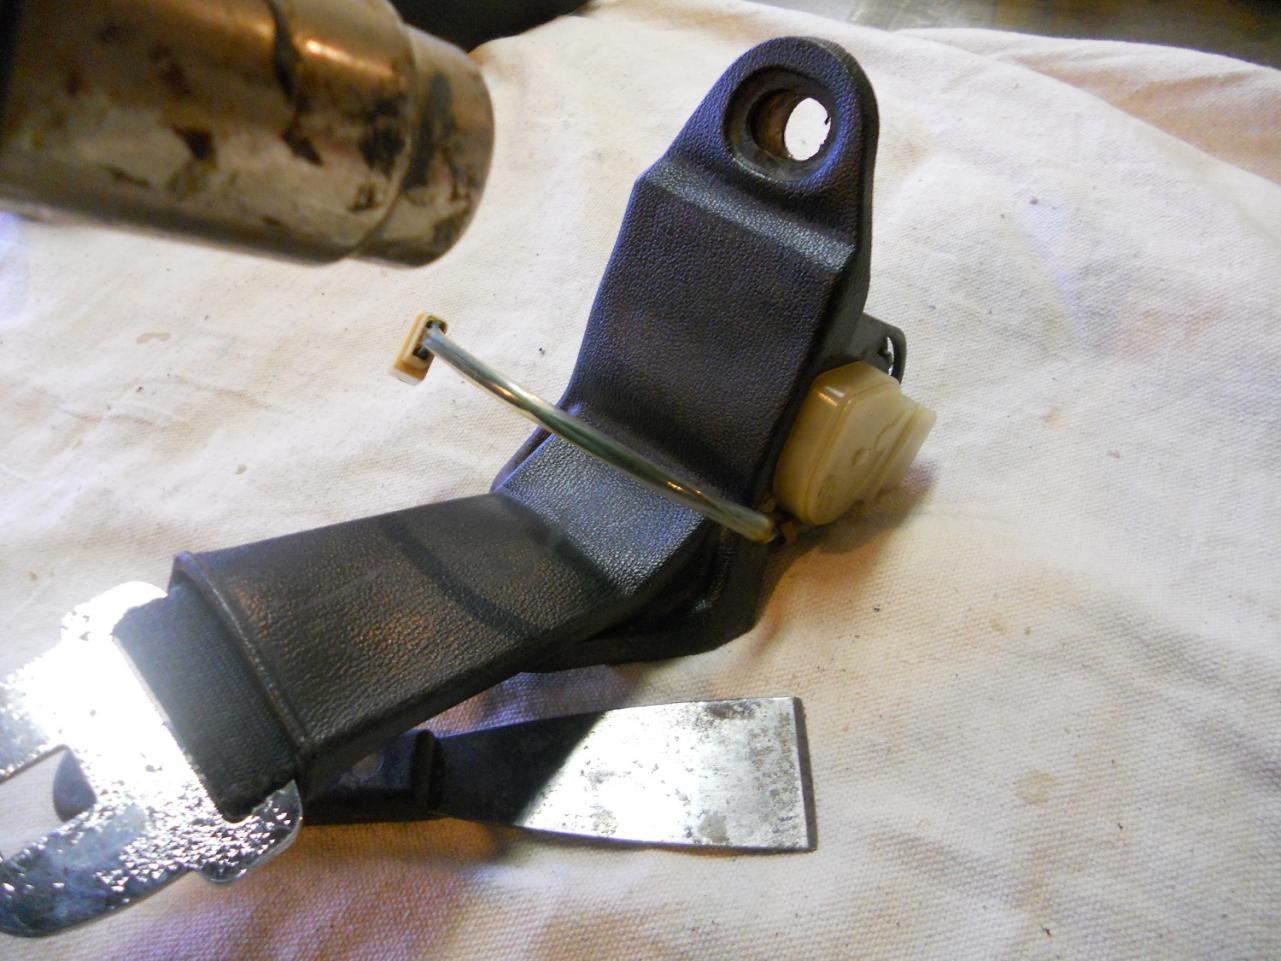
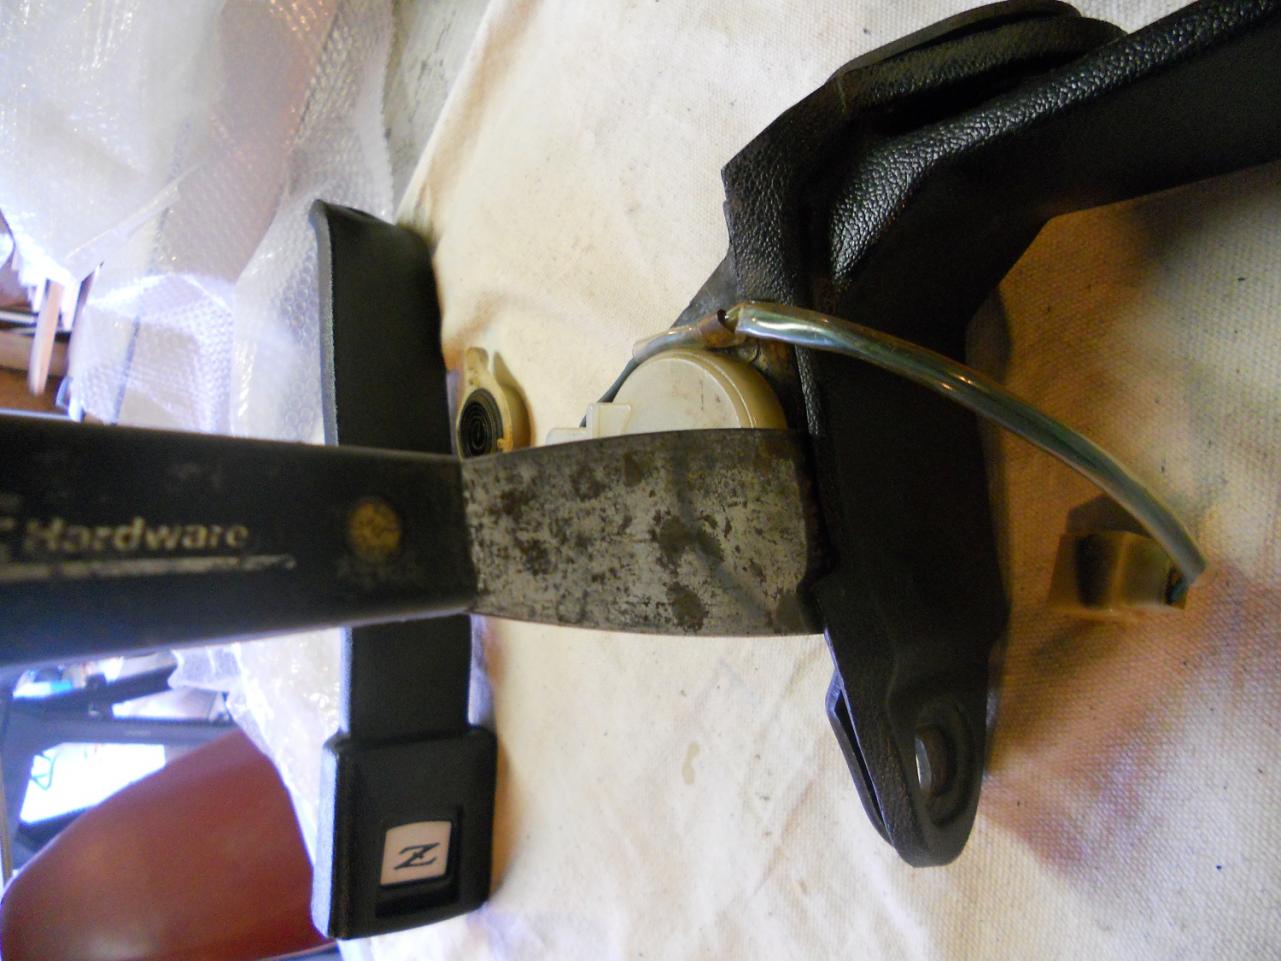
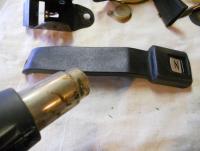
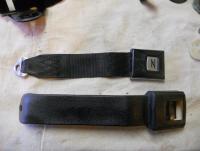
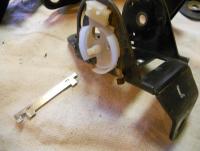
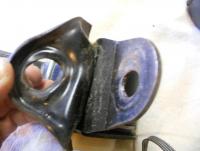
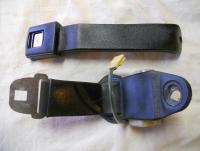
Next I worked on removal of the boot. The boot is glued to the frame in one place, just in front of the retaining screw located furthest away from the chrome metal seat belt tongue. The glue is tenacious I used a rigid flat blade putty knife and heat gun. I heated the boot (to make it suppler, they are rigid due to age) and then the glue area as well as the putty knife. I worked around all sides of the glue slowly and cautiously until the boot was lose from the metal frame. Boot cannot be fully removed at this point due to the seat belt webbing and chrome tongue.


-
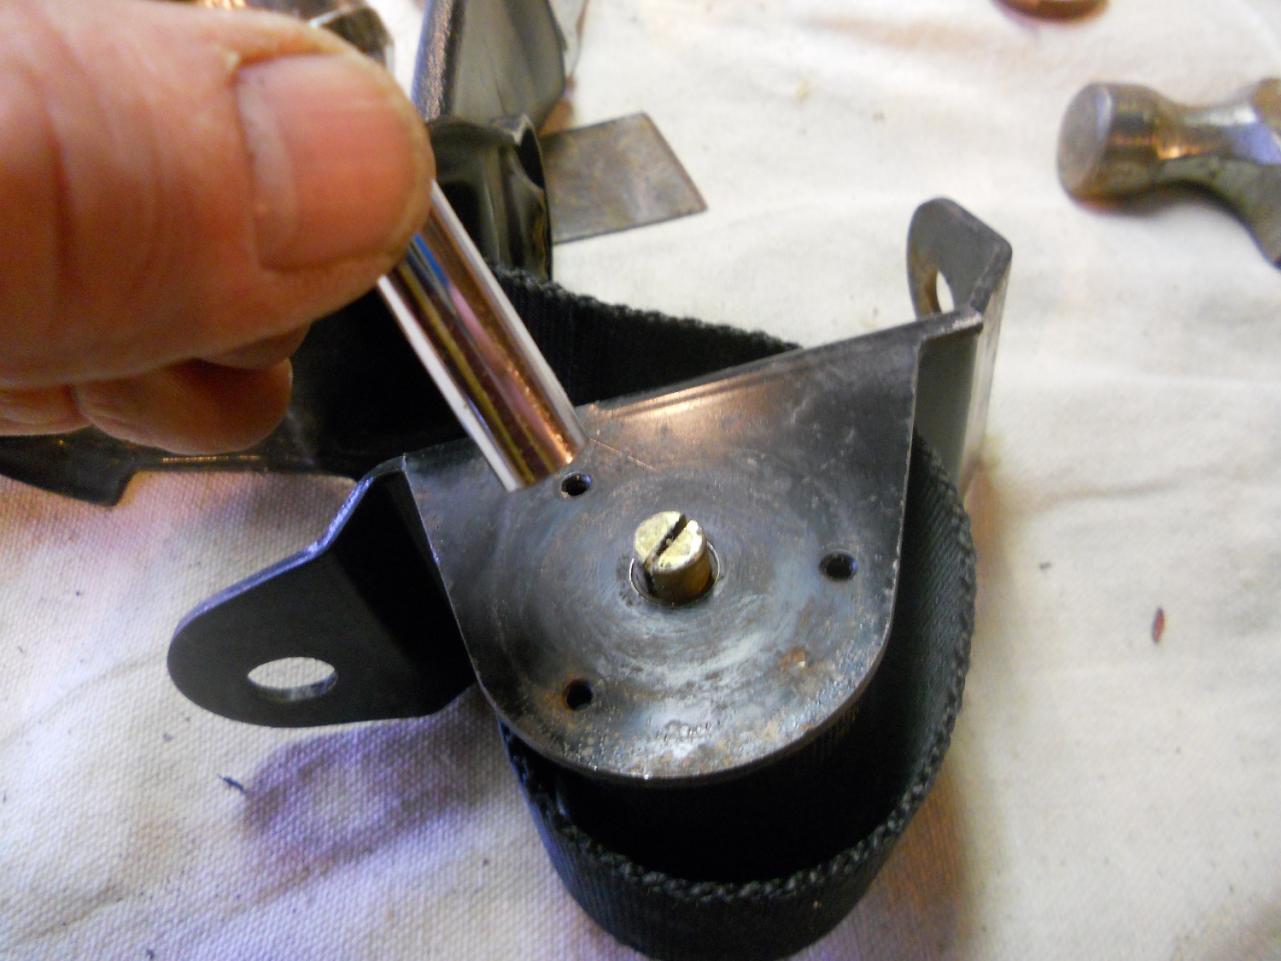
Set of retractable seat belts with boots in place. I started on the retractor mechanism side of the set. Removing the spring and cover. It is held in place by three nipples which fit tightly into holes in the metal seat belt frame. As you pop it carefully pop it loose using a flat object (I used a small flat blade screw driver) holding it so as to not let the spring tension take control. Once the plastic cover is lose you can unwind the spring (approximately 5.5 turns with the seat belt in the retracted position. Once unwound you can pull the cover off with spring remaining in the cover (you may have to coax the spring from the split in the seat belt retainer shaft).

-
Retractable Seat Belt Restoration for my 1972. I recently sent a set of seat belts to be restored to, due to recommendation on this site, I sent them to Ssnake Oyl products in Texas. We are at the point where they have disassembled my belts and given me an estimate. Ssnake Oyl in the estimate listed repair of a tear in one of the rubber covers on the male end of the seat belt. I am sure that the tear was not there when the parts were shipped but that is another story. I have since found another cover and will be sending it to them. Regardless the estimate was in the neighborhood of $780.00. Including new labels made at the price of $30.00 each. My first thought was that it was a little pricy but worth it to me. In reading the disclaimers in the estimate it was stated that they would not guarantee that the electric warning switches would work when finished.:disappoin I called and questioned this. They stated that they did not work on this part of the seat belt. I was a little puzzled but asked further and found that they basically do not restore the retractor mechanism. So I requested that they send the dissembled parts to me and that I would restore that part of the system so as to have them fully restored. That gets us to the basis of this thread. I am going to try and document the procedures as I restore the electrics and mechanism with photos.
-
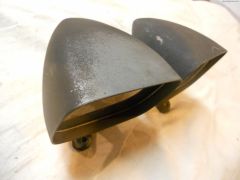
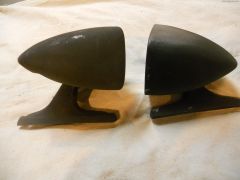
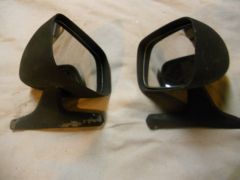
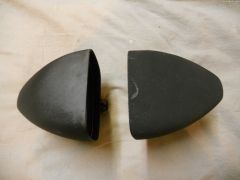
From the album: Sport Mirrors (Black Pearl)
This is my extra set of Sport Mirrors, sorry for the poor photo quality. -