Zs-ondabrain
Free Member
-
Joined
-
Last visited
Everything posted by Zs-ondabrain
-
 Just make sure that you regularly pull the linkage bars and clean out the cups and pivot balls with a Q-tip or rag, lightly grease them, pull thelinkage swival on the firewall and clean the shaft and bushings and regrease them as well. "A well oiled Machine" bla bla bla. Replace "oil" with grease and she'll be smooth as a babies butt. even regrease the pedal assembly while you're at it. and double check the strength of the return springs. Dave.
 -
Adding the front air dam WILL give a more responsinve feel at higher speeds as well as give a little more down force on the front end. My 70' was wobbly as hell at high speeds until I installed the Urethane Air Dam. To correct the inward folding of the air dam at high speeds, I used 1/2" "L" bracket across the front of the lower lip then used the same style L bracket to Hold the lip outwards by screwing that bracket from the frame to the lower lip of the air dam. This basically helps it hold its shape and give the car down force without folding in. I can now hit an easy 130 MPH without wiggle or loss of steering control. I had already replaced all the rubber with urethane bushings and upgraded to KYB's and Eibach springs but the air dam definately finished it all off. Dave.
-
Isn't that what I kind of just wrote?? "1/4" steel plate, taller end links" Sounds like the same kinda deal. But what-ever works.
-
Nice thing about the Editgrid is I can update as I go without waiting and waiting like I do with Zhome. I just added the 260Z and updated the 240Z. Dave
-
Sounds like your end-links are too short. Get at least 1/2" taller end-links and if that don't work, Run a 1/4" steel spacer between the frame and the frame mounts. Are you noticing the "Touching" when the car is in the air or with the car on the ground? The lower the control arms, the higher the bar will sit near the oil pump. so if it's hitting while the weight of the car is on the wheels, you need longer end-links. Dave.
-
Everything around here is an Indian (North American Native) Name. Even Seattle was a Chief. Stillaguamish, Snohomish, Tacoma, Sammamish, Sequim (Pronounced Squim), Snoqualmie, Steilacoom, Spokane, Sumas and the list goes on. All Indian names I think.
-
Yup, he's there on the week-ends sometimes, but you'll never get him to answer the door. That's his Private time. Oliver's a good guy and definately knows his way around a Z. By the way, First Gen would be known as the S30 as they were the first Z cars until the body change in 79 thru 83. Series one would be the very first marketed design of the 240Z (69' to early 71') The Series 1 Z is recognized mainly by it's vented hatch (2 chrome horizontal vents) and 240Z emblem on the upper quarter panel behind the quarter window (Datsun circle with "240Z" written across the circle. My numbers may be off a little but there was only about 16,000 ?? series 1's. Series 2 Z's have vented quarter panel emblems and non vented hatches. There are Many differences between years but no matter what you get, you'll find everything you need to know about that speciofic year right here at CZCC (Classic Z Cars Club) I'm in Marysville, write me any time you're gonna be in the area, we'll shoot the shite and go from there. Welcome to the Best damn Z car site on the web. Dave.
-
I wish I had more time as well. I spend very little time on the actual "Working on the car" Hell, MY car would be farther along if I had more time. Thanks a lot man, Dave.
-
YUP, and I'll just add it the list of other uprades that I make on a day to day basis, all by "Thyself".
-
This is in no way, a "Sellable" item. This a "Do it Yourself" how to upgrade. You have to weld a rod into your hatch after grinding that lip. The most I could do is sell the actuator and a prebent rod but that would almost be pointless. you can use a hanger out of your closet for the rod and the actuator is available on-line. hopefully I did'nt make the write up too complicated sounding. It's pretty simple. The only hard part about it is getting something into thehole to grind that lip and getting your mig welder's tip into the hole to weld the rod in place. I ran the weld wire out of the tip about an inch to reach the farthest point. The tricky part is getting the rod to hold still and upright while welding it. And like they say, nothing worth doing, is easy. On a scale of 1 thru 10, 10 being the hardest to do, I give it 3. Fairly easy, some hard parts, but fairly easy and time consuming. Dave.
-
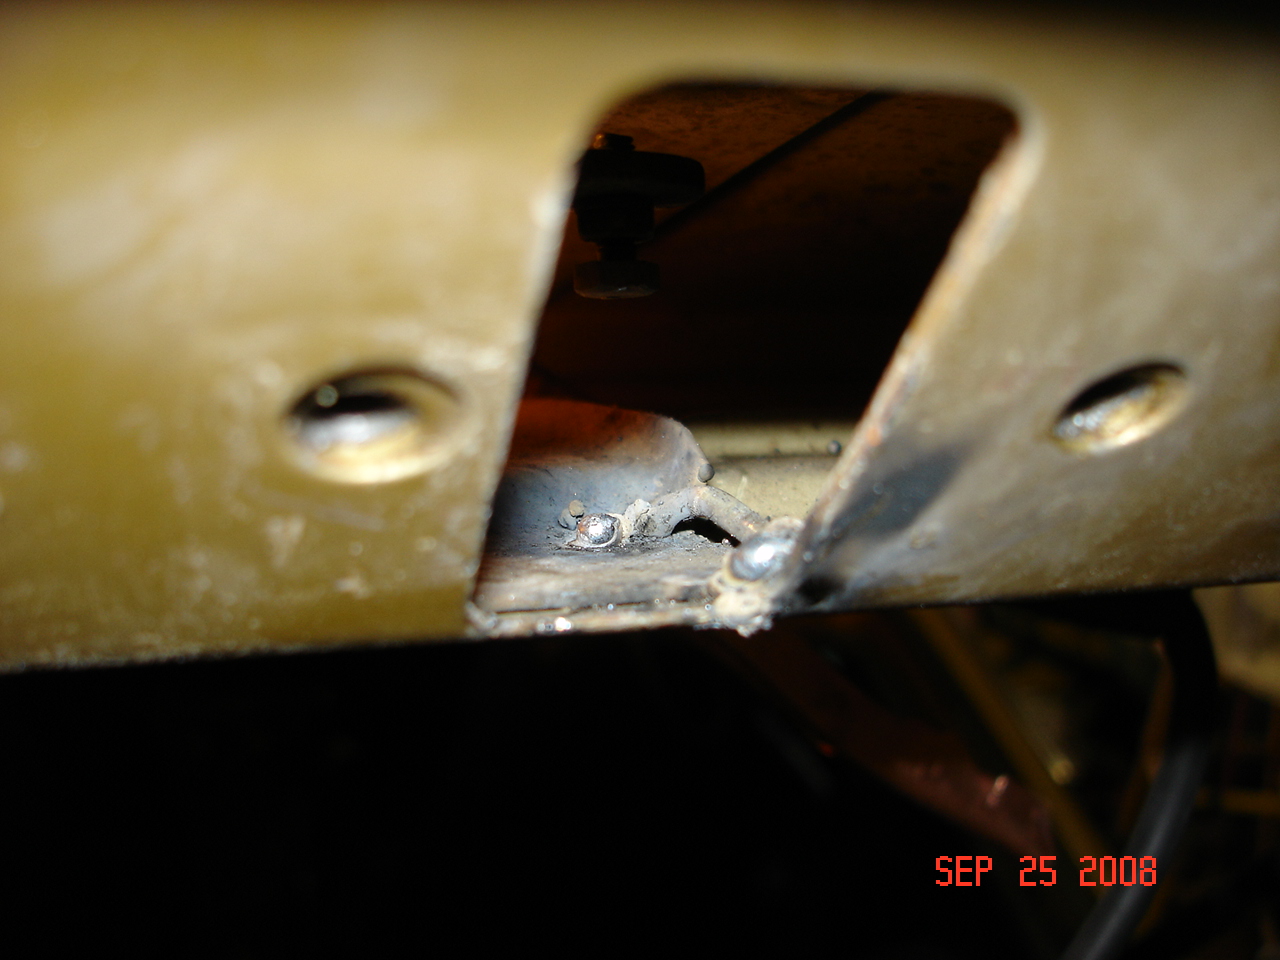
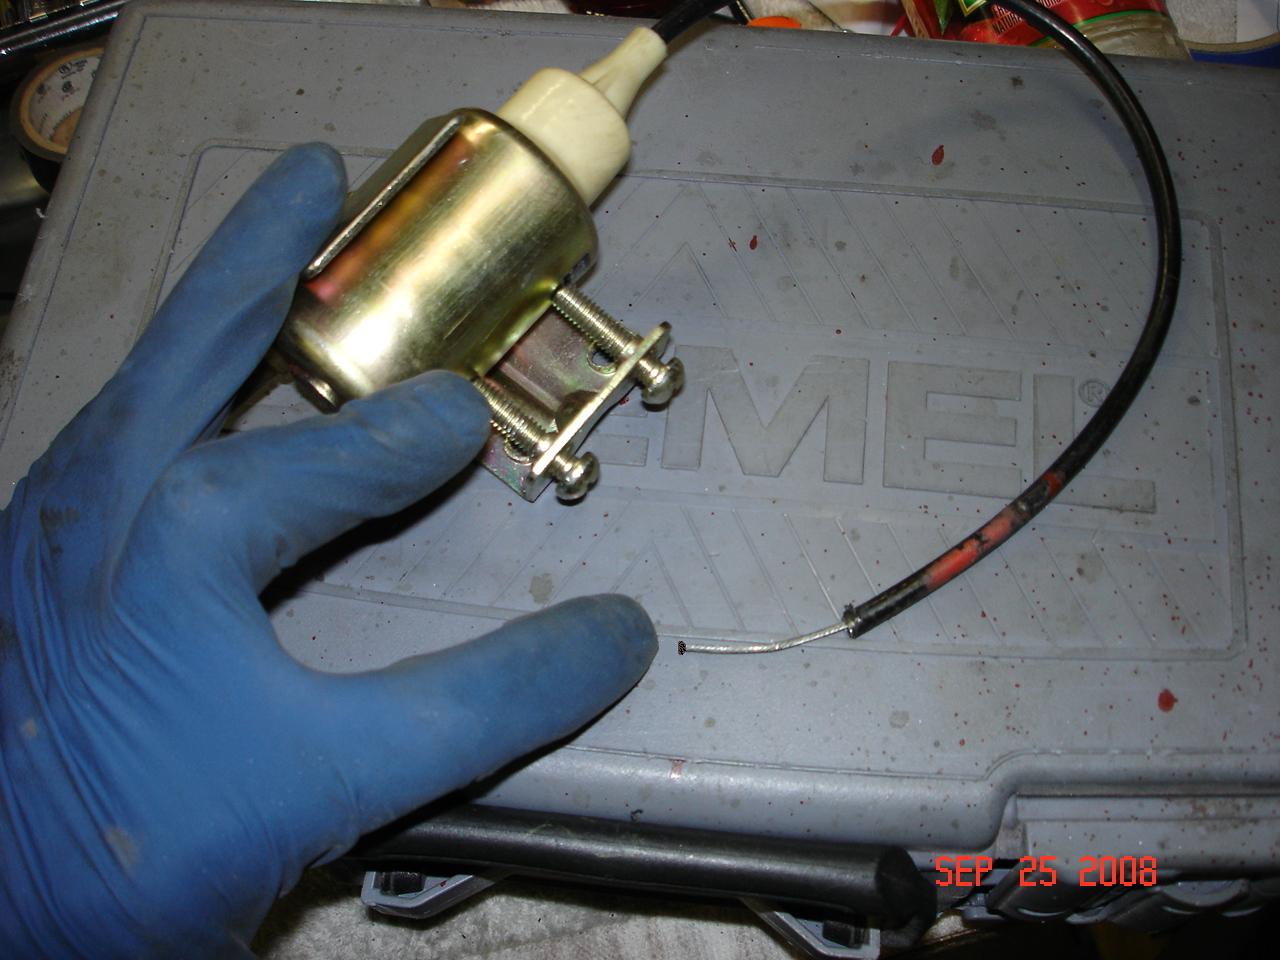
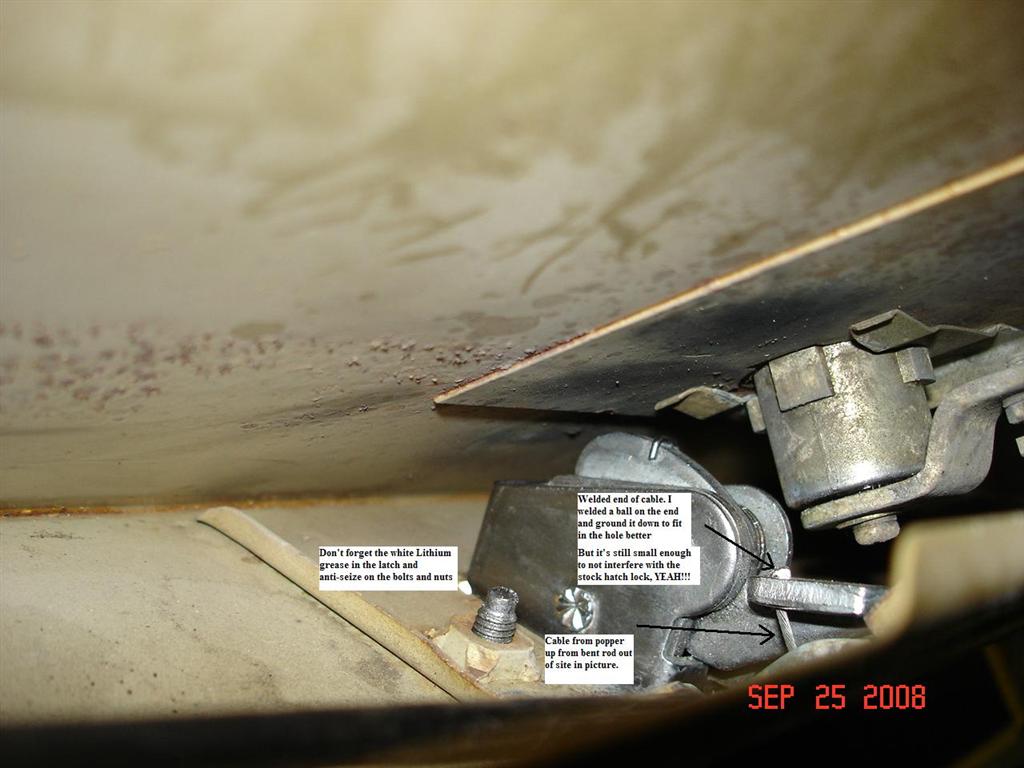
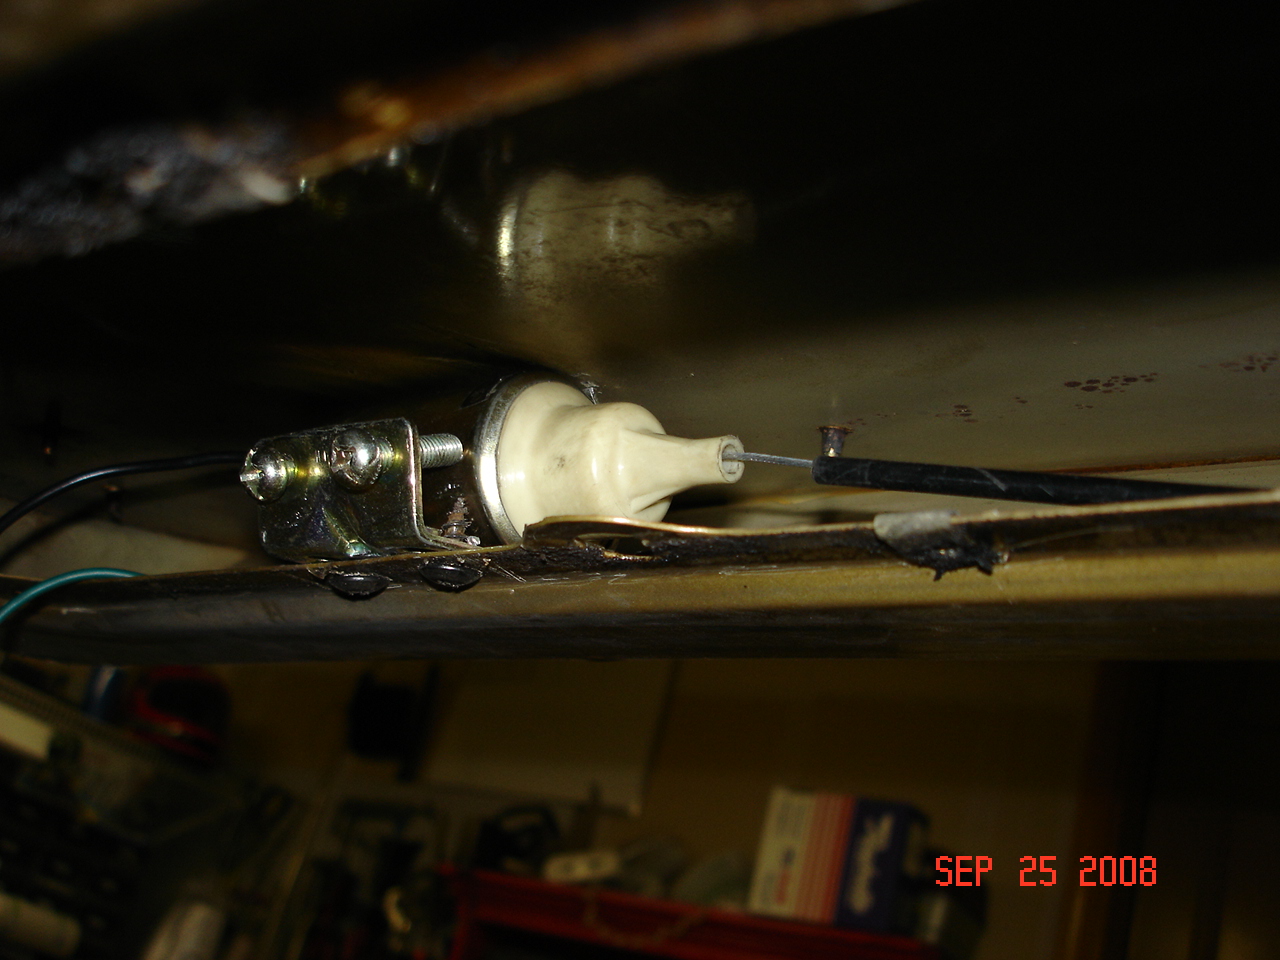
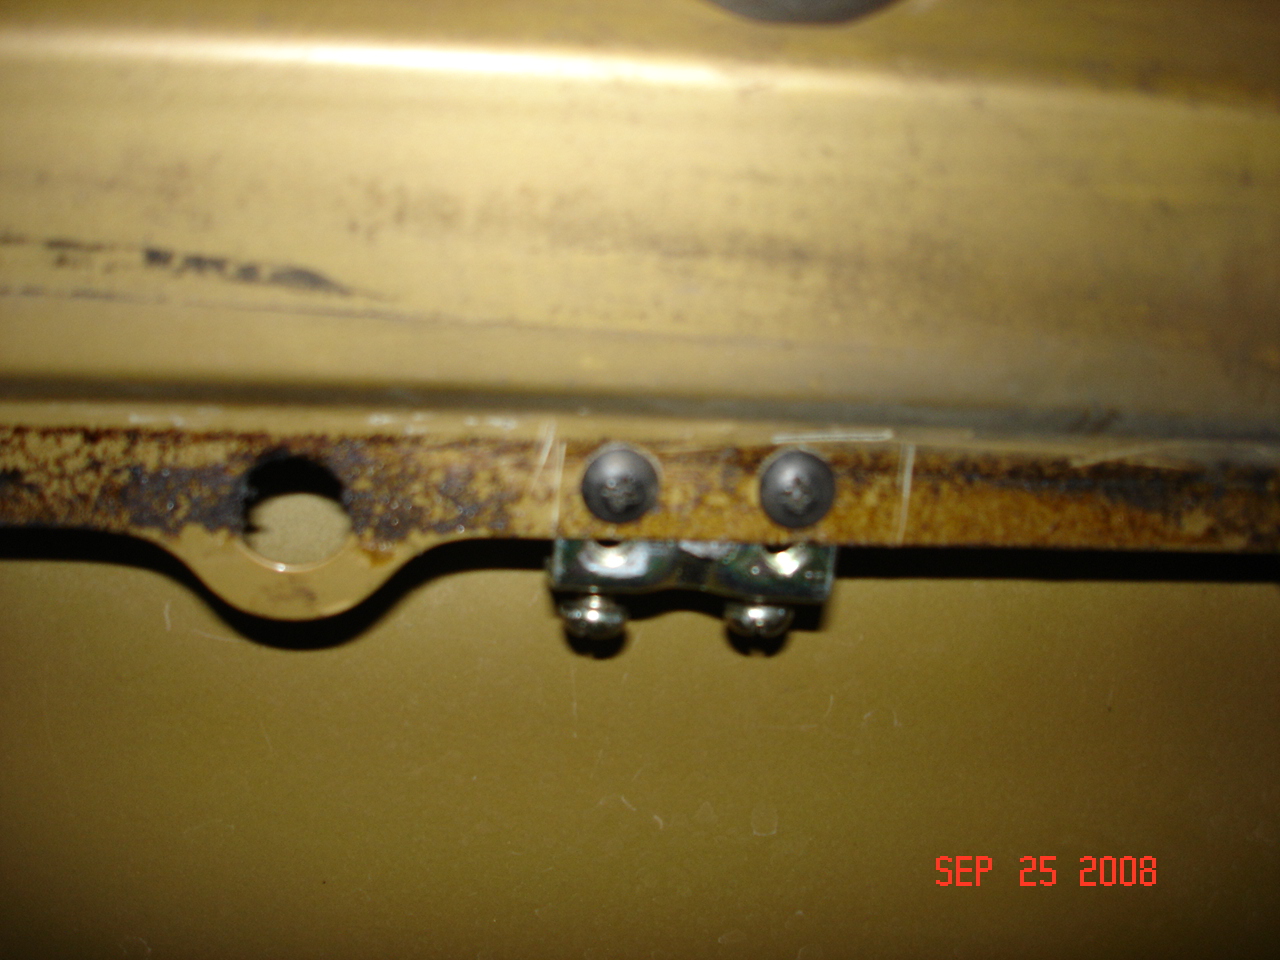
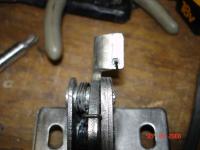
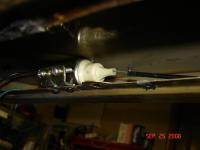
For years, I've read about people fiddling with a Hatch Release of one sort or another. Stuff from other cars, Inverting the lock to the boby and the catch bar to the hatch (I did this one) and even as far as running a release cable from the roof - thru the hatch frame and over to the lock. Anyways, I was discussing possible idea's with Stan, a friend of mine, and I came up with this one. Went down to the 260Z and went to work. I pulled the rear cover on the hatch, Latch assembly and the hatch lock. Took a 3/32" dia. rod and cut it at 1". Then gave it a slight bend in the center, about 30 degrees, then bent some 1/8" feet on the ends. then set it aside. Inside the latch hole, you'll see a 1/8" lip to the right or the square hole. Grind that lip flat so that the 1/16" cable (from the 11 lb Trunk release actuator) can slide where that lip is. I used an angle grinder with a 1" cutting wheel on it (started as a 3" disc but had used all but one inch of it) Slid the disk thru the hole and carefully ground the lip flush. Then I put the bent rod into the hole, lined it up parrellel with the ground down lip and welded it in place. Then I took the Latch and let it soak in some Carb Cleaner to remove the years of grease, dust and exhaust buildup. Cleaned it off and used white lithium grease on all the moving parts. Then I drilled a 5/64" hole in the latch handle with a really good drill bit, this is hardened steel and you'll need a good bit. Then I used a bigger bit to make a inset divet in the top so the cable will sit flush. Then I used a dremmel with a thin cutting wheel to make a slice in the latch handle so the cable could be slid thru the slice and into the hole (see the picture) Then I took the cable to the bench vice, clamped it in with 1/4" of cable exposed. grabbed the mig welder and ran the wire out about an inch, grounded the vice and welded a ball onto the end of the cable by tapping the cable with the weld wire, a ball would form on the wire then I'd tap the cable again till the ball welded to the cables top. Then used the grinder to smooth out the ball enough to fit in the divet of the latch handle and thru the bent rod. I ran the cable into the hatch area, thru the welded rod, and out the latch hole so I could slide the cable into the latch handle, thru the slice. Then I pulled the cable back into the hatch and installed the Latch back into the hatch and bolted it down. Keeping a slight tension on the cable, I pulled it over to the emblem side of the inner hatch area. I shaved 3/8" off the top of the actuator holder in order for it to fit in the hatch area, below the emblems. I slid the actuator into the holder and slid them into the hatch. with a slightly loose cable, I bolted the holder into place then tightened the screws of the holder into the actuator. The slack on the cable will give the actuator a slight head start and tug on the cable when you activate it to pop the hatch. I re-installed the lock and tried it. The sunken cable does not interfere at all with the operation of the lock and latch. Now drill a small hole into the frame of the hatch near the drivers side defrost cable. run single 16 gauge wire thru the hole, thru the frame and over to the actuator then plug it in. Ground the other lead of the actuator to the hatch using one of the bolts of the holder. Now run the wire from the defrost wire area to the dash area of the car and use a relay to power it. Relay diagram is below. here's a link to the hatch being popped video on youtube. Dave. Hatch release relay.bmp


-
Start checking the wiring around your Turn signal switch. The brake lights, turn signals and flasher wires go thru the T/S switch and associated wiring. also make sure that the Flasher unit is connected correctly, there is only 2 wires so it should be an easy swap and check. Check the wires of the Hazard switch, the body of that switch is fair game to gremlins.
-
That's nothing. Try bolting in a flywheel, bolting up the pressure plate, sliding the tranny in effortlessly, bolting the tranny up in place and letting the car down, then looking for the keys to start it up and finding the keys.........on top of the clutch. ARGGGGGG. That was a long day. Or how about bolting up the wheel, after a four point brake job, only to find the 2 new brake shoes on the bench. many more but not worth the embaresment. Dave.
-
I've got 16X7's with 225/50ZR16's on the 70' (shown below) but I'm thinking about going with a 225/45ZR17 for the 260Z. What's the best "Zero Clearance Issue" size to use with a 17" wheel? Anyone??
-
They are blowing out their current stock to make room for new stock and NEW items that came about during the summer. You'll also find that they do that after The Vegas shows like SEMA, when everyone comes out with new products. Dave.
-
It's cool, I just wanted to let him know that I understood what he did. Dave.
-
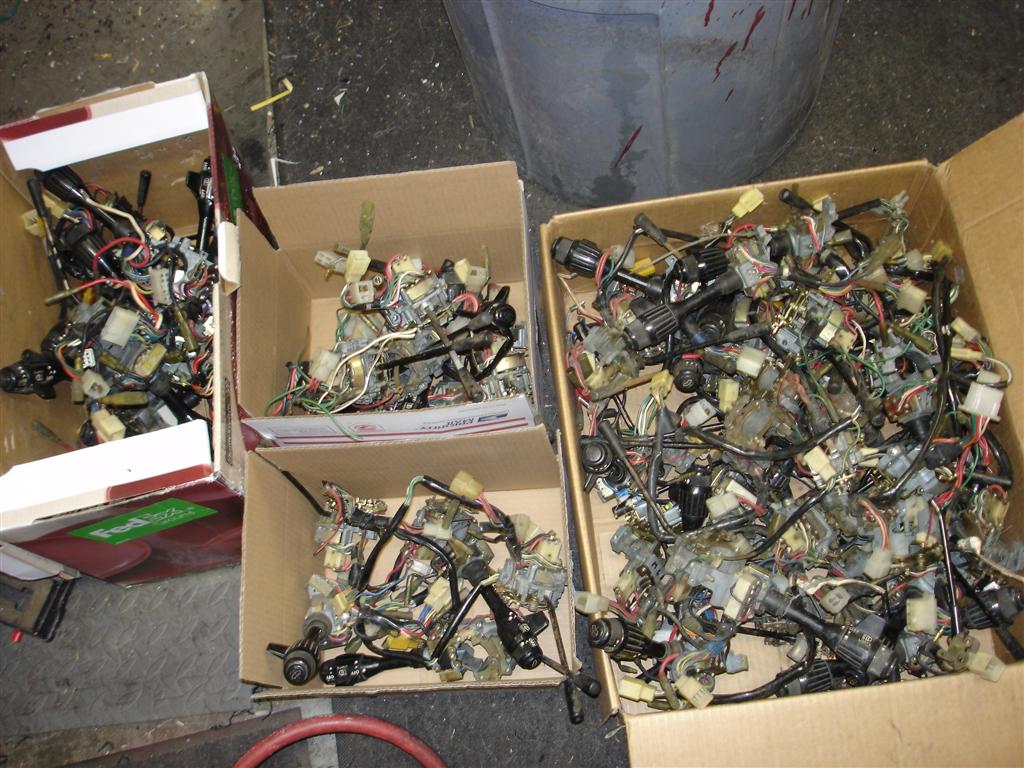
I never said that you could'nt check his lights with your switch. I rebuild combo and Turn signals on the side. Look at the pictures below. If the 240Z in question still overheats the fuses and switch, maybe it's time to get one of my upgrade harness's??? Maybe. write me or PM me. Dave. This is 3/4 of my switch stock. In total, I own over 80 pounds of switches from 69' to 78'. Need spare parts??

-
Thanks for the compliments Seth, but Arne was only involved with the ZXP (ZX alternator adaptor plug) and the SCP's (Sidemarker conversion plugs) I owe Arne alot for his ideas and help but I take full credit for the Headlight Harness and Parking light harness. Necessity is the mother of invention. My fusebox melted and lights went to hell, so I Needed a good fix. Everyone offered wiring diagrams but nobody MADE a Harness except for Black Dragon, and that harness is a Joke. Period. So I designed and made my own and the rest is history. I do make a Hardwire version for the 280Z but you'll obviously need to cut a few plugs off. But that's it, no tearing the car apart like the BD and Painless require. Dave.
-
Knew it was something weird like that. And as far as the Long in the rear goes, probably to ballance it out? don't know. glad you got an answer, Dave.
-
I love those things but there is a problem with using those on the intake/exhaust nuts. Most of the nuts sit back on the stud, just out of reach of that socket. Or at least that's been my experience with them. I usually go for the deep socket on a swivel. I got a drawer full of those but they rarely get used unless it's for the head of a bolt, but almost useless on a nut that sits on a too long stud. Good advice though, in most cases. Dave.
-
The earlier models are 2x3 (6-pin connectors) The additional 3 wires are for the intermittant wipers and the 2nd wire on the washer fluid, which activates the wipers when the fluid button is pushed. The top switch consists of 4 wires. the 2 green based wires are for the parking lights and the red and white (or red and black,it varies) are for the headlight switch. Check the switch with an ohms meter to see if the switch is working. Also check for power on the larger gauge red or white wire. Have fun. Dave.
-
I agree, if a butt load of white smoke was coming out of the exhaust, then I'd be worried.
-
The water tube can be unscrwed, with a bit of brute force, and brass plugged as SBlake01 said. Carl said to use "a universal swivel, a 10" extension and the socket" That sounds about right. But if possible, use a 6-point socket instead of a universal 12 point. It's a tighter grip, in my opinion, and should do the trick. I have small hands and am able to occasionally able to get a box wrench between the block and the exhaust manifold. I like the 8" long ones for more torque when removing those nuts. but I can't remember if it's possible to use those on stock manifolds, Headers are easier. You circled the "Air injection tubes" They are the 6 small tubes that all go into the larger cross tube. It's not impossible to remove the nuts that hold those tubes to the manifold but few have been able to do it easily. Then and only if you get them out, brass plug them or Braze them shut. As for that water line that comes out of the back carb and over to the passenger side "T" fitting. If you remove the water pipe from the thermostat housing, you'll need to do something about the "T" fitting. Most people use a bit of rubber water hose to clamp onto the "T" then fill the other end of the rubber hose with a bolt or plug and clamp it off. This will allow water to still go to the heater core and not dump out the open hole. You can also, instead, use a "Flushing T" to remove that "Y" pipe. Don't forget to have the exhaust Manifold checked for flatness. maybe even take it to a shop for resurfacing. One thing I usually do when installing a used intake manifold is loosen the ballance tube bolts just before installing. This will help when the studs or bolts on the head don't wanna line up with the intake. After tightening the intakes, retighten the ballance tube bolts. Did I miss anything? Probably. Dave.
-
Off the top of my head, there are 4 springs, 2 of which have a sticker or printing saying where they go, that leaves the other 2 for the other half of the car. I'm sure that sounded stupid but my set had identifying stickers. Look for those markers and go from there.
-
I did'nt read the whole thread but if I had to throw something into the mix, I say that your end-links need to be shortened by 3/4". That should clear the axles and allow the rear to sit correct without lowering too much. By the way, Why so big on the sway bars? Dave.