Zs-ondabrain
Free Member
-
Joined
-
Last visited
Everything posted by Zs-ondabrain
-

 Been there, Done that, Hated it!!! Is that a fricken Palm Tree in the background of your Avatar? Jealous!!
 -
And if they don't have any, Check your local Auto Body and Paint supply company. The usually have all of the clips, clamps, pins and molding tape associated with a tear down and repaint. Your Local shop is called WESCO Auto Body and Supply. 1507 Iowa St Bellingham, WA 98229 (360) 671-0900
-
And I don't think there was ever a Solid Mast antenna in the Z's. Took me a while just to type this.... Just got off a 2 hour skit of Guitar Hero. My 11 year old daughter was kicking my butt, so I had to show her who was boss. Now my fingers are all cramped and I have harness's to build, darn it. I'll just let Arne fill in from here, he knows the Original Equipment better than I do. Arne's on the ball, Dave.
-
Ok, I had a look and here's what I found: Coming out of the radio: Behind the "tune" switch, there are 3 wires that terminate at a 3-prong connector: Blue / White; Blue; and Blue / Red. Leave them plugged into the connector that goes to the back of the car. I believe the "tune" switch controls the antenna up/down? It does. Back of the radio, there is: - one Red / Blue wire Illumination wire, connect it to a red/blue wire in the dash - a paired set - Gray; Gray / Blue Most likely speaker outputs, if there is only 2 wires (grey and grey/blue) only connect one speaker, you may blow the radio's internal amp if you hook both up. - a single Blue wire that terminates at a 3 prong connector. Coming out of the connector (not connected to the radio) is a Gray and a Gray / Blue wire The blue wire goes to the ignition wire, that powers up when you turn the key to ACC. The grey wires are likely to the stock speaker from 35 years ago. Ignore them. From the back of the car: - 2 pairs of wires: Green and Green / Blue; Gray and Gray / Blue - I believe these pairs are for the speakers? Pick one set to connect to the radio's grey (+) and grey/blue (-) wires There are also some other miscellaneous wires - a clear wire, a black wire...not sure what they are, but this is most of it. The black might be a ground but follow it to make sure. The stock radio is grounded by bolting it into the car, correctly. Follow the clear as well. see where it goes. Any ideas? Sorry if this sounds stupid, I really know squat when it comes to electrical stuff It's hard to figure out where a rat got everything he uses to make his nest but if you take your time, you'll figure it out.
-
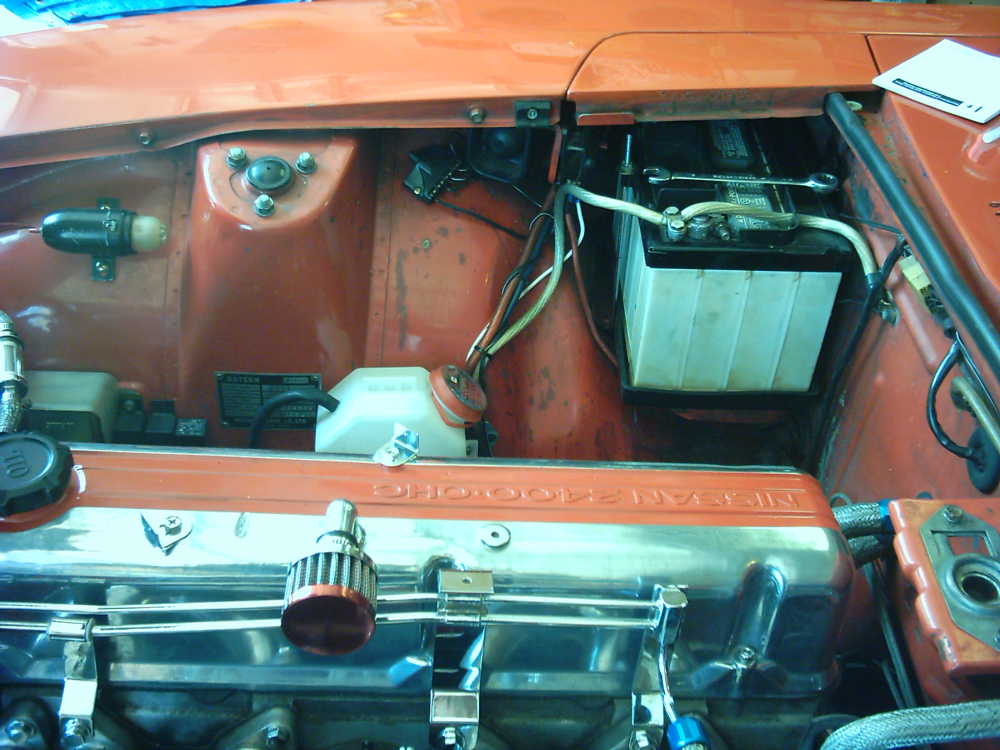
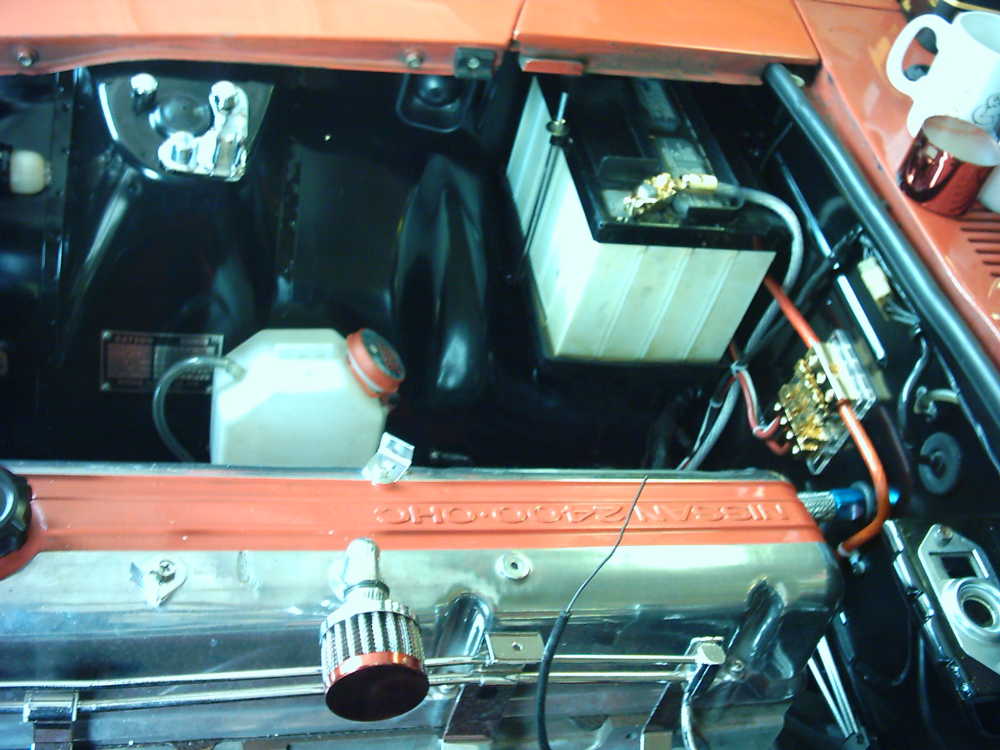
Hopefully I can stop you right there. The 240Z as well as the 260Z's electrical system was designed for a 40 amp altrernator. You go and put 105 amps thru the system and you're just asking for trouble. Oliver at Z-Specialties can say all he wants about the benifits but I've seen the end results of a system that is not prepared for 160% more amperage tha stock. You're now running a 1000 watt stereo system, 100 watt H4's, Foglights, driving lights, Neon, motorized accesories, Dual batteries, etc, etc. The most you need is the 280ZX 60 amp alternator. It bolts right in, it's not such a big shock to the system, and it looks totally stock. I'll help ya thru it. The 105 alt. won't allow you to run better lights until you upgrade the headlight system with relays, like my set-up, more on that later. Dave.
-
My 0 to 60 is about 6 seconds. give or take a second. Rolling 30 to 60 is about 2 seconds. If I'm in 3rd gear, I can drop it into 1st and top out around 6500, hit second and 60 in about 2 seconds. Sure, my old motor blows a little smoke out the back end, but that's to be expected of a 170K mile motor. I weigh in around 2400 curb weight. But the 3:90 diff, 225/50ZR16's, 79' ZX 5-speed, Killer ignition set-up, cam, exhaust and all that jazz get me down the road pretty damn fast. Ya, it may seem faster than it really is but the look on most Honda drivers faces is precious to take in, when this little red bullet wipes the pavement with their face. Funny thing is.. With all this performance, I also get 27MPG on the freeway. I love the 5 speed.
-
Your stock 260Z motor puts out about 160 HP at the FW. The cam, ignition, header, Mikuni's, and such should give you another easy 30HP on an N42 head. I Dyno'd mine at 185 at the flywheel and that was on a 240Z (2.4 Liter) with E88 head, header, stage 2 cam, Stock untuned S.U.'s, 280ZX E12-80 distributor, MSD 6A, NGK plugs and wires, 2.5" exhaust and the bottom end is totally stock. It's all top end changes. If I were to bore it out and do the 0.030 over pistons, ring, bearings, lightened flywheel and all that, I'd easily topple the 200 mark. My Triple Webers would love to play in that Playground!!! I'd be buying new tires every season. But that's just me.
-
That's what I do. Now get to work.!!
-
In your Z, the brake lights and turn signals in the rear are the same thing. They both use the same wire that goes thru the Hazard andturn signal switch. When you make a left turn, the switch disconnects the brake wire and reroutes it thru the Turn signal flasher, making the left brake light flash. The brake wire runs from the barke pedal switch to the turn signal, then the switch splits the signal and sends it to the Hazard switch and back out to the left and right taillight. This is what I do for a living. Your first post was explained well and I understood it. Check the T/S switch as well as the hazard switch. Most people forget or don't know that the brakes and turn signals are the same thing and run thru the T/S and hazard switches. ANd now you know. Wasn't that fun. To check the grounds in the rear, Just use and OHM's meter and connect it to a good shiny metal area and the other test lead to the black wire on the rear harness. You should have a very low reading, like 0 ohms is the best. anything above that and you should start cleaning connectors and maybe even tap the black wire and ground it back there, to a good spot. Use a dremmel to clean a spot of metal, then use a self tapping screw or use a stock bolt to secure the new wire.
-
With todays "Know-it-alls", I doubt it'll be gracefull. Most of them have no clue that come June or July of this year, Our Z's will reach their 40th Anniversary.. I actually love finding the "Kid" that doesn't know what a 240Z is. I walk them outside and show them first hand. It typically either blows their mind or they say "OH, OK, I've seen these before" I did'nt know they were related to the 350Z.... Dave.
-
I second that. It was the first thing that popped in my head. Try this... Wiggle the turn signal shaft up and down while using a large mirror or second person to watch the taillights. If they blink or come on and off due to the wiggling, the problem is obviously in the switch and you need to take it apart and clean it, Plenty of articles and threads on the subject on this site. If the problem is not there, Try wiggling the Hazard switch. Everything runs thru that switch (turn signals and brakes) and if it's damaged or wearing out, there lies your problem. If the results show the problem is in the switch, remove it and see if you can clean the contacts inside. Grounds are the worst part of a Z's systems. Double check your connections, grounds and such. Good luck. Dave.
-
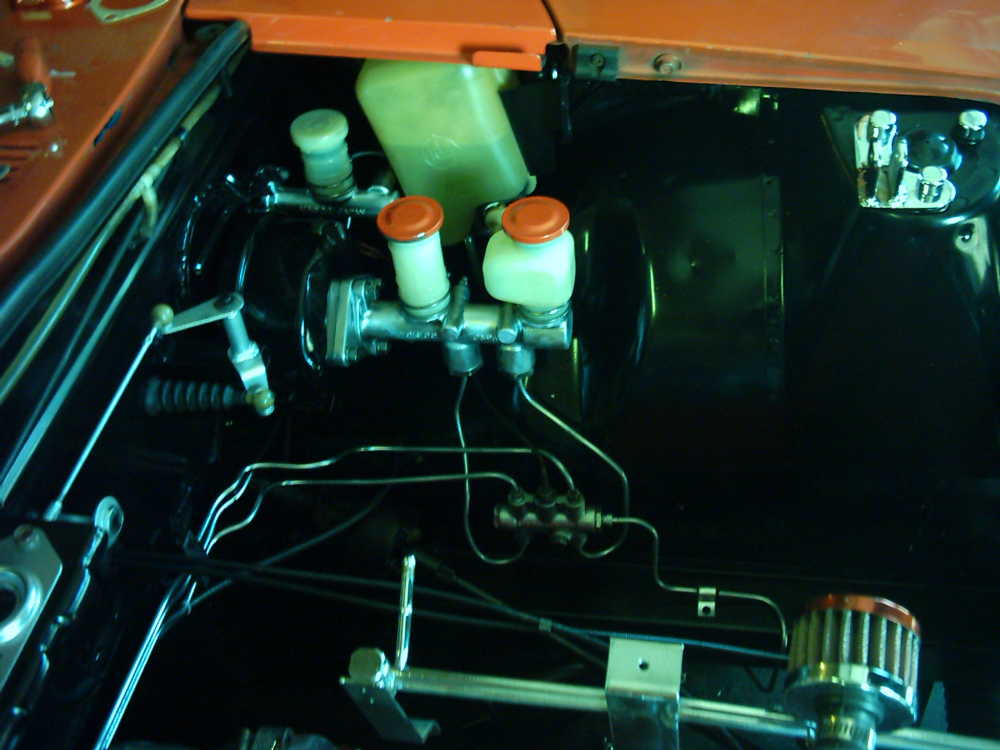
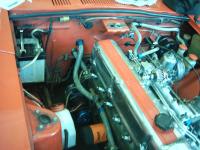
If you can pull the motor, you'll have a lot more room to work with. I personally Left the block and head in, when I did my engine bay refresh. I loosened the brake and fuel lines then wrapped them with tin foil, as it stays in place and holds it's shape. Paper can be loose and absorb some paint, onto the lines or whatever is being painted. Just depends on what you use. I started off with stripping the motor of everything but the front cover and head. Then I taped off the aluminum parts, (head, front cover and valve cover) then sprayed Oven Cleaner on the block. This helps remove the baked on grease from years gone by. Then I used engine degrease on everything else to sort of preprep for the rest of the cleaning. Then I used good ol' fashion dish soap (Dawn) with a green Scotchbrite Pad to srub all the other crap loose. I used an air gun to get the water out of all the crack and corners, don't need any suprises later on. Grease and wax remover on everything. But before I piant, I used Red Scotchbrite on the brake and fuel lines to brine a little luster back to them. The powdery residue comes right off and they get a "Brushed" look. Then I wrap them in the tin foil. I shot everything with Duplicolor Black Sandable Primer. I used tape on the backside of all the holes (inside the wheel wells) and paper rolled up in the threaded holes. Then gave it a once over with the scotchbrite, blew it all off, then painted it with Duplicolor Ford Semigloss Black. Do Not remove the tin foil till everything is dry and the flakes from the foil won't contaminate the new paint. To get the Fresh Casting Look back on the Aluminum parts. I just used a steel wirewheel on my bench grinder. Just degrease it, dry it then wire wheel it lightly to bring back the shine and texture. The fluid resevoirs were cleaned with brake cleaner. Just hold it with a pair of needle nose plyers, Spray it with the brake cleaner w/ the stray attached, letting the old fluid and cleaner run off into a coffee can, this will leave no finger prints. Let it air dry by hanging them somewhere. It won't take long because of the evap time on brake cleaner. All in all, it only took a day to remove everything, degrease, scrub and clean, wrap parts, prime and paint. Then another day cleaning, small part painting and reinstalling everything. I wrapped the whole car in plastic up to the cowl, taped off the fenders then wrapped in plastic, covered the crossmember, Bagged the harness up to the firewall and taped off the radiator holes. It doesn't take long and the end result is envious of most, as most wish theirs looked like this. Hope that helps a little. Most will want to use something other than spraypaint but most of my pet projects are on a strict budget. But as you can tell, a tight budget doesn't mean it has to look like it was done by a "tight" wad, ya know? I spent less than $100 on the engine bay refresh. Dave.


-
The NGK pre-cut to fit are only about $35 and usually available at most auto parts stores, sometimes it's a special order but still on around $35. They are ready to snap on, no cutting, exact fit wires. And they fit the OEM plug wire holders perfect. There is an easy alternator Upgrade for the 240Z but I'm pretty sure there is an easy set up for the 260Z as well, I've been researching it due to wanting to do the same thing to my 260Z. I believe the 81 to 83' 280ZX 60 amp internally regulated alternator will bolt right in, plugs right in with no altering. and you just need to rewire the Voltage regulator (white to yellow and Black white to white black. I believe this to be correct but I'll try it on my 260Z before I'll affirm it here. The stock unit does about 40 amps. Definately replace the battery cables with some good 4 gaugemulti-strand power wire. Like the stuff you get at the local Car Audio Shop. It's a couple of bucks a foot but well worth it in the long end. Trust me. And always make sure your stock harness and components are well grounded as well. That's the Datsuns Downfall, bad grounding makes everything work like poo poo, or not at all. Easy fix though. Dave Dave.
-
Or a Bumble Bee, Roadrunner, Falcon, Pinto, etc, etc.
-
Are you talking about the Fusebox cover/ashtray? Or the fusebox cover/switch holder plate?
-
No problem. I can only imagine what a pain in the butt that sponge must have been. hehehe
-
I helped a little, LOL Ya , together, we might be able to get some tunes in his Z again.
-
There was at least 2 inline fused items. One has a thick, heavy gauge wire and I think it's for the fan or rear defrost, ignore that one The radio may have one, just make sure to test it with the test light. If the end is dead, test the other end, just in case the fuse is blown. Here's what you need to do.... Tell me the wire colors on the radio you plan to use. Every wire. Also tell me the colors of the wires in the dash that you know are for the radio. This will tell me how to instruct you on what wires go where. Dave.
-
First, it's been a while so bare with me.... get a cheap test light. Ground one end and start probing all the wires. Then turn the key on to "ACC" and... one blue should test positive, that is your ignition wire to turn the radio on. There should be a red/blue and that is for the parking lights to dim or turn on the radios back light. I think the stock radio ground directly to the frame so there may not be a black ground wire. There should be 2 white or a white and white/black wires. Those are the speaker wires. You obviously know what the anteena wire is. The antenna UP/DOWN wires are Blue/red and Blue/white. Connect the switch to the matching connector with similar colored wires. This should get ya started, I hope. Dave.
-
Almost as bad as the kid behind the counter that Swore up and down that my car was a 240SX. I kept repeating myself, saying "LOOK UP DATSUN 240Z, Z as in Zebra. IT"S A 70' NOT A 90"!!!! I finally had to him to get the manager, The kid goes to get the manager and I hear them on the way back to the counter, the manager is telling the kid, " Ya, a Datsun 240Z, What, are you new??" "I thought you said you know everything about imports"?? Needless to say, the manager put the kid in his place. I got my parts and the kid kept giving me a dirty look, as if I just disgraced him in front of God himself. Kid lost his job a week later for being rude to customers. Dave
-
I don't know what you did but I can tell you that 2 screws are lose and 2 screws are missing. Fix those first then worry about fixing the rest. Dave.
-
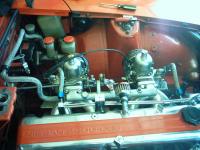
As for ignition set-ups, The Mallory Unilite, in my opinion, is the Best bet for the L6, Hands down. I installed mine almost 3 years ago and have yet to make a single adjustment or even change the cap and rotor. I use only NGK wires and plugs. I also use a Mallory Promaster coil and an MSD 6A. My plugs are gapped at 0.060 because my set-up shoots a Bolt of lightning. This also gets me an average of 27 MPG, even with my 40DCOE Triple Weber set-up. As for cams, The Robello set-up is nice, and the 480/280 Stage 2 cam seems to be the best version for both daily driving and the occasional race down the wooded thoroughfare. I love mine, it's got a beautiful lopy rumble that most mistake for a V8. That and the Ceramic Coated 6-into-1 Header with 2.5" aluminized exhaust and turbo muffler make it sound very intimidating to most. As long as you have a full set of Metric tools, deep sockets, combo wrenches and screwdrivers, you're good to go. I carry all of that in a small tool bag that sits behind the seat. I Never leave home without it and could probably tear the car down to nothing with everything in that bag. You're correct, this is not a huge site but as we've all figured out, great things come in small packages. Like the Z itself. Follow the link in my Signiture below for the rebuild I'm doing on my 2/74 260Z on CarDomain.com Dave.
-
You're probably right preith, I just have my flow meter set at 4lbs. If felt like it was choking on 3 pounds. Maybe just me. No split hairs here, just been a while. Chris, You got over $1500 worth of fuel delivery there, I'd keep it and rebuild them. The price of a good rebuild and tune, far outways buying another set of S.U.'s, if you're looking for some good performance. Don't get me wrong, S.U's ROCK, I love 'em. But I feel like I get more bang for the buck and when people come up and go "Holy Crap" That's a beautiful set-up ya got there" I lost count of how many people asked me what size V8 I had under the hood. I just tell them it's a straight 6 and they look dumb founded. I explain the stage 2 cam, ceramic coated header, 2.5" exhaust and turbo muffler have a deceiving sound effect. Dave.
-
It looks melted but it's actually Volcanization or Devolcanization, I can't remember which. I bought the identical rubber strapping from a local Upholstry shop and the guy explained what the melting look was. ANyways, the strapping was about $2.00 a foot but worked beautifully. You'll be able to manage the black material better but the white stuff, you have to drill first, in order to get the rivots thru. It won't seperate like the black stuff. The results were awesome though Dave.
-
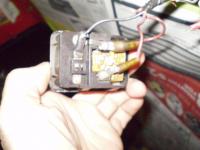
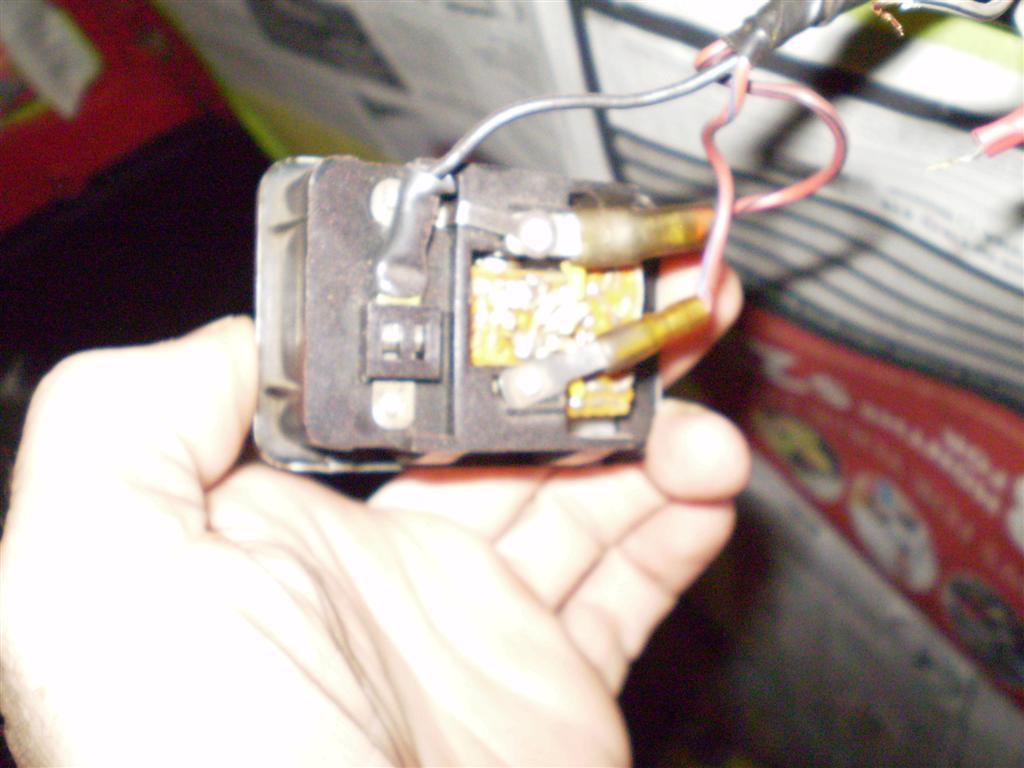
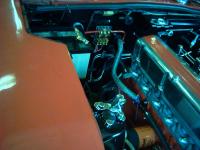
There are 2 plastic tabs on each long side of the dome light. you should be able to wiggle them lose enough to pull the assembly out. It's usually pretty easy due to the fact that it needs to come out to change the bulb out. Ignore the circuit board where a bulb should be. And look near my palm to see the 2 tabs I was refering to, Dave.