Zs-ondabrain
Free Member
-
Joined
-
Last visited
Everything posted by Zs-ondabrain
-
 Great Advice Bart, but on the other side of the coin, A LOT of us work on our cars on a "While I was at it" spur of the moment kinda schedule. I never know when I'll actually have time to work on my Z, so when I actually get time, it's a "Do it now or it ain't happening" kinda deal. But other than that, I totally agree. Dave
 -
Typically Rust will hold the 2 peices together. Just had thaqt issue with Z_Tyler_Z's 280Z. Decent smack with the hammer and they poppep off. By the way, who ever told Tyler that the U-joints couldn't be replaced at home, didn't have a clue. Popped the cups out (all four) cleaned the holes with a drum sander on the dremel, coated everything with a thin film of Antiseize, to keep the rust down for next time, and put it all back together. 10 minutes to get them out, 20 minutes to swap the new Ujoints in and 10 minutes to get them back on the car. Easy peesy, Beans and Cheesy.... Dave
-
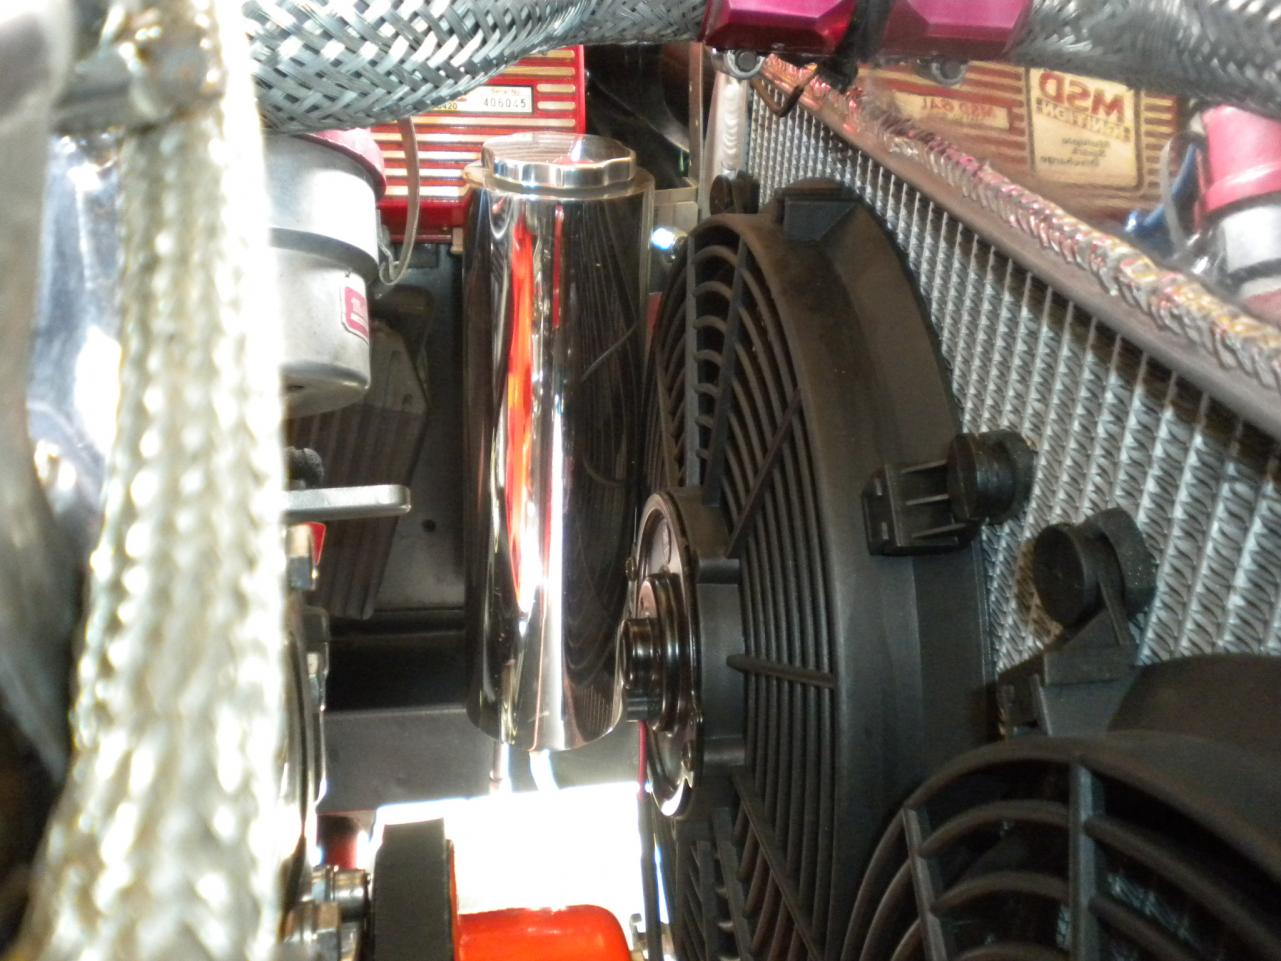
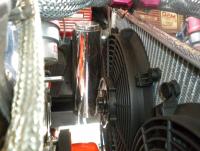
 Rad and Fans were $240 Delivered from Ebay, some guy in Oregon. Overflow was $50 at "Dreamers" in Everett, a Hot Rod Shop on Evergreen Way
 -
 Rad and Fans were $240 Delivered from Ebay, some guy in Oregon. Overflow was $50 at "Dreamers" in Everett, a Hot Rod Shop on Evergreen Way
 -
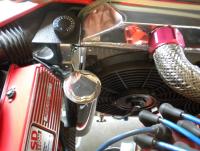
 Electric thermostat is in Celcius but set at about 180F and stops at 160 F
 -
 Electric thermostat is in Celcius but set at about 180F and stops at 160 F
 -
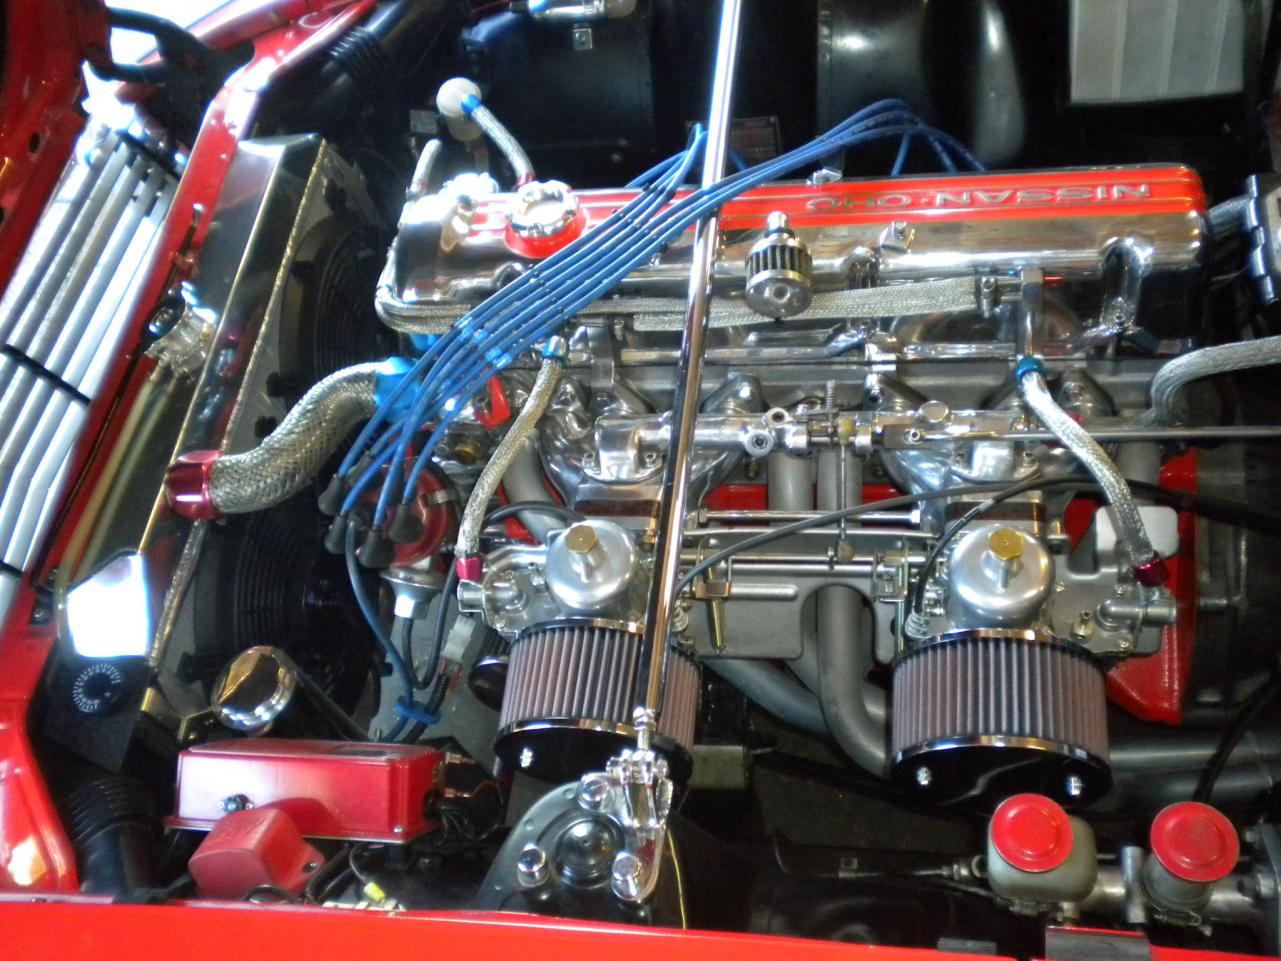
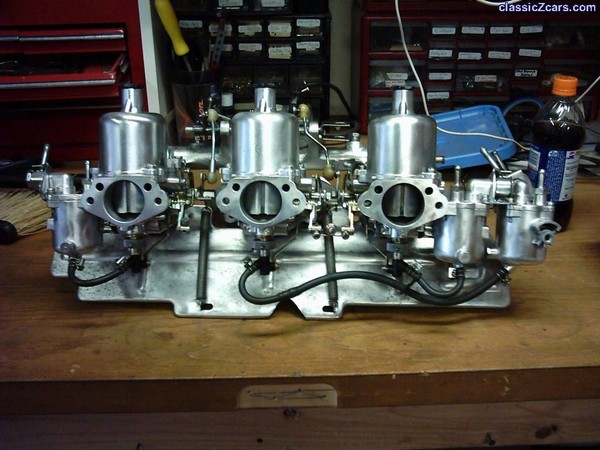
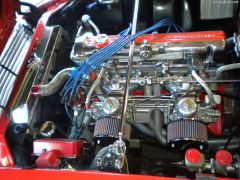
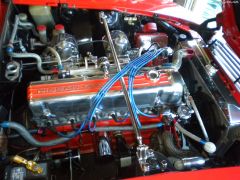
 Also New ZT SU's, rebuilt 2.6 liter, oil filter cover and New K and N Filter Kit.
 -
 Also New ZT SU's, rebuilt 2.6 liter, oil filter cover and New K and N Filter Kit.
 -
 Also New ZT SU's, rebuilt 2.6 liter, oil filter cover and New K and N Filter Kit.
 -
 Also New ZT SU's, rebuilt 2.6 liter, oil filter cover and New K and N Filter Kit.
 -
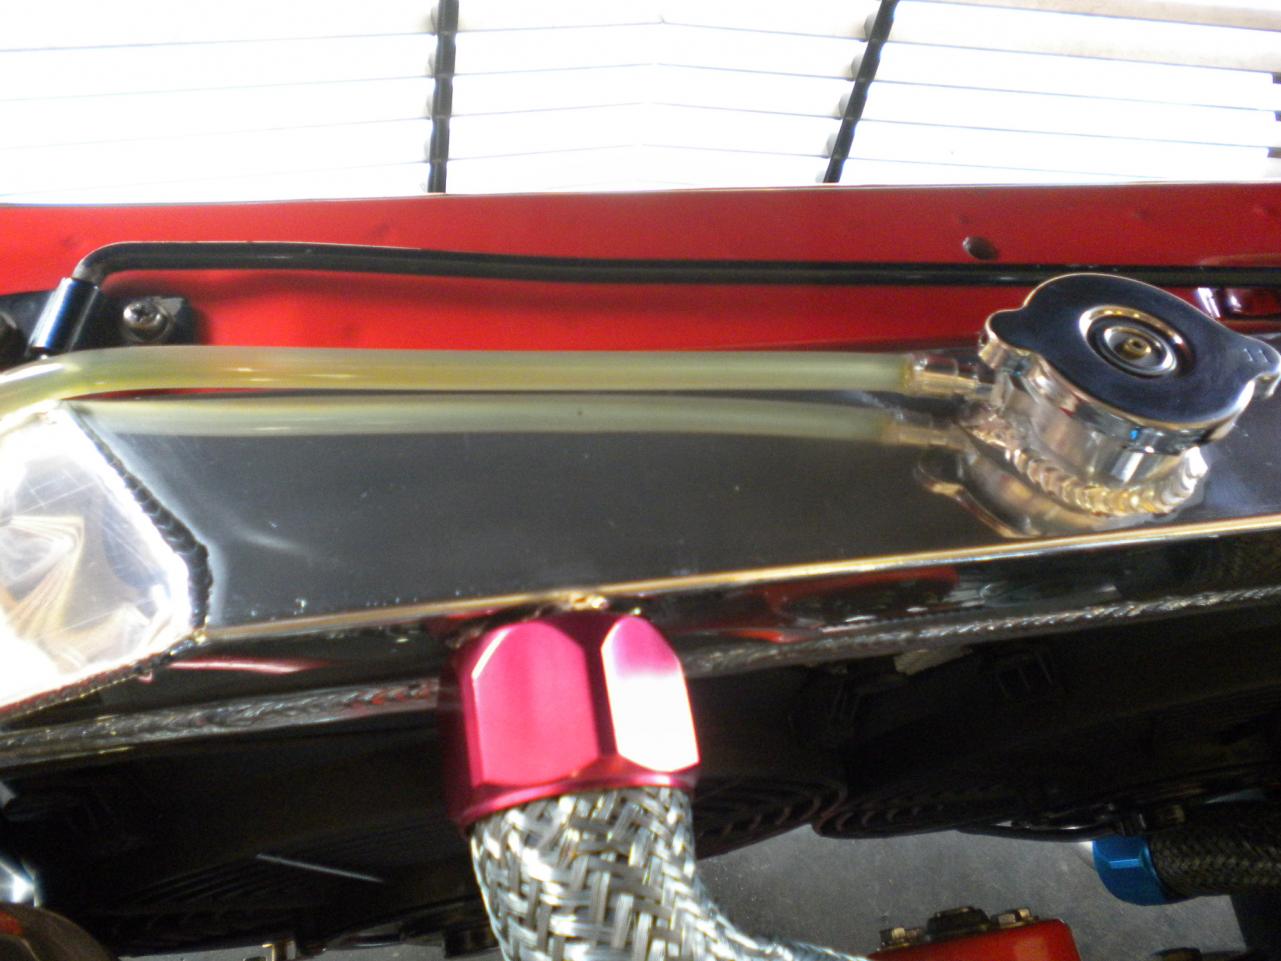
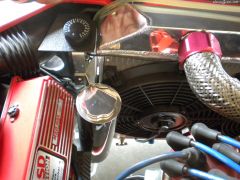
AND.... I leave it in during the winter. Never had an Overheat issue while using the Water Wetter. My Z is parked inside during all times of the year so I can't give proper conclusions for Freezing during the winter with the Red-Line. With the new Aluminum Radiator, Dual 12" fans, $50 Polished aluminum Over-flow tank, Clear 1/4" tubing going from the radiator top and tank, I Don't overheat, I can see the coolant and any air in the line going to the overflow. Dave you can see the Tank and line and NO air bubbles. The electric Thermostat is the dial on the left of the radiator

-
Look at the picture above, you can see the header. It replaces the manifold from the Head to the collector (where the exhaust pipe connects to the header) So yes, That's That. You can take Garys info as solid. Just remove the carbs, clean the whole cooling system thru the manifolds, pipes, hoses, etc. Basically renew the system.
-
Yup, it was me and it works awesome. Gravity CAN be a great thing. And I also love to use Water Wetter by Redline. Cools the system by up to 10 to 15% by volume. Great stuff in the heat
-
here's a clue... Water transfers temperature better than air. If there is an air pocket at the thermostat, the Tstat won't open, if it won't open, it'll over heat. By removing the hose from the Tstat housing, you bleed the air out and it's replaced with water. "Burping" the system so to speak. Most shops have a funnel with an adaptor to lock the funnel to the top of the radiator. Fill it with water, run the motor and when it opens up, the water fills and keeps the radiator topped off after a few openings and closings. Basically burping the system by forcing water in and leaving no room for air, to overheat the system. Dave
-
2 ways to fix that. only a handfull of people run into this issue. 1) Unbolt the GM mount from the R/T, redrill the hole closer to the rear of the R/T but make sure the mount clears the back plate of the R/T. 2) Turn the R/T around (180 degrees) redrill the hole on the top plate to match everything back up. The fuel lines will need to be raised a little due to you turning it around. Dave
-
George, 1> Definately Purchase the MSA header, I would suggest you spend the extra $$ and get the Ceramic coated header. They look great, allow better flow and eliminate the old smog lines and crap. 2> There's no Definative "How To" on desmogging the 240Z's. 3> Remove the old Air Pump. Typically dead weight anyways. Keep the stock air cleaner assembly. Leave the Block breather line that goes from the block (under the #1 cylinder) to the PCV valve on the center of the Ballance tube. Leave the Valve cover hose to the air cleaner there. Remove the Vacuum pots on the ballance tube and use a small zip ties to hold the bracket that the vacuum pot was attached to, to the front SU linkage. (You'll see what I mean when you remove the pot and the steel post connected to it and the center linkage) Use the Gallery of Pictures or the Garage Feature to look at others motors for a better idea of what a smog free engine looks like. When it comes to the water passages in and thru the carbs, they are typically clogged anyways. This happens because the heat from the exhaust crystalizes the coolant that is in the passages after the engine is shut down each time. Over time, the deposits all collect there and eventually clog the passages. Most people use a large bolt or plug to plug off the hose, at the "Y" pipe above the starter. Then remove the hose that goes around the back side and into the rear SU. Then plug the Thermostat off after removing the front SU hose. Most find that the car runs better without the extra Lag on the front pulleys, the air pump out of the way, and the emissions gone. 4> The Water lines don't have anything to do with cold starts. Just use your chokes to start it but don't leave them on too long. I have a new set of ZT SU's and they barely need any choke to start. But when they do need it, it only takes a little, and then I shut them off after 20 or 30 seconds of running. And just feather the gas with my foot or ease the chokes way down. You can order new hoses but if your eliminating all this stuff, you won't need them. Hope this helps. Dave


-
The ADS change every time you change pages, just keep an eye on the top. Bruce and Steve at ZTherapy are your BEST bet when it comes to ANYTHING SU related. My New ZT SU's are friggin Awesome and it's hard to imagine my Z with anything else. Dave
-
Any Python, Viper, Sidewinder (All DEI Products) will serve your needs. All have low to decent price, do their job well, very little draw on the battery, and have accesory outputs. You can do it your self..... Black goes to ground Red goes to the battery Green to the door pins Yellow to the ignition wire Orange to the Relay as well as the yellow, The starter wire is Cut, wired into the relay and the alarm will disconnect the starter wire when armed or when the alarm sounds. Blue is an instant alarm wire with a negative input. Connect this wire to a Hood pin and or Hatch pin. The alarms have both options for Built in Shock Sensor or remote Shock Sensor (attach it to the steering column and plug in the wires to the alarm, easy) The white wire goes into a relay (Unless you have MY Parking light upgrade harness) to power the parking lights. Instructions tell how to do it. If you have my PLH, just tap the small black wire to the relay and make sure the Parking light output of the alarm is switched to a Positive output. Almost all of these alarms have a Grey?? Second channel output which is activated by Holding down the Unlock button on the remote (Keyfog) to activate dome lights, horns, Hatch pop, etc. The Orange wire of the alarm is also used as "Ground when armed" wire. Connect this wire to a relay that cuts the power wire of the fuel pump, or Distributor, or other anti theft accesories. Hope this helps a little and lets you know that it's a simple job, you can do it yourself and know that if anyone steals your Z, it's because they had a flatbed or tow truck, cause they ain't driving away with your Z. Dave
-
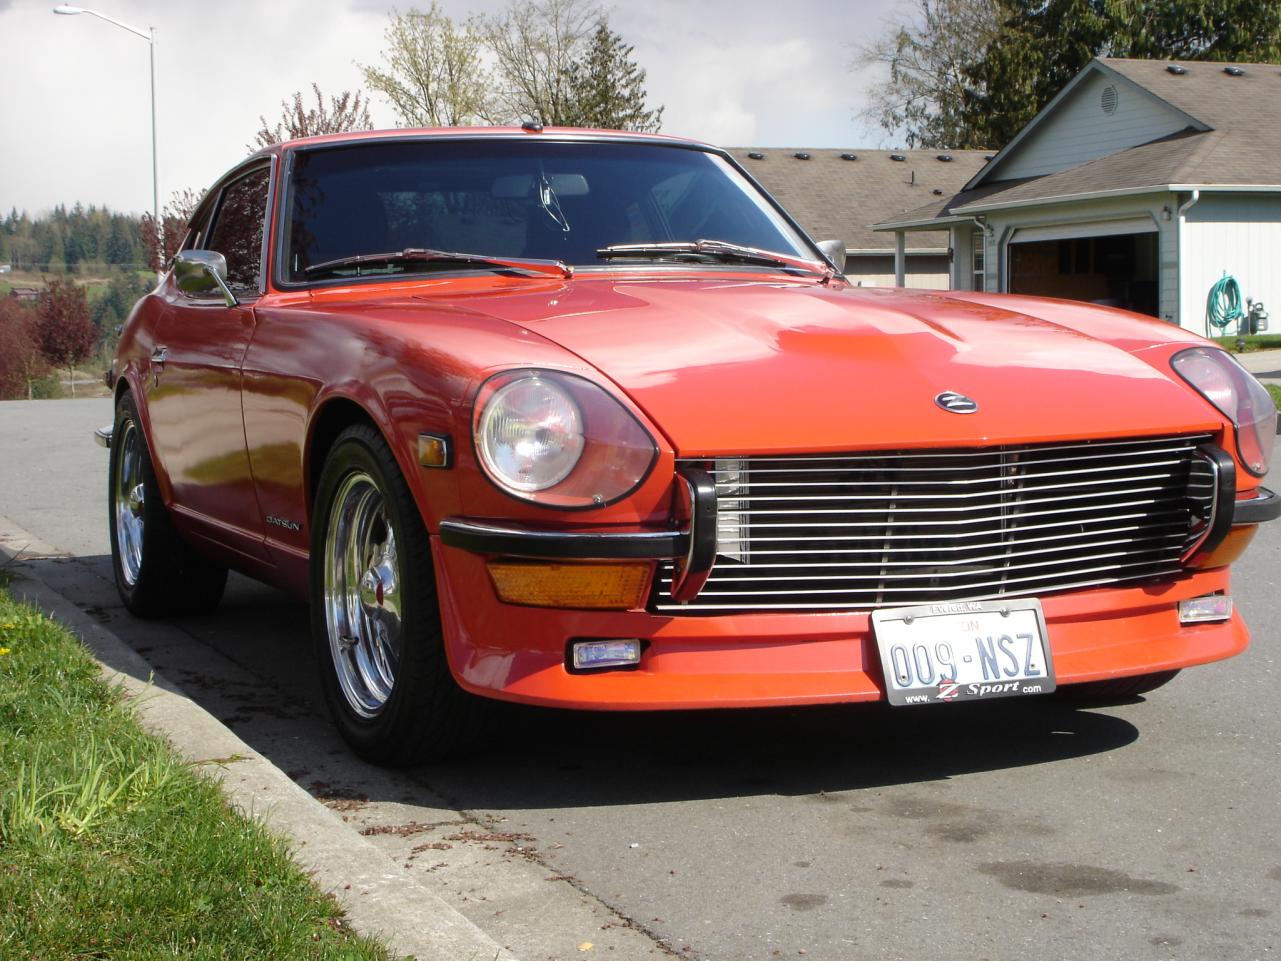
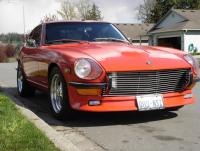
Not Shaved like you're thinking but I had to make due with what I had. Got hit dead center and cut out the middle. I always loved the nerf bumpers of the 70-1/2" Camaro. So I went for that look.

-
Nope. The 75 has a 9-pin connector and the 78' has a larger 10-pin? connector with the headlight (large wires) in the same plug. The 75' combo switch has seperate power and ground wires for the headlights. Sorry. Dave
-
ok, so it's an old thread but I had a question related to this area. I too have had gasket issues and fuel pumping out at a much higher rate than Johnny. This of coarse was because I pulled the top of the pump to polish it (polished aluminum is King) anyways, if leaked becasue of a tear in the gasket. I fixed it with gasket sealer. BUT..... My main question is this........ Every Stock mechanical pump I've had, leaks oil thru the 2 very small holes in the upper part of the lower assembly. My engine bay is typically SPOTLESS and can be eaten off of at almost any time. These 2 holes are breather holes for the oil in the pump area of the fuel pump. So the question is this, Does anyone elses fuel pump shoot oil all over their engine bay (passenger side) and is Plugging these holes OK to do. The oil gets in there and obviously Lubes the push rod that works the pump and if oil gets too high, it'll obviously return to the front cover. So should I plug them off to keep the motor clean? Or drive to the car shows with a rag wrapped around the pump to catch the oil and reduce the cleaning time at the show(s)? Dave
-
That was my thought as well, that's why I suggested the Water Pump R&R, Pull it, inspect and reinstal or replace. You're right though, the gurgling could be a boiling sound as well. Dave
-
I would do a complete Flush on the cooling system, Pull the water pump and replace it if it's leaking. "Gulping" sounds usually indicate Air in the system. So after filling back up after the flush and R+R of the pump, Park the car on an Upward slope, pop the radiator cap and let it runn for a bit, filling the radiator after the air is "Burped out" make sure the valve is open on your heater core when doing the flush, so you get all the crap out and don't burst a line. Dave
-
I had the Gear Reduction starter from an 81' ZX on my L24 and now on my L26. Works great. I think I also used an L24 starter on L20B back in 95'
-
If the meter is showing erratic on start up, and the lights are off, then I would get a volt meter on there and start checking voltage and connections. you gotta remember that the originalmeter is for a 40 amp alternator and you just installed a 60 amp alternator. If there is a surge of any kind, the ammeter can go bonkers (Erratic) and keep doing it afterwards. So check the output of the new alternator. Check ALL your connections. If you don't mind the extra work, reinstal your stock alternator and Regulator and see if the problem persists. If the problem goes away, then run your 60 amp alt. down to the auto parts store and have it checked. Even Brand New Alternators can be bad Right out of the Box. If the new alt checks out, and the problem is still there with the Old alternator, then the ammeter may have finally bit the dust. So test the alt and wiring and get back to us. Dave