
kenward1000
Free Member
-
Joined
-
Last visited
Everything posted by kenward1000
-
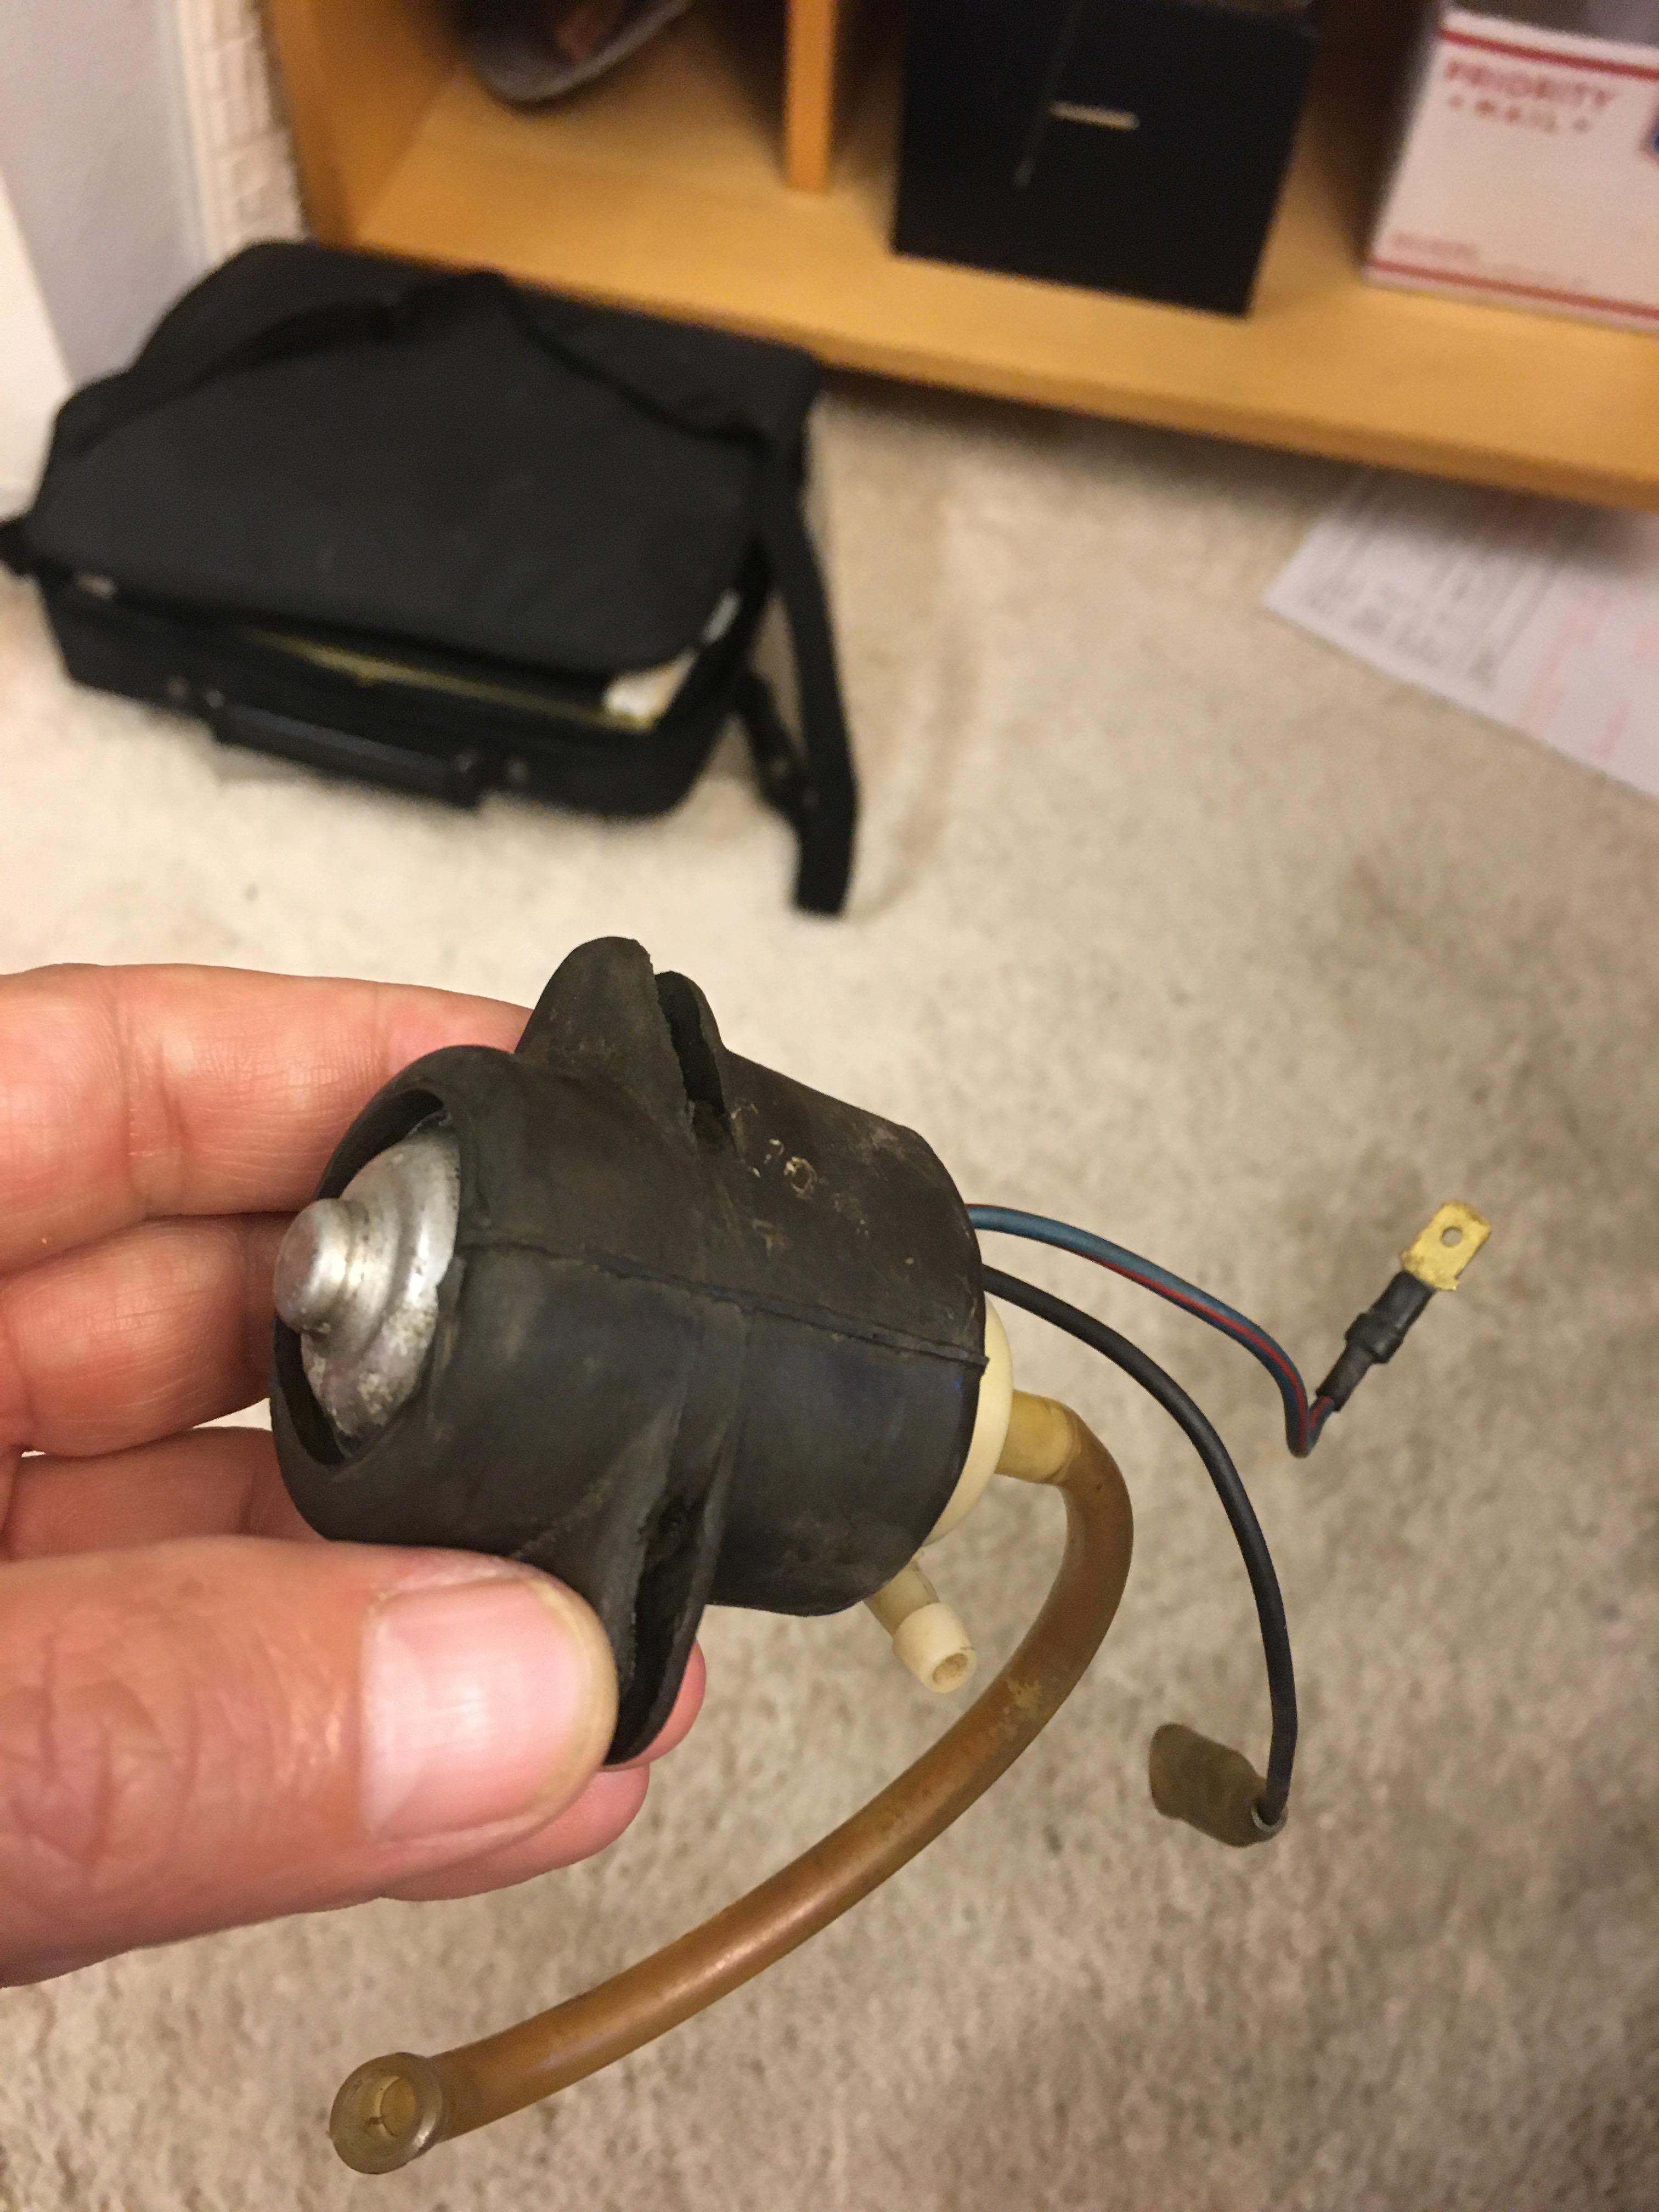
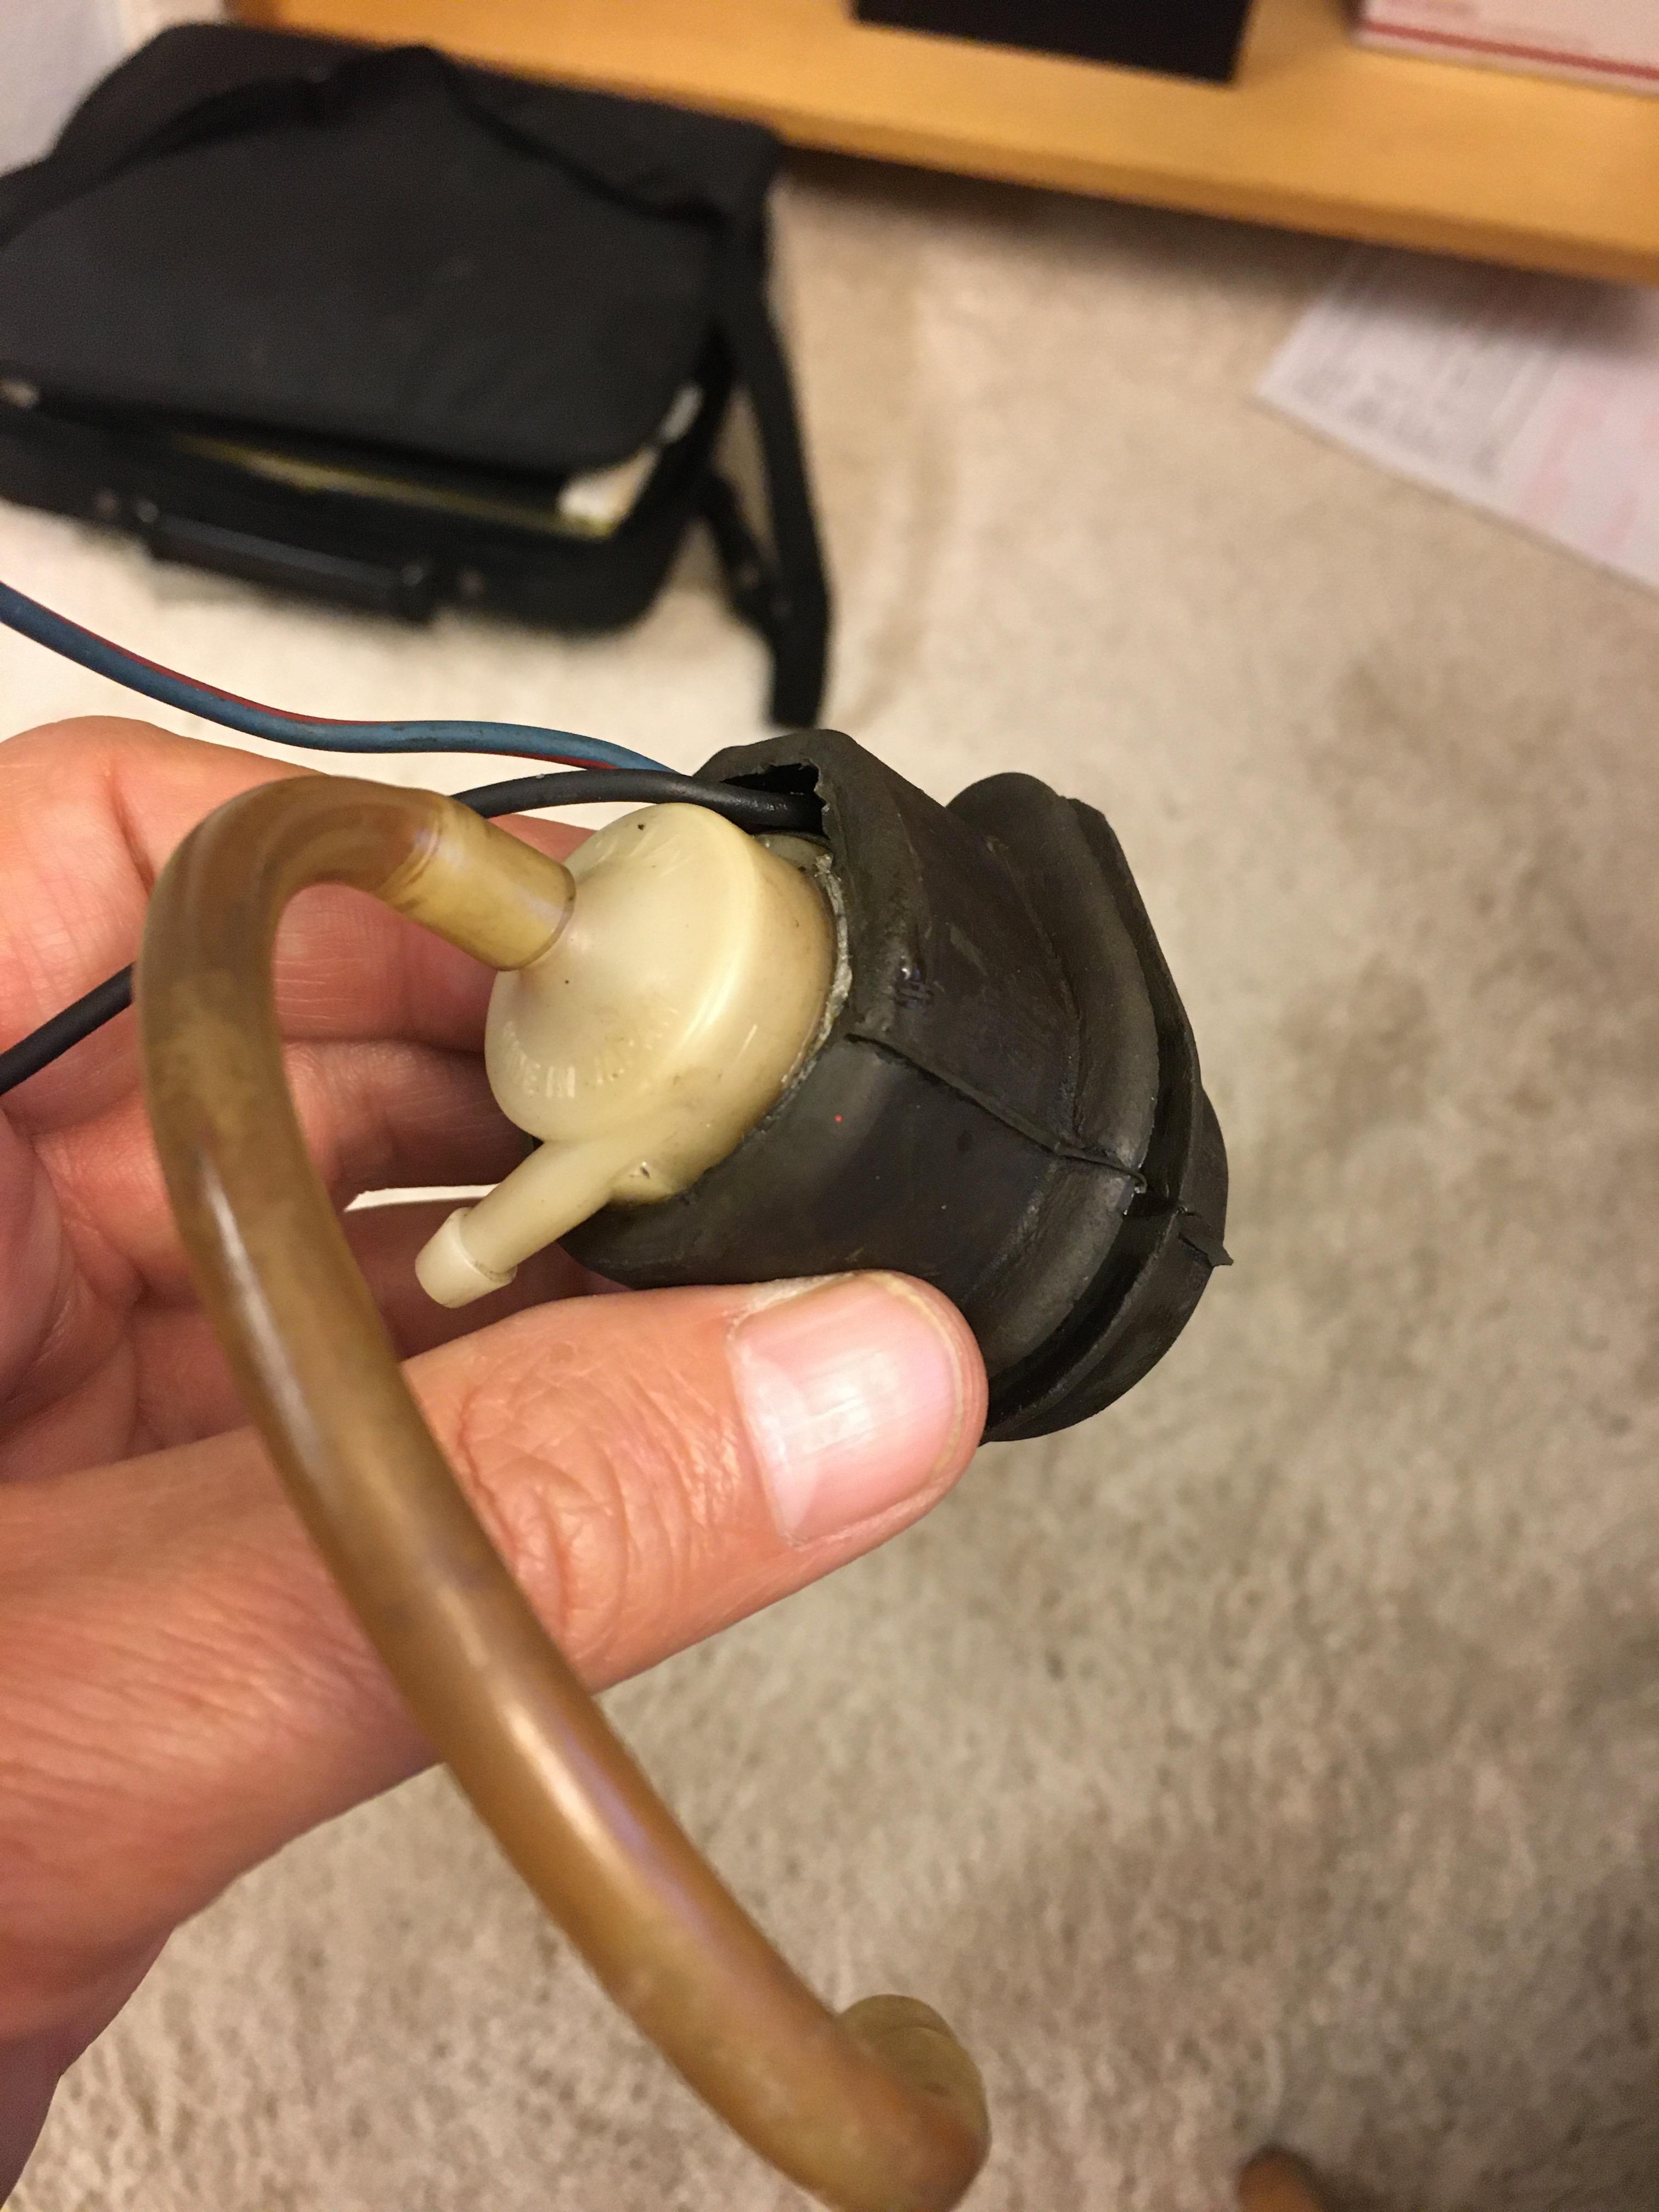
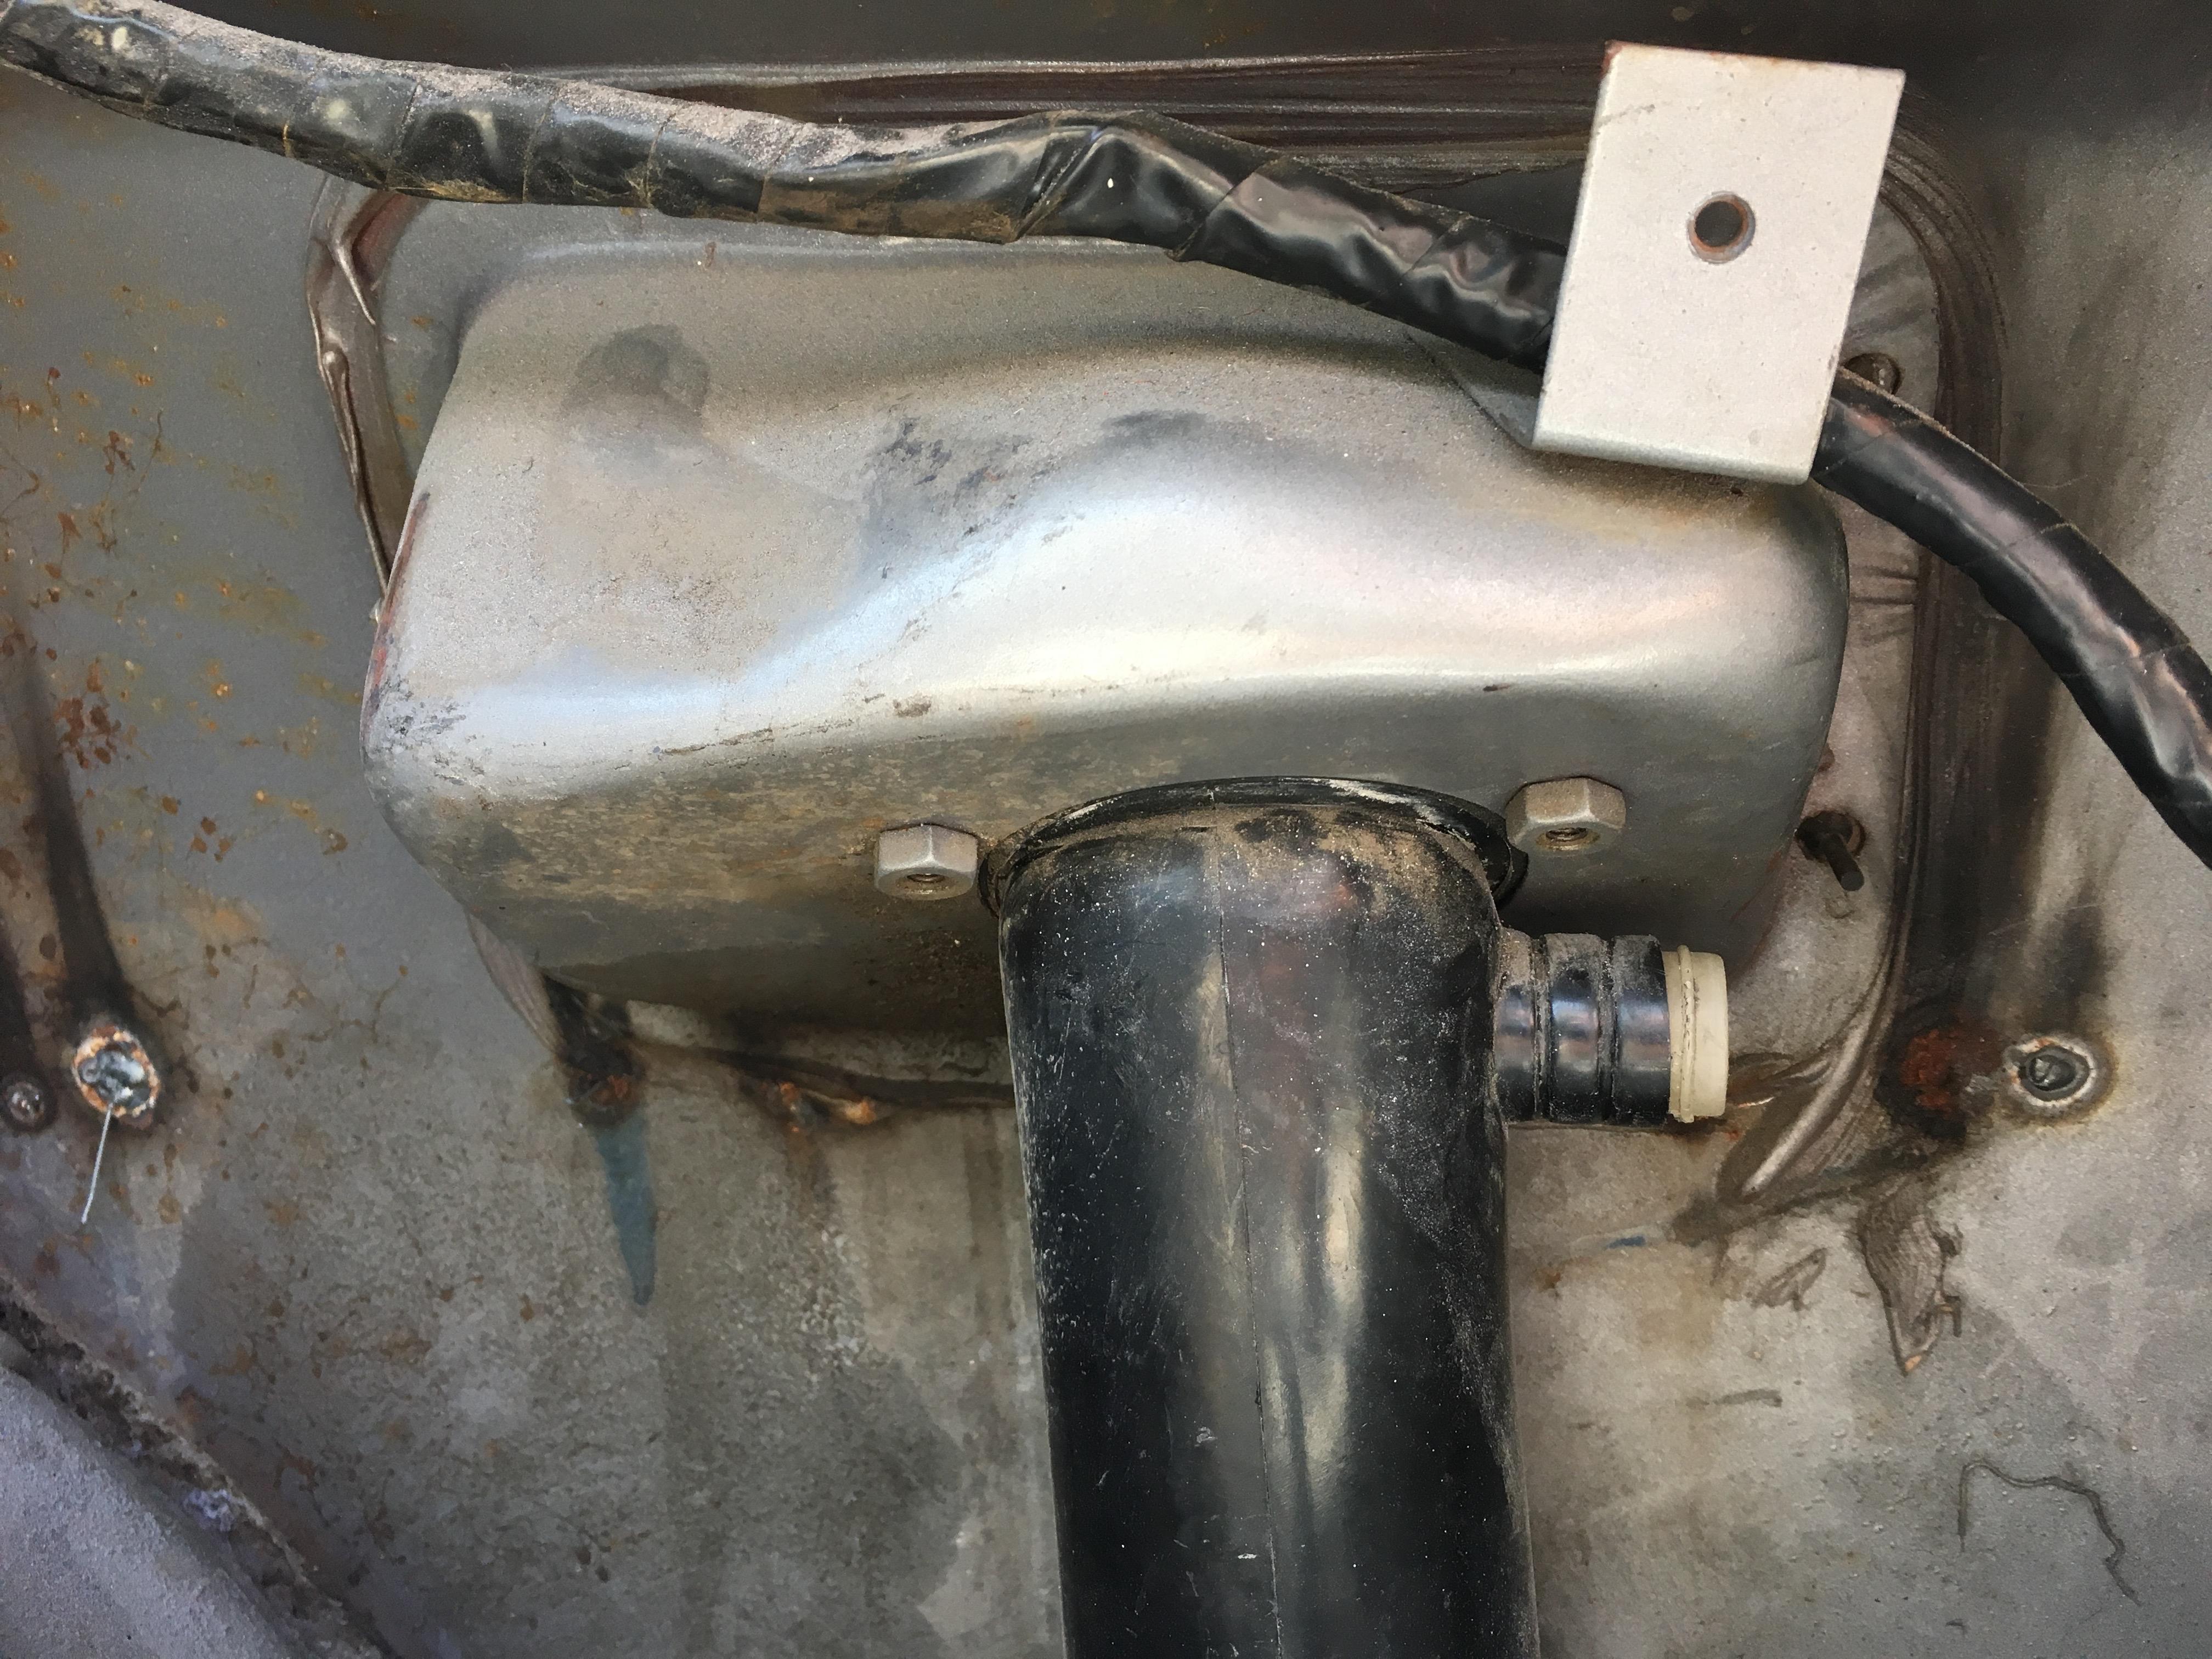
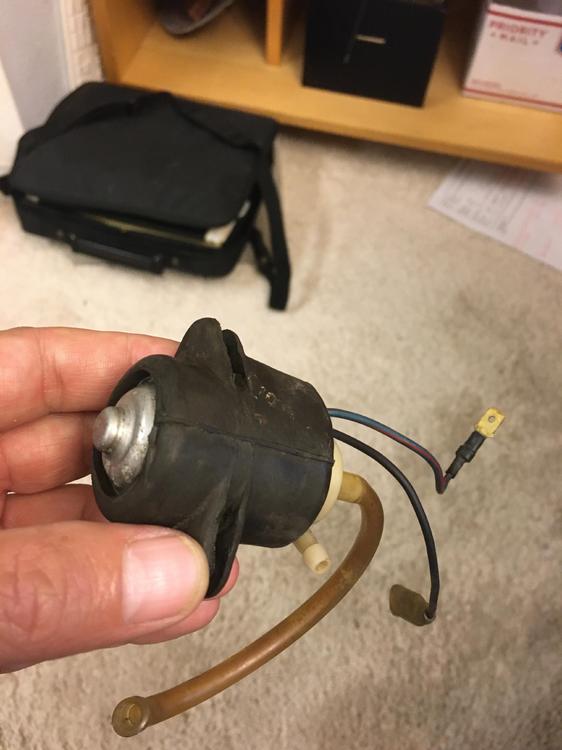
With enough heat and squirting with penetrant, got the old weak motor out of the rubber housing, after extracting the rubber housing from the reservoir. First installed the new MSA motor into the rubber housing, then tried to install that assembly onto the reservoir; not possible. Removed the motor, installed the rubber housing onto the reservoir, THEN pushed the motor into the housing. Success. Need to re-align the metal squirt tubes so the washer fluid sprays through the valence slots. Also need a tiny hose clamp (or maybe safety wire) for the passenger side washer fluid tubing (new tubing), so all the fluid sprays into the squirt tubes instead of soaking the firewall. Thanks for all the suggestions!
-
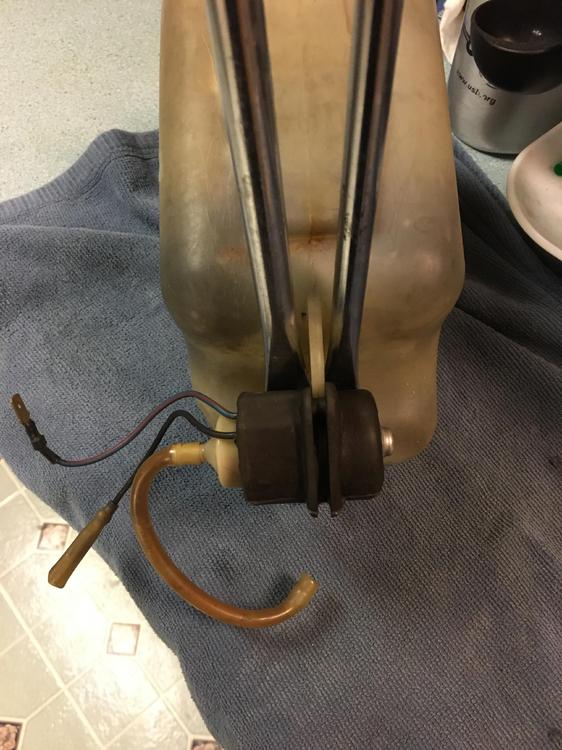
With the hot water soak and two pry bars (which mysteriously look like screw drivers) was able to separate the reservoir from the rubber/motor assembly. Now, how to extract the motor from its hard rubber housing? The motor is going to be discarded, so destroying it while using a press to extract it seems reasonable. Is there another option?


-
Just purchased a replacement pump motor, as the original motor is too weak to spray fluid anymore, even after replacing the tubing. How does the old motor come out of its rubber holder? Been dripping penetrating oil around the motor. Does the rubber holder need to be removed from the fluid reservoir first? The rubber isn't very pliable. Searched the forums repeatedly, found lots of posts about purchasing a replacement motor, no advice found on how to physically remove/replace it. Maybe I didn't use the correct search terms. I've been using this forum a lot since buying a 71 and 72 240z this year, everyone has been super helpful. Thanks!
-
If the "fusible link" that connects battery power to the wiring harness has failed or if the connectors between the "fusible link" and the wiring harness have opened/pulled apart, that will produce what seems like a total electrical system failure (no cranking, no lights, no horn, no nothing) even though the battery is fine. Just found/fixed this problem on my 71 240z with the kind people of the Help Me! forum.
-
Aha! That image led me to the problem spot. Now I can see the "fusible link", which looks very much like a length of black wire. The "fusible link" provides +12vdc to the wiring harness, through the plastic connectors. The tab of the connector on the harness side had broken off sometime in the past. So the DPO had put a wrap of duct tape around the connectors to hold them together. For some reason there's no slack in that wire on my car, so the connectors eventually pulled apart. When they were no longer touching, that fact was covered up by the duct tape. My "fusible link" shows continuity. Zip ties and clear heat shrink to the rescue, all electrical power restored, car starts. Should get a spare starter "fusible link" to carry with me on rallies, where a single-point failure means an expensive flatbed home. On the harness side, need to lengthen the wire by 2" to prevent tension strain on the connector and find a new connector end that has a functioning tab. Are there other "fusible links" in the wiring harness? Thanks for the replies!
-
Wait, do you mean the 20A IGN fuse in the fuse panel? Already checked and known good.
-
Where is the IGN fuse located? Thanks
-
Where is this alternator fuse located? Thanks
-
71 240z owned for 5 months. Been on two 900 mile rallies, driven daily, been running great. Decided to re-check vacuum pressure, after replacing two leaking hoses (block to intake manifold, intake manifold to brake booster). Started car, let it warm up. Shut it off, plugged in vacuum gauge hose. Car won't start. Won't crank, no turn signals, no horn, no nothing. Even though I thought that plugging in the vacuum gauge couldn't possibly cause the problem, removed it and still no electrical power. Battery is 2 years old, measures 12.75vdc. Searched all forums for similar issues. Charged overnight, still no electrics. Jumped from a known good battery, still no electrics. No voltage detected at any fuse in the panel, all fuses good. I'm electrically competent. Would appreciate any tips on where I can look for potential failures.
-
Thanks to jfa.series1 for telling me how to figure it out. Got the hinges in and solved my hatch issues. Thanks!
-
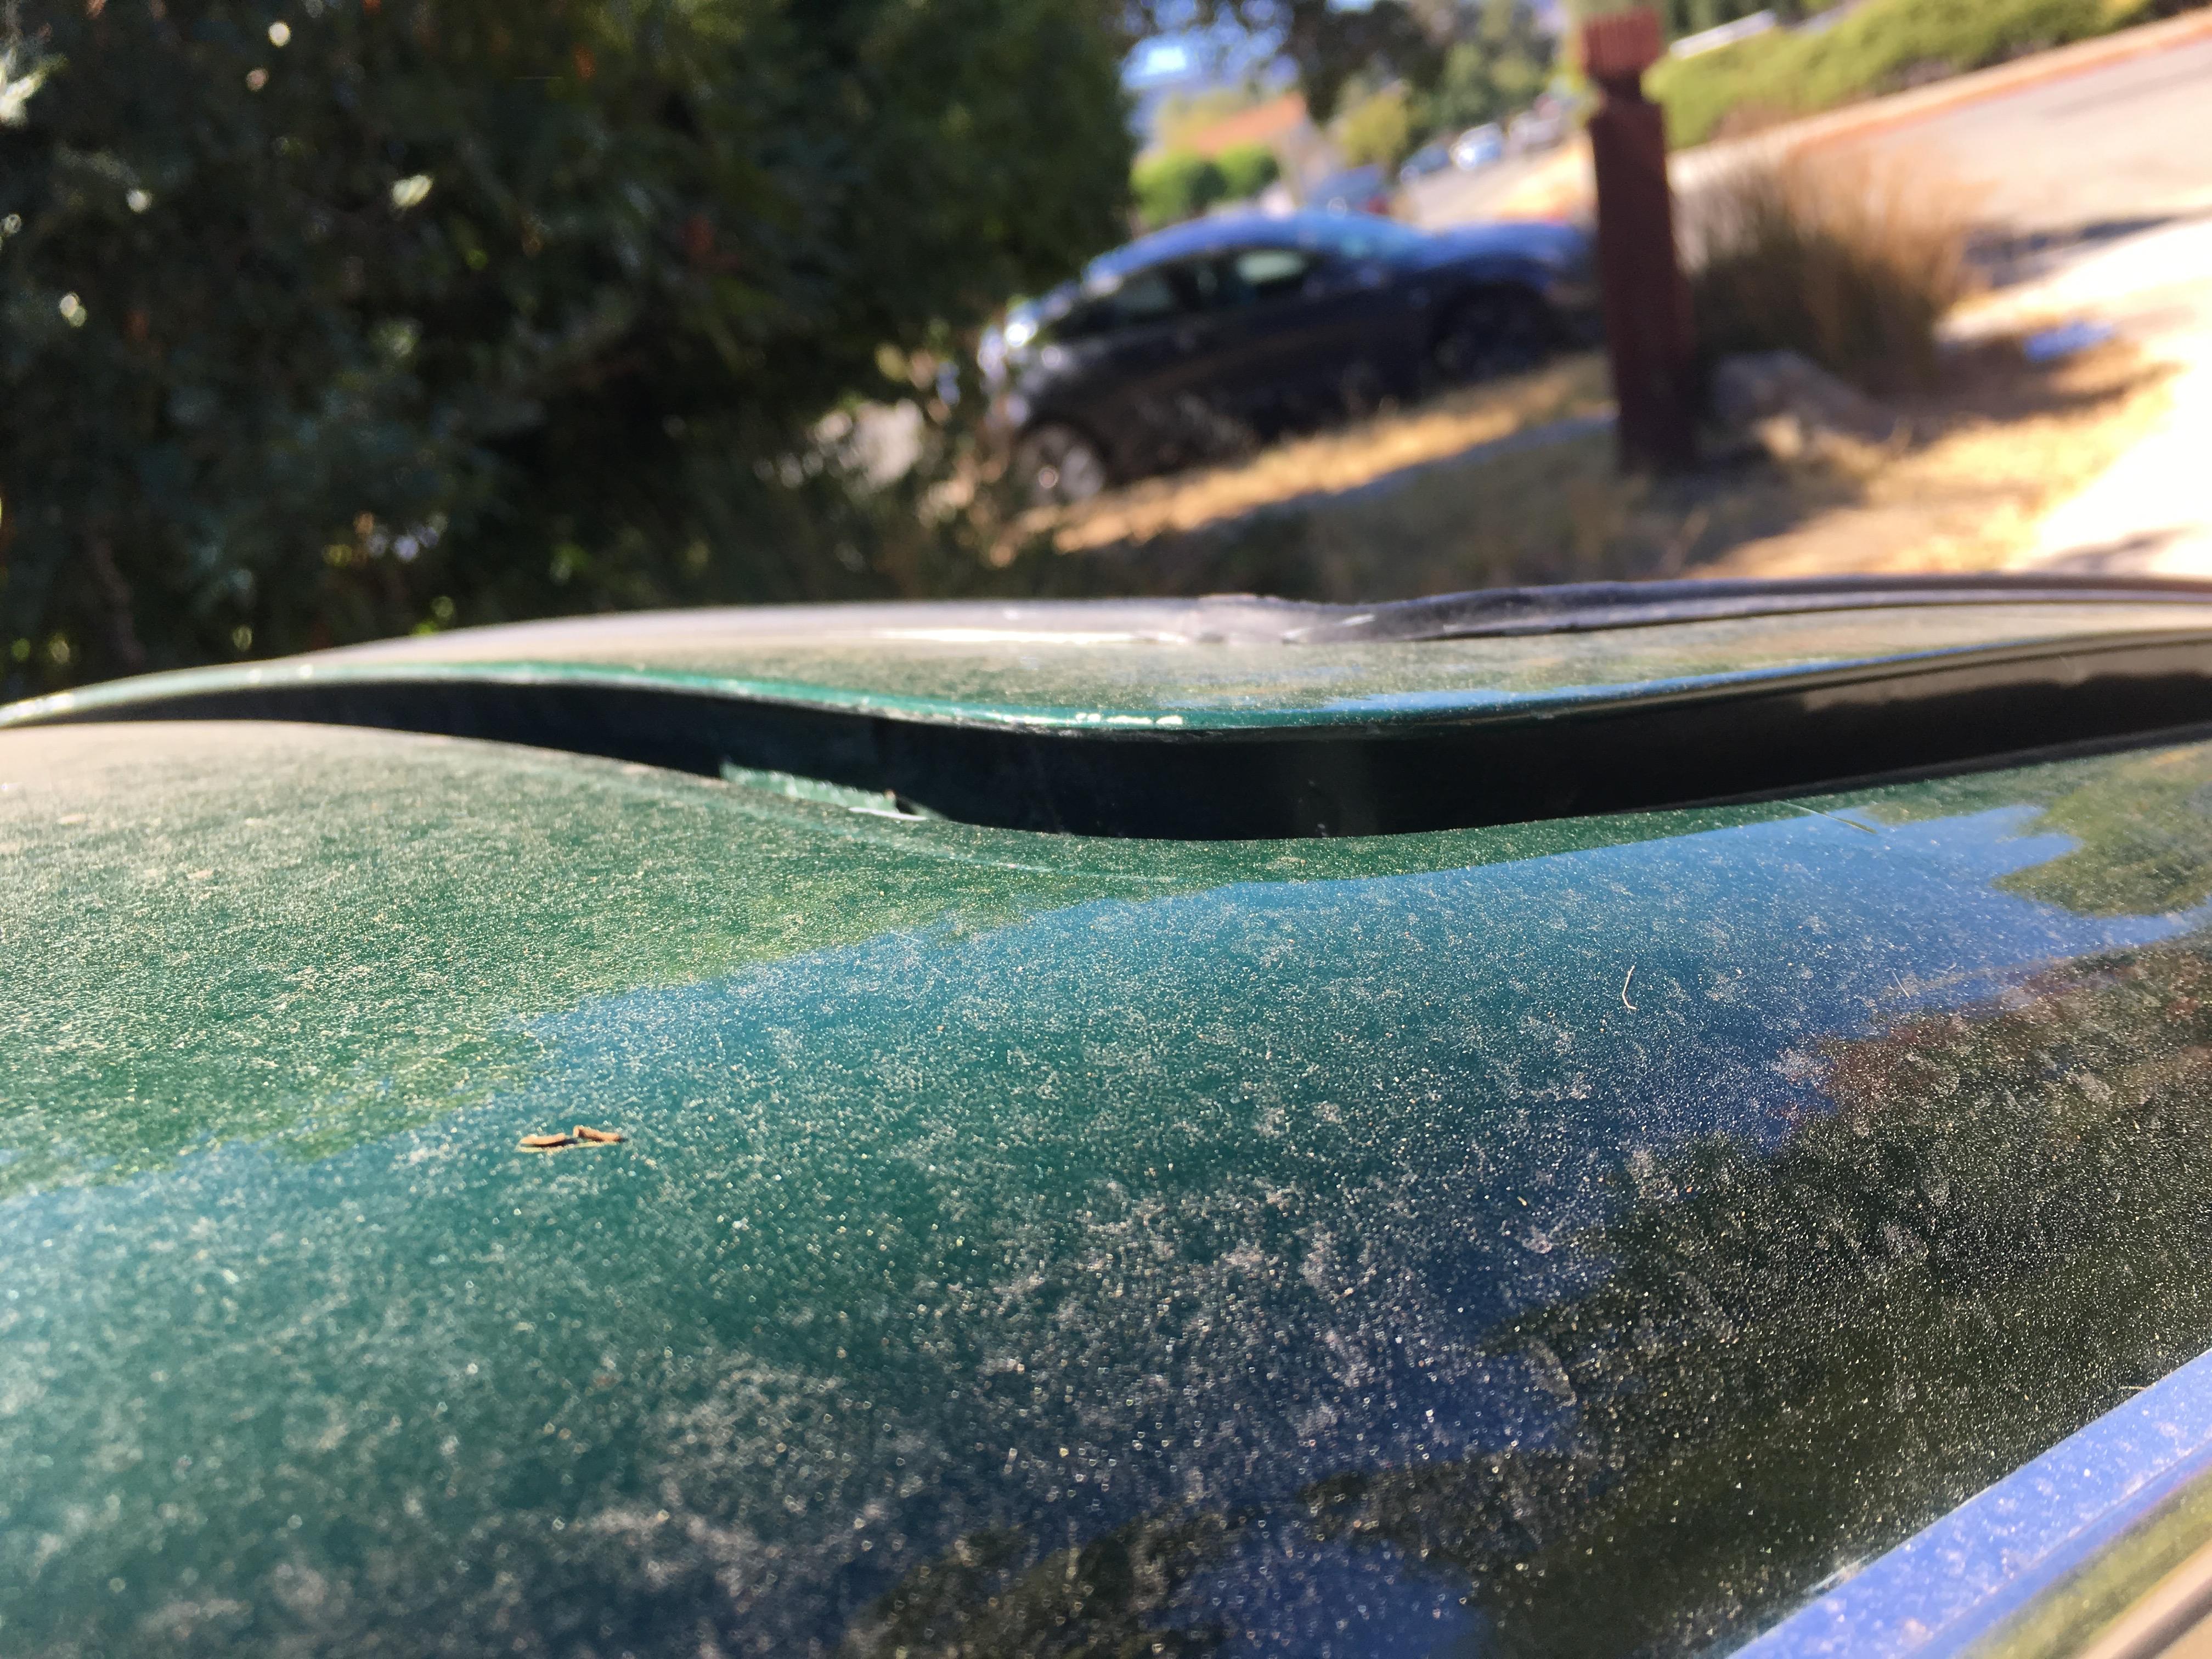
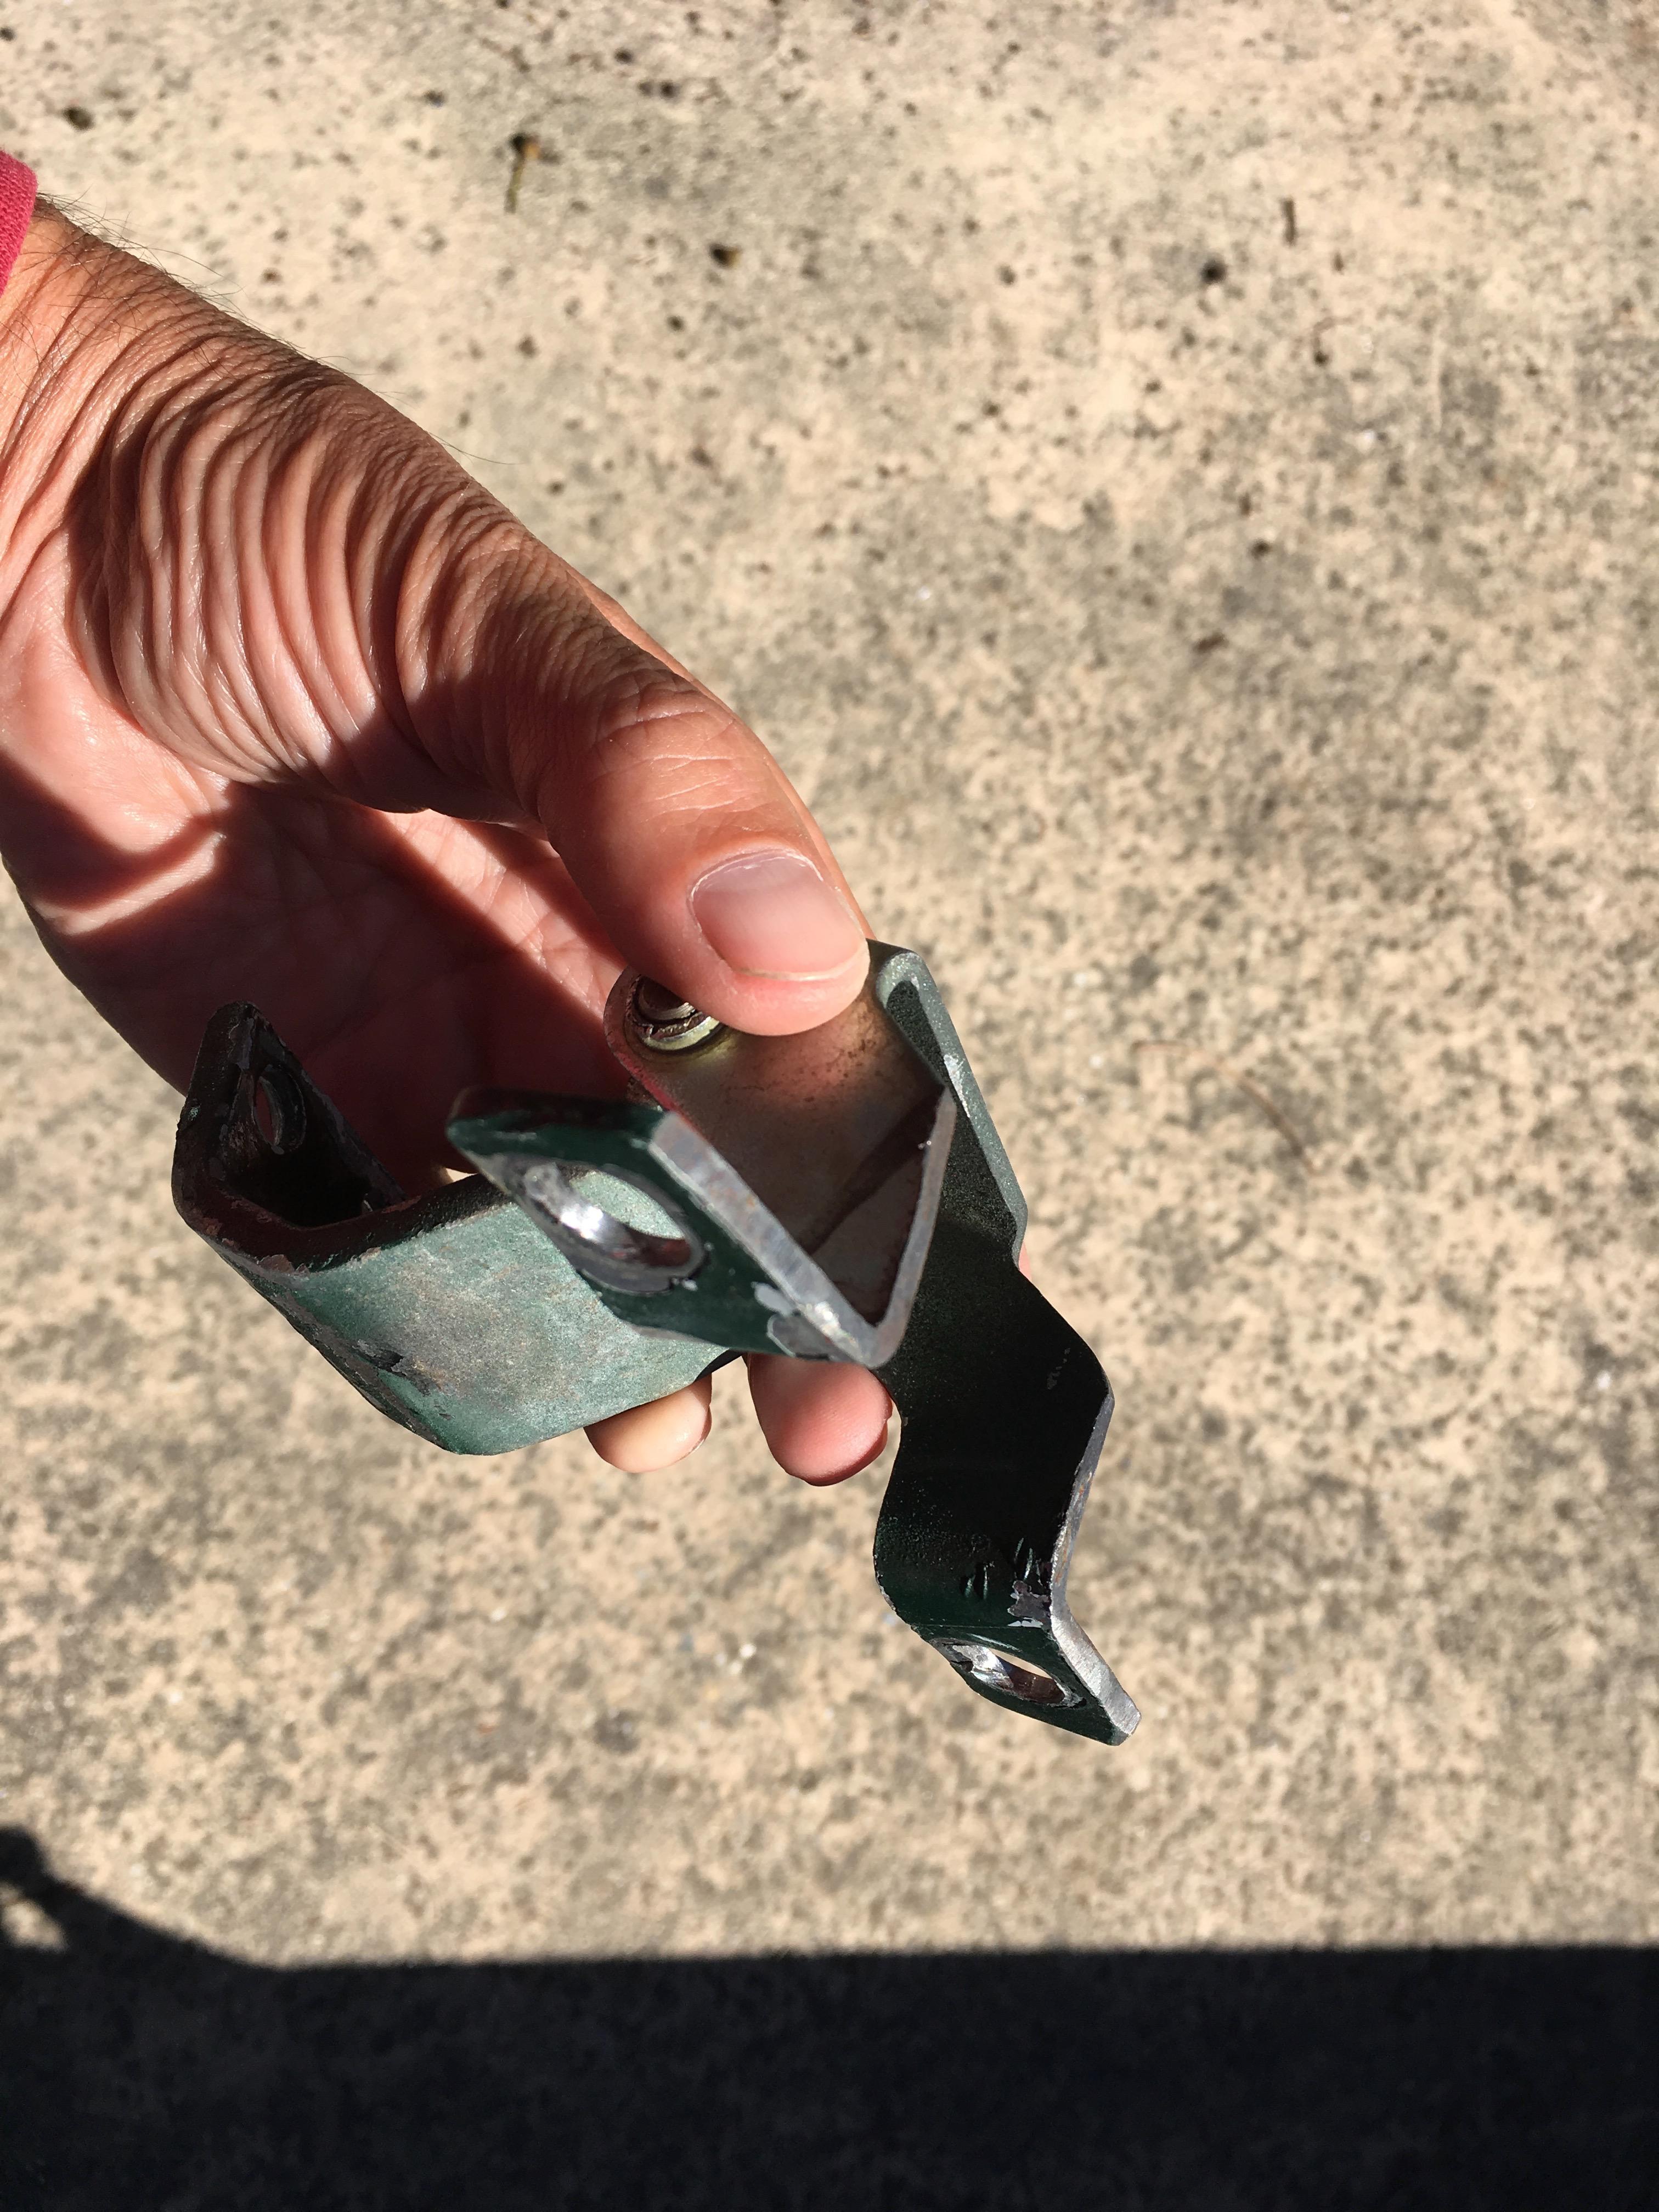
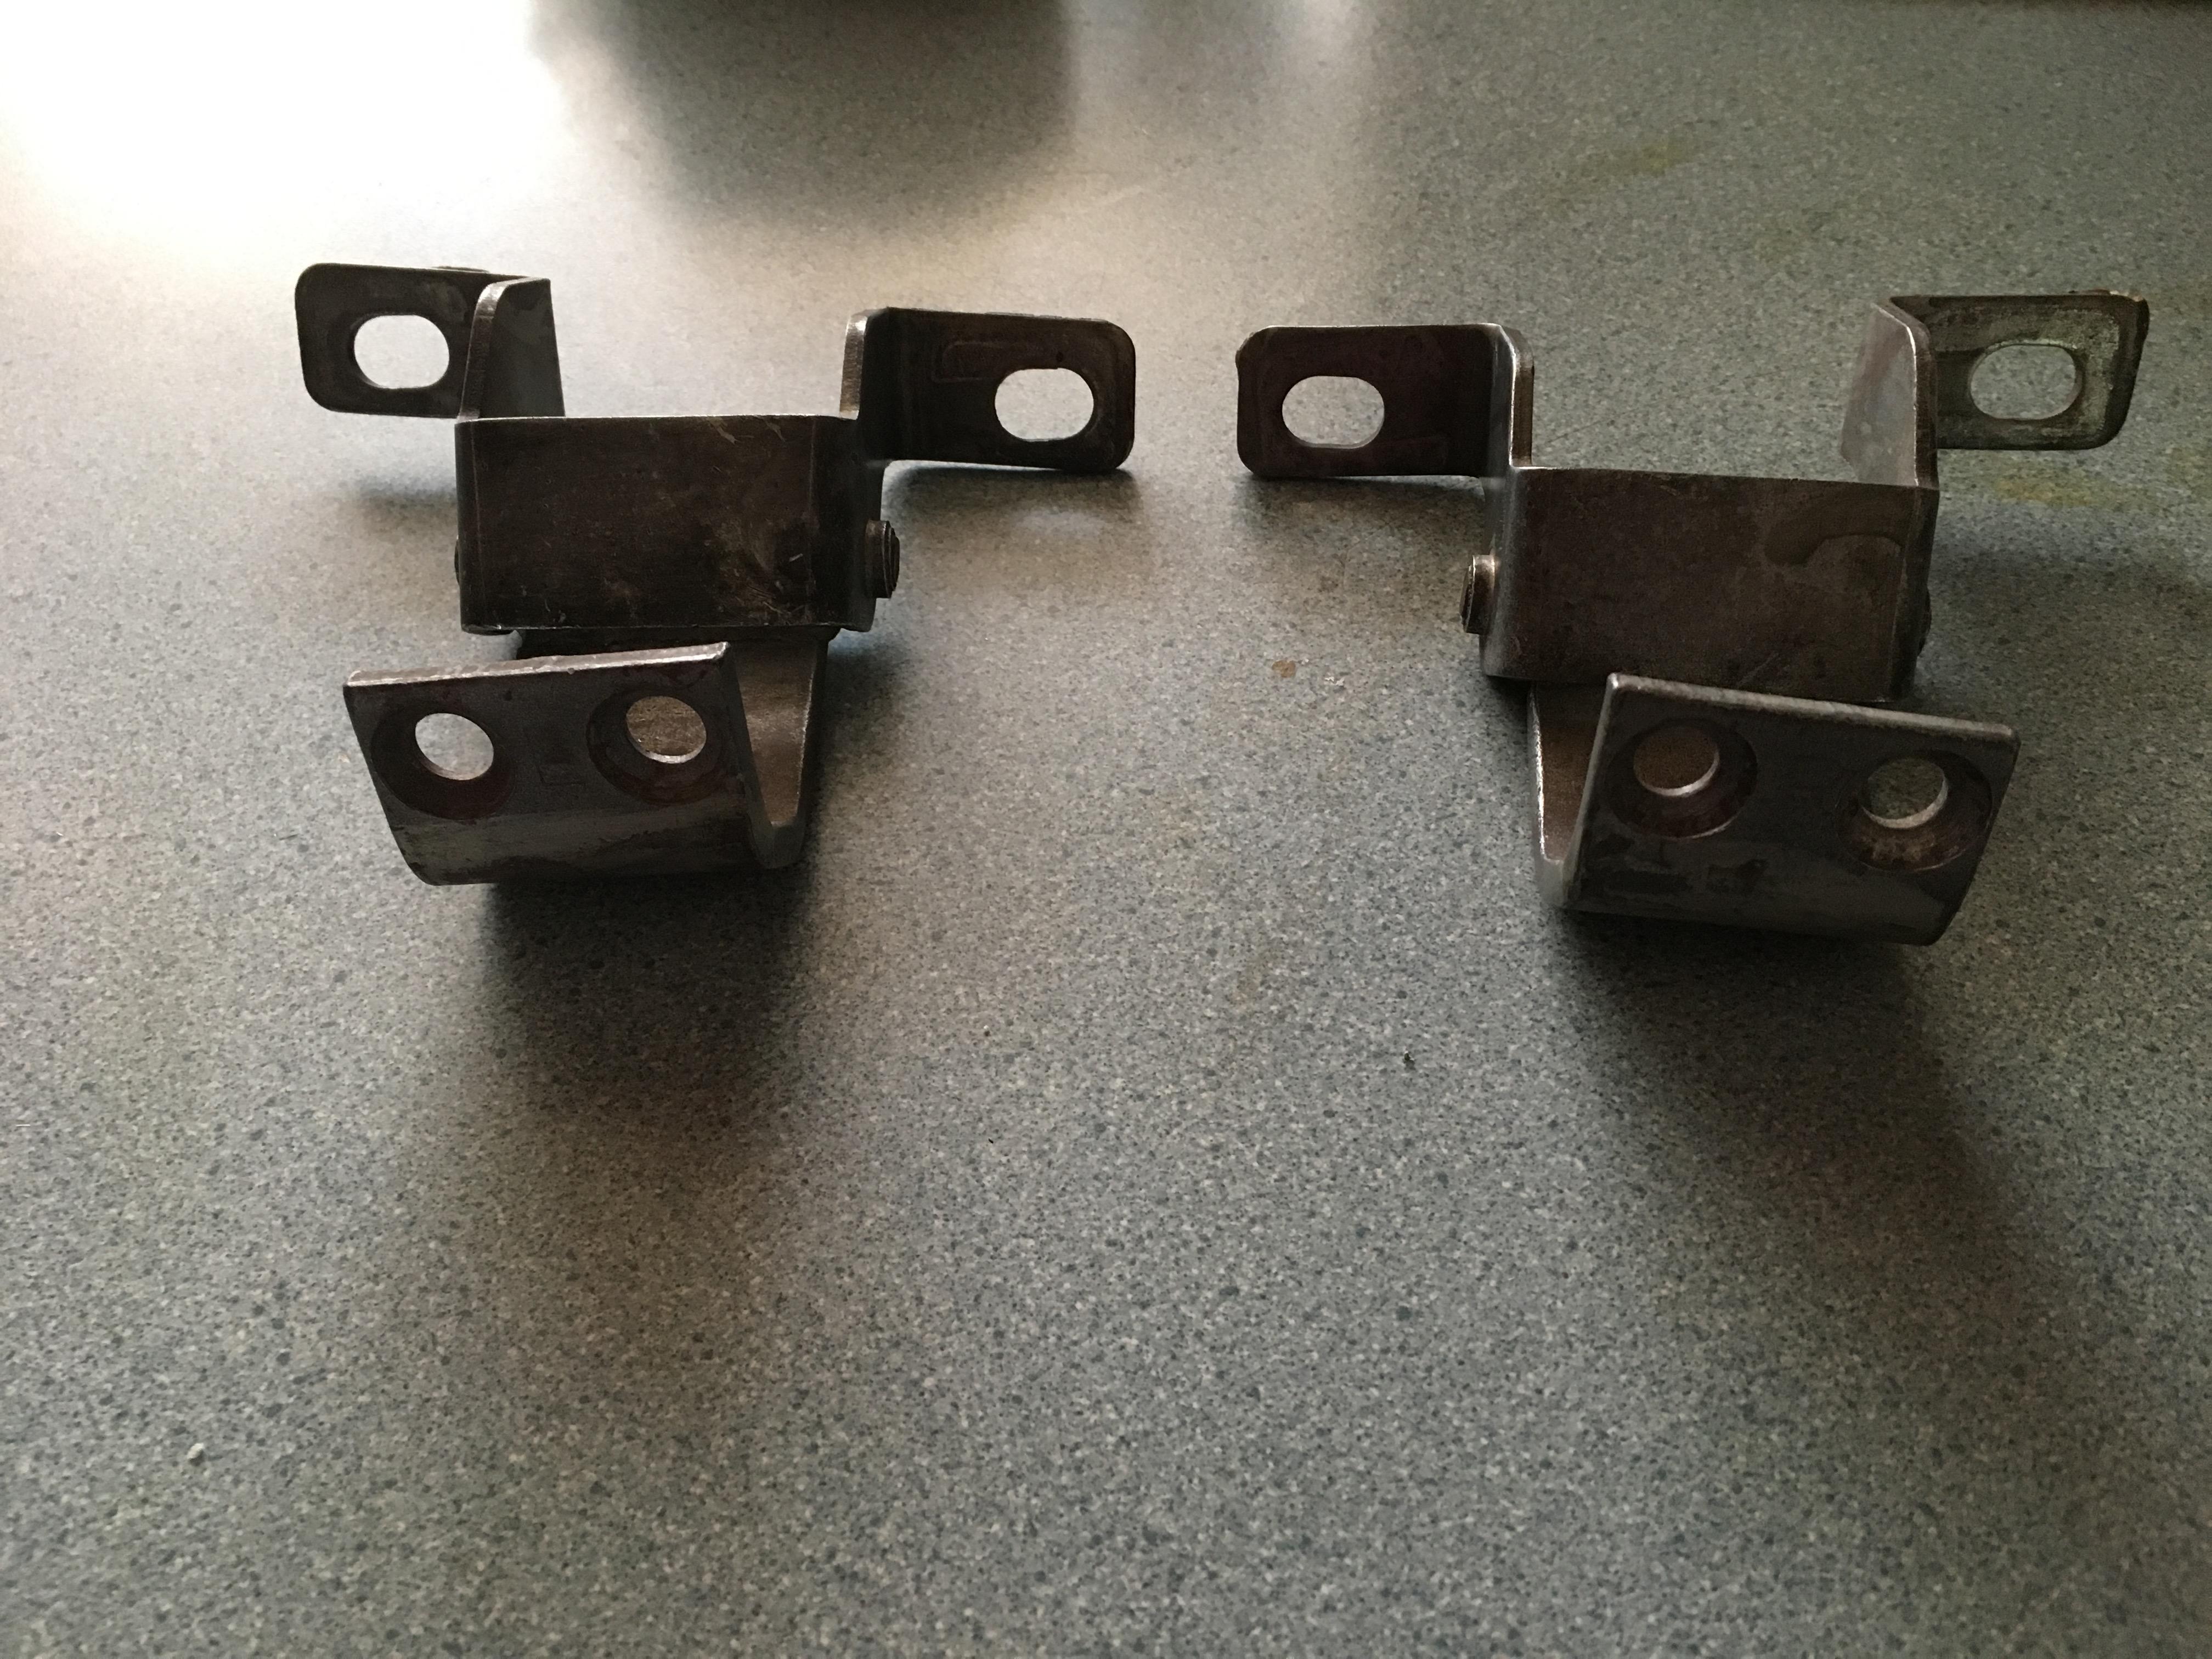
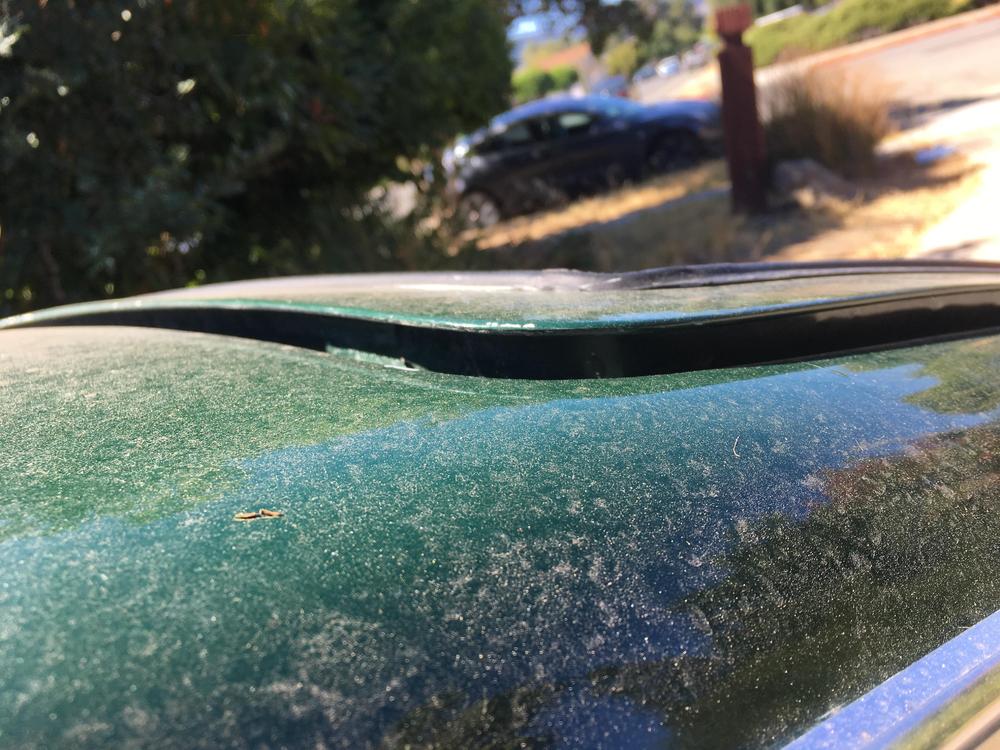
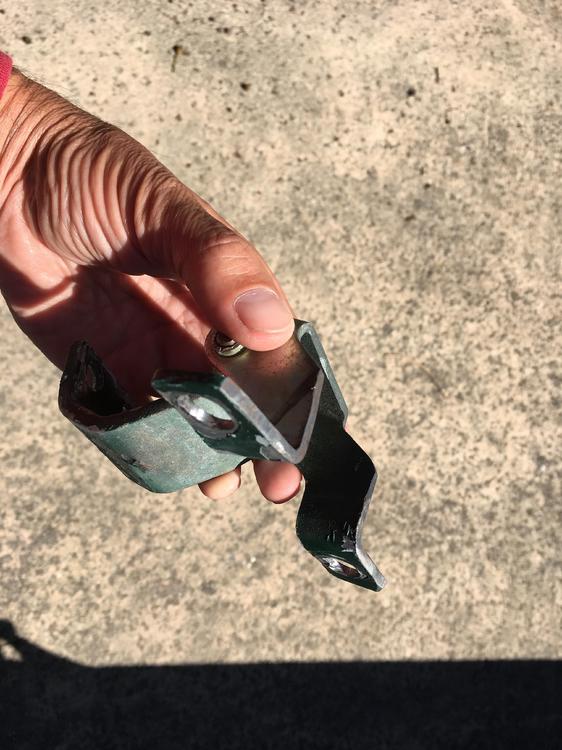
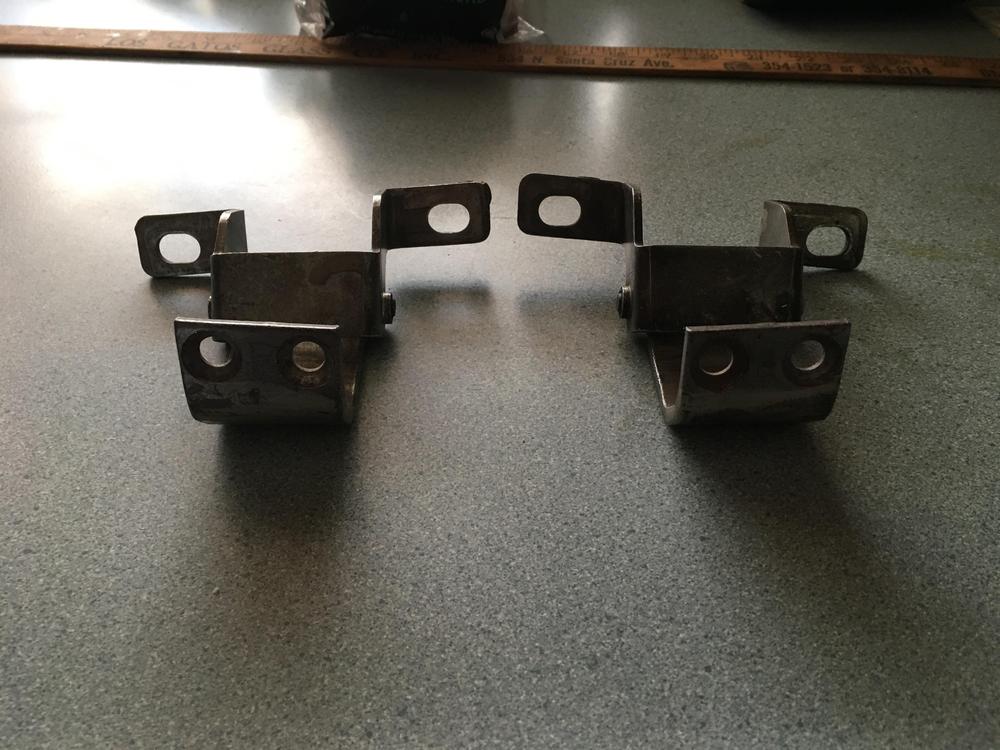
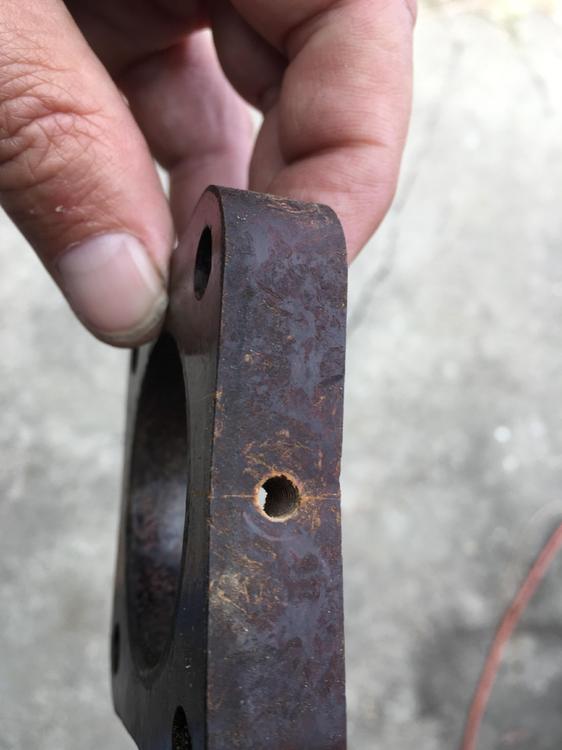
bought 71 240z 3 months ago. the driver side hatch at hinge has always stood proud. seller had no info, said it was like that when he bought it, always kept it garaged so he didn't worry about rain. efforts to adjust (after searching forums) all failed. removed that hinge, has a lot of bench grinder marks for some reason. decided to replace both hinges, eBay @ $40/pair. they arrived this morning and are symmetrically different, seems like they're made for specific sides of the car does replacement hinge image 5356 show the correct orientation, driver side on the left? thanks! couldn't resist putting a TLA in the title

-
View Advert 75-76 280z fuel tank Removed from my 71 240z. No leaks, fully functional, clean inside, never coated. Not sure why it was ever installed. Replaced by good 240z tank. Some small dents, some evidence of repairs. Includes working fuel level sender. Can include unused Bill Hirsch 3 part lining kit. More images available upon request. Can box and ship, estimated domestic shipping cost $75. Advertiser kenward1000 Date 09/29/2019 Price $450.00 Category Parts for Sale
-
This is my first points replacement so there could be confustion. Now that I've got the distributor drive tang oriented correctly, I'm going to set the points gap at 0.020" by rotating the eccentric screw in the cutout, in the points plate. This will initially set the dwell angle. For initial timing, going to use the 12vdc lamp with two alligator clips, to rotate the distributor itself. Going for 10 degrees. After I've got it running going to use the Innova 5568 to check for dwell angle within the stock limits. Finally going to check for timing within the stock limits. Or should I be initially setting the timing before initially setting up the points gap/dwell angle? Innova says set dwell first.
-
anything worth doing, is worth doing three times. or more.
-
Doh!
-
Thanks for the pointer! I always search before I post but must not have used the correct search terms. Got it fixed, thanks!

-
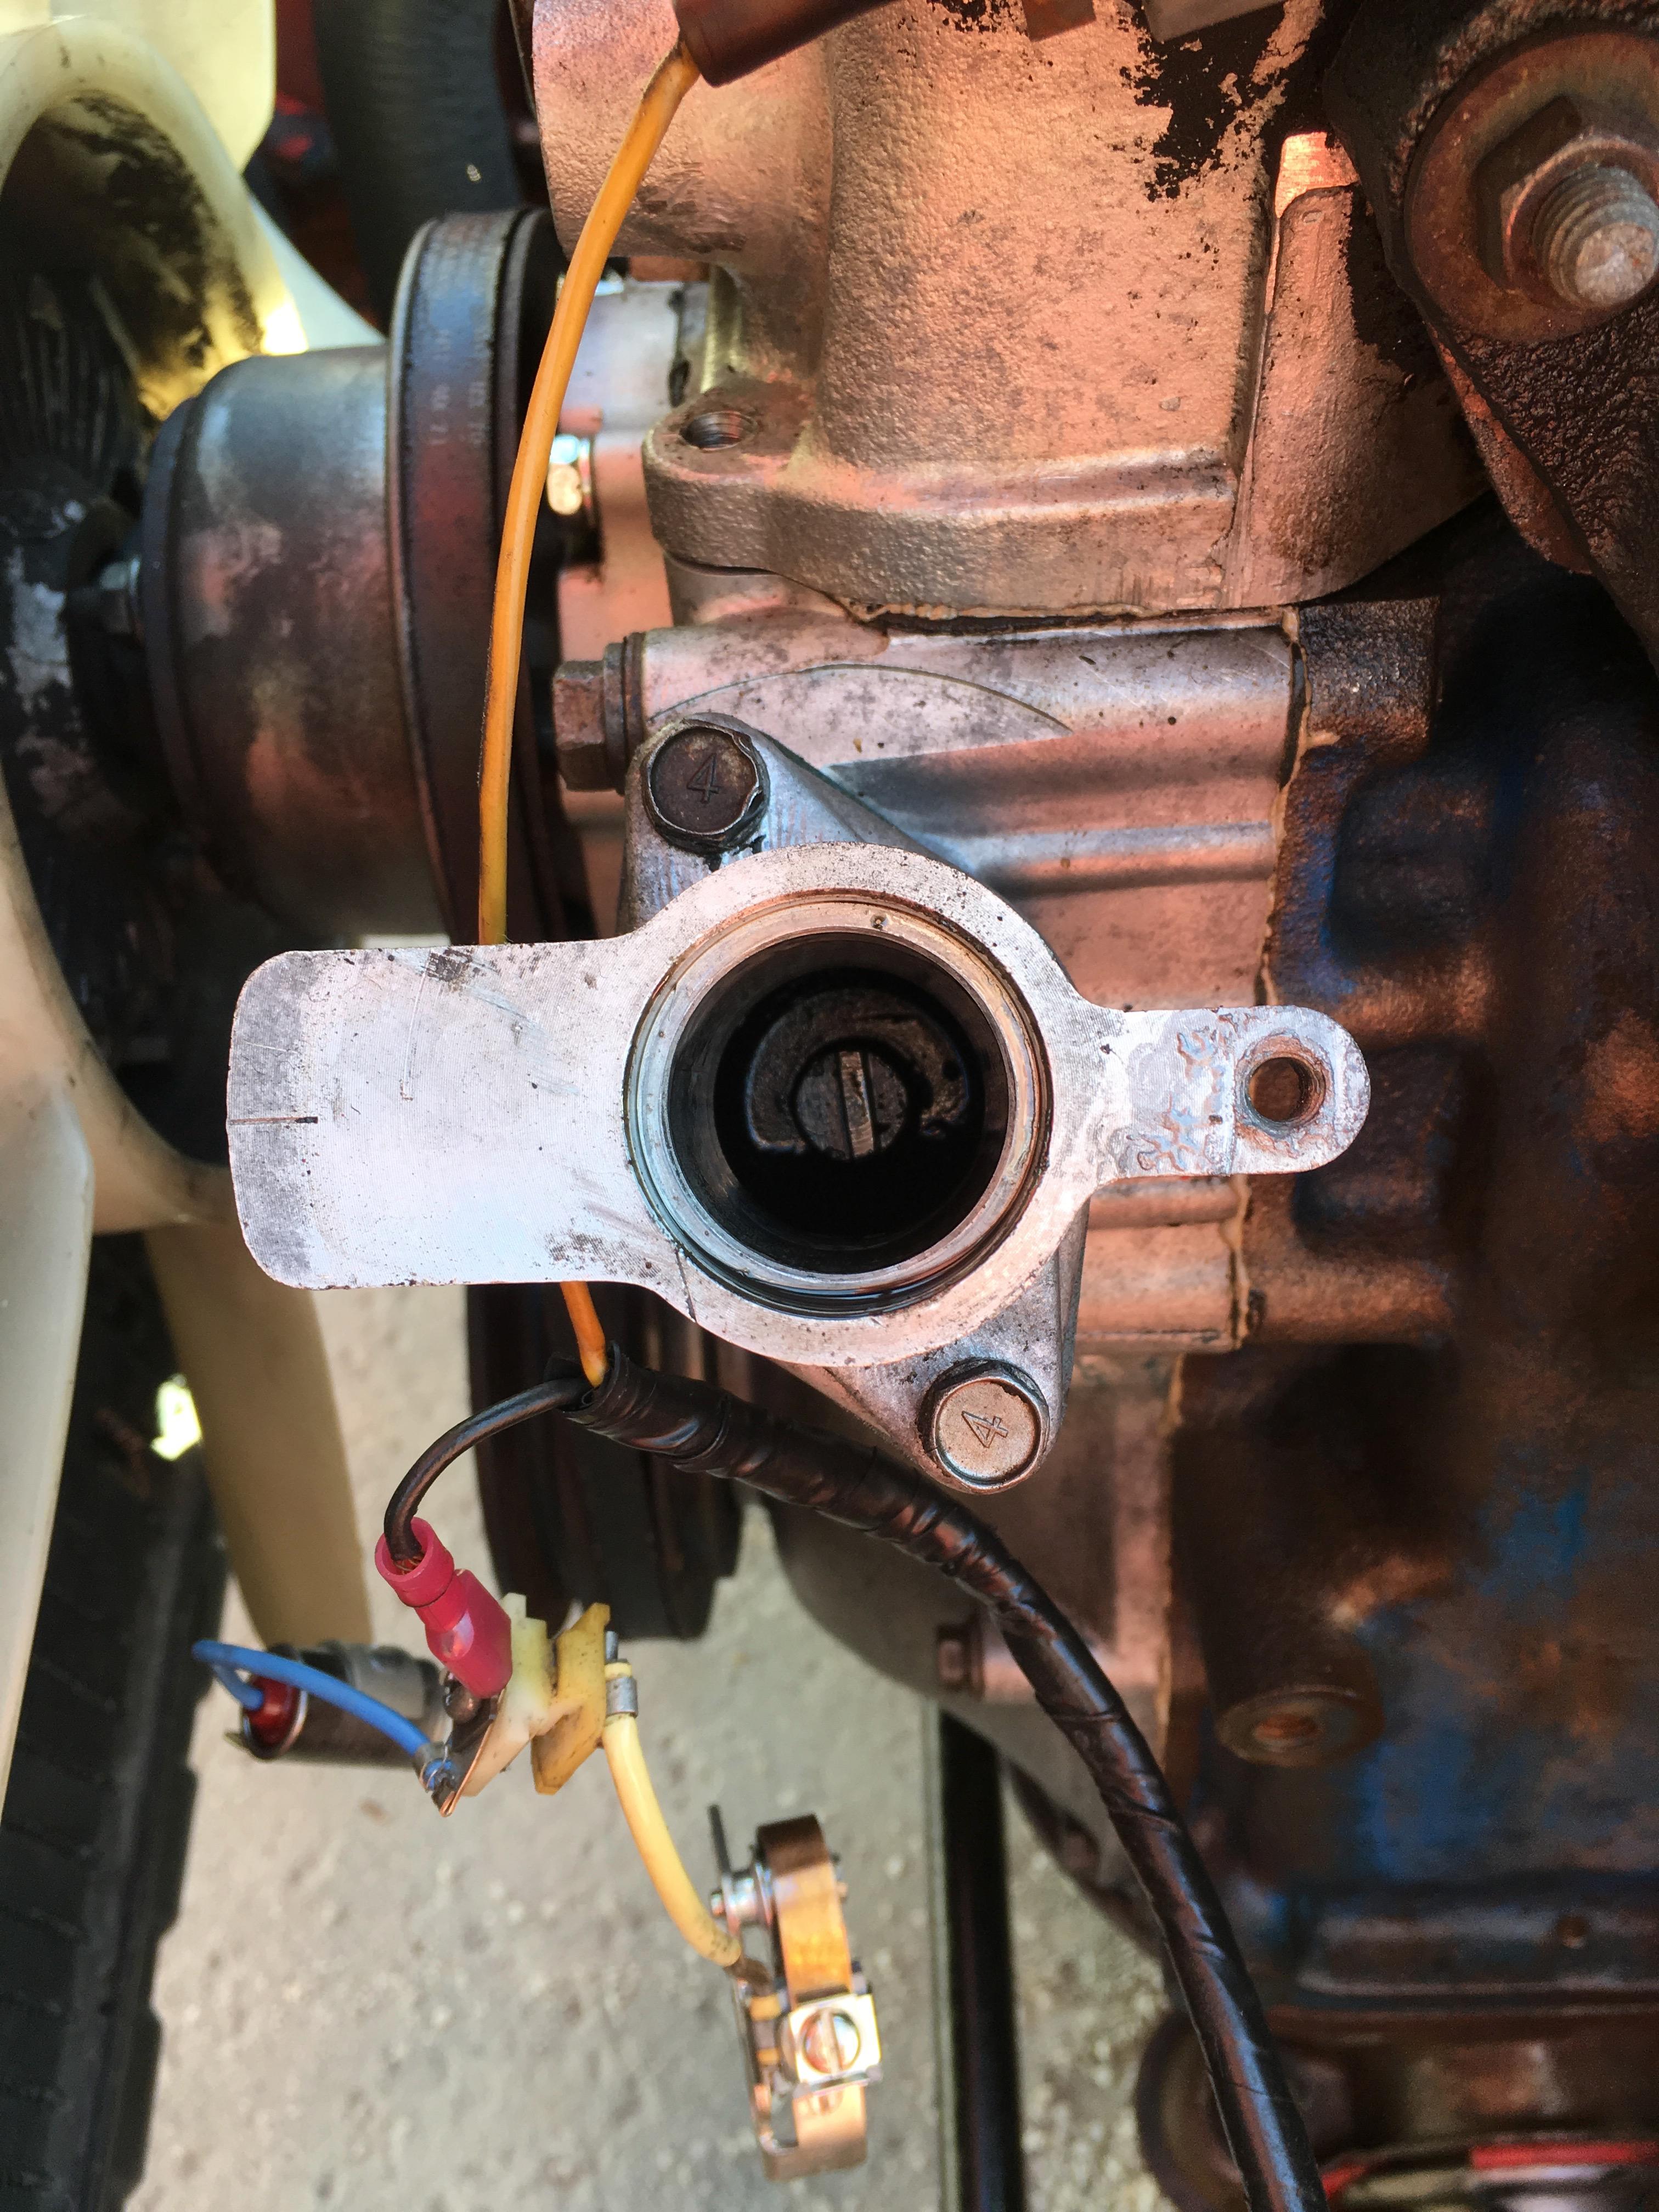
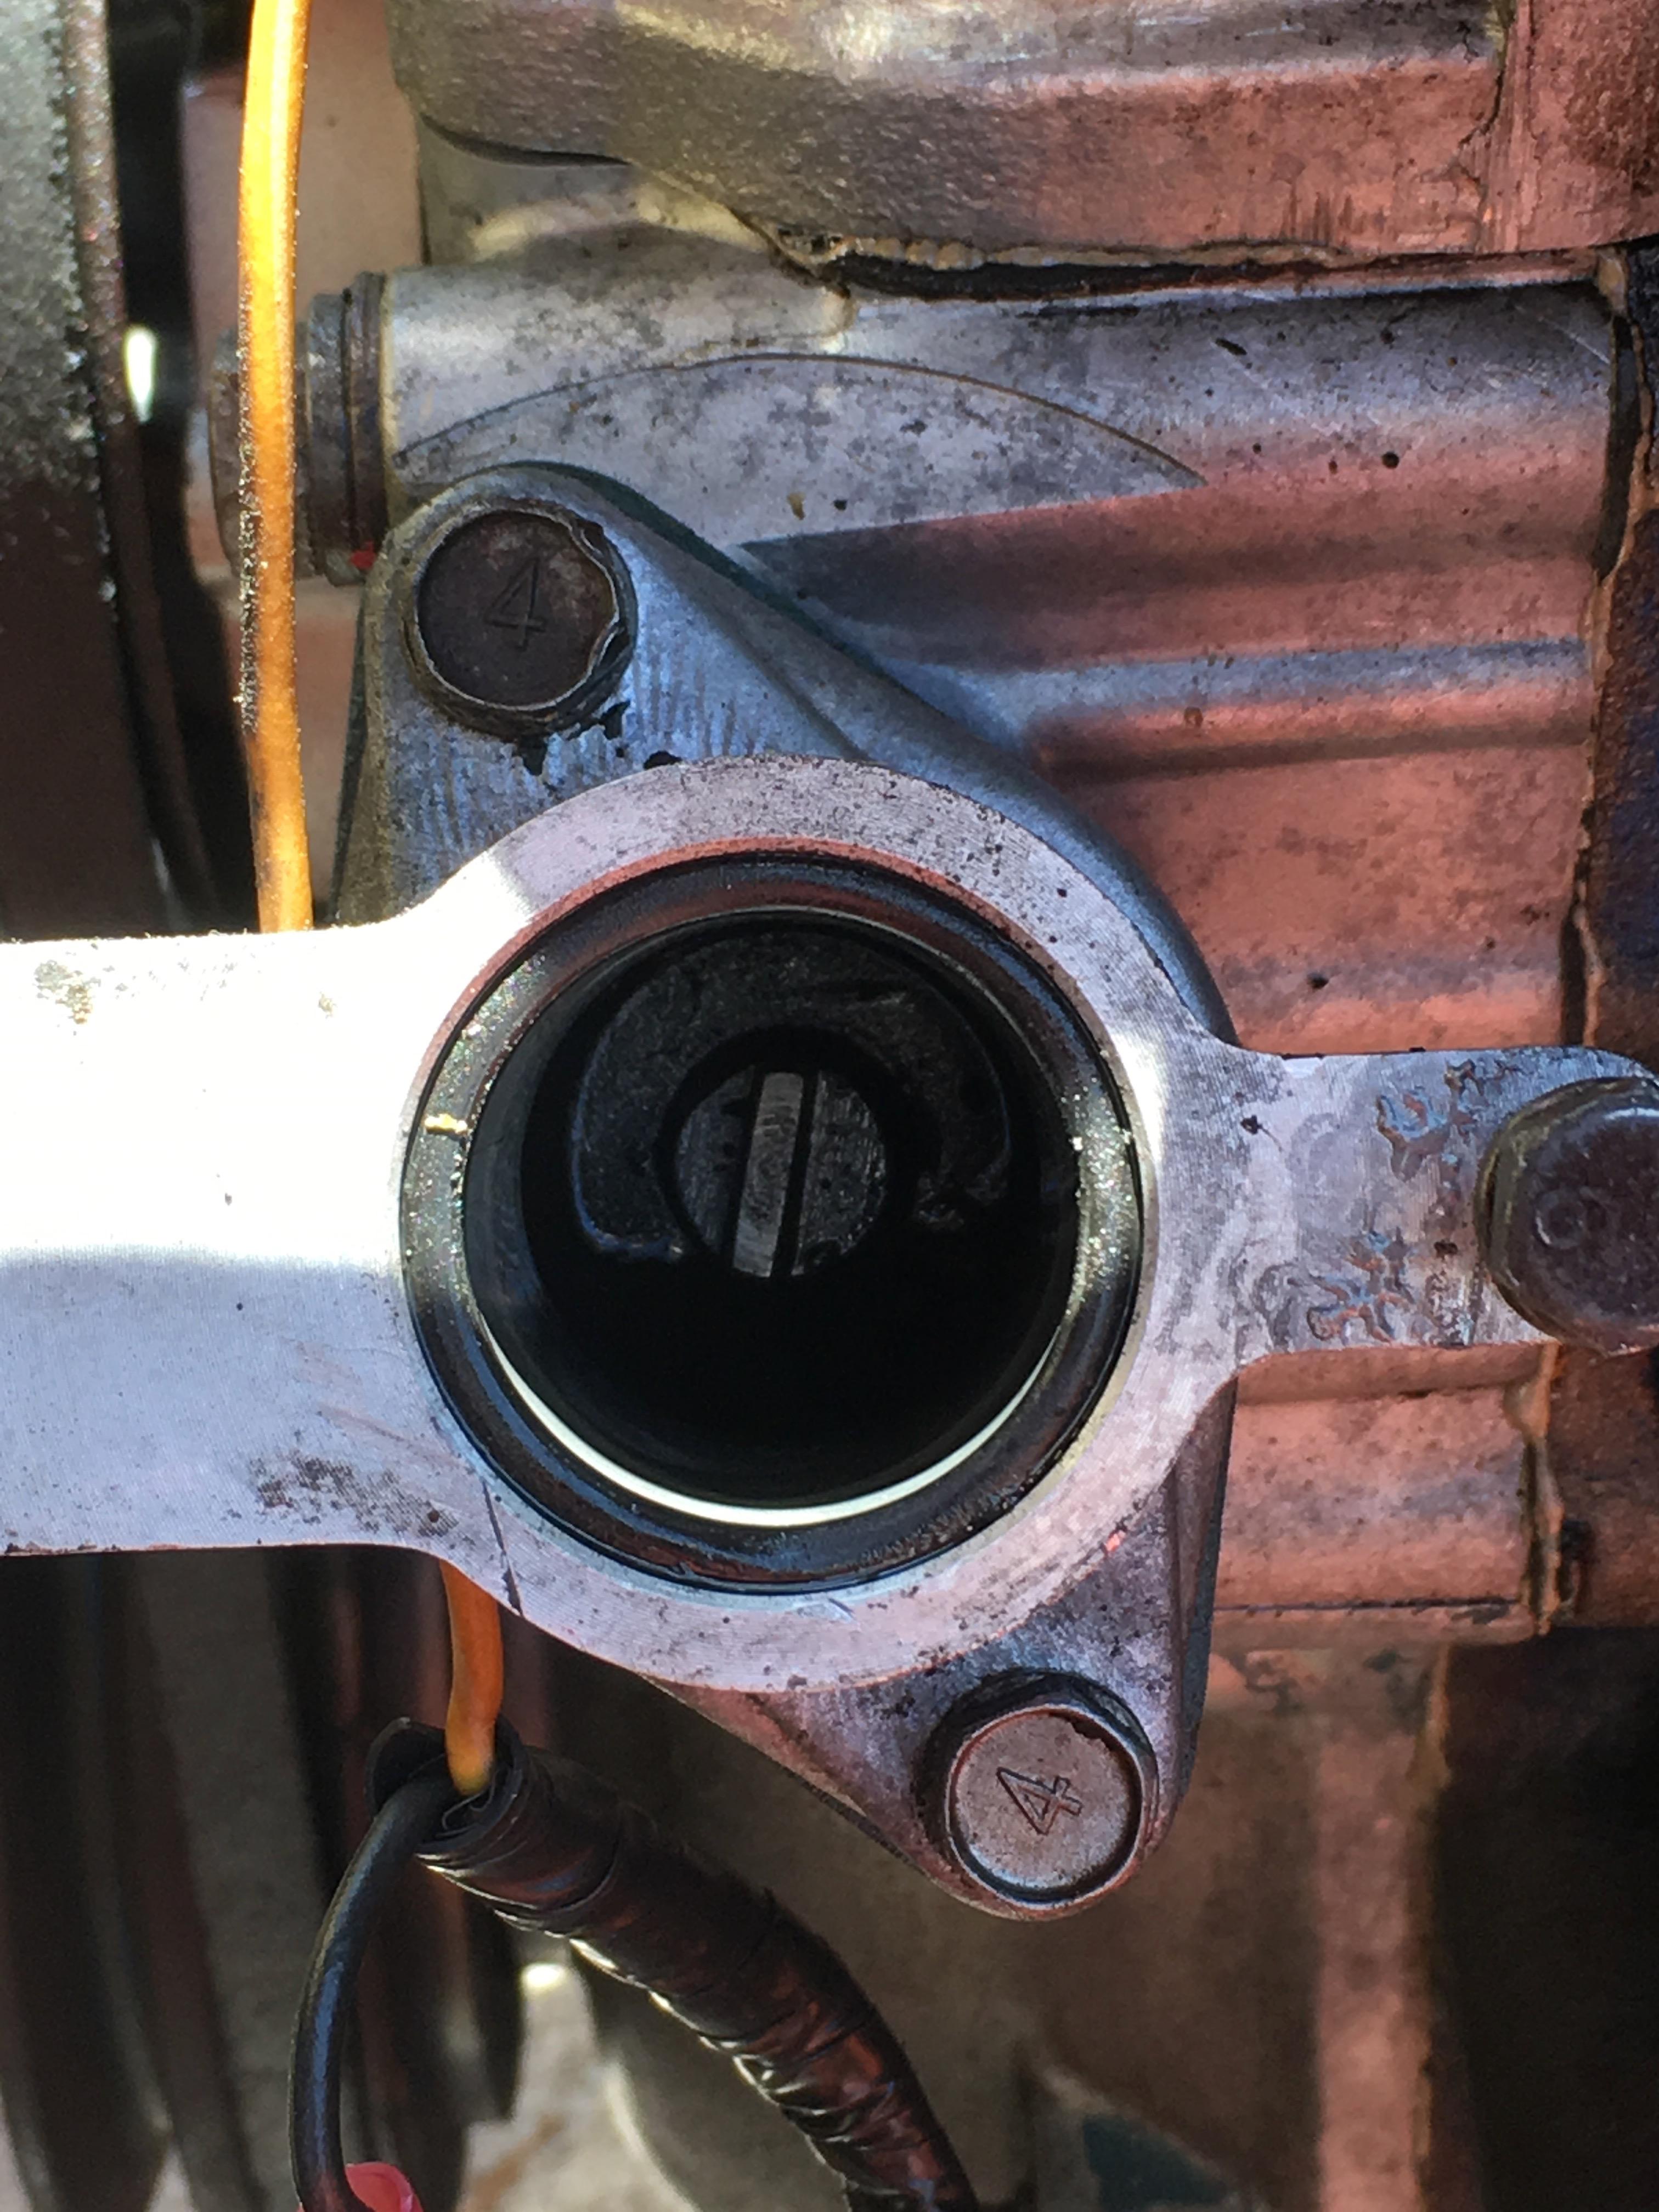
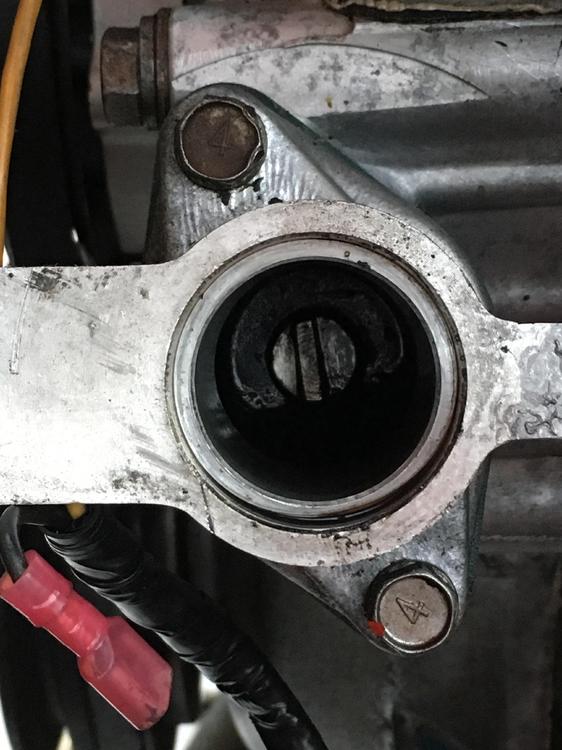
72 240z. Points were pitted, installed new points and condenser. Static timed it at 0.020" points gap. The car starts and runs. Checked the dwell angle afterwards with my new Innova 5568. Can't set dwell any more than 30 degrees where spec is 35-41. I'm at the end of adjustment range with the eccentric screw in the points oval. Set up engine for TDC compression on #1 cylinder, both its valves are closed, timing cover pointer aligns with 0 notch on crank pulley. Pulled the distributor to check the drive tang. Looks to me like 12:30-6:30. Is this the correct orientation?

-
Figured it out. Yes, two ways to do it right. 1. set the timing light for 0 degrees and adjust distributor until the 10 degree notch on the pulley aligns with the timing cover pointer. 2. set the timing light for 10 degrees and adjust distributor until the 0 degree notch on the pulley aligns with the timing cover pointer.
-
New 71 240z owner. Attempting to measure/set timing on a engine that has no vacuum advance. Bought an Innova 5568 digital timing light. Can see that the crankcase pulley has 5 notches, corresponding to 0 - 5 - 10 - 15 - 20 degrees of advance. Is it correct that if I want to set the timing at (for example) 10 BTDC that the timing cover pointer should line up with the 10 degree pulley notch (3rd notch) while the timing light display is showing 10 degrees? Or, when the pointer lines up with the 1st notch (TDC or 0 advance) and the timing light display shows 10 degrees, does that indicate 10 degrees of advance? Thanks for reading this!
-
Thanks for the clarification! Good to know that I don't have to remove/replace the plastic filler tube. I'll go back to trying to fit the tank fill neck into the filler tube. The car is on jack stands with the passenger side rear wheel removed. Have a motorcycle scissors jack under a tank-sized plywood sheet, then a layer of cardboard to protect the fresh powder coat. All vent hoses are connected to the tank and routed into the body. Thanks for the tip on connecting the fuel filler tube!
-
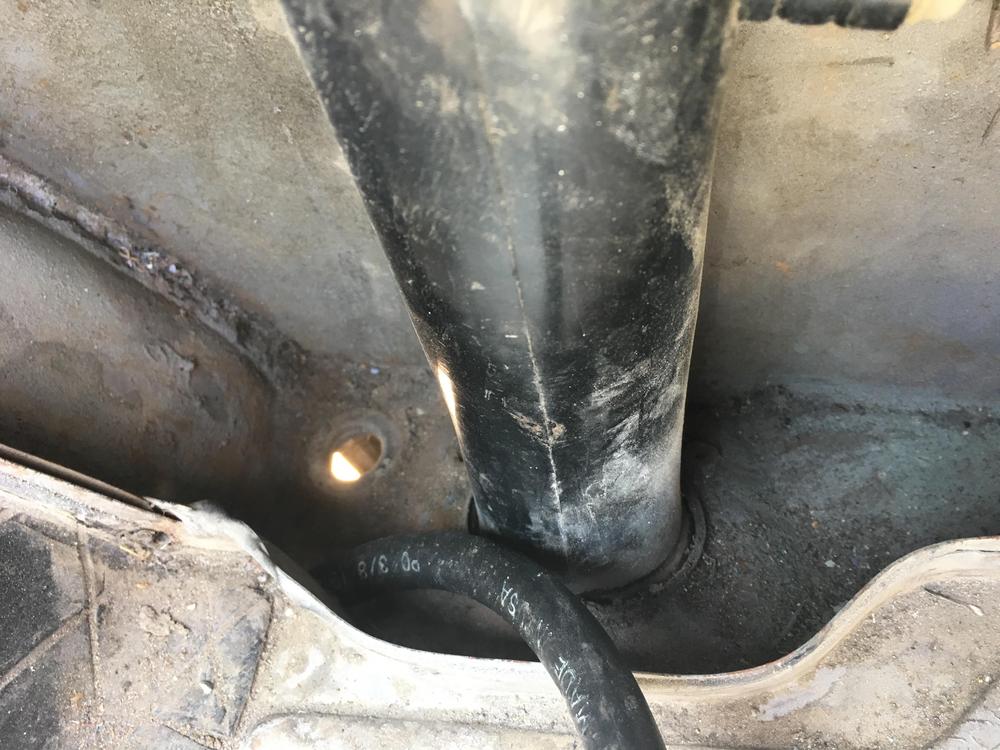
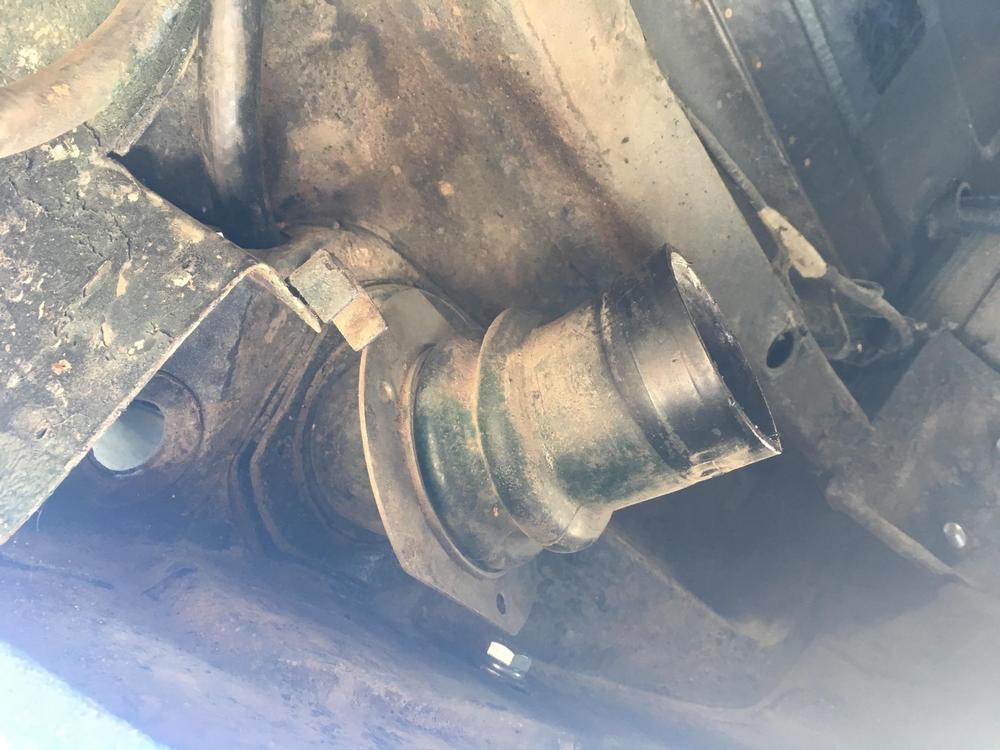
This morning tried to remove the plastic filler neck, take it downtown to Z Car Garage for identification. Can't figure out how to remove it w/o cutting it in half! From the images, can anyone confirm that the plastic filler neck is a 240/260 part vs a 280 part? Thanks

-
After I bought my 71 240z, had fuel overflow problems. Discovered there's no expansion tank and the fuel tank itself is from a 75-76 280z. Sourced a good 240z fuel tank and the correct plastic expansion tank. Fabricated the hoses, now trying to install the tank. Seems like the plastic filler neck is not quite lining up correctly with the fuel tank. Or maybe I'm doing it wrong. Can't locate the owner who did the swap. Wondering if fitting the 280z tank required a 280z filler neck. I see there are unique filler necks for 240/260 and 280. Is there a way to tell the difference, so I'll know if the filler neck is why the tank doesn't quite line up? Thanks for reading this post!
-
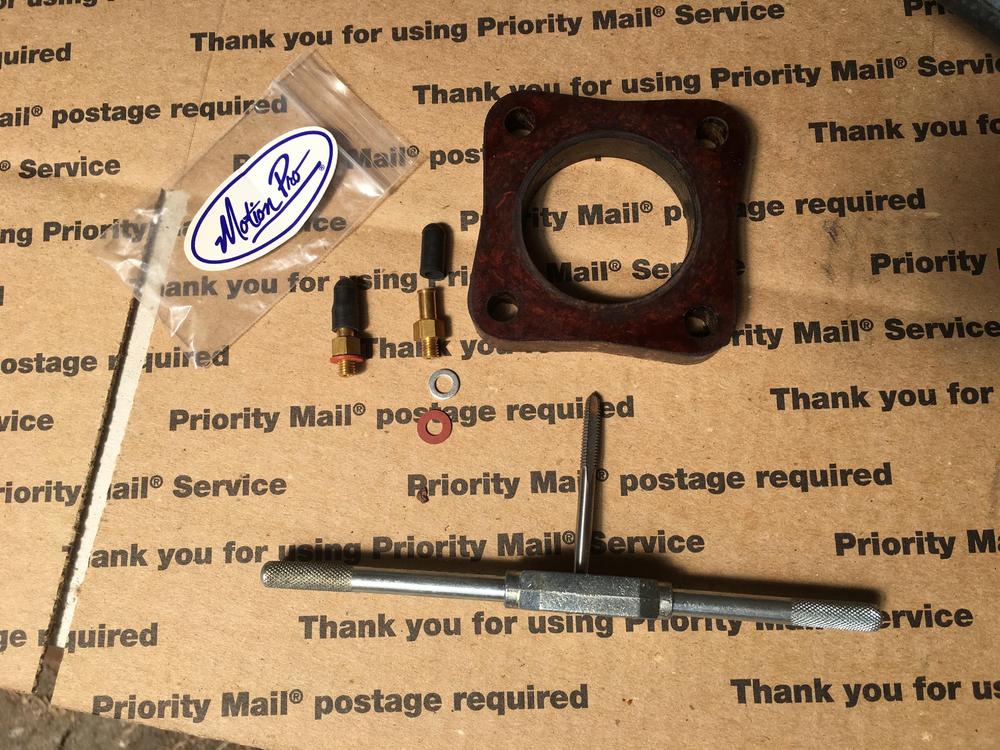
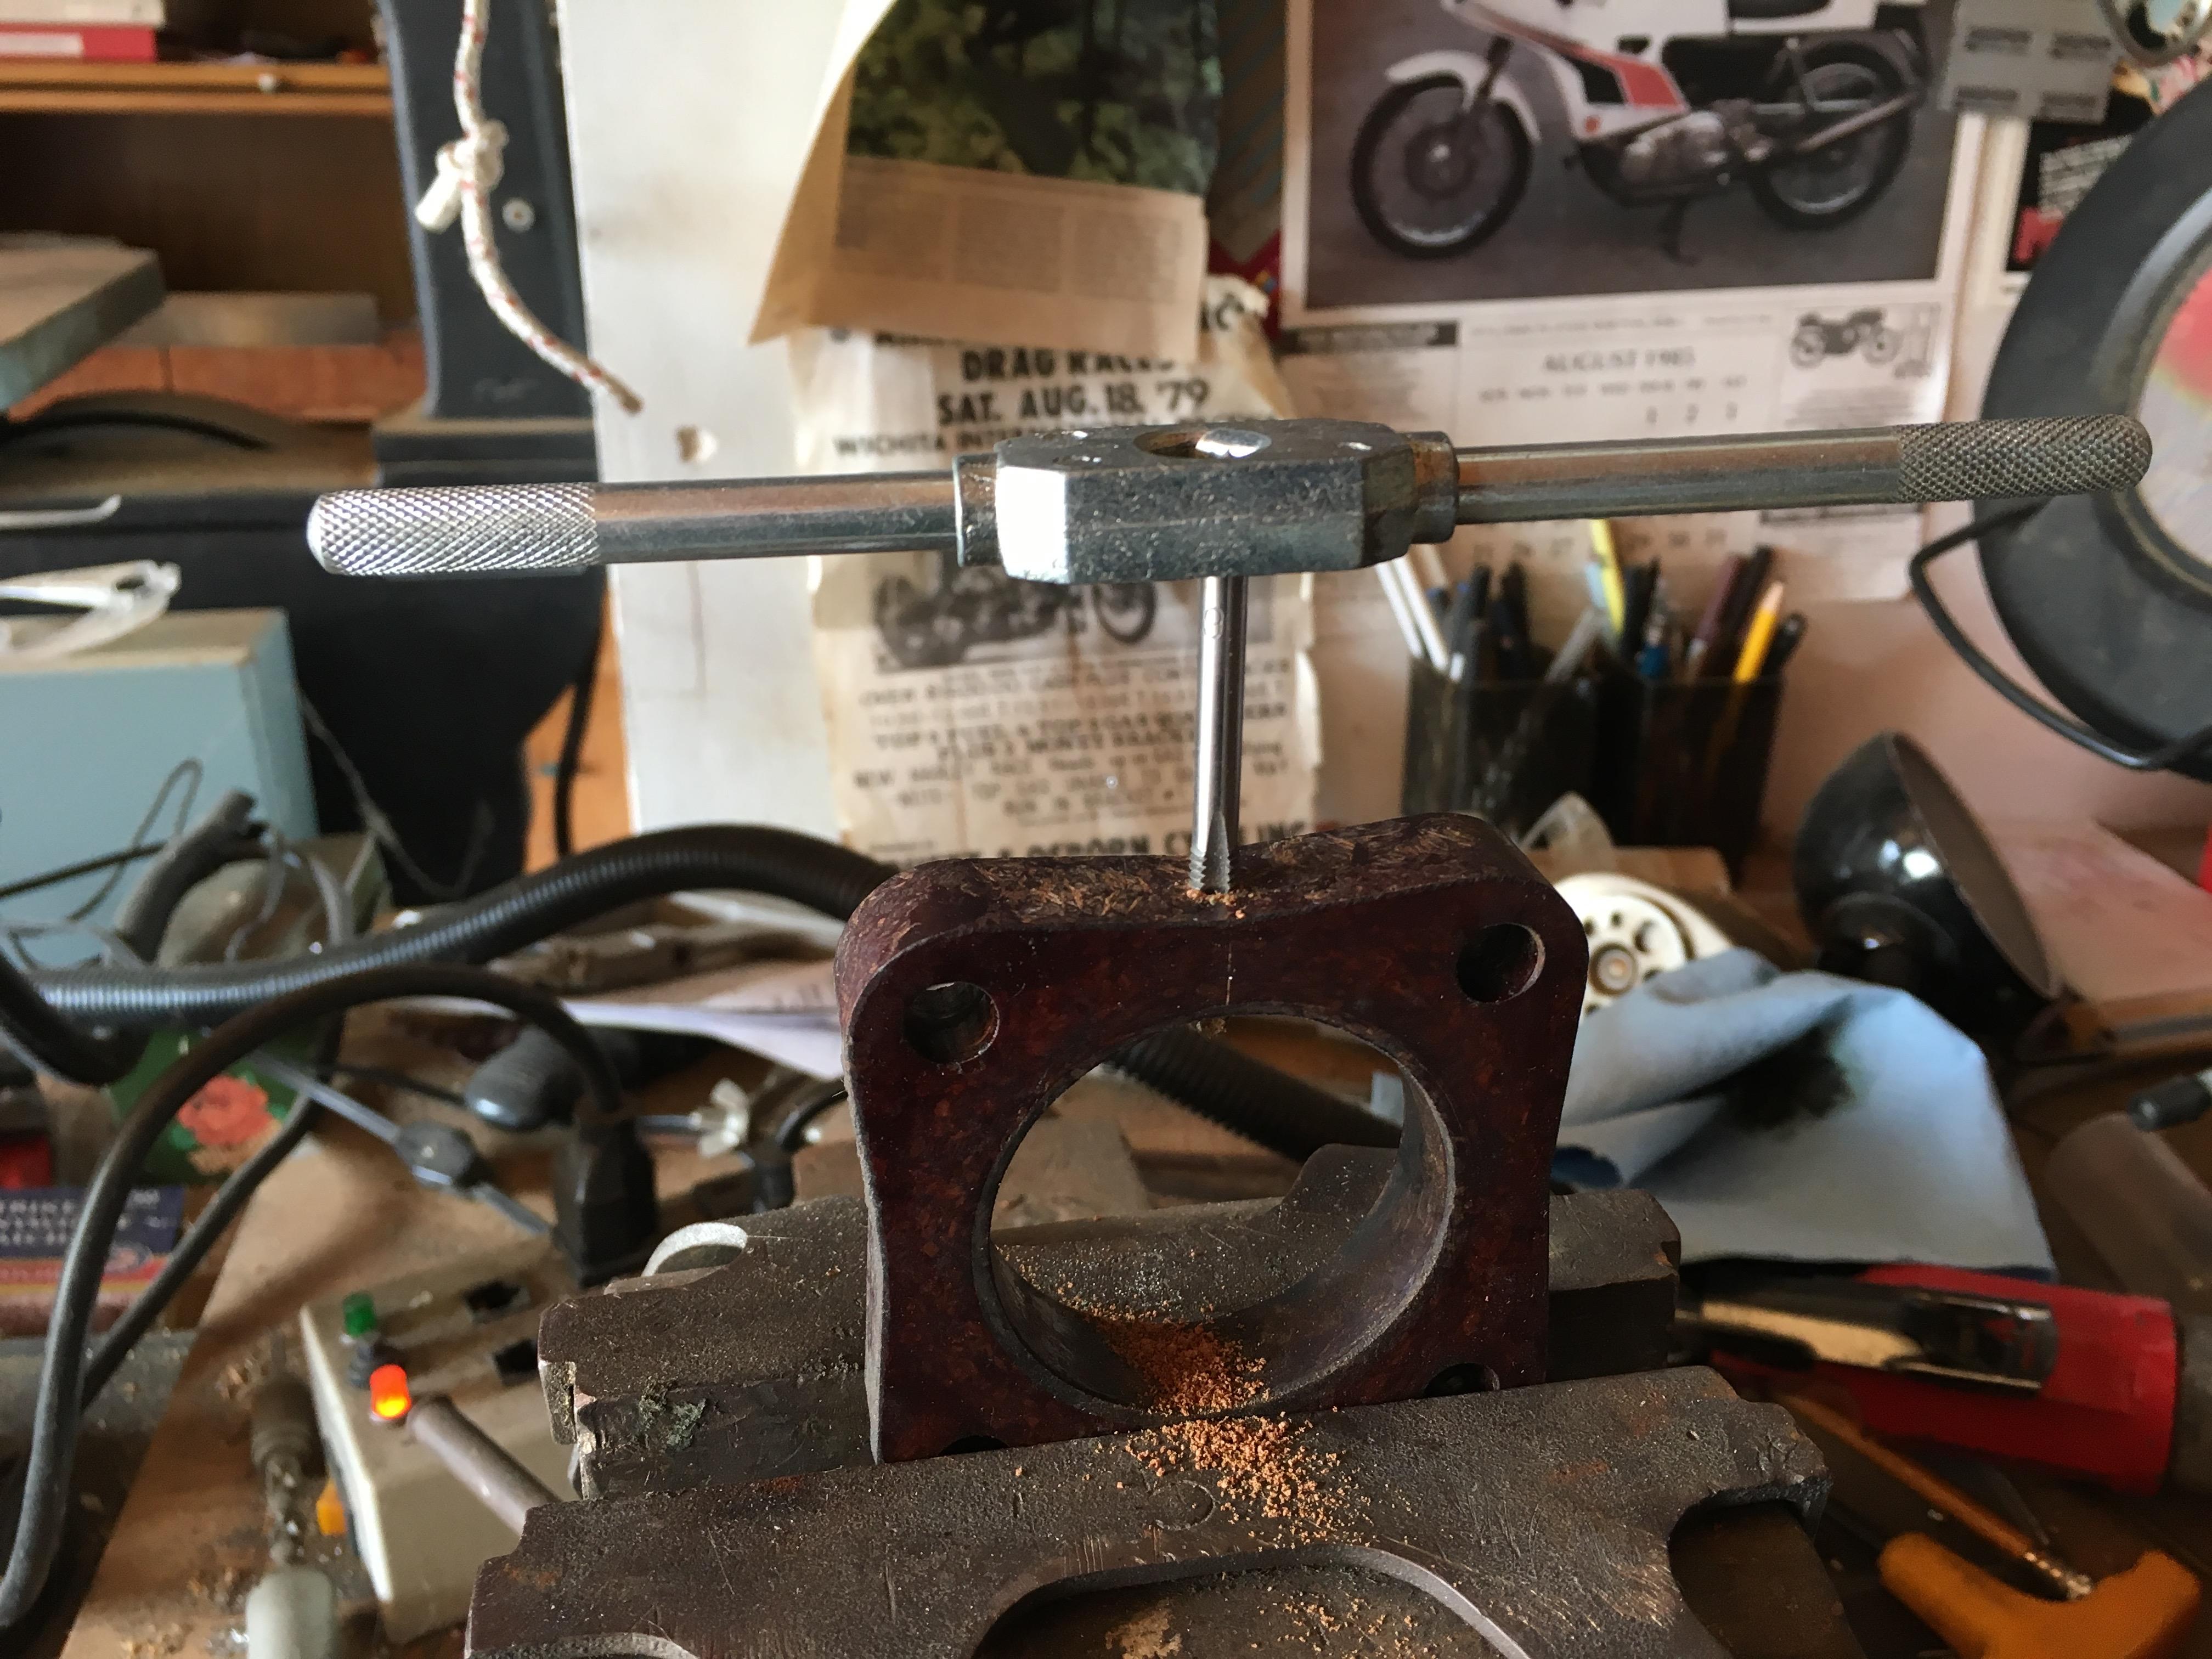
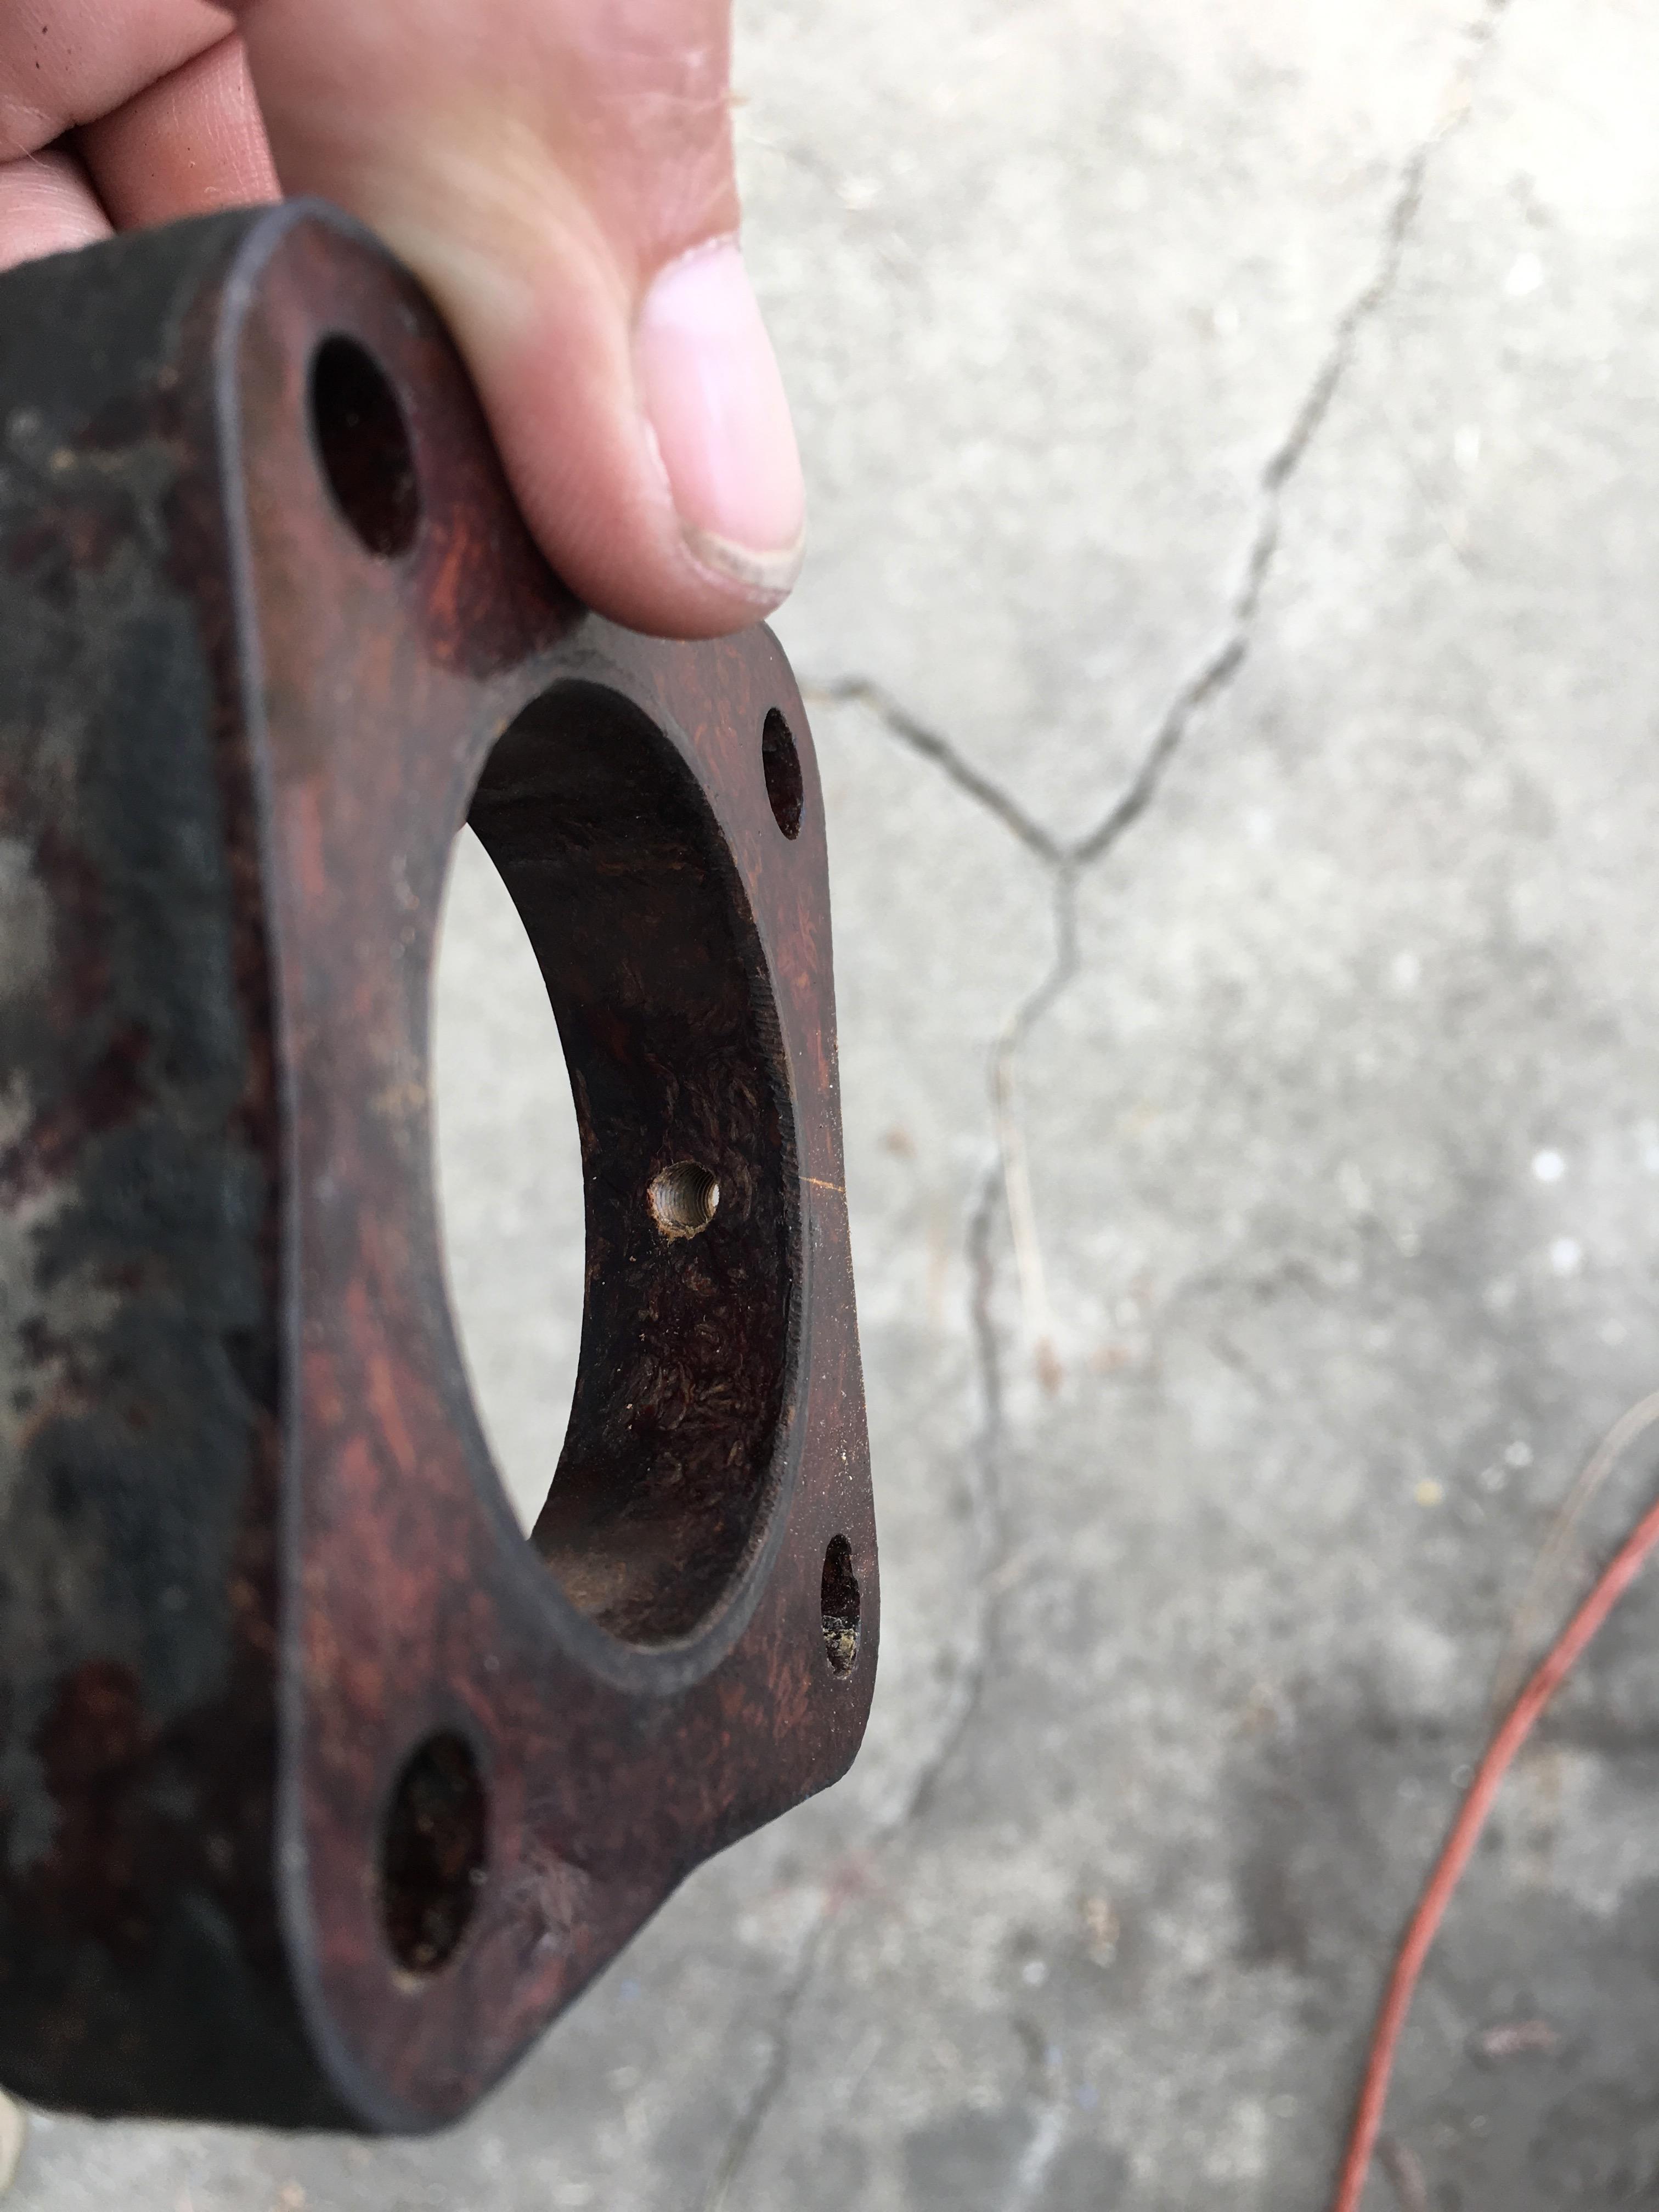
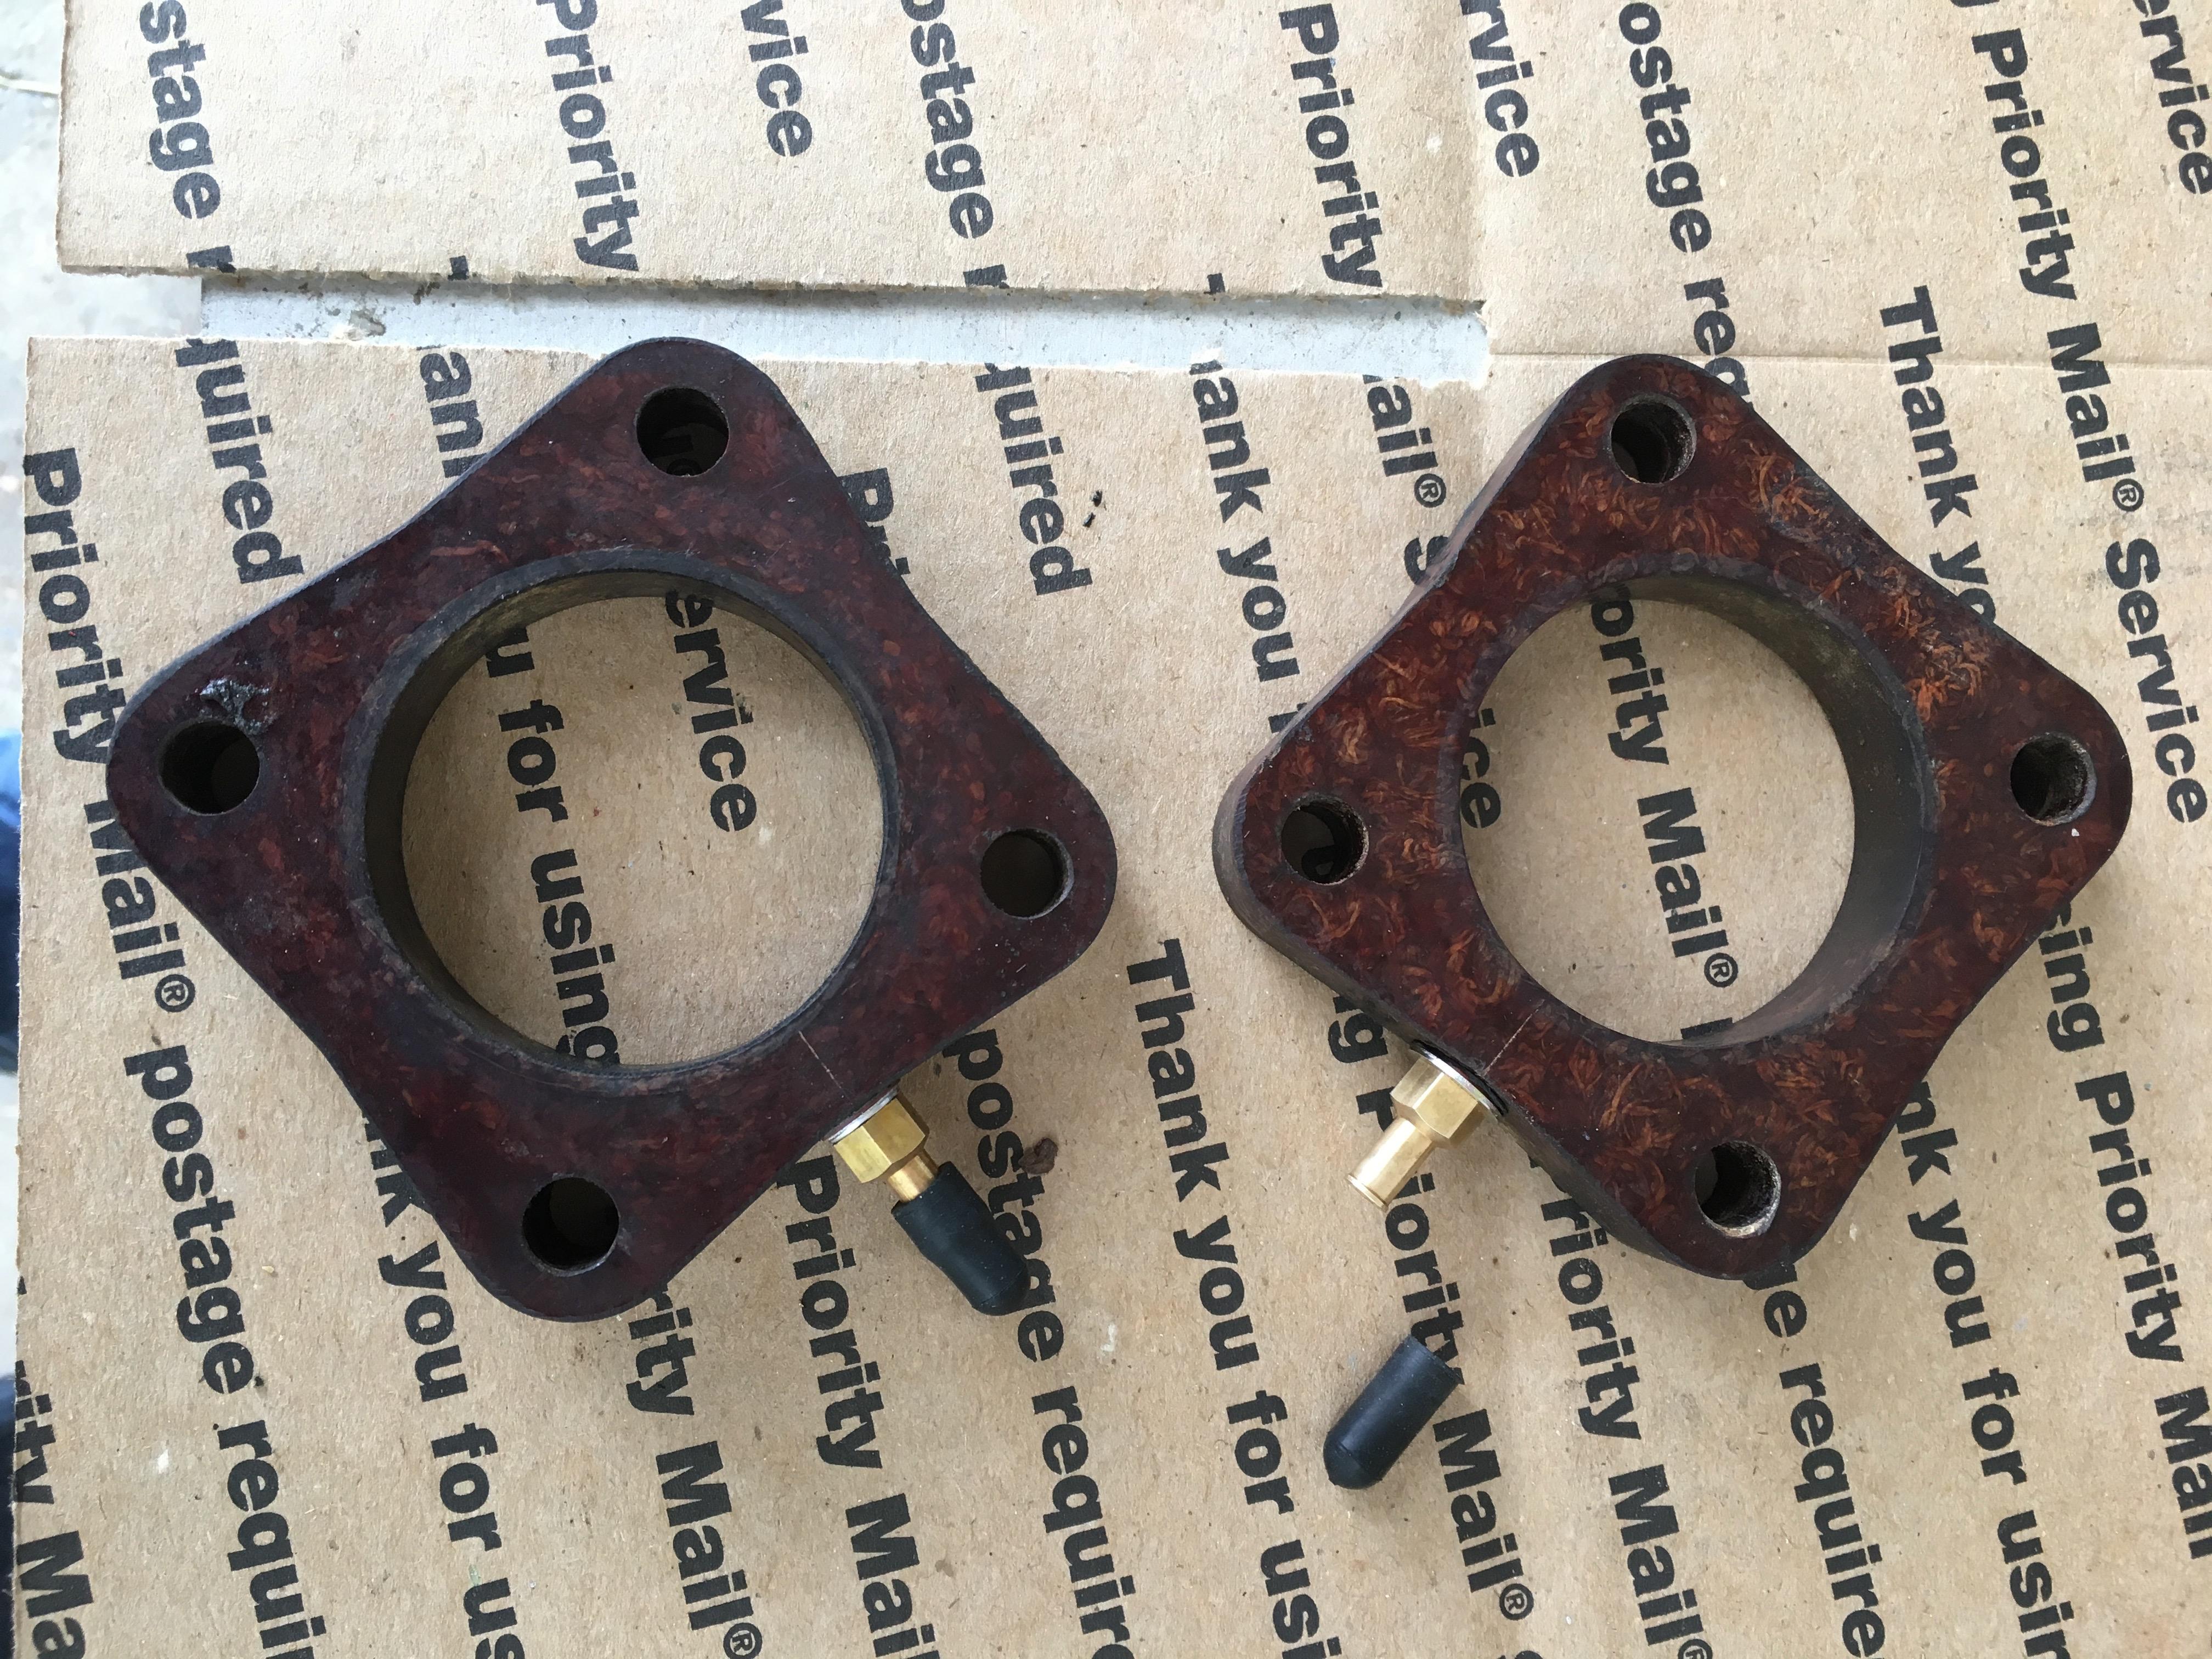
Connected the vacuum spigots to the insulators today. Measured and marked the center of a side, pilot drill 0.1090" then tap drill 0.1695" Tapped with M5 x 0.8, threaded the brass spigots in with a thin layer of Permatex #2. Keen to try this out. FWIW I can't diss the UniSyn; that's what Z Therapy recommends! This is just an experiment based on my years of balancing twin carb motorcycle engines like BSA, Triumph, Norton, Ducati.


-
The drill size for tapping a 5mm hole is only 4.3mm (17/100") out of a thickness of 14.7mm so will have 5.2mm of material remaining on either side of the hole. thinking just center the hole between any two stud holes, center the hole across the thickness. An open Q is how well the material will put up with tapping, ending up with good threads. Since the vacuum stub will remain in the insulator, could just install it with some loctite. Going to experiment with the insulators because they're easier to replace if screwed up, they're straightforward to fixture in the drill press vise, don't want to remove the intake manifold.
-
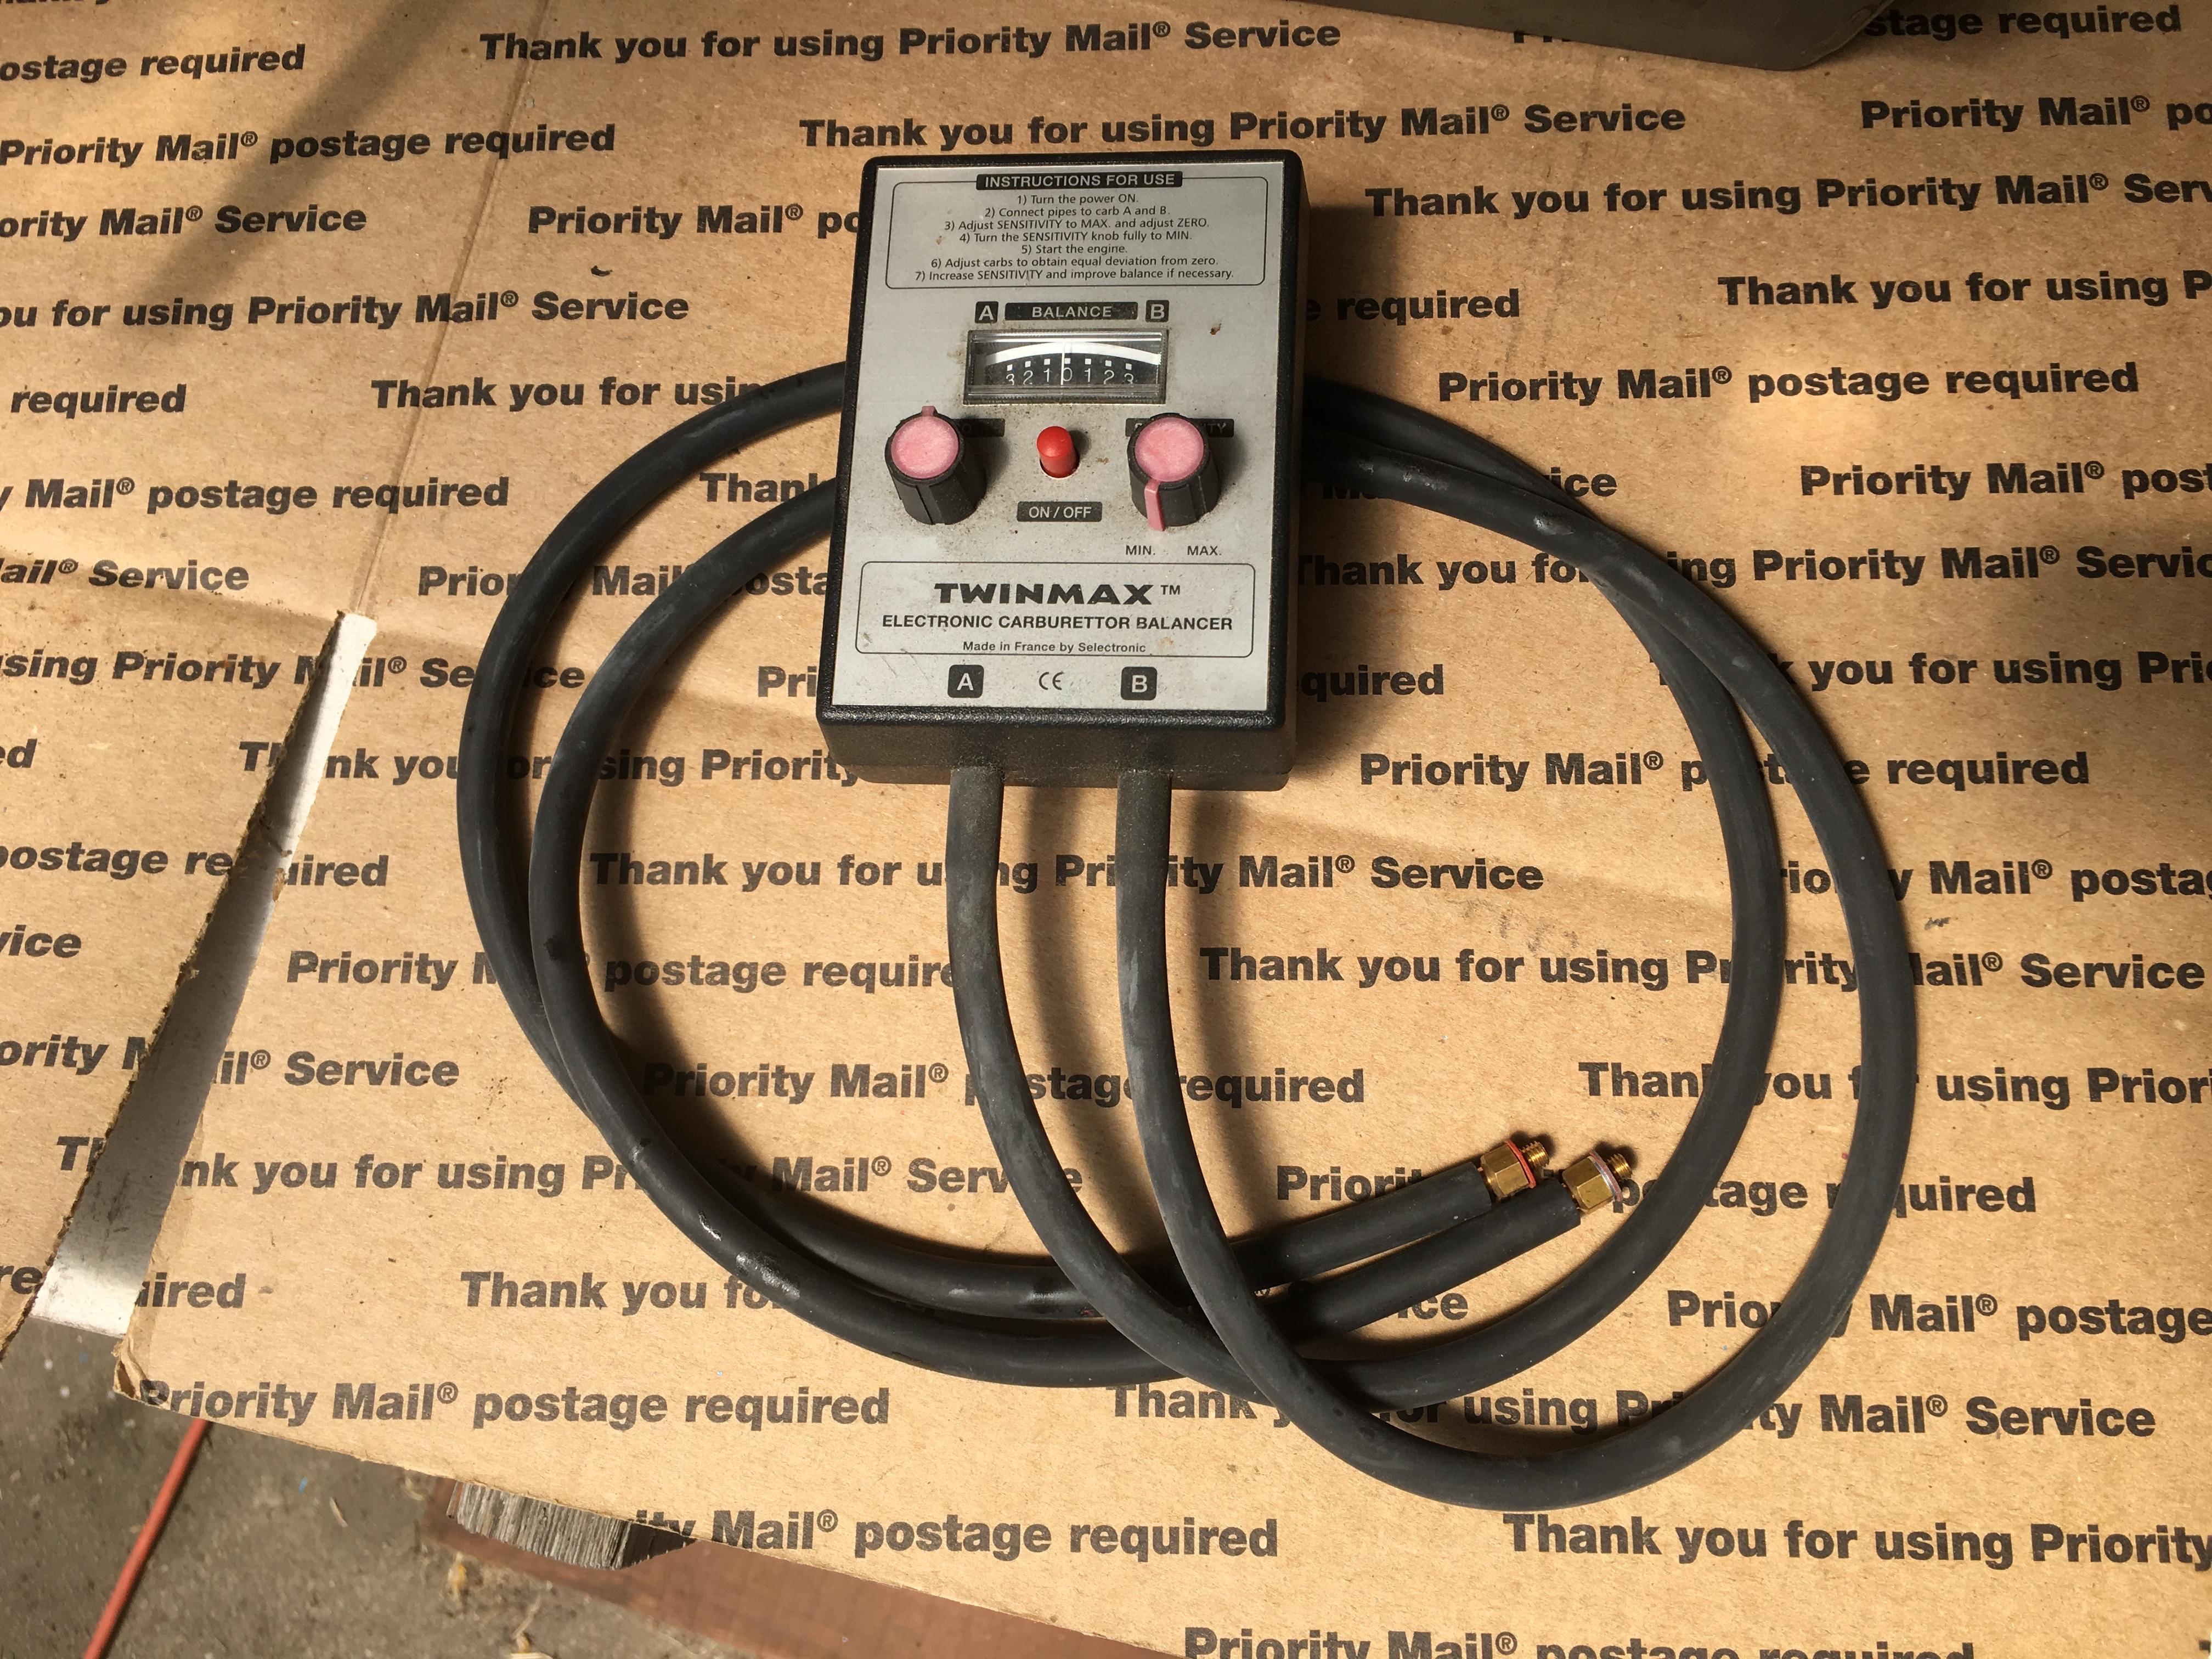
new 71 240z owner. just balanced pair of SU dome carbs with Unisyn, using instructions from ZTherapy. car now runs OK, but thinking it could be better. for my 70's Ducati twins, use my Twinmax electronic carb balancer. two hoses go to two fittings, one on each intake manifold. no moving a single air flow meter back and forth, can easily see relative vacuum suction, easy to tweak idle speed for pulling same vacuum at idle/5000rpm, tweaking so each carb starts increasing vacuum at same time, when throttle is opened. wondering if anyone else has tried this or mercury sticks. could do an experiment by drilling/tapping carb insulator blocks (could also use the intake manifold itself) for the 5mm x 0.8 threads. the fittings are capped after adjustment is complete. opinions are welcome.