Matthew Abate
Free Member
-
Joined
-
Last visited
Everything posted by Matthew Abate
-
 It’s this one, but there are many that are similar. https://a.co/d/g0cCVne
 -
I finished my LED pulse width modulator (dimmer) today. It’s pretty easy if you want to try it. Using a brass rod made it tough to work with hand files so I resorted to a bench grinder for some of it, but all you need to do is measure the length you want, grind the end into a tab to slide into the slot on the PWM control rod, and drill through them sideways so you can press in a retaining pin. It won’t stay otherwise. Sorry I forgot to photograph that part. I fabbed up a bracket out of a strip of steel with some holes and bends in the right places and it fits exactly like the OEM rheostat.

-
My Movie-720p30H.MP4 Got my LED dimmer figured out. This pulse width modulator was $16 on Amazon. The brass rod in the background is a rotary knob extension I will use to make the OEM Datsun knob reach this thing once it’s buried in the dashboard. I just need to figure out how I’m going to mount it.
-
I’m not sure what I would need yet. I’m looking into getting a key made from the code on the door cylinders. If that works I will know if the glove box and trunk are keyed alike. If they are then I only need to figure out the ignition. If I can’t find a code on it I’ll need new wafers. If none of this pans out I’ll need enough to do everything.
-
Fantastic! Thanks. I had found a document that states 1970-83 Z cars use tumbler series P-16-151/154 for the ignition. I’m assuming from the photos and your description of the kits that the rest of the locks use P-16-141/144, right? Where did you buy the kits?
-
Z Car Depot has door cylinders matched to one key, so I may start there. Two things I’m wondering and haven’t found answers to: How does one order a coded key? Which rekeying kits are correct? I’ve found places that sell ASP rekeying kits, but I’m not sure if it’s A-16-105, A-16-106, or some other kit that would work. I do know the ignition uses pins and the rest use wafers, so maybe that’s the starting point.
-
Question about my locks: what would you do to key all these locks keyed alike? I have an off-brand ignition with no steering lock wires, a NOS 240z ignition with steering lock wires, two door cylinders, a trunk button, and a glove box button. I only have keys for the off-brand ignition. I know the door cylinders have a code, so I could try to get a key made for them, but I don’t know if they match the trunk or glove box. I know the NOS ignition doesn’t match anything because I bought it recently. I have not been able to find a local locksmith so far. I’m thinking buy new door cylinders with keys and get rekeying kits for the rest, possibly foregoing the glove box. Any better ideas? EDIT: I found two different keys that will go into the door, glove box, and hatch locks. One says ilco X241 Suz18. The other says Curtis DA-2. It looks like both of them are left hand. The ilco will go into the ignition, too, but it doesn’t feel right. It’s sloppy and feels like I’m jamming a wire it it rather than a key. The Curtis will not go into the ignition. Neither of these keys will lock/unlock any of the locks.
-
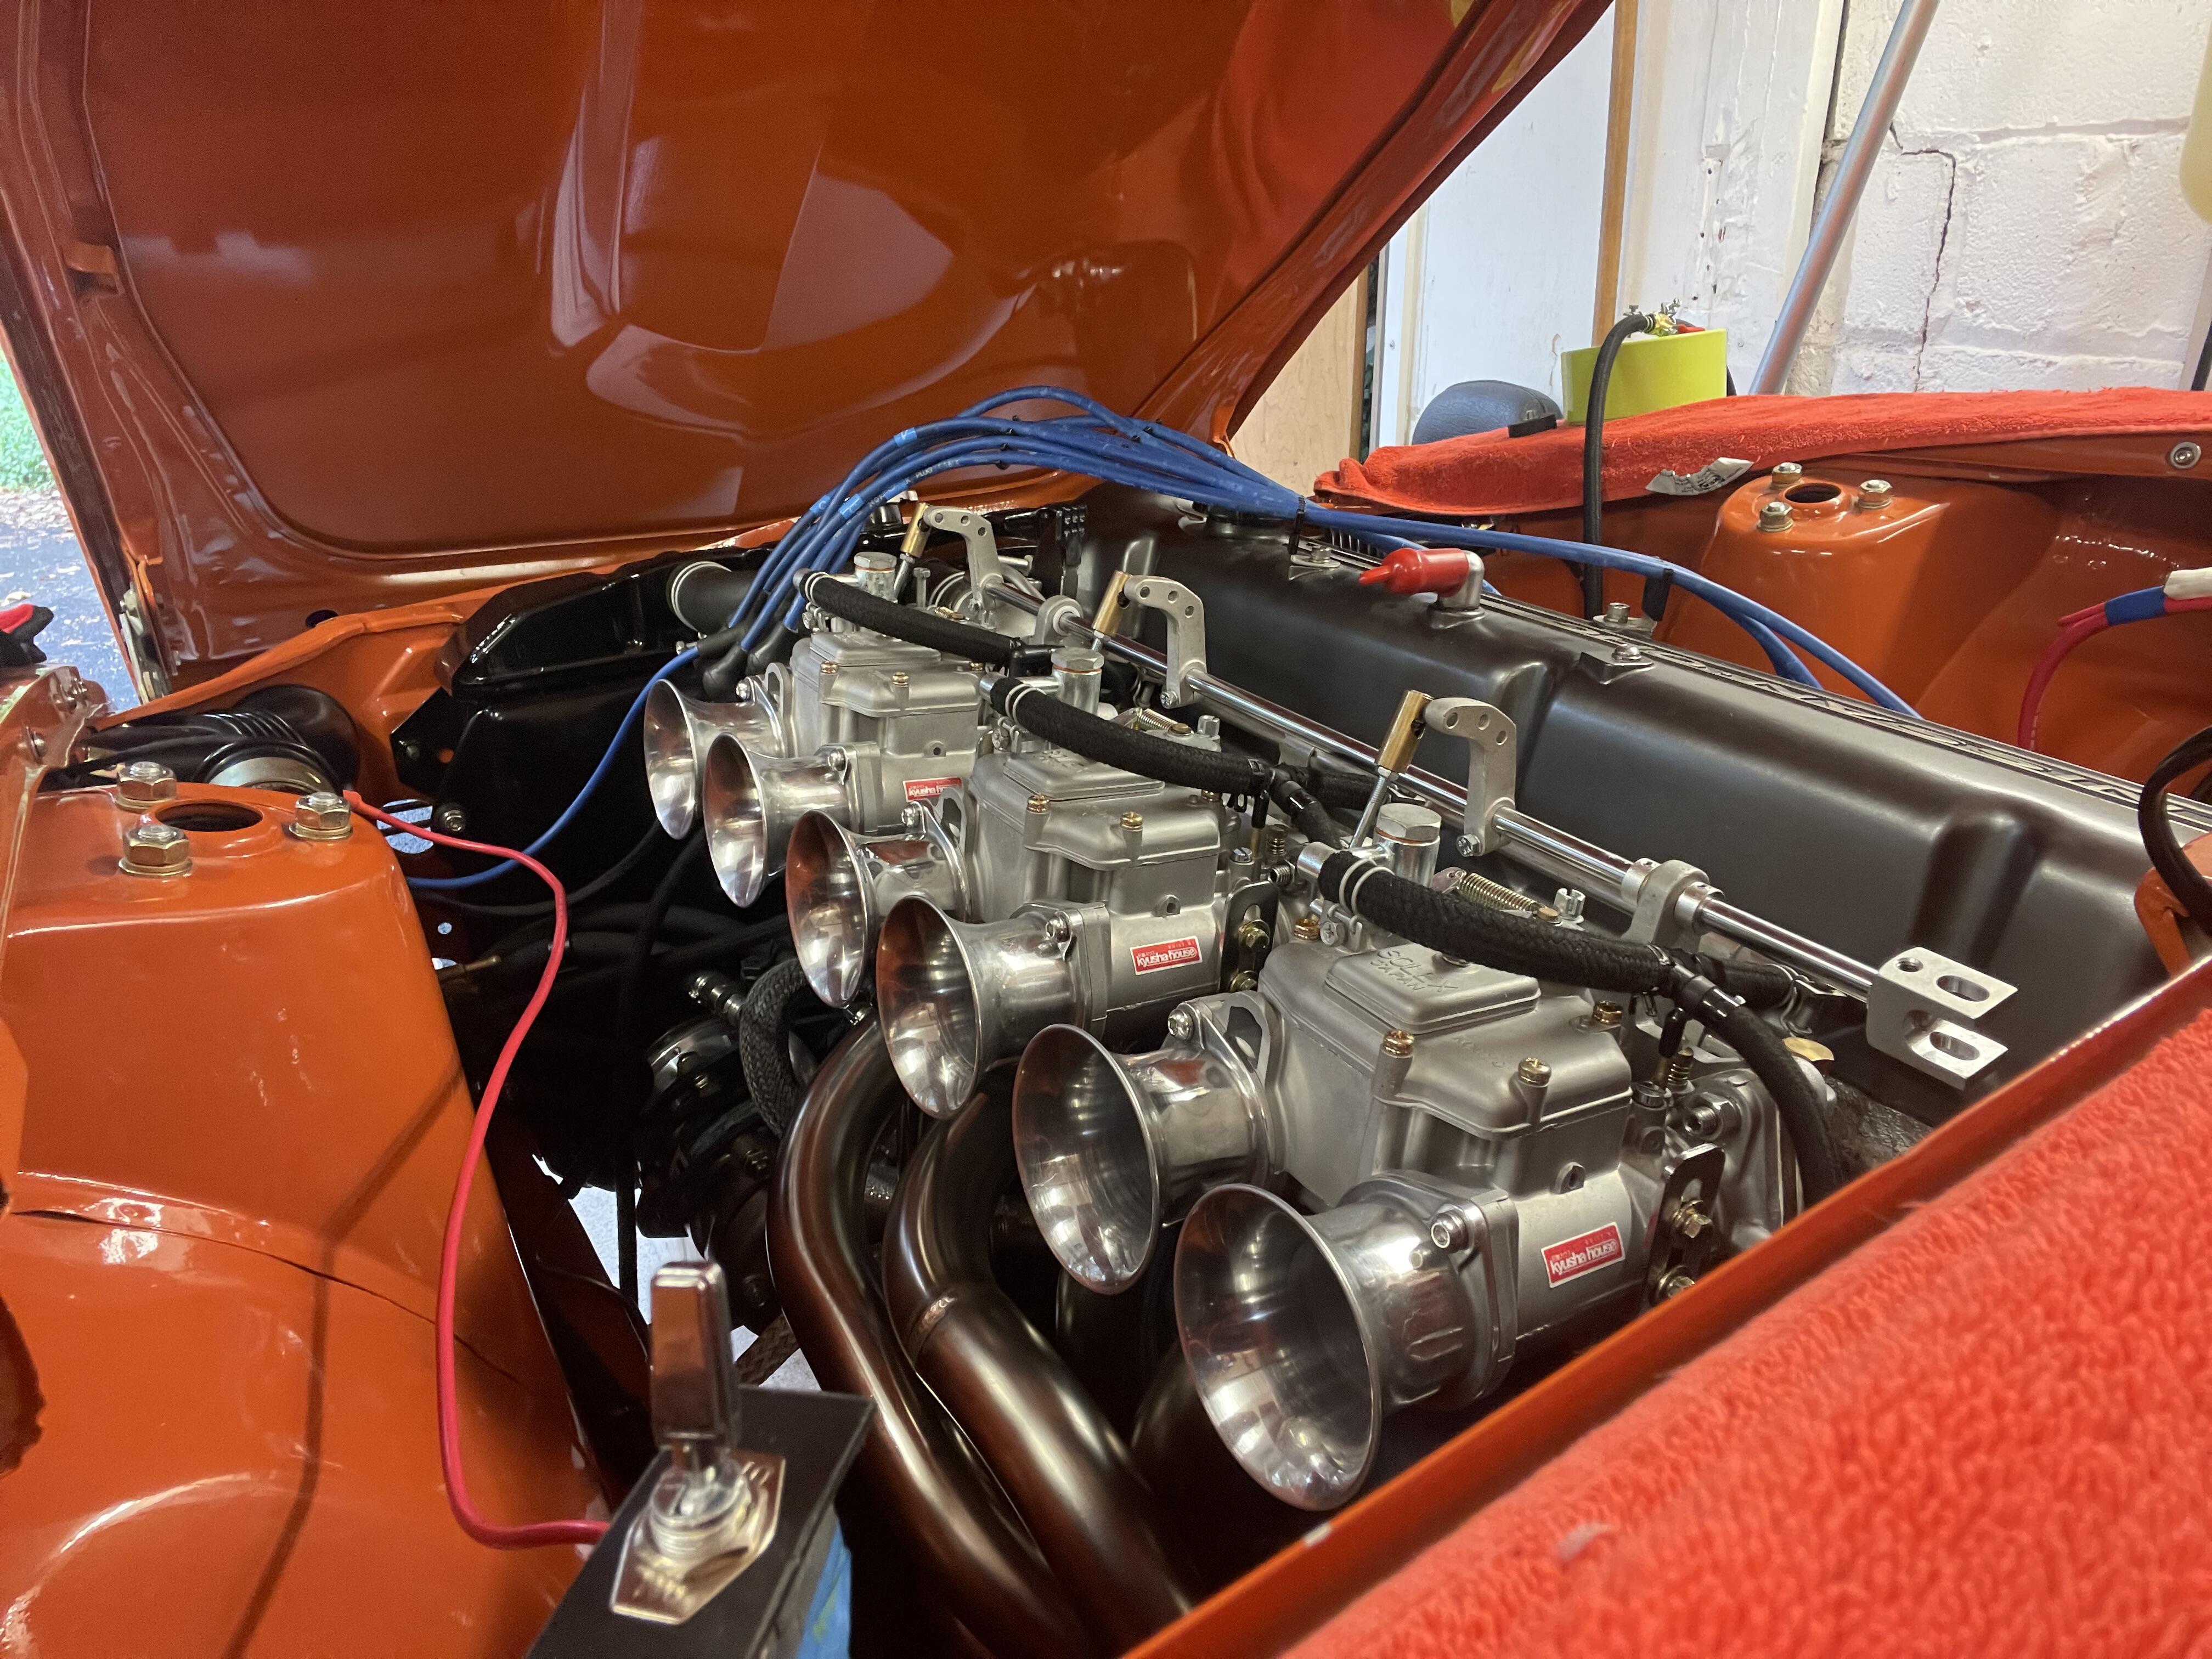
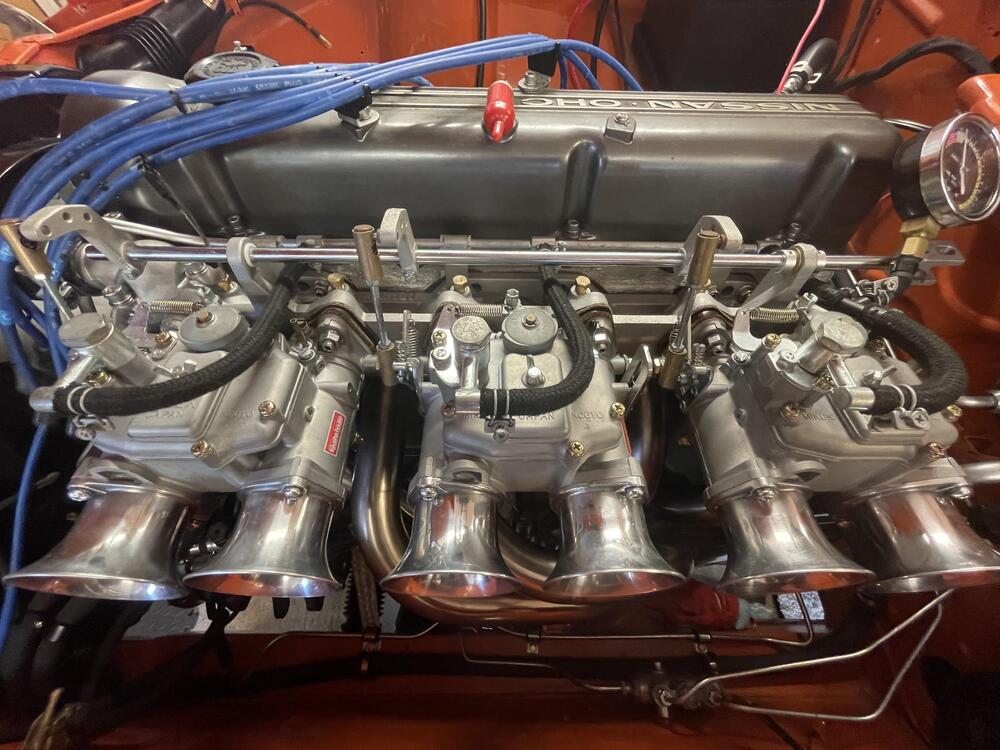
IMG_1916.mov I finally got the fuel pressure stable. There was an issue the first time I ran it with the regulator where I couldn’t get more than 2.75 psi out of it. I took it apart and cleaned it on the advice of the manufacturer and now it’s working. I’m not sure what it was because it looked pristine inside, but now I am good to go. IMG_1915.mov It’s still running super rough. The idle mix screws are at two turns out and it’s very rich. I’m hoping to address the jetting over the weekend, but I might not get to it.
-
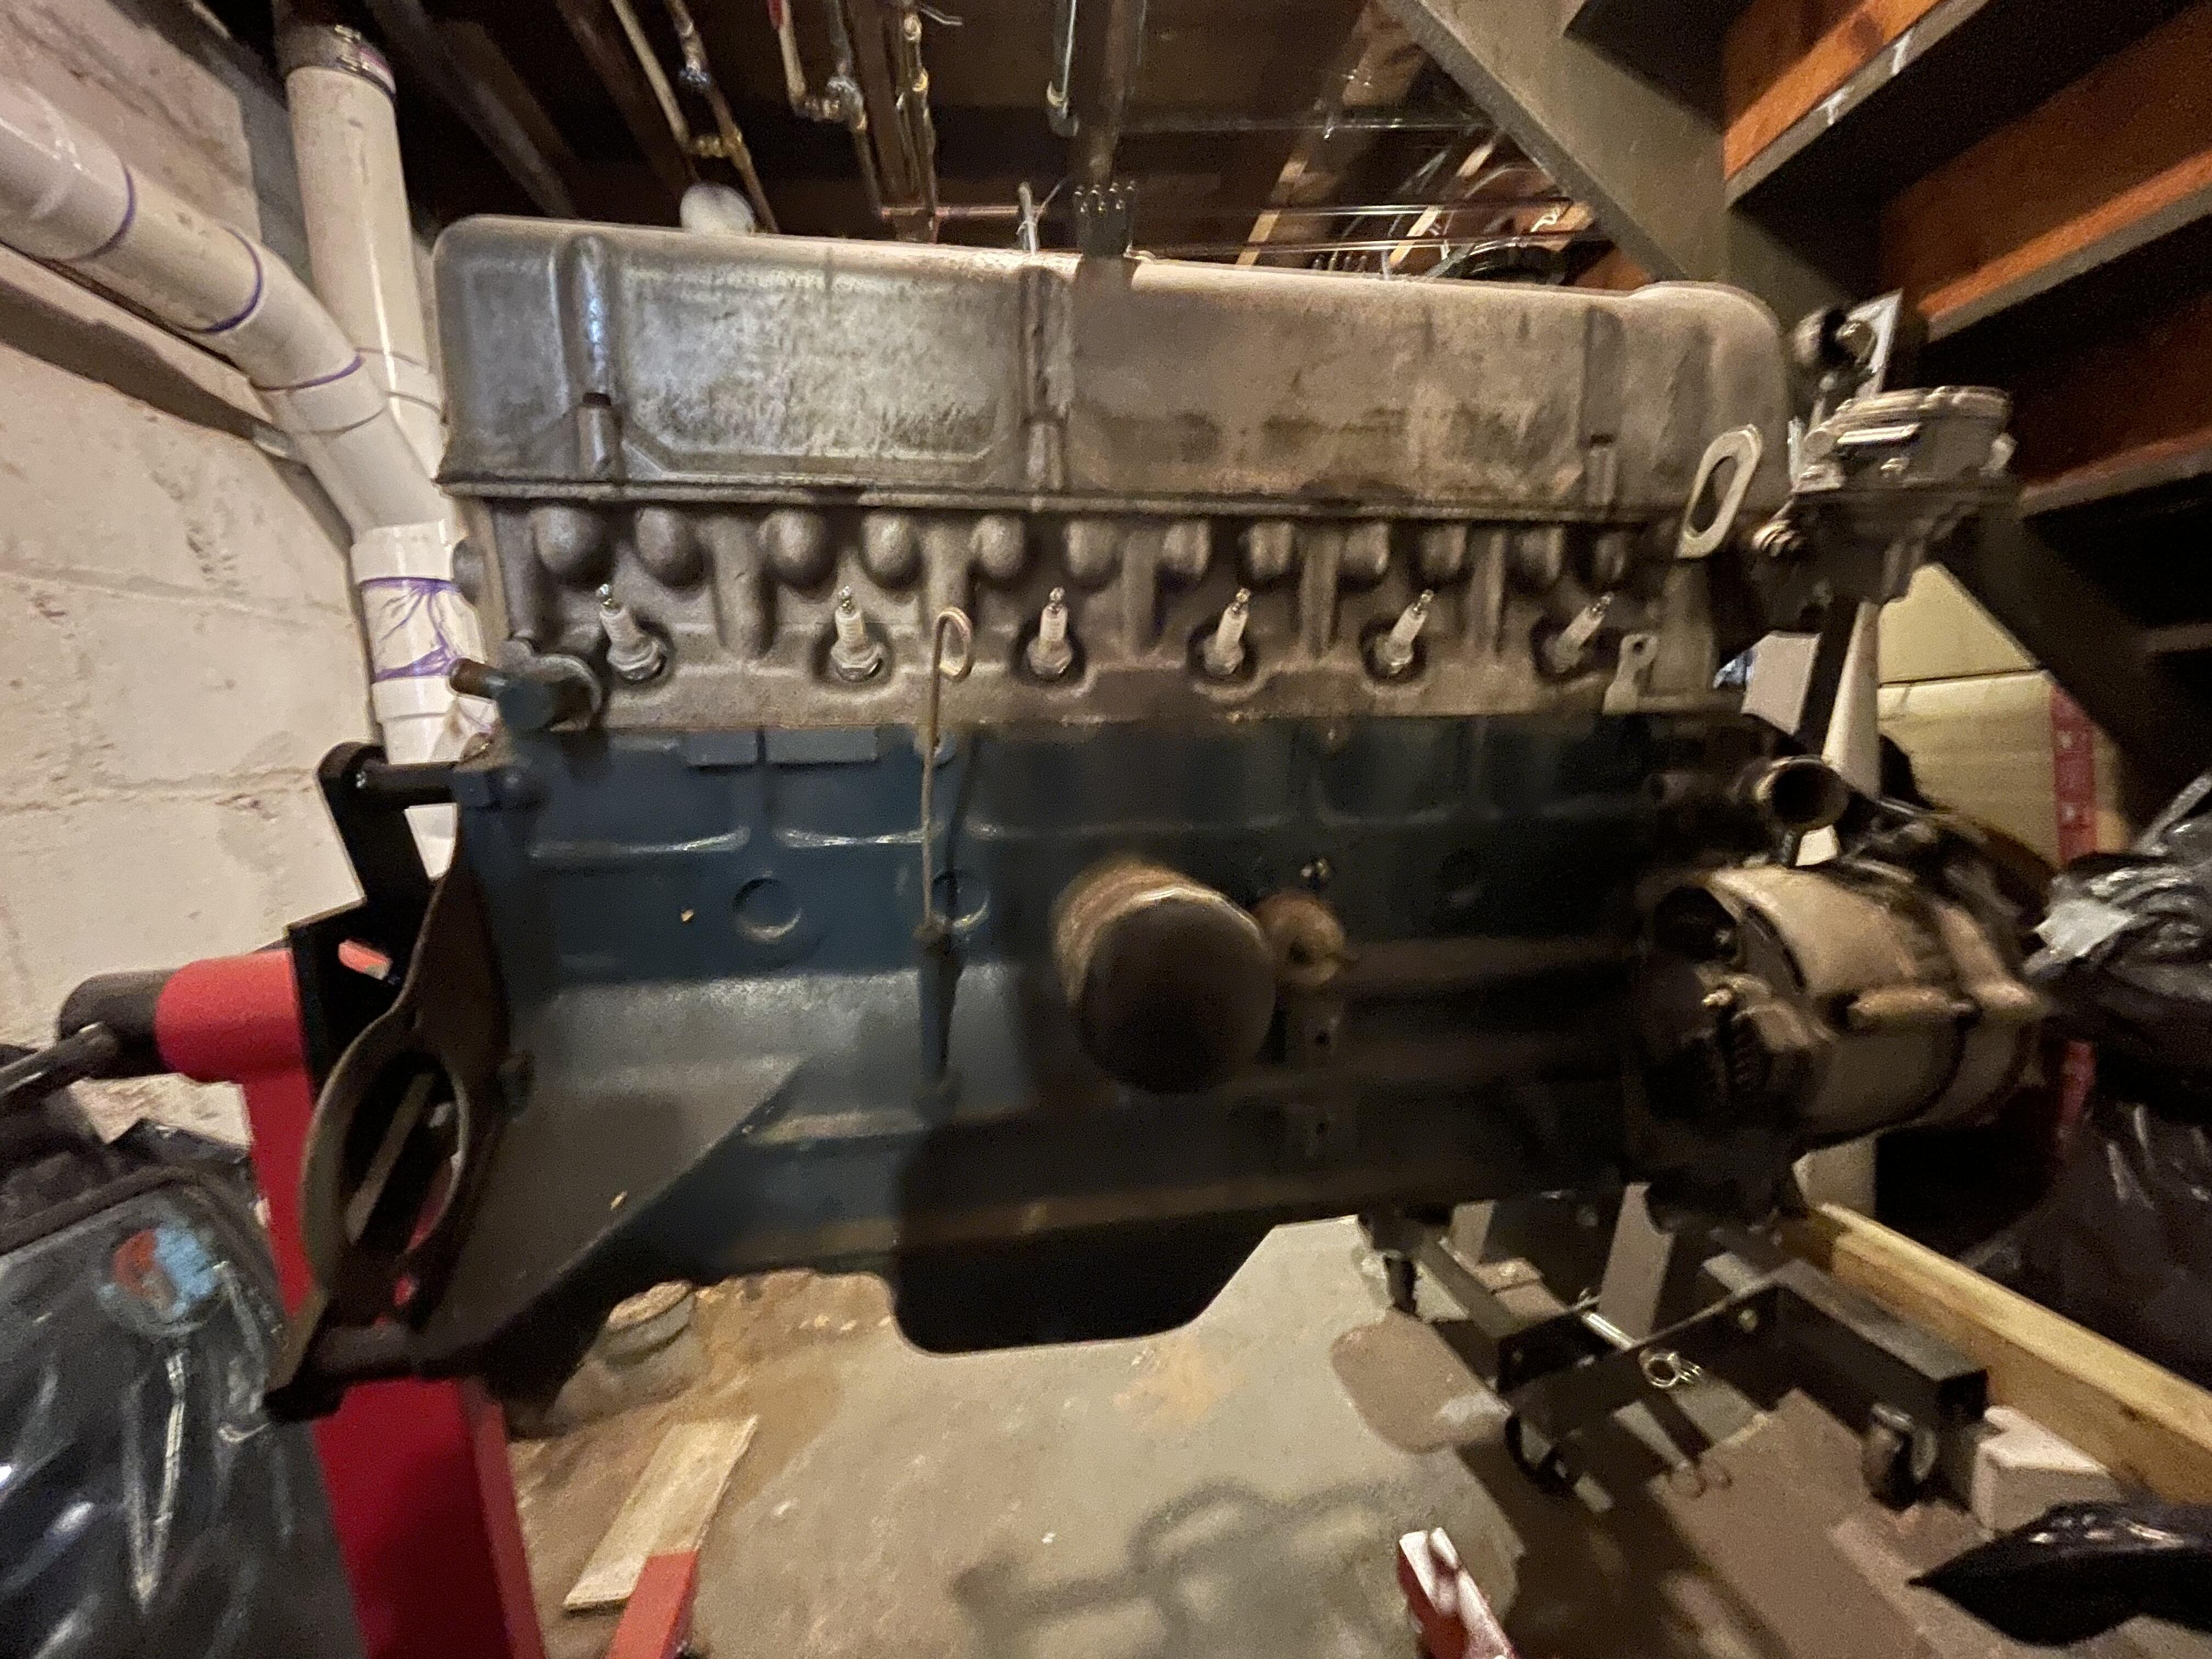
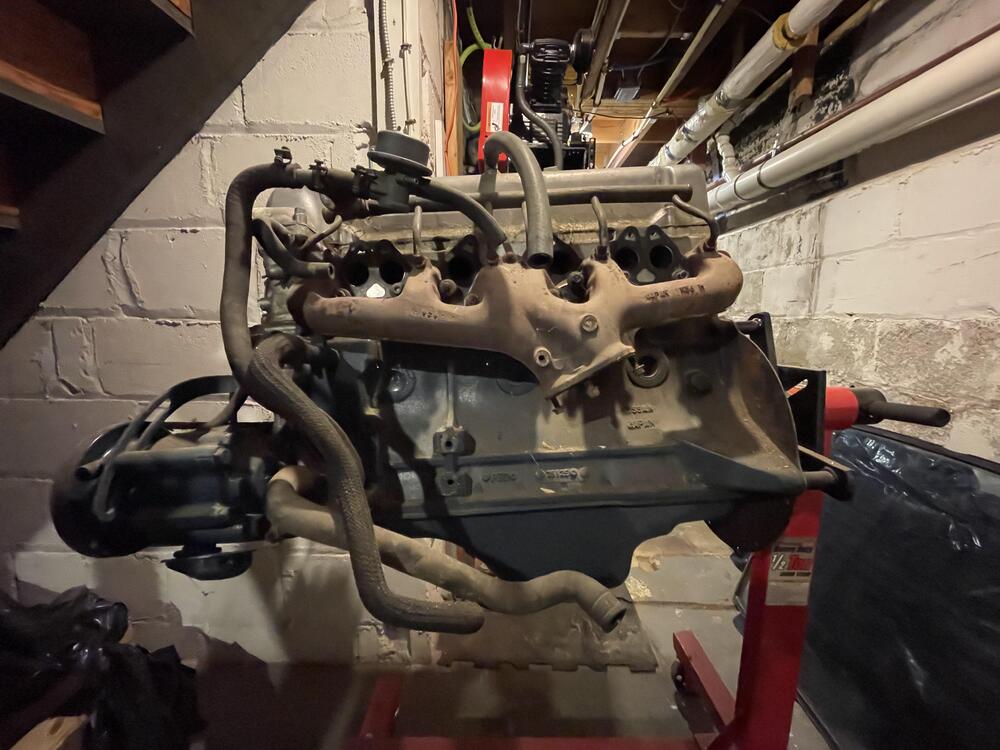
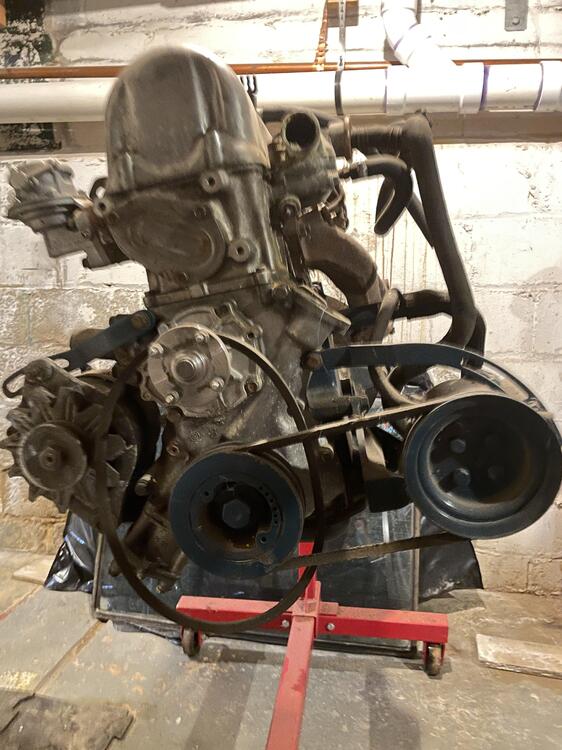
What’s a good asking price for an L4 engine? I need to get rid of the one that came in my car to make some room. I can’t vouch for it. I’ve never run it and have no info on its operating performance or condition at all. I think the head is an E30. Also, what should I remove and save or sell separately, if anything?


-
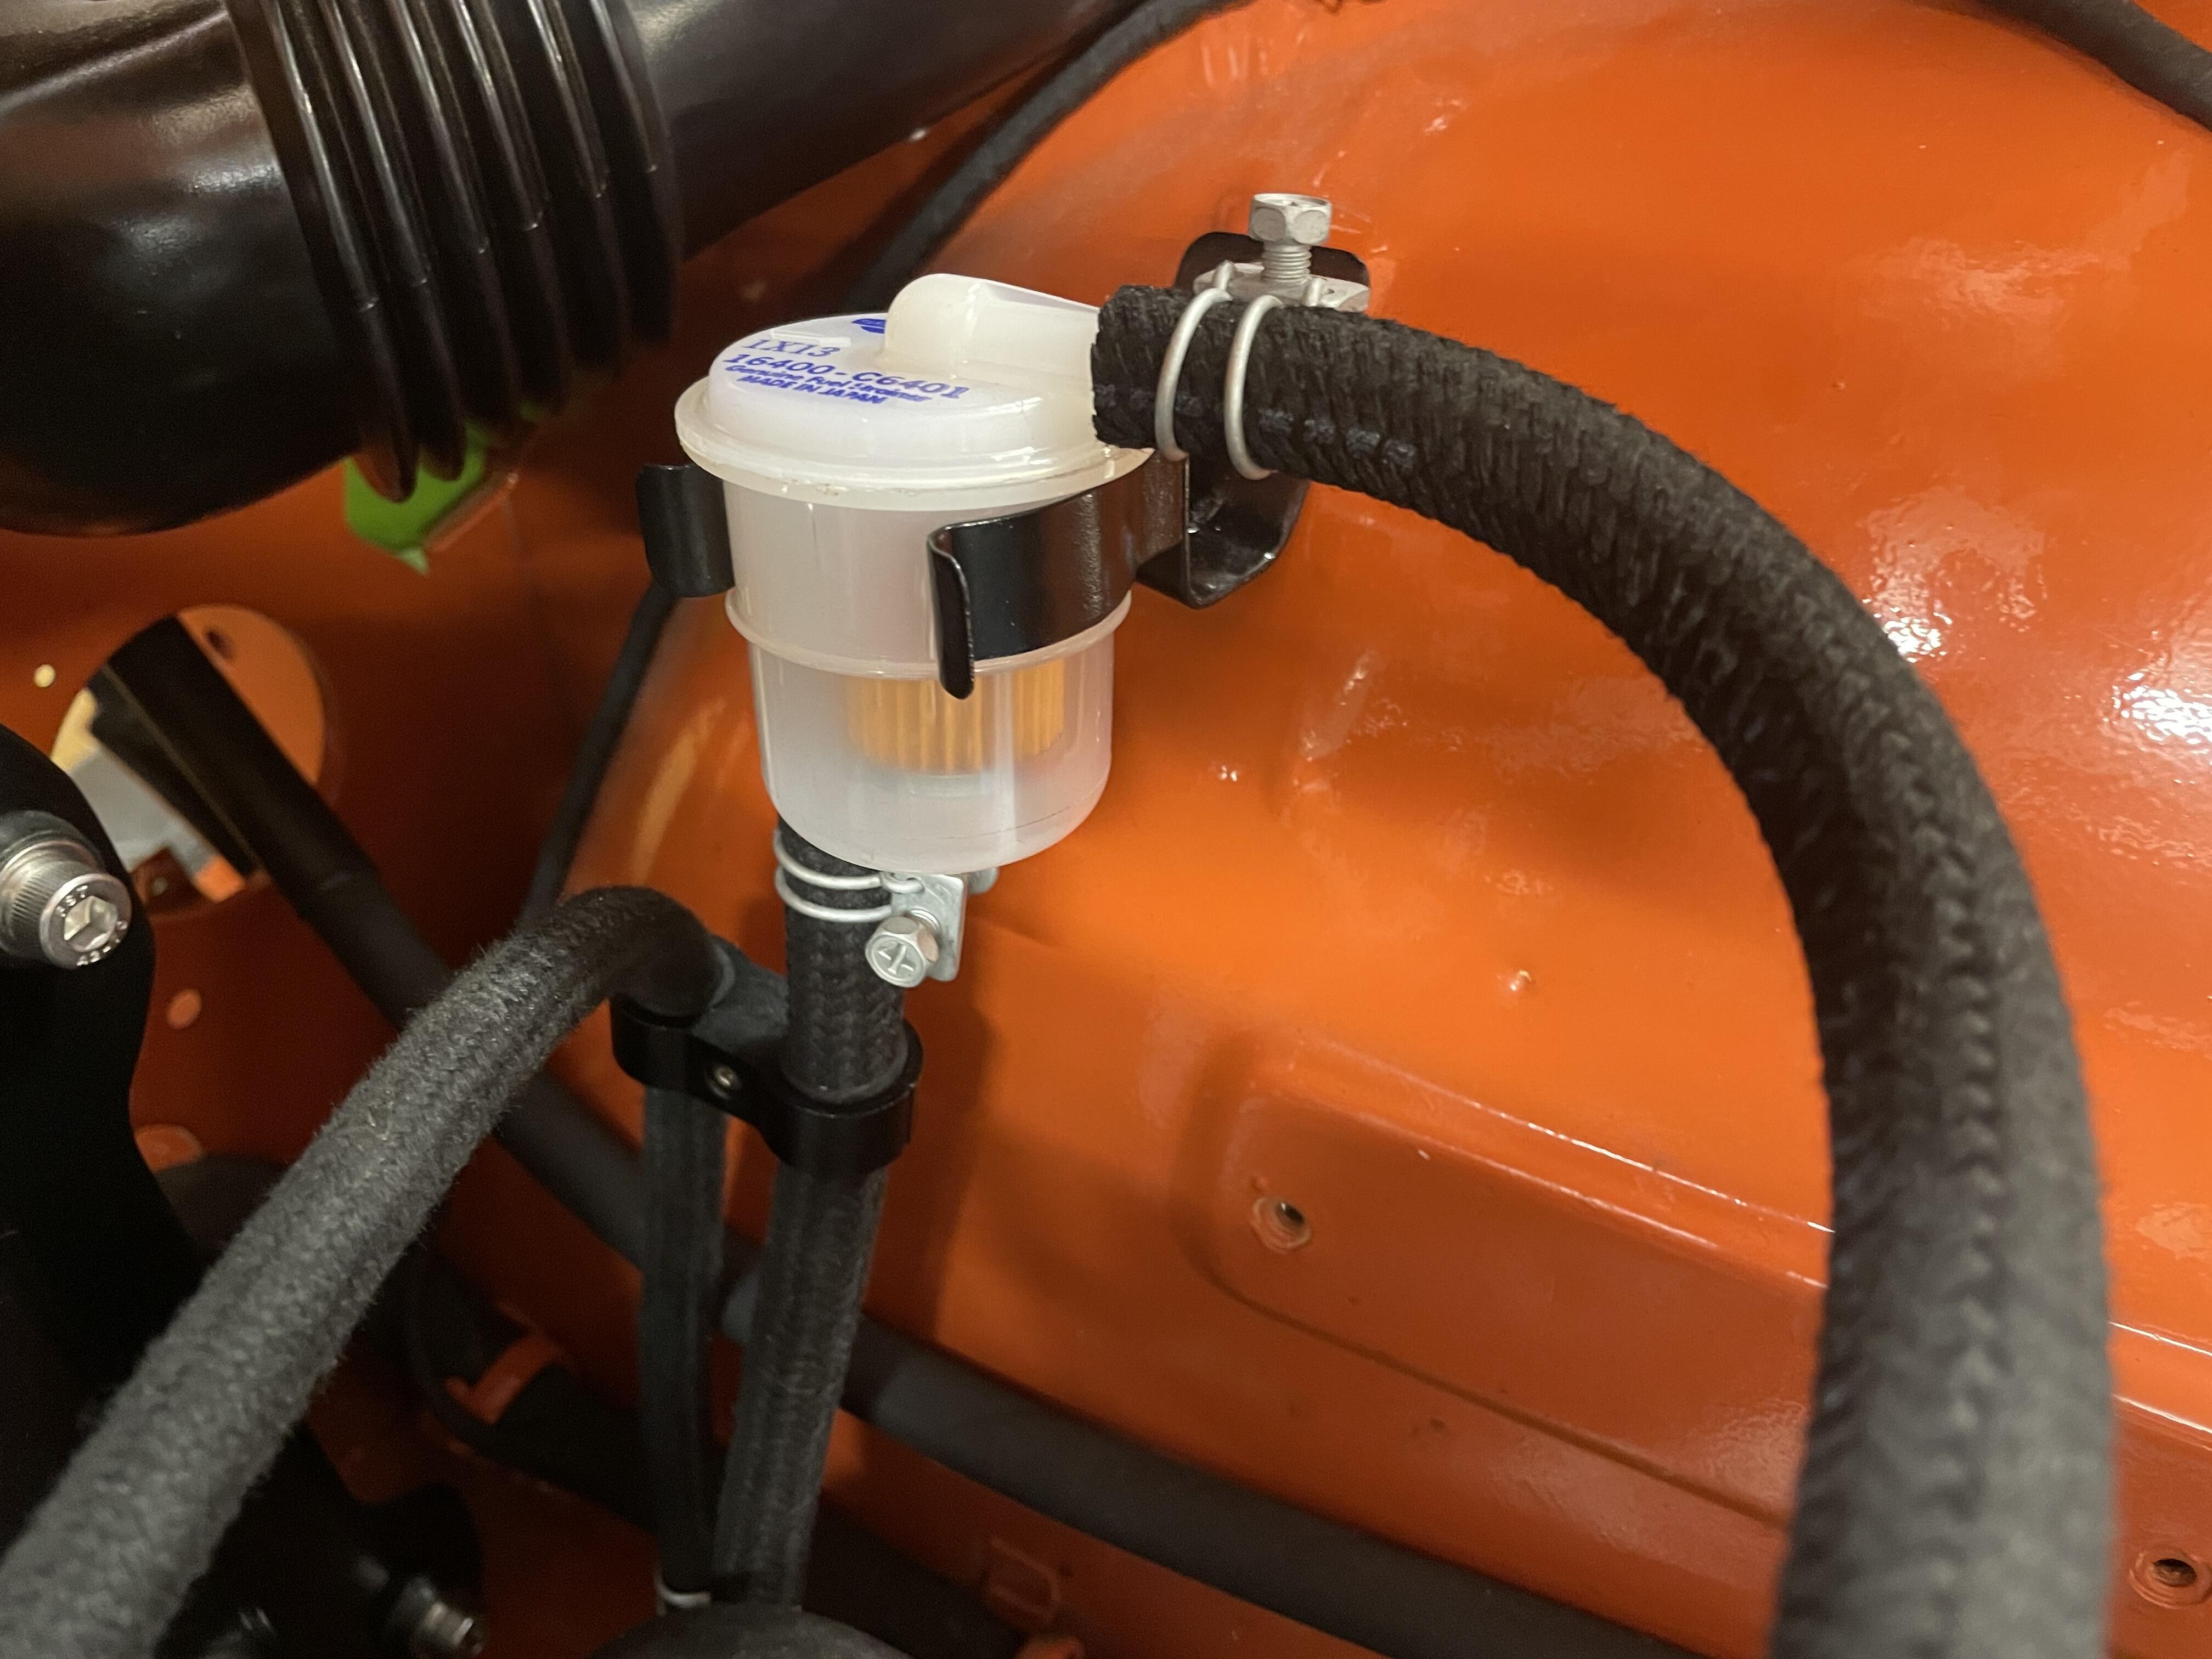
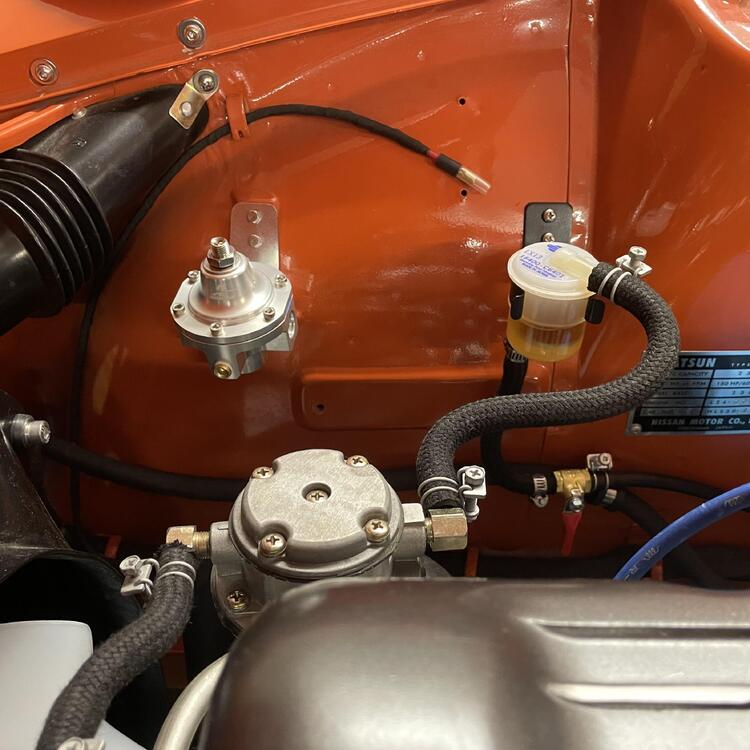
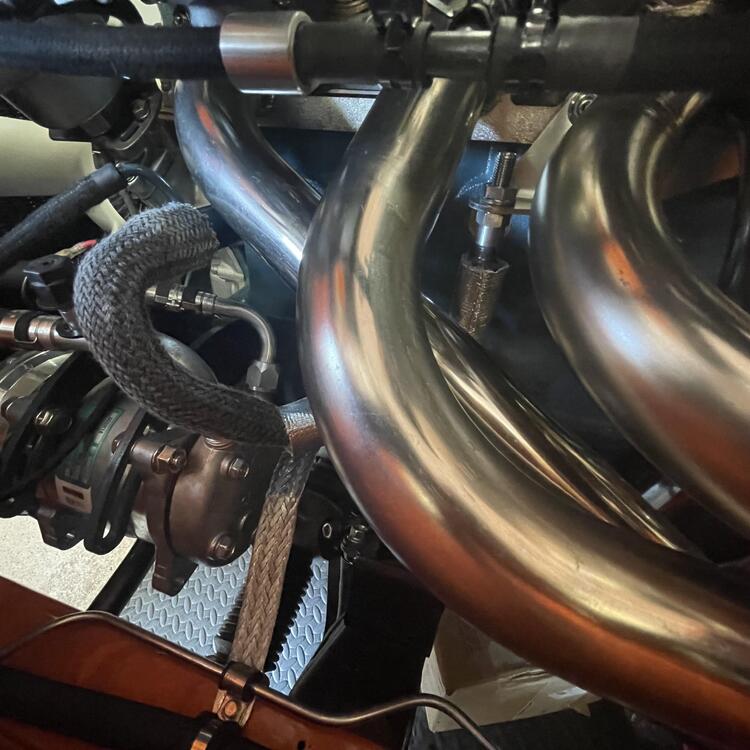
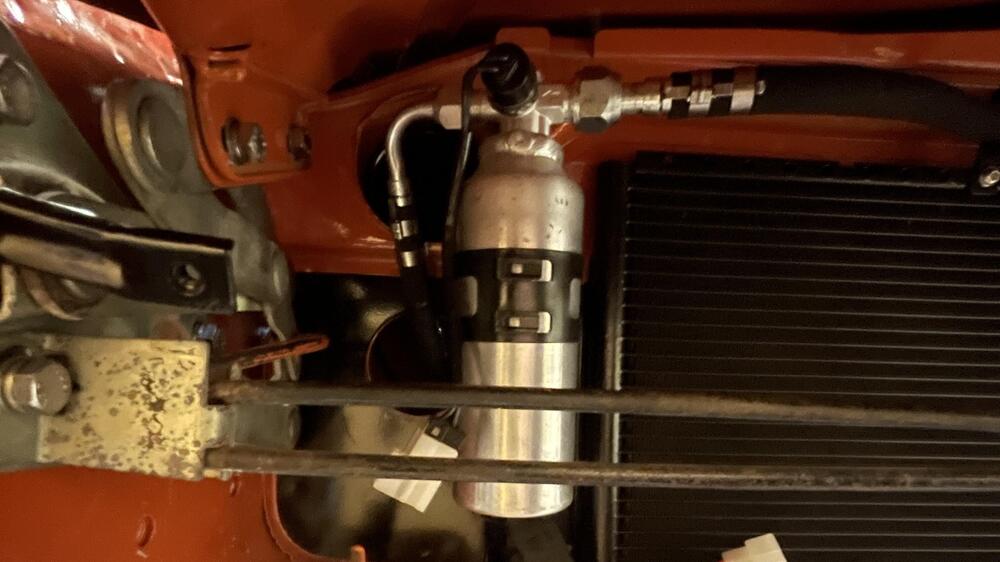
I broke down and bought a fuel pressure regulator by Aeromotive (the Ultra-Low Pressure model). The more I talked to people the more it sounds like I have a fuel pressure problem that is swamping the carbs, and even if I don’t it would always be an open question. The previous owner must have clairvoyance because there was a set of holes that perfectly fit the fuel filter bracket just aft of the stock hard point, and the dope who did my paint forgot to weld them up, so it was just a matter of moving the filter and tweaking the bracket that came in the box the use the original filter location. Now to route the hoses.
-
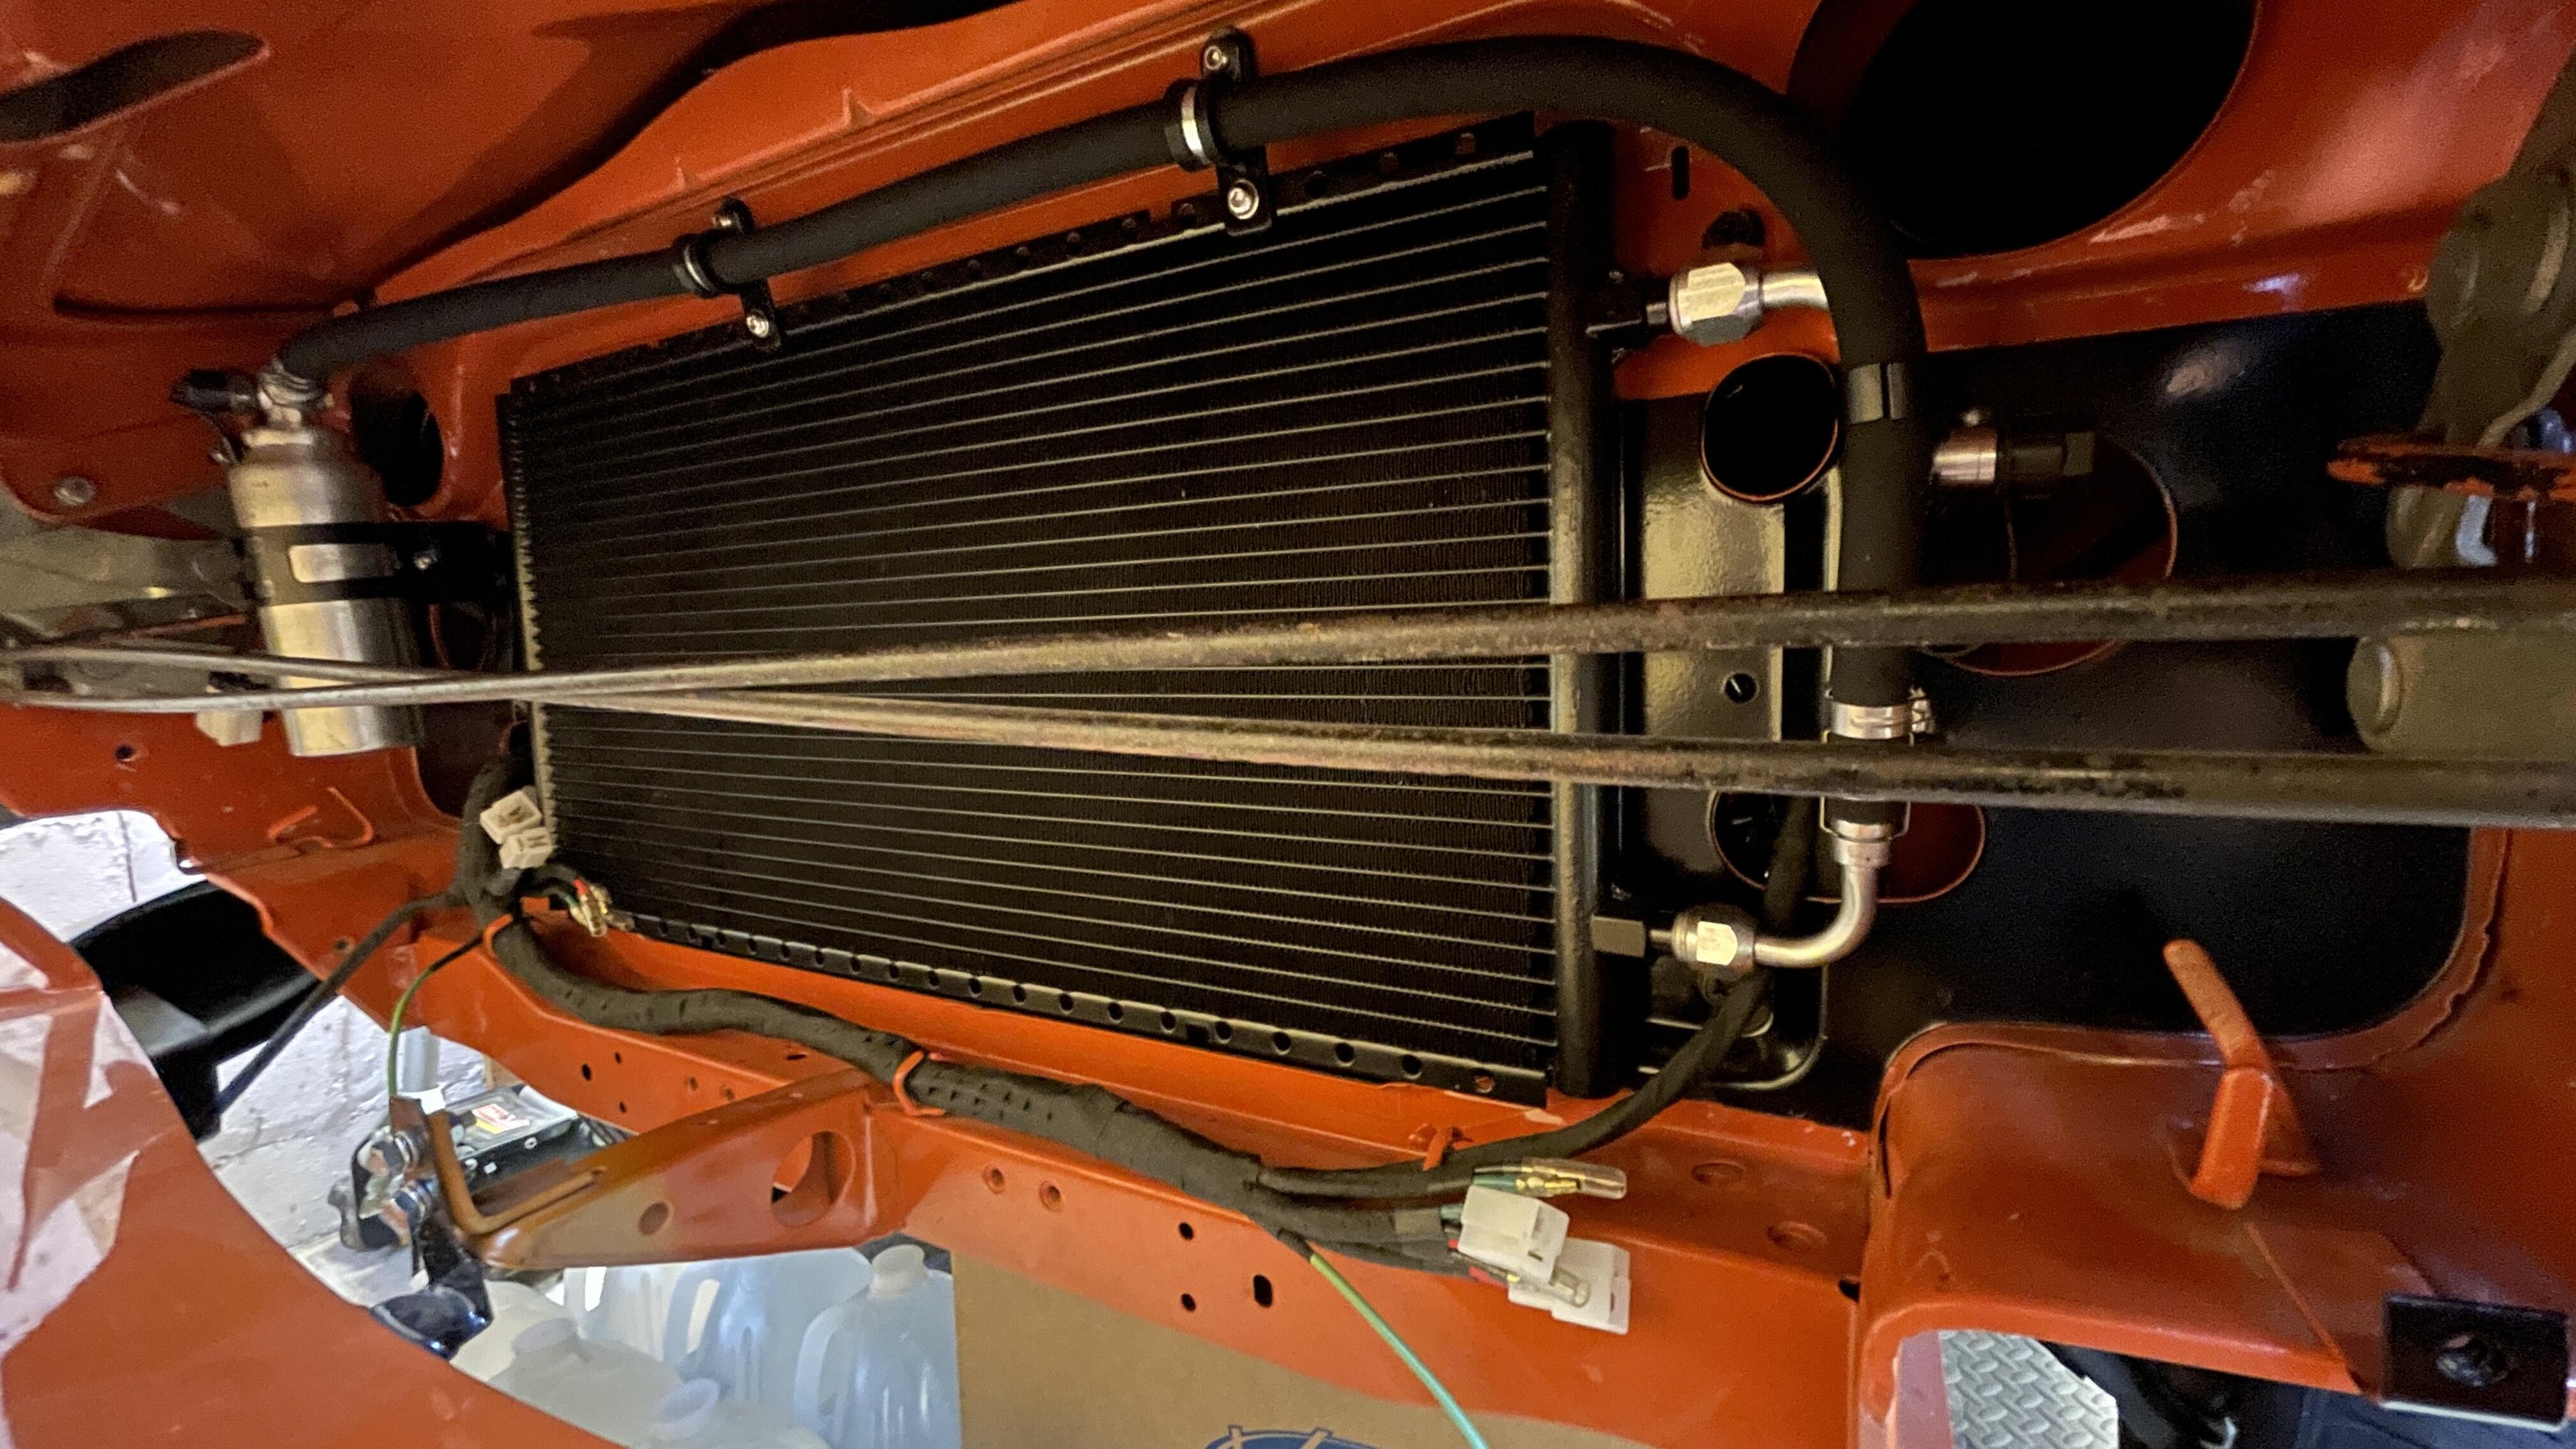
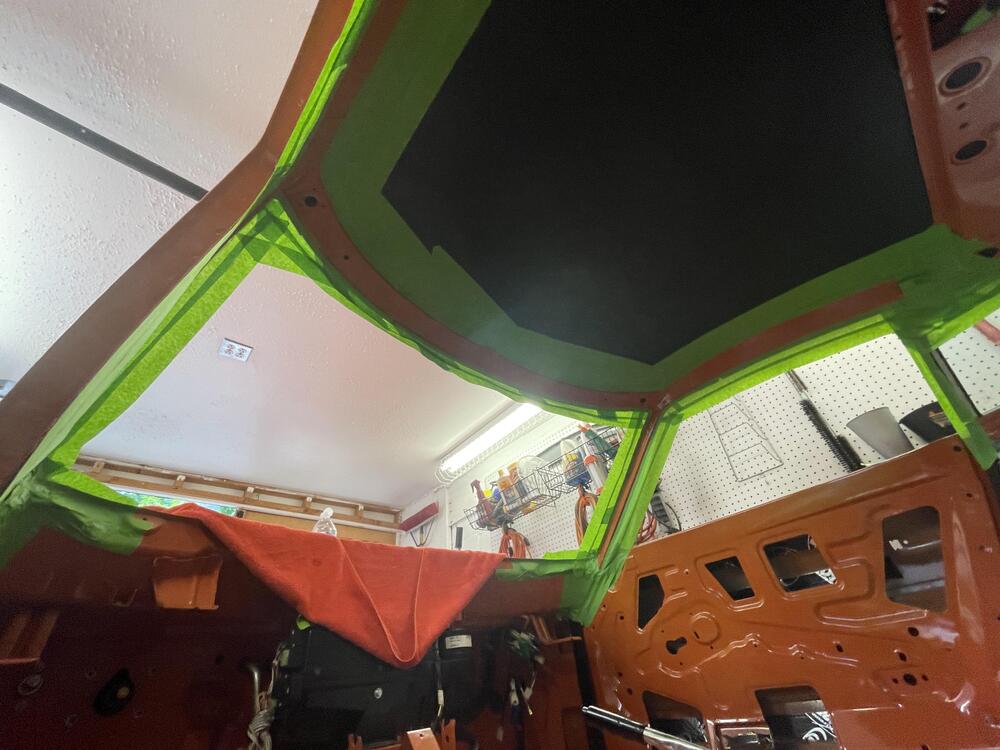
I worked on the firewall a bit yesterday and today. The dash can now go in once it’s ready (unless I forgot something as usual). I wrapped the -10 ac pipe at the evaporator end, but the insulation isn’t long enough to go all the way to the firewall, so I may need to address that. I also need to figure out where I want the AC drip hose to exit. There are still a handful of insulation pieces to put on the hump and the kick panels. I’m holding off because I am missing some plugs and I still need to test fit the ventilation and relay stuff. Once those are on I will tape all the joints and put a sheet over it until I order the carpet.

-
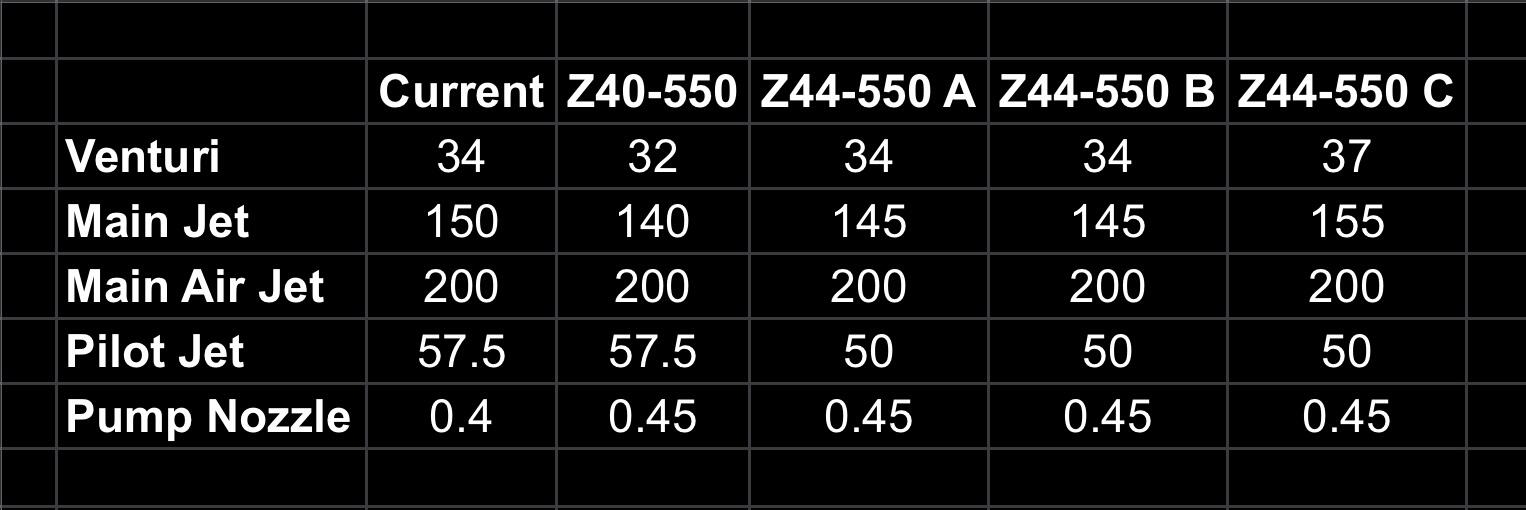
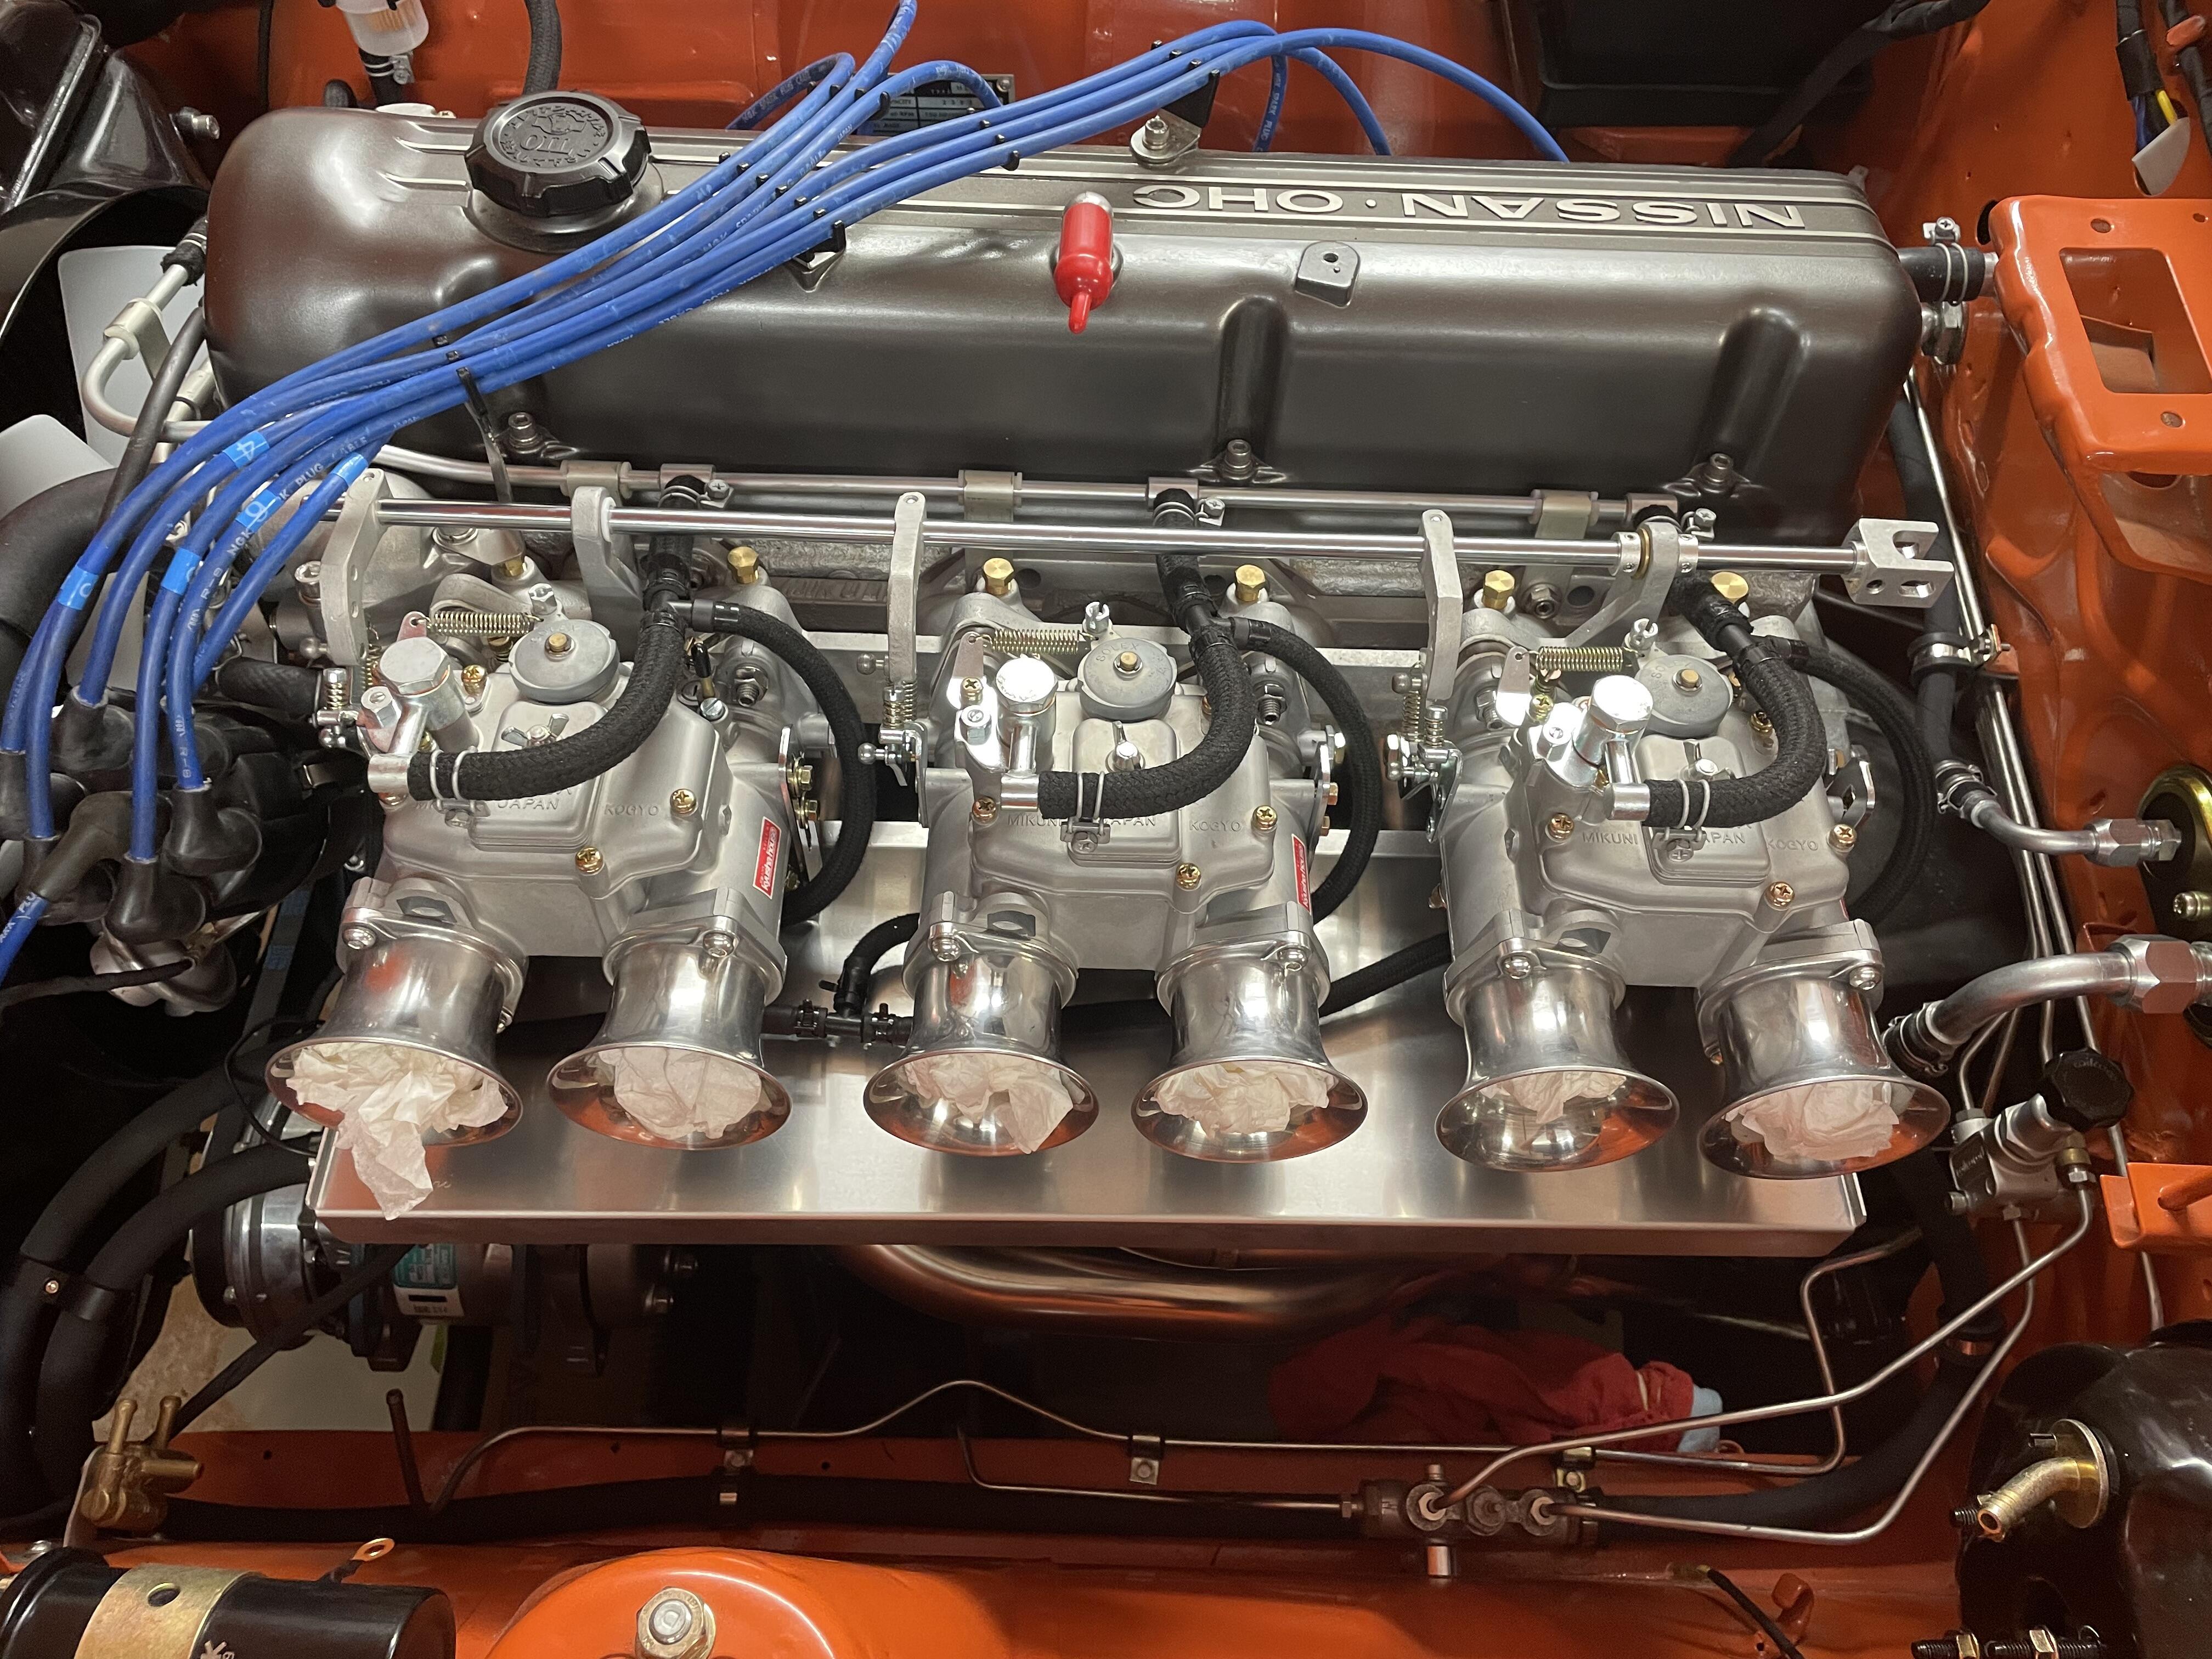
The engine is running much better! I was struggling to get the timing below 40° advanced, so last weekend I reinstalled my oil pump shaft and played around with different distributor bases and plates. Today I adjusted my valves and checked the torque on the head bolts. It’s still idling way too high (1,130 rpm) and running way too rich, but today it is much smoother. I have a jetting kit in the mail from Upgrade Motoring so I can bring it down to manufacturer’s specs. Hopefully next week I’ll be able to get it to where I can sync the carburetors. But first I need to relieve the fuel pressure by putting the fuel return lines back on. It’s currently over 5psi so it’s swamping the carbs. While I fix that I’m looking into changing my jetting: Im not sure about Mikuni’s recommended pilot jet, but I will definitely bring the nozzle up to 0.45. Depending on what happens with that and adding the regulator I might be fine with 150 main jets. We will see.

-
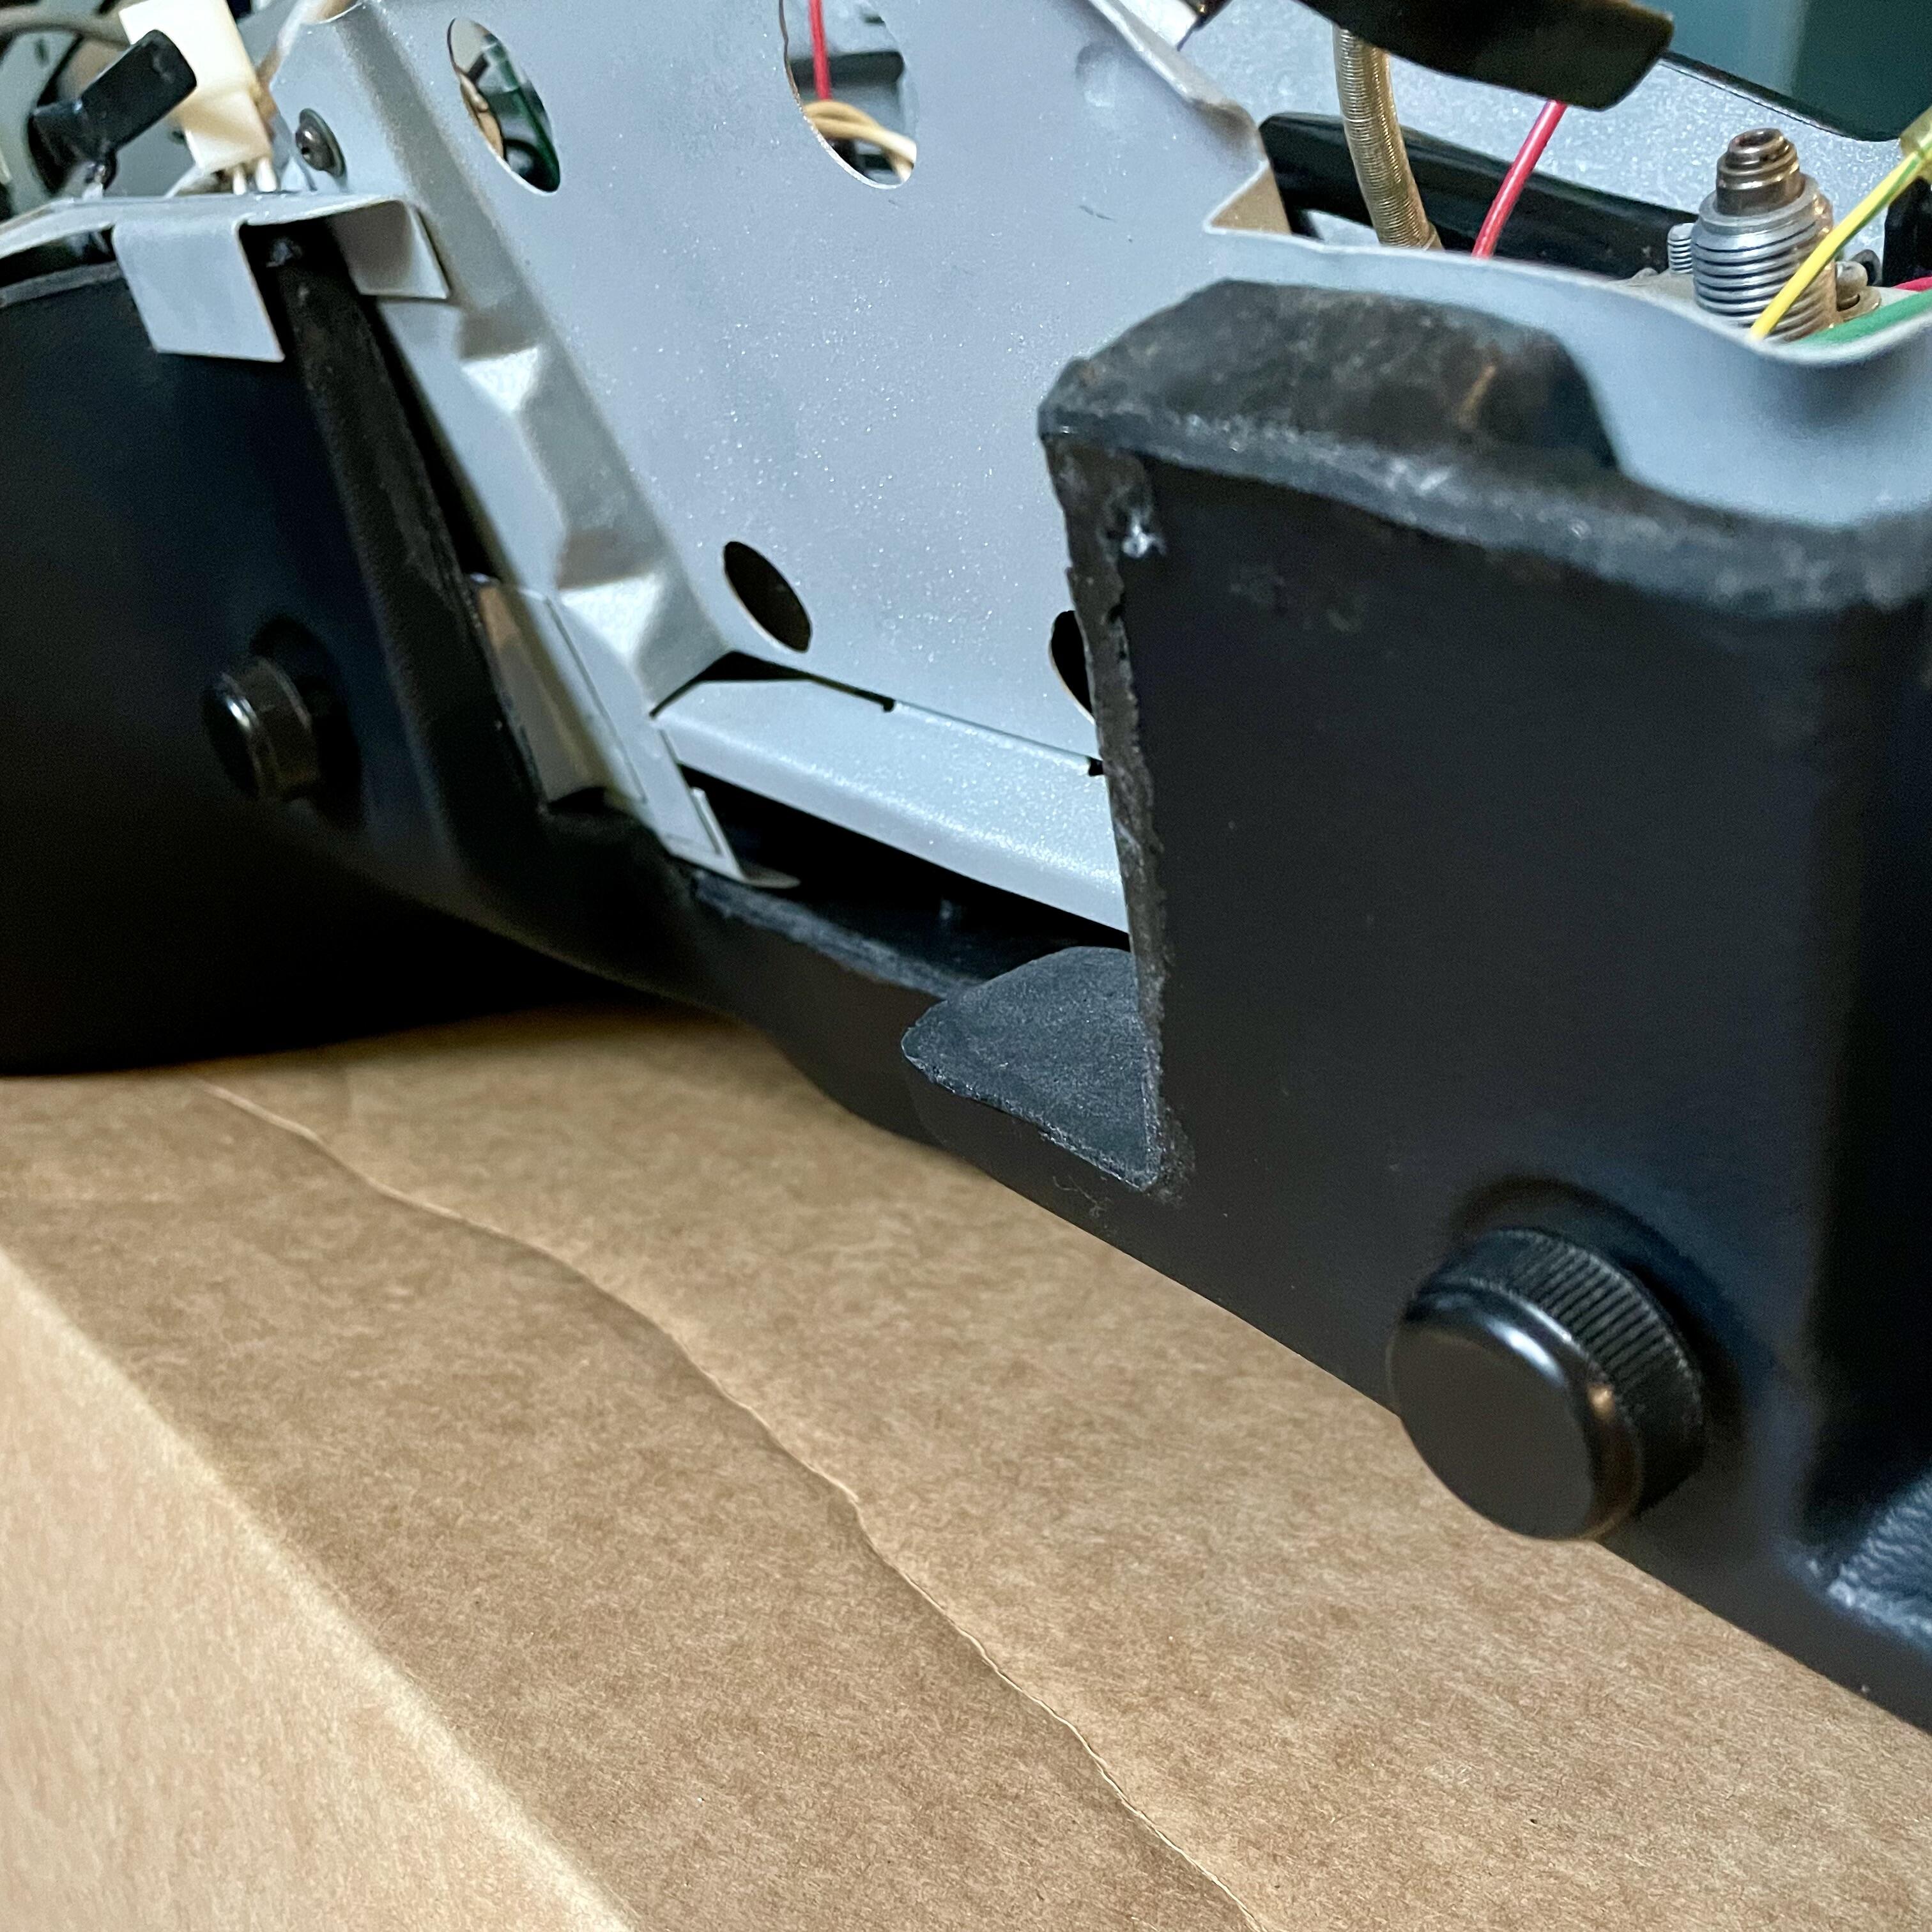
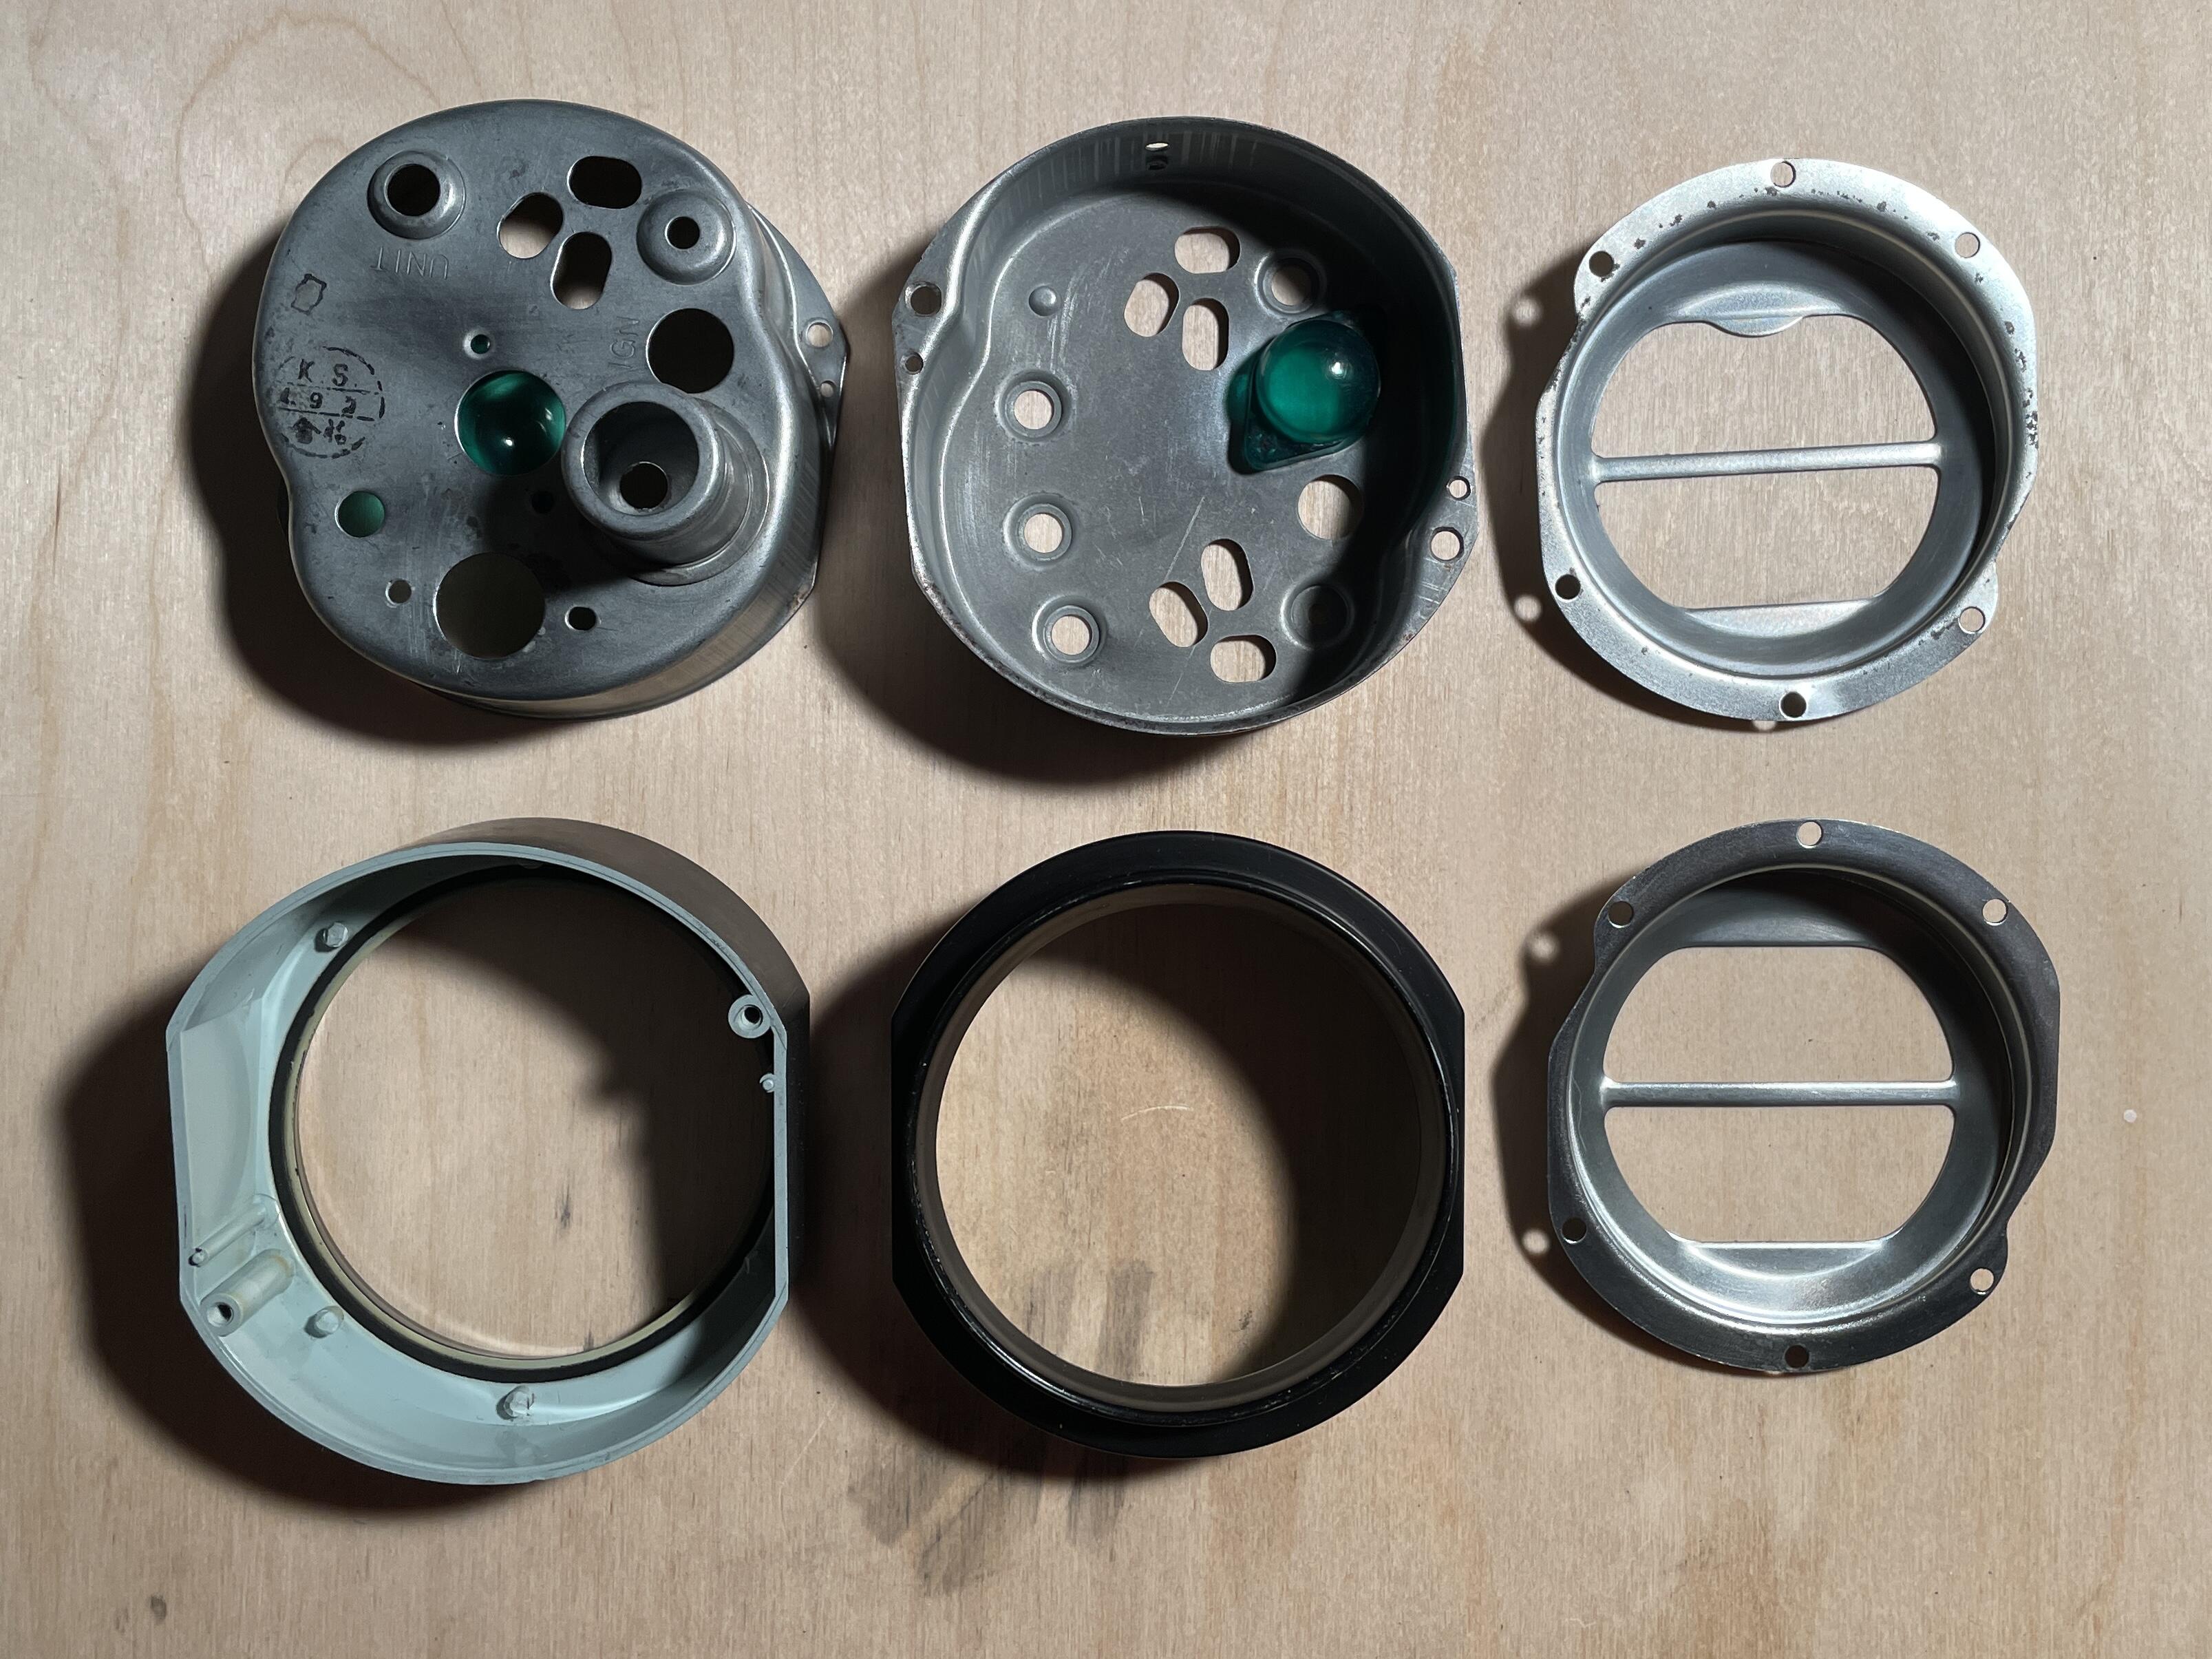
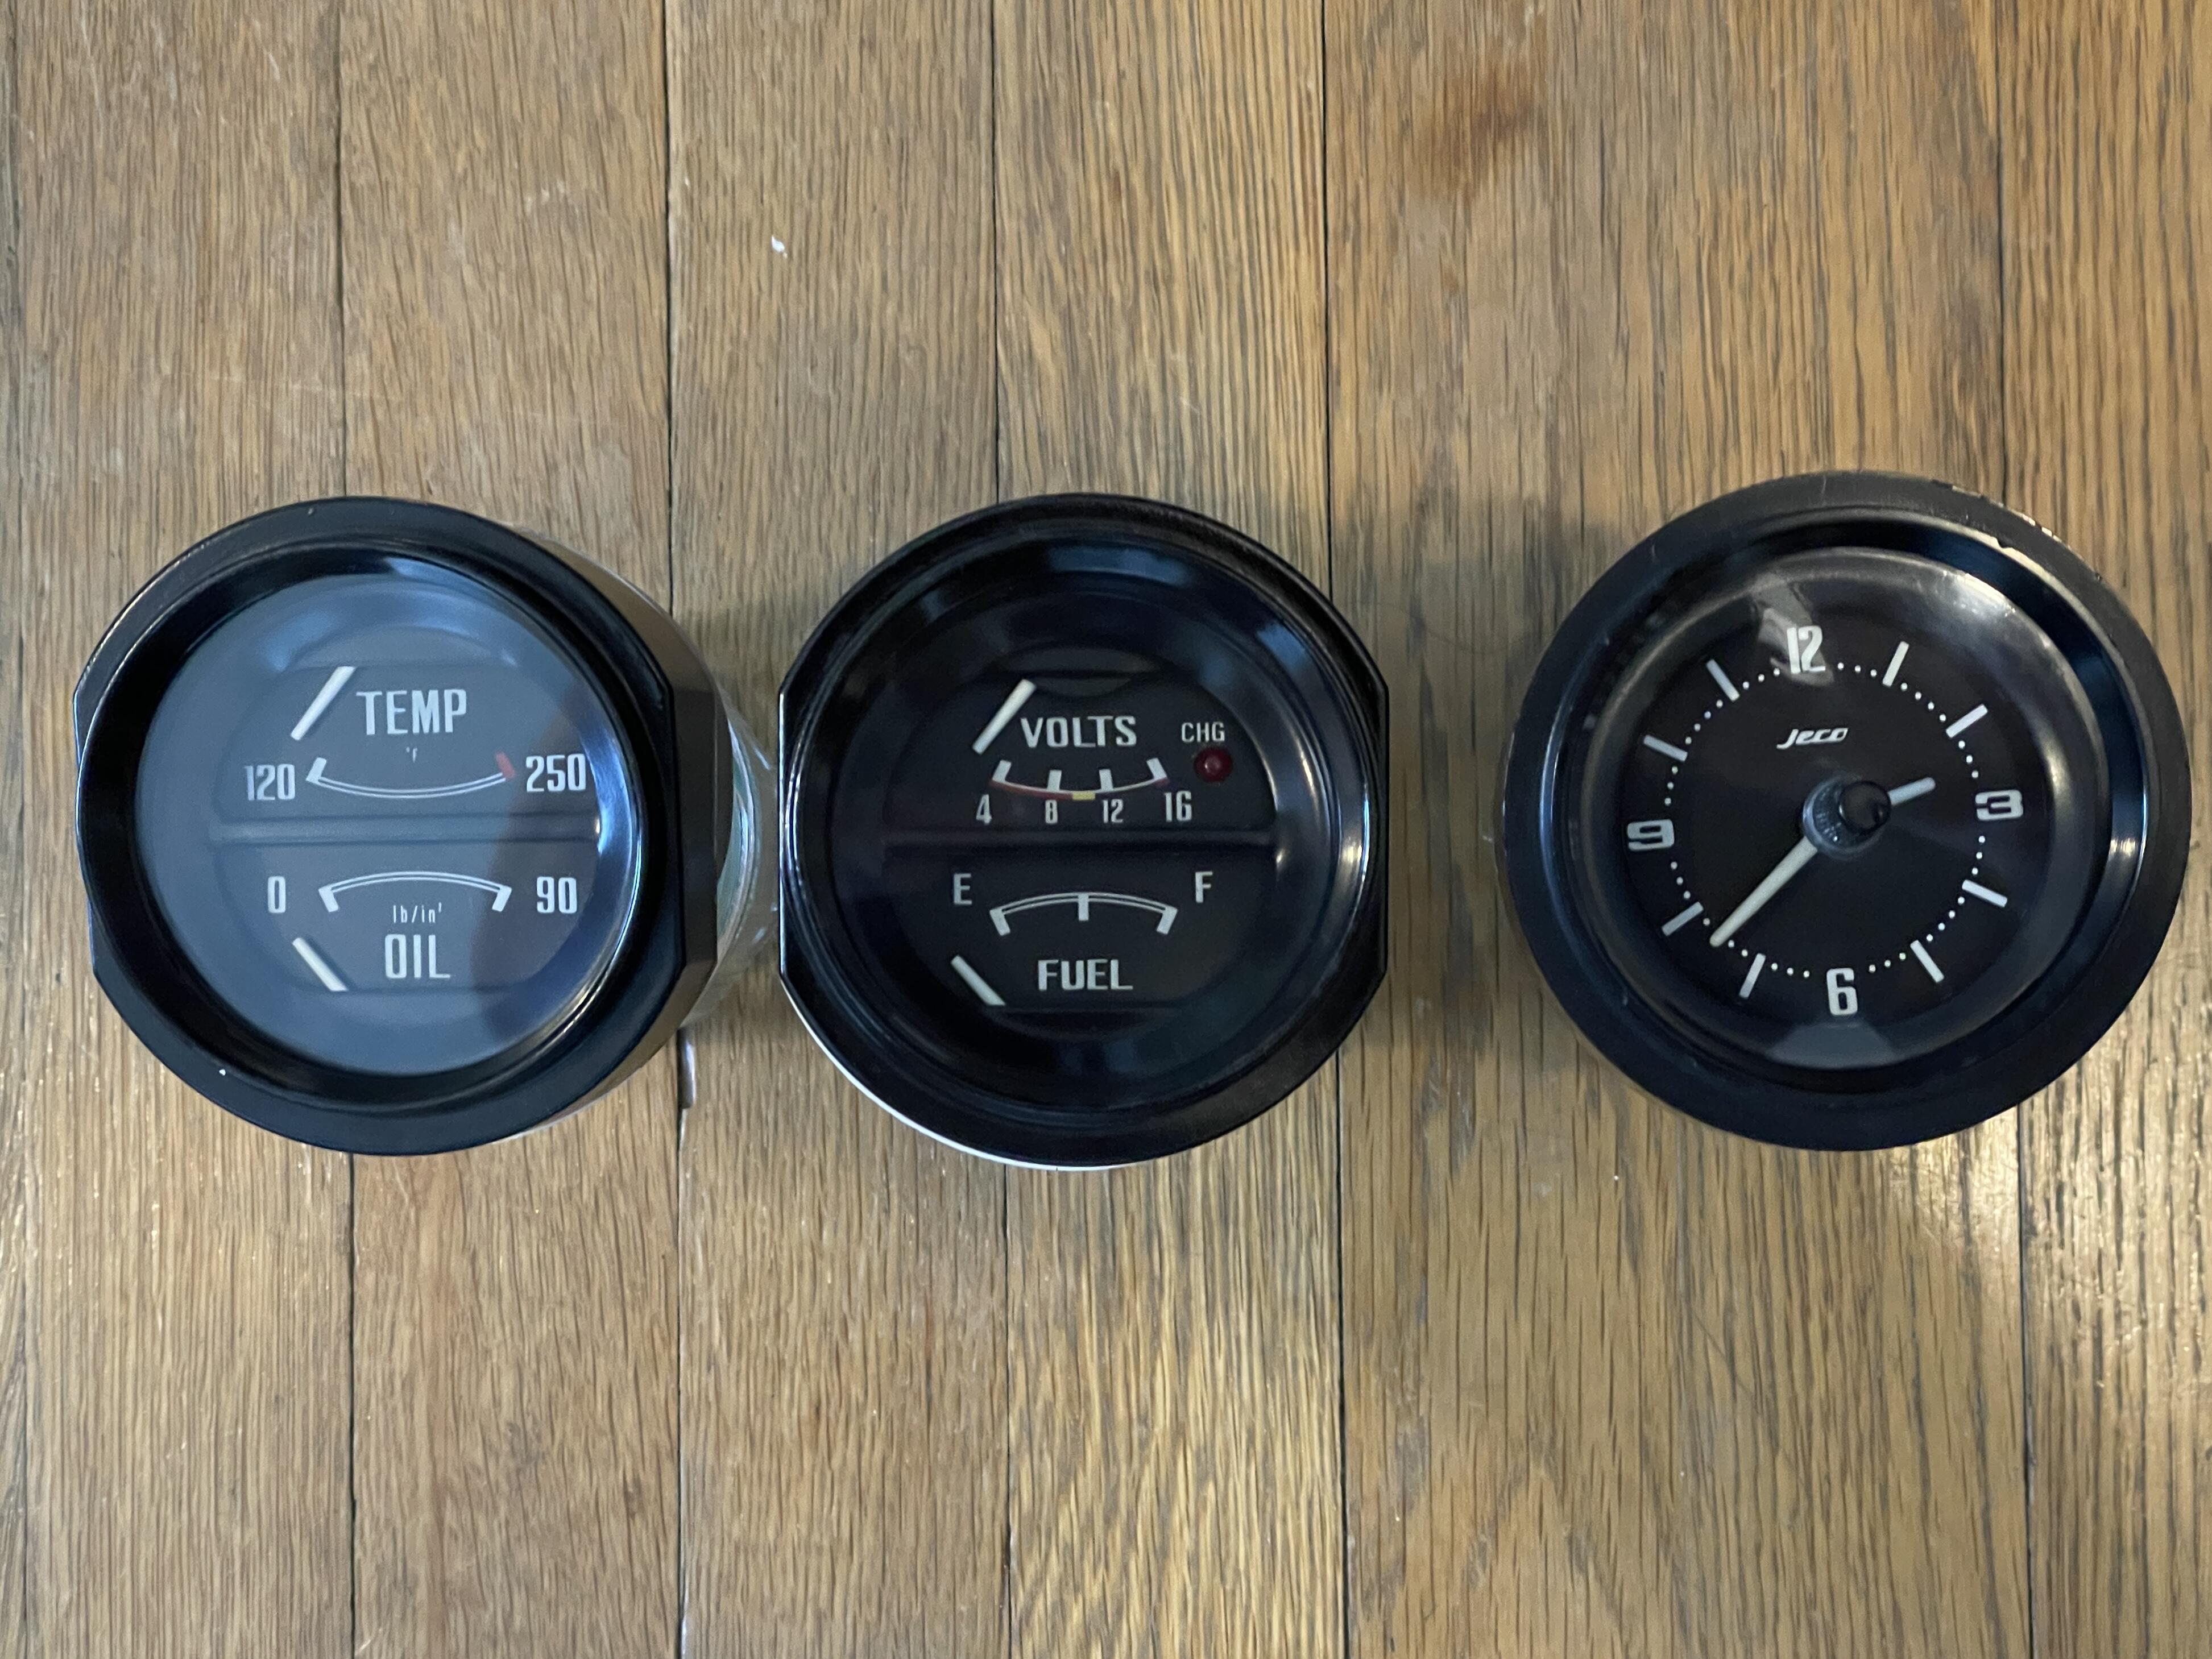
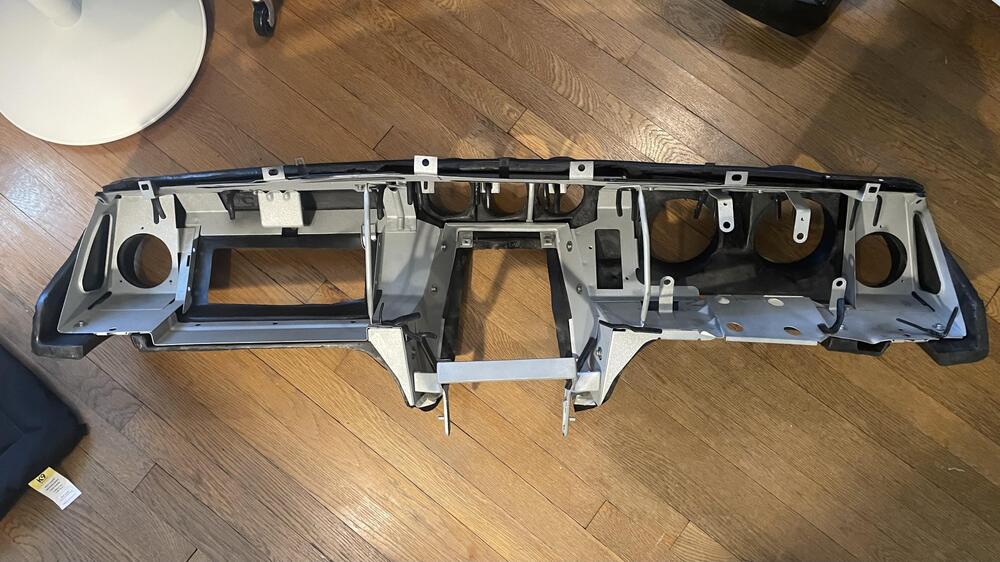
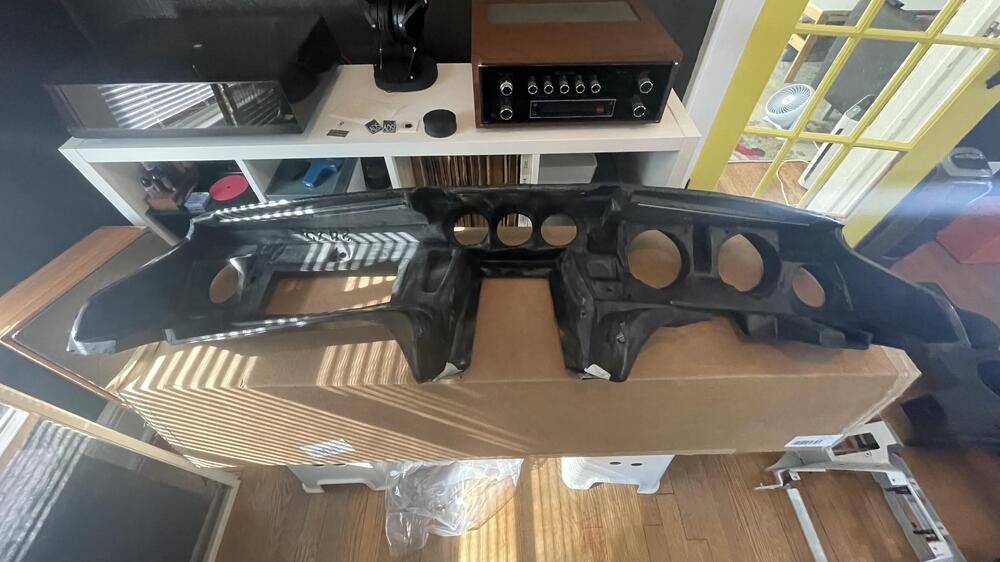
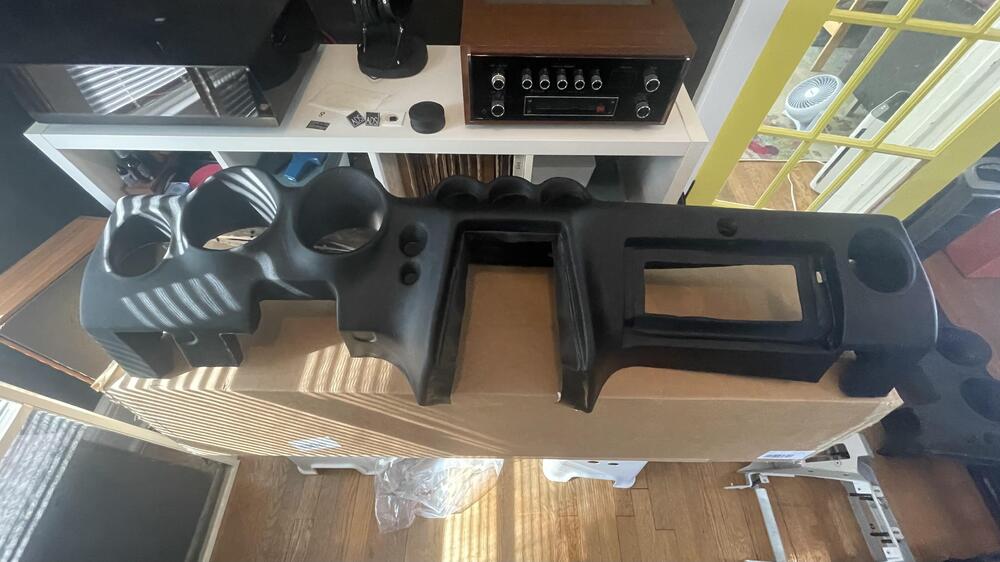
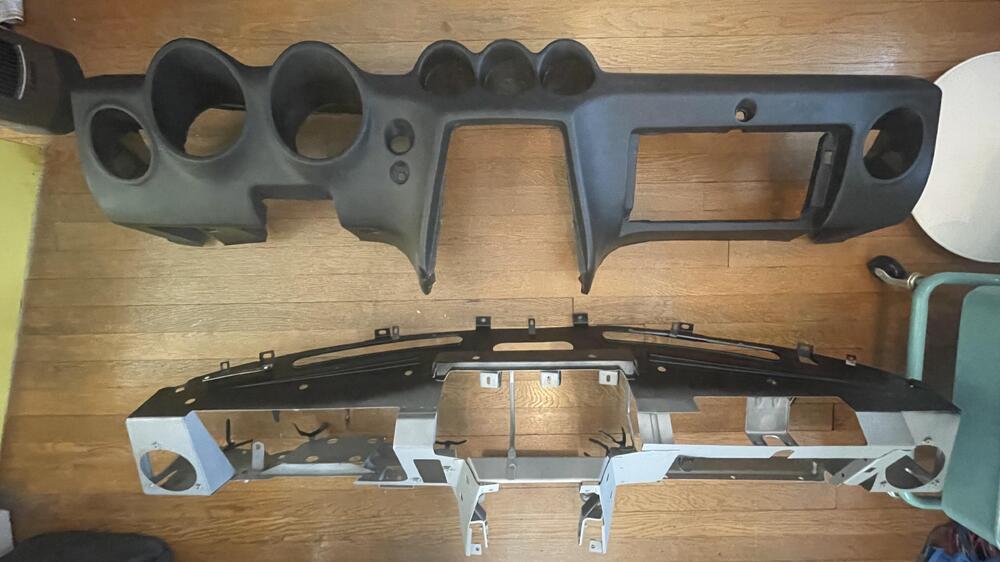
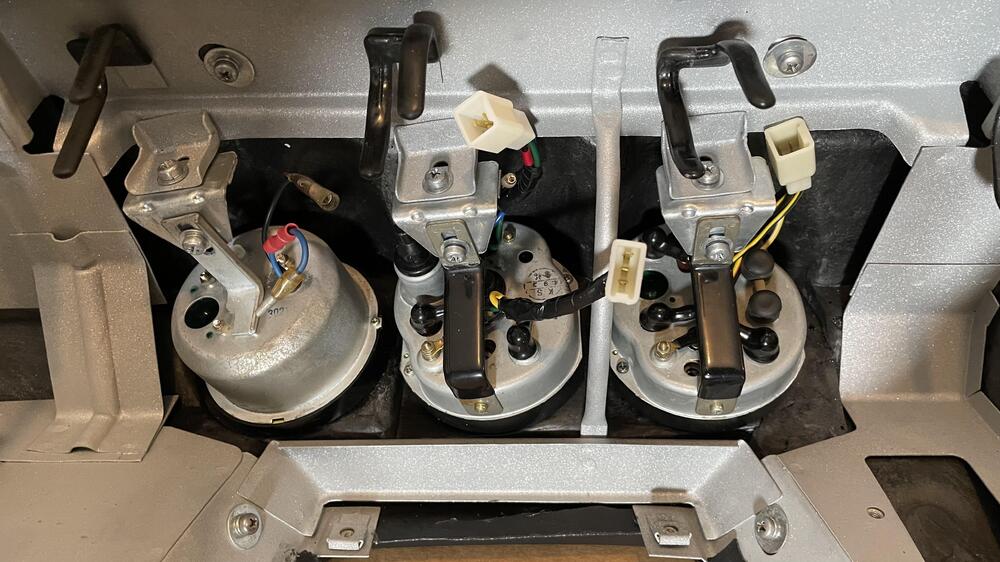
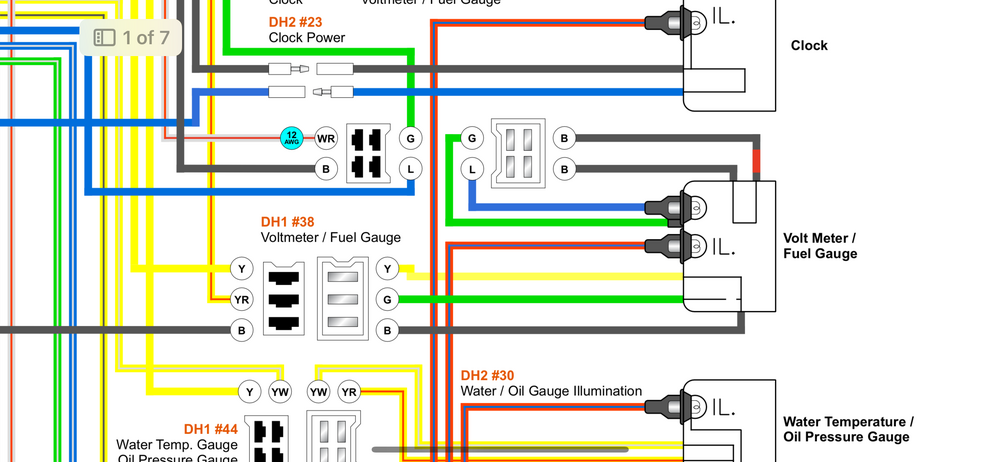
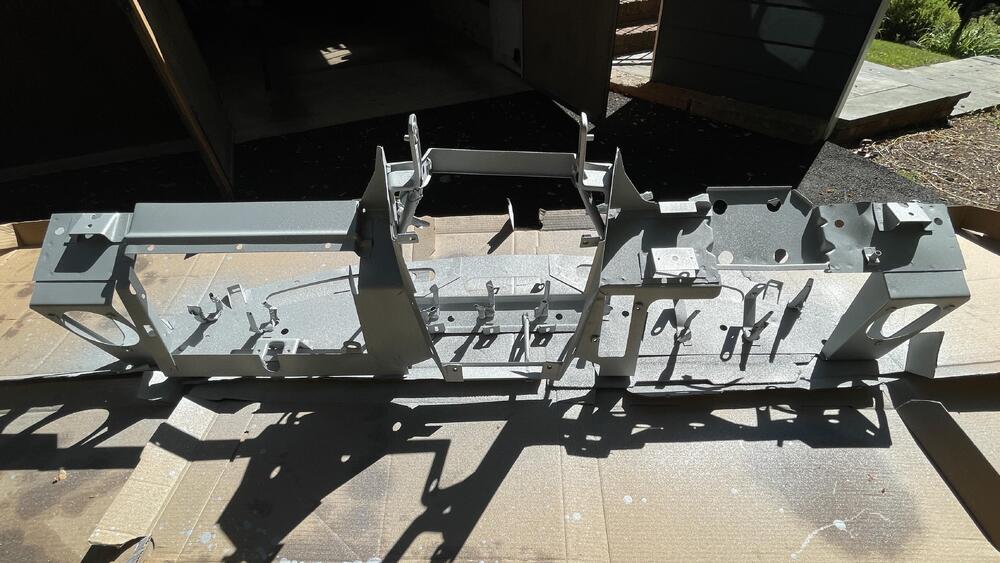
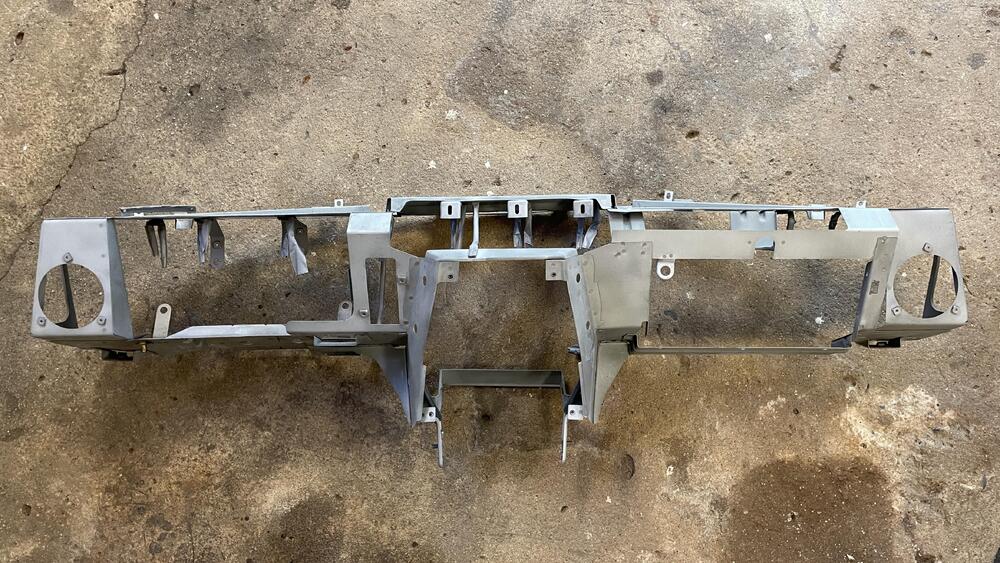
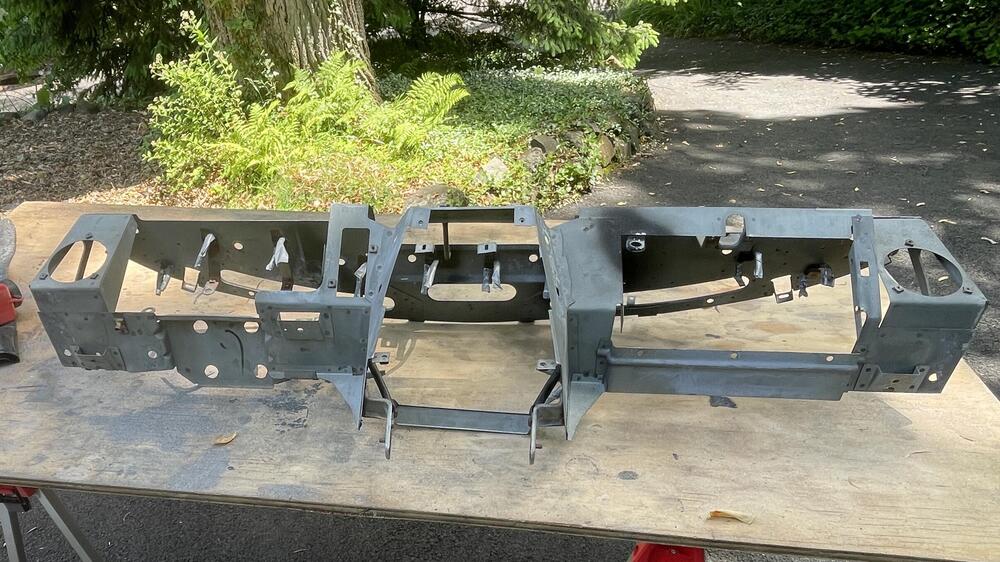
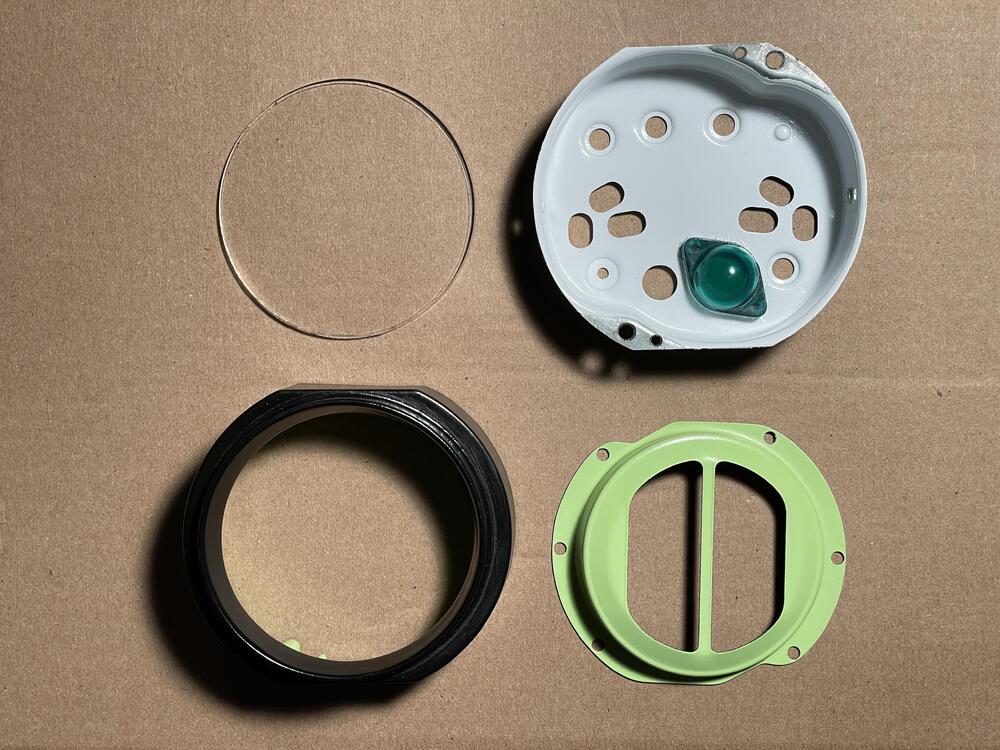
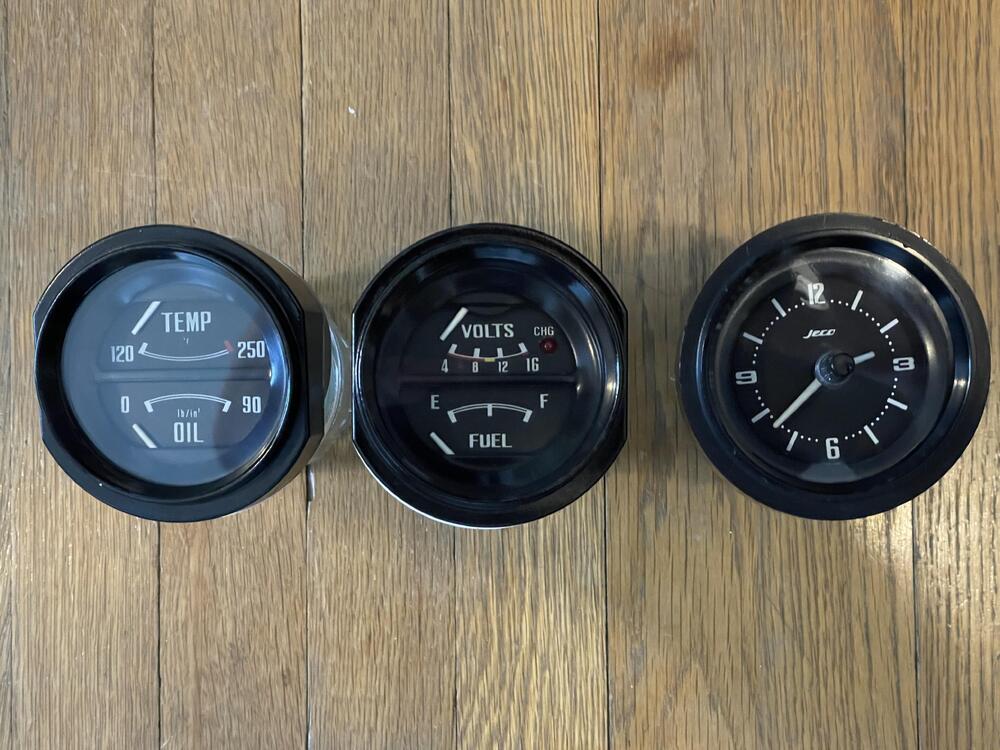
Side quest: I’ve started assembling the dashboard. Originally I had intended to “restore” the dash I had, but after wasting a ton of time and money trying to replicate the texture (which I did figure out how to do pretty well) I realized that my dash isn’t even original. It’s one of those ABS replicas. The replicas, while pretty true to the original, have a completely different grain pattern (droplet) than the original vinyl (hair cell). The ABS plastic is really easy to work, but it’s nearly impossible to find a compound that can accept an impression AND adheres to the ABS well. Add time under the sun magnified by the windshield and I had very little confidence of success. So I broke down and bought a replacement from Vintage Dashes. What tipped me over was reading that they’ve done a ton of work to match the OEM vinyl and the little details that changed from one year to the next. It’s pretty nice! I do wish the VIN plate fit over it a little better and they had left material to wrap around the bottom edges, but otherwise no complaints on fit or finish. The frame was in pretty nice shape after I ripped it all apart. I sand blasted it in the driveway and gave it a coat of cold galvanizing spray to promote conductivity and keep the rust away. The top got a coat of satin black like nearly every other part I’ve refinished for this car. The hardware sat in Goo Gone then 409 for a few hours, followed by a polish with some of my wife’s cuticle sticks. Good as (almost) new. Next comes the instruments and accessories, followed by the glove box, then the wiring. ••• Here’s a shot of the ‘75 voltage/fuel gauge in place for anyone who wants to do this mod: It’s a pretty tight fit getting the light under the bracket from the ‘73 Amp/Fuel gauge, so I put a bullet connector on the wire for the light in case I ever need to change the bulb. I really hope not because it might mean pulling the gauge out. This is how I wired it up. The green wires and black & red wire go to the fuse box. The blue wire goes to the alternator. The yellow wire goes to the fuel tank sending unit. The black wires go to ground. I kept the wires on the harness the same colors as the ‘73 rather than matching them to the ‘75. I go into this in more detail in my wiring thread.
-
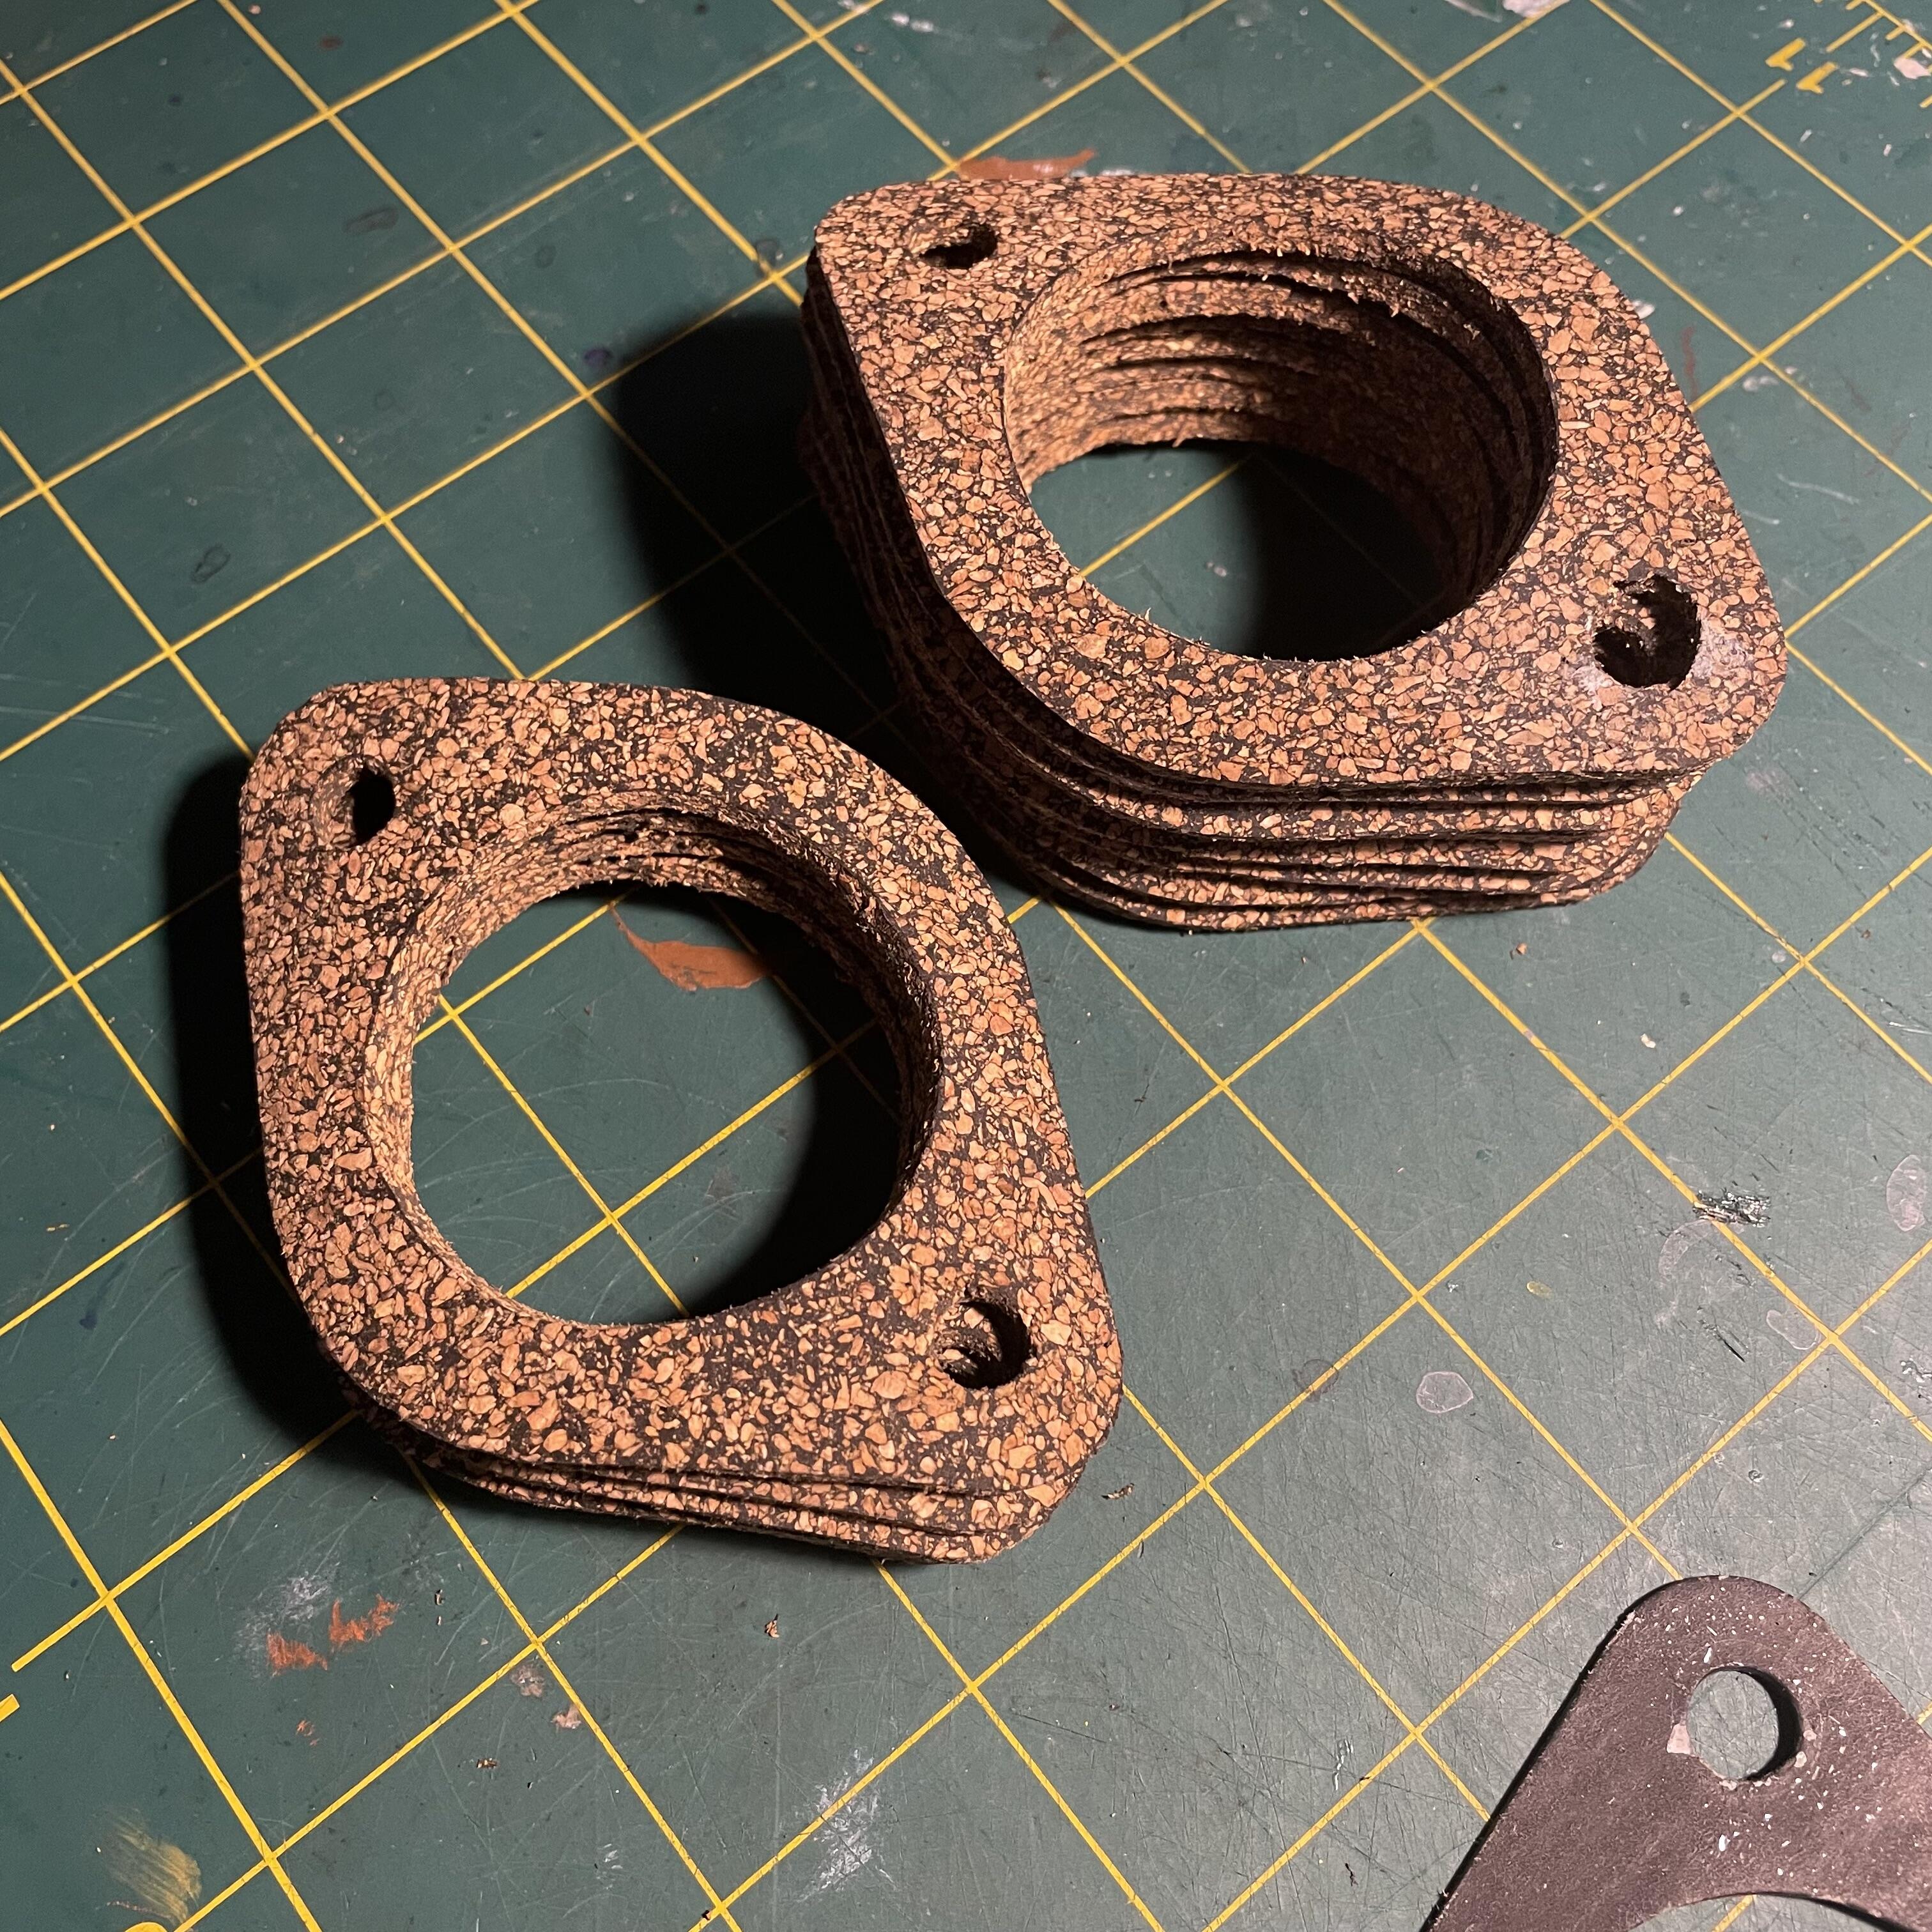
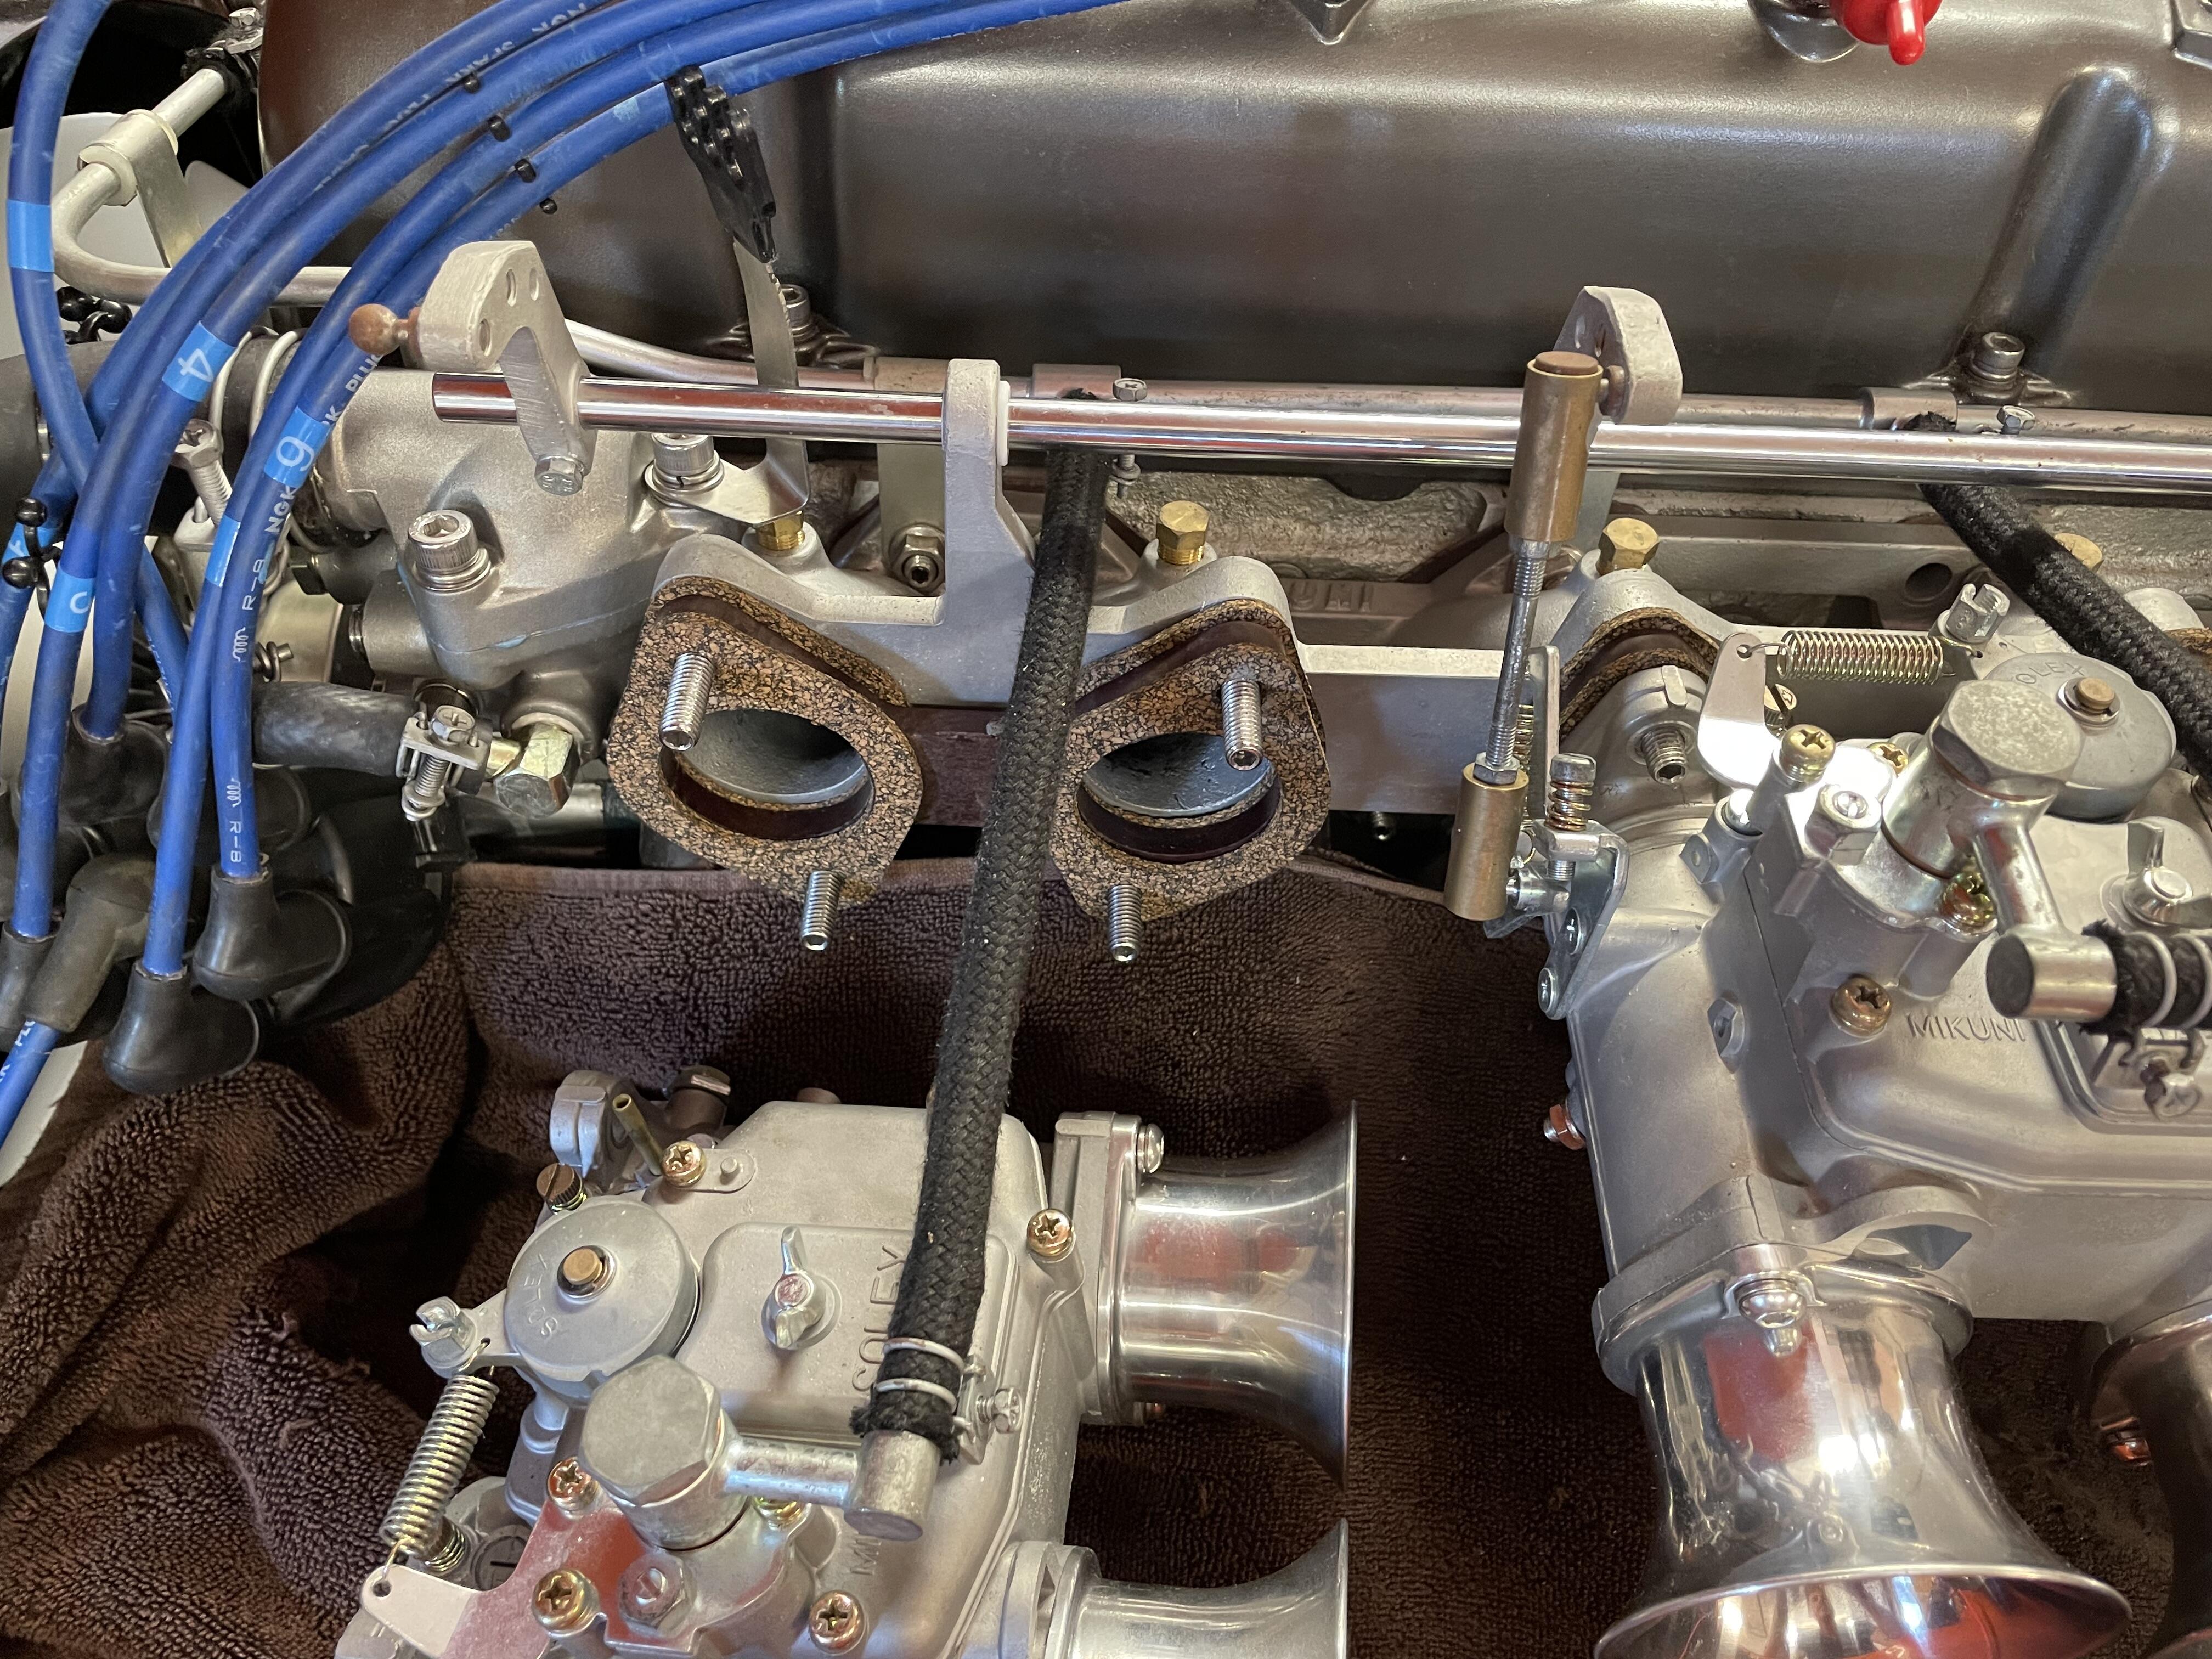
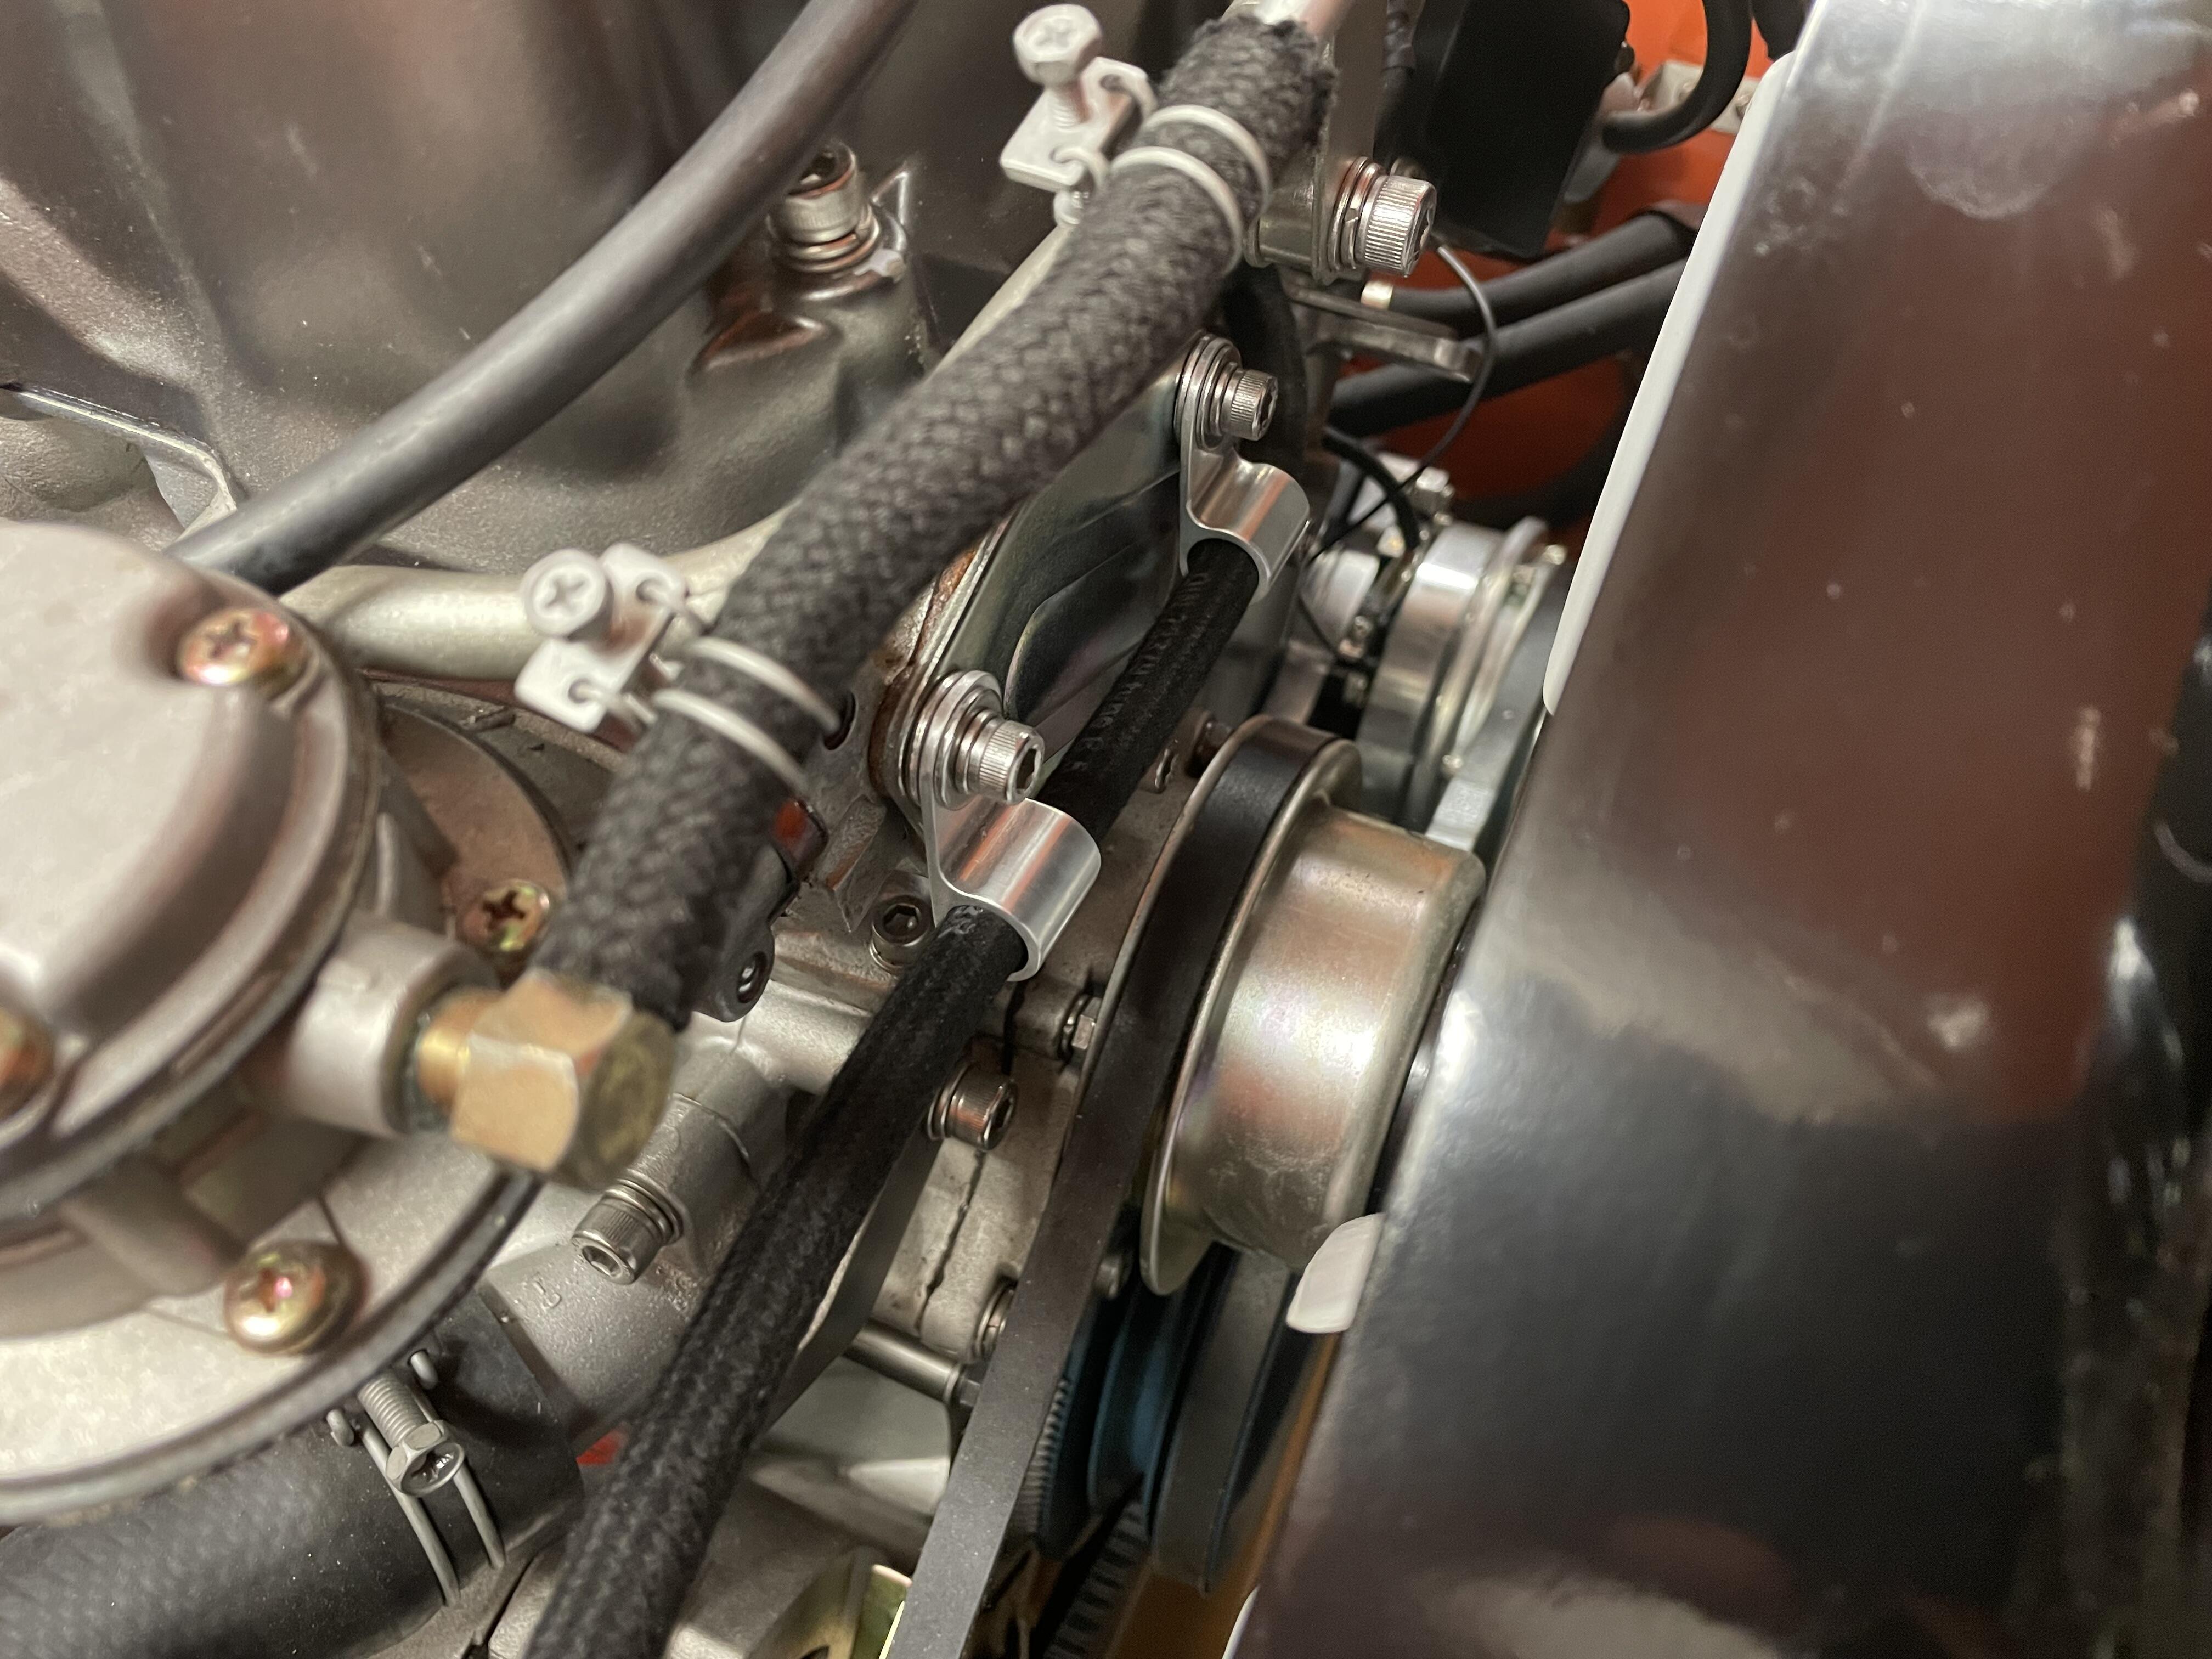
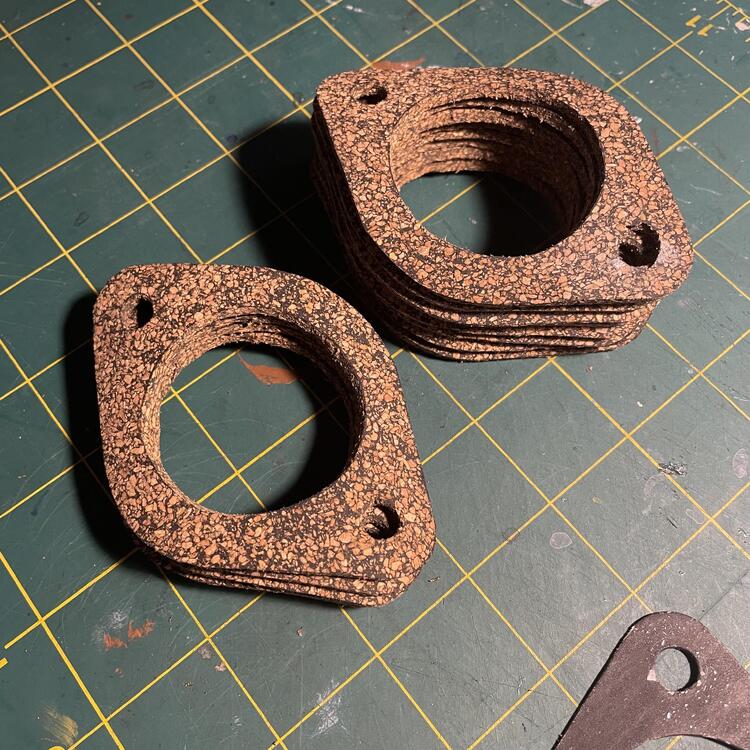
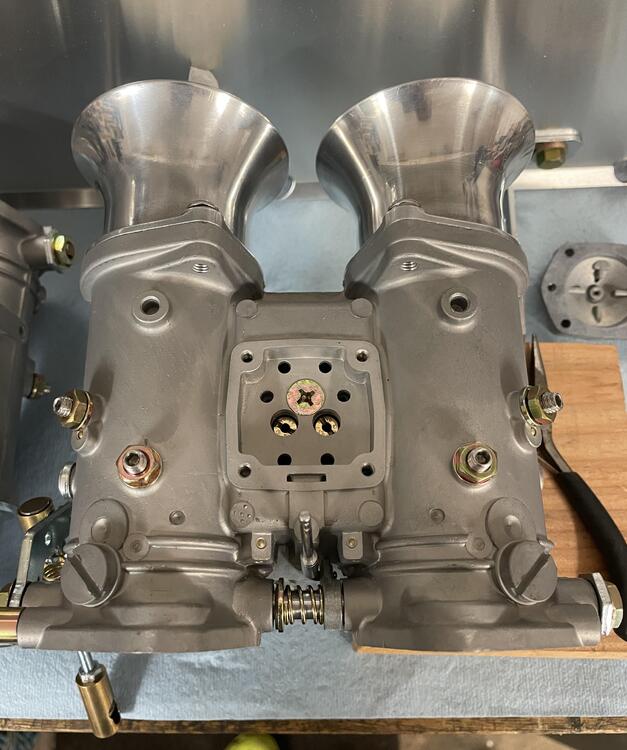
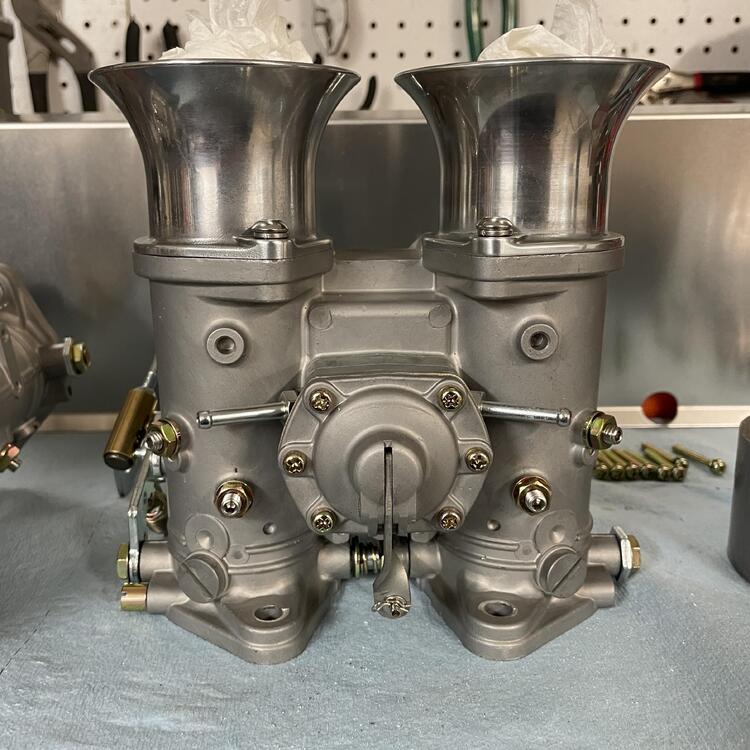
A quick little project while I wait for parts to arrive. I wasn’t happy with the clearance between my throttle linkage on the no. 1 carb and the thermostat, so I ditched the EMPI paper gaskets in favor of rubberized cork. Super basic. I used a roll of Mahle Motorsport JV123 gasket material, which is 1/8” thick (3.175mm), a template, and a pile of x-actor blades. The clearance is about double what it was. Done and done. Looks nicer, too.

-
$#!¥ Doors are too high. %@¢#

-
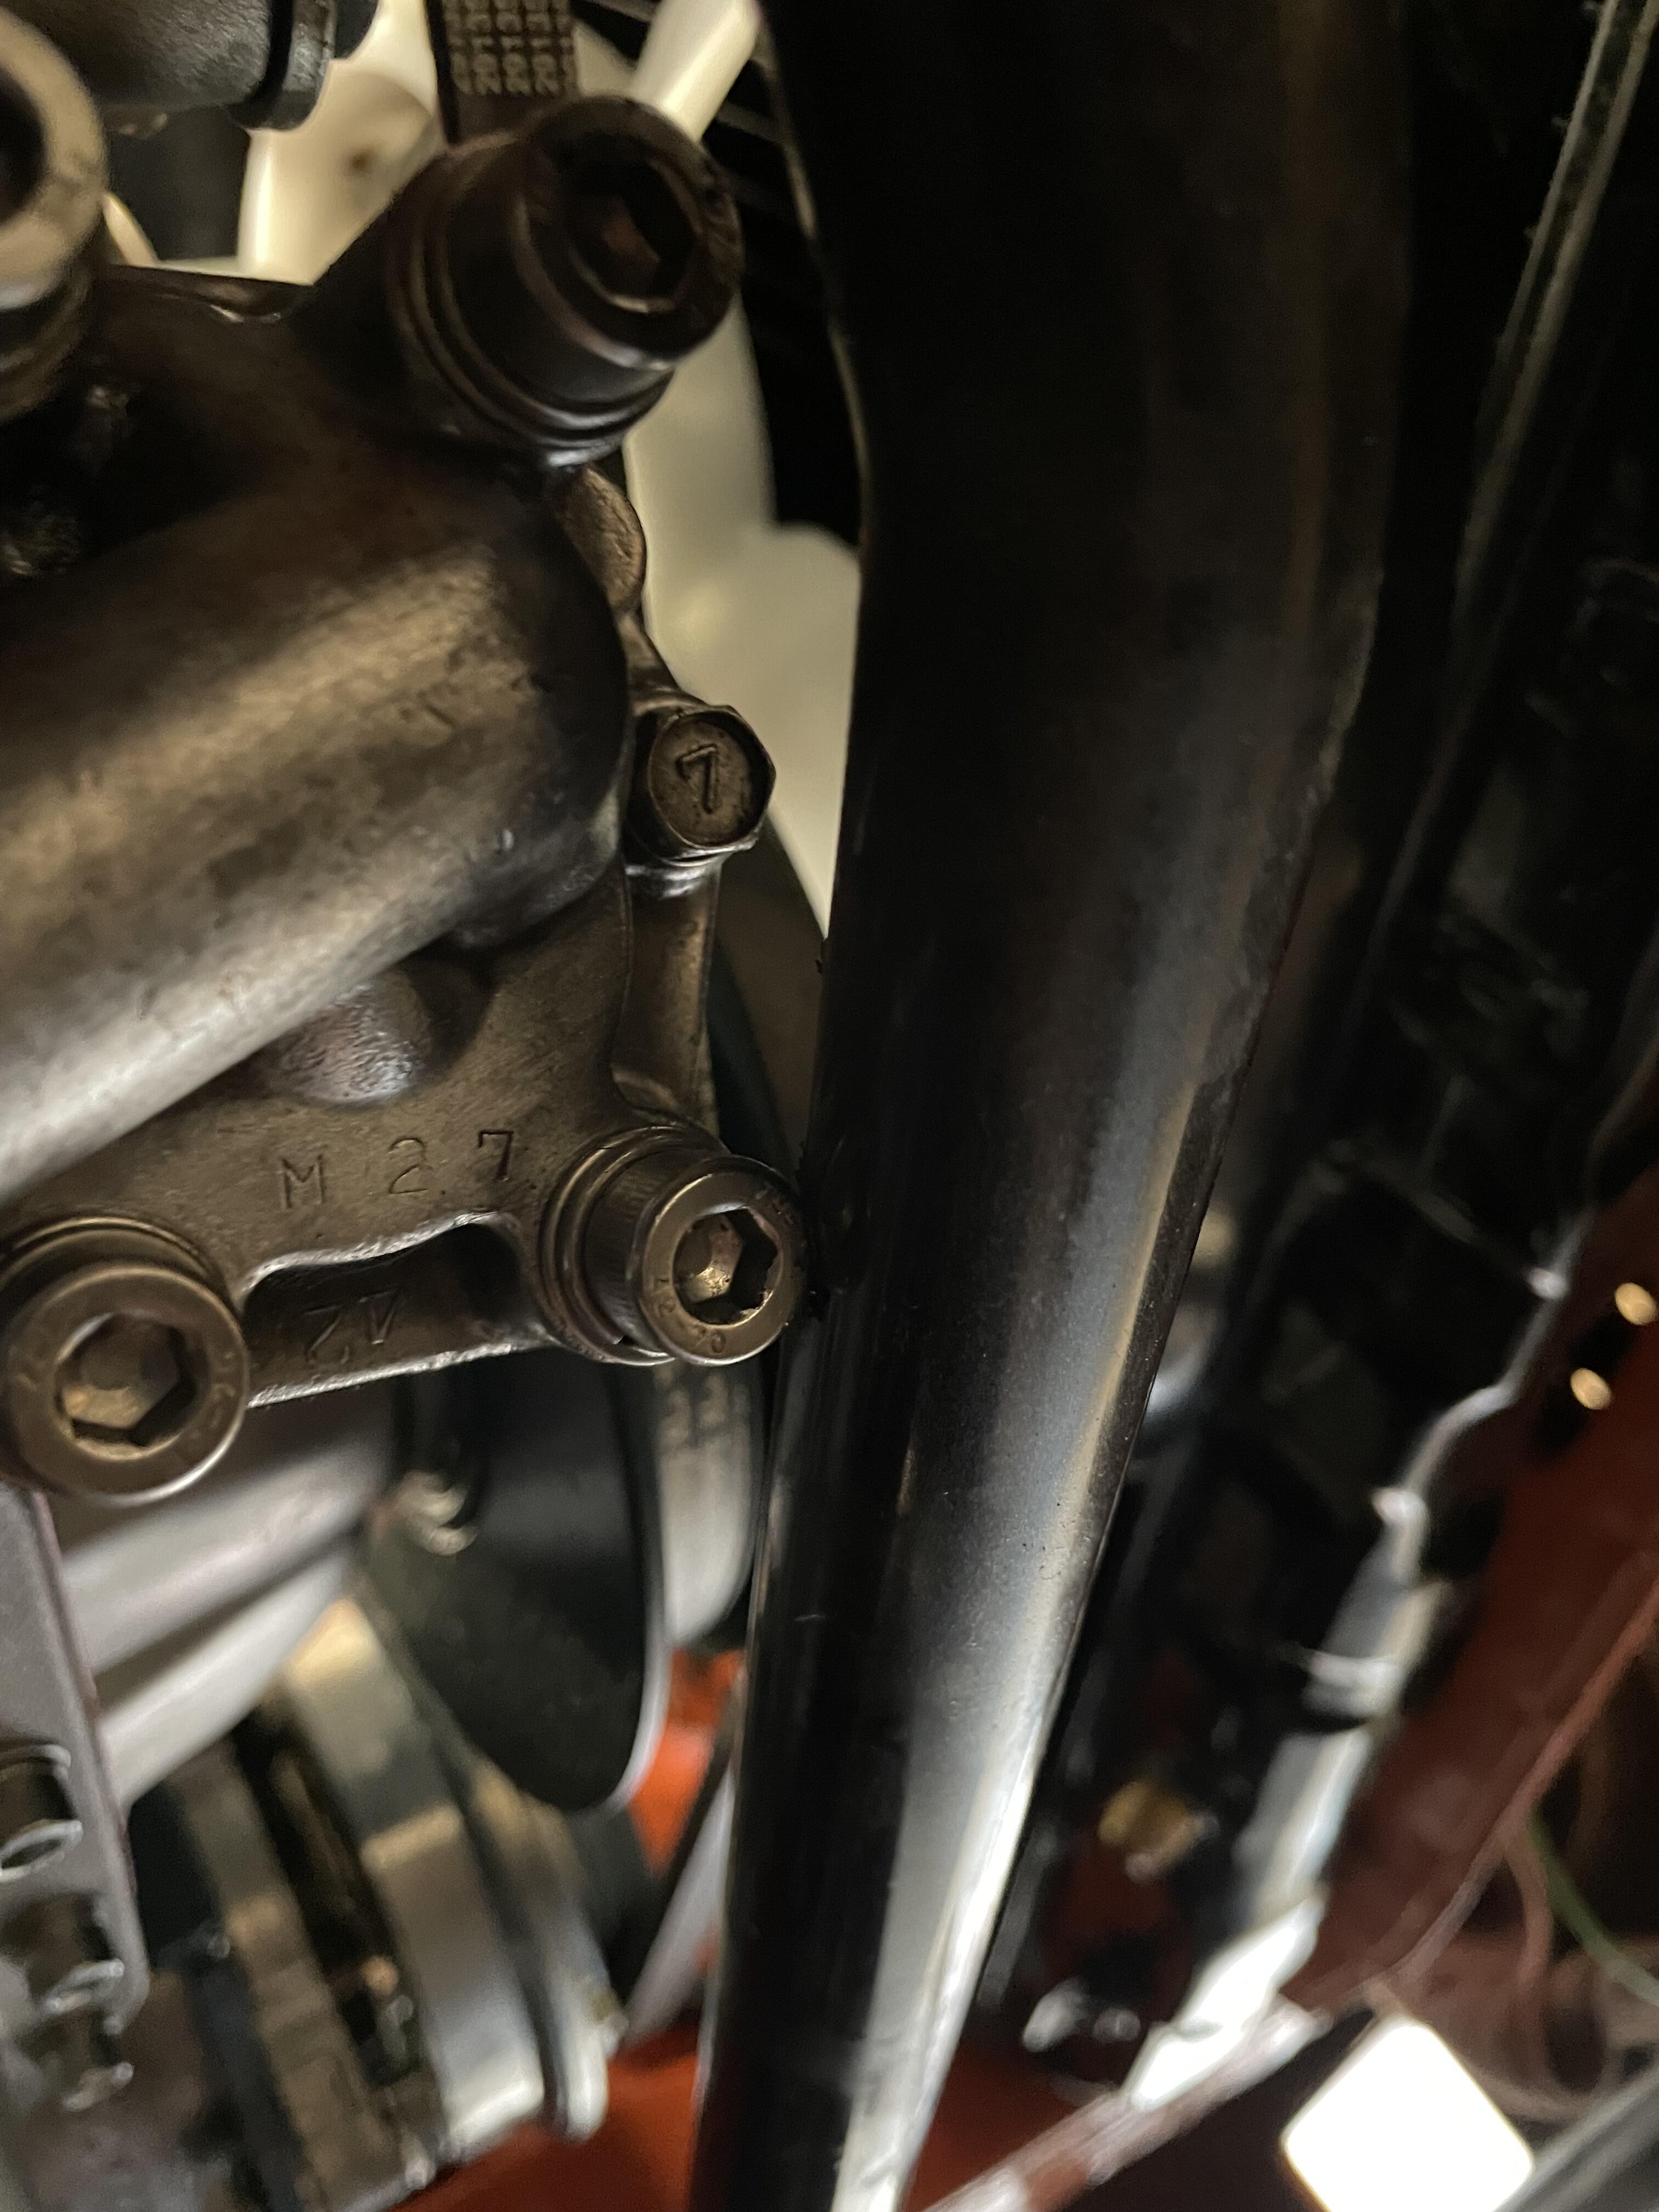
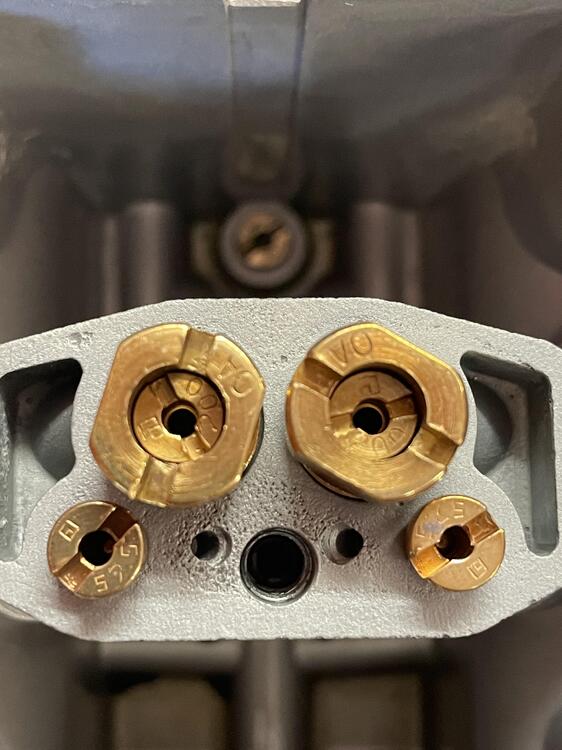
I’ve identified four issues that need to be addressed before I can start the car again: The timing being 40° advanced is due to the oil pump shaft being off by one tooth. To fix it I’m going to have pull the pump off, and to do that I’m going to have to pull the front sway bar because it’s hitting the pump bolts. I’ll be changing that hardware. Once I get the timing right I can address my insanely rich mixture (last picture), but before that I need to check my head bolt torque because I have a leak (not pictured). It could be the valve cover, but I want to check the rocker arm adjustment, so I’ll do it all in one shot.

-
It’s alive… sort of. I’ve been making little tweaks to try to get base timing dialed in, but there’s a lot out of whack right now and it’s a slow process. Today I checked the float levels, which were all at 12mm, set the idle speed adjustment screws and idle mixture/pilot screws to 1.5 turns, and primed the float chambers. After tweaking the throttle screws a bit it is starting pretty easily, but it’s rough as hell and the timing is out of whack (26 to 40° at various points). The fuel pressure is also too high because I had to pull my return lines off. They were starving the carbs the way I had them, so I’m going to have to rethink how I route that. I guess I know what I’m doing this week.

-
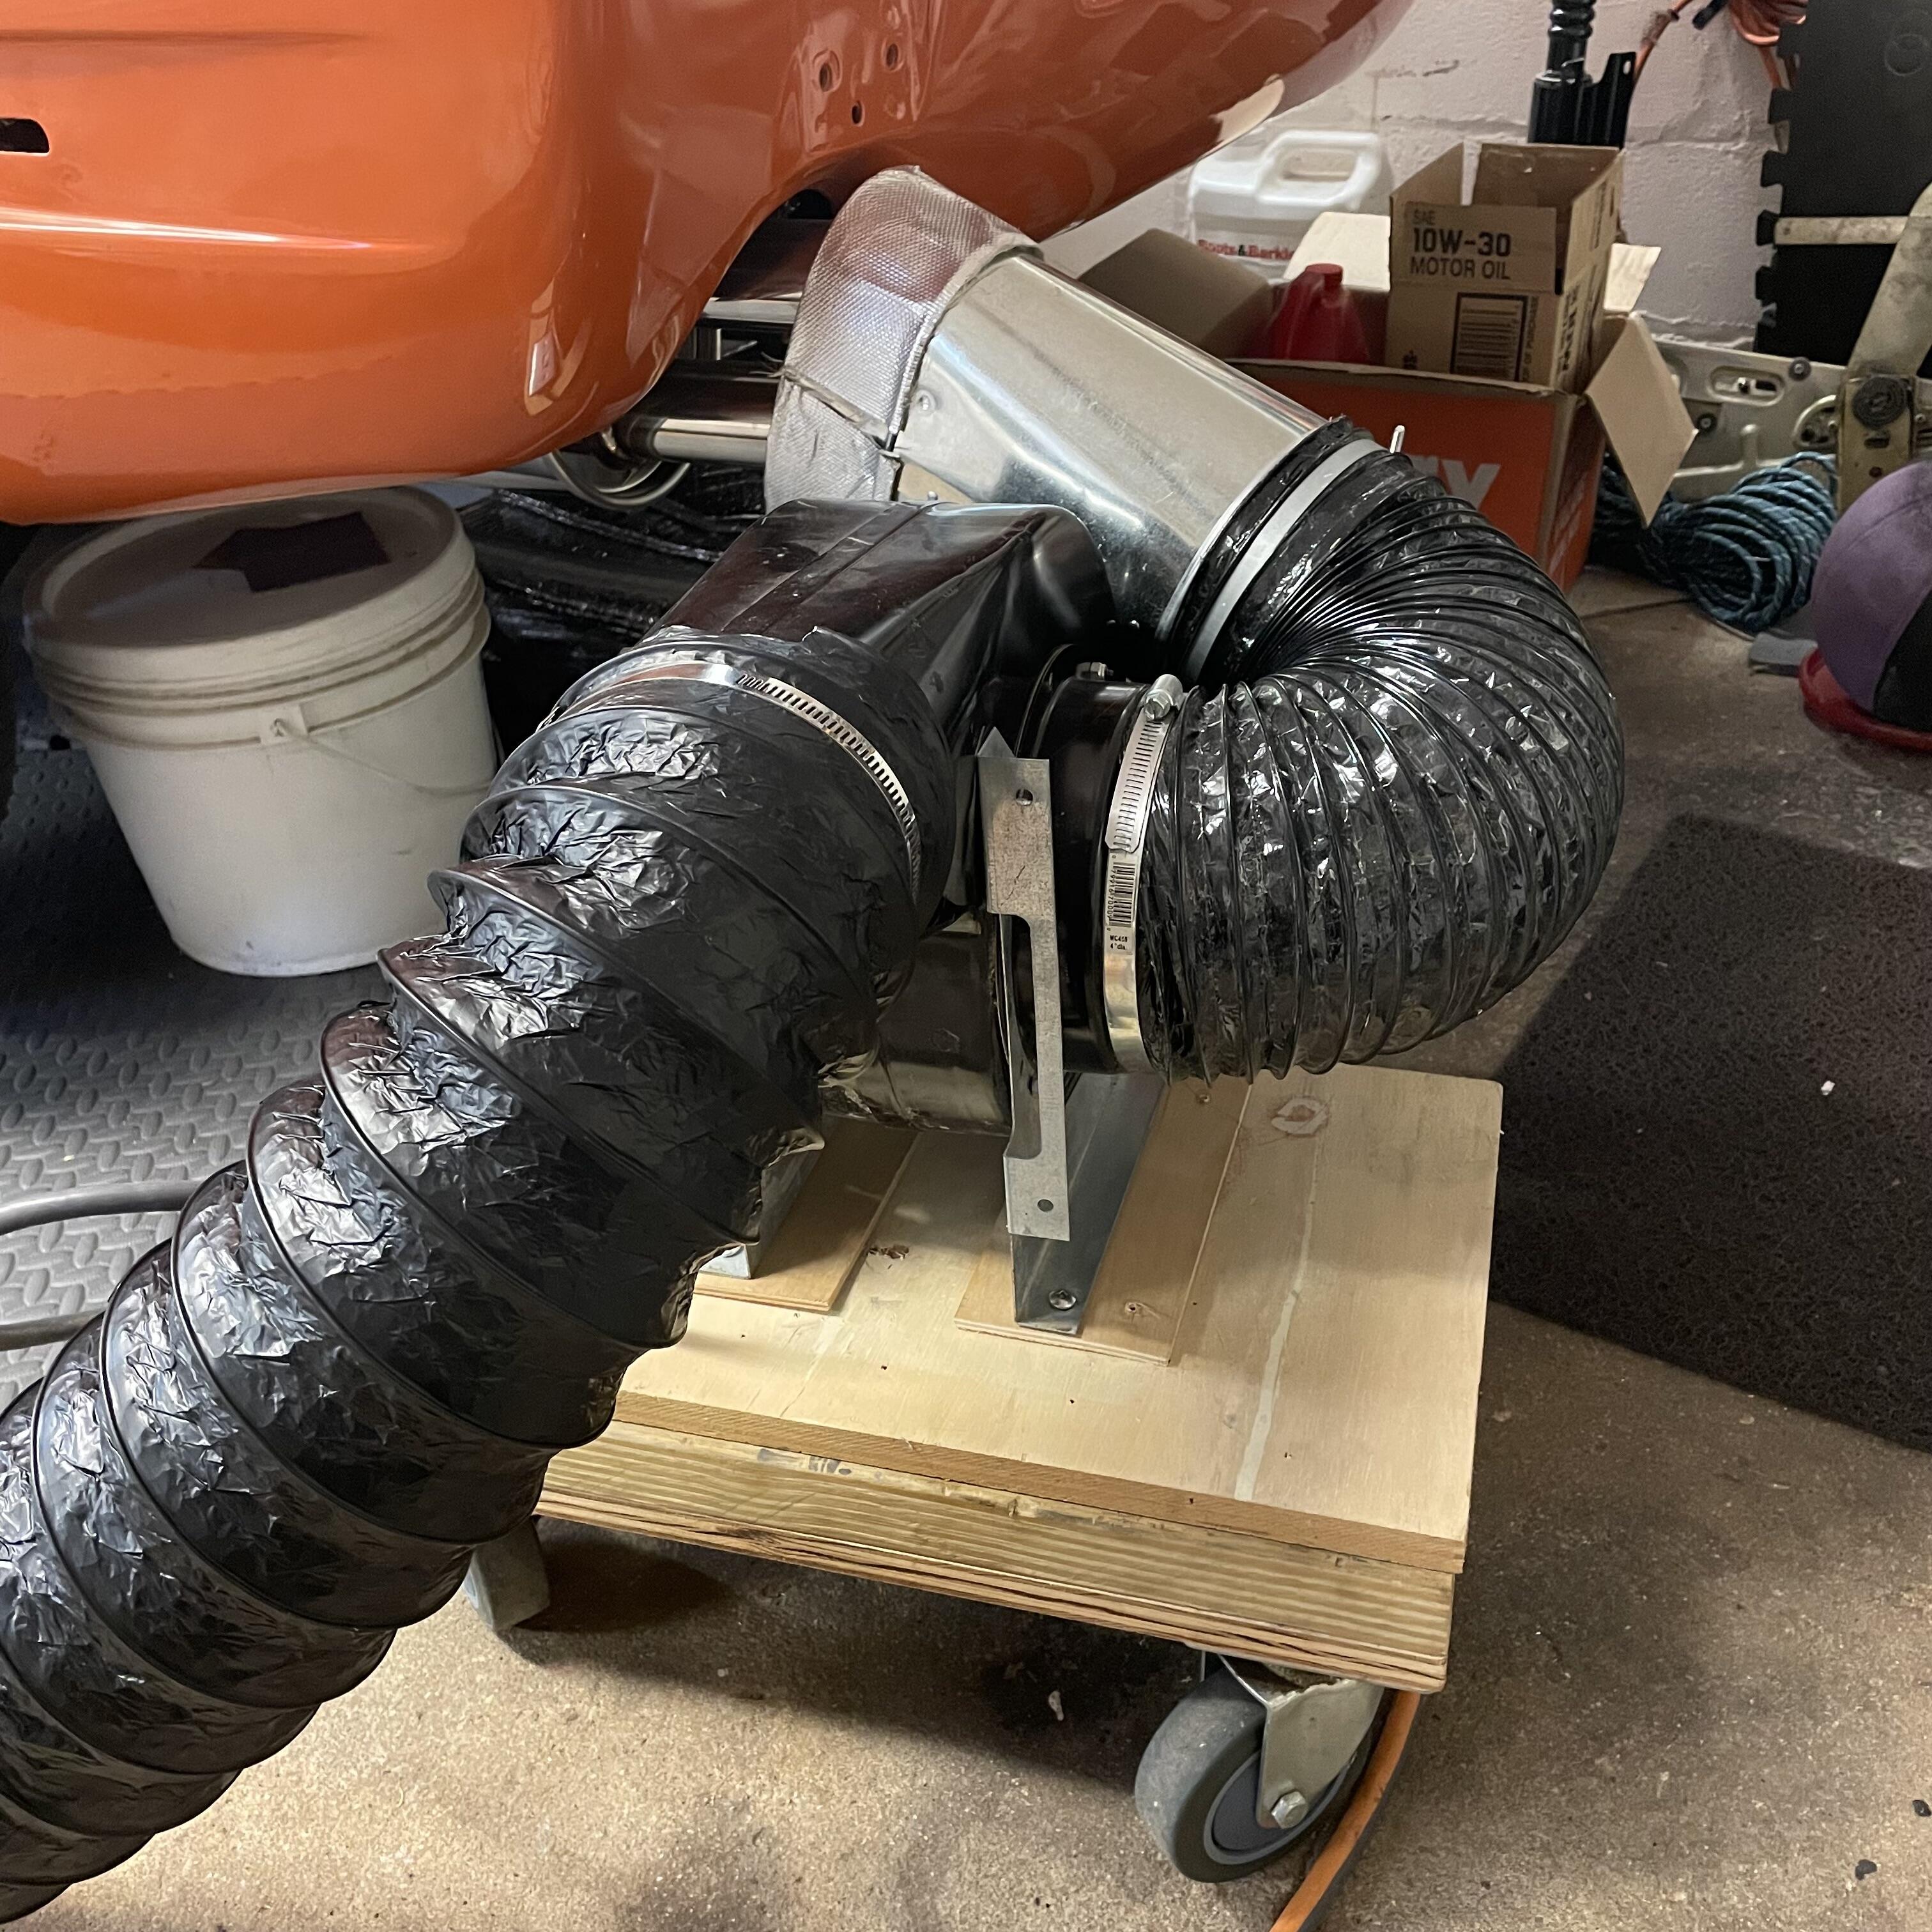
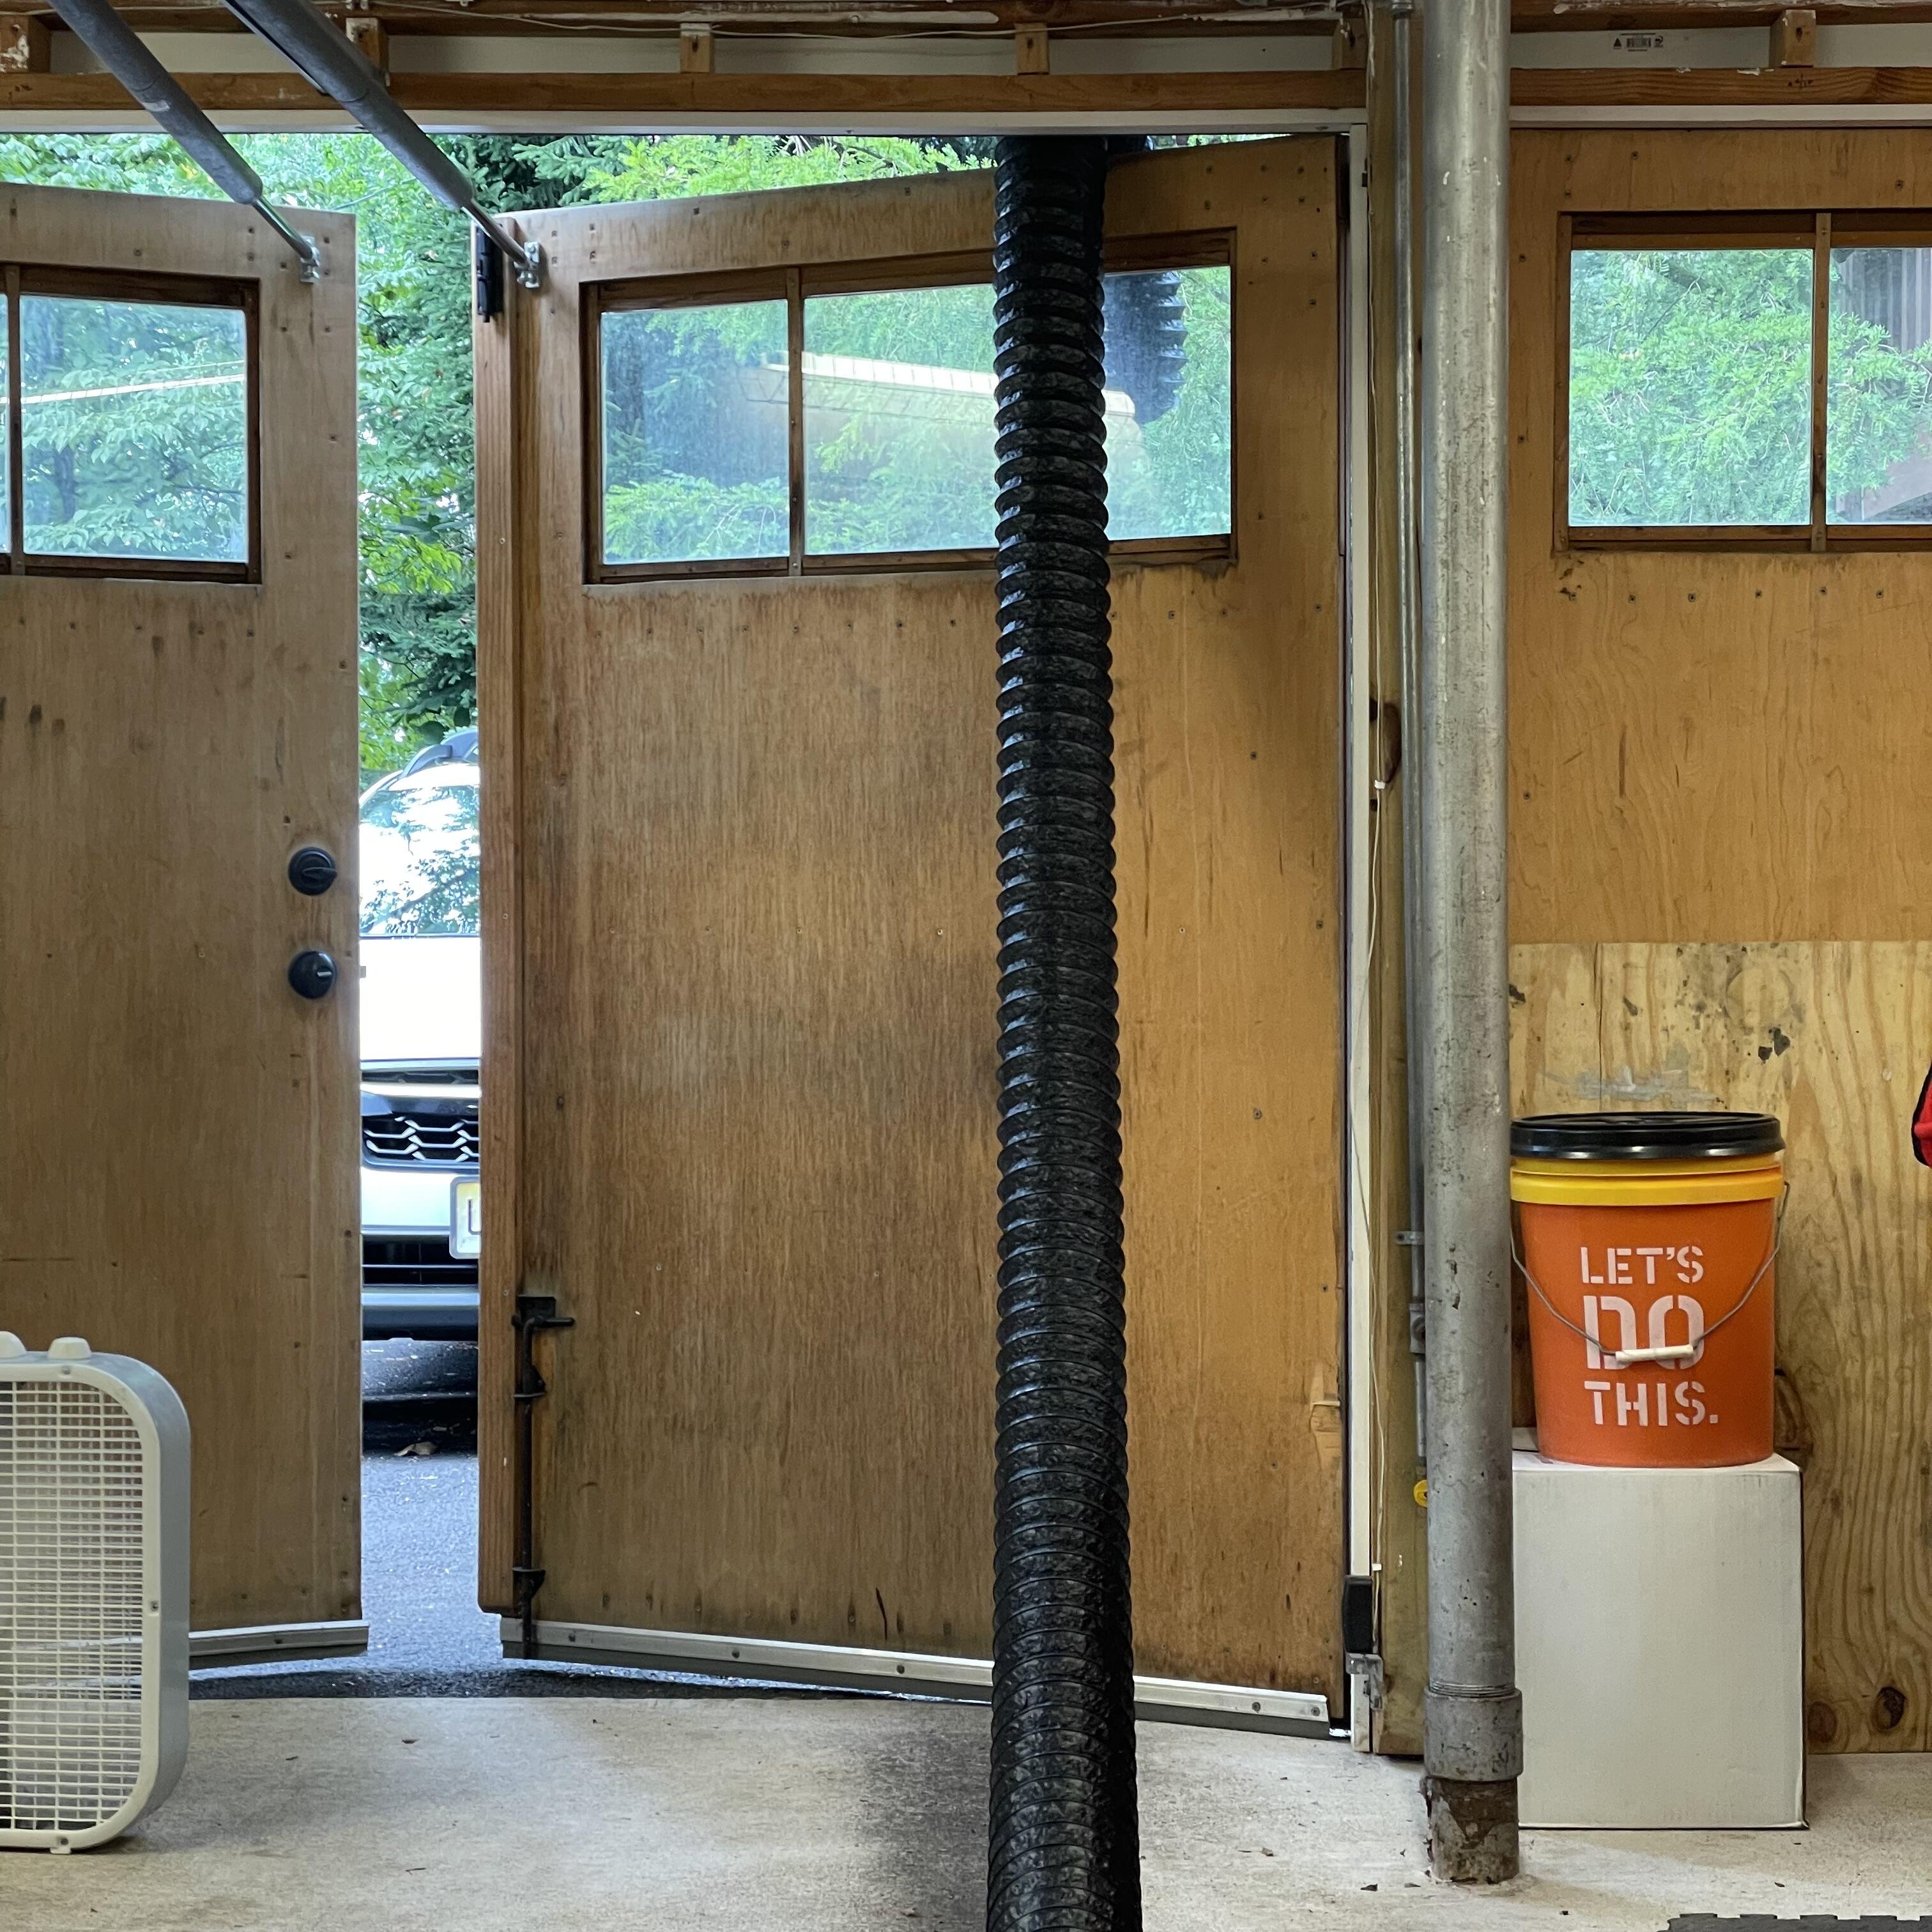
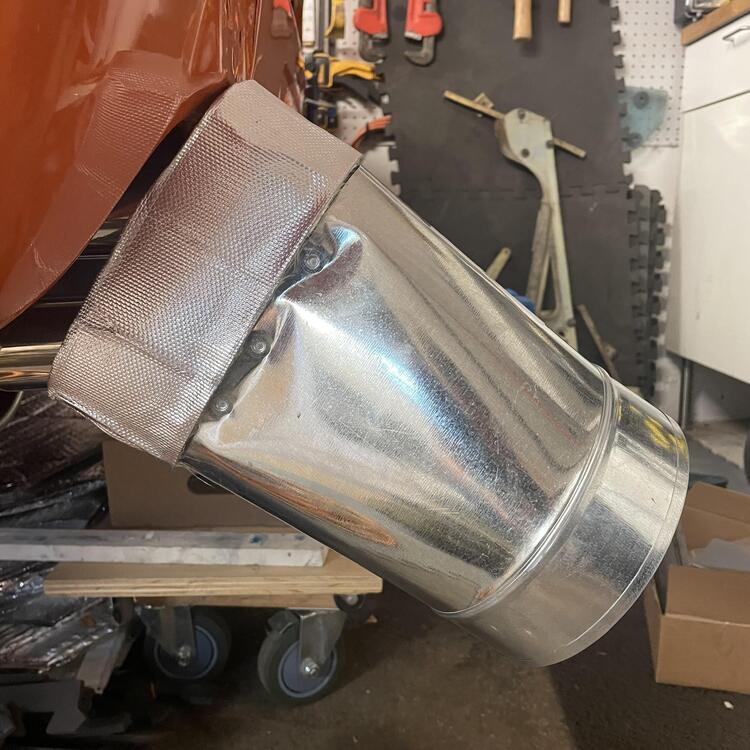
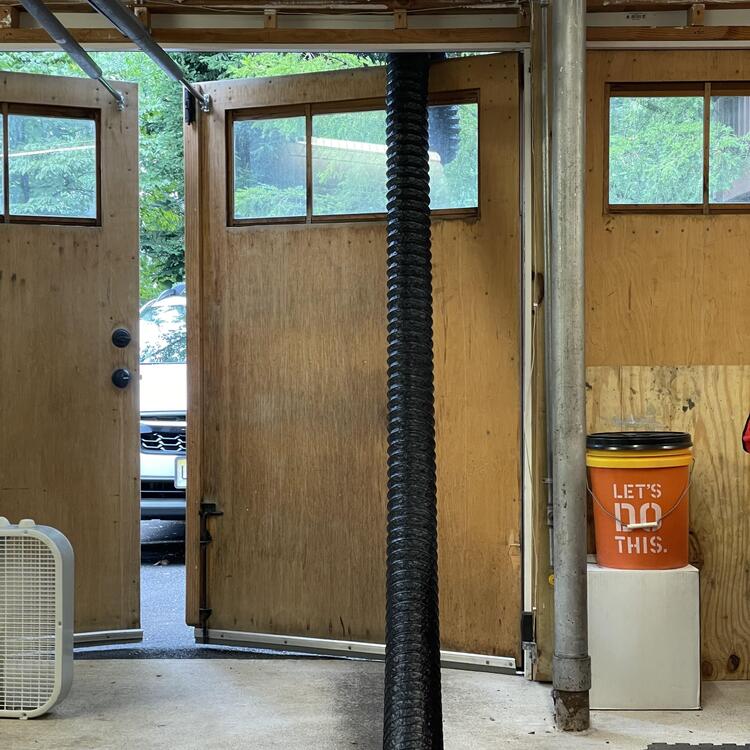
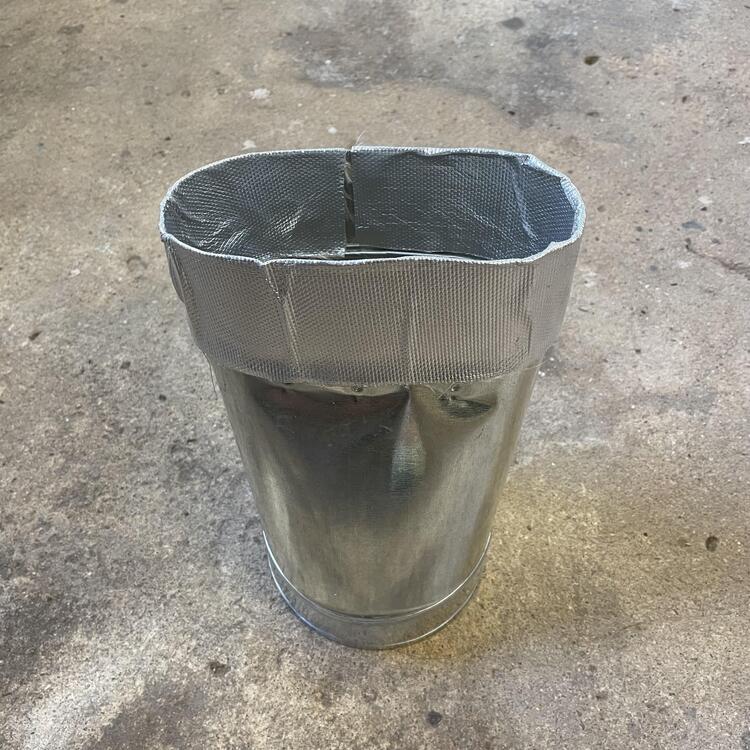
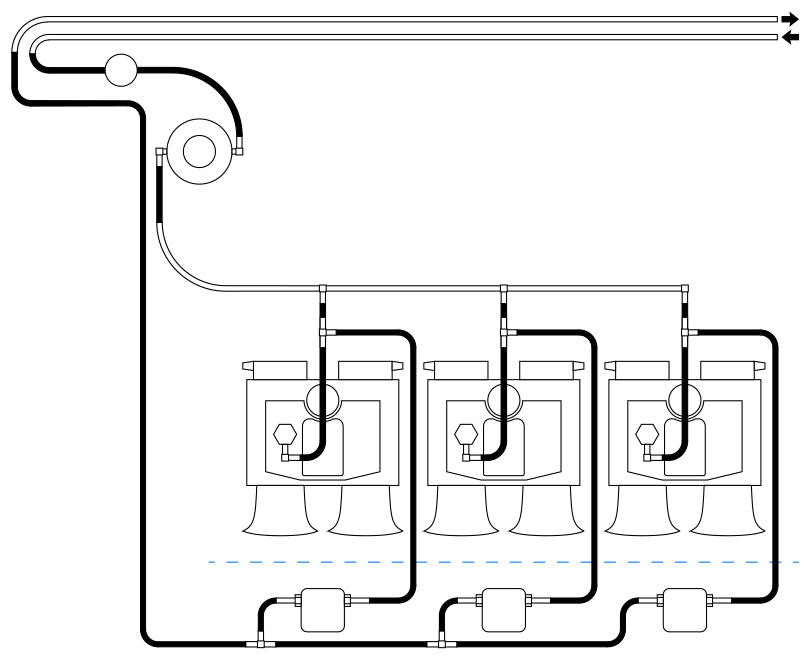
I made myself a little exhaust evacuation system so I can keep the car backed into the garage without gassing up my whole house. My in-laws recently refurbished their oven so they had a blower from an oven hood laying around. A piece of HVAC ducting with some scrap heat shield and some hose did the job. I do wish the fan in this thing was stronger, but if it’s not doing enough I’ll supplement it with a Vornado house fan under the back of the car blowing toward the front. 🤞🏻


-
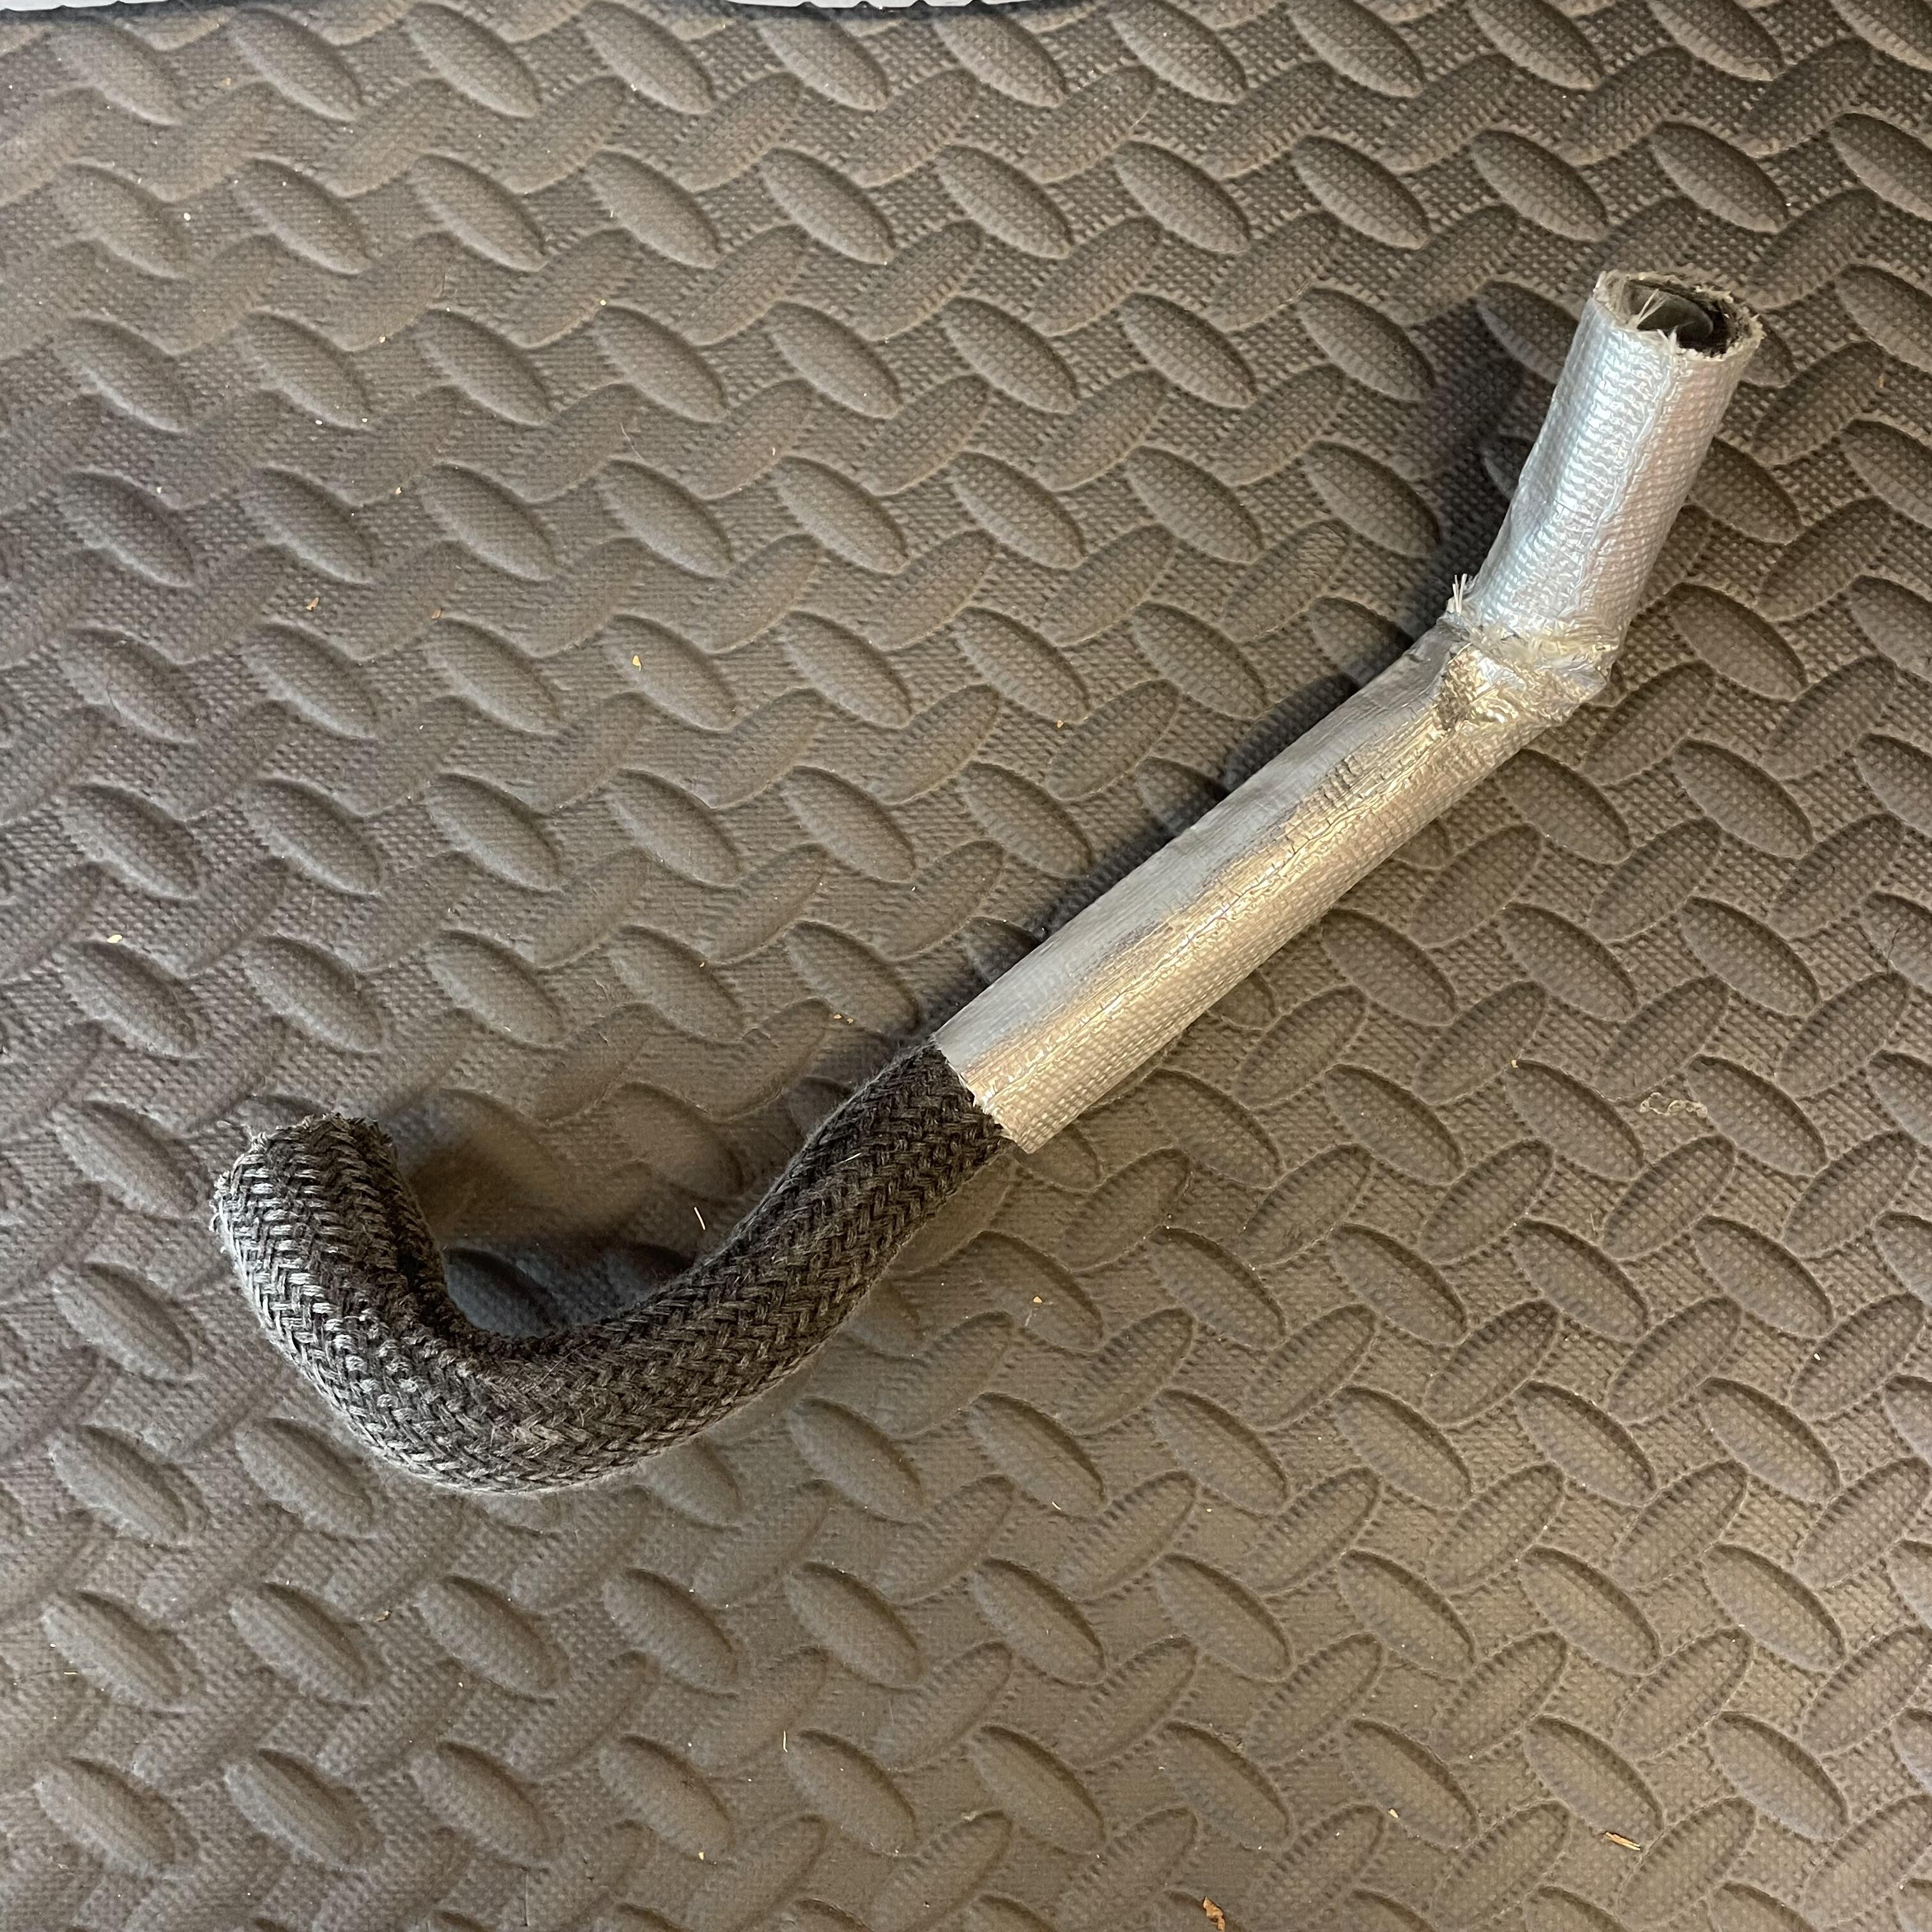
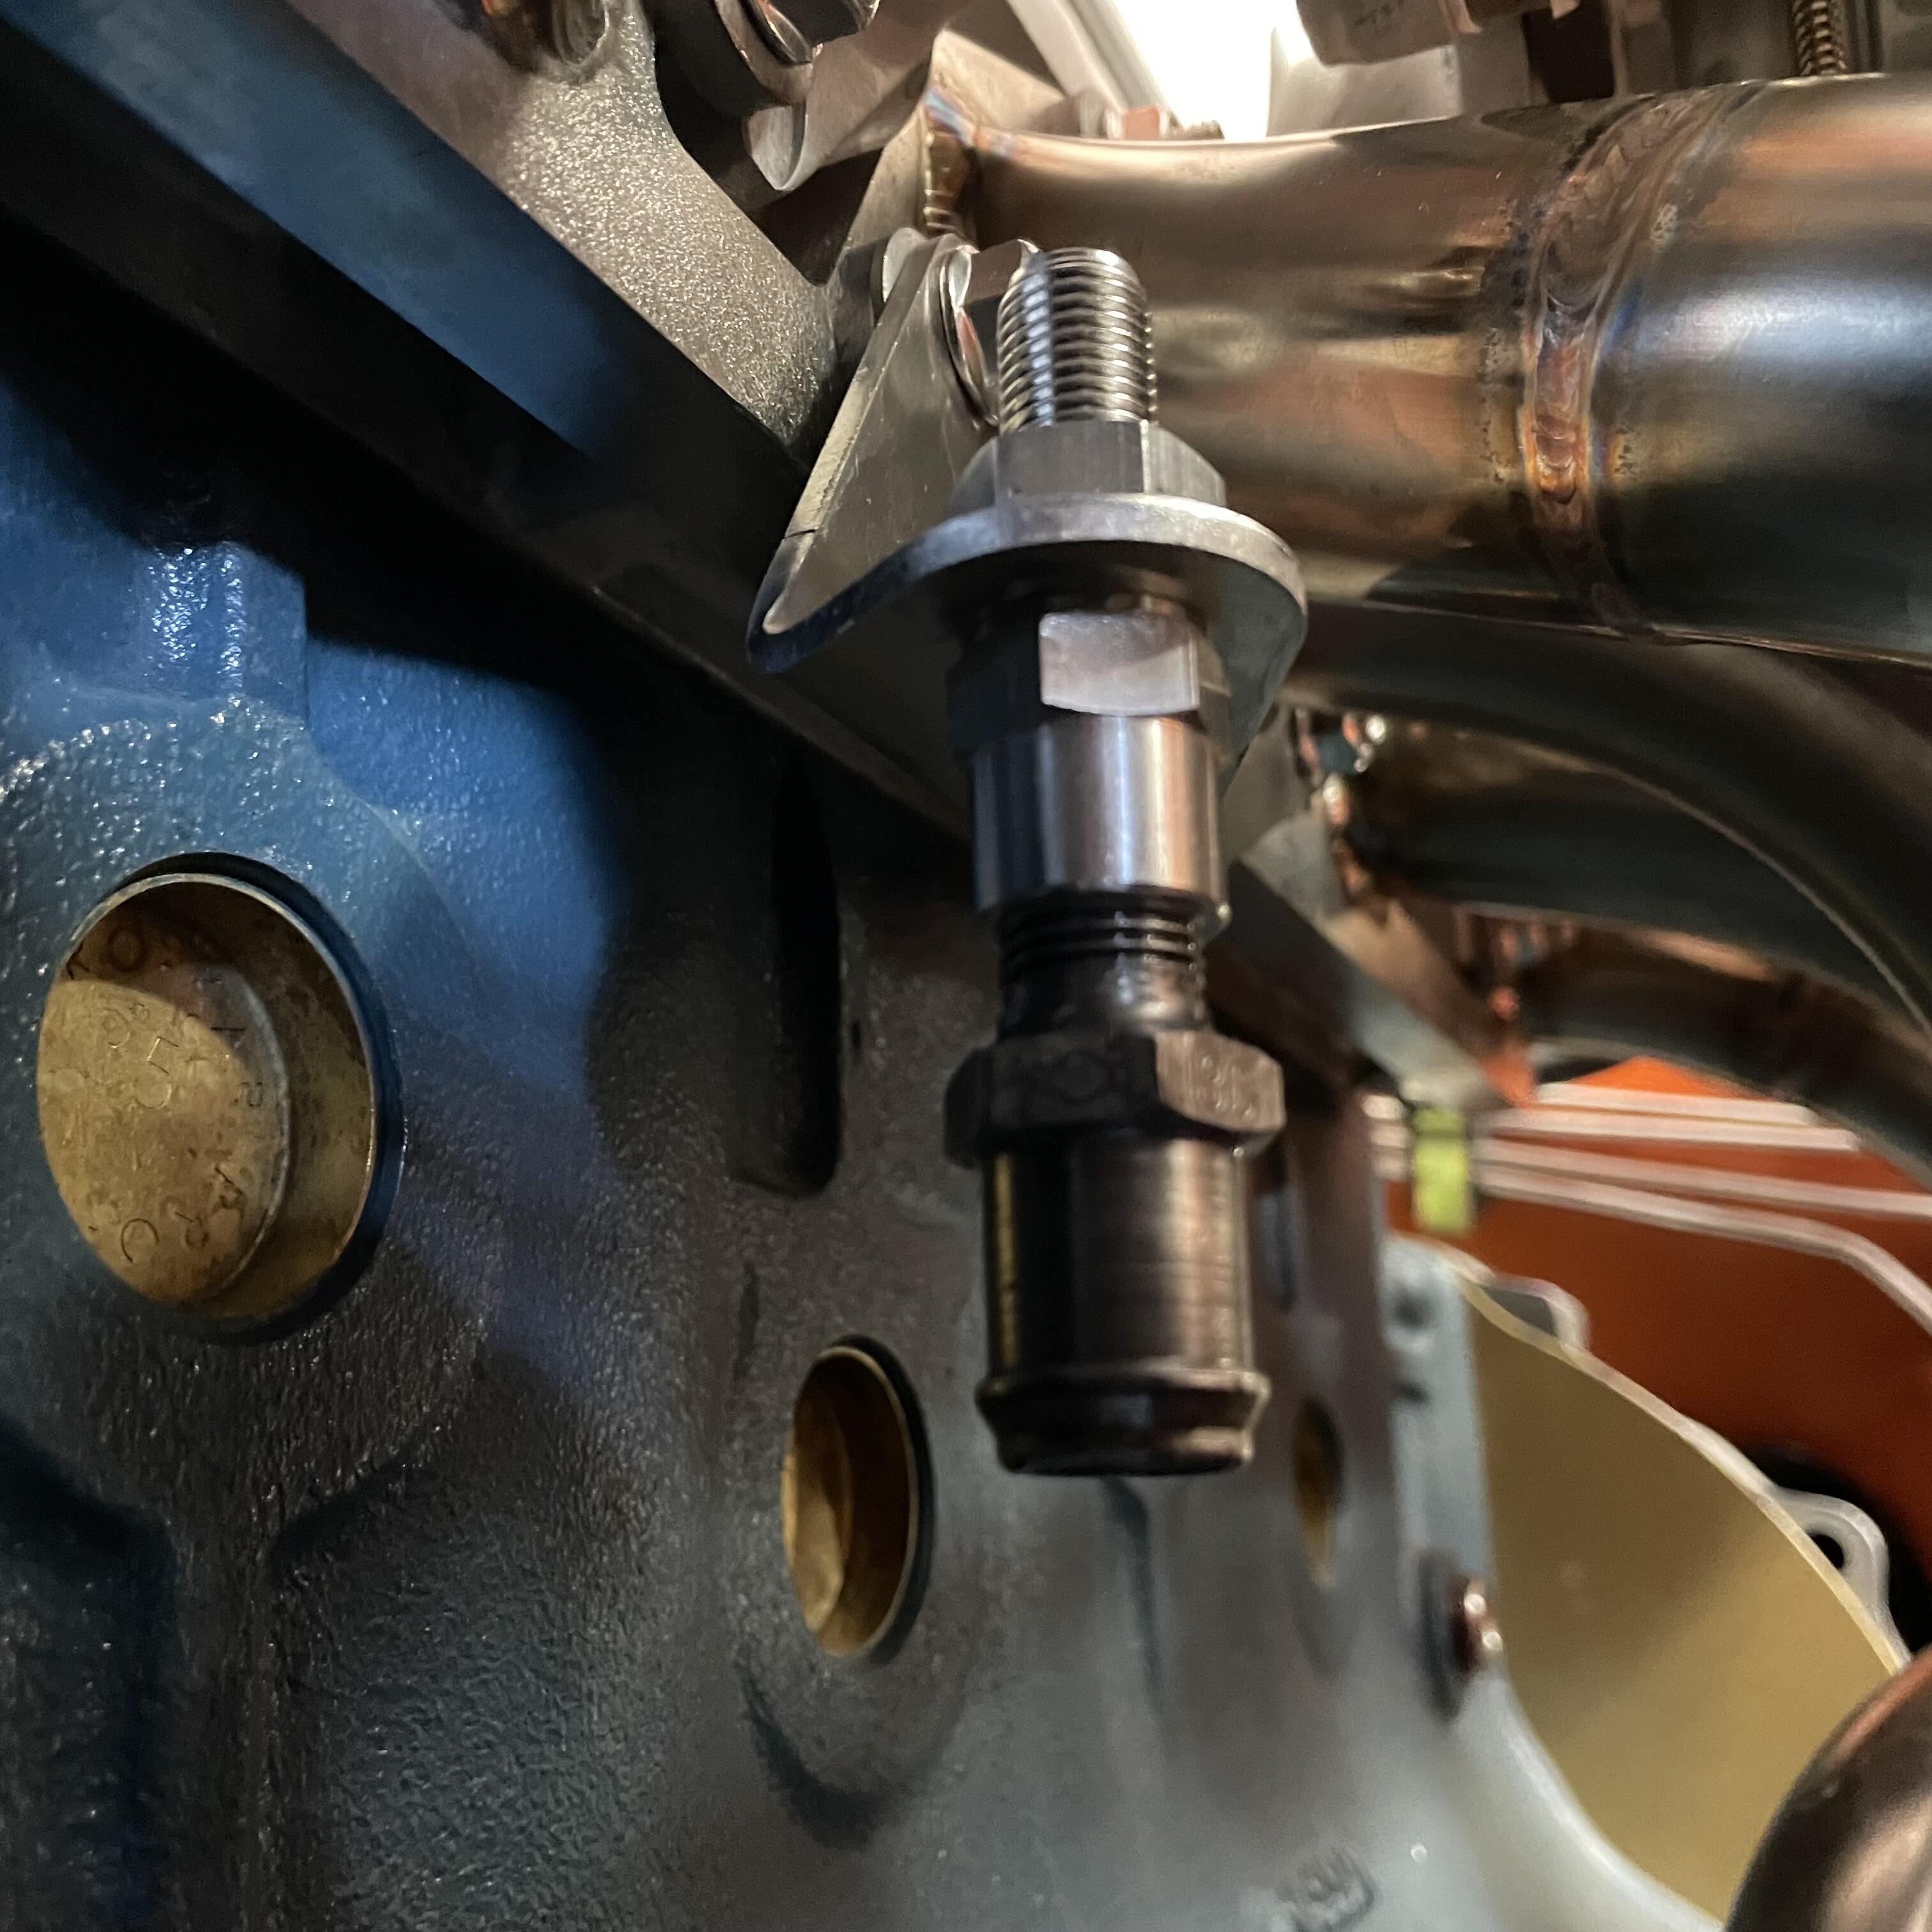
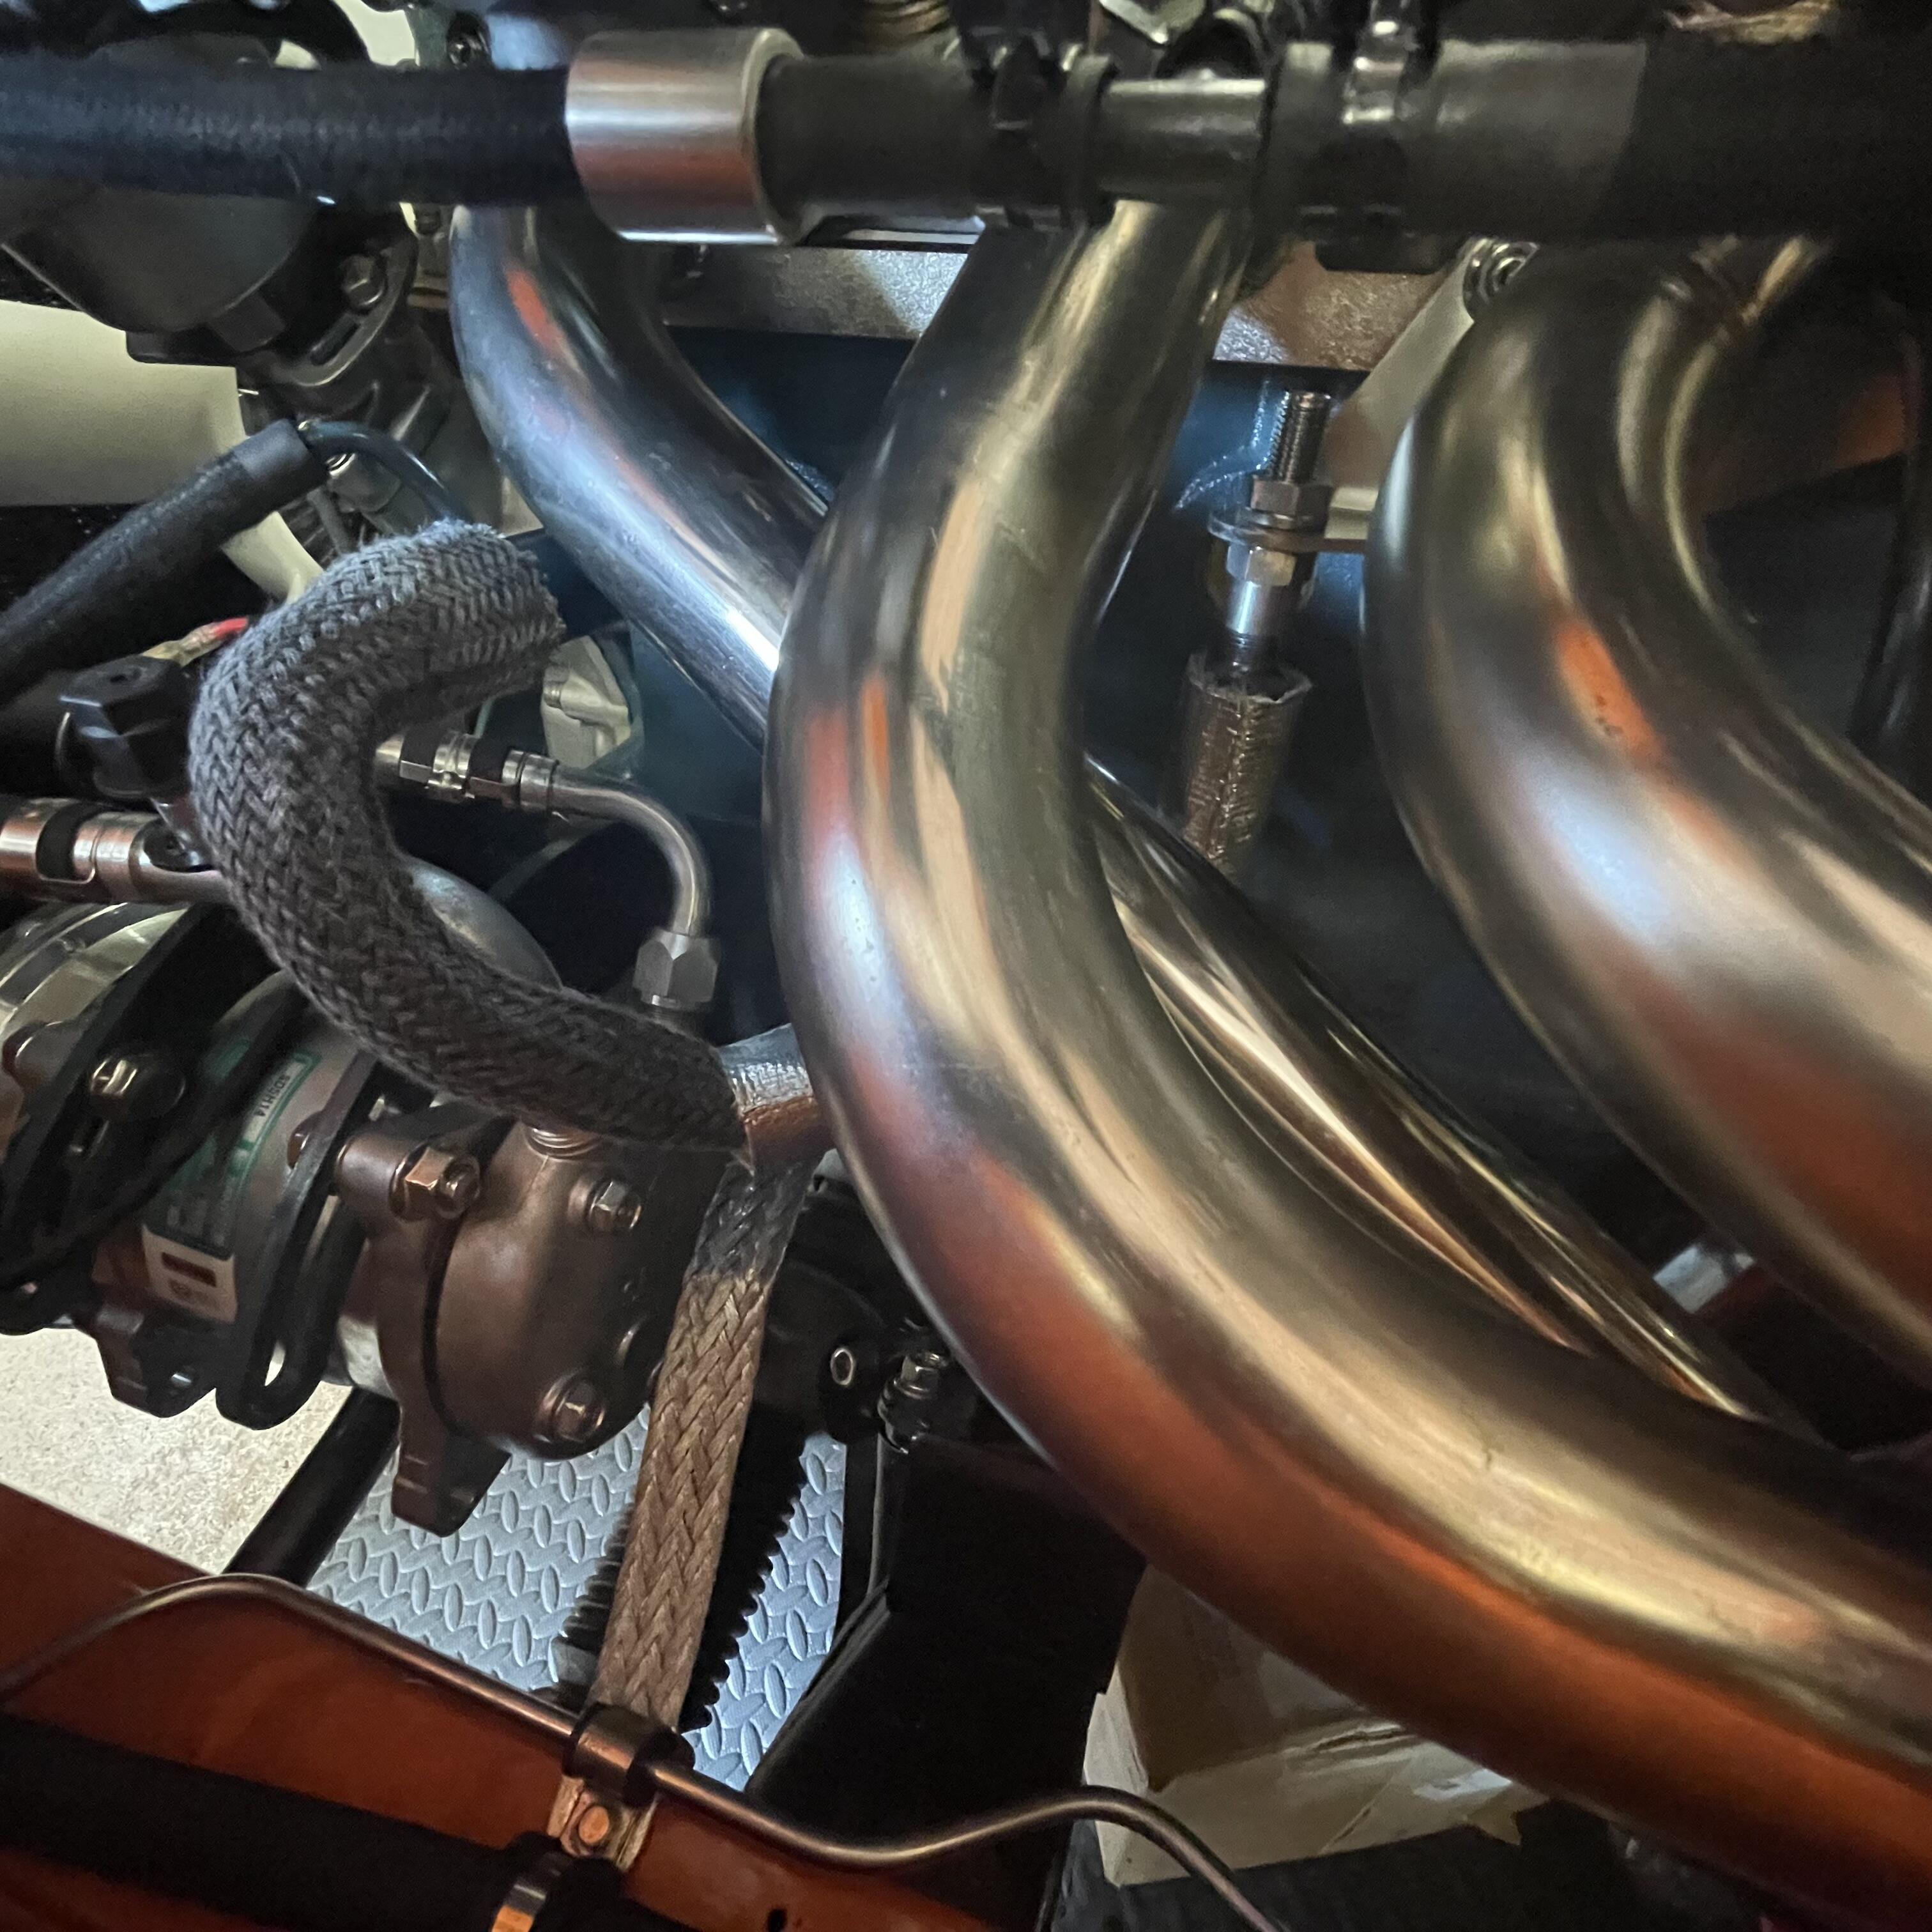
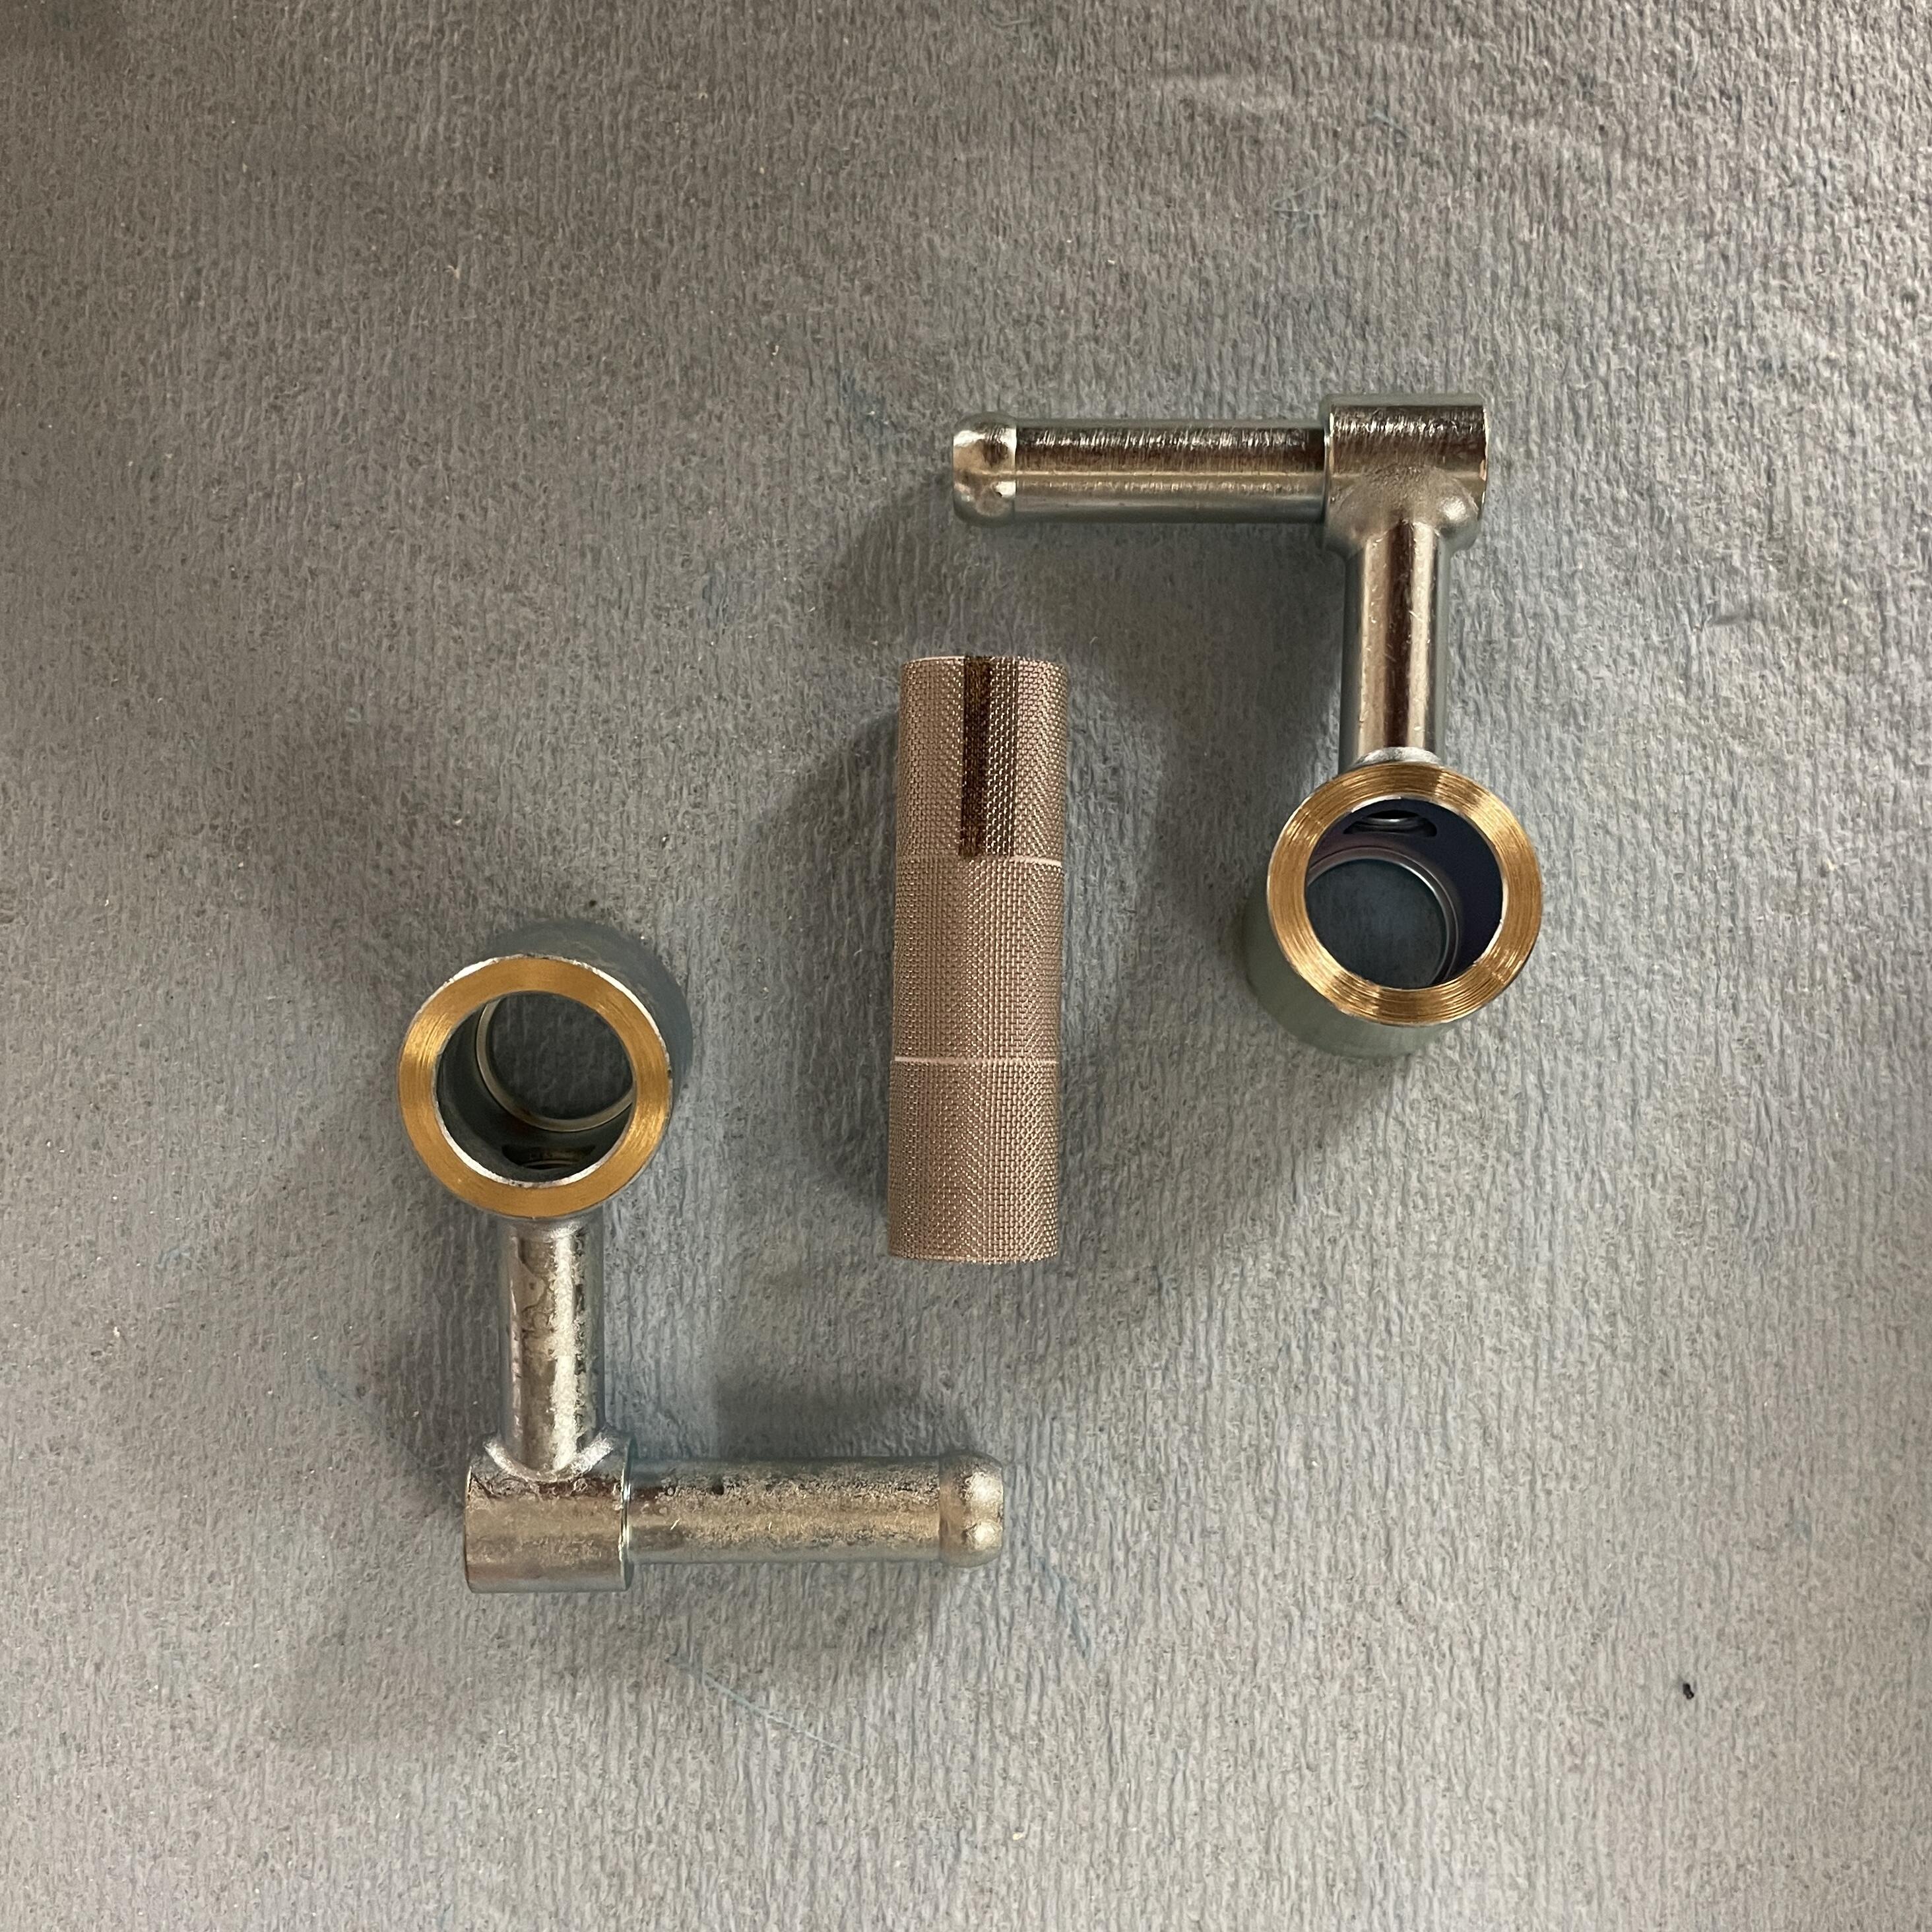
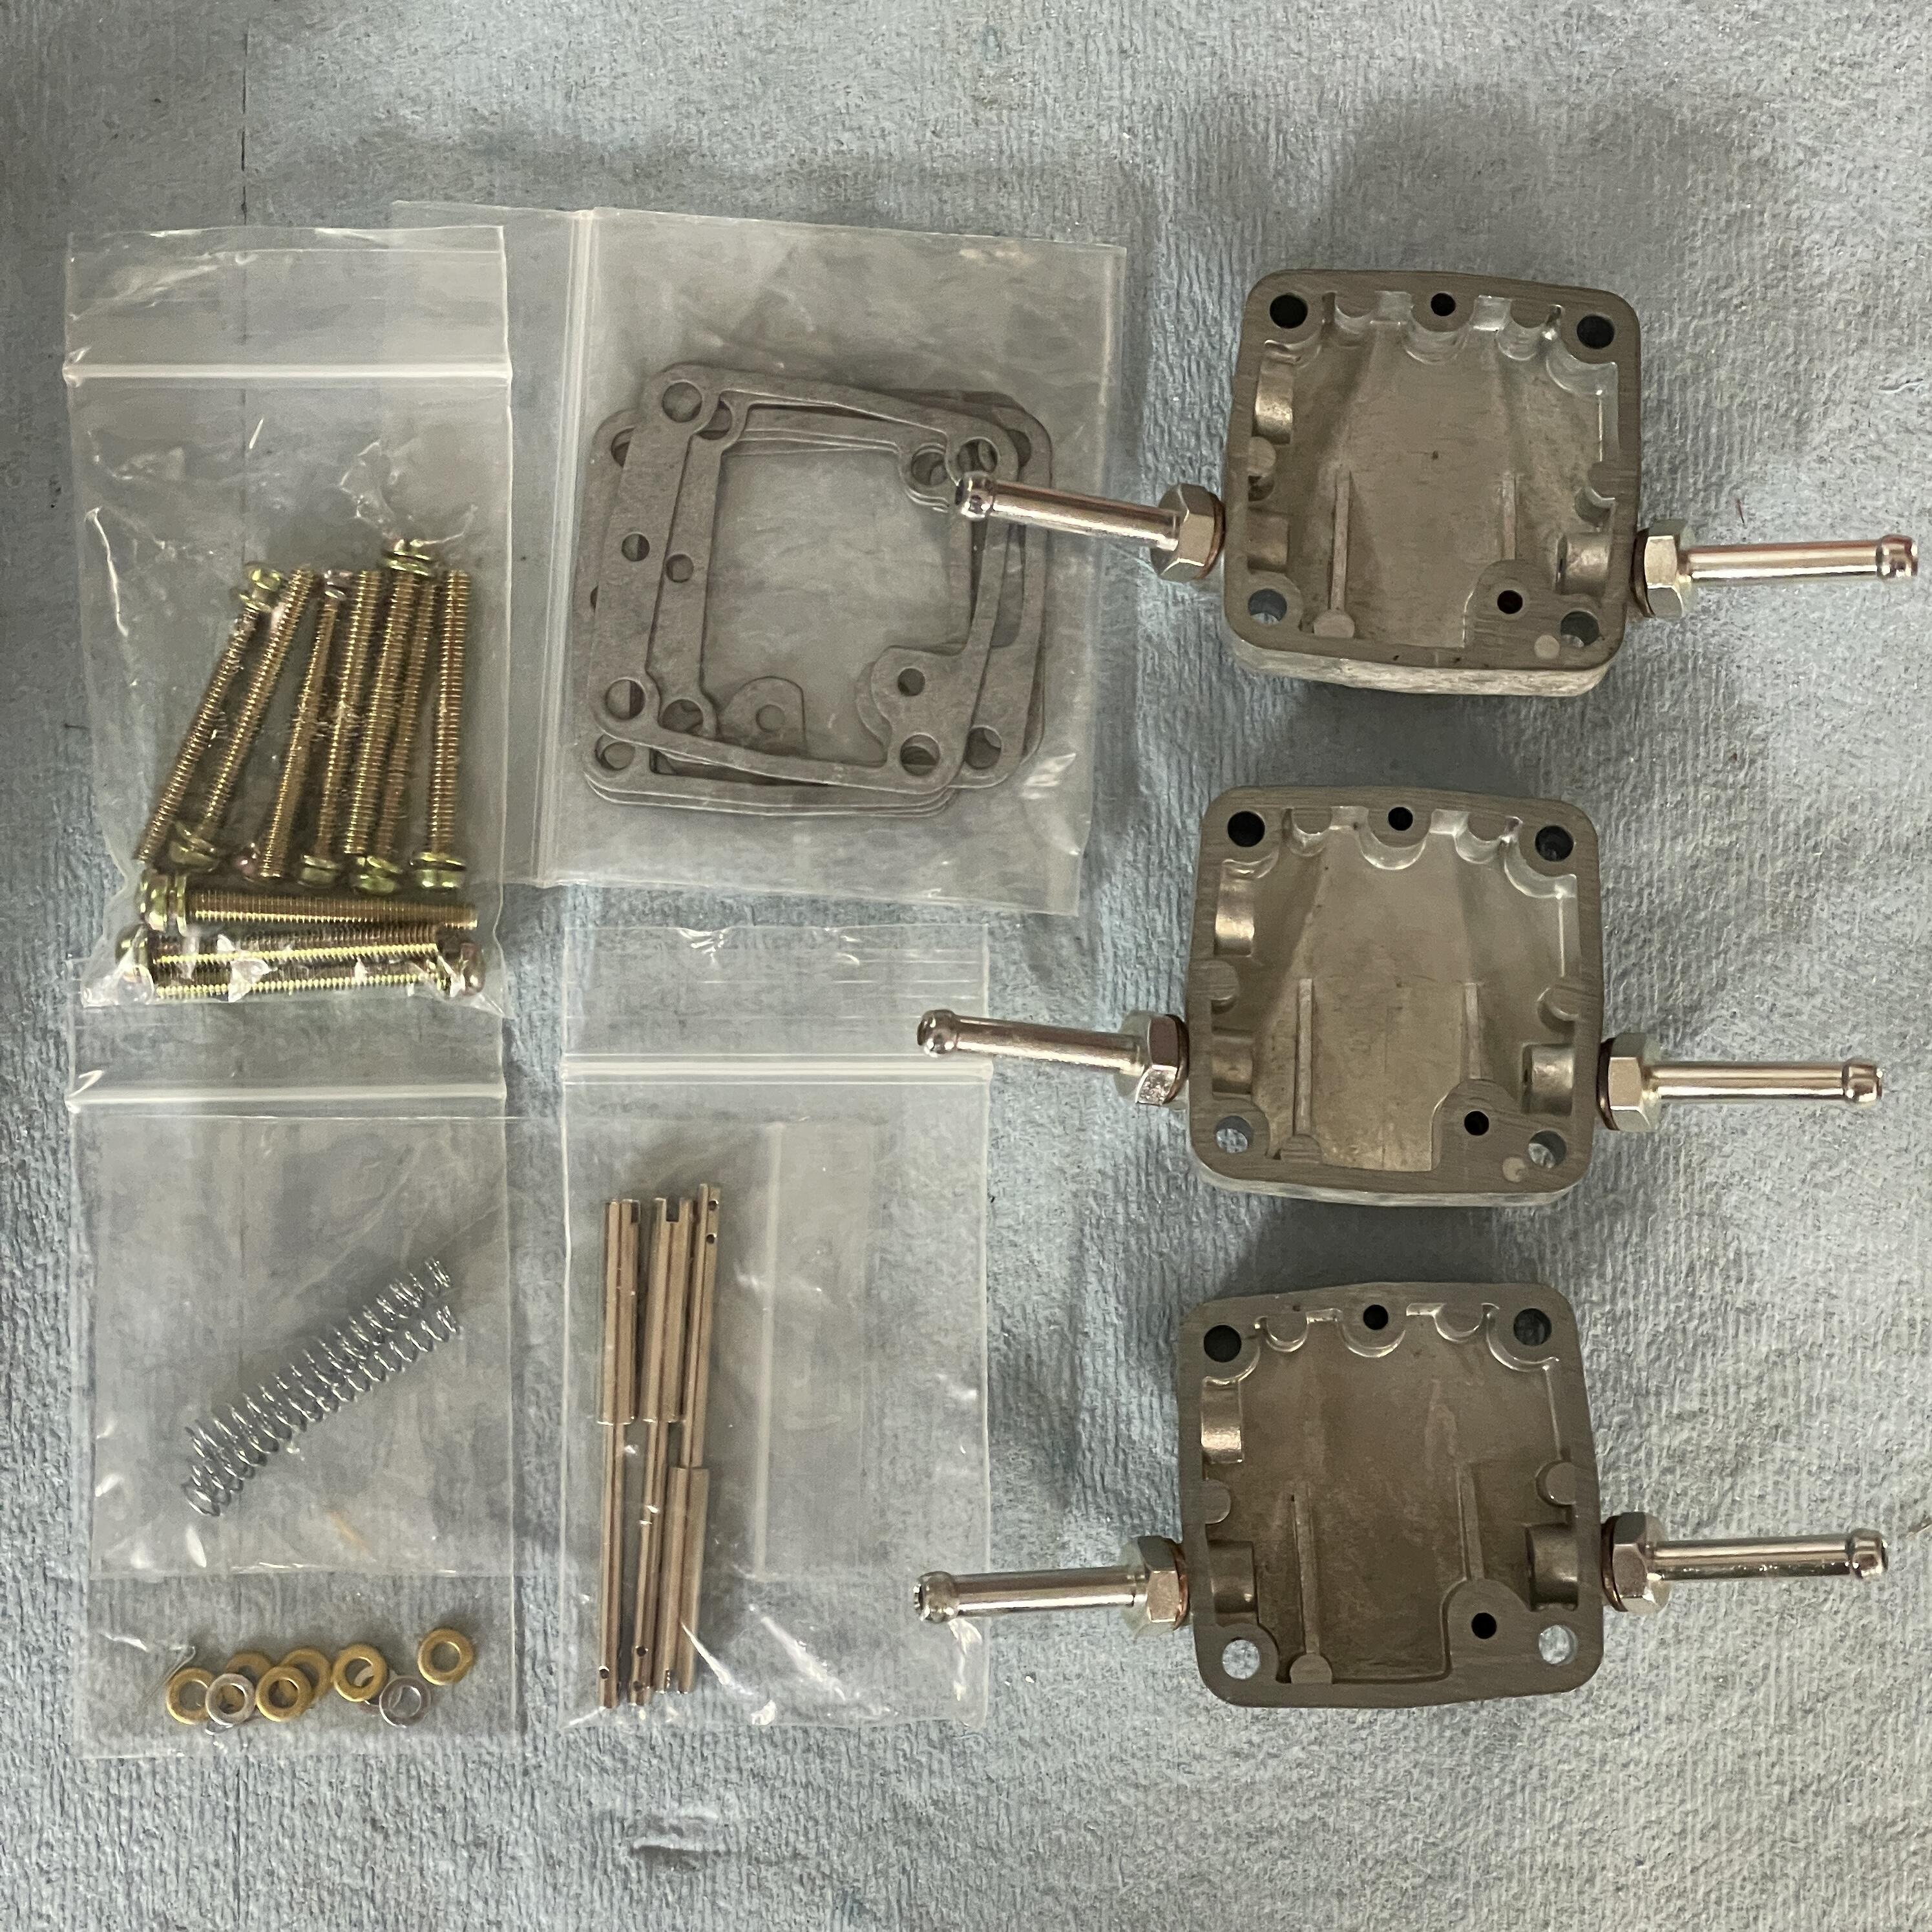
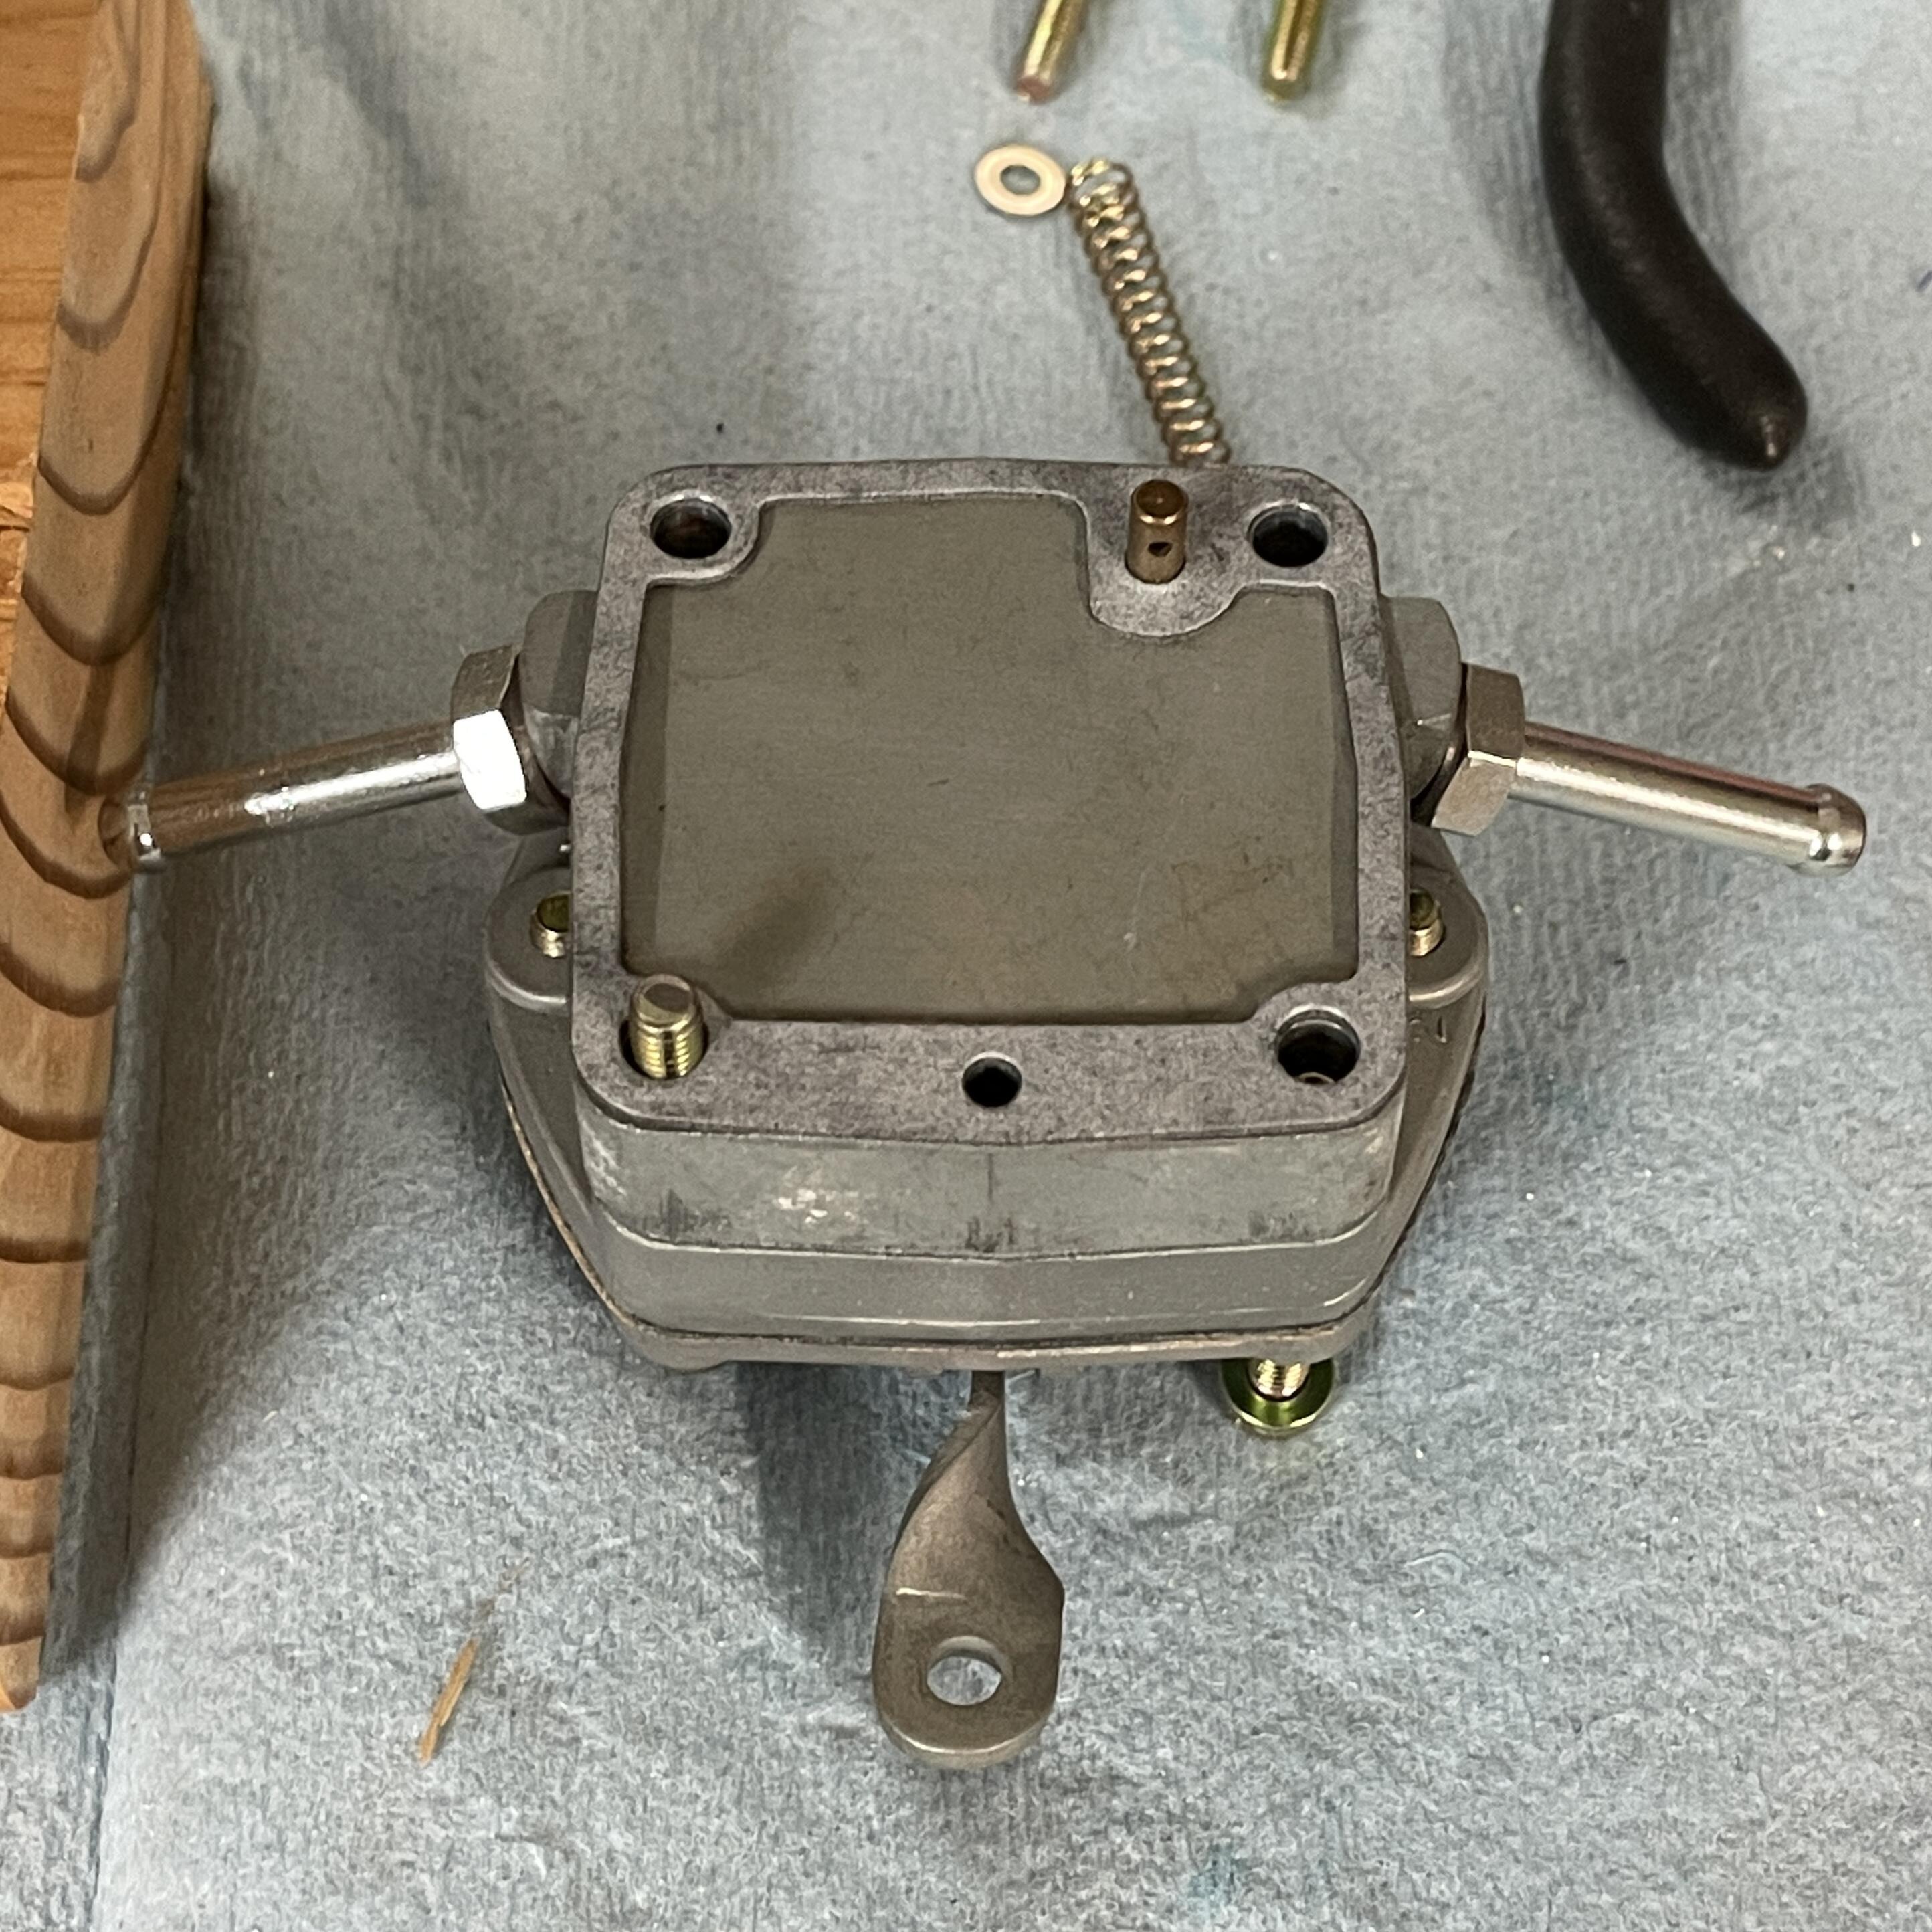
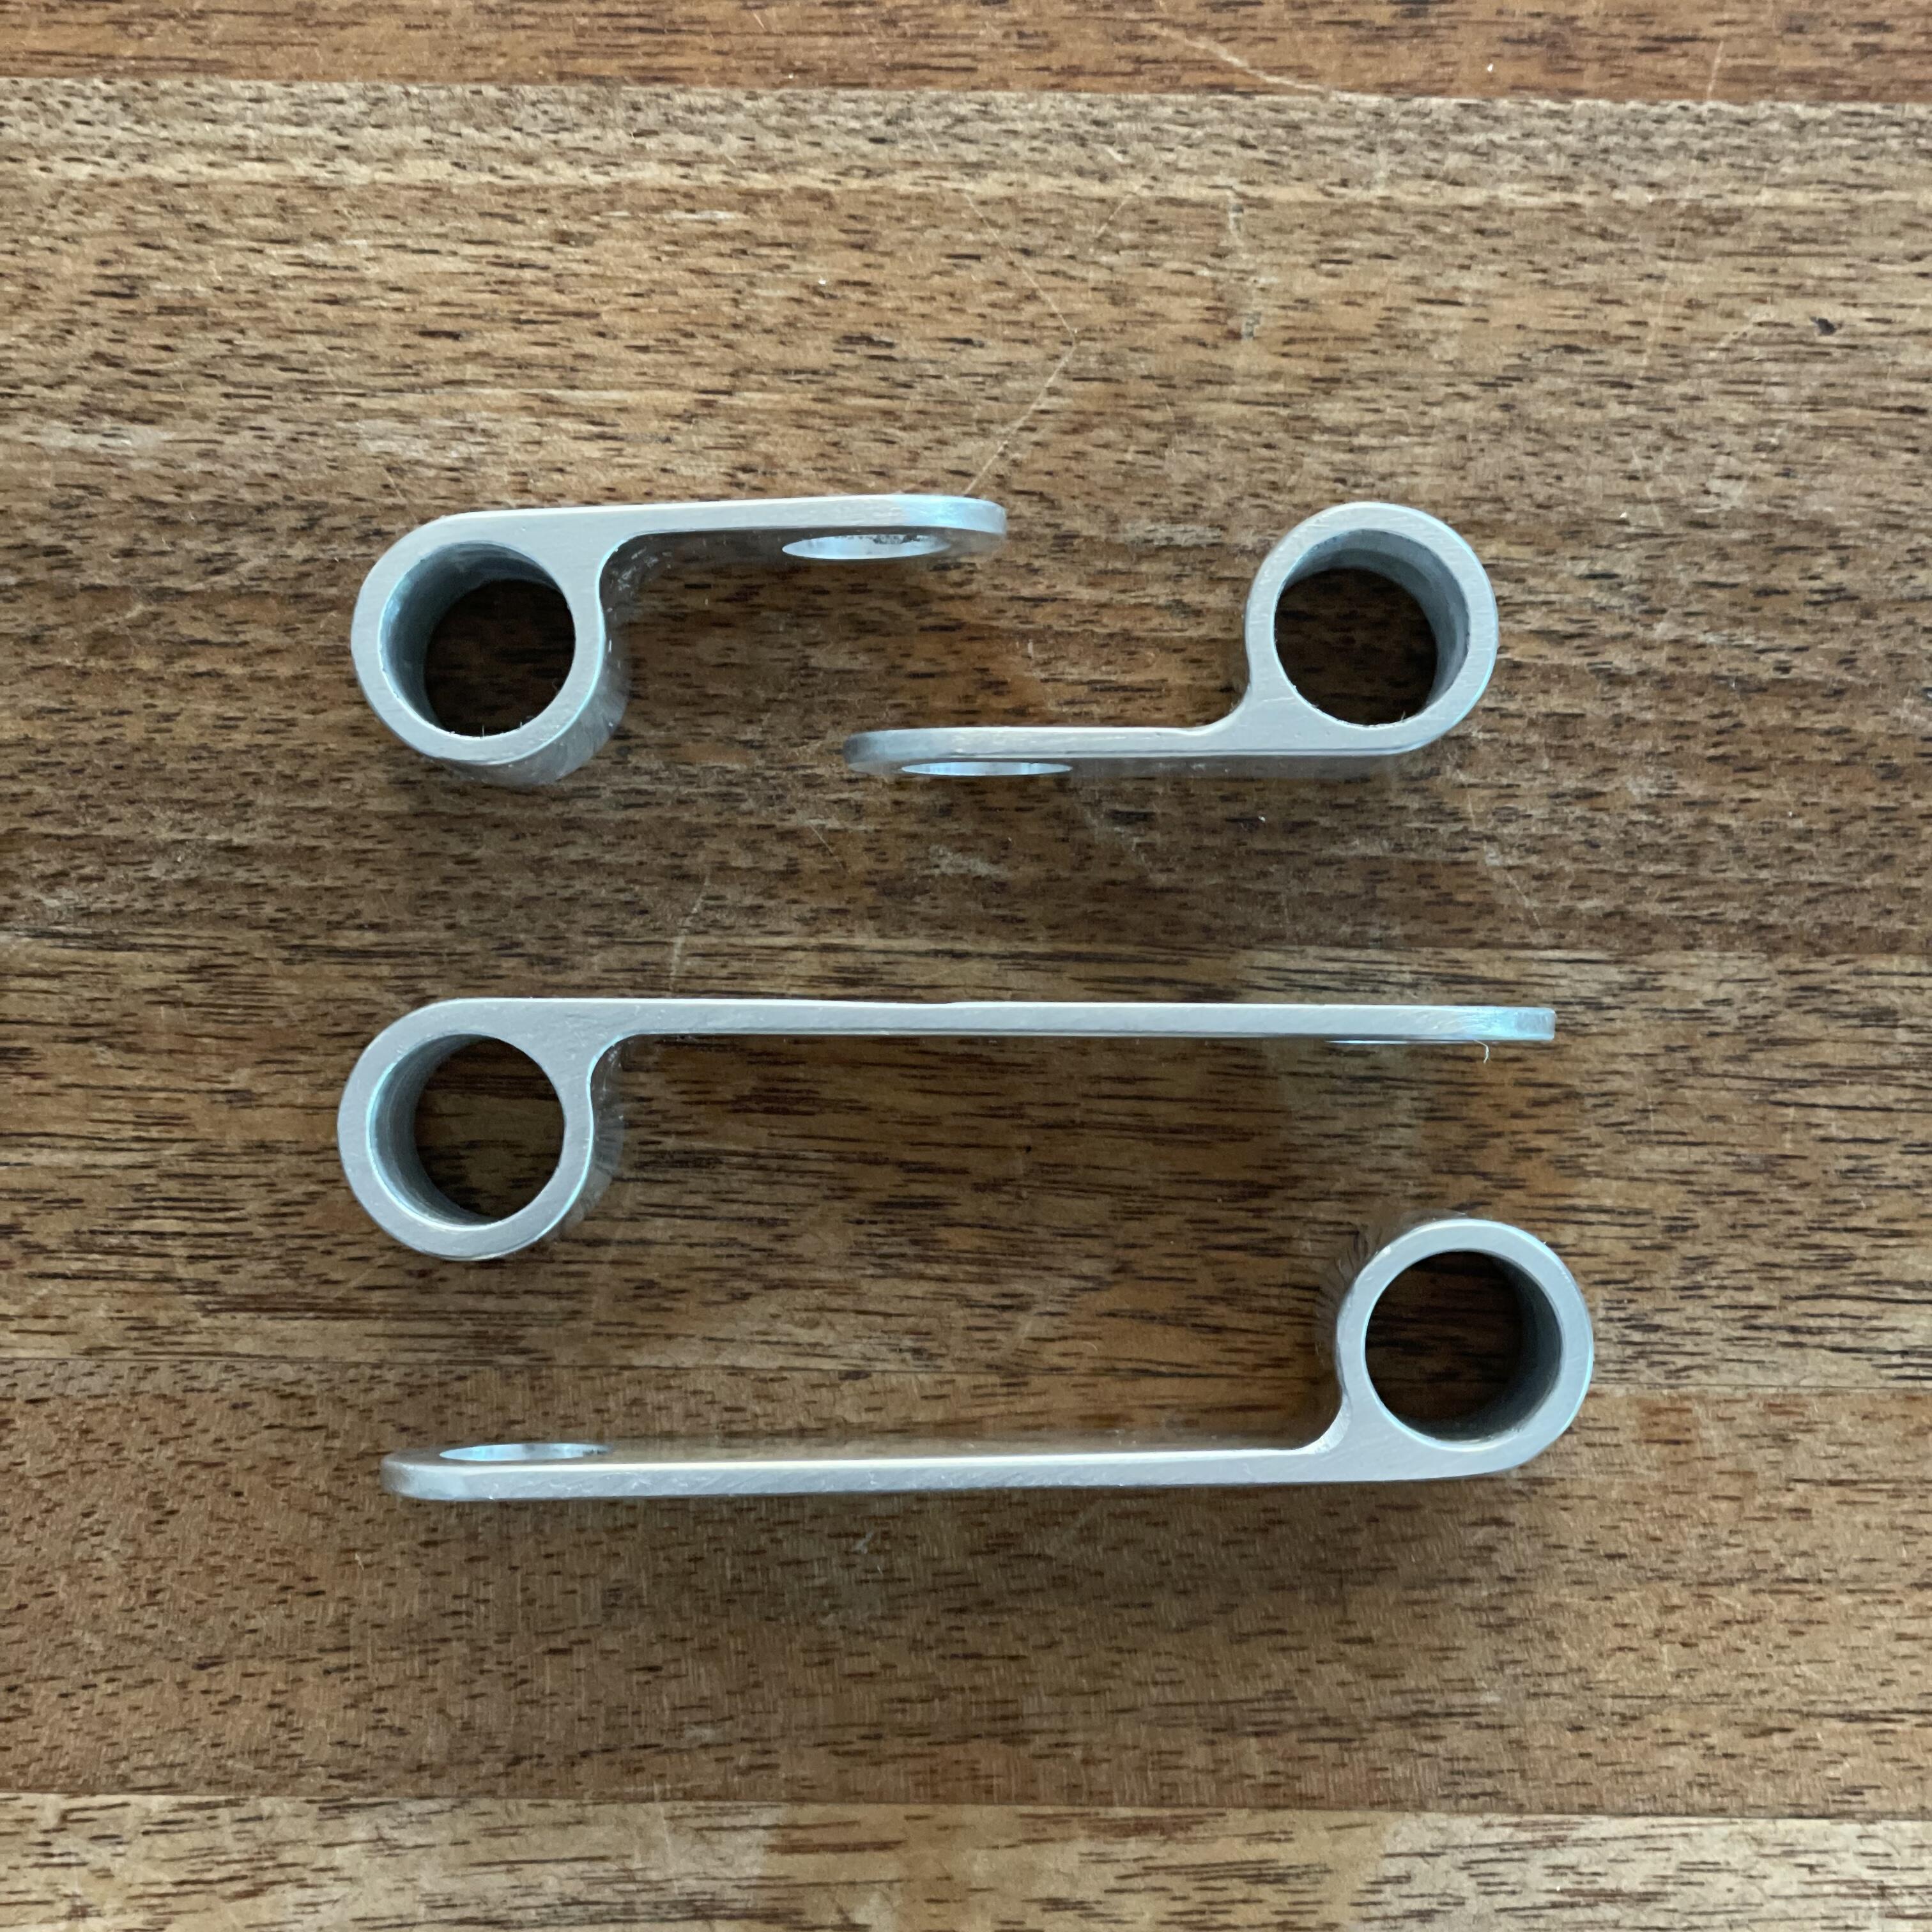
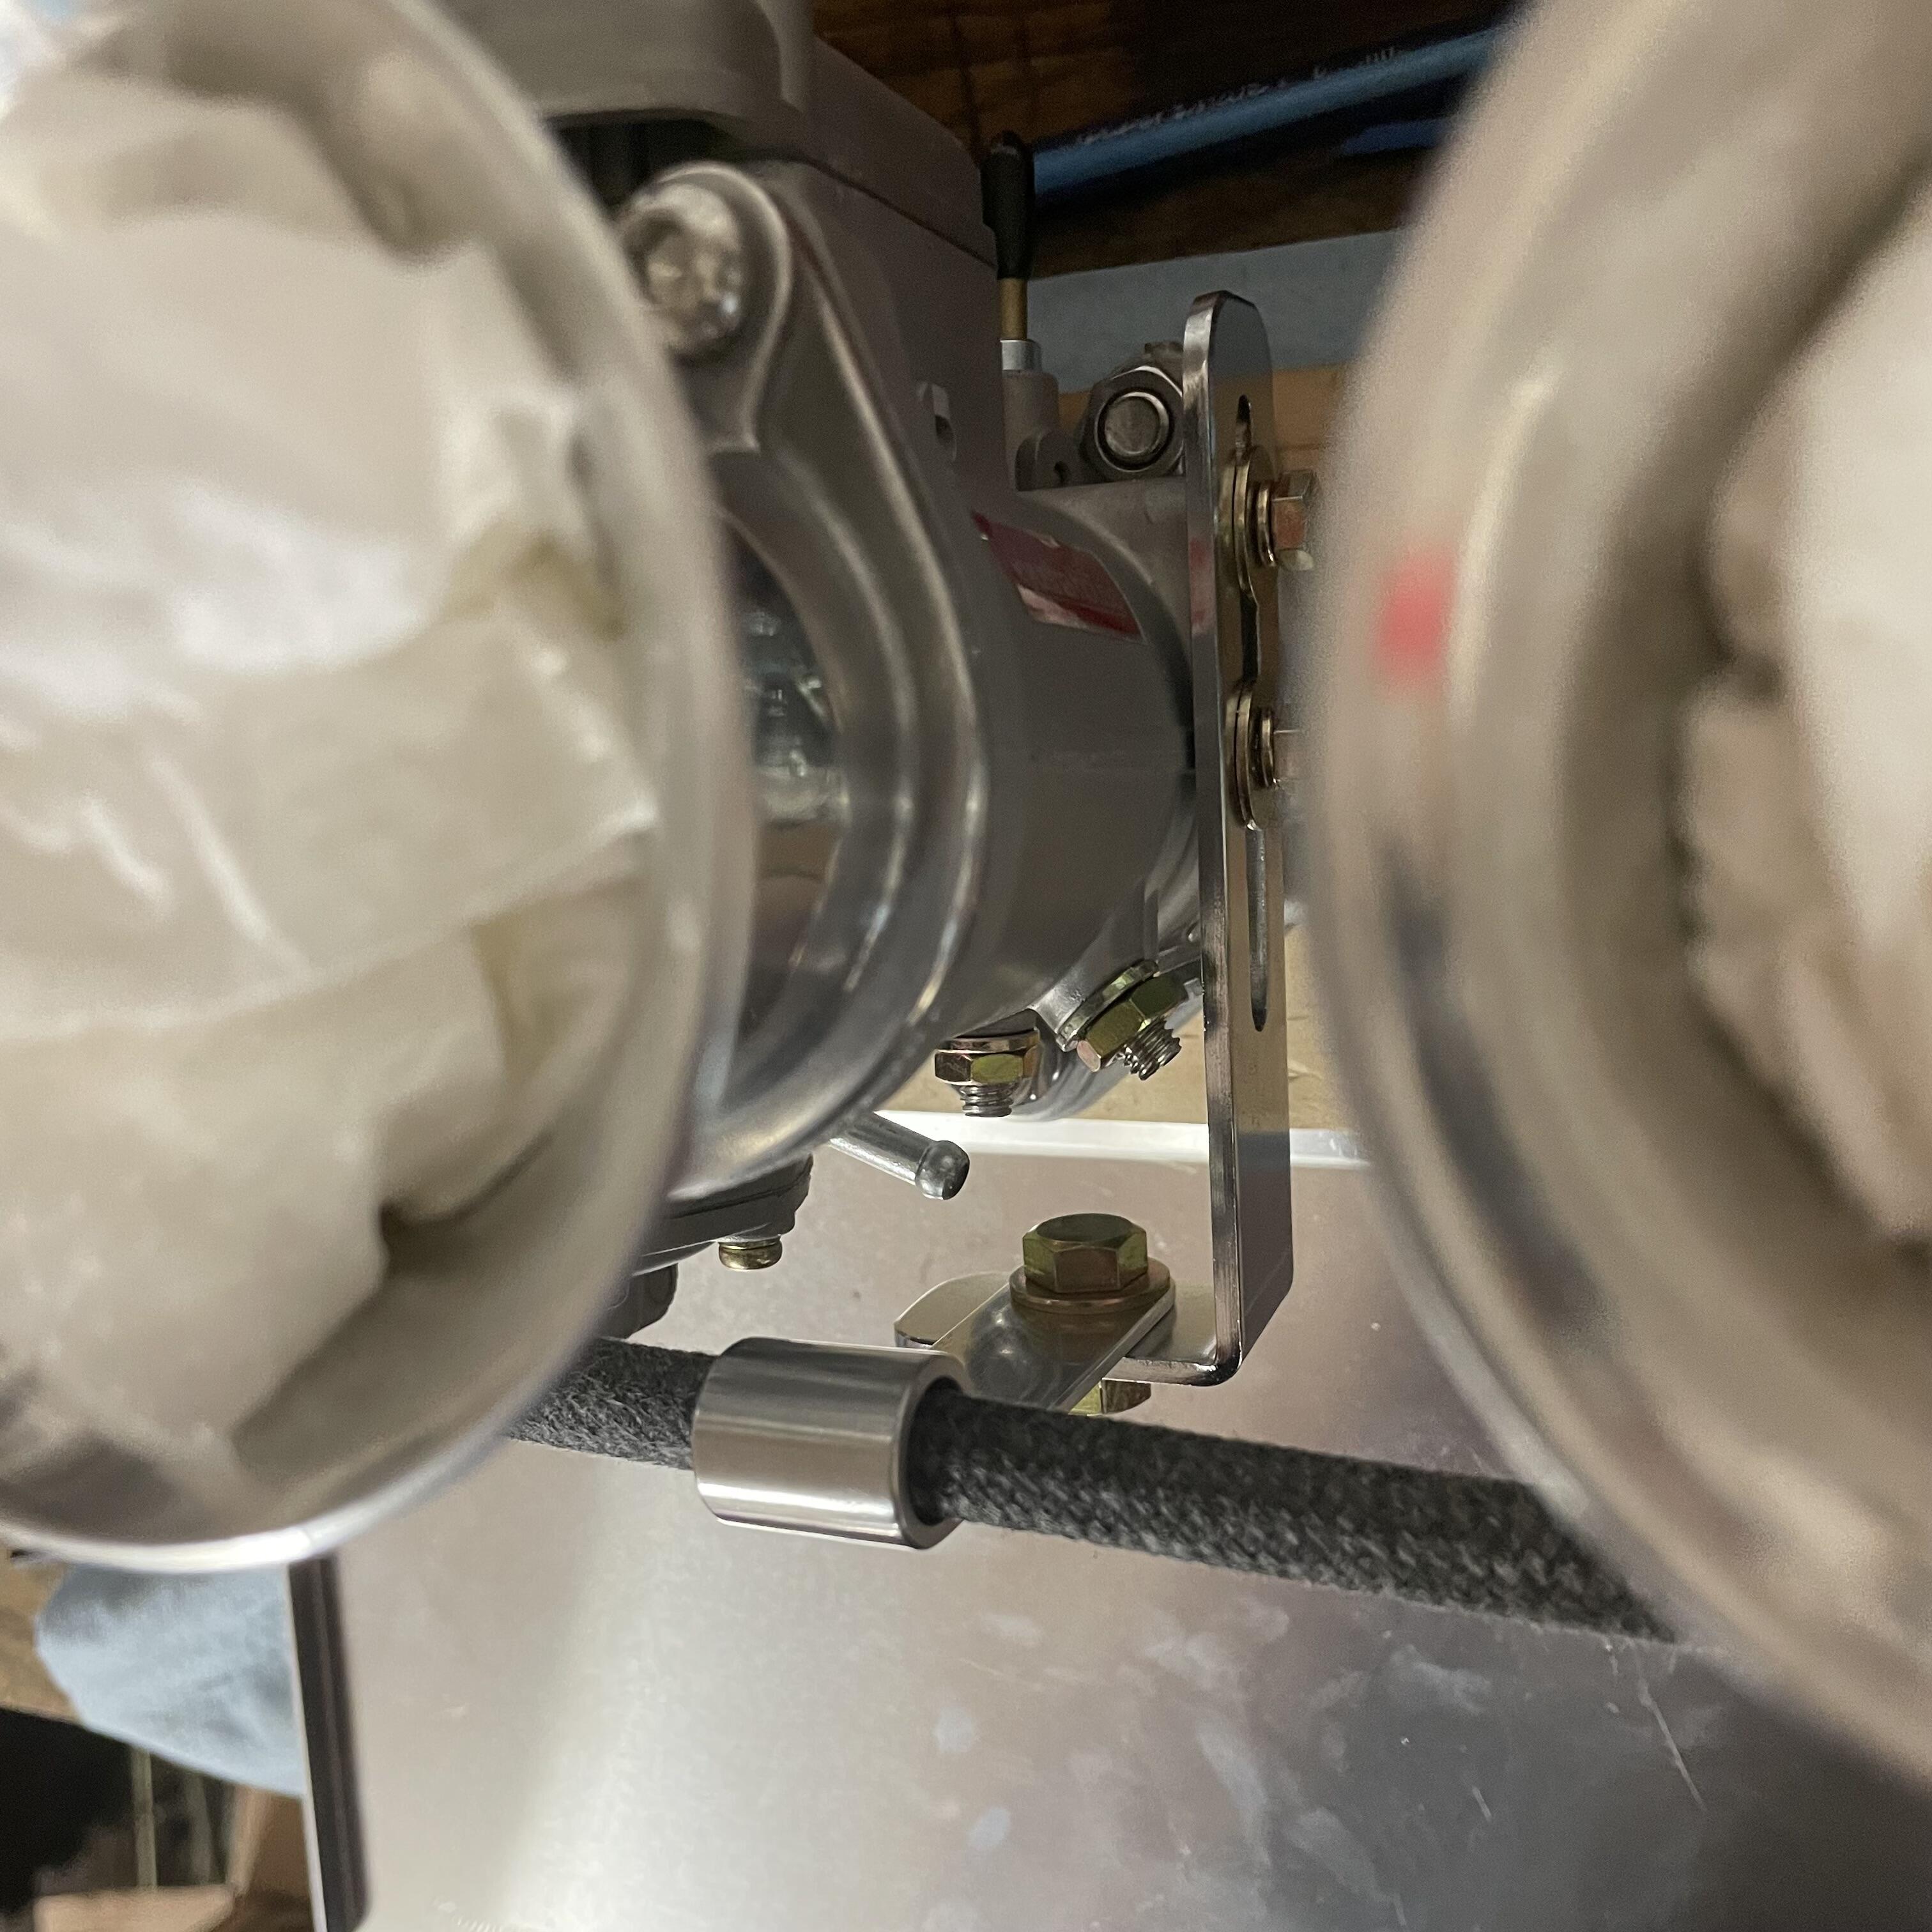
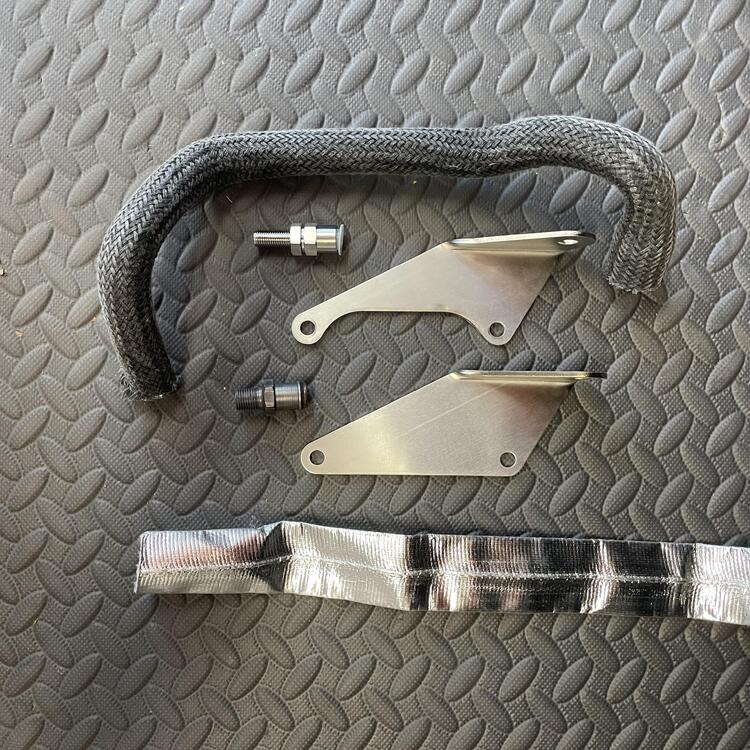
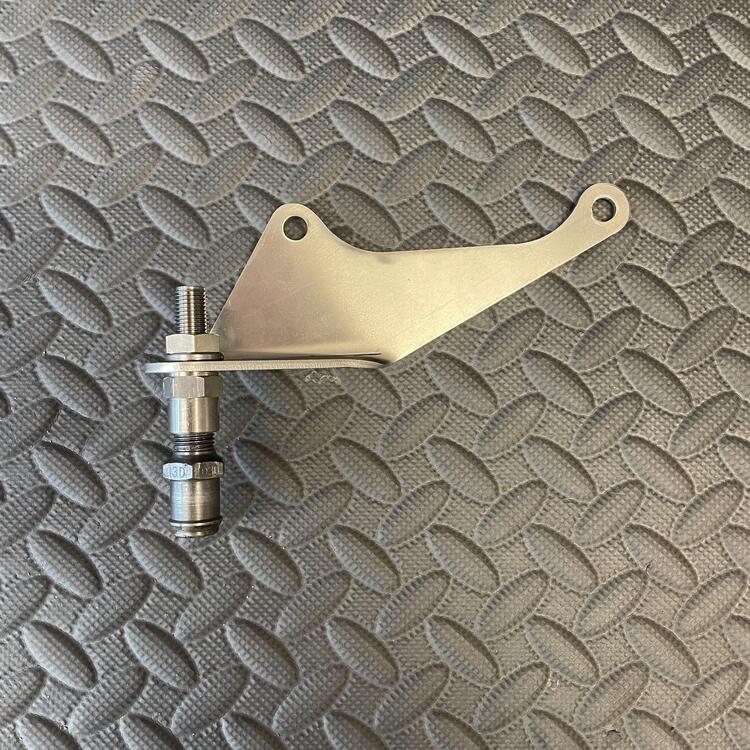
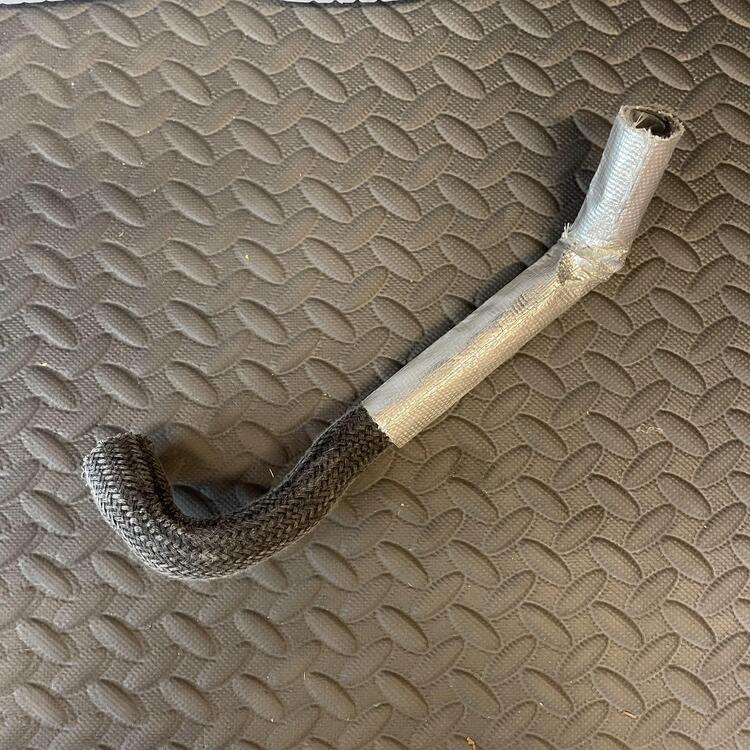
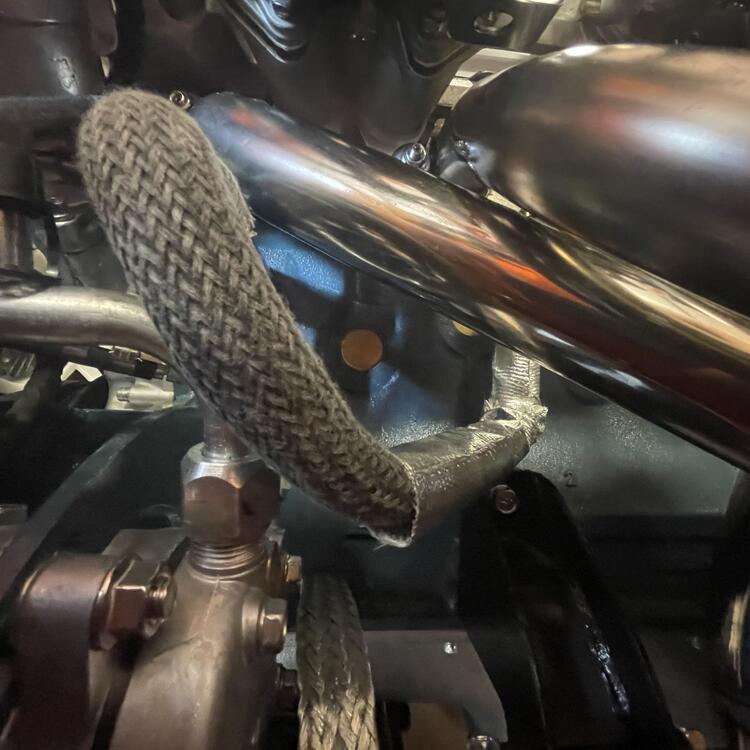
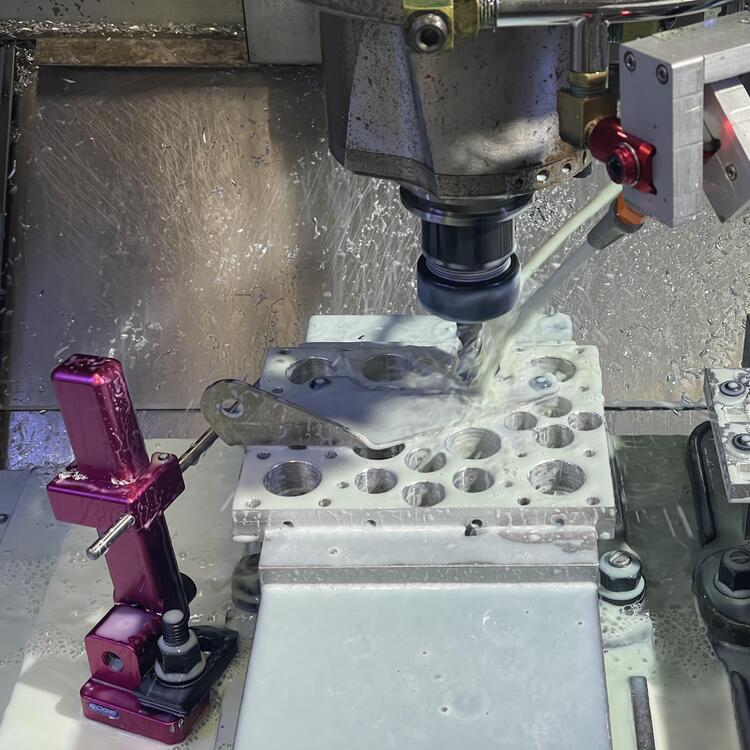
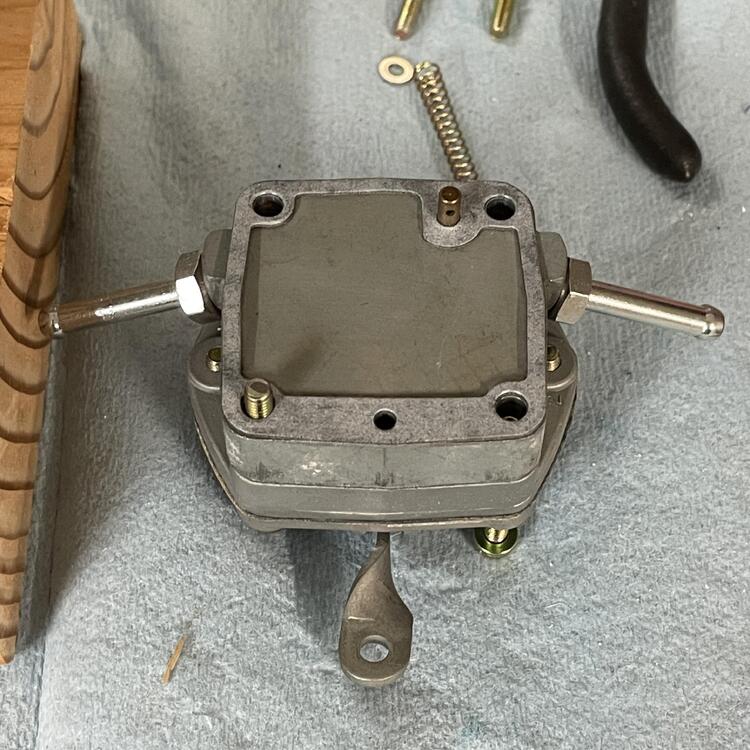
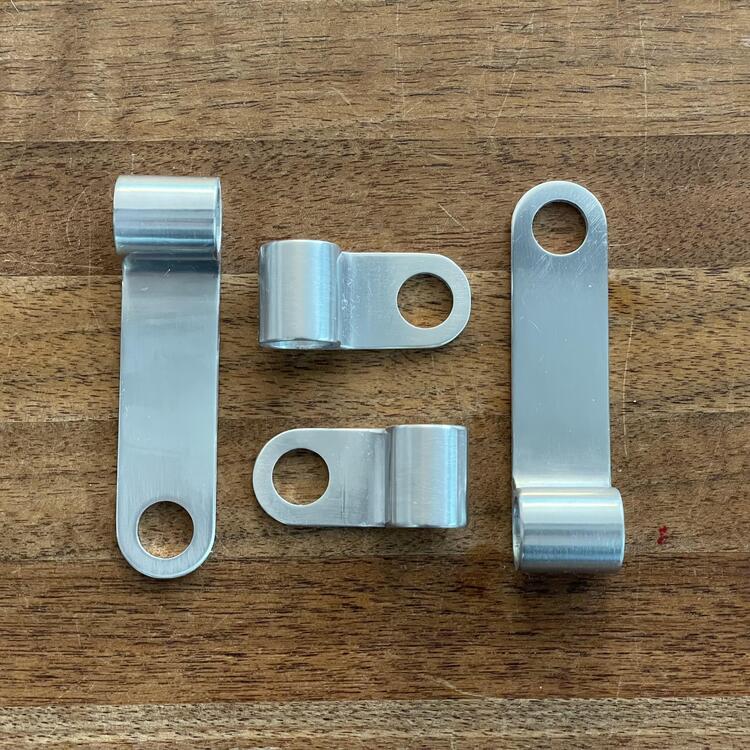
More harebrained schemes! With the change from SUs to PHH 44s I lost the balance tube from the Nissan manifold, which is where the PCV valve went. I’m not content to throw my hands up and say “Oh well” on all of the compromises these carburetors usually cause, so I made a bracket. Or rather, SendCutSend made me a bracket. It came out great, but I forgot to provide clearance for the 3 and 4 cylinder exhaust pipes on the manifold, so a friend graciously did a little CNC work on it for me. I’m reasonably confident this will be a good relocation point for the valve. The tricky part from here is going to be plumbing it into the intake manifold. The fitting the valve is screwed into is a Fuji 1/4” BPST to 1/4” OD compression bulkhead union. I was only able to find one place who would sell me just one, but @misumiusa was quick with it. I’m planning to run a stainless steel pipe to a vacuum manifold that will then route to the intake manifold.

-
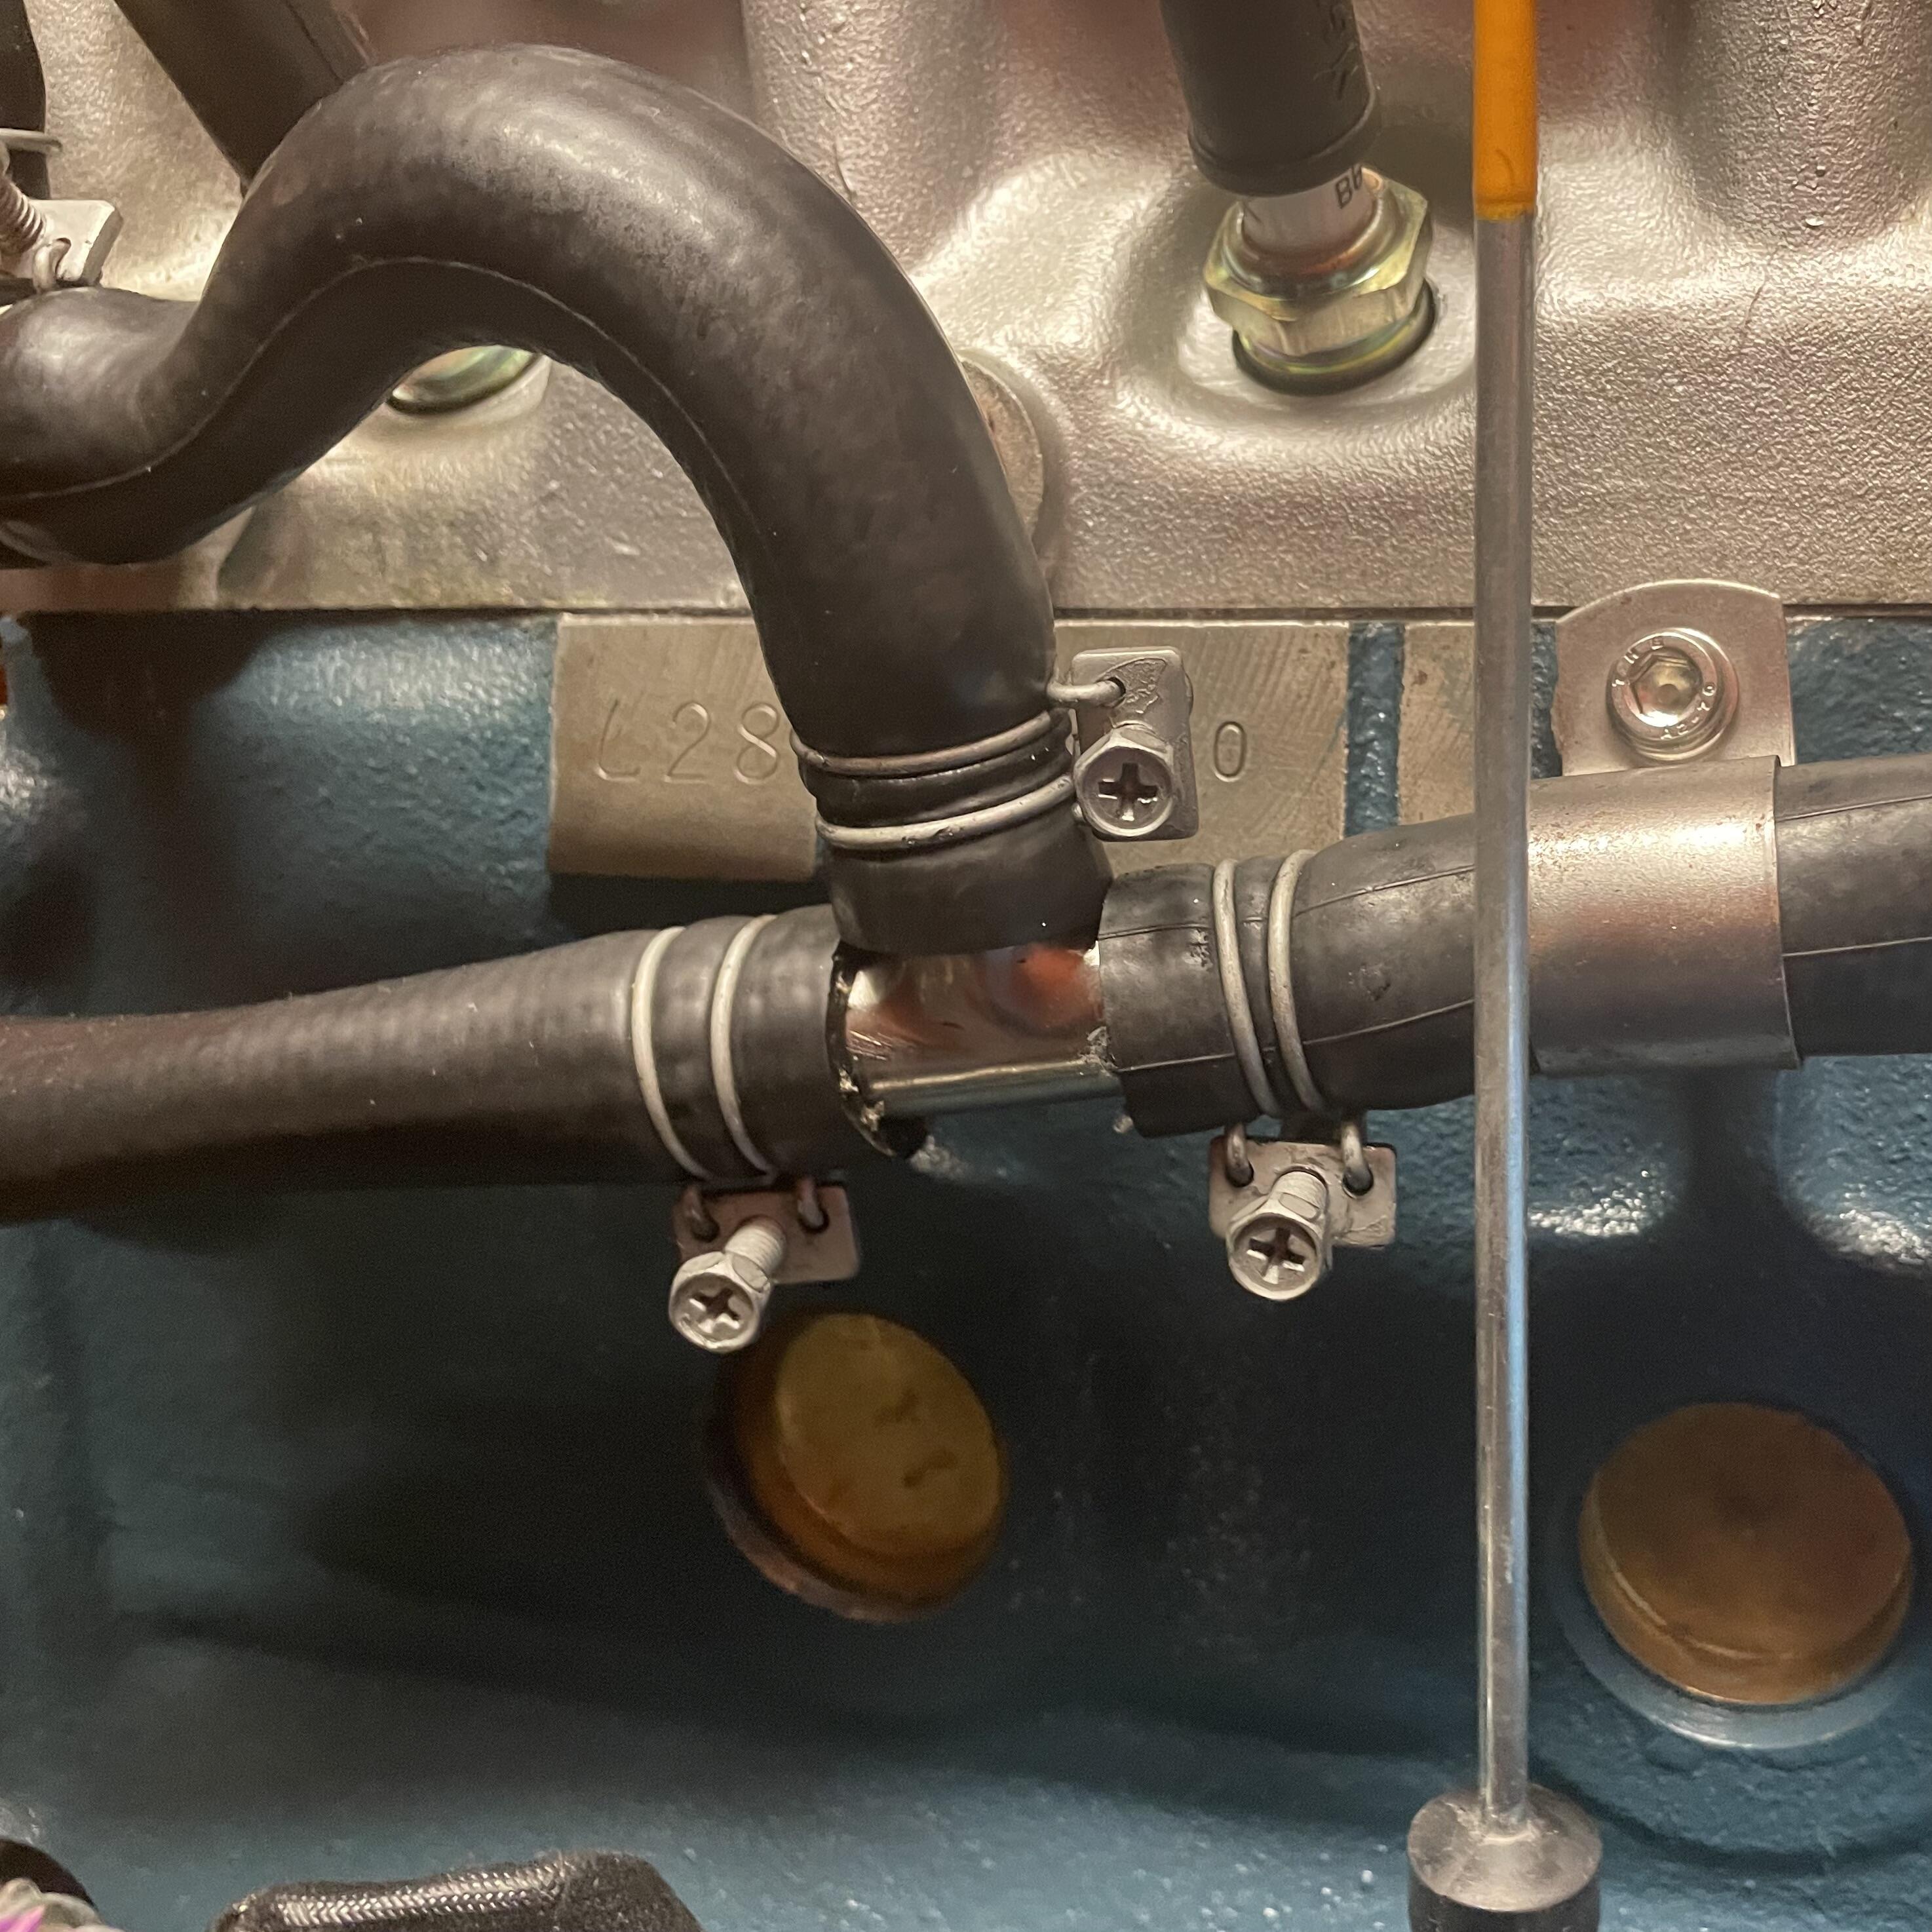
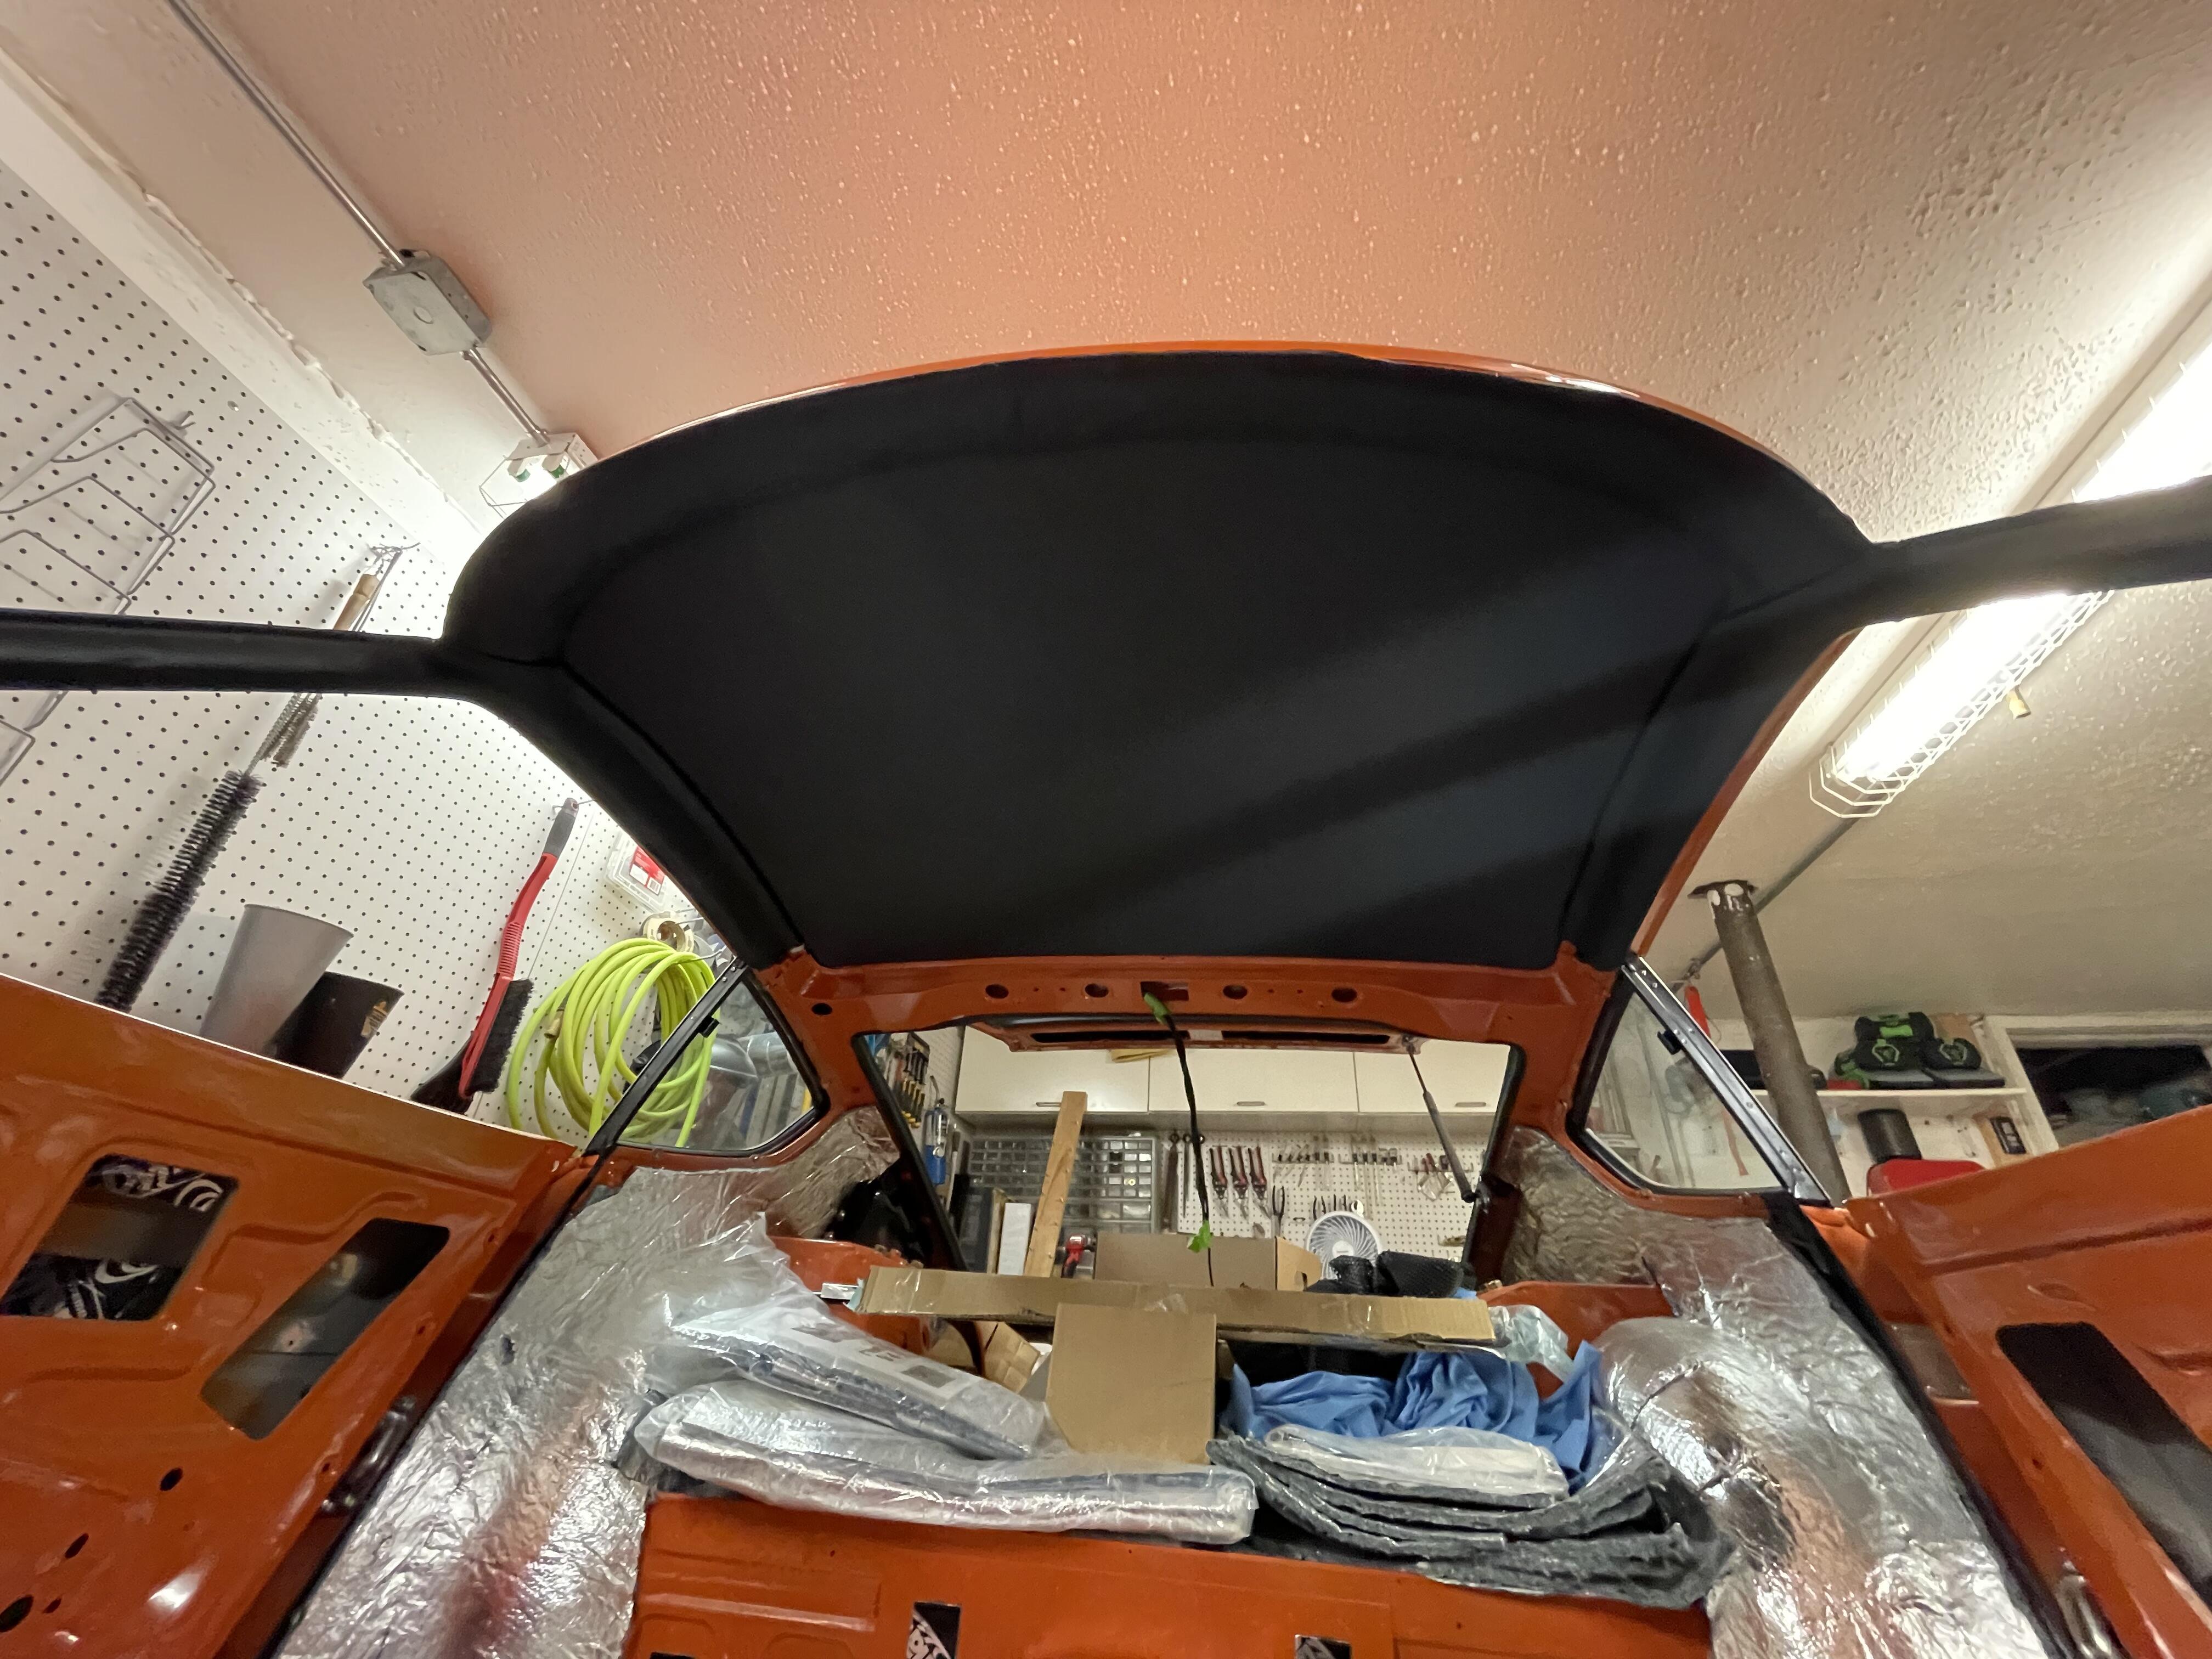
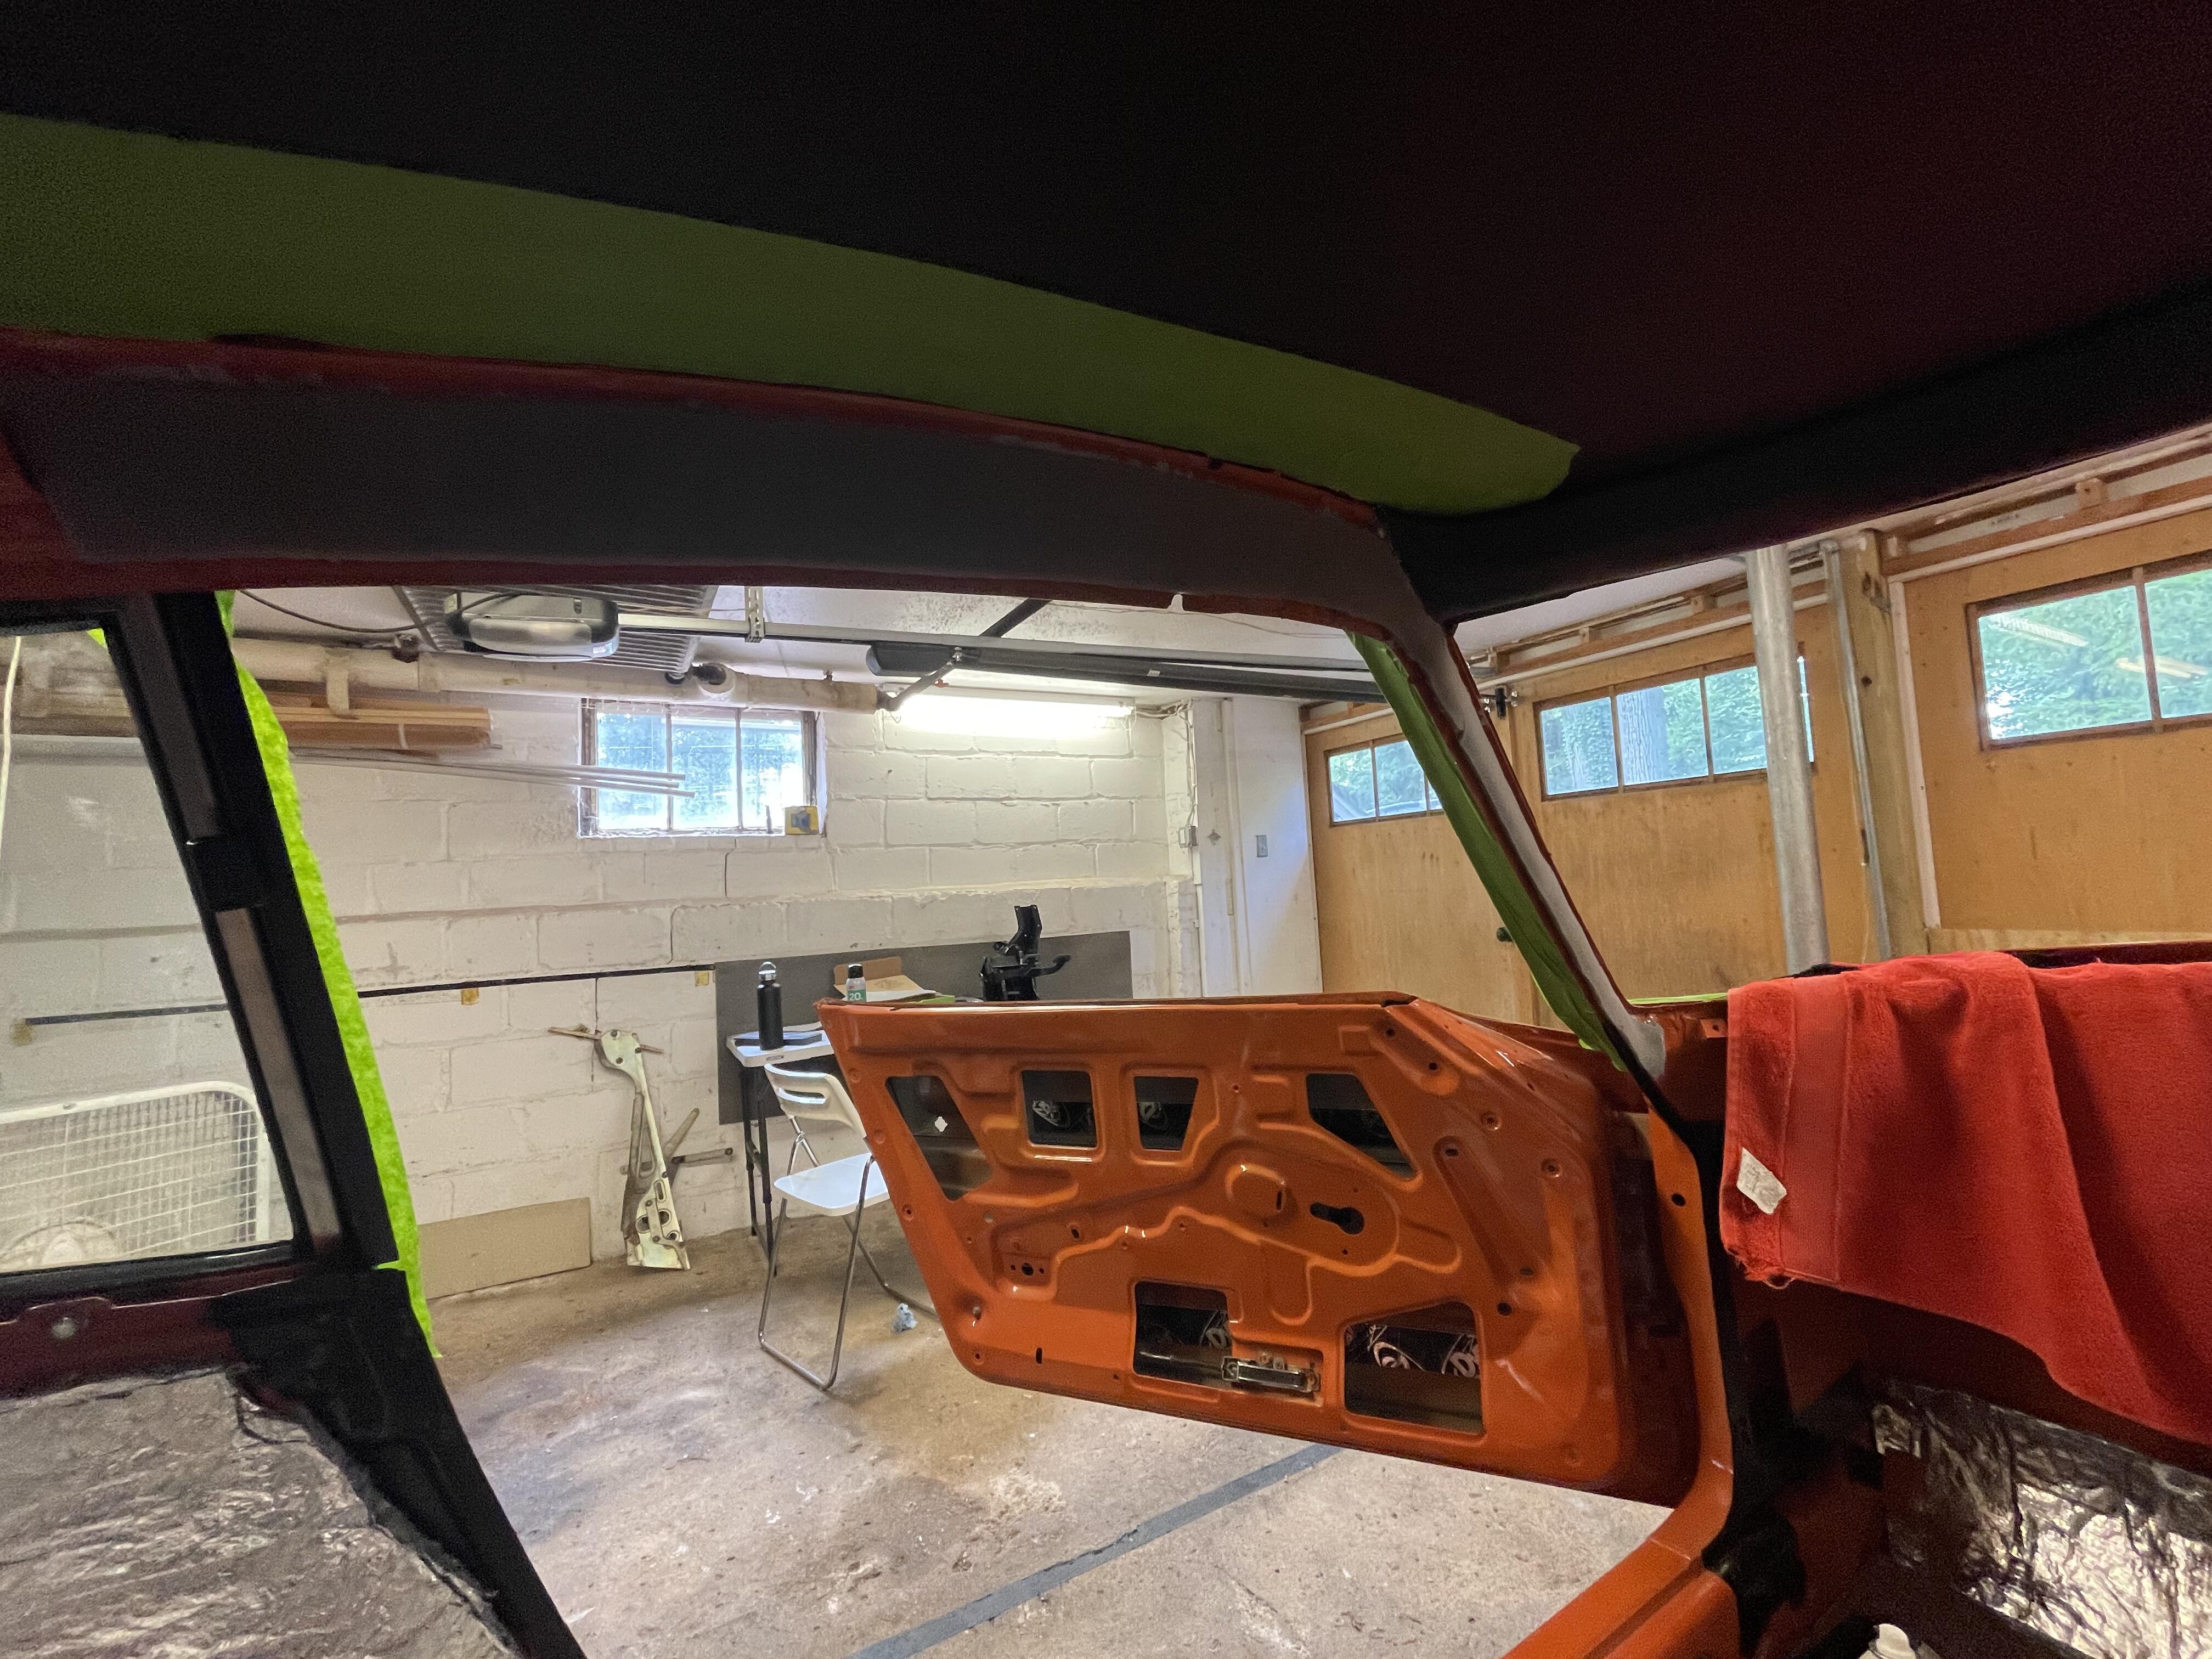
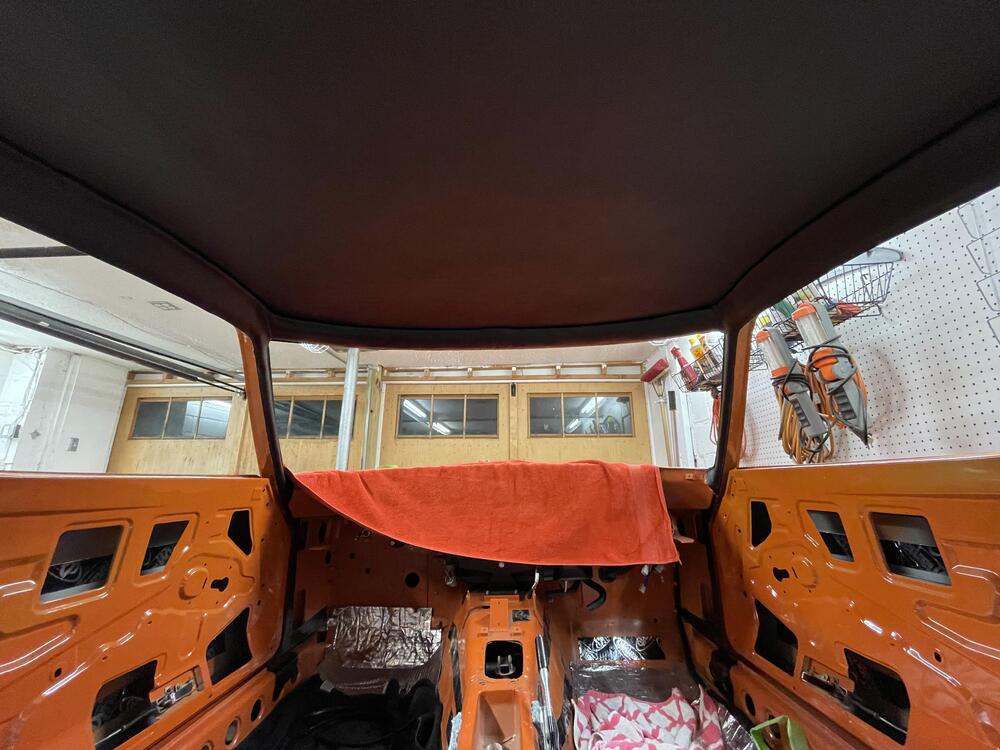
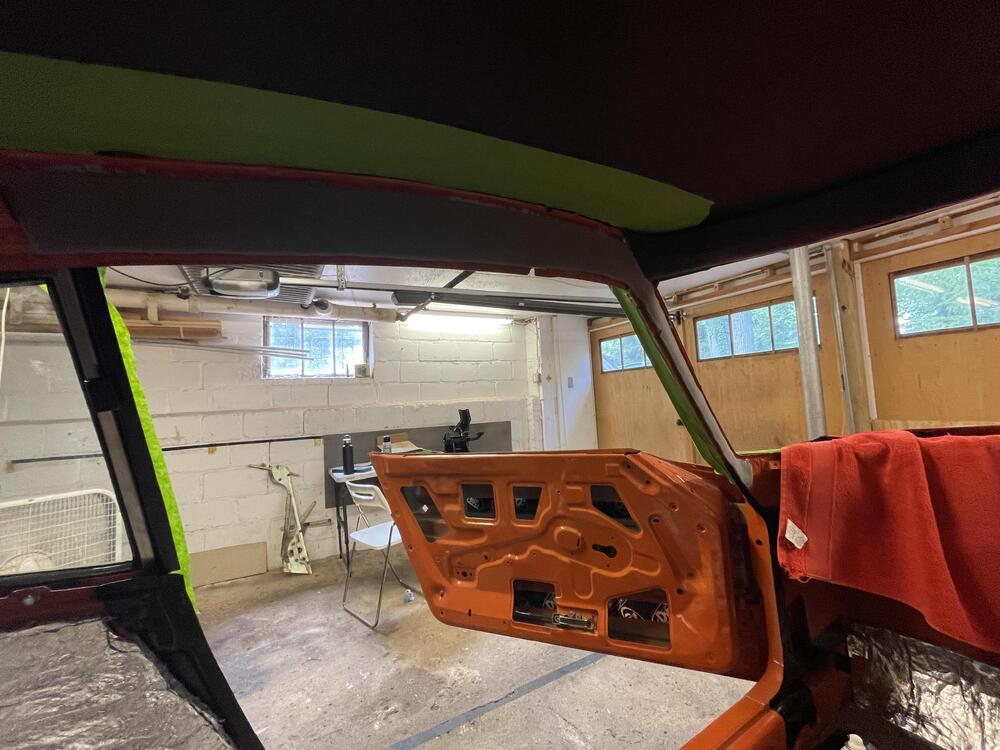
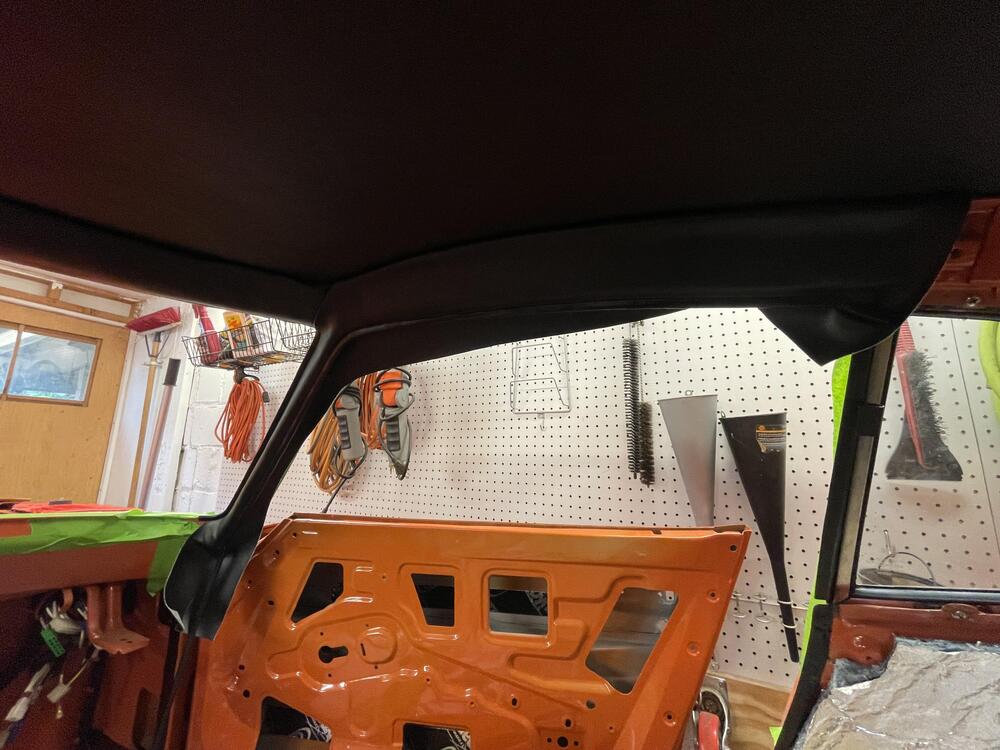
I’ve been neglecting this thread so I’m going to make a series of updates in quick succession… After much messing about I was able to close my coolant circuit. It was not easy. I had to order an entire set of clamps because I had the wrong size in eight (!) places. Luckily a friend of mine has a vacuum system for checking this and I got it sorted. She held vacuum for an hour so I’m confident it will be good. Despite being reassured by the seller that it had been tested, it turns out my coolant regulator leaks, so I swapped it for an open T fitting until I can repair it. Yeah, I know there’s a source for NOS ones, but I’m not paying his prices. ••• Vibe change. This vinyl pillar trim really changed how the inside of the car feels. Now I feel some urgency to get the windows in to keep the dust out. I’m 90% happy with how this came out. There is some unevenness I am hoping will come out as the vinyl settles in the same way it did in the head liner. I would try the heat gun on it but I’m too paranoid, plus my garage is hot enough I don’t really need to. If anything I’m nervous the glue will fail because of the heat. It’s an easy kit, but I made a critical error and used the wrong piece for the front, so I have to make the pieces work, which required some extra persuasion (see last photo for the pucker at the rearview mirror that should be hidden by the bracket). I’m sure if I had my mind right and took my time it would have been a cinch.


-
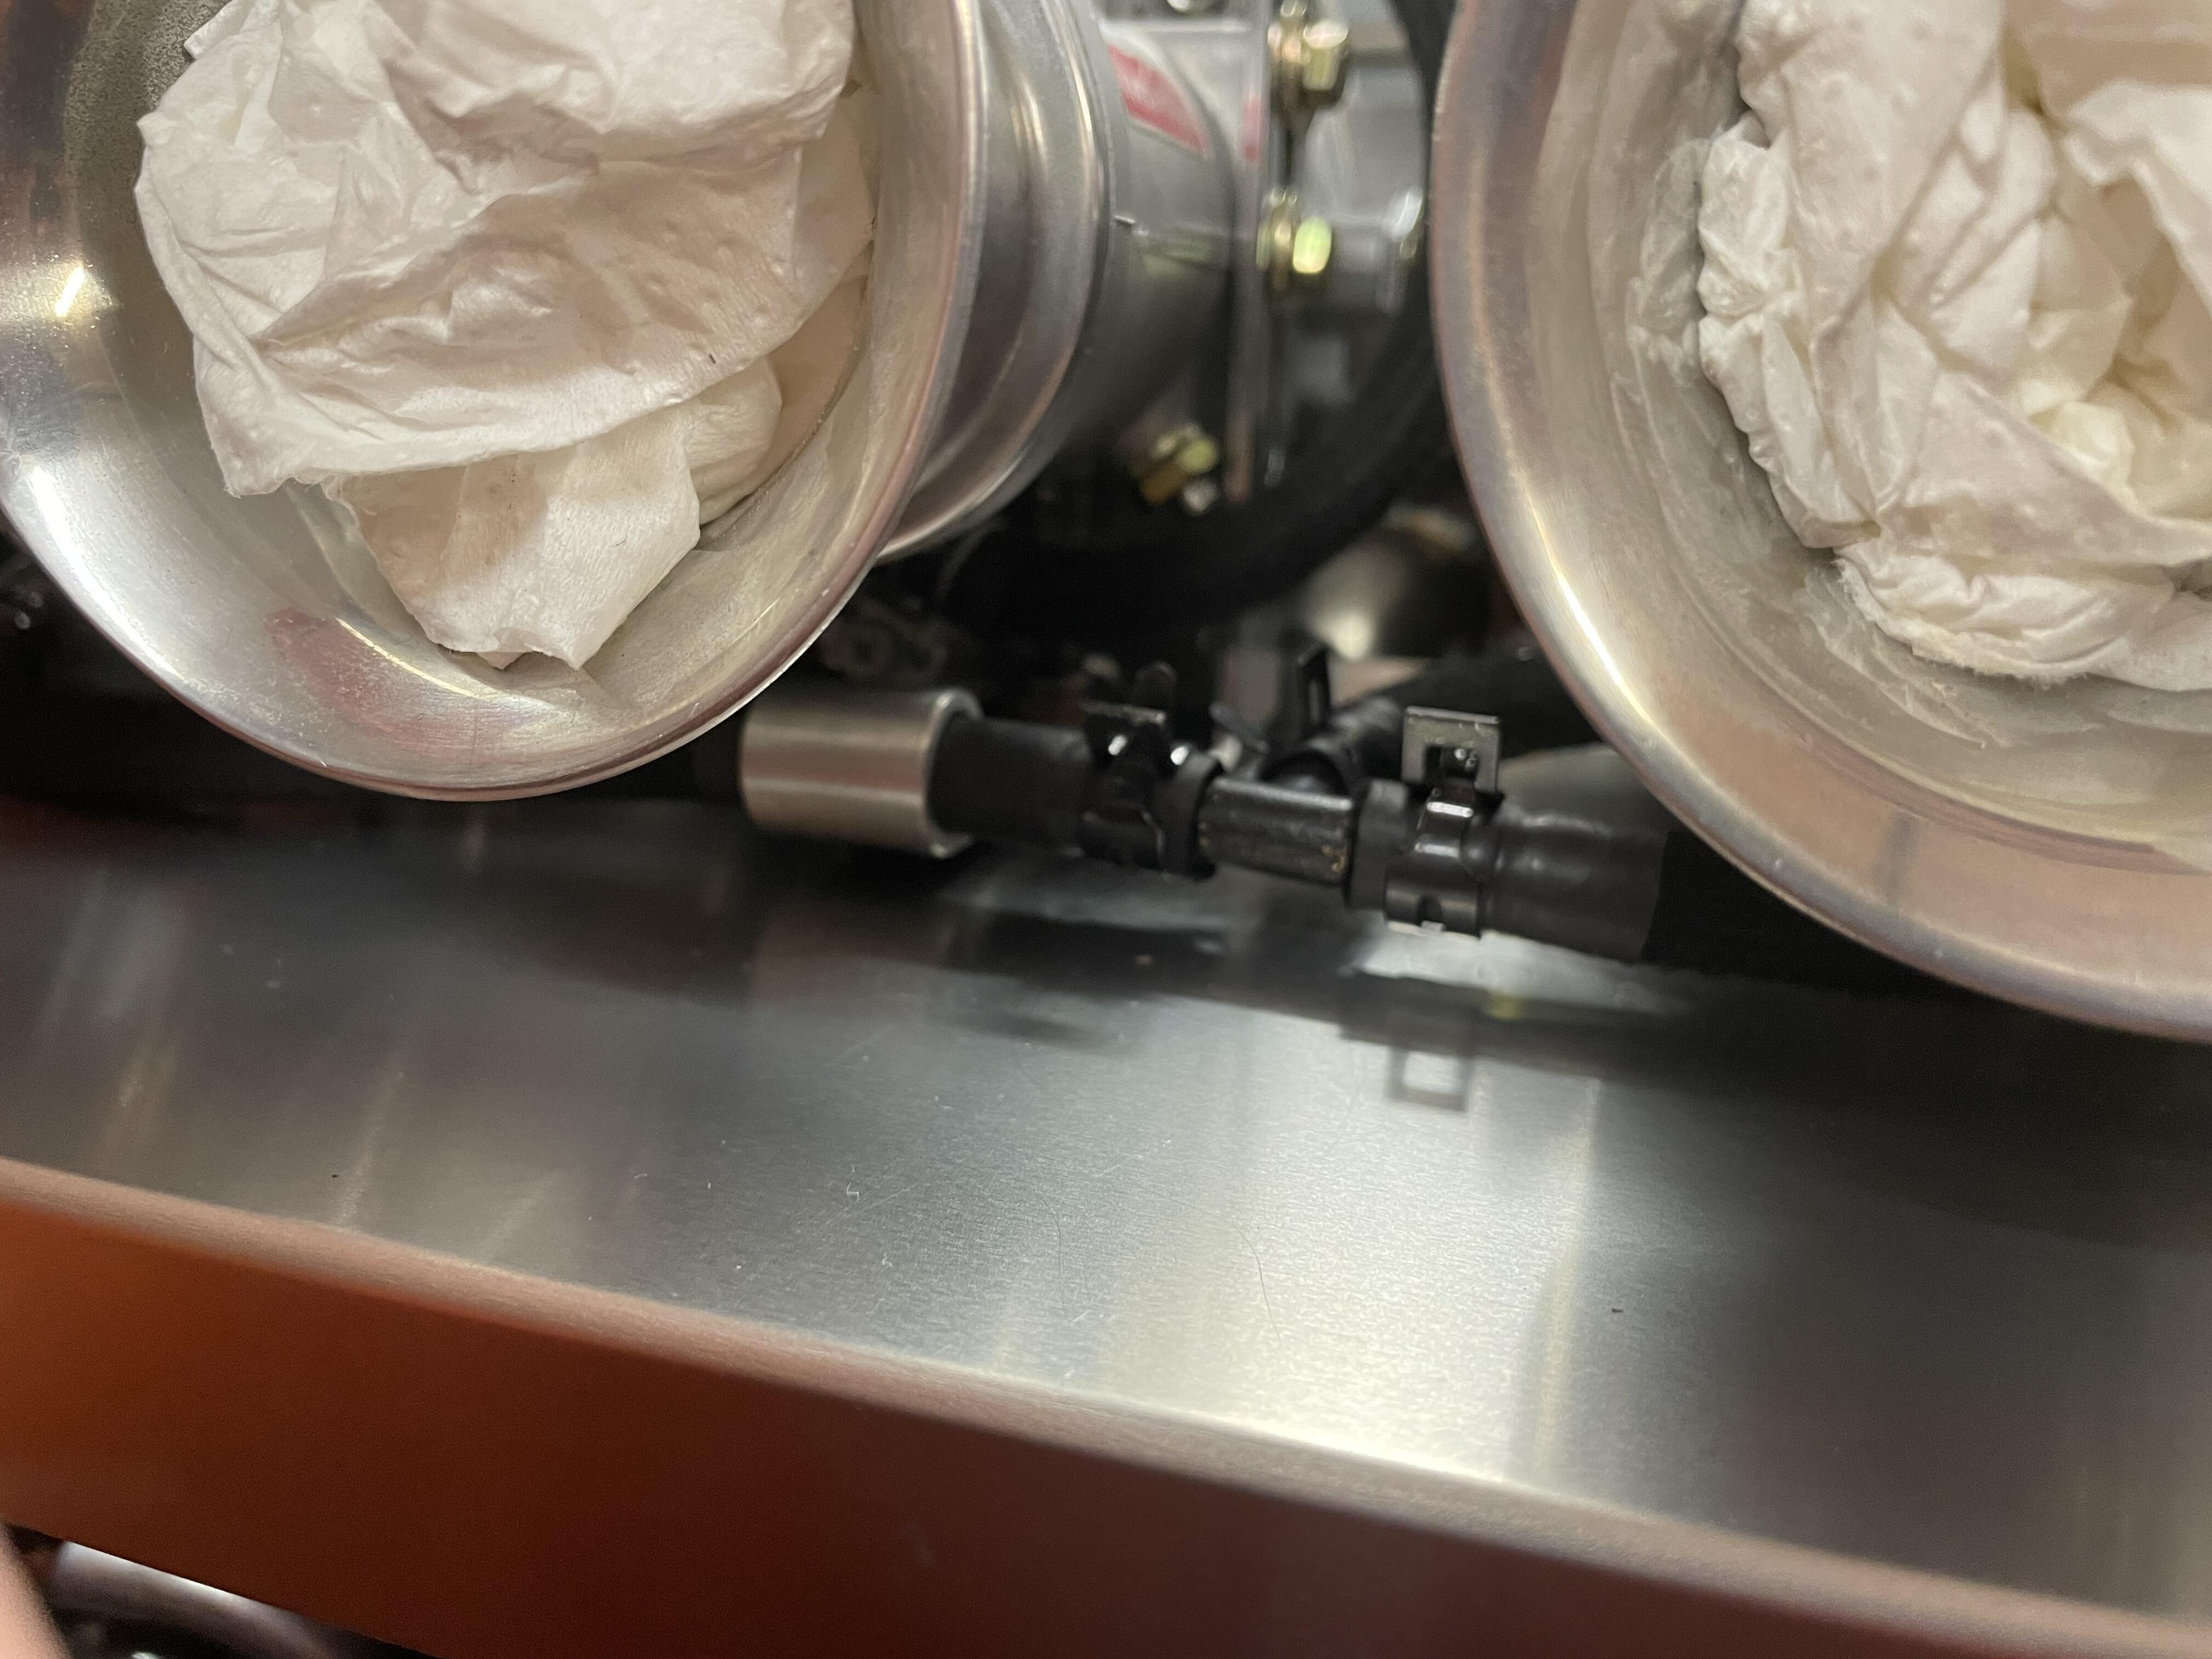
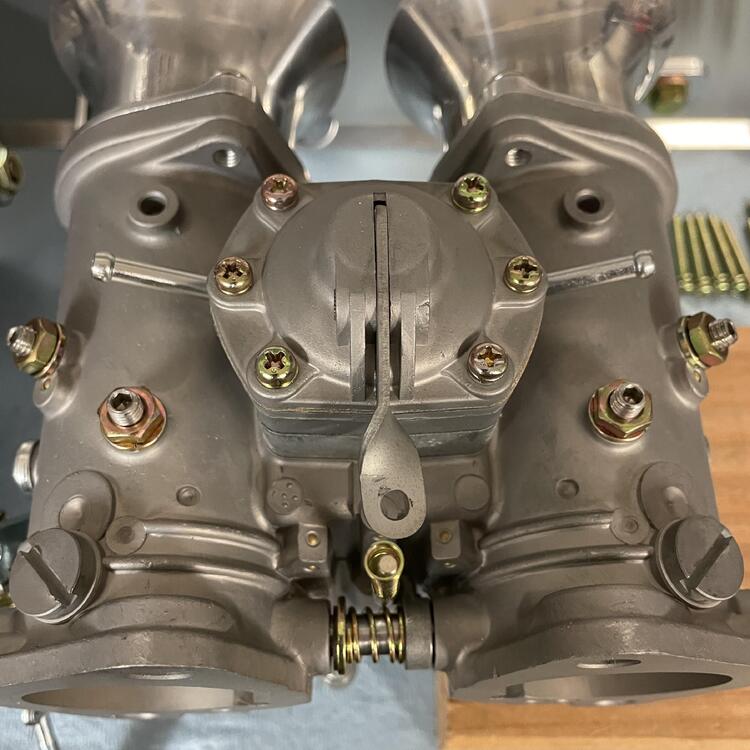
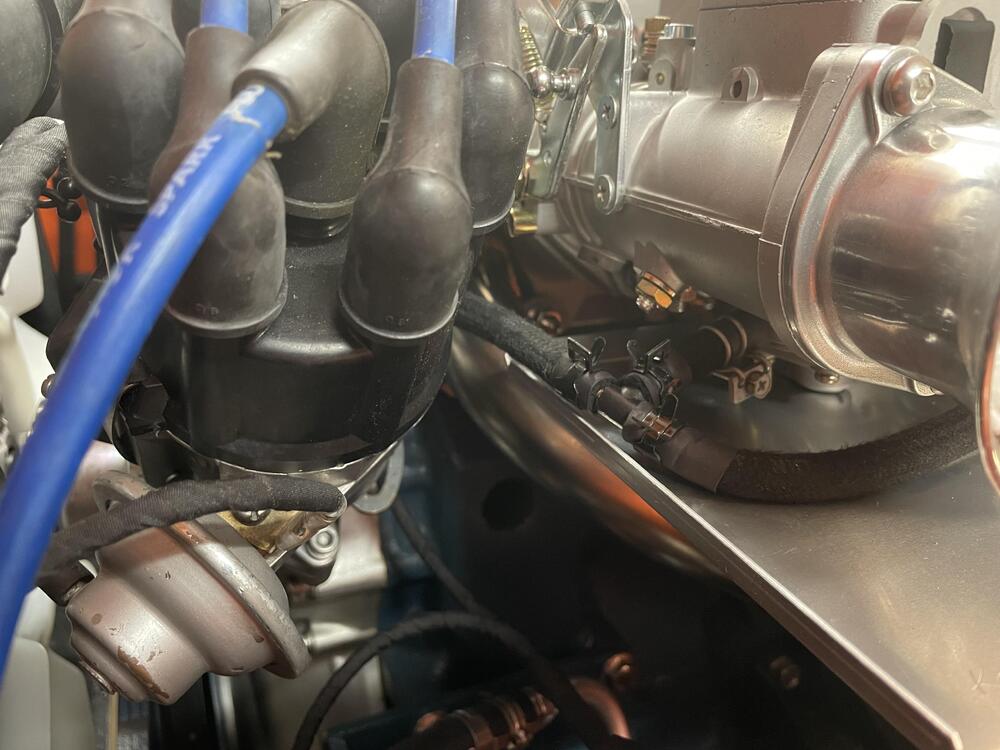
Okay, ran into another hurdle (although minor): My middle carburetor has a ball plugging the vacuum port. Yes, I know people don’t use vacuum advance with these, but I’m investigating solutions to that and this is stopping me. Does anyone know how to get it out? I’m not sure how to remove the vacuum port. It’s probably pressed in. I have a feeling I’ll have to use a drill.

-
Thanks! It depends on whether or not I make the dashboard wiring harness a blocker. If I don’t then I only need to jump some wires in the engine harness, make battery cables, fill the radiator, and bypass the heater. I have everything necessary to do those things, so I could theoretically finish all of that in a week. I also need to decide if I am going to fill the gas tank now or have the supply come from an external tank. Oh, and I need to get the transmission into neutral without having a shift stick, clutch cylinder, or clutch pedal in the car.
-
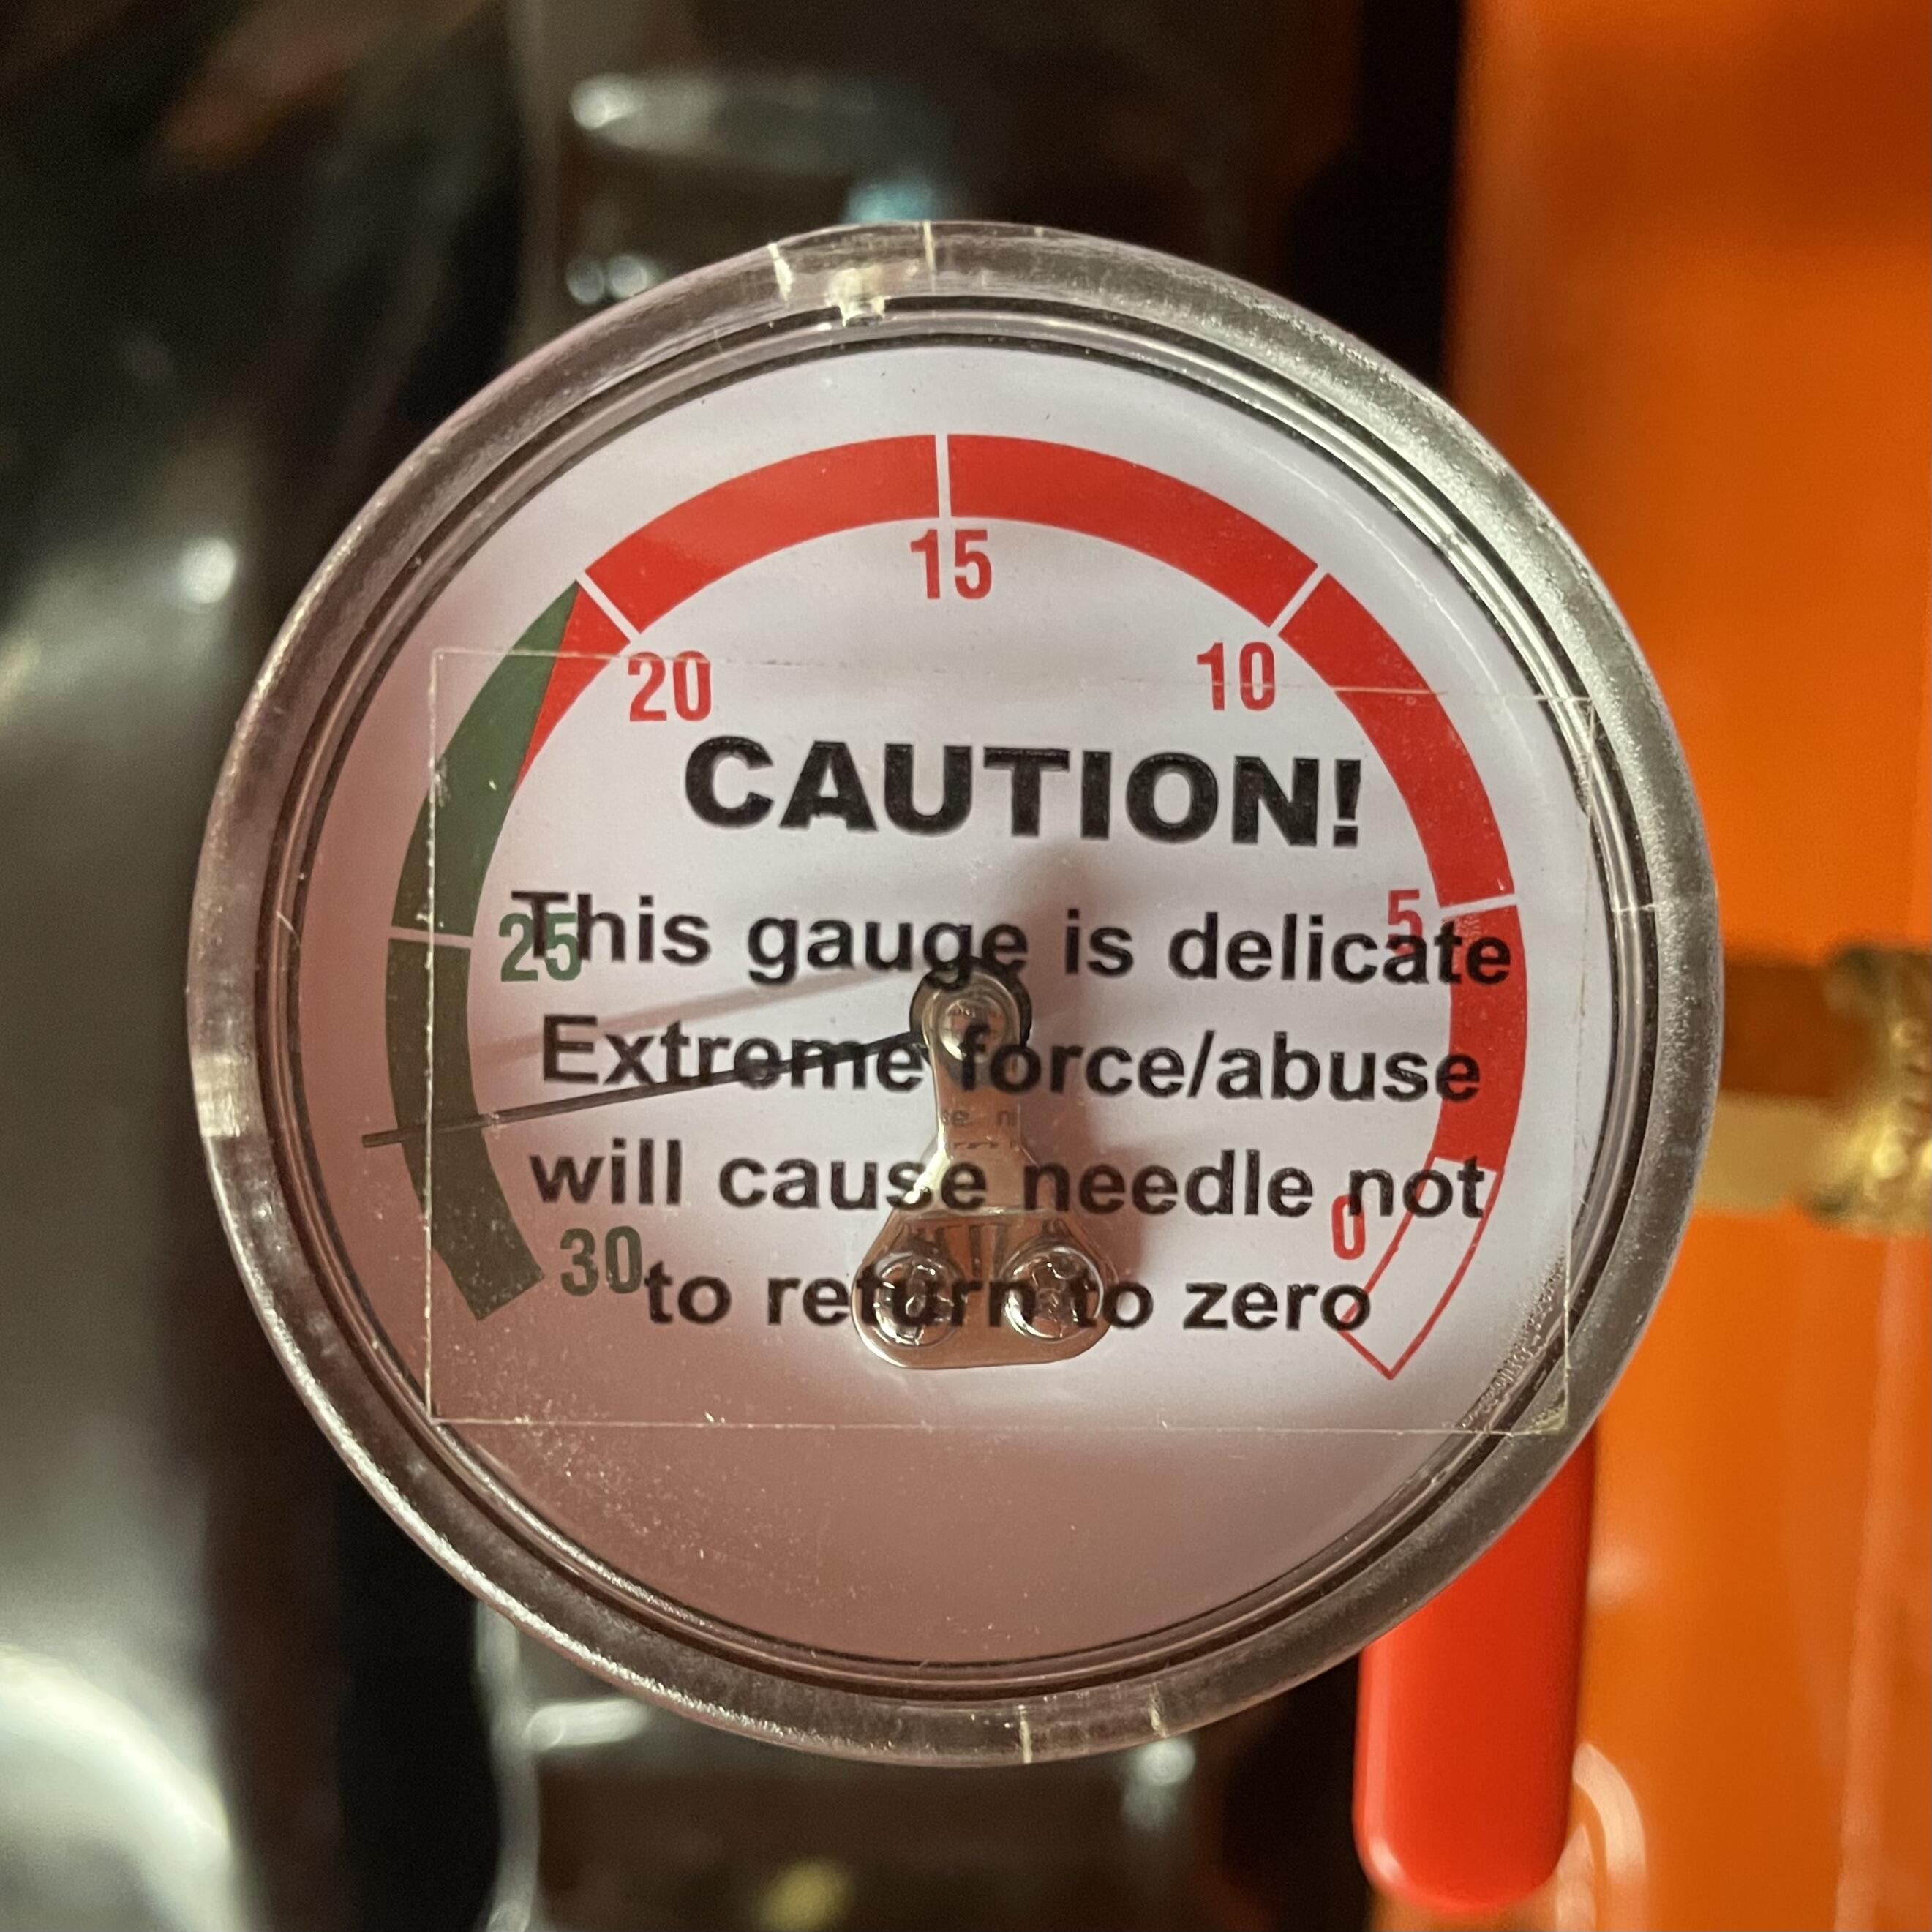
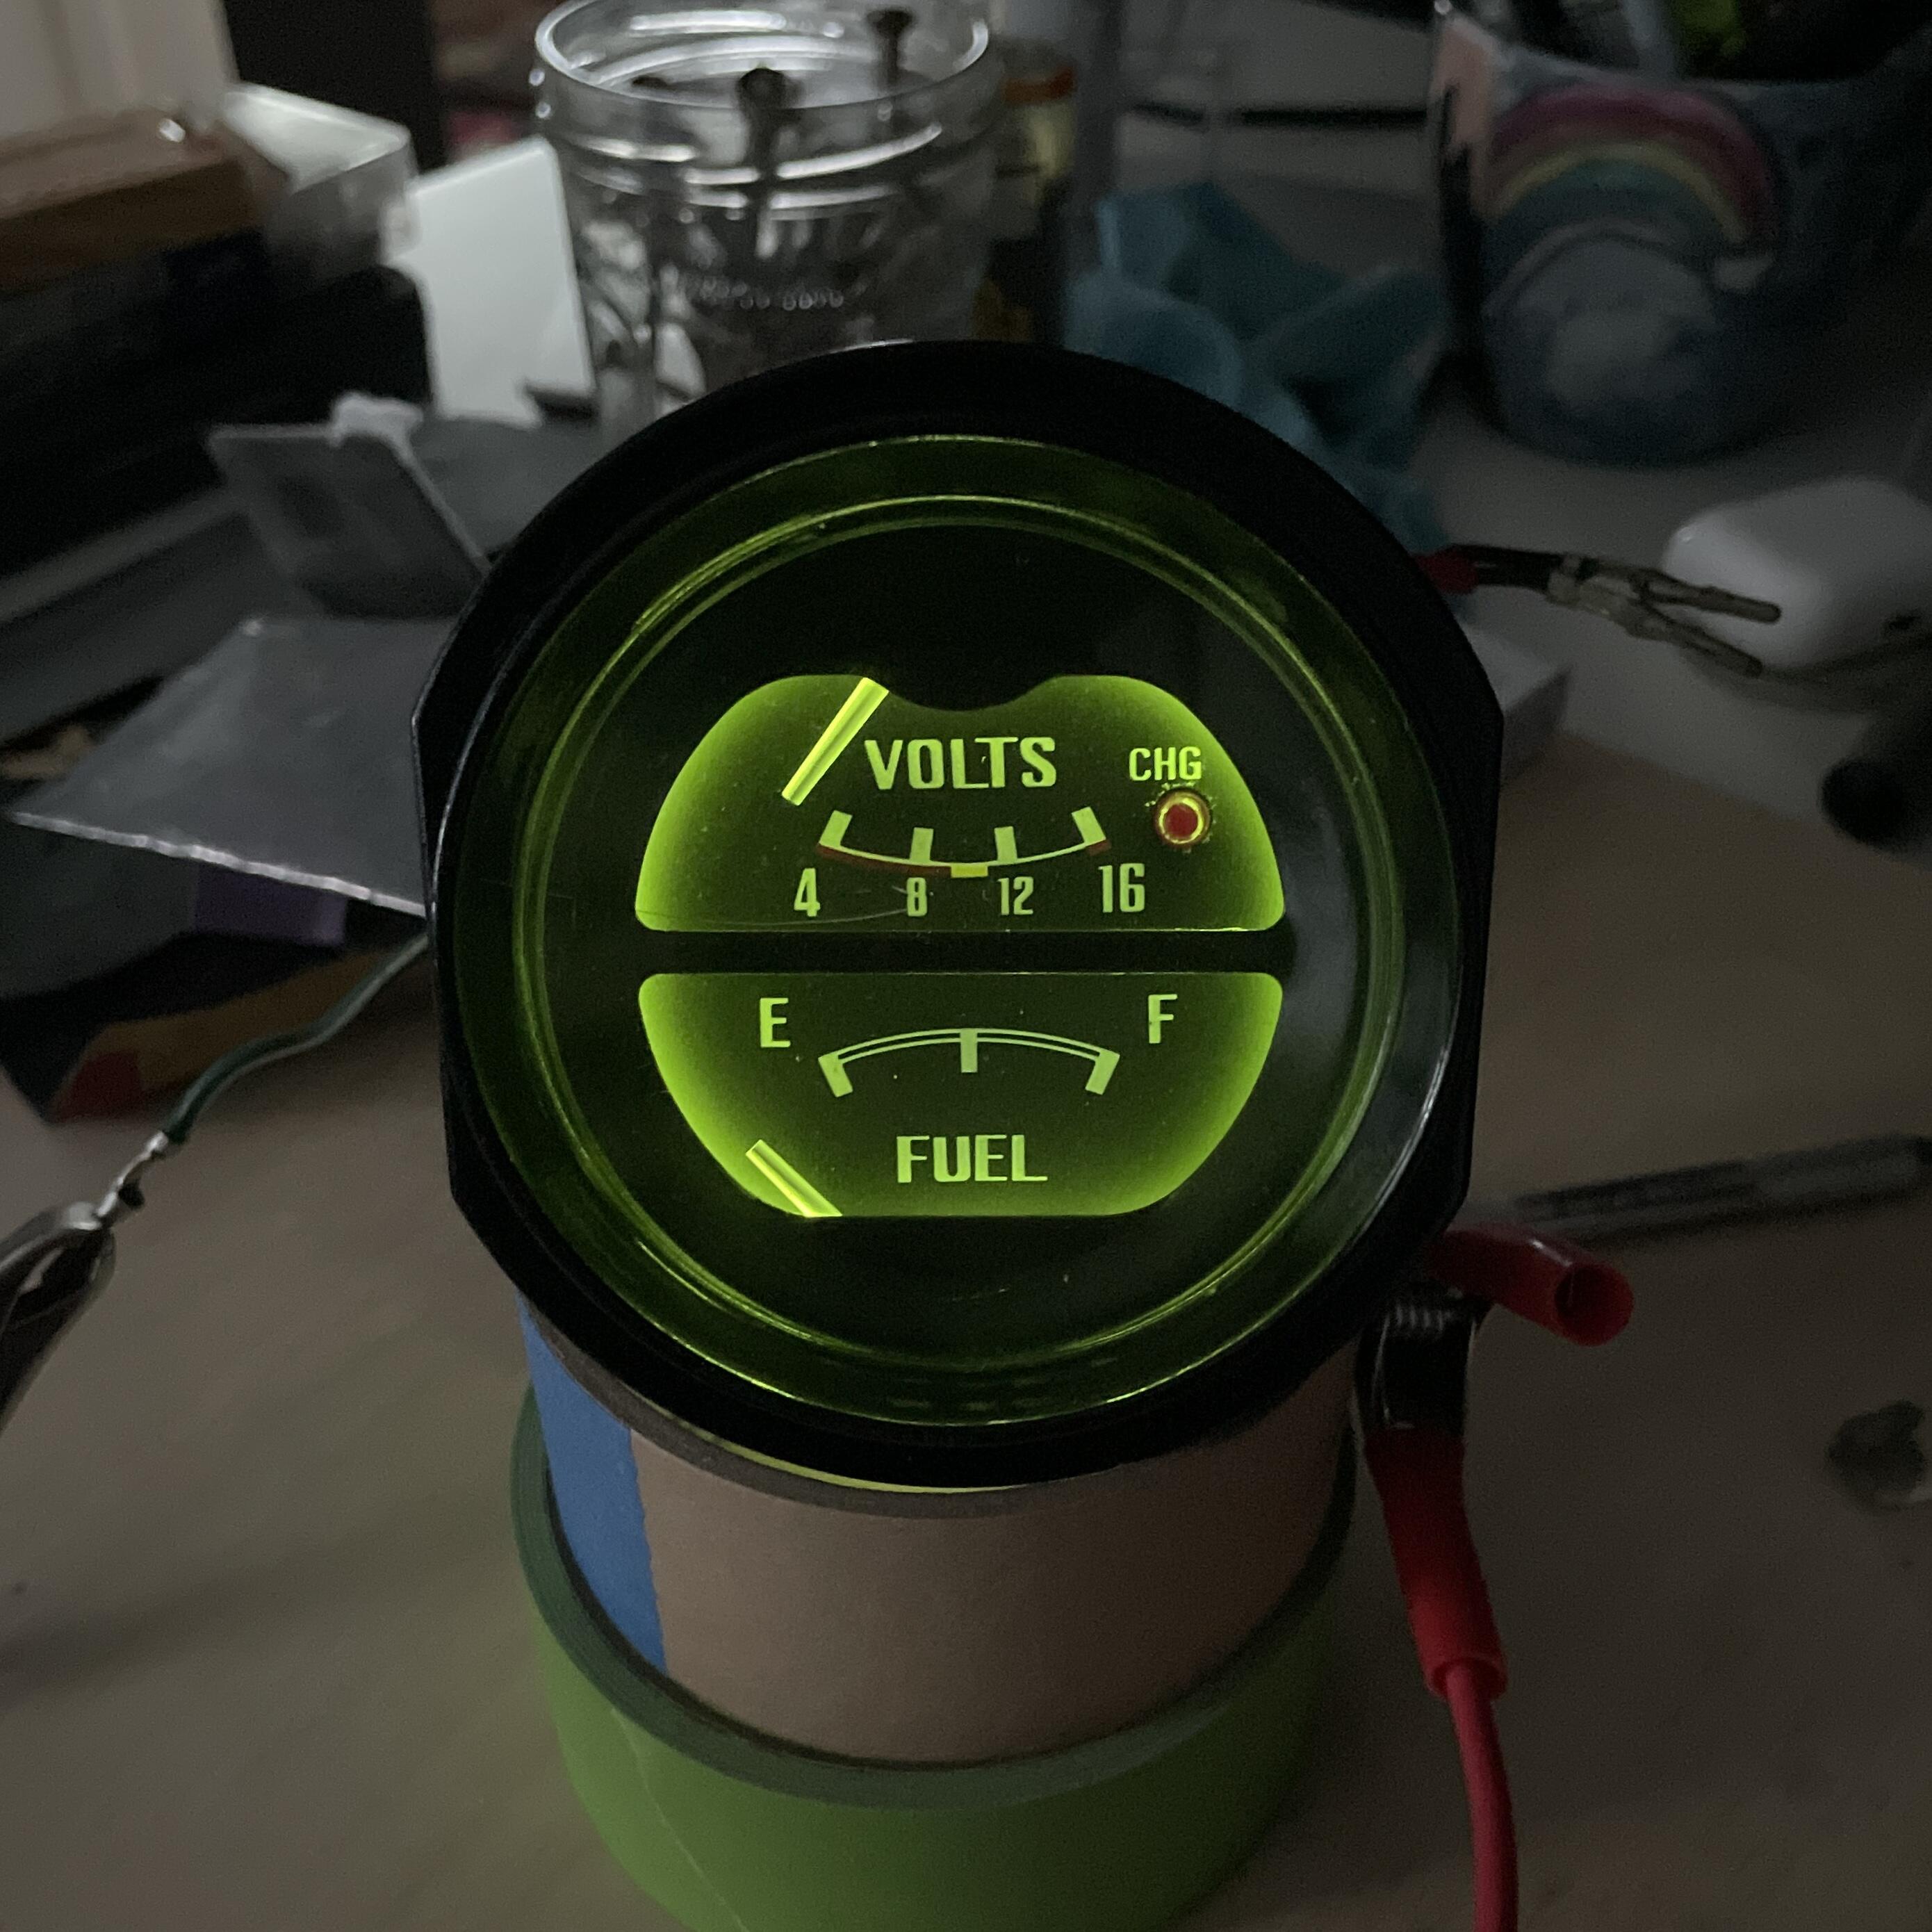
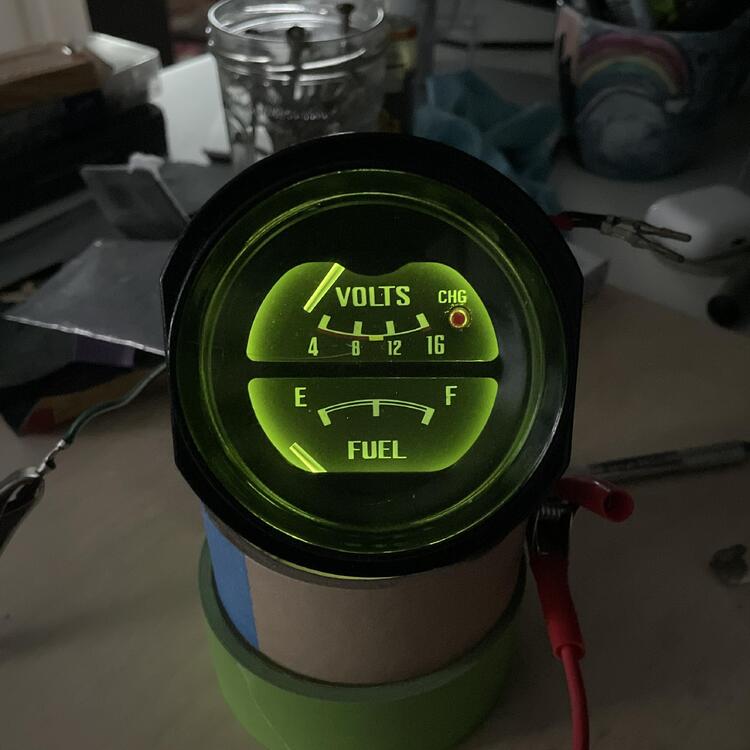
Some progress: Reboxed all my parts. It really drove home how much work I still have in front of me. ••• Wrapped up the remaining AC lines. Pretty pleased with how these turned out. Hopefully they don’t have any leaks! ••• Refinished and rebuilt my gauges. I matched the green to the inside of my clock rather than the blue from the gauges because the clock was in the best shape. Is it correct? ¯\_(ツ)_/¯ I used warm LEDs, which helped to knock back the intensity of the color. I’m still investigating PWM options to control their brightness. ••• Added some filter screens and cooling bodies to my carburetors. ••• Made some hose retainers for the fuel lines with a friend’s CNC machine. ••• Wrapped up the fuel lines. I may make a rail to clean up some of those cooling body hoses, but it will work for now.


-
I’m hoping someone can clarify some things for me: I would like to put something approximating the “correct” capacitor (aka condenser) on my coil and wire it up as original if possible. Z Car Depot describes the RFI suppression capacitor as plugging into the harness via a bullet connector. My harness was cut at several points because the previous owner was trying to force an AT harness to work in a manual, so I may have made a mistake when mapping everything to the wiring diagram. There is a B/W wire that splices to a green wire that ran to the voltage regulator and then through the firewall and to the green wires coming off the fuse box that supply power to the seatbelt switches & light and gauges. Could this B/W wire be what is supposed to connect to the capacitor? If so, that makes it easy. If not, I’ll just use it as an aux power feed and tape it back for any future needs. Secondly, is that even the best way to wire it up? I know others wire it directly to the positive pole on the coil. And last, does it matter what capacitance rating I use for this? The 280ZX (my engine and ignition are from a ZX) used a two-wire, 250v, .47uF capacitor. I have no idea what the 240z used. As far as I can tell, the .22uF ones were for the dizzy. I’ve found one from an RX-7 that has that rating, but it doesn’t look anything like the cylindrical ones from the ‘70s. I’ve also found some that are .50uF. Is that difference going to impact anything? Maybe this is trivial and I’m overthinking it, but like I said, I’d like to at least try to get it right.
-
@Yarb That would be fantastic! Thanks