inline6
 Subscriber
-
Joined
-
Last visited
Everything posted by inline6
-
 Anyone have any details about the hardware used here? This is a 1971 240z.
-
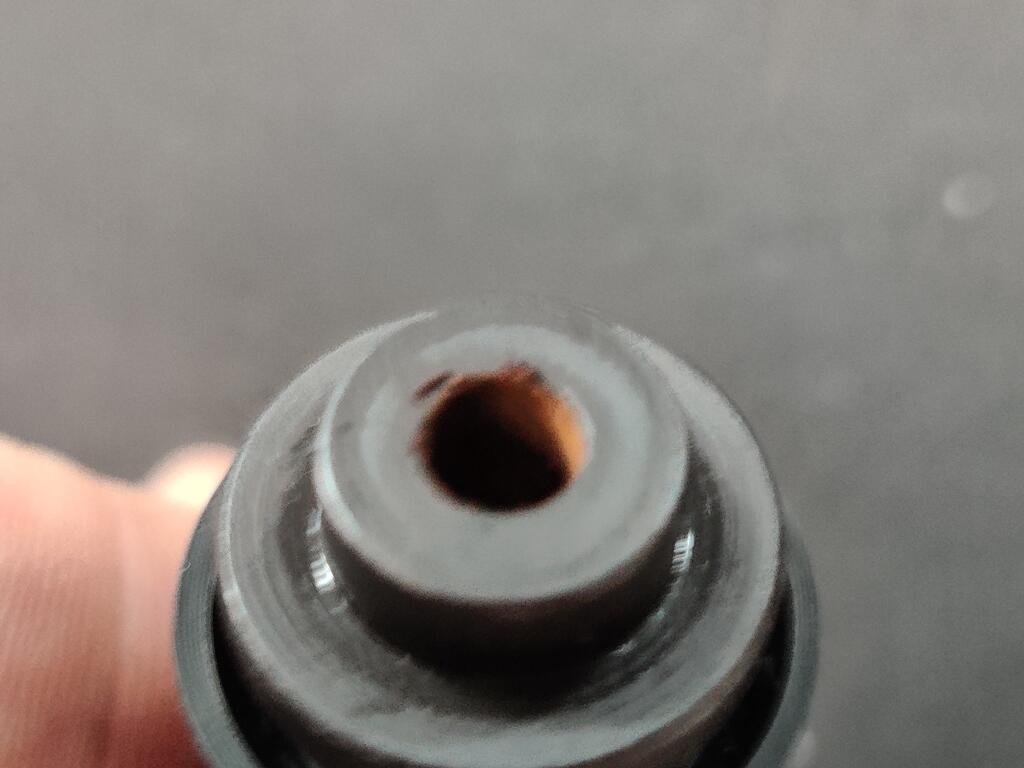
Referencing this nice exploded view and my comments earlier, #9 is the valve that got stuck. #10 is a rubber part that fits on #9. When the rod portion of #9 seizes in #12, then the cylinder operation stops working properly. I don't know exactly how it works, but I think #9 works like a one way valve - it seems to close the circuit, which then allows the main piston and primary cup to move fluid. When #9 is stuck in the "open" position, fluid just flows back and forth, and no force or movement of fluid is generated.
-
I recently couldn't get my clutch to bleed (just after I couldn't get my brakes to bleed), and the problem was the little slider valve found on the piston assembly. No pictures, but the little valve for the clutch master cylinder is much easier to get to than the one on the brake master cylinder. it has a little spring on it. Should be easier to disassemble and make sure it is not sticking.
-
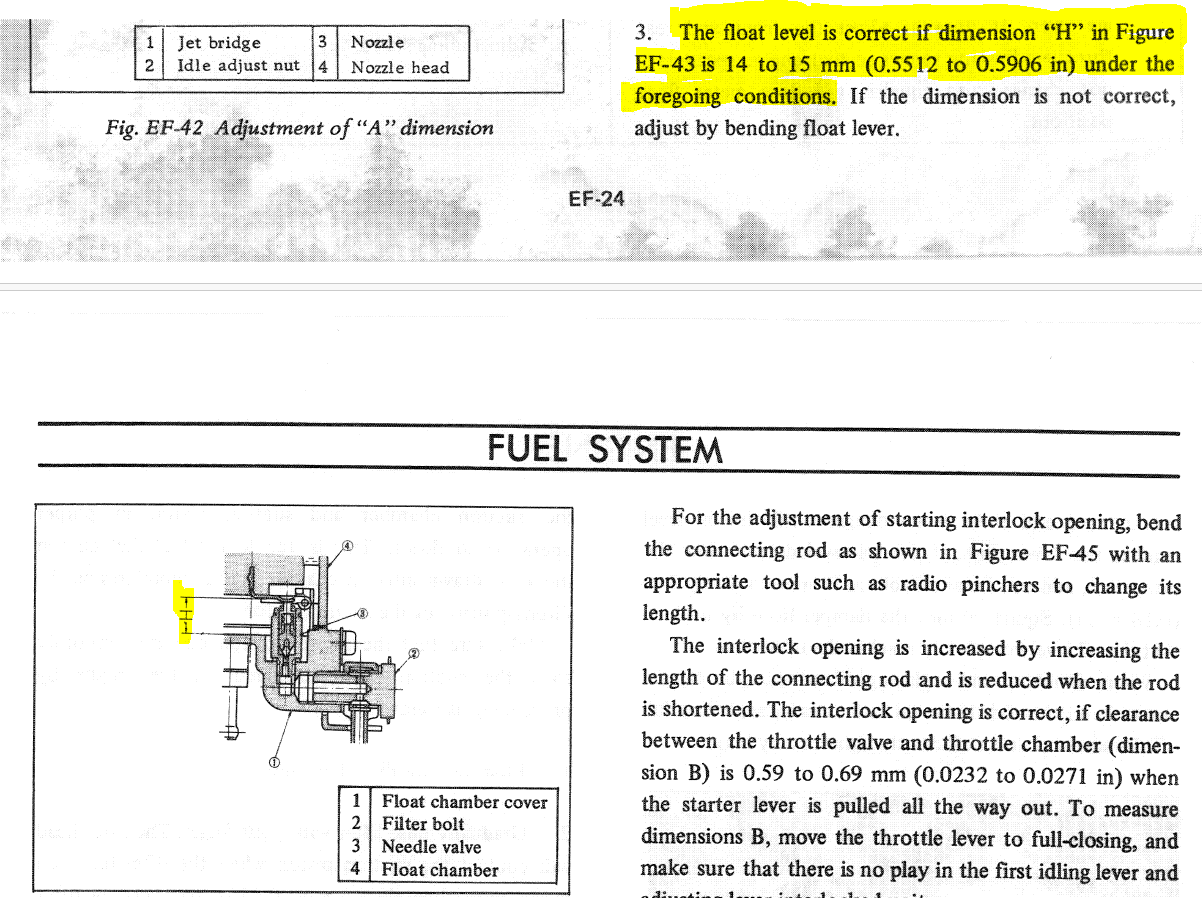
With the "wet set" method, I was setting them in the installed state, adding gas through the inlet to the float chamber. I was setting the height of the fuel (as seen by looking at the translucent nylon tub attached to the float chamber outlet) to 20 mm below the casting separation line of the chamber and the lid. I switched to setting at 14 to 15 mm between the bottom surface of the float chamber lid to to the top of the metal portion of the float. I did this by cutting and grinding 2 3d size trim nails - one to 14 mm in length and one to 15 mm in length. Using needle nose pliers, I hold each and place them vertically aligned between the float and the roof of the chamber lid. I hold the float pressed against the nail, pinching the nail (vertically aligned) against the roof... and I blow into the fuel inlet. Using the 15 mm nail segment, air can flow from the inlet past the needle valve. Using the 14 mm nail segment, it cannot. I used this method with the rear carb only. I did this yesterday. Today I started the car and the fuel did not gush out of the vent in the chamber lid. I did not run it long or do a test drive. FWIW, this second method is what I always used for my other Z when it had SU's on it. I never had problems with either fuel overflowing or performance, for that matter.
-
So a quest for the highest acceptable fuel level in the chambers may not have any value at all! Perhaps I can investigate that a bit with the wide band in coming months.
-
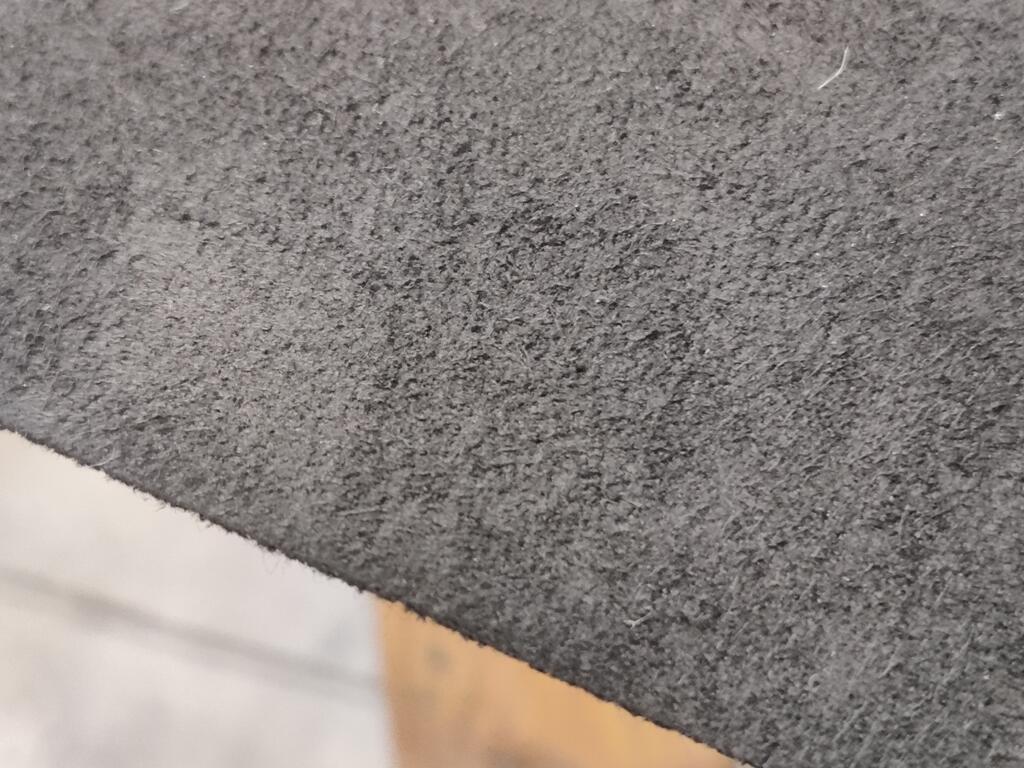
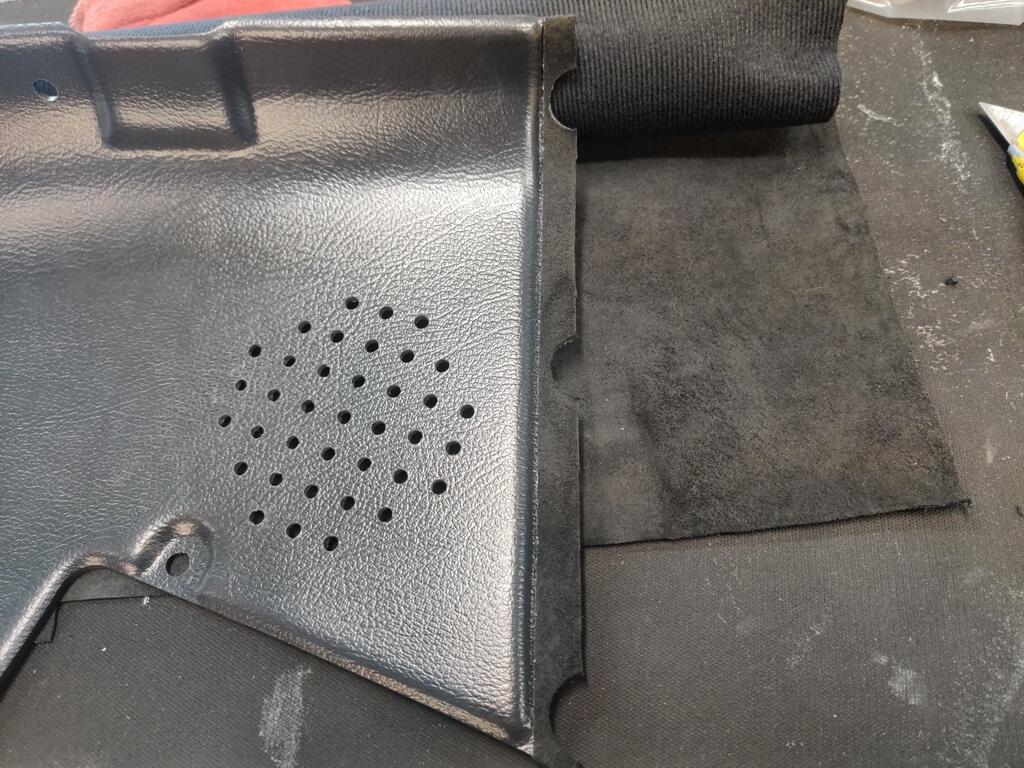
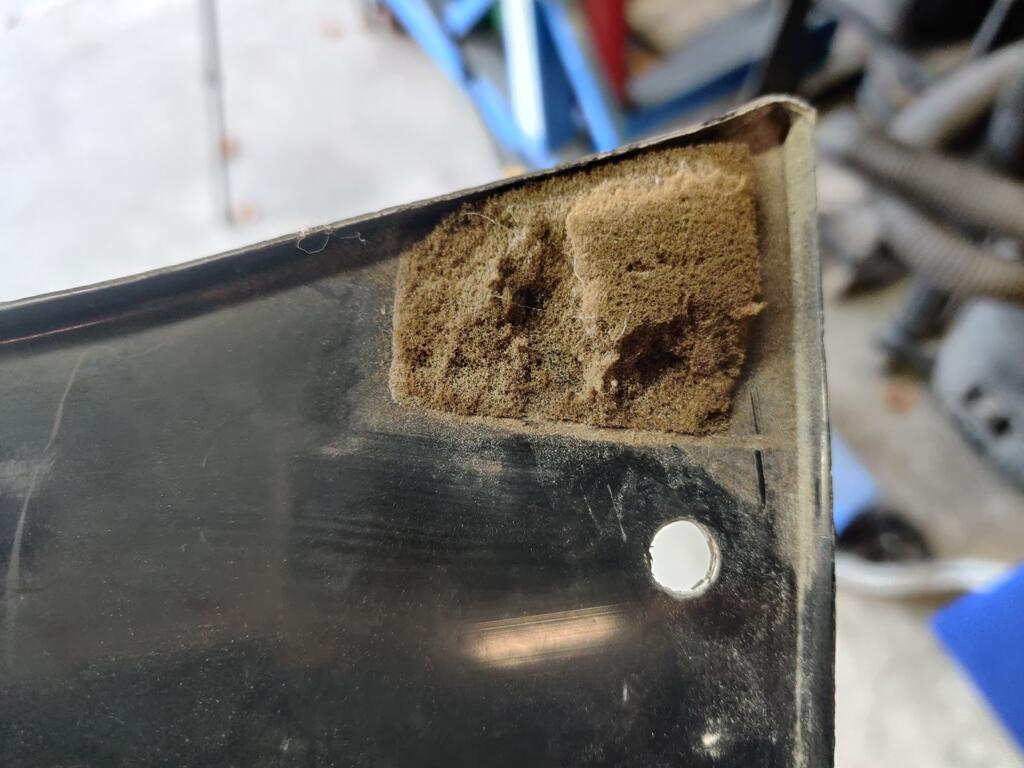
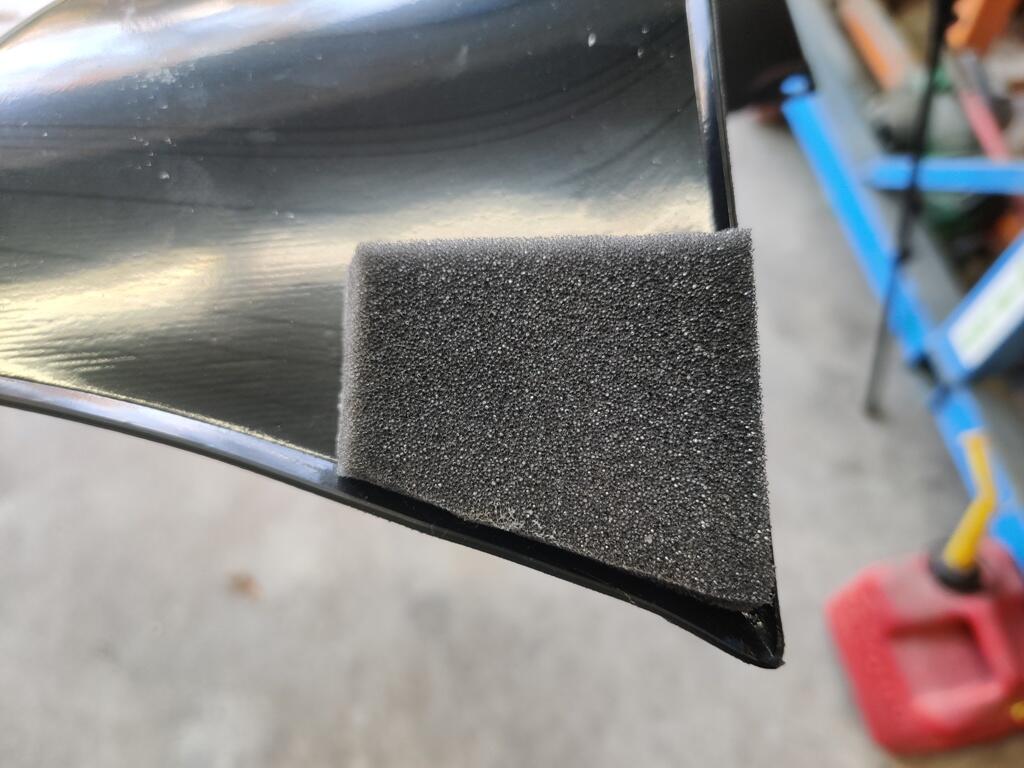
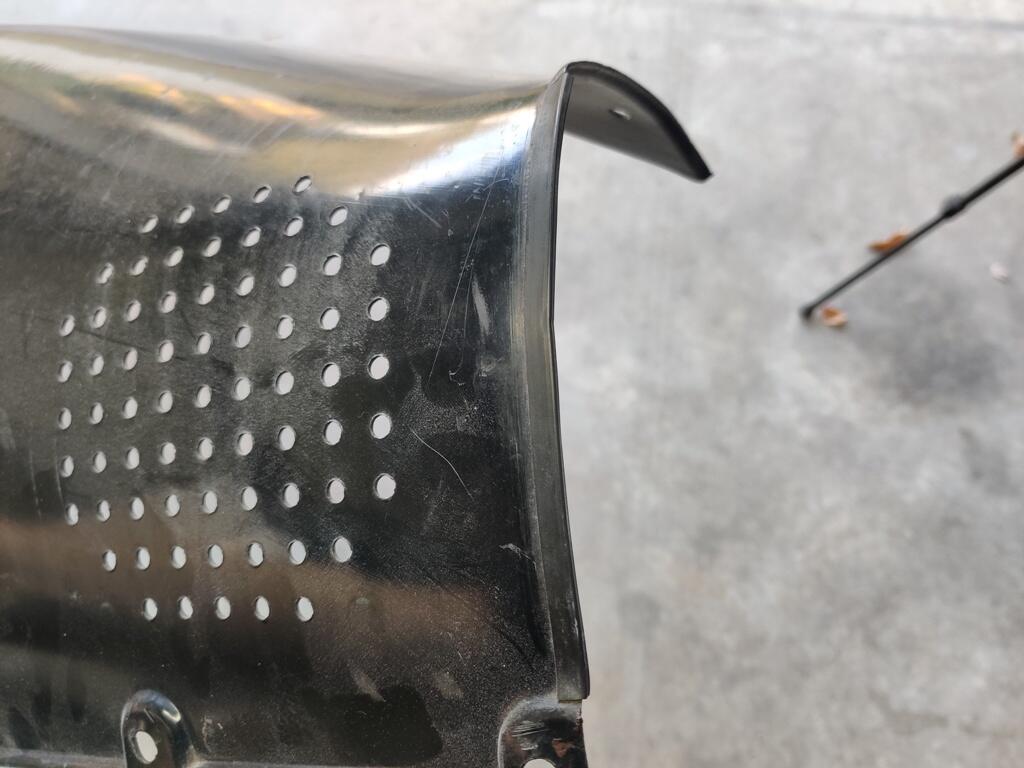
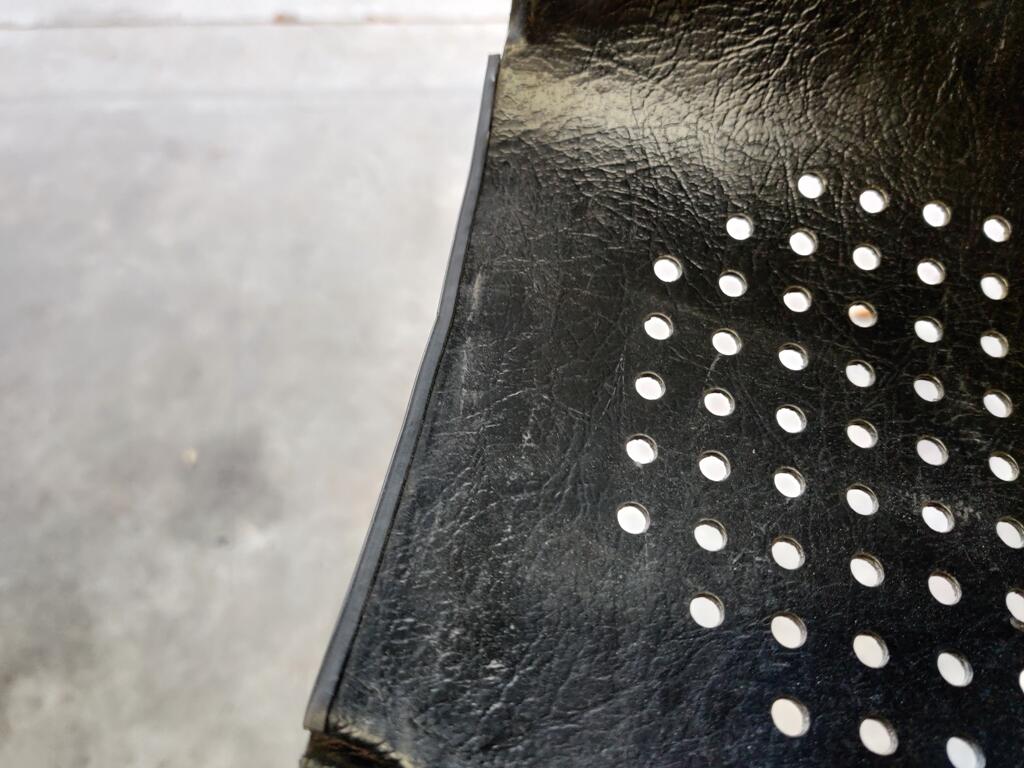
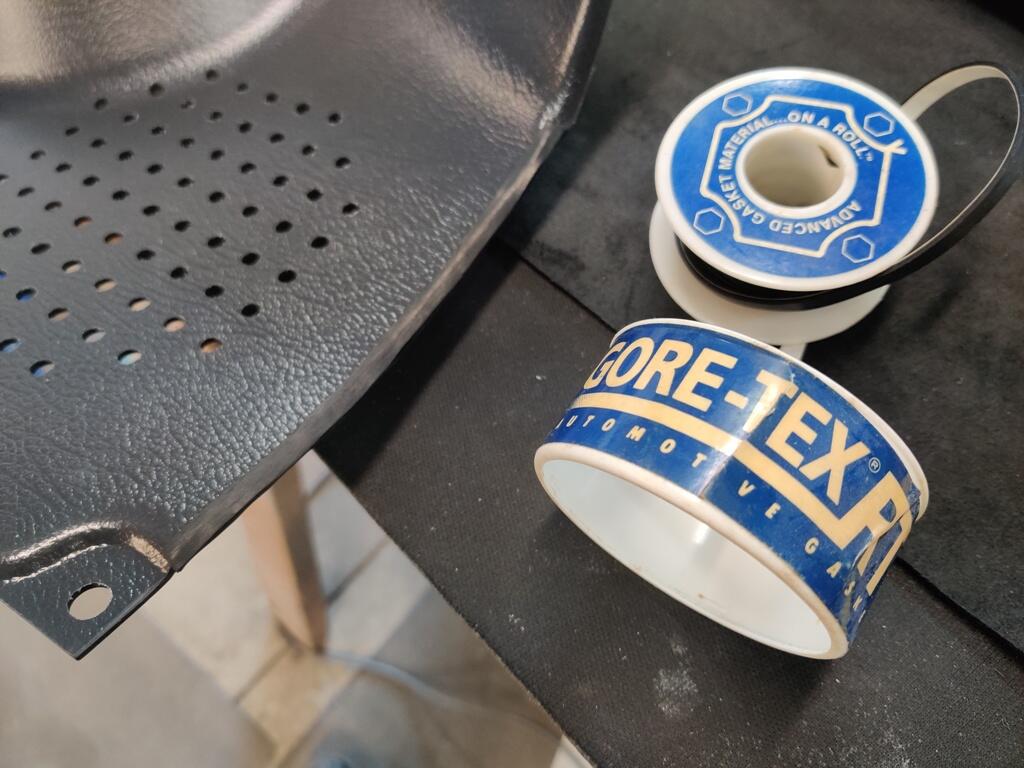
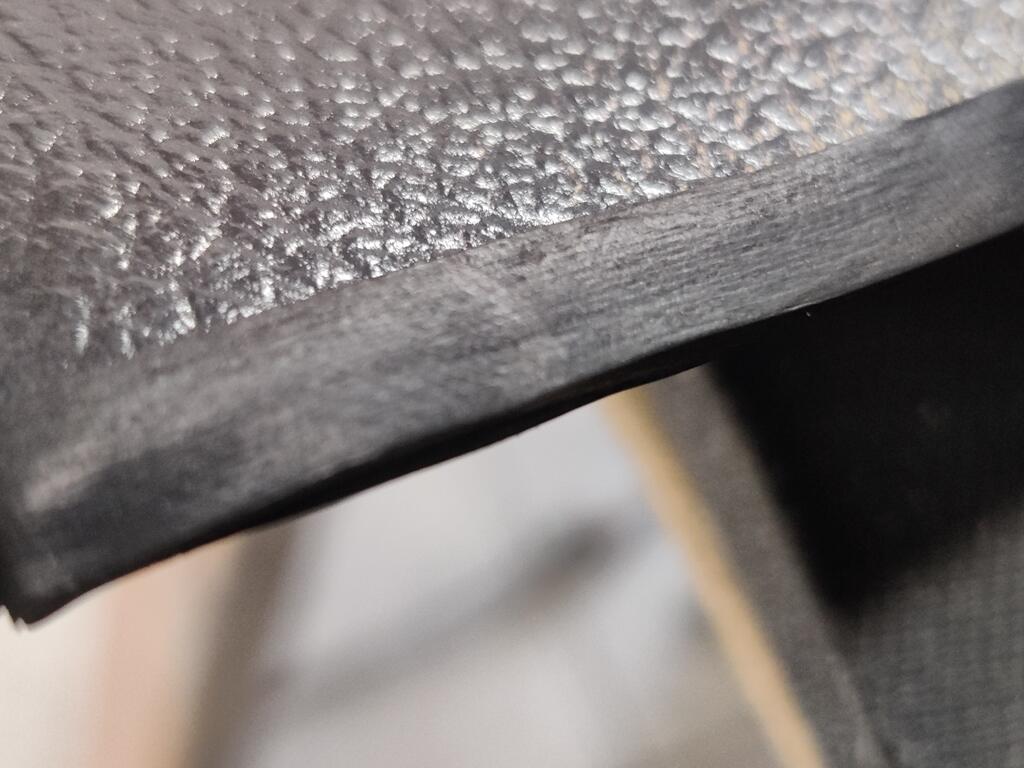
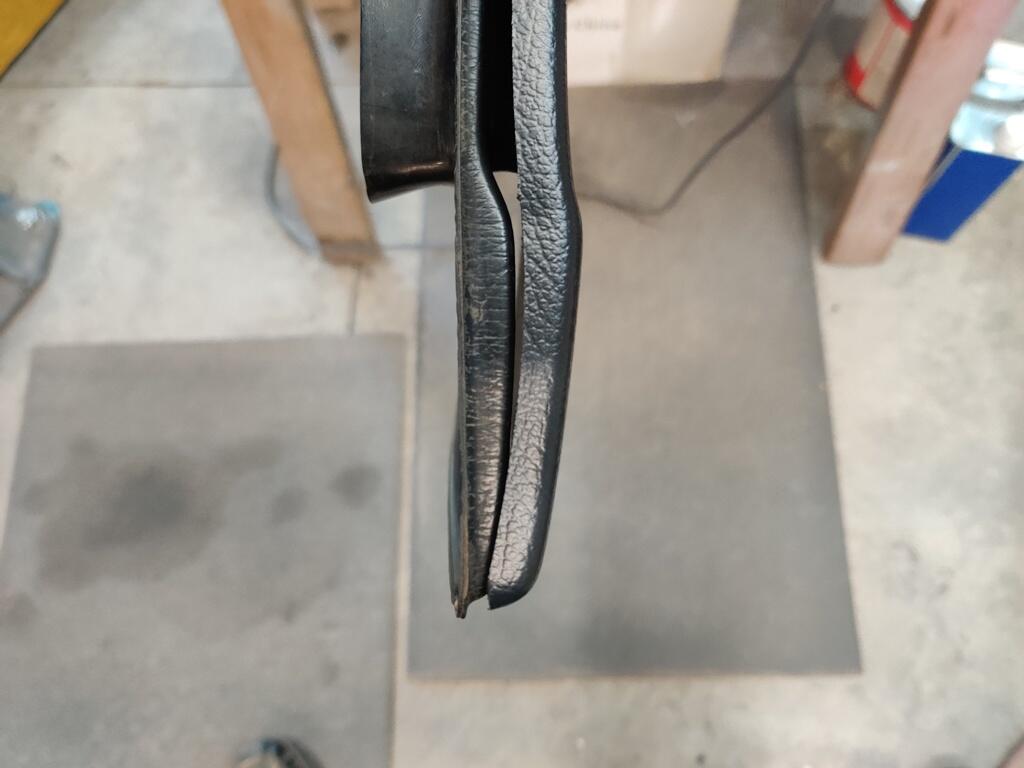
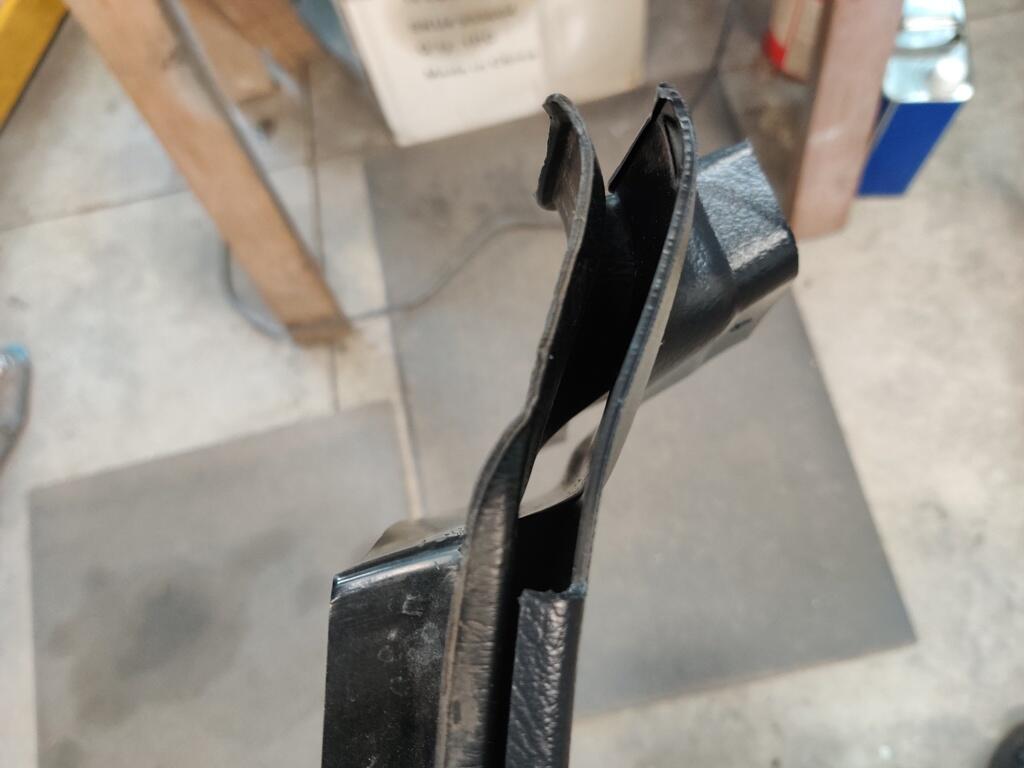
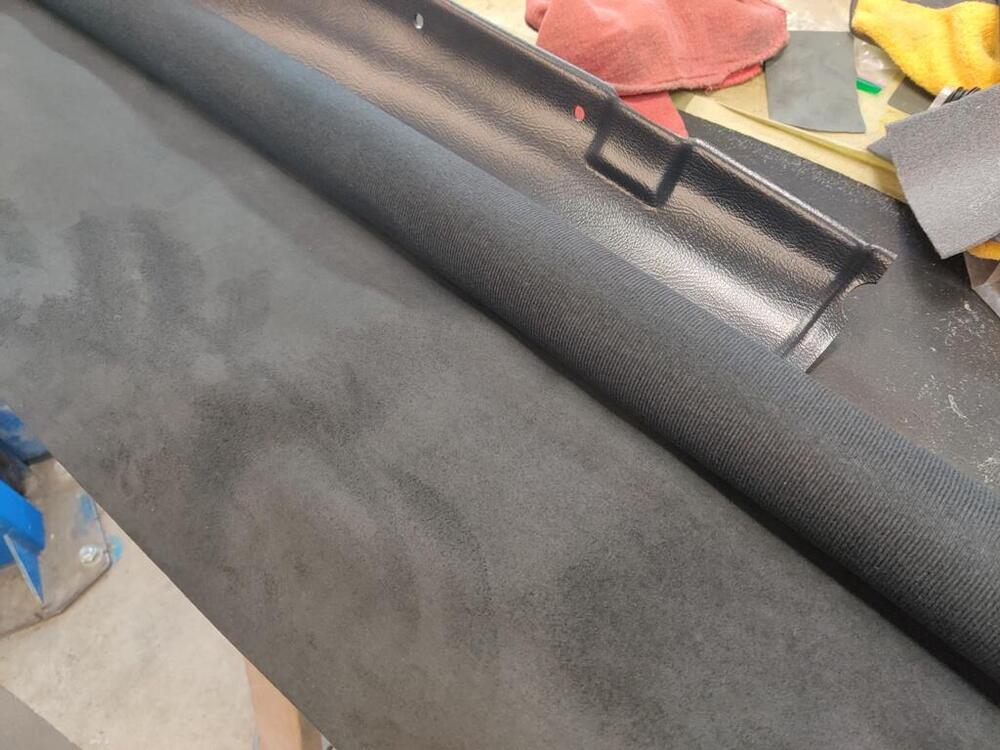
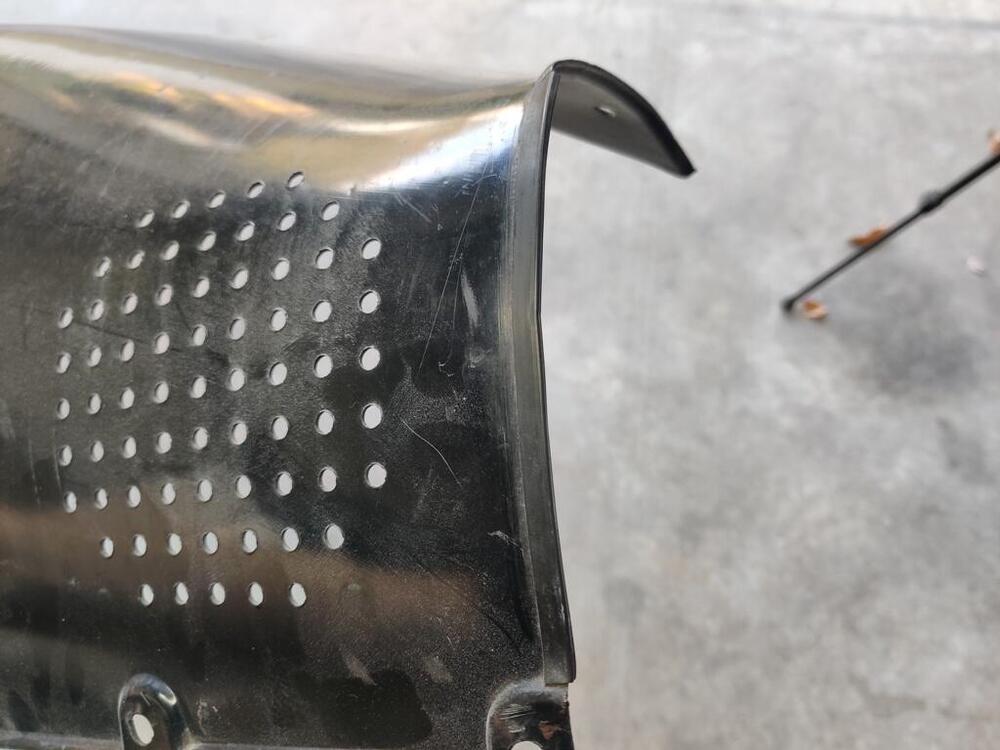
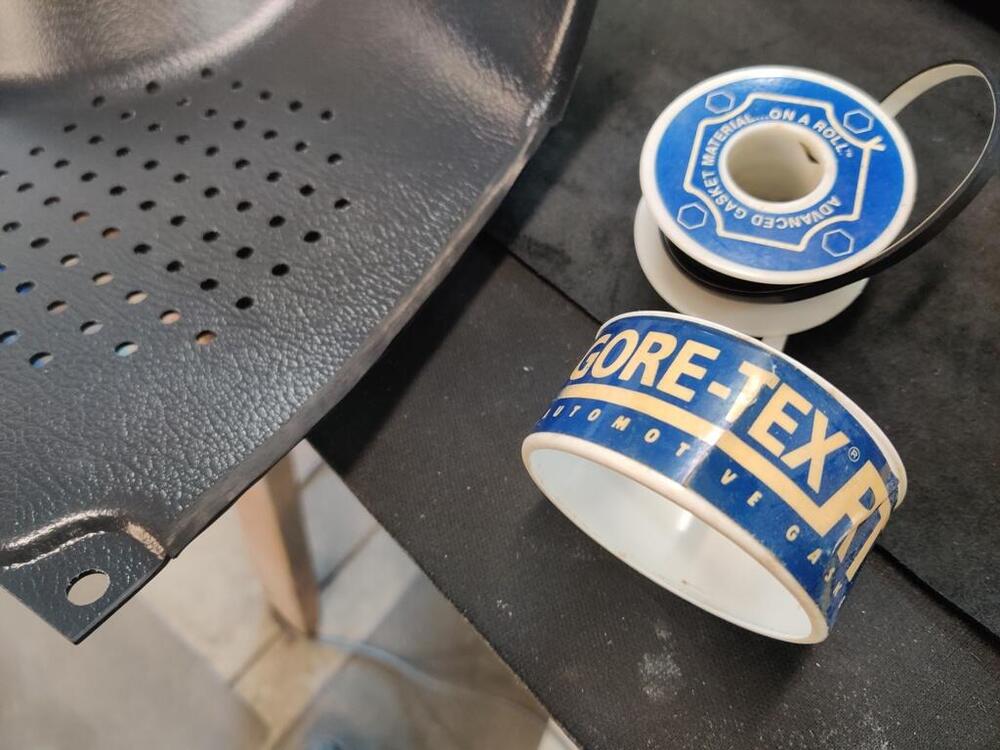
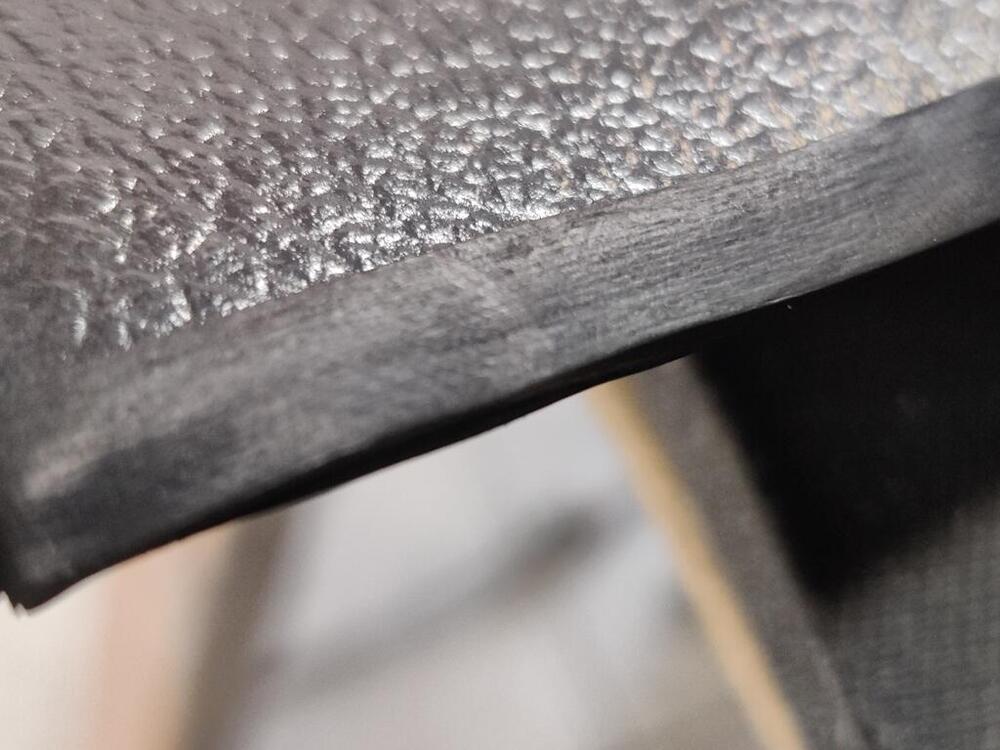
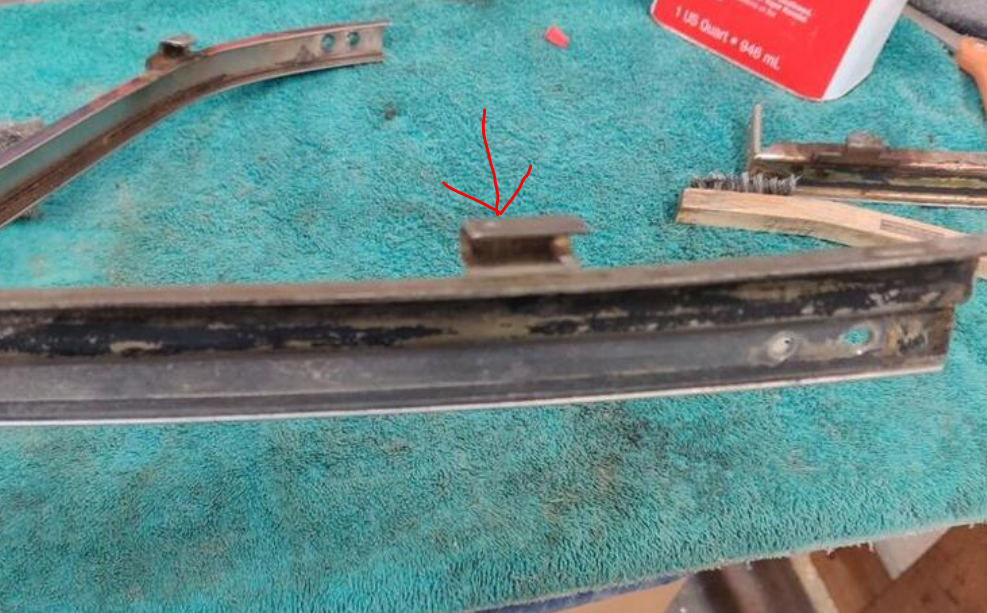
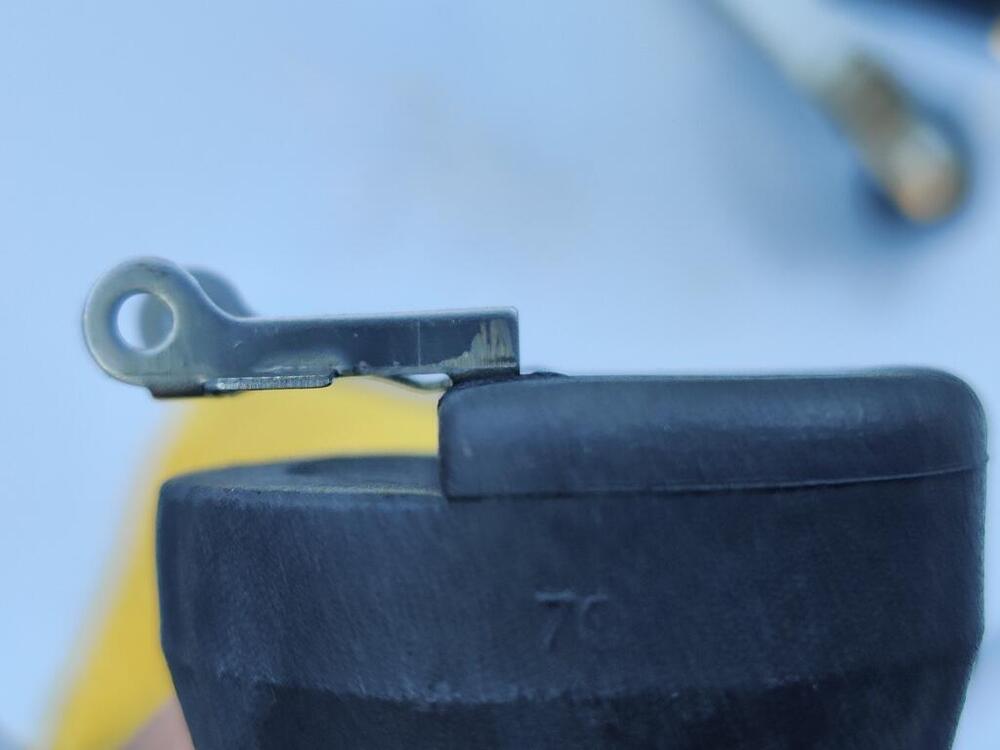
Some of my progress over the weekend included some modifications to the new interior trim panels. First, I glued some faux suede material (purchased from www.yourautotrim.com) in the spot where the quarter panel trim piece overlaps with the rear panel. I did this because the original trim panels in my track car squeak when they rub together. While my restoration car may have a bit more torsional rigidity (being relatively rust free and much lower miles), the torsional rigidity is not high on these cars by today's standards. So, this is an attempt to prevent noises. I think the material these aftermarket replacement panels are made out of is less likely to squeak from rubbing also. Additionally, I placed foam in the same locations as on the original pieces: I have some of this Gore-Tex that has been laying around for ages. I use it for various rubber gaskets like the ones at the back of the rear panels (panel for the first two pics, and the third pic is of the aftermarket panel): I put one piece of Gore Tex on the frontside , and one on the backside, and pinched them together at the back edge. The aftermarket quarter panel trim has slight differences as seen in pics two and three here: I used a 4 1/2" grinder with a mild sanding disc on it to quickly (and carefully) re-contour the front edge in a few places to improve the fit of the quarter panel piece to the car. The front edge was taller than it needed to be in some places. Fitment was much improved after removing some material. Can anyone tell me what this bracket on the quarter windows is for? There is a small hole in the original quarter panel trim at this location. I think it is simply there for securing the front edge of the quarter window interior trim panel, as it would be loose for most of the front edge otherwise. Anyone have any pics of the hardware used at this location? It may be specific to the 1971 cars.


-
It seems like the only thing it could effect would be fuel flow, and that with the level lower, it would "less". Are there other effects you are can think of?
-
I find it interesting that setting the float using 14 to 15 mm (I use a 3d nail cut and then ground to size and then fit between the metal part of the float and the roof of the float casting cover), achieves nearly level angularity of the float top surface with the underside of the float chamber cover. The two methods are wildly different. I wonder if going down the road and chopping through bumps... I wonder if the float level rises up a bit more because the float is bouncing around in the chamber. I don't know what the performance difference is with the fuel level too low vs "higher". I guess more experimentation is in order. I do have a LM-2 Innovate wideband sensor, and my exhaust has a fitting for it. Maybe some testing with different fuel level settings is in order.
-
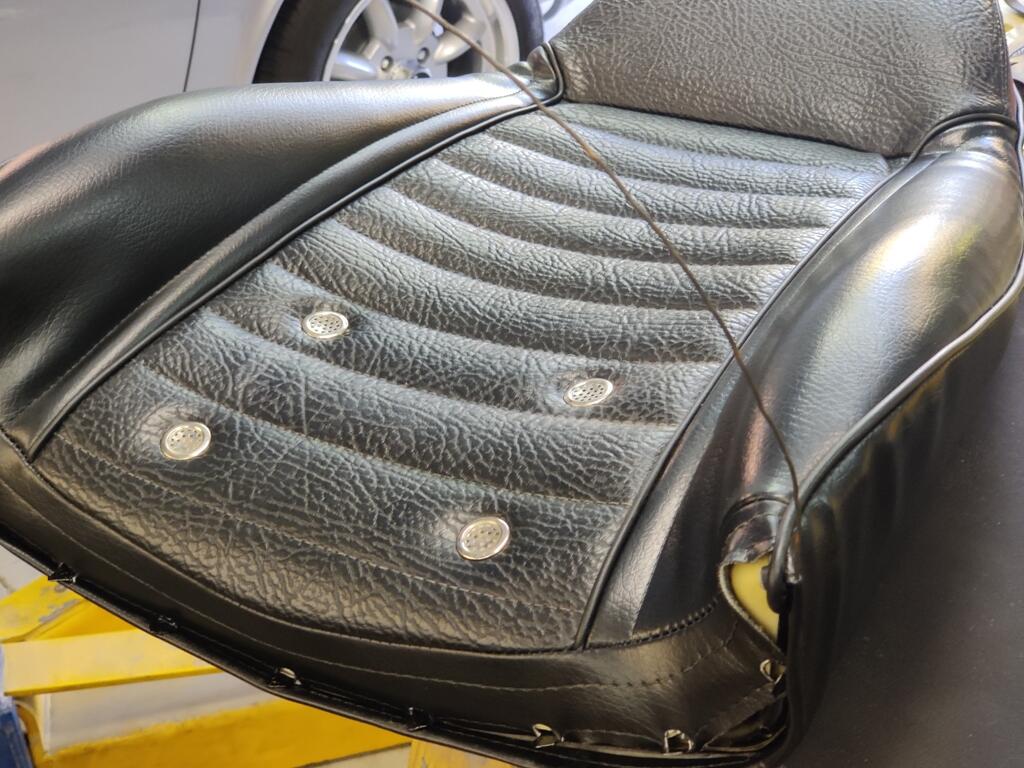
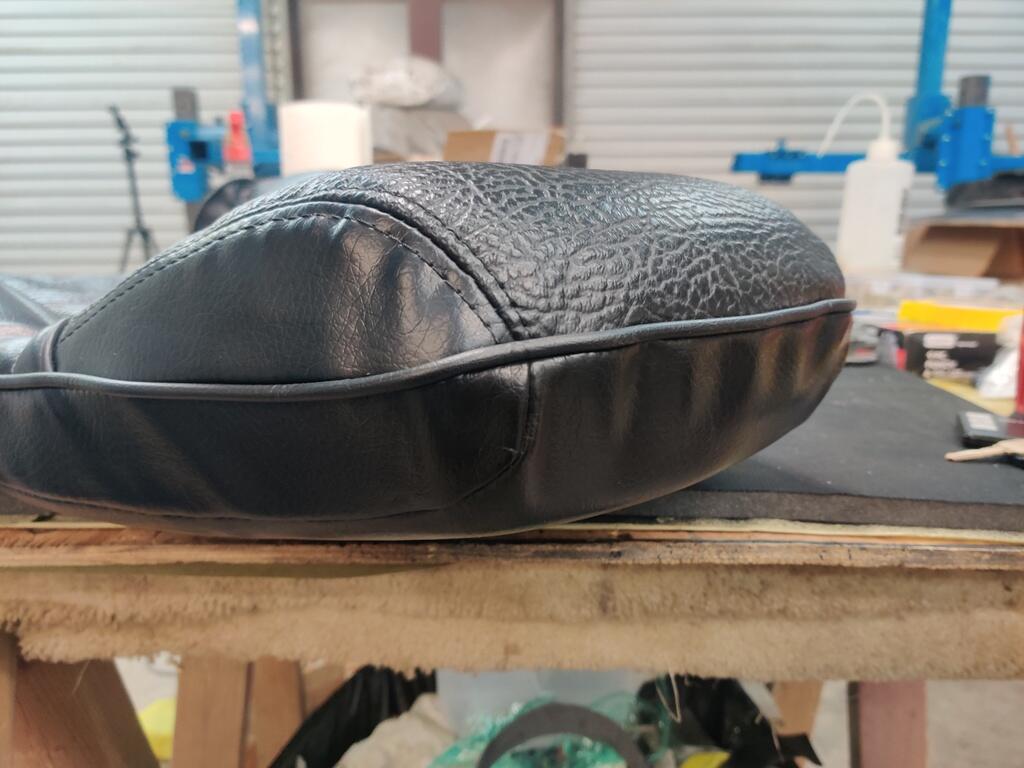
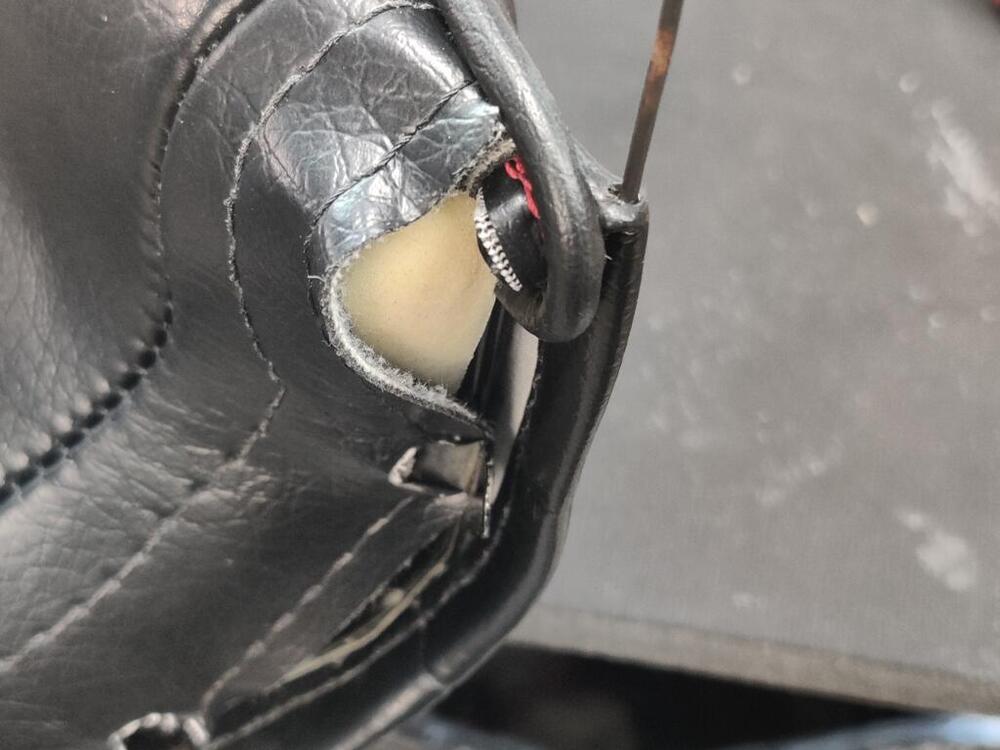
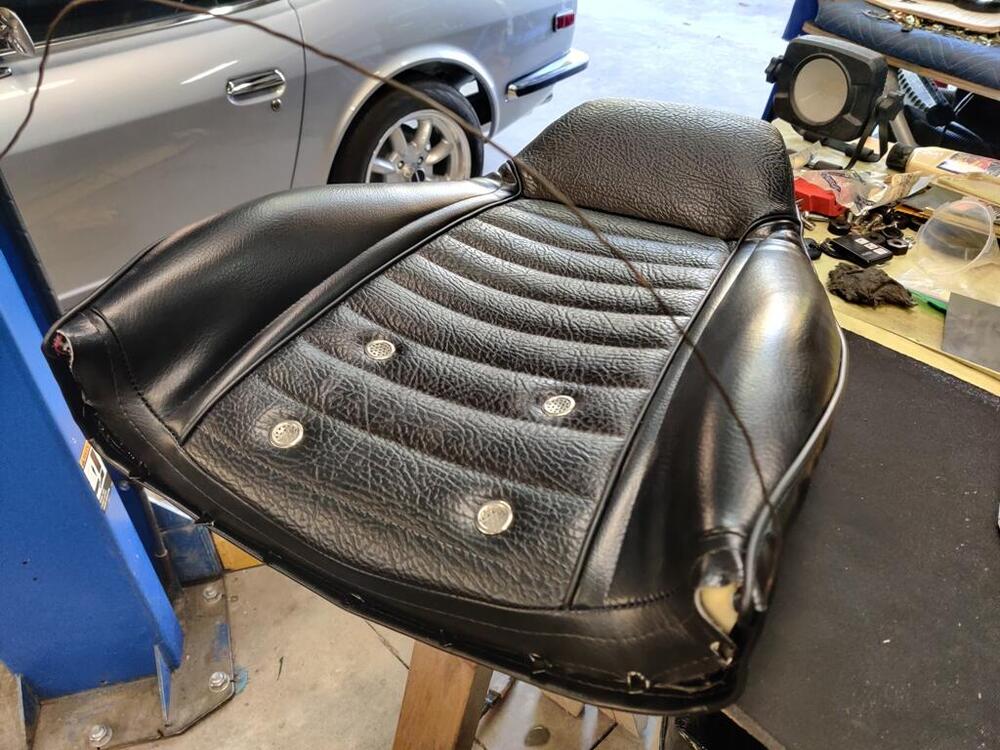
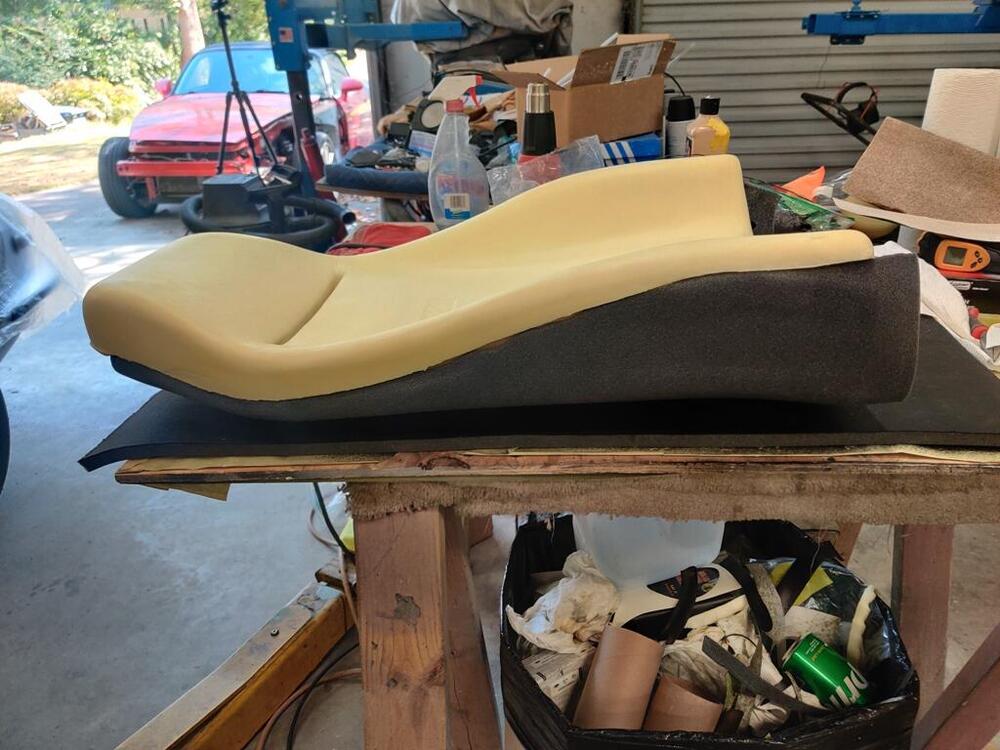
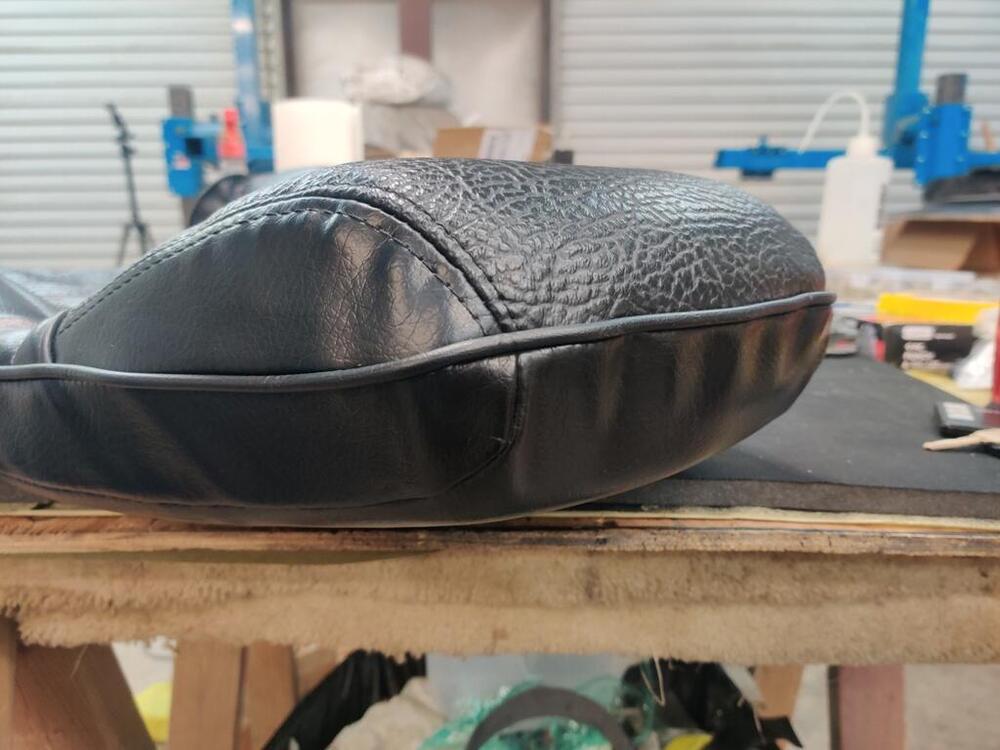
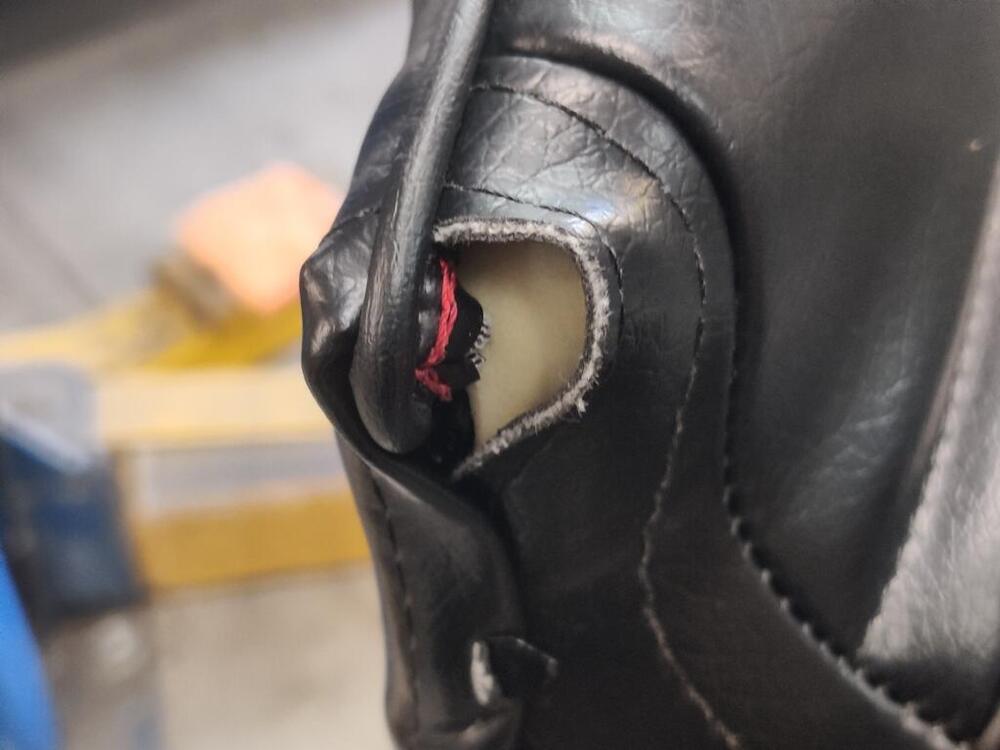
I worked on the other seat today. Lots of setting them out in the sun to assist with making the vinyl fit. My thumbs are jacked up from all the effort to persuade the seat back vinyl on far enough to get it over the hooks! The bottom cushion is a breeze. The backs are a pain. This time I did not use any thin plastic. I honestly don't think it made a difference. Getting the seat back upholstery down low enough to get onto the hooks is difficult. Having done two seats now, I think I see another improvement that can be made with the foam. Like the bottom cushion, and removing a bit from the front most edge, the seat back cushion could be modified for a better fit. I don't have great pictures to show exactly, but the back seat foam rises above the top edge of the metal seat back by quite a bit. You can kind of see that in this first picture. The foam is molded with an indention that the frame bar fits to. The head rest portion of the foam rises up over the frame by a good inch or more. However, as you can see (if you look closely) in the second picture, when you get the upholstery pulled down to where it belongs (to get it on the hooks on the bottom of the seat back frame) the foam which extended past the top of the back seat frame is compressed substantially, so that the top is nearly in the same plane as the top of the frame. In the second pic, the seat frame is what is locating the vinyl on the back half of the head rest. And the foam on the front half is no longer sticking up higher. The vinyl on the front half of the head rest is quite tight, as is the vinyl on the back surface of the seat rest. However, there is a bit of "void" around the periphery of the back half of the head rest. With some experimentation, I believe that trimming and sculpting the top edge of the back seat foam (to lower it a bit), as well as adding some pieces of foam around the edge of the seat frame at the top and about 3-4 inches down the sides would provide a better result. And, it would make it easier to get the back upholstery onto the hooks. I thought I would show where I added some wire as well. The bottom "roll" of the seat back upholstery (the back panel) has no cord or wire. So, I inserted some annealed wire that I got from Home Depot. I just ran it into the loop and pushed it through the full distance of the loop With this in place, I made slits in the vinyl at each hook. And when I bent the hooks over, they hooked around the vinyl and this wire. Without the wire, the hooks would only be grabbing the vinyl for the width of each hook. With the wire, the hooks grab the wire running the length of the vinyl, so all of the vinyl is holding the upholstery onto the frame. With both seat backs, I ended up with this in the corners: I think I will try some needle and thread work to tidy this up.

-
Is this the place? https://harmonclassicbrakes.com/
-
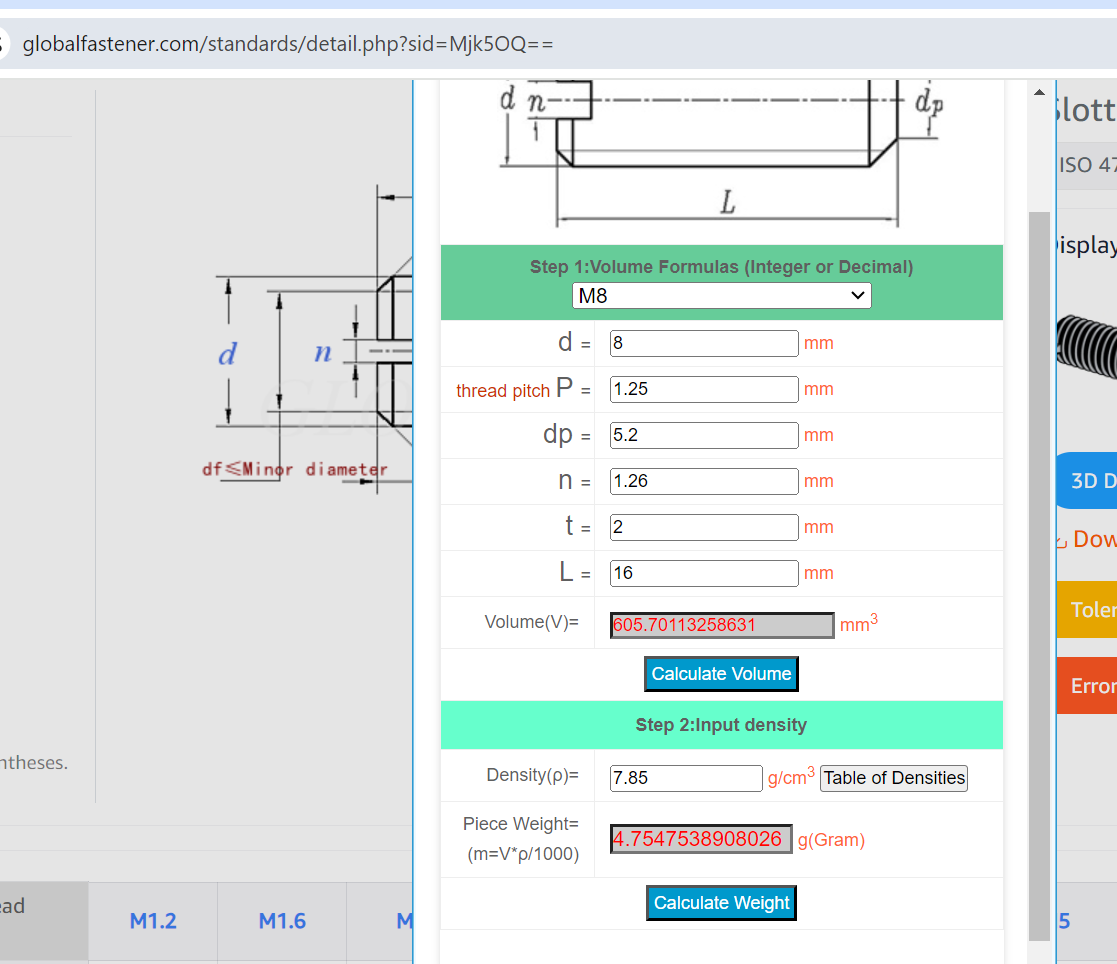
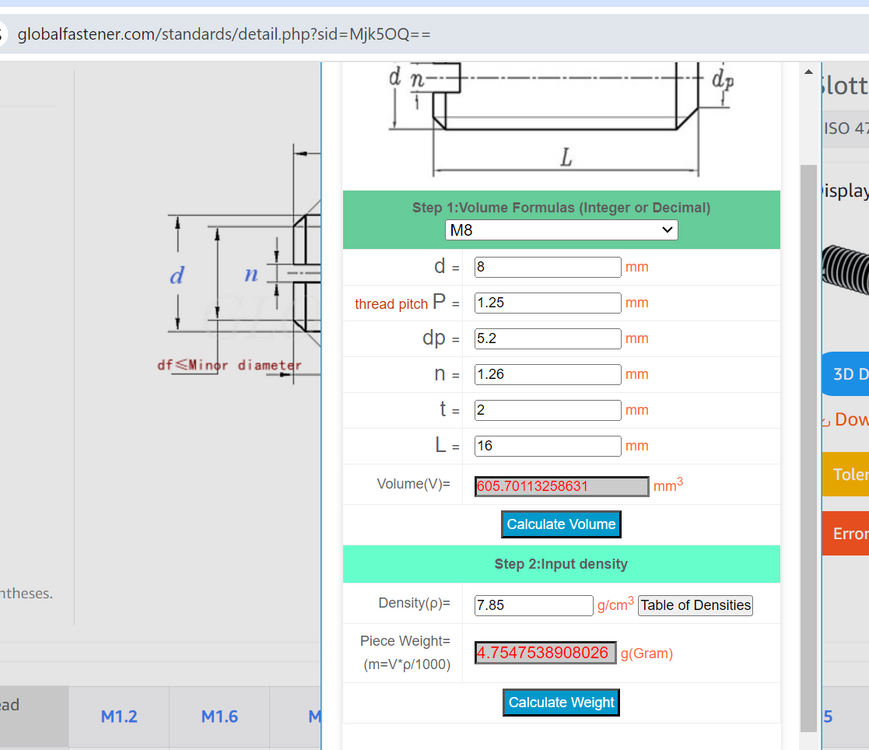
Thanks. I found a weight calculator: https://www.globalfastener.com/standards/detail.php?sid=Mjk5OQ== Plugging in stainless steel and M8 X 14 mm, it shows 4.08 grams. Just such a size is available from Belmetric without having to buy a whole bunch: https://belmetric.com/m8x1-25-a2-stainless-iso-4026-flat-point-allen-socket-set-screw/?sku=SS8X14FLATSS I drove the car around the neighborhood again today with the engine up to temp. There is a steep hill in the neighborhood, which is good for loading the engine. At 2.5 turns out on the mixture screws, the car powers up the hill ok. Still feels a bit lean though. Drove around for 10 minutes or so total. Came back to the garage, and hopped out to look the engine over briefly while it was running. Blipped the throttle a few times. It sounds nice. I blipped a few more times... and the rear float bowl started spewing fuel up through the float vent again. ☹️ While my intermittent overflow issue could be something else, (maybe the needle and seat is not working properly after all) I think the problem is the extreme angularity of the float. I am going to set the float height one more time using the 14-15 mm distance as shown in the factory workshop manual instead of wet setting at 20 mm below the float chamber cover bottom edge. Using this method, I will check the fuel level using the clear tube as when setting the floats using the wet set method. I want to see where the fuel height is compared to when wet setting at the 20 mm spec. Depending on what I find out, I may proceed with modifying the floats by installing one M8 X 16 stainless screw per float.

-
Does "Power Brake Exchange" only do swaps, with me having to "exchange" my Master vac for another? I want to hold onto my original one.

-
Something like this perhaps? https://belmetric.com/m8-slotted-grub-flat-point-set-screw-brass/?sku=SS8X10SLFLATBRS or perhaps stainless would be better because it is heavier: https://belmetric.com/m8x1-25-a2-stainless-iso-4026-flat-point-allen-socket-set-screw/? And what are your thoughts about drilling and threading up the center of the float on the bottom surface? Using the same logic you mentioned, if it were to back out, it would either drop out (and lower the fuel when it does), or contact the bottom of the float bowl, and hold the float up higher, dropping the level of the fuel.
-
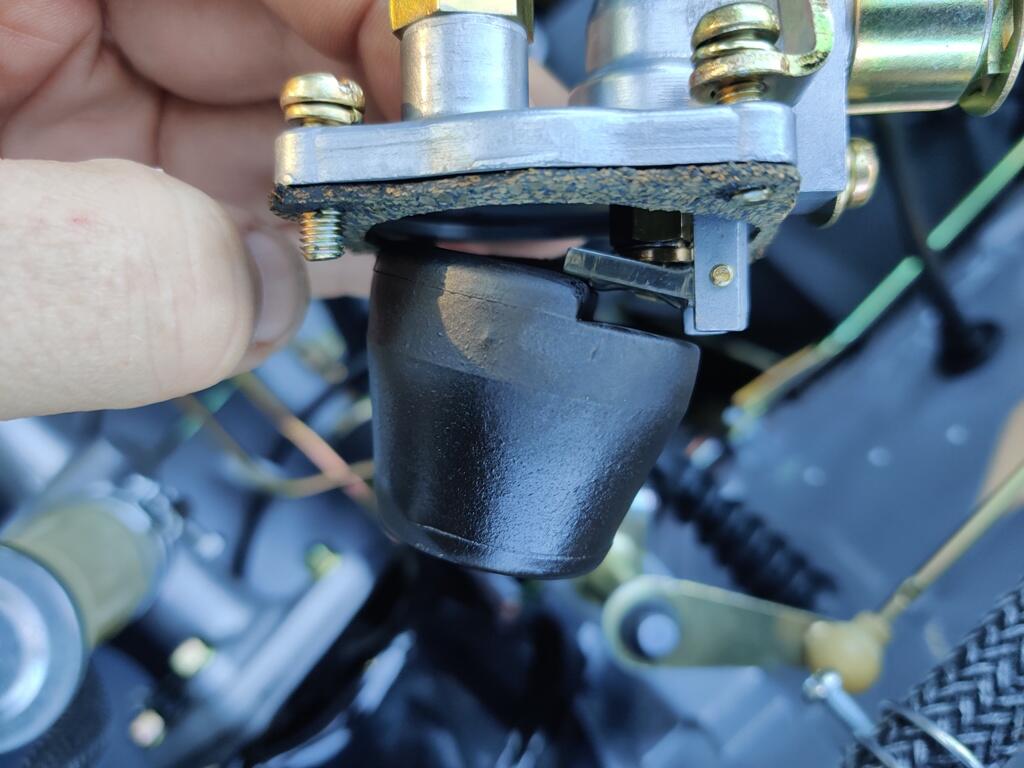
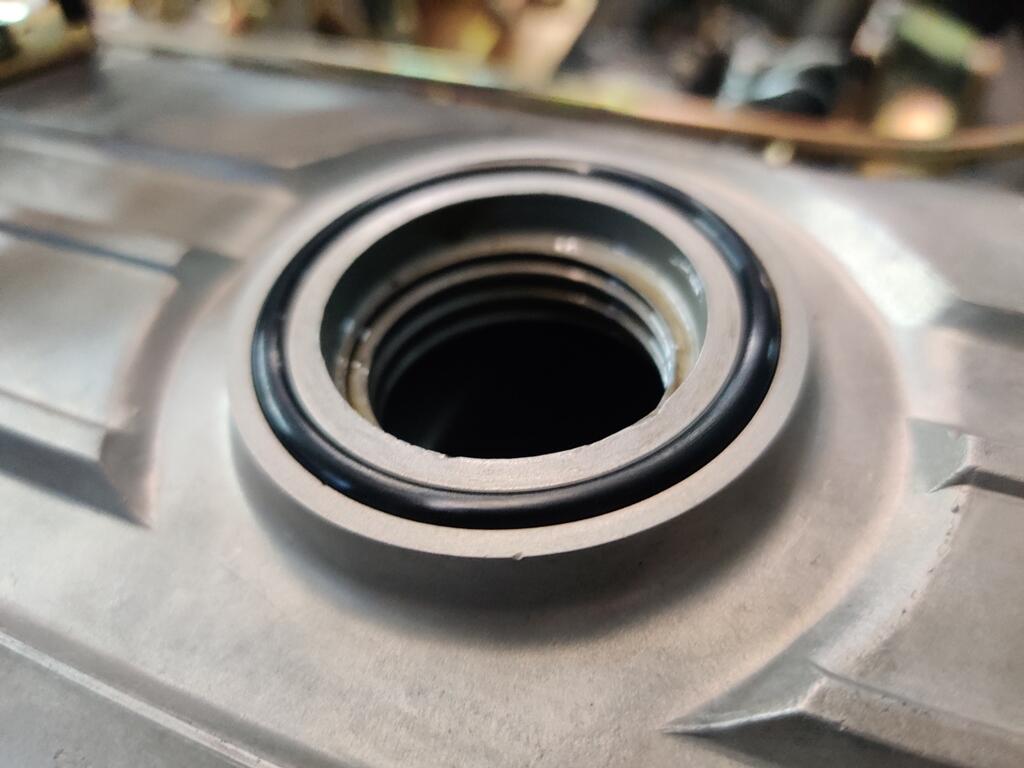
My brake pedal effort is excessive. If you disconnect the hose that goes from the one way valve (attached with a bracket to the firewall on the 240z) and place a piece of masking tape over the open end of the valve (to prevent a big vacuum leak), and then test your brakes, if you feel absolutely no difference in pedal effort (between hose connected and not connected), then the booster is doing nothing. That is the case with mine. My one way valve is oriented correctly and functional. But brake effort is the same with the hose that goes from the valve to the booster disconnected or connected.
-
I think I recall seeing that thread at one point, but totally didn't remember it. So, funny (not so funny actually) thing happened this evening. I fired the engine up and was doing some brake testing in the driveway. Went back and forth a few times. Got out of the car and left the engine running while I walked to the garage to get something. As I was walking away from the car, the idle dropped quite a bit. I turned around and came to the open engine bay to inspect, and yet again, fuel was running up and out of the rear carb float vent. So... I really don't want this car to catch fire and burn to the ground. @Captain Obvious, thank you for pointing me to that thread. I think I'd feel a lot better if I added some weight to my original floats, because I am very confident that the problem is the floats are either hitting on the underside of the float cover, or hitting on the side of the float bowls, or possibly the edge of the cork gasket! I don't like the severe angle that they are going to to close the needle and seat. In this picture, I am holding the float chamber at 90 degrees to the ground, so there is little force of the float against the needle. This is the position the float is in when it shuts the needle valve as installed on the carb float chamber, and providing me with the 20 mm spec. One thing I have seen in pics as I have been researching through forum posts is that the metal portion of the float (the part with the lever) is sometimes bent as well. That is, the whole metal part is bent up or down sometimes, such that it is not parallel with the float to surface. Here is a pic of mine. I think the metal part is bent slightly down. The pivot pin hole side is a touch closer to the top of the float than the opposite end. Bending this can have an impact on the final float position at the correct fuel height specification as well. I did one more wet set tonight. This time I went a touch under the 20 mm spec to try to avoid this problem happening again. So, @Captain Obvious, what amount of weight should I be looking at adding for 1971 carbs? Where did you land with your trials?


-
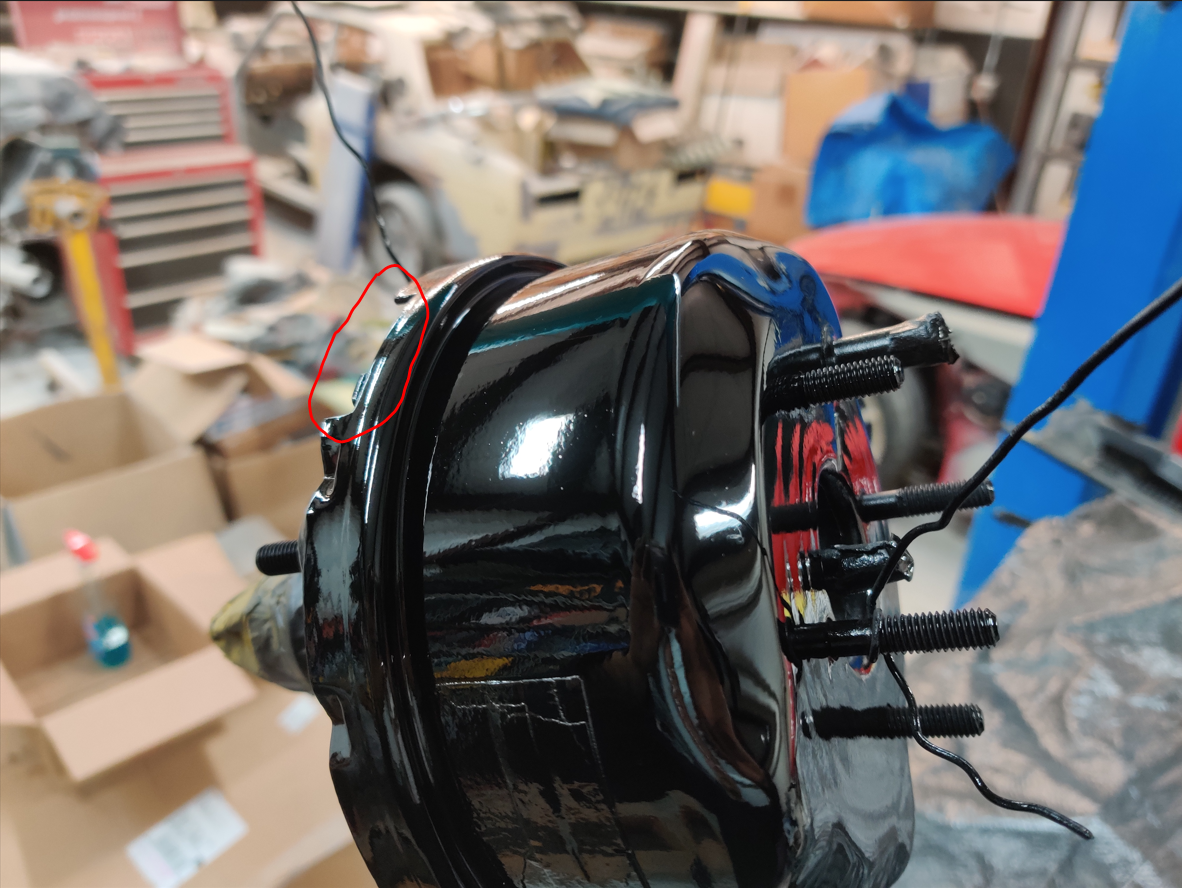
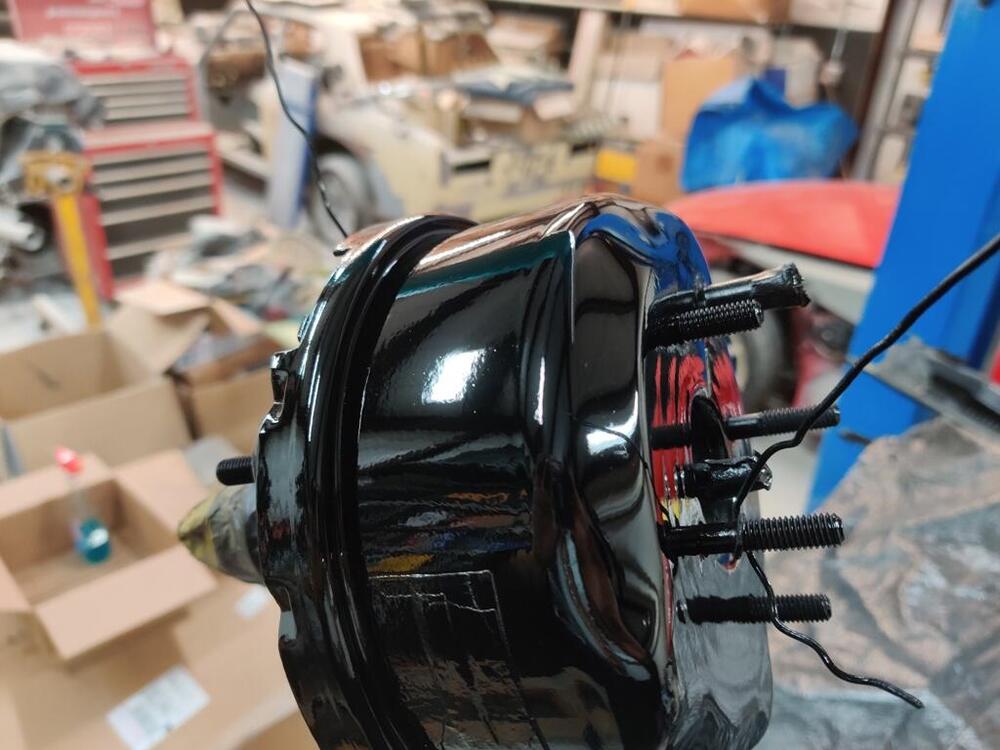
I bled the brakes and clutch again today. Brakes function, but the booster is not boosting 😉. This 7" kit is available from Zcardepot: https://zcardepot.com/products/power-brake-booster-rebuild-kit-7-inch-240z It looks like the right one to me. Anyone buy and install one of these? My booster looks like to be the rebuildable type that they mention (note red circled area): They are in Missouri, so stuff from them usually shows up where I am in Georgia within a few days.

-
Not finding needle valves readily available was probably a good thing. I probably would have ordered them, however, I went out to the garage and took the float cover off again and inspected everything again. This time I used about 10 psi of compressed air and checked to sealing. The float was turning quite a bit angled in order to get it to seal. That doesn't make sense to me. I don't get why the floats aren't more level at the point where the needle seals against the seat. In this case, the bottom edge of the float appeared to be crossing over where the side of the float bowl would be (if the cover was on the bowl). Perhaps the side of the float was interfering with the side of the float bowl and not able to rise more to seal the needle against the seat. Though I used the clear tube method to set float levels previously, I repeated that process tonight with this carburetor bowl, and again set the float level so gas came up to a mark I set at 20 mm from the bottom edge of the float cover. Is 20 mm from the bottom of the lid is correct? The needle and seat is working properly again now. I took the car for a another brief 3/4 mile drive. It was not fully warmed up, but it ran a bit better than before at 2.5 turns out on the mixture screws. Assuming I don't run into another issue, I will get it up to temp and try another brief road test tomorrow to see if I will be able to get the mixture close by backing out the mixture nuts a bit more. Perhaps I will need to switch to different needles. I don't know.
-
Unscrewed the mixture screws one half a turn and fired the car up tonight. Backing out of the garage, I notice liquid on the ground. It was fuel coming from the rear carburetor. Float seems operative. My rear carb needle and seat appear to no longer be sealing. I took it out and blew compressed air to clean everything out. I examined the needle rubber tip and the seat with a magnifying glass. They look new, but when I put everything back together and fired it up again - same thing. Fuel overflowed out of the vent in the top of the chamber. Looking online... and I am not finding needle valves available.
-
I put 20 weight in. I think I used to run just 10W-30 in the Su's on the track car. This time, I paid attention to the factory workshop manual.
-
Ok. Front and rear carburetor nozzles are properly aligned. Both carb pistons pass the drop test. Carbs sync'd again. Initial timing adjusted to 17 degrees before top dead center (euro distributor) at 750 RPM. Idle is staying exactly in one place. I drove a couple of blocks again. I haven't hit more than 20 miles an hour. However, the driveline seems quiet. No noises coming from the transmission or the differential. At two turns out on the mixture adjustment screws, it is lean. It idles nicely, but try to give it some gas and it is like you popped up a sail catching a headwind - the engine doesn't want to put out 🙂. When I pull the starter circuit a bit, the power kicks in. So, it appears that my engine mods may have altered the fuel needs a bit from stock. I ran my track car on SU's for a couple of decades... That engine had "some porting", 1 mm bigger intake valves and a header and dual 2" exhaust. If I recall correctly, the SM needles didn't work as well as the original N27 stock needles when I finally got everything dialed in. This engine has similar mods but a "stage 1" Isky cam. It is really quite mild, just has bit more lift. I guess I will play with unscrewing the mixture nuts a bit to experiment with determining what the engine wants. The manual calls for 2.2 turns out. I have them out exactly 2 right now.
-
Took another look at the carburetors tonight. Neither piston was dropping to a "clunk" in the carb bodies. The needles were touching the nozzles, and that was keeping the pistons from going to their correct locations when doing the "piston drop" test. I was wondering why my idle speed kept moving around! I loosened the nut holding jet bridge and centered it properly on the rear carburetor. Firing it up briefly, the idle is MUCH improved. I will do the same for the front carb and give it another little test drive.
-
So... I ran into the same thing with the clutch master cylinder tonight. This cylinder was a used part also. It looked to me like it was replaced by the previous owner as part of the fresh work he did to the car. Hmmm - actually, I think that was 28 (plus 6 years in my possession) ago! Anyway, the little valve was stuck in this one also. For any used cylinder, that valve should be checked and lubricated with a bit of rubber grease before installing the cylinder. I was able to get the clutch operational, and the brakes barely so. I need another person to assist to bleed them properly. And it is quite possible that the brake booster is not functional. Anyway, I took it for a brief drive in the neighborhood. It has been about 9 years now since I drove a Z. It's tiny! Turning around to back up, I was struck by how narrow, and also, how little there is of "car" behind me! I was reminded again of how awful the throttle linkage is. It has a lot of initial resistance, so you press a little harder, and then a little more, and then it "let's go", causing more acceleration than intended. As I recall, I will be able to sort that out by adjusting the linkage and bending the gas pedal arm as necessary. Oh, and that exhaust stink. Hahaha! Even when you get them running well, if you spend much time behind the tail pipe, you stink like you've been running a 2 cycle leaf blower. While it starts up easily and has good throttle response, it doesn't sound or feel like it is tuned. When I give it enough throttle to go past 2500 rpm, it acts like it is lean - it doesn't want to rev. I will need to check timing again (static and dynamic), and check set/mixture screws again, carb sync again, etc. Anyway, it runs!
-
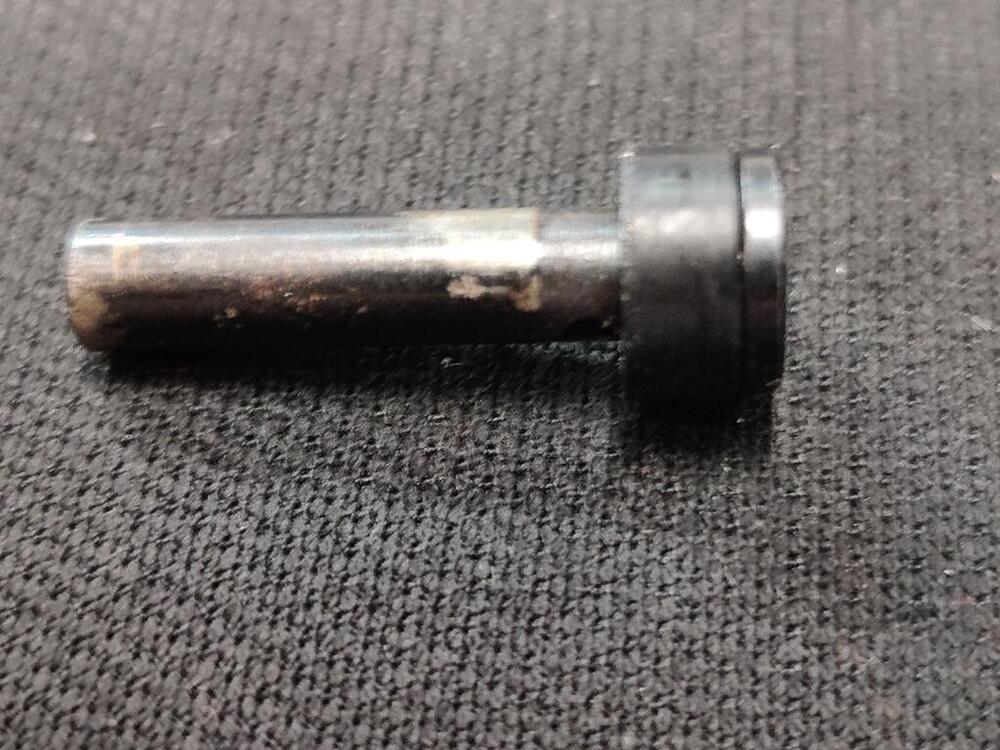
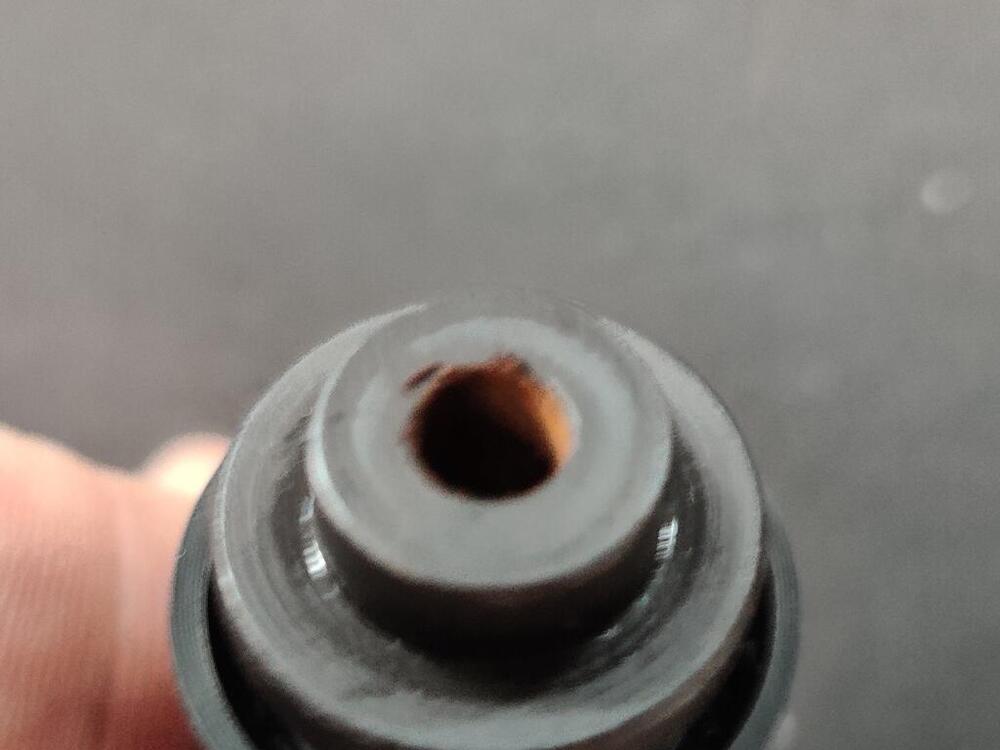
Thanks for that info! So, when I took the cap off, I found that the valve was stuck in an open position (makes sense if that is resting position, as the cylinder likely sat for a very long time and got gummed up/stuck in that position). The spring couldn't close it. In fact, there is a hole in the end of the cap, and pressing a flat punch against the valve, it did not move - it was stuck tight. Stuck in the open position, fluid just moved freely in both directions. The rear circuit didn't build any pressure. I just got back from the garage - I am done for the night. This time I was able to bleed the MC rear circuit with no issue. Then, I was able to bleed all four corners. I seem to have a solid brake pedal at this point. Hurrah - I got something done today after all. Now, I have the clutch circuit to bleed. And then, I'll try to fire it up and drive it around the neighborhood a bit.
-
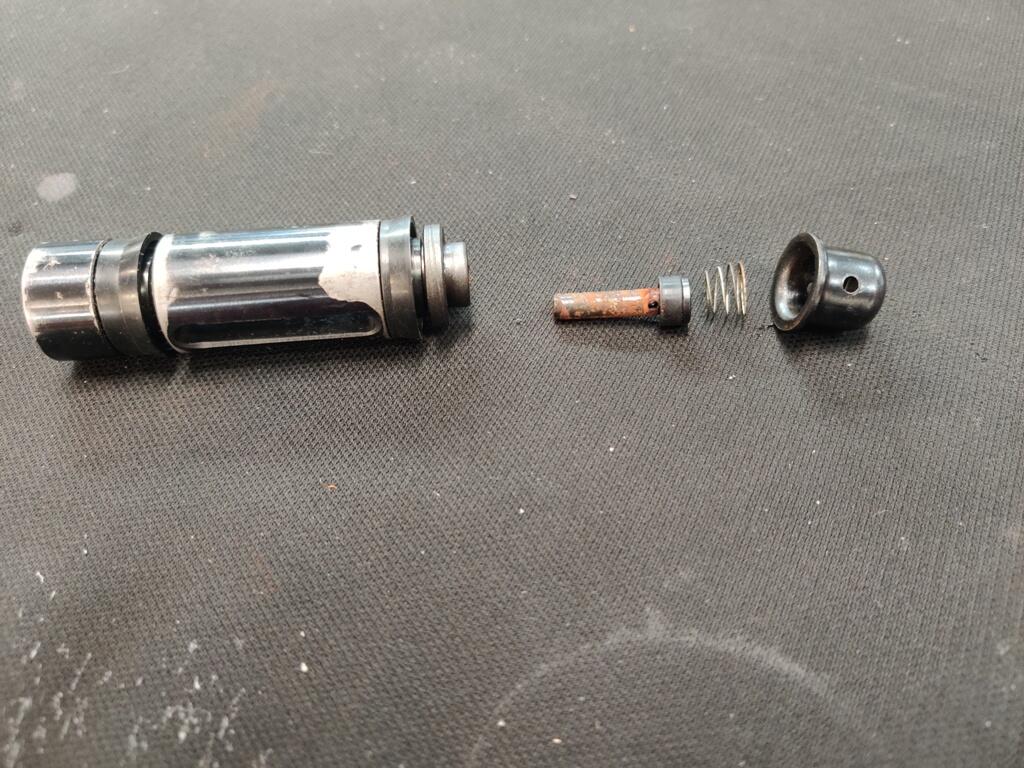
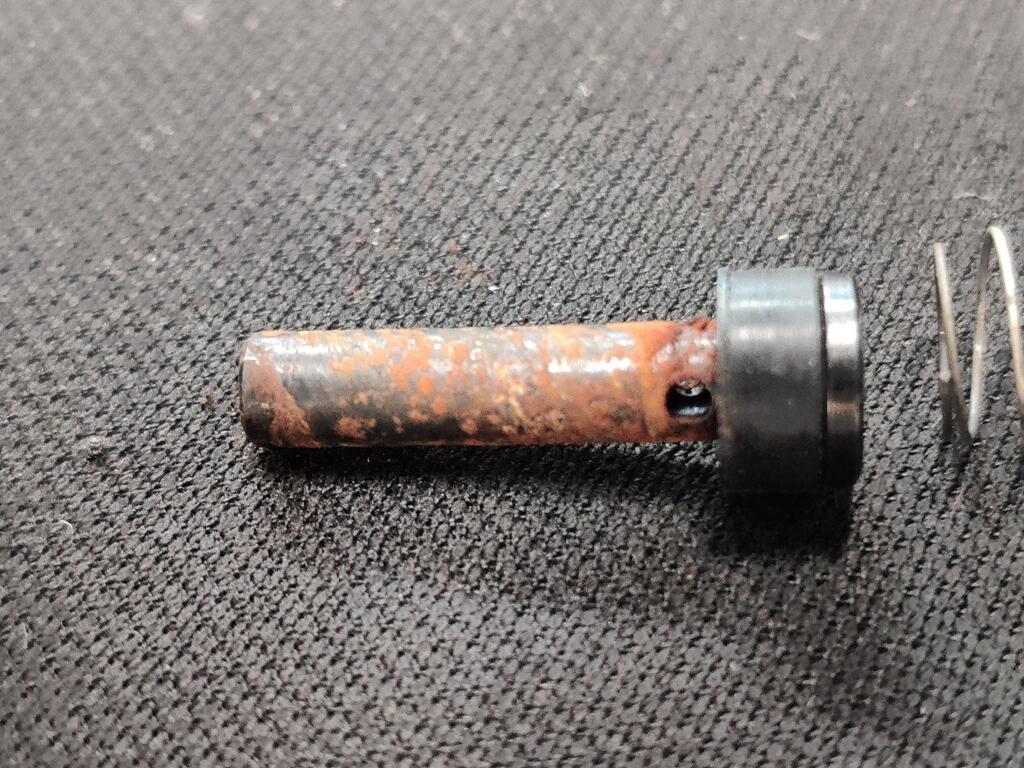
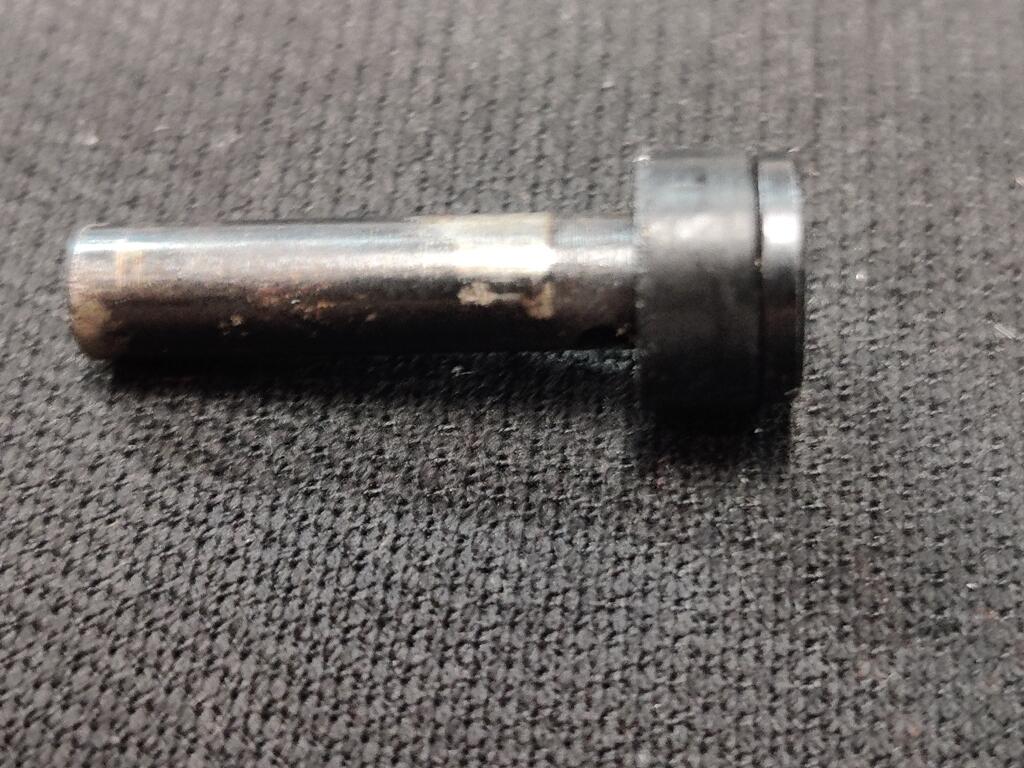
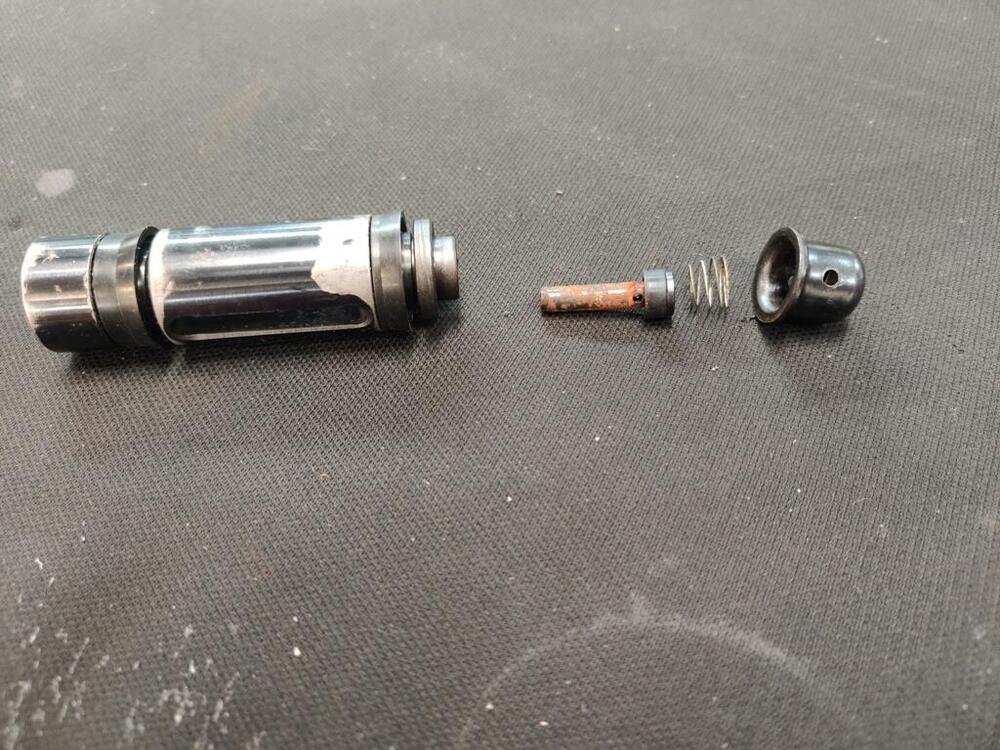
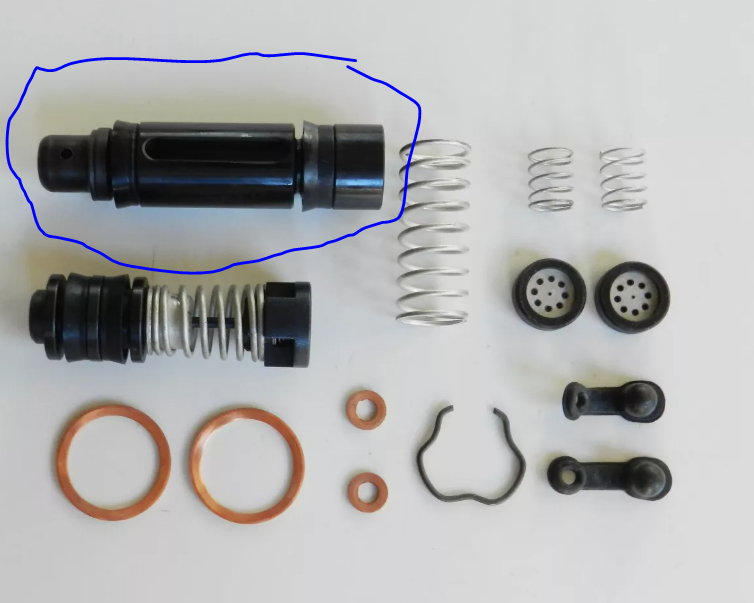
Today, I was excited to do some brake and clutch bleeding and then drive the car around in my neighborhood a bit. It was a beautiful, sunny day, and I was looking forward to it. However, it was not to be! I spent 8 hours trying to bleed the brakes instead. The rear circuit would not move any fluid. I experienced this once before with a "nearly new" Honda S2000 brake cylinder. Each circuit has a little valve that operates. I am not exactly sure how it works, but basically, there are conditions where the fluid will move one way but not back. That valve got "stuck" with the S2000 master cylinder. And I recall it taking me forever to figure it out. That experience was fresh in my mind as I attempted to bleed the brakes and the fluid was not moving either direction for the rear circuit. Though I knew I had a problem, I could not figure out what was going on. For my 8 hours of frustration, at least I can share what I finally found out to be the problem. This is the piston assembly for the rear circuit. Unless you are lucky enough to find a new old stock Tokico master cylinder (and pay big bucks for it), then you will likely want to do what I have done hear to ensure that you will not have the same problem. Here is my rear piston assembly. As you can see, I have removed the "cap" to the far right in the picture. For quite a while today, I tried spraying lubricants and blowing compressed air in the holes of this cap. But that did nothing. Eventually, I became frustrated enough that I put it in my vise (with flat metal plates instead of the serrated teeth) and clamped down on the sides of this cap (with the piston assembly sticking up vertically). I grabbed the piston assembly and wiggled it one way and then the other, unsure what would happen. Luckily, the cap is a light press fit to the end of the piston assembly. And yanking one way and then the other, I was able to pull the piston assembly from the cap. As soon as it came off, I knew I would be able to solve my issue. As you can see, there is a spring... and a little rod with a rubber seal on it (the piece with rust on it, second from the left). Some #0000 steel wool cleaned off the rust from that piece. And a brass "pipe cleaner" type brush cleaned the rust from the hole in the piston assembly: From there, I dabbed a bit of brake grease on these parts and reassembled them. I fitted the spring and tapped the cap back on with a small hammer. Now, this little valve works at it should. Determined to not have wasted some much time today, I am going to go out to the garage and bleed the brakes now like I originally intended to do today.

-
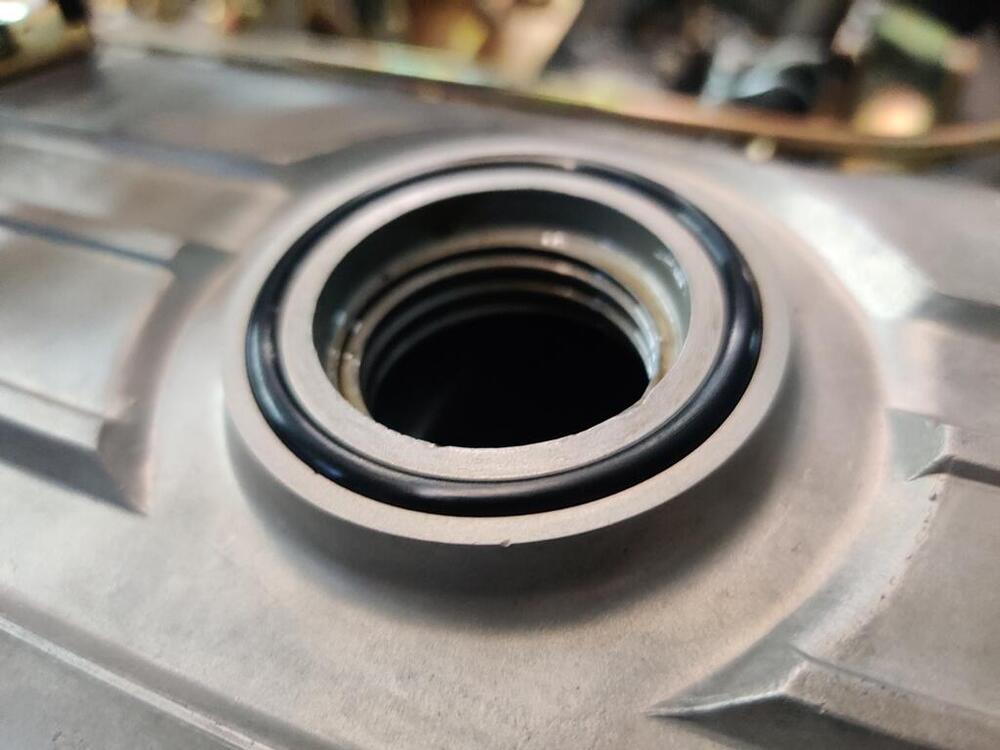
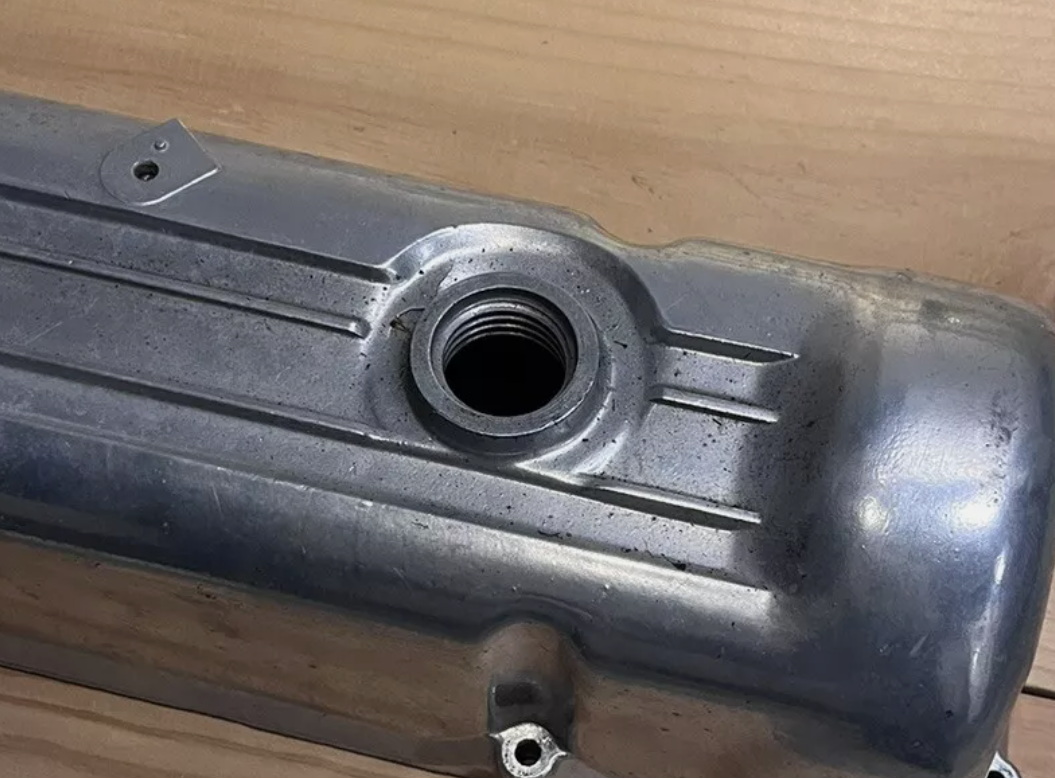
I didn't realize this difference for the 70-71 cars - the valve cover utilizes an O-ring to seal against the oil cap. I was able to get one (had to buy 100!) that fits very nicely! Later Z cars have a rubber gasket on the oil cap instead.