inline6
Supporting Member
-
Joined
-
Last visited
Everything posted by inline6
-
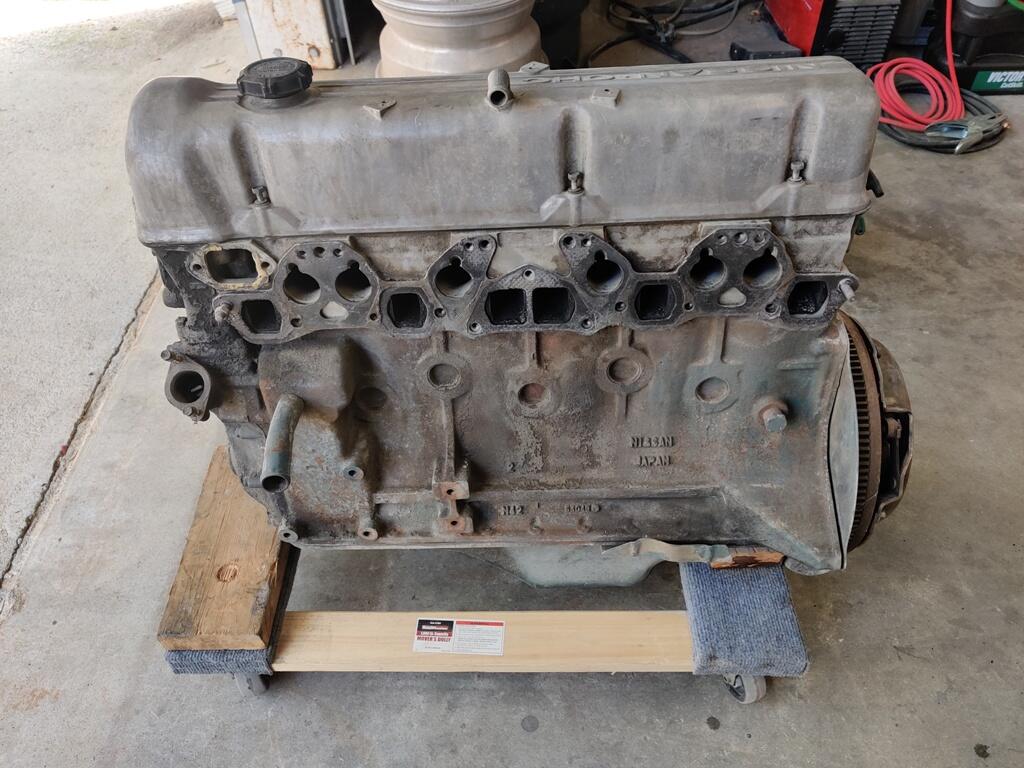
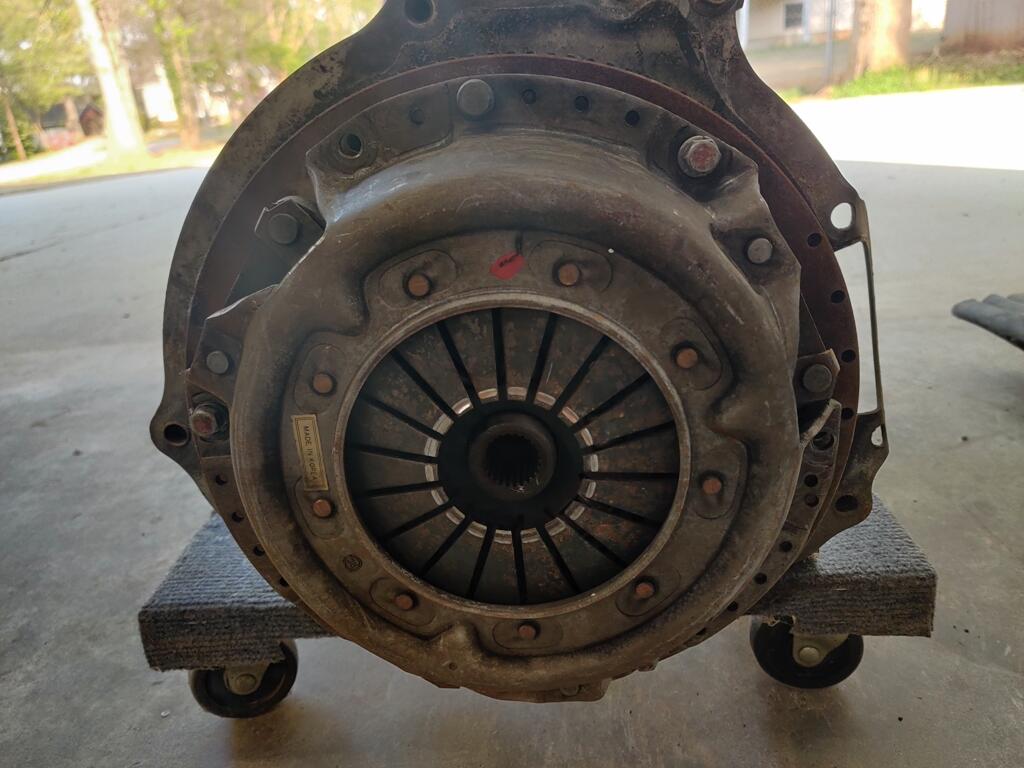
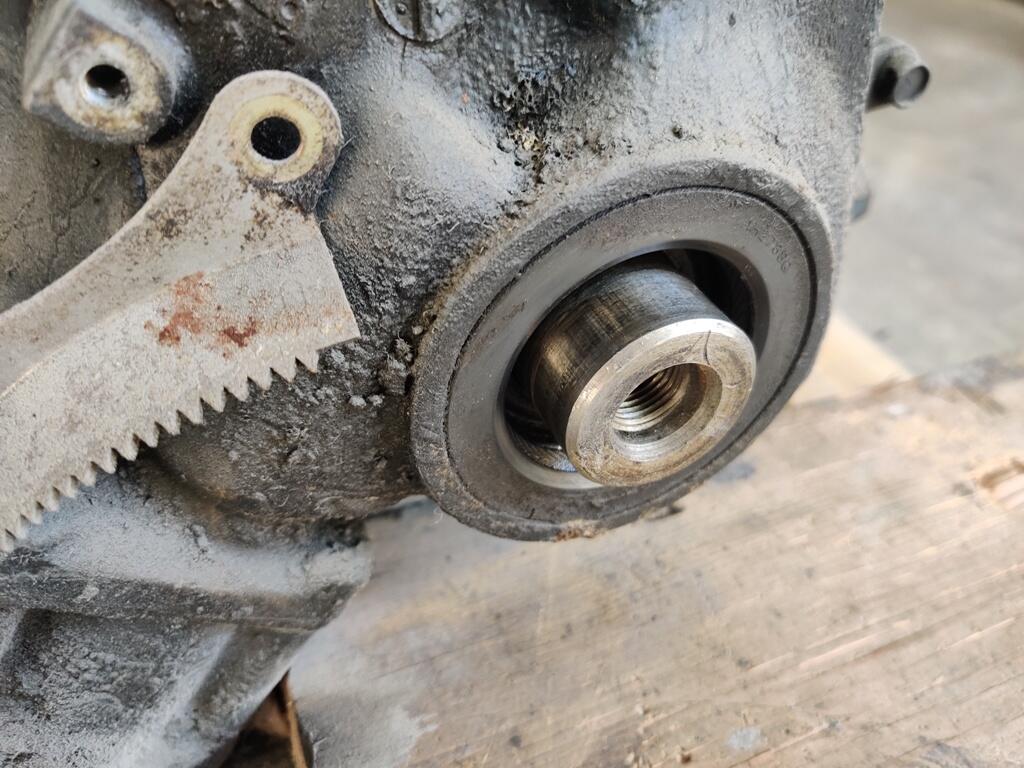
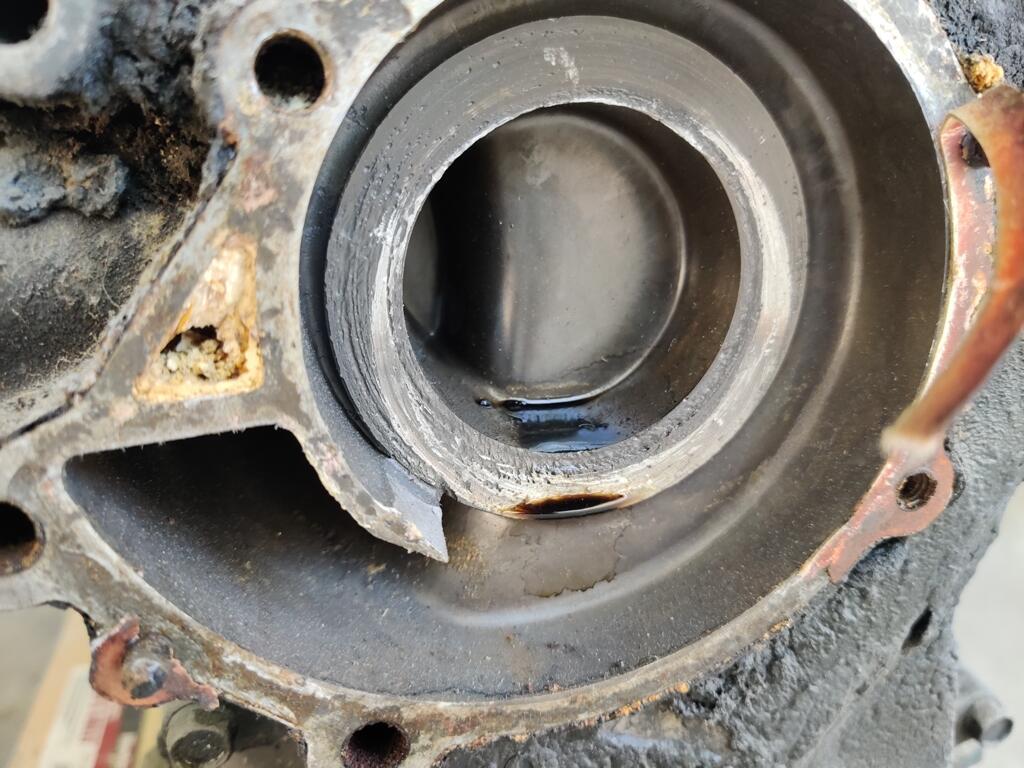
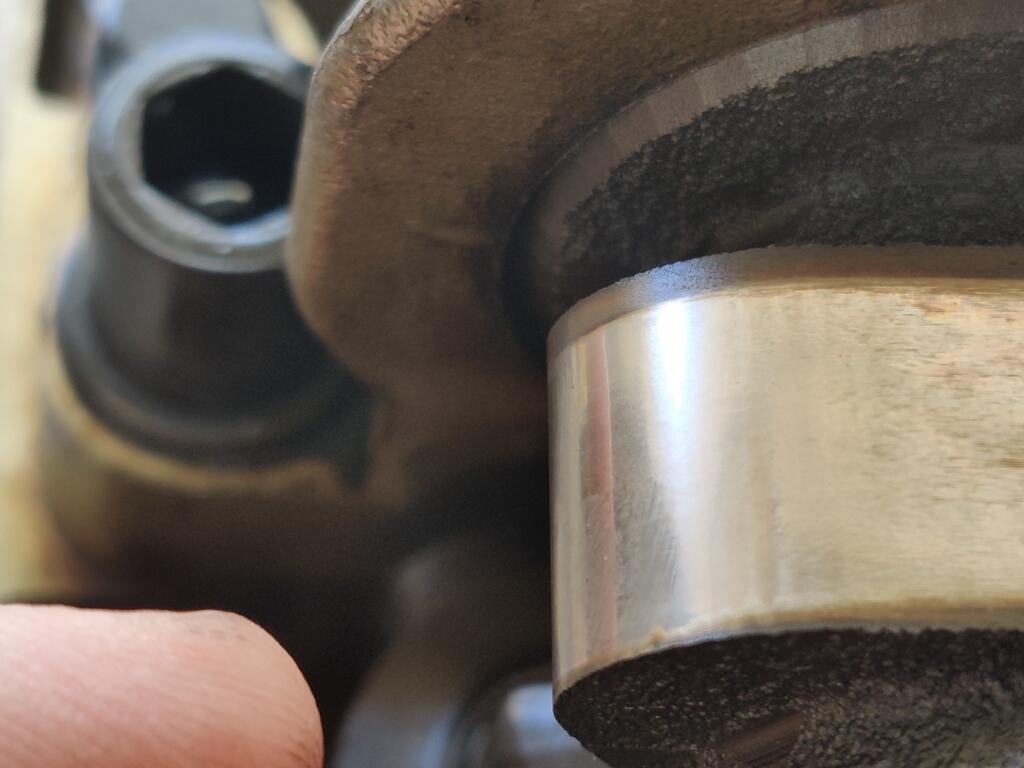
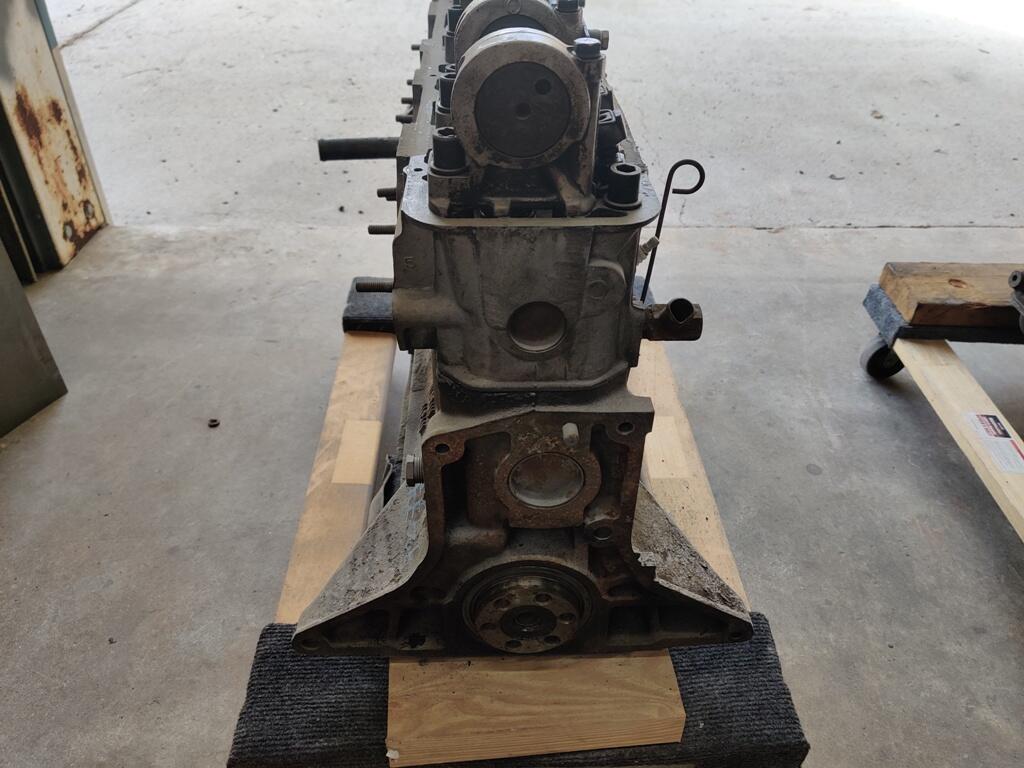
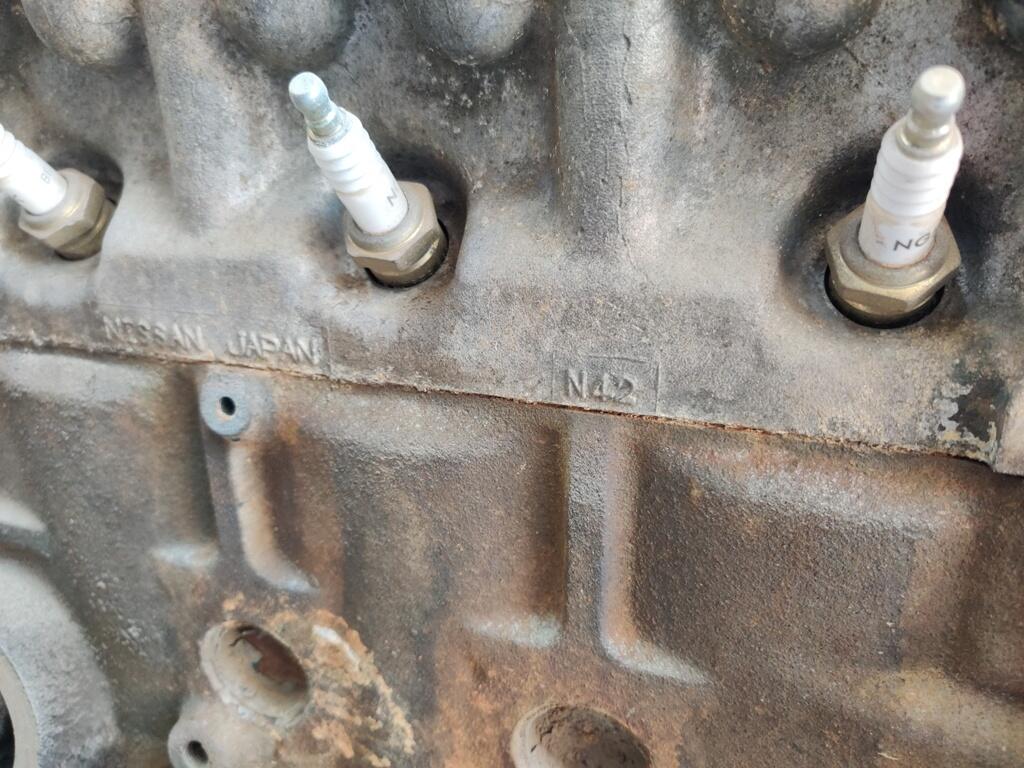
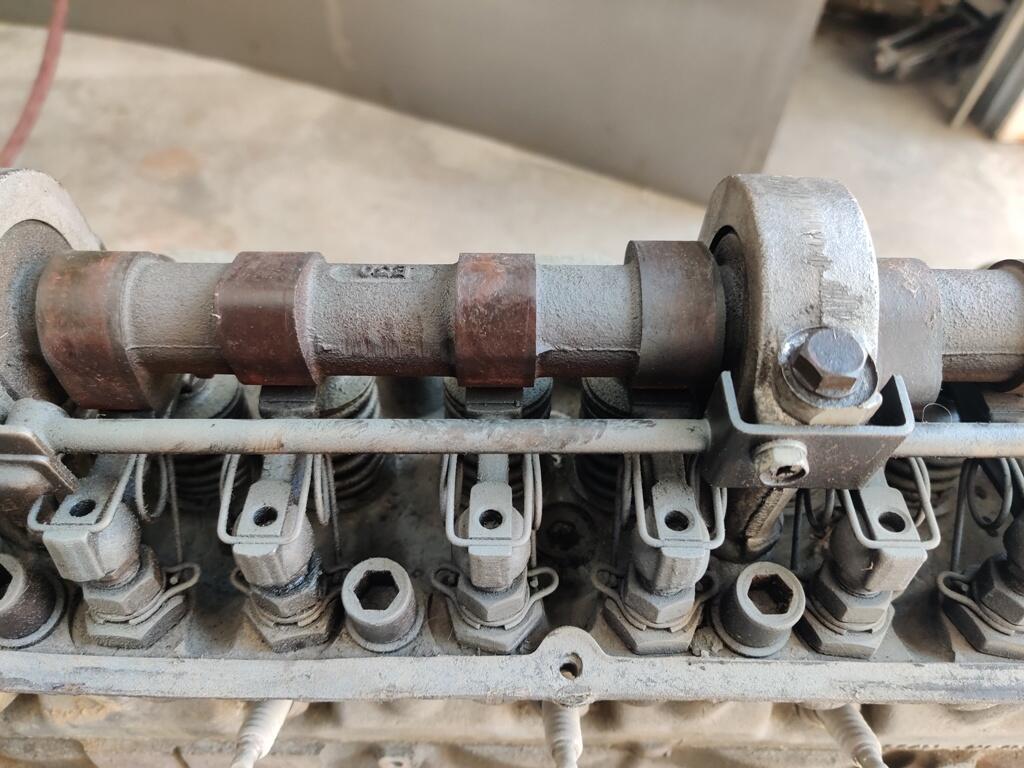
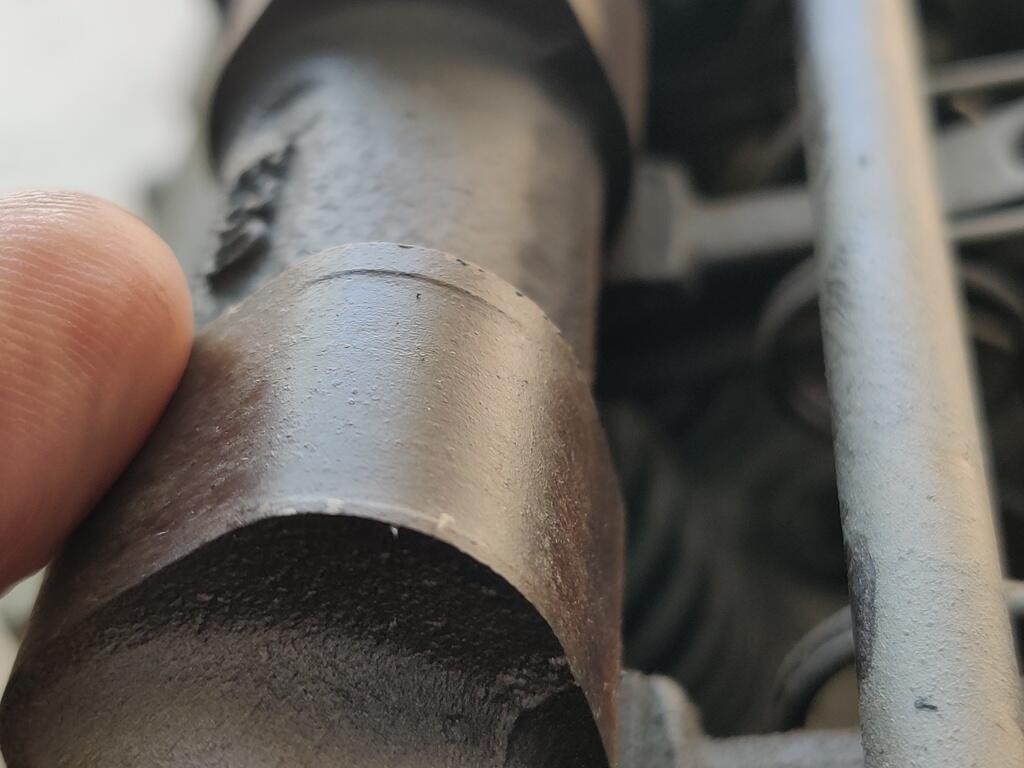
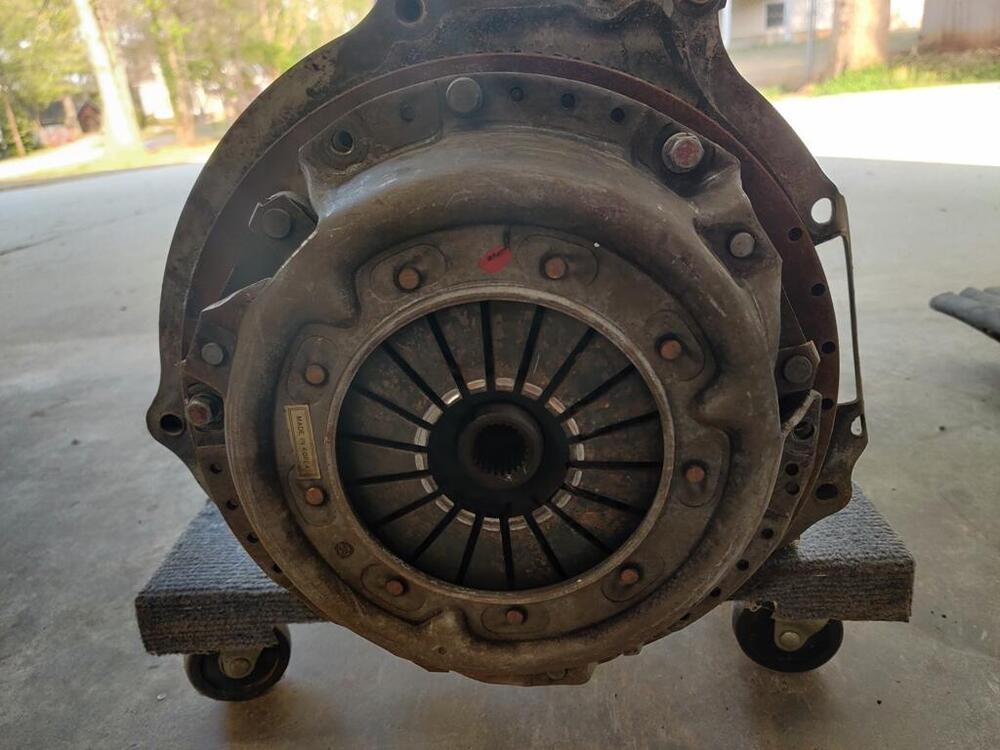
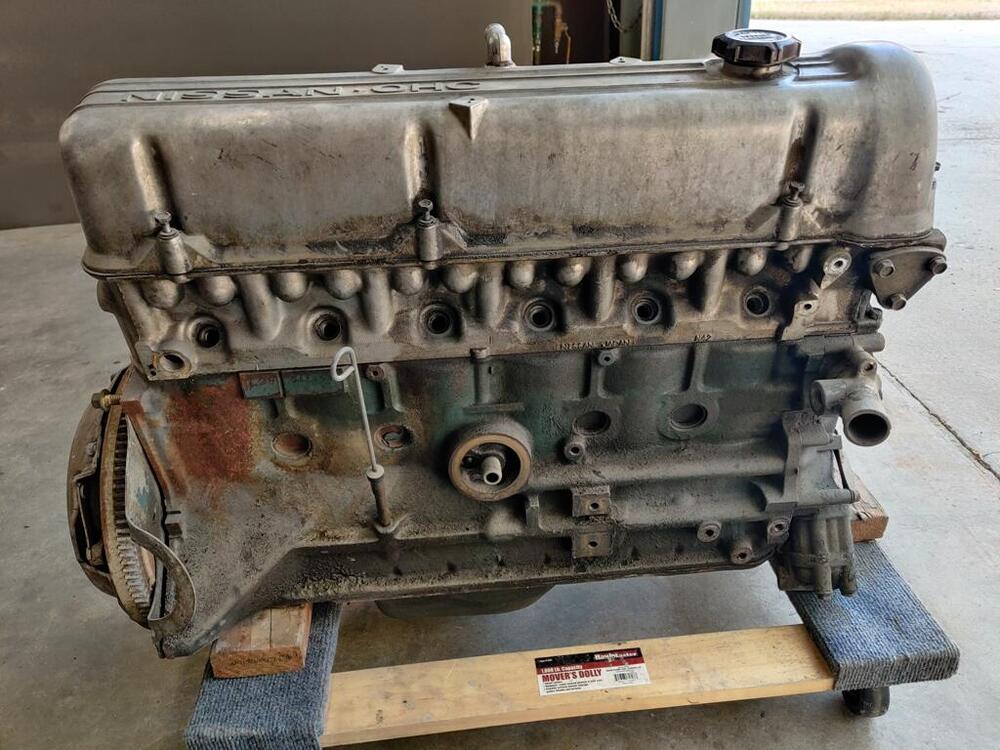
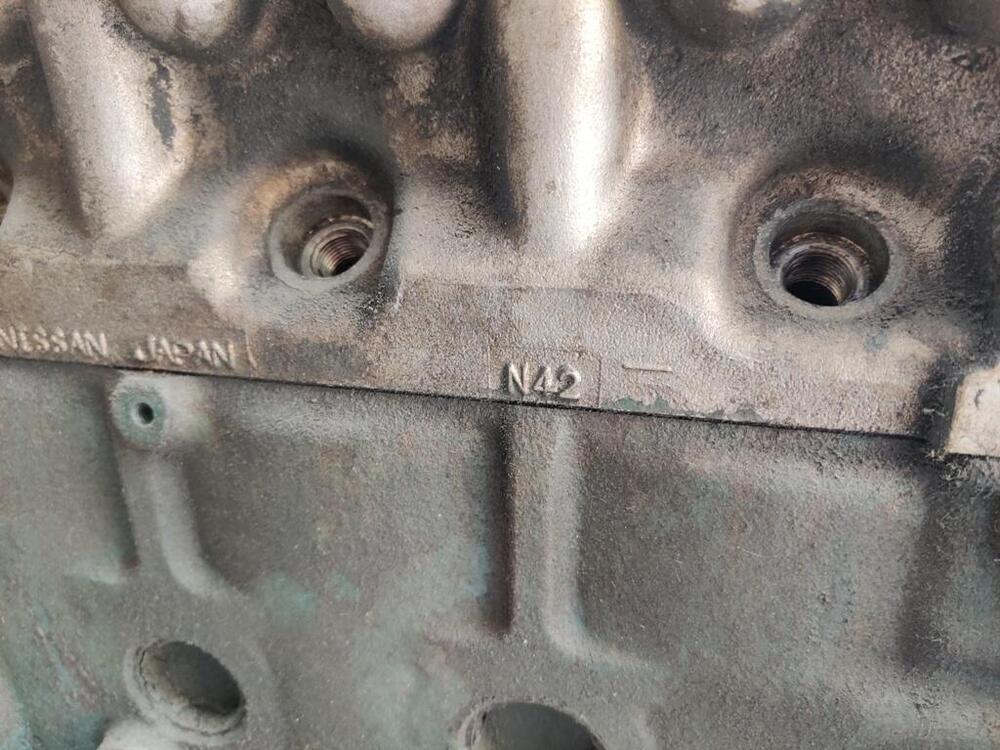
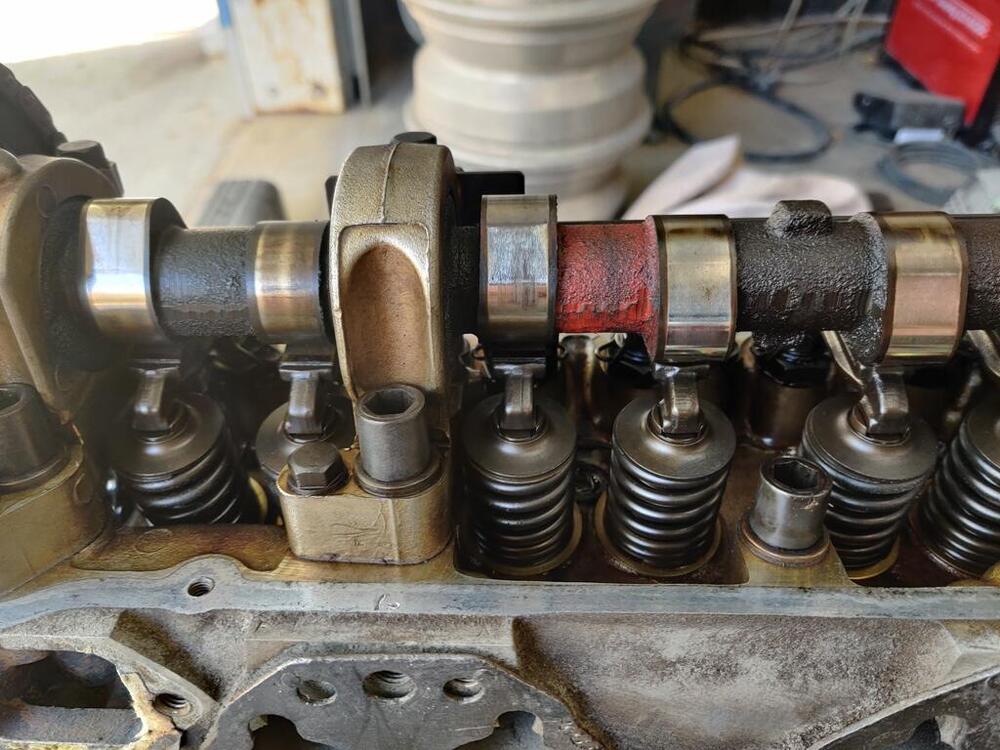
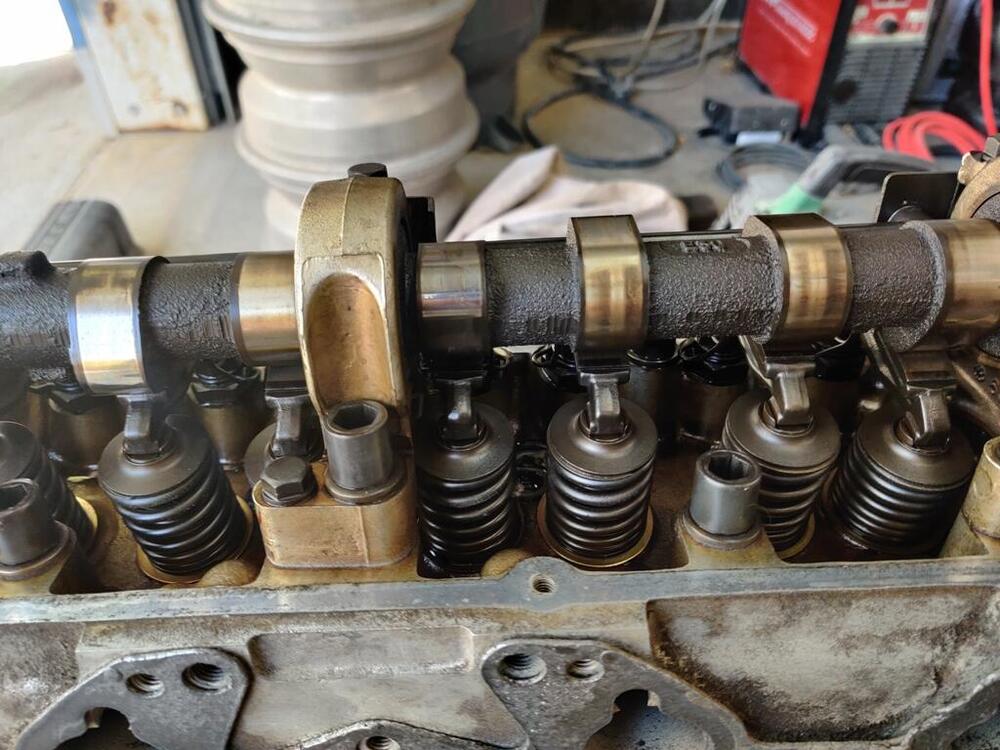
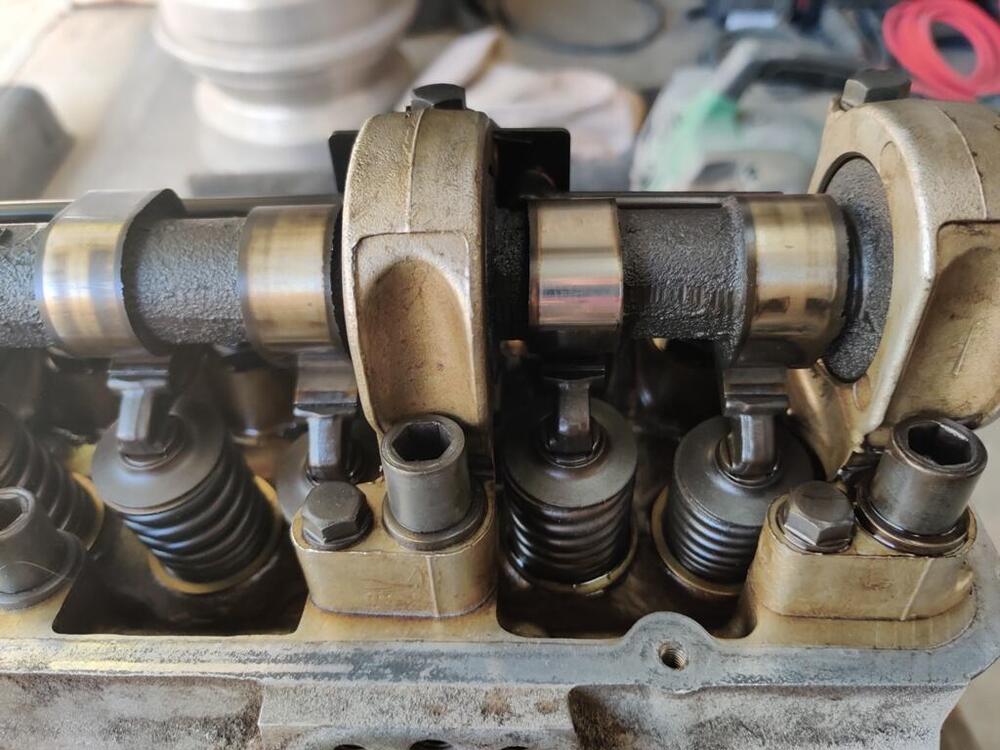
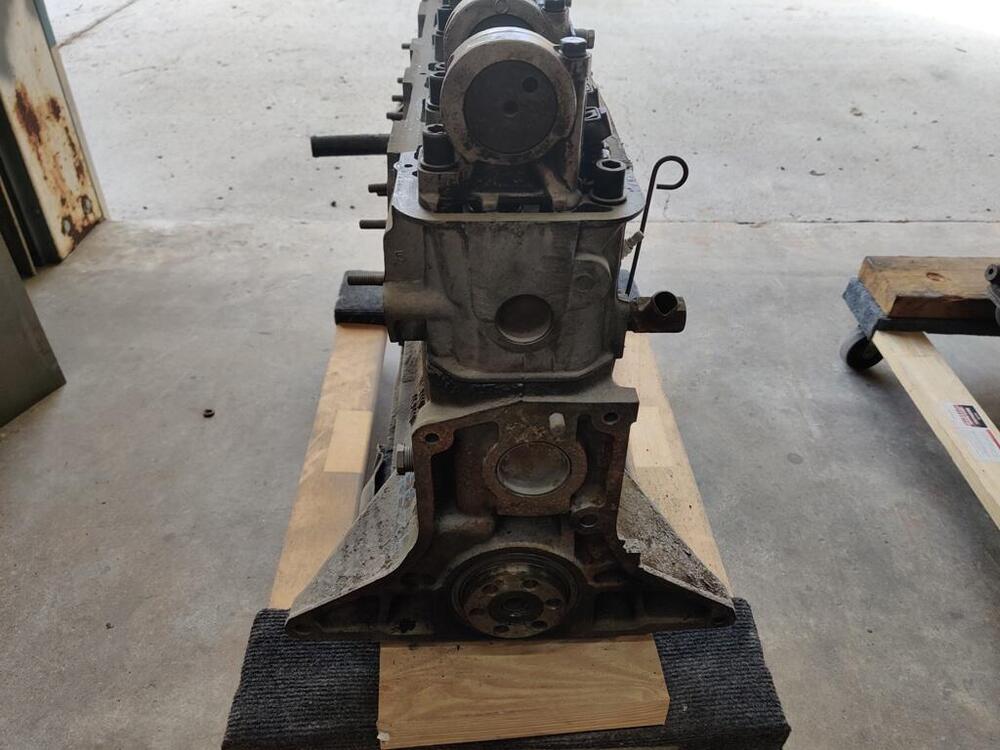
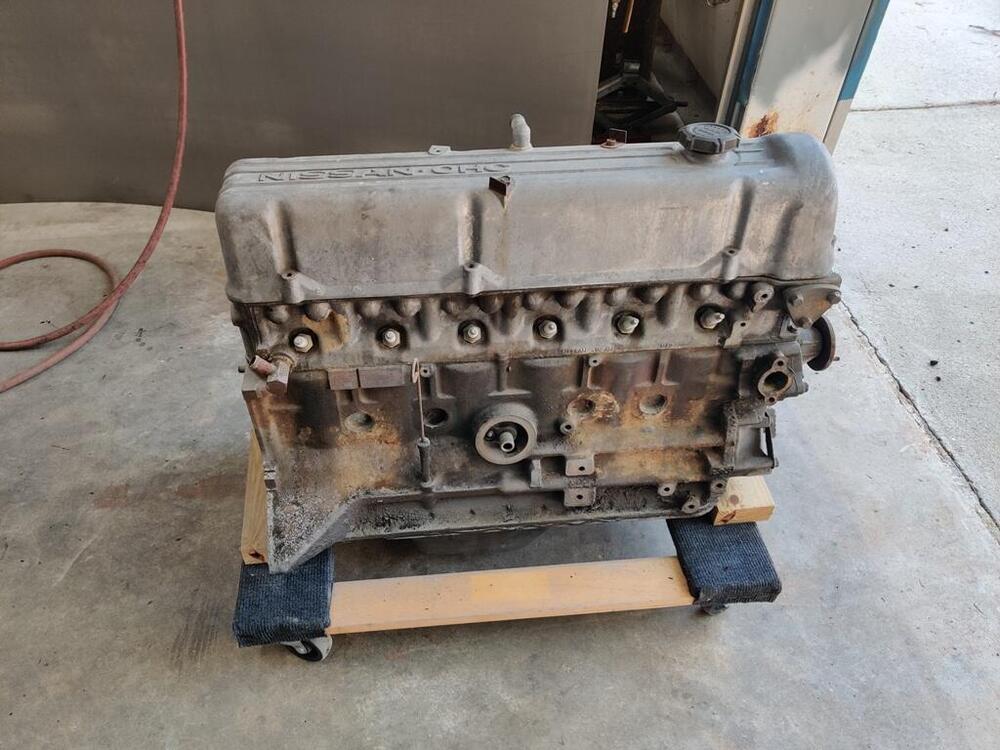
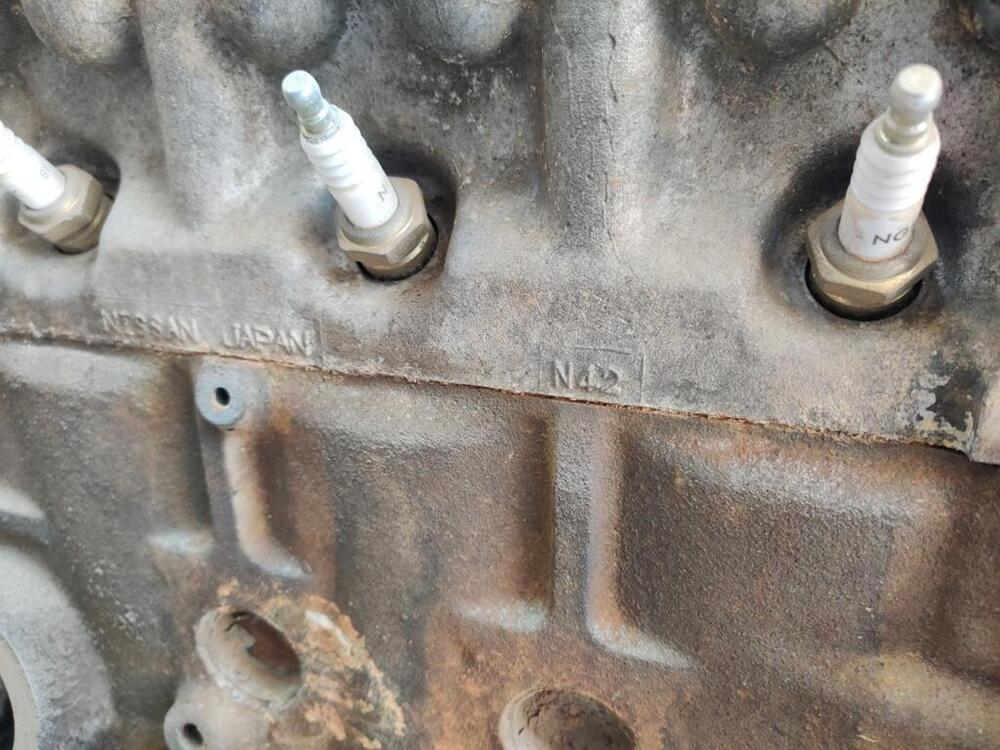
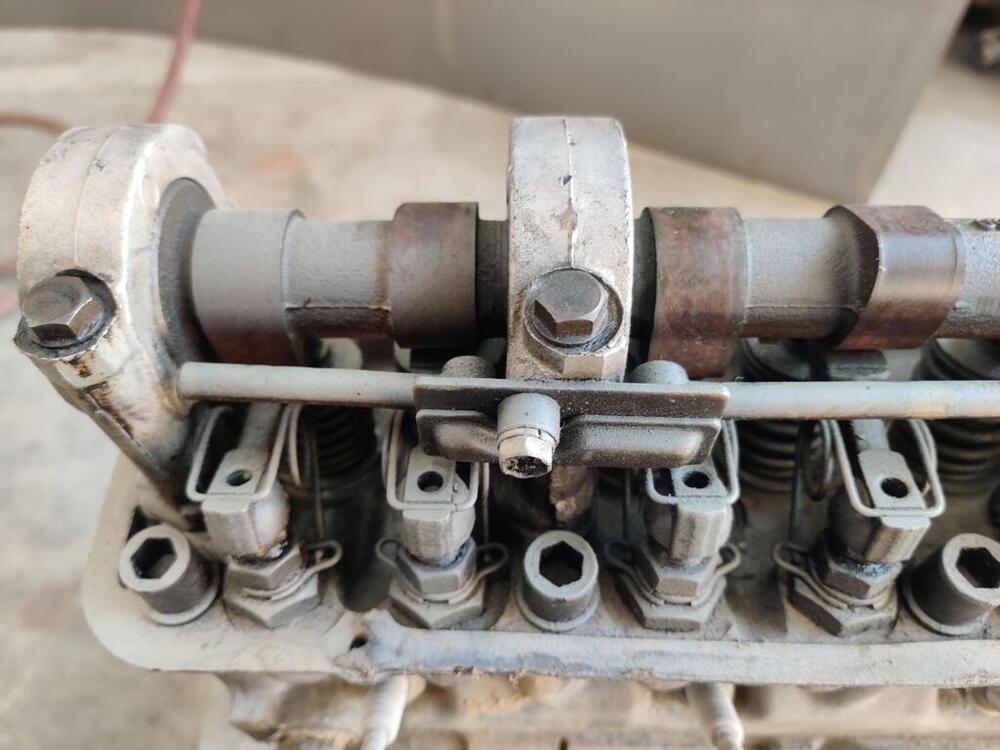
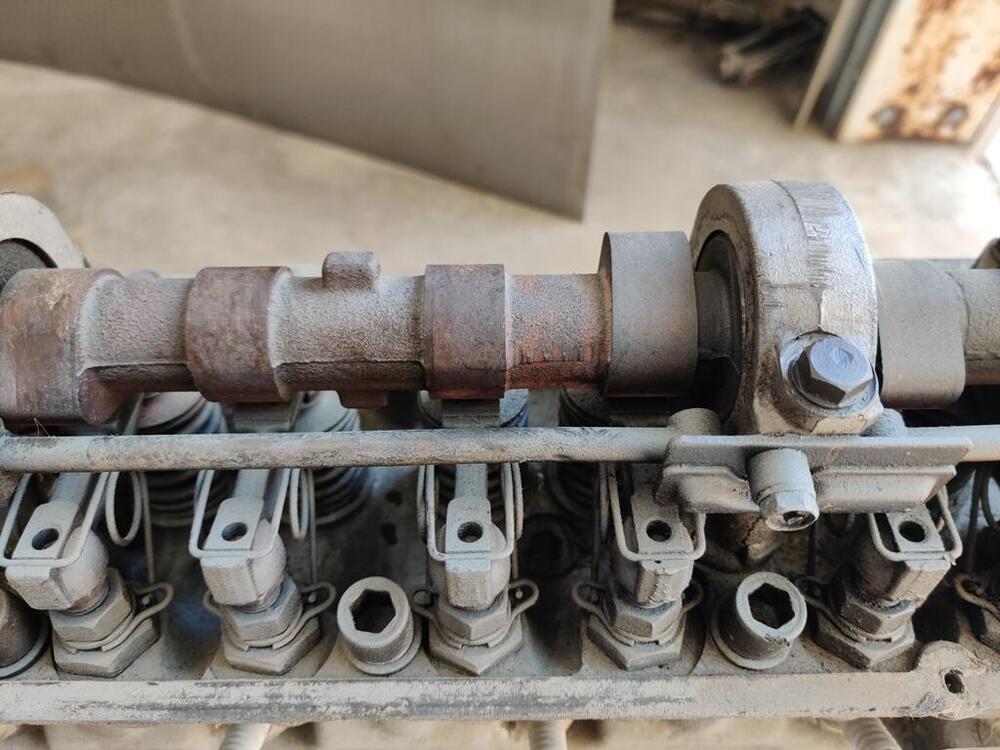
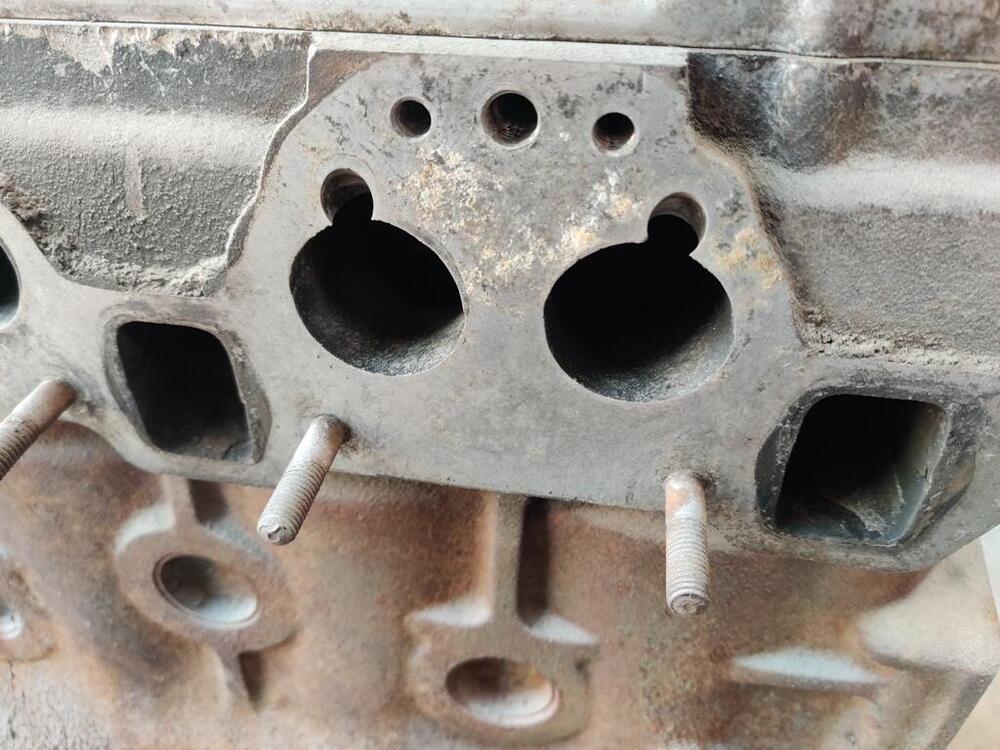
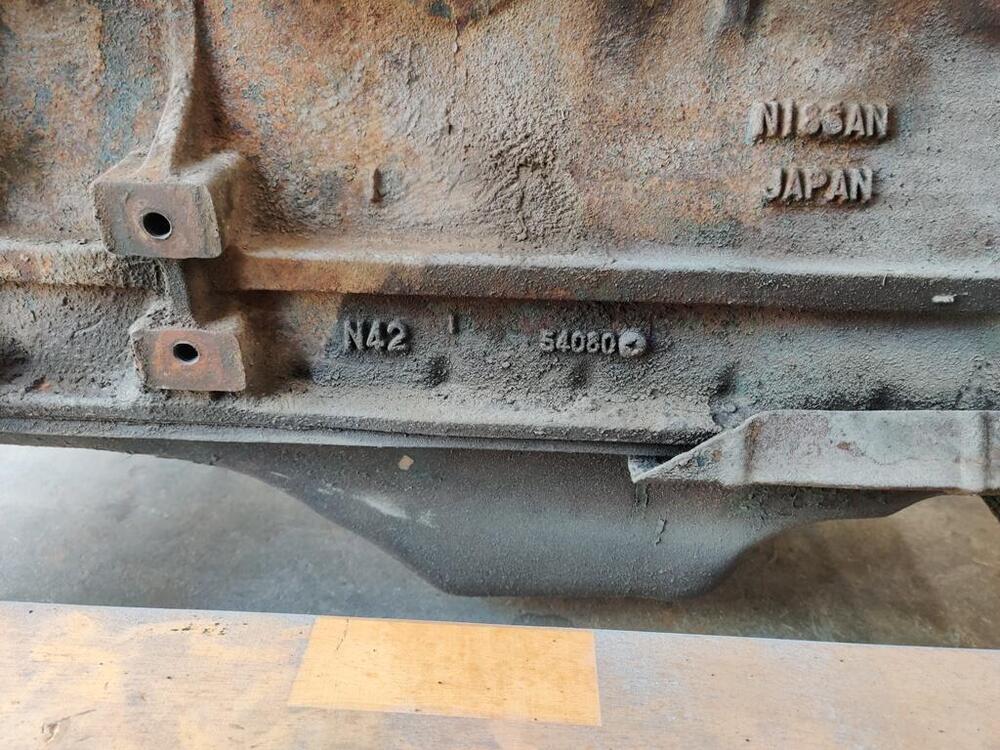
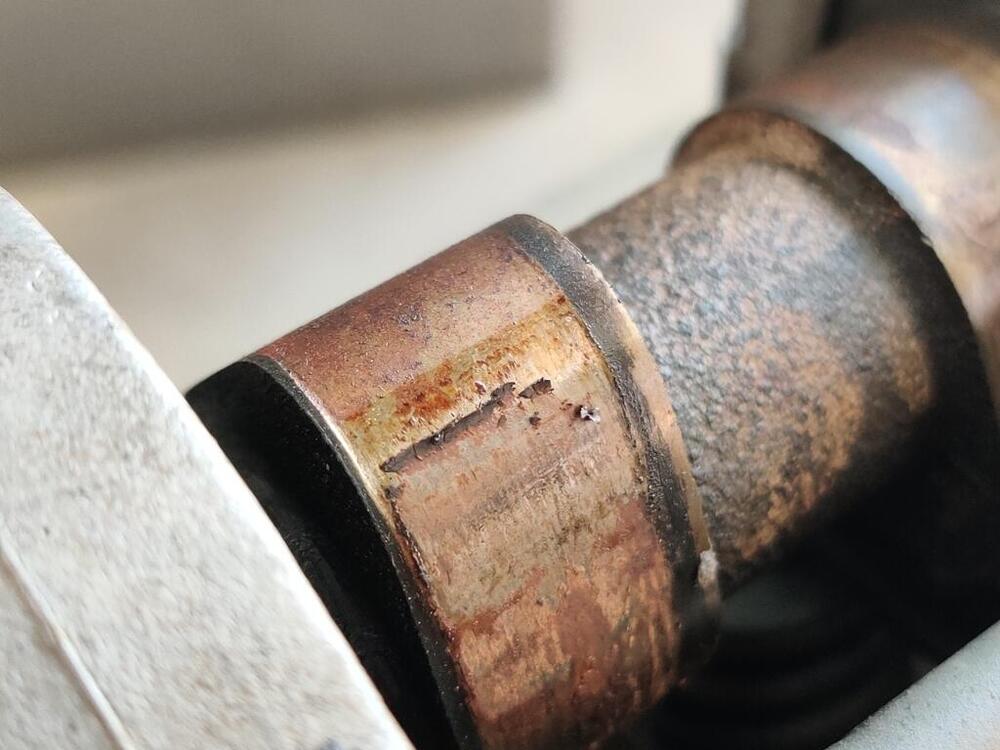
For sale is one L-28 long block. This is the desirable N42/N42 block and head combination. About 10 years ago, when I needed to build a new engine for my "track day" car, I located and purchased three of these N42/N42 engine and block combinations. The first block we sonic tested accommodated my requirement of an 89 mm bore size, so I didn't need to use either of the remaining two spare engines. These remaining two were removed about 10 years ago from cars which were in the same salvage yard in VA and have been stored inside my garage since. Both engines rotate by hand. I now need to free up some space in my garage, so I am interested in selling one of these off. Long block option #1: Price: $750 plus shipping to your location or you can pick it up in Marietta, GA. Pics of option #1: As you can see, option number one is pretty clean with no corrosion on the cam/valve train and has a clutch pp, disc, and flywheel. Long block option #2: Price: $500 plus shipping to your location or you can pick it up in Marietta, GA. Pics of #2: As you can see, option #2 shows some wear on the cam lobes which also have rusted. Questions? Need more info? Want hi res pictures? Just ask. Thanks! Garrett


-
Hi WolfZee, A transaction is in progress. If anything should change, I will let you know.
-
-
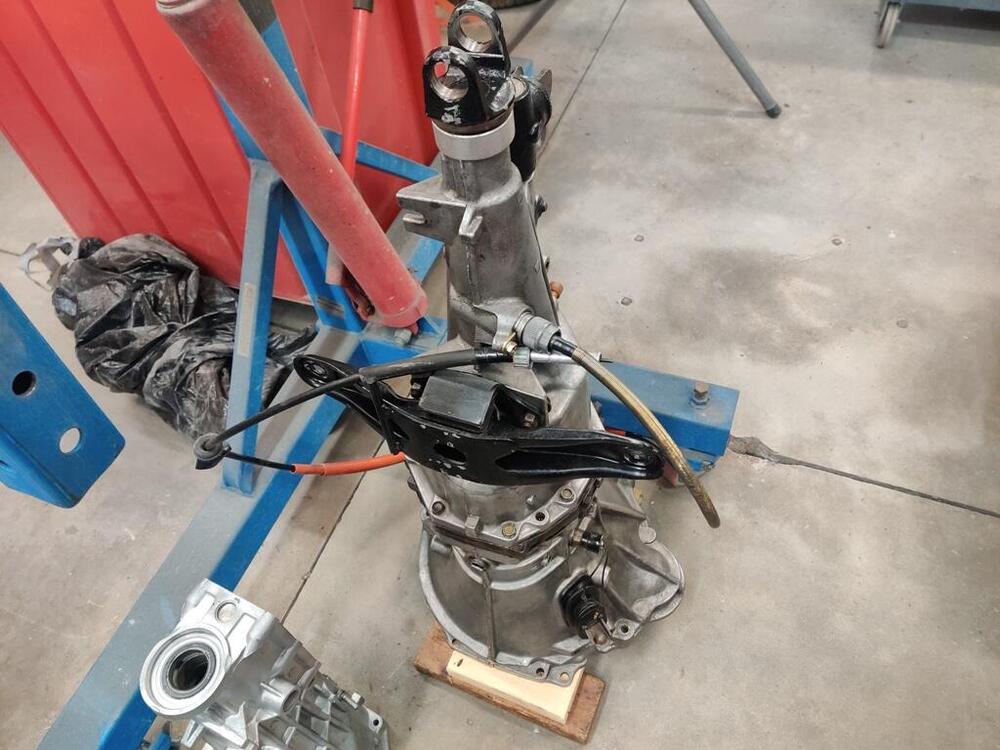
I have used this transmission in my Z for many years. After putting many miles on it over a number of years, I decided to rebuild it because it was grinding a bit when going into second. I rebuilt it myself using all new OEM bearings and synchronizers. I also replaced the seals/o-rings on the main selector rod. It has had little mileage added since the rebuild. It is in very good condition. I am switching to a 240SX transmission, so I no longer need this one. Price: $600 plus shipping or you can pick it up from Marietta, GA. Gear ratios: First 3.062 Second 1.858 Third 1.308 Fourth 1.000 Fifth 0.745 Not included are the speedometer cable and the series one transmission crossmember, though I will sell the crossmember separately.

-
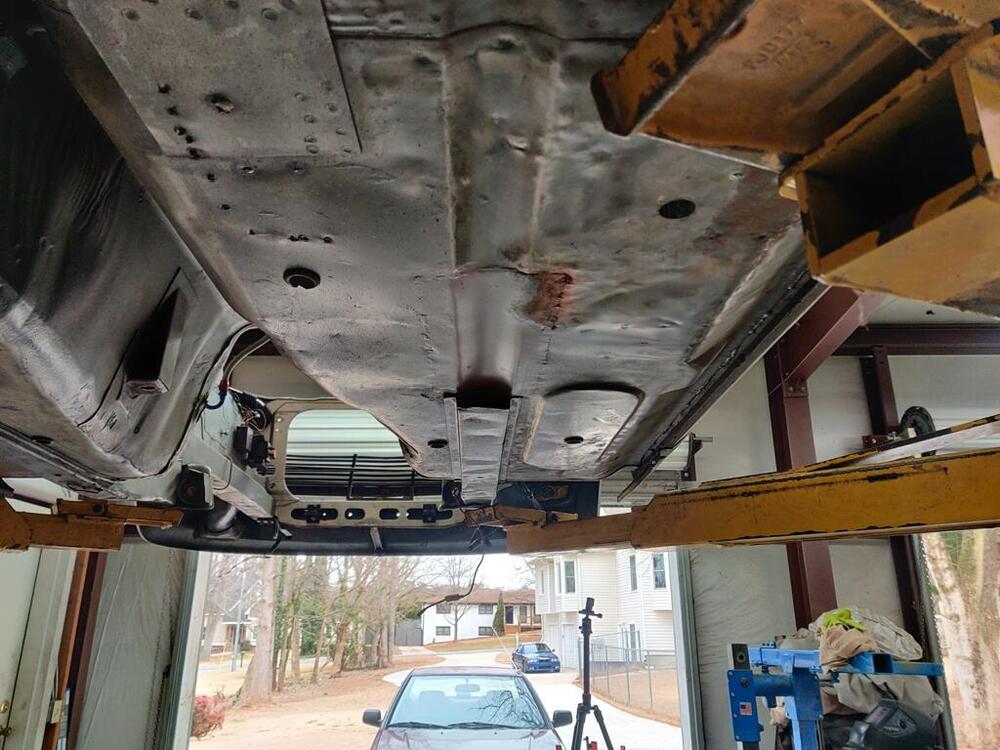
I have been updating an old engine build thread on HybridZ.org with content, but there is little interaction/engagement there. So, I figured I would like to post updates here as well. My efforts to get this other Z back running have expanded quite a bit beyond the rebuild of the 3.0 stroker motor. At the moment, I am working on repairing some rust in the floor panels. I have been watching a number of "Make It Kustom" videos on Youtube by Carl Fisher. In one of them, he creates some forms out of 3/8" plate to create a "hammer formed" part. Additionally, he uses a hydraulic press to "stamp" a recess into the battery tray he is making in the video. The rust in my floors on this car is not extensive. It is generally in the area of the large oval depression in the floor panel (on both sides of the car). Yesterday, I spent a few hours cutting out and grinding/filing on part of the form I plan to use to replicate the depression. On the right side floor, I only need a small portion of it. On the left side, I will attempt to make a full piece to replace the depression. I've never done anything with forms likes this, so we'll see how it goes. I will be using my 12 ton press because it is what I have to attempt to make the replacement part. But, I have been watching facebook for a suitable upgrade, perhaps a 30 to 45 ton press.

-
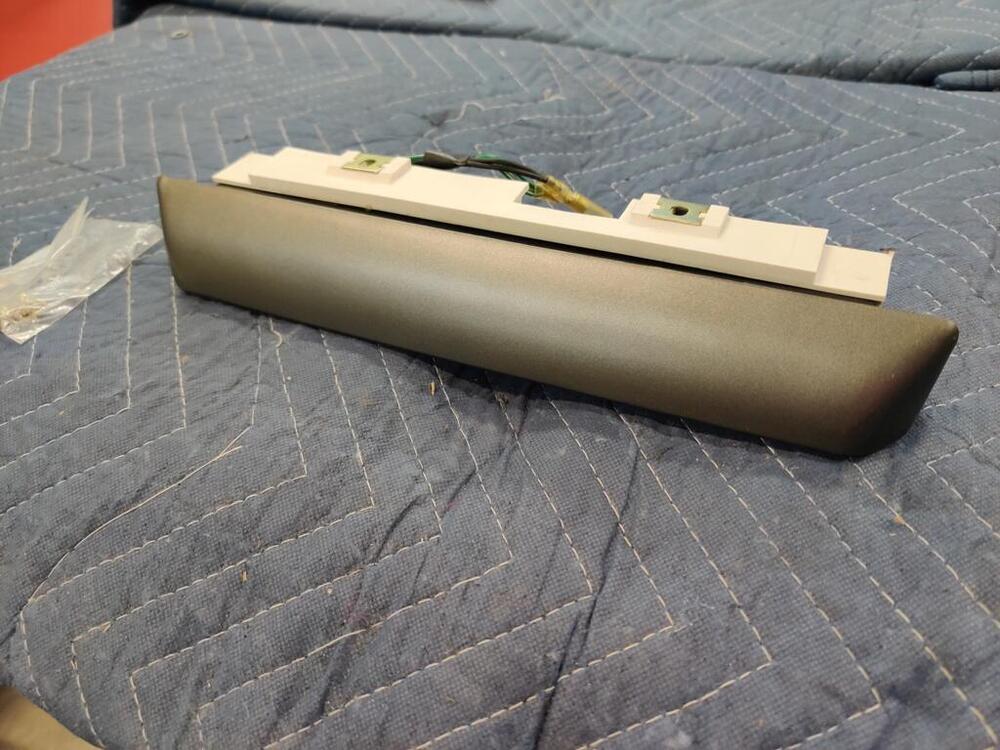
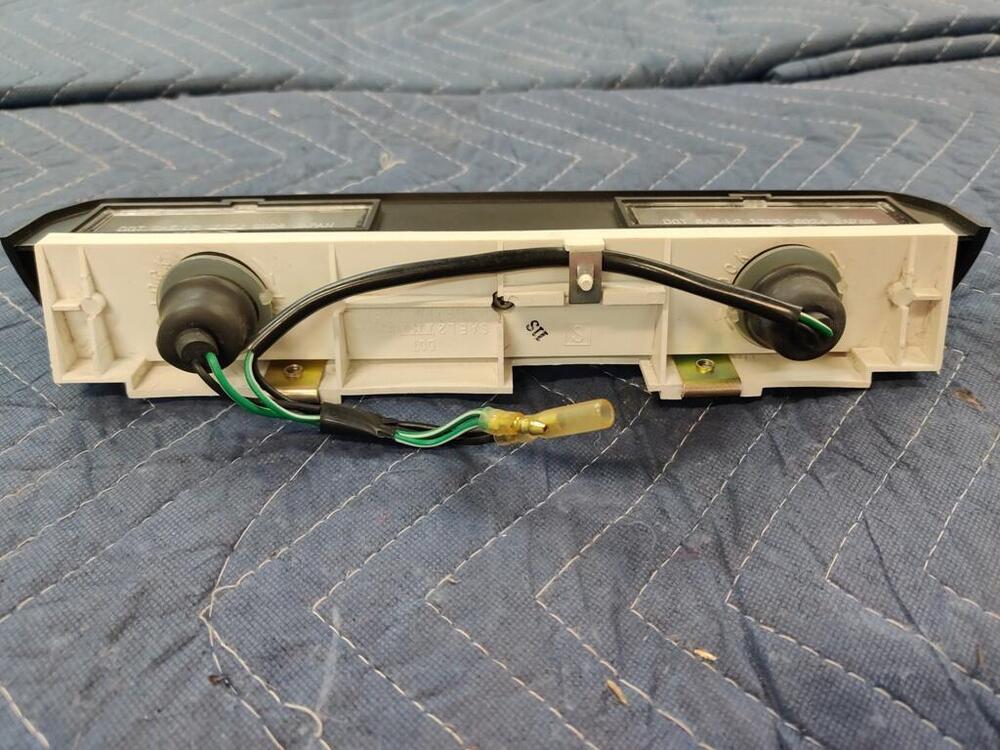
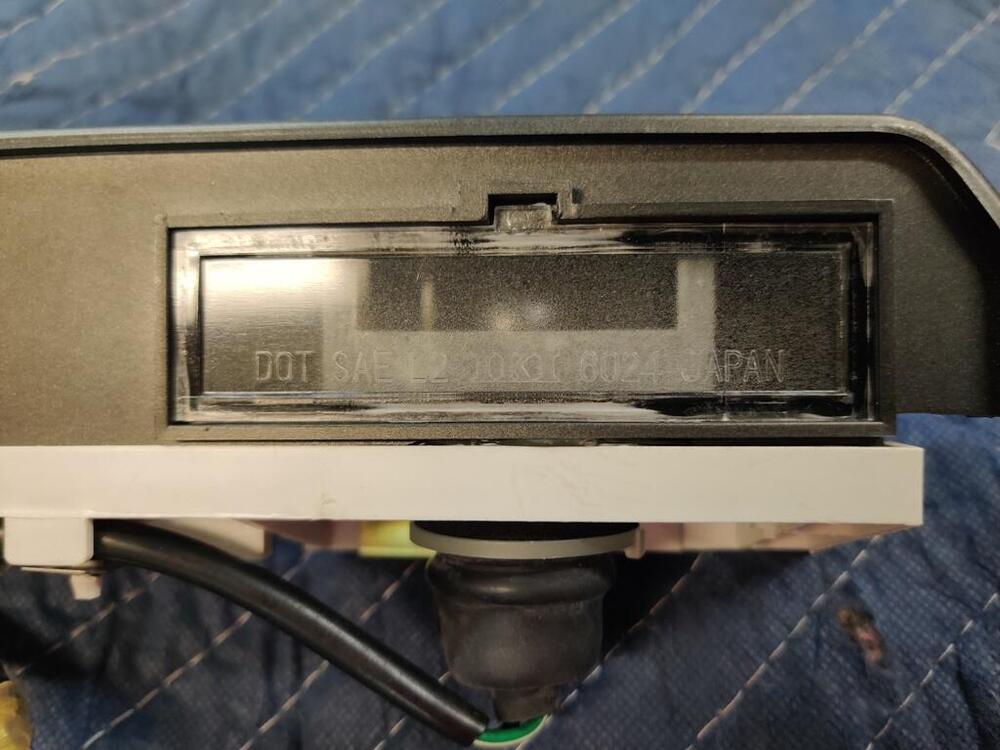
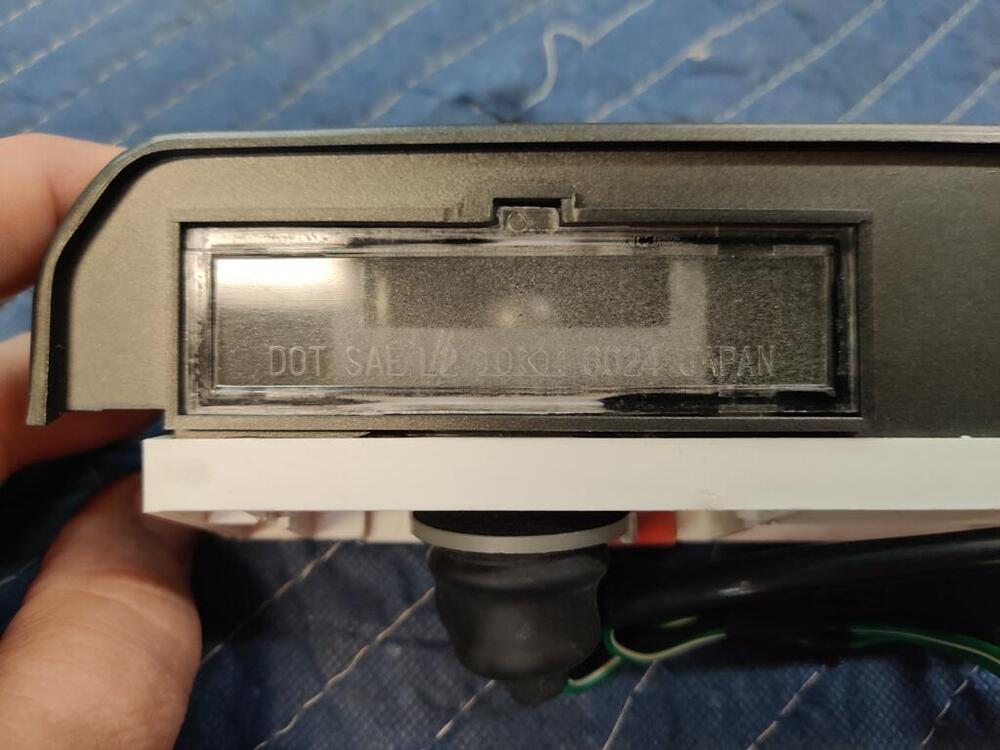
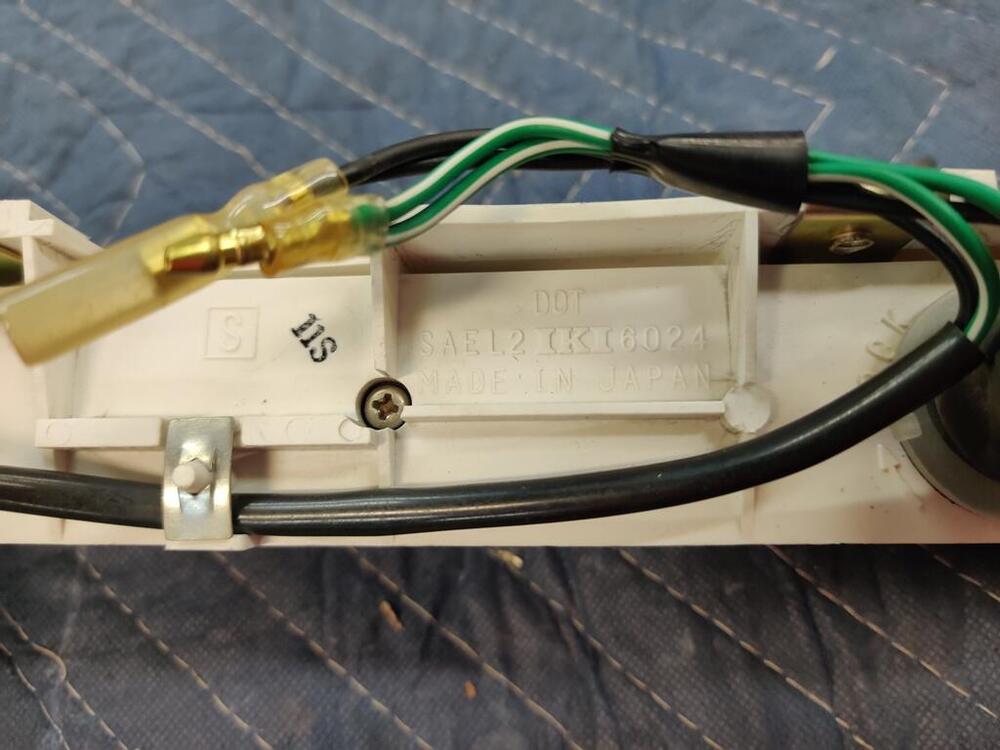
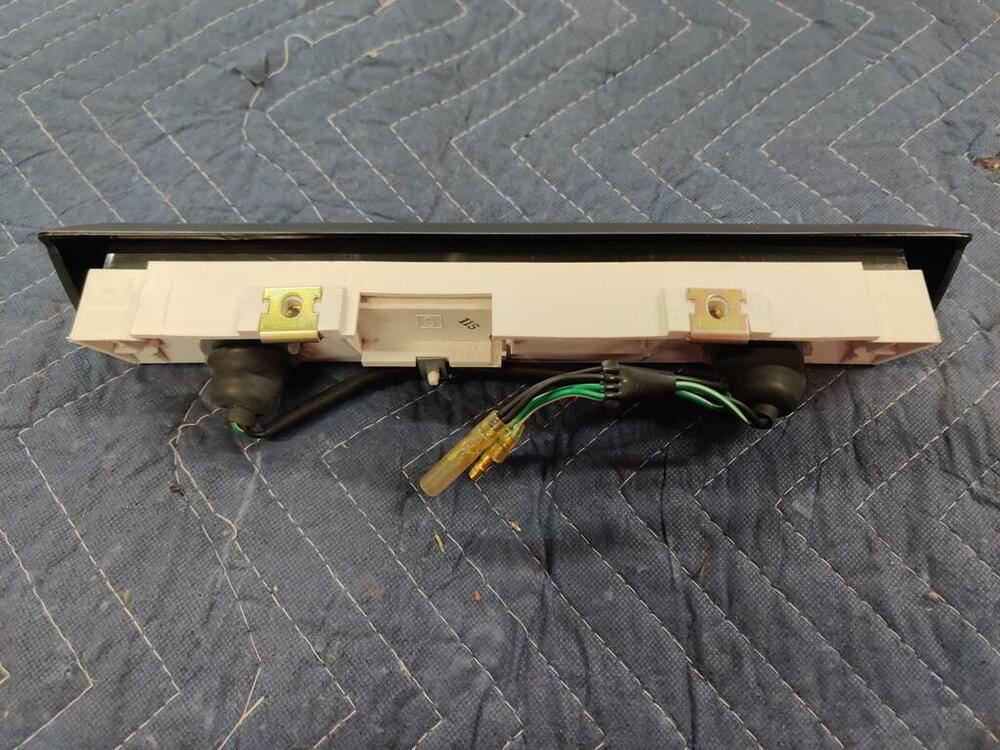
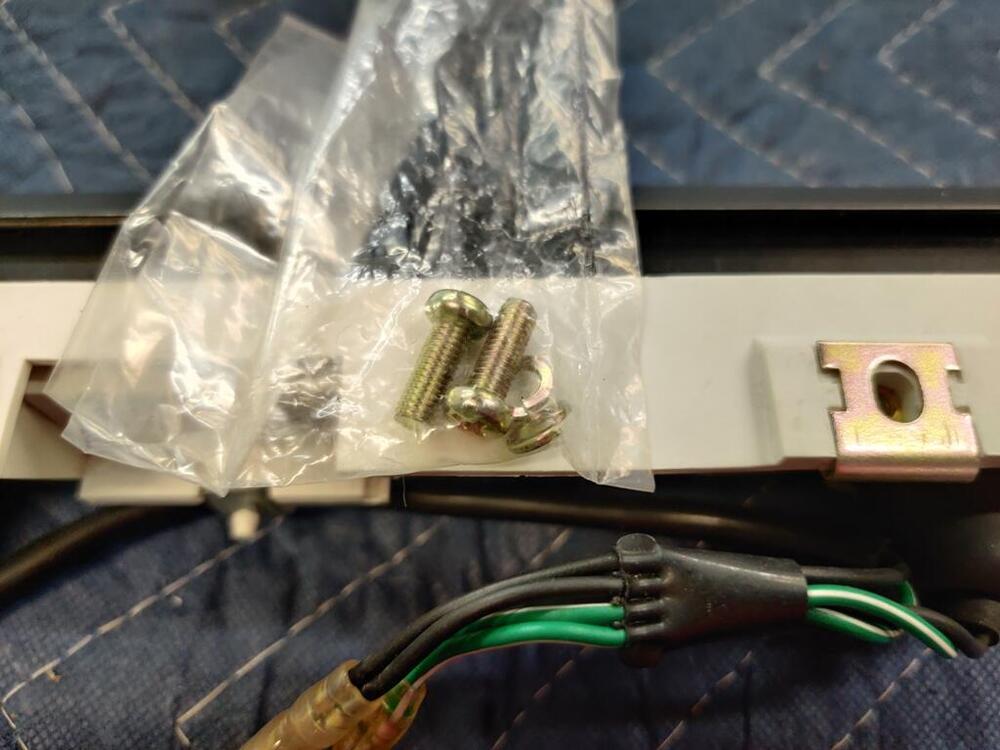
Unused (NOS) 26510-N3400 license lamp for 8/73 and later Datsun Z cars! Ready to bolt on - no repainting or cleaning your old/scratched one - saves you time! I am unsure of the upper date range cutoff for fitment. Please look at the pictures to determine applicability for your car. I didn't realize at the time I purchased it that it was not the correct lamp for my 71. As received, it had a slight discoloration (like a finger with thinner on it wiped it accidently) when I got it. I used the Ford color and matte paint (as detailed elsewhere in the forum) to touch up just the front face (not the whole grey area). The paint match looks very close to original. Hi resolution pics available. Price: $200 plus shipping cost to you.
-
Hi, Any interest in the overrider bar? I just saw that this new old stock overrider bar popped up on eBay, in case you find that of interest: https://www.ebay.com/itm/147201036119?mkevt=1&mkpid=0&emsid=e11021.m164380.l178264&mkcid=7&ch=osgood&euid=1977533a15b7463bb92dcd2931b944d8&bu=43190812684&ut=RU&osub=-1%7E1&crd=20260313042544&segname=11021&recoId=147201036119&recoPos=1
-
Lovely! I will IM you to handle the business end of the deal. Thanks for digging it out and cleaning it up.
-
I see. I do think some pictures with better lighting might help us see why it isn't fitting properly.
-
-
Still want/need this. Thanks.
-
-
Aftermarket or original?
-
The original vapor barrier is very thin, transparent plastic. I bought a roll from Home Depot ages ago, something like this: https://www.homedepot.com/p/Husky-10-ft-x-100-ft-Clear-2-mil-Plastic-Sheeting-RS210-100C/202184044 For sticking it to the door, I really like this stuff: The plastic sticks to it, and it to the door, really well even in the heat of summer. If you have to open it up to get inside the door, you will have to make a new plastic sheet, as it will not pull away from this product without damaging the plastic. It is an easy job, so no big deal.
-
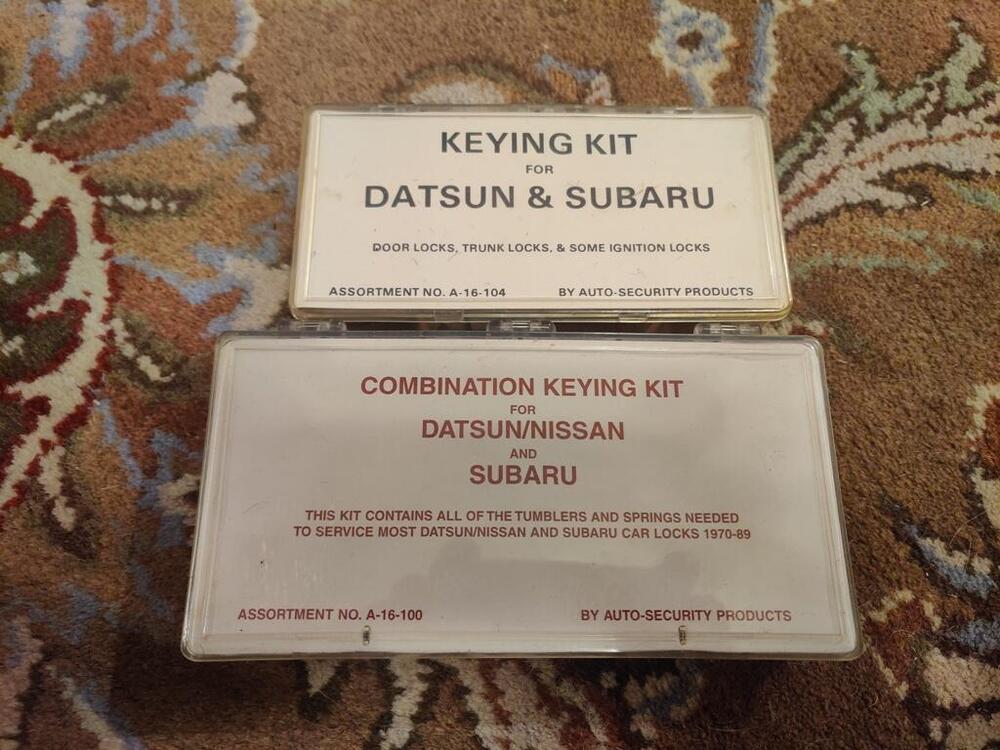
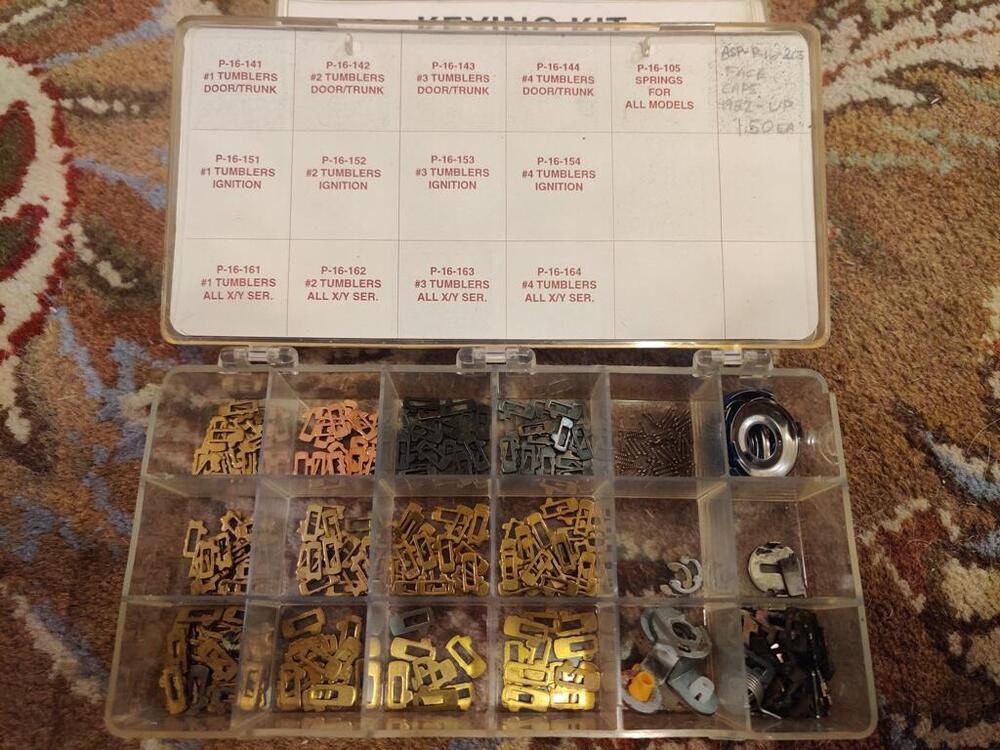
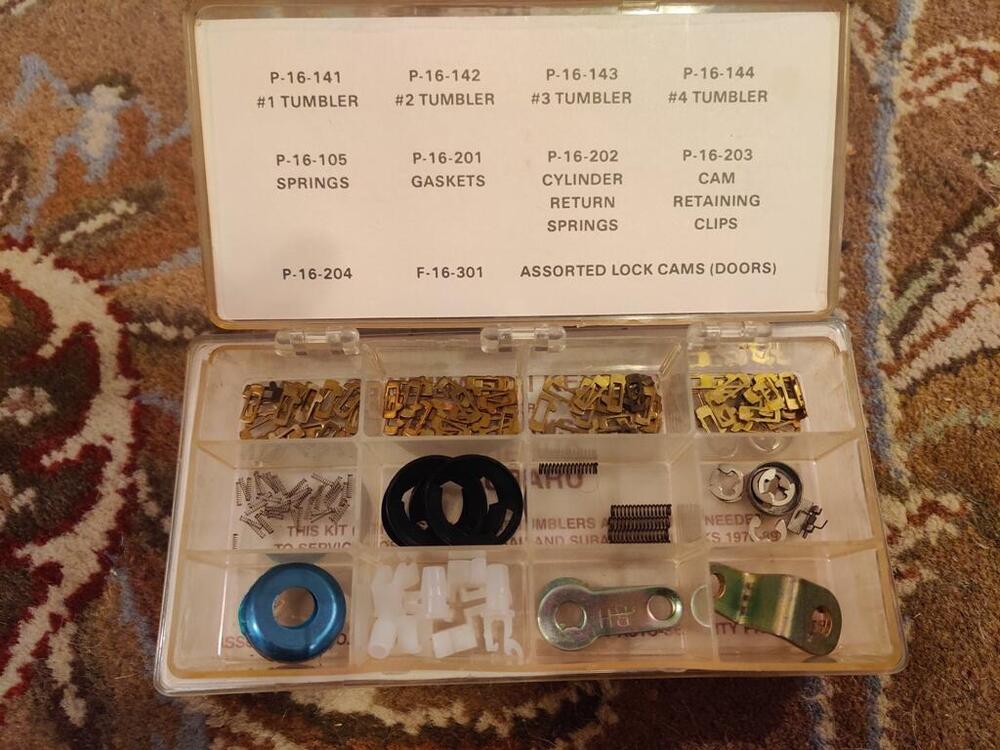
The kit number I purchased was A-16-104. I also managed to purchase another kit later which had the wafers for the ignition. It was the A-16-100. Be careful when shopping on ebay for old kits. Some are less than complete - missing some of the original parts. The wafers are all you need to rekey the locks, but some of this kits came with nice additional pieces like lock faces and new rubber gaskets. Kits I bought... second pic is the 104. Third pic is the 100. Garrett
-
Yes, that. I use the term undercoat generically and mean just that it is a coating (from the factory) under the car :)
-
I find the restoration on the car to be stunning. And so much metal work went into this one, and for a CA car at that. A few details that I am most impressed by is: the color of the plating of the engine parts... the plating on the car I restored and many restored cars is not the right shade. And the texture of the sound insulation pads on the fire wall - the early cars have a less than smooth texture of the asphalt based black surface of the pads. Also, the carpets look bespoke to me. I looked long and hard for a heal mat that looked like the factory one and could find nothing. And the carpet type (loop) of the carpets in this car is different than anything I have been able to find. Lastly, the "undercoating" which is sprayed to the bottom of the car is very similar to the original. It is not quite as black as the original, but looks to have a very similar texture/finish. The overspray of the paint on that "undercoat" is very much like the factory. The only thing I can find thus far that seems off from factory is the "black out" paint used in areas like the radiator support, the seat mounts, and the body just behind the quarter windows is gloss black on this car when it was flat black from the factory. Seriously impressive.
-
I heard back from Junkyard Jenny's. They only have four speed ones at well.
-
I'll consider a junk 5 speed transmission at this point, if nearby to me in Marietta, GA. Got one with something broken inside? Just looking for 5 speeds for now. Will open up to 4 speeds later if I can't get a five speed. Thanks for considering helping me out!
-
-
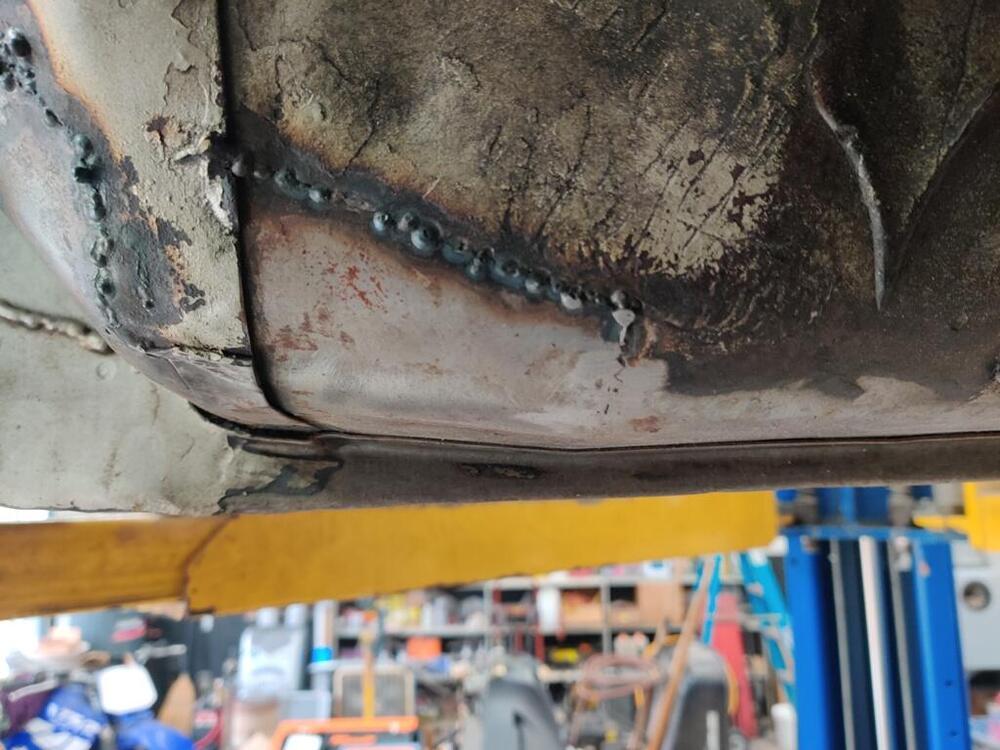
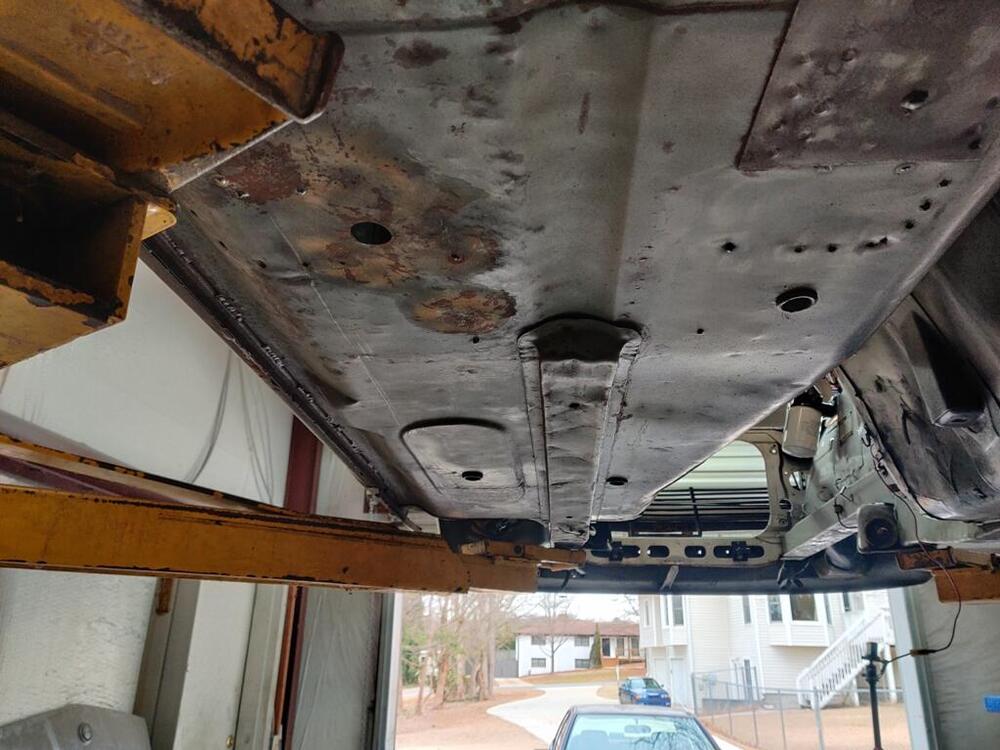
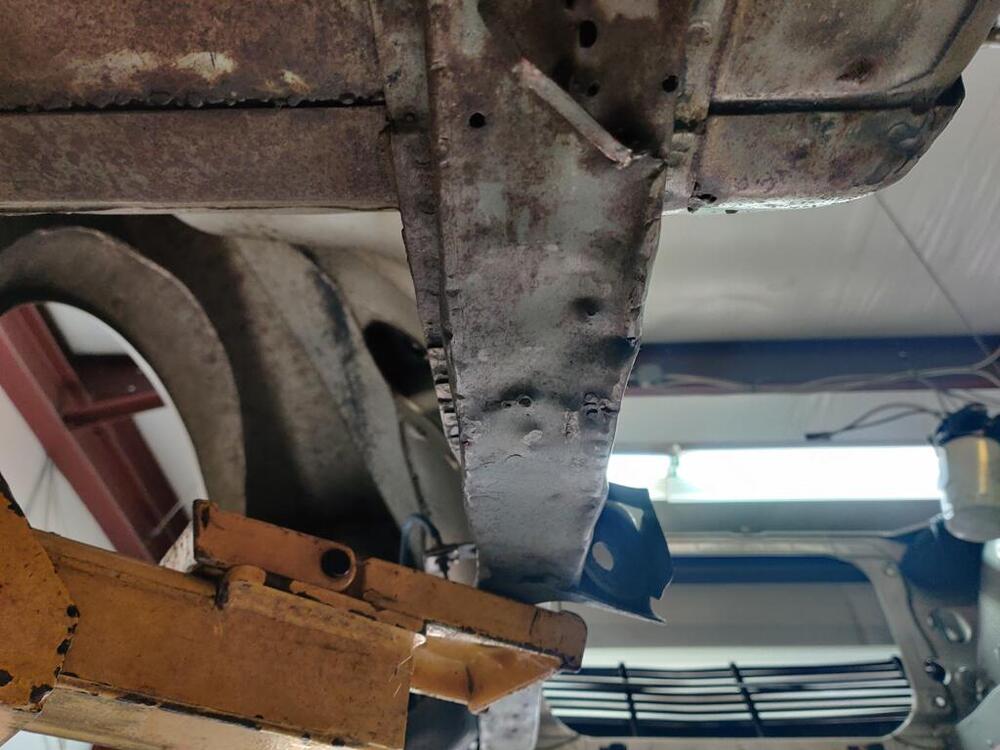
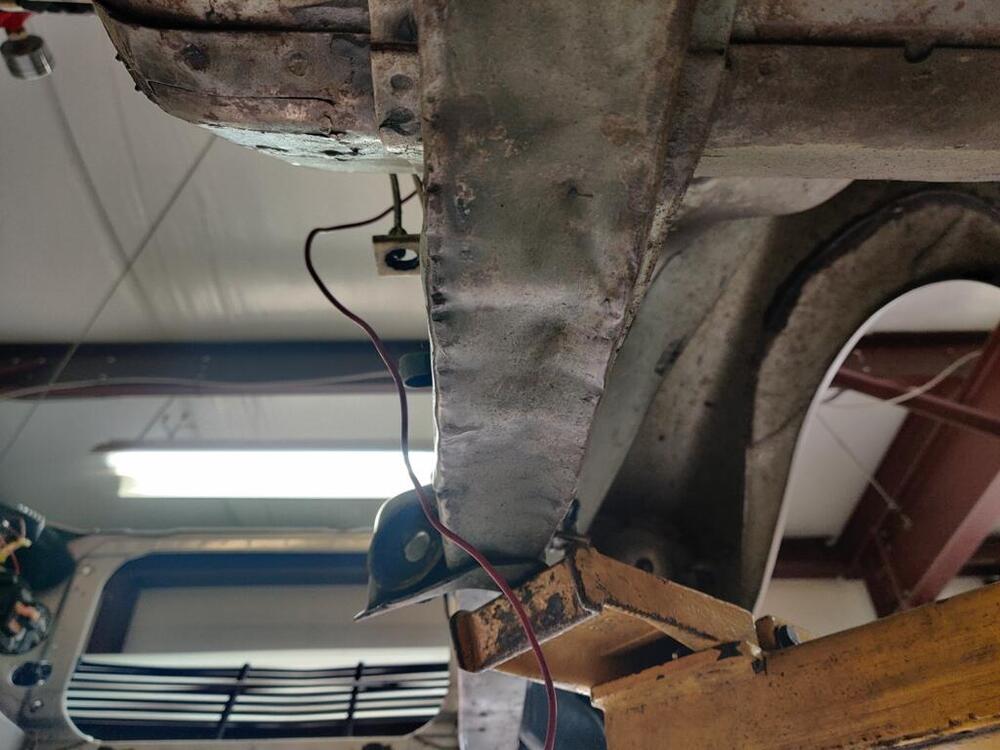
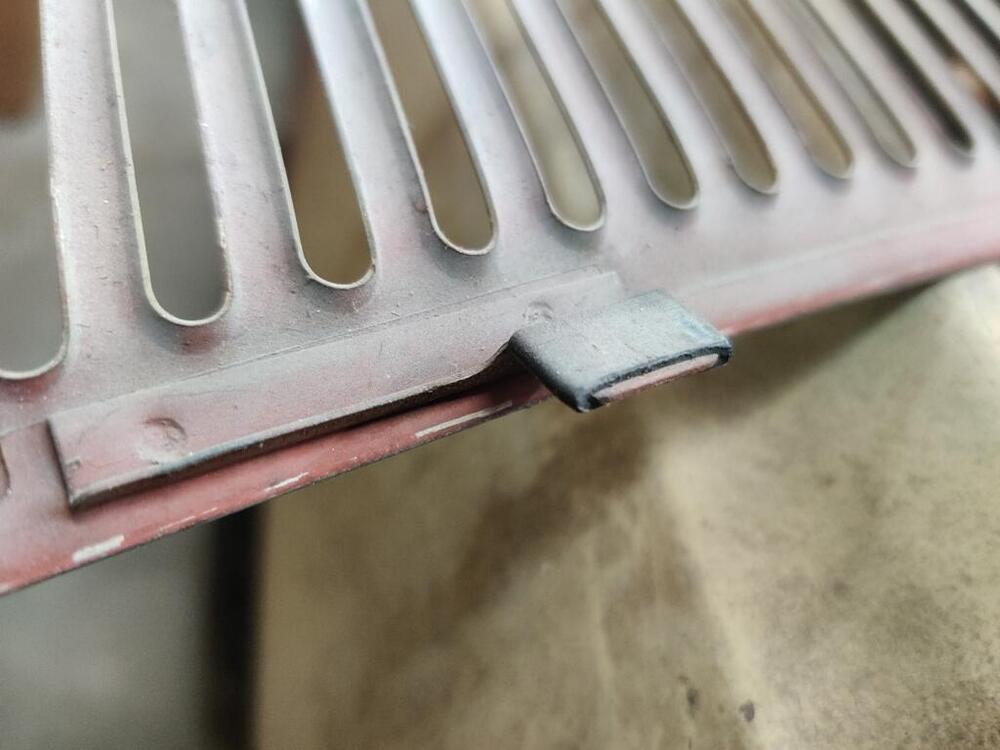
So, my concern is that I haven't been able to determine if the Klassic Fab rear frame rails have this little angle bend at about 4 inches before the front edge of the floor panel (see the first two pictures below). The floor panel has a bend in it there. And the frame rail follows the angle - the flanges are not perfectly flat from the rearmost point of the frame rail all the way to the front edge of the floor panel. Anyway, I'd like to know if the Klassic fab rear rails have this same contour. It isn't the end of the world if they don't but I'd rather same myself the time and effort of modification if possible. My factory rails are pretty bent up. The damage has pretty much been there since I bought the car in 1993. It will be nice to finally address the floor issues this car has and get some sound insulation and paint on both sides. When this car was operational, it was such a pain to have to wipe down the bottom of it whenever I got caught in the rain!
-
I'm going to address issues with my "track" car's frame rails (rear half). The floor of my track car has been bare metal for more than a decade (after I sand blasted it to remove surface rust), and the rear portions of the frame rails are bent/crushed as well as have some places where they rusted a lot. I think Klassic Fab parts have a good reputation for fitting well, however, I am interested to see how well the rear frame rails fit. I searched here and the wider web, and couldn't find any one who took pics of their efforts to replace the factory ones with KF ones. Anyone have any pics? There is a slight bend in the floor that I don't see in the replacement rails (viewing the pictures of them I can find online). I am going to take some pictures today of the rails on my car and will share them here a bit later.
-
@tadslc Just curious how much the set of four plus shipping ended up being. I have a set of two 16 X 7 with zero offset (same sizing as I put on my recently restored Z) in a classified add on the site and am trying to value them accurately. Garrett
-
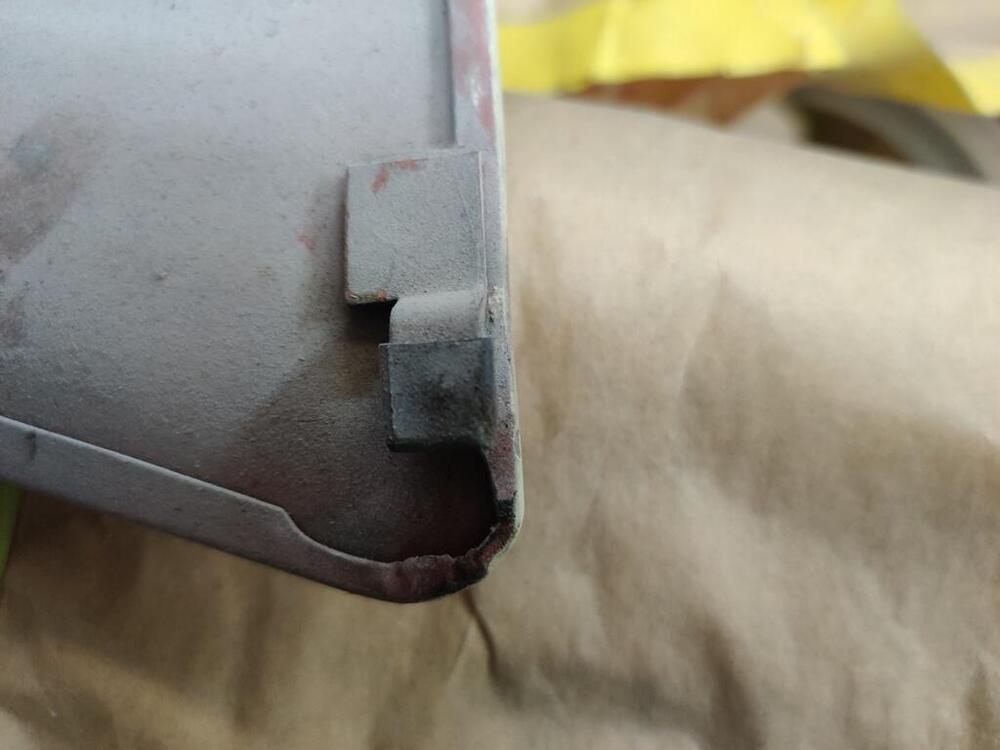
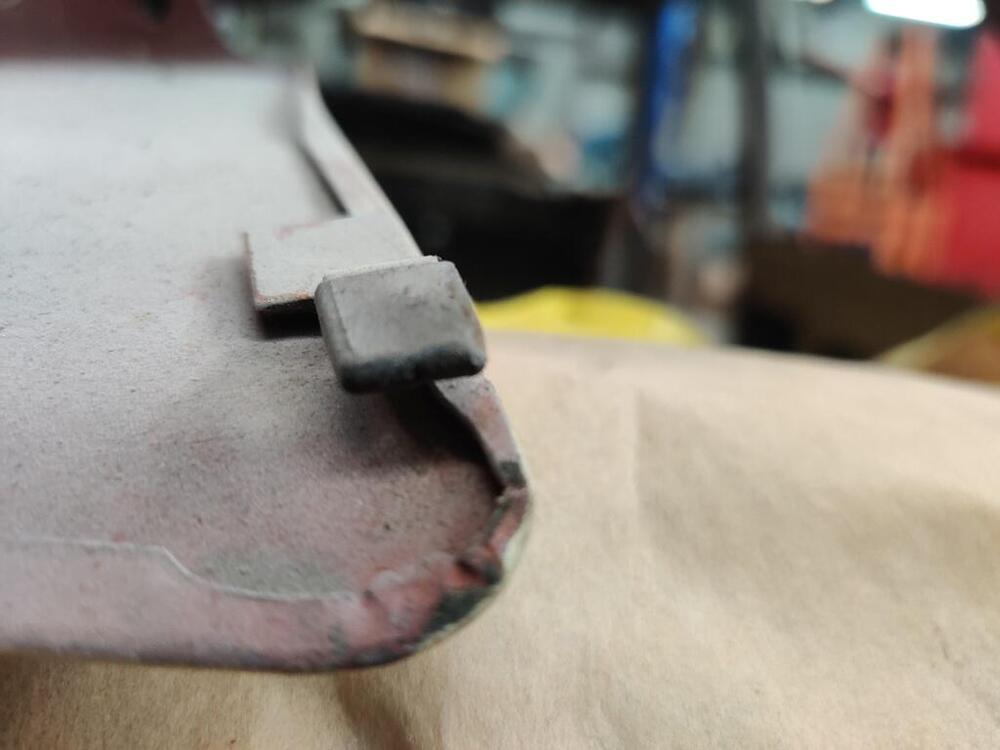
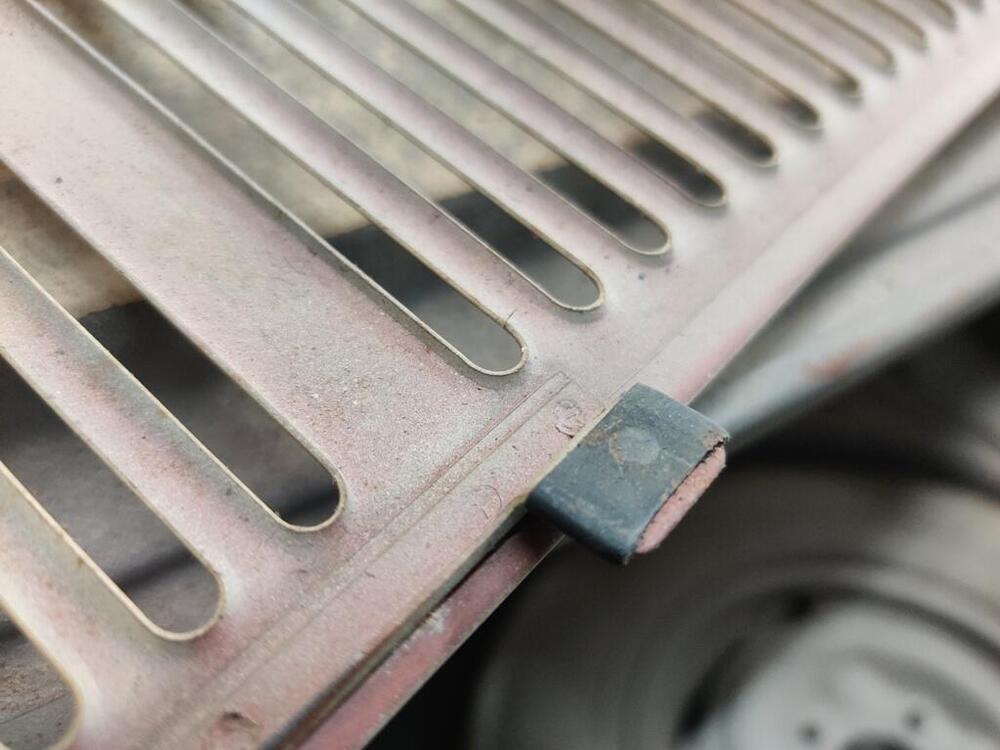
Here they are - looks like my cowl panel is missing one of the end ones. It is just a square rubber cap.


-
Hi Charles, I have a 71-73 510 glove box. Also, I think I may be able to at least get you pictures of the original cowl "clips". Garrett