inline6
 Subscriber
-
Joined
-
Last visited
Everything posted by inline6
-
 The tab thickness is .7 mm or .028"? What is the thickness of the panel? You are getting nearly zero penetration into the panel to which you are attaching the tabs? What is your wire speed? Is the panel prepped to bare metal where you are attempting to attach the tabs? Are you starting in the center of the hole, on the panel, or at the edge of the hole in the tab? Do the former, not the latter. Trigger, and then stay in the center of the hole in the tab - on the panel only, as if just trying to put a blob of weld on the panel portion. As that builds, you can move out out of the center of the hole and "pick up" the edge of the tab. When you do, the tab metal will melt (quickly) and pull the "blob" you started in the middle of the hole - the molten metal of what you started on the panel and the molten metal of the tab will join. Following this technique will maximize time on the thicker panel portion, and should help with penetration on that panel. Another idea: How big is the diameter of the hole in the tabs? If I still couldn't get good penetration to the panel with the above technique, I'd consider making the hole in the tab larger and repeating the technique above. Looking at your pic, the holes can be enlarged without making the edges too thin. You need to get the panel hot enough first, then slide to the tab which will melt much quicker by comparison. A larger hole in the tab will allow you to buy time "pre-heating" the panel, which equates to better penetration.
-
LOL. Yeah. We have an endless amount of work to do, but we try.
-
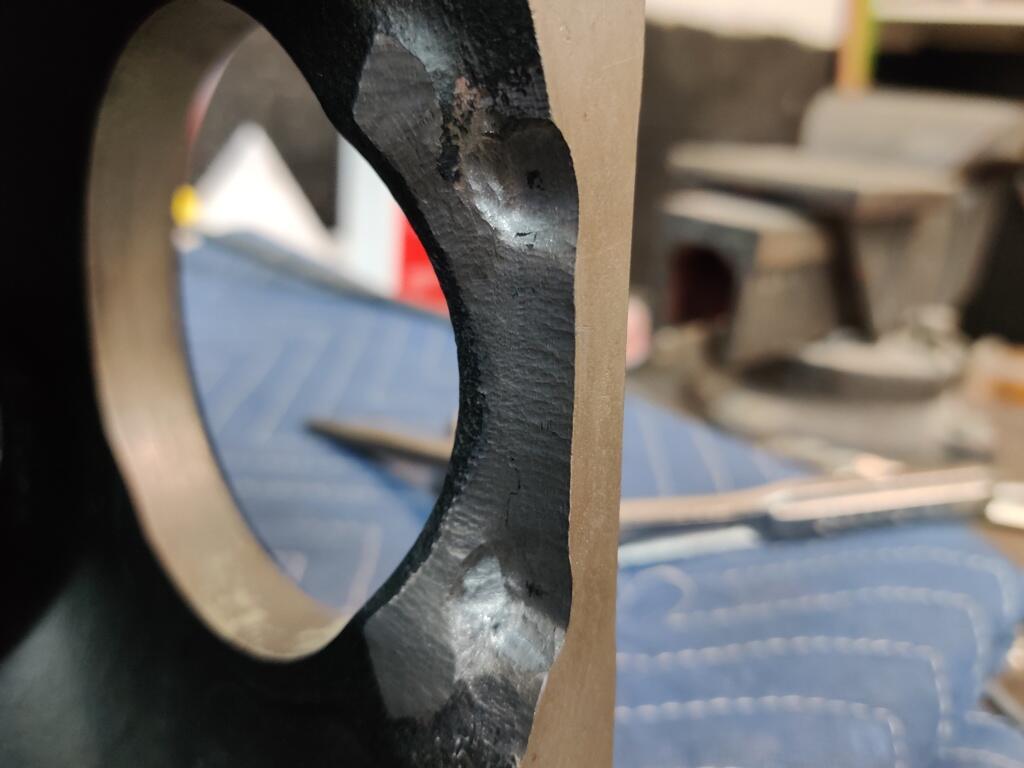
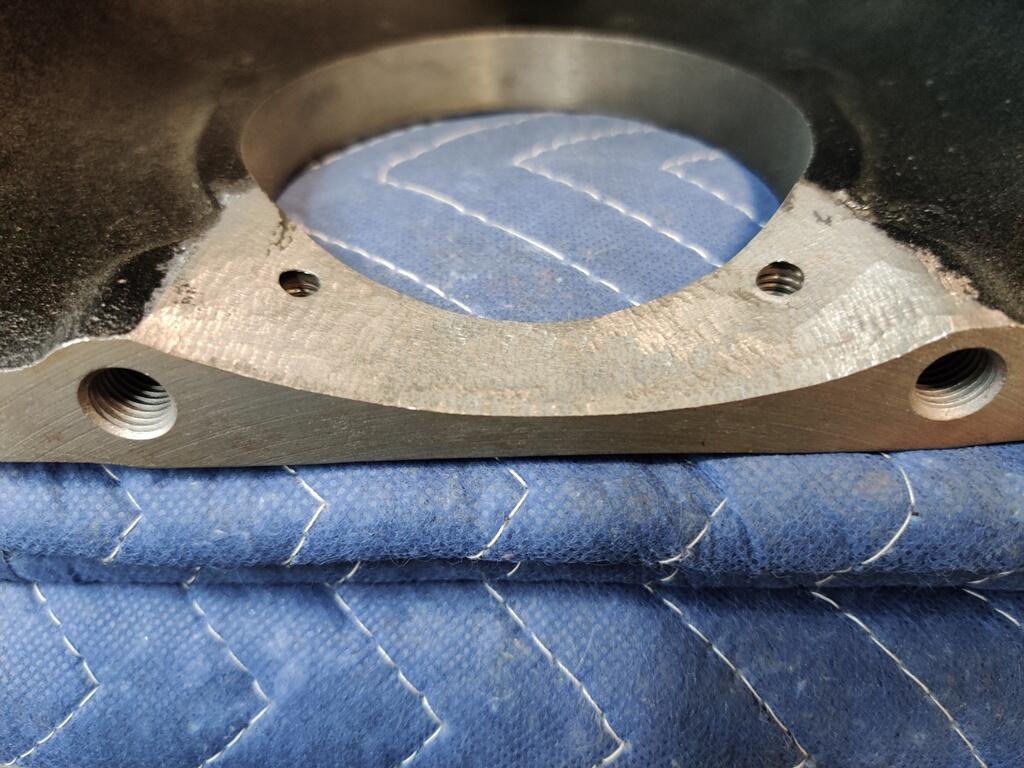
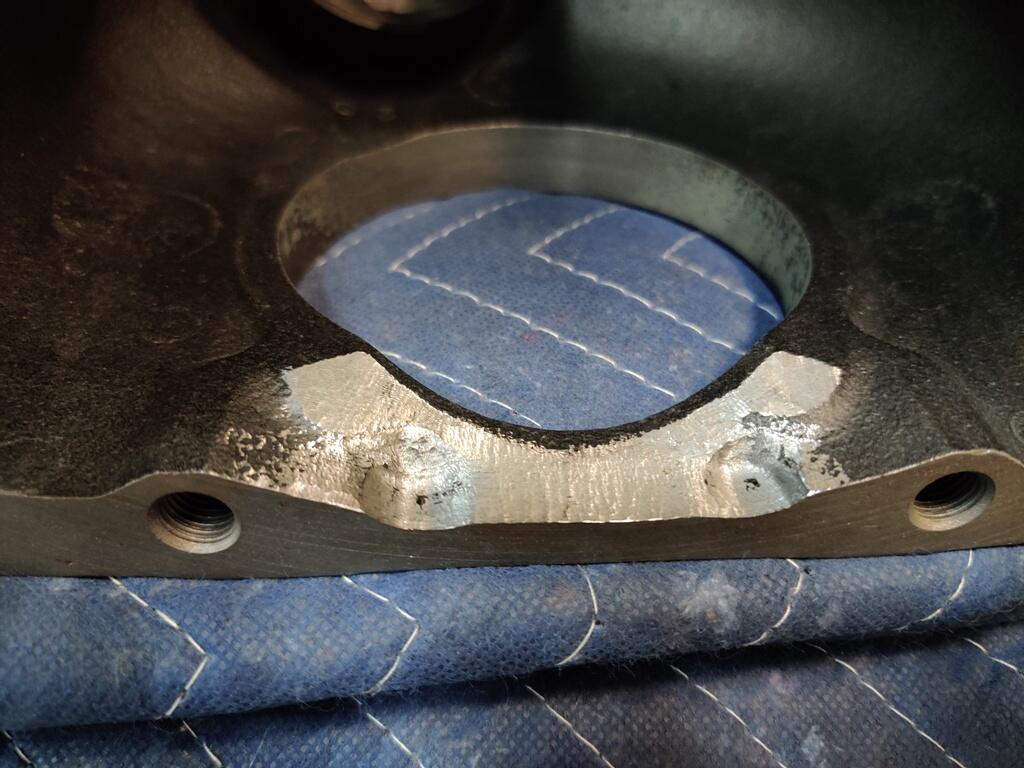
Hi Jeff, Just glancing at the pictures you provided, it looks to me like this area on the Subaru case is much thinner than on your case: I had to grind extensively to get the Quaife unit to fit. On the right side, I ground a little bit, and then made deep depressions to allow a couple the bolts to fit in "wells": On the left side, I ground more extensively, so much so, that I broke thought to the side retainer bolt holes. I spent hours with a die grinder. I would test fit, and knock lsd into the case lightly to make marks... which I then ground away. Again and again I repeated that process until the carrier went in. I also had to remove one of the ring gear bolts in order to get the carrier to slip in. After I determine the final shim size, I will assemble it one last time. During that final assembly, after the carrier slips into the case, I will need to torque that one last ring gear bolt through the side hole. Then I will be able to install the side retainers and finish assembly. The KAAZ unit may need similar approach.


-
Just on the down low... I work for SimplePart - the company that provides the ecommerce platform that Courtesy is now using. 😉
-
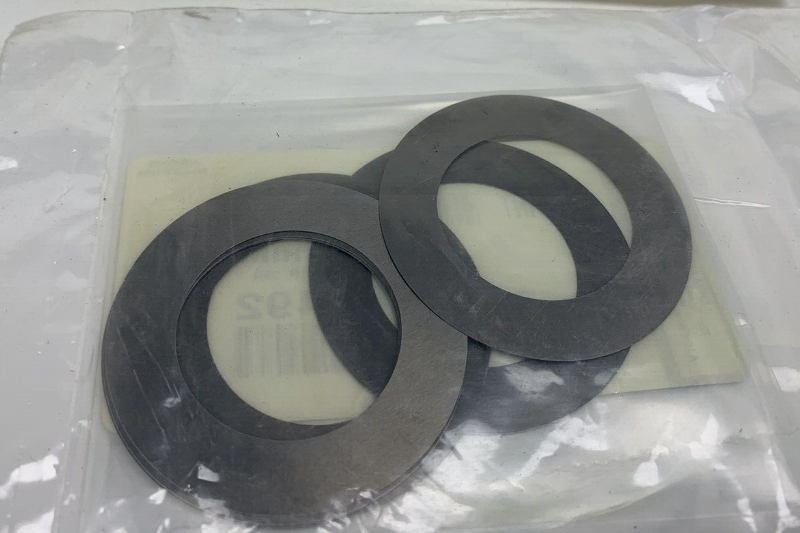
I have two brand new R160 shims (I think) that are useless to me. I could hit one of those with the file also to see how it compares... or send you one of them to see what hardness it is? They are 3.5 ish mm thick. G
-
VIN HLS30-60325 is much later than my car, so no chance on the driver window. But if you see any other candidates, don't hesitate to let me know!
-
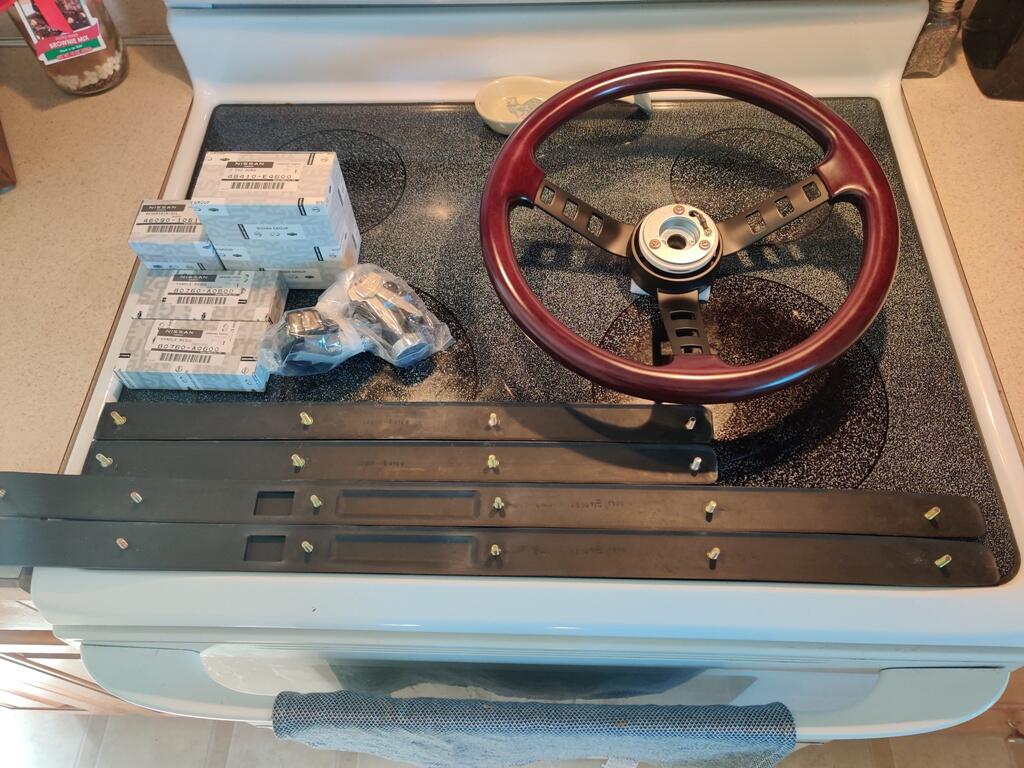
Today, I received some items I won from auctions in Japan. I use a third party, Jauce.com, to assist with the logistics. They handle receiving items... holding them until all are ready to export, and then packaging and sending them to me. There are many fees. There are bank fees when depositing funds. There are auction fees when you win. There are tax fees. There is shipping from the seller to the Jauce warehouse. There is the cost of shipping to the US. With all the fees and shipping, it can be difficult to determine whether what you paid was a good price. I thought it would be interesting to share a bit about my experience with purchasing and importing these items. The steering wheel is a "Nissan competition replica" - this one is wood vs. others available which are vinyl. I also got several genuine Nissan parts including a front set of front bumper rubber strips (the horizontal ones), a set of matching rear bumper strips, an ignition switch, a couple of window cranks, a horn pad for the steering wheel, and a clutch slave cylinder reservoir. Apparently someone made a batch of these replica steering wheels a while back, and you can still find them available in a few places. Generally speaking, without the horn button, you're looking at a minimum of $389 here in the US. Pair of genuine Nissan front bumper rubber strips are discontinued and no longer available - $200.84 with free shipping from eBay Pair of genuine Nissan rear rubber strips (the horizontal ones) $145 and $17 shipping from eBay and $66.51 plus shipping each from NissanPartsDeal.com Original Kanto Seiki ignition switch is available on eBay for $398 plus $19 shipping Set of two genuine Nissan window cranks $46.85 ($93.70 for two) currently, though they go on sale for about 15% off from time to time) plus shipping from NissanPartsDeal.com A genuine Nissan horn pad for a stock steering wheel - $310 on eBay and $269 plus shipping from NissanPartsDeal.com (but not currently available) A genuine Nissan clutch slave cylinder reservoir (old type) which is discontinued and no longer available Adding in all the fees and allocating the final shipping to the US. proportionately per item with the final auction price with fees included, here is what I actually paid: Replica steering wheel - $320.69 Pair of genuine Nissan front bumper rubber strips (NLA) - $96.46 Pair of genuine Nissan rear rubber strips - $109.77 Original Kanto Seiki ignition switch - $145.93 Set of two genuine Nissan window cranks - $63.16 A genuine Nissan horn pad for a stock steering wheel - $193.49 A genuine Nissan clutch slave cylinder reservoir - $21.30 A dollar buys a lot of yen these days, historically speaking, as can be seen from the graph below. The exchange rate is pretty much what it was back in about 1987. Something to consider!


-
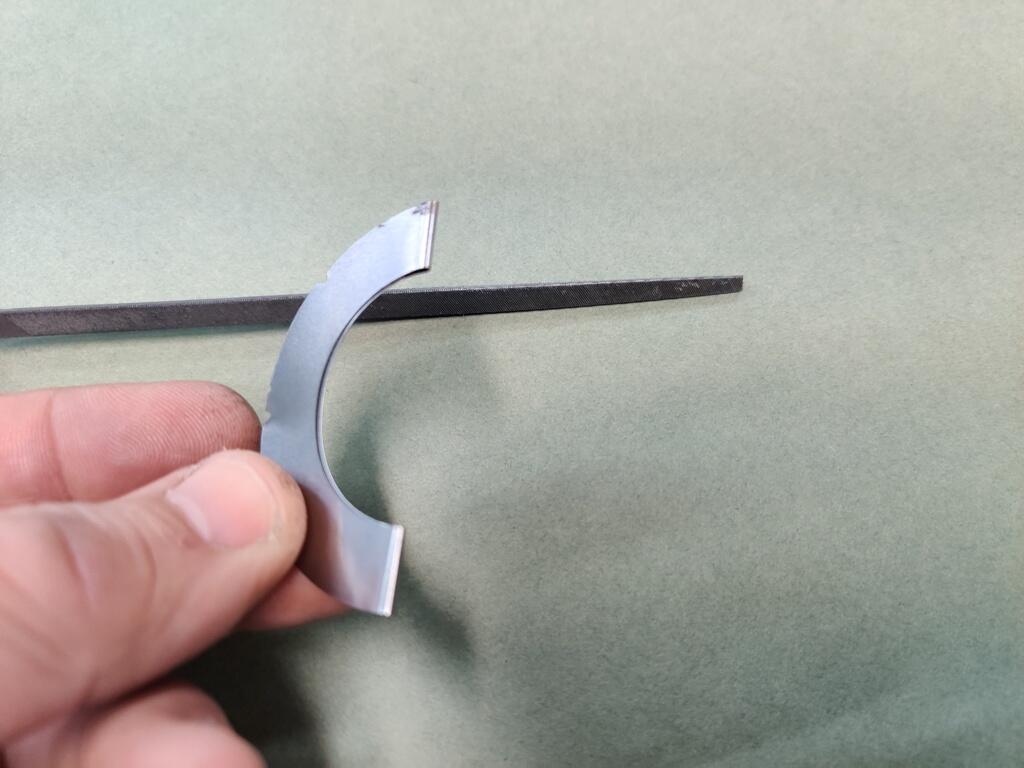
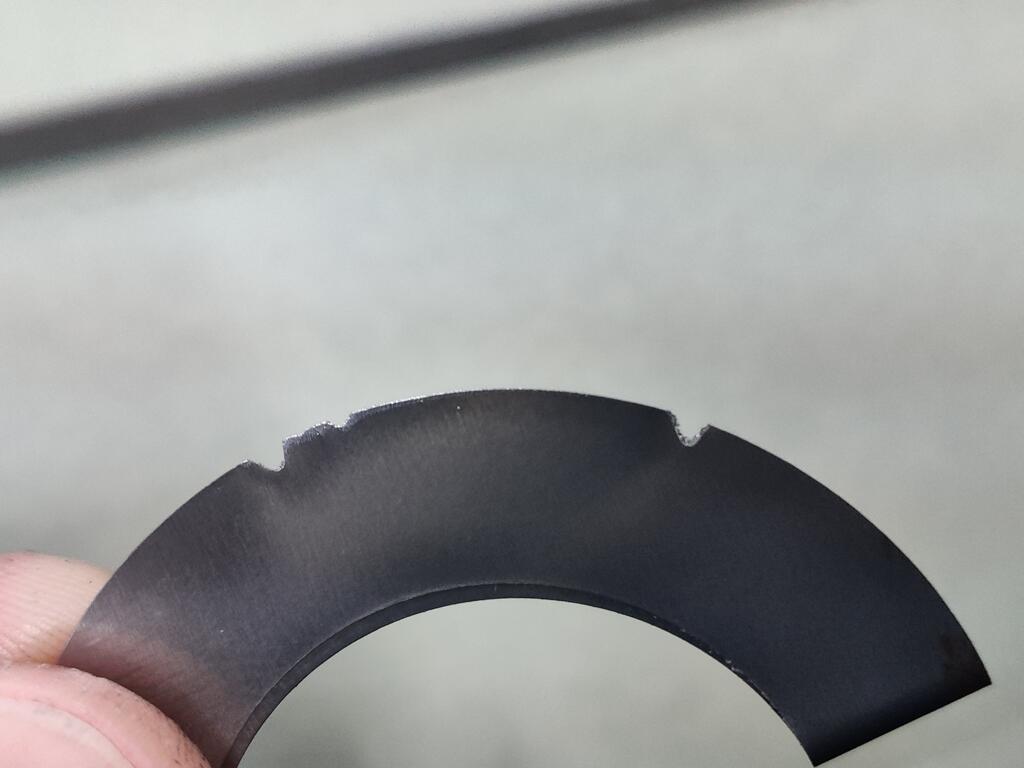
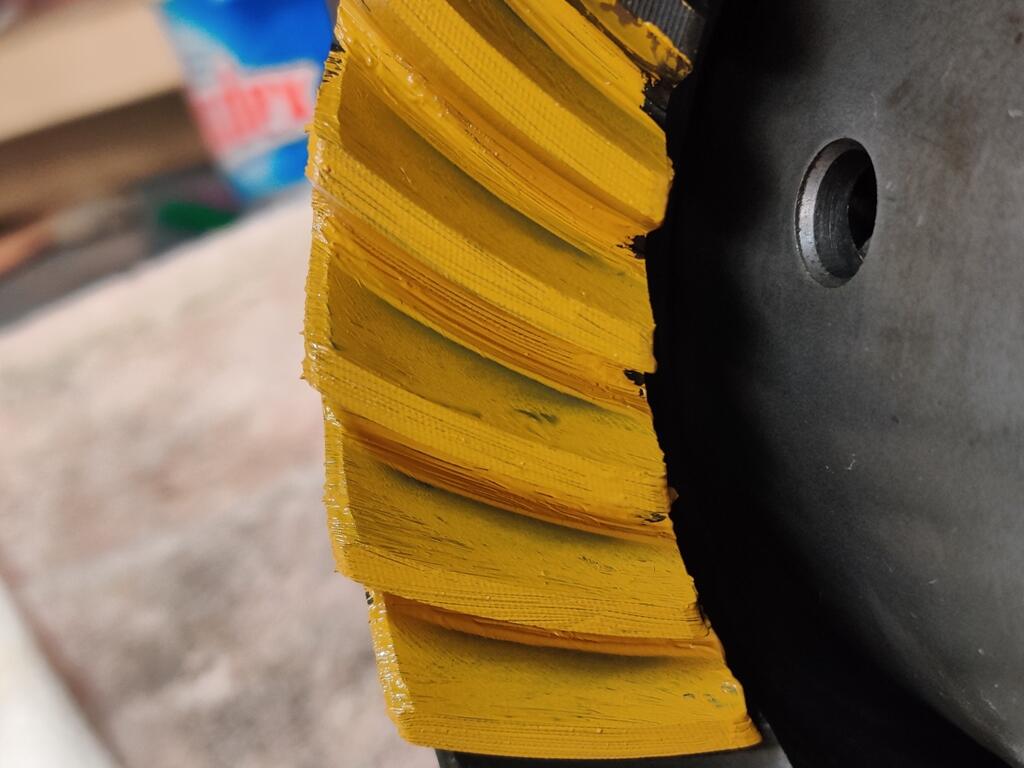
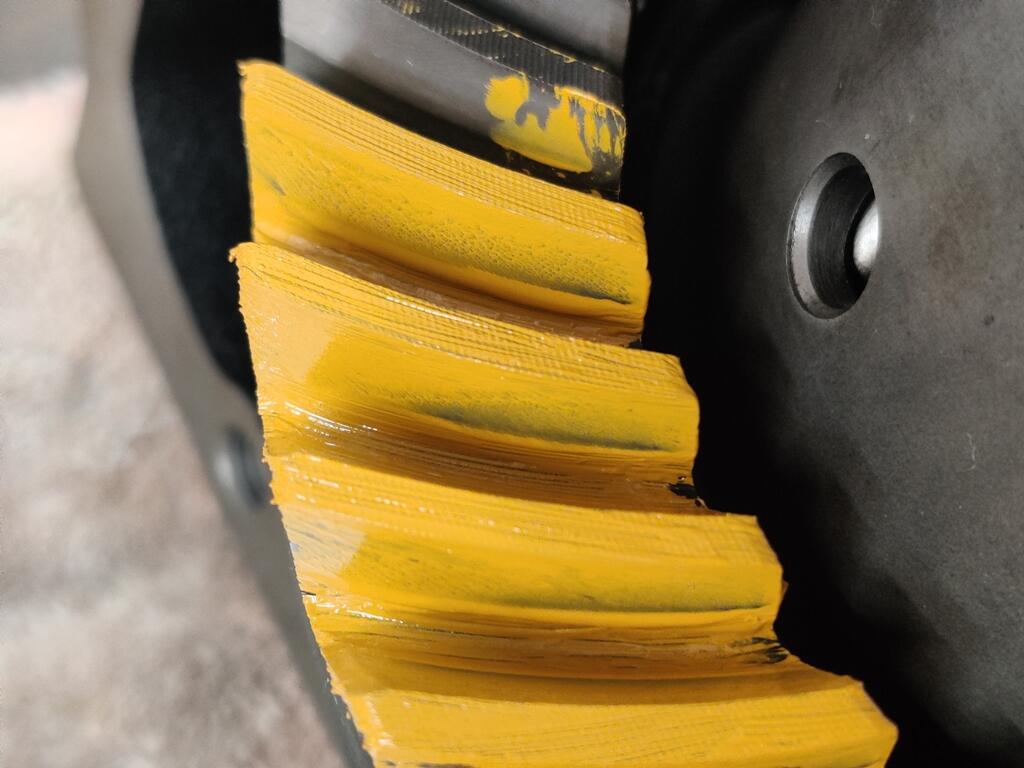
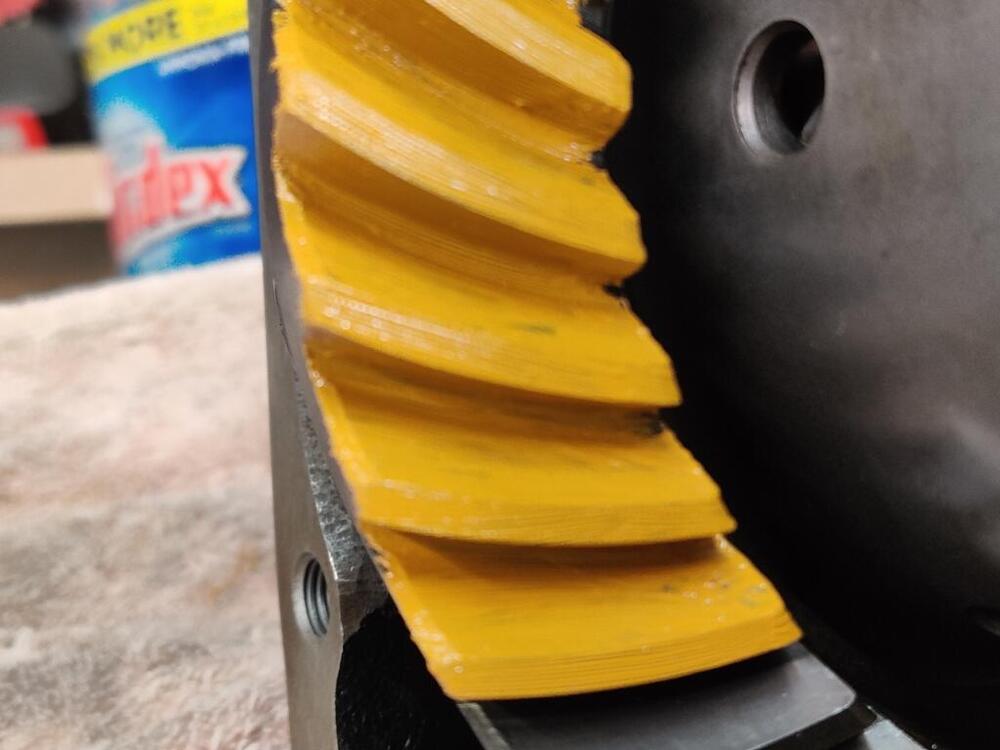
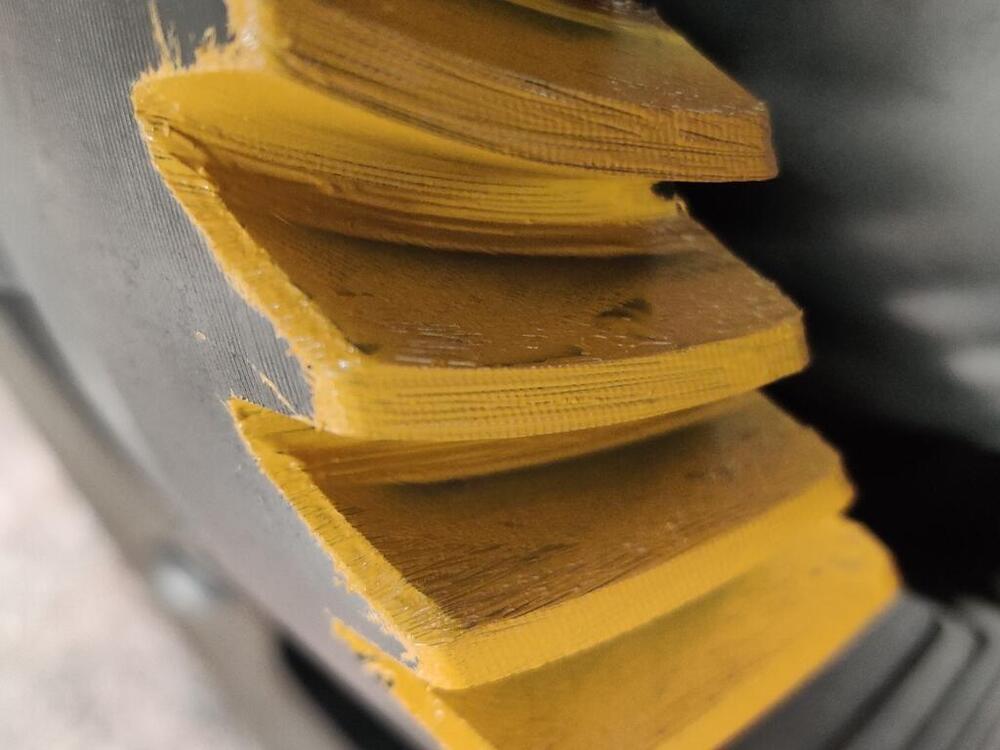
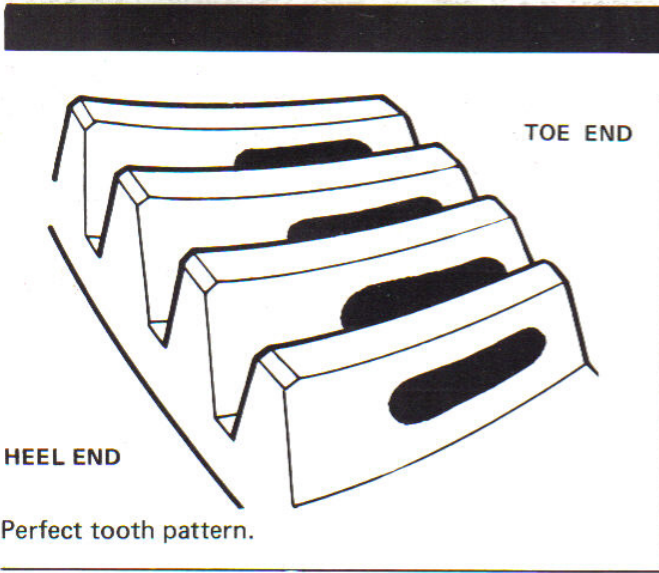
Welp... 😑 I thought maybe I was close to done with the shim issue until tonight. First came some shim testing. Folding one in half... and no spring back whatsoever. Then, I took a small triangular file and made a few strokes with meaning behind them. Even stacked twice as thick .010", four or five strokes was cutting through the shim pretty easily. Subjective... but not great signs based on the guidance. Then, I put the paint on the ring gear to check the wipe pattern. As a reminder, all three side shims are on the right, and backlash is .005". Start: Coast side - contact is at the lower portion of the gear tooth. A closer view and from a different angle of the same: And here is the drive side. Compare with the illustration from the Nissan differential manual: I am beginning to think that moving the pinion shaft toward the ring gear is not equal to moving the ring gear towards the pinion shaft --- as it relates to contact pattern. There is also as possible issue with cleaning the ring gear with WD40 - the paint may not be acting the same way as it was before with the perfectly oil free ring gear. I think my next step will be to remove the pinion gear yet again and take my best guess at additional shim thickness necessary to allow me to get about .004"/.005" backlash with the one left and two right side retainers in their original positions. Also, I am not comfortable with the hardness of these latest shims based on my observations today.


-
Also, I have updated my 240z fastener information at this Google sheet. The hatch hinge hardware is in the body section. The other related hatch hardware is in the body exterior section. I need to organize things a bit better in the sheet.
-
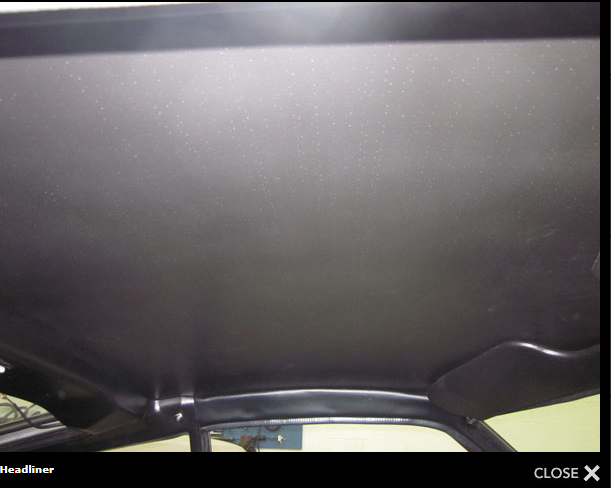
That is a good idea. He's looking for a left window for me currently. I'll ping him. Thanks for providing a picture of the Banzai headliner. It does look nice.
-
Yes, I think that is accurate.
-
Picture on their site: It has holes in it like this in the pic? https://www.zzxdatsun.com/catSoftTrim.php
-
No problem. Thanks for checking.
-
I believe those are fittings are only on radiators for the 240z with automatic transmission. They seem to be more common than automatic 240z's, in my opinion. I think it's possible that for a number of years after production of the 240z ended, many, if not more than most of the replacement radiators were made with those fittings, as they are simply not used when the radiator is used in a manual transmission car. Easier to manufacture and/or stock one part vs. two is how I see it. They are for running tranmission fruid through the radiator - this functions as an "oil cooler".
-
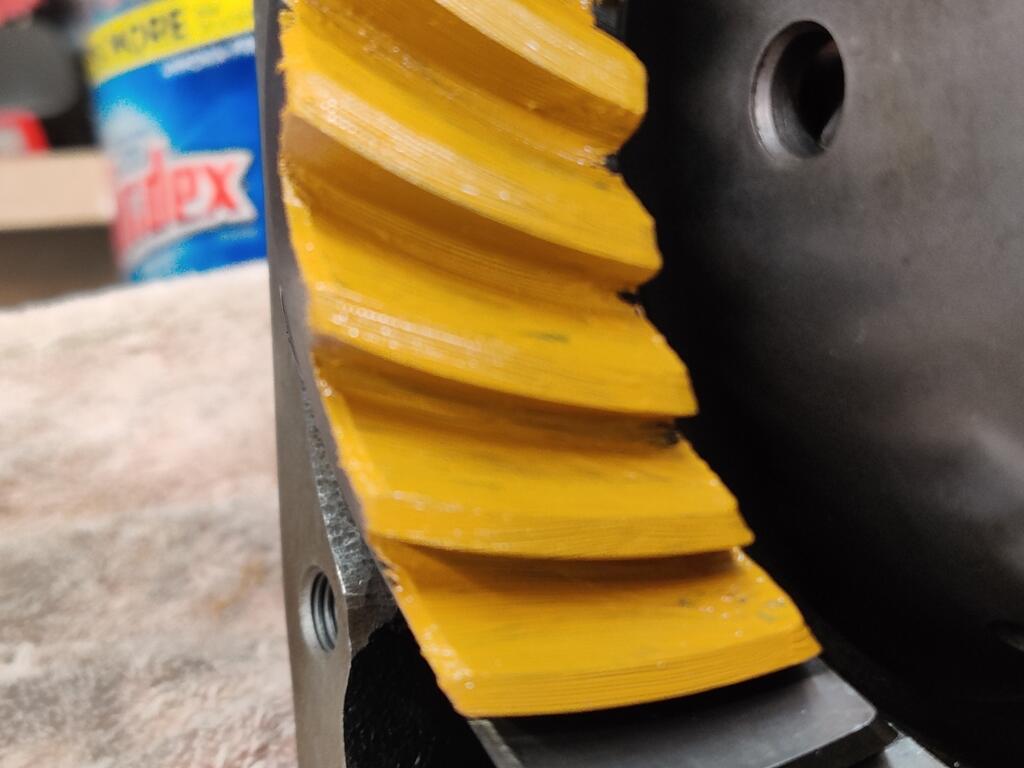
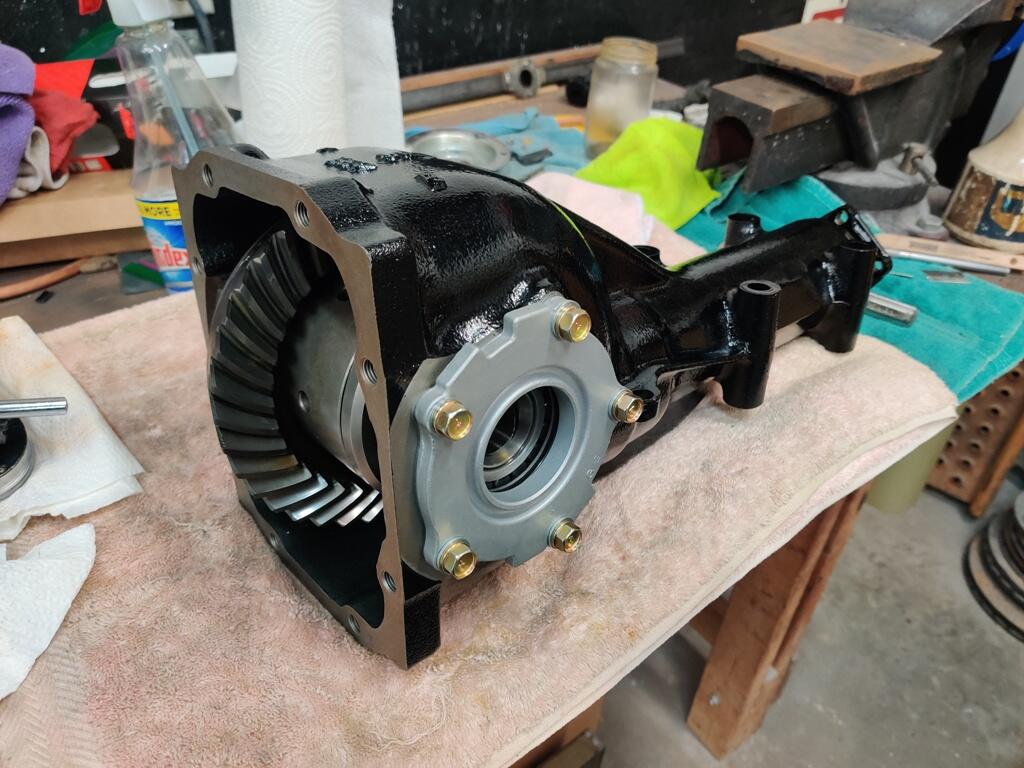
While it was apart, I cleaned all the yellow "paint" off of the gears. WD40 does a great job with removing it. But I didn't have time to reapply before quitting for the day. I'll reapply and check it out one day this week. As it sits now:

-
Ok - please have a look and let me know.
-
The shims came in the mail on Saturday. They fit like they were designed for the R180. Though the OD is bigger than the original shim/washer, it is no larger the rear pinion bearing. They appear to be high quality/strength steel, but I don't know if I can determine conclusively if they are suitable for this application @Captain Obvious. Probably best to still make a shim out of suitable material. Previously, I had cut .001" shims by hand and stacked 8 of them. This time, I rolled the dice with using 3 of these which are .005" each. During assembly, I replaced the pilot bearing with a new one, and left out the front seal. I torqued the pinion nut to about 100 ft lbs, and measured the turning resistance due to bearing preload at about 7-8 inch pounds (within specification). I also swapped out the side retainer shims for new ones of the same respective thicknesses. The old ones had a bit of rust/corrosion, so I felt it best to go with new ones. Here are my results: With the side shims in their original locations (.3 mm or .0118" on the left side and .4 mm or .0157" and .5 mm or .0197" on the right), I measured backlash at .012". Moving the left shim to the right side flange, I measured backlash at .005" which is within the factory specification of .0039" to .0079" That... is pretty exciting. Basically, each time I "push" the pinion gear closer to the ring gear with shims (a total of .015" so far) the backlash as been reduced. Now, the question is, do I disassemble, and add more shims to space the pinion even closer to the ring gear, and move the one side shim back to the left, or do I go with no shim on the left and the .3 mm +.4 mm + .5 mm shims on the right. It shouldn't matter, right? I mean, what if I add another .005" shim to the .015" thus far and get backlash that is still more than the .0079" max... and then when I swap the side shim from left to right I get less than .0039". I kind of don't want to mess with it anymore.
-
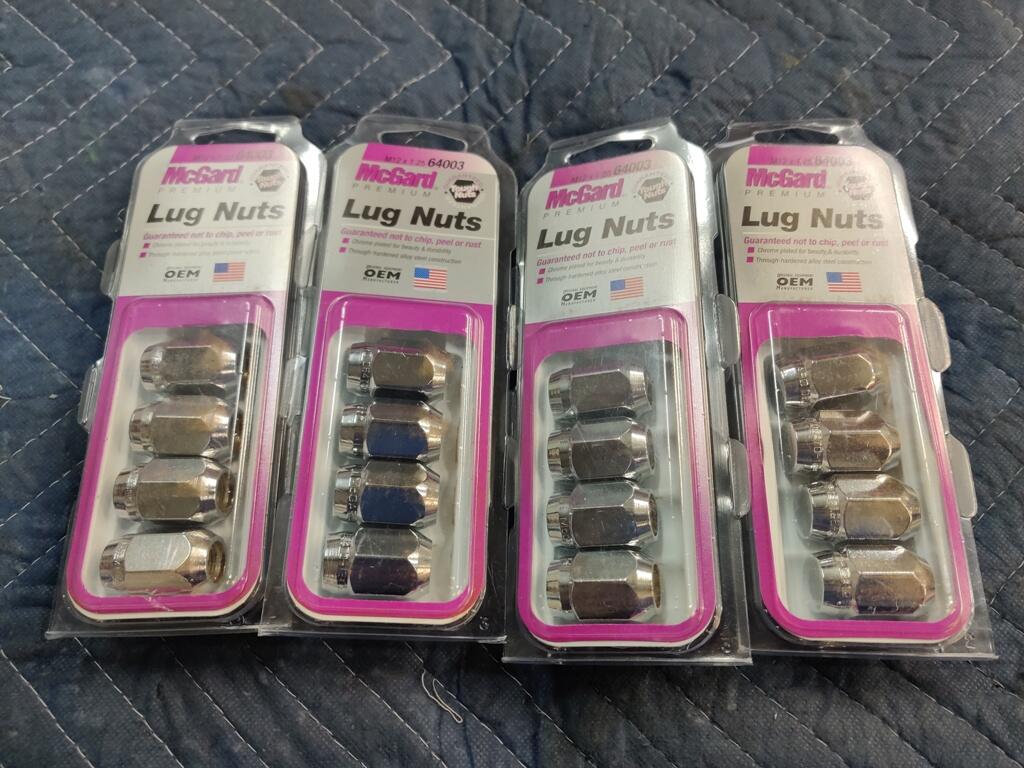
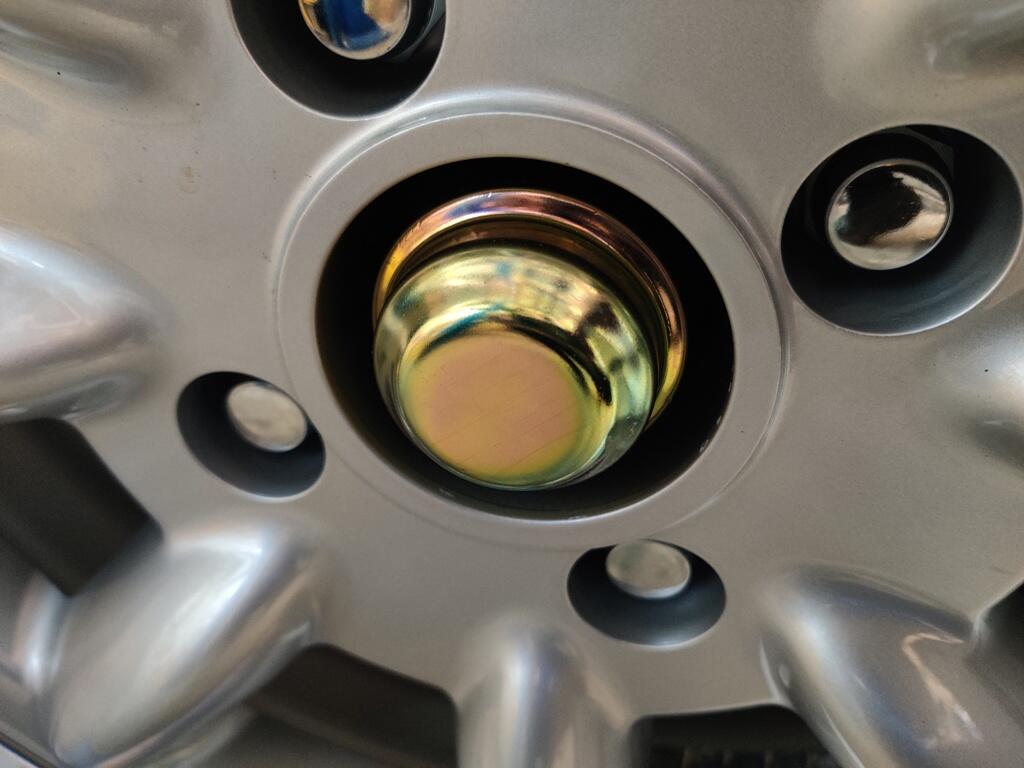
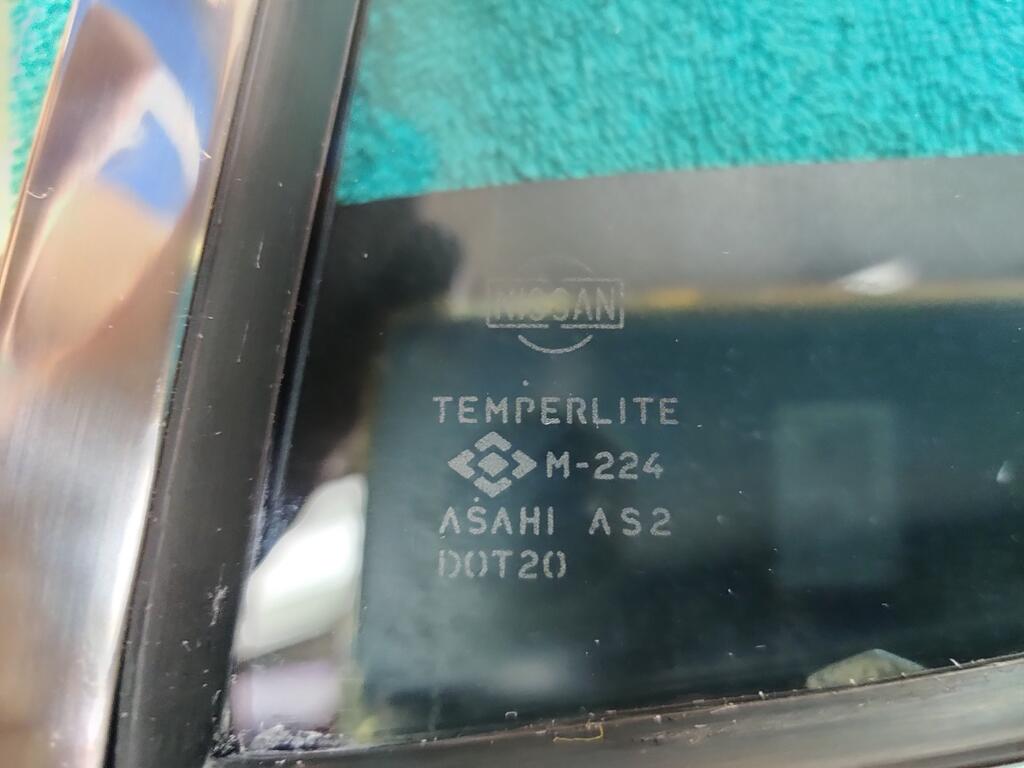
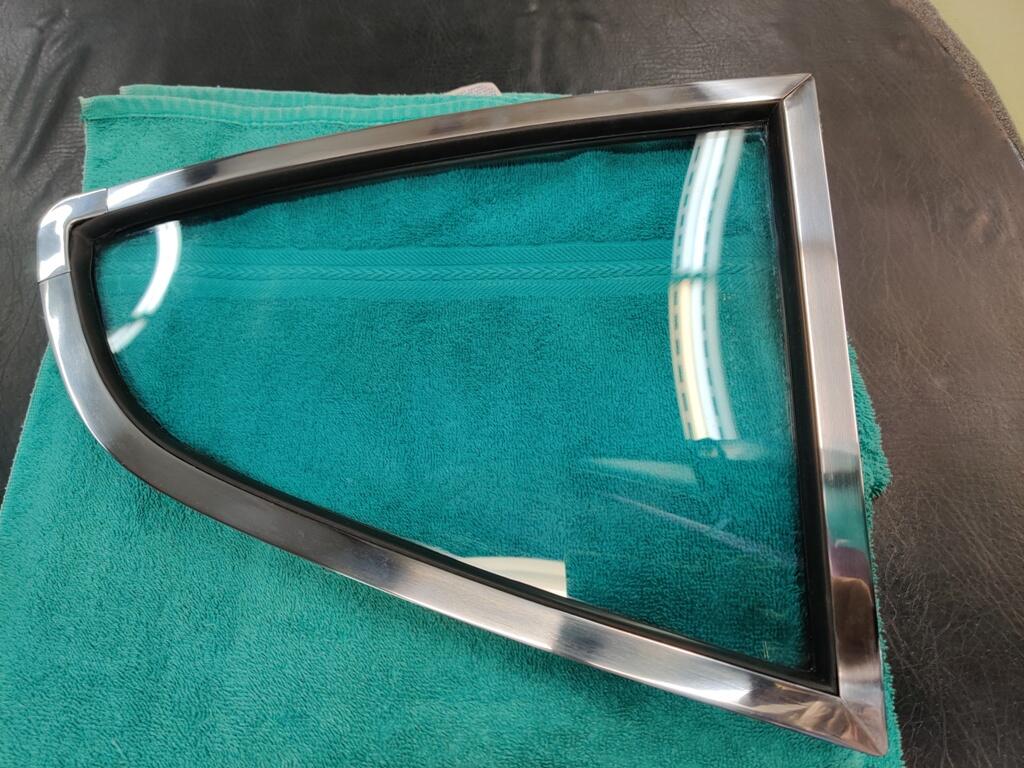
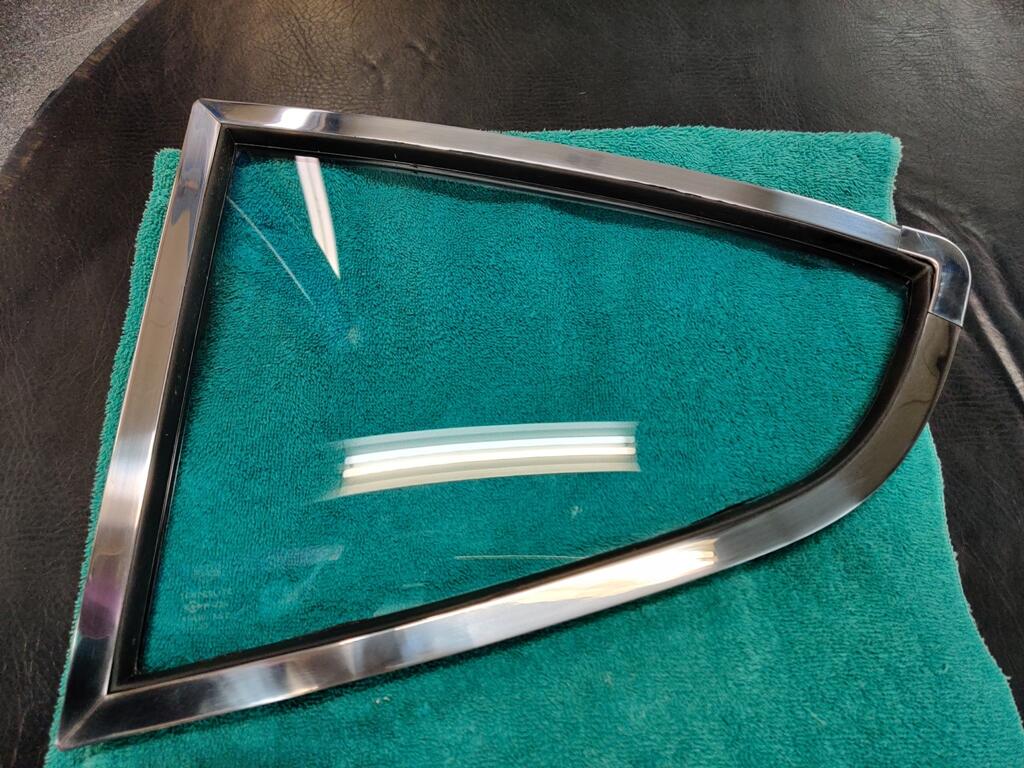
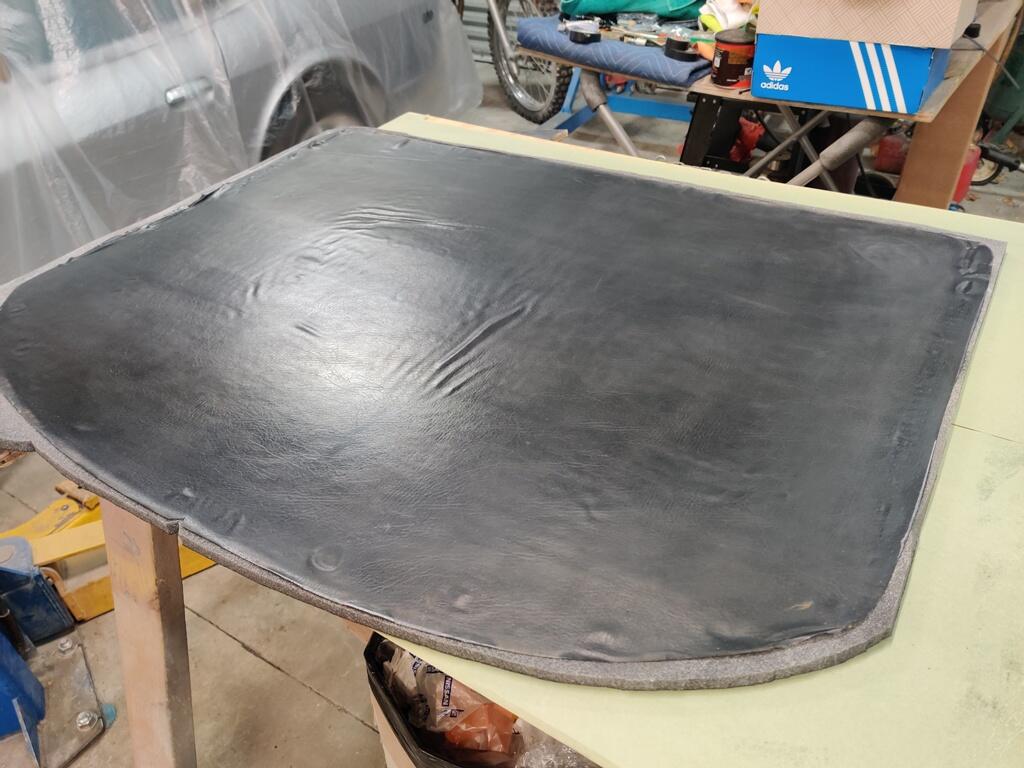
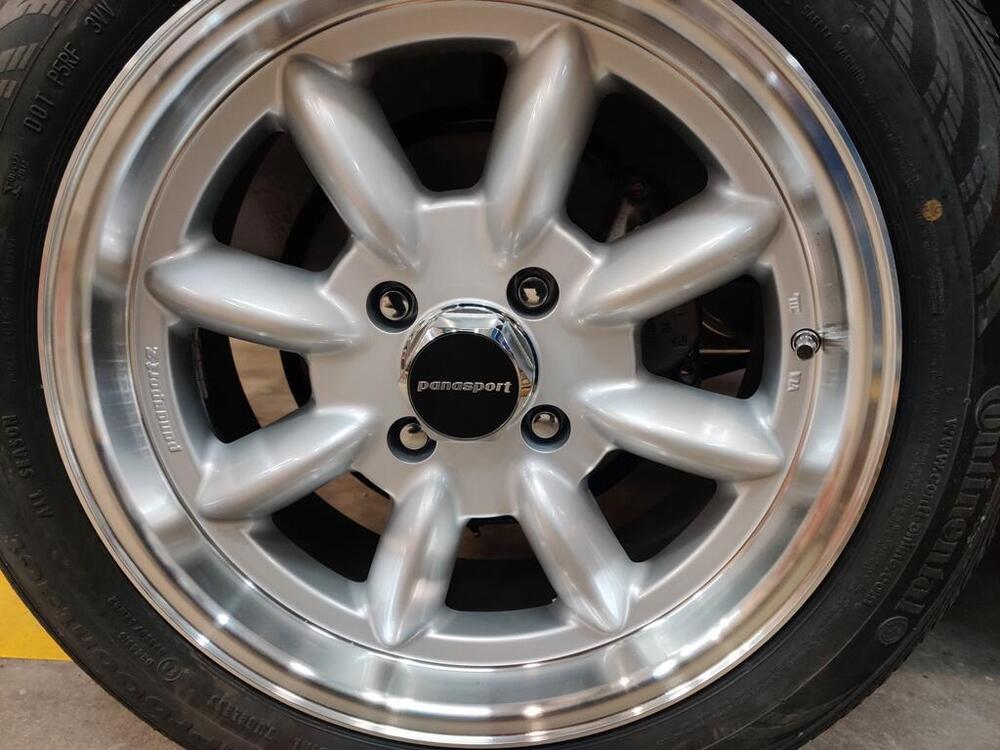
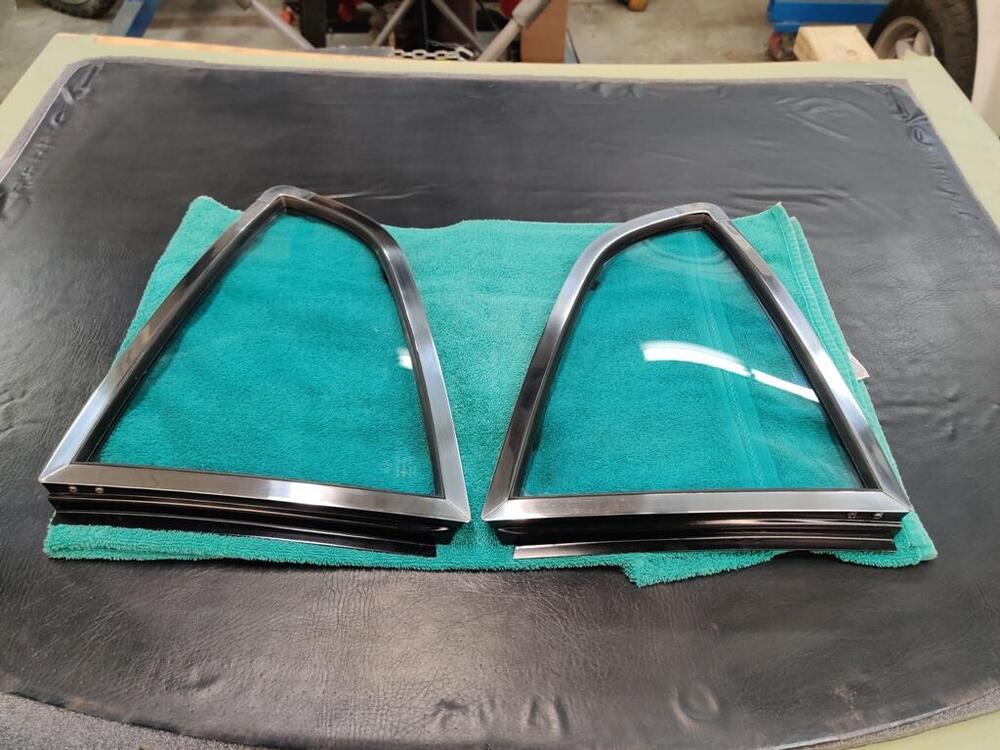
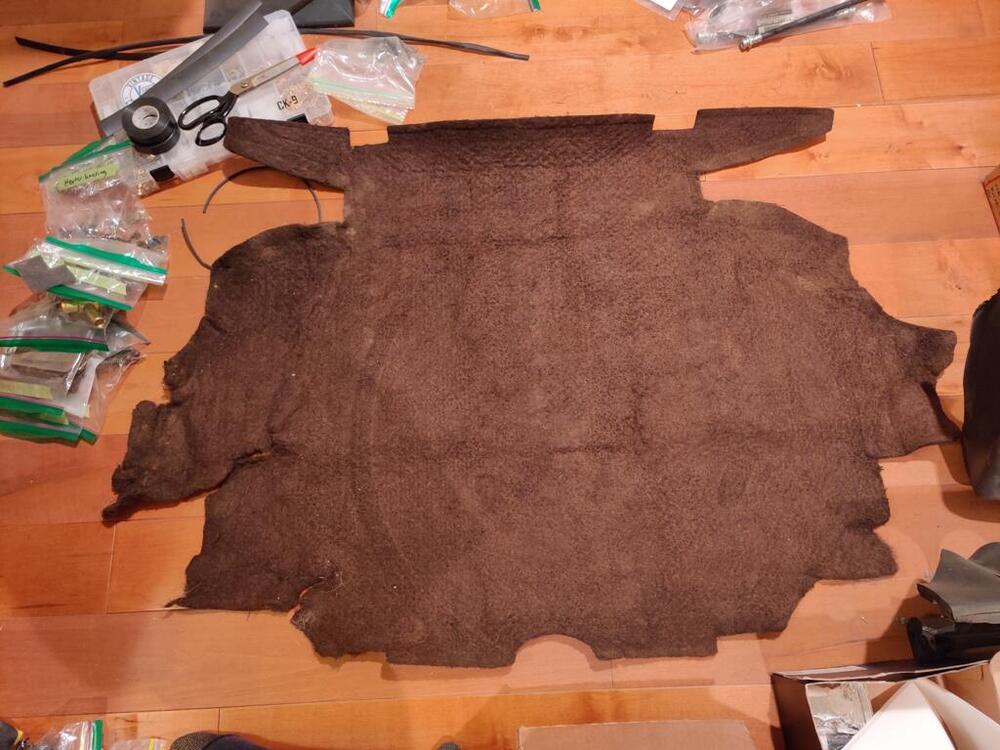
During the time I spent on the car this weekend, I assembled the quarter glass windows into Nissan NOS rubber and into the quarter window frames. It is a rather difficult job, especially when using urethane window adhesive. I set them aside after assembling to wait for the adhesive to dry. I think it is likely that I will install the quarter windows in the car this week. Interestingly, I see that the etchings on my quarter windows date them to May and June of 1971. Combined with the door glass, the car has glass which was manufactured from dates in April through June. New McGard lug nuts showed up on Saturday. They are very high quality. I have used them on my other 240z for 30 years and they still look pretty close to new. I put them on along with the Panasport center caps. While it finishes the look, I kind of like the look of the hub dust covers which I had specially plated in yellow chromate so they would look like those with the original finish. I also worked on the differential. I have a separate thread where I am reporting issues and progress. I think I am much closer to resolving the issue with excessive backlash, and am looking forward to installing it in the car. I also attempted to glue the old head liner vinyl to new foam. Unfortunately, I got a few wrinkles in it. I also discovered two very small slits in the original vinyl after gluing it to the foam. I suspect that when the headliner was manufactured, the vinyl was at a much higher temperature and was pressed against the foam while under some amount of tension. As such, wrinkles would not form like I experienced here. So, because of these issues, I will not be able to use it. At this point, I will need to source a piece of cloth backed vinyl and glue that to new foam. It won't be original, and that bothers me, but I really don't see that I have any other option. I have been looking for a new old stock headliner for years, but haven't found one to be available.


-
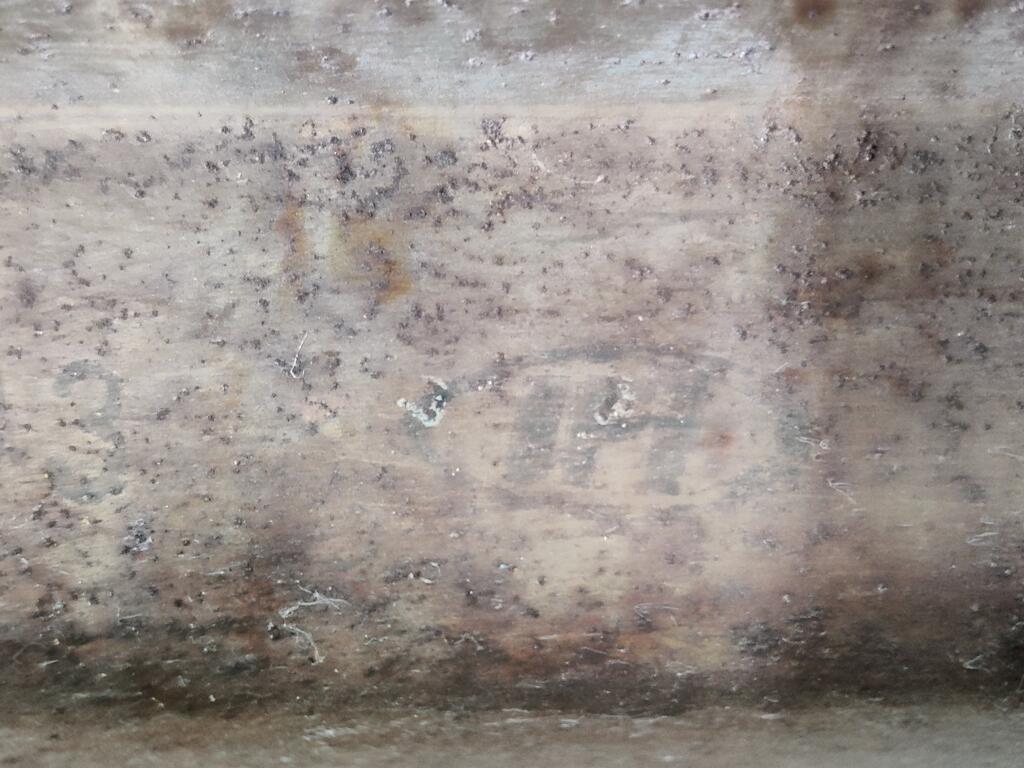
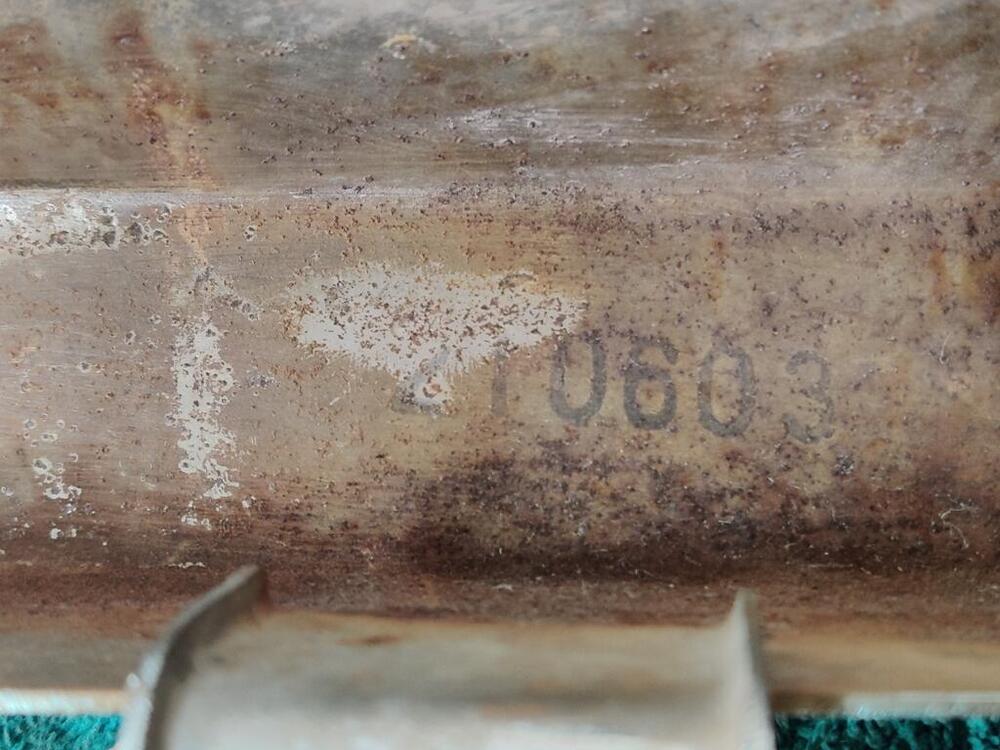
Ink stamped numbers are 210603 followed by IPI or 1PI

-
I wasn't able to find any jute templates in the resource section. Yeah, I'll hold on to it.
-
I have a good trans tunnel jute to use as a pattern. I do not have any front floor or under seat jute to use as a pattern. I definitely have some interest in those. I scored a nice piece of jute, along with what I believe to be an original rear hatch area carpet from eBay recently. It is not perfect, but good enough to use as a pattern, I think. I will take a look for these. Thanks!
-
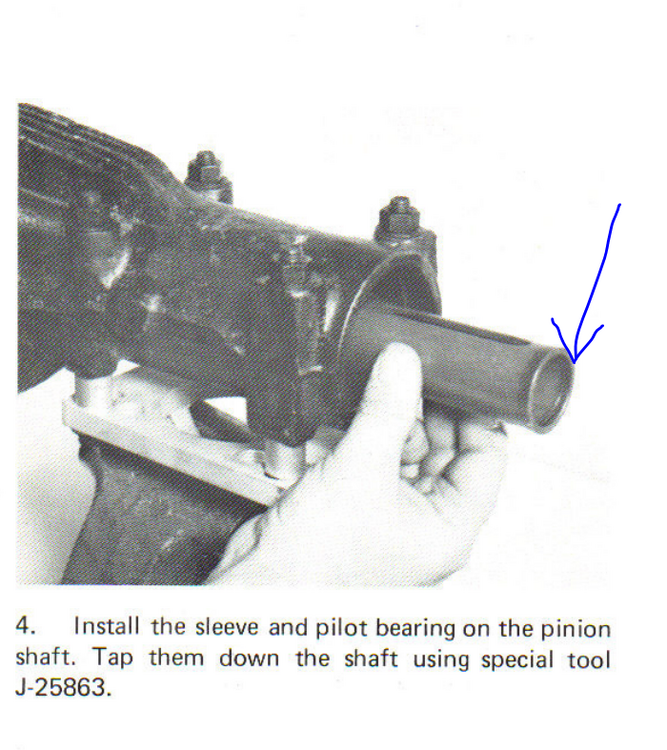
When the pilot bearing goes, the preload on the other bearings is no longer what it should be. Things are no longer locked in place. Note that the sleeve in this picture seats against the back of the pilot bearing: If the pilot bearing goes bad, I believe it introduces looseness, or another way of saying it: the bearing allows longitudinal movement after it is damaged. That longitudinal movement causes the rest of the stack of components on the pinion shaft to no longer be locked in place. Think of it this way: the pinion gear/shaft is engaging with the crown gear, which resists rotation because of tires on the ground. I think that when the stack of parts bearings and spacers become no longer "locked" in place because of the looseness introduced by the bad pilot bearing, the pinion gear can literally pull itself closer toward the crown gear. When everything is locked in place with tight bearings and correct torque on the pinion nut, the pinion gear is locked in position. It can't move forward or backward longitudinally. When the pilot bearing fails, the the pilot bearing inner race which is up against the sleeve in the picture above is no longer locked in place. It can shift longitudinally. This introduces looseness in the rest of the stack of components on the pinion gear. Then the pinion gear, acting on the crown gear, because of the way it is cut, literally pulls itself toward the crown gear due to the force coming from the engine/driveline. The looseness in the "stack" allows the pinion/shaft to pull itself - to slide within the front and rear pinion bearings (these are only a press fit). After the pinion gear/shaft has moved, then the pinion to crown gear relationship has gone all to hell vs. what it should be. And lots of noise ensues. Anyway, that is my attempt to describe what I think can happen. I am hopeful that replacing the pinion bearing and setting preload properly is all you will have to do to fix your issue.
-
I damaged an R180 differential years ago, and it had the same symptoms you are describing. When I would try to turn it from the front flange, it was harder to get turning initially than my good R180. And, I could feel the "bumpiness" as I rotated it, though it was slight. It would lessen if I rotated it quickly. Rotate slow, and it would be very noticeable and even hang up a bit. This behavior wasn't present on the good diff. If I recall correctly, I damaged it by replacing the front seal (behind the front flange) and then torqueing the pinion nut to what felt like 100+ ft lbs... because I didn't have a torque wrench, or some other stupid reason. I knew nothing about the importance of setting the correct preload on the pinion bearings. It's been many years now, so I don't recall how long it took before the noise showed up and I pulled the diff out to examine. It exhibited very much what you describe. I ended up selling it the way it was - it had value because of the unique 3.7 ratio that it was. At any time in your possession, did the front pinion nut come off and get put back on?
-
That clicking noise... It definitely should not be there. It might be the pilot bearing. When you grab the front flange and turn it can you feel the "bumpiness" as you rotate it? I see what you mean about the backlash. Seems to me that either the pinion has moved toward the ring gear, or the ring gear as moved laterally. What I wrote up above would be how I would troubleshoot. And, yes, reading the relevant parts of that manual before diving in would be wise.
-
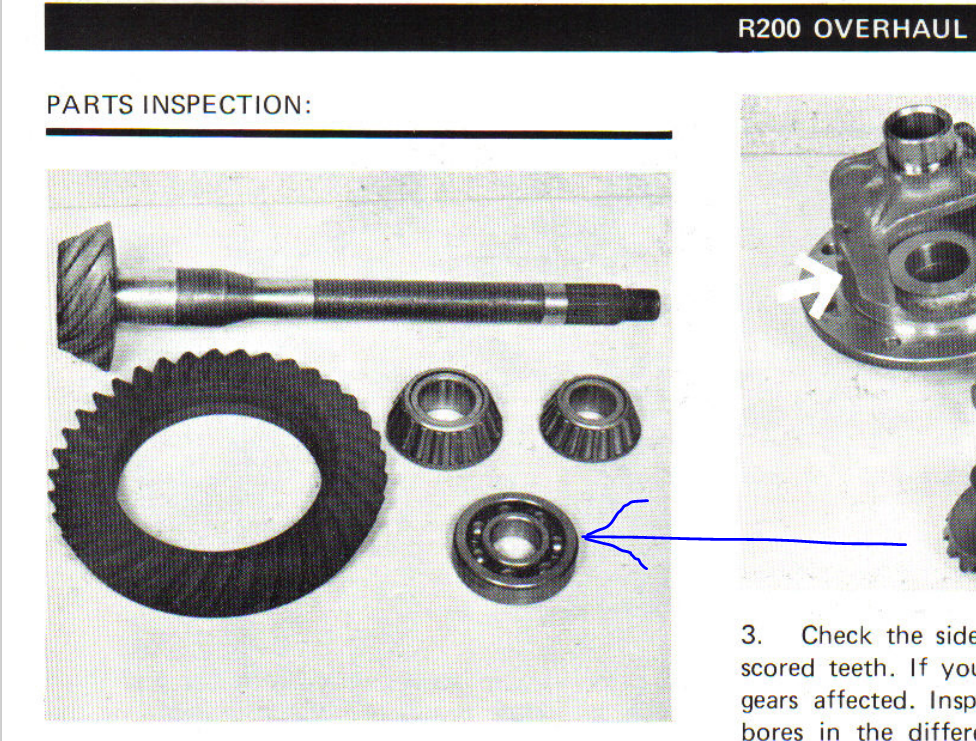
It is the front-most bearing on the pinion gear - in the nose of the differential - blue arrow. Also, note that this manual has been added to the resource section a couple of days ago: