inline6
 Subscriber
-
Joined
-
Last visited
Everything posted by inline6
-
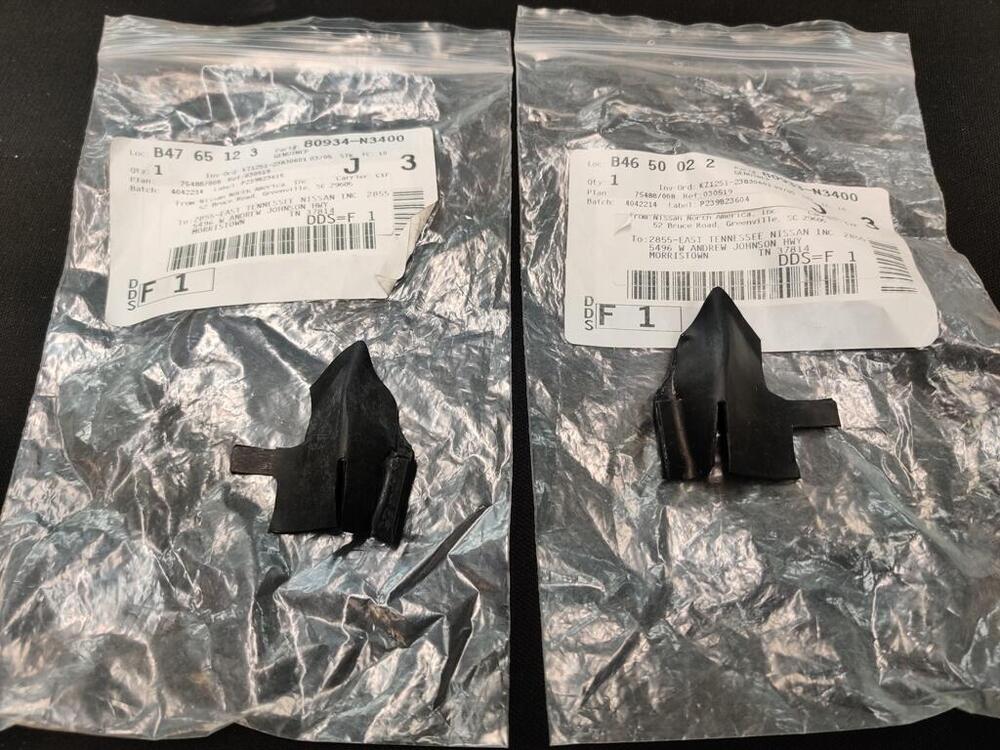
 I called them today. It seems they had a place in Atlanta, but they said that during Co-vid they shut it down. They only have operations in CA now. I will send them pics and get a quote. This is the website: https://decometalfinishing.com/chrome-plating-in-atlanta-ga.html
 -
I certainly could use the help. 🙂
-
I have been thinking of driving the car to ZCon in Tampa. I've made a list of things that need to done before the car is done and it is large. At this point, I am thinking I will not be able to finish in time. Here is a partial list, mostly of items requiring outside assistance: Machine shop to remove a small amount of material from the left side flange of the differential - need to put the stock pinion shim back in and then check back lash with original side shims in their respective places. Then check backlash again after moving the one left shim to the right side. Compare the difference and estimate amount to have removed from left side flange, given side shim sizes available. Send driveshaft off for balancing, but... I have to put the differential in car and check drive shaft fit first. I may need to remove some of the shielding on either the rear of the transmission or the driveshaft. Tell Snake Oyl to proceed with the restoration of the seat belts I sent them in June even if reproduction date tags cannot be sourced (they have delayed for weeks because they haven't been able to confirm that they can get the tags from "their vendor". Buy carpet in bulk (still have to decide which). Cut to fit the car and have local company put correct finished edging. Or, purchase Auto Custom Carpets, Inc. kit from RockAuto. I may purchase this kit for day to day use... and have a custom set of carpets for show. Get gas door lock and ash tray grill chrome plated by local company Horns - these have to be re-plated before I can put them back together I also have the following fairly large lift items: Assemble the seats - fit new support straps, foam and upholstery covers. Repair/restore center console Test gas tank for leaks - source and install a new tank from S30 World if it leaks Find source of the electrical short circuit in the windshield wiper circuit Then, there are the things I am forgetting... hahaha
-
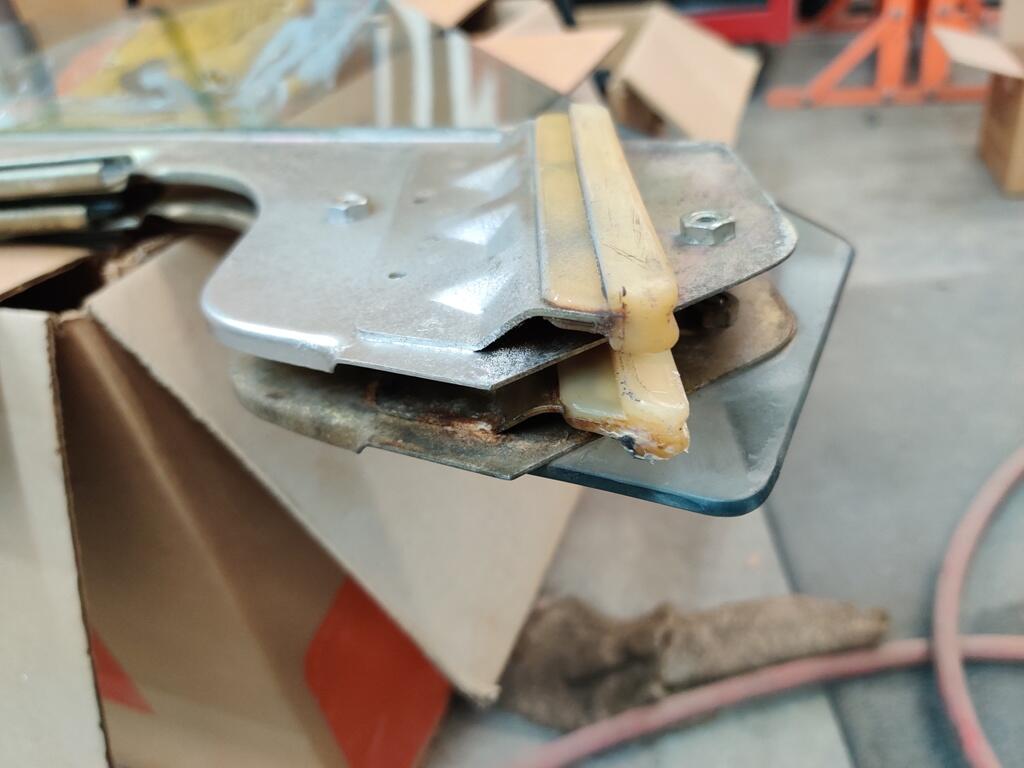
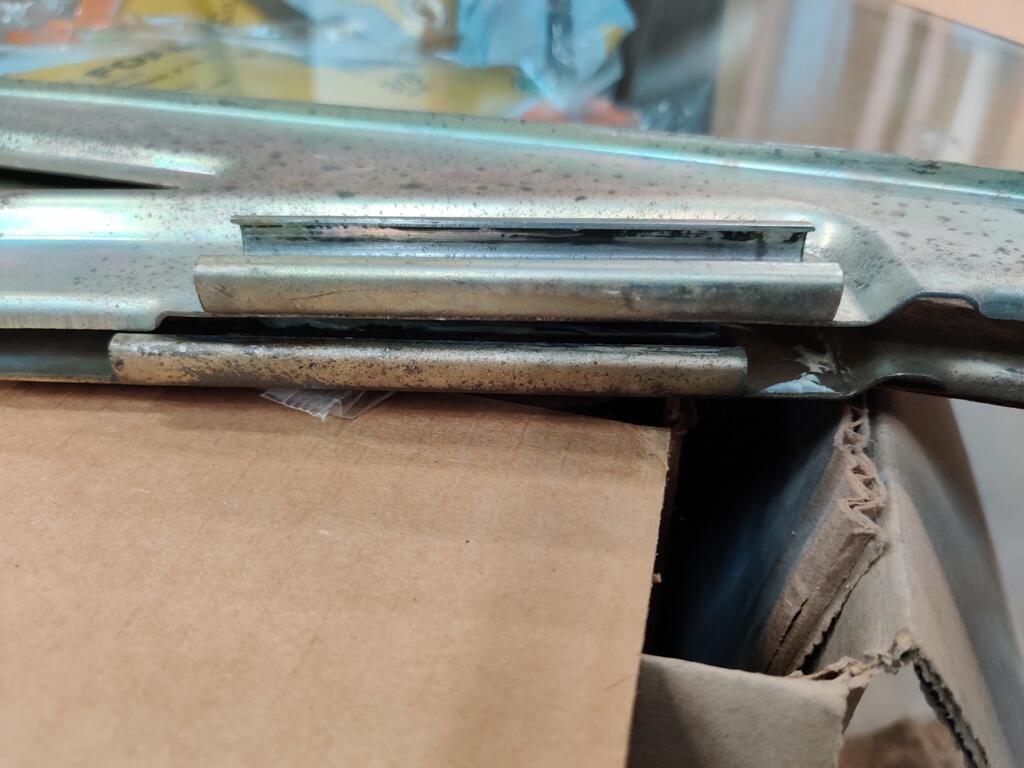
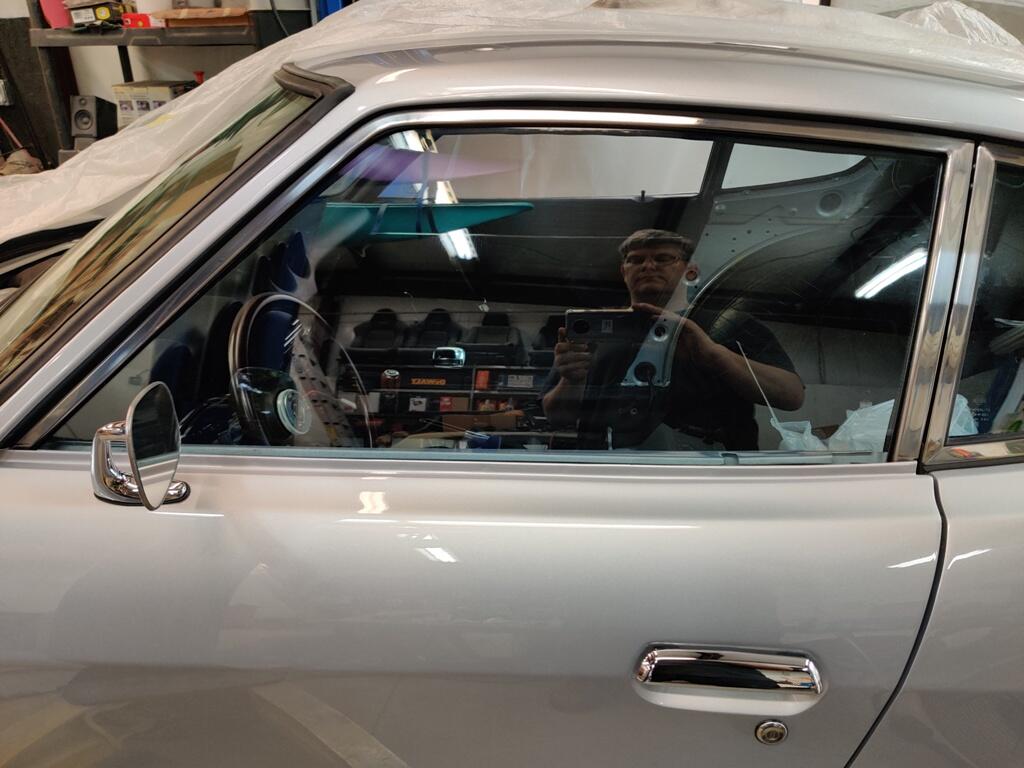
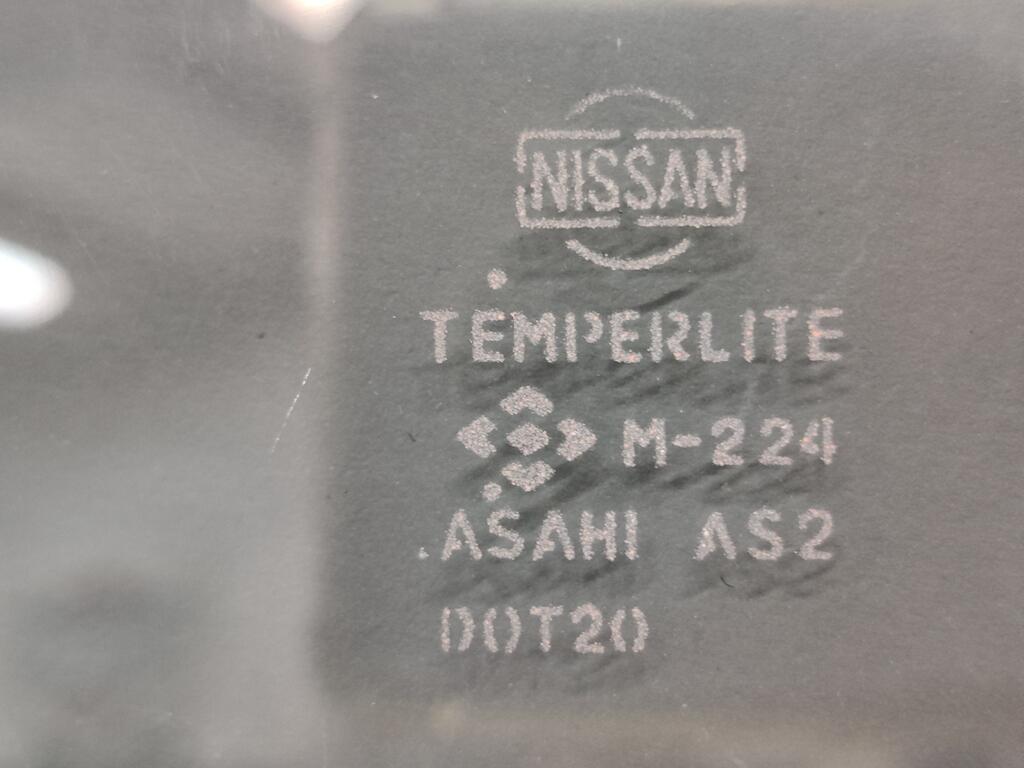
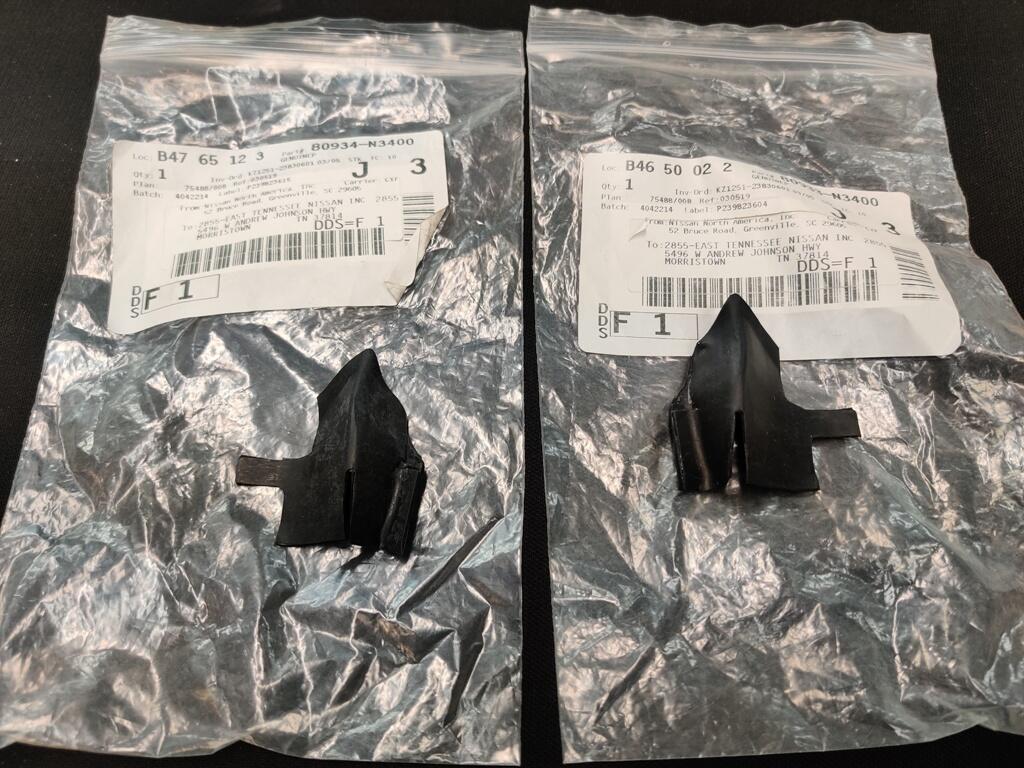
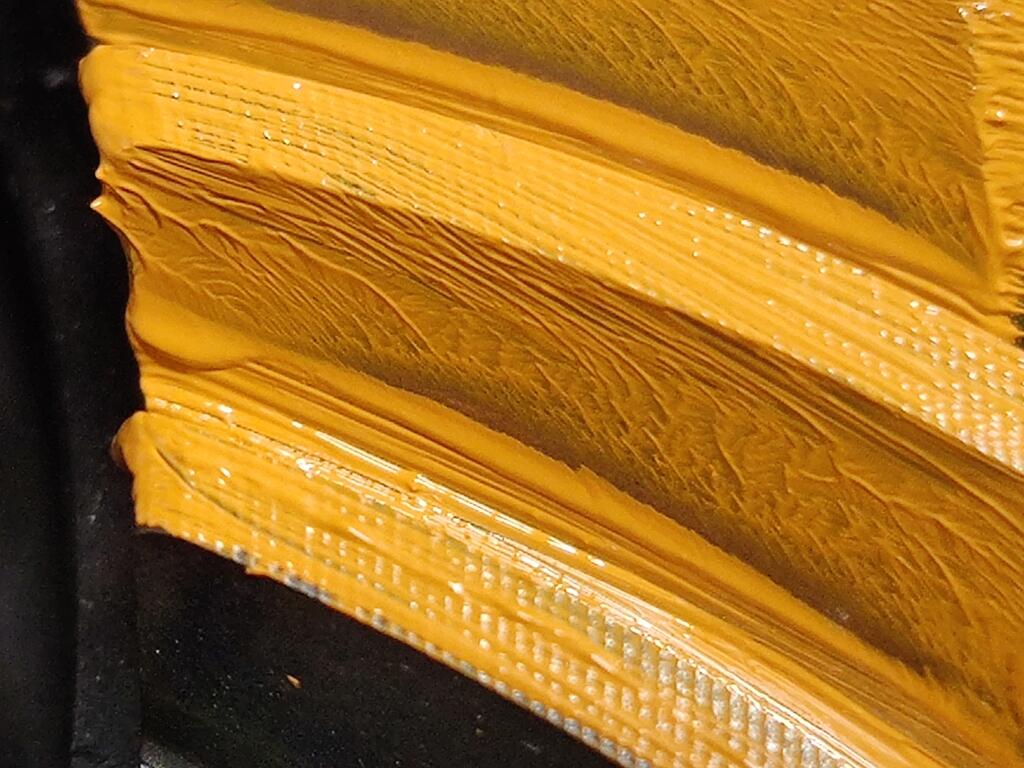
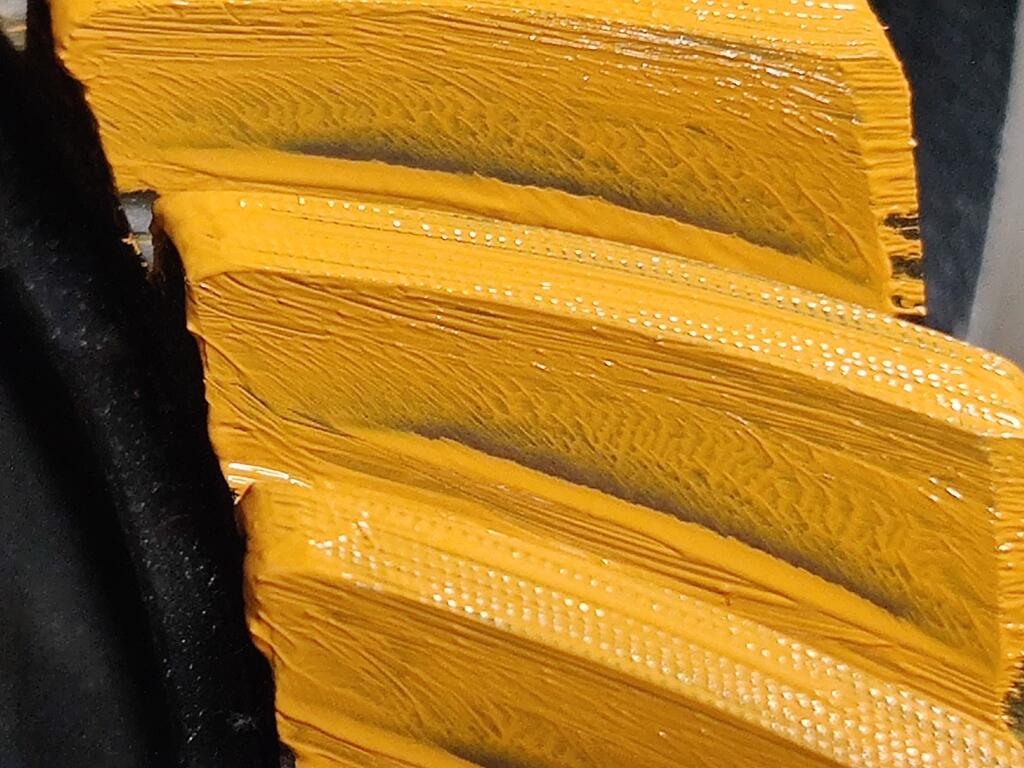
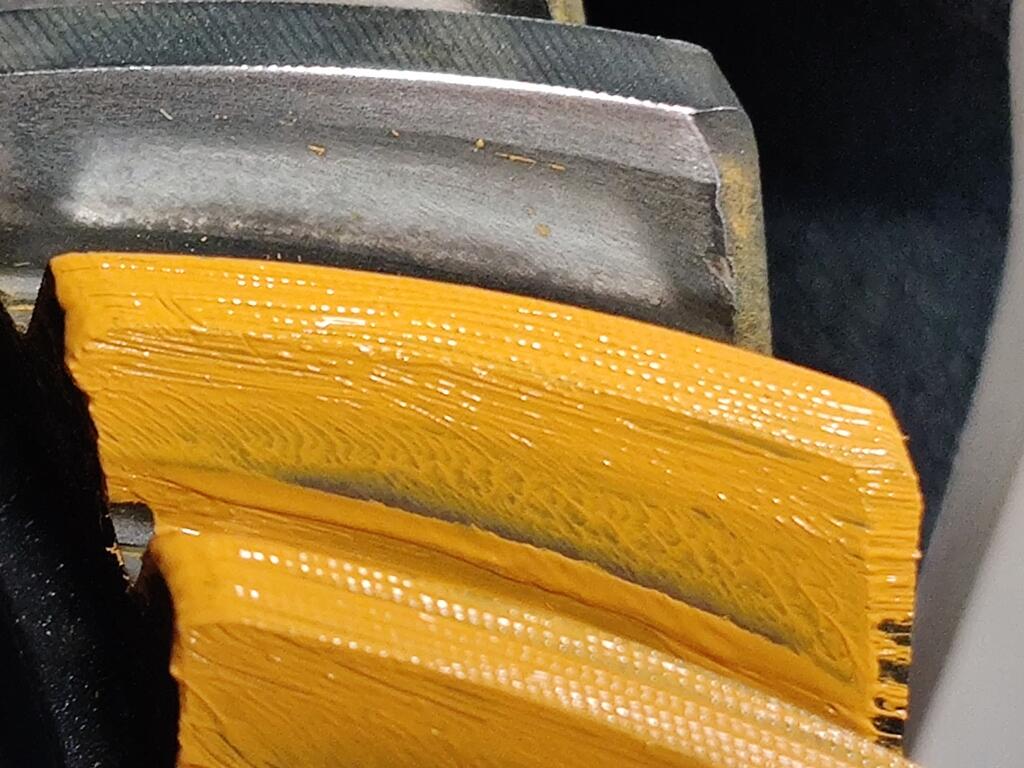
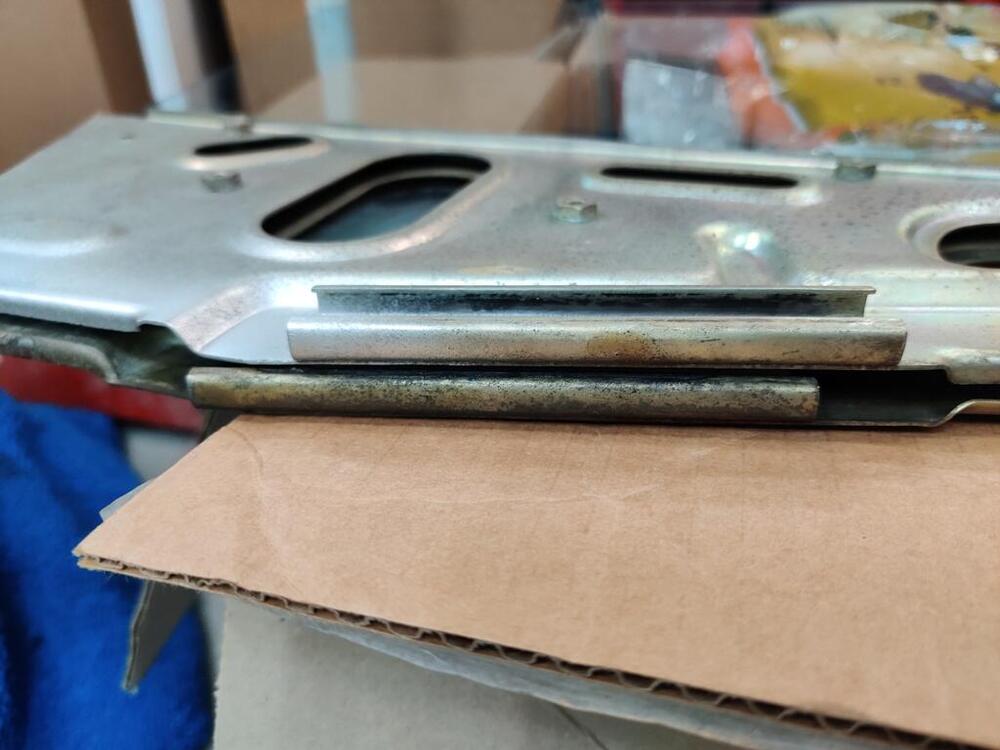
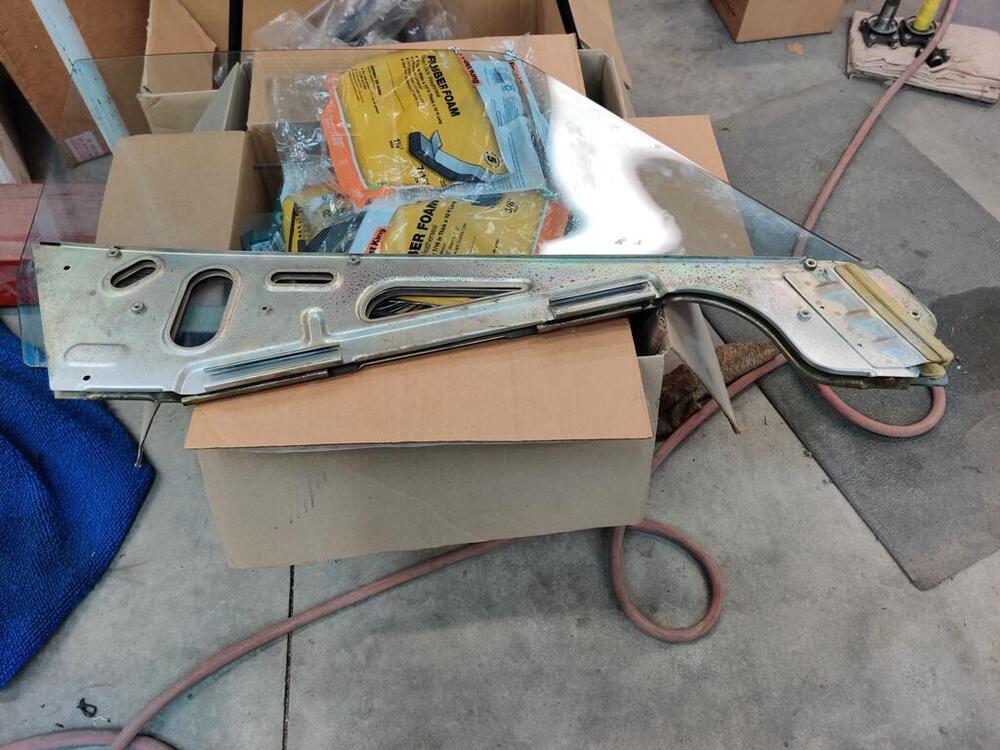
I didn't keep track of the hours closely, but I am going to say it took something around 10 hours of work to remove the scratches and restore the shine to the left door window. Thanks again to @Patcon for helping me source a left door glass with a date on it that is "in the ball park" for my 6/71 car. There were several deep scratches as well as some pitting which I was mostly successful at removing. I don't know if anyone else has the stomach for putting this much effort into removing scratches on glass, however, I think I should be honest in case future readers want to give it a try. The most aggressive disc in the kit is "a beast". It will quickly remove glass... and put nasty swirl marks in your glass in the process. Use it only if you have really deep scratches. The green discs (middle grit) are quite aggressive. Use these for light scratches and minor imperfections. The blue discs are quite fine. You will burn through them at a pace of 5 to 1 vs. the green discs. It is hard to see when you have sufficiently polished out the scratches from the green discs. Attack the glass at a 90 degree angle from when you use the green disc. It will be easier to see when you have removed those scratches if you do this. This https://glasspolishshop.com/polishing-repair-compounds/cerium-oxide is effective at polishing the glass back to a good amount of clarity and shine. If found that the Eastwood polishing buff was better than the polishing pad that was included in the pro polishing kit I bought: https://glasspolishshop.com/glass-restoration/scratched-glass-repair-kits/pro-glass-scratch-removal-kit-xnet-system. I think the Eastwood felt buff was harder than the one received in the kit. And using it, I believe the cerium oxide was utilized more effectively on the glass. With a softer pad, I think the cerium oxide was not pushed as hard against the glass, and therefore, did not polish as effectively. After so many hours of neck wrenching work, the scratches have been removed from the glass (except those very close to the Temperlte etching). When sighting down the glass at a sharp angle, you will be able to see slight waves or undulations. The finished product looks a bit like bodywork that was not done perfectly. Glass does get removed after all, and because it is so hard relative to primer or filler on a car body, it is exceedingly difficult to remove scratches and keep the glass perfectly flat. Anyway, there it is - the info you would like to have about attempting to remove scratches from glass. It takes a lot of effort, many hours, and though the final result may remove deep scratches, the final result will leave you with some slight waviness in the glass, and not the same level of smoothness as the factory finish. In other news, the window support is different from the 1971 vs. 1975 cars. Here are a few pictures which show that the regulator channels are in different locations. This makes using a 75 window in a 71 car not work. After I finished work on the left door glass, I installed it in its frame/support and installed it in the left door. Order of operations is: Install stainless steel frame (with glass channel weather strip already installed. Then window glass. Then front glass glide. Then regulator. Then rear lower guide for regulator wheel. After I confirmed rolling the window down and up was as it should be, I installed the 3M product for holding the vapor barrier in place. This product is very tacky. So, it sticks to the door, and the plastic vapor barrier to it, extremely well. Next, I will put the door panel clip receivers in place. I will need to cut the vapor barrier in a couple of places (around the window roller and the door release) and I will need to glue in place a couple of rubber seals before I can put the door panel on.


-
It is kind of freaky how you and I are traveling in parallel on so many Z restoration things. "I finally received this PVC tubing the other day. I bought it for the front markers lights but realized I needed a piece for the wiper motor too." - I bought some from Amazon just the other day for my from side markers. I went with the 1/4" diameter instead of the 3/8". I will be ready with the lacquer thinner when it is time to install it. "I can't upload the picture I want, but I the plug on the wiper was bad and instead of depinning it, I crushed it with a set of channel locks. Much faster!" - I did the same with one of the connectors for the steering column wires. It seems that the harness connectors are made out of a plastic which is not UV resistant. Sunlight makes them turn yellow in short order. I used Vise grips to bust mine to pieces. "I replaced the pins on the end of the wiring. Put a new jacket on the cable and reinstalled the wiper motor and bracket into the car using Steve Nixon's great little rubber pieces" - Same here. I seem to have an electrical issue with mine though. I tested the motor the other day and it kept running when I turned the wiper switch off. The fuse for the circuit blew shortly there after. I replaced the fuse and it blue again within seconds. Looks like others have beat me to the punch on the round head wiper screw. G
-
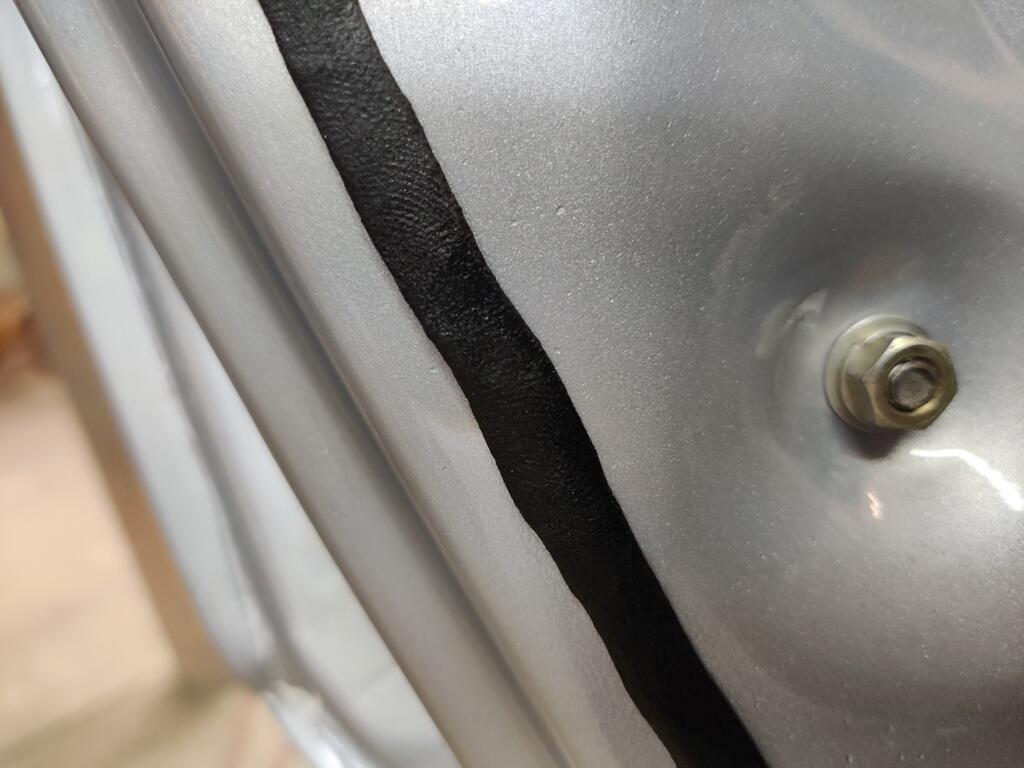
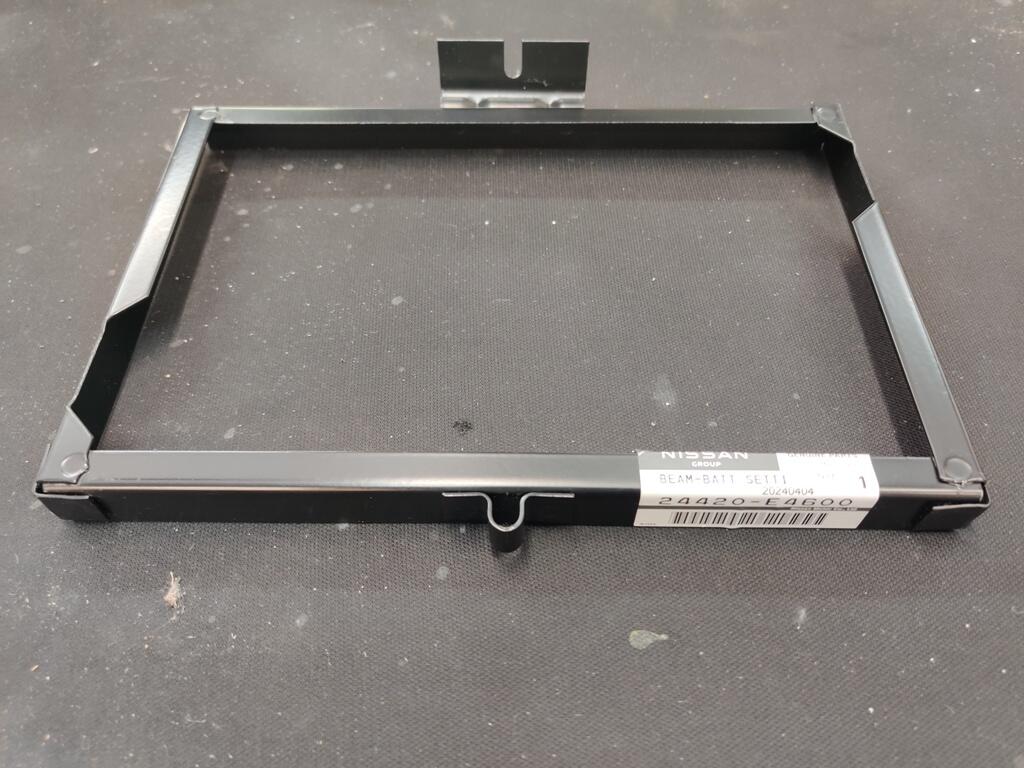
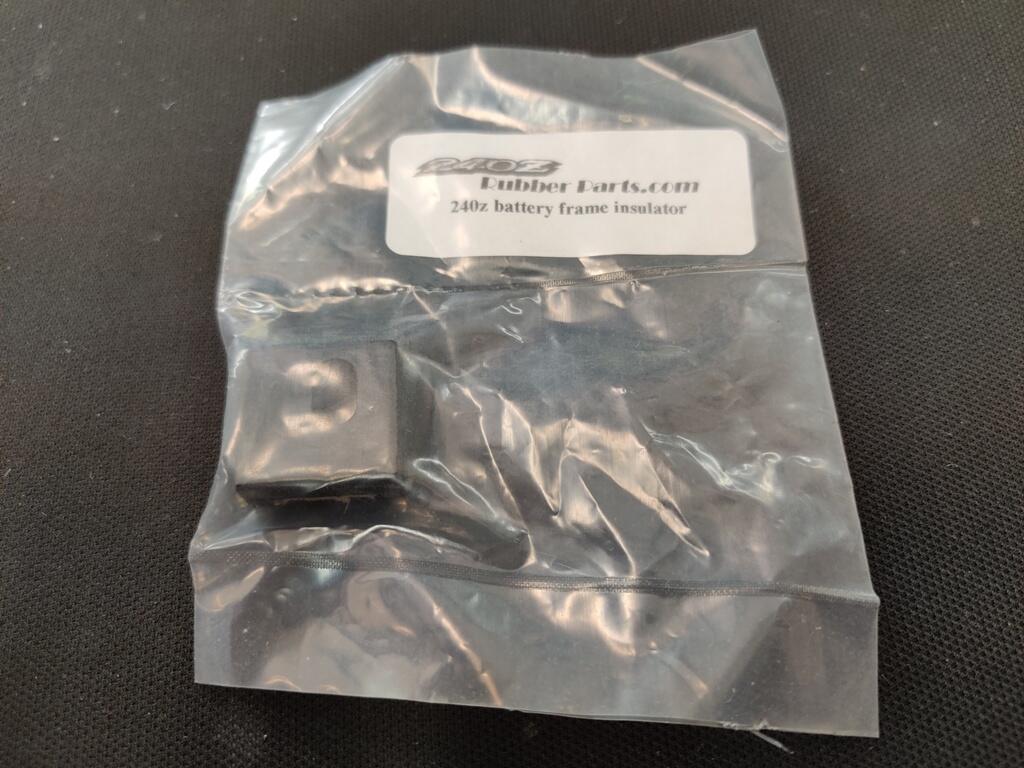
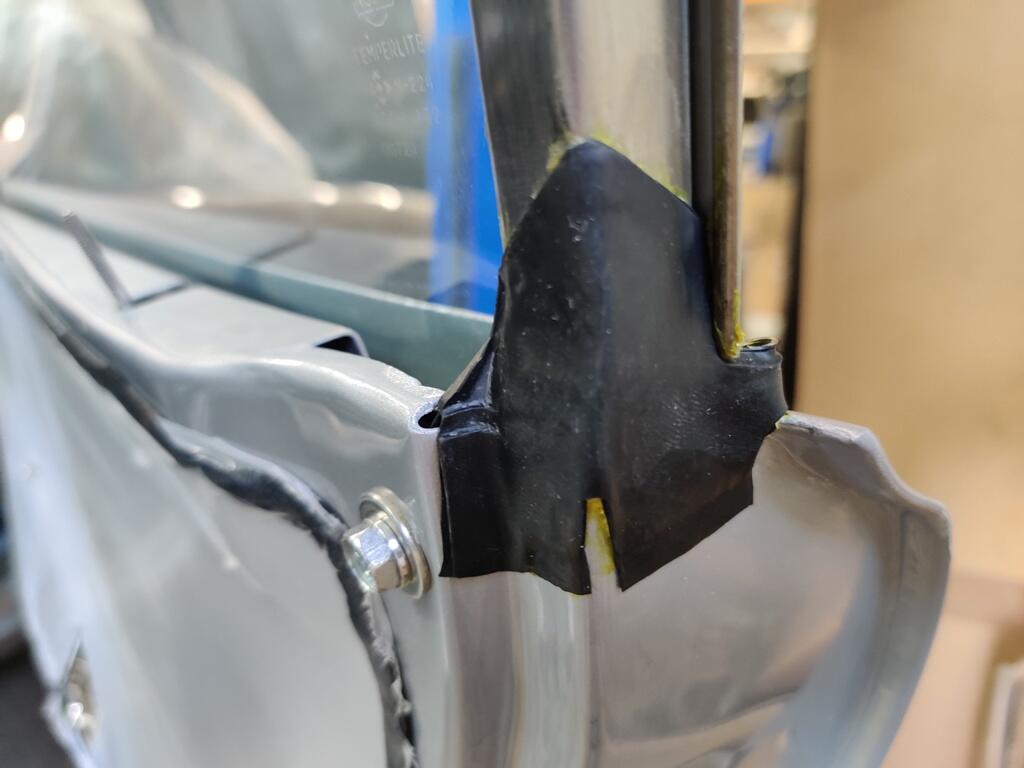
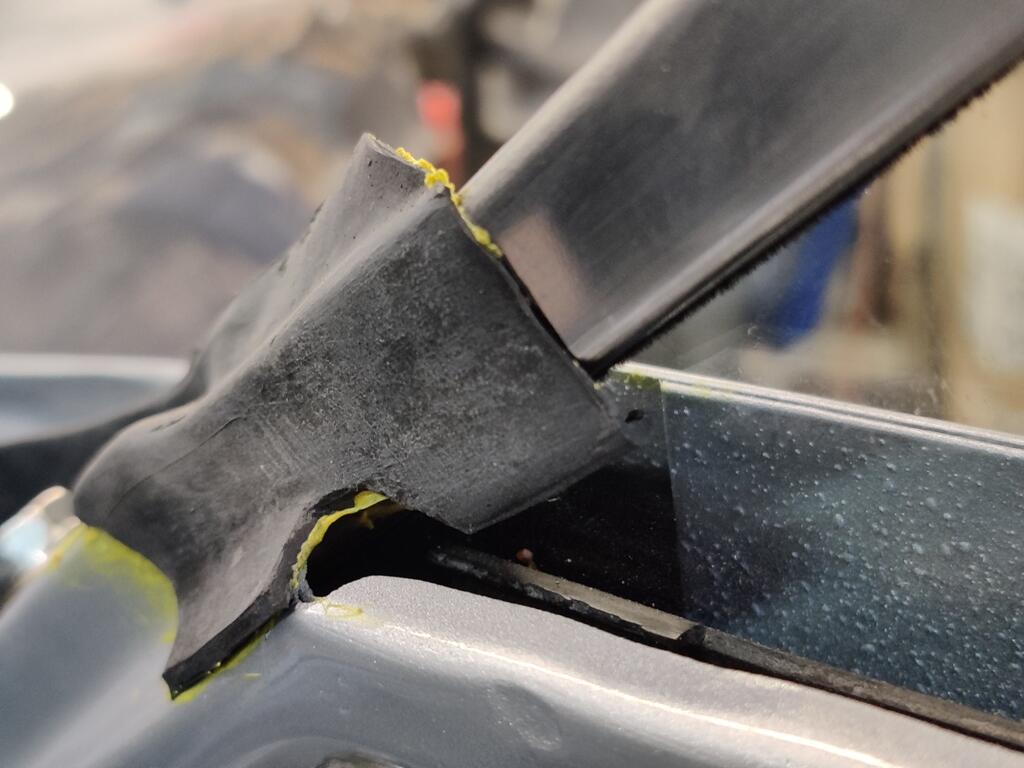
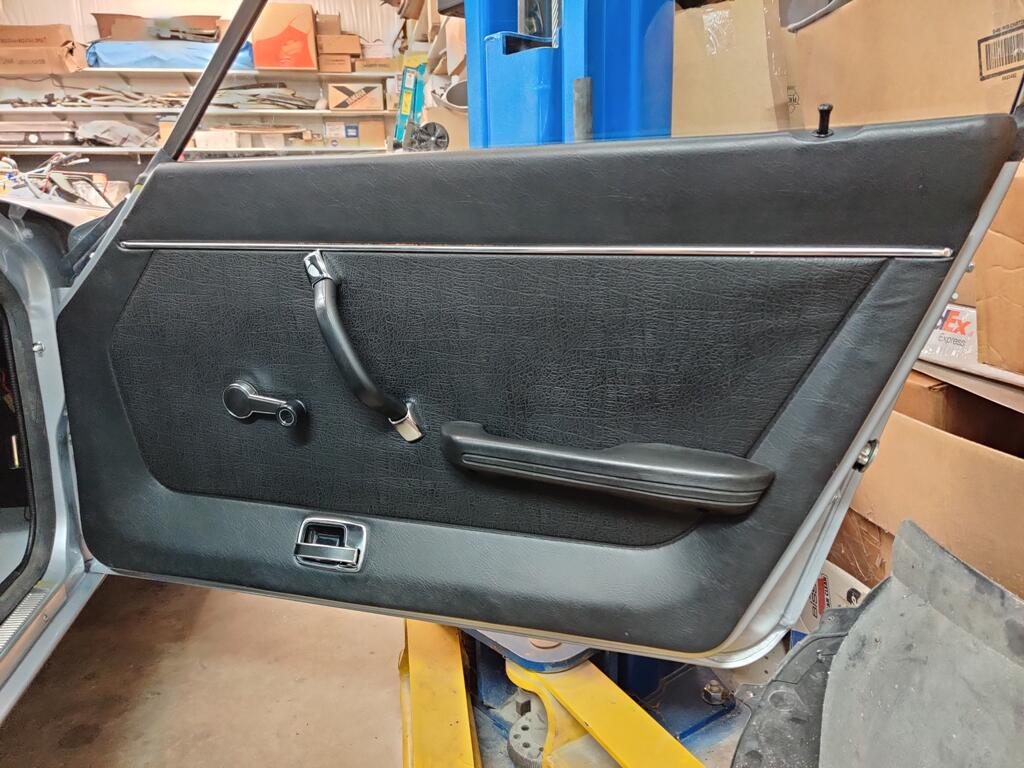
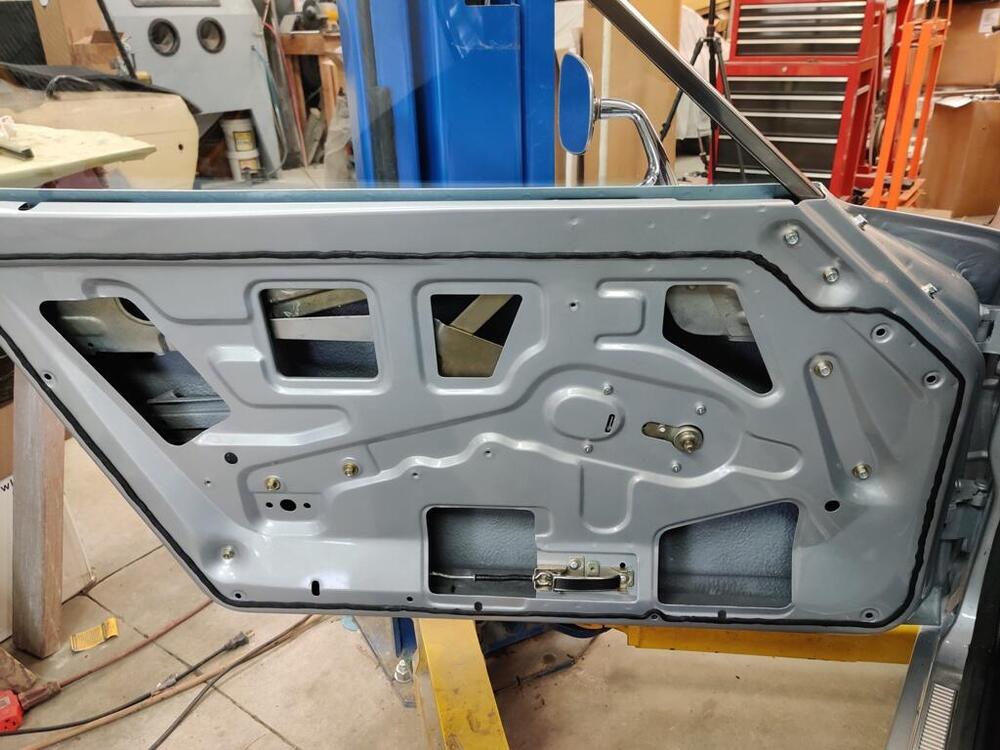
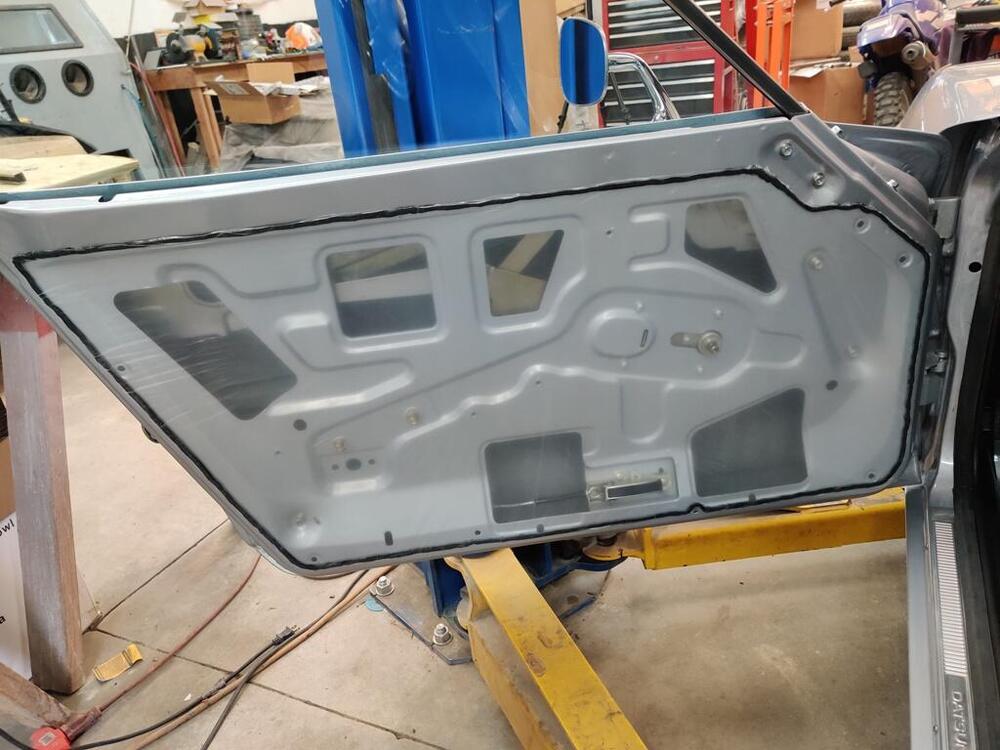
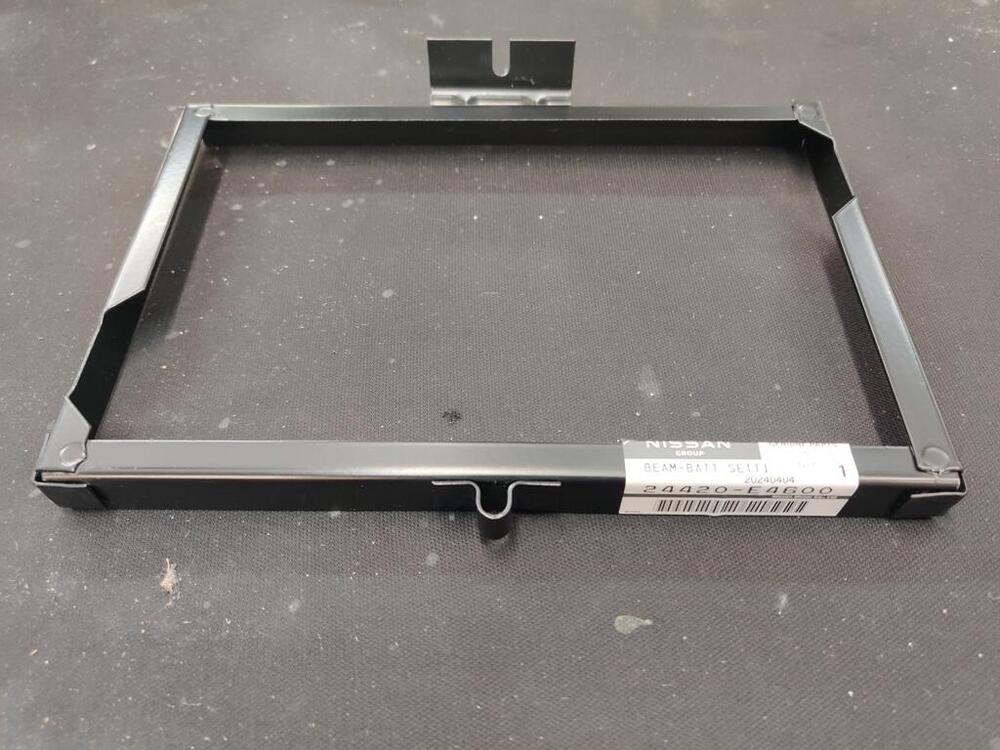
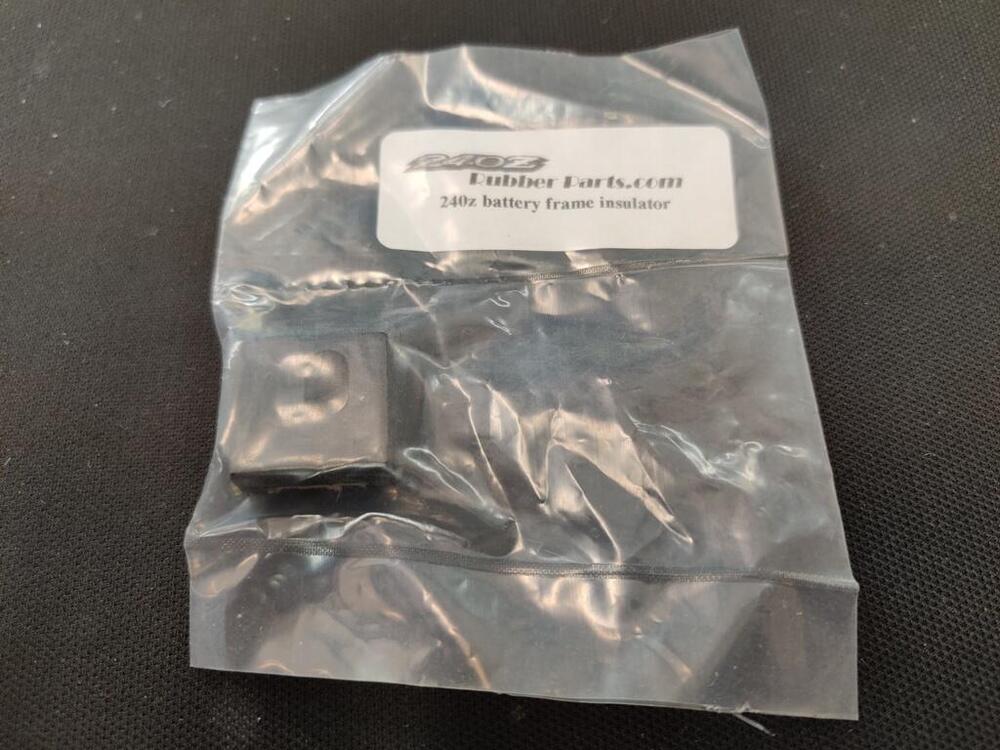
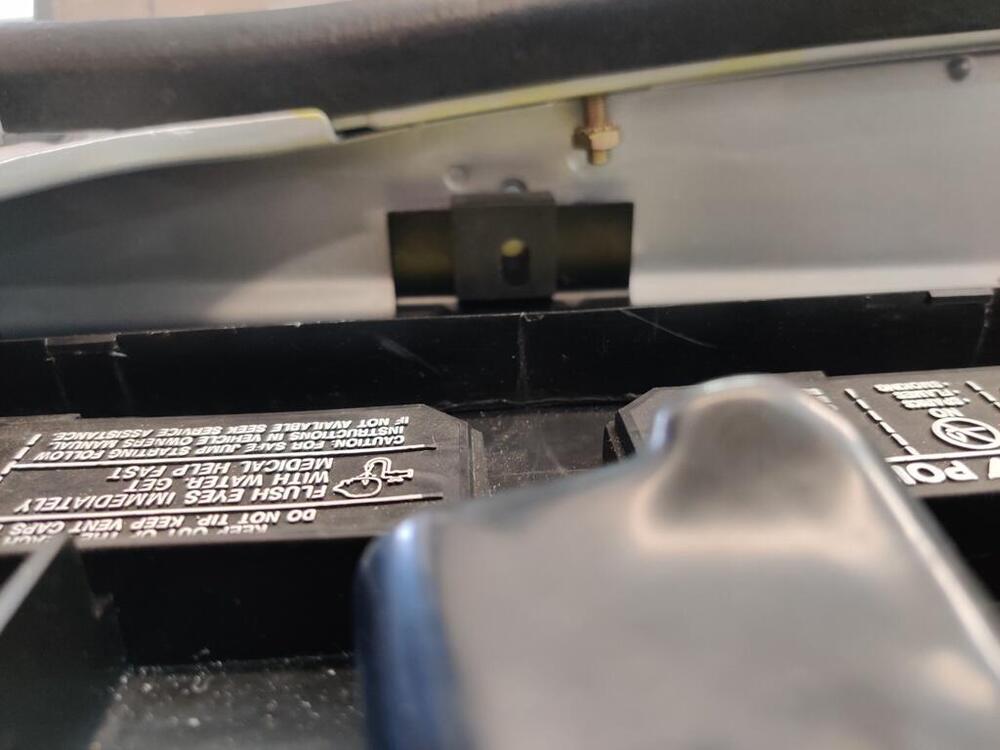
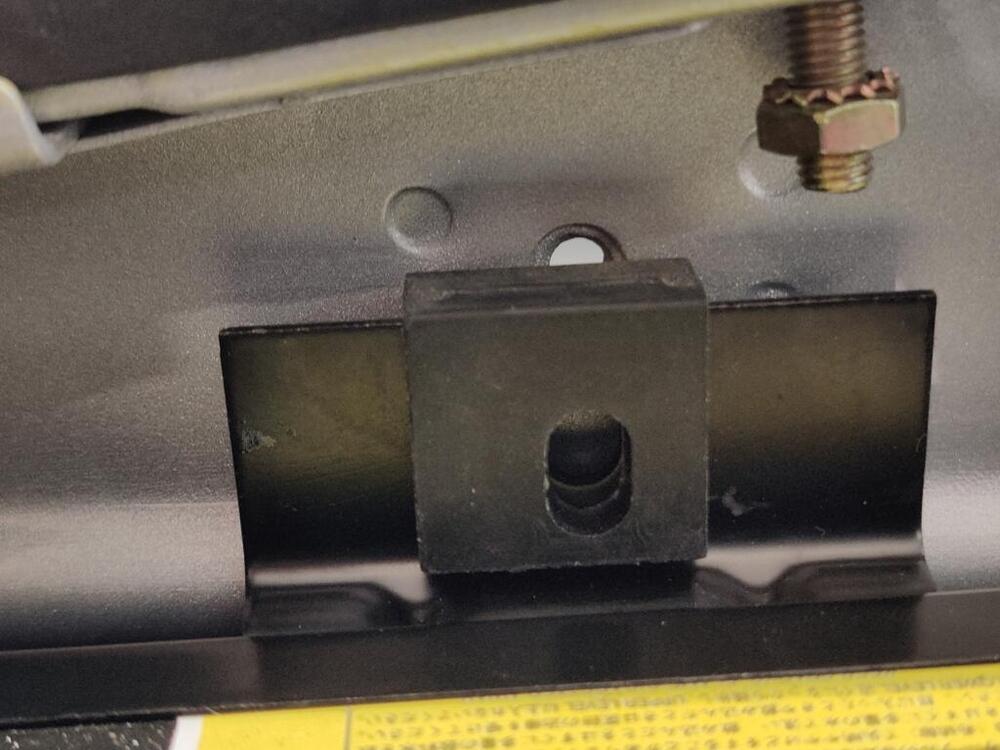
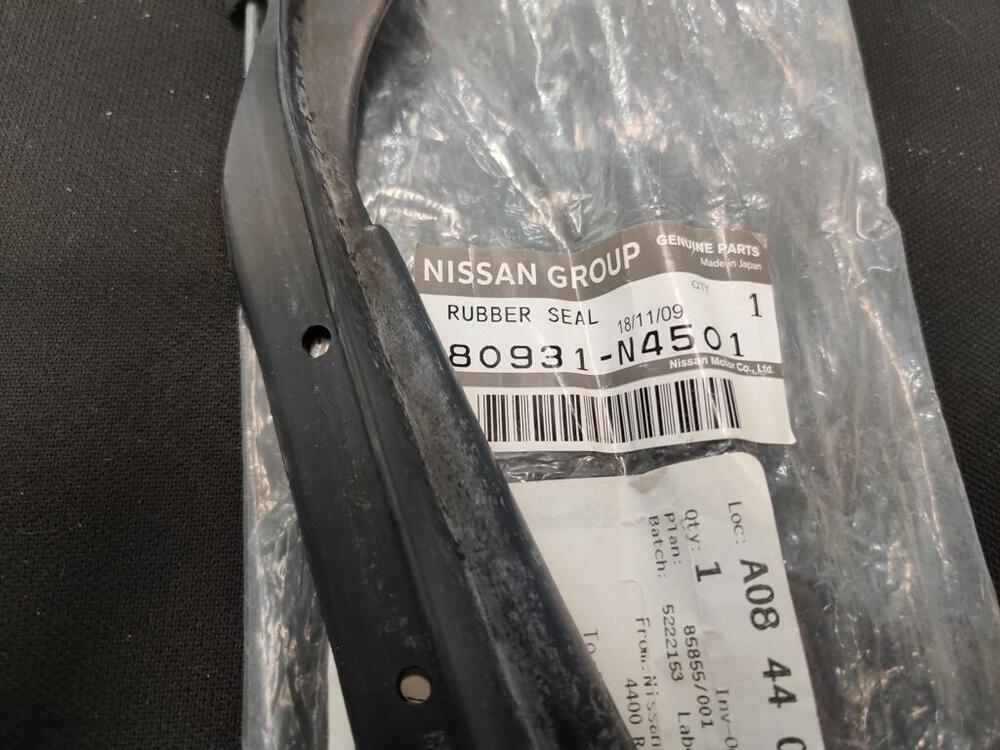
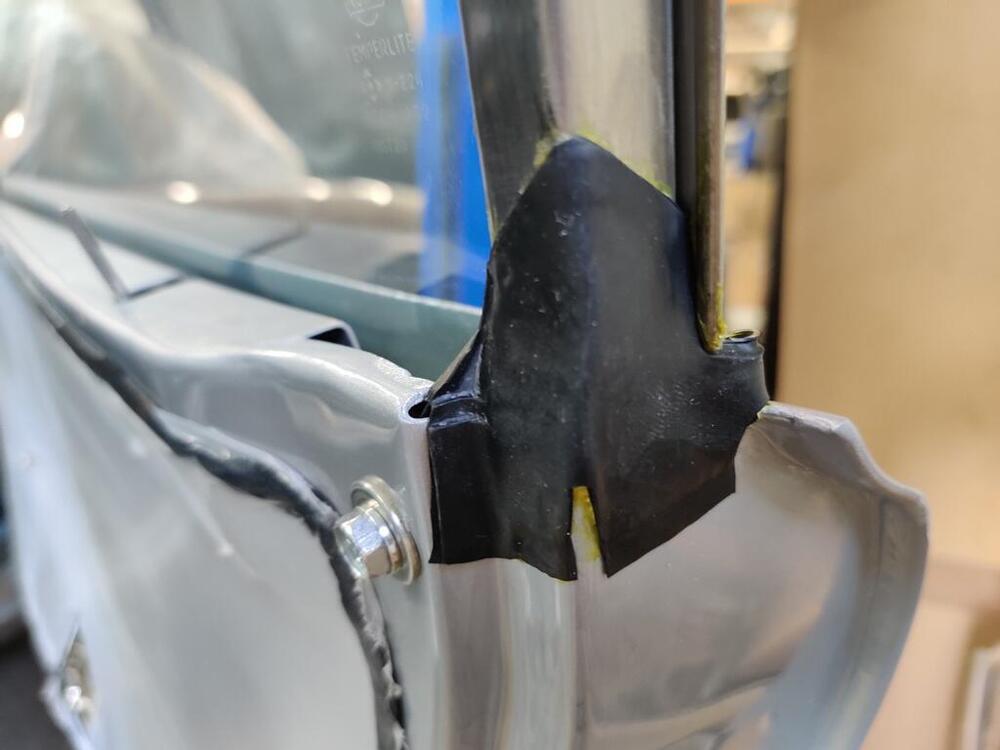
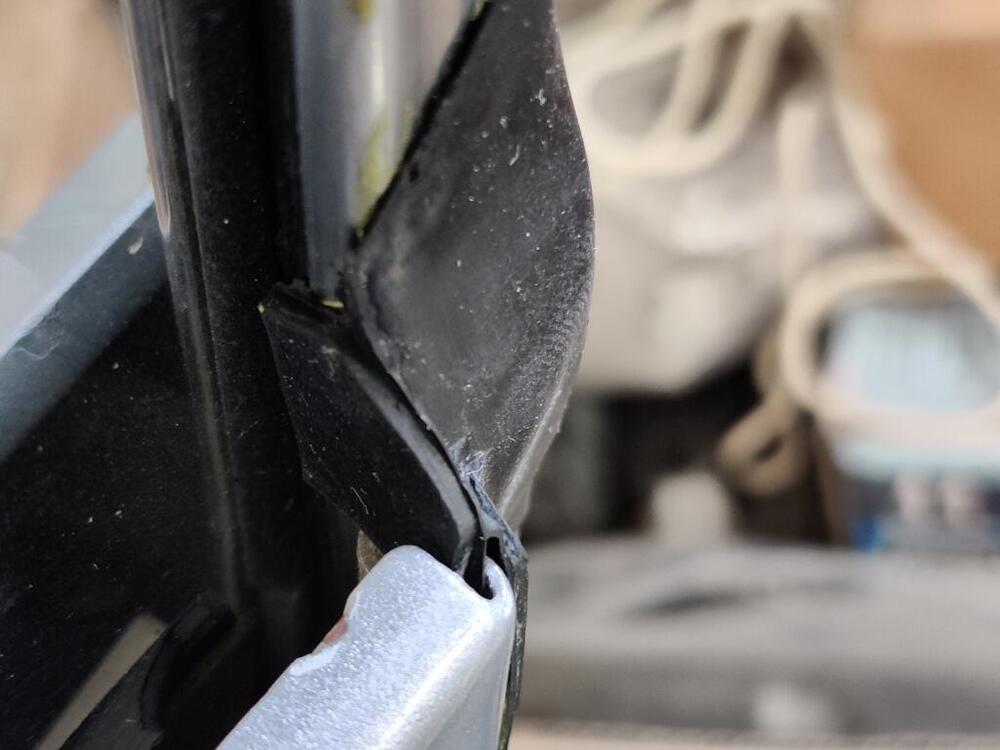
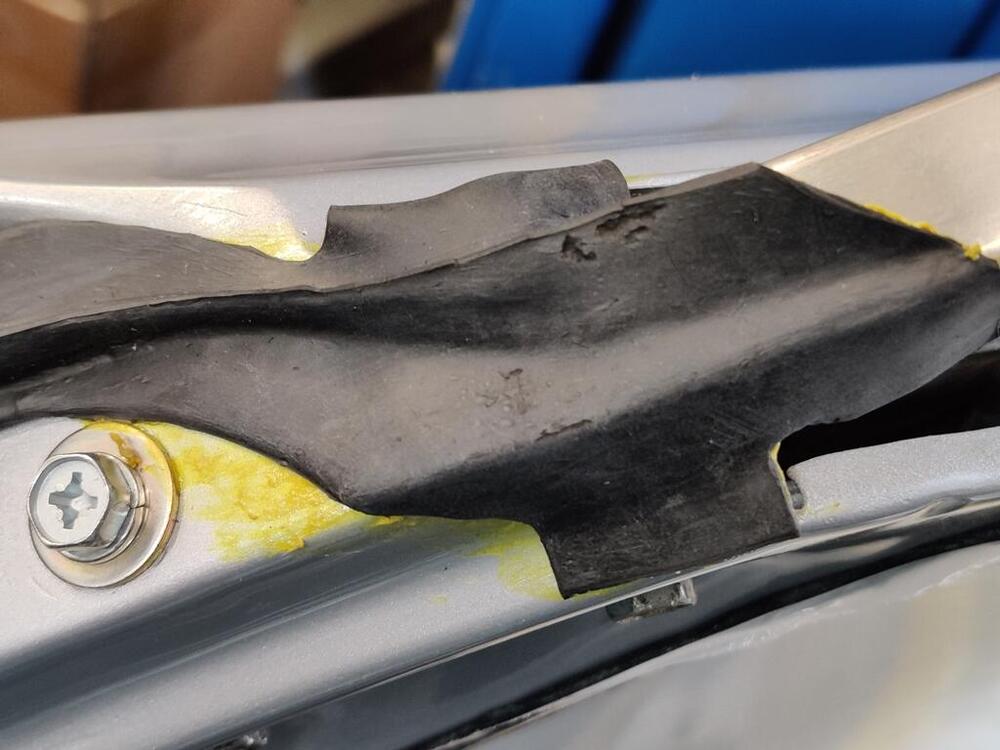
Lately, everything I attempt to do on this car fights back. For example, I have sourced a new battery, battery tray, and battery frame from a Nissan dealer. So, with all these "factory original" parts, how do I end up in this situation? A closer look: Is this battery shorter than the original? Is the battery tray thinner/shorter than the original? A combination? When I saw this, I just laughed and walked away to do something else. I am also wondering why the slot in the rubber part here is offset to one side. I have no clue. Next came more work on the right side door. I am still dealing with the consequences of the paint shop removing the doors (and I specifically said not to). Getting the right side door aligned exactly the way it was is a pain in the arse. Tightening the hinge locating bolts, loosening... rinse, repeat. I had them where they belong and did final body work finishing across the door gaps. I had it really close to perfect. Now, I am struggling. The door is made of thin metal. It is quite possible that by the time you bolt in the stainless steel window frame and put in the regulator and the glass, the shape of the door changes a bit. Probably a key piece of helpful info for those of you reading this and yet to apply paint to your car in the future. After quite a bit of fiddling, I got the "feel" of rolling the window up and down right - consistent slight amount of force throughout the travel both downwards and upwards. Next, I made a vapor barrier for the door and put that in place (sorry, no pics - I will remember when I do the left side). I had to straighten the lock pull rods as they were a bit "bent". The product I used to attach the vapor barrier to the door (first pic of three), and new door frame seals: For the front door frame seal, I couldn't get my favorite contact adhesive to stick to it properly until the third try. After the first two, I scuff sanded it. Only then did the adhesive stick to it properly. I have some adhesive clean up to do still. After these seals were glued into place, I could put the inner door panel on. I sourced reproduction door panels some time ago, probably a couple of years. They appear to be good quality, but I decided to move the door panels from my track car to this car. I purchased these new from a Nissan dealer around 1994. They are still in very good condition. The track car will get the repro panels. Getting the pull strap on took a crazy amount of time and effort. The chrome pieces do not want to snap into place. I had to massage and modify a bit here and there until they would finally latch into place. Anyway, that is how it can go sometimes. Much more difficult than it should be. But, I press onwards. 😉


-
I did, including the glove box lock. For that one, you have to drive out a pin to access the wafers.
-
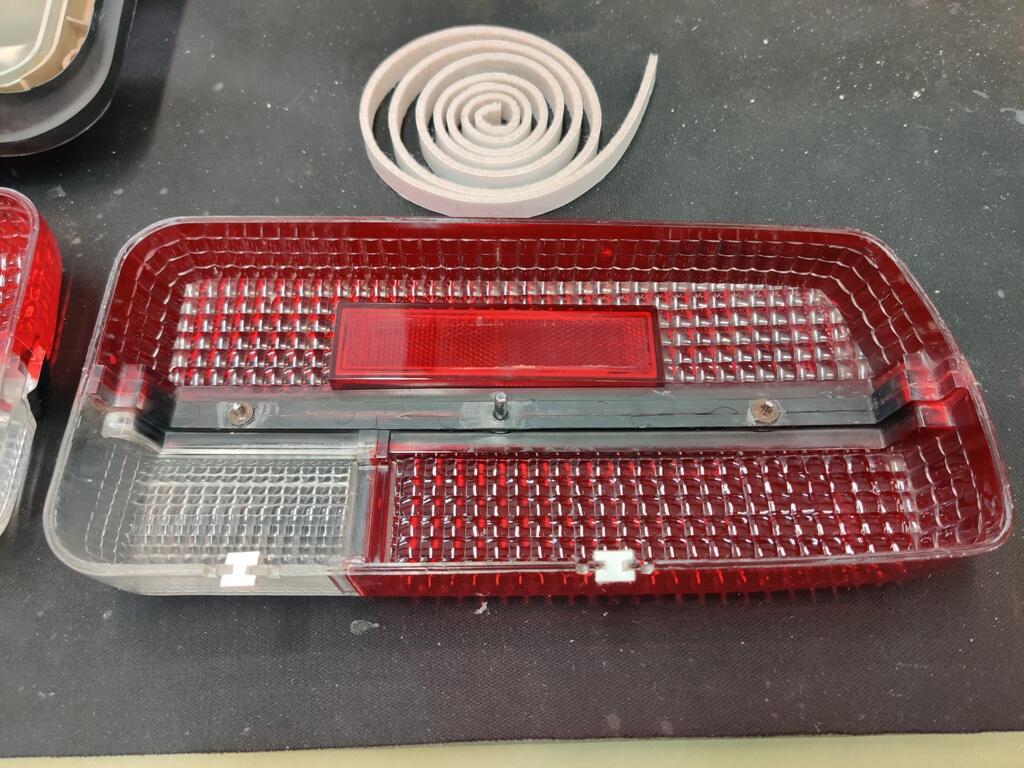
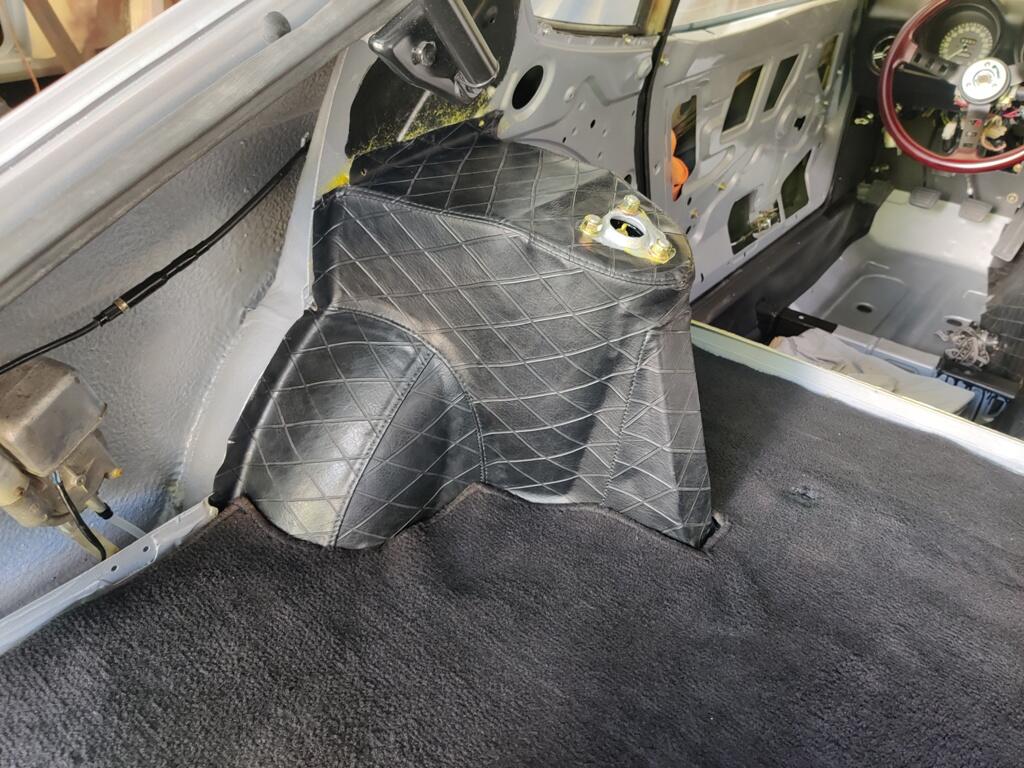
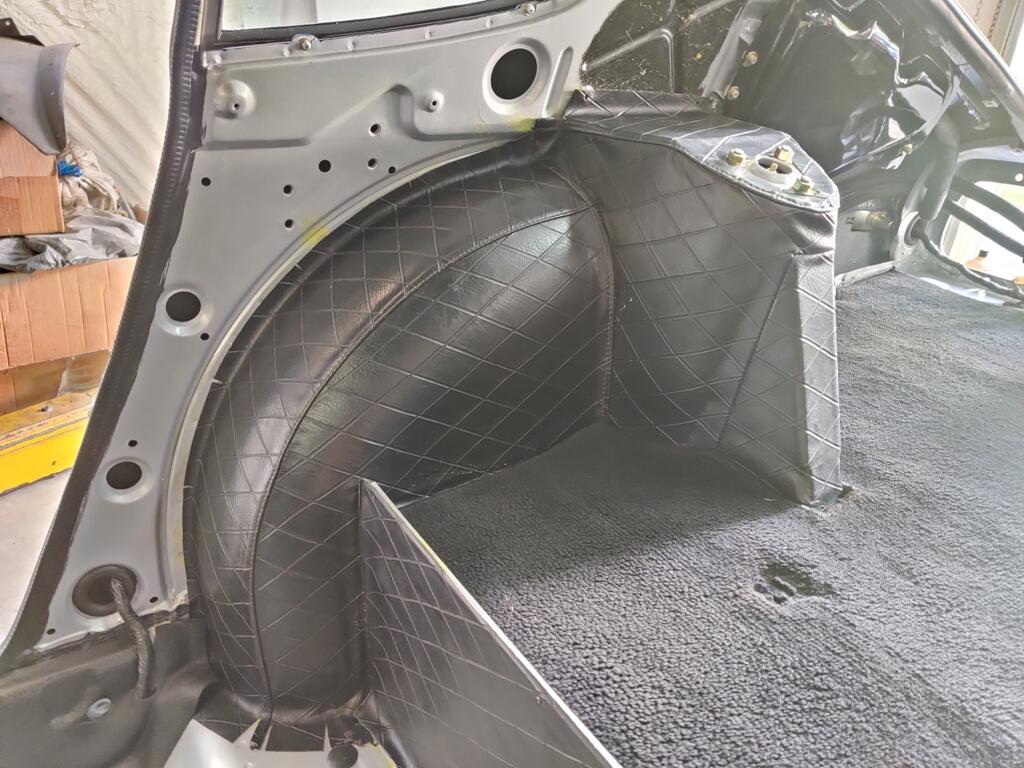
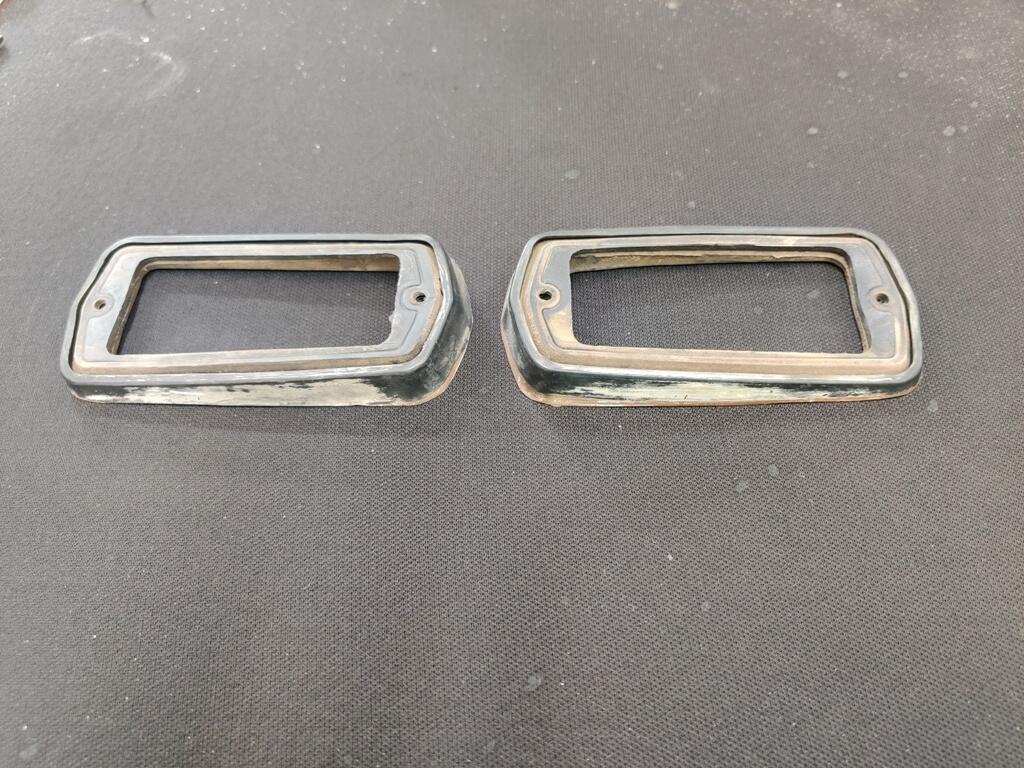
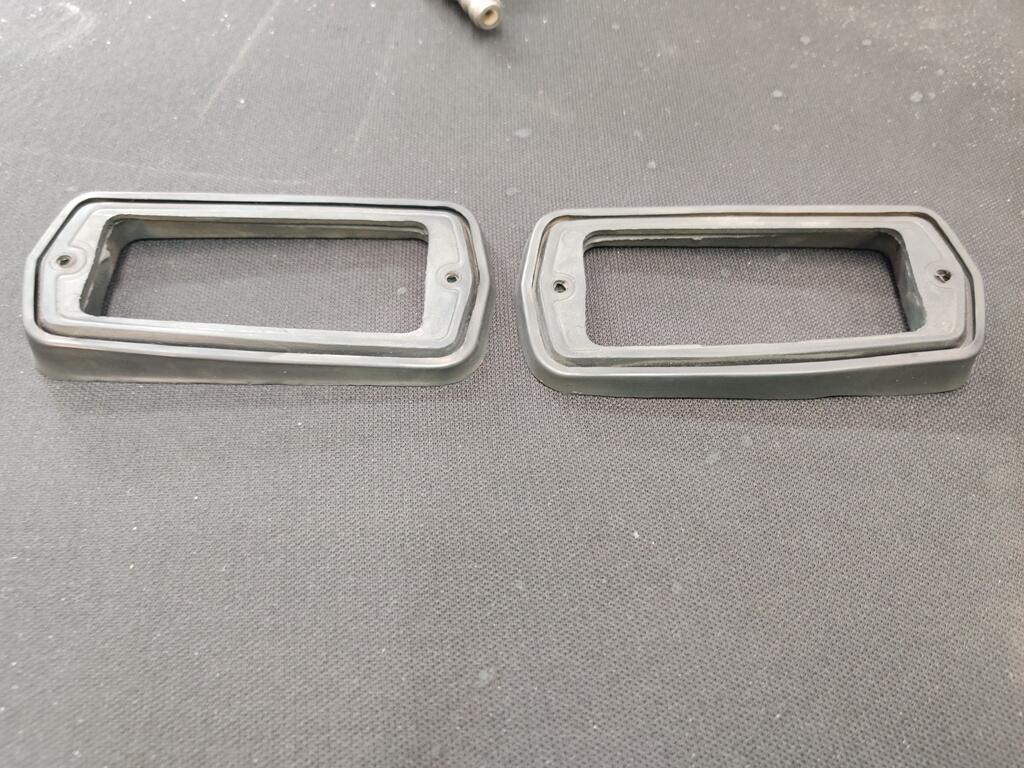
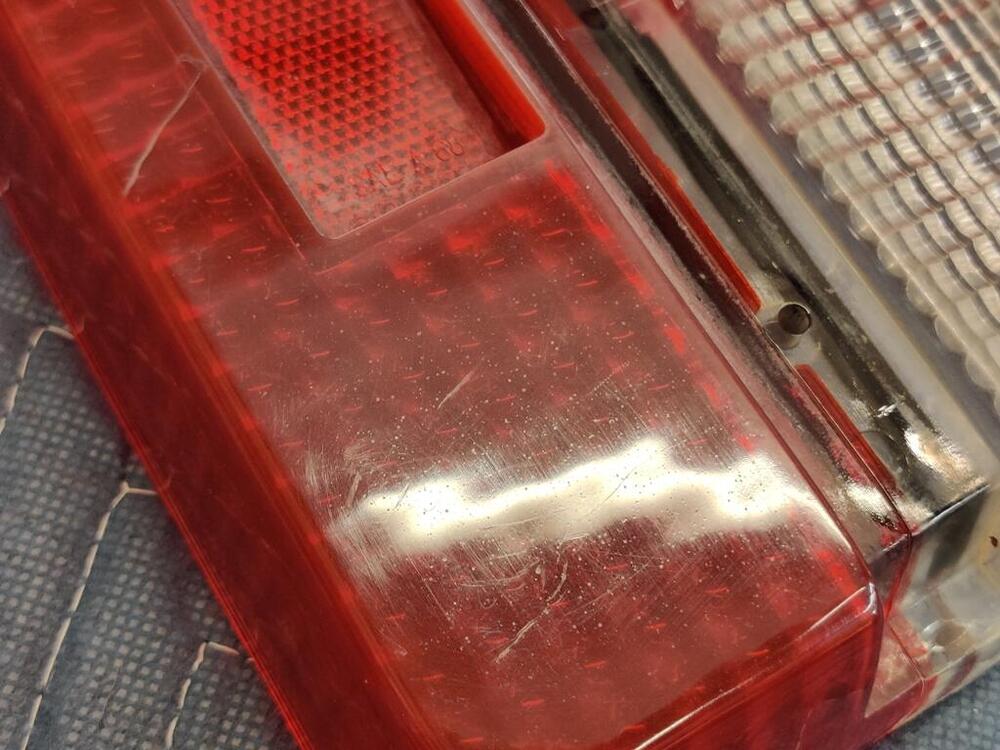
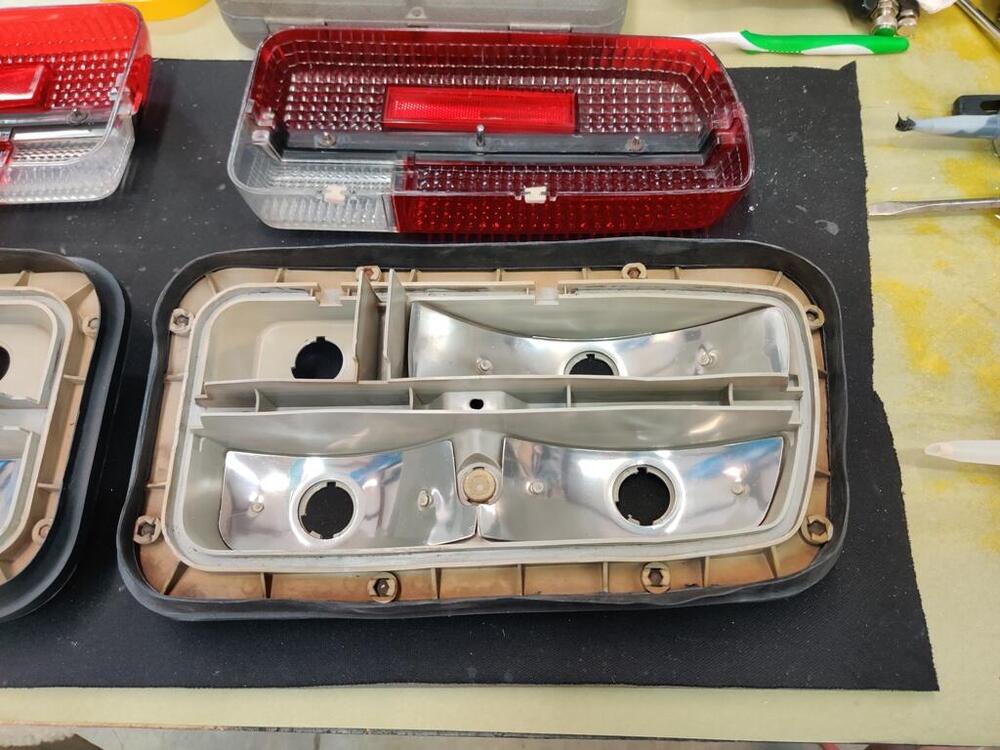
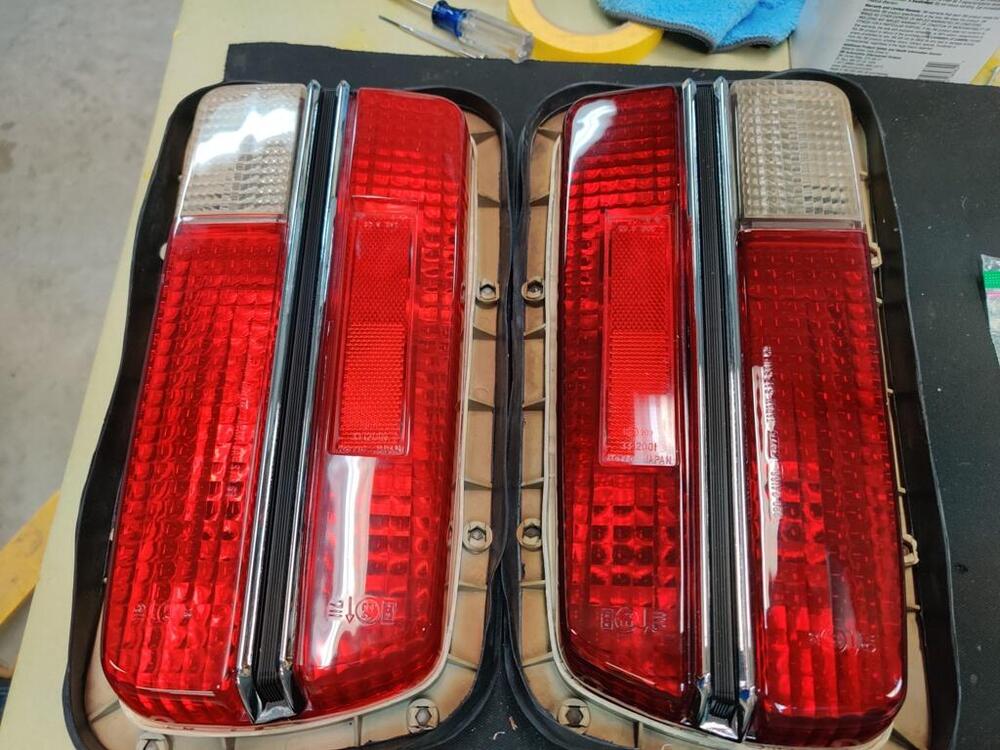
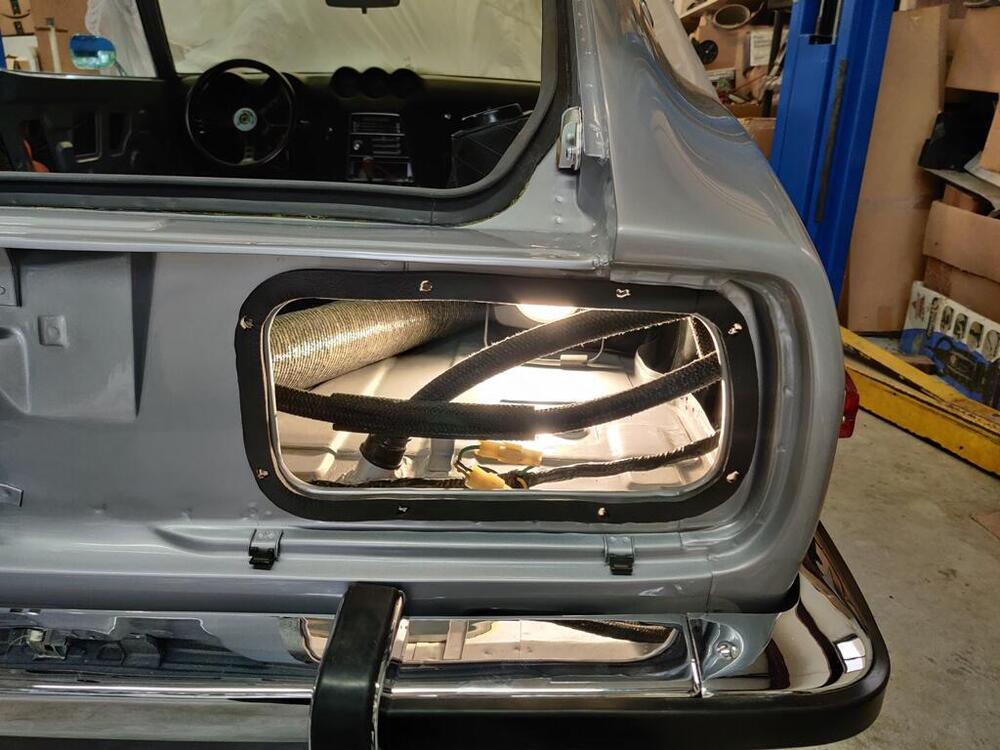
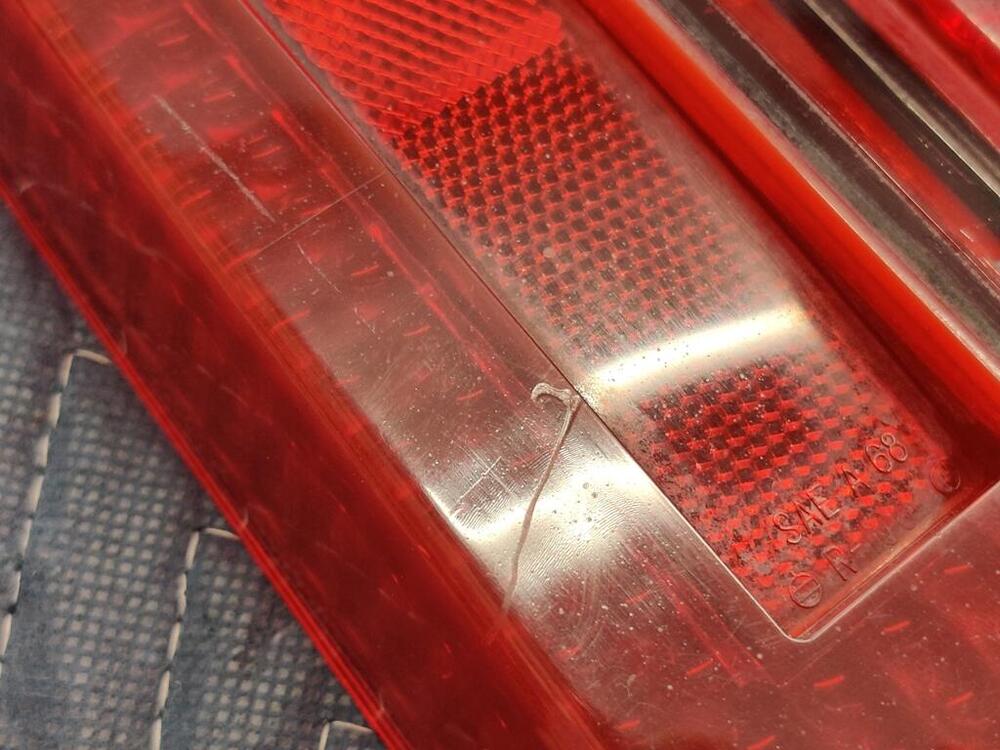
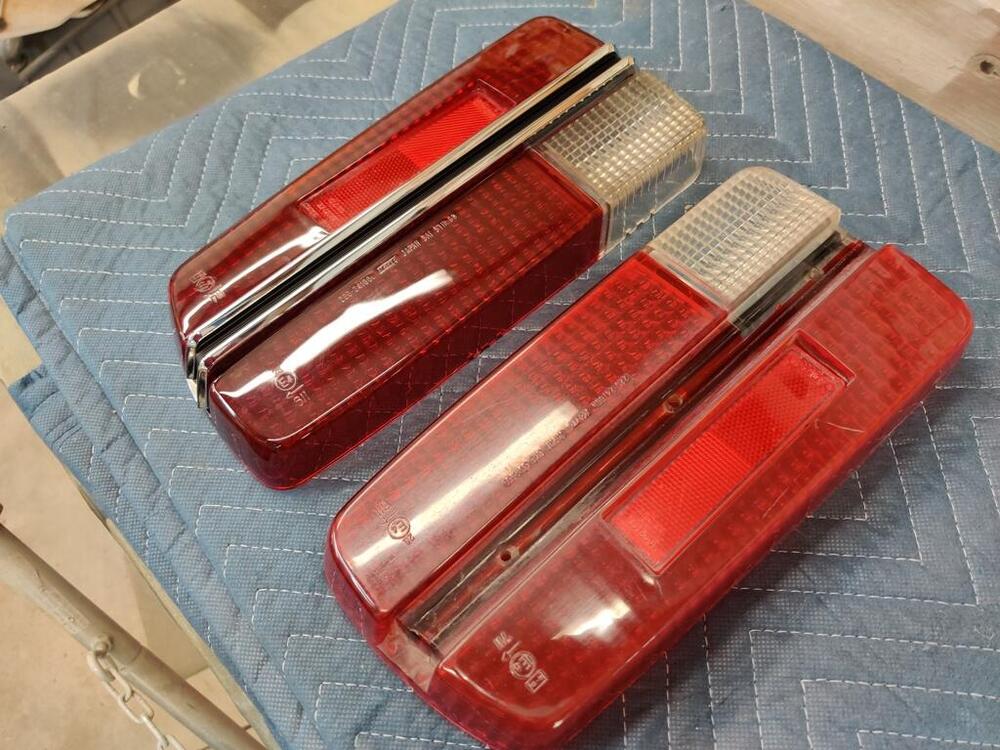
Correct, the tower and smaller rear wheel well are covered by one piece first. Then, you put on a second piece that covers the front wheel well. The "riser", behind the seats is installed last. Yesterday and today I worked on removing scratches from the replacement left door glass I got from @Patcon. I had to order some more discs and powder, so I set it aside for now. I went to install my tail lights and upon close inspection, determined that one of them needed more sanding and polishing to restore the proper shine to the lenses. After some more effort was expended there, I was able to glue the lenses onto the housings. For that job, I used auto body seam sealer. Seems like and odd thing to use, right? But, the old stuff that I removed from the housings when I pulled the lenses off looked like seam sealer. And, I had good luck with using it once before on the tail lights on my other 240z. My tail light lenses were in rough shape to start. Lots of pitting and scratches, some of them deep. I bought a small roll of felt from Home Depot and made little pieces to replace those that were originally in the bottom of the assemblies. I guess these are vents... to allow any moisture that finds its way into the assemblies to dry. While the housing were separate from the lenses, I used a heat gun to attempt to straighten the mounting flanges of the tail lights. These distort over time and prevent the stock rubber gaskets from sealing to the body of the car like they should. When "gluing" the lenses back to the assemblies, there is a need to use clamps (and boards and rags) to clamp the lenses to the housings, and let the sealant cure for 24 hours. Even with the housing flanges straightened somewhat, I used some self adhesive weather stripping (highly compressible) between the tail light assemblies and the body. These are now air tight - no exhaust fumes will be coming in through this notorious location. While not perfect, the lenses look very nice now.


-
Removing double post. I think the forum software is acting up. 🙂
-
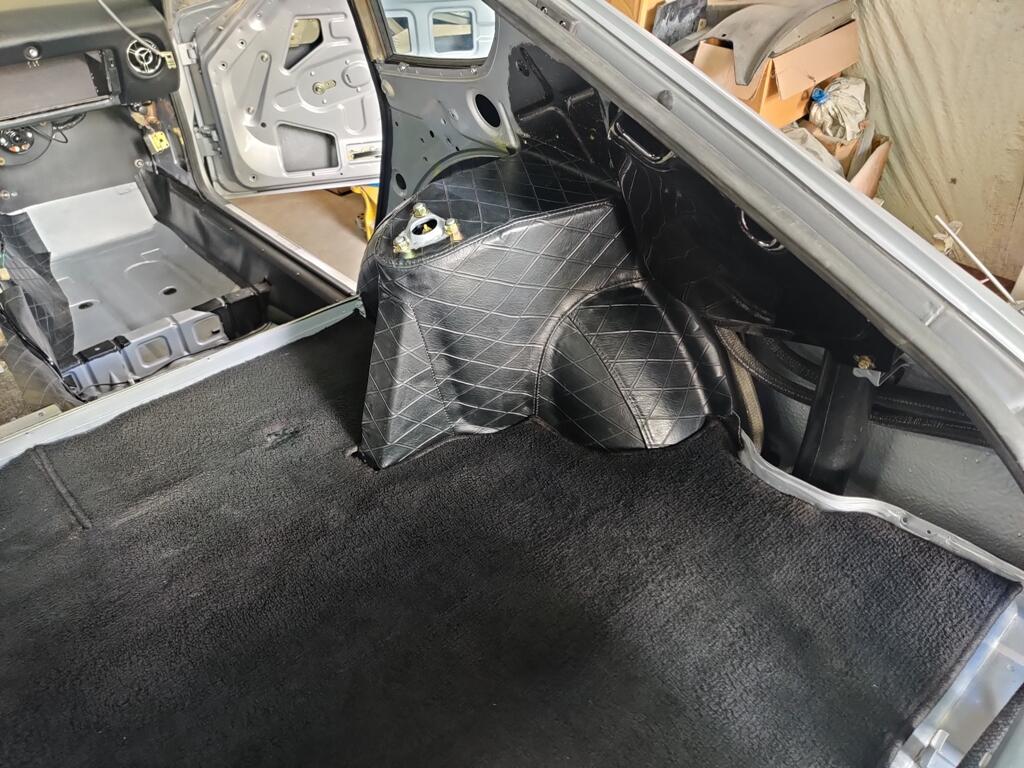
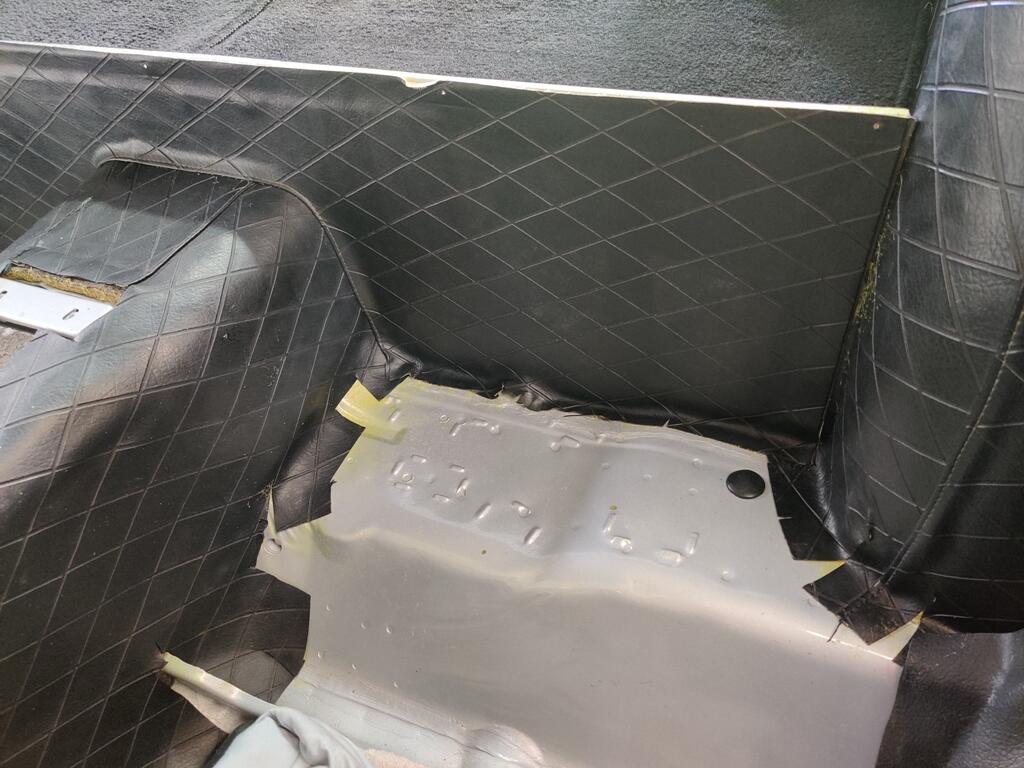
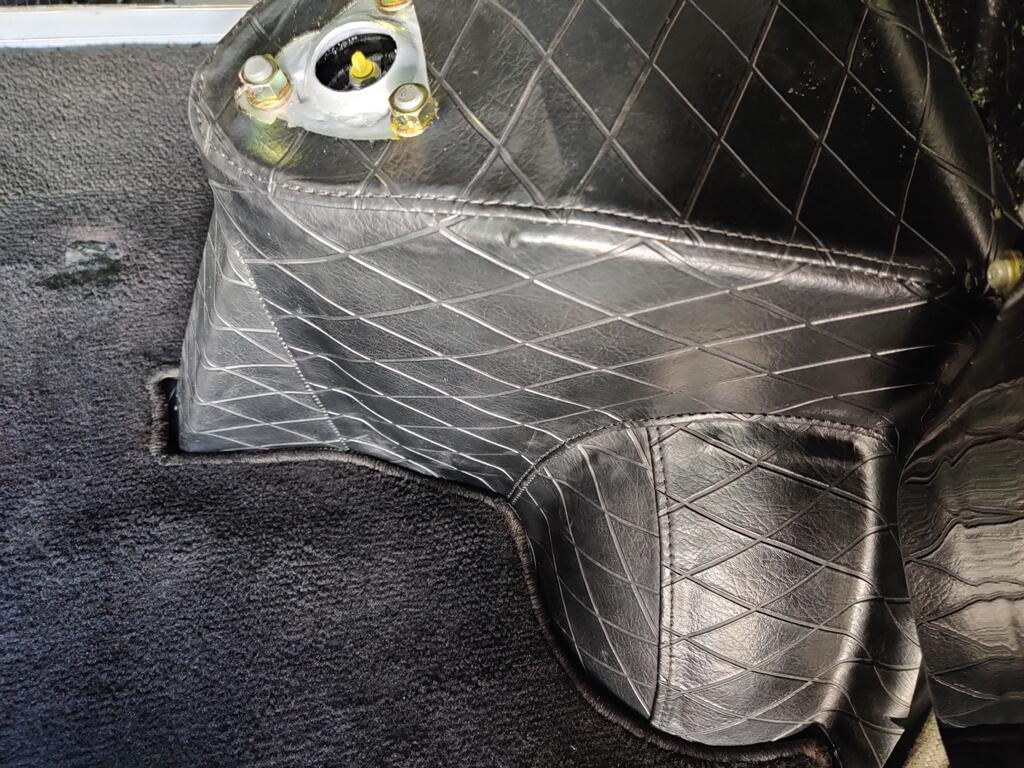
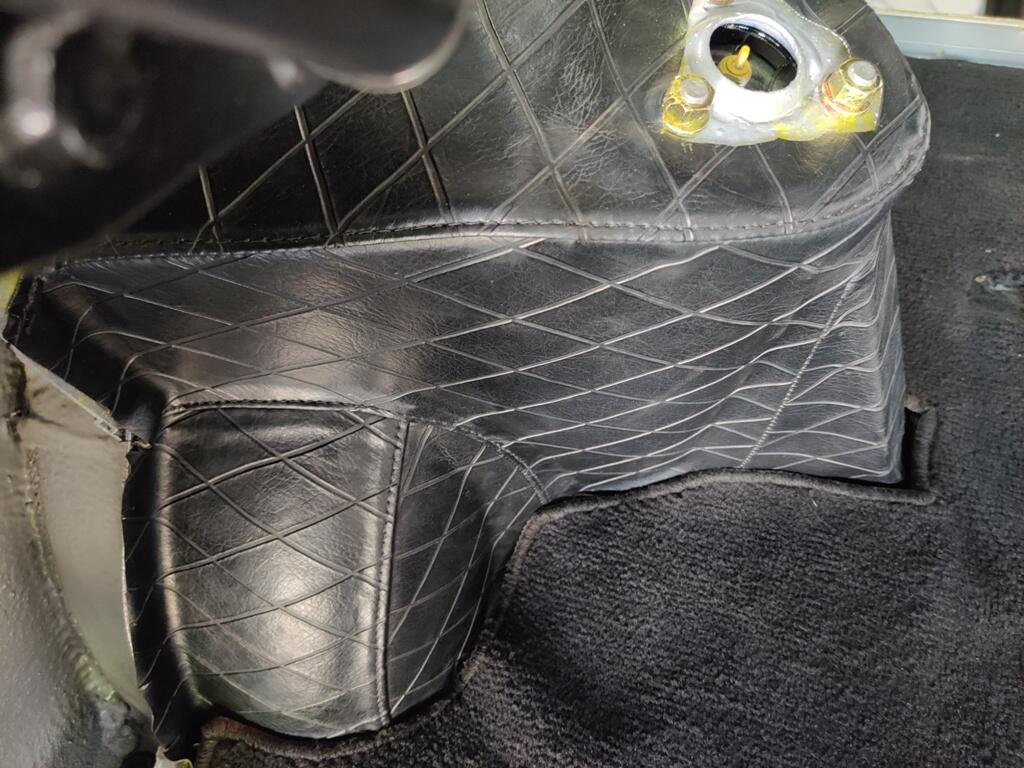
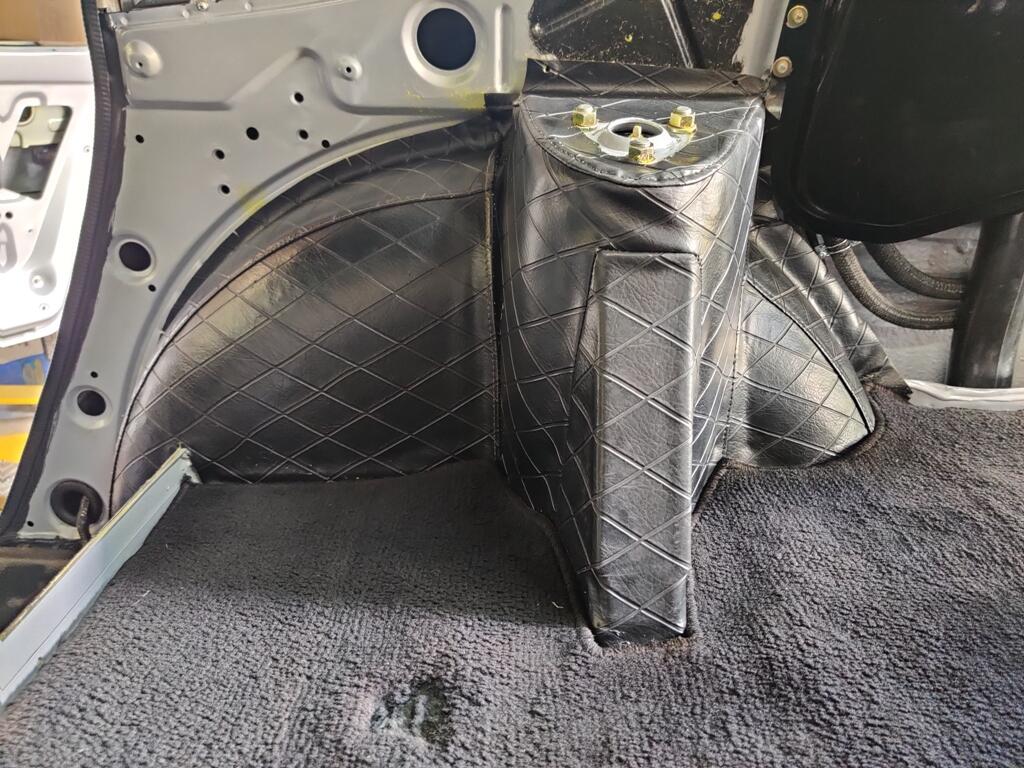
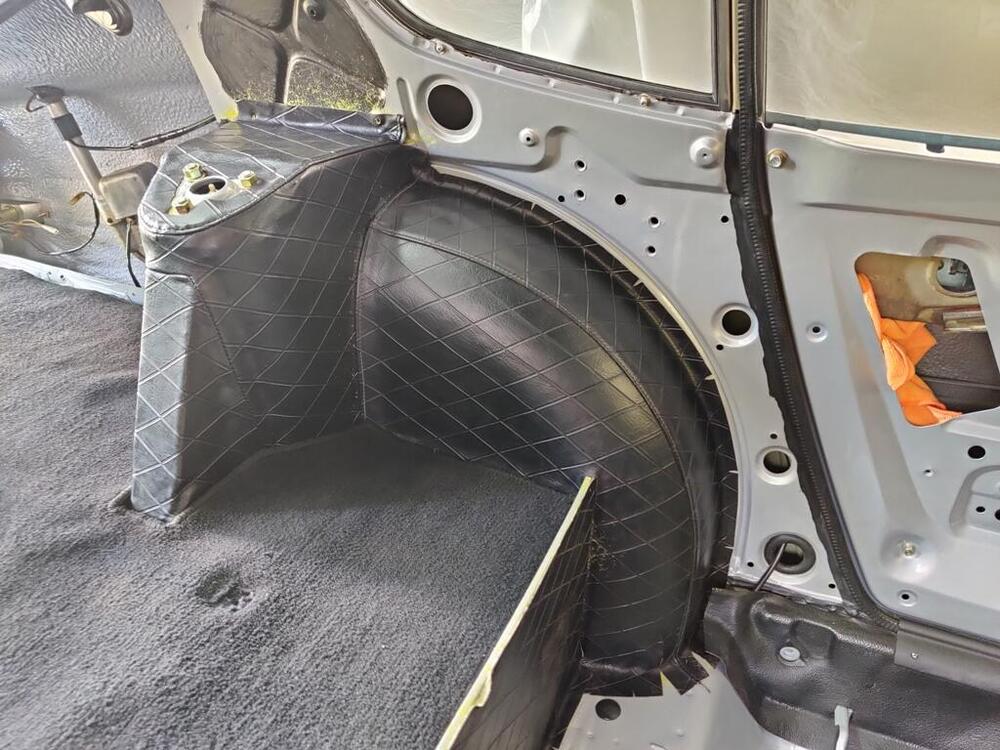
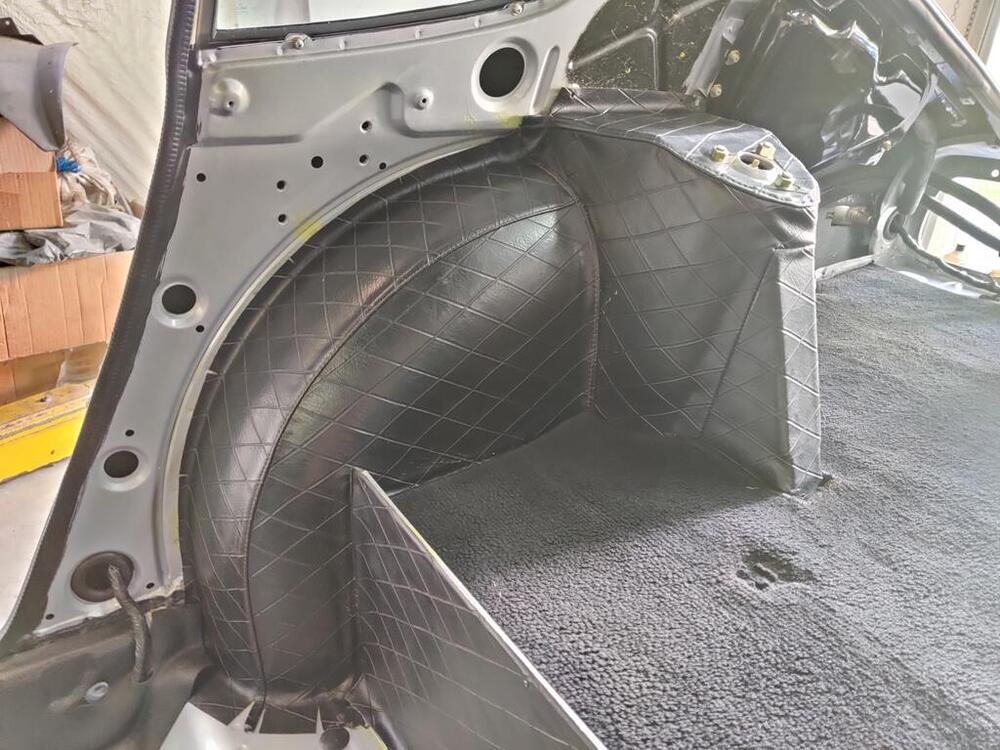
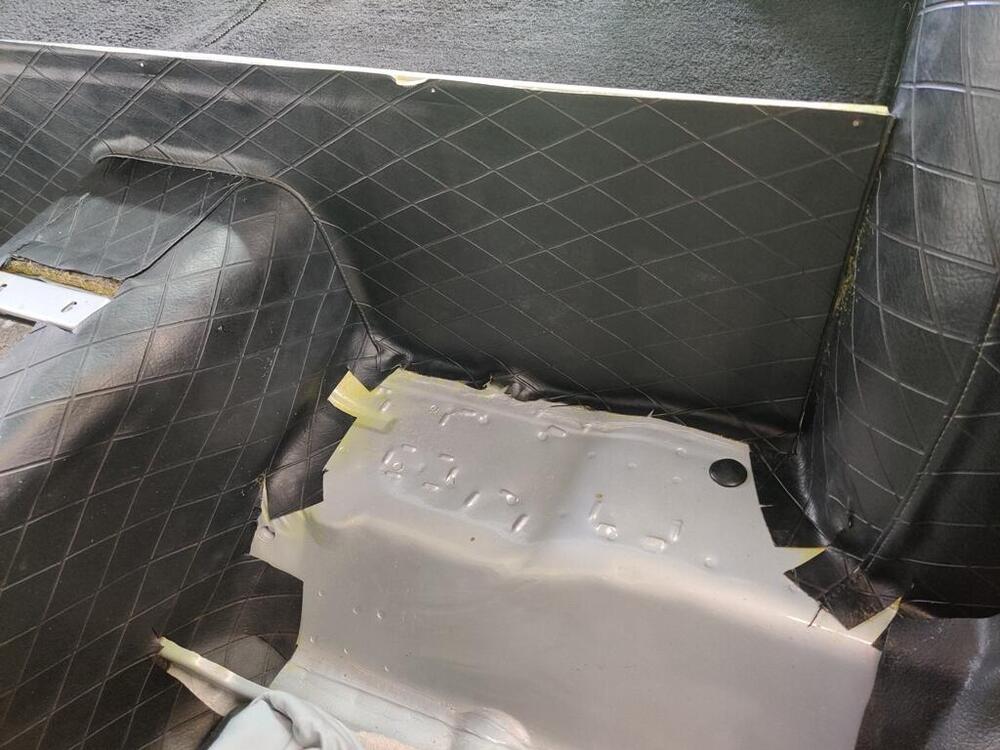
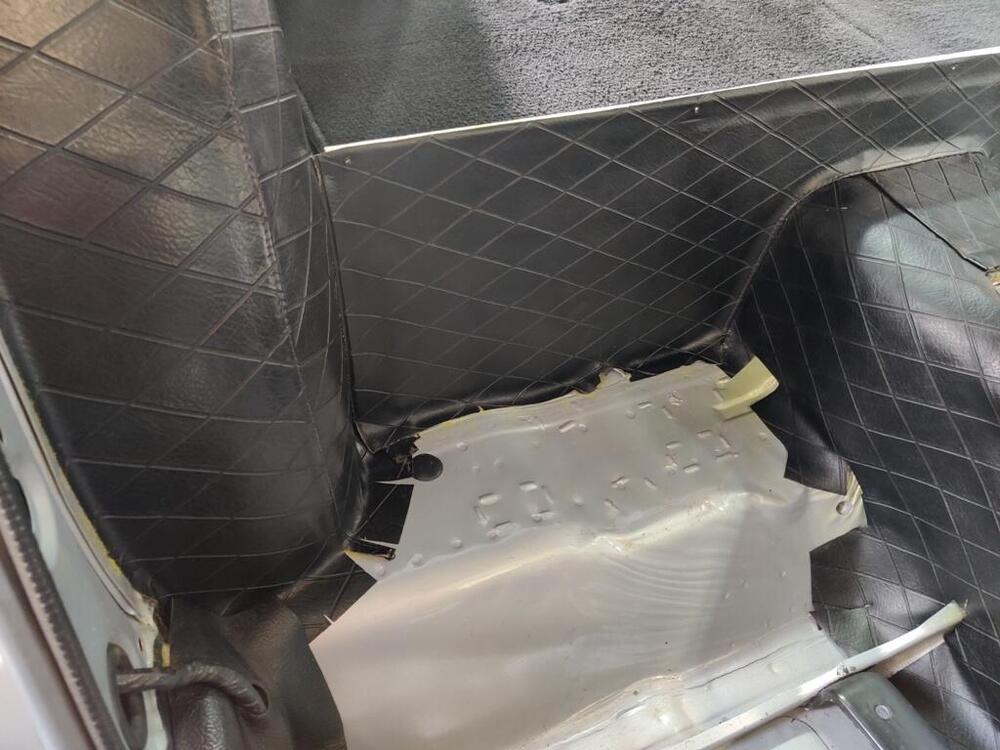
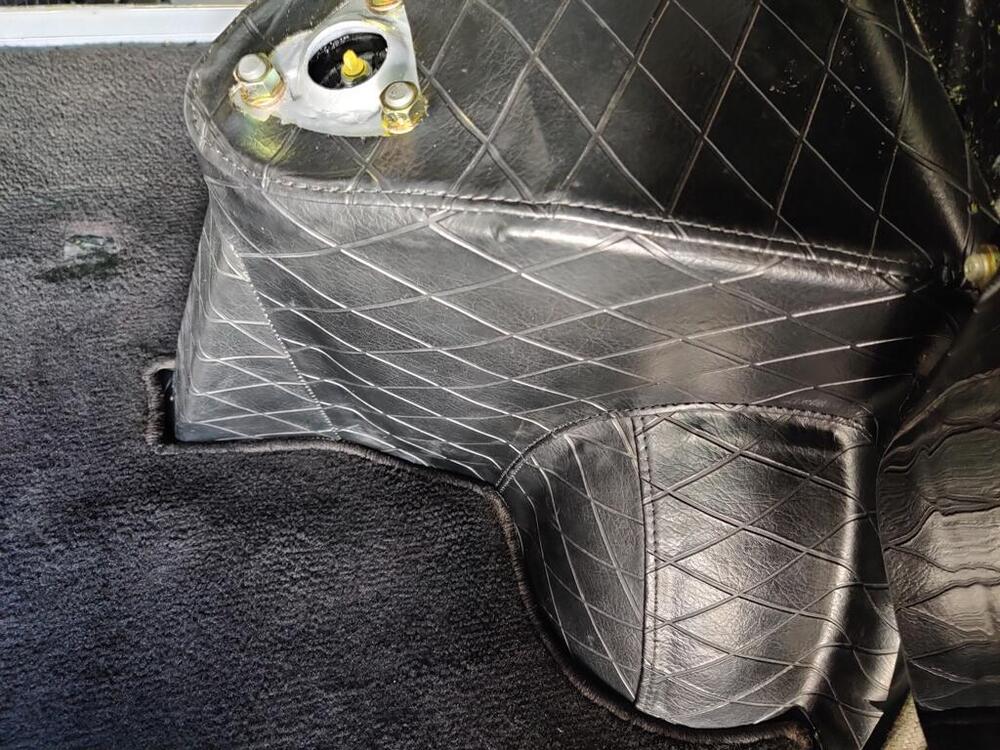
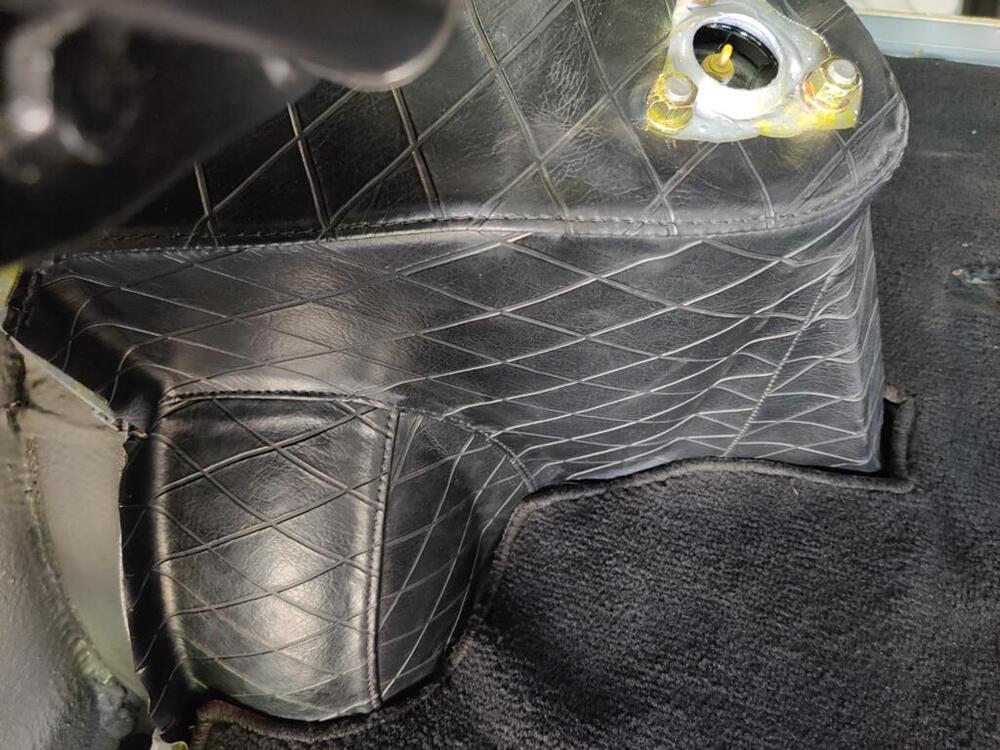
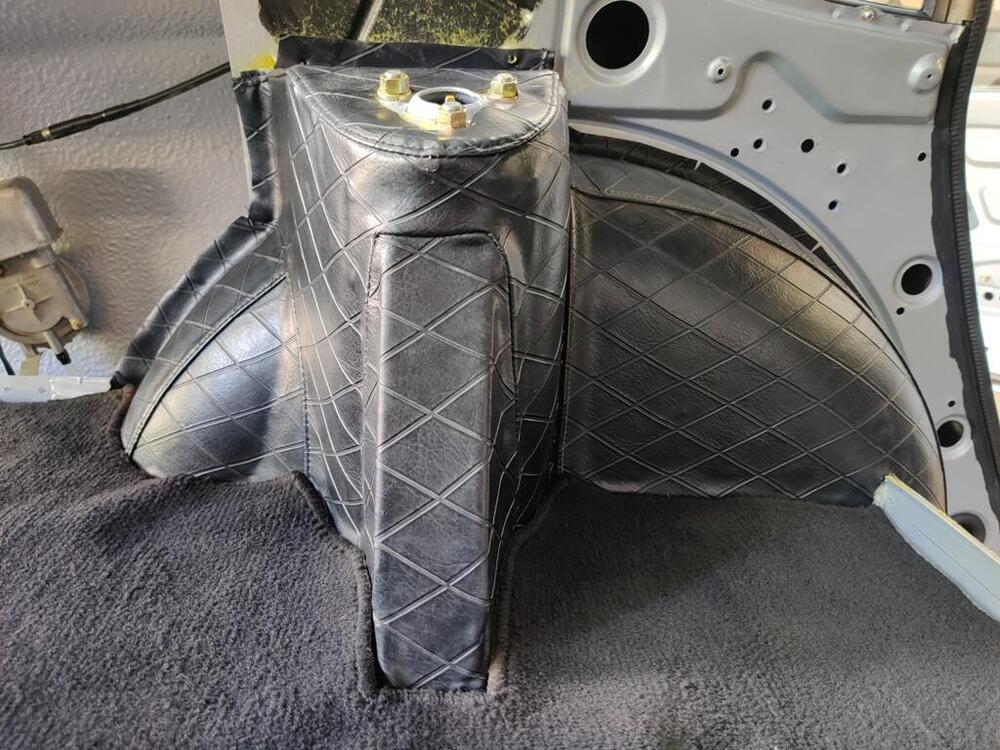
The time has come for me to install the rear tower and wheel well interior trim. The reproduction pieces have a "shallower" diamond imprint. I prefer the original. These pieces are often damaged, I think from putting in and retrieving things out of the rear hatch area, Objects nick and slice the vinyl, especially on the inner most portions that protrude. For the rear strut tower pieces, I took three complete pairs which I had accumulated over the past few years to a local auto upholstery shop. There, we determined the best sections for use. I left them with instructions to pull them apart as necessary and to re-stitch one complete pair using the best sections from the lot. Another "issue" I have noticed looking at 240z's over the years is that the vinyl covering the rear strut towers, if removed, often looks terrible when it is put back in. Whether, the wrong adhesive is used, or the installer lacks the necessary skills, or something else, the result often falls short vs. the other restoration work done on the car. So, as I started yesterday with my plan, one that included having all of the remaining diamond vinyl glued into place on the car before the end of the day, I knew I was in for some long, and stressful hours. First, I used Wesley's Bleche-White (an ancient bottle) to clean the backsides of the vinyl trim. Over the years, the white (I assume cotton) backing wicks up water and collects dirt with it. Wesley's Bleche-White that you can buy today appears to be a different chemical composition (based on a few minutes only) of searching online. The one I have appears to be the original stuff. I was amazed at how much dirt came out of the backside of the vinyl. I rinsed them thoroughly and then hung them outside in the GA heat to dry. While they were drying, I taped up parts of the back hatch area to protect from glue overspray. I once again used the Landau contact cement. When it is 90+ degrees, this stuff dries a bit quicker. That, and the very odd shape of the strut vinyl trim parts makes installation very challenging. On the first one, I struggled a bit because I didn't get the alignment right and it kept sticking to itself. With each passing second, the glue got drier and drier and more sticky. I screamed some obscenities and tried helplessly to reposition it without pulling it back off completely. Within two minutes, I realized I had failed, so I pulled it off completely. One important thing to note about contact adhesive is that it can be reactivated by applying more. So, before it dried even more, I grabbed the gun and went with a bit of a different plan. Instead of lightly coating the entire inside of the vinyl as I did before, I only sprayed the top (horizontal) section. I resprayed the corresponding top of the strut tower. Then, I positioned the top section so that the triangular cut out for the upper strut mount bolts was in the right location. From there, I put my attention at the portion of the top surface of vinyl that presses up against the inner quarter panel. I aligned the holes (those that accept the black plastic trim clips) that were in the vinyl to the holes in the inner quarter panel. I pushed the part contacting the inner quarter panel against it firmly. When I was sure those holes lined up, I lifted up on the triangle cut out area and pulled the vinyl taut as I repositioned the top (horizontal) section. You have a bit of work time, but you have to move quickly. At that point, I had only the top section in place, but the alignment looked good. From there, I lifted the other sections up so that I could spray glue onto the backside of the vinyl and onto the metal strut support structure. I applied more glue in areas where the factory workers had. Flat expanses got less, areas of transition from one surface to another, got more. From there, it was less challenging. I focused on getting the backmost section located properly against the inner quarter panel, making sure to put some tension on it as I pressed in into place. This is necessary to keep wrinkles from forming. I did have to lift back up some and reposition, but not a lot. Anyway, for the second one, I copied my successful second effort on the first. It went well. I still have some glue overspray, and the white haze that you see on the black vinyl to clean off. I think the white haze came from the Westley's Bleche-White, but it comes off. These pic were catching a lot of afternoon sun as well, so the black looks like it is washed out a bit, but it isn't. I think it will look nice when all cleaned up.


-
It is not that much work to take the carrier out, swap pinion flanges, torque and measure turning resistance on the pinion. You just need the pinion nut ft-lb spec and the turning resistance in-lb spec on hand... and good torque wrenches.
-
You have to be careful here. I think to resolve, you will need to swap the front flange on the differential to one from another R200 - to one that matches your driveshaft. When you do, you have to torque the pinion nut to the right torque range. If you do not, you will run the risk of quickly damaging the the "front pilot bearing", and suffering subsequent differential pinion/ring gear damage. I recommend looking up the torque spec in the differential manual in the resource section and using the low end of the specification. Why? Because the bearings are not new... and I have found that once they have been "crushed" and run... the light end of the specification is enough torque to achieve the correct turning resistance on the pinion shaft. The correct way would be to remove the differential. Place on a bench. Remove the carrier assembly. Remove and replace the front flange. Torque the pinion nut to the light end of the spec. Measure the turning resistance in inch lbs. Once you determine that is good, put the carrier back in, and reinstall the differential.
-
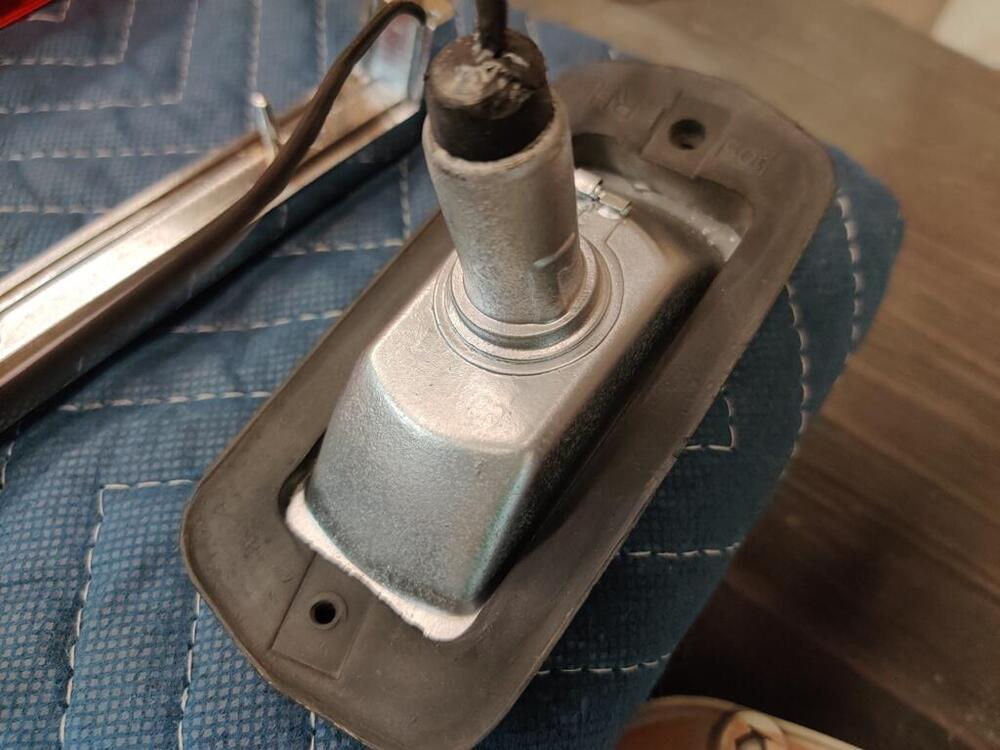
Sheet metal screws hold it down. In the US cars, that ring was used starting for the 1972 model. The 70-71 models which have a different transmission, utilize a different shift boot and do not utilize that oval ring.
-
New gears and used gears will have different wipe patterns. That said, my 4.11 gear set is used. I should have taken a wipe pattern before I took it apart. Had I done so, that would be the reference I could be using now. I am going to assume that my 4.11 gear set should have a wipe pattern more like that of the stock diff I posted pics of yesterday, and attempt to start again with the .126" stock shim in place, but start altering the ring gear position to reduce the backlash. I'll see where that takes me on this trip of experimentation with wipe patterns.
-
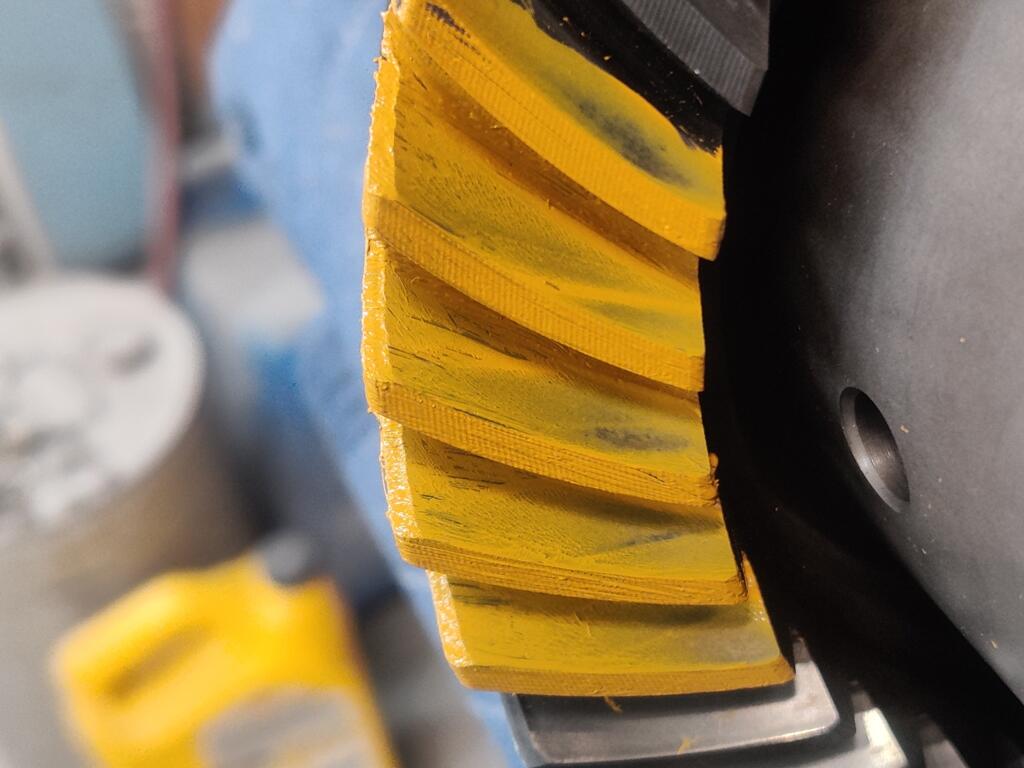
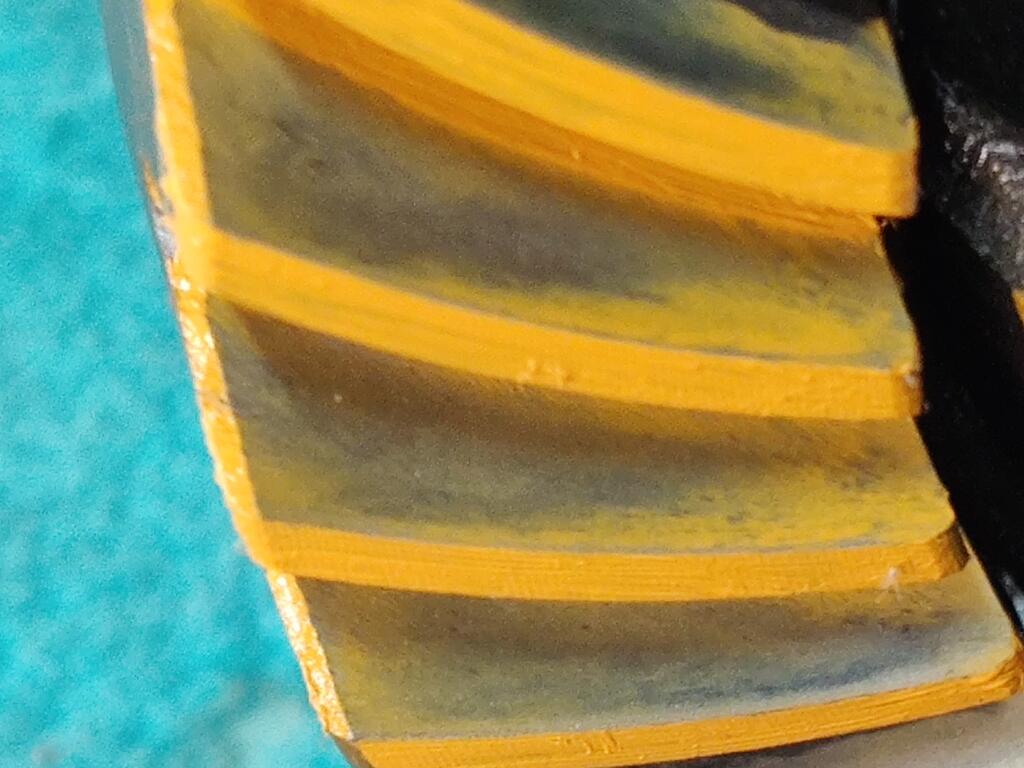
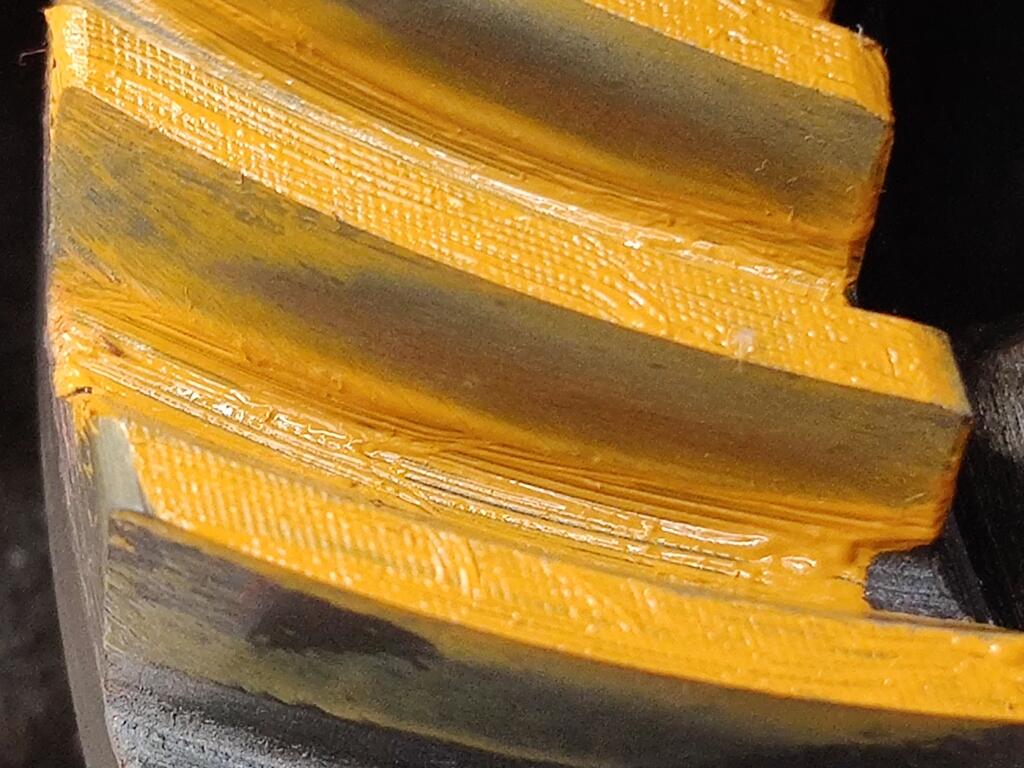
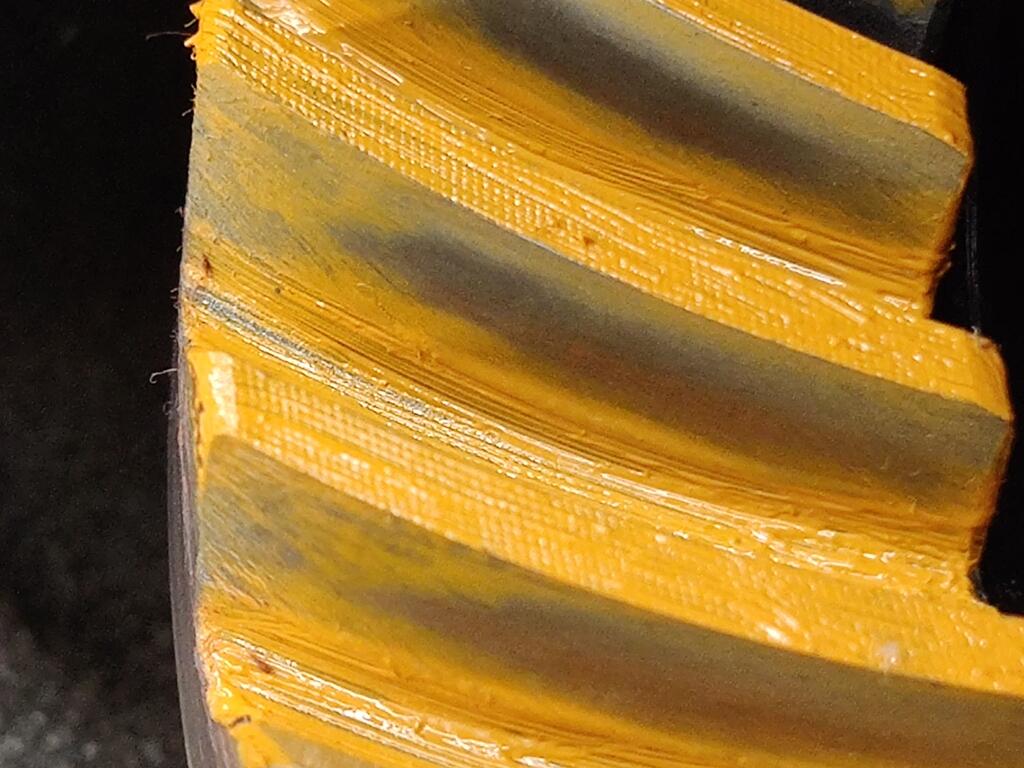
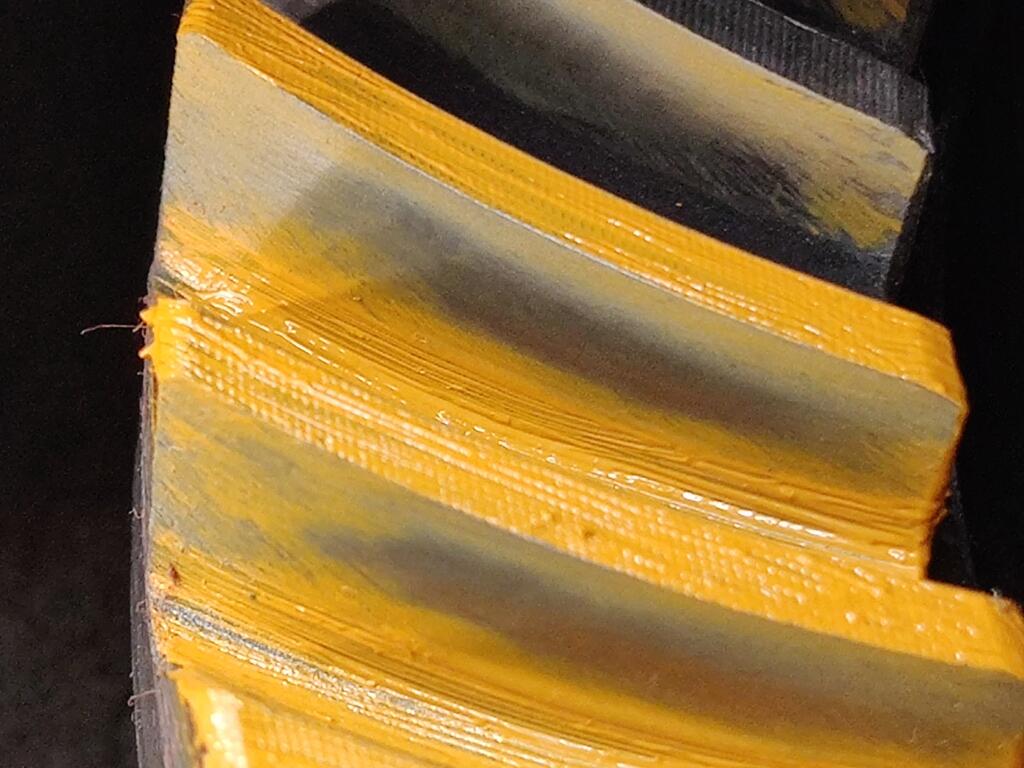
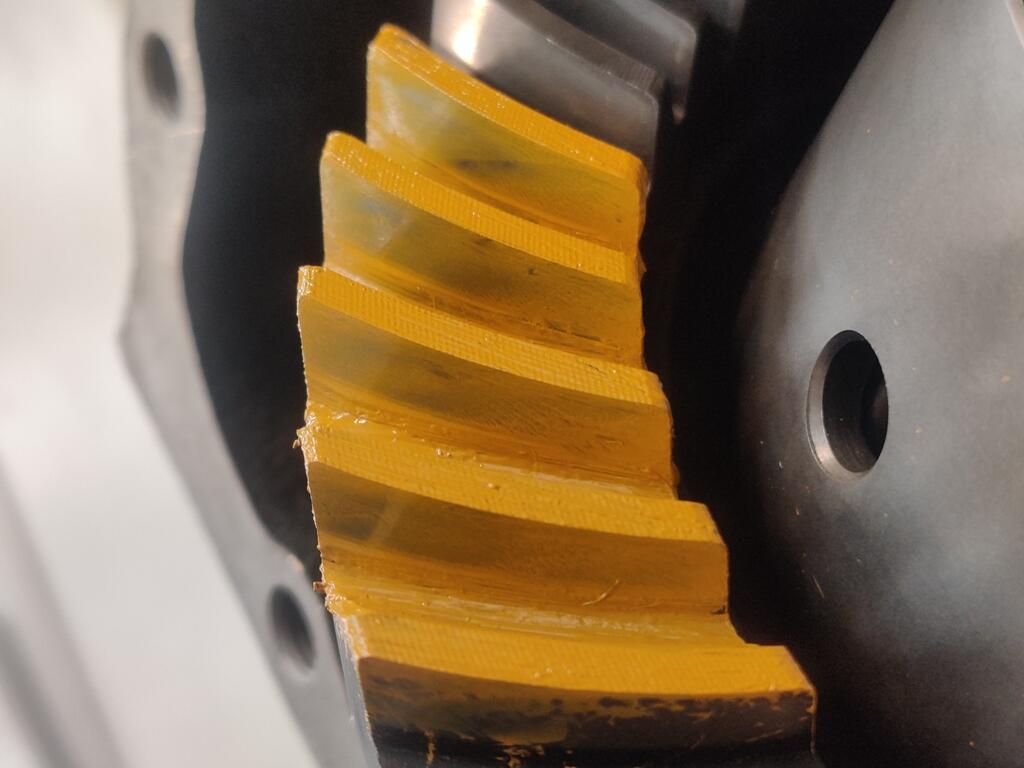
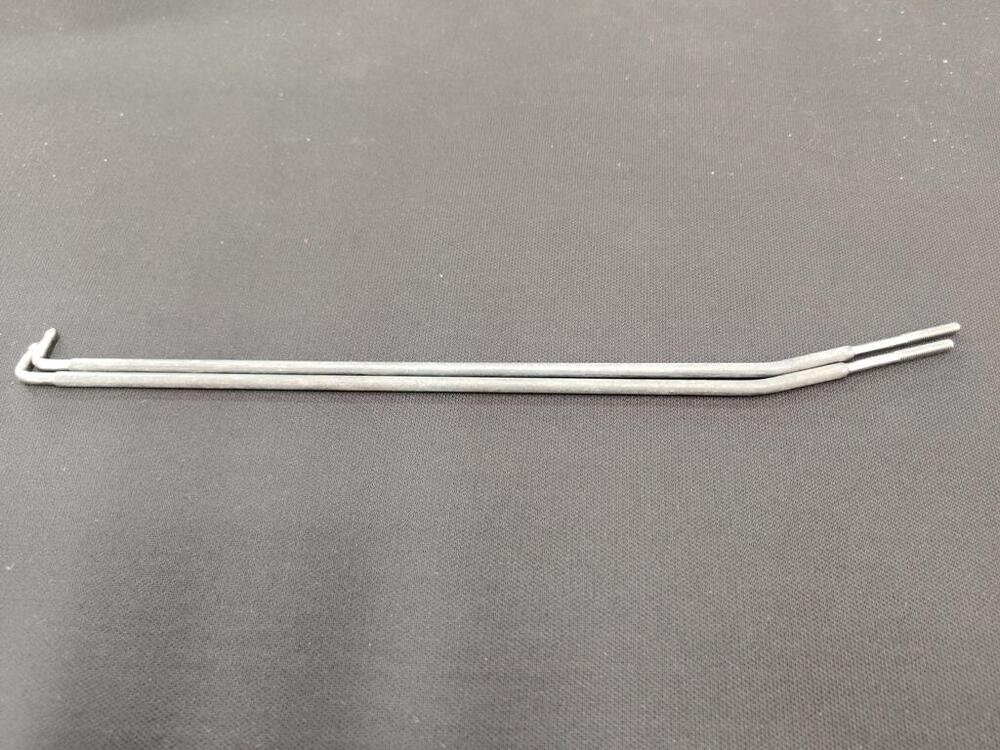
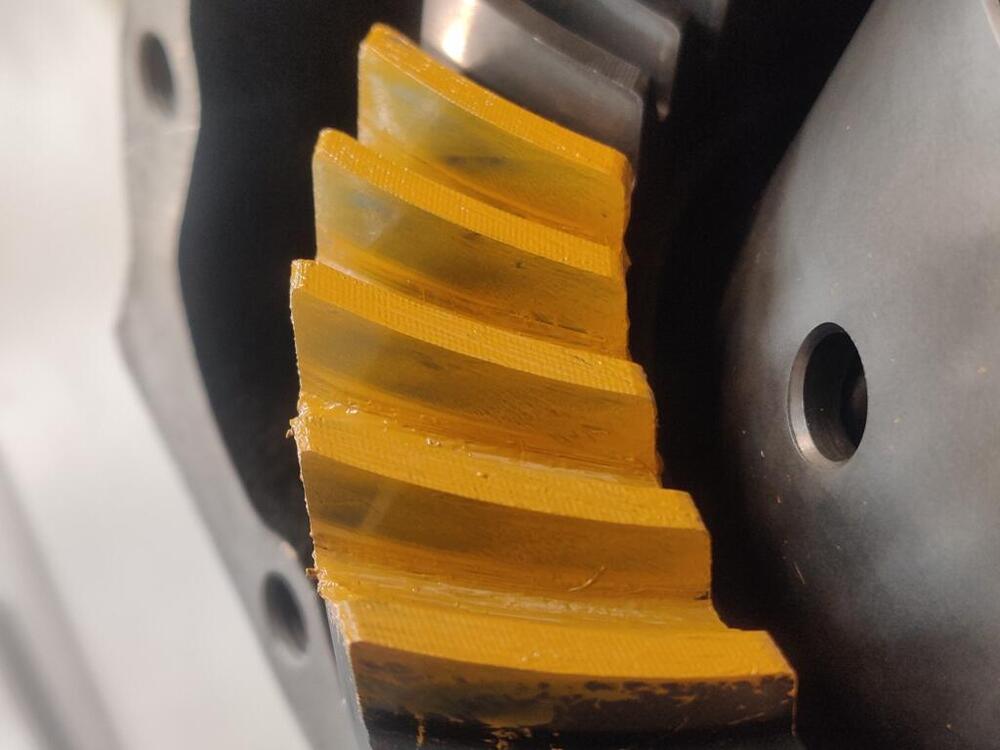
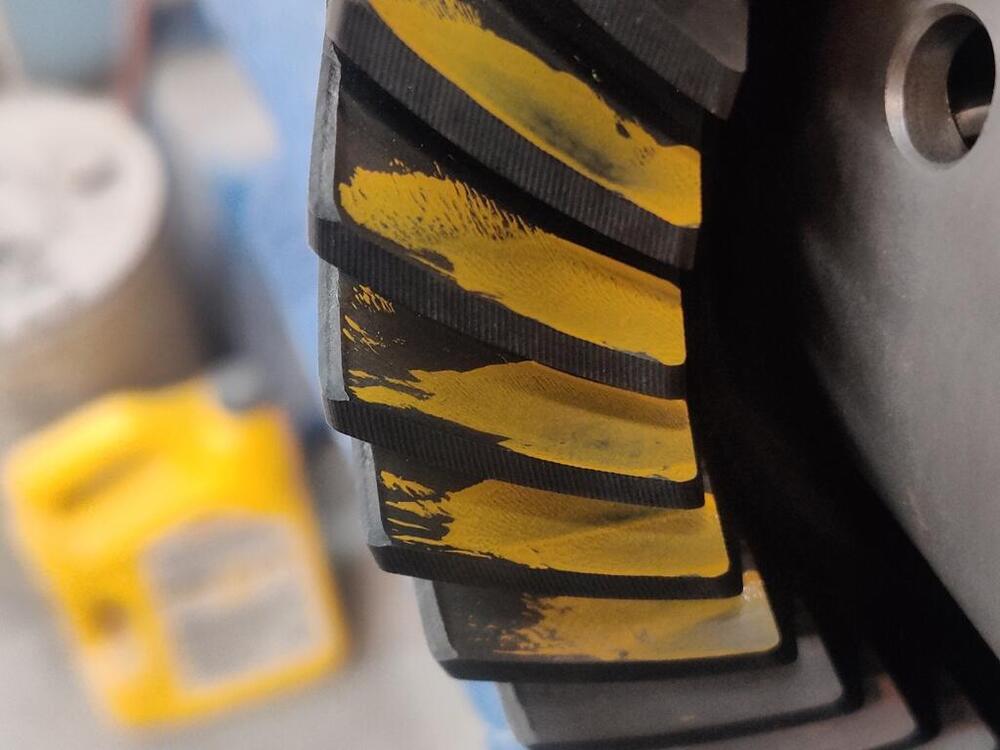
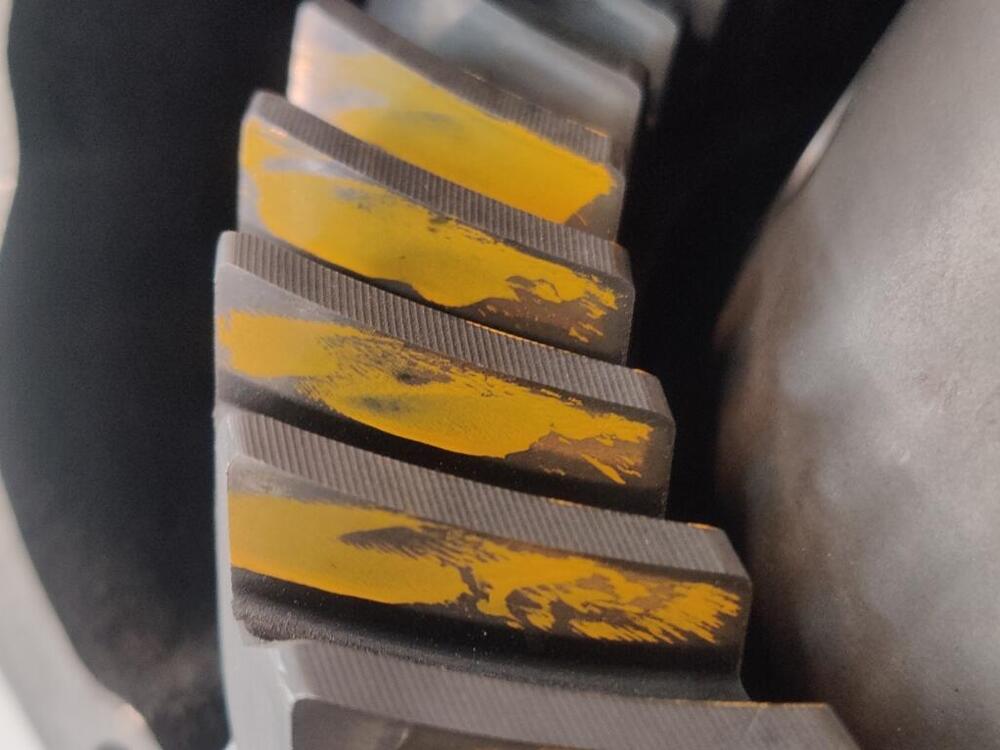
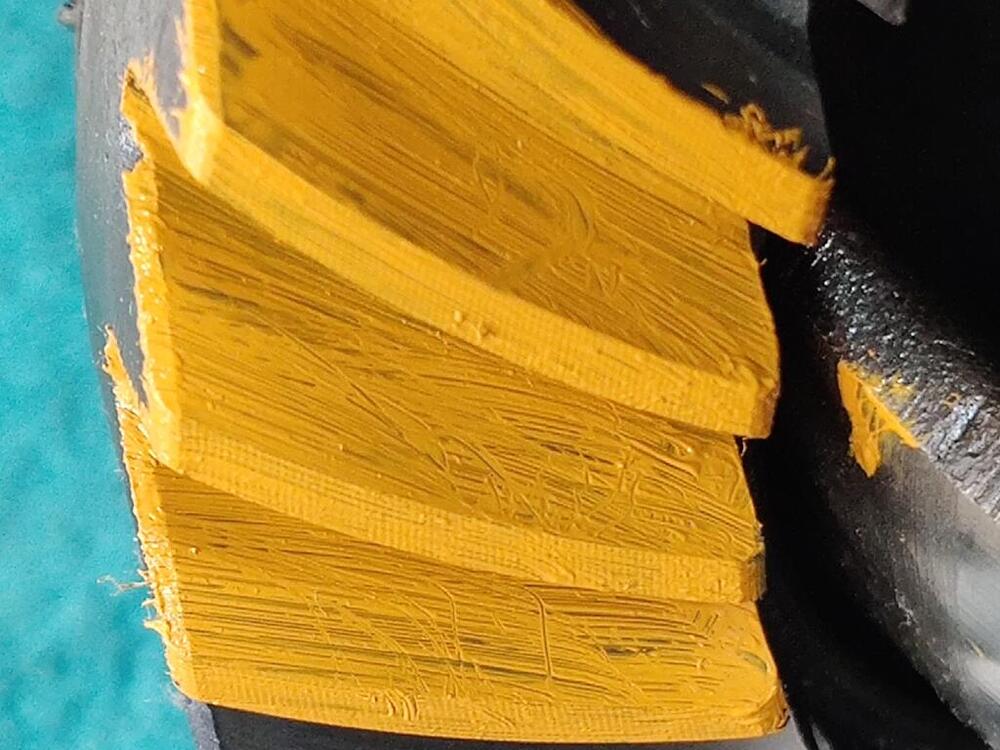
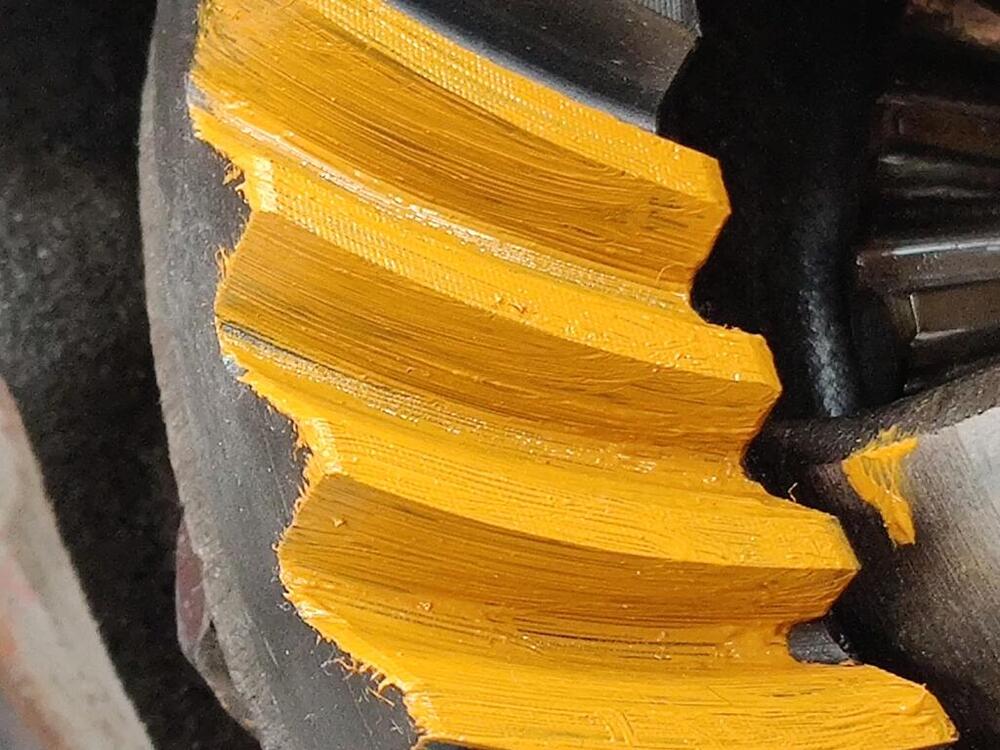
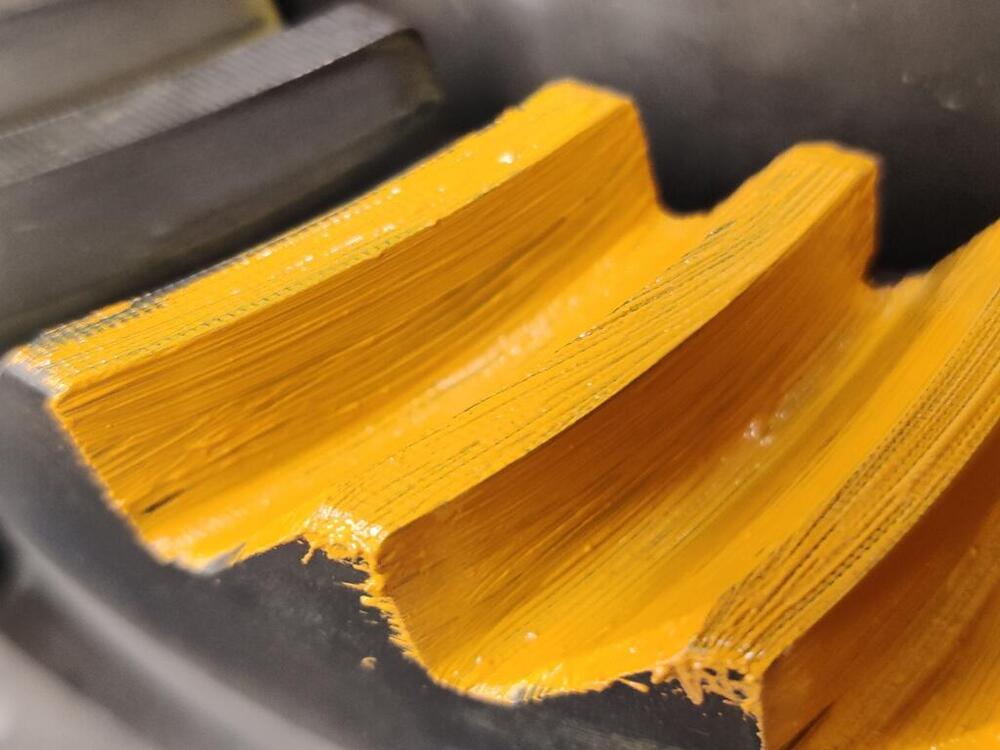
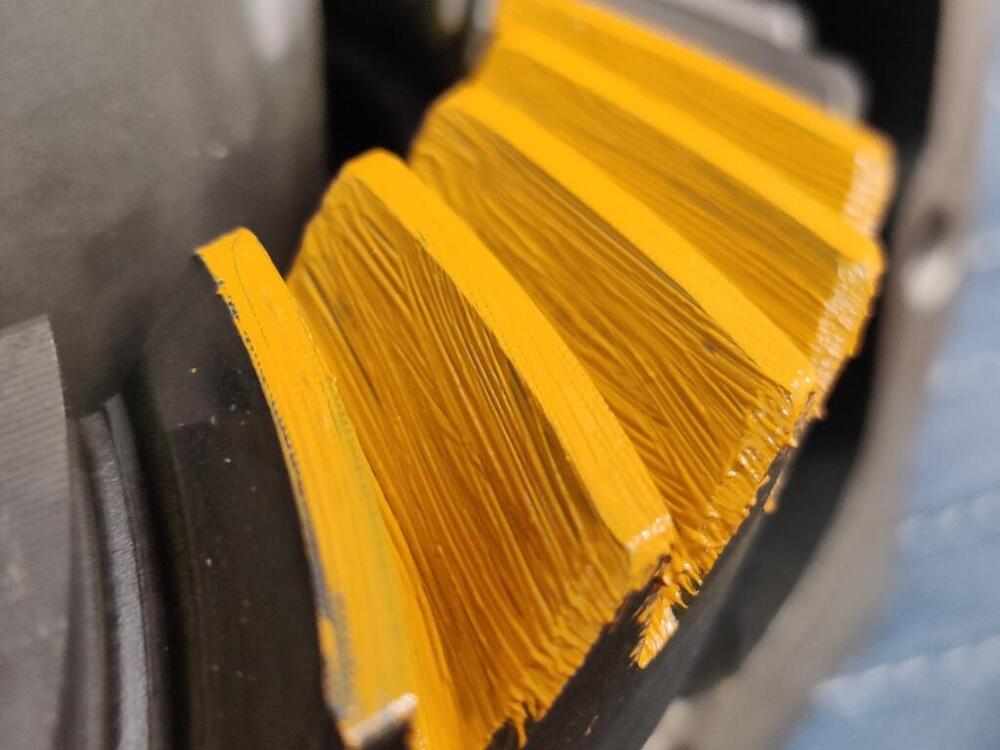
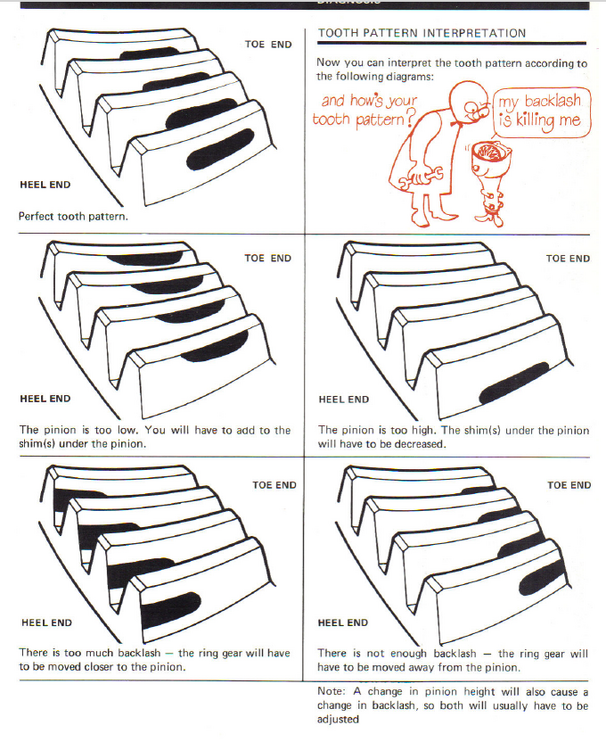
I've been staring at my posts and pictures for hours. I watched some more Youtube videos. Going to jot down my thoughts and sleep on it. The wipe patterns I have been getting are not right. They have a sharp edge on the bottom. They are too far down into the base of the tooth. The contact area should be larger. It should be centered, both between the base and top of the tooth, as well as centered between the heel and toe of the tooth. Drive side matters most. So, I need to center the contact on the drive side. I have been chasing too hard after the backlash. By adding pinion shim thickness, I have been able to reduce backlash, but I sacrificed pinion to crown gear alignment. The pinion is now too "high". I will have to reduce the thickness of the pinion shim. My first wipe patterns- I believe these resulted with the .126" pinion shim and the side shims in their original locations - which means this was with about .020" of backlash, and I hadn't figured out that I had to put some drag on the carrier to make the wipe impression more defined: No hard edges... and what appears to be much more surface area of contact. Same set up, but teeth that were not painted, but received paint transfer: Again, no drag applied to the carrier to help the impression. .020" backlash is too much... for sure. I'd like to try putting the .126" shim back in and moving the side shims to the right side... and doing a wipe pattern while applying drag on the carrier. If the wipe pattern is similar to the above in that the surface area of contact is larger... that will be good. Unfortunately, I will not have any further backlash adjustment. At that point, to tighten the lash, I will need to explore using shim stock between the crown gear and the Quaife carrier assembly.

-
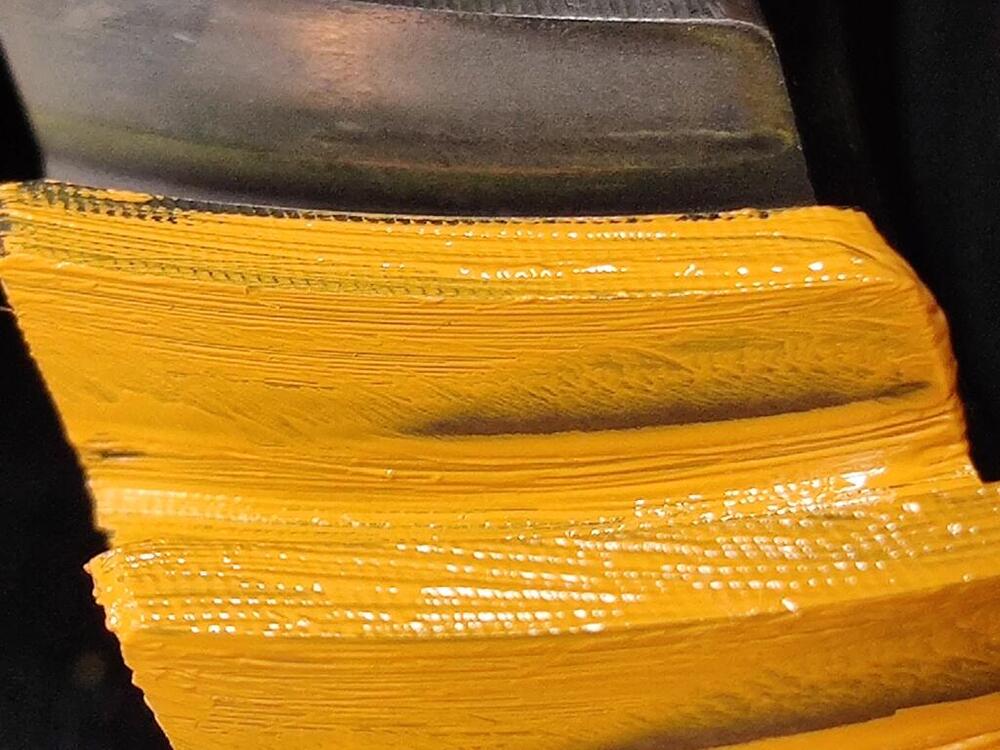
I thought about it some. Since I have a stock differential, I thought I would get a wipe pattern from it to compare. I measured backlash at just under .010". This is a few thousandths more than specification. These are very different. The size of the surface area where the paint is displaced is much larger. These pics look more like my first effort to get a wipe pattern with just the .126" shim in place where I had way too much backlash: I am kind of lost now as to how to proceed. I am going to run back through pics from prior efforts and stew on this.


-
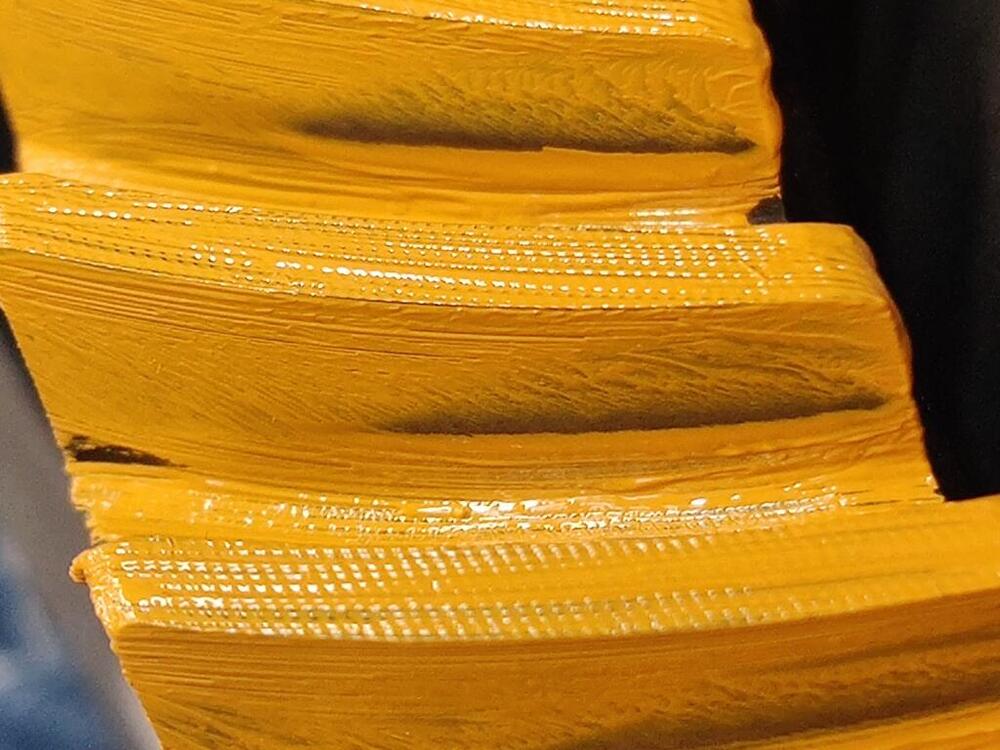
I put in a custom made shim today. Instead of .126" thick, this one is .151" thick. So, this custom one is .025" thicker. Where the original side shims were a .3 mm on the left and a .4 mm plus a .5 mm on the right, now I have a .2 mm on the left and two .5 mm on the right. The backlash before I took the differential apart was .005". The backlash is now .0055" Here are pics of the wipe patterns: I actually don't know if these are good wipe patterns. I mean, I have seen these pictures in the Nissan differential service guide. But I don't know how closely the wipe patterns are supposed to match the illustrations, and for some reason the guide doesn't have illustrations for the coast side:


-
Are you still making these @240Ziggy?
-
Looks like the one I bought from Rebello years ago.
-
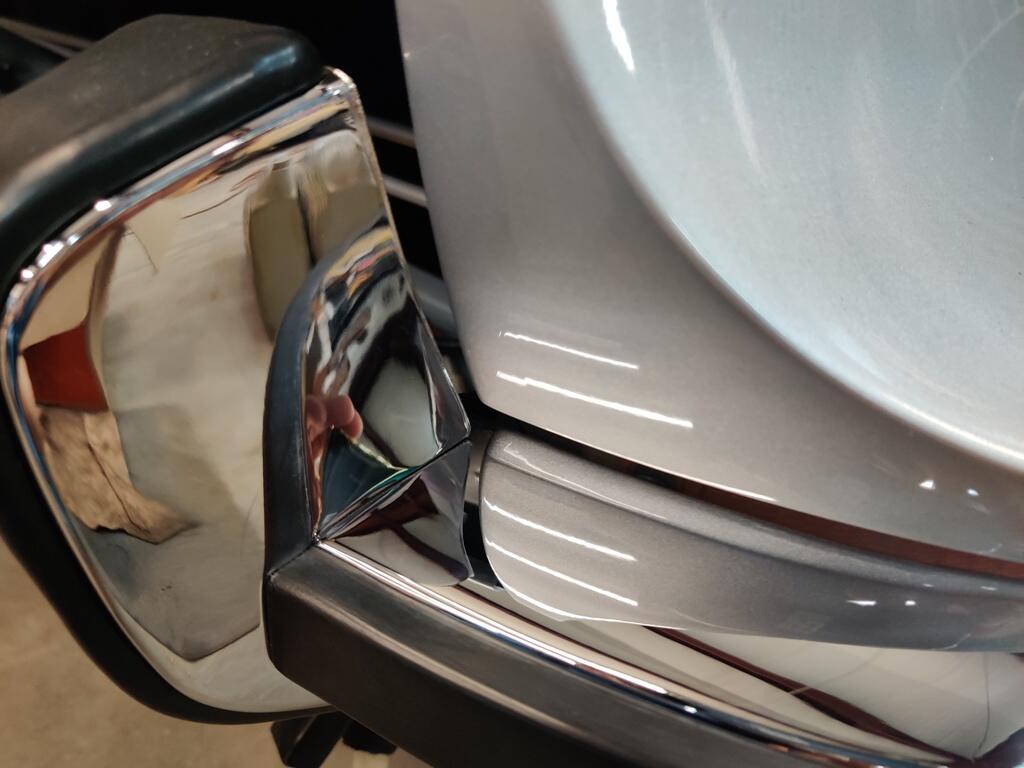
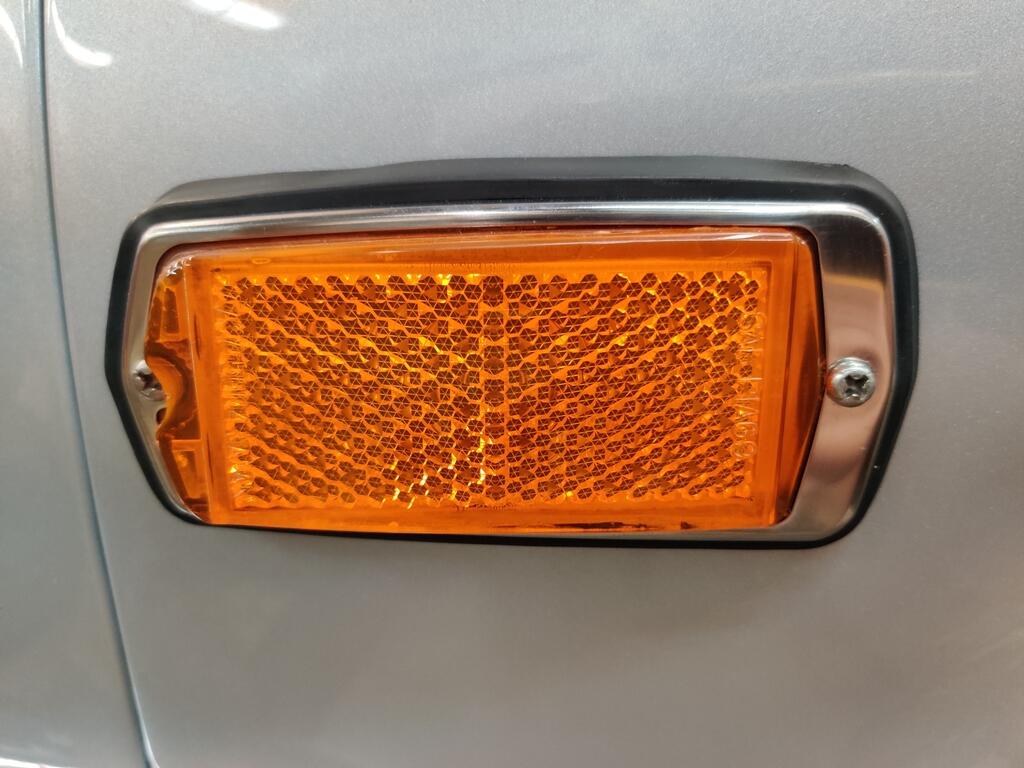
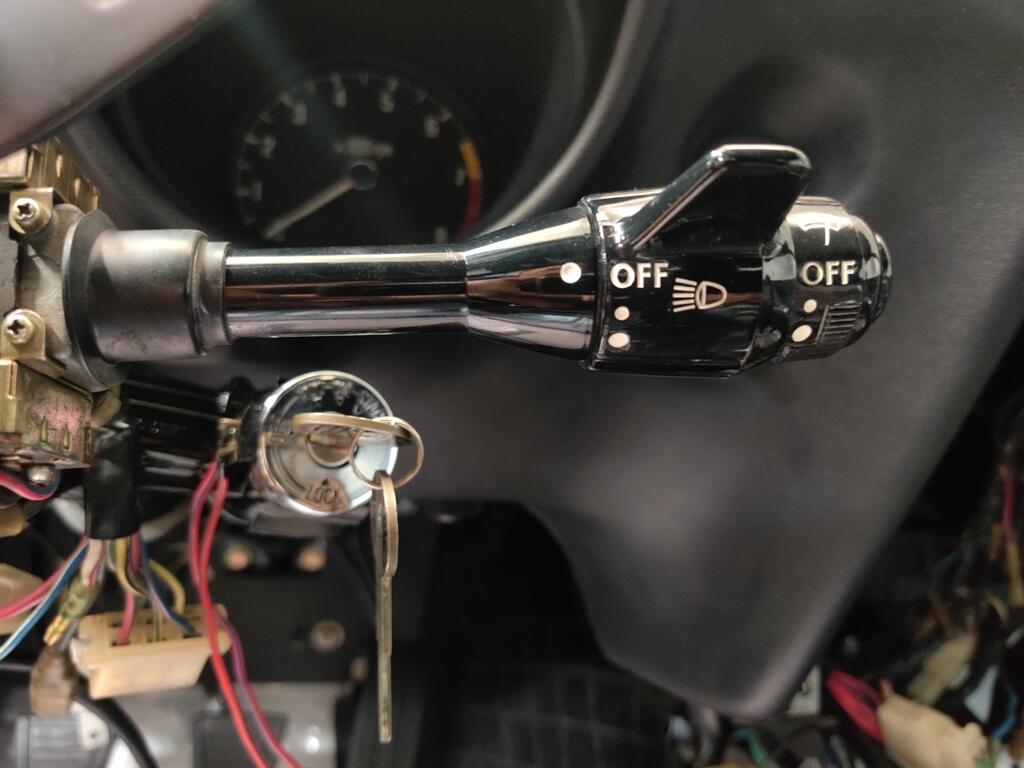
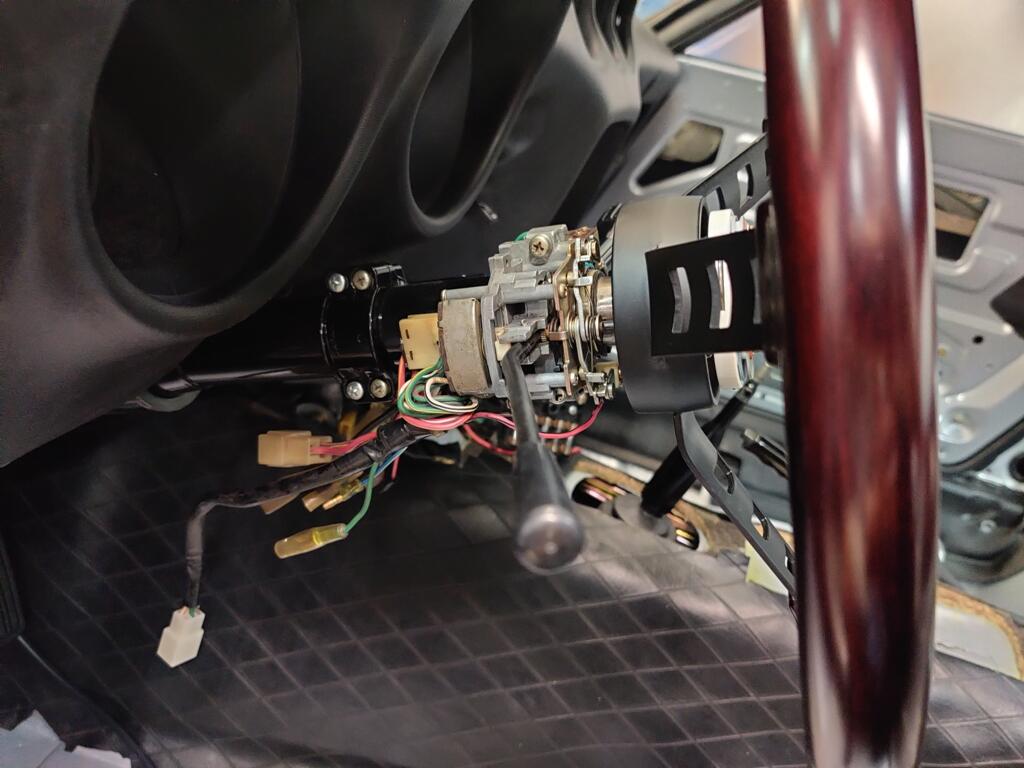
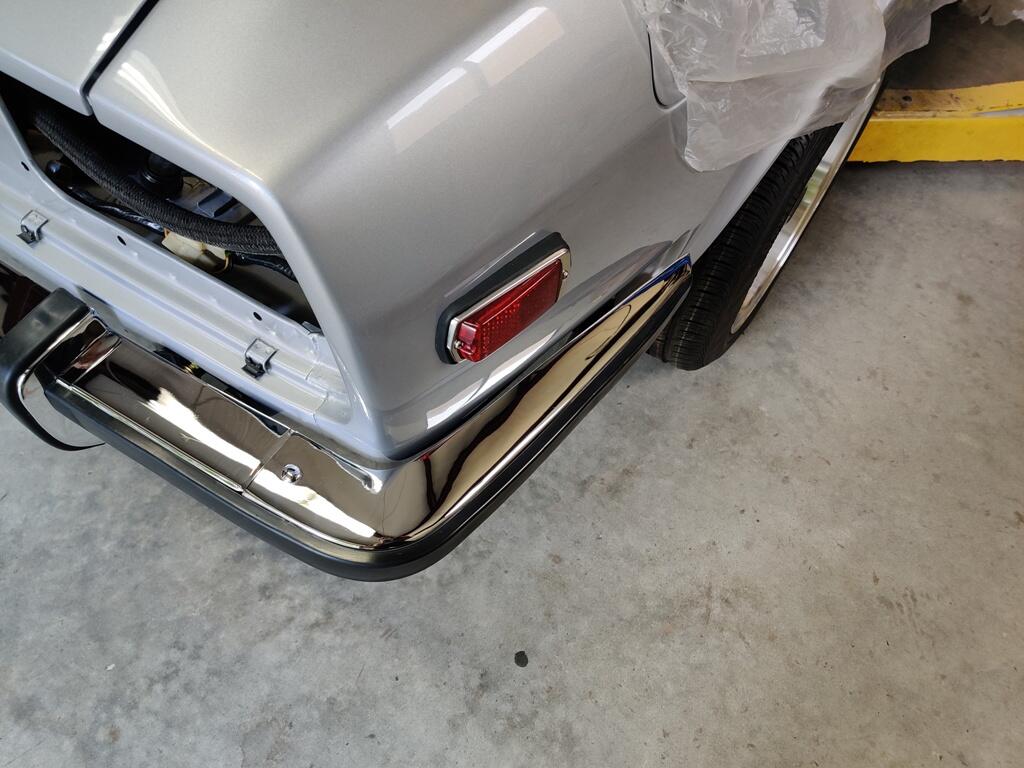
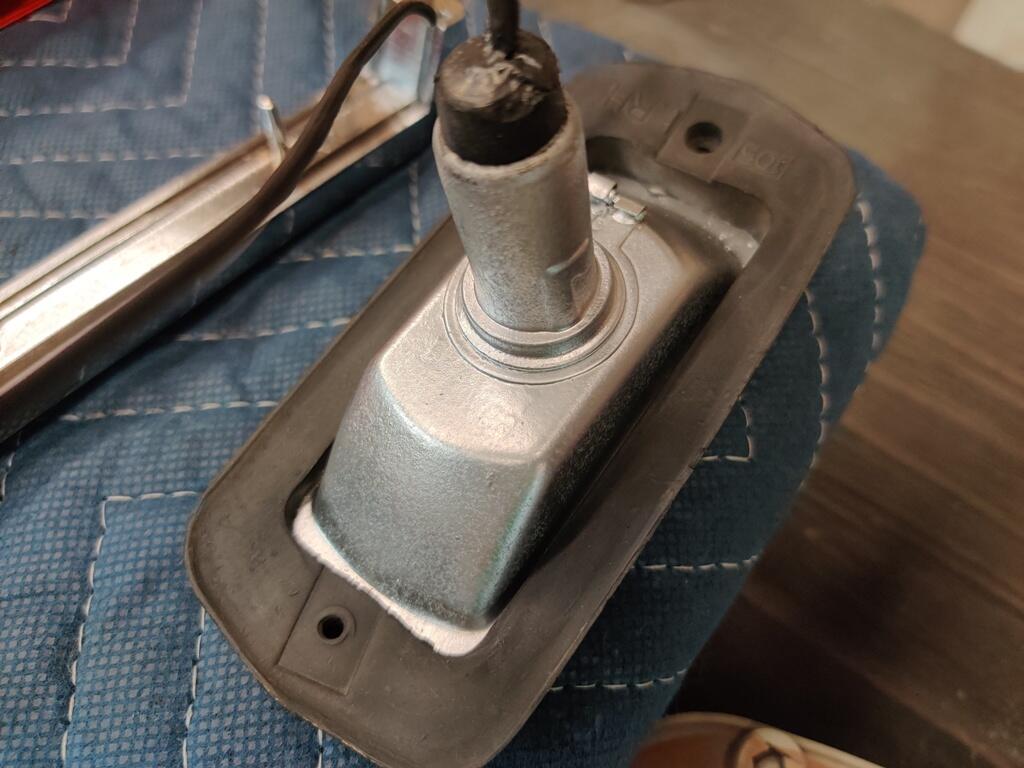
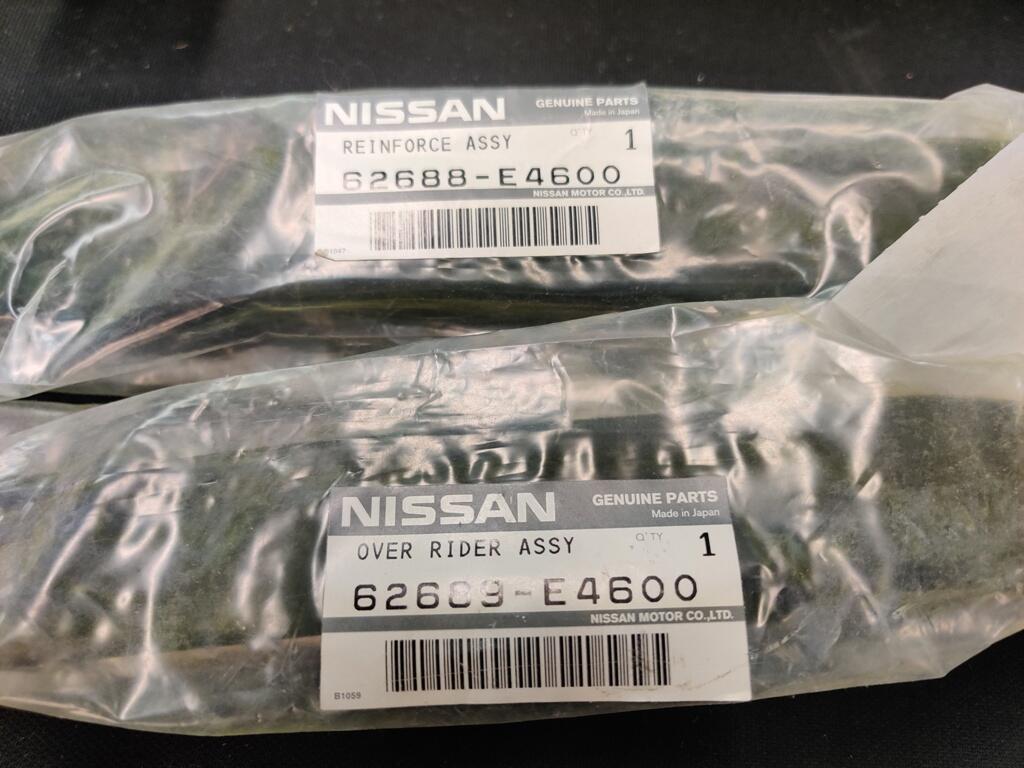
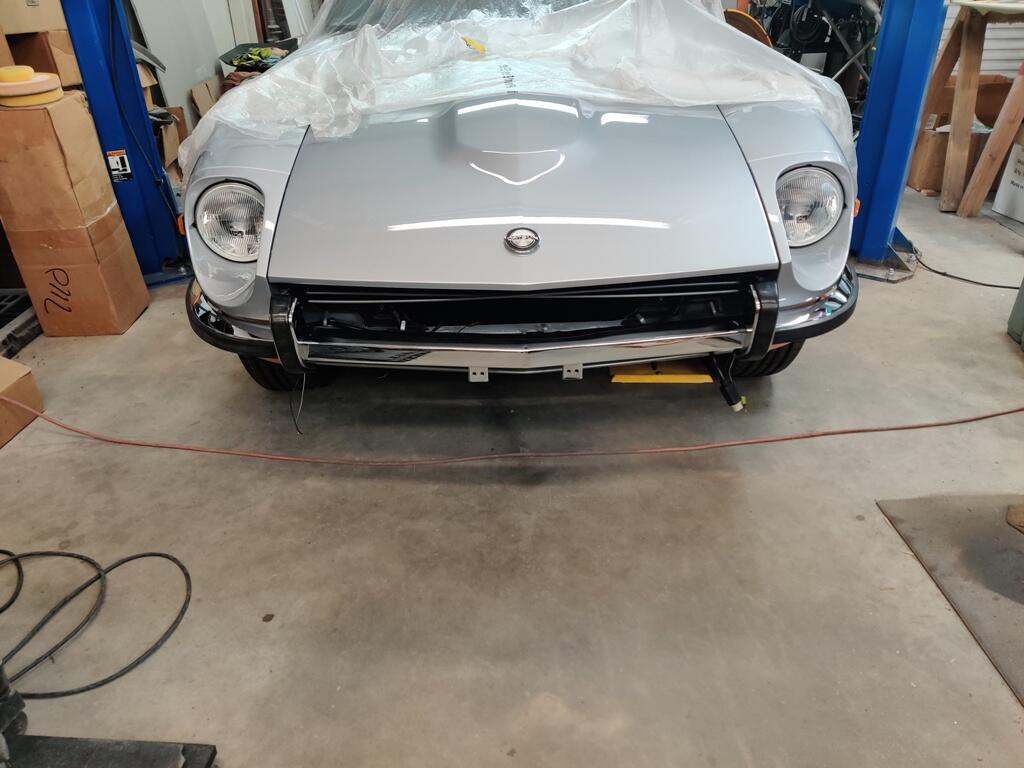
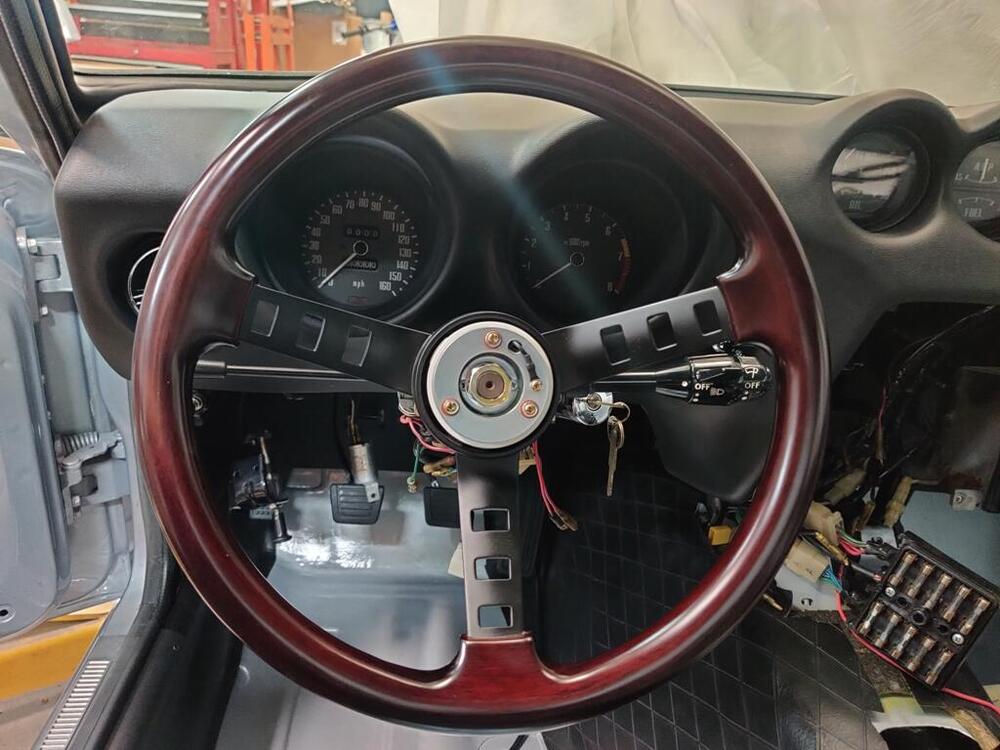
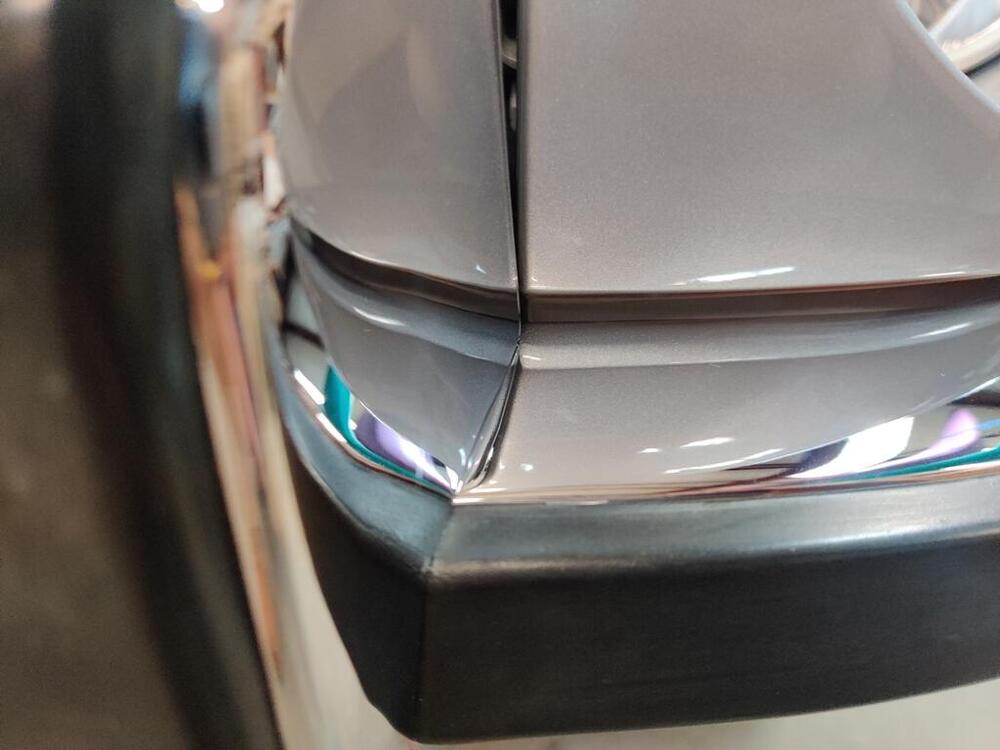
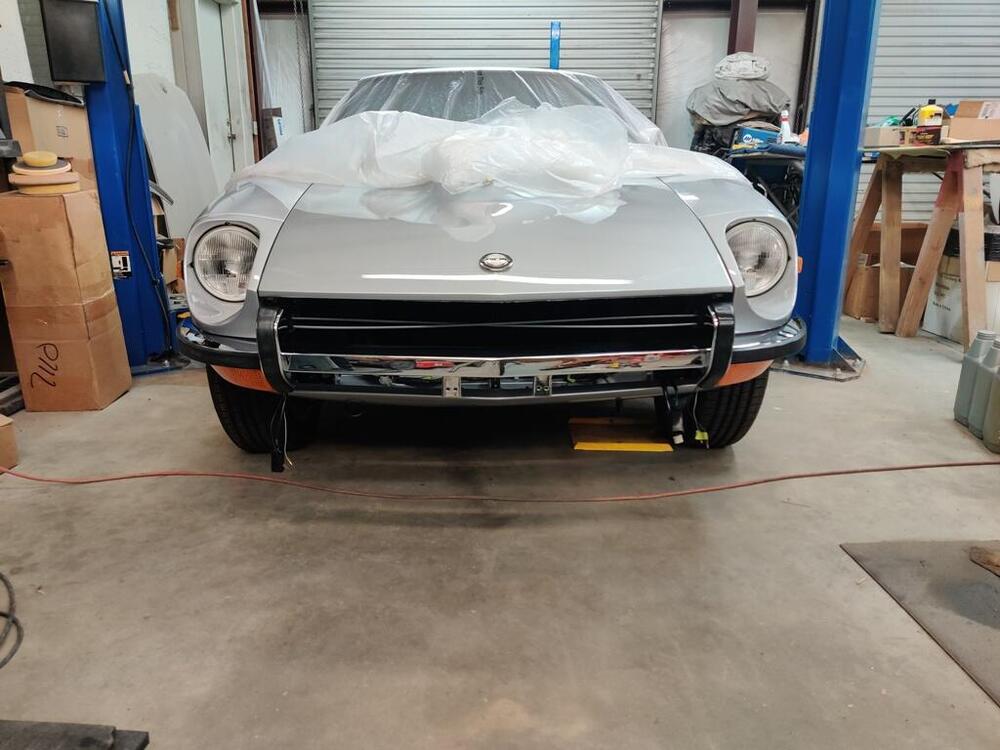
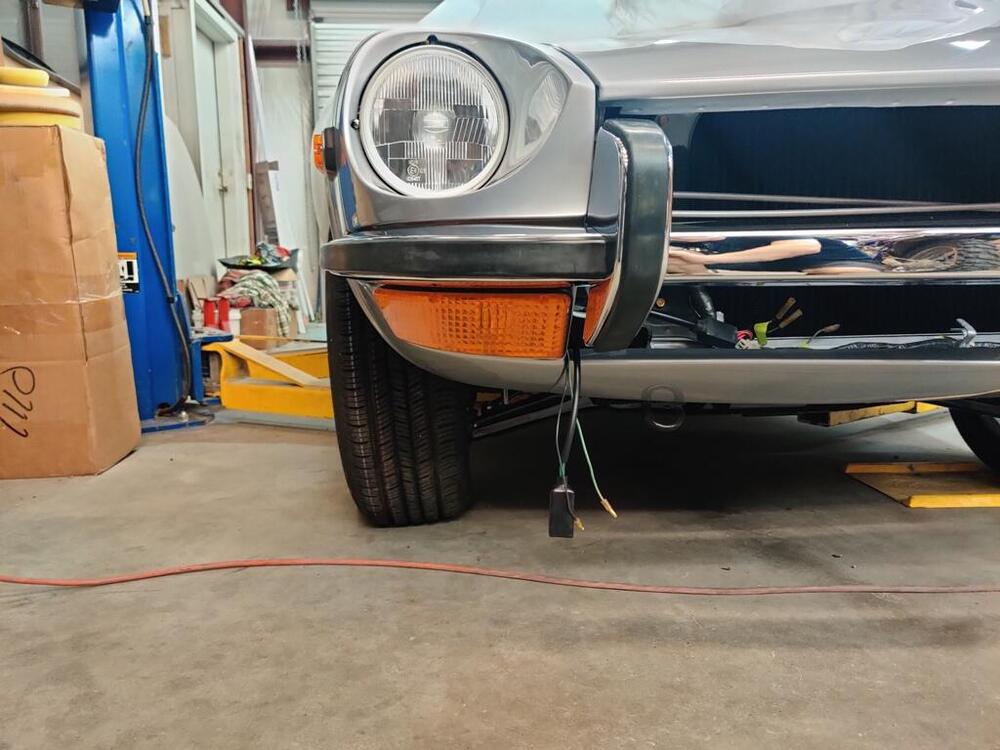
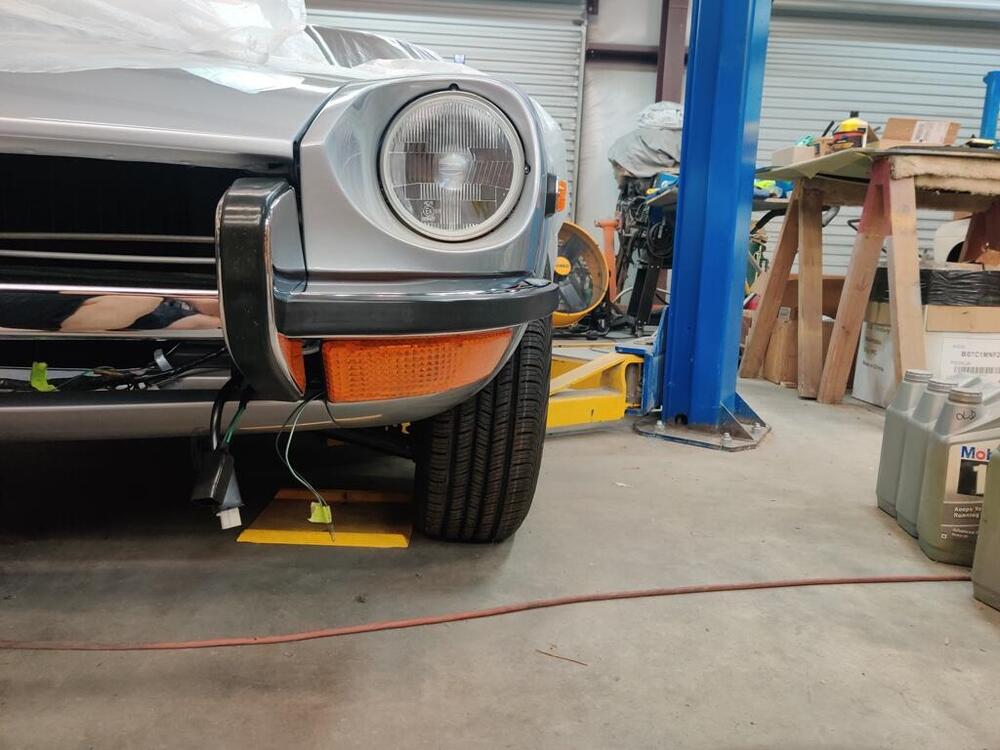
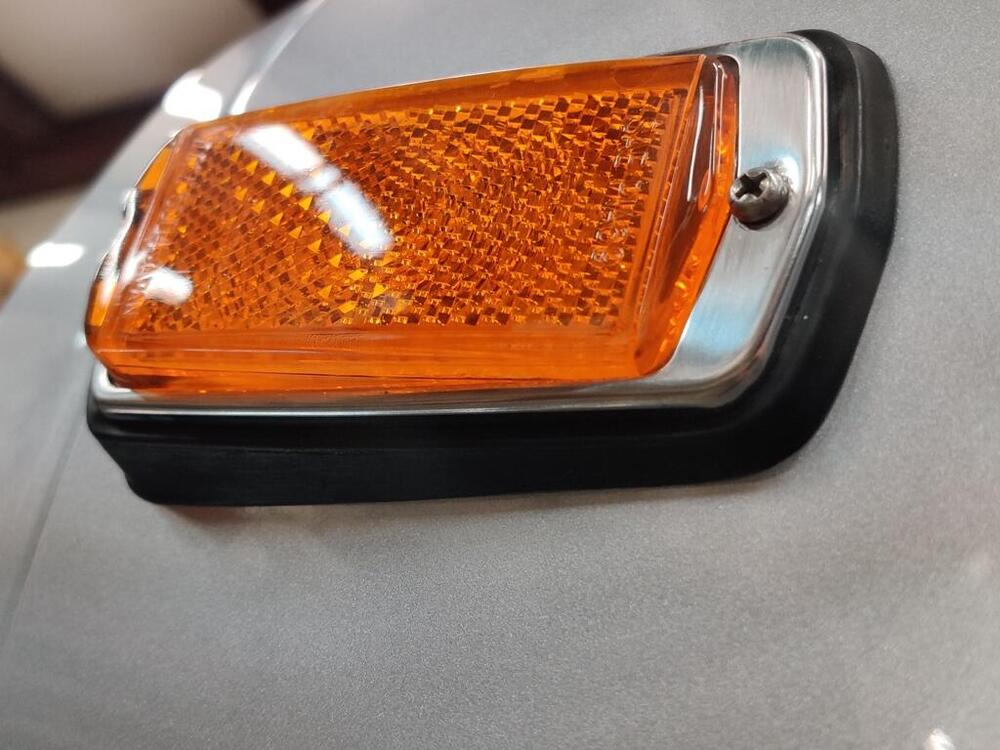
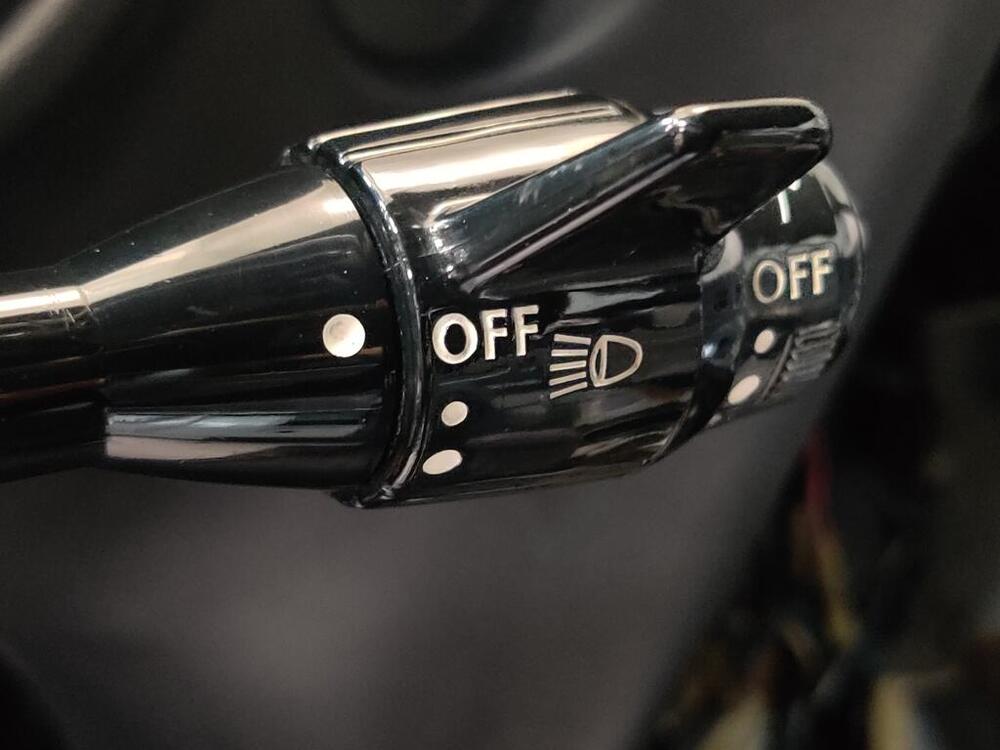
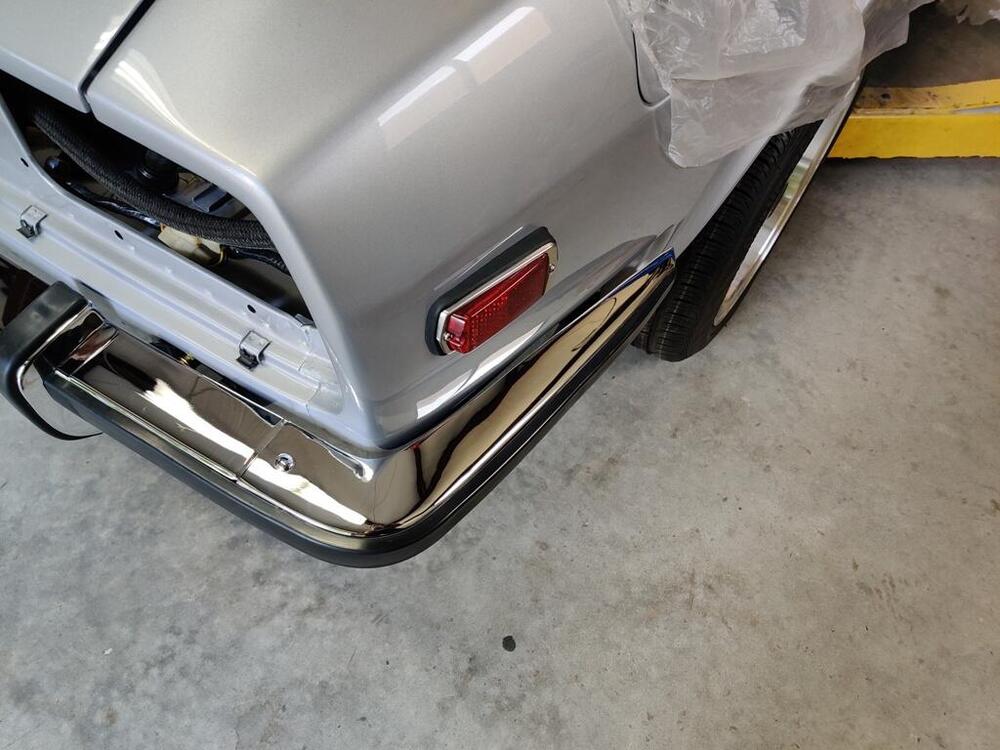
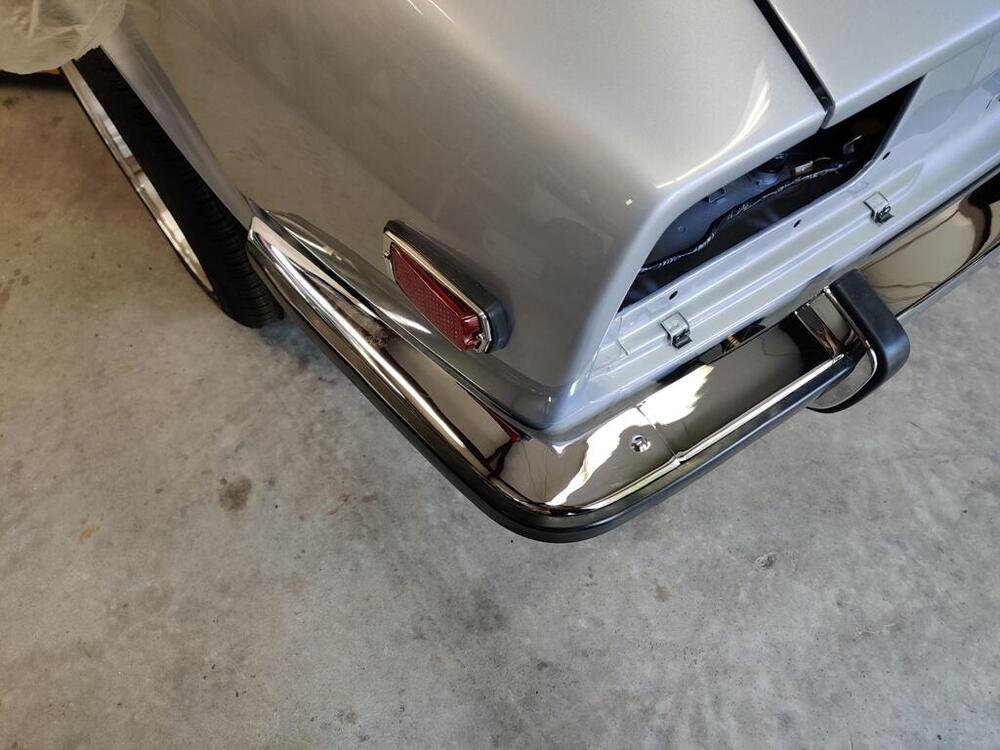
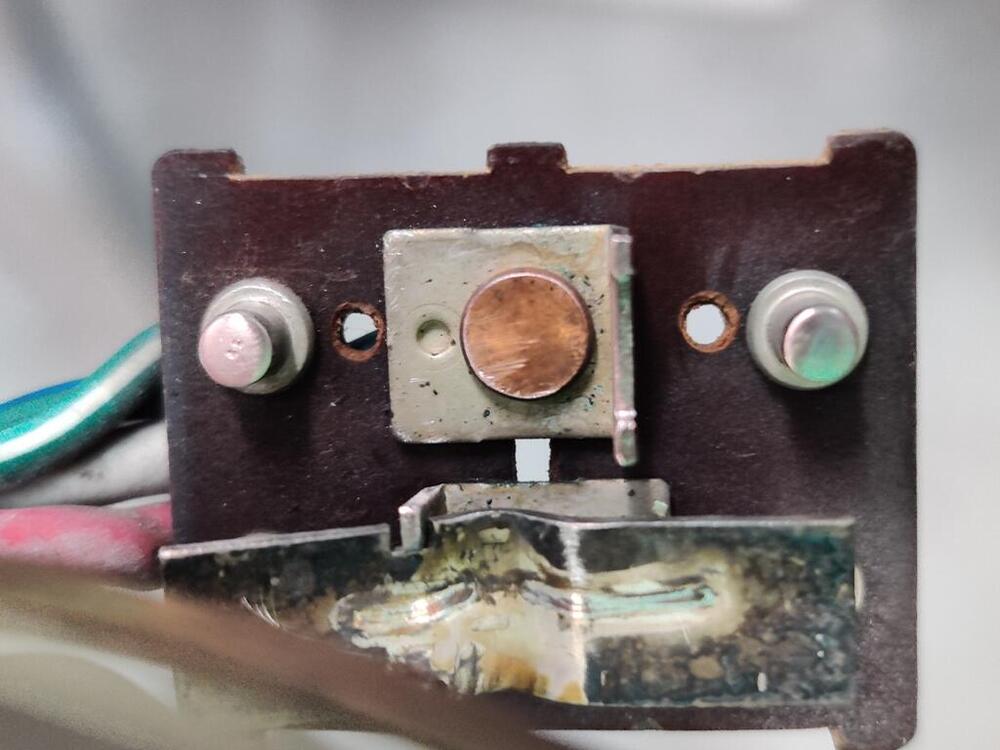
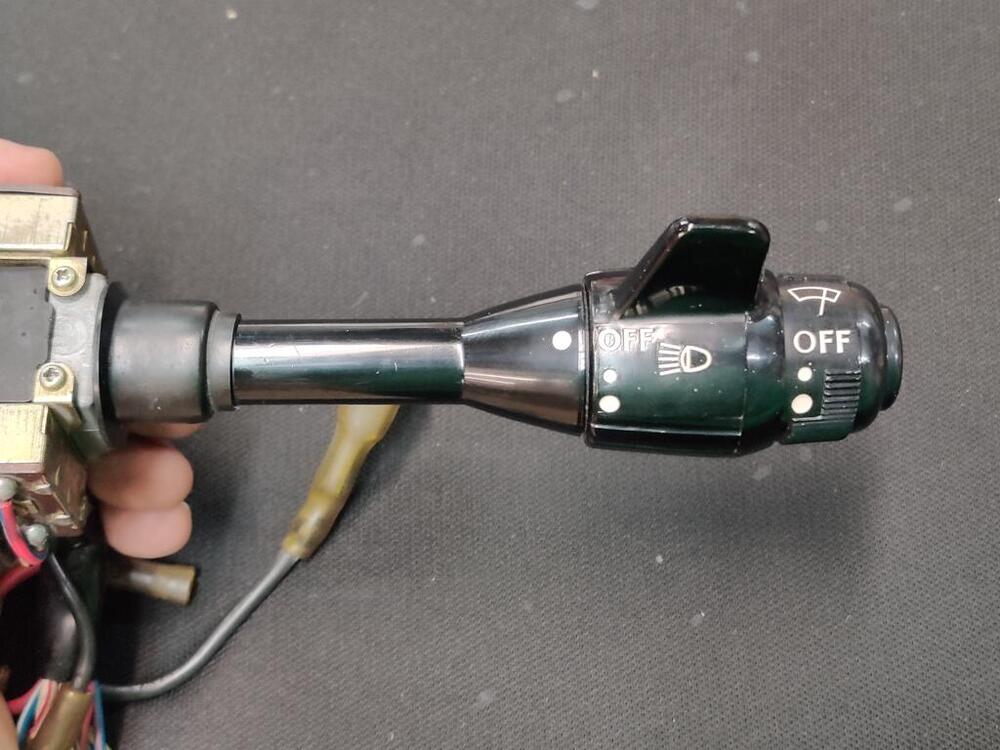
The front bumper is now fully fitted. One thing that is odd to me is how the over riders fit. The natural fitted position of these is such that a minor tap is likely going to push them into contact the fiberglass head light buckets. I've only taken the time to look at pictures of a couple other 240z's and it seems to me that the correct fit aligns these just inside the grill opening. I also am unsure what the correct depth of mounting the bumper is. I have room to slide it out a tad if that is more correct. The way I have it now, the closest part of the over rider to the body is at about 1/4". When setting the bumper height, I went for an even amount of space above the front turn lamp and below the body recess in the headlight bucket - "centered" in the recessed area: I like the replica competition steering wheel. It is a little smaller in diameter than the original, which I like. And it has a thicker grip diameter, which is nice also. However, it has less dish (so less depth). Without a seat to sit in, I can't tell if that will be an issue. I don't want there to be an ergonomics issue where hands and arms don't fit comfortably when my feet are the right distance to the pedals. Because it has less depth, the rim sits further away compared to the stock rim - I'd say about 1.5 inches less depth. And because of that, the turn signal stalk has to be bent back some. When I put the wheel in place, the end of the stalk was only about one and a quarter inches from the back of the rim. That is not enough clearance for free hand movement on the steering wheel. The distance between the stalk and the stock steering wheel is about 2 and 7/8" inches. I think after bending the stalk a bit, I have about 2". I will give that a try and adjust further if necessary. Replica competition wheel with wood rim... rebuilt headlight combination switch... cleaned and polished surfaces Turn signal stalk depth... cleaned and rebuilt turn signal switch assembly... Front side marker Front and rear side markers after cleaning polishing and installation


-
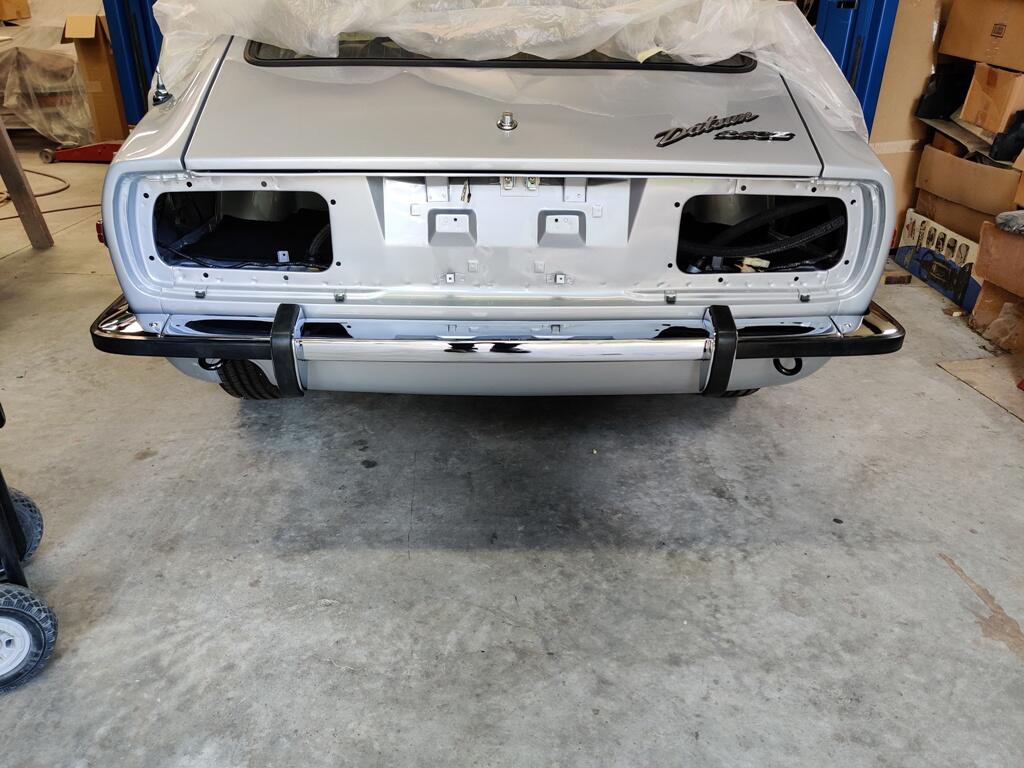
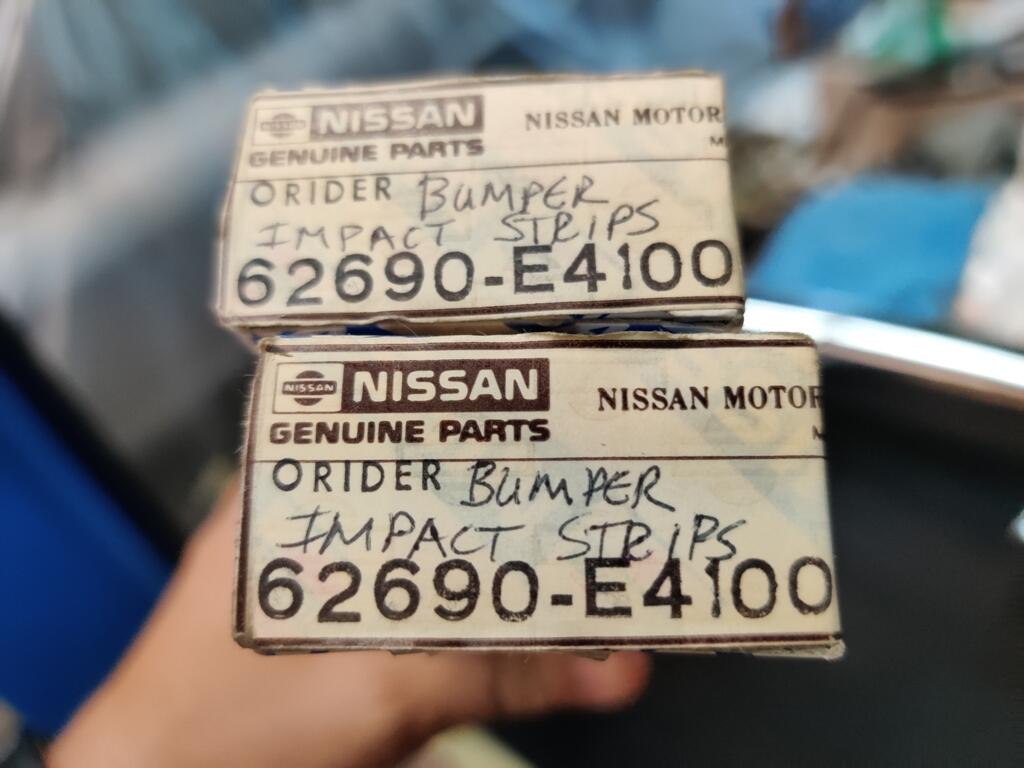
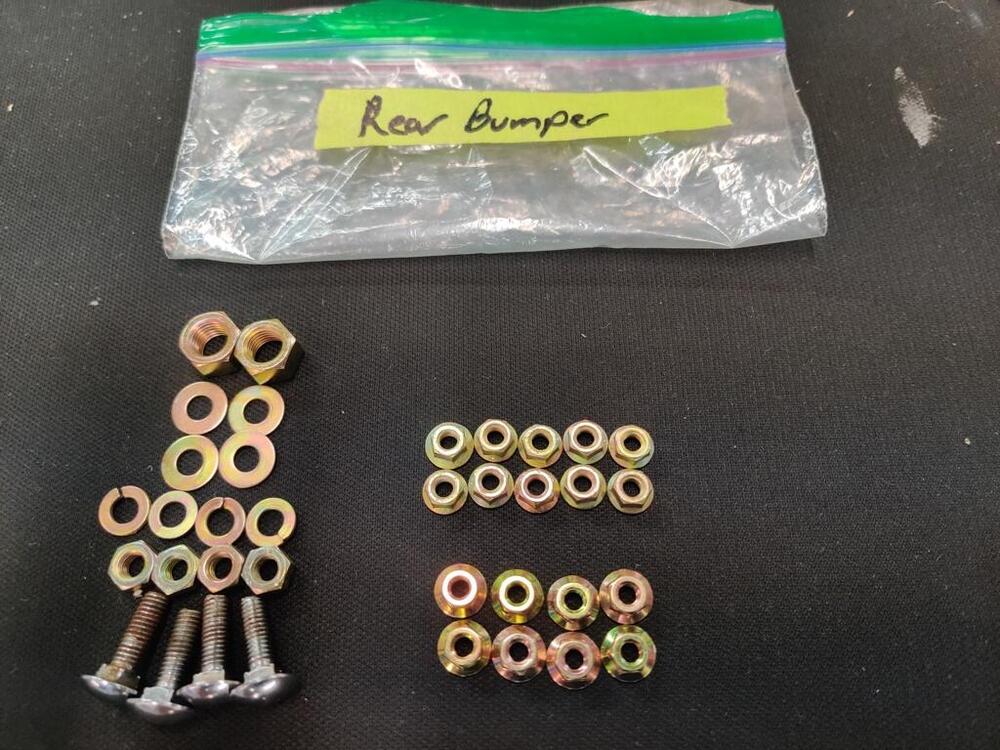
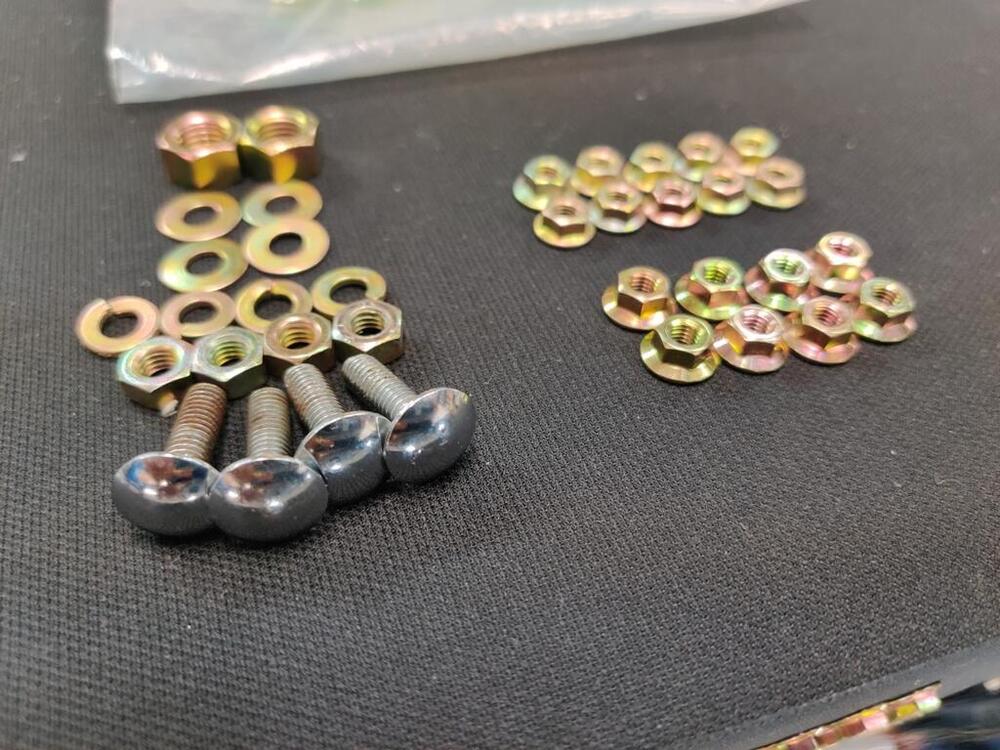
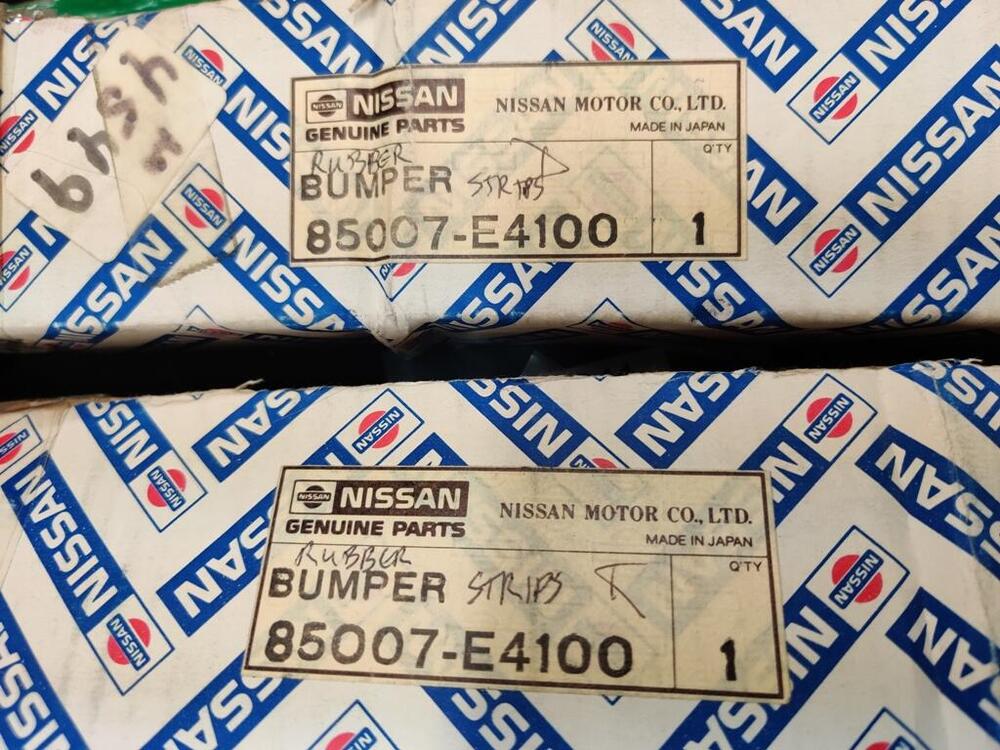
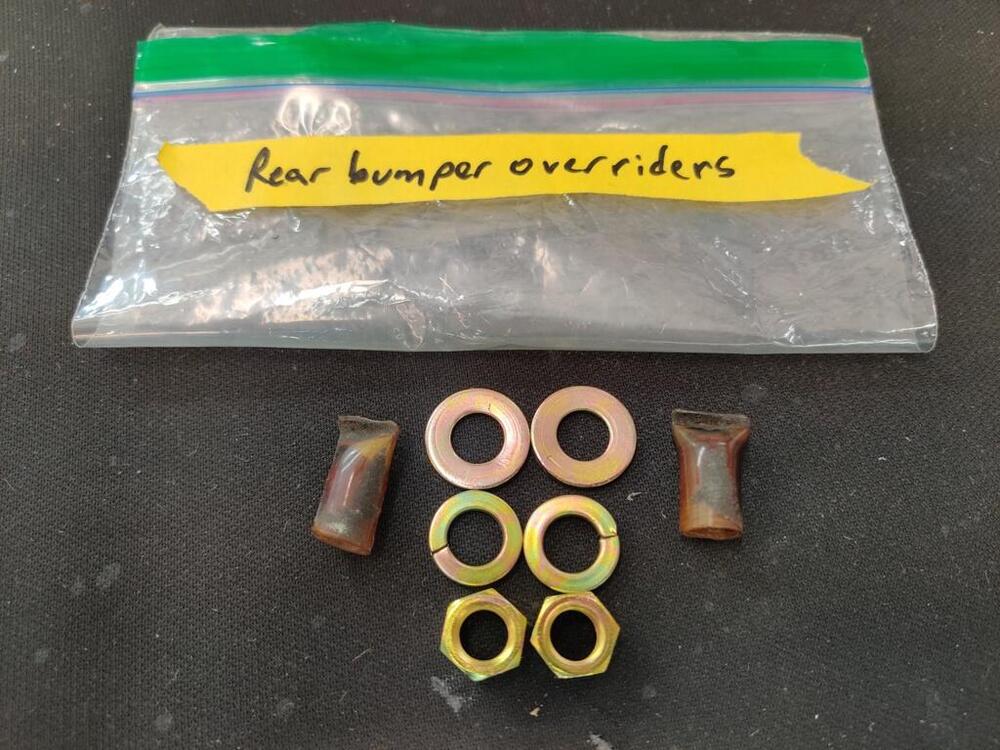
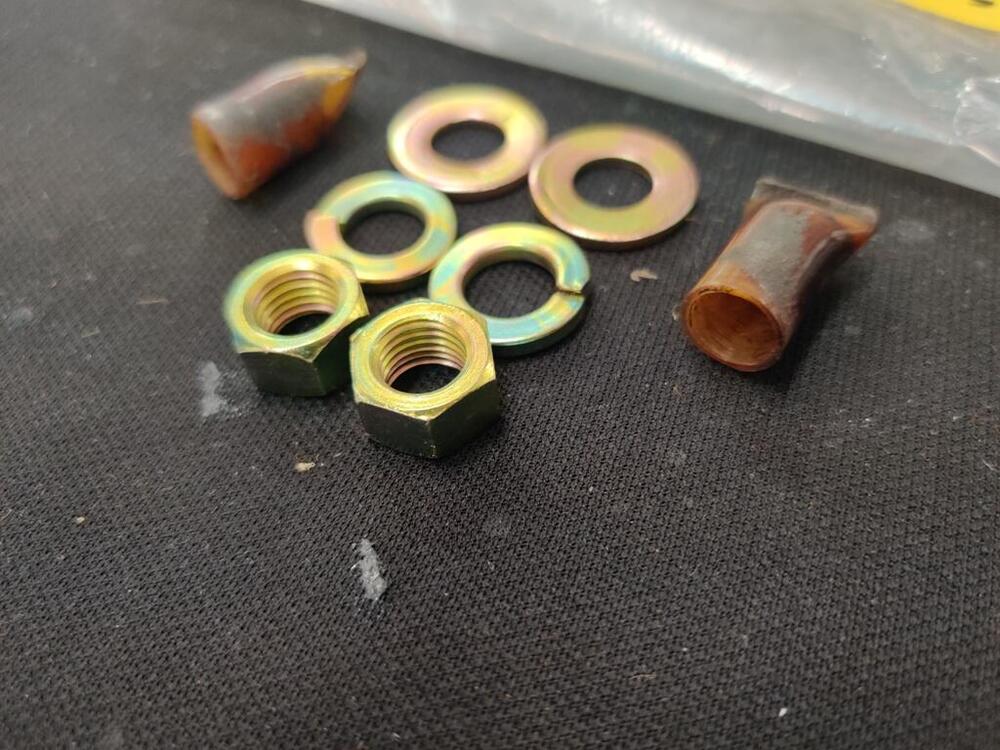
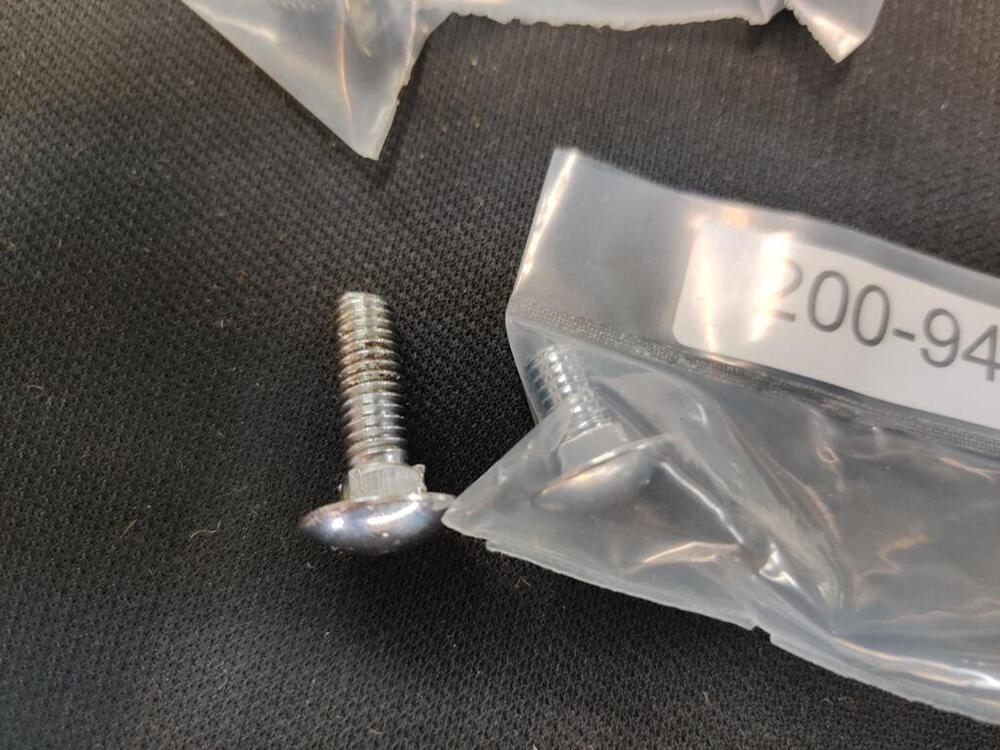
It took a lot of time to get the rear bumper together and on the car. On the backsides of the bumper ends and over riders, I used primer with zinc in it, and followed with a light layer of black. The backsides of these pieces were glass bead blasted before I sent them off. However, there is something about the plating process which causes rust/corrosion. It was very light, and only in a couple of spots, but I don't want it to be a foothold for more. So, hopefully the zinc primer and paint will keep further corrosion at bay. OEM chrome bumper bolts from the Z doctor were shorter than the originals (third pic here). That said, the originals are much longer than they need to be. I polished the originals a bit and reused them. Rubber strips for the over riders are aftermarket - some of the few parts on this car that are not genuine OEM parts.


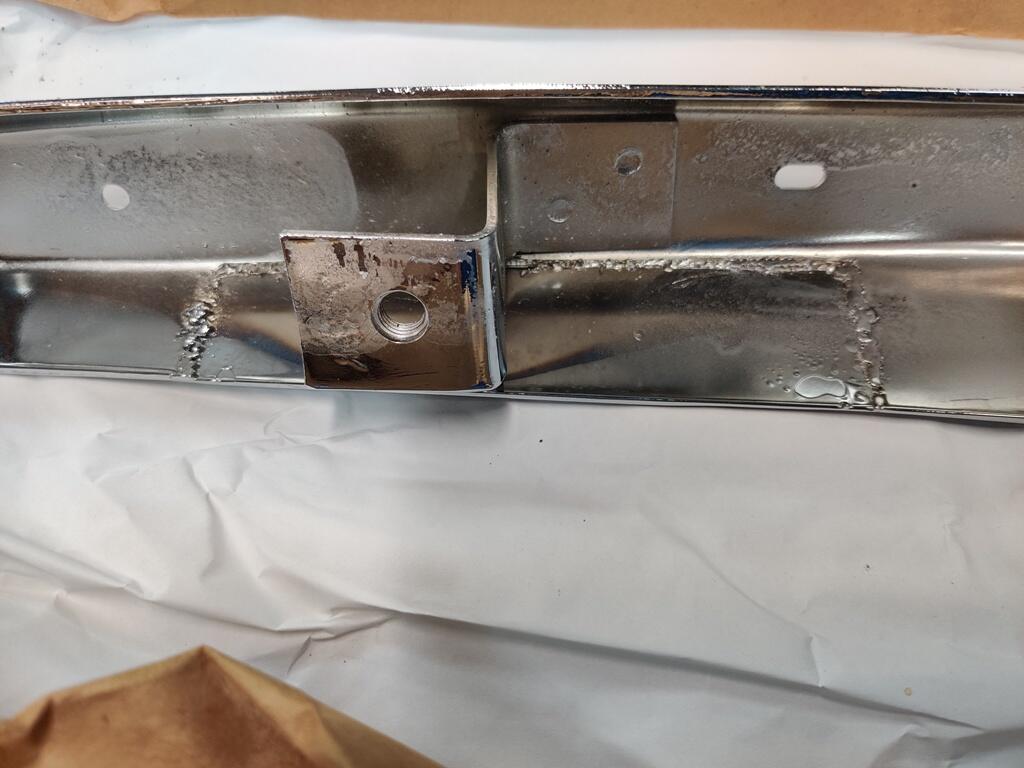
-
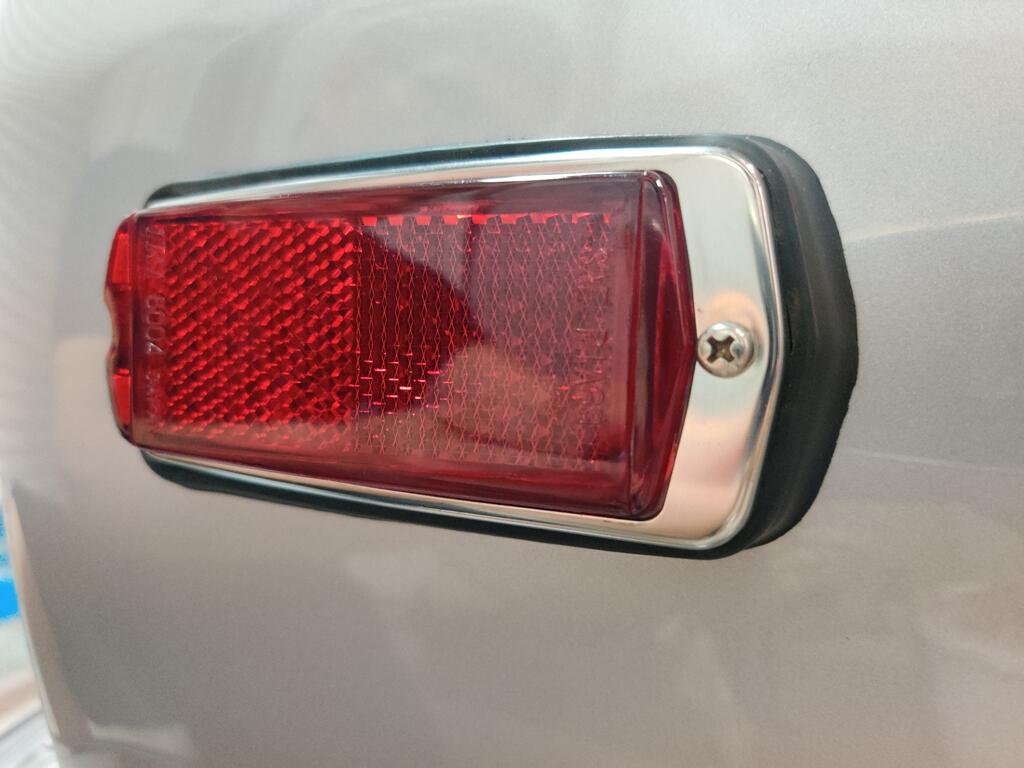
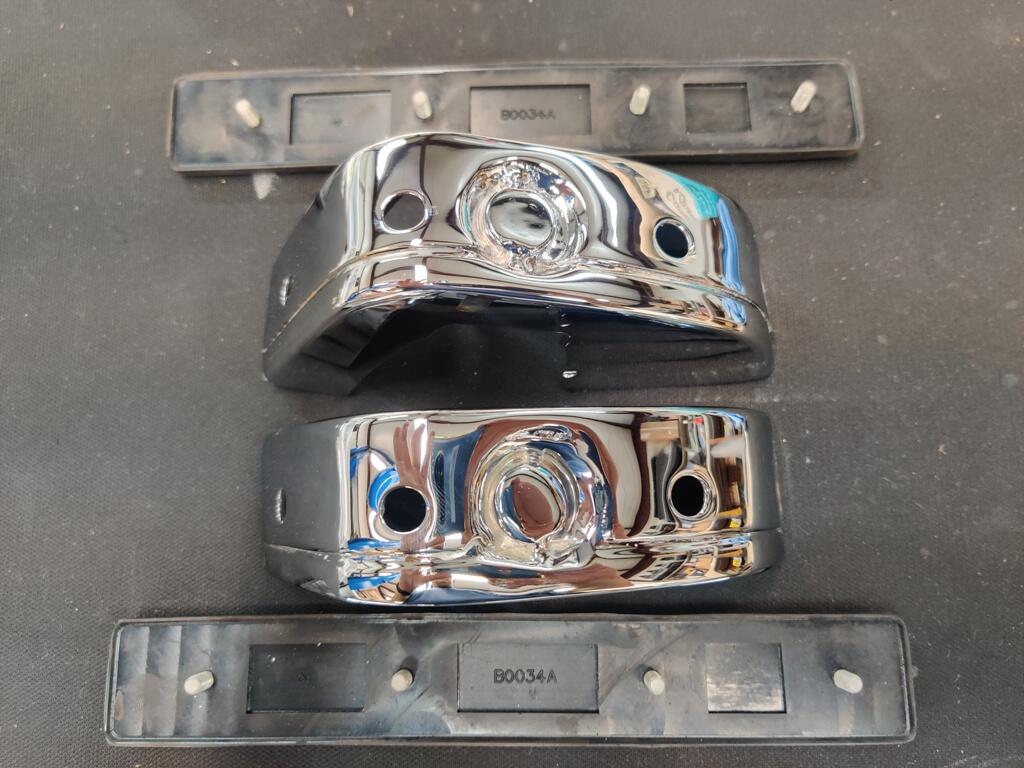
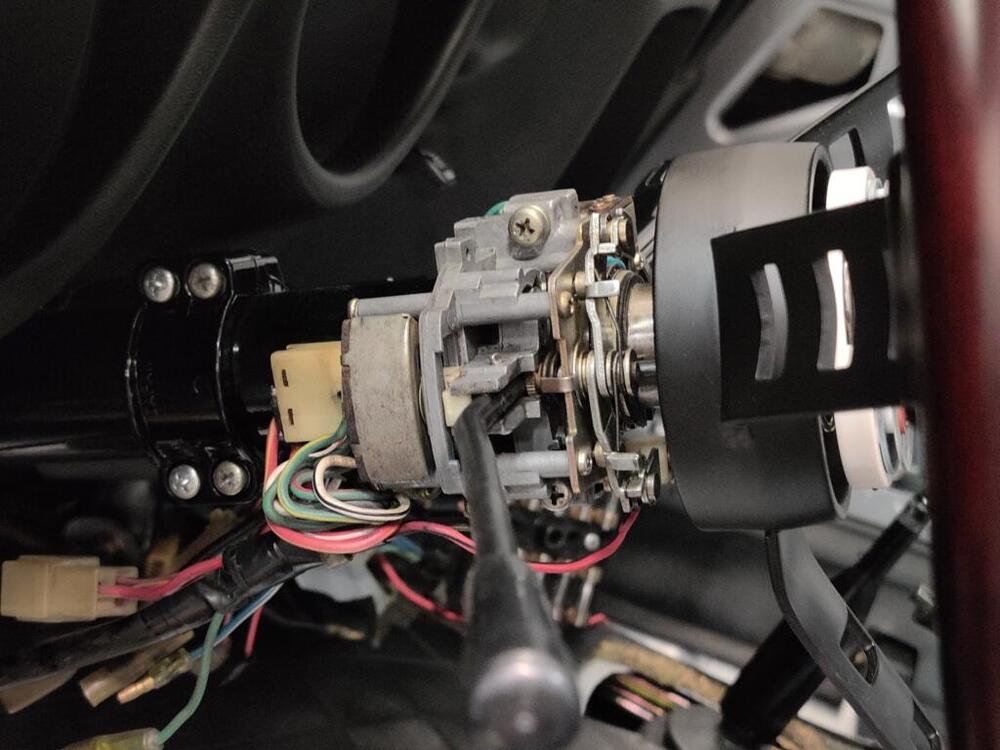
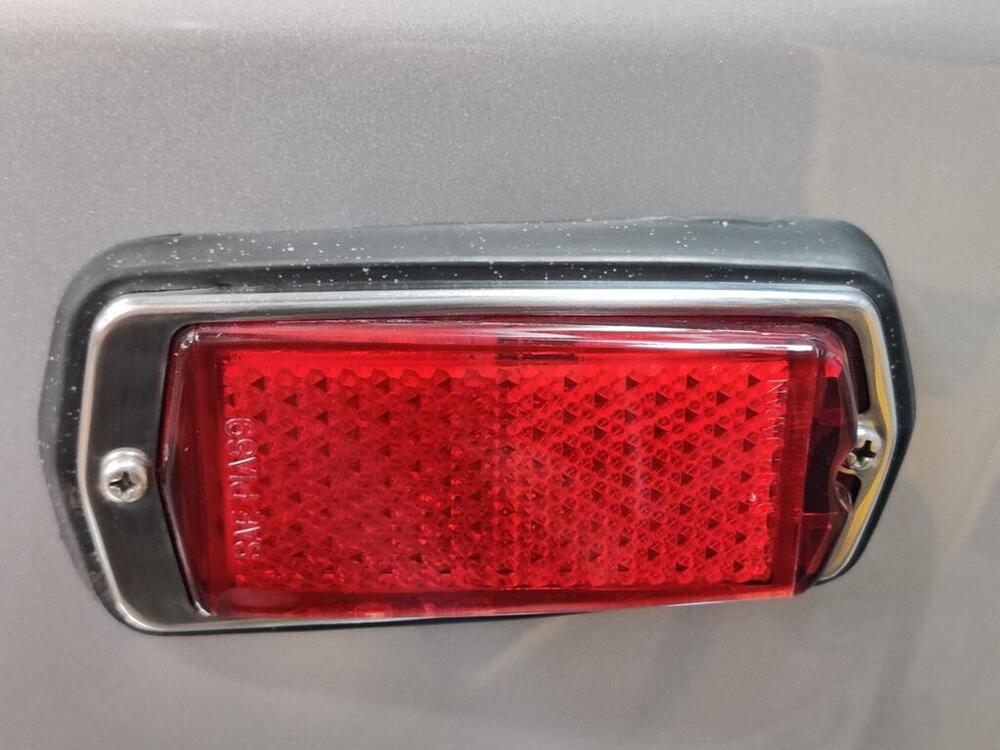
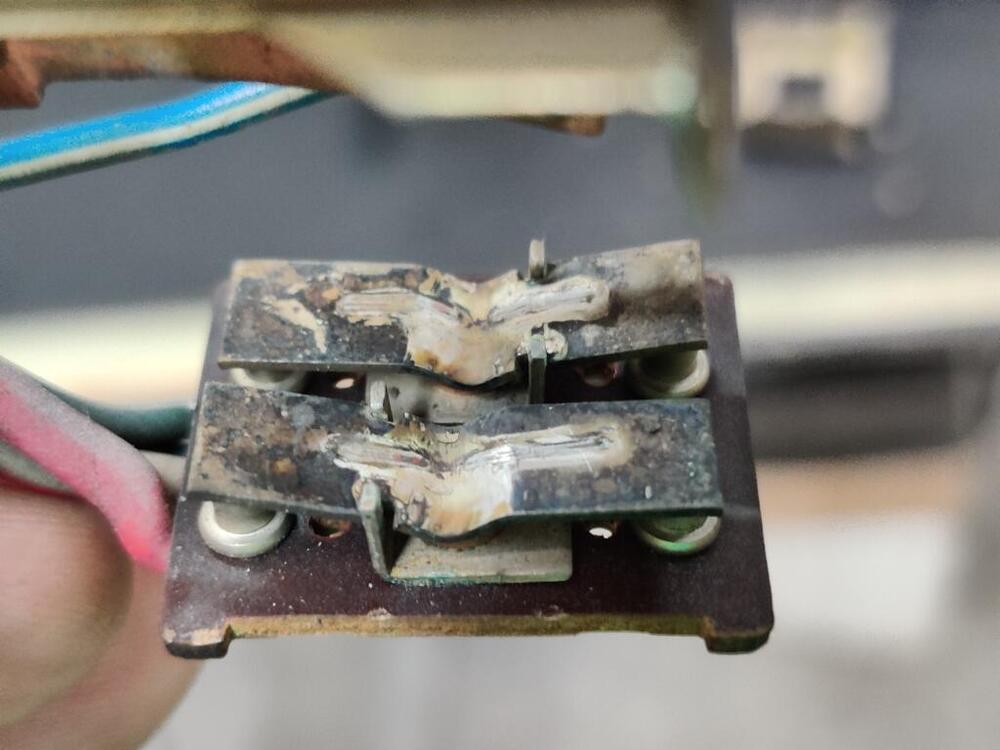
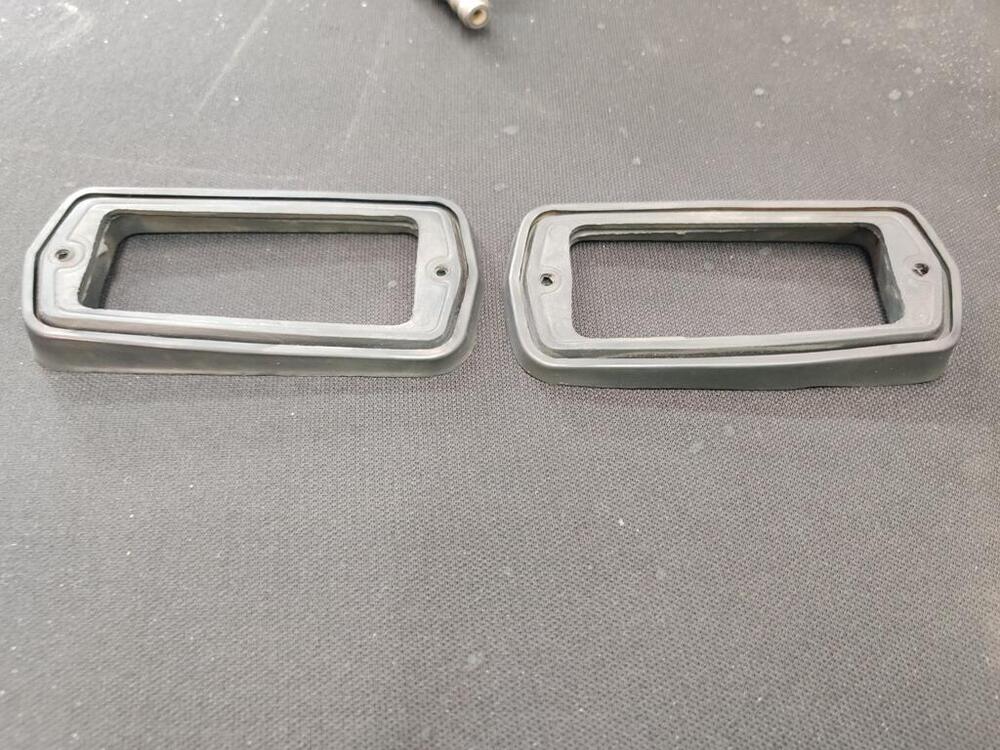
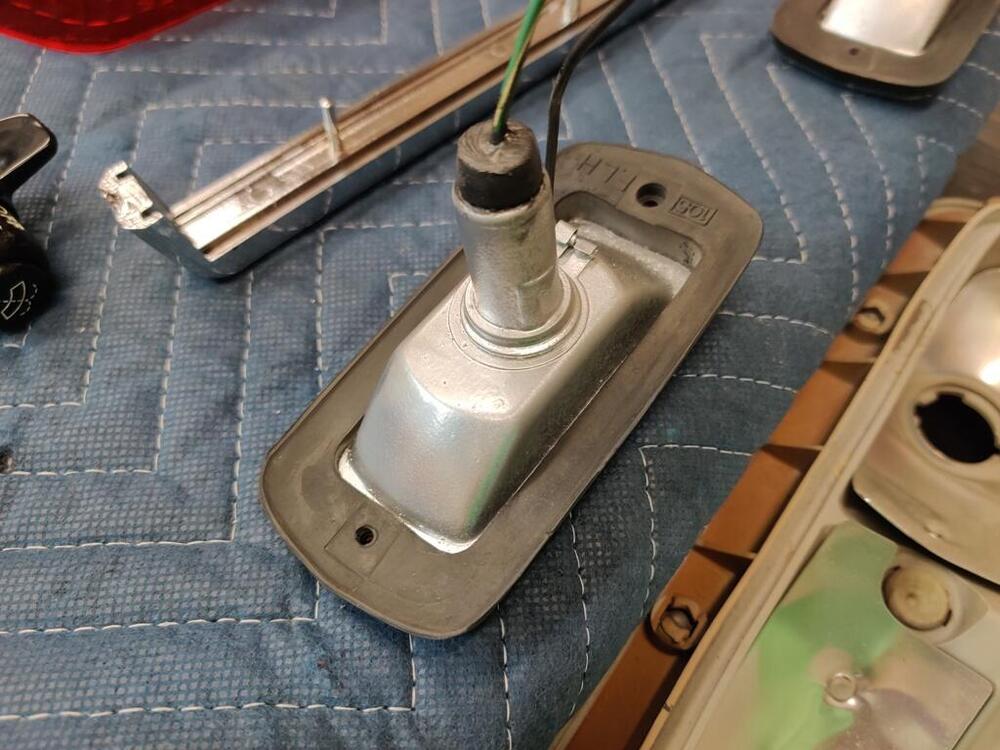
Today, the bumpers arrived back from Tri-City Plating. I spent some time putting the front one one together with some NOS factory rubber: Mock up: I am pleased with the results for the most part. I sent them one front and two rear bumpers, and one set of each, front and rear over riders. One of the rear bumpers was NOS and one of them was original to this car. The original one was damaged when the car was hit in the rear. The center section had a wicked twist in it, along with many dents, some deep scratches, etc. I spent a lot of hours working on it. I found that my hydraulic press was handy for some of that work. I got most of the twist out of it. And I got it relatively close to the same shape as the new old stock one. From talking to a few shops, it became clear to me that they have some expertise with straightening bumpers. So, I decided not to put more of my time into the center section, hoping that with the NOS center section also on hand, they could make the original one match its shape. That... didn't go well. I am not pleased with the final shape of it. I am glad I bought the NOS one and had it re-chromed as well. I am pleased with the work they did to that one. They did good work on the front bumper and the front and rear over riders as well. So, for this car, I have a complete set that are good quality. Inexplicably, on the NOS rear bumper ends, where I had asked them to fill in these half moon cutouts... they cut about a 6 inch long section out of one of them and welded in a replacement section to address this issue. And for the other bumper end, it appears that they stitch welded material into the half moon cut out until they had filled it with... weld. ??? I will share pictures of that nonsense when I put the rear bumper together and put it on the car. Other work I have done on the car this week included tear down and rebuild of the headlight/wiper steering column switch assembly and the turn signal stalk assembly. The electrical contacts for the headlight do wear. As I understand it, there is a high level of current going through the original circuit. I think tends to make arcing a thing on these contacts. For each, I removed the fulcrum portion, hit it with 600/1000/1500 sand paper grits and did the same with the "posts" they contact. Above, just getting started - you can see the depth of the "divot". Plastic parts were cleaned with soap and water and then buffed to restore some luster. I went through the turn signal lever assembly as well. I took it all apart, and removed any dirt and old grease. Then put it back together with new grease in appropriate areas, sanded down and repainted the turn signal stalk, etc. I also took apart all the side marker assemblies this week. I sanded and polished each plastic lens. I cleaned each stainless frame, straightened the areas where the screws contact them, and sanded/polished them as necessary to restore luster. For the front side marker light assemblies, for which, unlike the rear, the backsides are exposed to the elements, I also stole some rubber grommets from Datsun 510 rear side markers that I had on hand. I used those, as the original rubber seals disintegrated on these front assemblies long ago. Without these, water comes inside through the bulb socket backside. I used black silicone to ensure sealing of the transplanted seals here. And, I lightly glass beaded the backside of the front side market assemblies, primed and painted them silver to protect them from future corrosion. My preferred method for removing old paint from side marker gaskets is using the glass bead cablnet. Finished fronts:


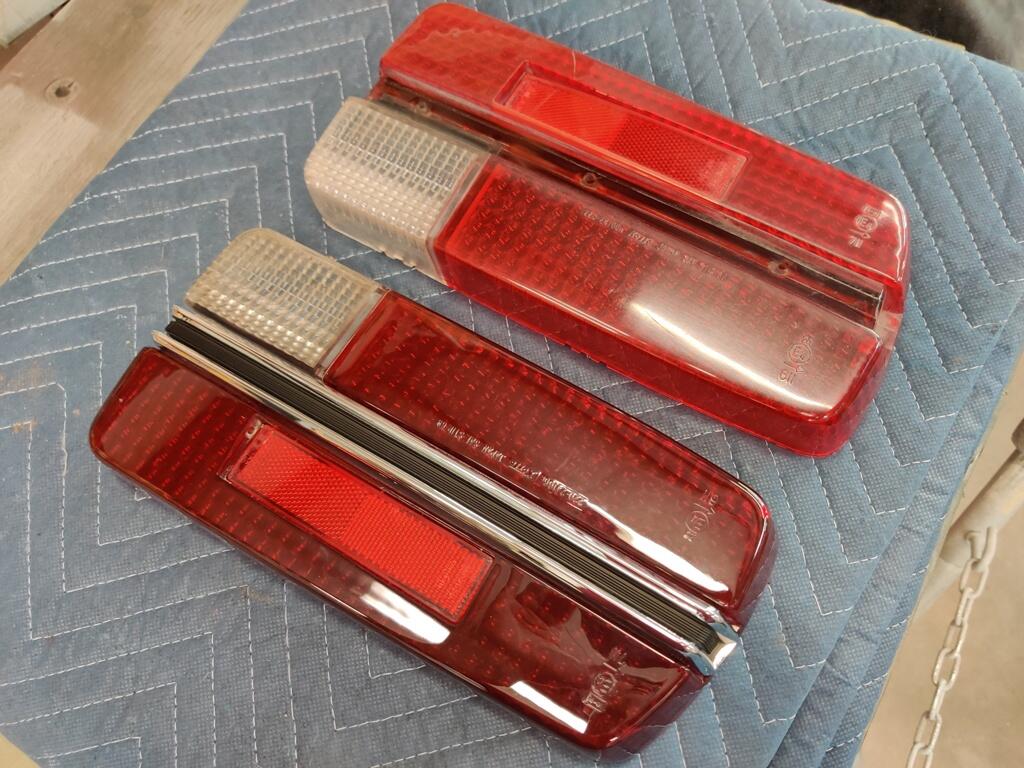
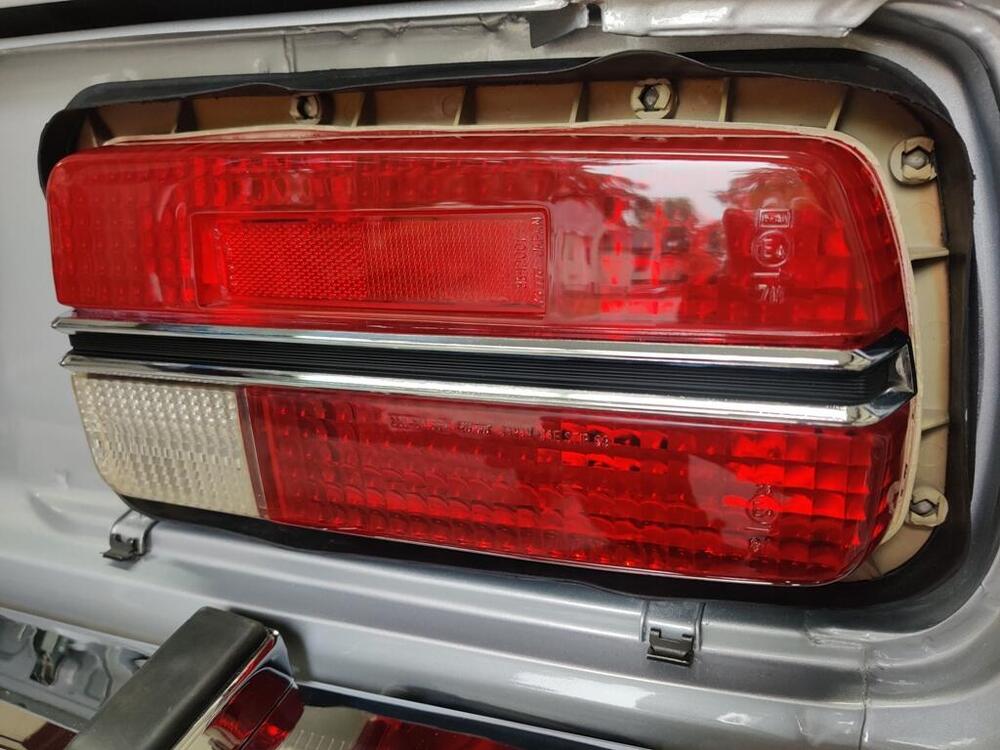
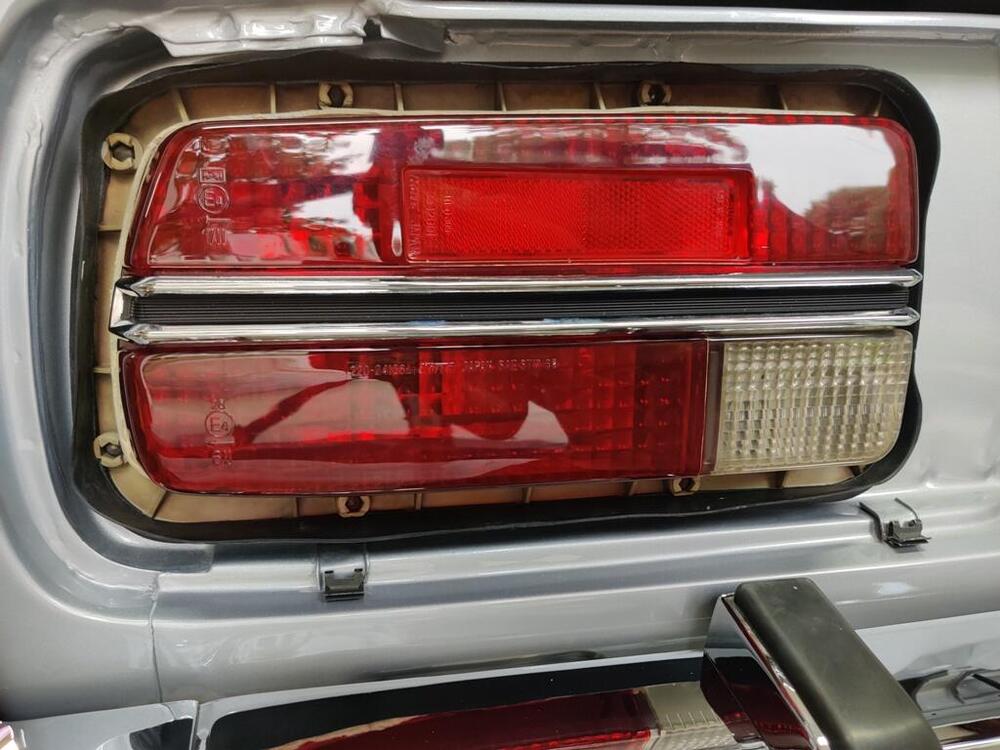
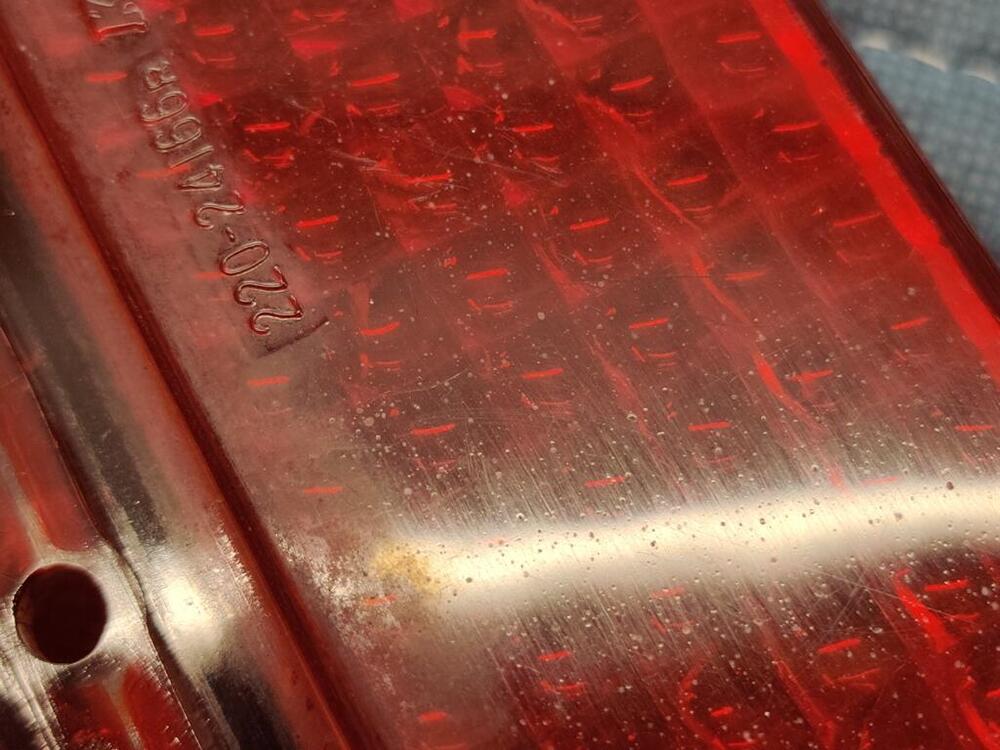
-
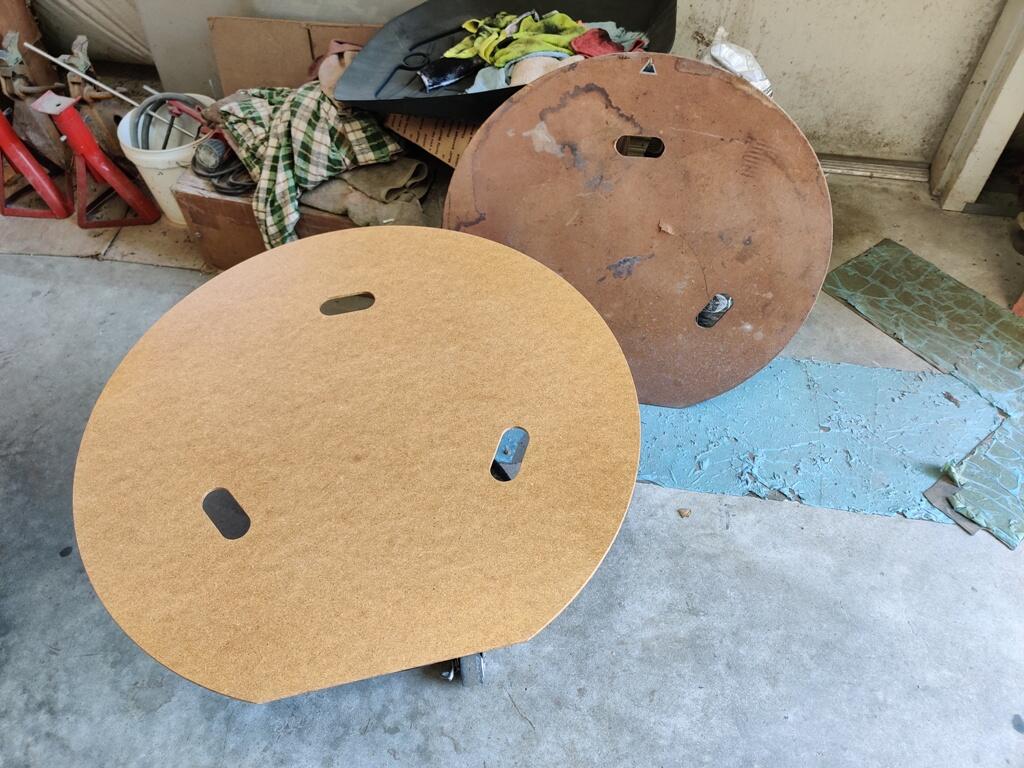
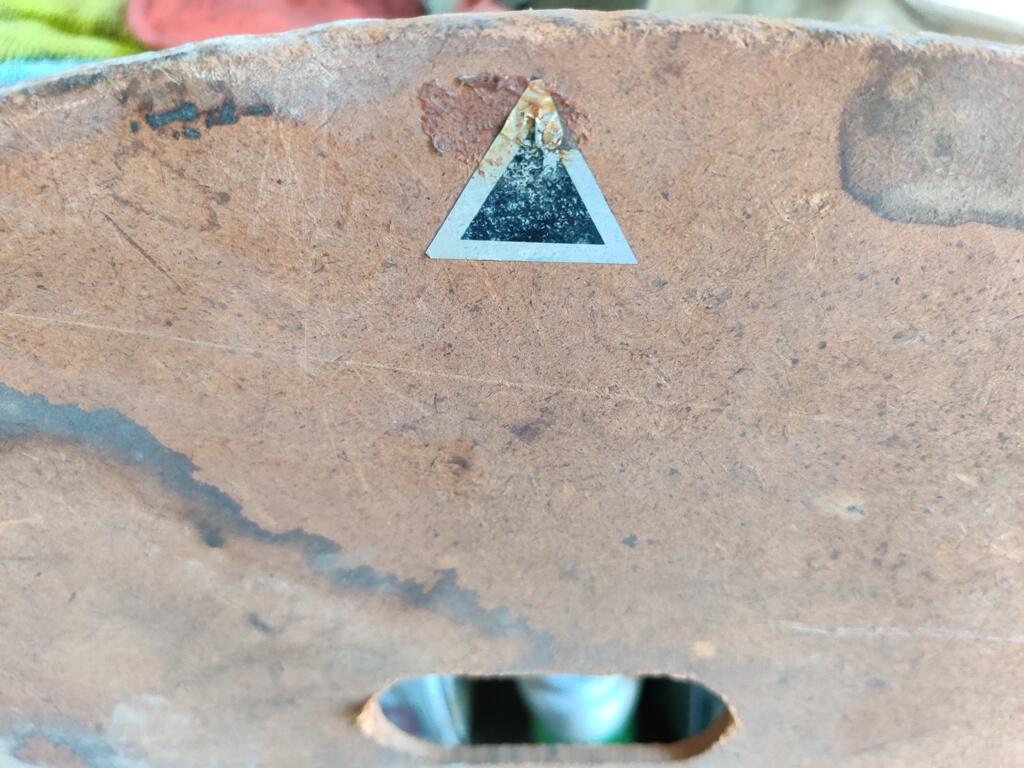
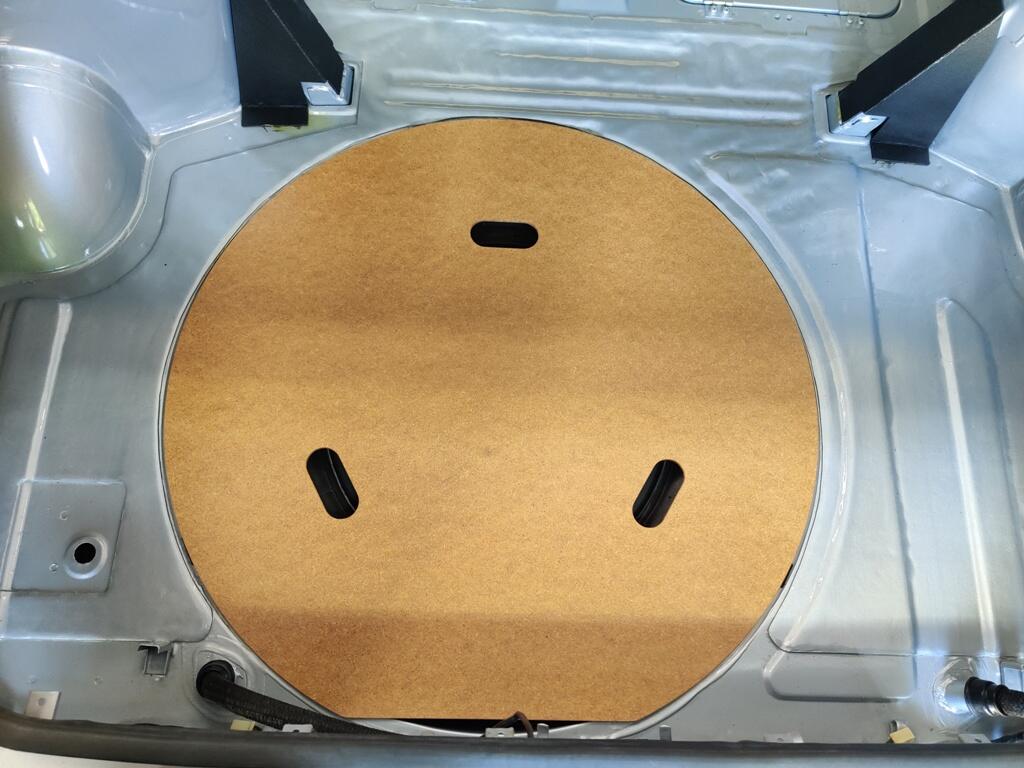
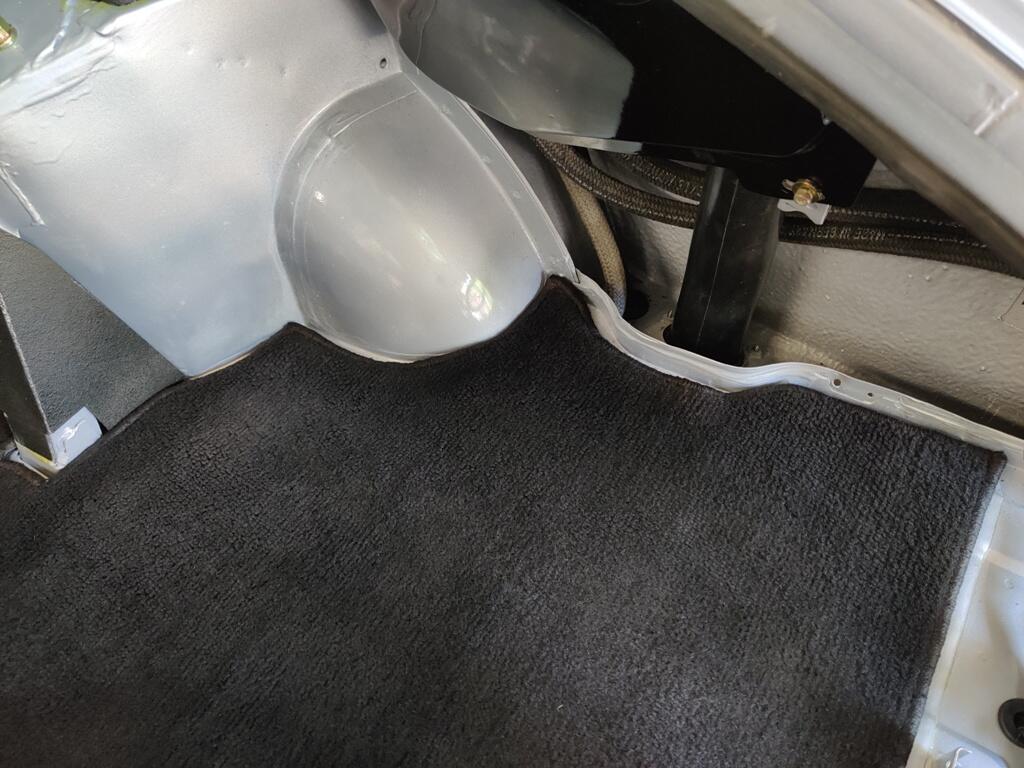
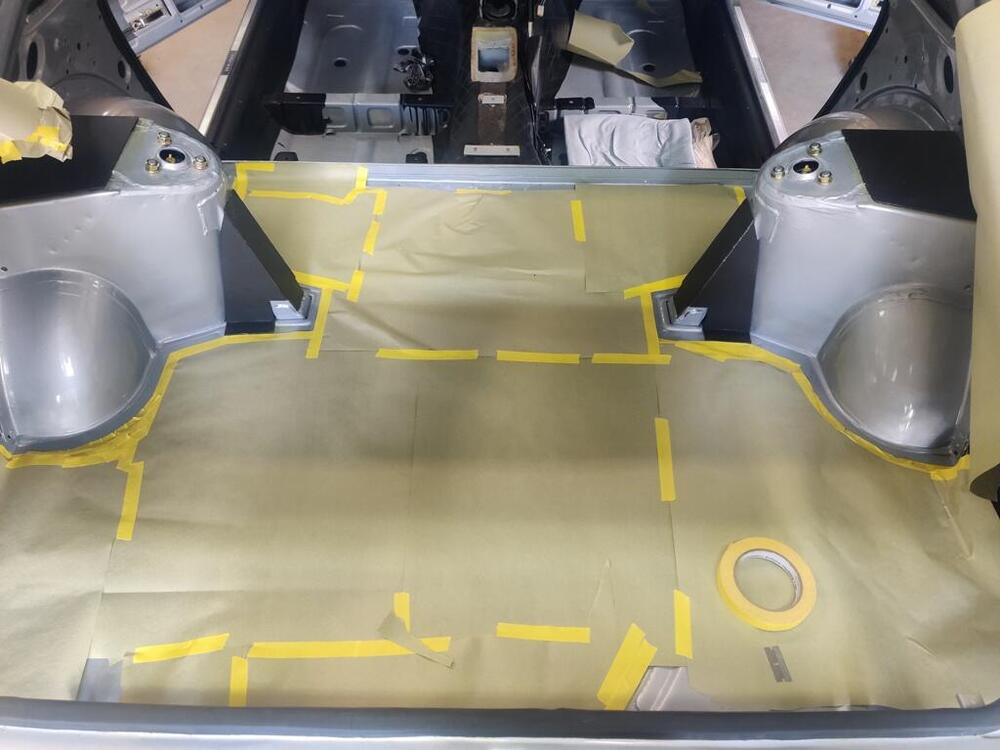
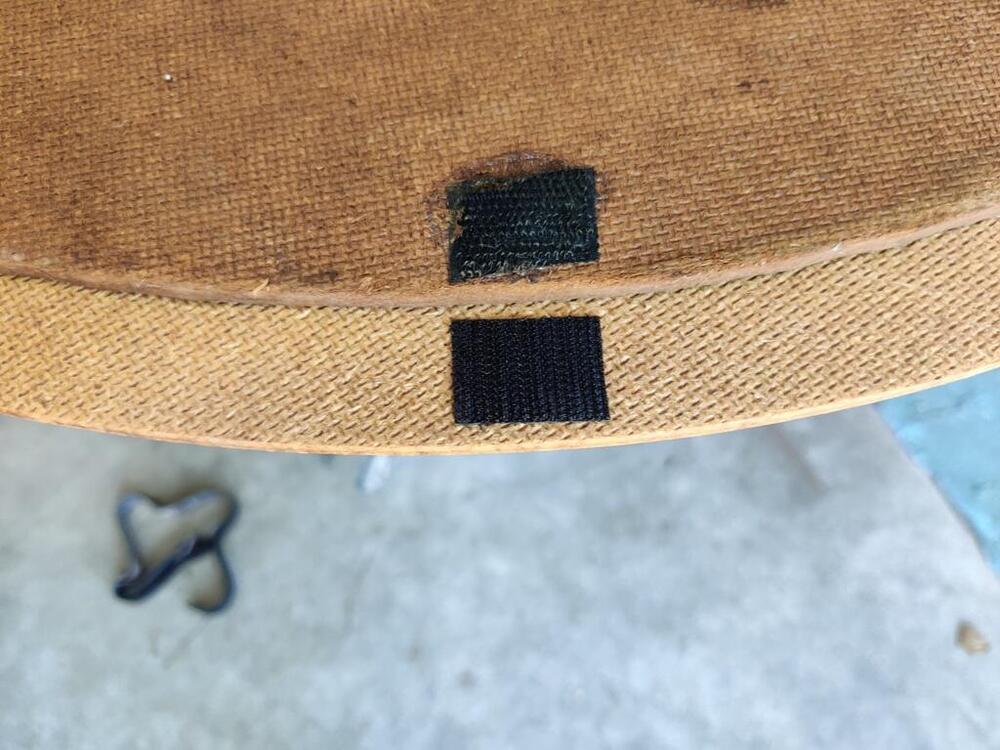
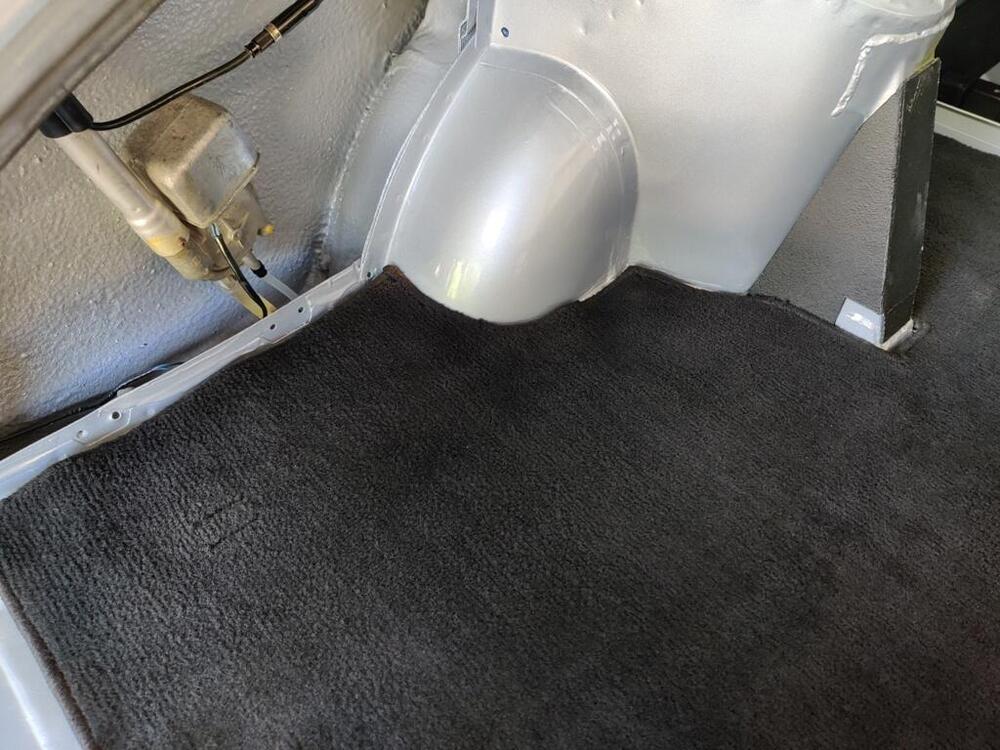
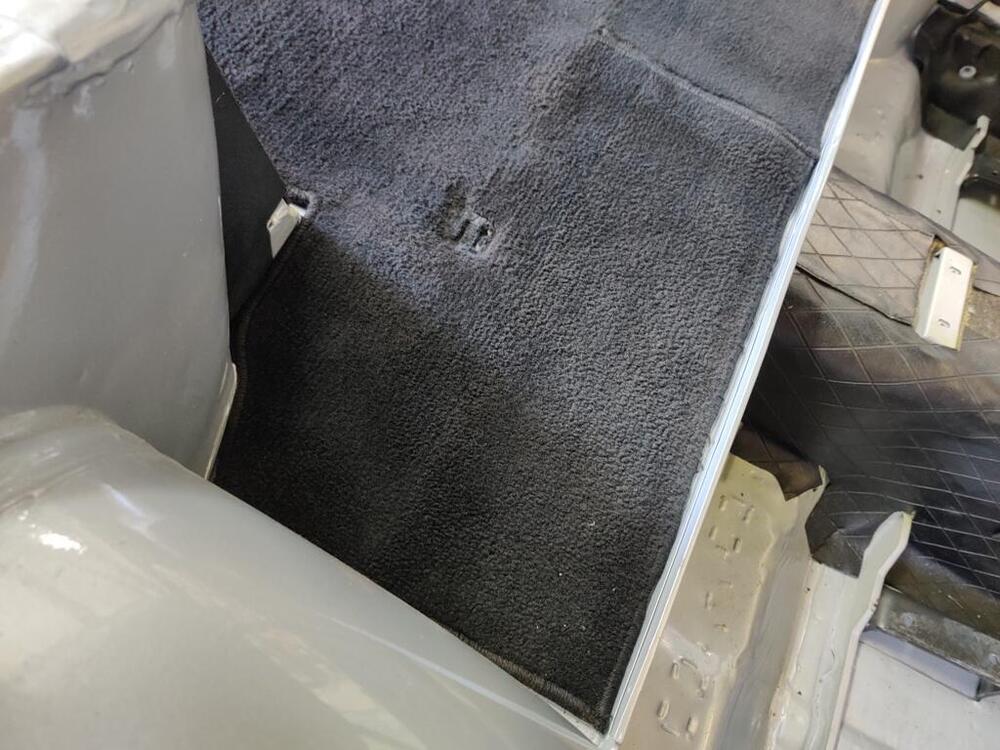
I found myself in the garage for a total of 12 hours this weekend. I also tacked on a couple of hours during the week this past week. I had to drop the gas tank down to install the gas sender harness. Wish I had put that in before installing the tank. That said, it wasn't too bad, as I found a way to lower it just enough to keep it from dropping loose of the fuel inlet hose. So, much frustration that could have been in store for me was avoided. From there, I put my attention on the spare tire cover. I was able to purchase this nice reproduction on eBay a while back. Today, I put Velcro on the body and the cover to match what was original. Can anyone tell me if these reproduction decals from Motorsport Auto are good reproductions of the original silver and black arrows? I put many hours into sanding the tail light lenses today. A few deep gouges required me to start with 400 grit. From there, I went to 600, 1000, 1500, 2000, and 2500. I finished with #83 Meguiar's polish and a foam buffing pad. I bought reproduction chrome trim strips for the tail lights. They are "good" quality, but not as good as the originals. Their are three posts on the backside, Two just pass through the lens. You secure them to the lens with circular clips that press down onto the posts. A rubber washer goes on before the circular clips. This is to keep water from entering the tail light assembly at this location. There is a third post that goes through the housing. On the aftermarket trim, this post was not made long enough. I have in mind a modification, as I would prefer the tail light lens be held to the housing with this post, in addition to adhesive that glues the lens to the housing. I cleaned up the hatch carpet I got off of eBay a while back. It was mostly protected from fading in its life so far. At the front, there is a band which is several inches wide where it was not as protected. The carpet is in quite good condition except for the fading. I think it is much nicer than what I have seen available now for carpet kits for these cars. On the spray can of this SEM color coat, it says for use on vinyl and carpets. So, I tested it out on a corner that was quite faded. It seemed to work pretty well. I sparingly hit the most faded areas of the full carpet. And then I placed it in the back of the car to check quality of fit. I may end up using this instead of new carpet in the hatch area. I do need to buy carpet for the rest of the car, however. So, for now, I will hold off on spraying it more liberally with the SEM color coat. I will have to order carpet material and decide what to do for sure then.


-
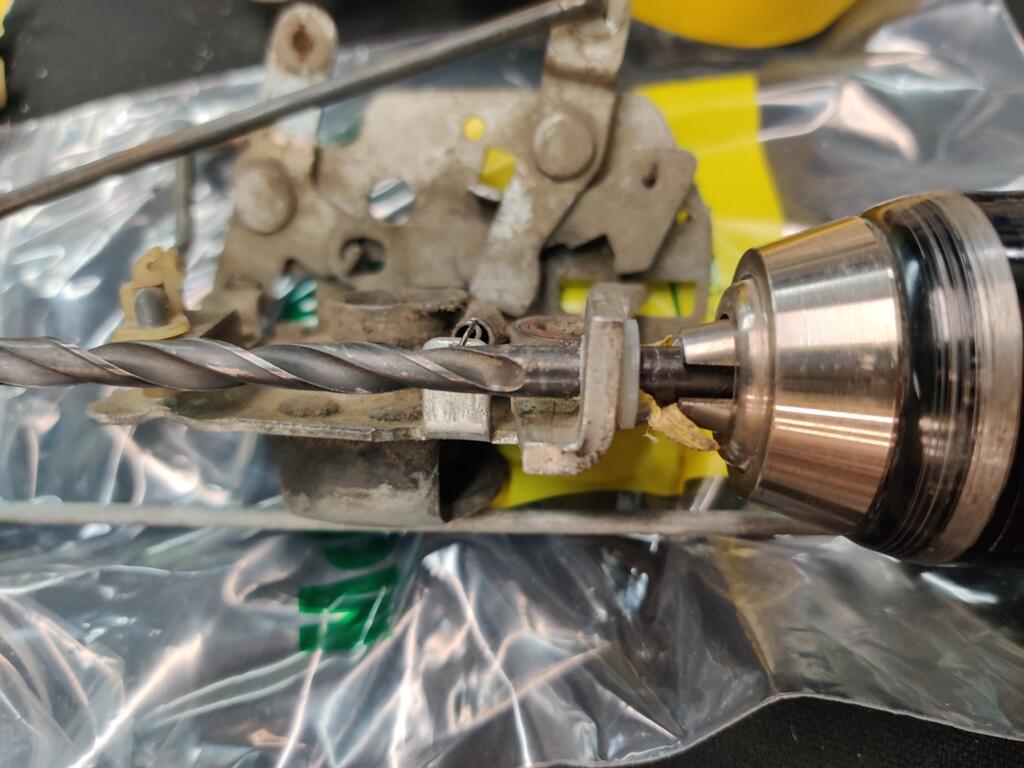
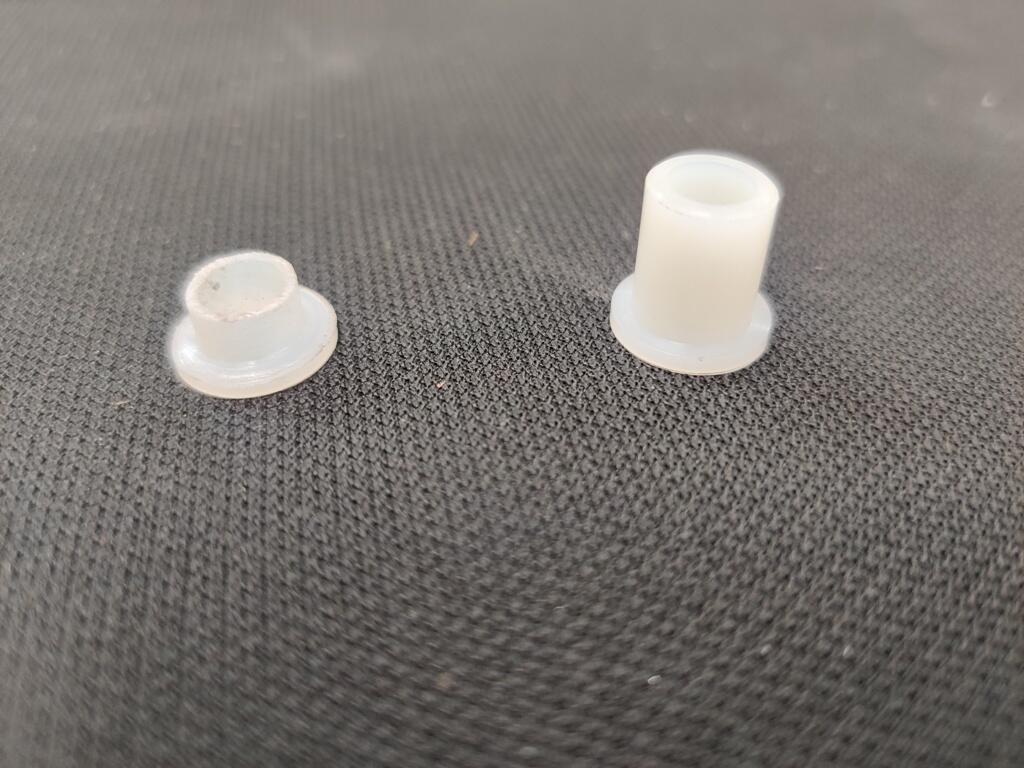
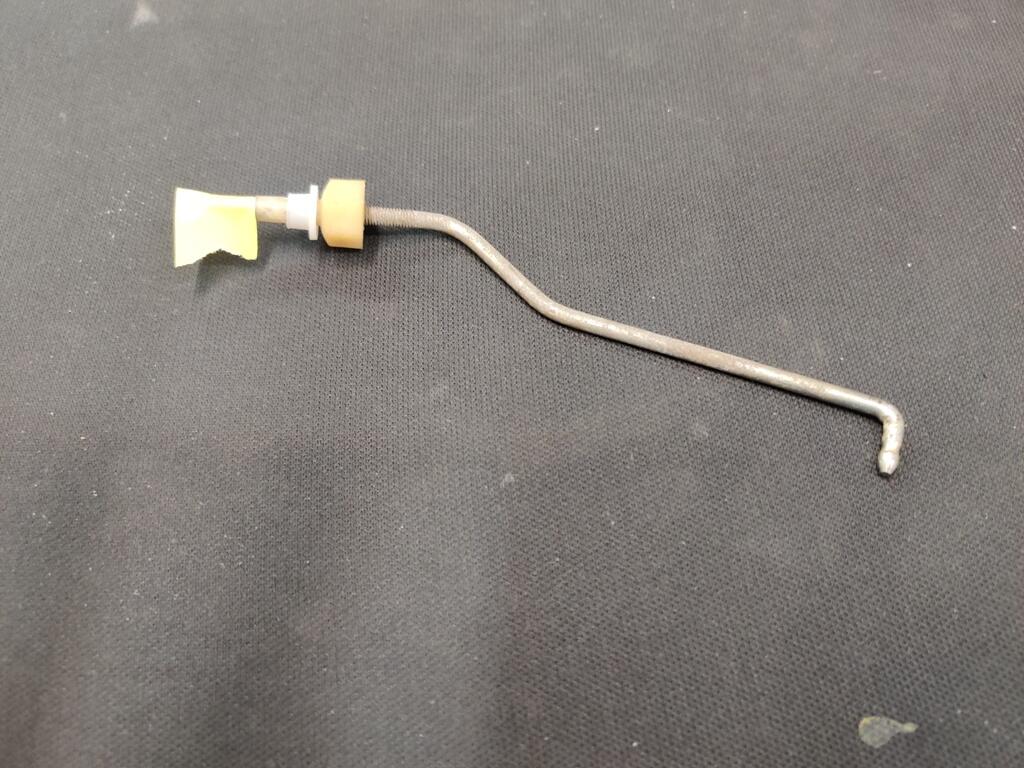
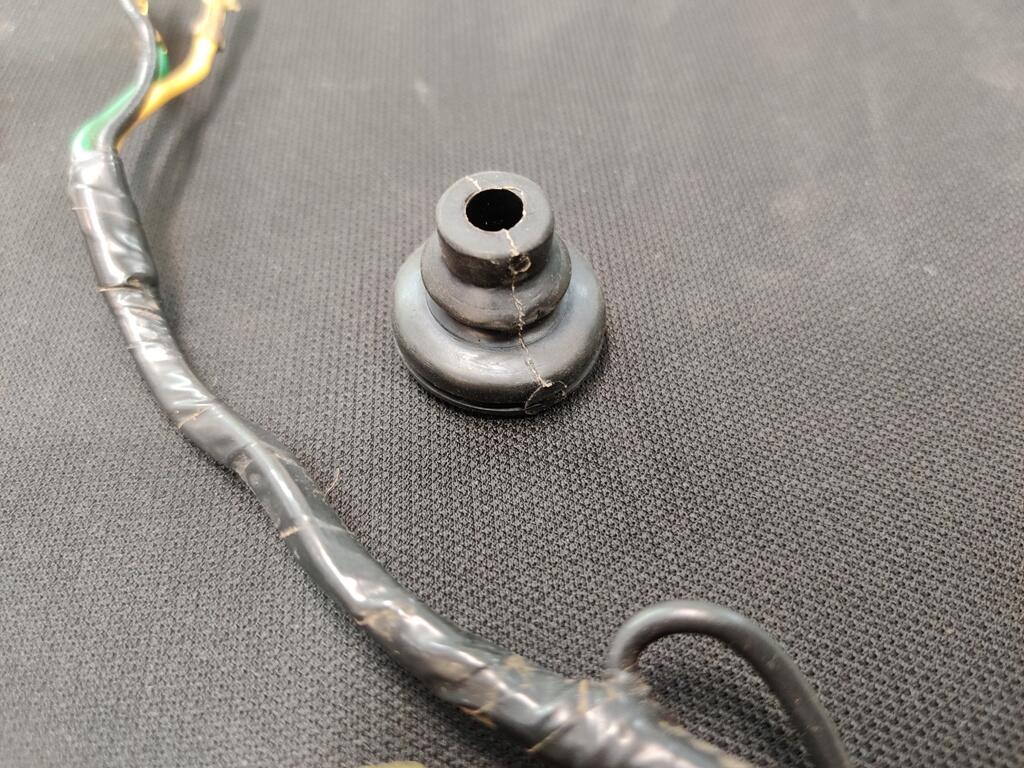
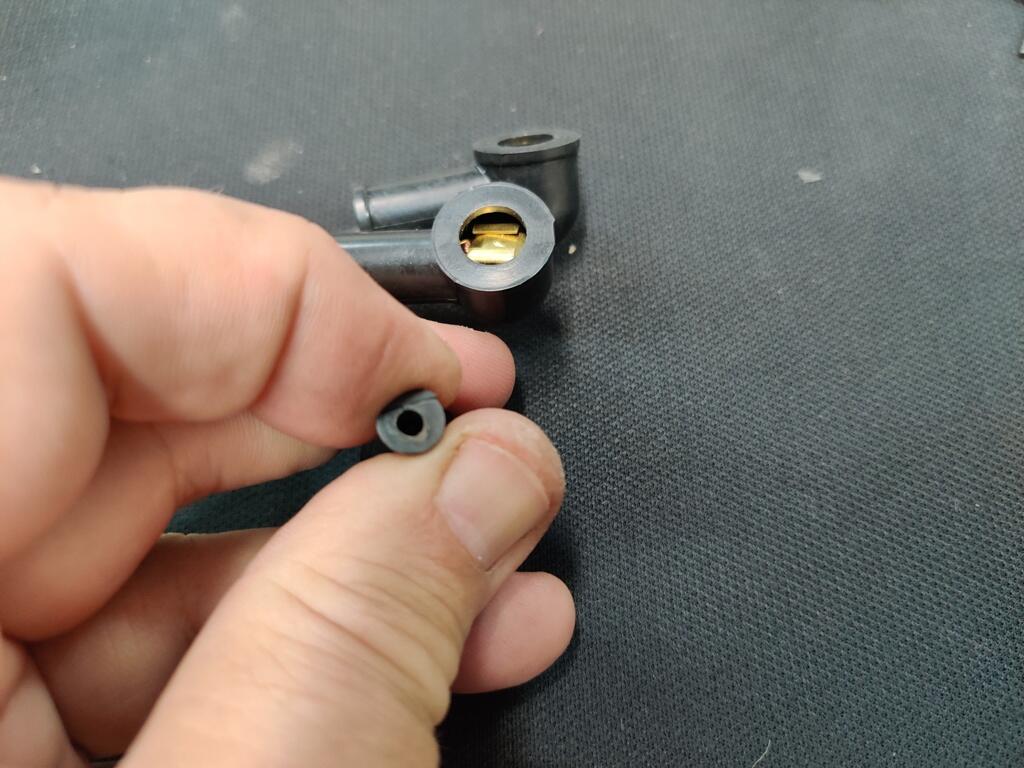
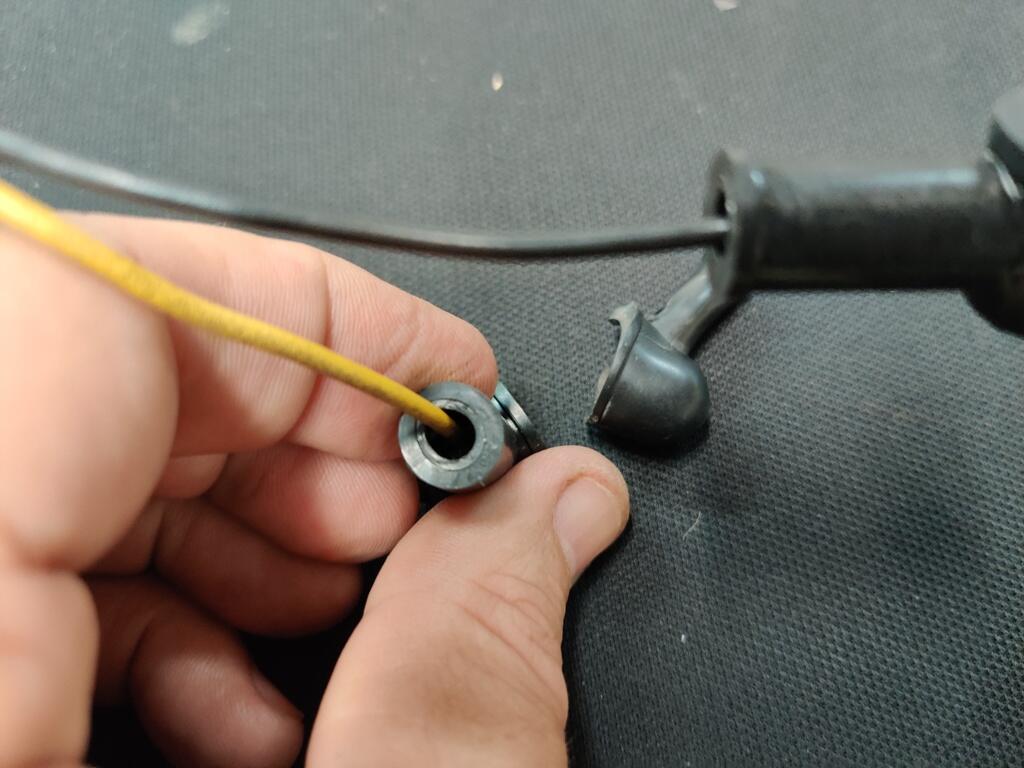
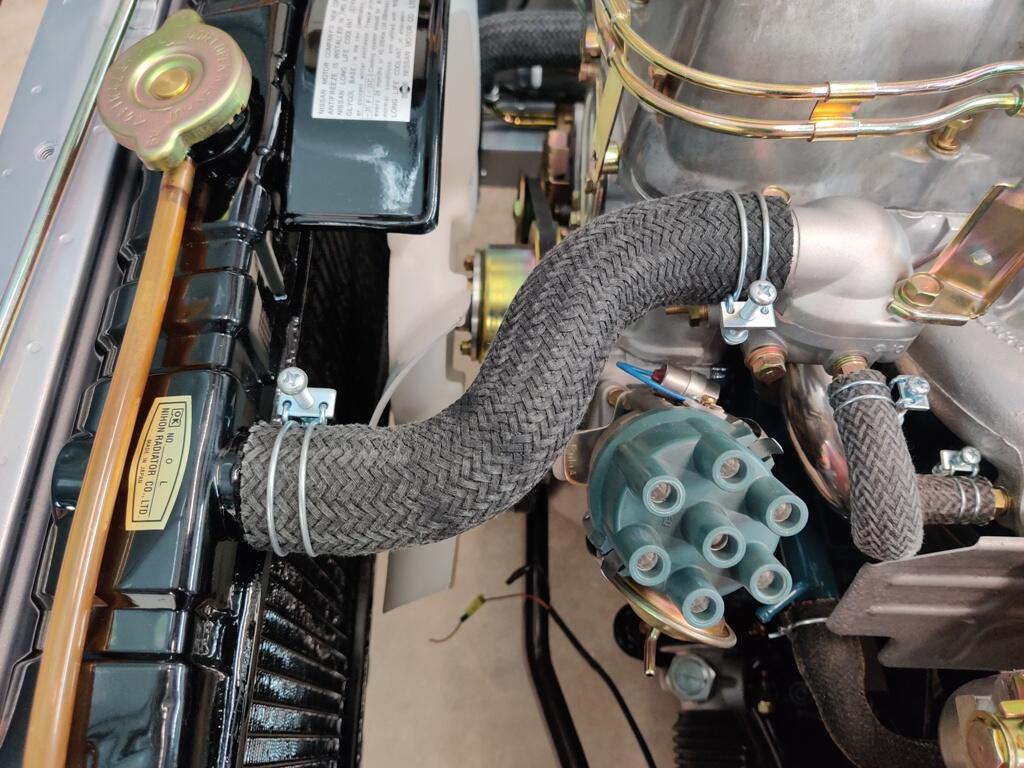
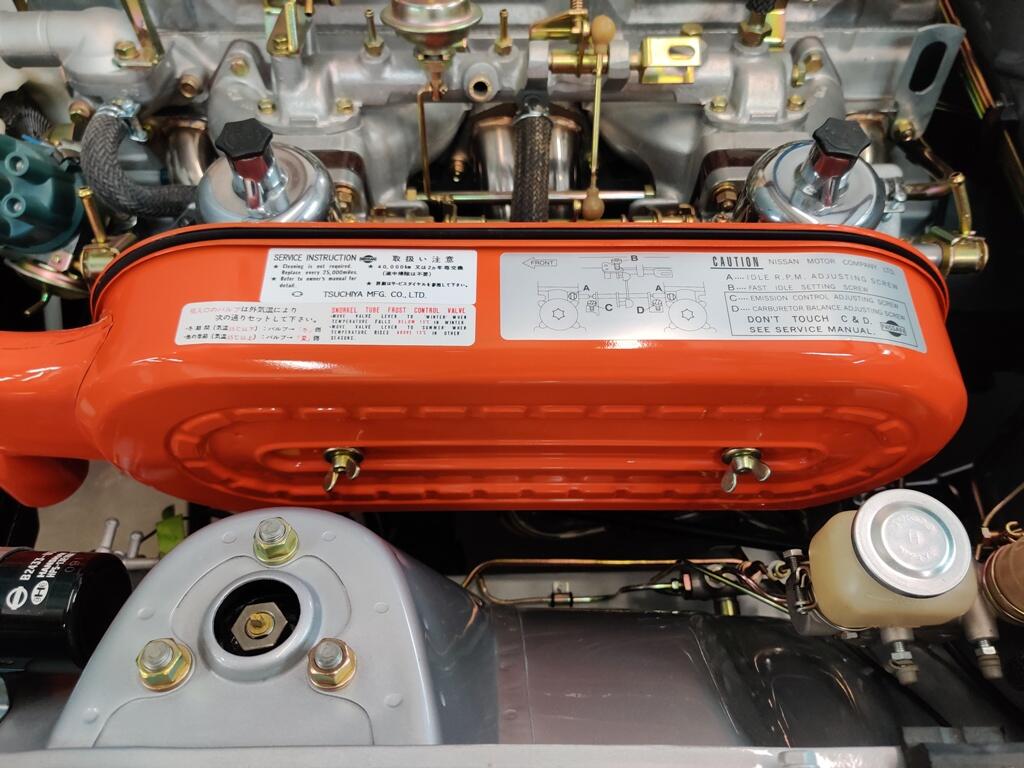
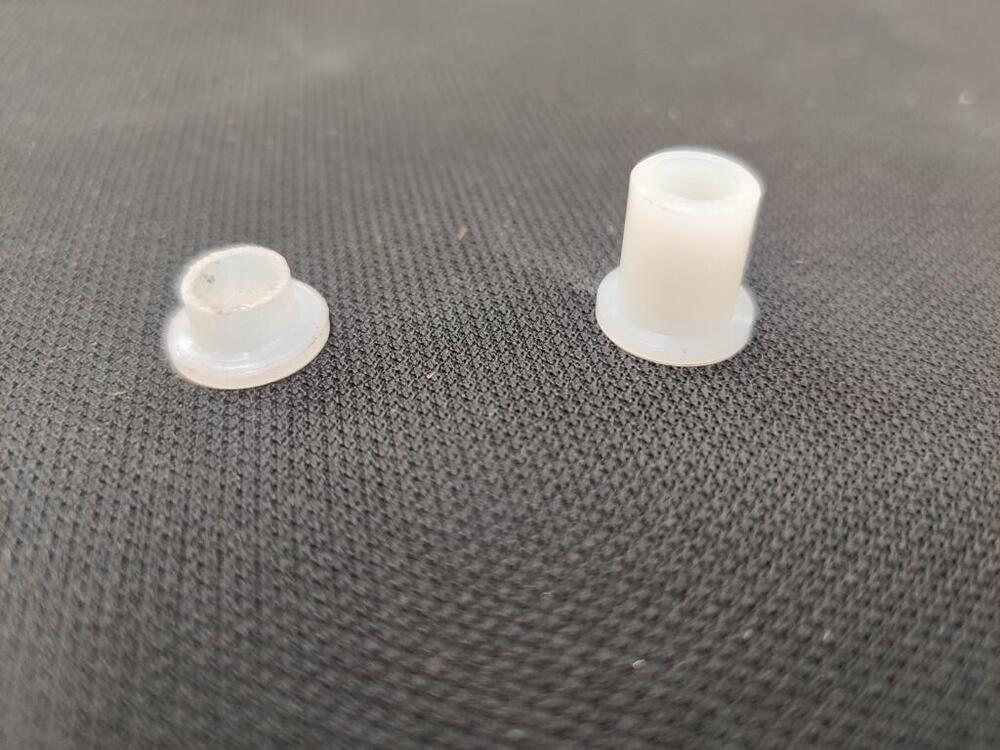
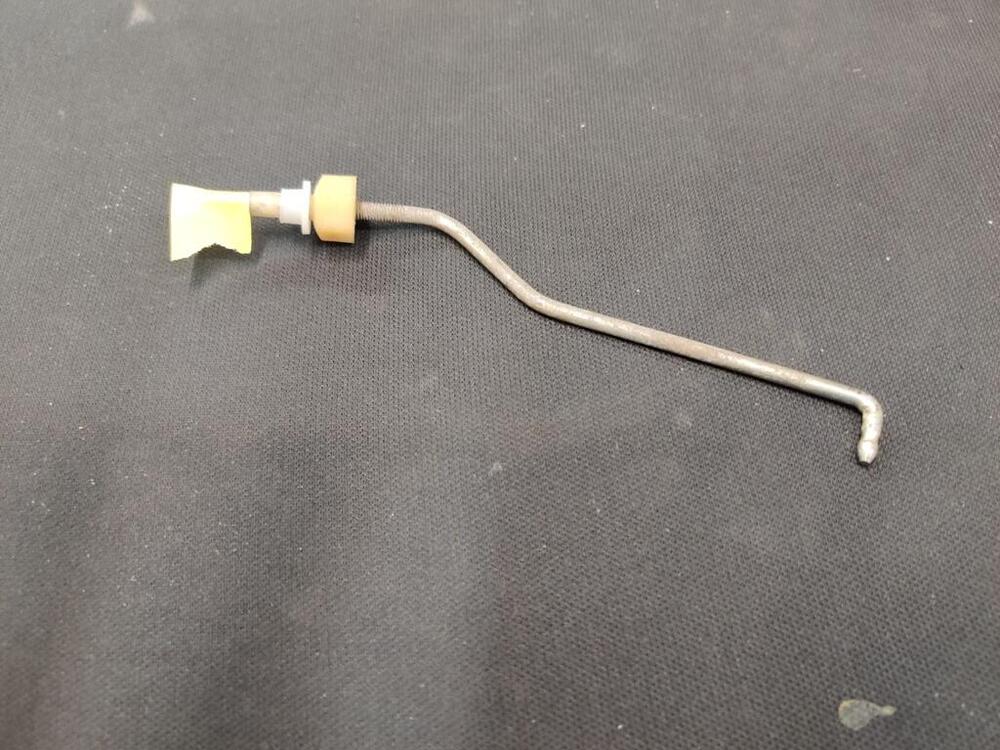
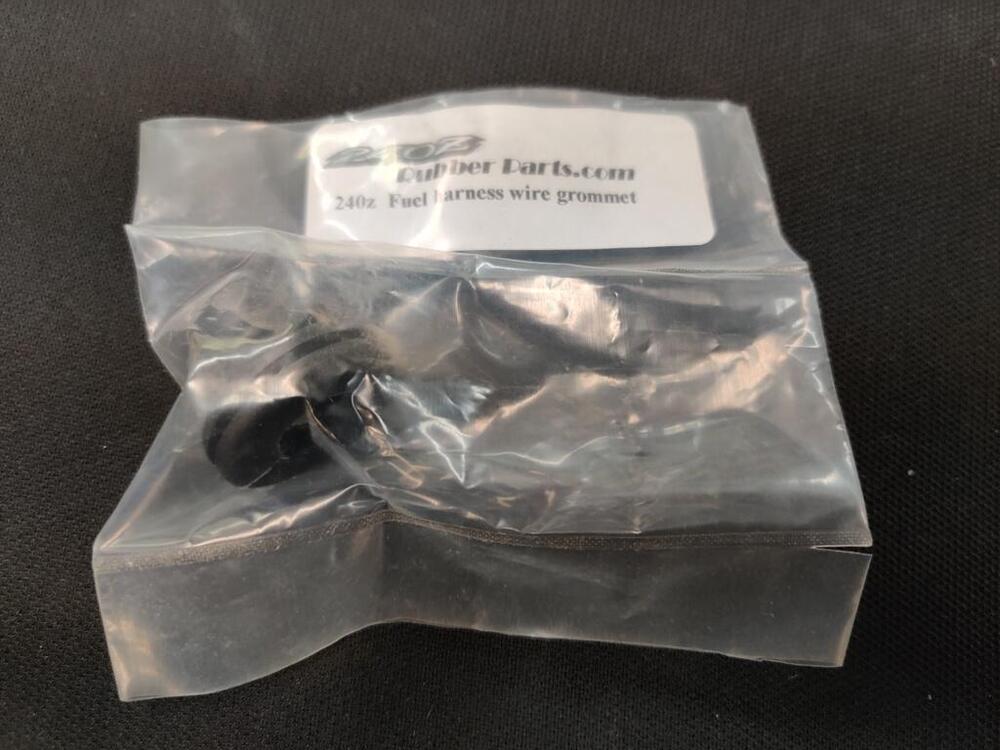
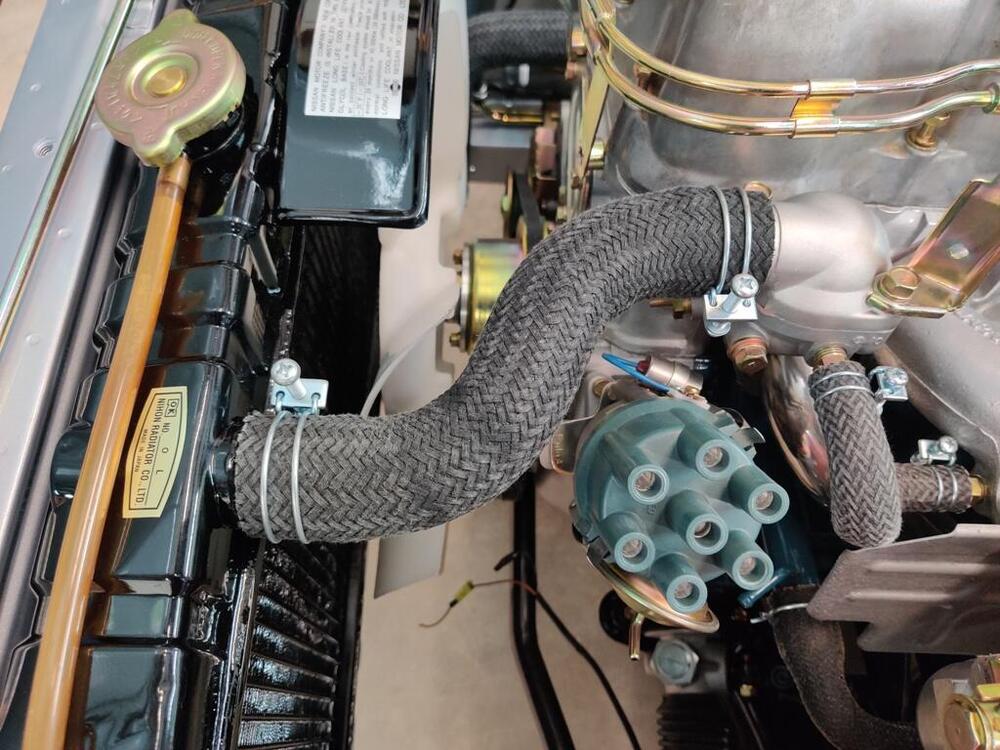
I finally ordered some little nylon bushings for the door handle linkage. I had to shorten the shaft portion and reduce the OD of the shaft portion also to get them to fit the opening in the door latch. I used bit in a drill with some tape around the bit to keep the bushing from spinning, and a hand file to remove material from the OD of the shaft until the bushings fit. After they fit, I used a piece of tape on the end of the linkage piece to keep it from falling into the door during installation of the linkage. Bushing as received next to a modified bushing: These aren't really necessary, but there were some there originally, so I put some in. With these linkages in place, I could finally open the doors using the new handles. One of the things I dislike about the 240Z is the sounds that it makes during opening and shutting of the doors. I like a solid sound instead of tinny, or "loose" vibrations. I am pleased with the results I achieved with the spray on sound deadening: Other recent work has included replacement of some rubber parts on the fuel sender harness: One issue I did not expect was that the new rubber covers for the terminals have a much larger opening for the wires. I got these from Banzai. I pumped them full of black silicone rubber to address this, but perhaps there are others available with a smaller hole in the end. I also installed the upper radiator hose and cleaned and reinstalled the original radiator overflow hose. The upper radiator hose was sourced from jdm-car-parts.com. I found that I had to trim some off of one end of the hose to get it to fit properly.


-
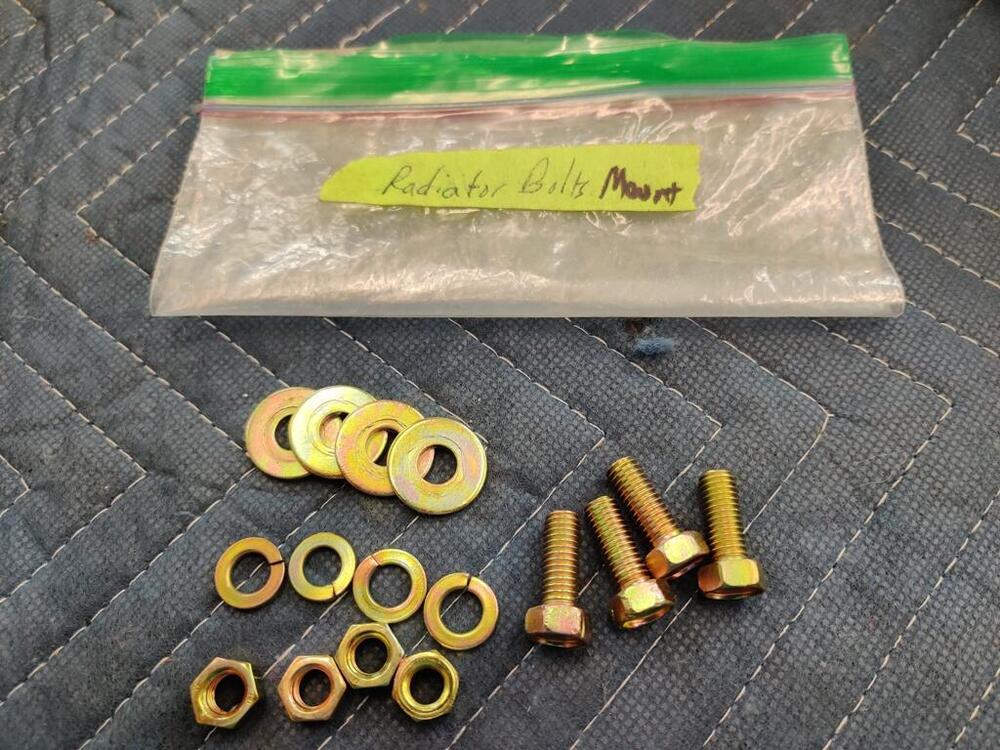
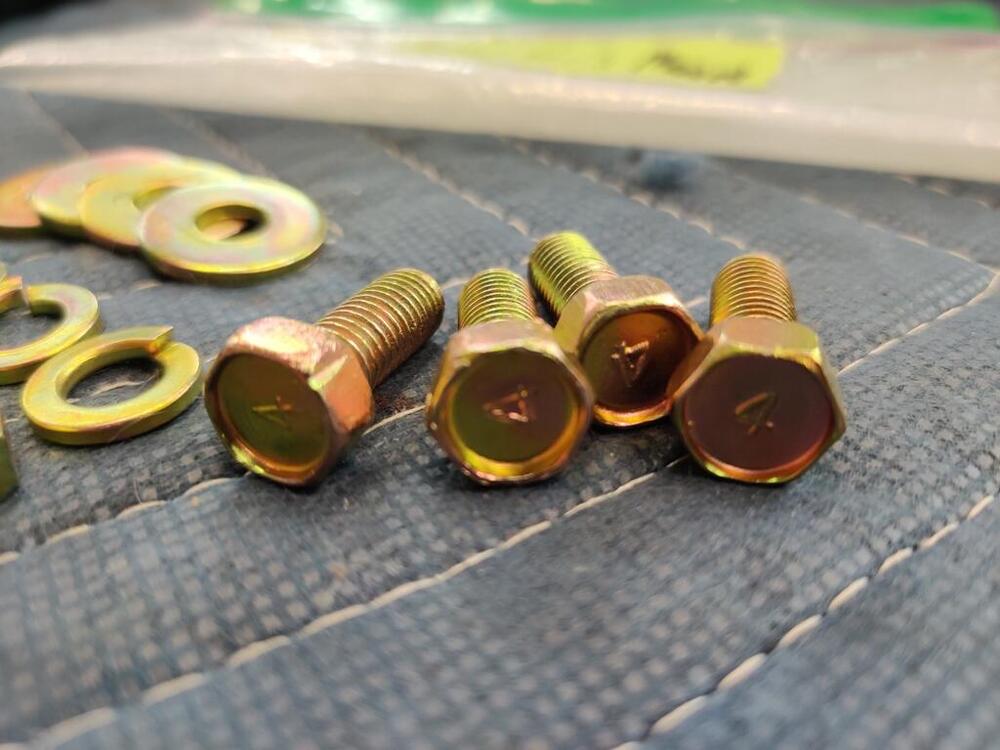
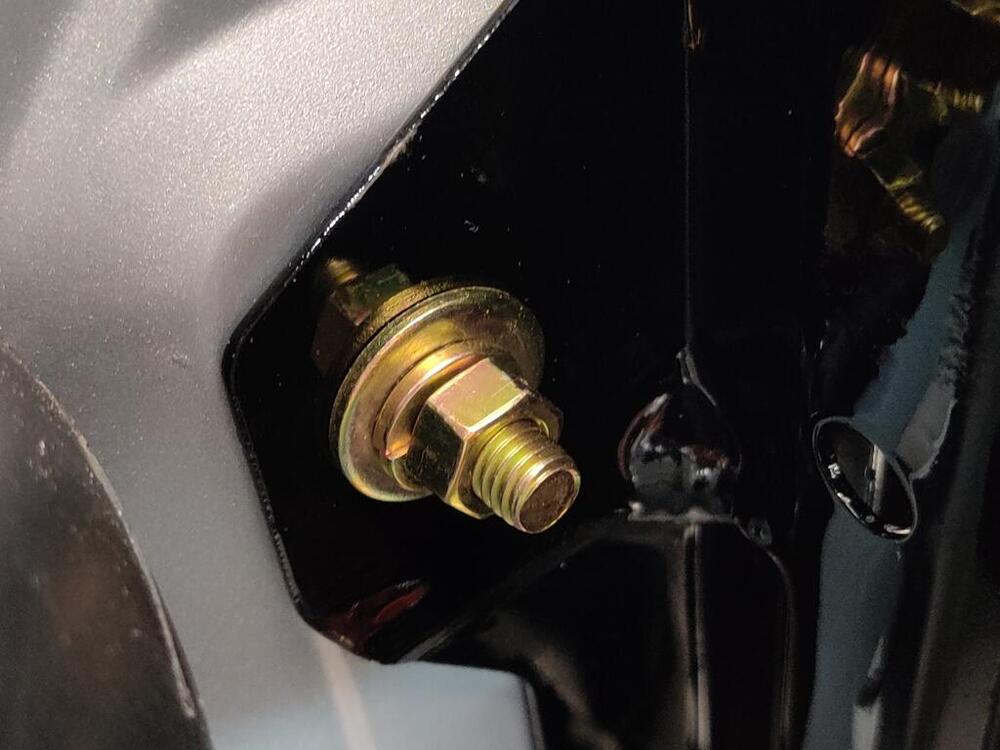
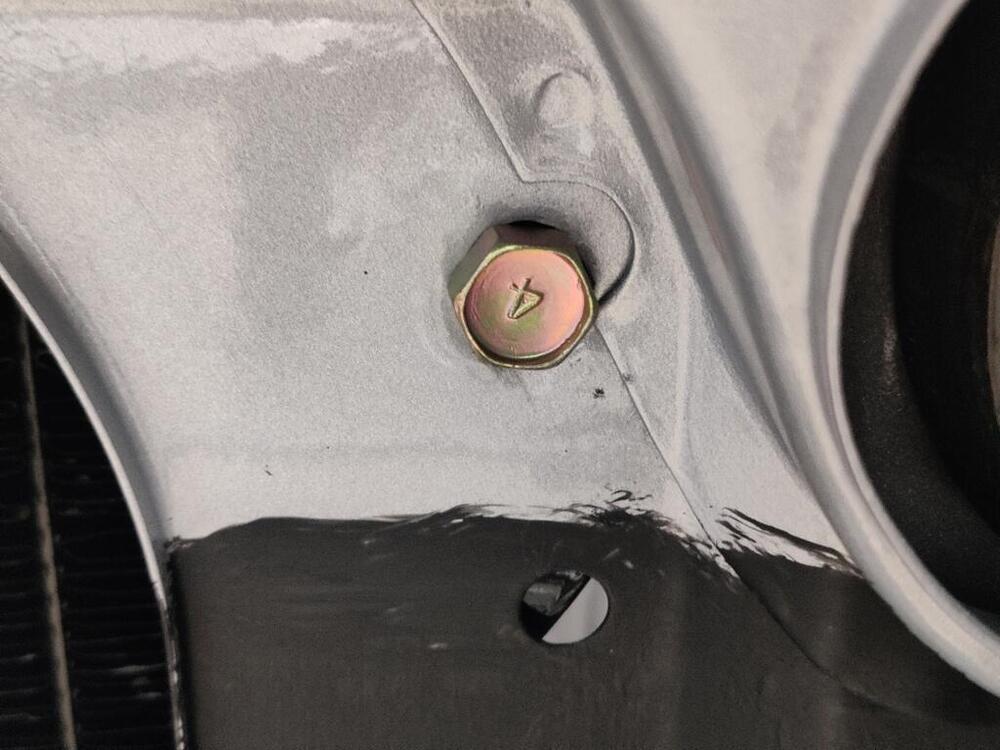
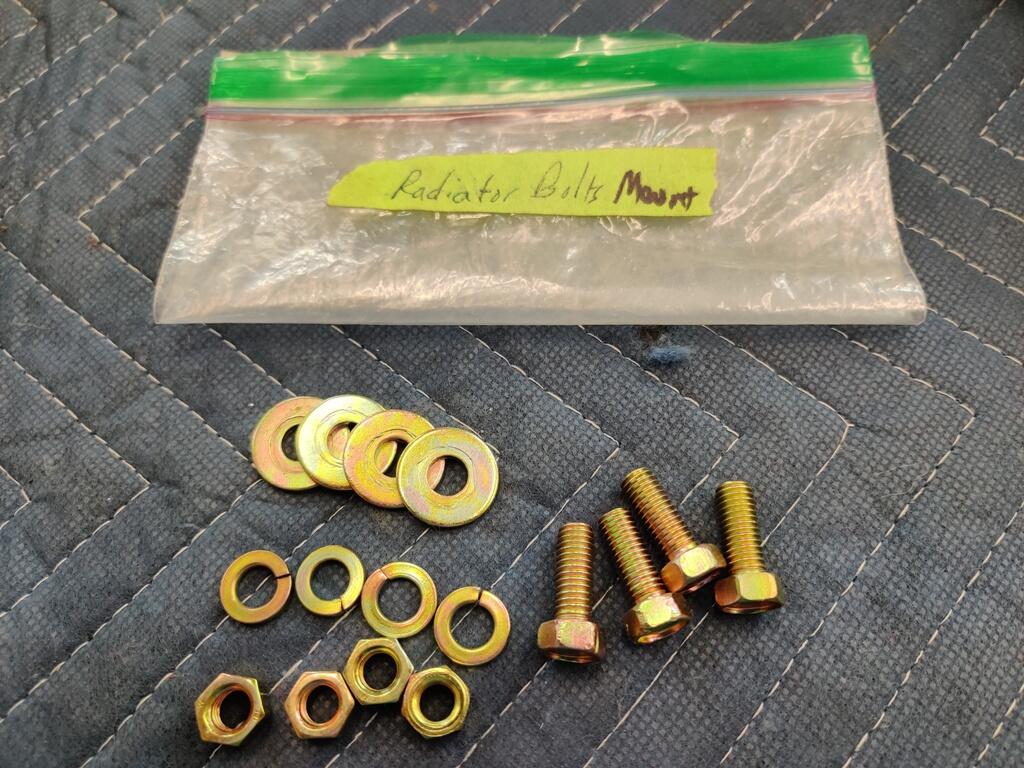
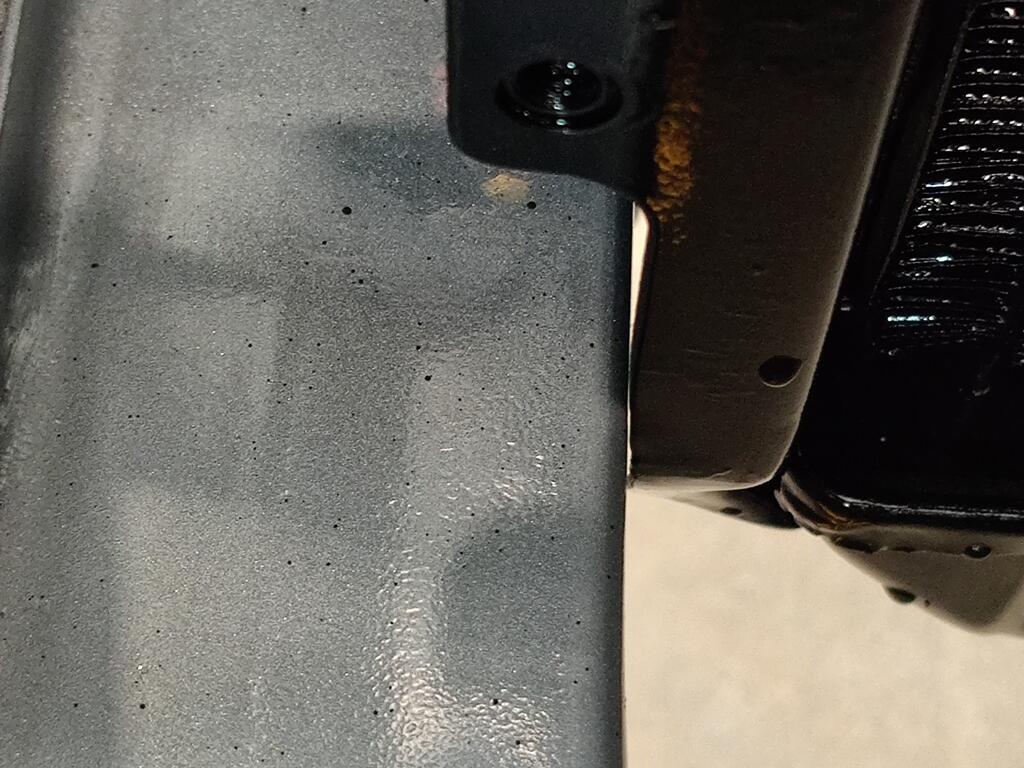
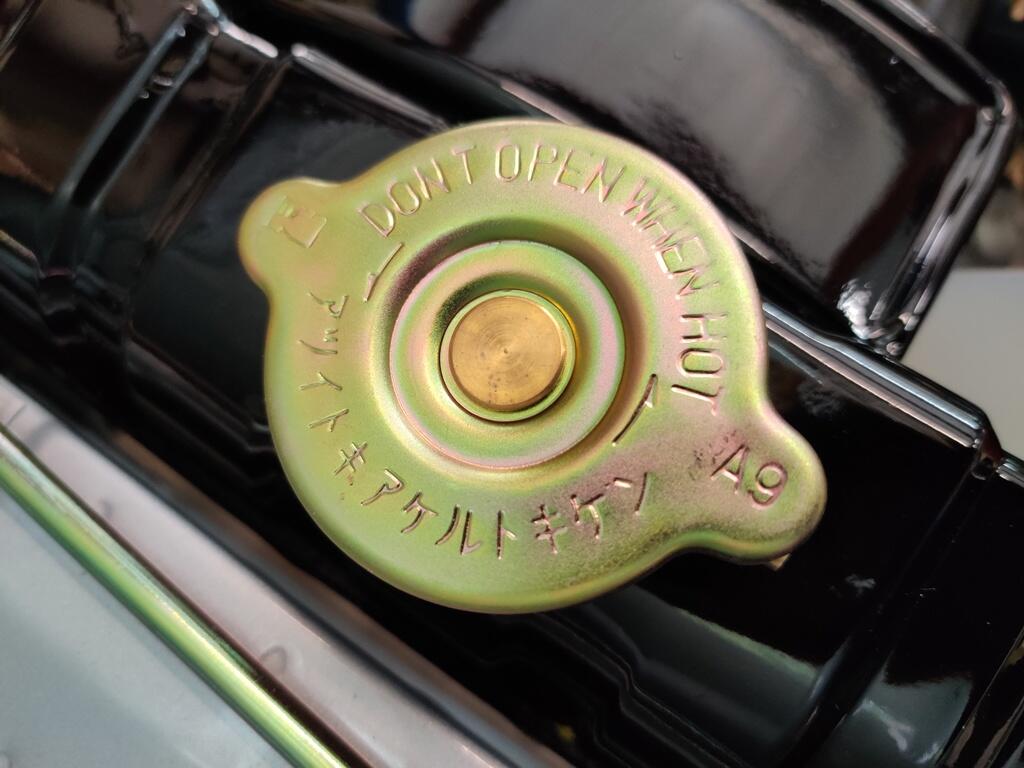
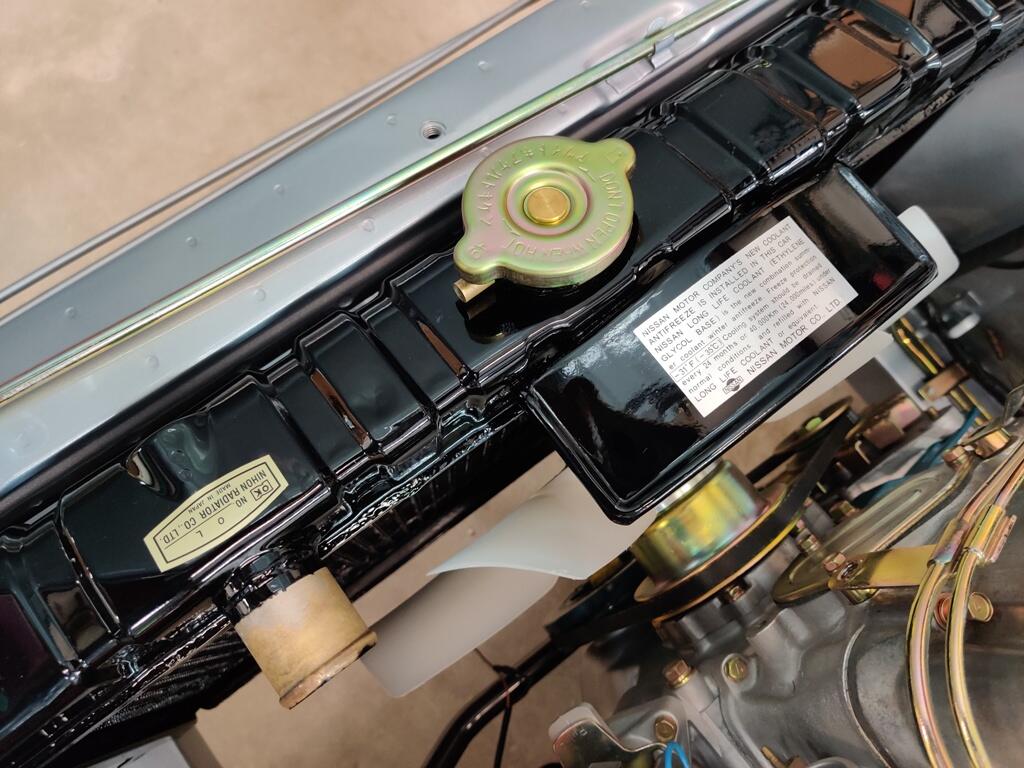
I finally painted the radiator. So, I was able to install it today. Is this the correct orientation of the hardware - just the bolt on the front side, and the flat washer, locking washer and nut on the inside? Oddly, the flange on the side brackets of the radiator basically touches the insides of the frame rails. All three of the radiators I have in my possession have this flange on the inside surface of the radiator. It appears to be for mounting a fan shroud, though I don't believe US cars had them as original equipment. I think this is an original radiator cap: I put some reproduction stickers on today as well: