Everything posted by inline6
-
How vibration free is your 70-71 240Z?
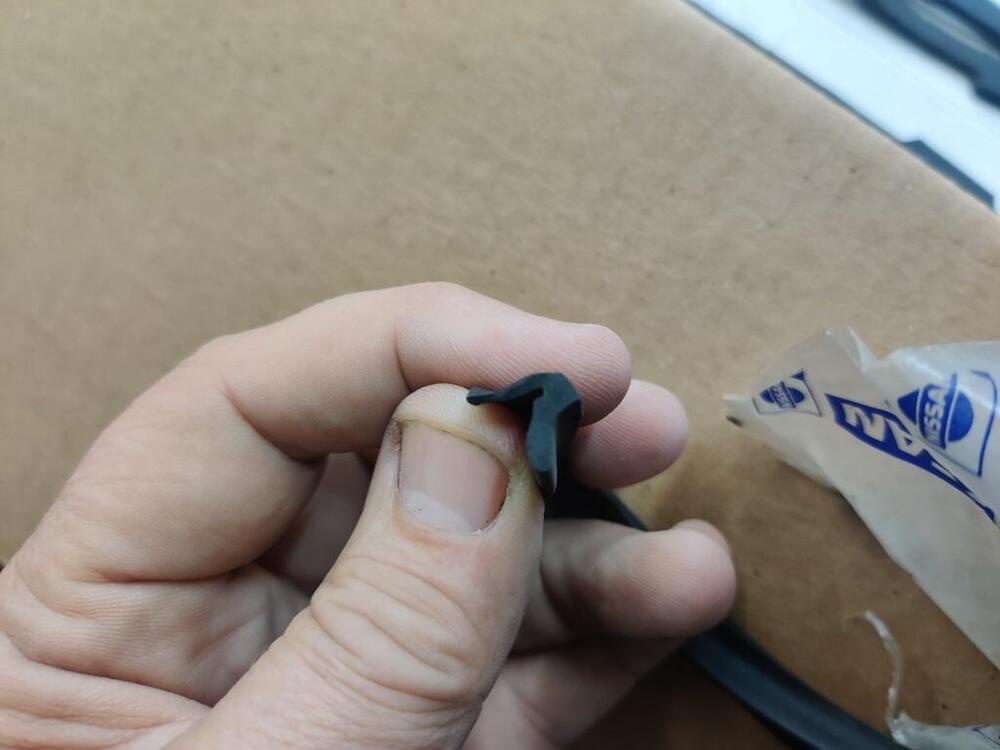
No, I am investigating my transmission rear bushing. I have two of these on hand I bought years ago: https://sales.omegamachine.com/Nissan_FS5W71C_Extension_Housing_Bushing_p/71411.htm I slipped one onto the old prop shaft yoke and it fits nicely. Not loose and not tight. I will have more time later tonight to measure ID and the OD of the new yoke. I'd say the new yoke is deflecting a good 0.030" to 0.040" up and down (total) inside the tail of the transmission right now. I am thinking I may need to pull the transmission tail section out of the car to do this bushing replacement.
-
How vibration free is your 70-71 240Z?
Shimming the entire crossmember downwards creates a problem because it won't squish the front control arm bushings to hold them in place. It might be possible, but you would have to shim where the crossmember clamps those bushings as well. After thinking about options for a few days, I ended up grabbing a later front diff isolator (I had a spare) and modifying it. I flipped it around to work with my differential which is in the stock position (not moved back like the 72 model). I didn't take many pictures, but basically, I cut off the ears, flipped them over and swapped sides. I was very careful to tack and position them level to each other and in an adjusted (and equal) front to rear orientation. The net result was to lower the differential at this mount location by nearly 1/4", and to remove some of the angle that was manufactured into it. For the propeller shaft, I replaced the front yoke with a new one and got a local shop to balance it. I painted it and the mount: After installing both, and placing spacers between the body and the transmission crossmember, I took some angle measurements: pinion flange, crankshaft dampener, driveshaft tube in that order: I would have liked to have lowered the front of the differential a bit more, but the diff housing was nearly touching top plate of the diff isolator. And, I would have to add a much thicker spacer between the body and the transmission crossmember to get it down to 88.2. The bolts are quite long though, so maybe I will. Now the not so good news. There seems to be quite a large amount of movement of the new transmission yoke inside the tail of the transmission. I am concerned that the bushing in the tail shaft is excessively worn. This picture was concerning when I saw it. Maybe because of excessive wear in the bushing in the tail of the transmission, my driveshaft with improper u-joint angularity was vibrating around much more that it should have. I'll need to check for a wear specification. The 240SX transmission I the one thing on this whole car that I did not fully rebuild! Ugh!
-
Hose Clamp Finishes
I don't recall seeing any yellow double wire clamps on the car originally - hoops or otherwise, at least not yellow like the plating we see today. I was at Caffeine and Octane and a couple of guys who used to plate stuff as their business commented on my yellow chromate /zinc plating. They said something about how difficult it is to replicate the original yellow plating because the chemicals are different or something like that. They said we all have to put up with the 'really yellow' plating we have now. I am unsure of the accuracy of that statement. Others, especially original owners, should chime in here if possible, but my recommendation would be to go with clear zinc for all the hose clamps on the car because if you go with yellow chromate, you'll almost certainly end up with a much more yellow color than anything you see that originally had a very slight yellow tint. With my examination of the hardware on my car I found few if any exceptions to: clear zinc: all JIS (cross in the head) screws all clamps coil bracket spare tire hold down door latches and catches some lock washer and flat washers - as used with JIS screws I believe the hardware list I uploaded has the color listed. It is not exhaustive, but it is extensive.
-
How vibration free is your 70-71 240Z?
Been looking at RT mount info. Found this: https://www.technoversions.com/DiffMount.html If I were to go this route, the mount underneath the differential would have to be removed completely. There is also question as to whether the RT bracket and this mount would fit the car without modification. Apparently, it is likely that the bolt for the mount to the bracket will interfere with part of the handbrake linkage. Though, there is a possibility that the mount has 3 mounting holes, and if so, one could use the two outside ones instead of the middle one and solve that issue. I can find a little bit of info about people addressing this problem, but I have not found conclusive proof that unmodified cars have this issue. I'd like to get some confirmation of that. Otherwise, I feel like I am missing something.
-
How vibration free is your 70-71 240Z?
I hear ya. I guess since I now know I have something that isn't right, I feel I need to fix it. Working on it today, I found some interesting things. One, I was thinking would be a problem, and it is. The front yoke of my driveshaft had some corrosion on it. I tried to clean it up as best I could and was hoping that when I sent the driveshaft off to be shortened and balanced, that the part where the seal rides would be ok. This black goo in the first pic is the rear transmission seal wearing at an accelerated rate. In the second picture, I have removed the yoke shield, and you can see where the seal was contacting at the two points (front and rear edges of the seal) on the shaft. In the third picture, you see where the yoke has been touching the transmission tail shaft inner bushing. That should not be, and could be indicative of another problem. Or, it could be evidence that the driveshaft is not happy and vibrating around because of the improper u joint angularity. This is after 500 miles. I received a new yoke this week from ZCarDepot. I am going to transfer the yoke shield over to the new one (two spot welds) and then take the parts to a local driveshaft shop. Given where the "wear" marks are from the tail shaft bushing on the old yoke input shaft (kind of centered front to back), and that I didn't have any problems with rubbing, I think the propeller shaft assembly length is ok. But, it barely fits between the transmission and the differential. When installing it, I have to bottom it out inside the transmission and rotate it to a particular position before the rear will go onto the front pinion flange. Once there it pulls back just a bit and the two mating surfaces contact. As far as how I am going to deal with the excessive angle at the pinion flange, I am open to ideas. The front of the differential points upwards noticeably when mounted in the car. I think I will need to focus my efforts on modifying the front differential/suspension crossmember, and/or the front isolator. I have a spare front differential/suspension crossmember, and a spare isolator (55415-N4301). I could flip it around 180 degrees and cut and weld on it to remove the incline... Or, I could cut the top surface of the differential/suspension crossmember where the isolator sits to lower it a bit. Going to do other stuff for now and wait for opinions and think on it some more.
-
How vibration free is your 70-71 240Z?
Ok, I took a measurement on the factory transmission crossmember. The crossmember has a "drop" of 5/8". So, when the crossmember is bolted into place, the top surface that the transmission isolator is 5/8" lower than the ends. The Techno Toys Tuning has the same amount of drop. The difference is that the hole for the isolator is shifted back also - it is not exactly in line with the transmission crossmember mounting holes like the stock one. It seems that all is well up front. It is possible that the 240SX transmission locates in a slightly different position vertically than the stock 4 speed. However, as I discovered when loosening the transmission crossmember bolts enough to drop the transmission about a 1/4" or so, the angle of the output shaft of the transmission didn't change much. It went from about 89 degrees to about 88.5. Turning my attention to the rear differential isolator, it is easy to see that there is an angle "built into it". While somewhat difficult to see in this picture while installed in the car, if you look closely at the vertical plate of the isolator and compare to the straight edge, you might be able to tell that the top of the vertical plate is closer to the straight edge than the bottom. Removing the isolator from the car, I confirmed that part number of 55415-E4102. This one was replaced new by the prior owner of the car and remained unused other than supporting the diff in the car for about 28 years. Outside the car, it is easier to see the amount of incline built into the part. I measured the angle on the cardboard surface and got .3. So, 3.6 minus .3 is 3.3 degrees. Ok... Why? One would have to assume that there is something different about my car. Too much angle on the rear section of the driveshaft which is causing a driveline vibration - it would not be a possibility that the engineers got this wrong, would it? And, now that I have been through all of this, I am fairly certain that I have been here and done this with my track car before. I believe I ended up modifying the differential isolator to reduce this angle for that car as well. I am very interested to see if this issue (too much upward incline at the front of the differential relative to the output of the transmission) is present in unmodified pre-72 model year cars.
-
How vibration free is your 70-71 240Z?
Good thought. I do. I will have a look at it to compare.
-
Choosing an SU Needle - If I have needle station info and real world AFR, can I use that to find the right needle?
Oops, missed that question. Yes, when I pull the choke lever a bit, the AFRs change - the numbers come down.
-
How vibration free is your 70-71 240Z?
I bought one of these Magnetic Bore Laser Sight to help with alignment of the transmission to the differential. Still pondering on the options for how best to solve my issue.
-
How vibration free is your 70-71 240Z?
I played around with lowering the rear of the transmission today after work. I backed off the bolts securing the transmission mount (Techno Toys Tuning) to the body to see what kind of change in angle would result. Picture of the mount I have (for use with the 240SX transmission) in the early Z: Backing the bolts off to drop the rear of the transmission more than 5/16 of an inch only changed the angle from 89 to 88.5. I expected more change in angle. Anyway, now I am thinking through various things. I find myself asking why the front differential insulator mount has such a "large" angle to it. First of all, I confirmed that my insulator mount is part number 55415-E4102 (the early one). When looking at the factory workshop manual, the image clearly shows an inclination. As my car is sitting on the lift, I measured the inclination of the pinion flange, and it was 87.1 degrees. Why is it so far away from 90? I mean, the driveshaft is supposed to operate with less than 3 degrees of angularity on the u-joints. If I was able to match the 87.1 at the transmission, that would be 2.9 degrees on each u-joint. And, we all know that when power is applied to the input flange, the nose of the differential lifts upwards (and thus the need for the "arrestor" belt which limits to differentials upward movement at the front). It seems to me, that instead of dropping the rear of the transmission down, it would be far better for me to change the angle of the front pinion flange, by either lowering the front of the differential, or raising the rear of the differential. Since I have used lowering springs to lower the car a bit, it seems to me that it would be more desirable to raise the rear of the differential. However, that would require modification of my stock parts here, perhaps removing the upper washers that have rubber bonded to them and replacing them with flat washers? I went through a fair amount trouble to source these washers as I am fairly certain they are what came originally on my 6/71 car. Further, I believe that the front differential mount, front differential insulator, rear differential mount, and rear differential mount washers are all as original for my car. So, I am baffled why the pinion flange angle is what it is. Am I missing something? How do I confirm that my front differential mount is the correct part number for my car - 55411-E4100 (used up through 6/71)? What is the difference between that one and the later 55411-N3001 used from 7/71 to 7/73
-
Restoration of BringaTrailer 240z - HLS30-35883
The odometer clicked over 500 miles on Friday night, so I took the valve cover off yesterday and did both the leak down test and adjusted valves. Here were my leak down percentages: #1 = nearly 4% #2 = 2-3% closer to 2 #3 = 4% #4 = 4% #5 = 3% #6 = a little over 1% For my Iskenderian cam, the valve lash is .006" on the intakes and .008" on the exhaust. I set each so that the feeler gauge was a snug fit while the engine was cold. All of the cam lobe surfaces looked great! The next time I fire it up and get the oil warm, I'll change the oil. Today, I removed a portion of the exhaust and the driveshaft and measured the angles of the front engine dampener and the pinion flange on the differential. I believe I will be able to lower the transmission rear crossmember to bring the engine/transmission assembly to the same 87.1 degrees that the pinion flange is at. I will just need to add shims between the transmission crossmember and the car body. Oh! And I just remembered that I should check the angles in the horizontal plane (not just vertical) as well.
-
How vibration free is your 70-71 240Z?
I found the angles today of the front dampener and the pinion flange: I measured these with the car on the lift. The rear moustache bar is locked in solid - there is no vertical movement at the mounting location. Same for the front diff mount. So, I don't have to consider suspension movement (doing this with the suspension loaded). The angle at the differential pinion flange is 87.1. And the angle at the engine dampener is 89. I should be able to drop the rear of the transmission, hopefully a small amount, to get the angle at the dampener to match. I am glad I didn't use the original motor mounts, which were shorter, and would make this problem worse.
-
Restoration of BringaTrailer 240z - HLS30-35883
It's been a while since I posted an update on the restoration! I have been driving the car - I have 488 miles on it. I reset both front and rear floats using the method in the factory workshop manual. To do so, I cut some "3d" finishing nails to the approximate lengths of 14 mm and 15 mm and then finished them to size with a benchtop grinder. The procedure from the factory workshop manual: Holding the assembly in its installed orientation (not upside down), I first place the 15 mm nail section in between the flat metal part of the float and the underside of the float chamber cover. I put it in place using needle nose pliers so that it is straight vertically. I pinch it to hold it in place by lightly squeezing the float and the chamber cover together. Note that when held in the installed orientation, the needle in the needle is in "free fall" and is in a fully open position. Then, using a magnifying glass, I inspect the area of the float tab and the tip of the needle. I verify that the tip of the needle is not touching the curved arm (tab) of the float. It does have to be within 1 mm of it however. If not, when you swap to the 14 mm nail section, the tab will still not touch the tip of the needle. I adjust the tabs so that both carburetor floats contact the tip of the needles with the 14 mm section of the nail in place. Interestingly, after I had set the floats this way, I noticed that with the 15 mm section of the nail in place, I could blow through the fuel inlet tube, and with the 14 mm section of the nail in place, I could not. So, what I found was that from fully open, to seated, the needles have less vertical movement than 1 mm. While I have been driving the car to break the engine in, I have been looking at air fuel ratios (AFR) using a wideband 02 sensor. I swapped from what I believe to be stock N27 needles to some SM needles. But, I have observed AFRs moving around a bit which is unusual and not expected, and which I think may be due to the engine still breaking in. I started a separate thread that details more about what I was doing and seeing here: https://www.classiczcars.com/forums/topic/69292-choosing-an-su-needle-if-i-have-needle-station-info-and-real-world-afr-can-i-use-that-to-find-the-right-needle/ This weekend I plan to do a leak down test on the engine to confirm break in is complete, change to standard oil (instead of break in oil), and adjust the valves. If the engine is fully broken in, I will do some more AFR testing and determine how to proceed. I may need to modify the SM needles in the cruising and pick up stages by some very light "sanding" - removing material by chucking them up in drill and using 2500 grit sandpaper only in a certain area of each needle. With the driving I have done, I also noticed a vibration at higher speeds. I started a separate thread for that issue: https://www.classiczcars.com/forums/topic/69334-how-vibration-free-is-your-70-71-240z/#comment-675670 Today, I am going to buy a digital angle gauge so I can check some angles in the driveline. I am hopeful doing this will help me determine the cause and fix that issue.
-
How vibration free is your 70-71 240Z?
This video is good as well - much longer and somewhat entertaining actually: https://www.youtube.com/watch?v=YgNZfIR-8Ng
-
How vibration free is your 70-71 240Z?
Thanks for that info, Mark. So, it seems like I should focus my efforts on the driveshaft. While I had the driveshaft shortened and balanced by a reputable driveshaft shop, I am thinking I will need to have it checked. There are actually several driveshaft shops near me, I found out today. I also am unsure if the alignment of the transmission to the differential is off. I need to check left to right of each as well as vertical angles of the rear of the transmission and the front of the differential. Raising the engine a small amount from stock (via the new motor mounts) may be a factor. I am going to buy a digital inclinometer to help with figuring these angles out.
-
Choosing an SU Needle - If I have needle station info and real world AFR, can I use that to find the right needle?
I put some easy miles on the car yesterday; I took it on the interstate for the first time. No full throttle application, I just did some cruising. I have completely eliminated all exhaust leaks I had at the joints. I have ensured that all the nuts and bolts relating to the intake manifold and header are tight and there are not leaks. While I was driving I took a couple more AFR recordings. With the SM needles, I am looking pretty darn good at idle - very near 14.7 to 1: My carburetor linkage is hanging a bit. When I drive normally, and stop for a traffic light, the idle is staying at about 1000. If I rapidly tap the gas pedal, the throttle plates drop a touch, and idle is steady at about 850. I have verified that both carb linkages are hanging... by what looks like something less than .010". When the linkage is hung and the car is idling at 1000, I can put my finger on the carburetor shaft linkage (each one) and force it to shut fully (move the linkage the last few thousandths to contact the idle screws). I think this is likely to go away when I get some more miles on the car. Anyway, during cruise, I am definitely lean with the SM needles - around 16.2: I don't notice any surging when this is happening. All seems well. However, if I depress the gas pedal anywhere from slightly to moderately, the AFR goes a bit more lean and I feel that hesitative state. I still plan to wait until I am at 500 miles before I attempt to do anything else. I am only 50 miles away from that point. Then I will do a leak down check, an oil change, and check valve lash. If the engine is fully broken in at that point, I will need to figure out what to do with either SU spring tuning, or needle tuning.
-
How vibration free is your 70-71 240Z?
Today, I was putting on some miles to be sure the engine is broken in fully on the Z I recently "finished" restoring. I have a vibration that seems to become noticeable around 70 mph. I have only owned two 240Zs, but I have experienced some driveline vibration with each of them. I was hoping not to have the issue with this one, but it is present. And it is bugging me. First, a simple question: Is it perhaps, normal... for a 240Z to have a driveline vibration? I mean, maybe with me driving modern cars, I just have lost touch with how these old cars really were? How do I describe it? Well, for one, the rear view mirror vibrates and blurs the image I see in the mirror a bit. That doesn't seem right. But, it isn't just the mirror. If I touch the center console, or the padded area of the transmission tunnel, I can feel the "hum" that is happening. And, I can feel it coming through the seat as well. The driveshaft has new OEM u-joints and was shortened and balanced by Carolina Driveline in SC. The rear axles have new, OEM u-joints and when they were installed, measurements verified they had the right amount of axial play. The rear differential has all new bearings and was assembled properly. The differential location is stock - it has not been shifted back as was done by the factory for the 1972 and later cars. I remember that the new engine mounts were thicker than the old ones by a bit. That may have raised the engine a touch. I also recall there being some slop in the transmission mount, which allows for a bit of side to side movement of the transmission. I think I will look at the propeller shaft angularity... to see if that looks off. I am interested to hear how much vibration... or how vibration free... is your Z?
-
Choosing an SU Needle - If I have needle station info and real world AFR, can I use that to find the right needle?
I have driven the car two times since the last post. Indeed, the AFR at idle is now higher - it is about 15.4 at 850 RPM. Cruise at 50 in fourth gear on flat road (2800 RPM) is about 15.8 AFR (much higher). While at full throttle in first and second gears, the AFR is about 13.1 to 13.2 (also much higher). No other changes were made. I just tightened the four nuts holding the carburetor bodies to the manifold, and each of the nuts holding the header and the lower half of the intake manifold to the engine and the 6 bolts holding the top of the intake manifold to the head. I also tightened the bolts that hold the intake balance tube to the intake manifold. I don't understand what I am seeing now. Perhaps tightening these, I have introduced a vacuum leak? What is odd though is that the engine seems to have more power. Oh... here is a thought: perhaps the engine is still breaking in! I only have 384 miles on it. Maybe as the cylinders seal a bit better, the combustion is more complete, and that is changing the AFR. I am going to put some more miles on it to get to about 500, and then do a leak down test and record the numbers. If the numbers confirm it is broken in, I will change out the break in oil. Then I will pick up with AFR testing.
-
Choosing an SU Needle - If I have needle station info and real world AFR, can I use that to find the right needle?
Just thinking through the option of adding a longer duration of time that the piston takes too drop - that would occur with higher weight oil. Probably wouldn't be the way to address the issue, because it would only add say another second or so (just guessing), before the piston would reach the same point of travel (and the needle reach the same point inside the nozzle) where it goes really lean. I found I was able to tighten all of the nuts holding the carbs to intake manifold as well as the intake manifold and header to the engine. Some I was able to tighten nearly a quarter of a turn. I fired the engine up after that, and I got a wildly different AFR at idle. So! It was raining and I didn't want to take the car out. I will revisit and see if I tightening up those things has perhaps eliminated an air/vacuum leak.
-
Bodywork Issues
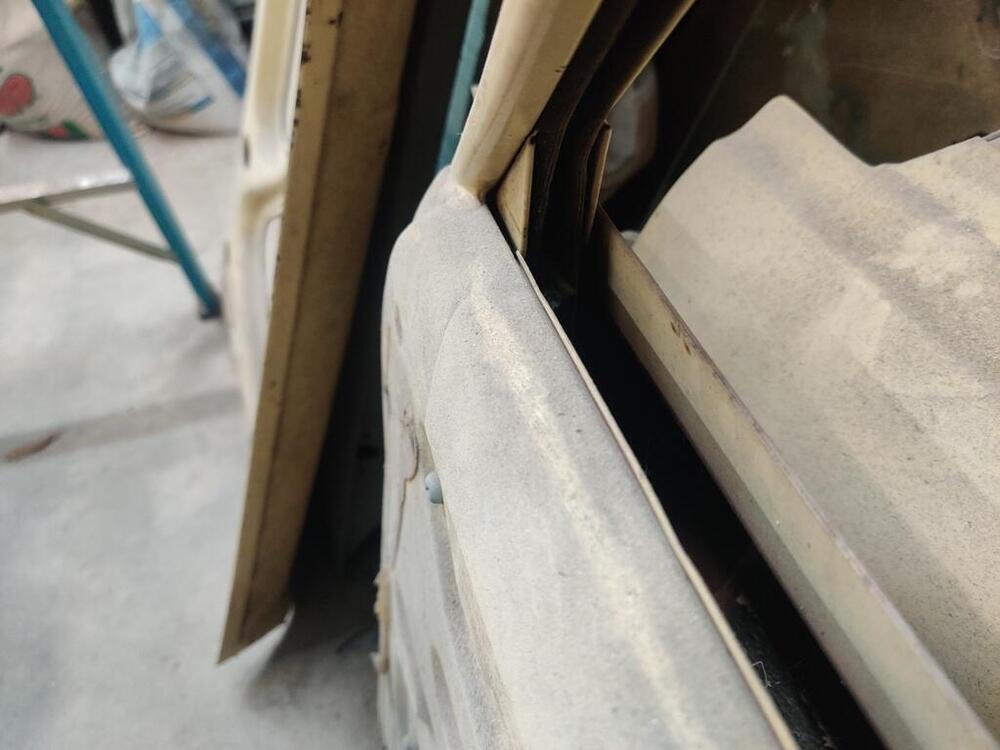
Have a look at this post in this thread. https://www.classiczcars.com/forums/topic/55369-1971-hls30-14938-lily-build/?&page=79&_rid=2858#findComment-66409 Charles mentions that his hatch lifts up as a result of the interference he describes.
-
Choosing an SU Needle - If I have needle station info and real world AFR, can I use that to find the right needle?
I had it connected and it was working, but it malfunctioned twice (after the engine was warm), causing the engine to "idle" at like 2800 rpm. So, I took out the adjusting screw, which keeps it from operating on the linkage. Perhaps I will hook it back up again and troubleshoot the issue. And I noticed that the on blip, the AFR "nearly instantly" went rich. That is certainly good, as it shows the carb is working like it has an accel pump circuit. That tells me I could experiment with a higher weight oil than the 10W-30 I have in there now.
-
Choosing an SU Needle - If I have needle station info and real world AFR, can I use that to find the right needle?
Thanks @Captain Obvious - little late is better than never I guess! But I did check the springs yesterday vs. a spare one I have and I checked the dampers. Both of the springs appear to be original and in good condition. They are the same free standing height as the spare one I have. I bought a carburetor rebuild kit from ZcarDepot a while back. The diameter of the brass barrel on the old dampers was not measurably different from the one of the new dampers that came with the kit. Interestingly, the barrel heights are shorter on the new dampers... and the distance they move on the stick is larger. And the new sticks don't have oil height marks. I choose to stay with the original dampers and springs. I changed the oil from straight 20 weight to 10W30 because I have that on hand and then went our for a few more AFR checking runs. Here is what I am looking at when letting off the throttle. This is cruising in 4th, then a rev match downshift to 3rd with throttle completely shut shortly thereafter for decel. From around 14.7 at cruise, when I blip the throttle to rev match, the mixture changes to around 12, but with the throttle plates shut entirely, after a second or so, the AFR starts to climb quickly, spiking north of 22. Unsure what that drop in AFR is at 9 seconds - I may have touched the throttle briefly. here is a lot of popping out of the exhaust during any overrun like the above. It seems odd that with the mixture looking pretty good under idle and cruise, and not far off under power that I am experiencing this. I will check for leaks at the carb manifold next, as maybe air is bypassing the carbs under high manifold vacuum conditions.
-
Choosing an SU Needle - If I have needle station info and real world AFR, can I use that to find the right needle?
Since the very rich AFR at idle I am experiencing with the N27's is not acceptable, I decided to order some SM needles and give them a shot. A comparison: While the differences at each used station are "small", they are evidently quite large when tuning SU carburetors, as I found out watching How SU carburetors work parts 1 through 4 here: https://www.youtube.com/@ACDodd/videos Anyway, they were only $40 delivered, so not an expensive thing. I swapped those in last weekend and made a few more runs to collect AFR. Doing so, I saw some changes and made some new observations. First the plots: Idle: I am quite happy with that. 14.7 to 1 is stoichiometric. For idle speed, I think that would be ideal. But I think this is great. cruise: For the recording of cruising above, I was mostly on flat road holding the speed at an indicated 50 mph in third. My RPMs are now being recorded, but honestly, I don't know which to believe, my tach, or the LM2, as there is a notable difference off of idle. Generally, the LM2 is reading higher by as much as ~500 rpm. I plan to notate some speeds in gears and tach and LM2 rpm readings and compare with calculated info based on transmission and differential ratios and tire diameter to see which is more accurate. Again, for cruising, I like the AFRs I am seeing here. I do not notice any surging or anything out of usual when slightly lean by this much while cruising. It should be good for fuel economy. acceleration: Now, for acceleration, I am less pleased. The first steep rise is first gear. I think I pressed record just after the light turned green and applied full throttle in first, then shifted to second and applied full throttle, then shifted to third and applied full throttle - very briefly. My focus points are seconds 2-3 and 6 to 8 and a half. For those, I am in a steady state - full throttle - flat road. In first, the AFR is a bit under 12. In second, it looks like about 12 to 12.2. So, rich. What got really interesting is that when I shifted to third and again applied full throttle, the engine essential "stopped" as the AFR spiked up to north of 20. I suspect the float bowls went dry. I was able to repeat this a second time. So, I will need to investigate this further. Now that I have watched the video series mentioned above, I will plan out my next steps differently. I won't be messing with needles for now. I need to check the springs in the carburetor to see if they are original and in good condition. And I need to investigate my dampers. They may have too much wear. One of the indications that I have an issue with either the springs or the dampers is that (and this is with both the N27 and the SM needles), the AFR is going extreme lean on throttle off deceleration. It is worse with the SM needles - going north of 20. But it is bad with the N27s as well, going north of 18. Lots of popping out of the exhaust... Based on the info in the videos, that is either spring or damper.
-
Choosing an SU Needle - If I have needle station info and real world AFR, can I use that to find the right needle?
I installed the new exhaust clamps today. As is often the case, I had to modify them to fit the pipe that slips over the header collector. The clamps were for 2.5 inch diameter, and while the headers have 2.5 inch outlets, the merge pipe that slips over top of those has an OD of 2.665". The "T bolt" clamps that were supplied originally were not heavy duty enough to clamp the slip fit connection tight enough to eliminate leaks. These new ones are strong enough, but I had to use a die grinder to slot the holes for the bolt and trim a bit off of the aluminum spacer to achieve a larger overall installed diameter when on the pipe: One of them still leaks a tad, but the other seems air tight. I will mess with the one a bit more some other day. With that done, I went about the main task of the day, which was to get some baseline AFR readings. Stock N27 needles, new nozzles, remanufactured carbs, in sync, etc. Mixture screws are turned down 2.2 turns. Here is idle: Let's call it 10.2 - 10.4. Here is steady state cruise. I will note that at a steady cruise on a very slight incline road, the AFR is a bit leaner than steady steady cruise on a perfectly flat, or very slightly declining road. Also, my RPM are only being recorded properly at idle. Any revs, and the signal is getting lost. This run is basically cruising in third gear at something above 3000 RPM Let's call that 16.2 - 16.5. And finally, a near, if not full throttle pull in first, and second, and part of third: This This one is harder to read. Wish the RPM signal was recording accurately. That said, looking at the above and recalling from watching the AFRs while accelerating with near full throttle, I was surprised to see numbers in the 12's and 13's. I am near certain that the two drops in the AFR line above (I put yellow notes at 4 and 9 seconds are shifts from first to second, and second to third. So, "pulling" in second under near or full throttle (look at seconds 6 through 9), I am seeing 12.9 to 13.4? I think I will work on getting the RPM signal attenuated and then I need to make some more full throttle runs. Perhaps I should do a leak down as a check to see if the engine is fully broken in. I've got about 280 miles on it, and until today, hadn't given any full throttle. That's why I was surprised with those AFR readings - I had only been applying moderate throttle and when doing that I am definitely getting lean AFRs. Transitioning from cruise to part throttle acceleration, I am generally seeing 16.9 to 17.1.
-
Choosing an SU Needle - If I have needle station info and real world AFR, can I use that to find the right needle?
Thanks for the reply. I overlooked the RH, but it looks much like the OA6 - leaner than the N27 for the first two stations and richer at every other station. I'll add it to the rather narrow consideration set.