


Captain Obvious
Free Member
-
Joined
-
Last visited
Everything posted by Captain Obvious
-
 I got nothing technical to add to this thread. My only question is does it really belong in the "club website" sub-forum? @Mike
 -
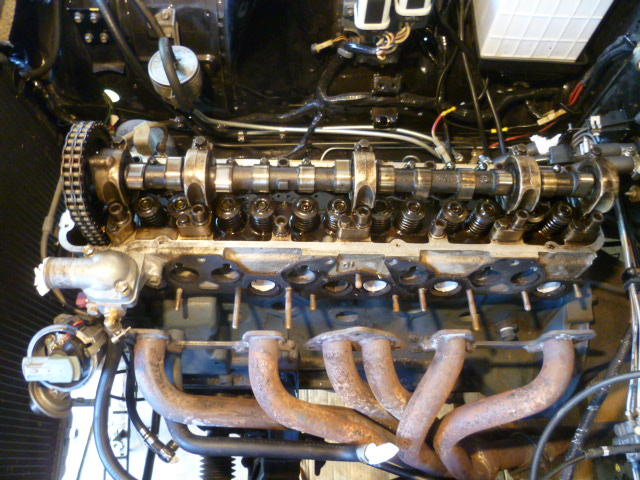
So here's another question... My PO used stainless studs for the exhaust instead of the original bolts, and some of them are crazy long. And the positions of the long ones seem almost random. Here's a pic I took during the teardown. There's four super long studs... Three of them easy to see in the pic, and a fourth hidden under the thermostat housing: Question is... Is there some logical reason for the length and the positioning? He clearly did it on purpose. Any ideas? I haven't tried to take any of them out (yet). I'm kinda torn between leaving just sleeping dogs lie and poking them. Based on what I've found elsewhere, I'm a little worried that something might be stripped out of the head or (literally) holding on by a thread.
-
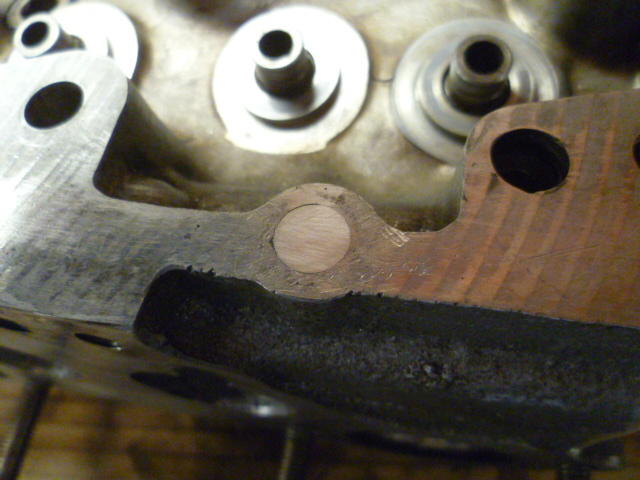
Thanks again guys. So here's that plug where my PO drilled through into the water jacket. Cut off and now flush: I'll drill and tap for the valve cover bolt later. Now that I've got good metal to work with, that shouldn't be difficult.
-
That's good enough for me. If you've seen tape like this on other heads, I'm going to assume it's factory and just let the plugs be as they are. Thanks for the data point.
-
I haven't dug into technical details, but for those of you who are already looking into it... Remember that it's a 78. Might be different than what you are used to seeing.
-
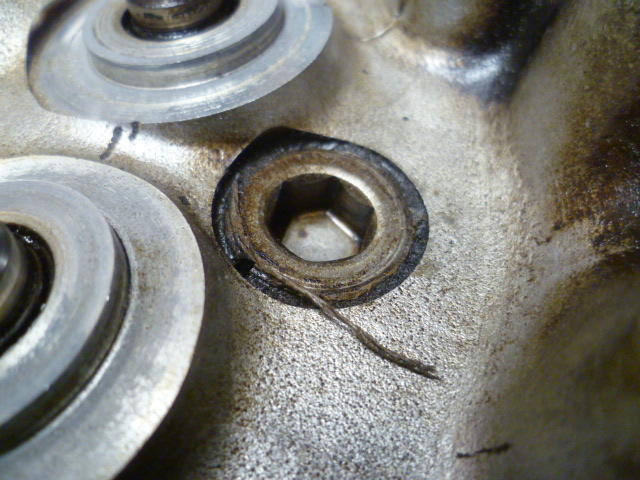
So here's a question for the collective... This is a pic of one of the plugs in the head from the casting process. Looks like Teflon tape sealing the plug. Was this factory, or did my PO have these plugs out and use Teflon instead of thread lock? Here's what I got:
-
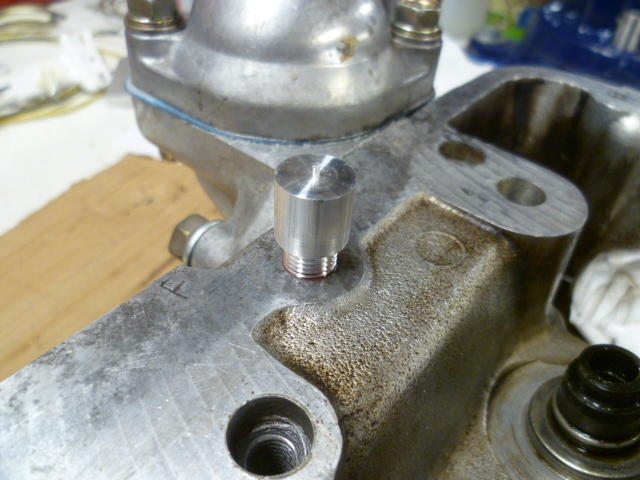
So no steps backwards today!!! I made a plug for the other stripped out valve cover hole up by the thermostat housing. That one was a breeze compared to the other one for many reasons. Mainly because the original hole was in the right place, but just stripped out. That and the fact that my PO had not punctured into the water jacket there too. Anyway compared to the one at the rear, this one was way easy. Red Threadlock on both the plug inserts and screwed them both tight. Here's the smaller, simple one by the thermostat housing: Give the plugs 24 hours to cure and I'll cut them off and flatten the stubs. Today I also took the valve seals off and started cleaning the chambers up. First wave done and no real surprises. Couple small gouges from the PO. Probably from slip-oops while cleaning the old head gasket off. Annoying, but I don't think they are going to cause problems. So, couple steps forward, and no steps back! Much better than the past few days!!
-
Oh, and my donor cam from @jonathanrussell arrived today and looks great! Thanks again for the incredible generosity!!

-
So I know that I'm way past the point of reasonable cost-benefit-labor-hassle... But at this point, it's me vs. my PO. It's personal.
-
I got a couple hours in the shop today. Here's what I started with. You can't really tell from this pic but that hole goes in on somewhat of an angle. It's not square to the top surface. It cuts in towards the center of the head: First I bored out the hole (hopefully close to the correct location) to about as large as I was comfortable with. Here you can clearly see the off-center hole that punctured down into the water jacket below: Then once that was done, I threaded that hole: And made a threaded insert on the lathe: Here's a test fit: I didn't glue the insert in yet. I'll do that tomorrow with a clear head. And then after I glue it in, I'll cut off the excess and machine flat.


-
And, since no car good project goes along without complication, I've found another PO caused issue with my N47 head. I had known for some time that a couple of my valve cover bolt holes were stripped out. Not the end of the world. And I also already knew that on one of them, my PO had tried to drill out the old bolt and missed. Hole was off center, half the steel bolt still stuck in there, crappy threads... The usual. Well, I decided that since I had the head on the workbench, I was going to do something about it. Mistake. I'm looking at the whole situation, and noticed that there is a chunk of brass way down in the bottom of the off center chewed up hole. I have no idea what that's all about, but I don't want it in there. So I start drilling it out. Figured out what was going on there... When he drilled (half) the old bolt out, he drilled too deep, and actually punctured through into the water jacket below. AAARRRRRRGH!!!!! That chunk of brass was some sort of plug he stuffed down into there to seal the bottom of the hole back up. So now I'm going to spend the next bunch of hours working on trying to fix that crap.
-
Thanks guys. I (think I) just nabbed the last 24 off rockauto. I need 12 for this engine, and 12 for my P79 when I get back onto that. So, now that it may be too late.... Same part number for both intake and exhaust?
-
So anyone got a recommendation on valve seals? Nissan genuine? Doesn't matter, all the aftermarkets are fine? Low profile Ford (I think?)? Viton? Anything?
-
Back story? Typical. I bought it a number of years ago with very little detailed info about it's history. I got a couple pictures from the PO taken during some of the work he did to the car, and a couple of the pics show the head off the engine, so I know he did that much. I also have a stack of receipts that include ONE piston and rings for said piston. So I don't know what goes wrong with an engine that requires the replacement of just one piston, but the implication is..... My PO has been into the bottom end as well. Kinda makes me wonder what kind of trouble lurks down there. All that said... I didn't buy the car for the condition of the engine. I bought it for the condition of the underside. It's pretty much rust free. To me, everything else is easy.
-
Thanks all for the encouraging words, and thanks also for the additional investigative work on the head thickness. I guess the bottom line is that I've got a reasonably high degree of confidence that my head was never planed. Surprising to me that the PO would get as deep into the head and NOT have it cut, but thankful for small miracles. Just one less thing to get screwed up under his ownership. Right. I saw that in the manual. The point of the pic is that so far I've taken out one of each direction so far. My PO apparently didn't know they were unidirectional and just tossed tehm in random. I will put them all in the right way when I put this thing back together.
-
I love the look. My guess is the only reason they made the headlight scoops a separate piece is they just couldn't form one sheet into the shape they wanted. Either geometrically impossible, or too much stretching for the metal to handle. I suspect if they could have successfully made the fender / scoop one piece, they would have.
-
-
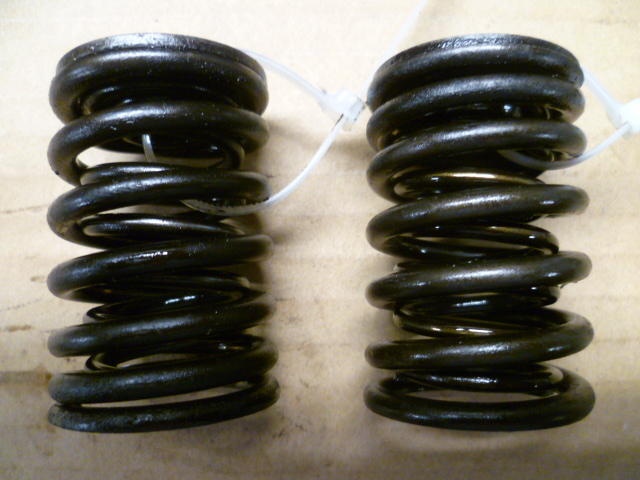
So I started stripping the valves out of the head. Next chance I get, I'll post up some pics of my home-brewed valve tool, but in the meantime..... So I'm taking the valves out, and here's the springs from a couple of the valves. I never even knew the springs had a variable pitch and a "proper direction" to them, and apparently neither did my PO. The retainer caps are at the top for both of these, but the pitch direction is different between the two: I'm not sure how much difference it makes in the grand scheme of things, but just another detail that was missed.
-
Even though functionally it's not critical, It would be highly un-Japanese to not control that dimension from the factory. These things are running down the assembly line and IMHO it would be extremely unlikely that they were not all peas in a pod to within a thousandth or so.
-
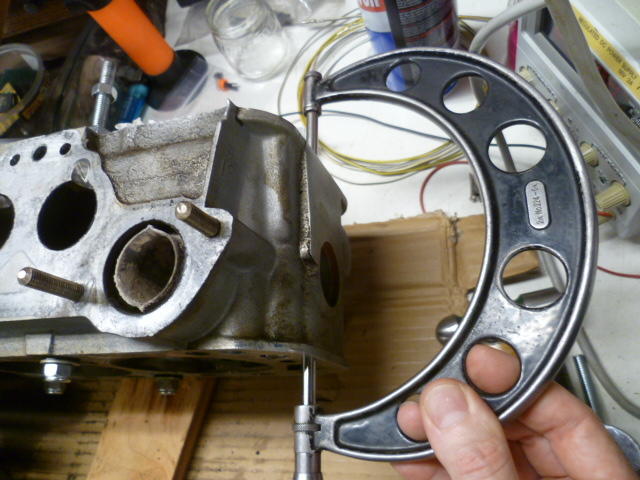
Well I don't have an explanation for why your E88 is different than my N47, but I do stand by my numbers. I cleaned off the measuring surfaces and even broke out the big guns. More accurate than the springy calipers for things like this. I don't know the last time this ol' girl saw the light of day, but she's still got it where it counts: Installed the correct anvil, checked her against the measurement standard rod, and then rechecked the head. I get the same thing I got before. About 4.254 inches or about 108 mm. So I don't know if they changed the head thickness over the years, or if yours has been cut.

-
-
-
Well, duh.
-
I call BS on the original paint. For that call, I cite (in addition to the blue on the door jamb plate) overspray on the wiper stalks, hood latch, and brake booster check valve. In addition, it appears there is blue paint on TOP of the dirt on the hood hinges. I got no dog in this fight, but I call BS.
-
I will get a better measurement on the head thickness once I get things cleaned up. But even though I took just a quick check, I don't think I've got eight thousandths of grime on my head. There might be a little error in my 4.255 measurement, but just a couple thousandths. Plus or minus two thousandths maybe? Probably not eight. So either they made the N47 head thicker than the E88, or I'm thinking your E88 has been cut. Anyway, when I get things cleaned up a little more, I'll take a more reliable reading.


