


Captain Obvious
Free Member
-
Joined
-
Last visited
Everything posted by Captain Obvious
-
 Thanks for the input guys. I haven't figured out what I'm going to do with a head gasket yet, but I'm looking into it. I've got two of the later ZX gaskets on order and I may end up using one of those, but haven't finished the investigation yet. Todays question.... Would I be completely shunned from the collective if I re-used head bolts? I've got three sets of used bolts here and I'm sure I can put together one set that looks great from the three sets that I have. What say ye? I'm planning to cut the heads off a couple of the old rusty long ones to use as guide pins to get the head lined up easier during the re-install procedure, but even with that, I've got enough remaining to make a good looking set.
 -
So today's question... Back to the head gasket. The original head gasket for my 77 listed on the parts fishe is 11044-N4200. I believe I have traced the superseding history as shown below: 11044-N4200 - 09/1974 - 04/1980 11044-N4210 - 05/1980 - 02/1981 11044-N4220 - 05/1980 - 02/1981 (don't know why there are two of them. Might be turbo) 11044-N4221 - Supersedes all of the above Then when they went to the F54 block, they changed the head gasket: 11044-P7900 - 80-82 GL (turbo) 11044-P7910 - 81-83 GL and non GL (everything 83 turbo and non turbo) 11044-P7911 - Supersedes all of the above And I believe the latest part number for the F54 gasket is 11044-P9600 So the question is... Can I used the same head gasket that was intended for the F54 block on my N42 block instead?
-
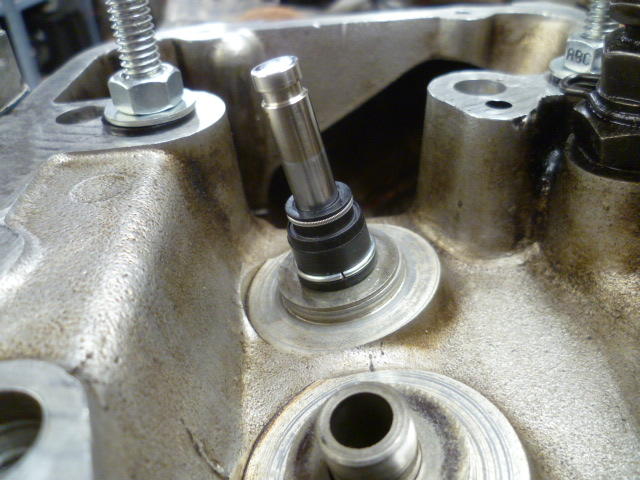
Thanks Dave! I think that's just how mine behave. Maybe just a tiny bit looser. I think my new ones behave like the original OE seal you started with. But they are clearly gripping the stem. And BTW... I did a little measuring of some valve stems, and they are purposely ground a thousandth or so smaller up at the top end where the retainers install. Maybe the first half inch or so along their length? That would be why your valves drop easier once you get them to that point. The stem is actually a little smaller at that point along their length. So it makes perfect sense that as you push the valve down through the seal, you'll reach a point where you get to that narrower part of the stem and it won't grip as tight.
-
Thanks guys. I did a few more valves, and I think I've got a non-problem. There is significant interference between the seal and the valve stem, but the stem is so smooth and with a little Mobil-1 on there, the seal just can't get a grip. jonathanrussell, what I have here behaves exactly as you described. I messed around a little bit with a valve and seal loose from the head, and I think it's OK. The seal is scraping the stem, but with the oil on there, it's really slippy. I'm moving ahead. Thanks again guys!
-
Yeah, that's what first struck me as odd. The brand new ones didn't feel any tighter than the old ones I pulled out. OK... So probably a little step backwards today. Just when I thought I had a day of nothing but progress!
-
Crap. Well maybe I'll check one more valve to see if it's my imagination. If it's not imagination, I guess I'll stop with the reassembly and get a different brand of seals on order. Dave, Checking the ID of the seal is pretty much impossible since it's bendable rubber. Can't get an accurate measurement. IMHO, the best way would be to place them on a gradually tapered dowel rod and see where they stop and then measure the diameter of the rod there. I don't think a direct measurement with calipers or something like that would work. And yes, I used a little drop of motor oil on the seals.
-
Well you know that if you don't find the root cause, it will absolutely happen again. Intermittent problems suck. Did you replace all the electrical connectors in the engine compartment? If the connector to the EFI temperature sensor isn't making great connection, it'll run very rich.
-
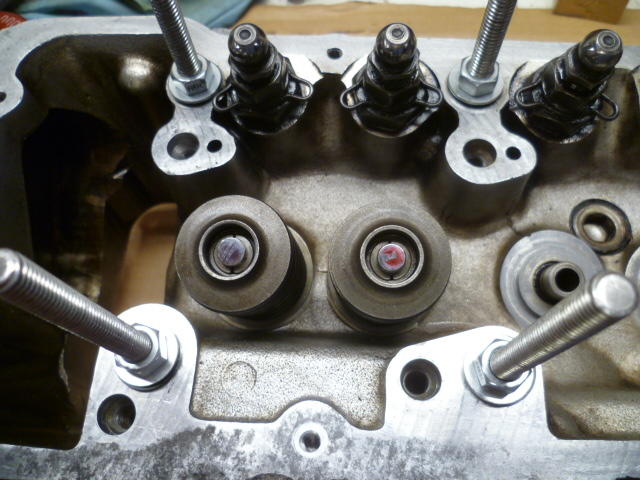
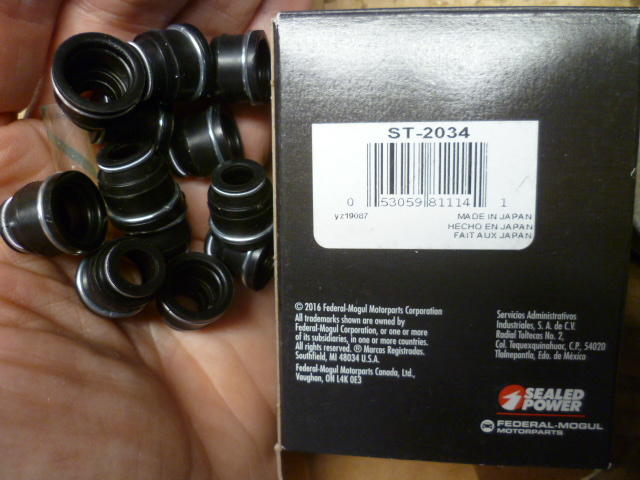
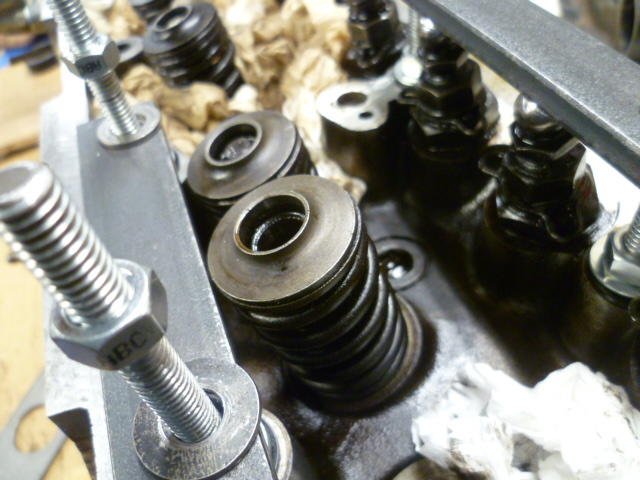
LOL. So today I officially turned a corner and started on the reassembly. Here's the first two valves back in the head. Woot!! : Everything went great. But this process does bring up a question for today... I'm using the Sealer Power valve seals. ST-2034: The seals went on great using the little condom that came in the box, but after installation, they don't seam very tight against the valve stem. I'm no engine rebuild expert, but in my limited experience the other valve seals I've messed with on other cars seemed to have a tighter grip on the valve stem. Anyone have any input about this? Just for a point of reference... The weight of the valve itself is enough to pull the valve down even with the seal installed. My previous experience with other seals is that the grip of the seal on the stem would keep the valve in place against gravity. Of course, it would slide if you pushed it, but gravity alone wasn't enough. Have I got an old dead box of seals, or is that normal?

-
Yeah man. Never seize.
-
Nice. It's already running well enough to get to Nashville? You've got a year to finish the tune!!
-
Would it be easier to tack weld an 1/8 inch spacer to the head flange where the washer makes contact? You running carbs or EFI? How thick is your intake manifold flange?
-
Clogged filter somewhere? Do you still have a fuel pressure gauge installed? Oh, and if Dave is right and you ran it out of gas, you shouldn't ever tell us that. You should make up some story about how your fuel filter clogged with sediment from the bad gas you got last time because they were filling the tanks at the station while you were putting gas in your gas can. Yadda, yadda, yadda, Or something like that.
-
Yes, the stock system used bolts everywhere. I found that same thing on the 83 motor I'm working on in parallel with my blowed up one from my 77. My PO already deviated from stock by installing stainless studs instead of the stock all bolt system. And ignoring the questionable length of the studs he had in there, it worked and I am (at this time) satisfied with that concept. I am NOT, however, satisfied with his choice of nuts that he used on the aforementioned studs.
-
Yeah, I know if I use self locking, it's likely that it will pull the studs out next time. Don't care. I'll deal with that next time. Thanks guys. Two votes for copper.
-
I took some quick ballpark measurements off my stuff and I'm off by about .100. Might be close enough that the original stuff would rock to take care of the misalignment. Haven't looked at it that closely yet. So gundee, how far apart are yours? What's the two dimensions you're trying to match up?
-
So here's a question for today... What do I want to use for exhaust manifold nuts? I'm looking ahead and I want to use something better than the mix-n-match of nuts my PO used. Of the eleven nuts I took off the exhaust... Ten of them were 1/2 inch, and one (just one) was 9/16. In addition, two of them were stainless (really really bad idea to mix stainless on stainless) and the rest were carbon steel. Anyone got a part number for something self locking? Distorted thread? I would really like something 12mm instead of the 1/2 inch nuts I took off. I would really like a set of matched, 12mm wrench, self locking nuts. And BTW, I discovered that my intake manifold is thicker than my header flange, so that might help explain all the exhaust leaks. Another thread popped up here: https://www.classiczcars.com/forums/topic/62535-thick-manifold-washers-notched-wanted/? I'm soliciting input along with the original poster over there.
-
So I've recently discovered that I have the same issue and was considering taking some material off my washers to compensate for the difference in thicknesses. gundee, How far are yours off? Is this an "accepted" fix? Anyone have pictures of said modification?
-
You could try something like this without nuts on both sides of the head, but I don't think you would like the results. I think it would be unstable and fiddley. I've called what I did a contraption, but in reality it's an extremely stable, predictable, and reliable system. I poked a little fun at it because it's a little unusual, but it's actually quite viable.
-
My pleasure. Glad to help!
-
Looks right to me!
-
LOL. It never stops. You just have to keep the voices at bay. BTW - I did not use a milling machine to fabricate my valve contraption.
-
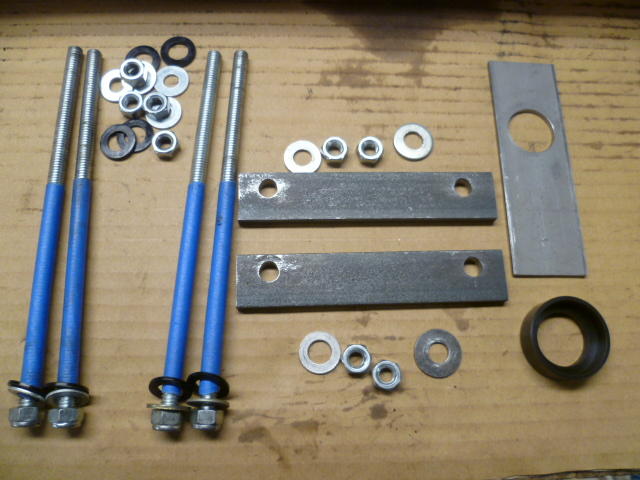
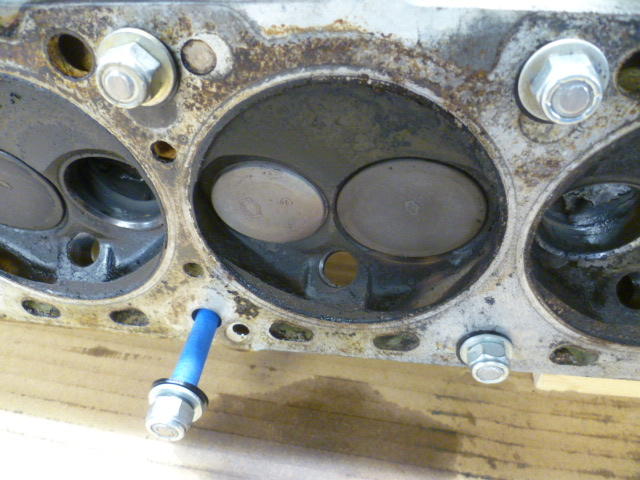
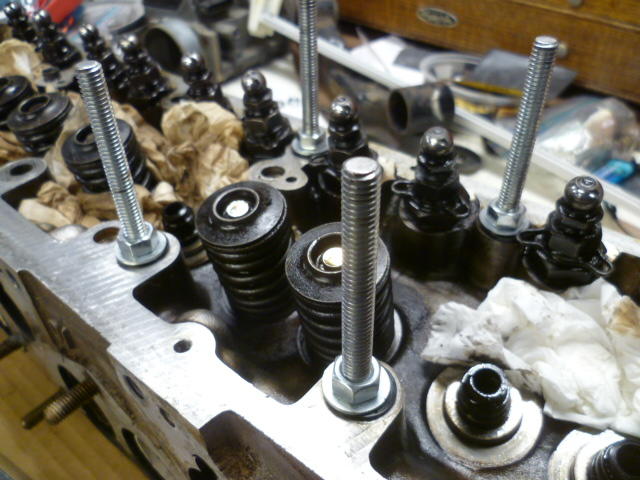
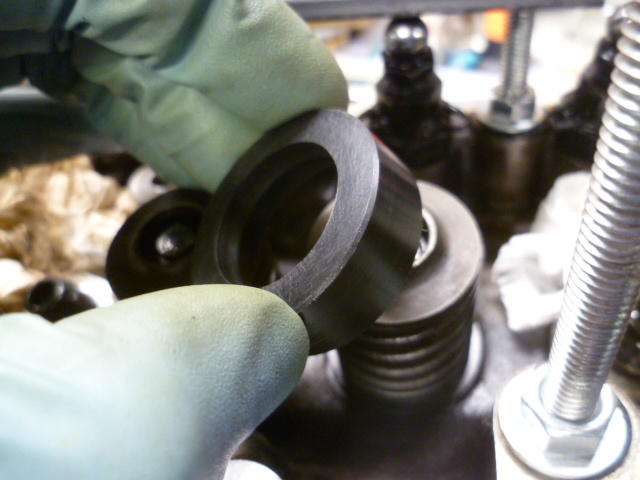
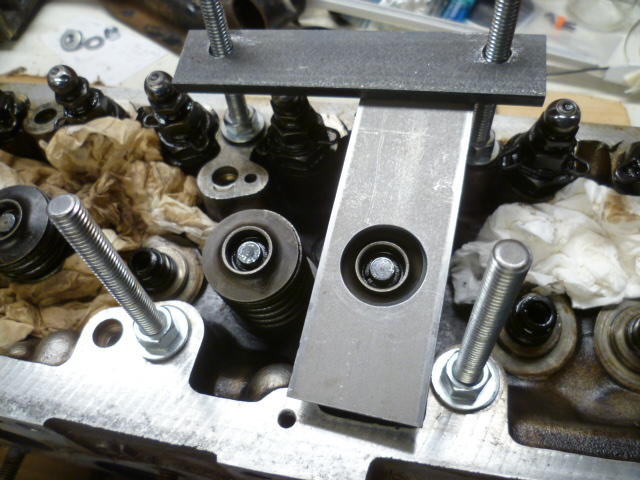
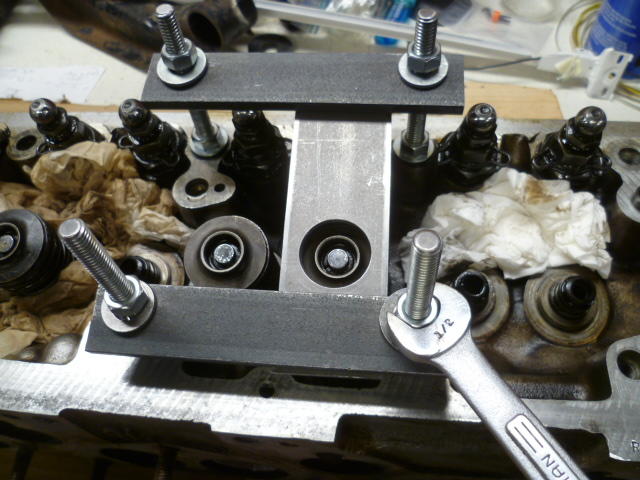
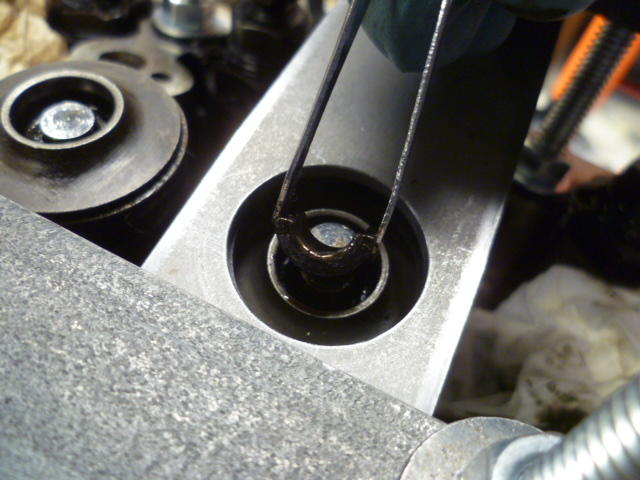
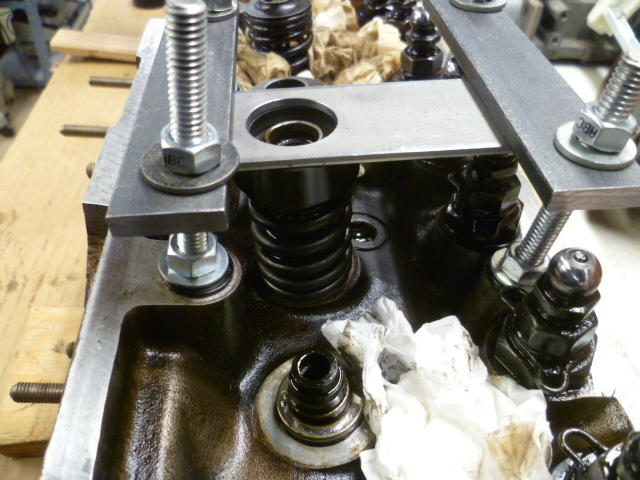
I had mentioned my homebrew valve removal / installation fixture before, but didn't post any pics. Not sure I'll be ridiculed for the contraption, but here's what I made. Here's all the bits and pieces. Some all--thread that I feed through the holes in the head where the head bolts go. The blue stuff is just masking tape on the threads so they don't cut into the soft aluminum of the head. And the black washers are nylon so I don't take the chance that I'll mar the surface where the head gasket seats: Feed the all-thread through the head with a nylon washer, metal washer, and nut on each side: Then I place a Delrin cup (that I made on the lathe) over the valve spring retainer: And then I use the pieces of steel plate in a configuration like this: Put on the other place and once everything is in place, I just tighten down the nuts until the spring is compressed enough to remove the retainers: I used tweezers: Once the retainers are out, just loosen up the nuts to decompress the spring and everything comes out: Yes, it's slow, but there's pretty much zero risk of springing a retainer across the shop. It's very low mental stress and I'm happy with that trade off for speed. Re-assembly will be reverse of dis-assembly.

-
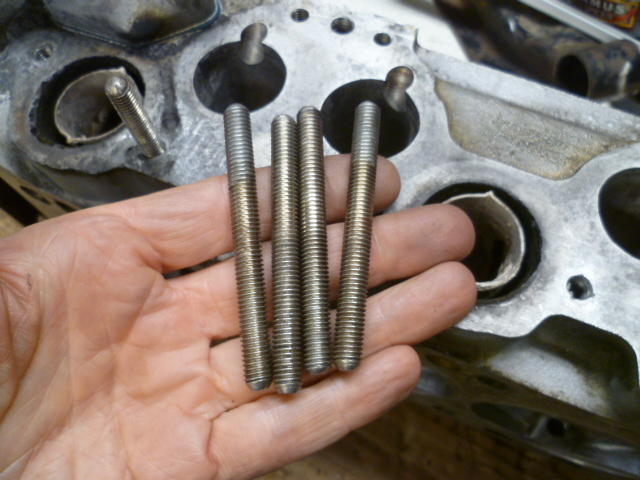
Oh, and all the exhaust studs also came out easy-peasy, so I was able to cut down the super long ones and even up the ends on all the rest as well. Most of them had burrs on the first threads on each end from the PO grinding them after using a hacksaw. The studs are all cleaned up now. Here's the super long ones all out. Thankful for small steps that go well:
-
No, it is not correct. I don't have a pic showing the correct routing, but one thing I do know for sure is that the elbow with the small diameter stub sticking out of it goes on the left side. The air vent should point at the driver's left knee.
-
Fantastic! Boat anchors for the win!! And great pic of those winners. Congrats guys. Congrats to all involved!! I miss you guys!

