


Captain Obvious
Free Member
-
Joined
-
Last visited
Everything posted by Captain Obvious
-
 And thinking about it some more and looking at your ruler measurements on the bolt holes for the new throttle body... I'm not sure there's going to be enough meat with a 100mm outside diameter for the adapter if you need to keep the center bores concentric. Maybe your architect to watch for that when he draws it up in CAD?
 -
Brake handle looks great. I don't understand what you used for the rubber bushing though. Cap from a piece of black pipe? I'm not sure what you mean. Is this a product they sell, or something they put on the threaded ends just to protect the threads?
-
Haha!!! One would assume!
-
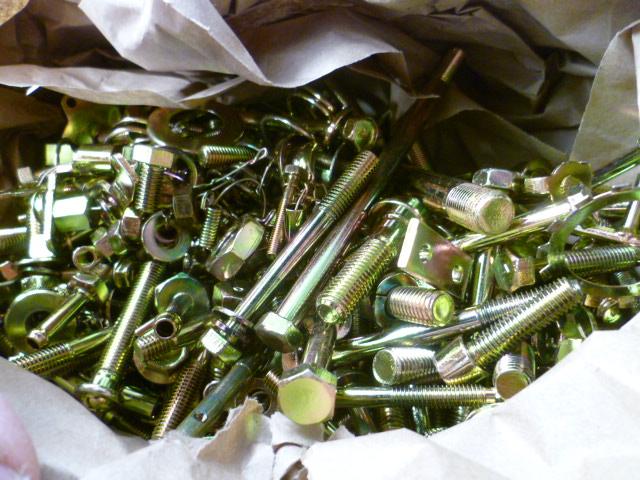
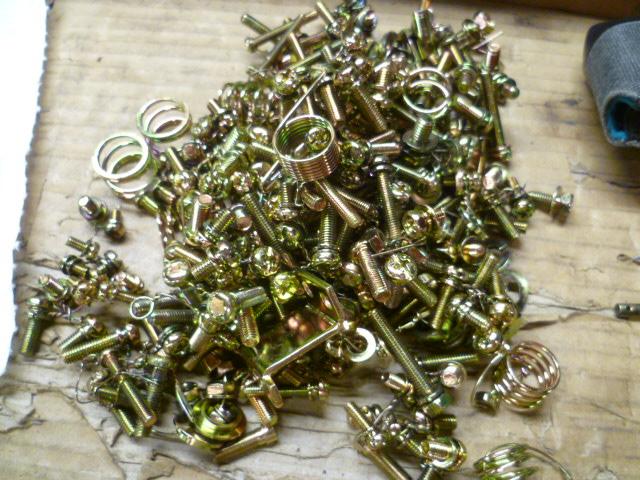
The black coating did not come easily with a finger. Came off with the wire wheel on the grinder, but even after that, the metal seemed to have a darker color to it. However, all that said, I just got the parts back from the plater, and it did not seem to affect how the parts looked after plating. Of course, I'm just looking at the yellow chromate coating and not the zinc underneath, but the parts look great. Couple small issues, but overall, I think it was a success. Everyone loves pics of boxes of newly plated parts, right?

-
Heck no! I'm not poo-pooing a napkin sketch at all. I'd be SOL if it weren't for drawings like that! Haha! My question about the bore sizes goes like this... On your sketch, it's 70mm on the front side if your adapter. But what is the size of the hole on the manifold size (not shown on the napkin sketch)? If it's straight through 70mm, then you're going to have a step change in diameter when you hit the 50mm-ish hole at the inlet side of the manifold. You could probably open up the hole in the manifold some with a grinding burr, but I'm not sure you'd be able to get it all the way out to 70mm. That's what I meant by tapering the hole from 70 down to 50ish.
-
Gotcha. And I also tried to do what you said and keep working it until it's down to bare metal. You'll see the pits where the rust used to be, but the rust is gone. So some other stuff I noticed with the citric acid bath... Some of the parts seemed to develop a black coating when left in the acid for long times. I assume it's due to the composition of the metal itself because it really followed the same type of part. If I had to guess, I would guess it was a higher carbon content steel parts and that was somehow causing a black oxide coating to form. For example... Shepherds hooks got black and so did throttle body mounting socket head cap screws. Most of the stuff didn't seem to care how long it was left in the bath or what temperature it was, but there were a couple things that didn't like extended soak. And (especially on the cold days towards the end of the process) I usually heated up the citric acid bath a little in the microwave to try to speed the de-rusting process, and it seemed the hotter I made it, the more likely that black coating occurred. My temps ranged from "just barely noticeable" to "I can still carry it without a hot mitt, but it's pretty hot". I didn't stick a thermometer in anything.
-
No, no, no... No apologies necessary! I ended up with the benefit of knowledge! The scary part now is I'm thinking "I could program up a little microcontroller to do that easy!"
-
@Jeff Berk I did a little digging into the heating element and how it's used. My (admittedly limited) research indicates that you are correct if you're talking about the older O2 sensors which would run the heating element all the time, but the new ones are monitored and modulated by the engine computer. In order to achieve A/F sensor accuracy, they want the sensor to stay at a constant temperature at all time, so they modulate the power sent to the heater to keep the temp constant. Older sensors didn't need that level of control, they just need to be really hot, but the newer wide band sensors need to stay at a constant temp. Here's the best article I could find about the whole thing: https://www.autoserviceprofessional.com/articles/1097-oxygen-sensor-heaters-how-do-you-know-if-that-heater-fault-code-is-real
-
Haha!! Guilty as charged! So I'll have to install some data collection software somewhere to hook up to the gauge. It certainly won't be to my phone...
-
That sounds like it will work fine. Remember to keep the main bore concentric with the hole in the intake manifold. Only bringing that up because the holes in the new throttle body aren't in a square pattern. Make sure you get the center holes lined up and let the mounting holes fall where they fall. Also, you're changing the diameter along the way... Are you tapering the bore hole in the adapter to account for the change in diameters? I don't think you want big step changes in diameter.
-
All of that stuff is phosphoric acid based. Ospho, Naval Jelly, etc. All creates a barrier of iron phosphate which helps deter the formation of rust in the future. I would have used a phosphoric based compound, but like Granny mentioned, the citric is so much safer. I mean the phosphoric isn't really that bad, but the citric is safer. That said... I did have a couple parts that were really bad (like an ashtray). For those parts, I did resort to the phosphoric stuff spot treatment method. Then once most of the rust was off in the worst spots, I put them in the citric bath with other parts.
-
Yes, I did have issues with rusting after it came out of the citric acid solution, and no, the fact that it was chelated didn't do anything to prevent it. I started this whole process near the end of fall when it was still in the 80's in the afternoons and sunny. At that time, I would dump the hardware jars into a bucket, take them inside and rinse them off in the sink. Then take them back outside and dump them all on the hot black driveway to dry. It seemed that the faster they dried, the better the results (makes sense, right?). But I ran out of calendar time, and by the end of this process, it was in the sixties and there wasn't much direct sun to dry stuff on the driveway. So I set up a three stage rinse bath: 1) Pick out a part or two from the citric acid bath and shake it around in a bucket of clean water. 2) Move it from that bucket into another bucket with "cleaner" water and shake it around. 3) Move it from second water bucket into a small container of methyl alcohol (methanol). My thoughts were that a) it evaporated faster than water, and b) water is miscible with the alcohol so it would go into solution and help get H2O off the surface. Then after all that, lay it out on the semi-warm driveway to dry. That process got me through the end of the parts and the cooler fall days. Most of the larger parts got a quick wizz on the wire wheel after that just because I heard they looked better after plating if you did that. I didn't do the small hardware stuff because it was hard to hold. And yes, I zinnnnnngggged a couple parts across the yard. Only lost one piece in the end, and thankfully didn't put anything through any windows. Yes, it was a PITA, and yes it's done.
-
That's a trick used with acetic acid to speed up the reaction. Apparently acetic acid works better than citric (but it stinks) and the addition of salt makes it work even faster. So fast, in fact, that they warn you not to put anything aluminum in the solution because it will be damaged. I don't know for positive sure if it has the same effect with citric, but like Granny, I did the same and added a little bit to my mix. I figured it wouldn't hurt, and may help. From what I understand, the citric does not convert the rust to anything, but it is "chelated" instead. And my (quite limited) understanding of the whole thing goes like this... Rust is not normally soluble in water, but additions of certain additives (like these mild acids) make it so that rust IS slightly soluble in the solution. I think that makes the acid additions to the water "chelating agents". So once you add citric acid to the water, rust becomes slightly soluble and "washes" off the parts. Doesn't happen quickly, but it happens. So back to my very limited understanding... There are several different combinations of iron and oxygen that can be called "rust", and the addition of salt changes the ionic characteristics of the solution and makes a broader range of them soluble. So in other words, "a wider range of rust types are soluble".
-
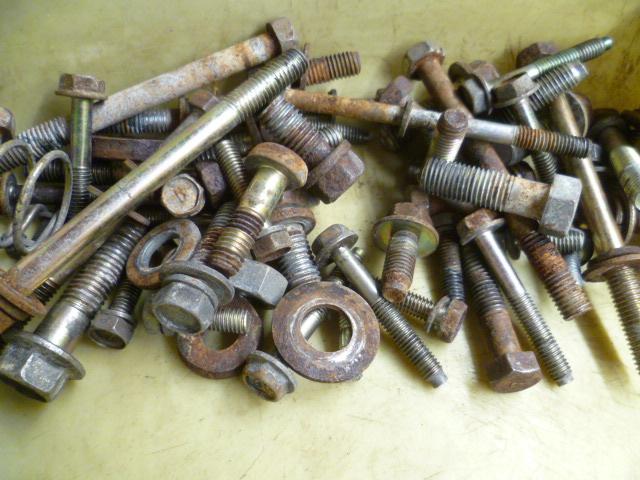
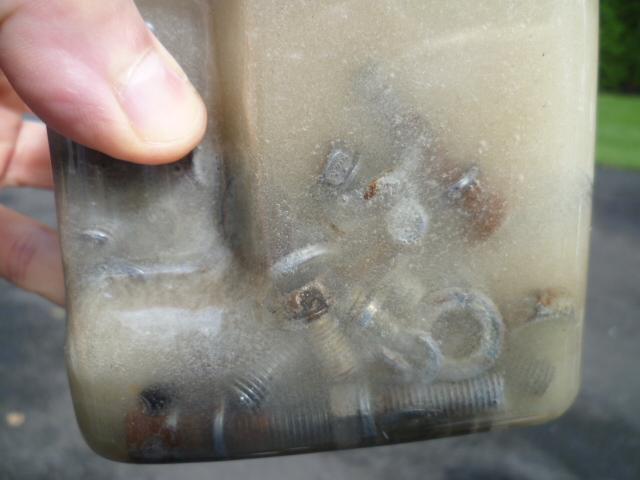
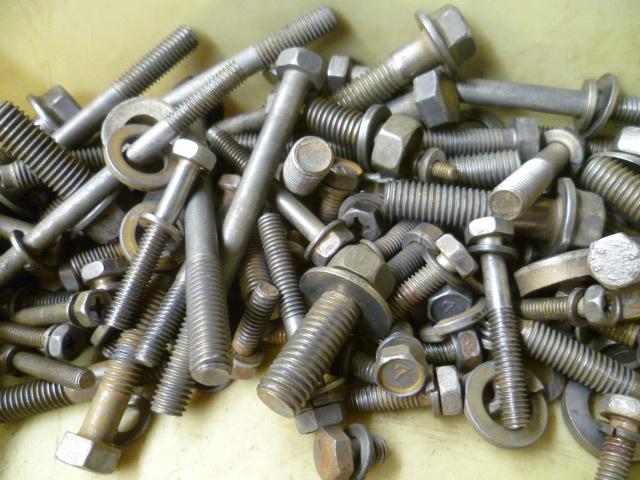
Brothers from a different mother, I tell ya. I've gone through thirty pounds of the stuff in the past two months. It's really hard to get a good picture of the results, but I tried. Here's a handful of misc hardware. Before: I put the stuff in a wide mouth plastic container for a couple hours. When I first put the stuff in, it bubbles and becomes a little milky looking from all the tiny bubbles. I think that's the remaining yellow chromate and zinc plating being eaten off: And then after a couple hours. They aren't sparkling perfect, but are a whole lot better than when I started: Here's about the only good shot I have of before and after: I've got parts out for professional plating right now. Should be done soon.....

-
Wait... You're saying I'm not already a geek?
-
It's sooooooo pretty....


-
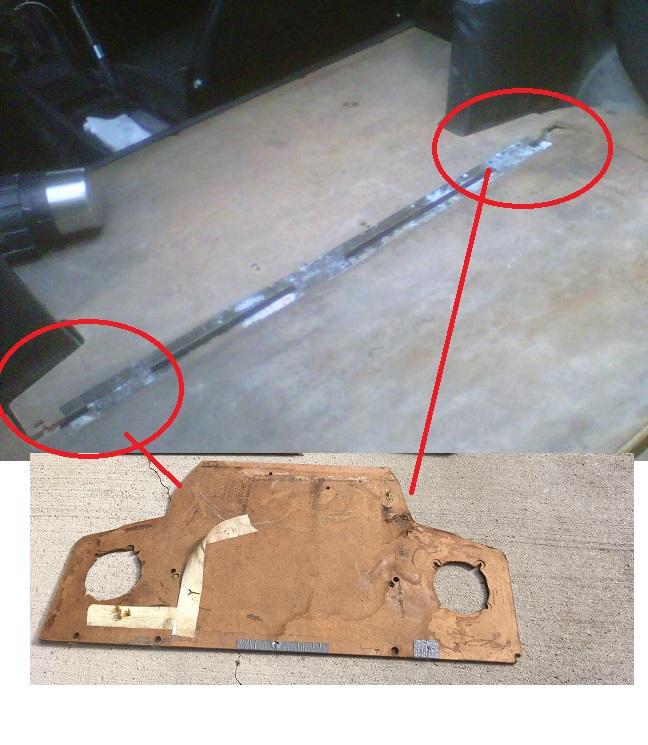
And (just in case you didn't know what I was talking about), here's a pic highlighting the mods your PO made to that front panel. Someone cut the "wings" off:
-
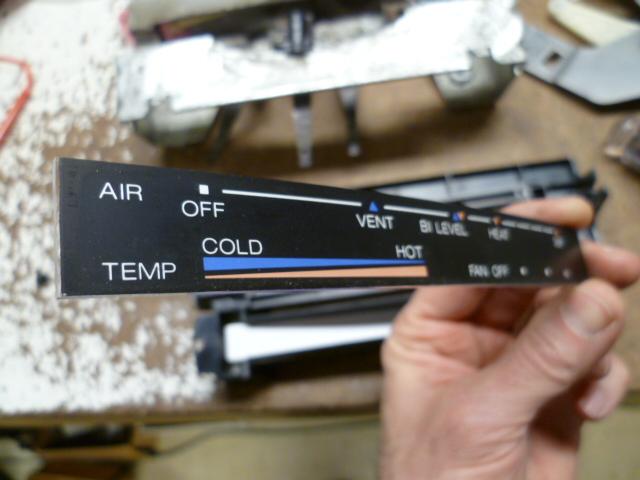
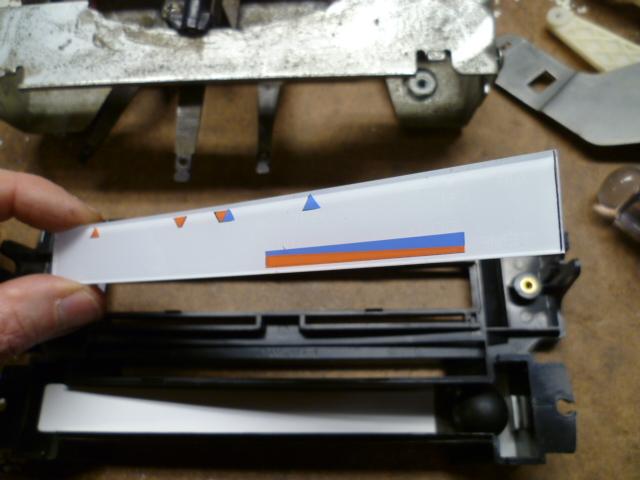
The HVAC panel is made by silkscreening on the back of thin transparent film and then that thin film was laminated to a thicker transparent plastic sheet for support and contour (it's a little rounded profile, right?). On the thin film (.020 ish) they silkscreen the black outline first, then the white to highlight the white lettering, then the red and blue to highlight the remainder. Four screen passes total. And they probably started with a matt finish transparent material to get the flat front. And then after all the silk screening was done, they glued the flimsy thin sheet to the thicker acrylic material. They use the same silk screening process for making membrane keyboard overlays. Here's a couple pics of a HVAC nameplate. Front side: Back side:
-
Agreed. That is a nice truck.
-
Thanks for covering for me Site. Looks like I've forgotten most of the details! There were big Phillips screws involved though. I got that part right. And the small ones holding the hinges in place (on one side). Chase, you're in better hands than mine now. Hope you get all the info you're missing.
-
IIRC, getting the rear bumper brackets out of the car is not the easiest thing in the world. Might have to drop the tank? Maybe try compressing and holding for a couple minutes to test my other theory first? Back the car up against something and leave it like that for a half hour?
-
Site, Those are excellent pics of the hinge. Shows how good (or not) my memory is! Thanks for the reminder!
-
OK, really really last one this time. My theory is that your drill hole is too close to the bumper mounting flange and because of the way the mono-tube shock works you're trying to force oil through a tiny orifice and it just takes time. I think you have two choices: 1) Drill another hole further back. 2) Push the shock in and hold it there for enough time for the pressure to bleed off. This is a pic with the shock cut open. If you look closely down into the tube, you'll see a very small hole in the center of the piece at the bottom. I'm thinking you've got a mix of gas and oil in the shock tube and when you push the shock in, it compresses the gas, but not the oil. If you compress it and wait long enough, that pressure should eventually equalize? Shock cut open showing the orifice that separates the two chambers of the mono-tube design:

-
Sorry, one last thingc... I drilled up here. And you can see from the shock shaft that mine stayed compressed no problem: And after cutting the shock open and analyzing the guts, I left a note for myself if I ever have to do it again:


-
Oh, and I mentioned above that the nuts are easy to get to... That's with the whole thing off the car. I don't remember how difficult it is when the whole assy is installed. Sorry.


