Captain Obvious
Free Member
-
Joined
-
Last visited
Everything posted by Captain Obvious
-
 Well I made it! Got in late and just laid low. Had a beer with my local Z buddy from home. We met along the way for the last leg near Nashville. Man was that a long trip. But we made it!!!!!! I'm not sure which surprised me more with the success... Me, or the car!!😃
 -
On the south side of Knoxville. Letting him cool off for a little bit. Anyone from the forum there who would like to have a beer with a weary traveler tonight?
-
So I considered registering the OG for the judged show just for entertainment value*. But I could not figure out how. I could not see any option to attend. Is that show full and they aren't accepting any more entrants? Anybody have a phone number for someone on the org committee? My electronic footprint is low while I travel, but I can text. *Him - "Dude, your car looks like asss, why are you here?" Me - Yeah, your car is beautiful, but I can see 1000 things that aren't original. And I drove mine almost 1000 miles to get here.
-
Man, I knew I needed a front bumper,but it really shows in that pic. Looks worse from a distance. Anyone near zcon got a decent bumper they would sell? Can't be too nice or it will look out of place.
-
When you are walking back to your car at a rest stop and see a puddle under it. Then you get close and realize it's just a condensate puddle from the AC of the guy in that spot before you. Phew!!

-
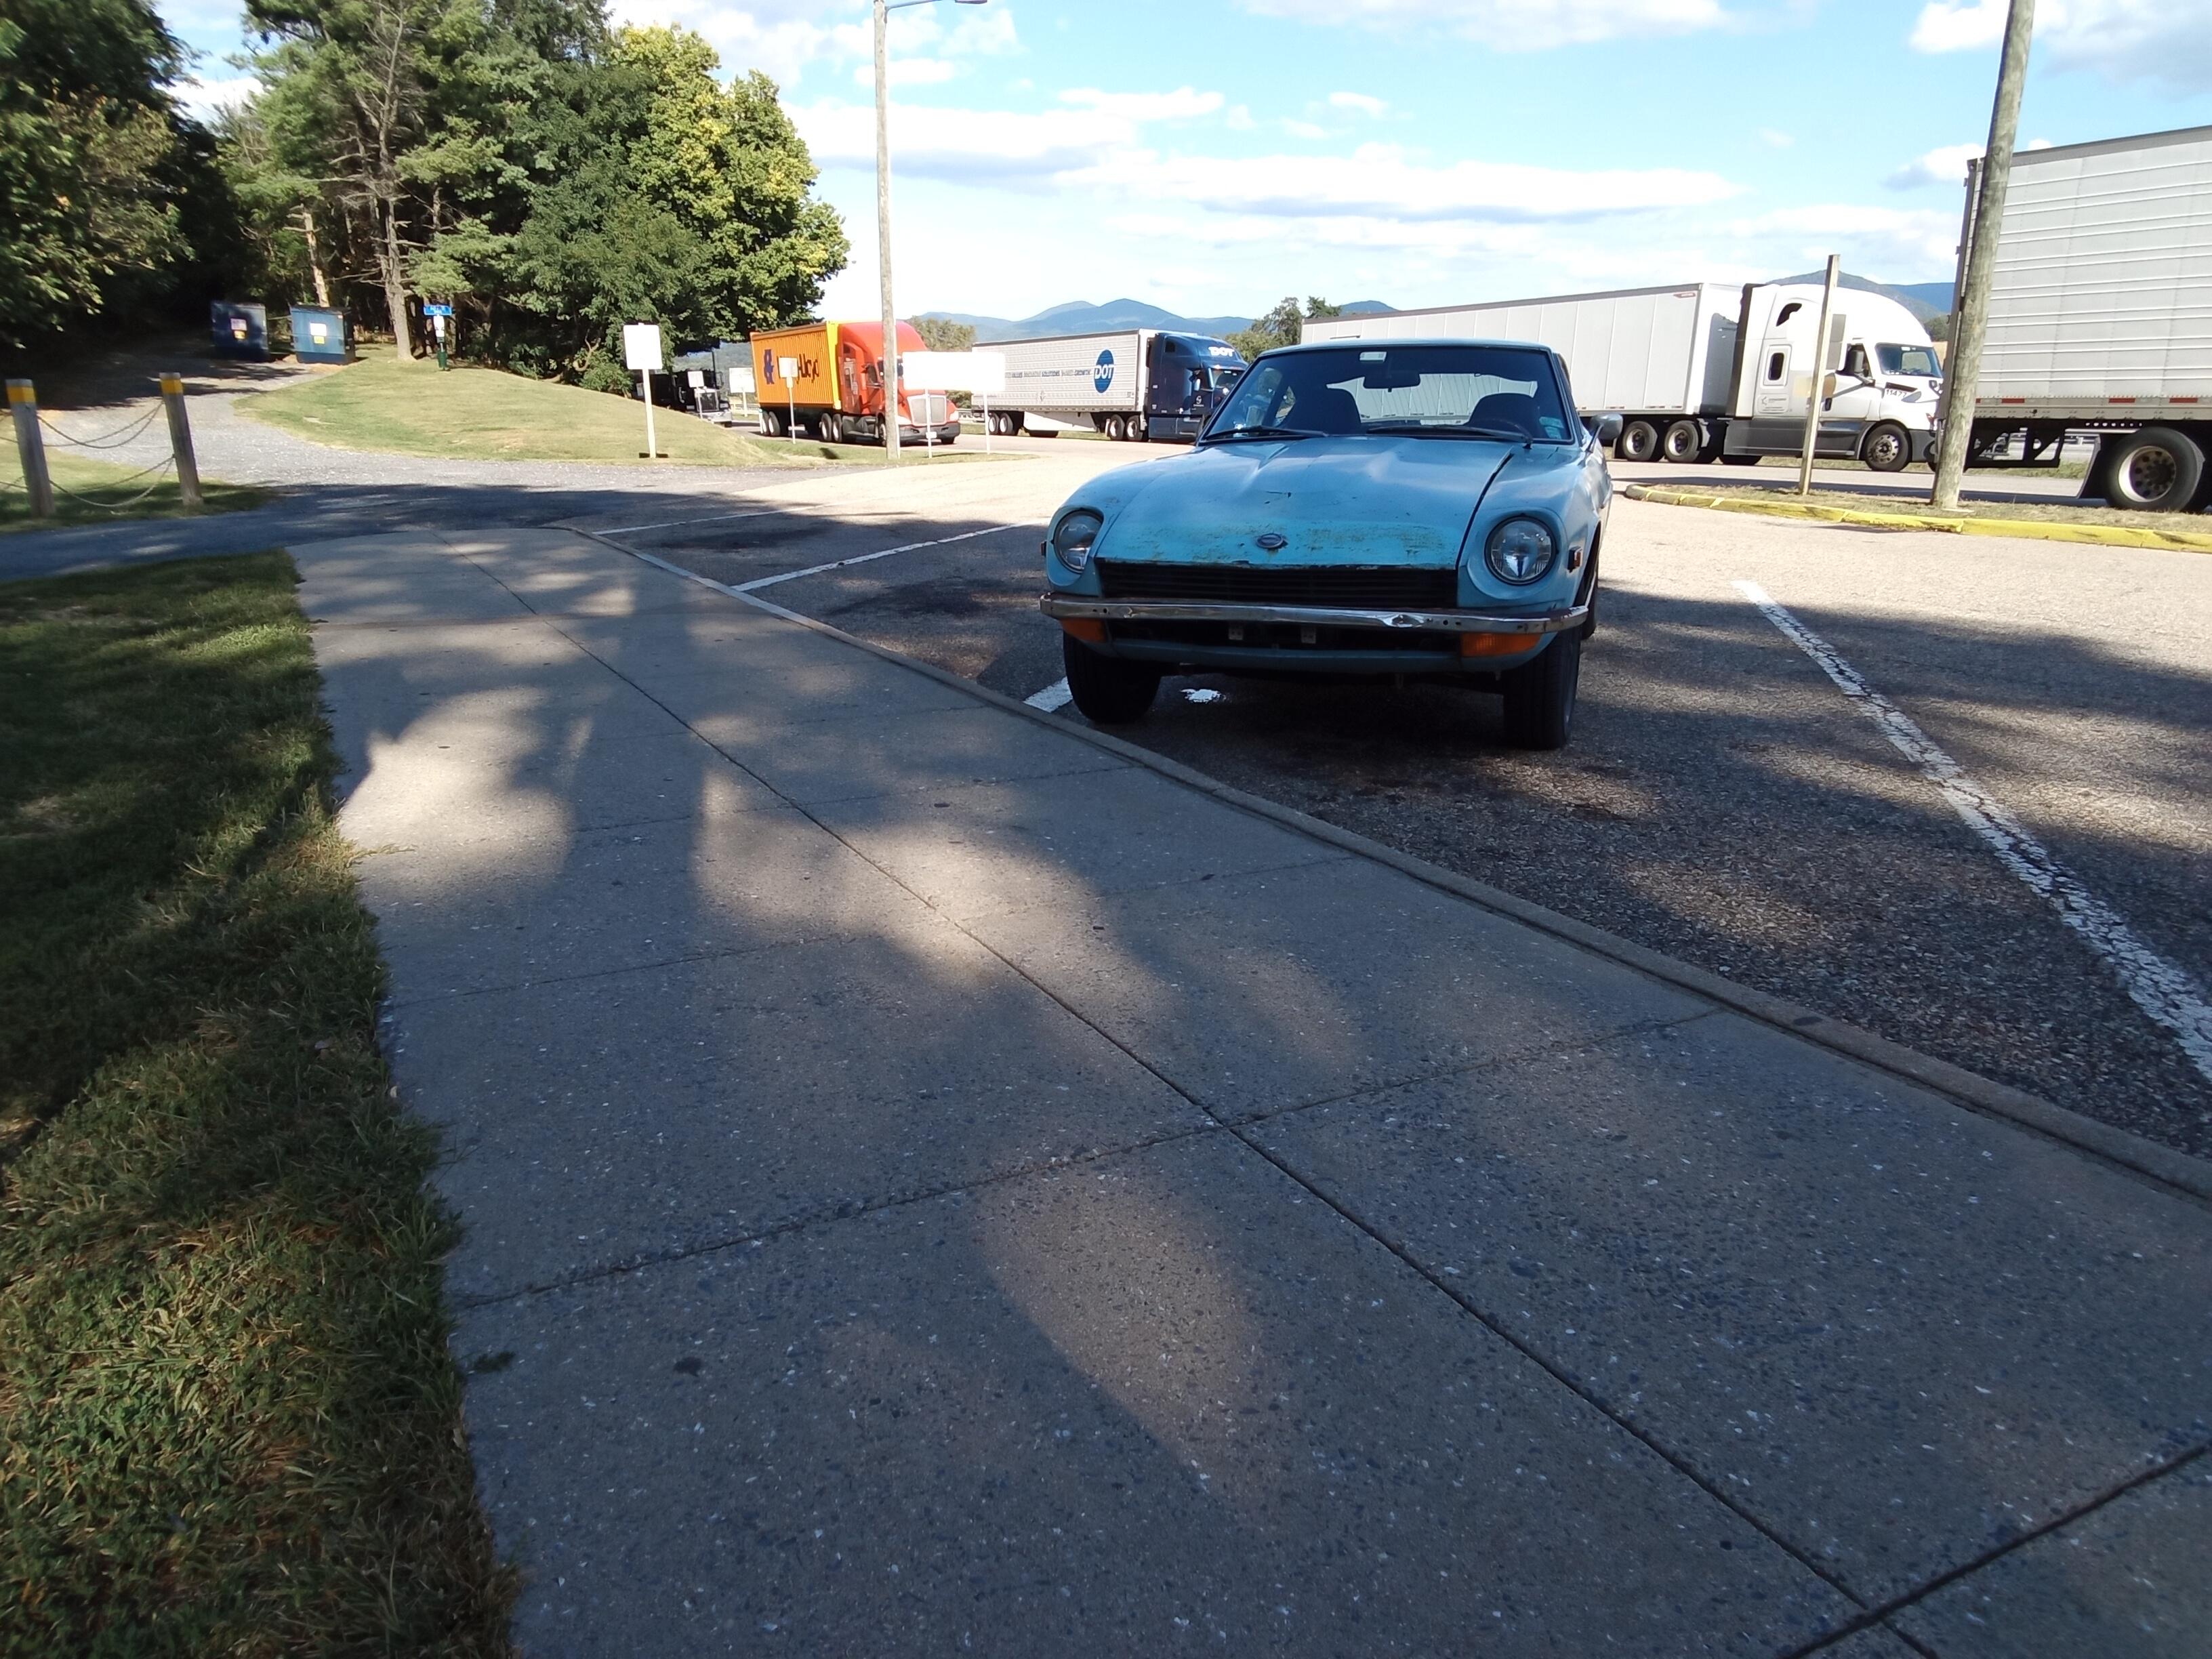
I'm in Christiansburg, VA. About halfway to Nashville. Travel has been OK. Only problem with the OG is the temps keep creeping up. The radiator needs work. It's right at the borderline at about 65 mph. If I try to run above that, the radiator runs out of compliance and the temps creep up. So I'm finding that I have to keep the speed between 60 and 65. Not ideal, but considering this car hasn't seen the road in 45 years, it's doing great. More news as it develops.
-
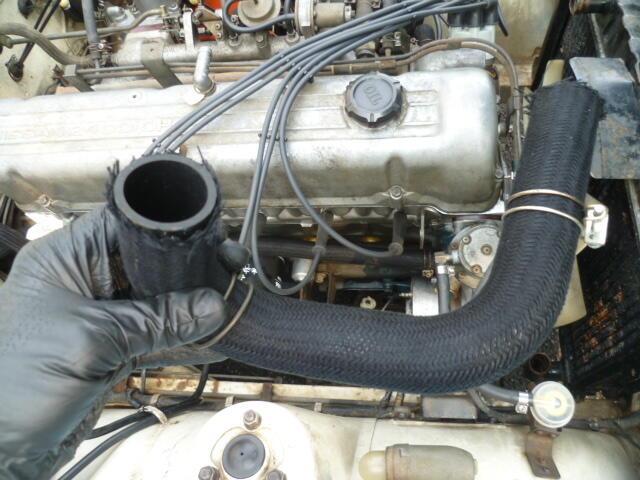
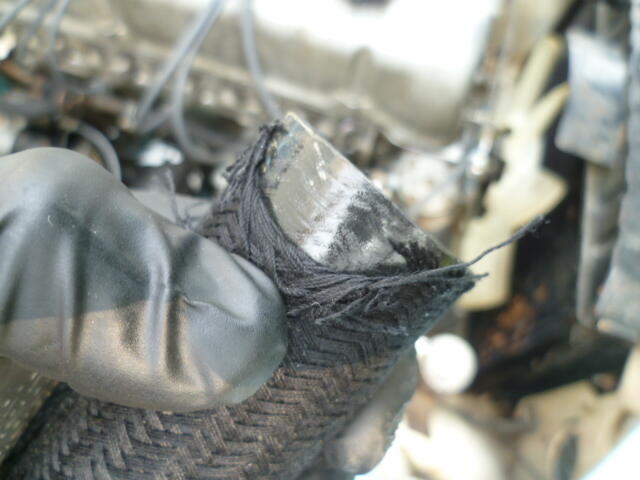
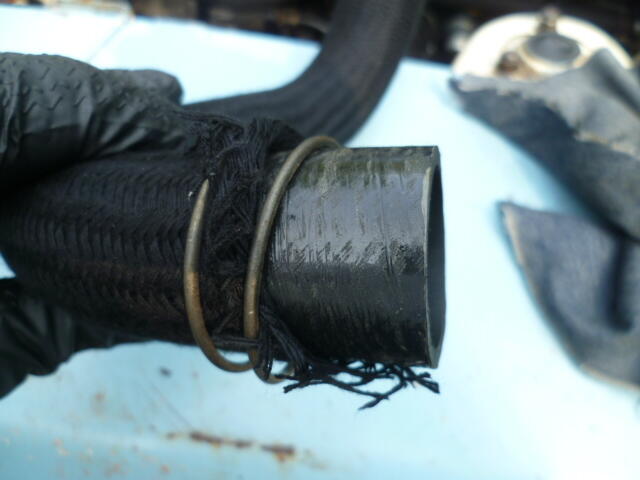
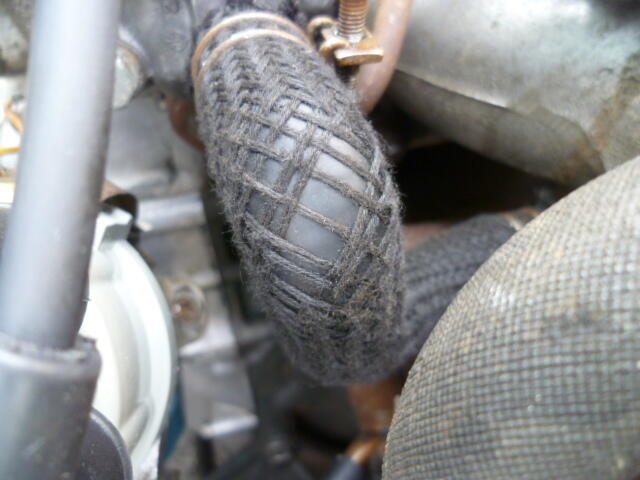
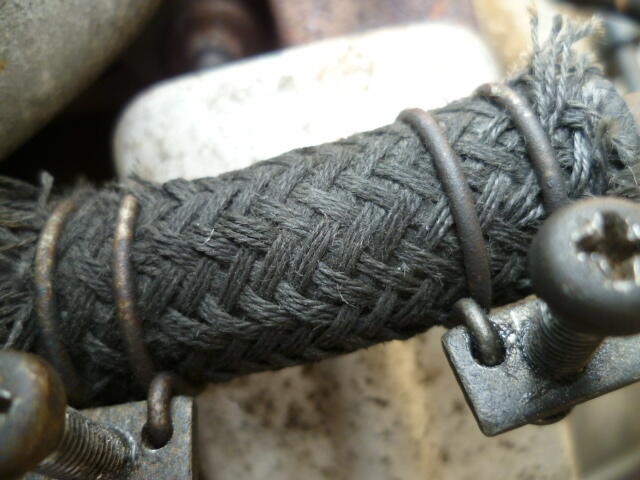
I messed with the radiator hoses today and had some of the same issues I had before. Here's the lower rad hose: \ And here's an example of how unattached the braid sheath is to the rubber underneath: And this happens when you slip the hose clamp over the end: And here's an example of the inconsistent braid density that I mentioned earlier. Most prevalent on the outsides of bends, which makes sense. Some areas are so sparse that there is big gaps in the braiding. Looks like this: Compare this to the original stock stuff: I know you can't get the stock stuff anymore, which is why you end up paying "only game in town prices", but still... This is what it says in the description: "All of our braided rubber hoses are very accurate replicas of the factory braided style hoses, they have been carefully molded to have the exact curves and bends like the originals!" Maybe they had a bad batch where there were quality issues. I just don't have the time to deal with it now. Maybe after Zcon. I also see in the ad that there is a warranty. I'm going to look into this when I have some time to breath: "We are confident in the quality and craftsmanship of our products, as a result we cover all of our products with our Resurrected Classics Parts Promise. This is a Lifetime Warranty that covers any manufacturing defects with your product during your ownership and entitles you to a new replacement of that part with free shipping. This warranty does not cover damage due to improper installation/handling, accidents, or improper modification. This limited warranty does not cover incidental, consequential, indirect, or special damages."
-
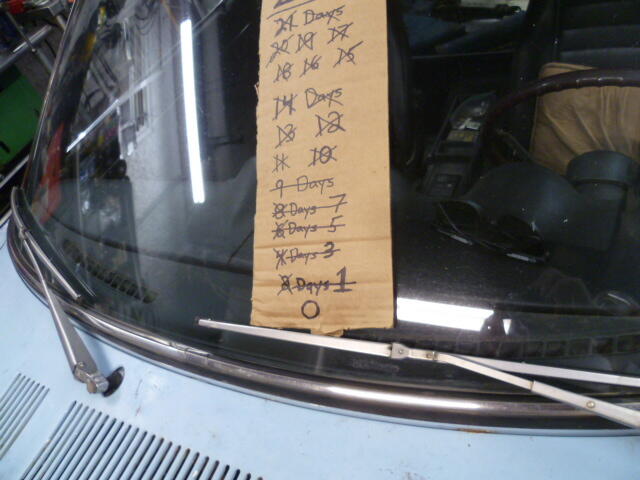
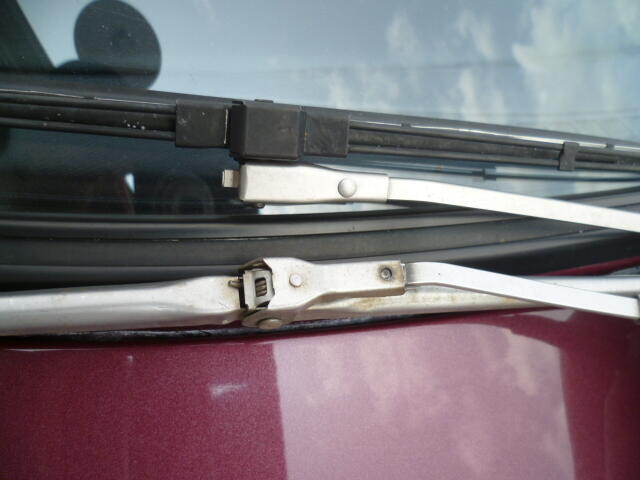
Well, I'm out of work time. In theory, I hit the road tomorrow morning. So whatever isn't done, isn't done. I got wipers on. Really don't want to be in a situation where I use them, but they're on there: Hope to see lots of you in Nashville. Assuming my radiator and my back hold together well enough to get there!!
-
So today is my last work day before I leave. One day left. Then a two day journey to get there. Flush my cooling system one last time and hope for the best. Check the valve lash. Balance the carbs. I was going to change the oil, but I've only got about 400 miles on it and it's really not even time yet. Anyone near Christiansburg, VA that wants to help me change my oil tomorrow evening? Hahahaha!!
-
Awesome. Thanks Jim!! Wish I would see you at Zcon!
-
So how bad do you want your turn signals working? Hahahaha!!!! ☺️
-
Today's question is about windshield wipers. The silver arm with the black "rod style" blade assy is what I have on my 280. The arm should be black like the blade, but all of the black has come off over the years. The other arm and blade came off the OG. Which style is correct for the OG?
-
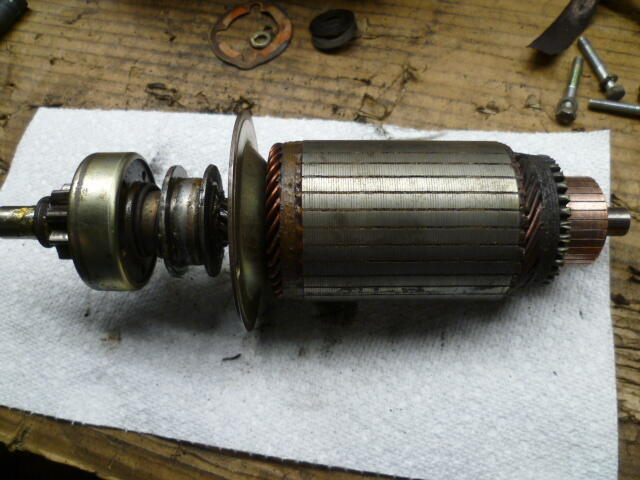
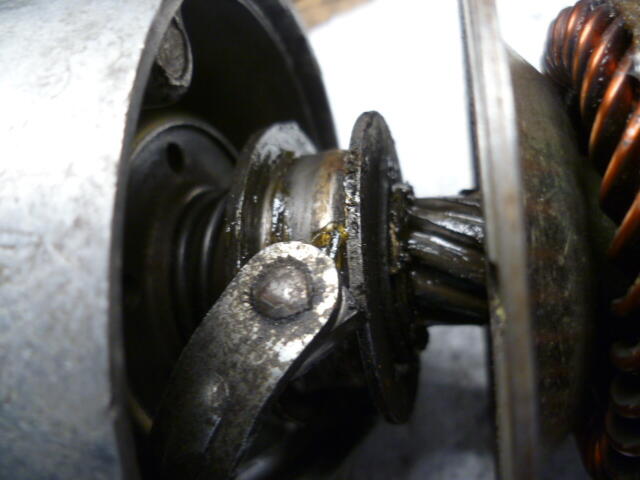
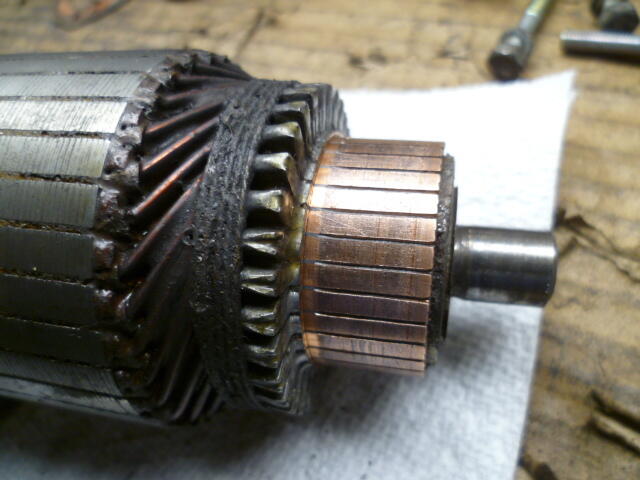
So today's event was I spent some time working on the original starter. Took it apart, cleaned and lubed, and reassembled. I had been using a gear reduction starter from a later year because the original was struggling in the beginning. Now that I have the motor and carbs gone through, the engine starts with the flick of switch and I don't have to grind out the original starter to get it to run. The original starter works great.
-
My build date is 7/70, and I do not have a hood on the map light. I'm way before 21000... I'm just over 6K.
-
Yes, that's the exact same experience I had. Trying to get the hose clamps on peeled back the braiding. The braiding wasn't adhered securely enough to the rubber tubing underneath. The stock stuff was way more robust than that. I like to think that I'm pretty good with my hands, and I ruined two of the pieces just trying to get the clamps on. Took the screws completely out of the clamps to open them up even further than they were designed to, and still messed up the braid sheath. Not impressed, and for the money, very not impressed. I believe it's the only game in town... Resurrected. I get it when its the only game in town, you pay "only game in town prices". But at least you expect to be satisfied with the quality at the end of the day. Last thing you want is to accept paying the price because it's the only option, and THEN finding out the quality is less than stock. I'd be trying to work on replacements, but I simply don't have the time at this juncture.
-
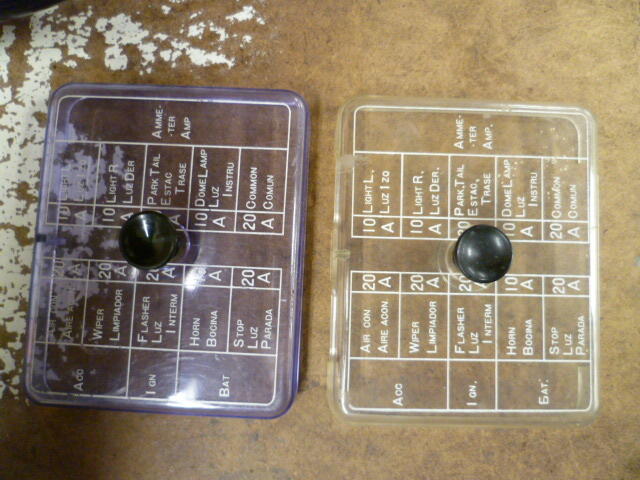
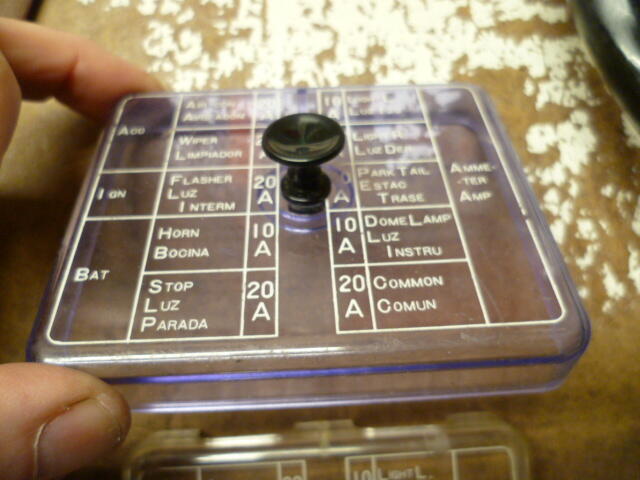
Thanks for the pic. Confirms my suspiscions. Memory says I took the one without the cut-outs off the OG. But then I put it in a box with the other one (with the cut-outs) and didn't label anything first. Duh. It seems the fuse covers that don't have the cut-outs are slightly later. They made a lot of changes in the fall of 1970, and subtle changes to the fuse block cover seems to be another one of the multitude of small changes they made. Thanks again! ☺️
-
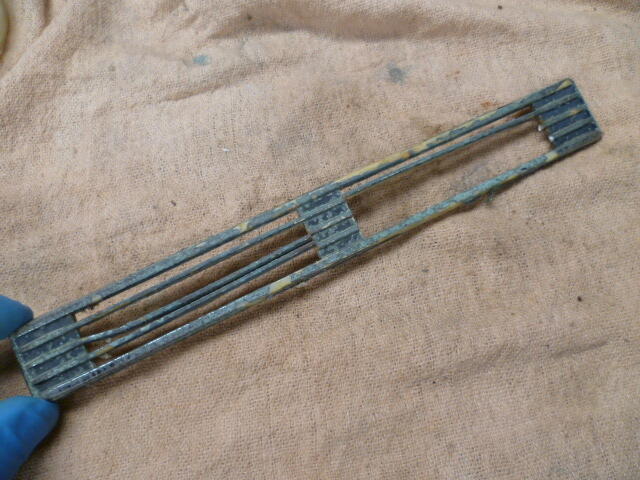
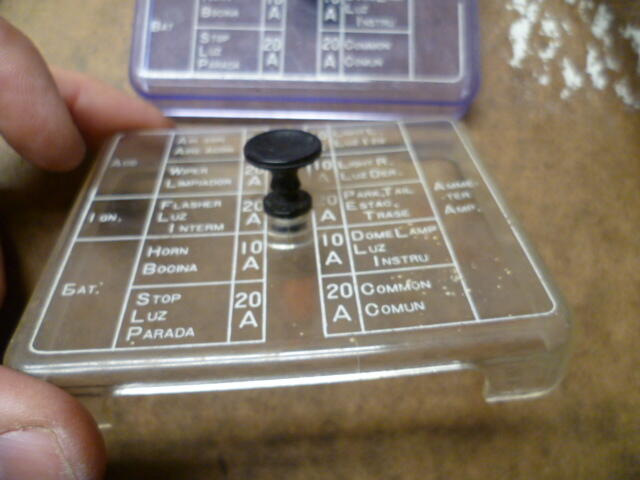
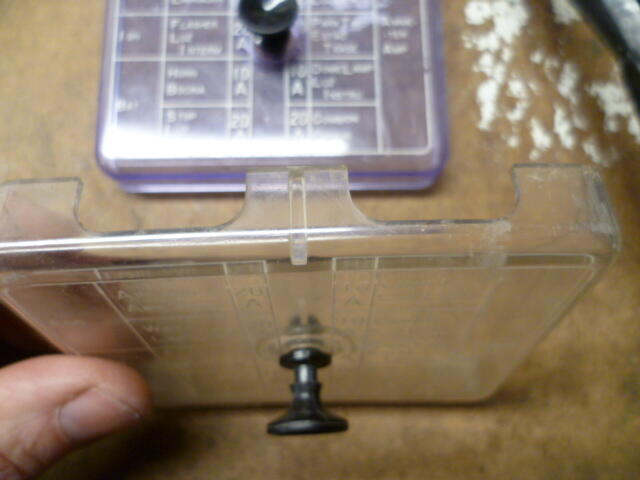
Today's question... I've got two fuse block covers. Which is the correct one for the early cars? This one has cut-outs on both top and bottom: While the other one does not: I have a guess, but am looking for other input.

-
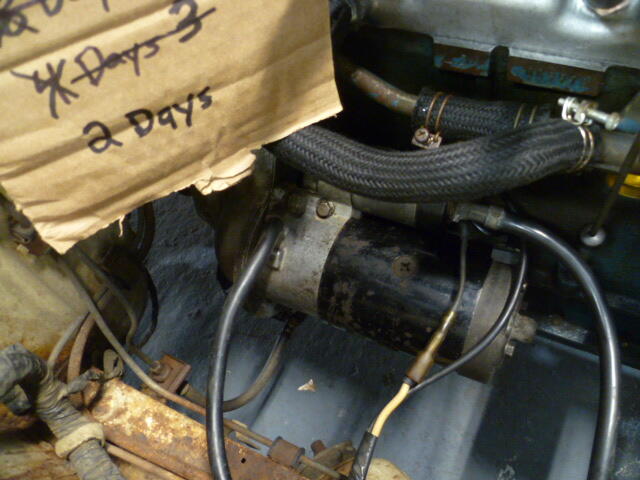
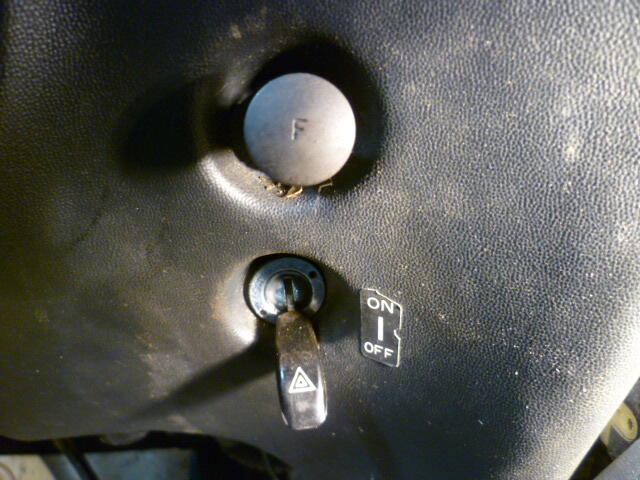
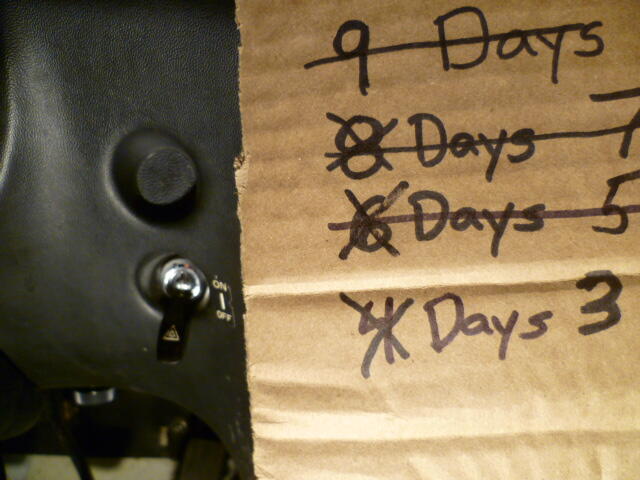
So today's adventure... I struggled with the reproduction braided hose stuff in the engine compartment. I'm not impressed. Don't fit great. Hose clamps peel back the braided outer covering. Inconsistant braid cover. Frustrating. Is it just me? On a good note... Remember my "F" switch?: Well I removed the switch and plugged the hole. The braided hoses weren't picture worthy, but the result with the "F" switch was! Looks like this: Three work days remaining!! Well, actually two at this point, but here's a pic from earlier today:
-
Haha!! Exactly. ☺️
-
Bring it to zcon. I'll fix it for you. ☺️
-
Measuring resistance from 7 to 8 will provide difficult to interpret results. The best way to check the AFM slider is to put battery voltage across 9 to 6 (positive on 9, negative on 6), and then measure the voltage between 7 and 8 while you move the wiper around. This process is documented on page EE-13 of the 77 FSM) The AFM is Dr. Bosch black magic and voodoo. As for the dent in the wiper? I don't know what you mean. Can you circle what you're talking about on your pic?
-
Awesome! Thanks much! Make sure we have a way to find each other once we get there. I'm hoping to get there mid-day on Monday. Send me a PM when you get a chance.
-
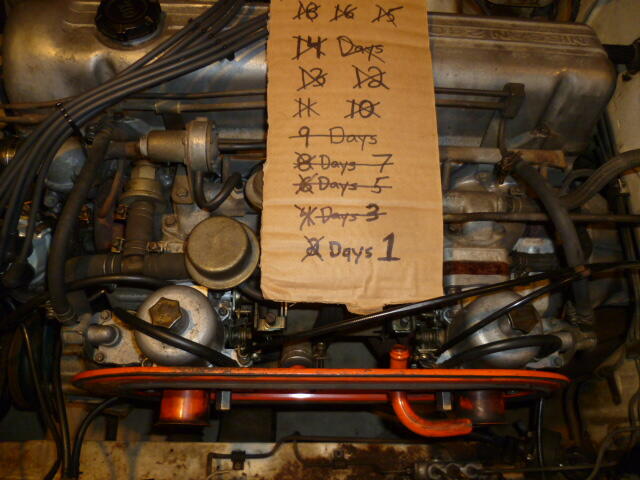
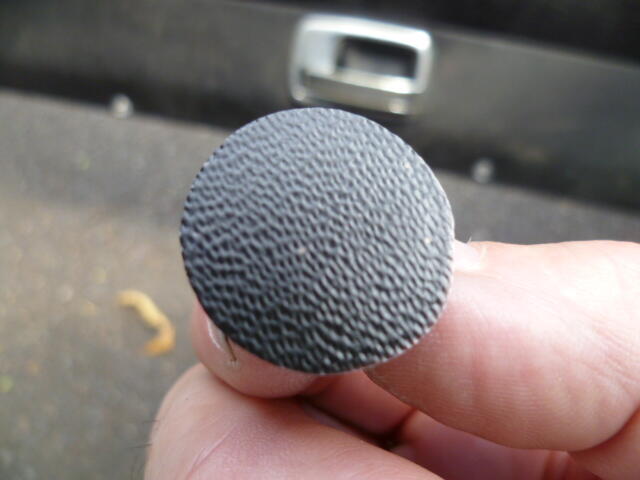
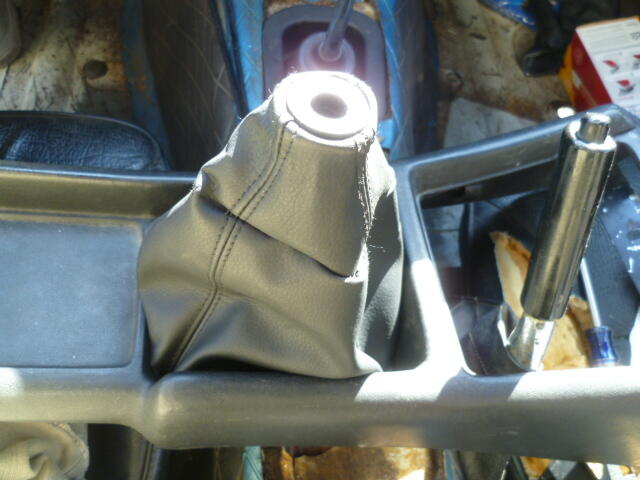
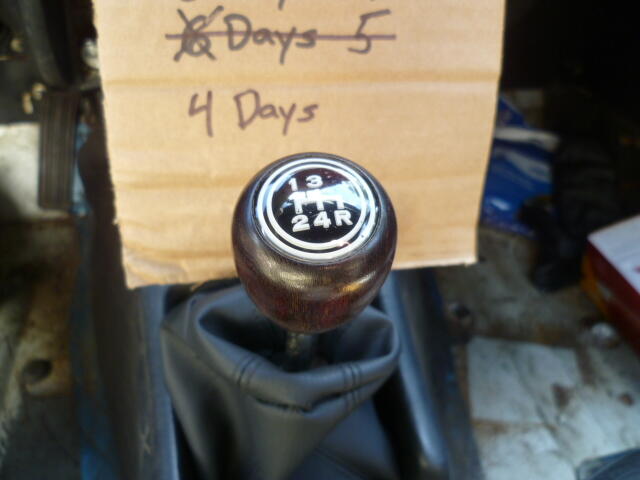
Thanks for the words of wisdom and encouragement everyone. I appreciate the support! I've been driving The OG around for a couple days ago, and my back isn't the happiest. I've changed not much else in my life in the past week, so I'm assuming it's the seats. There's no springs, and I assume all the straps underneath have turned to dust. I've got a couple car seat cushions on order from Amazon. They'll be here before the trip, and I'm hoping one of those options helps. I don't have time to do anything with the seats the right way. So today, I got my shift boot installed. Put the grommet in the right way (with help from @SpeedRoo): And then promptly folded it correctly down into the abyss where nobody will ever see it. Haha!!! So it's installed the correct way, but nobody except me will ever know. And, of course, all of you: 4 DAYS!!!
-
It just happens. Some cars are her, and some are him. This one happens to be a him. The OG would sound funny to me being a her. ☺️ I've cleaned off most of the dust, but the "will it make it" part of the journey won't be over until I get there!! Hahahaha!!! Jury is clearly still out!
-
I need one hatch vent. One of these: Anyone got an old one they could part with. I don't care if the mounting pins on the back are intact or not. I'll just glue it on at this point! ☺️