Captain Obvious
Free Member
-
Joined
-
Last visited
Everything posted by Captain Obvious
-
 @madkaw, another question... What is "a bunch"? Did you advance it to bring it back to stock timing, or did you go beyond that and advance the timing past the original stock settings?
 -
I think the only reason you guys are having trouble getting the cam gear back on using a different hole is because the holes aren't lined up with the pin. When you move to a different hole, you have to rotate the cam a tiny bit to get the new hole position to line up or the gear won't slip on. That's the point. You can rotate the cam a tiny bit, or you can rotate the crank tiny bit to get things to line up. But in either event, the overall tension has not chainged. Pun intended.
-
Haha!! Love it! I screw up way to often to do that! Would be funny though!
-
No, the centerlines between the cam and the crank never change. That's why the holes have no effect on chain tension. Another example to help everyone think about it...... Pull your cam gear off. Pry the locating pin out of the end of the camshaft. Put the cam gear back without the pin and leave the center bolt just a little bit loose. Now put a wrench on the flats of the camshaft and rotate the cam*. The cam will turn, but the cam gear will not. It will slip because the pin has been removed. This will effectively change the valve TIMING, but does nothing to the chain tension. In fact, you can check the chain tension as the locating hole in the cam passes behind any of the three timing holes in the cam gear. No change in tension. You can go a full turn on the cam like this and simulate ever possible valve timing, including the three fixed positions achieved by the locating pin. The valve timing will be changing wildly, but the tension never will. Does that make sense? *This is an illustrative example only. While it's possible to perform this academic exercise, you must make sure you have the pistons in a position such that there cannot be any valve to piston collisions.
-
Anyone notice the floormats?

-
Thanks. I'm growing more confident the more I analyze it. So what block are you putting the MN47 on? I'll punch 39cc into my calculations and see what I get.
-
We're probably saying the same thing...
-
The only thing that changes the length of chain on the tight side is moving the cam closer to the crank. Moving the guide, not anything with the tensioner shoe will have any effect on that. Part of the tensioners job is to keep the length of chain on the tight side constant. Even when the chain stretches. When the chain stretches, each link will get a tiny bit longer. So with the same number of links on the tight side will result in the cam timing being slightly retarded.
-
Here's another way to think about it... Within a small amount of manufacturing tolerance, the centerline axis of the cam gear must always be on the same axis as the camshaft. It if weren't, the gear would wobble eccentric and make the chain tighter in one spot and looser in another. If changing to a different indexing hole is expected to have an effect on the chain tension, then what happens when you rotate the cam 180 degrees? Does it get extra loose?
-
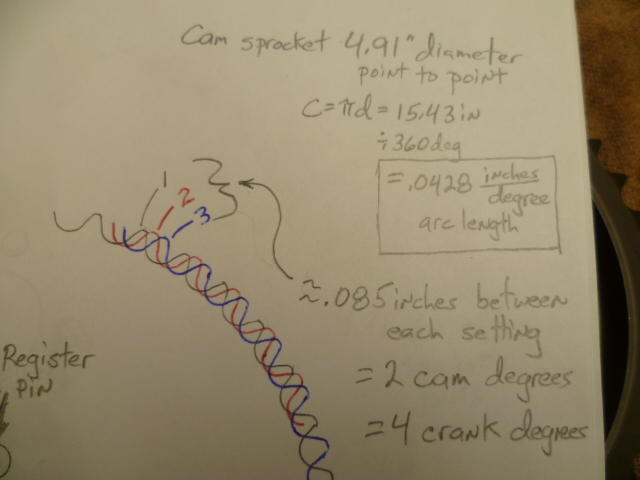
Actually I am completely confident that I am 100% right and 0% wrong. Changing the cam gear to a different index hole has absolutely nothing to do with chain tension. It changes relative teeth position, but not chain tension. This is what the different index holes do... They change the relative position of the gear teeth to the hole. (Which changes the relative position of the teeth to the cam lobes.) But it does nothing to the overall tension on the chain. Remember this pic? : The reason they say you can use a different hole to account for chain stretch is ONLY to bring the valve timing back into spec. It won't tighten up the chain any... That's the tensioner's job.
-
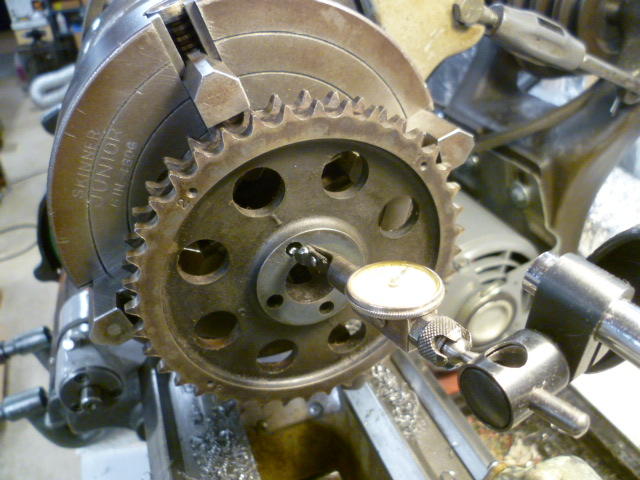
Oh, and I'm not worried about the valve timing. I've got a lathe and I've already verified that I can set-up to bore the locating pin hole: I didn't cut any metal yet, but if I need to, I can adapt to the offset bushings.
-
So now I'm not sure if your kidding or not... You do know that the timing hole you use has absolutely no effect on how tight the chain is, right? Haha!!
-
I completely forgot about that. I had talked about it before, but by this time, my brain was full. So I slotted mine some and it's almost back to where it should be. I'm confident with a new set of non-worn guides, I'll be able to make that work fine. Thanks for the reminder!!
-
I do it all at room temp with the hydraulic press. No muss, no fuss. Just money.
-
Haha! They're talking about that car on the Fiero forum right now. Could be mine under all that custom stuff. Doubt it, but could be!
-
You were right.... It was still early. This ones better. .
-
Yeah, that .047 difference really changed the position of the tensioner. However, forgot to mention... The chain guides and tensioner shoe are worn in that pic. If they were new unworn, it wouldn't be quite so bad. I can also slot the slack side guide holes a little to bring it in closer to the chain. I'm thinking that my sweet spot of "low hanging fruit" could be about .040 off the head, get new chain guides and tensioner shoe and slot the bottom hole of the slack side guide a little bit.
-
I've run the compression ratio numbers through my spreadsheet and came up with the following... F54/P79 stock - 8.83:1 F54/P79 with .040 shave - 9.37:1 F54/P79 with .080 shave - 10.0:1 Is 9.37:1 still in the realm of regular grade gas?
-
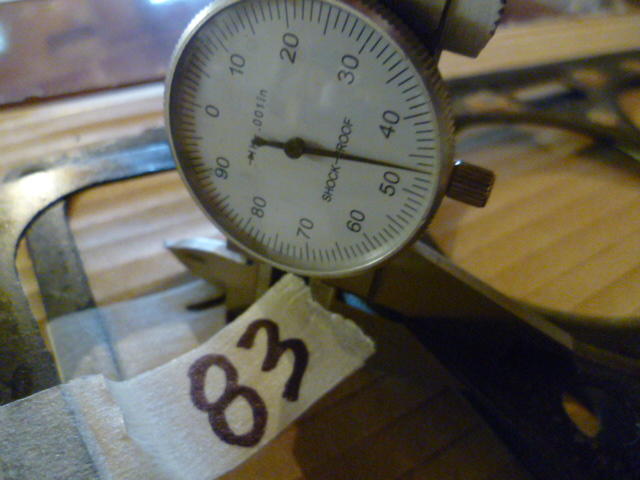
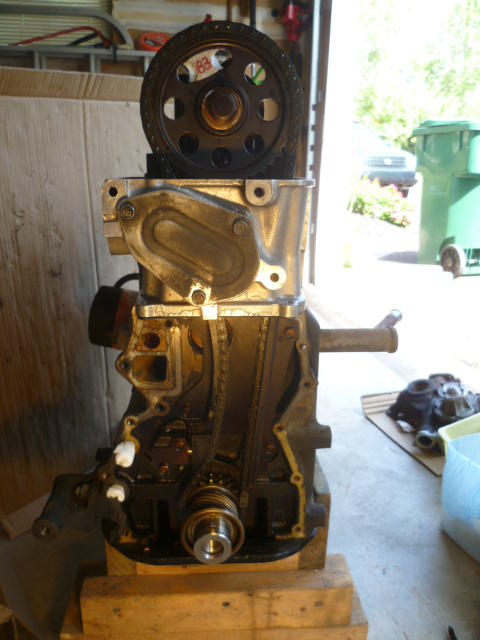
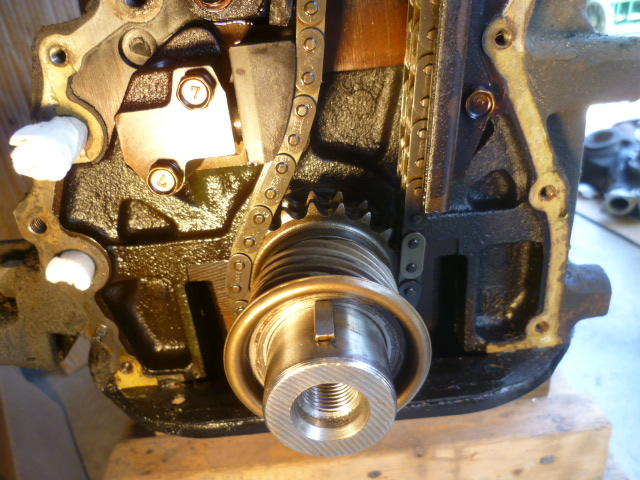
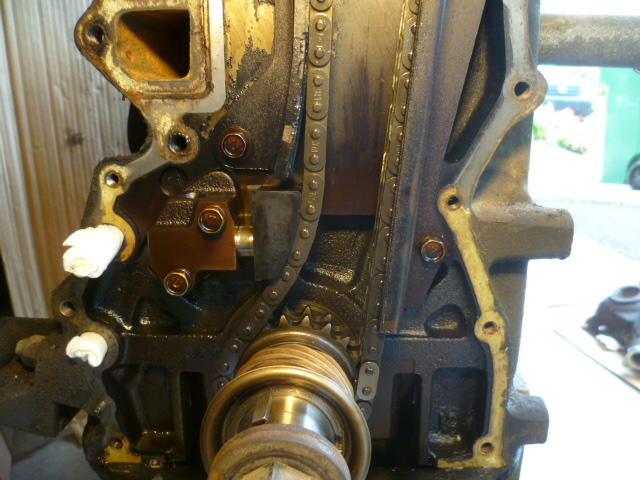
That's exactly what I'm trying to do with this P79. I'm trying to achieve the "best bang for the buck" and pick the low hanging fruit. I'm trying to get through this without having to use shims under everything or put in some fancy aftermarket chain tensioner. I would like the piece of mind that I could run a tank of regular gas through it if I needed to without detonating. I'm not sure that would be possible with the common .080 shave off the P79 since that sends the compression ratio up to over 10:1 What I would really like to do is shave the P79 as far as I can and still be able to use the stock tensioner, no shims, and regular gas. In other words, I want as much of a performance gain I can without the next level of modifications. With that in mind, I did this... I measured the thickness of the head gasket I took off the motor. It came out to be about .047: Then I put the head back on the motor WITH NO HEAD GASKET and tightened the bolts just a little. I put the timing chain in place so I could see what that would do to the tensioner. The theory is.... This is what the chain tensioner would look like if you were to shave .047 off the head. With the head gasket missing, the head is about .047 closer to the block, simulating a .047 shave off the head. So with the head gasket installed, the chain system looks like this: Here's a close-up of the tensioner with a normal head gasket installed: And here's what the chain system looks like when there is no head gasket installed: And here's a close-up of the tensioner with a .047 shave off the head (simulated by putting the head on with no head gasket): How does that tensioner look to the collective? I'm not thrilled. I think maybe a .040 cut would be safer. What say ye?

-
That's a stock Nissan cam. Not a regrind. You might check and adjust the valves while you have the cover off, but other than that, move on. Fix your fuel pressure and get your PCV routing correct.
-
Cool. And thanks for that too!
-
Thanks for that. I had the wrong one! He's probably wondering.... "Huh?"
-
Might that be one of our resident racers @Jeff G 78 ? Seems like the kind of thing he'd be all over. I also found another error source... If you look carefully at the piston design, you'll see that the tops of the pistons don't actually touch the cylinder walls. There's a small gap between the piston tops and the walls. You can see the effect of this by the carbon ring left at the tops of the cylinders where the rings don't scrape. Nothing scrapes there because there's no contact. I measured the volume of that area to be about 0.63 cc. Doesn't sound like a lot of volume, but since it's uncompressed, it changes the compression ratio by almost 0.1. So if you're at 8.9 and want to get to 8.8, you can account for that. I'm at 8.83 on my spreadsheet and am about to call it a day. Now I need to find someone who's measured the P79 volume AFTER they cut the head.
-
So while were talking about this stuff... Has anyone here actually measured the chamber volume of the P79 themselves? The online calculators use 53.6 cc, but can anyone here attest to the accuracy of that number? I've not measured it myself, and I don't currently have the equipment.
-
Well if you're going into the code... Here's the other things I came up with. First, I think the pin height used for the L28 flat top pistons is incorrect. When I put my pistons at TDC, they stick-up out of the block by .021 inches. I'm assuming Nissan's target was 0.5mm there. So whatever you need to do with the pin height to make that piston pop-out number work out to 0.5mm. Also, I measured the thickness of a used head gasket to be 0.047 inches (1.19 mm). I measured the thickness of a brand new one to be about .052 (1.3mm), so there's some crush there when the head is torqued down. Other thing I found is that the piston holes in the head gaskets are elliptical, not round. I measured the holes on a used gasket to be approx 3.440 by 3.505 inches (87.4 x 89mm) . Sure you can average those two numbers to something in between to make the end result close to correct, but I think it would be better to use real numbers. I also measured the holes on a brand new L28 head gasket and got approx. 3.447 x 3.516 (87.5 x 89.3mm), so the piston holes close down some as the gasket gets crushed. That makes sense too. Anyway, if you're going under the hood, there's some other things to think about.