Namerow
Free Member
-
Joined
-
Last visited
Everything posted by Namerow
-
 I'd like to hear some comments from owners who have experience with the small, hard-rubber 'chin' spoiler that was installed (by Nissan, I believe) on the Z's sold in England. Was it effective in reducing front-end float at speeds in the 120 - 130km/h (75 - 80 mph)? For reference, the Z that appears on the cover of the Haynes repair manual has this spoiler. There are also some good close-up pix of the part in Ray Hutton's book, 'The Z-Series Datsuns'. It appears to be pretty much vertical in orientation and only about 4" deep.
 -
I've had mixed results with Freeze-Off type products. They work like a charm sometimes, but aren't much help in other cases. I freed up all three of my downpipe-to-exhaust fasteners successfully using heat only... but it took renewed heating many steps along the way for each fastener to coax them loose. They were reluctant to turn for at least the first 1/4" of thread travel. I had to use MAP gas and a swirl-type torch head to generate enough heat. An oxyacetylene torch is ideal, if you have access to one.
-
I think you're may be on to something, Jim. However, the 'bolt' (actually more like a long stud) is non-rotational because it's designed to be firmly tightened into the blind threaded hole in the float bowl casting. That means that you wouldn't be able to rotate it to a new position (to take advantage of the eccentricity you're proposing) unless you were prepared to leave the threaded stud-to-casting joint 'loose' after you'd found the bolt orientation position you want. Maybe a thin jamb nut? If that would work (and I'm sure that one or all of Capt Obvious, Blue, Patcon, Grannyknot and maybe even Z Therapy are about to start work on this ), then it would seem that the final touch would be to slot the other end of the 'bolt' (where the lock nut) to allow use of a screwdriver to turn the bolt to make adjustments. Adjusting sequence would be: loosen lock nut on end of bolt loosen jamb nut where bolt fits into float casting turn bolt until desired fuel level is observed inside carb nozzle tighten jamb nut tighten lock nut job done One additional thought: I don't think the bolt offset needs to be more than 5mm. That would provide an up-down adjustment of +/- 5mm for the float bowl. If you set the float 'tang' adjustment to the FSM-recommended setting to start with, an additional +/- 5mm of adjustment should be more than enough to zero in on the desired fuel height in the carb nozzle. Gentlemen: Start your lathes. Report back here in a week, with pictures (to prove that it really happened). Whoever wins owes me two finished prototype eccentric bolts.
-
Figuring out the fuel level in the float chamber is easy. What we really need is for somebody to come up with a mechanism that allows the float level to be adjusted needing to remove the float chamber lid.
-
If you have the opportunity to visit Ireland, check out this little museum in Waterville on the Ring of Kerry. It has a great display of cable samples and other equipment from the original trans-Atlantic cable-laying efforts... http://www.ireland.com/en-us/what-is-available/attractions-built-heritage/historic-houses-and-castles/destinations/republic-of-ireland/kerry/waterville/all/1-90308/ The Irish whiskey isn't bad, either.
-
Most of that will buff right out...
-
The section headings in Wick Humble's book provide a pretty good guide for reassembly steps.
-
You're going to grind all those welds, right?
-
I found Vintage Connections to be an excellent supplier. If you purchase connectors and terminals, make sure you also buy the small and large terminal removal tools (not v. expensive and worth every penny) and a ratcheting terminal crimping tool (VC has one for under $50 that produces good results with a bit of practice).
-
Not sure exactly when they added these to their catalog (sometime during the past year, I think), but it turns out that Whitehead Performance (Toronto) has introduced an almost-full line of own-brand poly bushings for the 240-260-280 Z's. One of the key design features is the use of a material with a lower-than-usual durometer rating. Here's their write-up: "Whiteline Plus bushings provide the softness needed for street driven, low vibration, noise and harshness characteristics, while displaying extreme abrasion, tear and cut resistance, and near-zero compression set at a lower durometer reading of 70-80 (versus most poly bushings 100+ rating). In addition, Whiteline Plus polyurethane bushings are able to be bonded directly to the metal shell, which provide a method of flow control giving the bushing the characteristics of soft ride while on smooth roads, and when under cornering pressure cause the bushing to become firmer for improved suspension performance." T/C Rod kit - C $43 Steering Coupler kit - C $73 Front Inner Control Arm kit - C $59 Rear Outer Control Arms kit - C $64 Rear Inner Control Arms kit - C $90 Moustache Bar kit - C $71 That totals out at C $ 400 (about US $300), so they're definitely premium-priced (and no 'master kit' is being offered at this time). The typical PU master kits being sold by 'others' (which also include Steering Rack and Roll Bar bushings, plus 4 bump stops) are going for as little as US $200 c/o American vendors. Not saying that Whitehead is gouging on price. Instead, I think their prices just reflect the cost premium that comes with a small-volume production run. The sleeve-to-bush 'bonding' feature noted in the Whitehead write-up comes into play for the front-inner and rear-outer control arm pieces. It looks like they've paid proper attention to the design of the poly and metal pieces, so that these control arm bushes will provide torsional resistance (rather than simply acting as a free-motion pivot). It would be interesting to know what the durometer rating of the Nissan OE rubber bushes was in as-new condition. Anybody? It would also be interesting to know how the durometer rating of the OE rubber bushes drops with age. I wonder, for example, what value it has sunk to by the time the rubber is 45 years old?
-
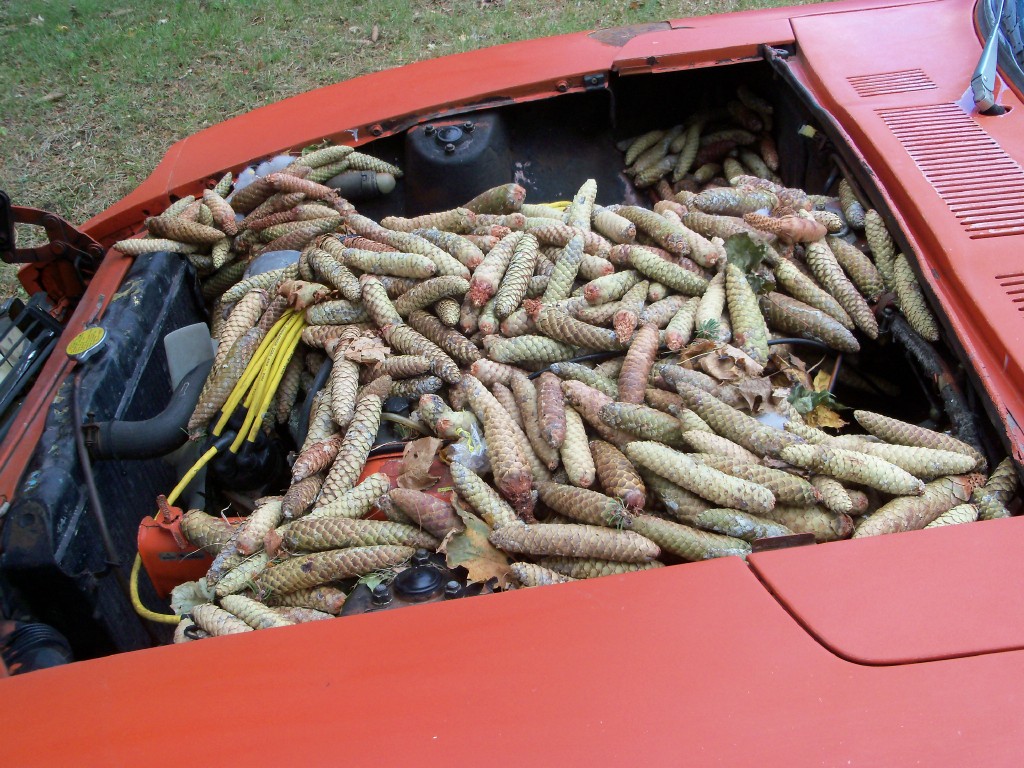
I'm always impressed by how fast and tidy you manage to work through these panel repair jobs! Big thumbs up. For humor value, I thought you might enjoy this picture that will illustrate how those pine cones manged to find their way into the car's fresh air ducts... (This was a very hard-working squirrel!)

-
Is that a thumbscrew right under the fulcrum of the main lever that lets you control the depth of your cut? I like the concept, but except for open-access areas where you're able to use the collar, it would seem to be just an air-powered drill with a set of spot-weld cutter bits. The sleeve mount for the collar looks like it will allow a max throat opening of maybe 1-1/2"?
-
Excellent result. Did any more pine cones or dead mice float to the surface? I have a complete set of door hinges off my original '72 if you come up short in your spares pile. The welding/brazing will undoubtedly have been the work of Deiter Roth (aka 'The Z Meister'), who ran a Z service/performance operation similar to Whiteheads out of a shop in north Oshawa. Deiter was one of the founders of the Ontario Z Owners Association and was a pretty fair hand with a wrench or a torch. He was the one who scouted this car for me back in 2007 (it belonged to a former client of his named Steve Tustin). Deiter and his wife were living in Port Hope when I last had contact a few years back.
-
Carburetor is a French word meaning, 'Leave it alone'.
-
Very nicely done (esp. the installation guide). I think you're going to enjoy a fairly decent amount of trade from this.
-
Re hatch logo arrangements, I vote for #1. Re the steel helicoil inserts: There's still going to be a steel-into-aluminum thread. However, the load face (thread contact area) for helicoil-into-hub is going to be a lot bigger than it would be for the bolt-into-hub alternative, so that's a good thing. I wonder if it might be better, though, to go to interference-fit steel inserts (internal thread only). Heat the hub, chill the insert, tap into place. You've left a pretty broad shoulder outboard of the bolt holes, so I don't think an interference-fit insert is going to cause cracking to the outside face.There are well-established engineering principles to calculate the amount of interference required (based on male and female part materials and on the inside/outside diameters of the insert). Hopefully, someone who's active in design engineering can help out. A good machinist would probably know, too, just based on experience. Seat-of-the-pants guess is 0.003" - 0.004".
-
Chris (and everyone else following this thread) will probably enjoy viewing the before/after shots featured under the 'Projects' tab on this dip shop's website: www.metaldipping.com Their projects include a 1976 Z, along with an Austin-Healey and a lot of American iron (easy to see now why people say that Healeys drive like a truck!). This looks to me like it may be a caustic (lye) dip tank rather than acid... but I didn't investigate very hard and I could be wrong. For their Z project, it's interesting to seethat the dip process apparently didn't strip the asphalt sound-deadening pad off the floors. Another observation is that the process may require re-tuning your eyes to be able to spot the rusted areas after the car has been treated. What was easy to see c/o visible red oxide is no longer quite so obvious. I like this shop's business strategy for offering an epoxy primer service to its customers. Probably a great investment and convenience for most of their customers (unless the shop's prices are out of line). Looking forward to seeing the 'during' and 'after' photos for Chris's Z.
-
Stanley's correct. It's the port for the coolant transfer tube that links the front and rear intake manifolds. A rubber O-ring is used at the base of each hole to provide an additional seal. These holes are tapped for a BSPT (British Standard Pipe Thread) fitting. That's not a metric thread, by the way. The threaded plugs you ordered from the Amazon supplier probably use the American pipe thread design. They won't work (as you've discovered). Given that someone has already removed the coolant transfer tube (and thrown it away?), it appears likely that your car has this secondary coolant circuit completely disabled (it's designed to assist engine cold start and warm-up and many Z owners have found it unnecessary for the climate conditions where they drive) . As such, there's doesn't seem to be any need -- other than aesthetics -- to block off these open holes at all. The coolant passages within the intake manifold don't connect to any air passages, so whether these coolant ports are open or blocked should have no effect on the operation of the engine. That said, if it was my car, I'd find the correct BSPT fittings and install them. You'll need two plugs for each manifold (total of 4).
-
Re pix of your dash, it looks like you intend to pit it back in the car as a completely assembled unit (i.e. gauges, hvac vent tubes, and glove box all in place). I assume that you've used this procedure before and it works, so my question: Will you put the heater/blower assembly in the car first, followed by the dash assembly? Or will it be dash first, heater/blower after? Also: For the mod to the park brake handle, how much additional thread length did you add to the adjuster rod? And where in the system is the return spring that Captain O. was talking about? (or is that specific to a rear disc set-up?)
-
For the pragmatist, there’s not really a reason anymore to wrap a bundle of wires with tape. Just go to your local hardware store and buy some of that split, corrugated plastic sheathing. The ‘woven plastic’ sleeve is another contemporary alternative to tape. Re-taping a wiring harness with tape is for purists only. Decide which camp you belong to and proceed accordingly. Adhesive-backed electrical tape doesn't really belong in the engine compartment of a car. Sure, it'll look good after you've finished. And it will probably continue to look good for a few months afterwards. Over time, though, it's said that the temps under the hood will cause the adhesive to begin to weep out of the seams, after which the harness becomes a grime magnet and a gooey mess (won't be easy to clean either, I expect). In hotter climates, this may even be a problem for the under-dash wiring harness. I recommend that you look into using 'loom tape'. ‘Loom tape’ is just wider-than-normal pvc electrical tape that uses no adhesive. Back ‘in the day’, this is what vehicle manufacturers (including Nissan) used. Loom tape is more expensive than high-end electrical tape, but it’s still relatively inexpensive in the grand scheme of ‘things automotive’. I bought mine from a muscle car restoration parts supplier located north of Toronto. You should have no difficulty finding a comparable supplier in your own area. A 100’ roll sells for about US$13.00. Find vendors by searching on, ‘automotive loom tape’. Loom tape is typically 1.25” wide. Other commonly-available widths are ¾” and 1”. The loom tape that Nissan used on the S30 appears to be metric-spec -- on my 70 Z’s Engine Harness, it measures as 30mm wide (1.18”). That’s only 5% narrower than 1.25” tape, so they’re essentially the same. Metric-spec loom tape is available from vendors in the UK, apparently sold only in a maximum width of 25mm. Also offered are 15mm and 9mm widths. Loom tape is typically wrapped with a 50% overlap. To create this, the tape needs to be wrapped at about 30 degrees off perpendicular. Or, at least, that’s a good guide for getting started. After that, you can just adjust on the fly so that you get and maintain the 50% overlap. The S30’s Engine Harness measures about 0.70” in diameter at its fattest part (i.e. about 2.2” in circumference). When I stripped my 70 Z's engine harness (damaged and also covered with paint overspray) , I found that Nissan used the equivalent of 22 wraps per foot over the fat part of the Engine Harness. Long story short, that means that a 100-ft roll of 1-1/4’’-width loom tape will be good for the equivalent of 26 ft. of the fat part of the Engine Harness. Of course, the S30’s Engine Harness only runs at its fattest diameter for about 2 feet. Conclusion: A 50-ft roll should be all you need. A 100-ft roll will leave you with lots left over for other places. For the skinny parts of the harness, I laid a 6-ft length of tape out on my workbench and then slit it down the middle with a razor to create two lengths 5/8" wide. Wrapping with loom tape is a two-handed affair. You cannot wrap the tape around the harness using just one hand! You have to pass the tape roll from one hand to the other on every single wrap, while also maintaining a bit of tension during the transfer (warning: over-tensioning the tape serves no useful purpose and may, in fact, cause problems). No amount of words can explain the actual wrapping process, but it’s not rocket science either and you’ll quickly figure out your own routine. Probably impossible to do with the harness still in the car, though. Tape all of the branches of the harness first. Start about 3" from the 'device end' of the branch, wrapping towards the end. When you get there, turn around and wrap back towards the harness trunk. When you get to the trunk, do a couple of figure 8's, then wrap down the trunk for about 3". Cut off the tape, and use a bit of regular electrical tape to hold down the loose end (you'll be wrapping over top of this when you're doing the main trunk). Do all the branches first. Then finish up by wrapping the main trunk. I recommend starting at the firewall end and working towards the front of the car. Once again, use figure 8's at each of the branch junctions. When you get to the skinny part of trunk that goes across the front of the car, switch over to the 5/8" wide tape. There's a very elegant technique for finishing a wrap. It involves pulling the loose end of the tape back under the end of the wrap. Too complicated to explain here (although I found it easy to perform after a couple of practice attempts). Most people, I think, just tie off the loose end. If you do all of this properly, you should only have one end where you need to tie things off. I think you'll be pleased with the results. Bonus of using loom tape: If you make a mistake, just unwrap the tape and try it again. Good luck!
-
Mr. 240260280 also did a complete article several years ago on refurbishing the Series 1 vent flaps. If you haven't seen that, do a search and take a look. It may give you some additional ideas.
-
Take the rubber flaps off and flip them over so that the curl now works in your favour. Alternatively, find some flat rubber or vinyl sheet stock of about the right thickness and cut new flaps.
-
Another possibility: Princess Auto (aka Canada's Harbor Freight) has a relatively inexpensive hydraulic collision repair kit. The challenge, I suppose, would be to rig a beam underneath the roof structure that would take the reaction force without creating a matching boo-boo in the roof. Or maybe you could make a big, temporary hoop structure that encircles the floor, so that the reaction force is taken by the underside of the floor sills.
-
With apologies to 'Crocodile Dundee': "That's not a torque wrench. THIS is a torque wrench!"
-
That's a nice result for your floorboard, considering how badly caved it was. Amazing what you can accomplish with a BFH and a piece of 2 x 4. I wonder what the garage guys had to say to the car's owner when they returned it to him after 'service'.