


Gary in NJ
Free Member
-
Joined
-
Last visited
Everything posted by Gary in NJ
-
 I fixed an oil leak on the front cover, so I took the opportunity to clean the engine compartment. This is not a show-quality job, but it's a major improvement to the picture above (the day I received the car)
 -
Hmm, even with the damage history and the poor repairs, that car is worth a lot more then $1,000 - especially here on the east coast. The car looks ok to me. Let me ask you a few questions: 1. Does the twist render the car undrivable? Does it have spooky handling? 2. Are all of the body panels aligned well? 3. Is this a daily driver for you? The reason I ask these questions; if the car can be driven, and you don't have to rely on it - then why not drive (enjoy) it until the right offer finds you. Somebody, some where, wants your car. They'd love to restore it. These cars are rare, don't hack it up because its not your dream car.
-
I cleaned the engine and engine bay this evening. I then started and ran the engine until the temperature started to rise above normal (with the alternator/fan belt removed the fan & water pump were inoperative). After 15 minutes of running the engine was free on any oil leaks. I reinstalled the alternator bracket and alternator and took the car for a short test drive. I parked it in my VERY clean garage and will take a look tomorrow for any oil on the floor. I changed the oil before parking it so I can determine if any oil on the floor is fresh or just residual.
-
The oil is collecting where the alternator bracket attaches to the block. So I removed the alternator and the bracket. Just to be sure it wasn't the oil pump I put a torque wrench on the four bolts and checked them at 13 ft/lbs (the spec is 11 to 15). I got a click on all of them. The timing cover was a different story. I started checking the bolts that weren't suspected of leaking and found they could all use about a 1/4 turn. The one just above the wet zone took a full two turns. The one just below took almost a full turn. Bingo. I haven't checked it out yet as I'm going to take Mike's advice and clean the engine tomorrow after work. But two full turns? I think (hope) we have a winner.
-
The good news is my front seal isn't leaking. The bad news is I haven't identified what is. I have a leak that is in the vicinity of the oil pump, but I can't tell if the leak is coming from the top of the oil pump, the timing chain cover or the section of the oil pan that is right in that area. The pooling seems to be most significant under/near the alternator mount. I've cleaned up the area with a rag and I'm letting it seep for an hour or two. I'll try to get some photos later. In the mean time, any suggestions?
-
Nice write-up rv6a. That's a very logical procedure.
-
You're in the right ballpark by looking at the ignition timing, but I would look at the entire timing chain-of-events; from the cam back to the distributor. If you have a non-starter, you need to confirm that the engine is timed correctly and that the distributor is installed correctly.
-
The '72 FSM shows the set-up I have (Figure ET-4) and describes it correctly. This is the same set-up that I had on my '71. However, in the same FSM Figure EC-47 shows the timing marks you describe. I can only guess that both systems were used in that year. I think the scale on the timing cover, with the single mark on the HB, is easier to read.
-
I haven't heard that description before, that's a good one. Congratulations on bringing home an actual working car. Pictures, pictures and more pictures - please.
-
Here's one of those cases where it shows we are a common people separated by a similar language. In America, a "torch" is something that throws a flame. In the rest of the world, a torch is what we call a "flash light".
-
Password protected
-
You're in good company Mark.
-
For what's it worth, my timing marks are on the harmonic balancer, with a fixed pointer on the timing cover. If yours is the same, you can "recreate" the pointer by confirming absolute TDC, and then attach a bent wire across from the zero mark. Or, just purchase the correct part. Timing by ear is much harder then correcting a missing part. In the grand scheme of things, removing the valve cover is a non-event. As a bonus, its an opportunity to check the valve lash.
-
Opps, I forgot to add that important tidbit. I edited the original post to include that. It arrived packed like it was going to fly on the space shuttle. Thanks for the help.
-
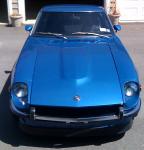
It's been almost a month since I got my Z. As you can see from the pictures, it's beautiful, but it was barley running. Well today I finished my punch list to get the car right. Here's what I found: 1. The car was only running on one carb. The floats in both carbs were slammed up against the covers. The piston in the rear carb had poor movement. Both carbs were removed, cleaned and adjusted to the correct spec. 2. The valve lash for the intake valves weren't even close to spec (cold). Four were at 0.003, one at 0.004 and one at 0.005. The valve lash for the exhaust were good; three were at 0.009 and the other three were at 0.010. Being that the intakes were so close together, I assume they were set that way. 3. The ignition wires gave a nice light show in the dark. They didn't even match. 4. I checked the dwell prior to changing the points. 26 degrees. 5. Oddly enough, the sparks plugs looked OK. I attribute this to general lack of combustion going on. Without fuel, spark and air, how bad could they look. I changed them anyway, along with a condenser, fuel filter, cap & rotor - all of which looked worn well beyond any reasonable expectation. 5. The car came with two foam pods on the carbs. They looked nice enough but that lacked air horns. The air horns on the stock airbox are part of the venturi and are vital to proper carb performance. Dave (a.k.a Zs-ondabrain) hooked me up with an original airbox - he even included the correct hardware. Thanks Dave. Another problem with the foam pods; there was no place to correctly mount the breather lines from the float bowels, the crank vent or the flow guide valve. 6. I discovered two vacuum leaks from the removal of the air pump system. Those have been properly closed off. After a full run-through, this car now runs perfectly. It now runs as good as it looks. I still need to replace the front crank seal. I was going to do it today, but my shake-down drive turned into a tour of the county. I forget what a pure, honest machine the 240Z is.
-
It's not that I wouldn't trust a 40 year old spare, but I'd hate to use it. After all, once used it can't be new ever again. I think I might store it in the basement and put a bazooka subwoofer in its place.
-
I decided to clean the spare tire and the spare tire well (yes, I really did - don't lie, I know you have too). I was looking at the spare and it occurred to me that the rim looked original. That's not that unusual. But then I started looking that the tire and I think this might original as well. What do you think?
-
-
Sounds like a engine timing issue. If you are sure that the distributor was installed with #1 @ TDC, then you may need to look at the engine timing.
-
I too recently went back to the OEM airbox. The lawnmower pods didn't provide enough flow at low rpm.
-
I'm going to try and make it as well.
-
That's the info I'm looking for to put into a second check list for an annual inspection. Thanks.
-
Opps. I'm 240-centric and gave a 240Z size. Sorry. For what its worth, a 175/78-14 and a 195/70-14 have the exact same overall height.
-
The OEM tire, 175/78-14 has a total height of ~ 24.75 inches. What you have asked about has a total height of ~ 23.25 inches. The 175's have a sidewall height of 5.37", wile the 205's have a sidewall height of 3.63" - and they're much stiffer. The car ill ride like a skateboard. 215/50-16's will fit well and have an overall height of ~ 24.50 inches. For what it's worth, I'm running 225/50-15 (just under 24 inches). The ride is stiff and the steering is heavy at parking lot speeds, but they do look good.
-
A little background on me before you think I'm crazy... I've been a pilot since the age of 16. So from an early age the use of check lists has been instituted into anything that I do that is of importance. I've also built and test flown my own (as well as others) aircraft. So developing check-lists and test cards is just something that I do. For example I have an extensive check list for the annual condition inspection on my aircraft. I find it useful and it gives me piece of mind knowing that I haven't forgotten anything. So with that information, I've put together a little engine check list for a tune-up on the 240Z engine. I figured that it might be of use to others so I've attached it here for others to use. I'm also putting together an annual condition inspection check list and could use the input of others. The type of information I'm looking for are: Things to lube Things to inspect Things to replace I will collect the data and put it into a logical flow, and then post it for the benefit of everyone. By posting, you've entered my world of "everything needs a checklist" or what my wife calls my world of crazy Welcome to my world. 240Z Tune-up Check List.pdf