woytovich
Free Member
-
Joined
-
Last visited
Everything posted by woytovich
-
Has anyone used the Z store cover...?
-
This website (thecarcover.com) carries the Technalon Car Covers for WAY less than The Z Store... sounds TOO good to be true. Has anyone ordered from them? Mark
-
Bringing this thread back to life... I was about to ask just about this question and it was never answered... I have a 71 240z with the tool boxes in the cargo floor. The straps are mounted to the floor rearward of the tool boxes. The carpet does not have holes for the straps to come through... Maybe I have a carpet from an earlier z where the straps were mounted at the front edge of the cargo floor? Mark
-
Then you don't need to add the rubber flap thing now do you... :paranoid:
-
I have a bunch of this rubber. If anyone wants a piece I could cut it and mail it... Let's say $5.00 via paypal should cover the pp fees, rubber, envelope, postage... with a bit for the beer fund.... Mark
-
Oxidation I presume...? Same as happens on an old, unpainted aluminum screen door.
-
Ok... so I've read this thread, carefully, and I have a couple of questions: I am running 195/70R14 (stock size) tires on my 71 240z. I am not interested in any serious sport upgrade to the suspension. It rides hard now. The springs LOOK shiny and new. (I just bought this car in the fall and it is only now on the road for me - after 25+ years of being stored). There is some evidence that the PO made some (mostly minor) sport upgrades: camber adjust kit, expensive tires, Cibie headlights, Vitaloni mirrors... 1. Is there any way, short of pulling them out, to tell what shocks are installed? 2. Likewise with the springs... I am looking for a stock height ride that is comfortable - not to the point of sloppy cornering but I won't be doing anything more than twisty mountain roads for my "fun" driving. I don't want to have to do any mods to make shocks/springs work. Is there a basic "accepted" stock replacement combo I should look at? Thanks, Mark
-
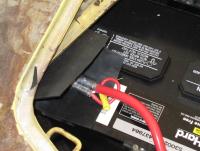
My cables were not the right lengths to flip the battery around... besides, that puts the + terminal very close to the firewall...
-
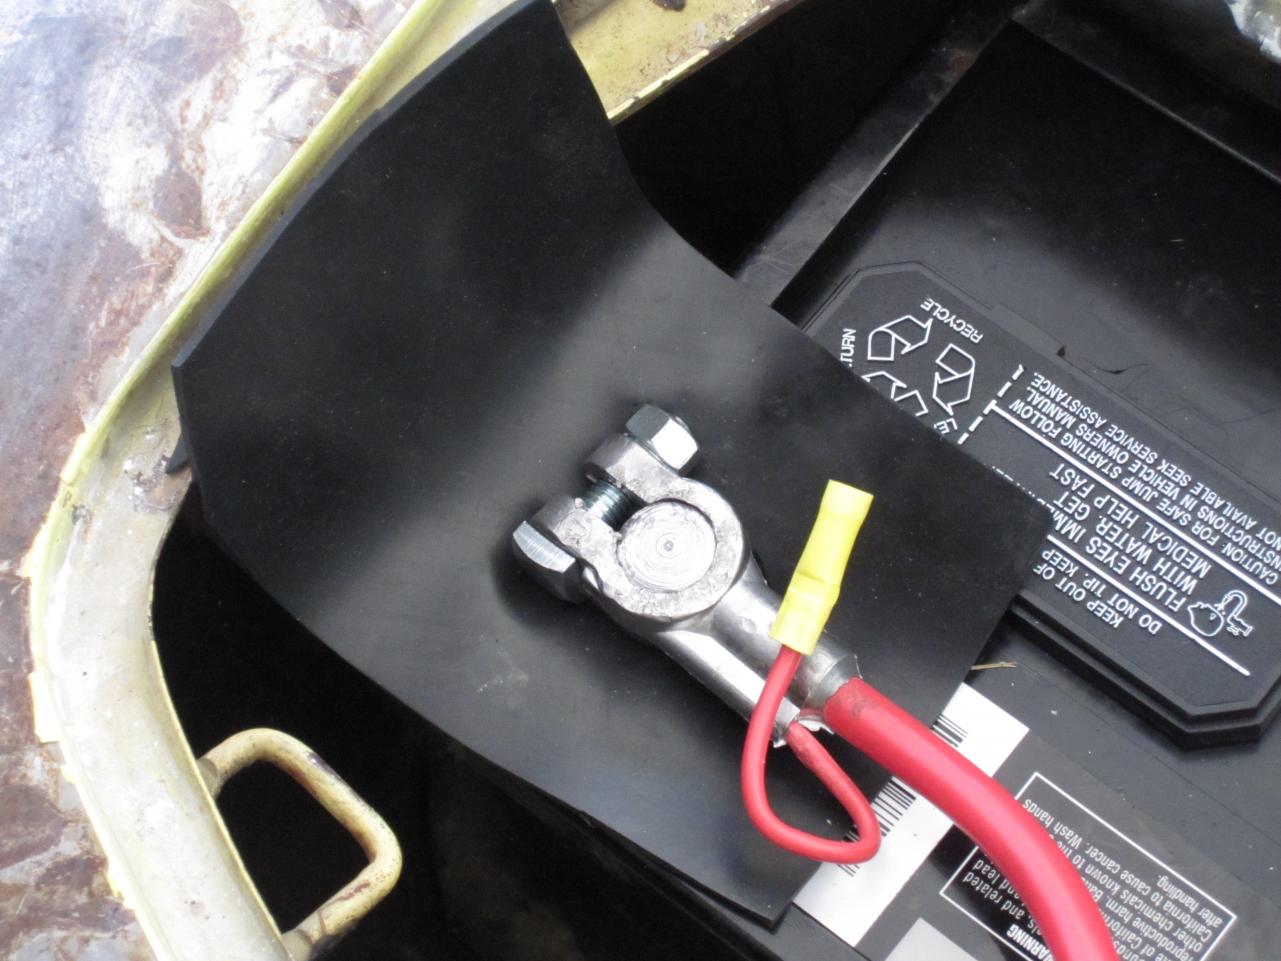
I like that... but as someone mentioned, the rubber flap protects the wrench too... I even think I'm going to make a larger one to really keep a wrench on the terminal away from the fender...
-
Well I finally got around to putting a Group 24 battery in my 71 240z today. As others have mentioned, there is a certain amount of anxiety regarding the placement of the positive battery terminal and clamp being so close to the fender sheet metal. I know using a Group 24F battery solves the "problem" but I had already purchased the 24... So, I grabbed some thick rubber sheeting I have around here, cut a hole in it for the positive terminal with a large flap left over on the outboard side. Slipped it over the terminal, installed the terminal and left the flap to fold over the top of the terminal. (I was sure to make the hole large enough to allow the clamp to push down sufficiently.) I feel better this way. The pictures tell the story. Cheap and effective. Mark .
-
Well it turns out the other one was in a box in the back of the car! ...and these have blue tinted glass in the mirrors - kinda cool.
-
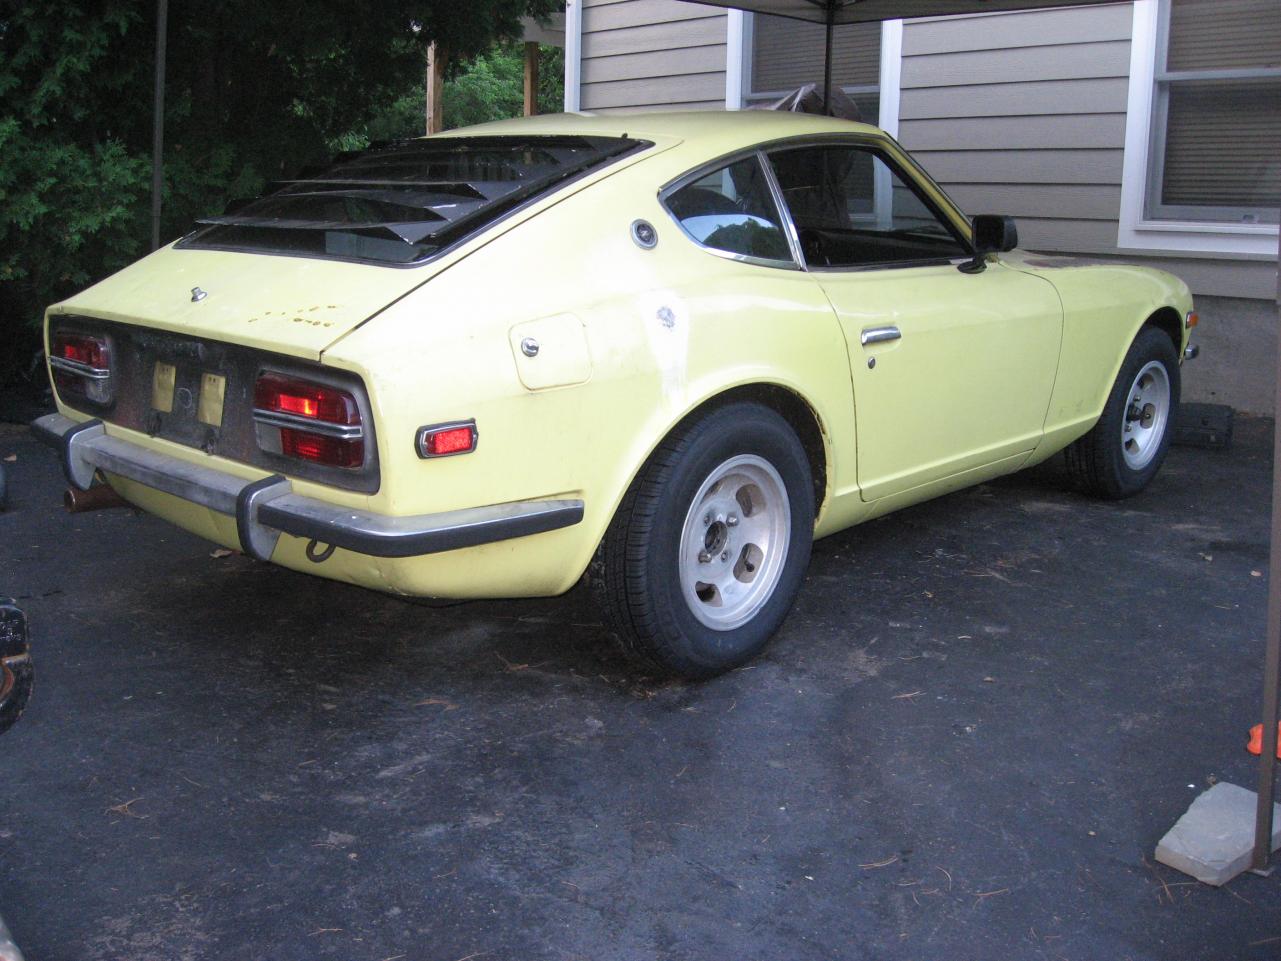
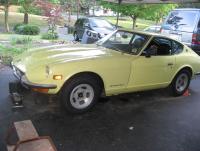
More progress! (it lives!) Well it's all put together (if you have followed the other threads the work on the front end is done: sway bar bushings/links, ball joints, tie rods, Toyota caliper upgrade, new rotors, odd "camber adjust kit" override). We even spent a couple of hours with a rag and polishing compound getting the gray haze off the light yellow paint. We drove it around the neighborhood for the first time today. It's the first time it has seen road time (other than on a trailer) since 1985. Still need to further adjust the clutch and replace the rear brake cylinders (one is leaking). Other than that I'll need to see about doing a carb adjust/tune up: it idles high and diesels on shut down. Mark
-
No need for longer bolts. That would leave you with a pretty odd looking arrangement once you had it tightened up. Jacking up the middle of the bar would work. Just be careful not to bend it (probably not easy to bend) The method in post 5 works without any drama. Mark
-
As the OP let me clarify: 1. Street car, stock components 2. "Stock" style sway bar links and bushings The original question wasn't the method to set up the links properly... it was how to get them on AT ALL. Given the length of the bolt included I was not able to get the nut started (all this with all of the suspension components installed and the sway bar already bolted to the frame/X member above...) Thanks for the insight though, I'm always interested in the "better" way to do things. It helps to understand the dynamics of the whole system.
-
I'm sorry, but I don't understand. What are "corner balance weights"? The jist of this thread wasn't how tight to make them but how to get the nut on the bolt at all! Mark
-
Ok... for the record I have a better method than stated earlier: Jack up the strut from under the ball joint (being careful not to damage the ball joint or anything else) just enough to better align the sway bar with the transverse link. Assemble the sway bar bushing pieces between the sway bar and the TL, leaving off the rubber bushing under the transverse link. (bolt goes down from the top so the nut is underneath) Put the nut and washer on the bolt and tighten partially. Use one of those rubber padded clamps (http://www.sears.com/shc/s/p_10153_12605_00931484000P?prdNo=3&blockNo=3&blockType=) and clamp between the top of the sway bar bushing bolt down to the transverse link. The padding helps it hold on at the odd angle. Remove the nut and washer underneath... check to see if you have enough thread to reassemble with the rubber bushing. If not, repeat the above until you can... The clamp is not strong enough to compress the rubbers in the assembly but it is strong enough to hold it once your tightening of the nut does the compression Hope this makes sense. Mark
-
ALMOST ready to run down the road with it for the first time! Did the hoses, master/slave clutch cyls, fuel lines, vac lines, rear shoes... Just today I finished up with refreshing the front suspension: ball joints, rotors, tie rods, sway bar bushings... I just added new brake pads and have found that indeed the calipers need to be replaced... I think I'm going to just do the Toyota caliper upgrade while I'm at it... New tires too... Here how it sits as of this afternoon:

-
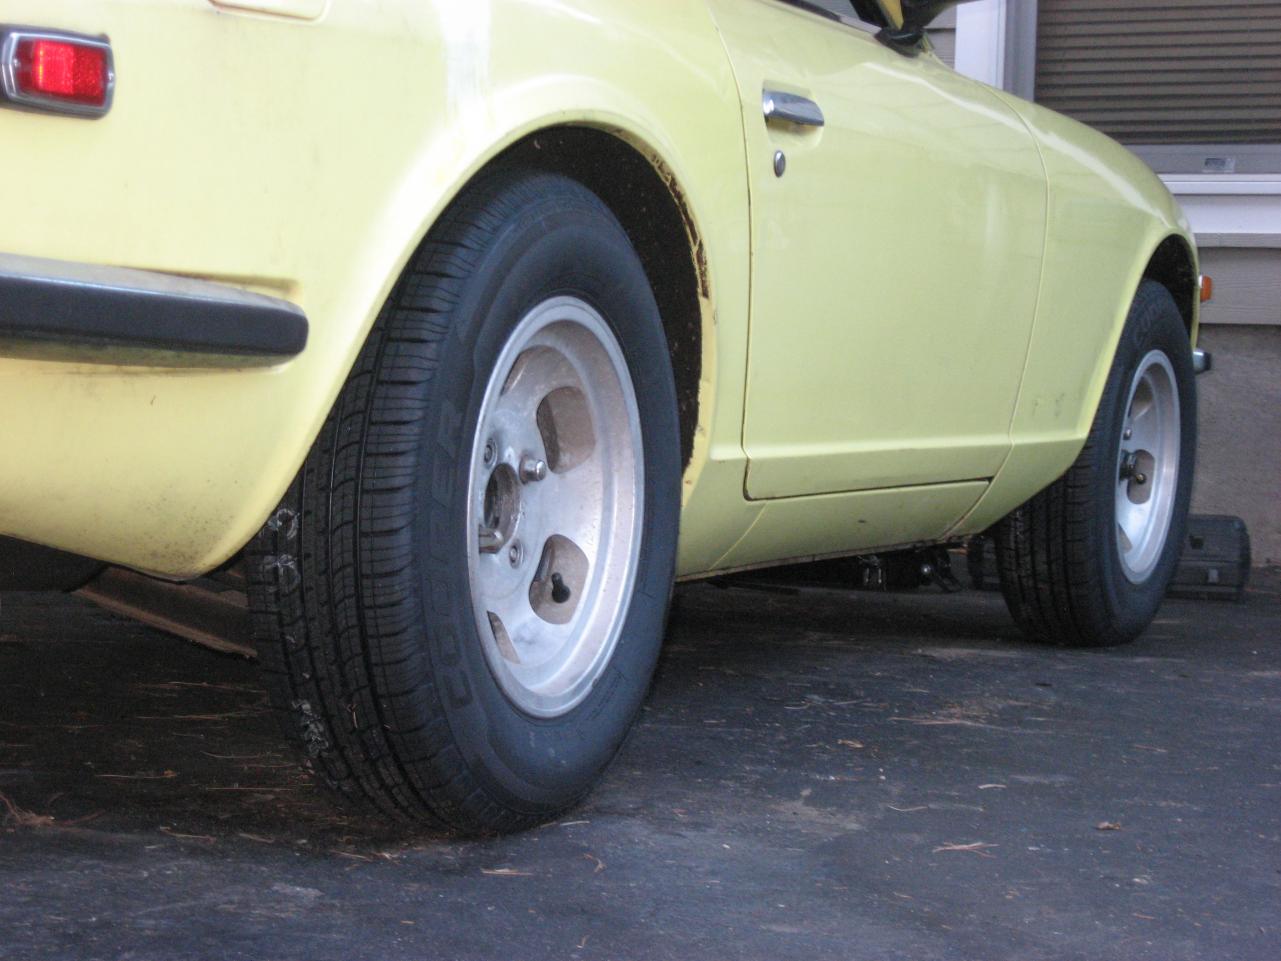
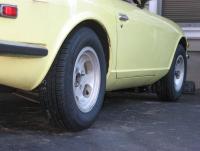
Ok... so I bought a set of relatively cheap Cooper Response Touring tires at Sears in 195/70R14. They have a plain retro look to them. My question related to the slotted wheels: I need lug nuts and I need center caps.... I have a few lugs that fit but I'm having trouble sourcing replacements. Is there an online source that stocks a multitude of lugs so I can find what I need? Center caps... I just want something simple. Retro cool would be great but I don't want to spend a ton of time or money on these... any help would be appreciated... Mark
-
Email me at mark at woytovich dot com with a price. Include shipping to zip 11731... If I can I'll grab it for the future swap...
-
Well it's that washer diameter that was cut out of the brace to install this kit. The kit's washer thing sits in this 1 1/8" hole and provides a surface to torque the bushing against. I would even hazard to say that the kit's thick washer is a more solid surface to torque against... That said I do agree that the RIGHT way is to replace the whole thing with a stock, unmolested piece... that's not going to happen here in round one... I do not feel there is a safety issue the way I'm doing it - I wouldn't do it if I felt otherwise. I will troll for a good stock piece for the swap sometime in the future. mark
-
So the company that makes this camber kit, Specialty Products, WILL NOT sell me replacement bolts... they will not break apart a kit... Nice... GREAT customer service Looks like I'm going to see about welding up the cam/washers and redrilling center holes and adding my own grade 8 bolts... Mark
-
I think I'm going to source compatible parts here. I'm going to weld/drill the cam thing to recenter the bolt hole and I'm going to source a bolt to do the job. I'll take photos and report back. On a side note: how much trouble is it to replace the crossmember/body mount (to go back to true stock)?
-
Can you tell me the bolt diameter? And, in your opinion, does it need to have a smooth shaft and be threaded only at the end? (does it move inside the bushing steel sleeve)? Would the threads cause problems?
-
Well I was thinking it would be faster to just weld up the cam'washer thing and use it to "fill" the big hole (drilling a recentered hole for the right bolt)... I might need a bolt that is a bit longer in that case. Was/is the stock inside of the body side just smooth steel with a hole in it? Does the bushing ends just rest against it or is there something else there? What allows the TA to move up/down at this end? mark
-
Please, let's move this conversation over to my other thread on the subject... no more posts here. Do it here: http://www.classiczcars.com/forums/showthread.php?p=331456&posted=1#post331456 Thanks... and sorry for the confusion. (and thanks for the help!)