darom
Supporting Member
-
Joined
-
Last visited
Everything posted by darom
-
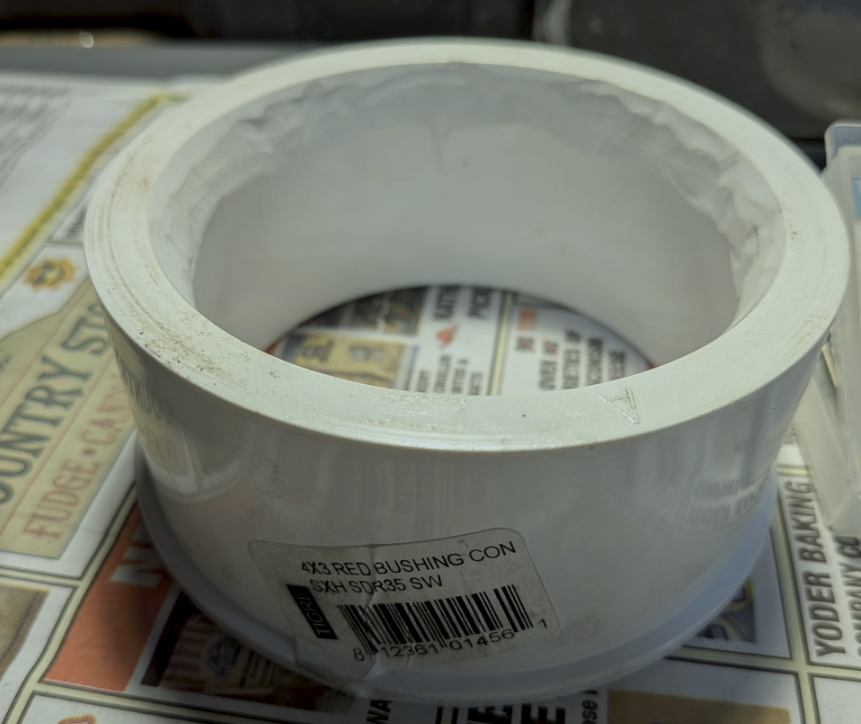
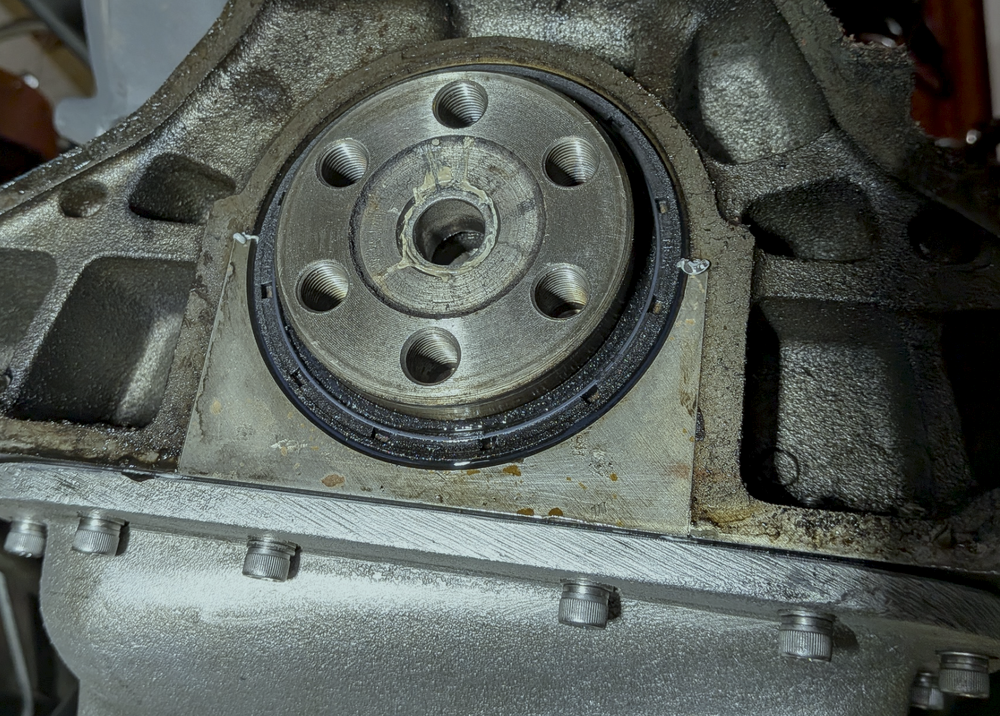
I tried using the sharp punch tool/screw extraction method while removing the seal. It immediately moved sideways inside. I was able to use a hook tool to extract the seal out. If anyone is interested, I found a plumbing part at Menard's that can be used for the installation. It is called '4x3 Red Bushing Con, SXH SDR35 SW' in the Plumbing section. Its inside diameter fits nicely over the crank. Once the seal is positioned, it was easy to tap it in. I had to dremel inside a little to make sure the 'tool' sits flush: Thanks to everyone for your input. I lost my clutch alignment tool from the Exedy kit, had to order a new one at O'Reilly's.


-
Thanks! You are right, aviation permatex is a sticky substance.
-
Great, thanks guys - I feel better now since I know that the auto shop actually replaced the front gasket. I bought a rear main seal from Rockauto, Mahle, JV637, made in Japan. Looks very solid. The last question - the inside lip of the rear main seal per Tom's book will be coated with moly/petroleum jelly. What about the outside seal surface and inside the engine where the seal goes? Wipe it clean with a solvent? Should I smear some aviation permatex on the outside of the seal before its installation? Thank you.
-
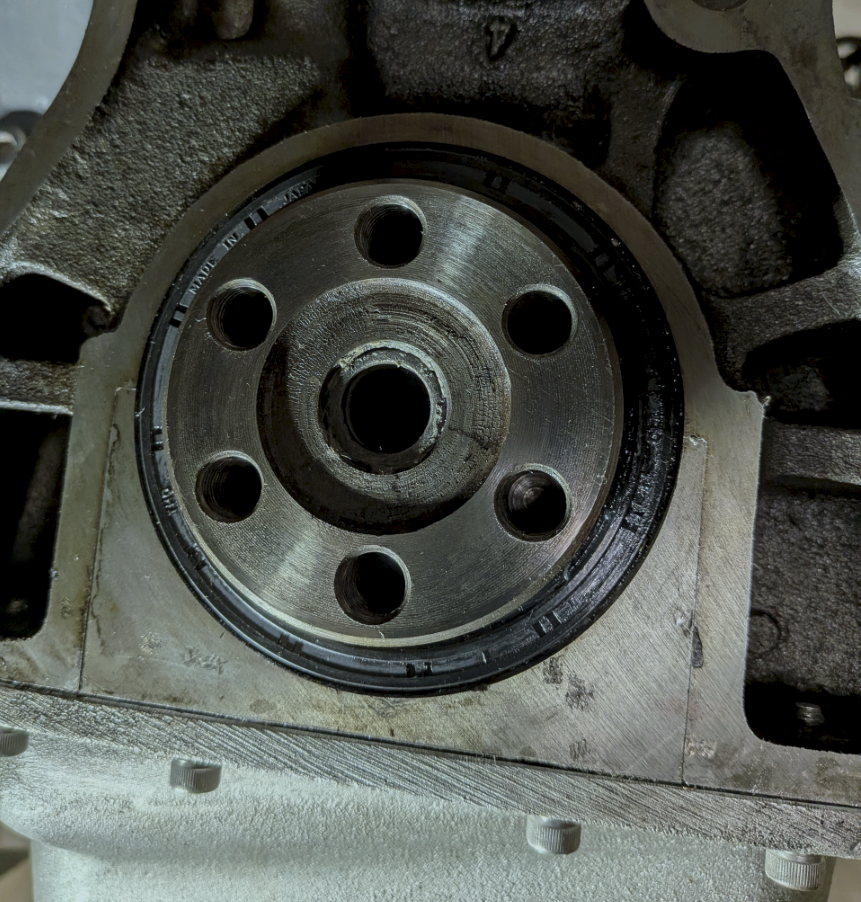
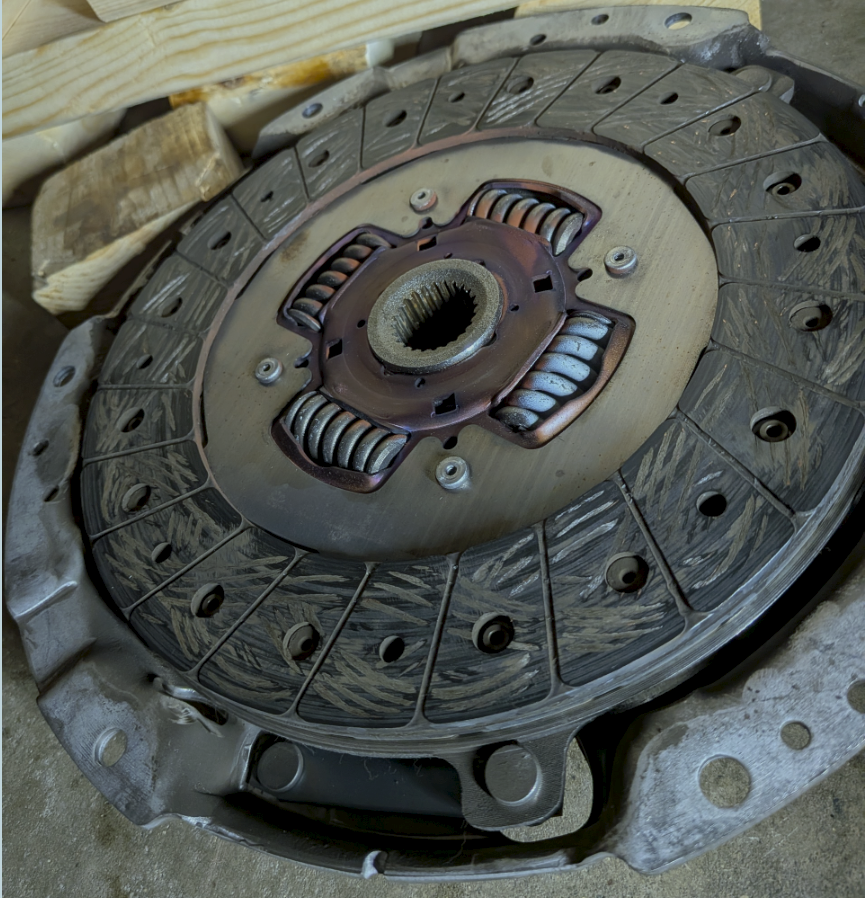
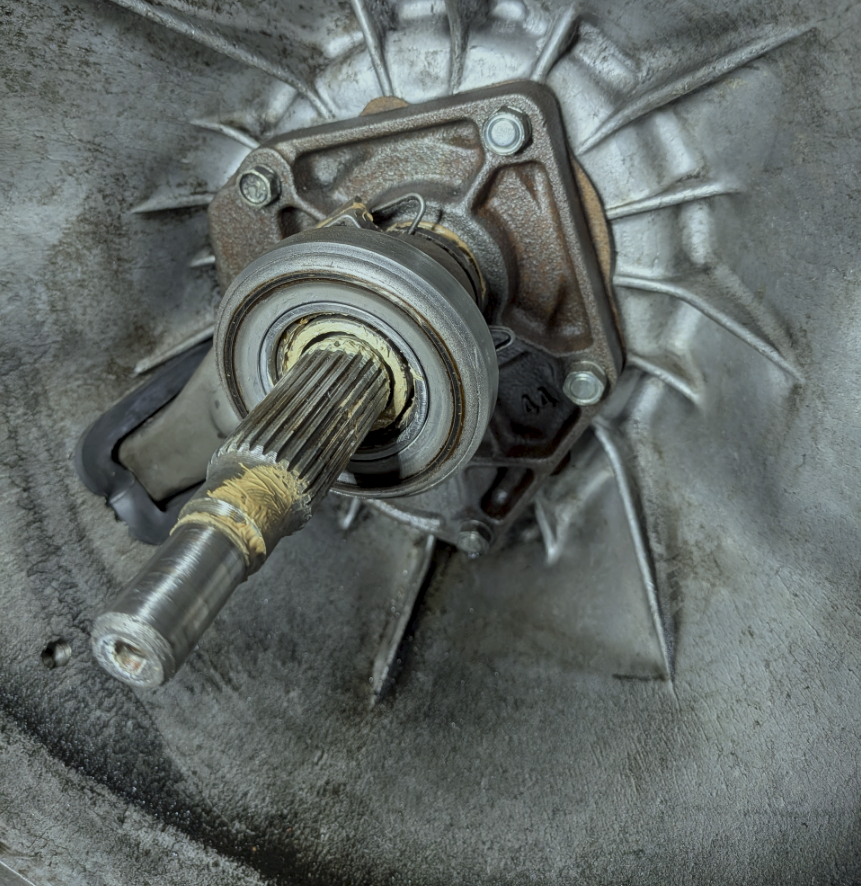
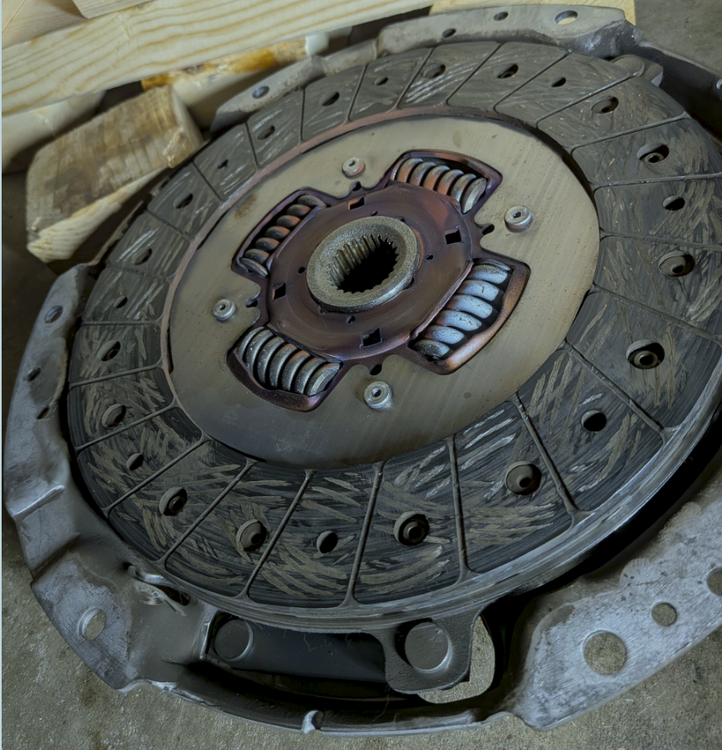
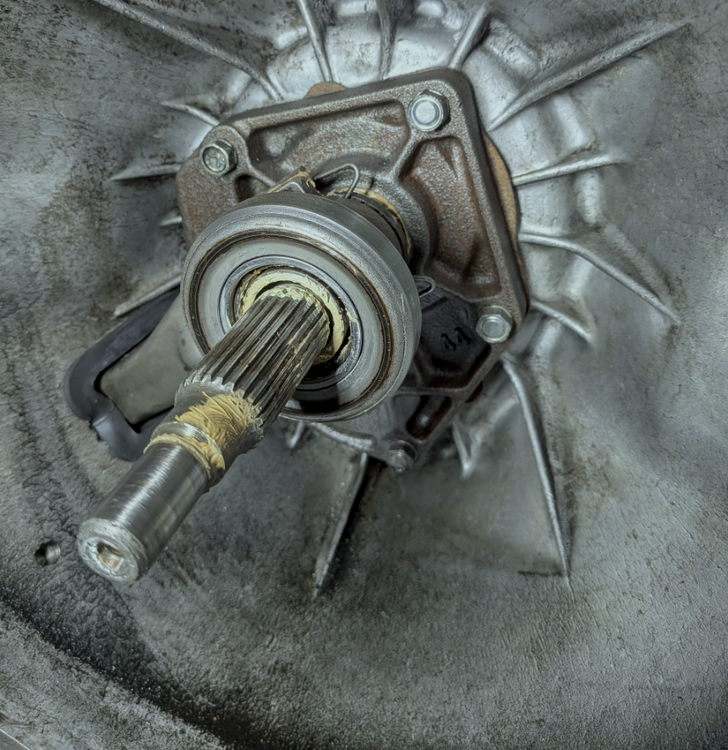
Hi guys, I am chasing some oil leaks, and I finally removed the transmission to find out that the rear main seal is leaking (I replaced the side seals a few weeks ago): I wanted to ask you if I should replace the clutch that I had the shop install 15 years ago. The car has put 1000 miles since then. The clutch plate doesn't look worn out as far as thickness goes. There are some grooves in it, but running a finger nail against then doesn't feel deep. The engine flywheel is smooth, no scratches. The clutch didn't slip. I replaced the master/slave clutch cylinders a month ago. Here are some pictures of the clutch plate: I also don't see any leaks around the front transmission seal/gasket area. It looks like the shop replaced it (I see the 'new' paper gasket sticking out): The throw-out bearing is smooth, no noise while spinning. Should I replace the clutch and re-do the front seal/gasket of the transmission? I got the replacement parts from the ZCarDepot just in case. Thanks!
-
Hi @HusseinHolland, I was going through your build/garage/Volvo mods and saw this comment about Milkfab's racing silicone gasket. I had the exact same thing happened to me. No overtorquing. Mine split as well. I didn't want to invest another $30+, ended up with a good ol' cork glued to the valve cover with black RTV, no leaks. I did send my feedback to Milkfab (I bought other things from them in the past), but never heard back.
-
Hi @HusseinHolland! Any updates on this project? Curious, if you finished the 350z tranny adaptation in your 1st gen.
-
Will do, thanks for the photos. it is a very nice looking oil pan.
-
Hi @Yarb ! Thanks for the link. I like their oil pan and it is cheaper than the Japanese one. Do you have any feedback? What kind of gasket did you use? Cork, rubber? Sealant? Does it come with the oil pickup? I didn't see it in the description. Do they provide new bolts? How deep is it vs the stock one? Any issues hanging too low to the ground? Any clearance issues installing it? Leaks? What did you do with the oil dipstick? Thanks!
-
That would be great. Thanks. I also started looking into getting an aluminum pan and found the one that MSA sells (made in Japan): https://www.thezstore.com/product/5261/price-drop-kameari-high-capacity-oil-pan-70-78-240z-260z-280z It is pricey, but the number of hours I spent on sealing the oil leaks in that area should justify the 1k price. I wish this pan had a groove built in with a rubber o-ring style gasket that GM cars use. My understanding is that the perfectly flat aluminum pan combined with the MSA's competition style gasket (i don't think it needs any sealant) should provide a good seal. What do you think?
-
I am going to resurrect this thread since sealing our oil pans never ends :-) I posted back in 2015 that I used a gasket which was sandwiched with Permatex Grey. It lasted me till 2024 (9 years) when the oil started leaking again. And boy, it was a major b$tch to remove it! Then I decided that I probably shouldn't be applying semi-permanent solutions again lol. I removed/cleaned both surfaces, made sure my oil pan was straight and applied a thin layer of Permatex Black to the oil pan to glue the cork gasket. Once it was cured, I put the oil pan back with a few dabs of Black in a few spots where the FSM is asking for. I installed the reinforcement 2 metal pieces and applied small torque to bolts per FSM. I did the same to my valve cover and it is working. It also makes it super easy to remove to do valve adjustments. Well, the oil pan gasket lasted me 6 months, the oil is leaking again. I think, it was Captain who asked if someone could manufacture a nice long thick reinforcement piece (we will probably need 2 for ease of installation)? If someone makes one, please sign me up.
-
Thanks, this car is a never ending story lol. Now I am hearing what sounds like my speedo cable in the front making buzzing noises which increase and decrease with RPMs :-) I must have bumped it when I was attaching the master cylinder's rod to my clutch pedal.
-
Thanks, Captain! This is a great tip. I learnt a pretty cool shortcut today.
-
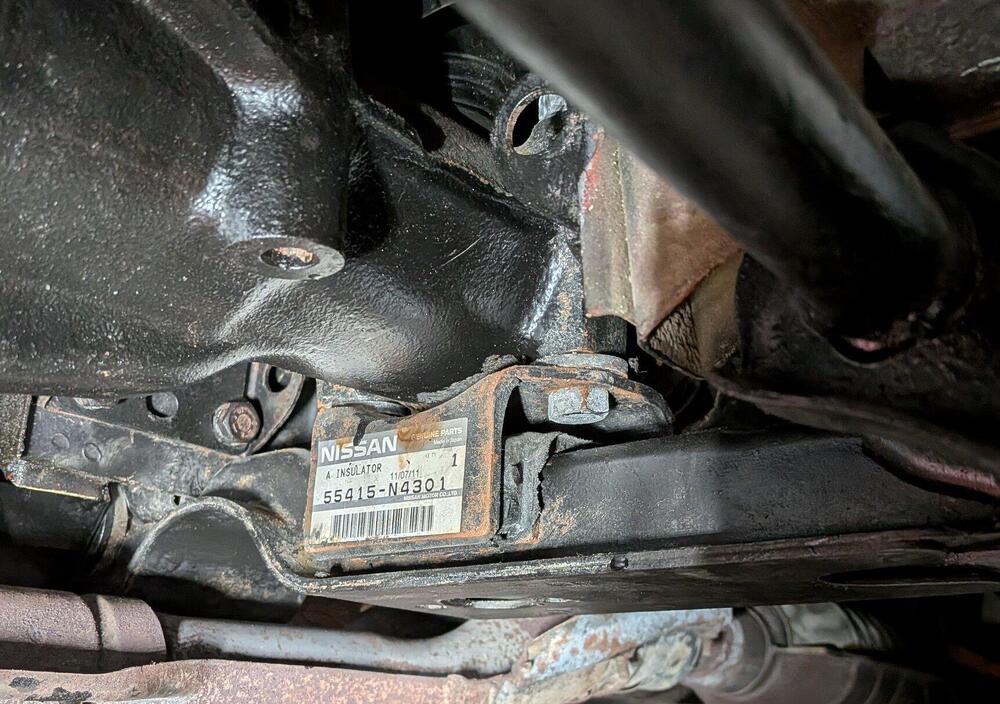
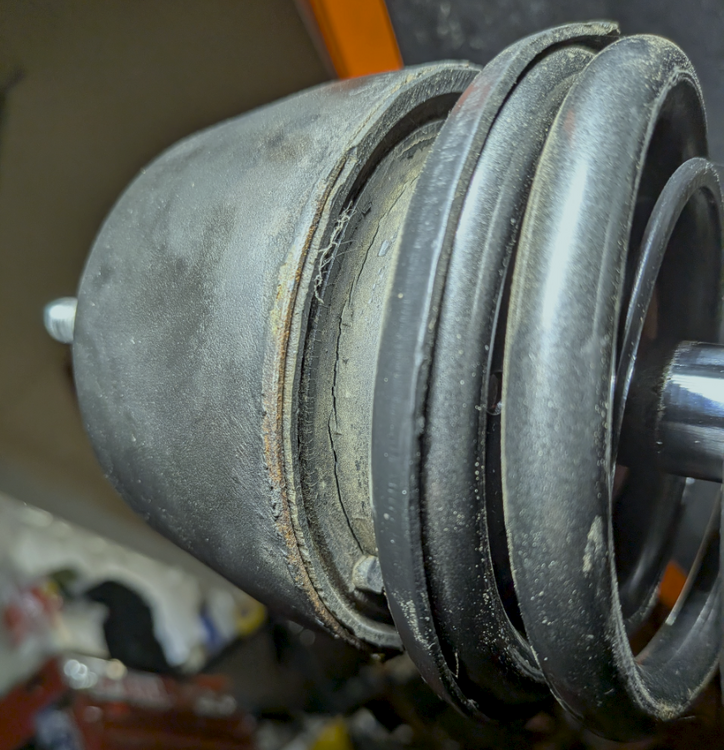
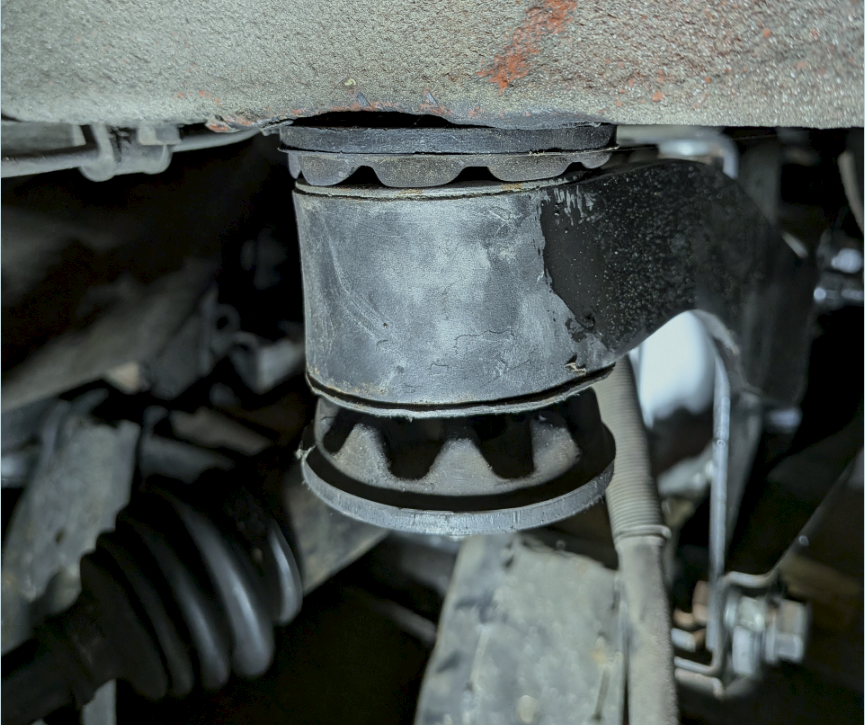
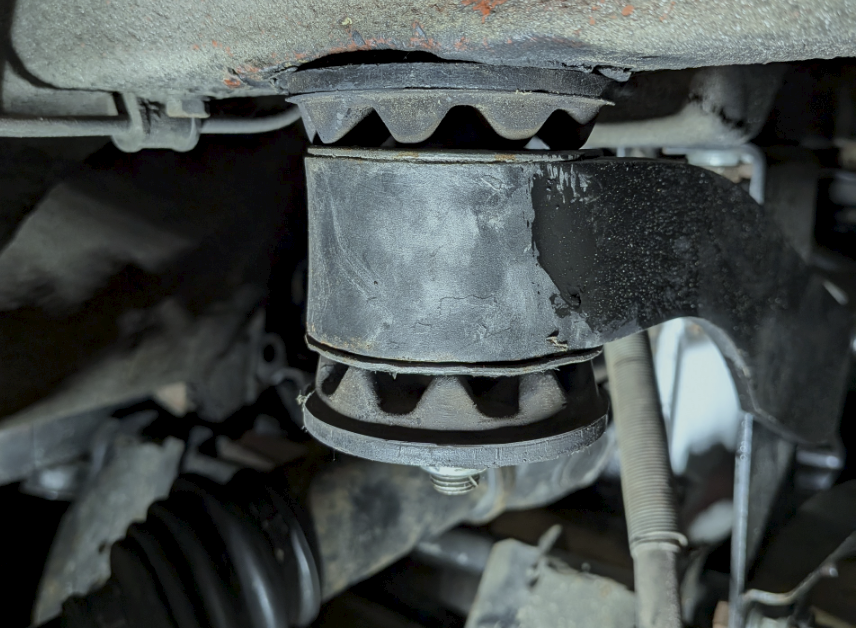
Re: the strut lock nuts - if I remember right, these are the cone shaped nyloc style lock nuts. I couldn't tell if they were noticeably loose. I replaced my old 280z insulators with 240z shorter ones with the zpartsdepot's adapters. I used 60 ft lbs to torque them. I had to use my breaker bar wedged between the insulators' studs to hold them to apply the torque. I don't remember myself doing this 10 years ago lol - it is possible I didn't follow the FSM's torque specs to the letter. Now I have to tackle another project - there is some oil seepage around my oil pan/possibly rear main seal. I might have to drop the transmission, replace its seals/gasket as well. Really not looking forward to it.
-
Hi guys, I replaced the mustache bar bushings and re-torqued my rear strut insulator lock nuts. I didn't notice any play there when the springs were compressed. The good news is that the clunking noise is gone. Replaced the master/slave clutch cylinders/hydraulic hose. The old ones showed some internal brake fluid leakage. No more grinding while shifting into reverse. The clutch fork moves 12.5 mm (half an inch). The pedal is at 8 in, 15 mm of free travel before the slave starts pushing the rod. I searched this forum and someone mentioned that the 15 mm is a good number for a fork throw. I am guessing if mine was too short to disengage the clutch disk, I would have heard/felt it. Thanks to all who helped with the diagnostics!
-
Yes, I checked the rear sway bar, I replaced its bushings there too when I overhauled the suspension. Thanks for the tips! I ordered the mustache bar bushings. I will probably need to replace my clutch master/slaves - they are original. My 'freshly' (10 years ago) rebuilt 5-speed from a ZX is giving me fits while putting it into reverse. With no engine running, I can't force it into reverse. With the engine running, I can rev up and shift. I am suspecting my clutch is not fully engaging? I also noticed I am missing my upper-stop bumper for the clutch pedal. I can't find that rod with a rubber stop in my spare parts box anywhere. I think it looks like a hood bumper stop?
-
Hi Charles, I started a thread a while back on hybridz in their EMS/Megasquirt forum: https://forums.hybridz.org/topic/136053-76-280z-microsquirt-project/#comments It has been a journey, so far no regrets dumping the AFM/Bosch ECU etc.
-
I will check the insulator nut on both sides, will compress the springs to do it. The noise has developed over the past year. There is no clunking when shifting gears, it is the annoying noise going over small/large cracks on the roads. The roads here in WI are not as good as in CA. The factory diff mount was replaced with a brand new (then, 10+ years ago) Nissan diff mount. I just checked it - the rubber is solid, there is no play. I am ordering the poly bushing kit for the mustache bar. The diff whine will probably get droned out by my MSD-2225 fuel pump :-) anyway. I insulated the FP with some nice rubber padding, and it is still loud. Appreciate your guys' ideas! It is summer here, time to enjoy our toys. Last winter I upgraded my stock Bosch L-Jetronic to the microsquirt ECU with the inj/spark control, need to start driving the car to properly tune it.
-
Hi guys, I am chasing a rear clunk noise which happens when going over the road cracks and potholes. Pushing the rear of the car with hands in an up/down motion doesn't reproduce it. I replaced all the bushings in the rear 10 years ago. I probably put about 1000 miles on the car. First, I thought the noise was due to my read speaker deck, I removed it. Another thought was the deck lid, there is small play in the deck struts due to the loose bushing/pin attaching the struts to the mounting location. I jacked up the car, removed the strut assemblies and checked the rear strut insulators. They are solidly attached, no play. However, I saw a hairline crack on the LH side. I checked all the rear sway bar bolts, nuts, plus the R200 hardware, rear half-shafts bolts/nuts, fuel tank/pump, mustache bar hardware. 10 years ago I installed an aftermarket RT mount, there is a 1/8 in gap between the R200 and the RT poly bushing when the car is rested on the jack stands. What are your thoughts? I went through a lot of posts about the rear end clunking (hundreds of hits lol), and I think I checked all of them on my car with the exception of that hairline crack in the insulator. I am planning to order a pair of strut insulators to begin with (240z ones with an adapter, unless someone has a pair of later 280z ones in a good condition?). Thanks!

-
I'd also put the multimeter leads directly on the fuel pump and watch the voltage when someone operates the throttle. Voltage drop there won't do any good to a fuel pump operation.
-
Thanks! I guess if the opening is 6 AN/ 0.34 in, I will need a 3/4 in countersink bit.
-
My protunerz fuel rail has the same shallow o-ring surface for the CSV line. @HusseinHolland what is the name of the drill bit you used on yours? It looks like a deburring bit (45 degree?). I am heading out to Home Depot, will look for one. Thanks!
-
I hope so too, I just ordered the same fuel rail from Protunerz. That chamfer for the o-ring will be the first thing I will be checking when I get the part.
-
Found this link to a pre-made timer relay to get some cheaper build ideas: http://www.okaauto.com/EFITimer.html
-
Thanks for looking into it! I have the same issue, I am running the MSD-2225 fuel pump, and I think it doesn't have any drain-back valve. I installed one of those Amazon special one-way valves after the fuel filter in the engine bay. After a while, it stopped working. When I took it apart, some corrosion inside created the seal/membrane gaps. What do you think about wiring the fuel pump relay + 5-10 sec timer relay into the ignition switch (ON position)? The fuel pump wires run under the carpet on the passenger side (at least in my 76), providing an easy access.
-
@Captain Obvious Any updates on your fuel pump-priming project? I use one of those $5 time relay boards to run a 1979 fuel rail fan blower for 10 minutes. It is manually operated. The relay board is attached to a bigger relay to handle the load of the blower motor.