


zKars
 Subscriber
-
Joined
-
Last visited
Posts posted by zKars
-
-
Edited by zKars
20 minutes ago, inline6 said: Yeah, this "One thing that just came to mind is the oil passageway plug that goes into the front of the block. I remember pulling it out and looking at it but am now only 80%ish sure I reinstalled it." You need to verify a plug is in place.
Happened to me too, engine shop didn’t put it back, “someone” forget to check if its there….. Wasn’t….. There is a back one as well….
Just have to ask, you’re spinning the priming rod CCW right?
-
Edited by zKars
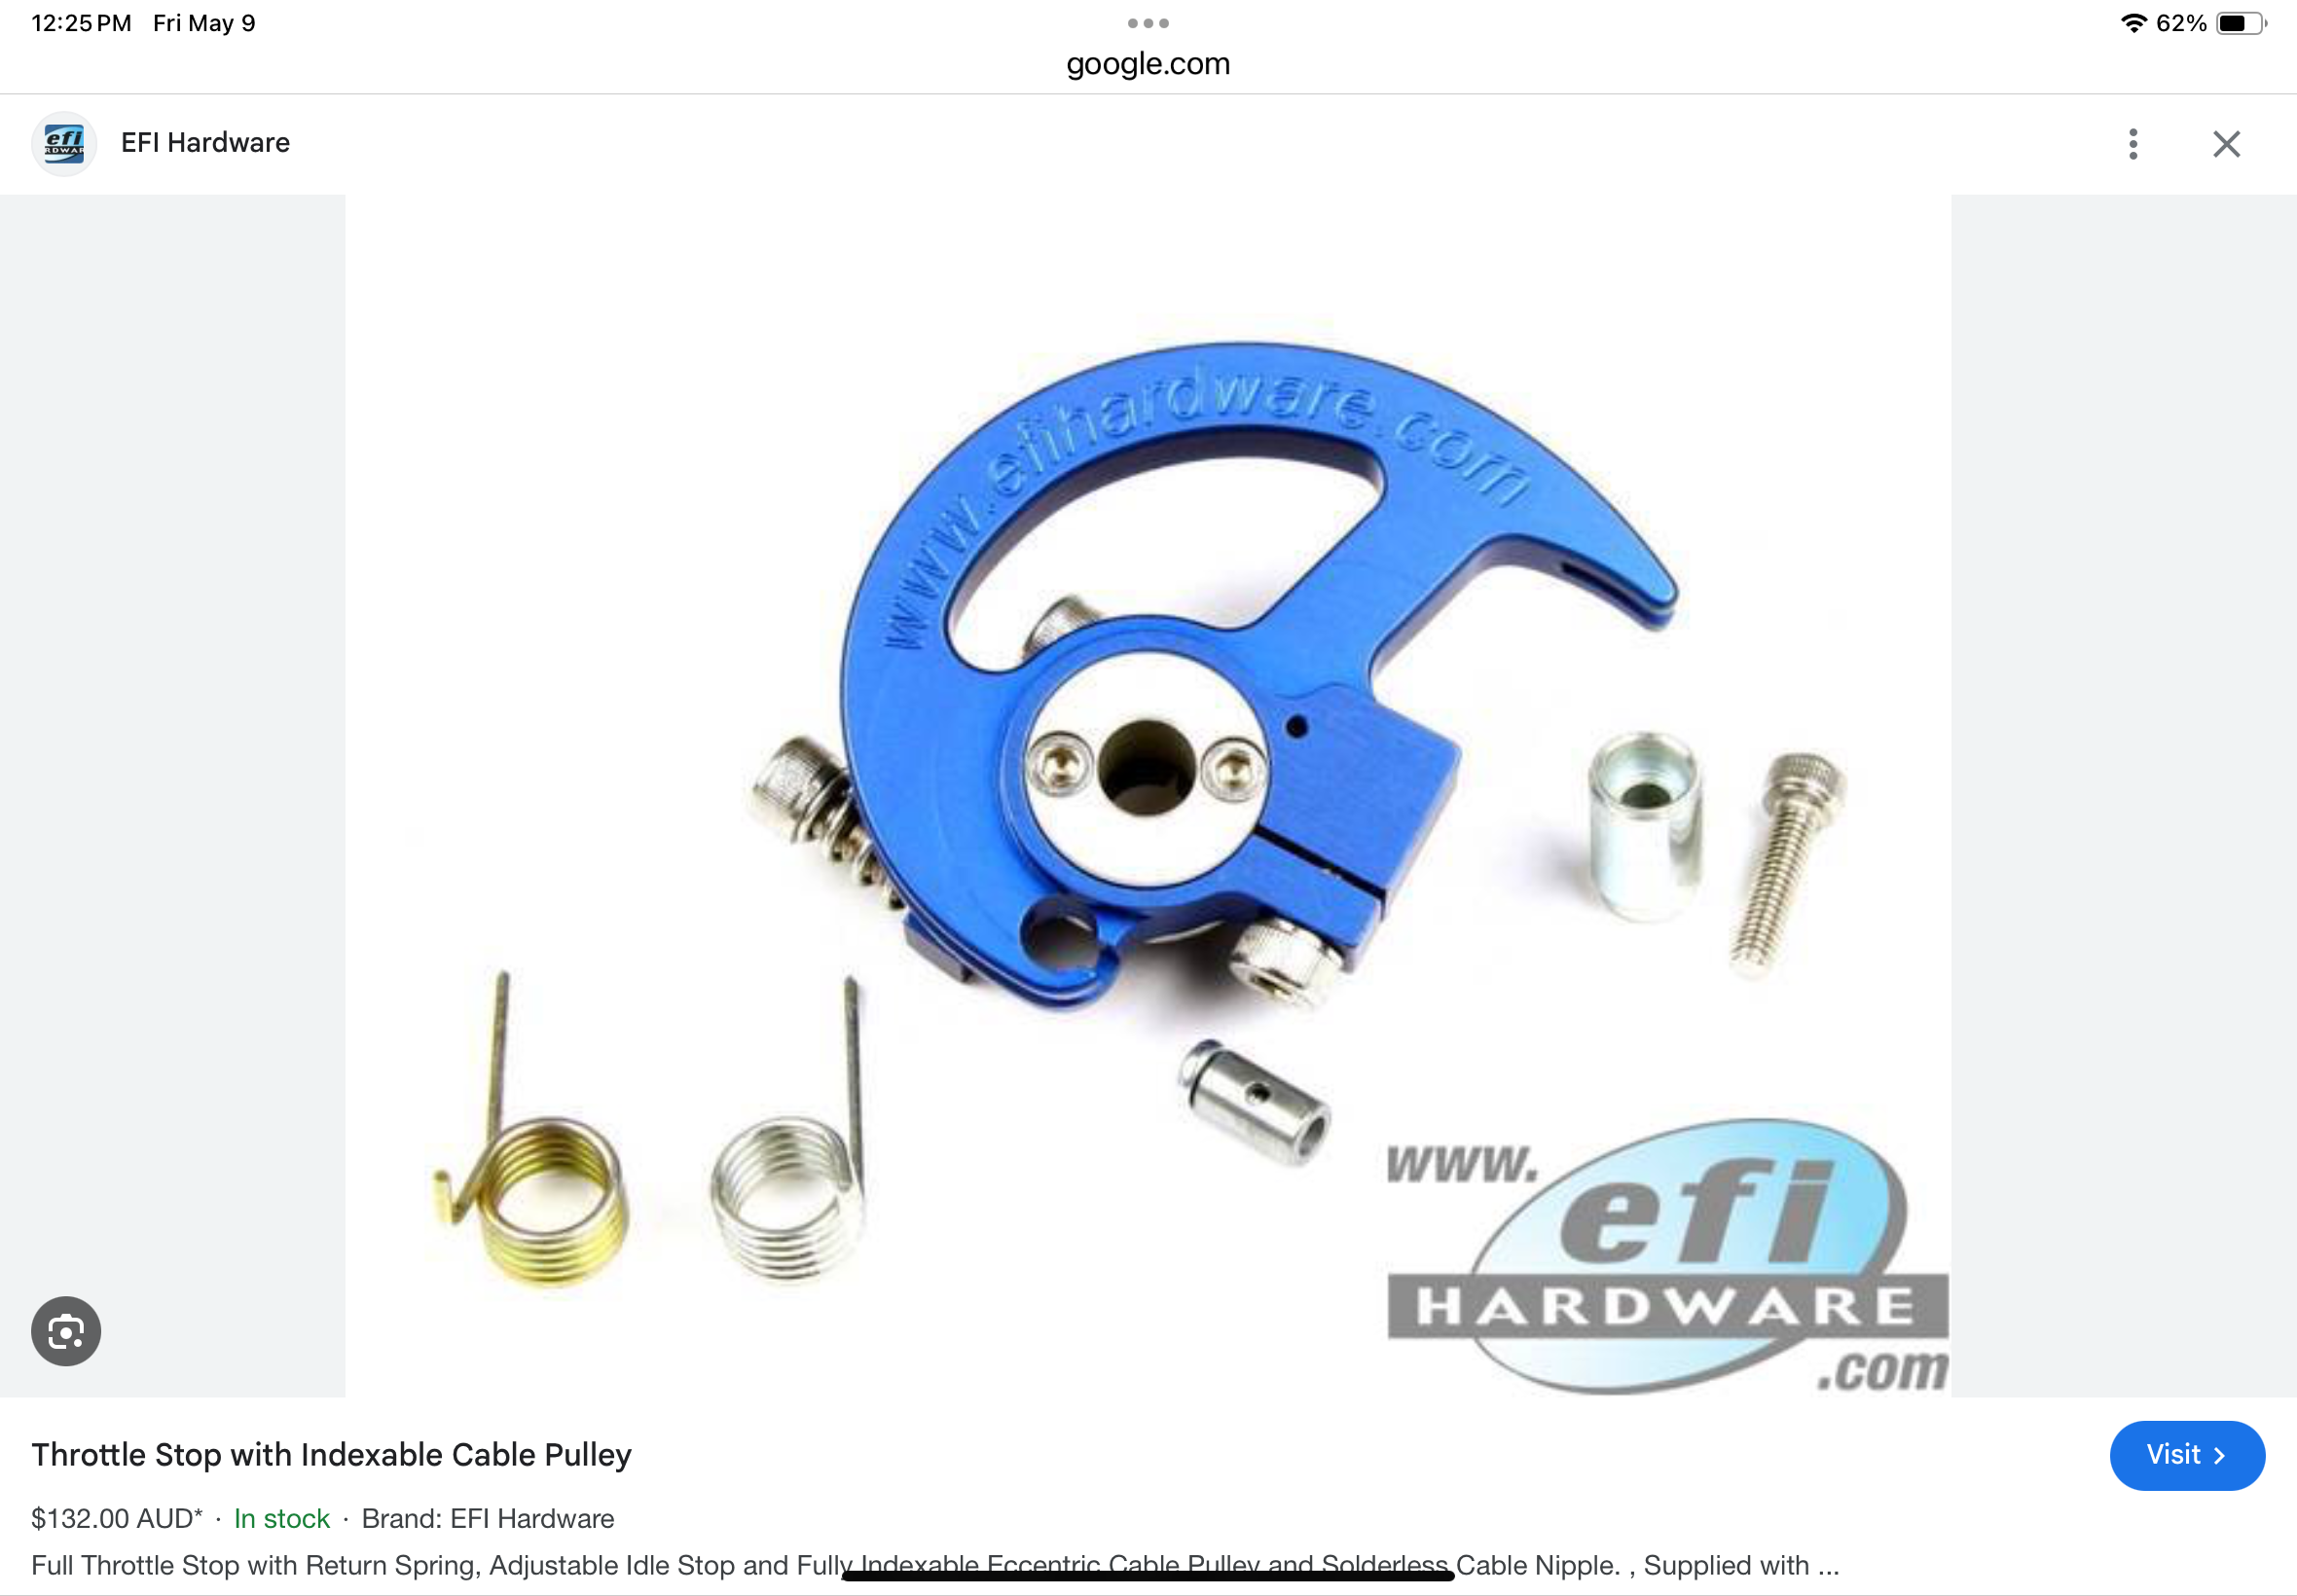
Goggle “Throttle Pulley”. Came up with several sources. efihardware has nice stuff.

-
 3
3
-
-
-
1
-
-
-
Edited by zKars
After replacing the insanely expensive cracked windshield in our 2025 Mazda CX-70 next week, I’m going straight to a shop to get Tera Shield installed on it. ZRAuto. Claims its three layers, clear for ever, blah blah blah. No idea about price yet. If it saves me one windshield it will pay for itself. That’s the brand the place I’m going to uses. I’ve looked online, and found a couple of retailers selling DIY kits in the $200 USD price range. Might try the DIY stuff on the Datsun just to say I did it.
-
2
-
-
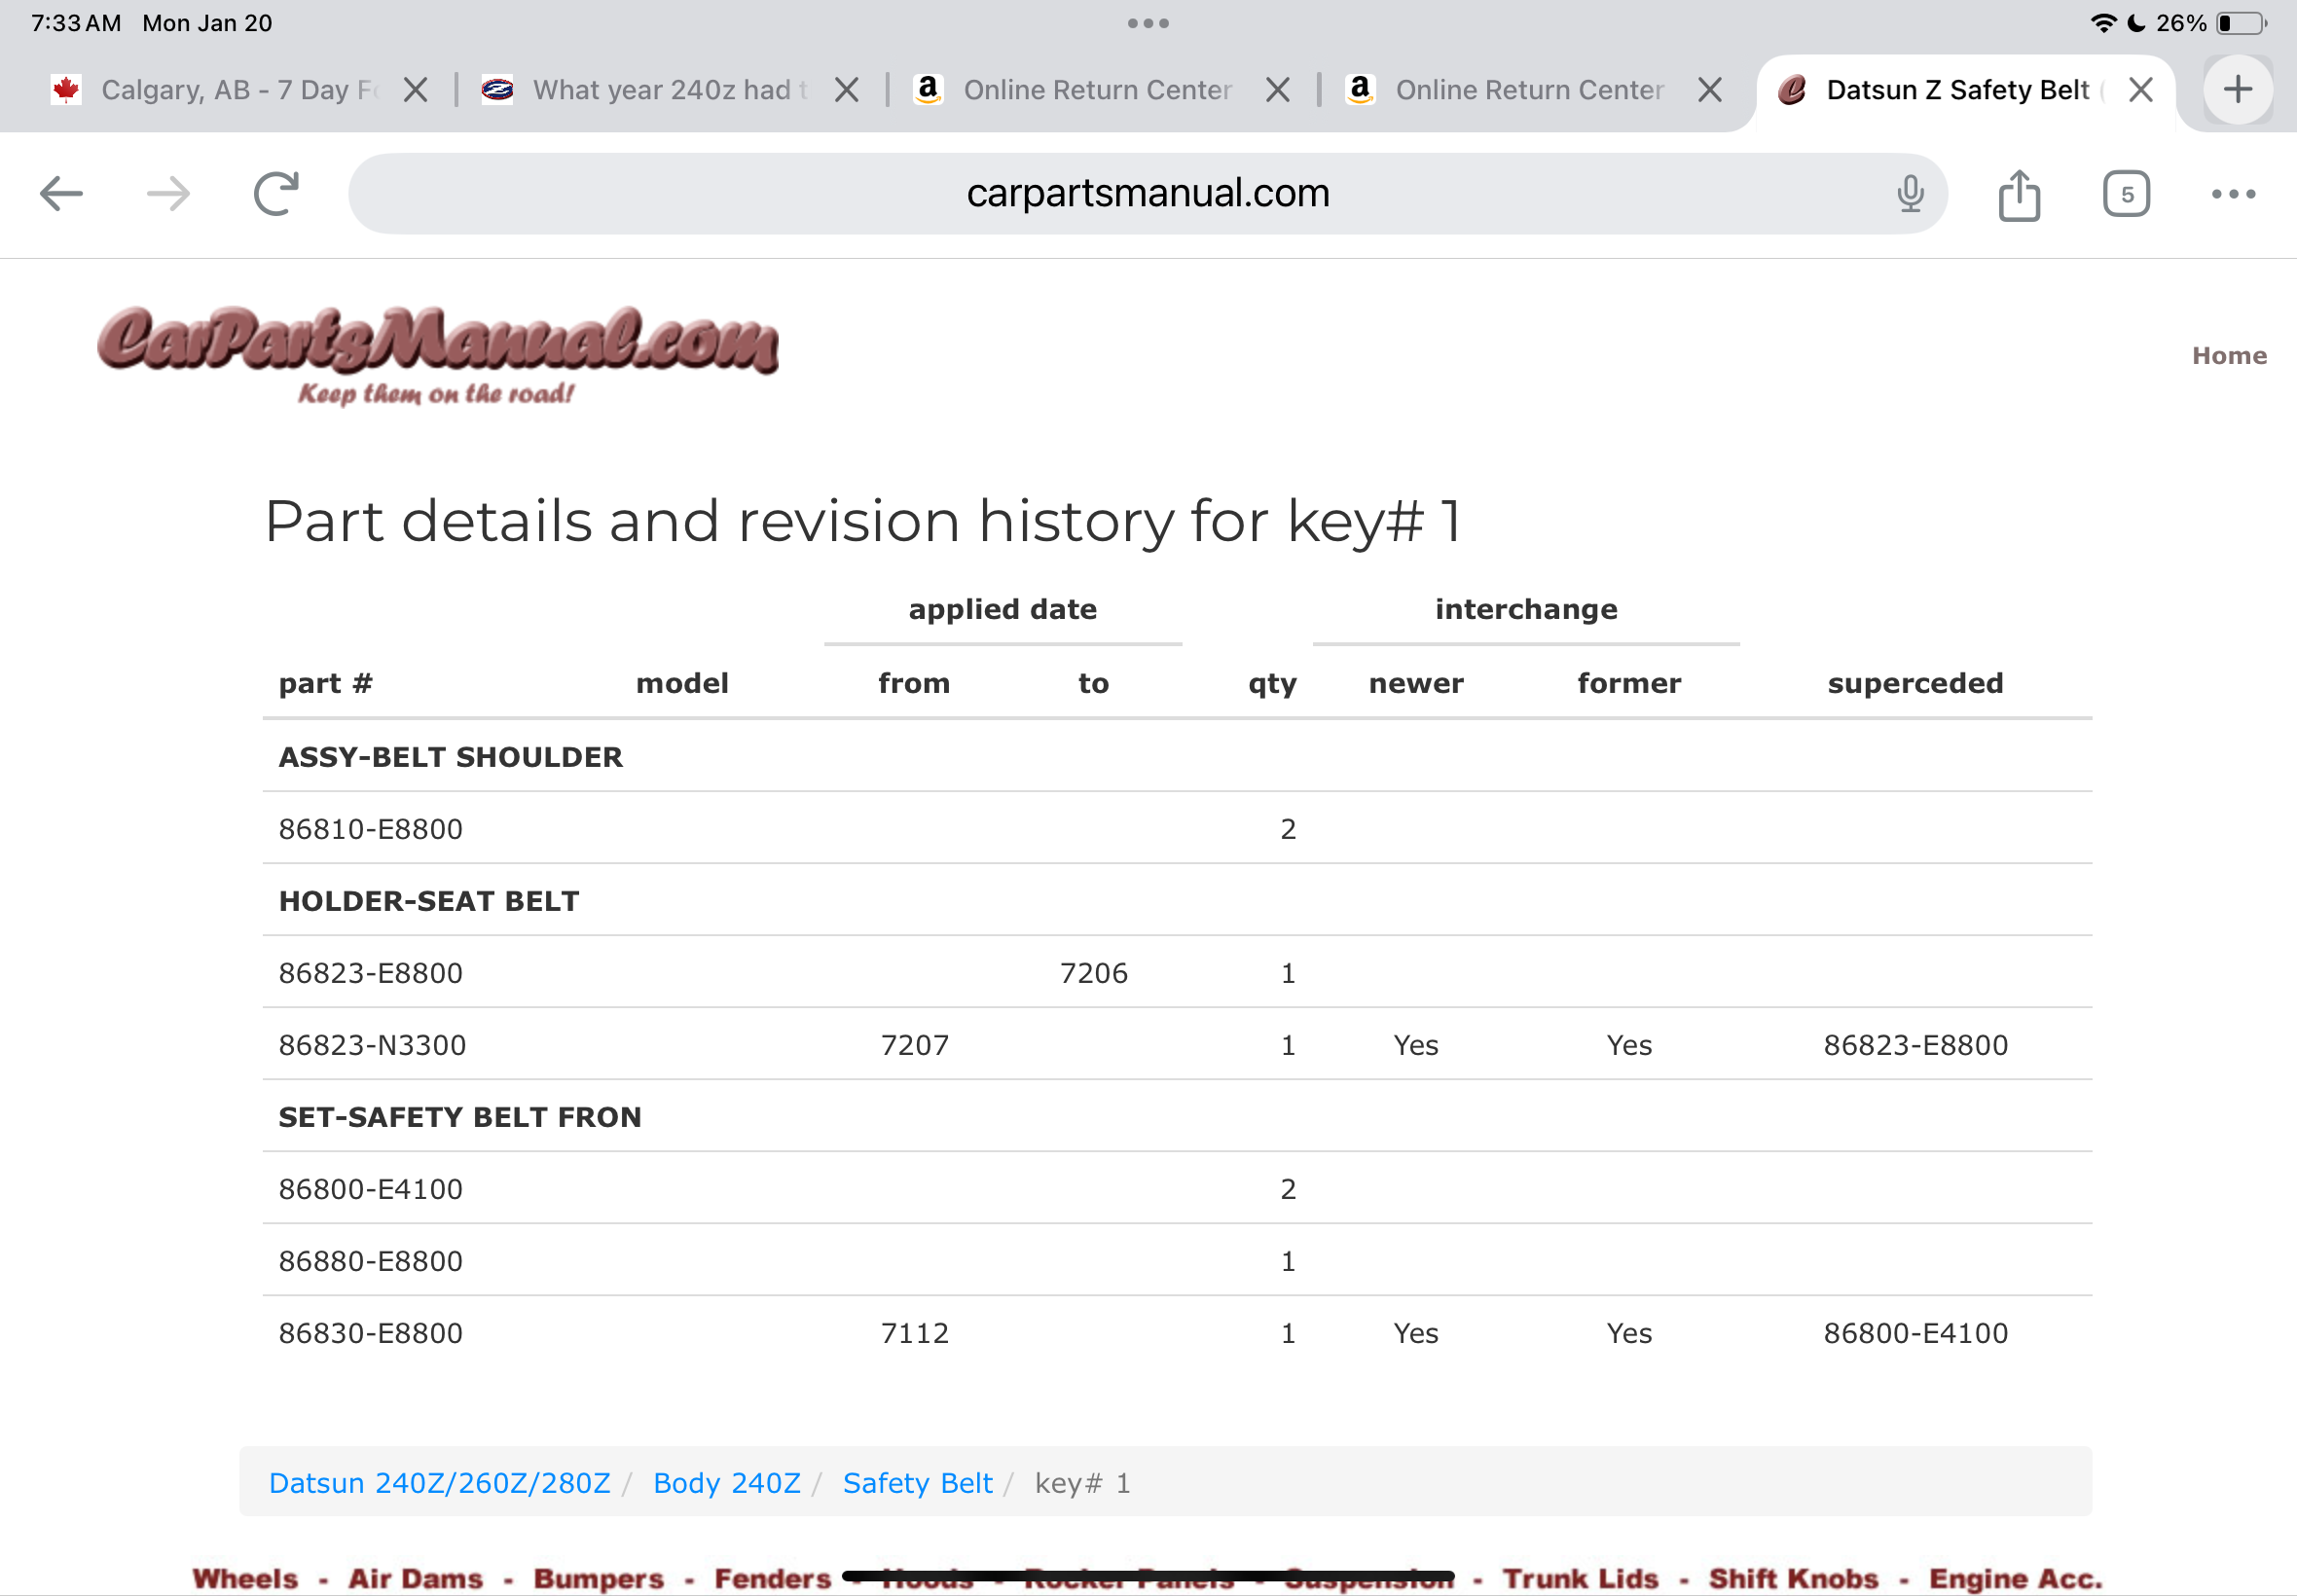
73 bumpers still have a pair of studs, they are just farther apart to fit the much heavier bracket design. The location of the bumperettes changed as well.
The 74 early 260 skinny bumpers changed again as it was mounted to hydraulics and it had a single mount stud as I remember. This bumper seems to have that.
Another indicator is the little weld in studs (M6) alone the top inside face that mounted that rubber spacer strip that filled the gap from bumper to body with the farther out 73 and 74 bumpers.
-
Edited by zKars
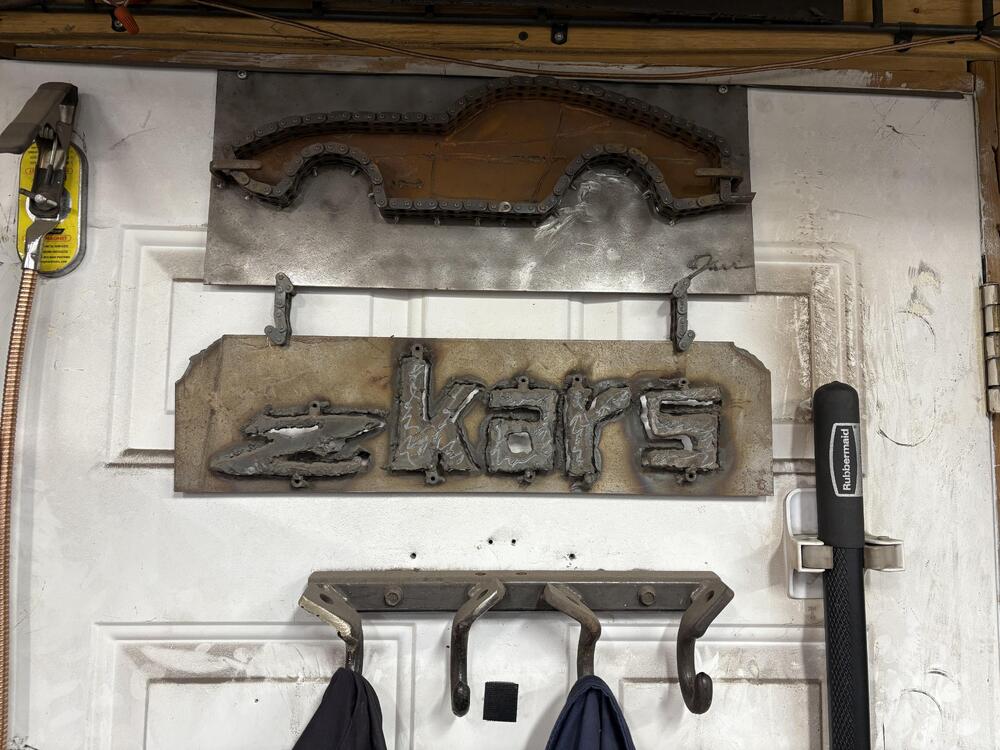
Exactly one chain. Printed out a side view and laid out the chain around the outline. Took a couple of zooms in and out to get the scale down to exactly one chain. Added a couple of embellishments.
Gotta do a 510 next. Can do another Z if you want!
-
1
-
 1
1
-
-
- Popular Post
The memory is swirling with details of tow hooks, but I would like to point out that from the point of view of originality, the presence of tow hooks is optional.
First remember they are tie down hooks, not tow hooks. They secured the car to the boat they came over on.
Memory of past discussions suggests there was a Nissan order to dealers that they be removed before selling. Correct me if that’s wrong. Seems from the many Z’s I’ve seen, most still had “some” so I suspect many dealers didn’t bother.
So it would appear to be “Correct” to have them or not on a restoration. If you could somehow know if they were there or not on delivery day for your particular car, then you would know to either include them or not to make it “right”.
Then the issue of what particular style was installed at each of the four spots comes up, but I think that was covered in some other thread.
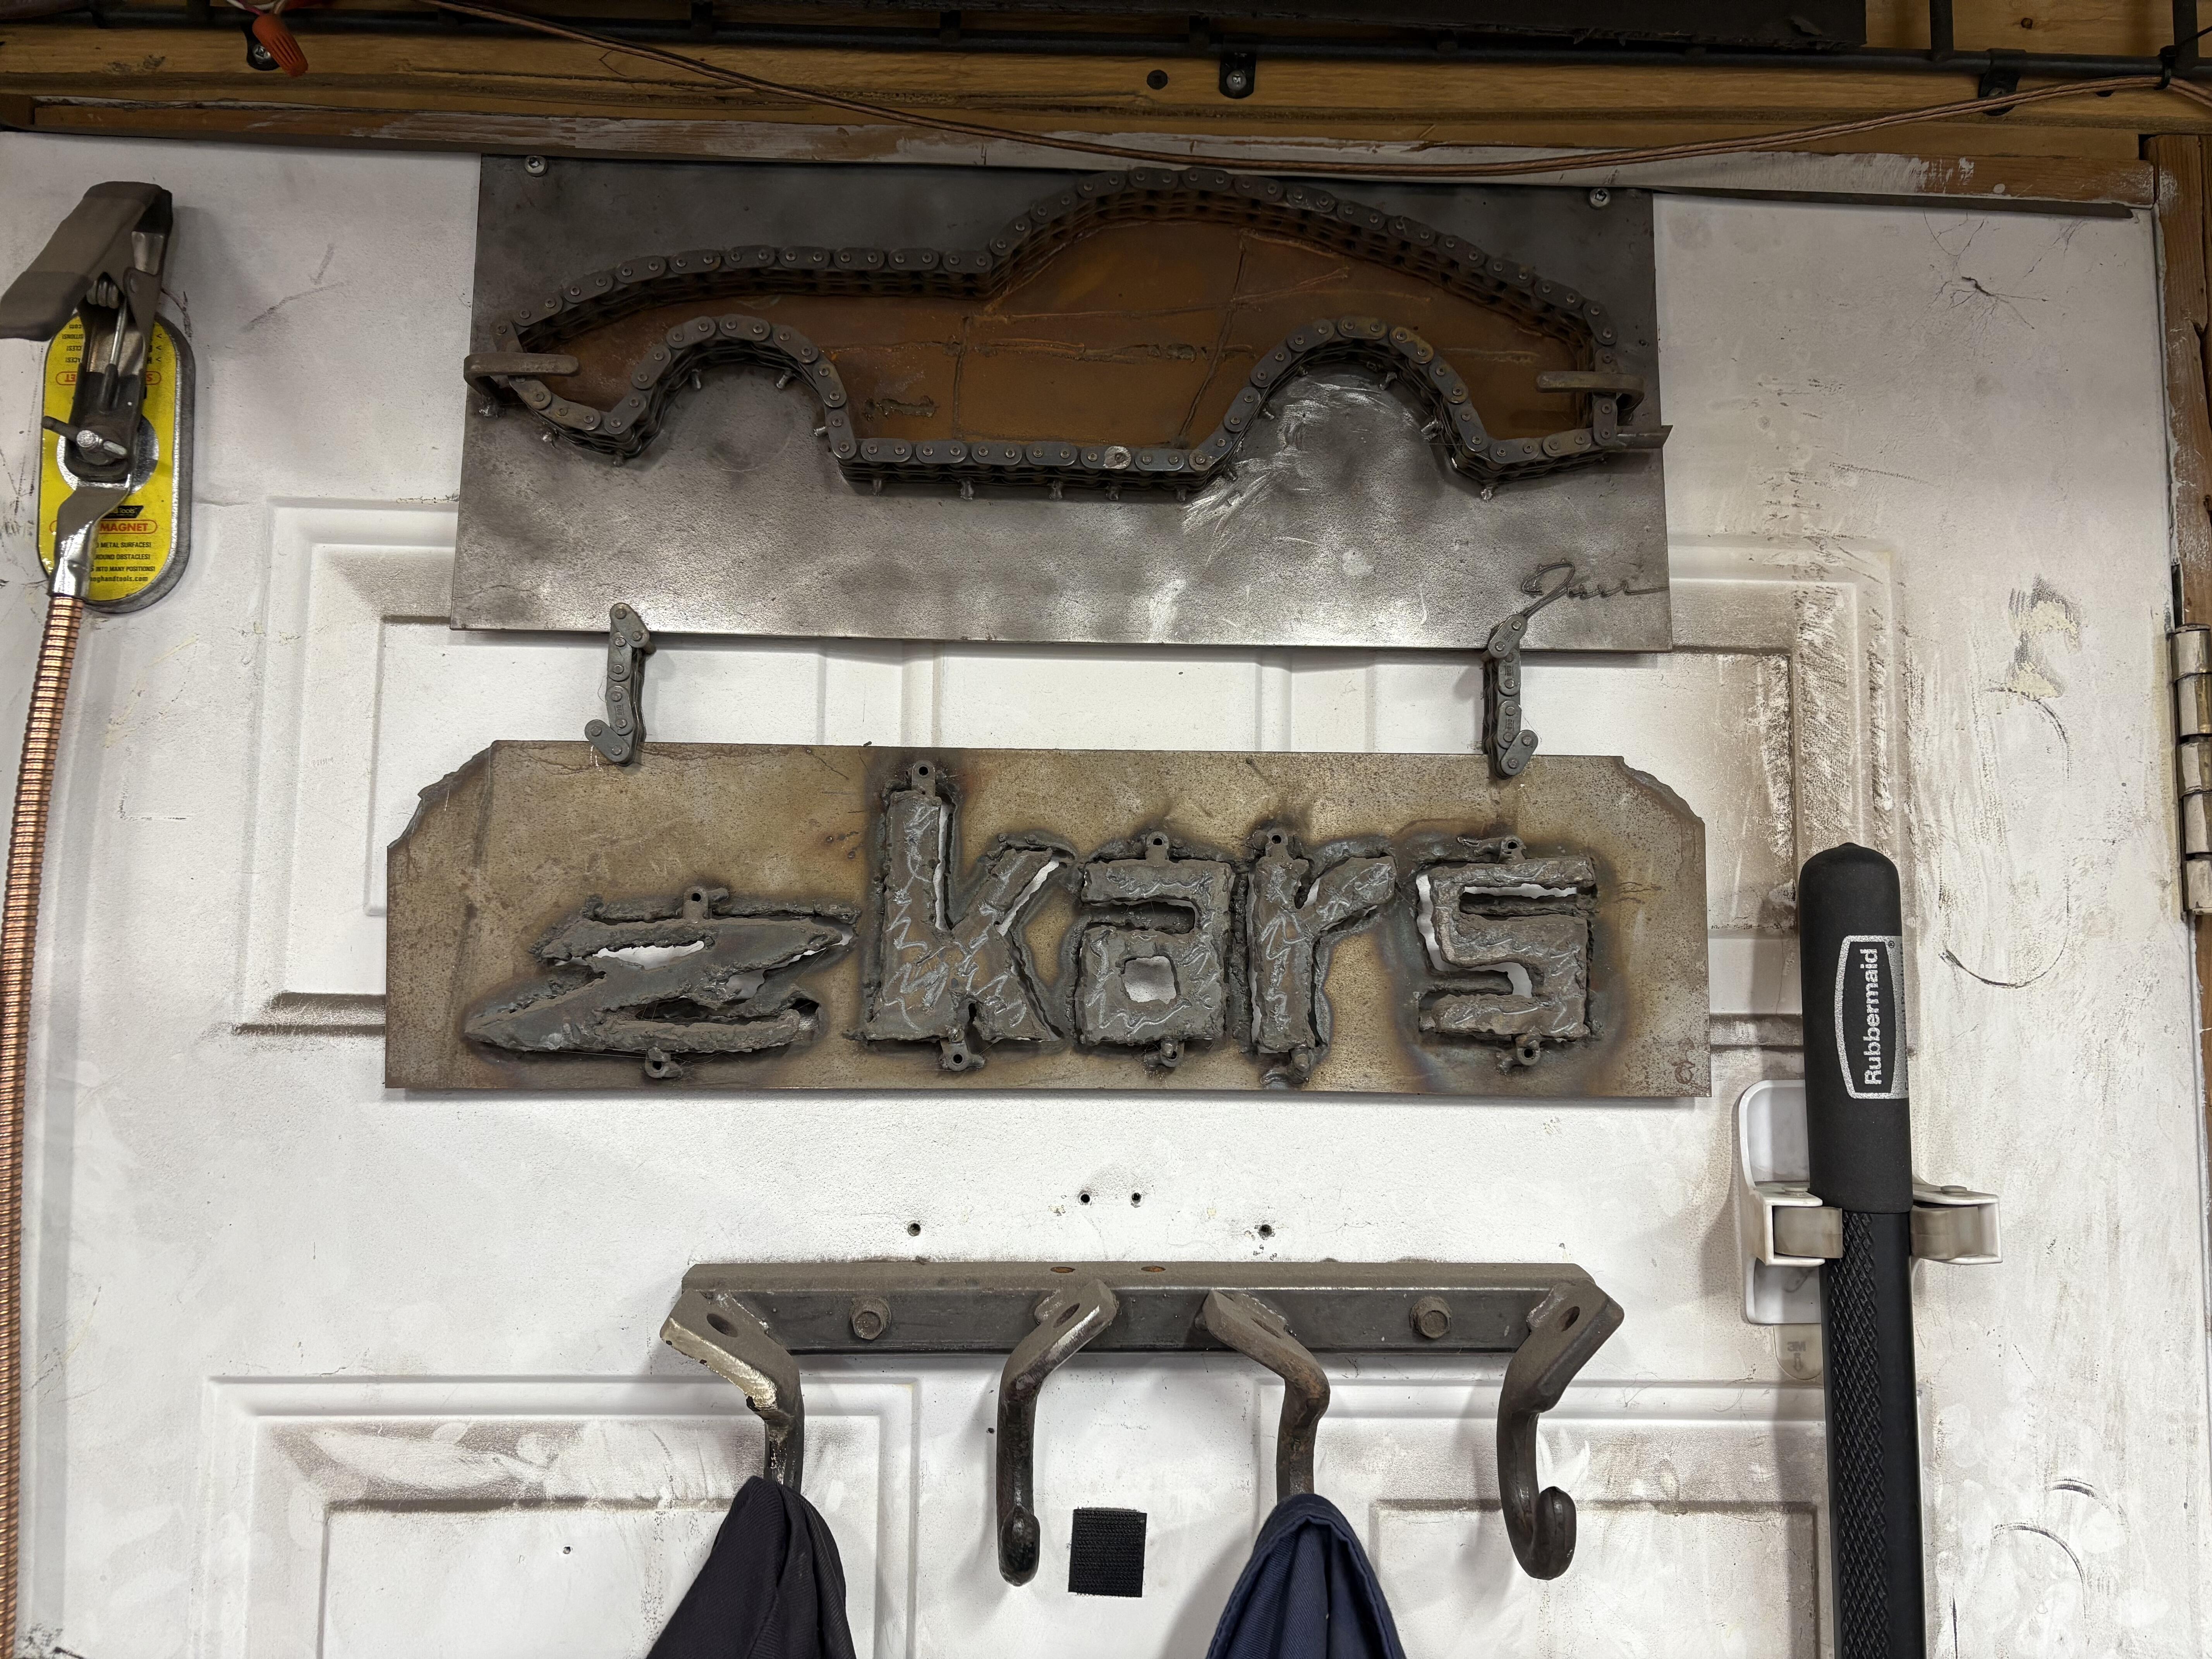
I made a coat hook rack for the back of my shop door out of some of the ones I have laying around. Probably sacrilege to some. Too bad.
-
3
-
 1
1
-
1
-
Wow, that Tacomacompany stuff is top notch. I’ve made all kinds of mods to my Harbour freight/Princess Auto cabinet over the years, and it woks pretty well, but I see the advantages to almost all of their products. Will be upgrading the feed and vacuum controls for sure.
The one huge thing I recommend is to make the top glass area into your access door rather than the big door on the right. My compressor is right there, never able to get bigger parts in there anyway
And use plexi sheets instead of glass. I buy a 4x8 and chop it up into 16x24 pieces to fit my frame. Disposable and cheep. I use cheap LED strip light strips ringing the entire inside top of the cabinet for lighting. They are surviving just fine.
What really amazes me is the amount of sand that makes out of my supposedly sealed seams….
-
2
-
-
Posted ·
Edited by zKars
- Popular Post
Some of you have dealt with this little annoyance, and I have found a perfect solution.
When doing a full restoration, or at least the full interior, you often have to replace the head liner and the A pillar vinyl, as well as the vinyl trim that goes across the top of the windshield where the sun visors and rear view mirror mount.
While I won’t discuss the pain of installing these items, what I have found is even more of a pain, is finding the nine M5 threaded holes to put the visor and mirror mount back in. All that fresh painfully installed lovely vinyl, and 9 secret little holes you have to find to poke holes through. Get out the pokey thingy of your choice and start poking until you find them.
If you put some kind of thin foam behind the vinyl like you’re supposed to, those damn holes are just a nightmare to sleuth out.
Not any more!
I put some nice long M5 grub screws in the nine threaded holes, THEN do the upholstery. Then finding the tips of them sticking out is easy! Make little “X” slits to expose them, grab your M3 hex key, back them out and screw in the visor and mirror mounts. Five minutes each! Easy peasy.

-
6
-
3
-
1
-
-
1
-
1
-
-
Being lazy and not having read the entire thread, I have a suggestion that perhaps has not been tried yet.
Replace the spade connector on the end of the BY wire at the starter. It may “look” just fine, you may have even cleaned and tightened the metal contact. I had one where there was only one strand of wire still crimped under the terminal tangs and that strand (like the rest) were filthy and corroded. No way to get enough current flowing to engage the starter solenoid. Snip, strip, scrape any corrostion off of the bare wire, crimp a new 1/4 FM terminal, stuff it on the starter terminal.
-
2
-
1
-
-
Edited by zKars
A prior discussion long ago about the intention of this part led us to believe (guess?) that it is a safety item in the case of a crash, to prevent the rack from rotating to preserve steering control by preventing the steering shaft u-joint angle from locking due to excessive angle. Or if the bushings wear out or fall out etc. Can’t imagine what else it might be for. I don’t think there is a force tendency to rotate the rack during normal driving. The tie rod ends rotate freely. Just me thinking out loud. Well, typing out loud.
I’m likely to have a well used example attached to a old steering rack around here someplace if the need arises.
-
2
-
-
-
-
2
-
1
-
-
Little advantage to DOT3 in my opinion. Worst part is having to COMPLETELY flush out ALL the DOT3 before replacing with DOT4. Are you prepared to do that properly?
Bit of maintenance to change the DOT3 fluid every couple of years when it gets dark isn’t worth the hassle and expense of going DOT4. Not convinced it improves braking in any measurable way for street use. It’s so cheap I buy it by the 2 litre jug.
-
I believe I have a couple of early master cylinders in working order. Definitely used, but should be rebuildable. Message me after the new year and I can something on the way to you if you like.
-
2
-
-
Edited by zKars
4 hours ago, 87mj said:Slightly off topic but I bought a low mileage '71 several years back and one of the first things I did was to replace the steering rack bushings with poly. I wish I didn't. My steering wheel feels every bump. I plan to replace them someday with the Resurrected Classics 240 bushings. I would think it would be a noticeable improvement. I was very pleased to see they came out with a replacement.
Did you also replace the donut in the steering shaft with poly? Put the rubber stock one back in.
If you want really wonderful isolated steering, install one of the power steering columns that are now available, AND replace the entire rack with the brand new ones from TechoToy Tuning.
-
- Popular Post
Took Summit quite a while to get them in, but they appeared at my doorstep in time for Christmas.
I have to say, they look FANTASTIC. Yes they have the curve already in. I have not tried to actually fit them. Will report back when I do.
-
5
-
-
I seem to recall a thread where a member used a block and tackle or some such to suck those suckers into place. Complete battle. Could NOT get the screws in any other way. i have fought this battle and given up and trimmed the seals away then used some glass sealant to form a lovely “looking” seal against the body. Or leave the stock seal, clean it up, then use the filler technique to get a moisture seal.
Just another battle with ill fitting aftermarket weatherstripping.
-
Yes it’s suppose to have a lock washer, but I believe your problem is stripped threads. You snug it but it pops free. I cannot imagine a scenario that would loosen that bolt. There is little force on it other than the clamping force around the splines. At least adding a washer, will position the threads in a new place and maybe it will snug up and stay that way. M10x1.25 thread if you want to get a new one.
I’m also concerned about the 1/4 of play, the splines shouldn’t allow ANY play just because clamp bolt is loose. I guess it could be pried open way too far? Do the splines slip on super sloppy when you assemble it? Usually its a real snug fit.
-
3
-
-
Maybe not the most interesting post of the day, but just used my u-joint tool on the half shafts of the current restoration re-assembly, and it fits just fine with the extra welded lip thickness. Good for both drive shaft and u-joint as is.
Oh, and use a cheap air chisel with a pointy tip to remove those stupid c-clips. No more banging on screw driver trying to get rusty ones to move.
-
1
-
-


Axle Stands
in Shop Talk
·
Edited by zKars
https://technotoytuning.com/garage/parts/techno-toy-tuning-hub-stands?srsltid=AfmBOopa6jRW6cUSQ9PXFDILN9oYNqUzVHqm3tx5nVKNJKdkWBs52W8E