zKars
 Subscriber
-
Joined
-
Last visited
Everything posted by zKars
-
 you got it now. Start button is perfect.
 -
Black yellow coming from the harness. No idea why you would have three wires there. There is a single 1/4" male spade terminal on the starter. The black /yellow wire from the harness should be the only thing attached to it. If there's more, then some one has added something... Pictures might help.
-
Do one test first. When you have the "click" no start condition, remove the small spade wire connector (BY wire) at the starter that is your key "start" +12 signal, and connect the spade terminal on the starter to the battery + terminal with a different wire. (make sure you are in neutral!!!). If the starter cranks strongly again, you have narrowed the problem to one of two common places that affect the ability of this connection to supply sufficient current to the solenoid to engage it. (And you know the starter solenoid is fine) 1. The key switch in the Start position is not able to supply enough current to the starter terminal due to a bad key switch. 2. The spade terminal on the end of the BY wire at the starter is not well connected to its wire. Cut it off and replace it after thoroughly cleaning the bare wire you will strip, to add the new 1/4 spade terminal to it. Solder this terminal to the wire if at all possible or make a very good crimp and insulate with heat shrink either way. Let us know what happens. PS. I f you haven't already done, thoroughly clean the heavy battery wires and their connections at either end, att the battery, at the starter and where the negative line is grounded (starter mounting bolt?). If the battery cable terminal ends are poorly connected to their wires, replace the cables.
-
zcarsource.com and arizonzcar.com are different businesses run by different individuals. I could be totally wrong here, but I suspect zcarsource offers the dash restoration service, but sends them out to one of the real dash restoration businesses, hence the $300 additional charge. Just my opinion.
-
As far as I know the only difference in AFM's from 75-78 is that the 78 AFM no longer has the fuel pmup switch contacts and corresponding pins. Other than that all are identical. Even the 79-83 NA afm's can be used, they just mount differently to the car. This can be overcome with a bit of creative bracketry.
-
I was working on a guys car and it had several extra wires running around the engine bay from various PO's attempts to run stereo's, fog lights, you know, the usual crap. My mission? To remove all traces of this stuff. I was literally pulling wires out left and right cleaning this mess up when I found about a long 14 gauge light blue wire on the drivers side coiled up nice and neat underneath the brake booster area. Followed it back to the firewall where it lead into the hood release bracket. Assuming it went through the firewall in there, I was tugging at it trying to pull it out. Not budging. Finally I noticed it was operating the hood latch! Some PO had looped it around the latch arm, then more or less horizontally over to the master cylinder body, then over and down behind it, leaving a nice rolled up couple of feet hanging just above the frame rail. Tug that from underneath and it opens the hood simple as anything. Not exactly a nice tucked job, but fully functional.
-
and here are some pics


-
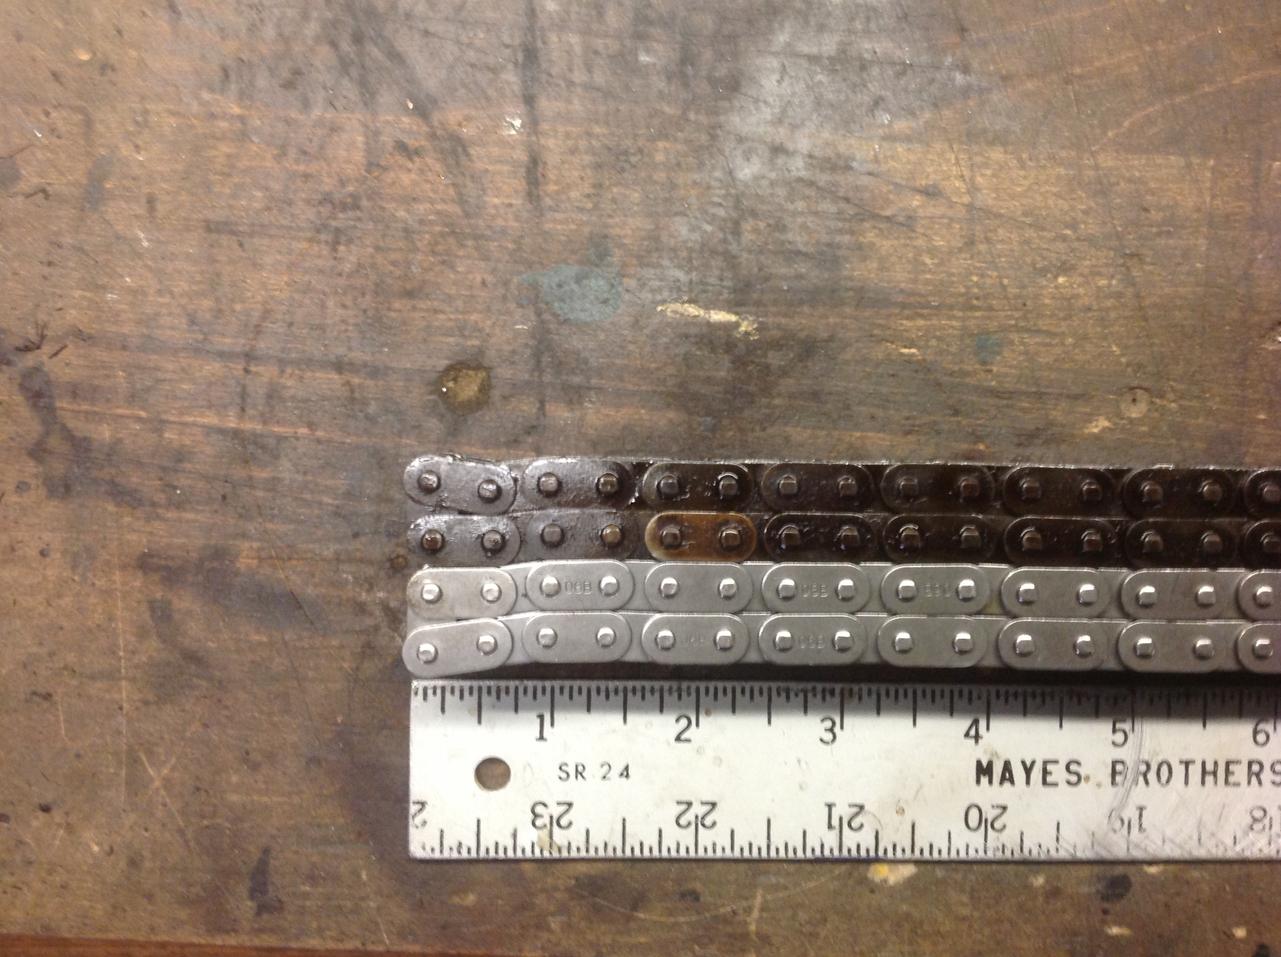
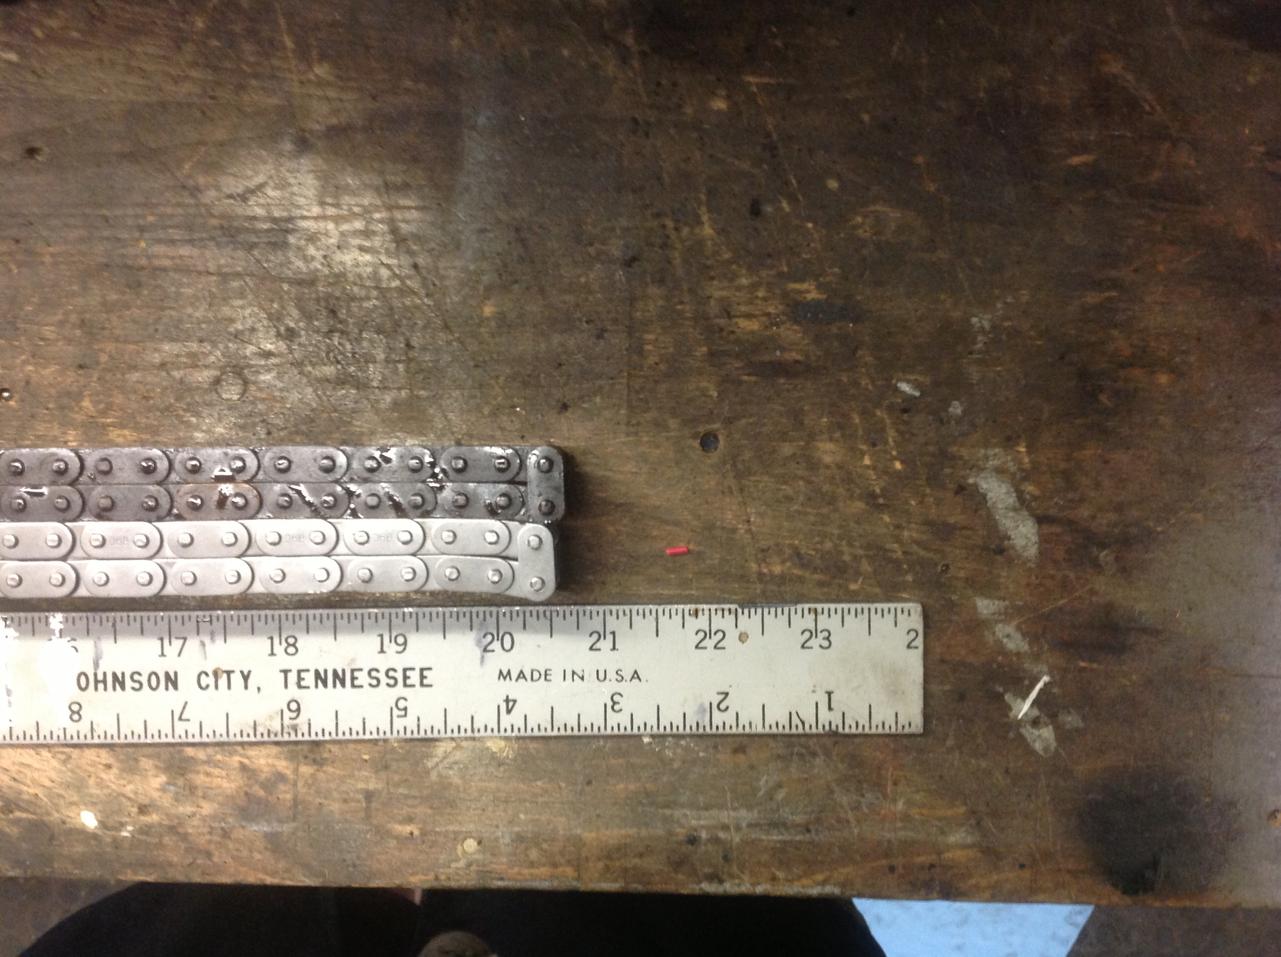
More details now that I'm made some positive progress. The car is running and left for its new home last night. The original power-on ticking/clicking noise that caused the iniitial investigation is gone. Replace with much more satisfying and familiar cold clearance set valve train clatter. Blue/Jan, you guys are spot on about new chain being tight ie no slack. I installed the "new" (to him) head and a new chain and guide,s and as usual, the chain is a VERY tight fit. I got the chain on its correct clocking, then when re-installing the (curved) tensioner, I had to use a c clamp across the chainand guide in the center to lightly compress it to get the top bolt (slotted hole) in the tensioner. Same when re-installing the tensioner. Tight fit indeed. I took a picture of the old and new chain on the bench to show the length difference (sorry will post it later). The old is clearly stretched, but not quite to the extent I expected. The old head had shims under the towers as well which I removed for the near-stock thickness N42 that took its place (used his towers/cam/rockers/lashies). Would have been impossible to get that chain on with those shims in there. I looked at the valve cover and it looks exactly like the two shown above. Not a mark/gouge in the cover that I can feel with my nail or finger, just the cleaned paths made by fresh modern oil clearing away varnish. And in general, with more thought about what caused the tooth skip to start with, I'm more and more skeptical about the rag having anything to do with it. I just can't believe the texture and material strength (or lack of it) of it would be able to create a wad that would have had sufficient compressive strength to cause this. The rag was well distributed around the gear when I stopped dug it out. No concentration in one spot. I'm now inclined to believe its a combination of the herky/jerky motion of using the remote crank switch and the very loose chain with no tensioner pressure that ate my lunch. Beware! Another learning point to add to the conversation. When using the starter to rotate things, it's now very clear that it had no problem bending the valves as it rotated the engine without so much as a hiccup that might give you clue something bad was happening. At one point late in the process, (actually just before the realization of doom occured) I'de put a socket on the crank nut to move the engine to exact TDC to get things lined up for another timing check. The engine rotated smoothly then BANG, it stopped dead. When back the other way, smooth until, BANG, same thing. Dead stop. I put quite a bit of pull on the handle and couldn't budge it. So its clear that HAND rotation or maybe pushing the car in gear is the right technique, if you have ANY reason to suspect an old loose chain or you're working on a new motor and testing if you turns over. Sounds obvious now, doesn't it?
-
Looks good to me! One question or concern perhaps. Is that glass filter at the front of the rail rated for FI pressures? Might we worth a check.
-
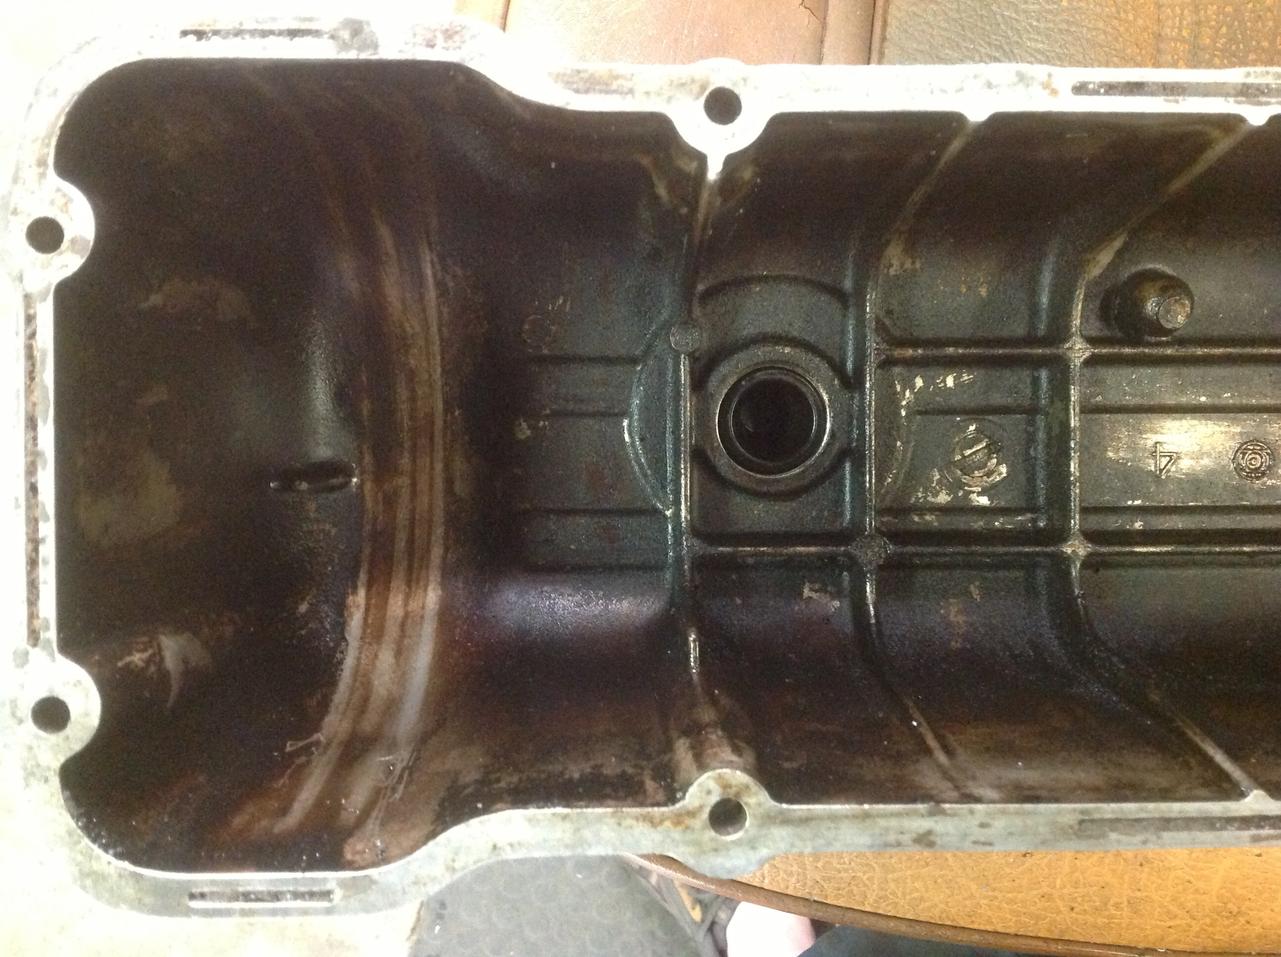
Hardway, so from what your saying, it seems then that there was no actual touching of the chain to the valve cover. You can confirm that there is no marks in the aluminum? If thats the case, then the patterns we see are likely just "cleaning" of the previous dark varnish coating by oil spraying from the chain. Did you recently change to so some of that modern "detergent" oil?
-
The A11-600 000 ECM works from all 75-78 North American 280's. If that maximum ecu is working for you, relax. Drive it and forget it. It's tune is for a smaller engine, so your mixtures might not be "correct" but if your plugs look okay (brown, not white or black), your mileage is reasonable, and you've had it working fine for a couple of years, be happy. If you really want a A11-600 000, let me know. Some say I'm cheap, I call it affordable.
-
Wow that's hard to believe! Its scored all the way around! Its not clear just how close the chain must be to the cover until you see something like this. Does this mean it was loose enough to be "floating" off the teeth enough to be rubbing the cover over that much of its circumference? Hard to imagine how this looks running, but there's the proof. I haven't really looked under the cover of mine, other than to note how black and grundgy is looks.... I'll report back.
-
I agree. Chain tooth jumping was just a dirty rumor for me as well until now. Though it seems to take quite a combination of a loose chain and some "help" apparently. Thanks for the additional support to the "it ain't ALL my fault" threory as well....
-
Hi everybody! It's me, the "I can't believe I did that" guy..... :stupid: Well, believe it or not, I have another "learning experience" to share. So grab a coffee and get comfy. Working on a new friend's 78z over the last few days, trying to get it ready for an "out of province inspection". Your Canucks will know what I mean. When moving a car to new province, everything has to work, and no rust holes or no insurance. Quite a challenge for most Z's, this one is no different. While doing a million other things, we decided to investigate a small engine "rattle" that happens under any amount of power "on" application. Not good. Bad bearing, slap happy piston, loose valve train? Let’s find out. Started with a valve lash check and setting. Off comes the valve cover. Well, it came off but the gasket didn't so much, had to be scrapped off. Then there was some RTV stuff left over that was doing a great job of gasket sealing to peel off, and we all know how you don't want those little tendrils of that crap getting in the oil, so while I was peeling and digging it off, I stuffed a standard blue shop rag sheet in front of the timing gear to prevent RTV bits from going down there, cuz most of the RTV was on the front part. Finished the clean up and proceeded to start checking valve clearances. Right away I notice that #1 rocker is super loose. Have to jack up the adjuster about 6 feet (slight exaggeration) to get .010 clearance. Yeah, because the valve is stuck partly open, the spring pack is about 0.10 lower than its mate next to it. I can push it down and it pops back easy enough, but right to a nice stuck position. Alright, there’s the rattle source. Stuck/bent exhaust valve. Proceed to start spinning the engine with my remote start button and checking a few more looking for loosy gooseys . Just about then, the car's owner who's working with me tells me to hold it, that blue rag is caught up in the timing chain/gear. Sure enough, I'de left that thing down in the timing cover and it got dragged up and is now nicely distributed over the cam gear between it and the chain. We're talking a thin synthetic blue towellete here, we just grab its bits and spin the engine and get it clear. Its shredding into bits and pieces its so thin and weak. No biggy right? Read on.... Finish setting the valves, which are all somewhere from spec to spec x 3 too wide, slap the cover back on with a new gasket and try to start the car. It cracks but we're getting no fire. Nothing. Ok, what did we do? First I had just yanked the plug wires off, didn't check what order they were in, they were just zip tied together, not in nice ordered clips, so who knows how the PO had left the timing or drive spindle. Could be anywhere. So set the engine to TDC and the dizzy is pointing to one, so just put them back on again in stock order and position. Still no go. Check spark, good, all cylinders. Check each injector with noid light. Flashing. Check fuel pressure. Good. oh oh...... What the hell have I done. Swap ECM's. Nope, same. Threw timing light on #1 and check while cranking. Yup, right at 15' ish, good enough. Hmmmm, spark, fuel, timing, what else do you need? Compression???? Pull the plugs and stick the comp gauge on #1. I know its going to be 0 with that bent valve. Sure enough. Then I check #2. Its 0 as well..... ?????? And 3..... and 4 ...... oh no...... and 5, and 6, all = 0.000000000 How is this possible? To make a long story short, hour and half later, heads on the bench, all 6 exhaust valves are bent. Yup, all six. Nice nick in each piston, nice shiny spot on each valve face. The timing chain slipped on the cam gear by about 5-6 teeth when that thin, feather weight, POS blue paper towel got in between there, causing a not too surprising detrimental effect on piston/valve clearance. When you think about the force required to stretch the chain to make that happen, I initially dismissed it as impossible. No way that piece of fluff did anything bad. Yeah, right. What I hadn't considered was the incredibly loose stretched timing chain on this old well worn L28..... I can *almost* slip a tooth by hand it's so loose with no tensioner pressure. Just took a little old piece of near-nothing to bunch up "just so" and make it happen. I'll bet you couldn't do that again if you tried on purpose all night long. I had actually noticed that the cam seemed out of time earlier but didn't catch on. When I was setting TDC to check timing and dizzy alignment after it didn't start, I was peering in the oil filler hole for #1 bunny ears, and noticed that the centerline of them wasn't at 12:00 at crank TDC, more like 10:00.... So all you engine tinkerer's out there, beware! Even the slightest mis-step can lead to disaster without you even knowing you done it... Runs, set the valve, doesn't run. How do you get that wrong? Of course now I’m thinking about that initial stuck valve that I found before the engine turned with the rag in it. Just how did that happen? Maybe the chain had already slipped a couple of teeth before I got there due to that crazy loose chain, just enough to take out that one valve, and my rag trick just finished off the other 5 by slipping it a couple more. Let’s just say that’s true and not ALL my fault.. Yeah, that feels better. A little…. Well It’s a good thing I have all them old heads in the shed..... Eenie meenie minie moh...
-
Smooth beveled end (37 deg) is -4 AN fitting. Look in the hose and see its mating surface. The seal occurs where the male bevel meets the femal metal, not on the threads, hence teflon tape on those threads does nothing. The NPT threads rely on the tape to seal as the threads interference fit when tightened just right. Google -4 AN Fittings in Google images to see many many examples. Check out http://www.anplumbing.com as well to see what's available.
-
Jordan: You're doing a pretty good job so far but there is more to do. You won't see much of a signal with a volt meter at that junction box. Its not a 12v on or off signal there, its a very low voltage waveform from the magnetic pickup in the distributor. I'de just pull the coil to dizzy spark plug wire from the center of the dizzy cap and put it near a ground (1/4 in) and crank to see if you have spark or not. Does the car die instantly (ignition loss) or does it run worse and worse and finally die (running out of fuel, though happens quick with an FI car). You can check for +12 at the coil + terminal when running, and not there when you're in the "dead" condition with the key "On". This will tell you if power supply from the key switch is staying on or not. There are five components in your system that might be heat failure related. In order of likely hood they are : -Bad dirty/hot connections that work when cool, but lose connection when heated. Clean every connection to the coil, ballast resistor, dizzy and ign module. -Ignition Coil internal failure. Needs replacing. -Transistor ignition module. passenger side kick panel up above right foot on the right side. Not in the engine bay, so less likely to heat affected as much. -ECM module that runs the Fuel injection. By drivers left foot on the side. It controls the fuel though, not the spark. If you are losing spark, its likely not this. -Distributor pickup coil. There's some leads, now go out and start methodical testing.
-
I love a good mystery. When you say the starter engages, does it crank continuously when you put the key to the lock position, and does it everytime? Does it stay cranking when you pull the key out? Do you have to go all the way to lock before this occurs Pull the switch off the back again, and with the key in the cylinder, grab the little retangular tab in the back that goes into the switch with your fingers and work the key from Lock to Start. Does the tab move in perfect sync? With the switch in your hand, but hooked up to the wiring, use a flat blade and pretend you're the key. Does it work normally in all positions? No hanky panky when in the Lock position? THe only electrical "connection" between the lock position and wiring harness is the two (black) wires on the side of the lock with male spade connectors that work thewarning buzzer with the key in. You didn't hook them up to something you shouldn't have did you? Are they pinched in the mounting of the lock somehow? There's some ideas to mull over. and its not Winterpeg now, its mosquitopeg....
-
Setting up to be a battle royal. Supporters from both camps are already trash talking. Trying to think of the most appropriate movie parody where an old timer comes back to thrash the young current champion. Must be 100 likely candidates. I am also keenly aware that the John/Greg battle is real life... Just gonna live the dream along with everyone else. SCCA runoffs at Road America Elkhart lake Wisconsin. Sept 20-22. 2013. Nice two day drive from here. Hope to be there, God and wife willing! PS : John will indeed need his vintage hair and those dark thick rimmed glasses he wore in the Datsun commercial. Gotta make sure I bring some.
-
Charlie, Float levels are key, then make sure the front choke is not still "on" compared to the rear. The cable choke mechanism pulls the jet tube down, effectively moving the needle farther up richening the mix. If the front jet tube that gets pulled down is gummed up on the outside and dirty, or the cable mechanism is not adjusted right, then the front tube may be partially left down even though the chokes are "off". Use the chokes and look and see if the tubes are both drawn down equally and return to be fully up when the choke level is all the way to "off". Take off the air cleaner and backing plate if you haven't already to clearly see what's going on. If the jet tubes are both all the way up, then re-set your mixture on both carbs to be the same at least as a starting point. Turn them all the way in (CW looking from the bottom) then out 2 1/2 turns. ztherapy.com sells a wonderful and much respected DVD on the topic of tuning and re-building SU's. There are also many many posts on this forum on the topic.
-
Ideas: -Losing coolant? But not to the overflow? Do a leak down test for sure. Is one cylinder disposing of the coolant due to a HG failure and causing the mis-fire? Plugs might be a clue if one looks different than the rest. -Bad hoses, ie collapsed lower hose on the suction side. -Front cover damage in the impeller area causing poor pump performance. Check for chips and cavitation caused pock marks in the impeller housing area. -If using a thermostat, take it out and see if problem changes/improves.
-
I think this is a great idea. I'm contributing to the cause for sure. And not just for the T-shirt....
-
What Steve says.... Safety is in YOUR hands with these cars.
-
Plywood spoiler and lawn edging? Now we're breaking the inventiveness barrier wide open! What's next? And are you really running with no rear hatch glass? Or is it just super clean? Can't imagine that's good for aero...
-
What a great experience. Congrats on what you accomplished. Nice trouble shooting too!. Isn't that interesting about the fuel rail. Turns in a restriction or fuel boiling receptical it seems. Well well well... Do only one thing, that is replace just the return line and see if its still fixed. I wonder if you have a slightly weak fuel supply volume and a return hard line that maybe didn't have the restrictor orfice and something and you were dumping too much fuel back to the tank. I love these mysterys that turn out to be something you wouldn't guess.....
-
I suppose I'm in trouble for using one as a welcome mat...