zKars
 Subscriber
-
Joined
-
Last visited
Everything posted by zKars
-
 Call me a crazy person, but unless you really want the authentic seal to keep things, well, authentic, I'd suggest going another route. I really don't like the rather poor "seal" this type of shape makes with the fender. If you really want to prevent water from going "over the wall" so to speak, I'd suggest something like a door weatherstrip like those found here: http://www.mcmaster.com/#rubber-bulb-seals/=13zgp4c You can buy lots and extend it as far as you think it needs to go. If you install it with the "grip" just barely started on the pinch weld, then apply the fender, it will push down as far as it needs to, to make a perfect consistent seal along the fender length, as that gap is not consistent. One could even add a small bead of sealant alone the top of the seal to really stem the tide. Ok, enough nautical references.... If I can find the specific one I used, I'll post it. Edit: Here it is. 1120A232 bought 10ft. I secretly hoped that the Kia door weatherstrip would work. It won't, bulb on the side rather than on top. Then I could say I have it on the doors, hatch AND fenders. hmmm perhaps I shouldn't add fodder to the "Crazy" thing... Oh, if anyone needs a few of the original clips for their "authentic" seal, let me know....
 -
Let me know at z240@shaw.ca if no one closer responds.
-
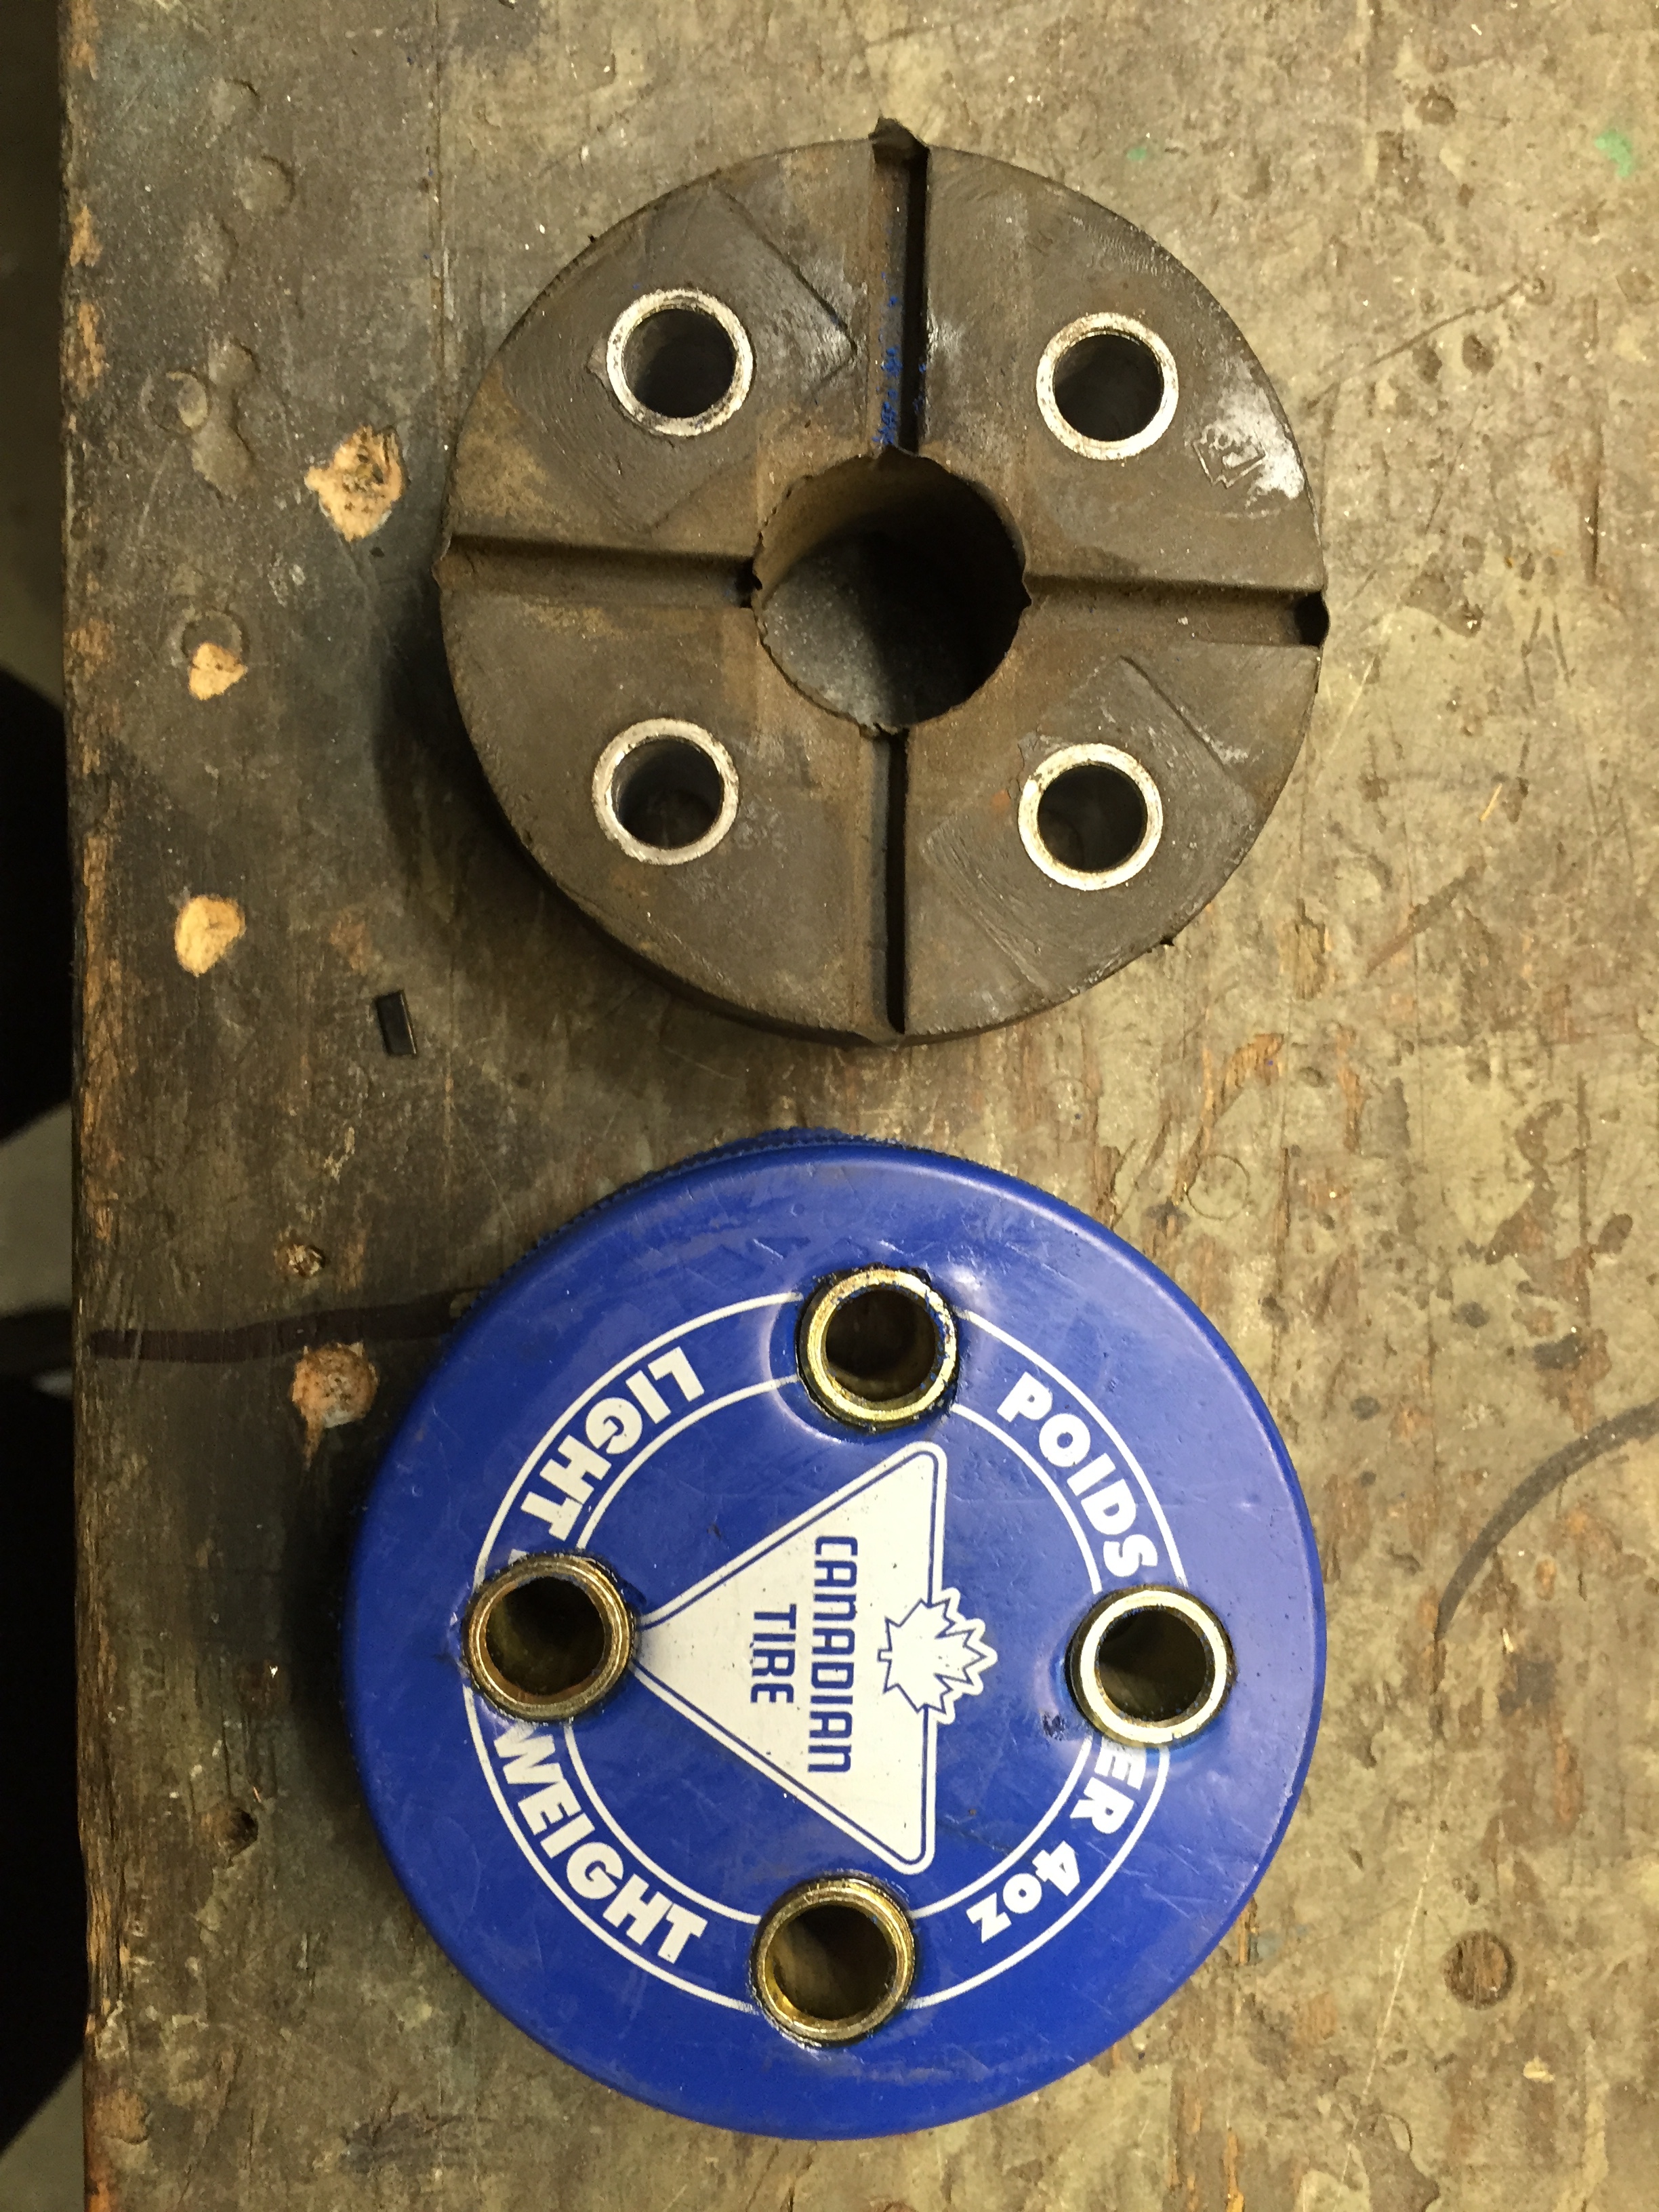
And for completeness, here is the authentic Canadian Tire light weight practice puck solution along side the stock rubber part. For correction pucks are the correct WIDTH but are larger diameter. Those metal tubes are from the poly bushing . The material stiffness is pretty much the same as poly, maybe a bit softer

-
Zed has this right unfortunately. That is definitely a 4 speed sorry.
-
-
-
-
I'll bet it was done with spray chrome!. That is a dream trip for me. Have to find a way to do it.
-
Let's just assume it was bad timing with the auction.
-
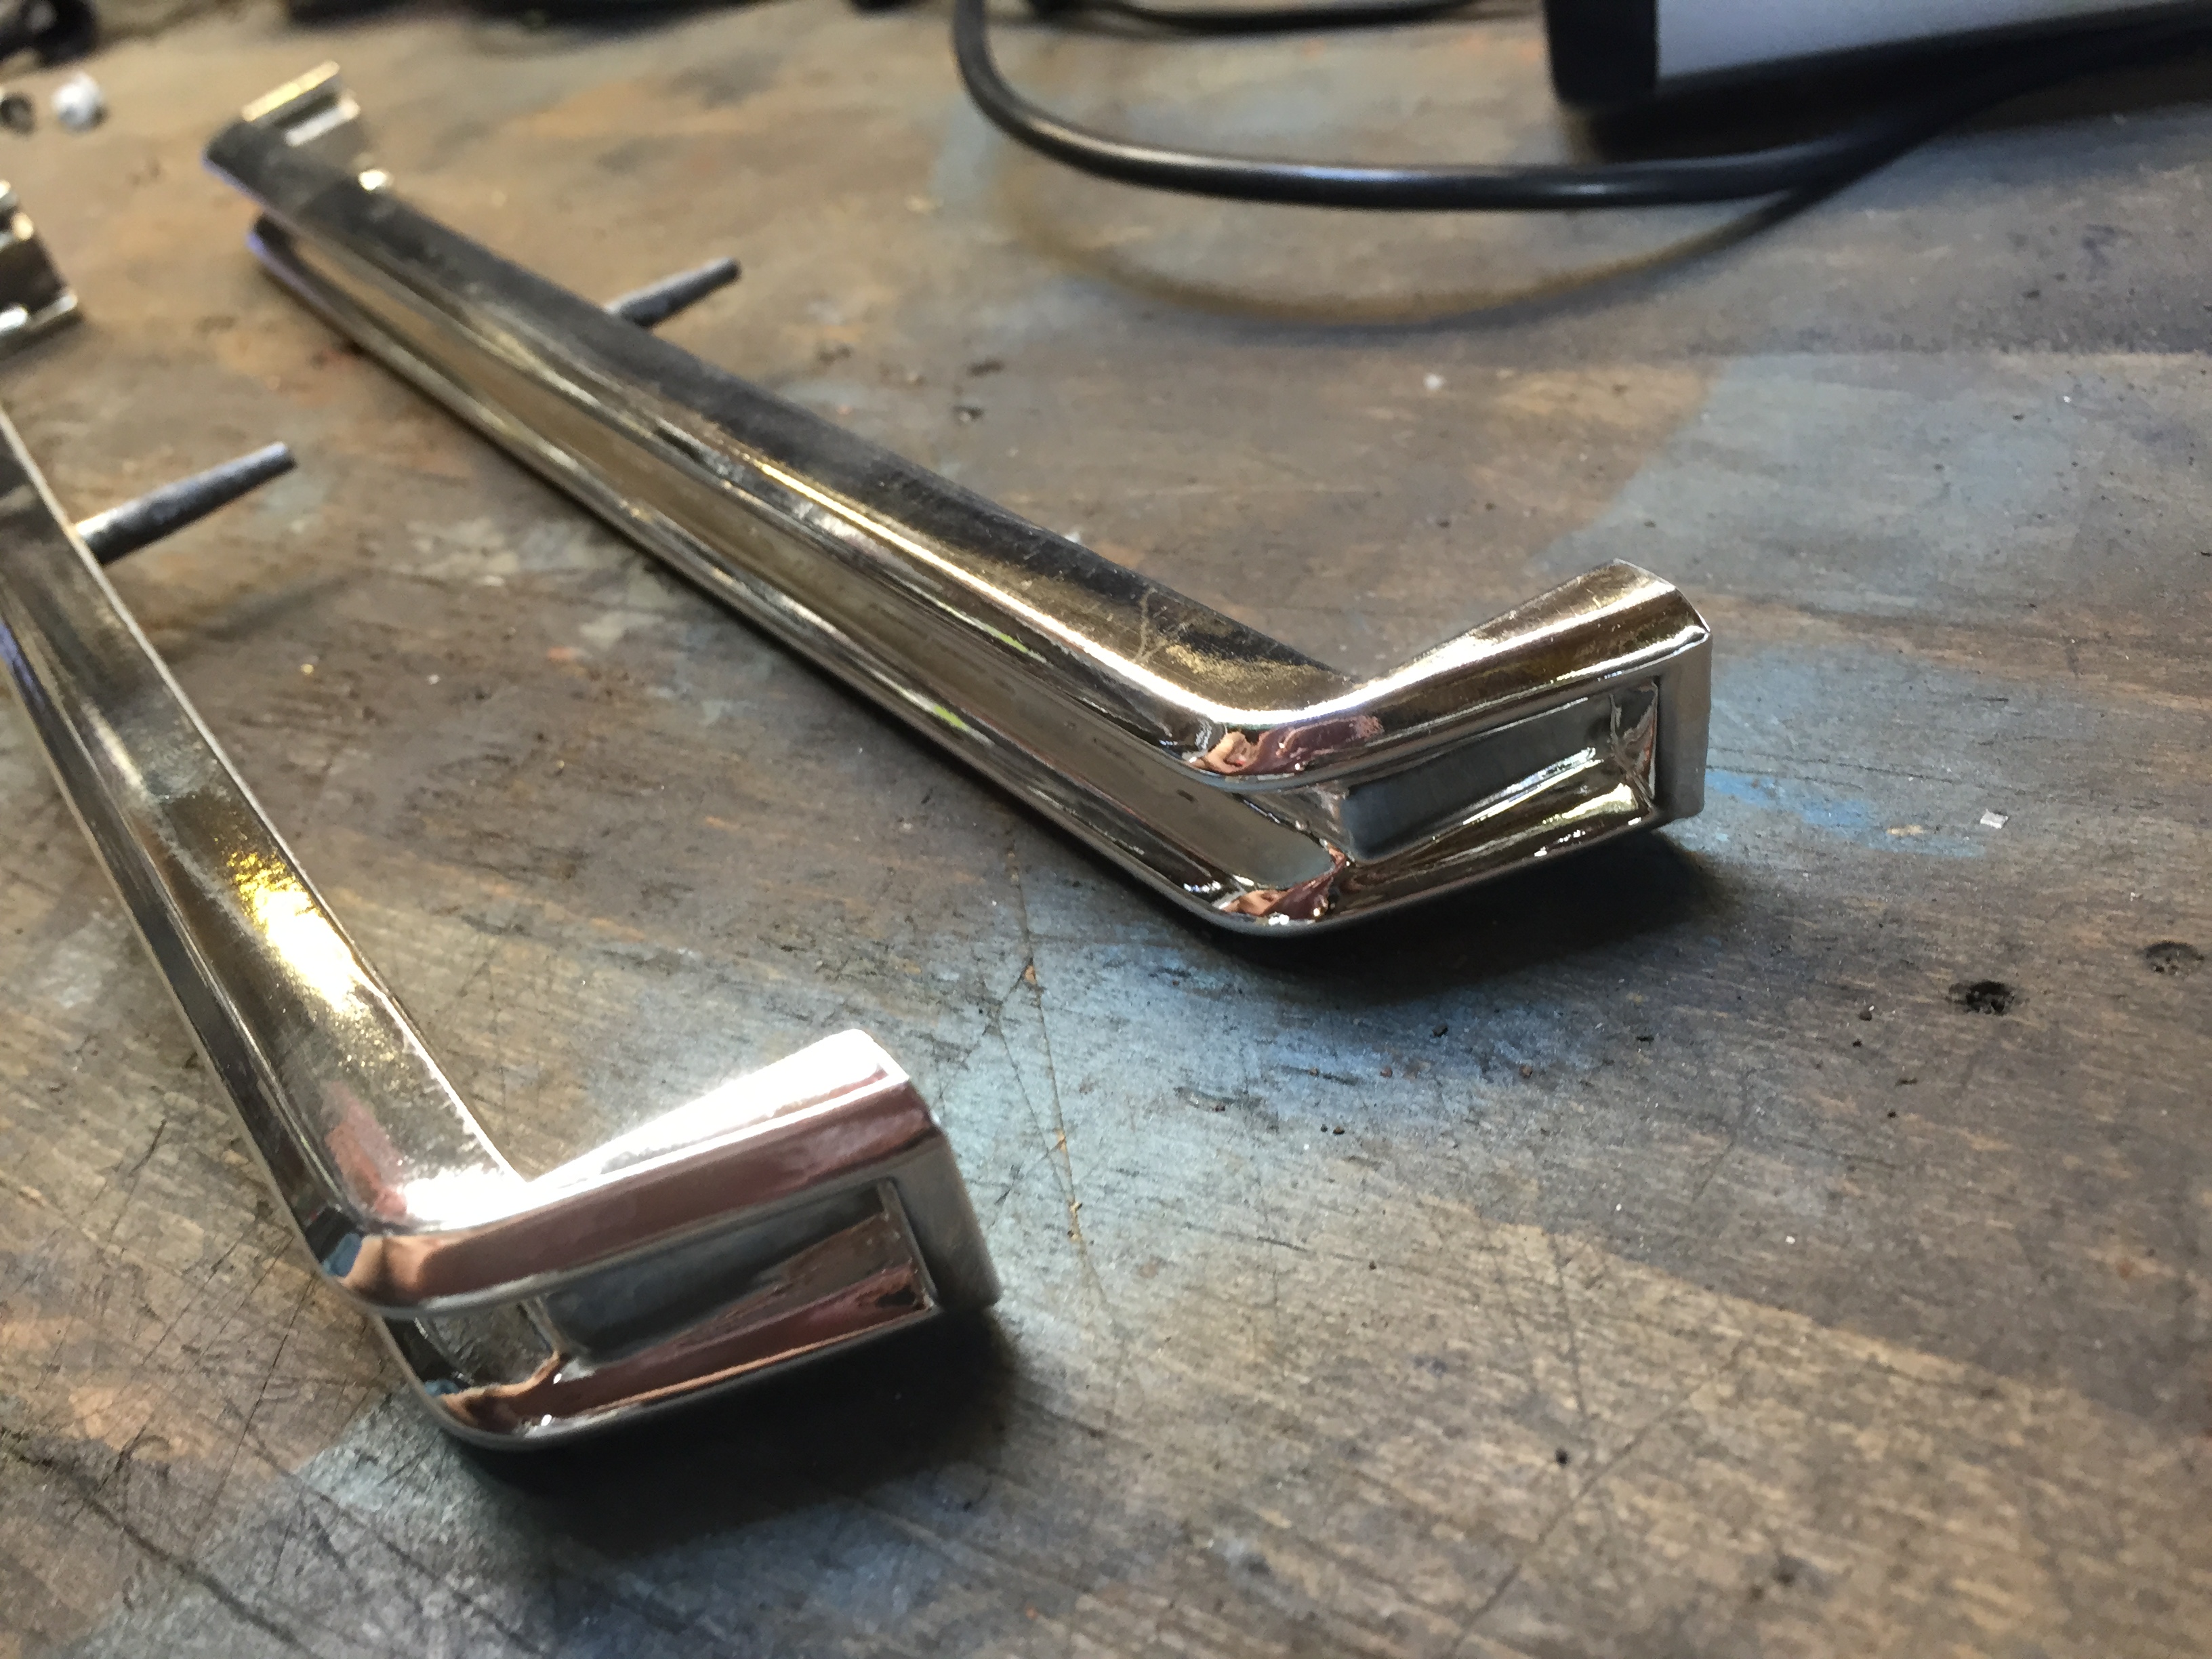
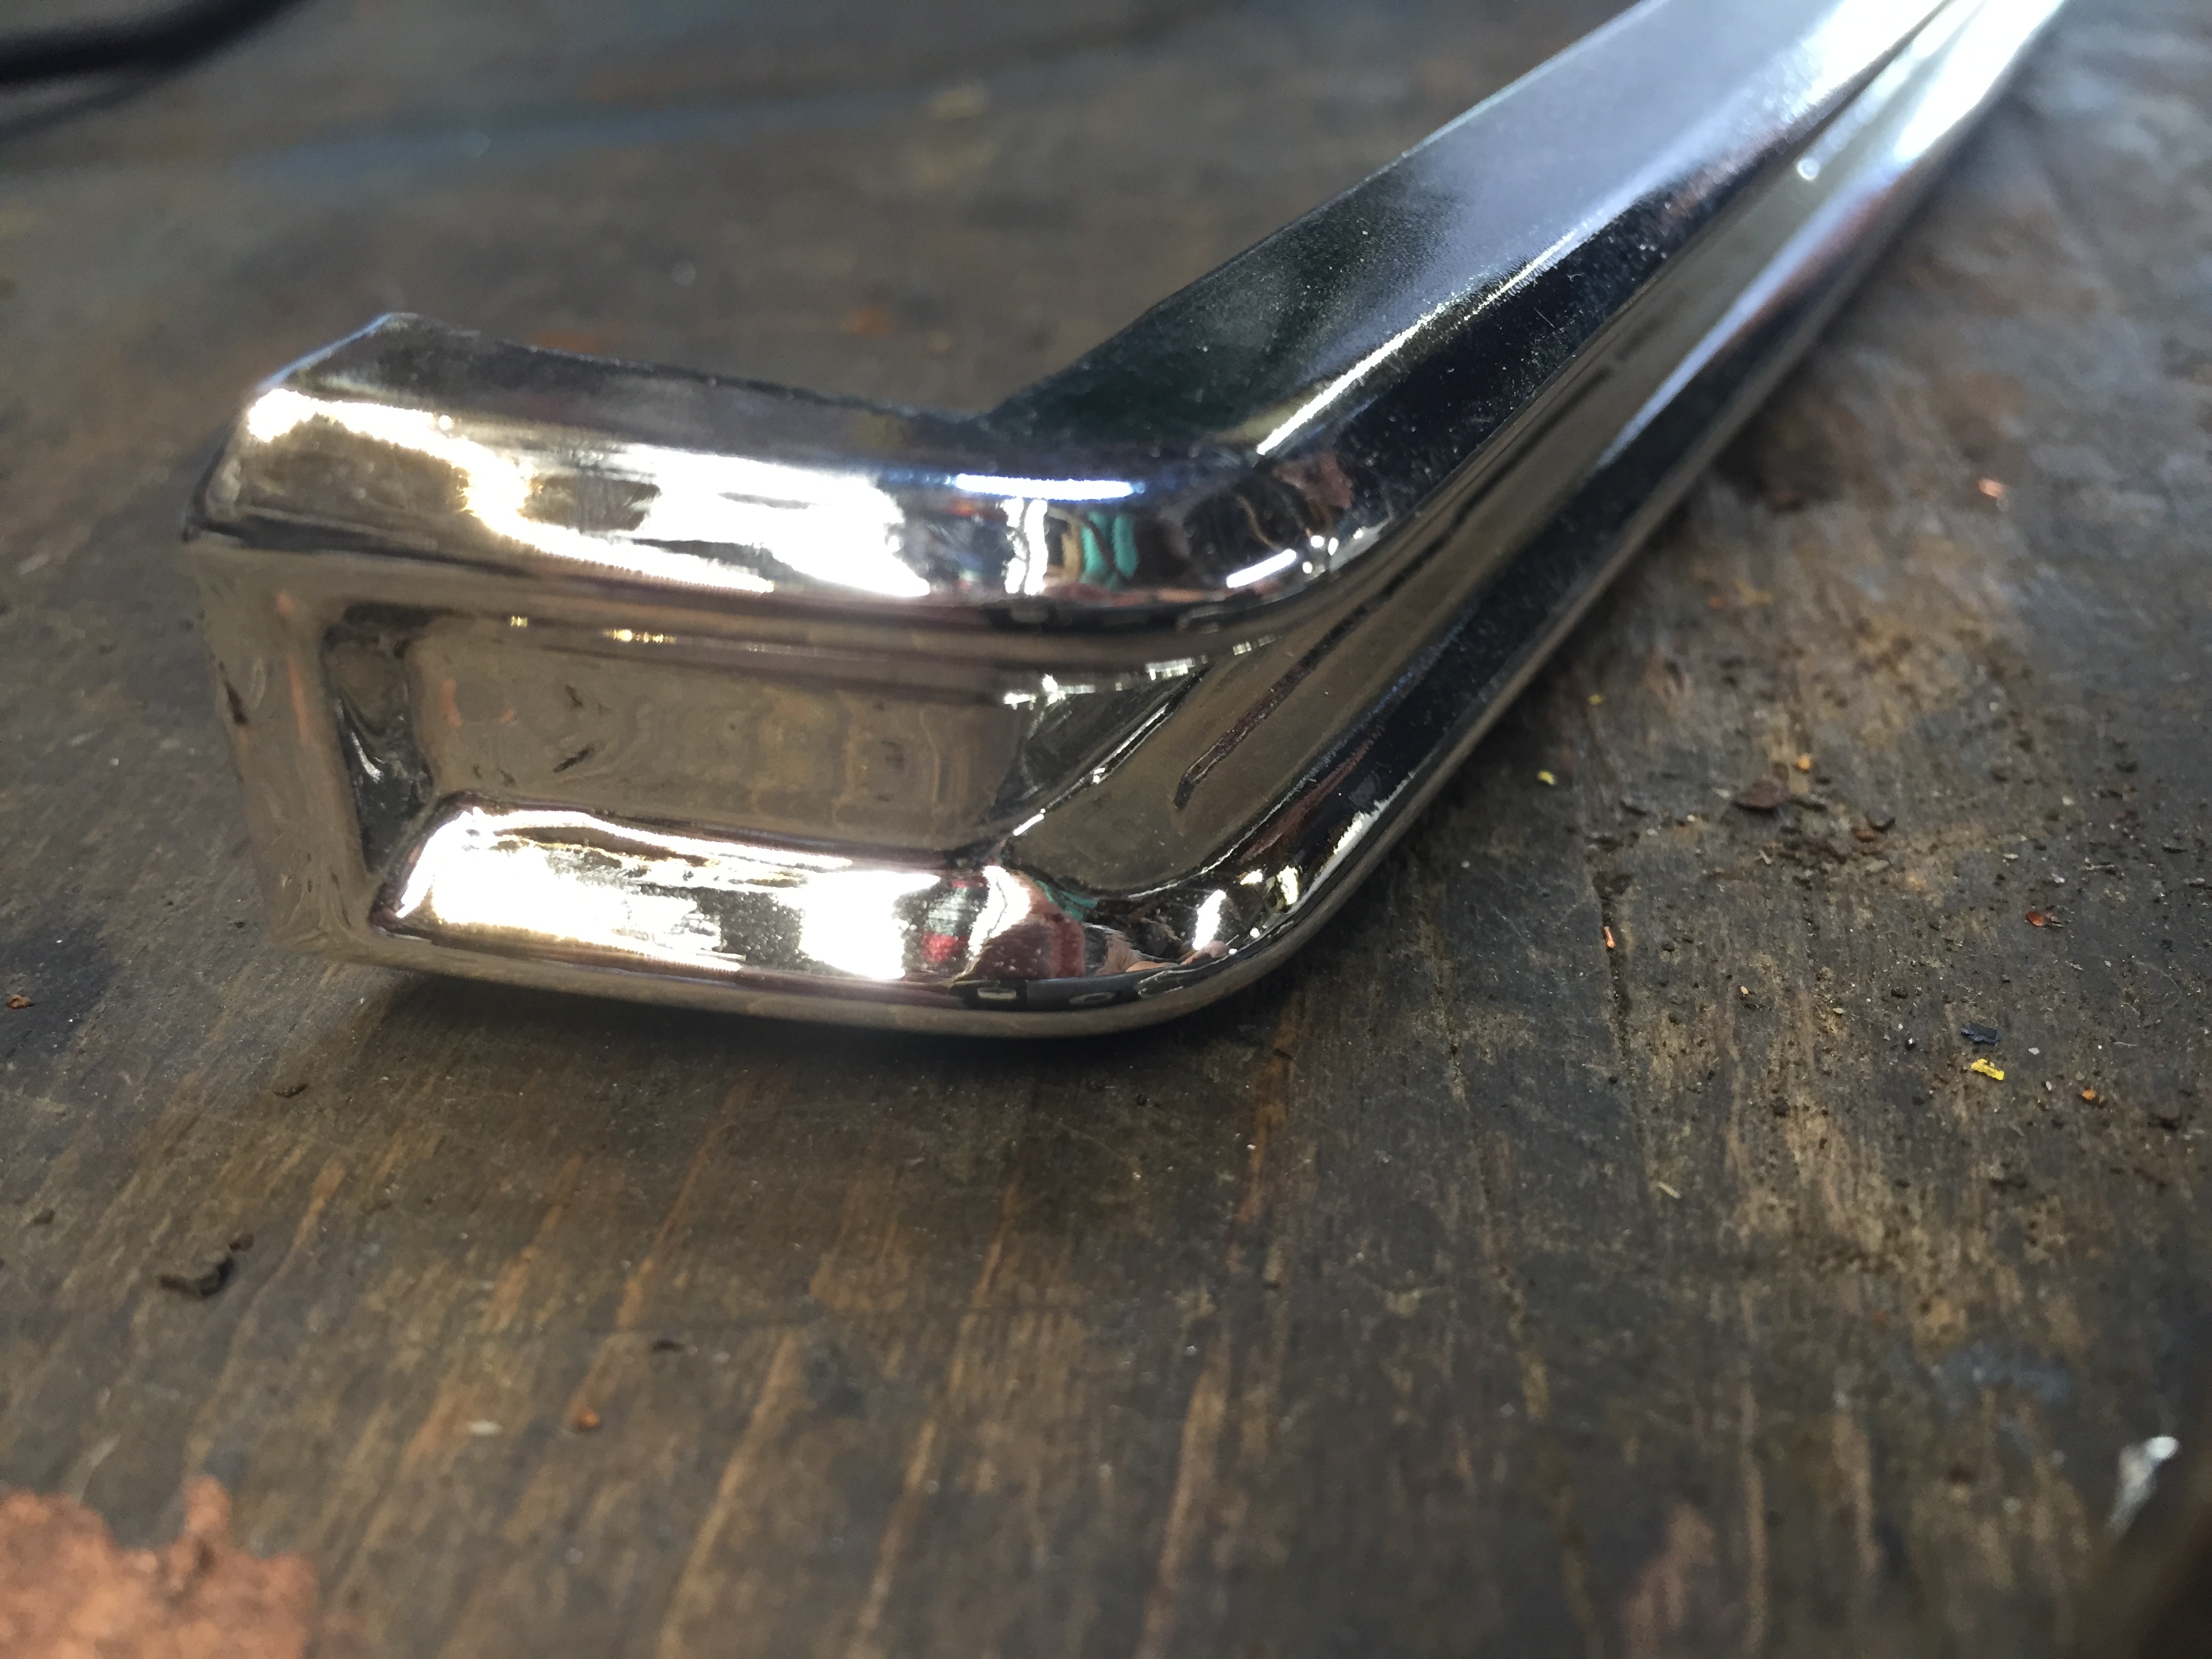
Well it's about time someone brought the issue of preparation quality. I was frankly expecting more detractors by now. Of course there are flaws in the finish, the prep on these is not perfect. But if you get dust in your paint job at the body shop do you blame the product or the application and prep. The parts of the items that are smooth and glass-like have excellent quality chrome reflectivity. Places where there are imperfections, divots, casting marks, and yes dust, will produce a less than perfect chrome reflective surface with a paint type finish method. I did not ask the tech for a "perfect" job and related prep. The knobs especially had less than perfect chrome to start (minor pitting) with and very minor defects show through. They were vastly improved in appearance, comparing before to after. I think the picture are showing dust that is on top of the chrome as well, so that may be misleading. I'll see if I get better pics that reflect (pun) more of what I see (or don't see) in my hand. Judging chrome work implies the highest standard comparison to your typical perfect mirror like bumpers, very easy to pick out flaws in other techniques. There are always comprimises in alternative methods. I still stand by the quality of the process in terms of what is possible, given correct prep. The appearance, durability and cost saving far outweigh other methods, in my opinion.
-
I'm watching the end result $$ with great interest. I'm about to put the early 71 I'm restoring up for sale. This will make a good (I hope!) comparison.
-
-
Yes, that was the next post. Got distracted, sorry. They charged us $145 (CDN, about $1.50 USD, well $115 ish) for the 5 pieces. The two tail light strips were $90 out of that. There was quite a bit of prep on those. Clearly if you did a lot of prep and masking yourself, the costs could be reduced further. I don't impress easily, this process appears to have potential for the restorationists in all of us.
-
We had them do five items. One complete metal gas door opener assembly, one plastic gas door opener knob, one metal 240z pillar emblem and a pair of 240 chrome tail light strips. The parts look amazing. They did all the prep work as well. The parts are clear coated with automotive clear. They feel smooth and the finish is tough.


-
Hey gang, I have some great news to share. A new "Spray Chrome" business opened up in (near) Calgary this year, and is only one of two in Canada at the moment. There are likely others in the US. A little googling might reveal one near you. The cost of setting up this business is a bit steep, and the expertise and process puts it a bit out of the realm of the do-it-yourselfer. But the thing to remember here is that you can Chrome ANYTHING. Don't want a section chromed? Just mask it off. This is our local business. http://www.cosmic-chrome.com/ They are family owned, the father and his two sons do everything. Bruce (dad) and Jeff (oldest son) are very motivated to grow their business and have already done some amazing work. As you will see on their site, its much more than shiny chrome as well. This process is not new, I think we've discussed it briefly before, but it has matured to the point of now being commercial grade. The vendor indicates that several OEM's are using it on plastic exterior chrome items such as truck grills. They have even just changed to the latest products that give even better results. We had them do a few items to see what the quality, cost and durability are like. Here are the results.
-
-
-
-
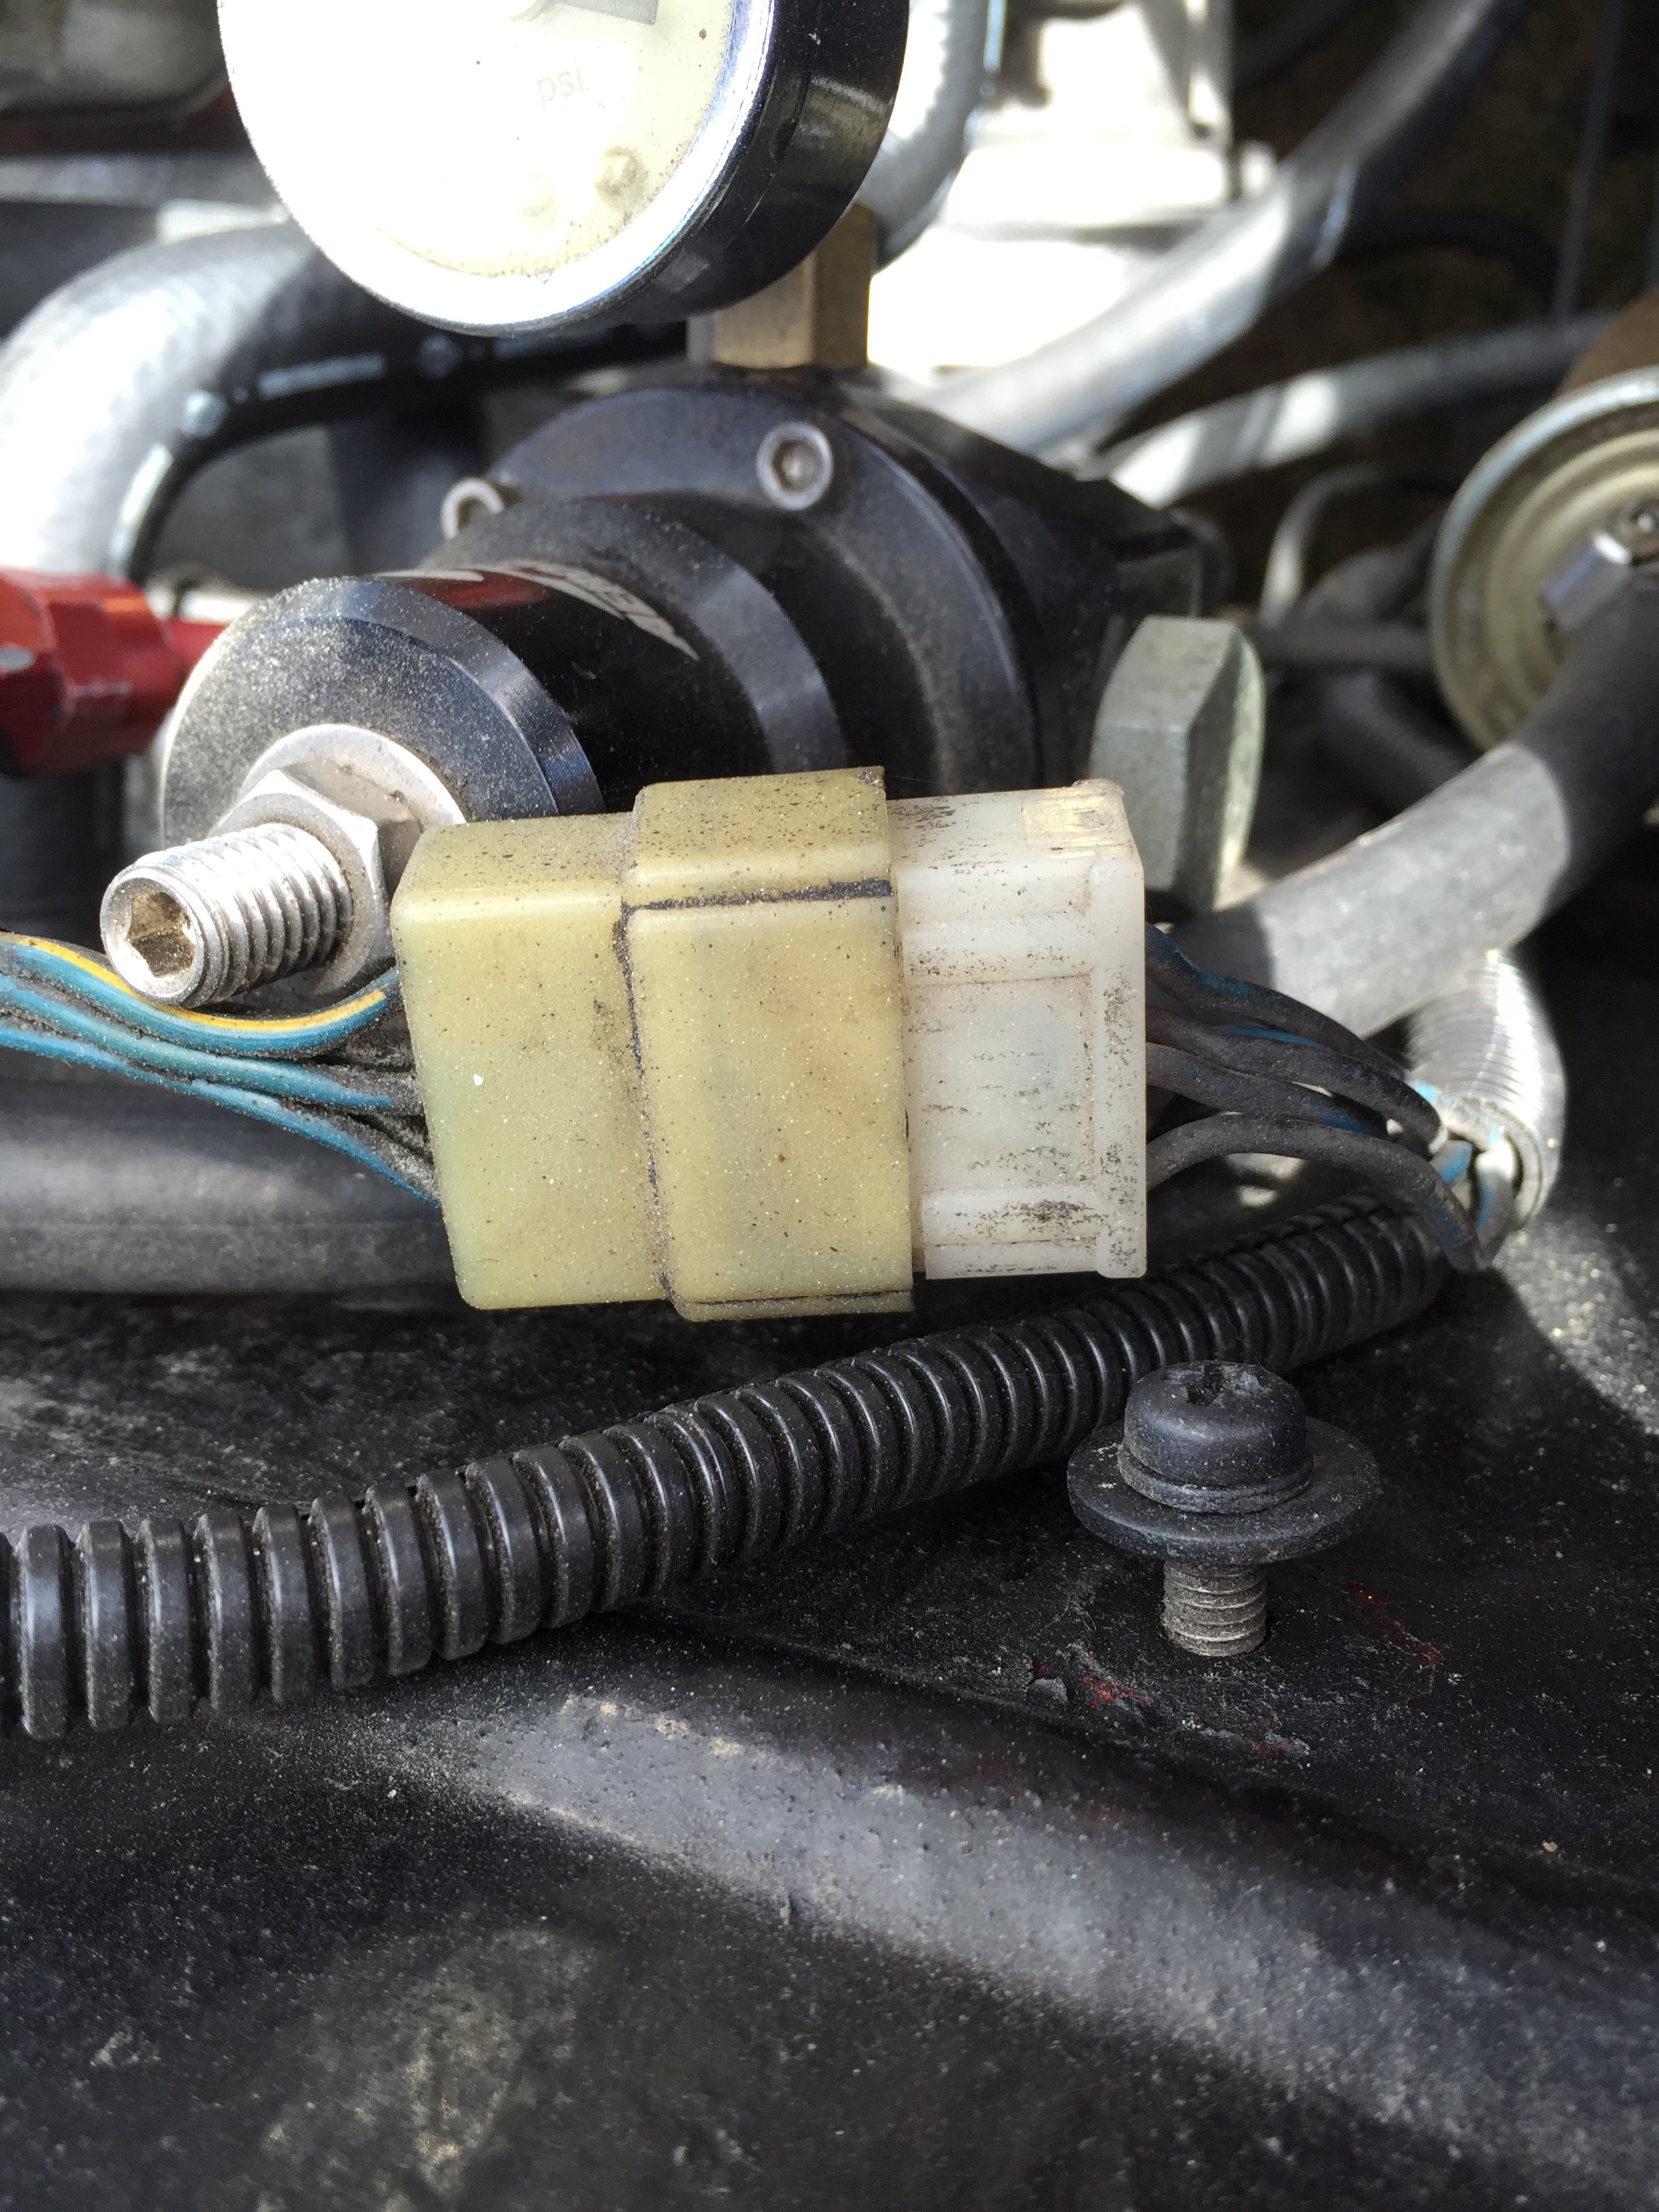
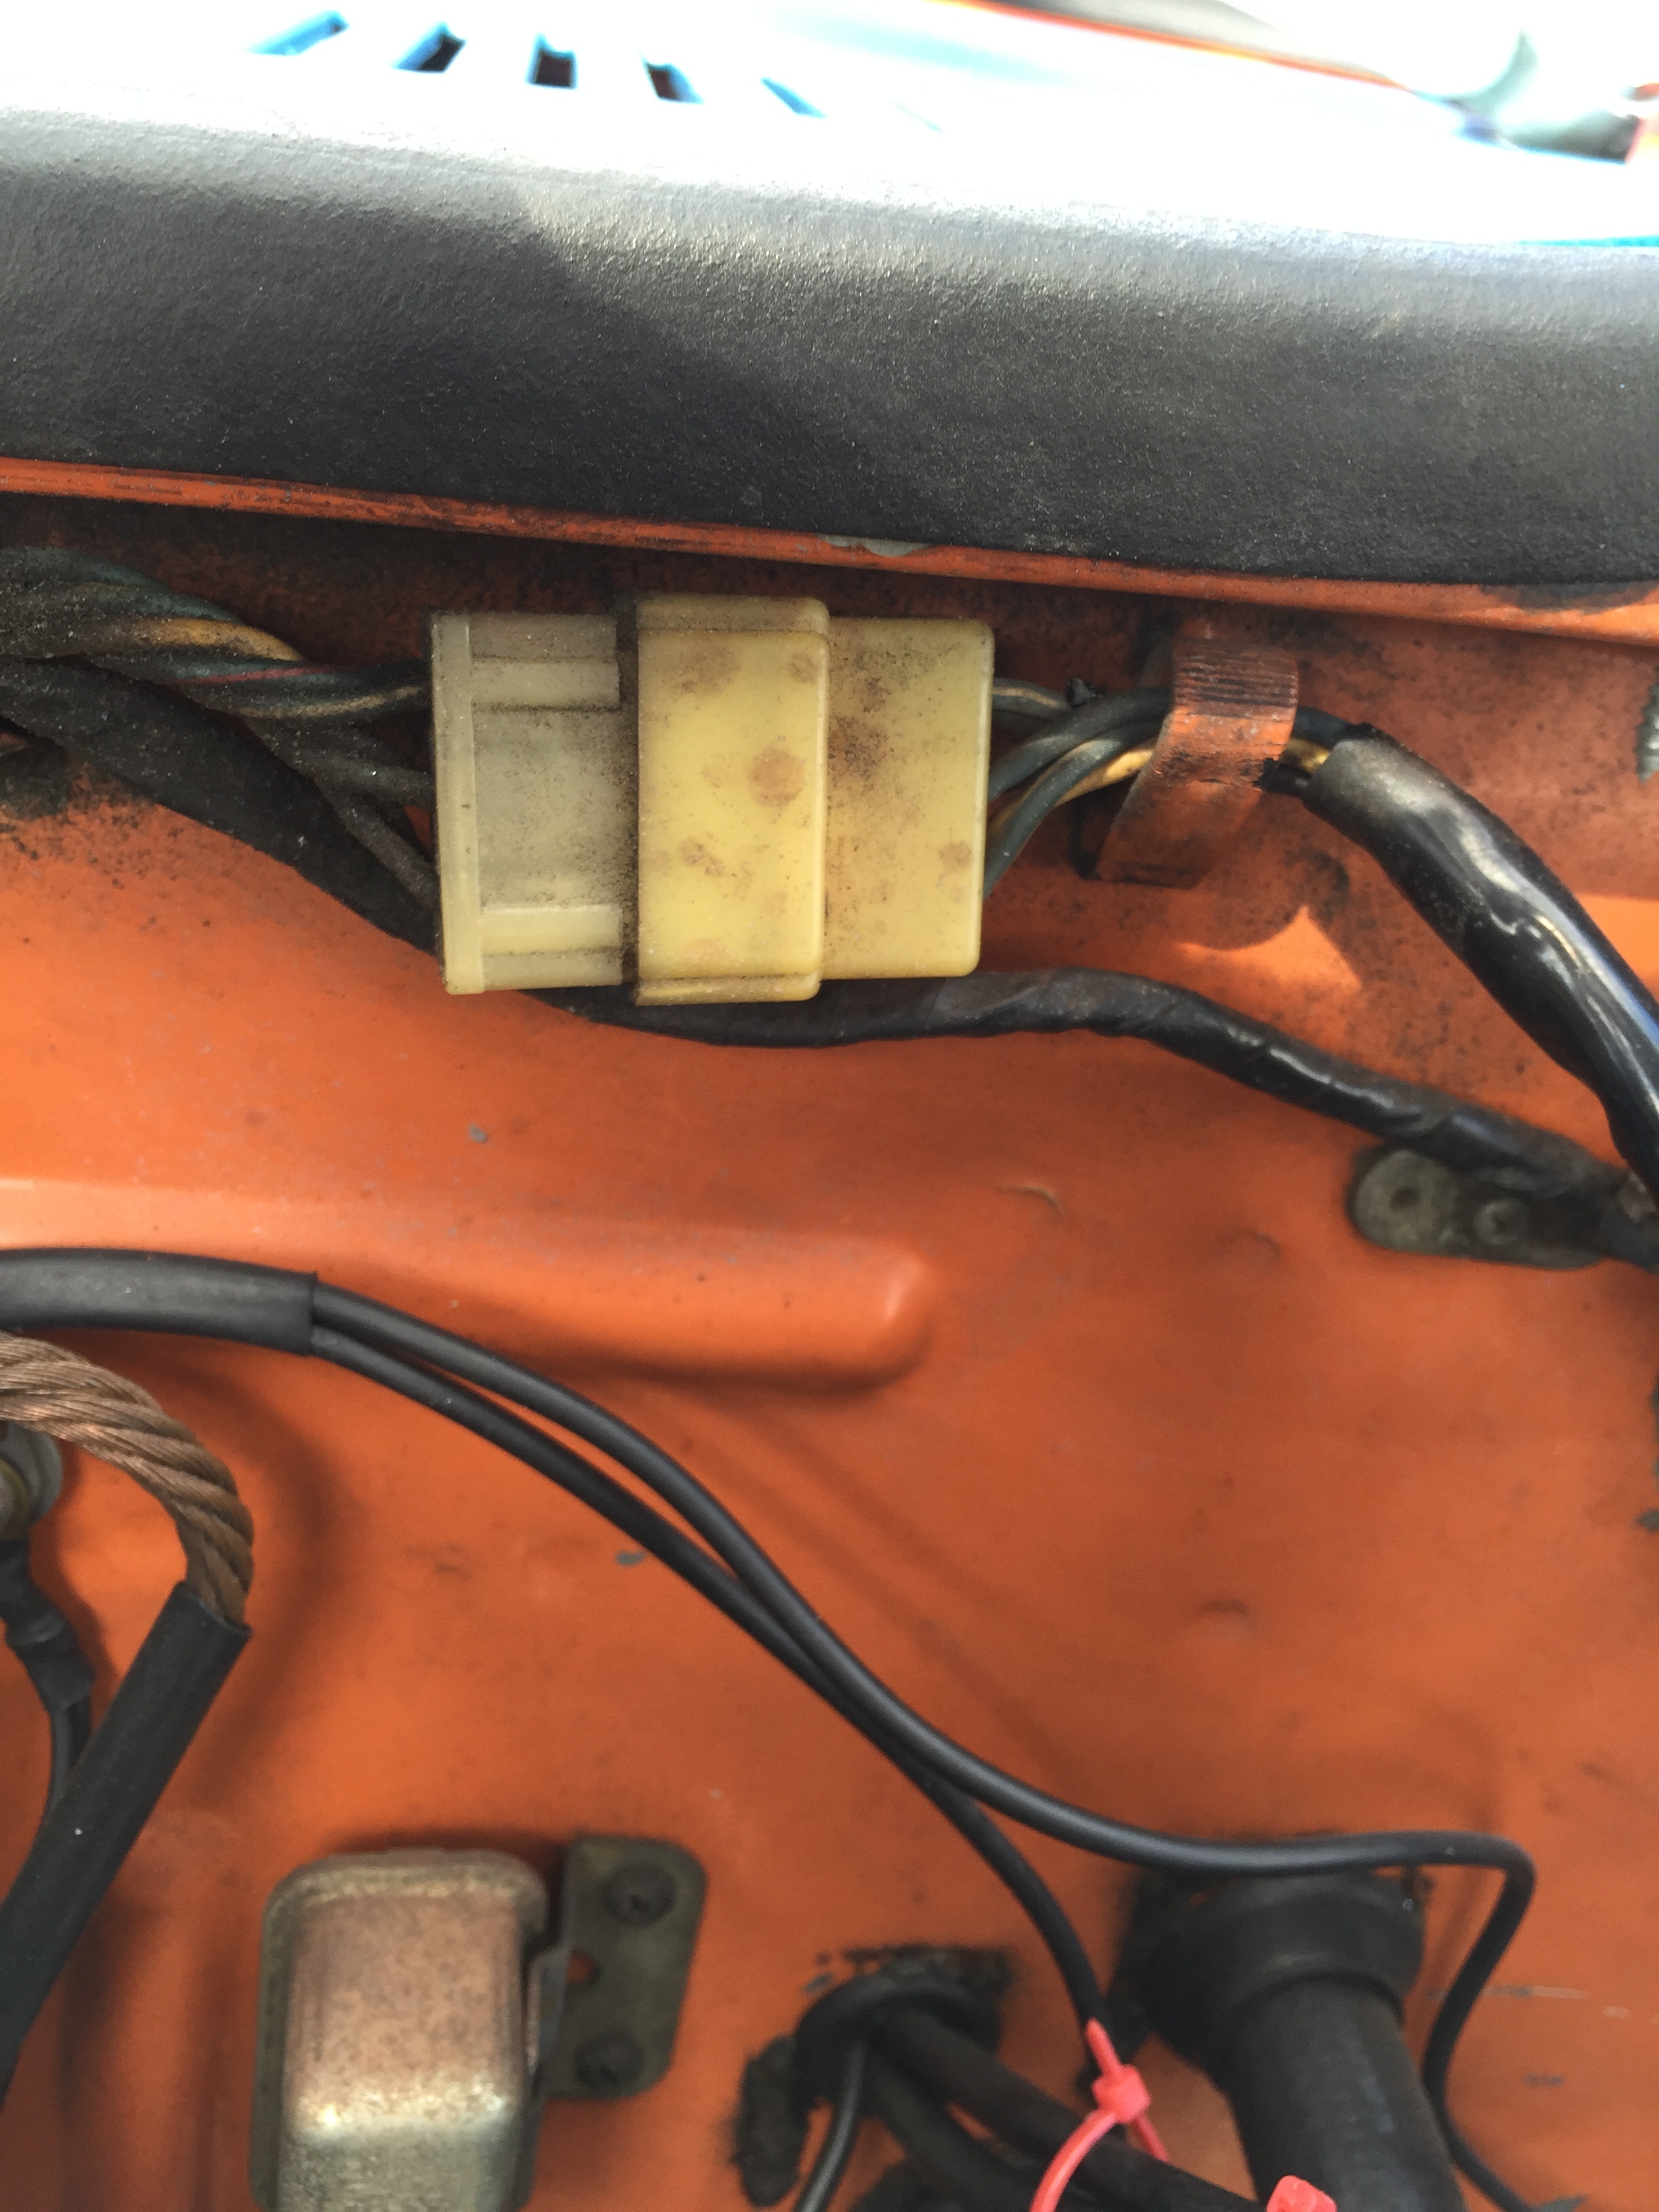
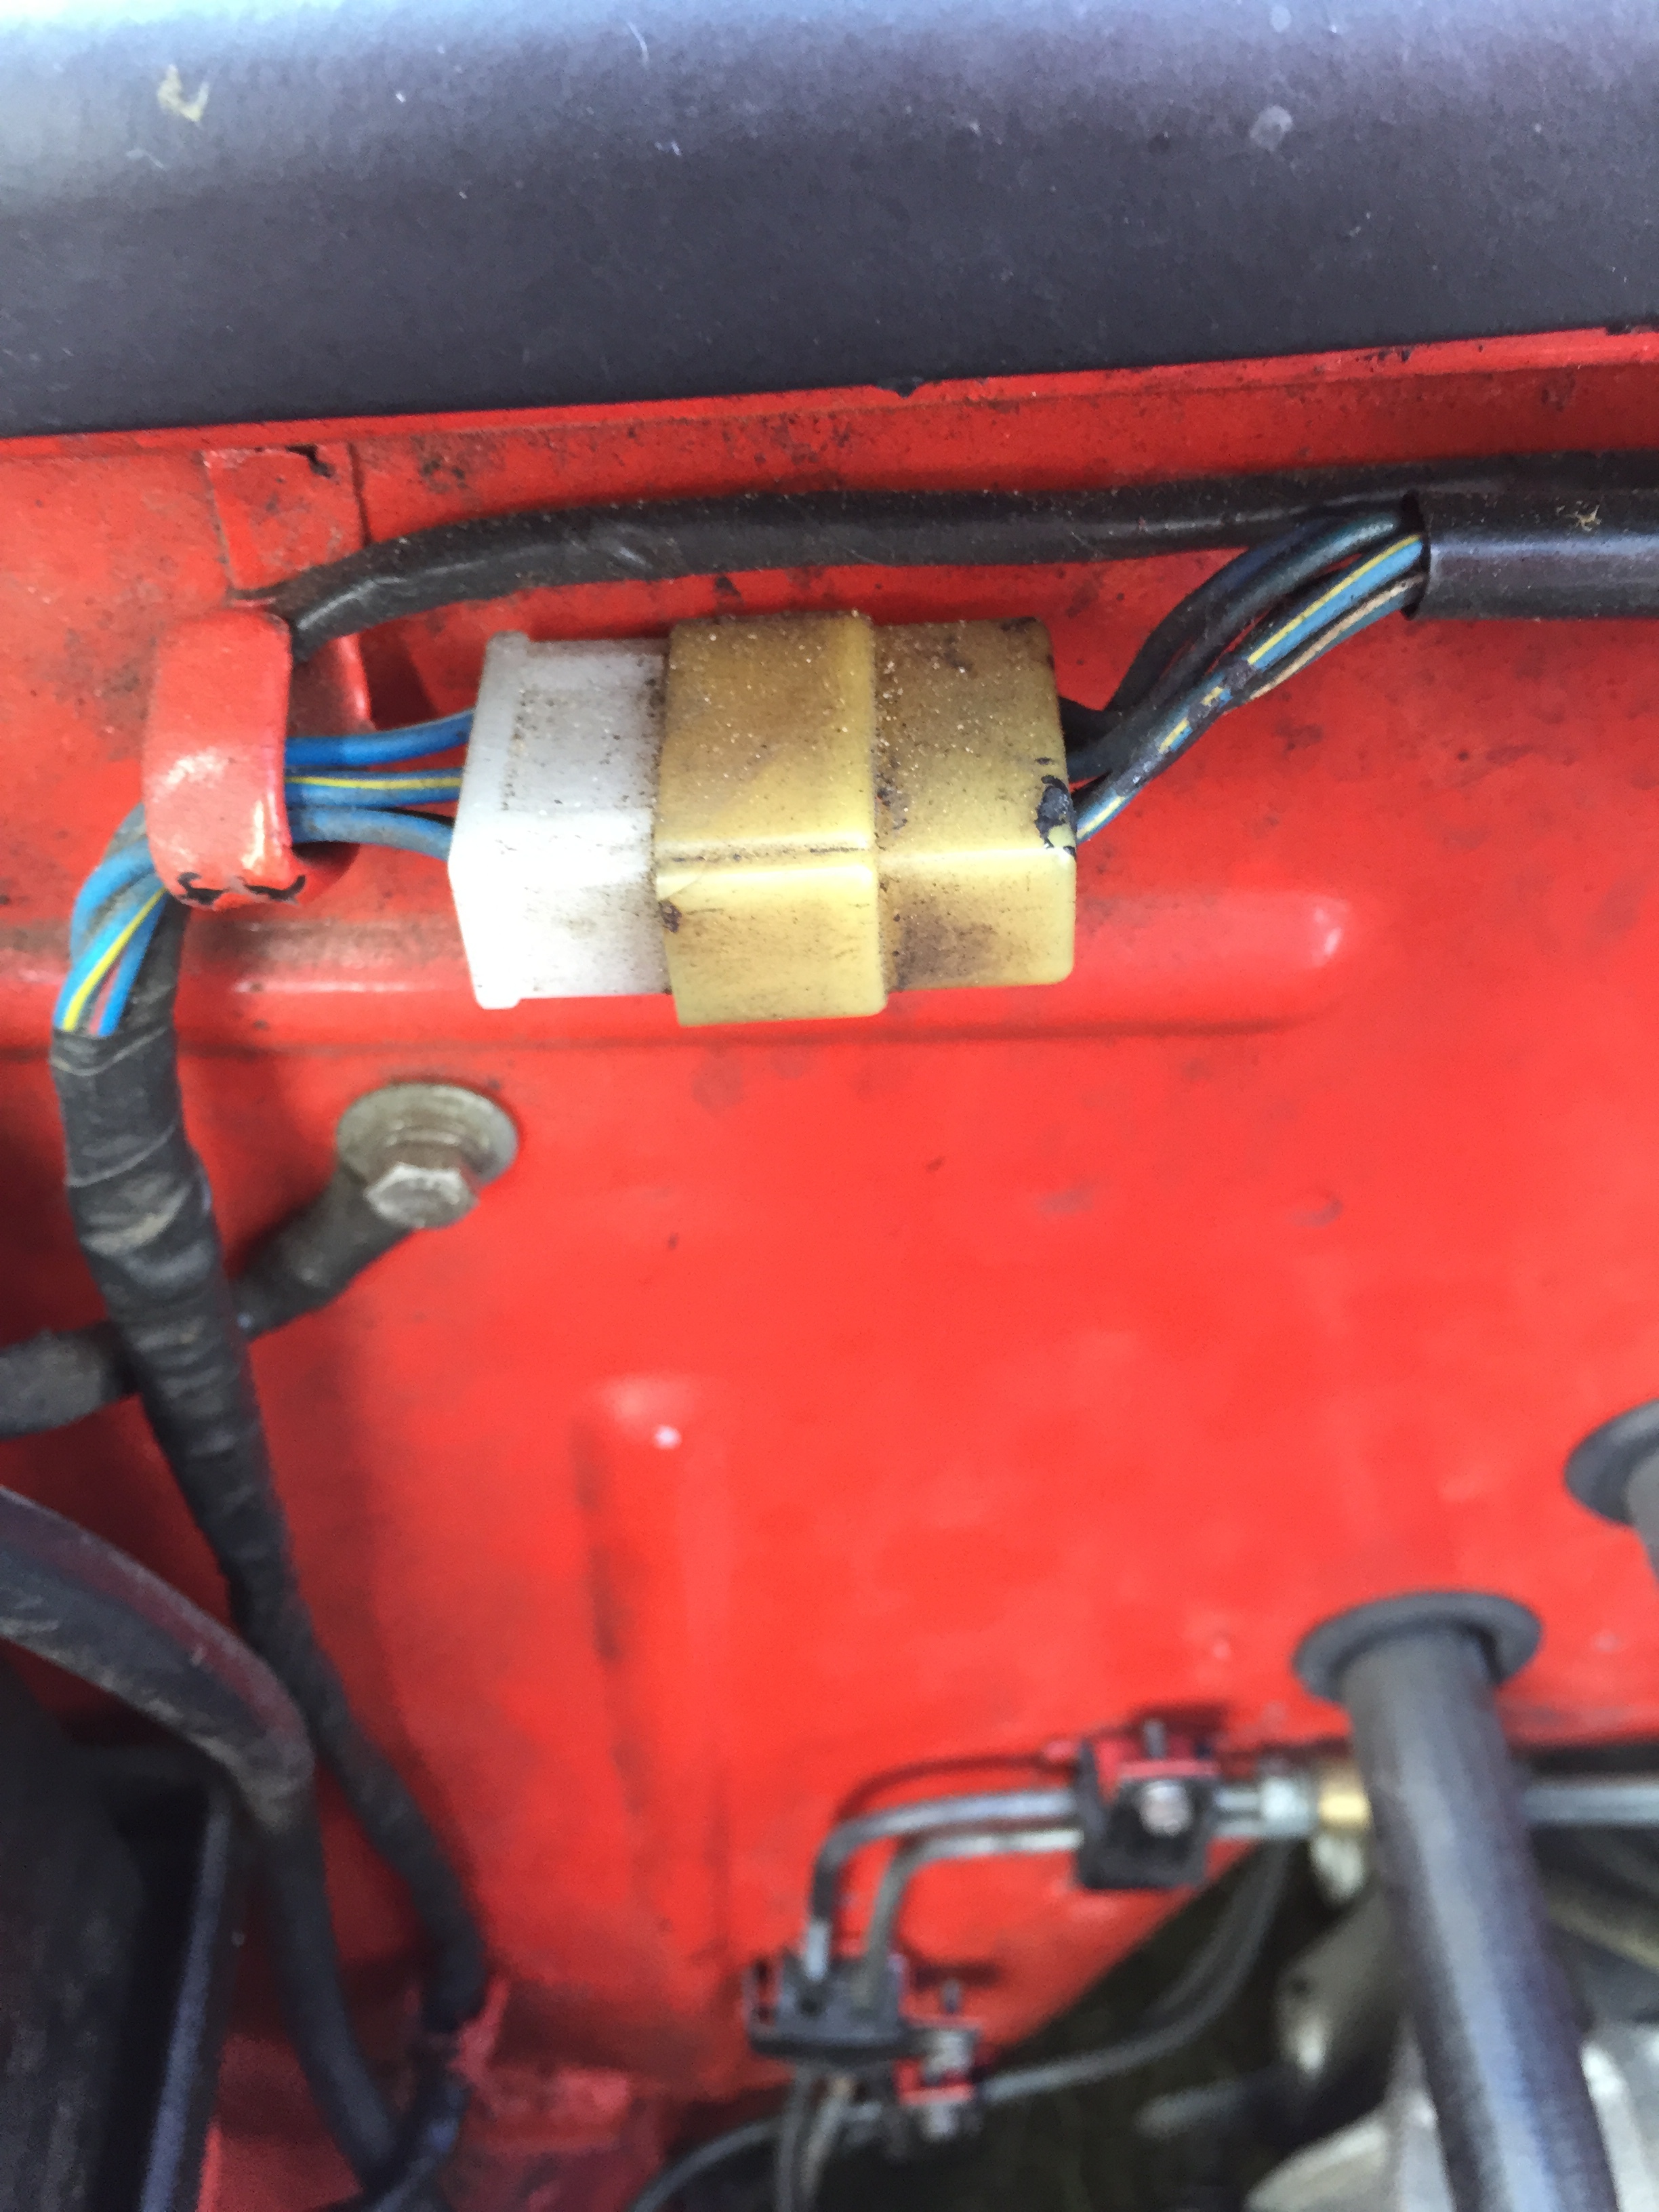
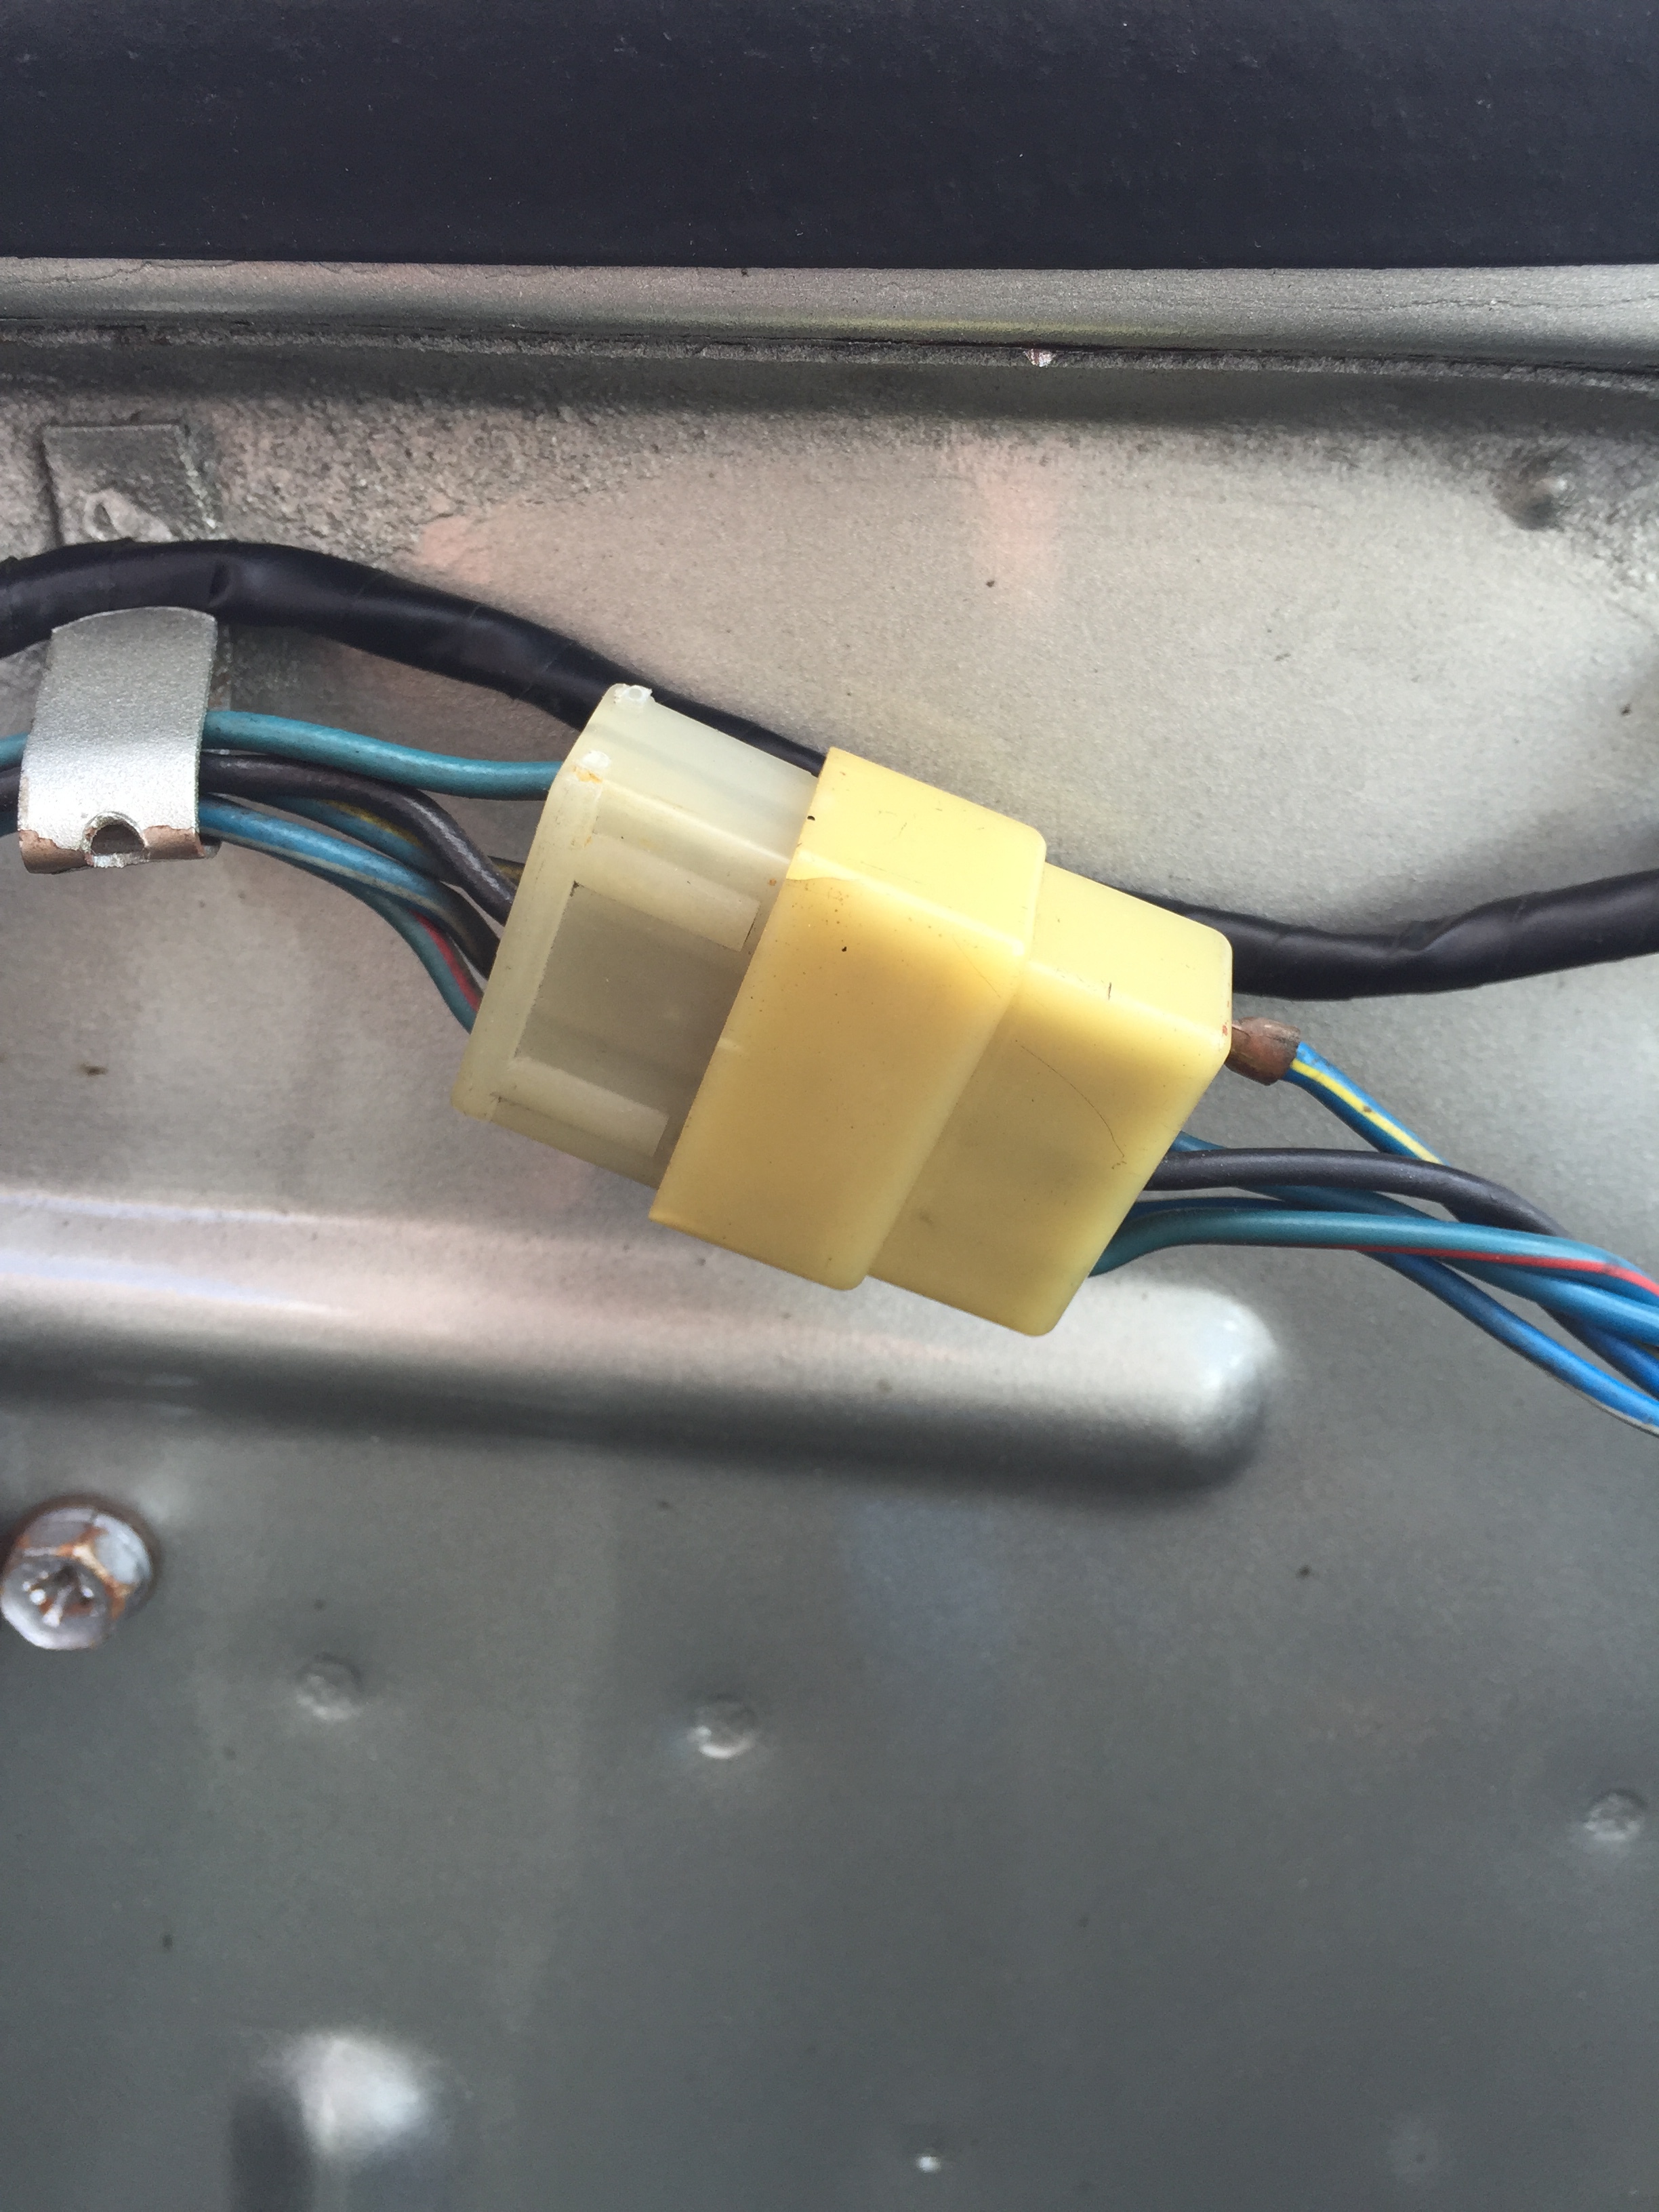
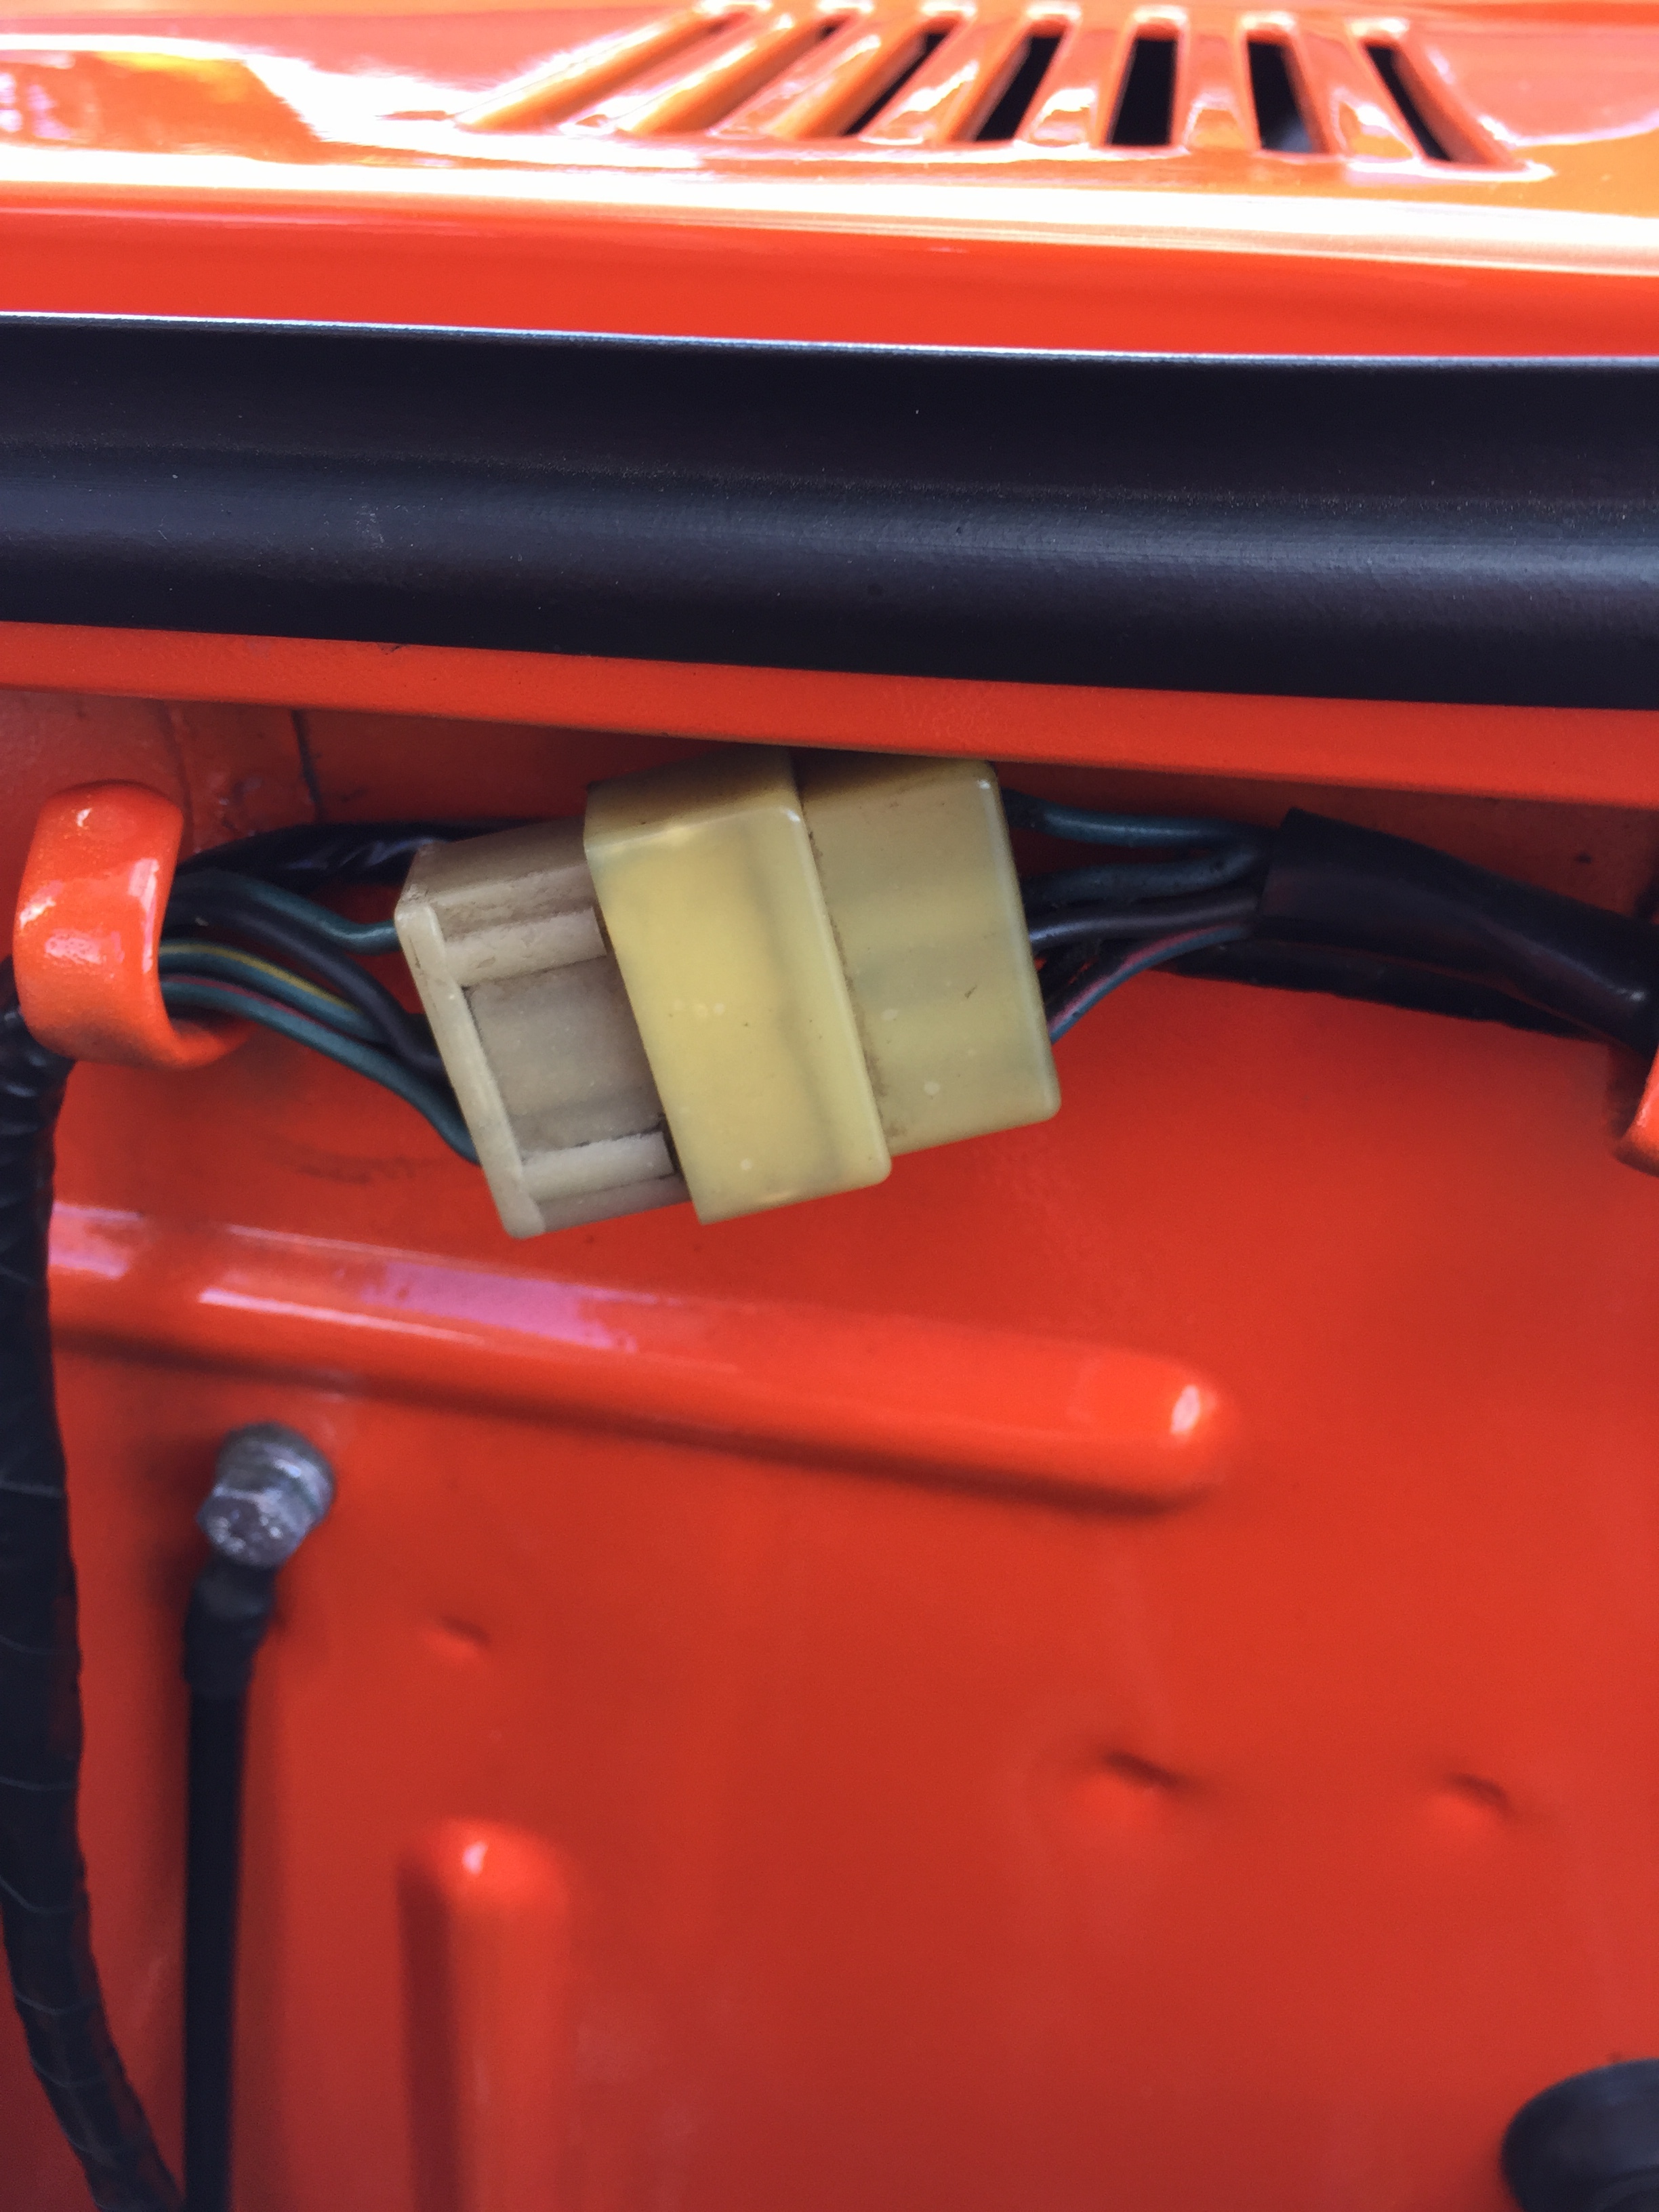
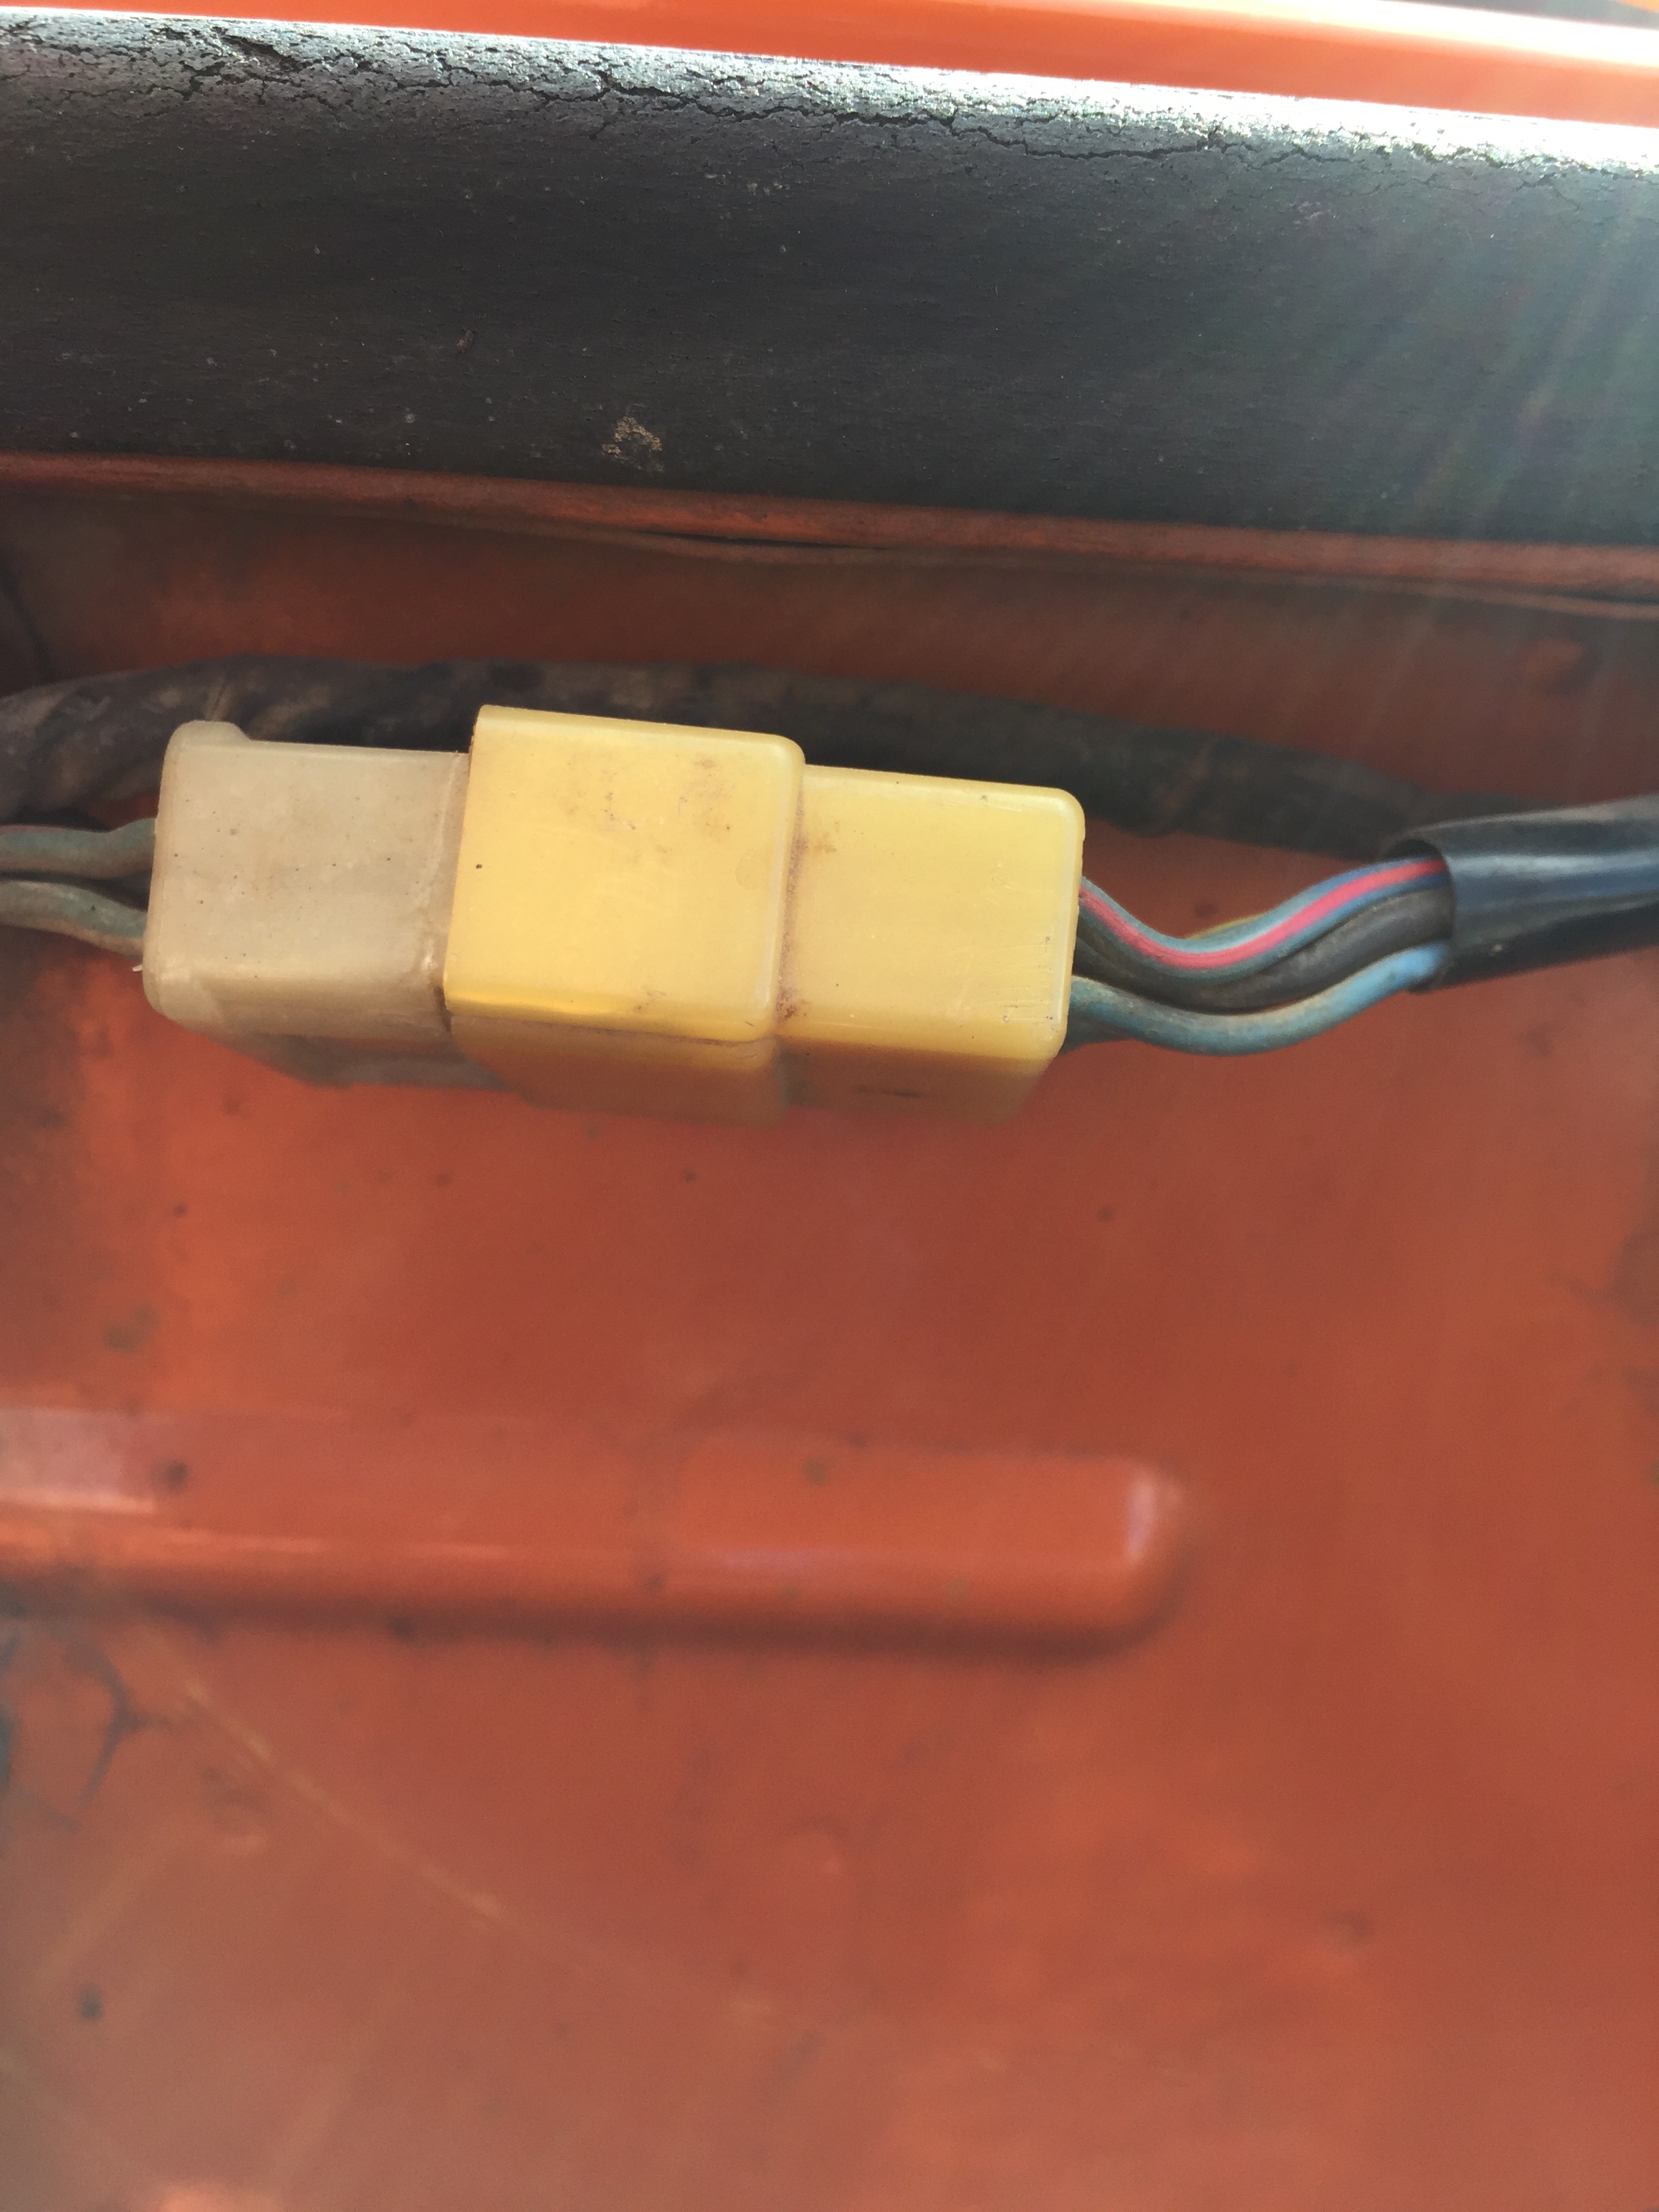
During my recent time at the recent ZCON 2016 event in Toronto, (best ever by the way, said the un-biased Canadian) I made several interesting observations about the 240z's that were present. Most observations were something like "I have to step up my game if I ever want to win anything at these things if I bring mine again". Some mighty nice machinery indeed. As the OCD perfectionist in me is never quiet, I could not help be notice something interesting about almost ALL of the 240's present. It began with the judged show on Wednesday. I was staring longingly at everyone's engine bays, as I'm in the midst of doing a relatively stock-ish 71 resto and wanted a bit of guidance on what is right and wrong. The one thing that stuck out like a sore thumb was the sorry state of electrical connector on the wiper motors of almost all the 240's there. Even the one Z that was later to be crowned a gold cup winner had his connector cleverly hidden under electrical tape. Apparently if you can't see it, you can't judge it. I did not dare to peel the tape back to look, but I'm betting a yellow nasty brittle connector lurks beneath. Sources for these shells and connector pins have been widely discussed here and other places and they are CHEAP, so I cannot imagine why no one has taken care of this little detail. Apparently next ZCON I'm going to have to come with a pail of shells, pins, my strippers and crimpers and get everyone a fresh new connector, so that the wipers work properly both electrically and cosmetically. So I took it upon myself to take a picture of every exposed 240 engine bay wiper connector at the peoples choice show that Saturday just to show how rampant and wide spread this problem has become. The wiper speed increase alone is worth the effort. PS. Don't forget the huge "tongue in cheek" vibe liberally applied to this thread...
-
Right, 249 should have that round plate as you describe. This piece is later 240/280.
-
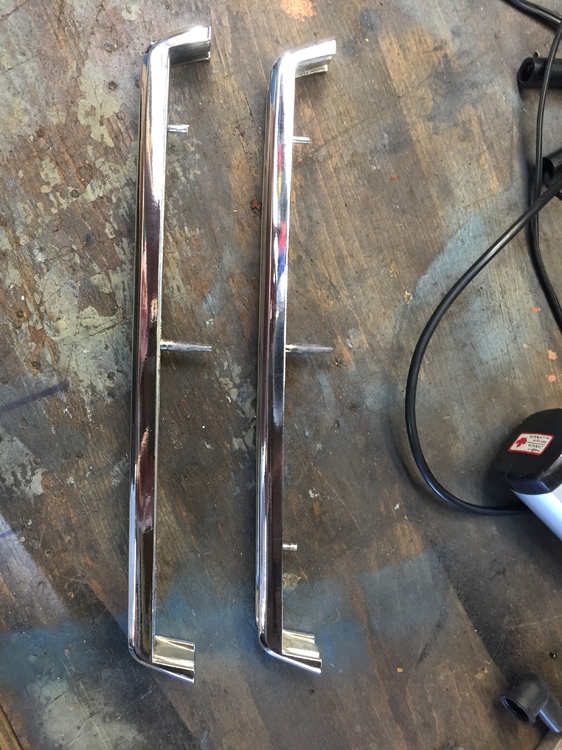
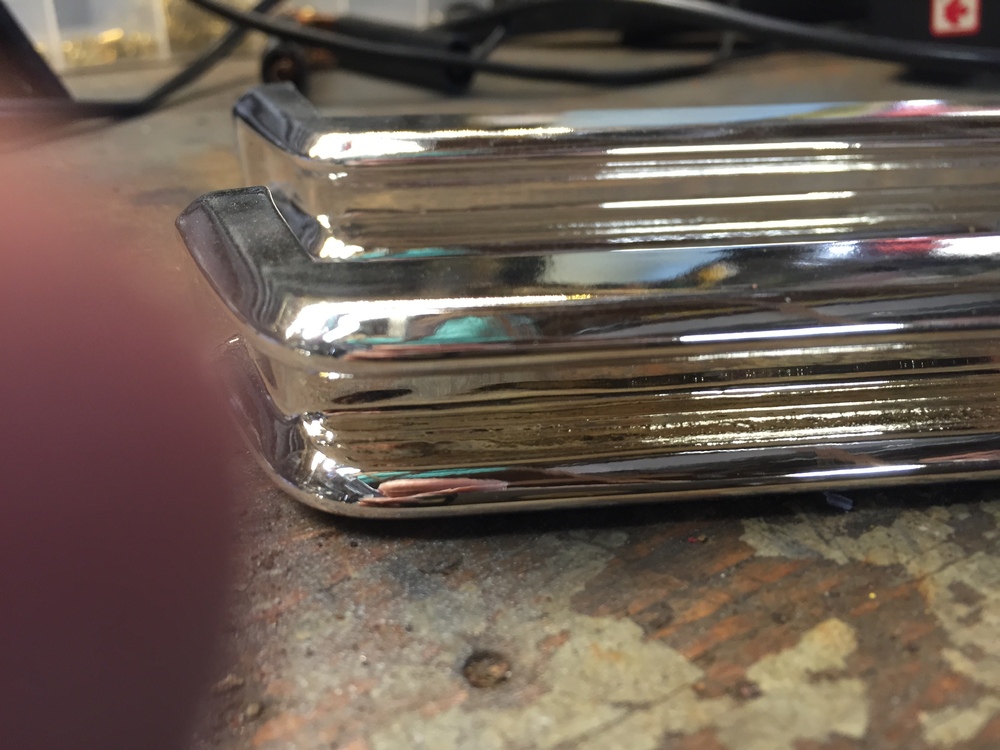
These are tool storage compartment trim strips. Should be 4. Two per tool bin top edge to protect your precious hands as you reef the jack and stuff out of those cubbies. 249 doesn't have the storage cubby holes so put away for another day.
-
Is this not the stock battery cover that goes under the top hold down bracket? We spotted a couple of these at ZCON.
-
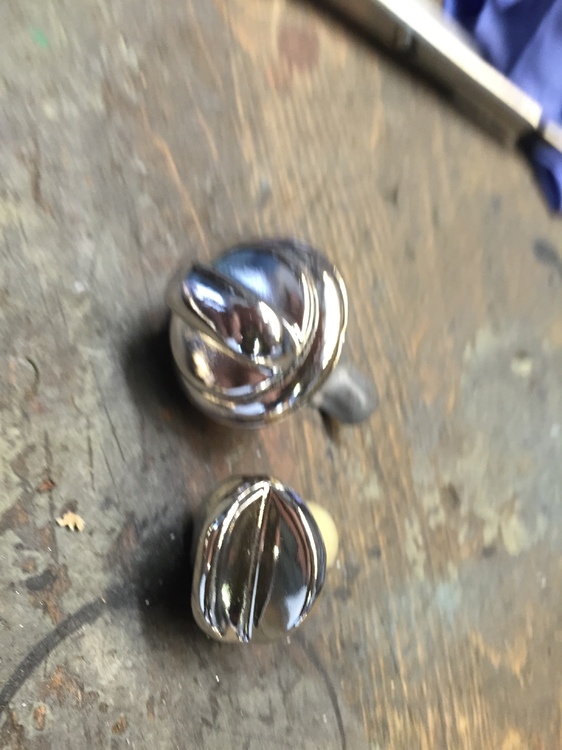
Interior side underdash air vent control knobs.
-
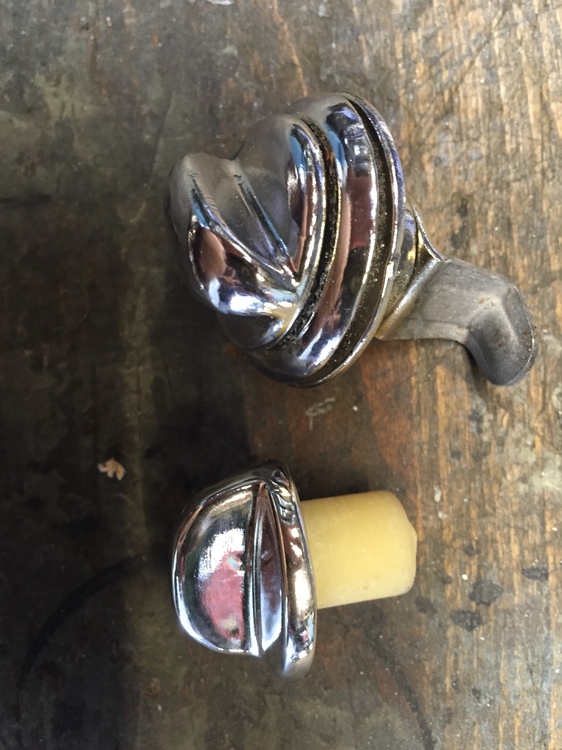
Weber or similar chrome foam/screen air cleaner cover hold downs. Not Datsun
-
Spare tire hold down bracket. Threaded T-handle thing goes through it into spare well center tower.