Namerow
Free Member
-
Joined
-
Last visited
-
 This topic has already been pretty thoroughly discussed by CZCC members. Here's a good place to start...
 -
Quite right. I was looking at the wrong column.
-
I was able to buy an OE molded hose at a local swap meet, so -- even though I bought a length of 9mm (ID) braided hose from Bel-Metric for the purpose -- I never got around to trying out the idea. No reason why it shouldn't work, although you might not be able to make the straight braided hose flex quite enough to match the radius of the bends molded into the OE hose. Unless you're trying to build a concours winner, though, I doubt whether anyone would notice. CORRECTION: I just went down to the workshop and pulled out the hose that I bought from Bel-Metric. It's quite flexible and can be easily bent to match the curves of the molded OE hose... and without any signs of the walls collapsing. It also fits nicely over the nipple of the check valve (the one that fits between the engine-side and mastervac-side hoses). The actual ID of the Bel-Metric hose is 9.4mm, so the best size of copper tubing to use as an insert would be 5/16" OD (7.9mm). 3/8" (9.5mm) tube would be too big and I don't think you'll be able to find 11/32" (8.7mm). In any case, the quality of the fit doesn't matter much because there's no fluid flow happening here. It's just a vacuum hose. The only thing that would cause a problem would be if the hose walls collapsed or got pinched off. It's worth pointing out that the range of aftermarket replacement parts for Series 1 Z's has expanded quite a bit since 2019. Many items that used to be unobtanium (such as this engine-side MasterVac hose) are now quite readily available. The hose in question lists at ~ $80.00 (originality doesn't come cheap). For reference, a 3-ft length of 9mm braided hose from Bel-Metric costs about $15. Add anywhere from $0 to $10 for the copper tubing.
-
I worked with the show host, Tom Cotter, on a number of media events staged by a European manufacturer back in the late 1990's. Nice guy. Very knowledgeable, very enthusiastic, and seemed to know just about everyone in the business. Odd, in hindsight, that I don't remember us ever talking about Datsun and the Z (I had two at the time).
-
The stamped-metal spring cap, in its OE form, was actually manufactured as an two-part assembly' ('Assembly - Bumper Bound'), consisting of the metal part, along with a molded-rubber 'snubber' (some call it a bump stop) bonded to its underside. When new, the snubber piece started off feeling and acting like rubber. Unfortunately, the material didn't age well, becoming hard and crumbly over time (kind of like the consistency of a dried-out hot-dog bun). I'm pretty sure that the stuff shown in your photo is the remains of the snubber. These days, those snubbers are usually replaced with versions made out of polyurethane.
-
Great-looking car, picture-postcard weather, beautiful country. Thanks for posting.
-
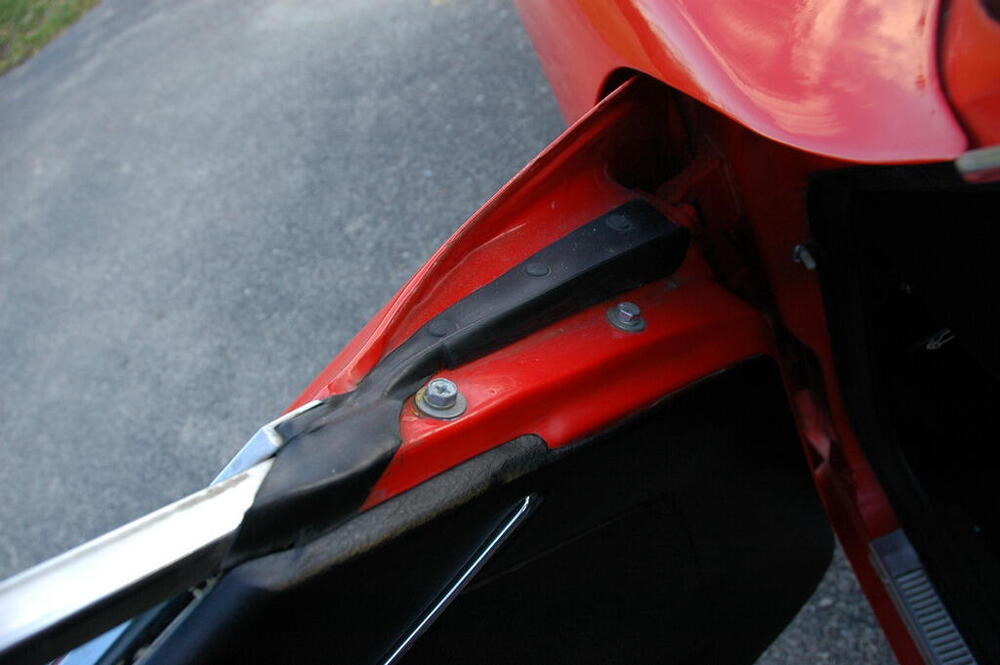
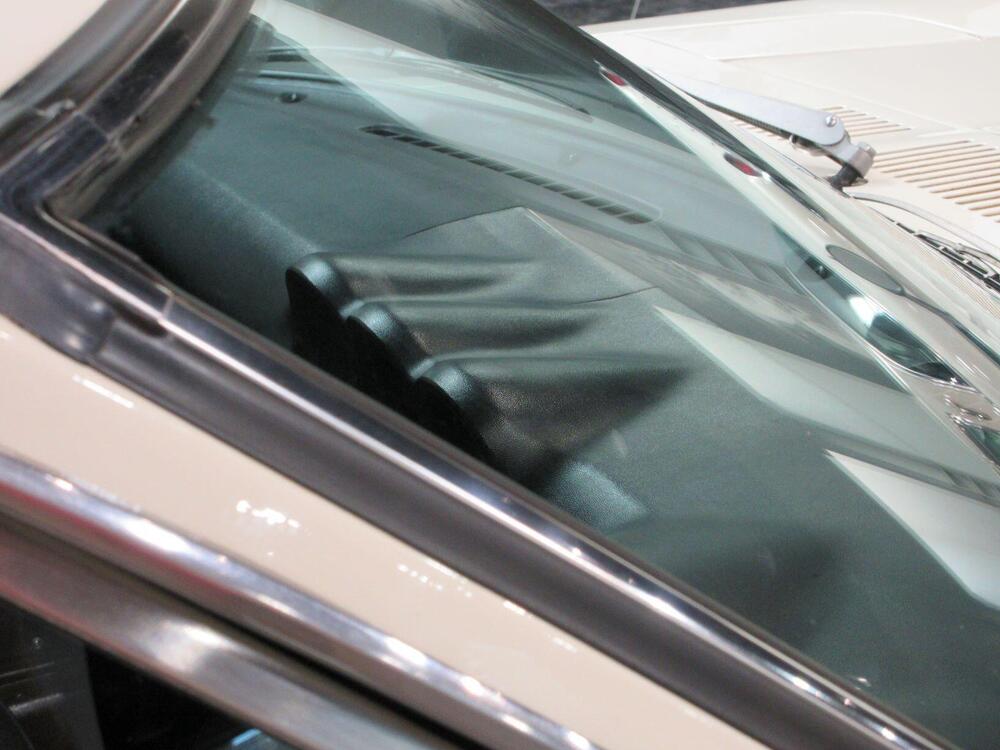
Car looks fabulous, Charles. For those of us who remember your paint disaster, this has to be very rewarding. Re the problem seal, here's a photo from an unmolested early 71 Z (VIN 019769) that came up for sale on BAT a few years ago. Hope it helps...
-
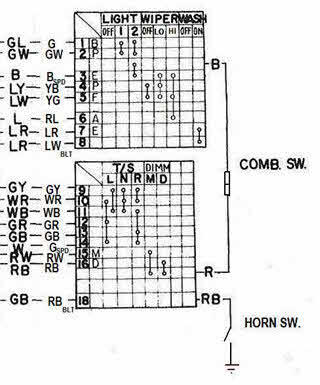
Nice work, Captain Obvious. Thanks for your persistence in moving this forward. A few questions and comments specific to the Combination Switch: I see the Horn Relay, but I don't see the Horn Switch (talking about the 'switch' that operates when the driver pushes on the horn pad) Letters appear in some of the rows in Column 2 of the 'grid' for the Combination Switch (the letters are: A, B, D, E, F, M and P). Can you refresh my memory as to what they stand for? As currently depicted, the Wipers show only 'OFF' and 'ON' modes, with the logic within the 'ON' mode apparently trying to do double-duty for both 'HI' and 'LO'. I think that the switch's operation might be more clear if 'ON' is replaced with discrete 'HI' and 'LO' modes. See attached schematic, per my original post in this thread back in July 2024. As I also pointed out back in 2024, it's worth keeping in mind that the colours of the wires coming off the Combo Switch don't always match the colours of the wires to which they connect on the Vehicle harness. See below (bold-face letters are Vehicle-side, regular-face letters are Switch-side)...
-
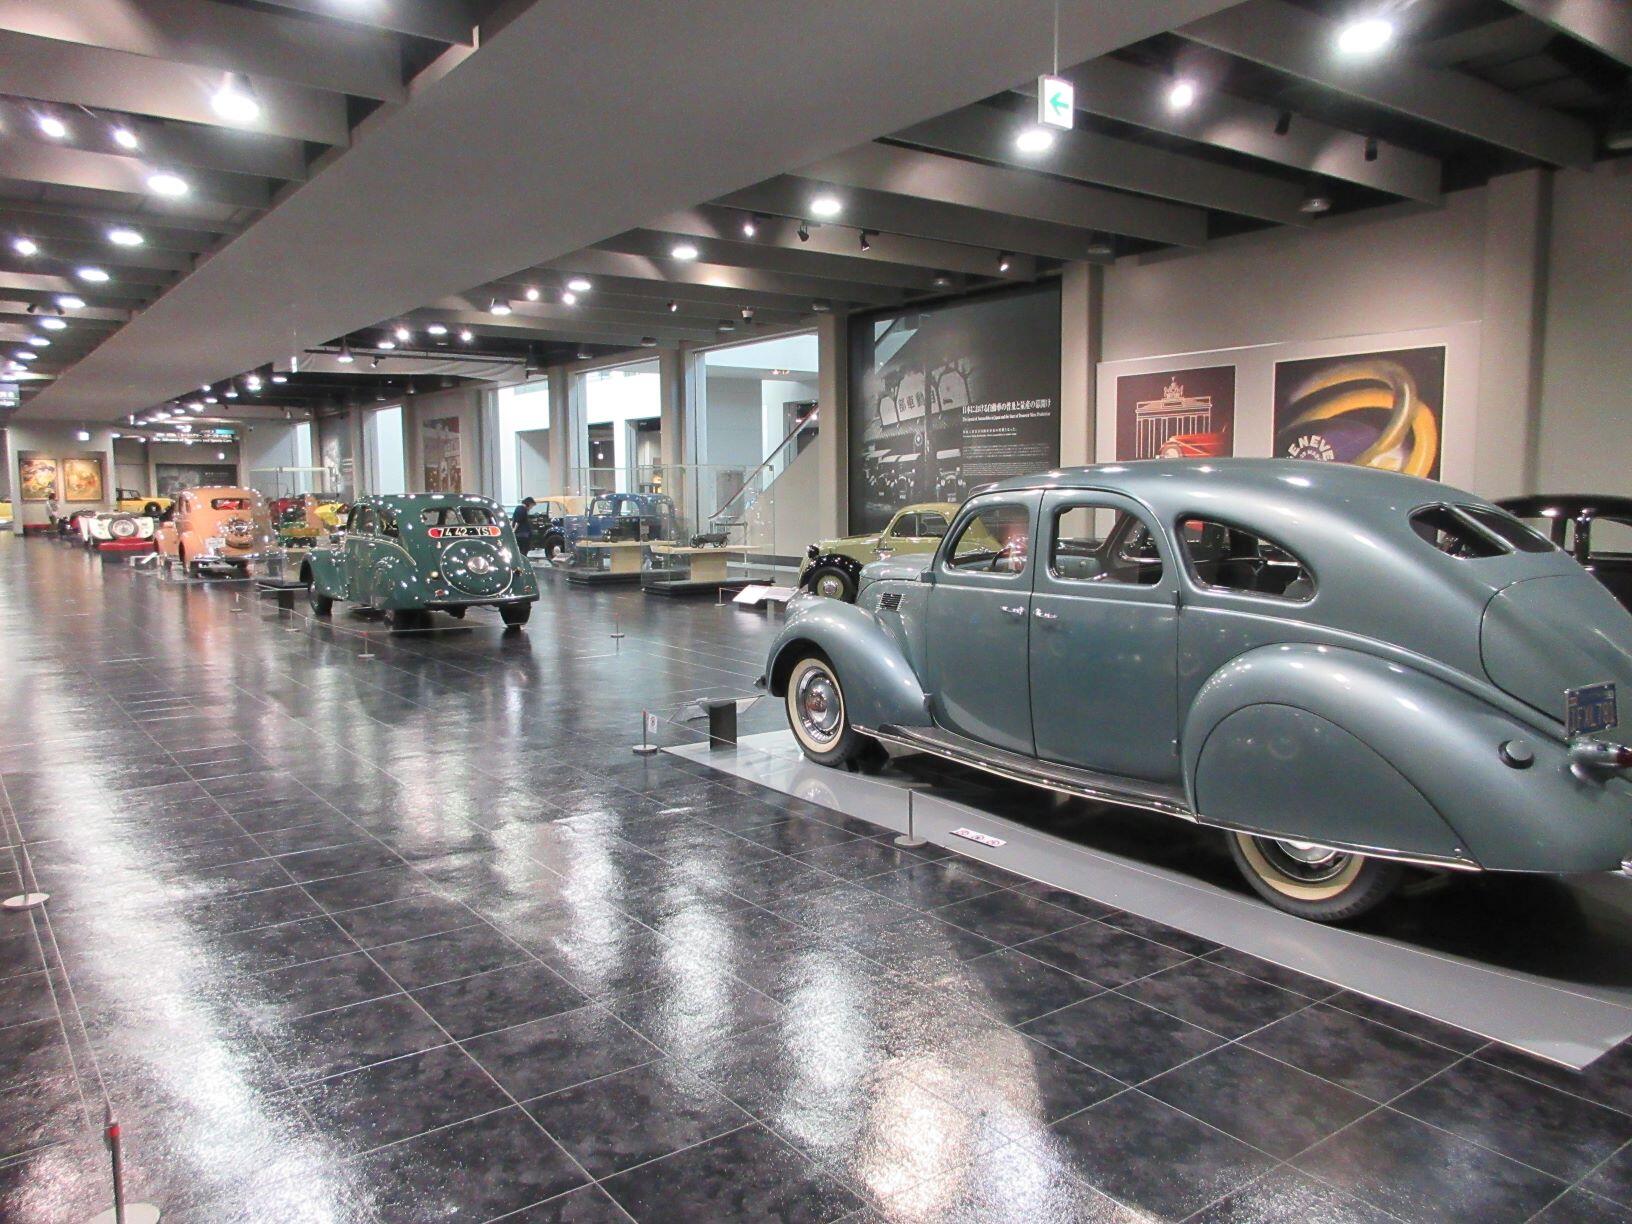
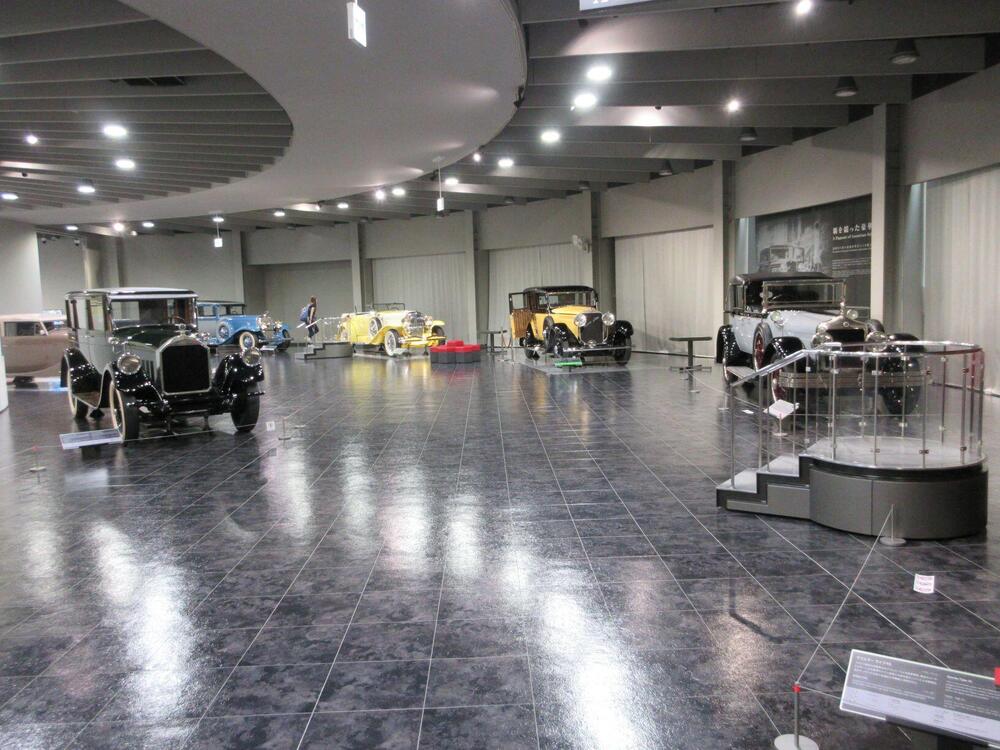
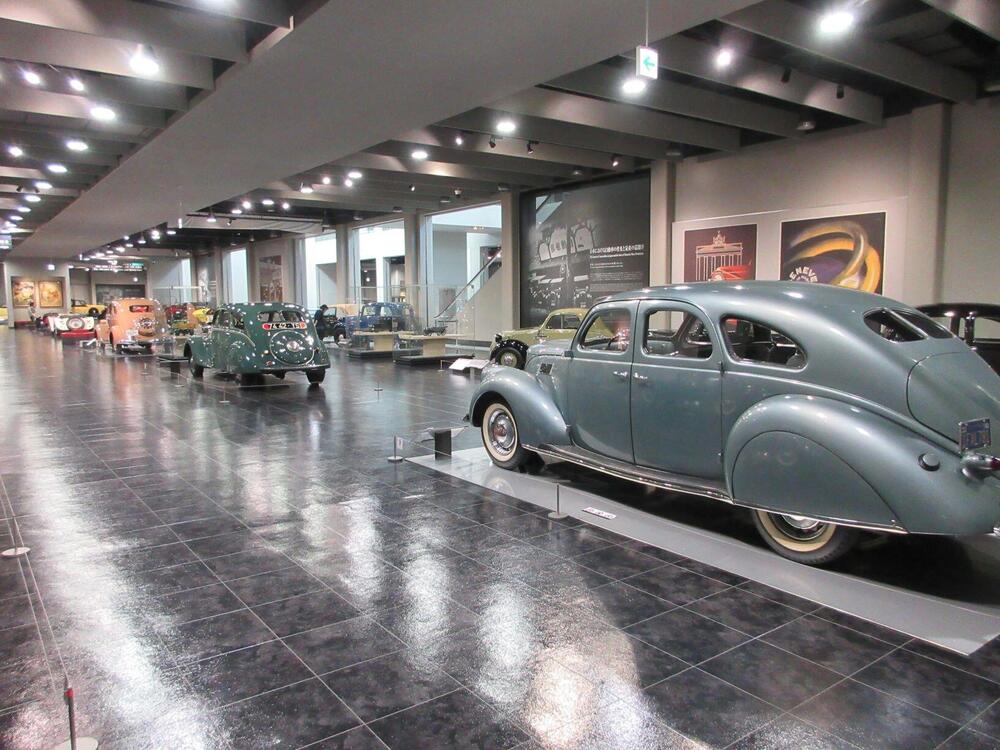
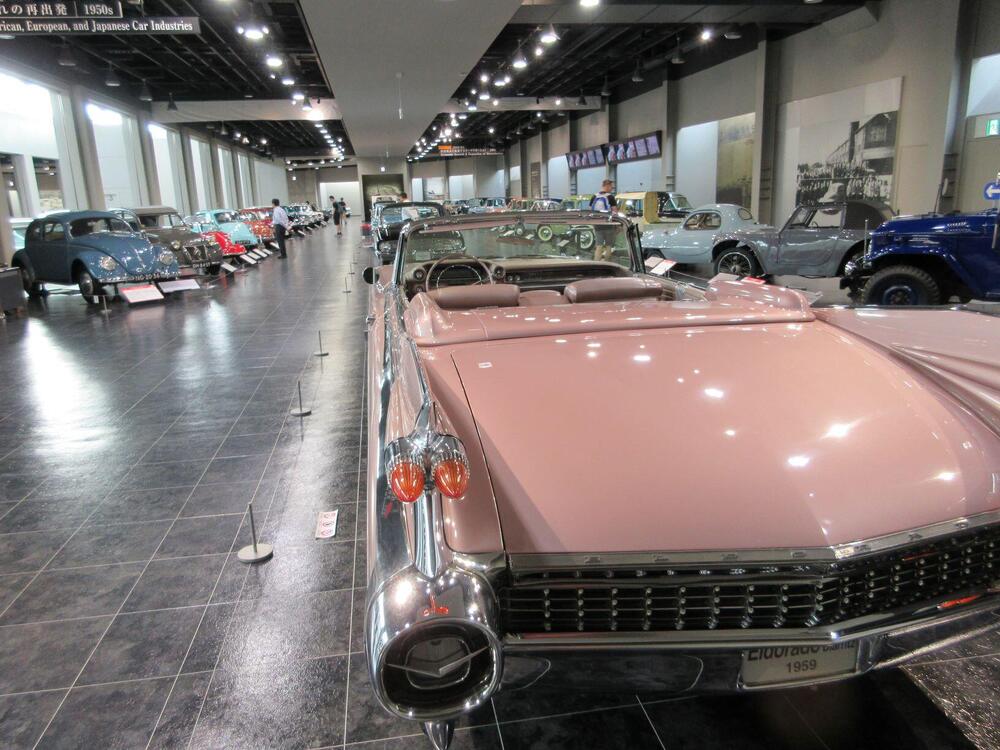
I visited the Toyota Museum a couple of years ago and highly recommend it to anyone visiting Japan. DC871F's photos here only scratch the surface of a really great collection, displayed in an attractive and thoughtfully organized way. Nice restaurant on site. Also, a huge display of model cars. Over the past fifty years, I've been able to visit most of the world's premiere automotive museums and this one ranks in my Top 5. As a bonus, you can even use the local magnetic levitation ('maglev') train service to connect with the main JR rail station in nearby Nagoya. The museum is an easy day-trip from Kyoto or Osaka. The connections will allow you four or five hours of time at the museum. BTW, the 240Z on display is so authentic that it even has a suitably-cracked dash pad!
-
Thread highjacked. Start a new topic if you want to talk about hub stands.
-
I've often seen pictures posted by CZCC members where their Z is perched up on axle stands, front and rear. Getting a car up on stands at either the front or the rear is easy. I'm curious to know what the accepted wisdom is for getting the other end elevated and then getting the stands extended to full lift. Can it be done safely in one step, or is it better to start with the axle stands at minimum extension and then go back and forth in steps from front to rear until both ends are up all the way (i.e. the axle stands at maximum extension)?
-
That would be a great addition. @Mike Within the 'Knowledge' tab, there seems to be no appropriate 'category' for Inline6's list. Perhaps we could benefit from an additional category called 'Hardware'. It could hold contributions dealing with fasteners, hoses, materials, finishes, chemicals, and the like. Maybe even an additional one, titled 'Tools'. Years ago, two other Z owners created similar 'S30 Fasteners' spreadsheets. However, neither was even close to yours in terms of whole-vehicle coverage. Both of the authors ran out of steam after listing about 20 items. One of them actually included photos of some of the more important items. Easy to see why he tired of the project fairly quickly!
-
The wiring pigtail for my 70 Z's antenna also consisted of just 2 power wires (i.e. no ground wire).
-
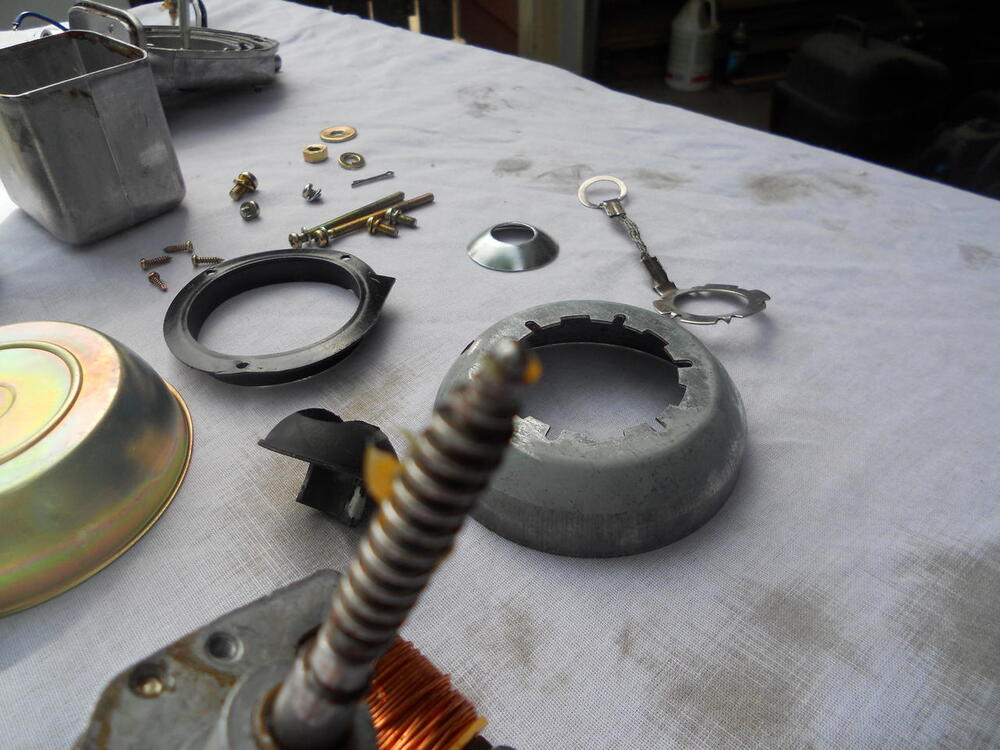
I think that the 'ground wire' consists of the braided wire shown in this photo of the disassembled antenna assembly from my 1970 Z . The larger, toothed washer gets clamped between the assembly casing and the inside of the fender, while (IIRC) the smaller, smooth washer slips over the antenna mast. The purpose is to ground the mast...
-
@inline6 What do you mean by 'workbook'? And what do you mean by 'resources section of this website'? (I can't find anything tabbed as 'Resources') p.s. Thanks for the link to the spreadsheet. That's the most comprehensive and detailed list of S30 fasteners that I've seen so far. All that's missing are the part numbers (although adding those would be a huge task). If possible, it would be a great addition to the 'Knowledge Base' section of the CZCC website. Do you know the identity of the author?