Pinbill
Free Member
-
Joined
-
Last visited
Everything posted by Pinbill
-
Thanks for the reply mark. No matter where I set the nozzles the car will only run for 5 seconds at a time. The idle is rough and terrible and then it dies. When I open the throttle it bogs. Not sure where to go from here. I will check the floats again tomorrow.
-
Update, The points gap is set correctly. I got 1.6 ohms across the resistor. On the coil I got 1.7 ohms from positive to negative. Then for the secondary I got 8.95 ohms from positive to the main coil wire and 8.95 ohms from negative to the main coil wire. I checked the plugs and I am getting a yellowish spark on all six cylinders. My battery is at 12.1v With the car running measurements on the coil were 7.6v on the positive tab and 3.8v on the negative. With the car not running and the key in the on position the coil is getting 5.1v and the ballast resistor is getting 10.9v and giving out 5.1v. Does anyone know how much voltage I should see at the coil and resistor? Thanks for the help, Bill
-
Alrighty, It looks like I am moving in the wrong direction. I took the car out on the street and the hesitation under load got worse. It would buck and now I could hardly get up the driveway. The car starts but runs erratic, idles terrible, and shuts off. I have been through the carb system a number of times. Double checked the float valves. Took the nozzles off and checked for clogs. Cleaned the spark plugs I bought yesterday. I checked the suction chamber spring and doesn't have paint on it. It was running well with them at one point so I think they are OK. I am starting to think the problem is electrical. My points, condenser, rotor, and wires are new. I know the wires are hooked up right and the rotor is clocked correctly. I am currently searching the web to find out how to test the resistor and coil. If anyone who knows how to test the resistor and coil I would be forever grateful. Bill
-
Got out to the garage. I changed the float setting to shut off at 14mm. There is a bit of studder under acceleration. One of the plugs looked fouled. I am headed out to get a new set and then mess with the mixture settings. I also tested the vacuum. I am getting 15 at idle with altitude of 5200'. Bill
-
It's a four screw suction chamber. Headed out the the garage in a few hours to test the vacuum and set back to 14mm. Do the springs in the needle valve wear out over time?
-
Hey Mark, Thanks for getting back to me. Before the refurbish the car hadn't been run in six years, the carbs were real dirty, the intake manifold gaskets were original ect.. It ran ok but it wasn't the greatest. After the refurb it was running much better. Then today I changed the float level from 14mm to 10.31mm. The car ran much better at 14mm. To set it I blew through the fuel inlet line and made sure the valve was fully closed and not letting air through at 10.31mm. Is that the best way to do it? I found this spec in the service manual and tried 10.31 because my car is 8/71 build date. Should I use the 14.28 setting? I will rig up a vacuum test tomorrow.
-
Hello, I had my carb adjusted pretty well but wanted to get it running better. Here is the backstory. So far I replaced all the intake gaskets, cleaned the carbs thoroughly, adjusted the timing and set the valves. I checked the float level by measuring from the top to the float. I set the mixture using a gunson color tune. The car would run good but would pop a bit on deceleration and the plugs always looked a bit rich. When lifting the slide I could never get the idle to go up 100 rpm and then settle. No matter how I set the mixture the idle always would drop off when I lifted the slide slightly. I have read that if the idle drops off that means the mixture is too lean. It seems conflicting to have rich plugs and lean condition when I lift the slide. I played with it this afternoon and made it worse. I want to start from the beginning. I would like to thread something into the bowl at the drain and set the float using the clear sight line float adjustment method. The procedure looks pretty straight forward but I don't know the thread size for the drain plug. Does anyone know the thread size for the bowl drain plug so I can order a nipple for the clear line? Thanks for the help, Bill
-
Thanks for the info guys. I spoke with lone tree steve and he used precision for three of his cars. I was a bit nervous about the door weatherstripping not closing right. If the door weatherstripping has been fixed I will give it a try. Bill
-
View Advert 8/71 240z Inspection Light Wanted Hello, I am looking for an inspection light that would go in a 1971. Thanks, Bill Advertiser Pinbill Date 05/24/2020 Price Category Parts Wanted Year 1971 Model 240z
-
Hello, I am preparing for a glass out repaint of my 240z. I would like to source a high quality weatherstrip kit. Everything is online so I can't see them myself. I bought a weather stripping piece for the hood and it wasn't as good as the original. My body guy says he can reuse the chrome strips on the wind shield and hatch. Does anyone have a recommendation for good quality a weatherstrip kit? Thanks, Bill
-
This is my car running. Maybe I should drive it a bit and see what happens. I am a bit of an alarmist when it comes to my cars. I do get a bit of coolant smell. I may have overfilled the radiator. VID_20200324_132307720.mp4
-
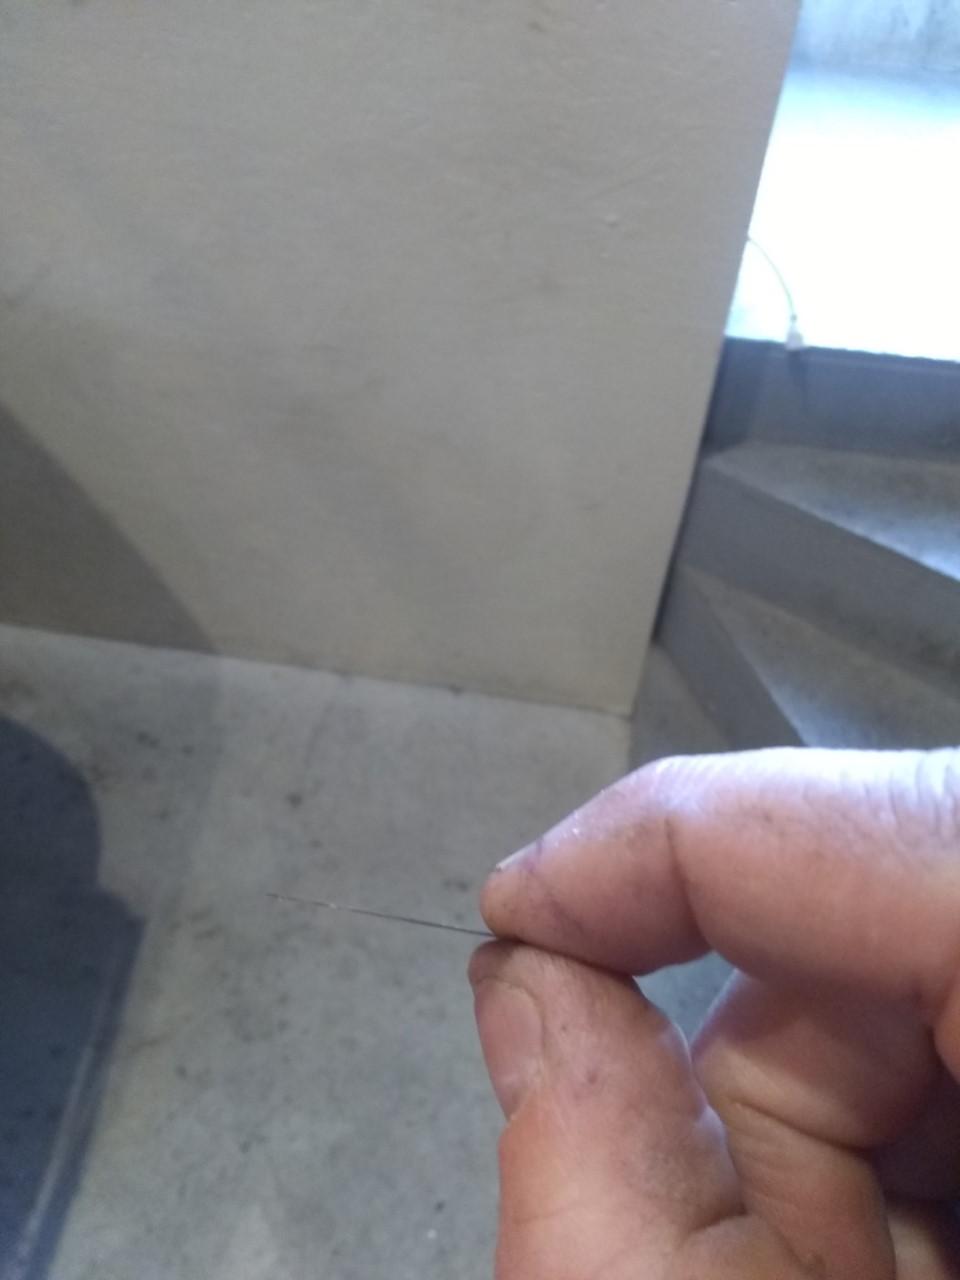
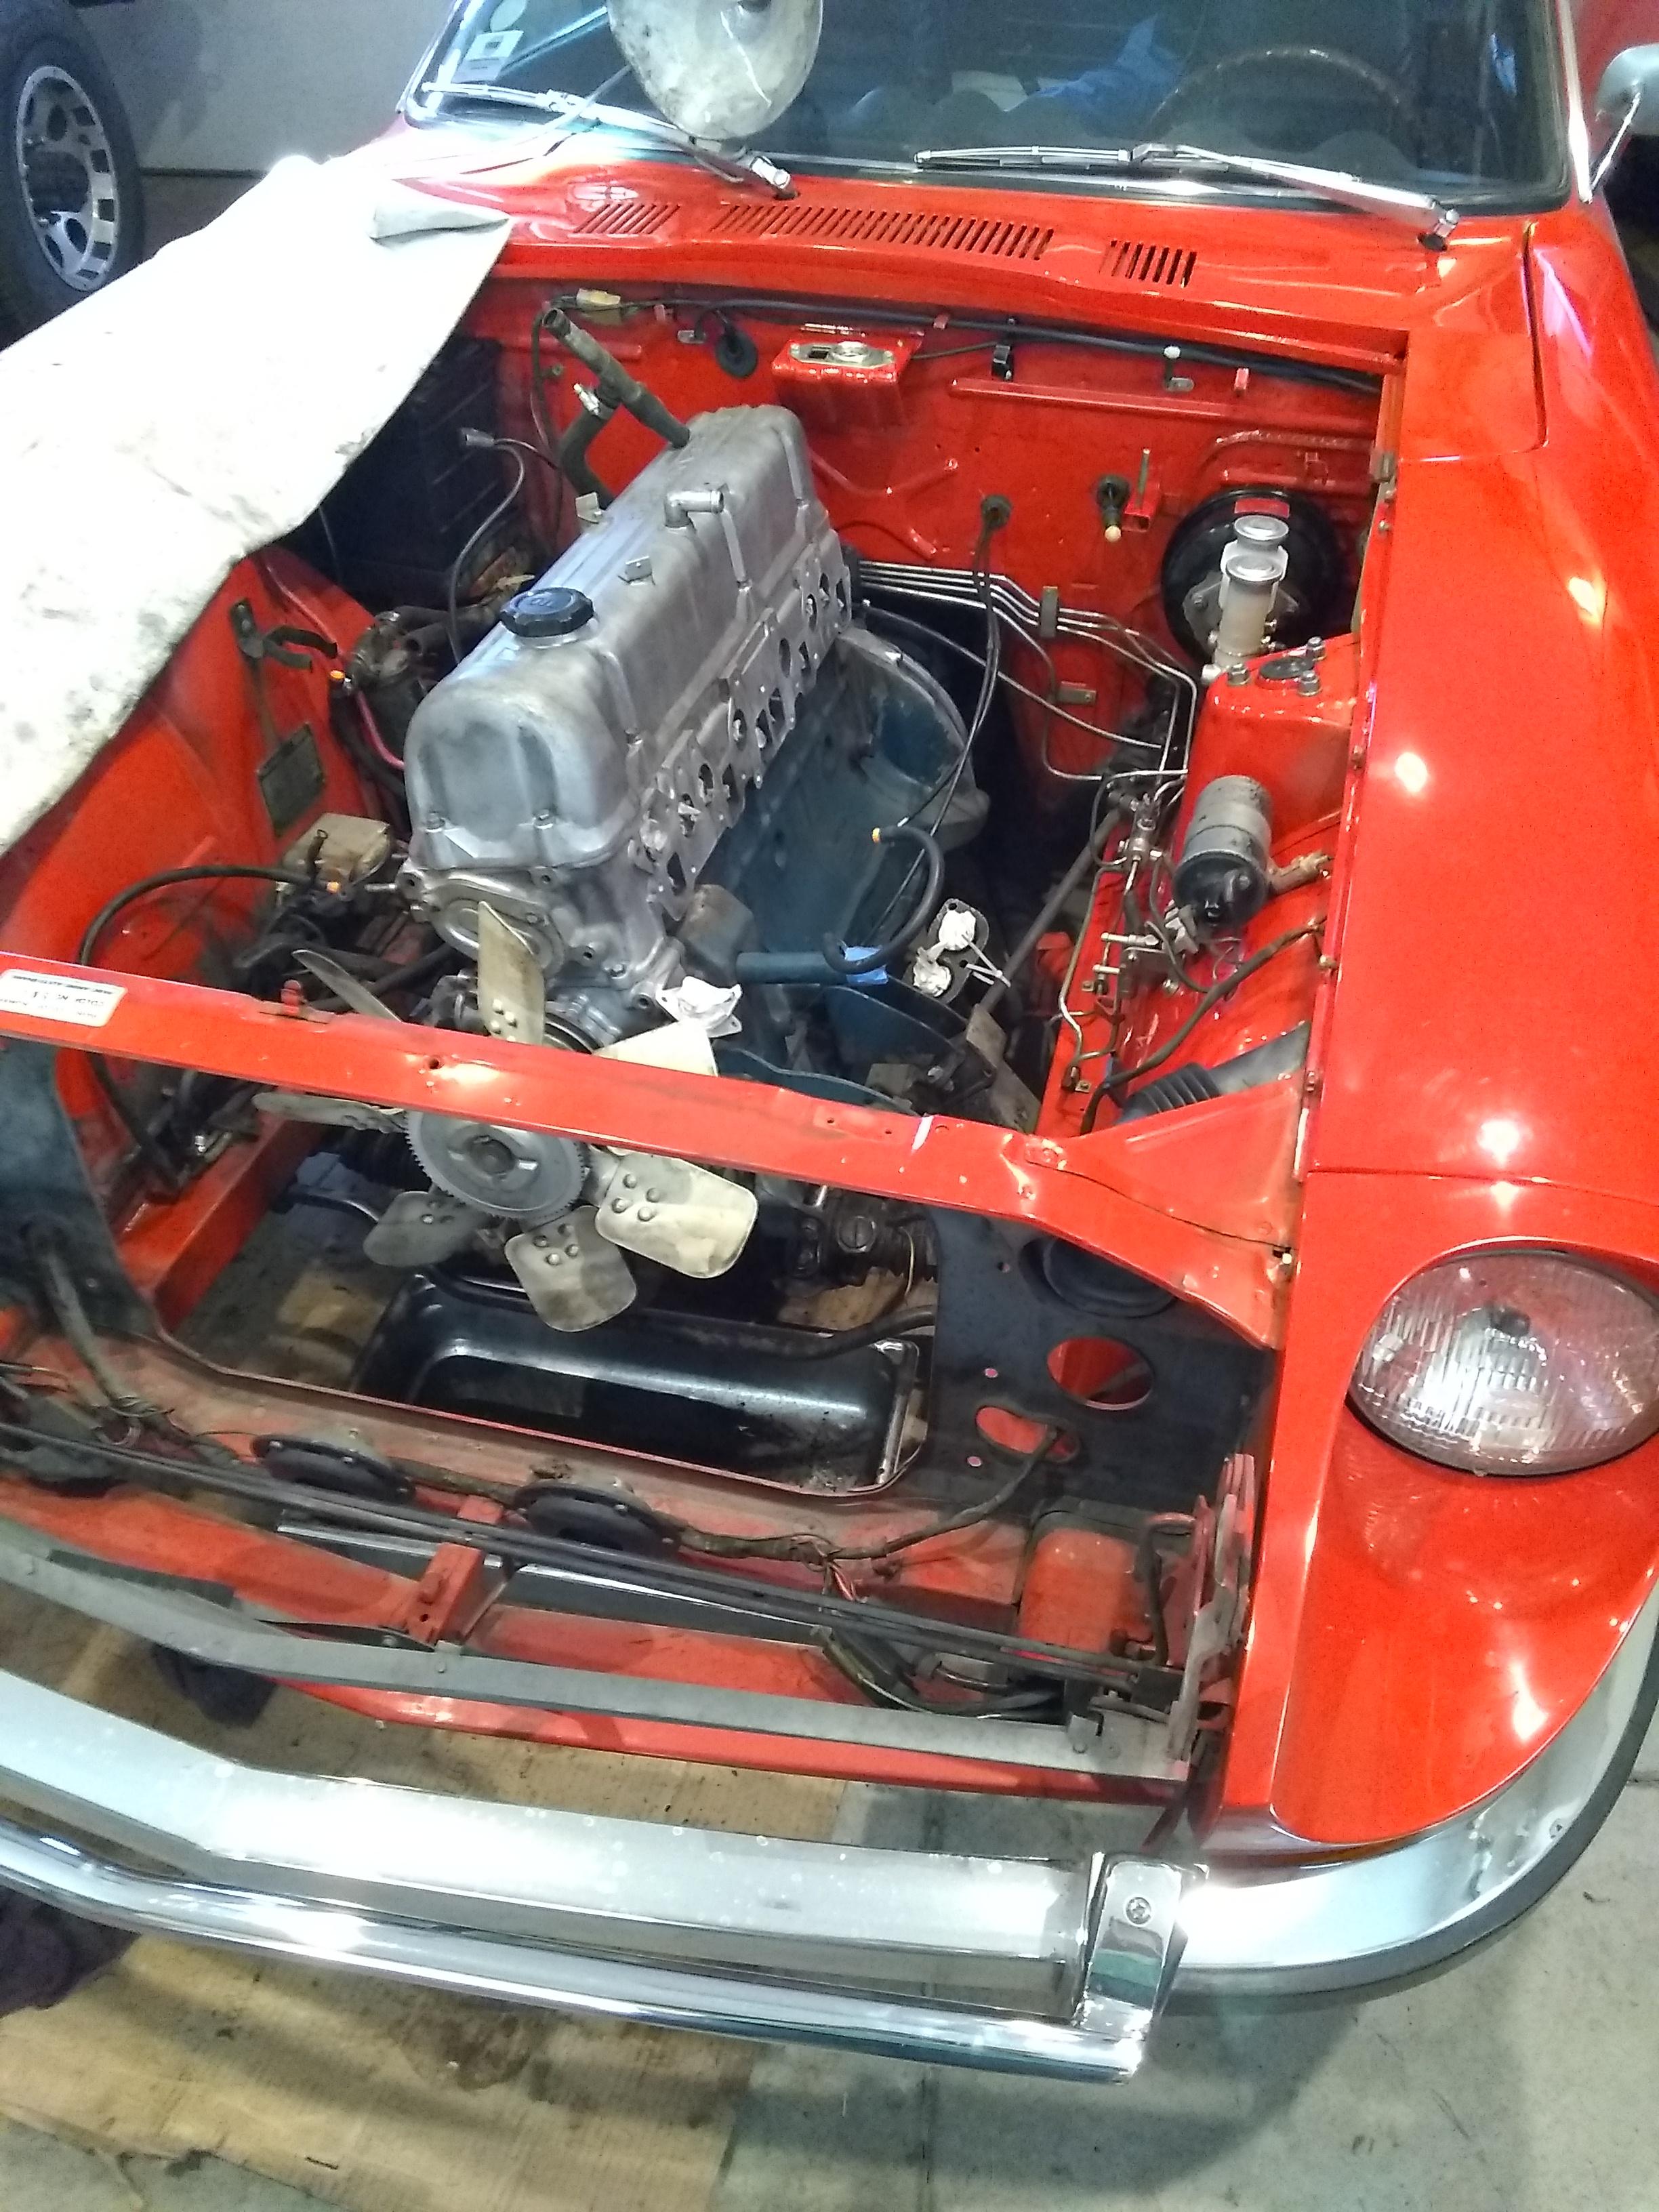
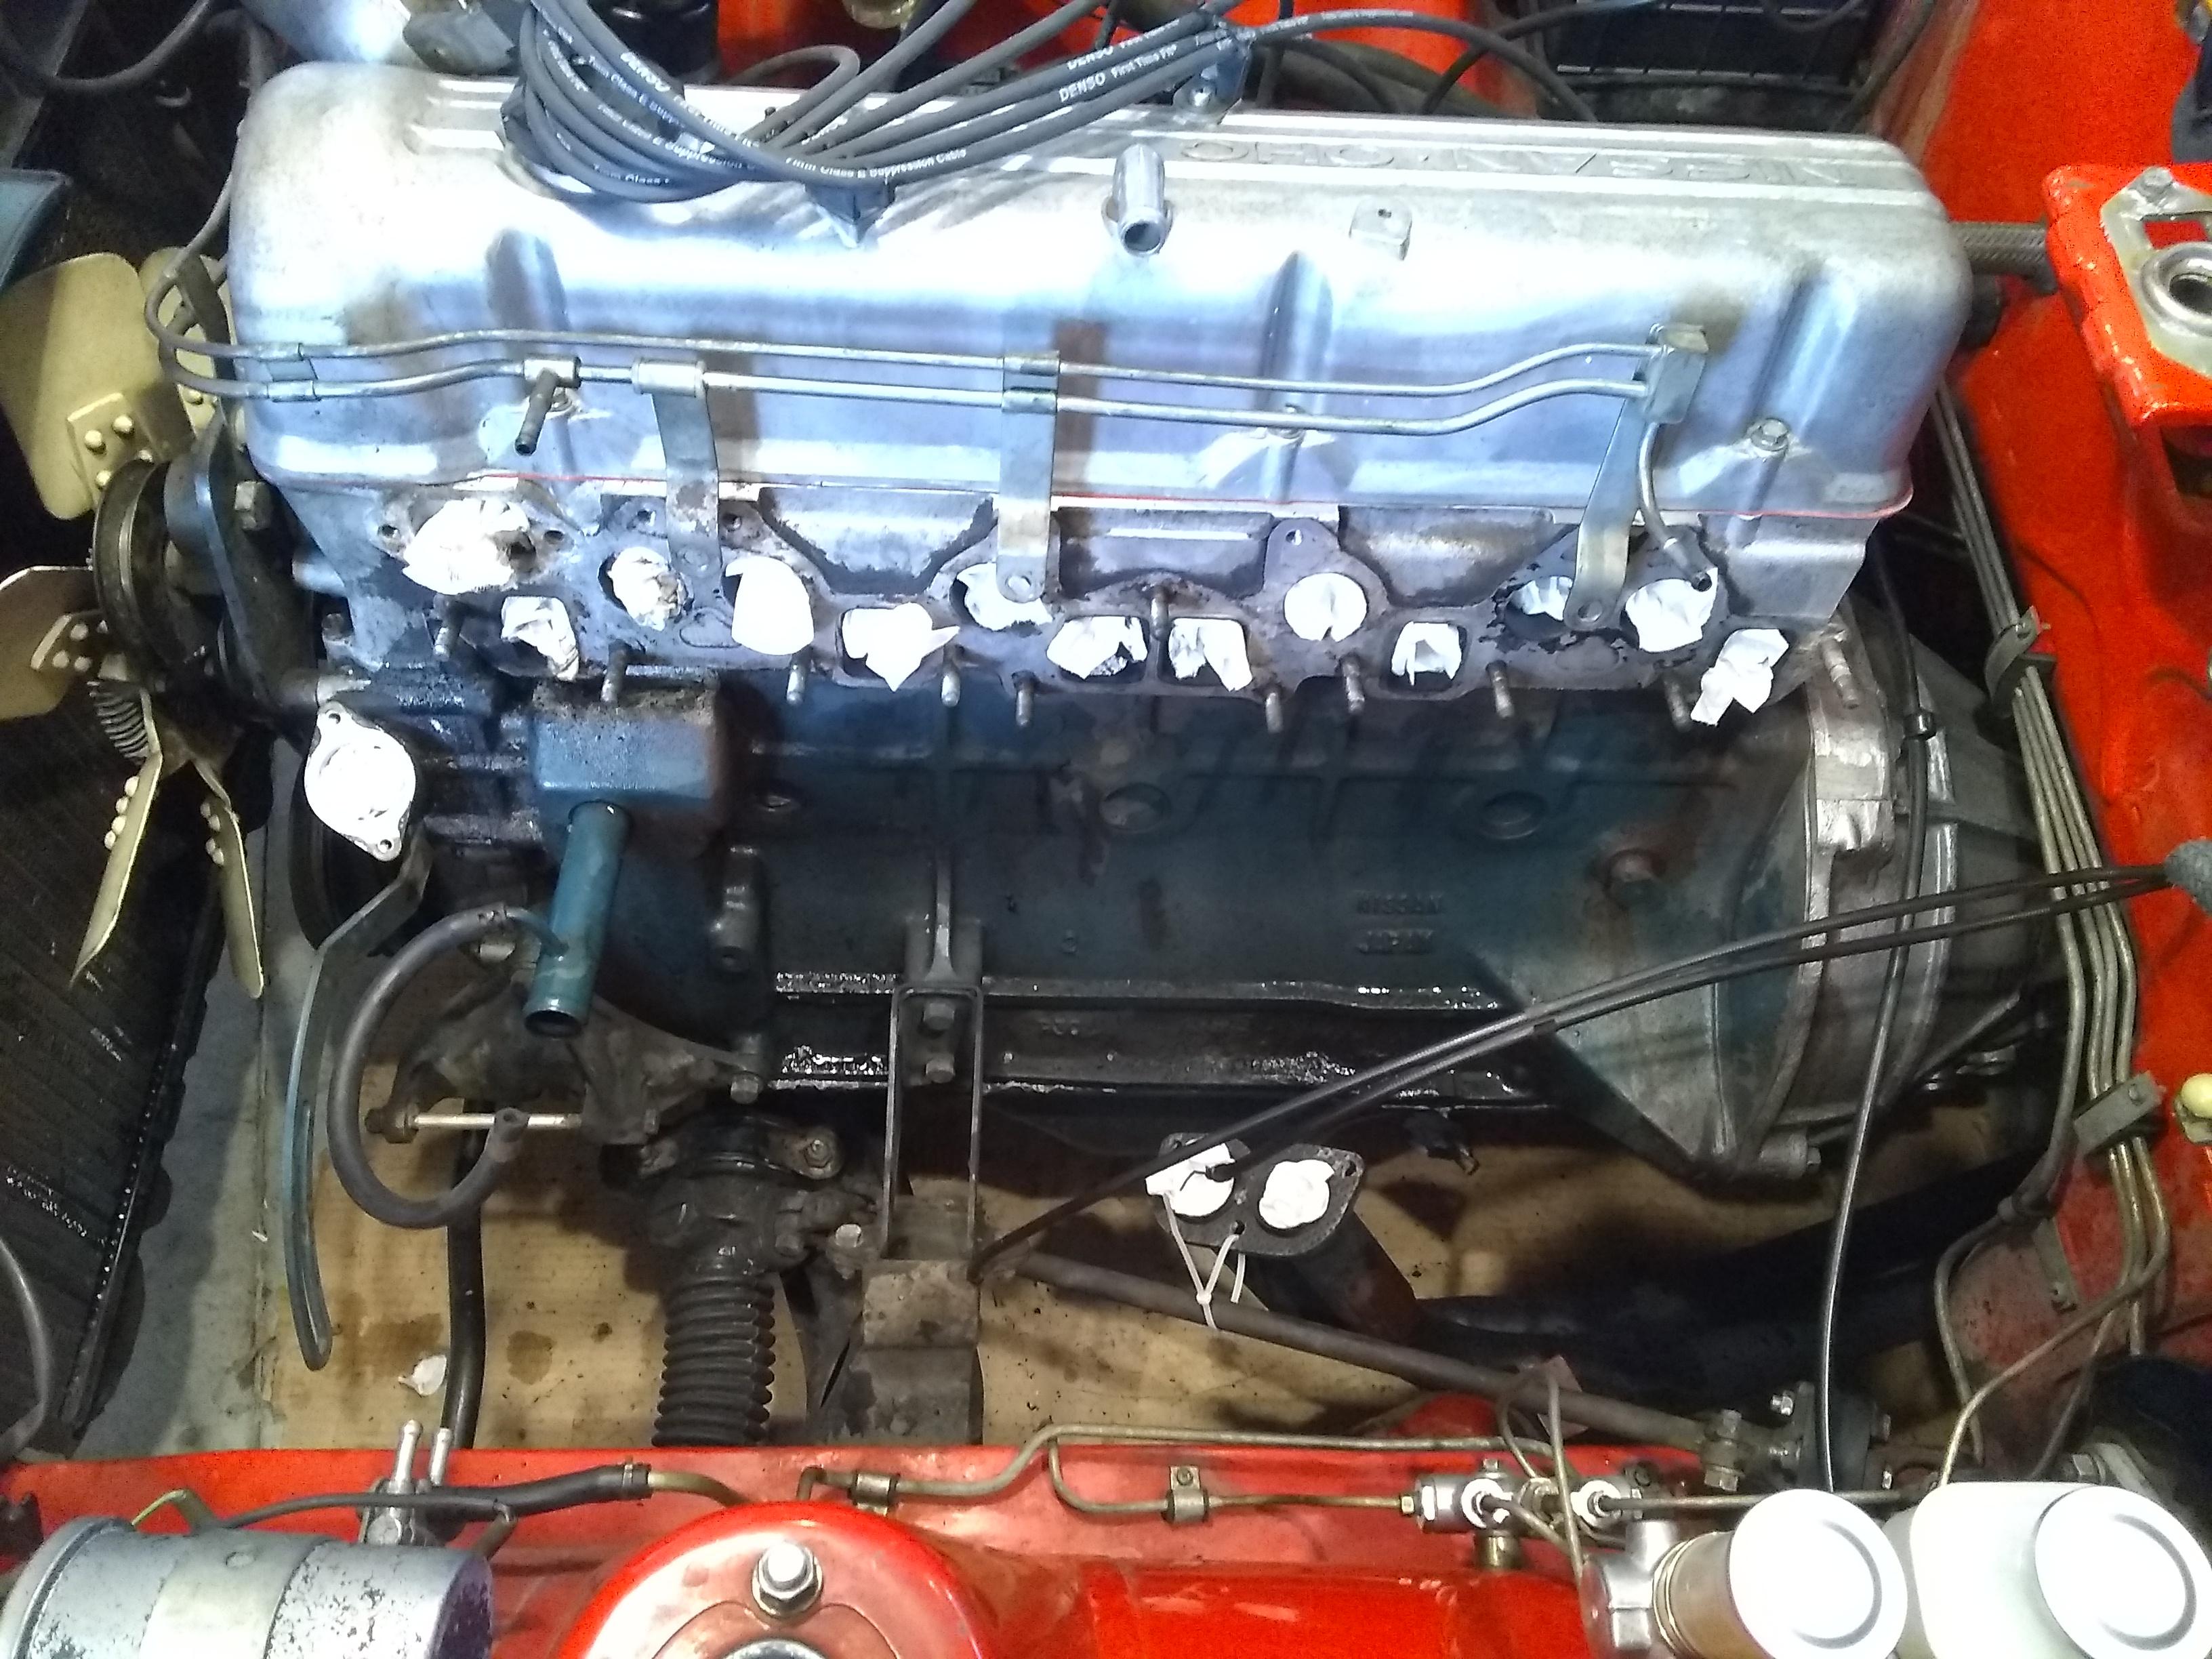
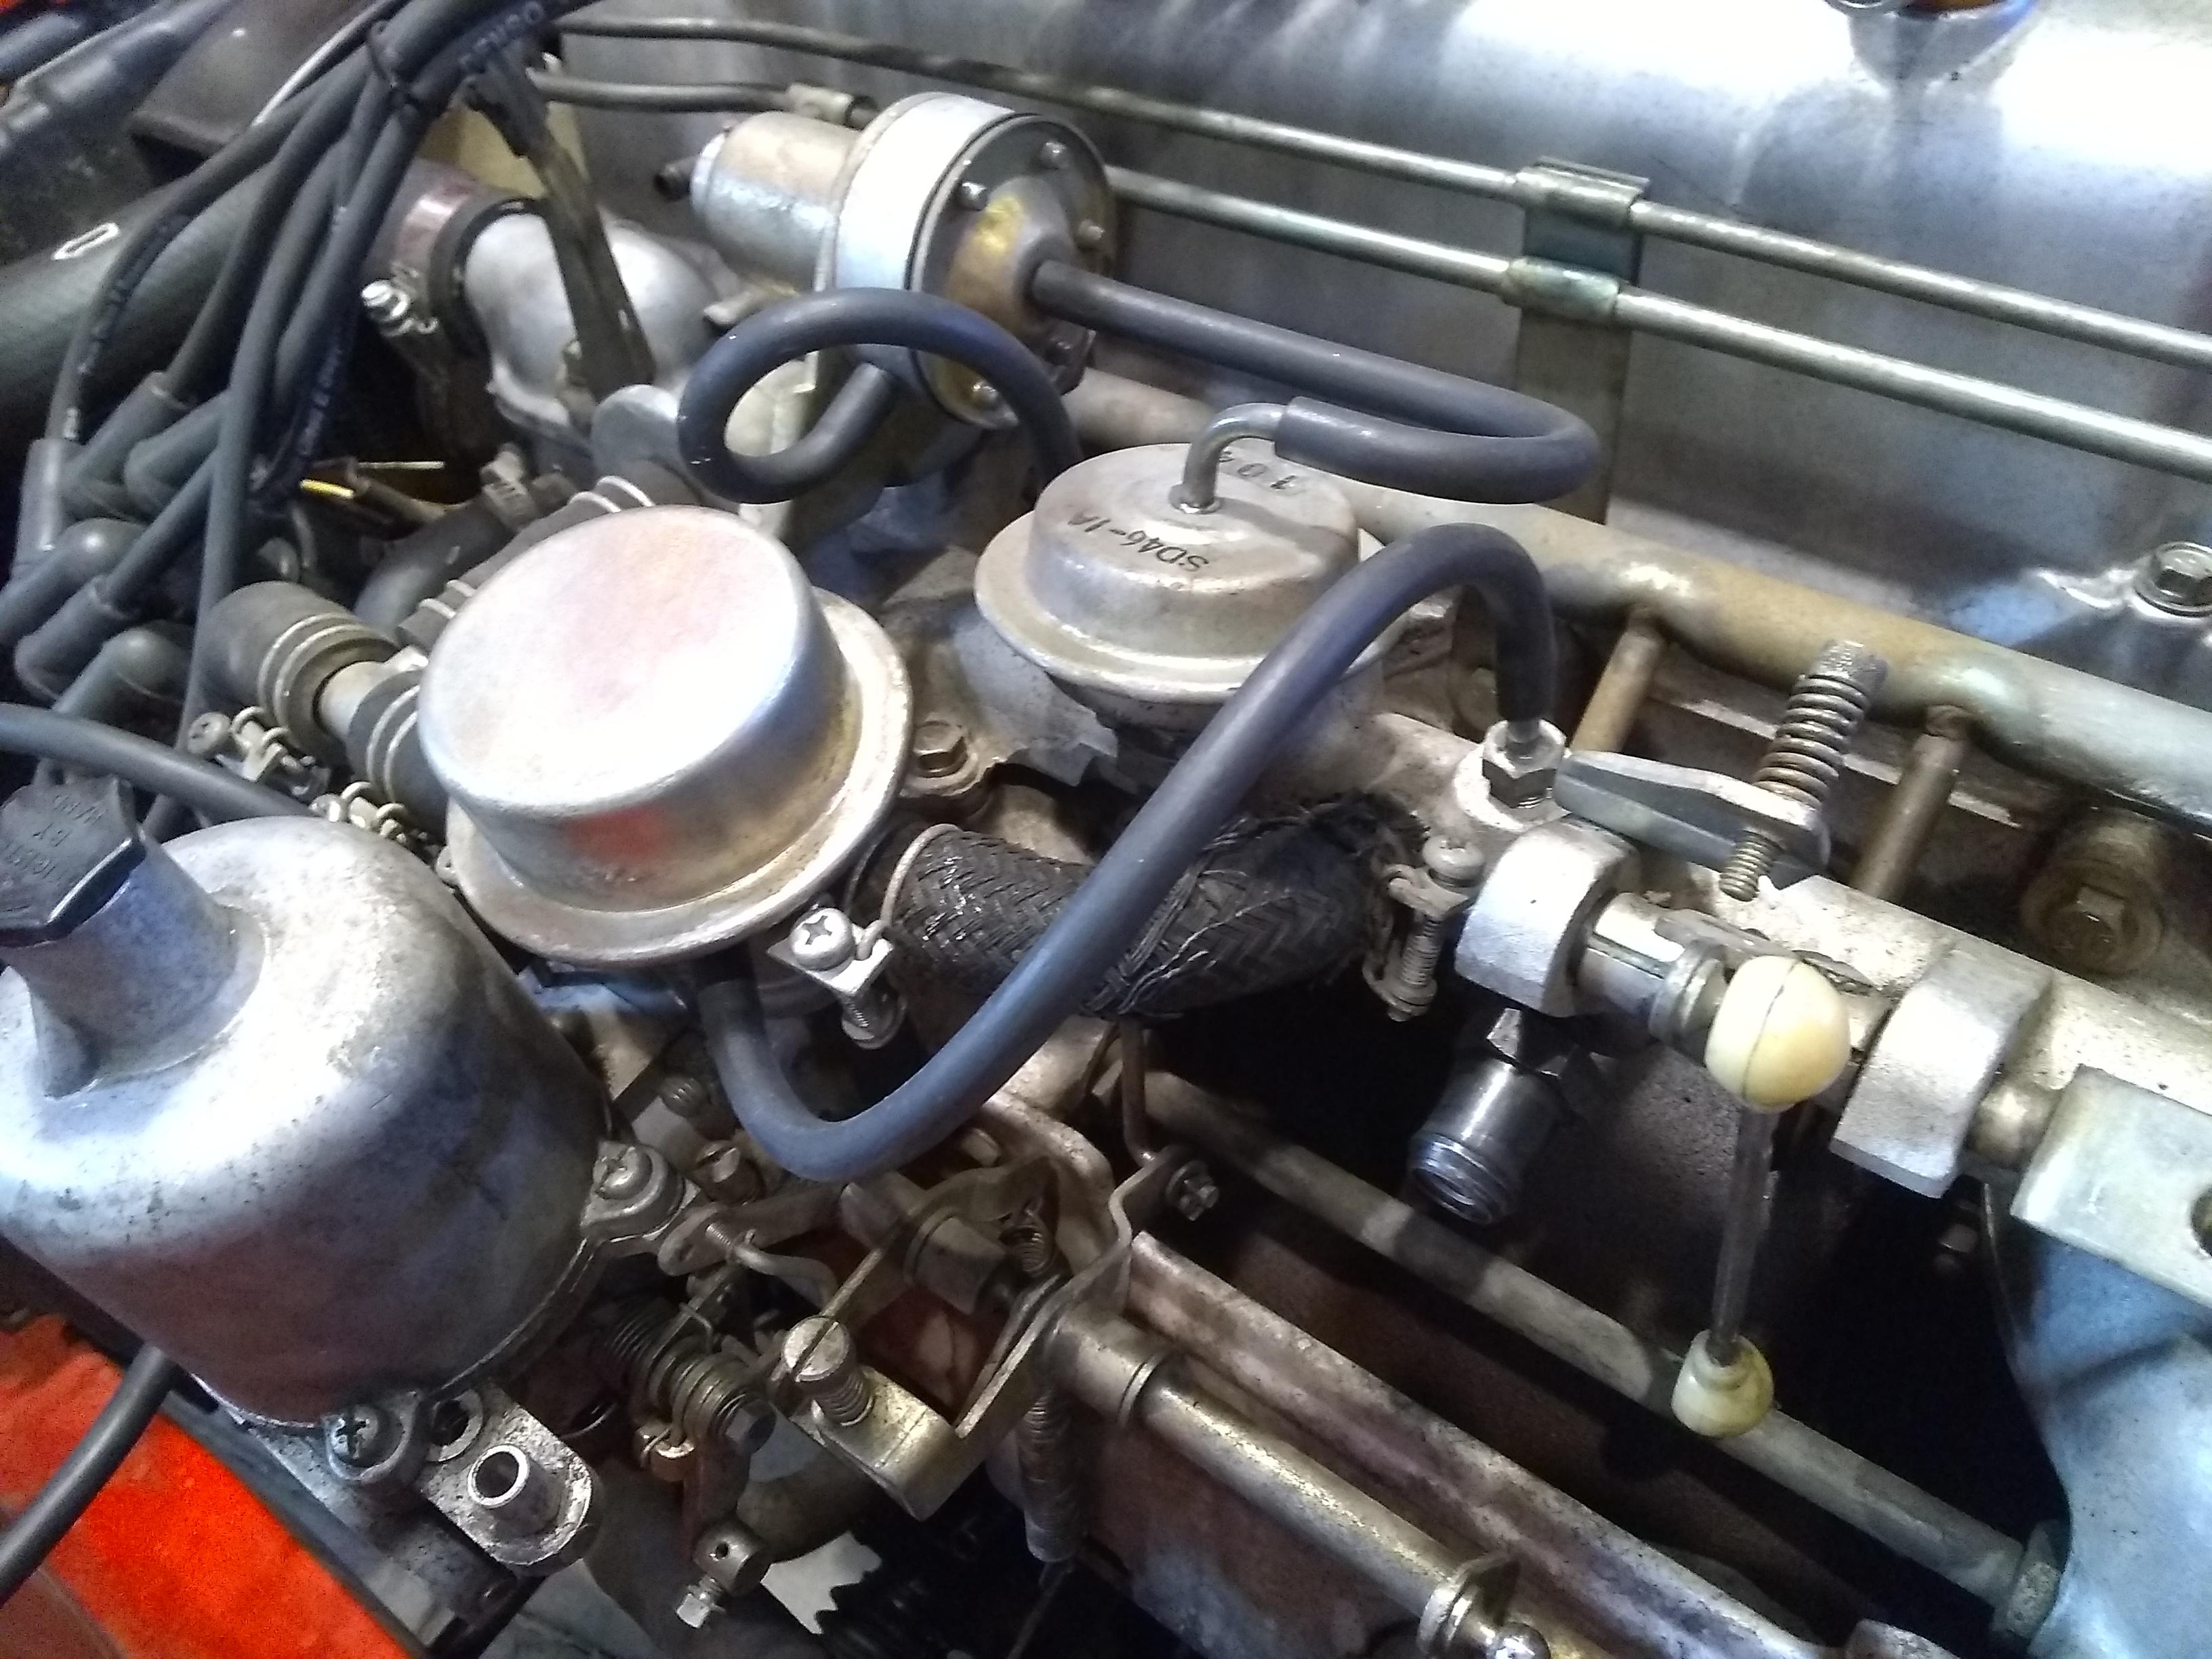
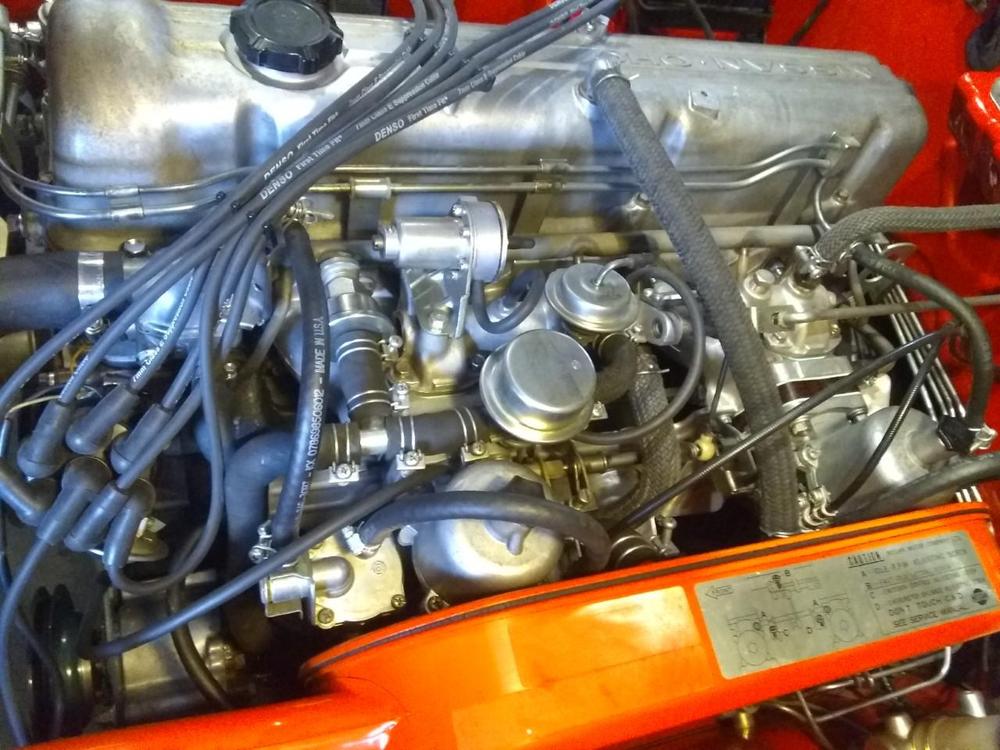
The piece is very thin and flat. I need to do the head gasket for my own piece of mind. I have too much time cleaning the engine compartment to let it slide. I may get to it sooner now that I can't visit with anyone. Here are some pictures.


-
Sorry for the confusion. I didn't take the head off. Although I was right there when I changed the gaskets and detailed the motor. I had the manifolds, fuel pump, the thermostat housing, water intake housing off etc. I checked the torque on the head bolts but decided to stop there. Taking the head off will go quick when the time comes. It is a very easy car to work on I am working on a Porsche 944 right now and it is a different ball game.
-
Hey Guys, Head gasket leak!!!!! The valve noise doesn't matter. Its going to have to be rebuilt. There is a leak in the head gasket on the drivers side near the firewall. I didn't notice till I cleaned everything an saw some seeping. I should have replaced it being the gasket is so old. The bad news is I had everything apart already. The good news is I can have the head re done. It will be easy to do because everything is clean already. I will drive it this summer and do it next winter. I will be researching what I want to have done to the head and what type of cam I will put in there This is kind of embarrassing, but I found a part in my parts washer. I don't know what it is. I think it has to do with the brakes. Maybe the master cylinder. Can anyone identify this part? Thanks, Bill

-
That's good news. I am hoping to run the car a bit instead of work on it. LOL. Its sounds just like the motor in this video maybe a little less. I will listen with a hose and concentrate on that area and adjust the valves again. How quickly do I have to adjust the valves when hot? It seems like the parts can cool down pretty quick.
-
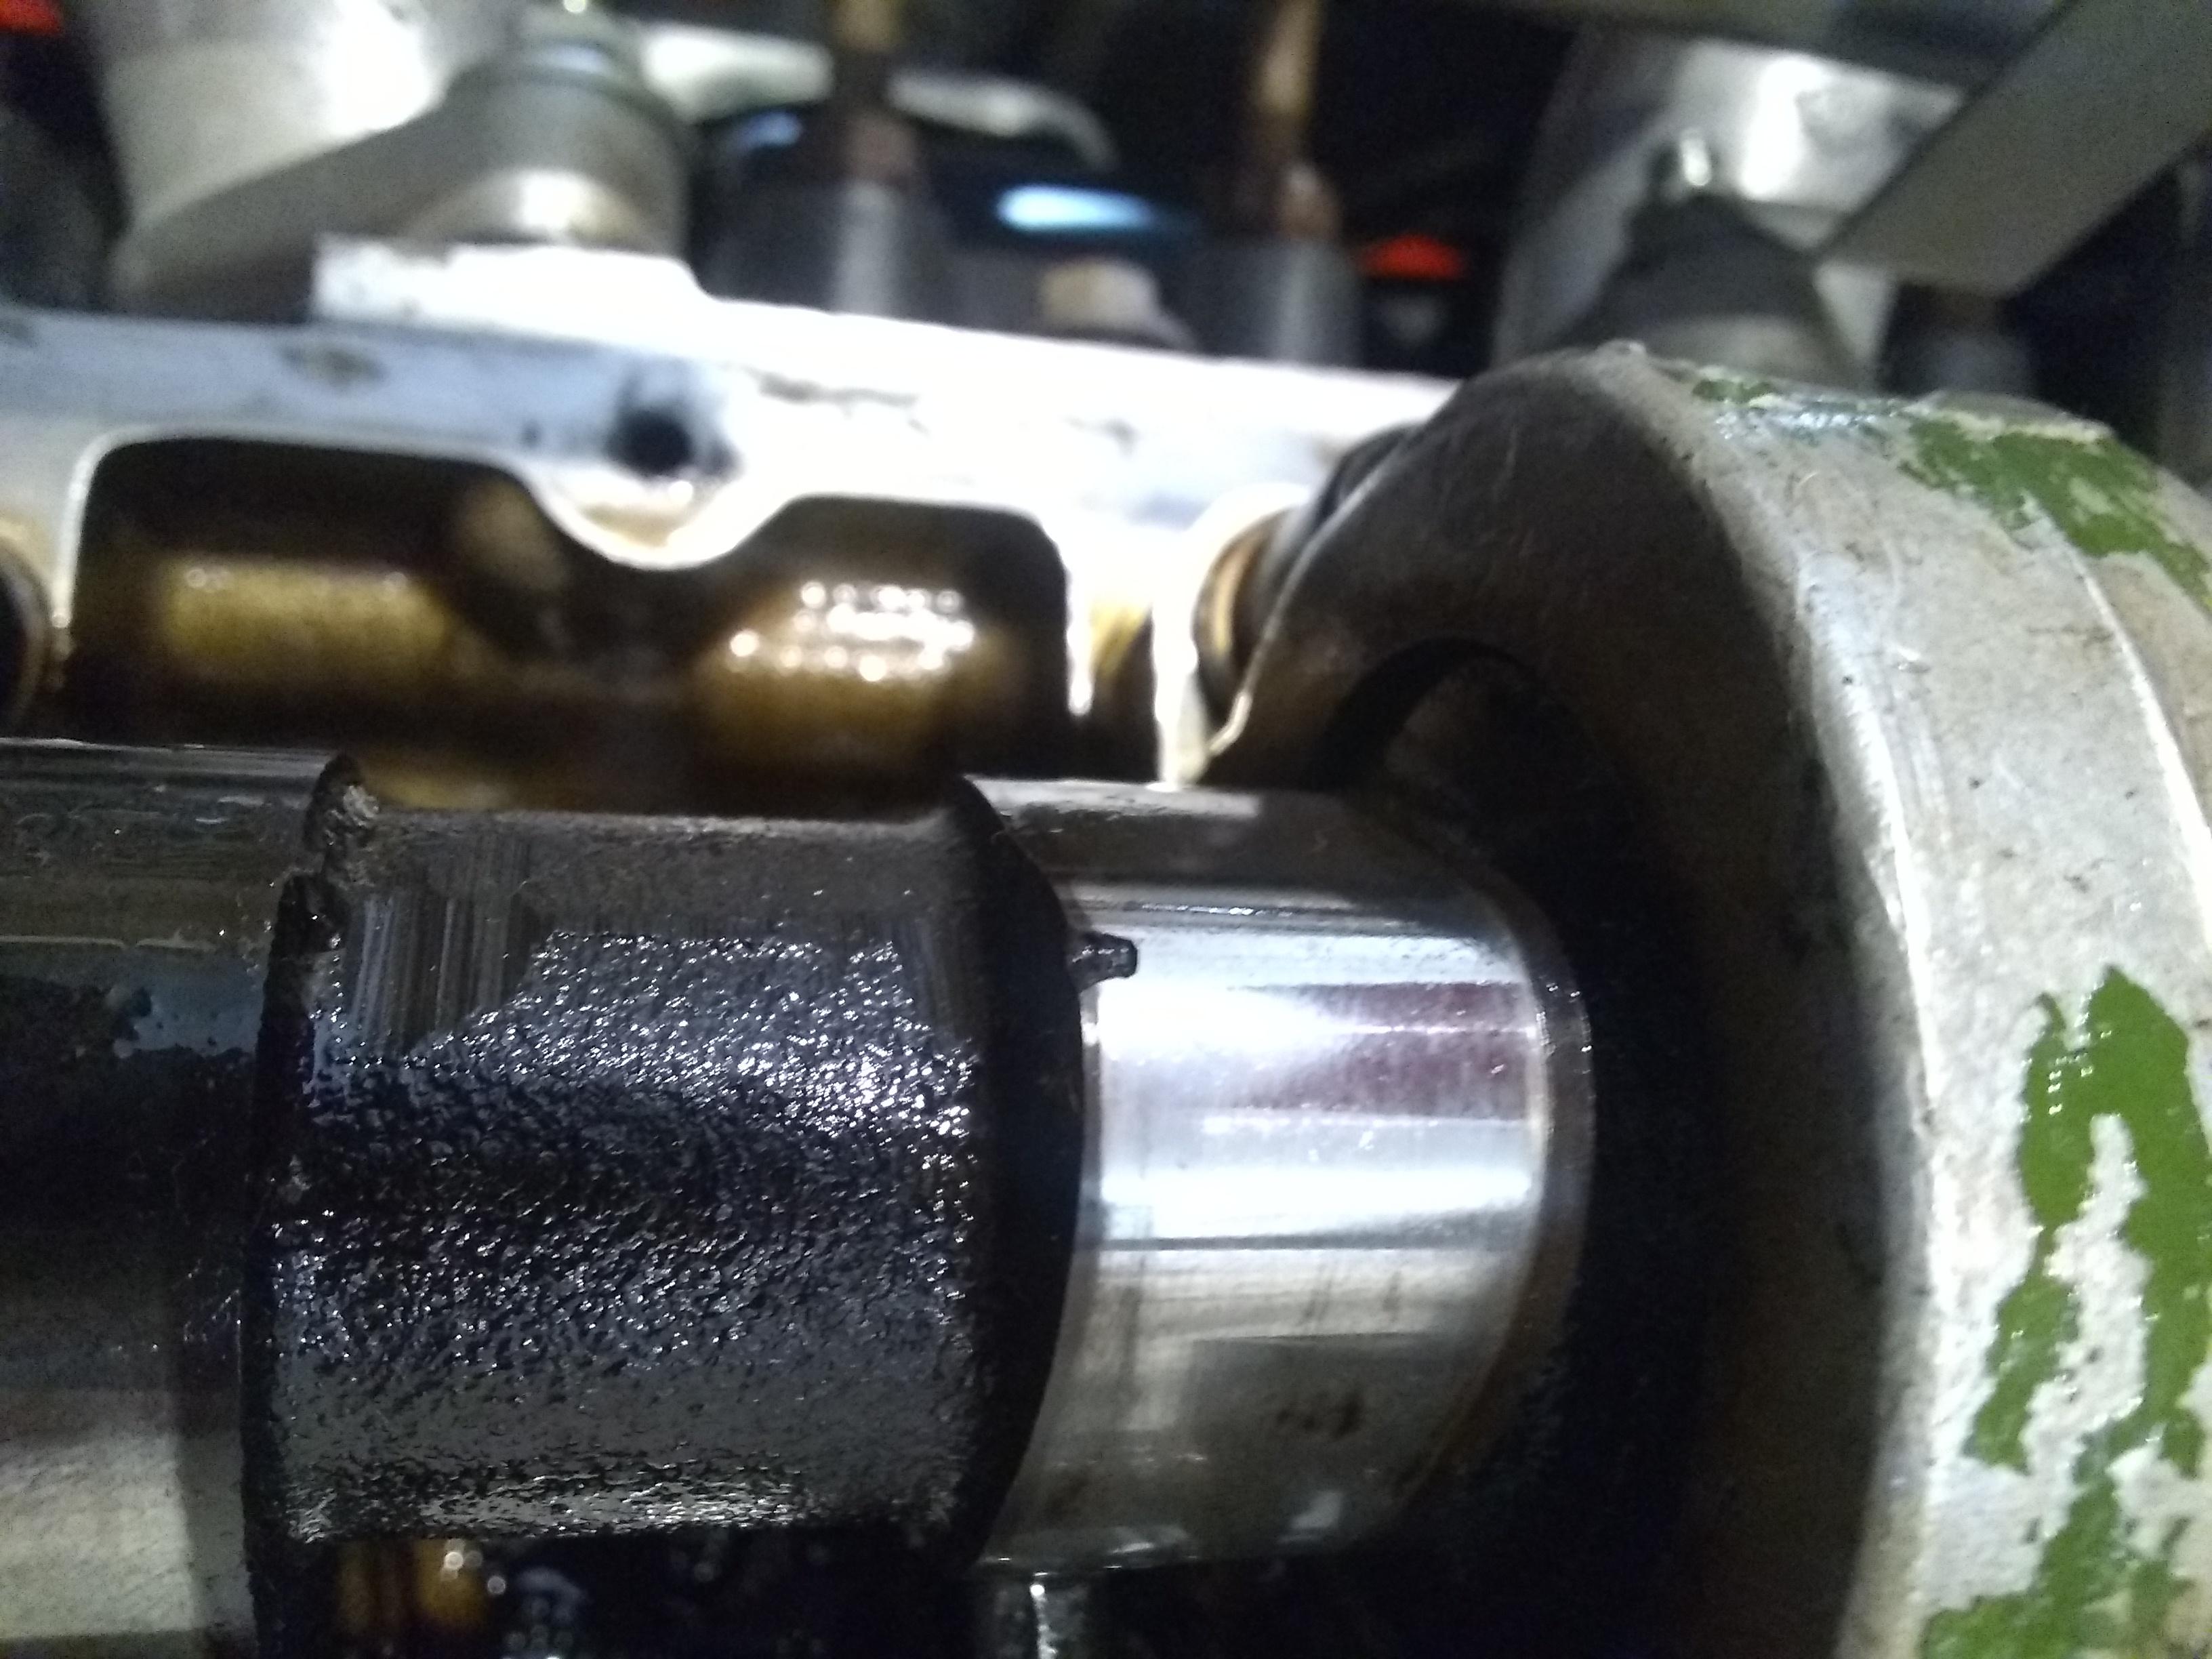
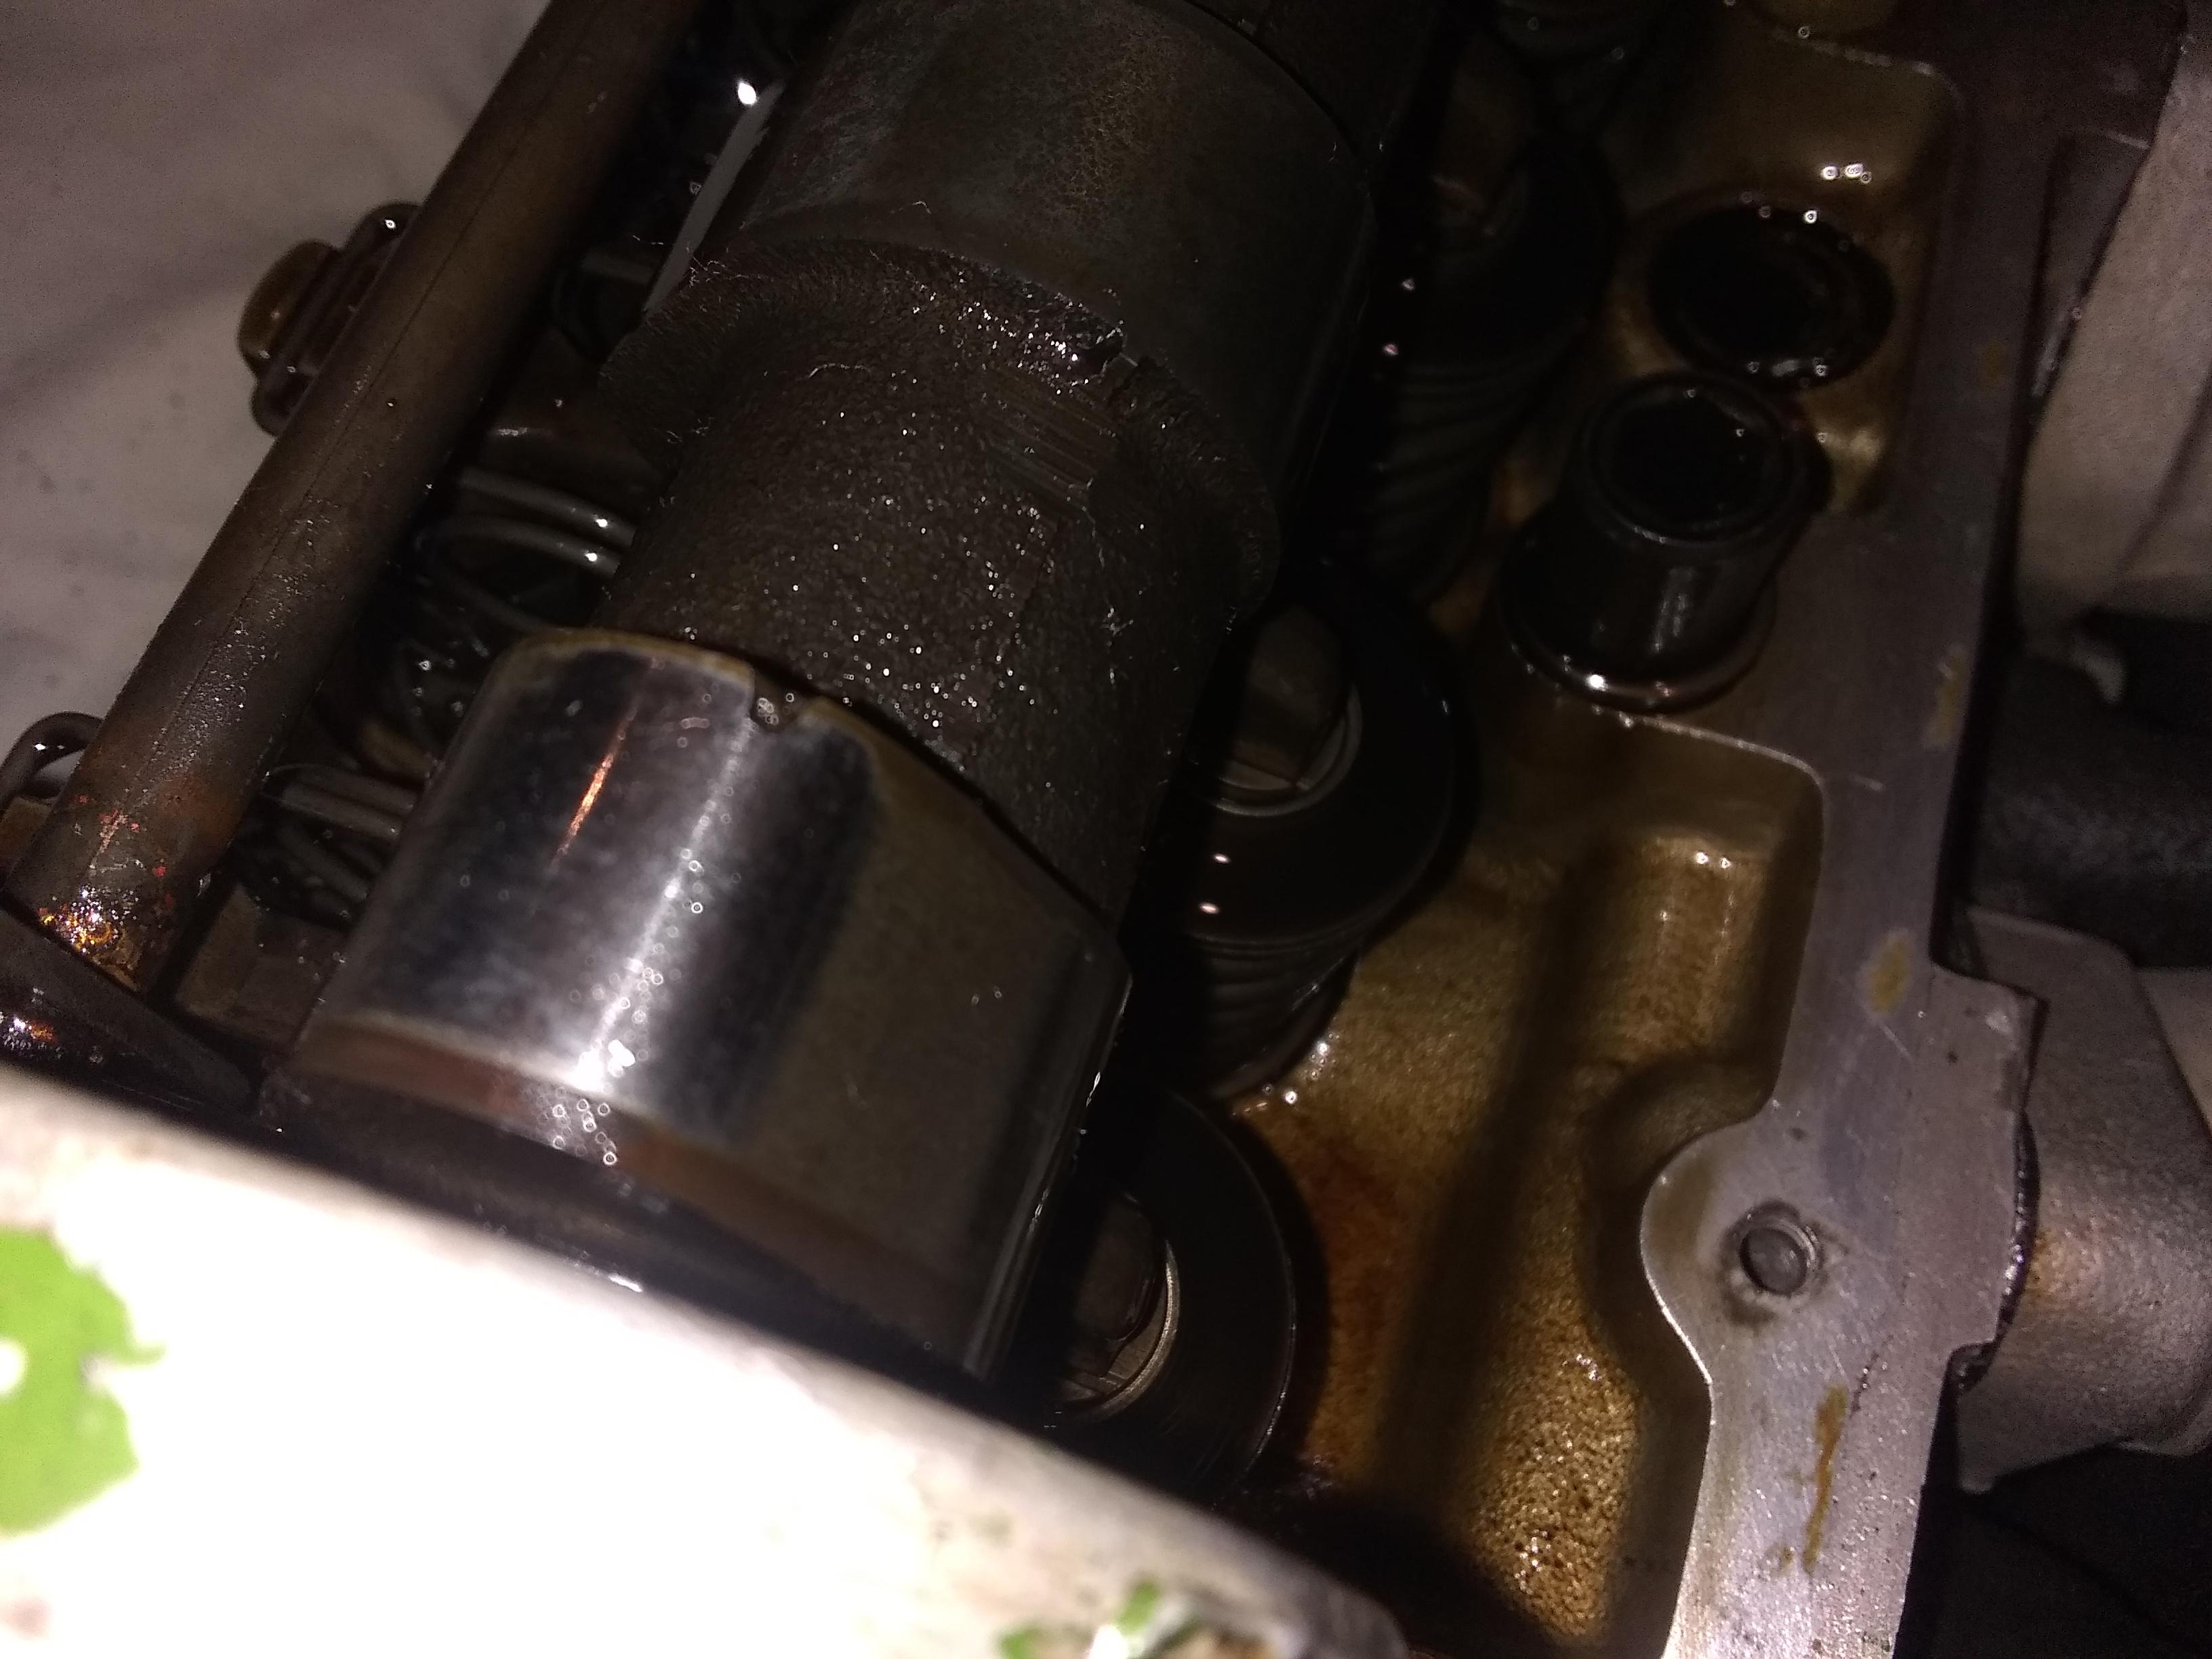
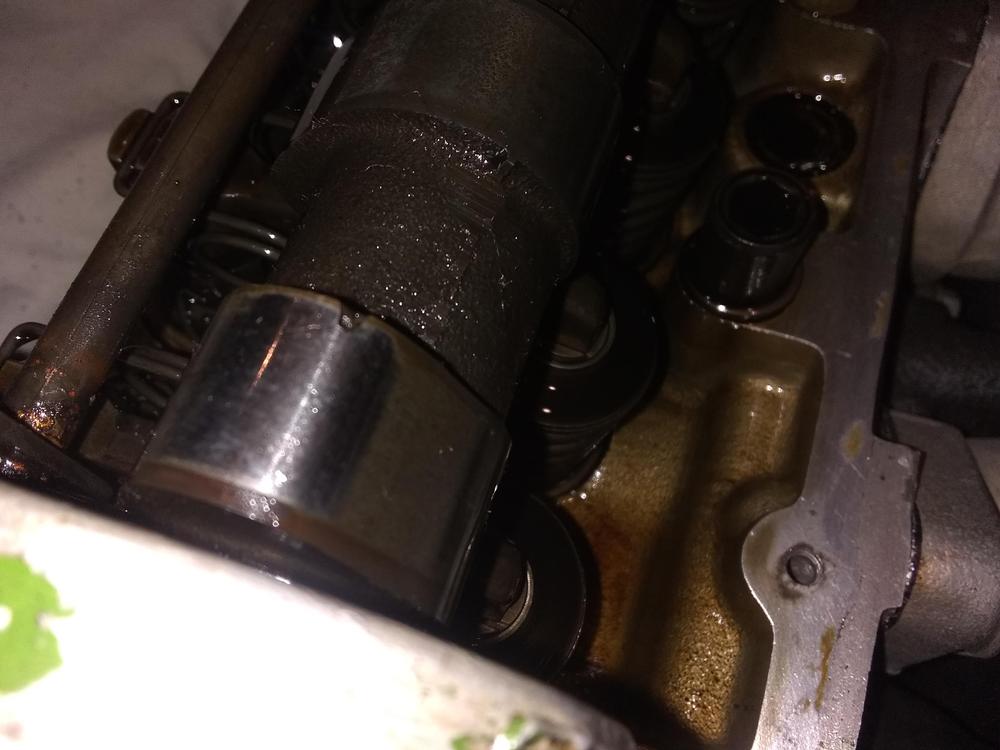
Hey Everyone, The refurbishment of my 1971 Z has been coming along. I got the engine compartment detailed and its running well. I thought I was done working on it for a while. There has always been a ticking sound in the top end. I was re checking the adjustment on the valves and I think I found it. There is a chunk out of a valve lobe. There is a little scoring on the rest of the lobe but nothing crazy. It seems like it should be replaced right? I would like to use this opportunity to upgrade to a cam with internal oiling and block off the oil rail. I would like to keep the cam stock if possible. I can only find performance cams. It looks like I should change the rockers too. Do they make a stock internally oiled cam kit that will fit a 240z?

-
That's great info. I didn't know the compressors could be rebuilt. Thanks for letting me know. The MSA kits are NLA. I will save all the parts. I don't know when I will be getting into it but its nice to have the option to put it back. I would want to put all new seals in it and new lines. The lines are 50 yrs old and held on by hose clamps. LOL. I am ready to start re assembly today. The engine compartment and all the parts are. I touched up the area by the battery tray yesterday. Got the radiator flushed and painted. The exhaust manifold will be done at the ceramicote place today.
-
Yes, that's the one. Thanks.
-
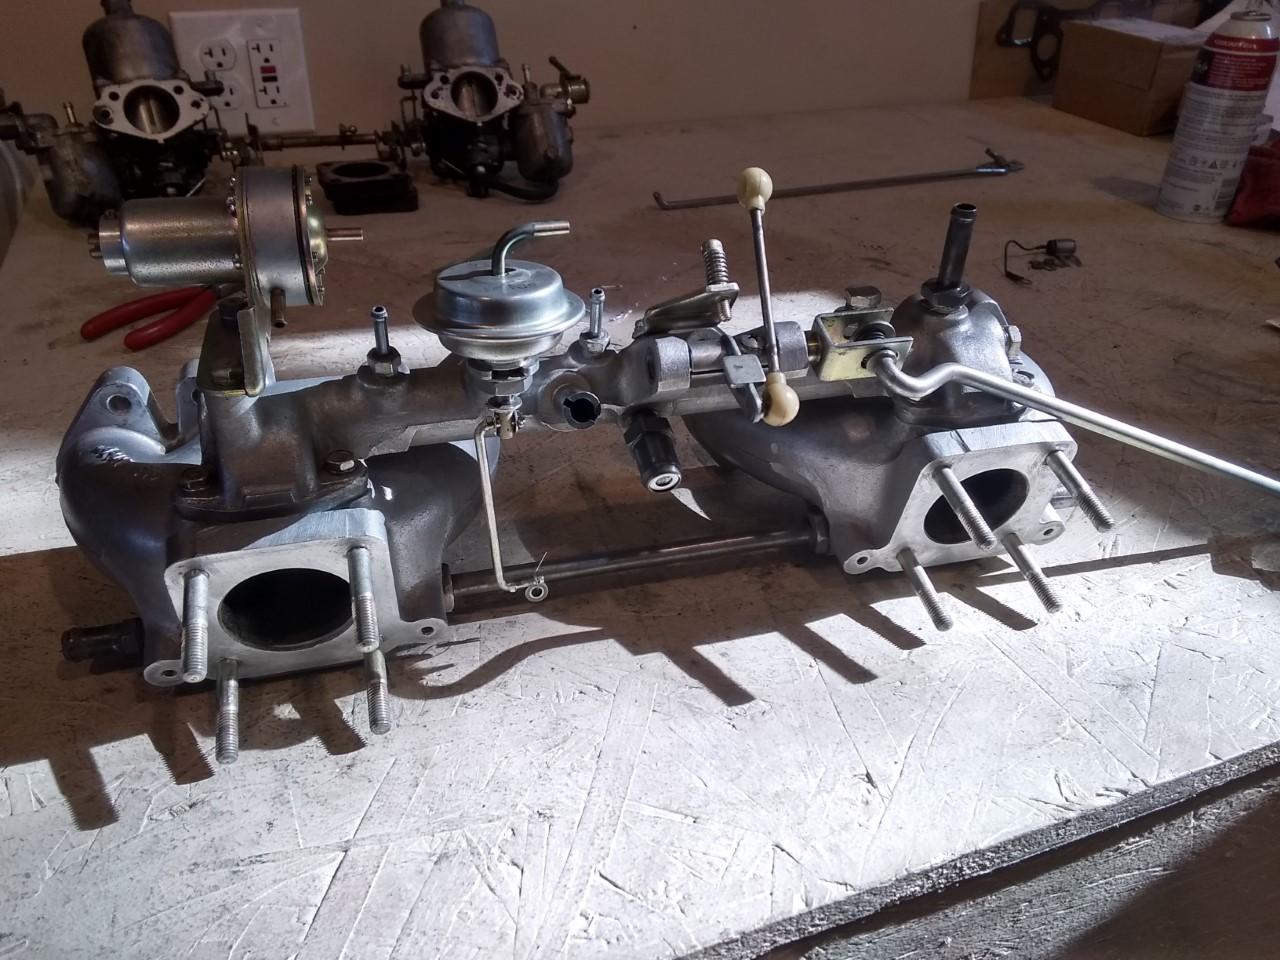
I ordered a gasket for the little plate today. It was listed as a head inspection plate gasket. I would like to know what I can expect to inspect in there as well. I don't think I will have the car running again in time for the z car meeting in February. Maybe. I got the last parts off the car today. There are a few things to clean up and I need to degrease the left side engine compartment this afternoon. The radiator is getting dropped off for a flush Monday and the exhaust manifold should be done next week as well. I looked at an 83 280zx parts car for the transmission a few months ago. The guy opened the hood and I was shocked at the octopus that was under there. The AC unit had no charge left in it. I took out all the AC stuff under the hood. The lines were hard rubber and held on by hose clamps. I figured they were garbage. The compressor is R12 so I think its garbage too. Are any of the engine AC parts worth saving or should I recycle them?

-
Ok, here is an update. The engine compartment detail has snowballed. I should have just pulled the motor. At this point everything is getting cleaned, buffed, polished, etc. I was happy to see the coolant inlet bolts came out easily. It looks like either the fuel pump or the cover on the front below the valve cover was leaking. While I have everything apart, are there any parts on the front timing cover that are prone to leaking that I should change out?

-
Sorry guys, I went with the MSA studs. I figure the original ones didn't have antiseize and were good for 50 years. I couldn't find a stud that was easily ordered and closely matched the two sizes needed. I will do antiseize on the new ones. I will be dead and the motor will need to be rebuilt before the manifold comes off again. LOL. I did order the 14037-V5005 lock nuts. I don't need split lock washers or locktite with these correct? Thanks for the help, Bill
-
Aahhhh!! The MSA website says they are OEM, but I would hate to put bad quality studs in the head. I will call them tomorrow and cancel. Thanks for the tip about the locking nuts. The nuts were almost falling off when I removed the manifold. I think the bolts on the intake were in secure. Found the lock nut part number on a previous post. Nissan# 14039-W1500. I will call them tomorrow. Where can you get stronger studs? Should I reuse the intake bolts? The internet and global commerce are amazing. Here is an ebay listing from Kuwait for NOS bolts, but it takes 25 days to get here. https://www.ebay.com/i/152934531896?chn=ps&norover=1&mkevt=1&mkrid=711-117182-37290-0&mkcid=2&itemid=152934531896&targetid=858364557731&device=c&mktype=pla&googleloc=9028786&poi=&campaignid=6469750552&mkgroupid=92738162767&rlsatarget=pla-858364557731&abcId=1141176&merchantid=6296724&gclid=Cj0KCQiAmZDxBRDIARIsABnkbYQjLs_nMWT7sFzgrnbmkAh8hLJFknhrzAd8HRk2iSlFWC0wmN-L6IEaAjcjEALw_wcB
-
Got the studs from MSA. Got a bit of rubber, weatherstripping, and hood bump stops and all kinds of stuff. I cleaned the crap out the the head and block today. Starting to look real nice. Tomorrow I will start buffing out the brake lines and engine compartment paint. I never in my life thought I would be buffing out brake lines......
-
Gotcha, it is going to change into polished metal. I am going to remove the studs today so I can clean the head surface off. I ordered the Z therapy video today. I called this morning (Sunday) at 745 Pacific Time to get the business hours and a guy took my order. I didn't expect to speak with someone. He was very nice and I felt kind of bad. I hope I didn't wake him up. LOL. Does anyone run different needles for altitude? The car will be mostly in Denver 5600' and in the mountains up to 9000'. Bill
-
Hey Guys, Didn't make it to the last meeting. I am going to hit the ZCCC meeting in February. Its good for me to get out more. I am running the mt90 redline. Not sure what the previous owner had put in it. I am pretty sure the wrong oil ate up the synchros. Got everything off the right side of the motor today. The bolts for the manifold were very loose. I decided to take the smog pump, distributor, and thermostat housing off to polish them up and change the gaskets. Both bolts for the thermostat housing broke off. There was enough to grab on and I was able to get them out with heat and PB blaster. It is so nice when broken bolts will come out. I really dodged a bullet. Two questions: Is there a reason to replace the exhaust manifold studs? I think I could get them out if I needed to. Is there a good way to clean the zink parts without taking off the zink? There is some corrosion on most it so I may lose a lot of it when polishing. I don't want to destroy the coating if I don't have too. Bill