rossiz
Free Member
-
Joined
-
Last visited
Everything posted by rossiz
-
 ok, i'm loving this! when i first saw the thread title i was scratching my head wondering why on earth anyone would do such a thing. kinda like pulling a trailer w/a bike... but pulling your race supplies to the track is an awesome idea the bumpers are so ridiculously flimsy i'd want to stay away from 'em, and the mounts are not much tougher. on the '78 with the frame-mounted bumper shocks you've got some stouter mounting points. maybe you can use that same area of the frame? my wife's hyundai has a hitch with a cradle that mounts underneath on either side of the tank (similar locations) and it works well. this might avoid having to go back to the diff mount...
 -
ok, a more serious reply: since the engine is already out and on a stand and drained with the pan off, you're really only a few bolts from a re-ring anyway. a set of rings is cheap, and at 130K miles (i'd assume the odo had rolled) the bores should be fine - you can check 'em with a scope if you want with a scope. i'm guessing you'll still see the hatching.
-
oh... i TOTALLY want to see a running engine in the living room video! bolt it to some wood blocks, exhaust would be just the manifold and y-pipe, flames out the back, jerry can of gas up on a nearby table w/fuel line zip-tied to the handle... AWESOME! be sure to open the windows, eh?
-
thanks cap'n - much appreciated! that little clip is one of those parts that you just can't do without... let me know what i can do for ya.

-
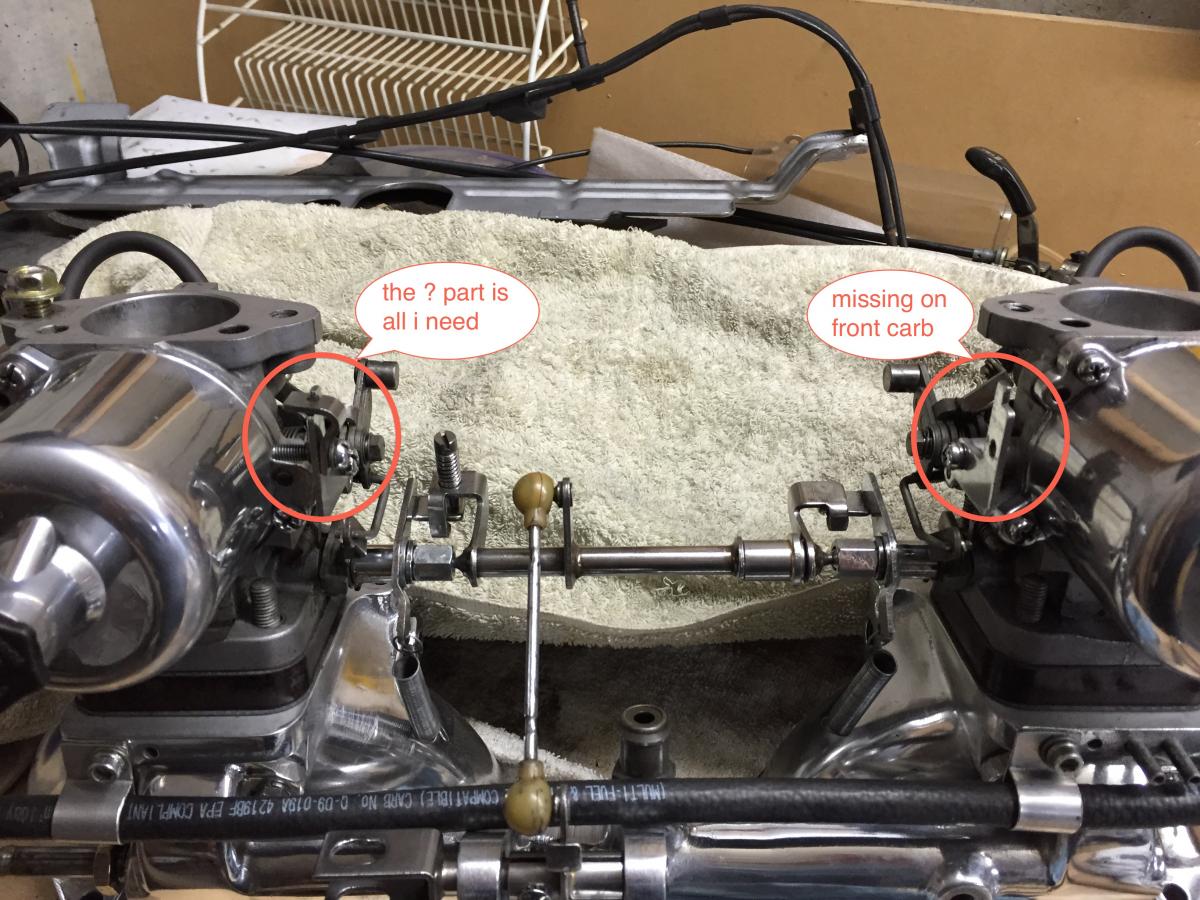
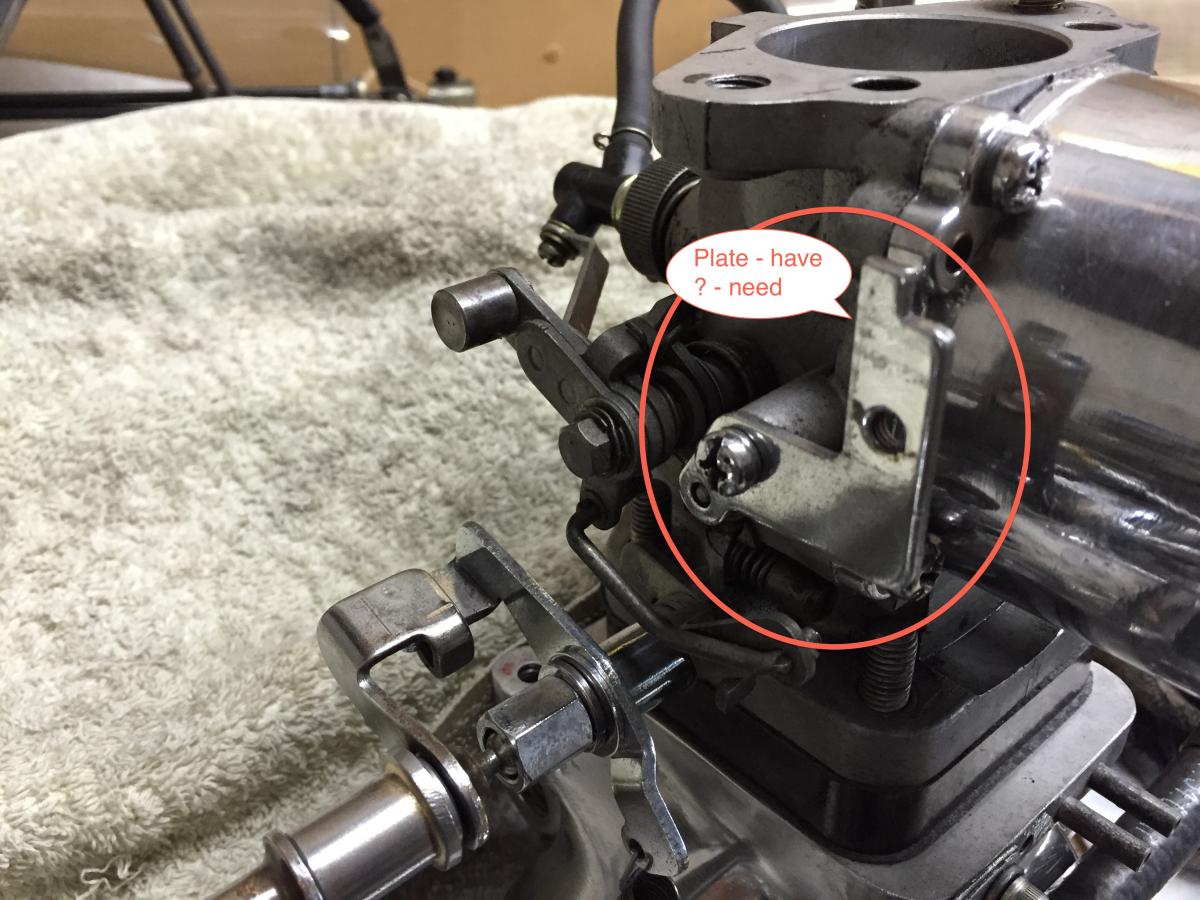
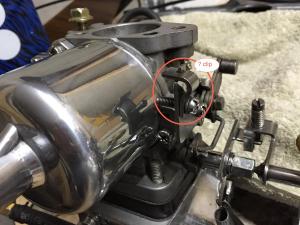
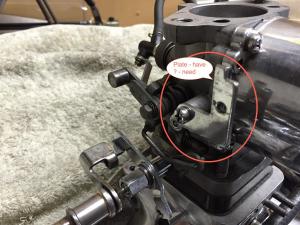
i'm missing one of the choke cable clips for my 3-screw su's. this is the little question-mark shaped clamp that mounts to a plate attached to the carb body and clamps down on the end of the choke cable housing to hold it in place. anyone have this little piece to sell? i believe they are "handed" (front vs. back) so i'll check which carb it is and post a pic when i get home... thanks in advance!
-
fantastic news - looking forward to the results. i'm impressed with the tight tolerances and level of consistency with which these engines were made. i was gonna toss my old warped 150K mile head and literally just held onto it because i was too lazy to put it out on the curb and i'm glad i still have it, as it's a parts goldmine. i was able to swap out an entire cam, rocker & lash setup between motors with perfect fit. also was able to replace a bent valve on a new head with one from the old one and it seals perfectly and lash/wipe is spot on. somebody knew what they were doing with these things on the assembly line.
-
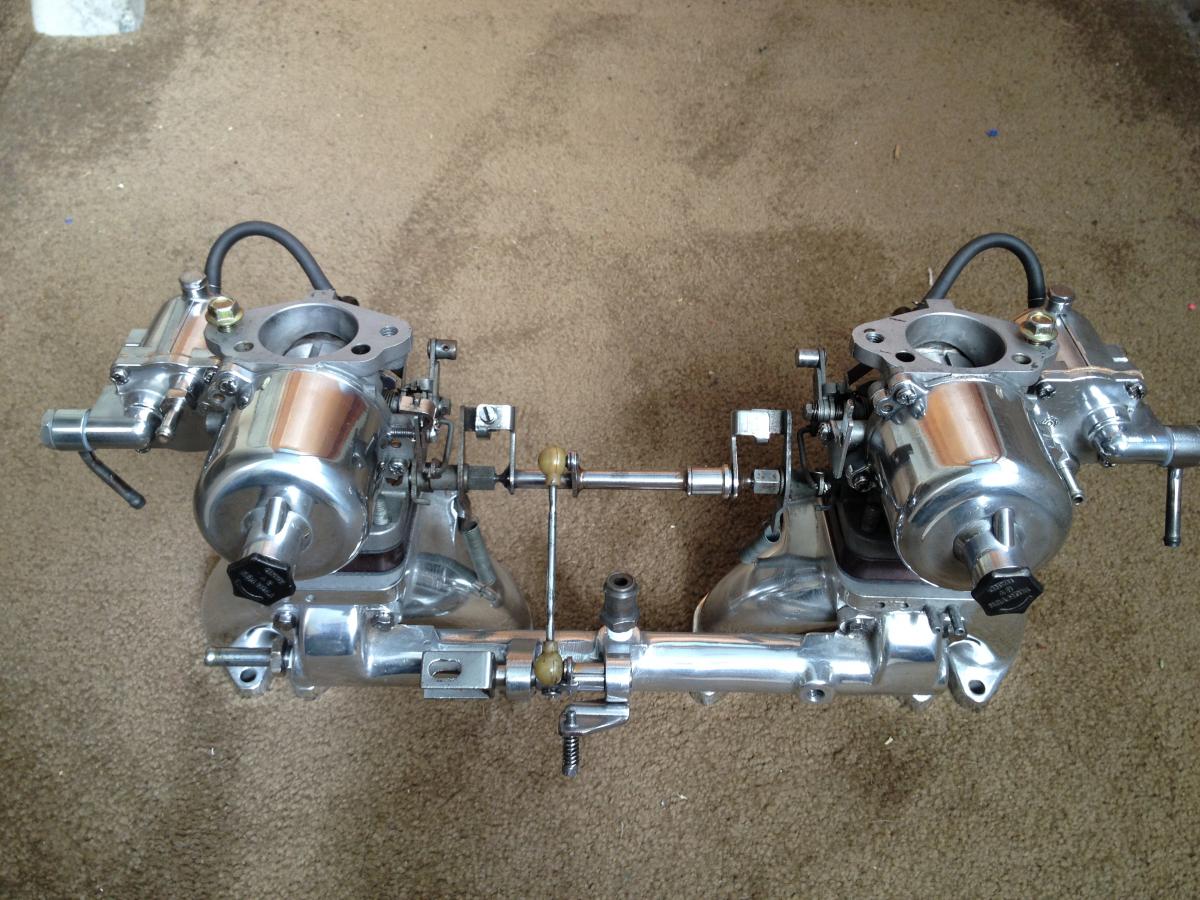
actually, it's an ersatz euro tube... i couldn't find one, so i made one by cutting, filling & cleaning up a donor (thanks again mark maras!). i left the vacuum port on the top of the balance tube for a gauge, brake booster will attach at the end of the log. here's a link to the work: http://www.classiczcars.com/topic/51242-looking-for-a-balance-tube/ the intake manifolds are N33 which came w/the carbs and i believe the whole setup is from 3-screw '72... all the extraneous vacuum ports will be filled as i have no use for them.
-
bummer... i was hoping i could actually give some helpful advice. makes sense why they changed it though!
-
nice work sherlock - who knew?? the hole in the top from the sender cover is pretty big, if you can see the problem from there, you might be in business to repair it. and you can do that with the tank still in the car, as there is a gasketed lid in the hatch area that you can remove to take out the sender unit (at least there is on my '78) so try looking in from the top before you go through the trouble of dropping the tank.
-
or if you can get some accurate gauge wire that you can solder in and pull out. you might need to dress the top of the solder lightly to remove the lip/burr but you would def. get a better measurement than drilling. looks like your mini-bits use a hand twisted drill, which might be difficult to get a very straight, clean bore. these are all tiny nits we're picking, but it would suck to do all that work just to find out you were 1/2 a jet size off due to drilling inaccuracies...
-
gonna swap out the efi in my '78 for some su's and i've been trying to figure out what i need to do for fuel line routing and venting. been through the fsm and can't find anything very detailed and there are so many pics of different ways to do it i'm scratching my head at this point... the goal is to clean up my engine bay as much as possible, keep things simple and avoid heat on the fuel lines to reduce vapor lock, etc. so i figured i'd run new hard lines up the firewall and over the tunnel and re-locate the fuel filter by the brake booster and then send a line out to the carbs. this should keep the fuel cool and reduce the clutter going 'round the front of the valve cover. i've got a low-pressure fuel pump that i plan to mount out back in the same location as the oem efi pump. questions for those who have the experience w/this: do i need to keep the charcoal canister - if so, how do i plumb it? i don't even see it on the 240 - am i missing something?if i delete the canister, do i just block off the third hard line that goes to it? will that cause expansion pressure issues in my tank?any issue w/just deadheading to the carbs, or do i need a return to the tank?i've read various conflicting reports on the return line - many site vapor lock but without the oem rail running over the headers is this an issue?i could put a bleed-by fpr after the filter and run a return line to the tank, but i've read that fuel pressure regulators restrict flow and i don't want to drain my bowls... any wisdom on this? thanks in advance for the help.
-
i know absolutely nothing about your carb setup, but in my experience w/bike carbs idle shake was often caused by them being out of sync at the idle circuit. i assume you've synced them with a flow meter of some kind? could also be a clog or imperfection in one of the idle circuits (crap in a jet or burr in an orofice) leaning out one idle circuit's fuel delivery even though the air flow was constant at the bellmouth. again, just some basic multi-carb advice - not specific to your setup.
-
i hear what you're saying cap'n - the mod was shown on the 'just su' video and i figured they knew what they were doing (not that i do...) we'll see how it goes eh? i've got a 2-sensor wideband that i'll be installing to check both carbs independentyly, which should be informative for checking the sm needls as well.
-
-
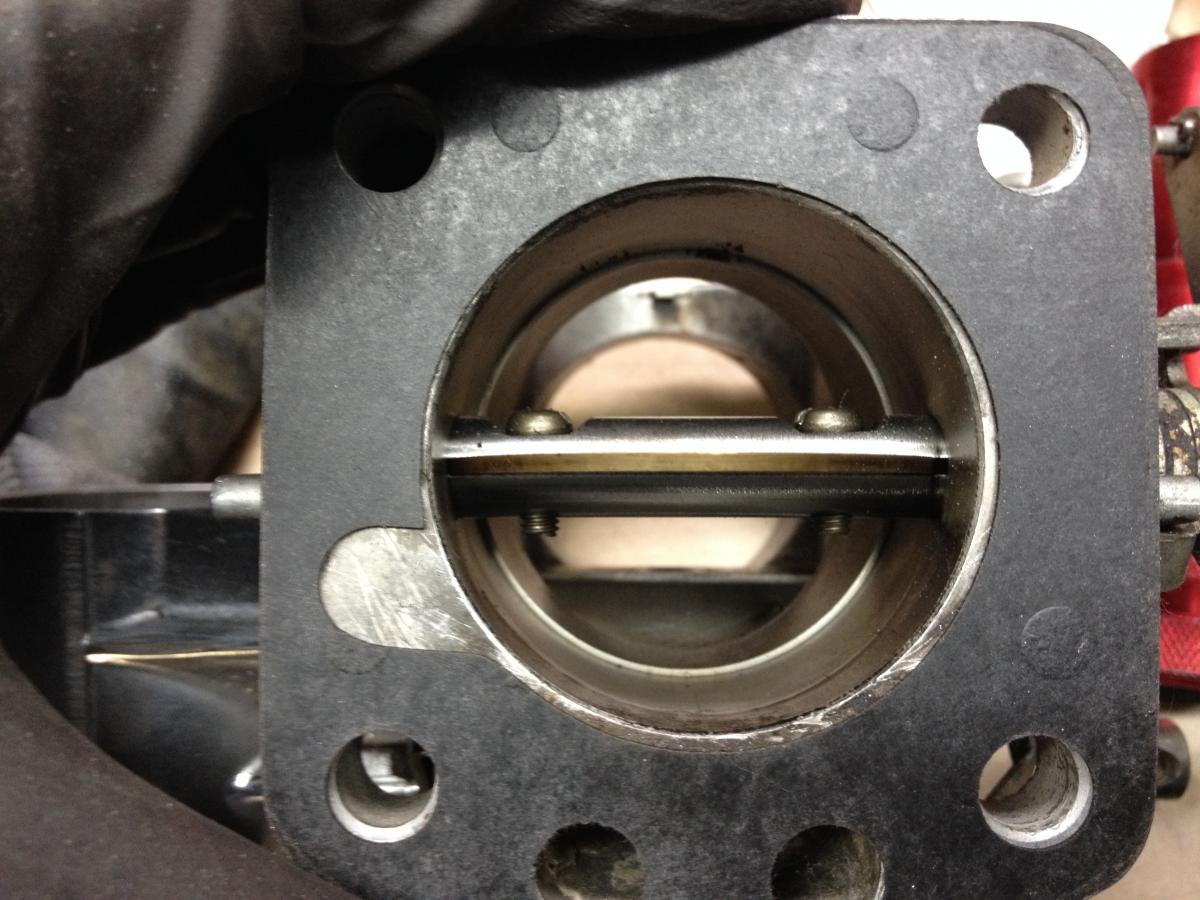
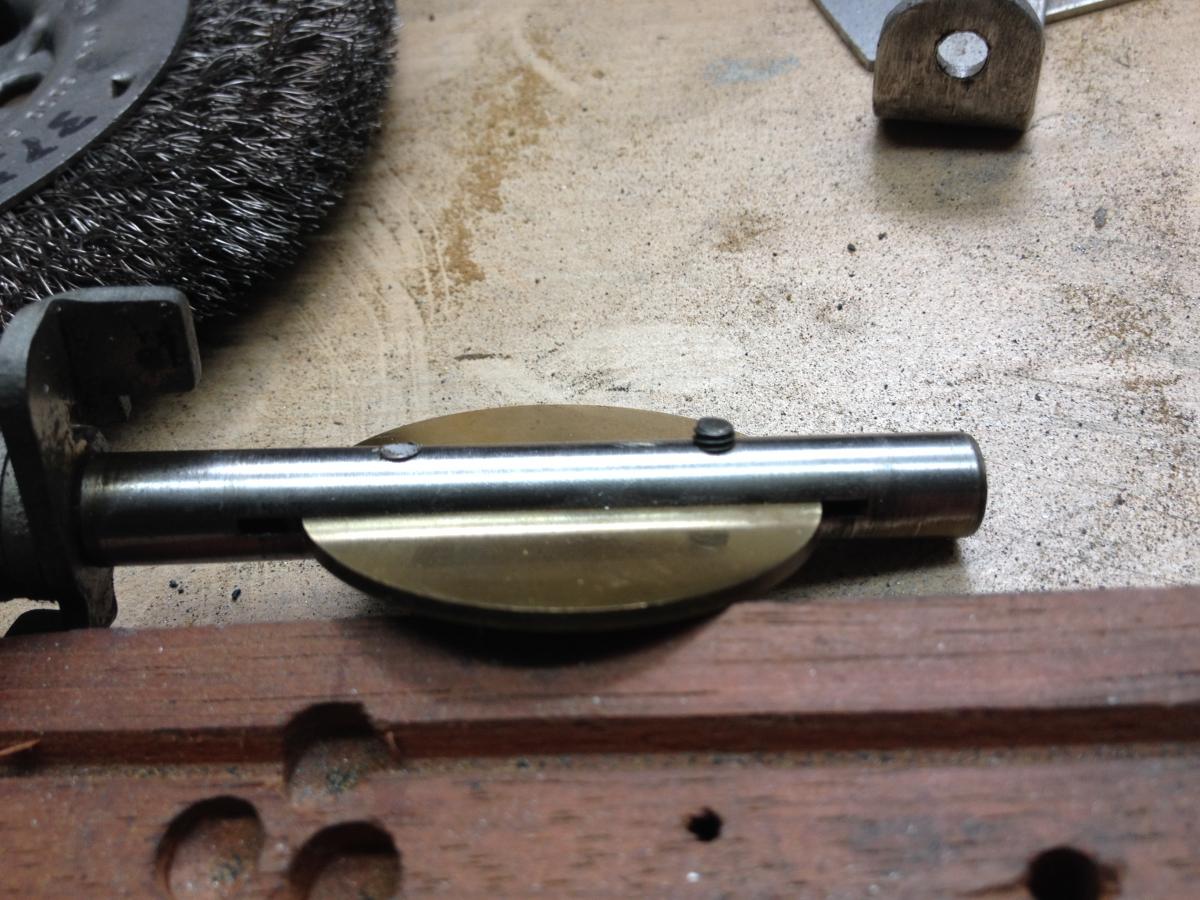
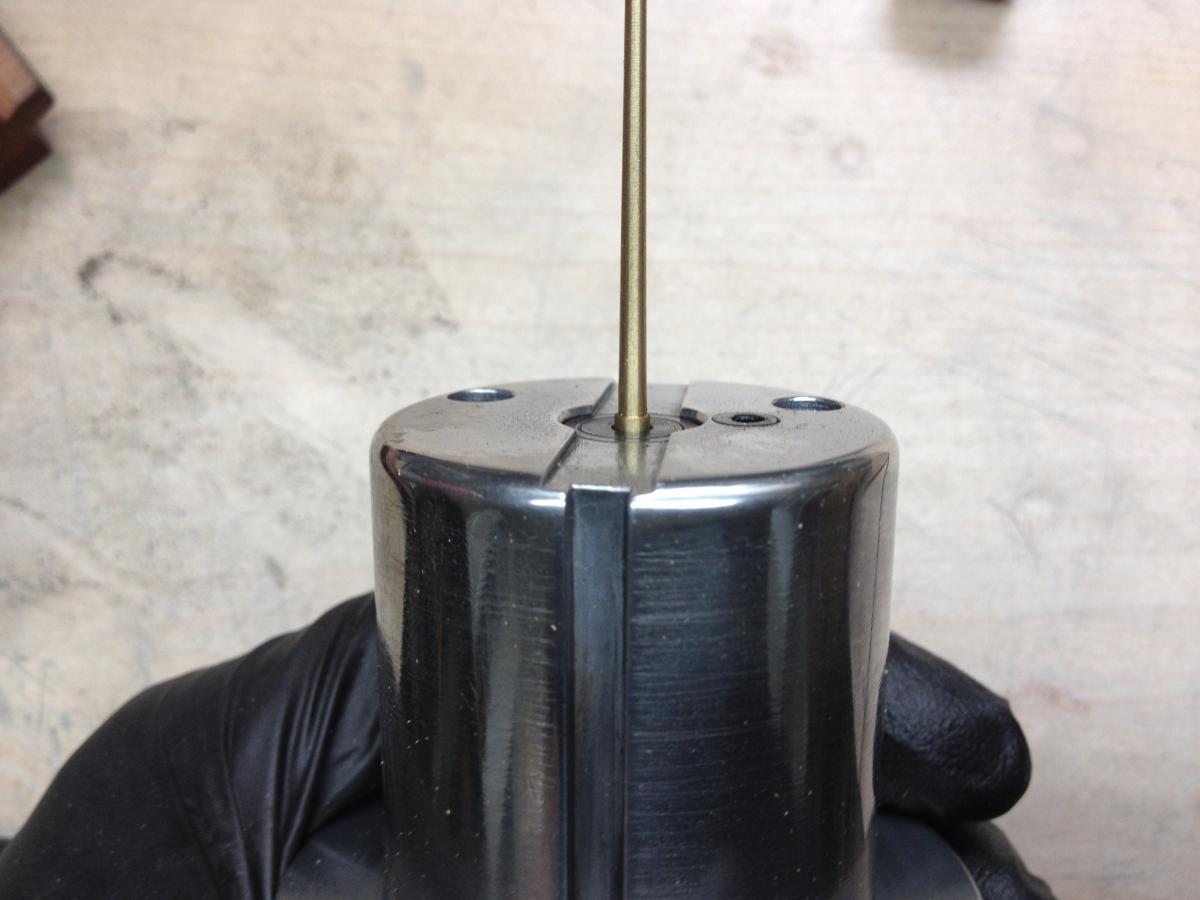
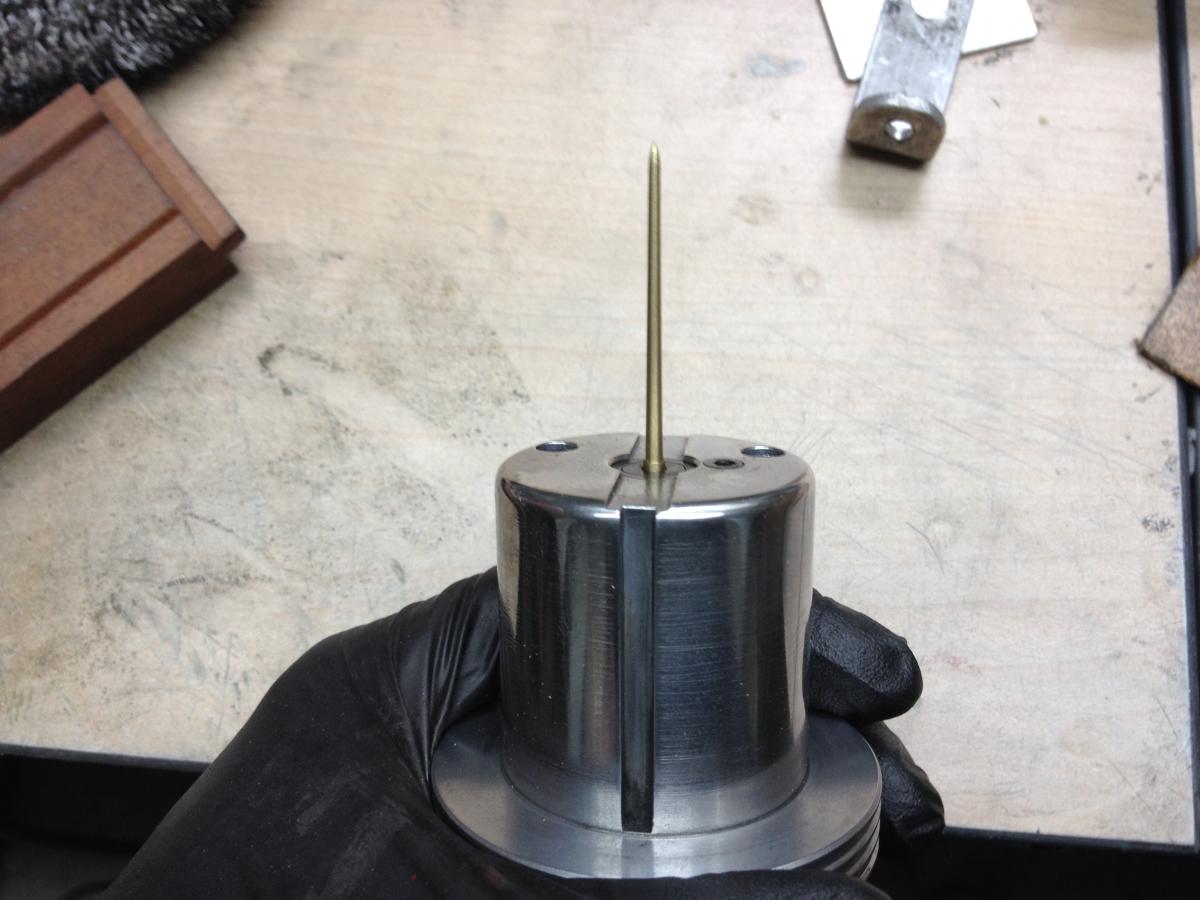
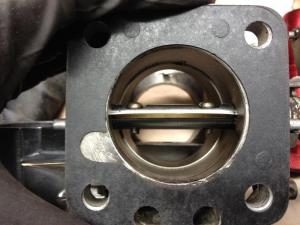
finished re-building the su's following the detailed info on the "just su's" video - new nozzles & sm needles all set up. these carbs have got to be the simplest think on the planet compared to the 4-barrel chevy stuff i've worked on. the trickiest part was setting the float levels, but even that was pretty straightforward. while i was at it, i beveled & polished the pistons and trimmed the butterfly screws to get 'em out of the air stream. then just for fun i hit the float bowls & linkage w/the buffer wheel to make 'em shine a little. i ordered a firewall grommet for the choke cables and when that arrives i'll put the su's on my current engine (along w/the low-pressure fuel pump) and do some initial tuning and a butt-dyno comparison w/the efi. butterfly bolt trim: piston bevel: all done:


-
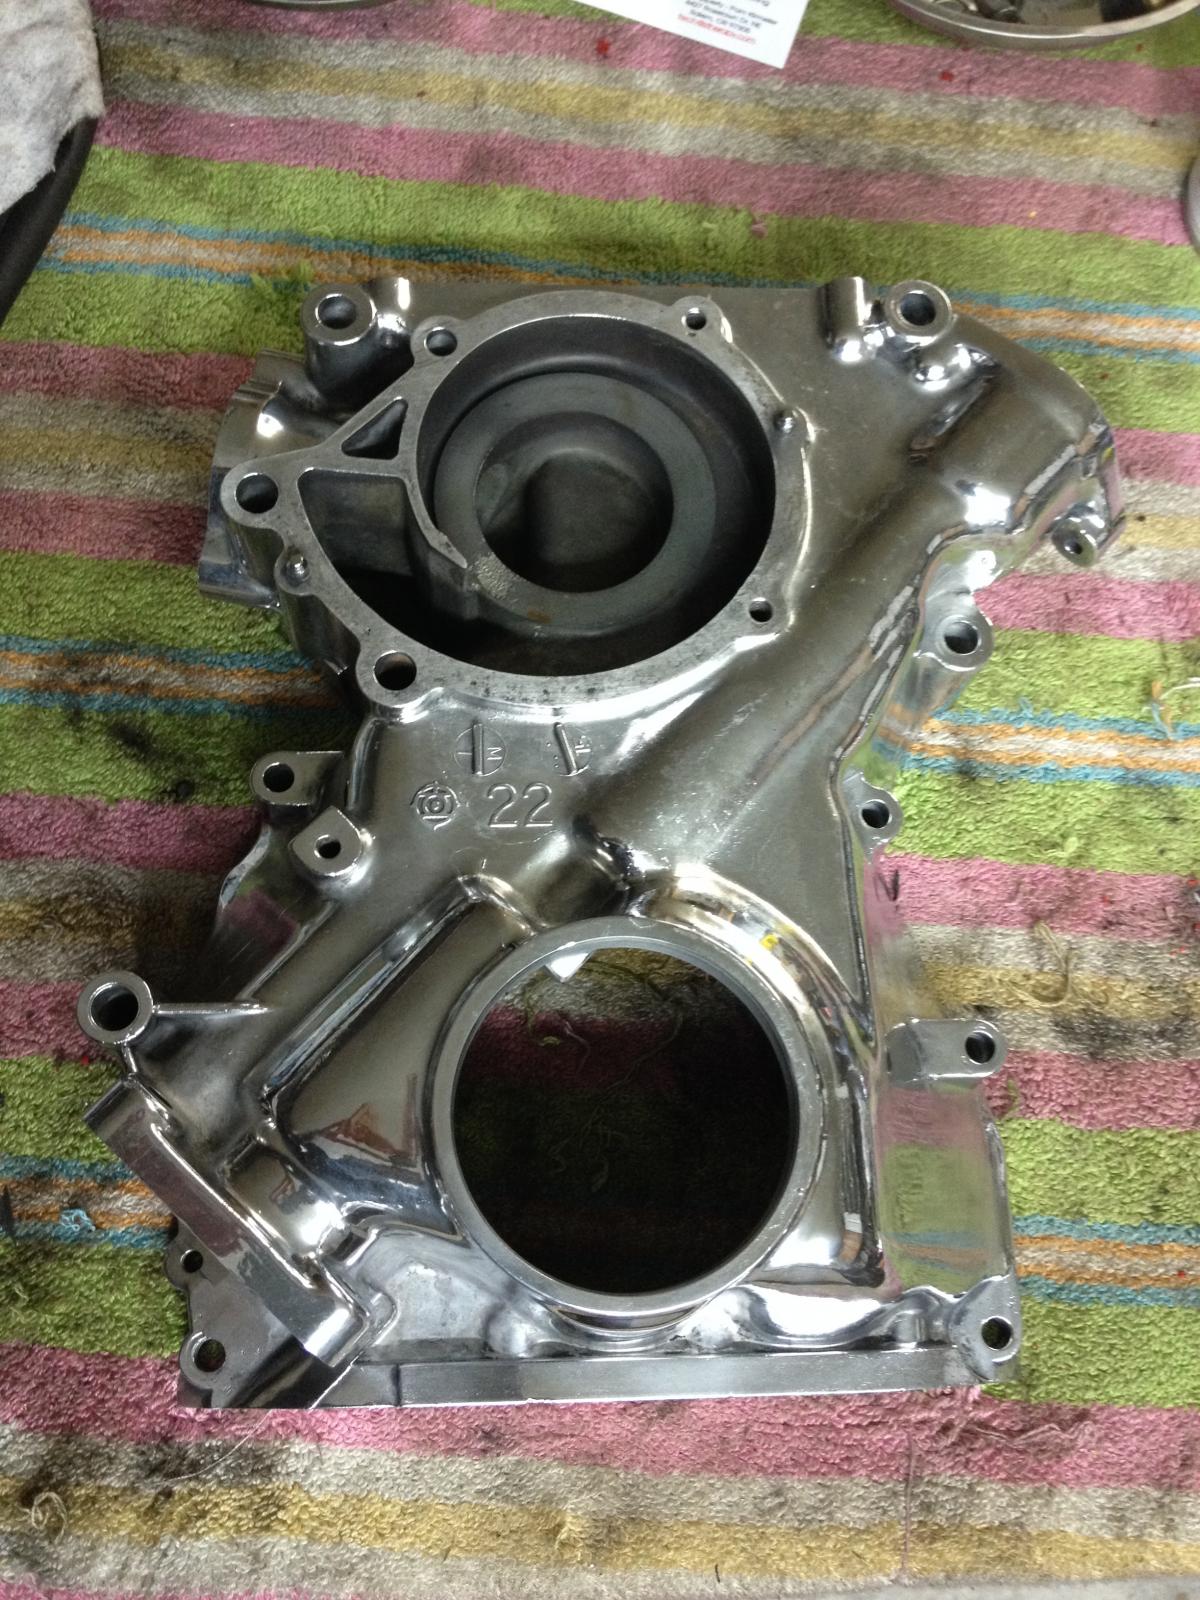
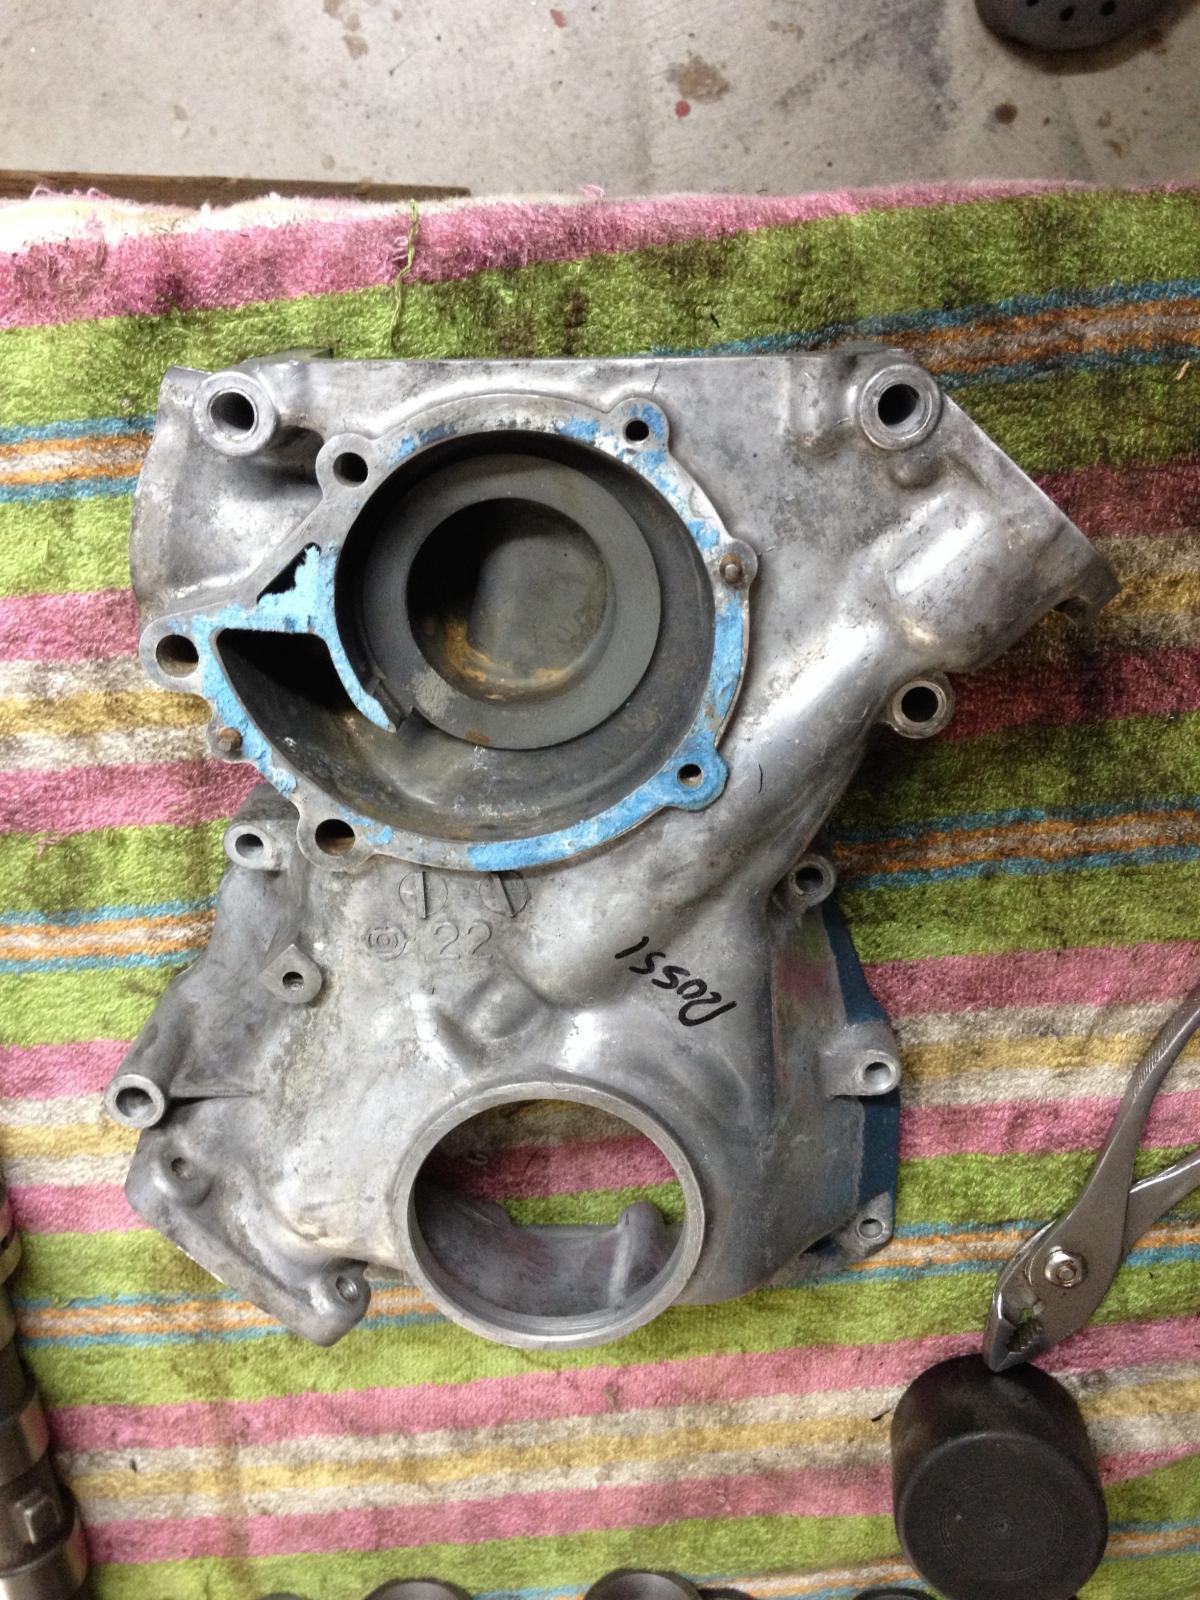
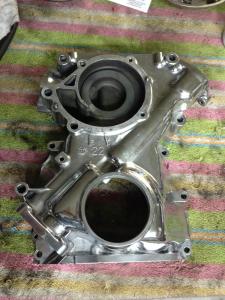
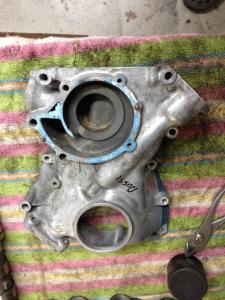
waiting for new clutch/flywheel to arrive (went w/a 240mm setup) so it can be balanced along w/the crank and the flywheel lightened. was supposed to arrive tuesday last week but still in transit... meanwhile the head is getting cc'd and surfaced shaved for a 9.75:1 cr. in the meantime i'm cleaning up parts and getting ready for assembly once all the internals are back. bought a melling expansion plug kit and discovered it was short 2 plugs, so couldn't finish that up either. ordered some brad penn assembly lube and break-in oil - looking forward to being able to use them... the front cover is a pretty rough casting - the inside is actually nicer than the outside, so it didn't polish up that well. looks better than it did though.
-
cool, another build thread - we need a chart to keep track of the progress across all of 'em. keep the pics coming
-
if you've got the parts in hand, why not try swapping towers? it's 10 bolts and if you can adjust 'till the cam spins freely you're good to go - if not, well you're right where you are now, so nothing to lose but an hour of your time...
-
i would be interested in fit/finish as well as how the chassis performs - they claim it's stiffer, wonder if it still creaks and squeaks like the original? the other thing i don't get is how you fasten everything that has threaded inserts in the oem body - do they provide all these? also, how do you fasten all the other misc stuff into the skin where the oem uses sheet metal screws (engine bay,interior, etc.) wouldn't they just crack/rip out of fiberglass? also, how uv stable is the material? i've always heard about how corvettes twist and shrink over time. wonder how much prep/cleanup is needed to get a good paint job - less than for a low rust metal restore? but if those issues are somehow magically covered, it sounds GREAT!
-
nice! let us know when in june - i'm gonna have the first 2 weeks of the month off and am hoping to do an engine swap (if the stars all line up perfectly)
-
gotta keep up w/the pack, eh? truth be told, i've had the paint for quite some time and you beat me to the punch on the post! can't wait to start putting this lump back together. this came as well
-
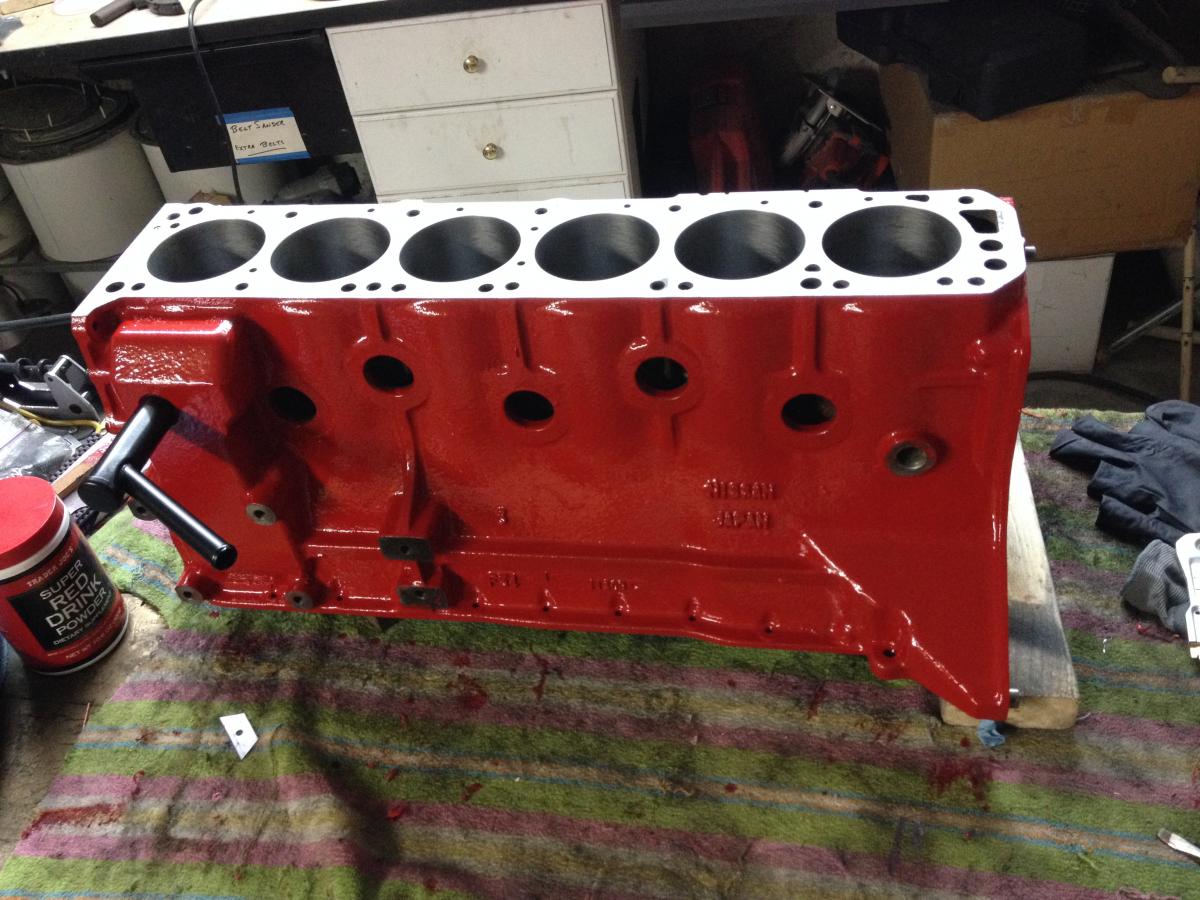
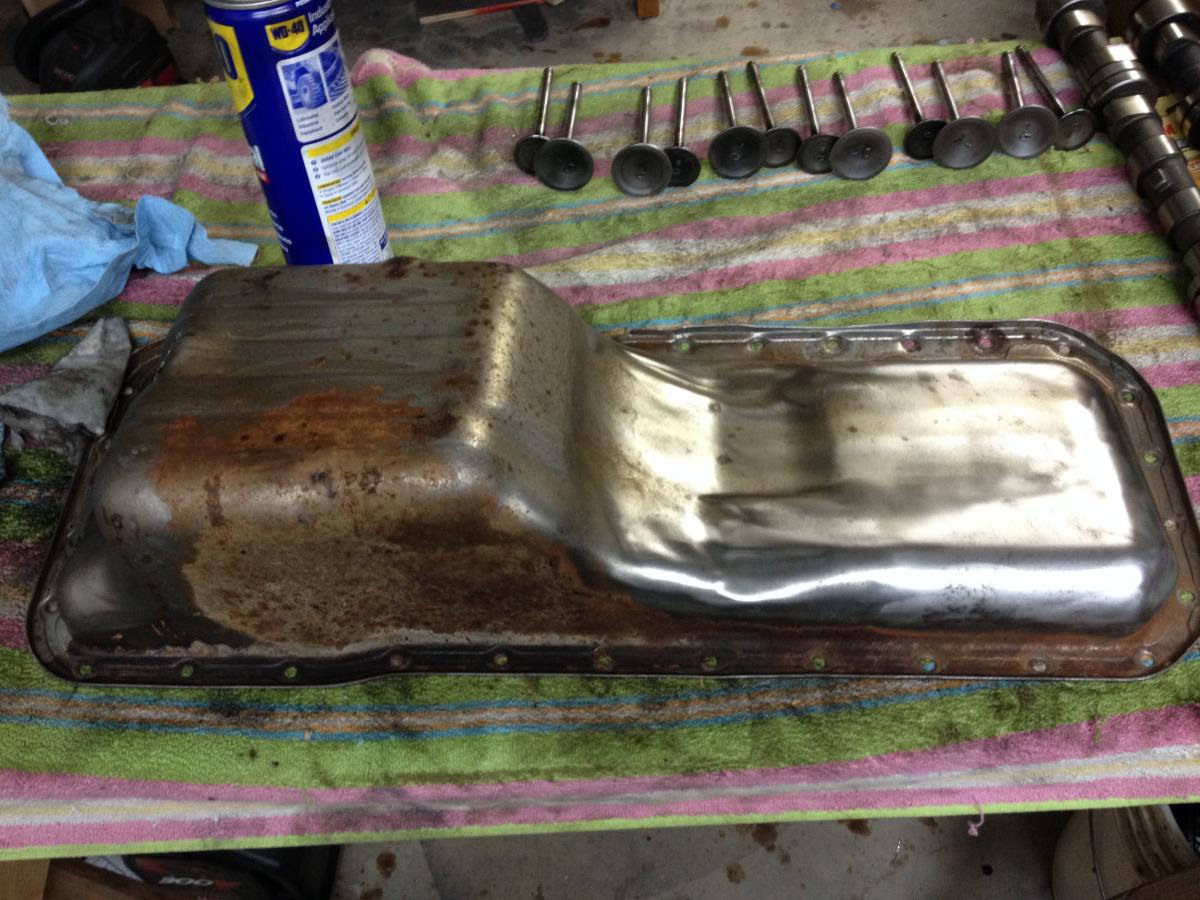
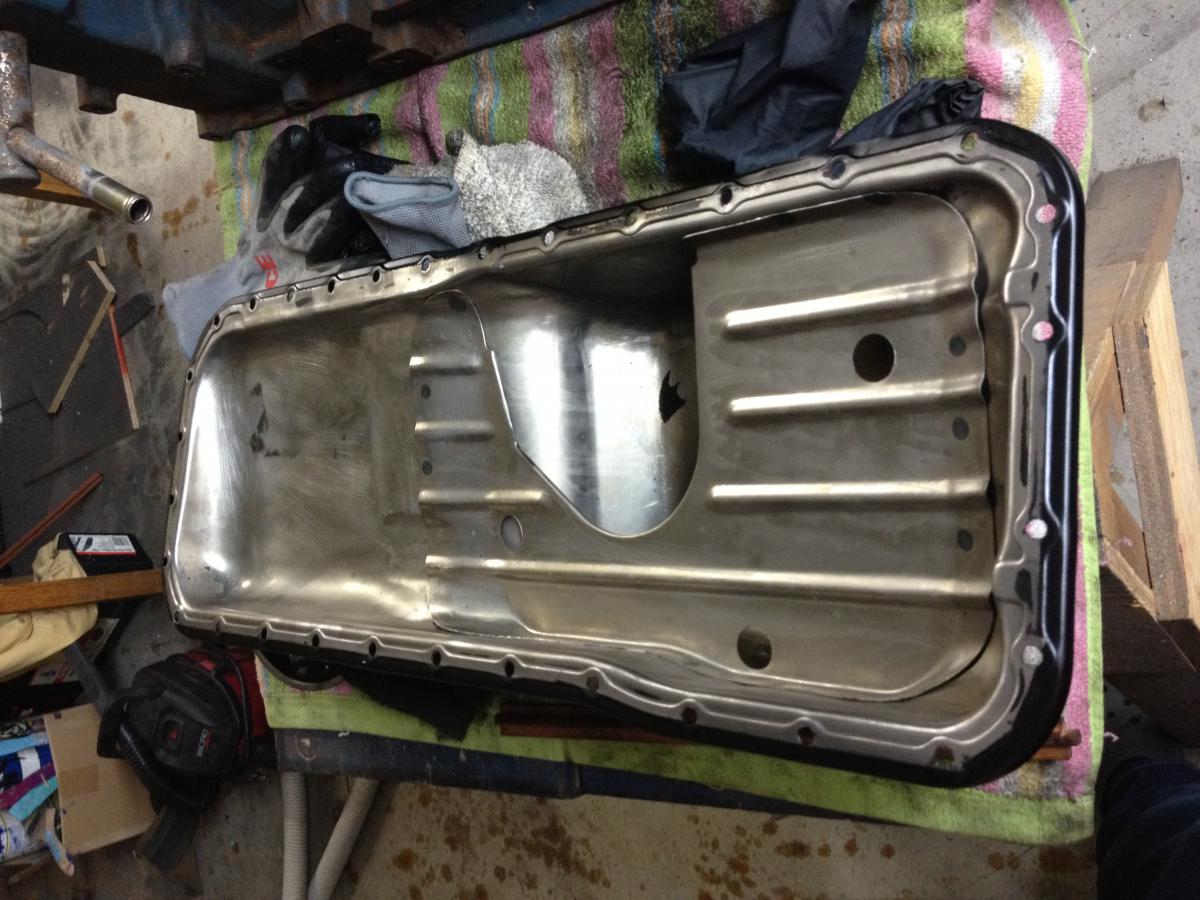
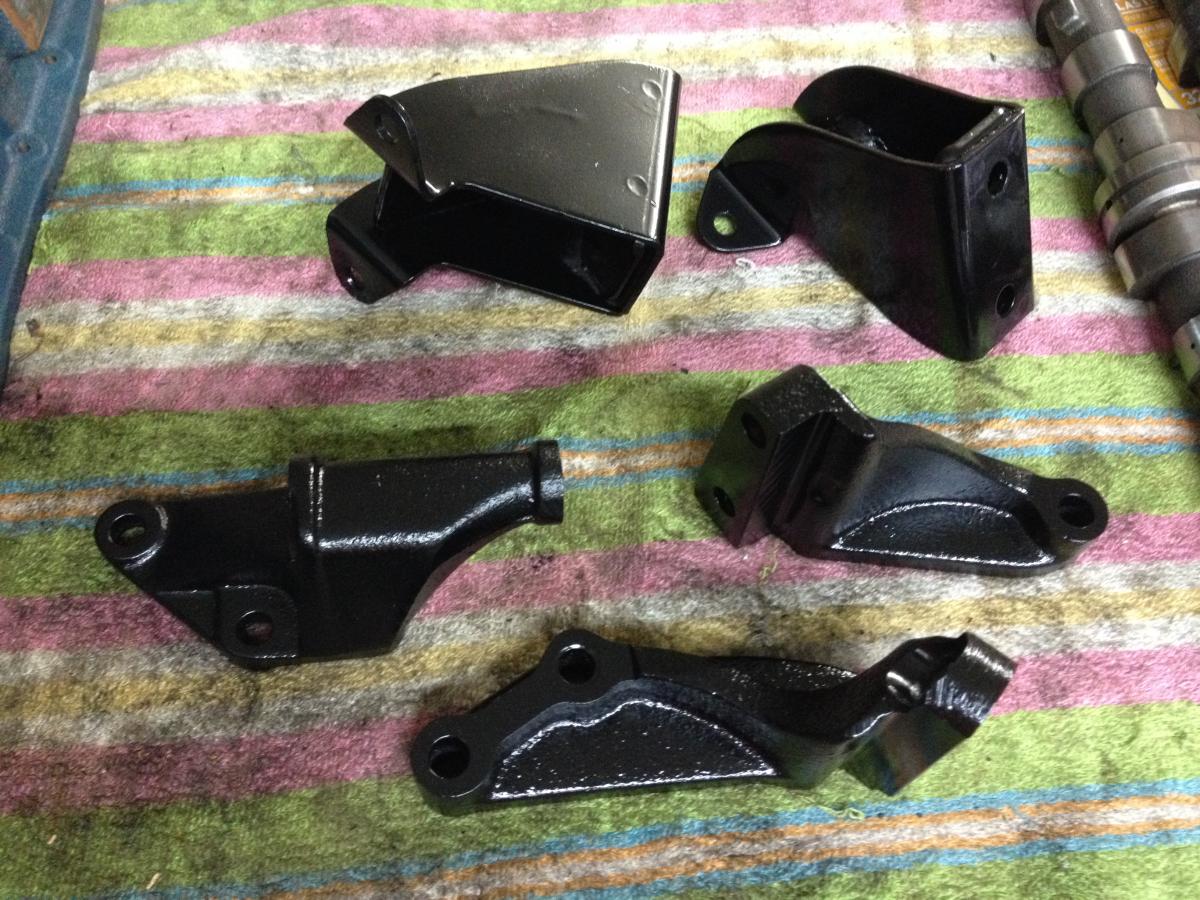
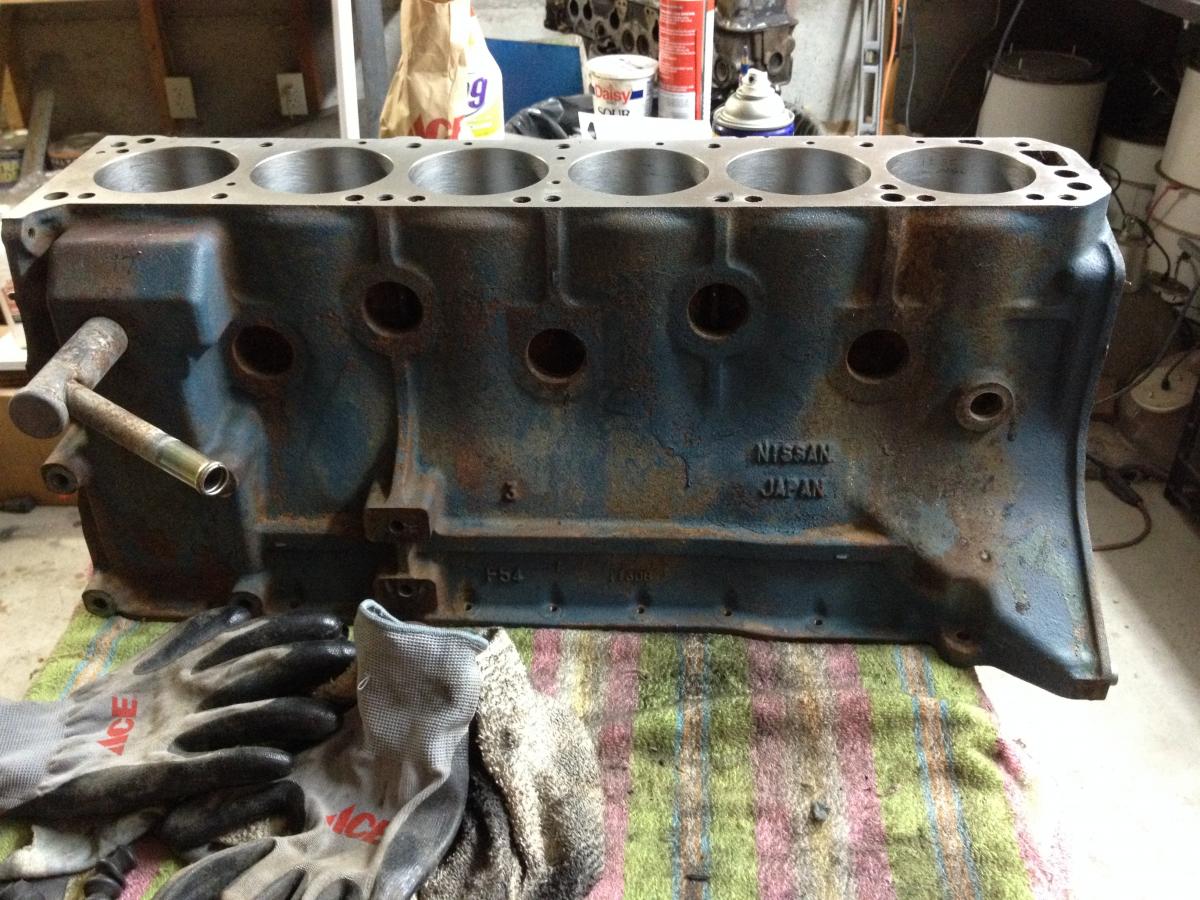
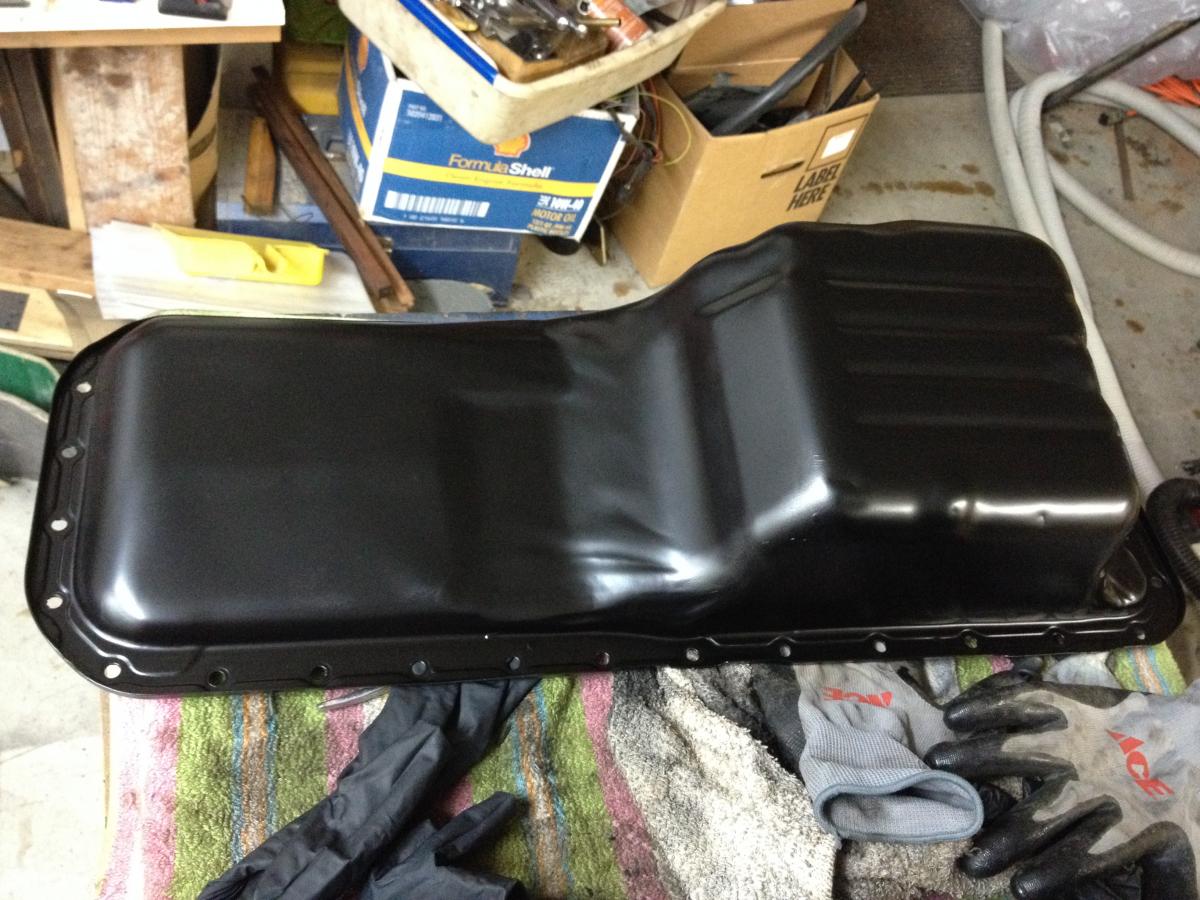
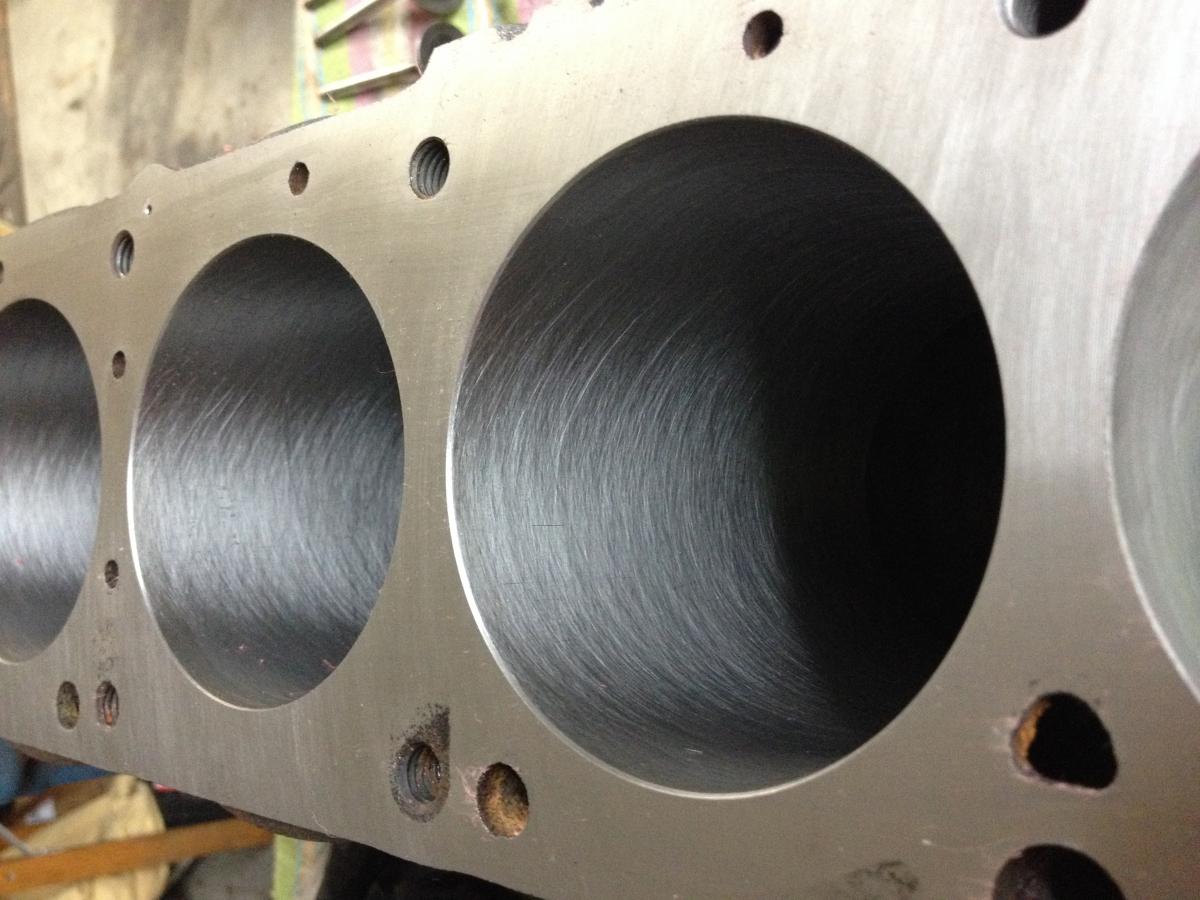
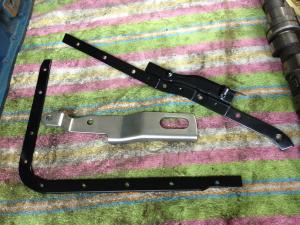
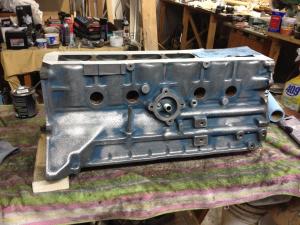
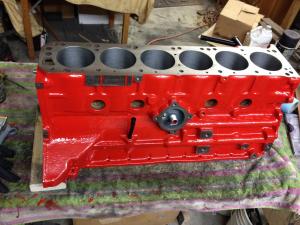
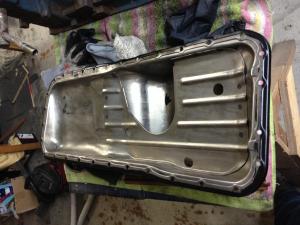
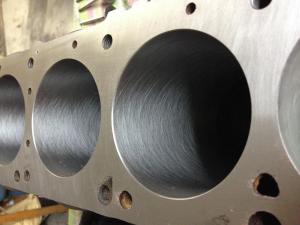
a little progress over the last couple days - stripped the pan (an hour w/the wire wheel and more w/hand abrasives), straightened the dimpled flange & painted, stripped a bunch of misc. brackets & painted. picked up the block from autosport seattle - tanked, deck surfaced, bores honed. ugly on the outside but real purdy on the inside. spent about 1 1/2 hrs cleaning it off using questionable safety practices - mounted my wire wheel on the angle grinder and went at it hell bent for shiny metal. by the time i was done i felt like i'd mixed it up w/a porcupine as i picked countless wire bristles out of my clothes and flesh... all in the name of progress. 2 coats of POR engine block paint and she don't look half bad. pan in process & done: misc bits: block transformation:


-
i wouldn't advise on totally disconnecting the brake warning light - mine was very useful when i had a leaky brake line, and i'm happy it performed its function. the rubber hoses that go from the chassis hard lines to the wheels get mighty crusty over time and when they start to weep you will slowly loose fluid, maybe so slowly you won't notice it or see drips. there are floats in the master cylinder caps which trigger the light to go on when the level gets too low.
-
great to hear the story - my riding buddy always says "if nothing goes wrong, it's just a trip - not an adventure" after fixing flats up in the mountains and pulling bikes out of the weeds more than once, it's nice to have a "trip" every once in a while and hear other peoples adventure stories... glad you made it safe and thank GOD you missed that hail!! i'm wondering why we don't have any more pics of the z car fan in oklahoma??? oh, and how long is it gonna take you to hang a carport off the side of that house to shelter the z - or is she parking in the living room and you're in a tent??
-
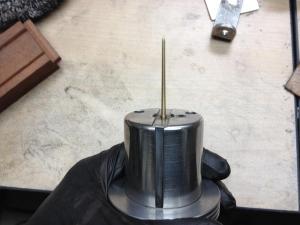
quick 'n dirty - like it! but i'm not so sure how accurately repeatable that method is for tuning...