rossiz
Free Member
-
Joined
-
Last visited
Everything posted by rossiz
-
 i have a fuel pressure gauge between the fuel filter and the rail - the pump check valve is holding pressure, the gauge is at a solid 35psi when i go to start. when i pull the solenoid wire off the starter and turn the key, i can watch the needle bump up a psi or two as the fuel circulates, and i can hear it running through the fpr. then when i re-connect the starter, it fires up. i'm sorry, but i've never been very good at conforming...
 -
another offering... high-speed run, slightly uphill, couple of bumps in the road and "plop-plop" 2 little taps on my left ankle.

-
i've been quiet on this thread for a while, since last time i chimed in there were electrical issues clouding the problem, and i wanted to be sure i had good, consistent info to report. it's been warm here in seattle, and i've been plagued by constant hot start problems. the car runs fantastic, plugs seem decent color, i just ran seafoam through the intake the other day and my idle has gotten much more stable, the only issue is starting when it's hot. the car starts like a champ in the morning - almost instant. now that it's hot outside, when i stop for 5-10 min. the car has a very predictable pattern: it fires up for just a second, dies, then will not start at all. doesn't matter if i leave the hood up, it just seems that the initial heat soak is flashing the fuel pretty quickly for me. strangely, for me priming the fuel actually works consistently to get it going. i hop out, pull the wire from the starter, hold the key for 30-45 sec (a long time, yes, but it does work) and then she'll fire up - if not, i'll get the same sort of 'almost start' and have to repeat the process, but once it starts it revs right up and it's business as usual. the other odd thing is that if it heat soaks, the vapor will stay behind the injectors for a very long time. i took my daughter to her ballet recital at 4:00 and it was hot out - shut the car off in a parking garage (at the perimeter, sun on the hood) and came back at 6:00 and it did the 'almost start' dance, needed 30 sec. of priming and then fired right up. i'm going to put a toggle switch in the cabin to cut the starter wire so i don't have to jump in and out of the car every time. hope that will work until i can save up for a header. i'm convinced the header will work to reduce the heat soak. i'm also planning to look into the multi-spray injectors and a different rail.
-
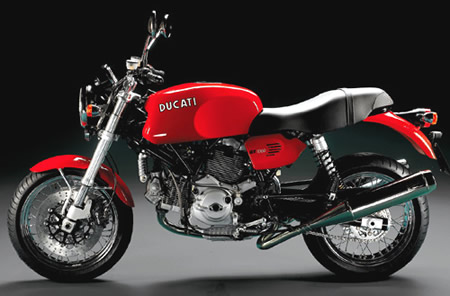
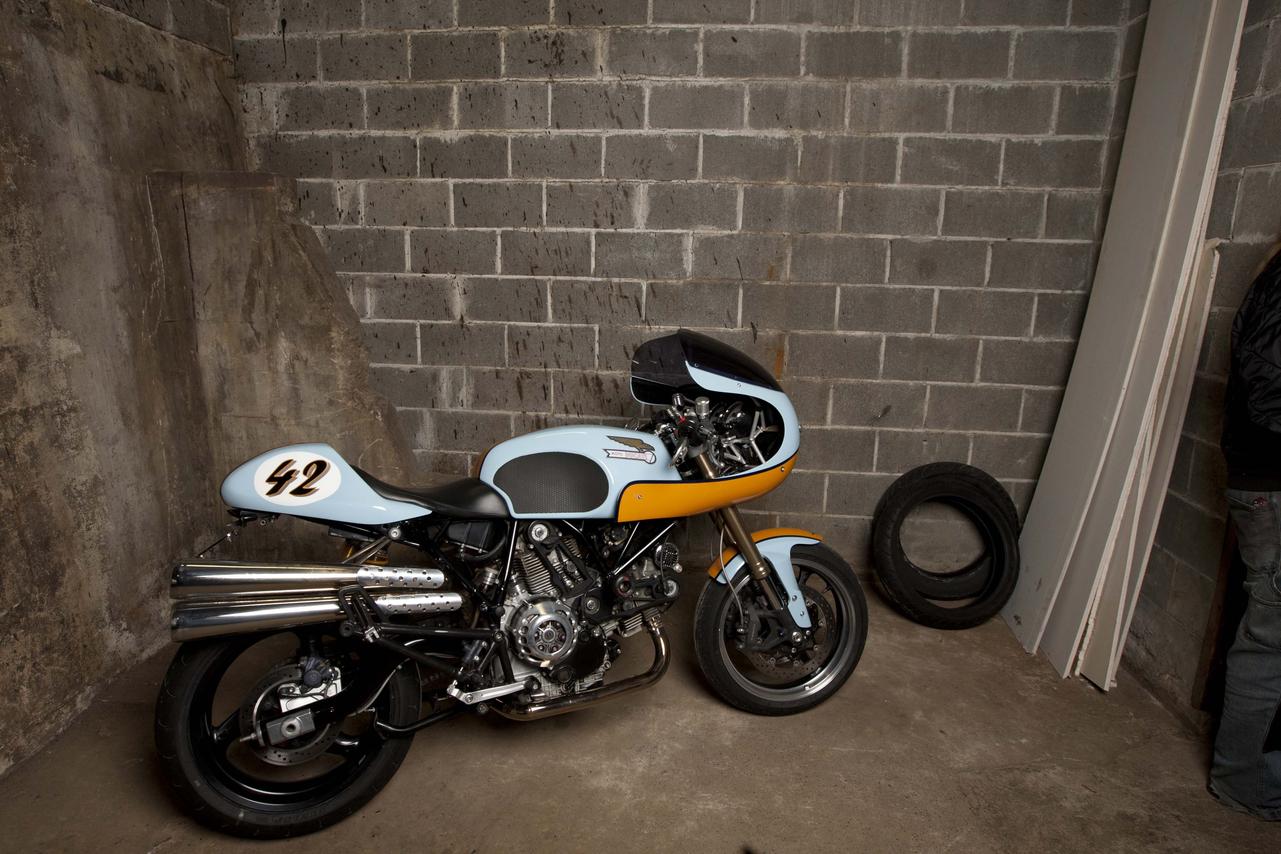
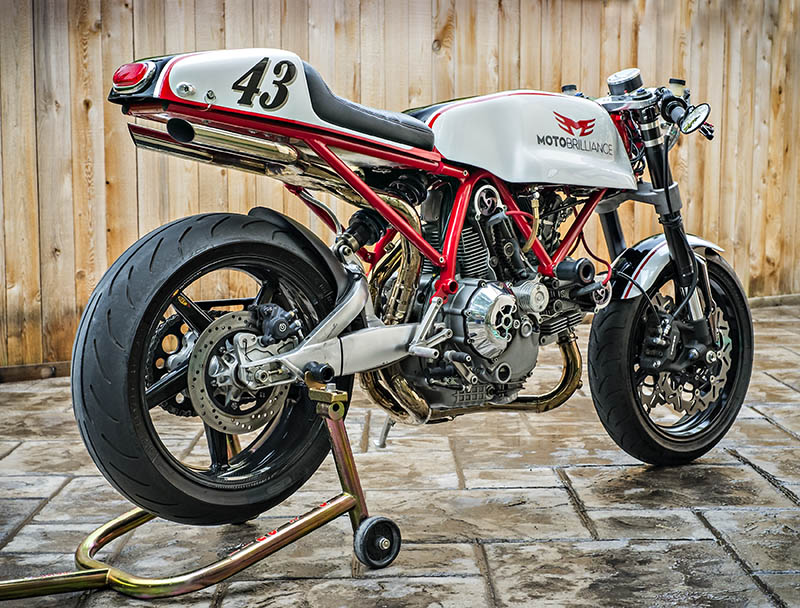
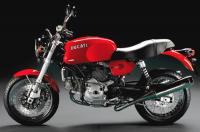
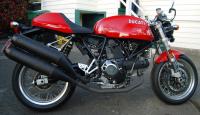
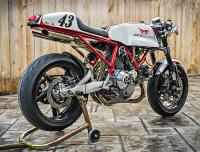
interesting parallel: i bought a ducati sport classic - the GT1000 because it was the more civilized bike of the model range (more upright riding position, ample passenger seat, etc.) and over the next 6 months slowly modified it to be more and more aggressive/sporty, until i realized that what i really should have bought was the Sport 1000 (sister model, with more aggressive stance, etc.) so i wound up selling the GT, buying a Sport and then continued modifying that one :} until i wound up building a bike from the ground up to get just what i wanted. it's a sickness with me... pic 1: GT1000 pic 2: Sport 1000 pic 3: the rossiz modified Sport 1000 pics 4&5: the full custom (frame, bodywork, everything) we'll see if something similar happens with the z family - although i don't see myself building a car from the ground up!


-
Nice!
-
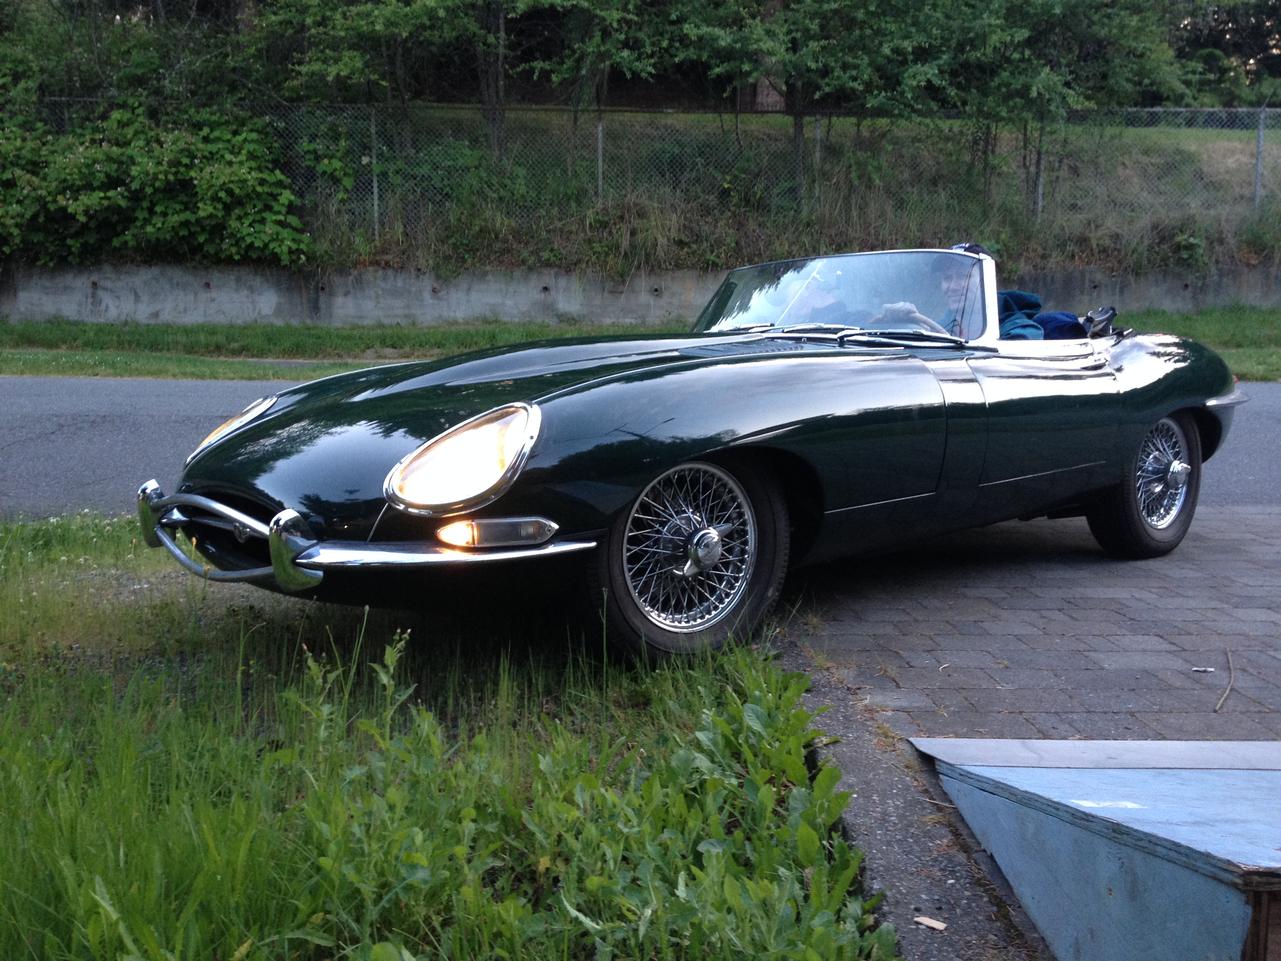
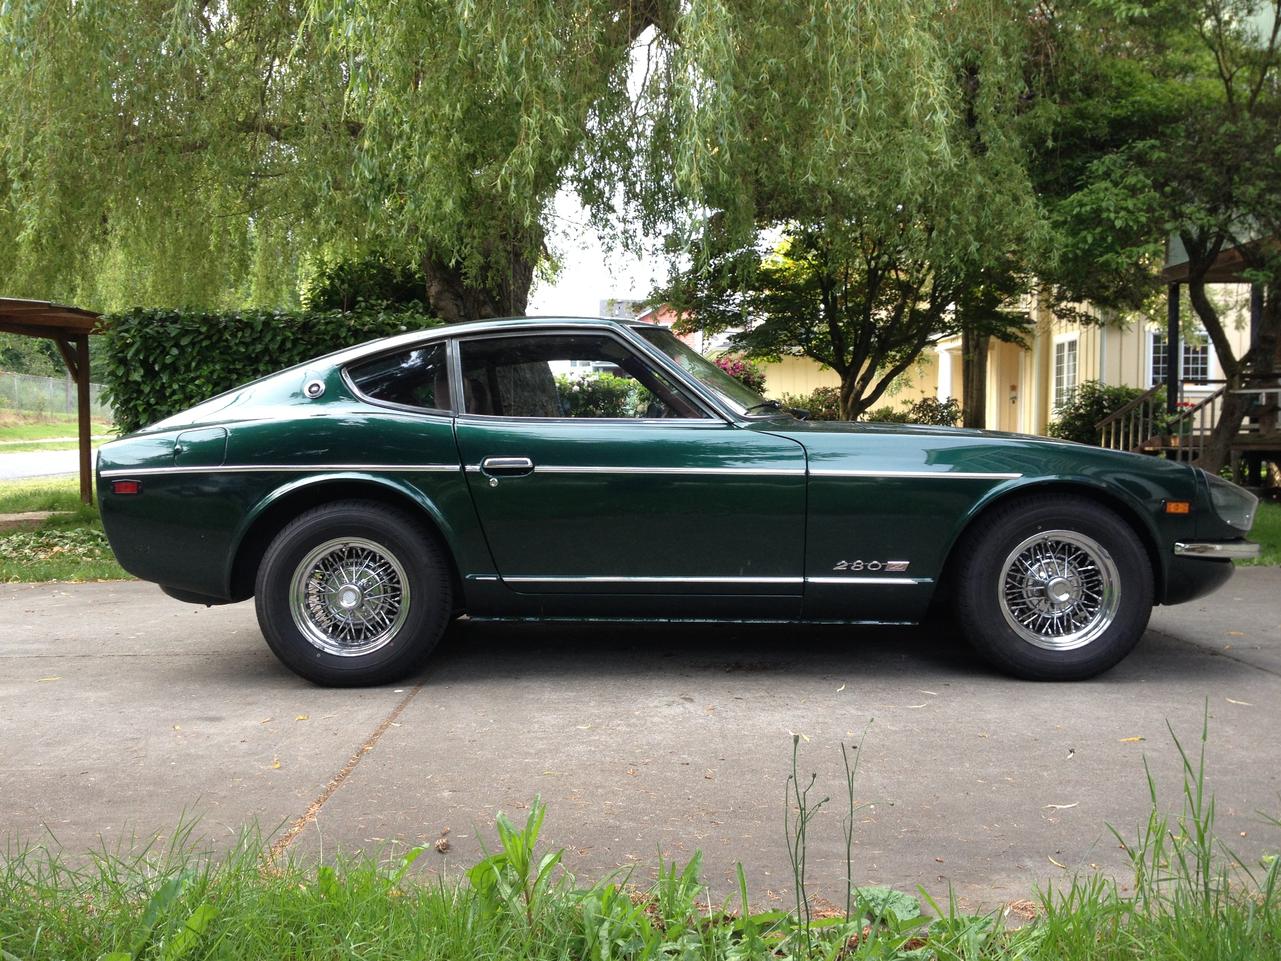
interestingly, here is my little list of similar styling cues shared between my specific z and the e-type in the pics: rear "hips" long, sloping nose headlight covers wrap-around bumper center hood swell hood vents/louvers lines of front door/fender joint wire wheels wood steering wheel green paint/tan interior i've been dying to get rid of the awful chrome tape the PO put on my rockers and the crappy stick-on door bumper trim strips, as they both take away from the gentle swooping lines of the side profile - especially the "hips" in the rear, as the trim just cuts across the top of the wheel arch. problem is, the bumper strip is so stuck on it started removing paint when i tried to peel it off, and the chrome tape just disintegrates when i try and peel it - gonna be a project for the painter when i do the body work to the rear (bumper holes, etc.)
-
ohhhhhh.... that makes perfect sense to me now. i did it all wrong, and am thinking that's probably one of the reasons the rear is still sitting a little high. i was actually surprised to see that when i lowered the car off the stands, the rear was WAY high (wheels cambered) and i figured the springs needed to settle in. duh... i will pull them apart, wipe off grease, re-do and report back.
-
yes, it really does feel like a new car - with all the work i've done, i'm really starting to understand why this car was such a hit on the track. when i got it, the thing ran fairly well, handled better than my 4Runner and looked cool, so i figured that was what i should expect from an old classic. i had no baseline to compare it to, and i am sooo glad i decide to dig into it. she's running way stronger now, better revs too, and handles very aggressively. love the feel in the corners! the last sporty car i had was a 2006 mini cooper and i absolutely loved the computer-controlled automatically adjusting suspension. while the short wheelbase of the mini was certainly a little more flickable, the Z in it's current state feels like it would hang tough with that newfangled technology. i'm really digging the way it slices the corners with almost zero body roll and no skittering over mid-corner bumps. as for alignment, its actually pretty straight - no pulls left or right at any speed. after the bushings, my steering wheel is ever so slightly to one side - just a couple of degrees, so i was going to do the alignment the way i always did on old cars back as a kid: tie string to the rear wheels, pull it forward ~20' in front of the car, set steering wheel to center, adjust tie rods so string just grazes both sides of one front wheels. i seem to remember reading somewhere that the factory spec calls for a few degrees of toe though... will peruse the fsm.
-
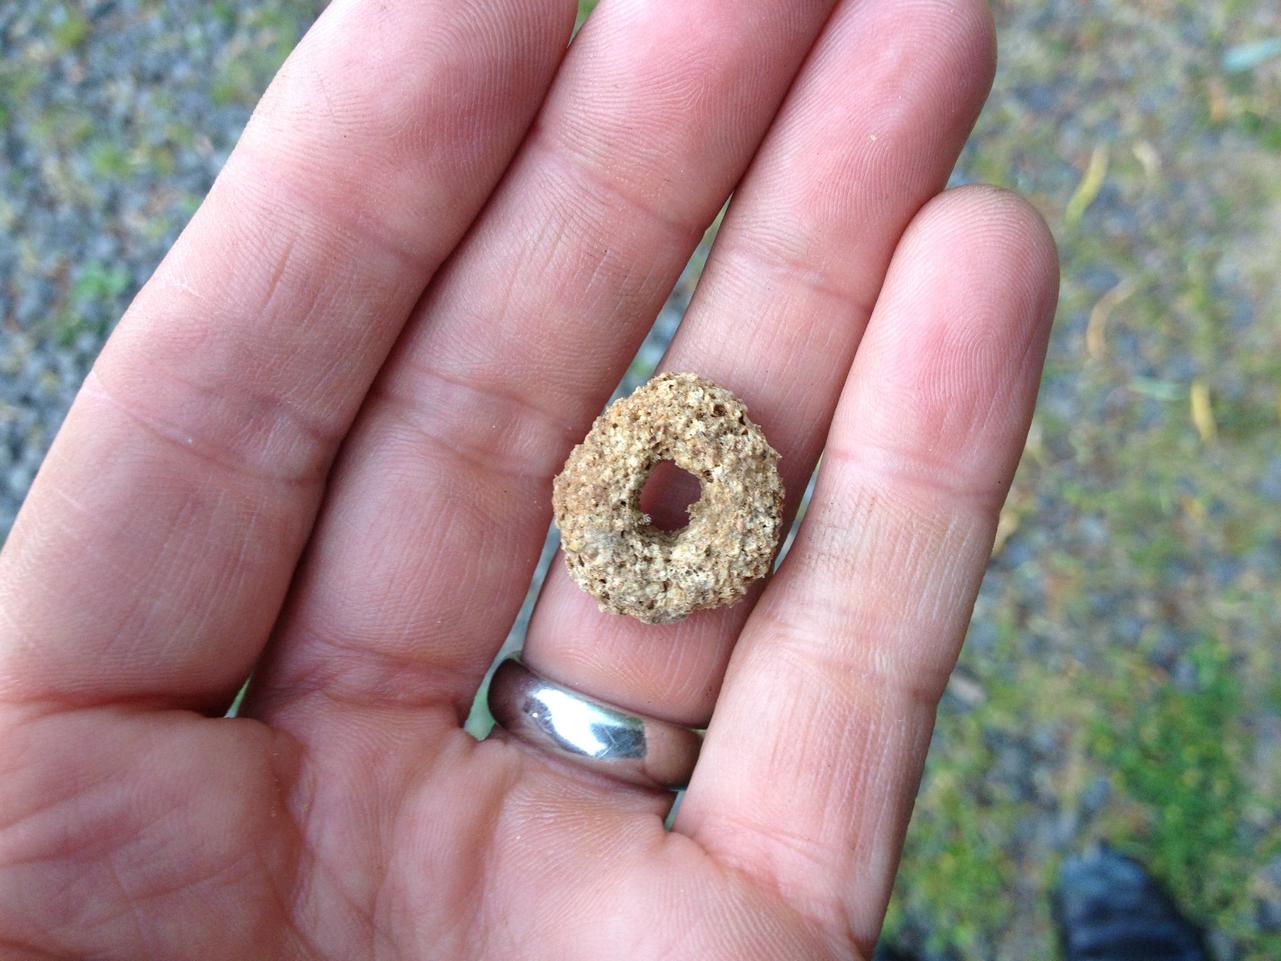
ha! no fur, teeth or claws have come out so far... they are like cereal, in that they are dried, crumbly things, but i feel like if they actually WERE 30 yr. old food, they'd be mouldy or stinky. maybe they have hit the first stage of petrification??
-
after having the pleasure of driving Cap'n O's Z, i was very jealous of his super precise steering. i had a bit of play in mine and was afraid i might need to tear into the rack - turns out it was all in the rack mount bushings. here are a couple of videos showing how much the rack moved - top one shot from under the car shows how the tie rods lifted ~1/2" and the bottom one shot from the engine bay shows the lateral movement. i had the car up on stands and was just moving the front wheel back and forth with my knee while filming got the $12 poly rack bushing kit from msa and it was installed in about an hour as follows: remove lock nuts and bolts from rack bushing clamps pull out shriveled-up oem bushings grease up the new ones and push them in - i needed to pull the passenger side tie rod connection at the wheel to get some more clearance crank it all together enjoy scalpel-sharp steering getting the bushings in was a bit tricky, as there isn't a great way to access them - you can SEE them easy enough, but it's an awkward hand position to get in there. probably easier if you take more things apart, but i was stubborn and wanted to do it with minimal collateral removal. steering is sooooo much nicer - tight, sharp, can feel what the wheels are doing. well worth the time and $
-
i didn't mess with the spindle pins - just the clamps that hold the rear control arms to the chassis. there are two: one next to the diff and one towards the rear of the car, each has two bolts. i greased up the rubber bushings plenty before re-installing. not sure how that joint would make a difference loaded or un-loaded, but i'll see if i can shimmy underneath and loosen/re-tighten them. might need some ramps, now that it's a bit lower...
-
aw shucks... have to say i'm enjoying the little thing. now that i've lowered it and tightened up the steering, i must admit i haven't been driving it in the "classiest" of fashions... more like a crazed teenager ;}
-
i'm up to a good spoonfull at this point - another offering today. left it on the porch railing to see if the raccoons would eat it...

-
the msa kit came with poly bushings and i torqued the links enough to compress them a little with no load on the suspension - about 1/8" proud of the nylock nut. i'm fortunate in that the bushing connection points are all solid - no rust at all and the fasteners weren't even stuck. lots of grease was applied all over the pivot and bushing points, so i'm feeling good about it.
-
funny - i never even thought to ask how his jag performs, it just LOOKS so cool i guess i assumed it would handle as well. knowing what i do about my brother's '66 mg and having messed w/brit bikes of that era, i'm guessing wooden brakes, wobbly suspension, fiddly carbs and oil leaks... but it does look pretty damn amazing. the c-type has always been my favorite jag - all those voluptuous curves and beautiful detailing, sex on wheels.
-
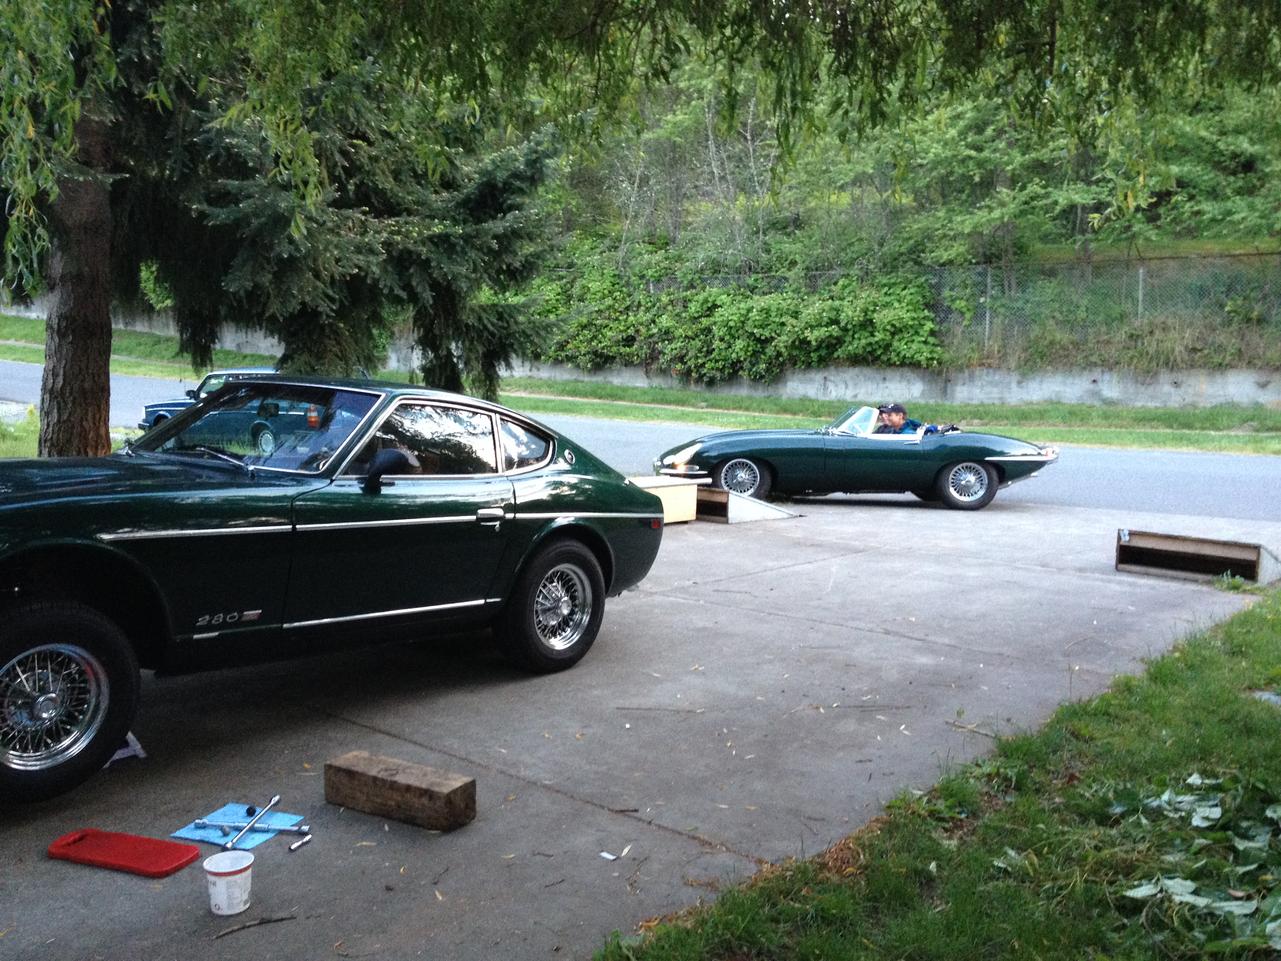
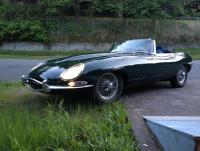
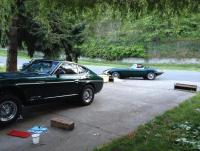
i've been restoring my z out in front of my house for the past 6 months, and i've met a ton of people during that time. they just stop chat about how they had one in high school, or how they dated someone who had one, or how they always wanted one... one neighbor up the street mentioned he had a '67 e-type jag, and while i had my car up on jacks fiddling w/suspension, he came by for a visit. with the green paint, tan interior, "wood" steering wheel, 240 bumper, headlight covers and wire wheels, the z really held it's own in the presence of a $90K brit classic it was a hoot to see the two cars together! there were so many styling cues that were similar - i had never seen the z in that light. don't get me wrong: i have no delusions of grandeur thinking my little $6,500 japanese DD is in the same league as that uber-classic, but i get to drive the snot out of my car every day and his only comes out 5-6 times a year on "special occasions" - i'll take the z any day :classic:

-
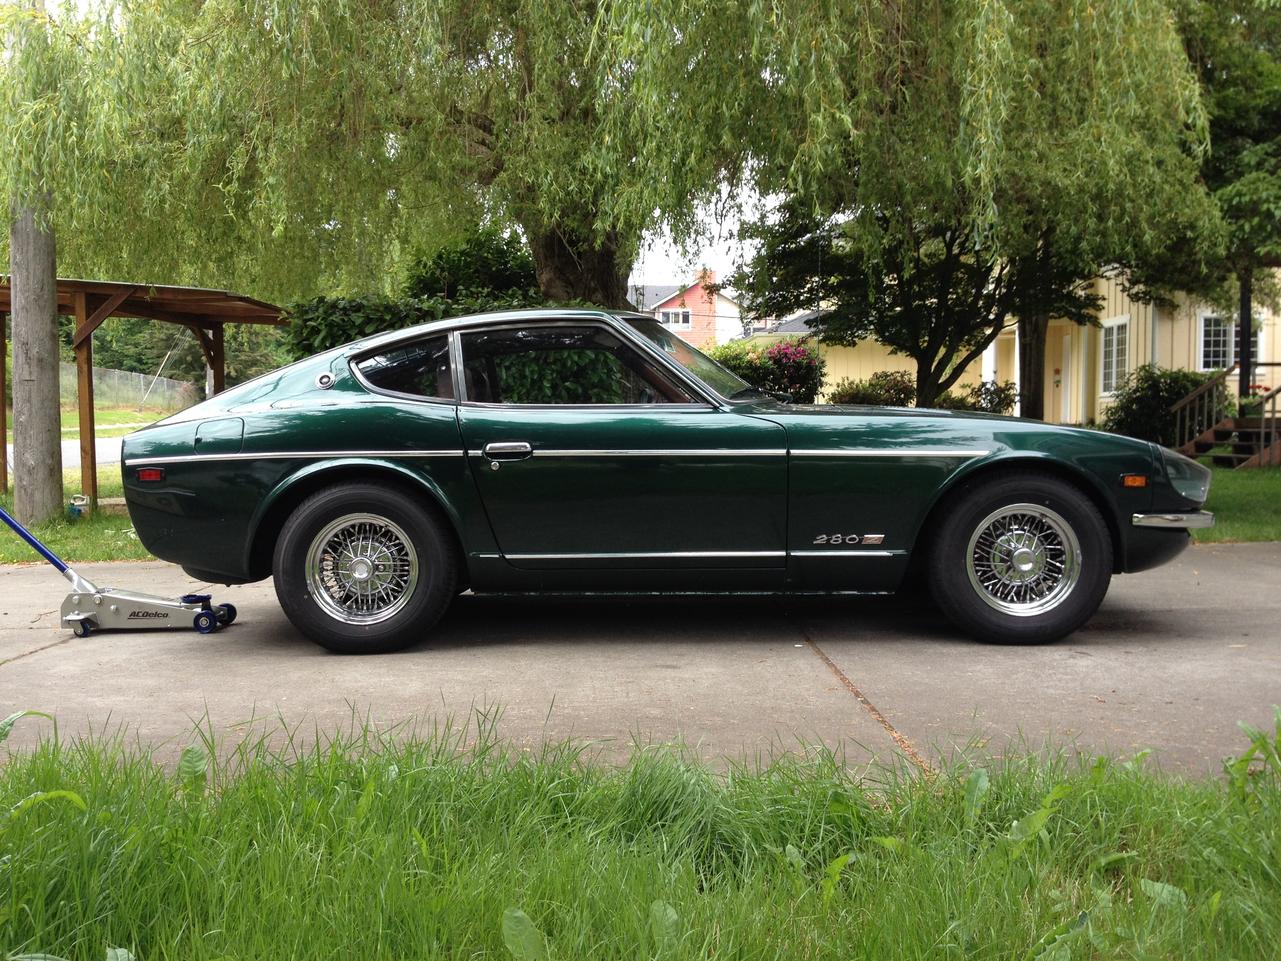
got a bit of free time this afternoon to pull out the cut oem rear springs and install the eibachs. the nice things about having done this job 3 times now are: i know exactly what tools to use none of the fasteners are difficult i can do it in an hour the not-so-nice part is that fact that i've done it 3 times now... anyway, i did learn a few tricks that might help others: remove spring clips at flexible brake line and disconnect e-brake, un-bolt half-shafts at wheel connection, disconnect sway bar a good floor jack is a huge help - use it to prop up the control arm when you remove the strut tower bolts and slowly lower the assembly until it can swing out. remove rear bracket (2 bolts) that holds up the rear control arm, loosen the 2 bolts for the front bracket (the one closest to the diff) - this lets the control arm lower/hang at an angle so the strut assembly can be swung out and you can fully service it w/out removing from the car. this way you don't need a vice to get the top shock nut or gland nut off. loosen the top shock nut before removing the 3 top strut tower bolts (easier, better leverage) and if you back it off until the strut shaft dips below the nylock ring, it reduces the amount of futzing around w/the spring compressors, then as soon as the spring pressure is released from the perch, you can spin the nut off w/your fingers. with the floor jack under the control arm, you can lift the finished assembly up into the strut tower (use your foot to work the handle) while guiding the bolts into the chassis holes - use a socket on the top shock nut to rotate the cap to line up the 3 bolts w/the holes. piece of cake. the results: here is a picture of the car w/the eibach fronts and the cut-coil oem's at the rear - back end is slightly high the ride was pretty good, even w/the wonky, mismatched spring rates, but the rear felt a little bouncy. here is a picture of the car w/the eibachs both front and rear - interestingly, the rear is actually just a little higher than before. i've heard the springs need to "settle in" a bit, so i'll reserve judgement for a while - anyone know how long it should take for them to "settle"? the ride is much better - feels more "matched" front/rear. before, when i hit a bump, the front and rear reacted differently, now they react similarly. overall, the springs feel much firmer, but not harsh. the car feels much more crisp over the road, vs. the vague, mushiness w/the oem's. the new springs behave a lot like the suspension on my bikes - tuned for more aggressive riding, they actually feel better the harder they are run. the eibach's feel a little "bumpier" pootling around below 20 mph, but the faster i go, the better the suspension seems to perform. whereas the oem's sort of got overwhelmed at higher speeds, this setup feels quite a bit more confident. to be clear - i am no racer, but i can definitely feel that the car is a whole lot more fun now! main takeaway: the biggest bang for the buck in stability/handling was the sway bar upgrade - HUGE difference.


-
nice!! my kids ran like my L28 minus 1 cylinder: 1st 2 ran lean, 3 & 4 waaay too rich, 5 perfect mocha... they seem to have been equipped with those new-fangled "self-adjusting" chips - they all evened out quite nicely eventually, although there was a fouled plug or two along the way...
-
@JeffG - can you point us to a thread on how you modified the cam? i'm looking to do something similar (shave a p90 on an f54 with cam, but for the street) and i've been thinking about turning back the cam vs. all the shimming. i've seen eccentric cam bolt inserts - is this what you did?
-
so i only had a couple of hours tonite, but managed to swap the eibach fronts. now i have the correct eibachs in the front and the cut stockers in the rear. will swap out the rear springs later when i have time. the front is now a bit lower, looks quite nice actually, and a quick test drive shows even better front end tracking, sticks really well. the rear is a little higher than the front - not funnycar high, just about 1". interesting experiment though - kind of an iterative test of different setups. what i started off with was a really crappy baseline: blown struts, tired, saggy sway bars and too-high stock springs. the ride was really boat-like for a sports car, lots of body roll and not much damping to speak of. the next test was with all eibachs, but front/rear reversed - very low rear, too high front, and the ride sucked. the front pushed and washed out in corners and the back was harsh. the third test was with eibach rears in the front and cut-coil stocks in the rear - ride height was level, and it actually felt pretty good (better than the first two setups) now i've got the correct eibach fronts and cut-coil stocks in the rear - ride is lower in front, it tracks quite well, but i'm actually feeling the road surface more from the back it seems... i hope to finish the swap either tomorrow or thursday nite and i'll report back. the good news is i'm getting pretty good at pulling her apart and swapping suspension bits - it's actually kinda fun :}
-
yes, as annoying as it is to repeat the process, i suppose i would rather tear the suspension apart and re-do it than take another chemical solvent hit to the nards...
-
oh crap - you mean i now have the rear springs on my front end?!? does anyone know how different an eibach progressive rear spring is from a stock front spring? the surprising thing is that this arse-backwards setup dropped the ride hight about 1" and seems to be riding really well... but of course now i'm wondering if i should swap everything back out?? what a pain in the butt...
-
wow... you guys amaze me. salt bridge??!? who knew!
-
the struts that were in the car had no branding on them - just black casings and a warning about pressurized gas (no longer applicable). the car feels really nice now: well planted and quite settled. the swaybars make all the difference in the world when cornering (thanks for the tip Blue!) and have all but eliminated body roll - a total transformation from before (felt like a minivan in comparison). the springs/struts seem to do a better job of keeping the car from getting wobbly over bumps... just seems more settled, balanced, with less translated to the steering wheel. in truth it's hard to say if it's more solid than yours Cap'n, without driving them together on similar roads. definitely less body roll though. if you're going to lower your car, i would definitely recommend cutting coils first, try that before spending the $$ on the spring kit. worked like a charm for me - dropped it down just enough and kept the civilized ride i so cherish on my commutes. on another note - i discovered that my rack bushings are almost non-existent! with the car up in the air, if i grab a wheel and turn it sideways the whole rack lifts up & down about 1/2" - yikes. the good news is the rack seems totally tight otherwise and the bushings are cheap (already ordered) so i'm looking forward to pulling that slop out of the steering.
-
@Jeff: understood - on my bikes (ducati twins) i've always had injectors matched and it makes a noticeable difference when tuning for afr - the shop keeps about a half dozen new injectors on hand and when they order a new set they flow test to find a matching pair. too bad you can't adjust them... @Cap'n: yes, i did a bit of research on plugs and the projected tops seem to run fine so i'm happy with them.