inline6
 Subscriber
-
Joined
-
Last visited
Everything posted by inline6
-
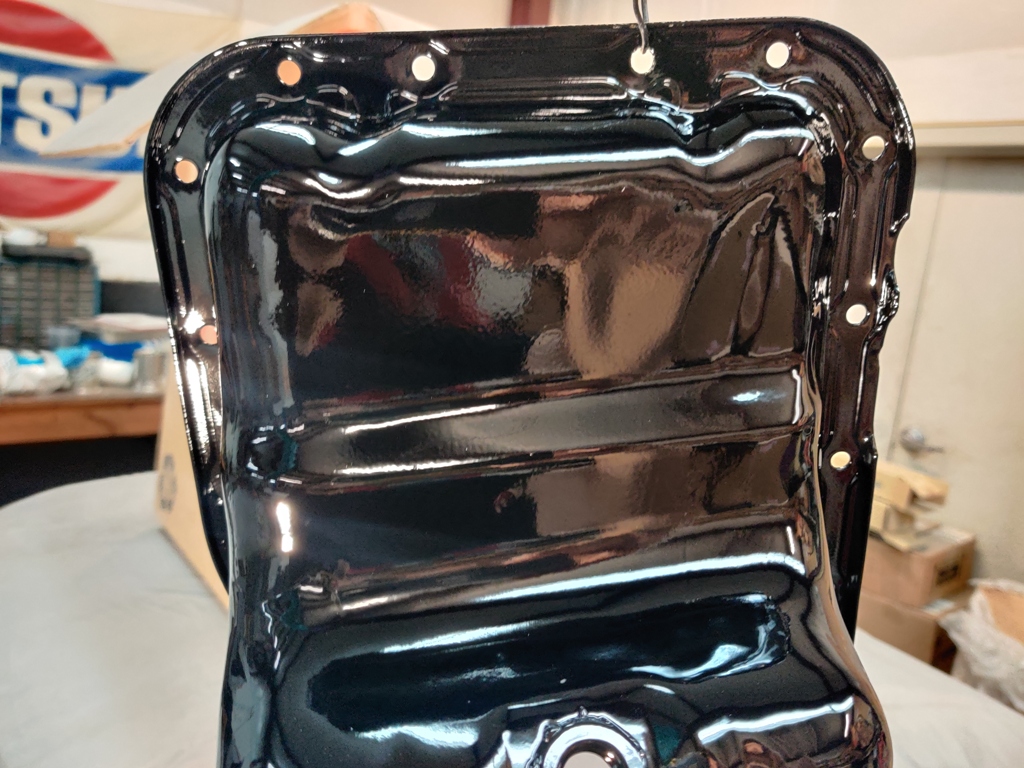
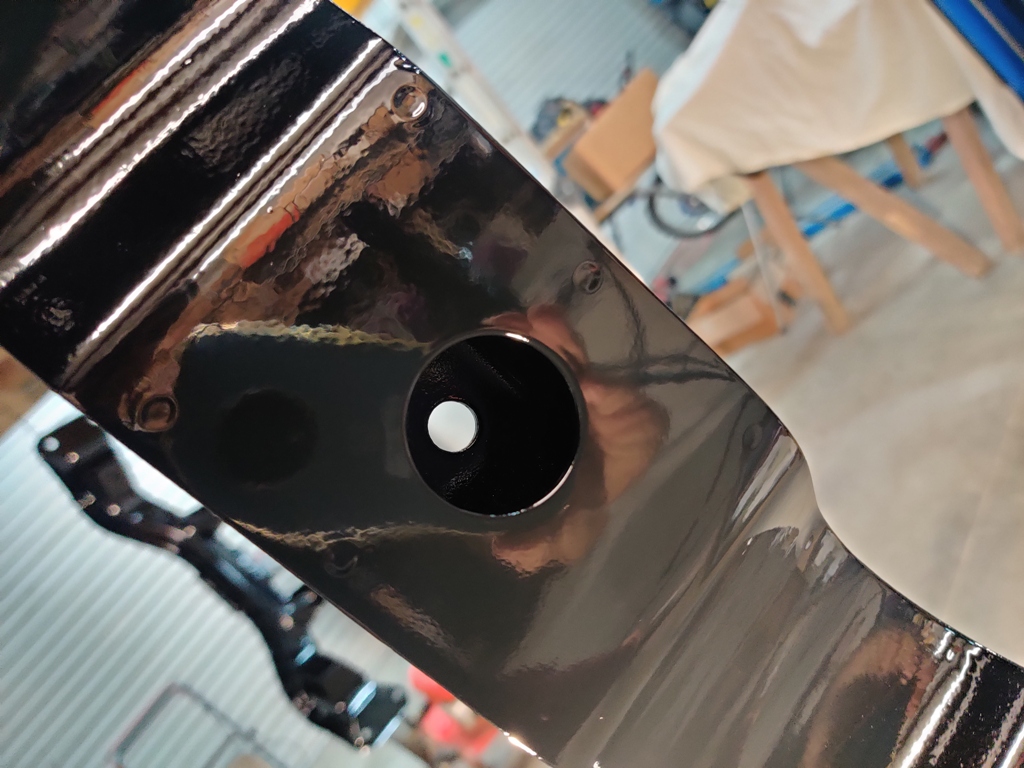
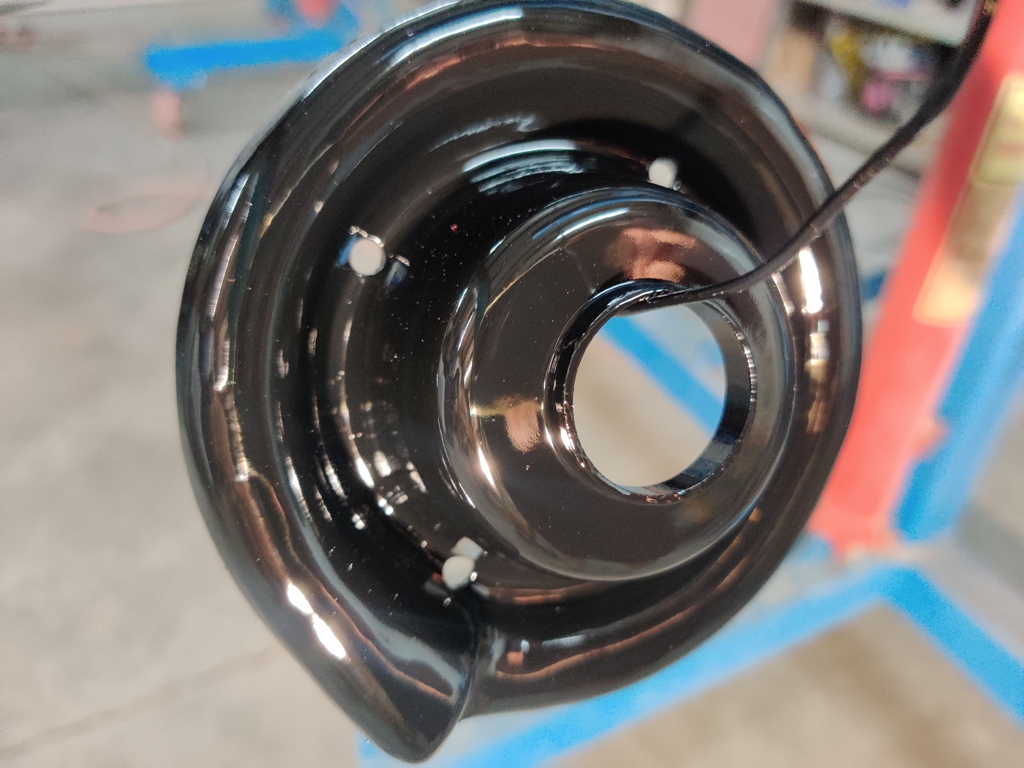
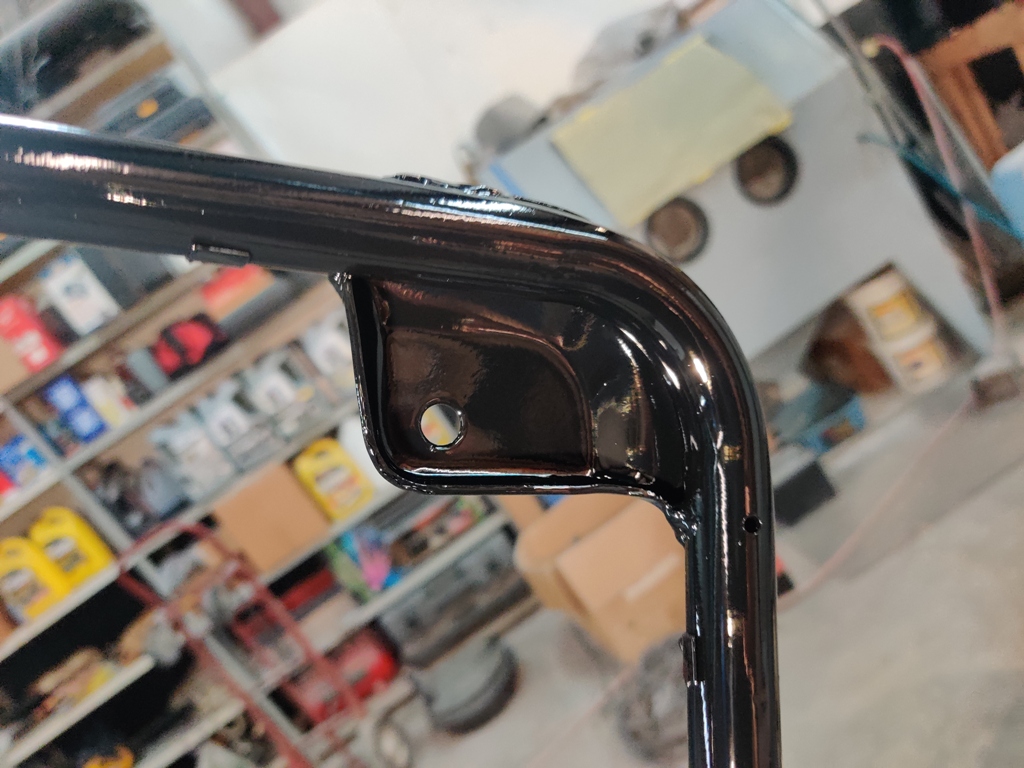
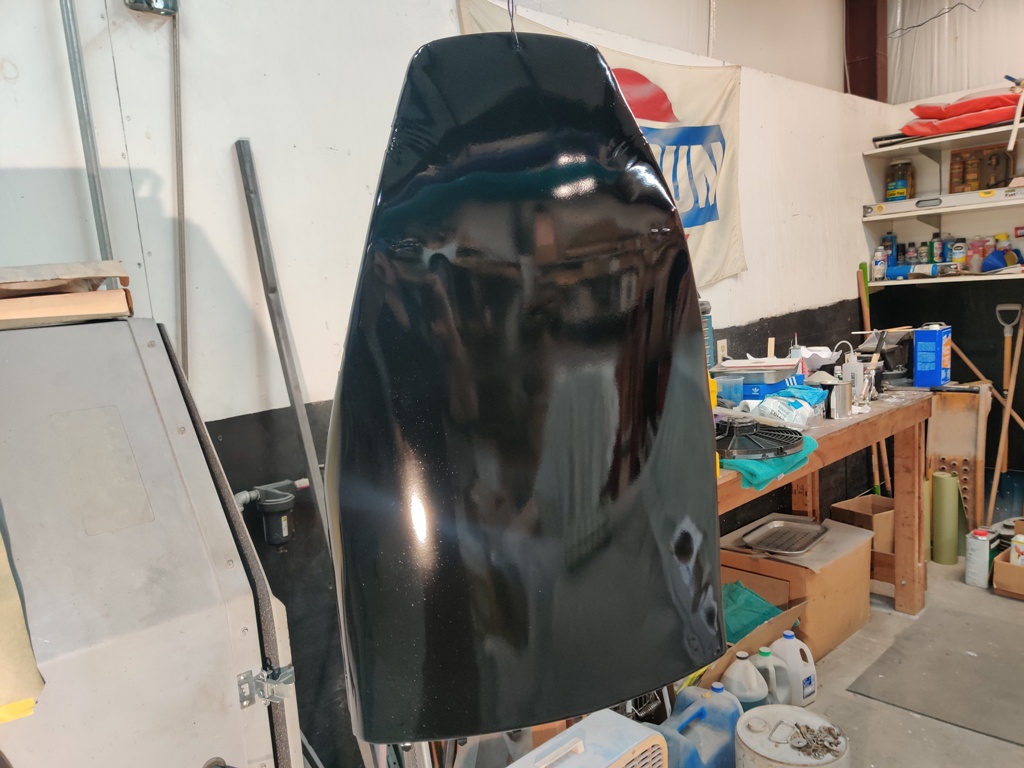
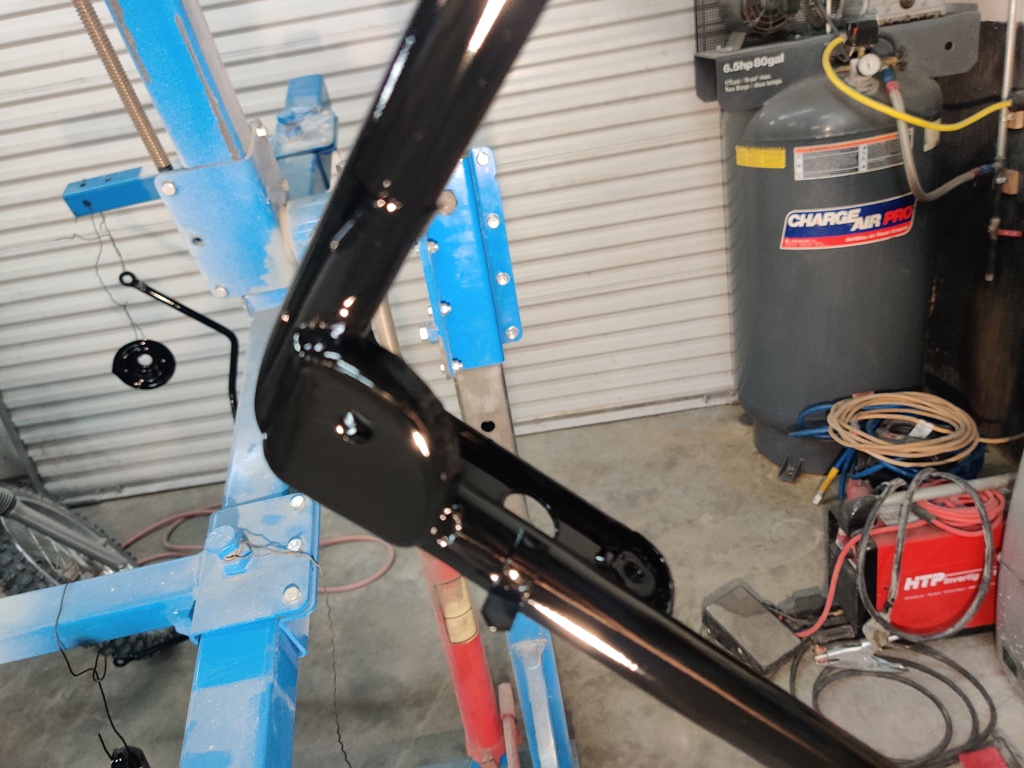
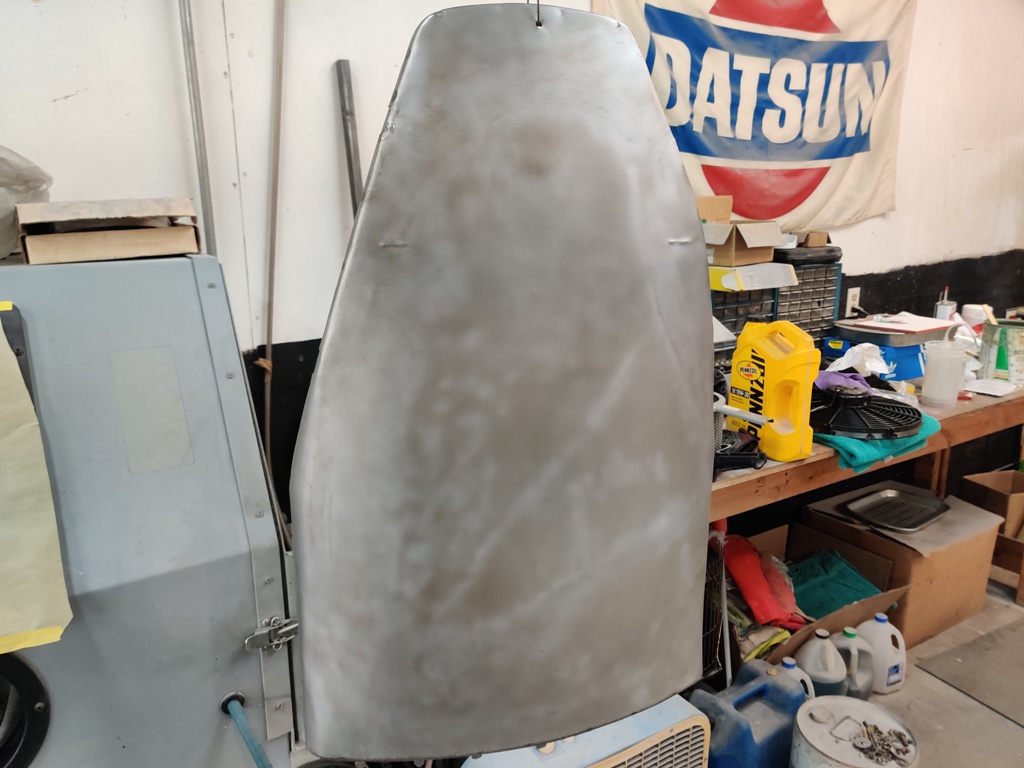
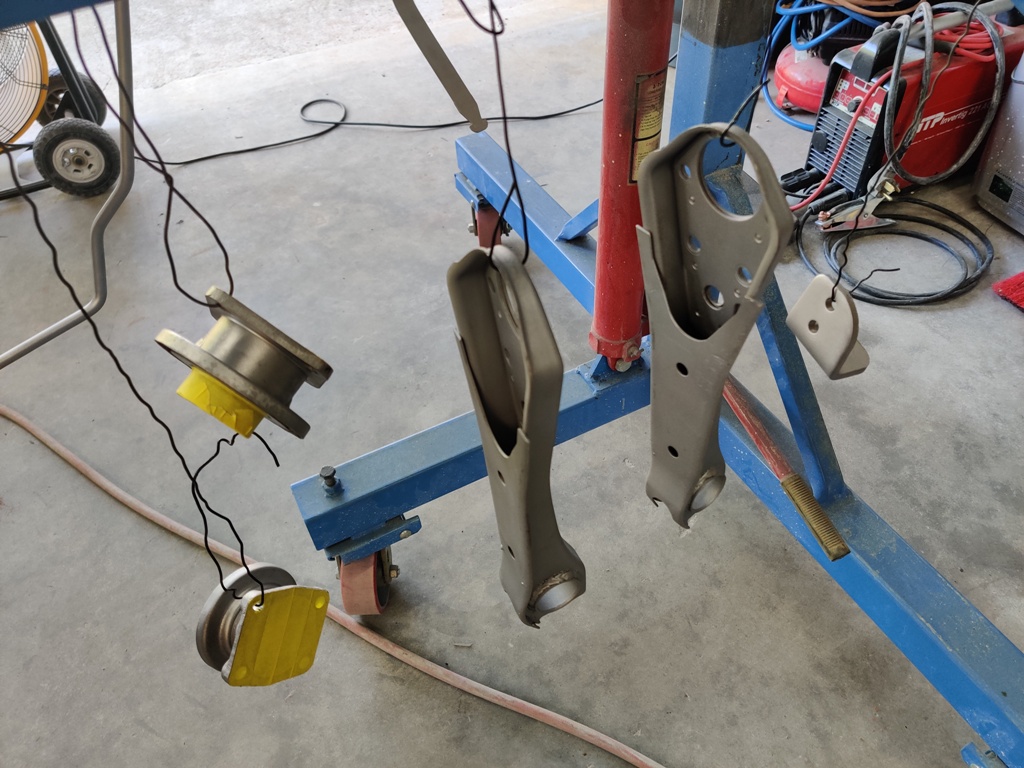
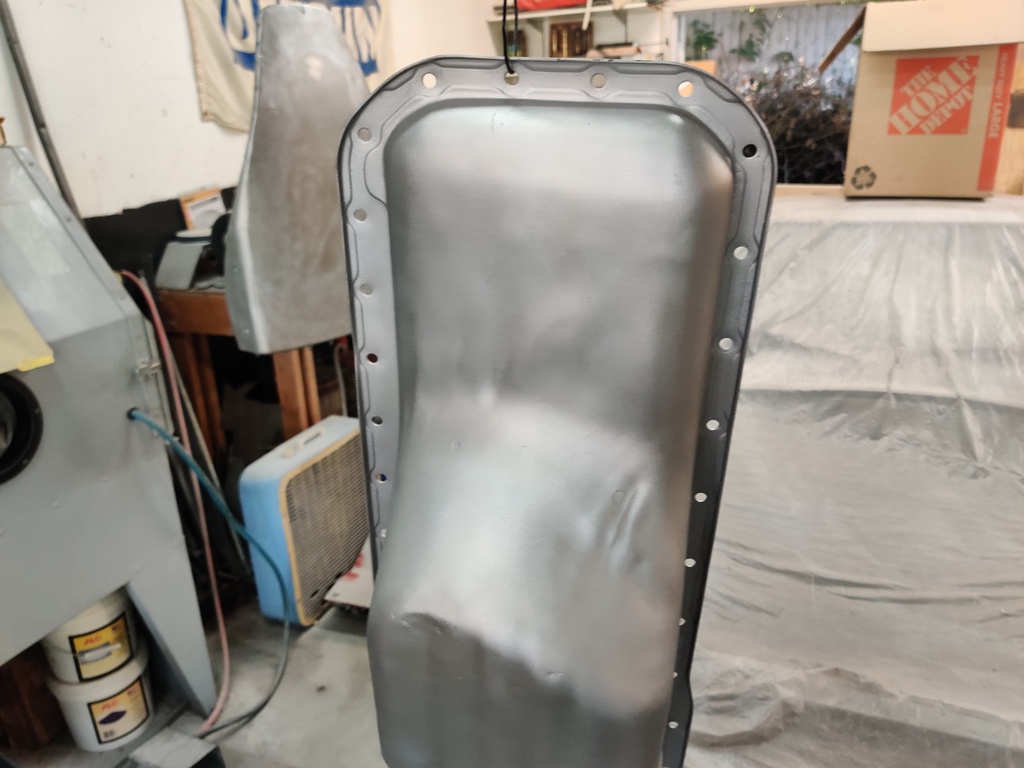
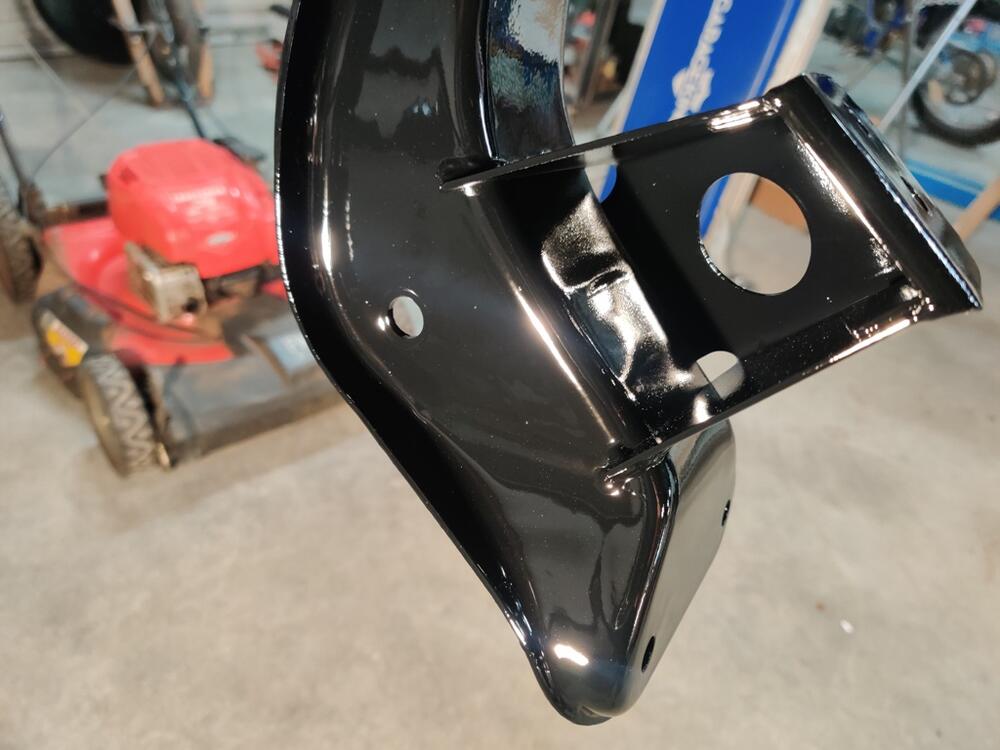
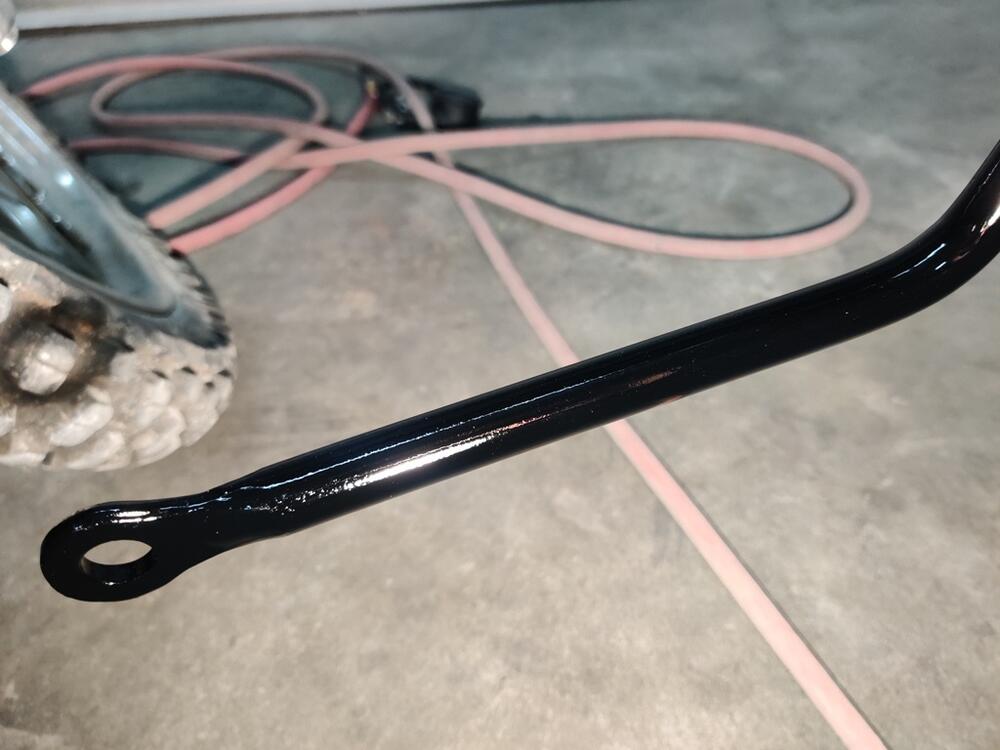
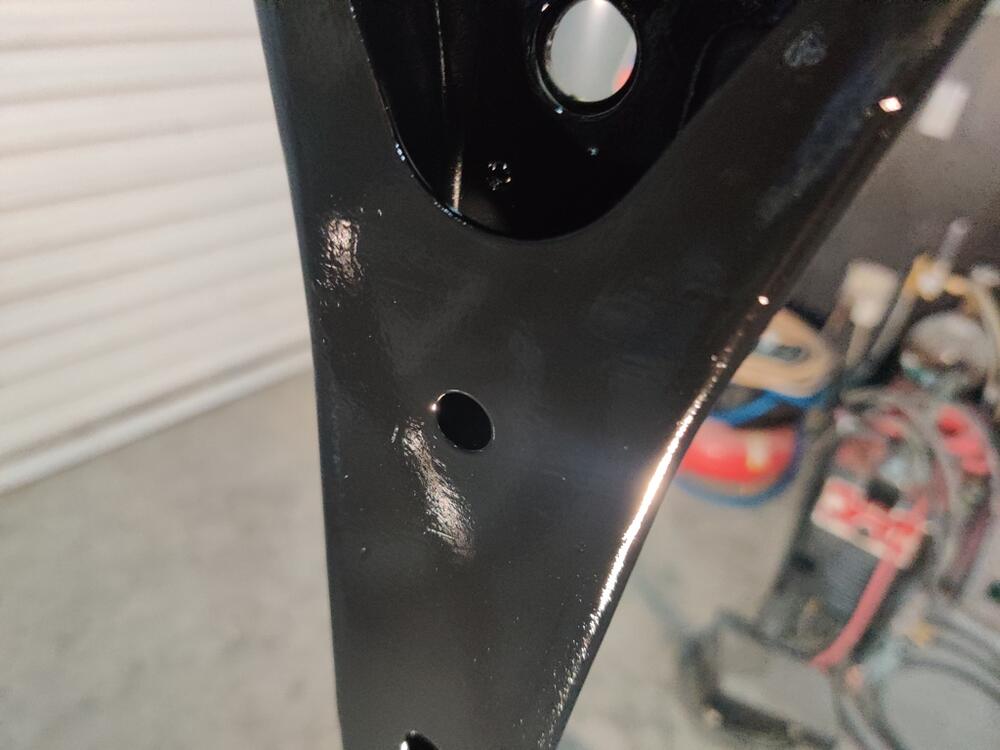
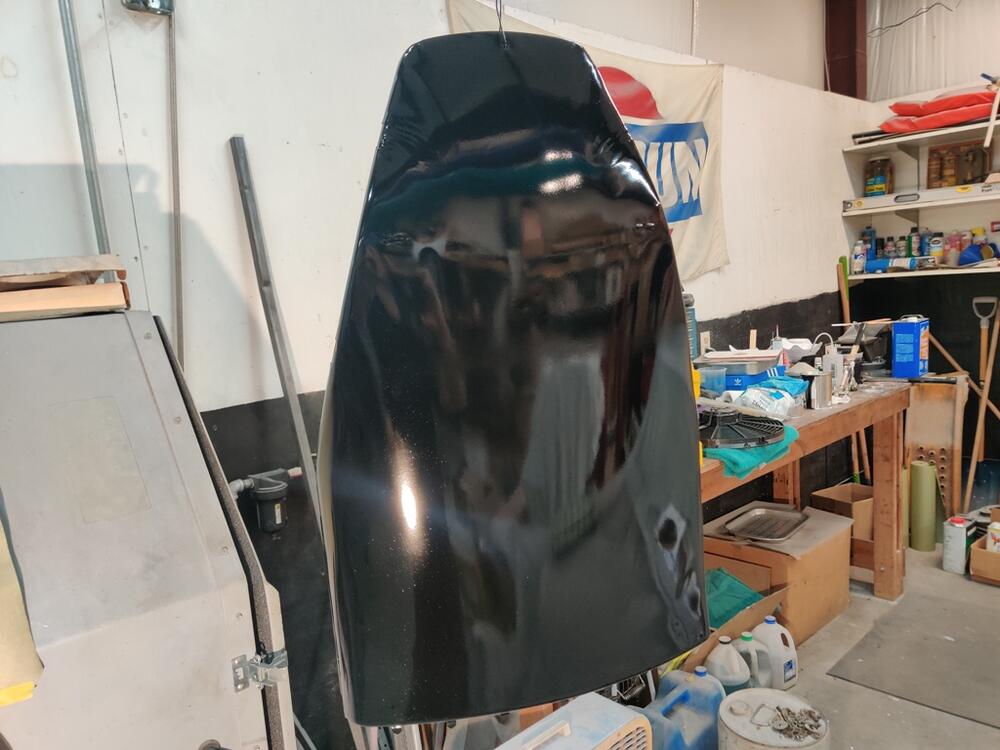
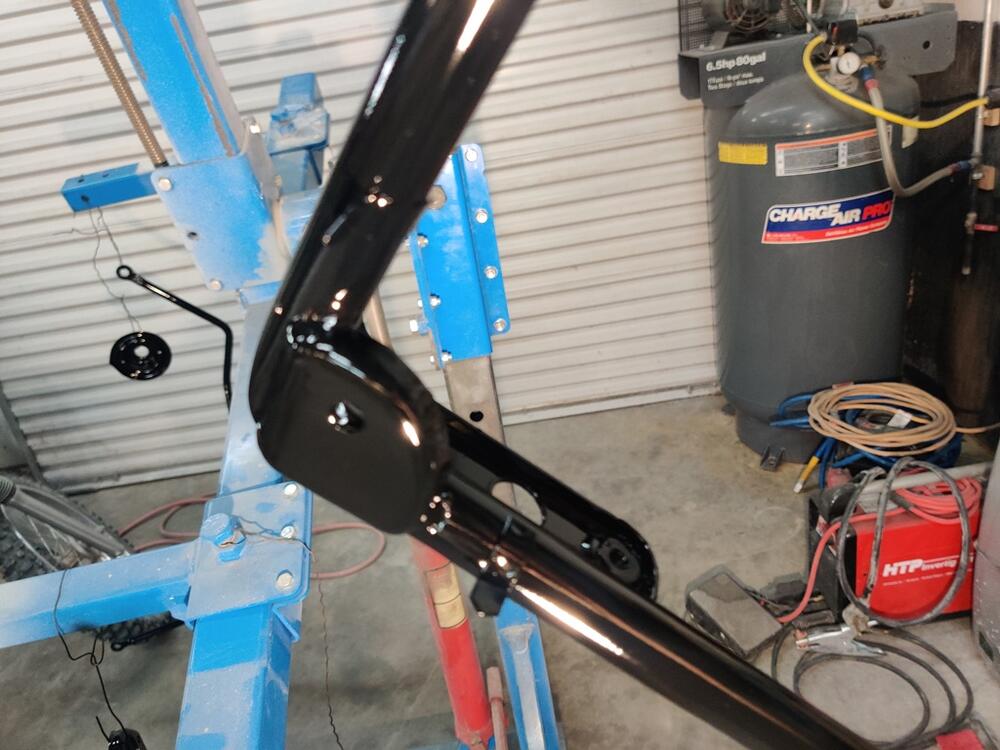
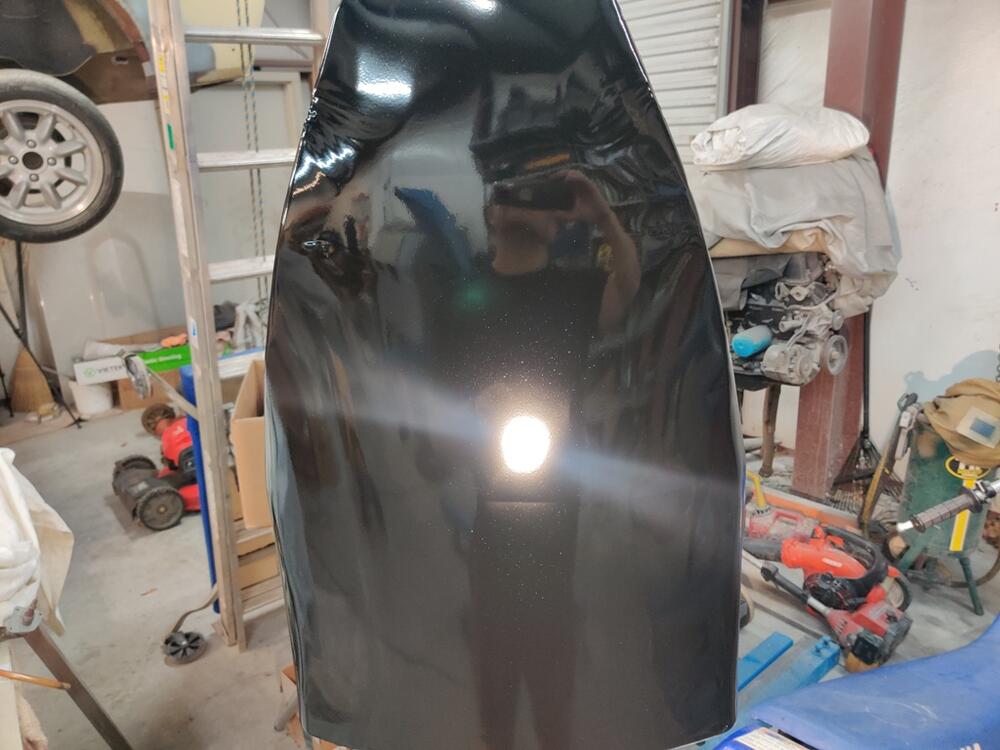
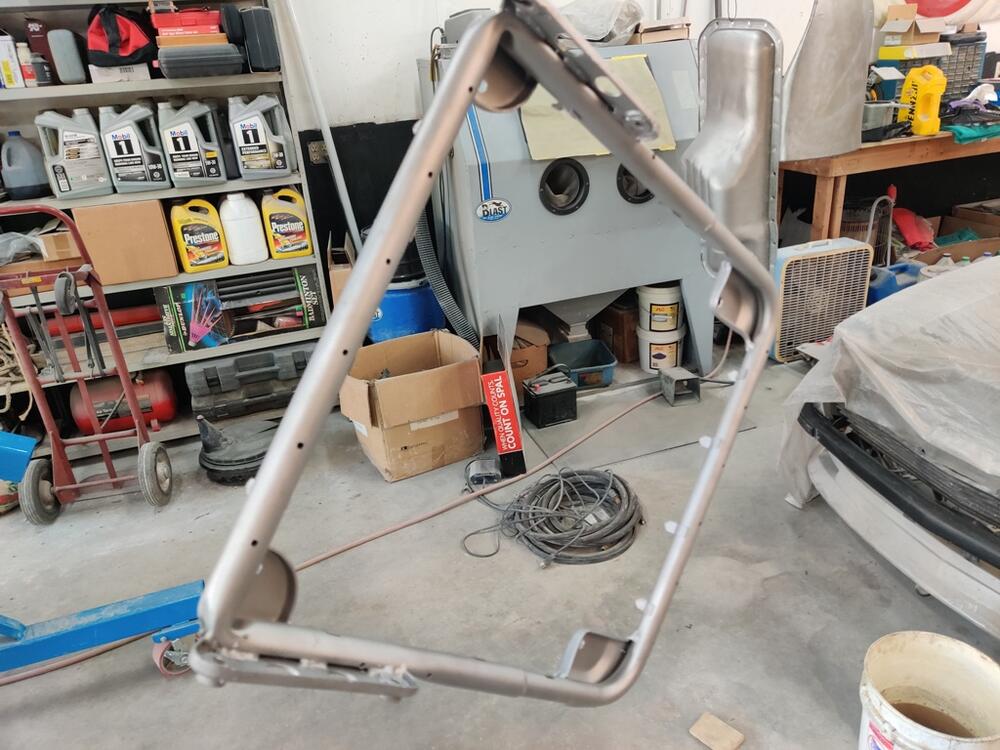
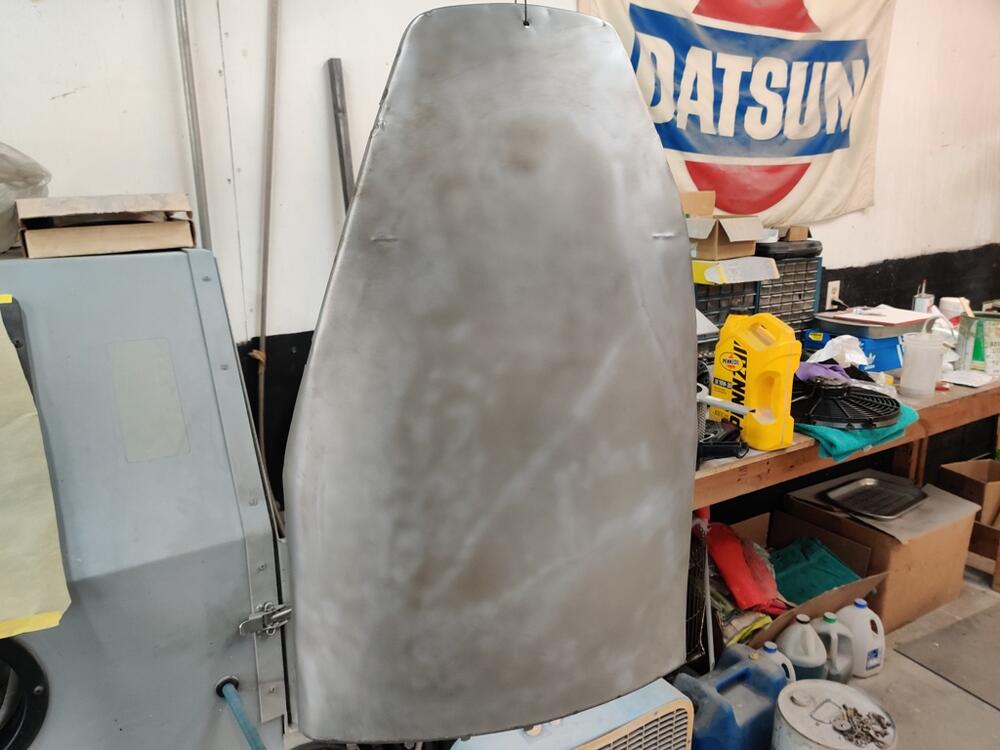
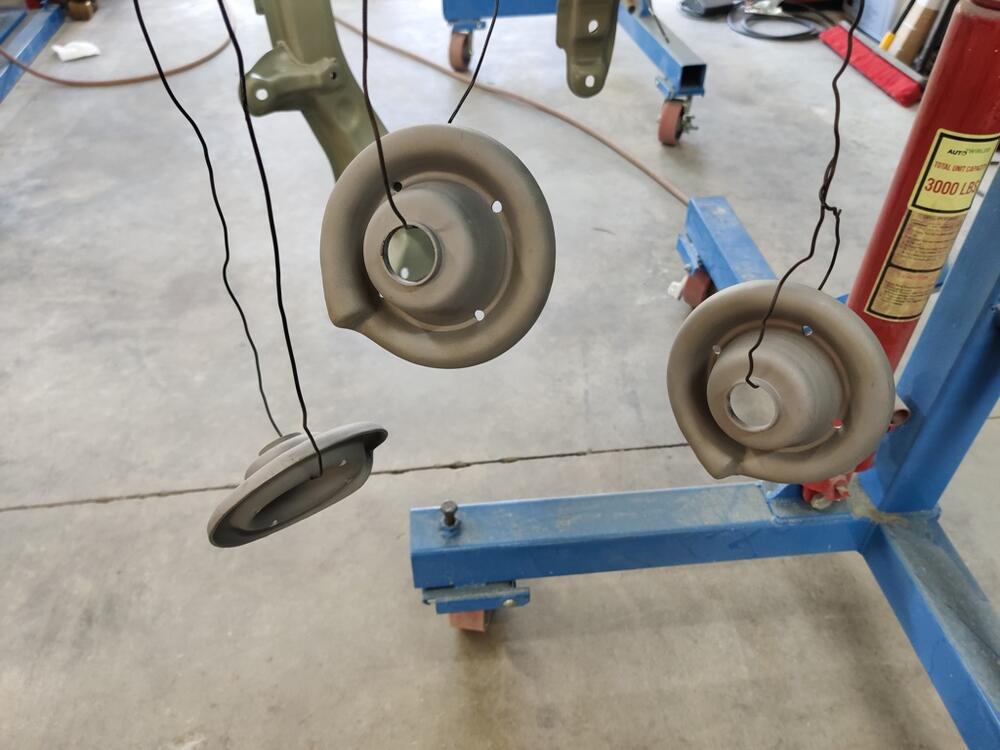
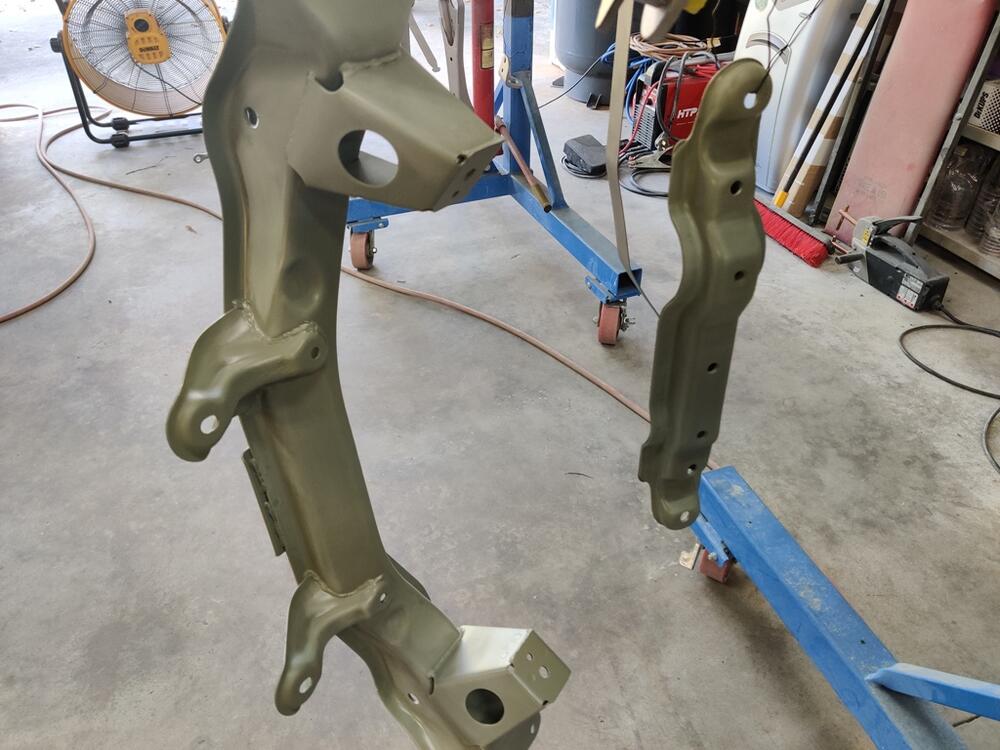
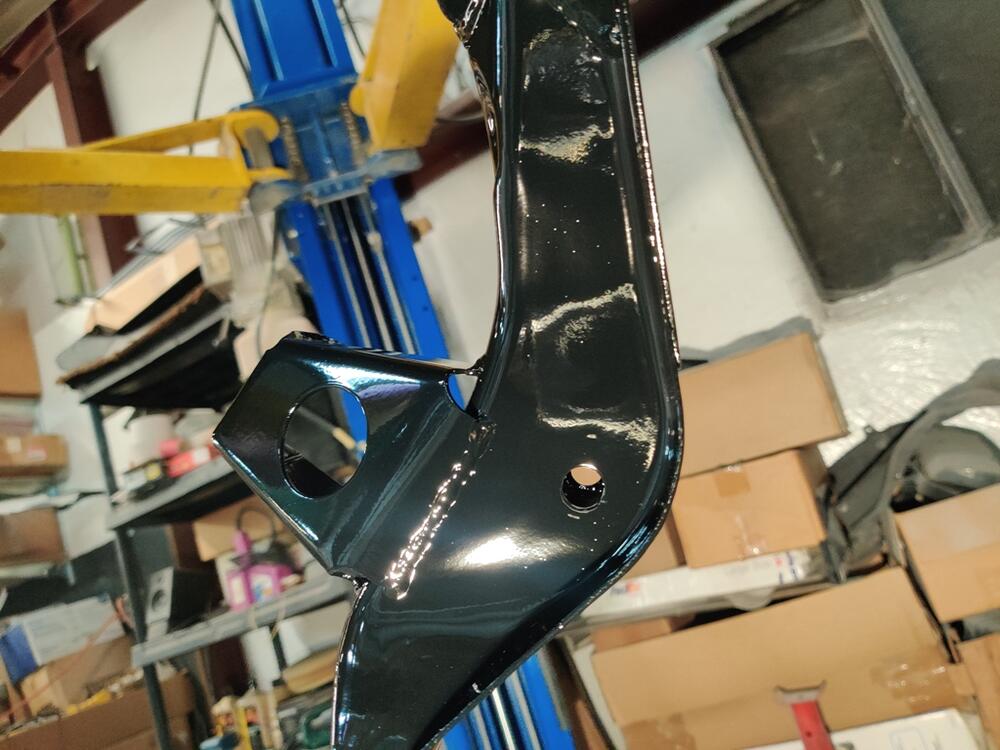
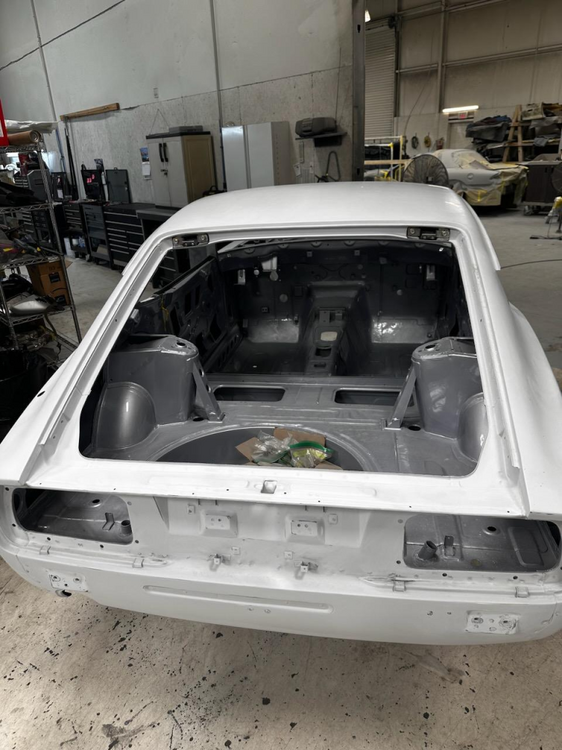
 As the time is obviously coming when I will be receiving the car back from painting, I find myself thinking about reassembly. I have been putting together a list containing "order of reassembly" which I will share soon. Over the past weekend, I got through another batch of parts that are black: All of these parts were coal slag blasted, glass bead blasted, epoxy primed and painted black. I only have a few parts left that need to receive fresh black paint. I will try to get that accomplished before the car chassis is back from the paint shop.
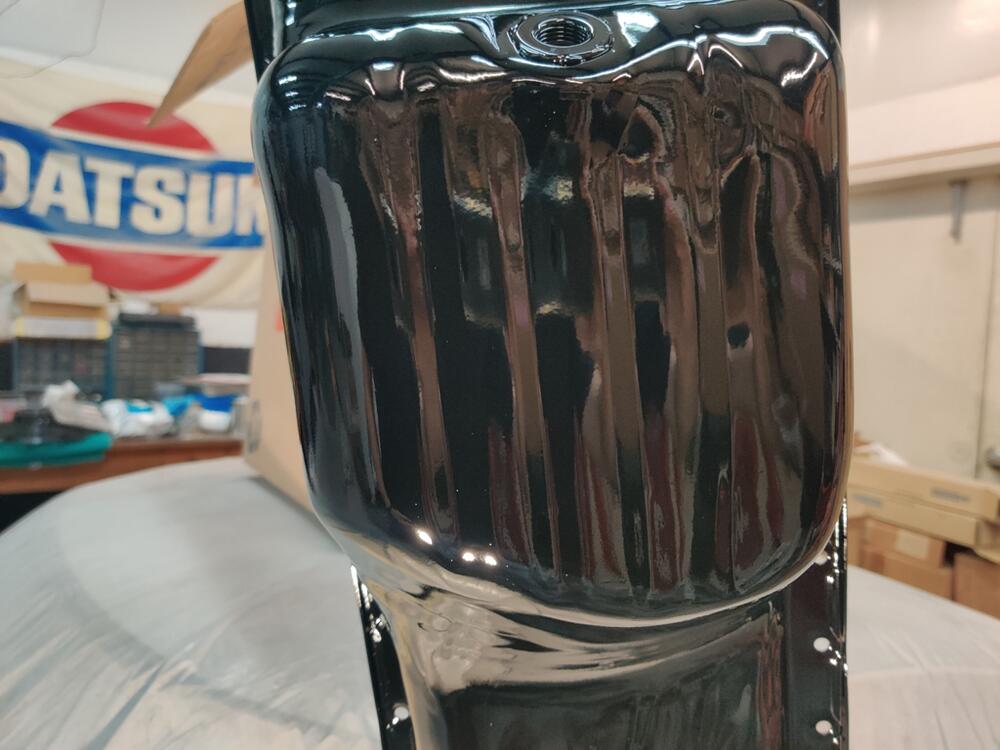


-
This one looks very original and unmolested. I note what appears to be original front carpets, original radio, most of the hose clamps in the engine bay are original, and an original rear muffler. 73k original miles claimed. Nothing in the description about the engine or chassis numbers matching the door tag yet. Worth $25k right now? Right click and open in new tab to see larger pictures. https://www.ebay.com/itm/256204088147?hash=item3ba6f42353:g:fmEAAOSwY0Jk5~tL&amdata=enc%3AAQAIAAAAwCgIrIkzW0imPWYjTmScCTAPtCppC68RtRcskuzXb8045x%2Bl5lMJYYQTMrIuKhQoBkuAczFcc1btKdzX83fpSsqpWeIkMn2tBLDj4aaHdVKsydXE6xuivDw%2FK%2BiY7O129LLBd5WGpKB%2FXpdQTiDe0m%2FA7qhl627GoeNo%2F8TPihVXawP%2BopUjj3zK41%2FL6mMco17mW4rEaBV9YLkx6Pi8P0wVIxaH1MPA1bPsfRSYvcqA%2Fh%2BZePXAwu7Qft8pdIrIjA%3D%3D|tkp%3ABk9SR8jD-uDKYg

-
I like the undercoat finish you achieved. What product did you use?
-
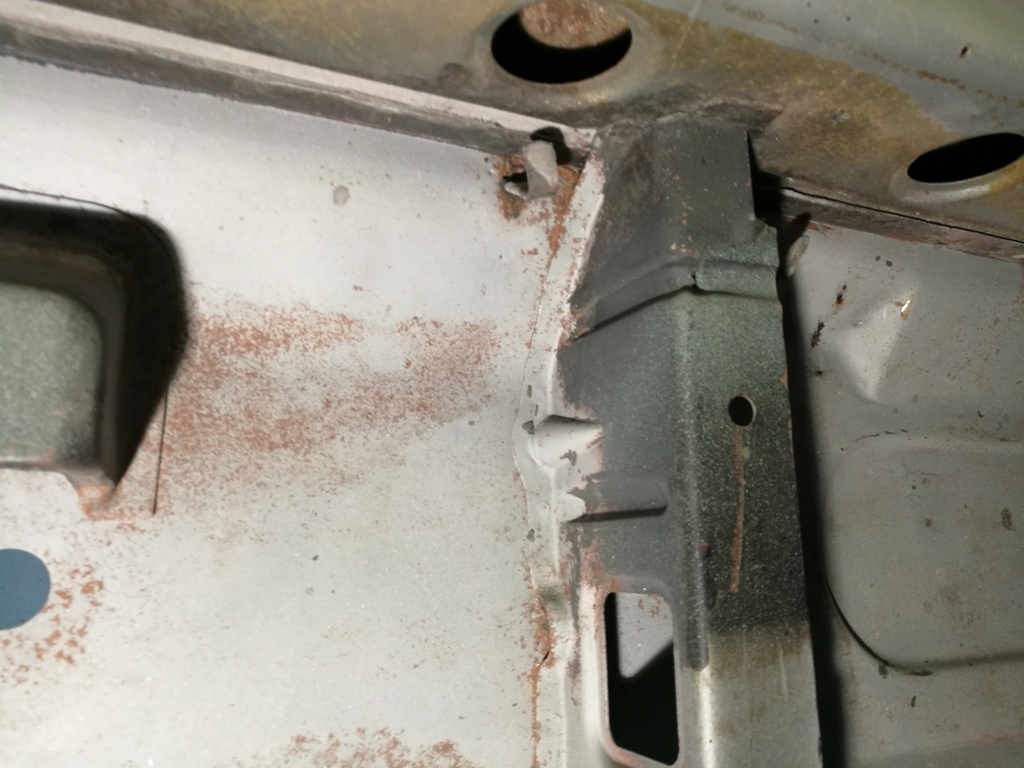
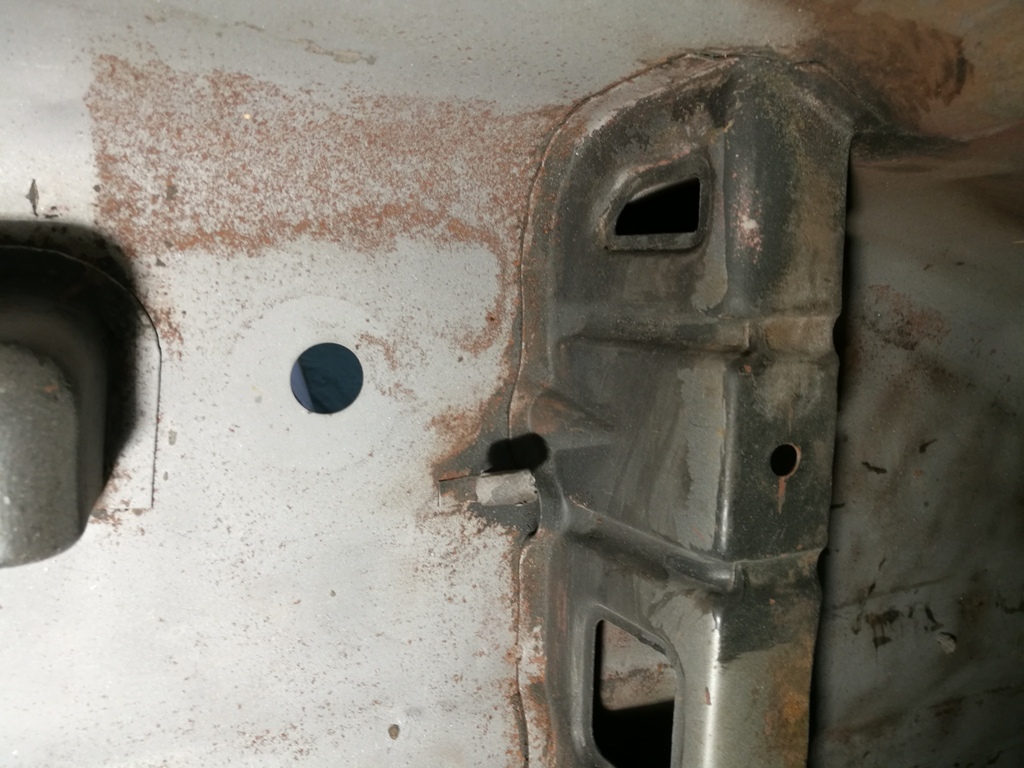
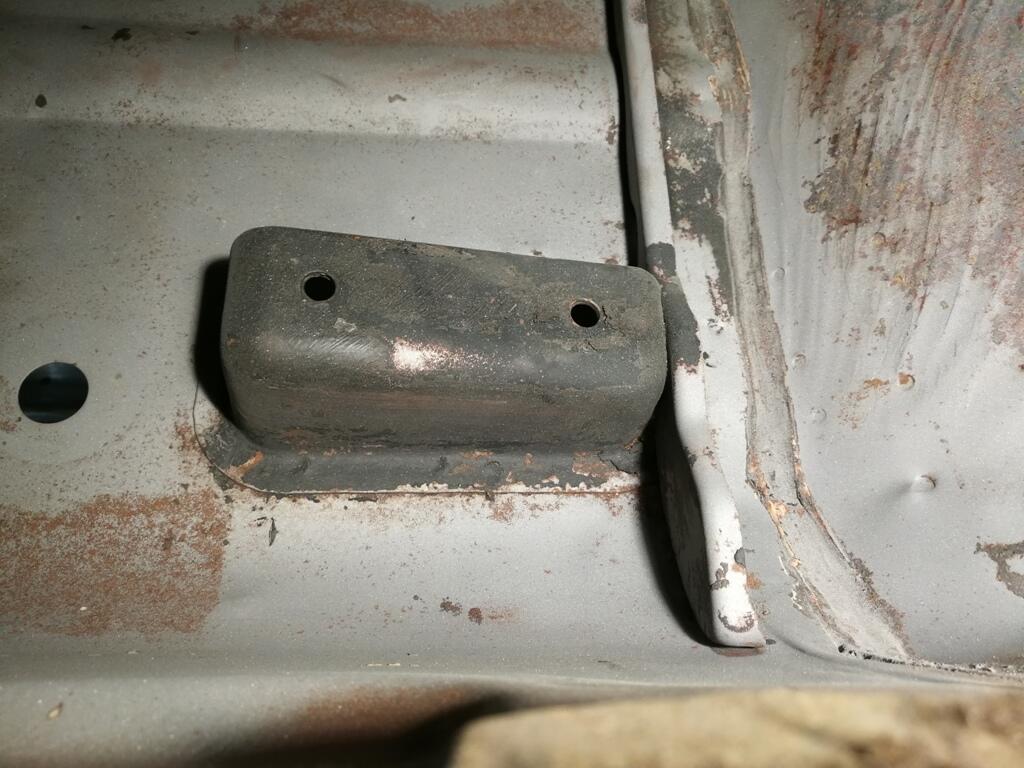
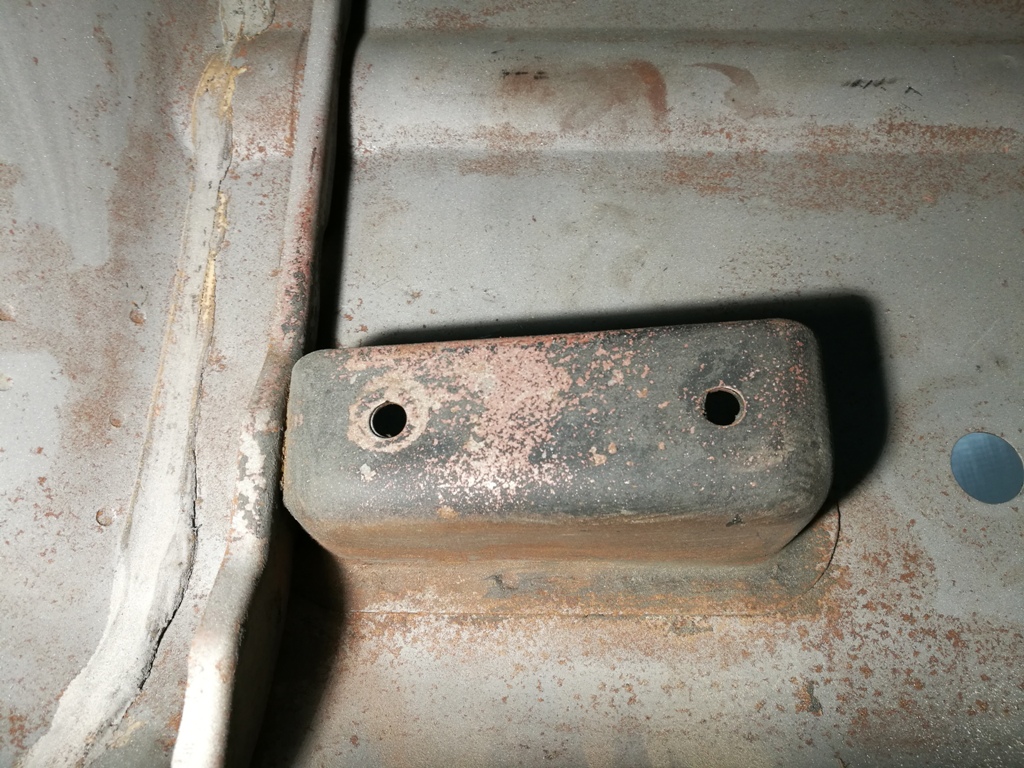
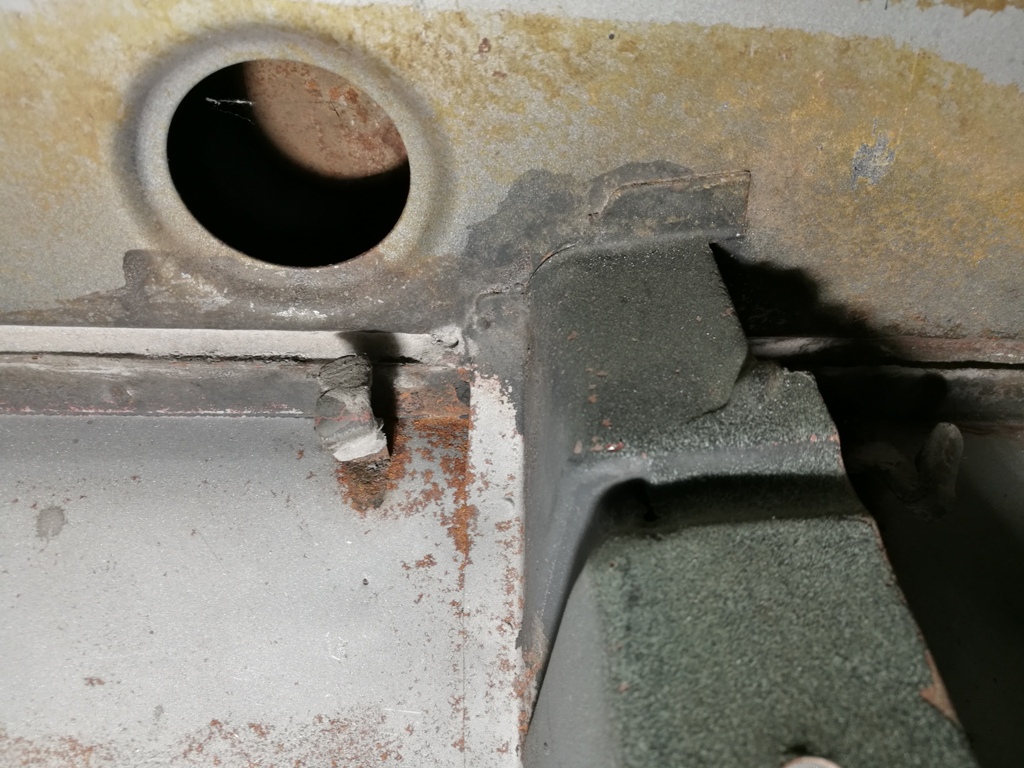
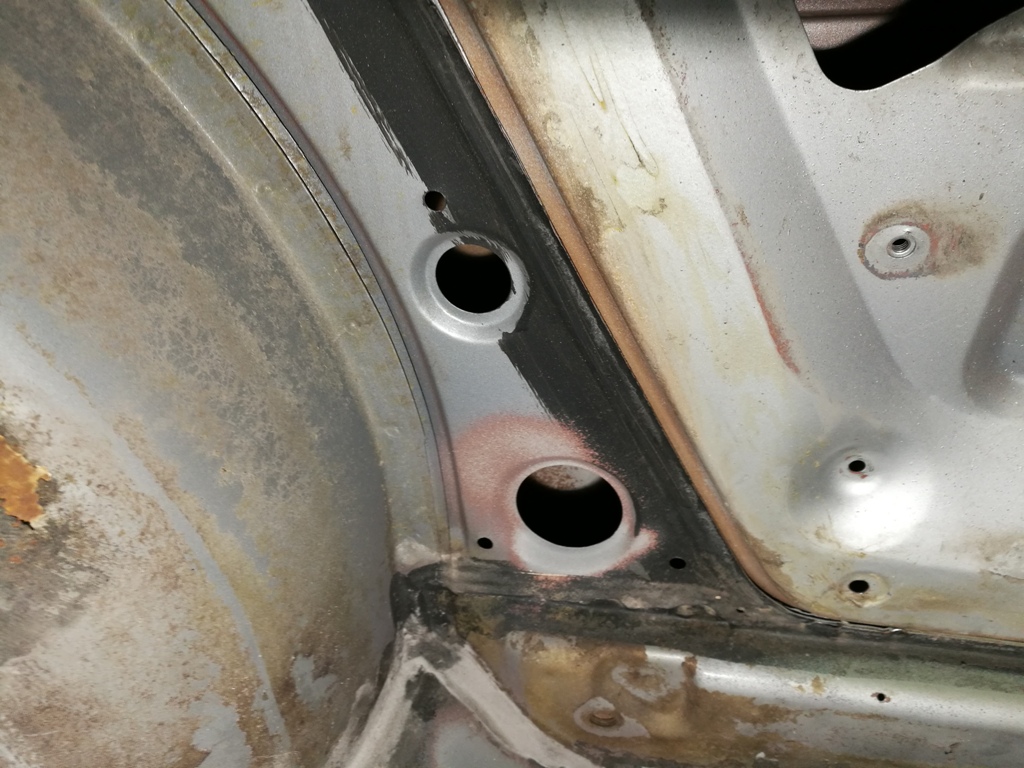
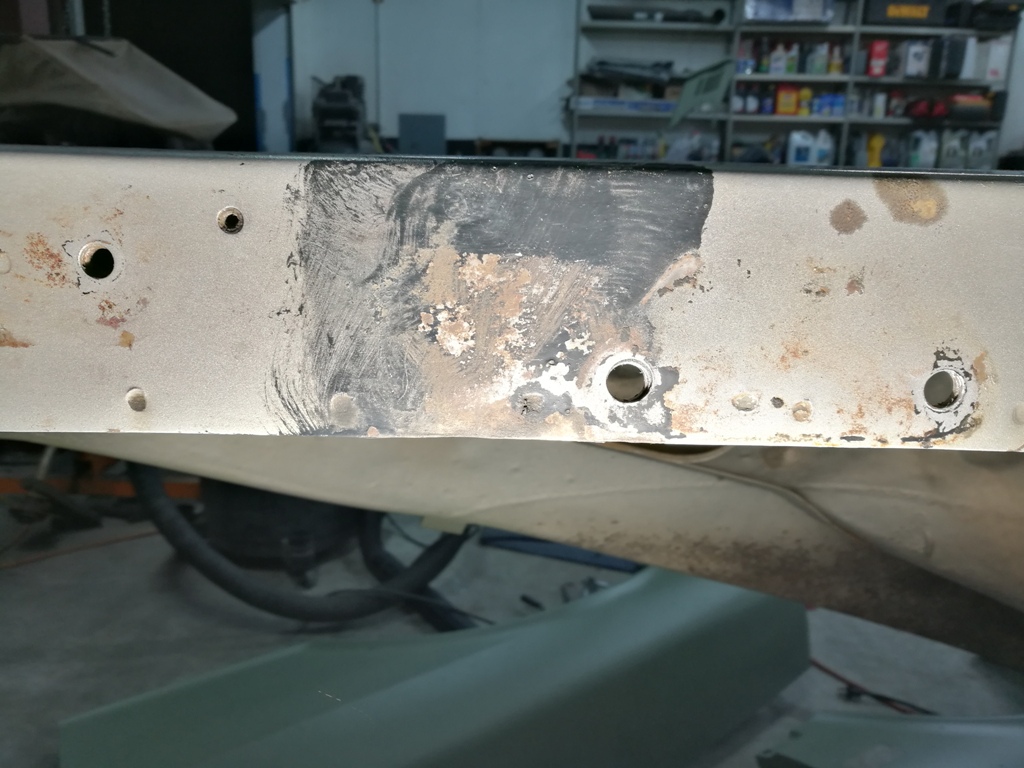
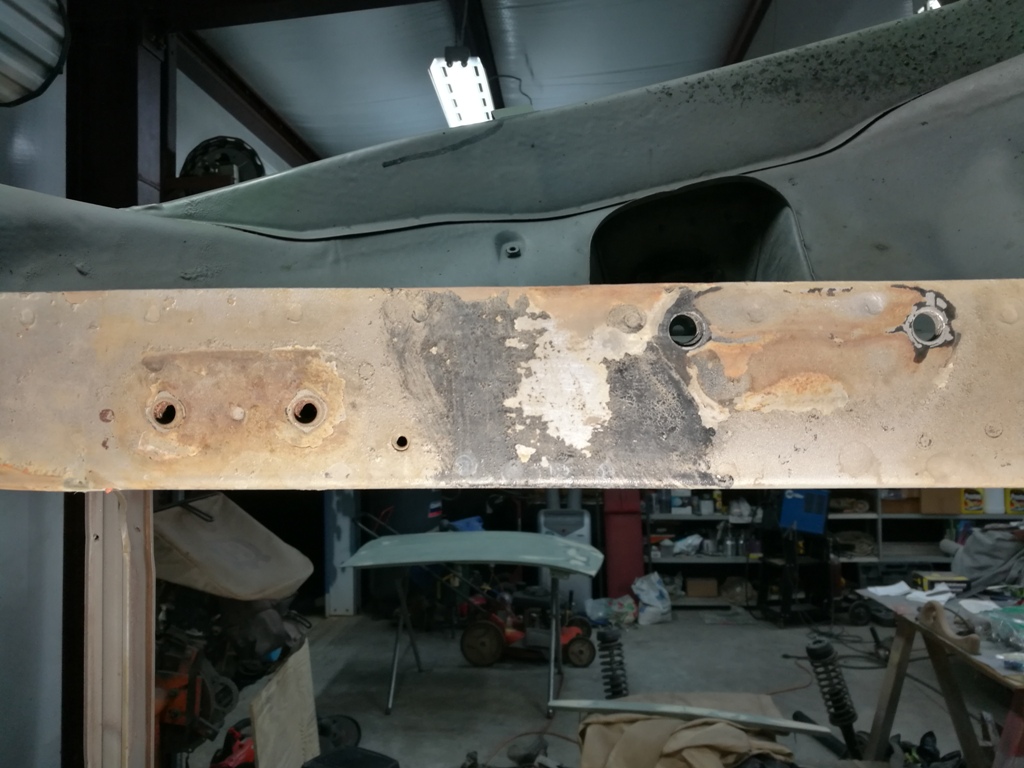
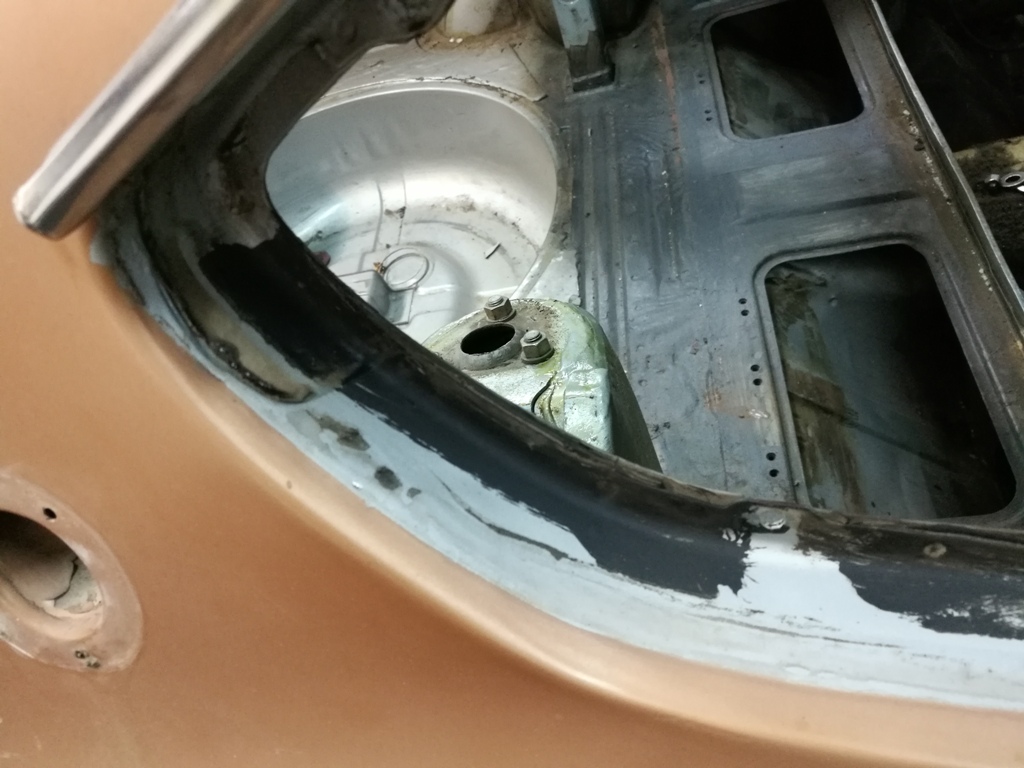
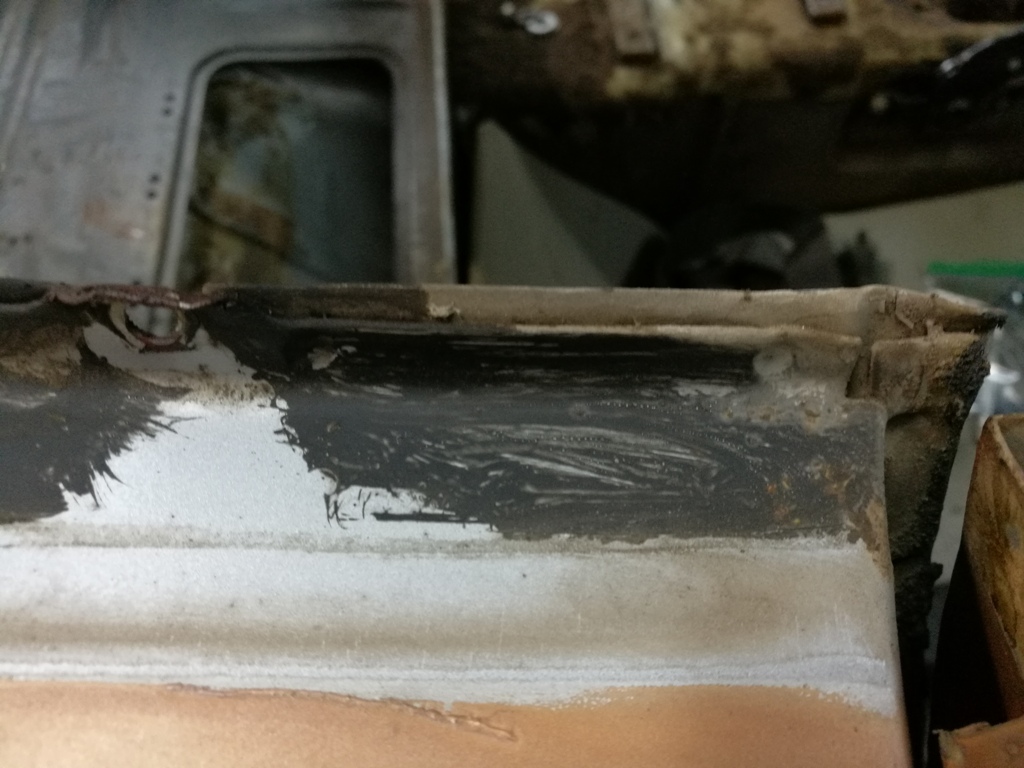
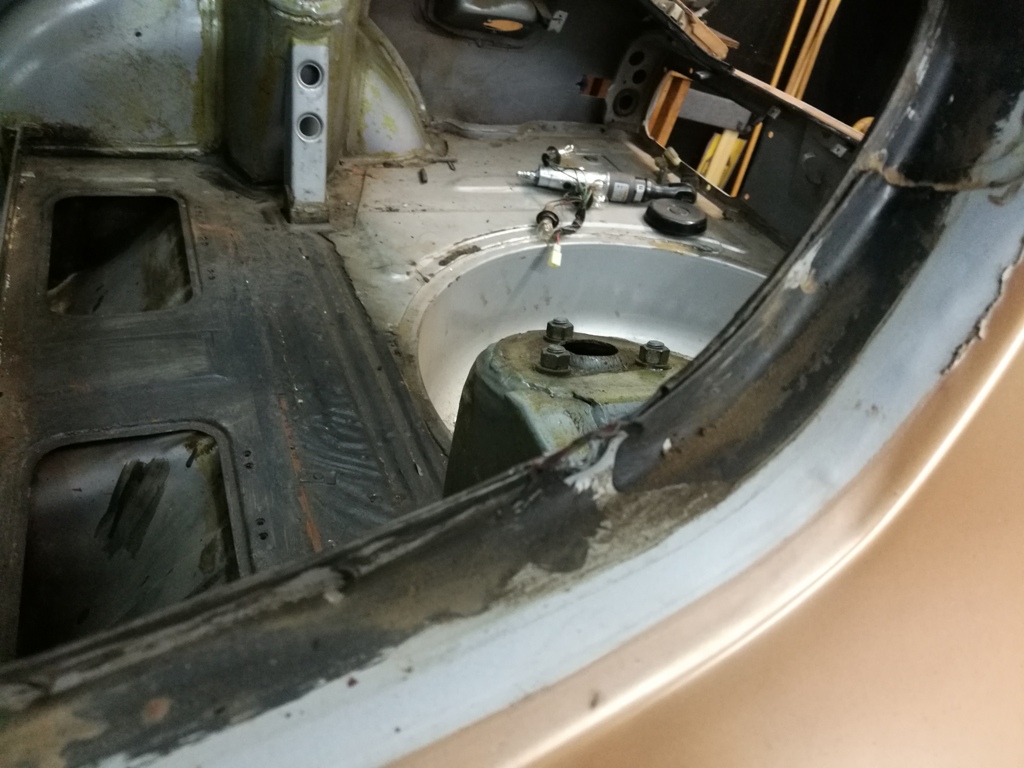
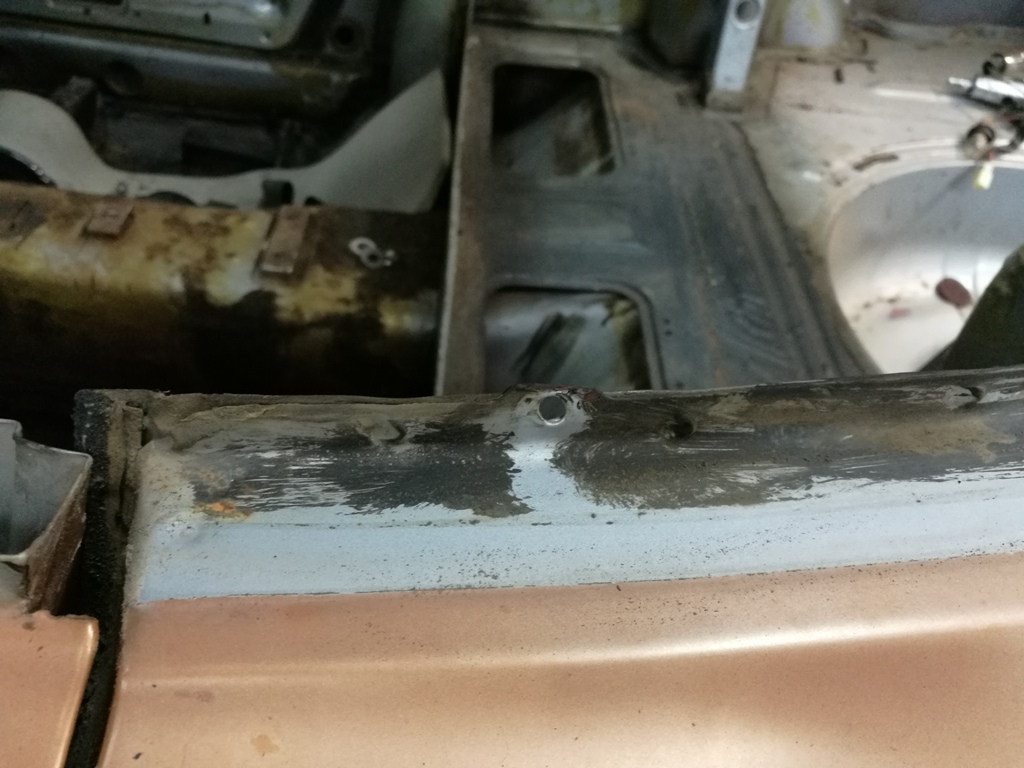
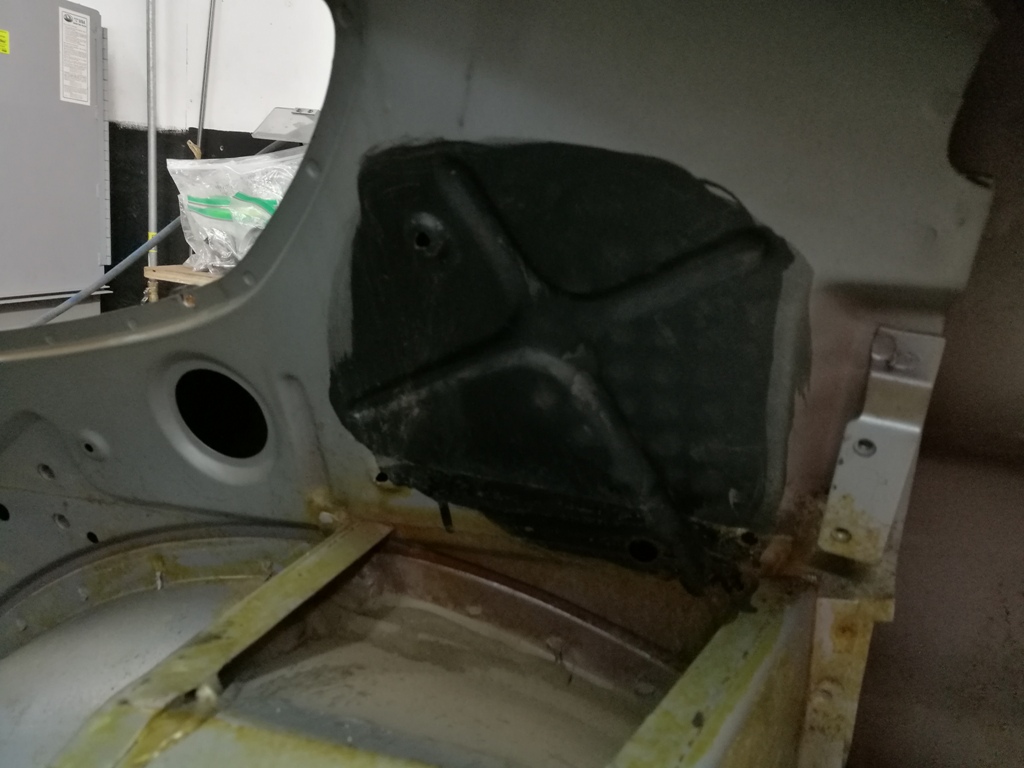
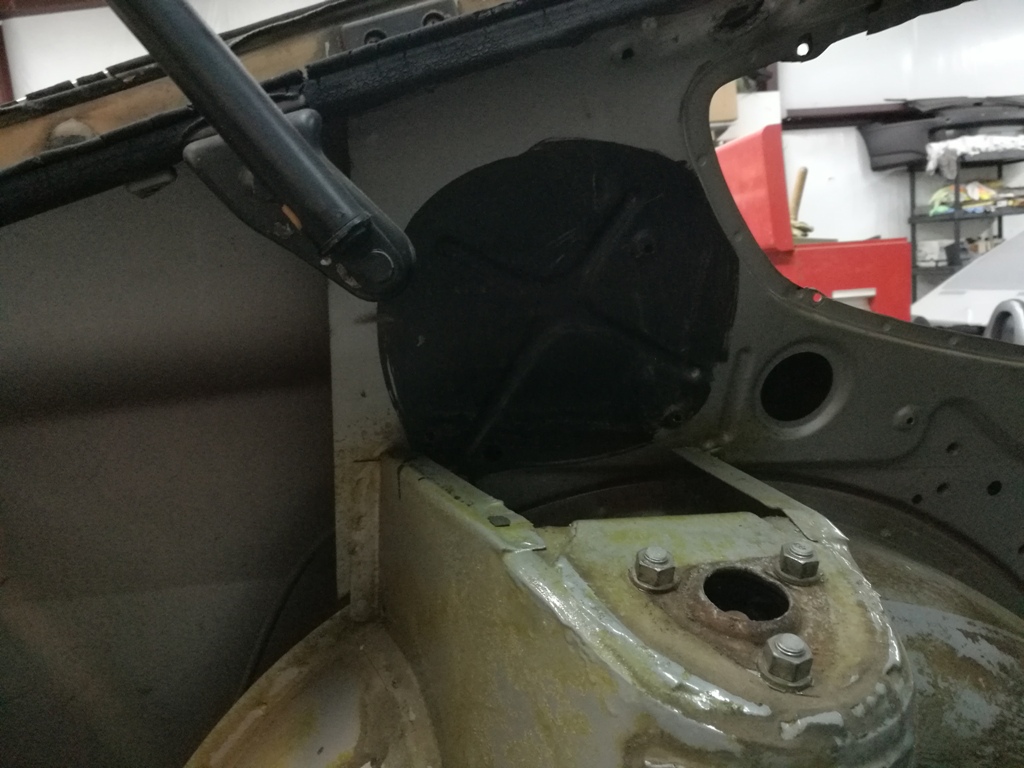
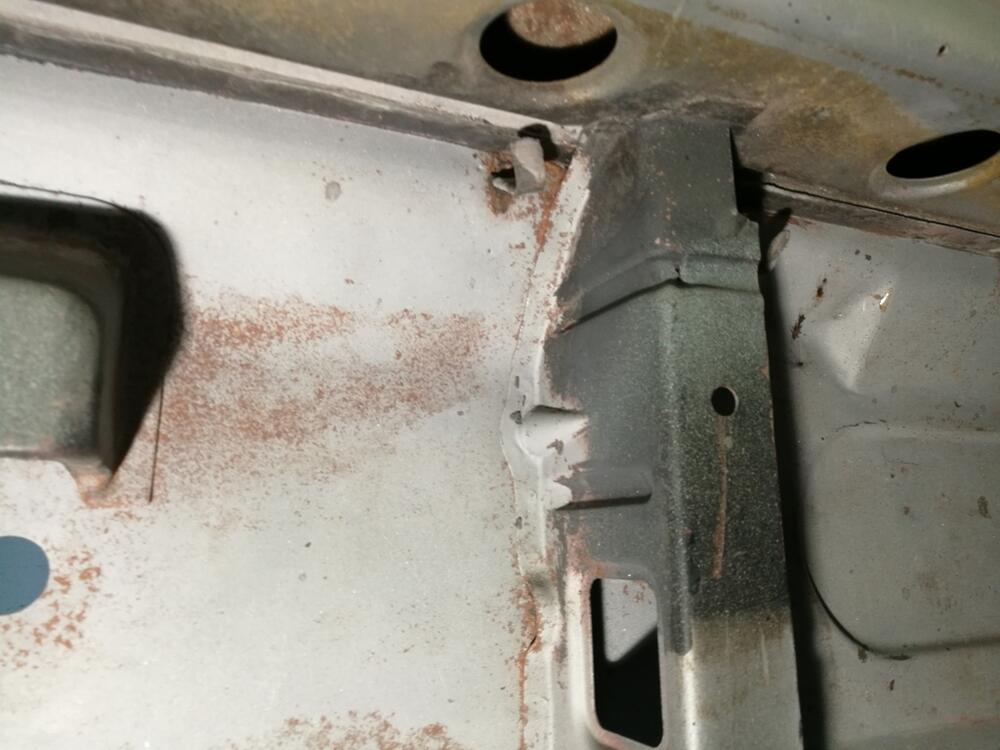
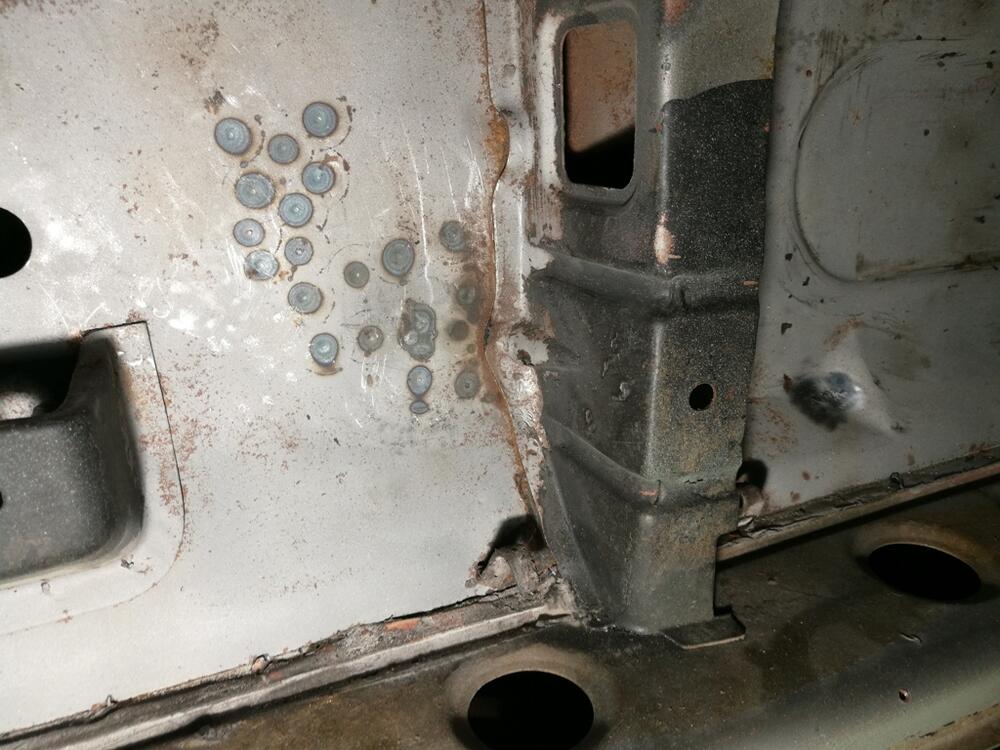
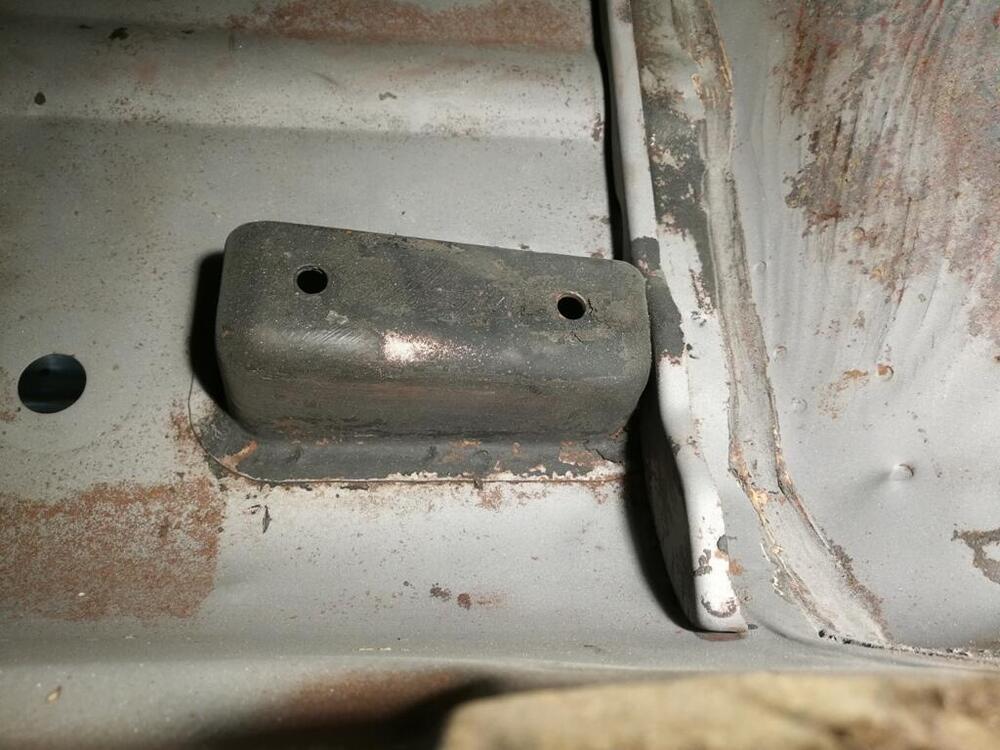
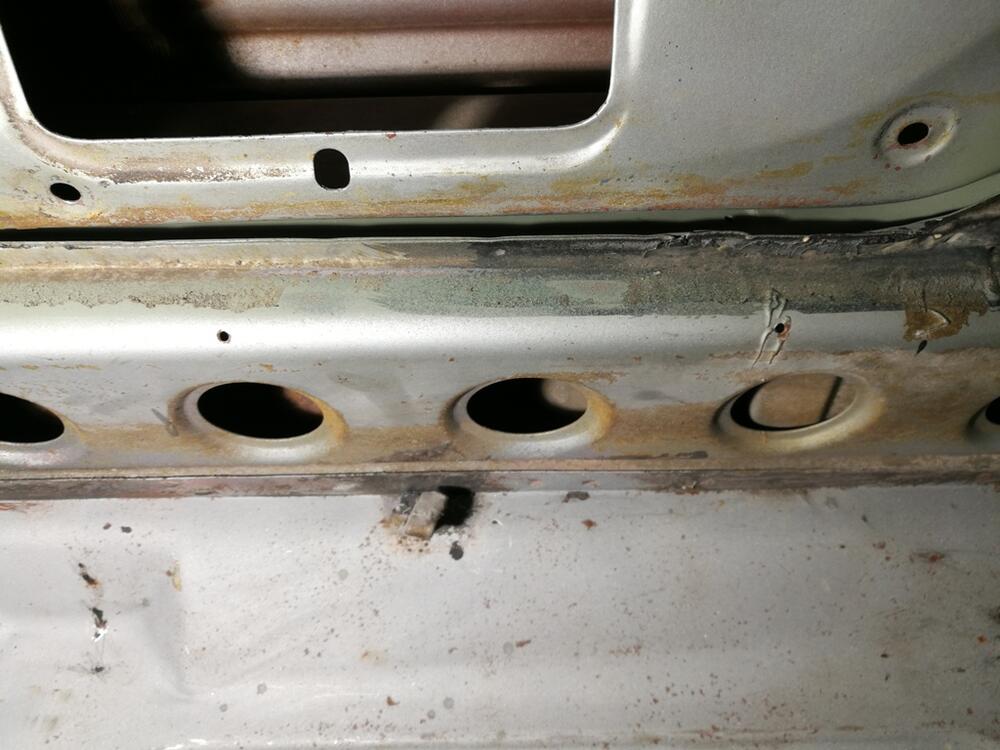
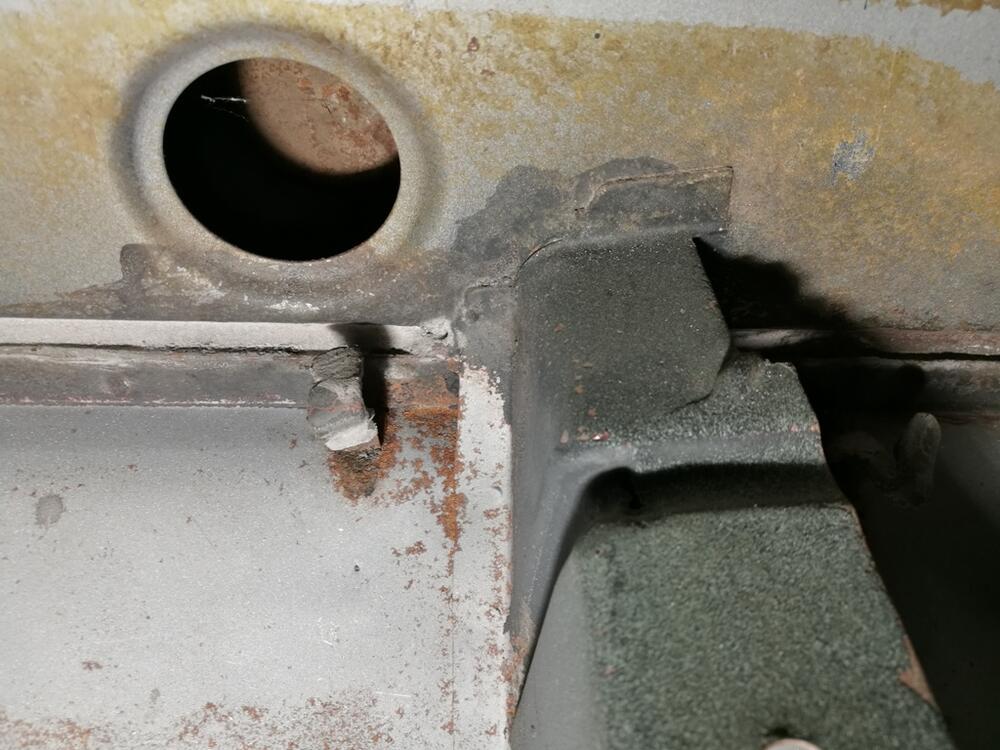
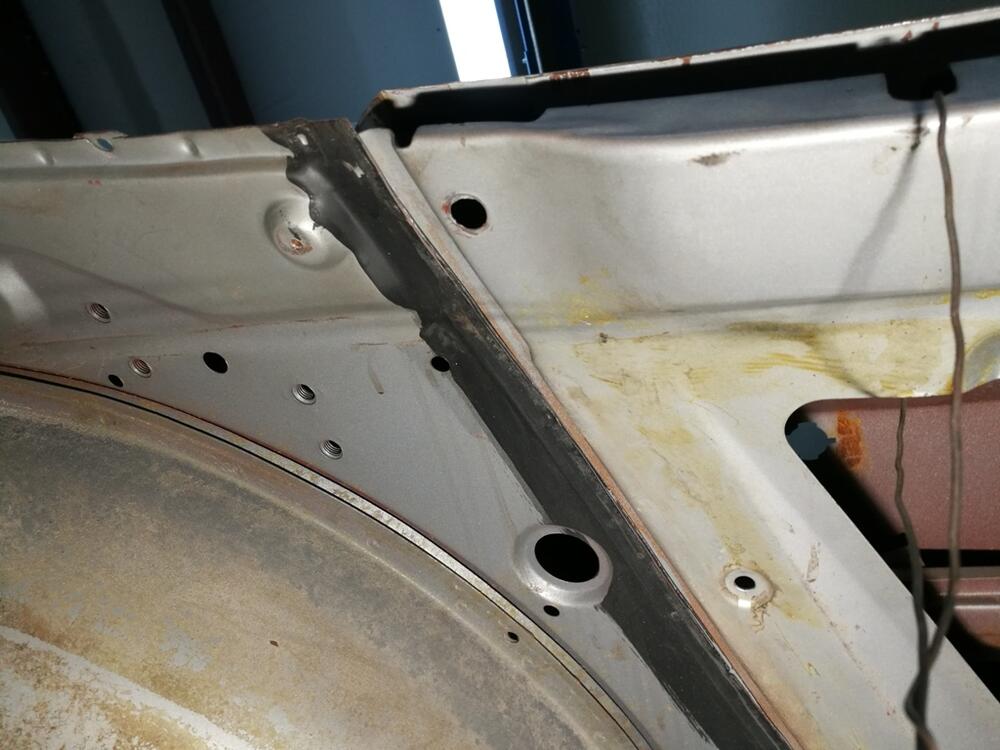
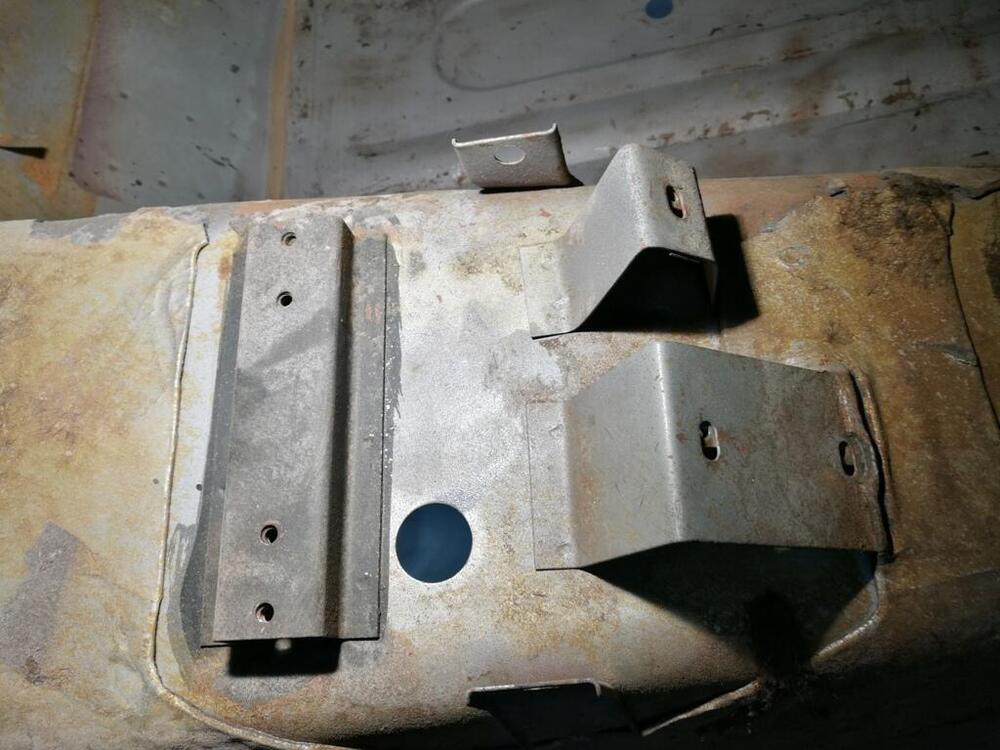
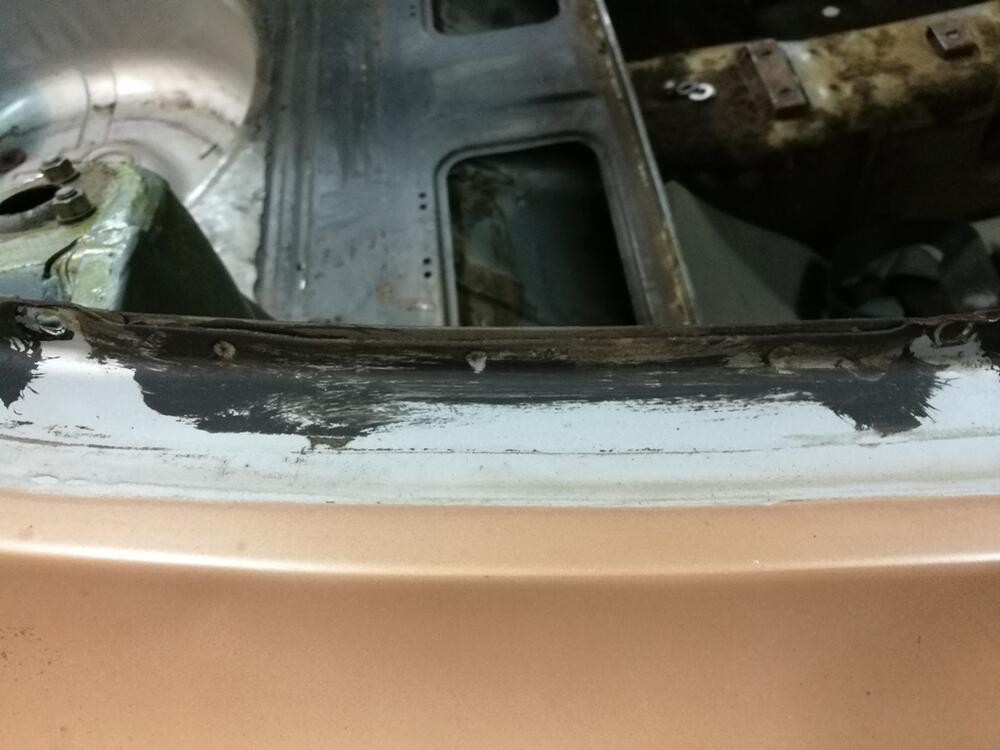
I few documentation pics from my 6/71 car: Left side front seat mount outboard, inboard: Right side front seat mount outboard, inboard: A couple of the back seat mounts: Interesting details, left side: Quarter windows - looks to have been applied after they were installed! Underside of front frame rails:


-
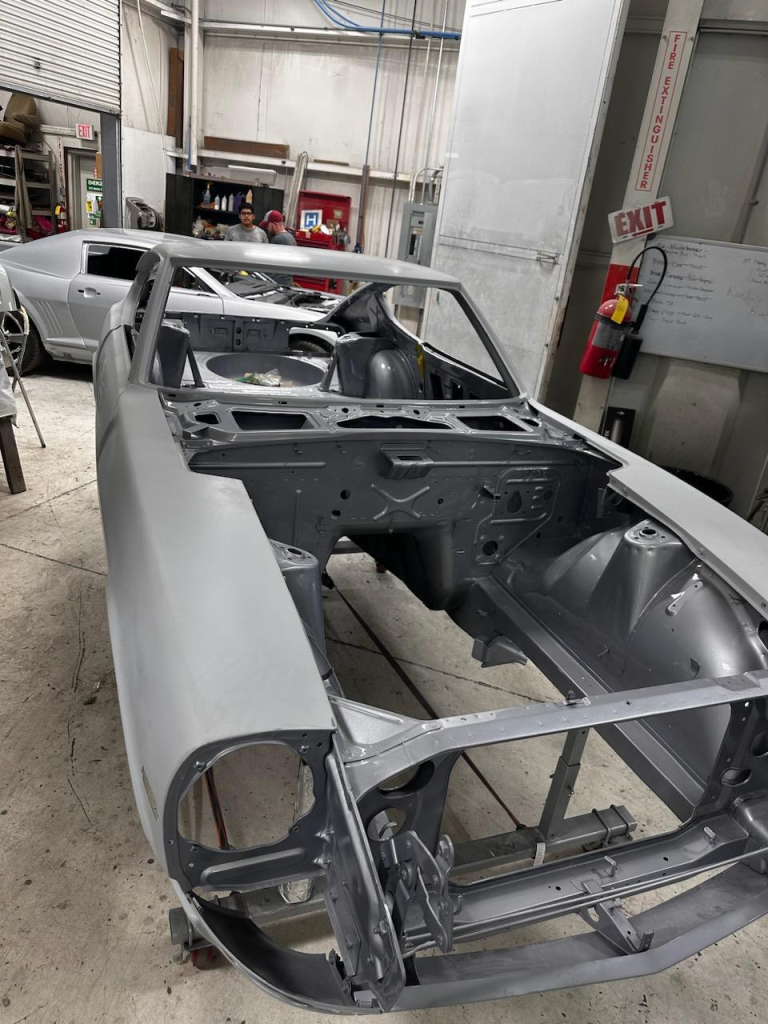
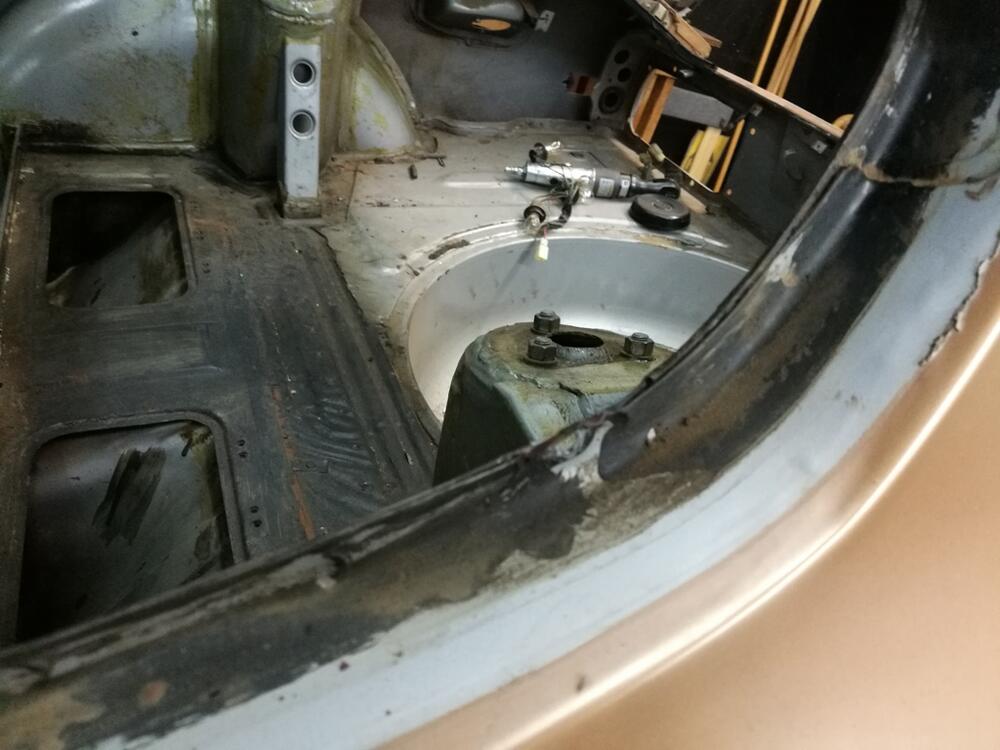
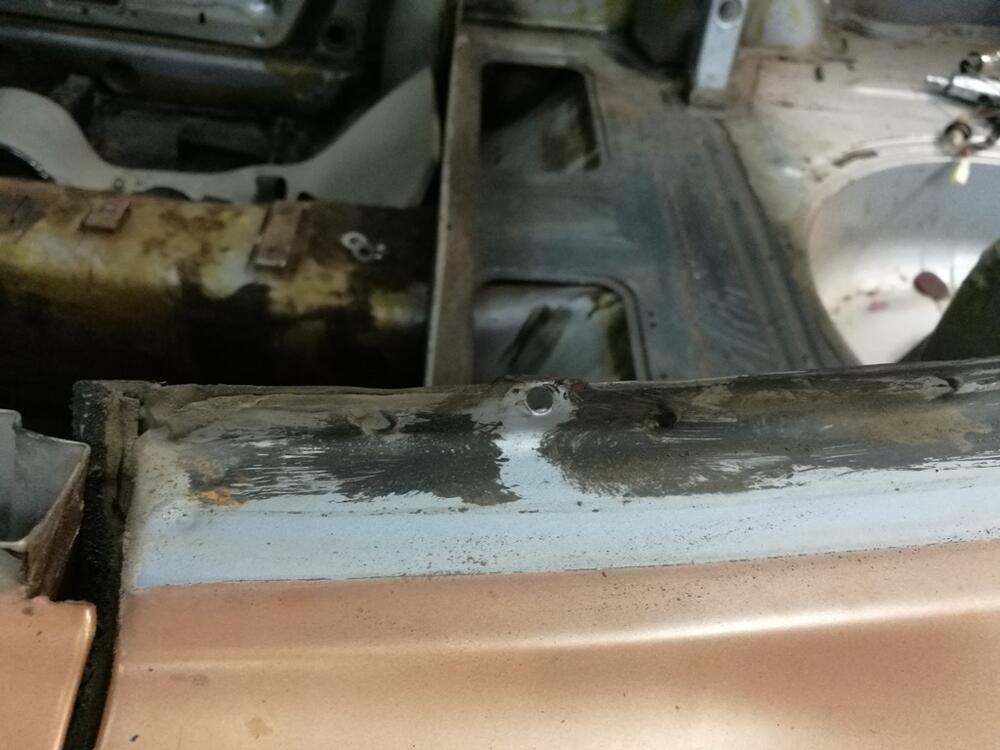
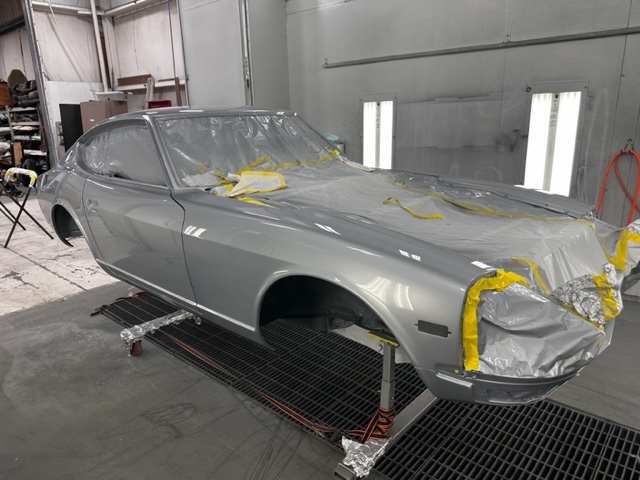
There has been some more progress at the paint shop. It looks nice from what I can see in these pictures. I see that they did as I requested with regard to painting the car without taping off the wheel wells and presumably, the underside of the floor also. My intent was to attempt to replicate the paint done at the factory originally. Those areas of the car received overspray as the primary body surfaces were painted. They departed from my instructions by painting the inside of the car and the outside of the car at different times, and by removing the hood, cowl panel, headlight housings, and fuel door. Those, I assume were sprayed separately (or will be) along with the rear hatch panel. It will be interesting to see the body in person. I am curious to see if the surfaces "moved" due to shrinkage of filler/primer over the last 6 months. Hopefully, it is straighter than when I gave it to them, as they certainly went over it as part of the work done. I have seen over and over how painted fresh from the shop, panels are super straight, and then months later, they aren't due to shrinkage. This car has had considerable amounts of time sitting, so hopefully there will not be additional shrinkage post paint having been applied. I am looking forward to getting it back and starting the assembly process!


-
huh?
-
I was told by the head guy at the paint shop that they spray the headlight housings separately because the clear coats will "bridge" the gap between the back of the headlight housing and the front of the fender, where the two parts contact each other. From examination, my car had been painted twice when I received it, once from the factory and one afterwards, in a gold color. I can see, from examination of the disassembled parts, that the car was painted at the factory with the headlight housings bolted in place. The paint surely did "bridge" the gap, to the degree that the number of coats of primer and paint at the factory could. I believe the concern by the paint shop with this repaint is that much more material is used during their paint application process, and as such, more bridging will occur. I don't think color coats are an issue, but the clear coats are likely much thicker than the factory paint coats. Anyway, they are going to do it how they feel is best. I just hope the paint doesn't "crush" and "move" (like it did in on one or two spots on my other 240z) when they bolt the headlight housings to the fender, as there will be a certain thickness of paint on both the fender front edge and the headlight housing back edge, and these will come into contact and compress when the headlight housings are bolted into place. Crossing fingers that they are completing the work this week, and that, if it matters in their shop, the weather cooperates on the day they spray the exterior of the body.
-
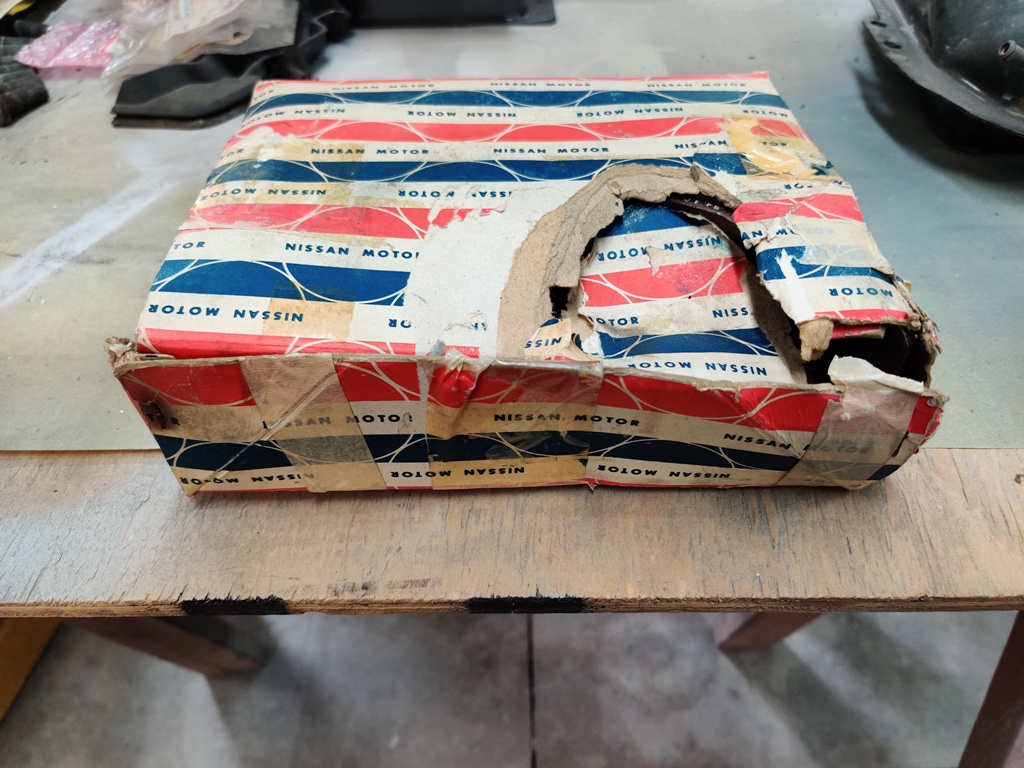
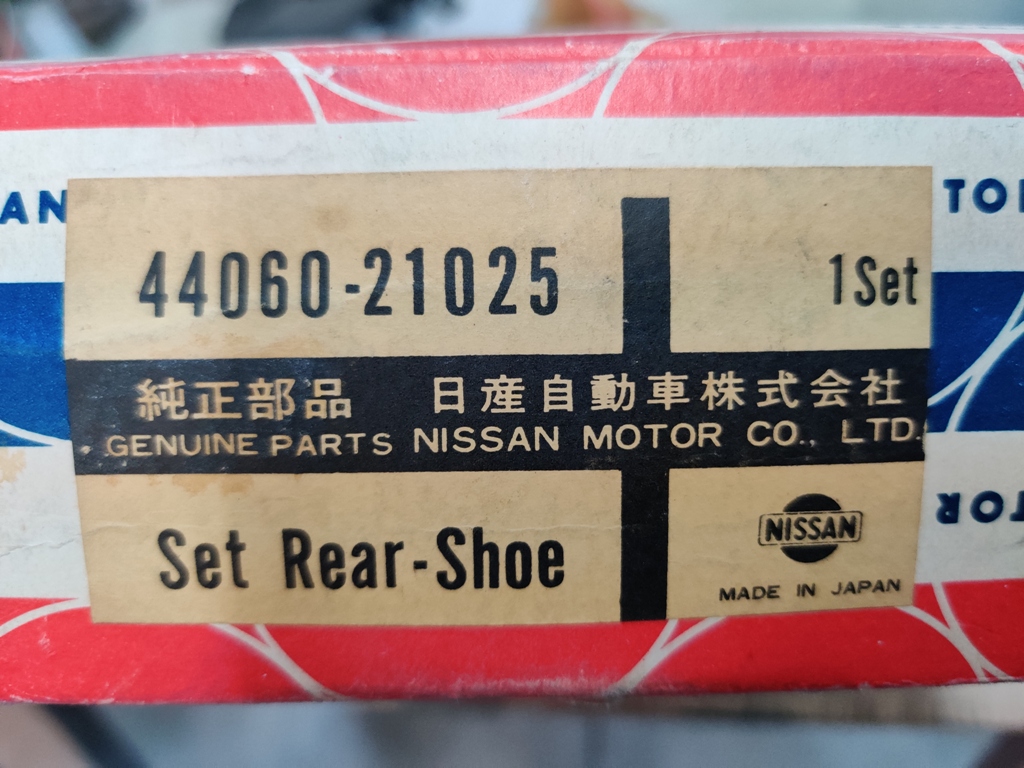
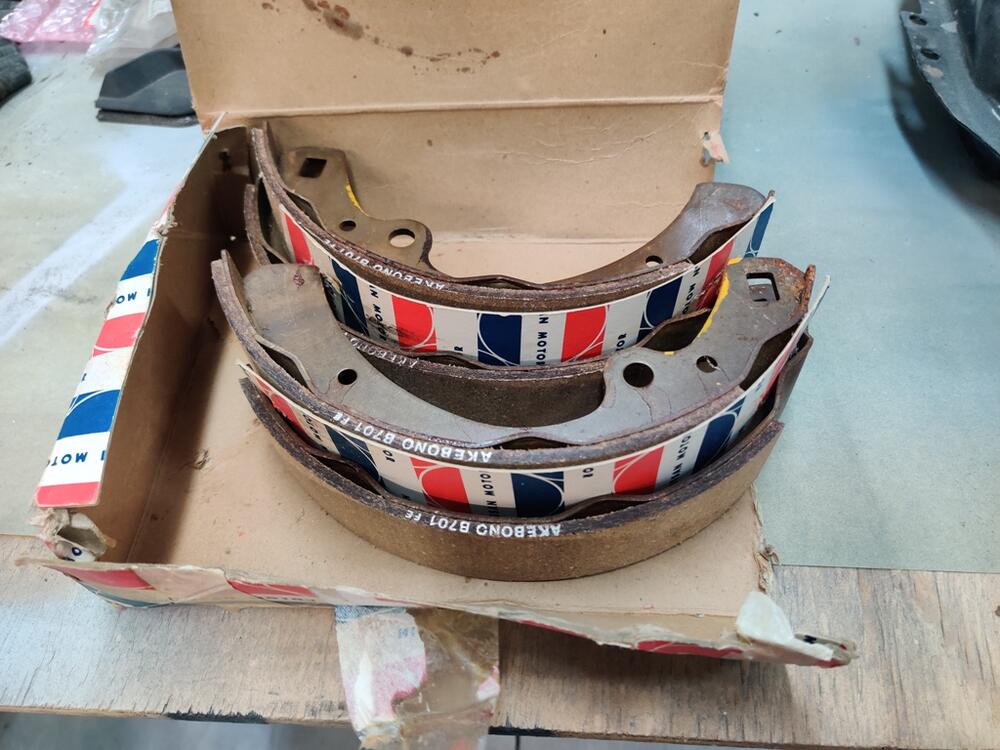
The body shop sent a couple of pictures. The rest of the car may be done this week. I don't know why, exactly, they aren't following my instructions. I mean, yeah, the instructions are many pages long, but specifically, I wanted them to spray the car all at once. And, I didn't want them to remove the headlight housings for painting. I think they know what they know... and don't want to depart from methods they think (or know) are best. I realize that they may not be equipped to spray the car all at once - paint can dry during the process and that can create its own problems. Anyway, I am sure it will look nice when it is done. I just hope it looks similar to how it looked when it was sprayed at the factory originally. That is one of my goals. I also found these and snapped them up the other day. I have original brake pads for the front, so it was nice to find these as well.


-
I received spray cards on Thursday. 901 silver - a similar Honda silver, and 918 orange. I went with 901 silver. Maybe the car will get painted this upcoming week!
-
On Friday, I received an email stating that they were ready to paint the car, and the "spray cards" would be on their way today to me in the mail. I've been very busy the last several weekends working on my two rental houses. Both of them became vacant at the end of May, and I decided to take the opportunity to address various things that each property needs. I should be wrapping up that work soon and the car will be painted soon as well. Looking forward to getting it back.
-
Looking at just these pics is not sufficient for an assessment one way or the other.
-
Hi Don, I have a 72 choke lever I have been meaning to sell.
-
That style just snaps on. Try using your thumbs to pry up on the edge of it.
-
I had a Datsun 510 with this issue years ago. When hot, I would turn the key and get a click noise from the starter. It would usually start after off/on with the ignition key several times. One time it would not and I tapped on the starter solenoid with a hammer, and then the car started. I replaced the starter solenoid and resolved the issue. But, I recommend trying what others above advised first.
-
Unexpected update! Evidently "they had a window open" and I was told that if I wanted to inspect the work before color was sprayed, I needed to come next week! Various things aligned - I had taken today off to travel to Charleston, SC for a soccer tournament... and John, the guy that put me onto these painters was itching to go flying today. So, we flew to AL today and dropped in to check out the work they have done thus far. I talked with the two guys who have worked on it thus far, and all is looking good. There is an issue with hood alignment, but they are hoping that when they install the hood springs, it will resolve. They had to straighten the belt line in a few places, align the rear hatch, and they found a hairline crack in the driver side headlight housing, which they fixed. I suspect I caused that crack the day before I delivered the car when I was assembling panels. I asked again for "spray cards" of the 901 silver to be sent to me ASAP - next day or second day, as necessary. As things stand now, they may paint the car before the close of business next Friday! Or not. We'll see.
-
You may find a few posts from my restoration thread helpful starting with this linked post below. I also made this video which shows my final result:
-
Hmmmm - Interesting - very close to me.
-
After pinging the paint shop once weekly for many weeks for an update, I slowed to every other week. Responses were all the same - haven't started yet. I stopped asking. I finally got an email on Friday, requesting door latch, hatch latch, hood latch hardware and hood springs, and attached to the email were two pages of issues that they noted - I assume that is their punch list so far. Along with that, they made mention of maybe starting on June 22nd. Just venting here for a moment, but if I could have had the car in my possession from when I dropped it off on February 19th until say... the third week of June, I could have had it absolutely PERFECT. I busted my arse to get it done back in Feb, and "ran out of time" on my punch list for no good reason at all. Why did I deliver it then? That is when they told me to! Ugggghhhhhhhh! It is the same thing with my Honda S2000, by the way. I dropped that car off... I don't know, maybe 5 weeks ago to have some frame straightening work done. They said they would get to it in about 2-3 weeks. Follow up with them 3 weeks later - they said we're looking at at least 3 weeks. Ugggghhhhhhhh! Why can't these businesses do better with their timelines? Remember my parts plater? G_d - took more than 6 months to get that done and back to me! Oh, and the new engine for my other 240z - haha... it has been nearly 7 years now. At least that has been done and sitting on an engine stand bolted to a pallet for 6 months. Ok, end of rant. So, the update for this thread, the paint shop may start on their part of the work towards the end of June. 😑
-
I will tell you what I think based on my reading and re-reading of the Mikuni service manual, and based on some comments from others when I was doing Mikuni jetting with a wide band just over 10 years ago. Essentially, backing the idle mixture screws (pilot screws) out too far causes the pilot circuit to cease to provide fuel and air mixture too early. First, know that the pilot circuit is a separate circuit from the main circuit. And the pilot circuit supplies fuel not only for the pilot outlet (tiny hole just below the pilot screw... BUT ALSO the bypass (group of outlet holes just at, and on the other side of the edge of the brass throttle plate). According the service manual, when the throttle plate is "shut" (held open only by the throttle stop screw), manifold vacuum pulls fuel and air mixture (per the pilot jet and air jet) into the carburetor bore through the pilot outlet hole. The car idles from this mixture. The bypass holes are on the other side of the throttle plate. With the throttle plate in basically a closed position, the bypass holes are seeing basically atmospheric pressure (way less than the pilot outlet which is seeing negative pressure from engine operation at idle). In fact, the Mikuni manual says that with the throttle plate in this position, the bypass holes actually supply air into pilot circuit! So, air from the pilot air jets as well as air from the bypass holes is entering into the pilot circuit, mixing with the fuel that is there also. As the accelerator is actuated slowly, the throttle plate opens, and the first of the bypass holes now also becomes like the pilot outlet hole on the manifold side of the throttle plate. Negative manifold pressure acts on that first bypass hole. At that point the air that was traveling into the bypass and mixing with the fuel and air mixture in the pilot circuit stops flowing into the circuit. Instead, the negative pressure pulling on the first bypass hole, now pulls fuel and air mixture into the carburetor bore just like it has been happening at the pilot outlet all along. More throttle opening and another bypass hole adds more fuel and air mixture, as negative pressure pulls on that one as well. With more throttle opening, yet another bypass hole comes into play. At 20% throttle opening, the negative pressure has dissipated, and there is no longer "pull" on the pilot outlet, nor the bypass holes. It is here in the throttle opening that the mains are designed to take over. Now... Clearly, one can set the pilot screws at 2.5 turns out and get the car to idle well with a corresponding pilot jet with throttle plates on the throttle screw stops (barely cracked). However, when the throttle is opened more, in the 5-20% zone, the bypass holes are uncovered as discussed above. And evidently, if the pilot screw is pulled back to far from the pilot hole, then the bypass holes do not supply fuel and air mixture as they should. I think, with the pilot screws backed out too far, the negative pressure being applied from the manifold side of the throttle plate is "not enough" to pull fuel and air mixture through the length of the pilot circuit pipe that spans the distance between the pilot outlet and the bypass holes. So, what happens? Many people have experienced a lean spot as they open the throttle from idle to that 20%. Running the pilot screws at the specification (per the Mikuni manual: 1.0 turns out for 40 phh and 1 1/8 turns out for 44 phh), allows the negative pressure to pull fuel and air mixture out of those bypass holes to give better drivability up to 20% throttle opening, and therefore, helps to make the transition to the mains more seamless. From all of this, my advice is to go a size (or two) higher on the pilot jet and set those pilot screws at 1 and 1/8 out (for the 44 phh). Remember to set float level properly and get the fuel pressure right first.
-
Do nothing until you set, and confirm that you have set the fuel level in the float chambers properly. Any changes to float level alter all the jets that you land on using your wide band 02. If you have incorrect fuel level, and you correct it after your tuning with the wideband 02, you will surely have to tune for jetting again. Mikunis are very sensitive to fuel pressure also. Look up the recommended value range in psi. I believe it is 3.5 psi. Use a quality fuel pressure regulator to ensure steady and regulated pressure. If I recall correctly, idle and cruise are going to be running off of the same jets - these are the pilot jets. Setting idle mixture screws appropriately is critical to the selection of those pilot jets. Adjusting the amount that the idle mixture screws are turned in or out will cause differences with any given pilot jets. Set them at 1 and a 1/4 out... to 1 and 1/2 out from full in. Do not go further out than that. And leave them alone after doing so. Later, you can tweak them between that 1.25 to 1.5 to fine tune AFR at idle, but set that thought aside for now. Also, be very careful when bottoming them out. Note (write down or draw) screw head slot alignment... or "clocking", for each screw on each bore. That way, you won't have to repeatedly bottom them out in the carburetors because you forgot where you were while turning them. The idle adjustment screws are fragile, and easily damaged. The screws should have perfectly shaped tapers, not any wear marks or indentations in them where the taper seats against the carburetor bodies. Next, adjust the throttle stop, idle speed screws. You need the throttle flaps cracked open enough to get the car to idle. If you have a lumpy cam, do yourself a favor and set idle to at least 1200 rpm for initial idle and cruise tuning. Start the car. Adjust throttle stop screws to get the car to idle at 1200 rpm. Check air flow across the carbs. Sync at idle speed by adjusting the throttle stop screws per carb. I won't go into ignition timing here, but make sure your ignition time is set properly - static and dynamic. Once the car is idling at the desired rpm and carbs are in sync, swap pilot jets until you get 14 to 15.5 for the air fuel ratio. You can tweak idle mixture screws between the 1.25 and 1.5 range and watch what that does to AFR at idle. From here the car should be drivable. Next, you need to determine appropriate mains and air correction jets as well as accelerator pump jets. When determining all of those, keep in mind they all kind of are interrelated. If you are super fat/rich on mains, the accel pump will be impacted as well. Messing with air correction before getting the mains close is a waste of time. Same with the accel pump jets. Oh, and use the middle hole on the pump lever rods. Don't mess with the other holes in the rod. I recommend avoiding wide open throttle for a while. Instead, I believe the Mikuni manual indicates that the main circuits don't come into play until throttle openings exceed 20 percent. I recommend backing out the throttle stop (on the floor of the car) to give you max 80% throttle - maybe try to fab something to give you near 60 percent. When cruising, ease to your 60 percent throttle (pedal against your floor stop modification - allowing you to hit a consistent throttle position repeatedly for tuning) and record runs (if your wide band has that ability) for examining after the fact. Get 60 percent throttle and record or observe AFR from around 3k through 5k rev range (at 60% throttle). You are looking for steady state of 12.8 to 13 or so AFR while the main circuit is engaged (60 percent throttle should guarantee that). After you get the target AFR for 60 percent throttle, extend the rev range to whatever you max engine revs are, but use the same throttle opening percent. If AFR drops (richer) as highest revs are approached, go bigger on air correctors. Again, I find that the mains and air correctors are interrelated. For example, if you change the air correctors a large amount, it may well change your "baseline" you had with the mains that were achieving the target AFR range. Keep this in mind if you find you are having to make large changes to air correction to get where you need to be AFR-wise at the last 1000 rpm of the range. Do not drill Mikuni jets. They are sized due to their flow. It is possible that the orifices will differ in size for a specified jet number. Do not alter. Again, they are sized for flow, so if the orifice is bigger on one of same numbered jet, it will flow the same as o,ne of the same number but with a smaller orifice.
-
Thanks!
-
Looks like a D followed by 0 - but hard to make out. If you open that pic in "new tab" in chome, you can zoom more. That car has 5/1970 on the door tag. Jack would be 4/1970
-
I have been looking for a jack and wheel chocks for my 6/71 Z for a long time now, but I am not having much success. It was mentioned that the dates on these items are not necessarily close to the car manufacture date. I am curious to see how much they differ. If you still have your original jack and chocks (as best you know), can you have a look and post what you find? Just need the letters and numbers stamped into the base of the jack, and the letters or numbers stamped onto (ink) or in (indented) your wheel chocks and the month of manufacture of your car from the door tag. Thanks! Reference this thread for info on determining dates if you like:
-
Does the replacement headliner from Banzai have the holes?
-
The very unique arrangement of pin holes forming a circular pattern on the original headliner is not something I have seen in any replacements. There are pros and cons for going either direction, but I would like my headliner to be the original vinyl with those holes. That is great that yours is in such good condition CantechZ, and the pillar trim too.