Inf
Free Member
-
Joined
-
Last visited
Everything posted by Inf
-
 Also wanting to fix this, my differential has a pretty persistent wet-road-grime look to the underside where the cover meets the body. Hoping to hear any feedback people have
 -
Satin here also on my 03/72 build. I feel like flat black would look terrible. Since the seats have just a bit of a shine to them, the mechanism should also IMO.
-
Did you have a local car upholstery place do these from scratch? Used to take our other cars to a local guy's shop in Dallas when our seats got worn out, or some interior paneling needed to be re-covered. He didn't speak much english, but he did a great job and for a great price. May consider a re-do in leather at someplace similar when my vinyl repro covers eventually wear out.
-
Hi, welcome to the site. 1) Generally speaking, yes. If you take a very good condition stock and mostly original car and paint it some other color, the value will go down, especially if you do not do it right, which would entail stripping the car down, etc. A better question would be: do you care if the value goes down? Are you planning to sell it in a few years? 2) The modern R-134A kit you can buy from MSA or Courtesy Nissan will run you close to $1000 all told, and paying someone else to install it may run you a few hundred on top of that ($300-$600 if I had to guess). There are other (technically superior) options, like the Vintage Air super cooler setup that some members here have used, but that will cost you more, especially in terms of the installation (requires a lot more work, but worth it in the long run I think). Also, the Vintage Air Gen II: http://www.classiczcars.com/forums/showthread.php?t=30411&highlight=vintage+air
-
I think you will find the Black Dragon harness will take some work to install, it is not a simple plug and play kit. What they sell is a universal kit, intended for any vehicle A handful of members here have reported using it over the years, sounds like it works aside from needing to hack up the stock wiring a little bit. MSA sells a kit made by a Zs-ondabrain, a member here, which IS plug and play for 240Zs. It's a great fit, comes with plain straightforward instructions, and you won't have to do any hacking of the original wiring. It costs more, but it was definitely worth the money to me.
-
Did the same thing when I installed my Optima Red Top (going on 7 years now...). One of my open ended wrenches has a spot where a 2mm deep pit of material was blasted off with a terrifying bang and spray of sparks. It was a good demonstration of the ridiculous amount of current a car battery is capable of dumping out.
-
Out west would probably result in a better course, east Austin is flat like a pancake and would probably make for a boring course.
-
-
Cool, I wonder where they plan to build the track? The only place I can imagine them doing so is out on the east side of town someplace. The west side is pretty much staked out and developed.
-
Just found this thread while looking for some other information, sorry no one replied. I was kinda off the site for a few years when this was posted. I'm guessing you figured out the answer to your question by now, but I figured I'd post a picture of my MSA kit for anyone else who comes looking. It hangs down quite a bit, and if I had to do it over again, I would probably go for the Vintage Air blower and evaporator/heater box. From the pictures I've seen, the Vintage Air blower seems to only stick out into the volume where the original blower motor and box were located. The MSA evaporator box hangs way down, and it kinda intrudes on the passenger foot area. Also, the draw-through design of the MSA evaporator is definitely less than optimal. The Vintage Air unit is a blow-through, and should yield much better results.
-
With all the threads like this popping up today, you can tell that school is out for summer. Can't wait for September again.
-
I haven't seen much on Subaru stripping, maybe you're thinking about the Kia Sportage door seals. Search for Sportage, and you should find the thread. Decided to replace the door seals later this summer, as it seems all the new Kia Sportage door seals that fit have been bought up until another boat brings some from Korea. I'm also eagerly watching this thread, as I have to install my new hatch inner seal soon. The original one is starting to fall apart. I bought the seal Black Dragon sells, still need to get some adhesive. I've heard good things about the black 3M weatherstrip adhesive, so I'll try to track some of that down and give it a try with any tips people bring forward here.
-
Is there anything I should do to treat the rubber, to prevent dry rot or cracking or anything? I need to get a can of air for mine, I imagine I'd go to use it in a pinch to find it low on pressure. Haven't aired it up in more than 5 or 6 years, and I figure it's a pointless strain on the tire to keep it charged up all the time, given its age.
-
It's original, and I believe I have the same. And yes, I too have taken the wheel out just to clean it and the tire well I was torn between keeping the original spare which I would not trust in a pinch, versus buying a new nearly-original sized replacement. Still driving around with the original, not sure how well I'd expect 40 year old rubber to hold up for even a single drive back home.
-
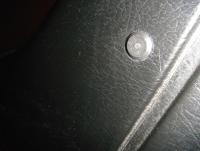
Sounds a lot better than the option the PO chose on my car. He used some fastener which looks like that, but has a plastic screw, the head of which is designed to shear off when it's in tight... that or he CUT them off once he had them screwed in. They are flush, and impossible to push the center in. I bought the genuine article Nissan clips for whenever I need to pull a panel, but it is an absolute nightmare to get the old ones out. Anyone encountered those types of clips, and have a good way to remove them? I'm trying to avoid mangling the panel, or the body mounted hole through which the clip goes on the backside. It's been 6 years or so since I had to remove any of them, but I seem to remember they worked a lot like drywall anchors - the type that splay outward when the screw pulls the far end inward. Here's a picture:
-
Interesting, check out the Google Maps Street View of Gary's. I got curious, because I used to live in Dallas, and looked it up: http://maps.google.com/maps?oe=utf-8&client=firefox-a&ie=UTF8&q=2464+Royal+Lane,+dallas,+tx&fb=1&gl=us&hnear=&cid=0,0,17566782199794396152&ei=OWjrS9GDPIPGlQePzticBA&ved=0CBMQnwIwAA&hq=2464+Royal+Lane,+dallas,+tx&ll=32.895759,-96.896997&spn=0,0.003532&t=h&z=19&layer=c&cbll=32.895996,-96.89639&panoid=eSHkvSBS05Hn_cgKJZ22Jg&cbp=12,183.78,,1,3.58 The car was there several years ago whenever the Google Prius cruised on by, so I'm guessing it's owned by someone who works there. Looks like a 280Z though.
-
That's a real bummer Richard, I hope you get your money back. This whole thread makes me that much more apt to sticking it out with my half dash cap for a while longer.
-
Removed
-
This. Or, use it as an opportunity to find the appropriately sized stainless hardware.
-
If you have stock parts, you can't adjust the camber on a stock S30 AFAIK. If you are all stock and they told you they adjusted the camber, they were bullshitting you. You would need adjustable camber plates/camber bushings/etc to do that. The toe is easy to adjust - you loosen the lock nut between the other tie rod end and the inner tie rod ends. You can then use a wrench to turn the inner tie rod end, pushing the outer tie rod end in or out, which adjusts the toe. You can measure the toe in a few different ways, and I've seen some pretty fancy methods on Youtube involving strings perfectly parallel to the axis of the car along each side that you can measure the rim relative to at the front and back. I just used a measuring tape and measured from the inside edge of the center groove on the front tires on the leading and trailing sides, and did a little math to get the toe I was looking for. Not perfect, but it seems to track fine, and it's only toed in a degree or less, so I'm not worried about weird tire wear patterns. You need to minimize the friction under the front wheel when you're making the adjustments, so that your adjustments actually change the toe as the car sits. Otherwise, there will be some tension in the system, and the toe will change to relieve the tension as soon as the car moves. I went to Home Depot and bought 4 cheap vinyl tiles and put some chassis grease between them. After driving the front wheels onto them, there was not much friction for the adjustment to work against. Worked out nicely. But anyway, back on topic to your original question: you should probably post where in Georgia you live. It's a pretty big state, and no one can tell you a place to go without being more specific. You wouldn't drive from Atlanta to Savannah just to get an alignment.
-
If you are unhappy with their service, and are so inclined, you could do your alignment yourself. With the stock equipment, only the front toe is adjustable. I did mine last week, probably not as precise, but you have the advantage of being able to mess with it as often as you want at your leisure.
-
So basically it will undermine my A/C by letting warm air bleed into the airstream from outside, regardless of the position of the top climate lever? Bummer. Do you think it's feasible to get at that door to apply a seal without removing the dash? I.e. maybe by removing the front heater control panel and going in through there?
-
Thanks for the responses. I think I may have to chalk this one up to a future project. I just got everything back together again and I don't think I have the stomach to rip the dash apart for this fix right now. Will this missing seal mainly make a difference when I'm trying to run the heater (rather than my aftermarket A/C)? Winter is a long ways away for Texas
-
They look like 240Z seat covers to me - horizontal stitched paneling and all... I think the vents should be silver, though, and not gold.
-
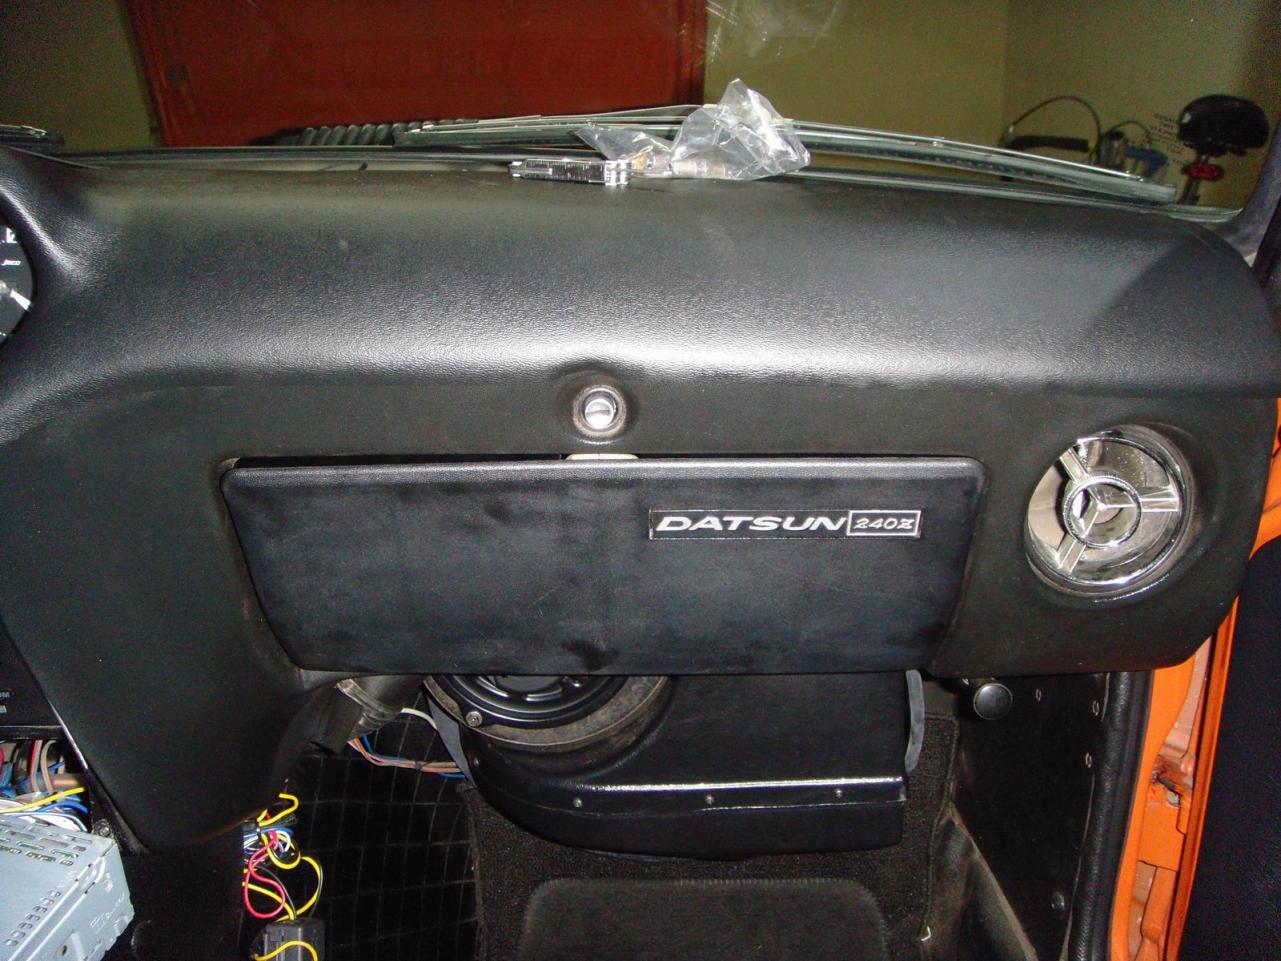
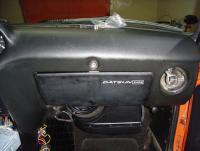
I pulled the glove box to get at the smaller gauges. It was not easy, let me tell you. Removing the glove box is an experience in and of itself, so long as you plan to reuse it. I then stuck my arm in through the glove box hole and was able to remove and replace all the bulbs. I should warn you that I had nothing but problems with the MSA bulbs, as I mentioned in previous posts. I actually had to take the glove box out and put it back in twice, just because the MSA bulbs kept popping out after the first time. No problems so far with the Eiko bulbs. MSA should really be ashamed of themselves for selling a kit like that at such a ridiculous price when it doesn't even work right. I sent them an email detailing what is wrong with it, and received no reply. I have to say I am a little disappointed in them right now.