MikeW
Free Member
-
Joined
-
Last visited
Everything posted by MikeW
-
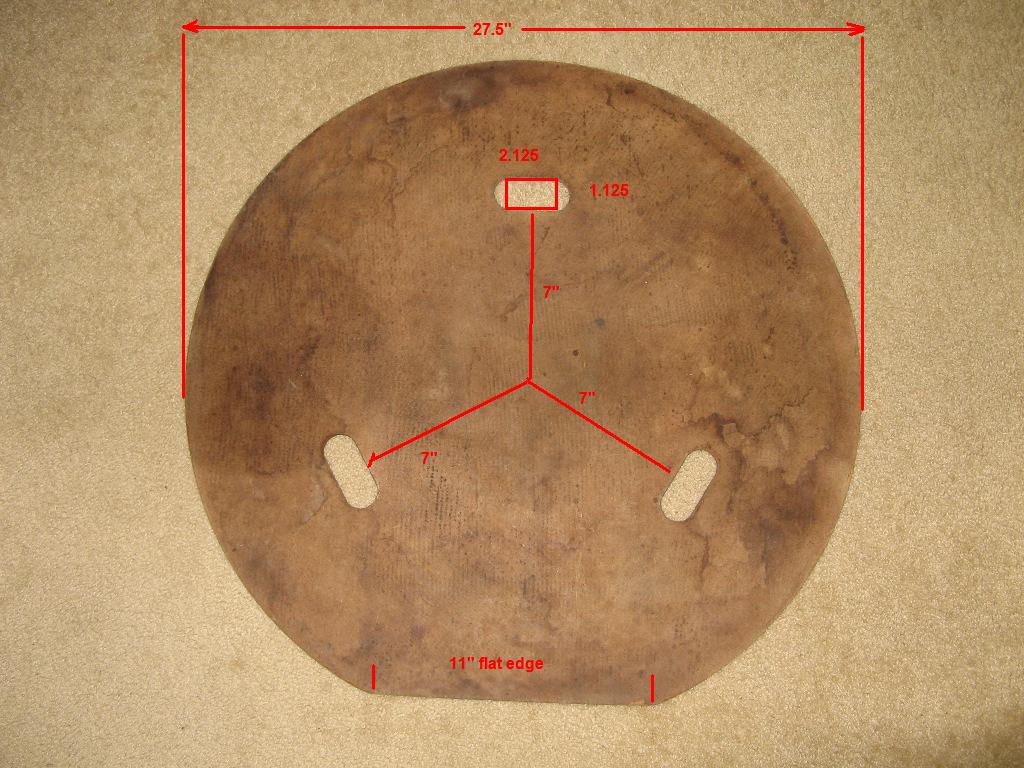
 My 1972 cover is just the board: no plastic clips or velcro or anything else. There are no holes or marks indicating that I'm missing anything. My measurements are slightly different than those above. Start with a 1/4" board and make a 27.5" circle. Give it an 11" flat spot. Make 3 hand holds 120 degrees apart that are 7" from the center. Each hand hold is a rectangle 1 1/8" x 2 1/8" with a half circle cut out at each end. Hopefully the attached picture will make this description make sense ...
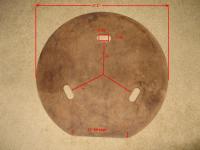
-
I know I mentioned this before but when I POR'd my floorpans and had to use a garden hose with the marine clean step I found that a good wet/dry vacuum will remove the water in a hurry. As E said if I ever decide to cross a river I'd pull up the carpets and use a vacuum instead of hoping everything would drain out of the holes.
-
There are lots of pictures of floorboards in the gallery here. Just doing a search for "floor" provides the following: http://www.classiczcars.com/photopost/showgallery.php?si=floor&x=20&y=9&limit= Most holes in floor pans are rust. The only holes that are supposed to be there are perfectly round drain holes about an inch in diameter that came with rubber plugs in them.
-
According to the factory service manual: "No cylinder should be less than 80% of the highest cylinder" 150/170 = 88% You can always add some oil to each cylinder and run the compression test again. This will help determine if it is rings or valves that is causing the difference.
-
I hate to break it to you but generally you put money into cars and get enjoyment in return. If you're treating the car as an investment to somehow earn money when you sell it I'd suggest a savings account or CD instead. Many people spends lots of money restoring cars and then selling them for a fraction of the restoration cost. A $10000 paint job won't add that much to the sales price. Unless your crystal ball indicates that there's going to be a huge increase in value for a 280Z I'd be cautious.
-
Did you glue the weatherstrip on? If not just pull it back off - that's what I did when I needed to verify that the door was actually adjusted properly.
-
Are you saying that the door won't close all the way? Usually new weatherstrip makes the door harder to close. Some people have suggested spraying silicone lubricant on the weatherstrip to help make the doors close easier.
-
Even my rusted original is straighter than yours. It sure looks to me like someone fabricated those by hand, possibly by bending the aluminum using the original as a form.
-
Whoever took those pictures need to buy a better cell phone.
-
If you go to the Napoli web page at http://www.napoliclassics.com/ I think you'll find that it's actually this 1974 Datsun 710: http://web.dealer123.com/web/br/?ID=44980
-
I wasn't speaking about the specific car in question but from more of a general point of view. I'm sorry if I didn't make that clear.
-
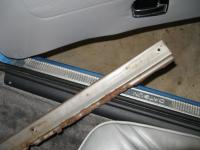
In an effort to hopefully get us all on the same page here's a picture from my car. You will notice the aluminum "sill plate", which, in my case, says "Datsun". Courtesy calls this a kick plate. Inside of that is the "scuff plate" which Courtesy calls a "skuff plate". Mine is steel with a textured black vinyl glued to the top. The "scuff plate" has a hump on it which goes over the door weatherstrip. Normally there would be a thick piece of what I think is vinyl that goes under the "scuff plate" and is glued in place. This piece normally extends down to the floorboard. I obviously removed mine when I installed a full carpet kit. Finally, I included in the picture an original "scuff plate", upside down, which shows just how much it had rusted.
-
Agreed. I do, however, consider it fair game if the description obviously misrepresents the car, for example, if it states "rust free" when there's clearly rust in the pictures provided.
-
Any chance you can post a picture of the polished aluminum plate? That might help others identify it.
-
If you really can't wait to drive it consider that it takes several minutes for the car to reach operating temperature. A quick spin around the block won't hurt you but as Stephen says you risk a lot if it does overheat.
-
Welcome. http://www.georgiazclub.com/ Also, you might consider this event: http://www.themitty.com/
-
I did the back side of my bumpers with POR-15 silver. Of course, it helps to have a Z car where you can easily see the back side of the bumpers without having to remove anything.
-
I was thinking the same things. I still have the original radiator which I had re-cored 22 years ago.
-
JN stands for Japan - Nissan; for an explanation see http://en.wikipedia.org/wiki/Vehicle_identification_number My daily driver is a 240SX but other than roughly the same displacement as a 240Z it has nothing in common with classic Z cars which do not use the modern VIN standard that was introduced after 1980.
-
How about a Google Spreadsheet? That way it's all online and anyone can edit it simultaneously. I've started one here and published it to the world. You'll need a GMail account but they're free: http://spreadsheets.google.com/pub?key=pgfGtZfjS1MhXEV8zDxh9Lg I'm not sure how this works, however, if someone else wants to edit it. I may need to give permission to each user individually. If so, just PM me with your GMail address.
-
There's not much to it. You first remove the black plastic shroud that encloses everything. There are screws from the bottom that hold the top and bottom halves together. At that point it should be fairly obvious but the combination switch on the right and the turn signal switch on the left are fastened to each other with screws that effectively clamp both units to the steering assembly. Each switch has its own set of connectors; just be sure to label anything that's not obvious when you disconnect them.
-
Where the power come from? You obviously will tie into the existing door plunger switches so that the step lamp will only be illuminated when the door is open. However, this will require running at least one new wire (presumably the black lead can be grounded inside the door). My concern is how that new wire will be routed. You'll either need to find or create a hole in the body near the existing switch or run the wire such that it interferes with the weatherstrip. In either case the new wire will need to be of the type that can handle constant bending from opening and closing the doors.
-
The super easy way is to follow each of the 4 control cables down to the vent controls they attach to. It's very easy to disconnect those cables at the far end - one screw each. You may want to label them first. At that point the whole heater control panel will come out as a single unit with the slider controls and cables still attached. You then only need to be concerned about the map light and the rotary fan switch. Years ago I did this job the hard way which is leaving the cables attached and I wish I had known there was a better way. It's very easy to crack the fragile plastic frame. Now that I have a NOS heater control panel I don't plan on even looking at it funny.
-
... unless you had your dash restored in which case the newer, thicker vinyl prevents those two from going in far enough from the front. I had a real struggle installing those from the back.
-
I'd try using a magnet to determine where the filler is. You might also be able to find the hole from the inside of the door; I don't remember how much room you might have to work with there, however. Once you know where to drill I wouldn't worry too much about the paint as it's going to be completely covered by the mirror base. We had a similar discussion here recently about finding existing holes for emblems. It was suggested to cover the paint with some tape to help prevent chipping. There was other good advice in that thread: http://www.classiczcars.com/forums/showthread.php?t=24604