motorman7
 Subscriber
-
Joined
-
Last visited
Everything posted by motorman7
-
 Here are some of the award links. Would be nice to have a video of the presentation. http://autoweek.com/gallery/car-life/winners-la-jolla-concours Pic # 23 https://www.lajollaconcours.com/2018-winners
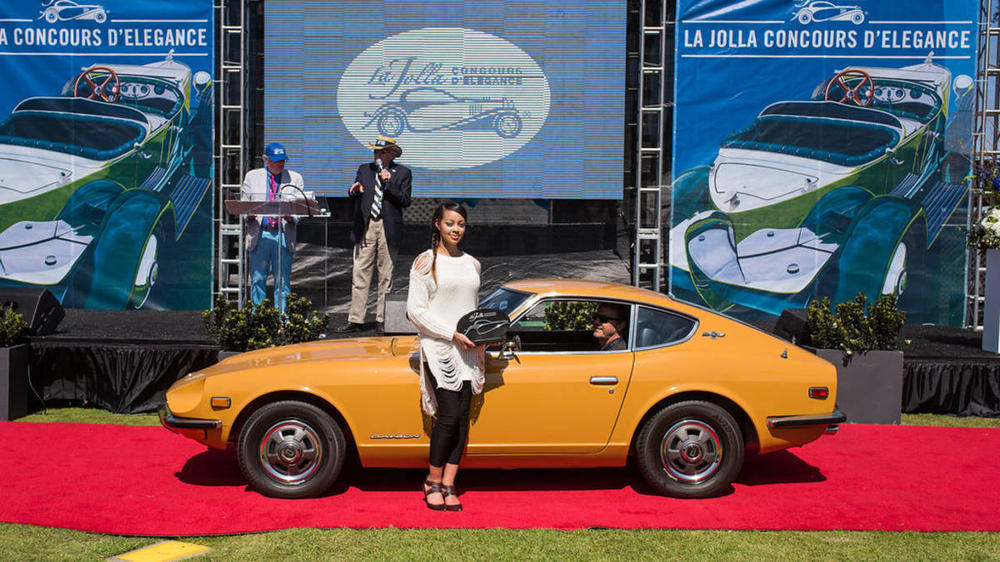
-
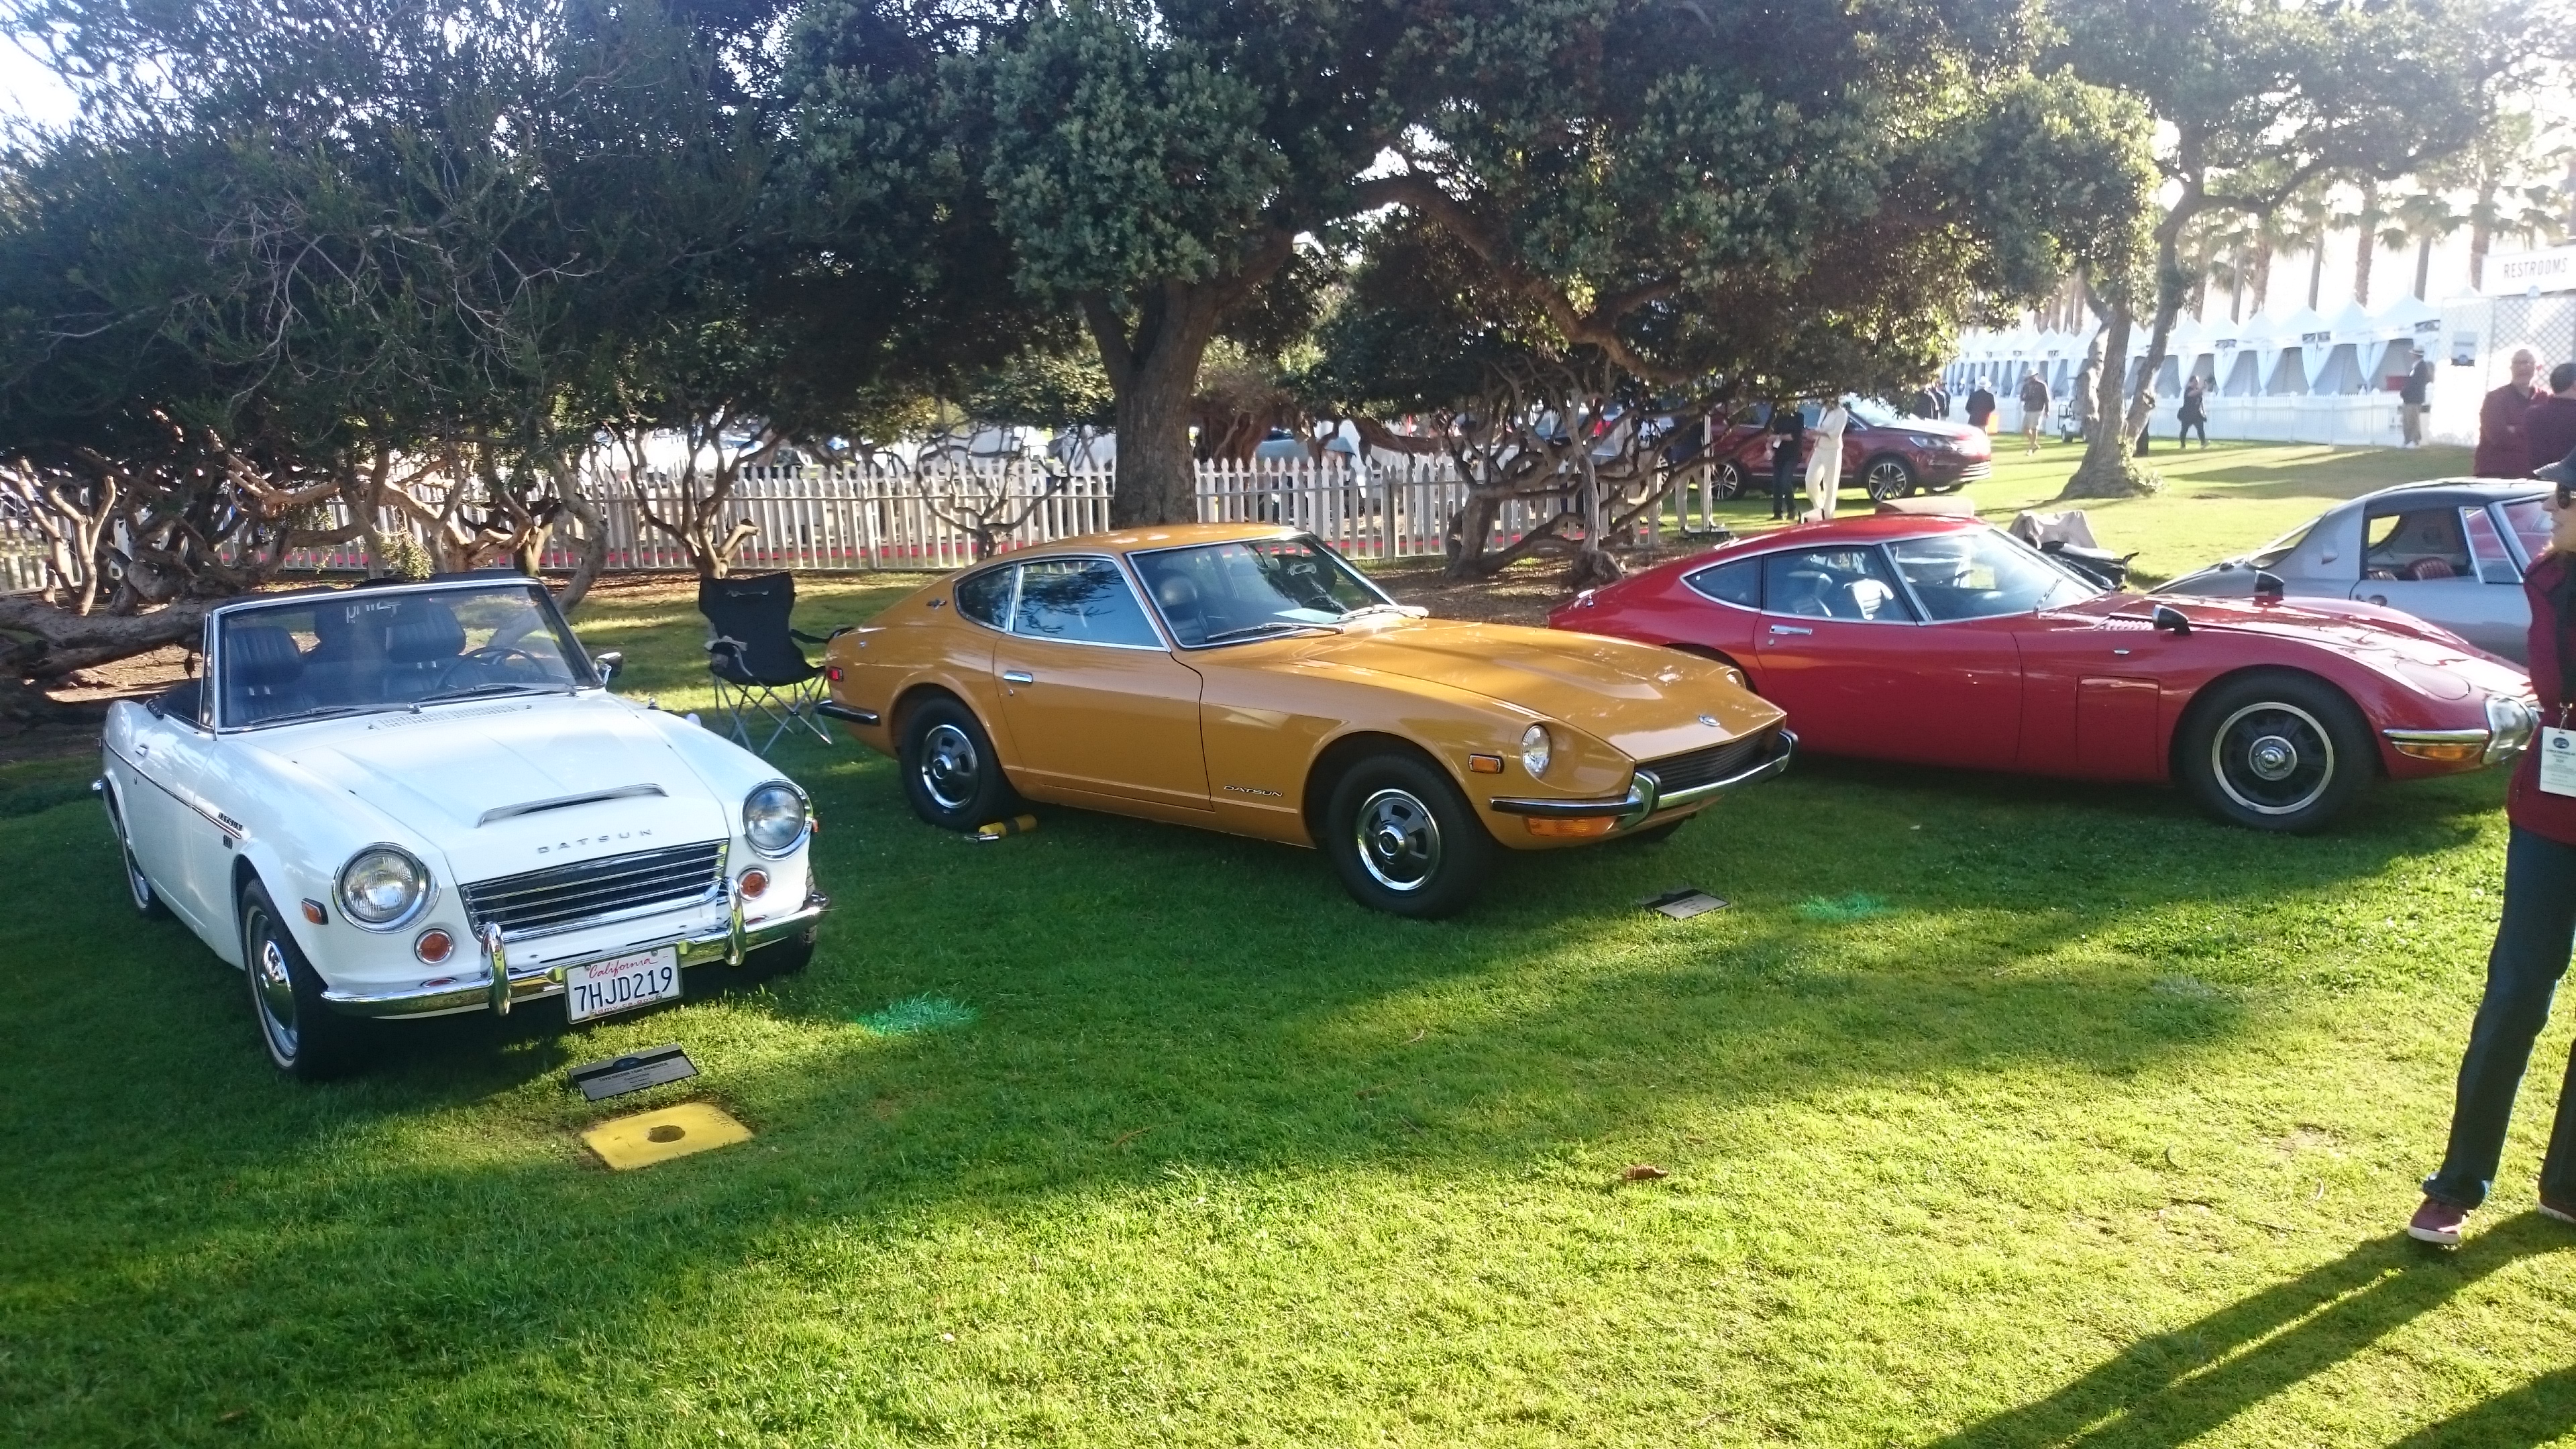
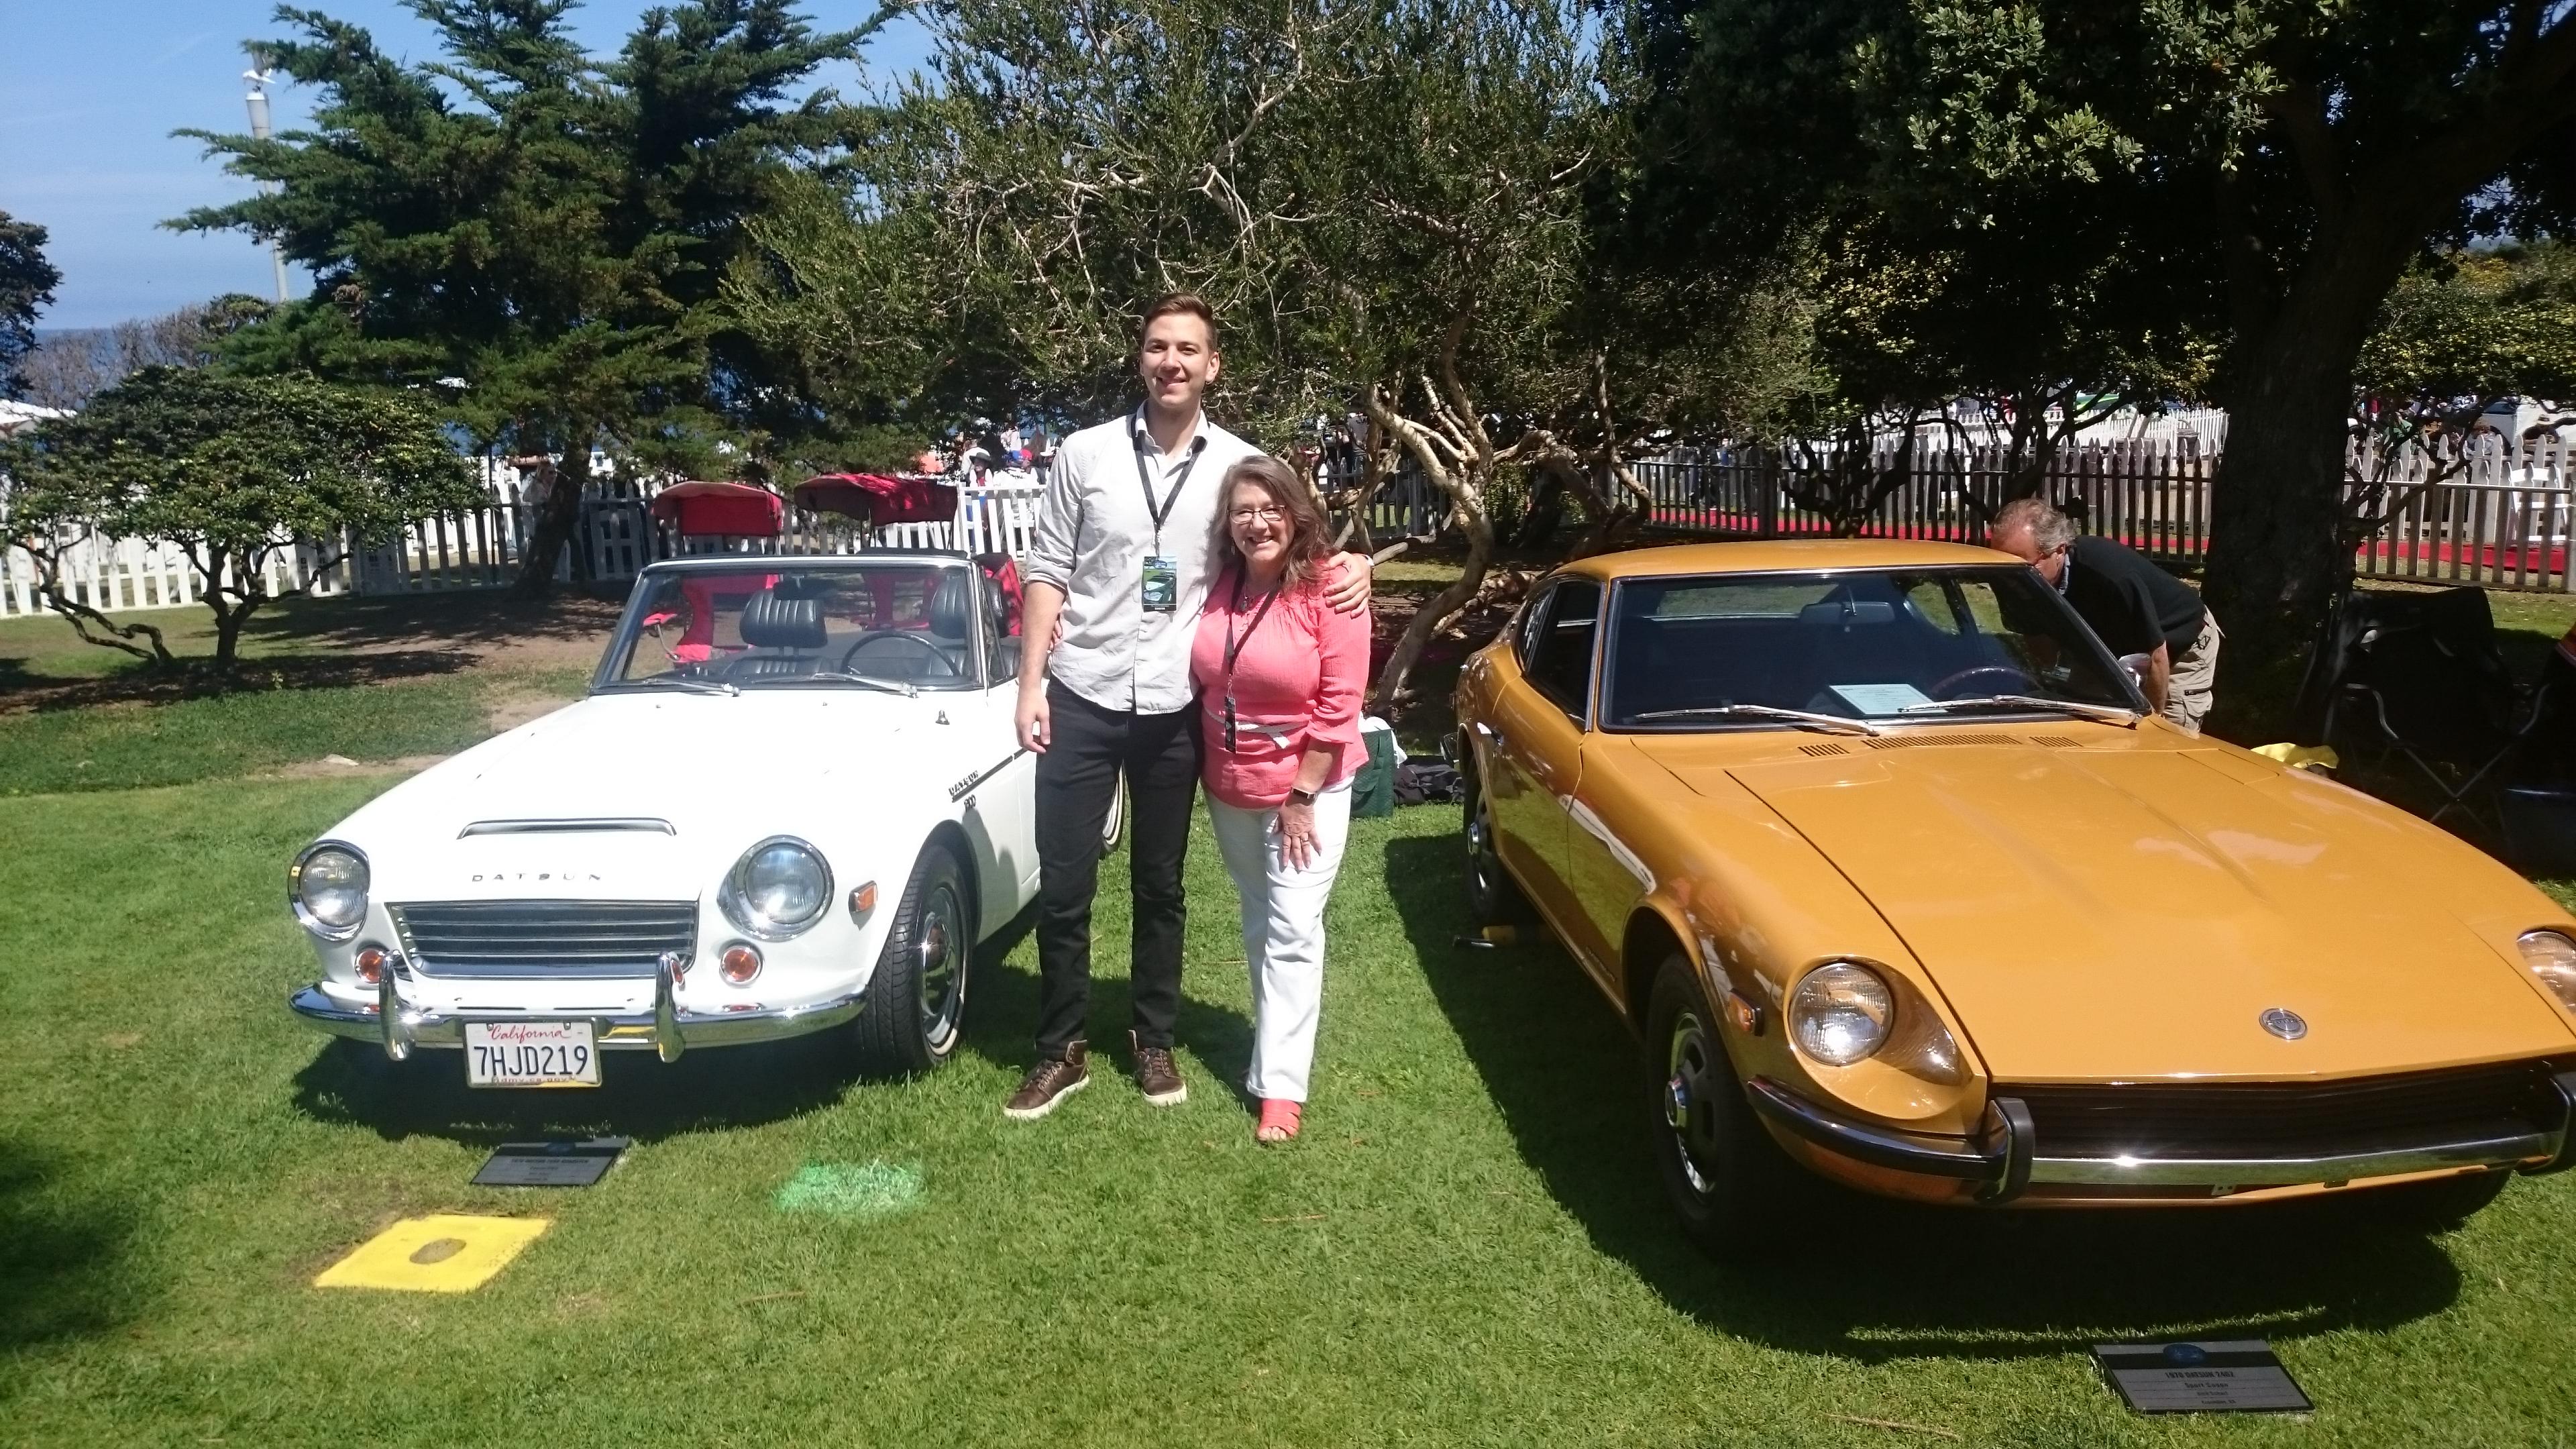
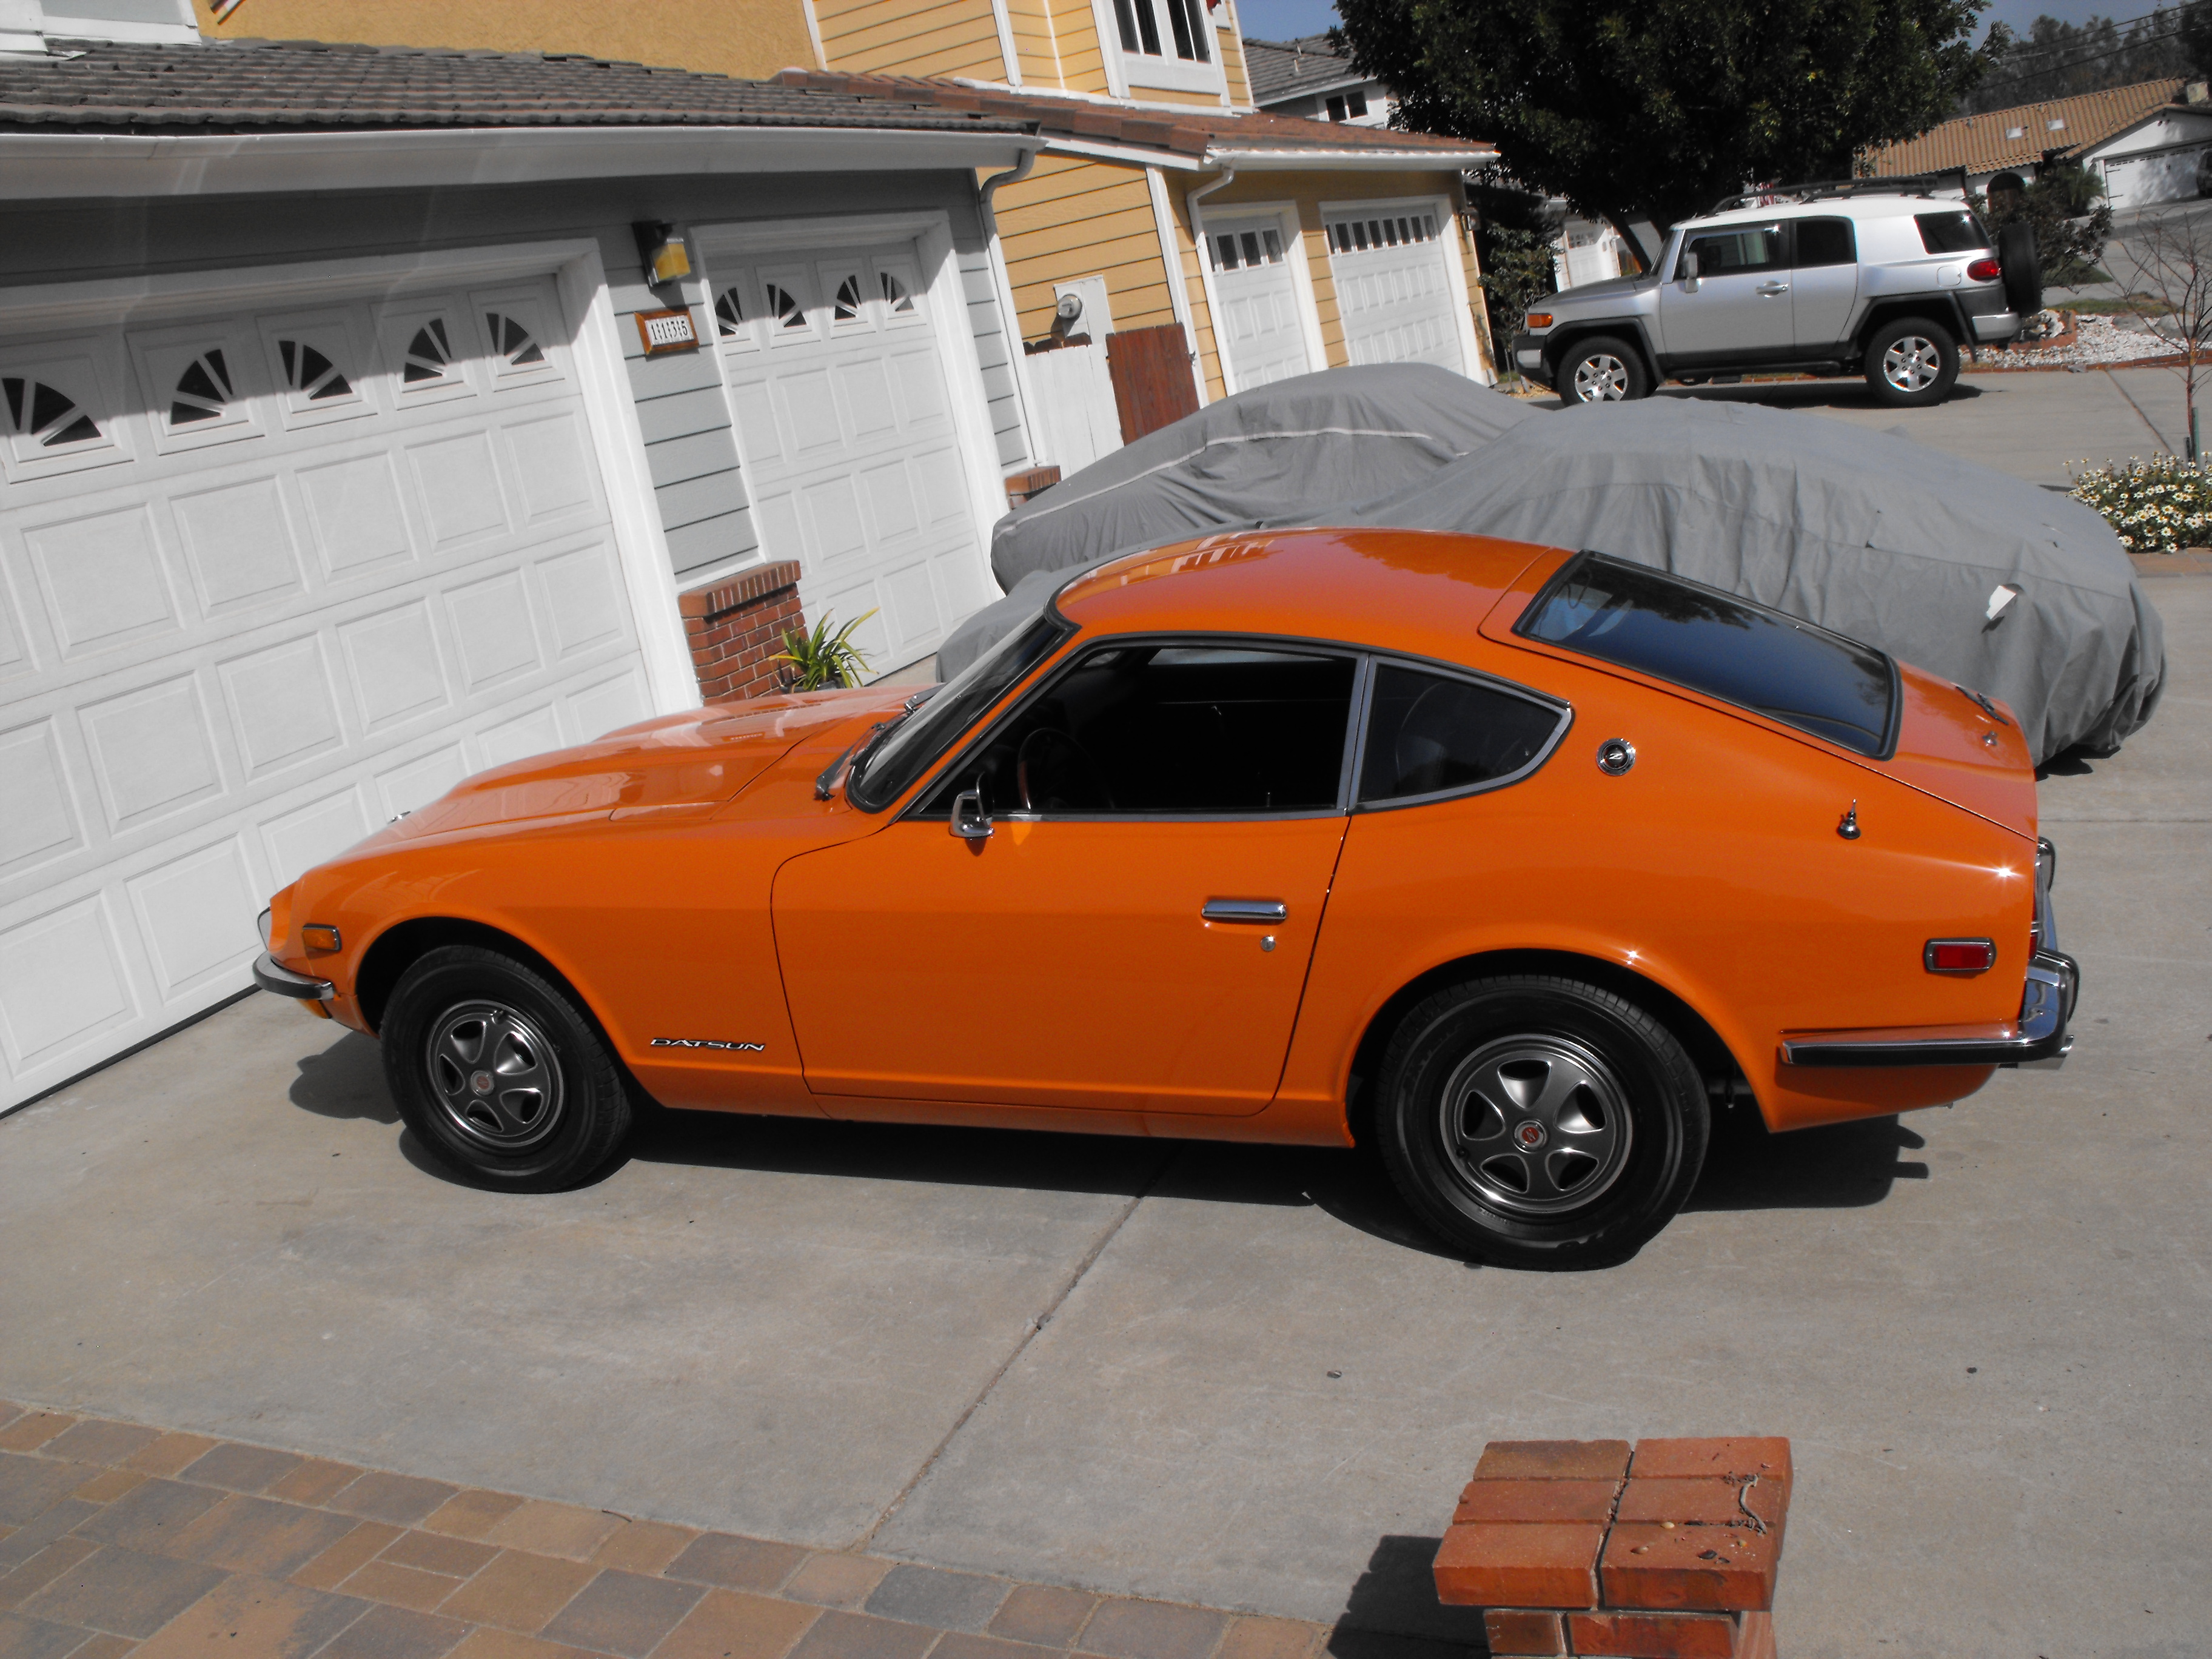
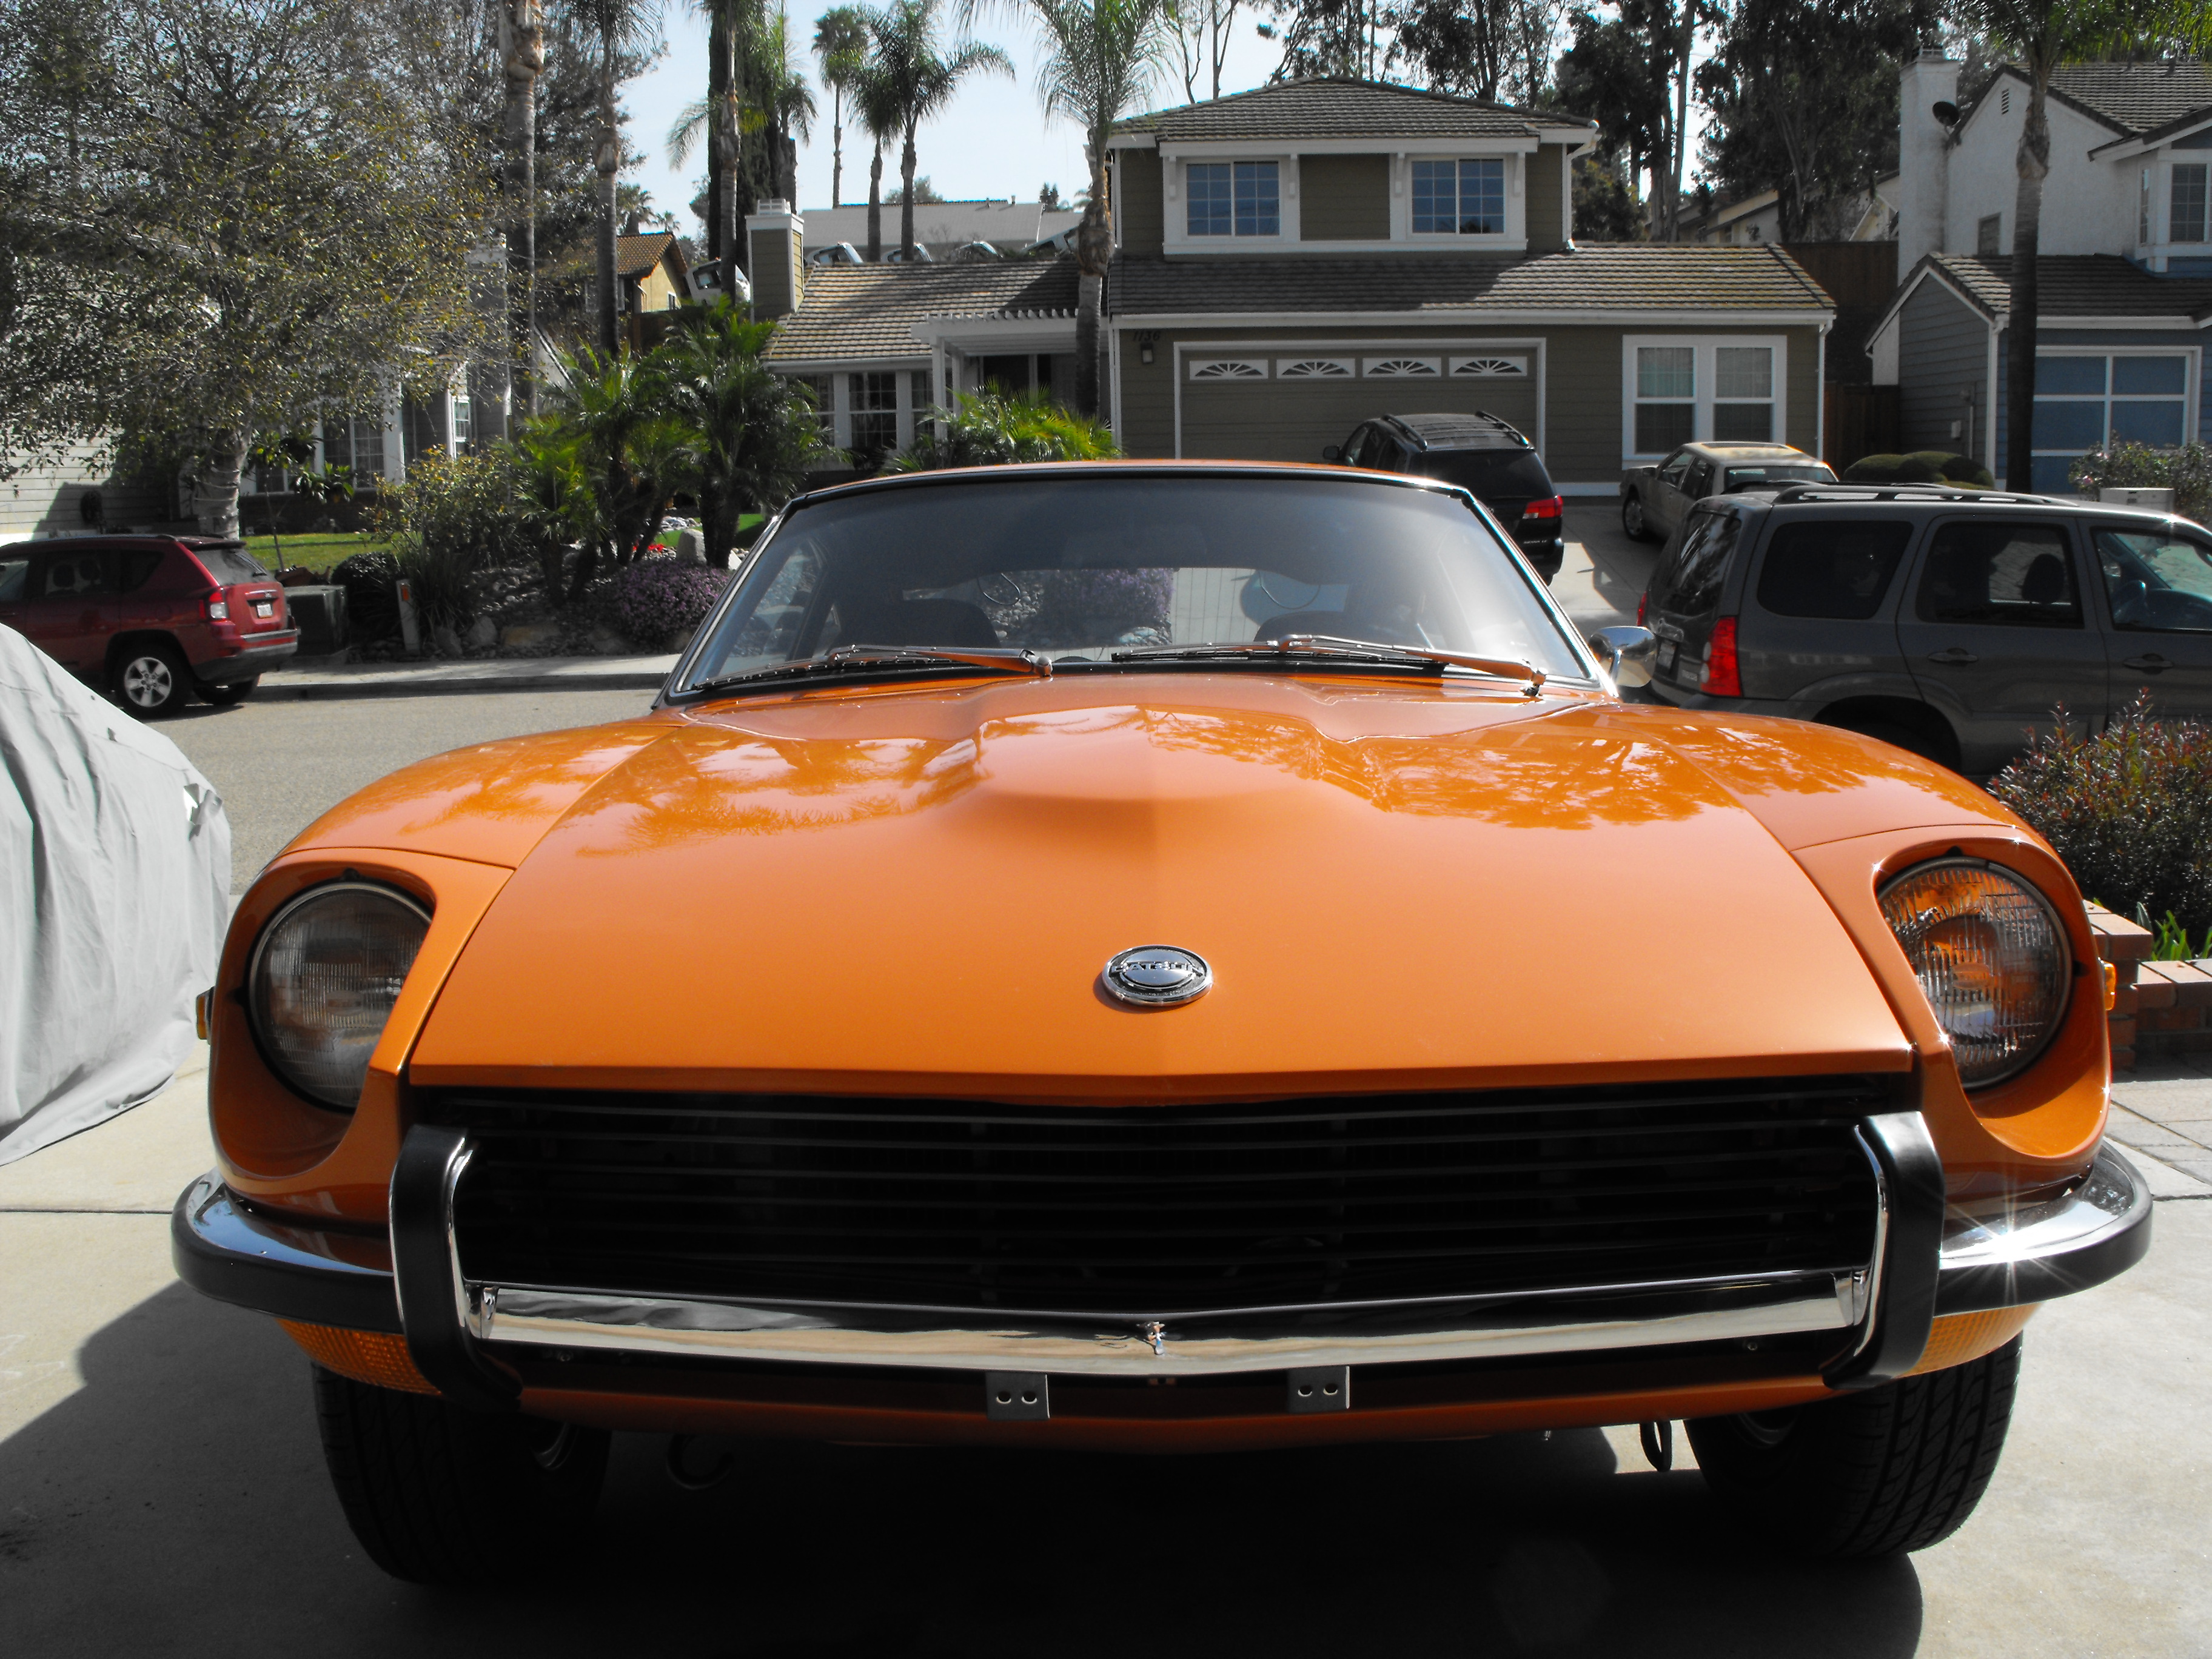
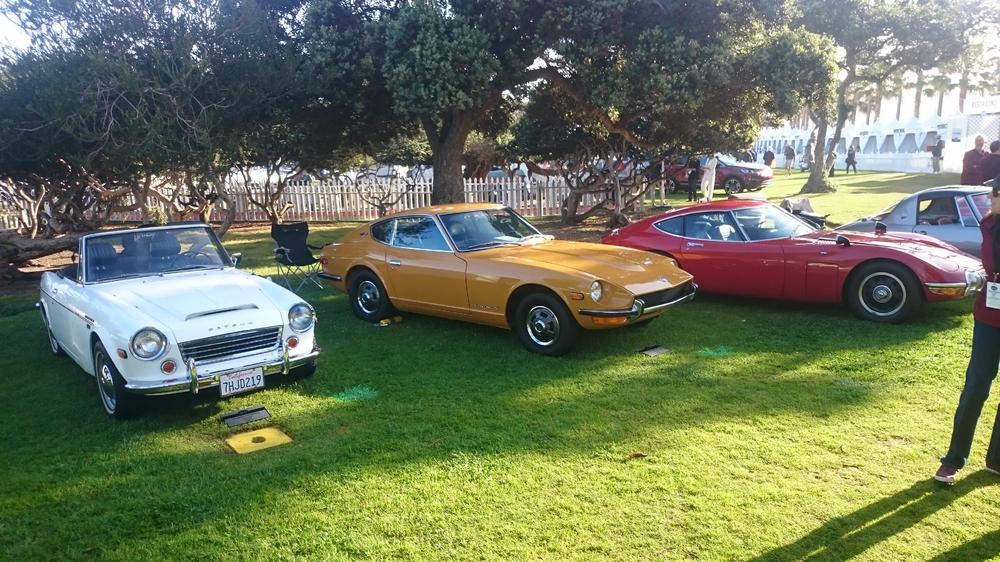
Yes, there were some great cars there. Mike Malamut's Mazda Cosmo took first in the Japanese class. His Mazda Rebo and a Honda sport coupe were the 2nd and 3rd place winners. The Judges graded on restoration excellence. The 2000 GT was easily the priciest car in the Japanese class and garnered a lot of attention. I would venture to say that my Z got almost as much attention as the 2000 GT. The show was very busy which blows my mind since the cost to enter is way high at $70. I usually attend the free show outside and peek through the fence at the cars inside. The cars in the show were just insane; Bugatti's old and new, Rolls Royce's and ton of Mercedes, Duesenbergs, McLarens, a 1963 Lola GT that had like an 8 man pit crew prepping it before the show, a charger Super Bird. I could go on and on. Amazing cars and a lot of fun. Glad the 240Z was well received. Oh, one other cool thing happening here: the Petersen Museum in LA ( https://www.petersen.org/) is doing a year long exhibition starting in May contrasting Japanese and US car design styles. They asked if my roadster was available to present as part of the display, so I will be loaning that out to them for a year. Nice to see the Japanese cars getting some visibility. Also nice to get some free storage . I need space
-
TV clip from the local news channel. KUSI concours video.MOV
-
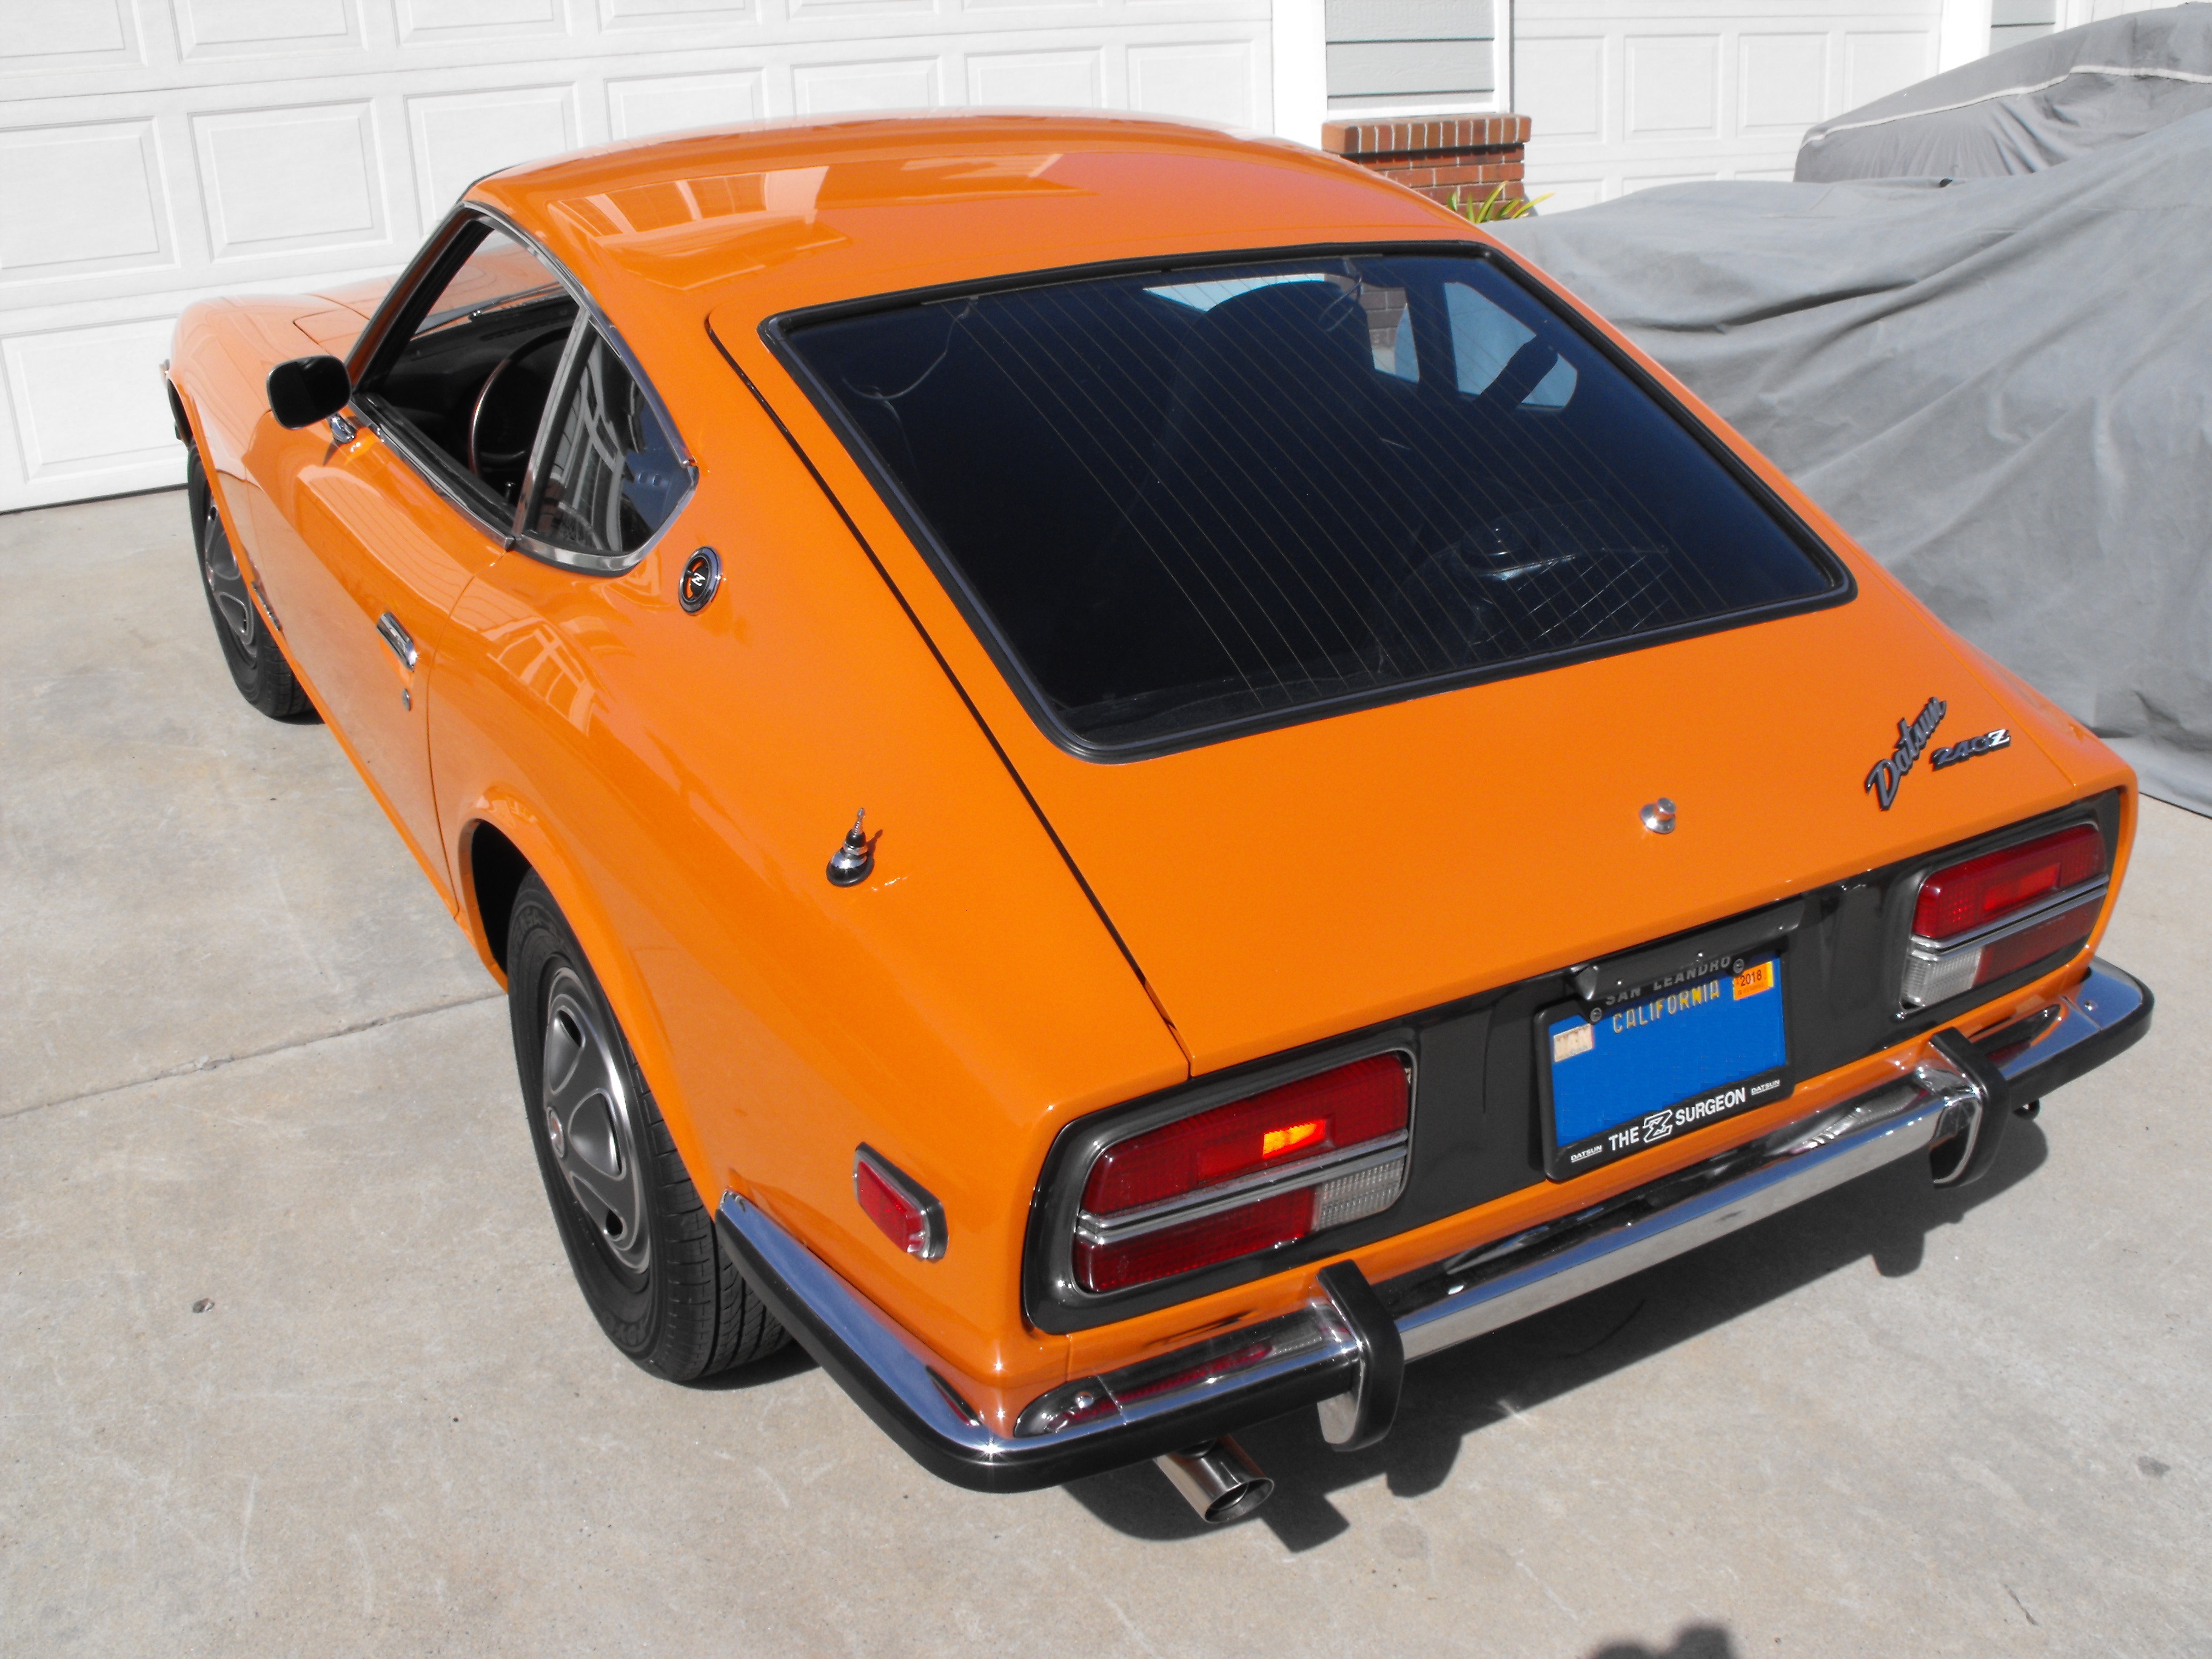
Had a great weekend at the La Jolla Concours this weekend. Brought my 1970 240Z and the roadster. This is the first year that the La Jolla show has had a Japanese Class so I had to offer my full support. It was a fabulous show as always and had a great time. The party the night before was epic and way worth high entry fee (The party is an all you can eat and drink affair catered by La Jolla's finest restaurants). Anyway, I was interviewed by the local TV station, KUSI, I will try and find a video clip of that. I also was presented the "Honorary Judges Choice Award/Trophy" which is probably the best award I have ever received. The Honorary Judge has the entire field to choose from and he chose my Z, just barely, over a Ferarri that he liked. The emphasis on the award is preservation so that definitely helped. So, I will try and post some clips if they come available. The Award presentation was absolutely phenomenal. I felt like a rock star with all the people at the drive up presentation and photographers. They talked for about two minutes about the car and the award while the gallery and photographers snapped pics. Was way cool.


-
Yes, paint is Global PPG
-
Hi Jim, Paint was paid for in the same manner that I was. Payment was in advance through Paypal. Again,the customer was great with all this. Miguel would let me know when payment was needed and I would let the customer know. I will double check, but pretty sure the paint was all PPG brand. 10. Just for clarification on the paint and body work: The thing that really shows the quality is the work that was done on the panel alignment and the creases and lines along the body and hood. Too often the lines that form the hood bump and the side line (not sure the correct name for those) are smoothed over, rounded or uneven. They typically lose their sharpness when taken to the average body shop. Miguel was very careful with the lines which is what makes the panels look great. They are sharp, even and straight, very nice!
-
Epilogue: So, this is actually my first ‘contracted’ 240Z restoration (Yes, we had a signed contract). Overall, I would say that it went surprisingly well. The restoration was done within the contract estimated cost of $40K and time frame of one year (almost). The breakdown on the costs for the customer are as follows: Paint: $12,000 Parts and Material: $14,885.28 Labor: $12,476.25 For a grand total restoration cost of: $39,361.53 Payments for the paint were made by the customer directly to the paint shop Payments for parts and labor costs were made by the customer through Paypal. Payments were all made in advance in $1500 increments. When the $1500 was spent, I would send an invoice and then the next payment was sent. This process worked very well and the customer was very prompt with payments and very supportive. The customer was able to monitor the progress through the blog and was very communicative and supportive during the restoration. This was done by e-mail and not through the blog. It was actually a very nice way to do things. For the most part, the restoration went as planned. Below are some of the items that were lessons learned or different than originally planned or expected. 1. Initially, the plan was to restore the car to what Hagerty’s would consider a Condition #2 car, similar to my orange Z, which I consider a condition #2. However, after the paint job, the project was kicked up a level to where the car would be in the Condition #1 category. As I mentioned earlier, paint and body work quality is a huge factor in a restoration. https://www.hagerty.com/apps/valuationtools/1972-Datsun-240Z 2. Quality paint and body work is expensive. I was hoping to get the paint done for $5-10K. This is what I discussed with the customer. I got a number of quotes and even considered Maaco (they did a nice job on my yellow Z, not on my silver Z). However, I had seen Miguel’s work and really wanted a great paint job so I went in that direction. The total cost of the paint job was $14,000. The customer paid $12K of this and I paid out of my labor cost $2K. The reason I covered $2K of the paint job was that I had told the customer $5-10K for paint, and obviously we blew way past that. The other reason is that I charged labor for my early prep and body work, all of which was removed by Miguel. So, no fair to charge the customer twice, so the right thing to do was to pick up some of the cost. On the next car I do, after I remove all the parts, car will go straight to Miguel for paint. No need for me to do any body work, although stripping most of the paint would not be bad. 3. One more item on paint: I would consider my Orange Z a condition #2 car, primarily because of the paint. This orange Z that I just finished is about 90% in the Condition #1 state. As you can see from the valuation tools page, the price difference between the 2 conditions is more than the total cost of the paint. Aside from the paint, I would say the cars are almost exactly the same. If I had to do it over, I would have taken my orange car to Miguel. I think the ROI is worth it for the paint. 4. Scope creep: Every engineer has experienced this. There were a couple of things that we added that were not part of my initial restoration plan. Originally the car had the slotted mags. The customer and I discussed the pros and cons of putting on the steelies and hubcaps and eventually we went in that direction. That was a bit of a cost hit over the original estimate. Polishing the mags would be about $300. Getting a set of nice steelies and hubcaps was over $1K when all said and done. Also, we ended up going with a nice reproduction of the original OEM exhaust instead of just replacing it with an off the shelf system. The OEM reproduction came out great and looks and sounds super.. Nice choice on both items. I will do this same system on my white one as well. (Special thanks to Carl Beck for bringing this to our attention). 5. Organizing everything in large storage boxes by section works out great. I had an engine box, an interior box, and an undercarriage box. This makes finding parts much easier. 6. I do a lot of my own zinc plating, but when doing large projects, taking stuff to the plating shop is the way to go. There were several times I brought a lot of parts to the plating shop and just paid the minimum $75 lot charge. This is a nice way to go as it is quick and they do a nice job. Powder coating is also relatively cheap. 7. Time wise, paint took a lot longer than I was expecting. I was thinking 1-2 months. I think it took 5 months. Fortunately I was able to do the engine and some undercarriage items during this period. 8. Parts are starting to get hard to find. It has been very helpful to have the support of the classiczcars.com site in hunting some of these things down. Thanks everyone! 9. Not sure if I could do another one in a one year time frame. Need to take into account, Vacations, Birthdays, weddings, car shows, home maintenance etc. These are some of the items that stand out the most on the restoration. I will add more as things come to mind if they are significant.
-
Hi Guy, The whole project was actually pretty enjoyable (for the most part) and educational. I think the most important thing I learned is that if you have a decent car to start with, then pay the extra money for a great paint job. That being said, I've actually started stripping and boxing the white car parts. I will sand it pretty bare, then send it off to Miguel to do the paint work, same as the orange car. For the orange car here, I will do a summary here at the end and quote costs, labor, lessons learned etc. I will probably continue the white car blog but not in as much detail. Good to hear from you again. Best regards, Rich
-
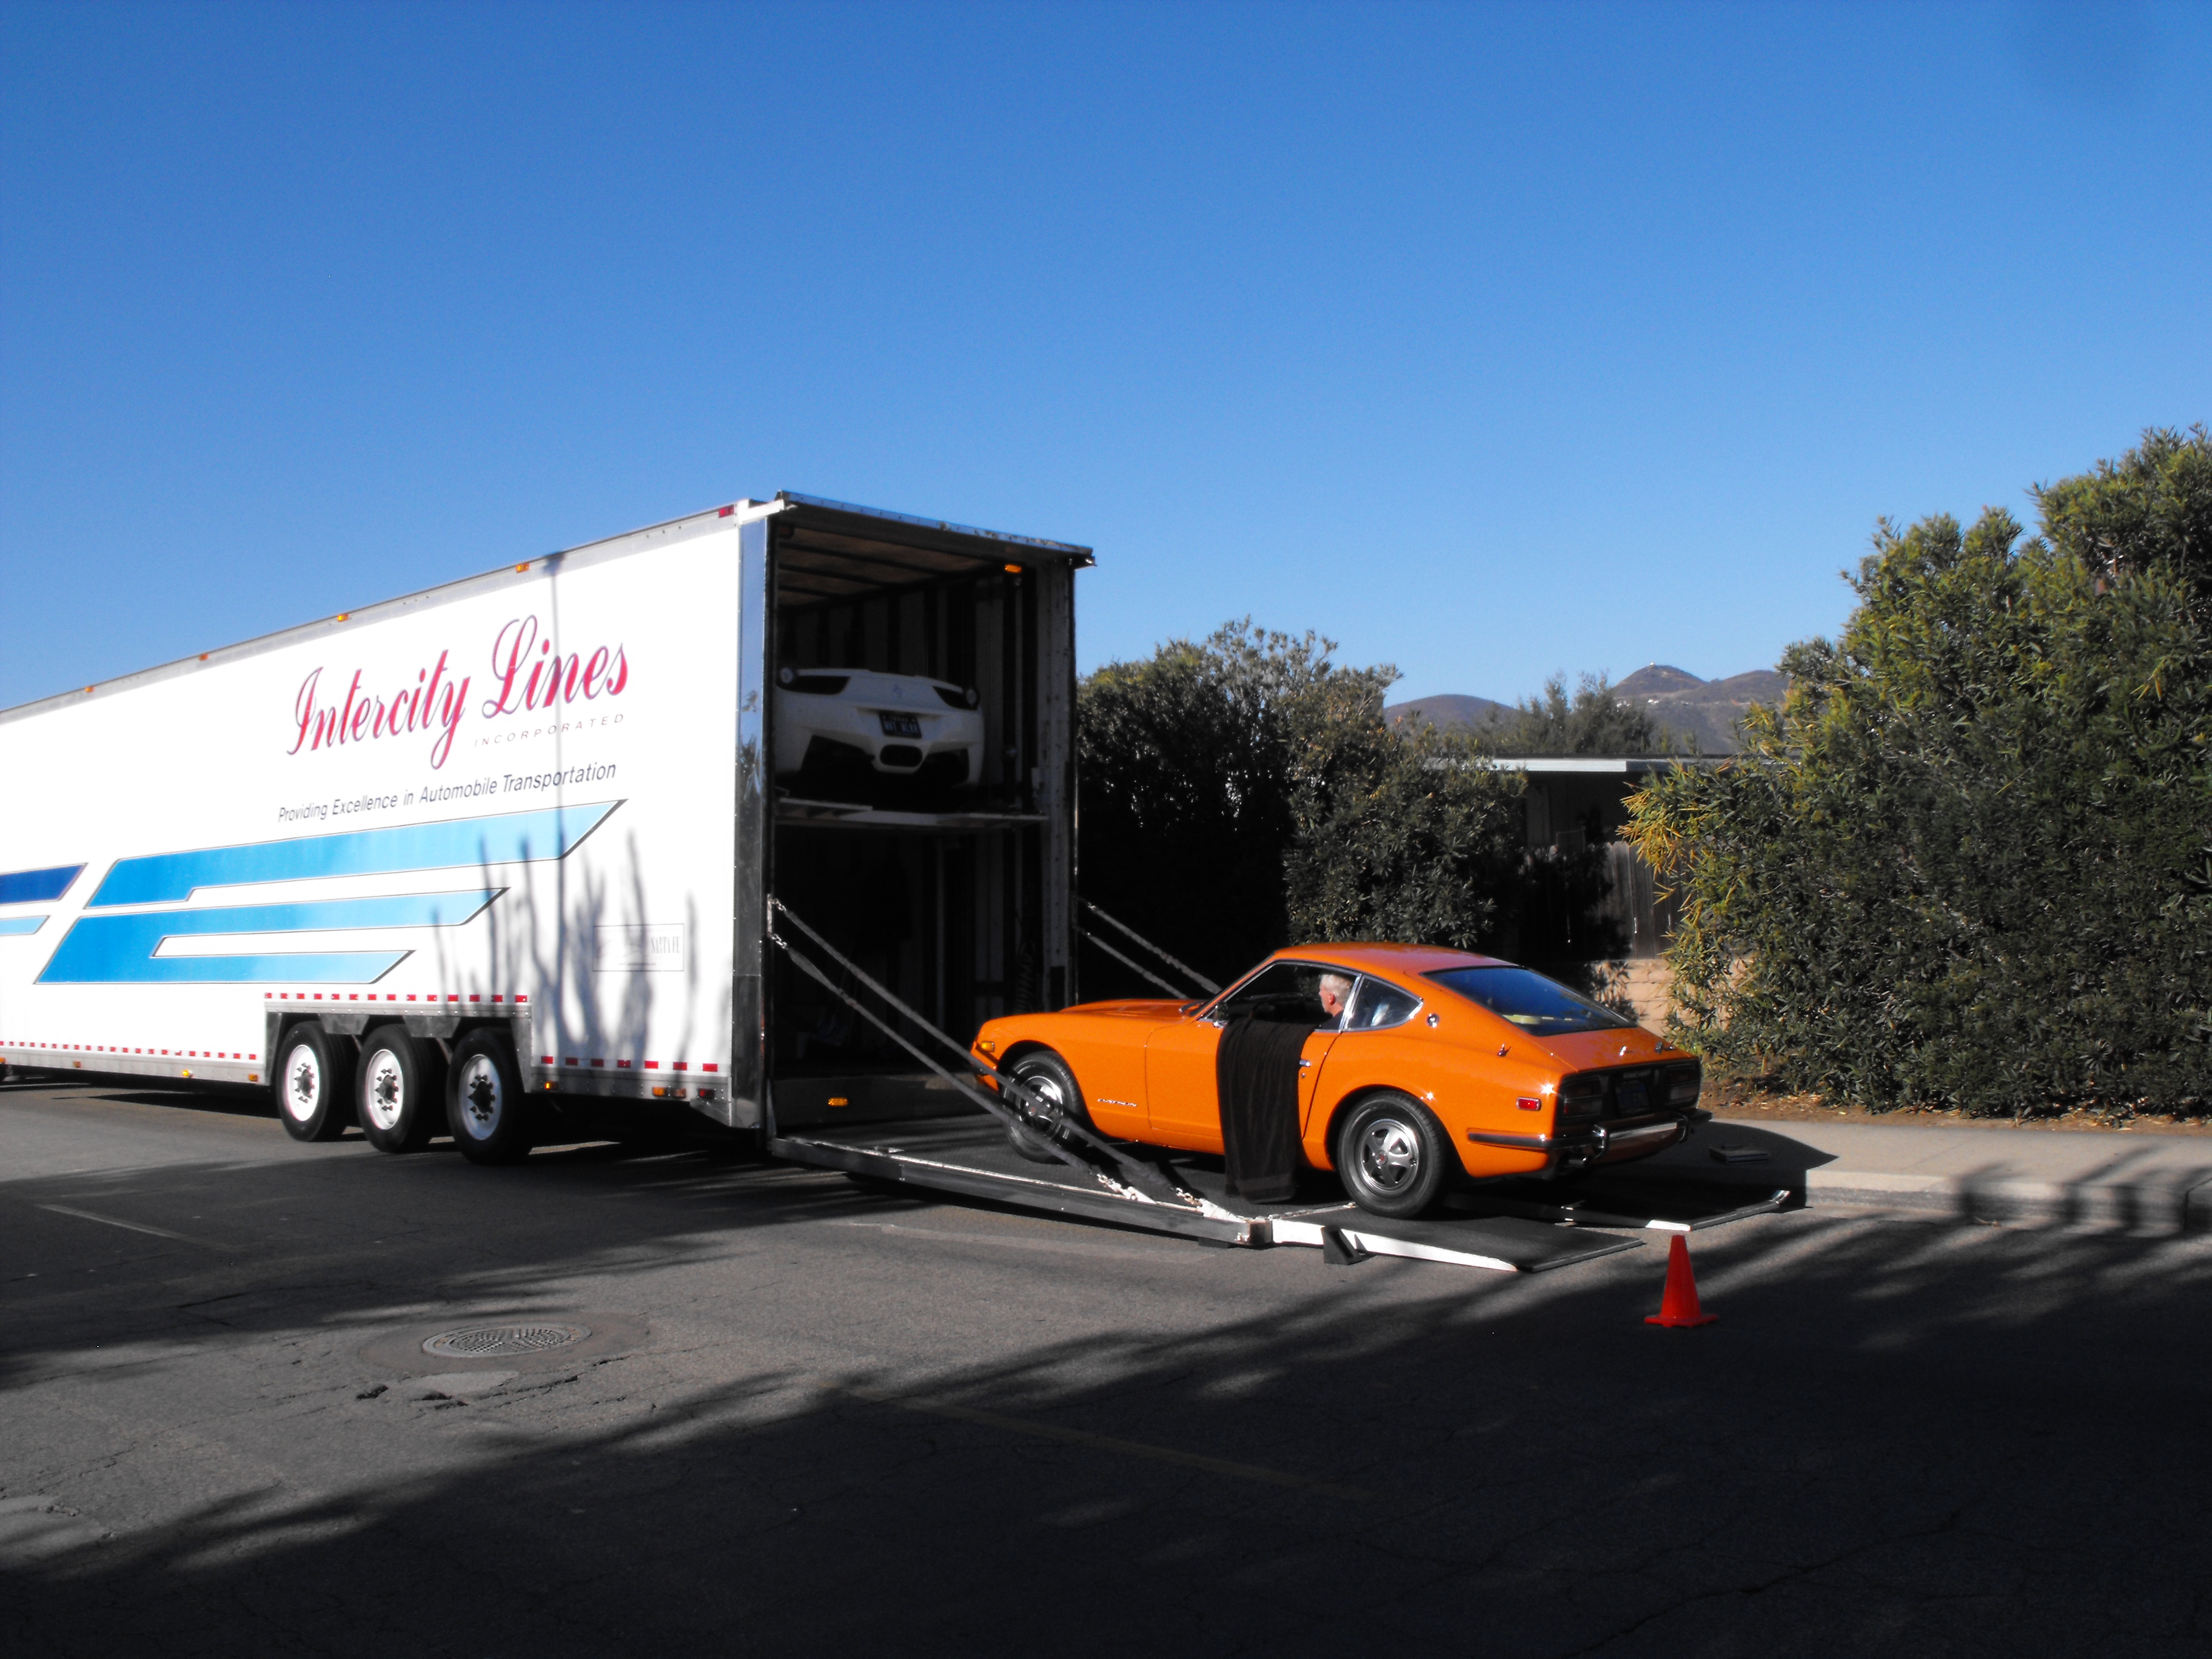
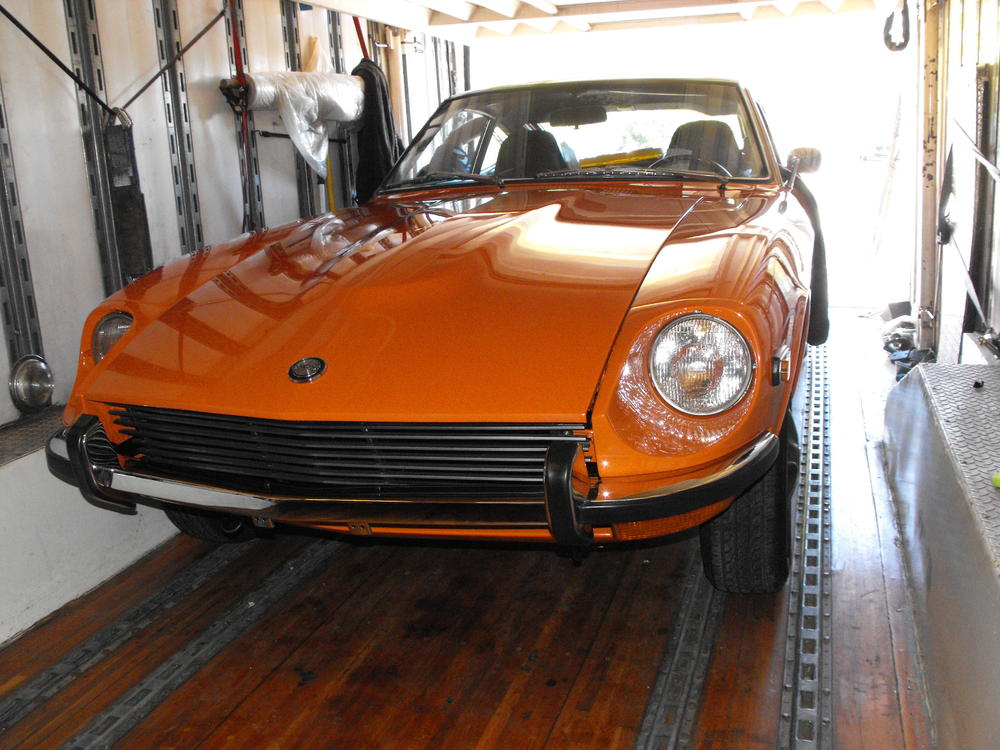
And...off she goes, back to the owner. Will post overall summary and lessons learned once I get a little time.


-
Here is a link and one of the last known pictures of one Yuasa N50
-
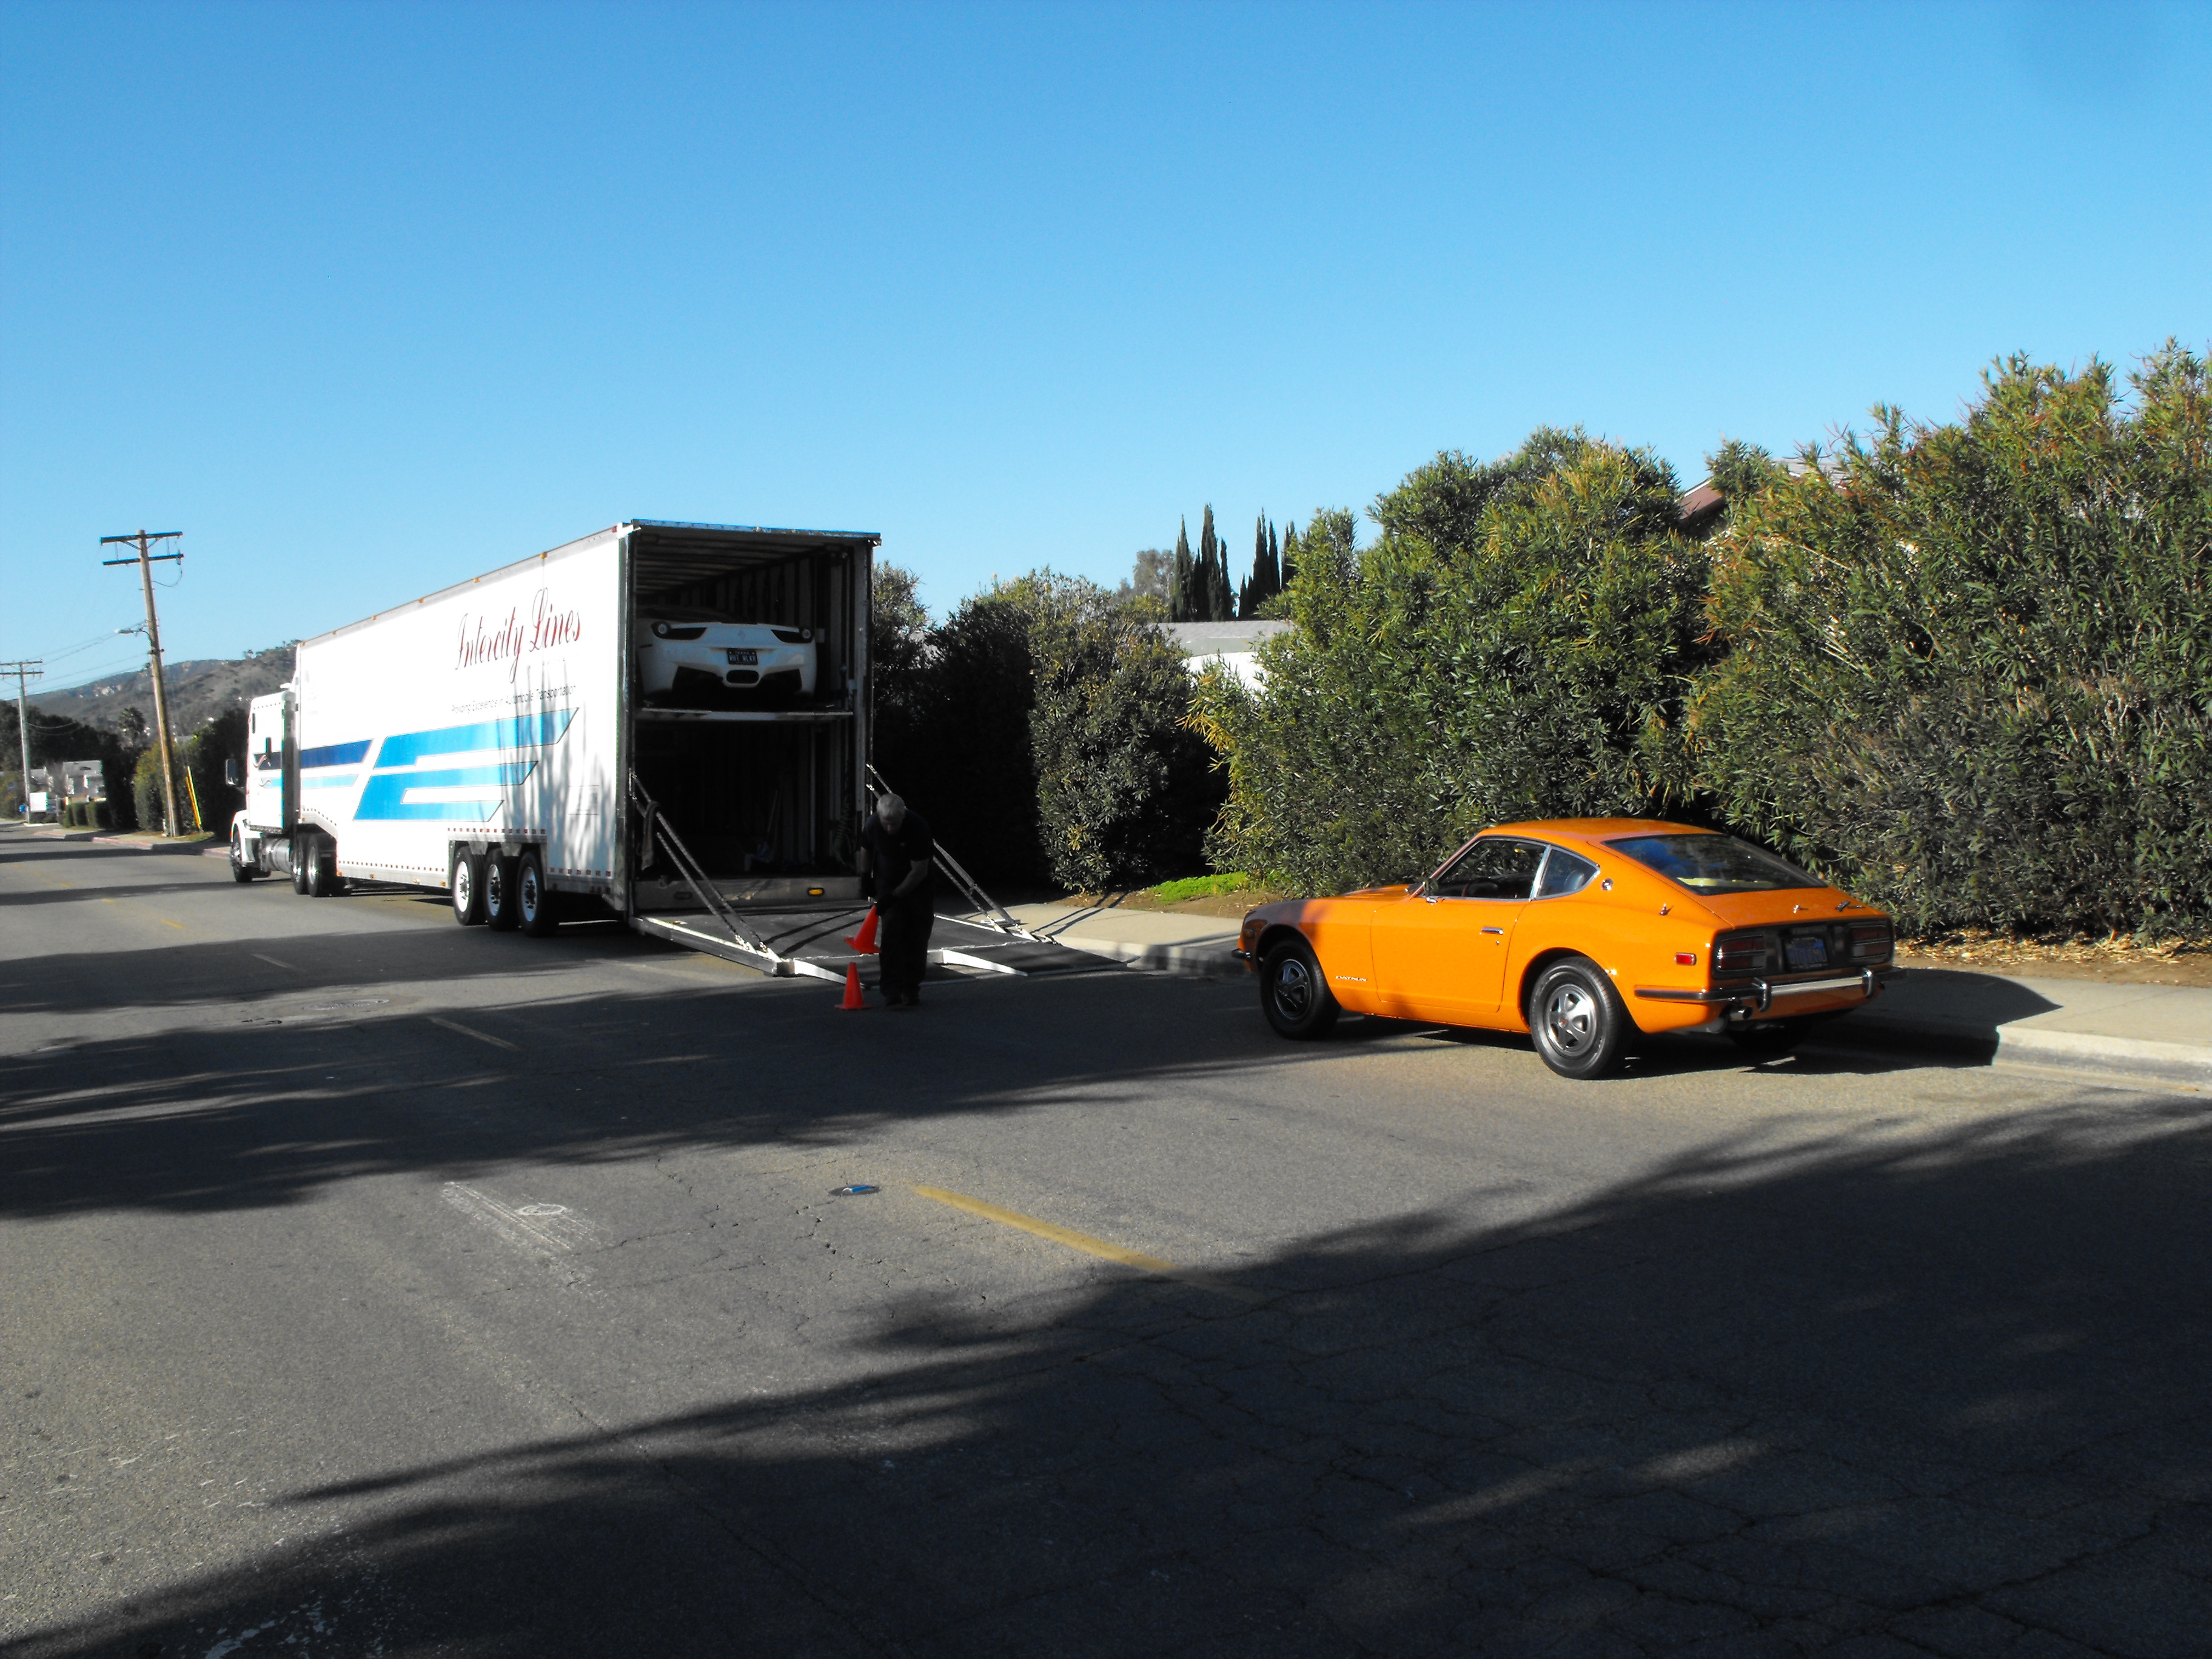
Thanks for the comments everyone. Still waiting to hear from the transportation company on the pick-up date. Should be in the next week or so. The owner is having Intercity Car transport (http://www.intercitylines.com/) do the pick-up and transportation, so looks like we are in good hands here. They are Jay Leno approved .
-
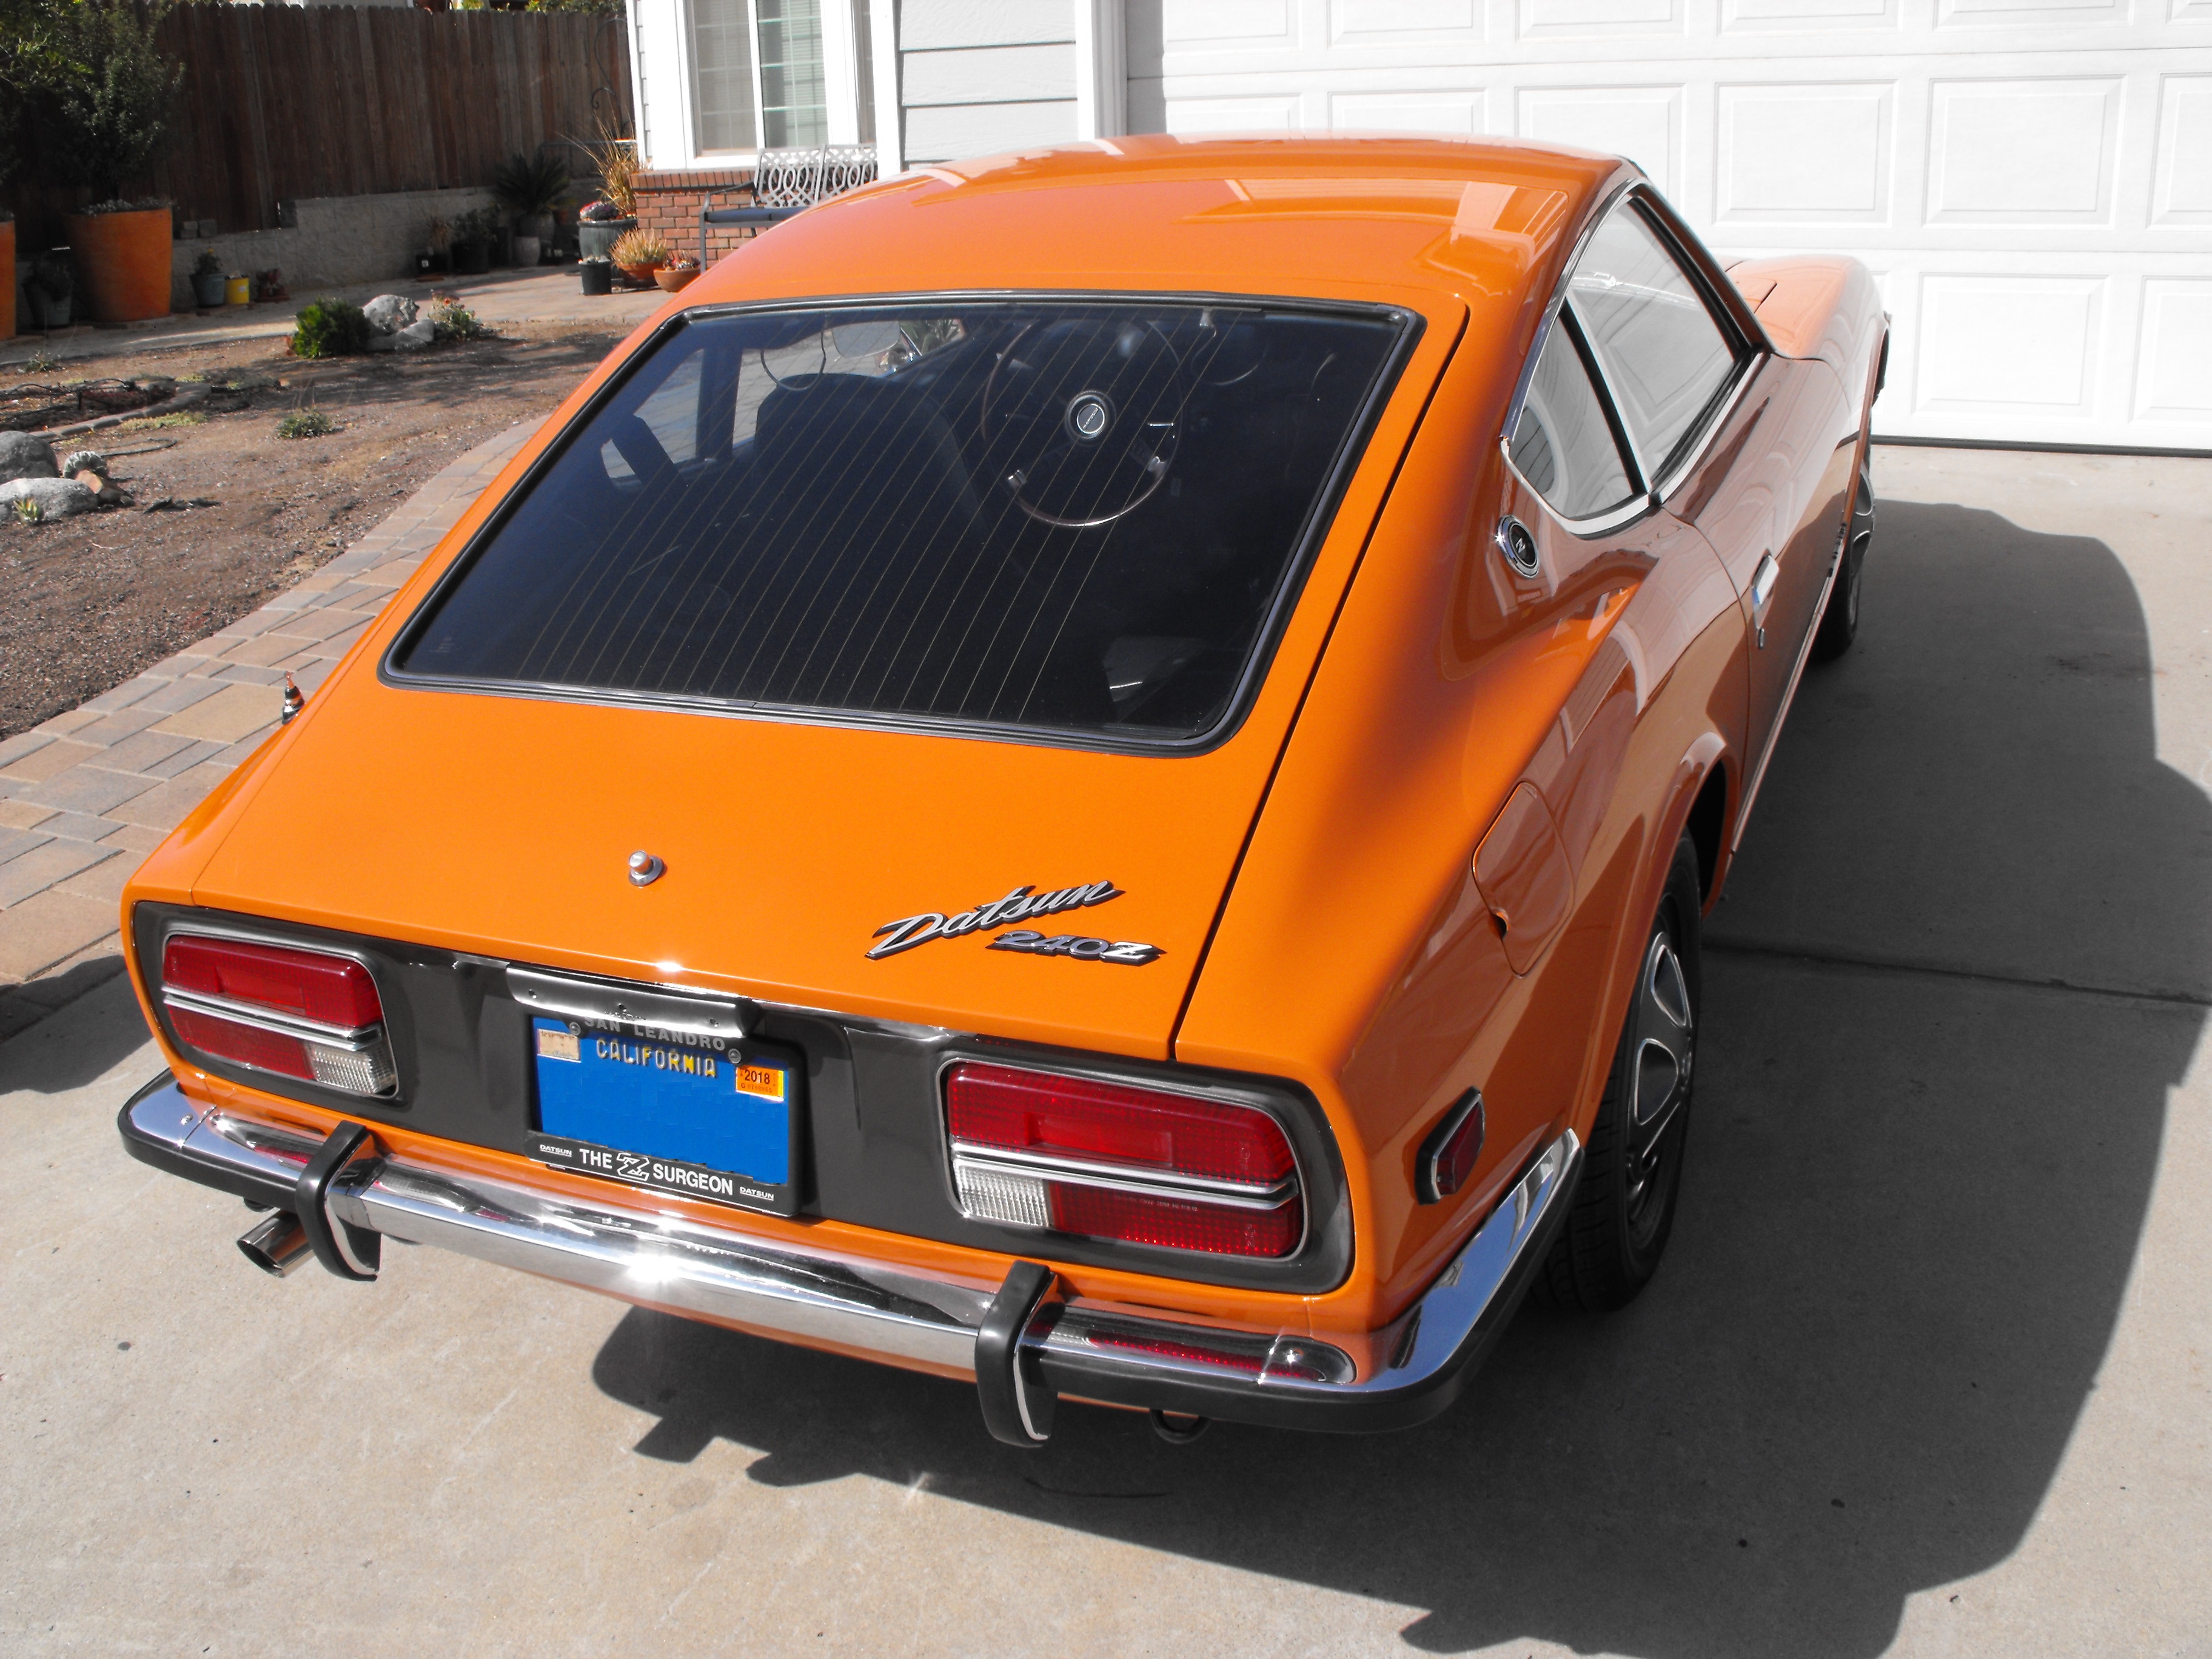
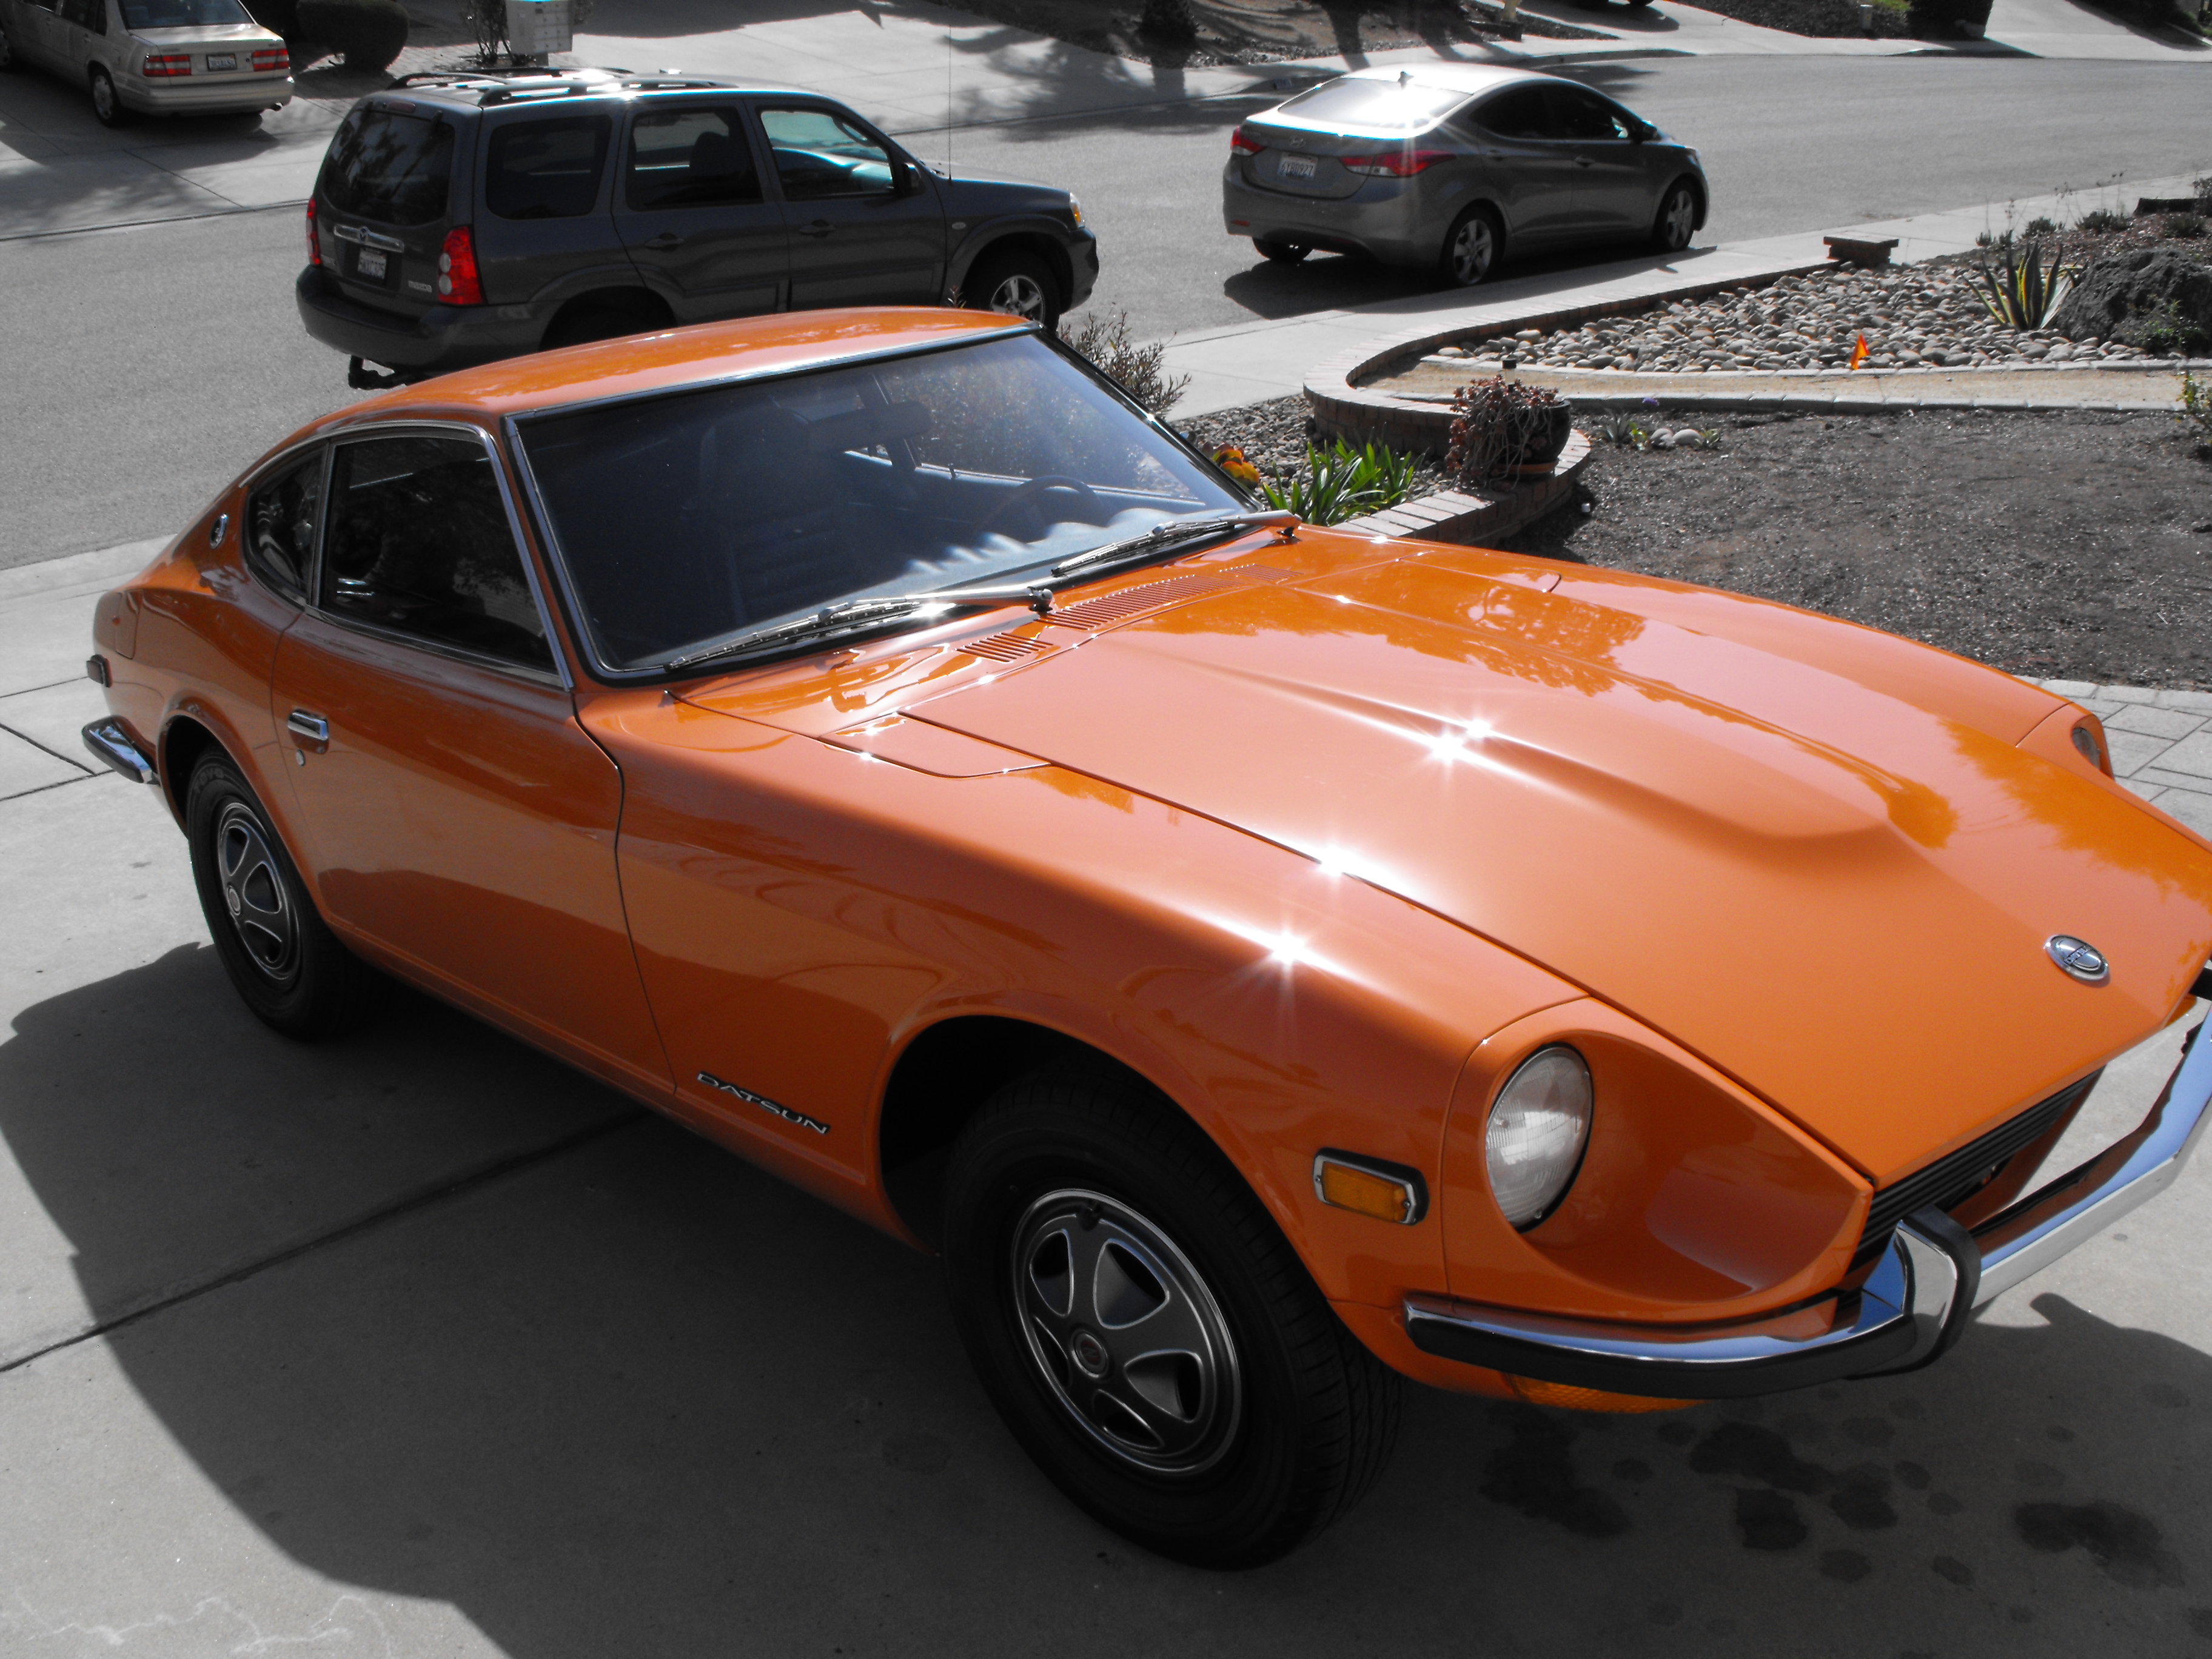
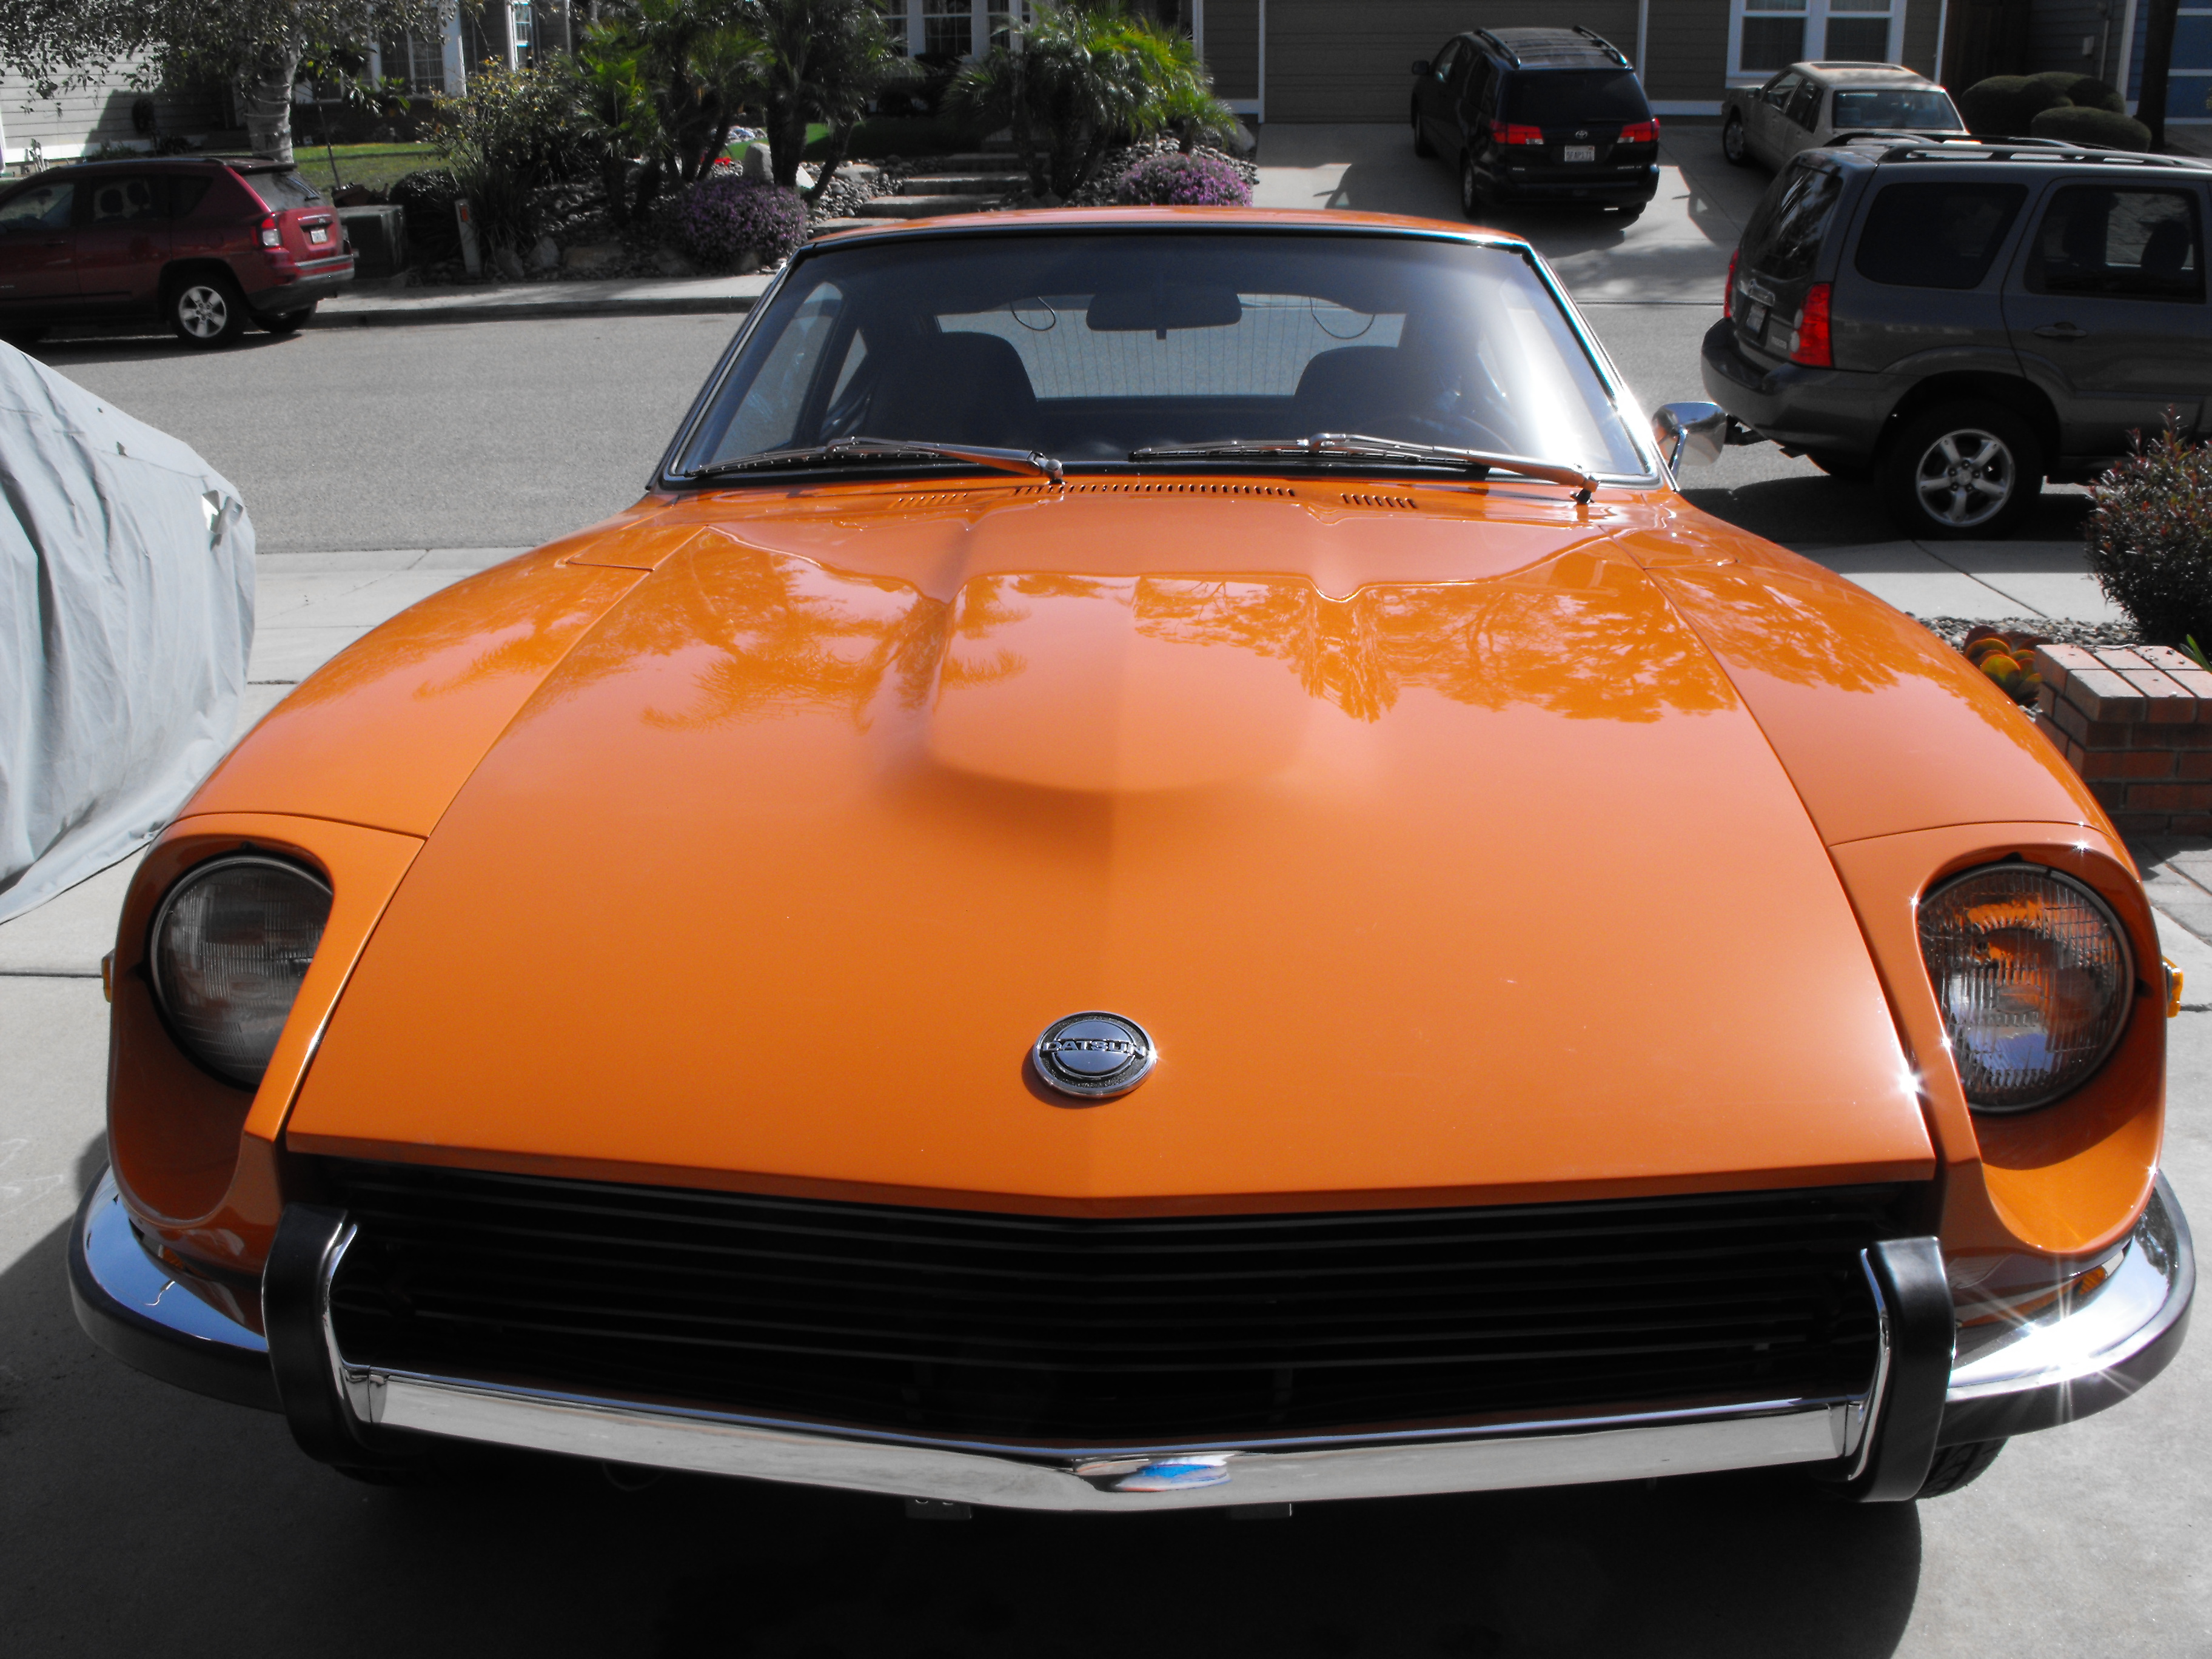
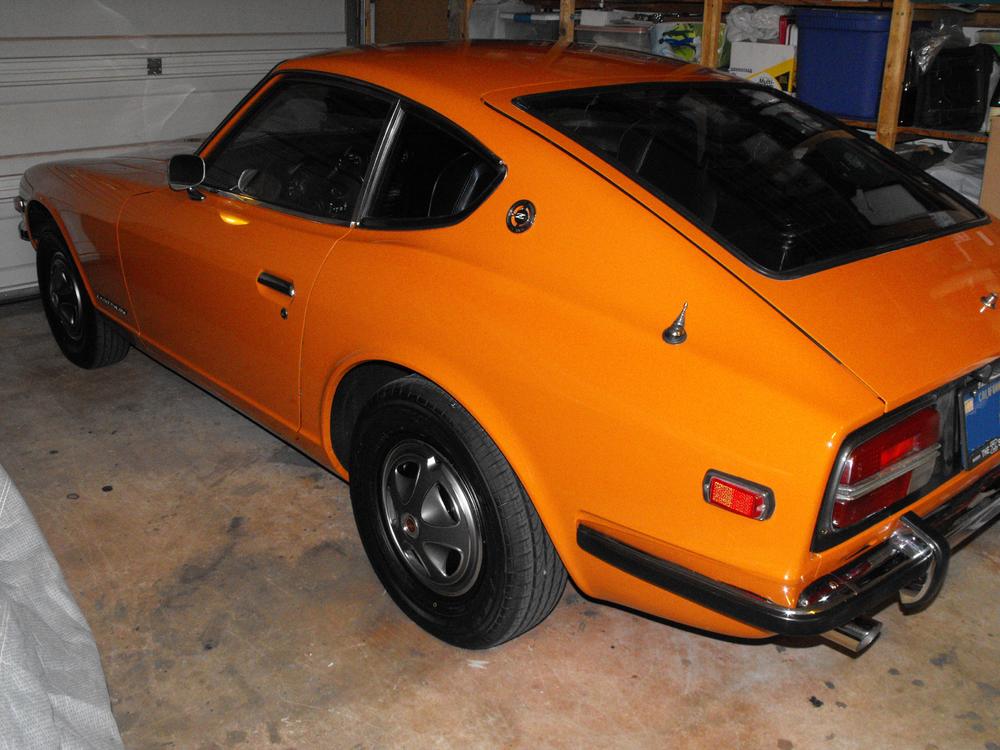
Had a nice sunny day today, so I backed the car out for a couple pics.


-
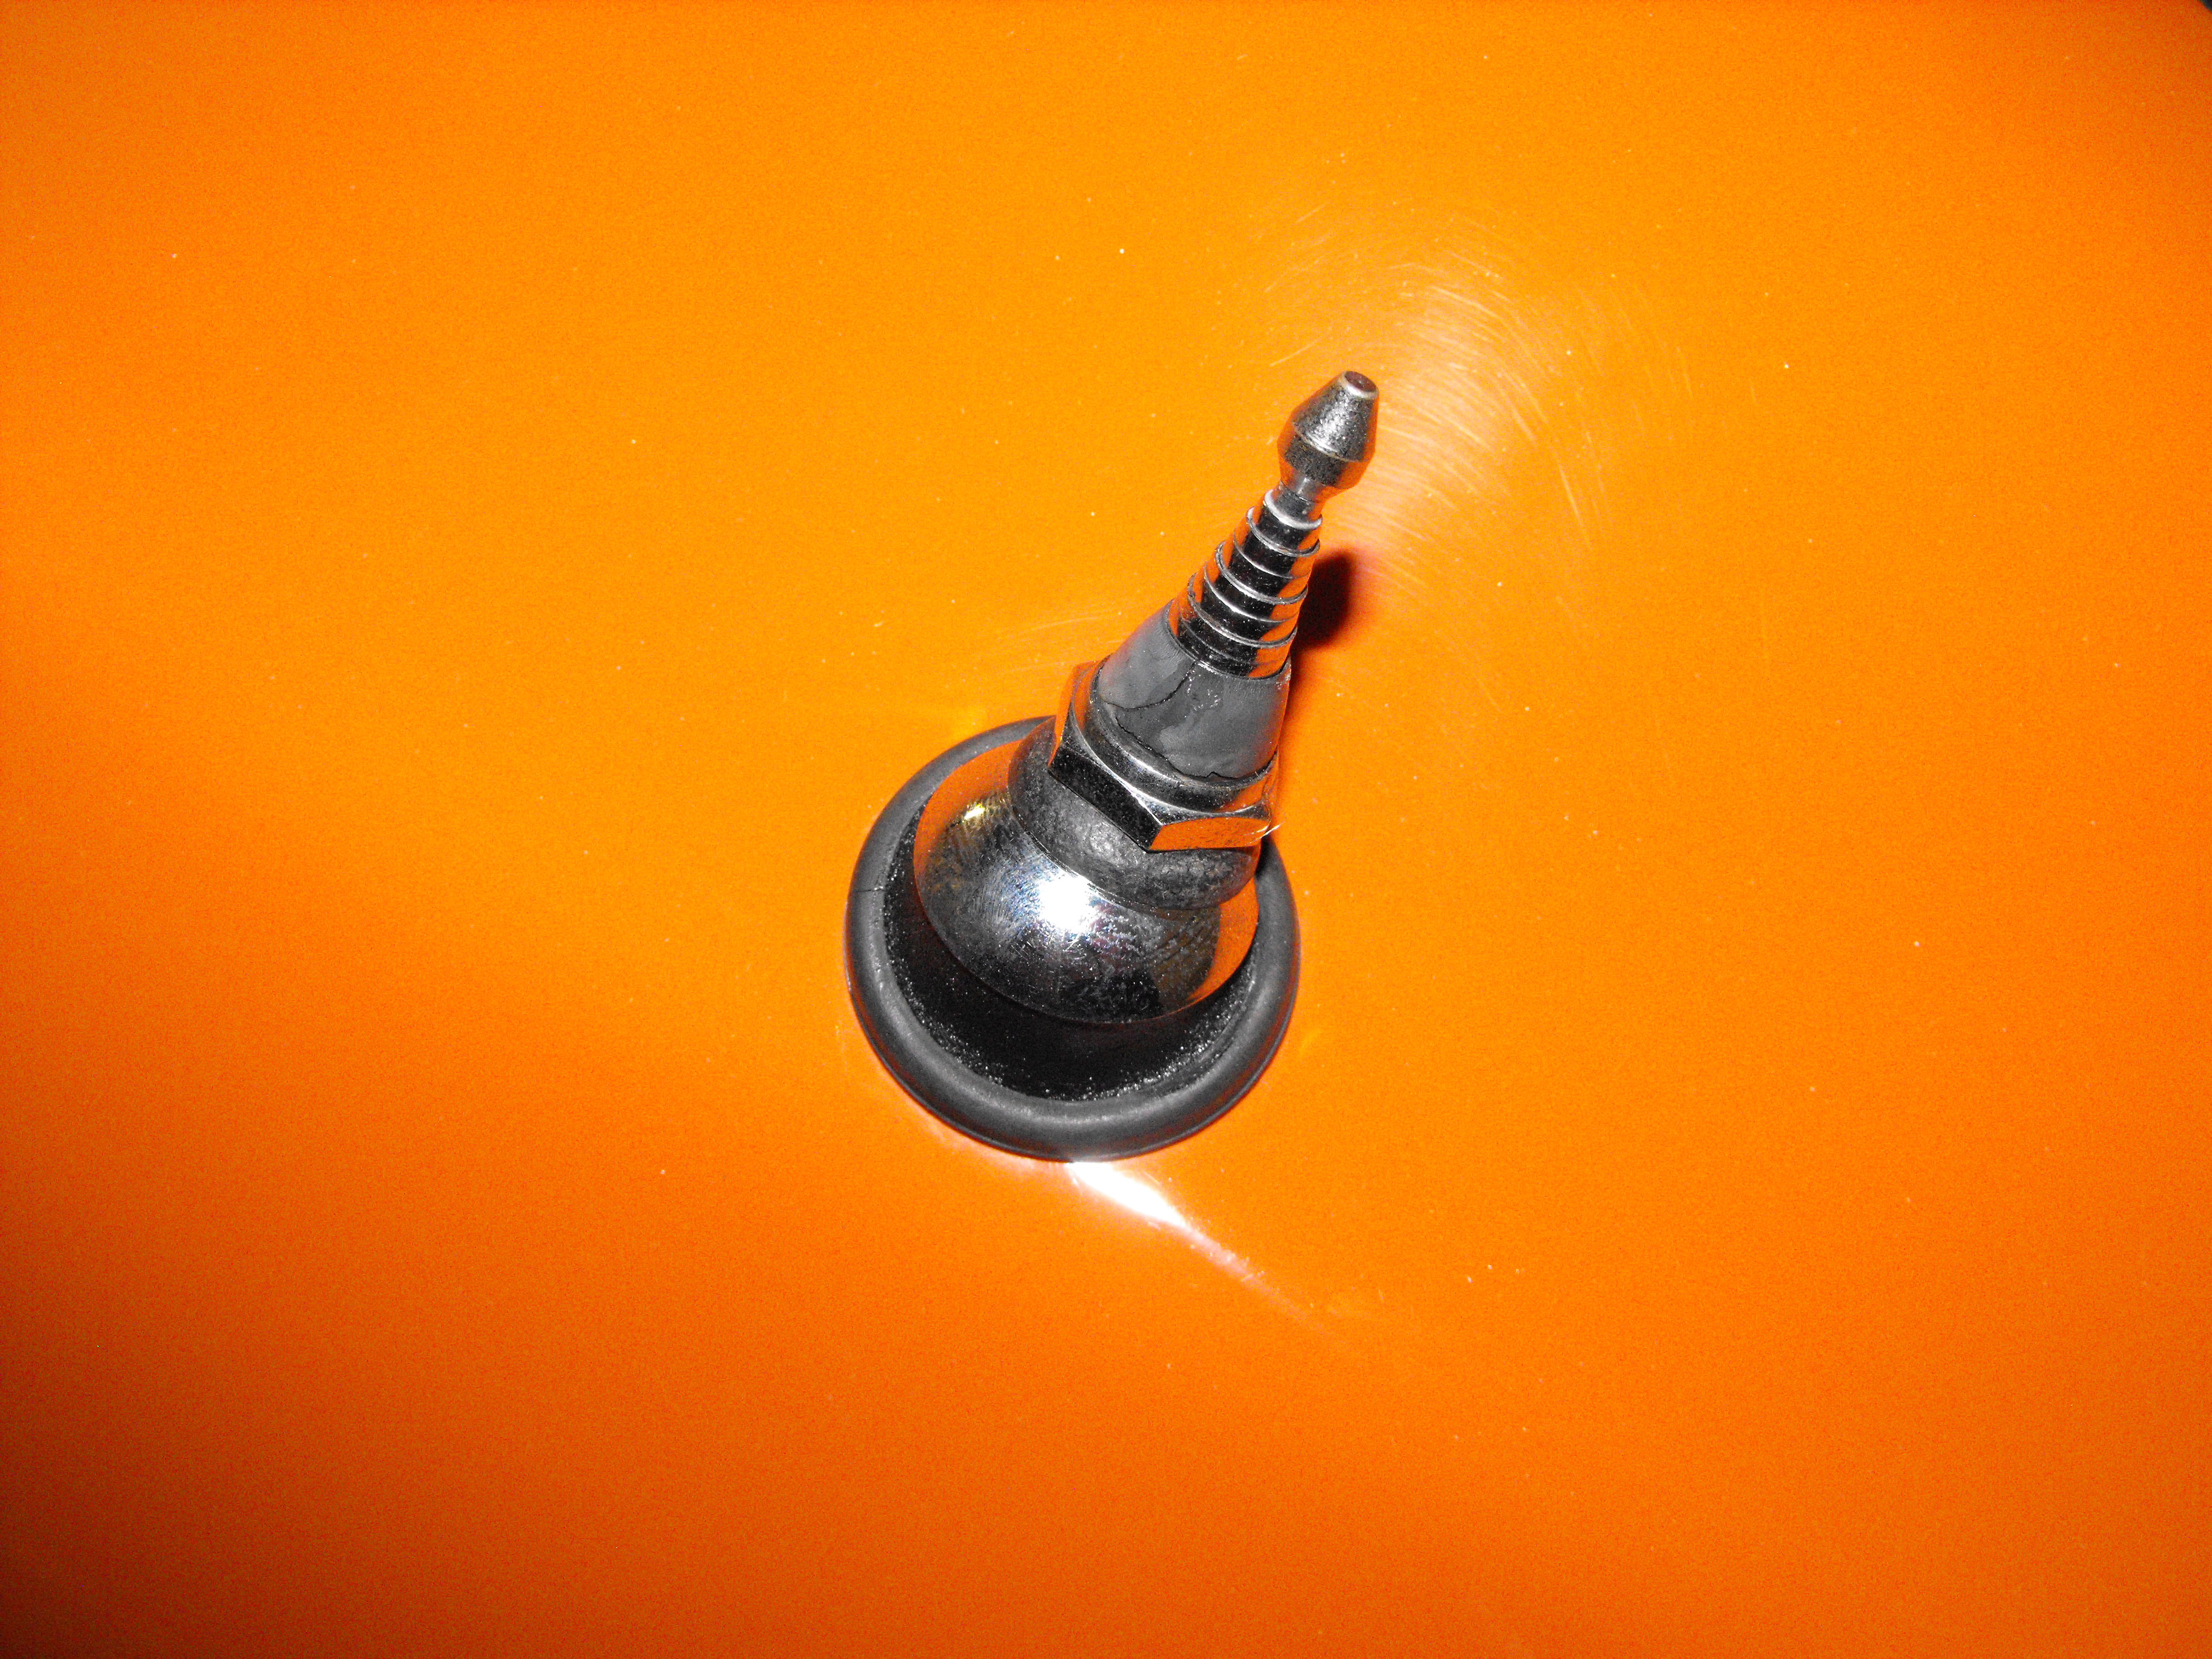
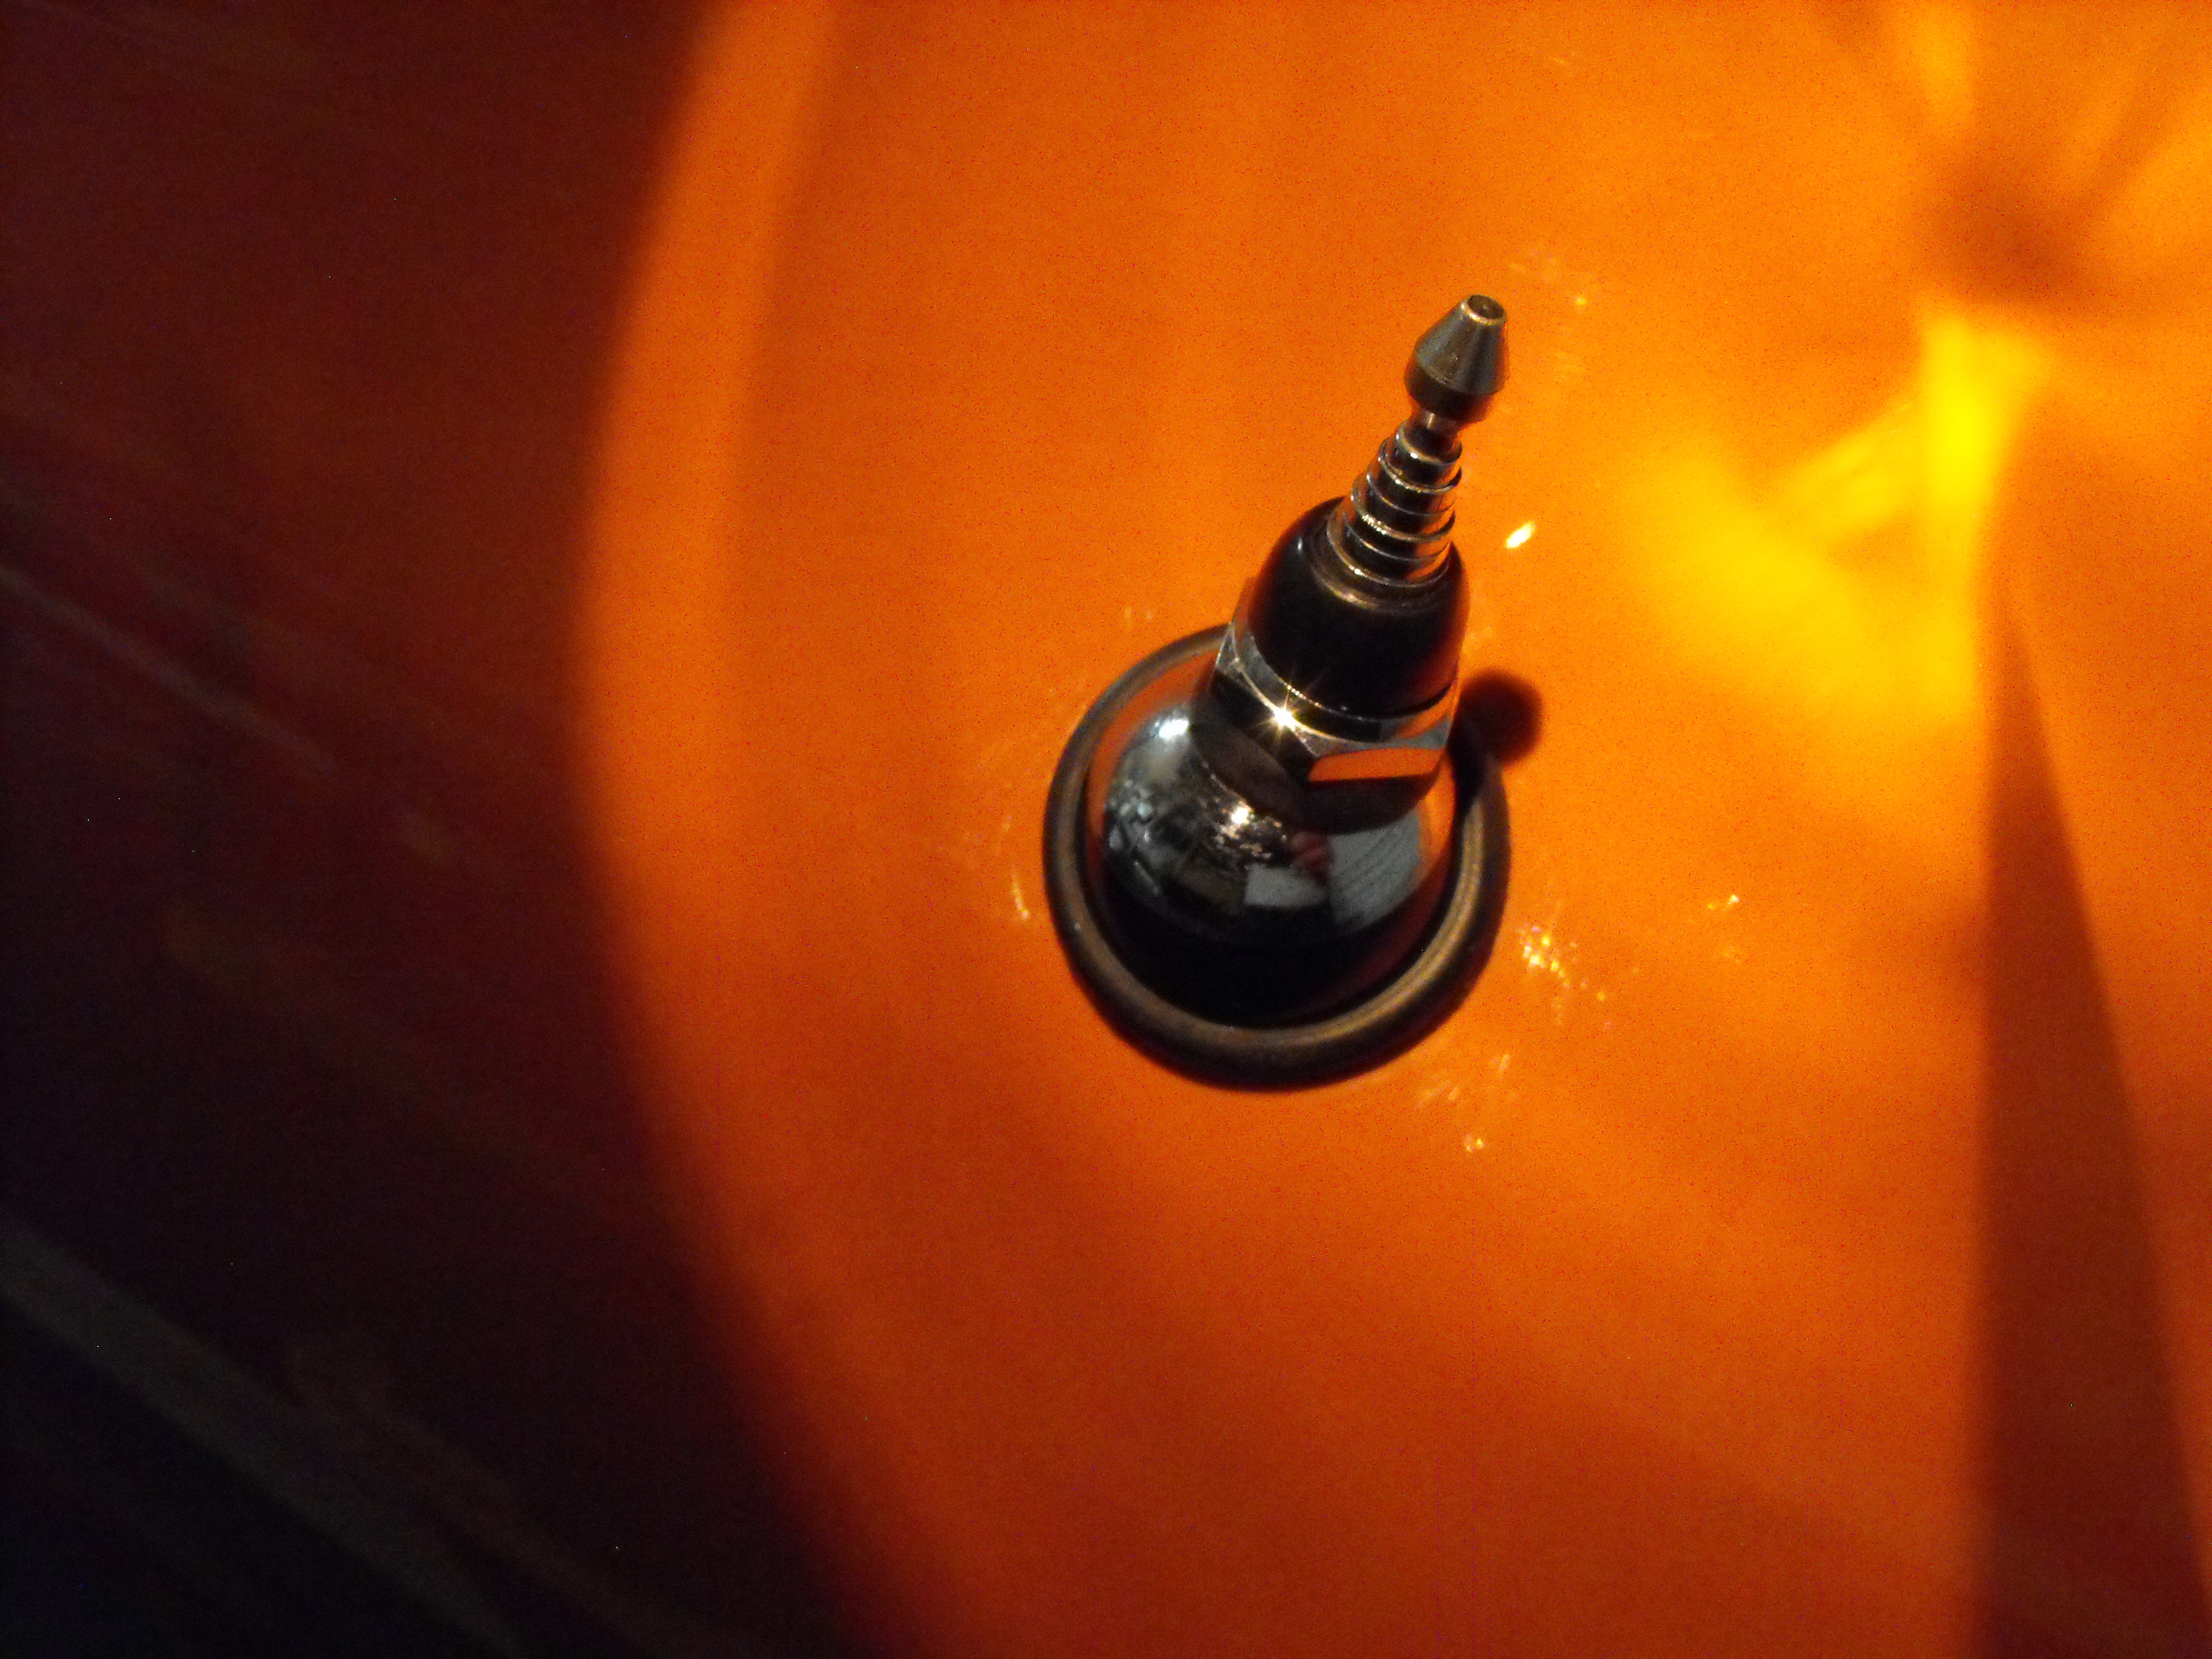
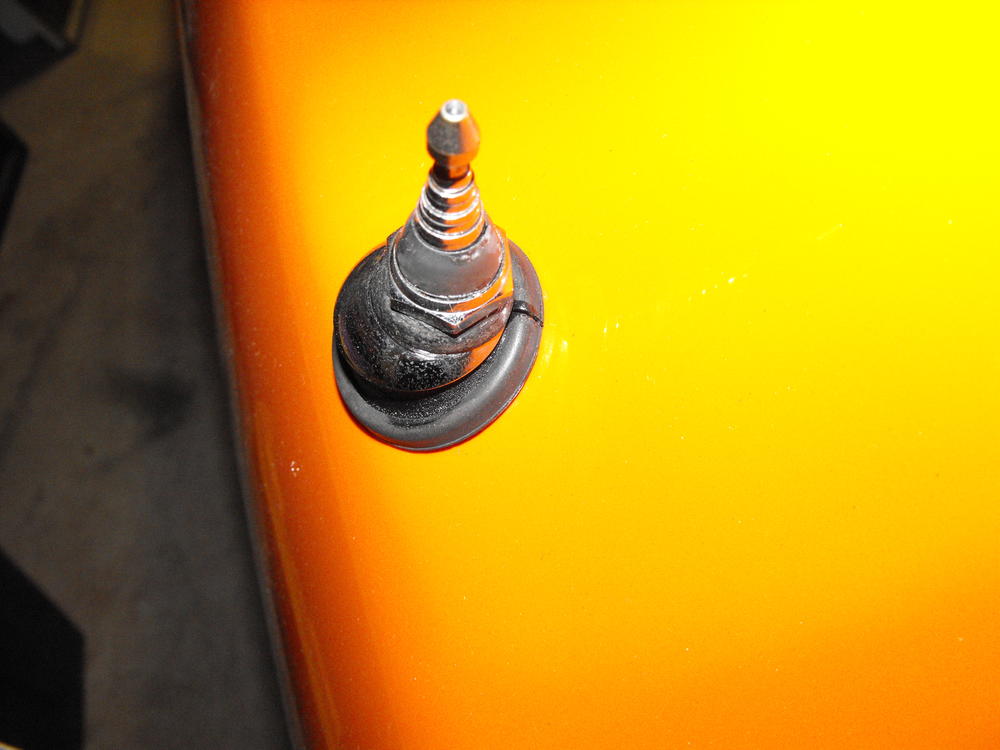
Got the new antenna parts in. The originals were cracked and oxidized so picked up the new parts from http://www.240zrubberparts.com/. Pics below show the old antenna parts and then one with the new parts.


-
This won't last long if it is legit. https://sandiego.craigslist.org/csd/cto/d/1972-datsun-240z/6485937019.html
-
I am guessing you probably just adjusted the air flow per the video. Ztherapy sets the standard mixture flow to two open turns, which is probably how you received yours. My set from ztherapy was set the same way and car ran like crap at the high end and on acceleration. I opened the mixture dial one more turn (three turns total) and the car now runs perfect. Each car is different and one size does not fit all. I still think it's carbs.
-
This is what I think will happen when you replace the oil pump..(see quote below) Your problem is most likely carbs
-
Just my opinion on a couple things: 1) I doubt that the oil pressure is the problem with the accelerate and idle problems. Sounds like carb adjustment to me. Also, could be fuel vapor lock issue. 2) I don't really trust the oil gauge value on the 240Z gauges. You would probably want a direct pressure gauge to the block oil port to measure real values. 3) If I did contact the seller, I would ask what rings and bearings were installed. Does he have the receipts. these parts are as important as the head items if not more. 4) probably not worth the time and effort to sue if you do not have direct oil pressure data 5) Not sure what disassembling block would do for you. Just change out the oil pump if you are concerned about it's integrity. Much cheaper and easier.
-
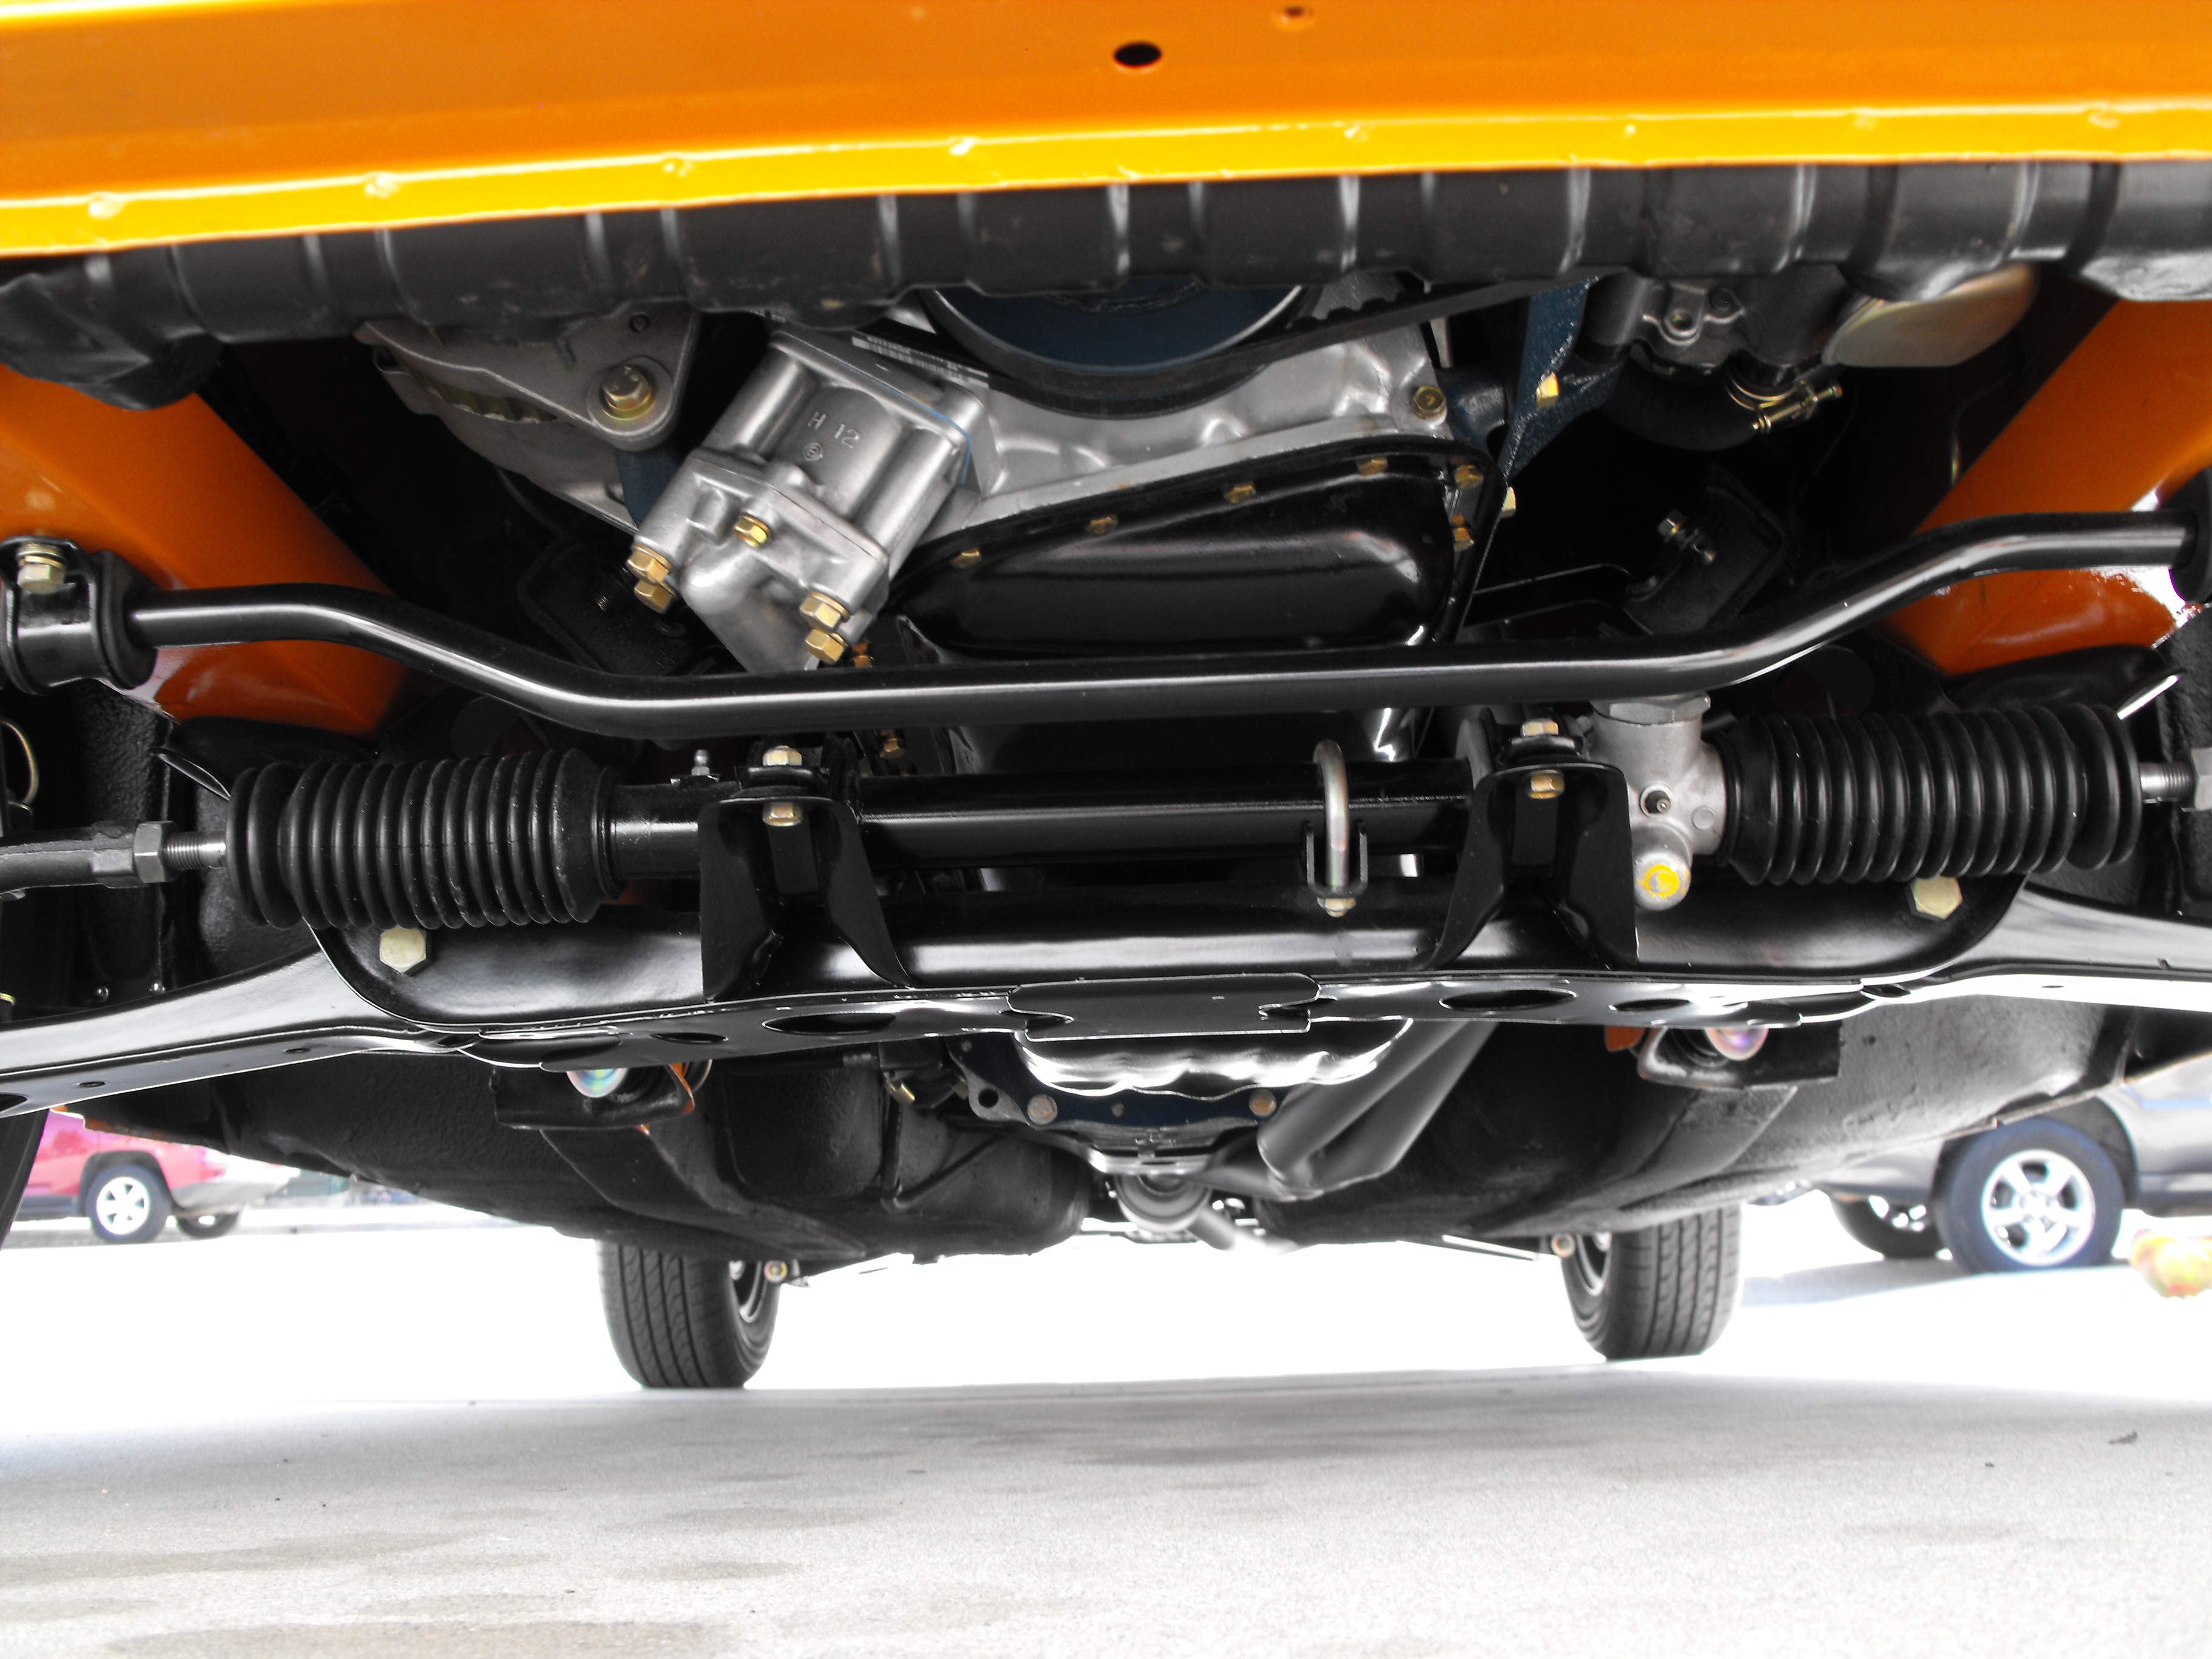
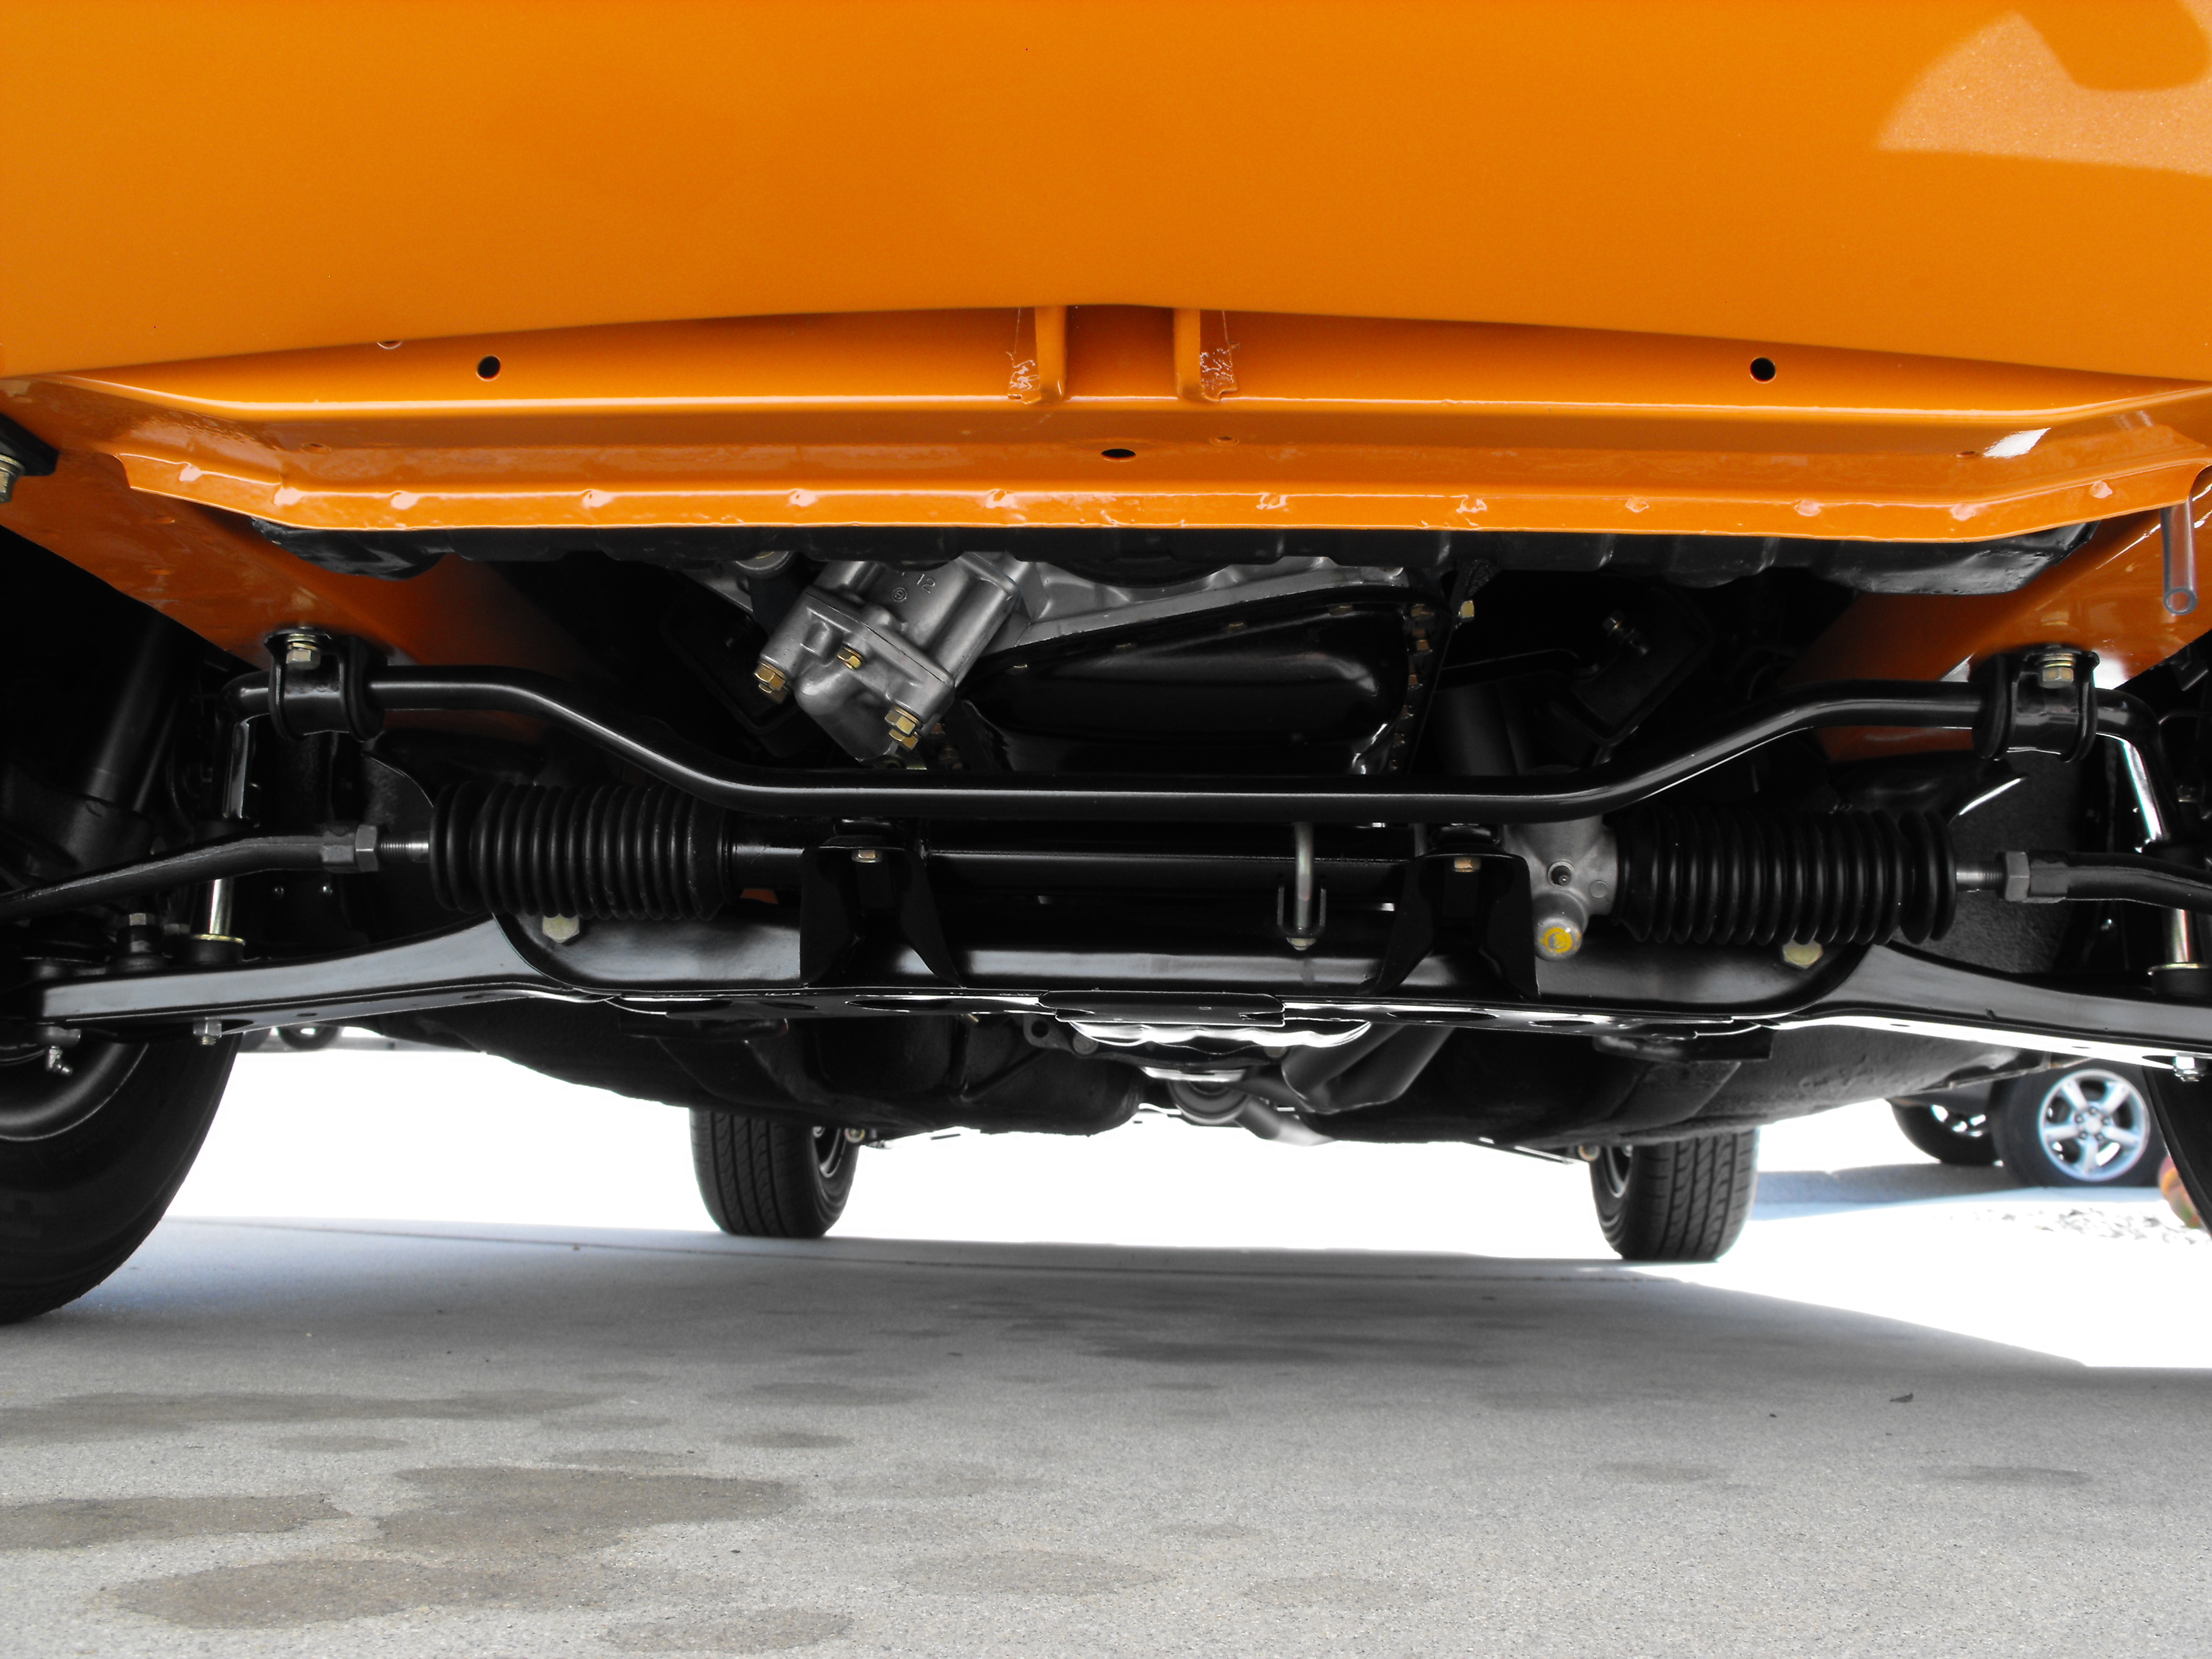
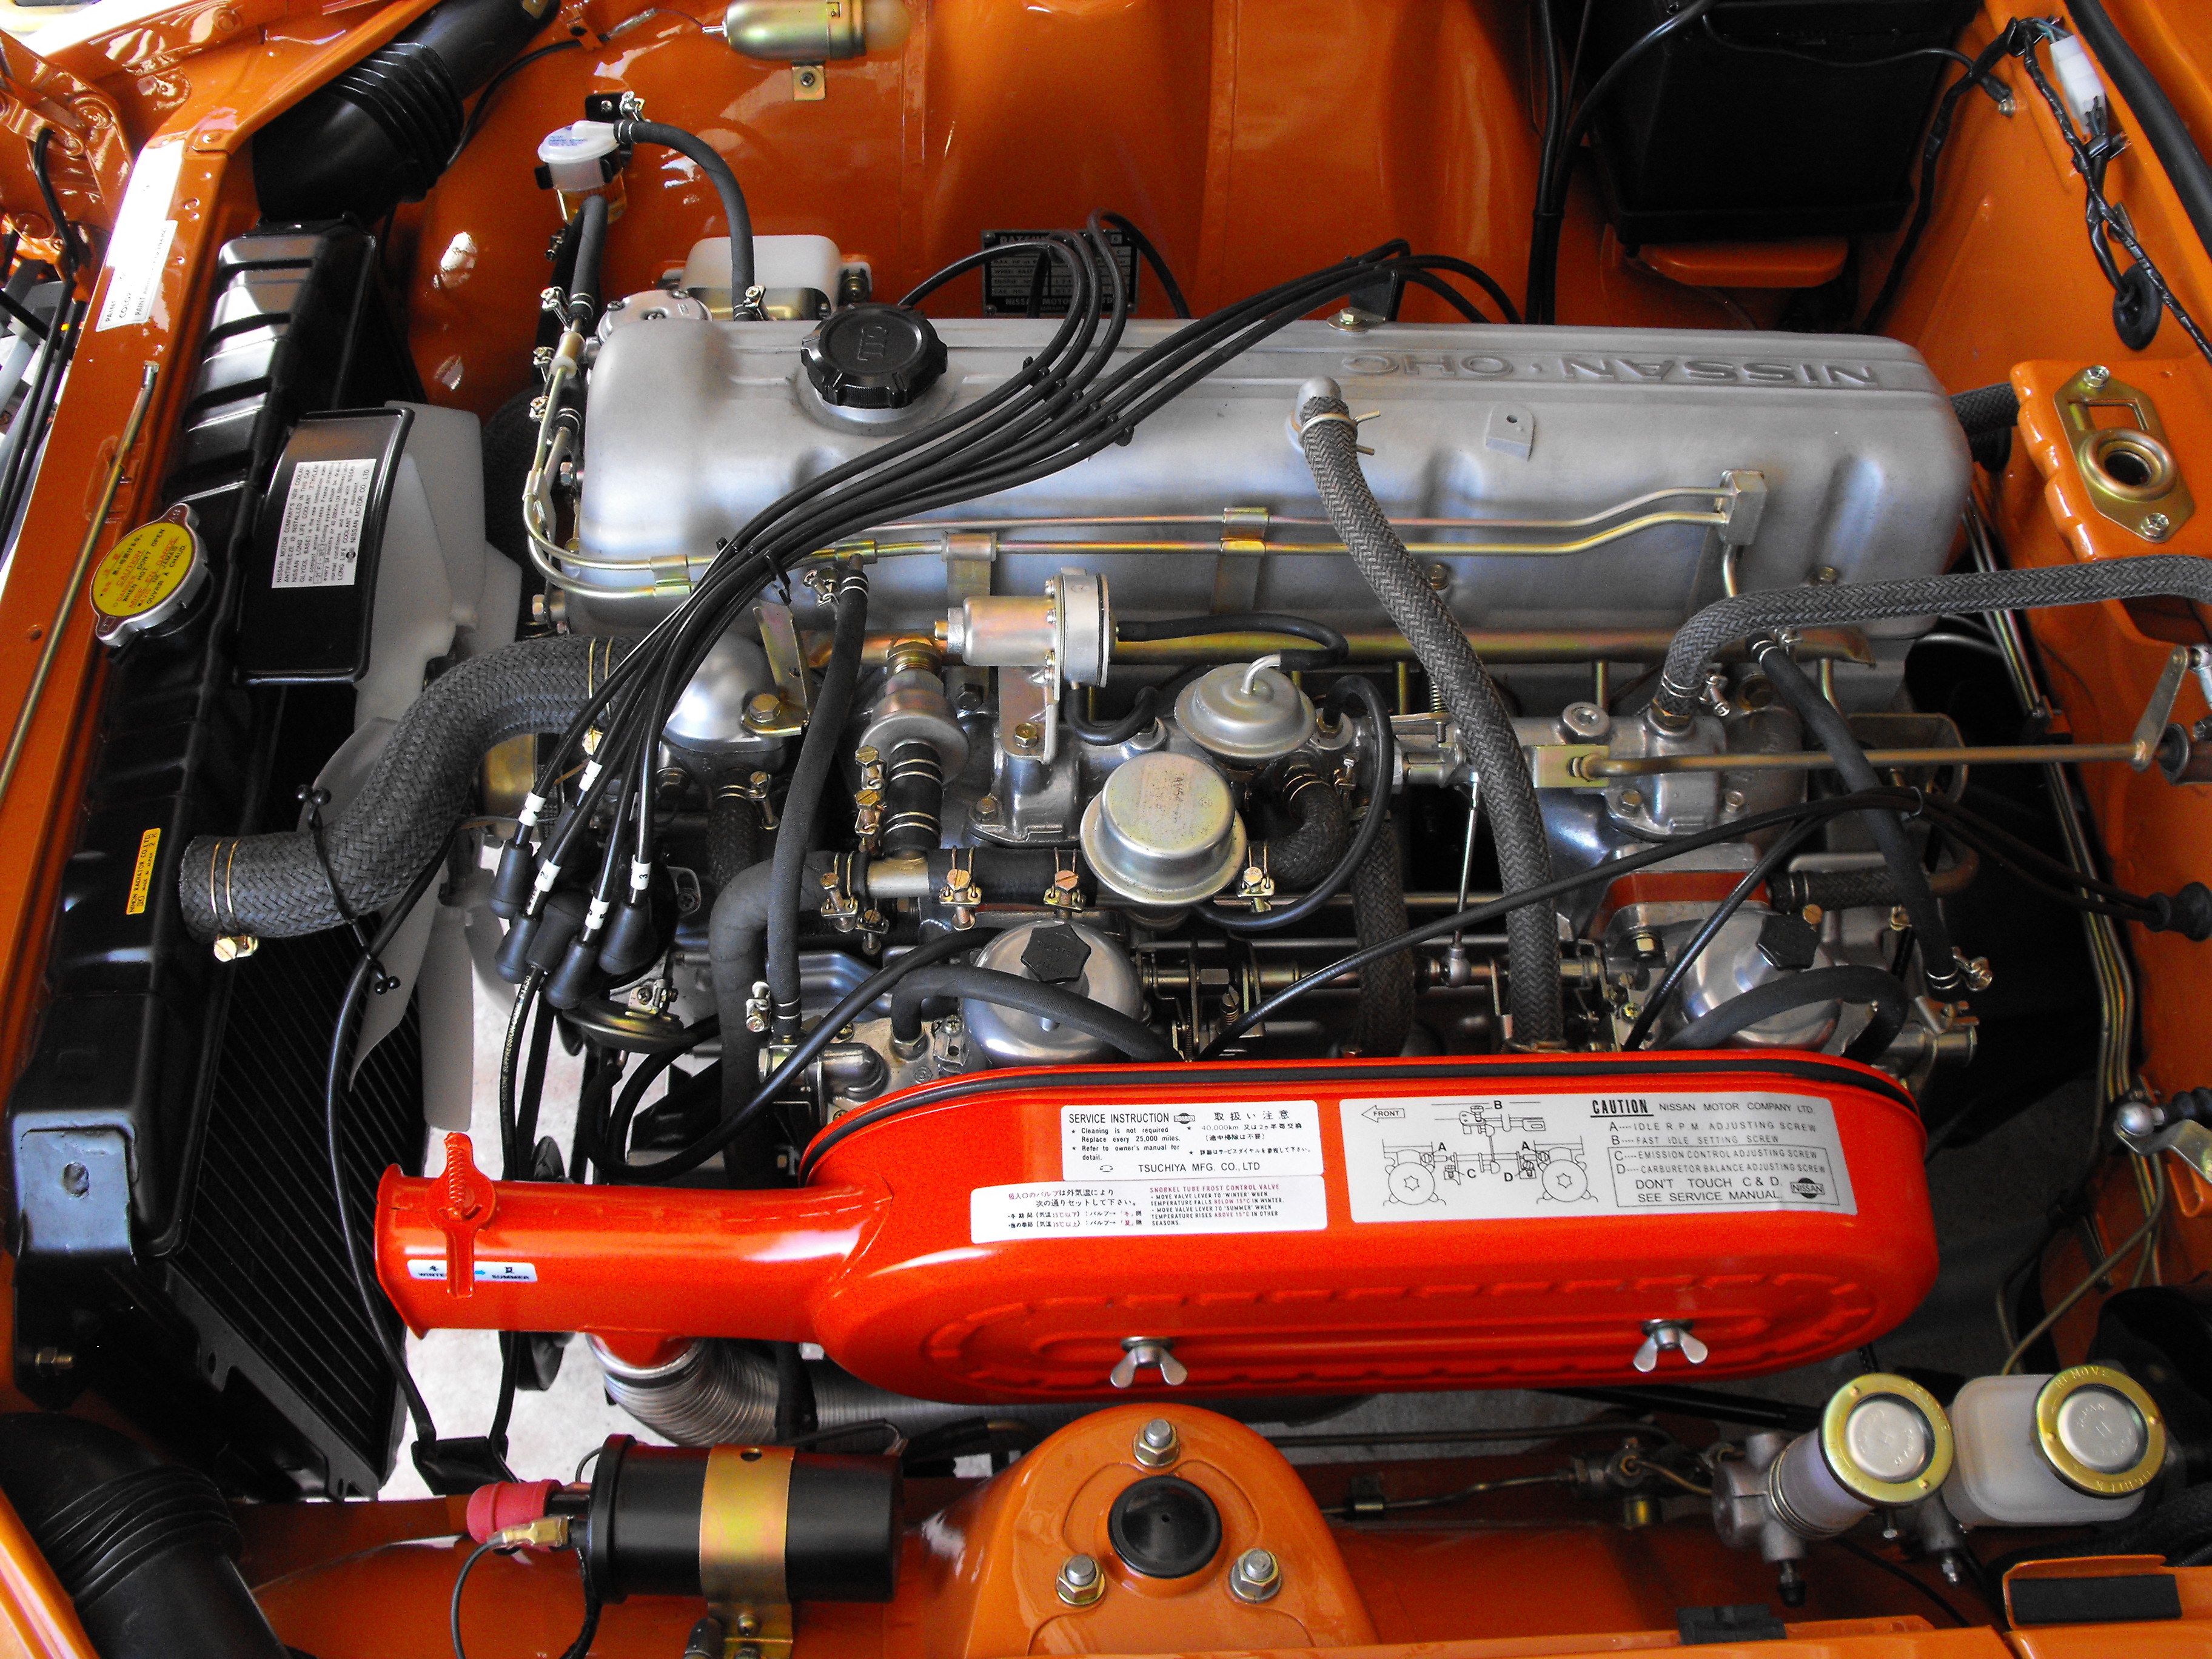
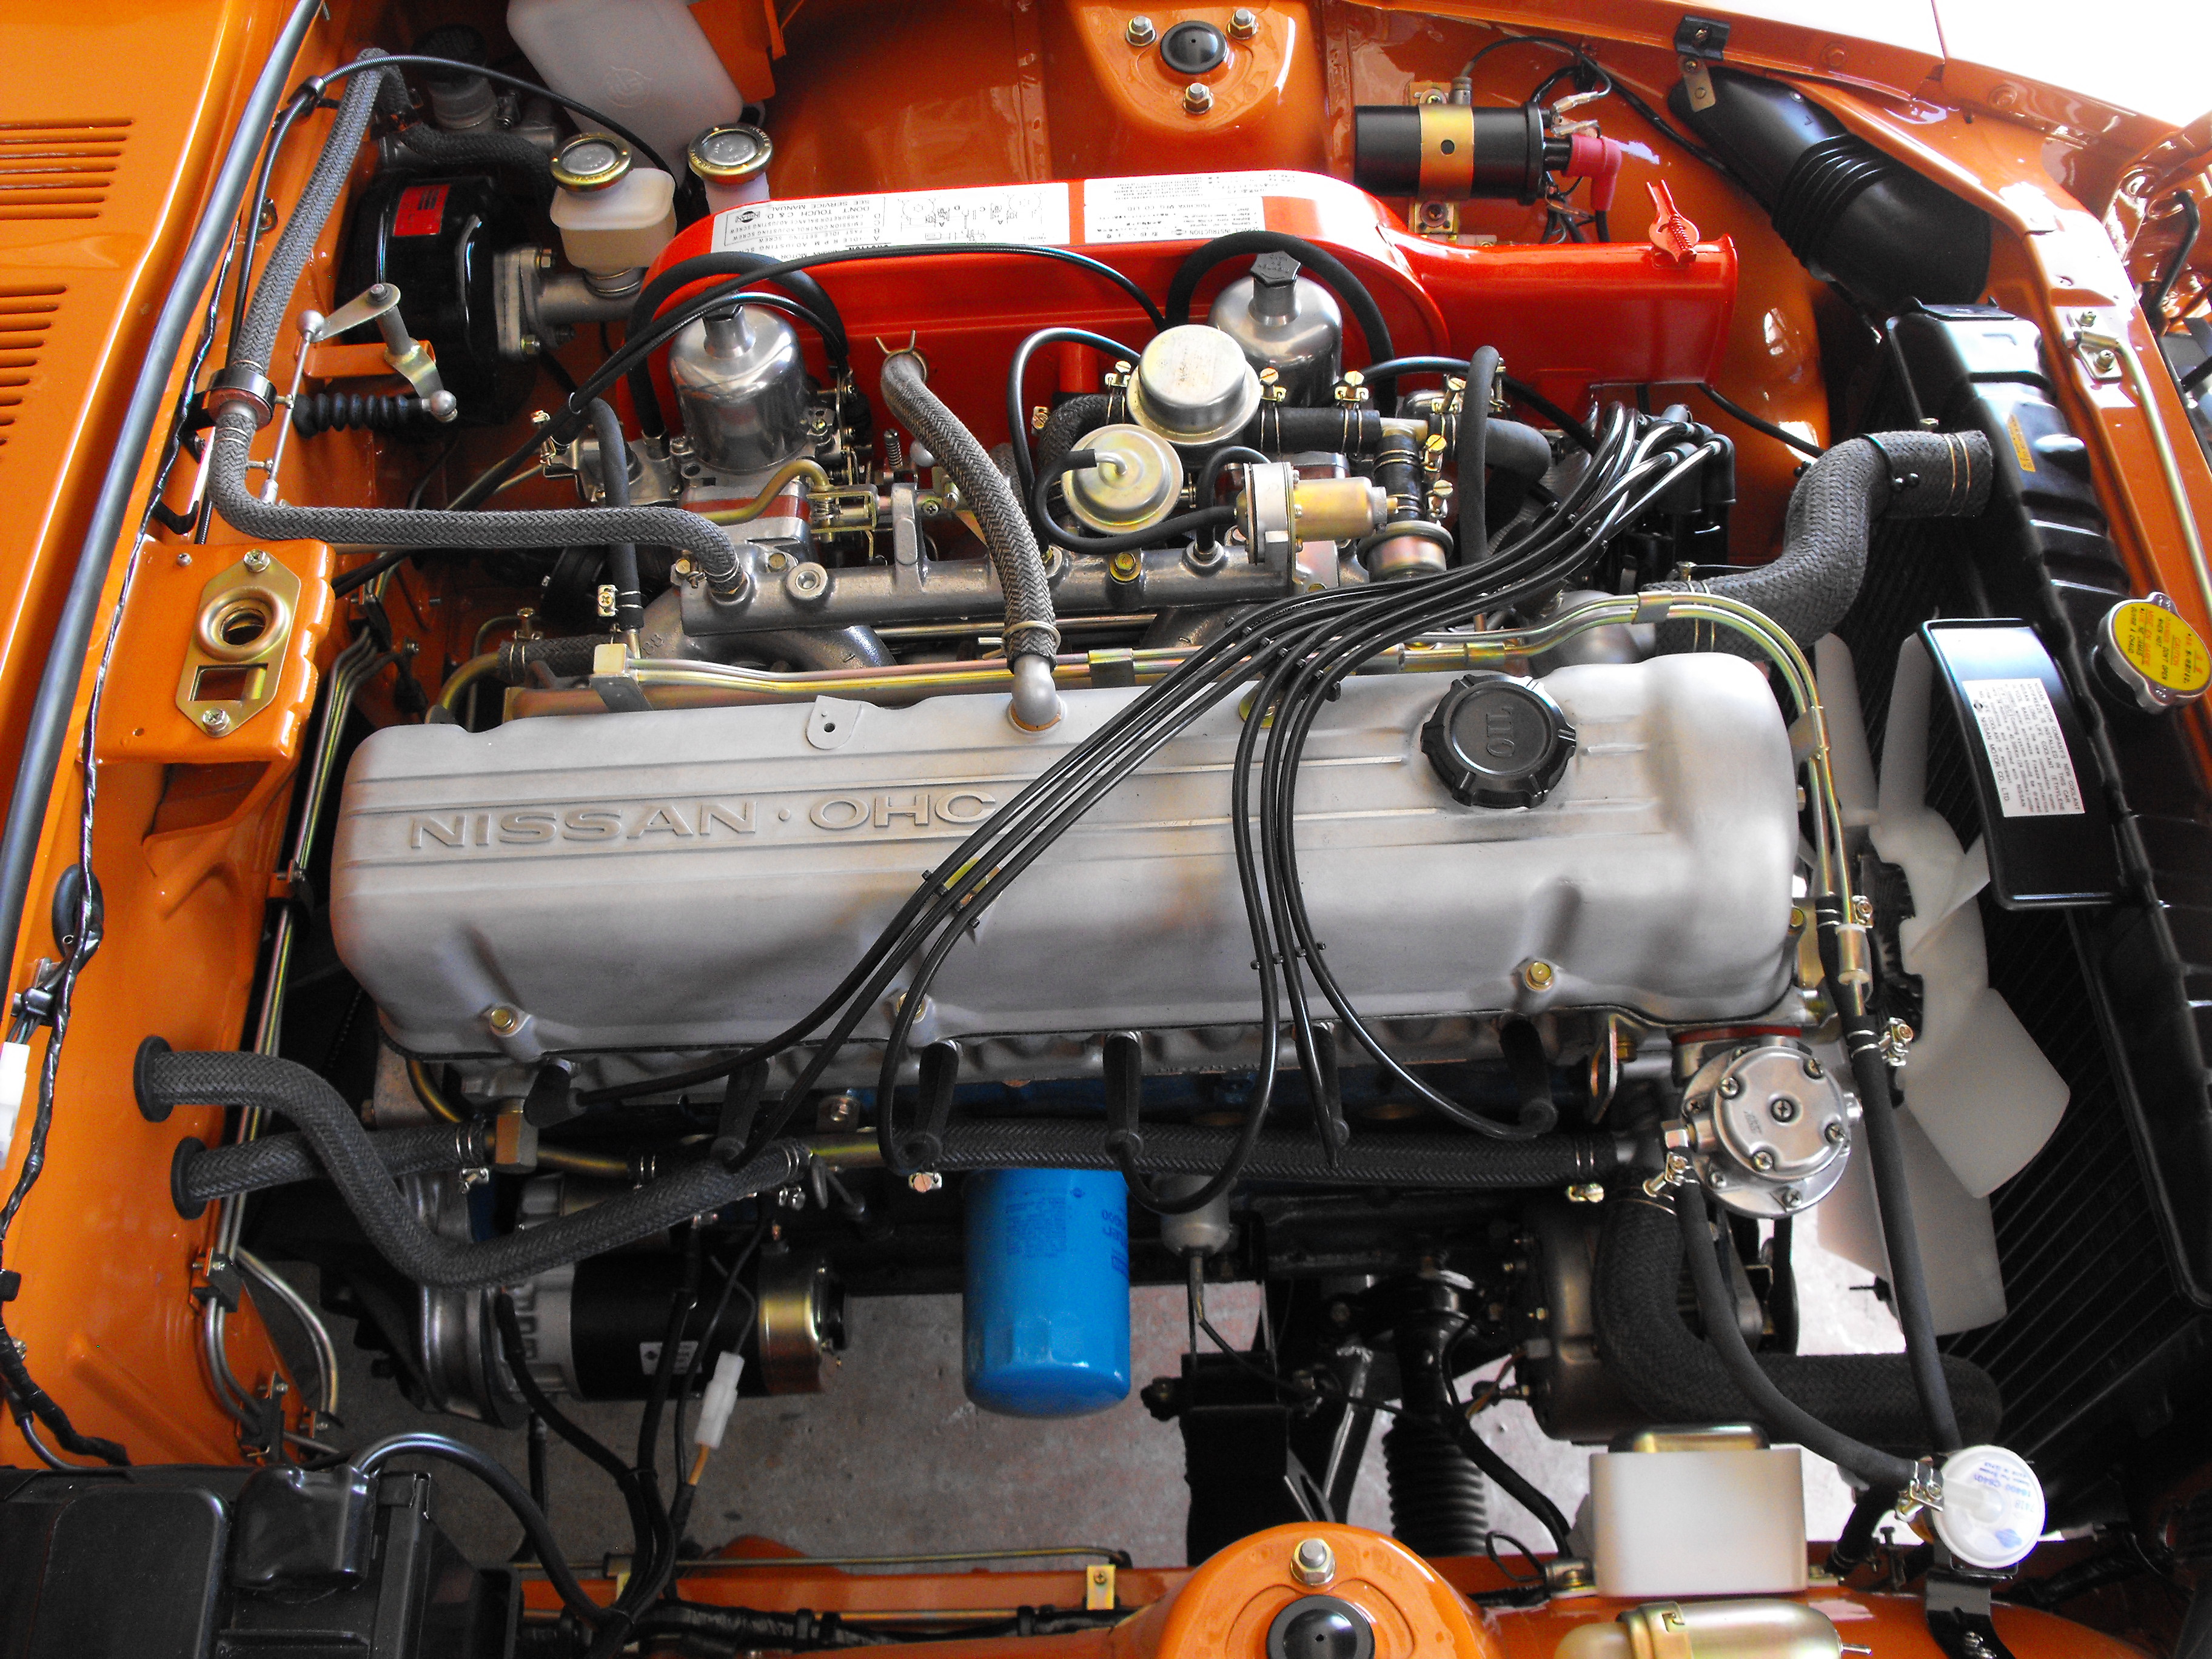
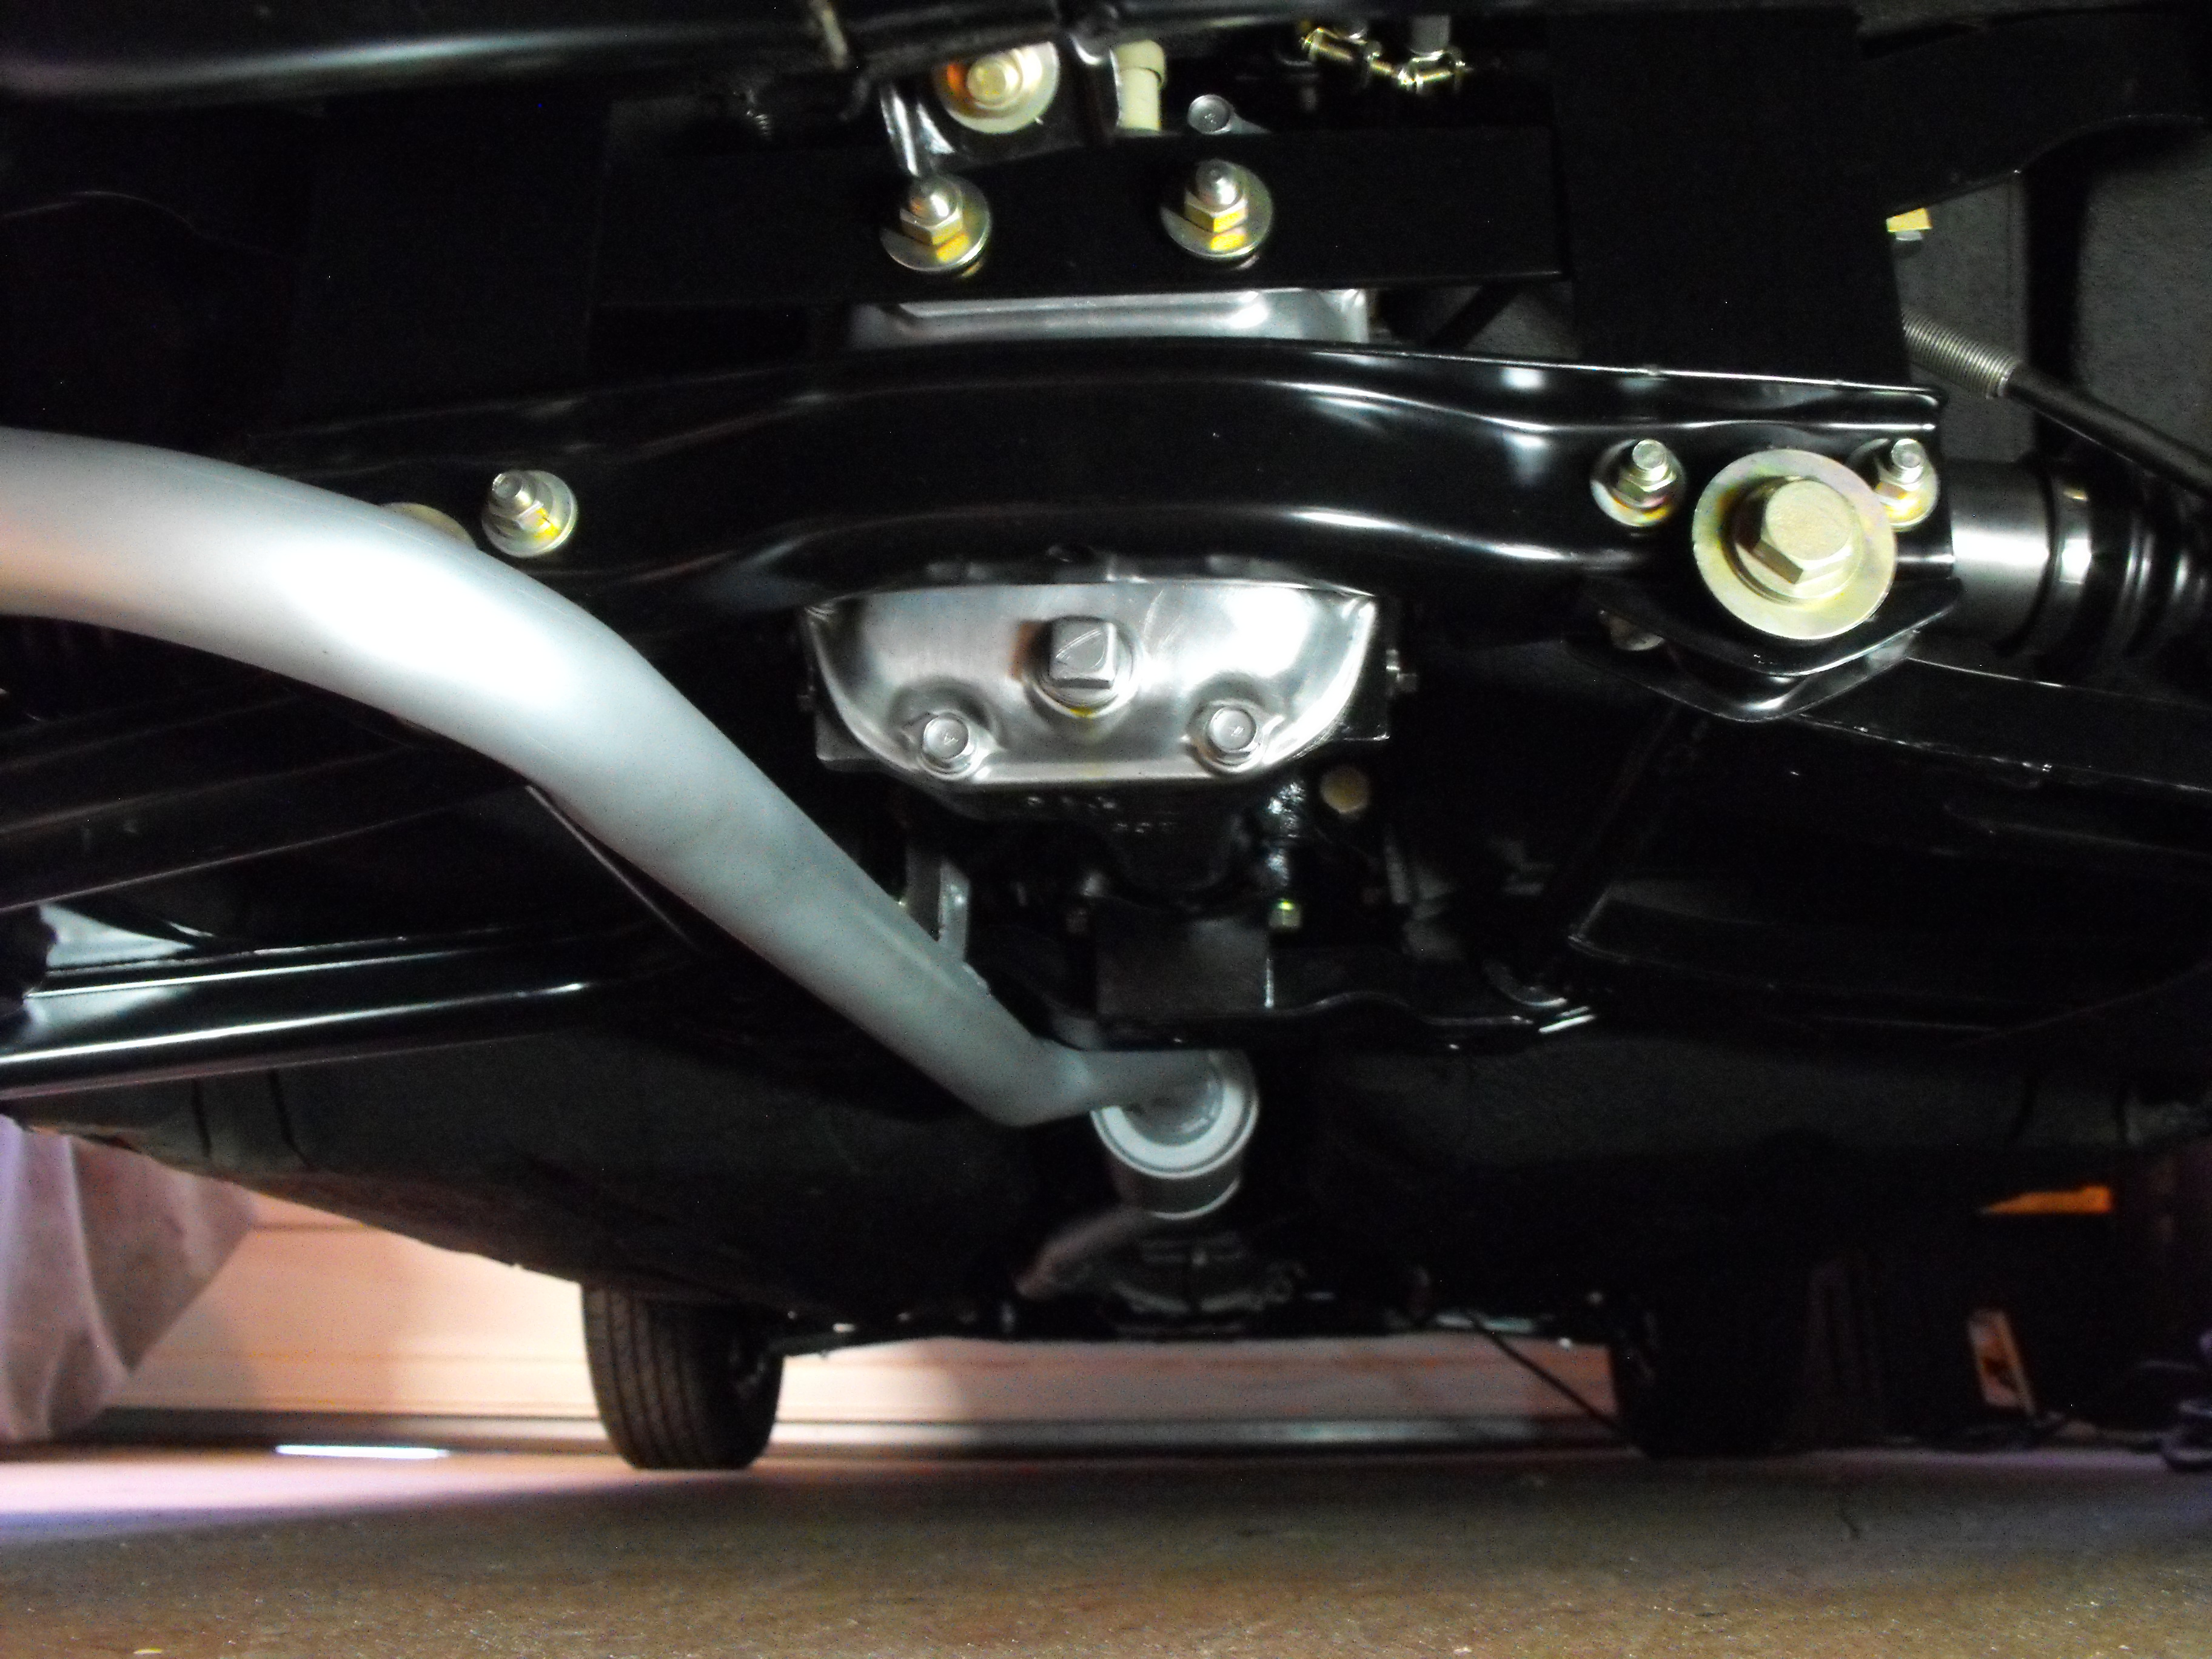
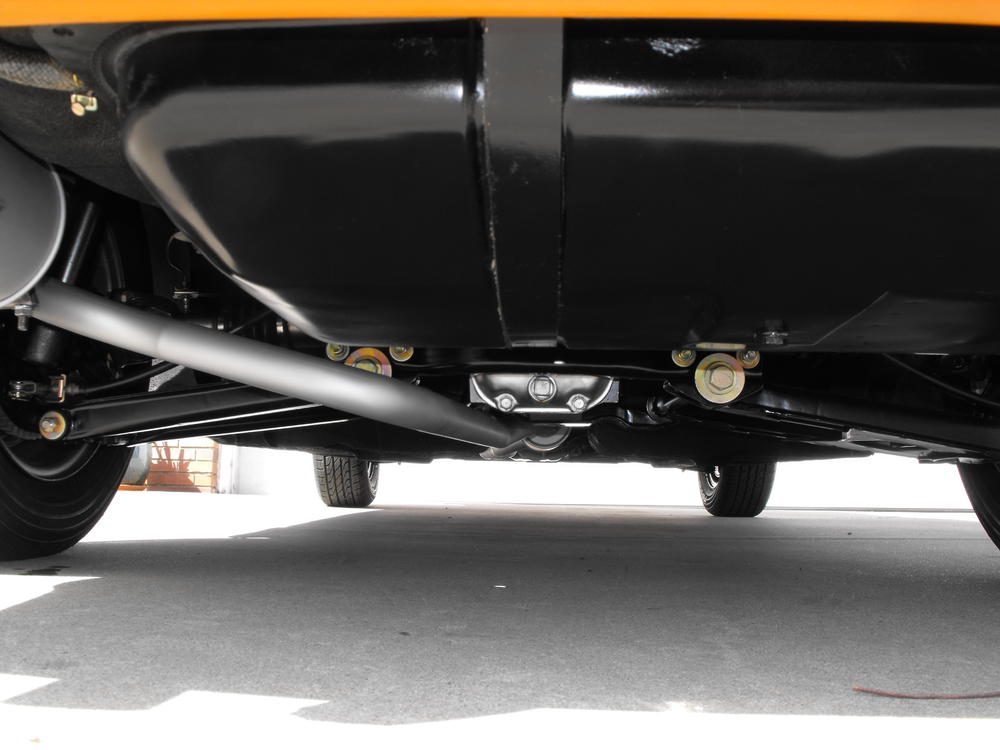
Hmmmm, need to install those two bolts on the lower bell housing. Pics are always good for stuff like that. Also need to add the black paint to the muffler tip. Will take care of that tomorrow. Here are the latest motor pics. Got the final decals on and voltage regulator cover.


-
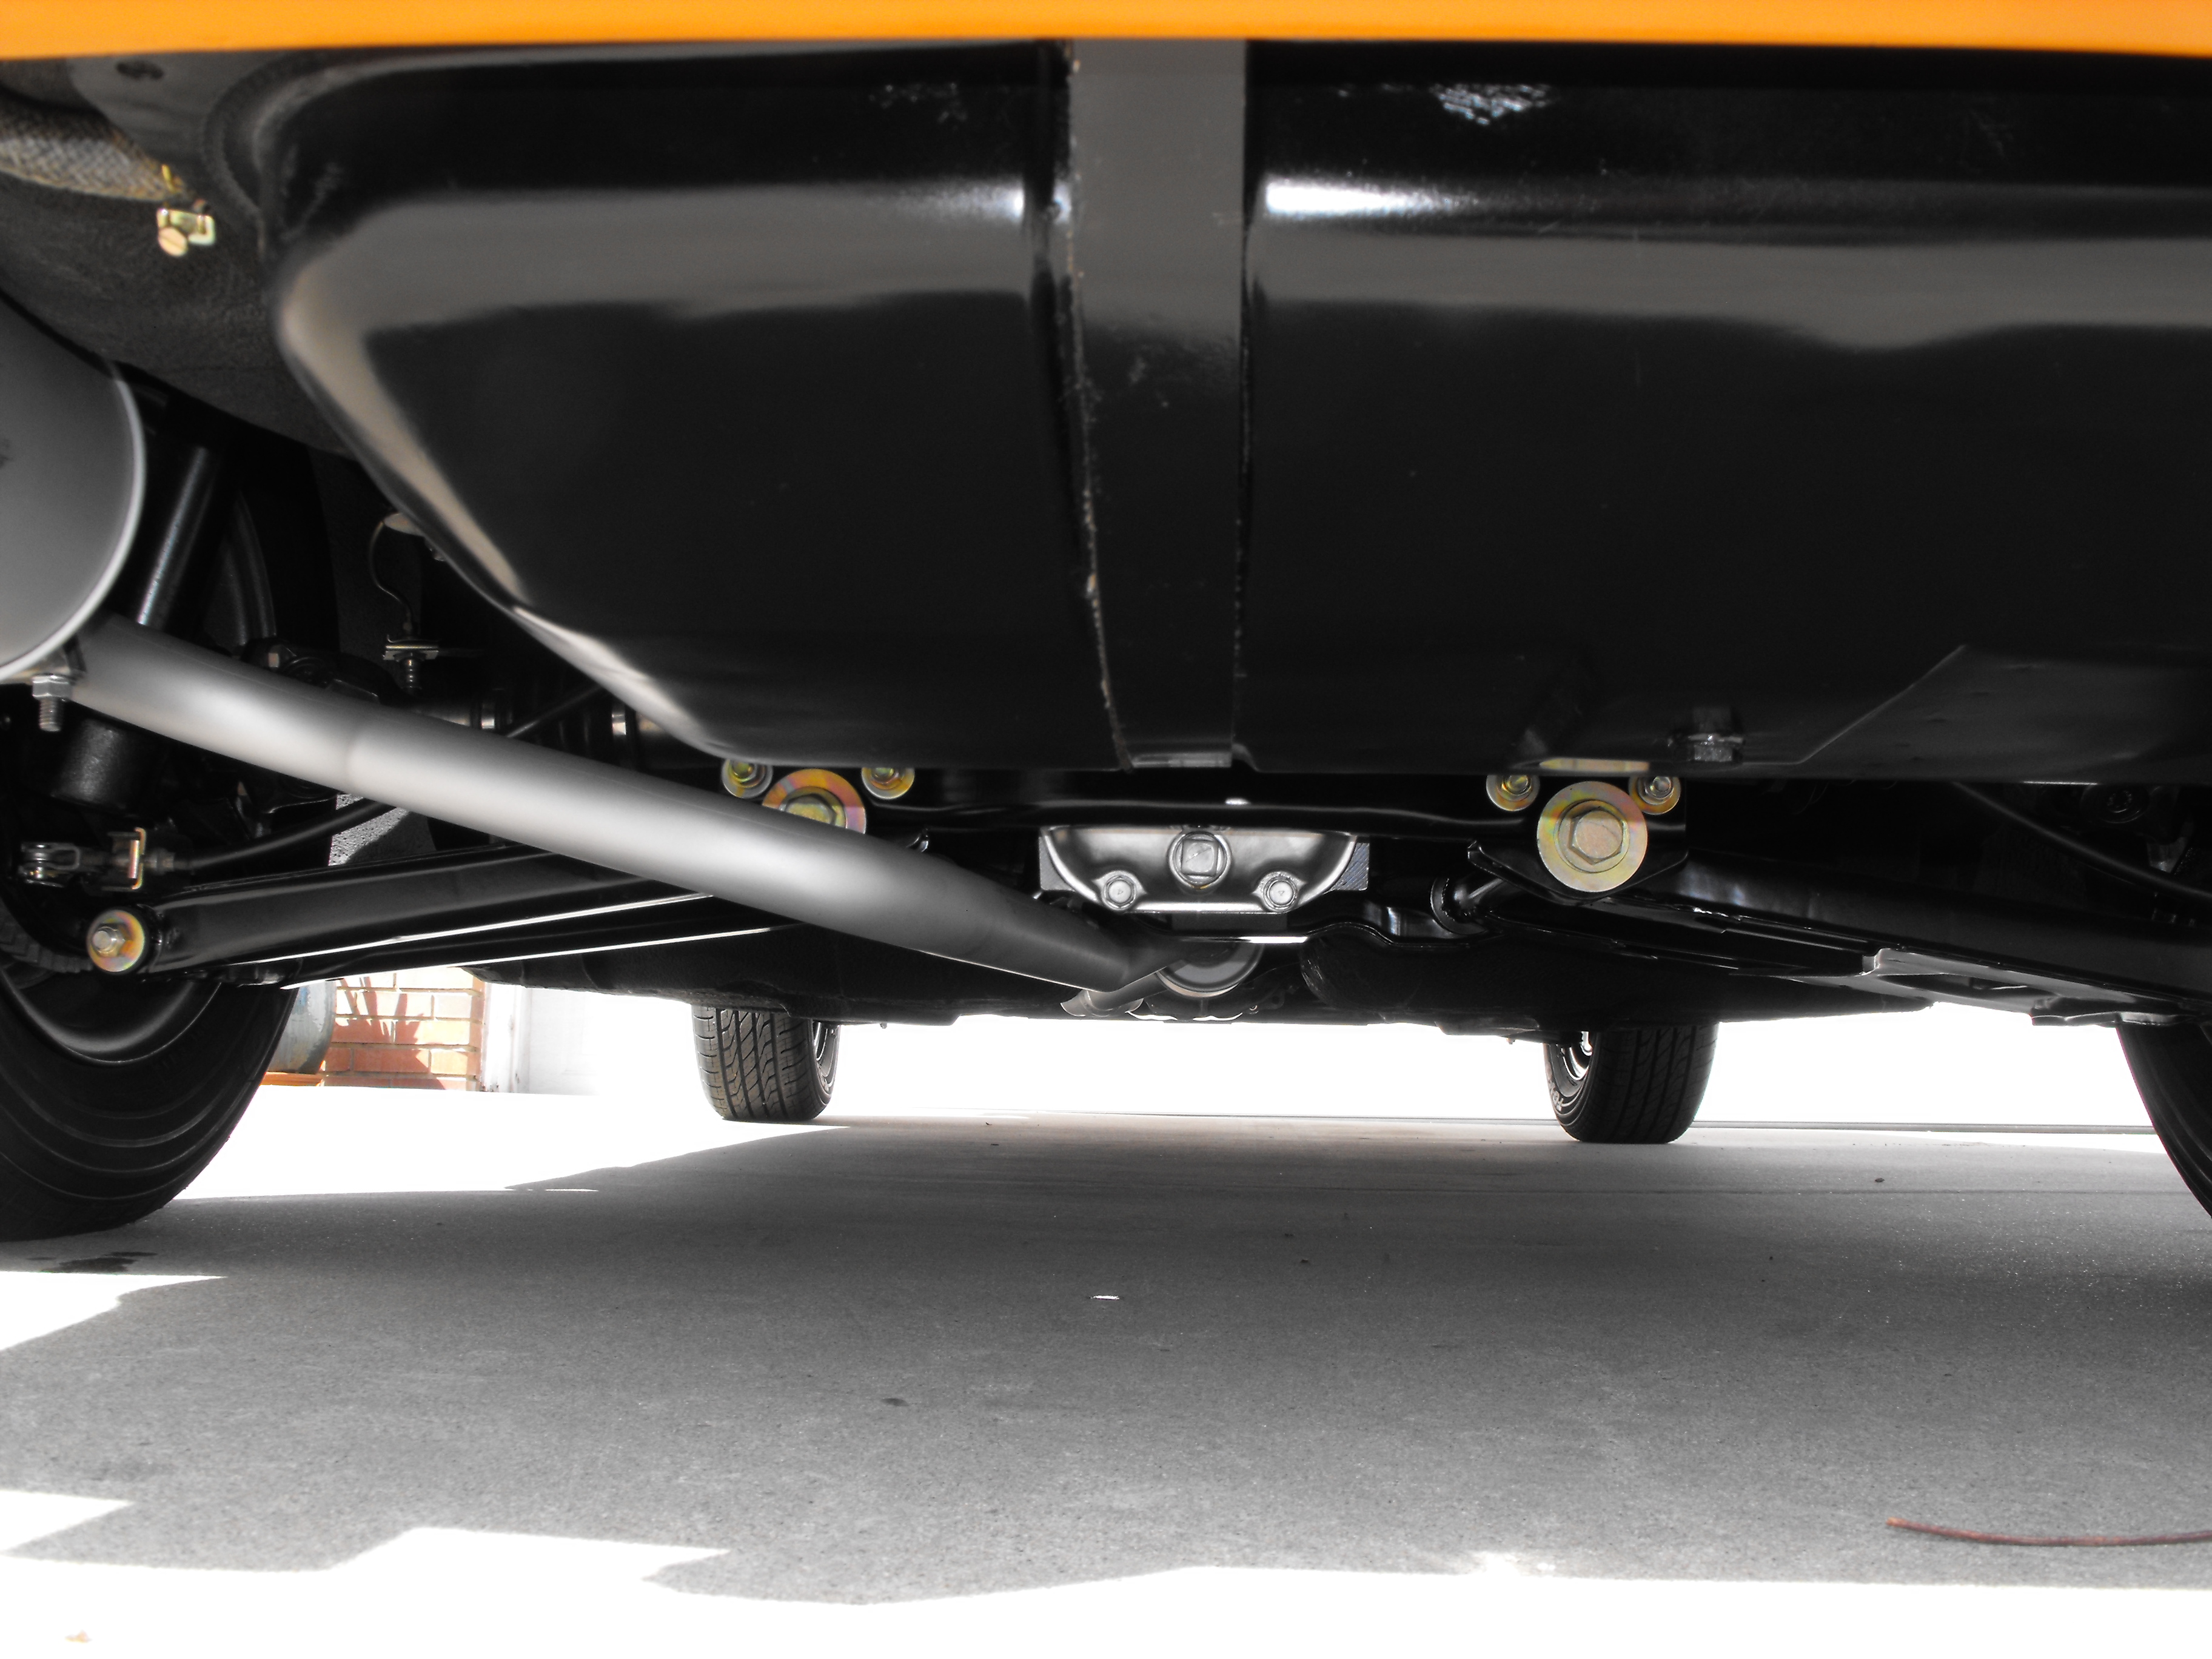
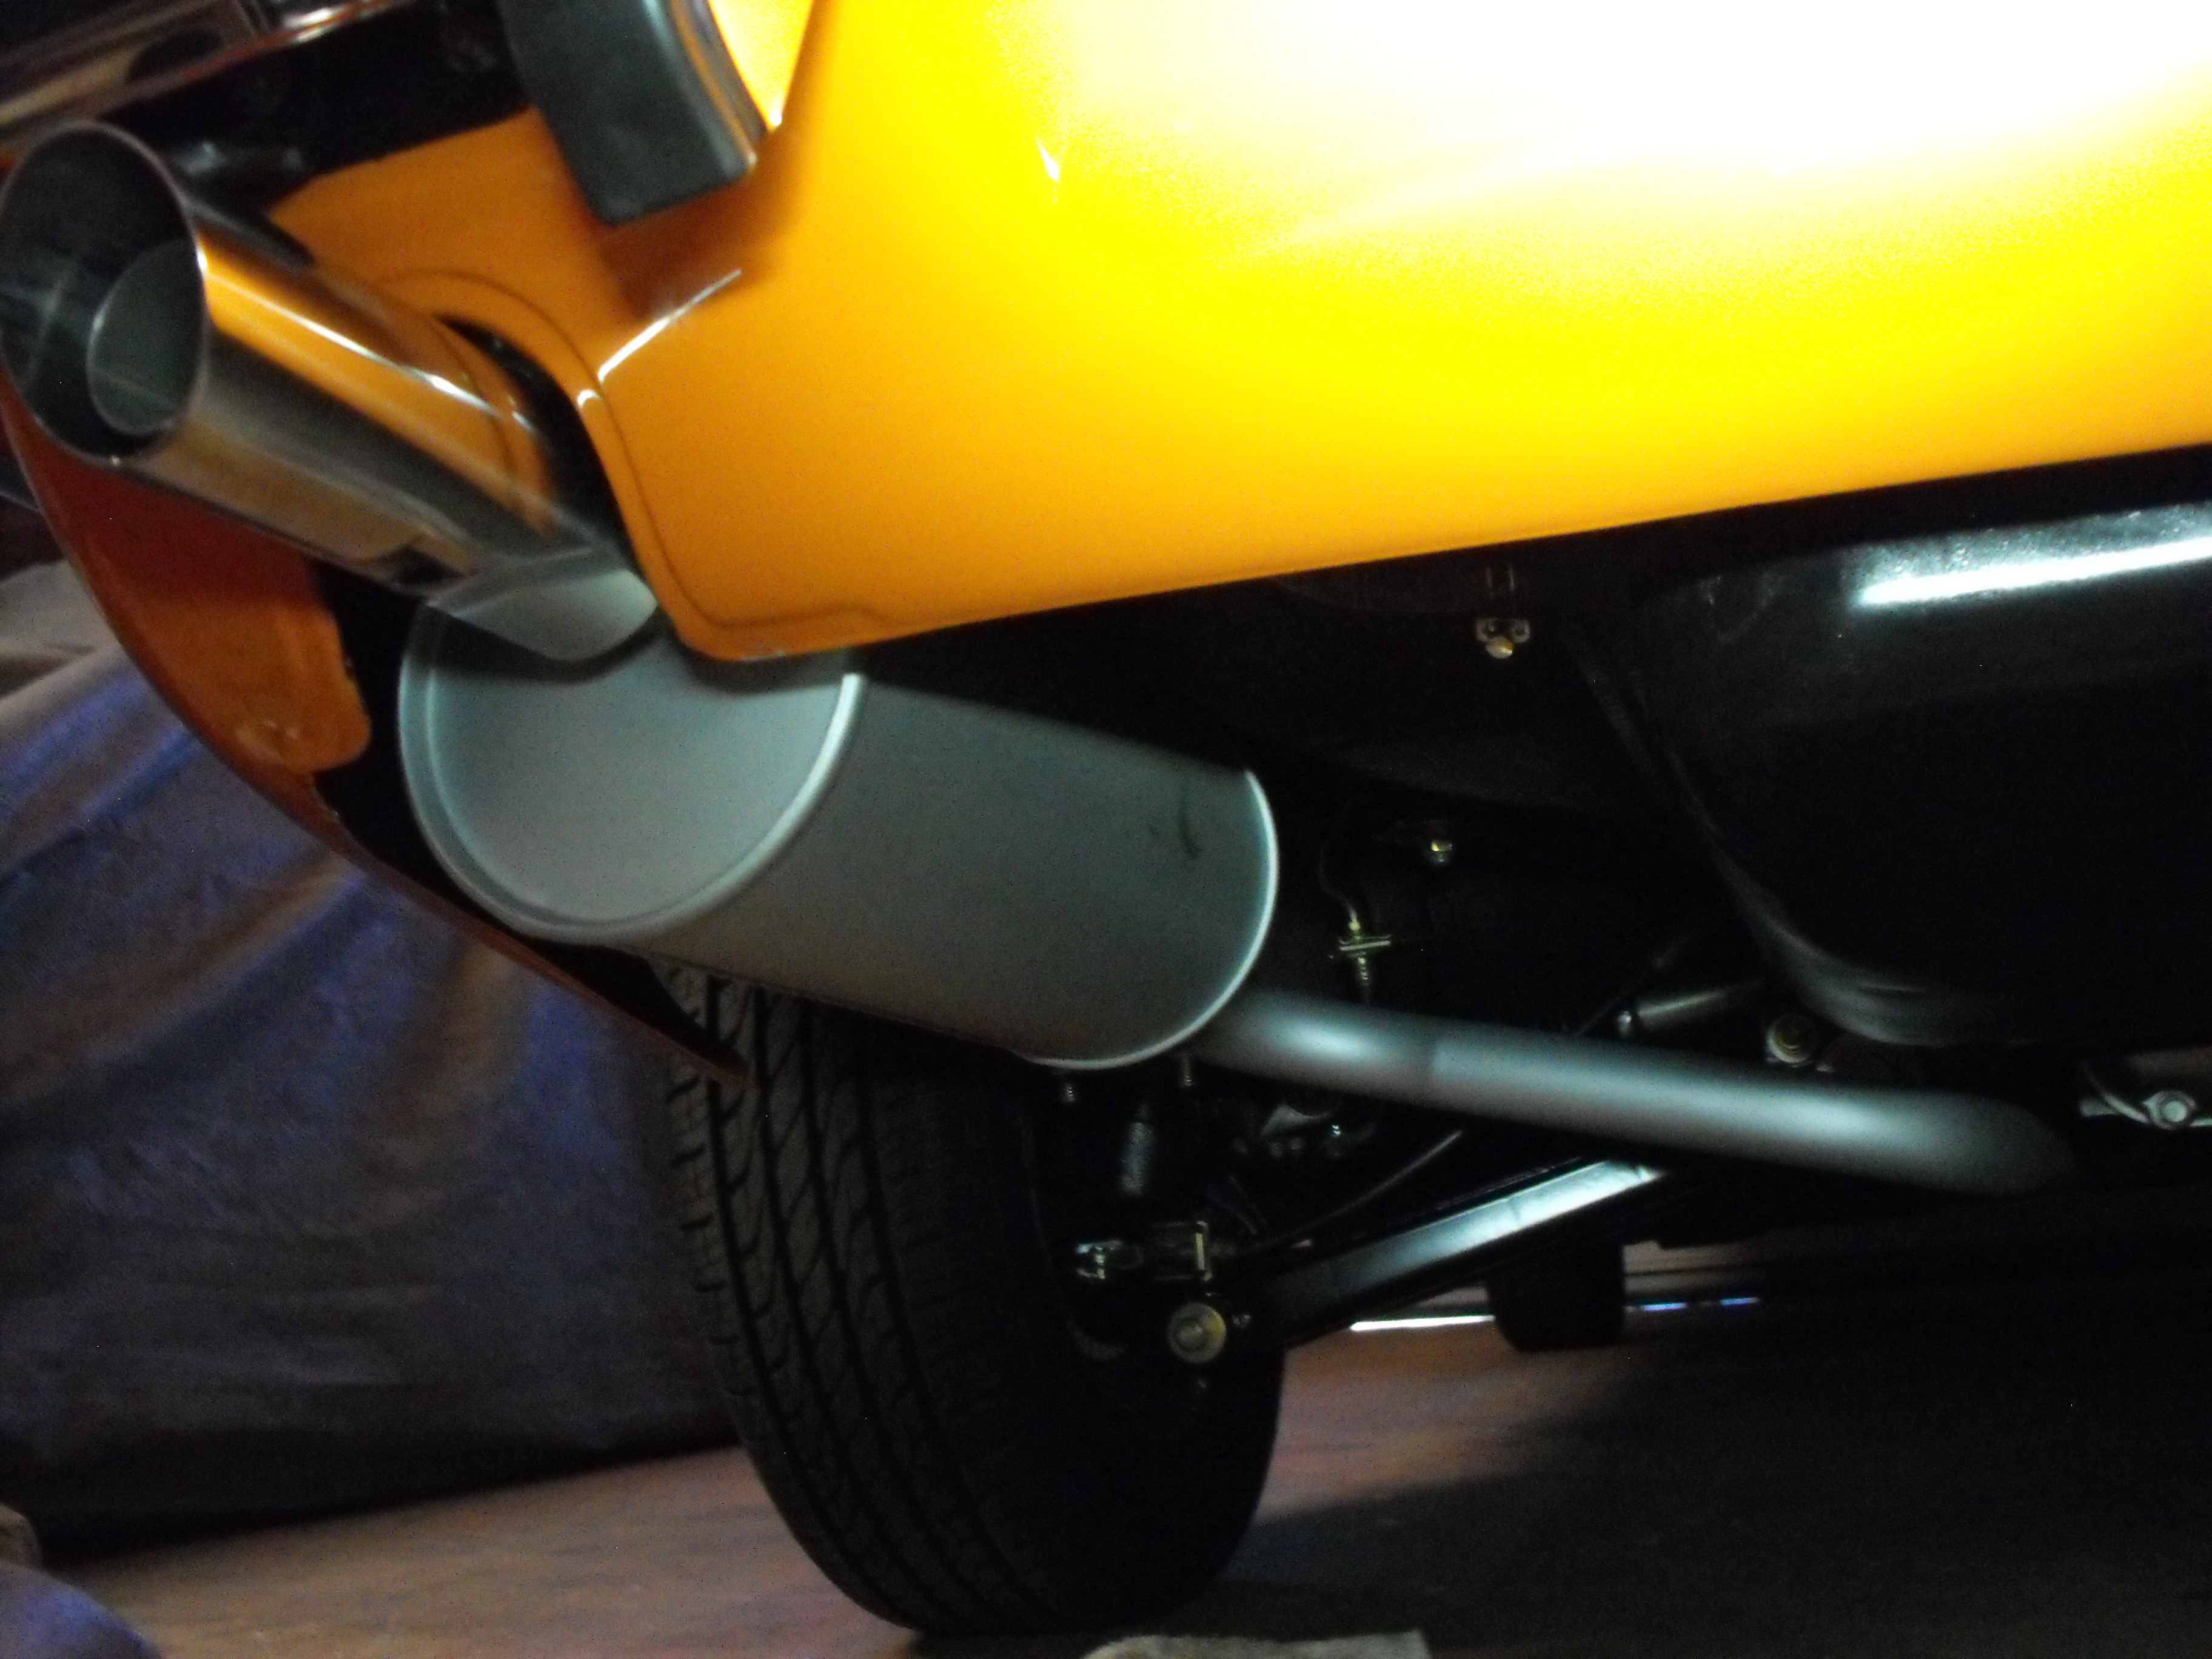
Exhaust 2.0. This is so much better. The resonator is tucked up there nicely.


-
Interesting topic regarding sound deadening material selection. The short answer is that I selected the Noico because it was used and recommended by others on this site. As a mechanical engineer who has worked extensively with noise reduction and sound deadening applications, I think that it would be difficult to rate one brand over another without actual side by side tests performed with the correct measuring equipment on the actual parts in question. You cannot compare a Ford truck door with a Datsun 240Z door. The door panels will have different resonant frequencies, thus different sounds . Material Mass and energy absorption are key as are thickness and dampening. The dampening will be affected by the size, mass, stiffness and thickness of each individual panel. That being said, what may work well in one application may not work as well in another application. I really could go on for a while on this subject but will stop here. That being said....I did not perform any technical studies on 240Z's with the materials available and cannot knowingly state that the product i used is the best in this application.
-
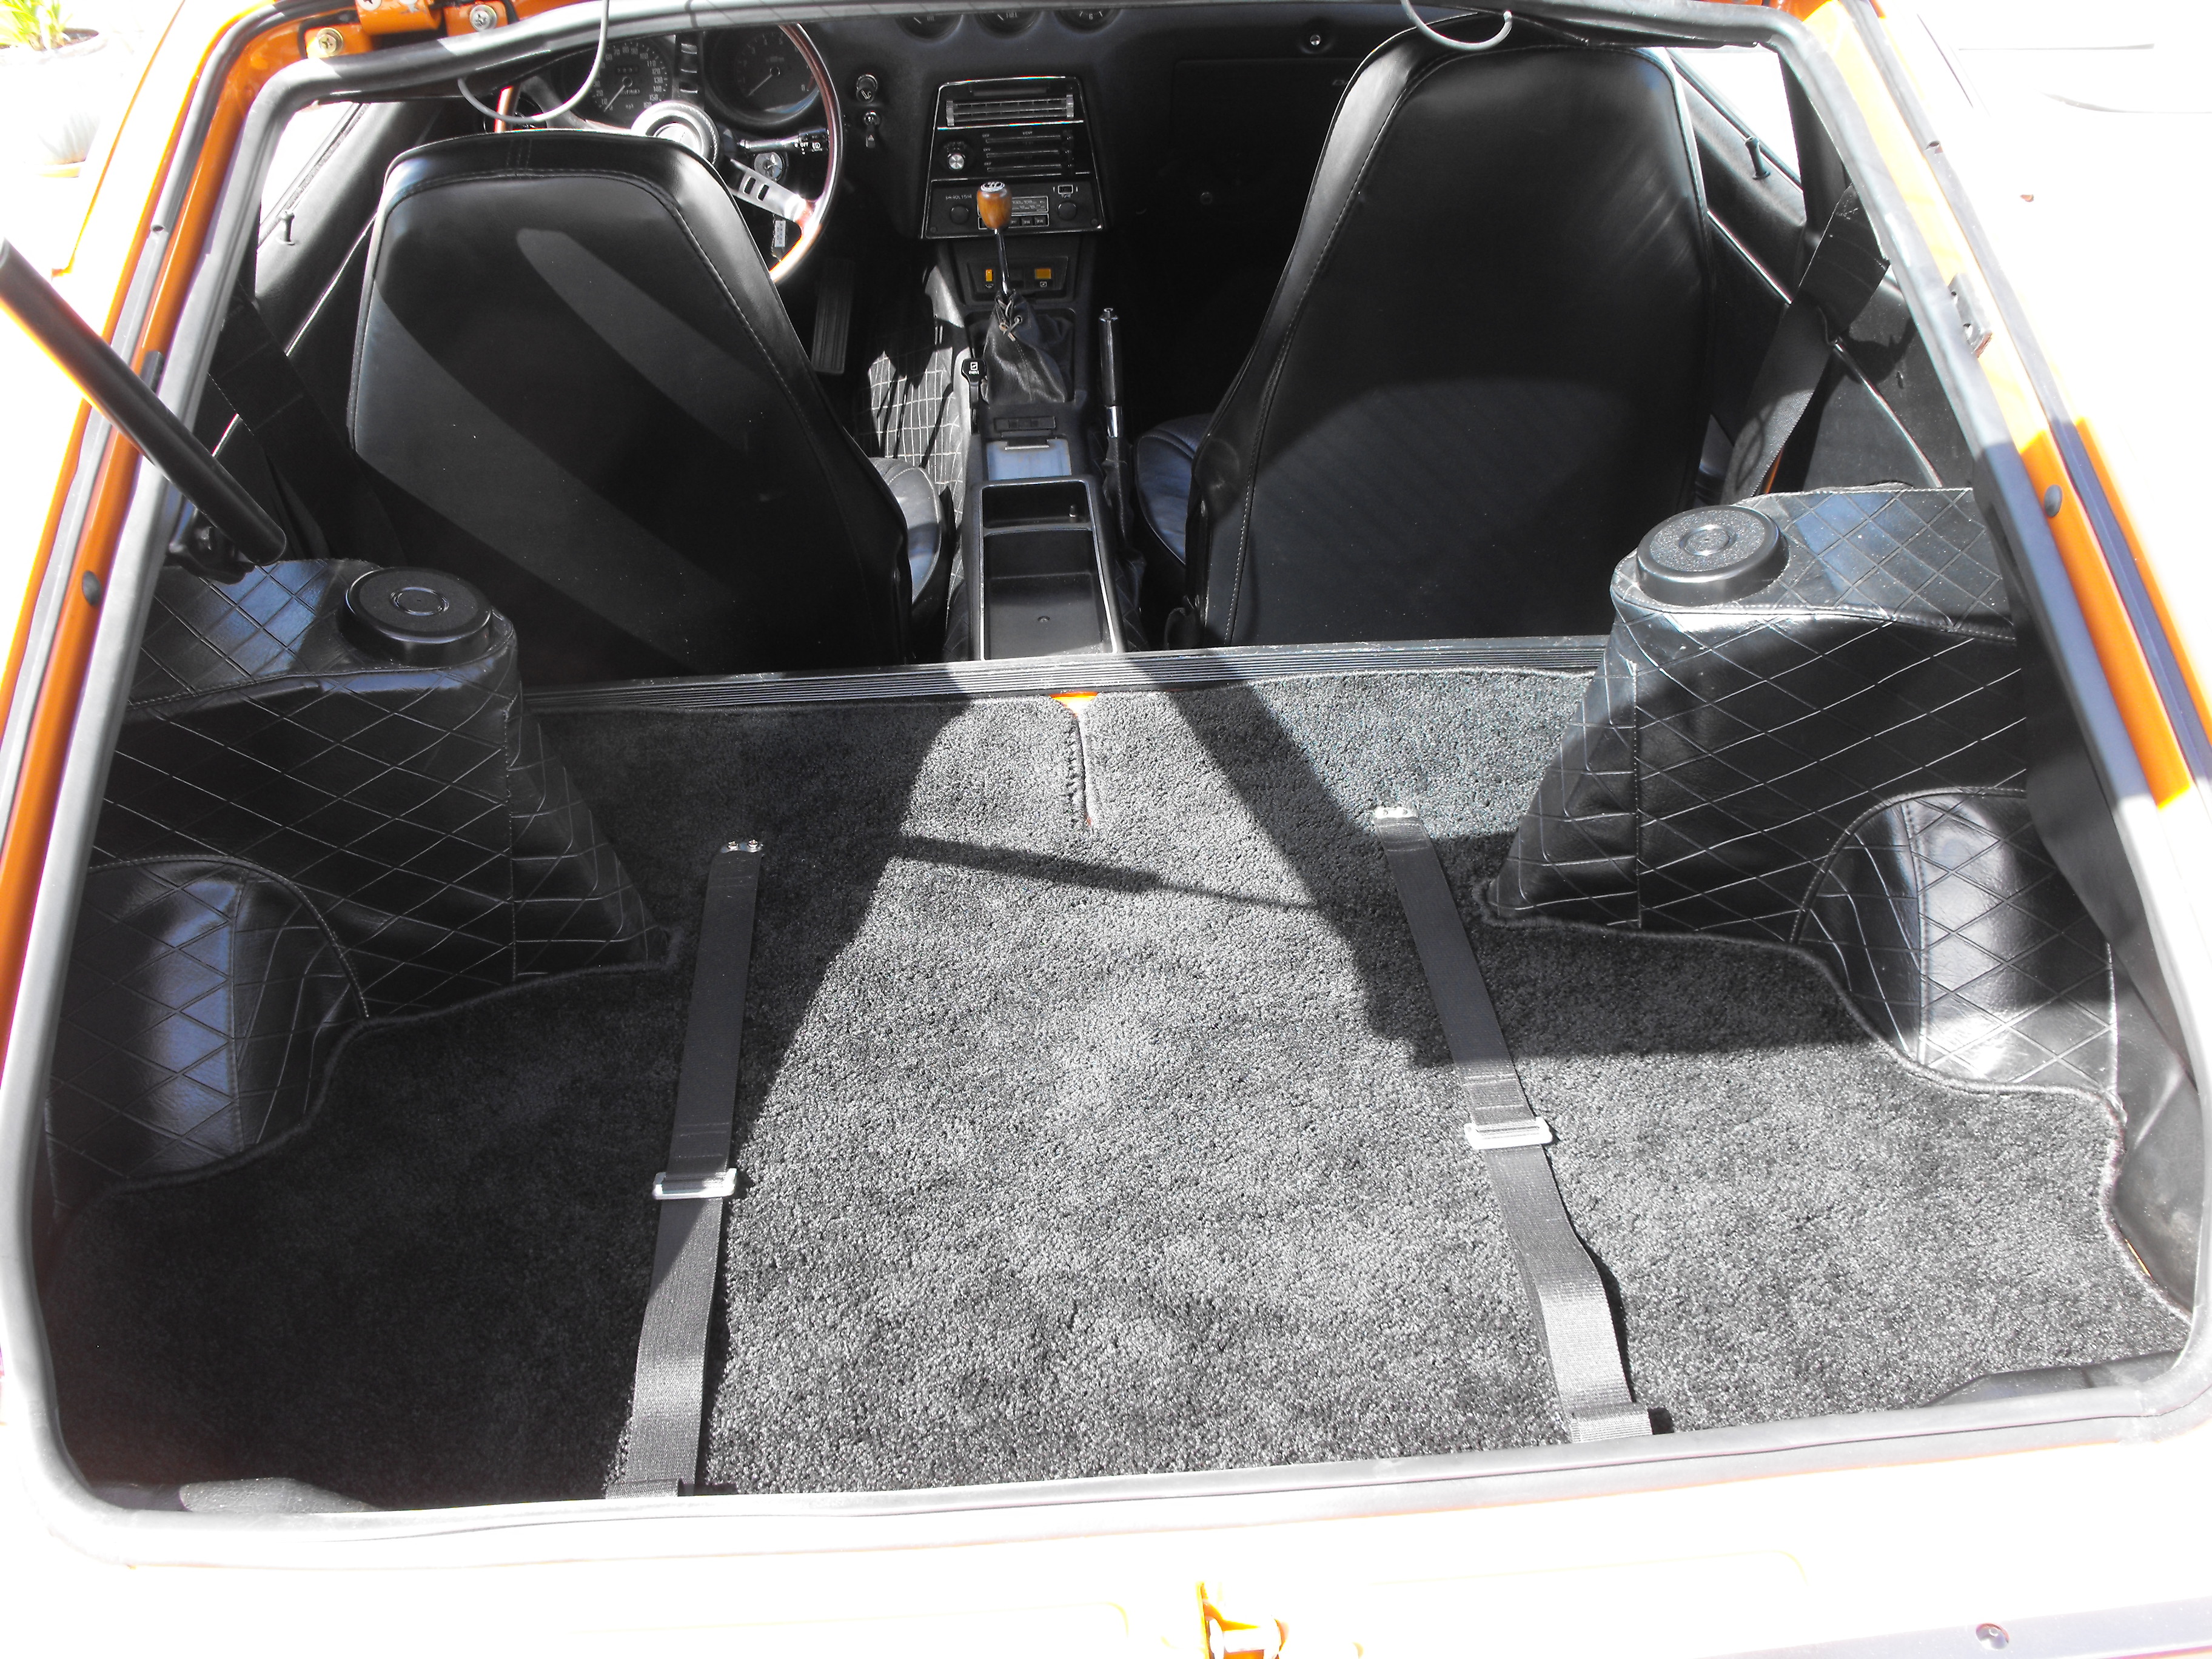
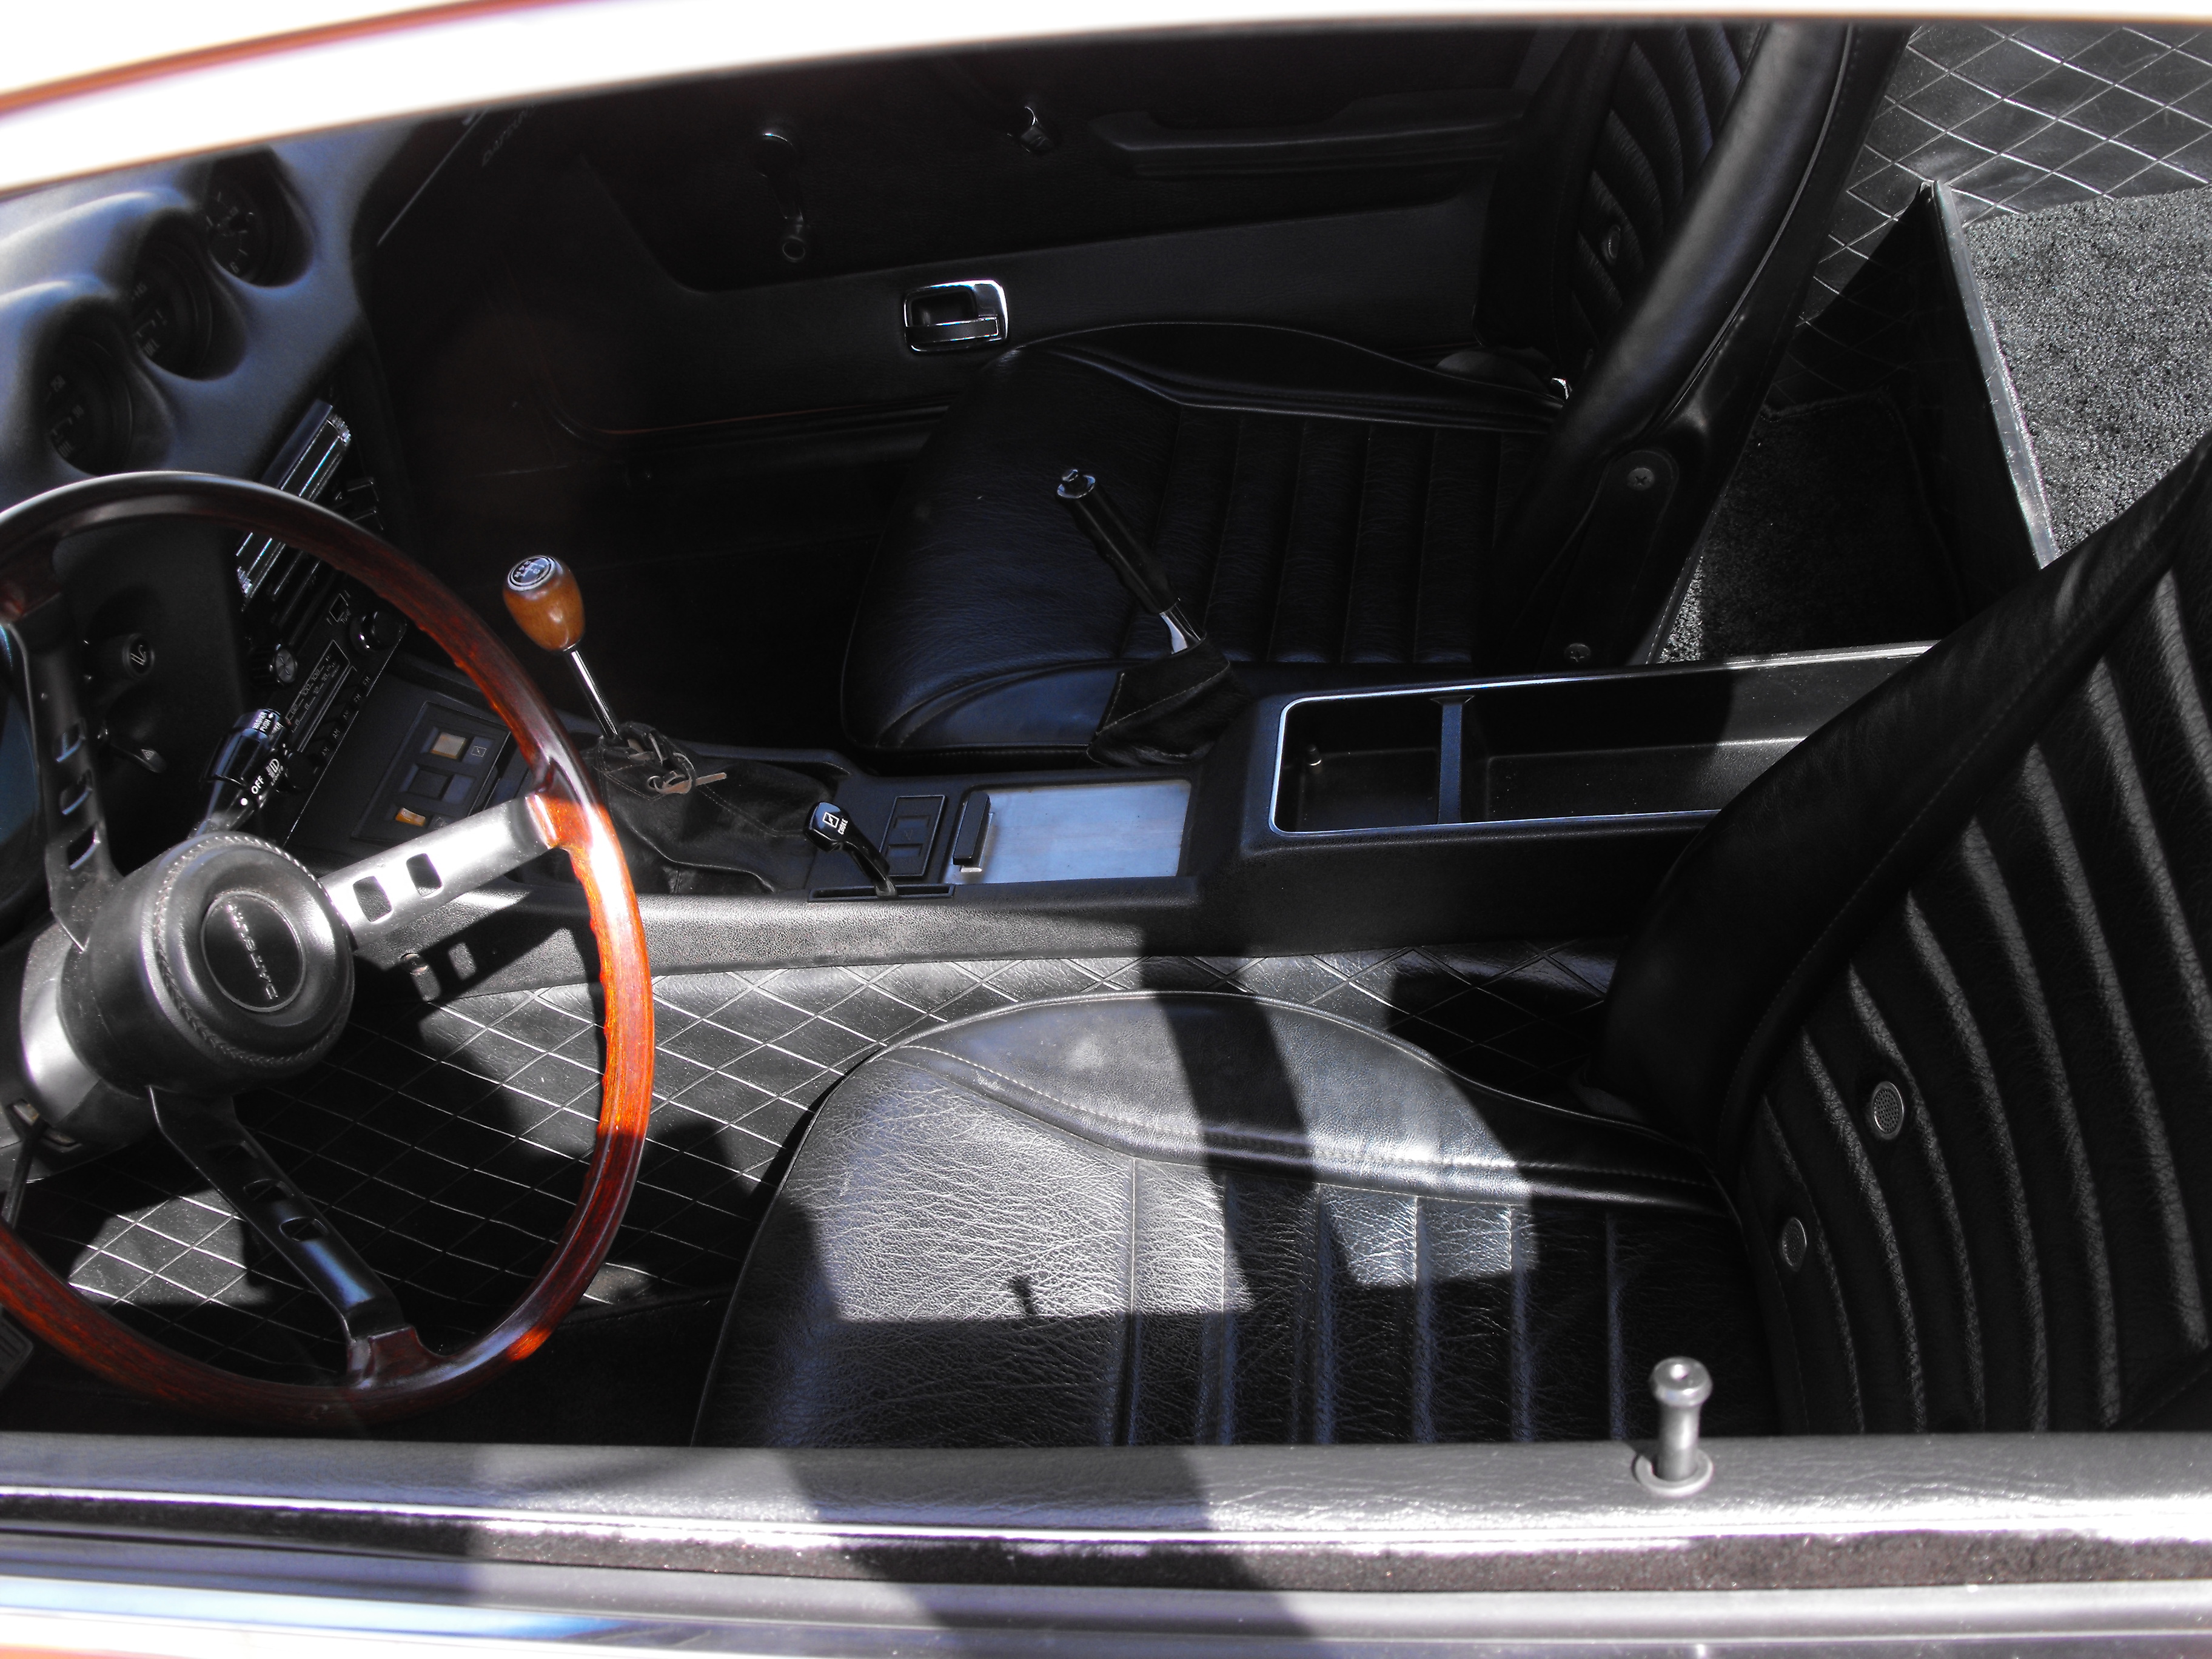
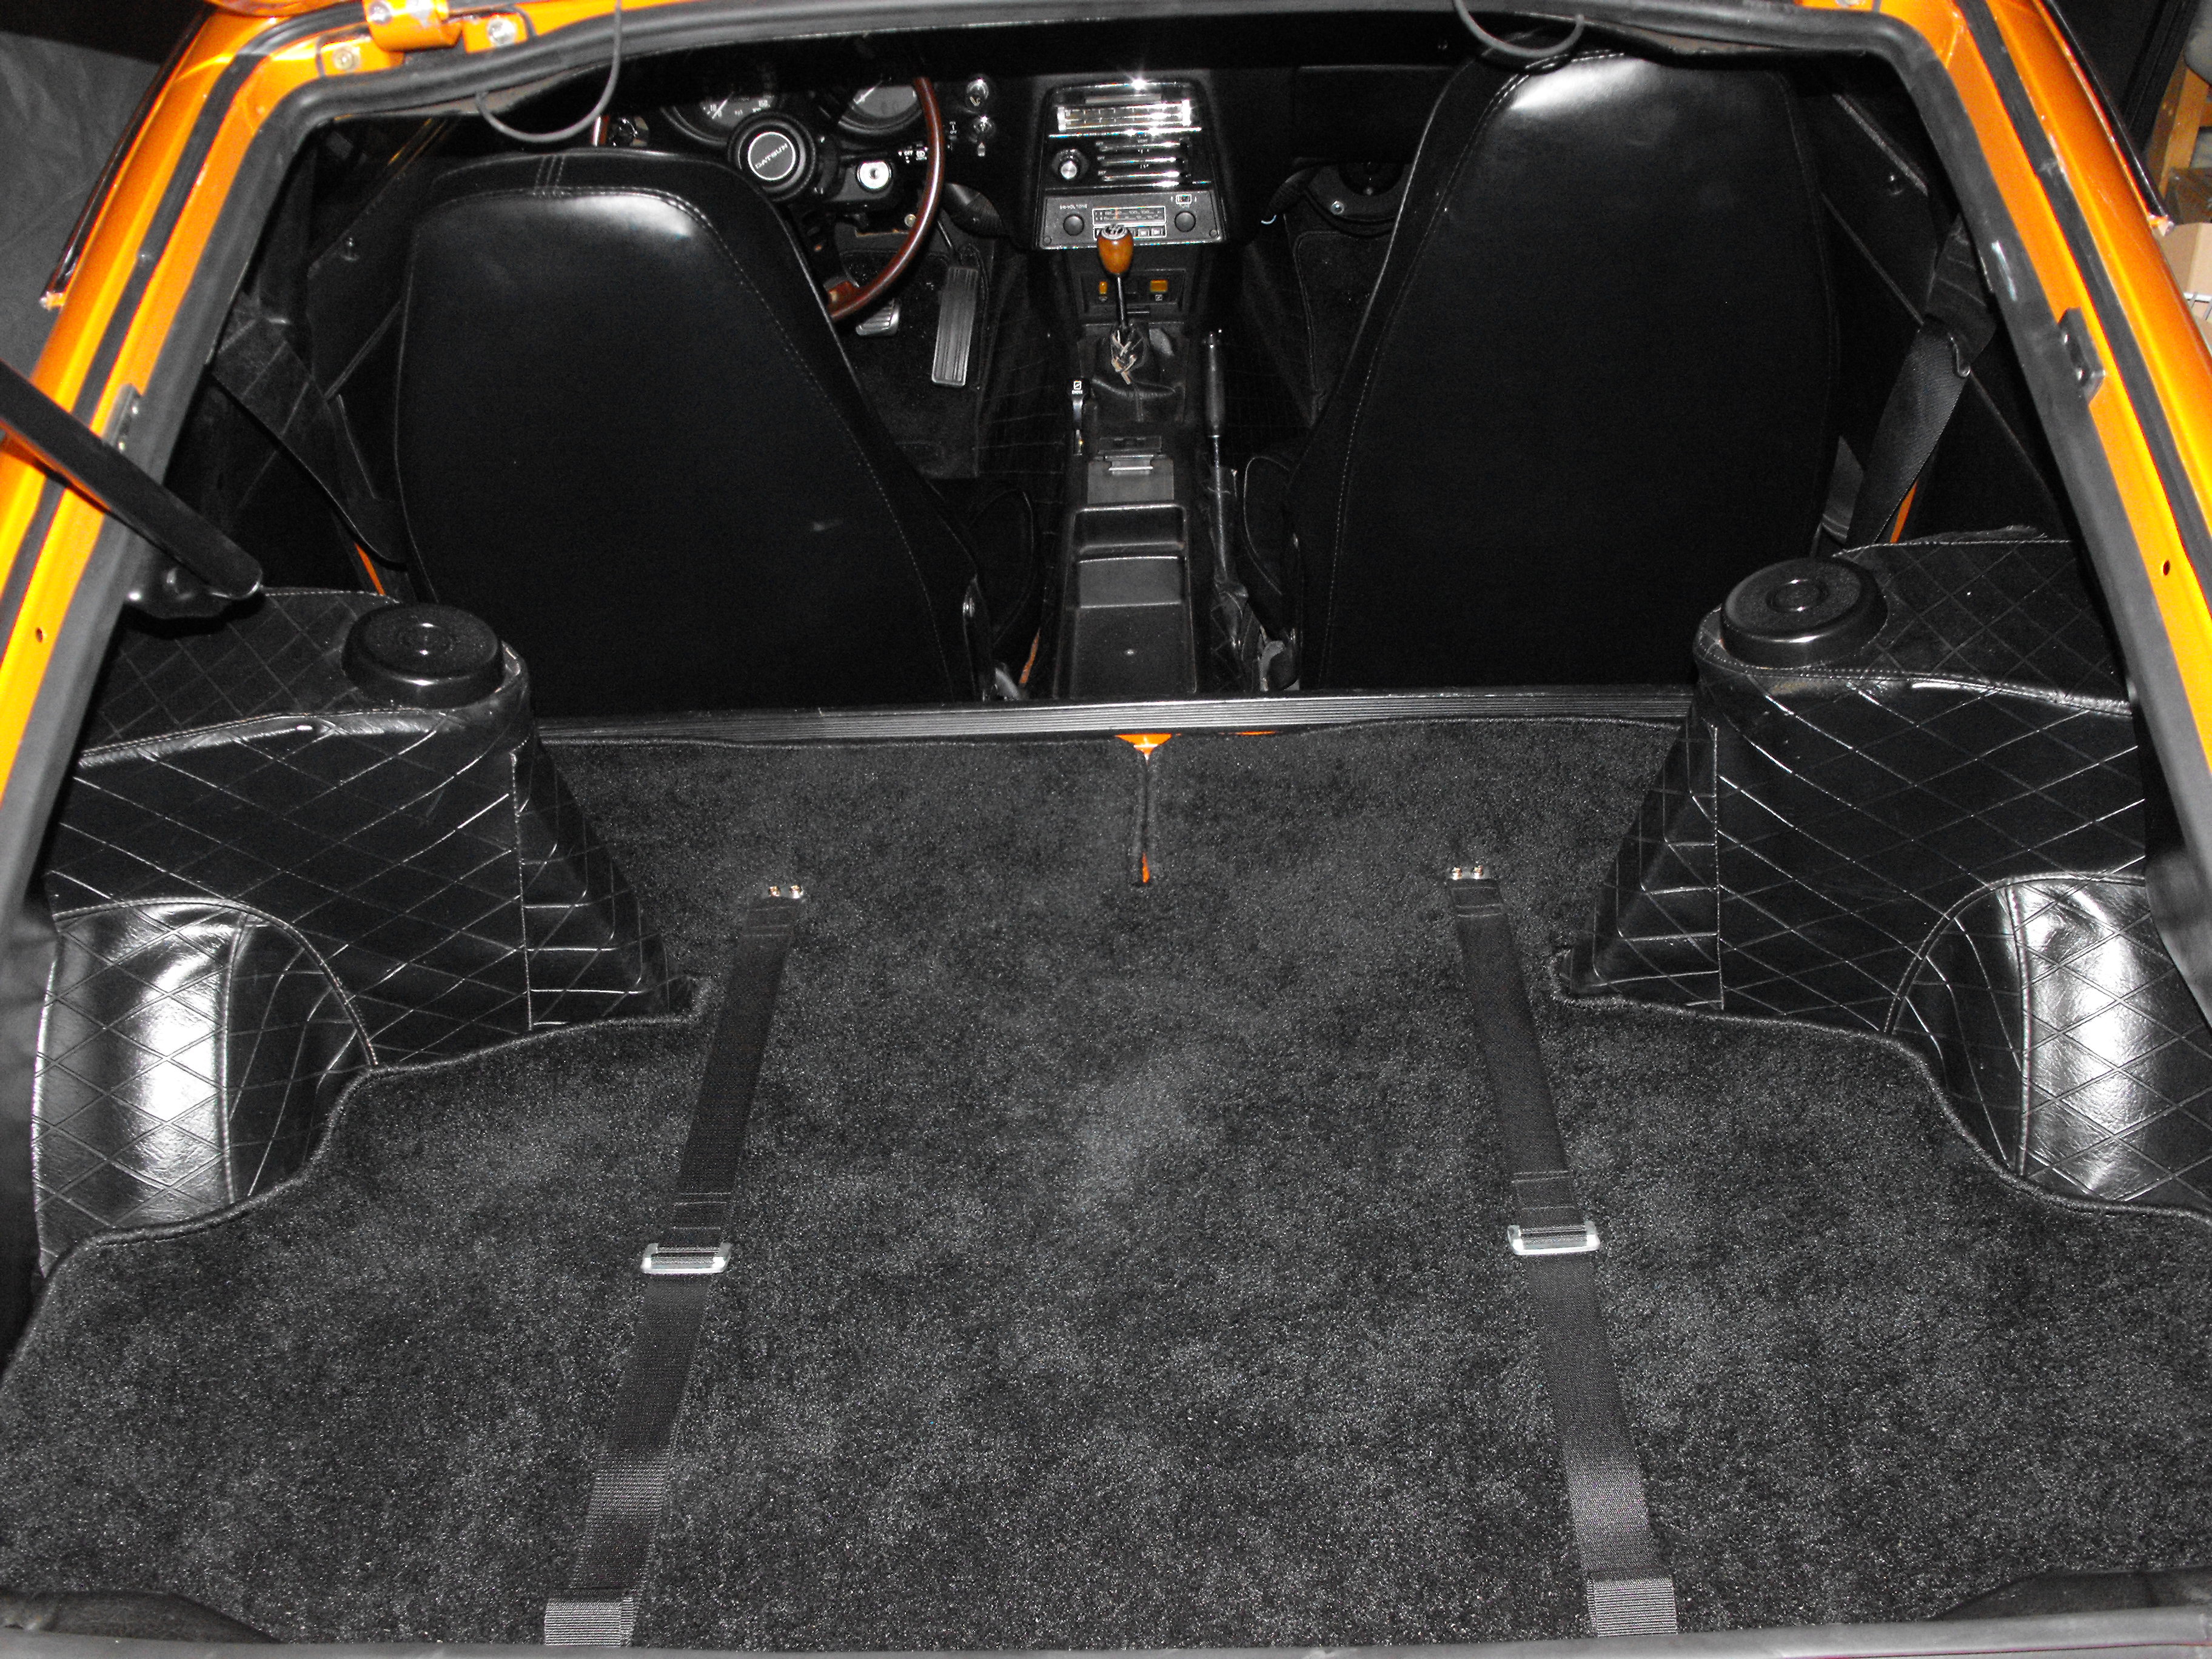
No Prob....it's always good to have a little diversion. Got the luggage straps in and rear panel installed. The interior is pretty much done except for those two little hatch plugs (should be on their way here from Banzai Motorworks). Took one more pic of the car in my garage. It is starting to hit me that the car will be leaving soon. It actually makes me a bit sad. I often walk out into the garage just to look at it. At this point I just have a few parts that I am waiting on but those should be in soon and quick to install. Then a few little adjustments; the brakes squeak and the carbs need some minor tuning and then she is ready to go. Hard to believe that it is just about complete. It has been quite a journey.

-
I did exactly what @siteunseen mentioned above. It looks great and is the closest I have seen to the original. Although, I did use the 'Bulldog Spray adhesion before the paint coat.
-
Yes, this really was a tough choice. I talked with my paint guy at length about the two options. We went with the two stage in order to have a more durable finish and simpler touch-up if needed. We also wanted the paint to really shine and standout. Durability is also why most of the undercarriage is powdercoated, the underside is POR-15ed, and I put clear coat or matte coat clear over some parts (like aluminum). Otherwise, in 4 or 5 years the process needs to be repeated. Ideally, it would be nice to have the restoration look perfect for another 40-something years.
-
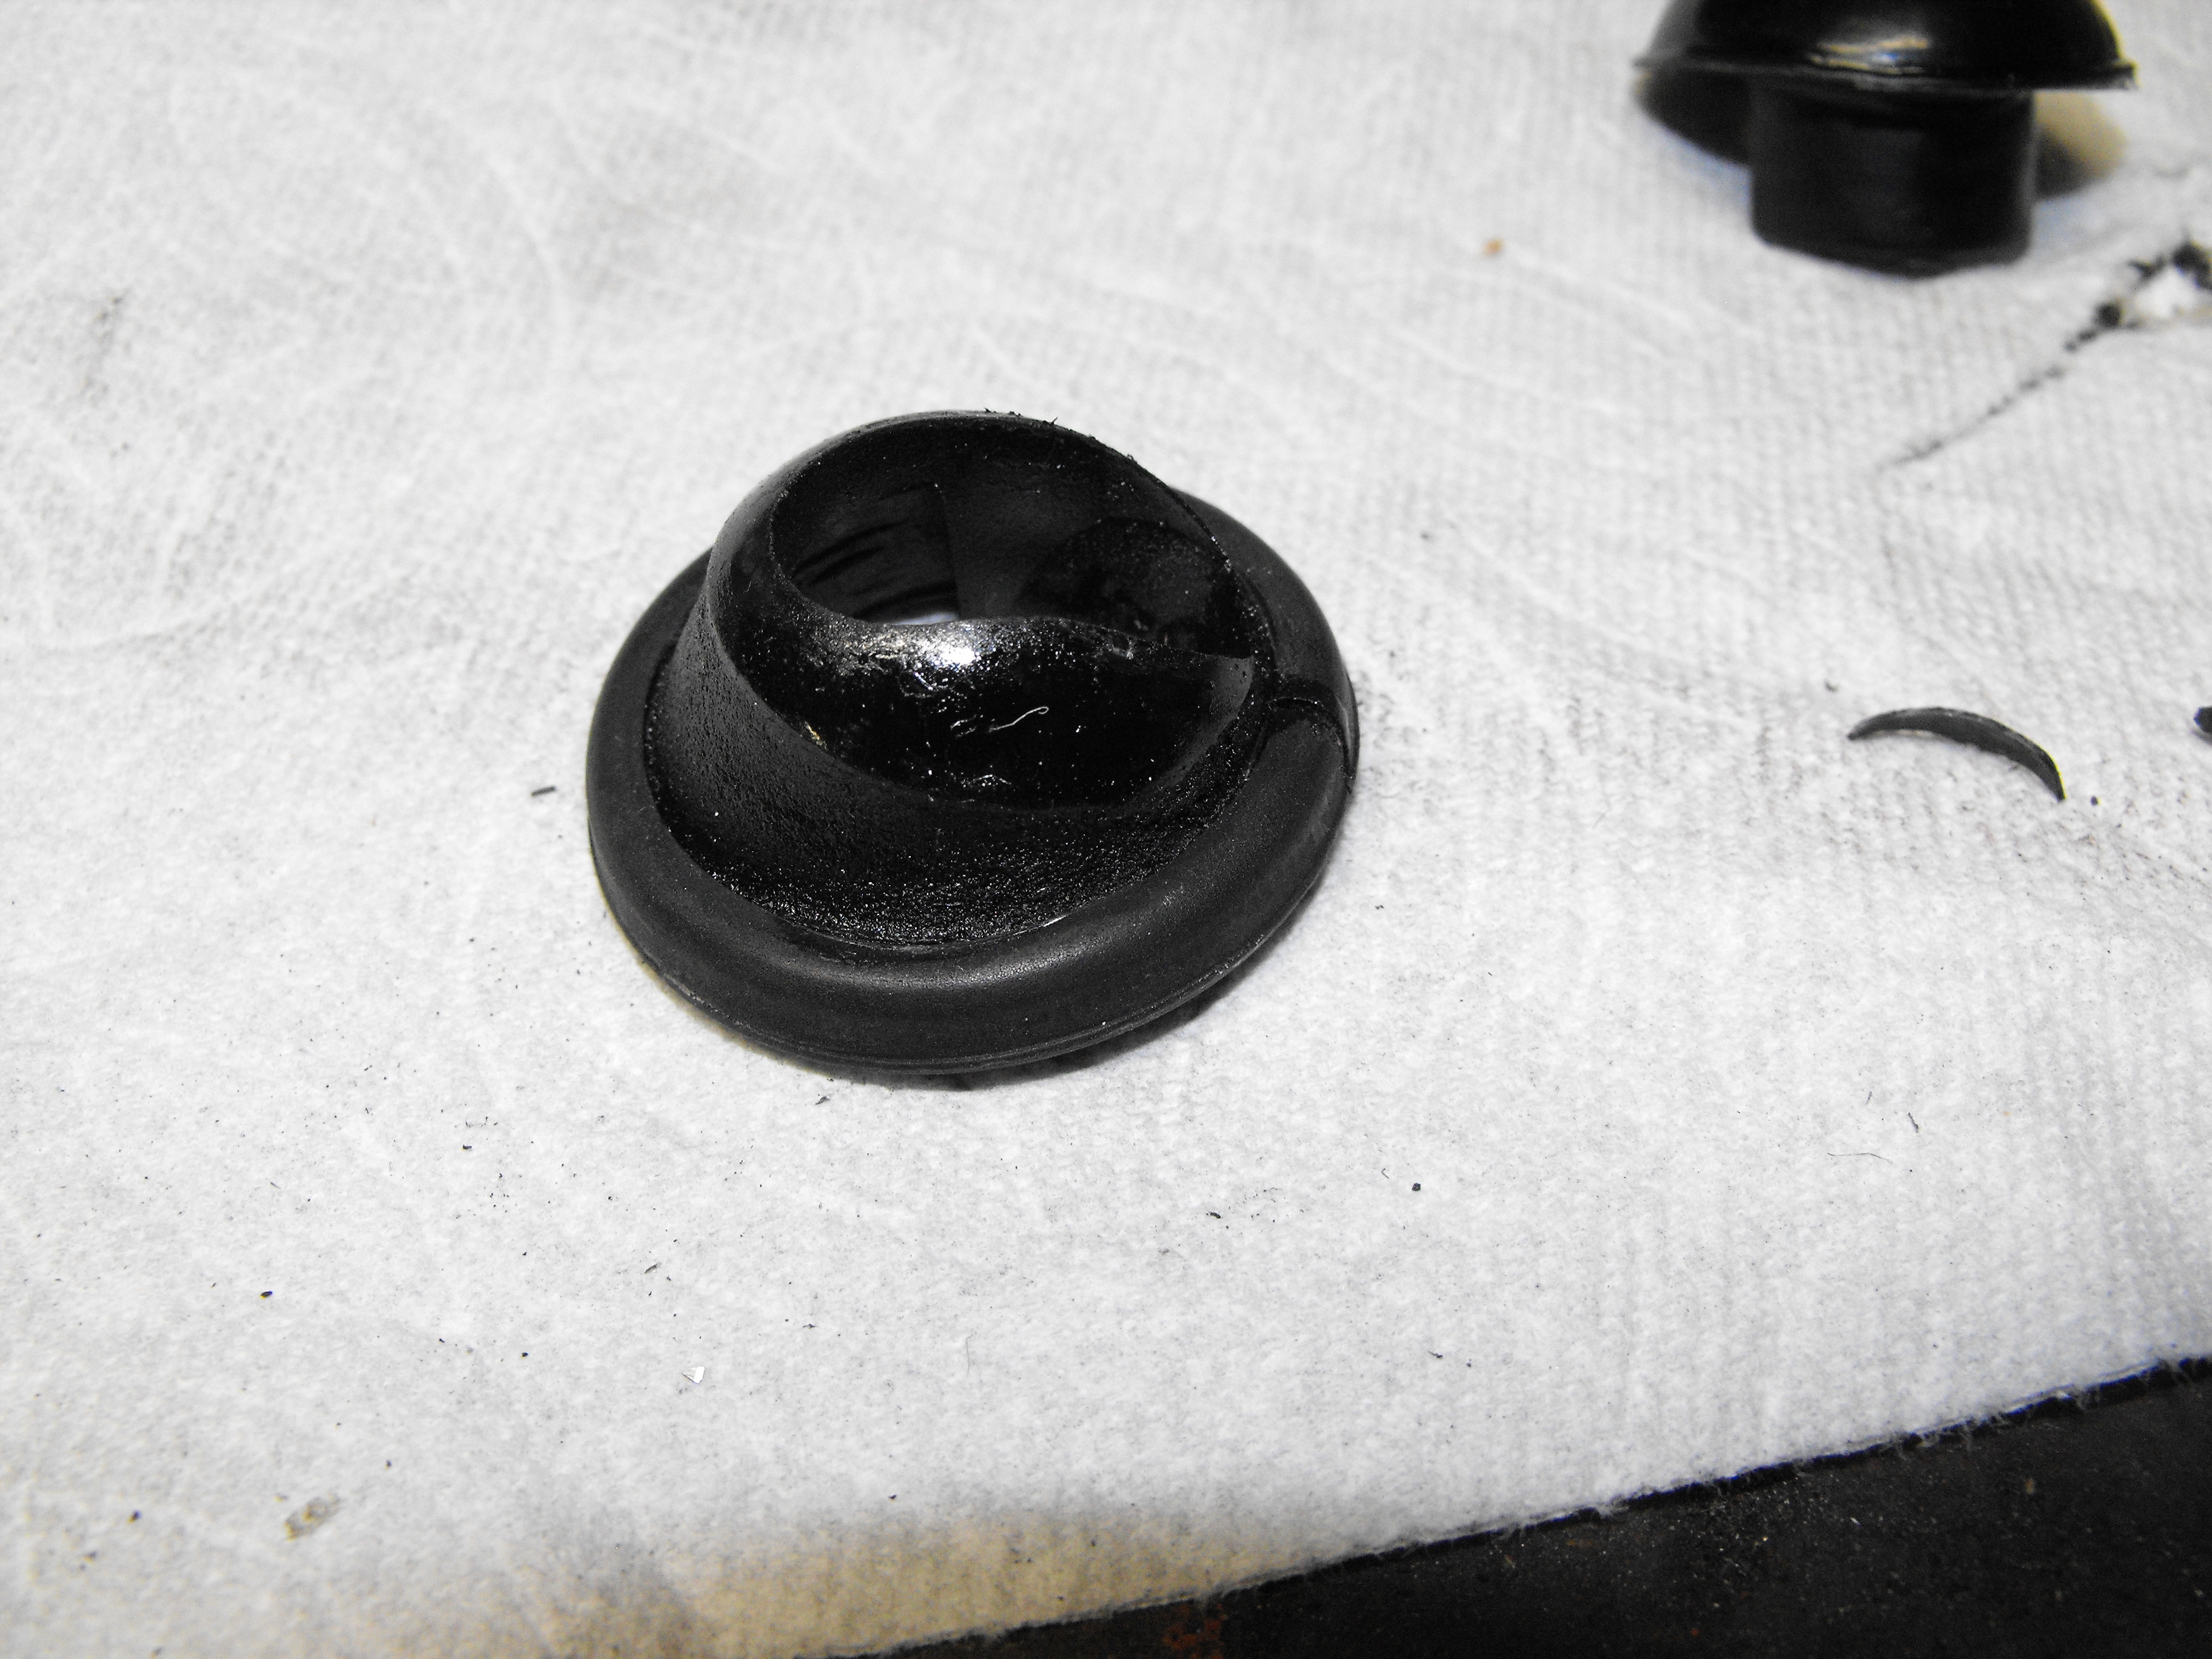
Yes, the larger black piece that looks like a dome is plastic. The rubber disc shaped piece is below. The plastic part tends to disintegrate and the rubber piece hardens. The parts that are below the body are usually in great shape since they are not exposed to the elements. It's just those upper parts that are a problem.
-
@nix240z: Would be nice to get the rubber/plastic below that as well if available. Time takes its' toll on plastic and rubber.