motorman7
 Subscriber
-
Joined
-
Last visited
Everything posted by motorman7
-
 Thanks for the response everyone. It has really been fun (and educational) putting this all back together. I will probably take a break from the car restorations for a bit once the JCCS is past. I need to get going on some overdue house maintenance items. Not nearly as fun as working on the cars but very necessary. Thanks again, Rich
 -
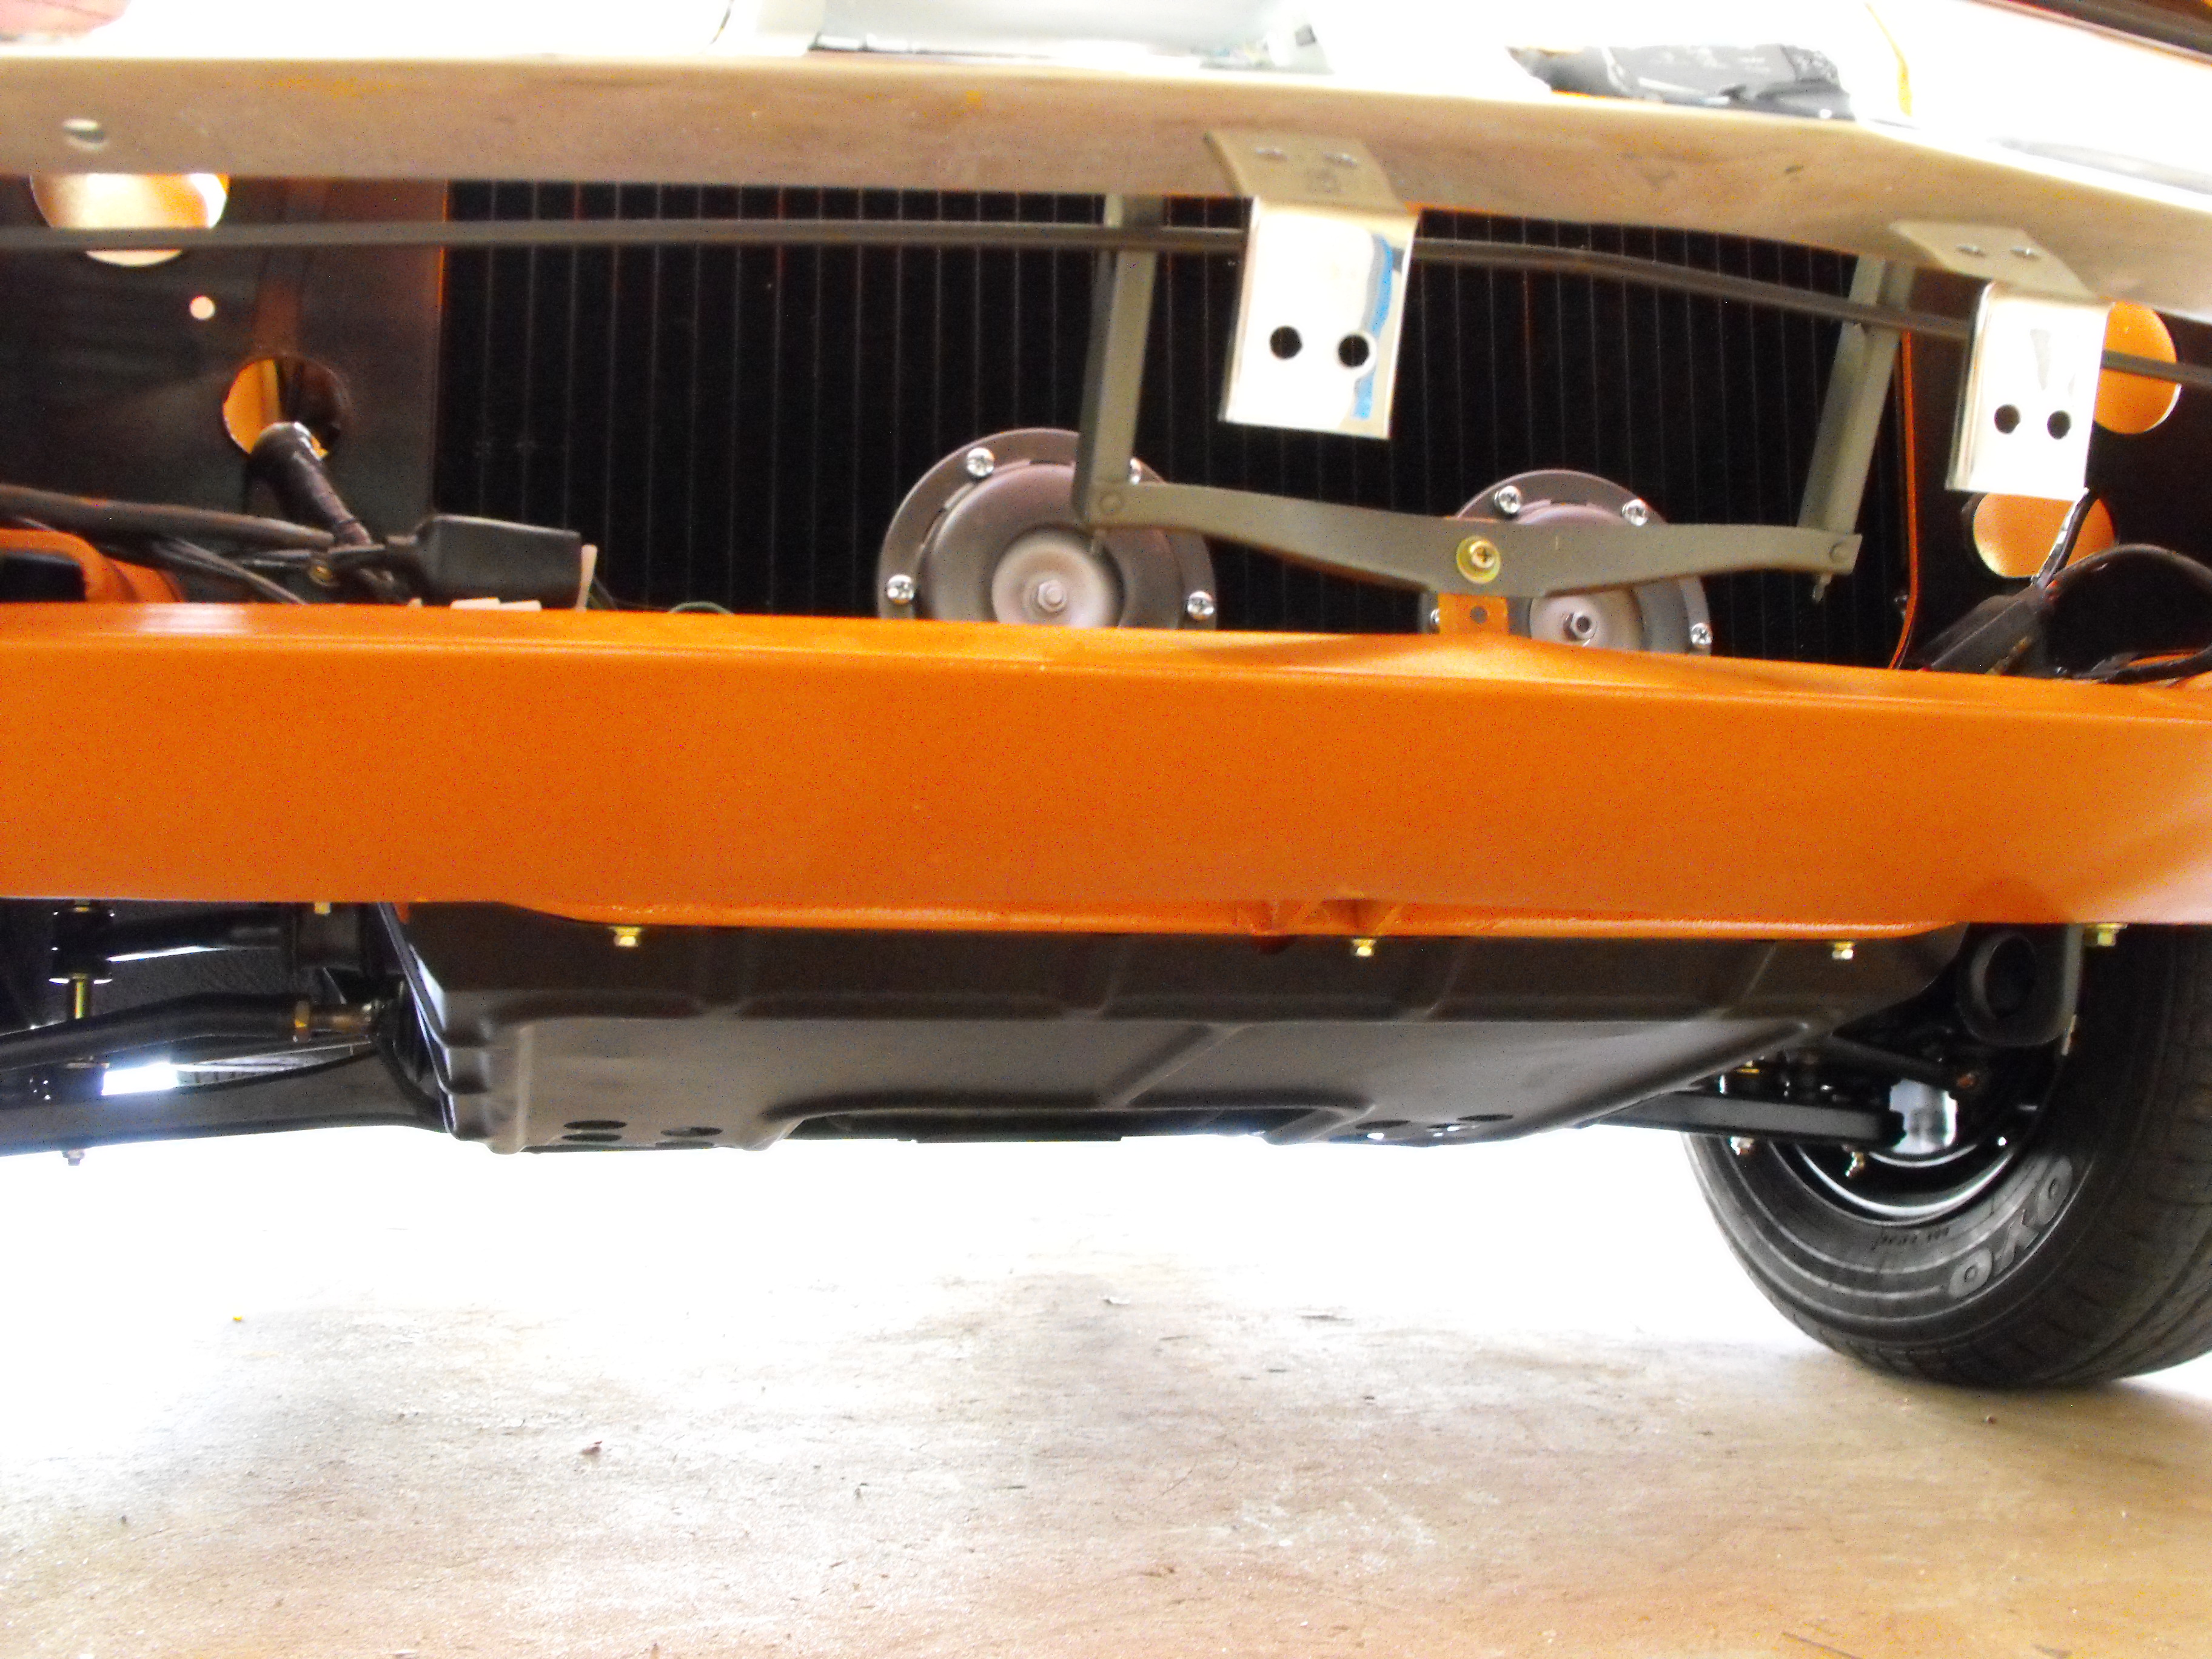
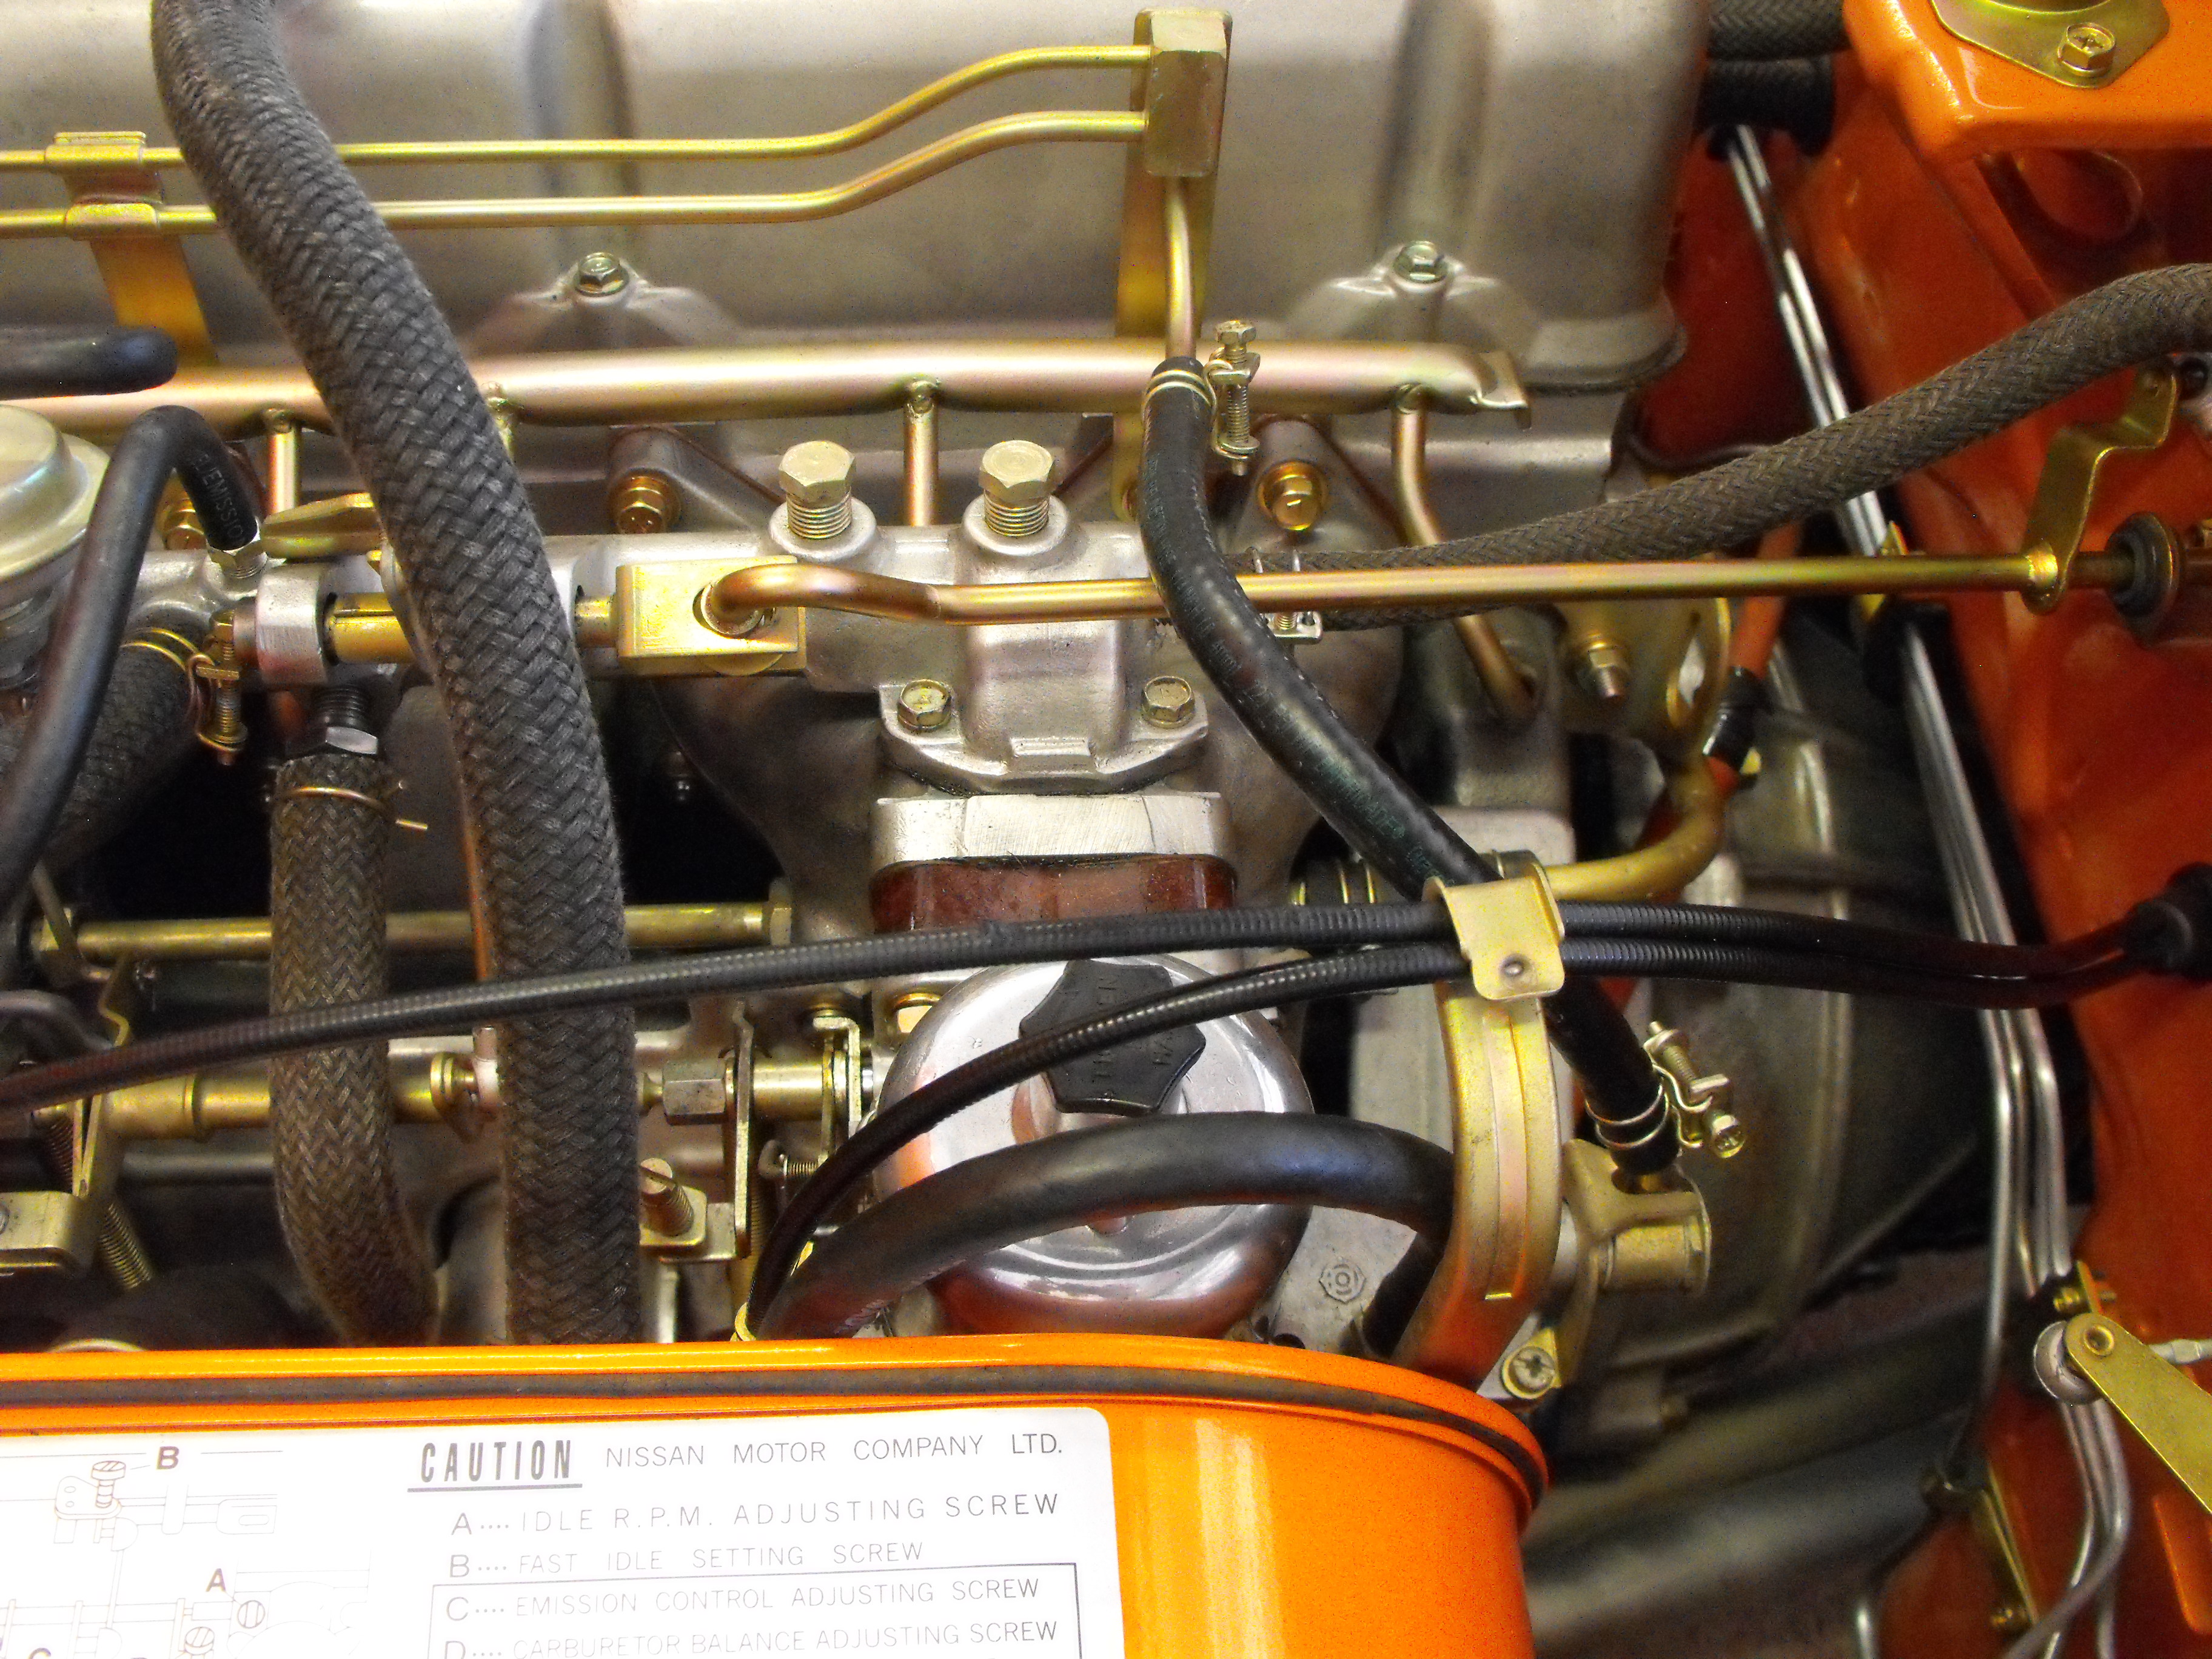
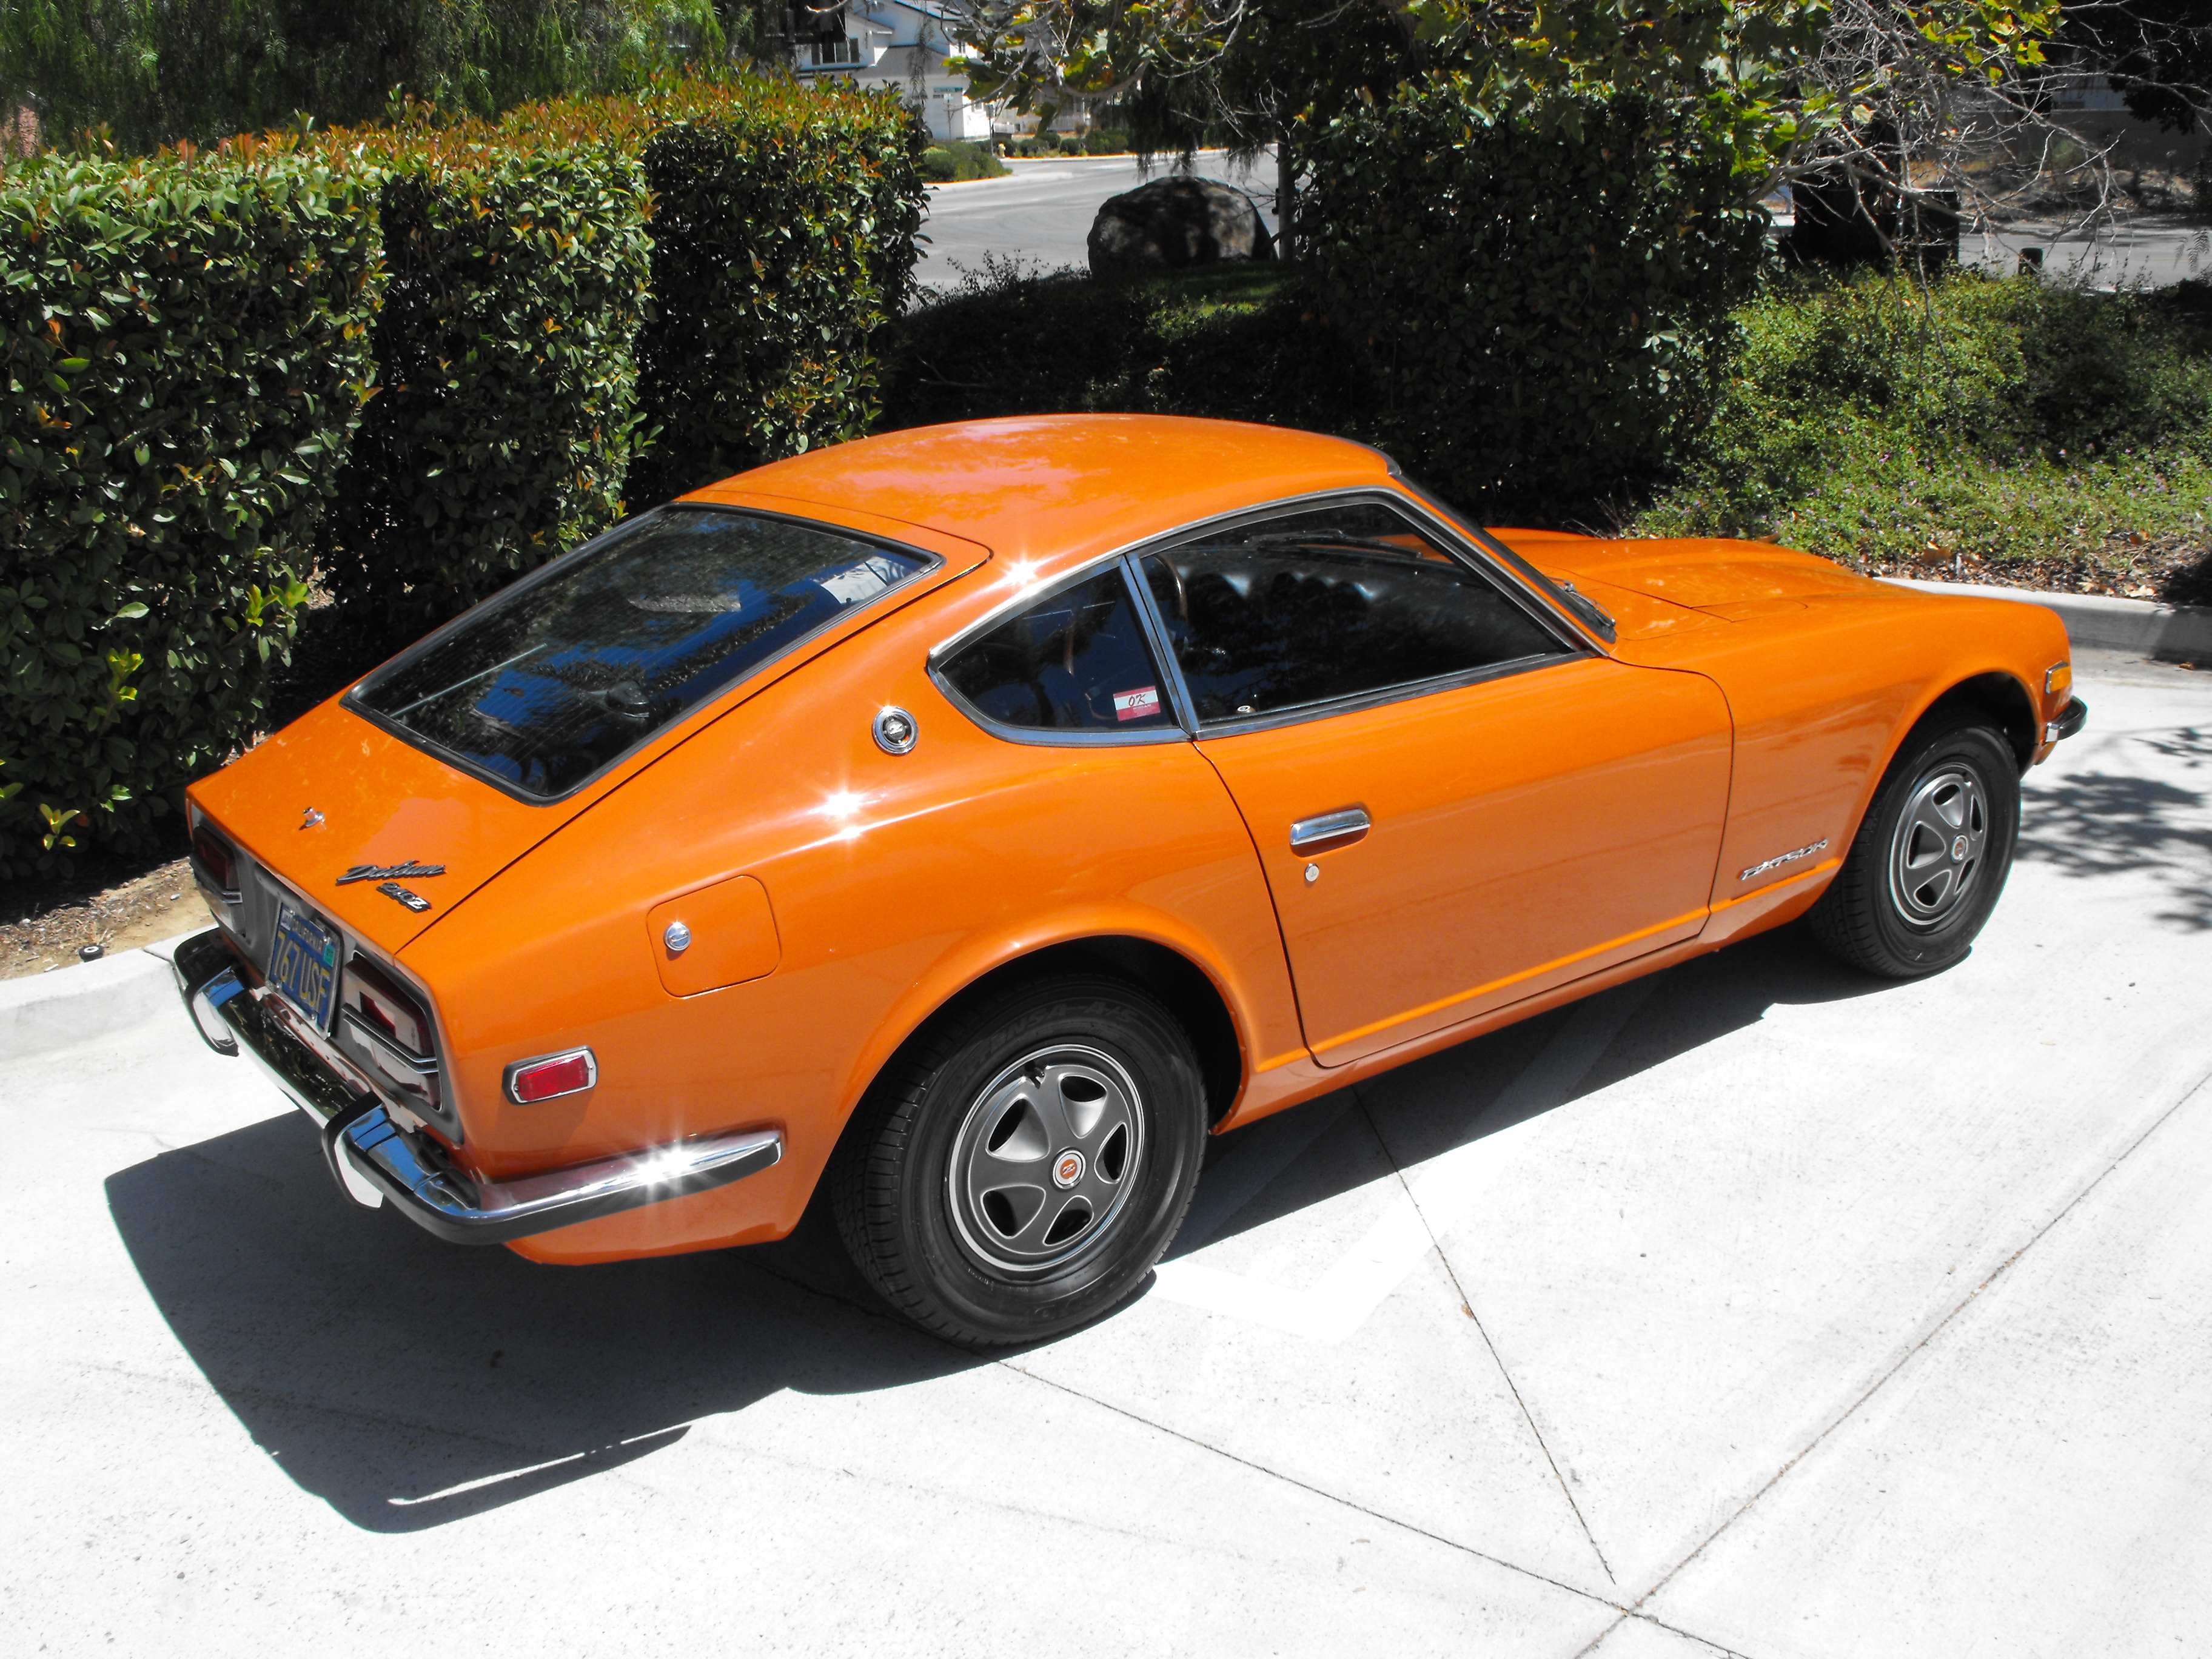
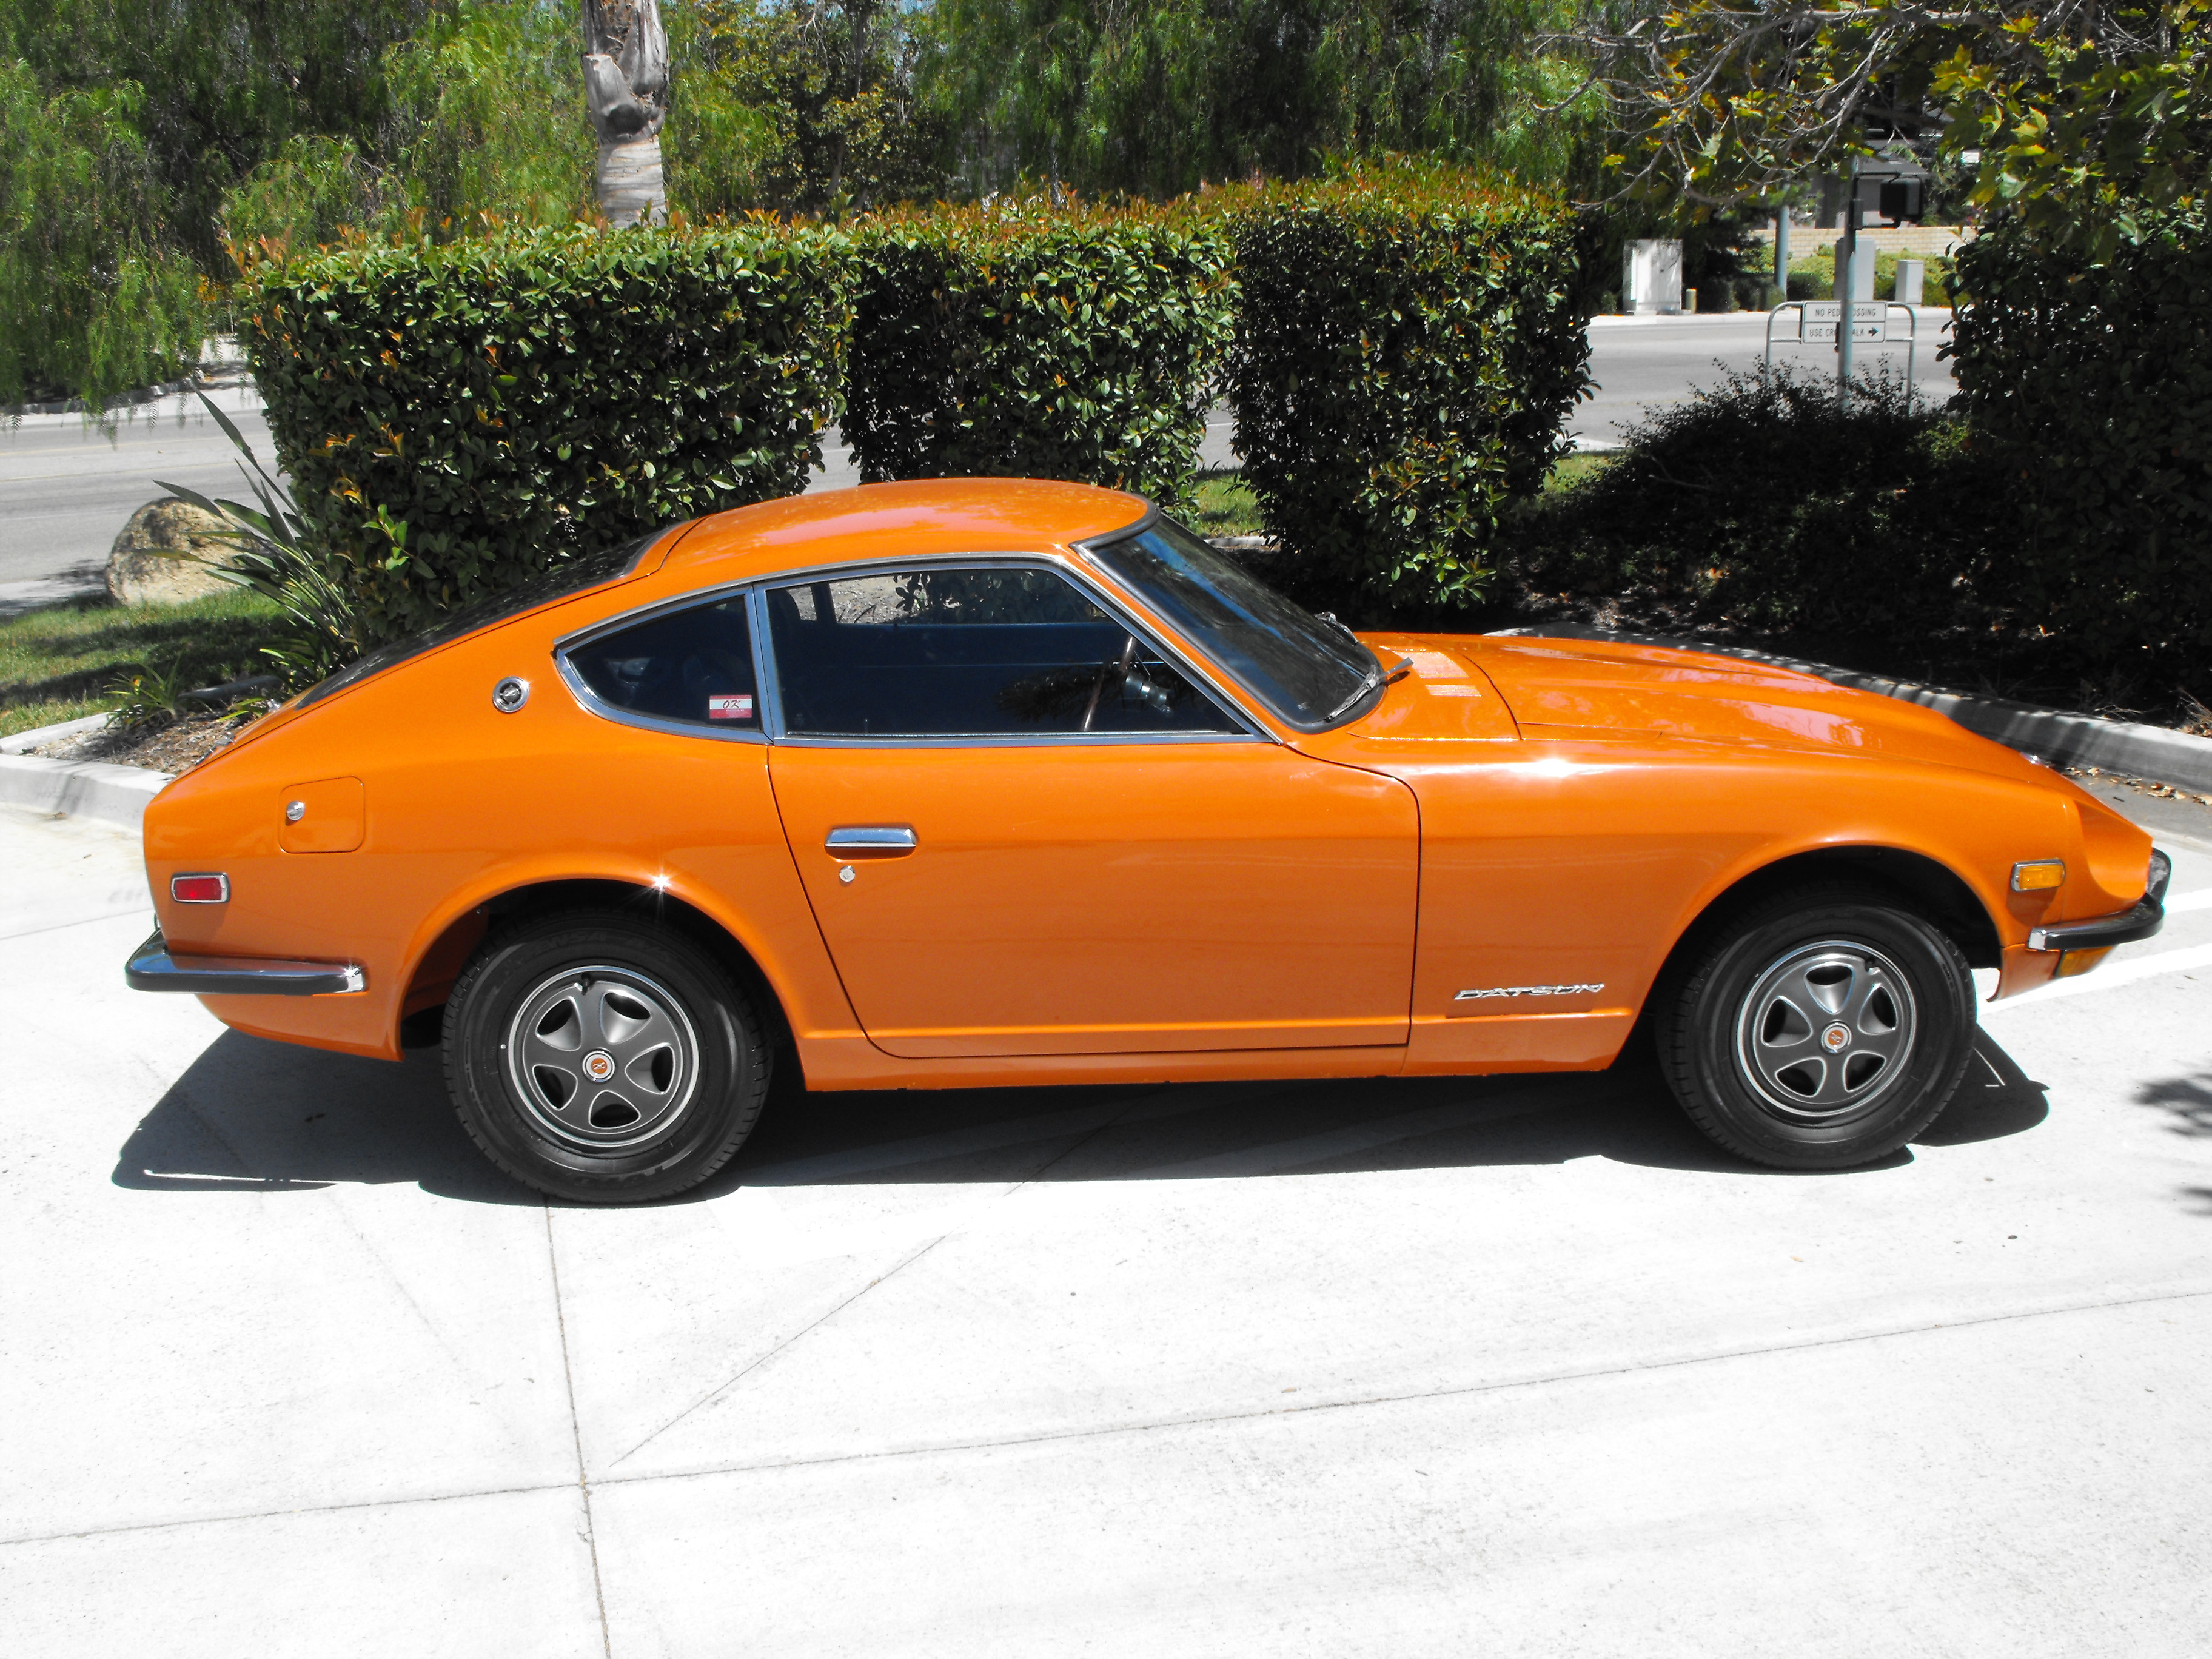
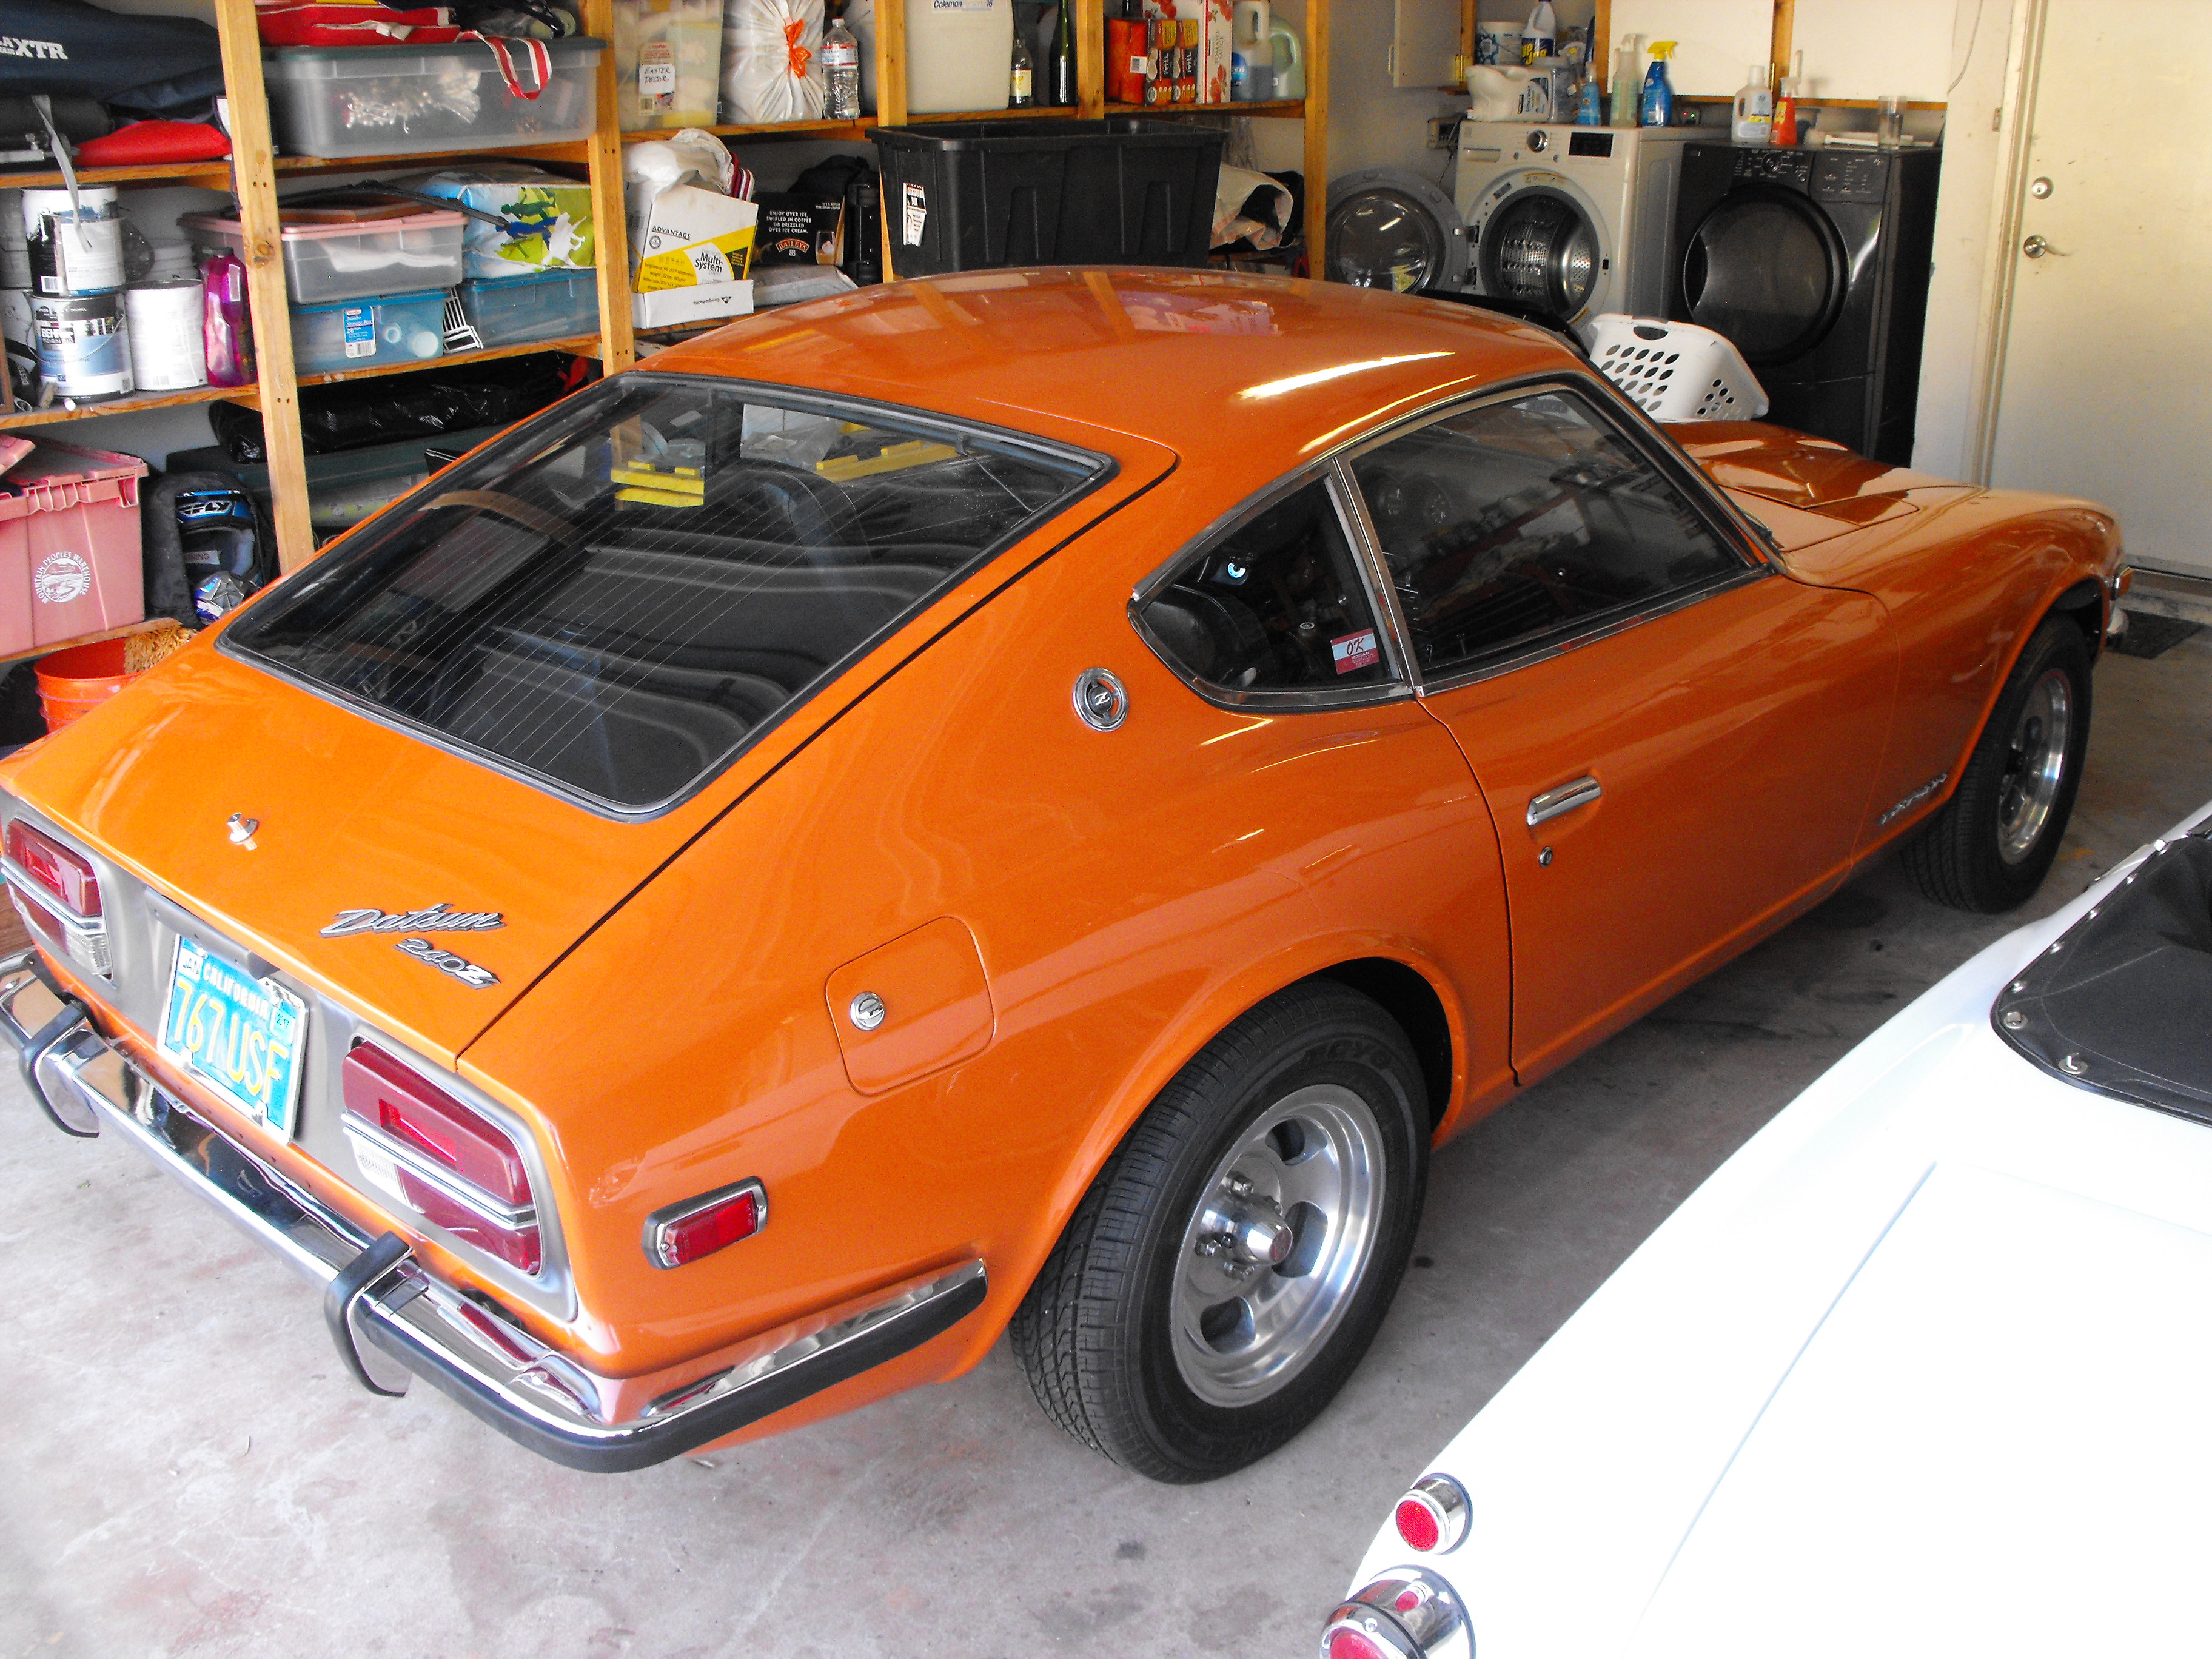
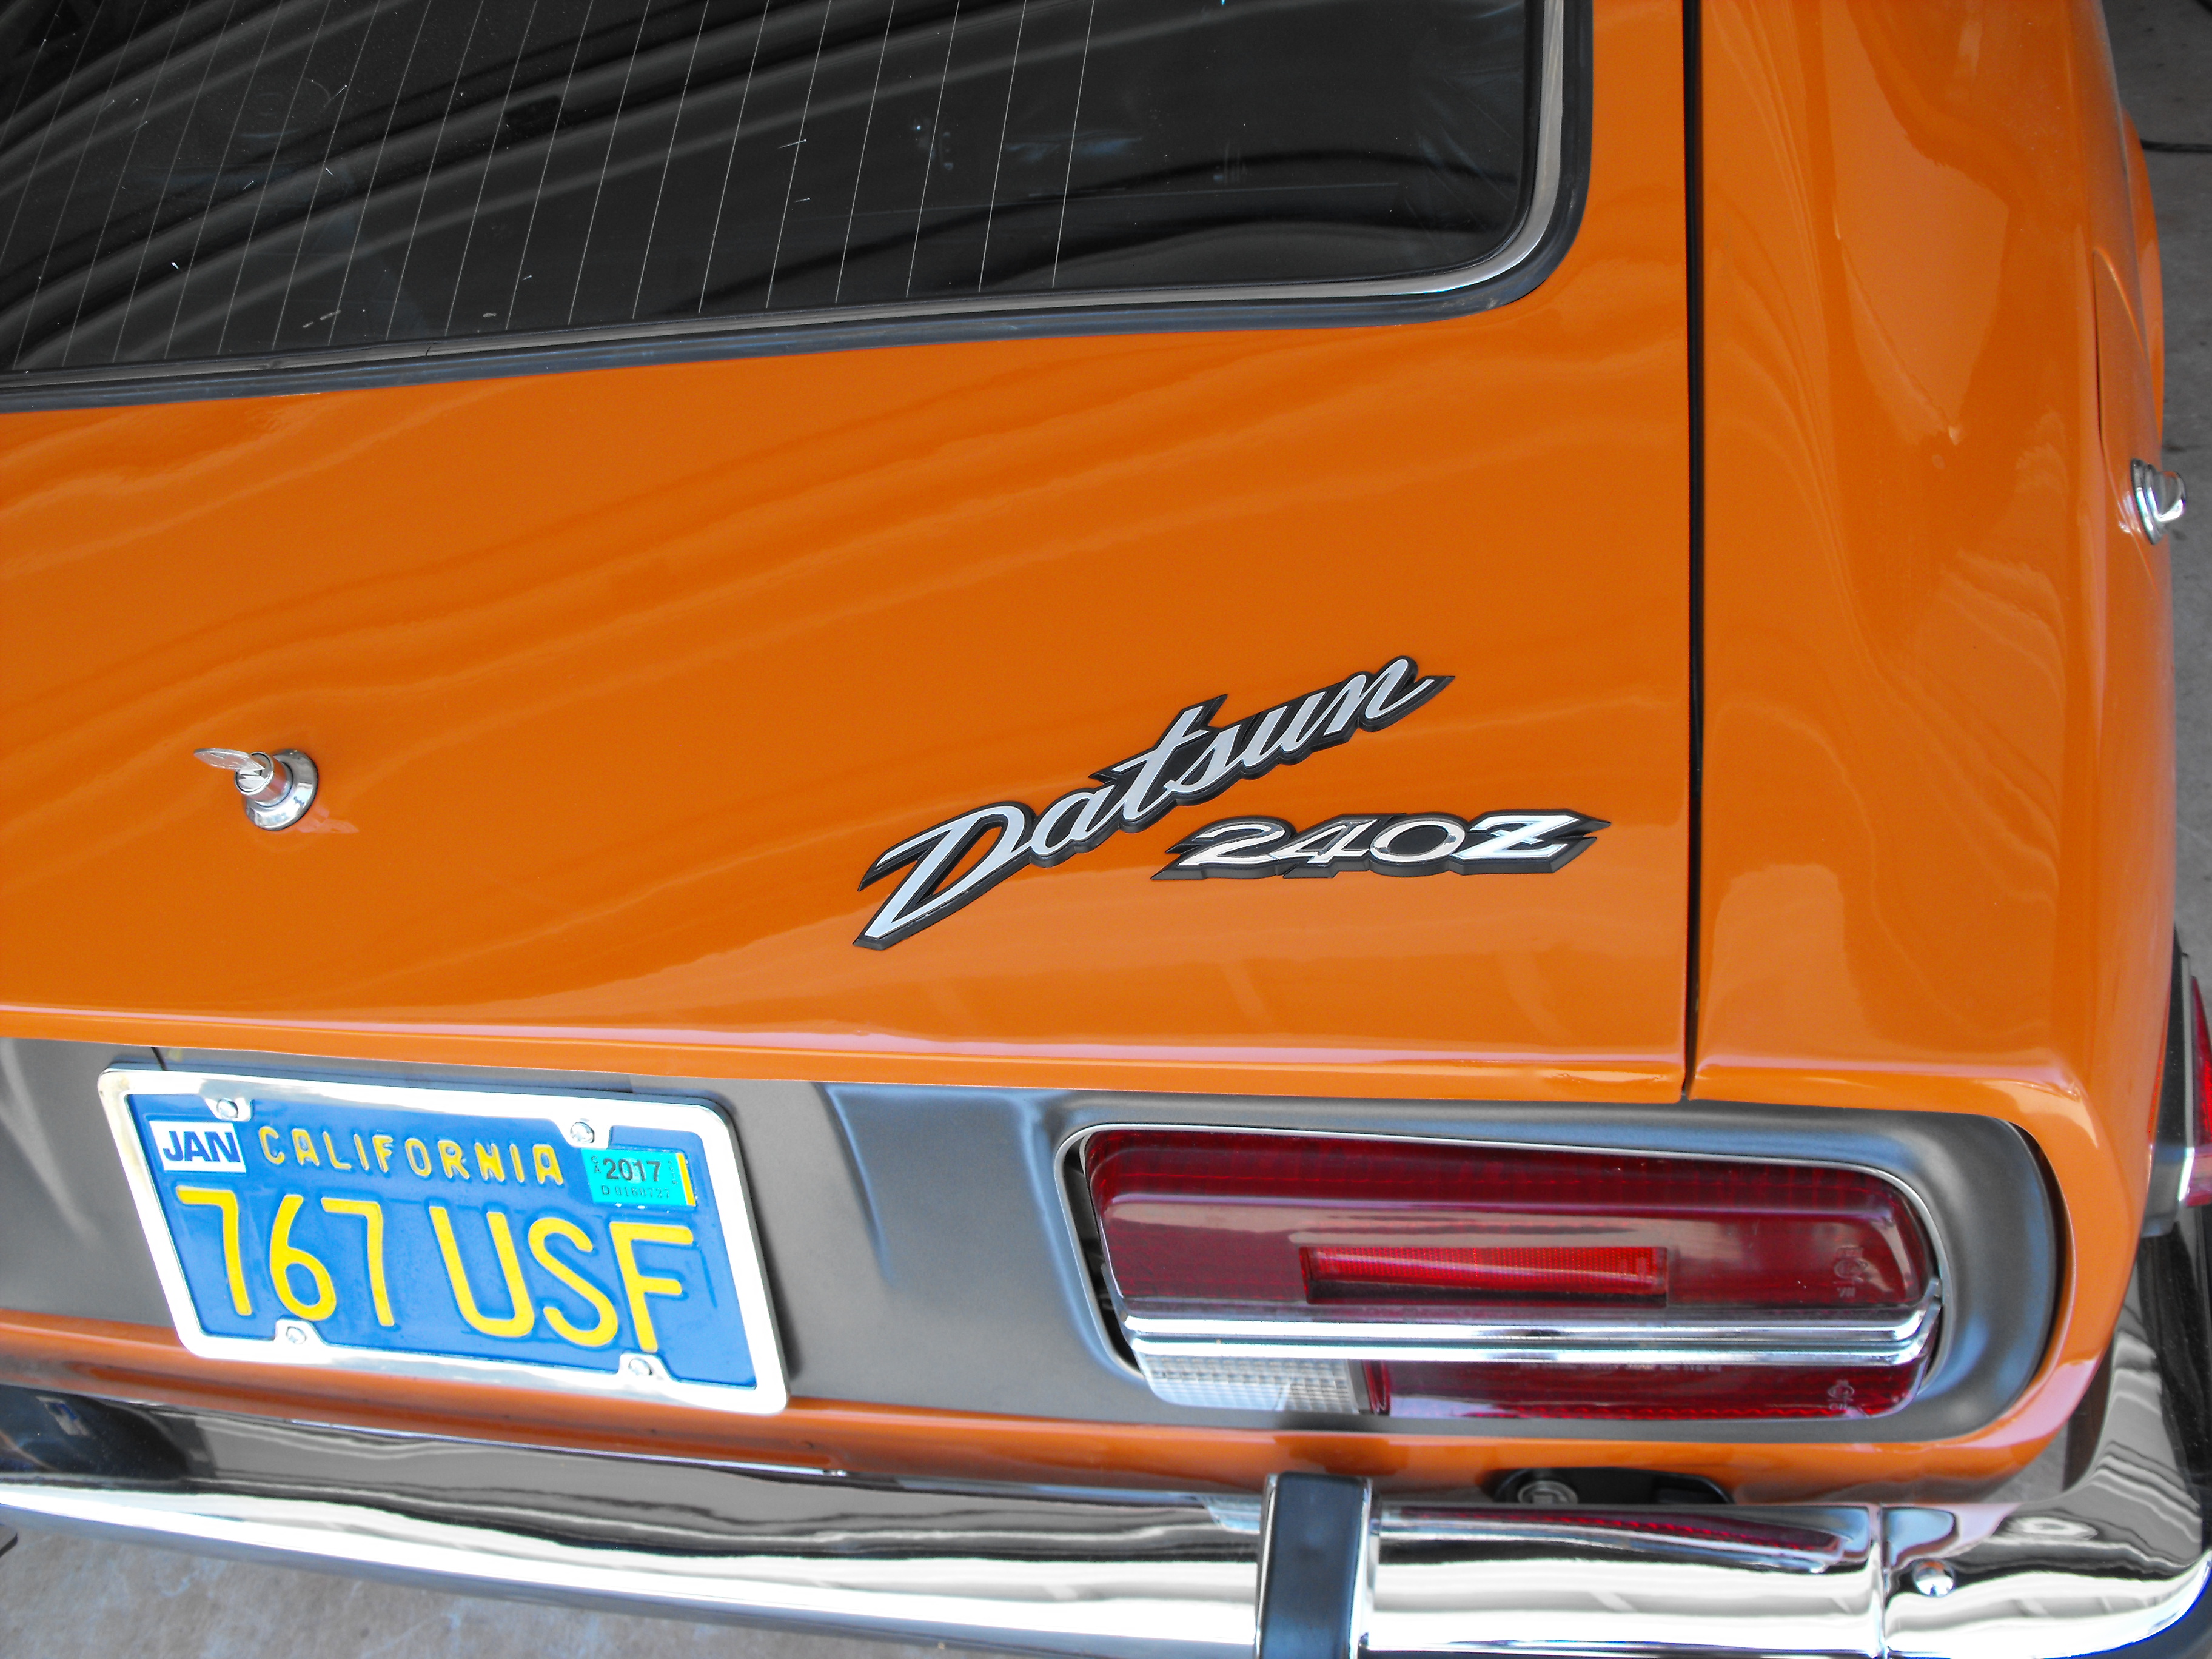
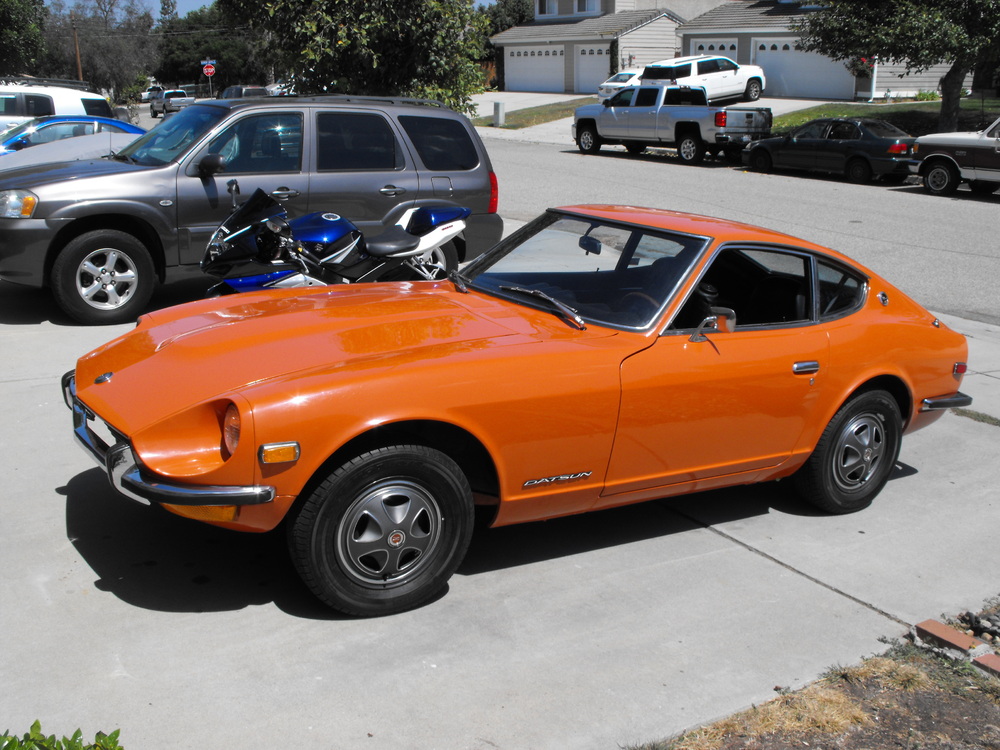
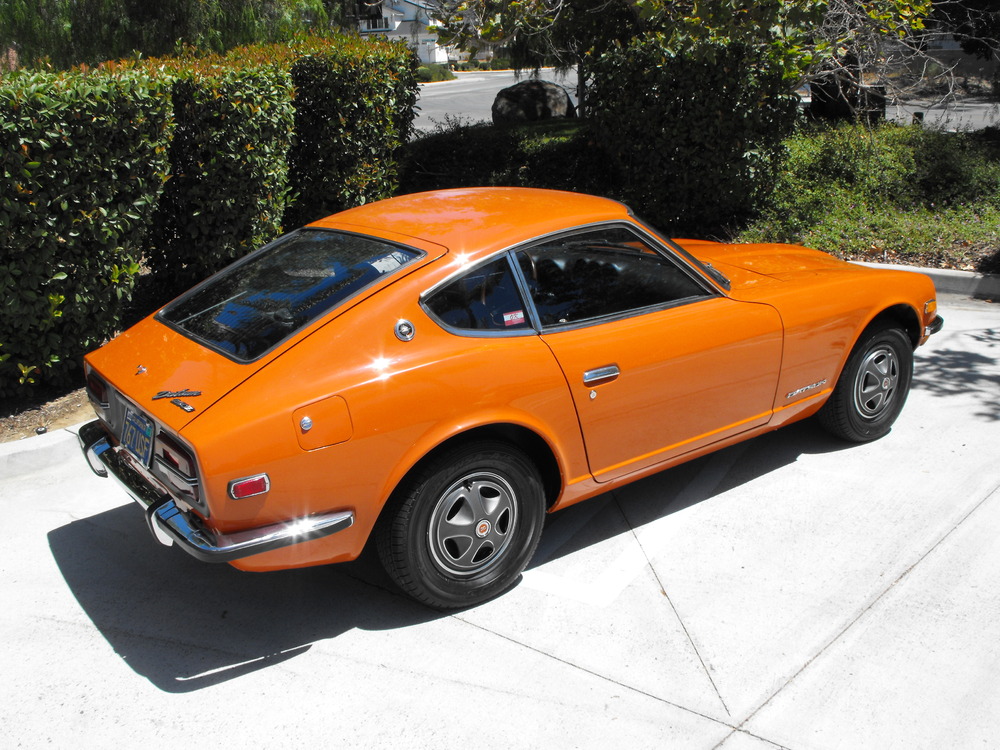
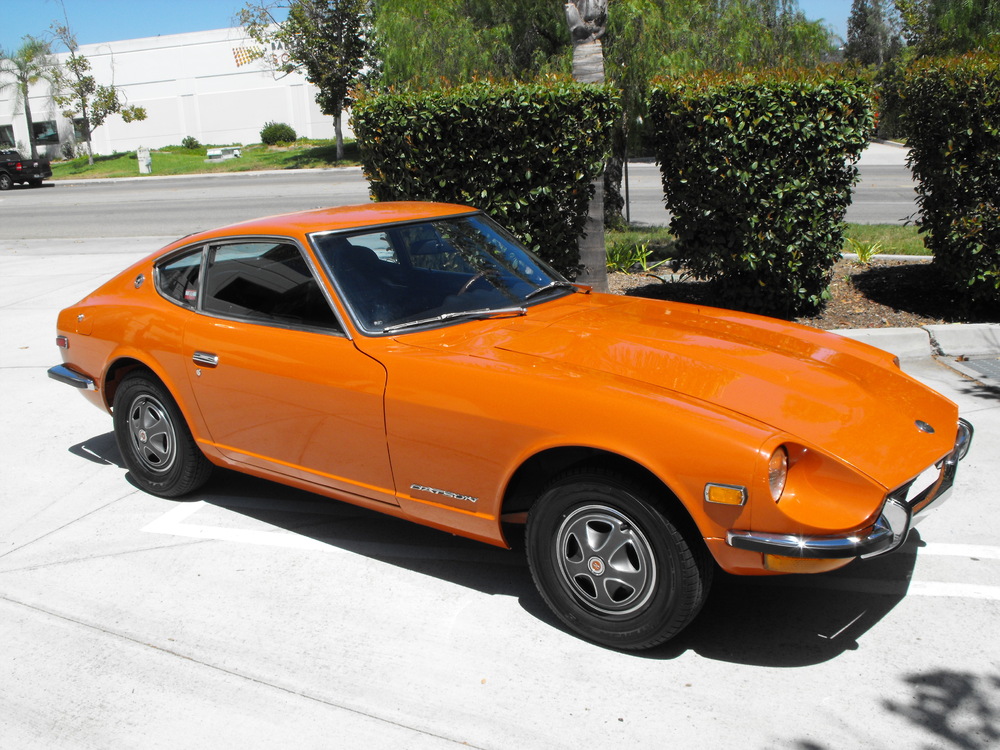
Got a few more items added to the car. Got the skid plate powder coated and attached to the underside of the car. Never realized that all of the nutplates are there on the bottom of the car. Bolted up nicely with some new M4 bolts. Got the horns re-furbed and installed. Also got the choke cable holder installed. Re-tuned the carbs while I had the air cleaner off. Also took the car for a nice drive to check everything out. It's running great with plenty of power. Very smooth and great to drive on the freeway. Took the car to the alignment shop last week and got that dialed in. Looking forward to the JCCS in a couple weeks. She is close to being finished.


-
I have never considered the blue chromate as a brightener. The blue helps with the 'rainbow' effects and sets up a good base for the yellow. Usually my bolts come out dark or brown when I leave them in the yellow for too long. I have heard what Blue mentioned above, nitric acid as a brightener, but I have never used it.
-
OK, got the steel wheels and hubcaps on. Time for a small photo shoot


-
Did some detailing today. Also, added a pic of the diode on the antenna. It works great. Got some decals put on, buffed out the paint a bit and worked on the stereo install. Will get the original rims and hubcaps put on tomorrow. Here are some pics


-
I know, bummer. I got the cheap pull handle and cable from Thailand and it is kind of lame. I think I will swap this cable for the original one out of the my yellow Z eventually. The yellow Z is my operational donor.
-
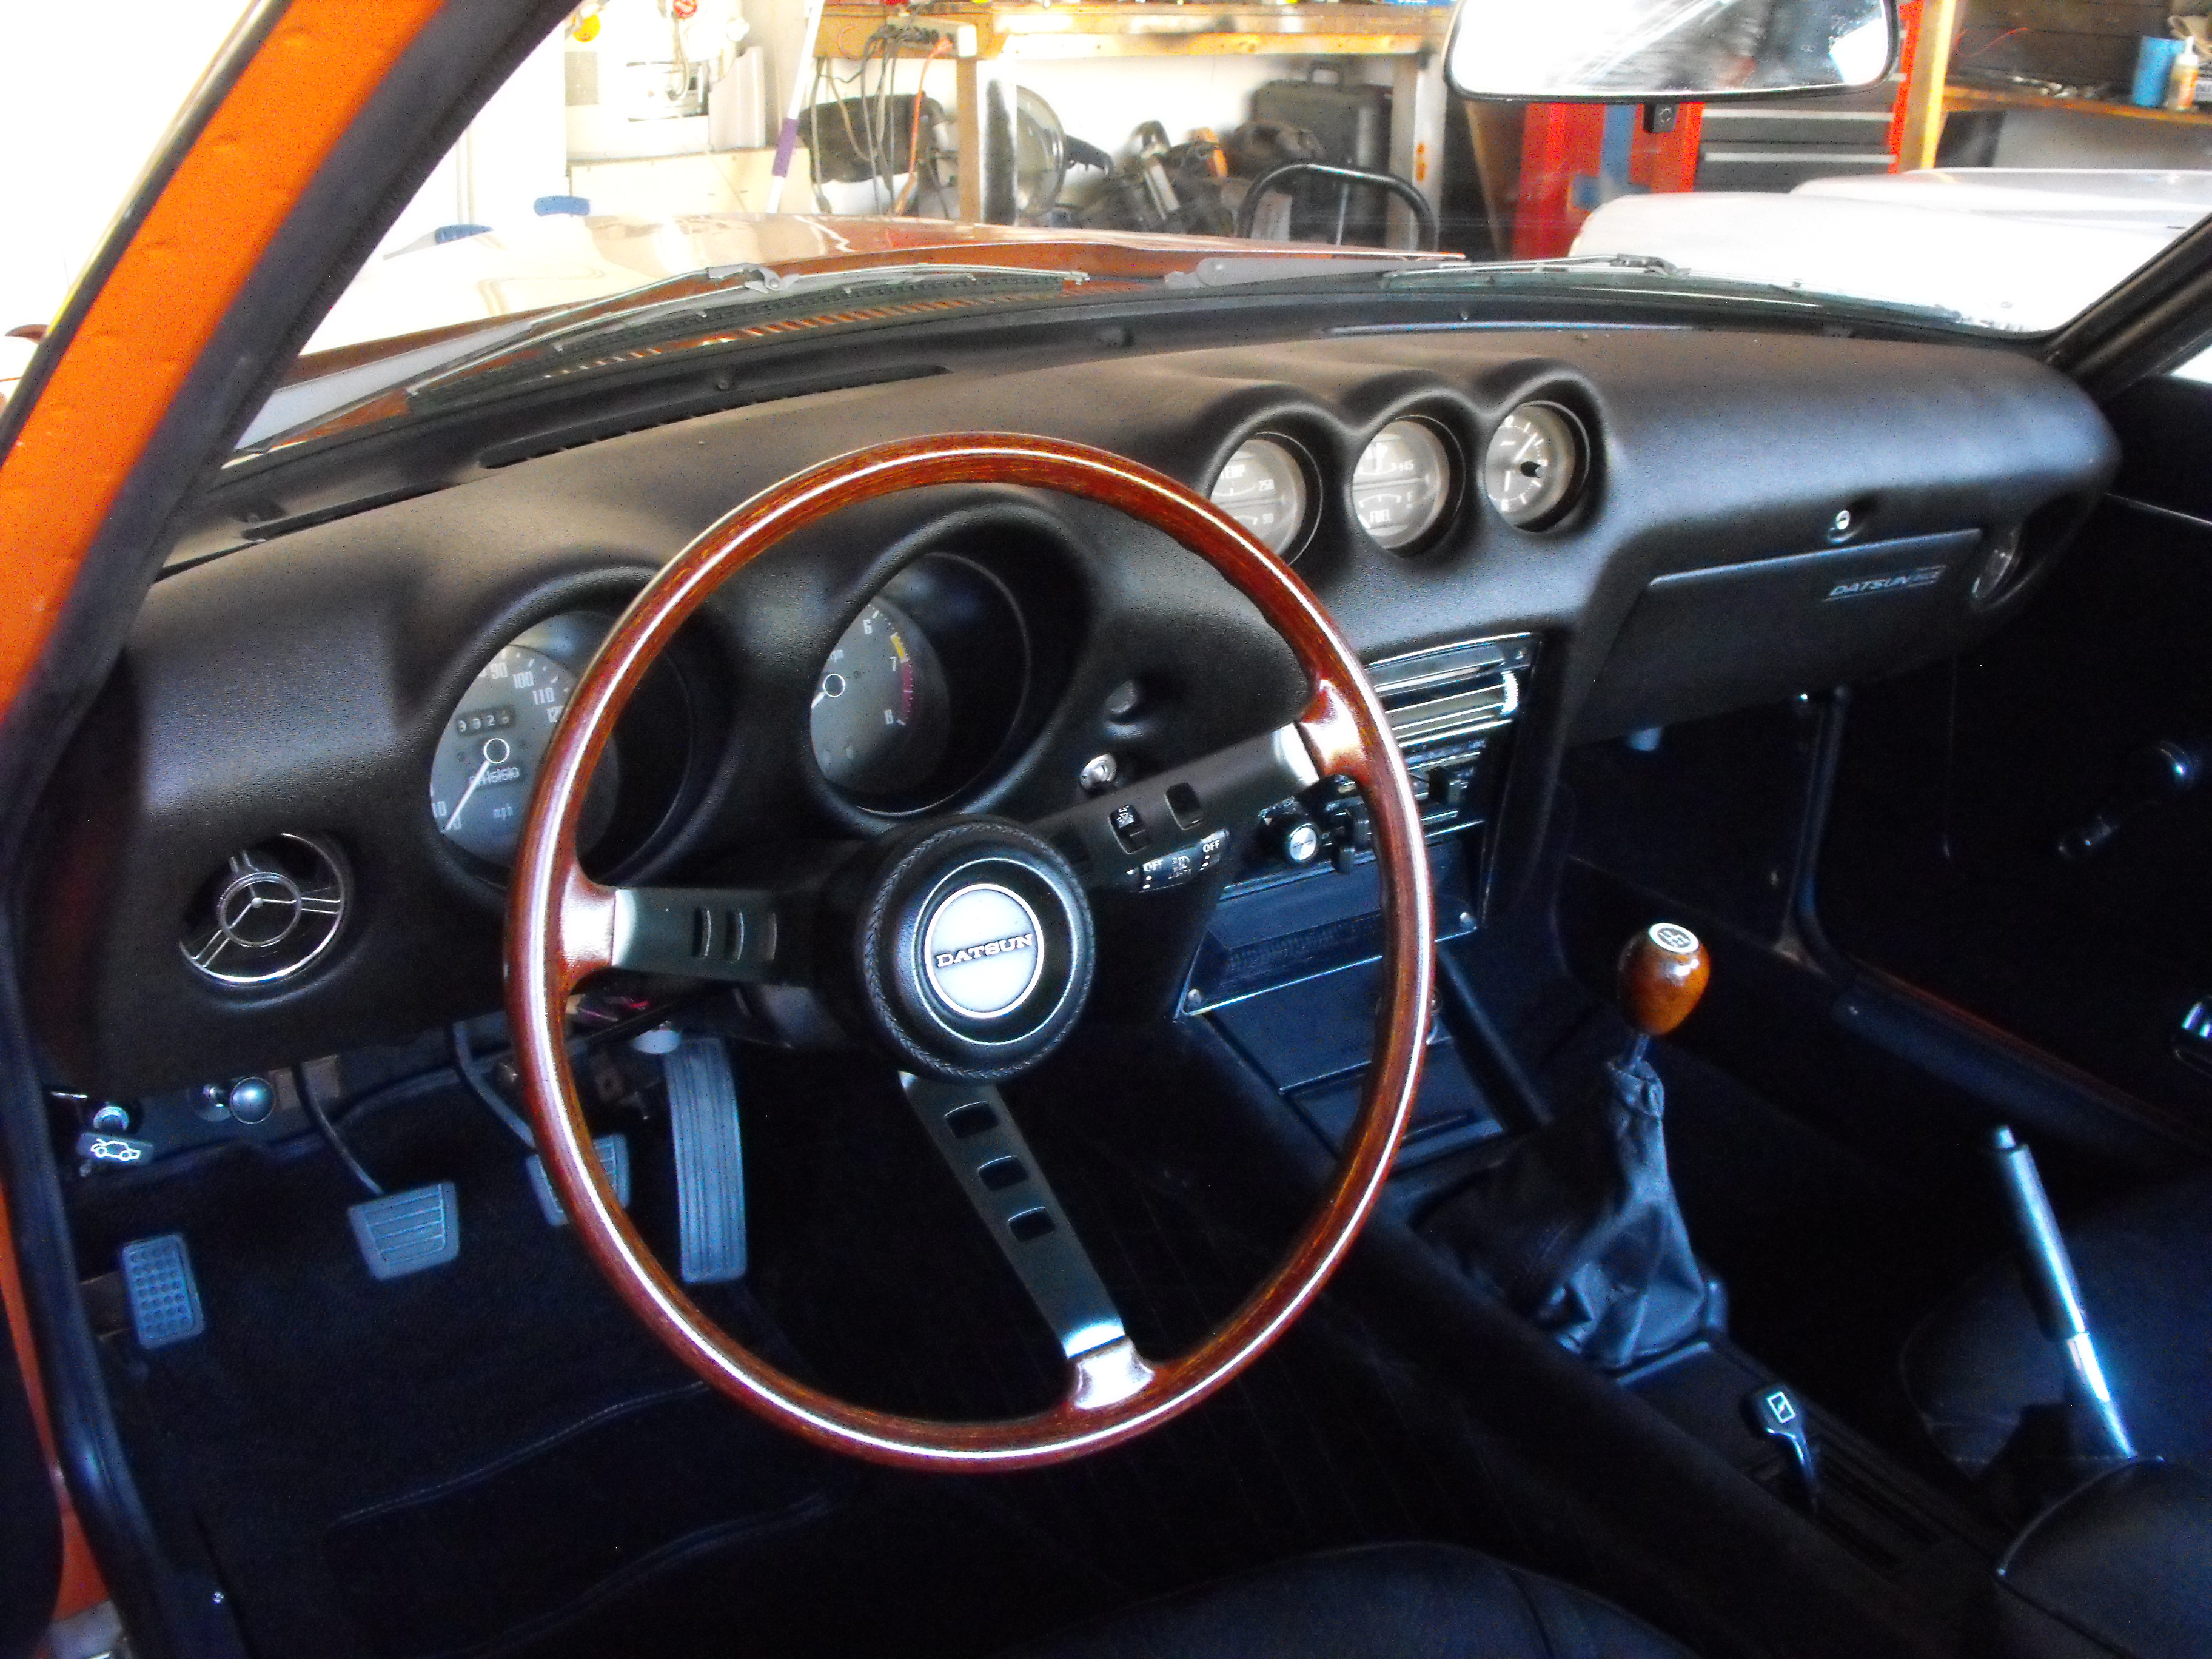
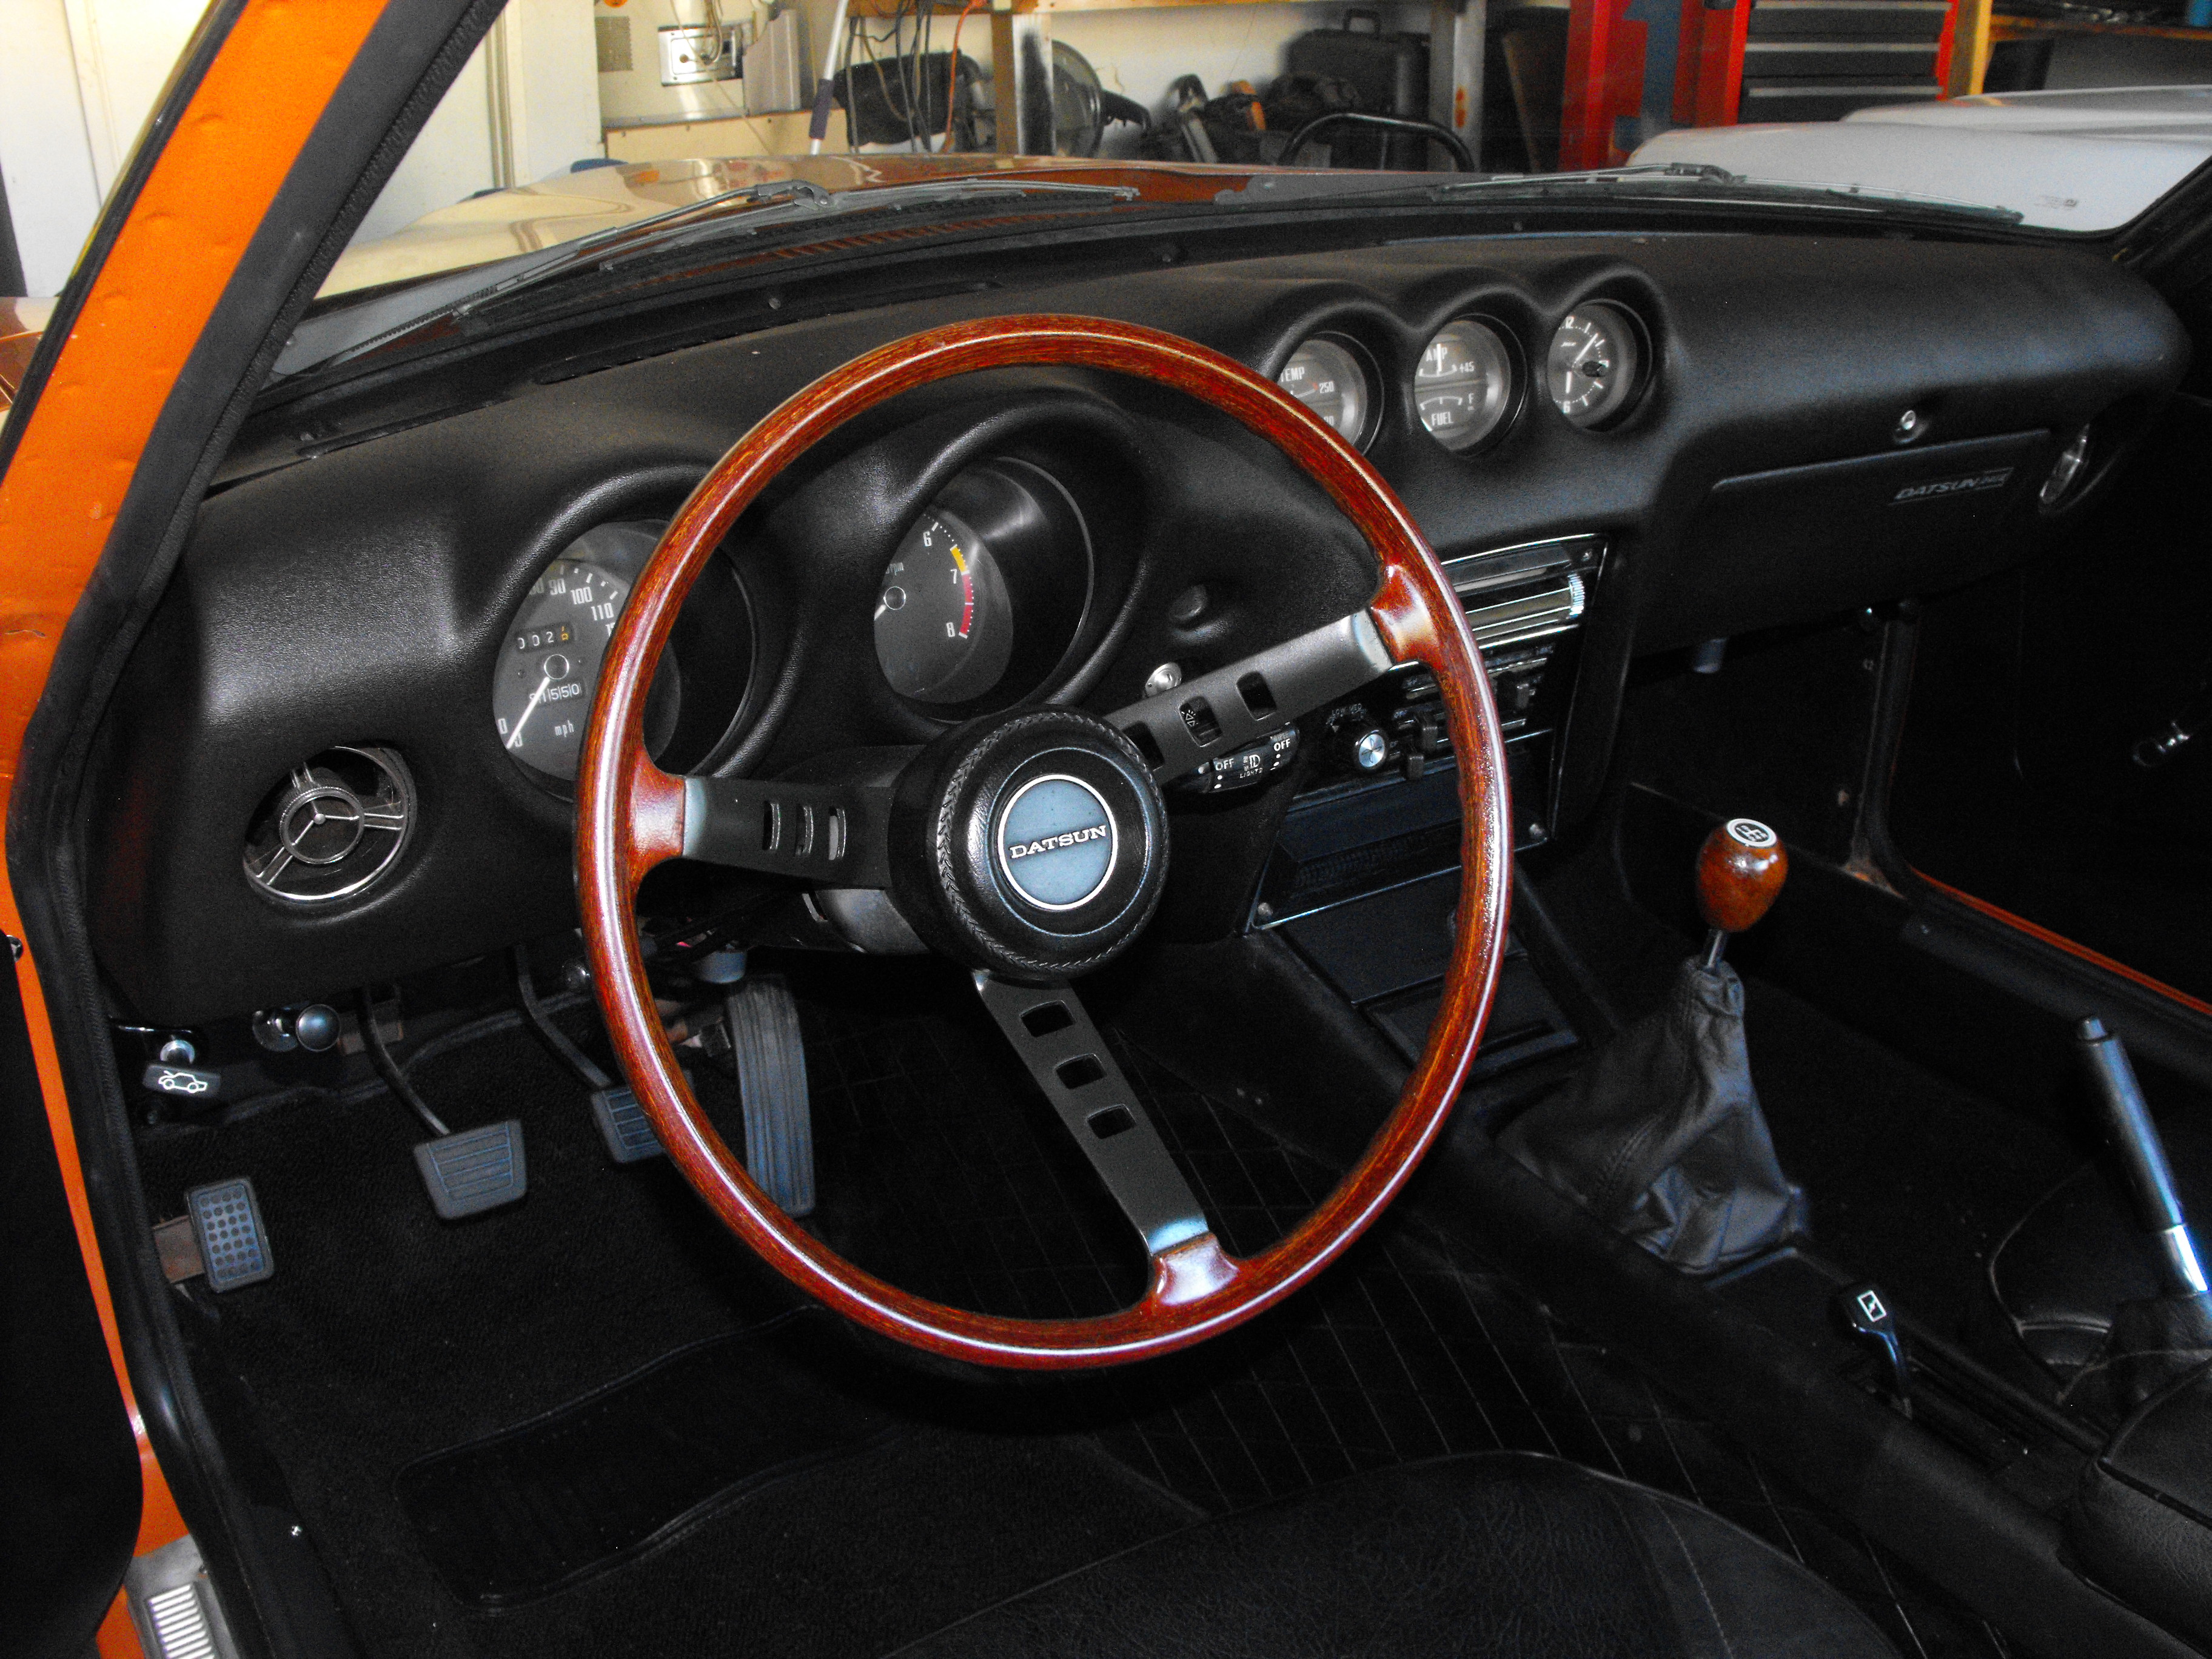
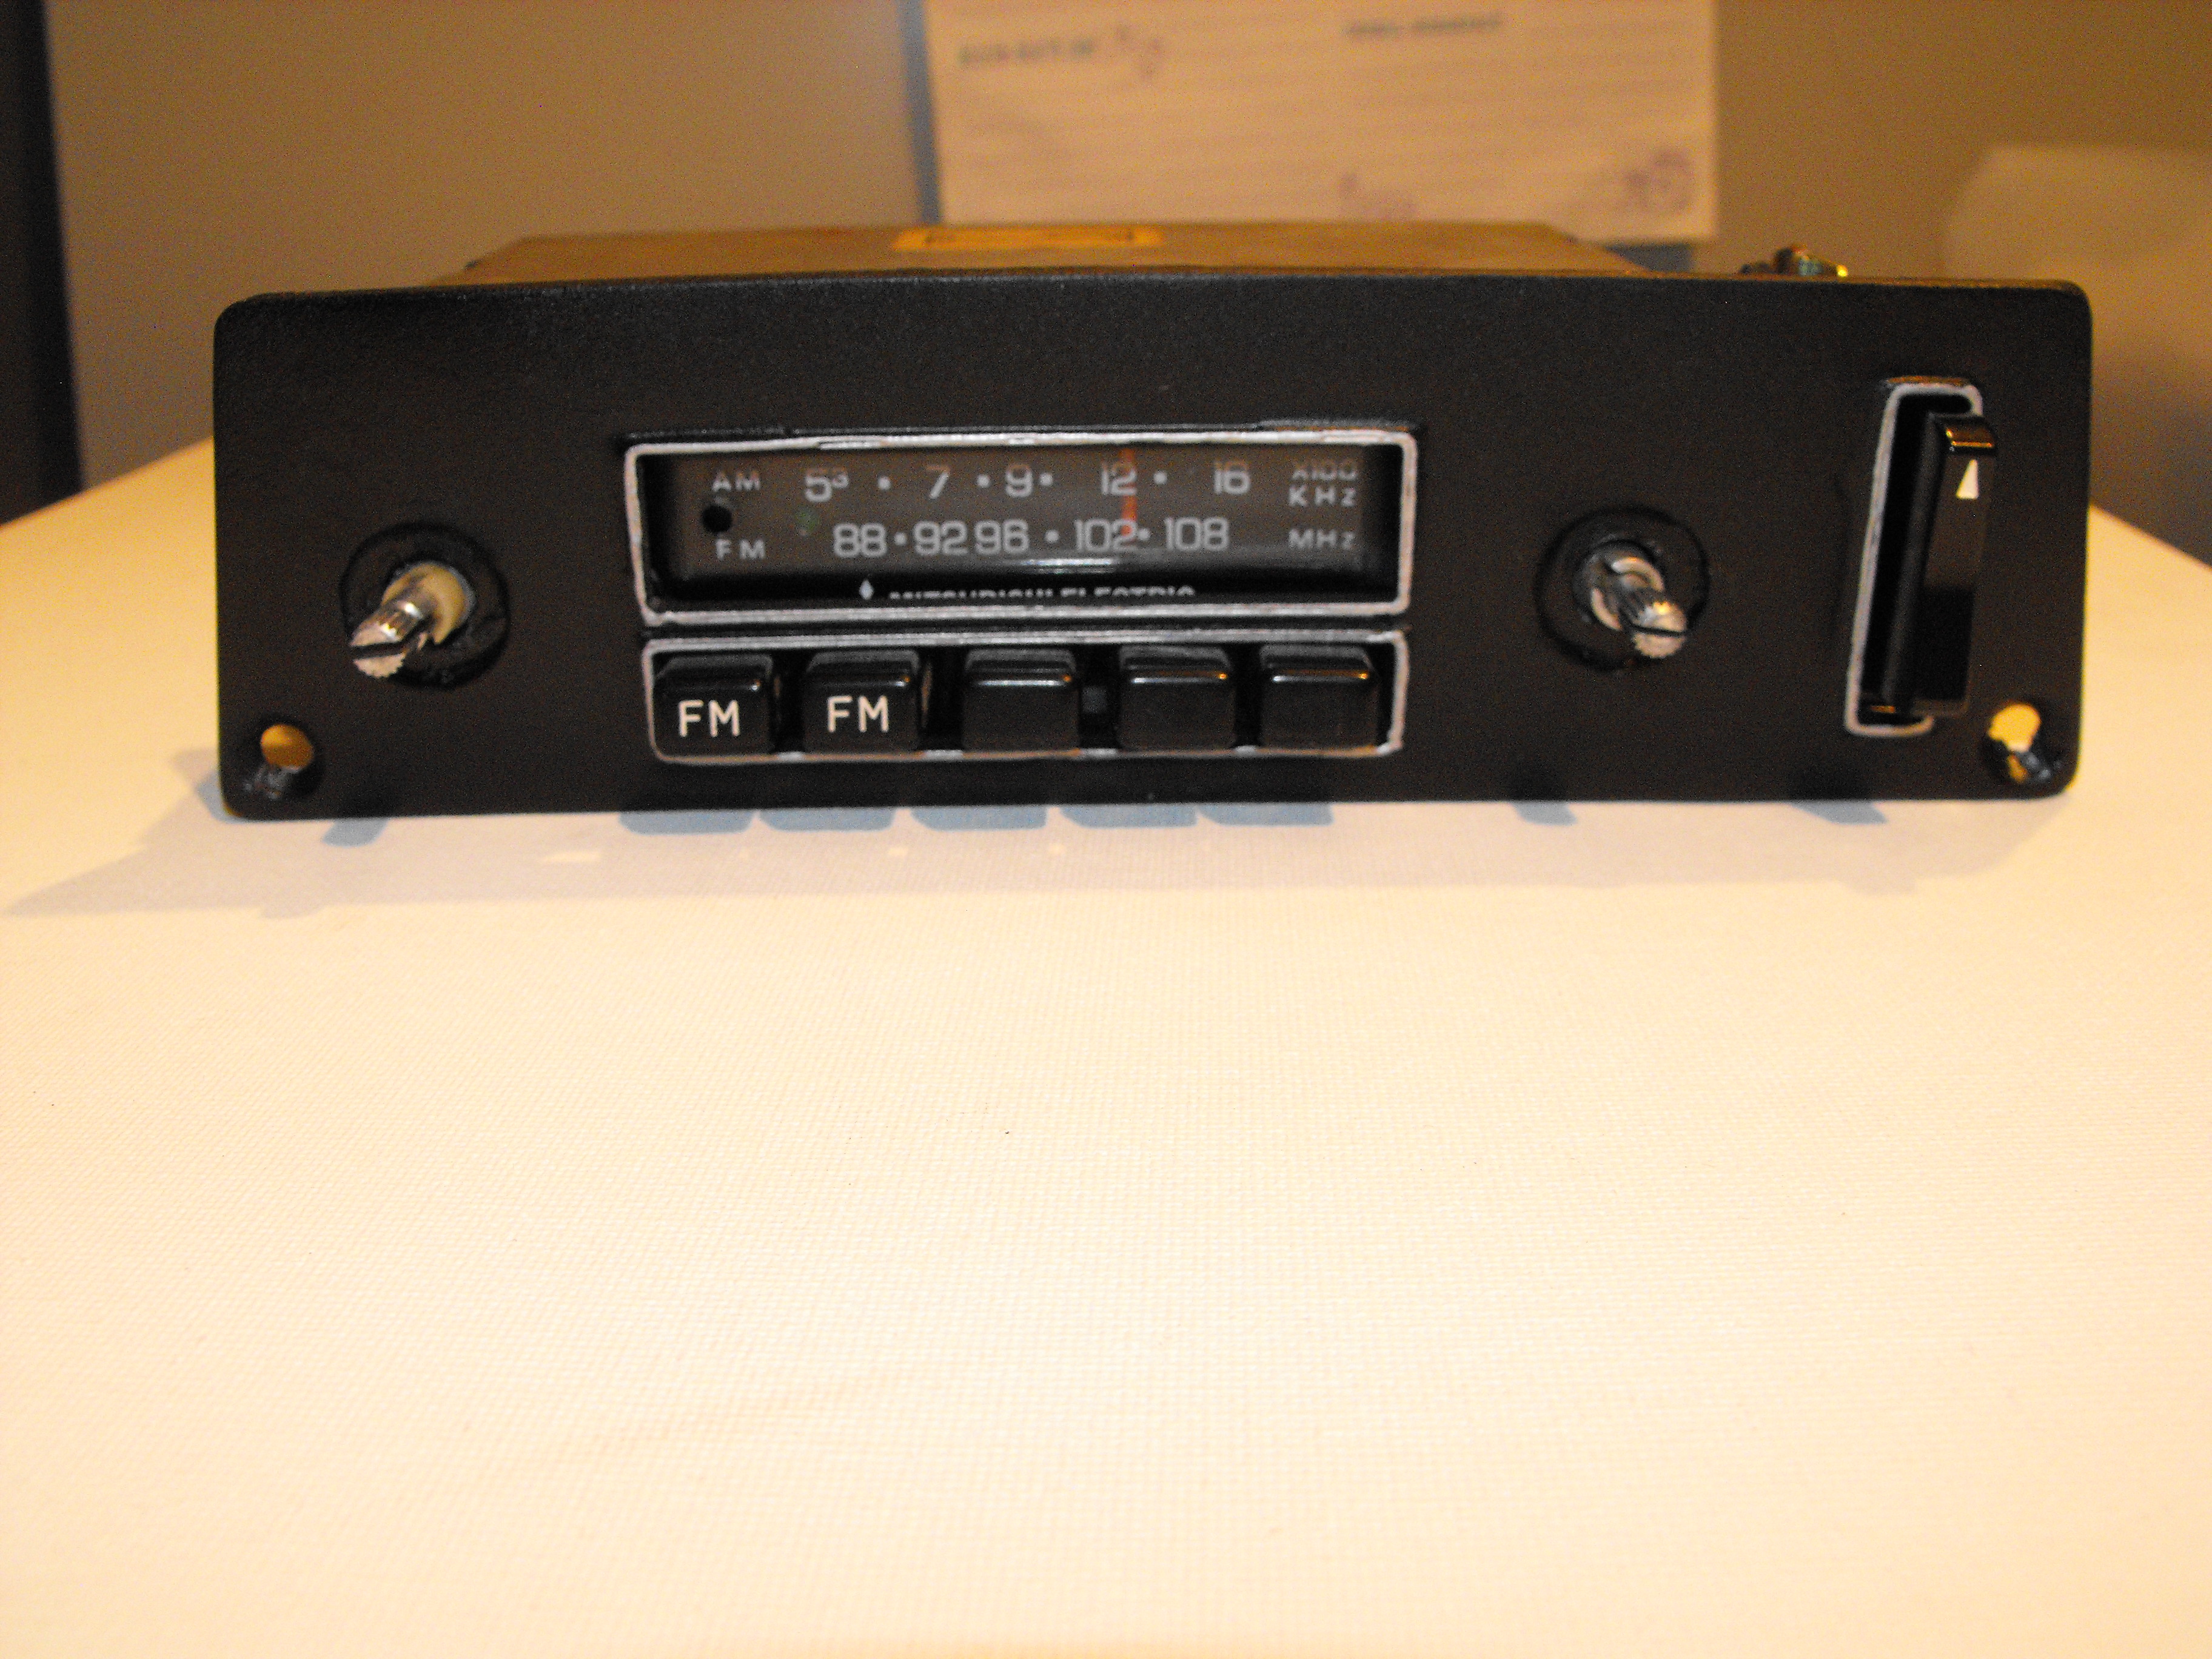
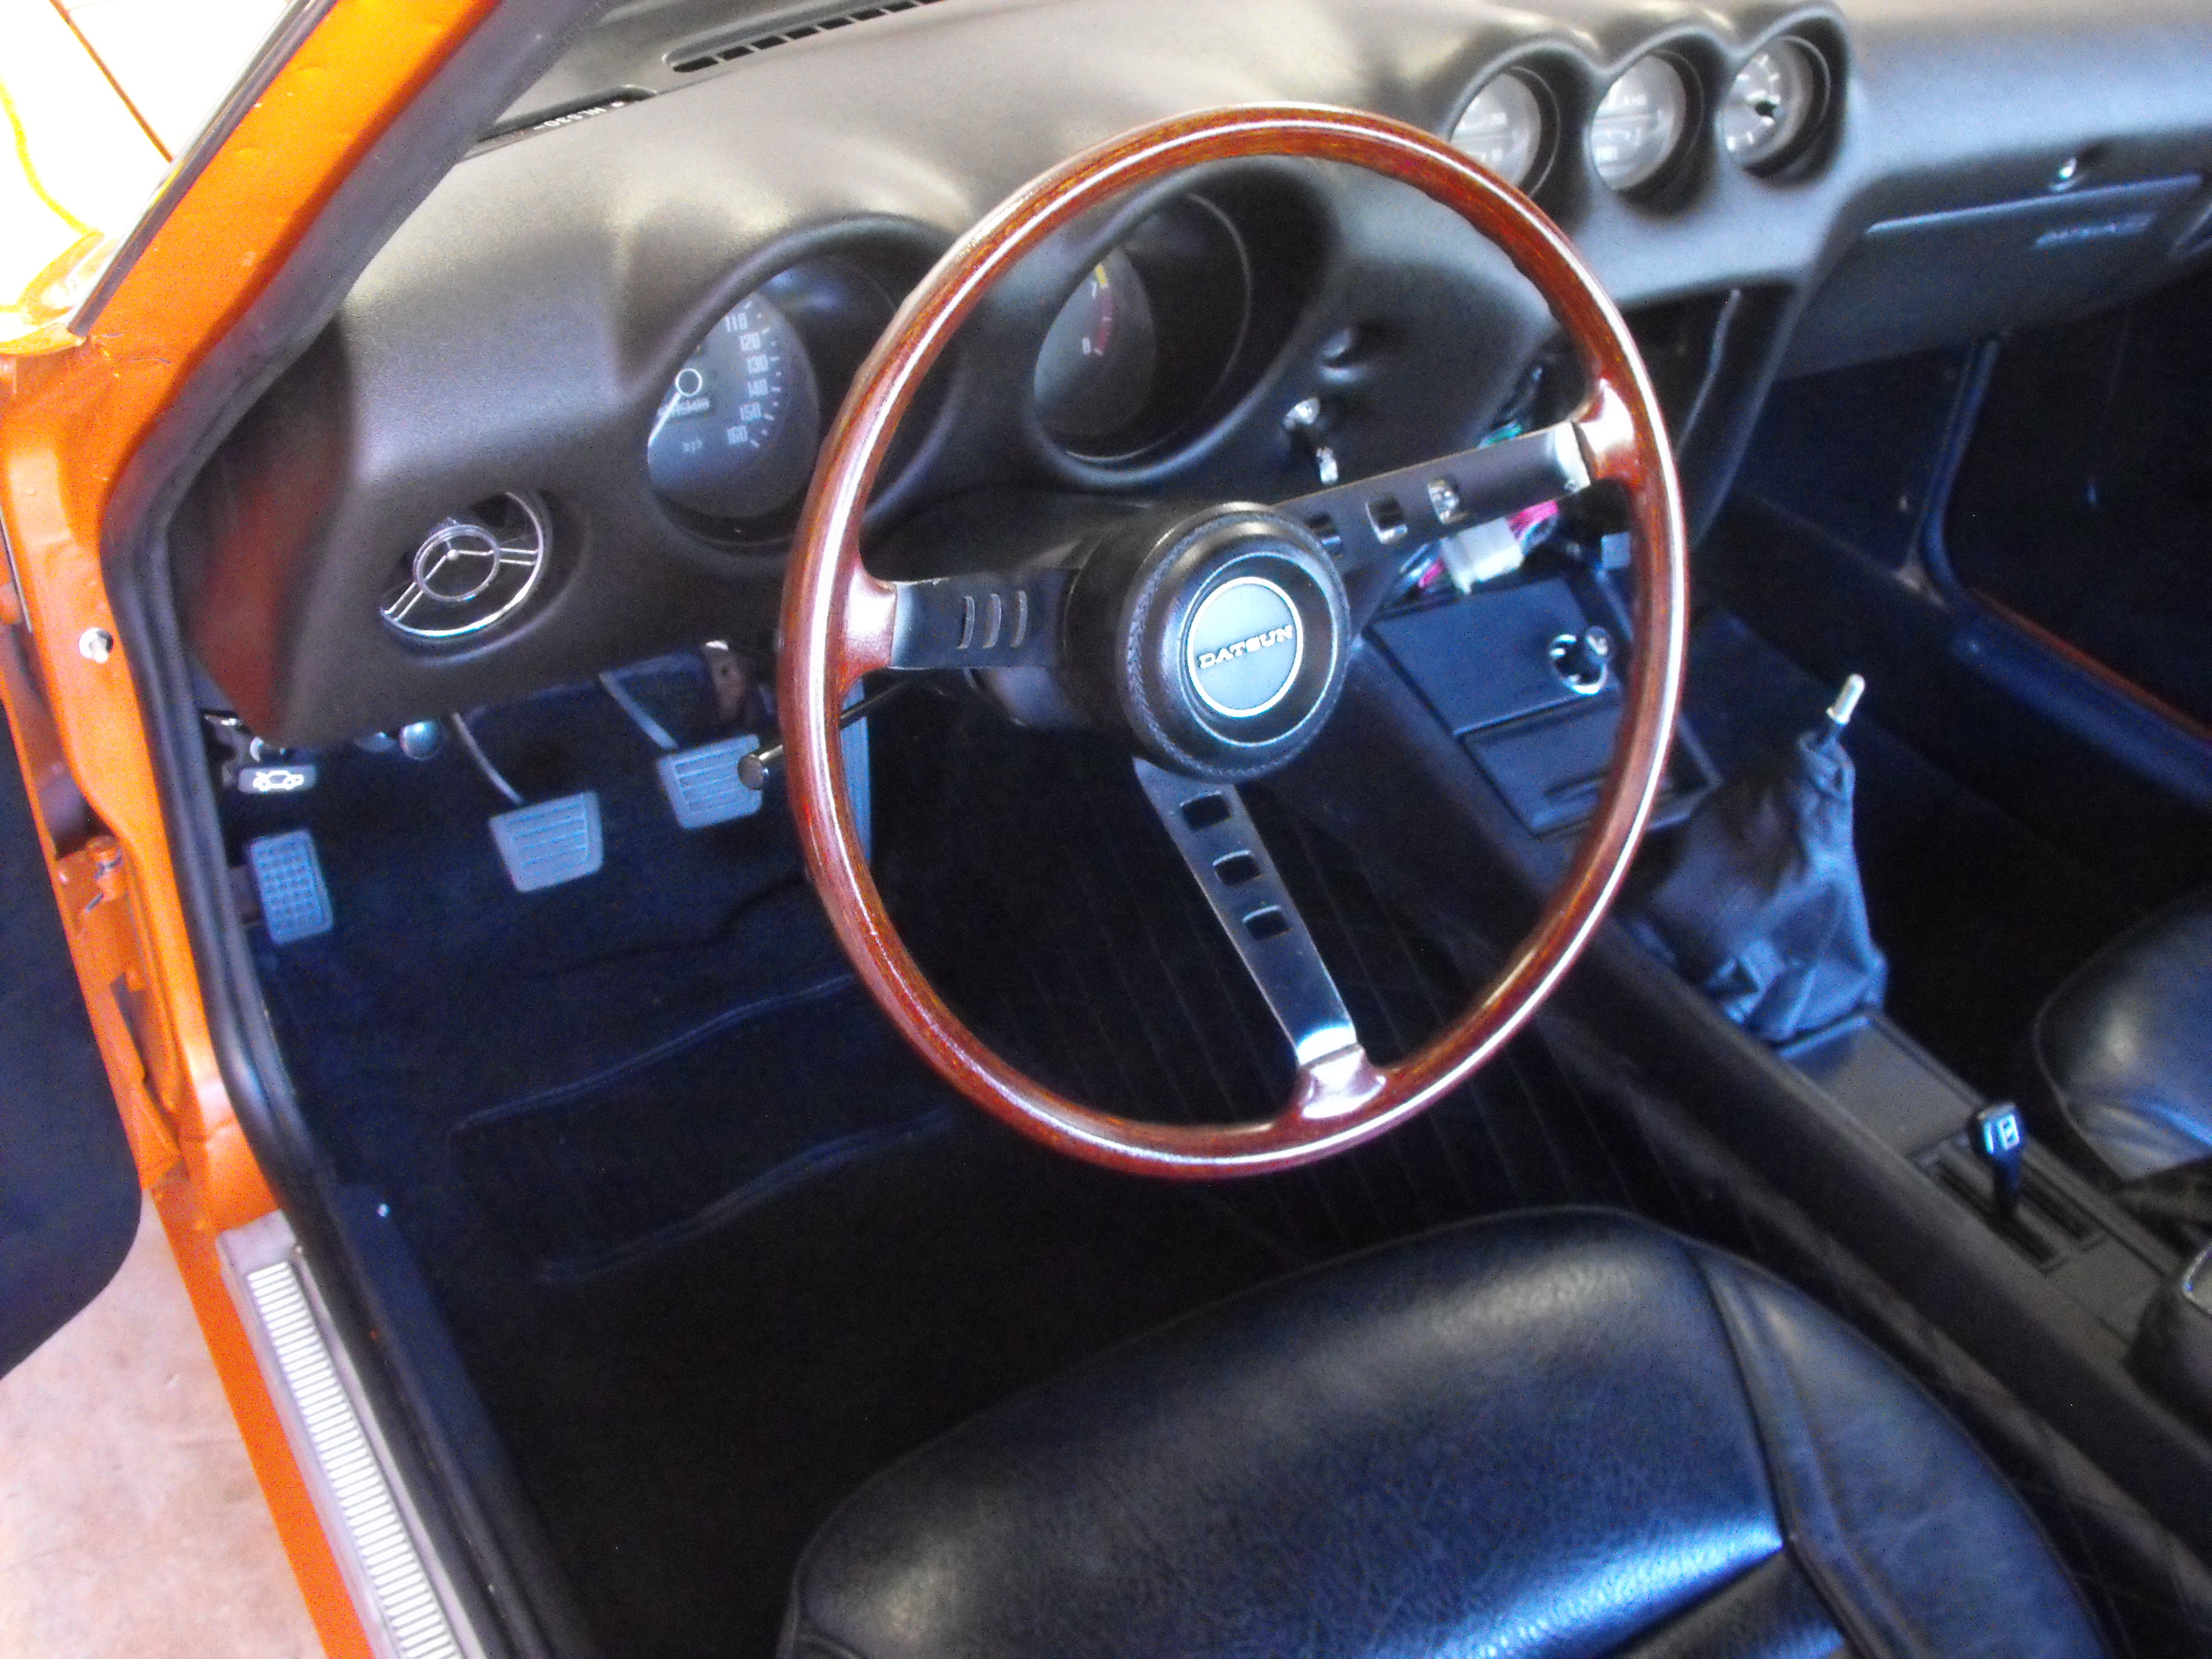
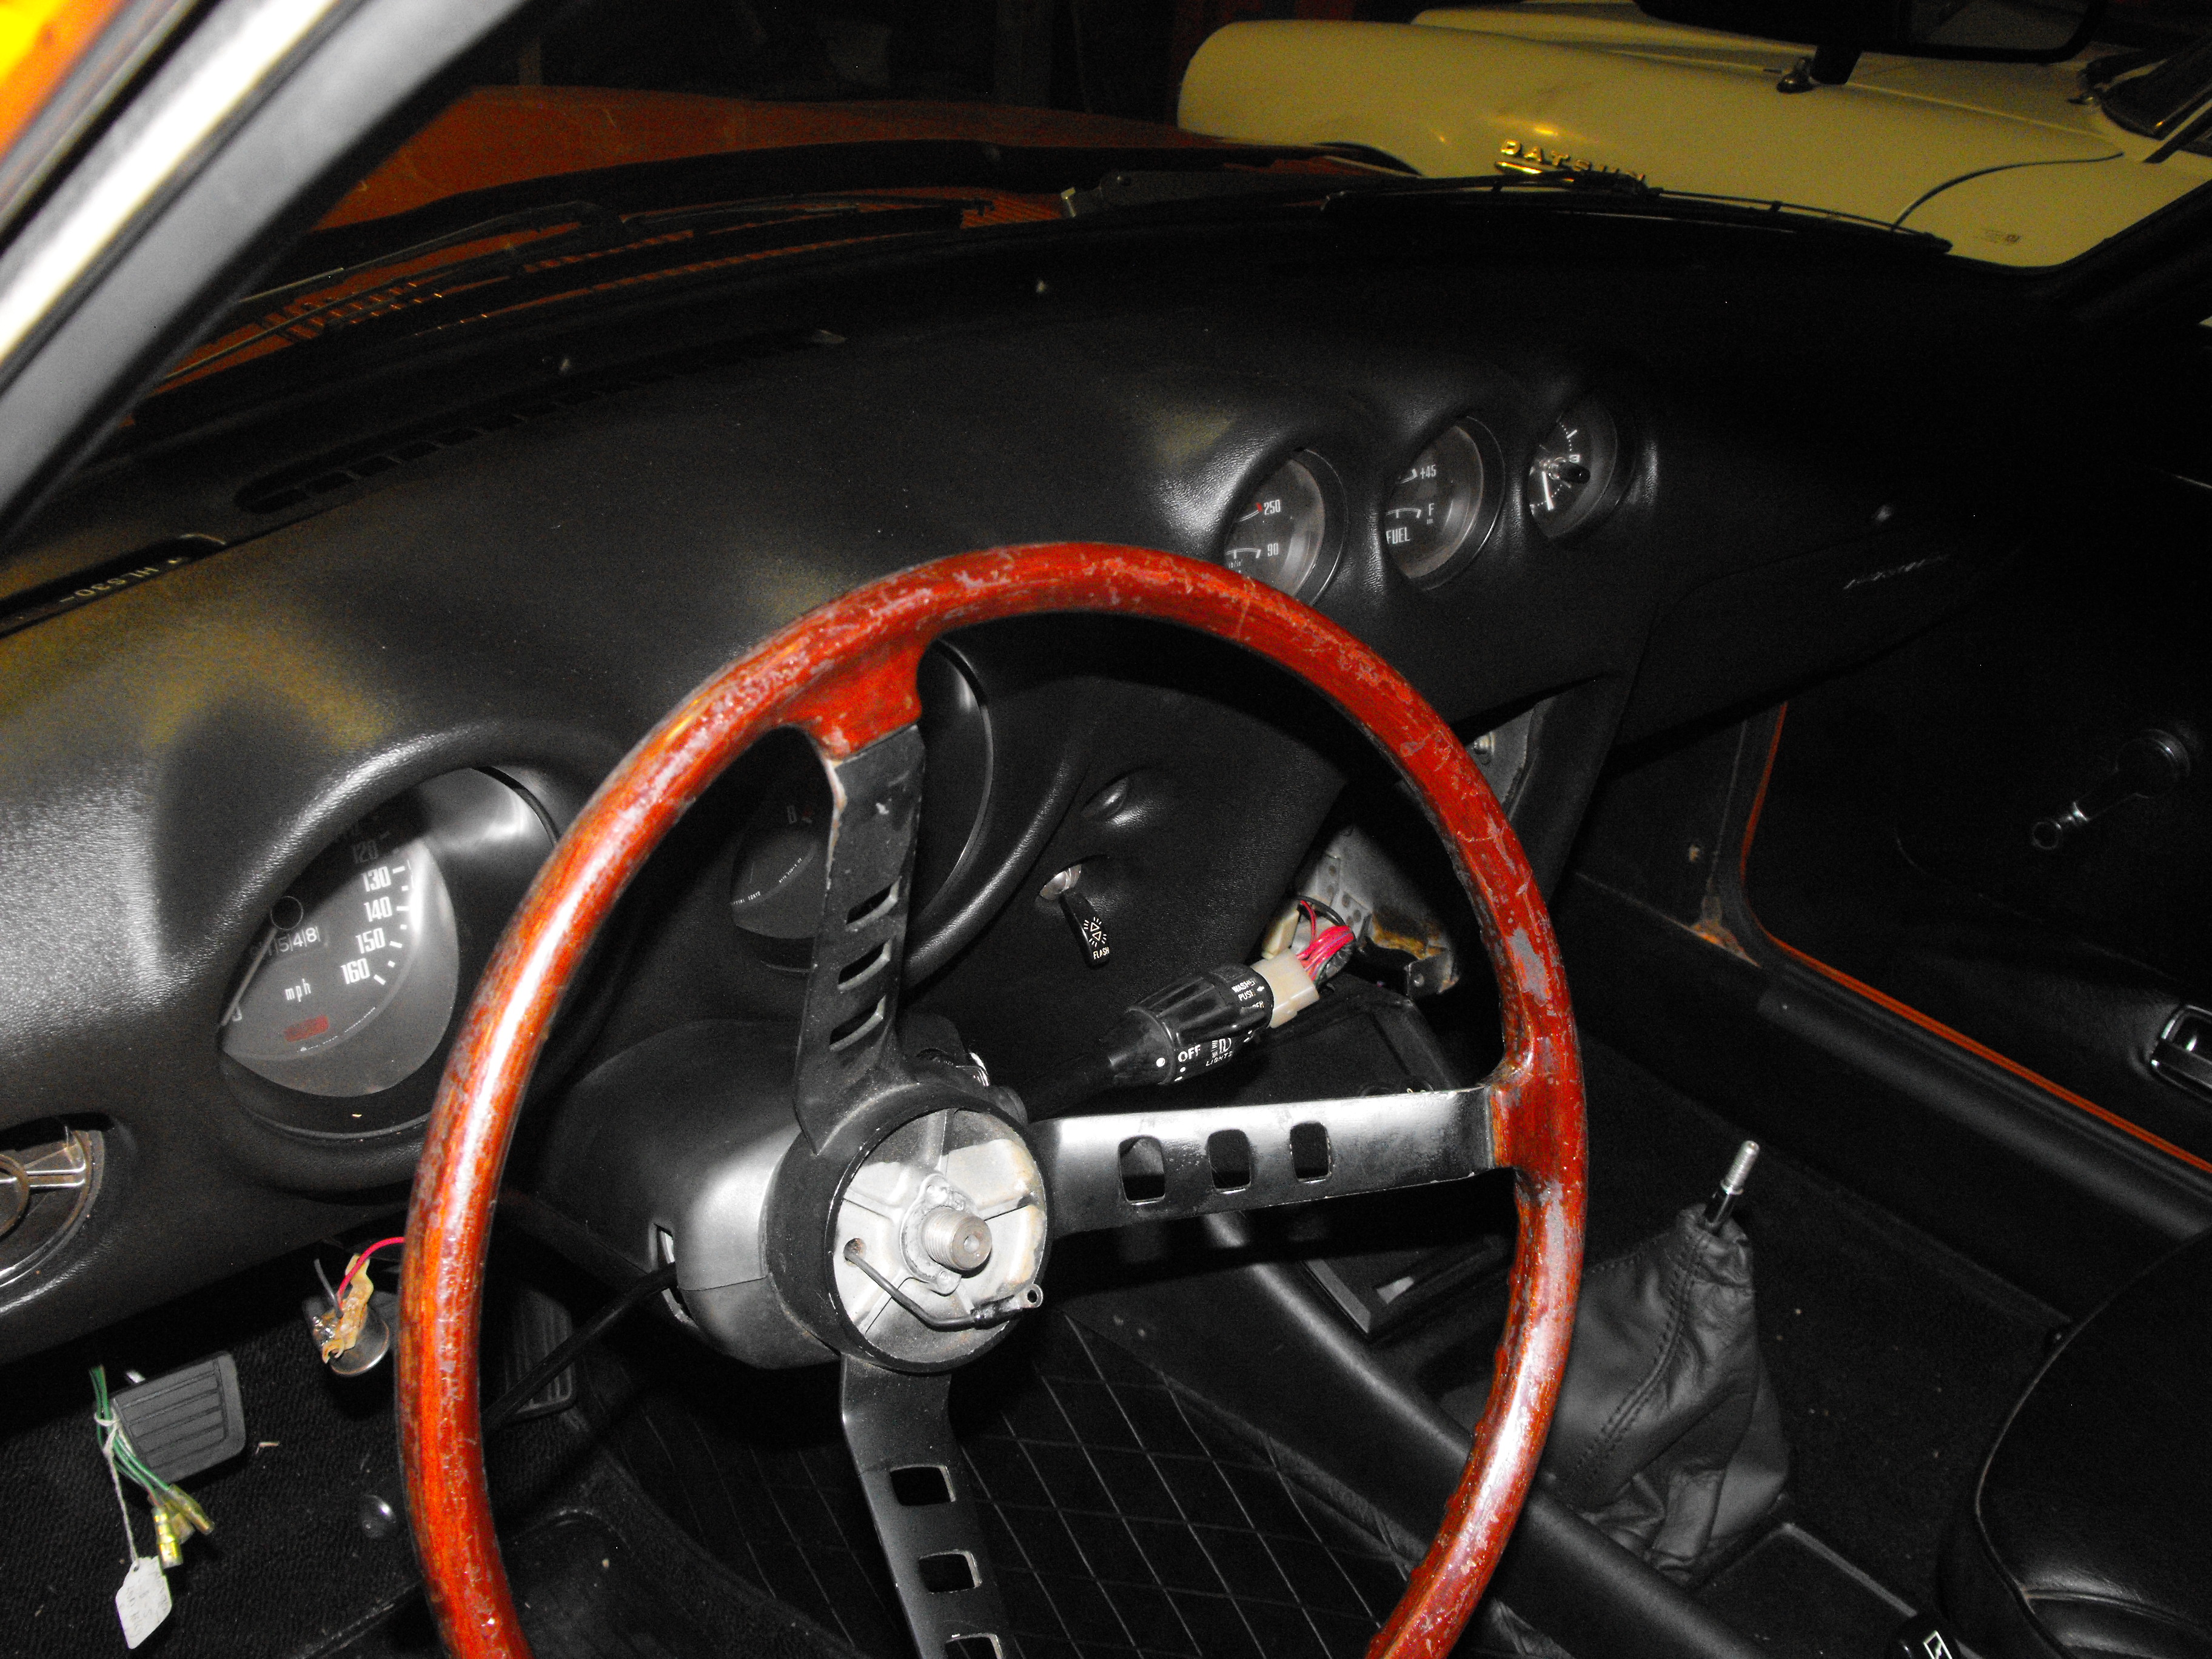
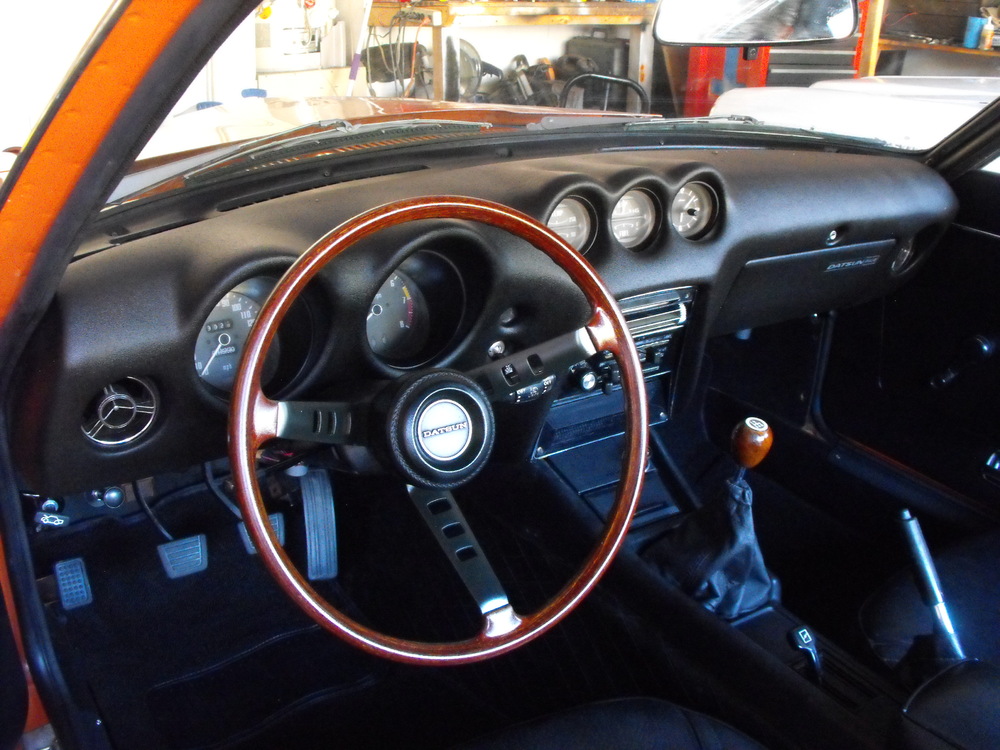
Still working on the interior. I put an aftermarket antenna in for temporary until I can find a nice original antenna at a reasonable price. I am setting it up to work off of the series 1 antenna switch that I got with the car. I will need a diode to get it to function correctly, but should work nice when done. Finally got the shift knob in and finished the black portion of the steering wheel. Very happy with how that came out. I currently have a blank faceplate in where the radio goes. I have a 3-D printed faceplate and old radio that I will install this week just so I have an operational system. Will keep a lookout for an original radio at a cheap price in addition to the antenna.


-
Looks beautiful! Love the red color and the interior is looking very nice.
-
It was in pretty good shape in the first place, so I just lightly sanded the front smooth surface of the steering wheel with 600 grit and then sprayed with clear enamel. You need to be careful with the bumpy part of the steering wheel (finger grips on the far side) when you refinish because you can wear through the wood grain. You will notice that these bumps are whitish and don't have any grain on some of the poorly restored 240Z steering wheels on e-bay. So be gentle with the bumps.
-
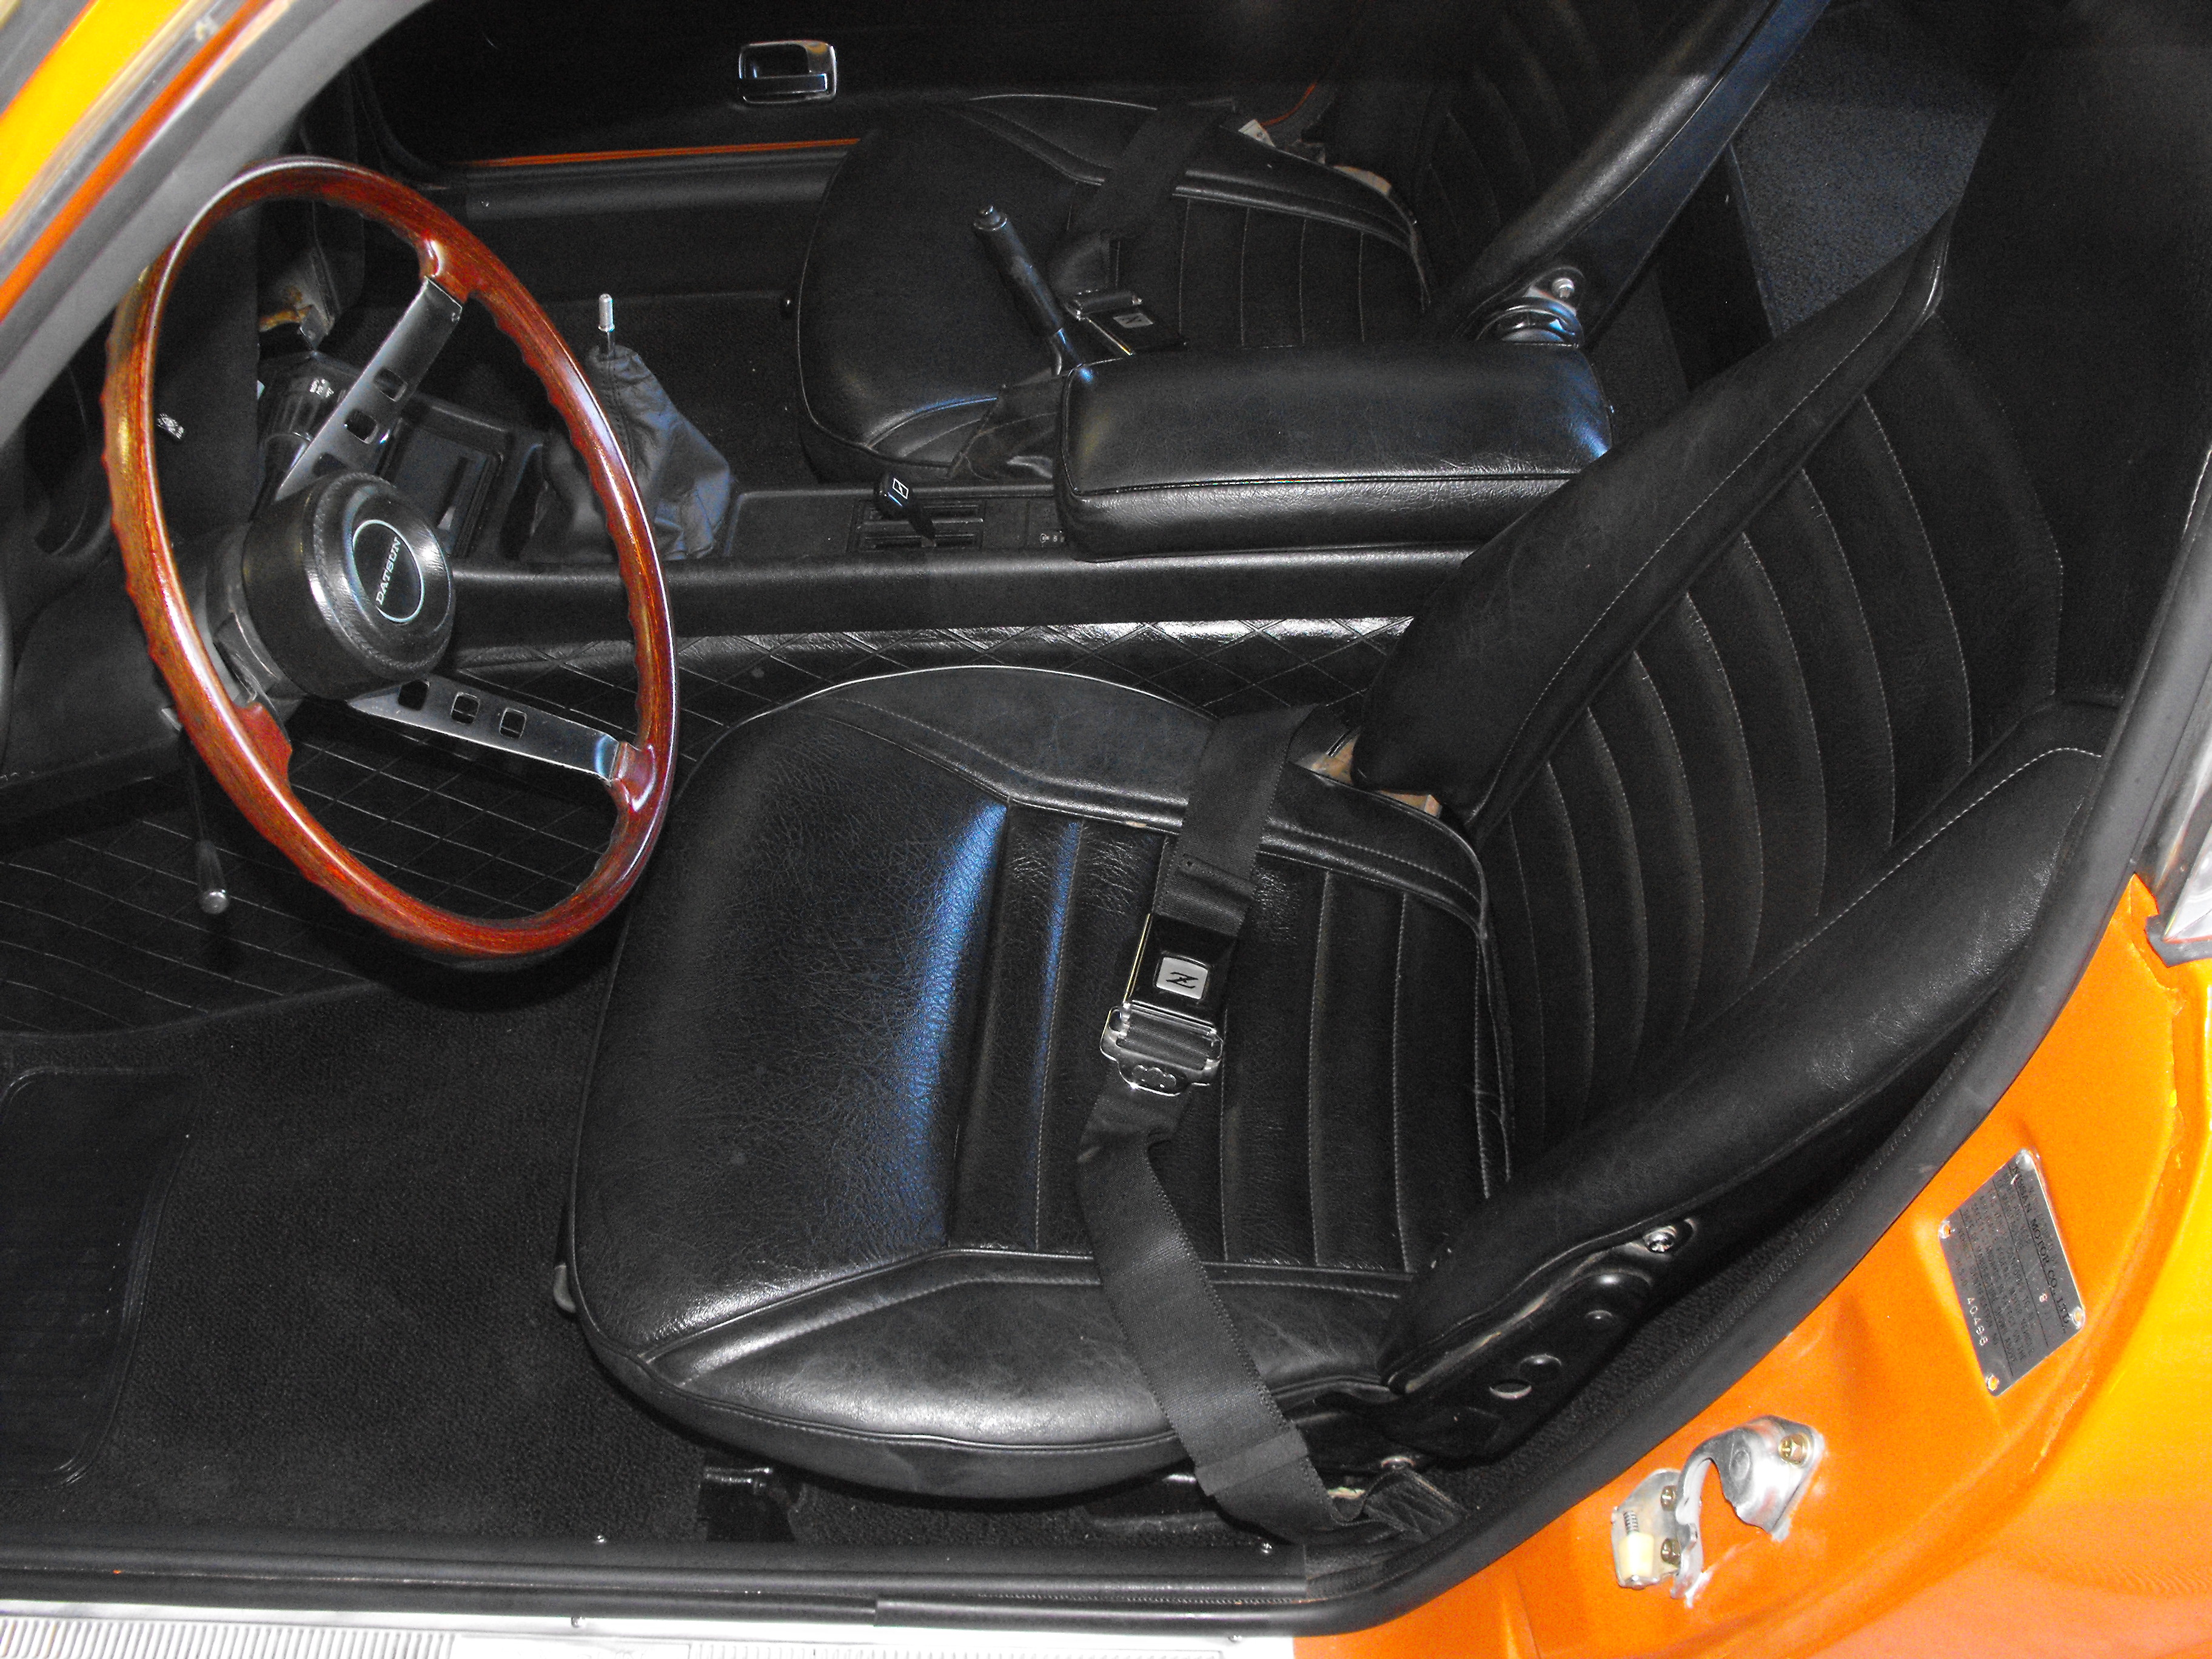
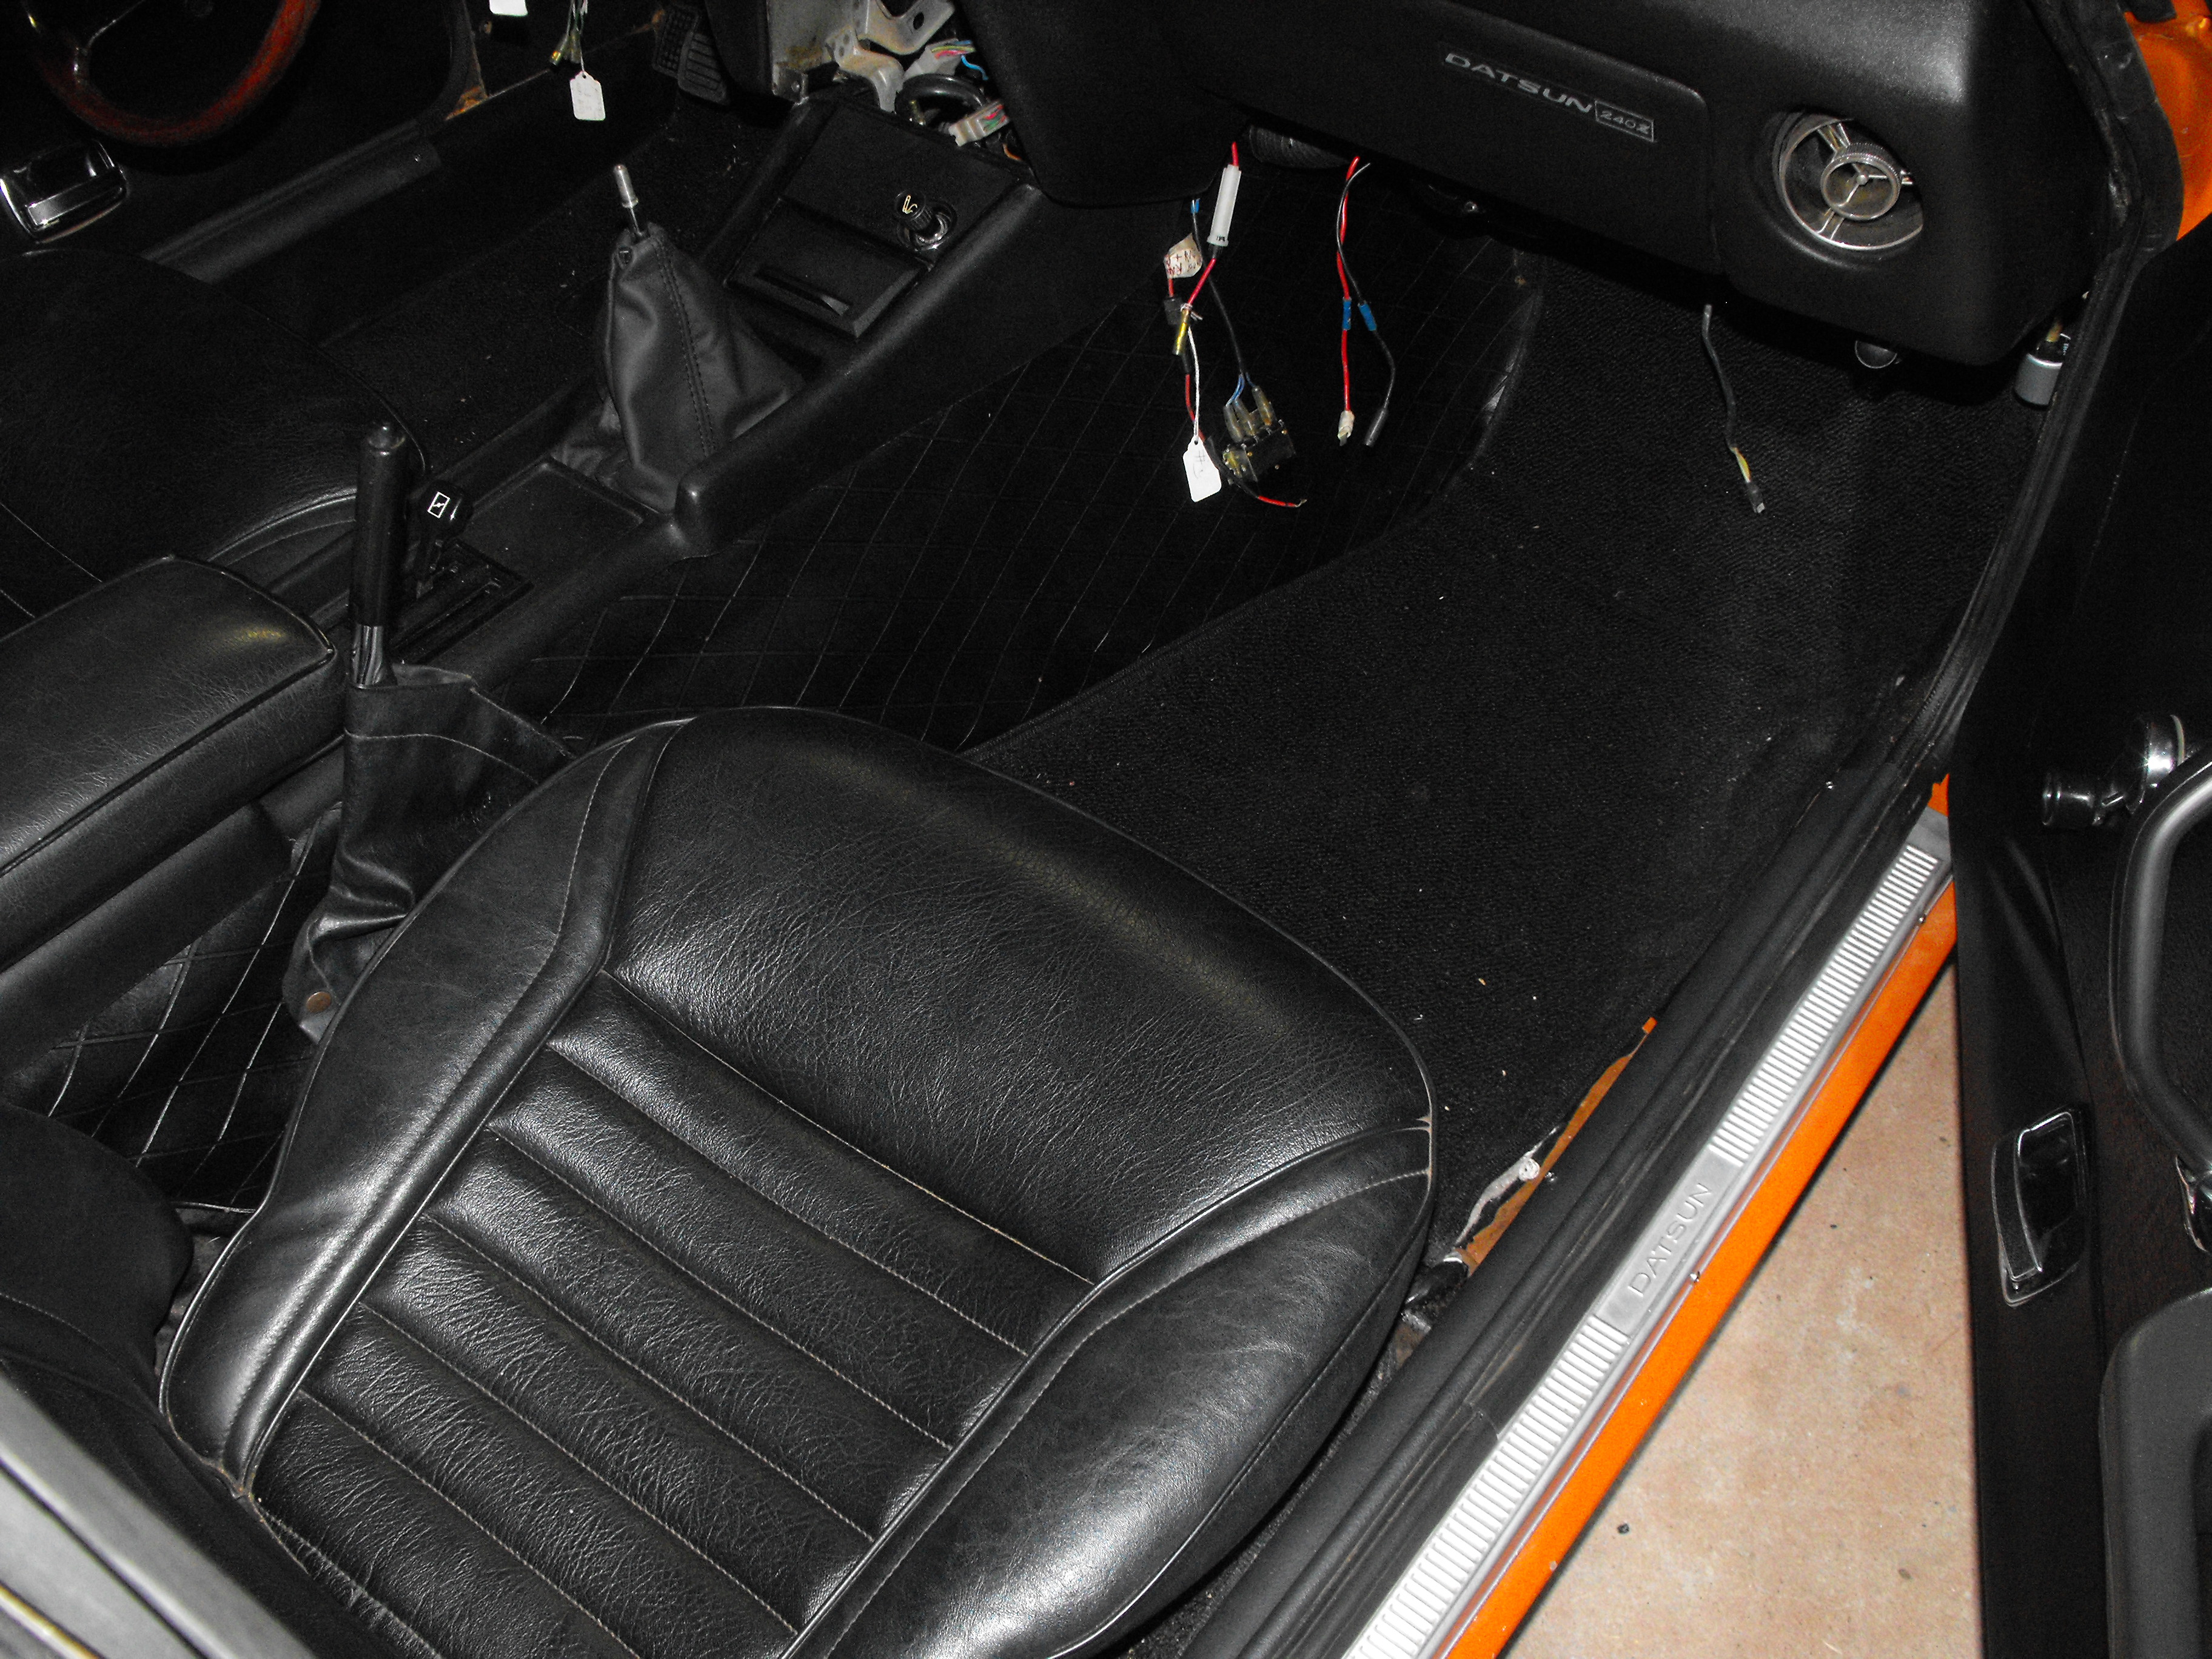
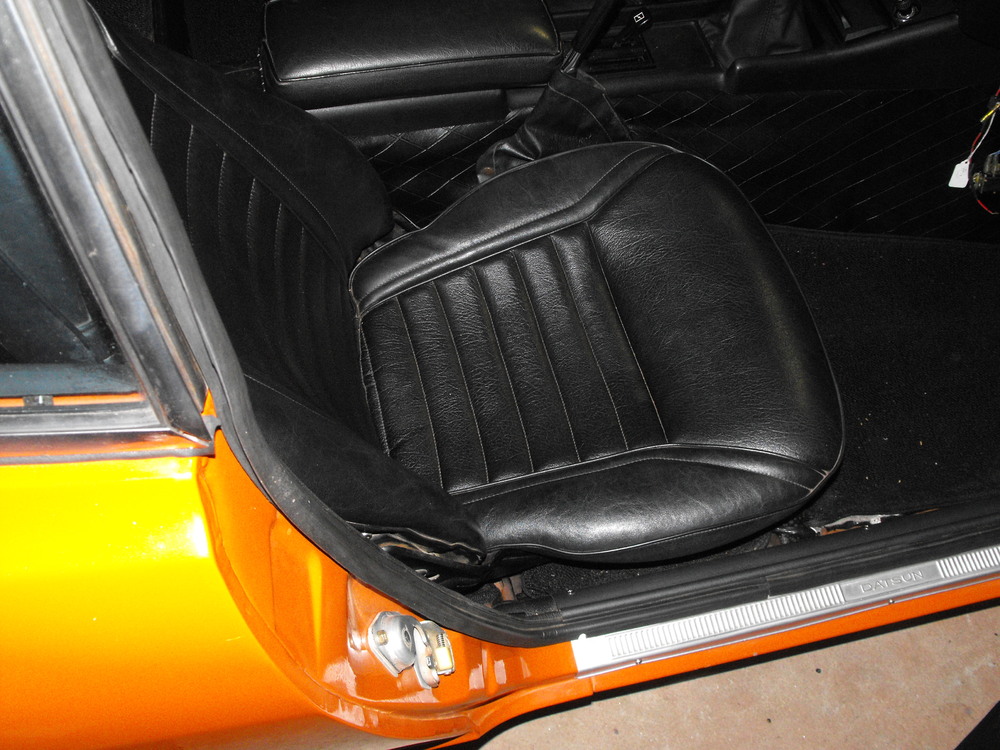
Got just a few things done this weekend. I put the seat belts in. Also removed the seats and cleaned and lubed the rails so it would move back and forth nicely. I did a touch-up on the wood part of the steering wheel. Will probably do the black parts a little later this week. I installed the horn assembly with the horn guts just because I had parts. Will have to remove it all to finish the black on the steering wheel, but that is fine. Also riveted in the door ID plate. I added some of the parts to the vent assembly panel, but not ready to tackle that yet. Maybe next weekend. Here are the pics.


-
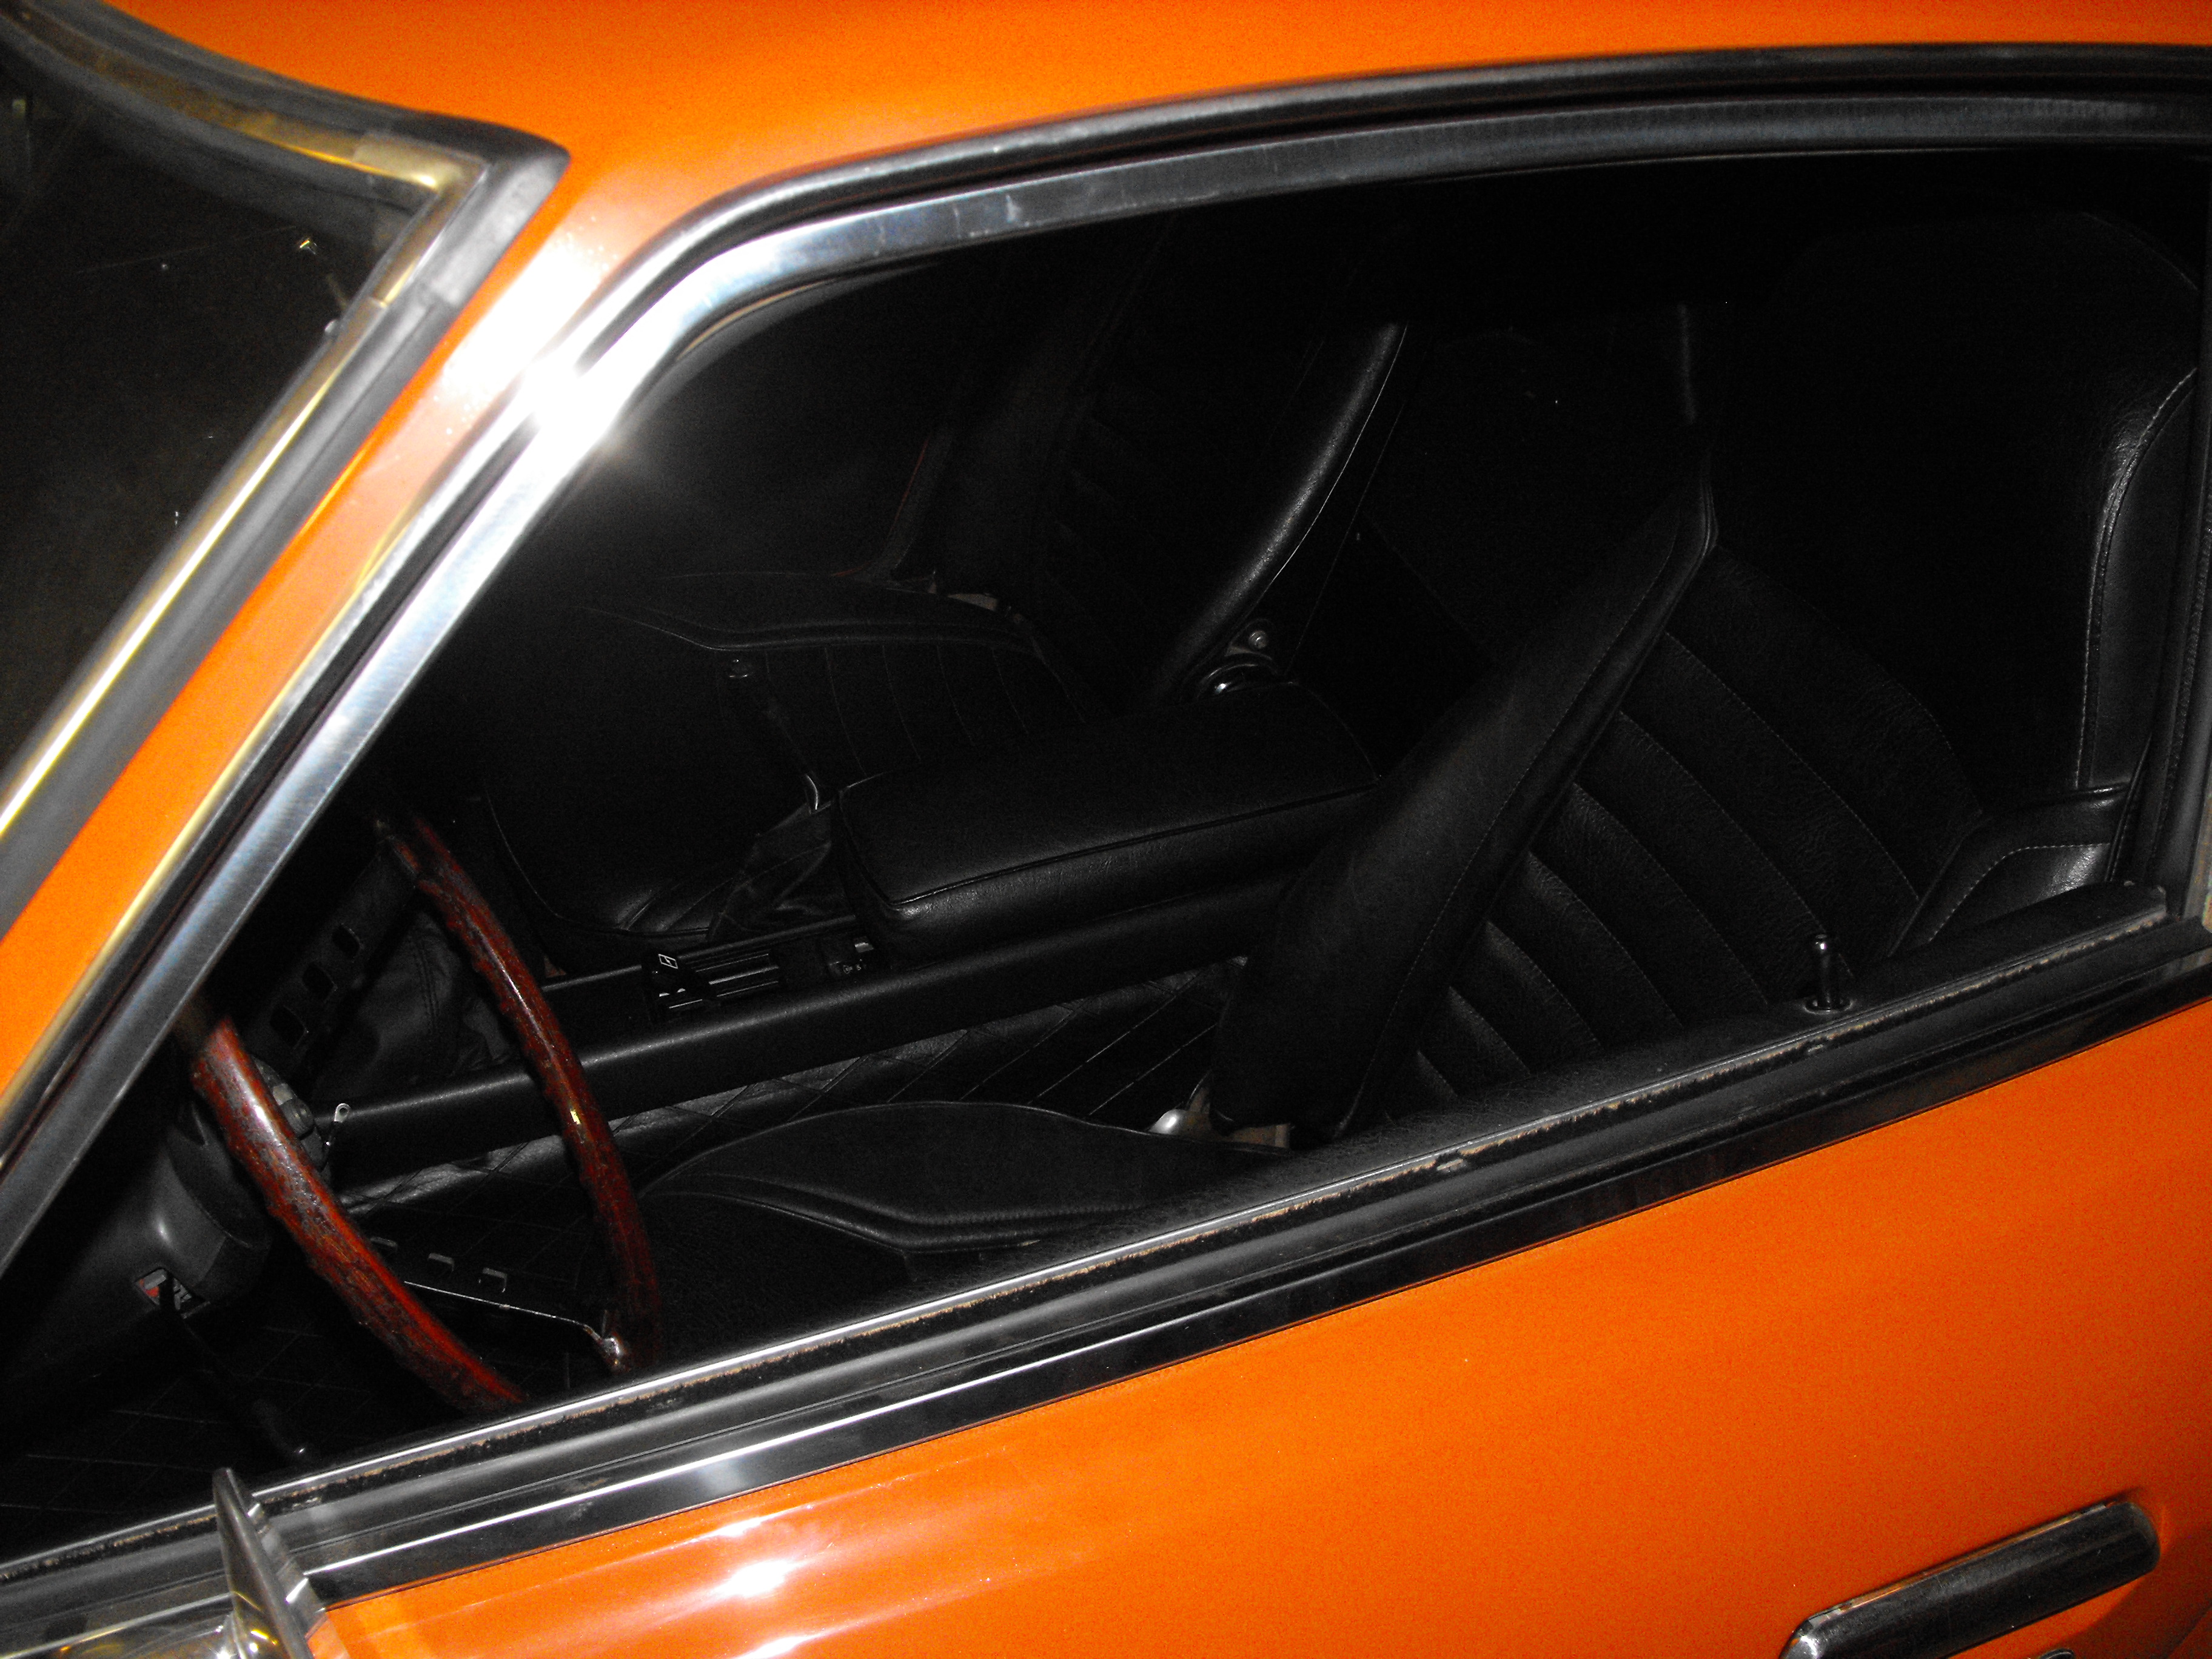
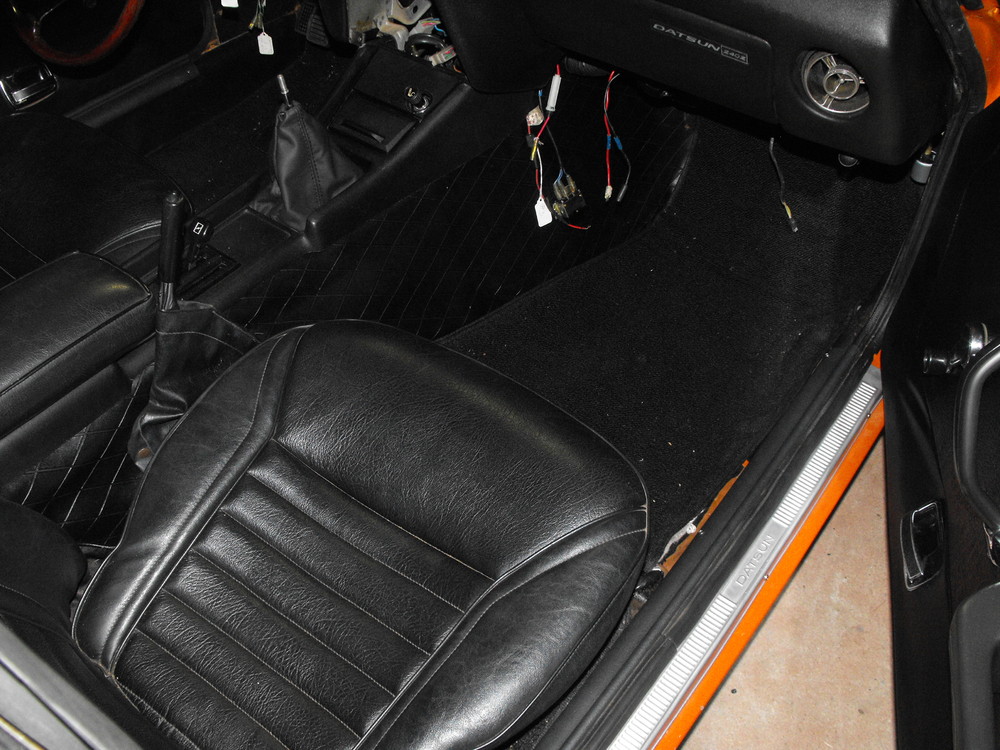
Here are the latest pics. The interior is coming along. Still some electrical to finish.


-
Here is how I did mine. For the 3 piece strip, I put the center one in first, centering as best I could. Then put on the two sides....trimmed the extra length. Hope the pics are clear enough


-
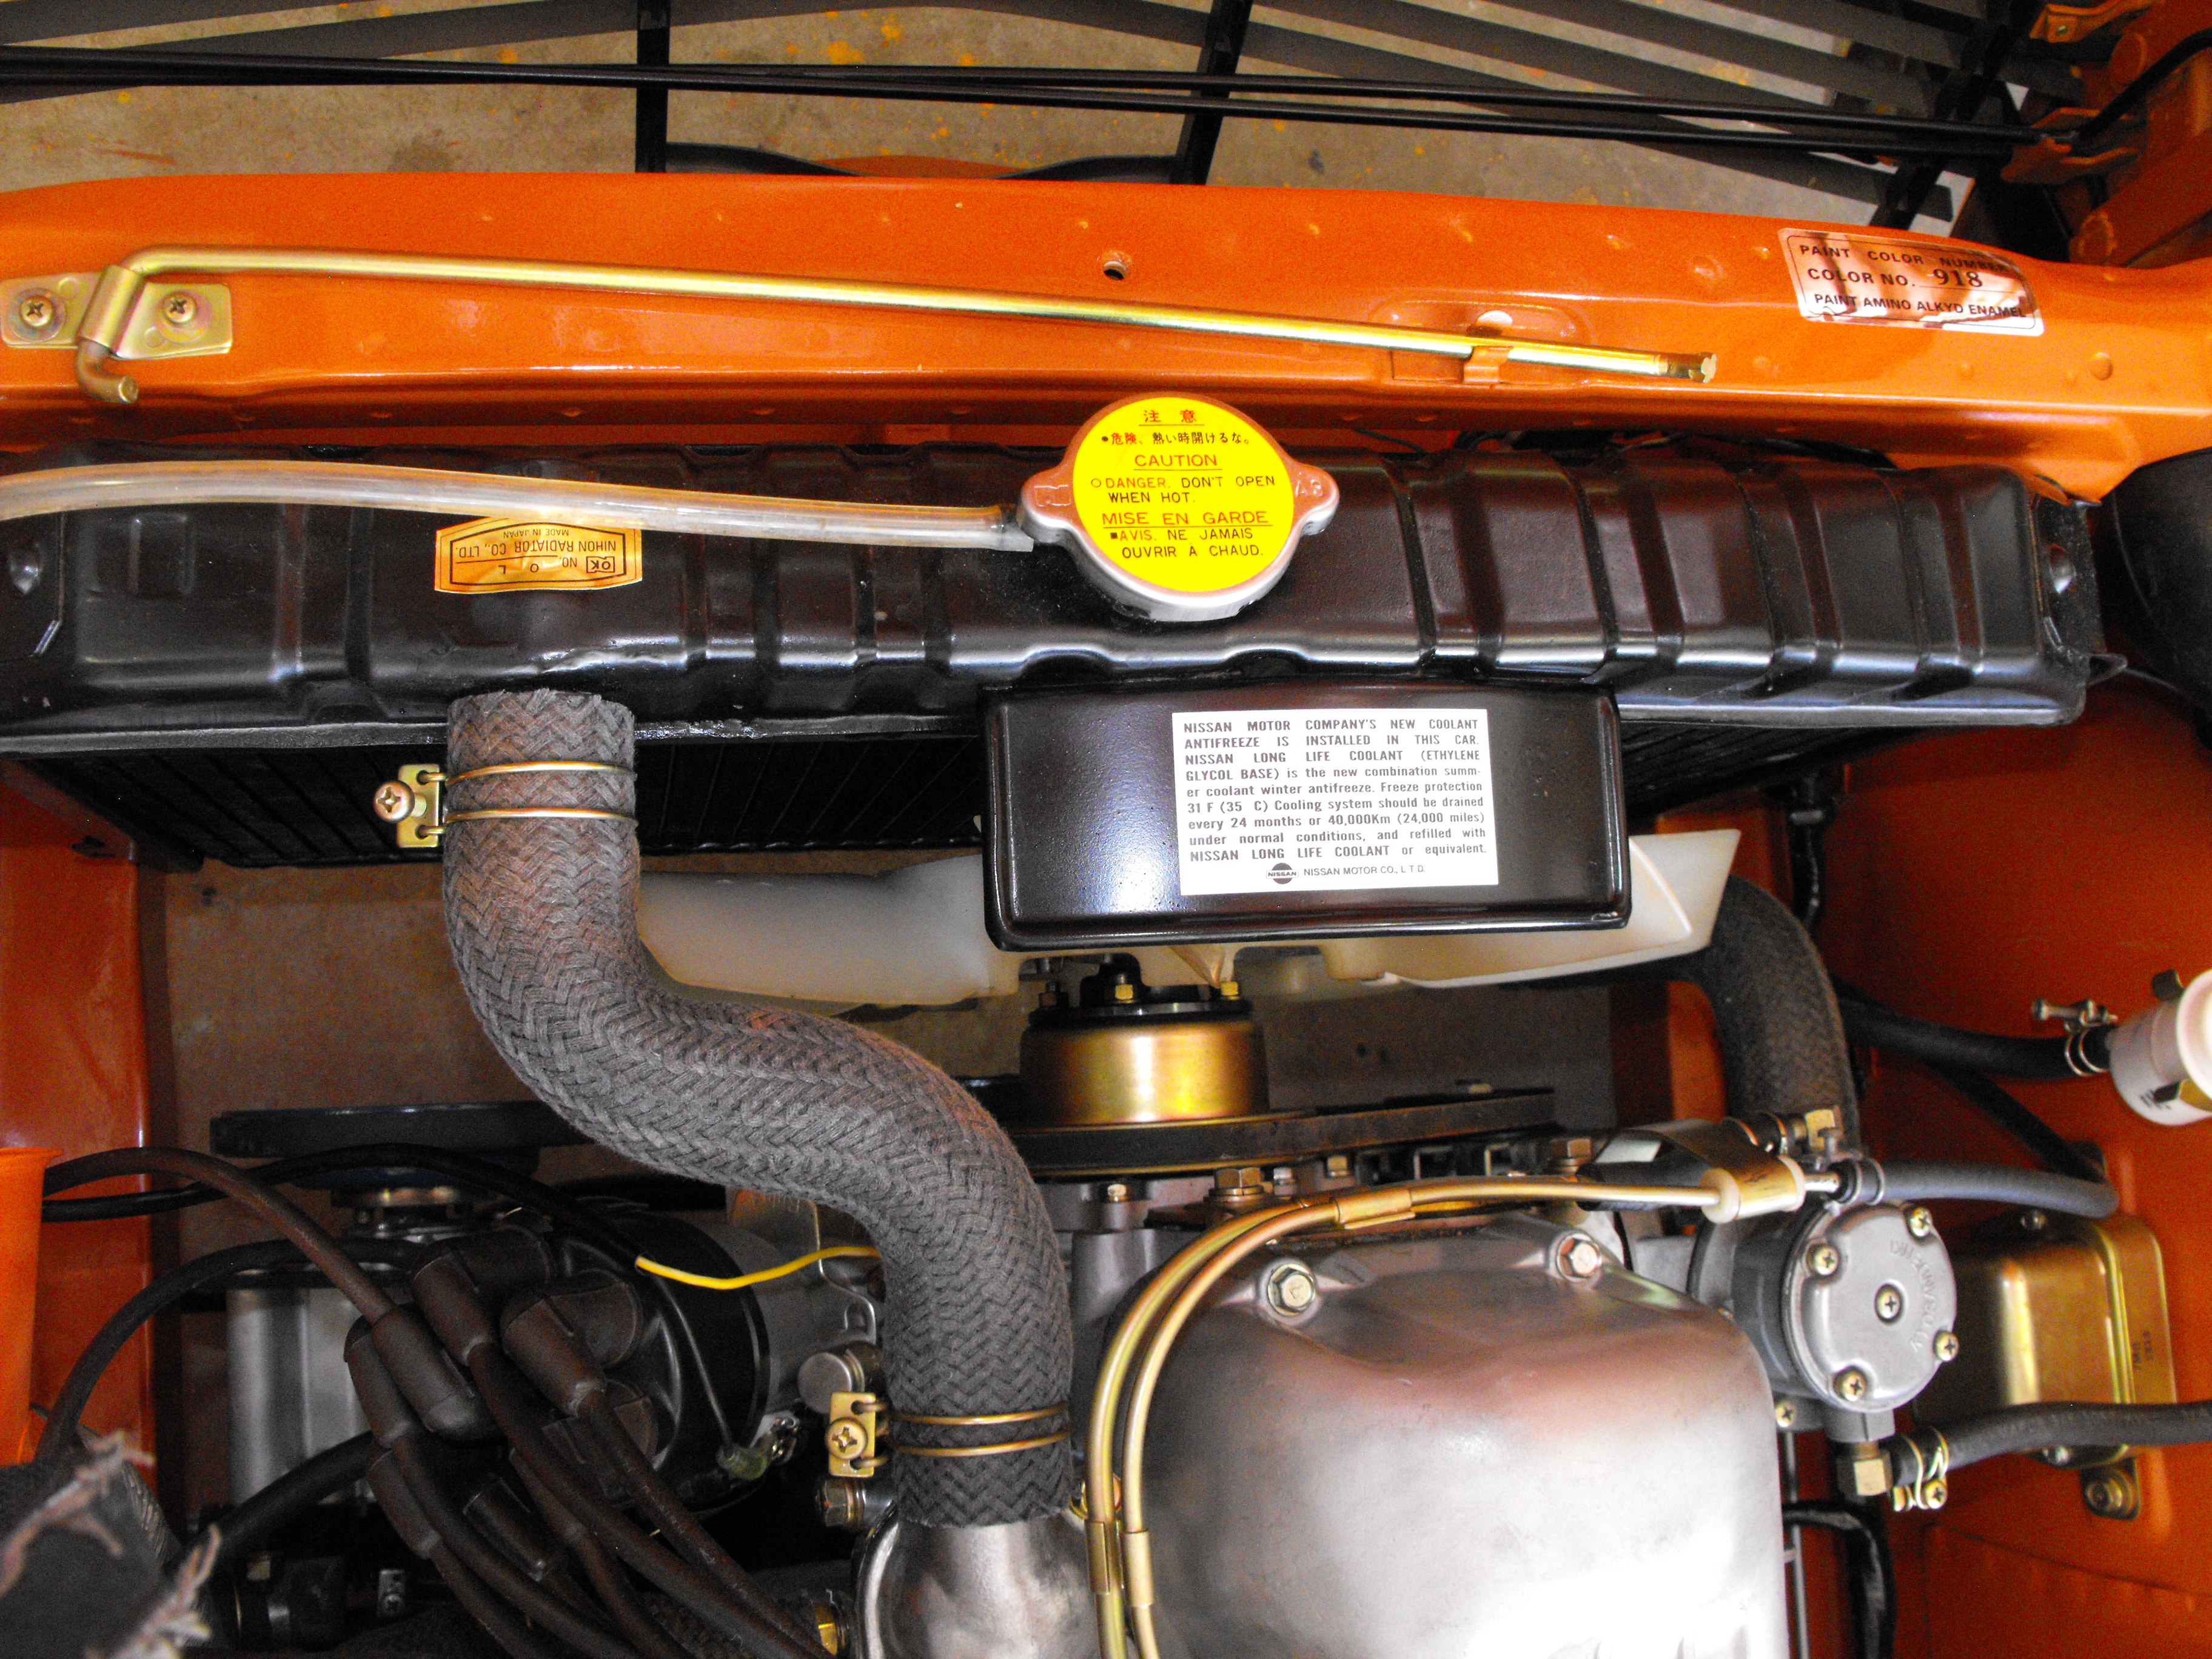
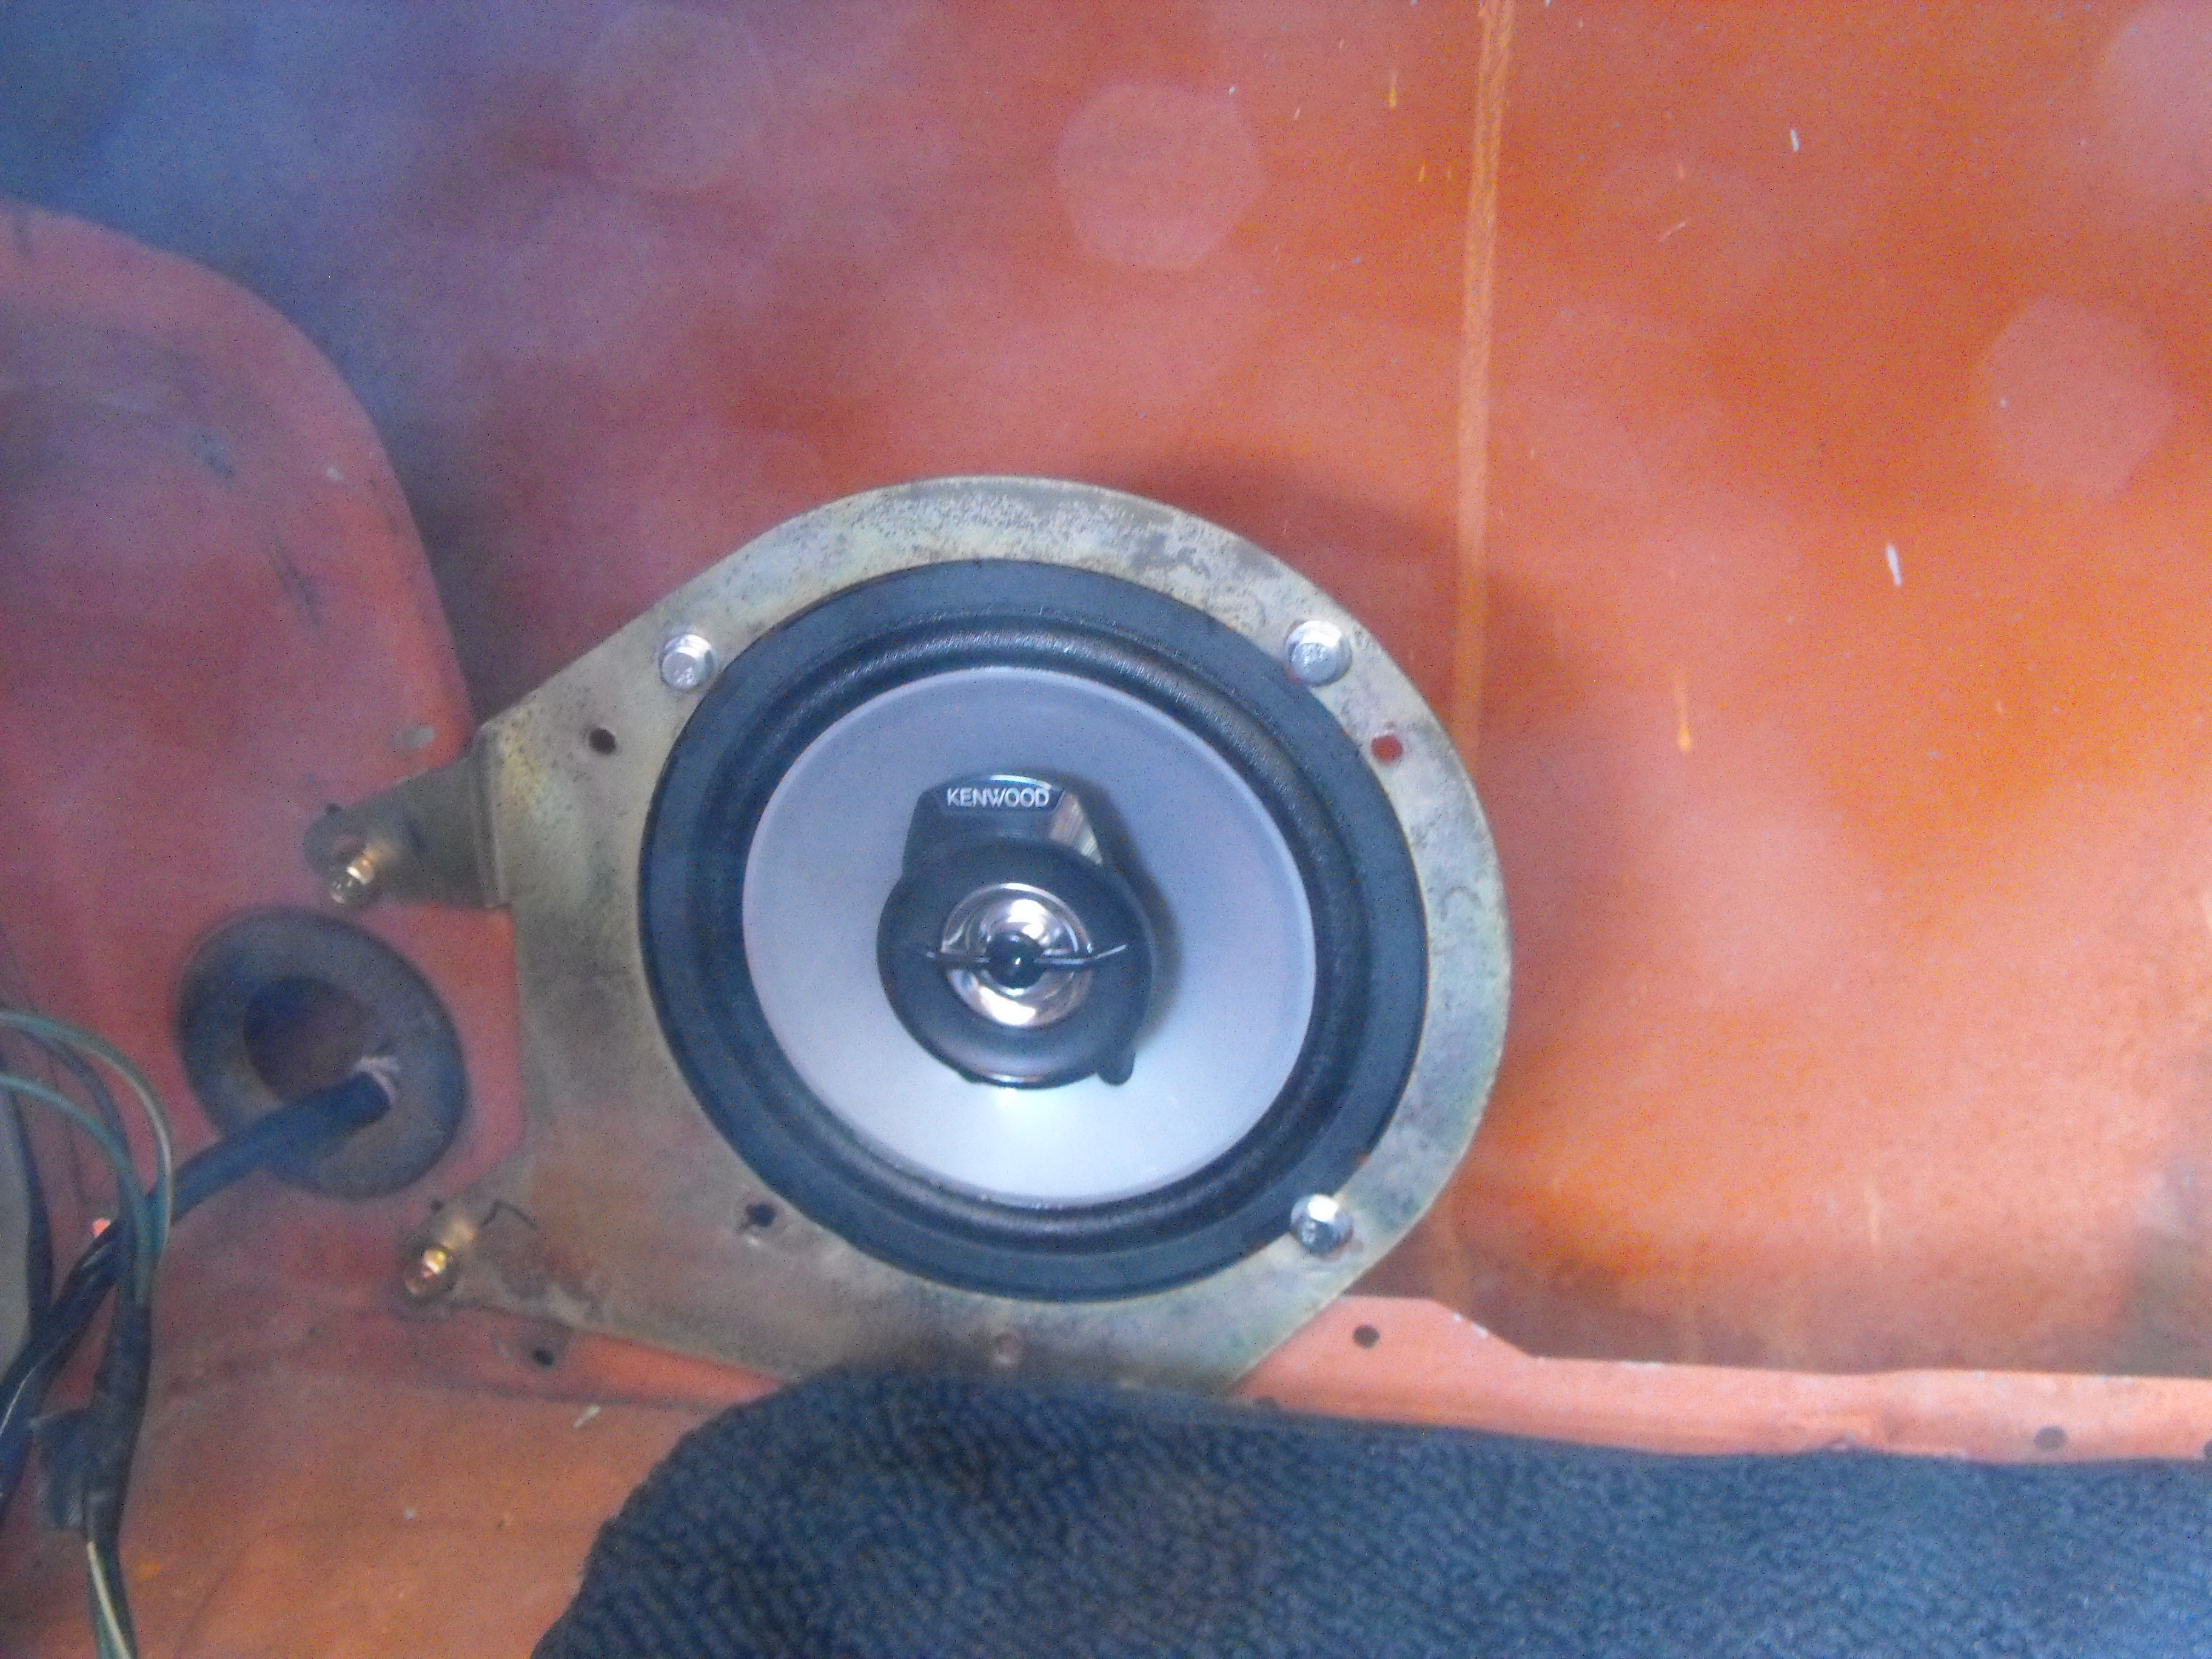
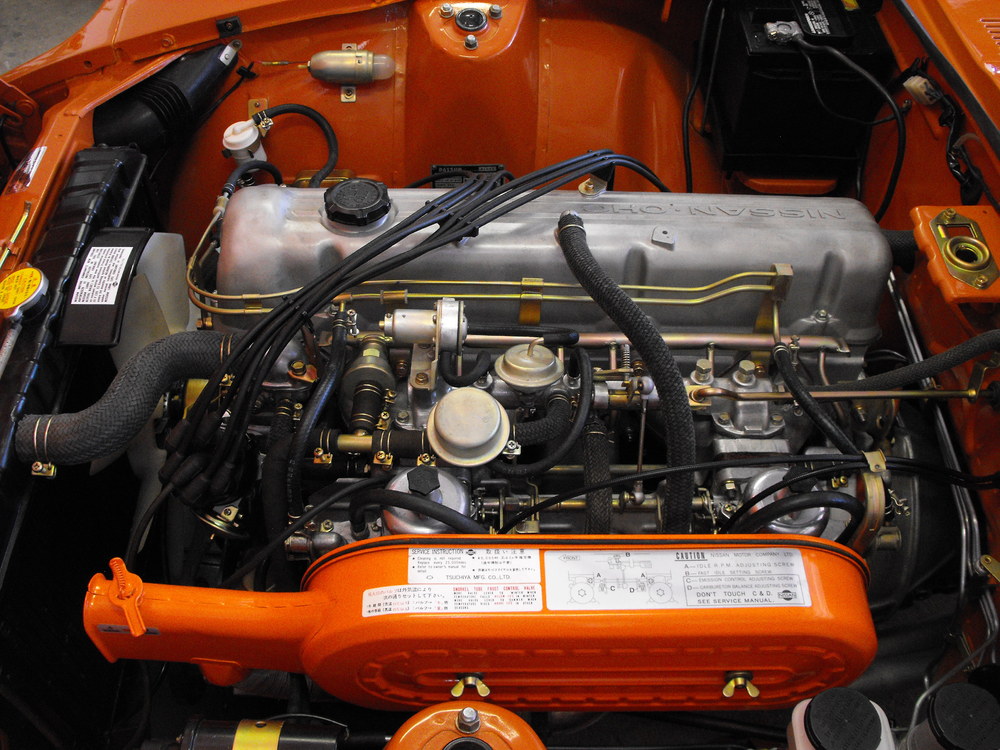
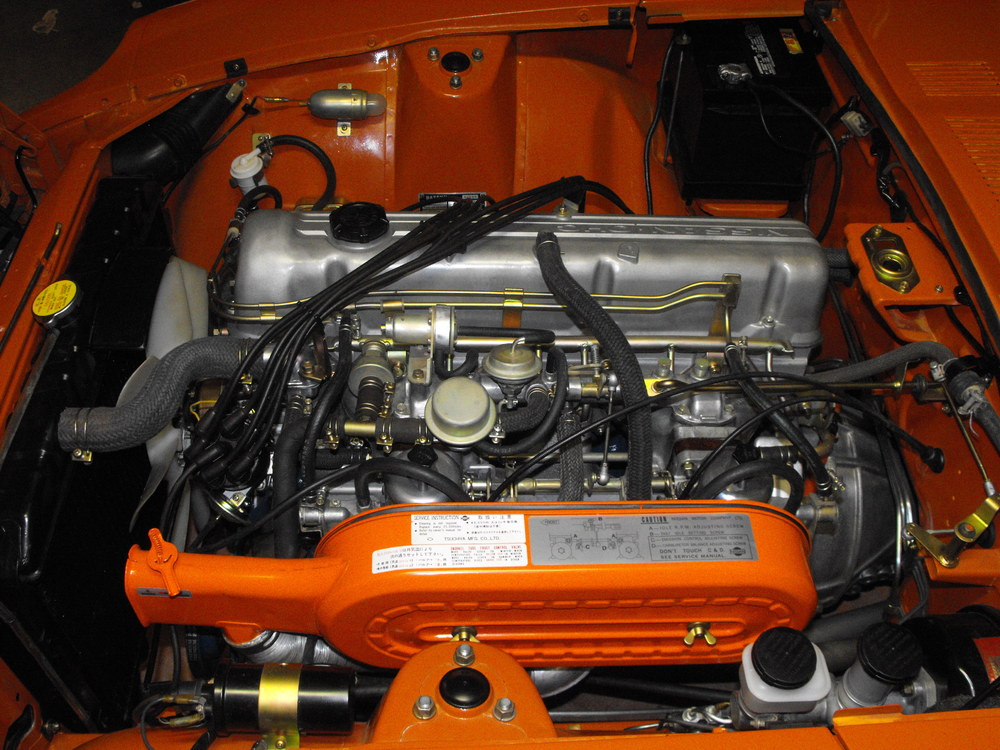
Made a lot of progress this weekend. I got all the lights; high beams, running lights and blinkers working. Got the brakes bled so no need to pump the brake pedal to get the car to stop. I put the left rear speaker in and hope to get a right rear speaker in sometime this week. I will need to run an extra pair of wires for this since it is not in the original harness. Still not sure what I will be doing for a radio, but it will be nice to have two speakers if needed. The speakers I got are the Kenwood KFC-1352S speakers. They are similar in size to the original speakers, Coax, 4 Ohms and use the same attach points as the original speakers. The the install was pretty easy. Just added a couple bullet connectors to the speaker so they attach nicely to the original harness. Got the air cleaner housing installed with air filter and hot air hose attached. Also got Dan's battery cover installed, so the engine compartment is near complete. Will post some pics tonight. Now I just have the interior to continue work on. Will probably do seat belts next weekend and start the re-furb of the steering wheel. Also need to get the heater panel in. It's getting close. Will probably hit the DMV next week to get it fully registered. Right now it is still non-op. The plate tags say 2005 on them so it's been a while since the car has been registered for the road.
-
Hi SB, His shop is just 10 miles away from my house, so I am over there whenever I need those hard to find parts. The quality of his parts is excellent, but his focus lately has been more on racing than on restoration. I have never ordered a panel kit from him so not much I can offer on that side. Also, he usually does not carry much stock. Usually he orders from his suppliers then sends to you, so you may not get parts that quick. Anyway, just my thoughts. Lucky for me that he is just a quick drive away and his shop is incredible. If you are ever in town, you need to stop by his place. He has about 30 Z's, roadsters and 510's in his shop all under construction and they are way cool. Best regards, Rich
-
I think it is worth $8K as shown in the pics
-
He just texted that it is sold
-
Just texted the guy again. If it's available I am going to pick it up
-
It's gone
-
Wow, that is a steal at $3K. Would drive up there now and get it if I had room for it.
-
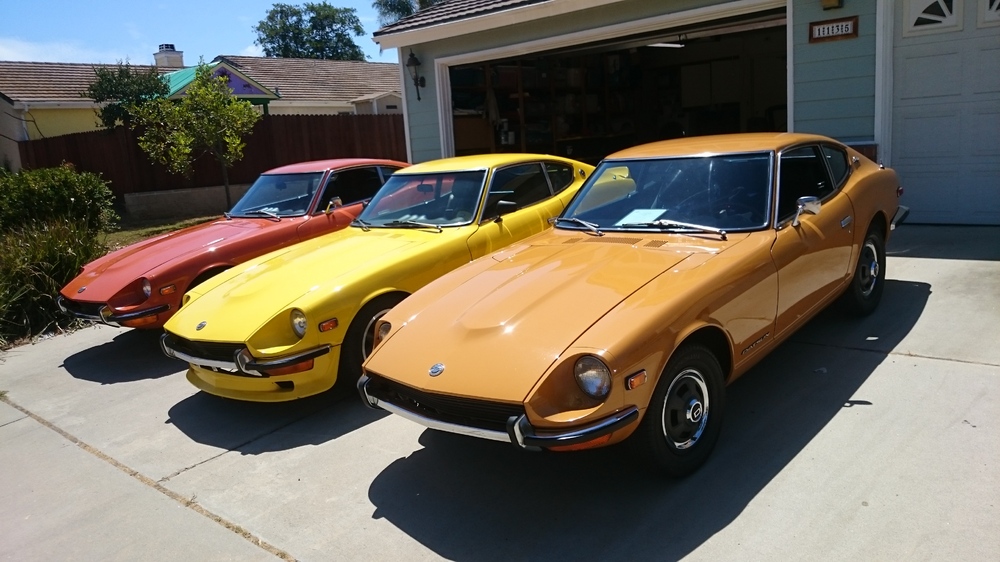
I agree, the blue one goes. Nice to see another person with three or more Z's. I don't feel so bad now.
-
They came that way...kind of a flat Titanium color. I got them from Les at Classic Datsun Motorsport (http://classicdatsun.com) . I was in his shop and they were on the shop floor and I loved the style and color. He was planning on using them for his Z. I told him if he ever wanted to sell them to give me a call. Several months later he gave me a call and said that he would sell them as his car has been long delayed. He said there were only a few made in that color.
-
Very nice, Great Job!
-
Very cool, Congrats! What Class were you in? What were some of the other cars in the class? Best regards, Rich
-
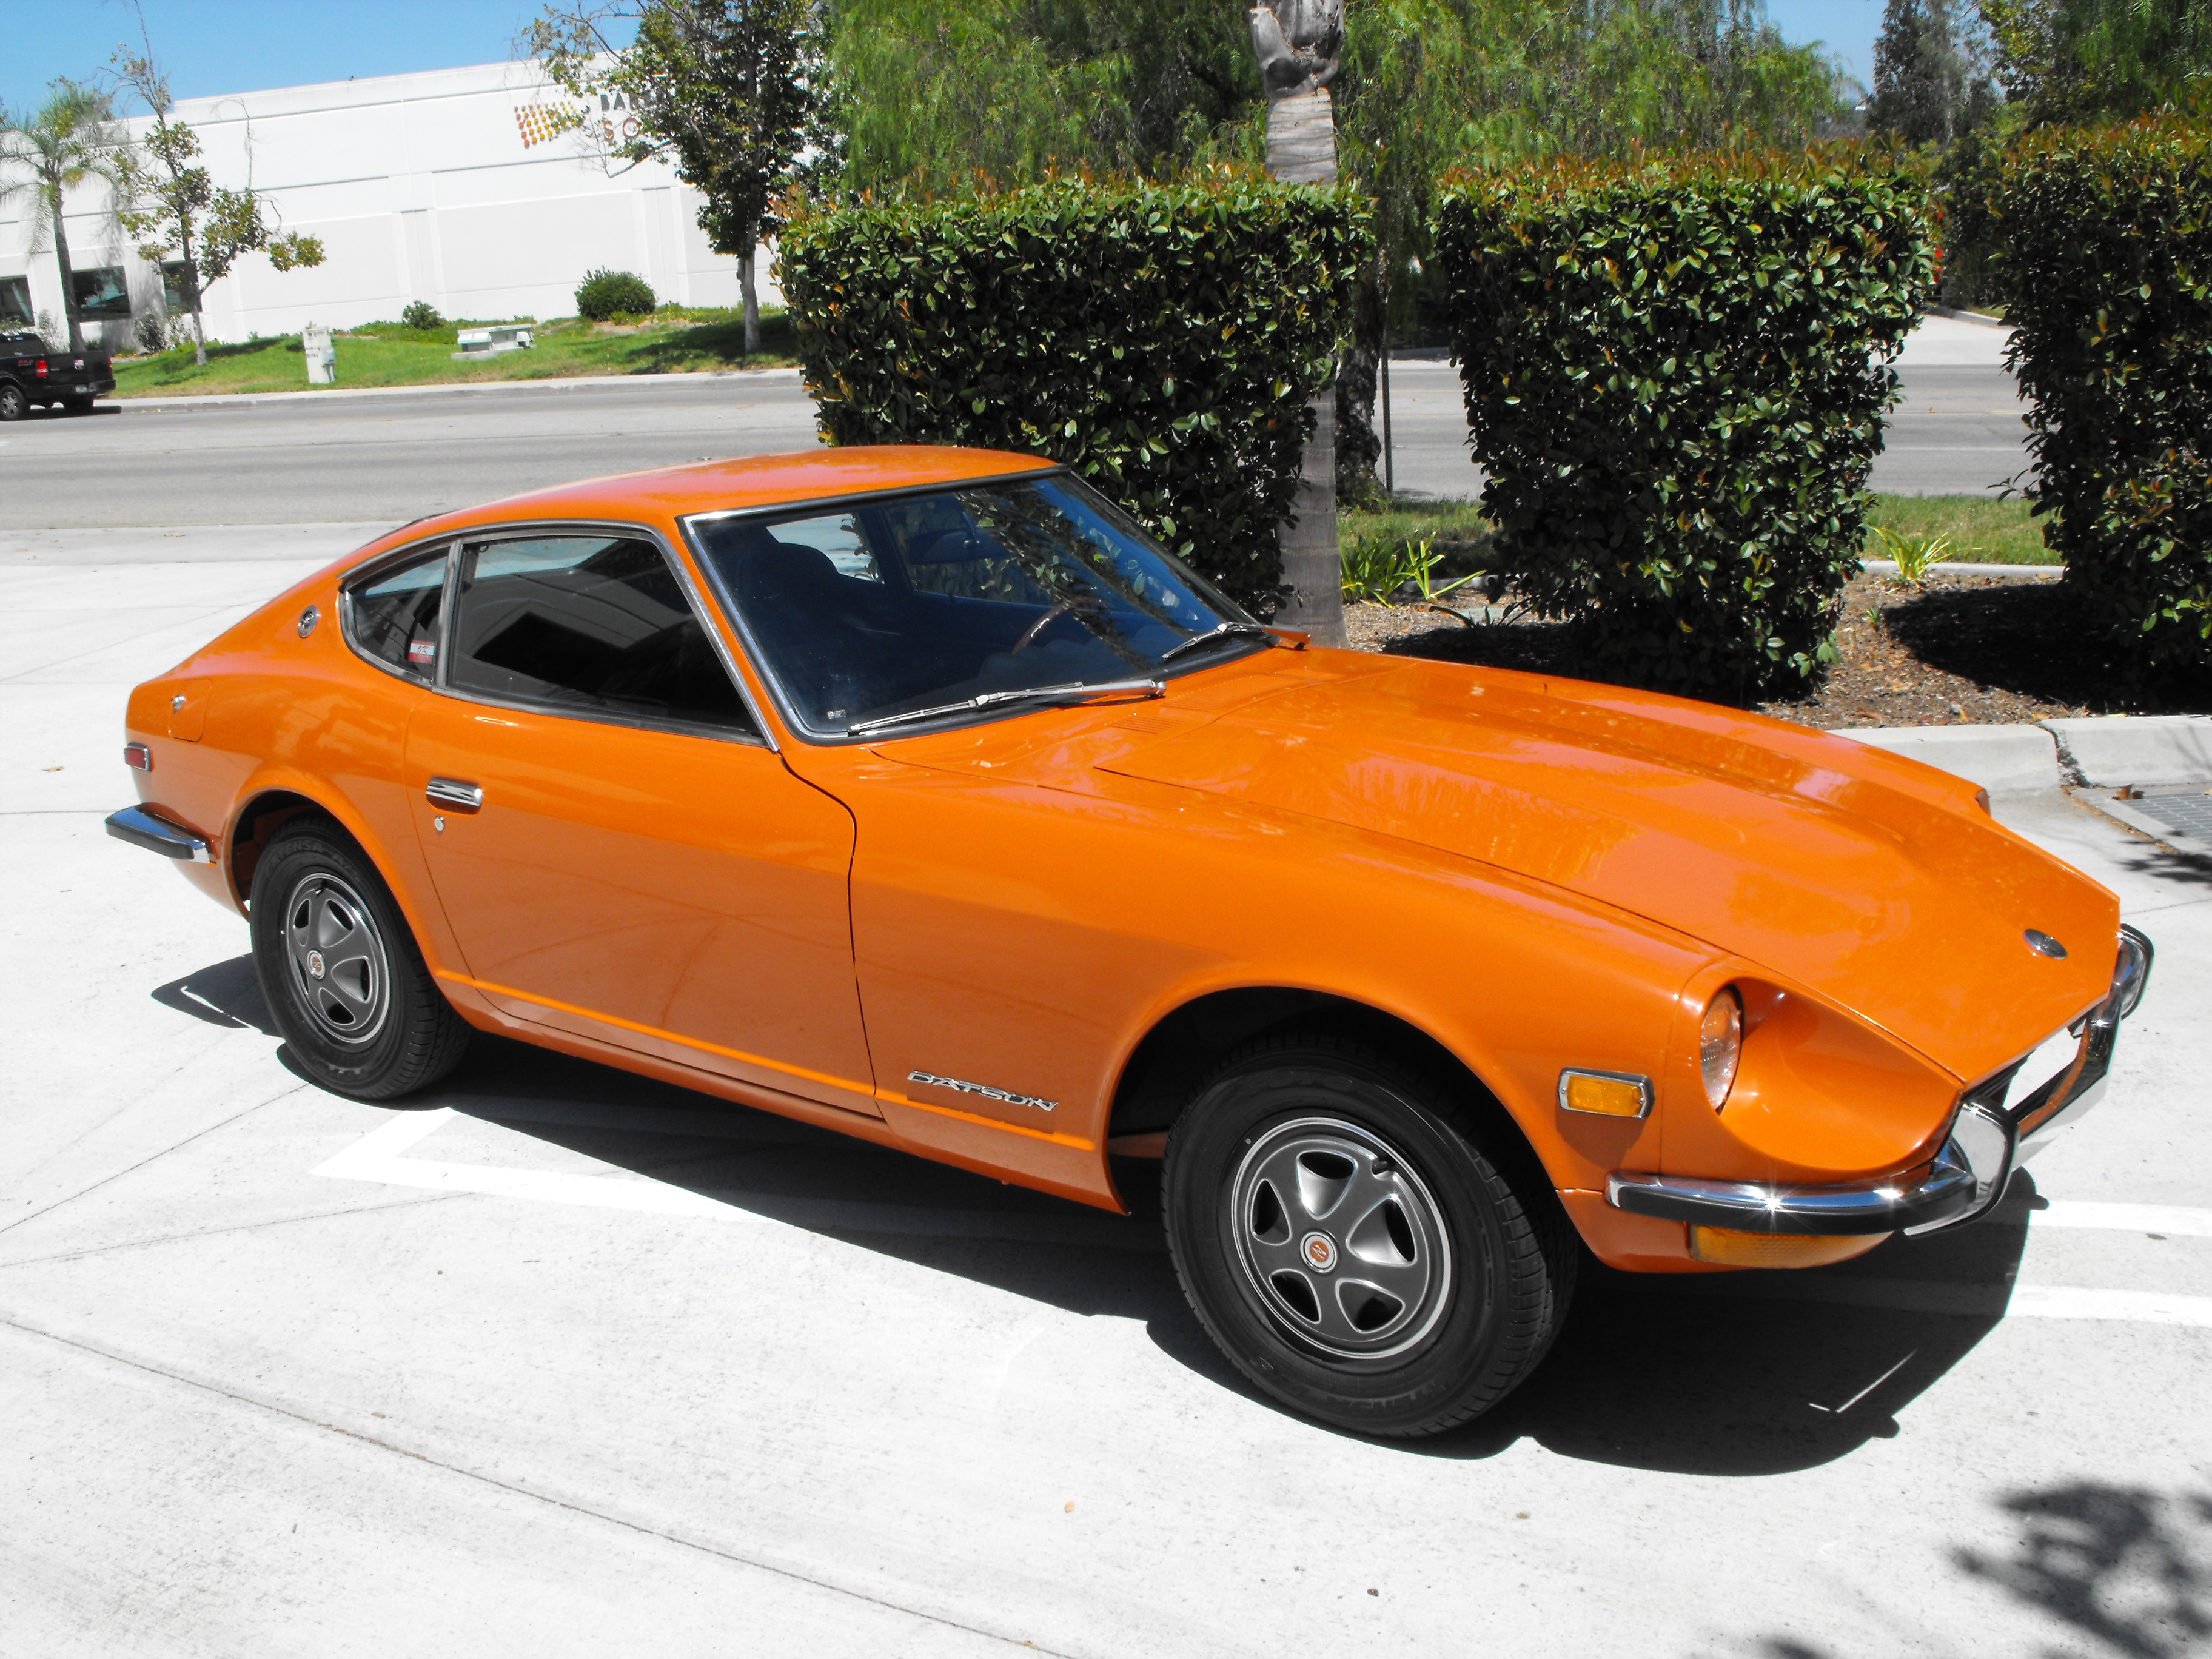
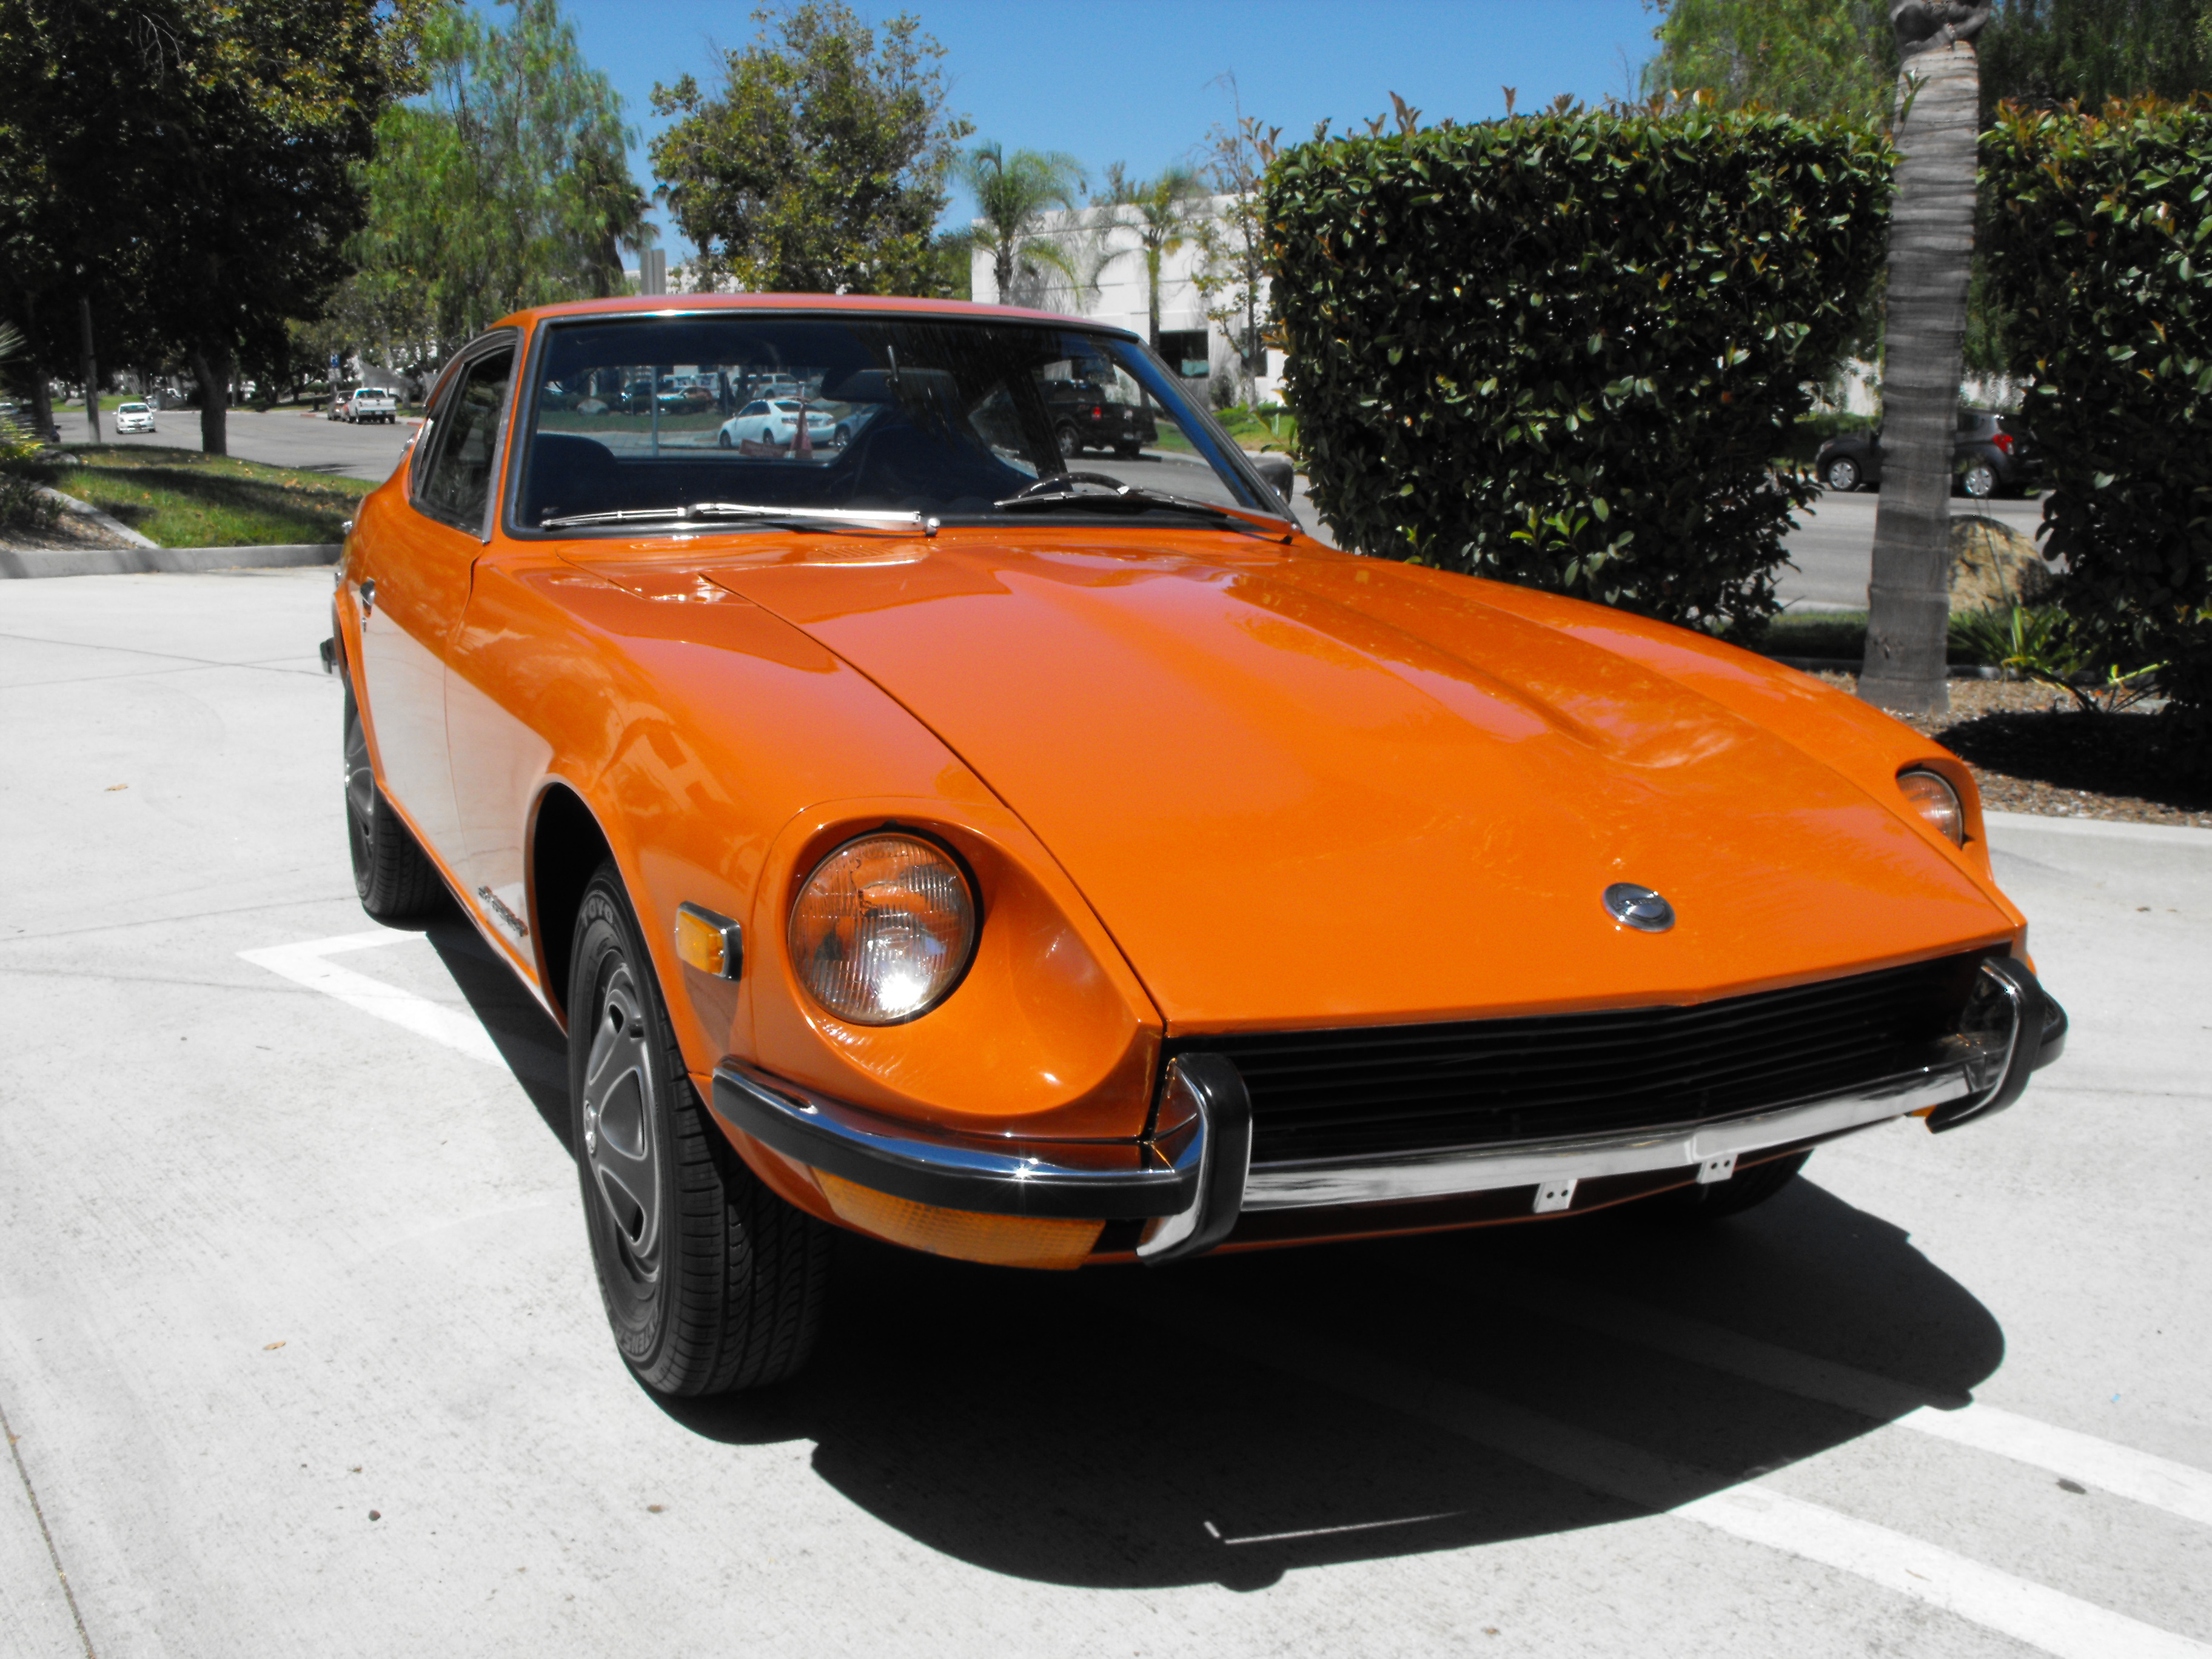
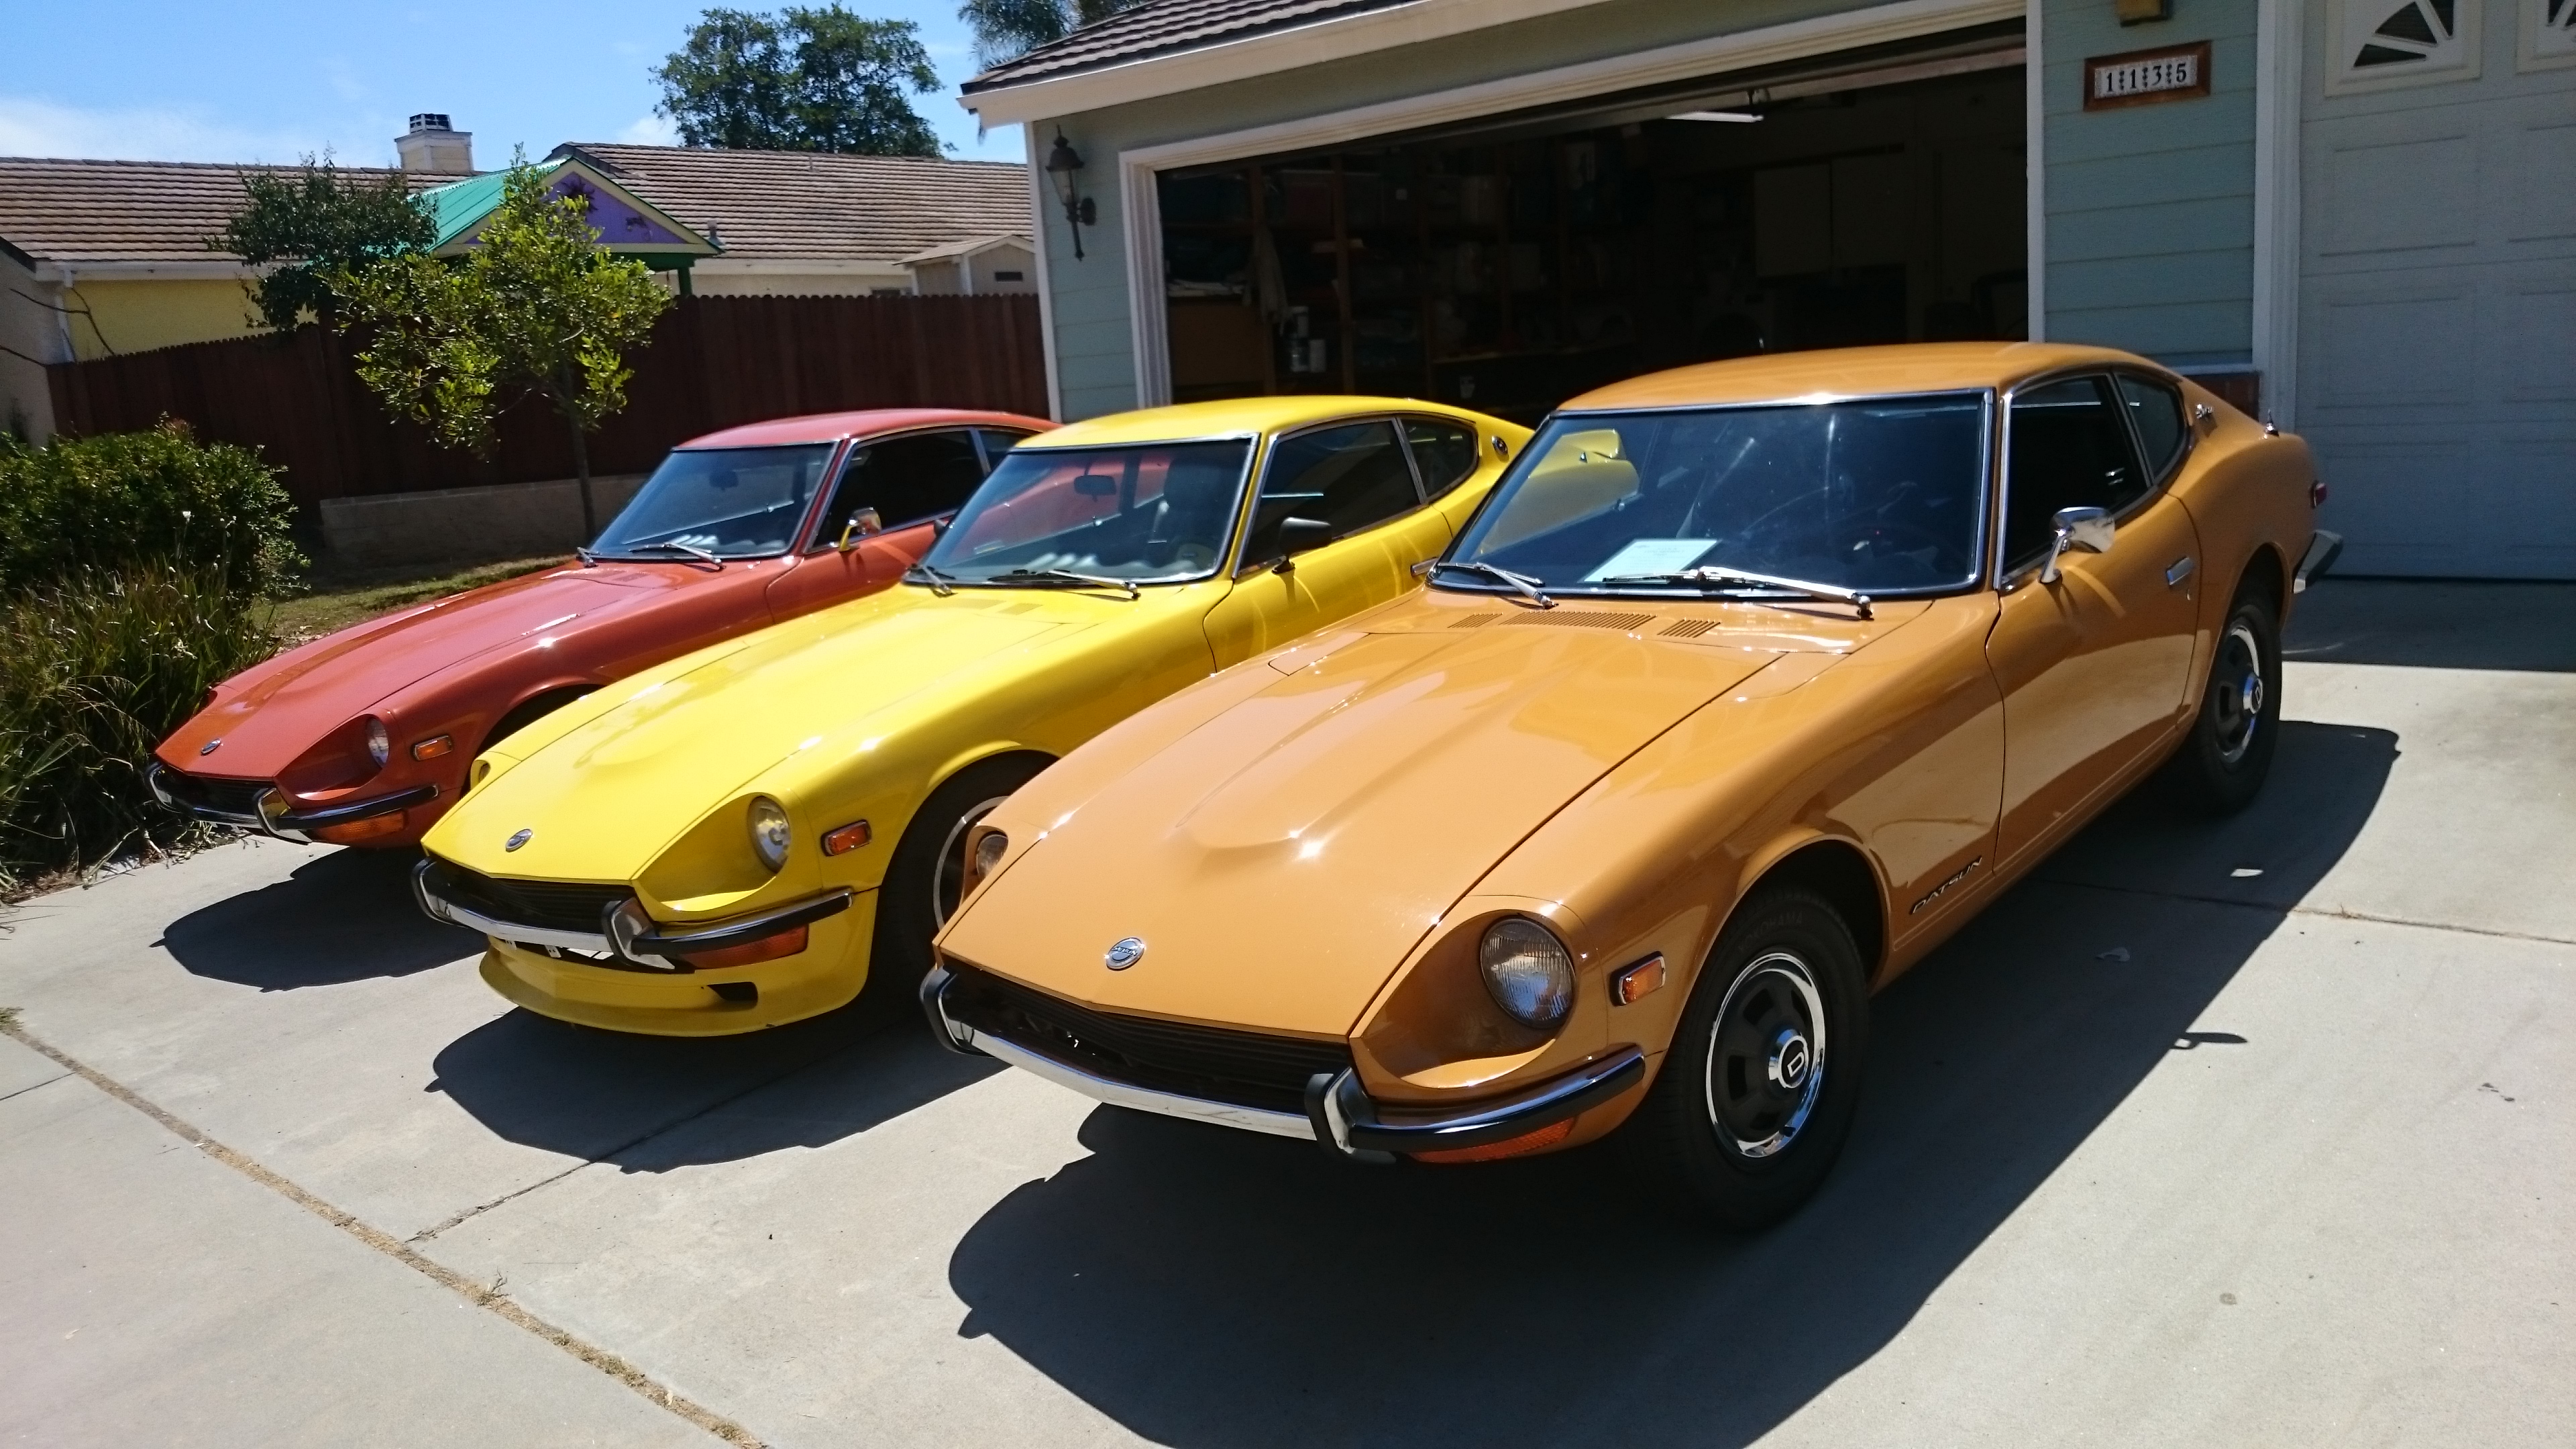
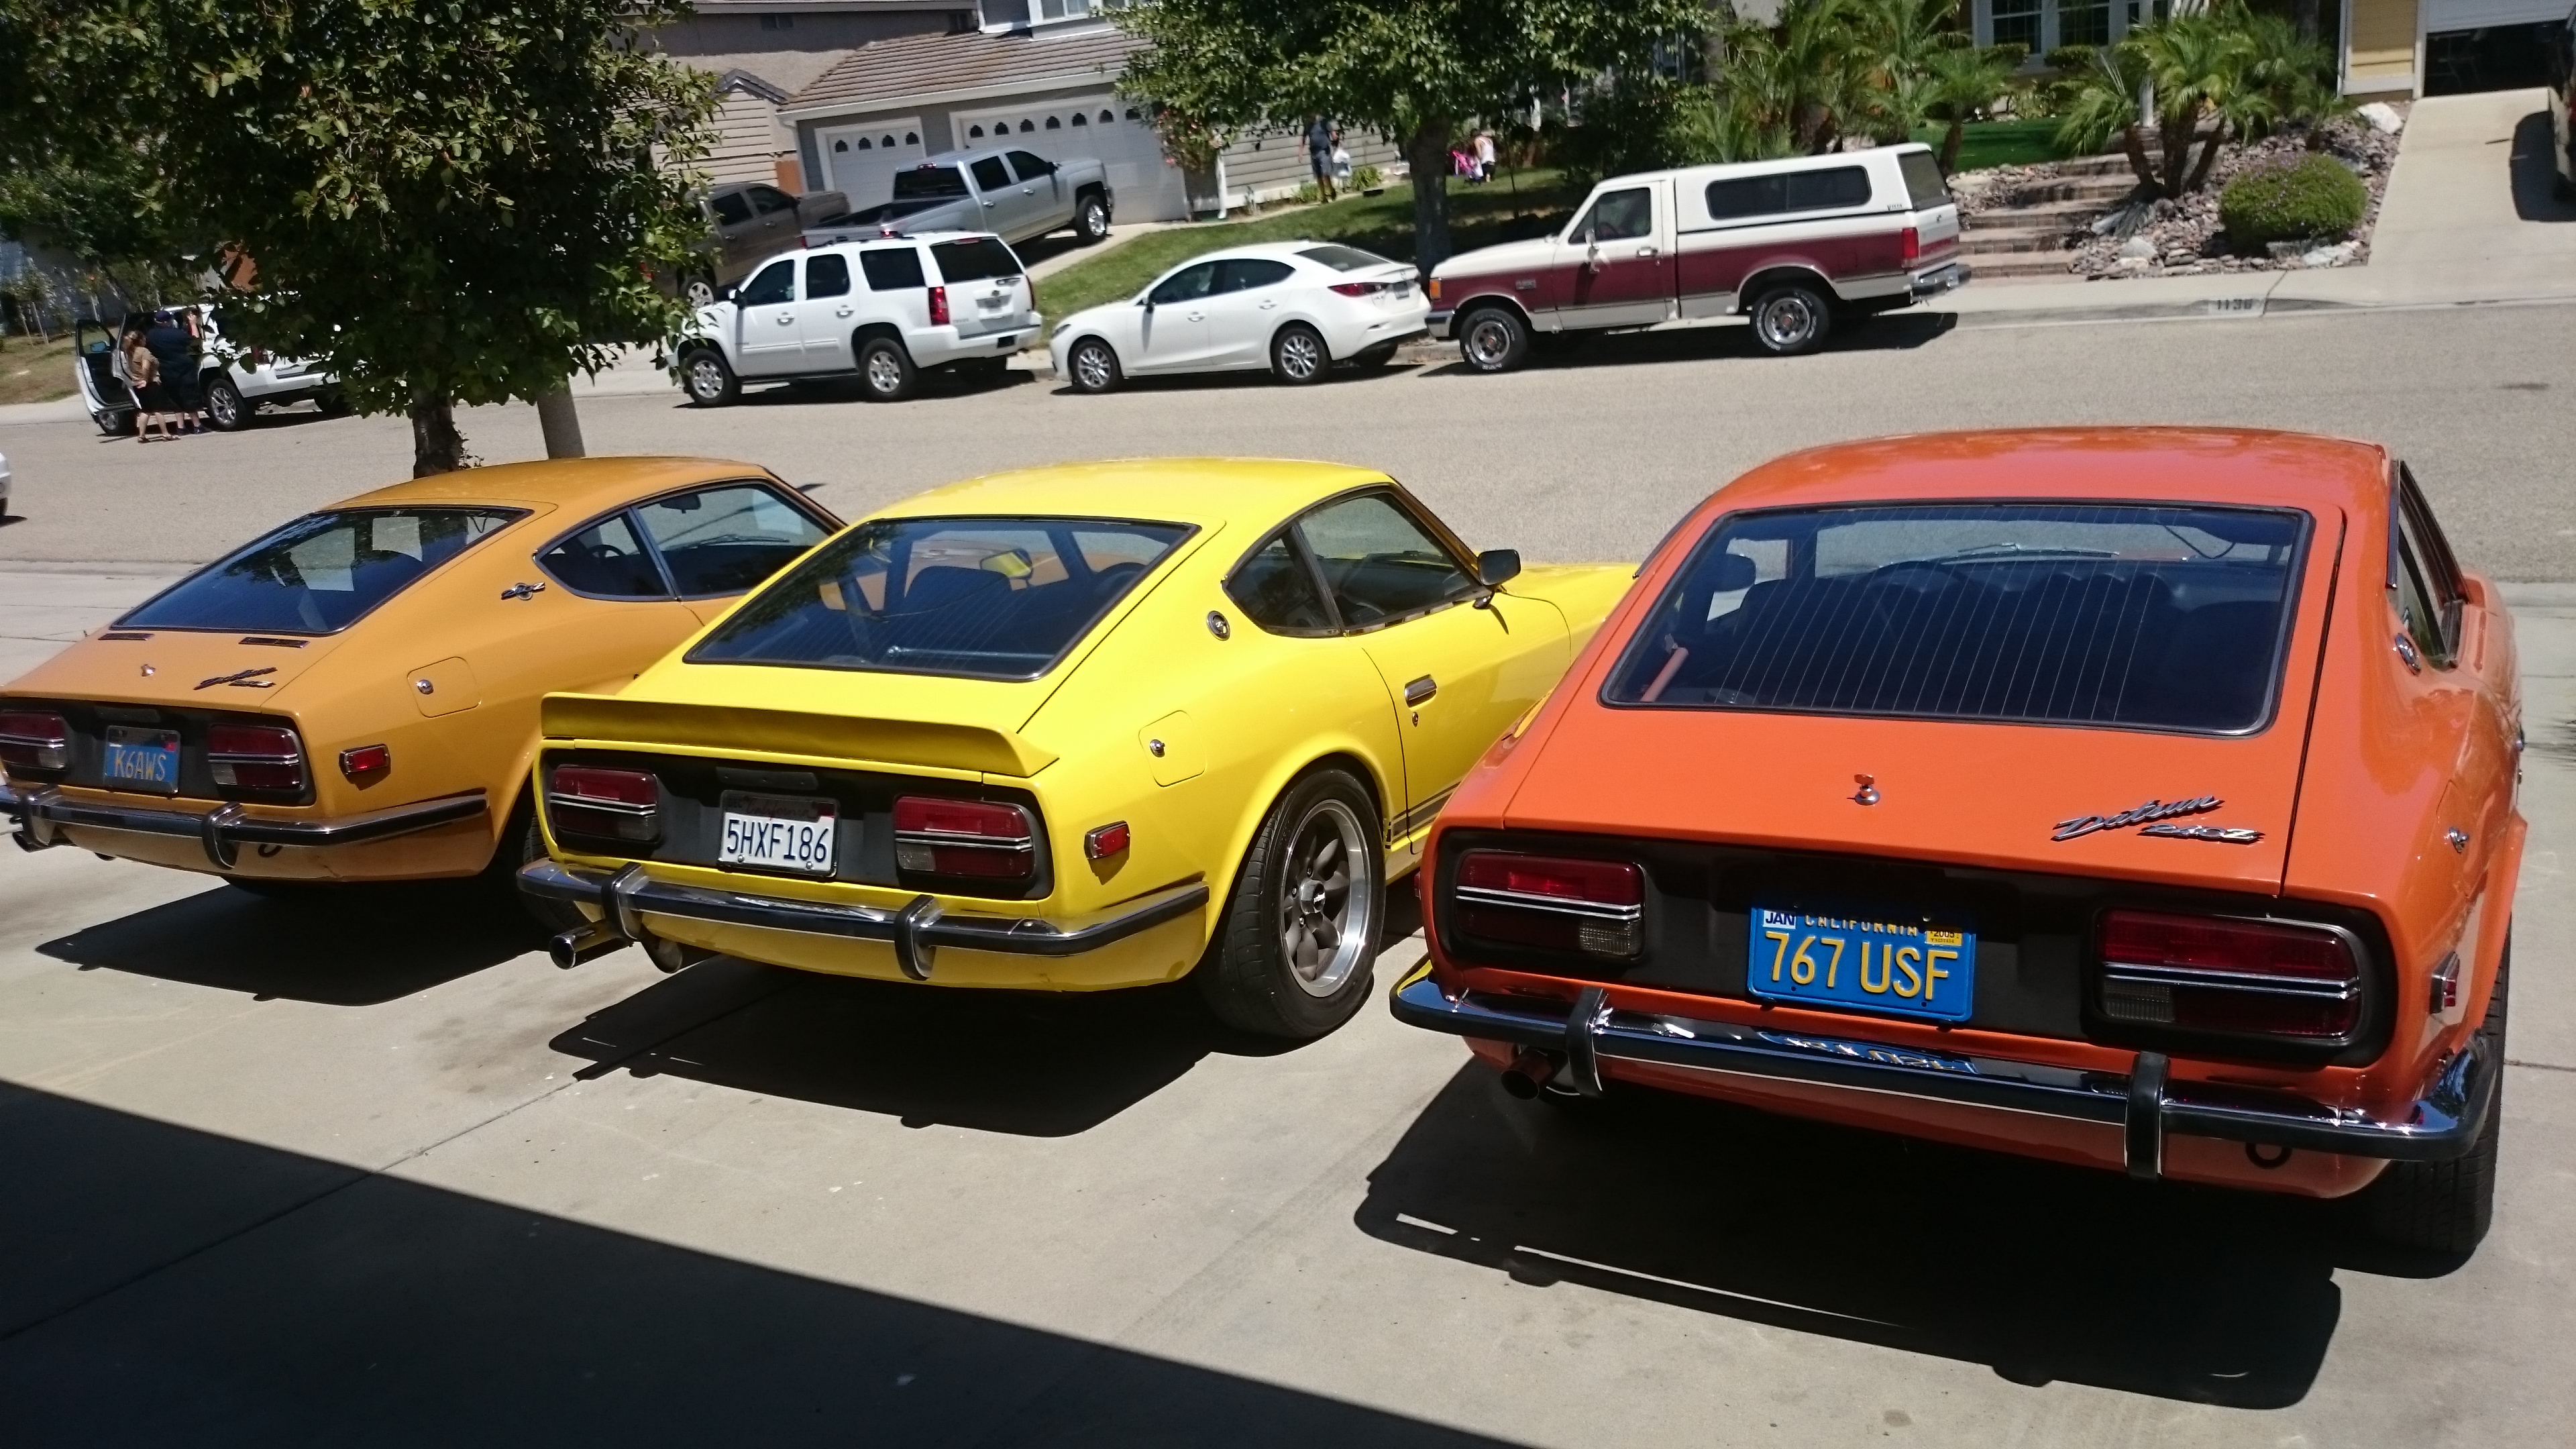
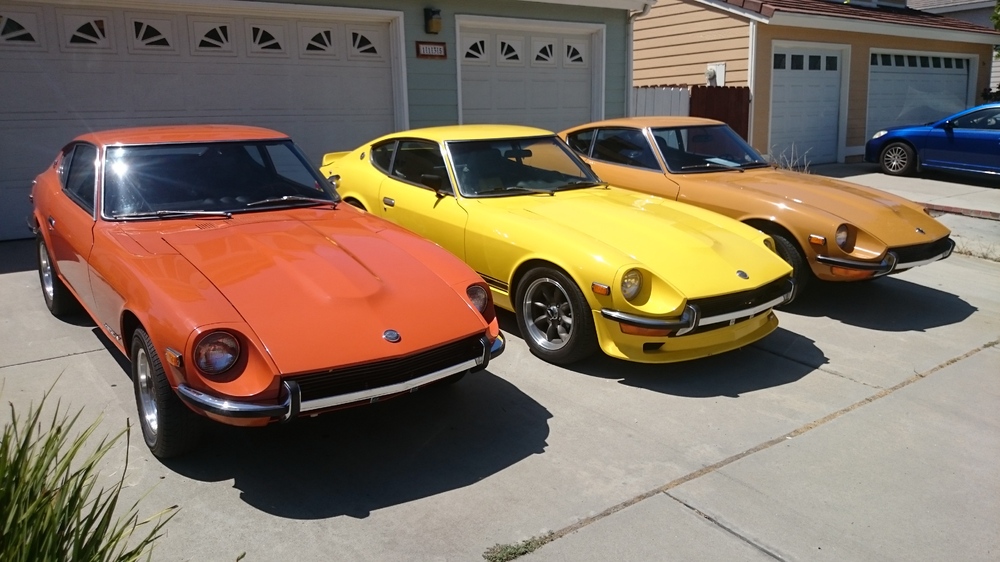
Got the electrical figured out, WooHoo! I had the Black/white wire and Black yellow wire swapped in the four pin engine connector. Once I swapped the contacts it worked perfect. Just thrilled about that. I put in new diff fluid and trans fluid (Valvoline full synthentic 75-90). Got the clutch working and brakes kind of working (needs more bleeding). Took it for a short spin in the cul-de-sac and lined it up for a group photo Op. Here is a little California Sunshine. I don't care for the mags on the persimmon car at all. Will put the hubcaps on next month. That should be much better Rich

-
I do the yellow chromate immediately after the blue chromate, so the part is still wet. When the yellow chromate is done I dip the part in hot tap water then blow dry on high heat with a hair dryer. This works well for me and often I will install the bolts within an hour or two. I think the heat from the hair dryer is important in hardening the chromate. I typically dry the part for about a minute on high heat.