motorman7
 Subscriber
-
Joined
-
Last visited
Everything posted by motorman7
-
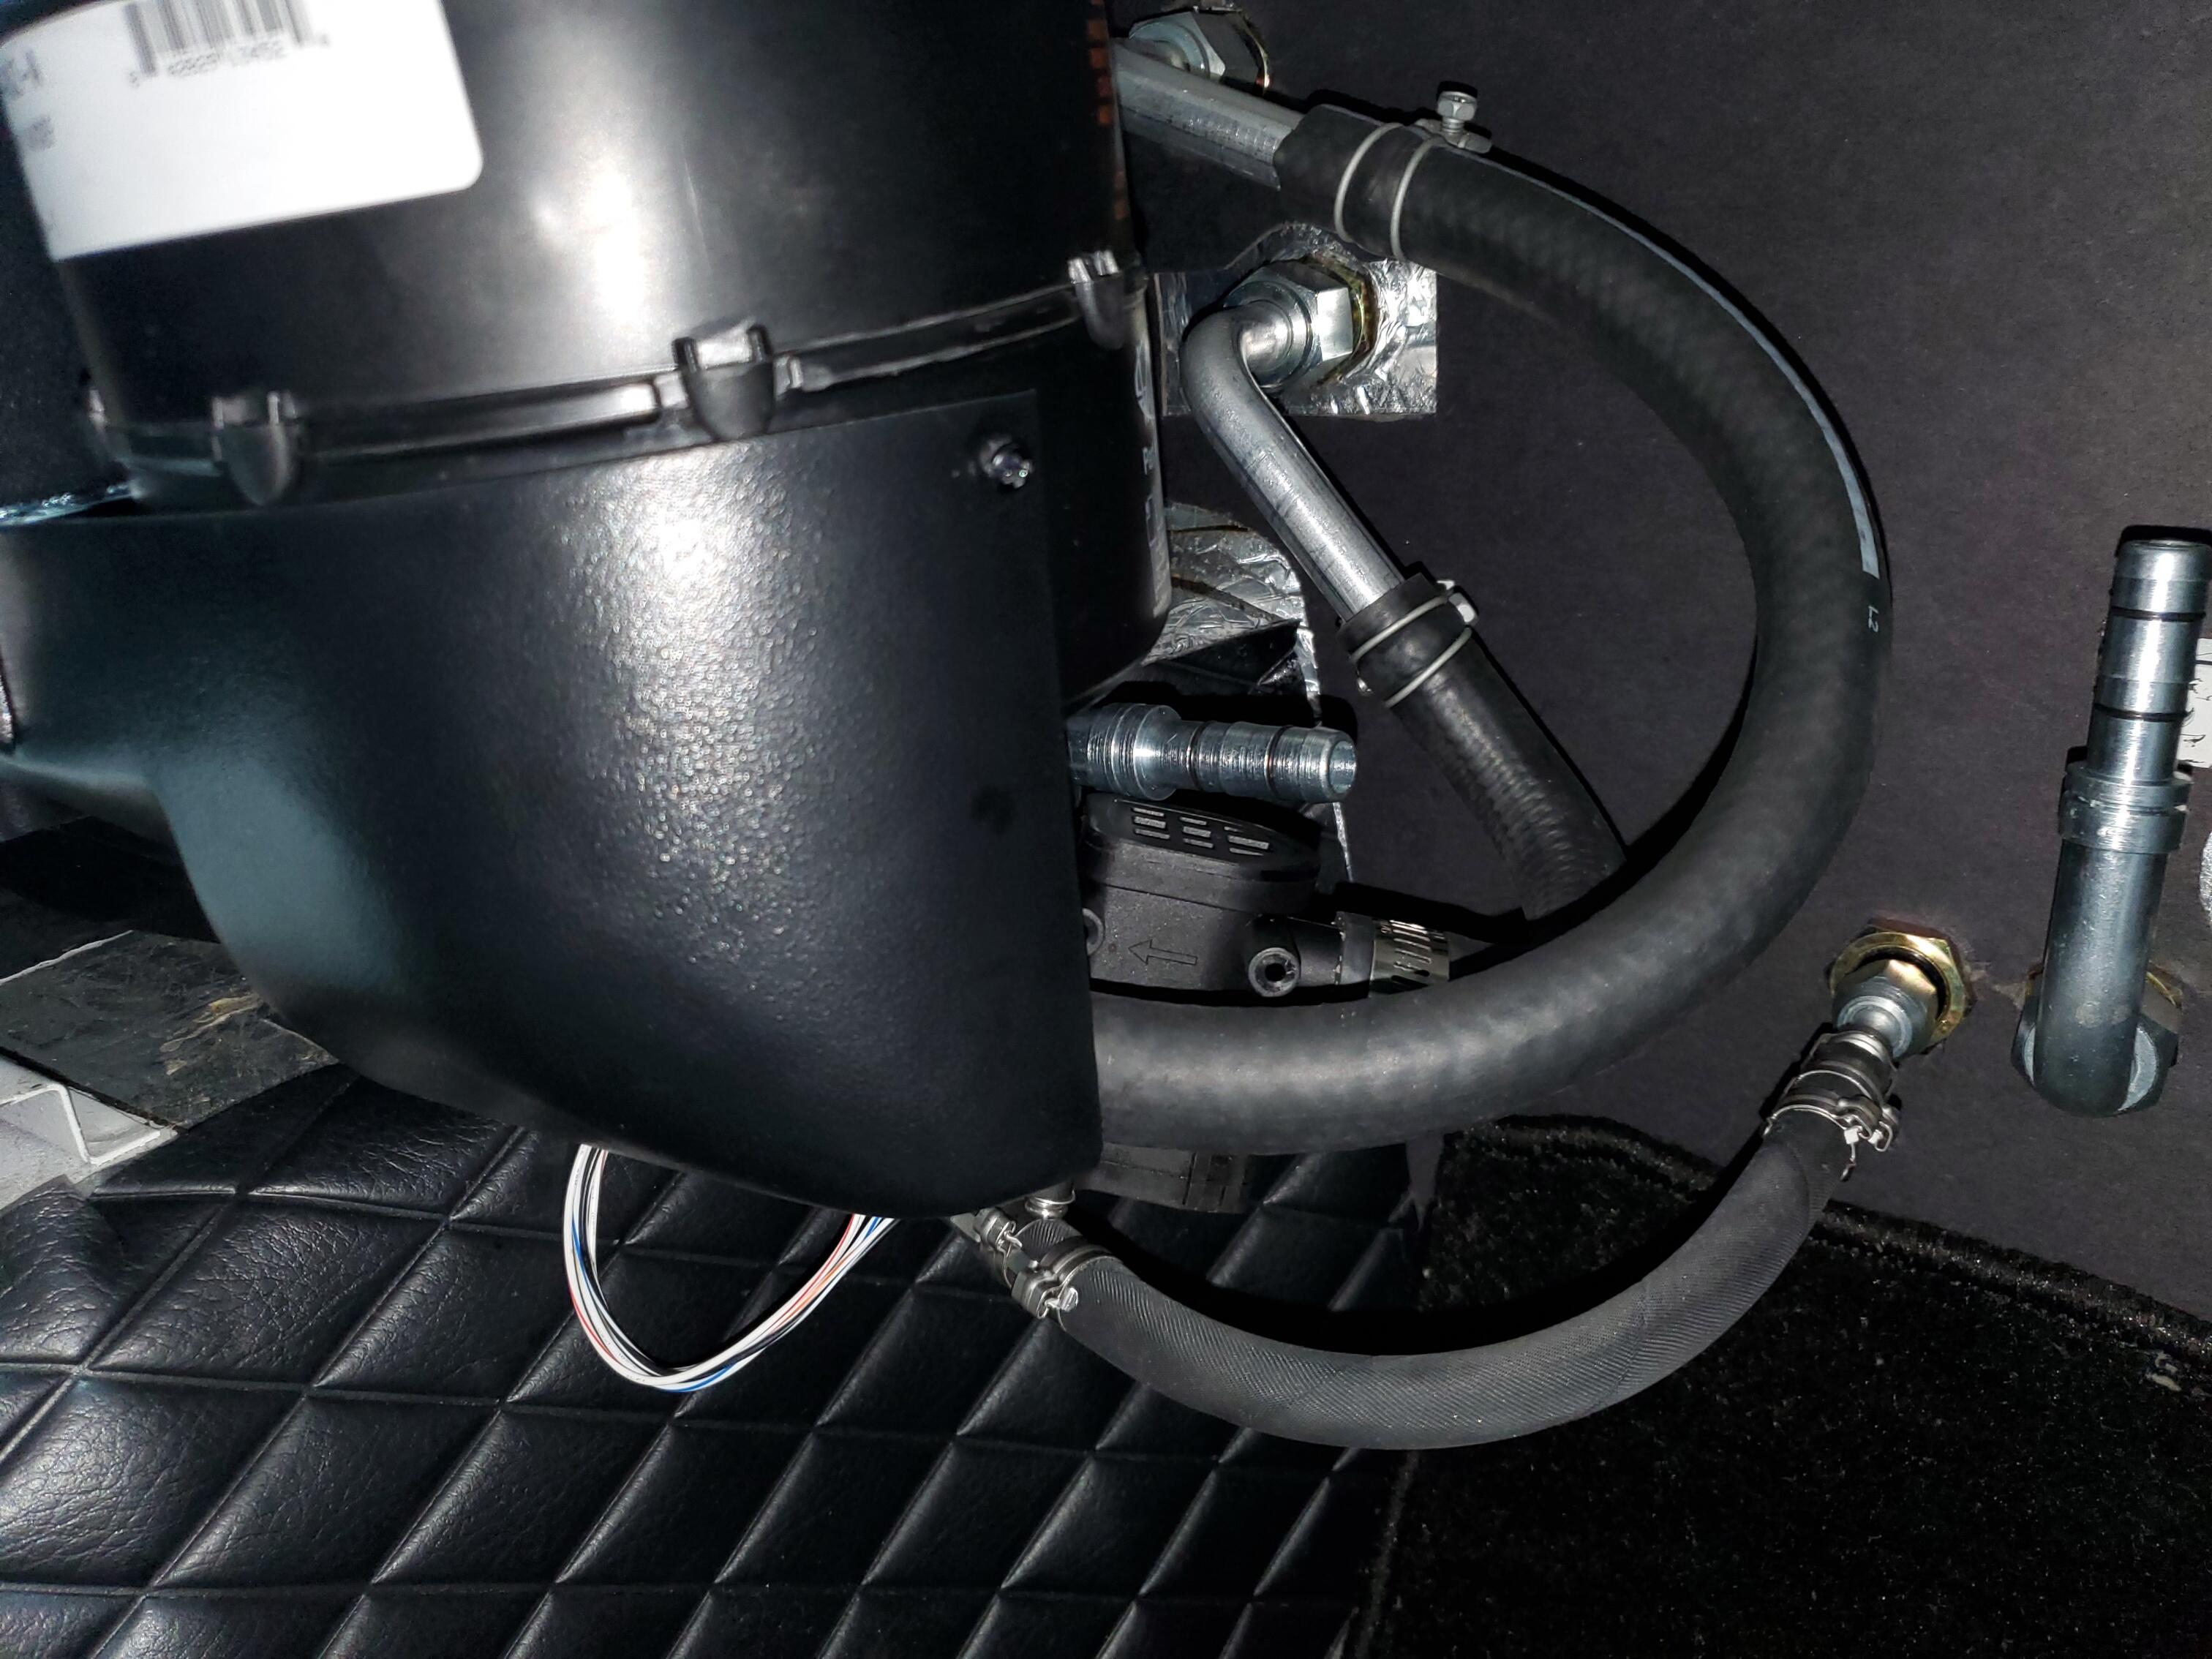
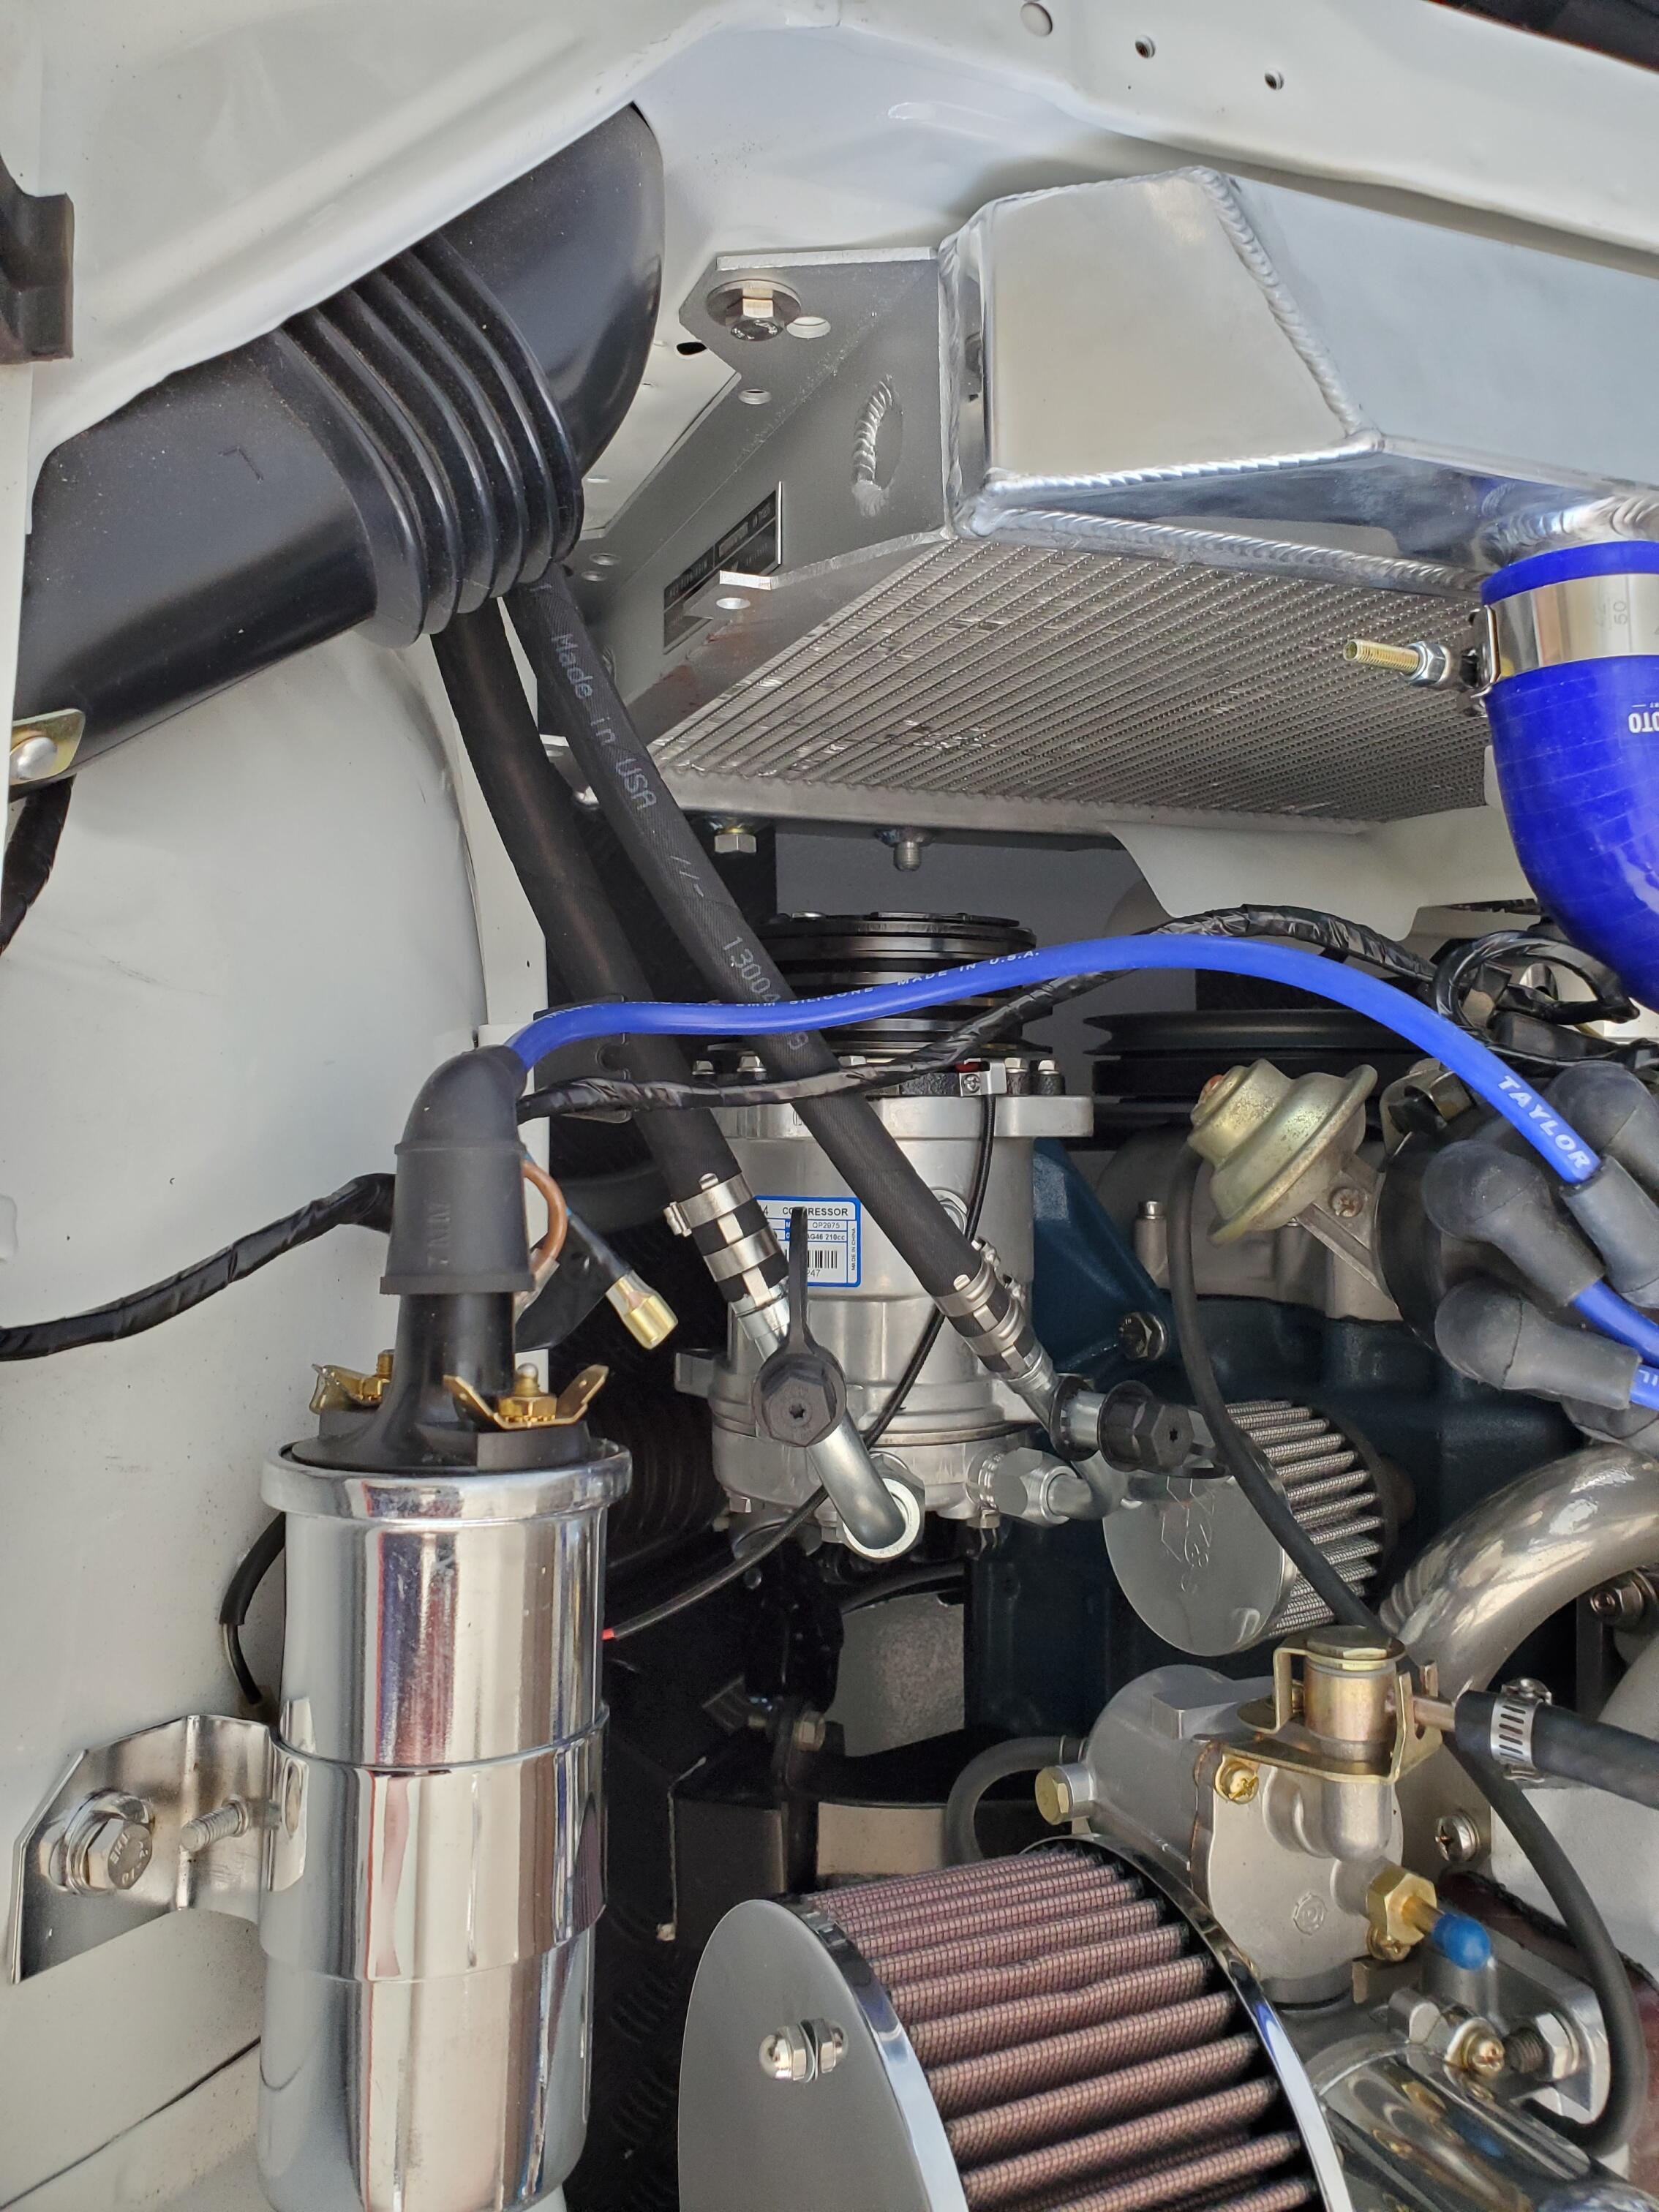
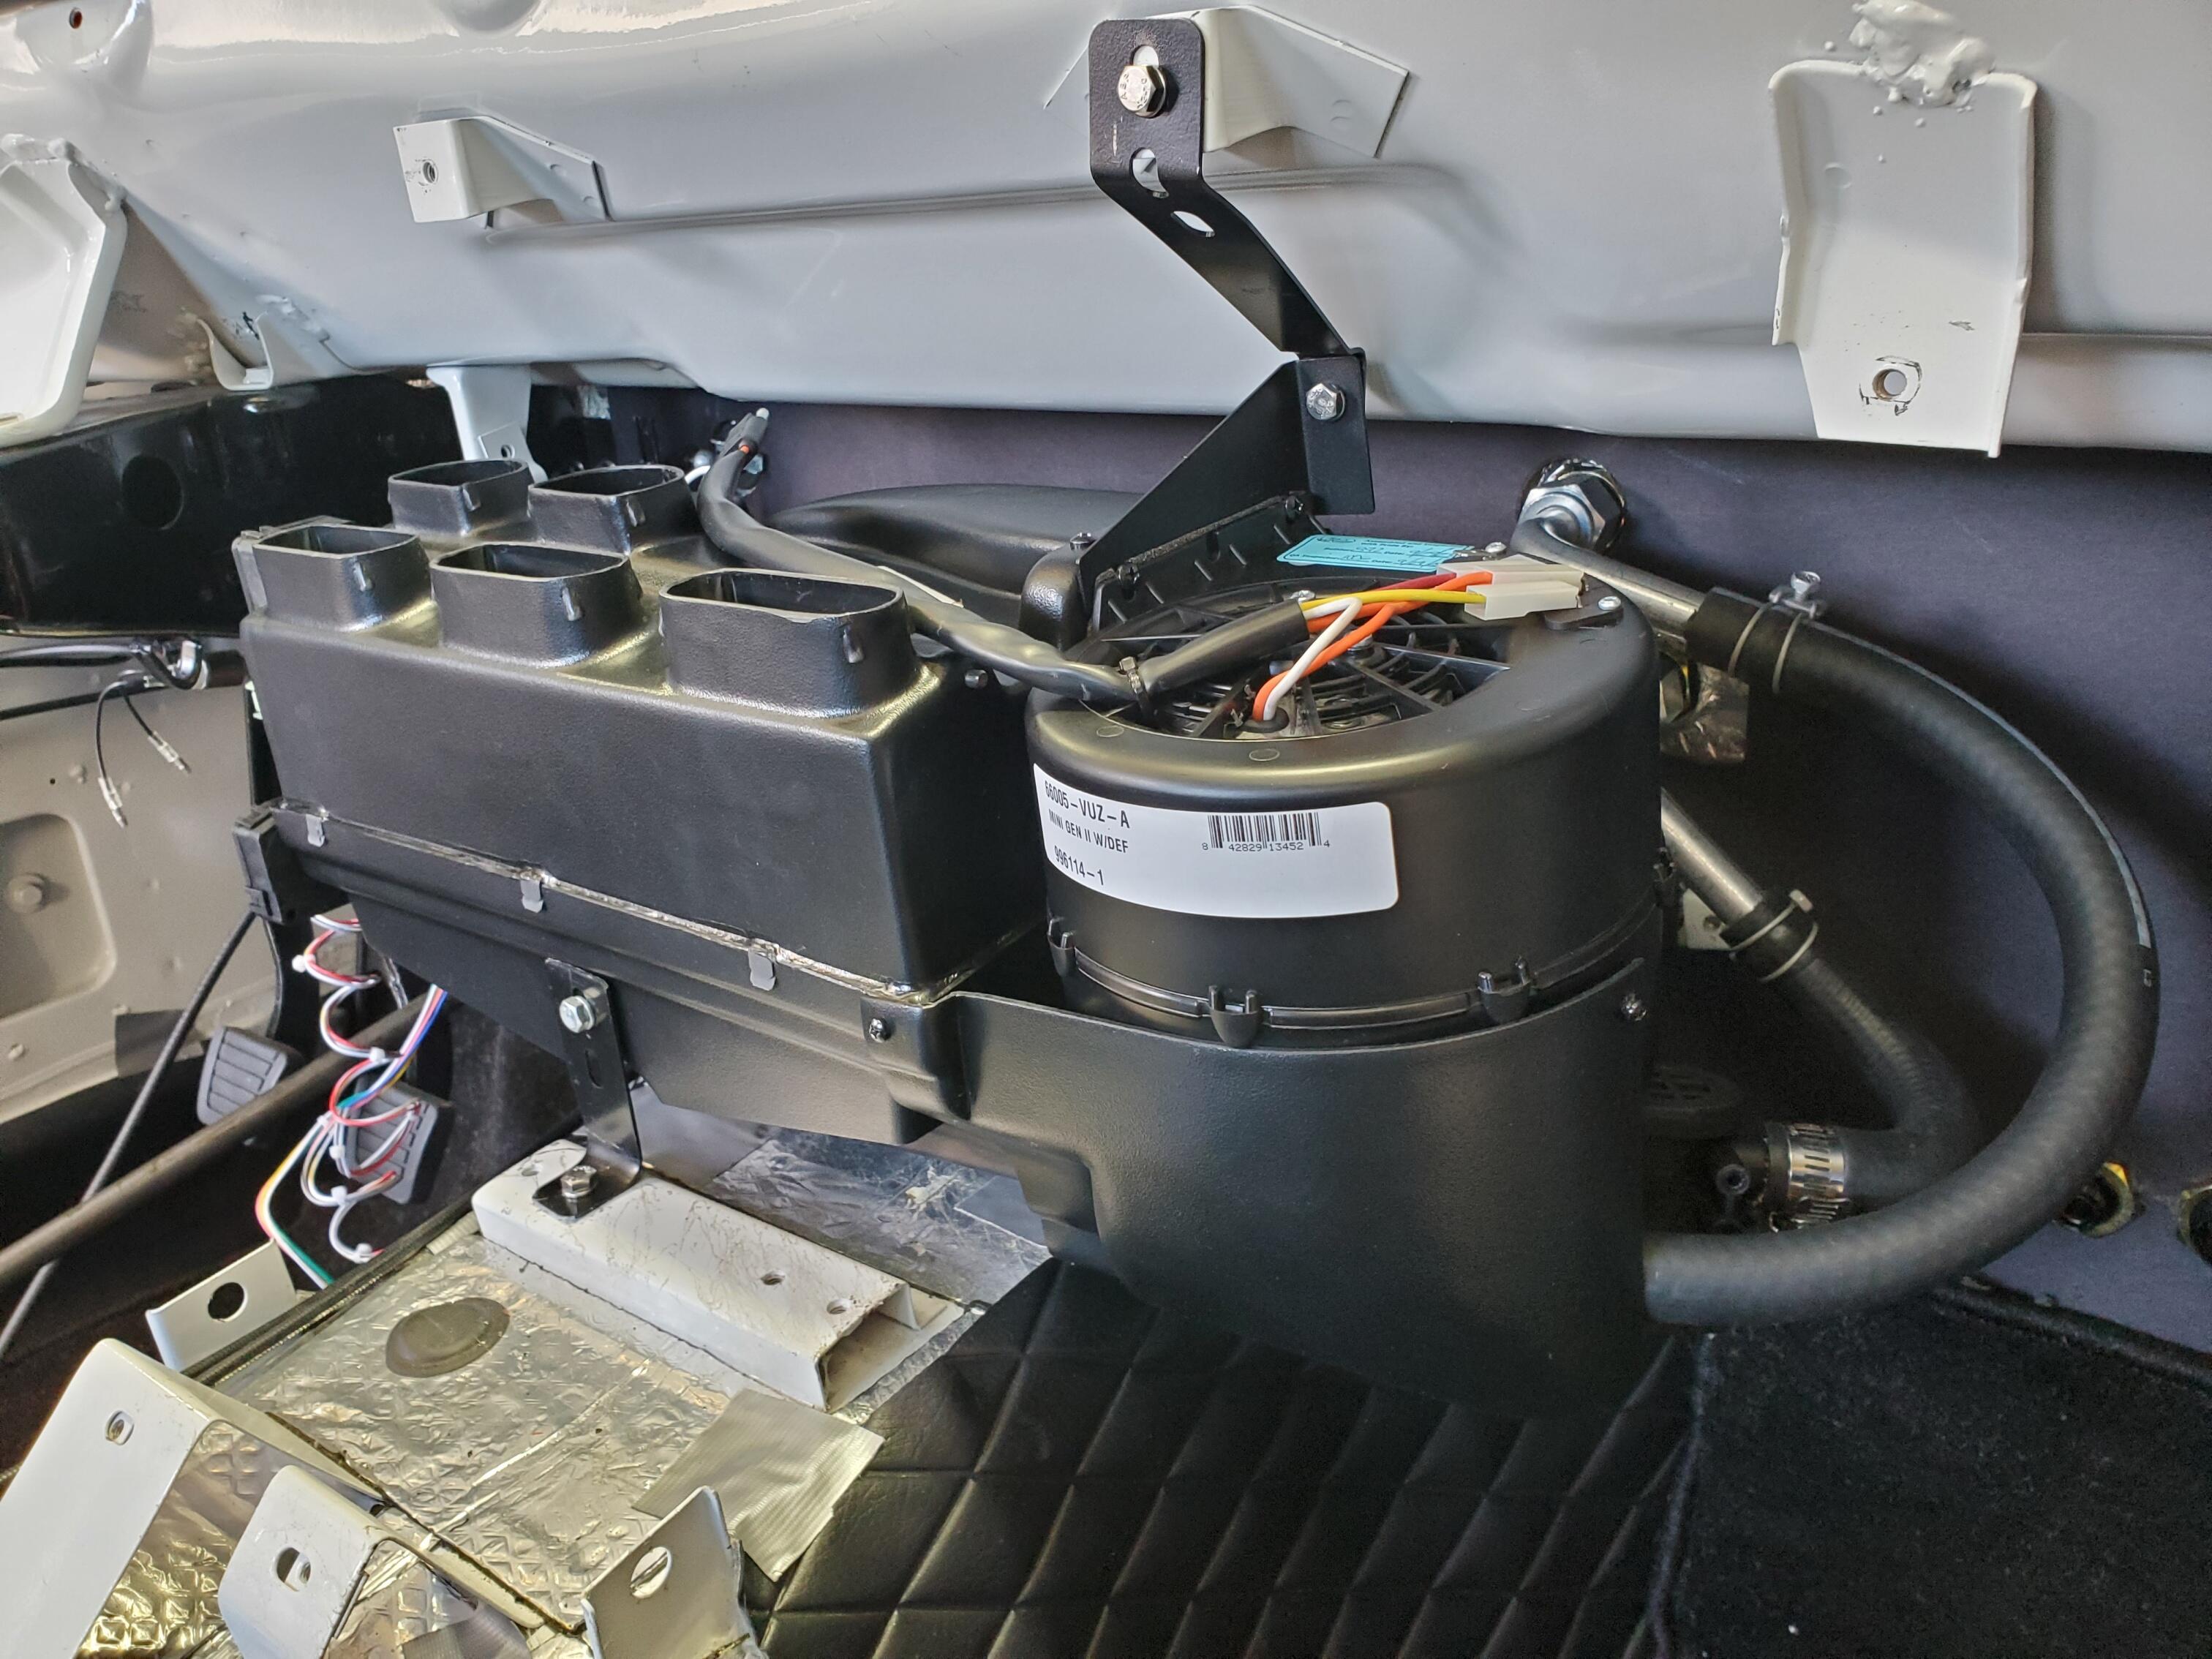
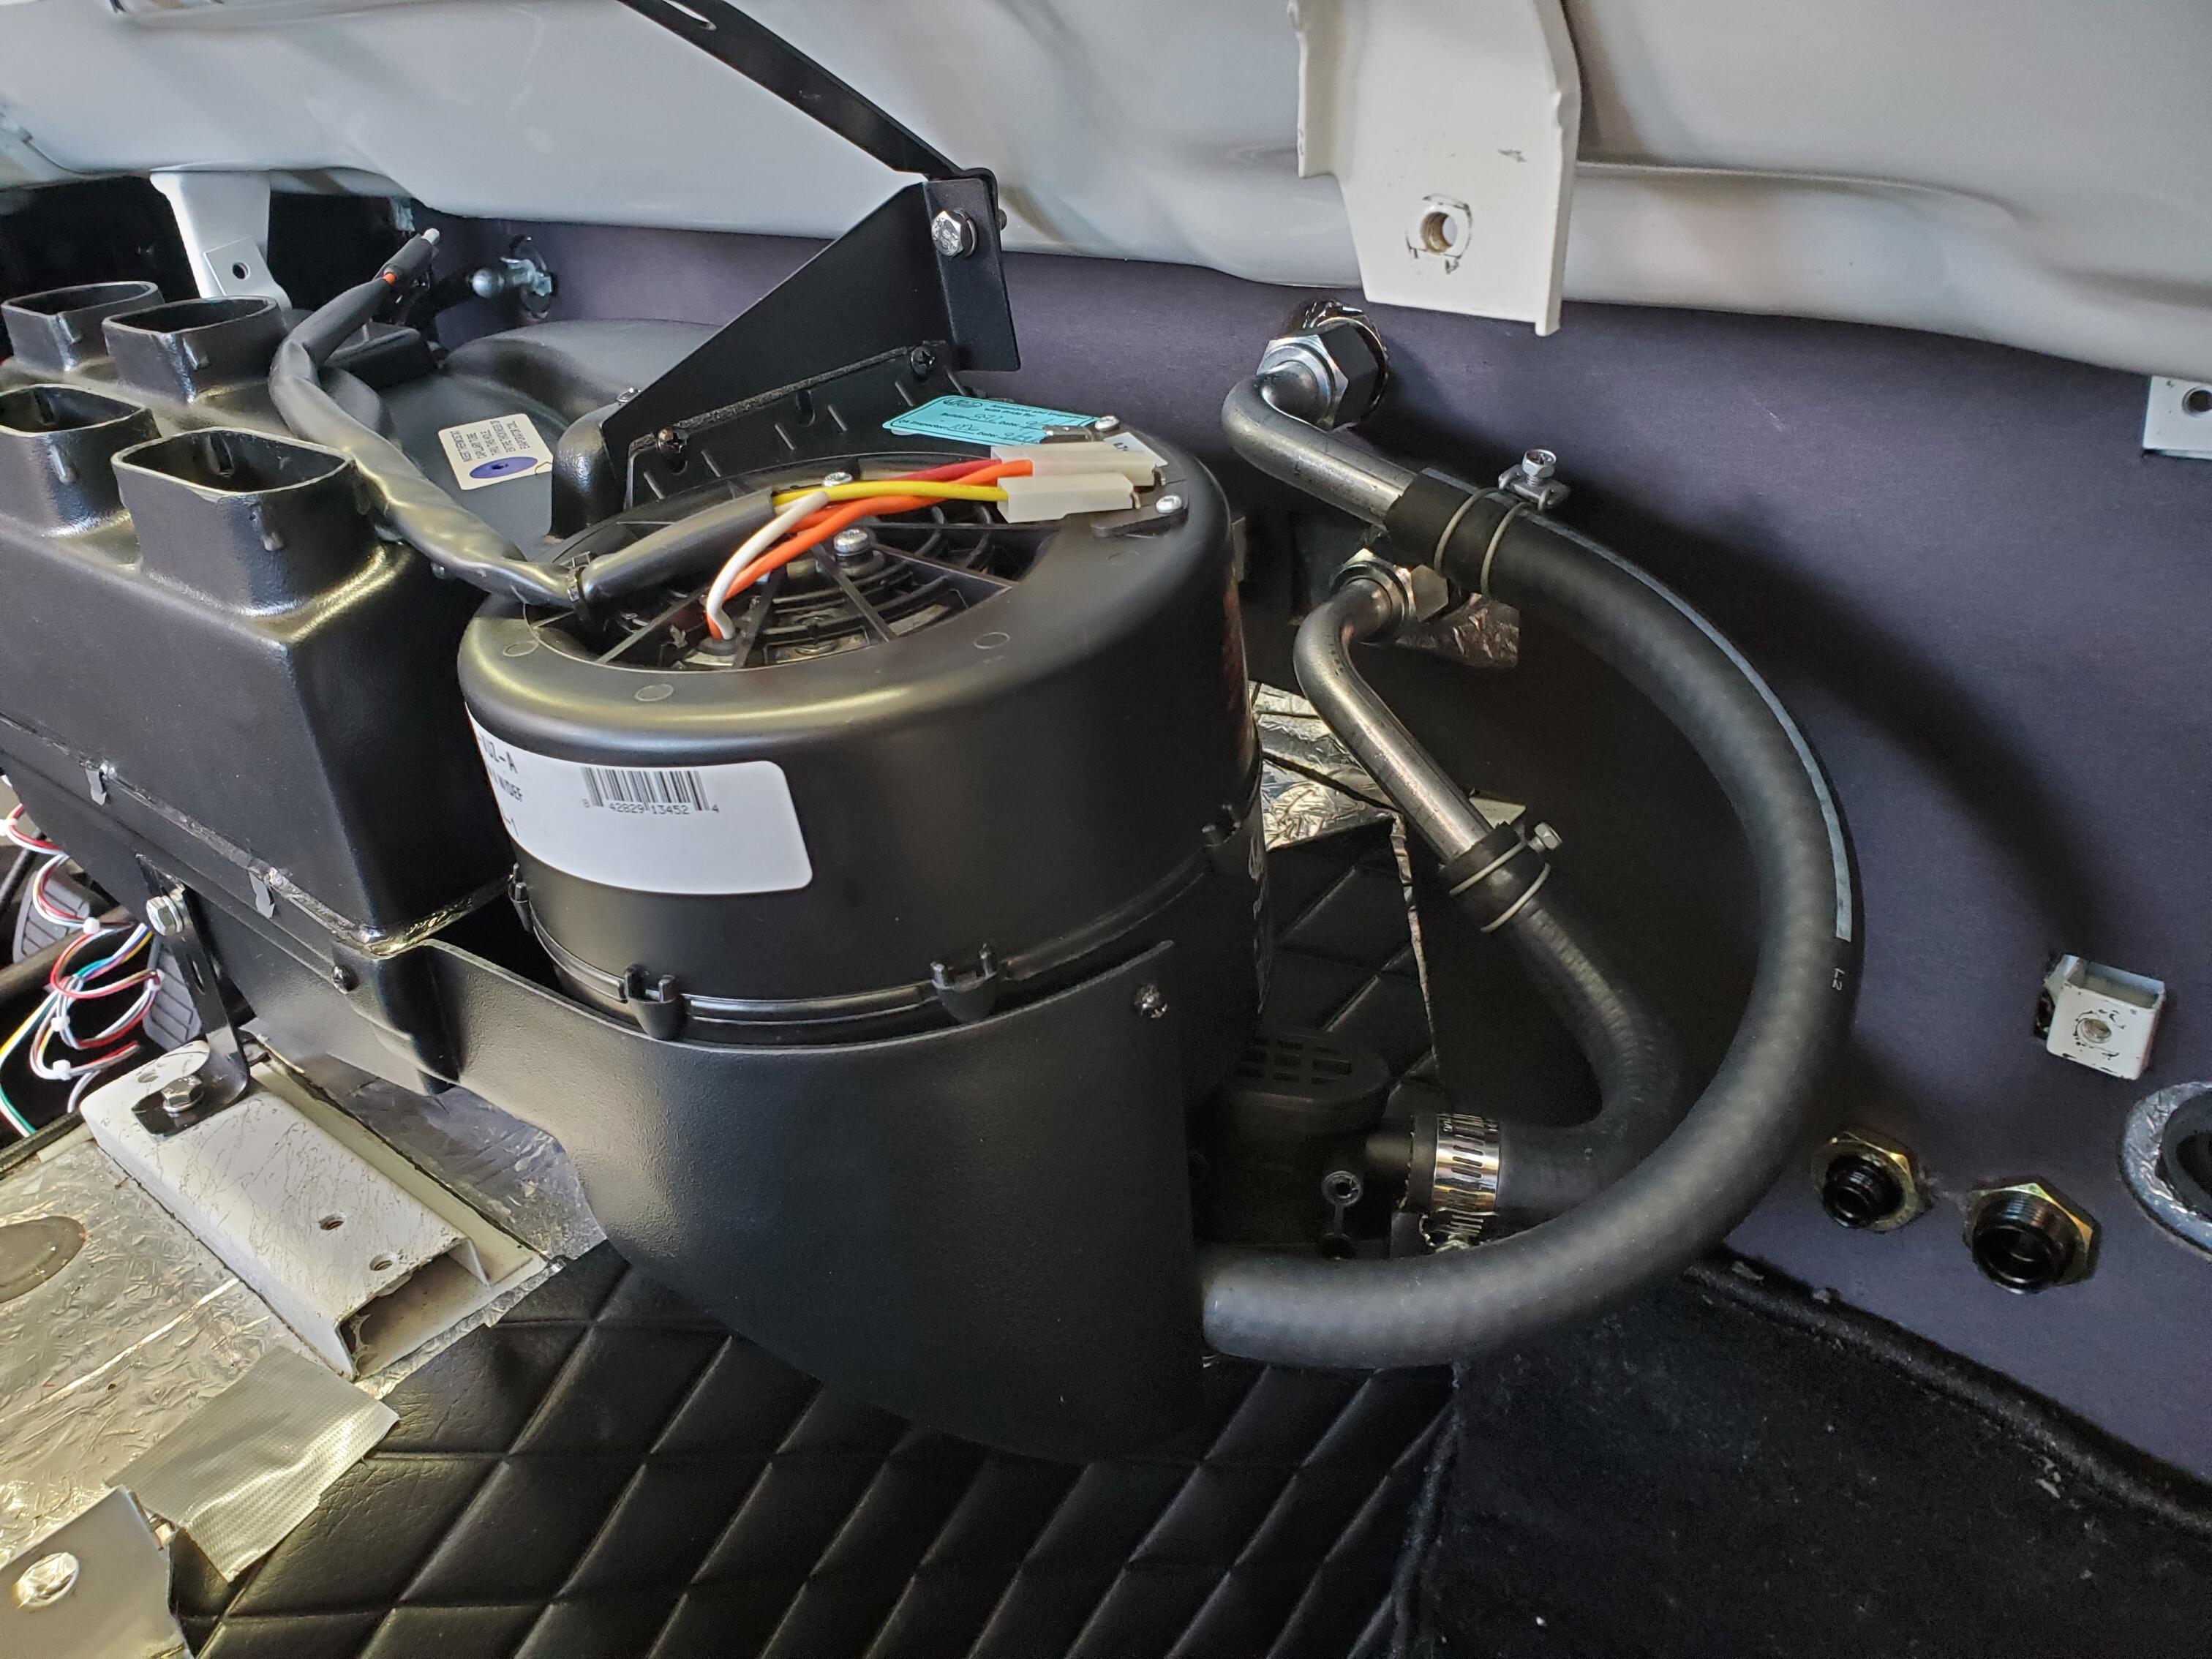
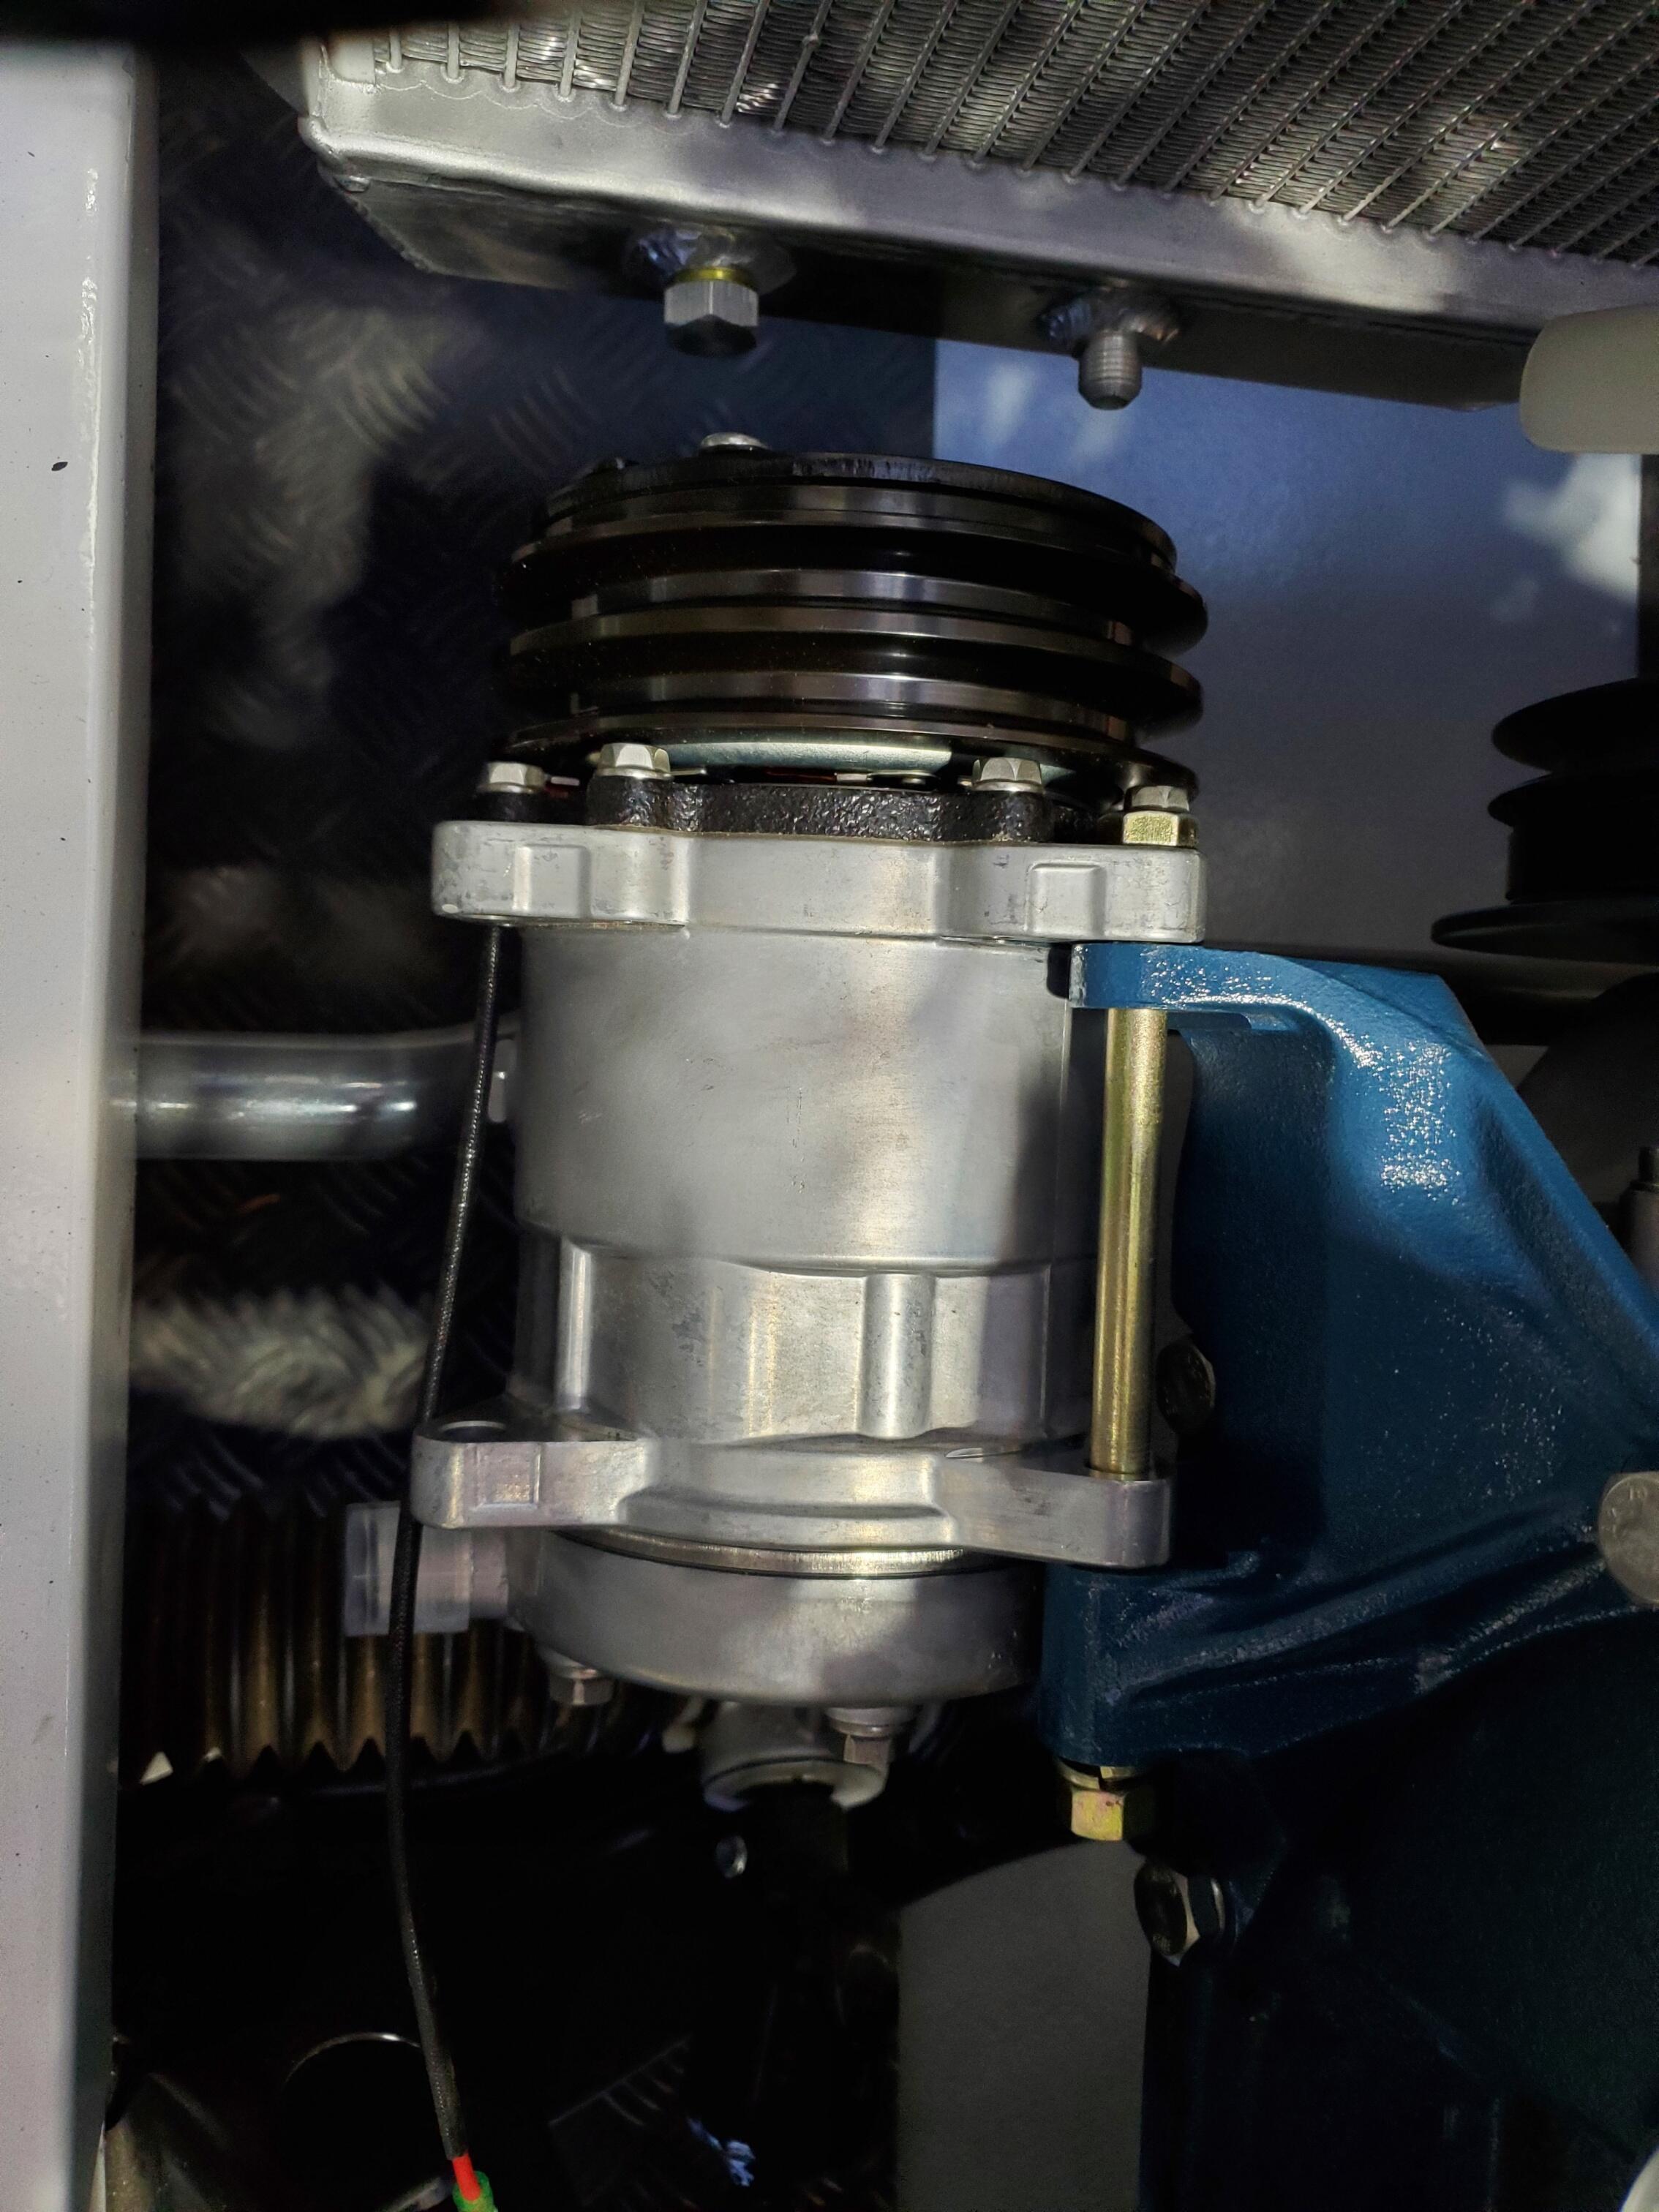
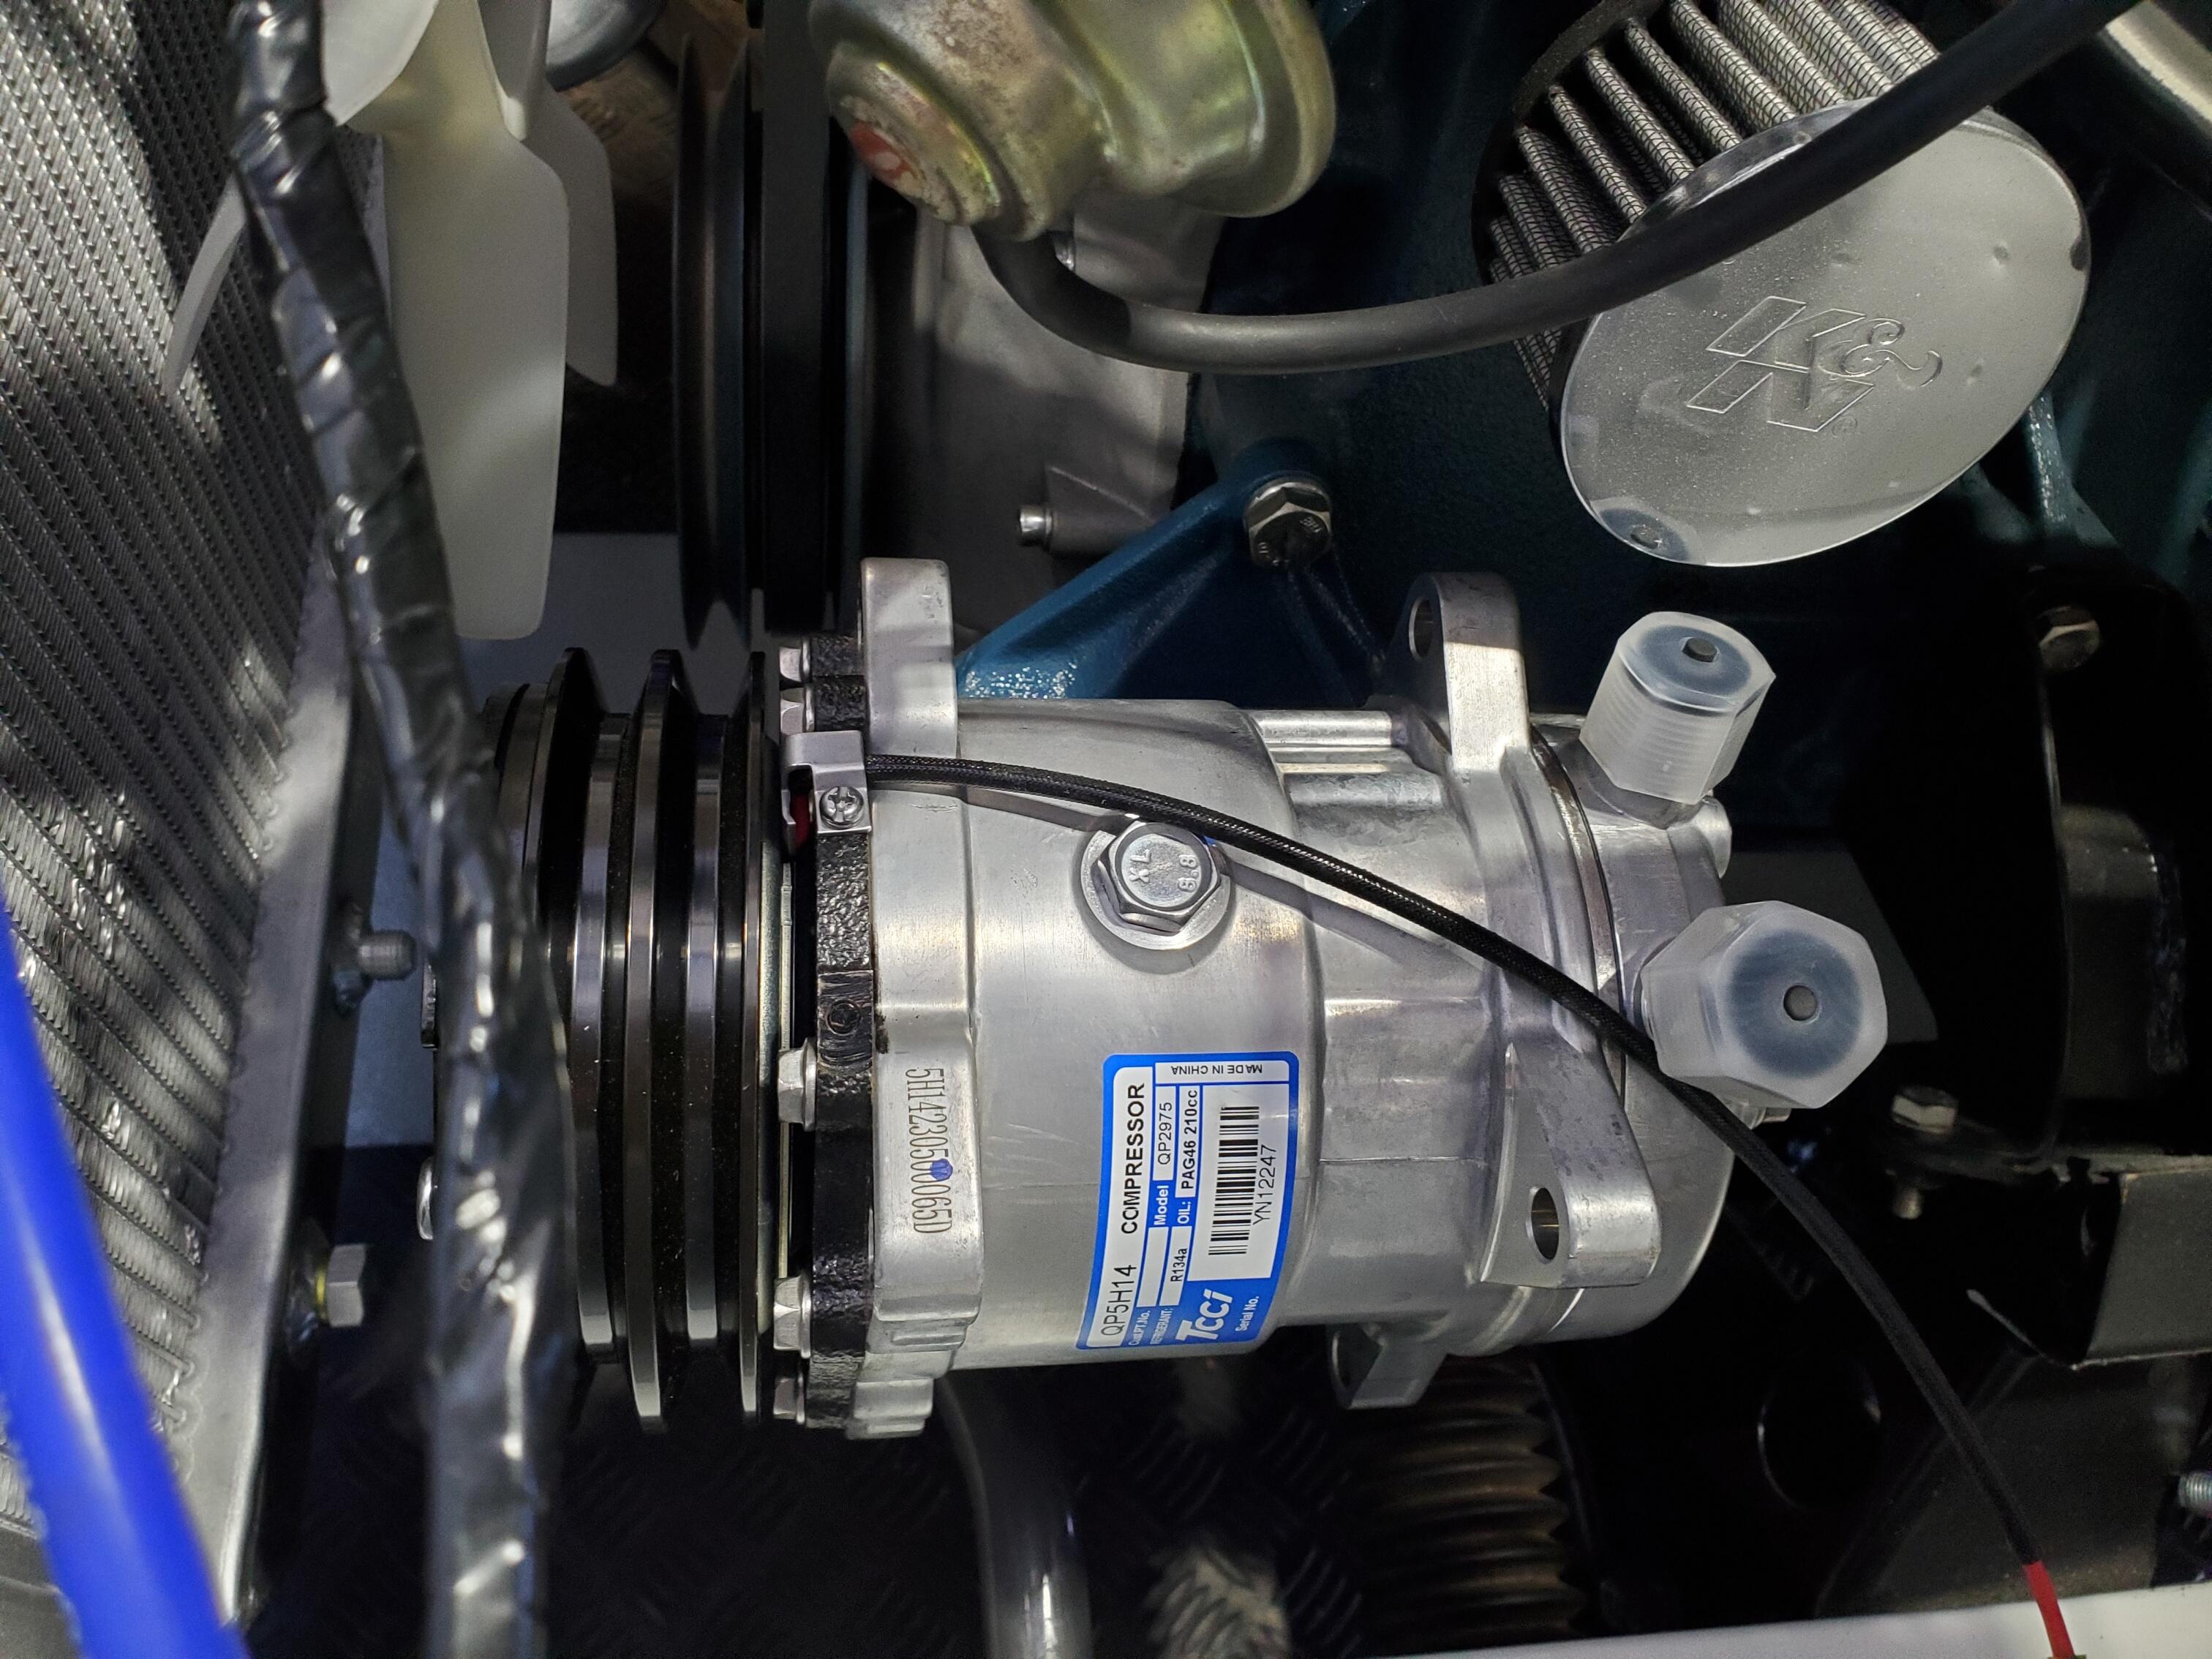
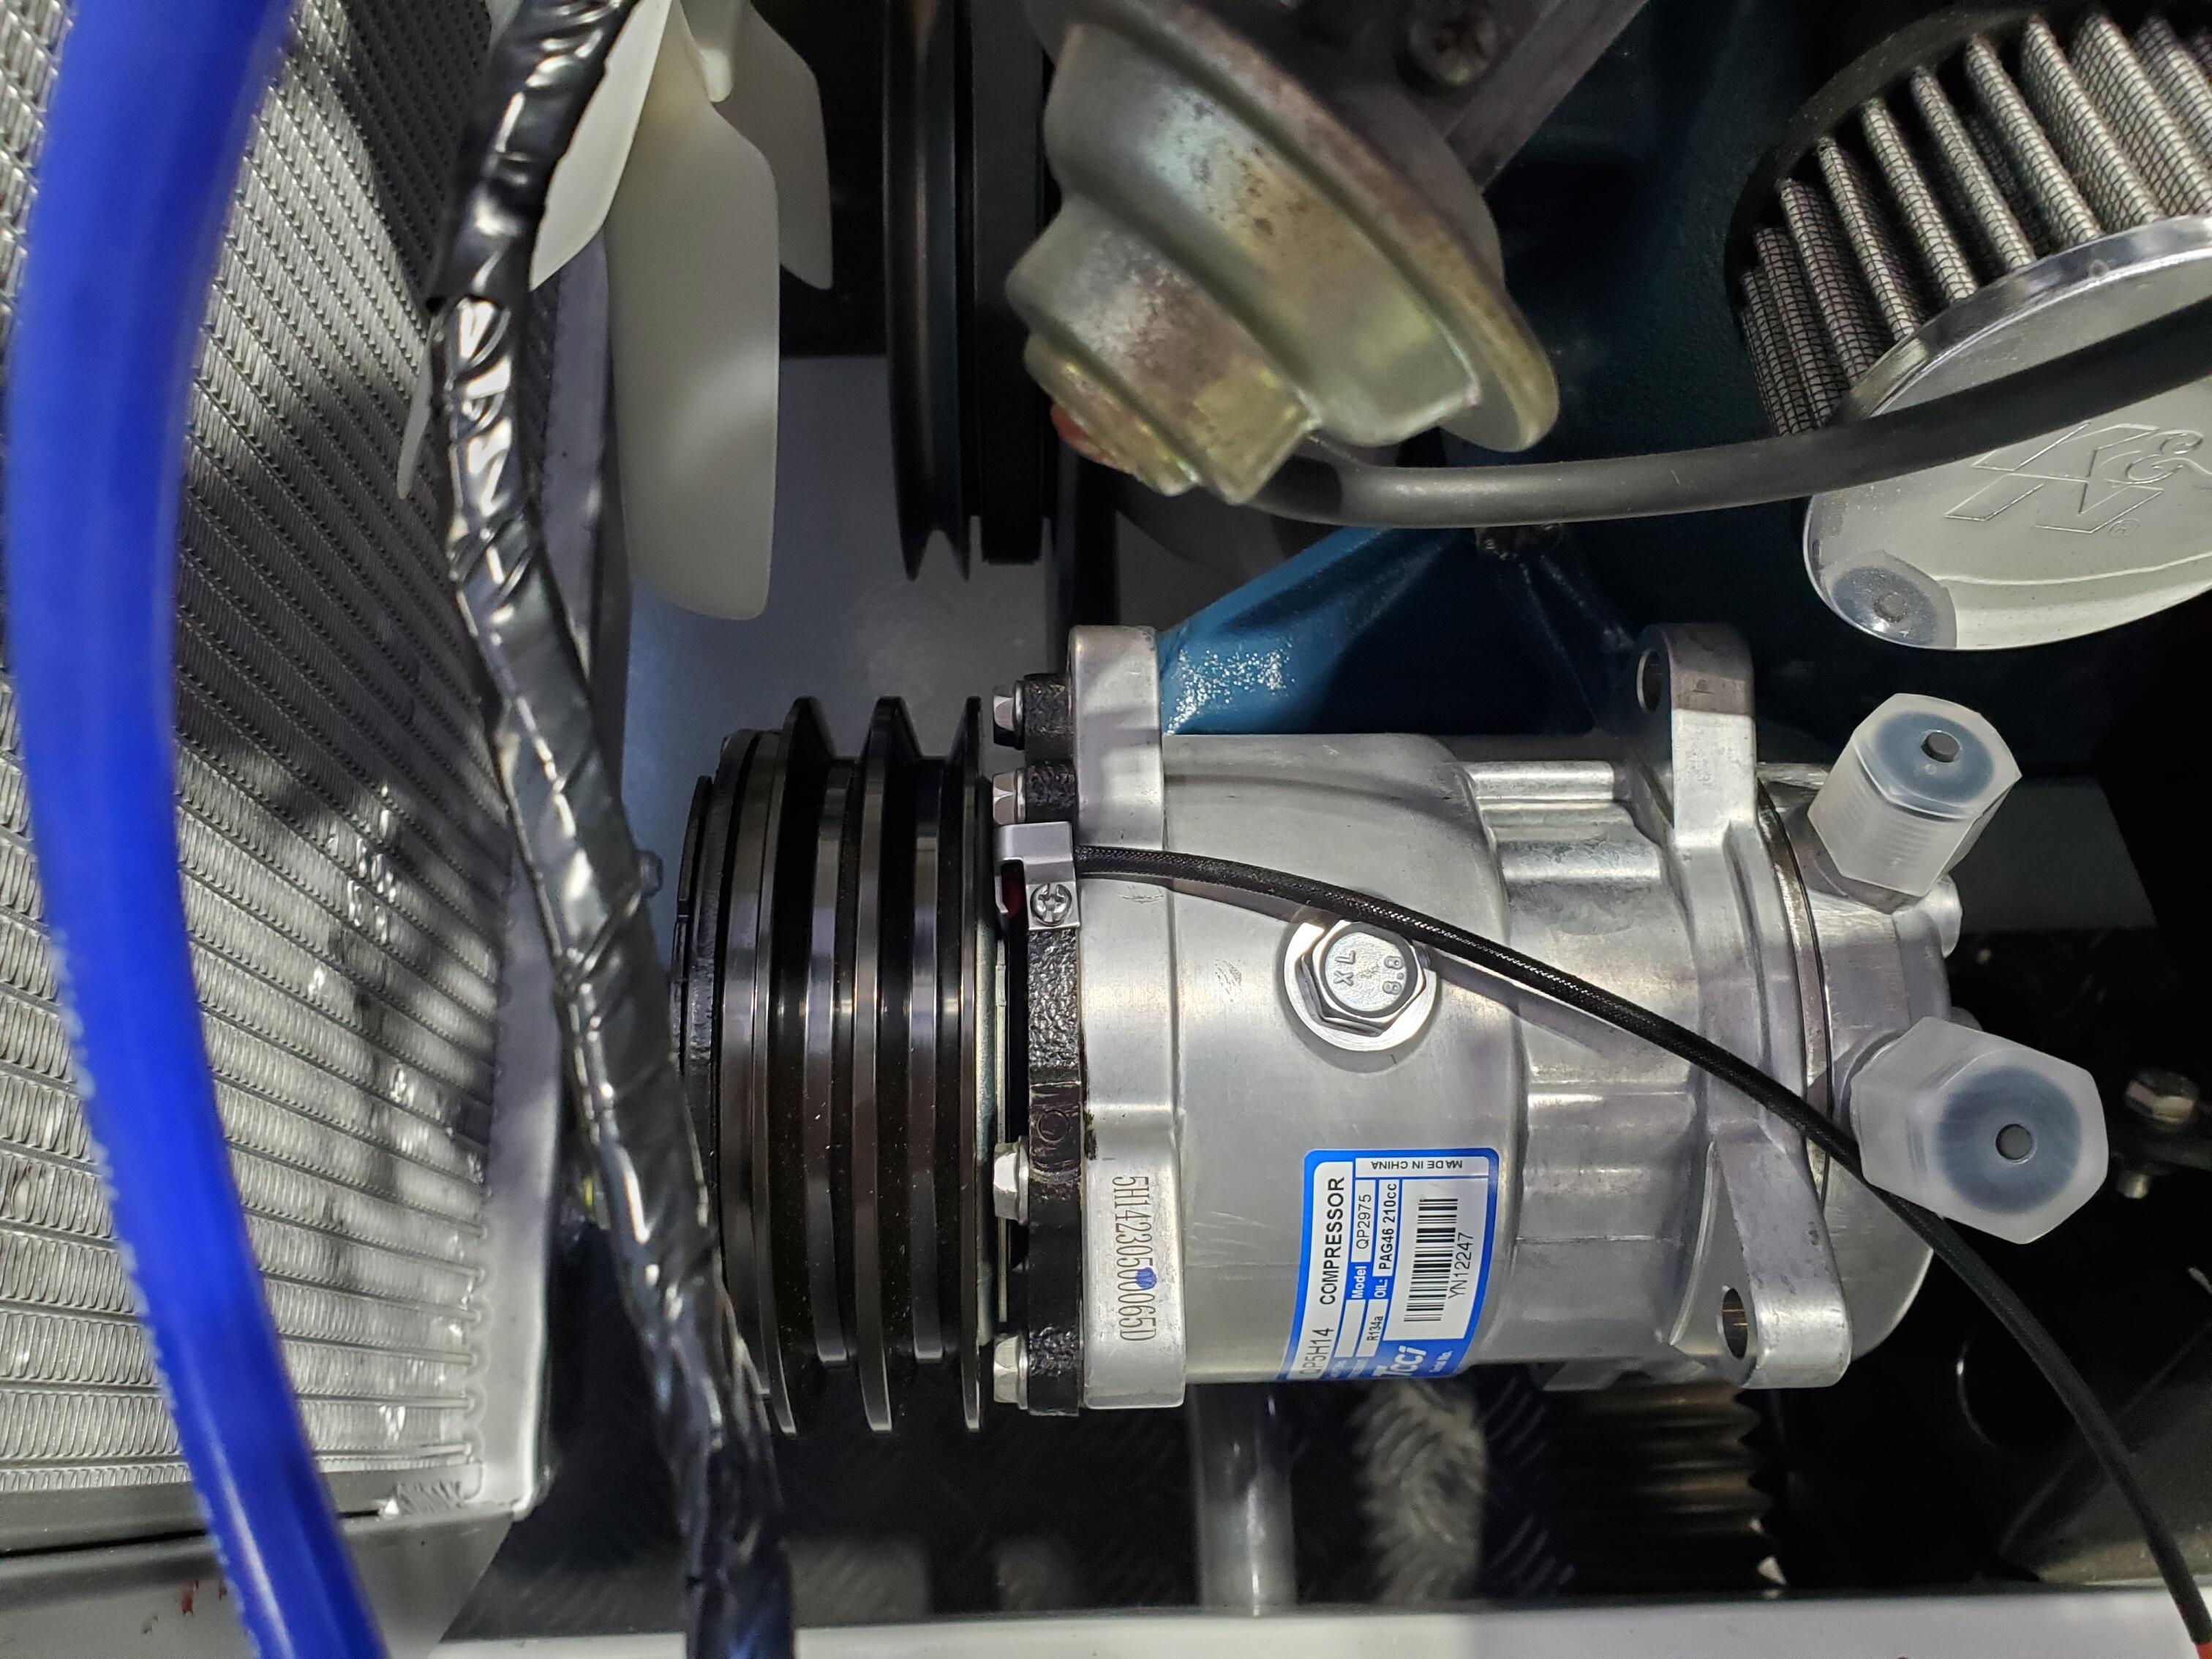
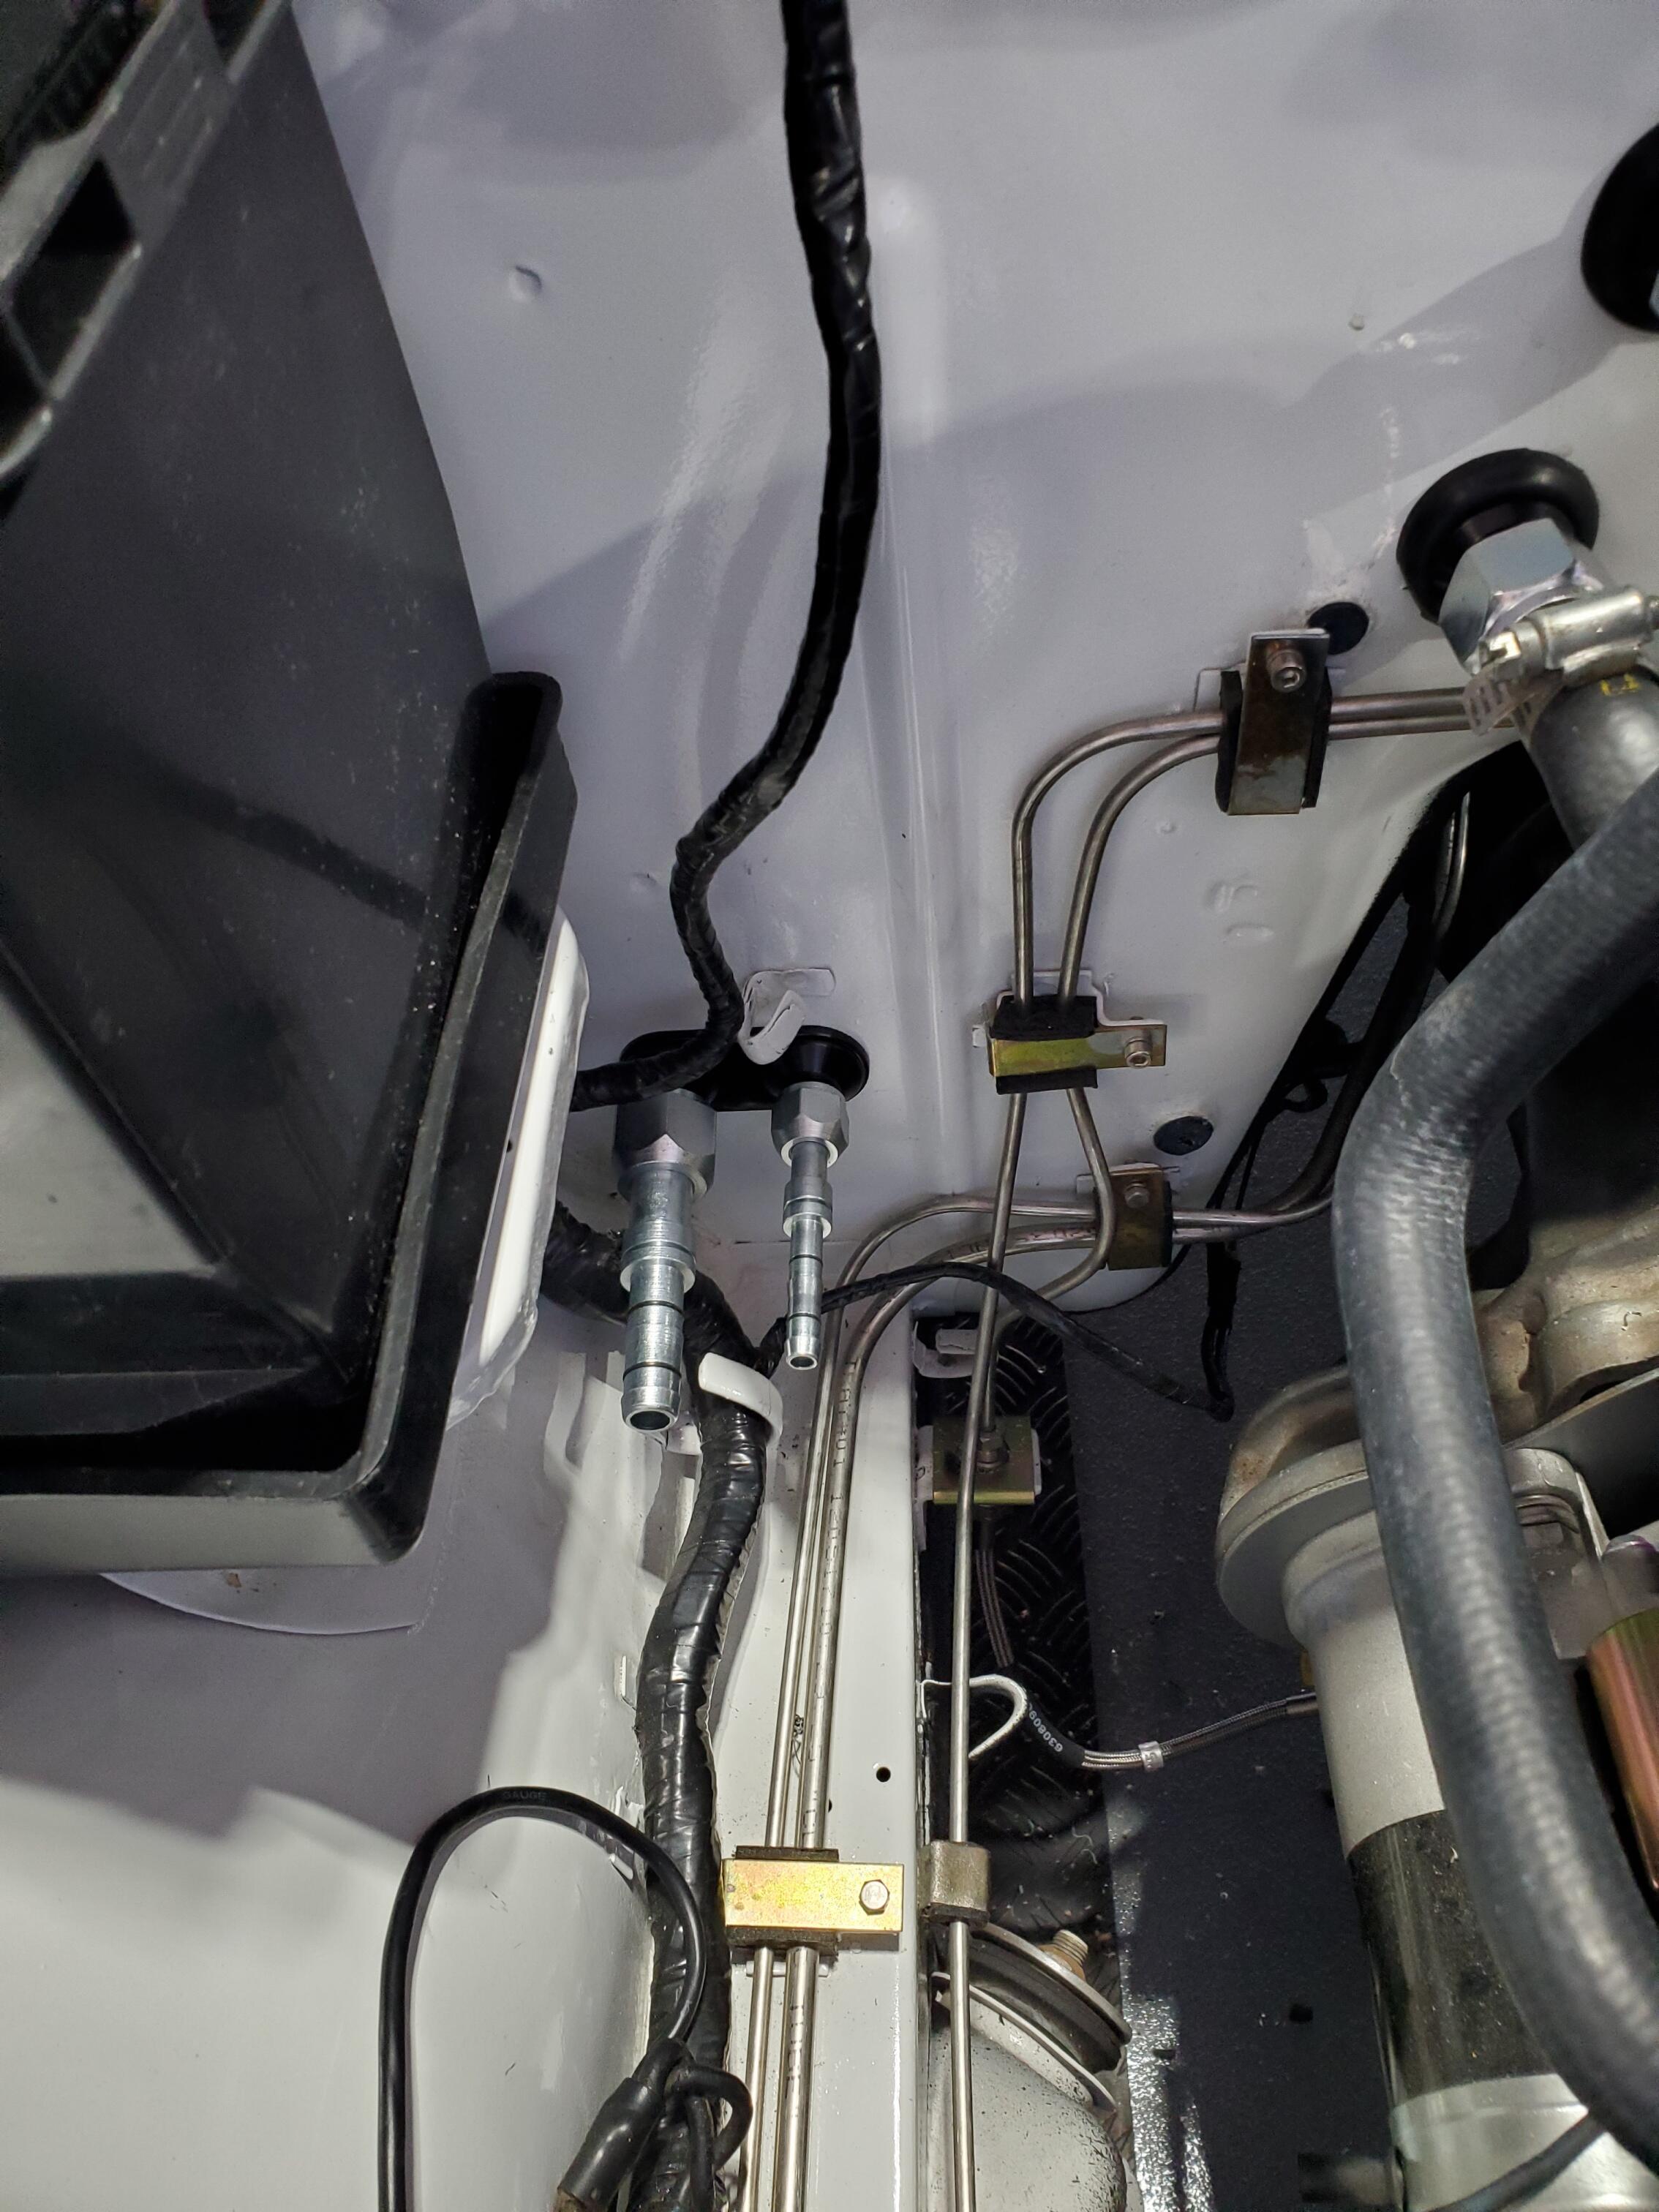
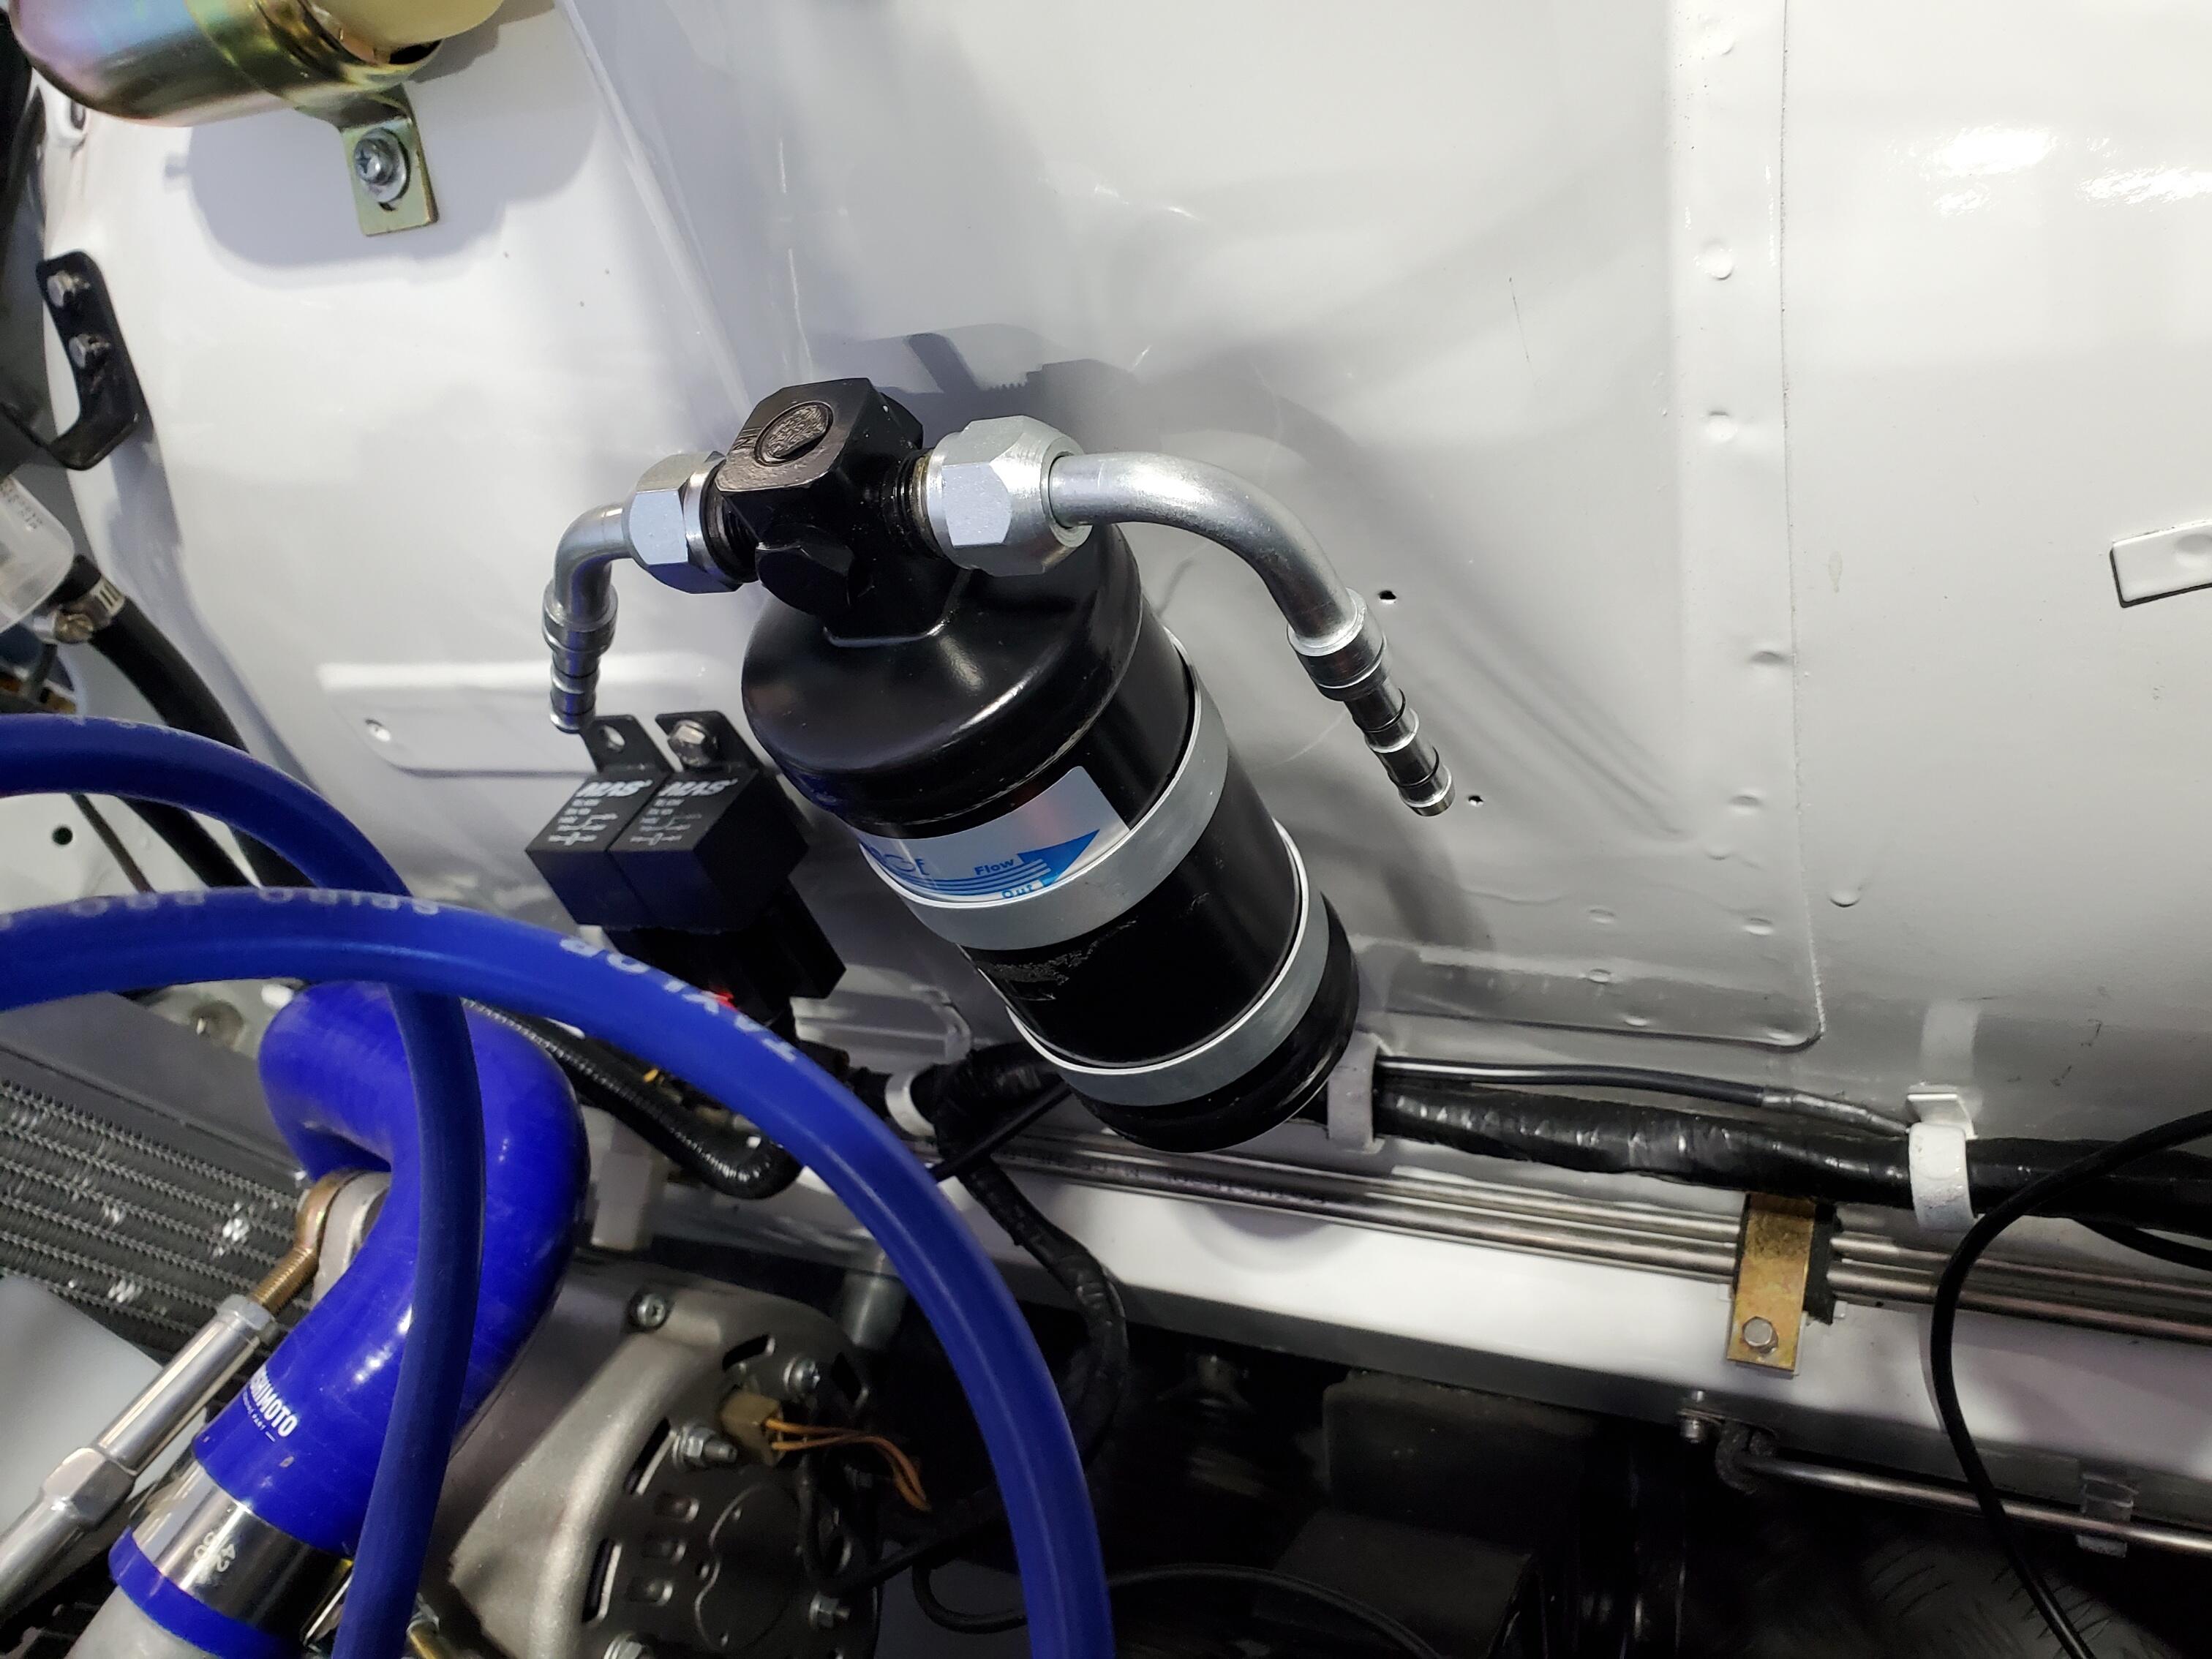
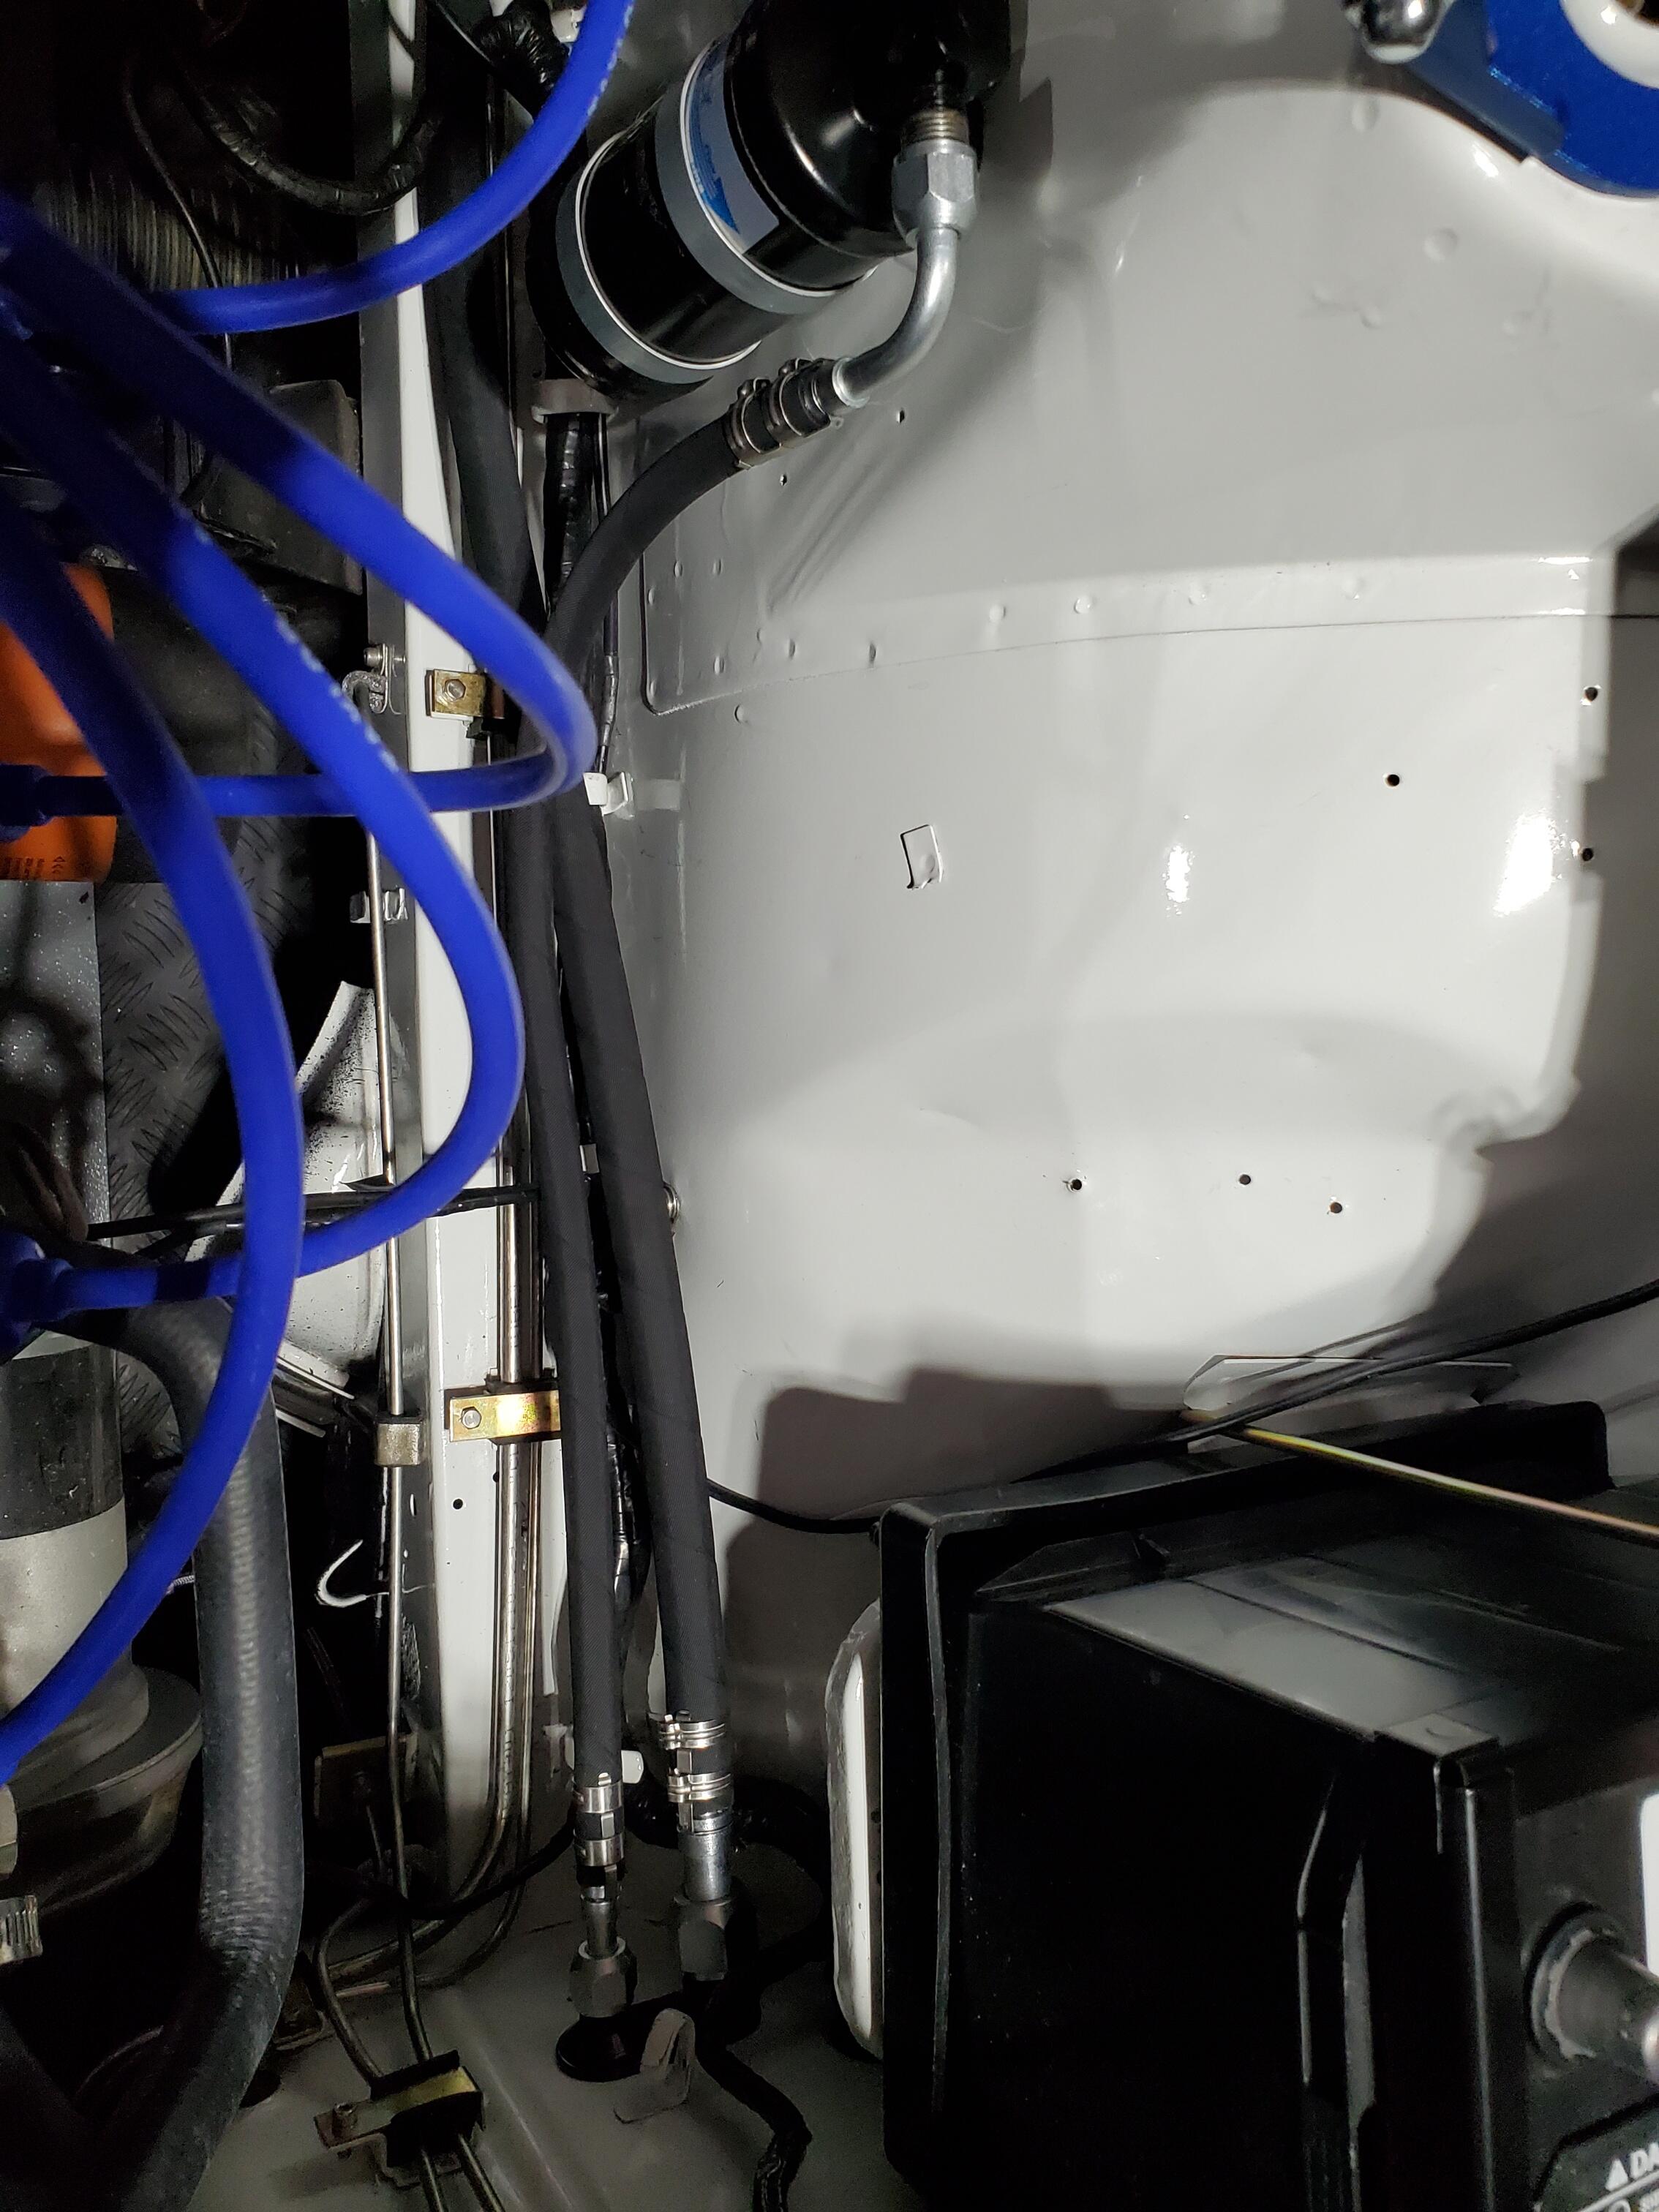
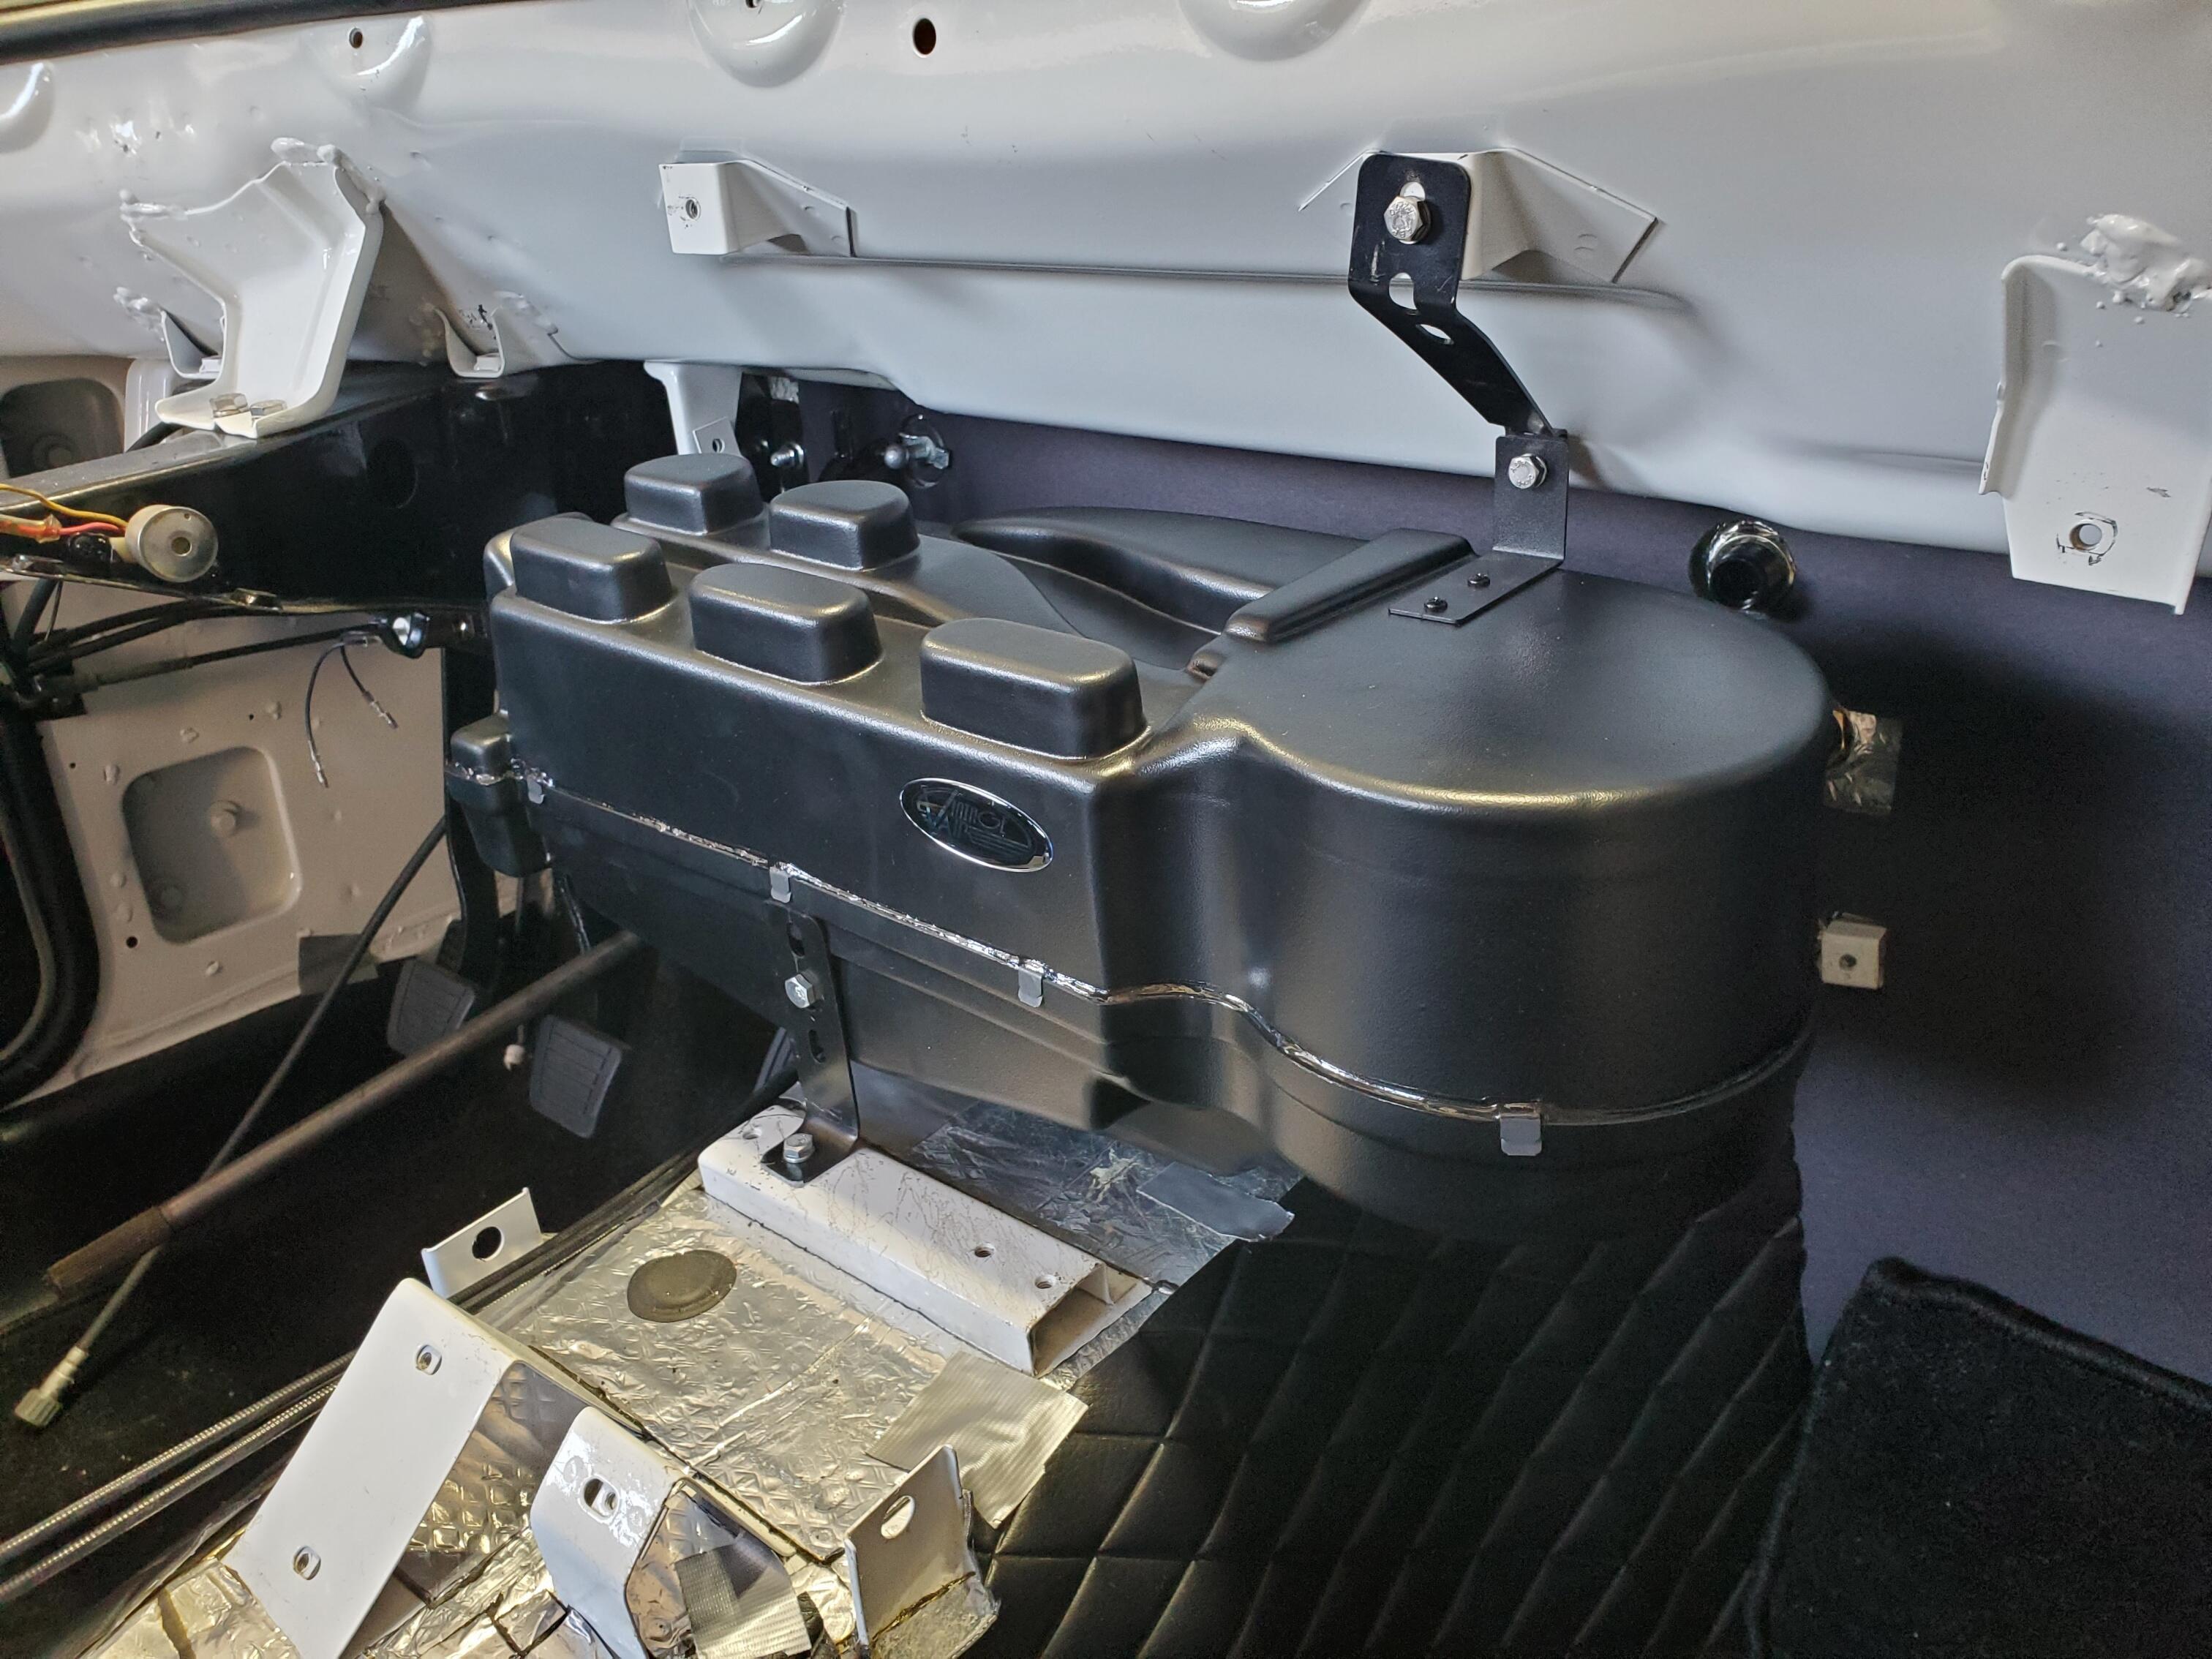
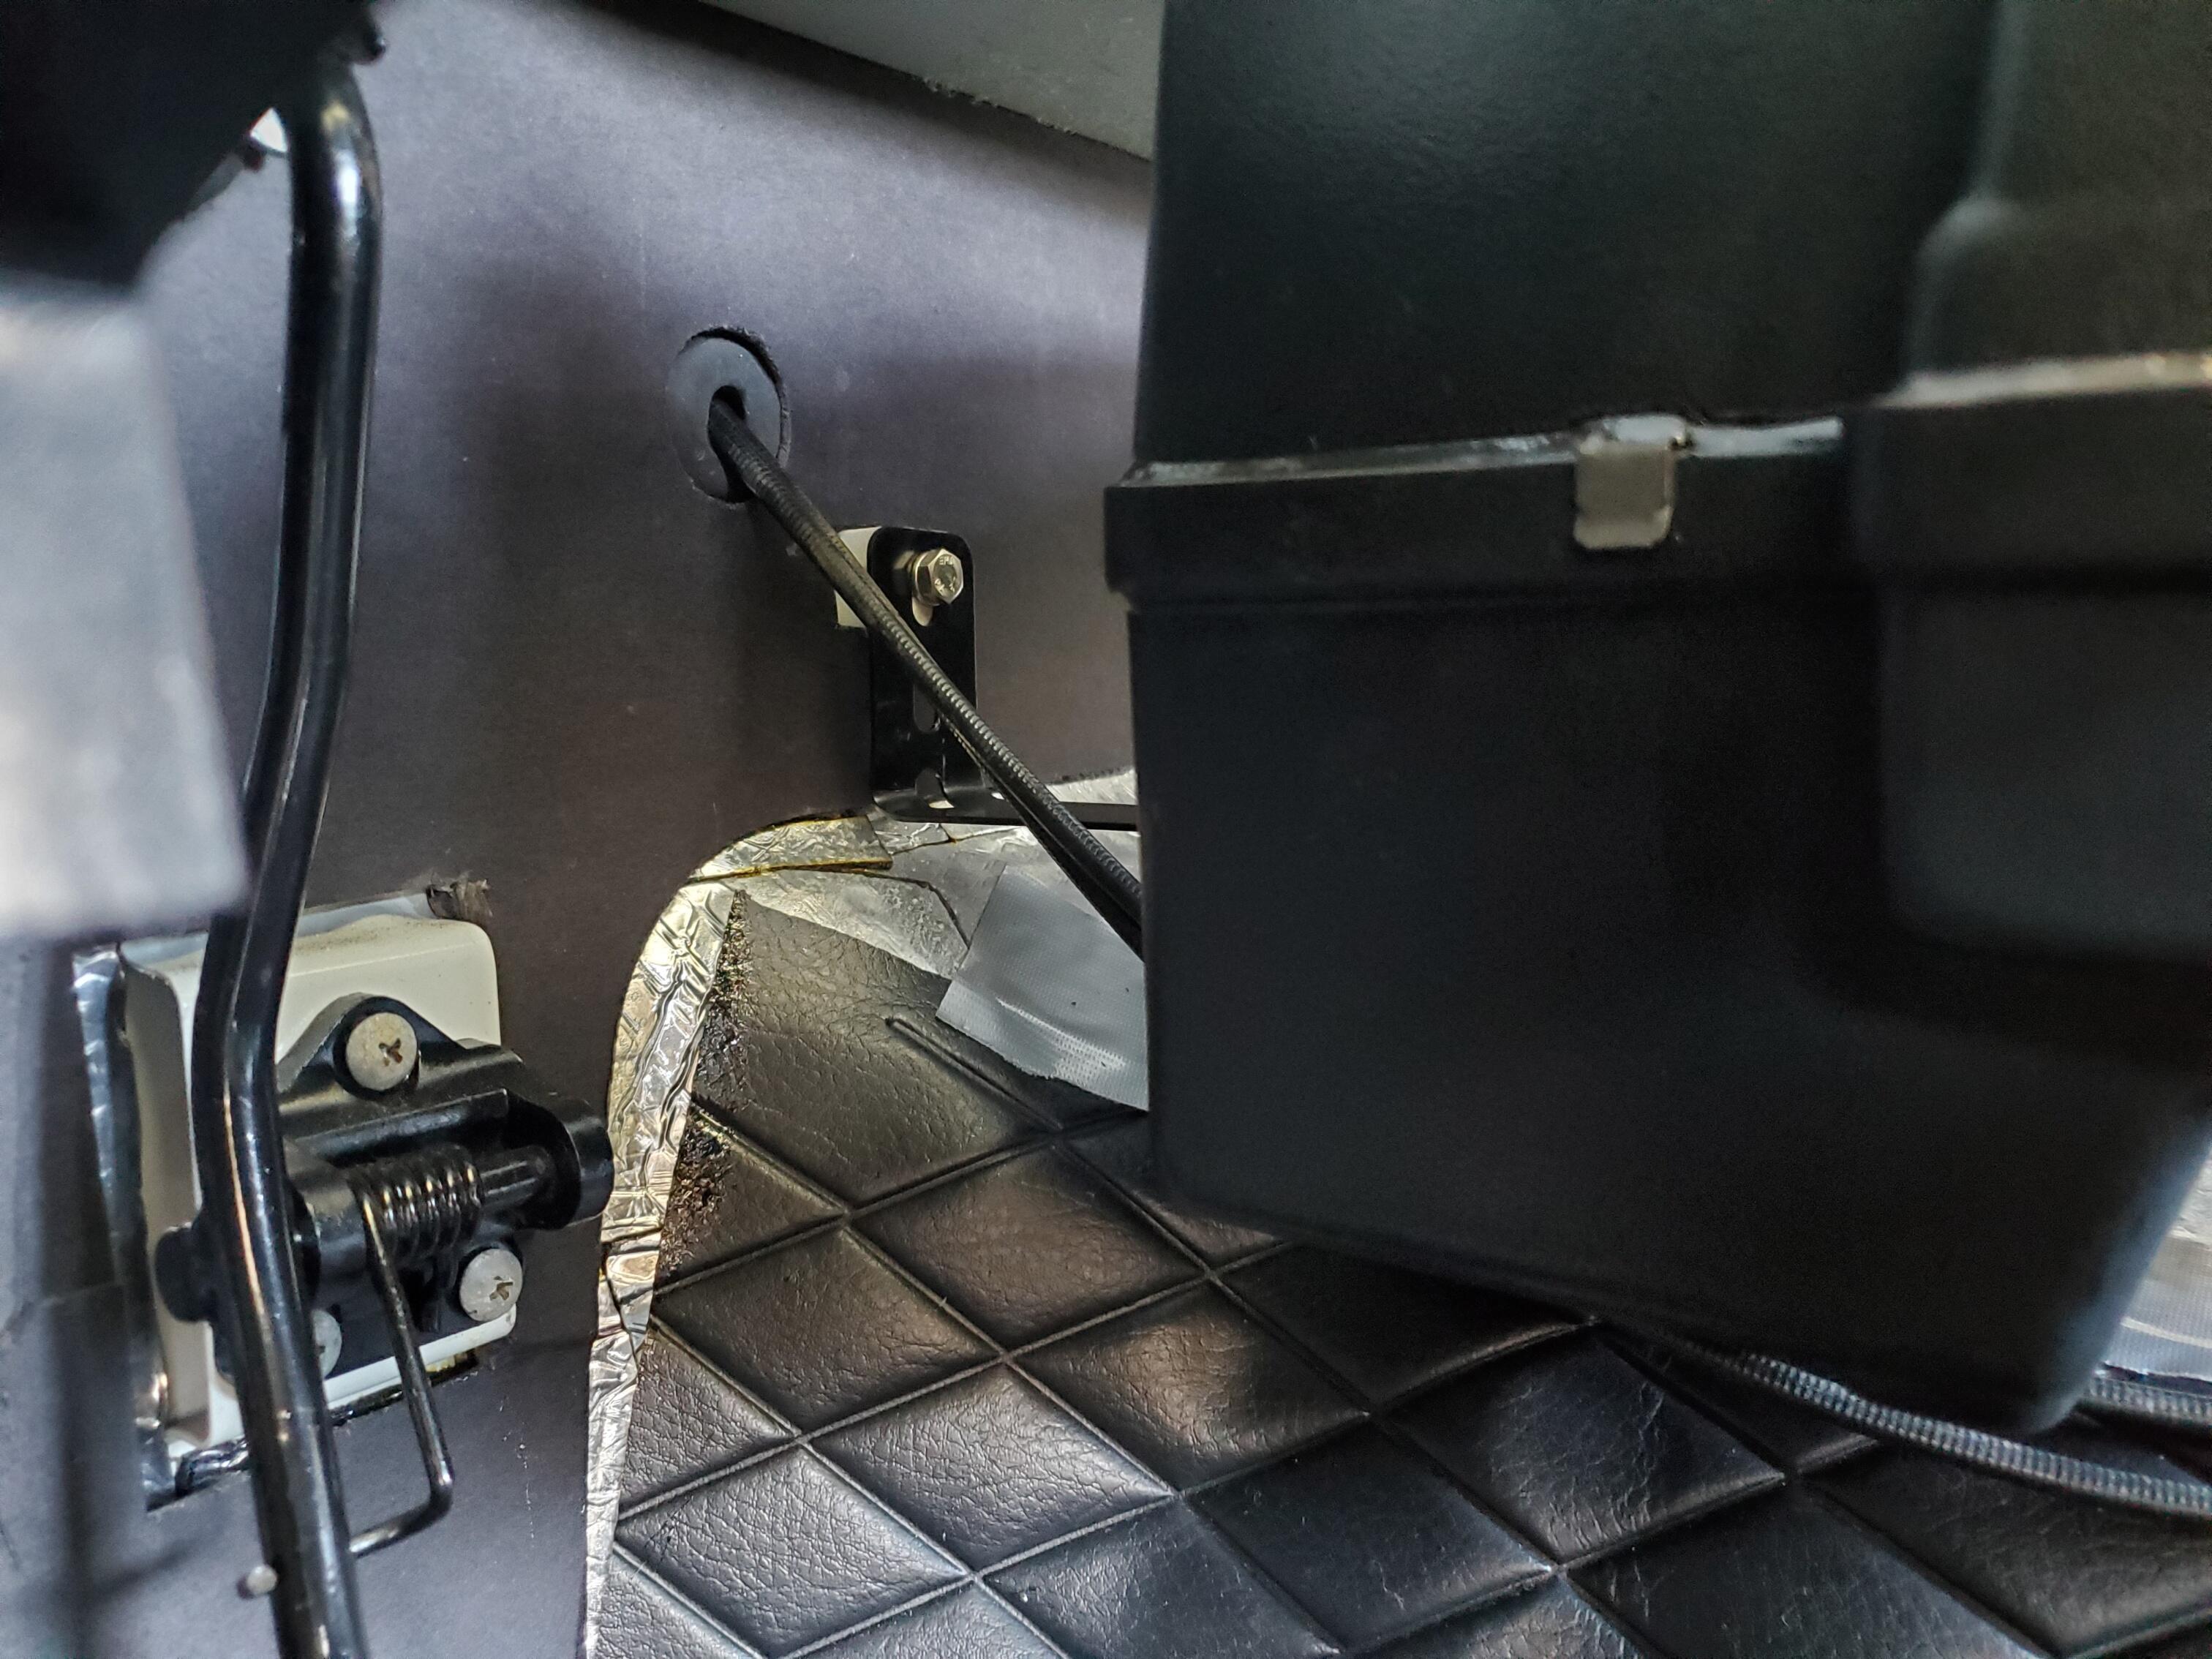
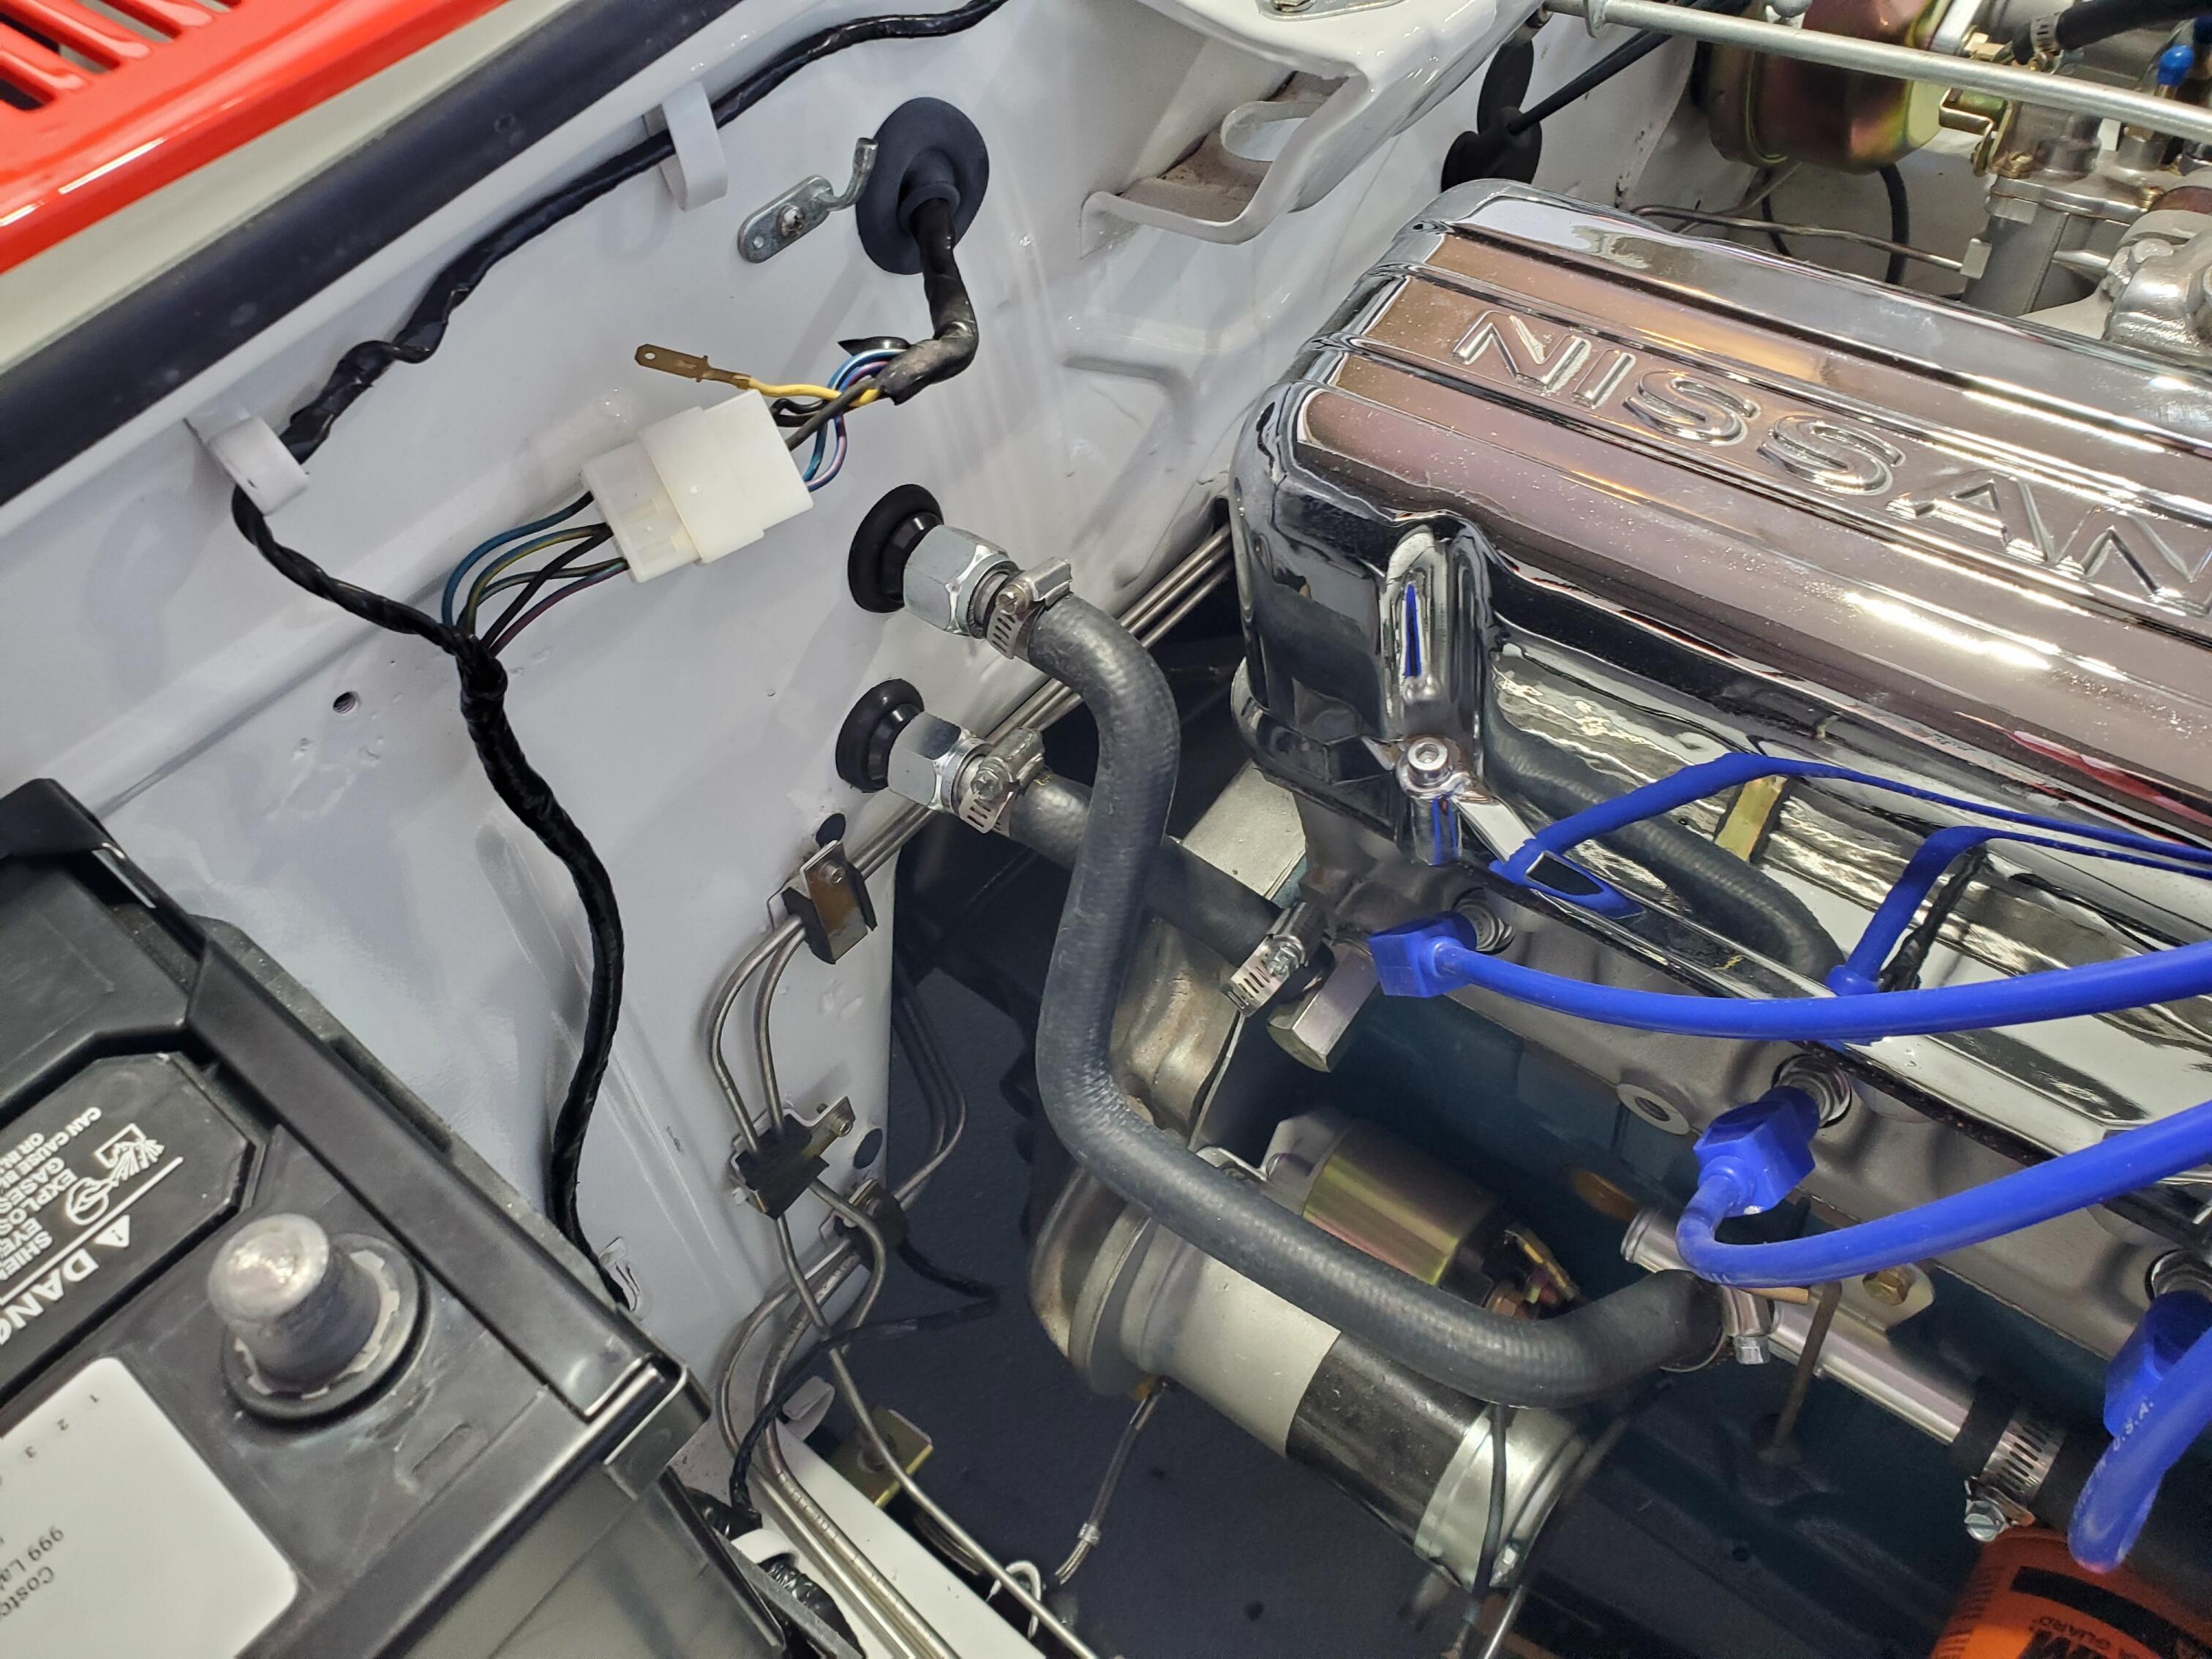
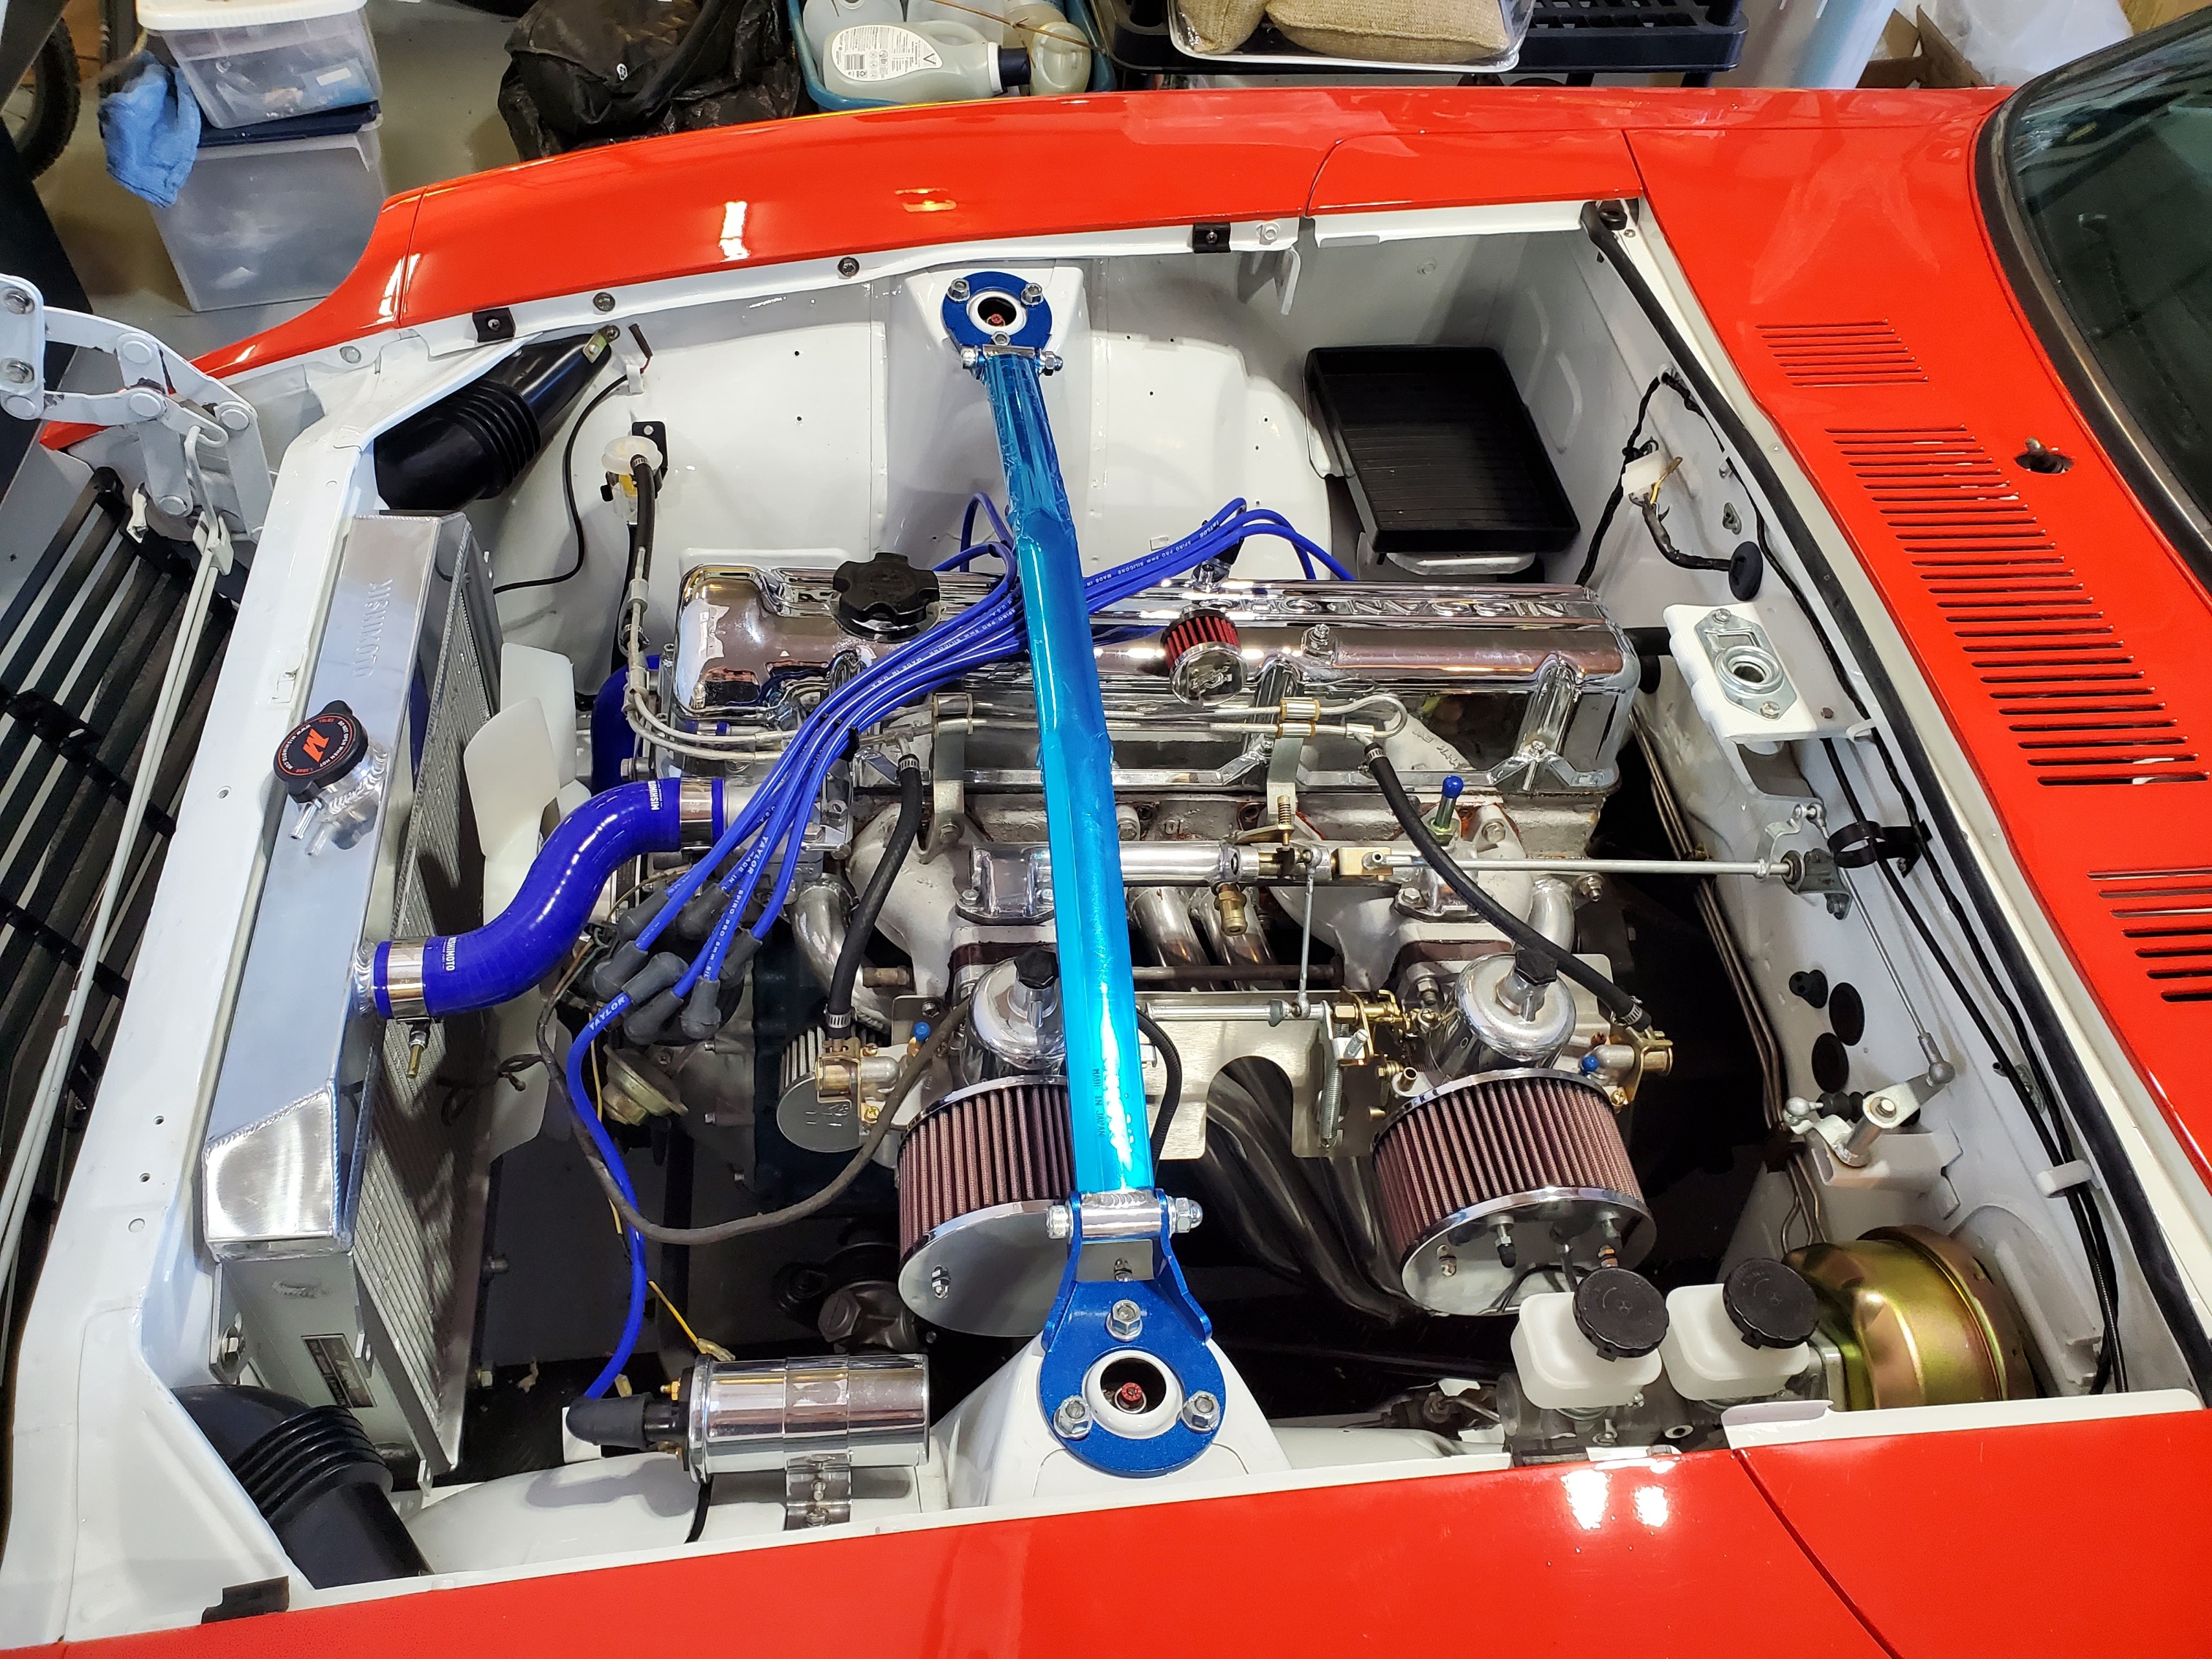
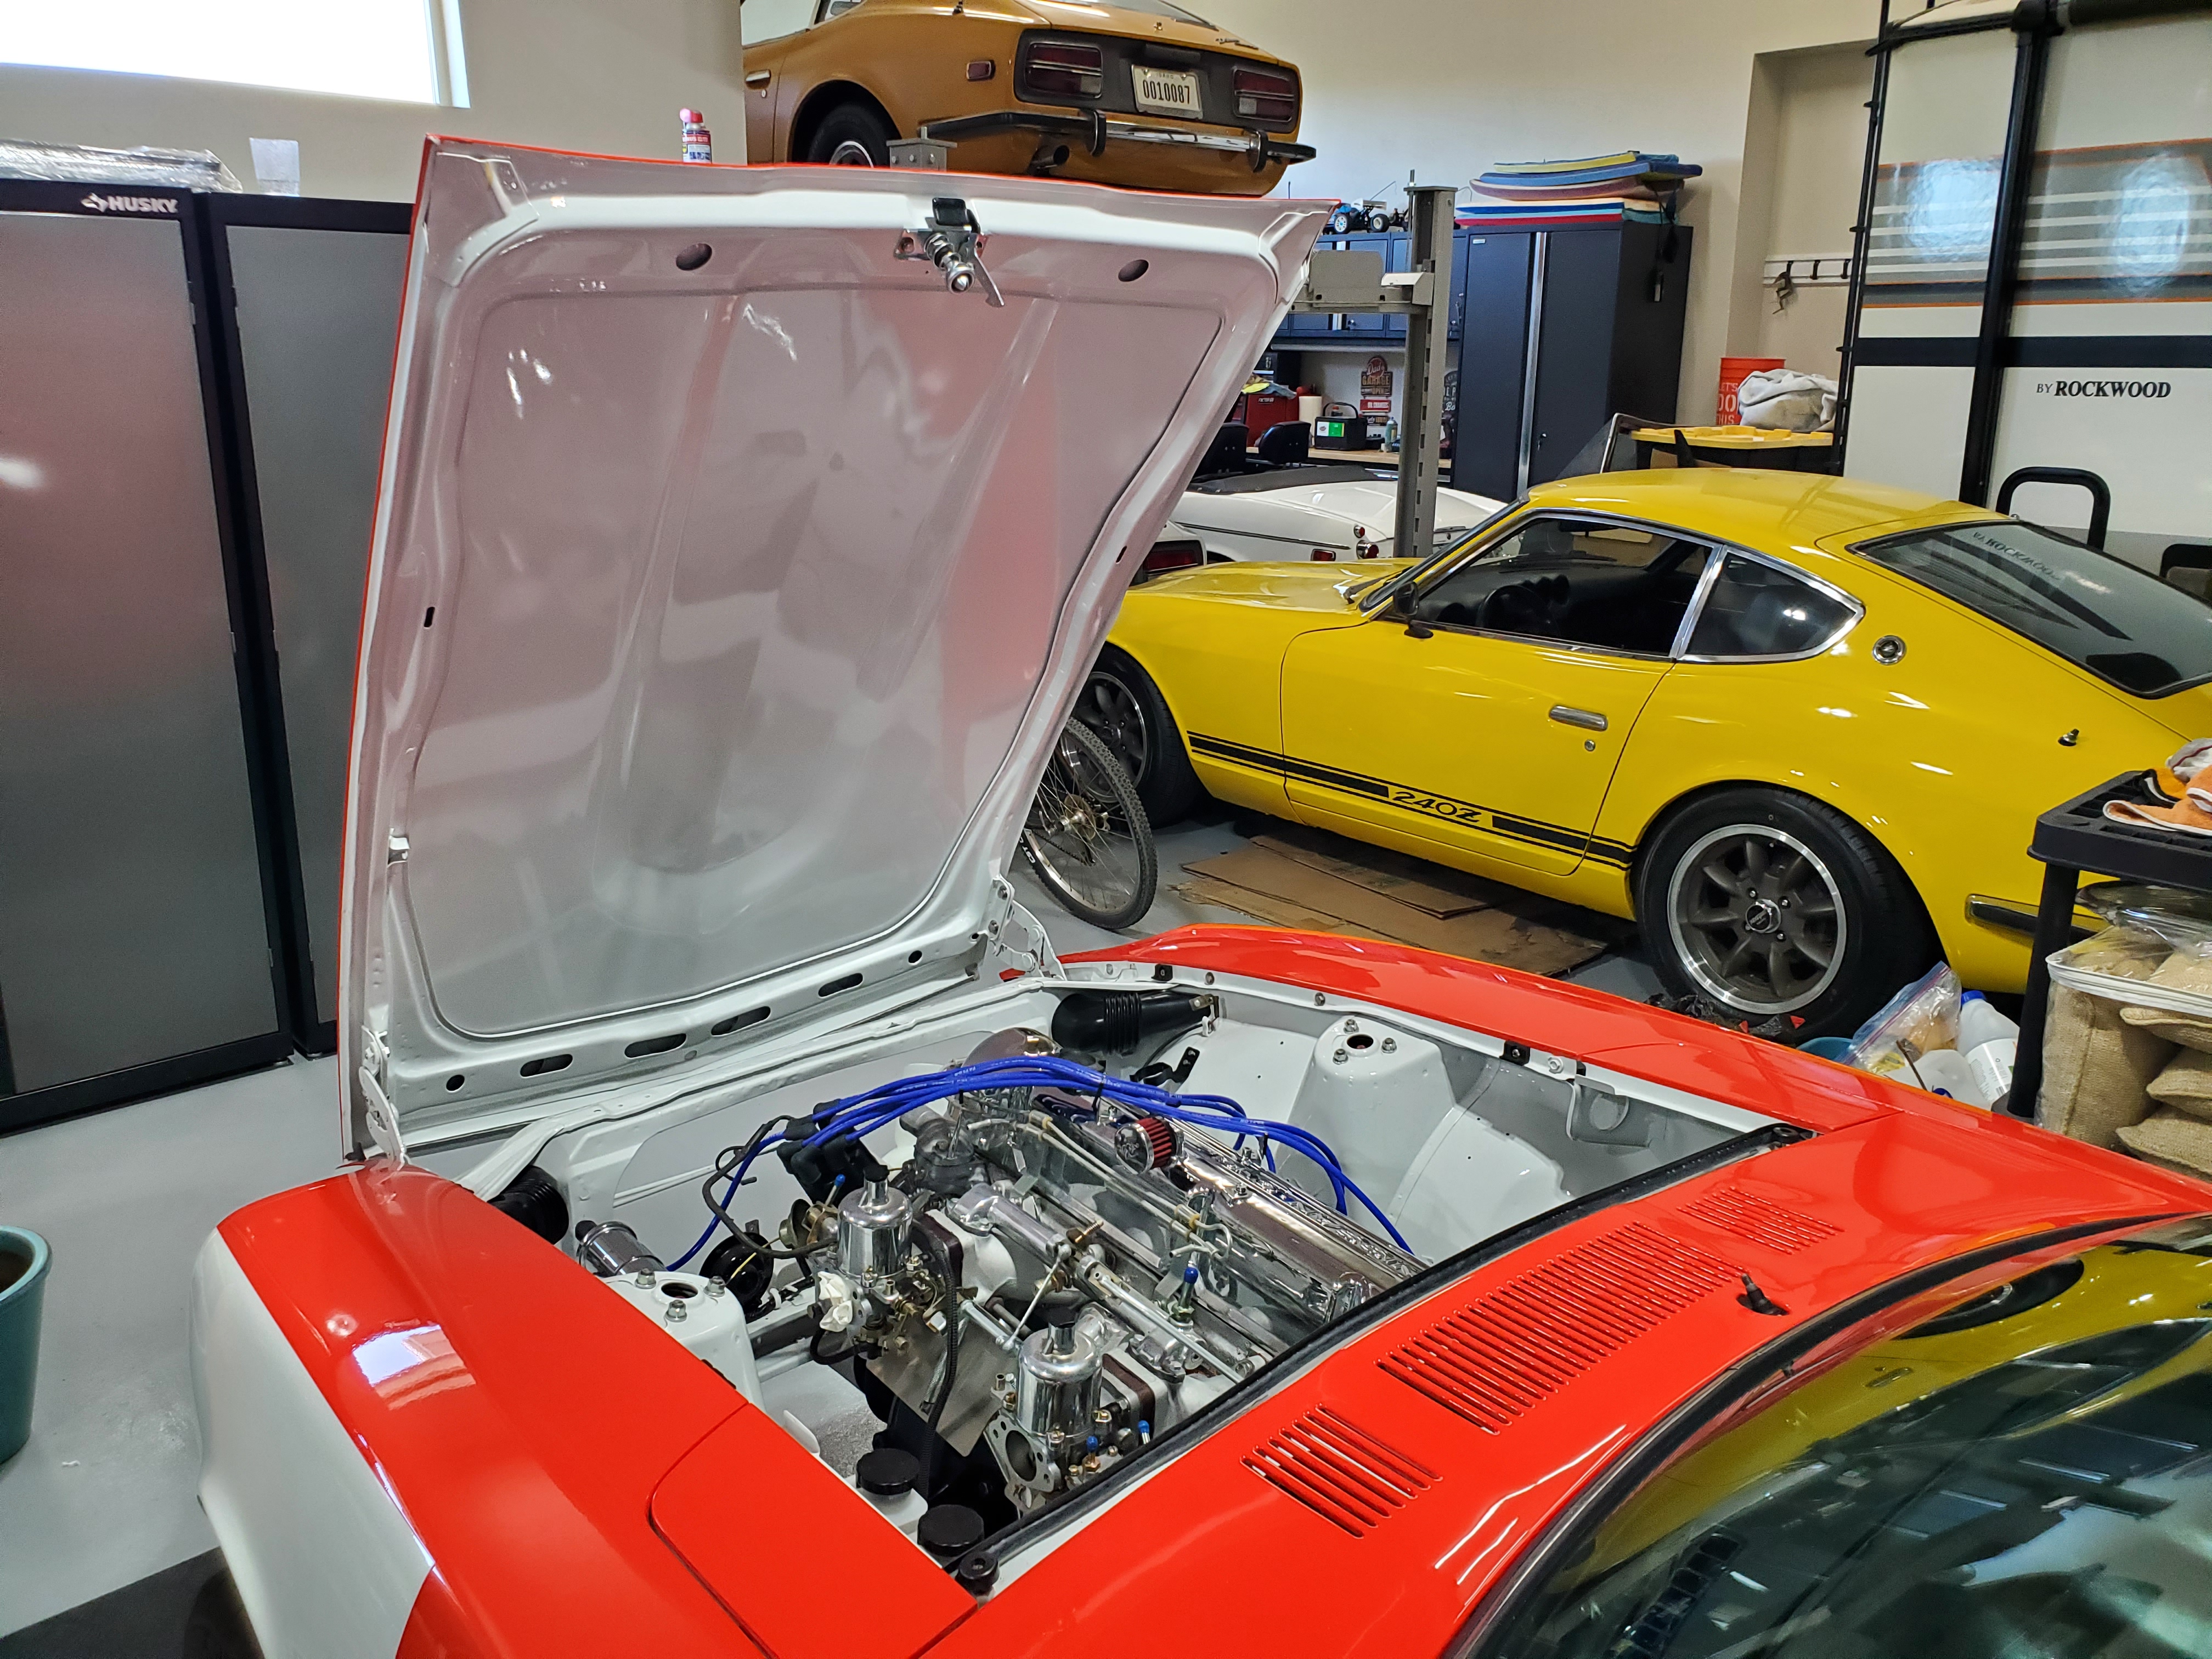
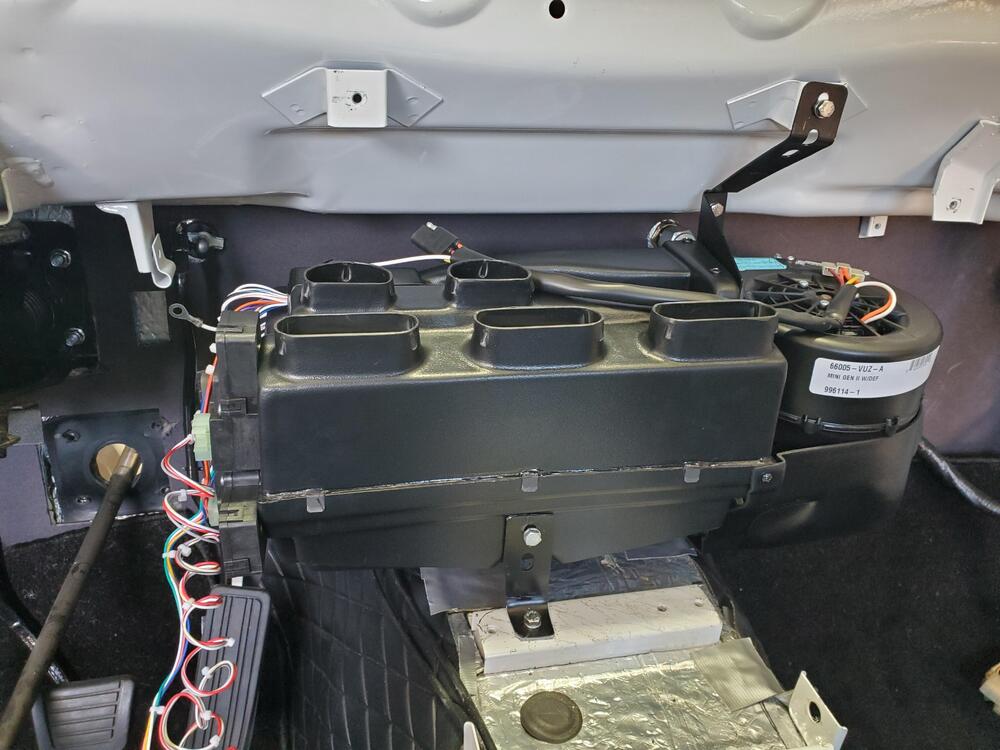
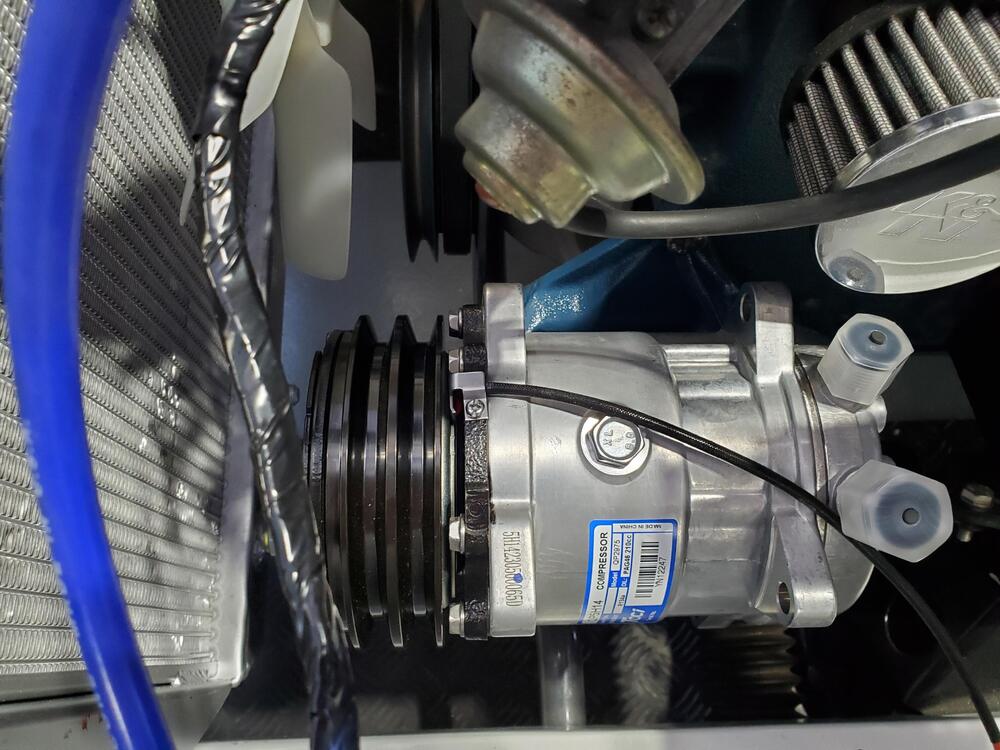
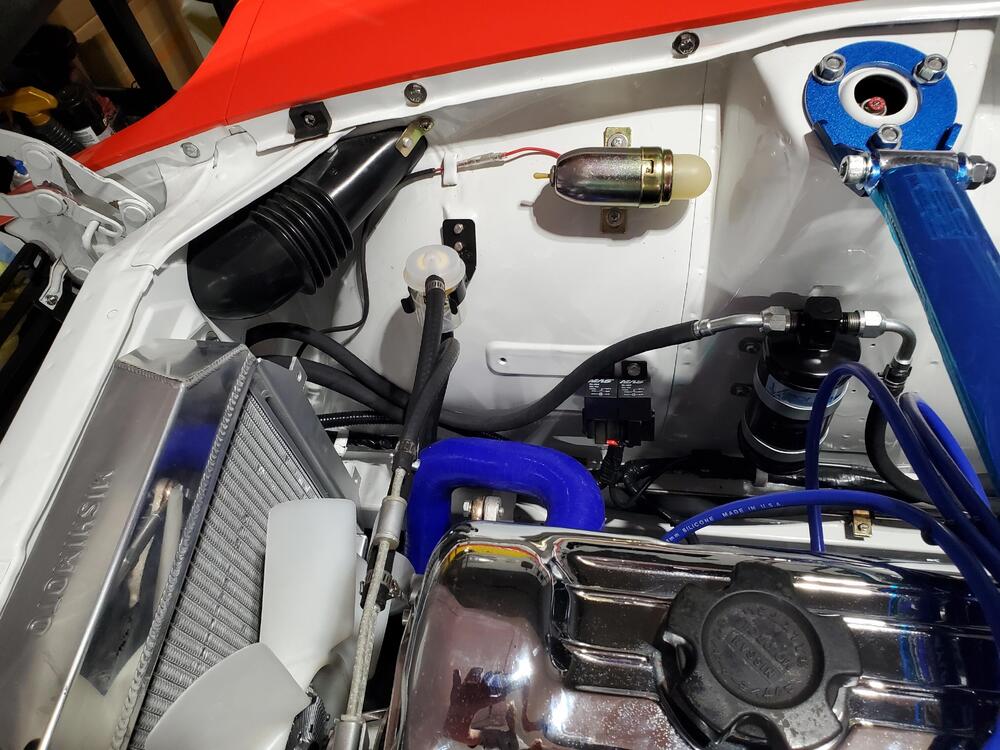
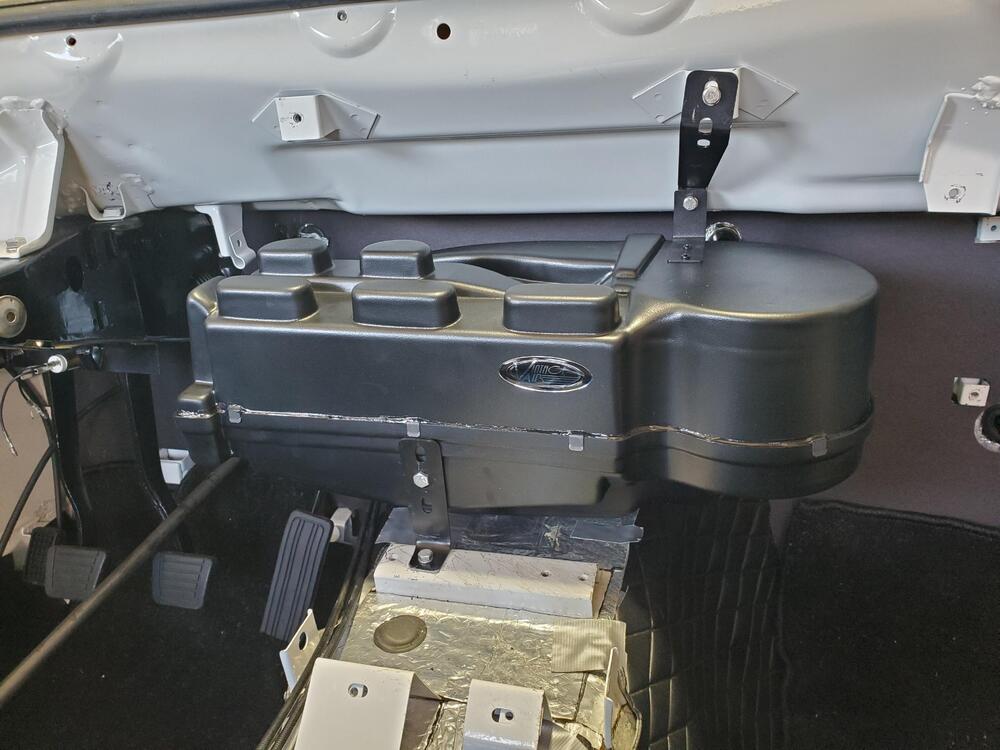
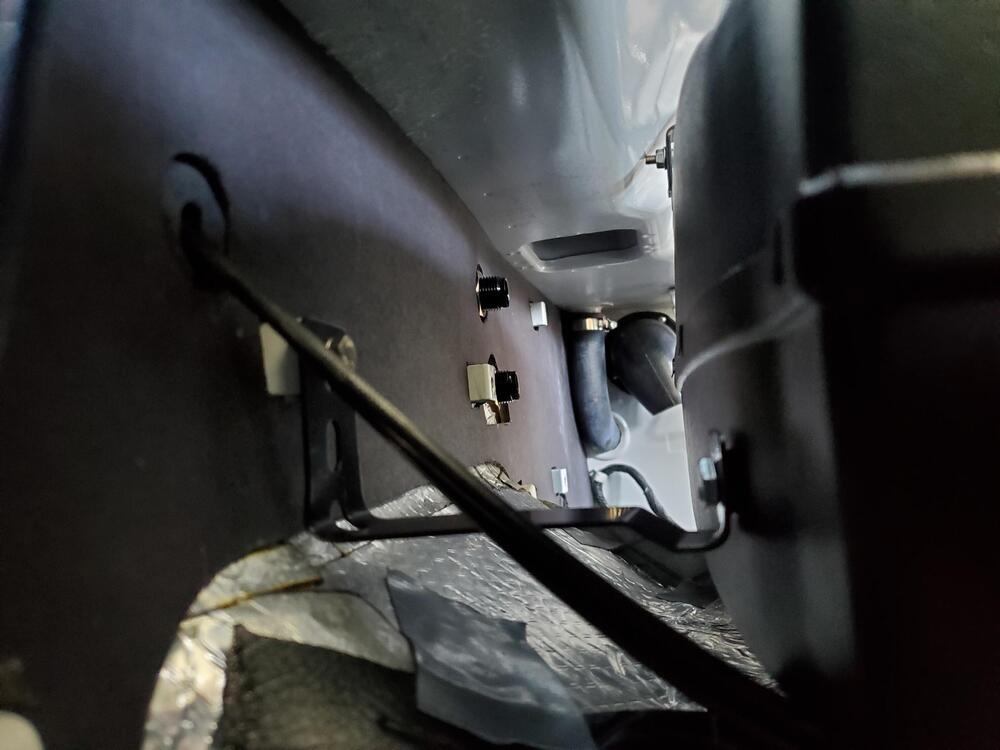
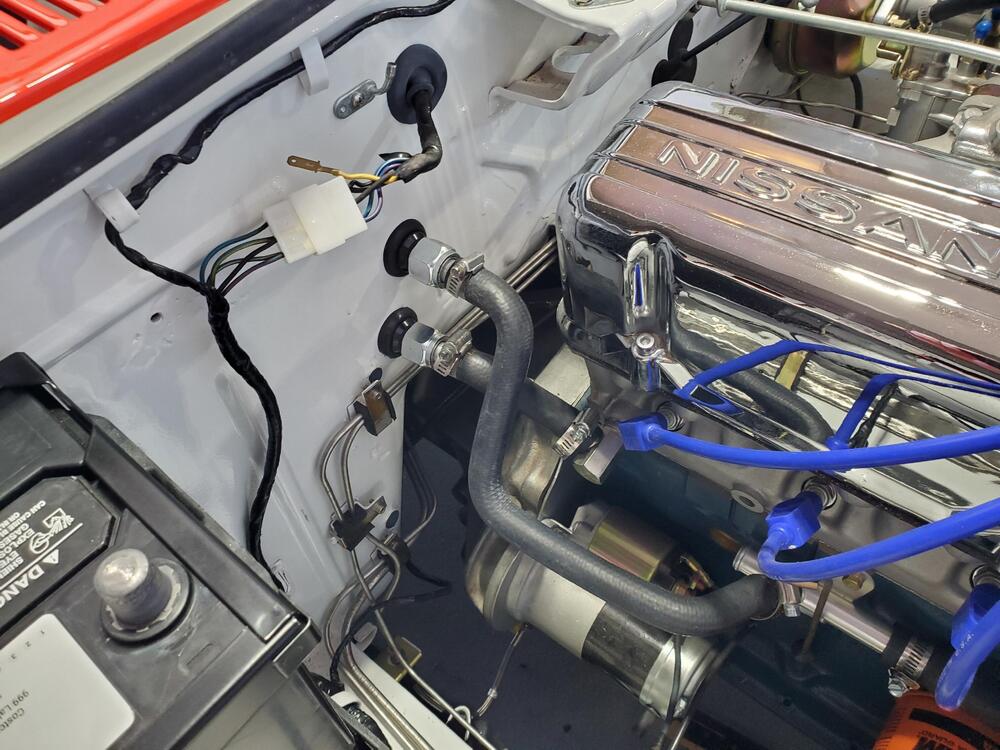
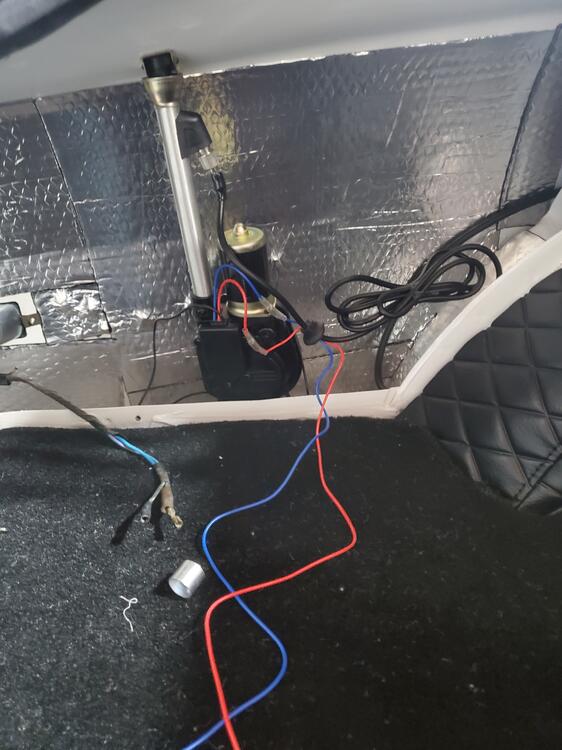
 Lots of progress this week. I installed the Evaporator unit using the brackets I fabbed with the mock-up. I fabbed and installed the heater hoses, installed the heater hose control module (electronic, yeah!) and almost all of the AC hoses. AC hoses were pretty easy to make using the hose pliers, very straight forward. I am very happy with the AC compressor mount on the Smog Pump bracket. I drilled out the bracket slightly to accomodate the larger bolt. It mounts firmly in place using the larger bolt. I will add an alternator tensioner to the top of the unit to complete the support and provide adjustment. I was short a few parts (AC hose clamps), probably because of the bulkhead addition so I ordered the few parts that were needed. Also, I did not like the right angle set-up for the AC lines at the bulkhead so ordered one more straight fitting. Will complete the installation when those parts arrive. Here are pics.


-
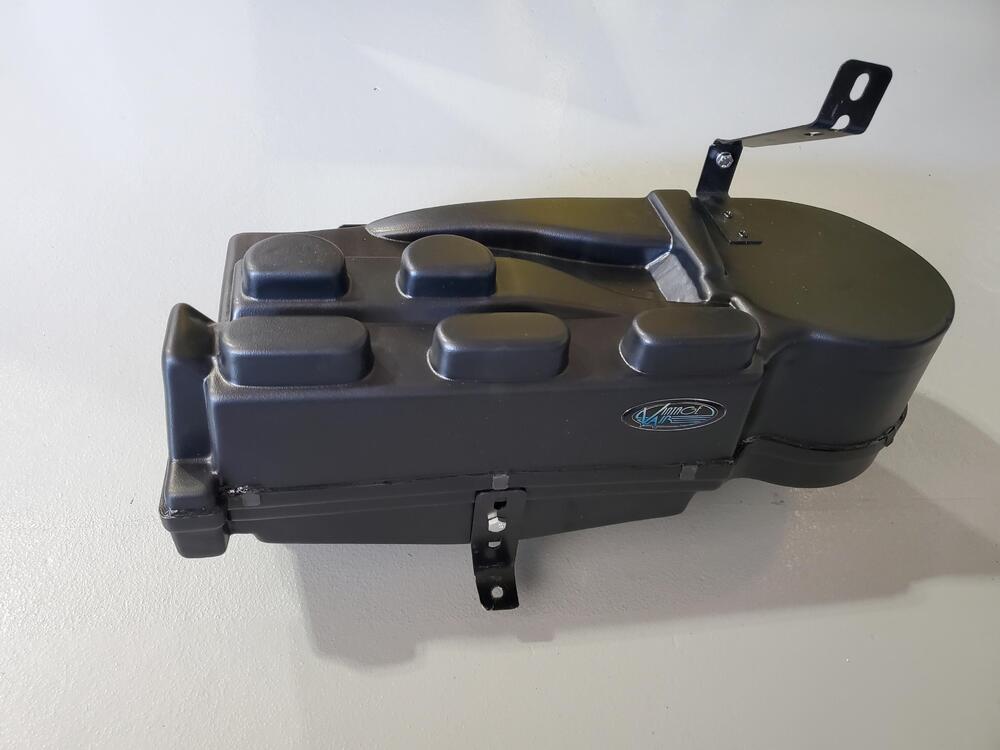
It's the same one that is installed in the other thread. It's the VintageAir Gen II mini. The thing that I am really liking about it is the compact size and the electronic vent operation. No more rickety sliding levers and cables to install and adjust. I have not addressed the control panel yet, but will do my best to have it look like the original when I get to that point.
-
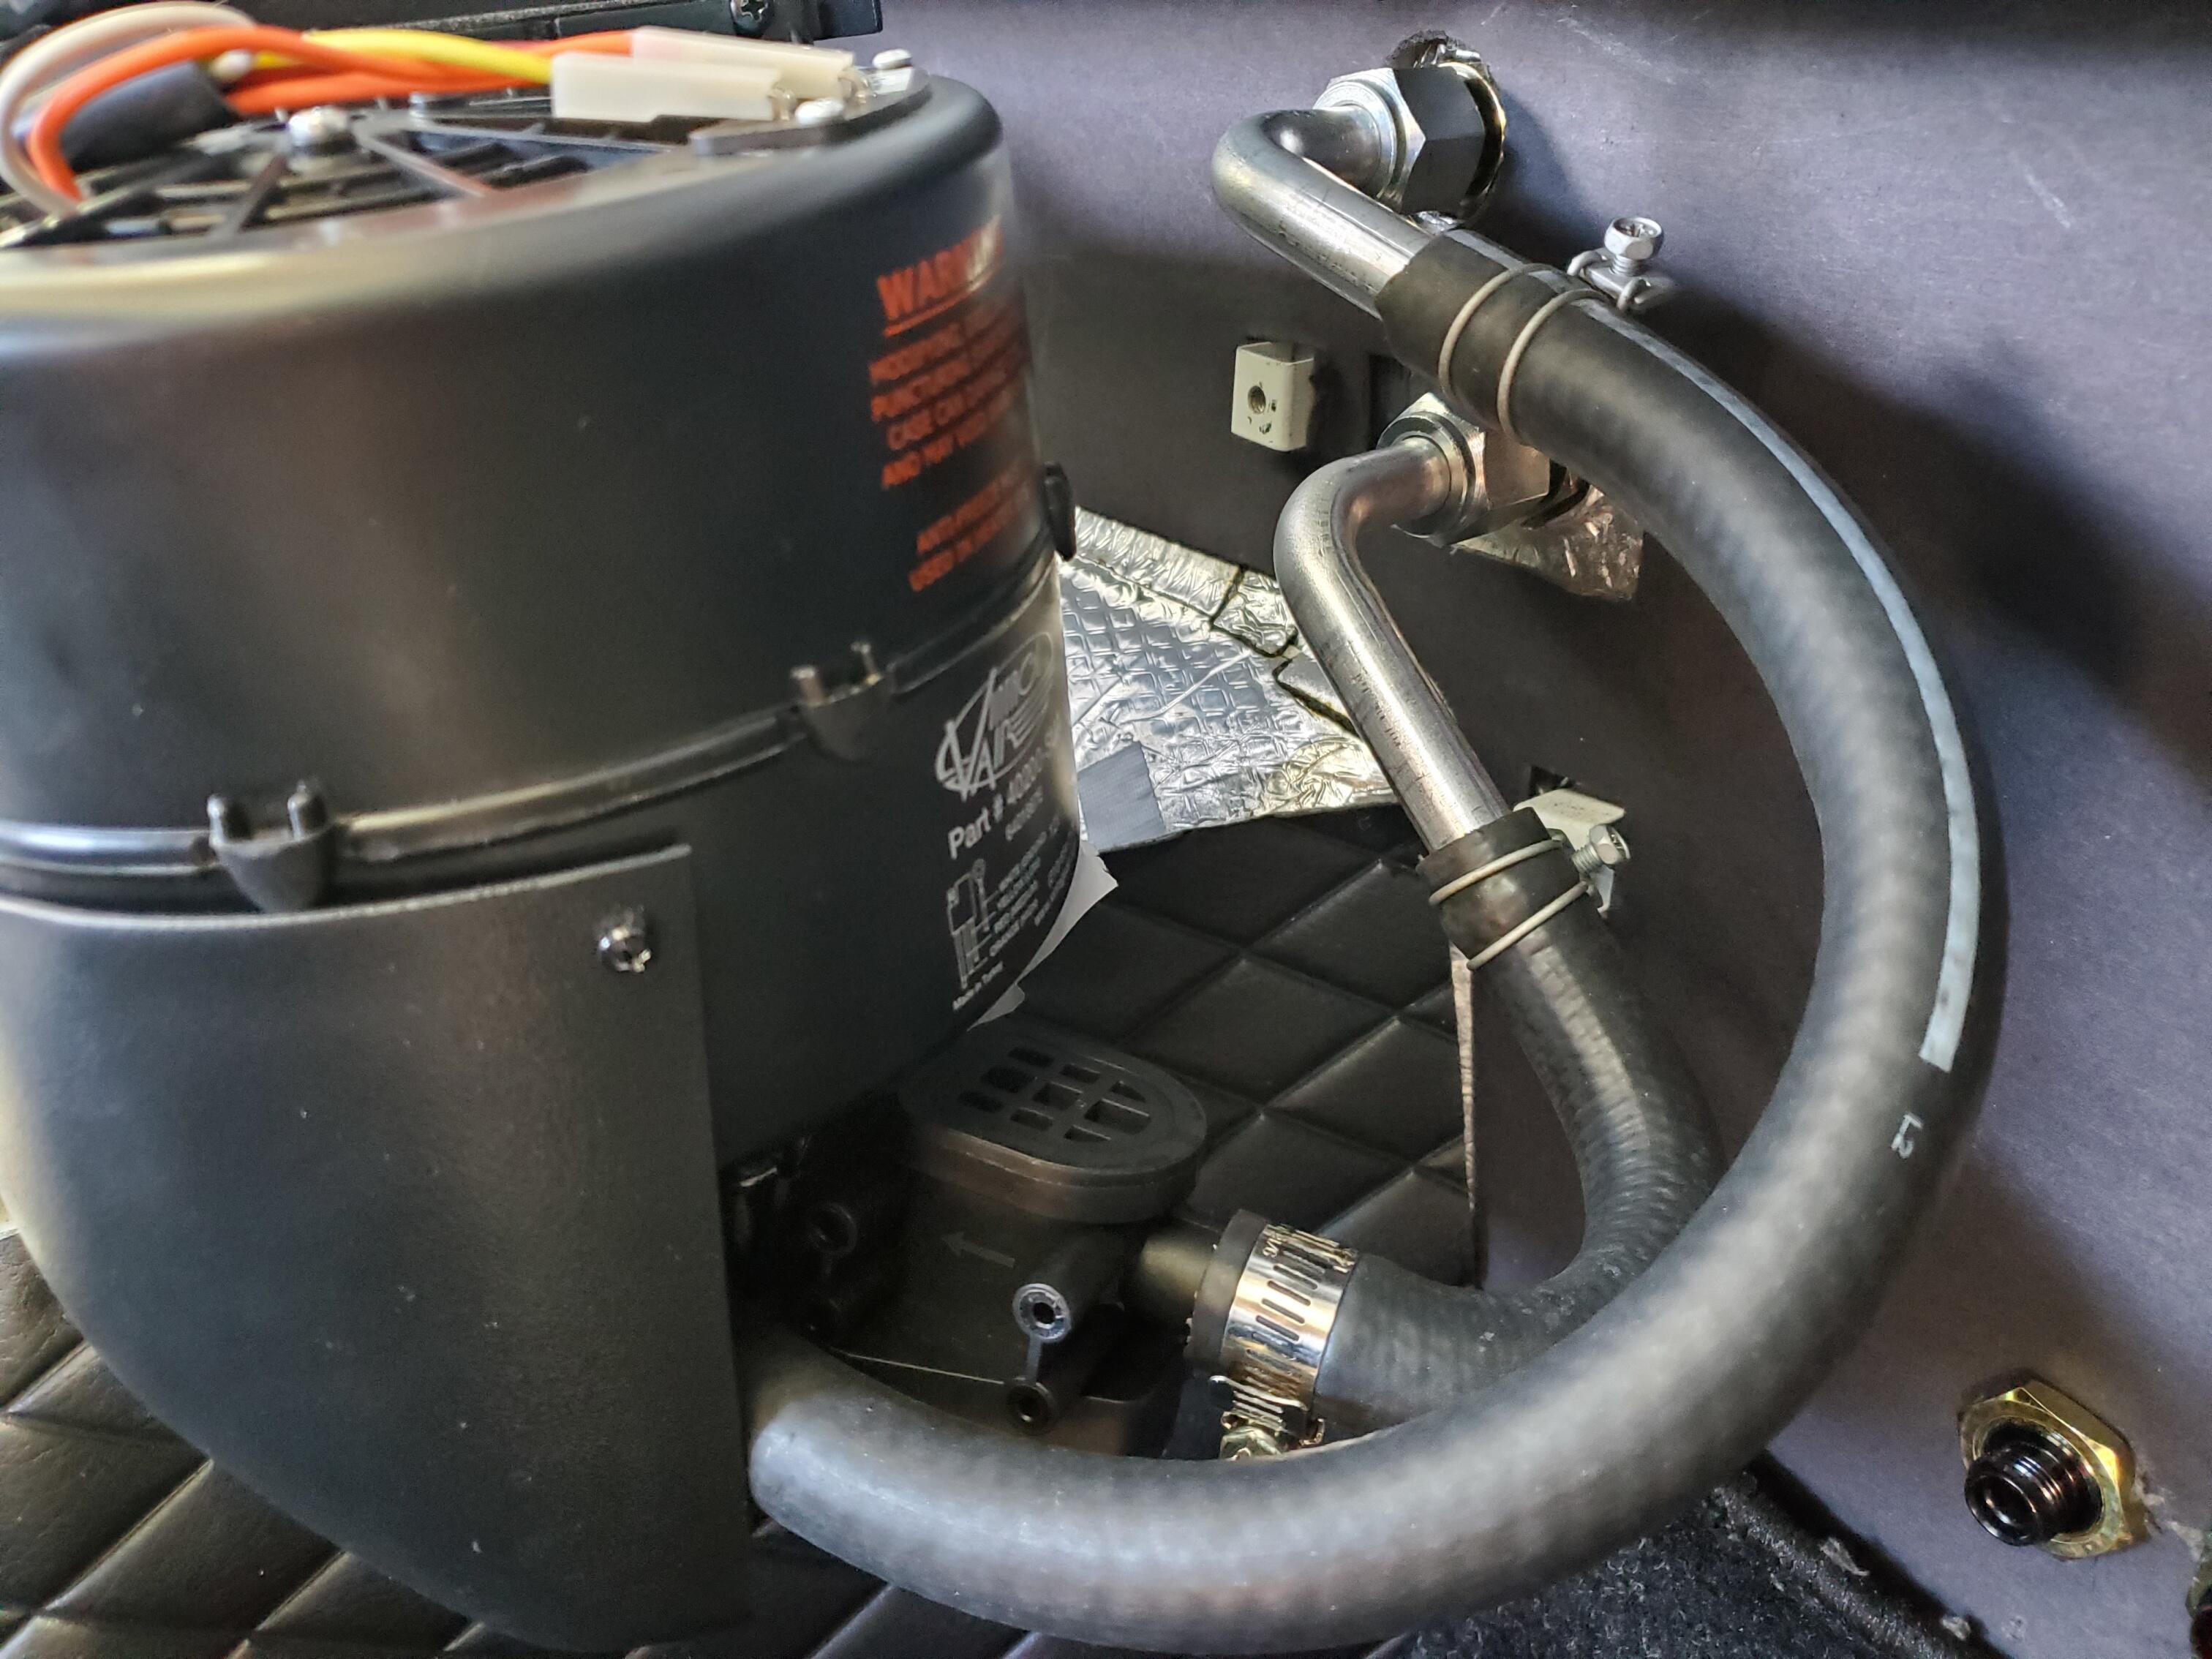
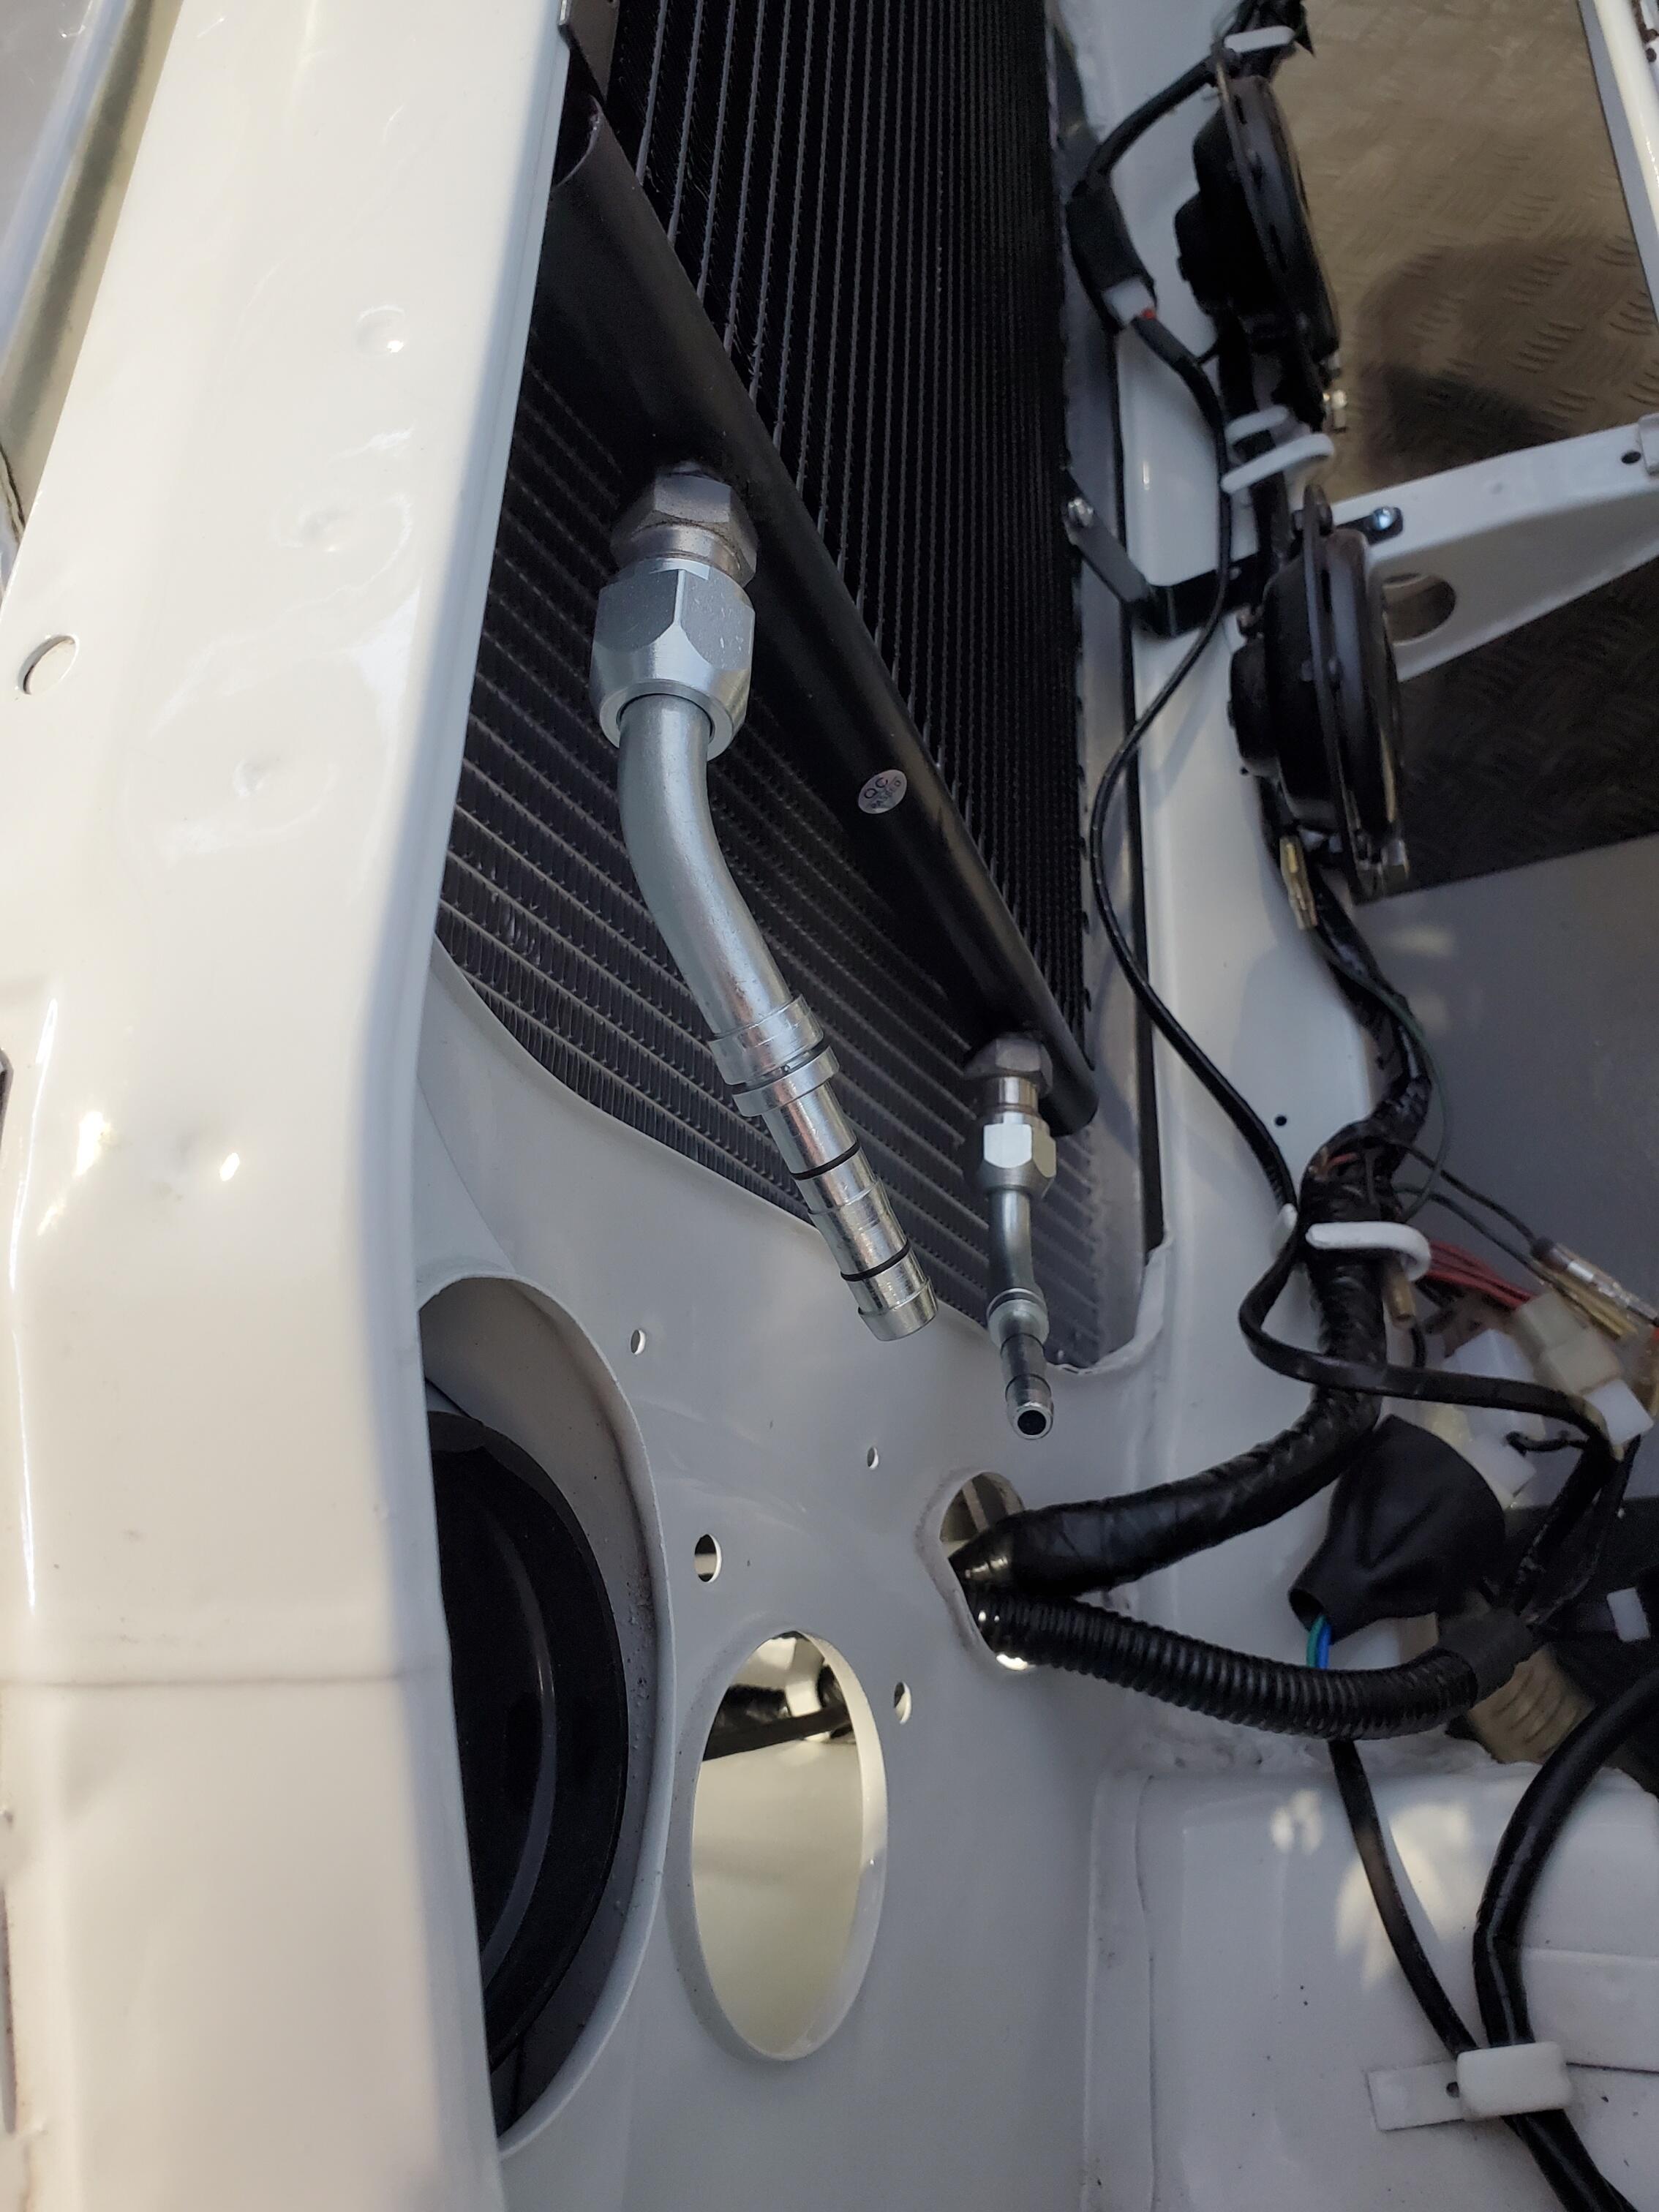
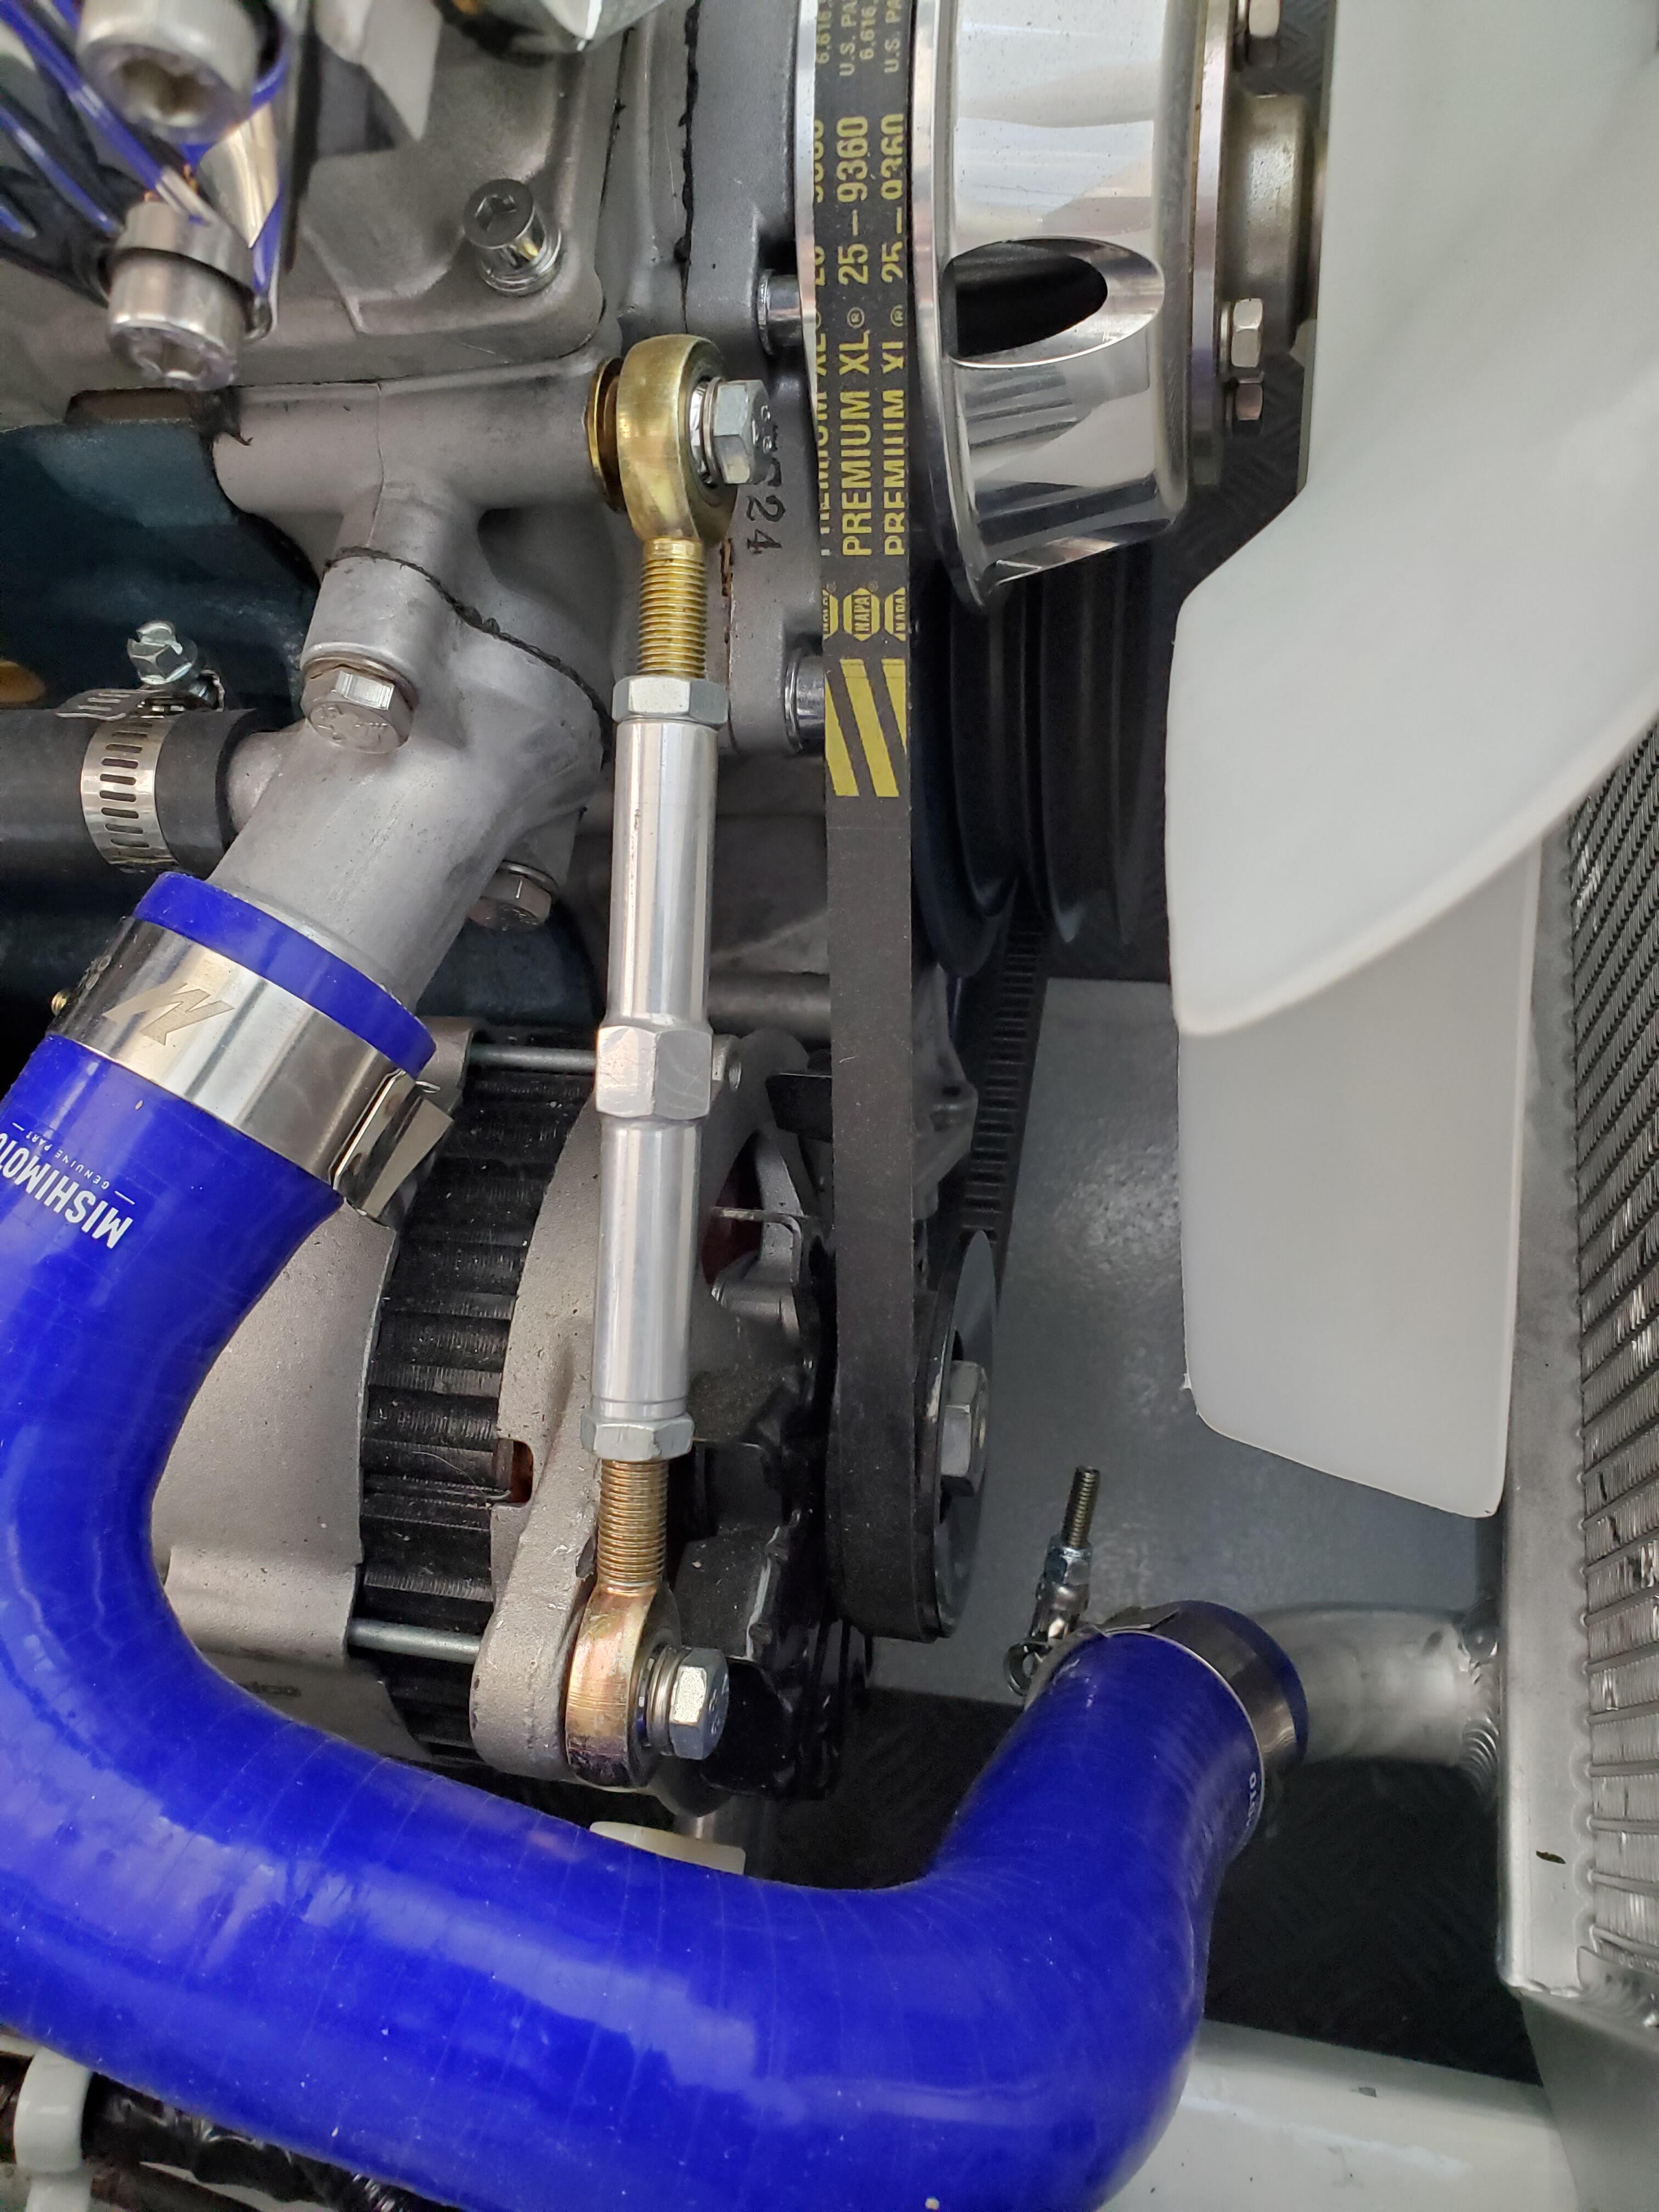
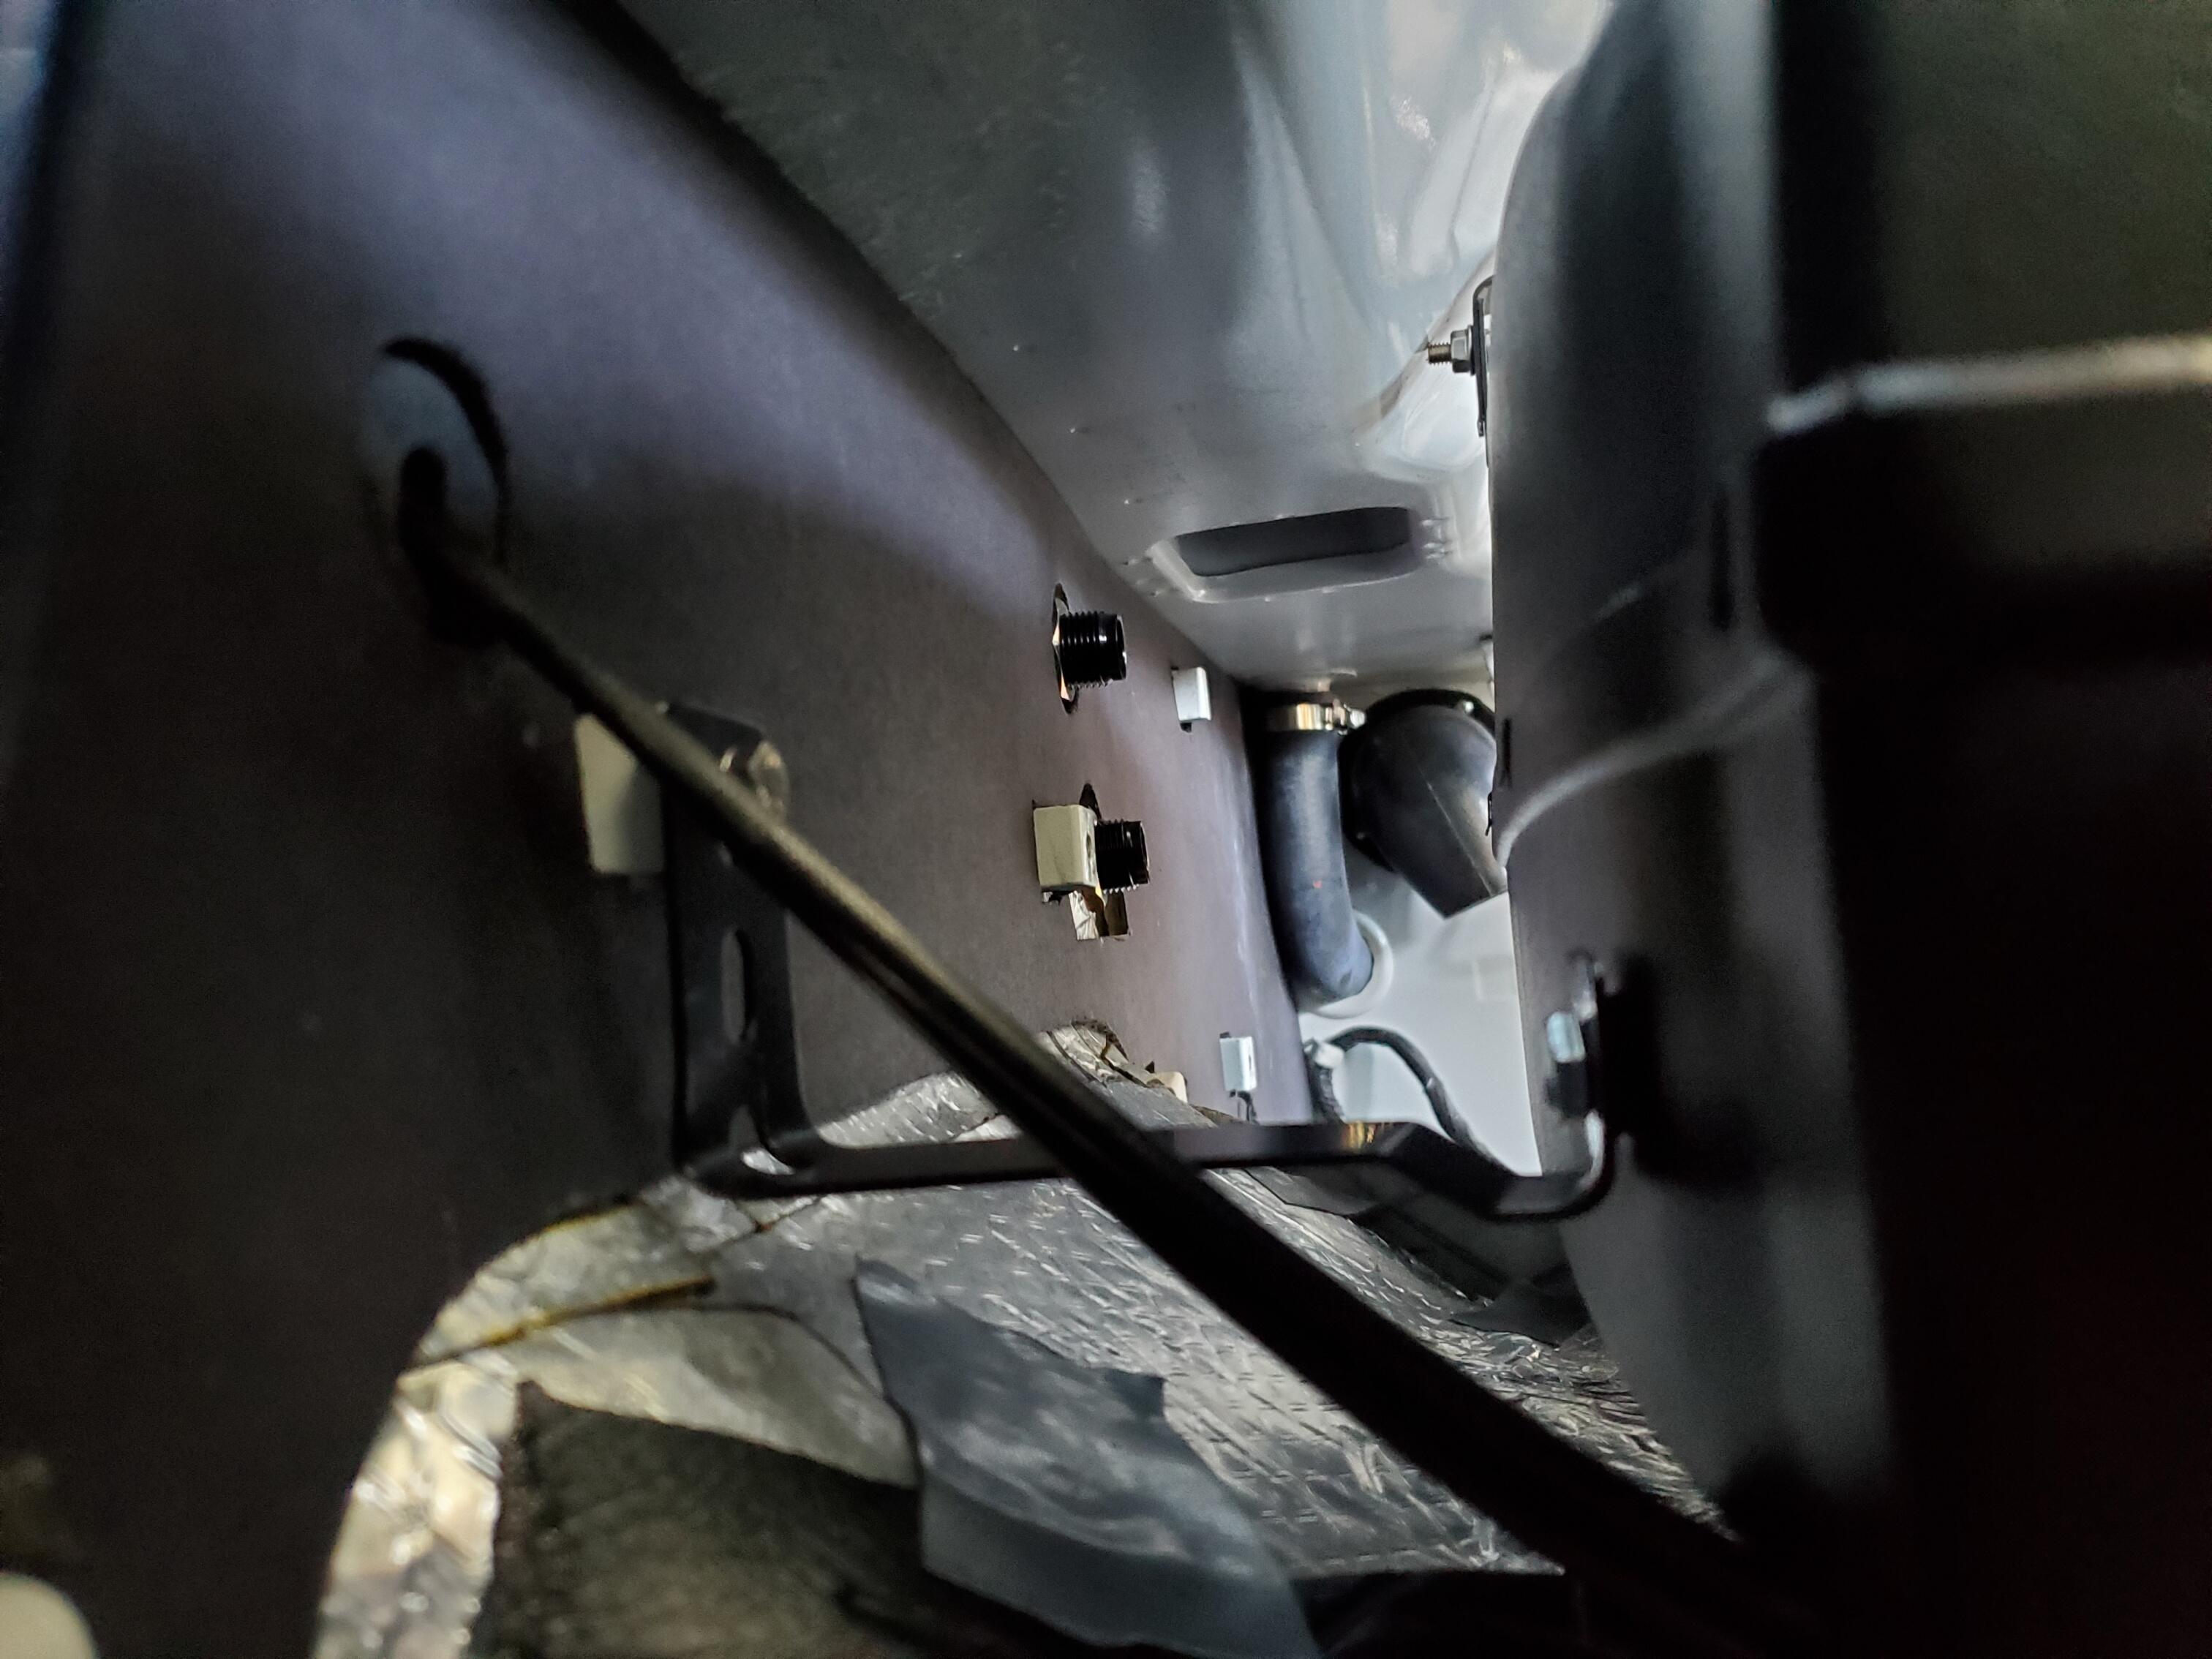
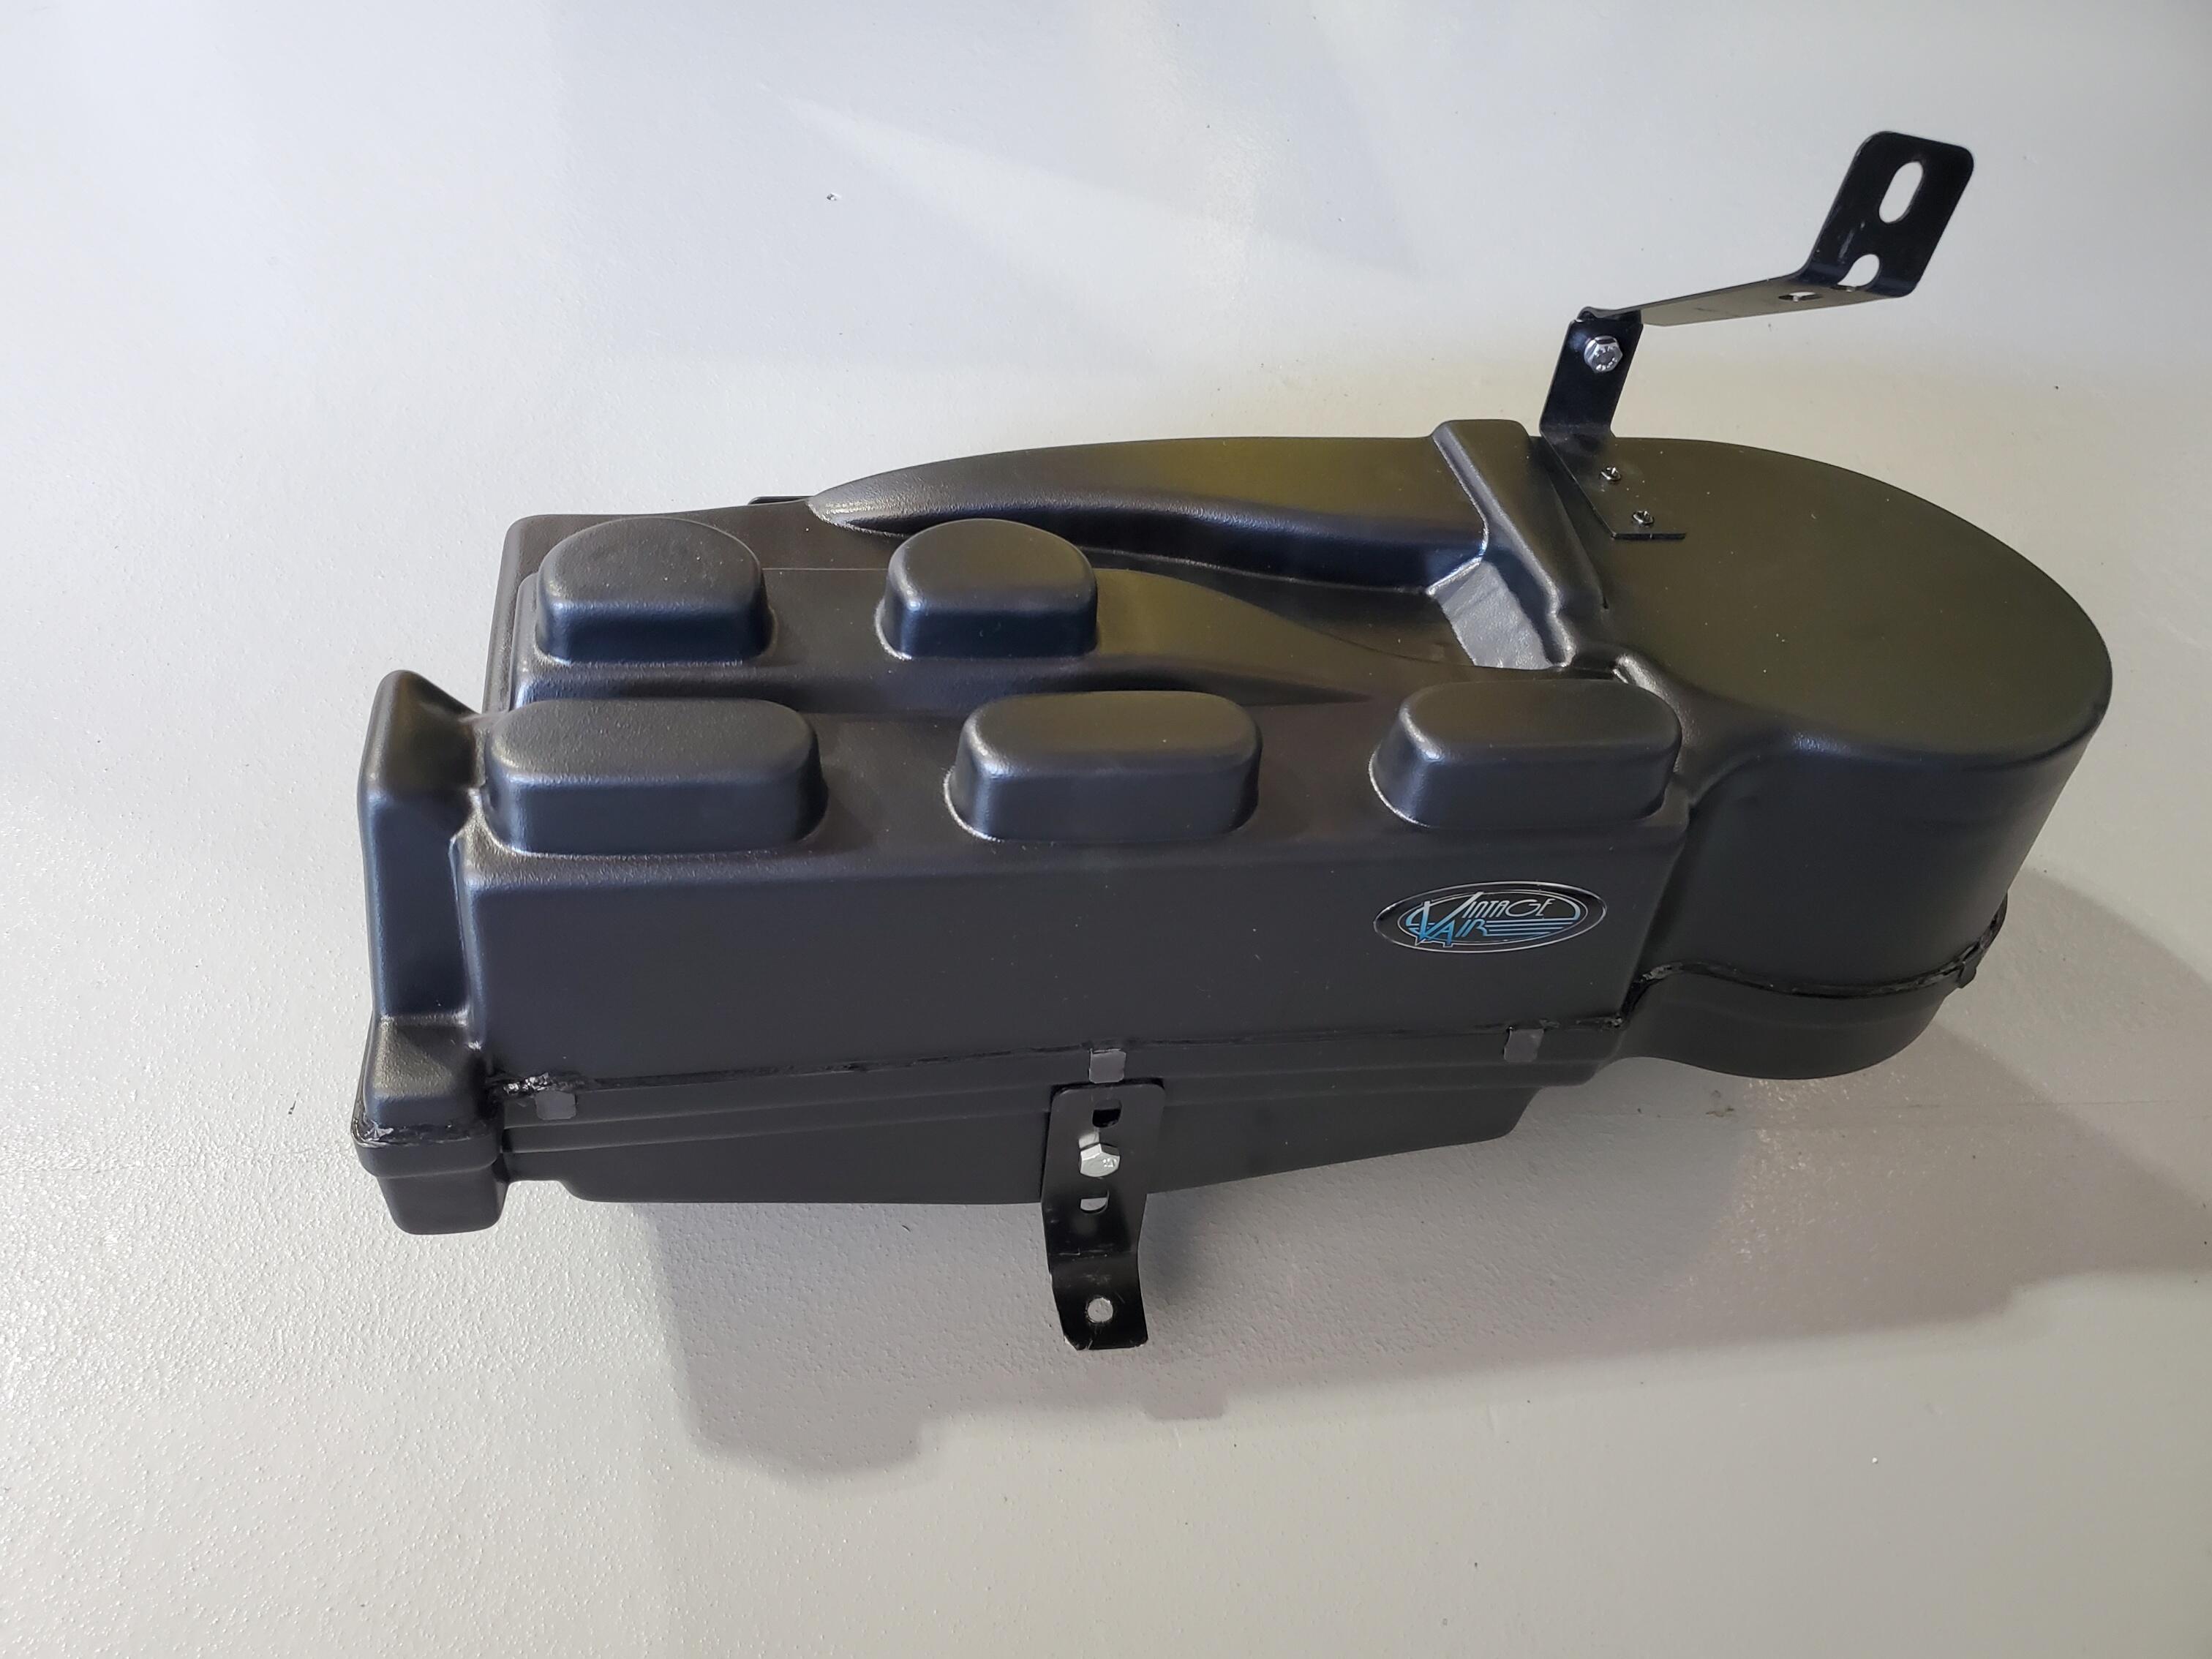
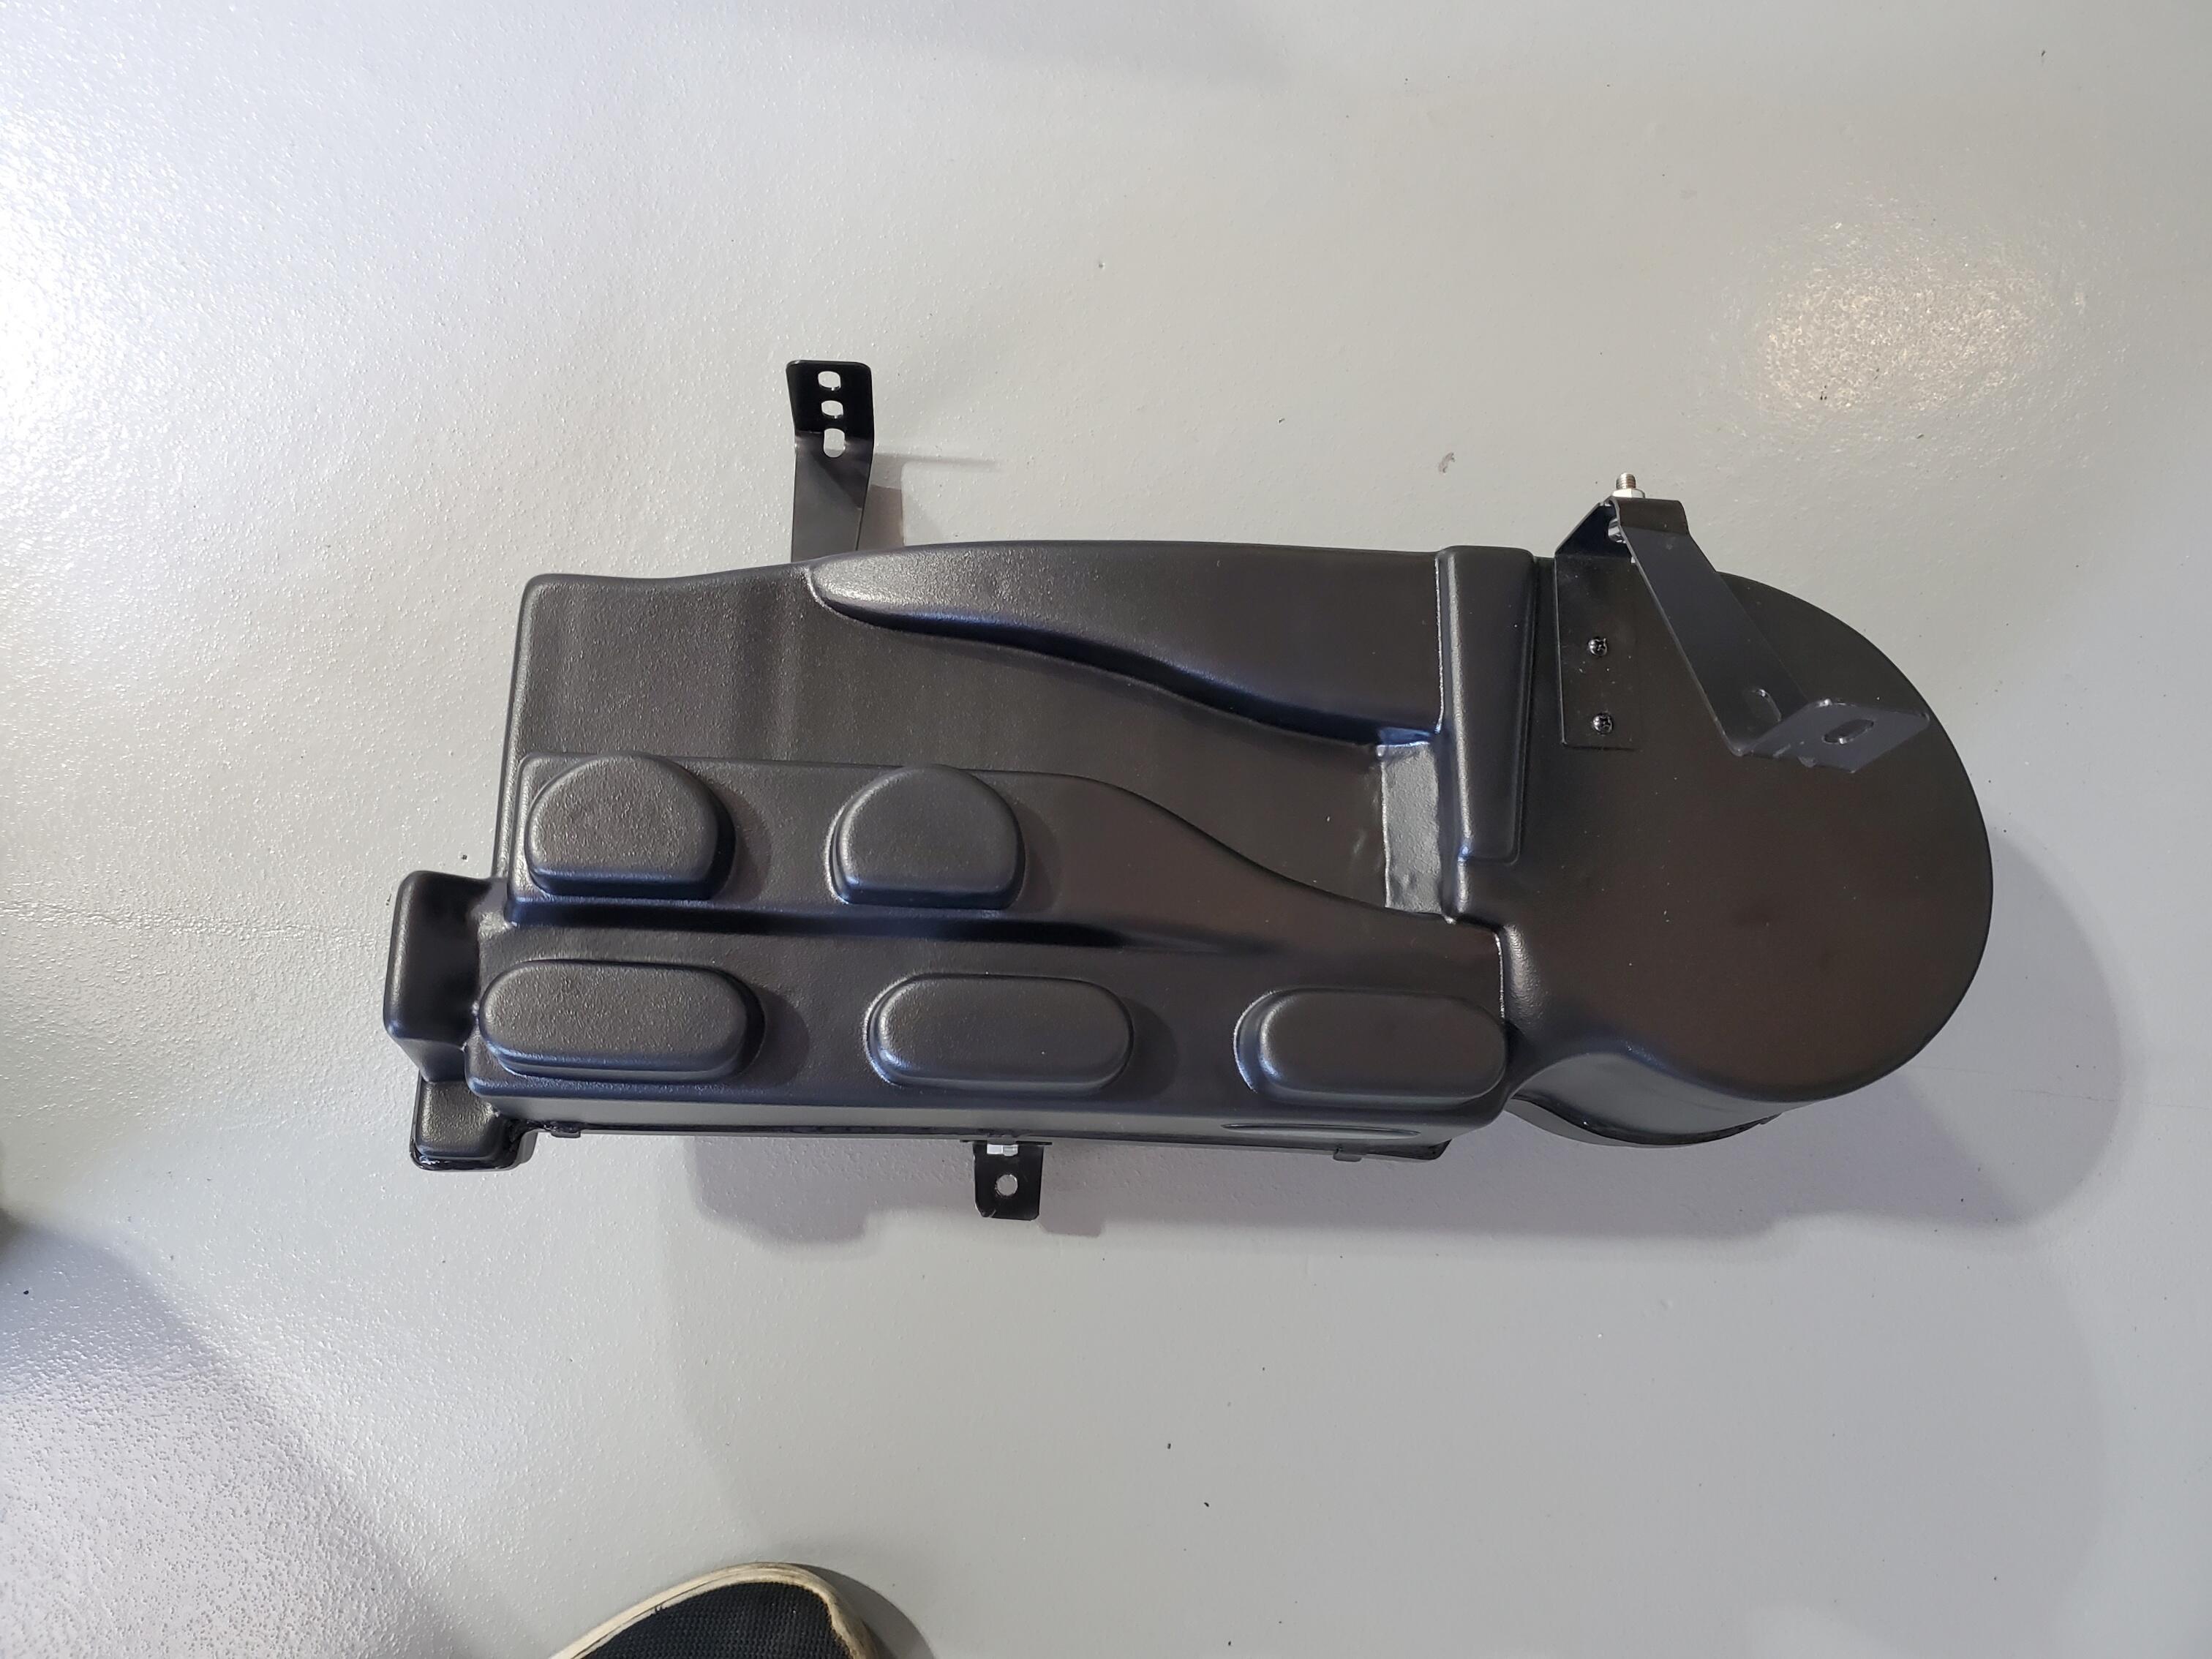
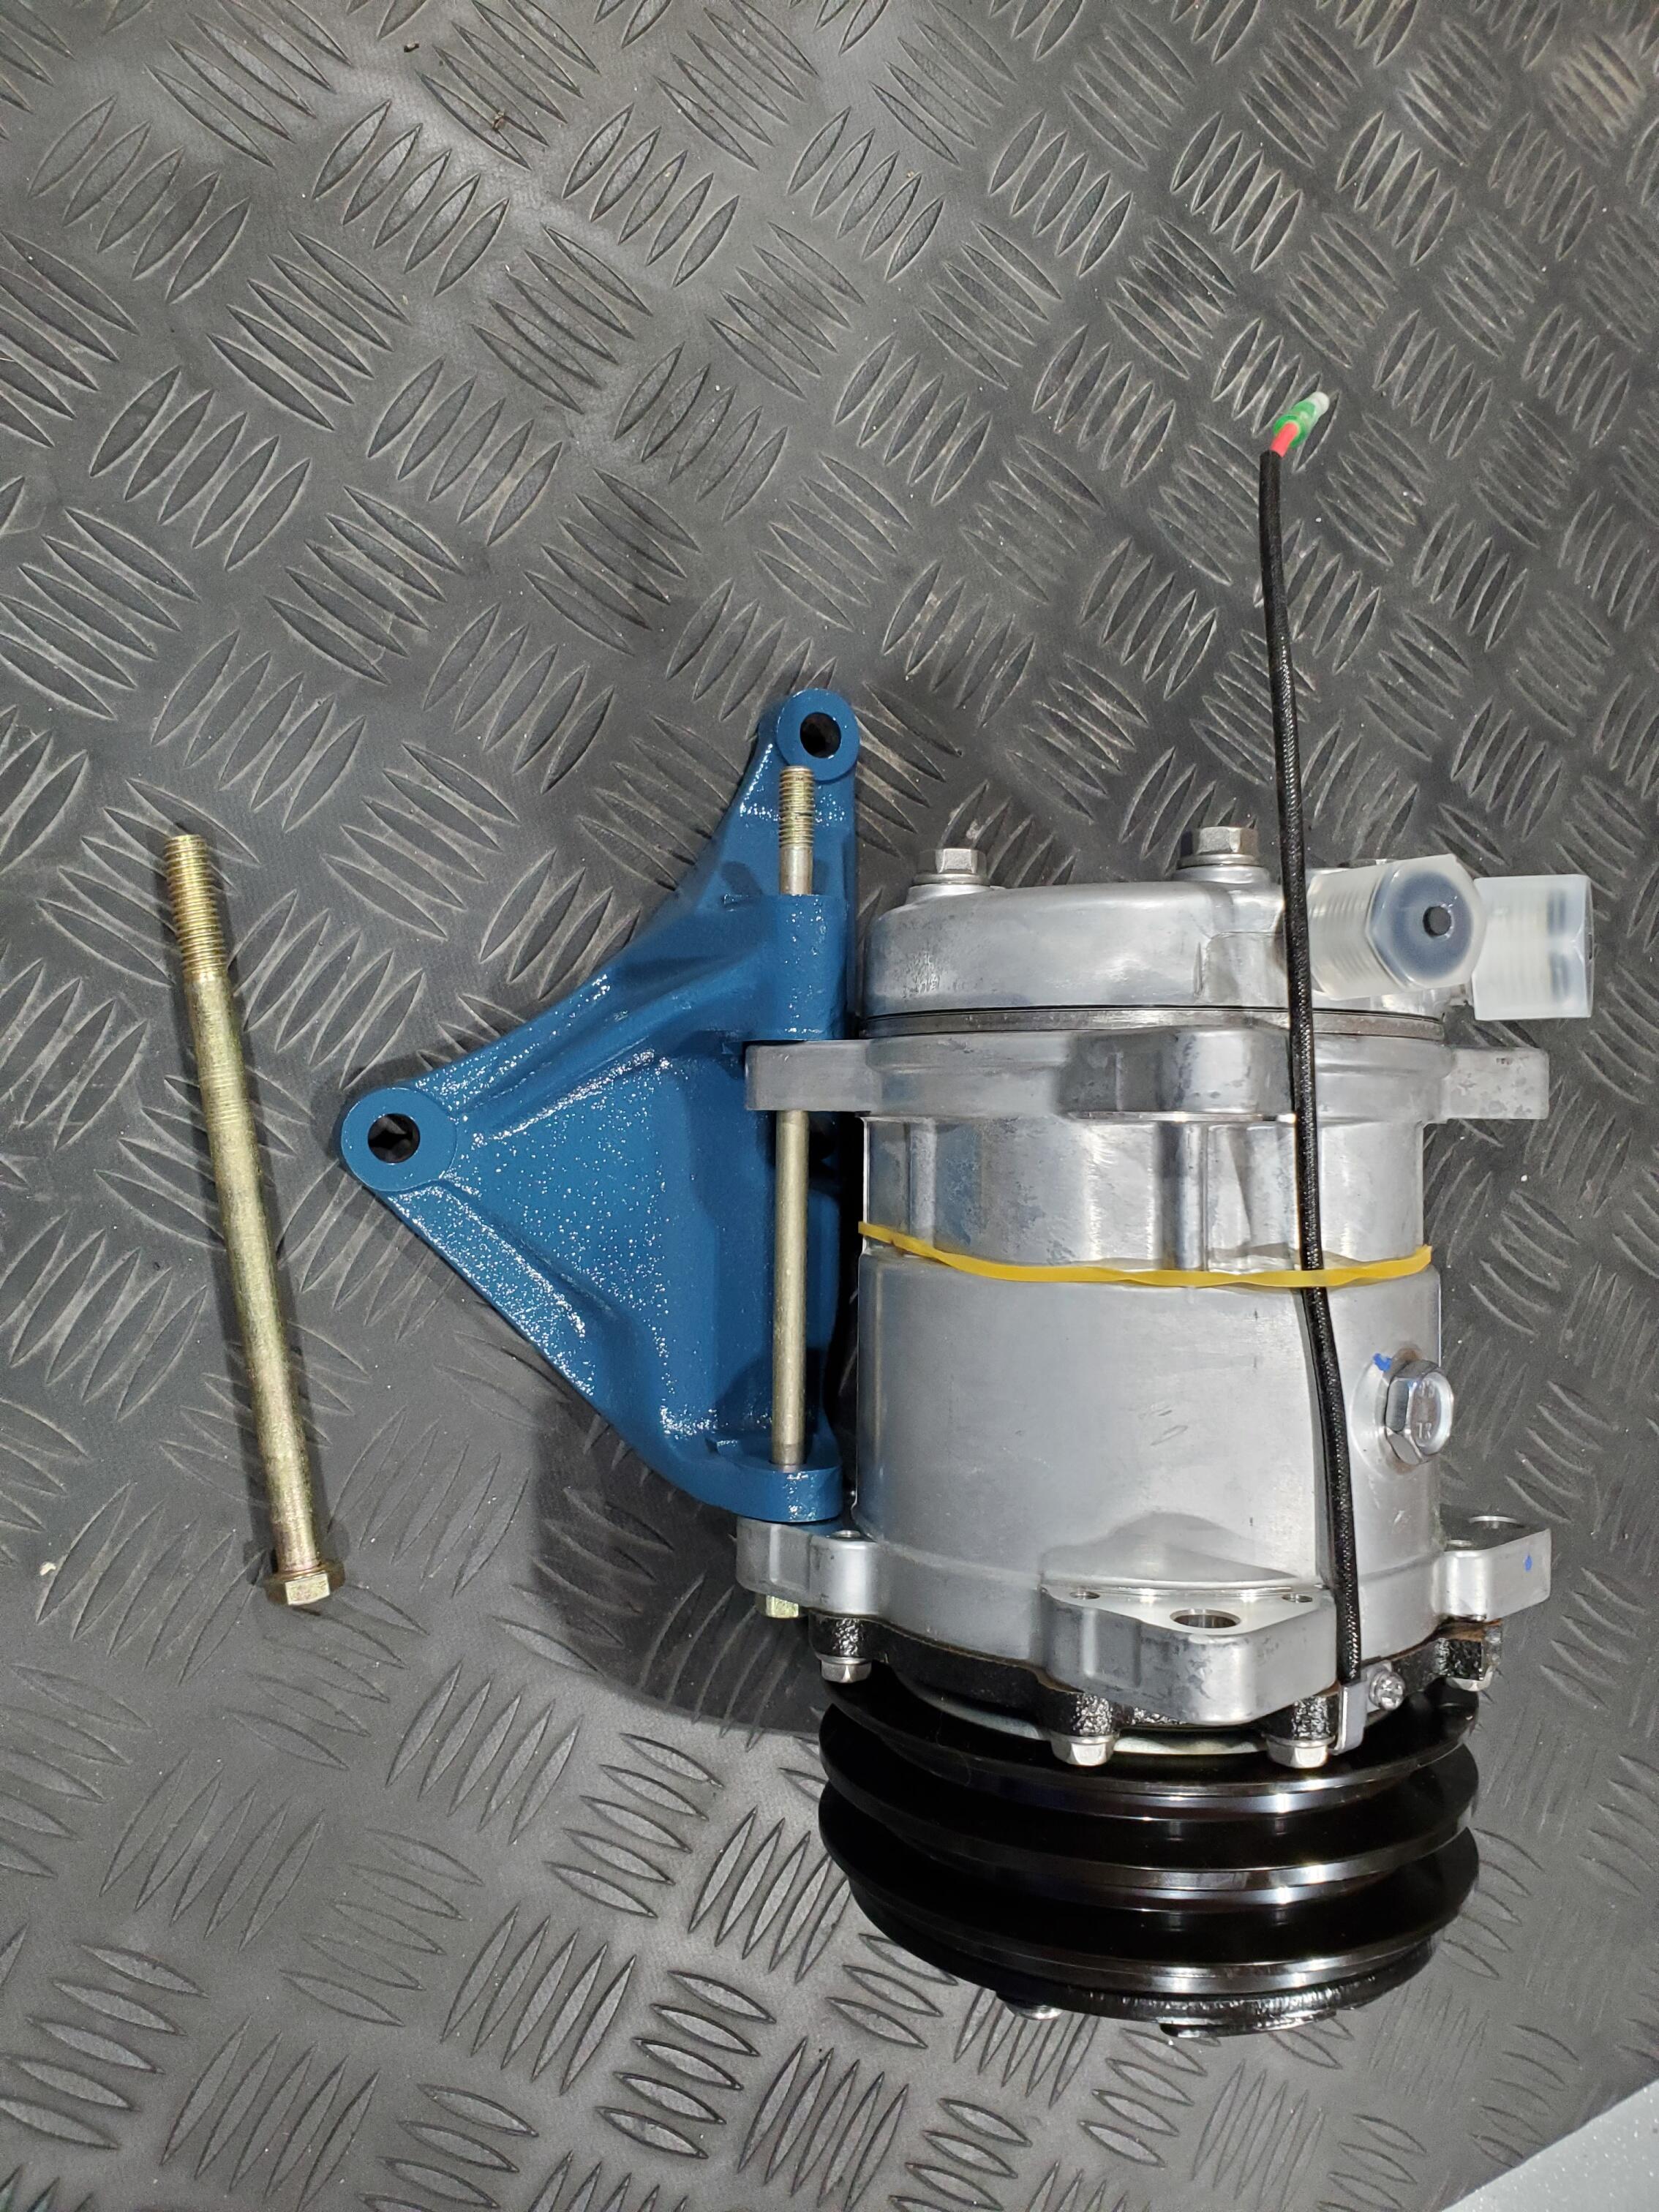
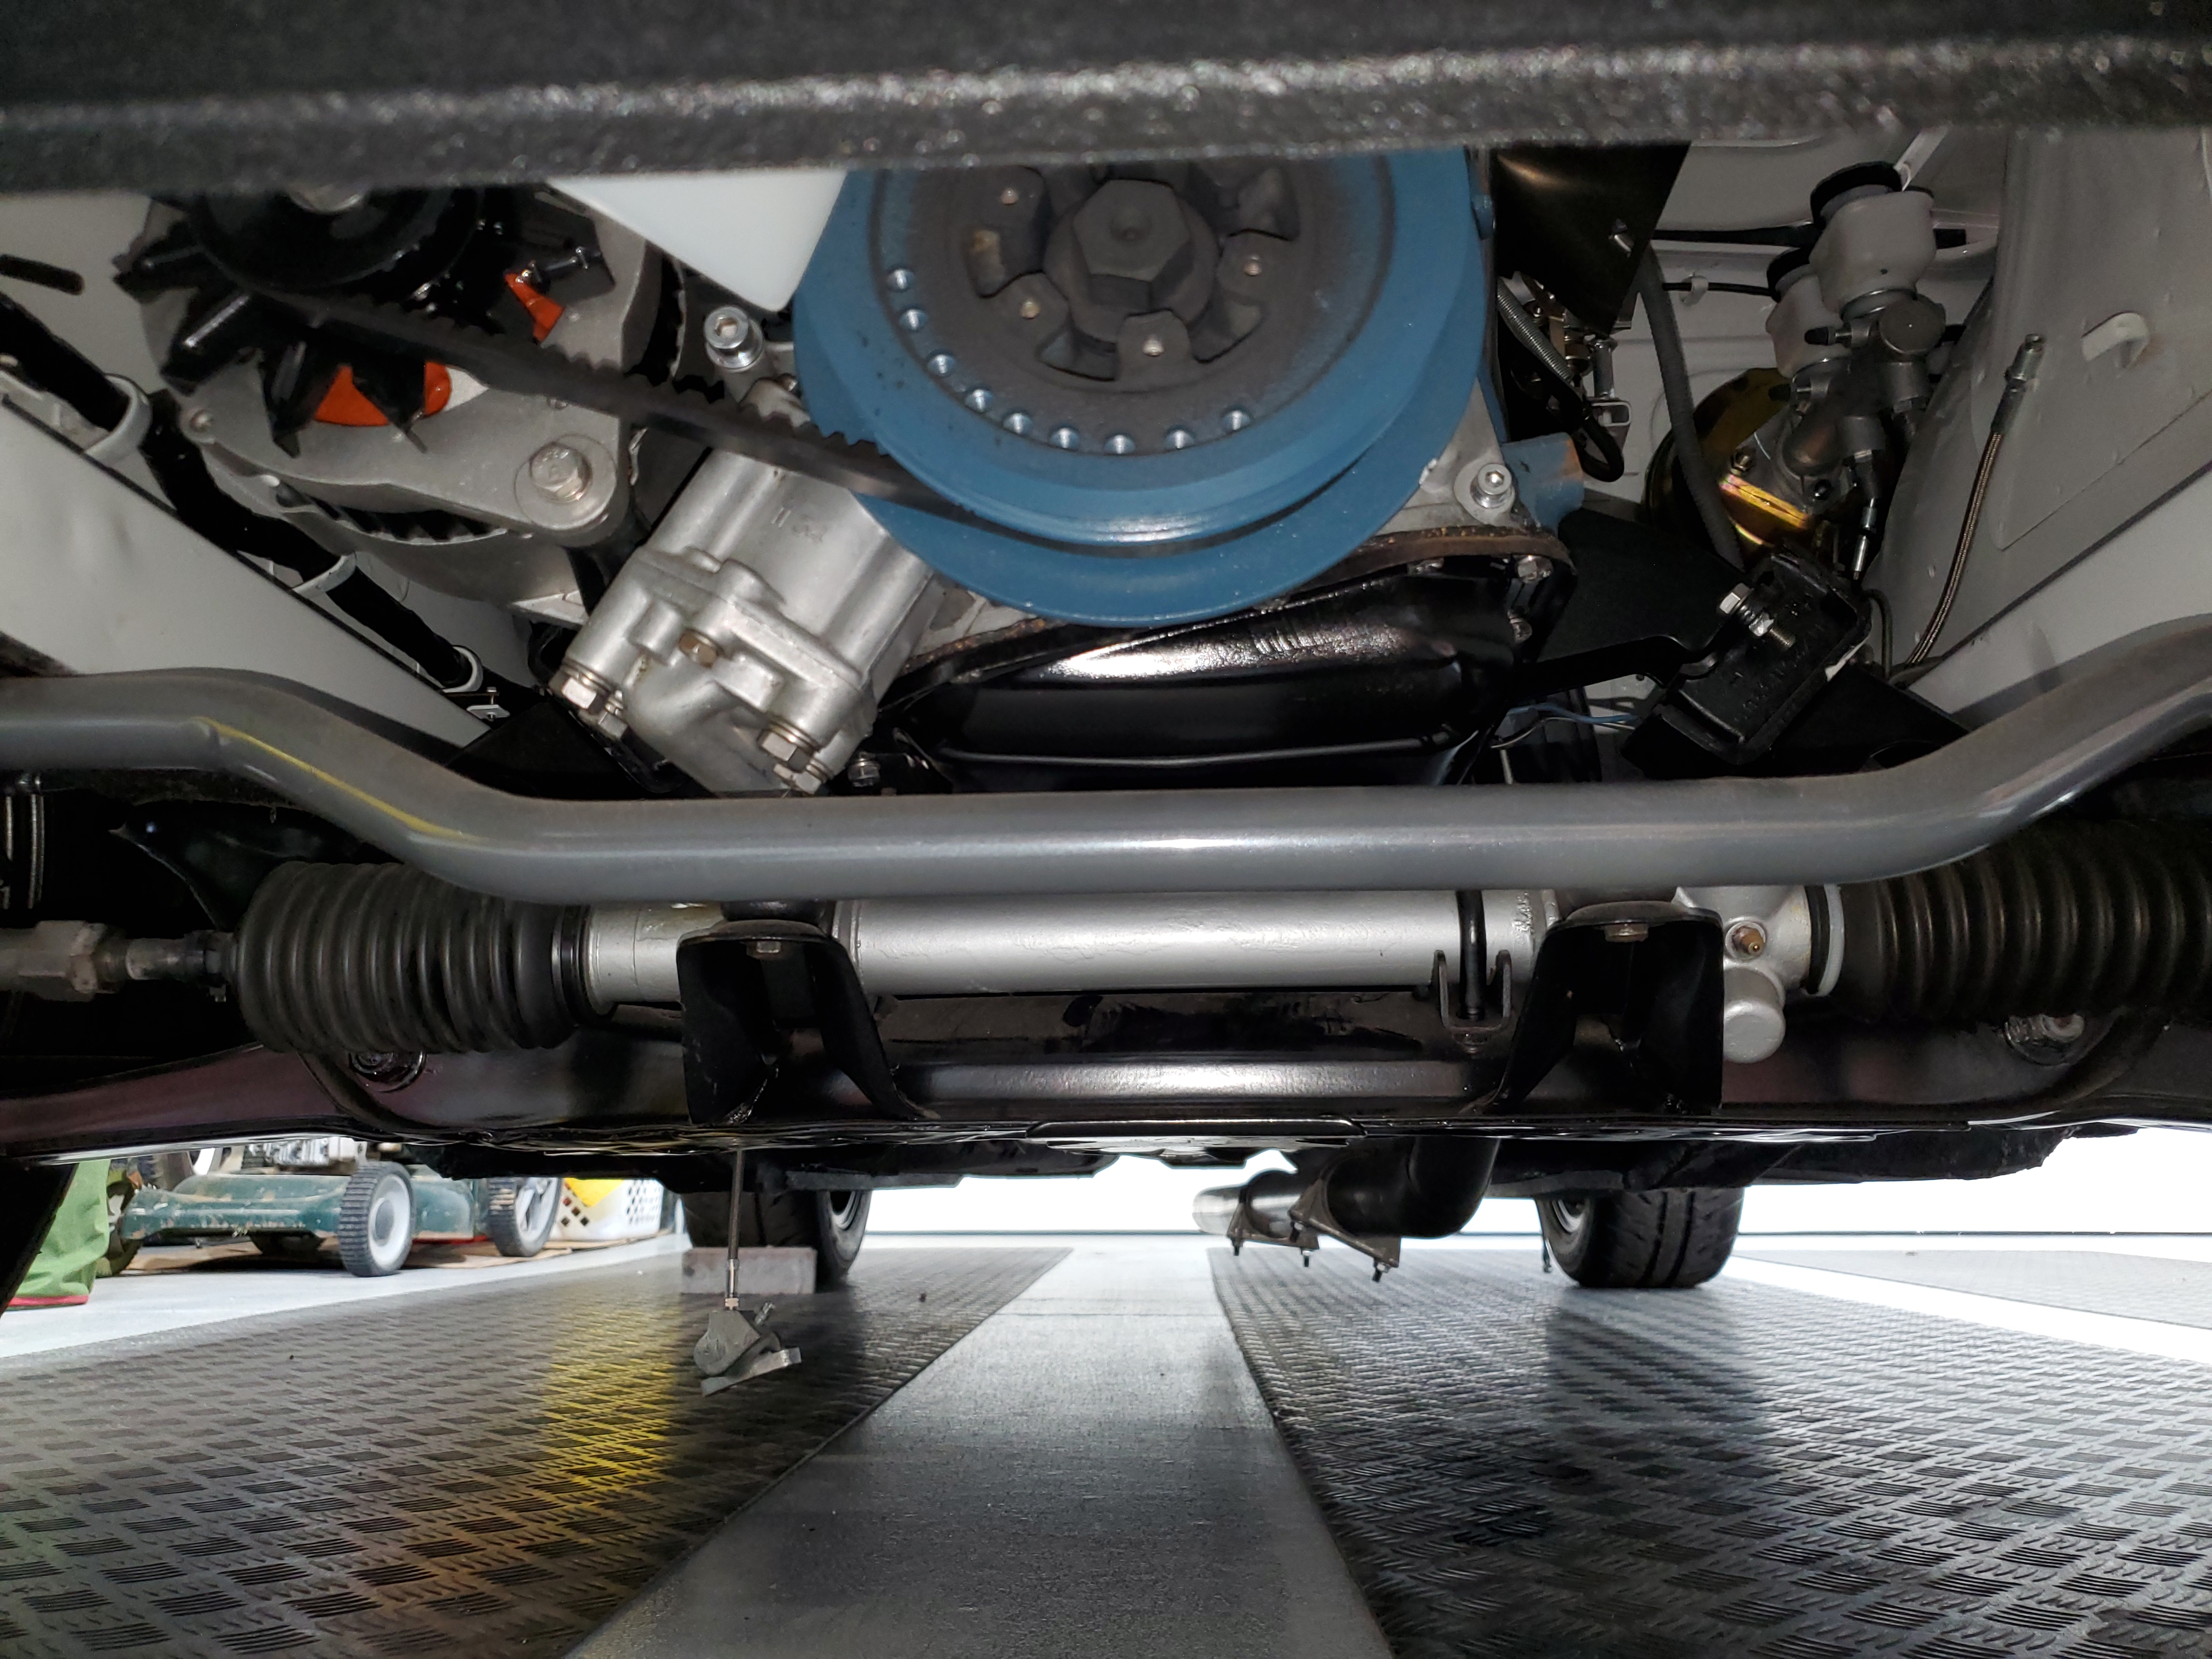
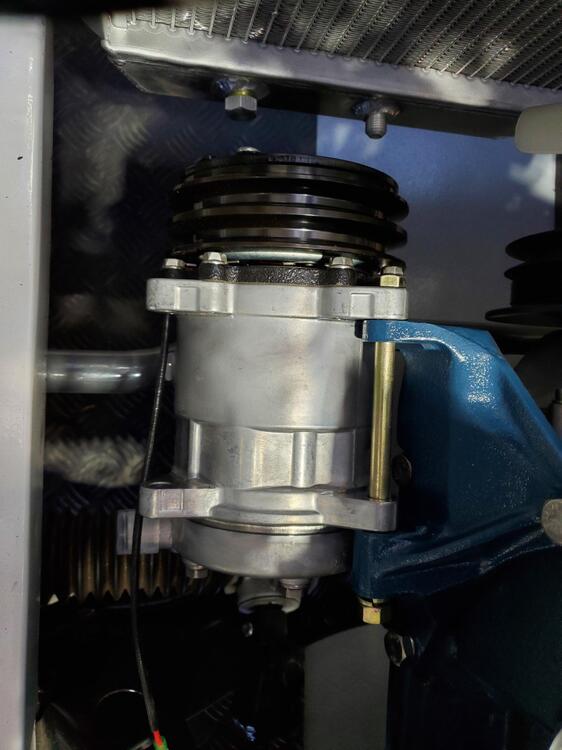
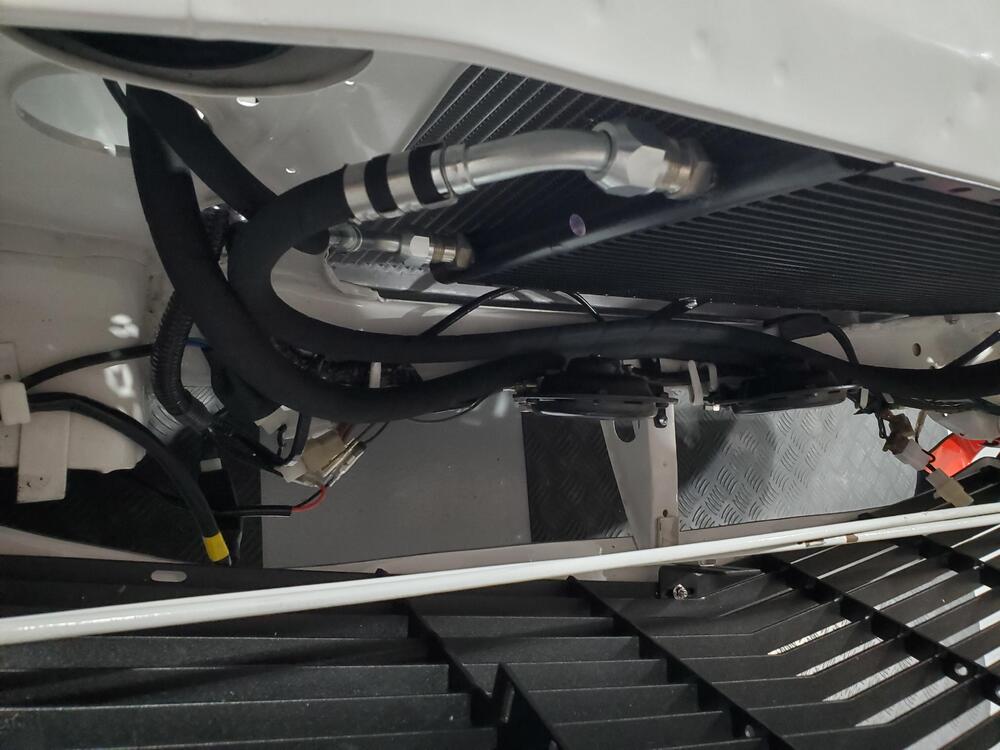
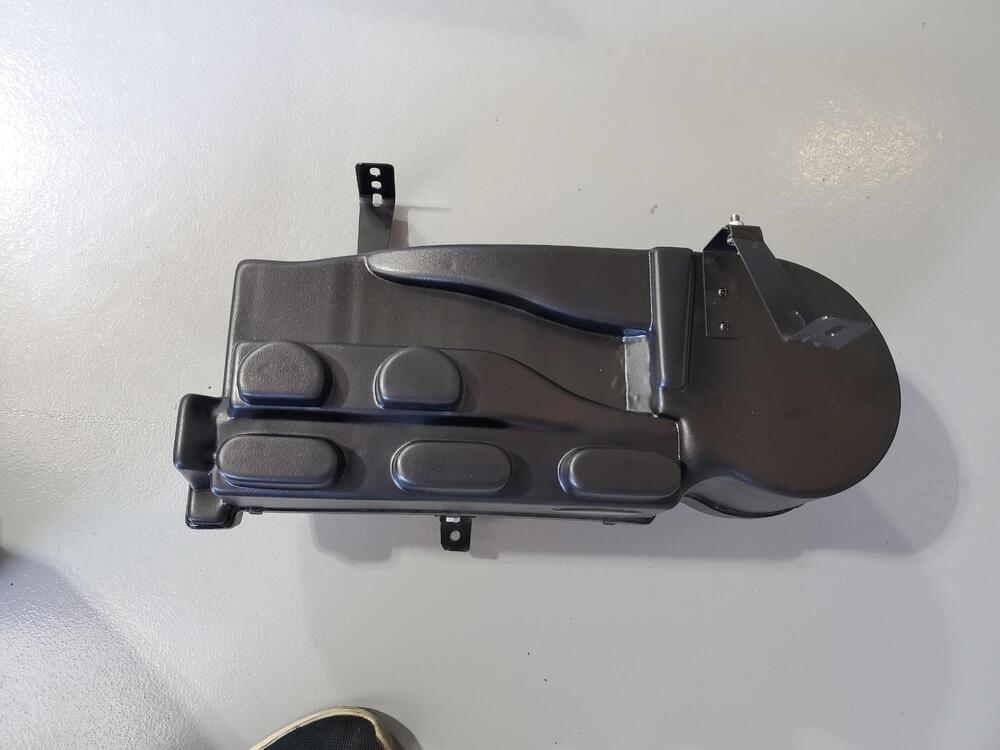
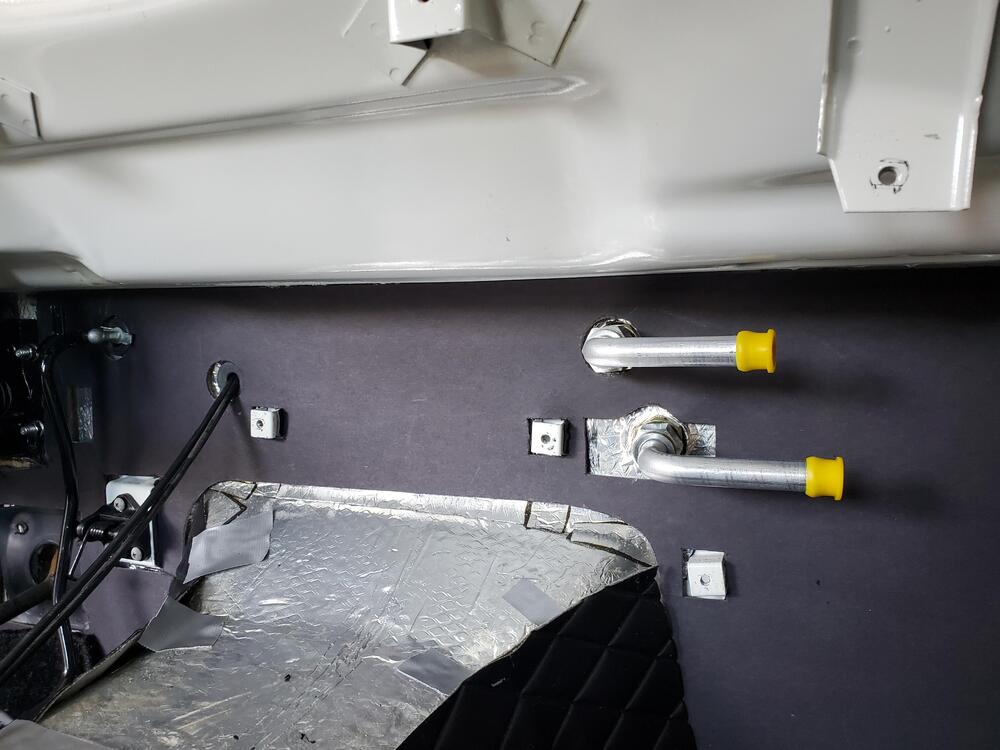
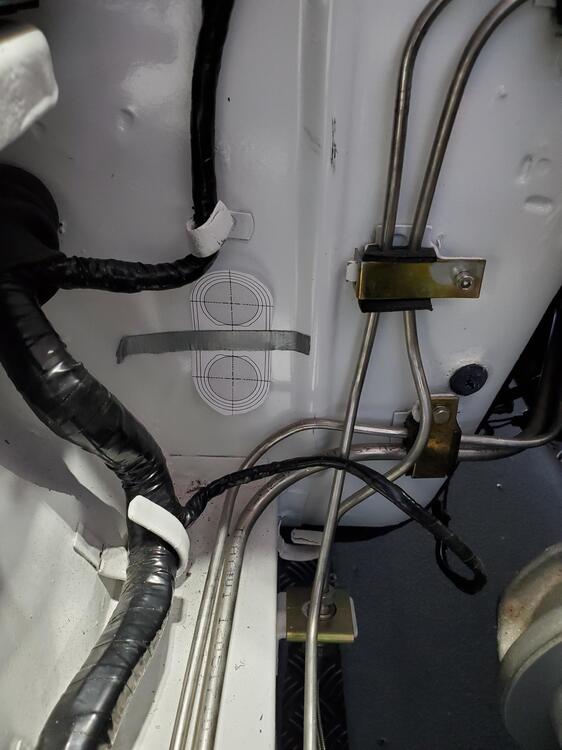
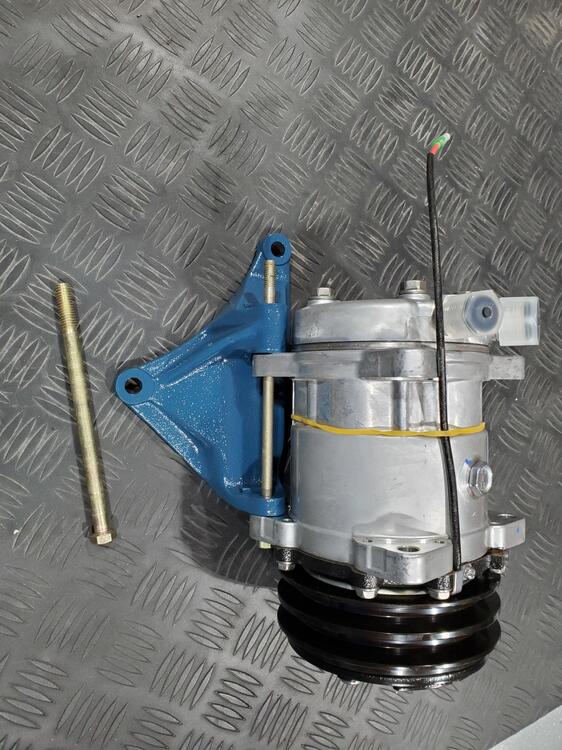
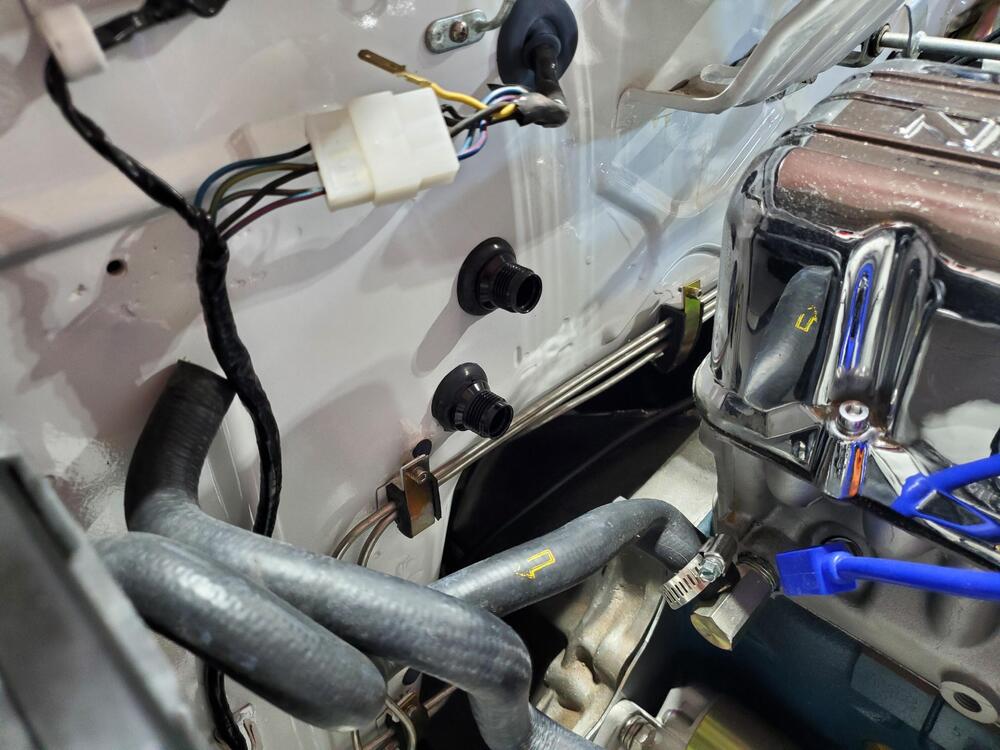
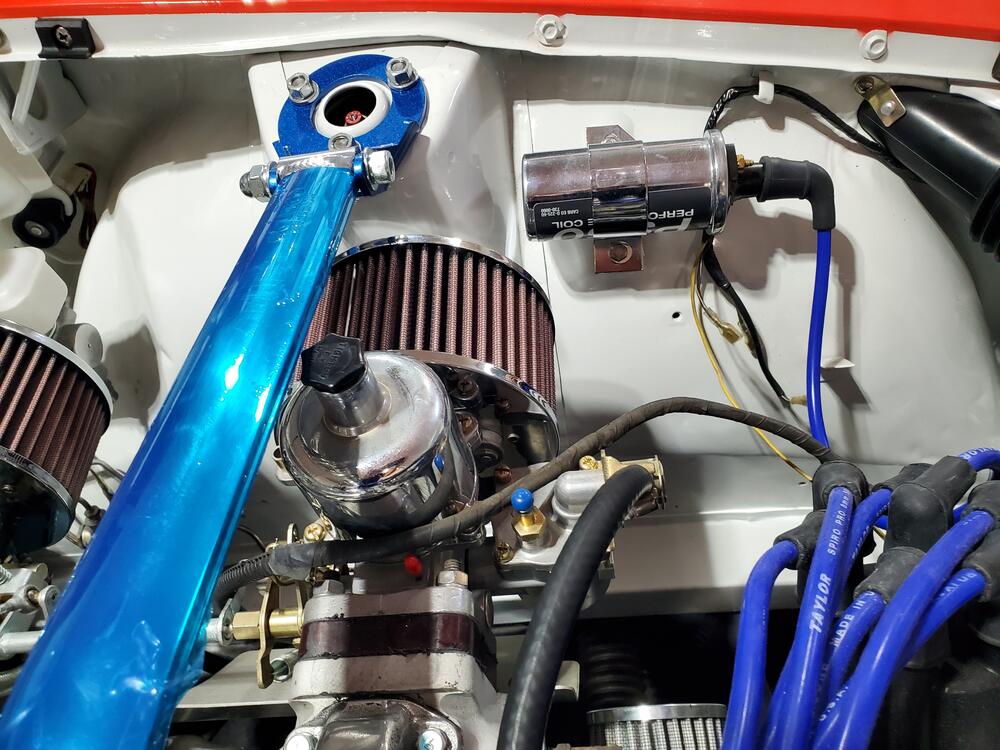
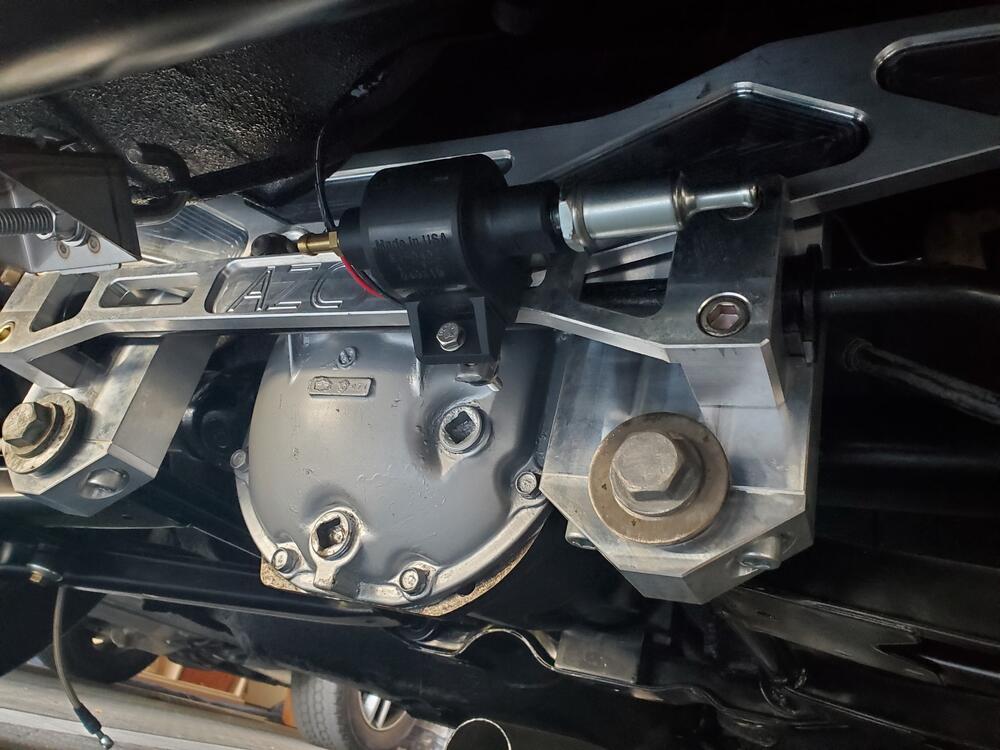
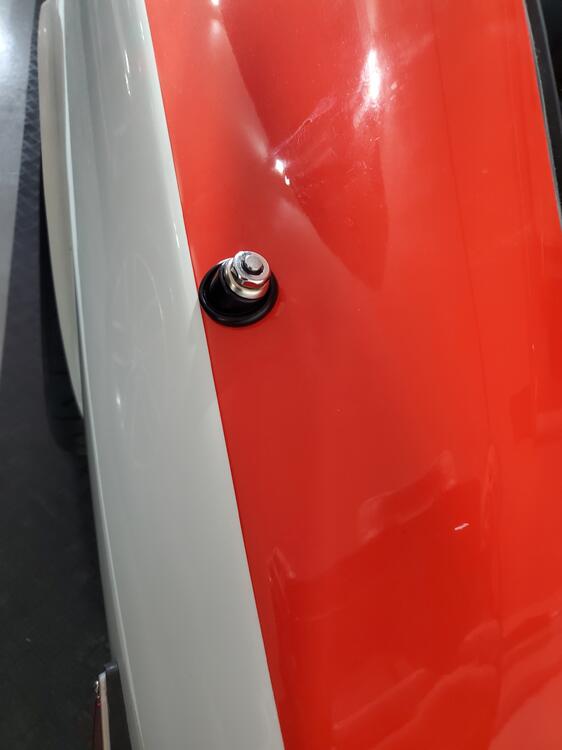
I was provided a light weight (about 1 pound) mock-up of the AC Evaporator with the kit to use for fabricating the support brackets. This is much easier to manage than the actual 15-20 pound REAL Evaporator unit. I fabricated the 3 brackets to support the unit as shown below. I installed the bulkhead connectors for the heater lines in the engine bay and adapter the hoses. I will do the interior heater lines next. I temporarily attached the right angle heater fittings on the interior just to see how they would look. Also did a quick verification putting the mock-up back in to make sure there was no interference with the heater lines . I marked a preliminary position for the AC lines with a cut-out from the bulkhead connector kit, but decided to go horizontal instead of the vertical shown here. Horizontal gives a little more foot room for the passenger and also keeps things fairly clean inside the engine bay. I grabbed an old smog pump bracket and found that it works very well in supporting the compressor. The bracket also lines the compressor pulley up perfectly with the crank pulley. I cleaned and painted it. You can see how things line up in the picture below, very nice. I will drill out the bracket to accomodate the larger bolt shown below, which is a bit beefier and happens to be the correct length. I will use an expandable arm similar to what is supporting the alternator for an upper support that will also provide a little adjustability. As I get farther along with this, I must say that I am actually starting to like this set-up. It is very clean under the dash and so far has not been difficult to install. (Hopefully I am not speaking too soon here). The AC Evaporator vent openings are all controlled electronically and seem fairly simple in their operation. If things continue to go smoothly, I may put this on more cars in the future. Pics below.


-
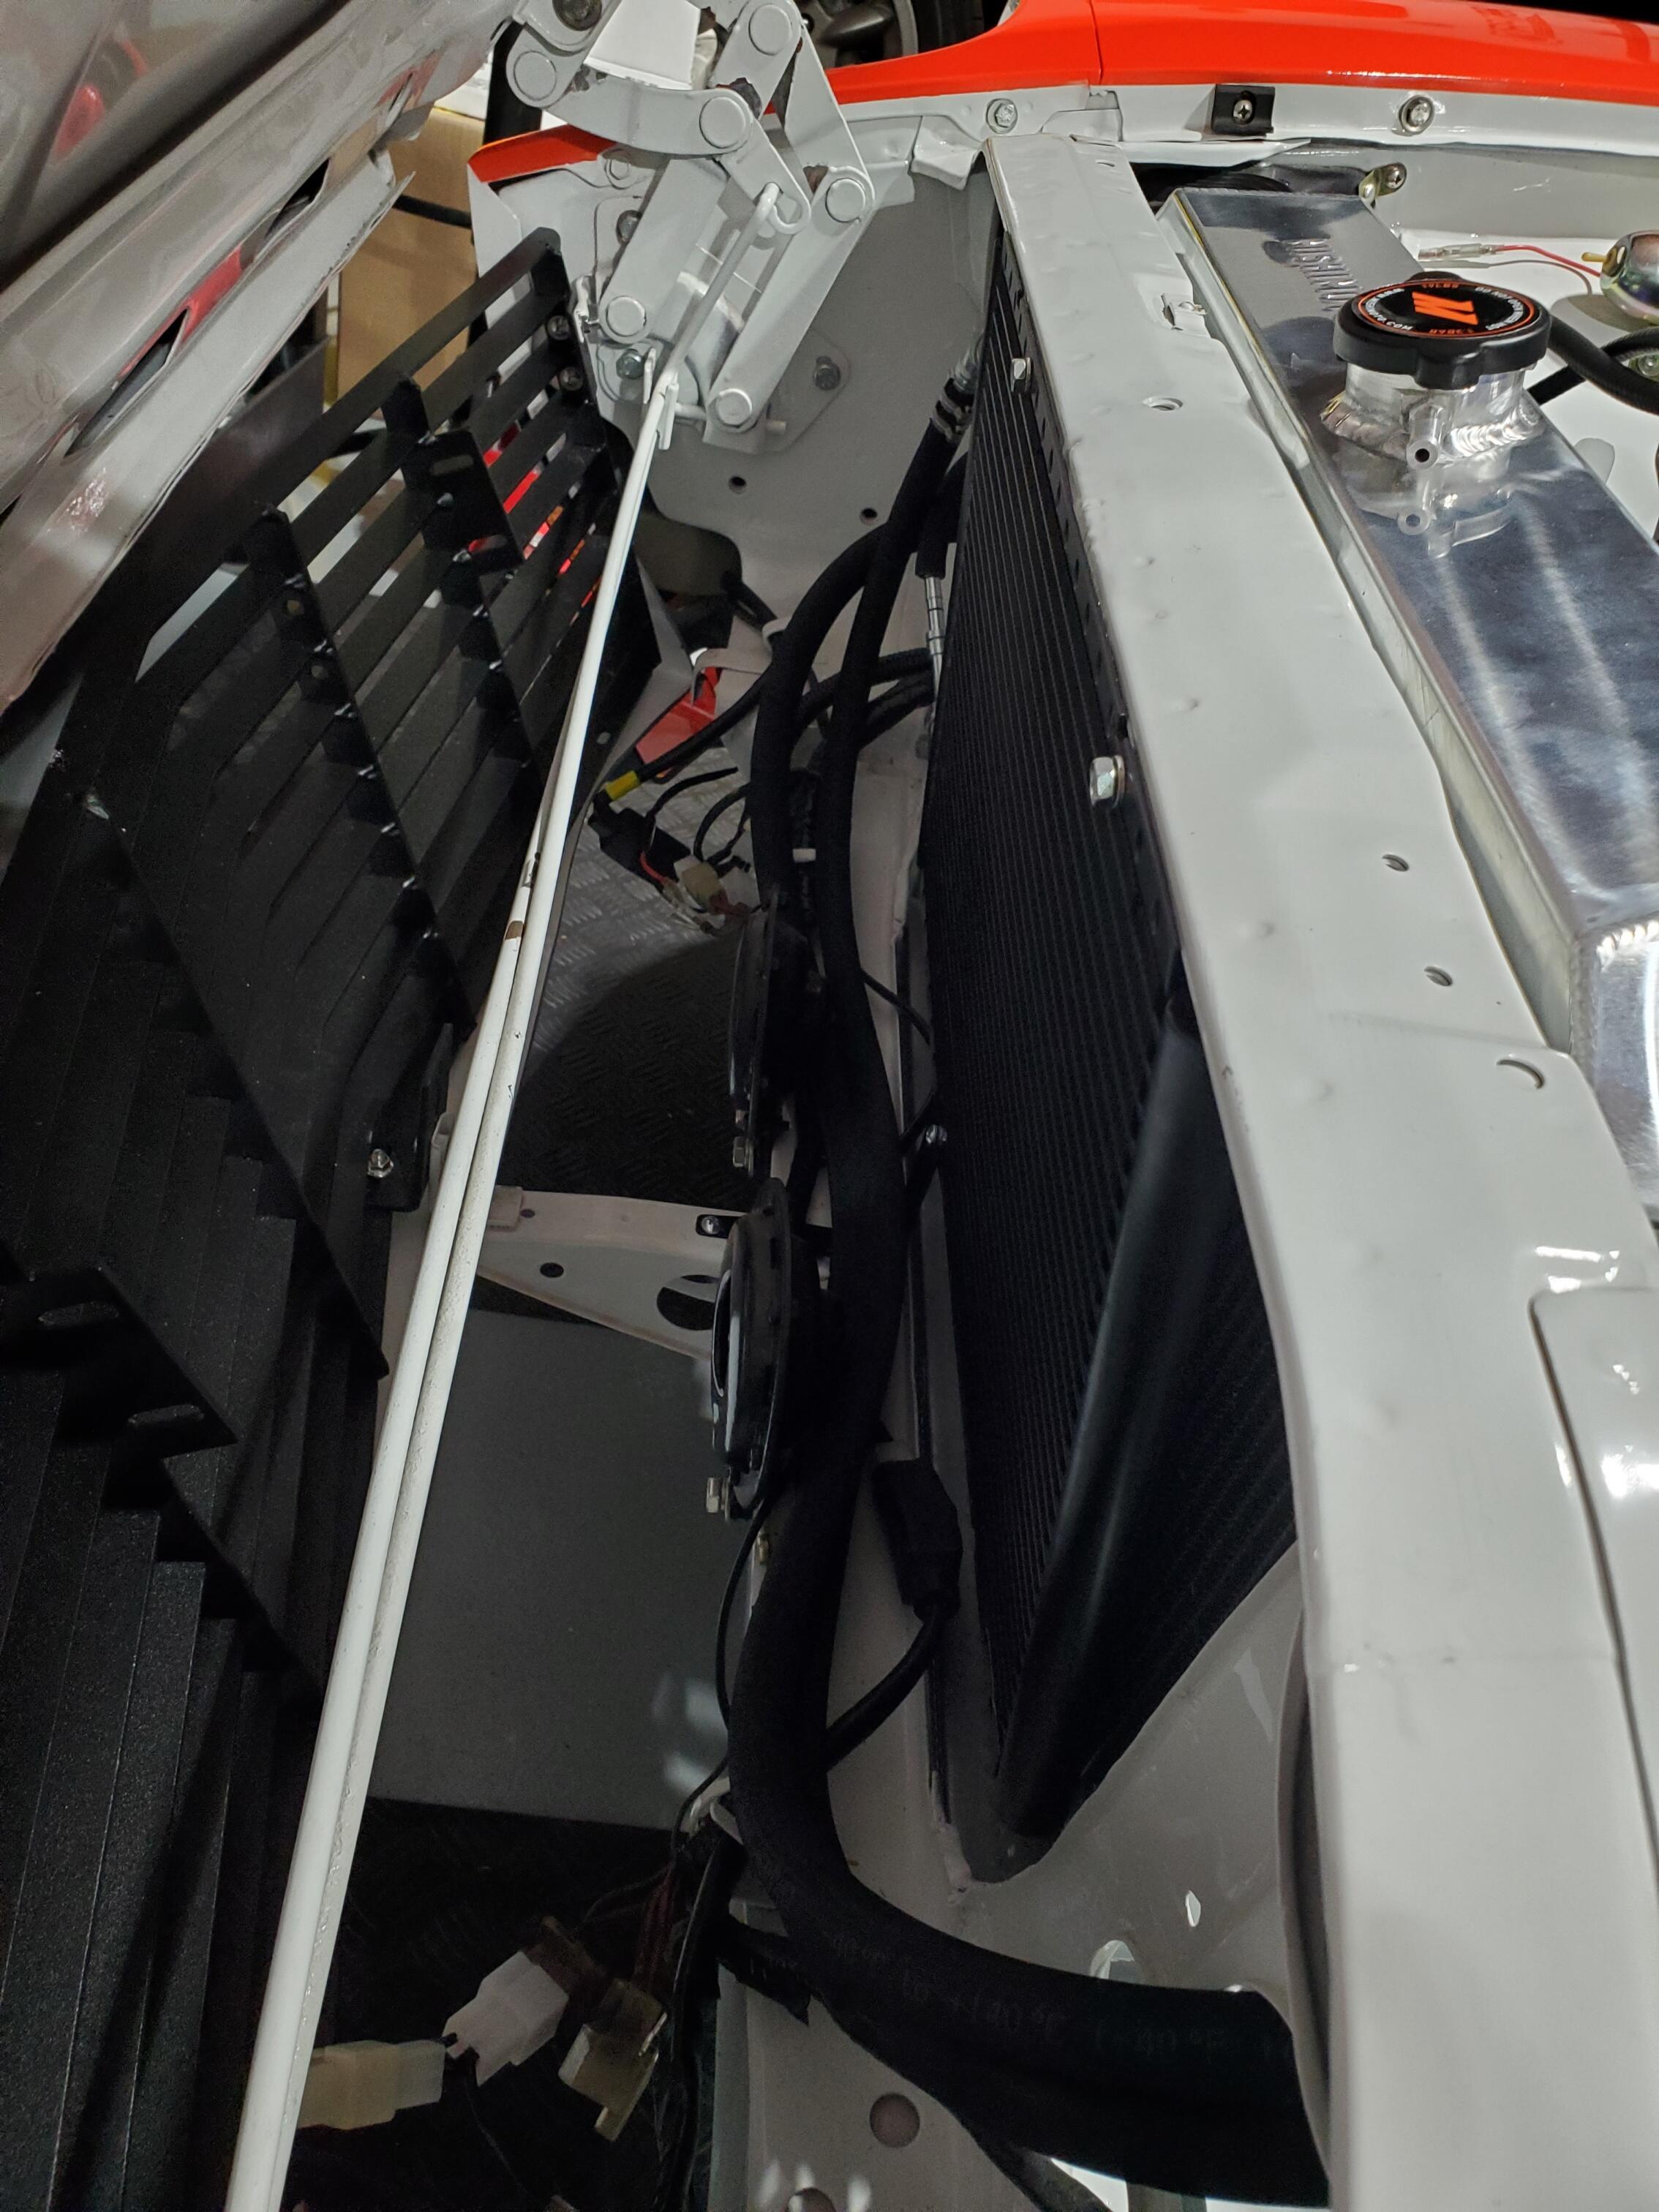
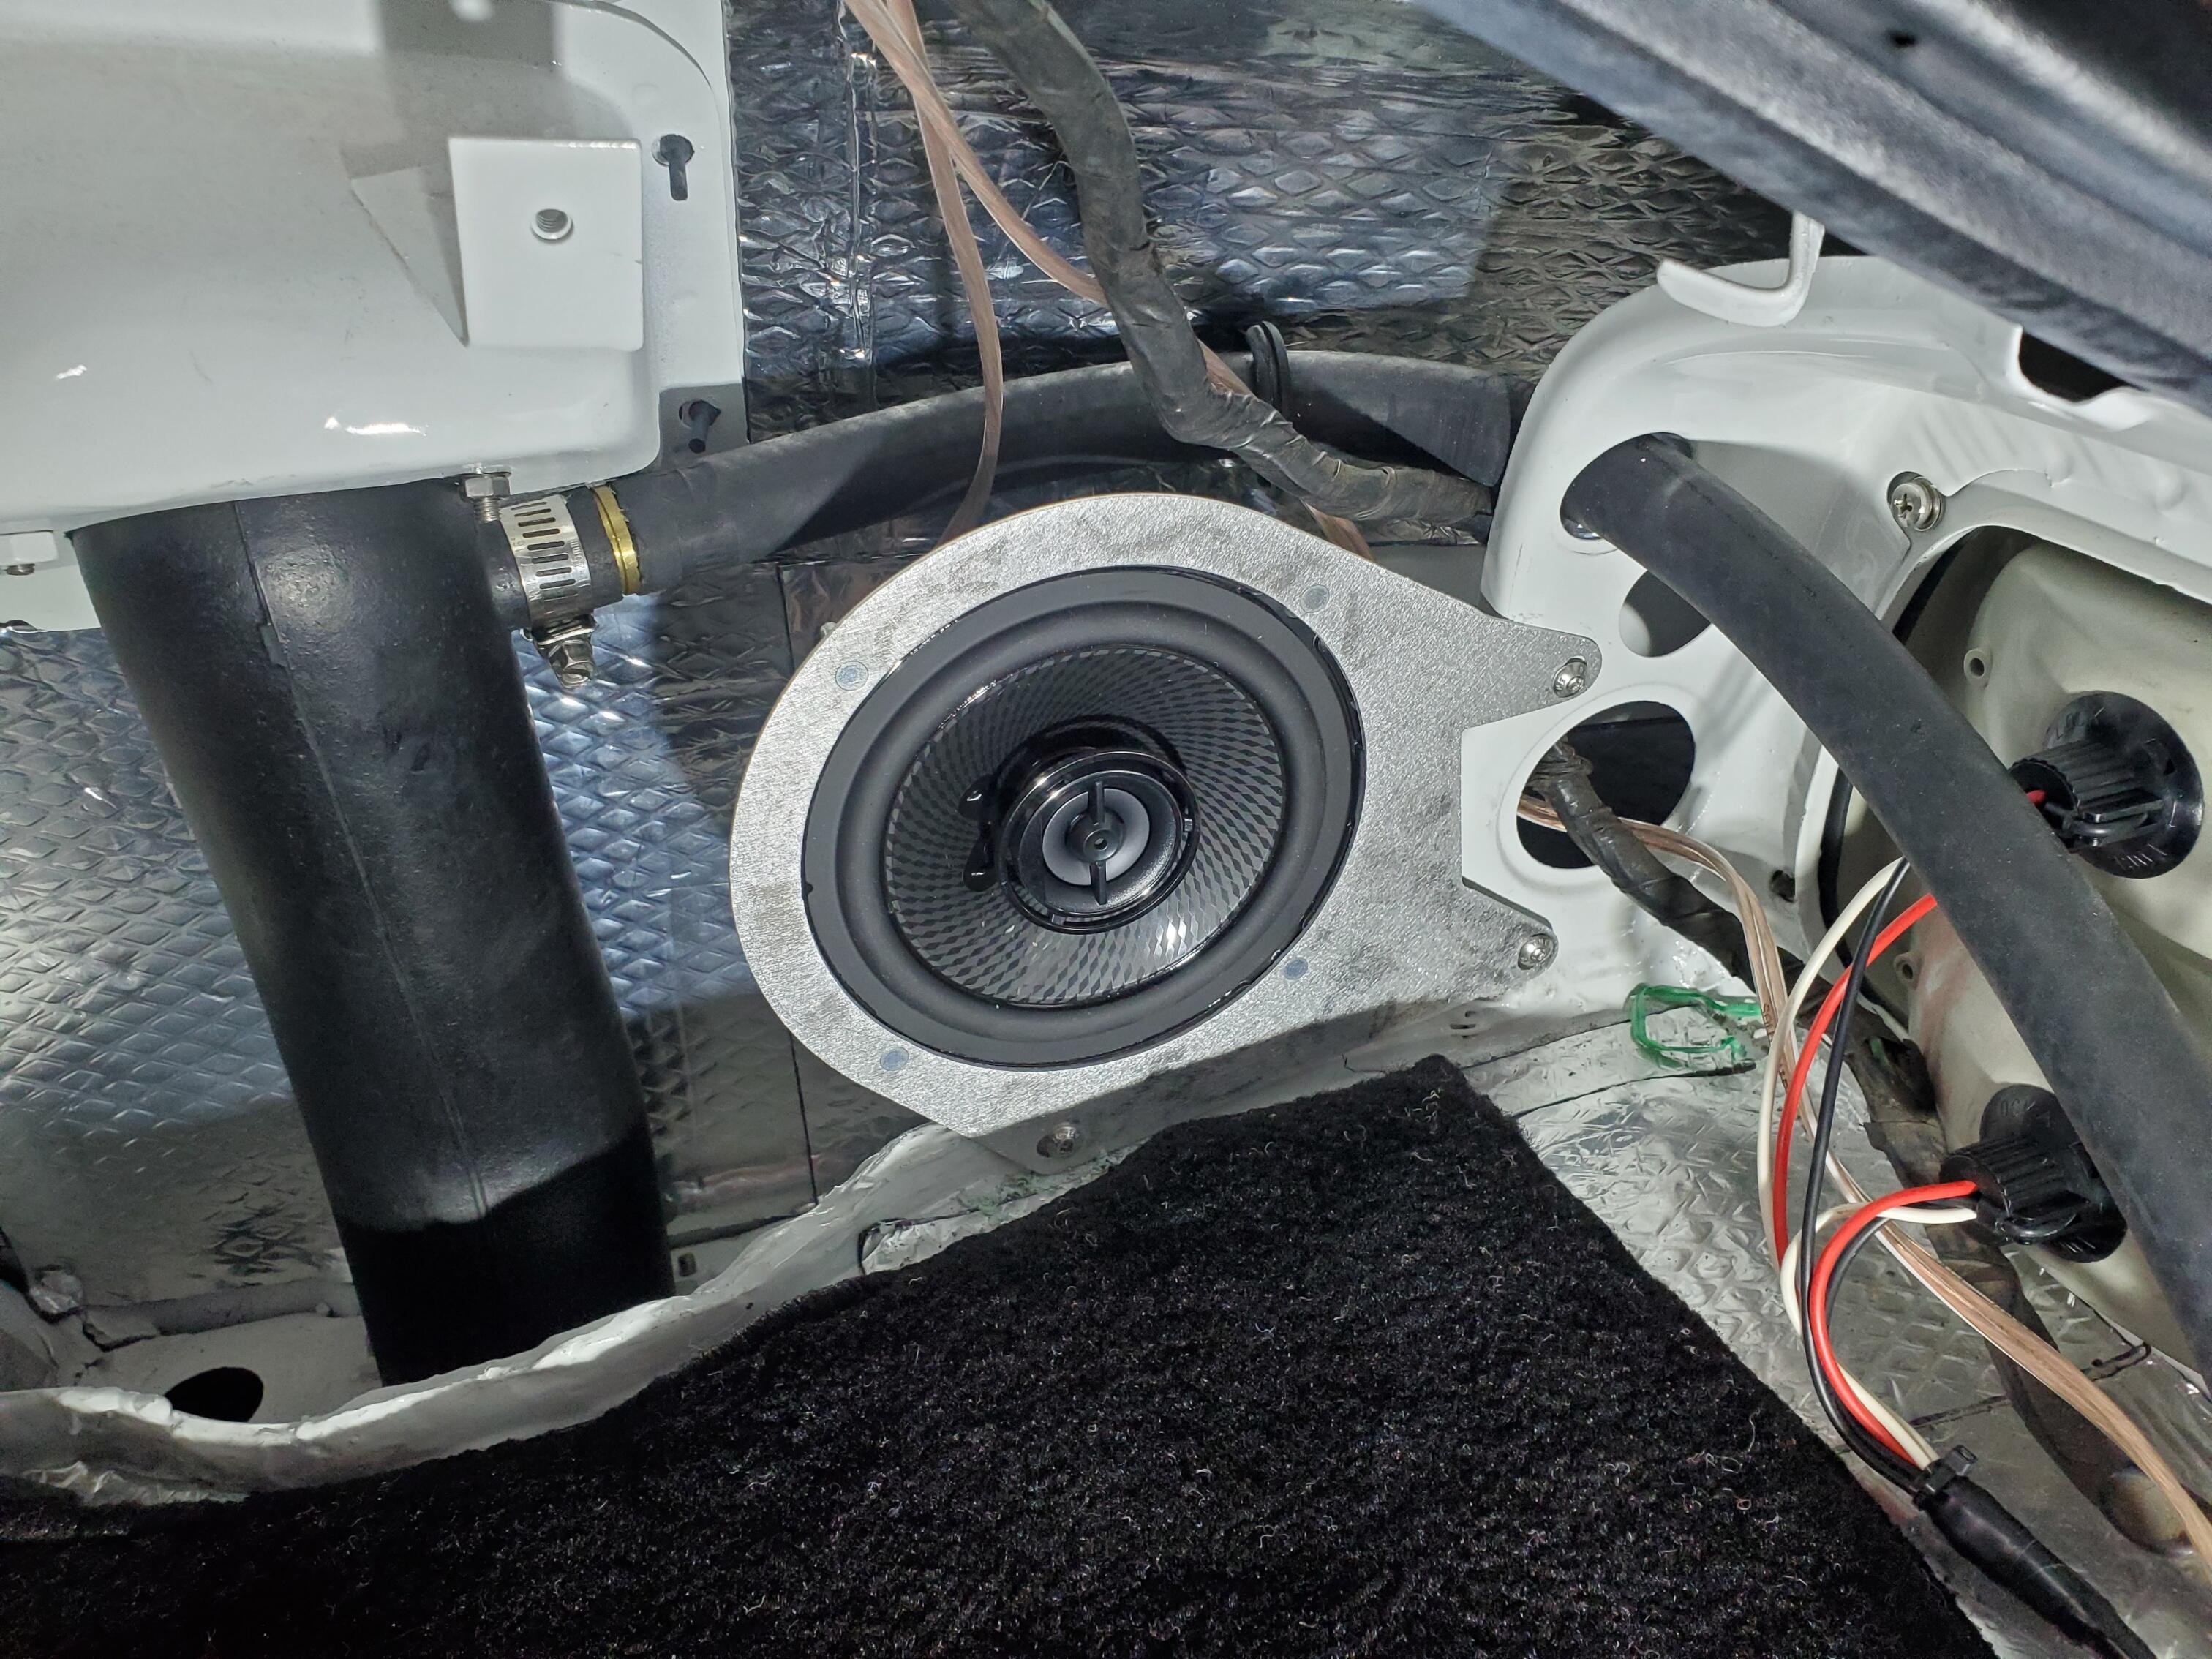
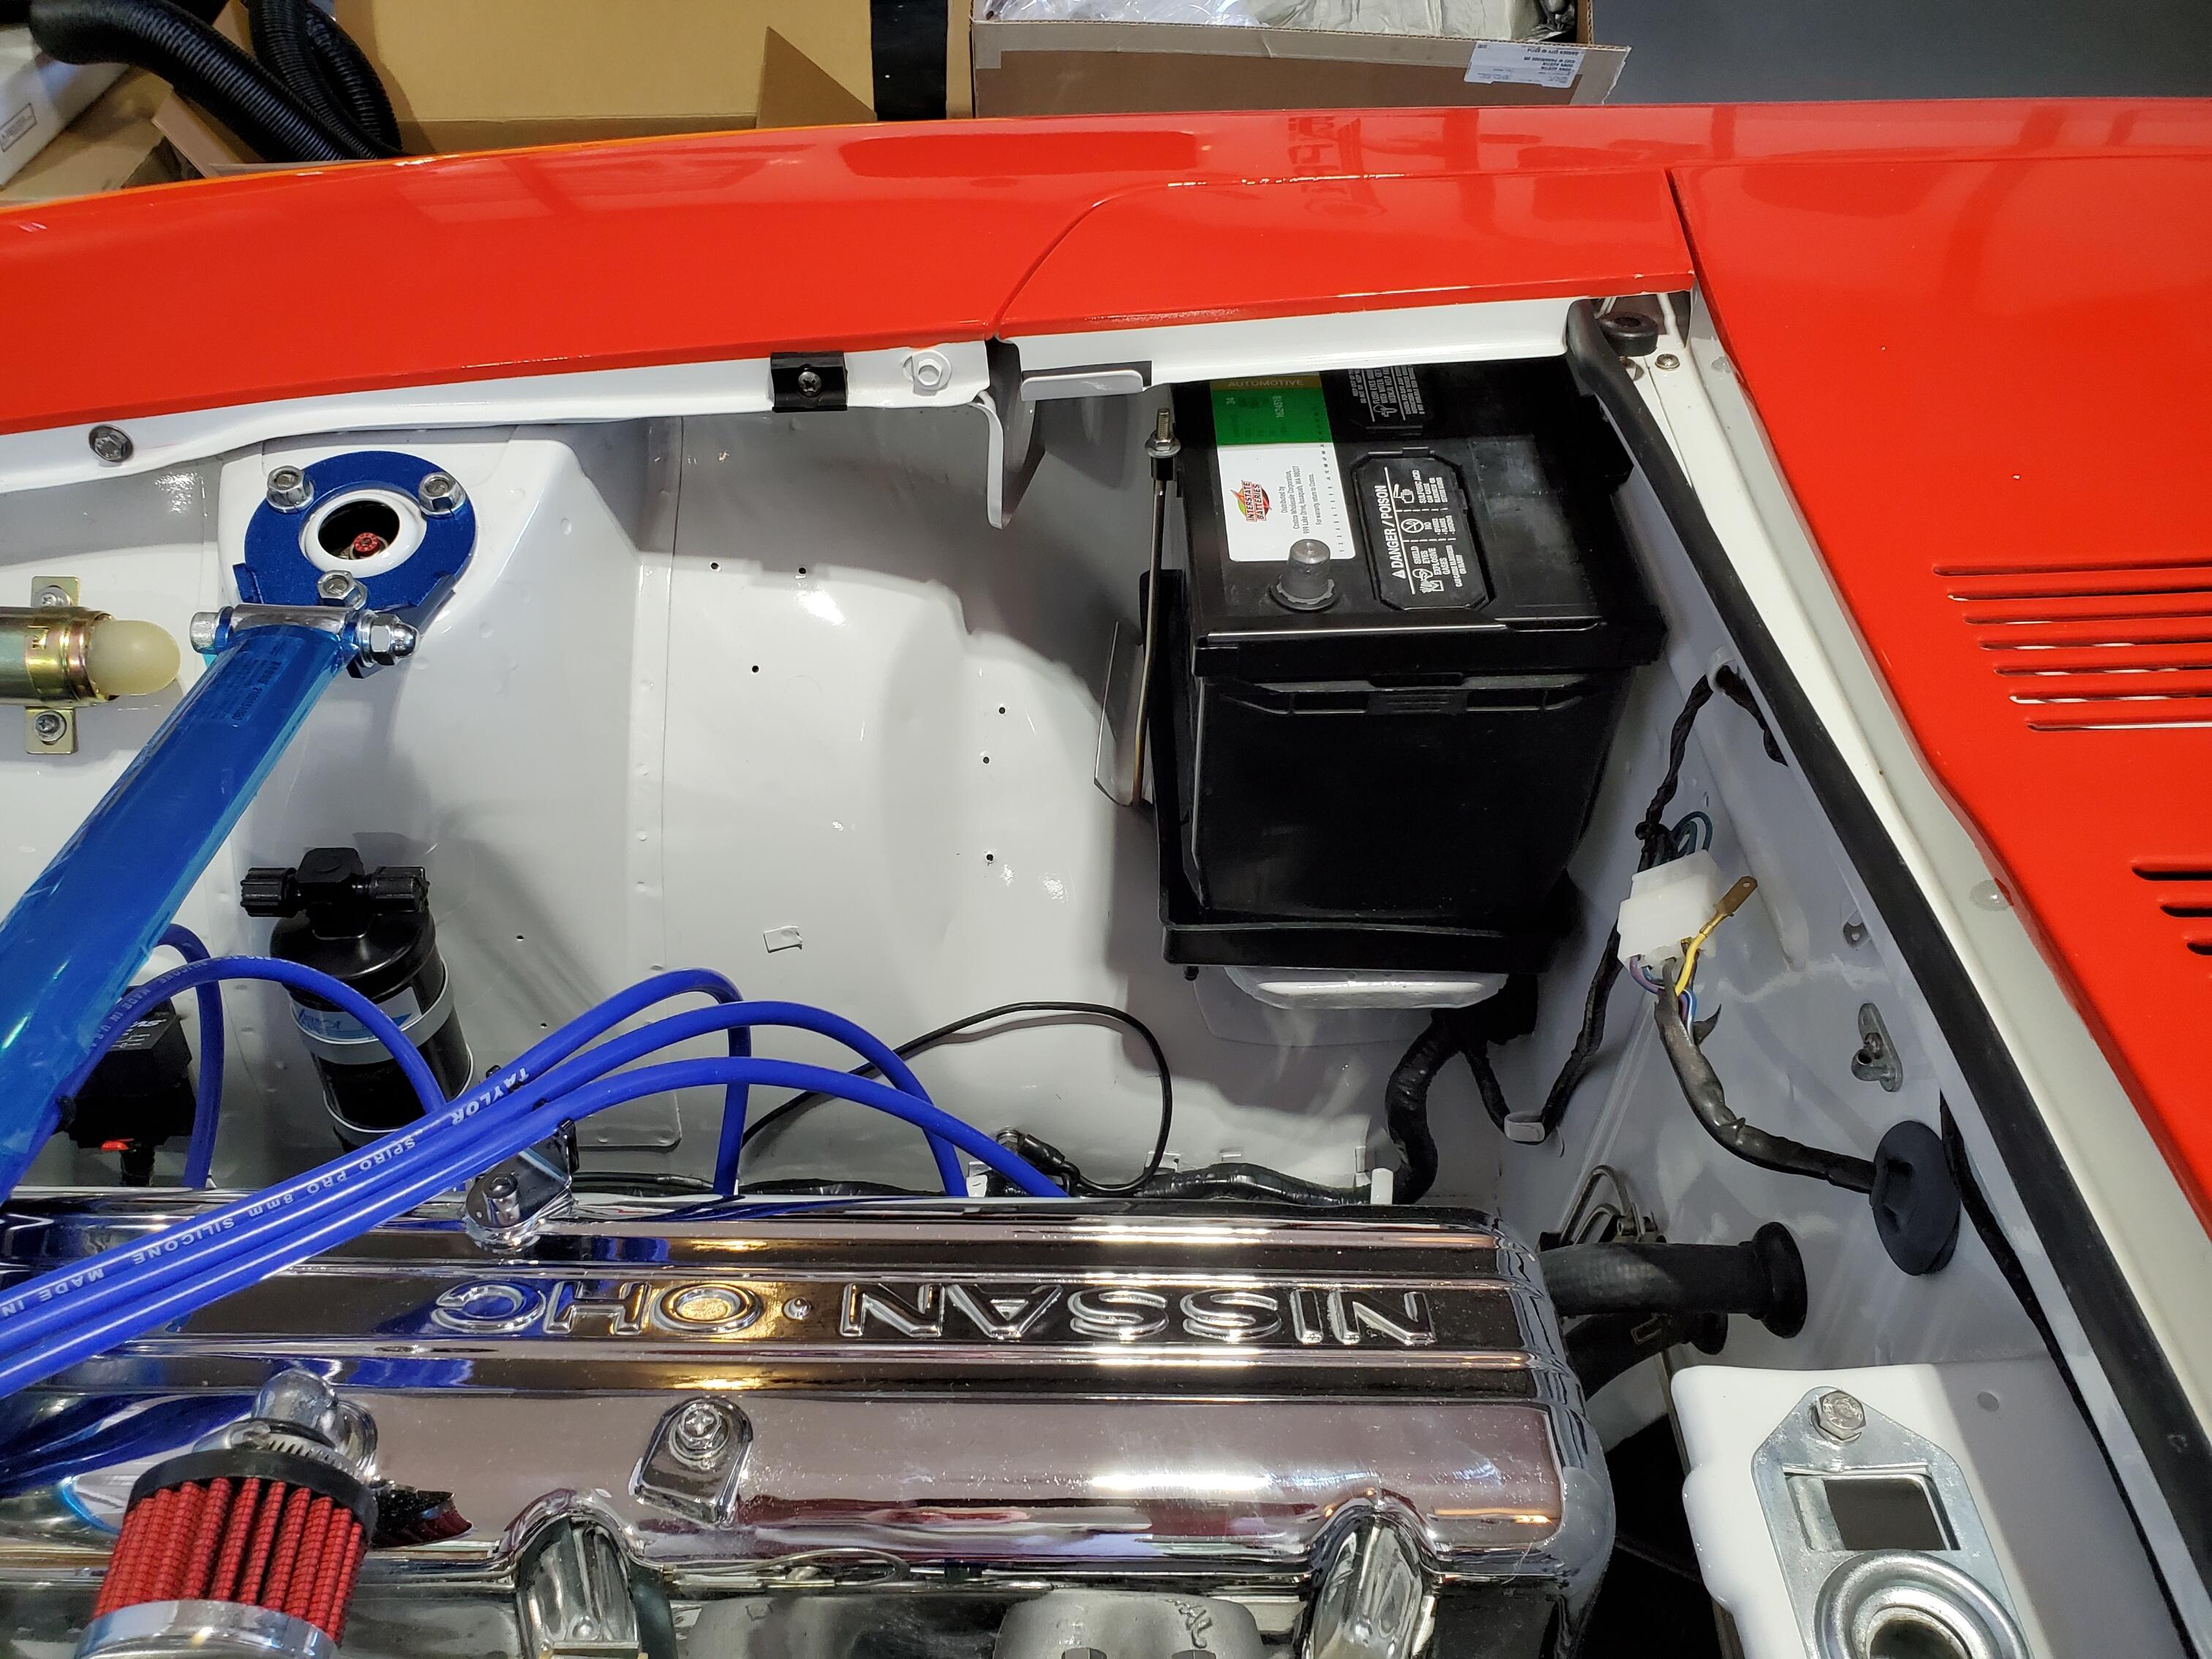
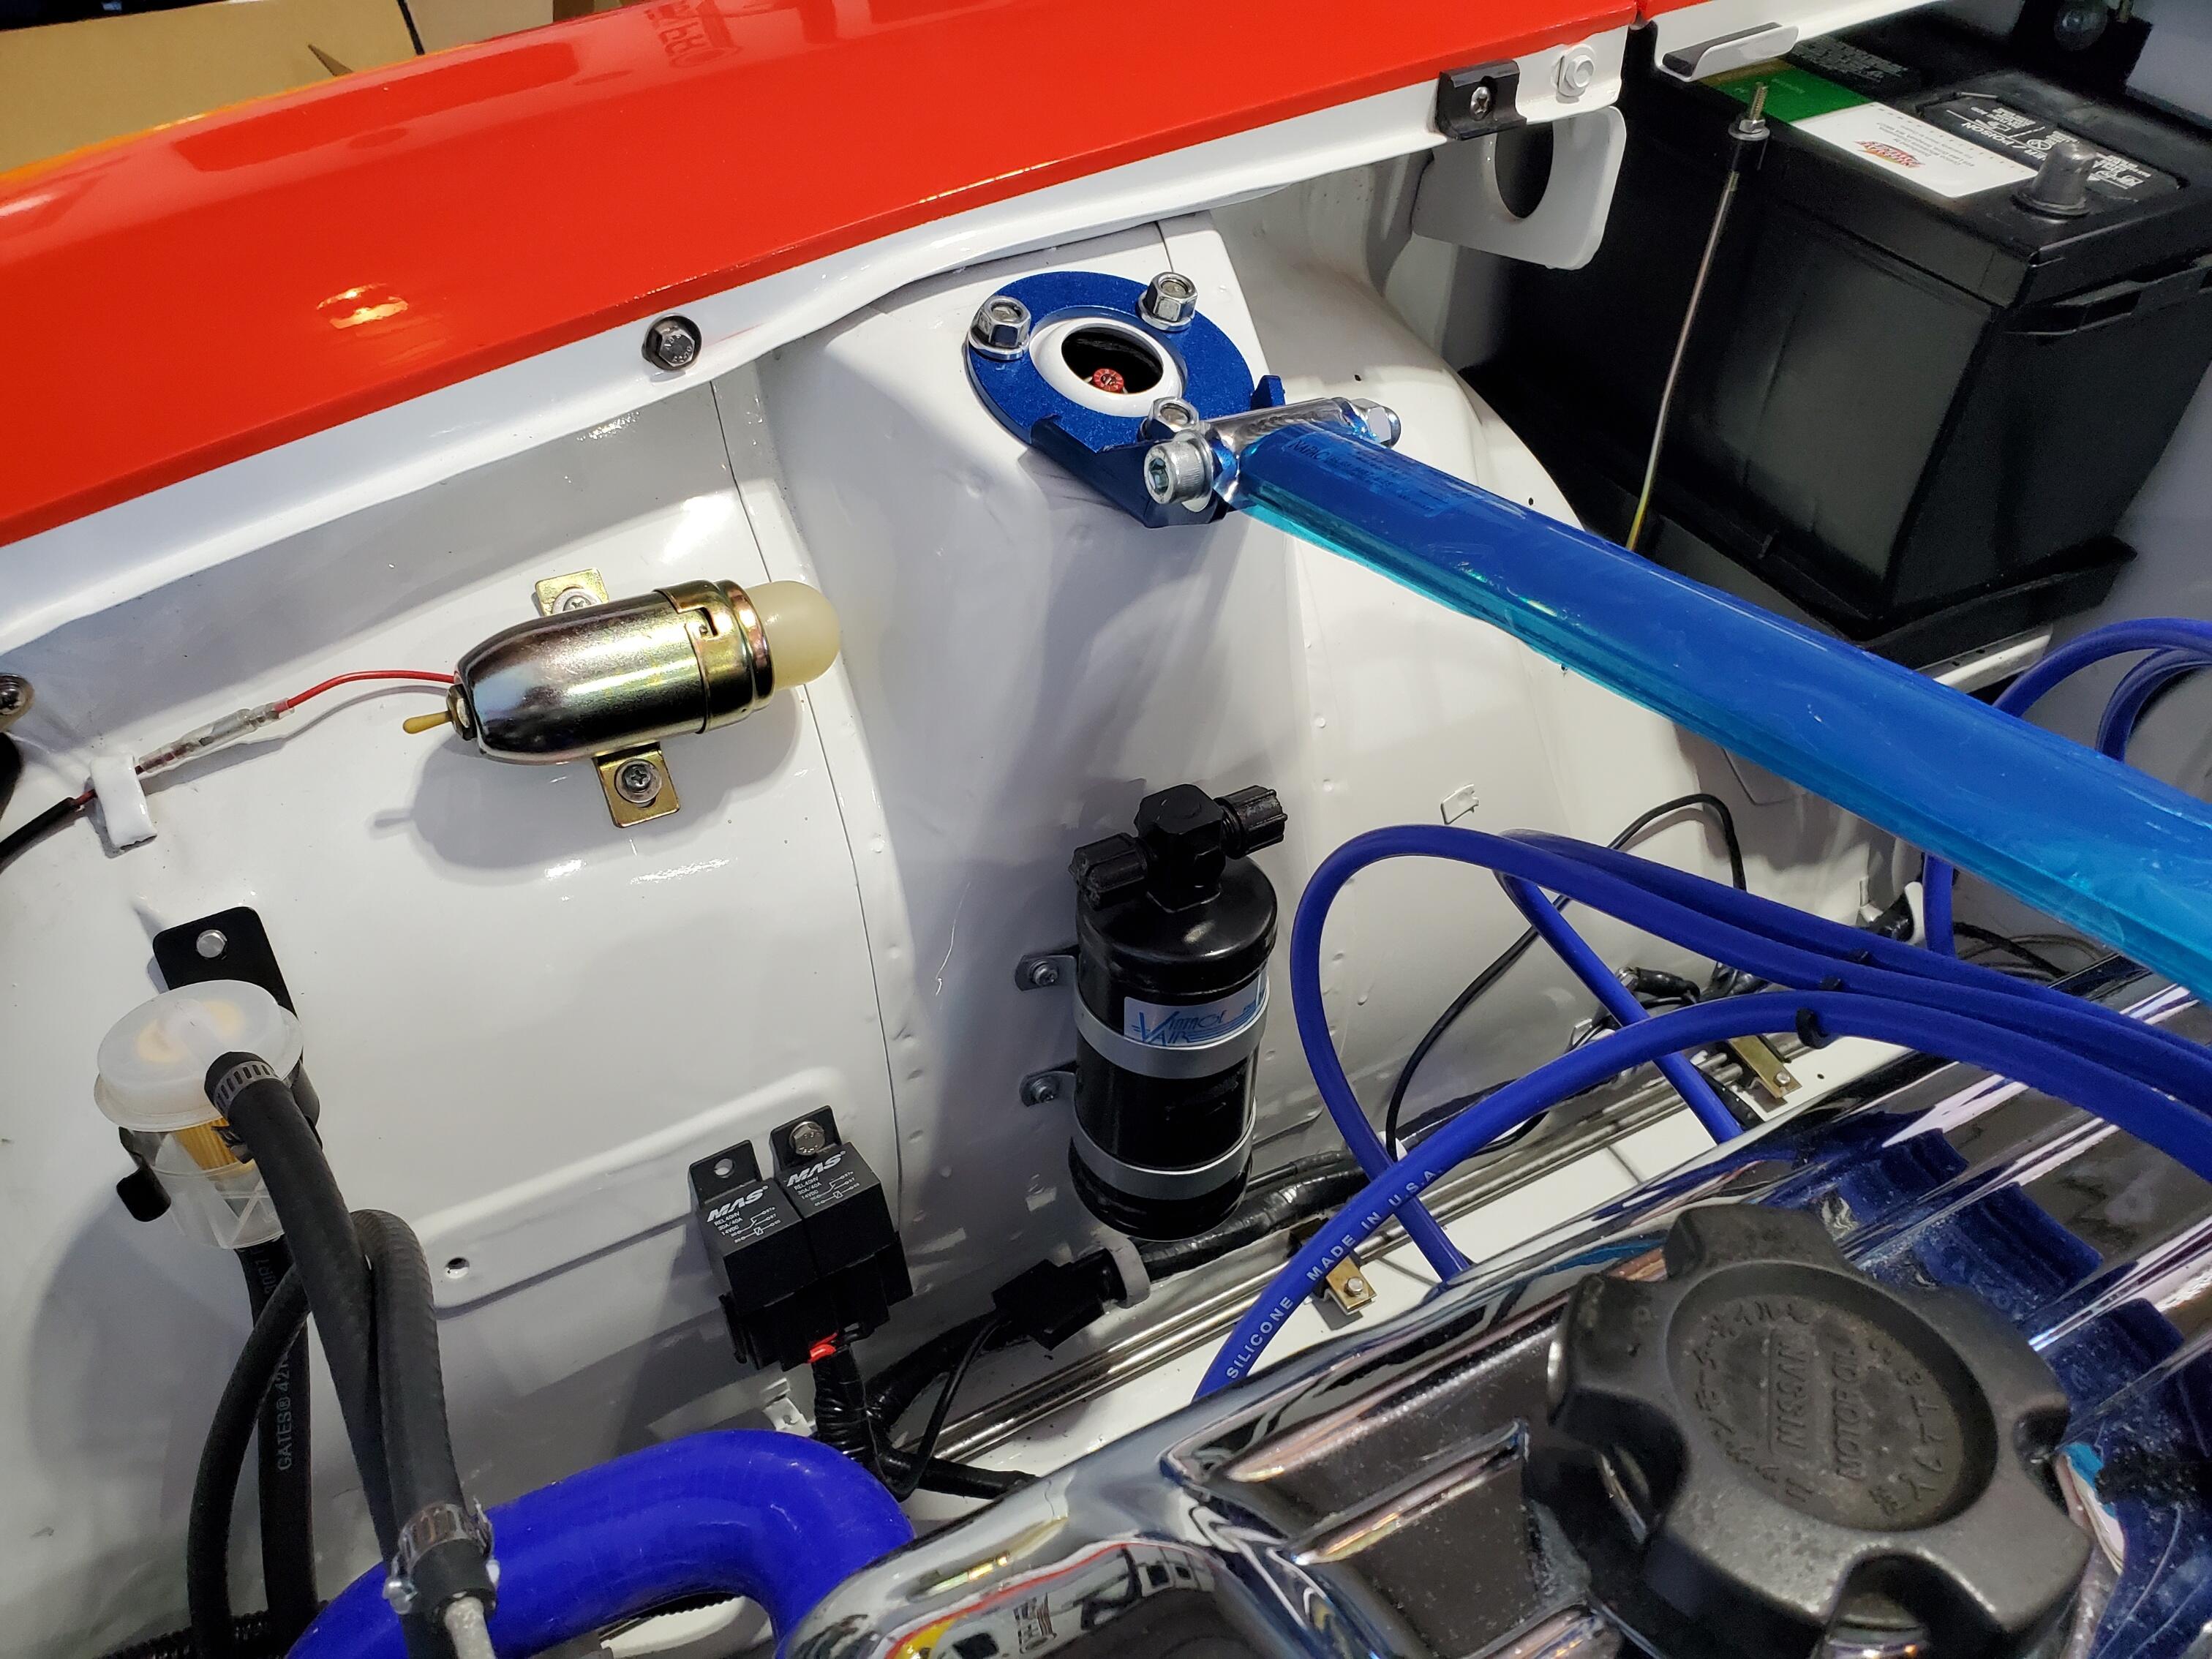
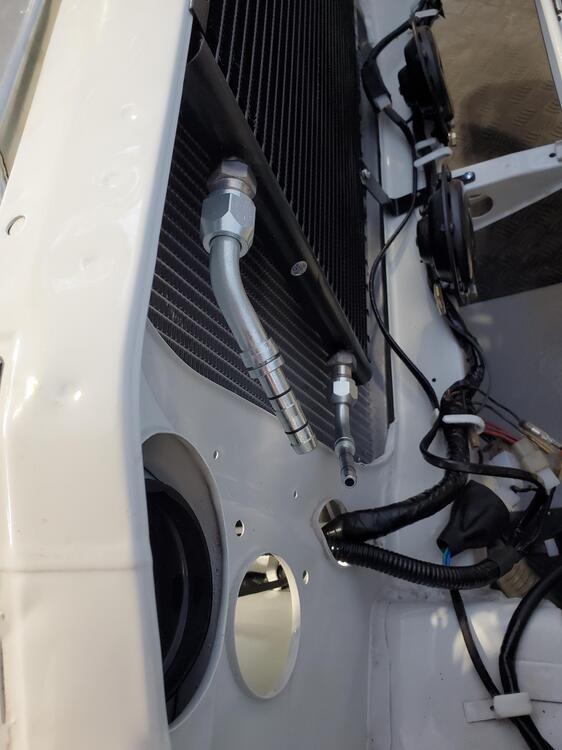
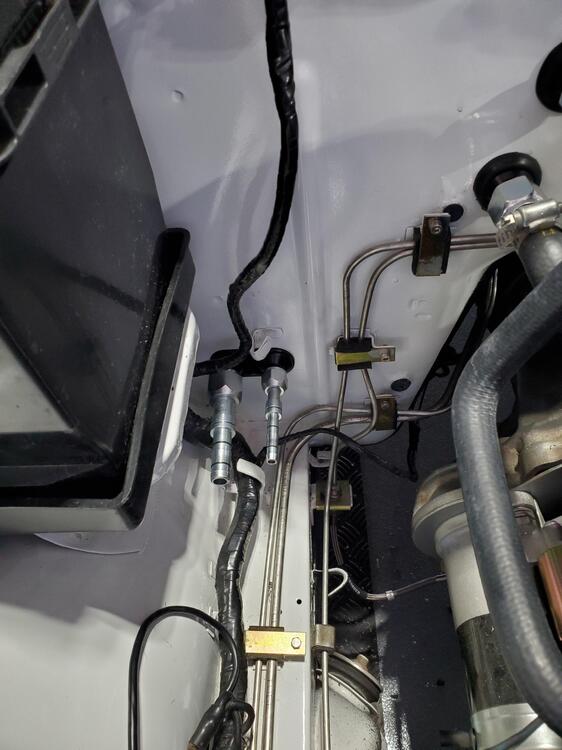
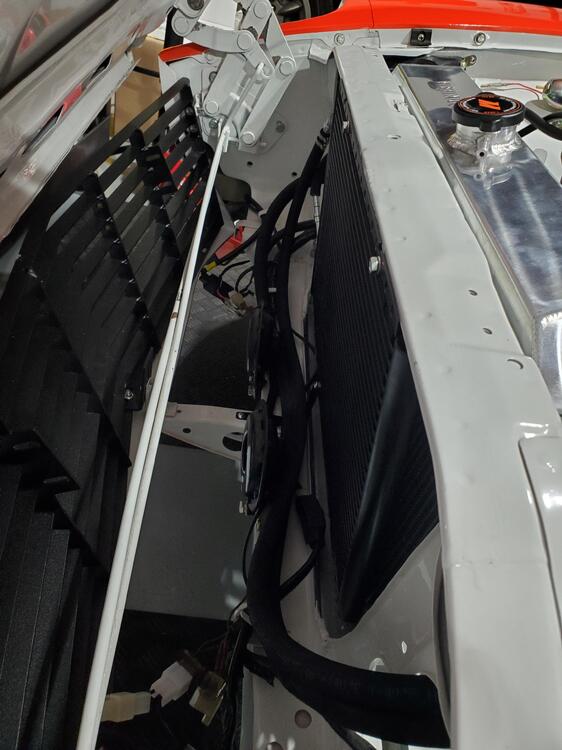
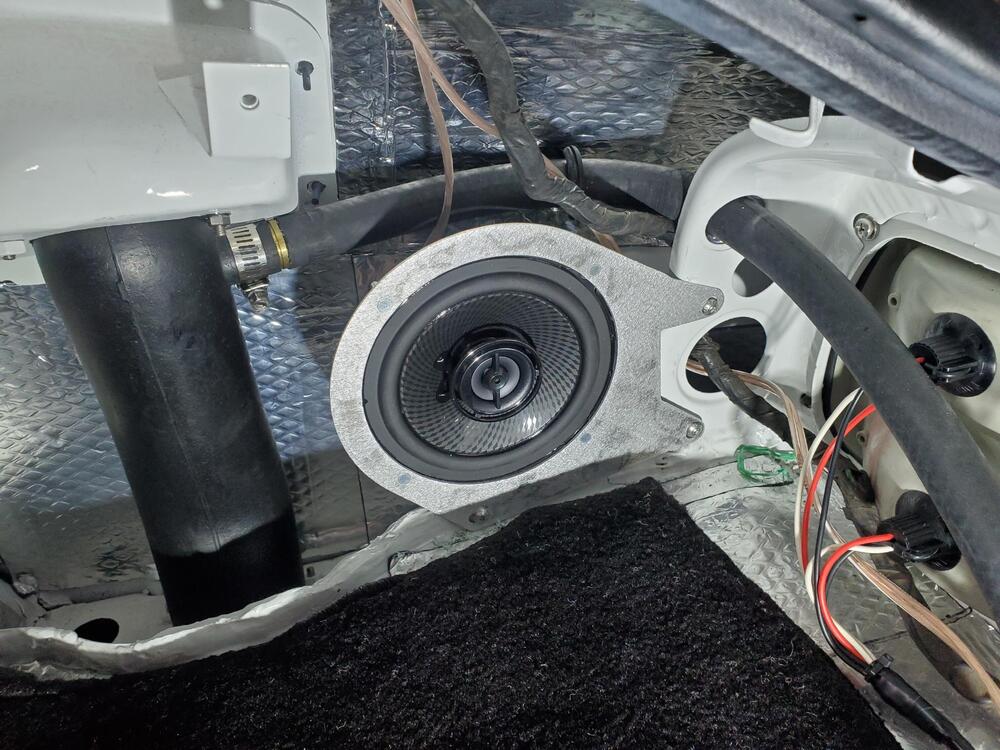
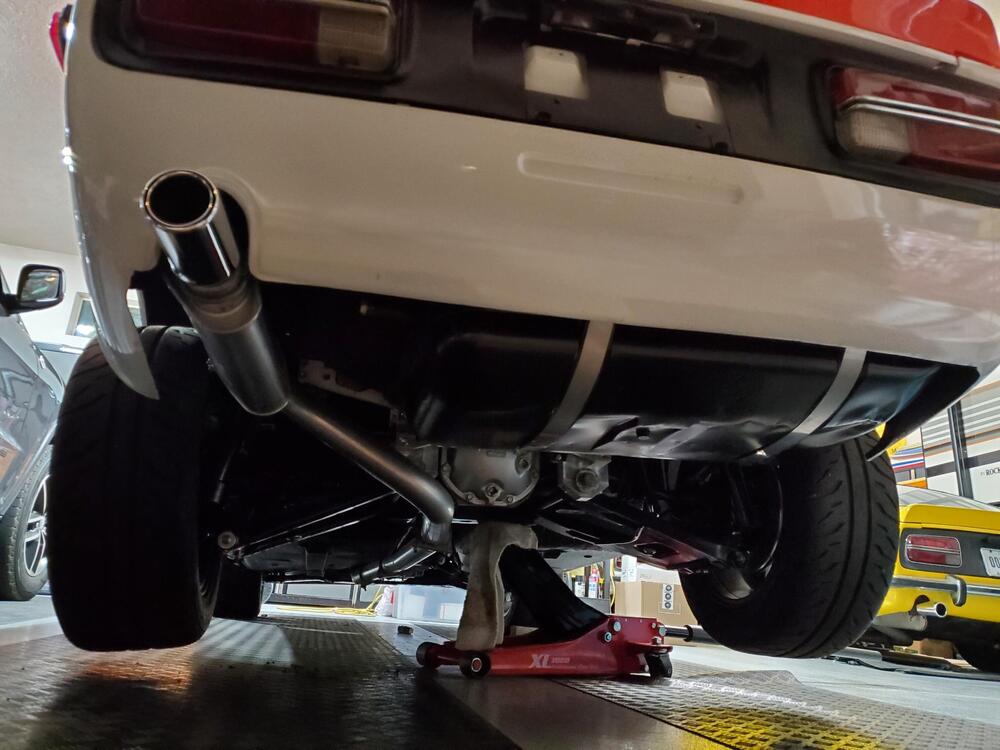
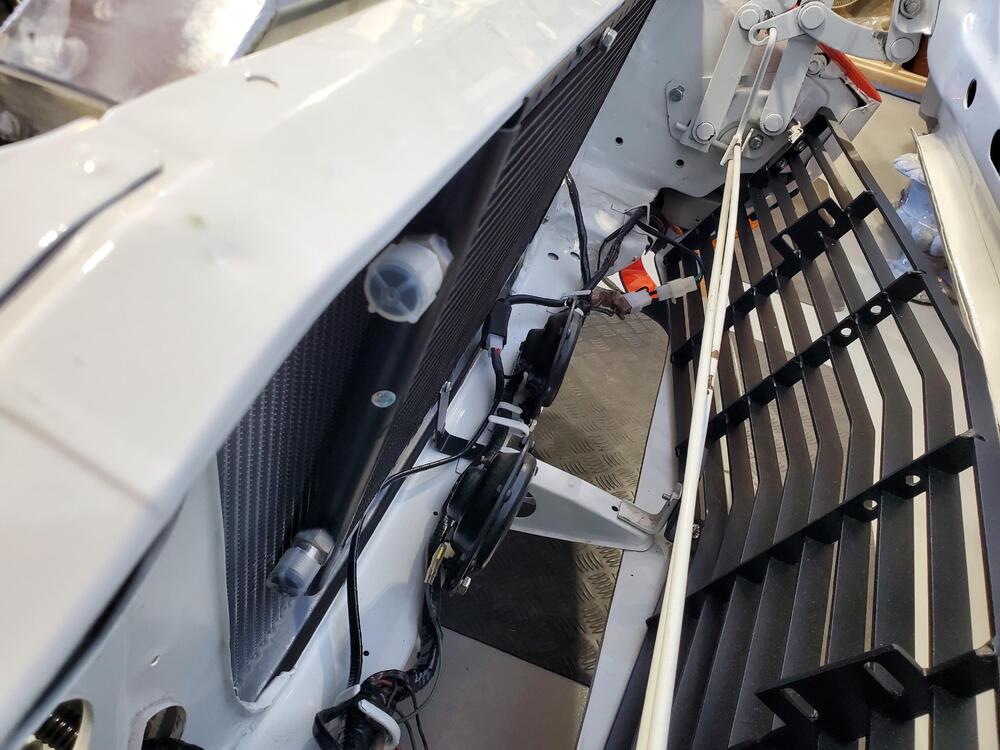
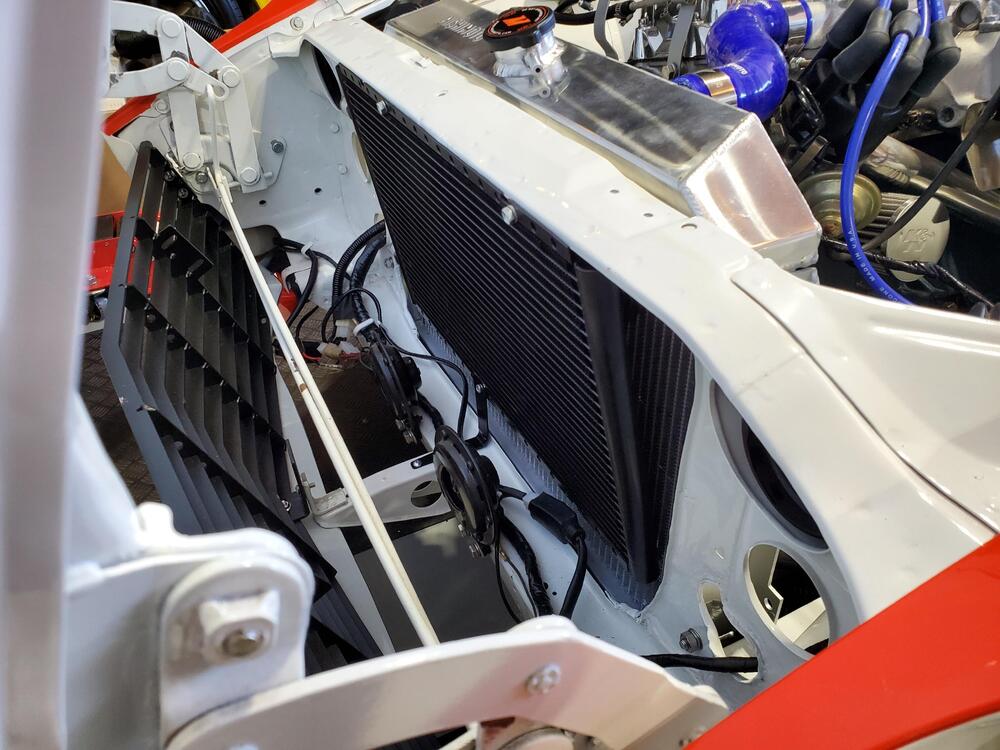
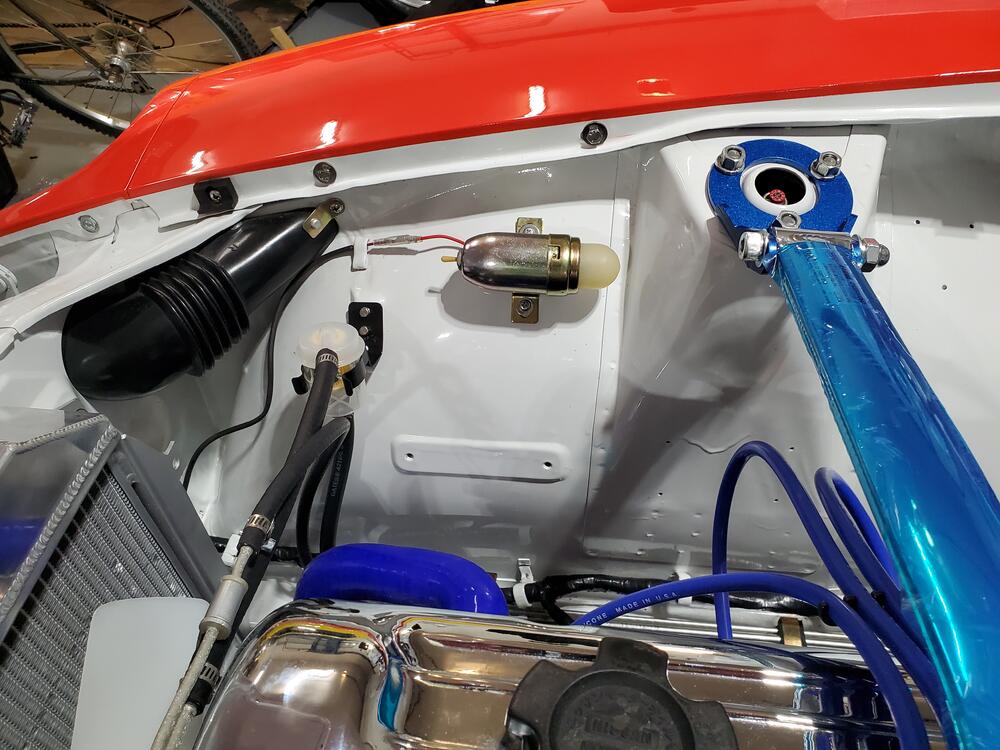
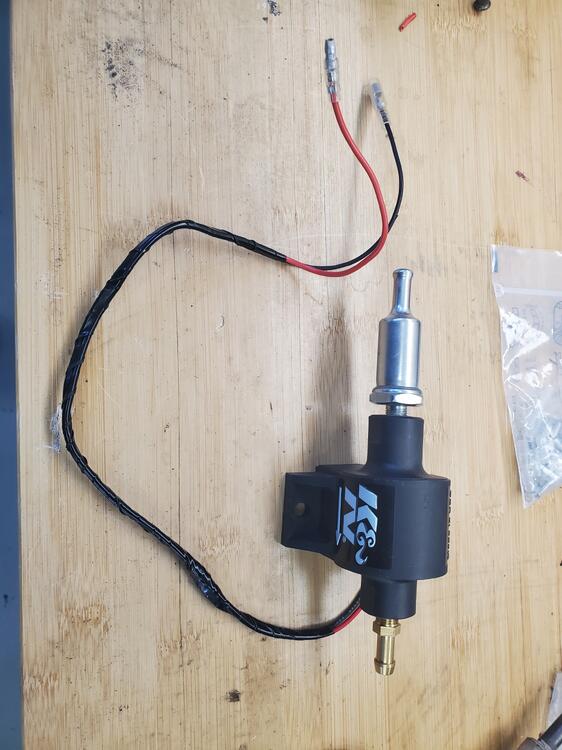
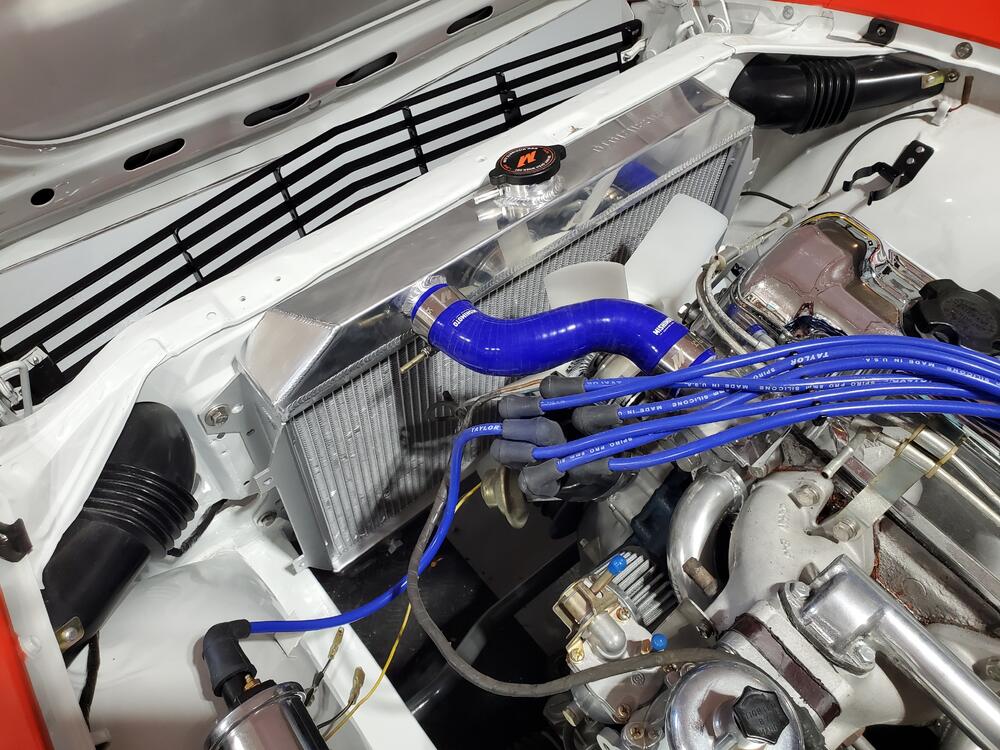
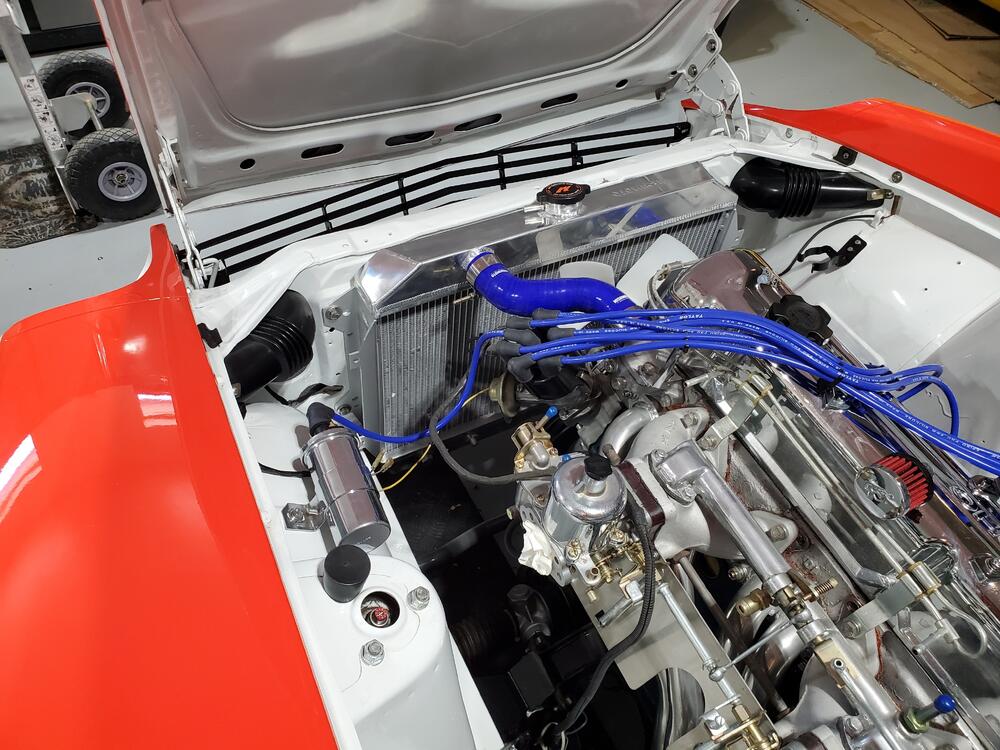
I ordered the Skillard speaker supports and installed the Kenwood 5 1/4" speakers on each side in the rear hatch of the the car. I attached 16GA wire (overkill) to the speakers and routed them to the front for future attachment. Also installed the battery, picked that up from Costco, Model #34. The posts are in the correct orientation with this model although the battery is a bit on the short side. Finished the exhaust and muffler installation. That was fairly straight forward with the off the shelf Motorsport assembly which I also have on my yellow Z. Received the AC kit from Vintage Air, so started the install on that. Installed the Condenser and Dryer using existing holes. Trying to be minimally invasive here and not drill any new holes when possible. Not sure what they were for, but there were two nice 5mm holes with nut plates at the top forward part of the radiator support frame that I used for the top support of the Condenser. Amazingly hole spacing on the radiator support frame matched the holes on the Condenser so I used those for a nice solid top mount. I custom fabbed a bracket on the lower end for base support . The angle looks steep in the pics because of the perspective, but I am guessing it is about 7 degrees from being parallel with the radiator, so should be fine for air flow. I installed the Dryer using the holes that are typically for the ID plate. I haven't come accross the plate in the stash of parts yet, so I will leave it here for now as it makes for a clean hose routing. The bulkhead fittings for the water lines fit nicely in the original rubber for the heater hoses, so for now I will keep it this way. The next project will be to install the evaporator in the interior. Will show pics of that once I get that going. Special thanks to this thread for doing the pioneering work on the AC install. I am using this as reverence.


-
Yes, They even include directions on how to 'bed in' the brakes. Very thorough.
-
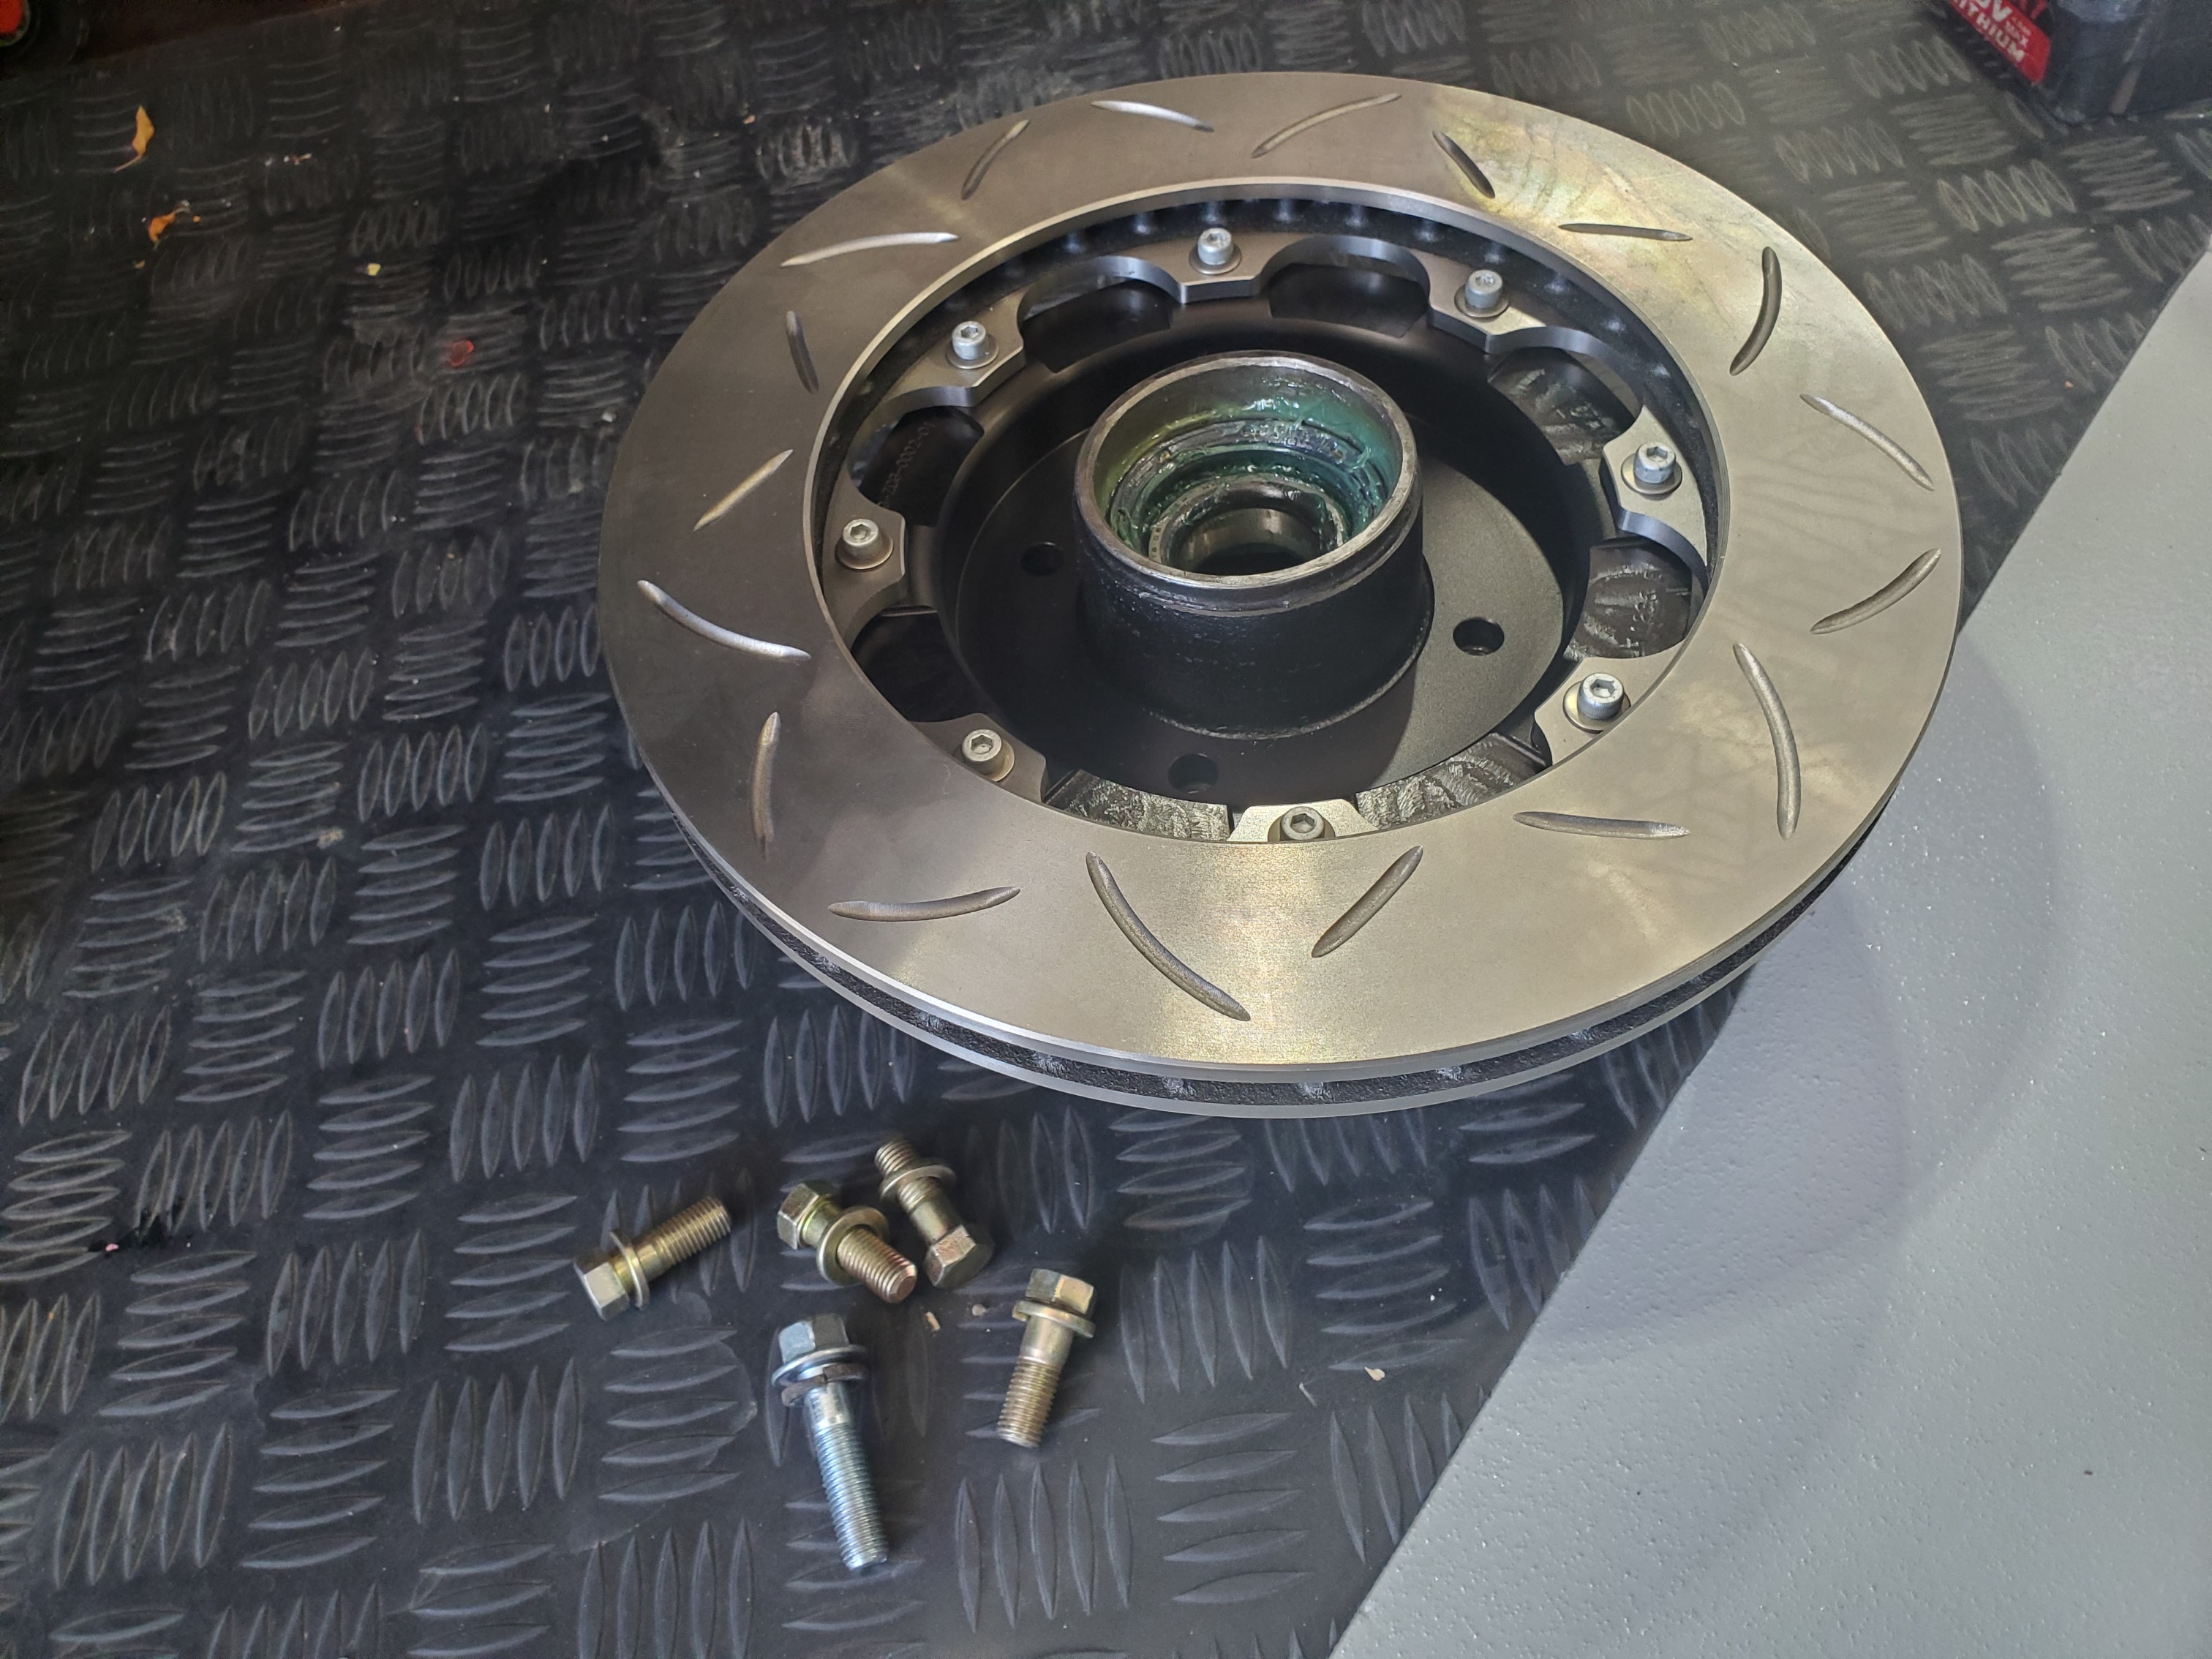
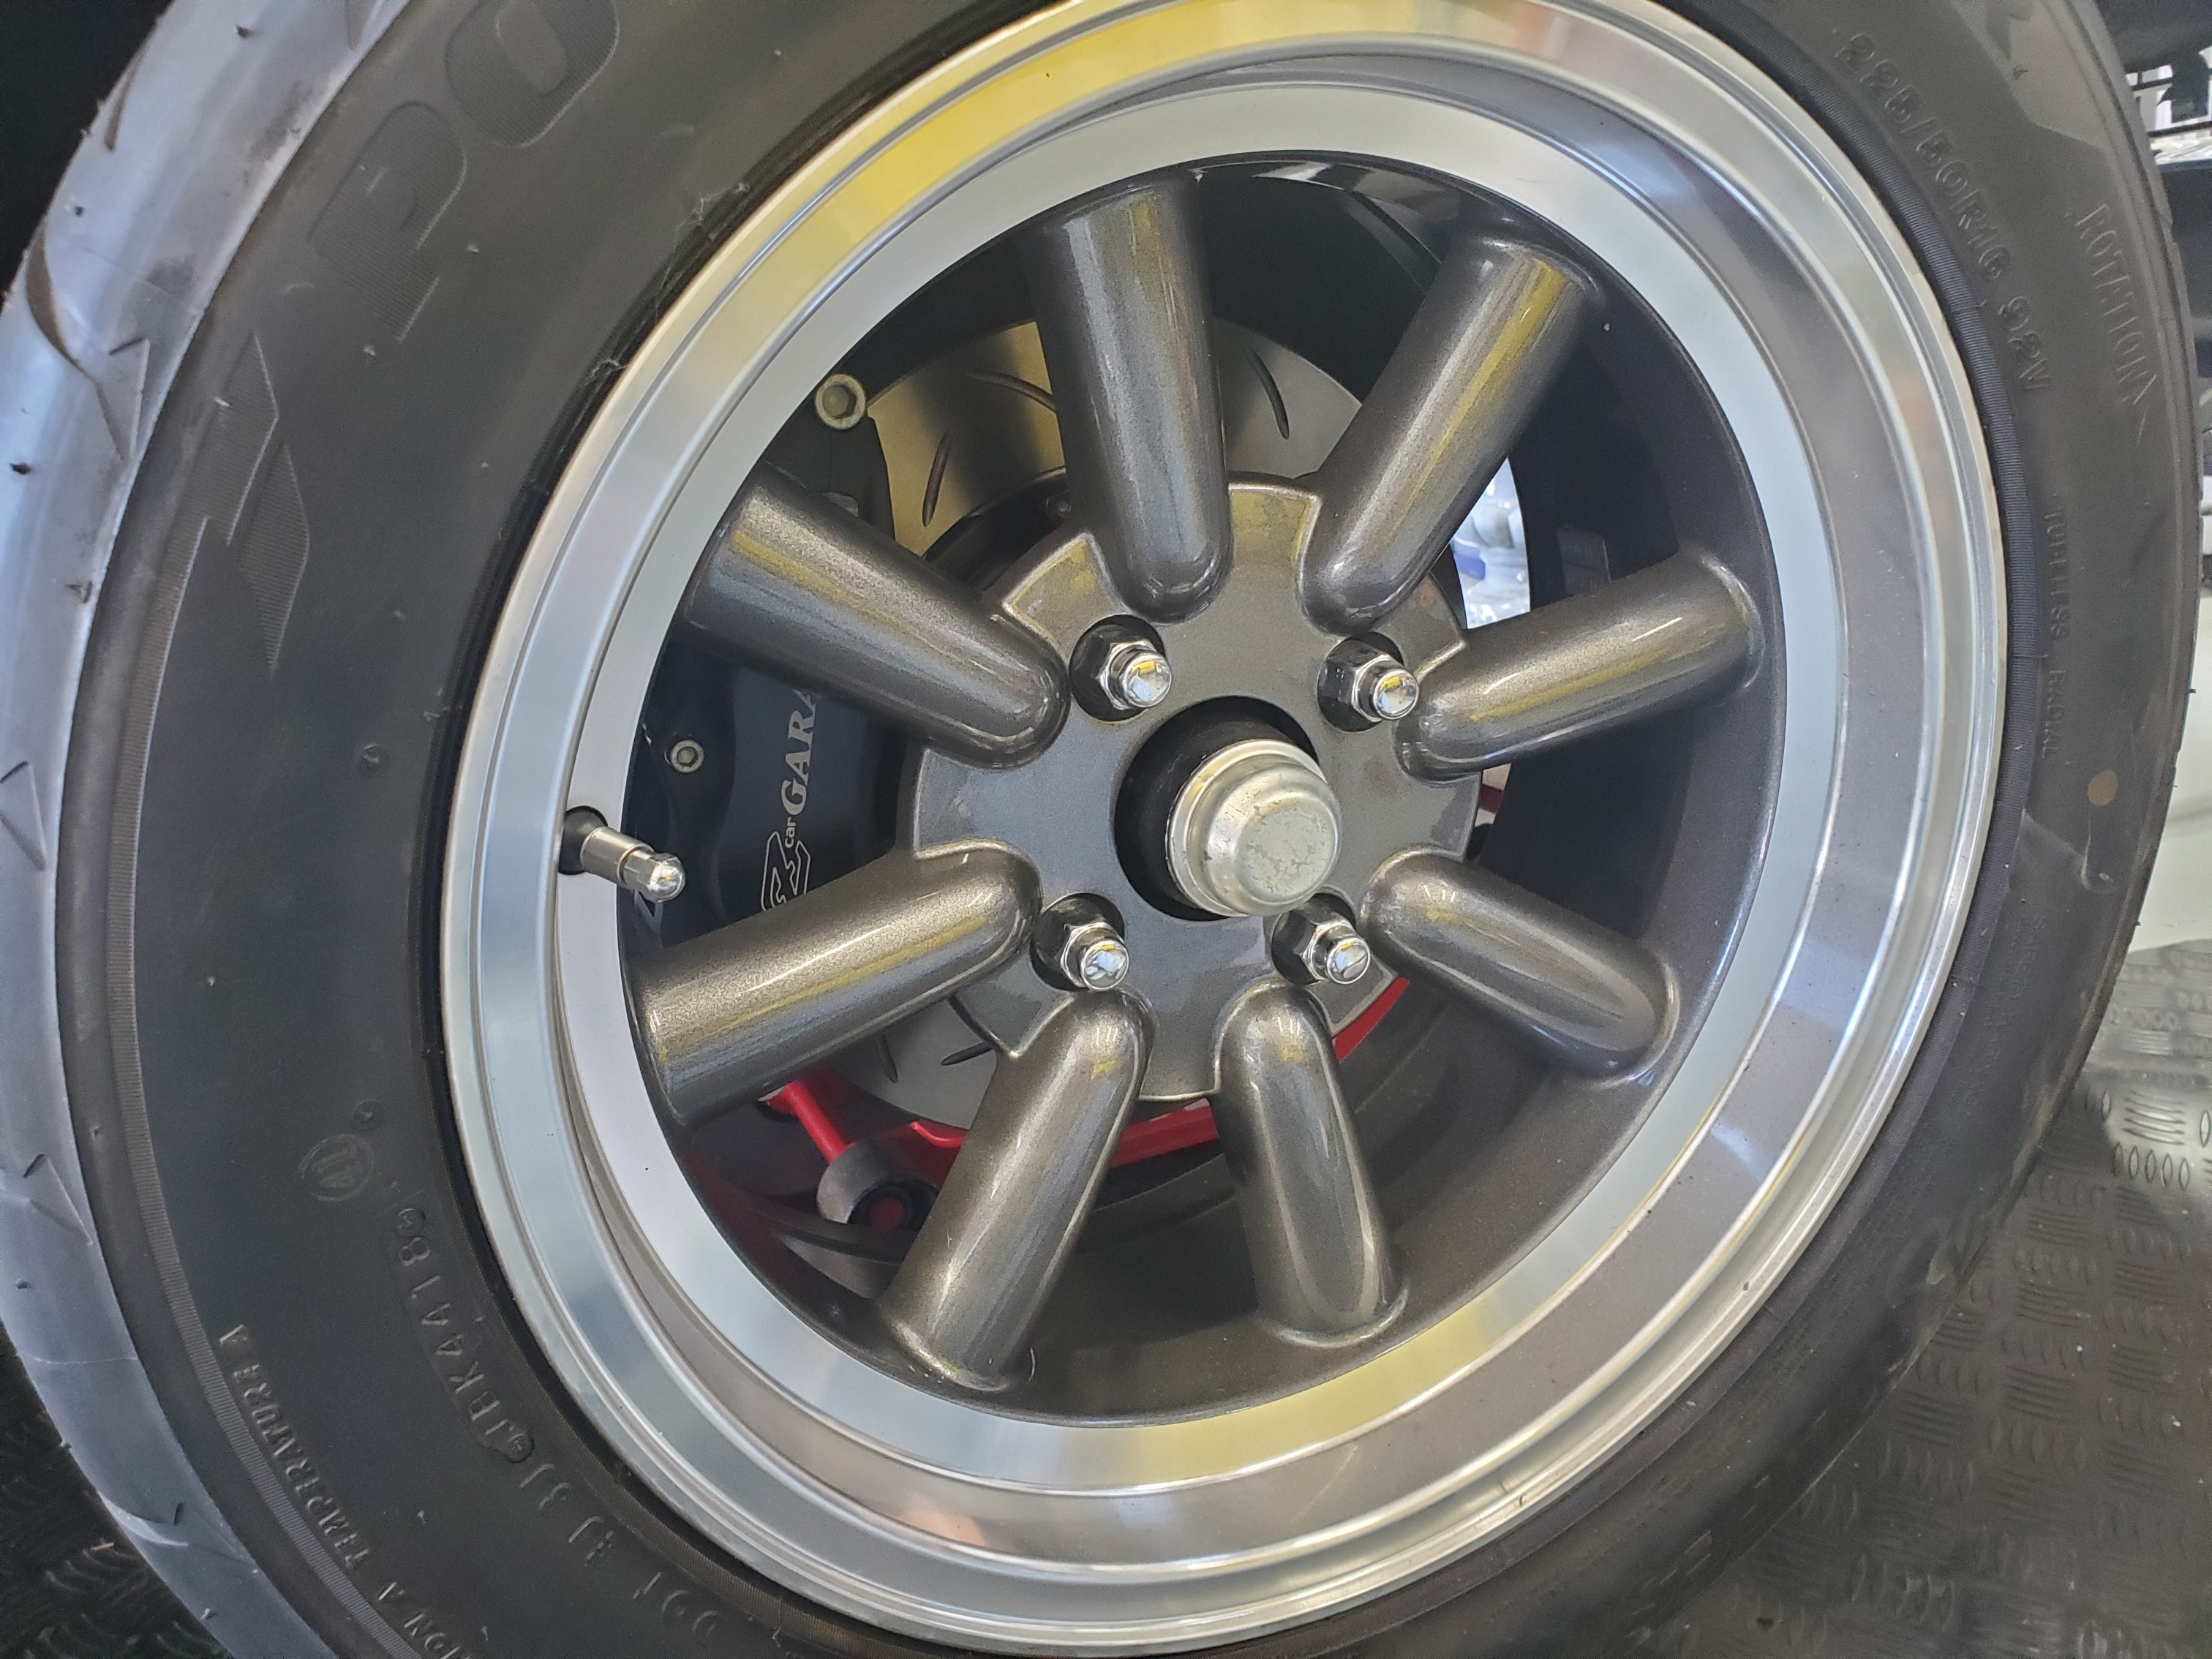
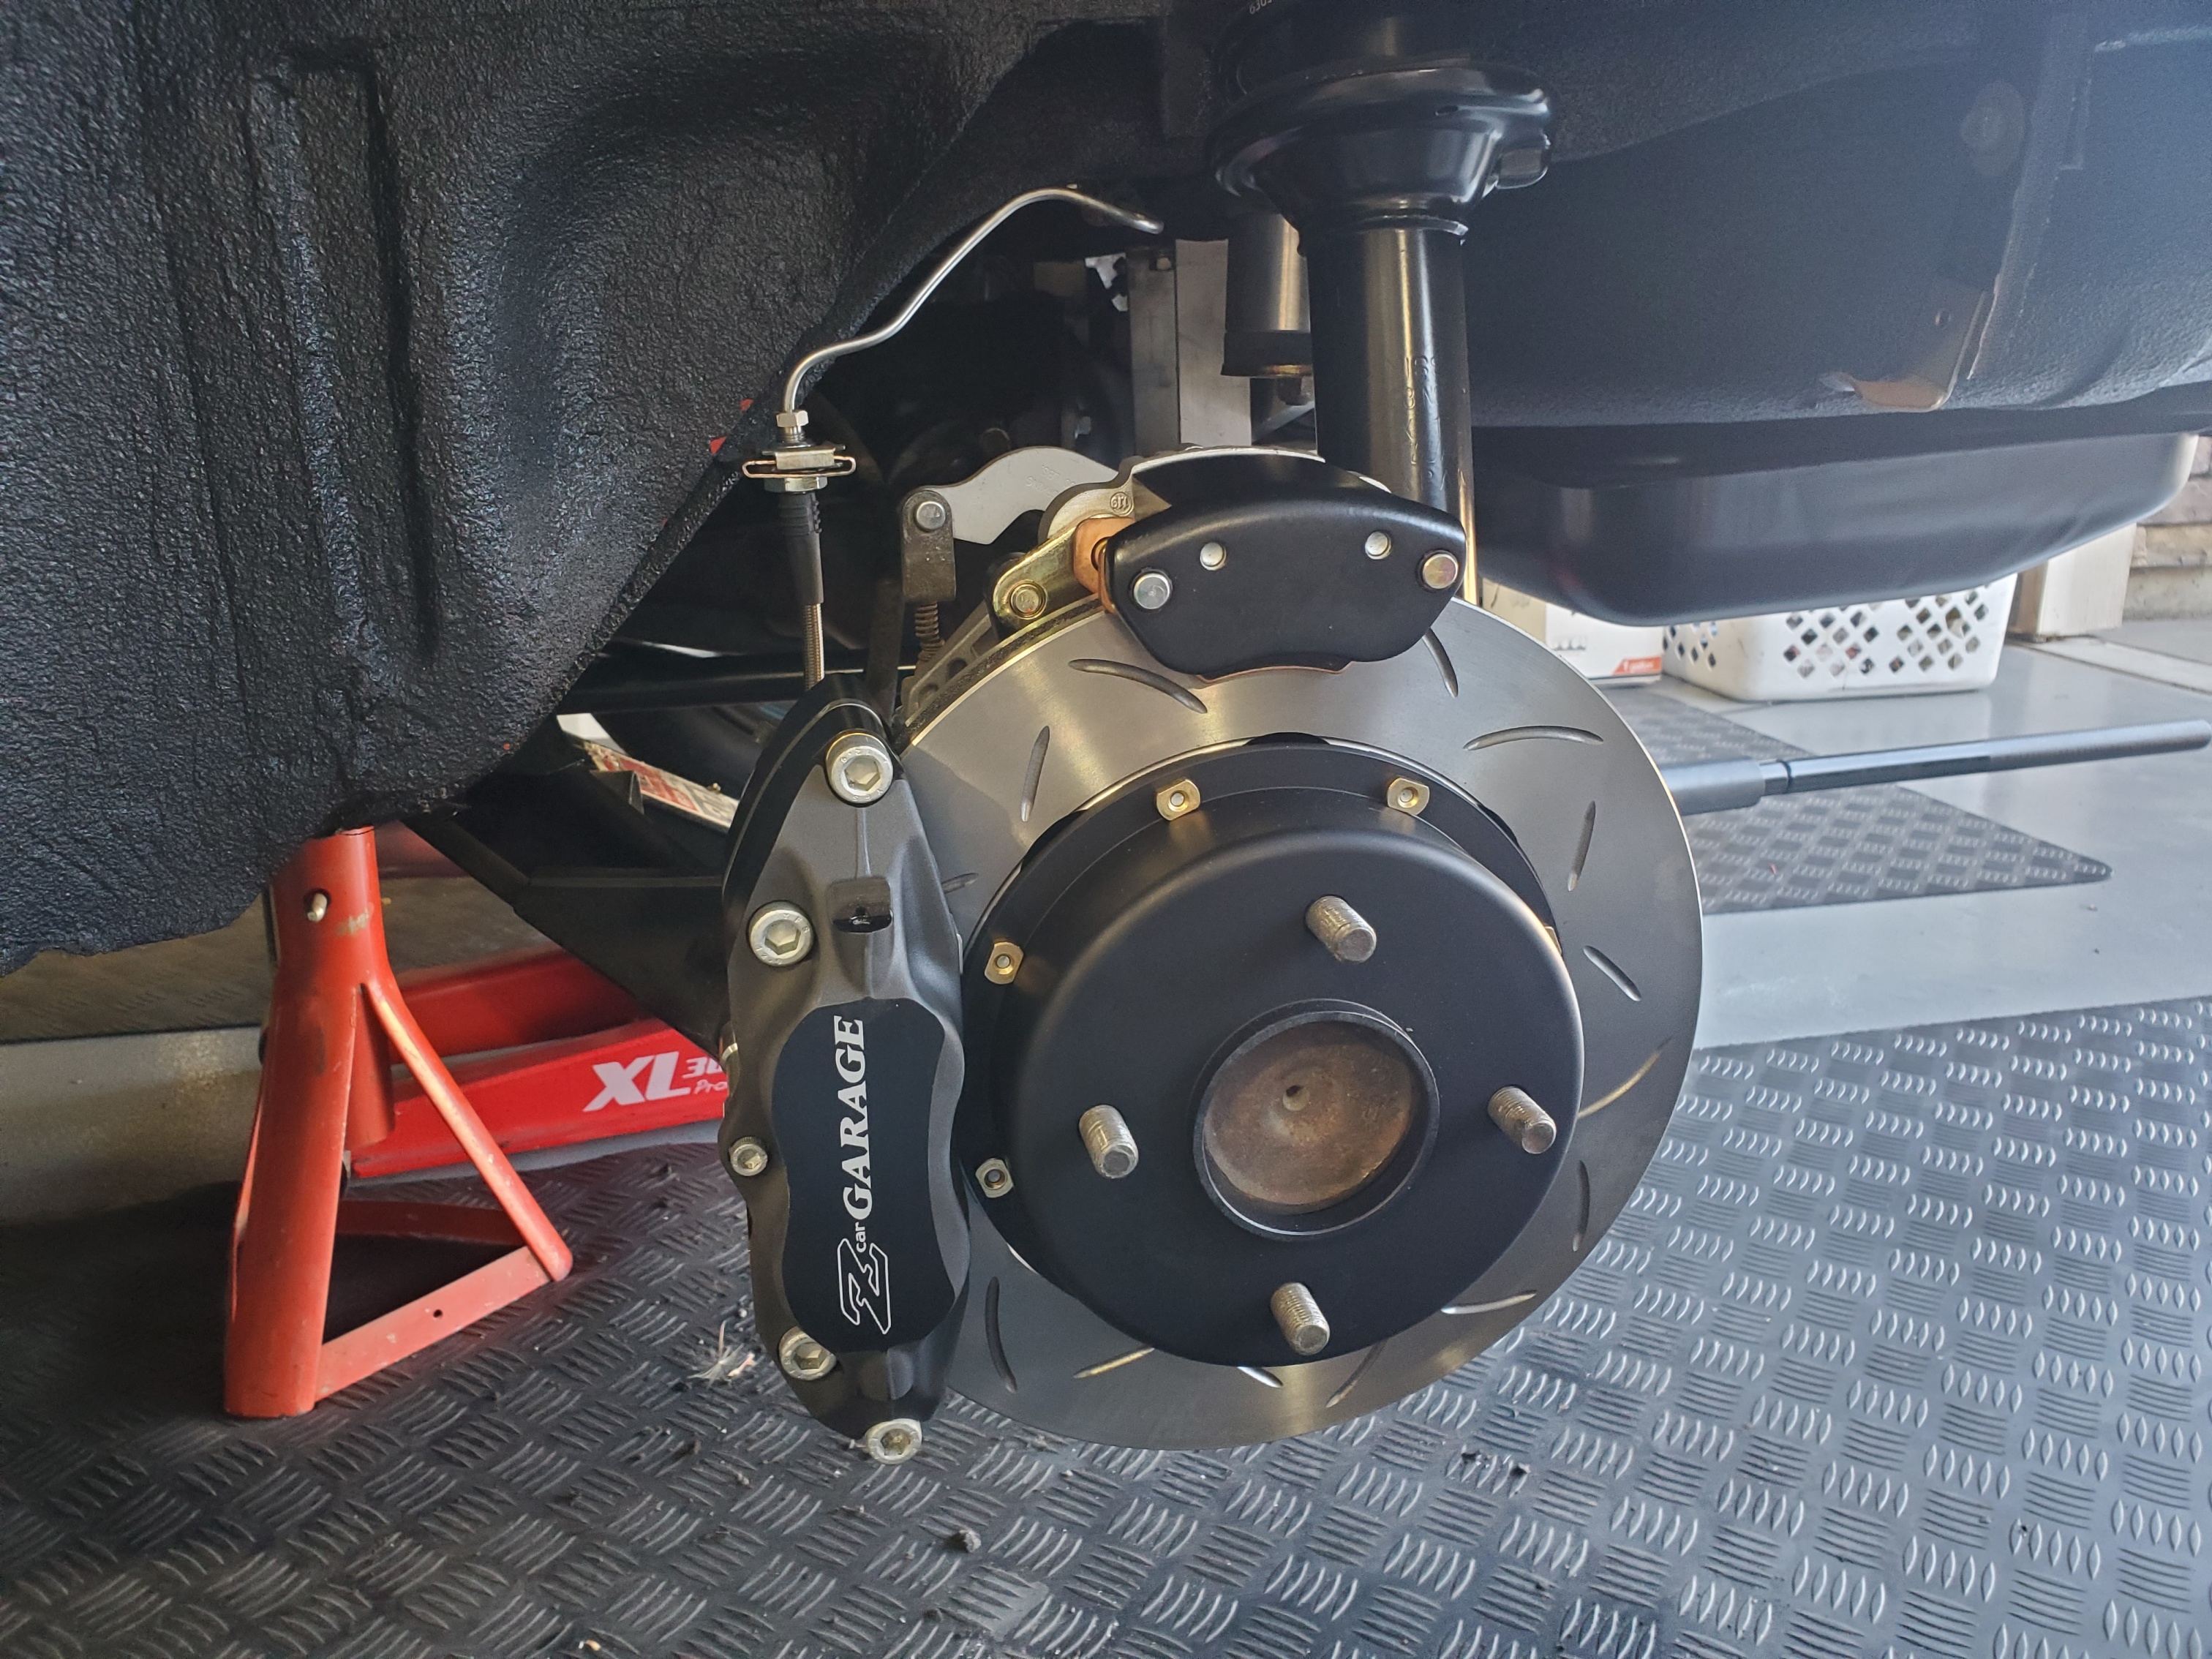
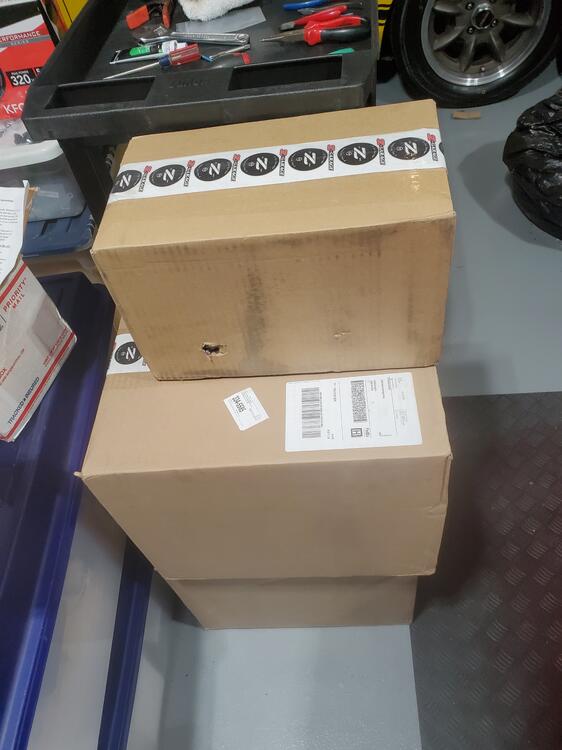
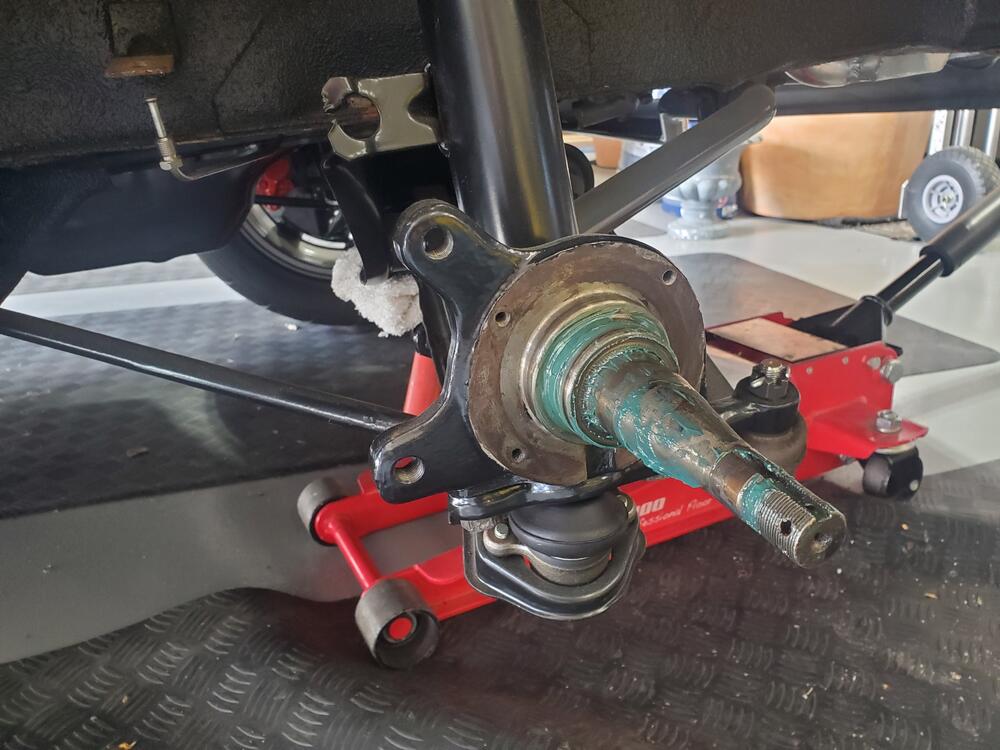
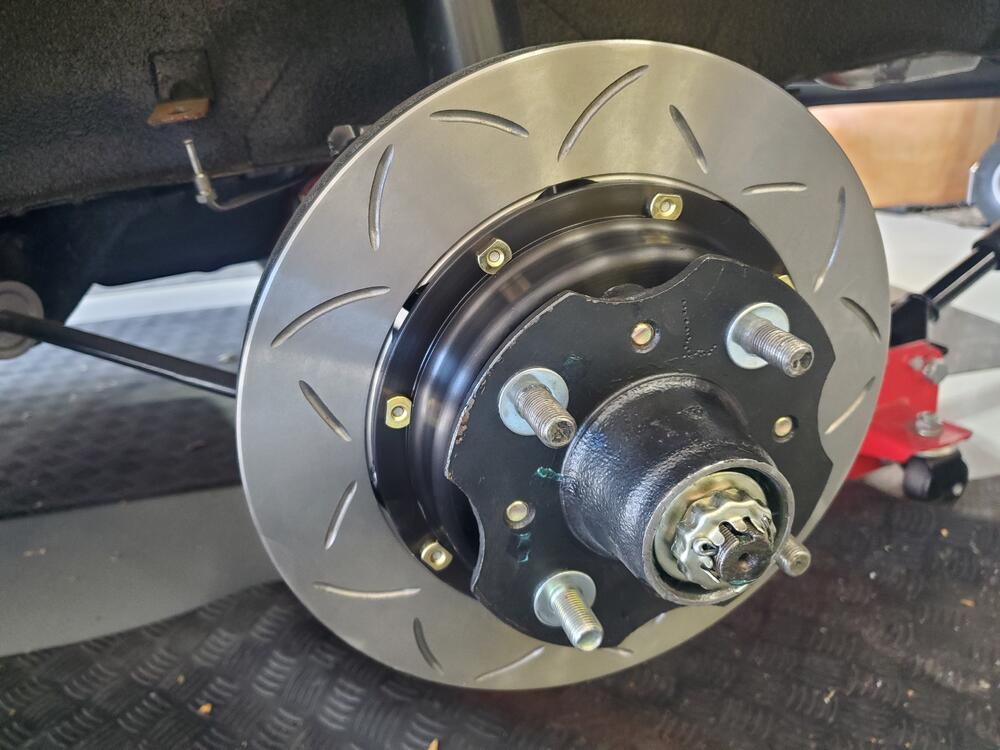
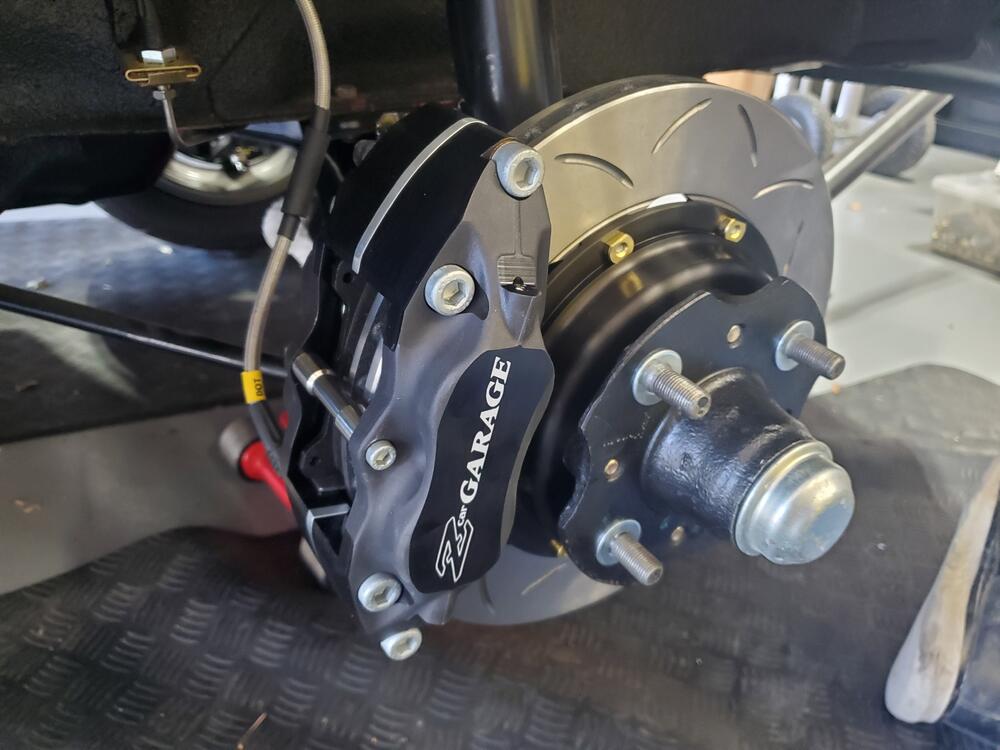
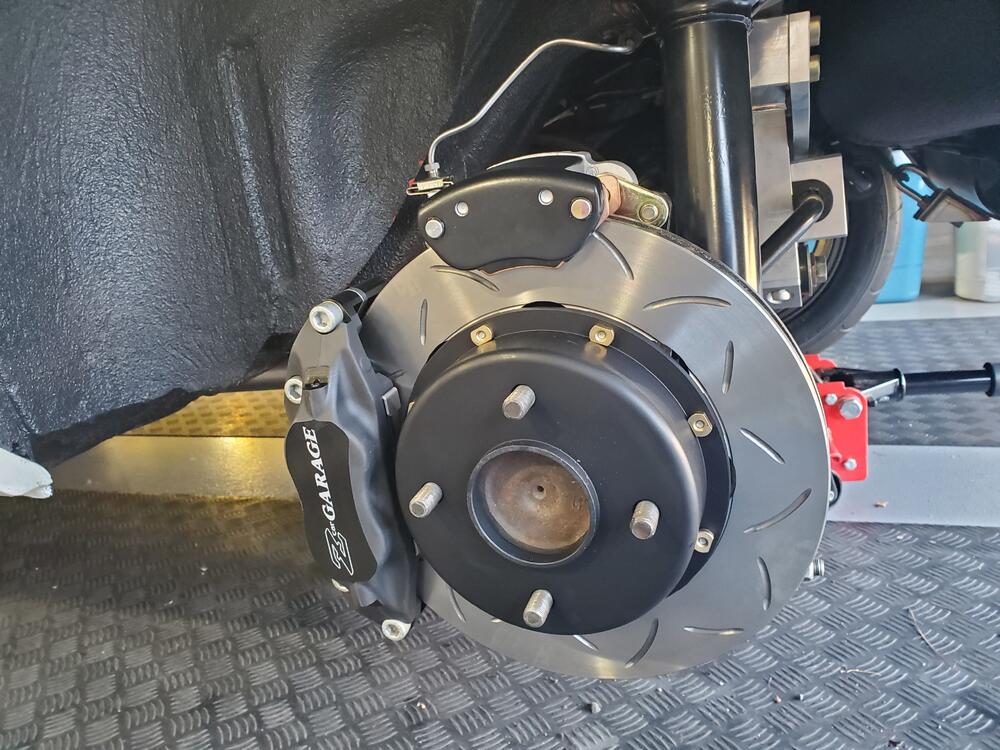
I installed the Z Car Garage brake kit on the Z Replica yesterday. Boy, everything should install this smoothly. The kit comes with a 60 page PDF file with complete step by step instructions for the installation. I was able to pull the PDF up on my phone and follow the instructions conveniently. Instructions not only had very clear pictures, but also included torque values and thread lock instructions at each step. Also, the machining is BEAUTIFUL and the quality is excellent. The parts arrived in three nicely packed boxes. The parking brake set-up is also pretty cool. The only issue I ran into during the assembly was that the previous front brakes on this car had the Toyota caliper set-up, and the 4 bolts that secure the disc to the hub were longer than the stock bolts. As a result, I had find the correct bolts in my stash. Fortunately, I had them on hand. You can see the bolt length difference in the third picture below. Other than that, a very straight forward install. Was able to complete the install in a day.


-
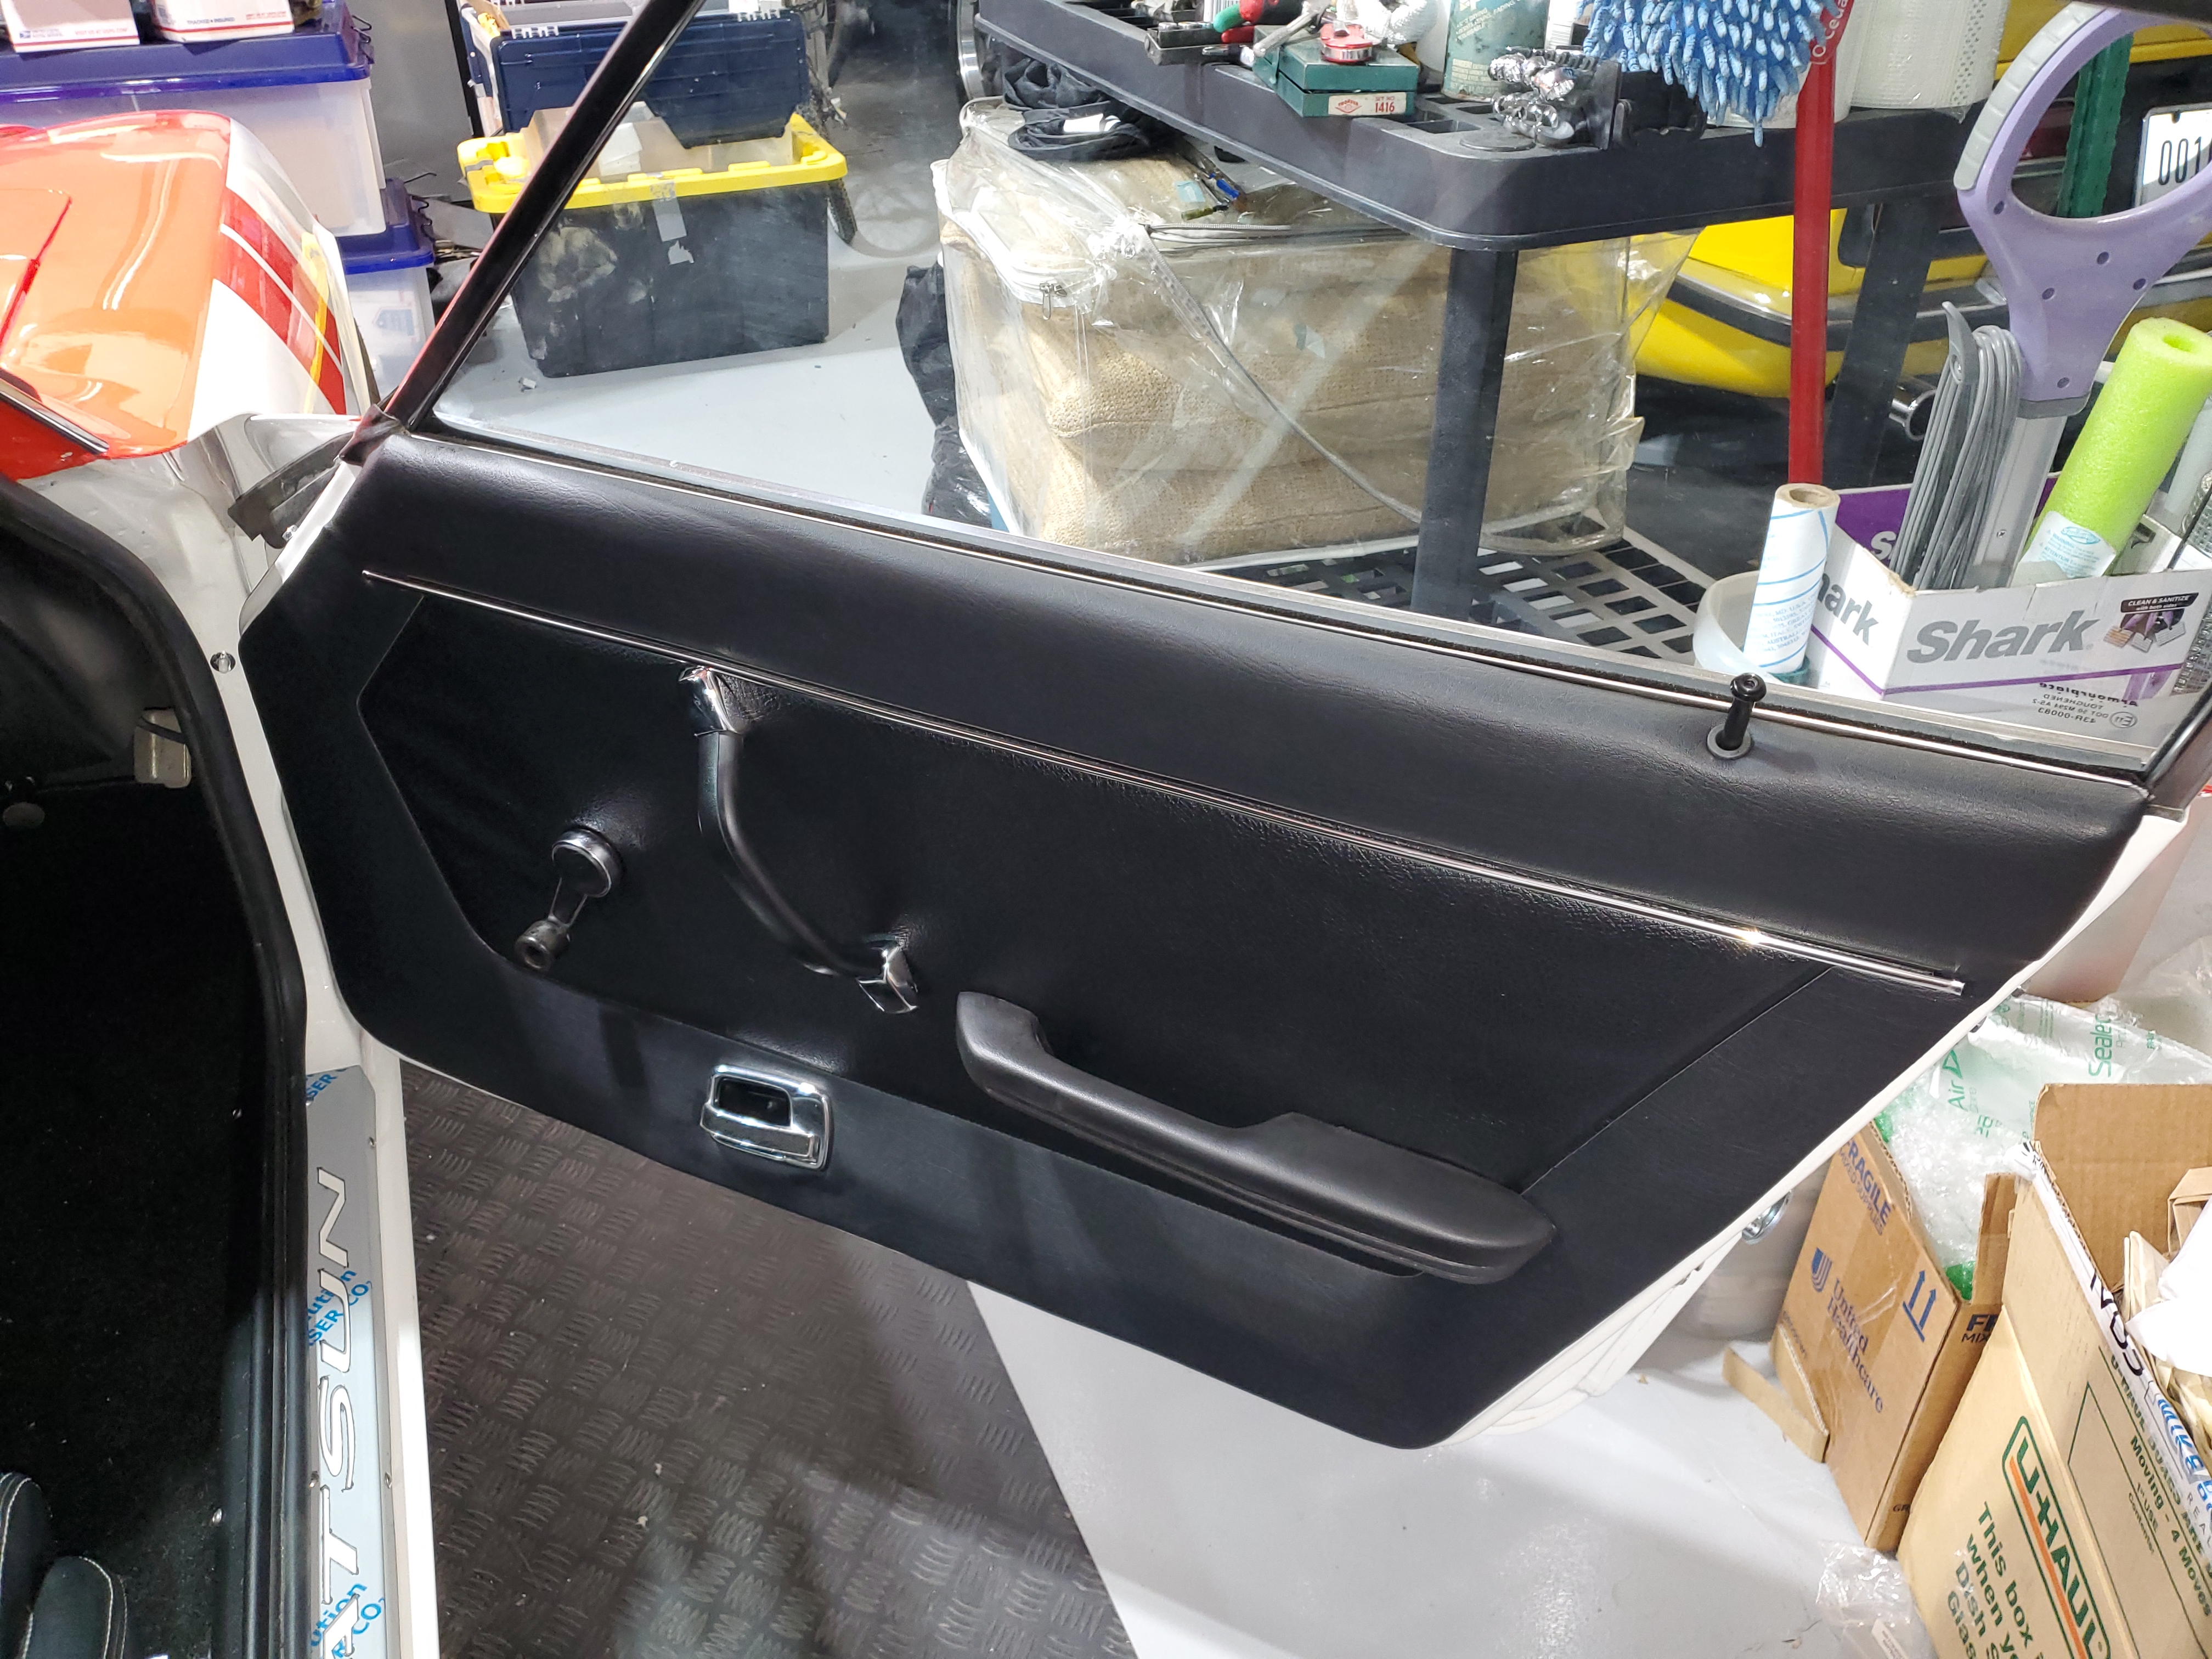
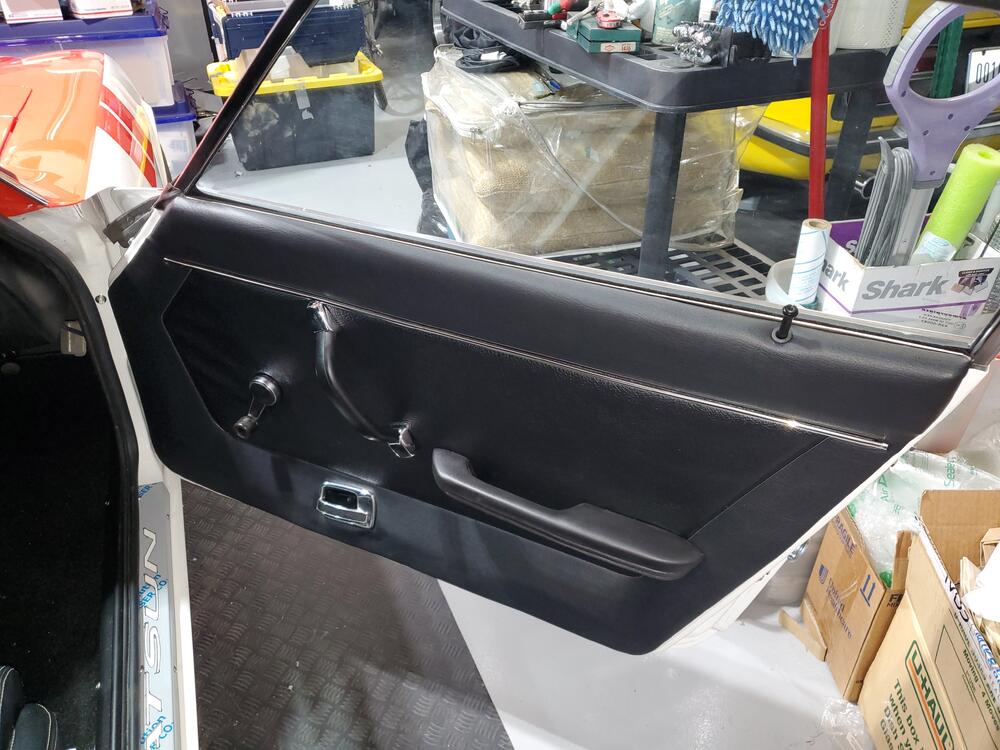
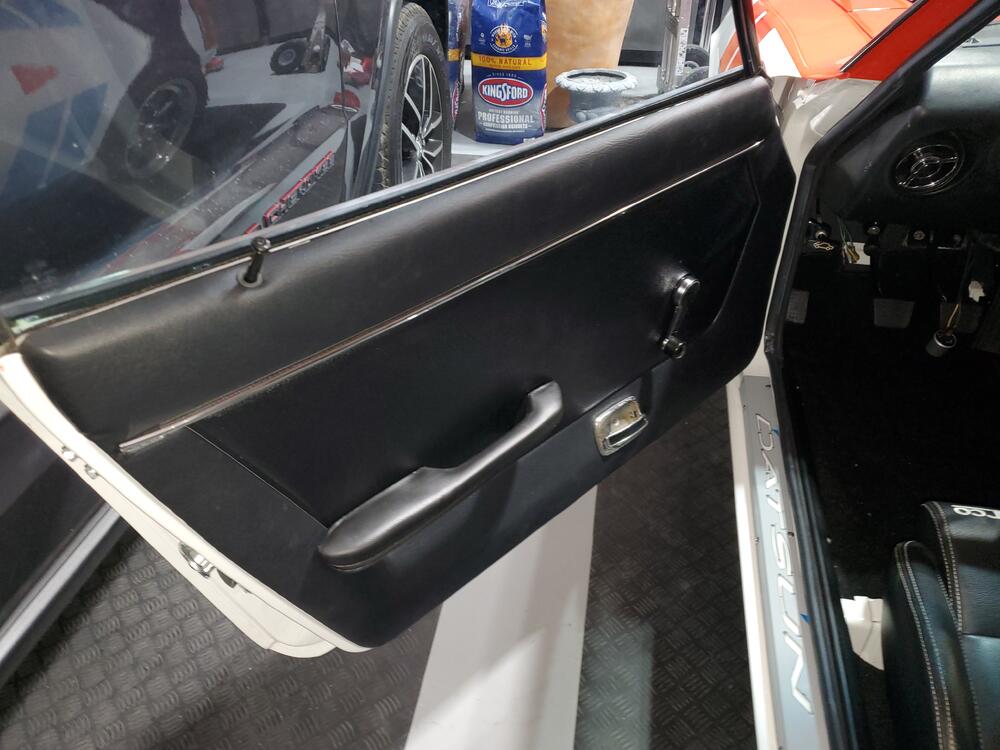
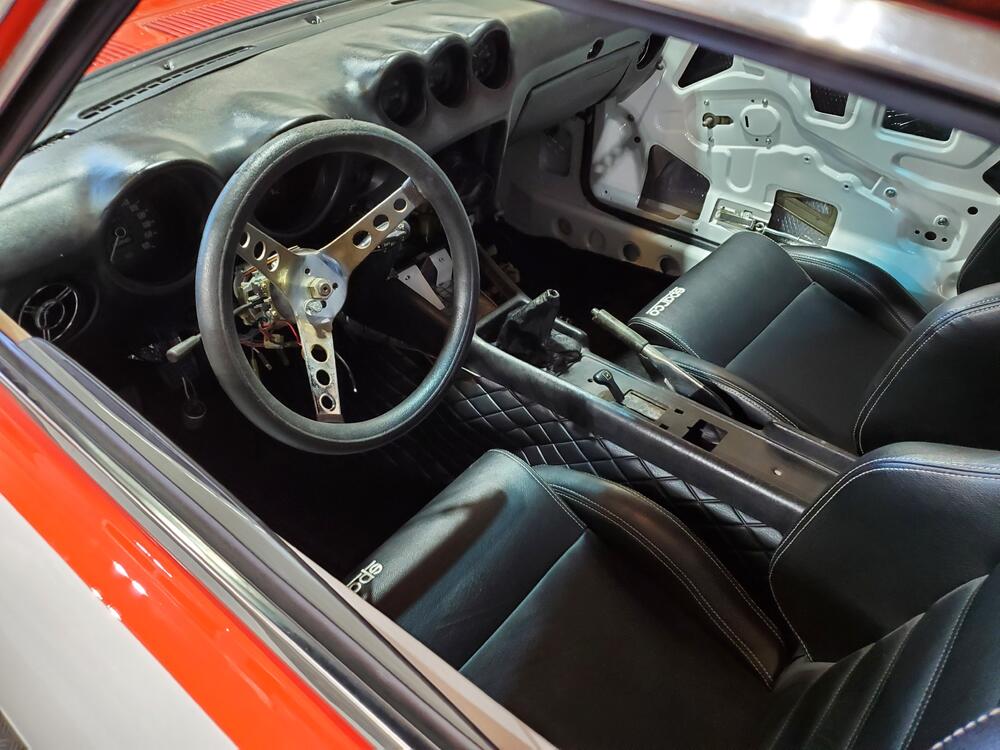
Got the Door cards and handles installed. They went in very nicely with no issues and look great. Need to find a chrome pull handle finisher for the drivers side. The one I have has pitted chrome. May be somewhere in the stash of parts here.
-
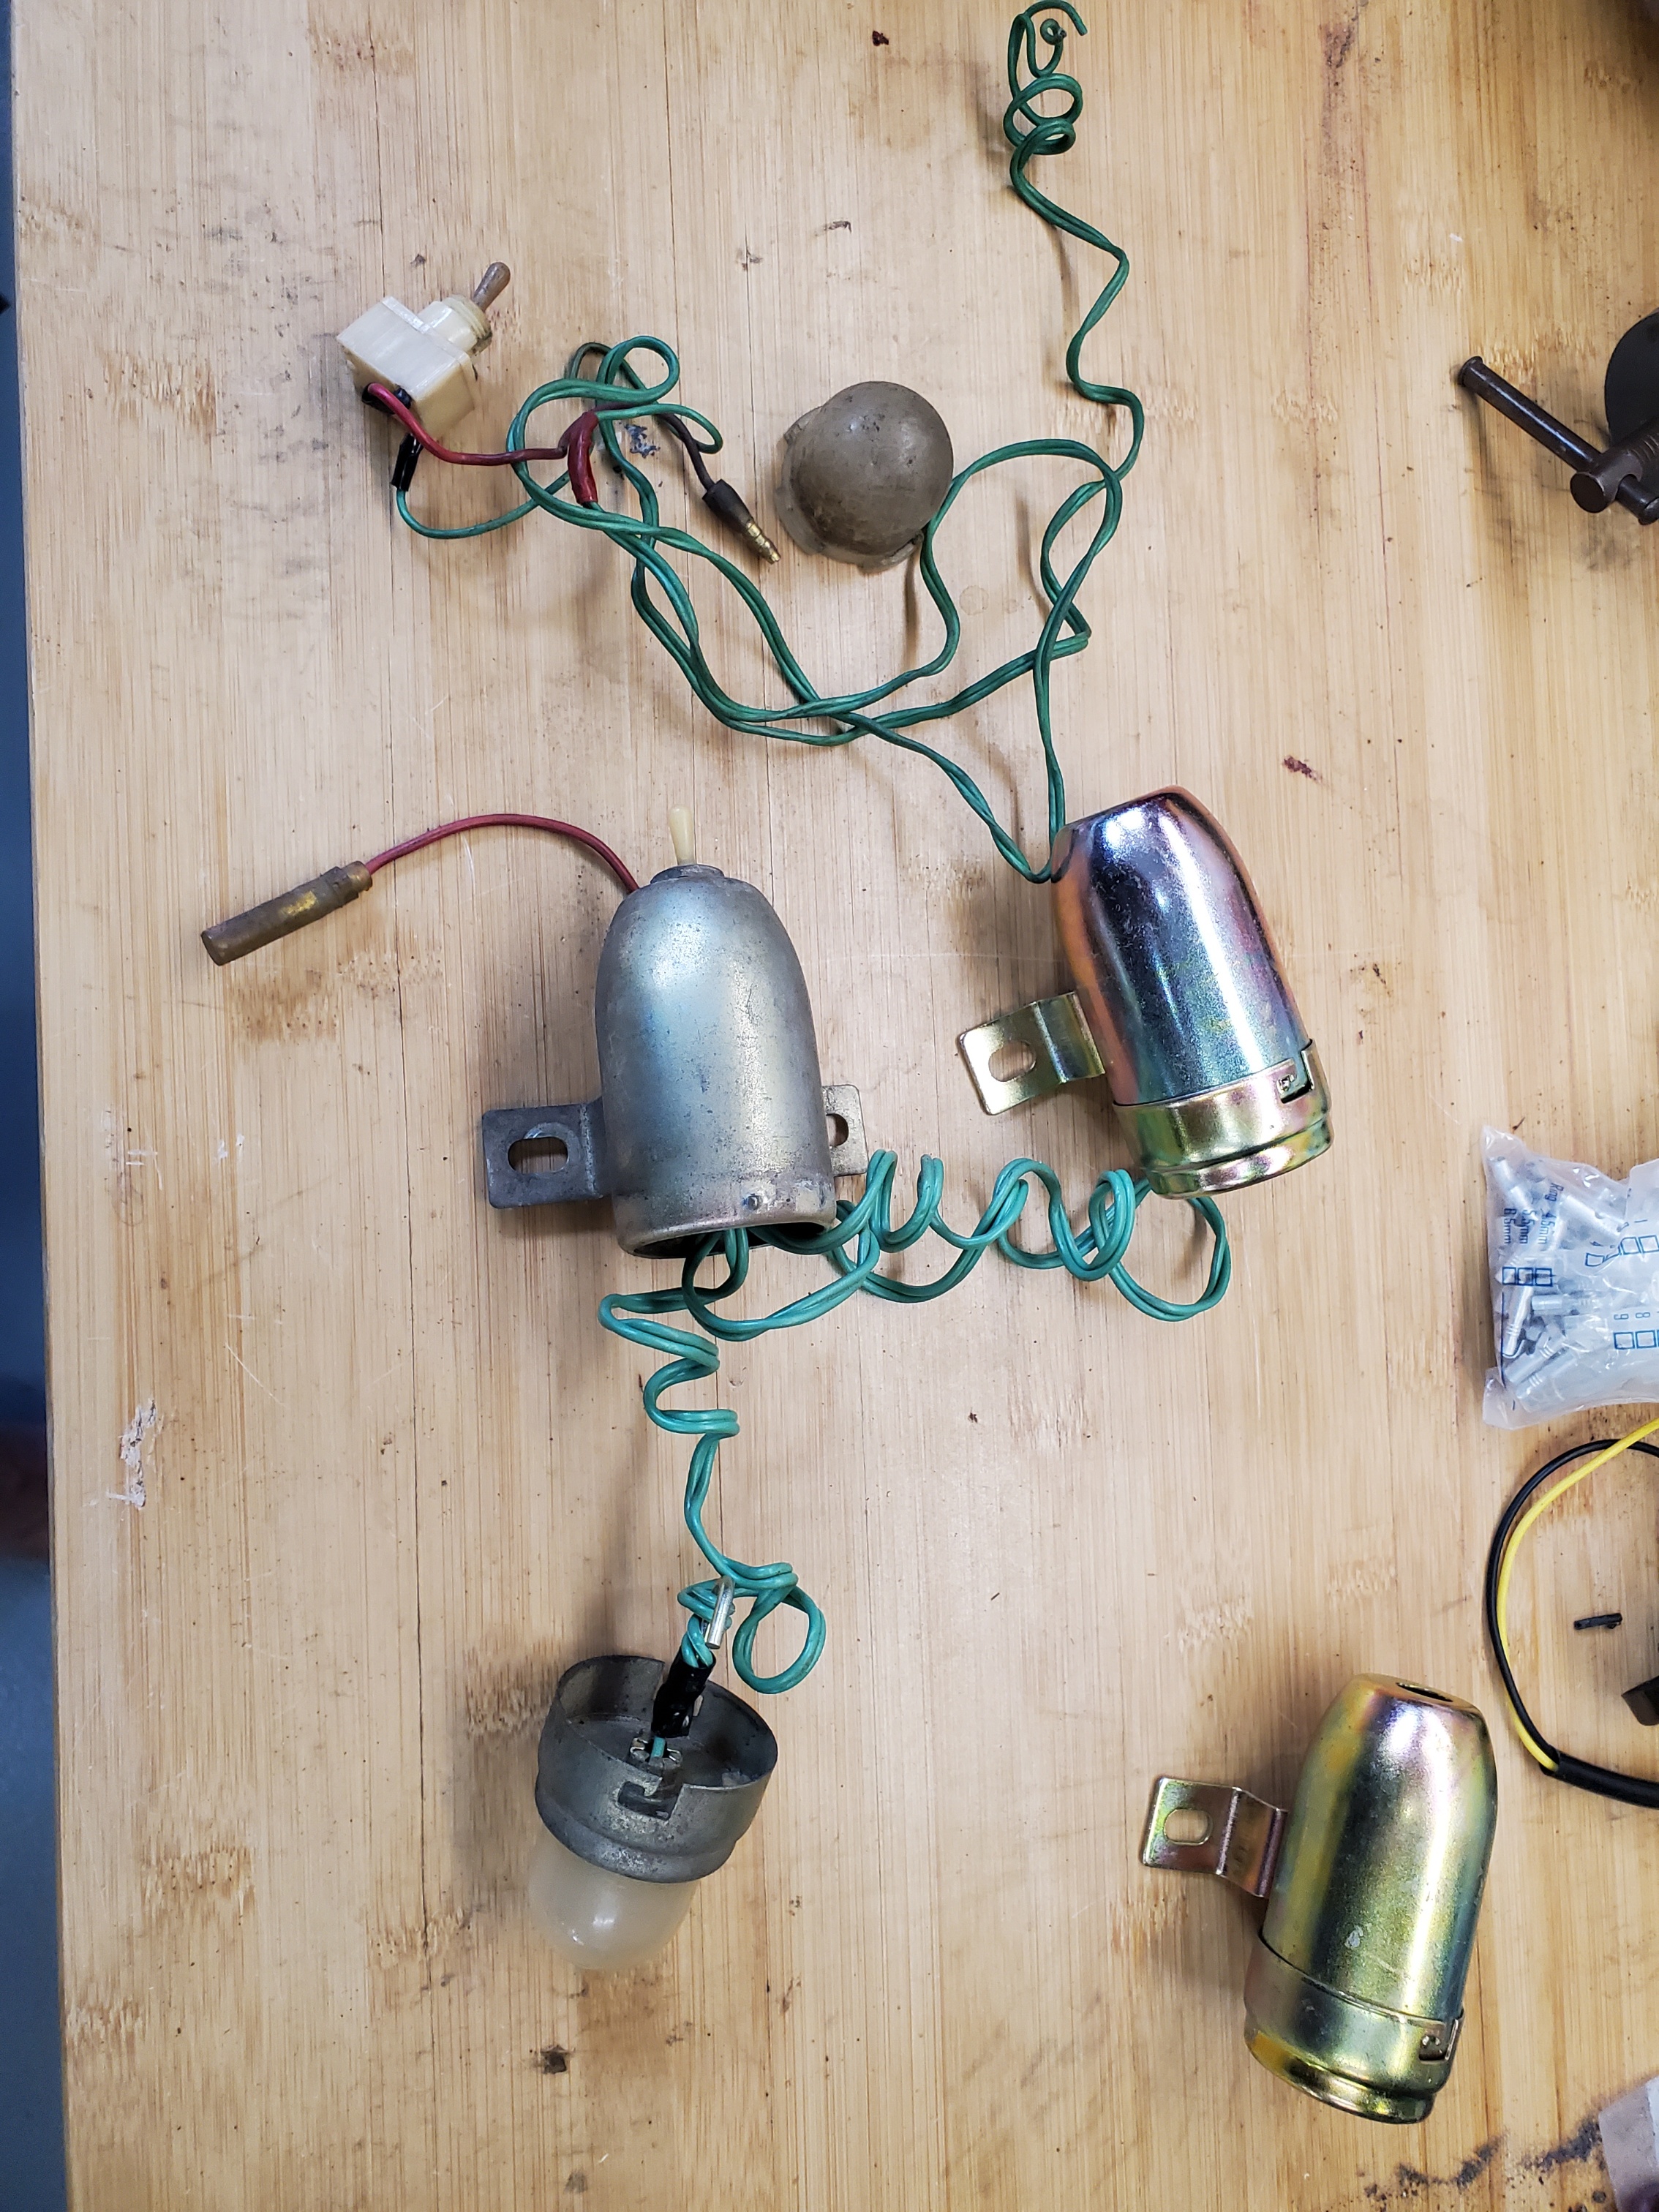
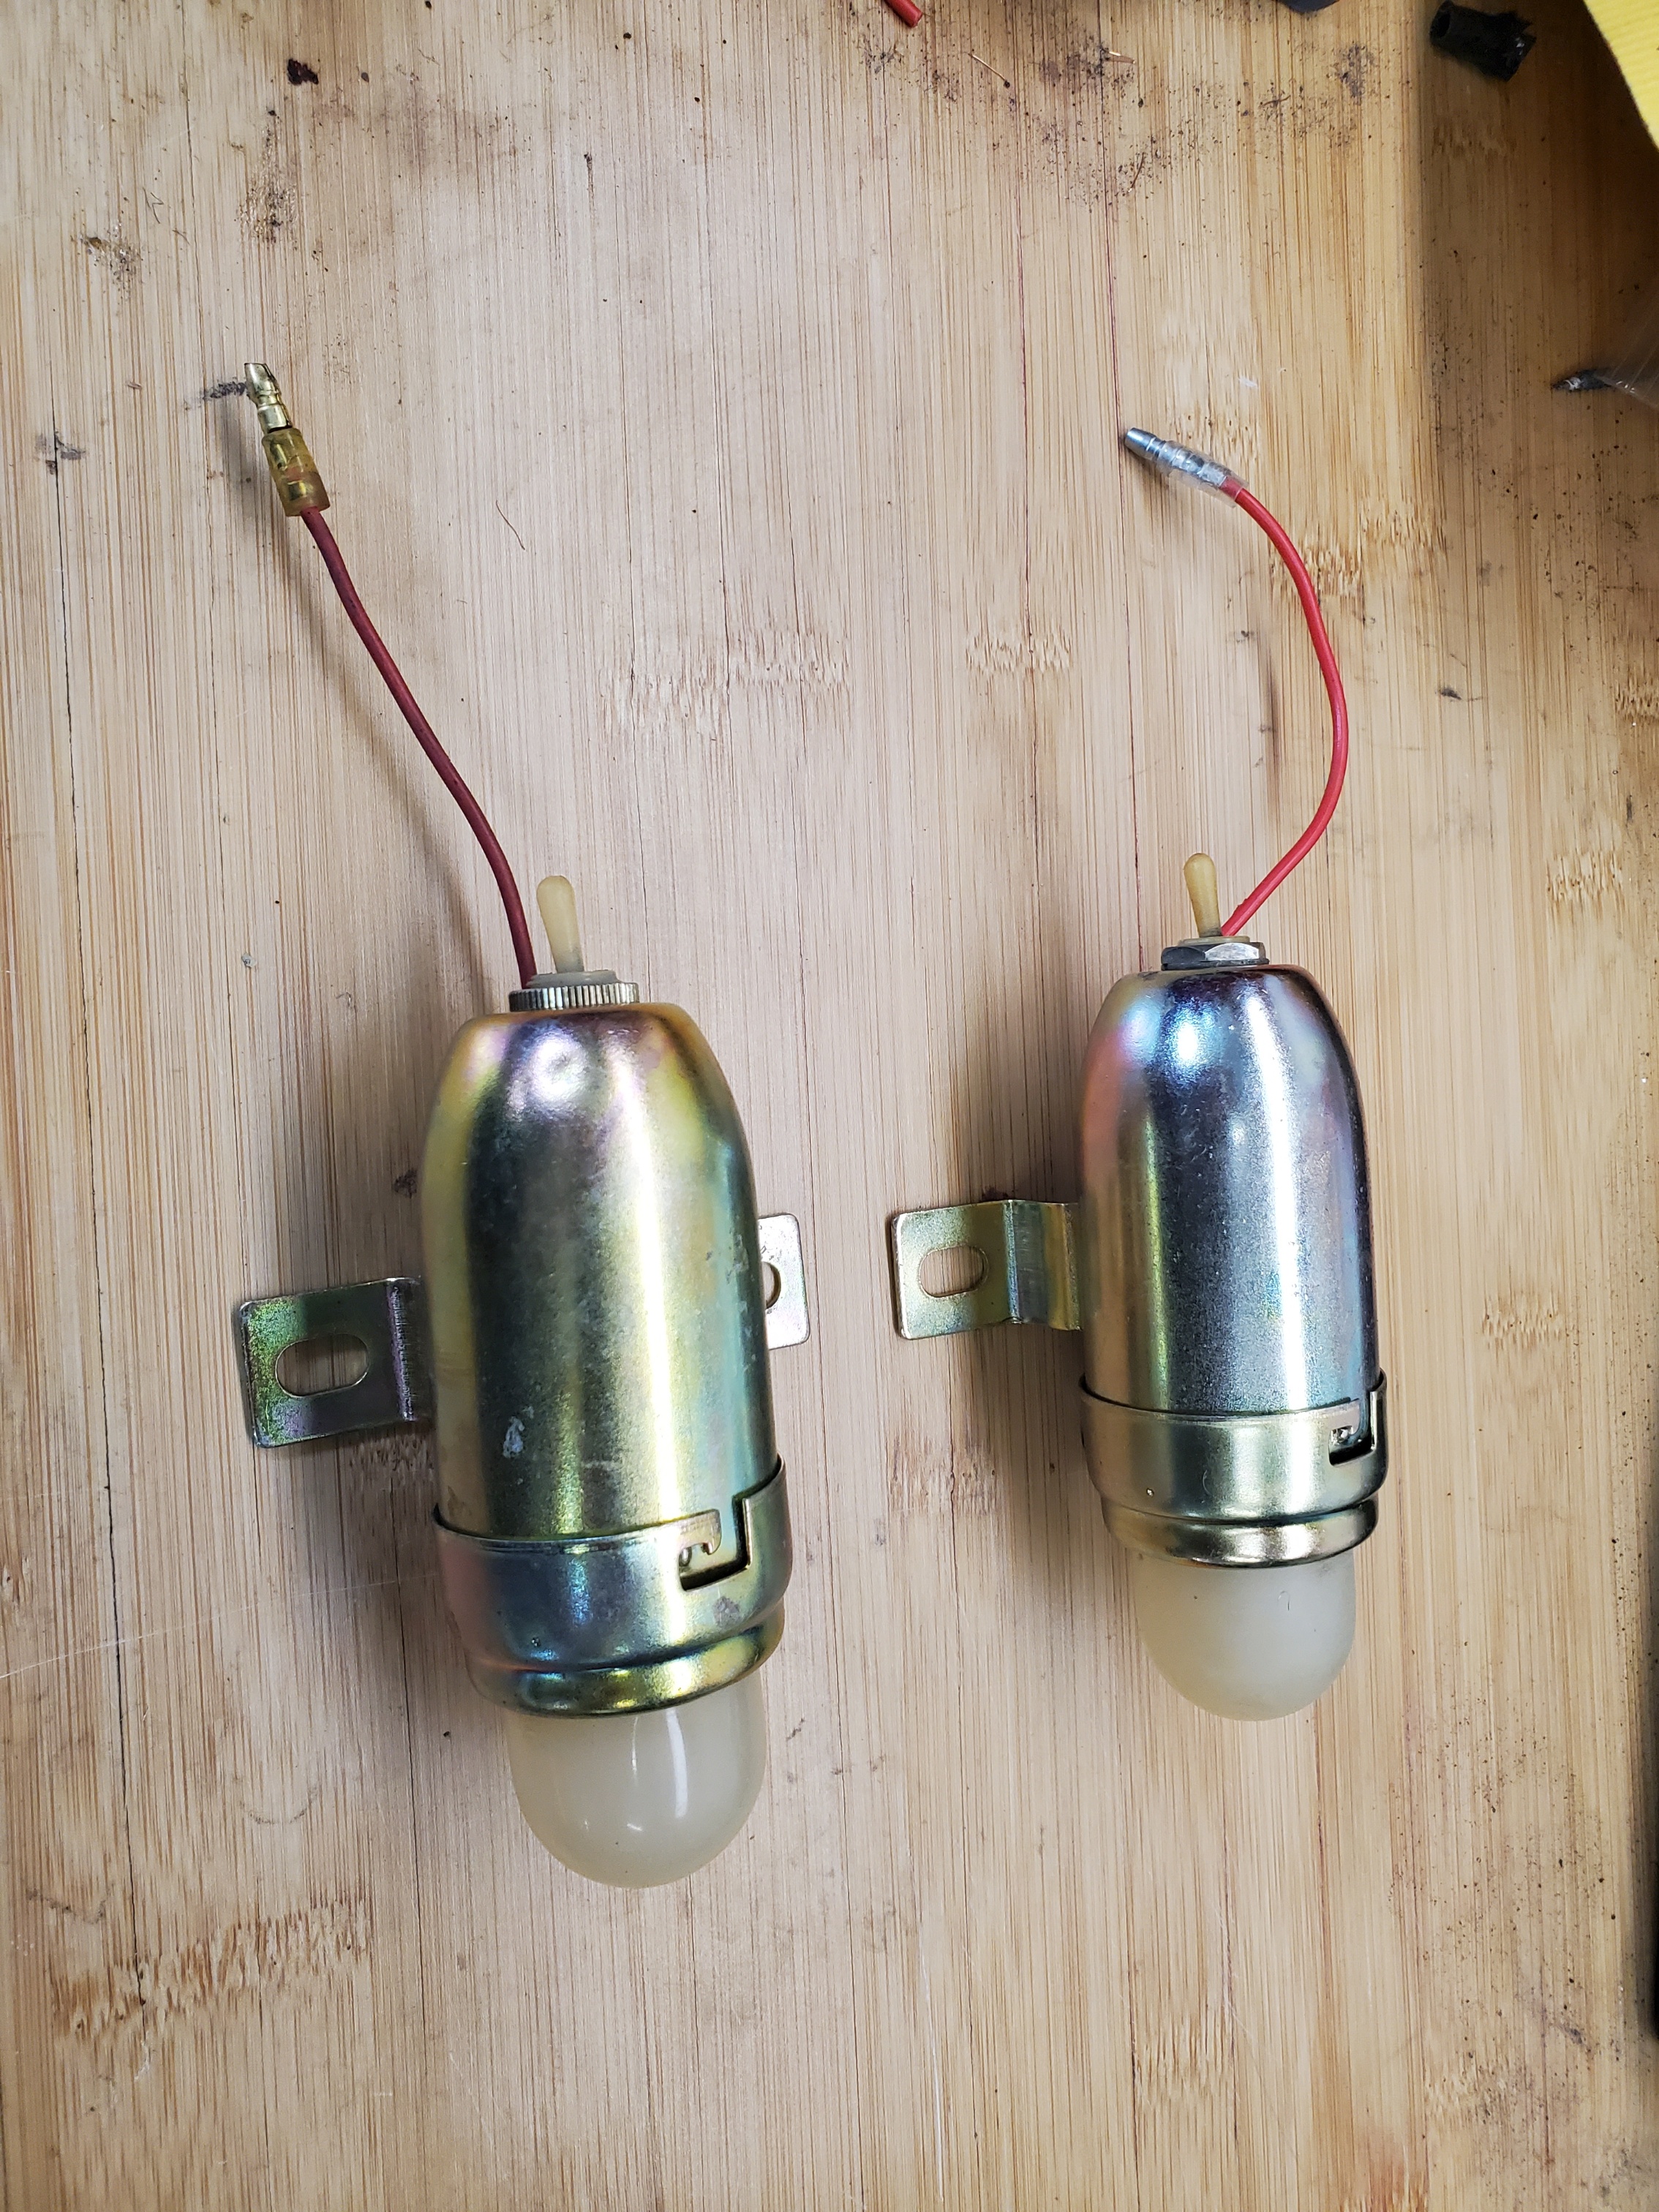
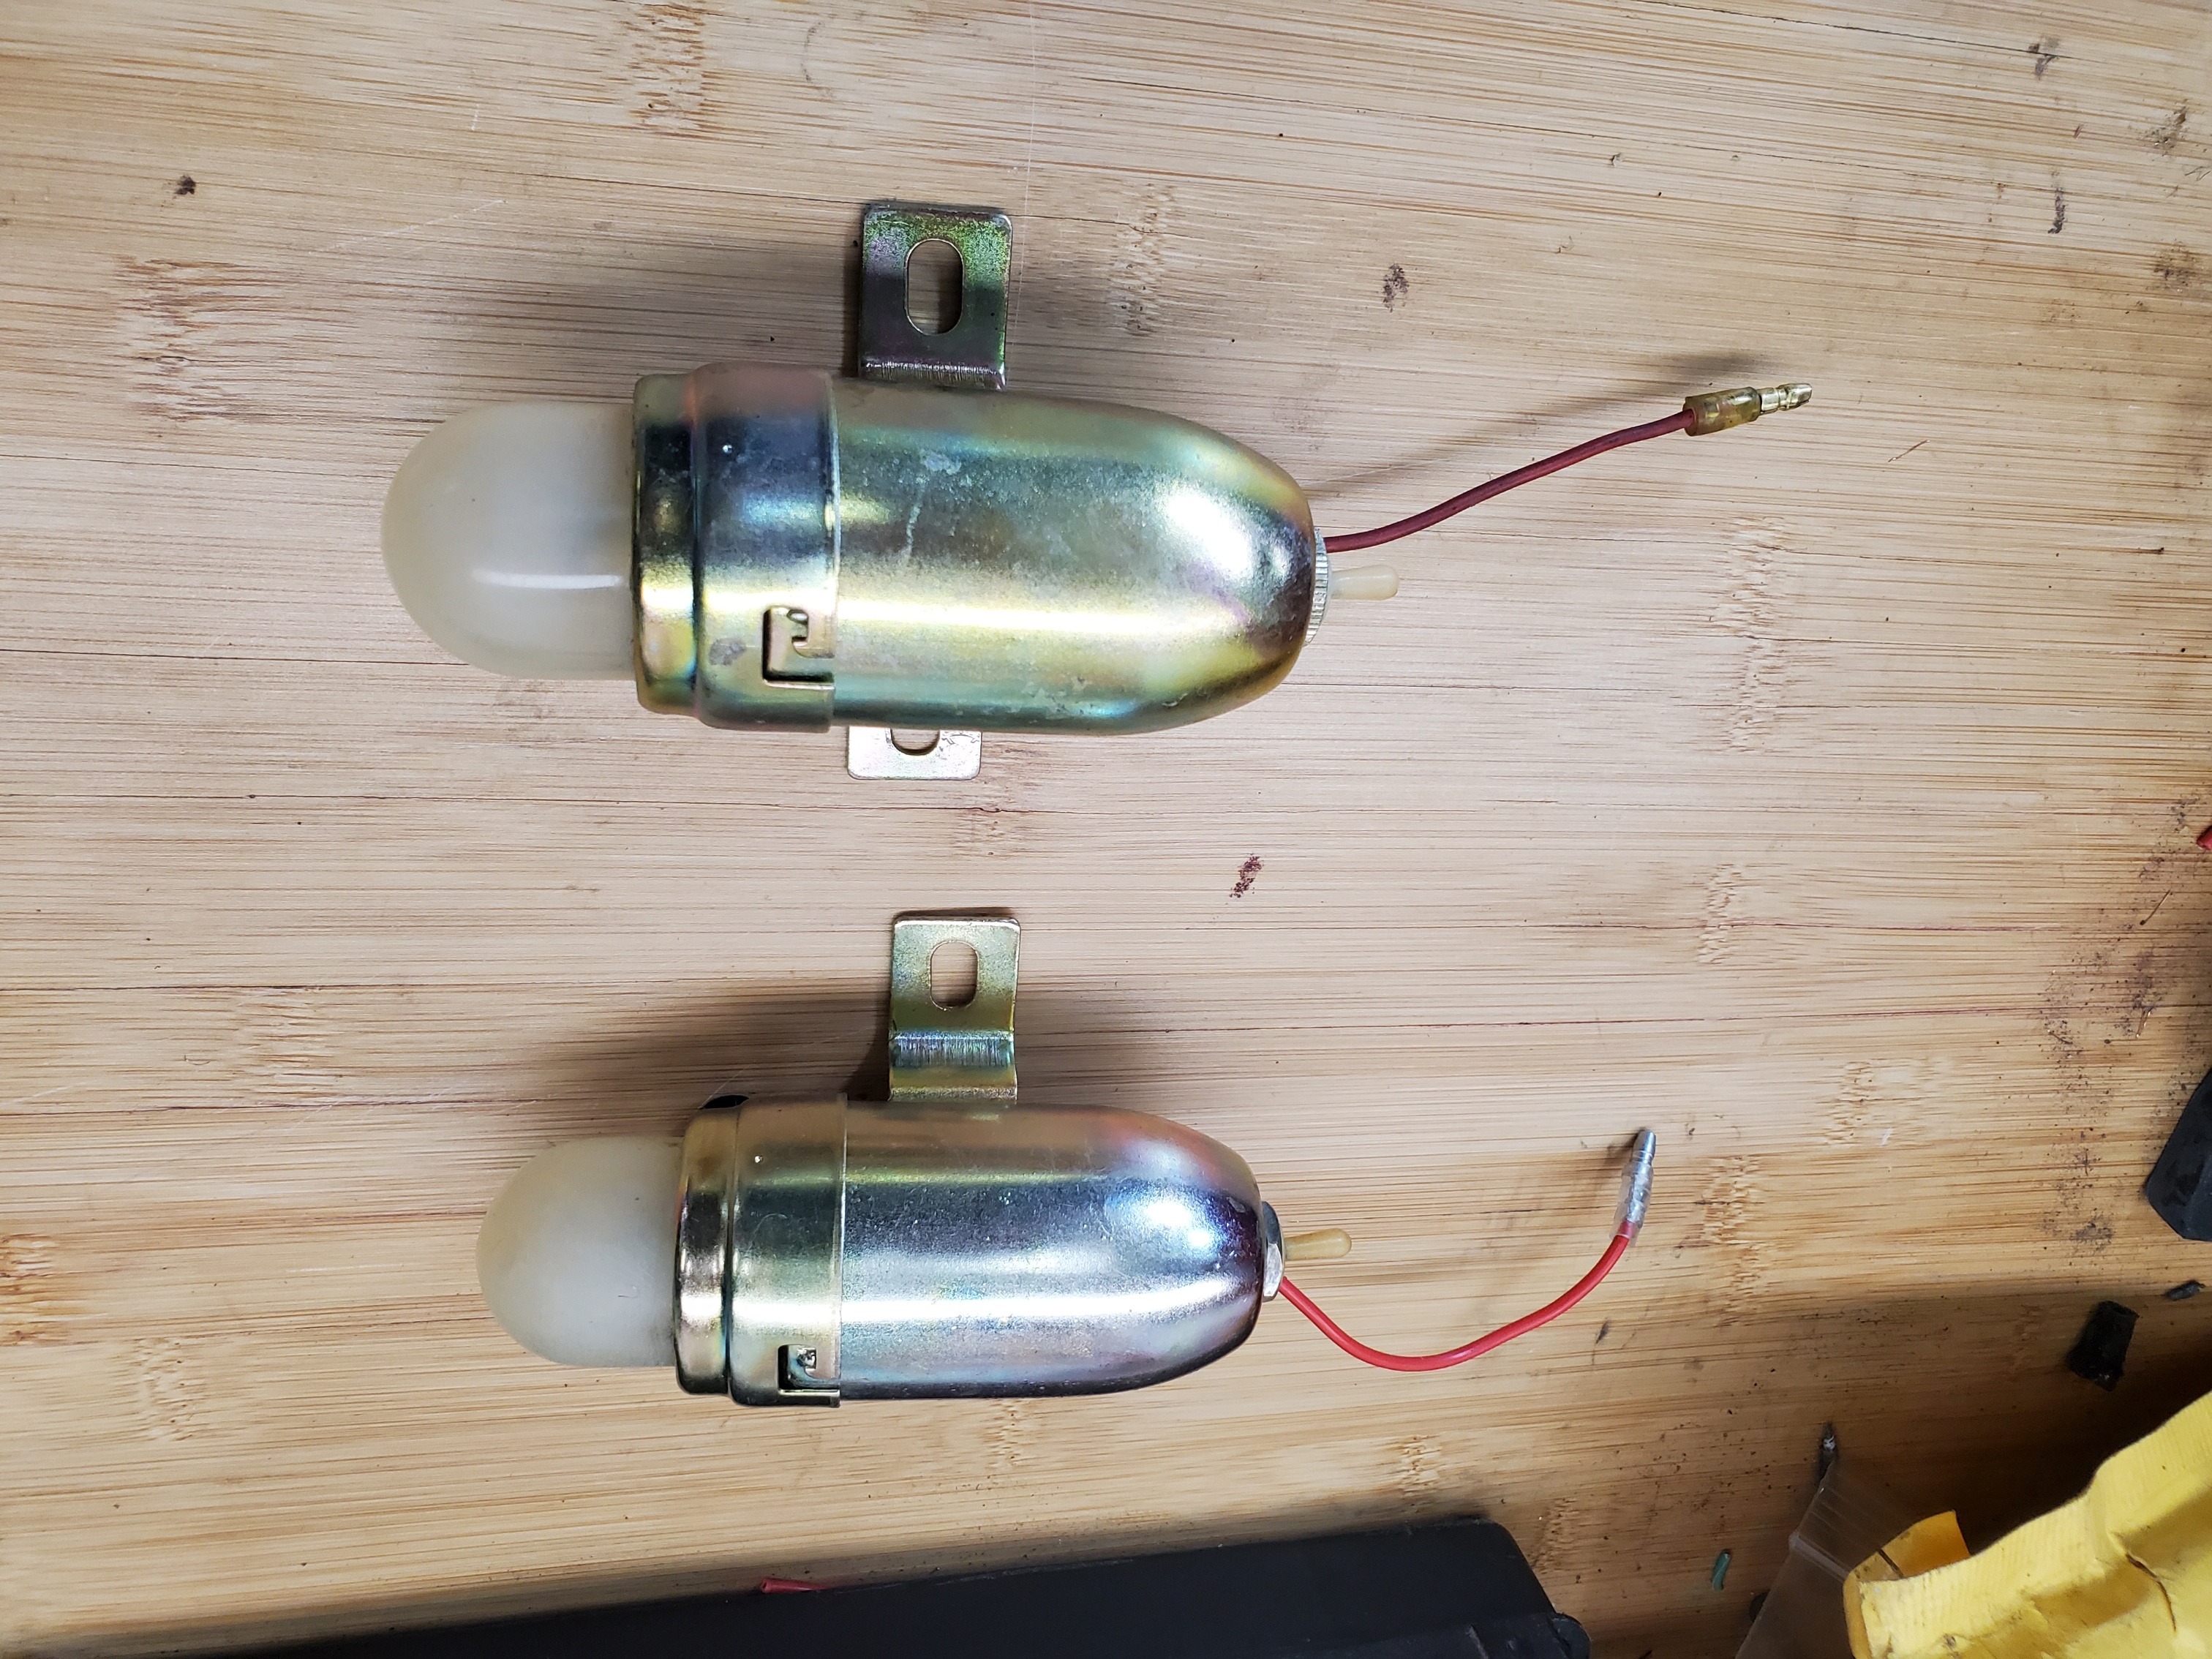
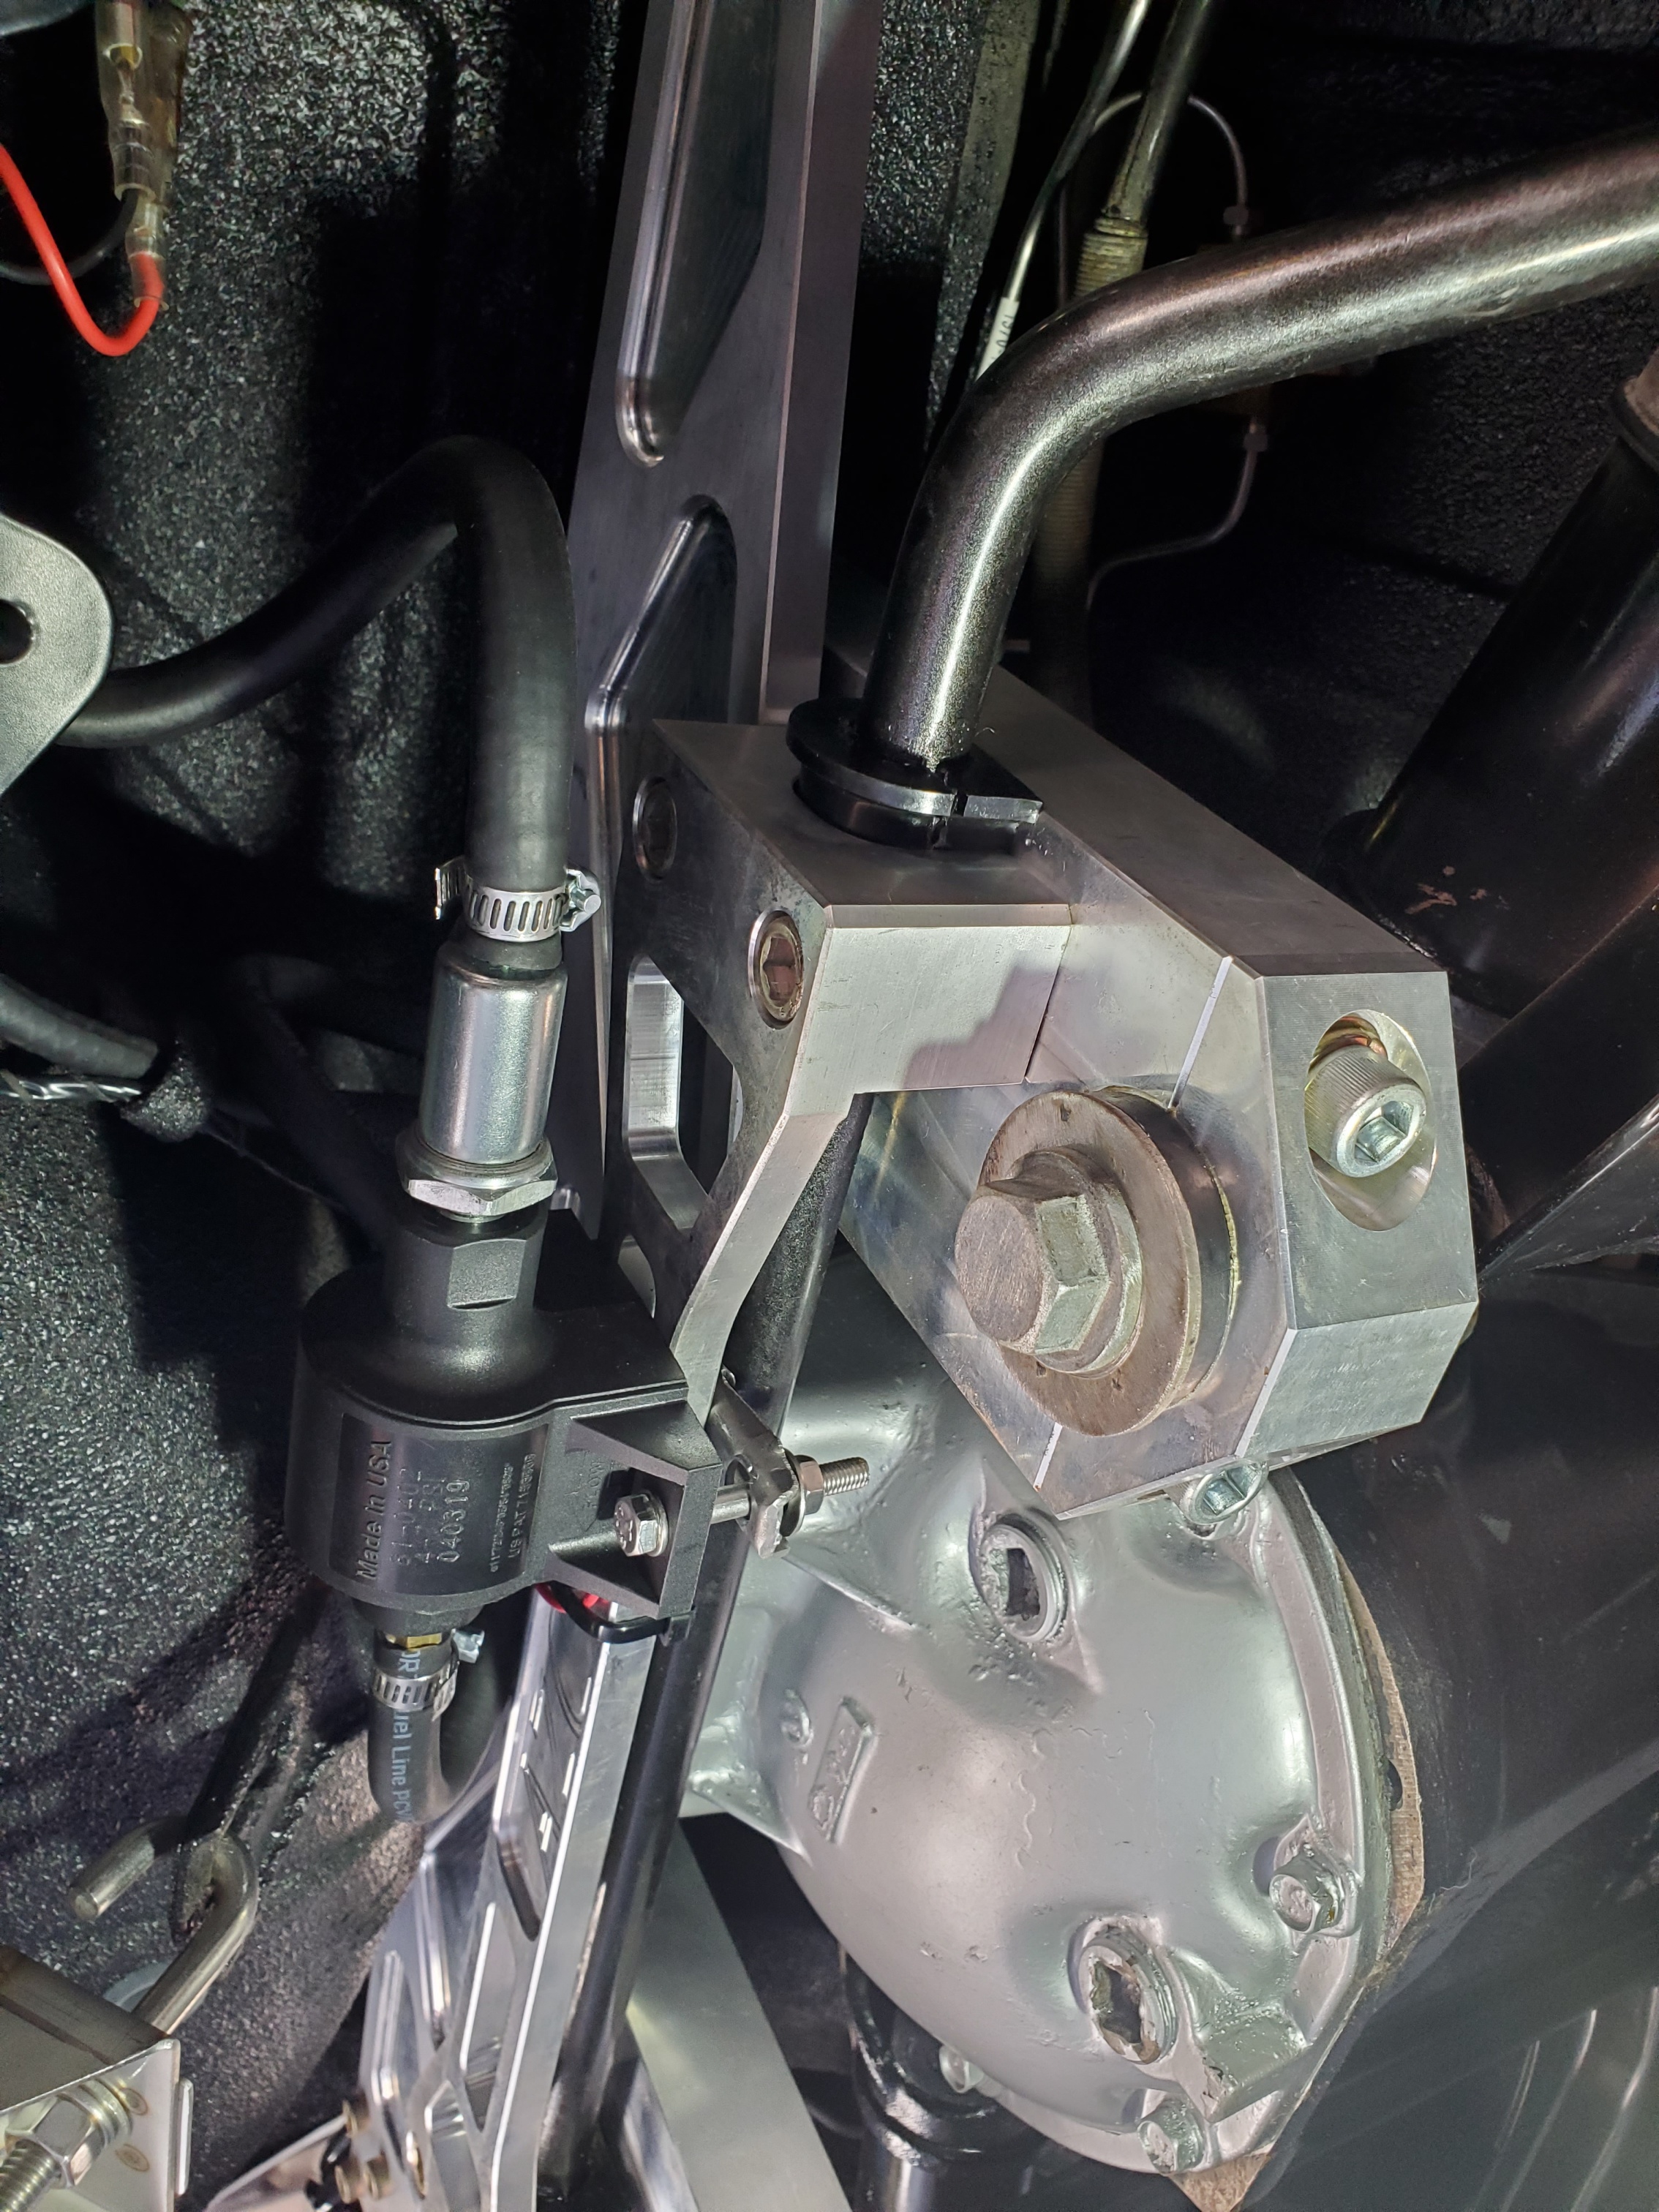
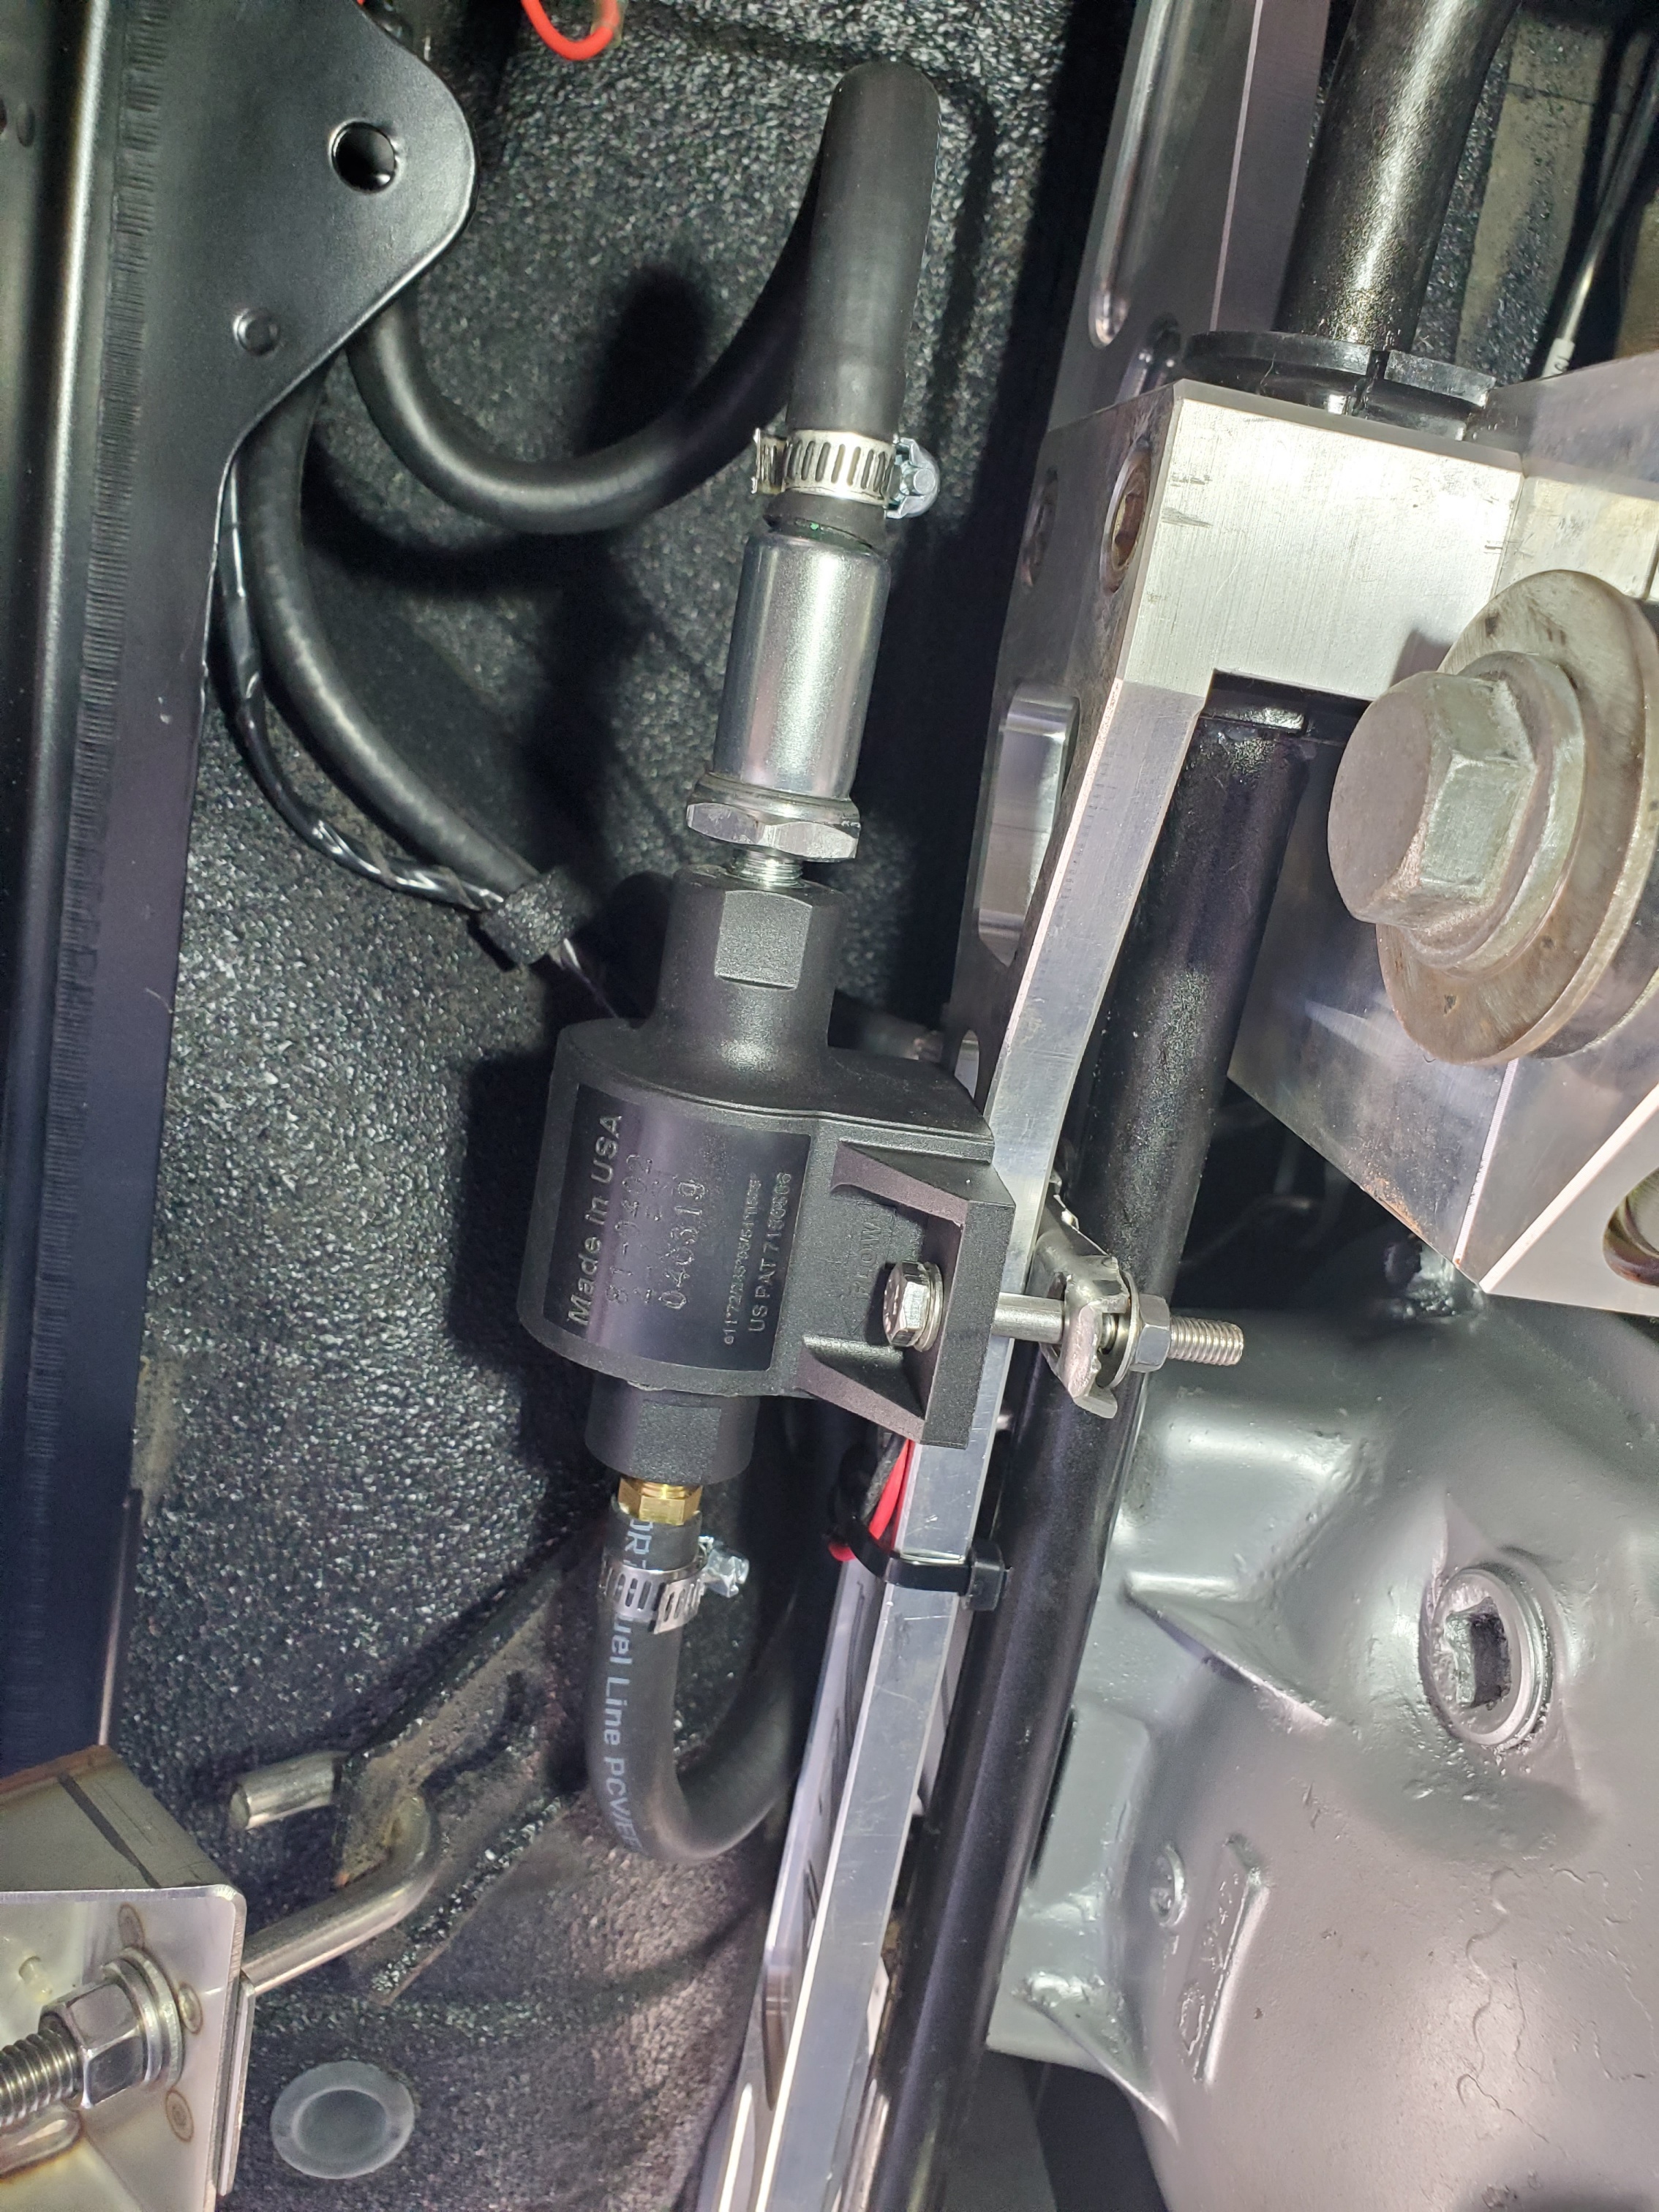
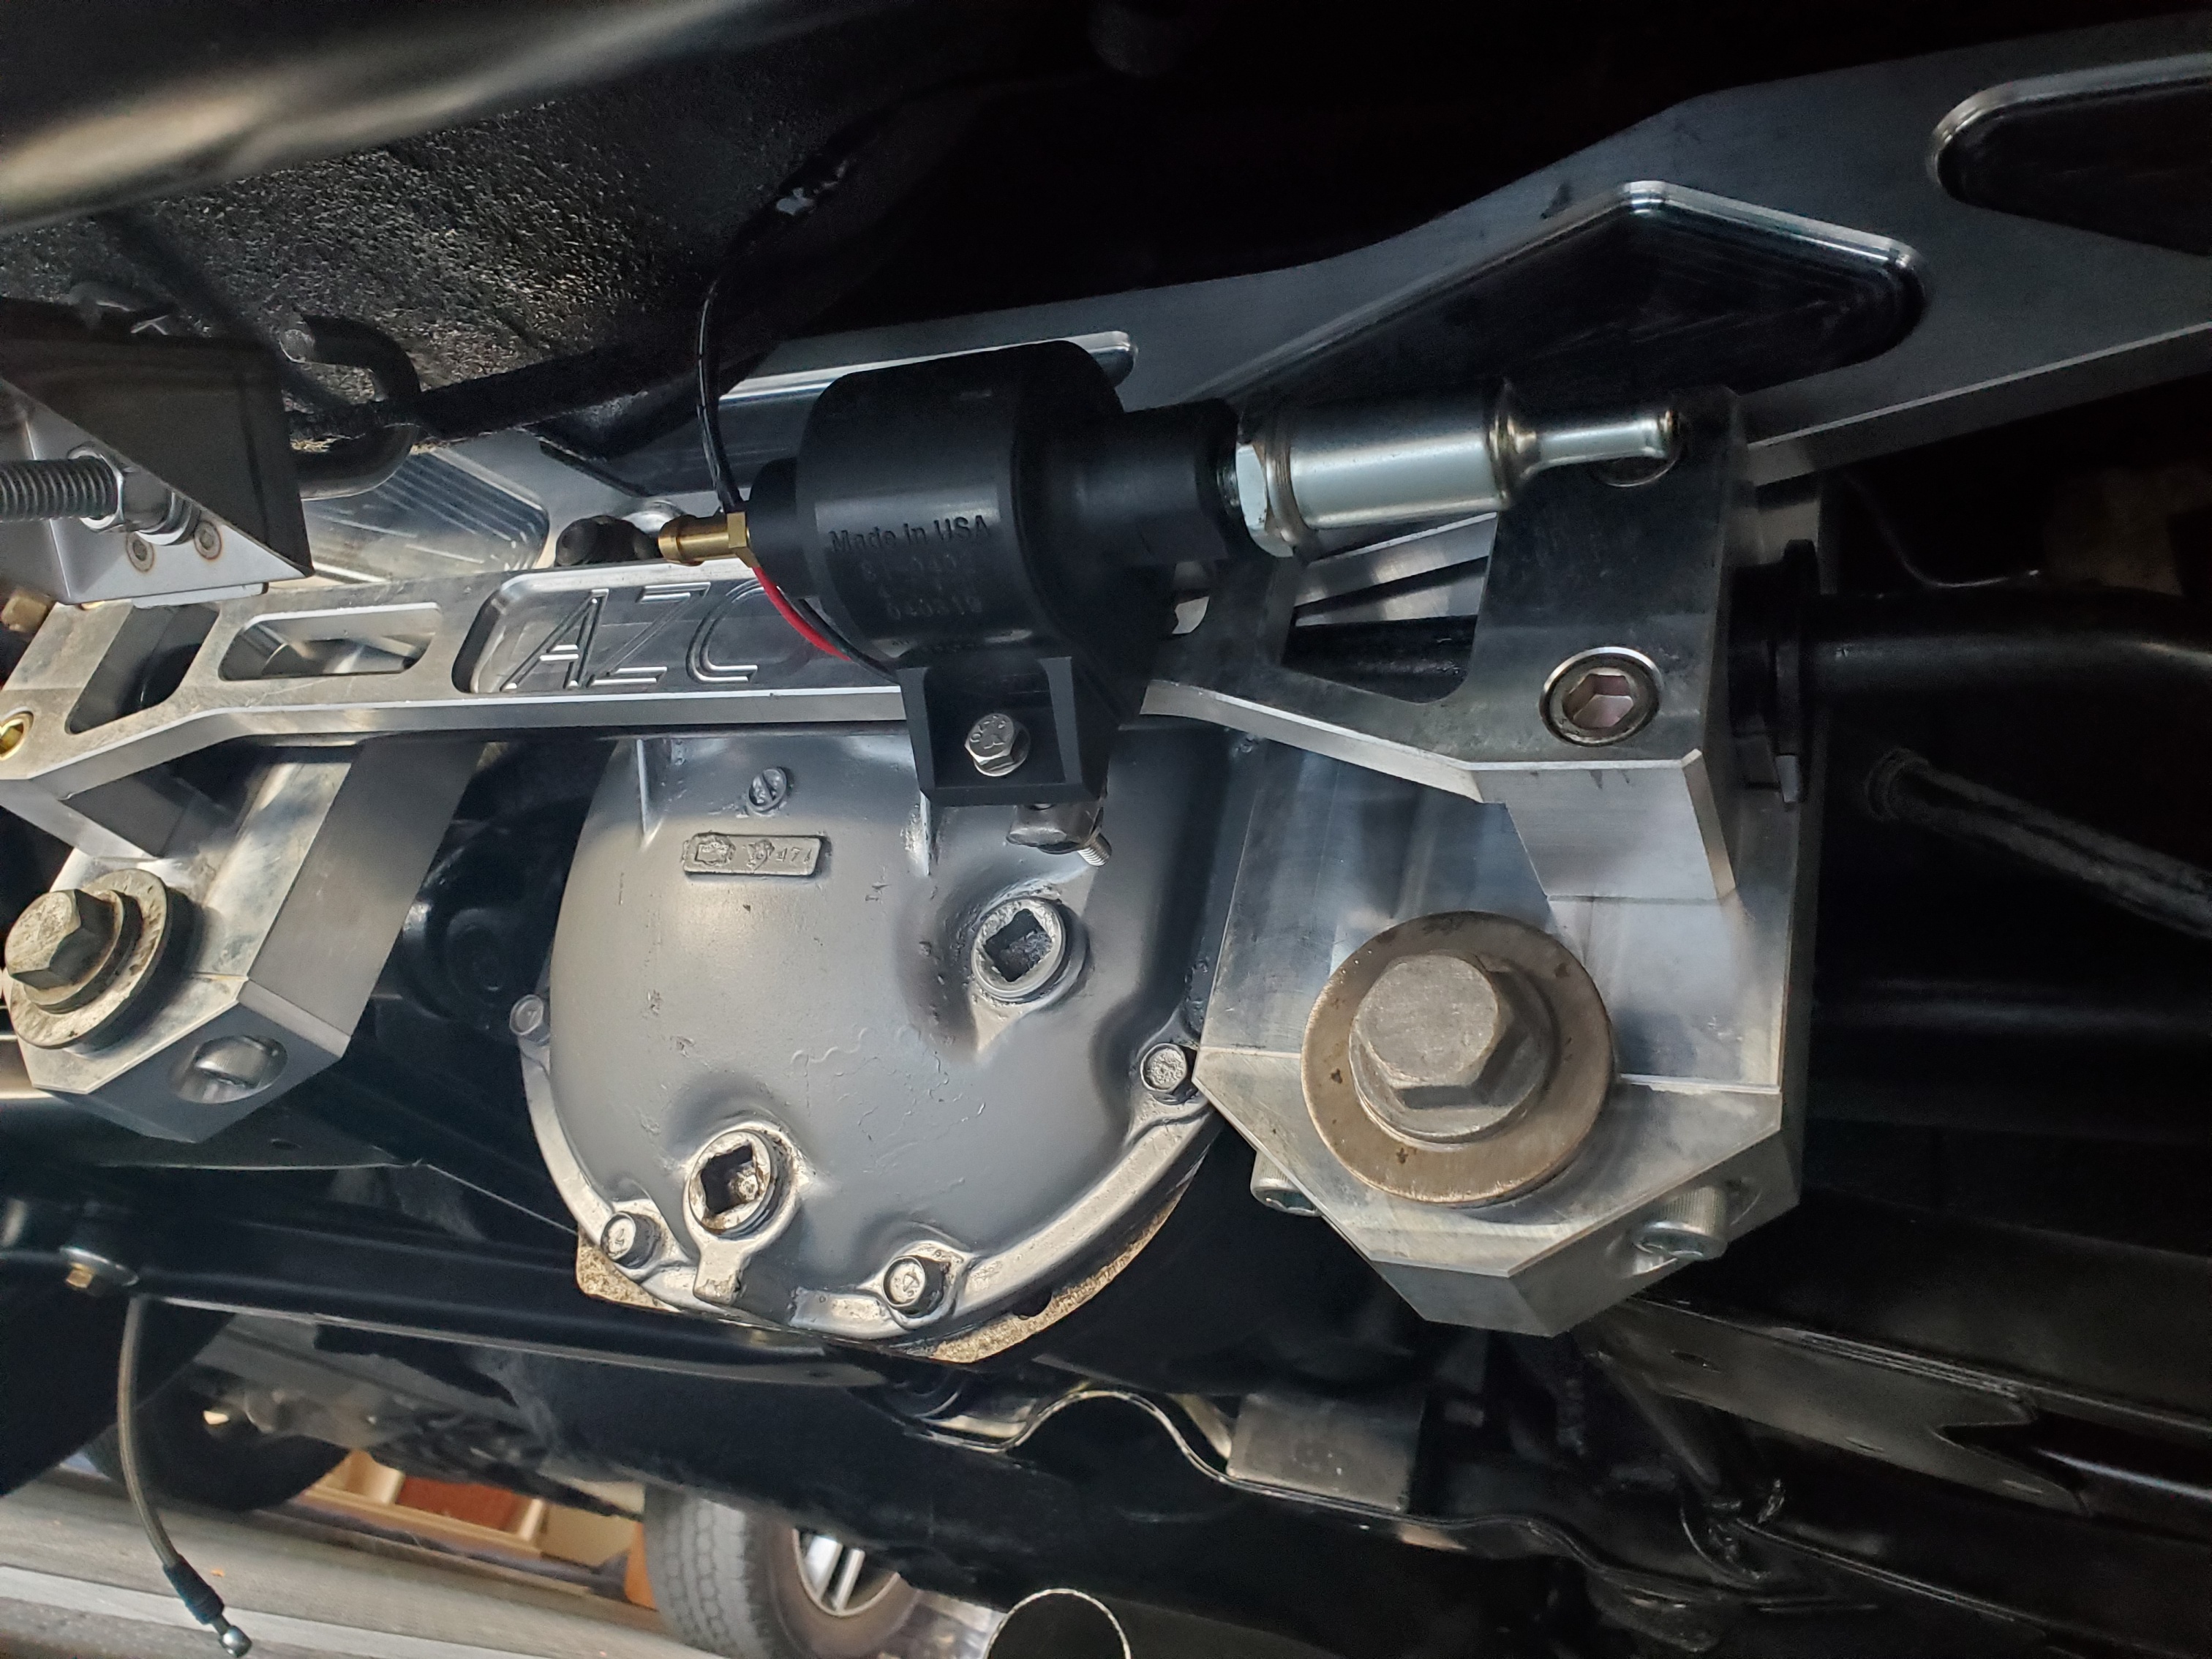
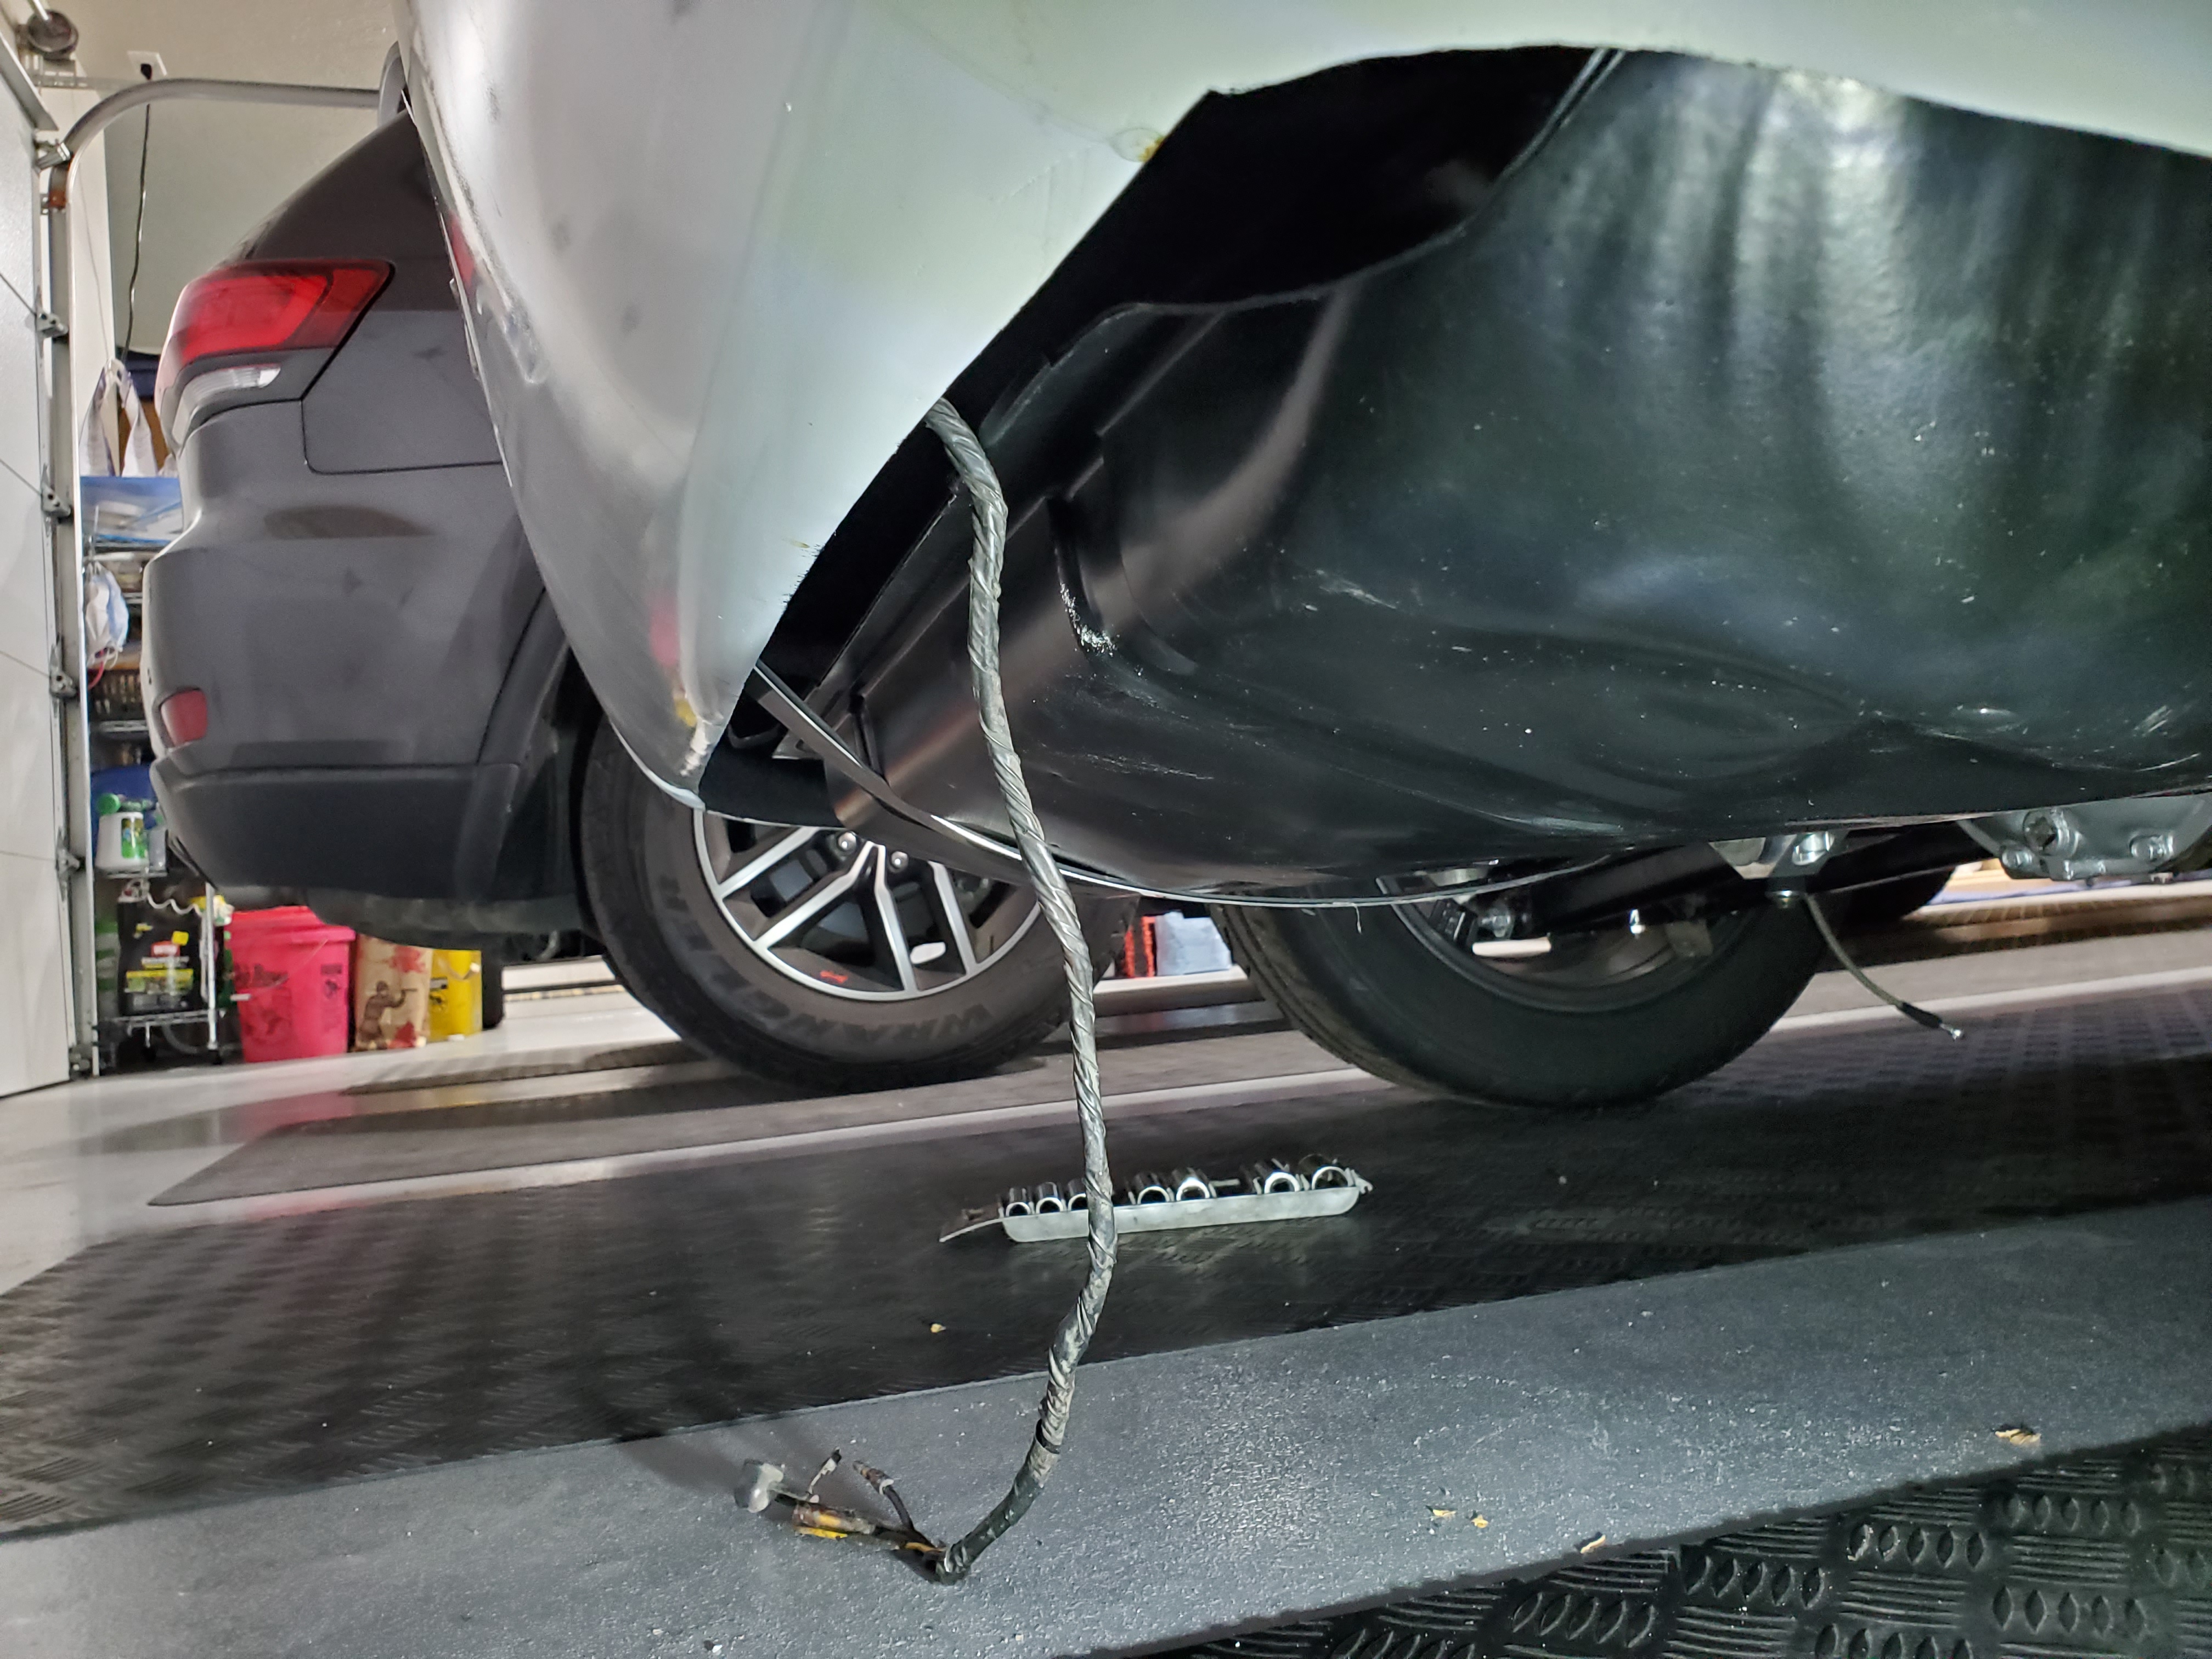
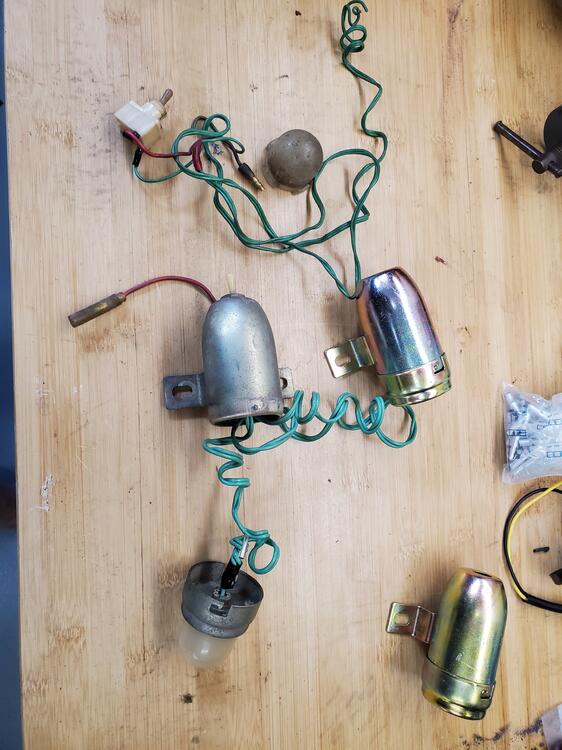
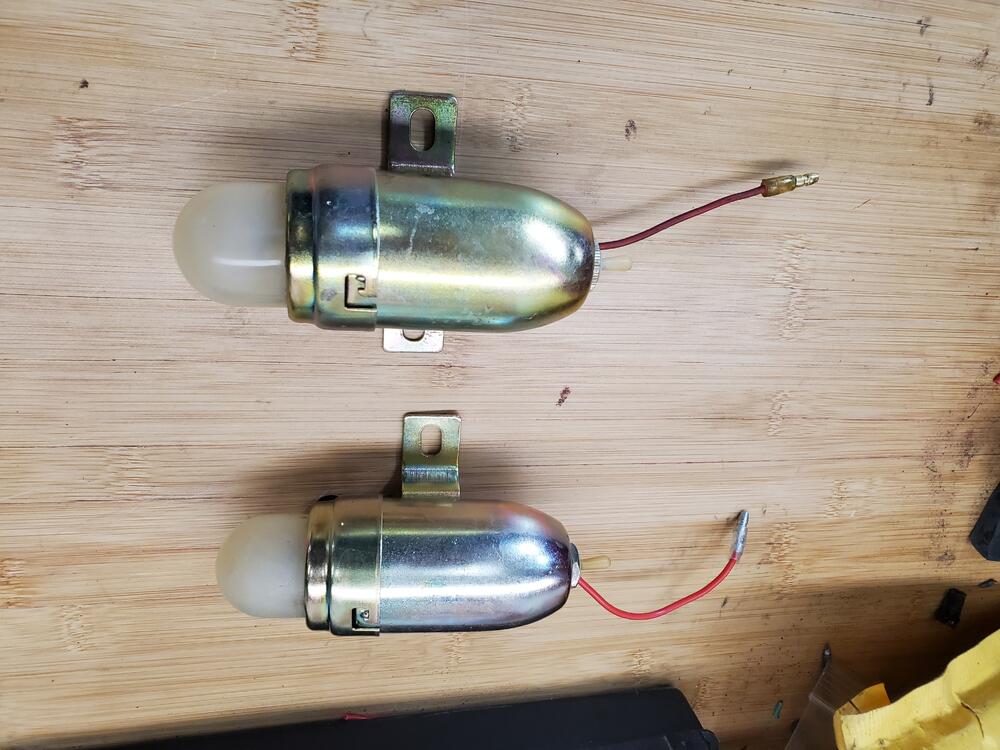
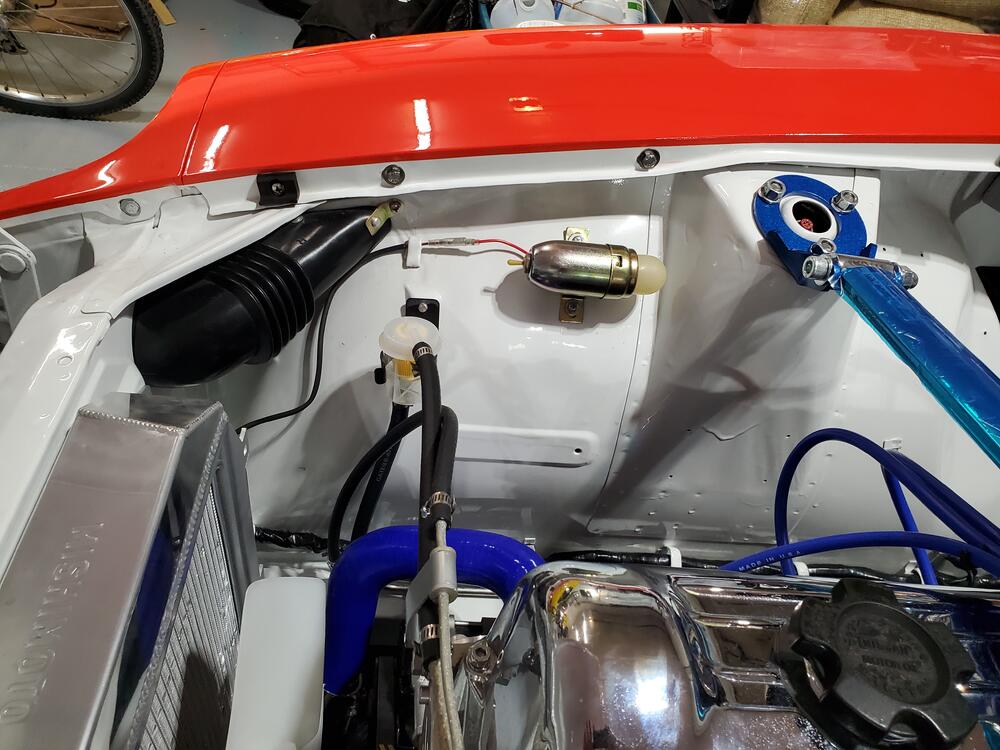
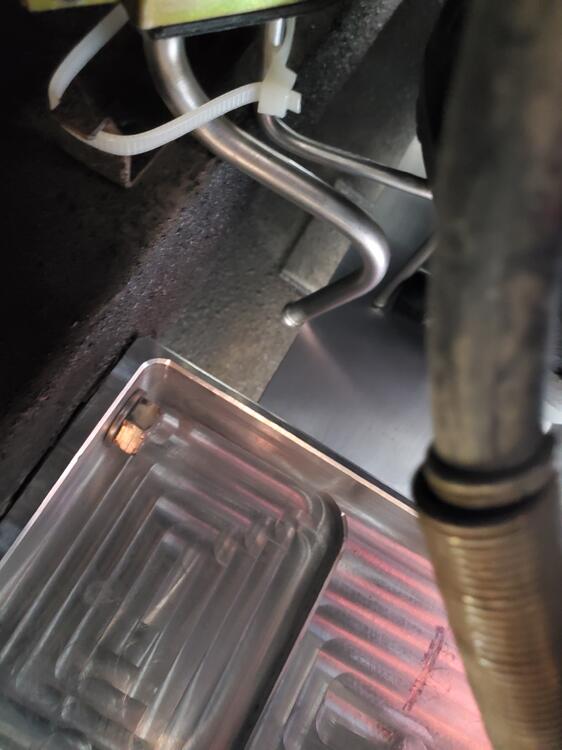
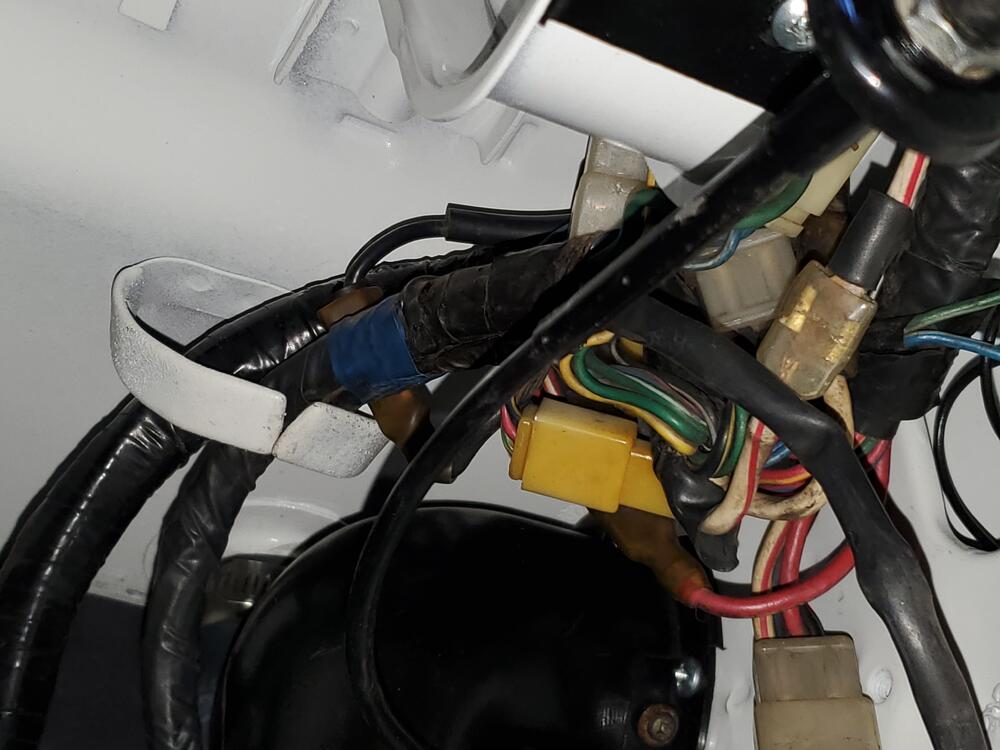
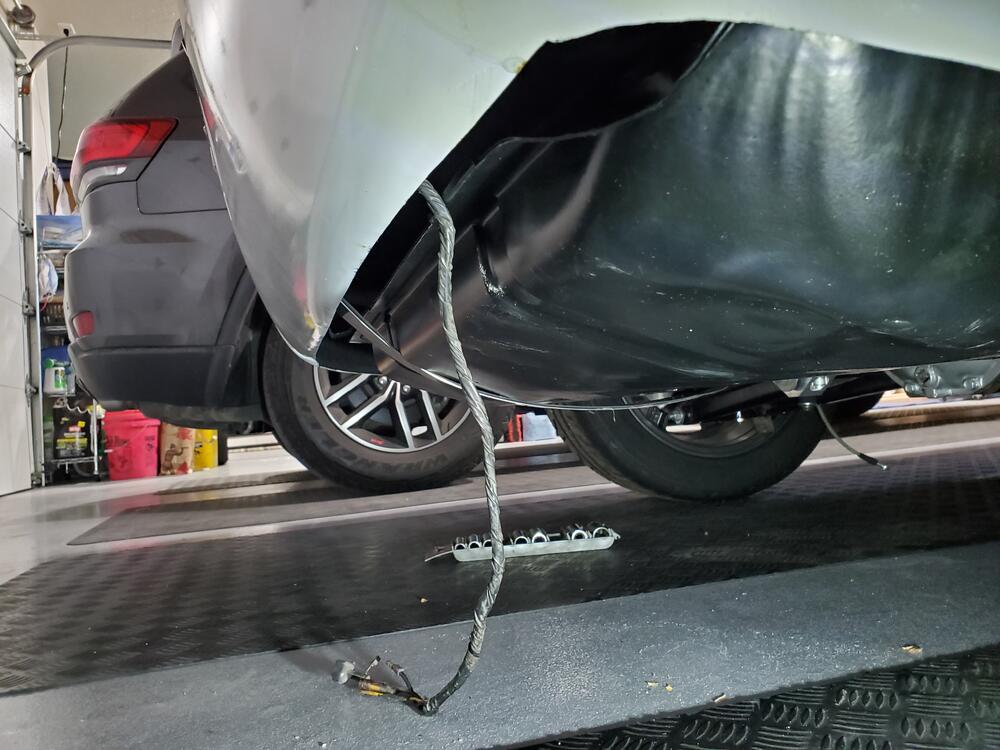
I had some spare housings for the engine light, so I put a couple together. The original was pretty corroded. The white dome on top is definitely very hazy and opaque, so I cleaned it as best as I could. It would be nice if someone would contract a mold for these and have some nice translucent ones made. I installed the most silver looking light as it better matches the engine bay colors. I installed the fuel hoses to the electronic fuel pump, tank and forward metal lines under the car. The metal lines had to be reformed slightly as they were crashing into the rear suspension parts as shown in the pic below. Such is the curse of aftermarket parts. Anyway, everything worked out nicely with a little tweaking (not to be confused with twerking). Hoses routed smoothly and installation is pretty clean. I am trying to figure out a clean way to route the carb float bowl vent into the small K&N air cleaners. I would like to drill a hole in the base of the air filter and route the hose into the air cleaner, but that leads to a pretty sharp bend in the hose, and it collapses. A right angle fitting would work better. I will have to look around a bit and see what is available. Not sure what other options there are without things looking too messy. Pics below.

-
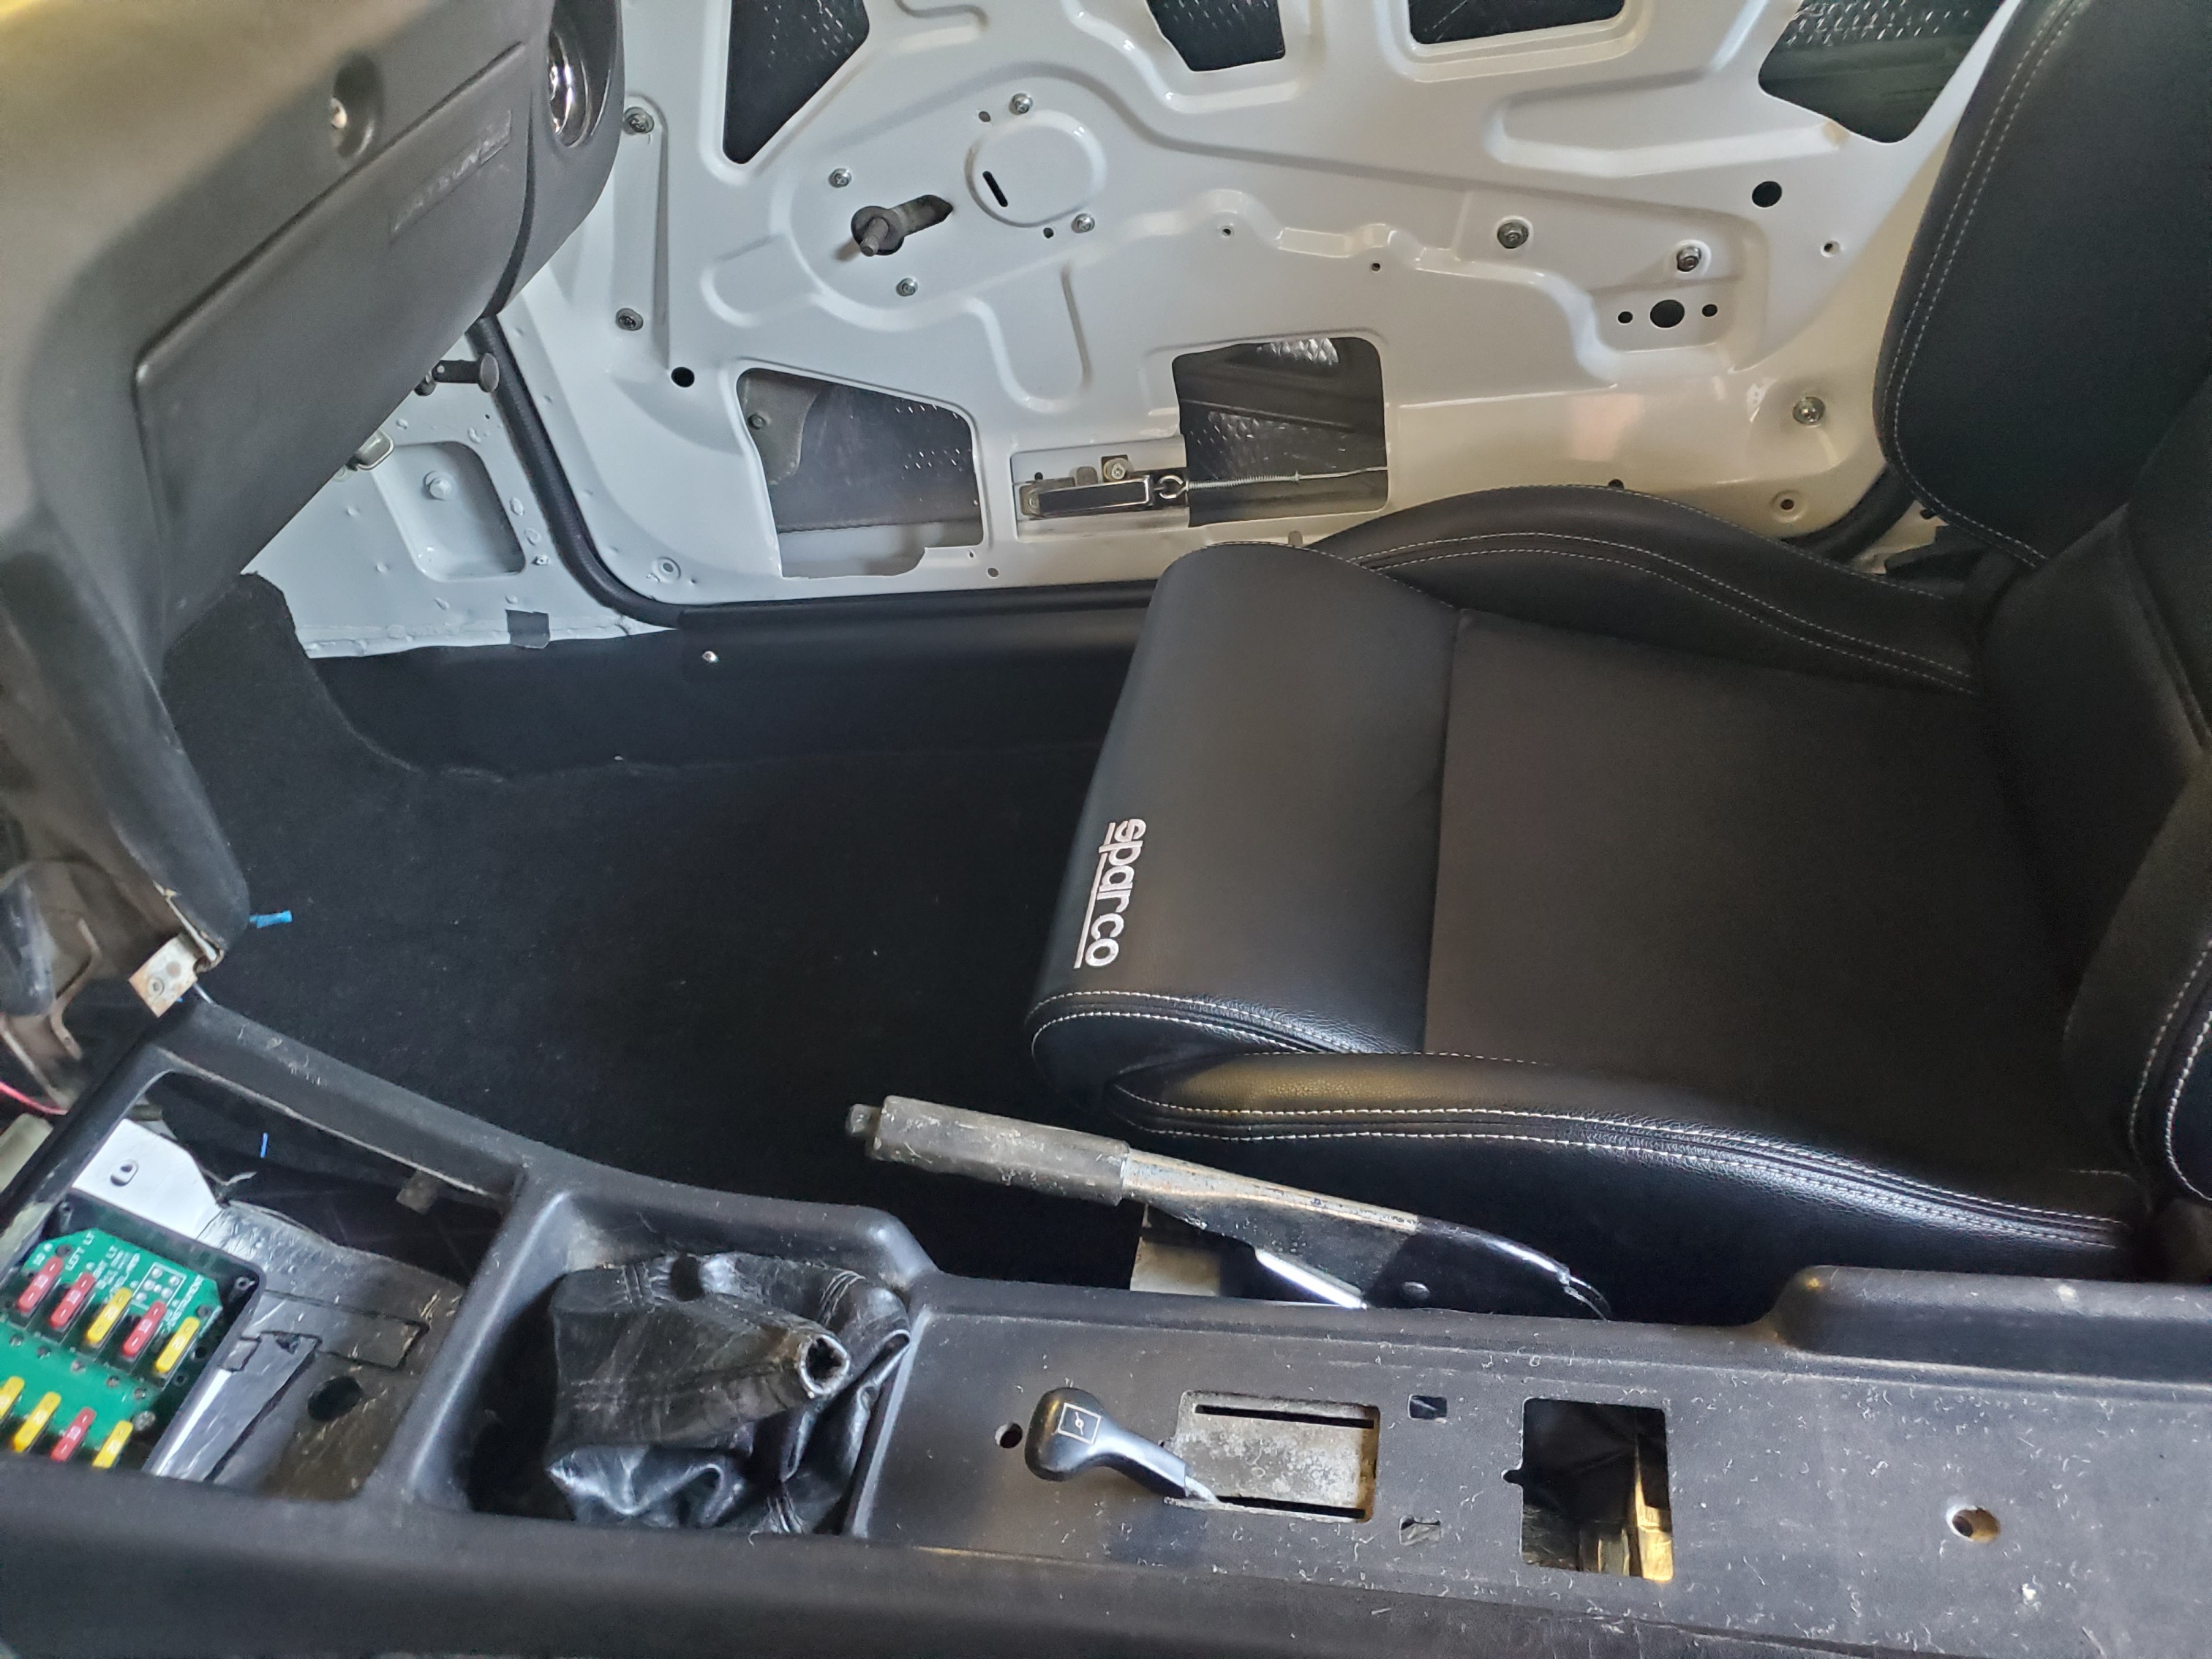
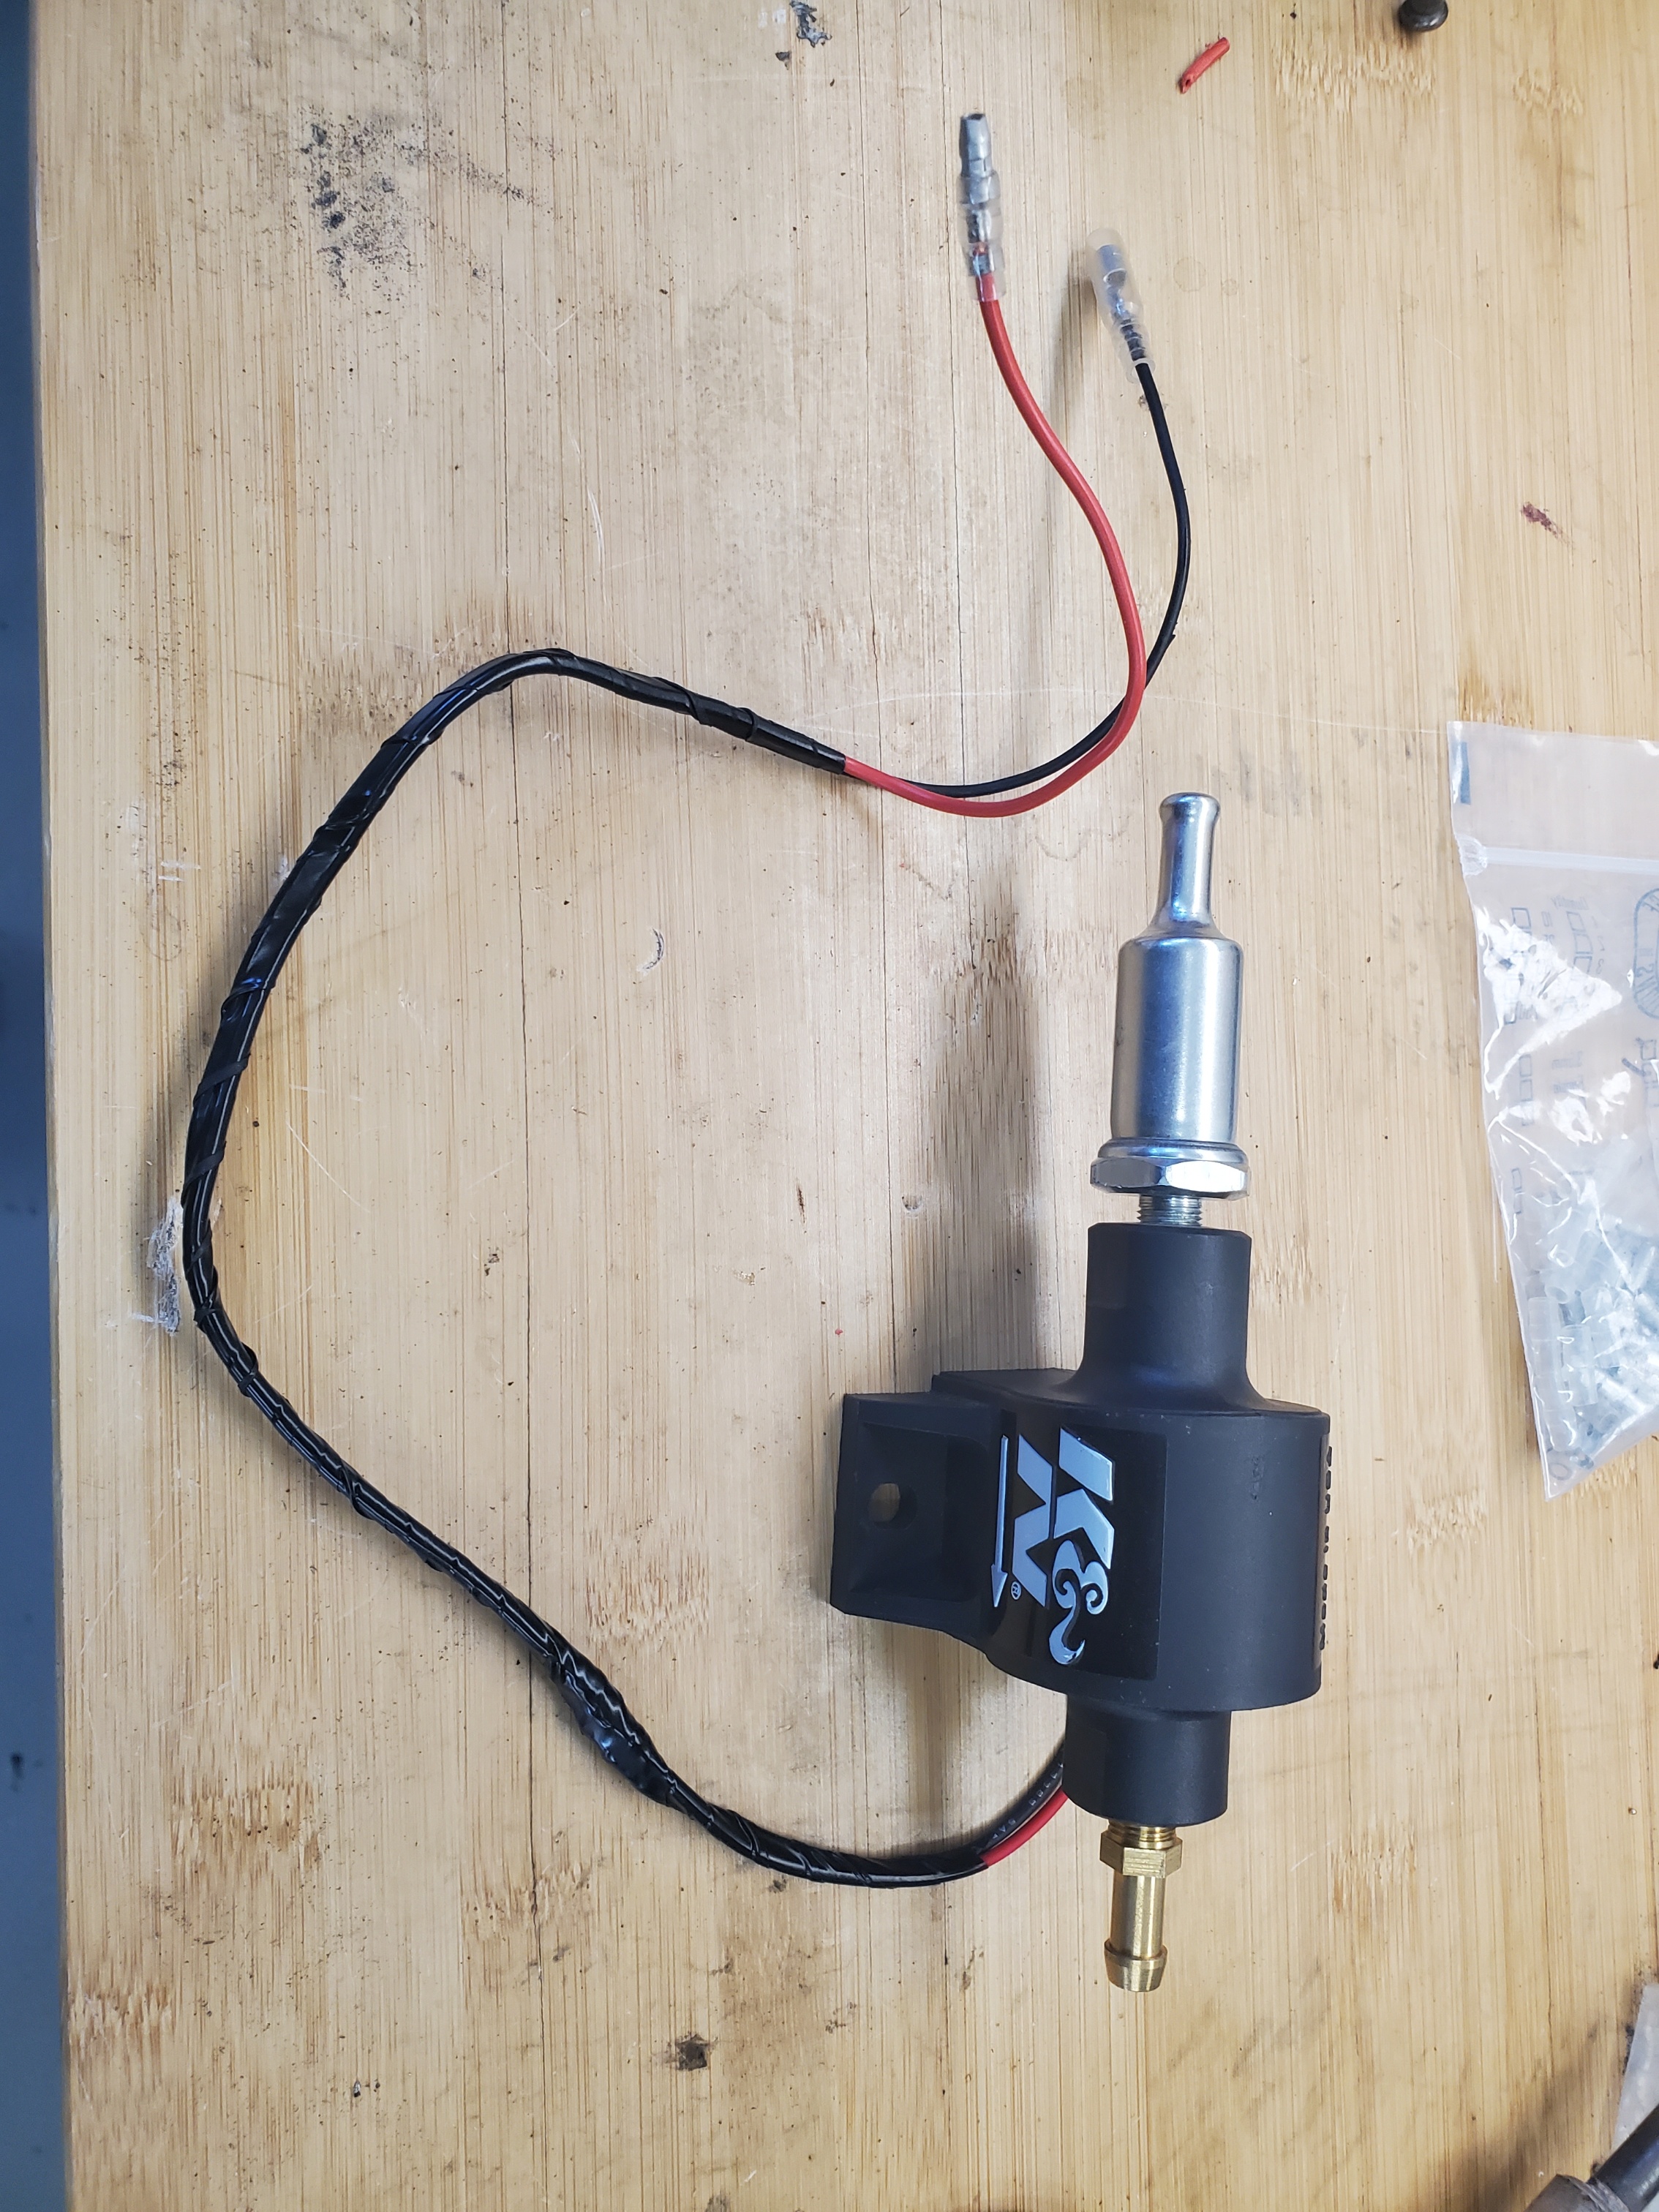
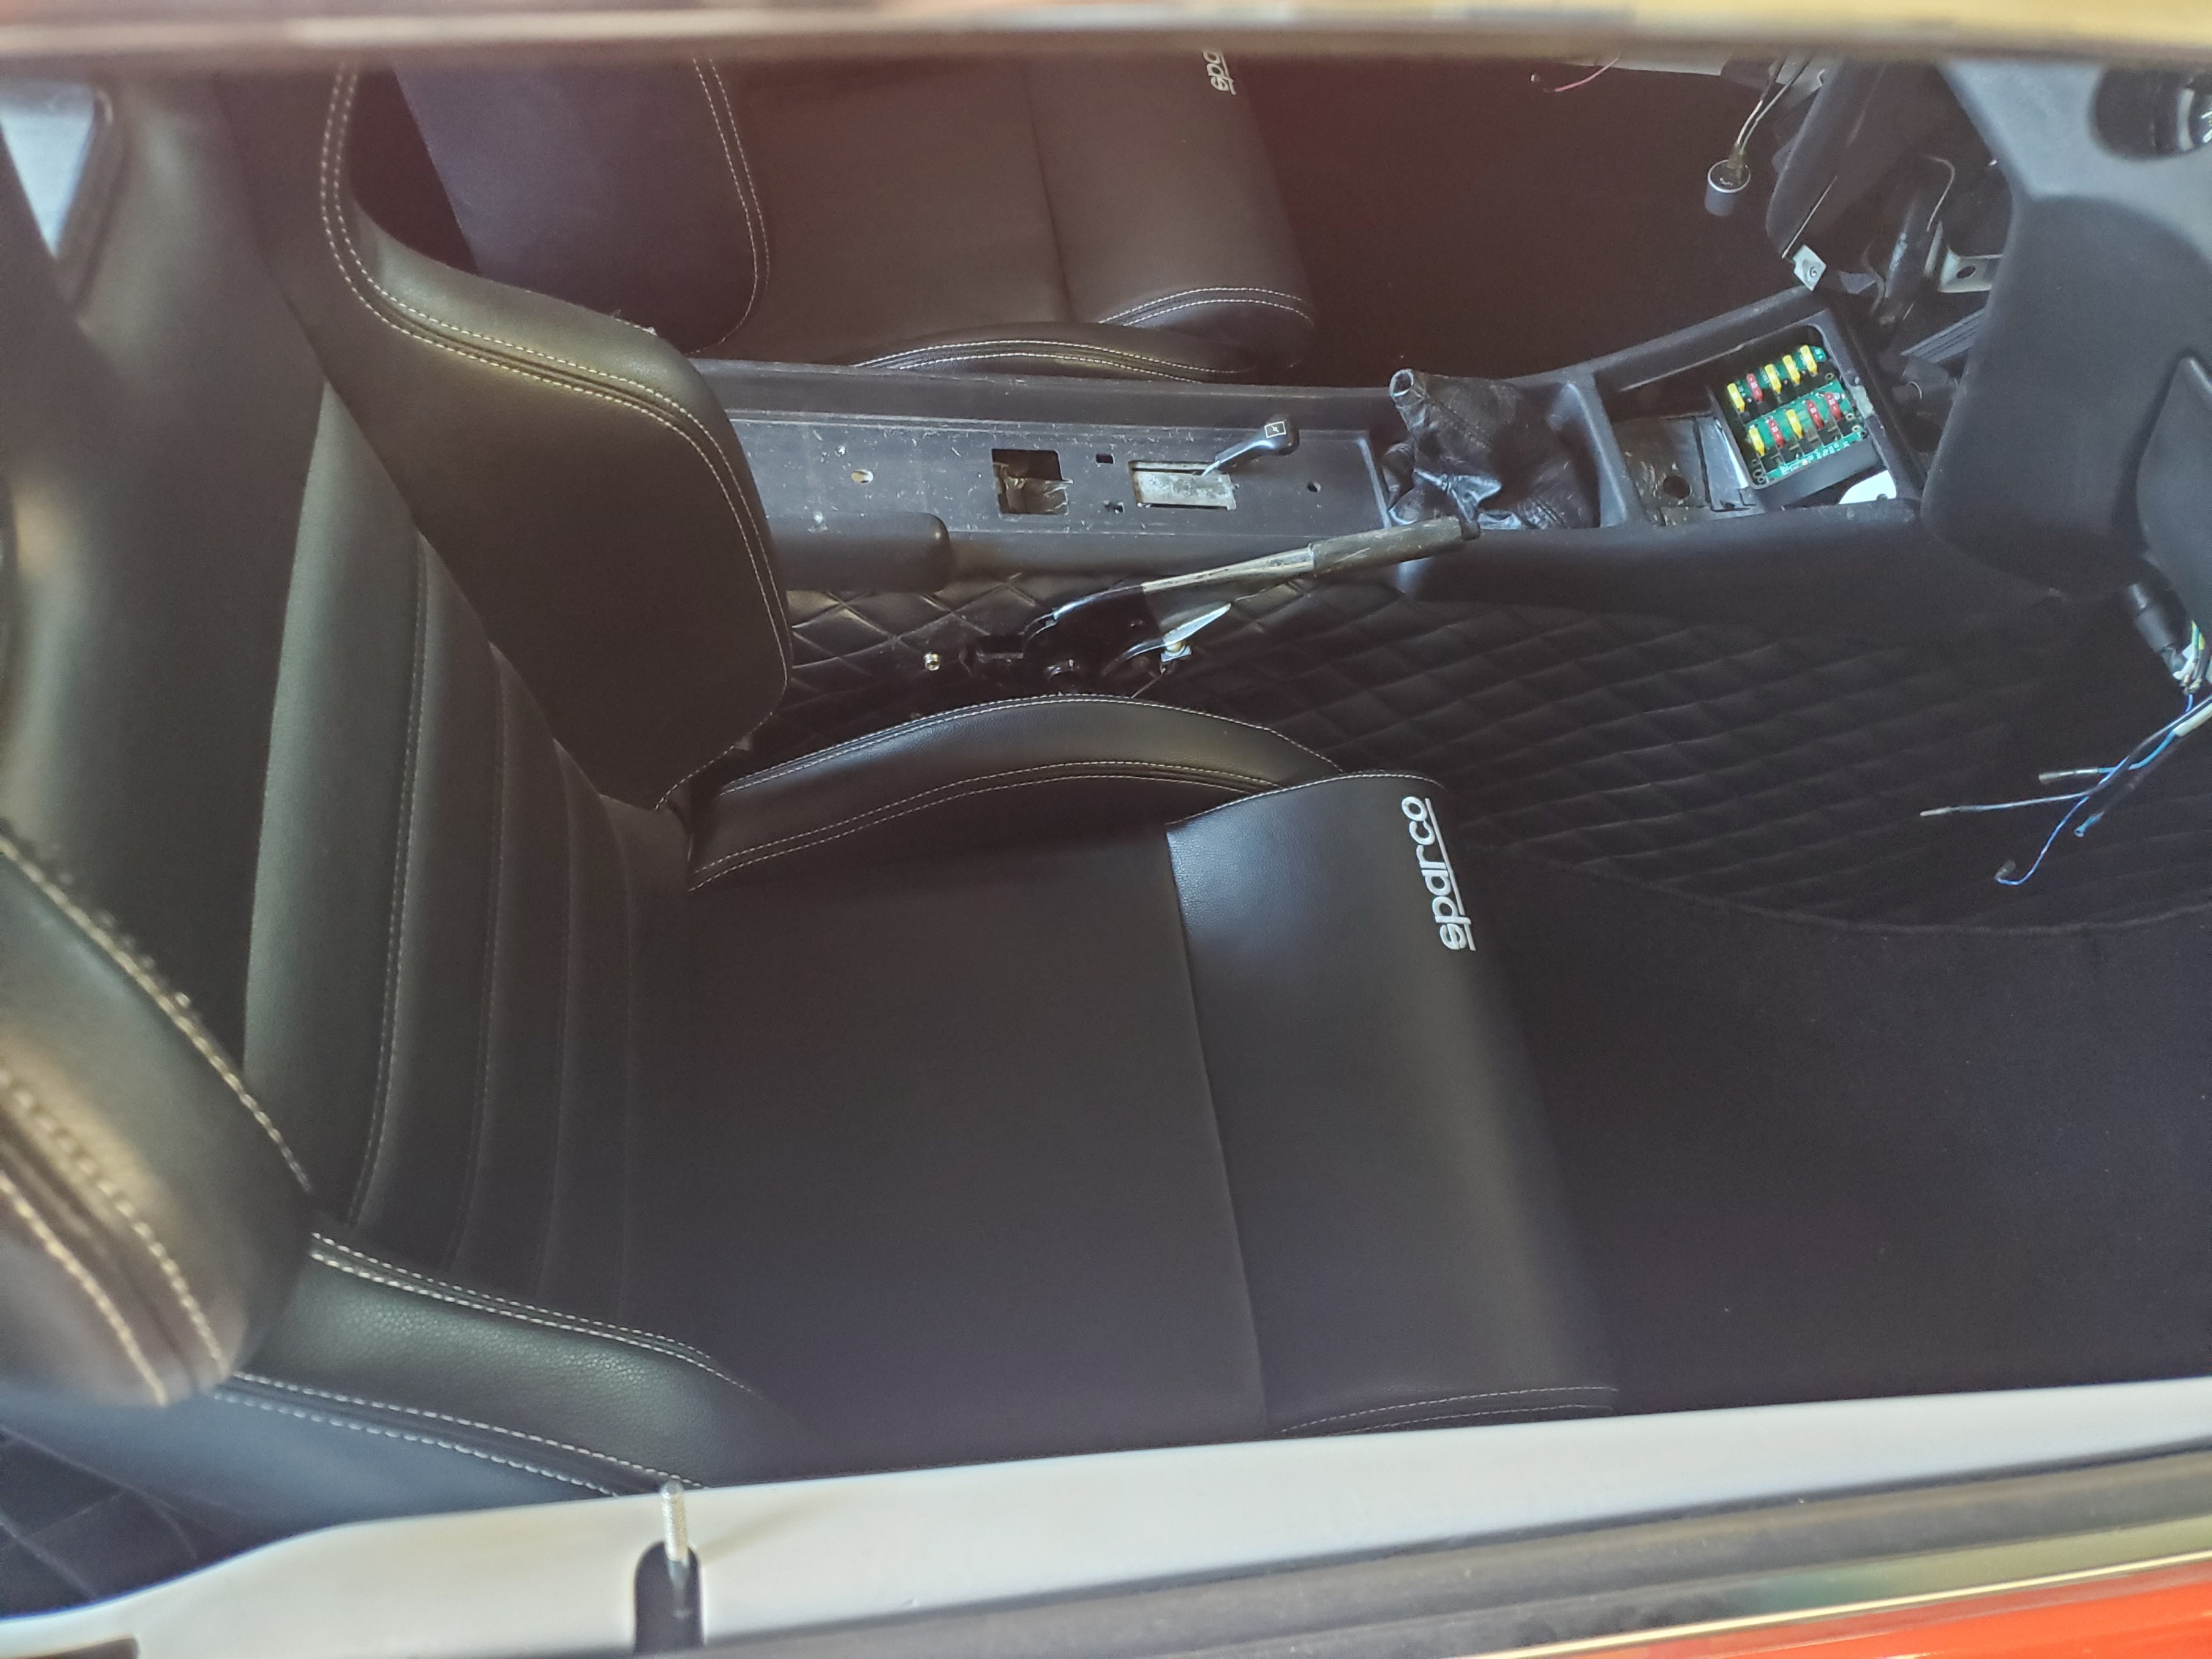
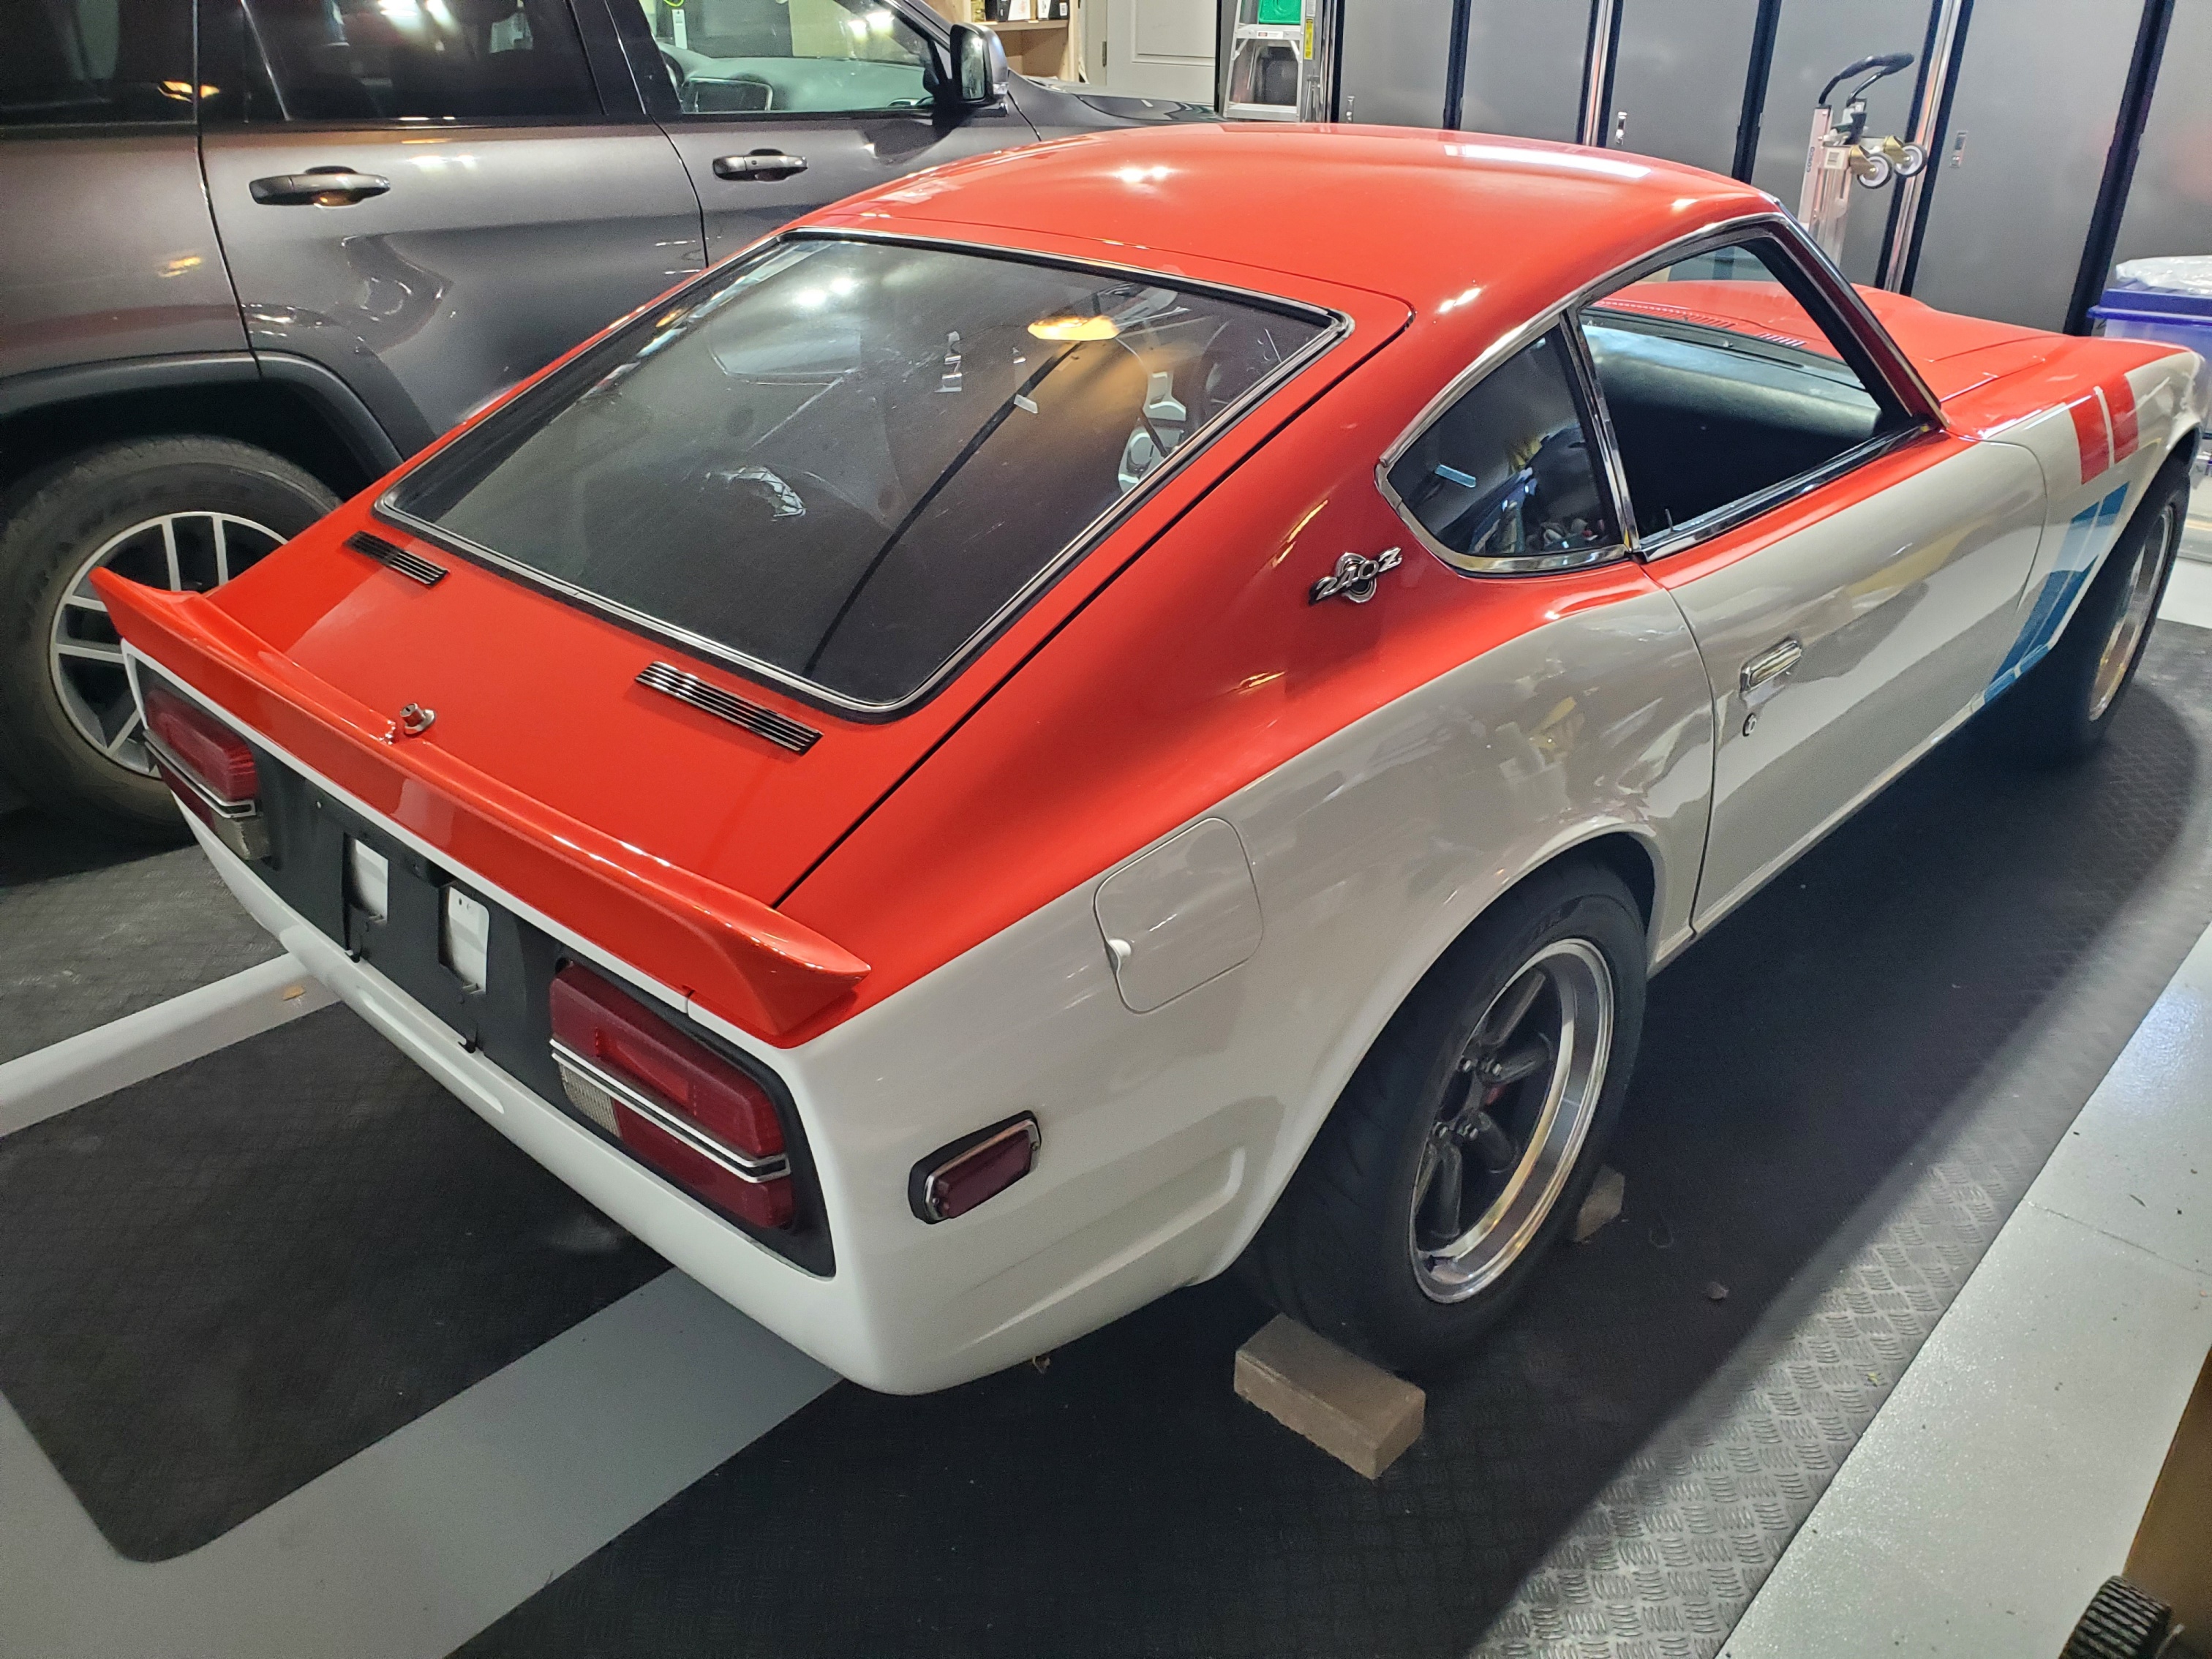
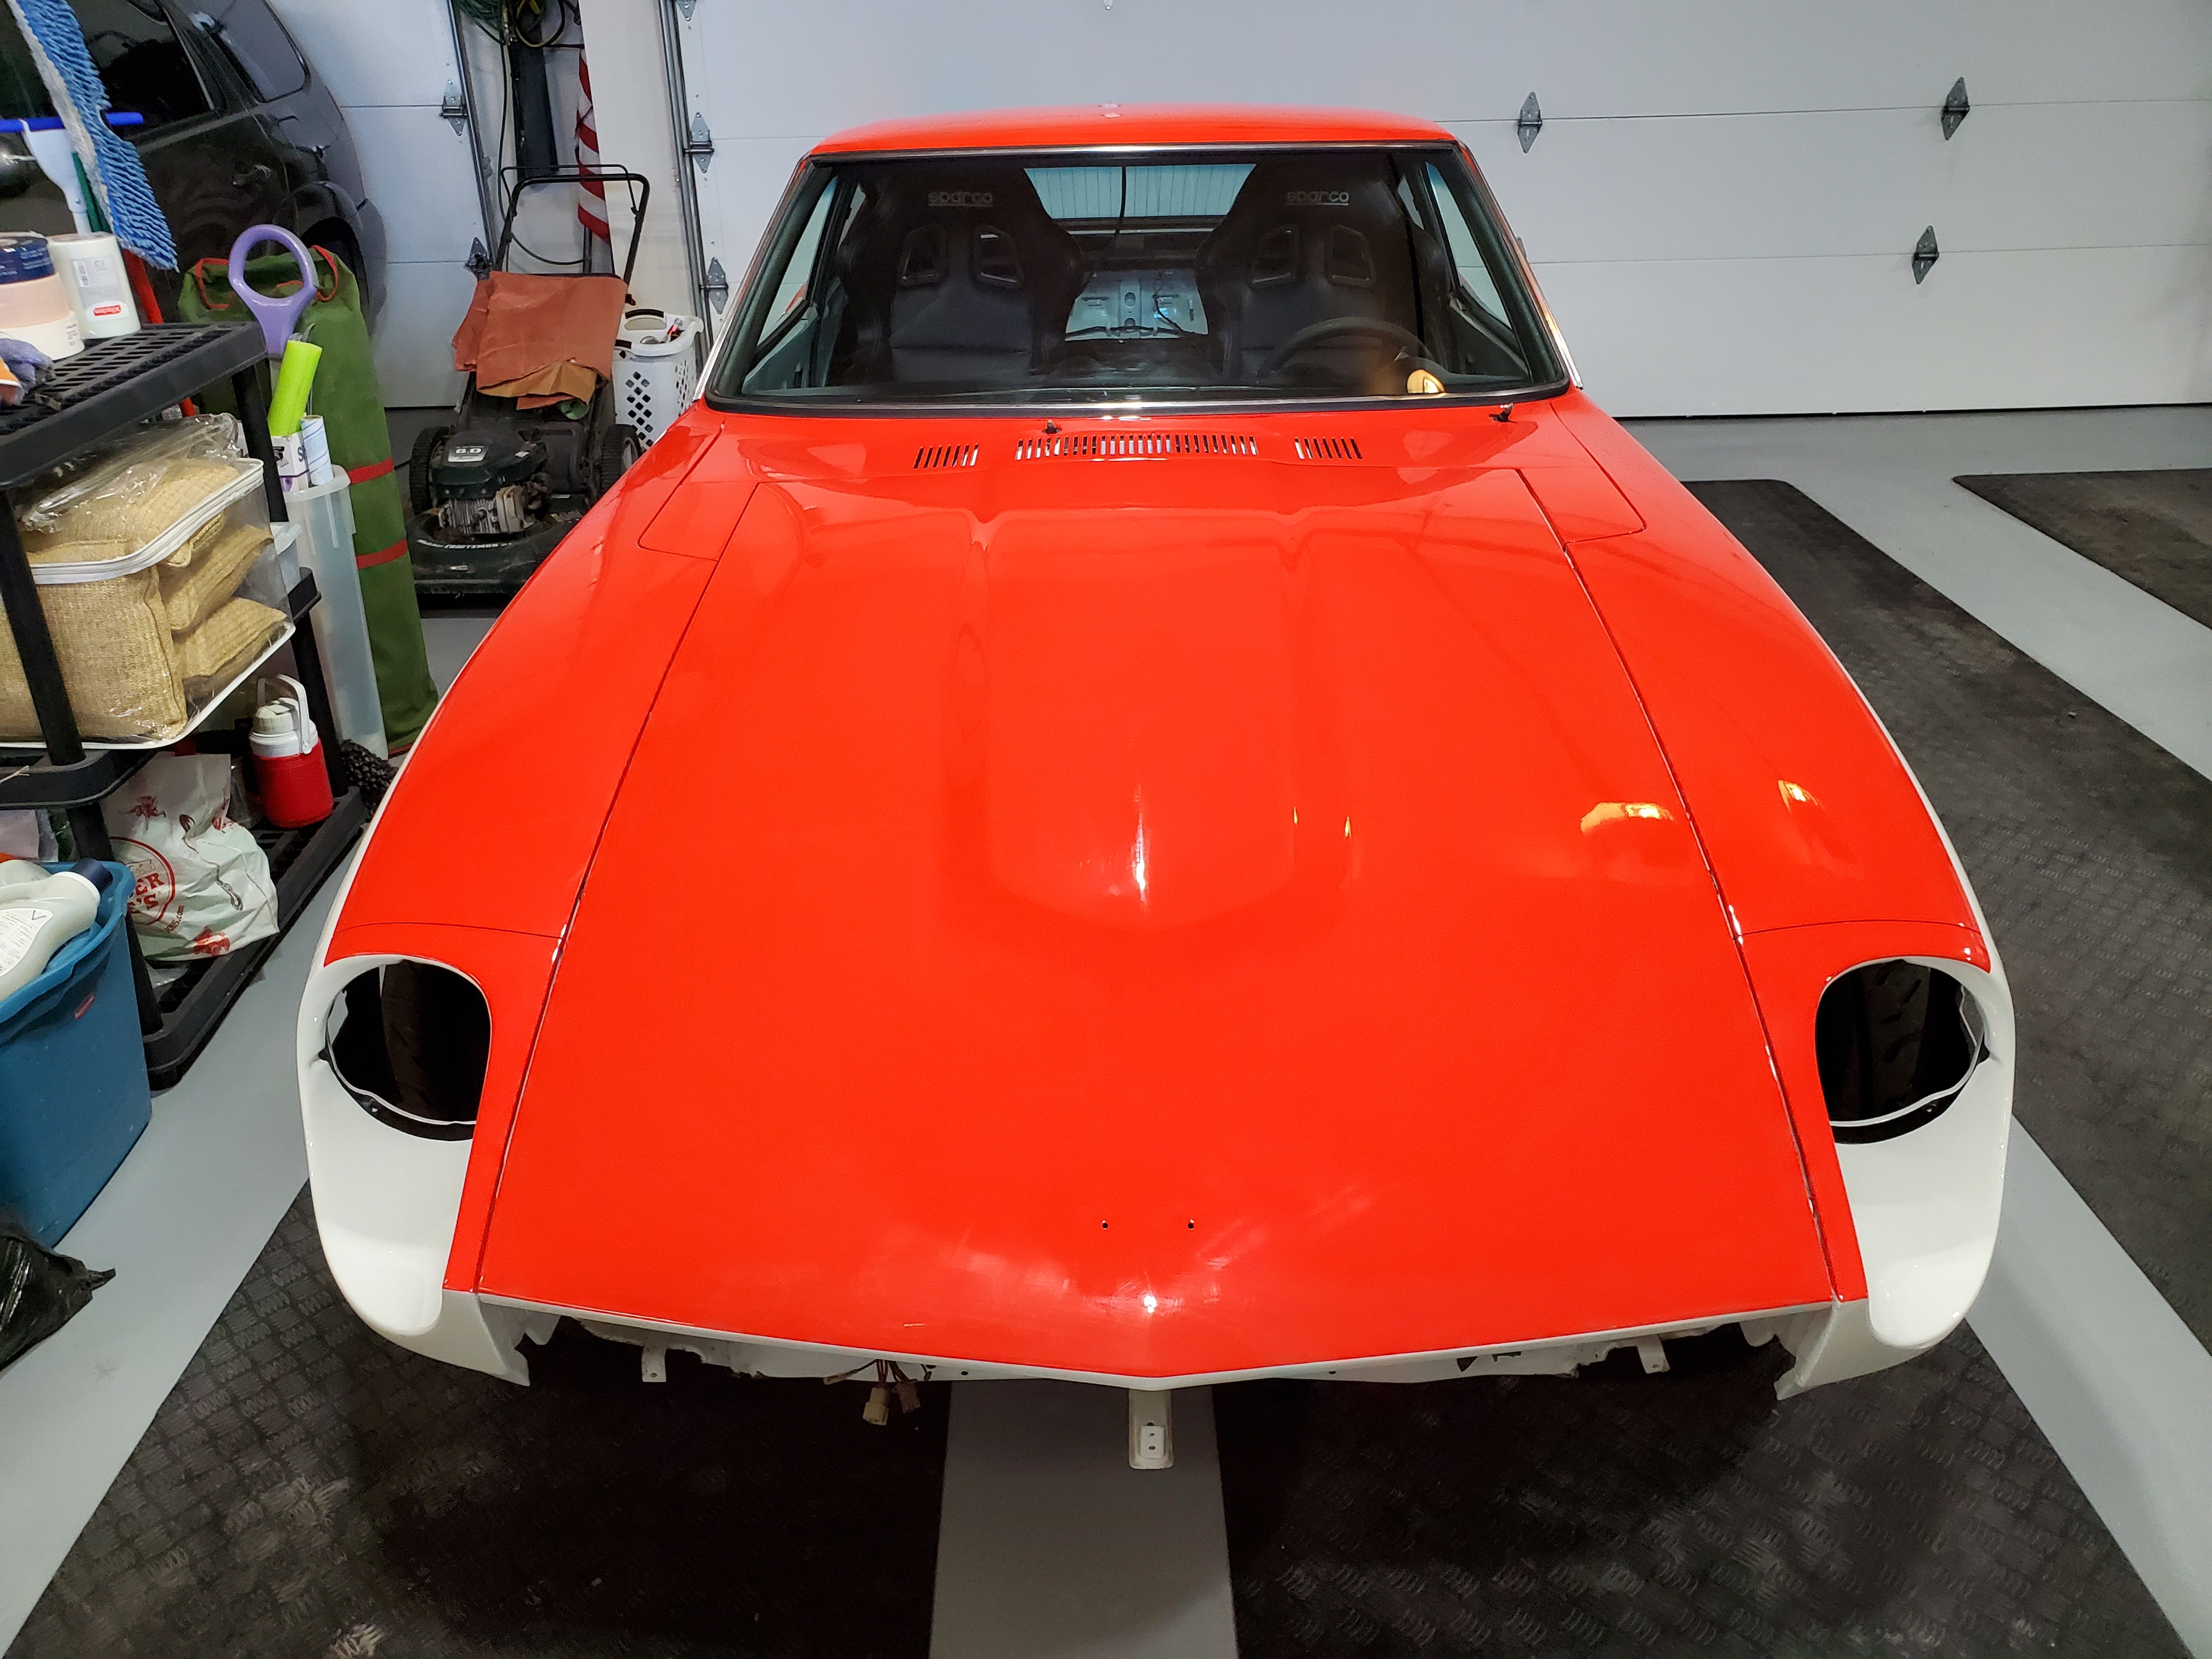
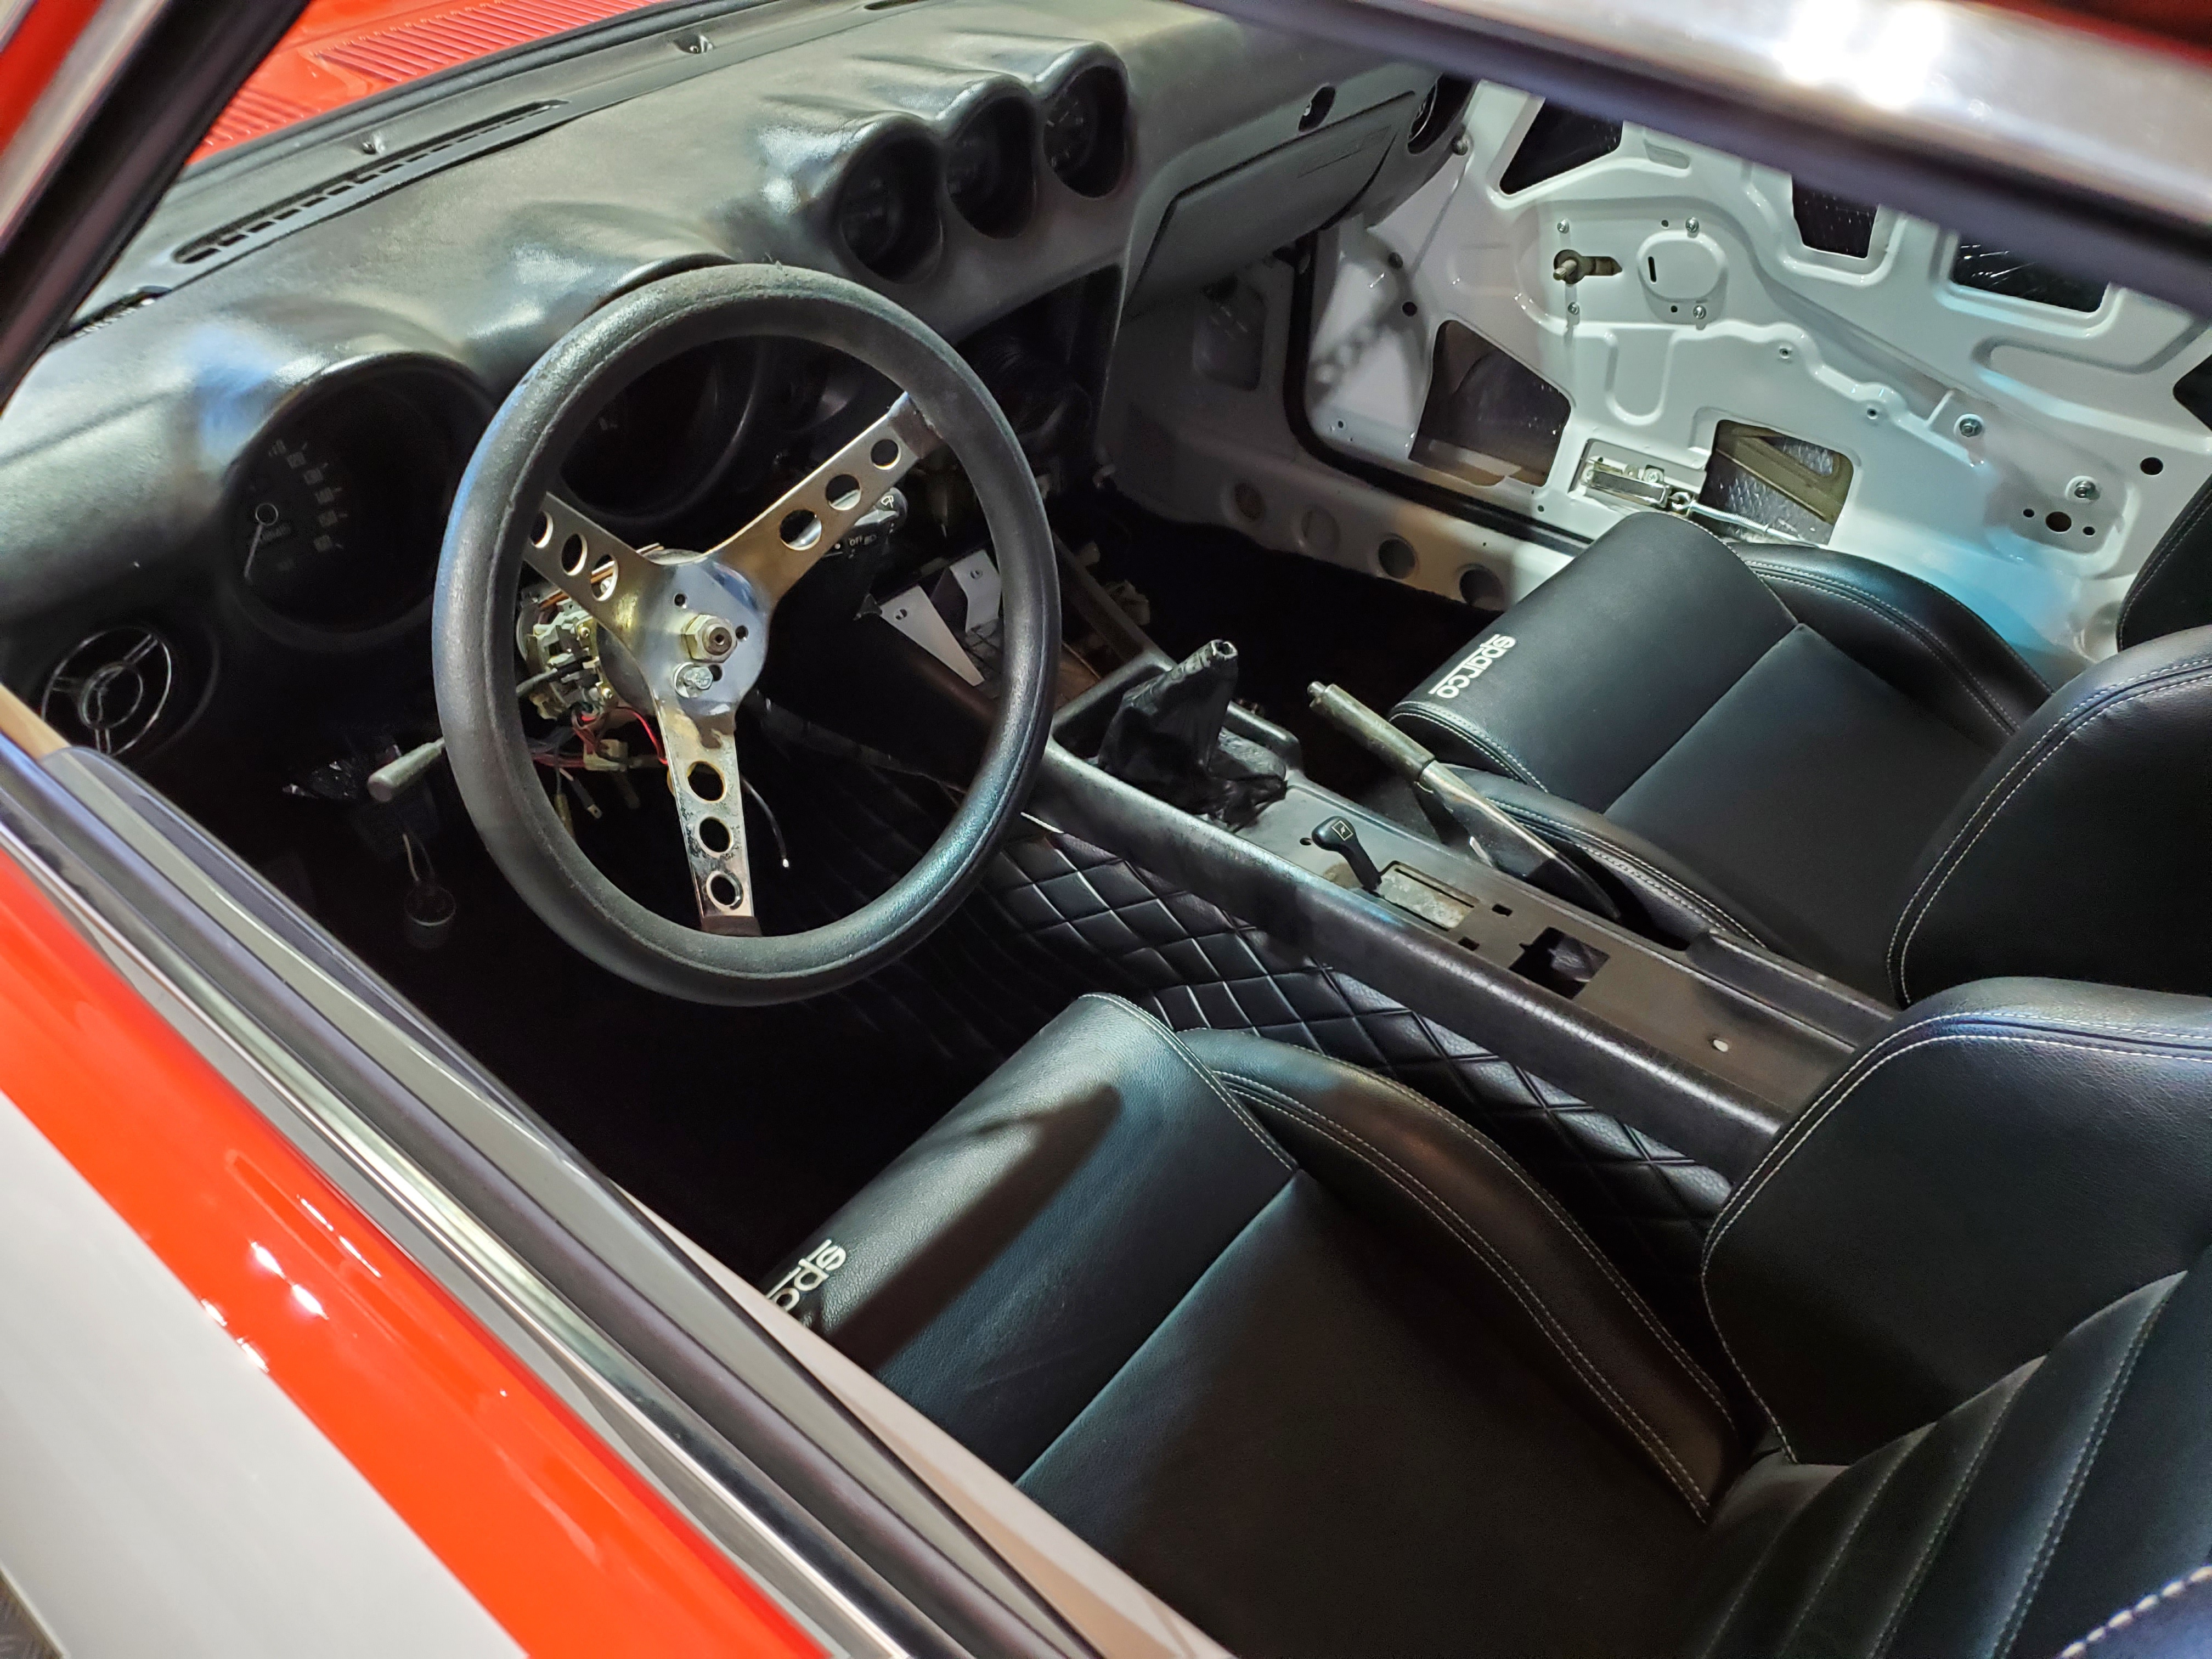
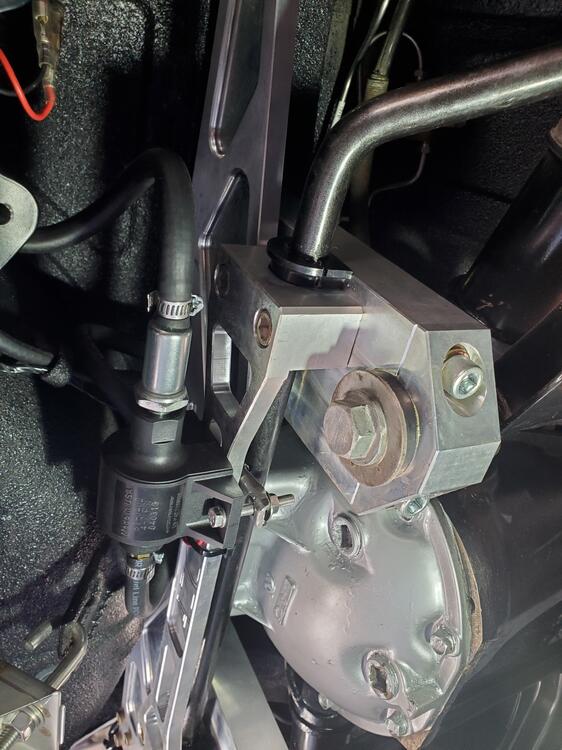
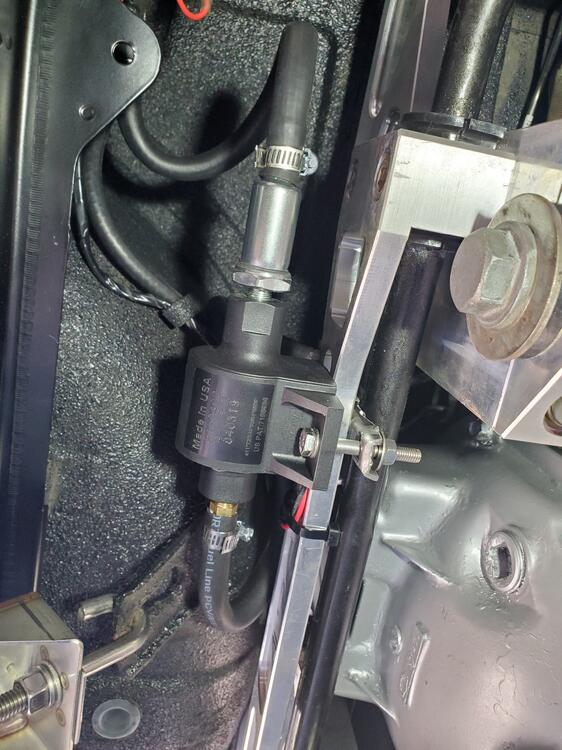
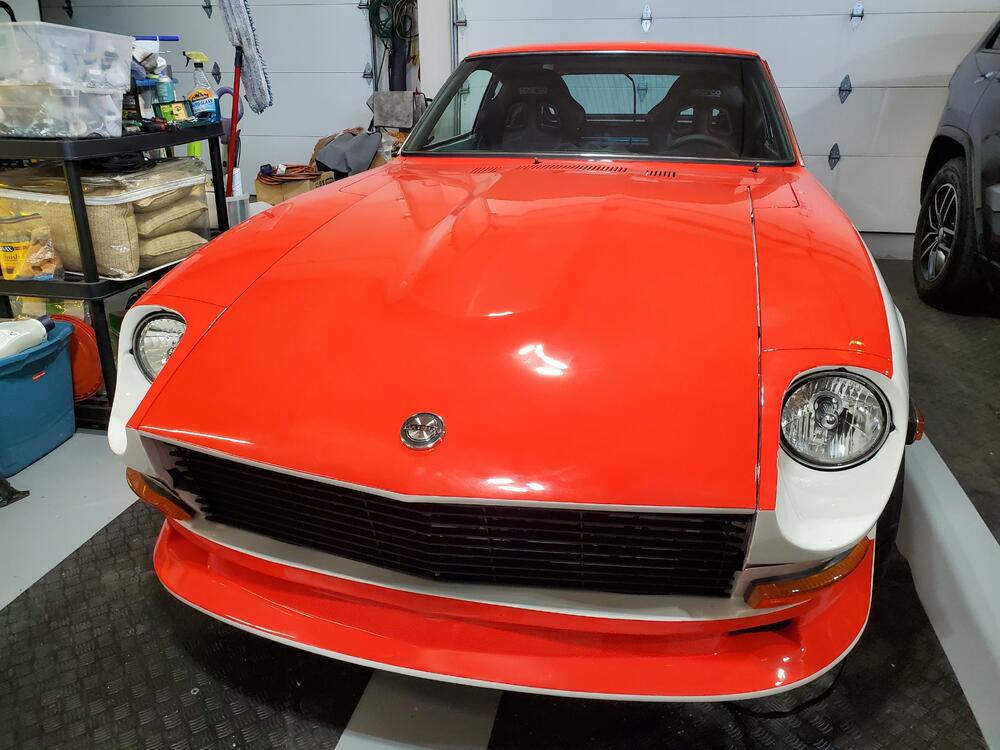
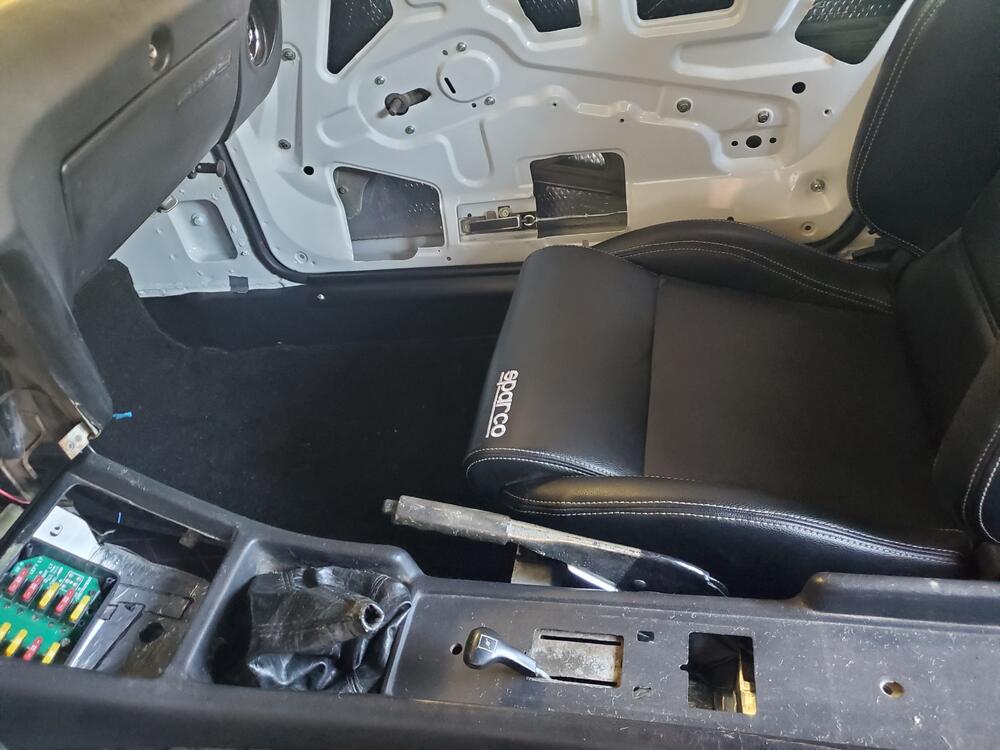
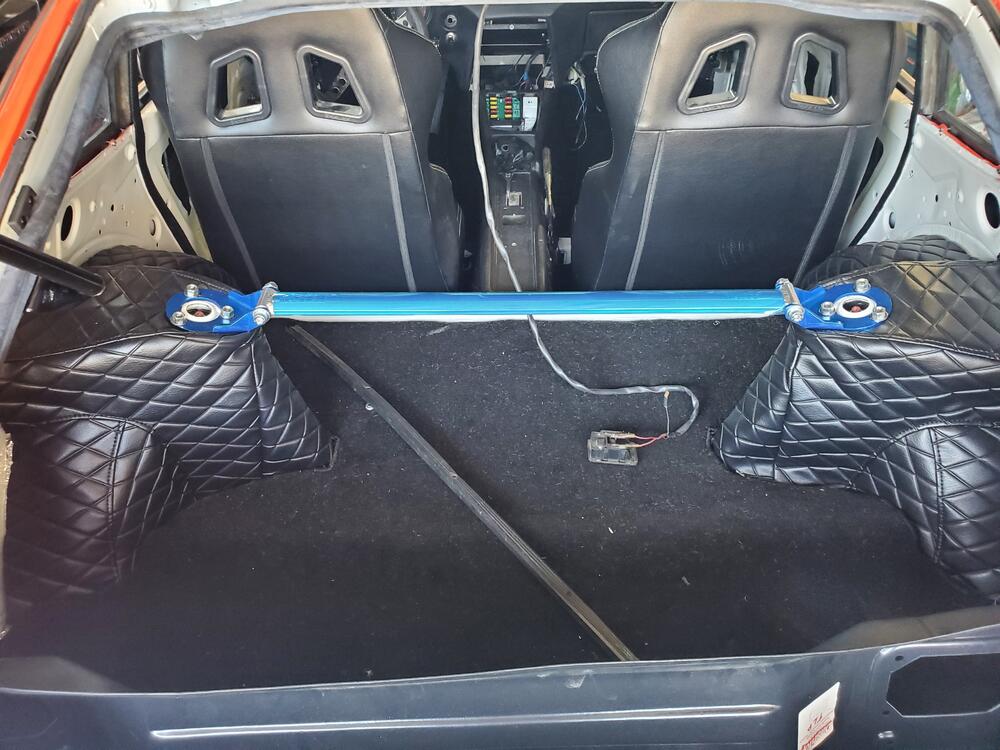
Boy, got sidetracked with my daughters wedding, landscaping projects, contract work and life in general. Finally getting back to working on the Z now that all of that stuff is done. I finished the front end, installing the halogen headlights (will install relay kit later) front turn lights and side lights. I rebuilt the headlight holders which were freshly zinced, installing new screws, wire sleeving, new connectors and over shield. Installed the aftermarket antenna. I will post the brand name later as it was a pretty nice install. Added bullet connectors to mate to original harness. everything lined up well. I put in the new threshold vinyl and scuff plates. Also installed the Sparco seats. The rails on the Sparco seats are about half an inch wider than the stock seat rails so I had to drill 2 additional 3/8" holes to accomodate the wider rails. Started work on the fuel system. I mounted the K&N electronic fuel pump on the rear suspension brace after modifying the electrical wires and making a custom mount plate. I added about 8 inches in length and added bullet terminal to mate into the existing harness. Also started installing fuel lines. Should have the fuel system complete in a couple days. Installed shock tower braces front and rear. Will remove protective blue plastic once car is complete...or let owner do that. Will leave on for now to help prevent any scratches. Pics are below.


-
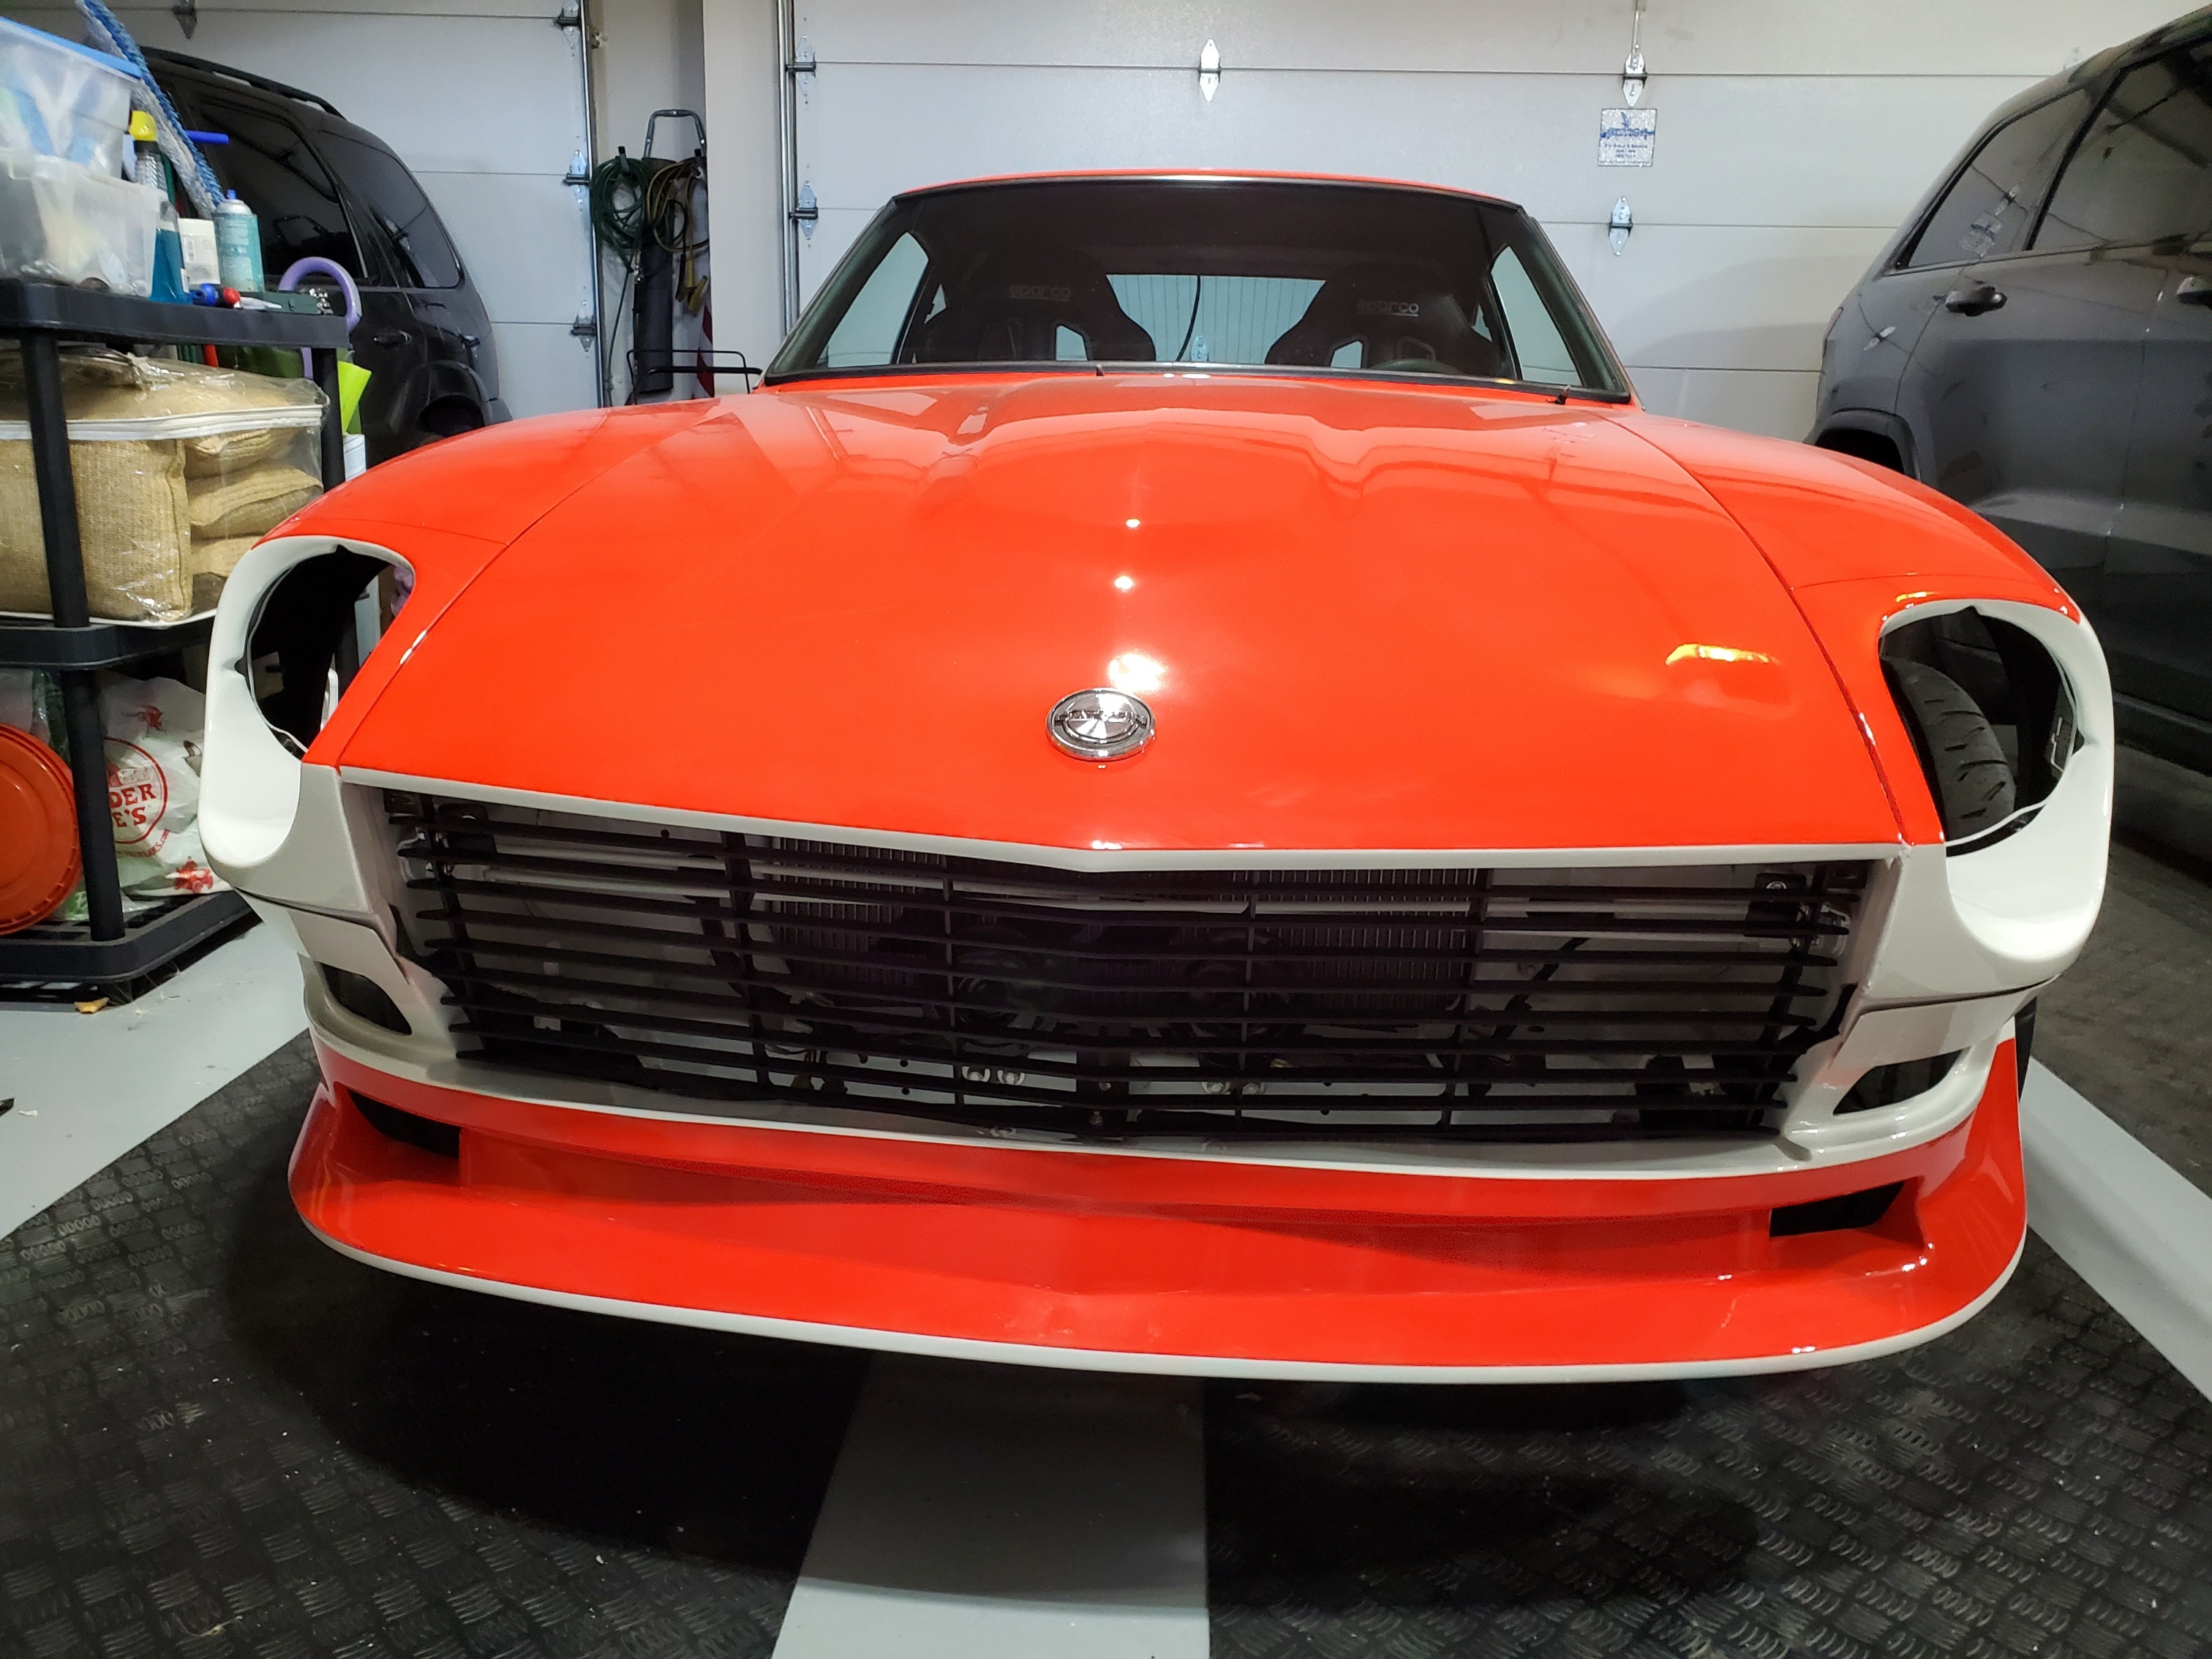
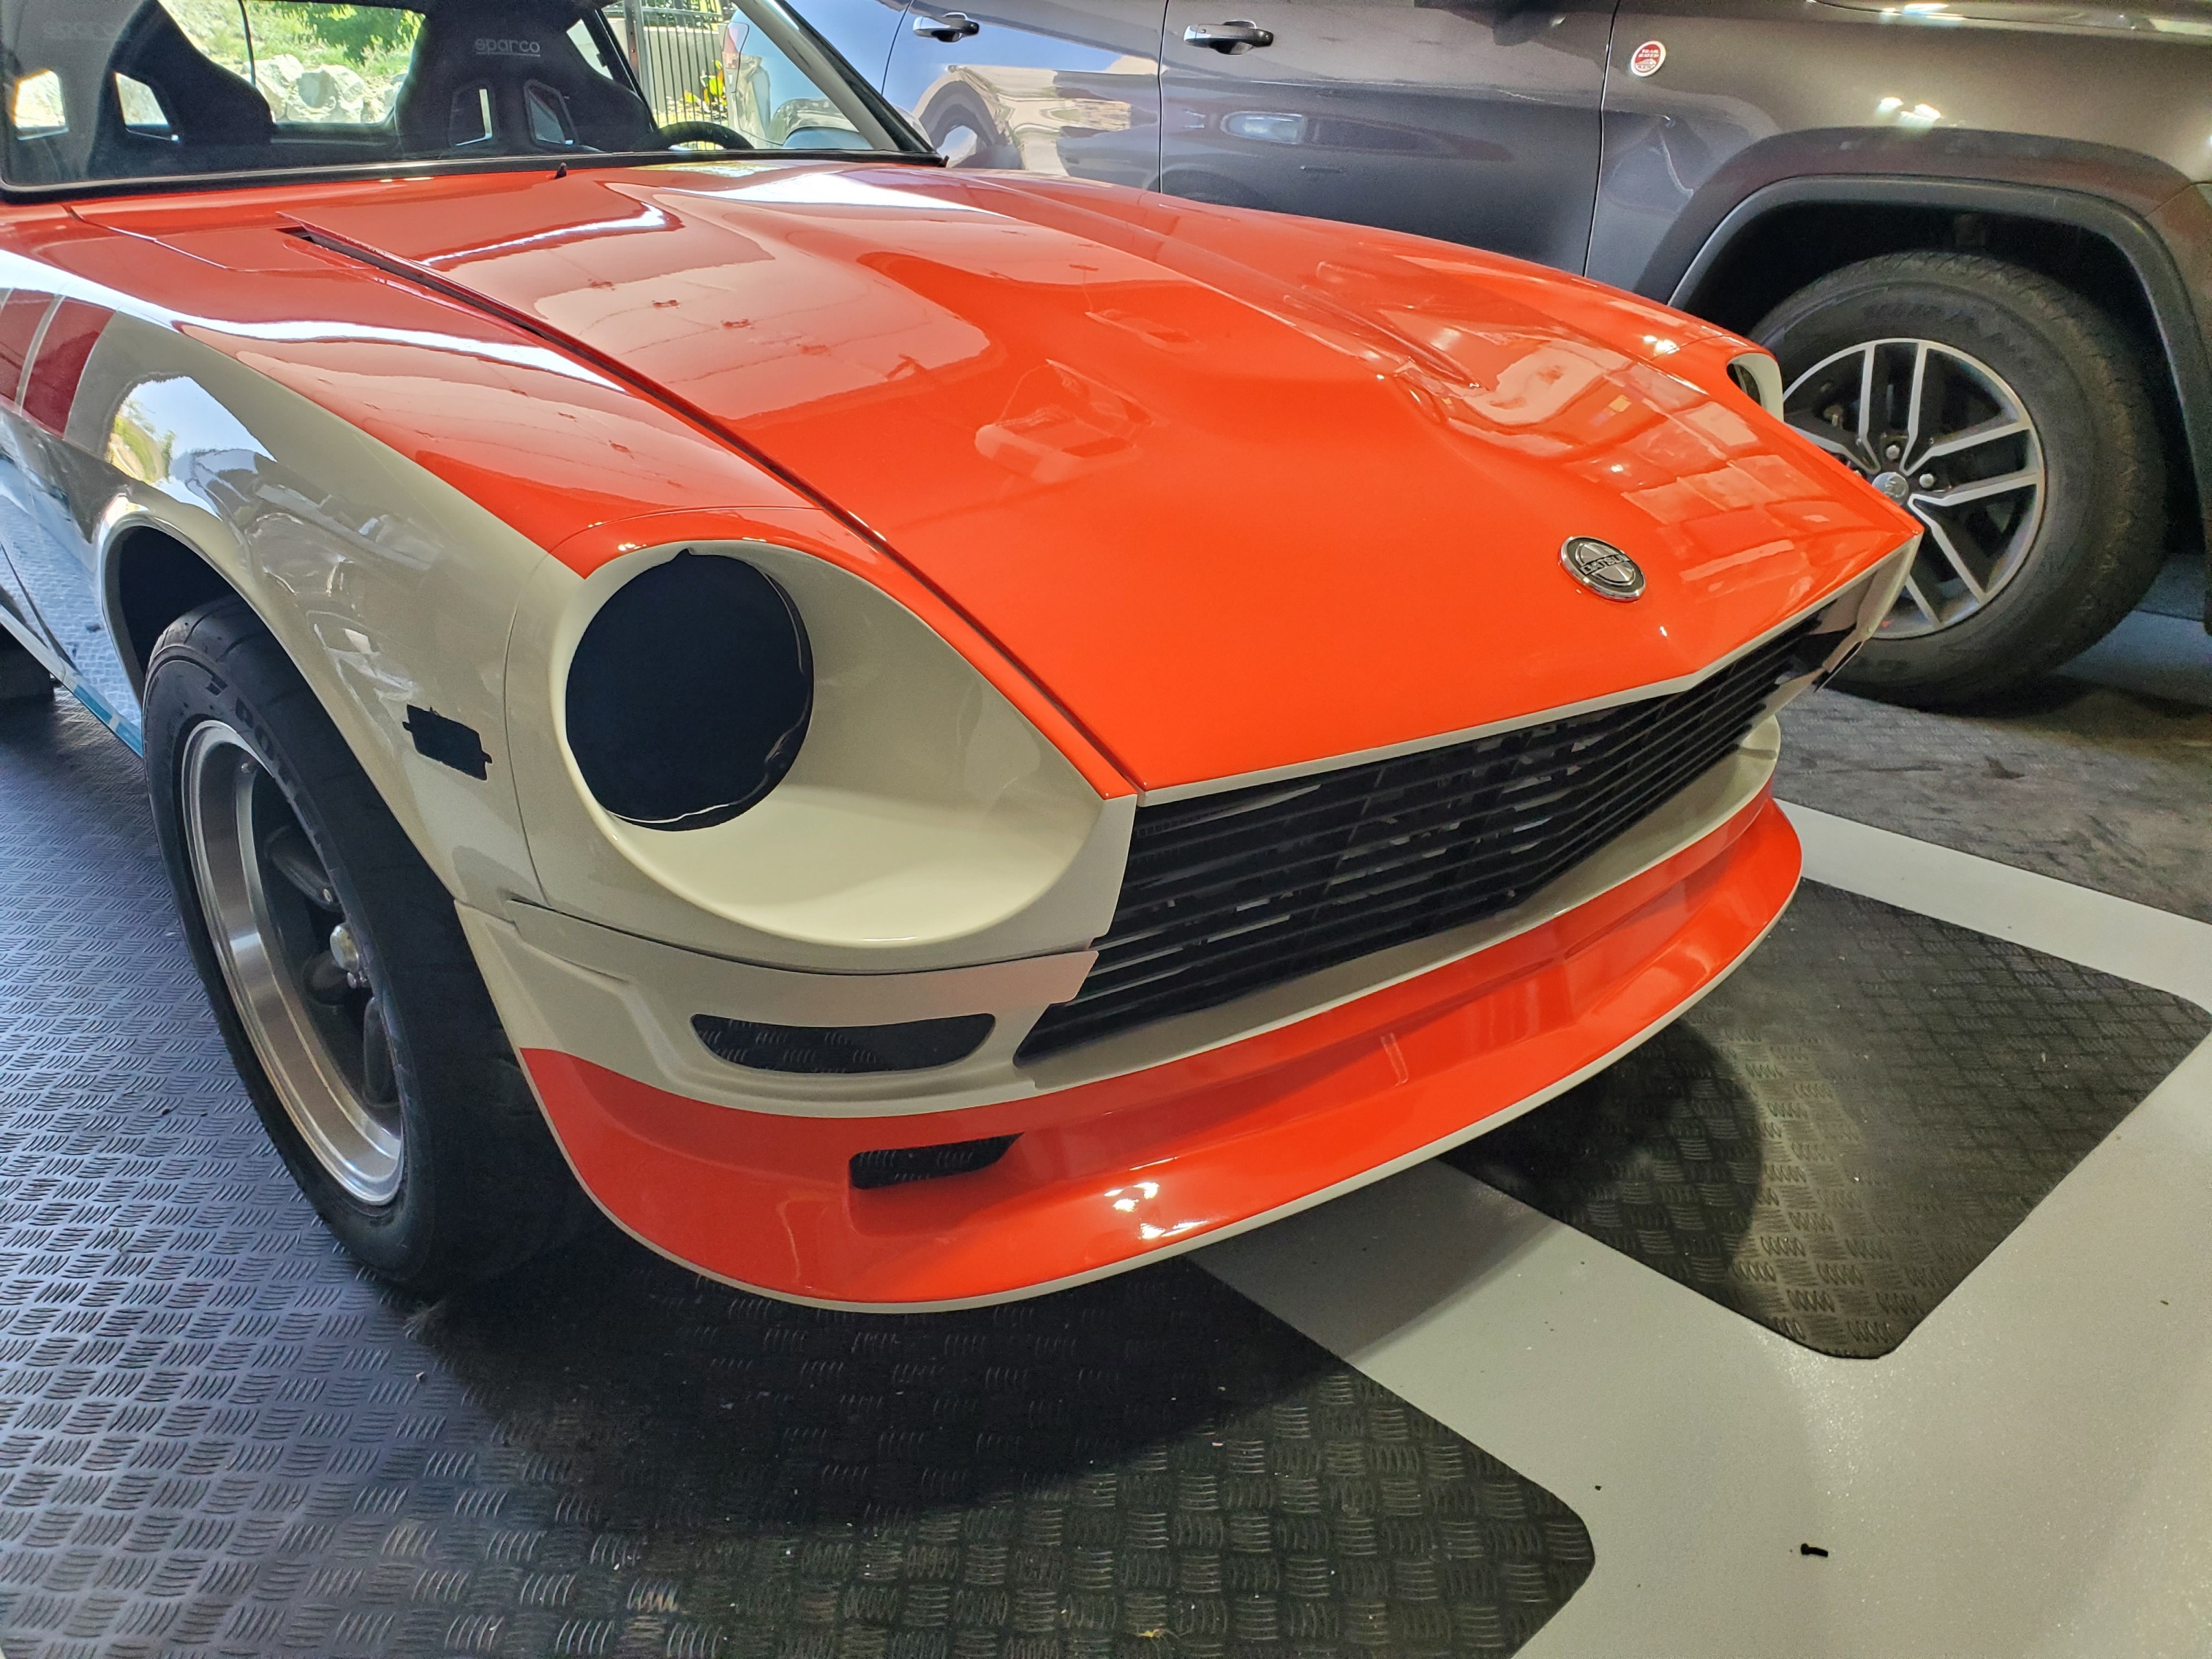
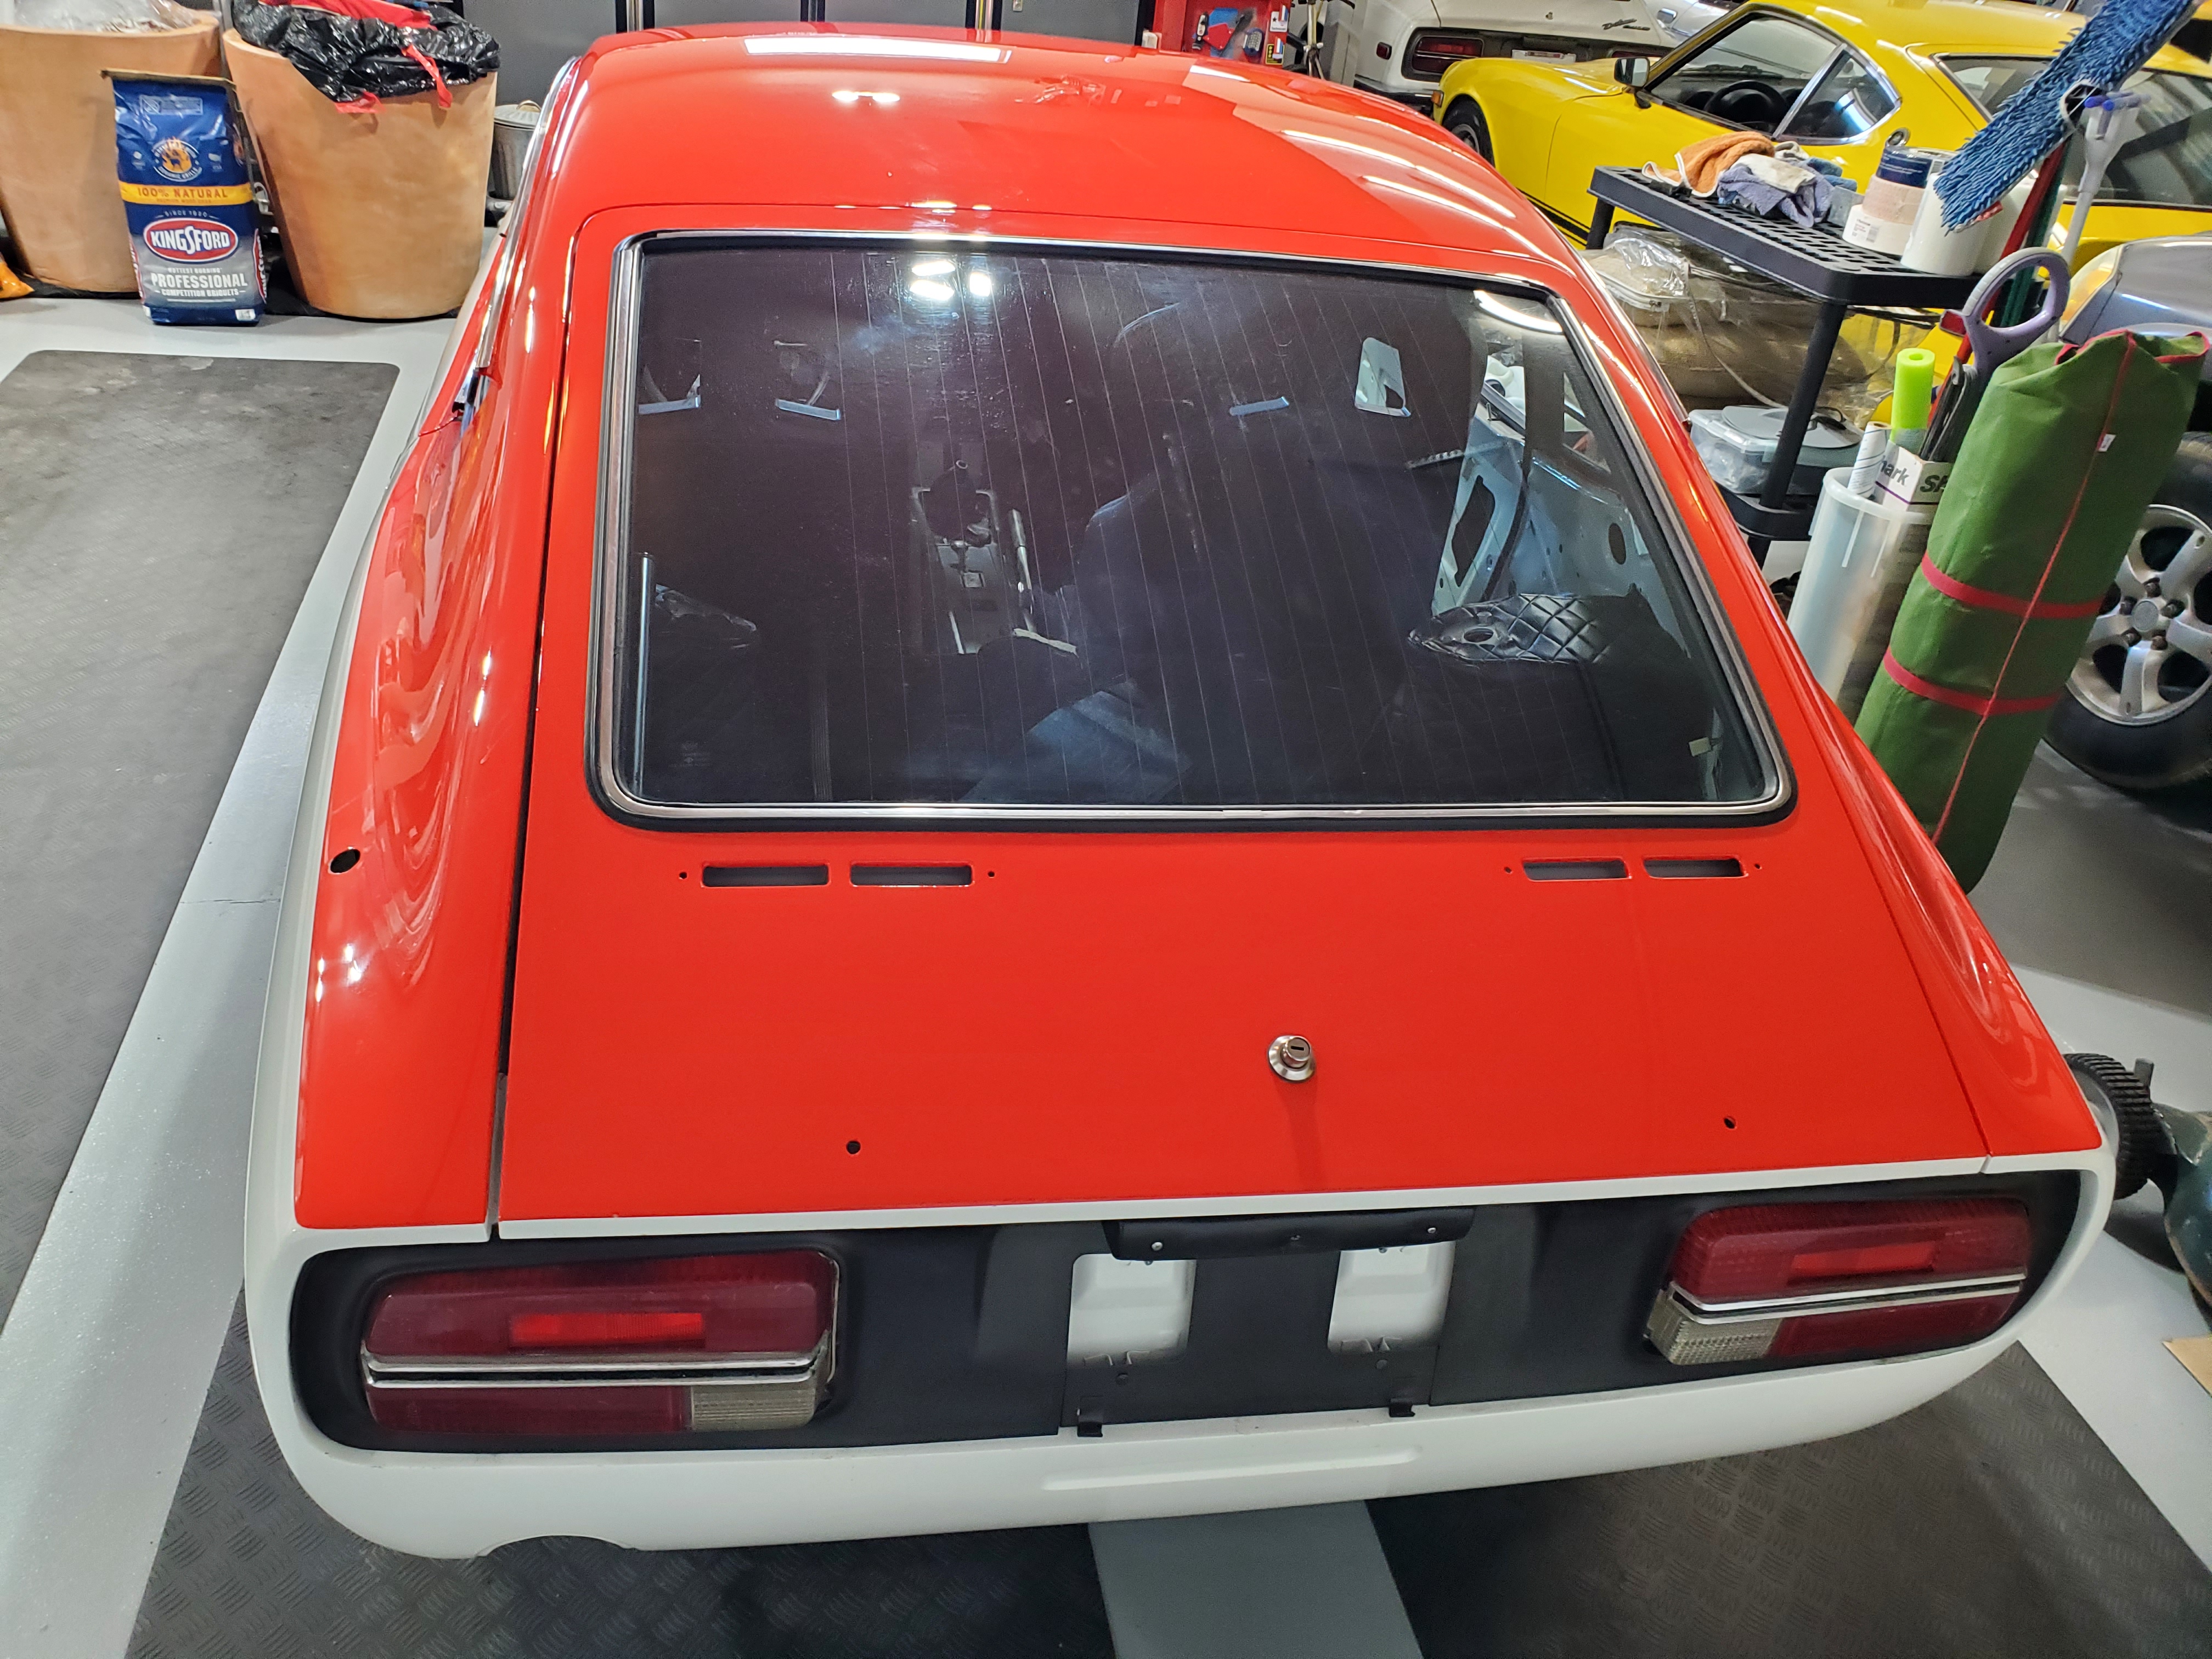
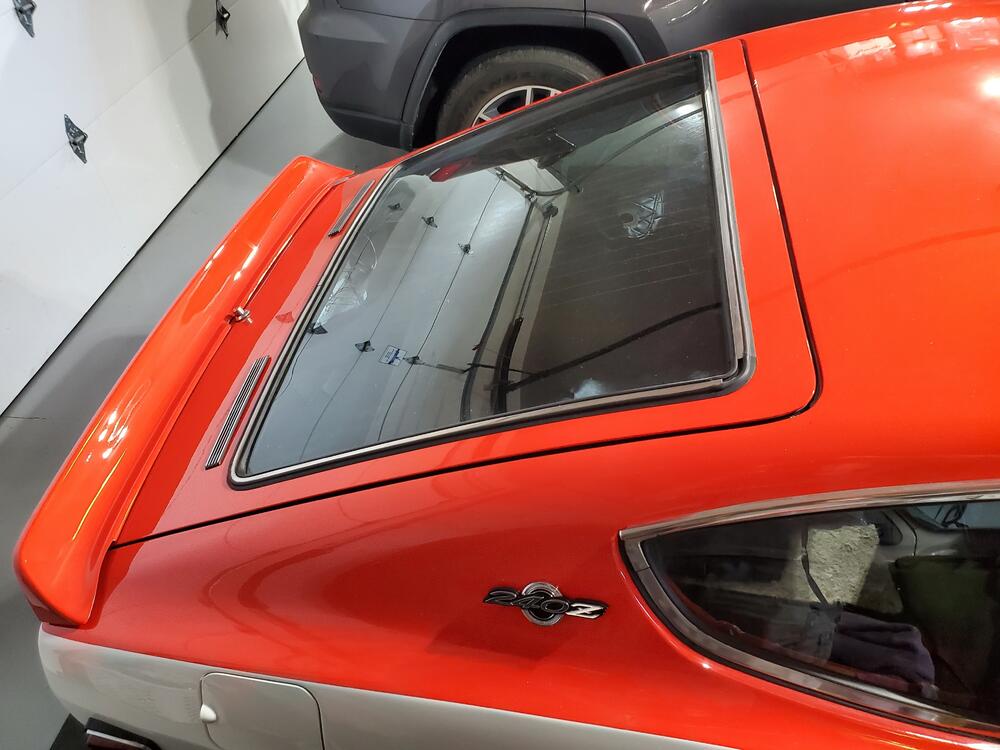
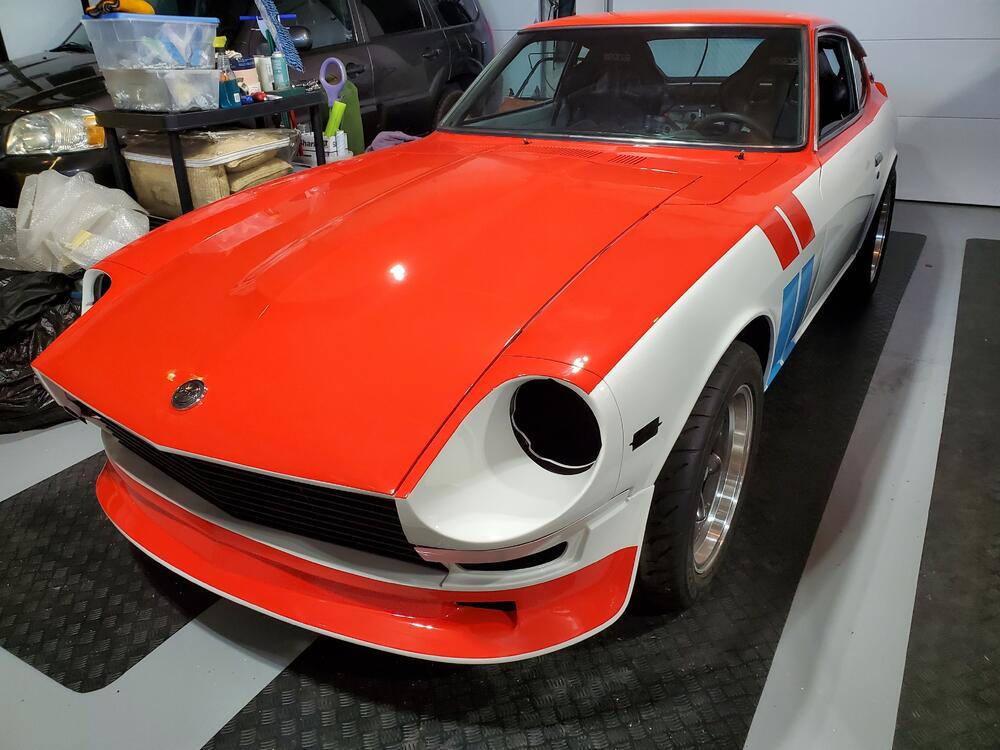
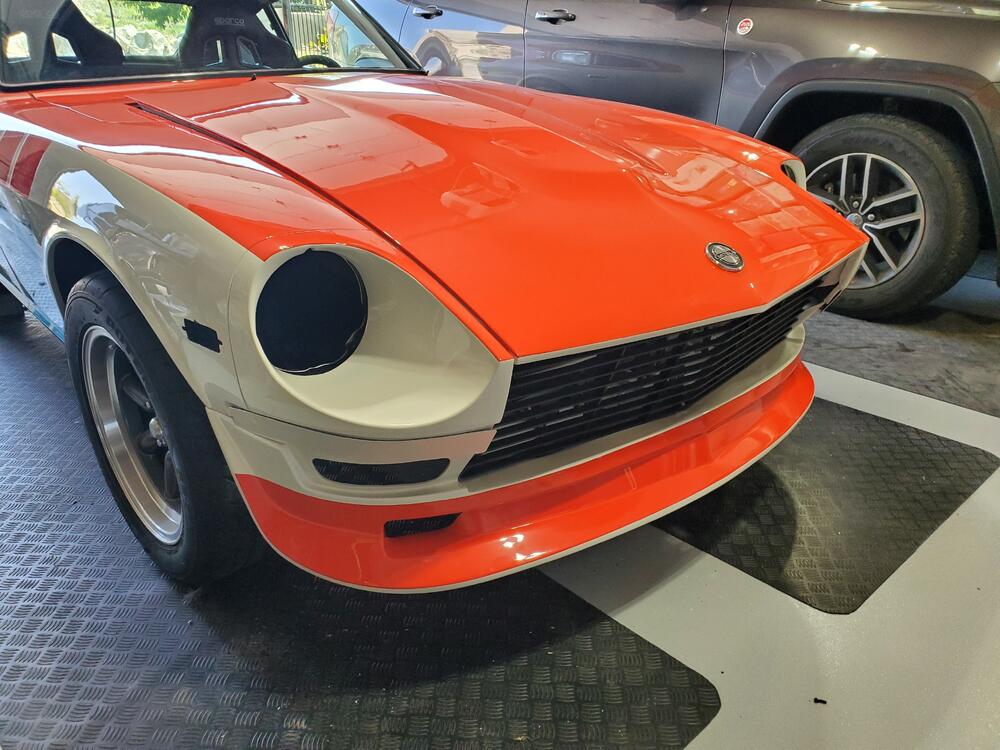
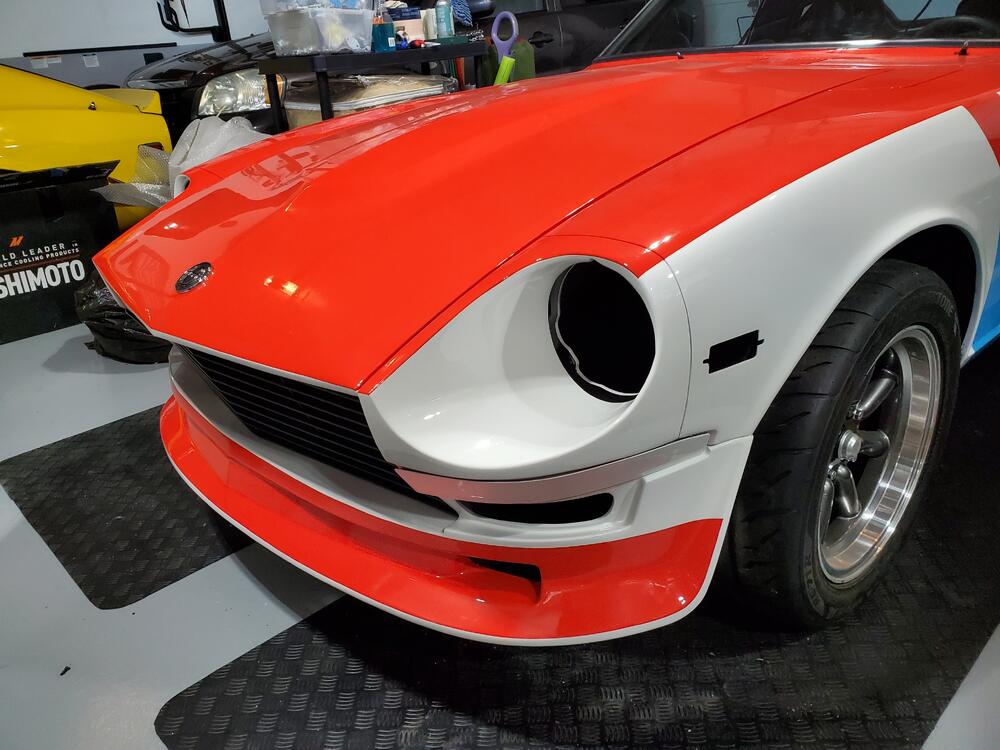
Car parts arrived, so I am now continuing the assembly. I installed the rear hatch vents, the spoiler and internal hatch cover. Installed the radiator and temporary install of hoses (clamps are a little on the large size and will need to be revisited). Also installed the front air dam, Skillard grill, and bumper deletes. I wish I could say that it all bolted together perfectly, but such was not the case. The rear spoiler was fairly simple as were the vents, however the front air dam and grill are a very close fit. The grill has about a half inch clearance from the body at the top, however, the air dam is line to line with the grill. Also, on the grill, the lower support in the center required some modification as the slot was not long enough to engage the support. I had to drill a hole a bit below the slot in order to get full support. Also, the grill comes stock with just 3 support points, 2 upper (one on each side) and 1 lower in the middle. There are two lower side mounts on the front clip that are not used as the grill has no features for these. These would be nice as they would help with alignment of the grill. Below are a few pics.


-
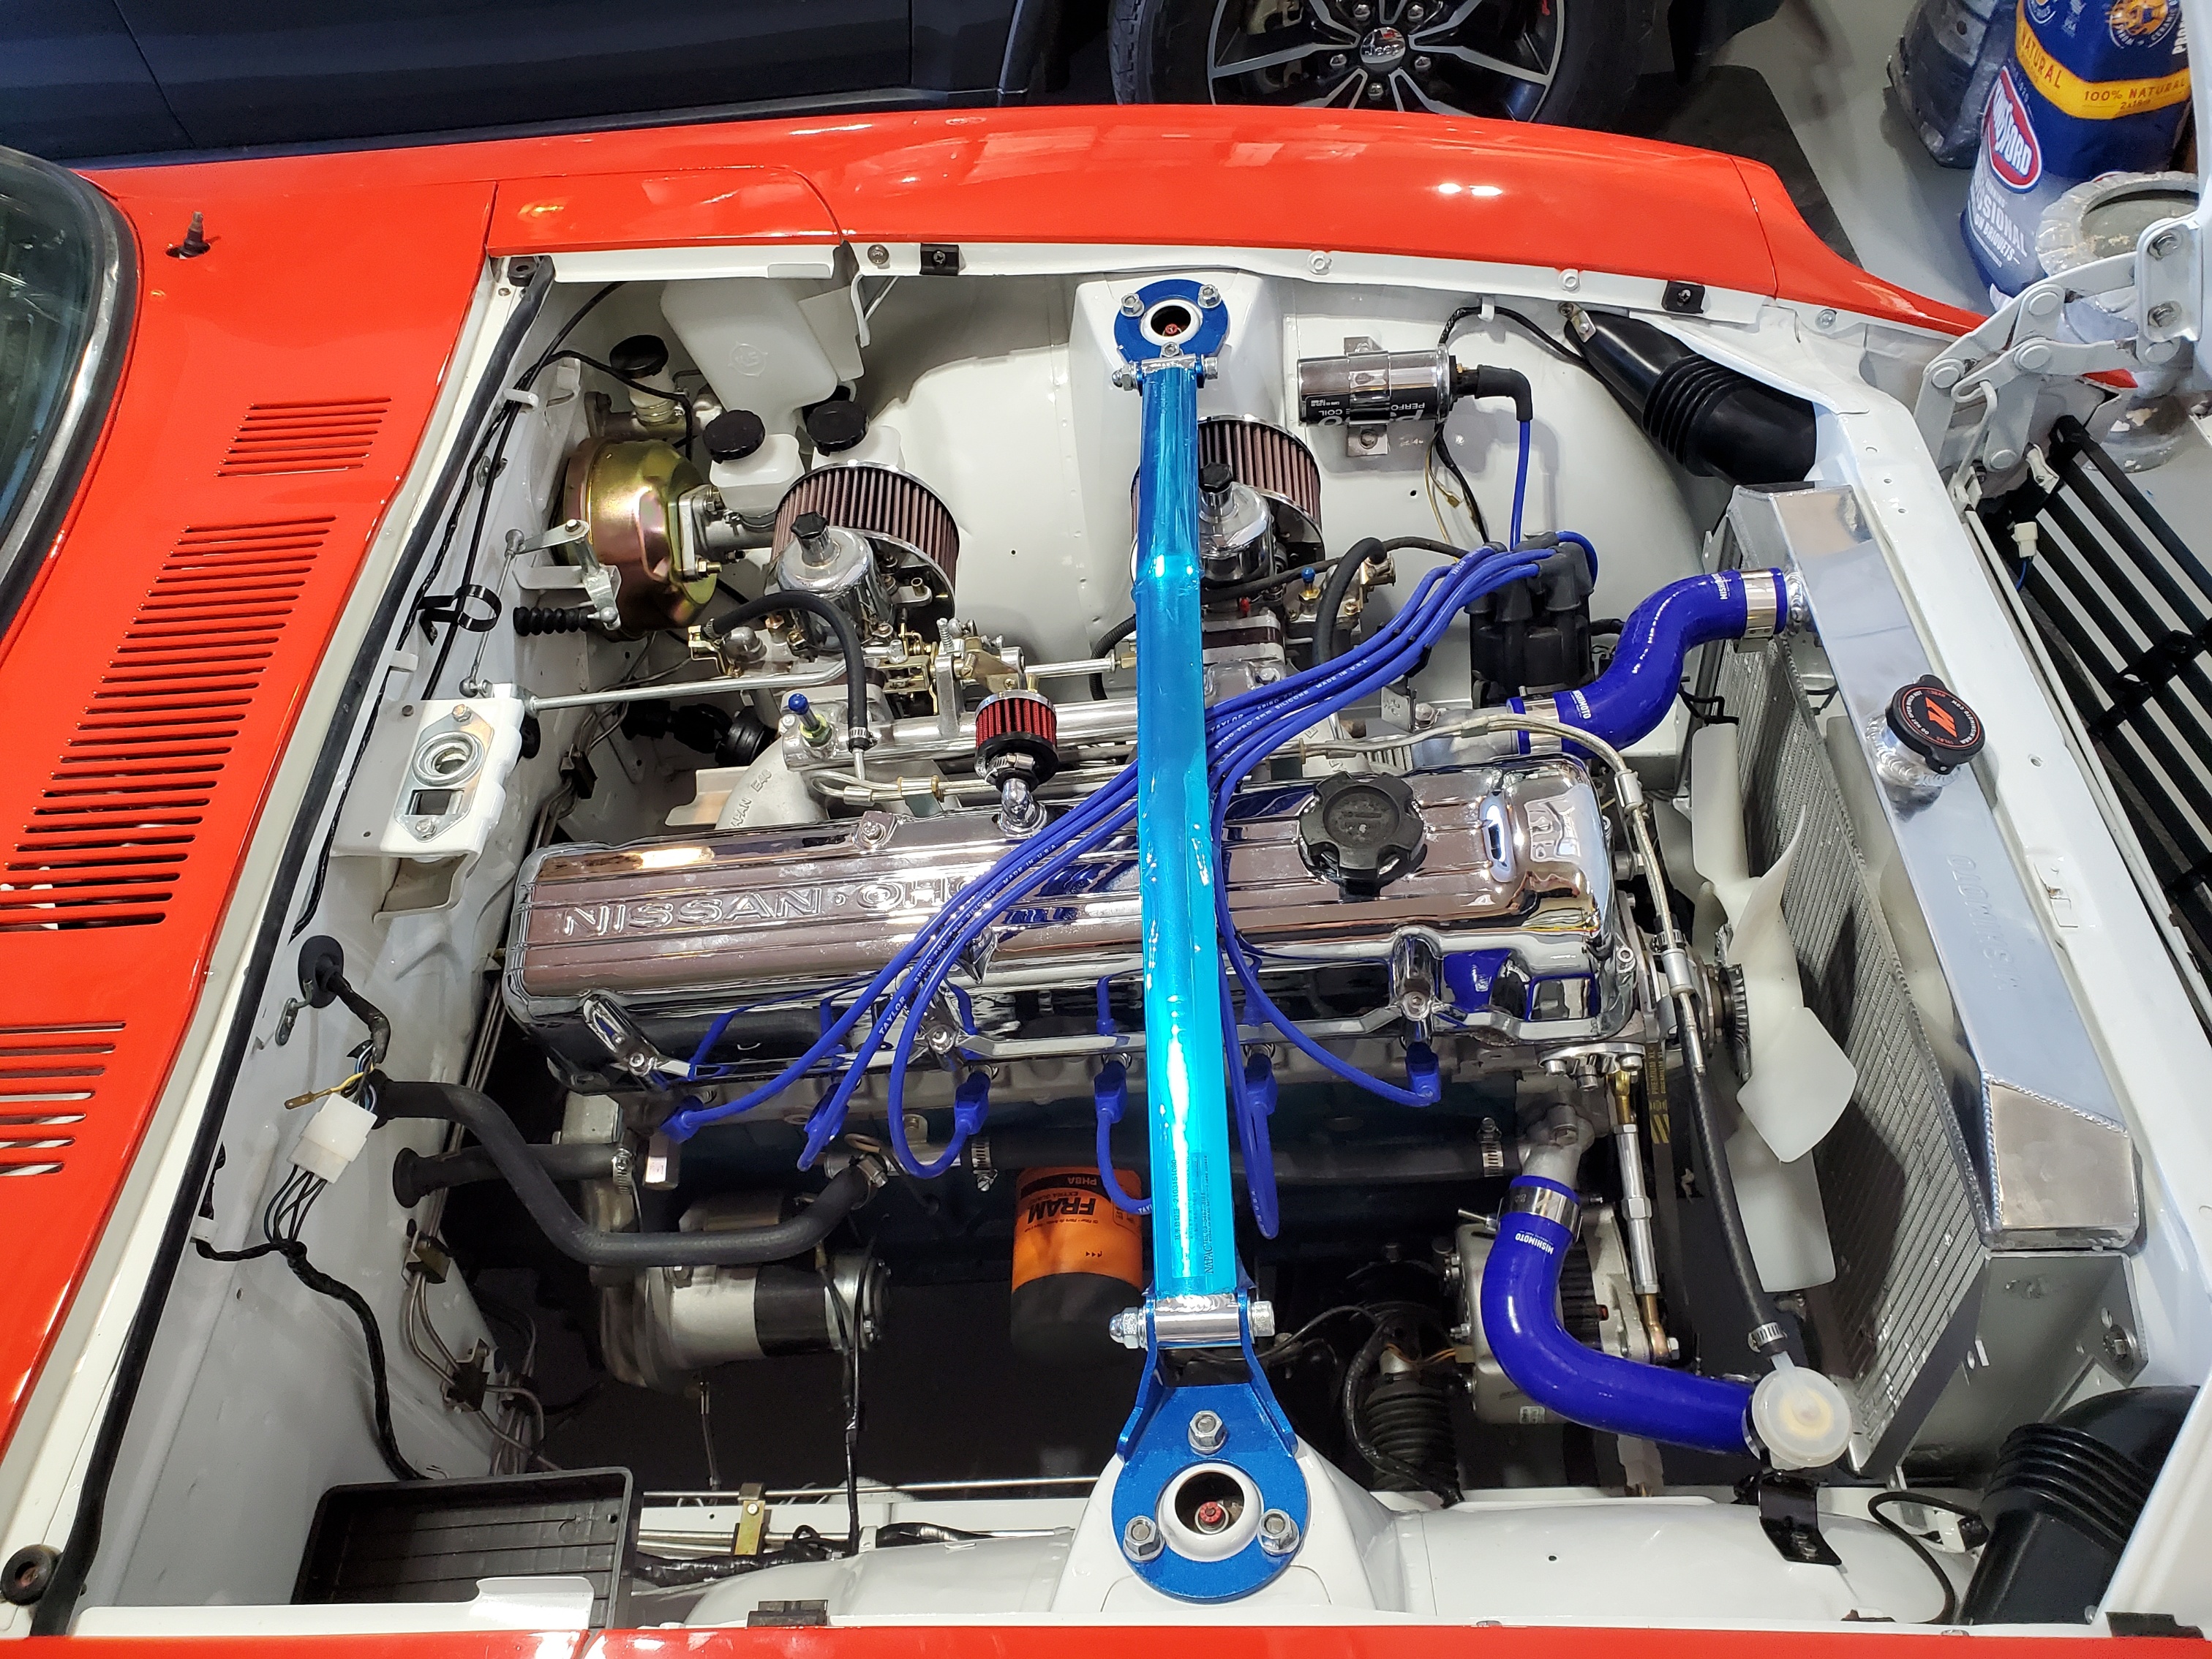
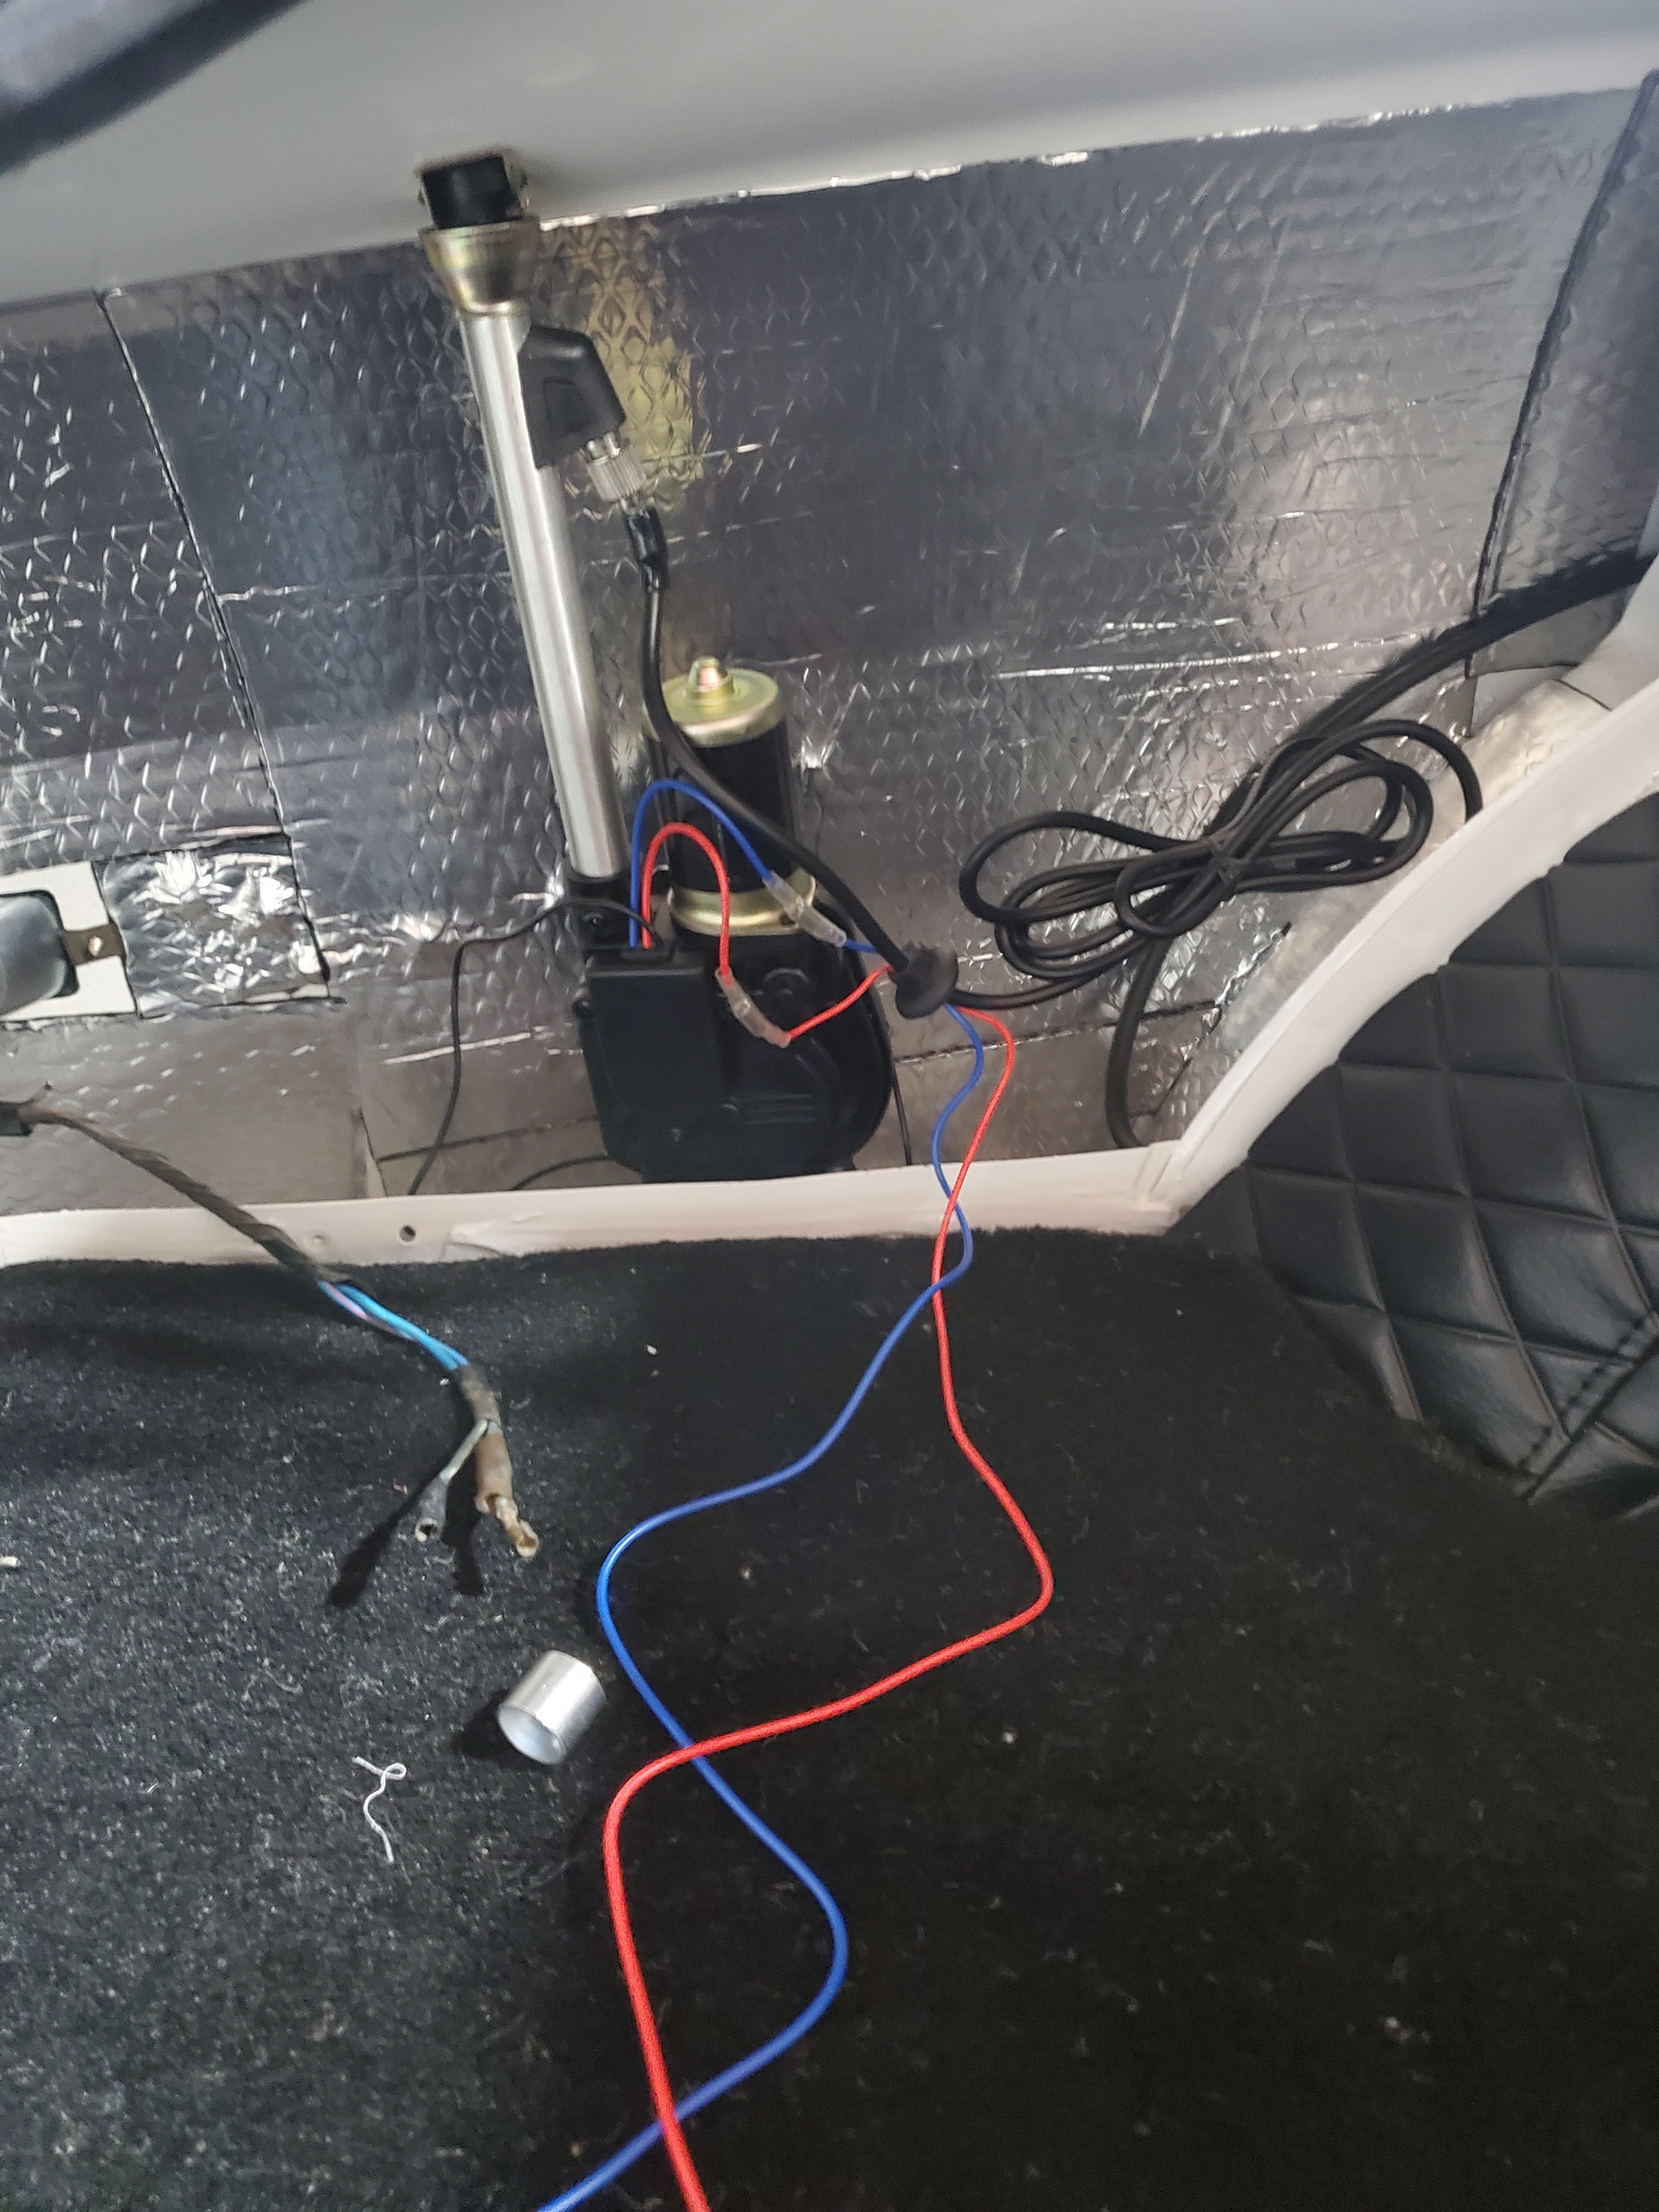
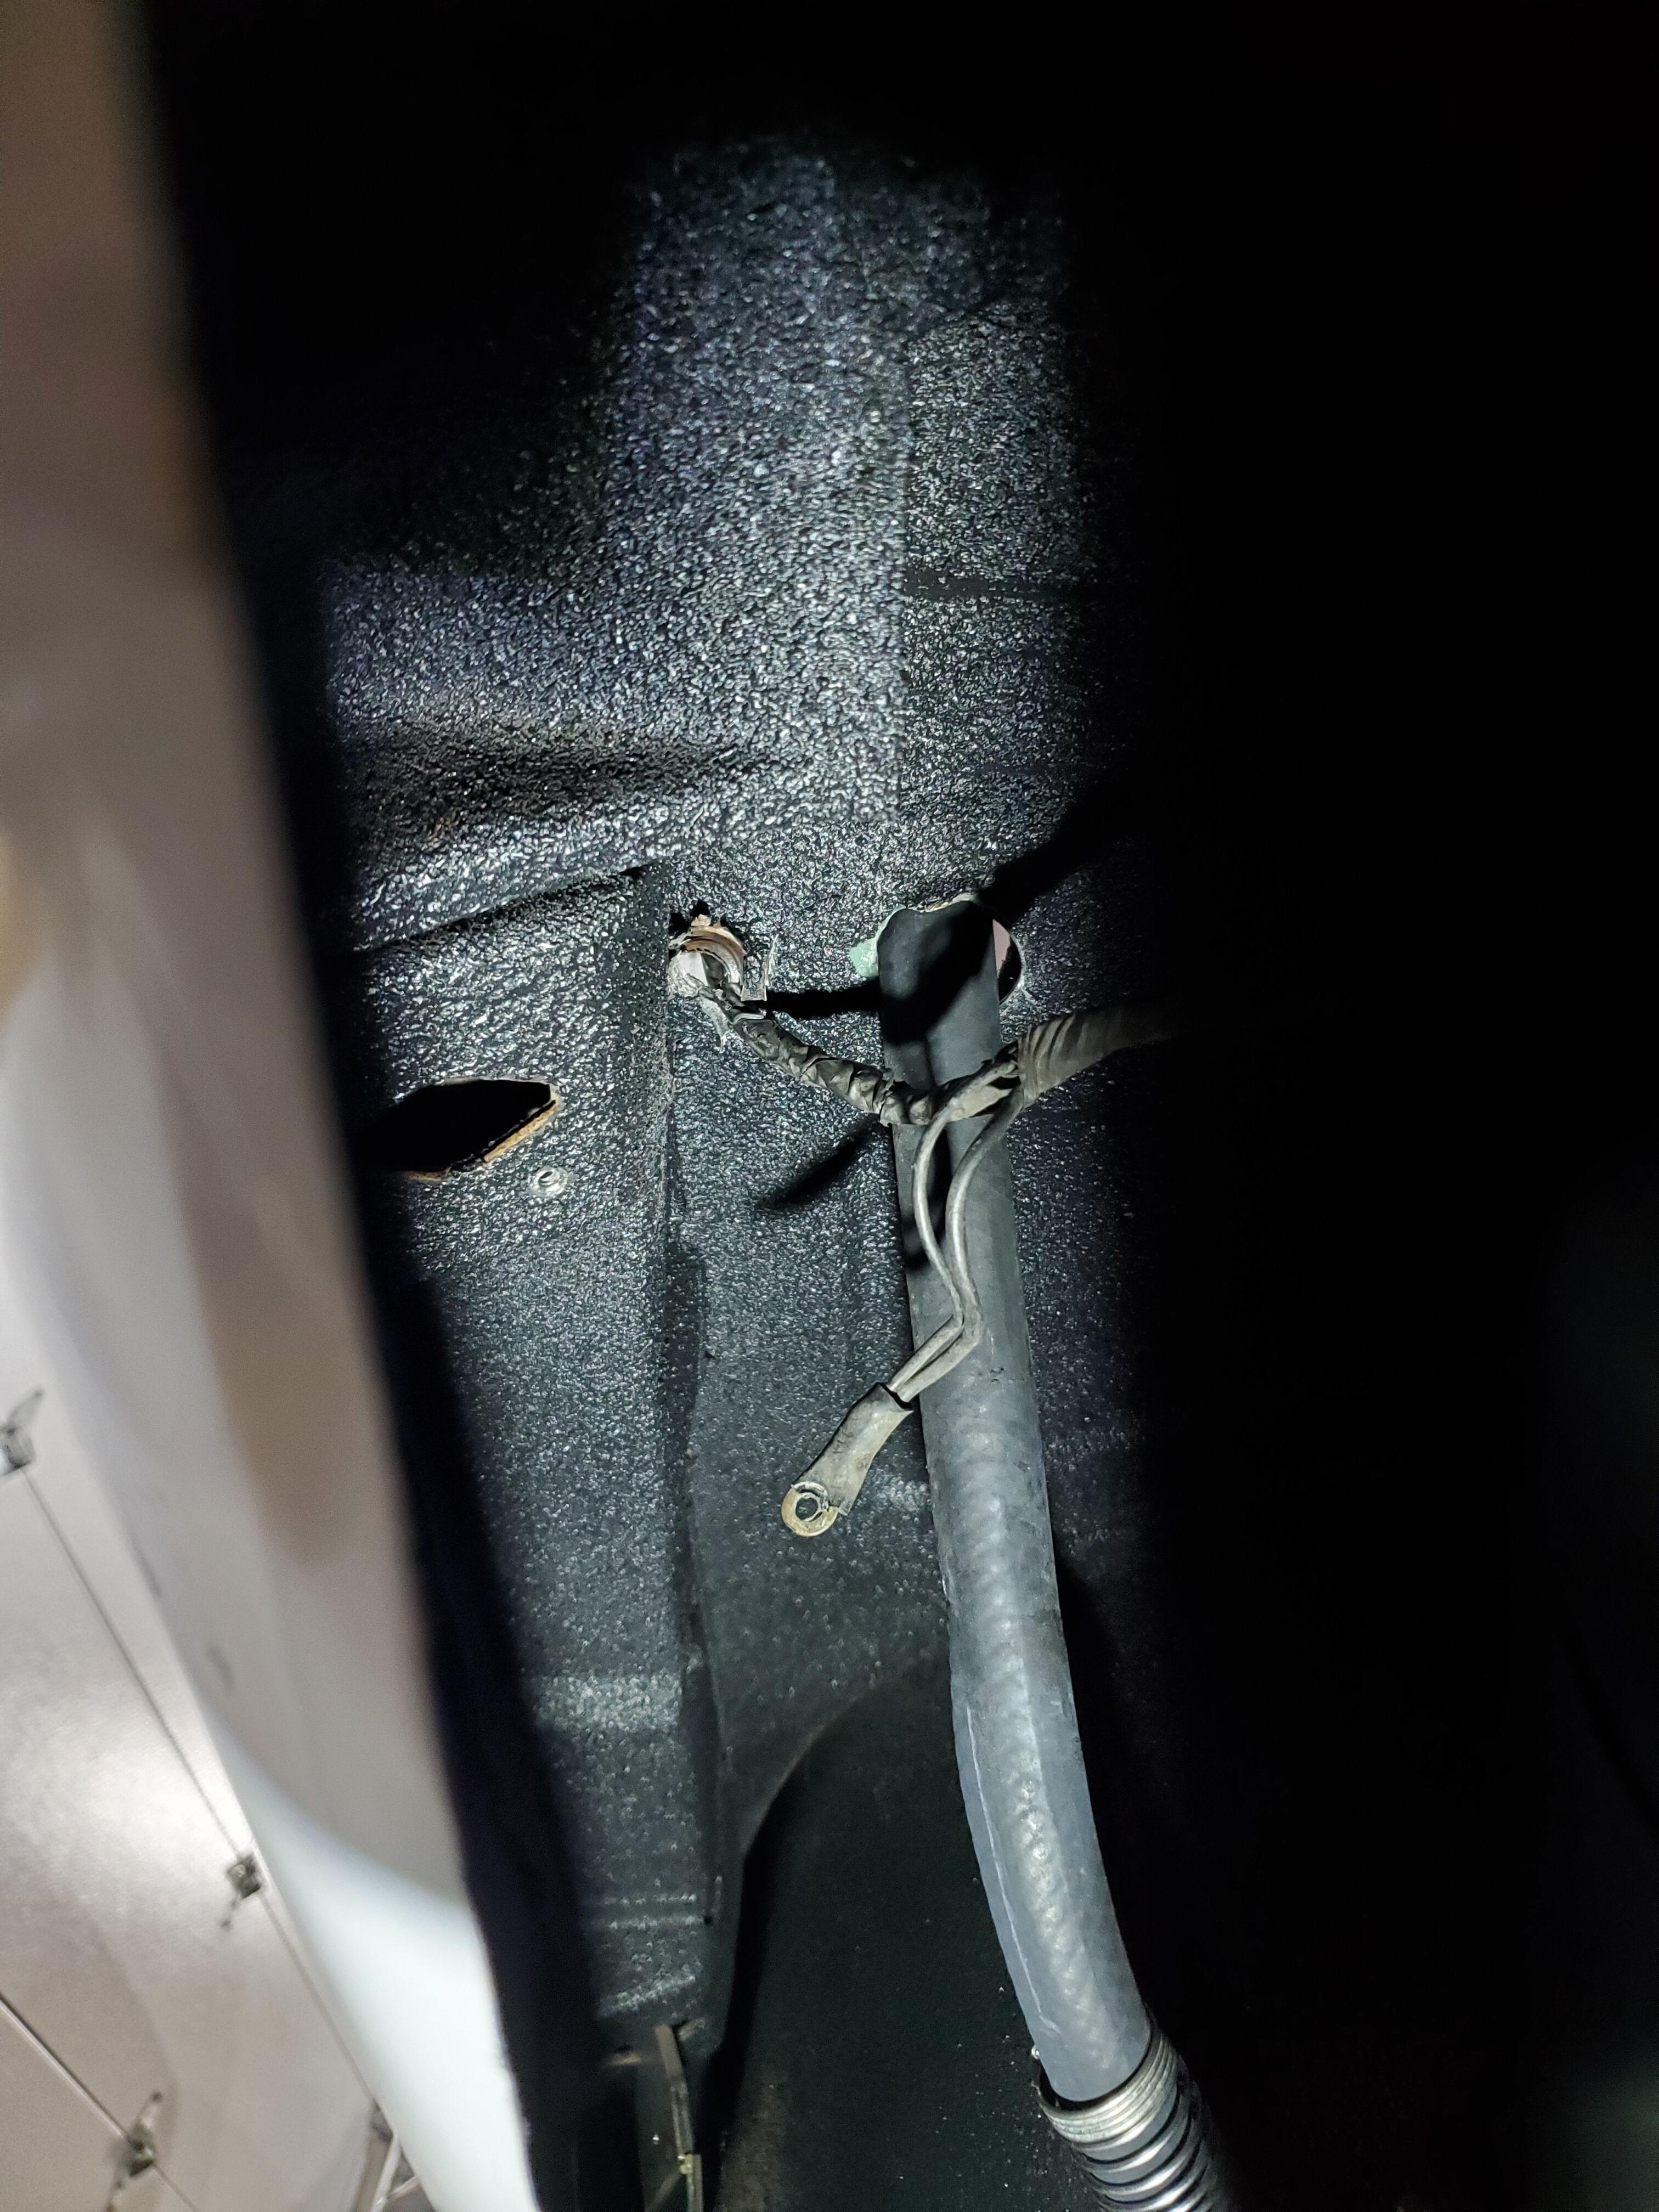
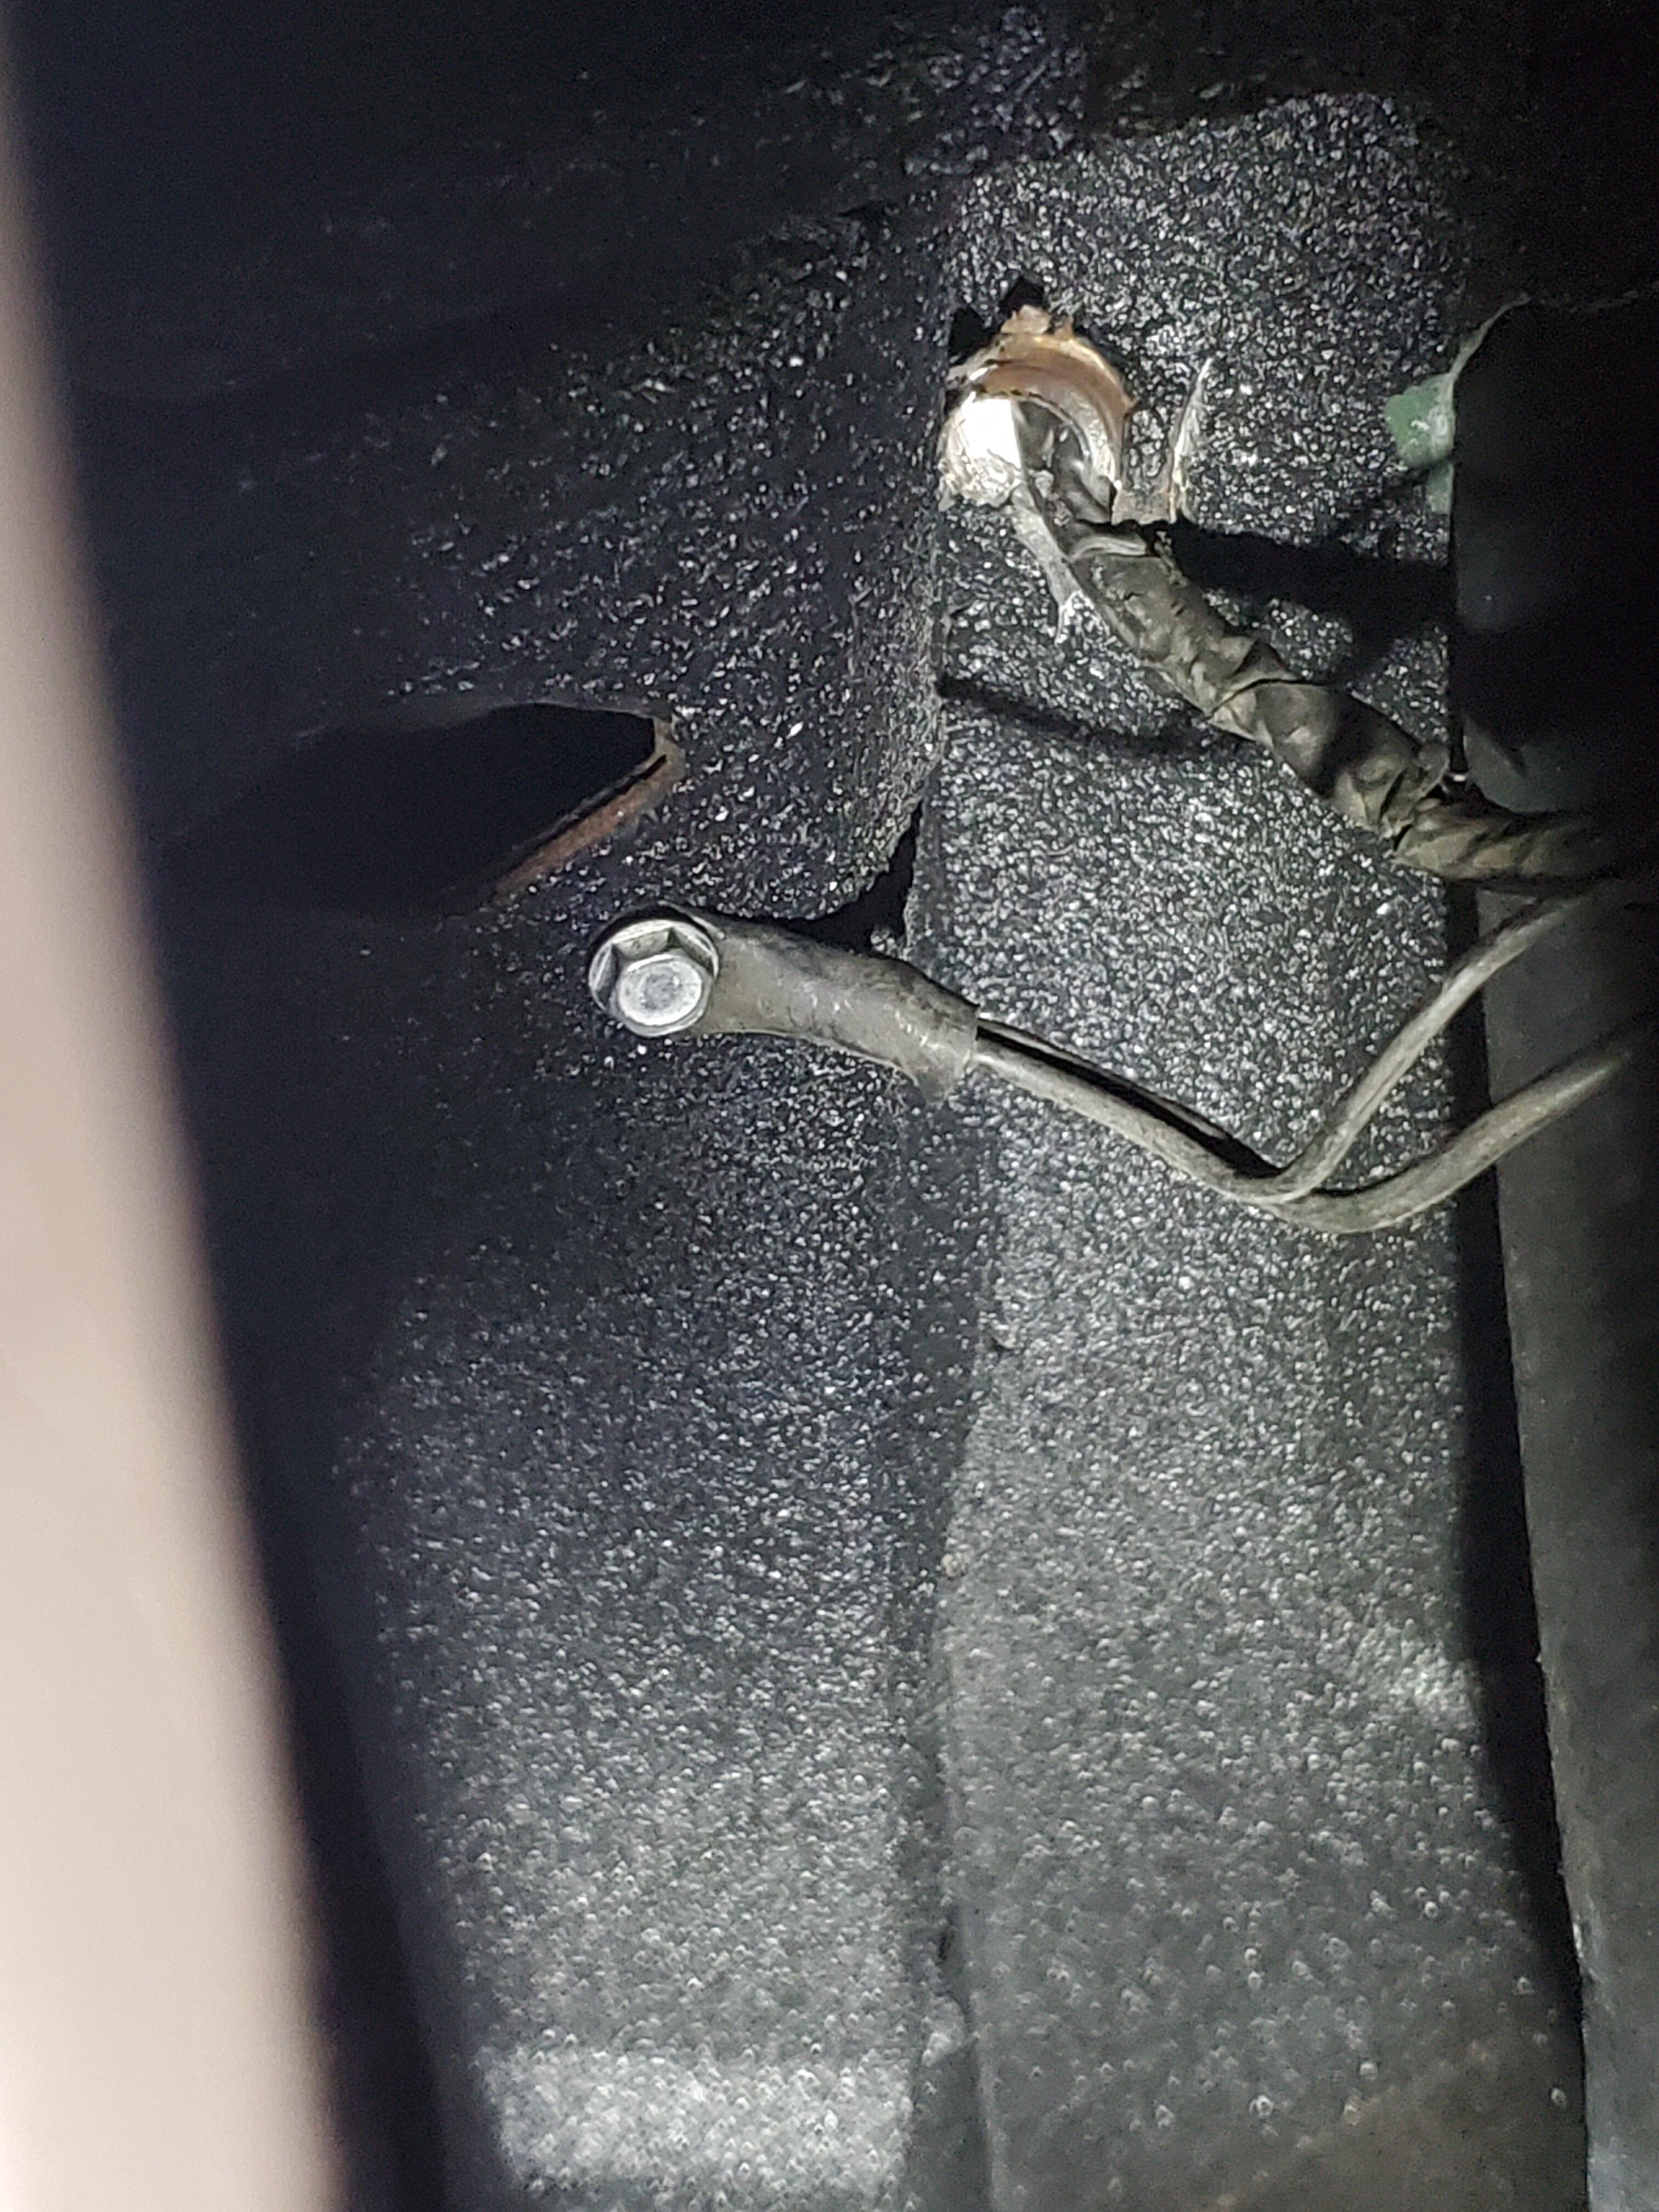
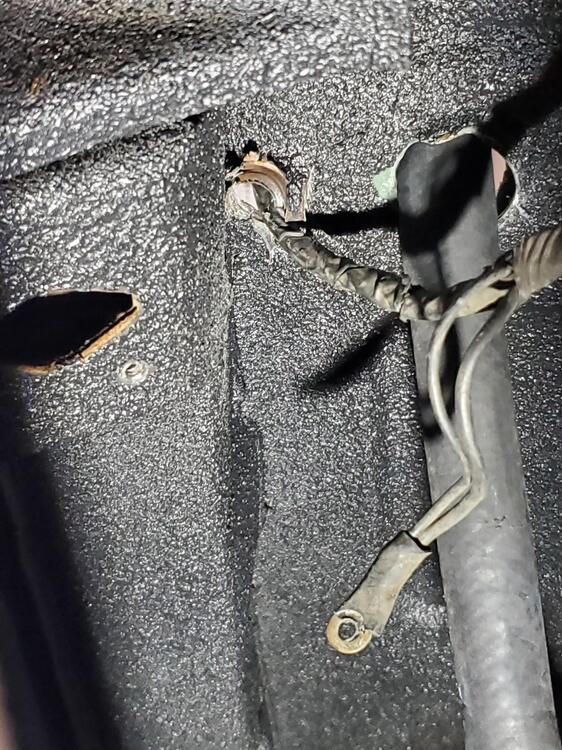
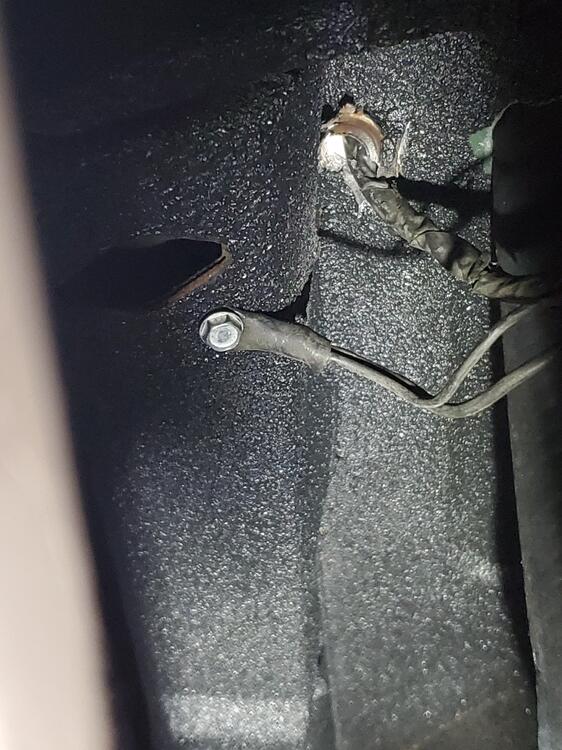
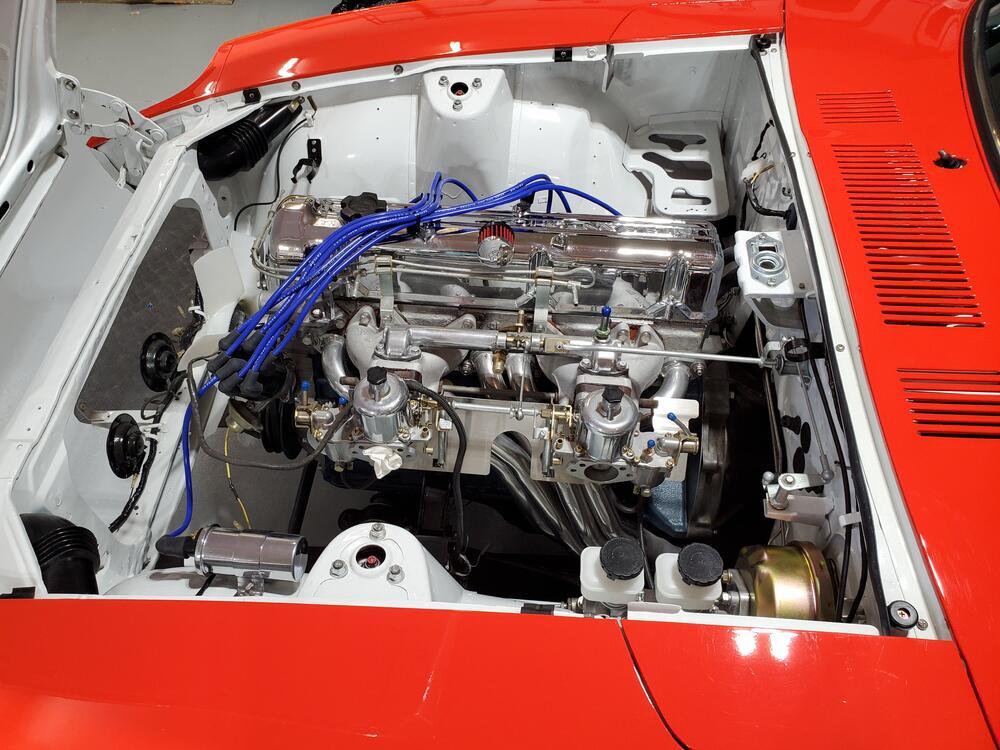
I did a little work on electrical wiring the last couple days. I installed the new modern fusebox, splicing it into the original harness. Conveniently, the new fuse box had the yellow terminal sleeves to make it easy to graft into the original harnes. I worked under the passengers side dash to make the connections for the engine bay, dash and rear harness connections. Most of this was pretty straight forward as the connectors are Poke-a-Yoke. I did have to replace a few broken terminals on the harness, but overall, not too bad. I had to drop the tank a bit to install the fuel tank harness which was coiled up in the back of the car. Also, I could not find the ground nut hole on the frame under the rear panel so I drilled a hole and secured the ground to the body. Not sure if the hole was covered up or did not exist at all because it is a 1970 car. Anyway, wire is now properly grounded and securely attached. Pics below. A little more car info: Engine was rebuilt by the same shop that does Adam Corolla's race car engines.


-
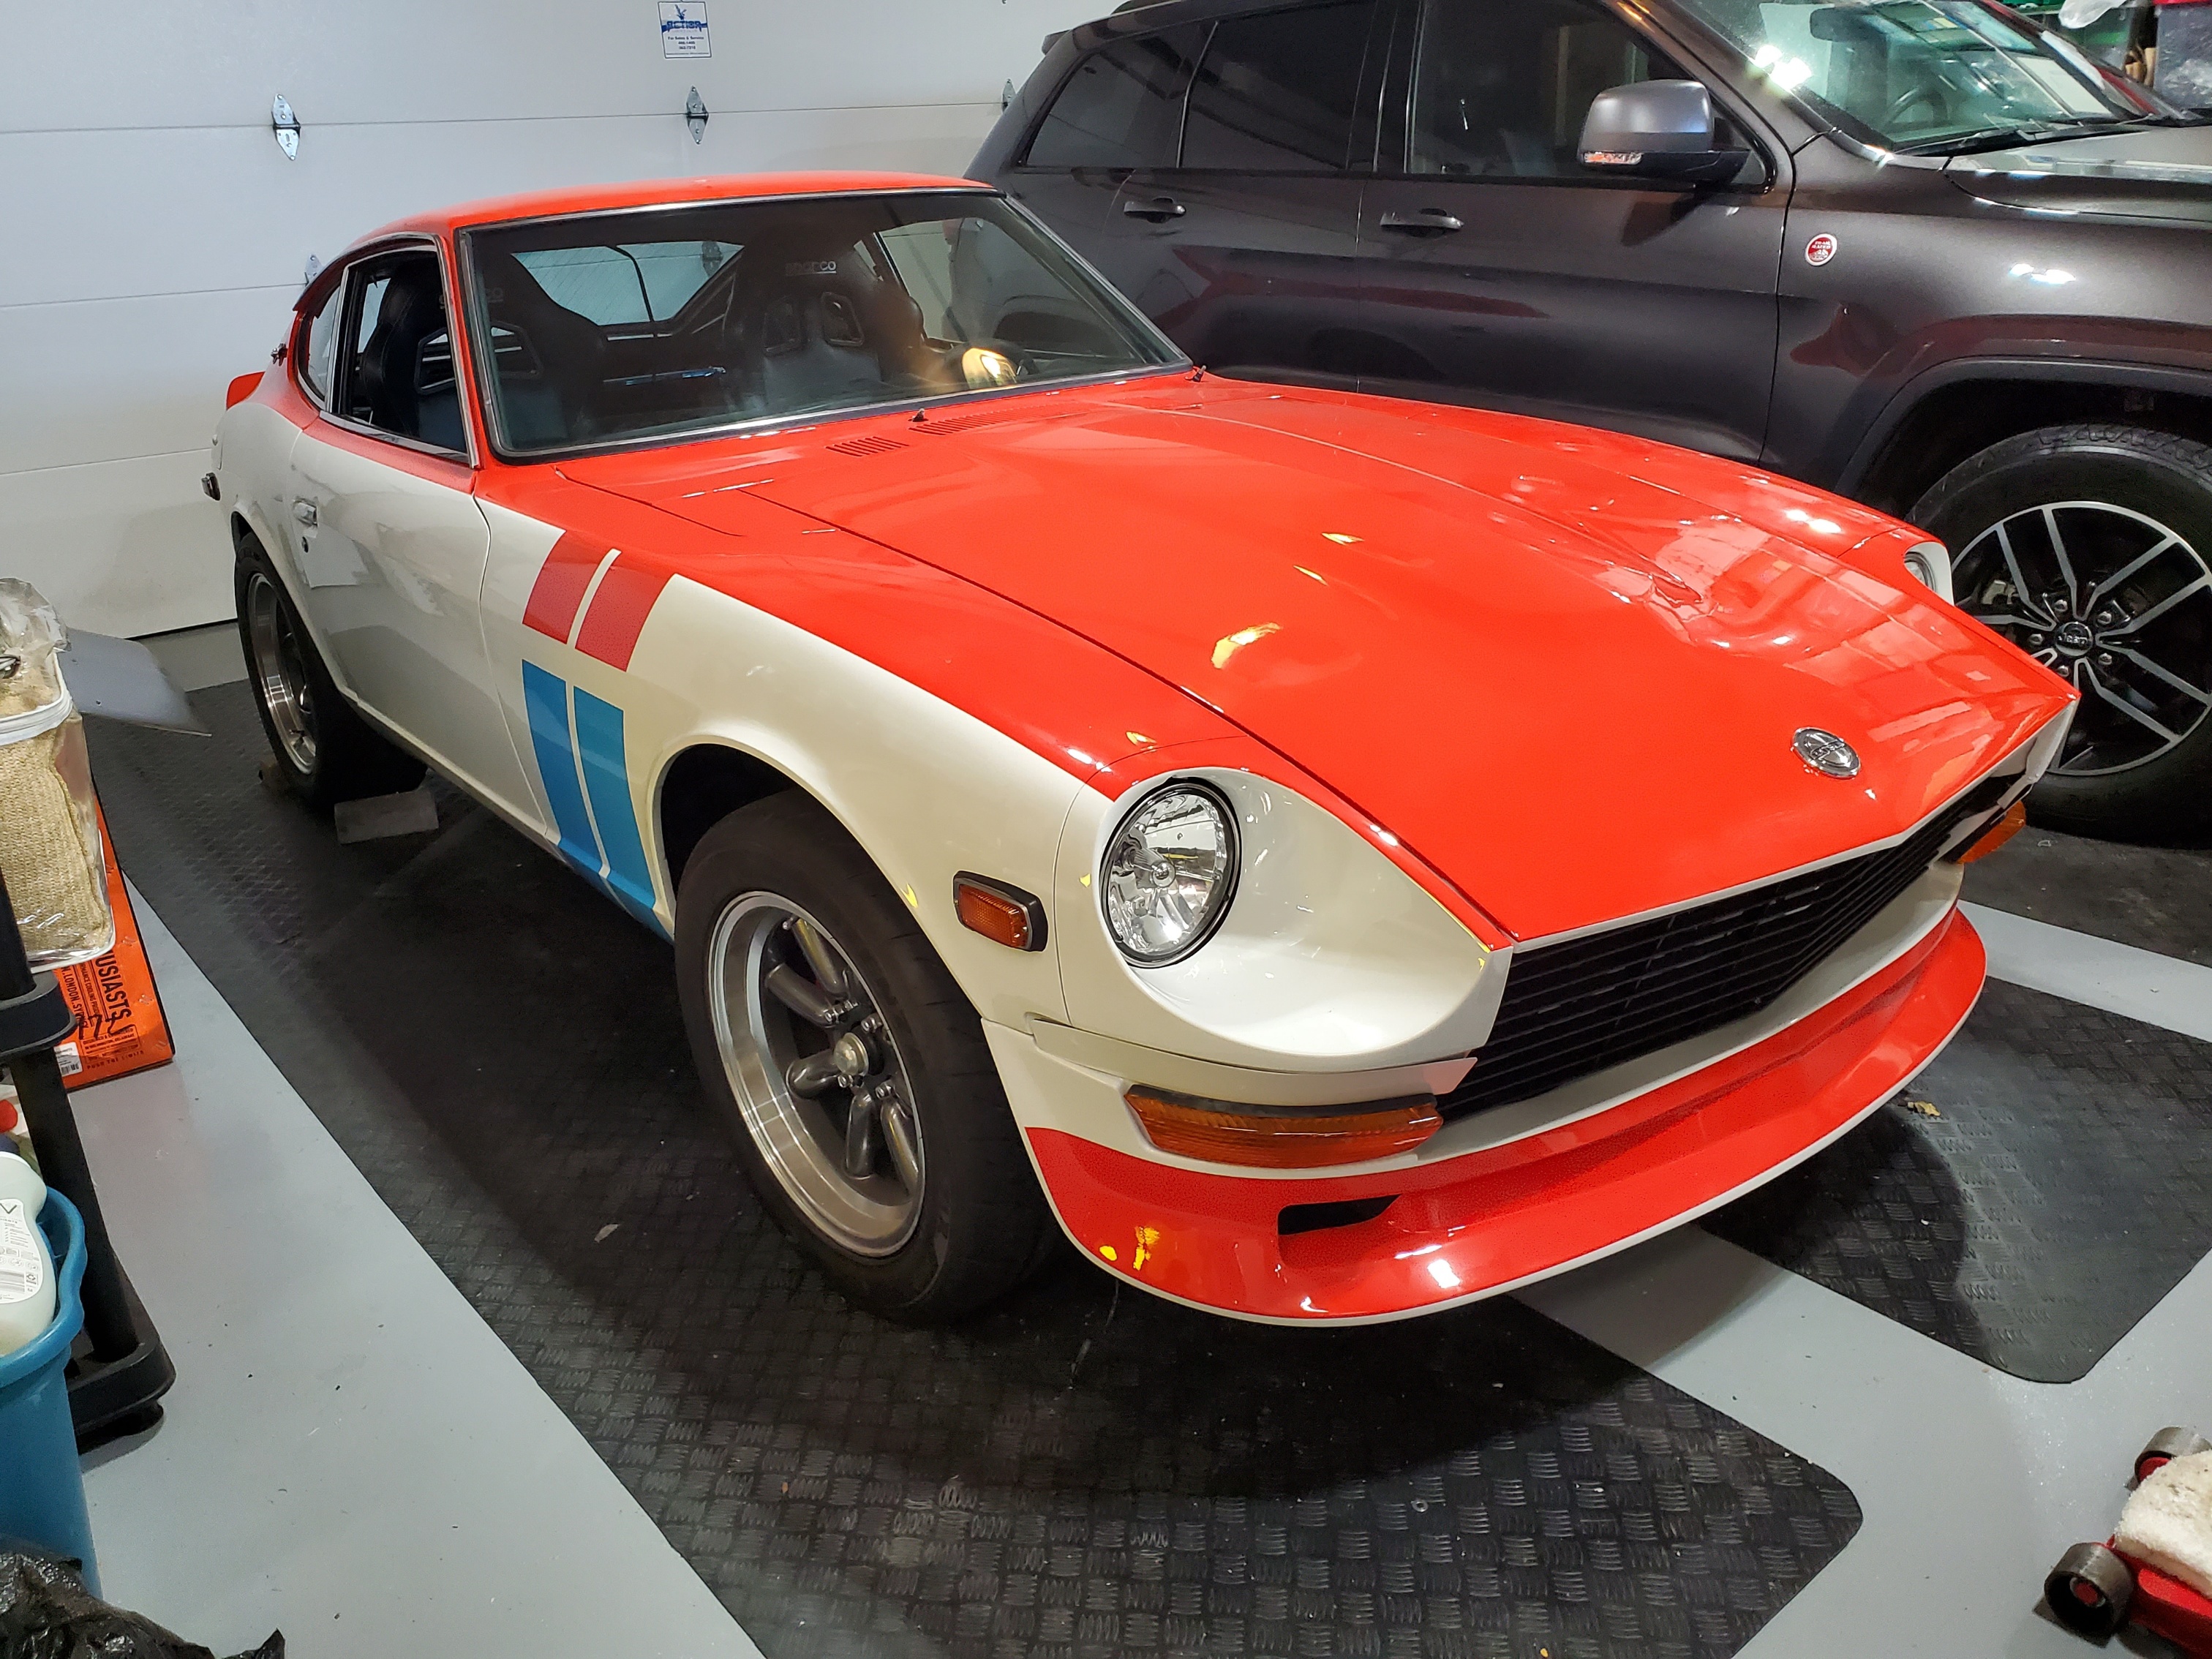
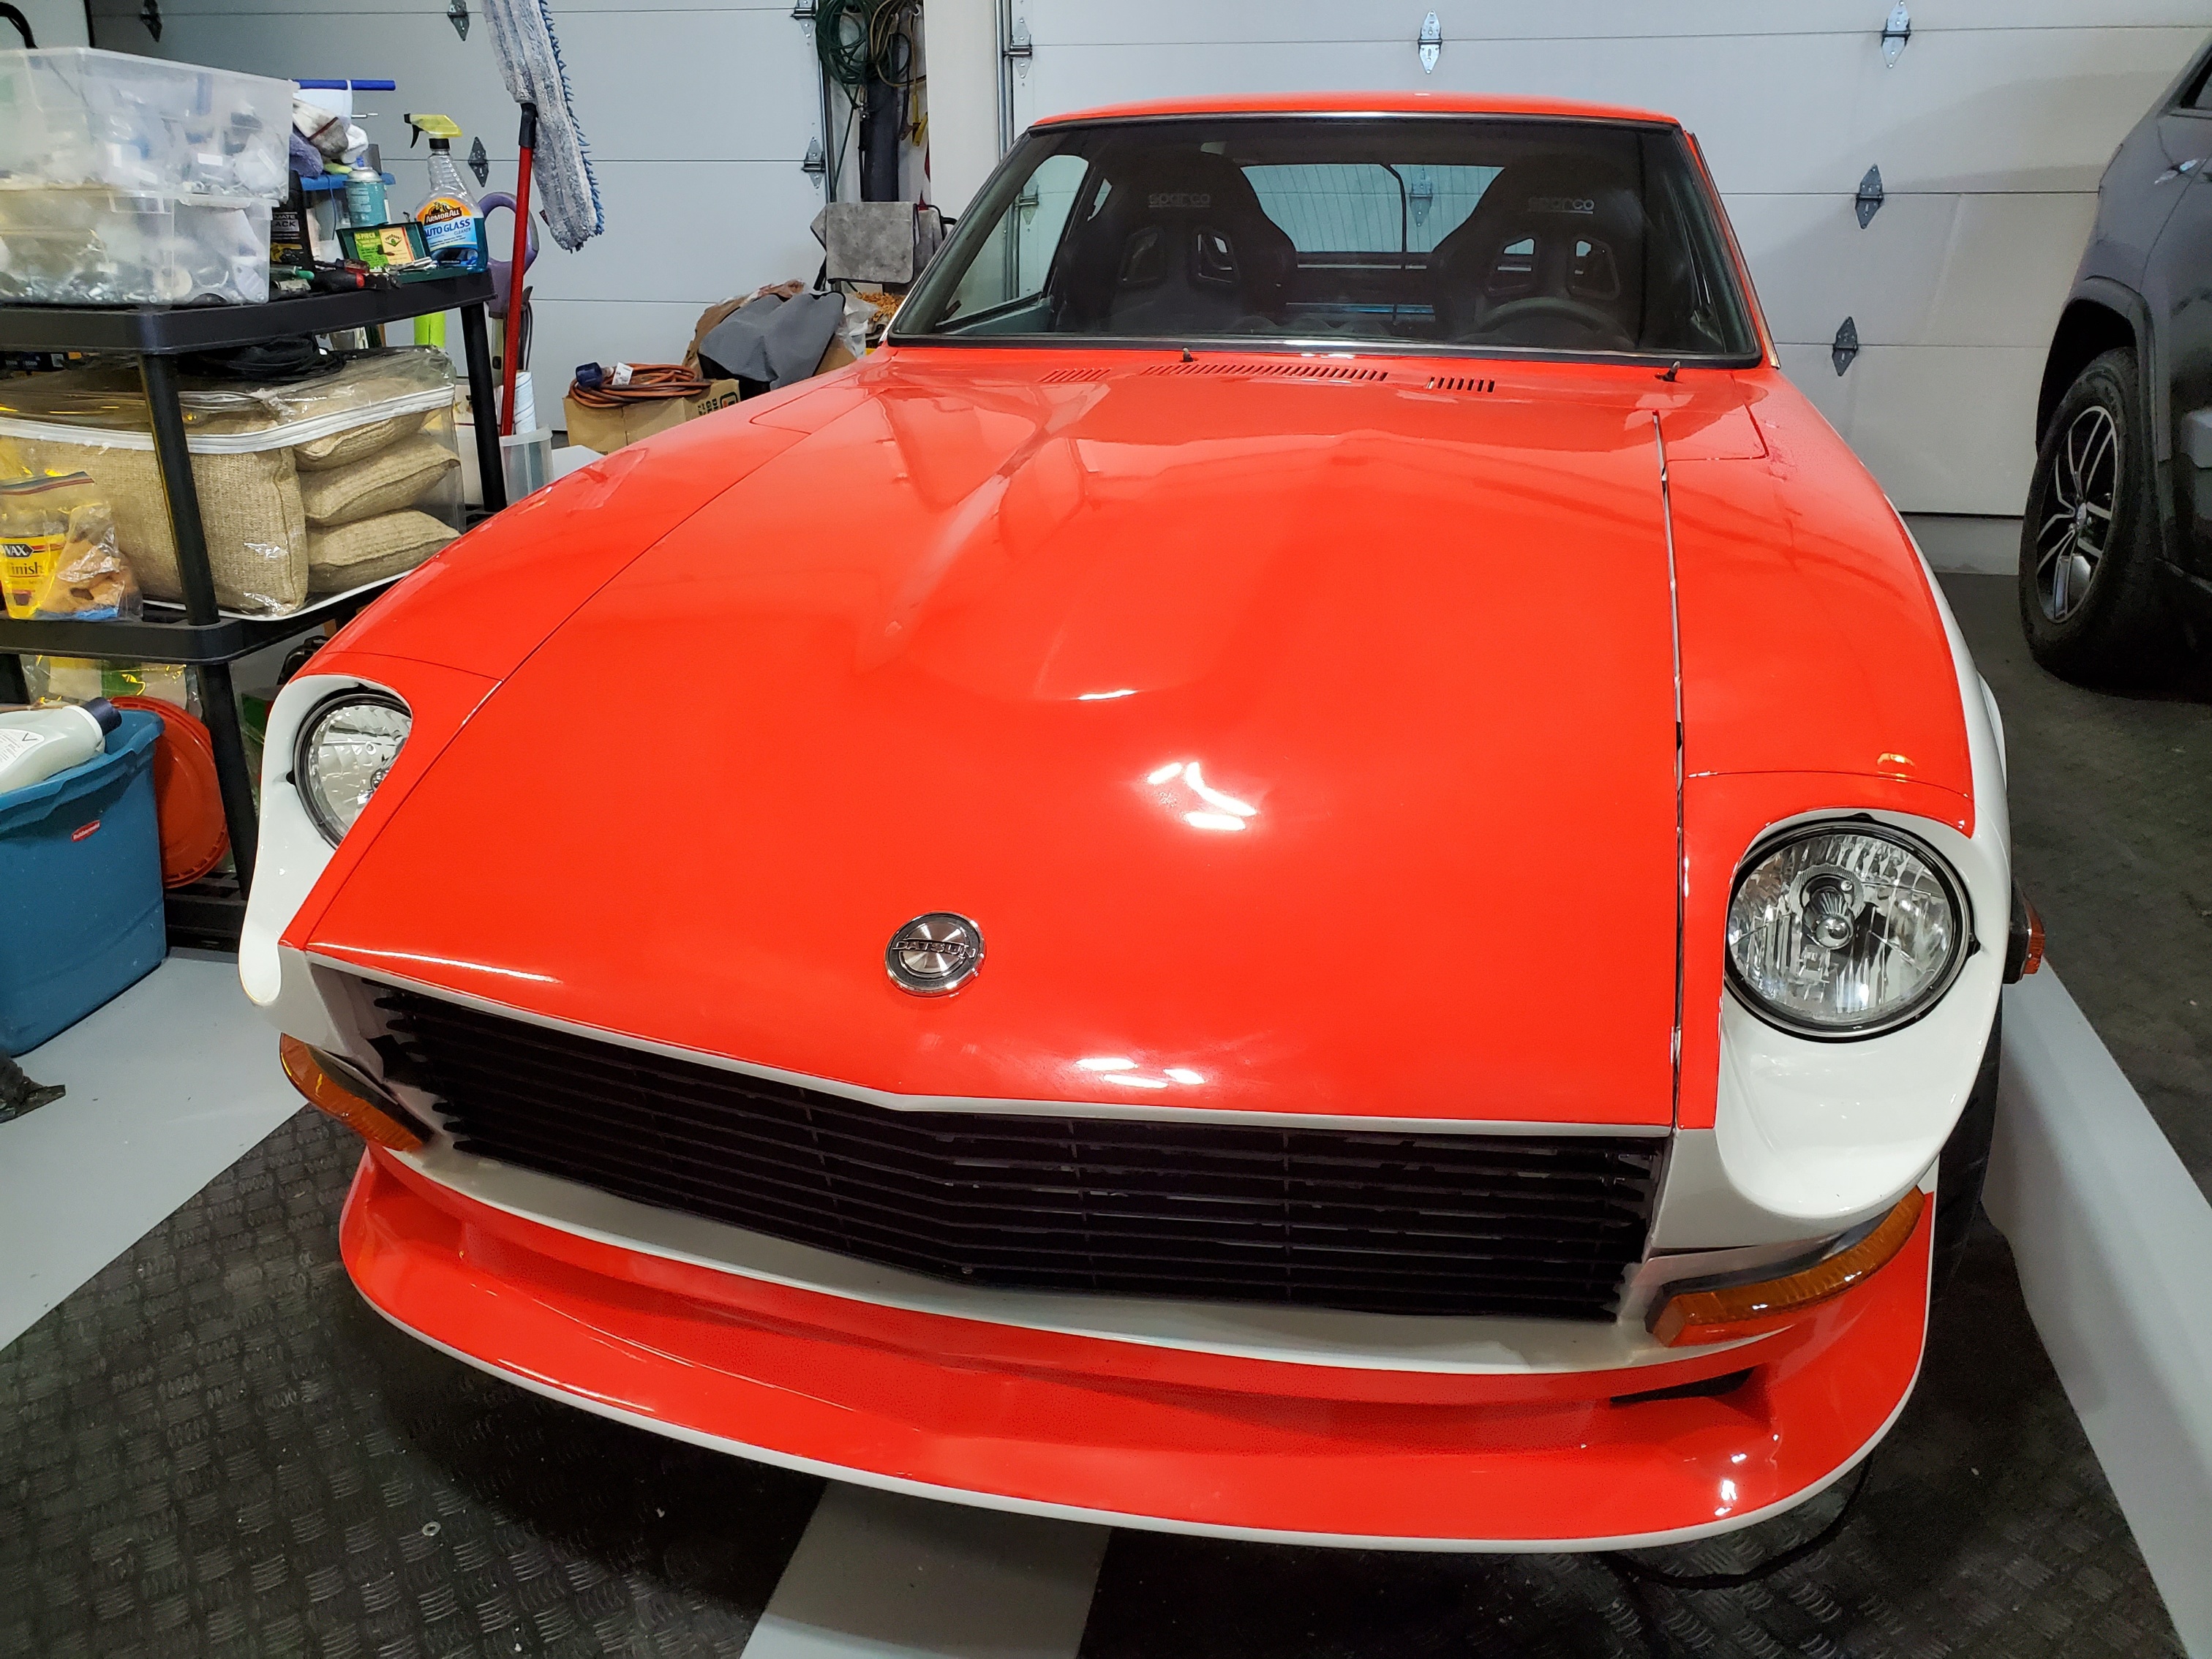
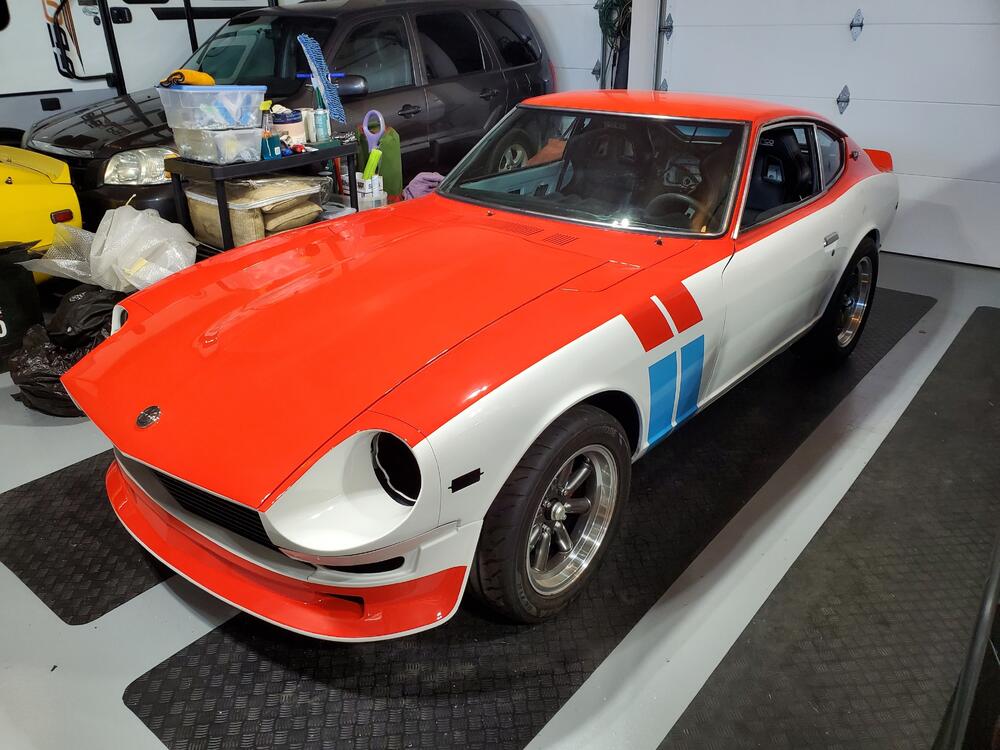
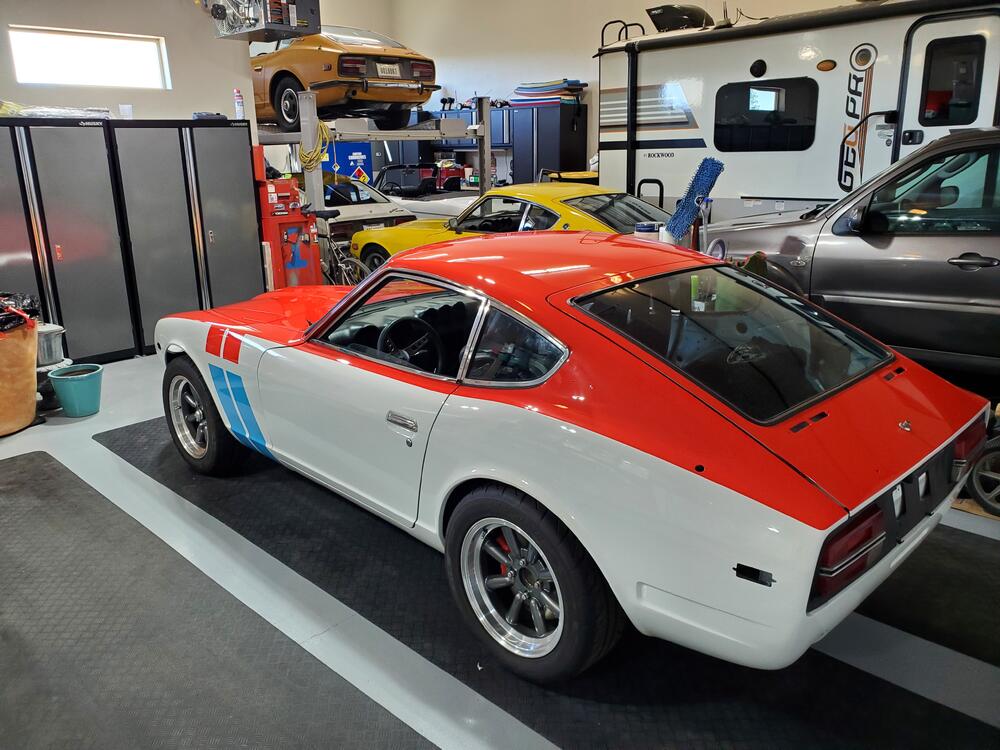
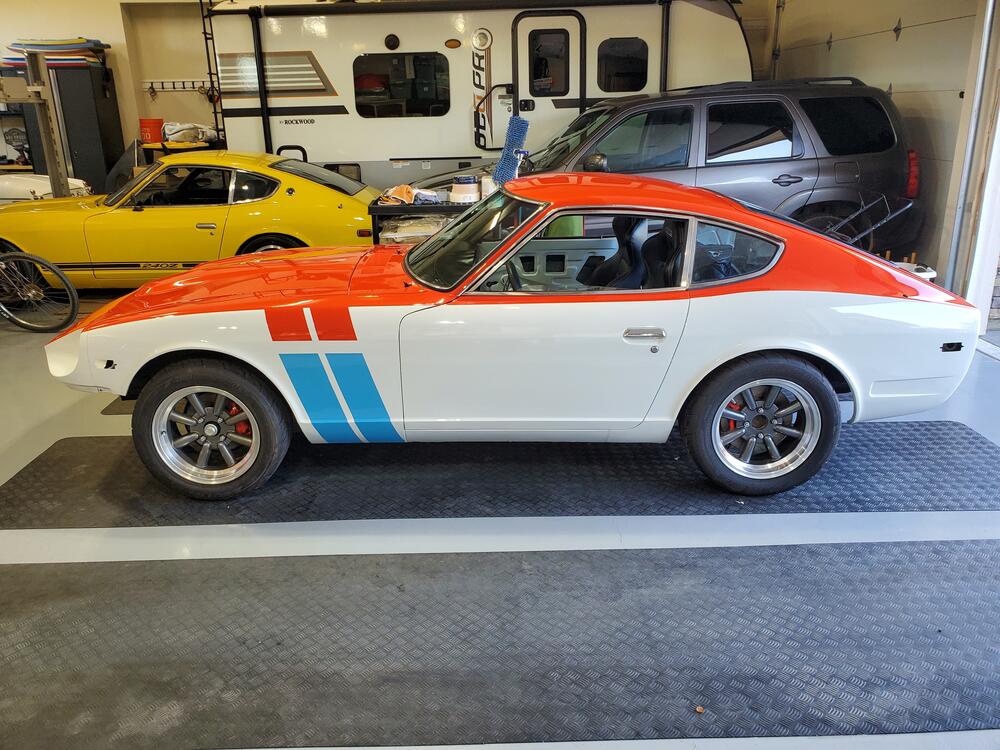
The paint job on this car is gorgeous! I love seeing this in my garage even though it is not mine. It looks right at home with my other cars. After a two year break, I am back restoring Z cars....in my retirement. I love it. I did some of the work on this Z back in San Diego for a good friend of mine (the owner). I helped install the motor and transmission, all of the glass, most of the interior as well as the electrical harness refurb and wiper motor refurb. To make a long story short, I moved to Idaho, the owner is moving to Texas and not much has been done on the car since I left San Diego. I was asked to complete the build by the owner which I am more than happy to do. So, I will blog my progress on the site here for both the owner and others to see. Some of the plans are to remove the current brake set-up and install the Z car garage set-up. Also, I will add air conditioning. I have done neither of these on my previous builds, but hope to get input from the group and installation videos as needed. So, car arrived yesterday evening. We unloaded the car and pushed it into the garage where I will do the work. Today, I just wiped down the car with detailer and microfiber cloth to clean off the dust on the car and the engine bay, also cleaned the windows. I aligned the hood and latch mechanism so that everything operates smoothly. Tomorrow, I will begin to tackle the electrical wiring. Most of the remaining parts are still in San Diego, but will arrive here in two weeks. Until then, I will clean up some of the items that are currently on the car. Here are a few pics


-
The paint job on this car is gorgeous! I love seeing this in my garage even though it is not mine. It looks right at home with my other cars. After a two year break, I am back restoring Z cars....in my retirement. I love it. I did some of the work on this Z back in San Diego for a good friend of mine (the owner). I helped install the motor and transmission, all of the glass, most of the interior as well as the electrical harness refurb and wiper motor refurb. To make a long story short, I moved to Idaho, the owner is moving to Texas and not much has been done on the car since I left San Diego. I was asked to complete the build by the owner which I am more than happy to do. So, I will blog my progress on the site here for both the owner and others to see. Some of the plans are to remove the current brake set-up and install the Z car garage set-up. Also, I will add air conditioning. I have done neither of these on my previous builds, but hope to get input from the group and installation videos as needed. So, car arrived yesterday evening. We unloaded the car and pushed it into the garage where I will do the work. Today, I just wiped down the car with detailer and microfiber cloth to clean off the dust on the car and the engine bay, also cleaned the windows. I aligned the hood and latch mechanism so that everything operates smoothly. Tomorrow, I will begin to tackle the electrical wiring. Most of the remaining parts are still in San Diego, but will arrive here in two weeks. Until then, I will clean up some of the items that are currently on the car. Here are a few pics
-
Thanks for the advice. Post deleted
-
I owe Z Car Depot an apology on the gasket issue. Looks like I ordered a 510 gasket instead of a 240Z exhaust gasket. Not sure how I made the mistake, but will need to be more careful next time. Since the 510 gasket works for now I will leave it. Lesson learned here.
-
The oil leak is a pretty easy fix. It's the bodywork that concerns me more. Assuming I were to take possession, I would probably have every single part, nut, bolt, glass, dash, etc. removed from the car within a week. I just want all the parts to be there. Running is a plus though
-
https://bringatrailer.com/listing/1970-datsun-240z-102/ I went over to @flynjim place to check out the Z up close. After looking the car over, I will probably place some bids on it but I am guessing it will go for higher than my cap. The car is pretty much what you look for in a restoration candidate as most of the parts are there and alterations are minor. Both the engine bay and undercarriage have a few minor mods, but nothing that is a show stopper. In the engine bay, the smog equipment has been removed or capped off and the the main steel fuel line has been modified/shortened to accomodate an electric fuel pump that was once in the engine bay. Other than that, it is fairly original. There are still a number of original hoses and wire clamps which is nice to see. Alternator has an internal voltage regulator, so no voltage regulator on the engine bay side wall. Remnants of wiring to the electric fuel pump are still there but would not be hard to delete. The undercarriage looks pretty untouched except for the exhaust system. Dirty, but not that difficult to clean (or powdercoat and re-plate). Looks like all the original parts and bolts are there, having never been removed. That is nice to see. Interior is not bad with most items that need to be replaced available on line. With new seat vinyl, radio and a Vintage Dashes Dash, the interior would be pretty nice. Most of the weather stripping is trashed, but the owner has the Precision replacement kit which would be useful for a majority of the seals. Bushings in most locations are original and would need to be replaced. These items are readily available on line. The body needs a bit of work. Both rear fender wells have a significant amount of bondo and should have been repaired using welded in patch panels, again, avaliable on line. It looks like the individual that did the body work used hand formed sheet metal and bondo to repair. The hood dents are in a difficult to access spot, but still pretty standard work for a body shop. Rear hatch panel ends are rusty as usual and needs to be replaced. Other than these areas, the rest of the body is pretty reasonable needing just minor rust repair work. The floor pan looks fairly clean and does not have any undercoating on it which gives you a nice view of its condition. Frame rails had some minor rust spots and a few small dents but were better than most that I have seen. Also, looks like the rear dark gray panel has never been removed as the original plastic rivets are there. Anyway, hope this is helpful. I will be watching the auction to see how everything goes.
-
No longer in San Diego. Wife and I moved to Boise in October of 2021 and absolutely love it. We have a beautiful home in the hills and about 4 times the garage space (1500 sq-ft)
-
Will be checking this one out tomorrow AM. It's about 20 minutes away from my place and looks like a nice restoration candidate.
-
"ZCCA judges can tell it at one glance." Kats, you give them too much credit. Most ZCCA judges are Z owners just like you and me and are occasionally incorrect in their assessment. I am sure a number of the ZCON participants here can point out quite a number of ZCCA judge errors. Unfortunately, you usually don't find out until 4 months later when you get your official judging sheet.
-
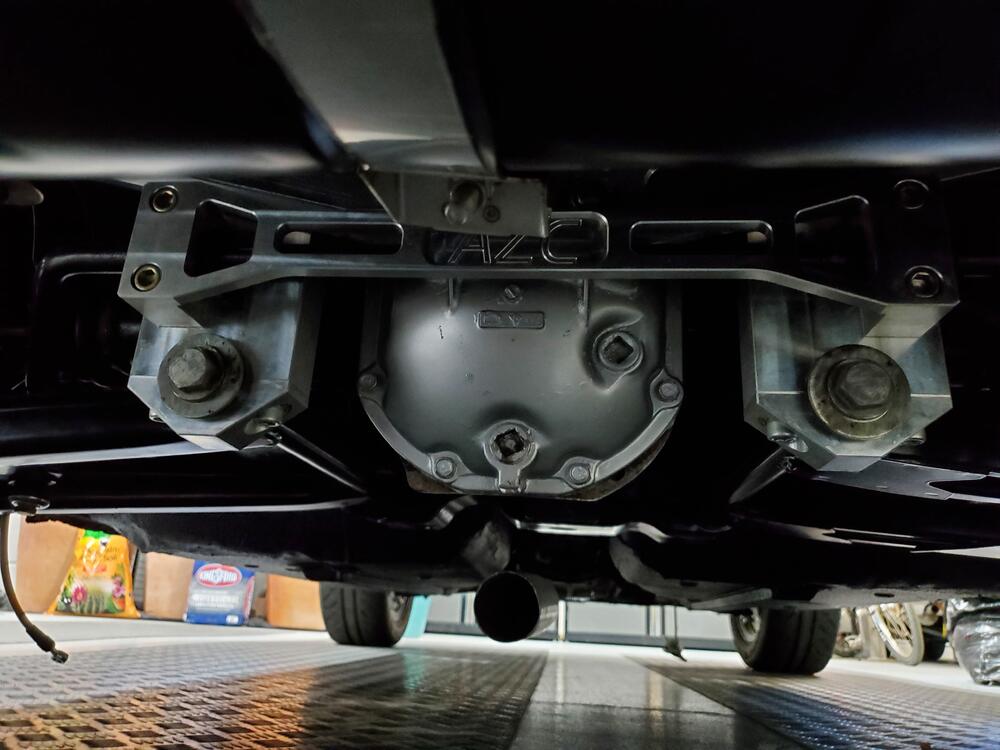
Rear diff is correctly painted all black including bolts.....according to dad's 4/70.
-
I stand corrected. Thanks for the info Carl.
-
Also, regarding the rear hatch panel, again I recommend jdm-car-parts.com for the panel. Their part is a quality stamping. Other sellers have low quality stampings and the features are blurred.
-
Wow, a very impressive car. As I said on the other thread, I have not seen many restorations better than this one. Of special note in regards to detail are the cloth wrap fuel hoses, inspection marks and correct clamps (color and style) in the engine bay. That being said, putting my ZCON judge hat on (which sometimes doesn't count for much), the following items do not appear to be correct, but can most easily be fixed. I will not mention items already noted above. - Hub caps are from a later series 1 car. Hole for the valve stem should be under the spoke, not the slot. - Horn face should be olive drab color, not bare zinc - Seat texture for the base/seat does not match the back. The back is the original vinyl, the seat is aftermarket. (This one probably bothers me the most). I would have changed the back also, just so the textures match. - Plastic trim is missing from seat base, both seats. On early models only. - Steering wheel color seems to light. Could be lighting. - choke knob is later model. should be more trim and rounded. - Door panels should have two screws near the bottom holding them on. On early models only - Hatch attach large flathead screws should be silver zinc - I dont see rivet divots in the rear hatch panel. Also, I am not a Just Dashes fan as I think they do a poor job with the three scallops over the center instrument cluster. Vintage Dashes is more true to the original on this feature. And, when buying the braided engine hose, get it from jdmcarparts.com. There are other sellers out there for these items, but they do not match the original NOS very well. I am sure I may have missed some stuff, but pretty darn nice car. Will be watching this one. Rich
-
Wow, fabulous car! The engine bay is virtually flawless. I could knit pick a few interior items, but will give those a pass for now. I have not seen many that are better than this one. Should top $100K.