motorman7
 Subscriber
-
Joined
-
Last visited
Everything posted by motorman7
-
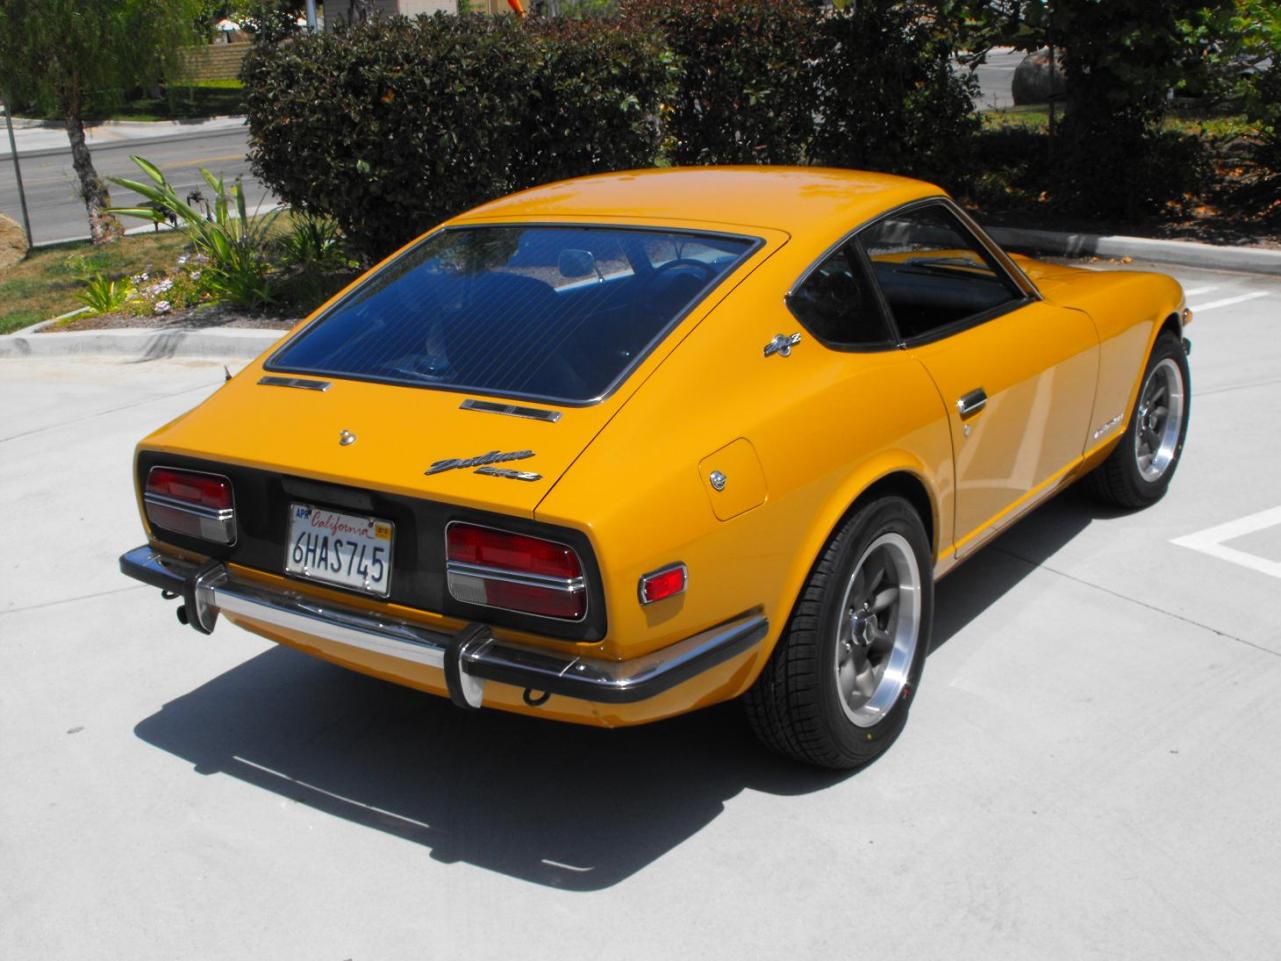
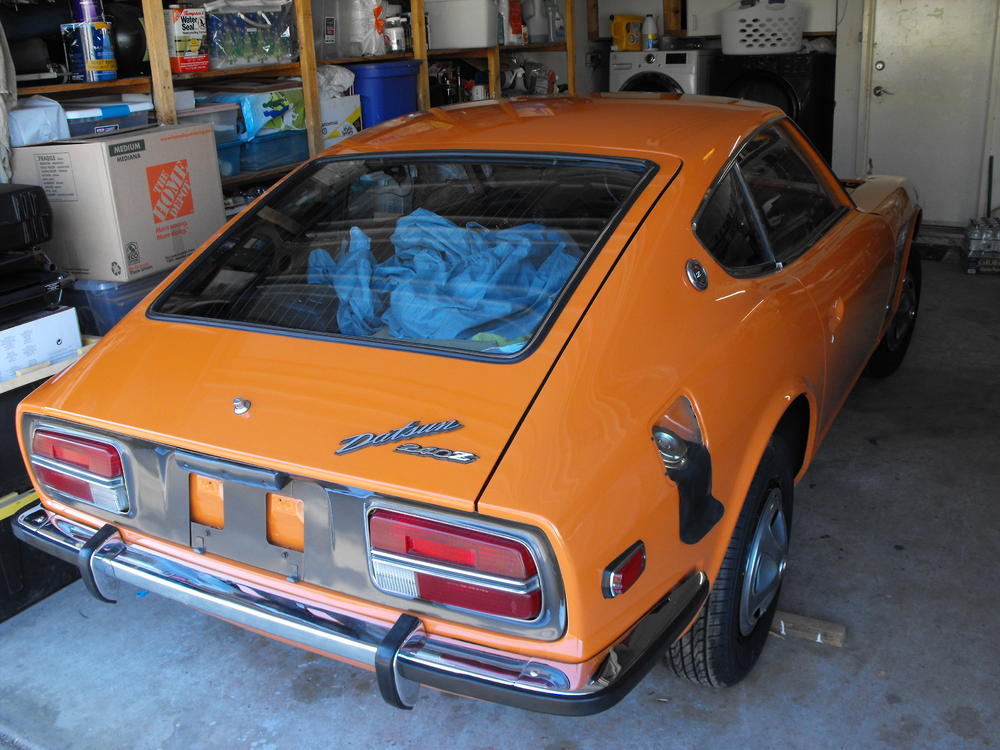
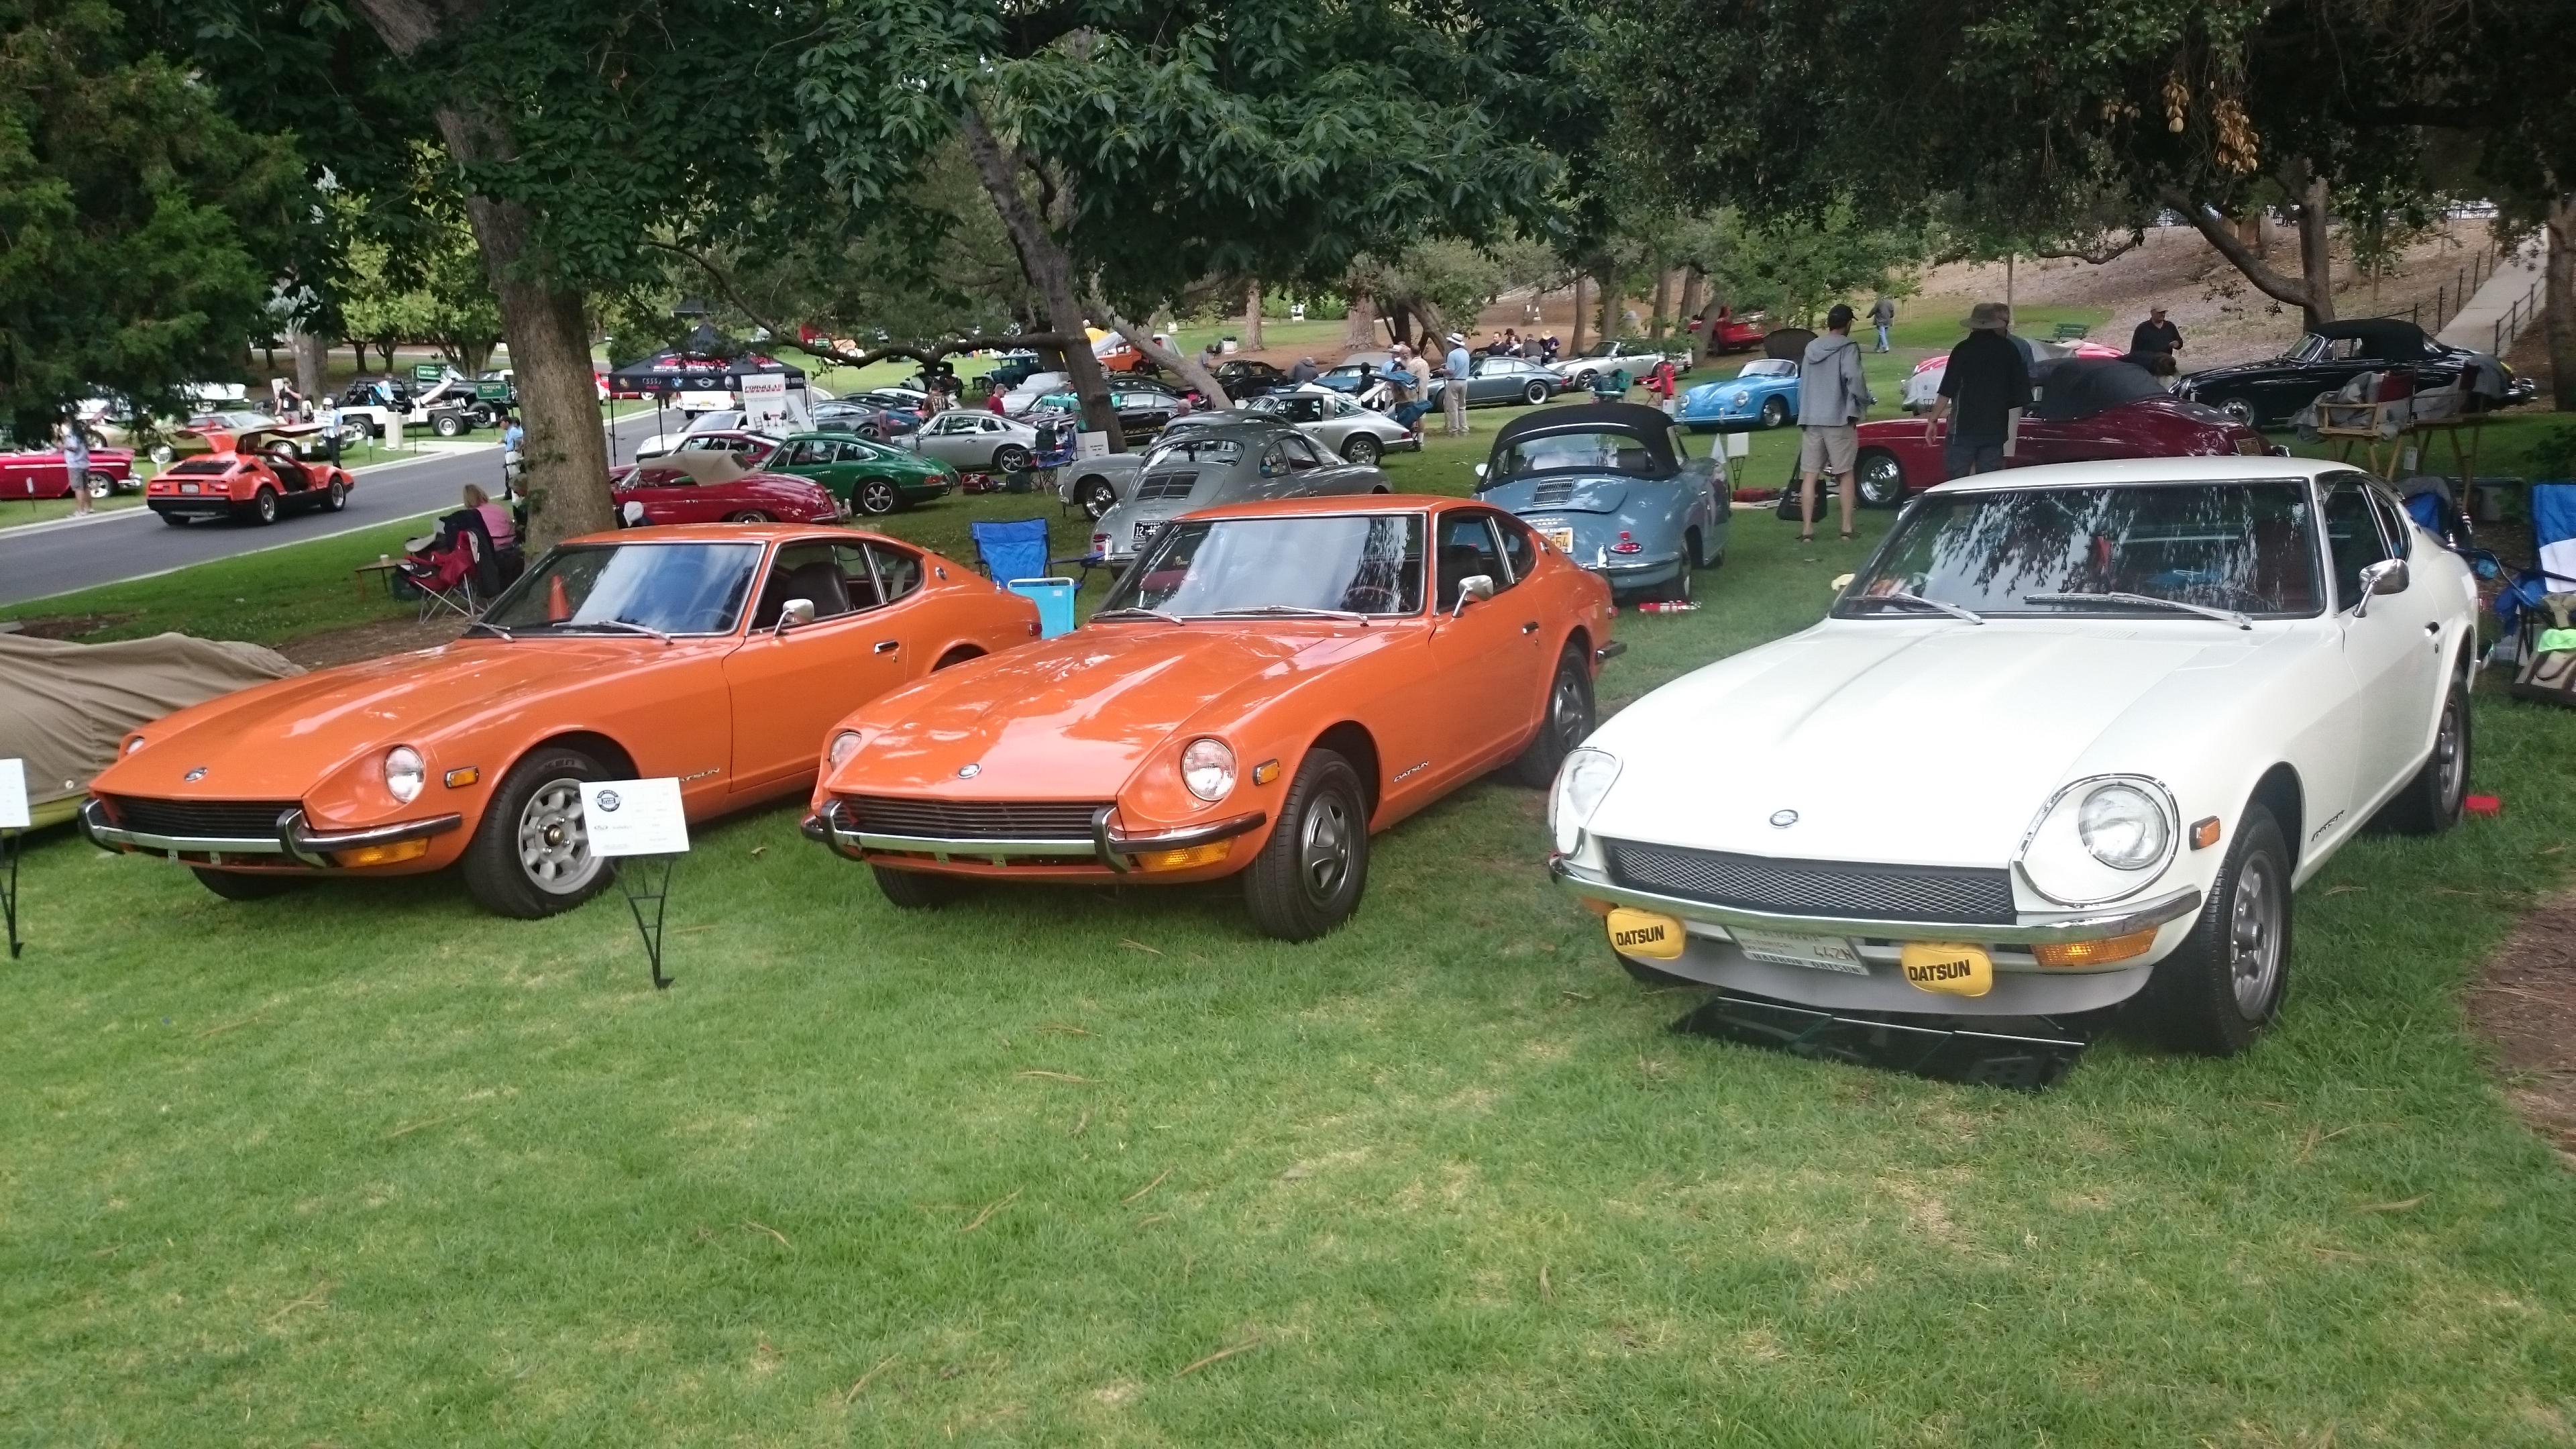
 Hard to say which is really better. I think the single stage has a bit more pop and brightness to it. Two stage has more of a mirror finish. Attached is a pic of two orange Z's. The one in the middle is single stage, left is two stage.
-
And just as heavy. Looks like something from Briggs & Stratton.
-
Correct, no AC on this one. I am not a big fan of the dealer installed AC set-up, neither is the car owner. Personally, I think it detracts from the true nature of the Z as a sports car. Also, the dealer installed compressor is a behemoth that detracts from the whole engine compartment. If I had a resto-mod Z, I would consider a modern AC system, but not for an original Z.
-
I installed the hatch glass this weekend. I also polished the stainless steel hatch molding and inserted that into the rubber sans corner pieces (which are in my storage unit). I loosely installed all of the cloth wrap hose for the fuel line. Will do final install once the clamps come in.

-
If I was single, I would be doing the same. Being married, the wife takes first priority, so things are moving a little slower than i would like. Since she let's me accumulate the cars, I am (almost) OK with that.
-
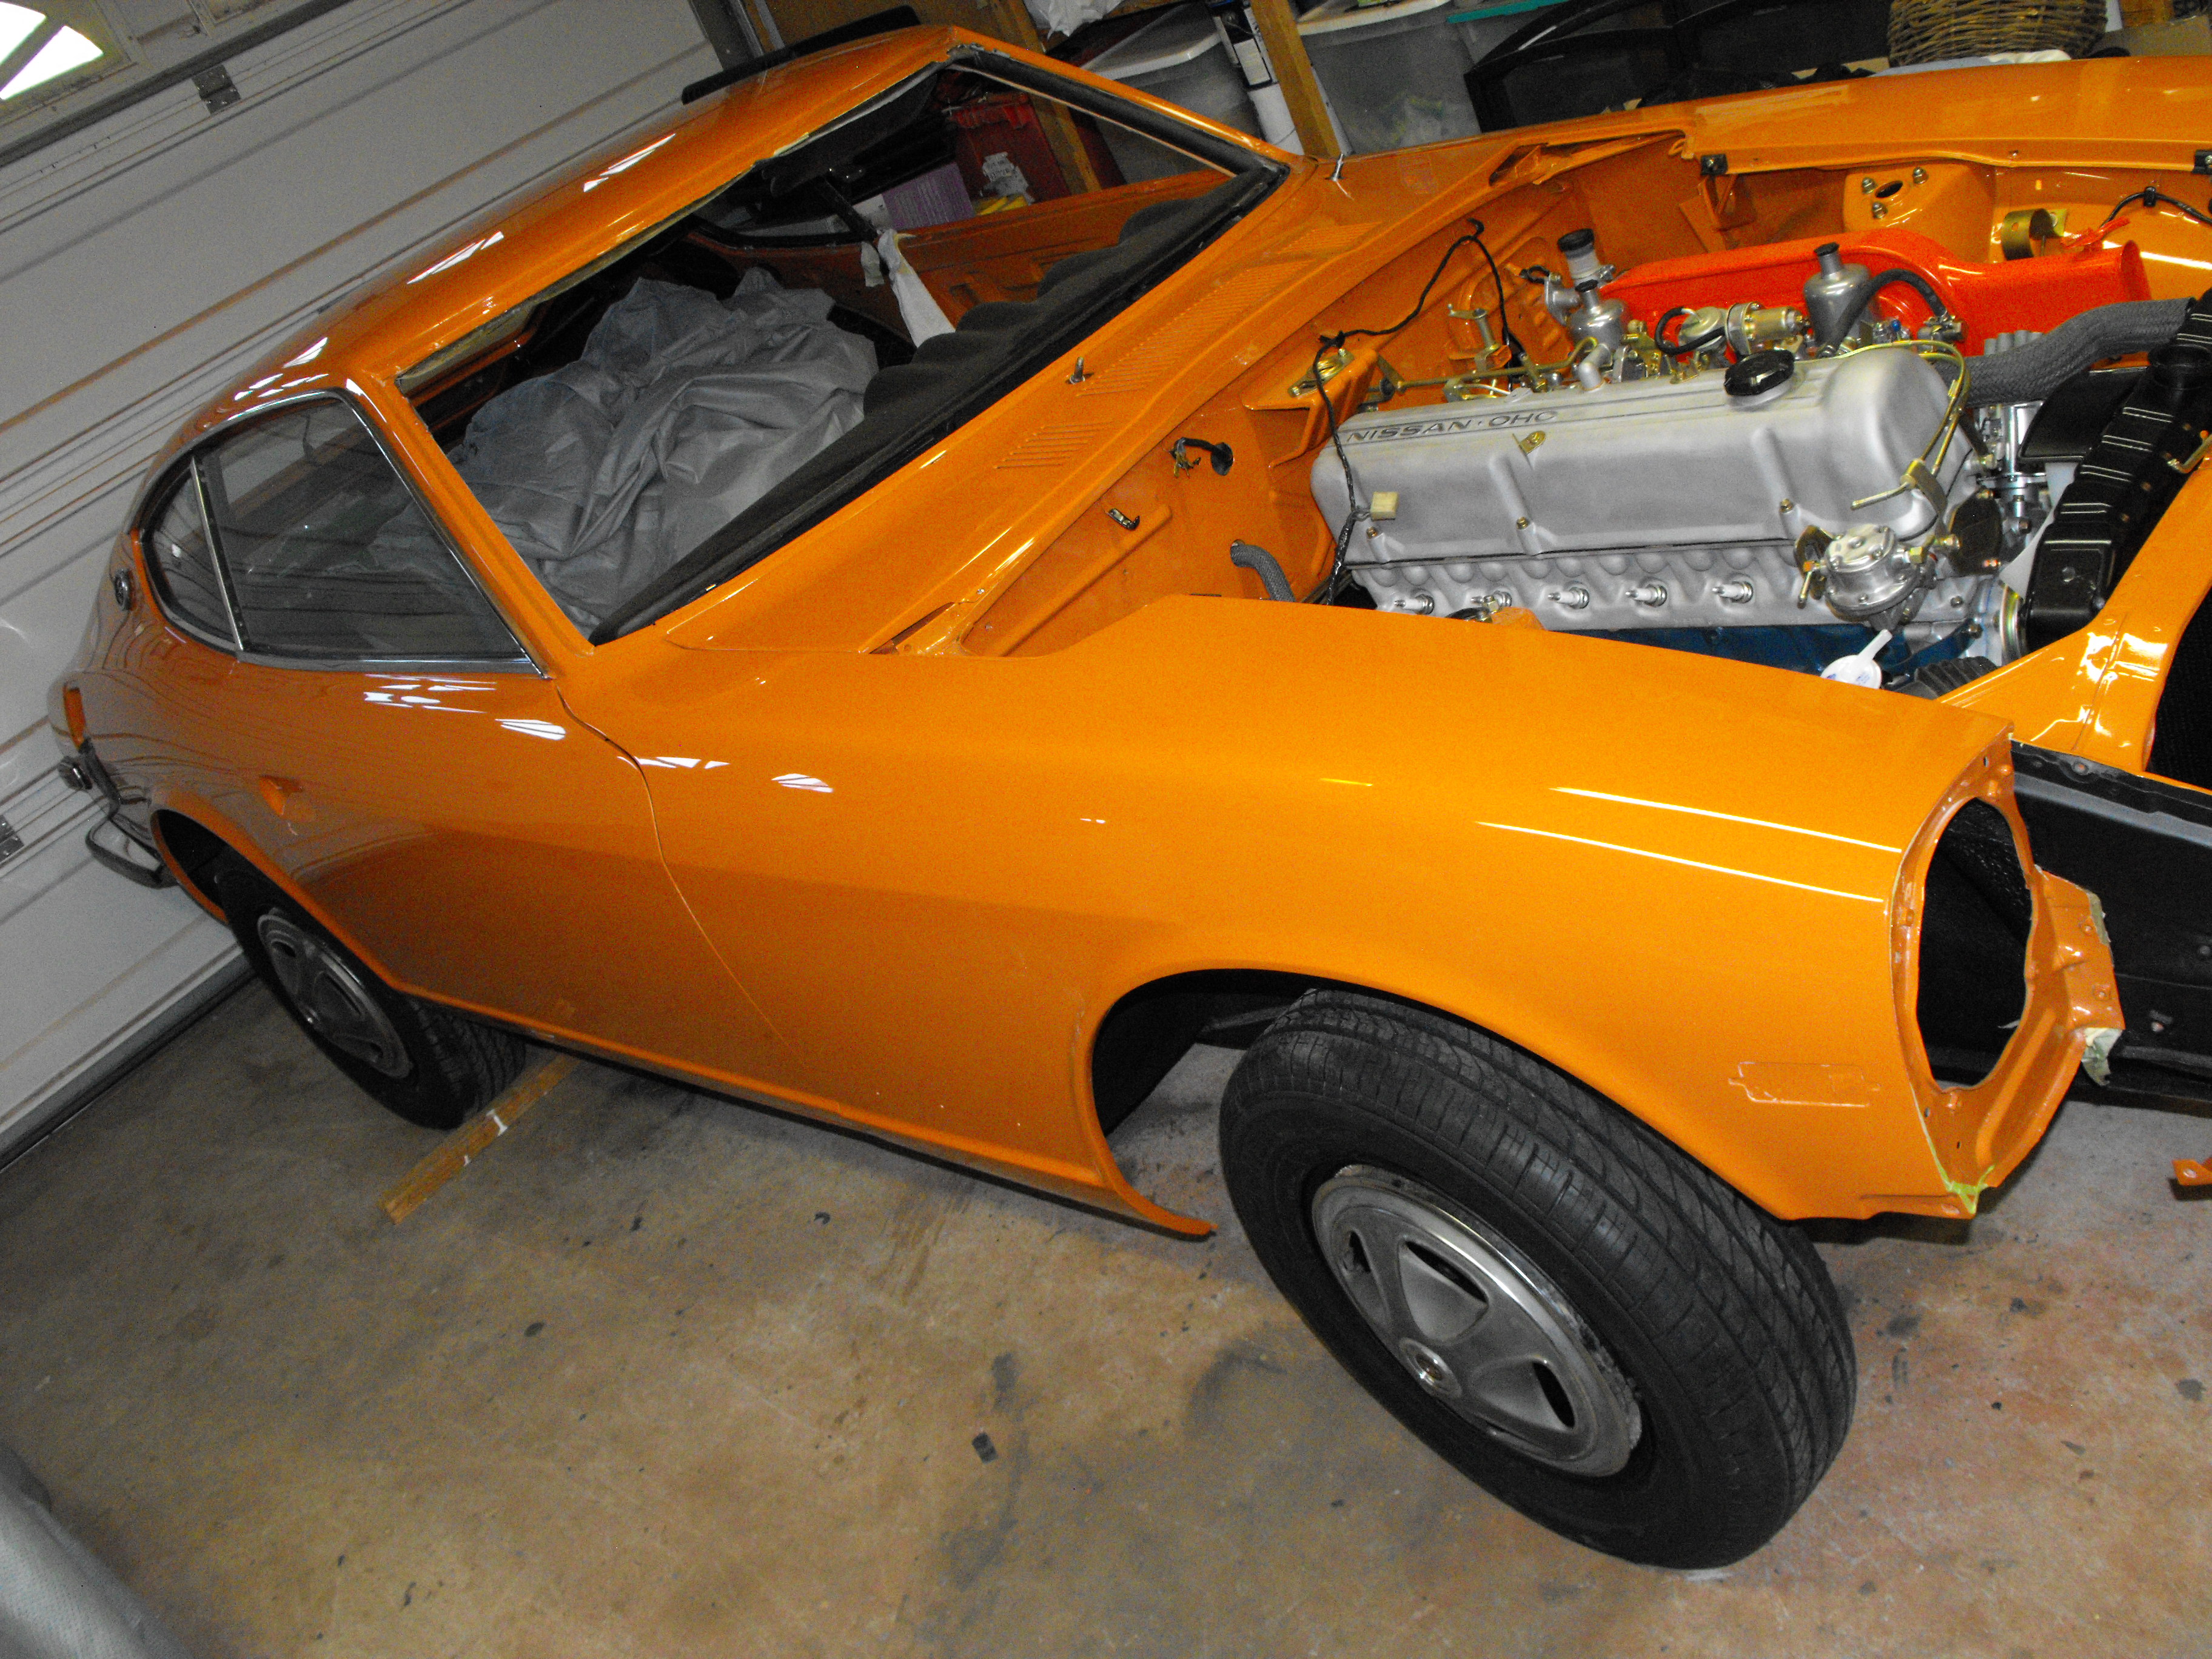
Got the fenders placed on the car. Will align and secure those tomorrow. Starting to look nice here.


-
I am pretty sure that the cloth wrap is the original fuel line. I use my dad's 1970 240Z as a reference which is for the most part un-restored and has been in the family since day 1 so I know its history. Also, this thread is a good reference. Thanks for the pic CanTechZ
-
Here is a (bad) picture of the hatch installed. Still terrible lighting since I am using a flash at night. Should be able to get some nice shots this weekend. I will have the glass in by then. I got the new wrapped fuel hose and I absolutely love it . This is the closest match of the original fuel tubing that I have seen. and looks very nice with the wire clamps. Pics are below. Also picking up the fenders tomorrow from the paint shop. They are now color sanded and polished.


-
These are the clamps (QTY and size) that I ordered off of e-bay for the hose in the engine bay. Cost was less than $50 for 42 clamps, not bad. I measured the diameter of each hose using my calipers and ordered clamps that were in the range. Double Wire Hose Clamp Pipe Clip Screw Bolt Tight Fitting Classic Zinc 9-120MM ( 351393130624 ) Clamp Diameter: 25-29Mm Quantity: 4 ITEM PRICE: US $4.64 Clamp Diameter: 40-45Mm Quantity: 6 ITEM PRICE: US $7.38 Clamp Diameter: 13-16Mm Quantity: 12 This item has been shipped. ITEM PRICE: US $12.60 Clamp Diameter: 28-32Mm Quantity: 4 This item has been shipped. ITEM PRICE: US $4.84 Clamp Diameter: 20-24Mm Quantity: 10 This item has been shipped. ITEM PRICE: US $11.50 Clamp Diameter: 18-22Mm Quantity: 8 This item has been shipped. ITEM PRICE: US $8.88
-
https://jdm-car-parts.com/products/wiper-motor-cover-for-datsun-240z-260z-280z Jay has them at JDM but they look a bit odd in the picture. Interesting texture. Speaking of JDM, the braided hose came in so I put them in place. Now I just need the clamps. Also got the hatch, hatch seals, hatch hinges and hatch latch installed. Will take hatch pics when I can get some good light.


-
Thanks for the info on this. I picked up the BCWL-018 hose for my fuel line in the engine bay. This hose looks closest to the OEM fuel line.
-
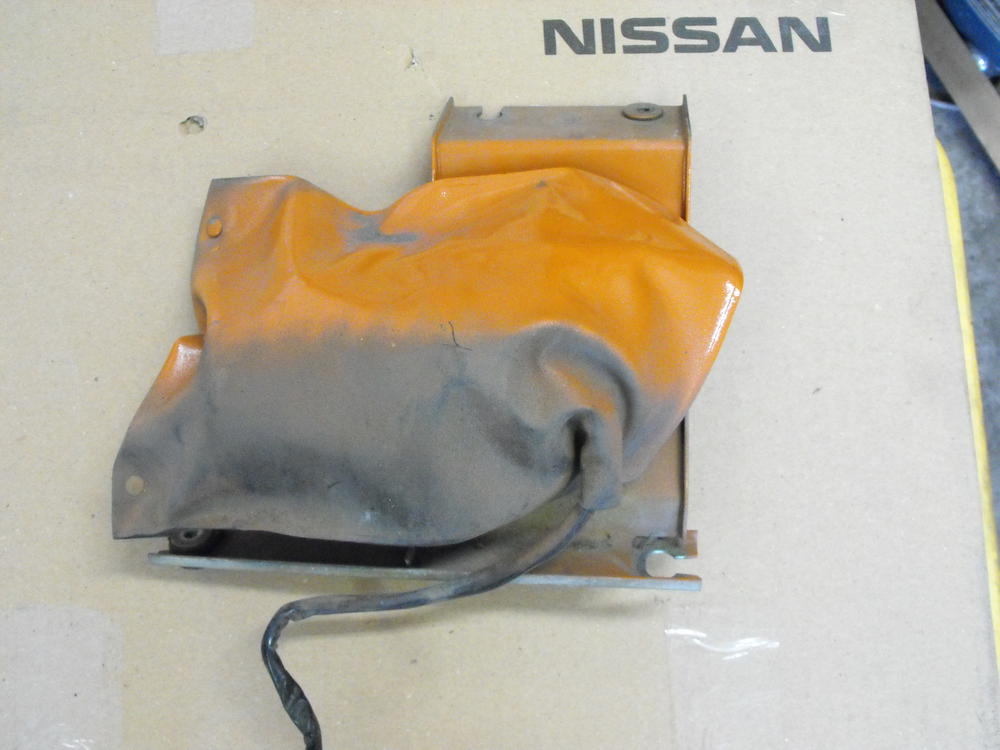
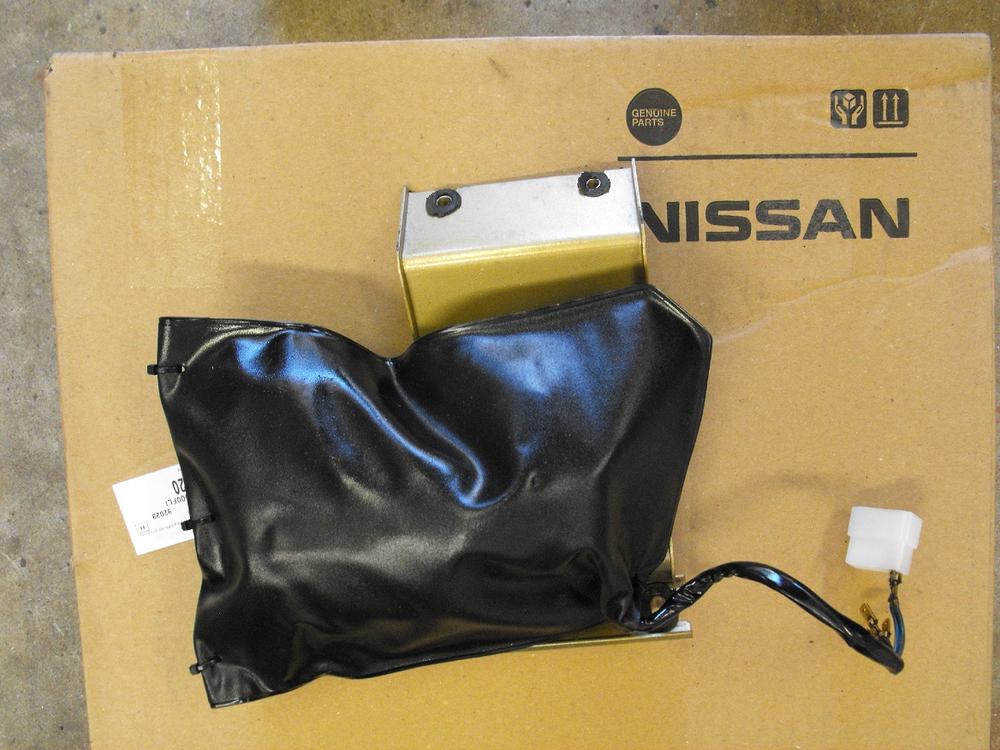
The bag was an extra part from my previous build. As it turns out, the last two cars I purchased were from older gentlemen that were going to restore their Z's but never got around to it. With both purchases there were a lot of extra parts that the previous owners had bought intending to use for the restoration. This bag was one of those items. I thought I saw a vendor selling these, but I can't remember who. I thought I saw it at Zeddsaver but I just checked there and didn't see it.
-
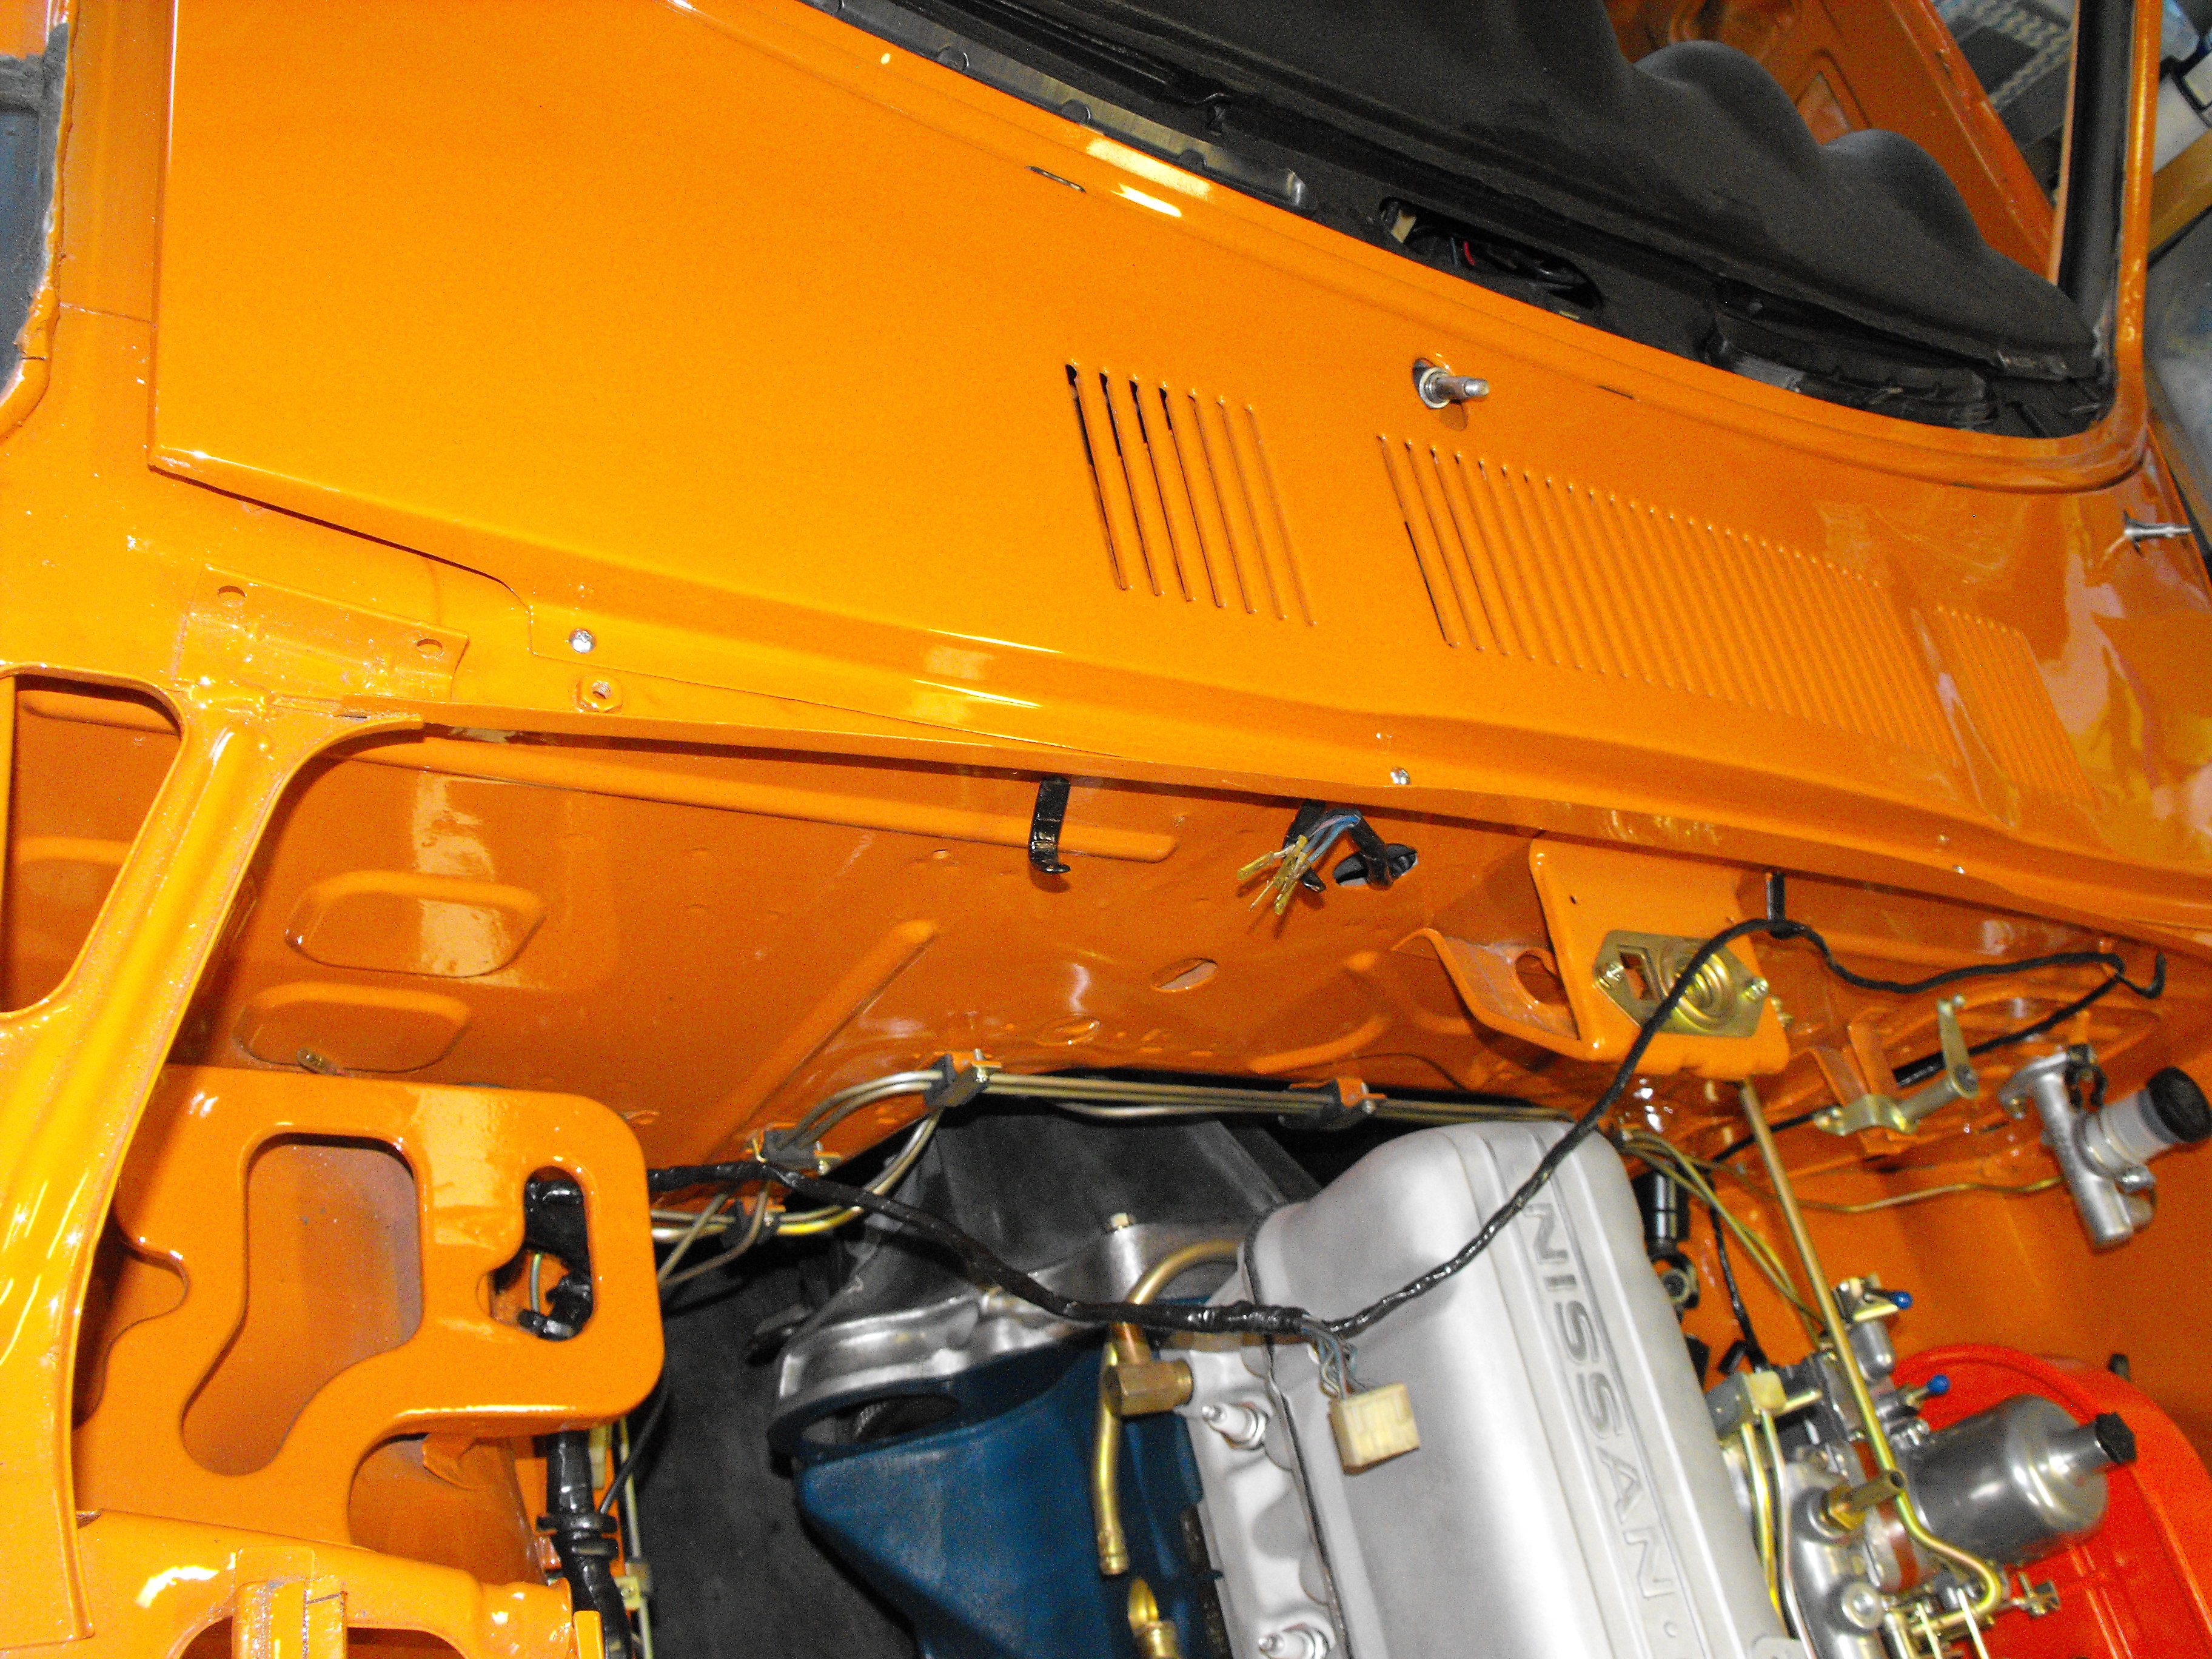
Cleaned up the wiper motor today. Put a new cover on and replaced the connector housing. I used tie-wraps instead of the plastic rivets. The original rivets could not be salvaged. This is one of those things that is not visible on the car, but you know it is there. Installed wiper motor and wiper arm assembly Also installed the cowl and front valence. Cleaned and painted the front grill. Installed that as well. Pics are below.


-
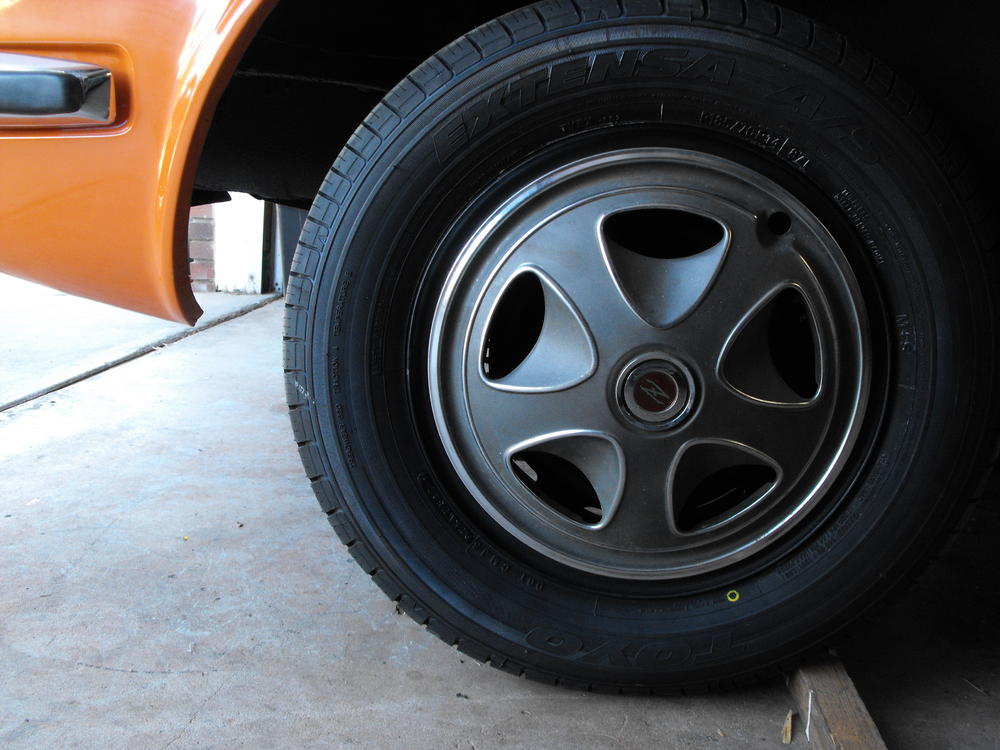
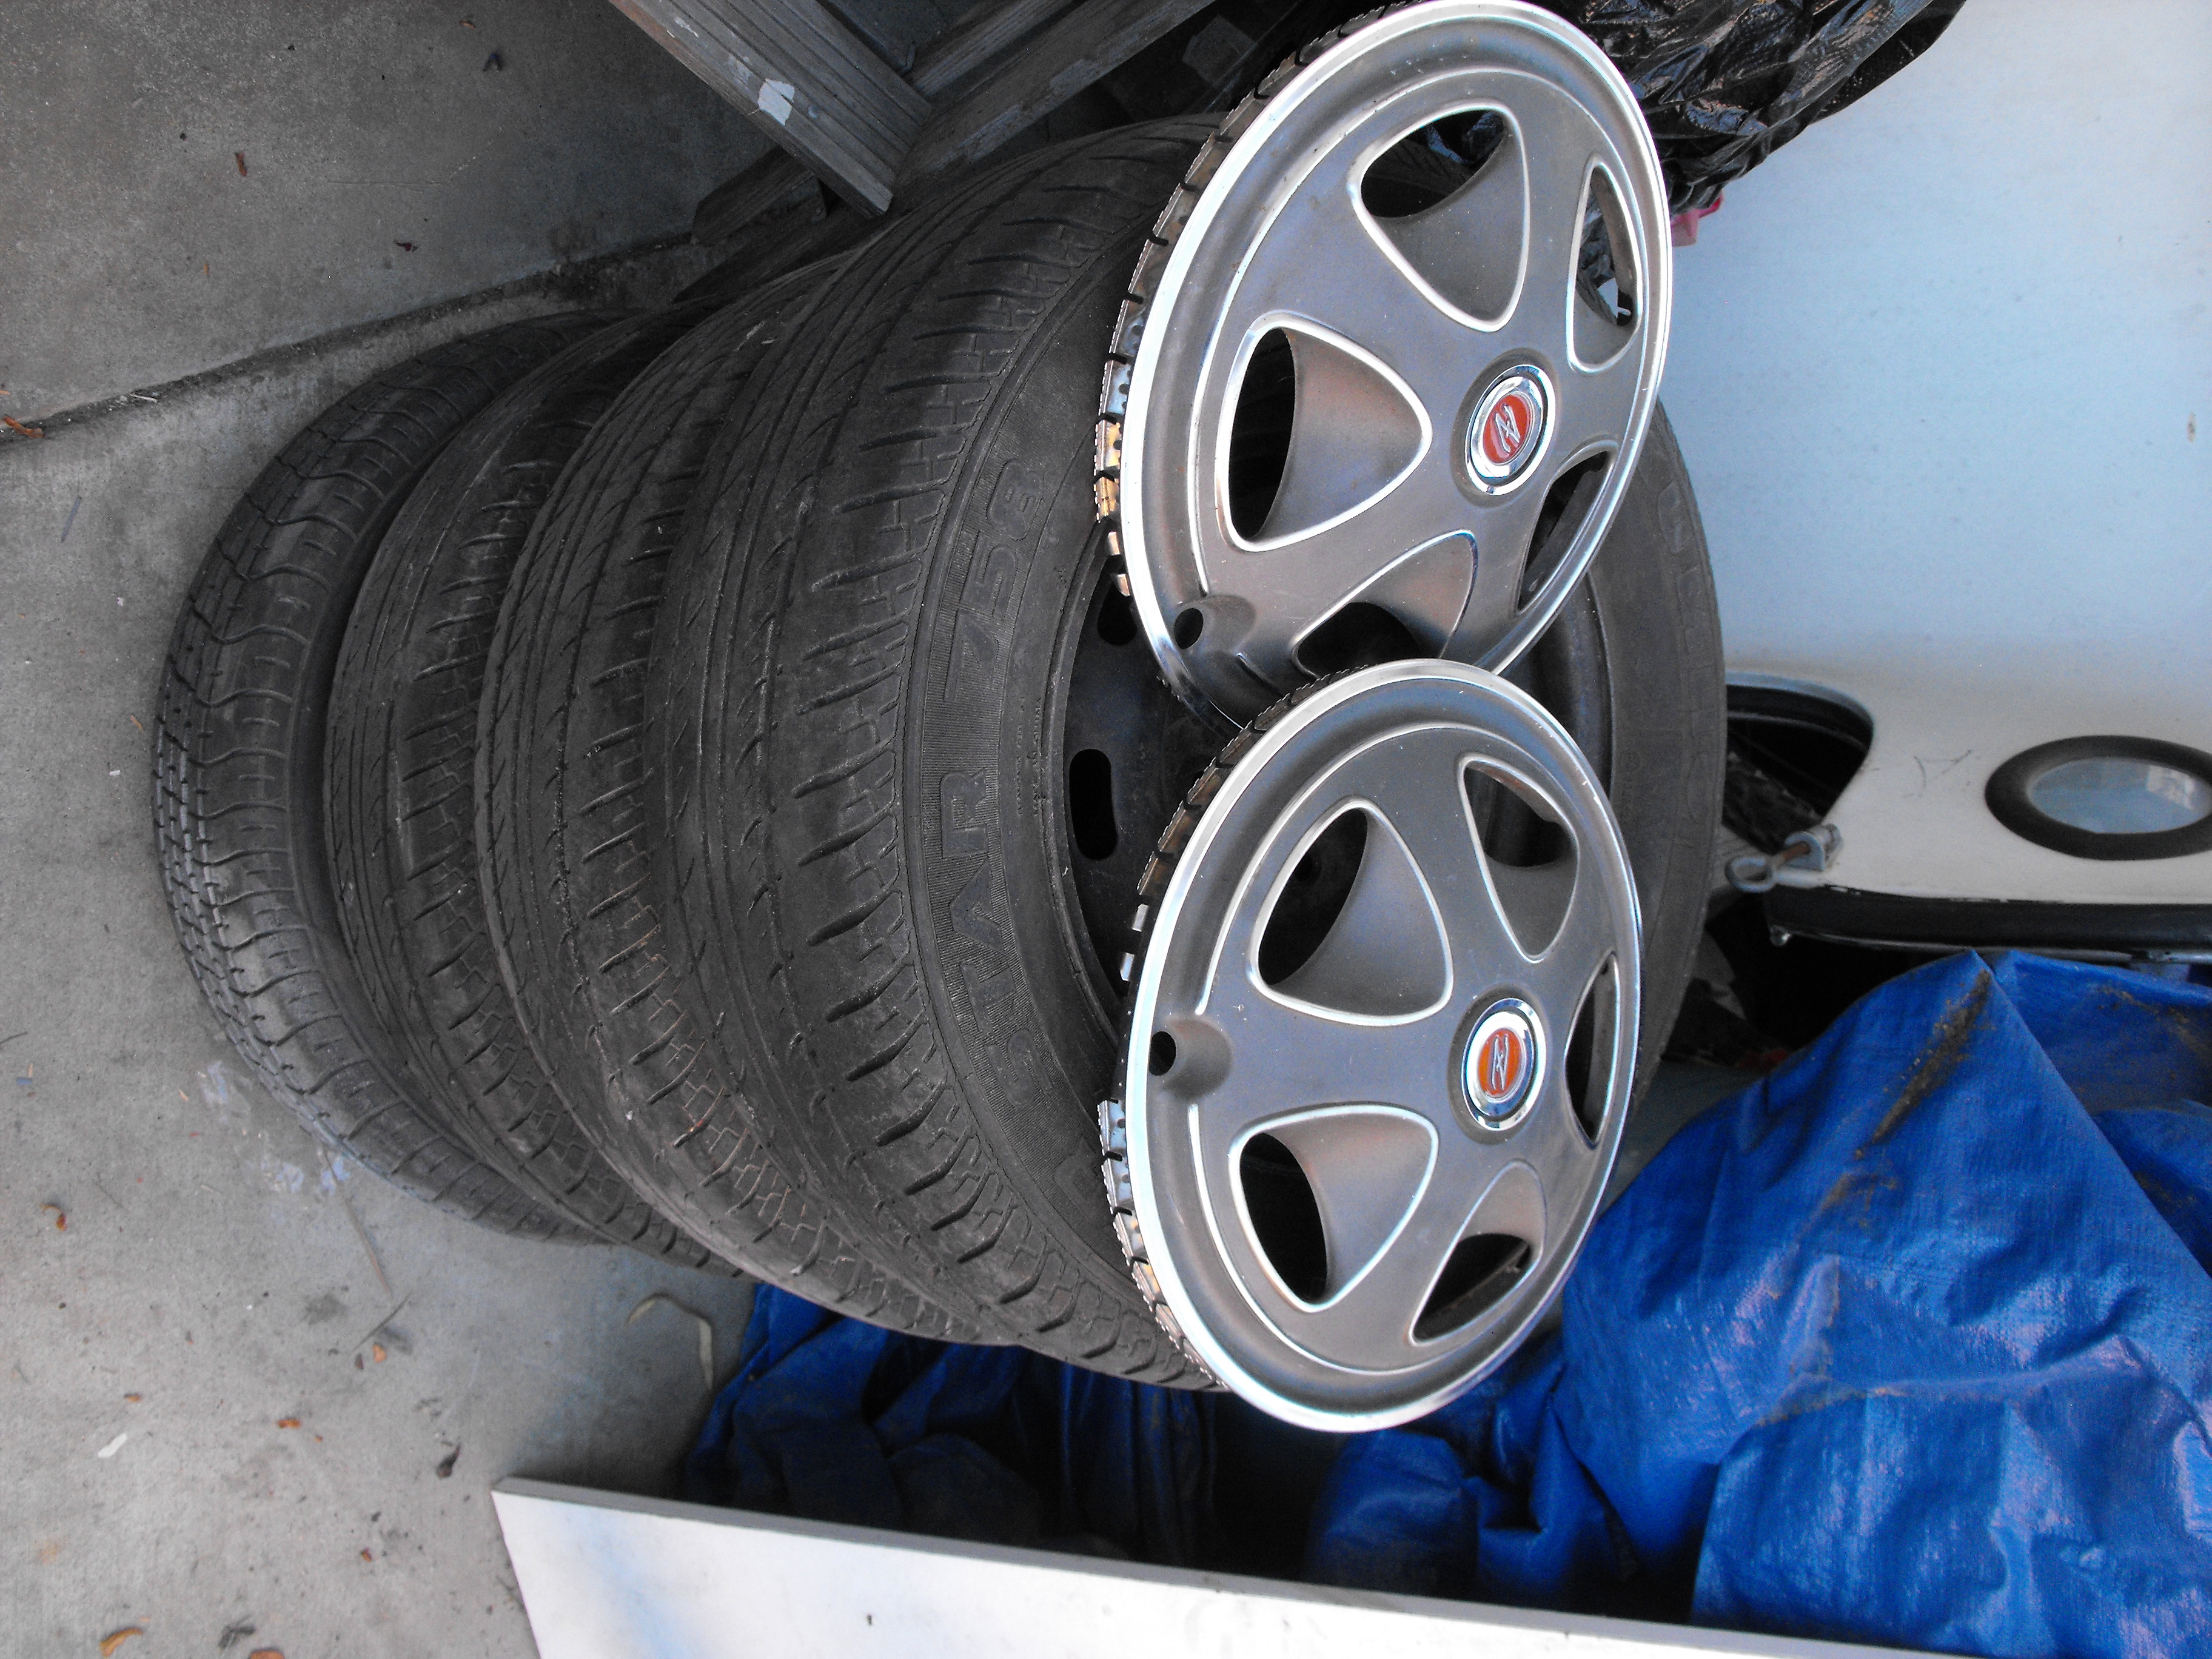
I had the four 'Steelies' powder-coated a matte black and sprayed the backside silver similar to the factory rims. Also got new Toyo's mounted and balanced. I loosely placed a hubcap on just to see how everything looks. Hubcap needs a bit of refreshing and a new coat of paint, but otherwise things look good. I installed the four tires on the car since this is how we will roll .

-
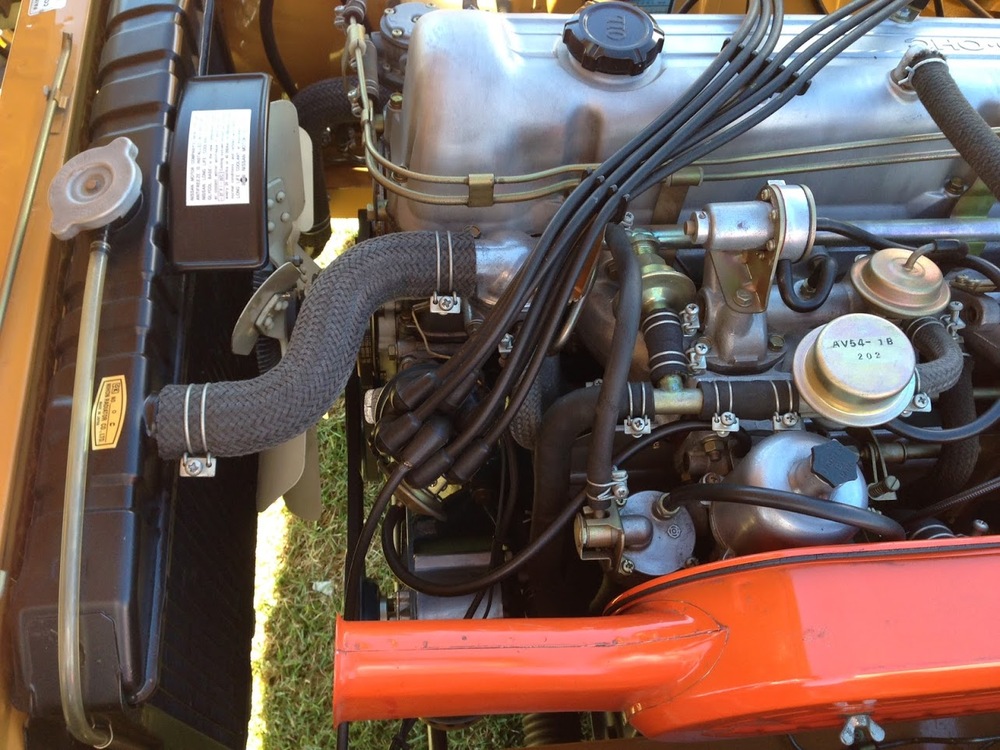
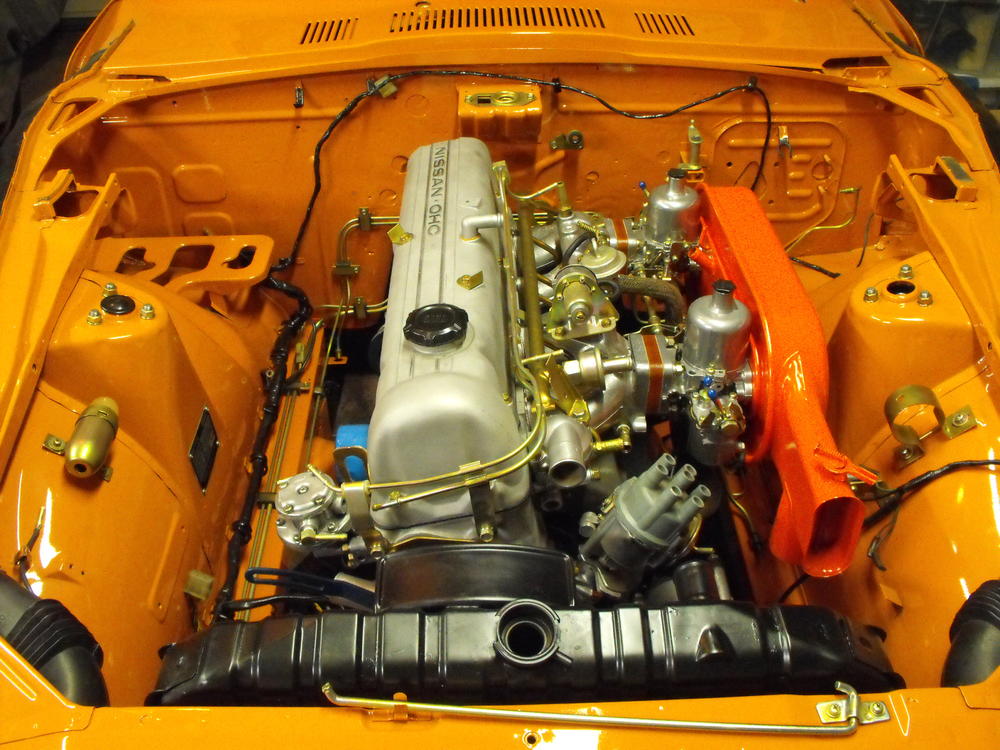
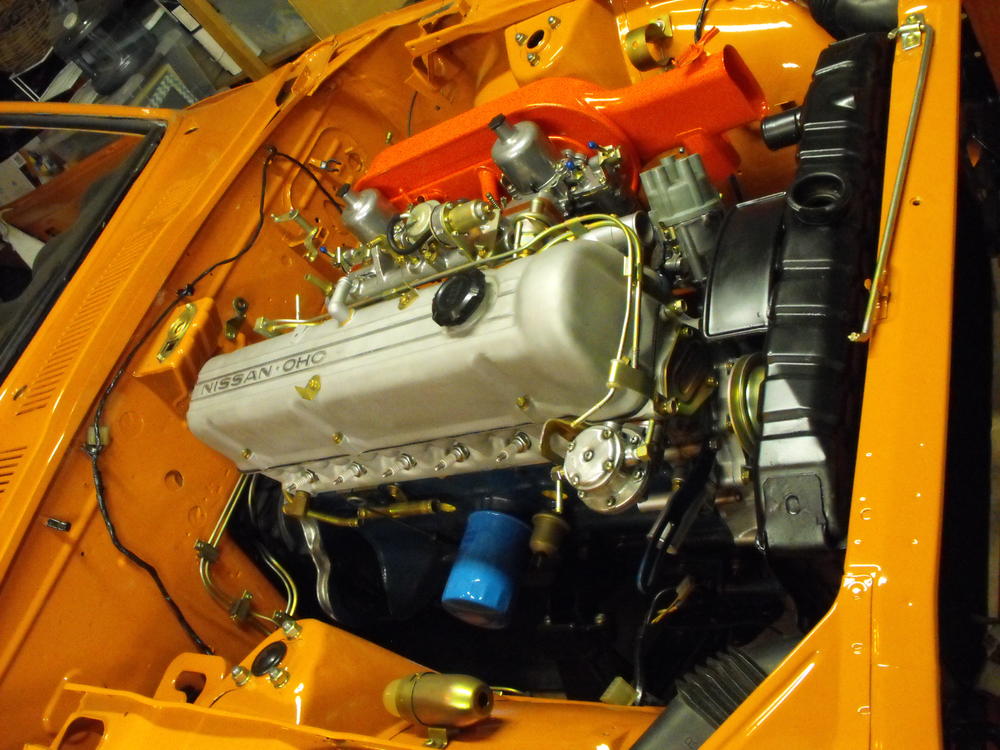
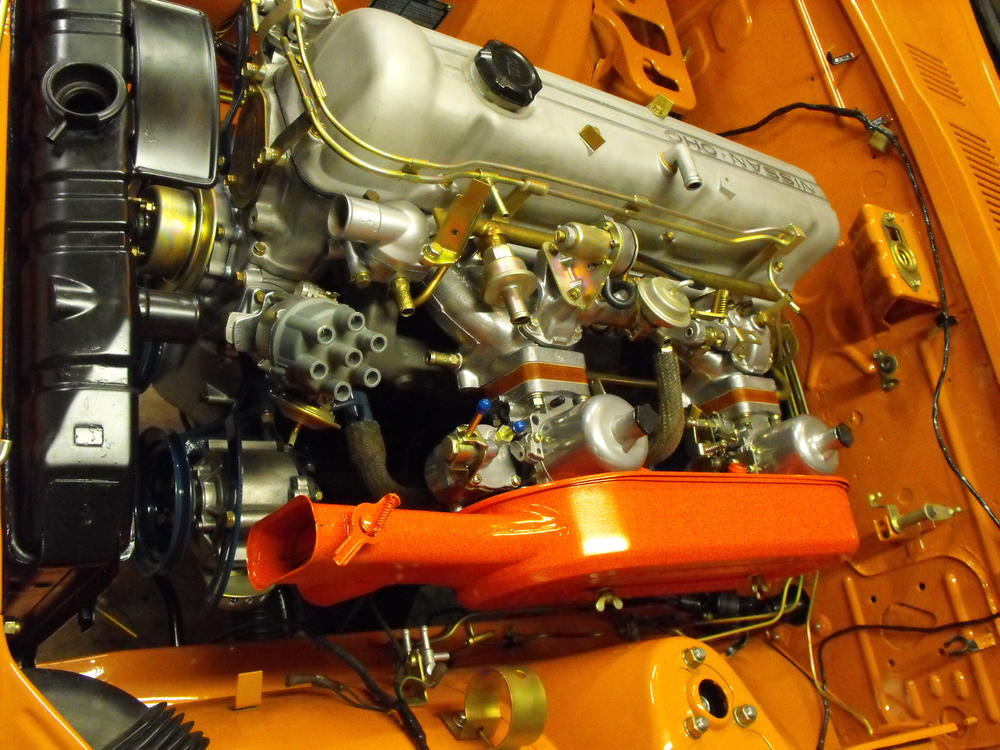
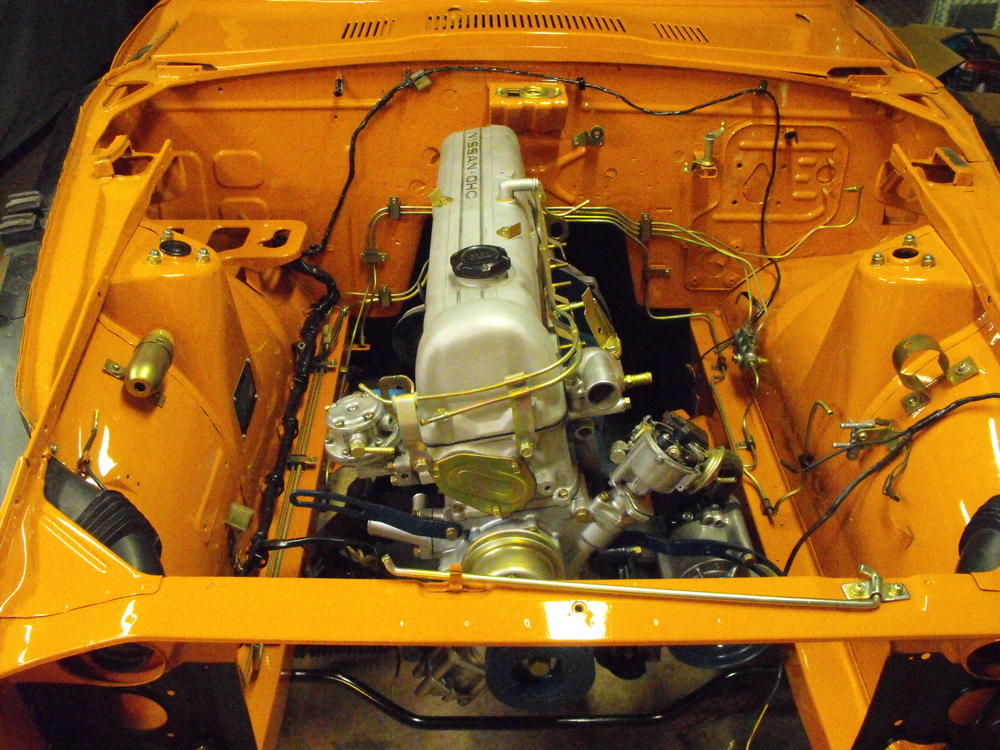
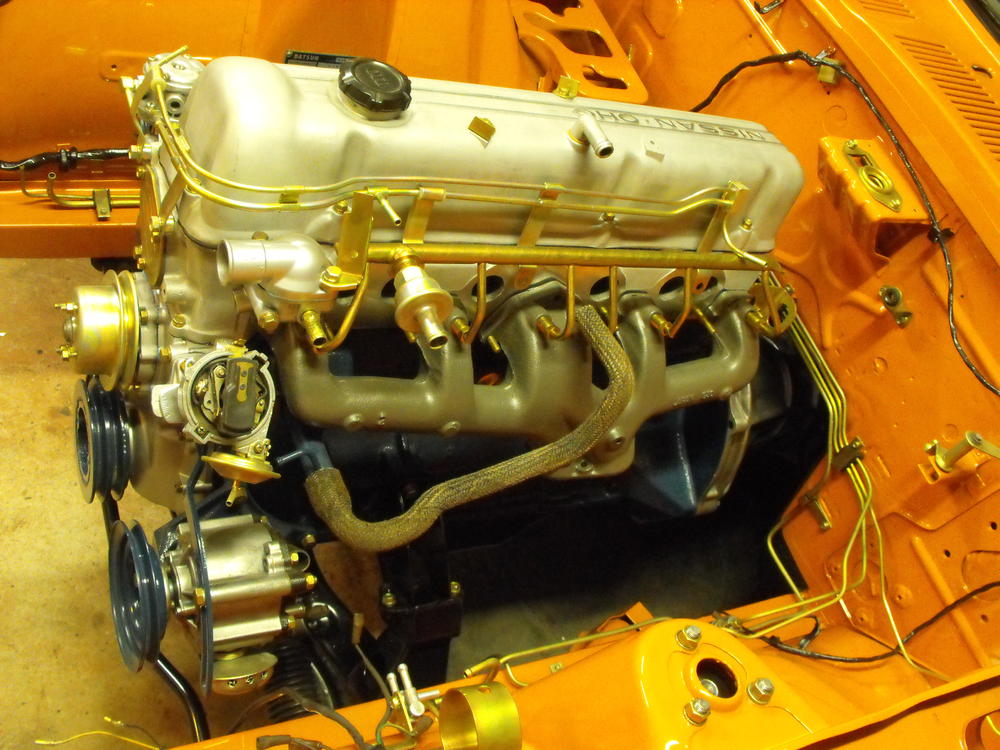
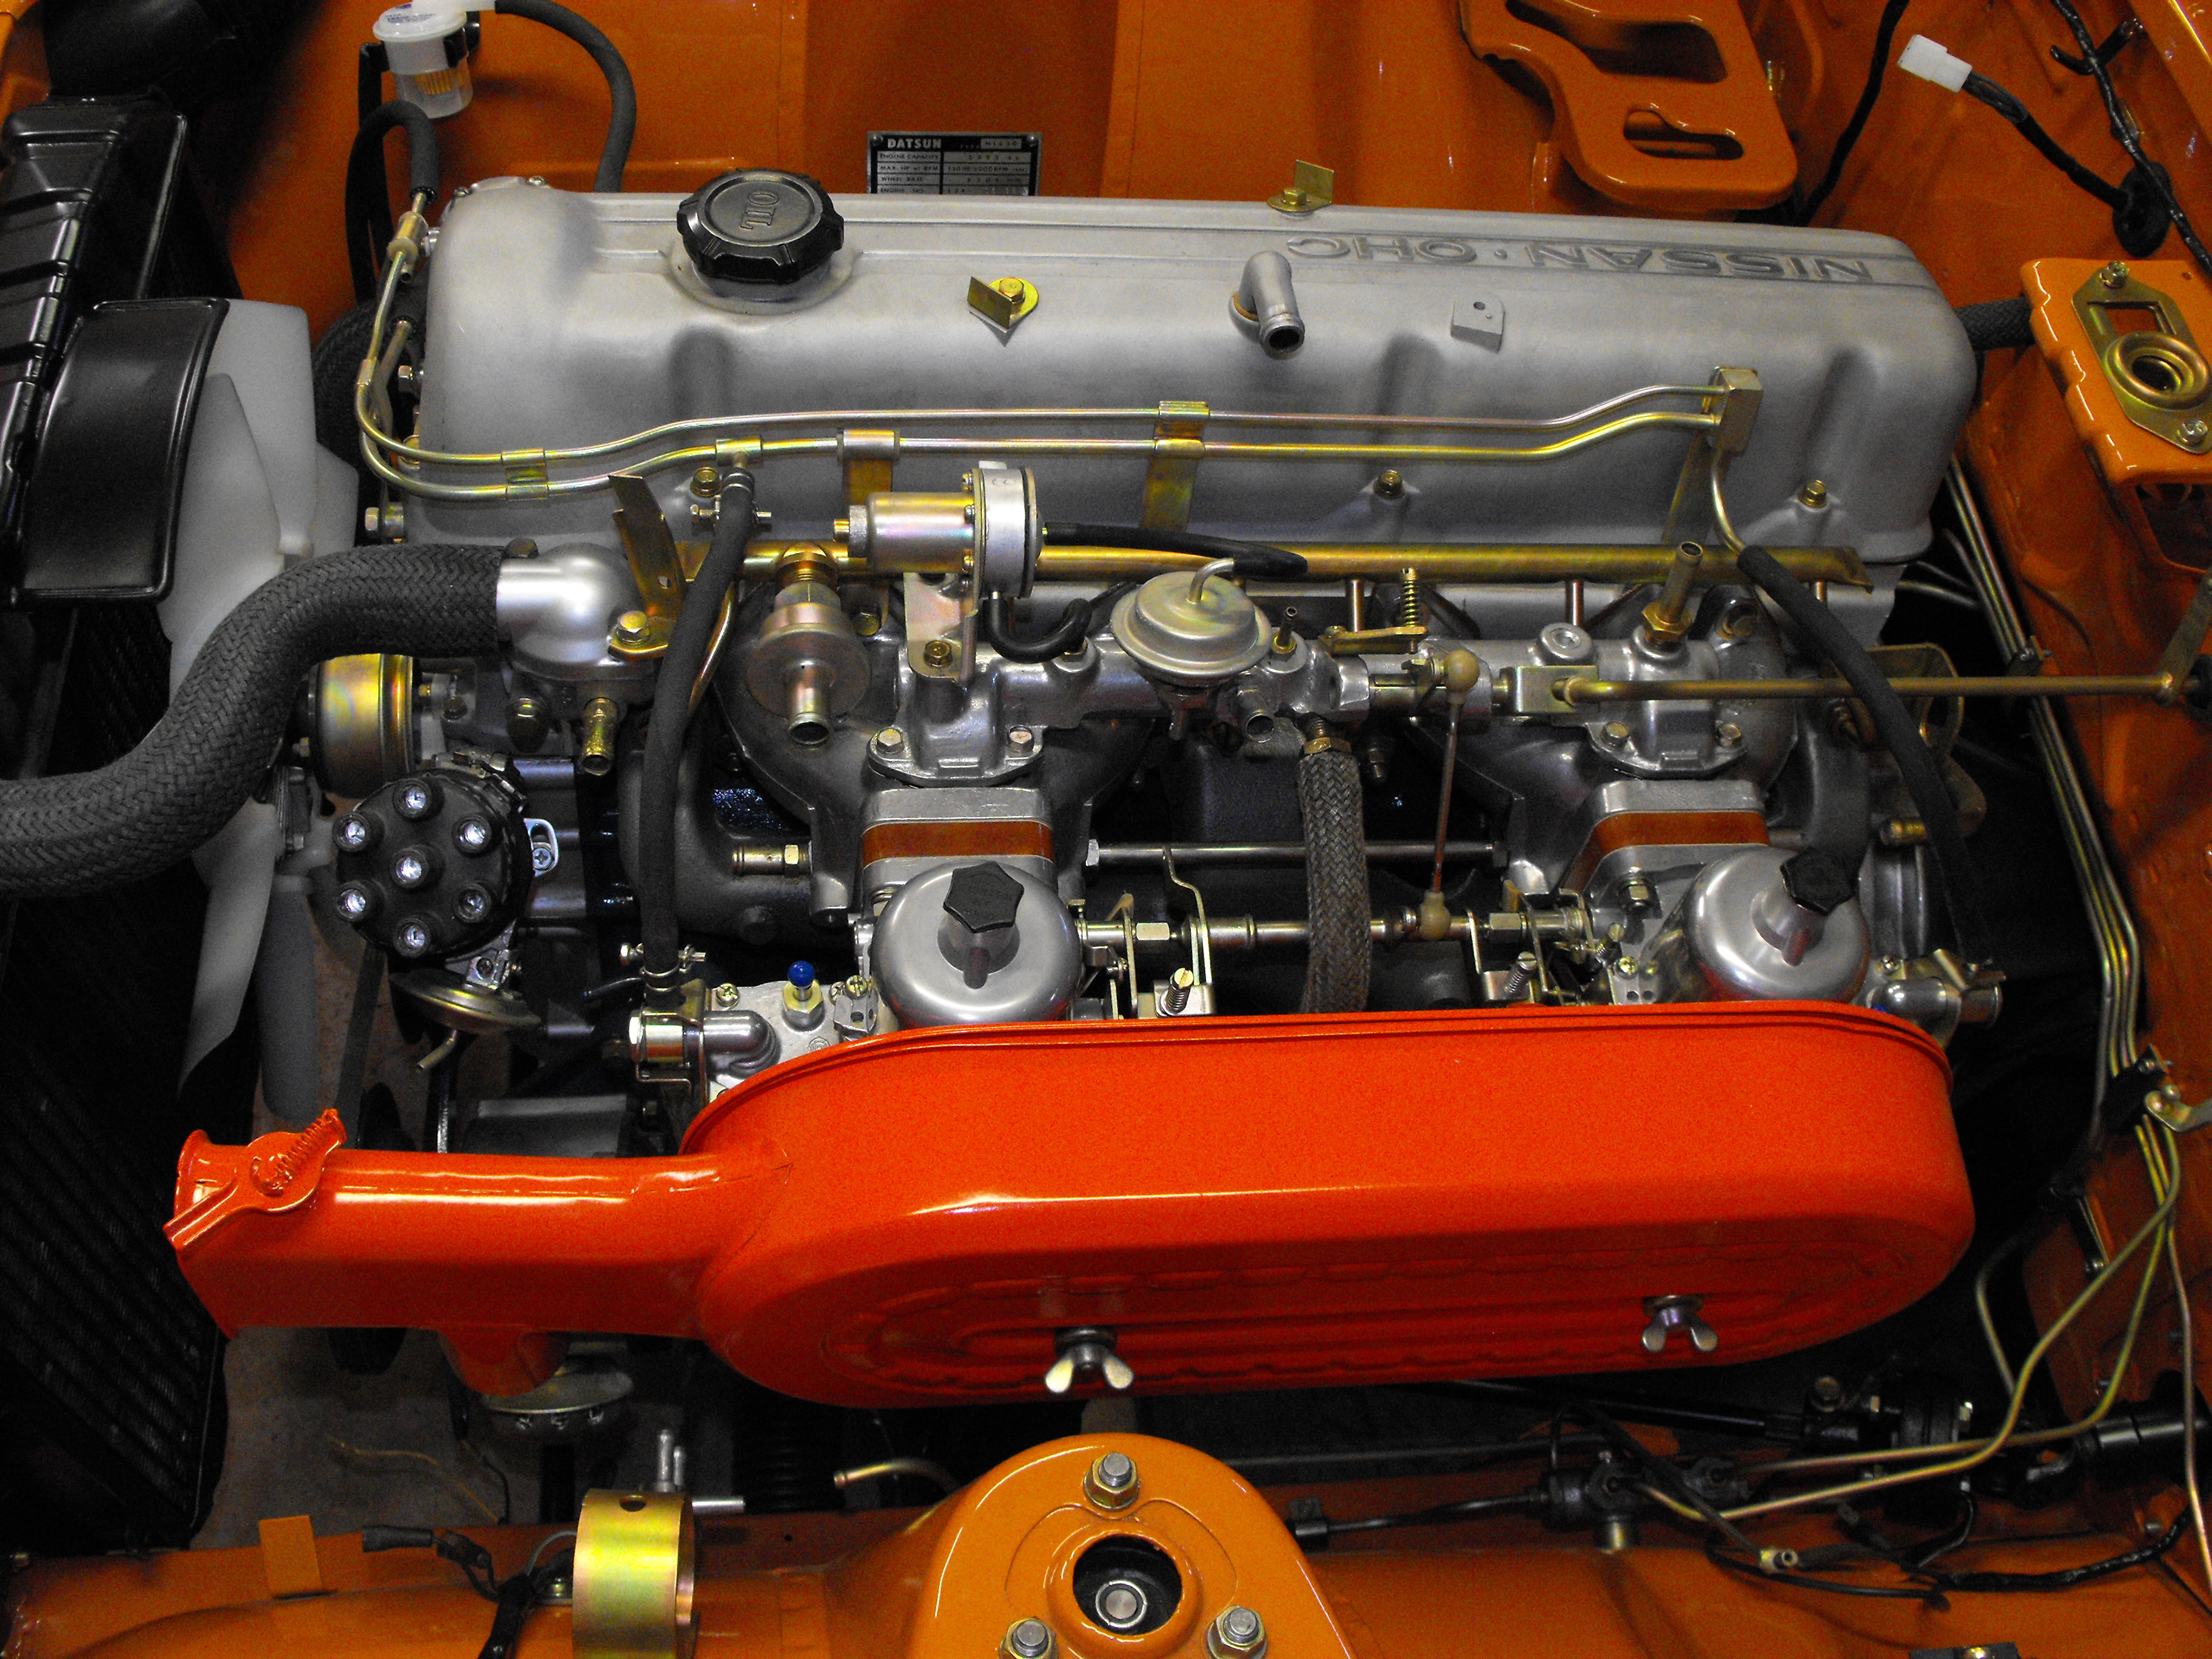
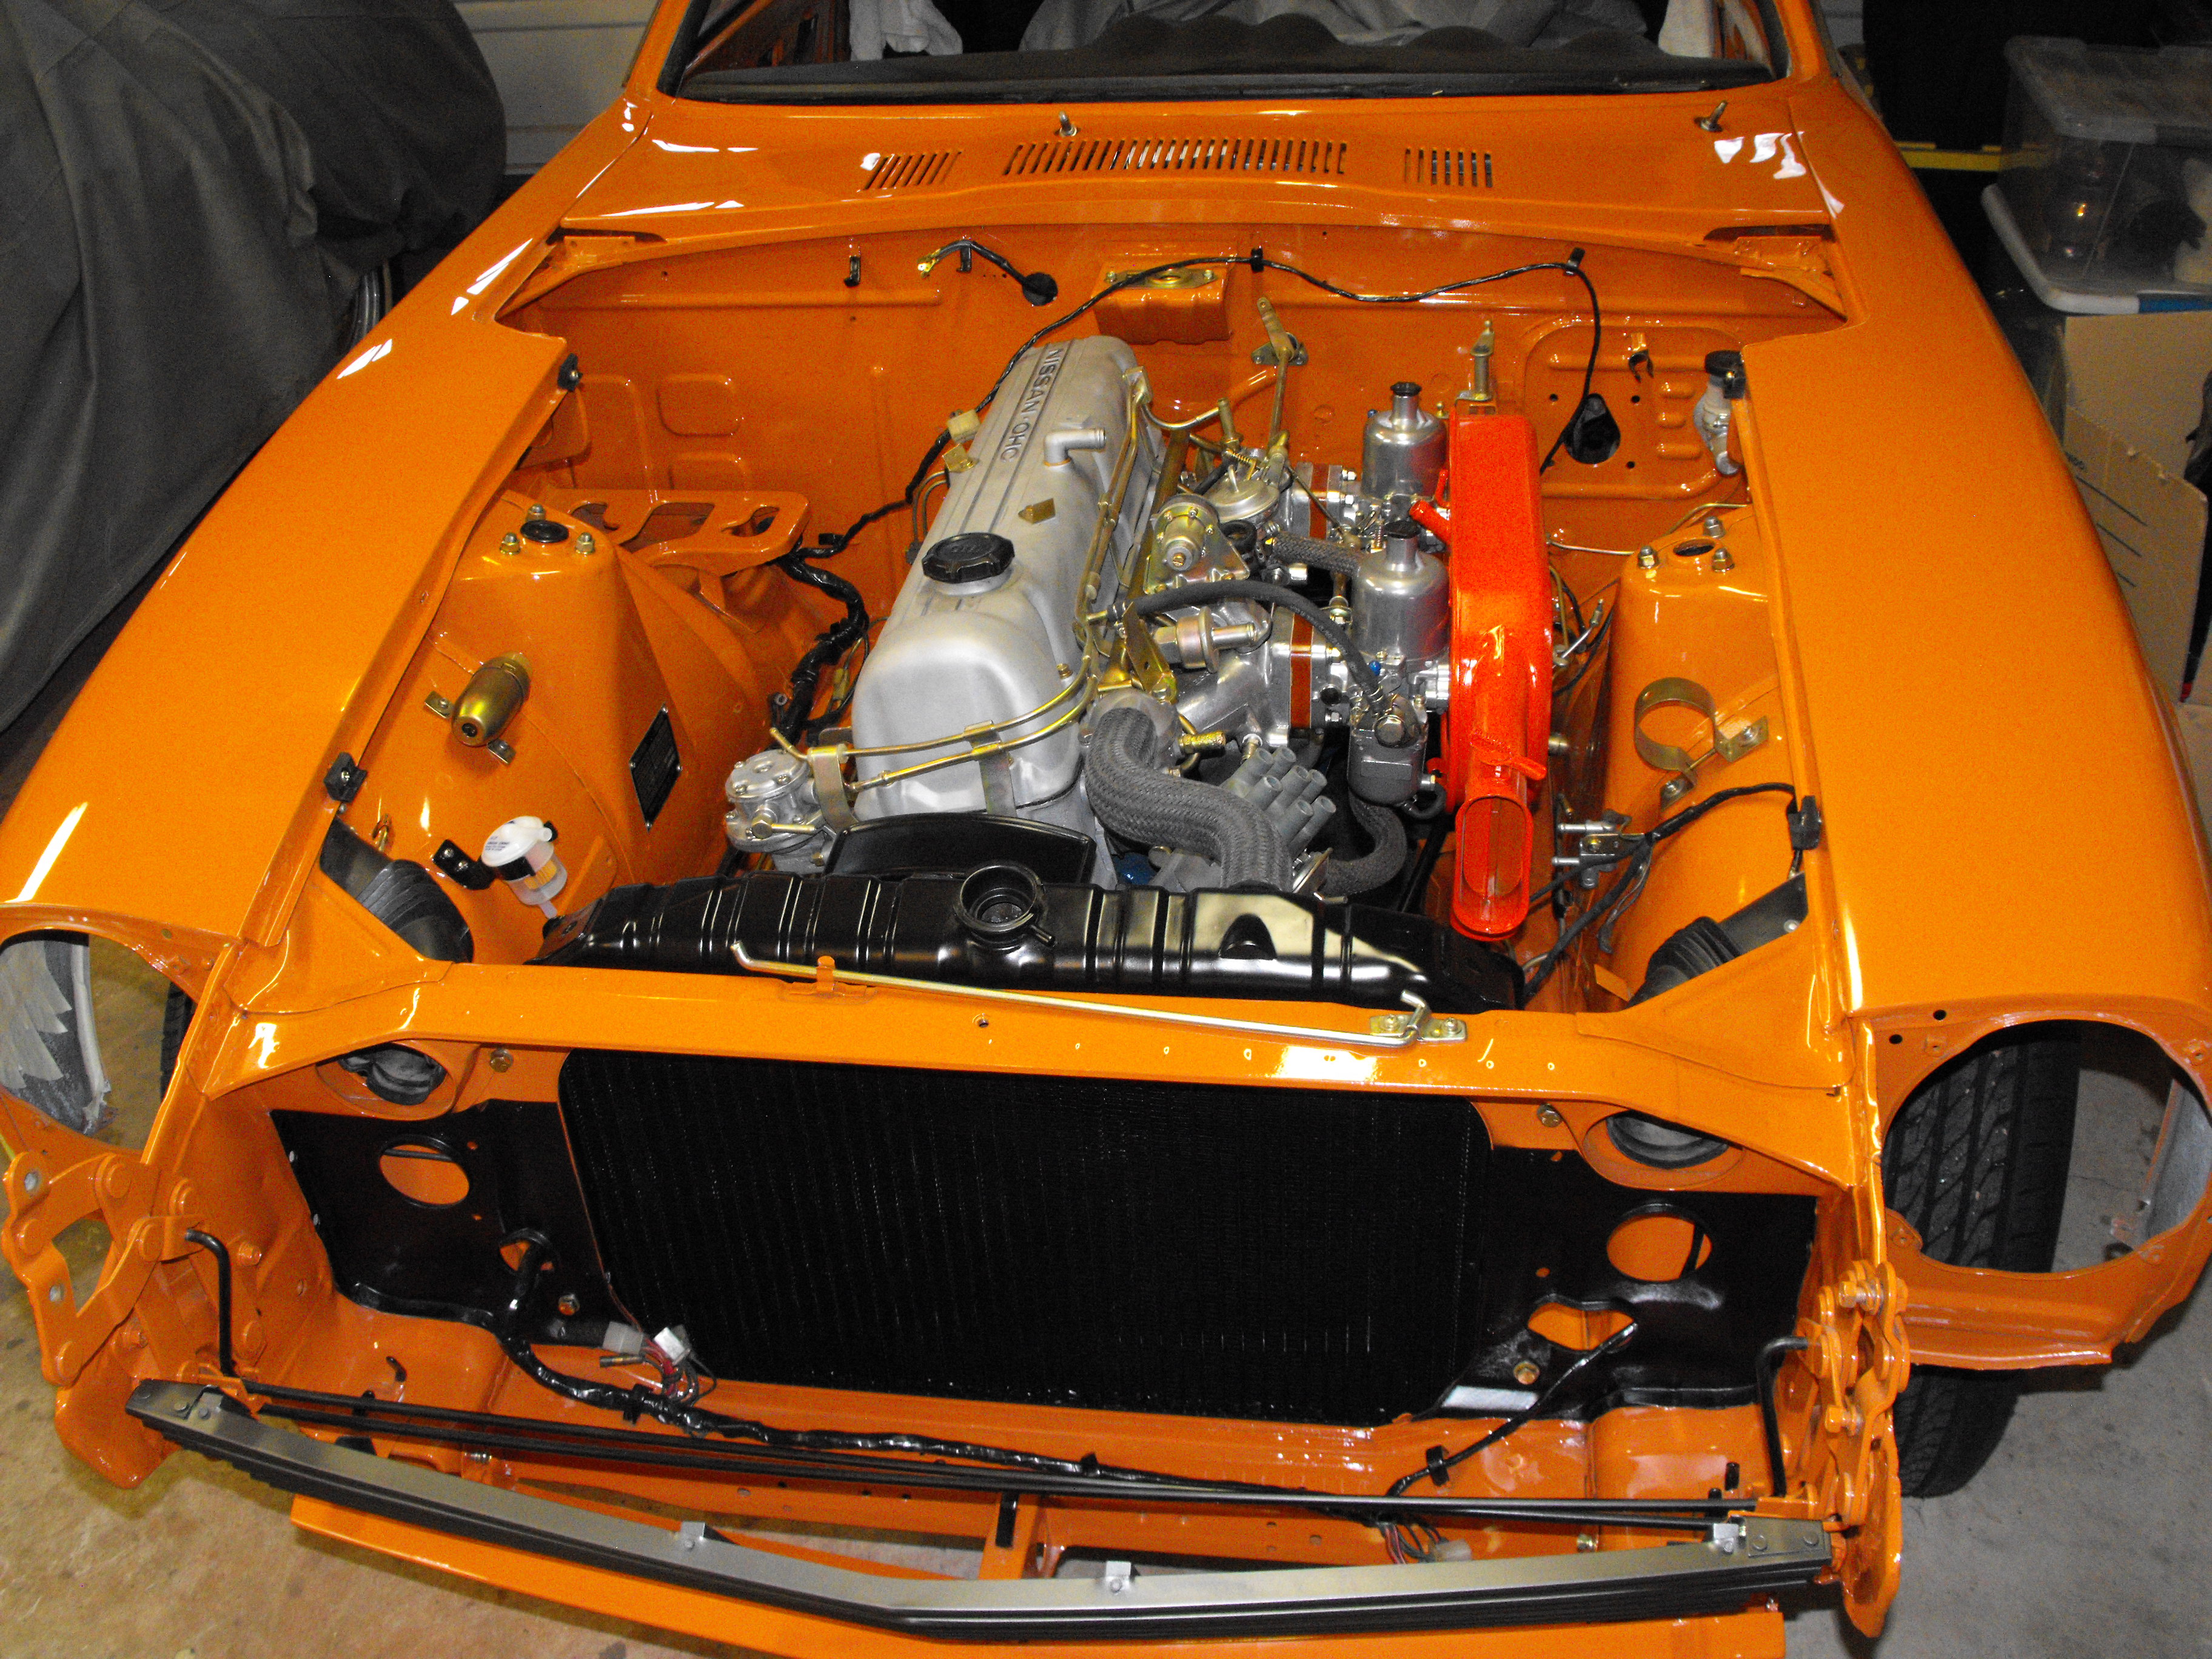
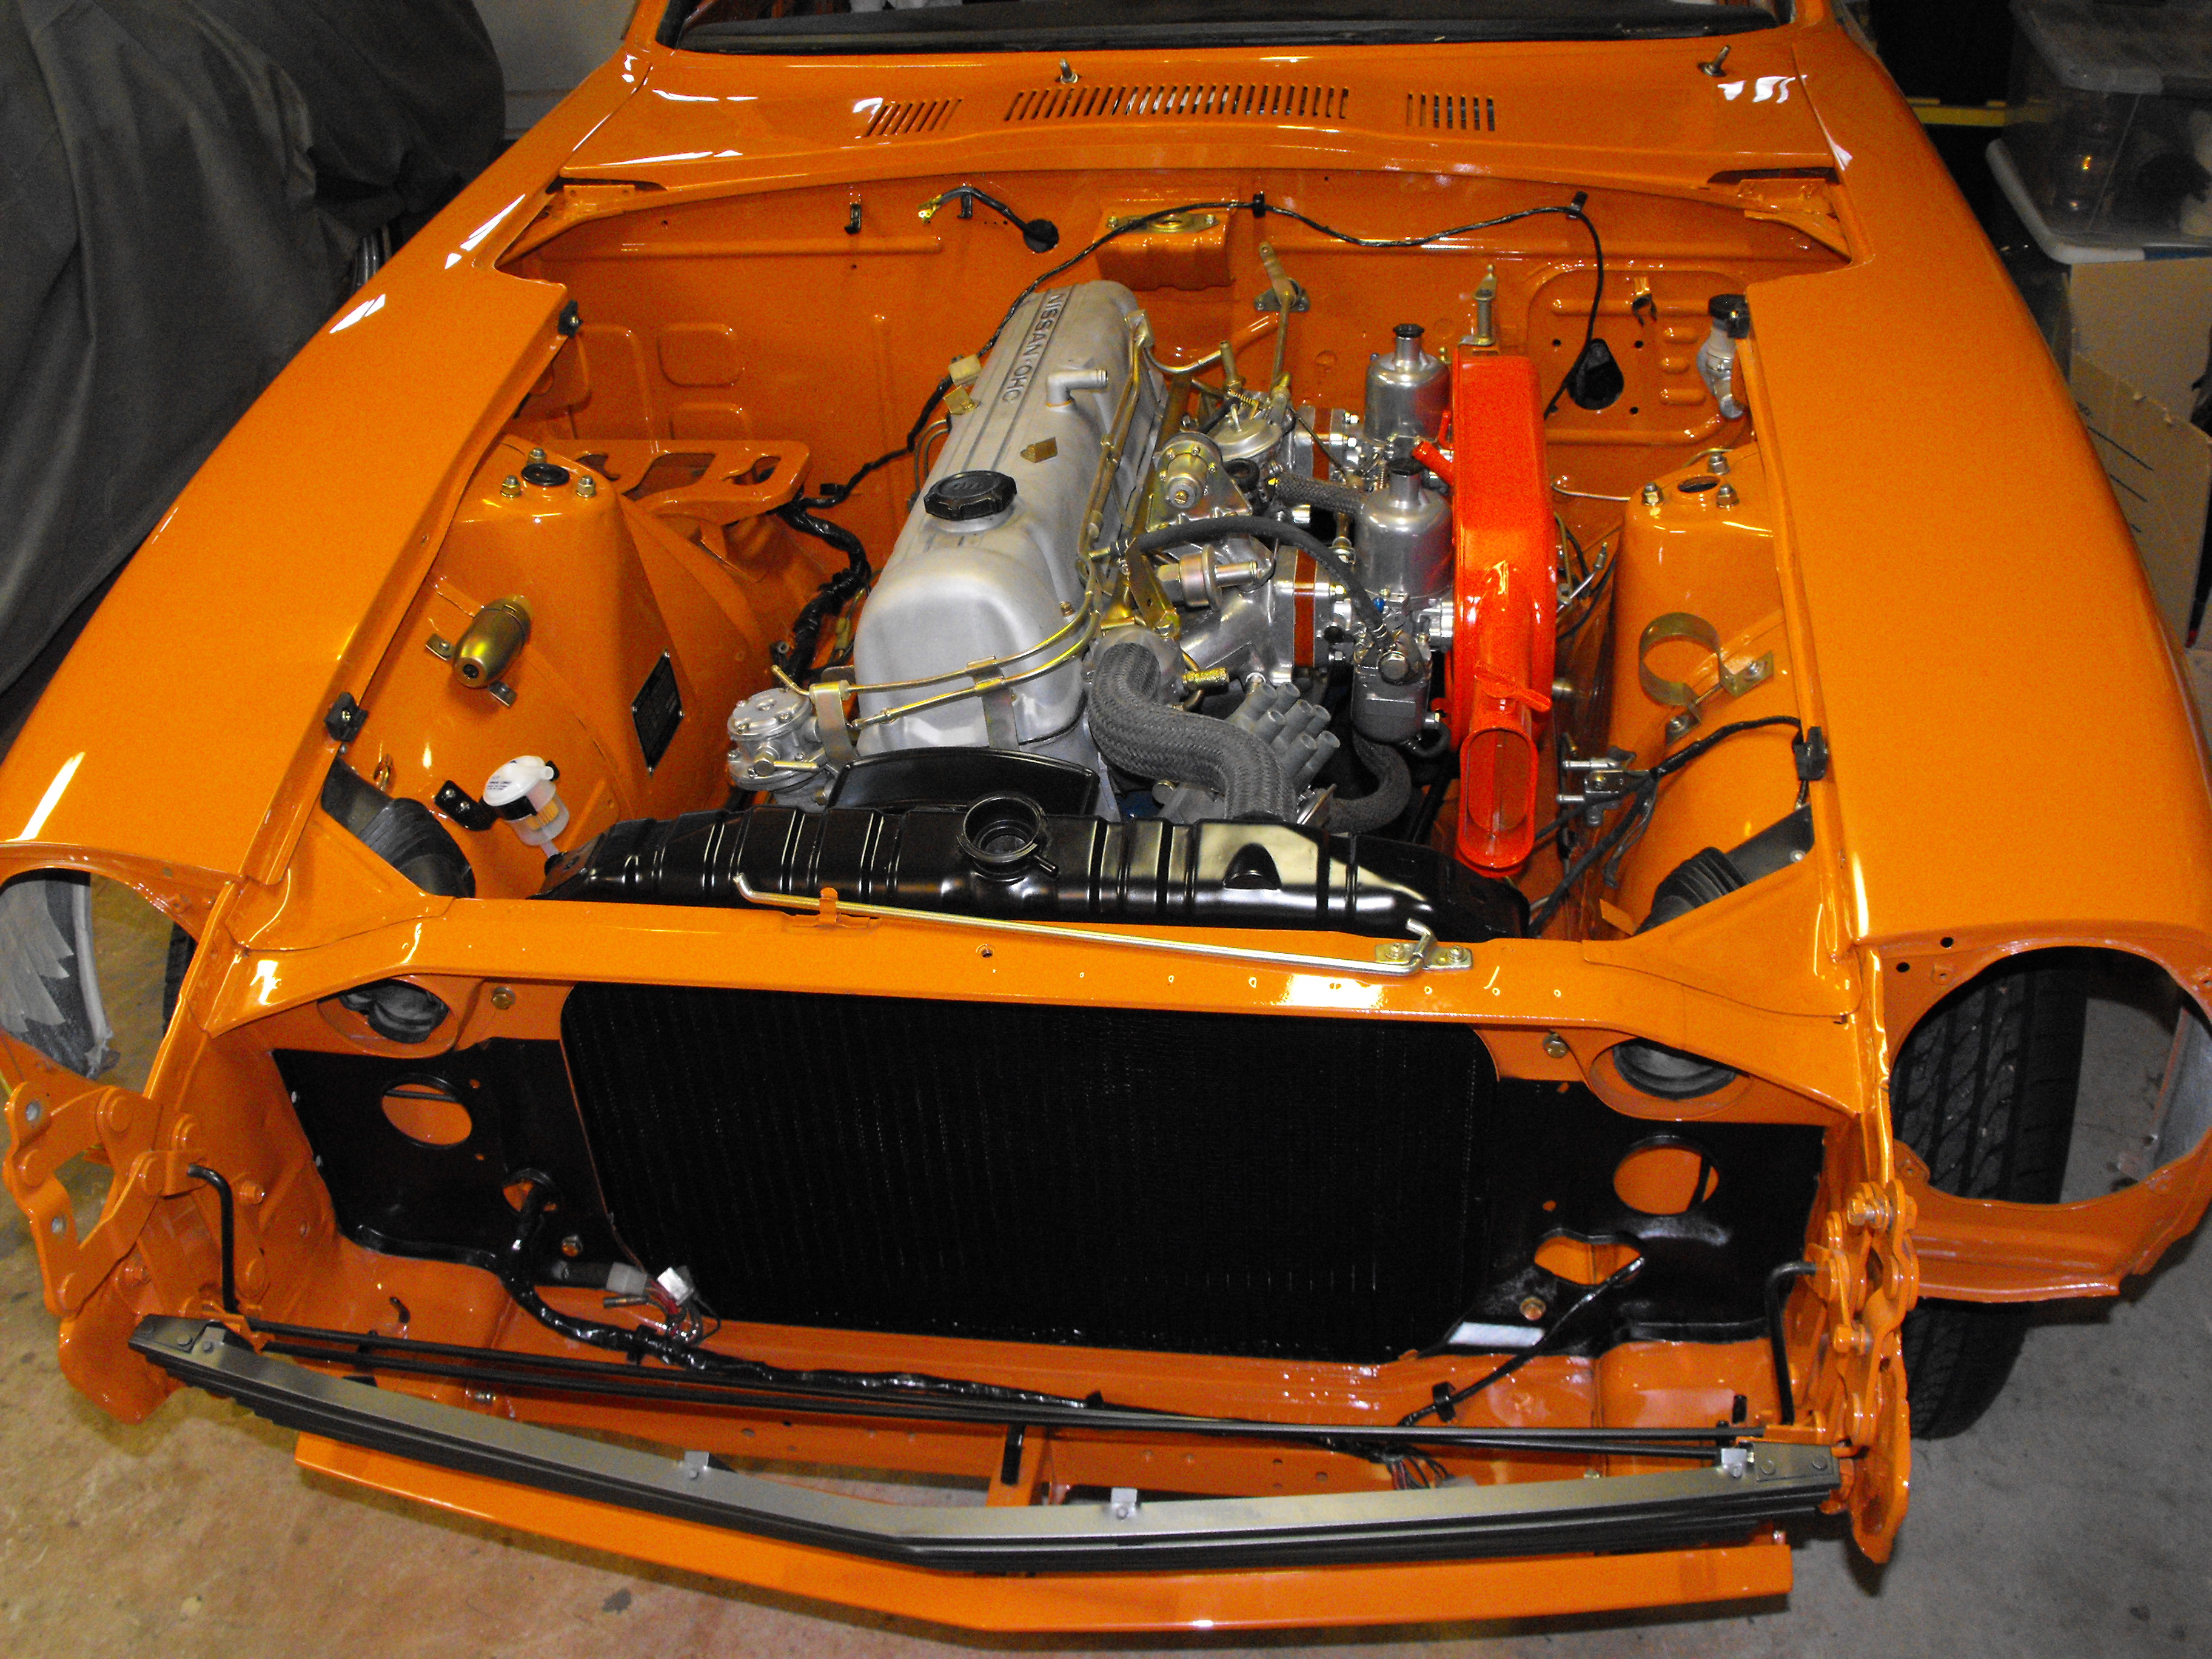
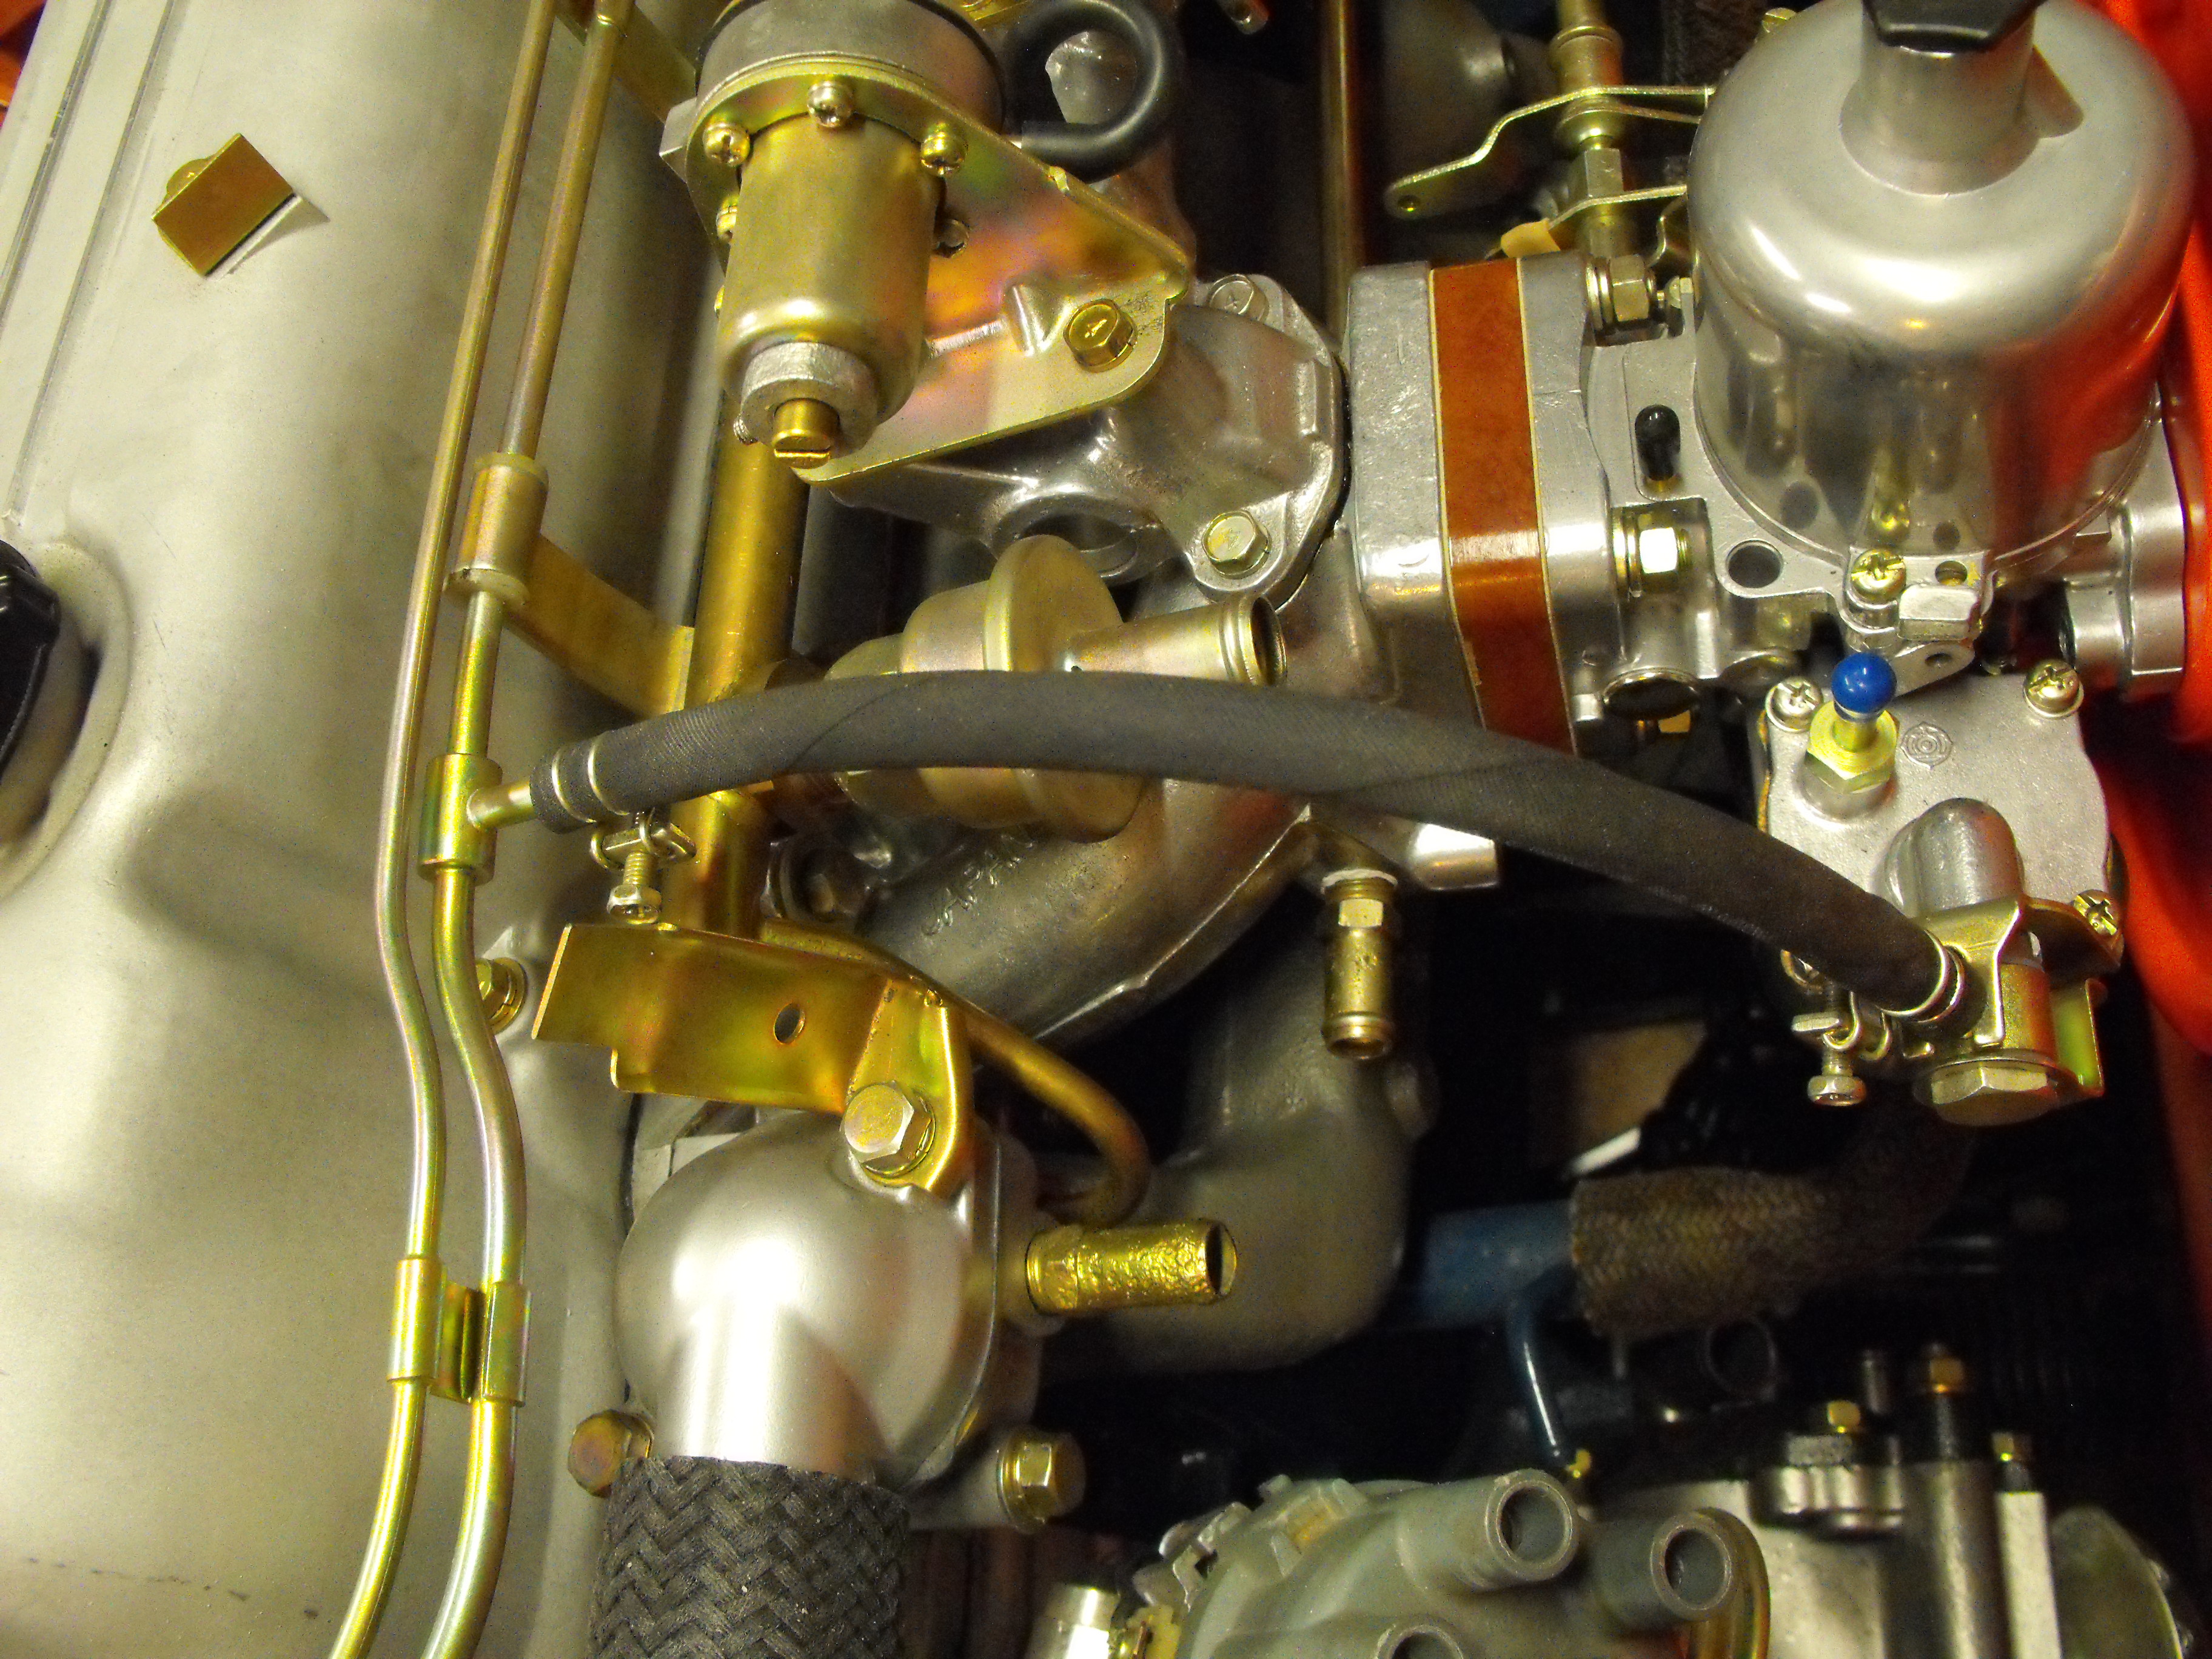
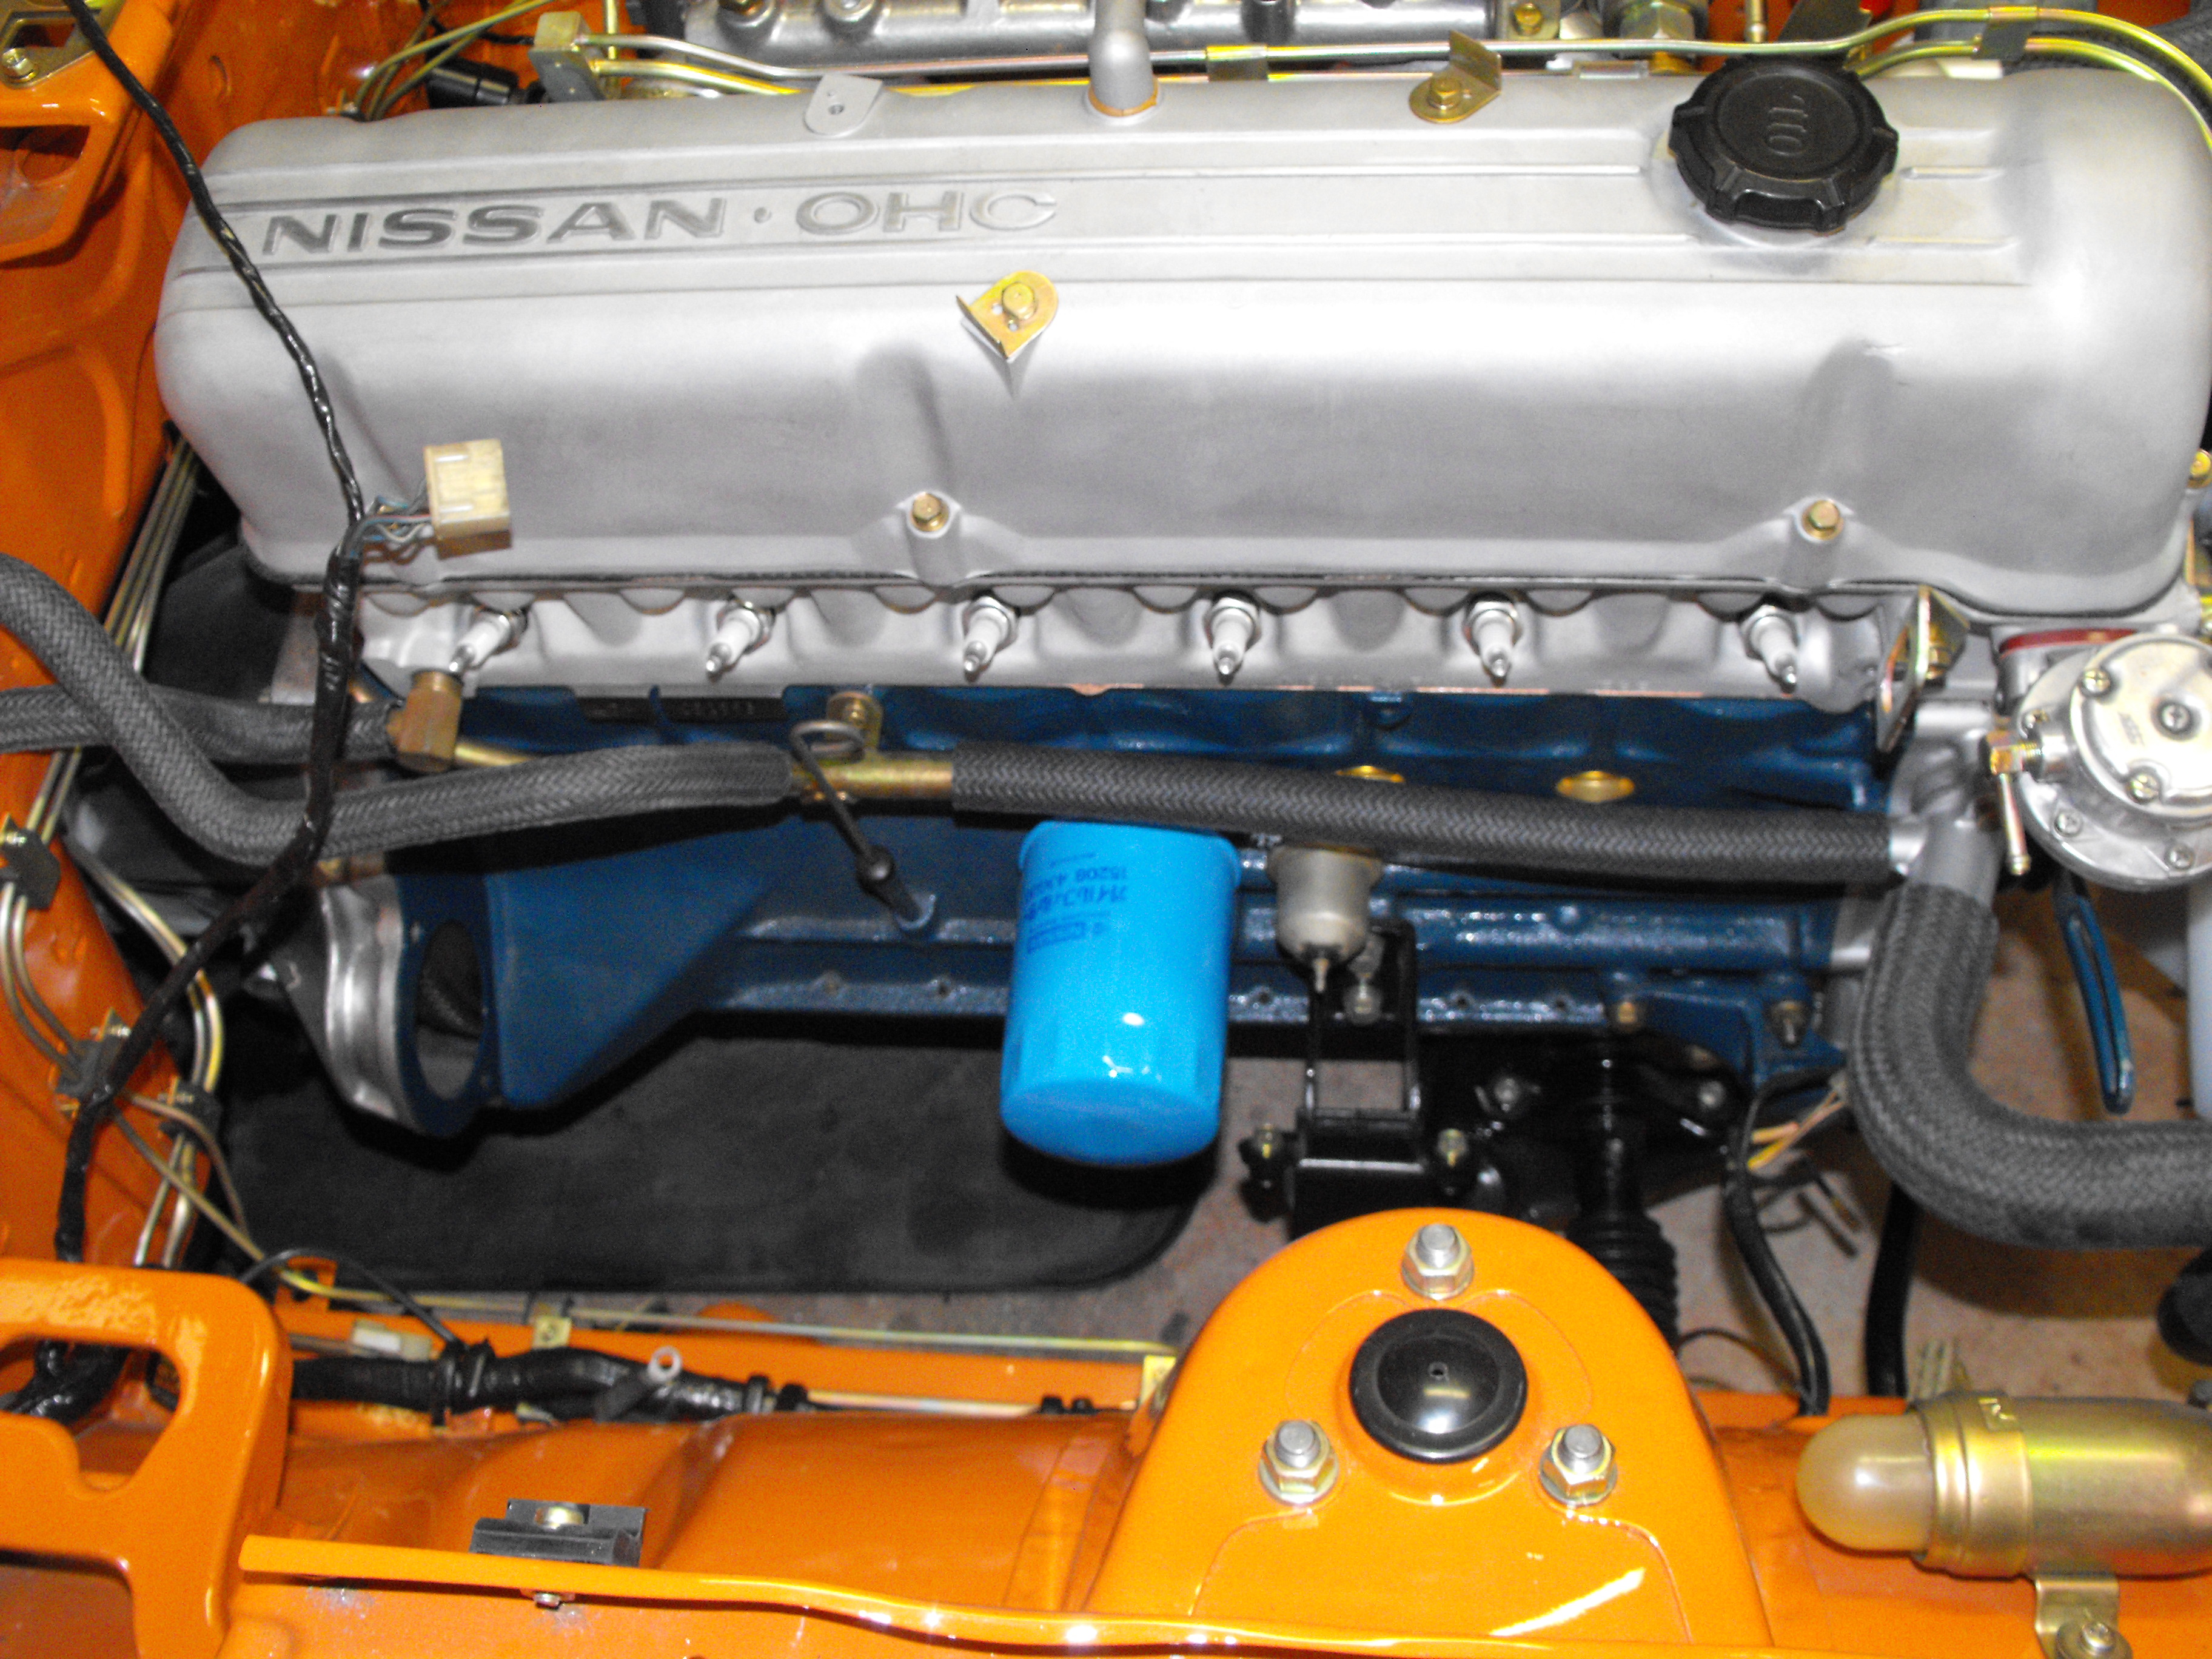
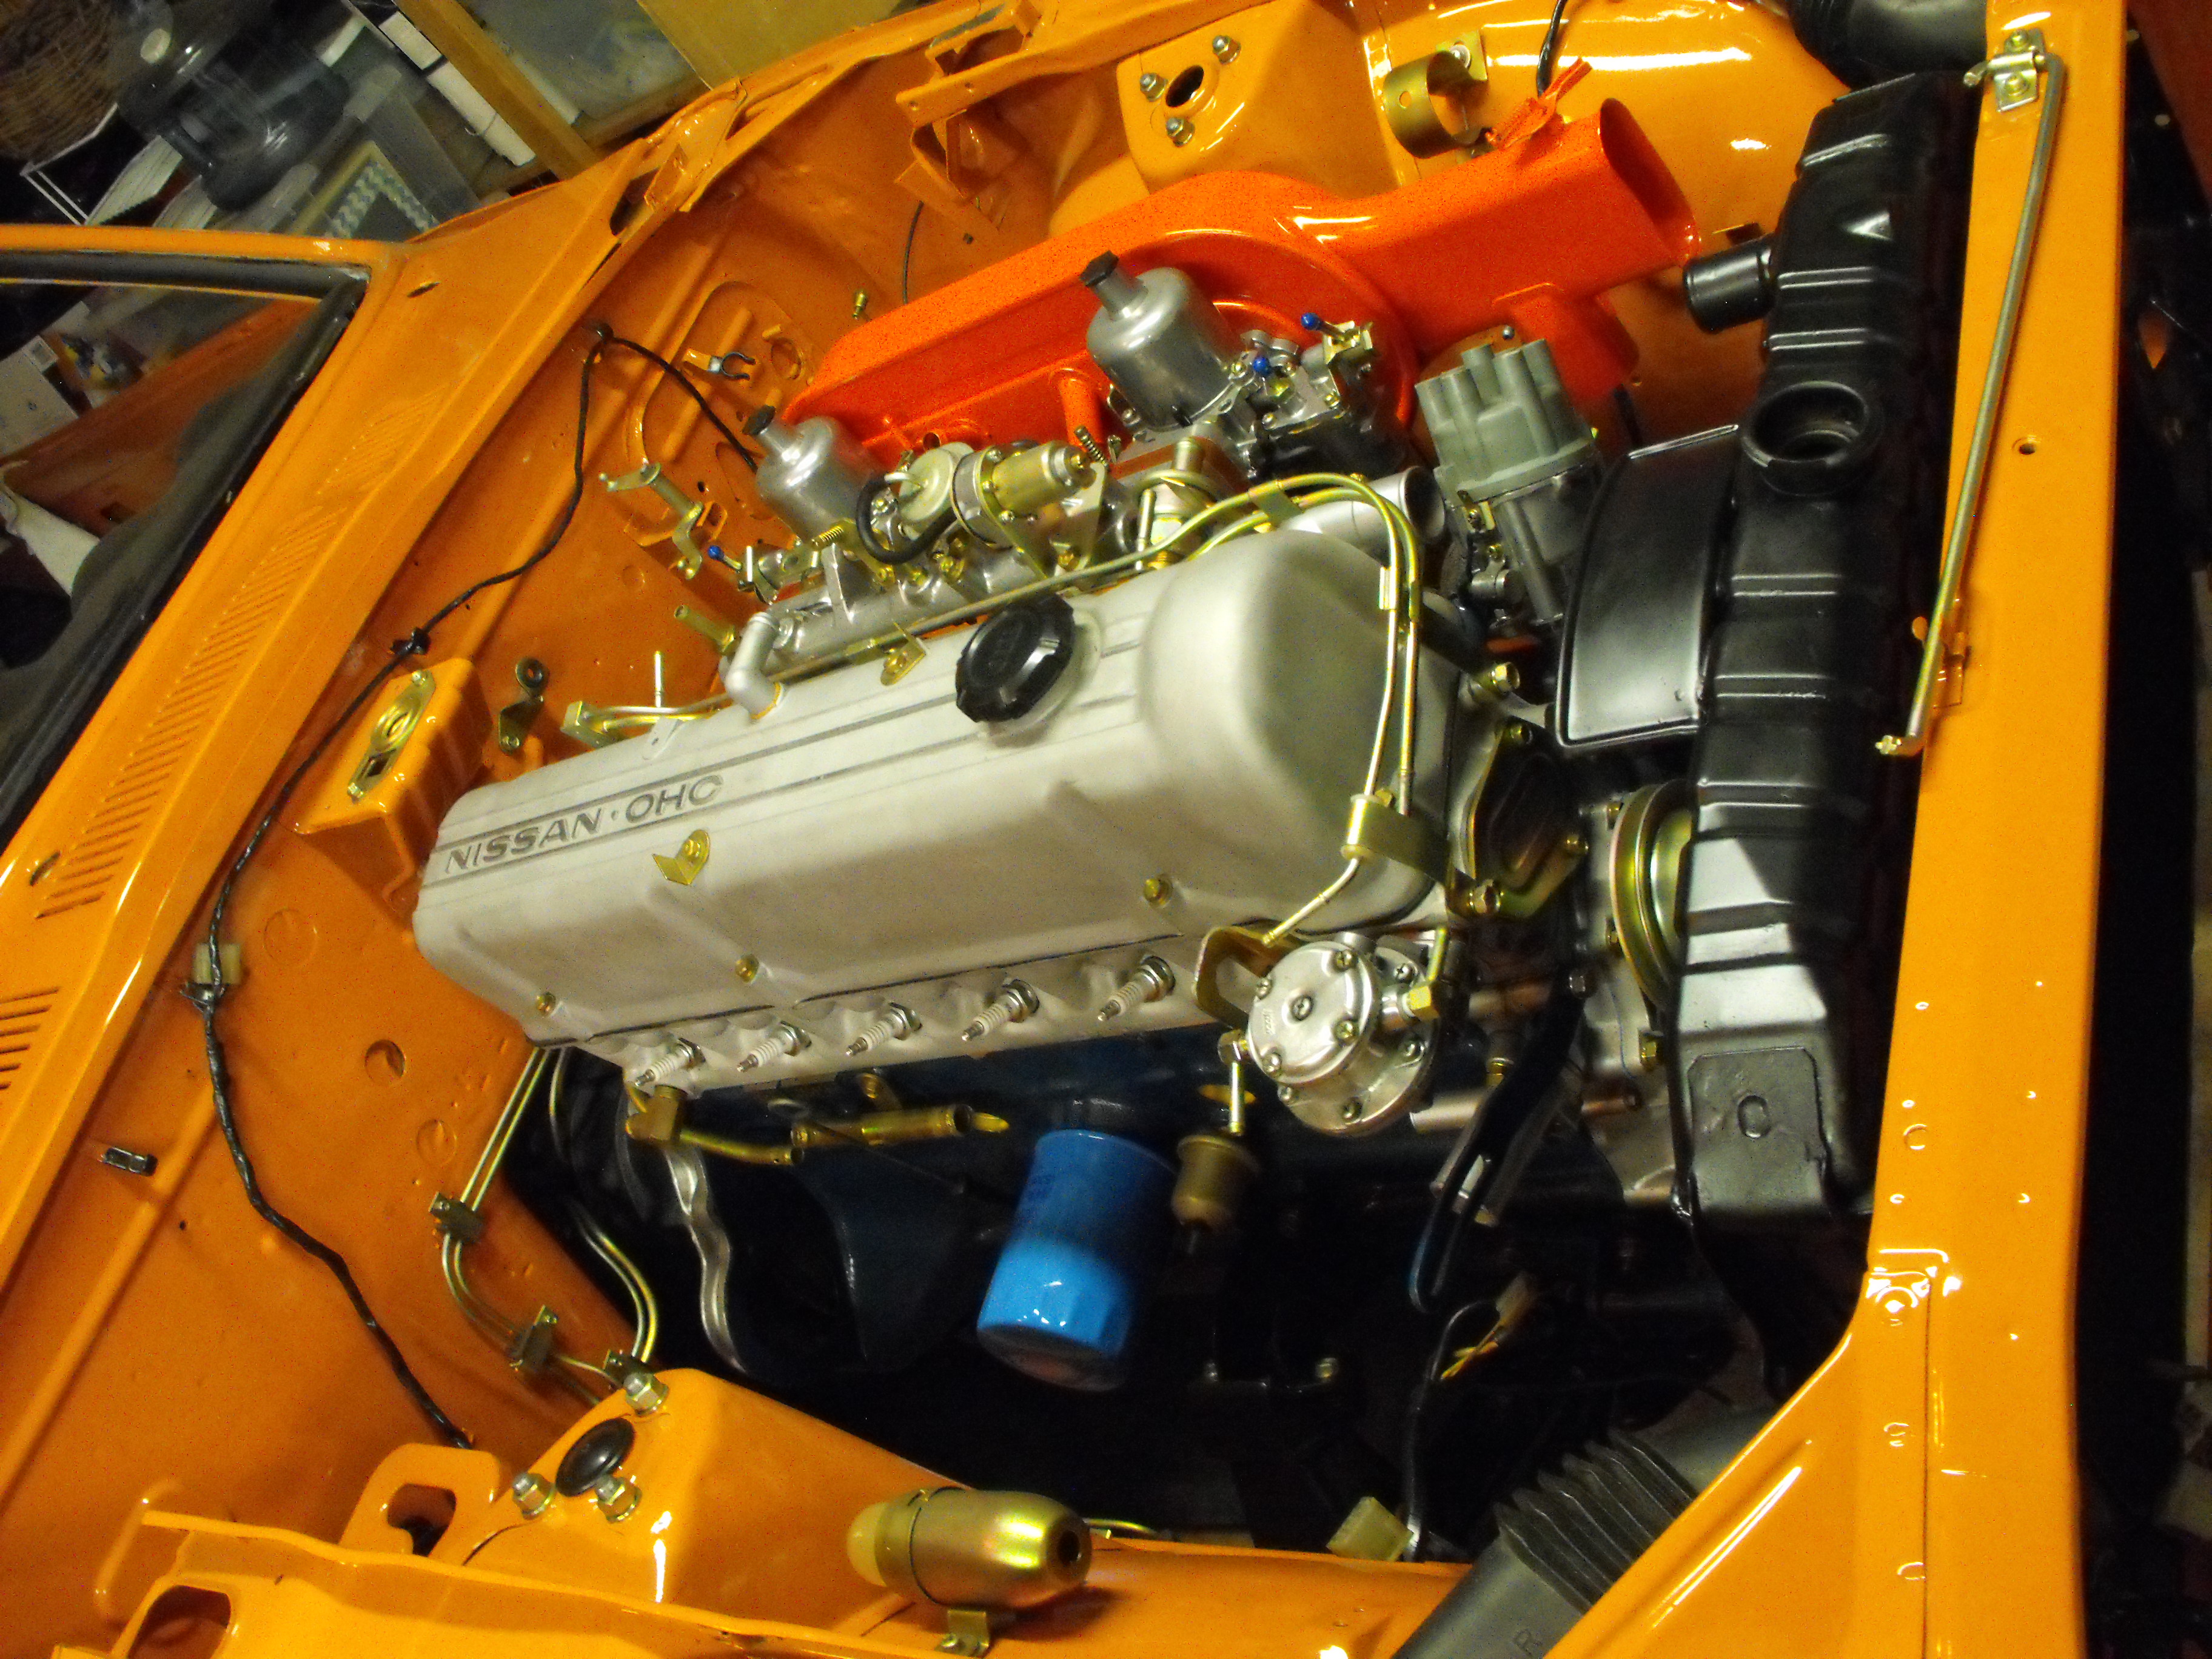
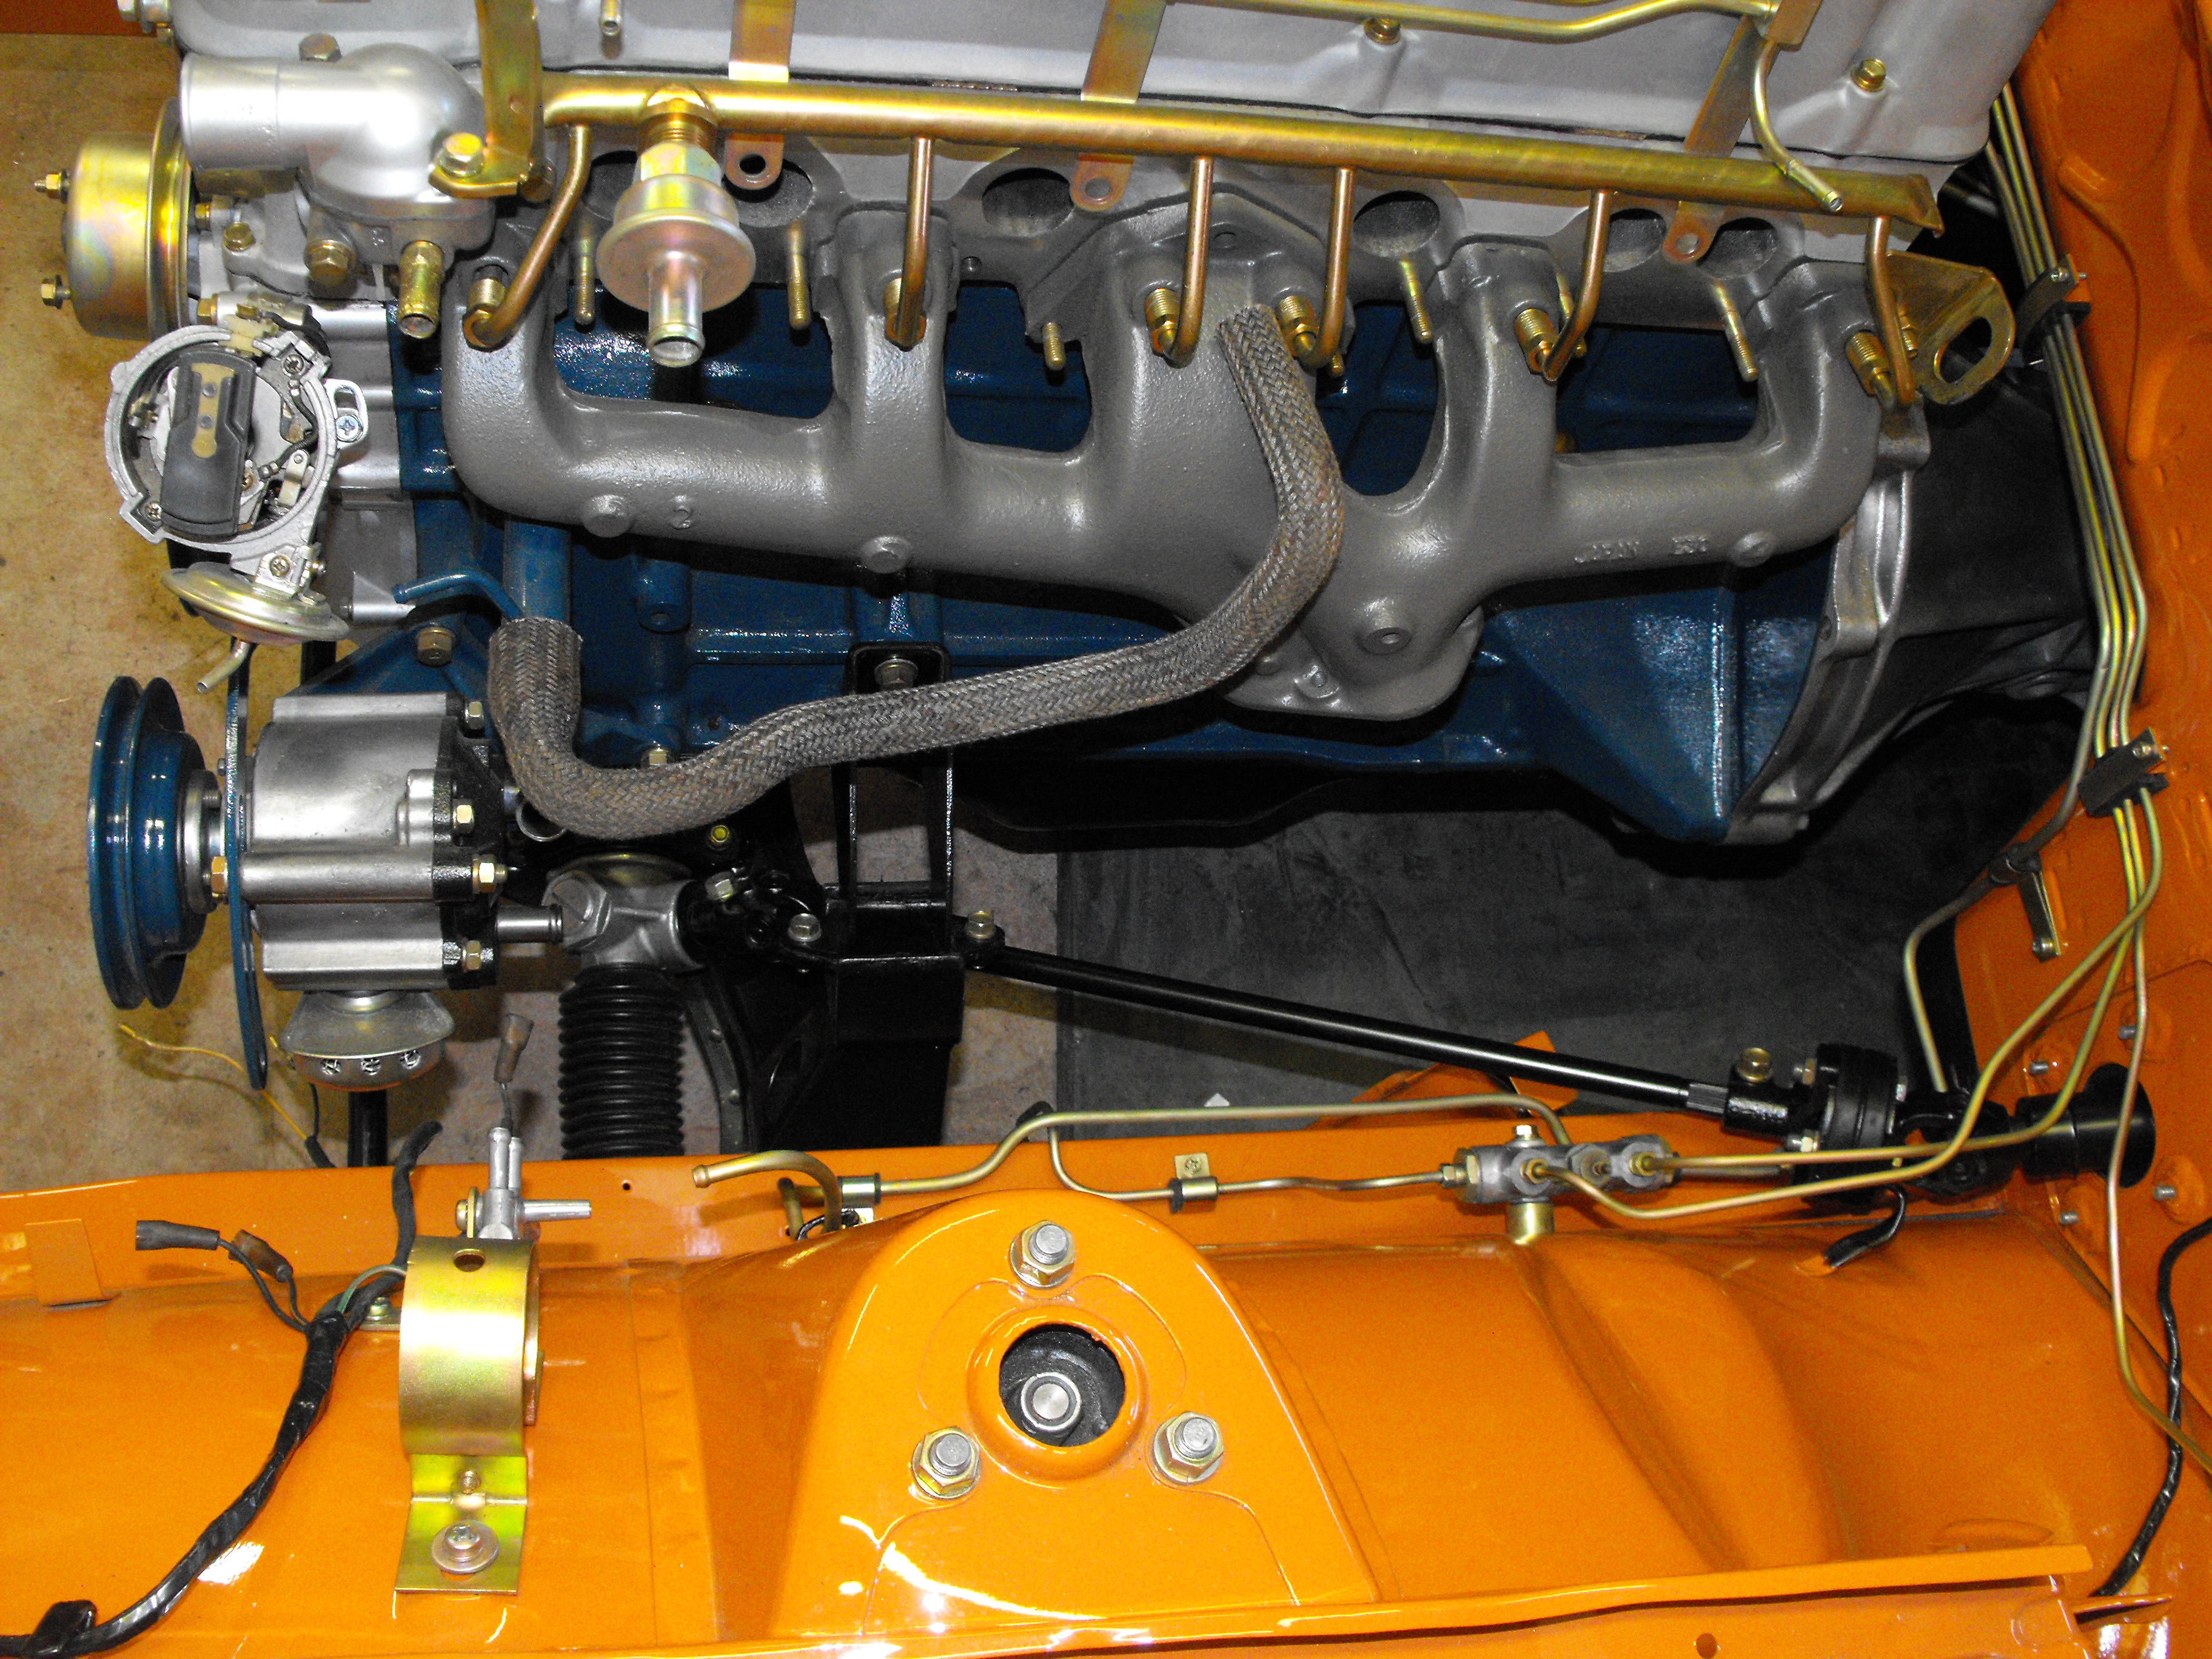
Got the exhaust and intake manifold installed. Threw on the air cleaner just for pics. Picked up the radiator from the repair shop and attached it, but not very happy with the radiator shop paint job. Will probably remove it and clean up some of the drips and solder remnants, then re-paint. Will have to get some of Jay's braided hose and some nice wire clamps next. Will also get the master cylinder and clutch master in shortly, then I think I will be ready for the fenders. Pics below.

-
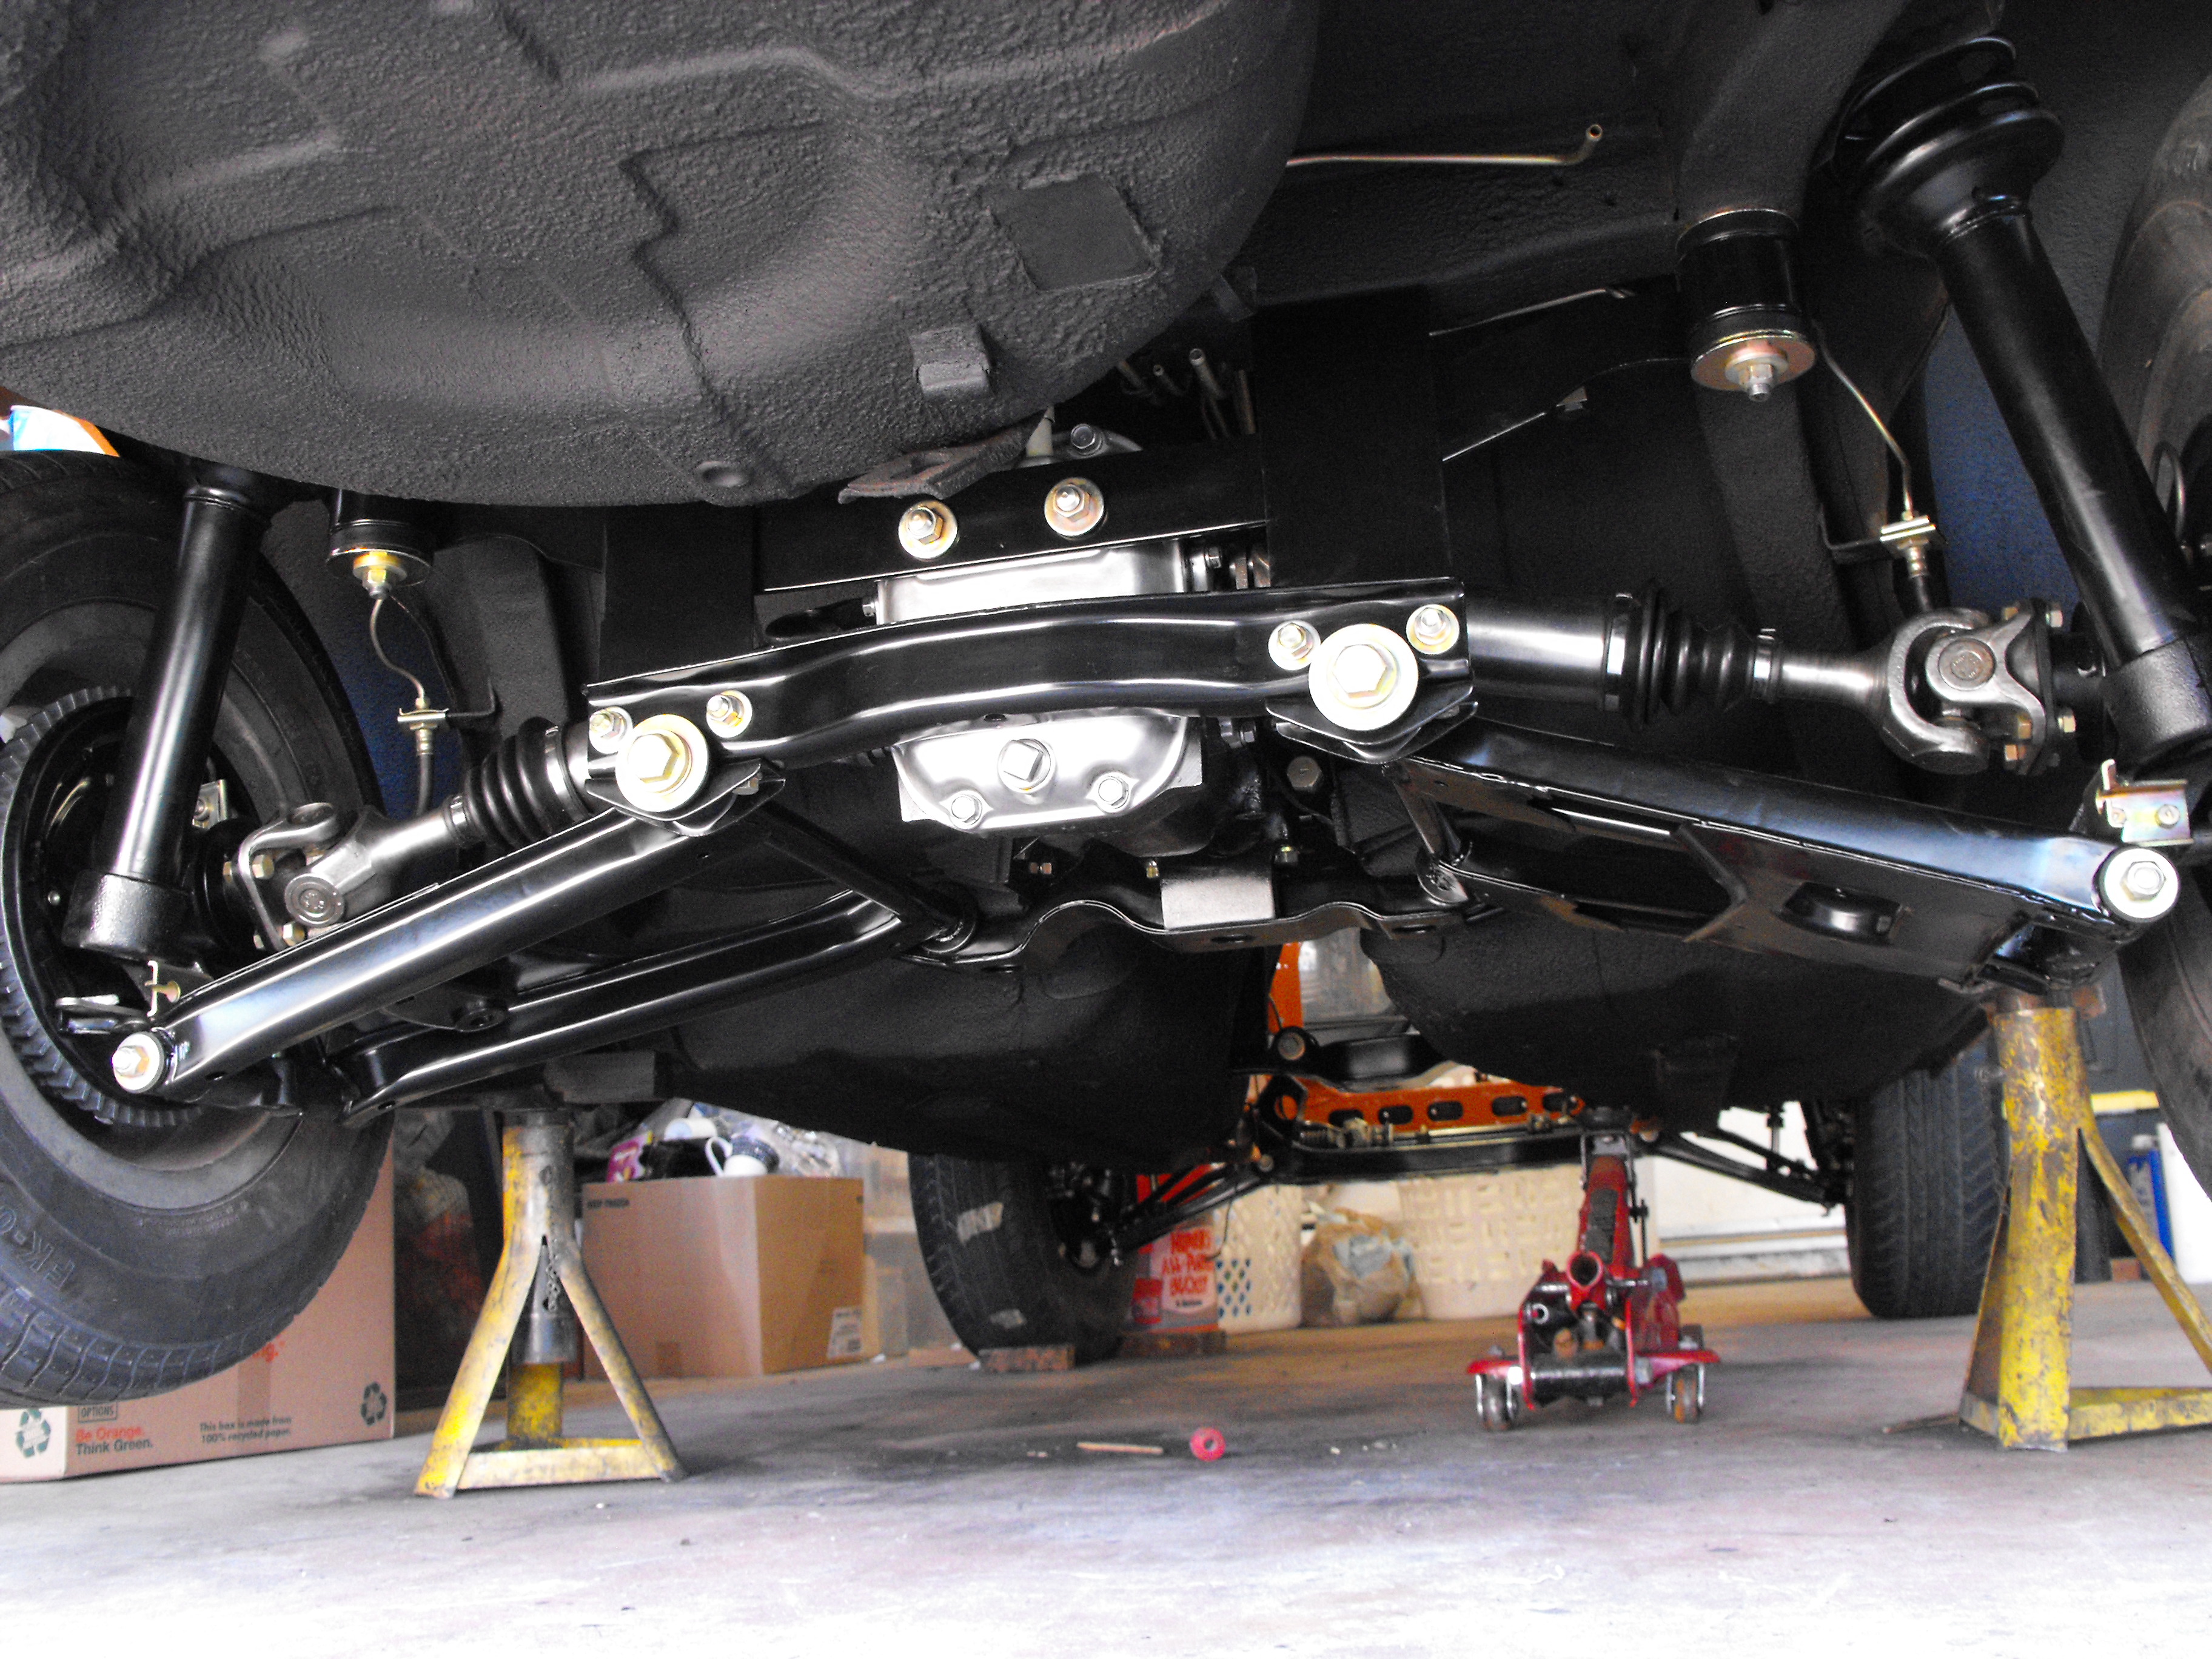
Got the steering rod cleaned up and installed with new bushing. Also got he rims and hubcaps. Thanks @Montezuma! Should be able to get radiator in tomorrow and carbs and exhaust manifold 'officially' installed.


-
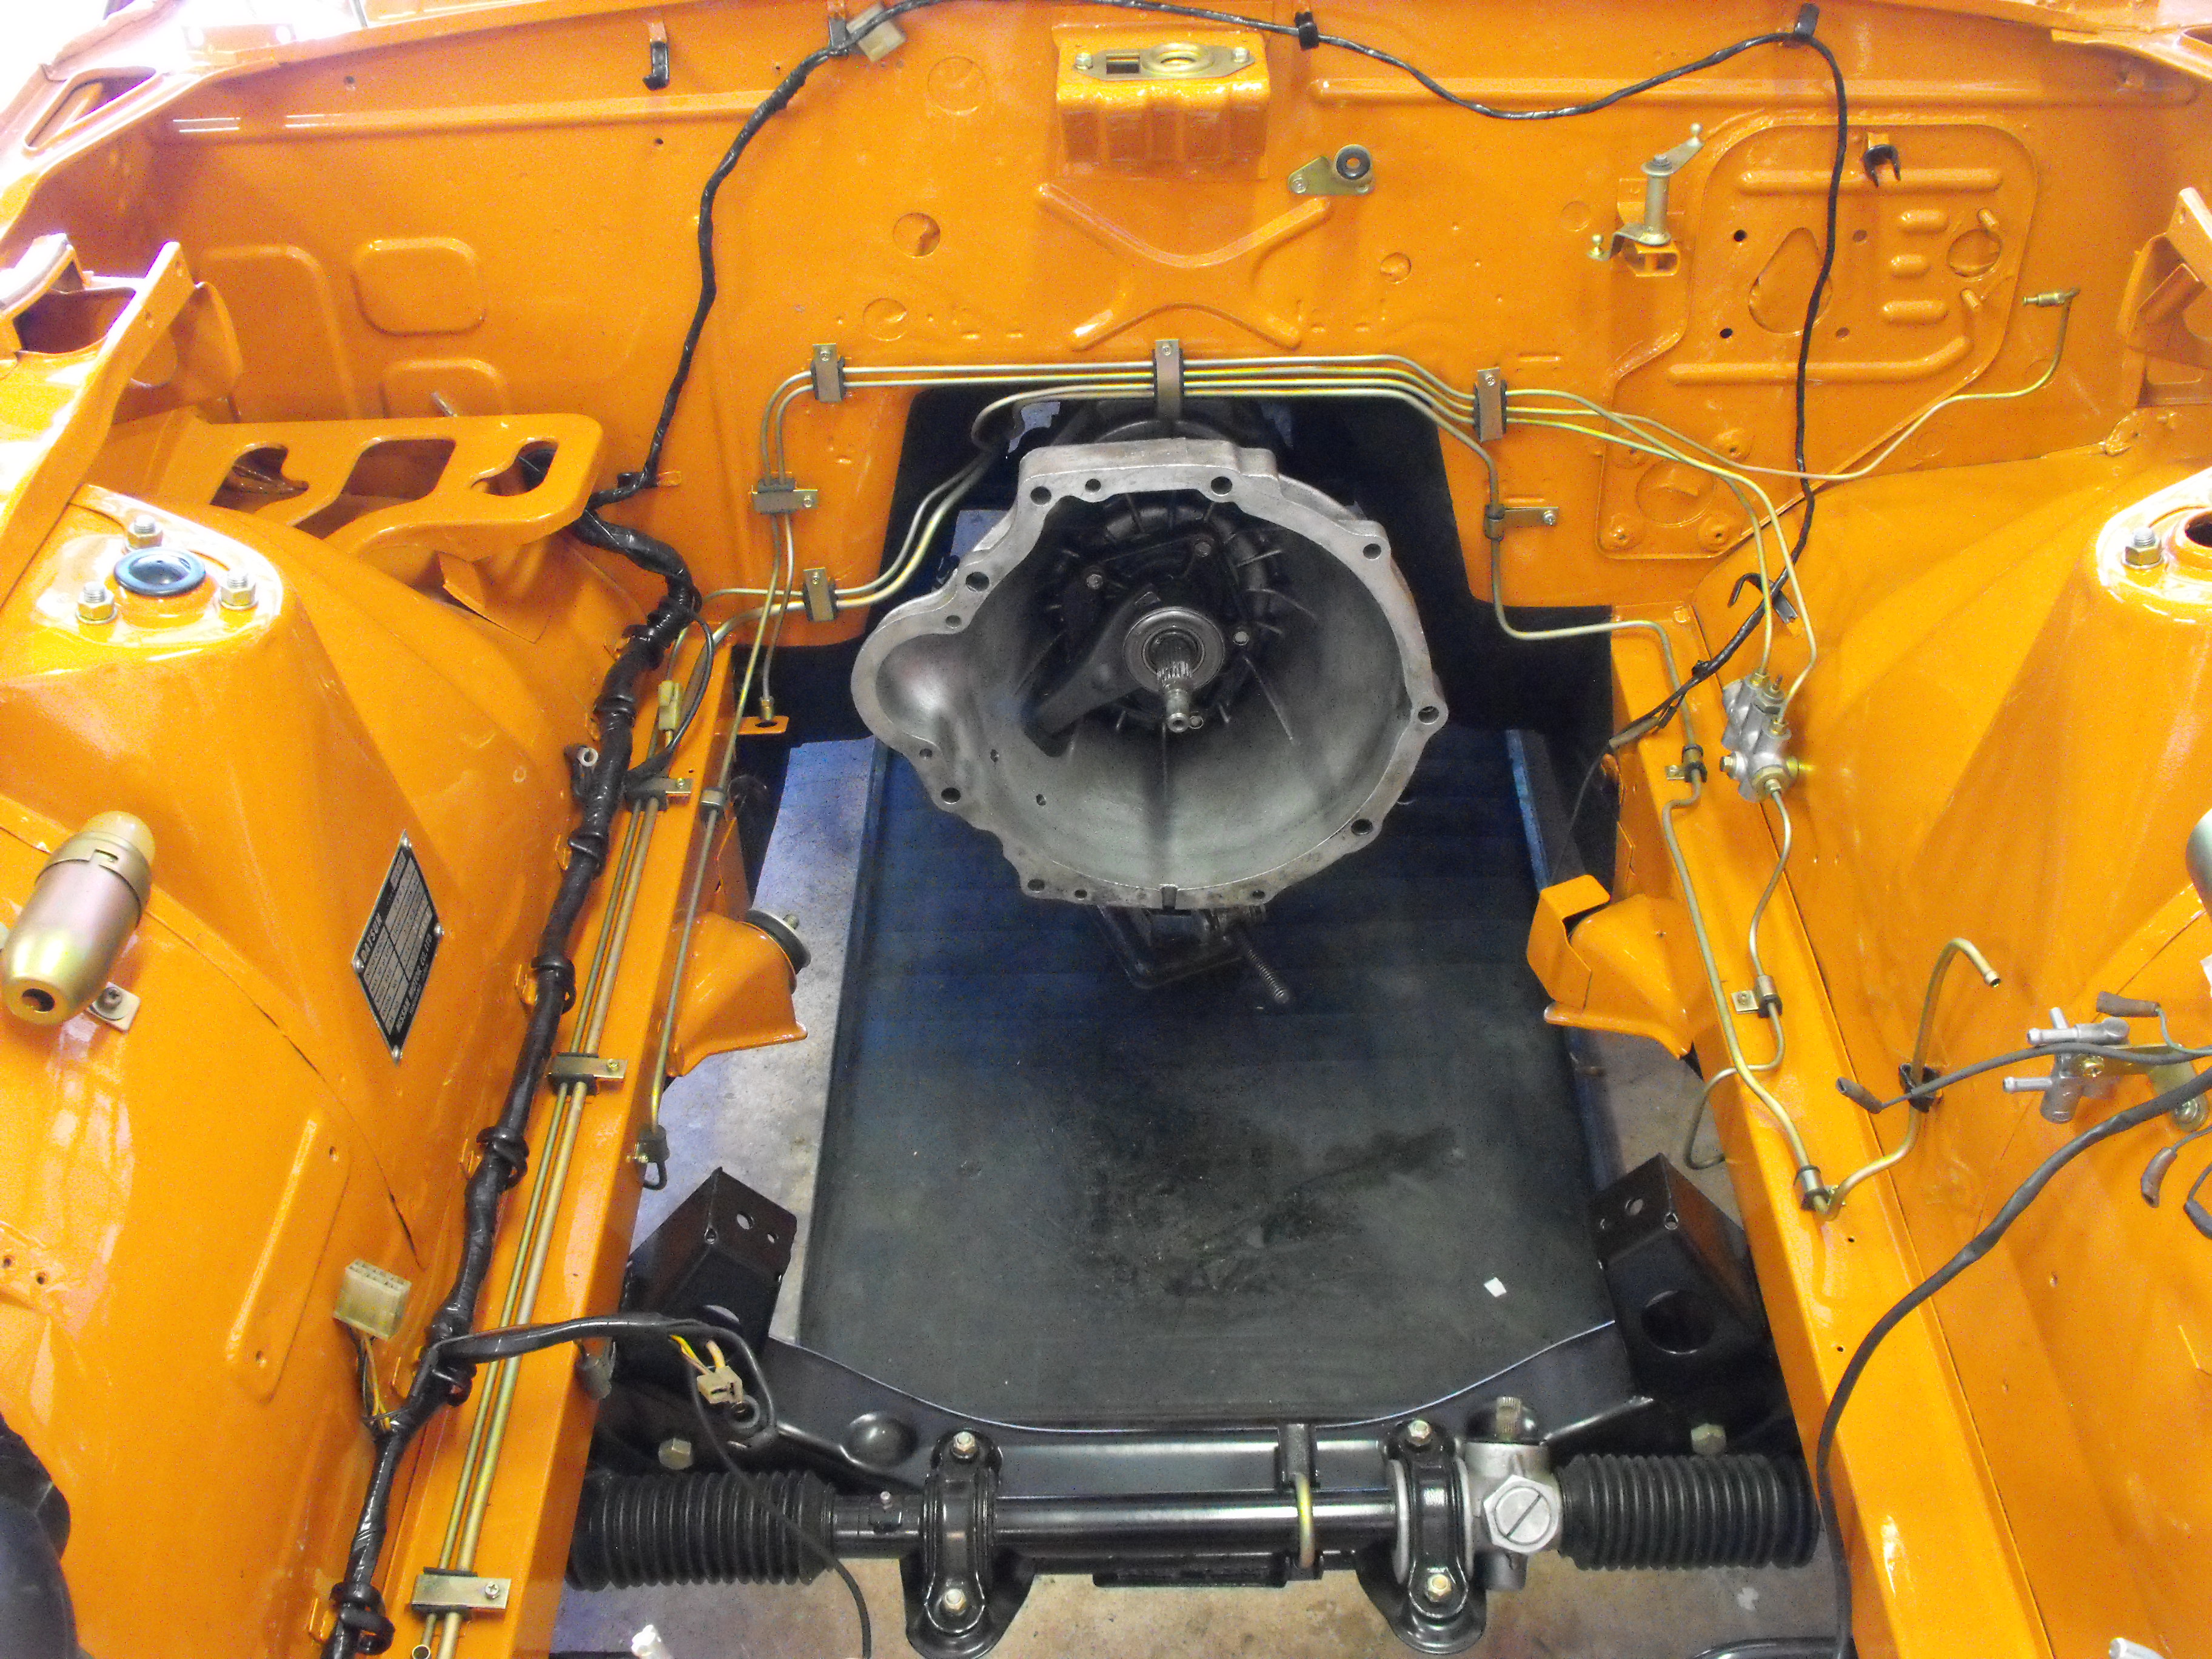
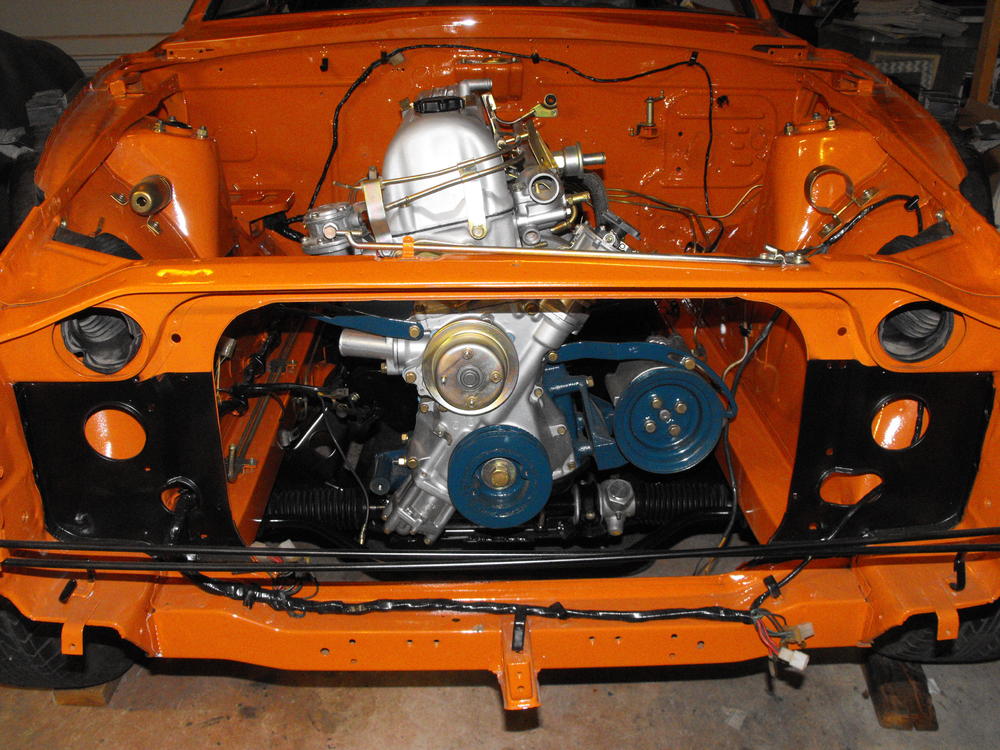
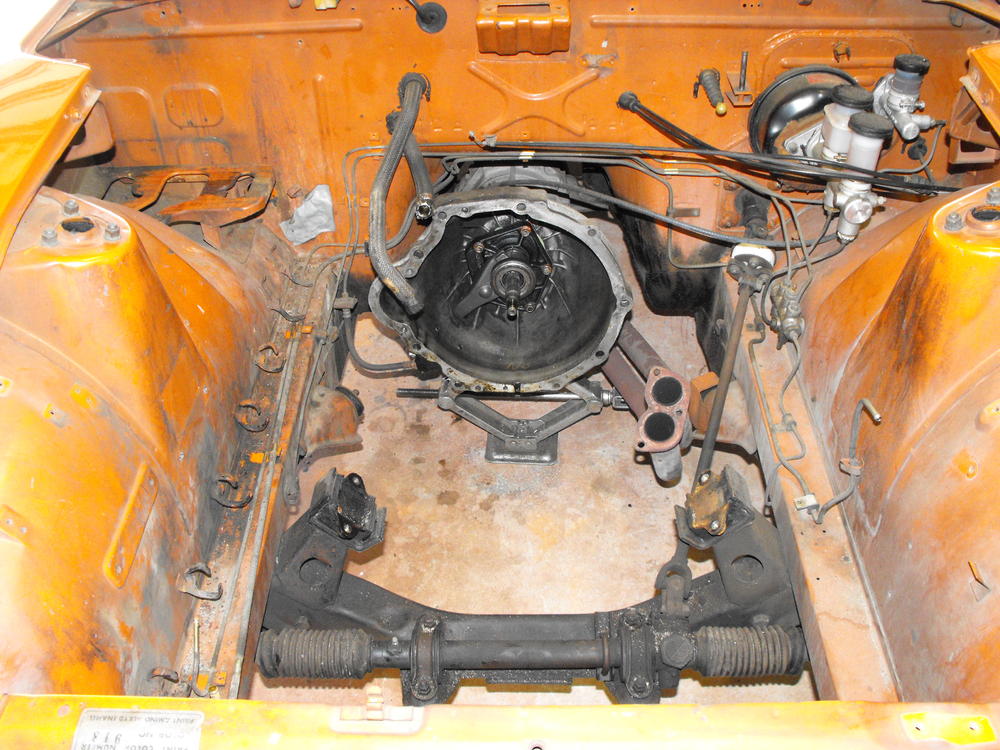
Got clutch and pressure plate installed. Also installed the motor. Things should move along nicely now. I picked up four rims today and have about 8 hubcaps to sort through for the wheels. We are going stock with hubcaps for the final set-up. I will drop the rims off at the powdercoaters next week. Should be able to post some pics of the hubcaps in the next day or two. Radiator has been re-cored and is ready for pick-up. I will get that on Monday and should be able to install that day. Some pics are below.

-
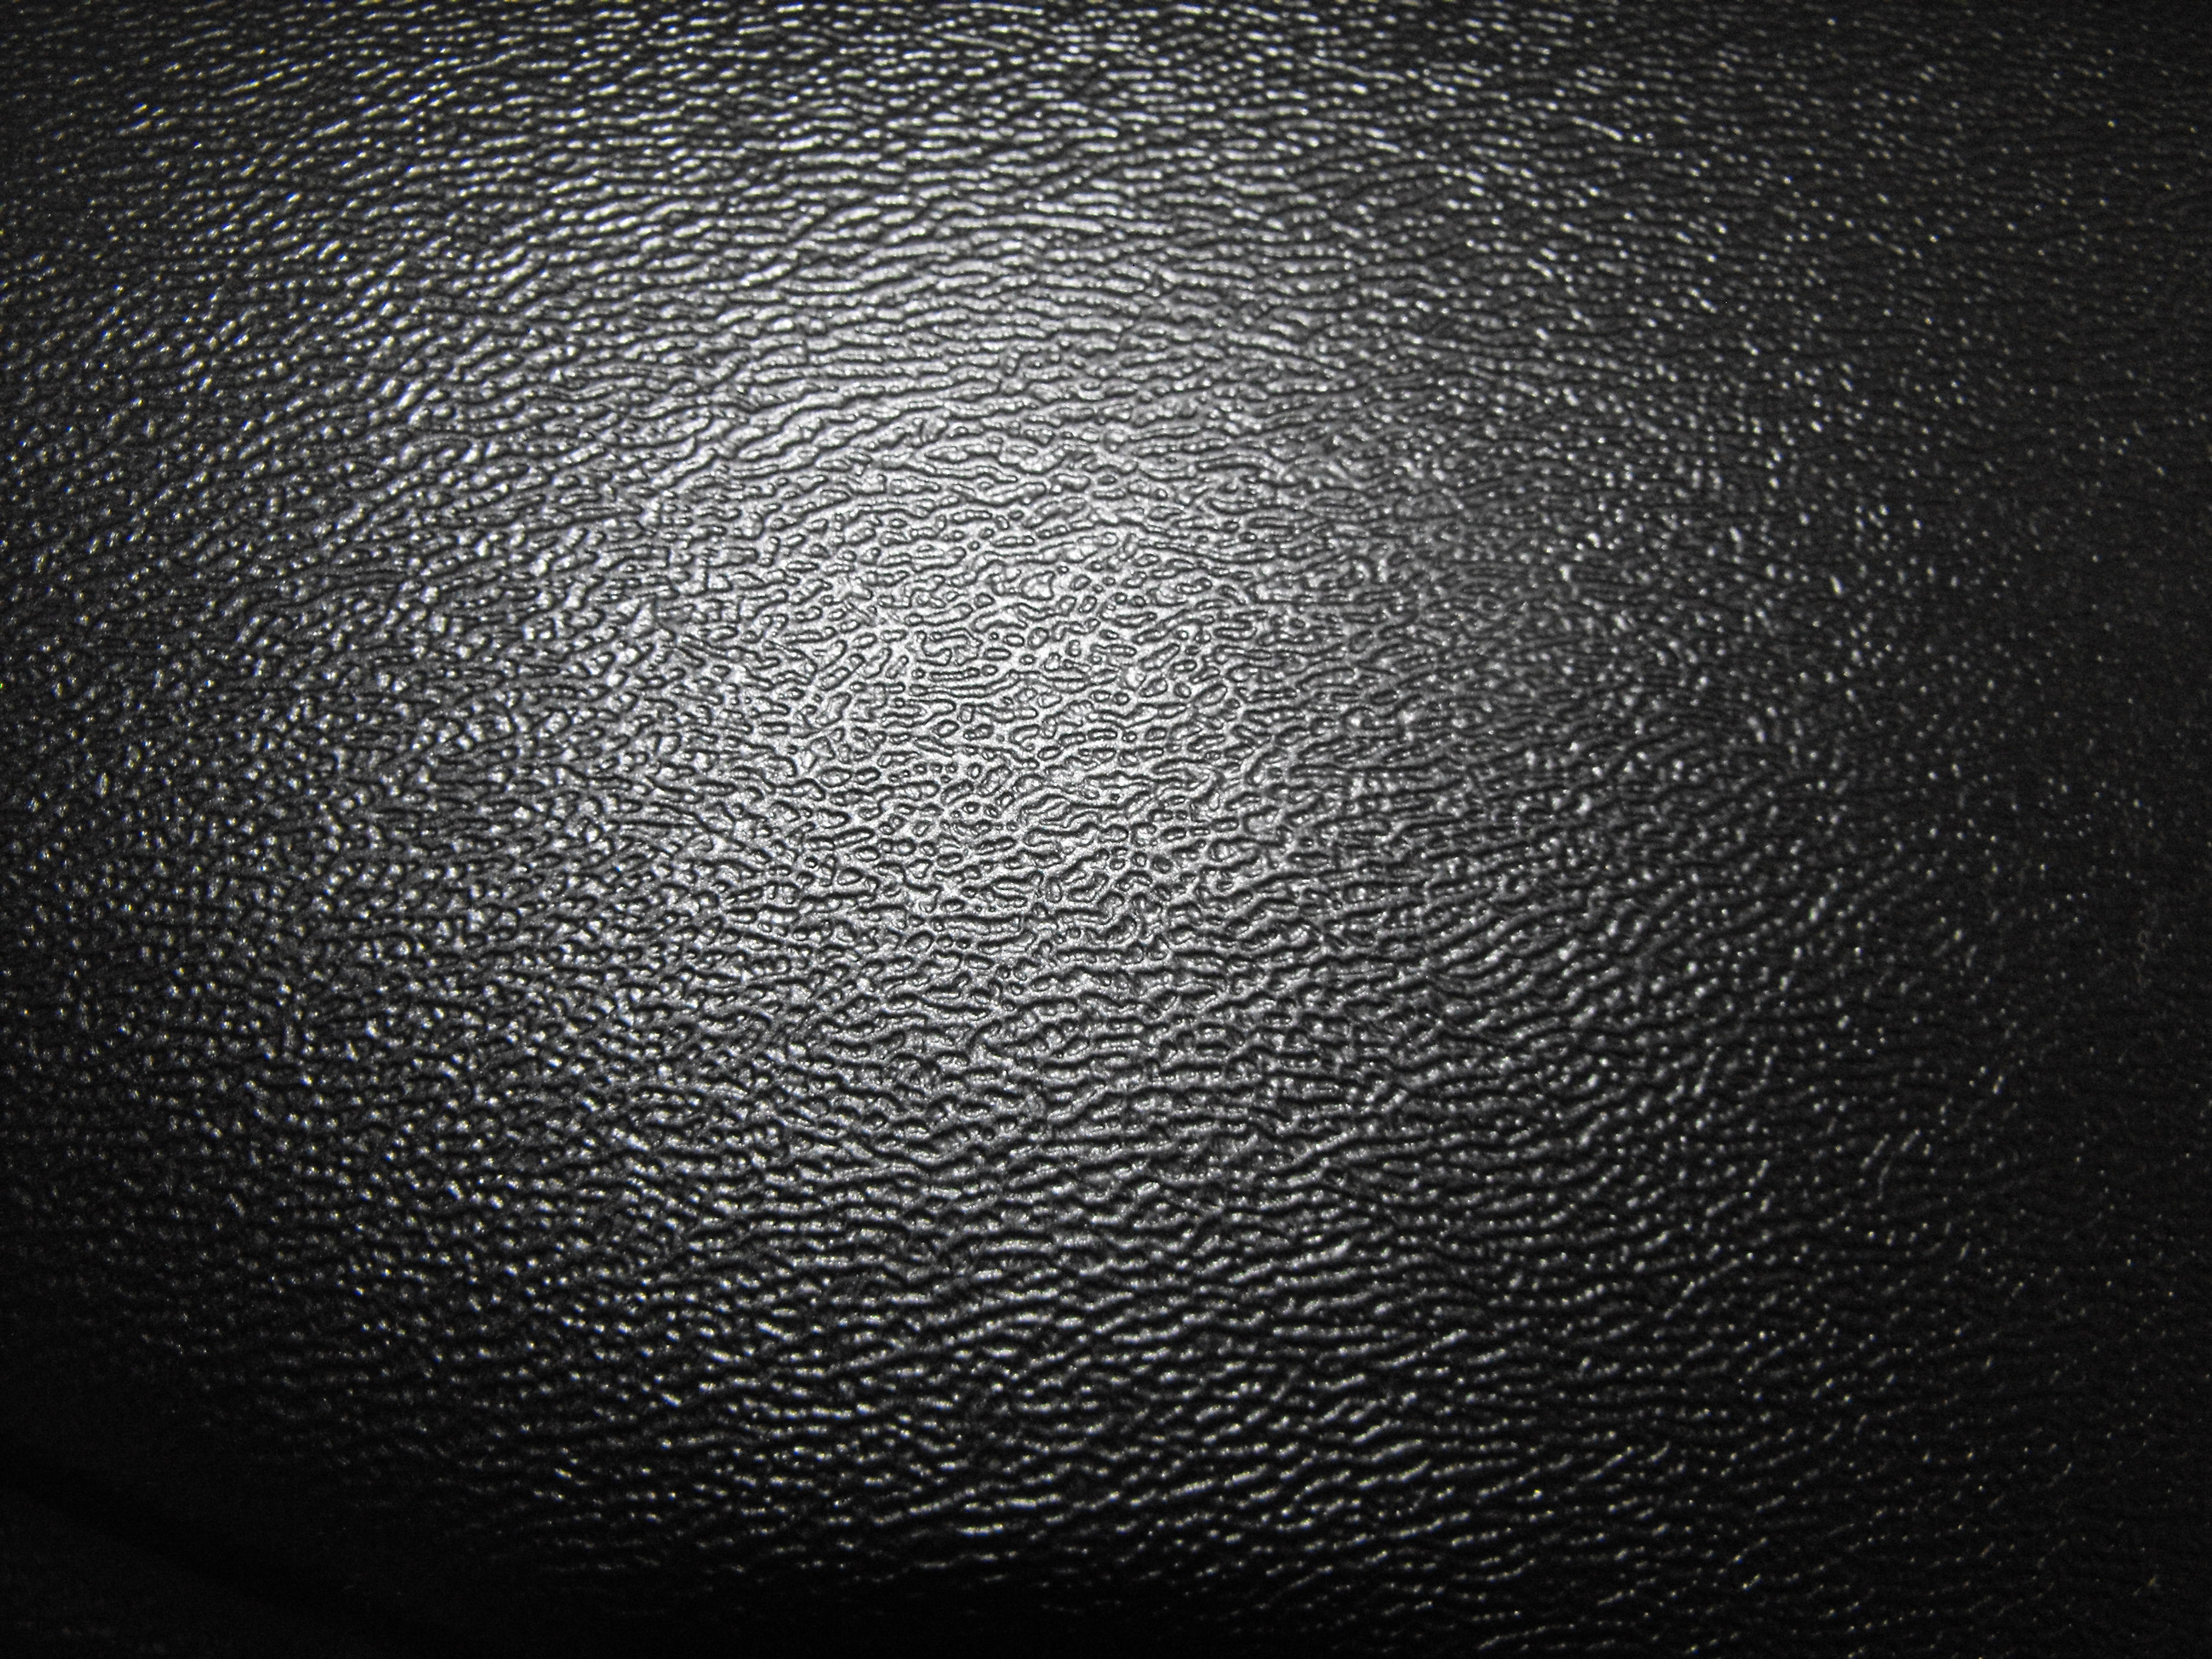
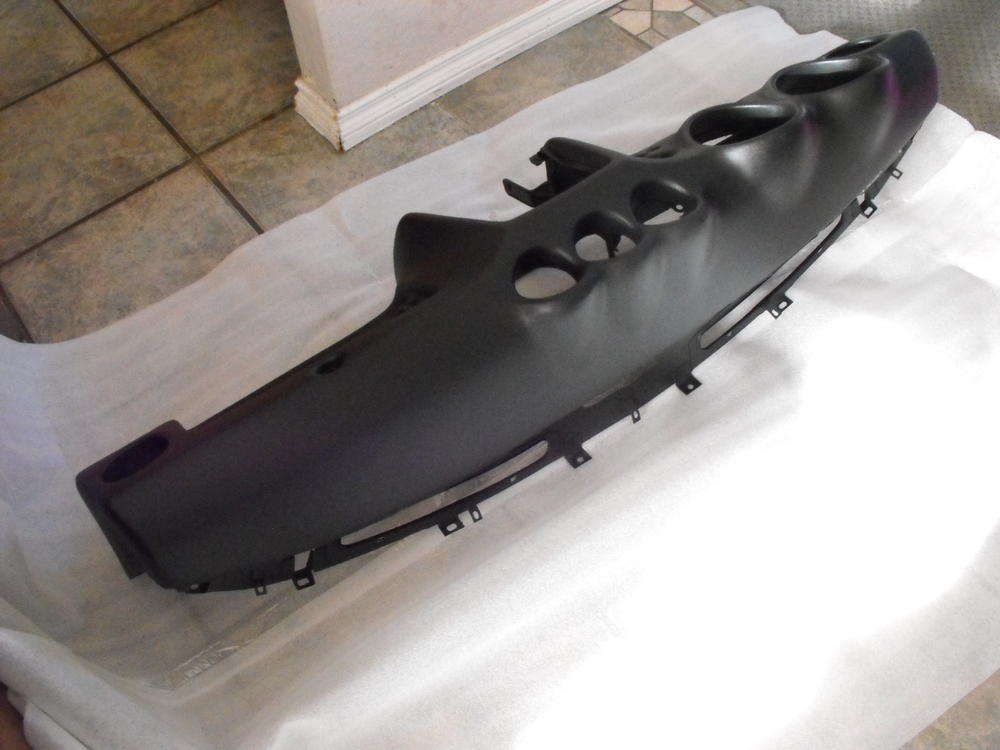
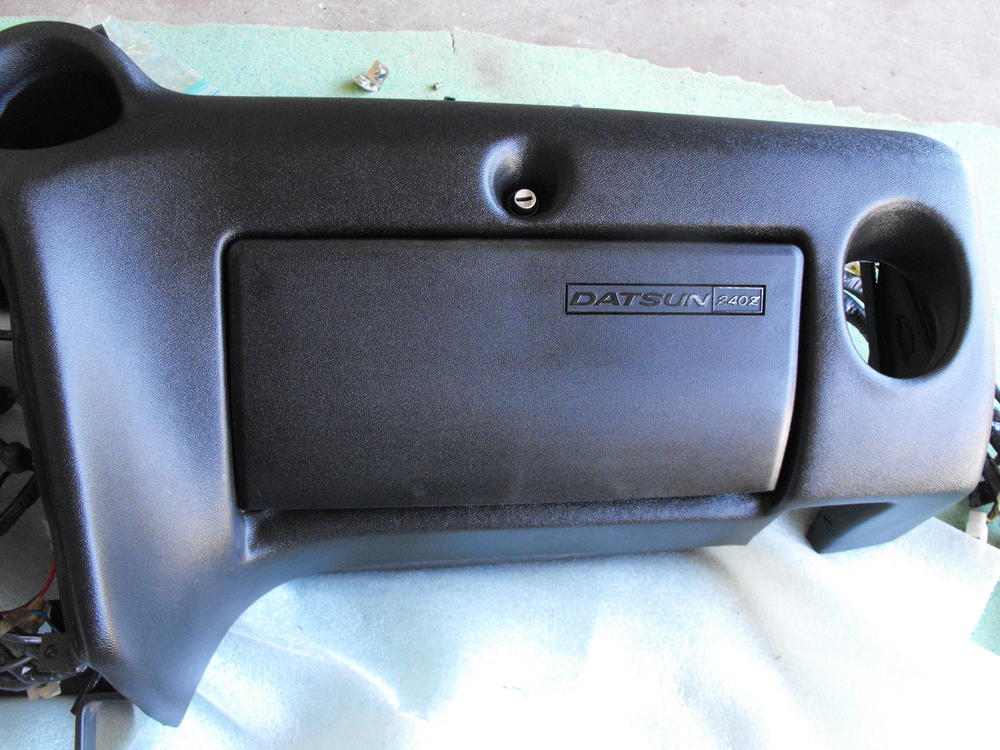
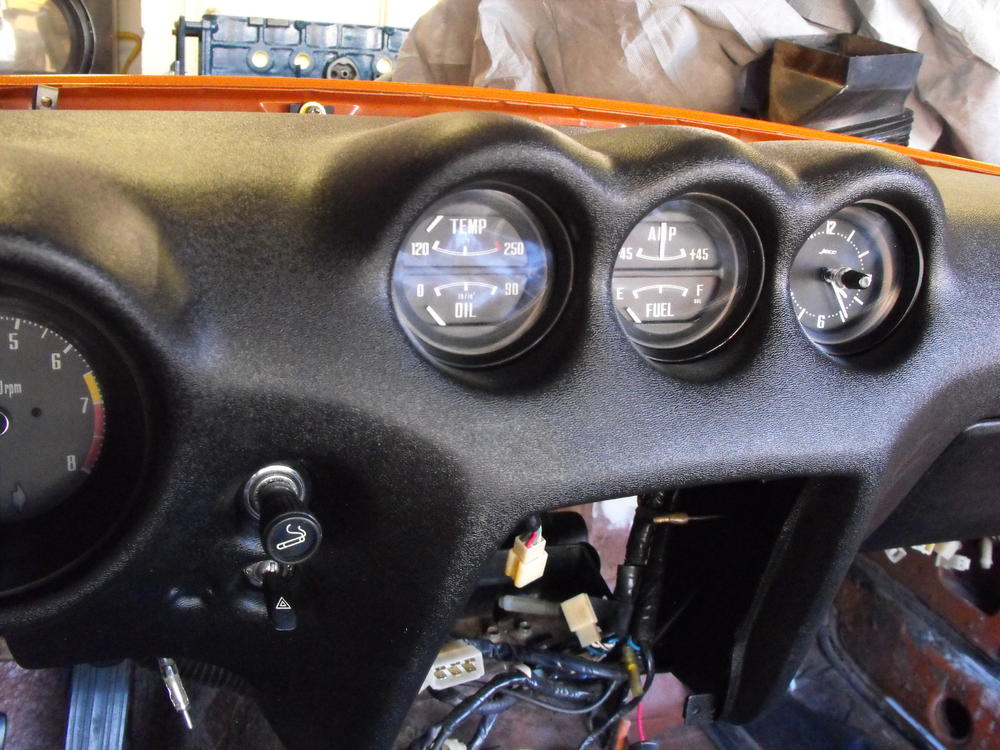
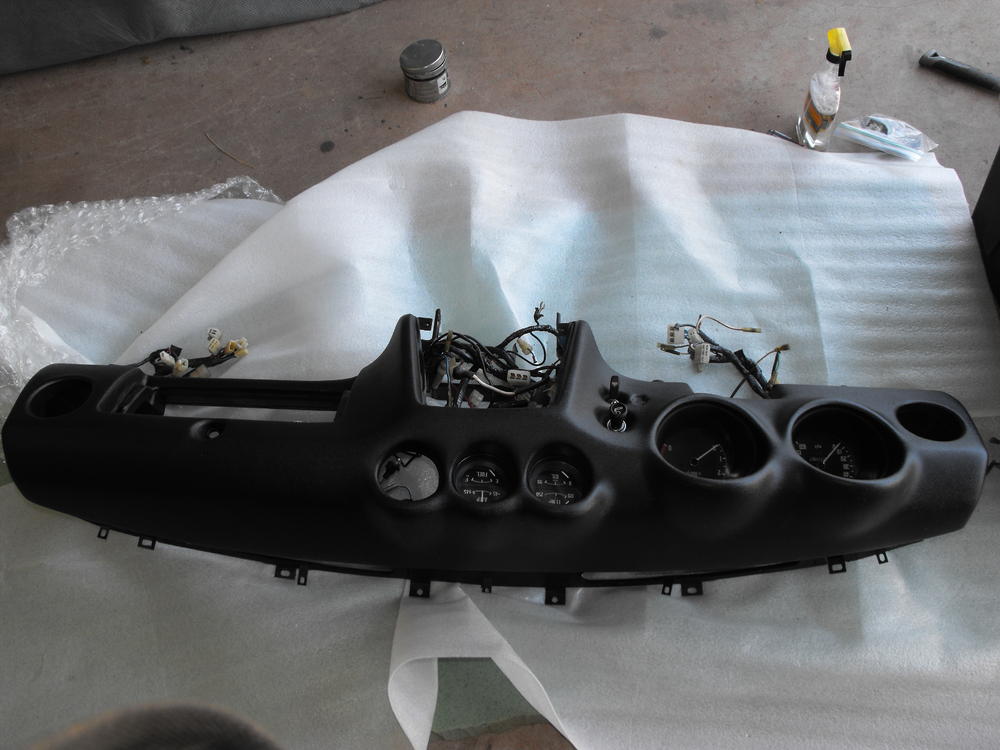
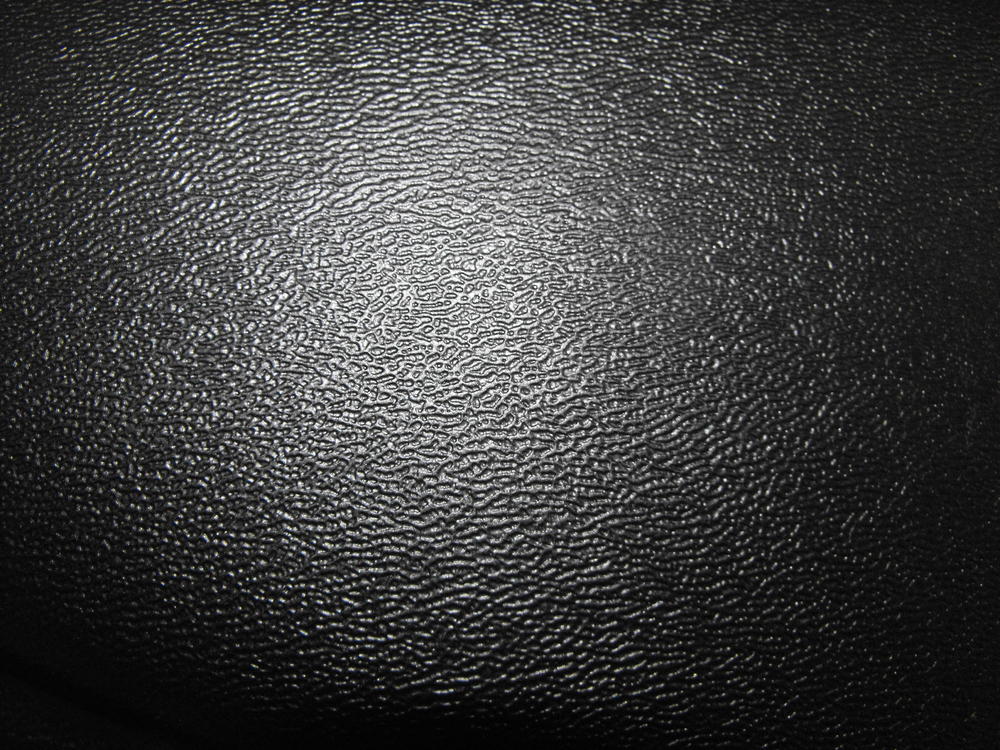
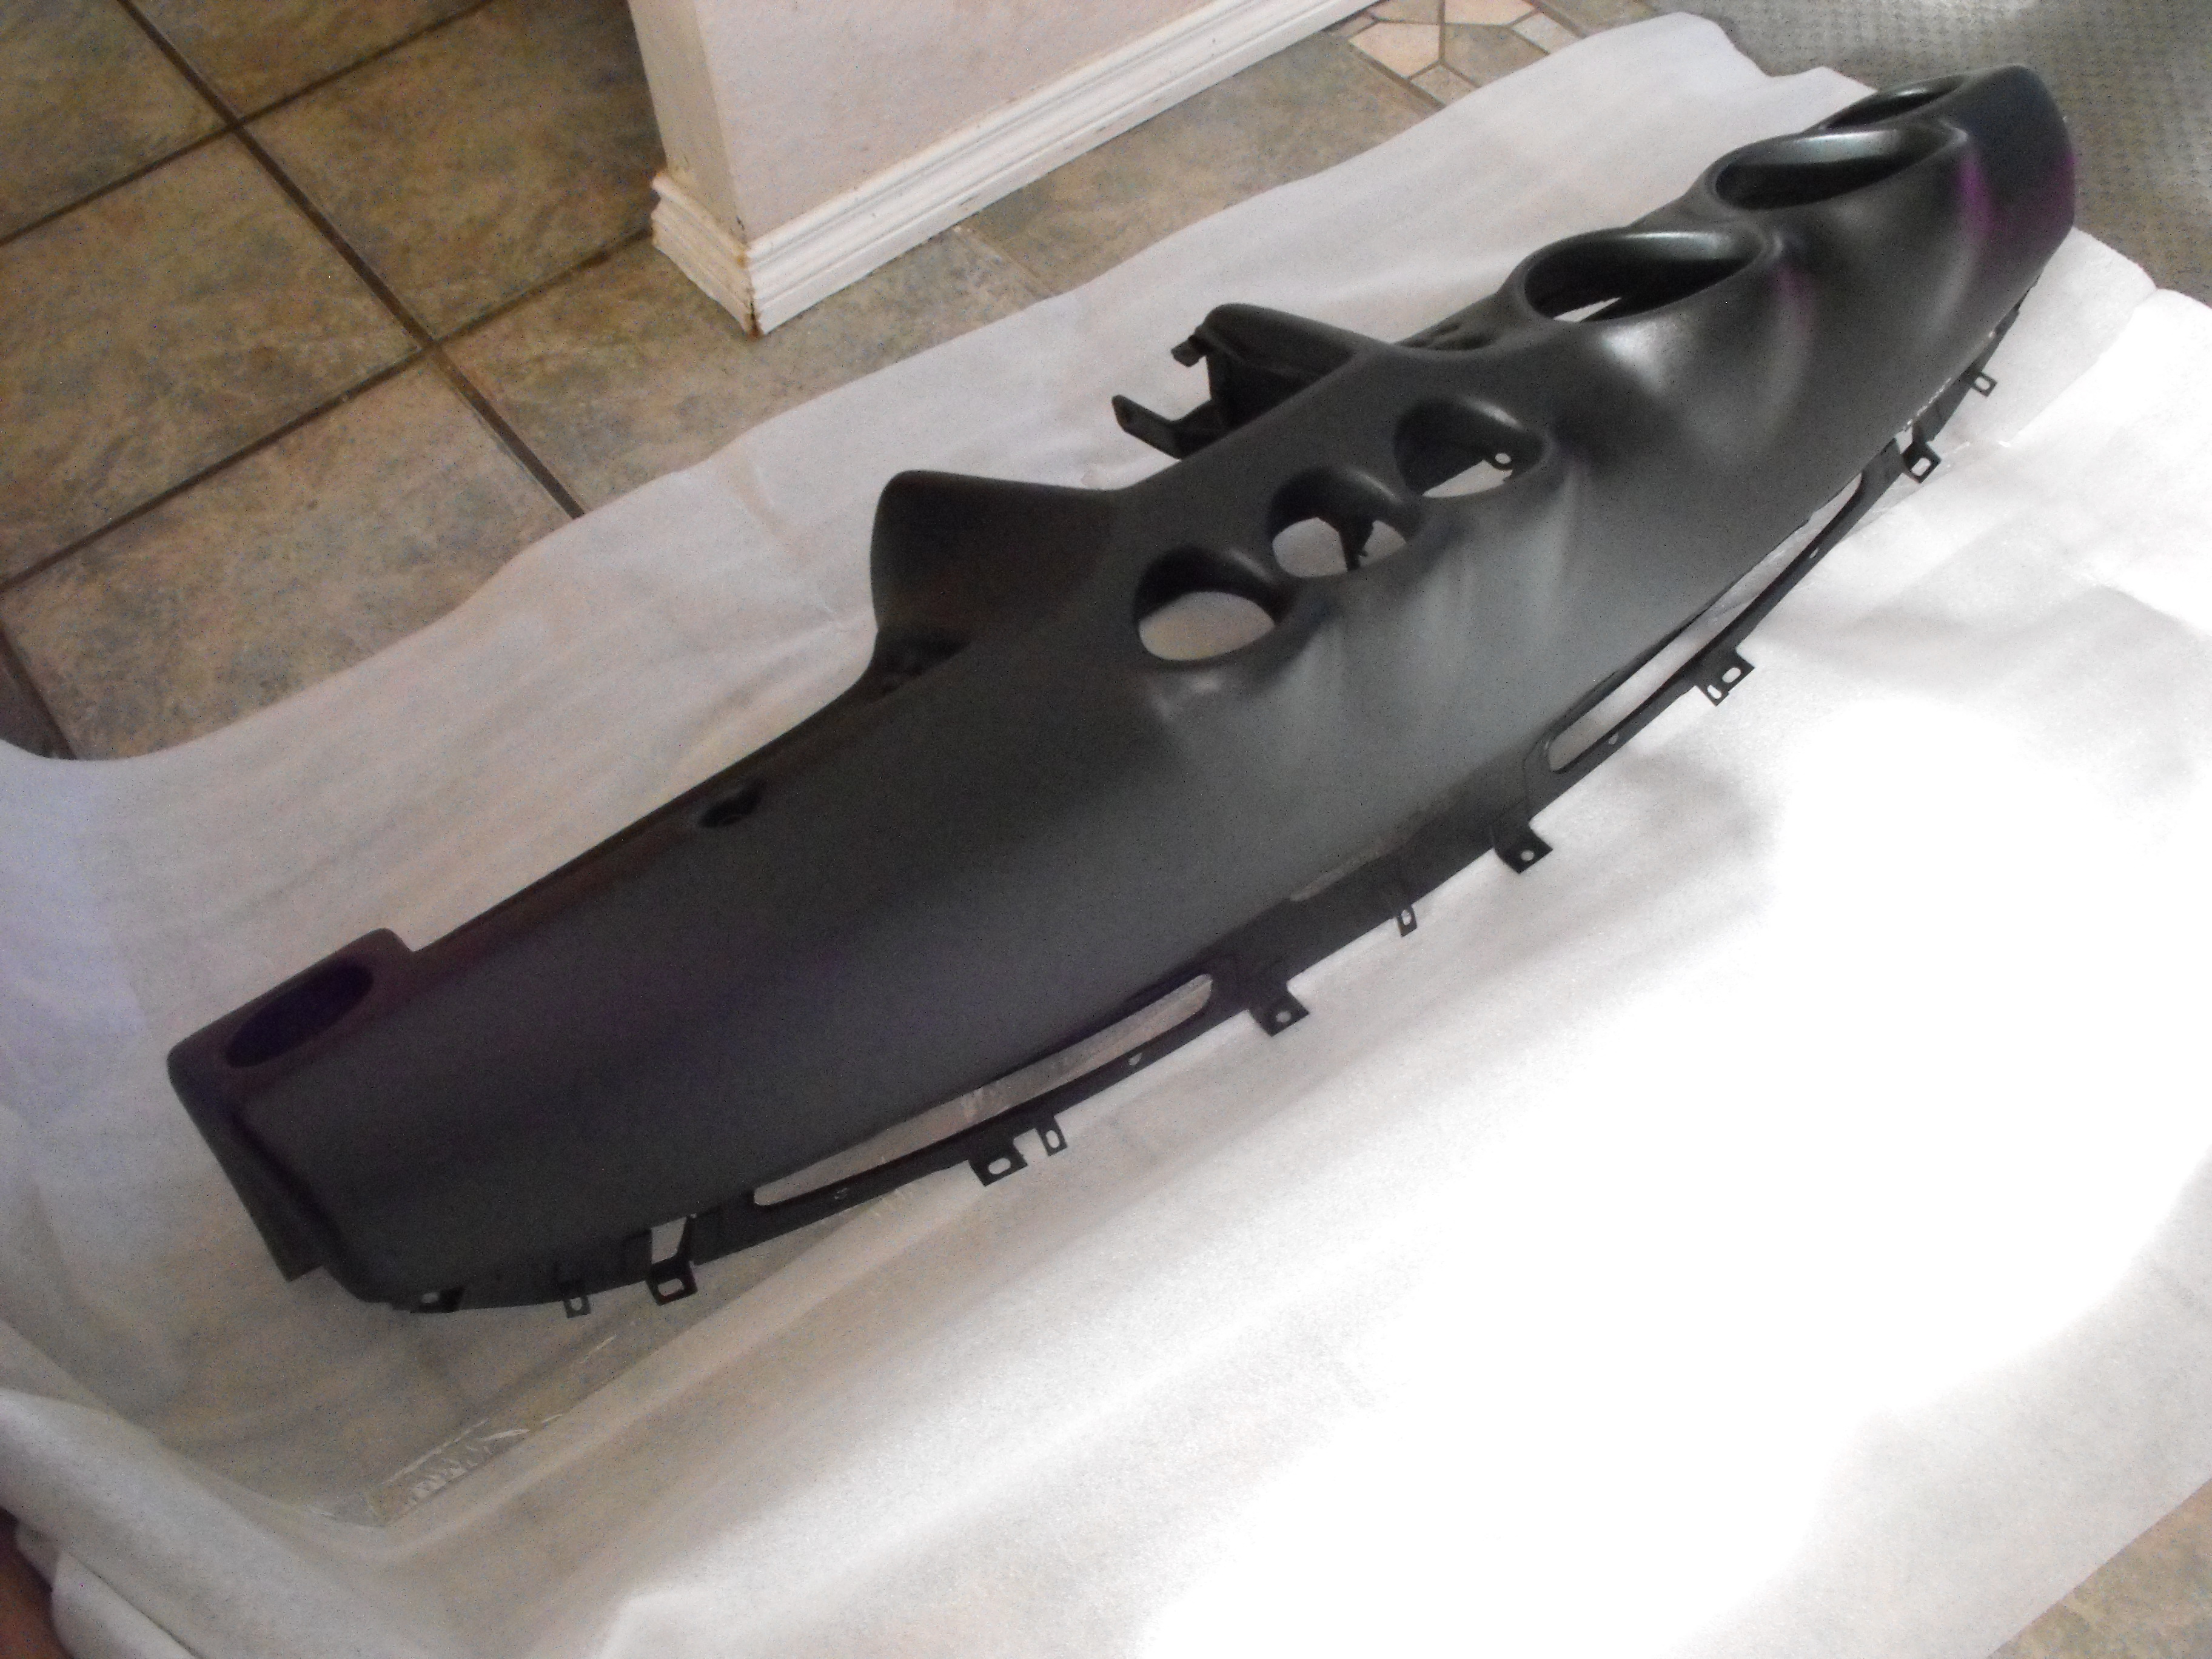
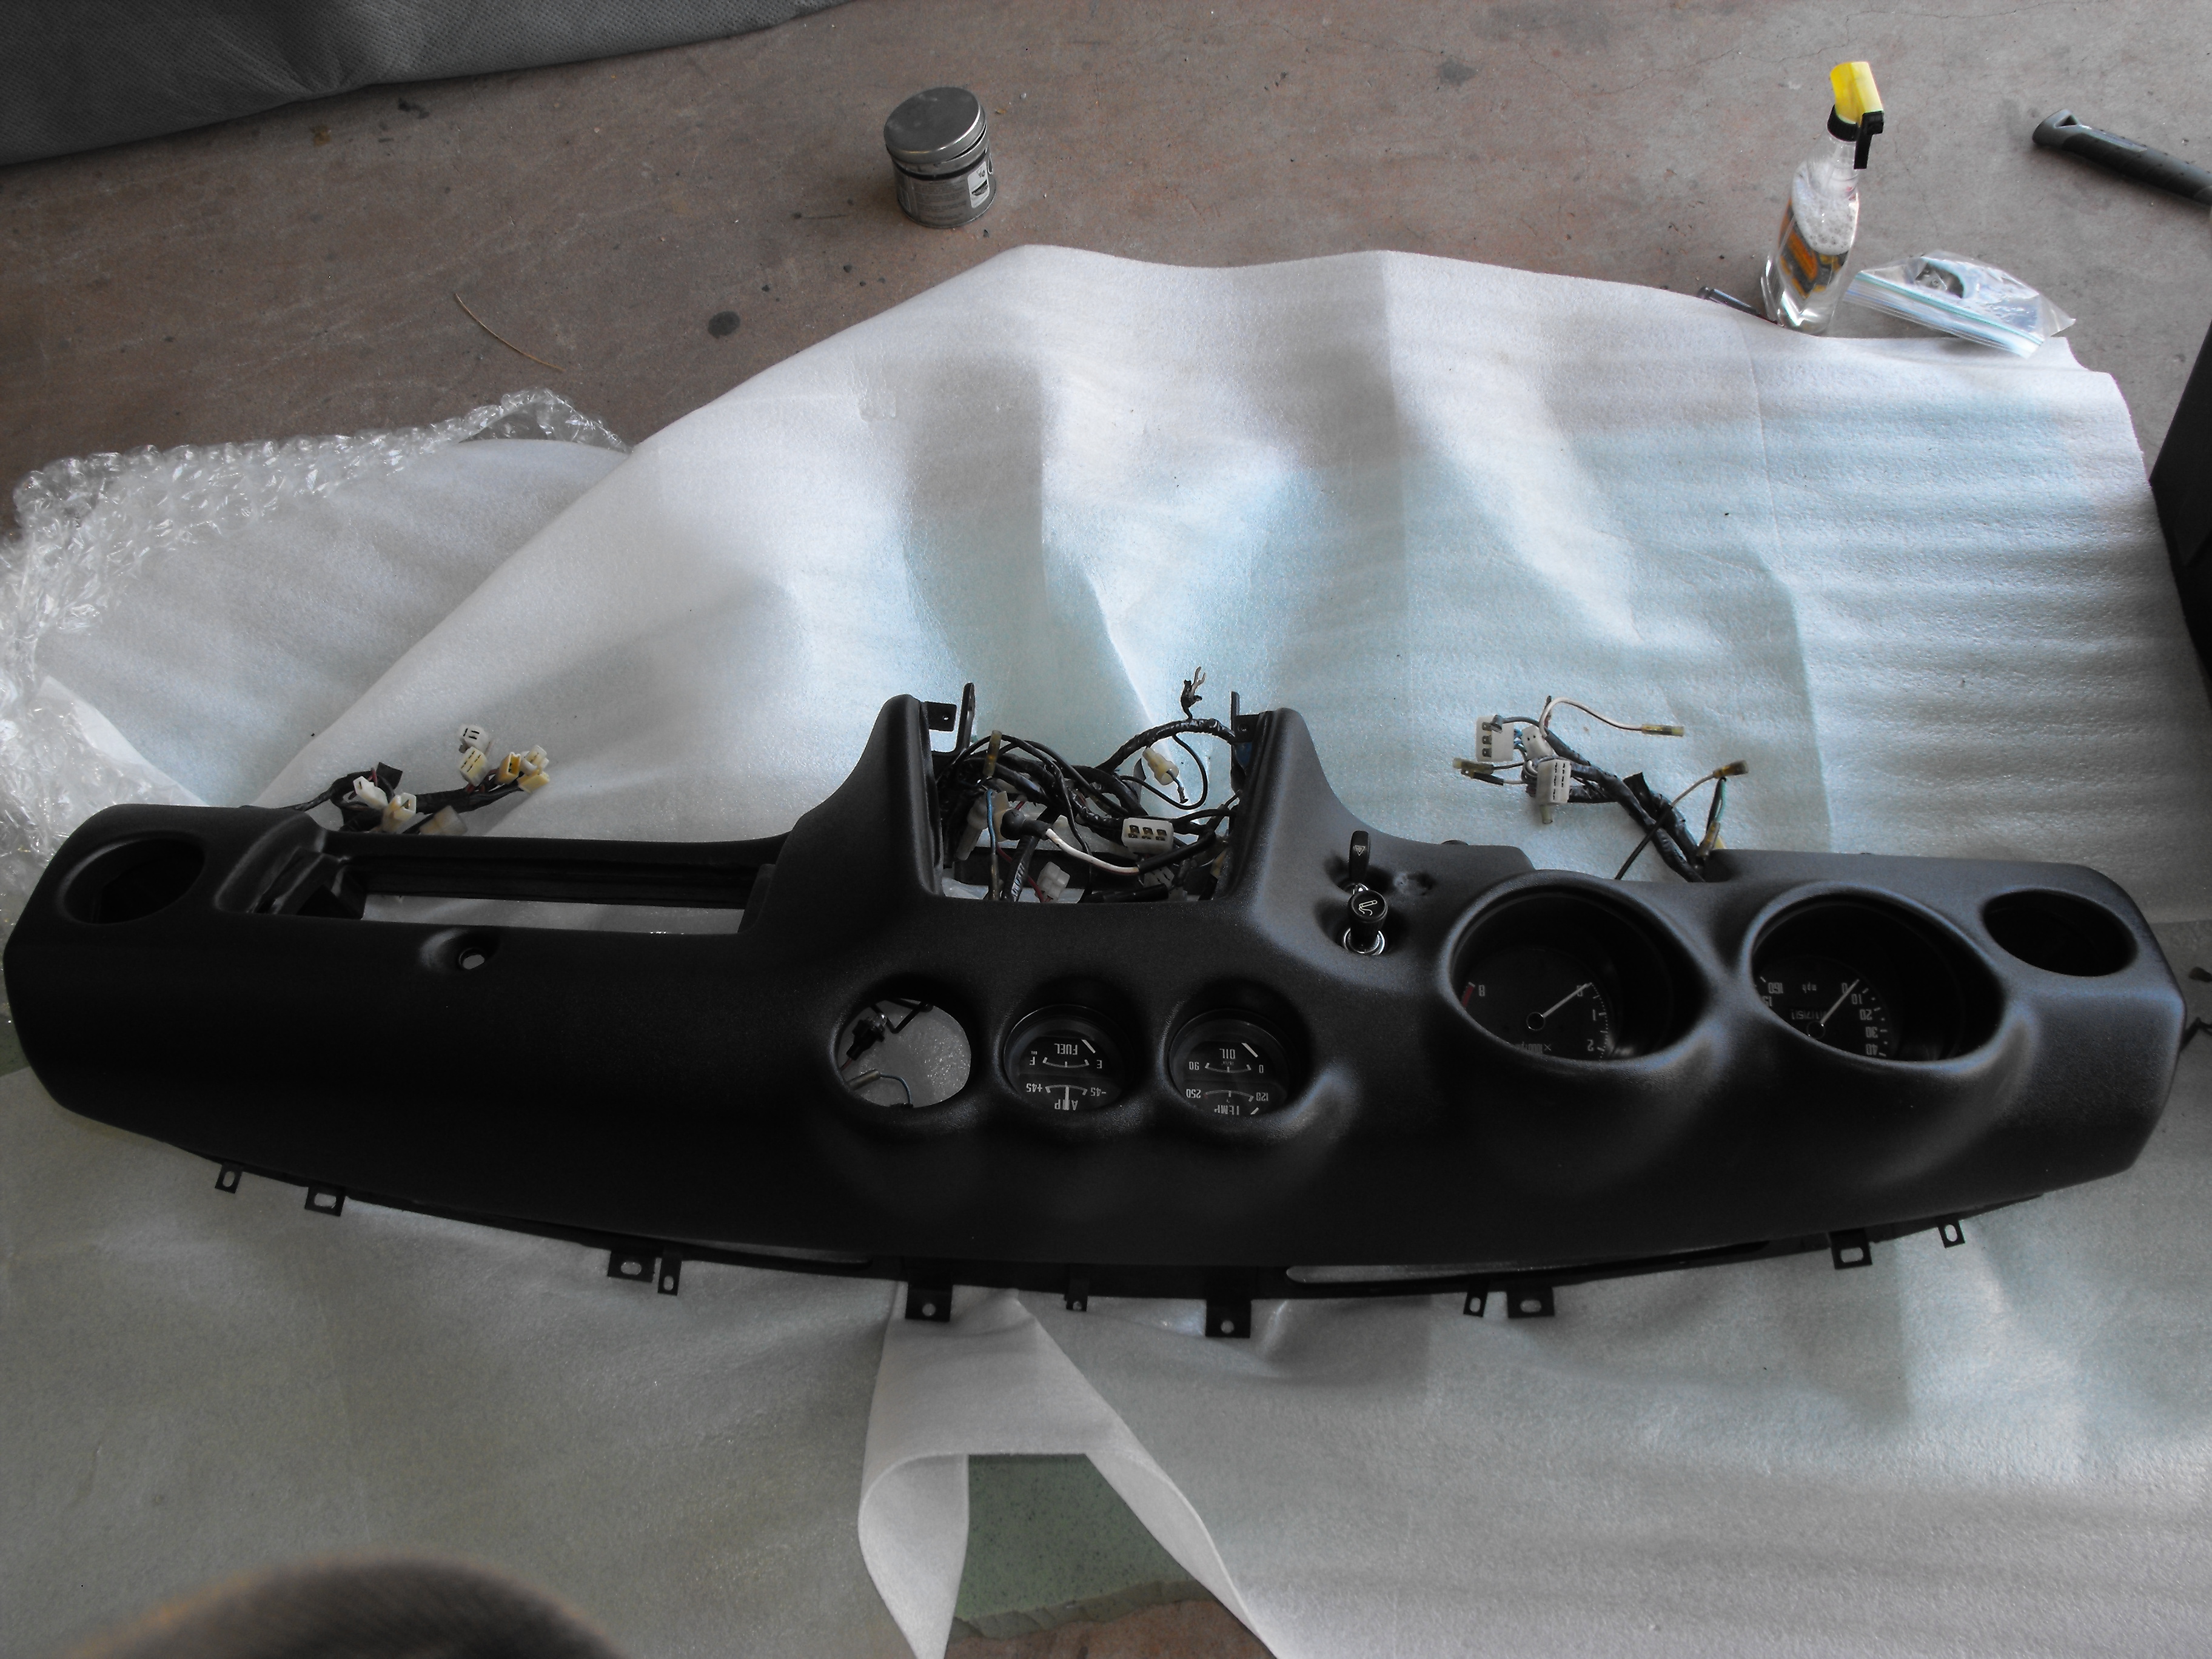
Got my dash back from Justdashes about 2 months ago. The dash looks very nice and all of the instruments fit back in nicely. You can see my write-up on this thread on pages 7 8 and 9 The cost was $1750 plus shipping. Shipping is about $150 each way. I dropped it off and picked up so no 'shipping' charges. My only issue would be the texture of the plastic material. To the naked eye, at about a two foot distance, the texture looks similar to the original as you can see in the pic with the glove box below. If you do a close-up, however with camera magnification, you can see that the texture is not like the original (color is same for samples, lighting makes color look different. justdashes is dark pic, original dash is gray pic). If I could get hold of a Yick Sang or Mold-tech texture style book I could tell you what each is. Also, they covered up a couple holes for switches that I had to re-drill, but otherwise, I would use them again if I had to (and could afford) a new dash.

.thumb.JPG.d0ab9a01b2e9606d9779a00d2a92c20f.JPG)
-
-
-
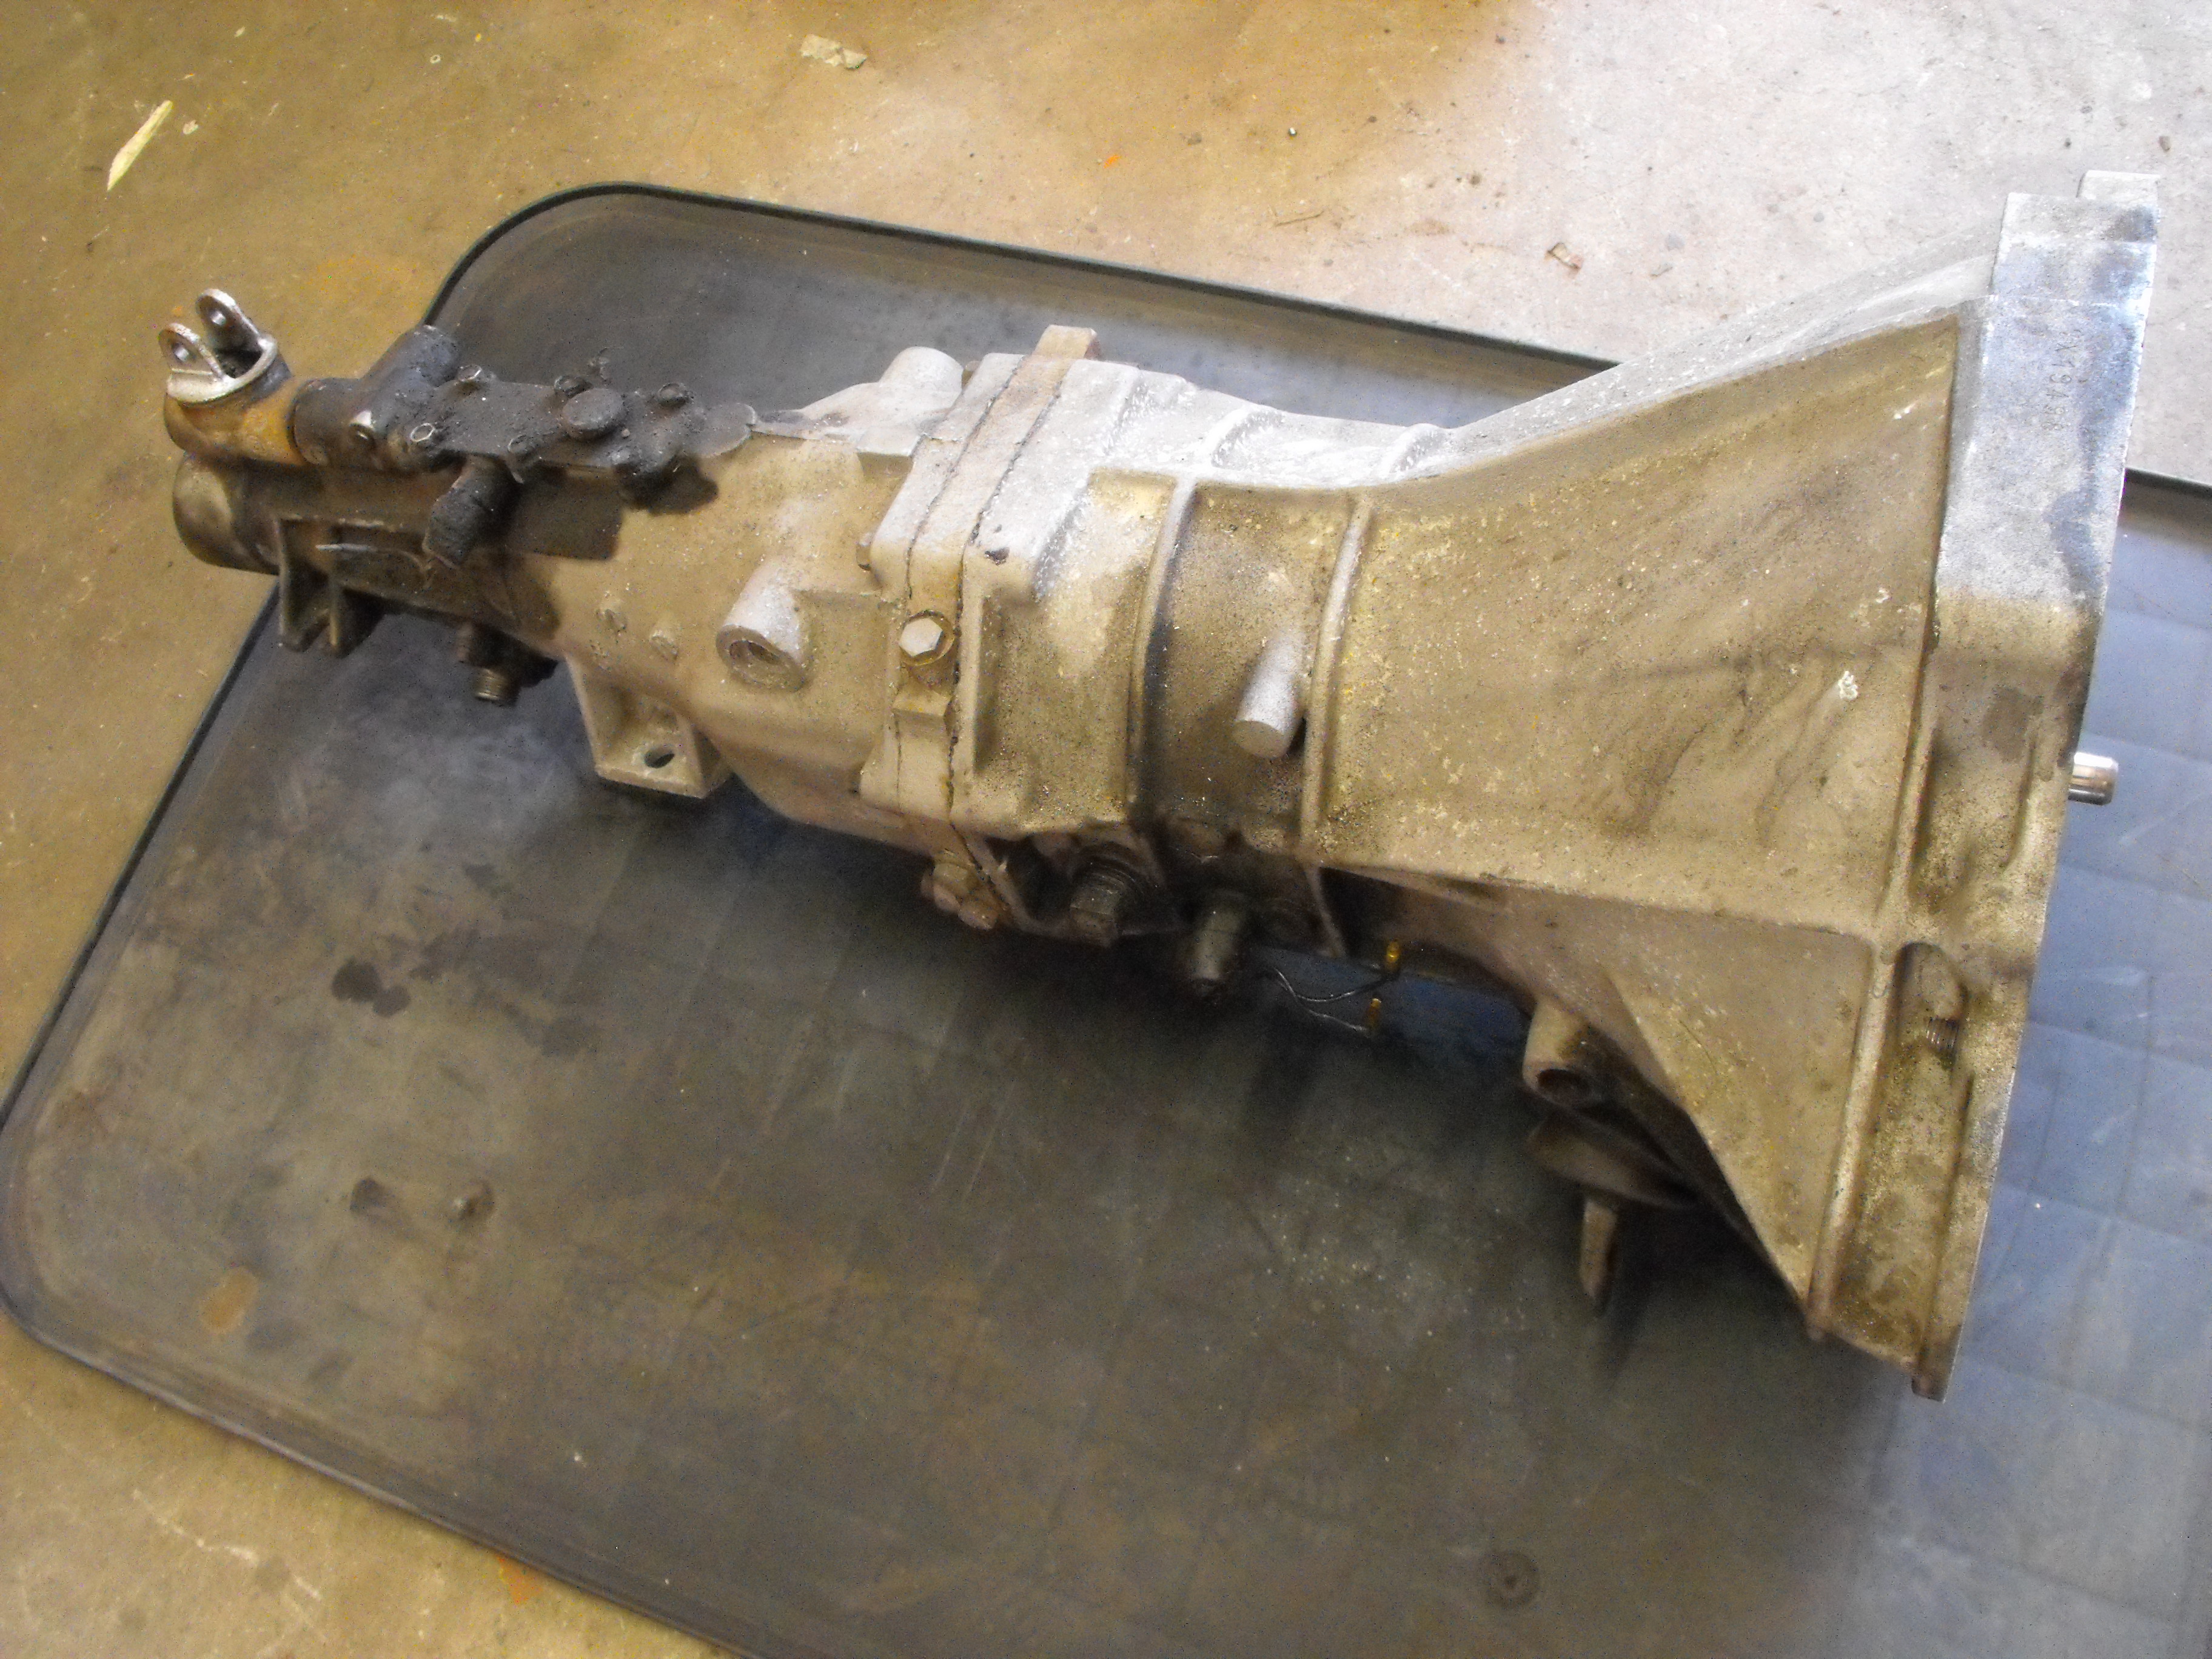
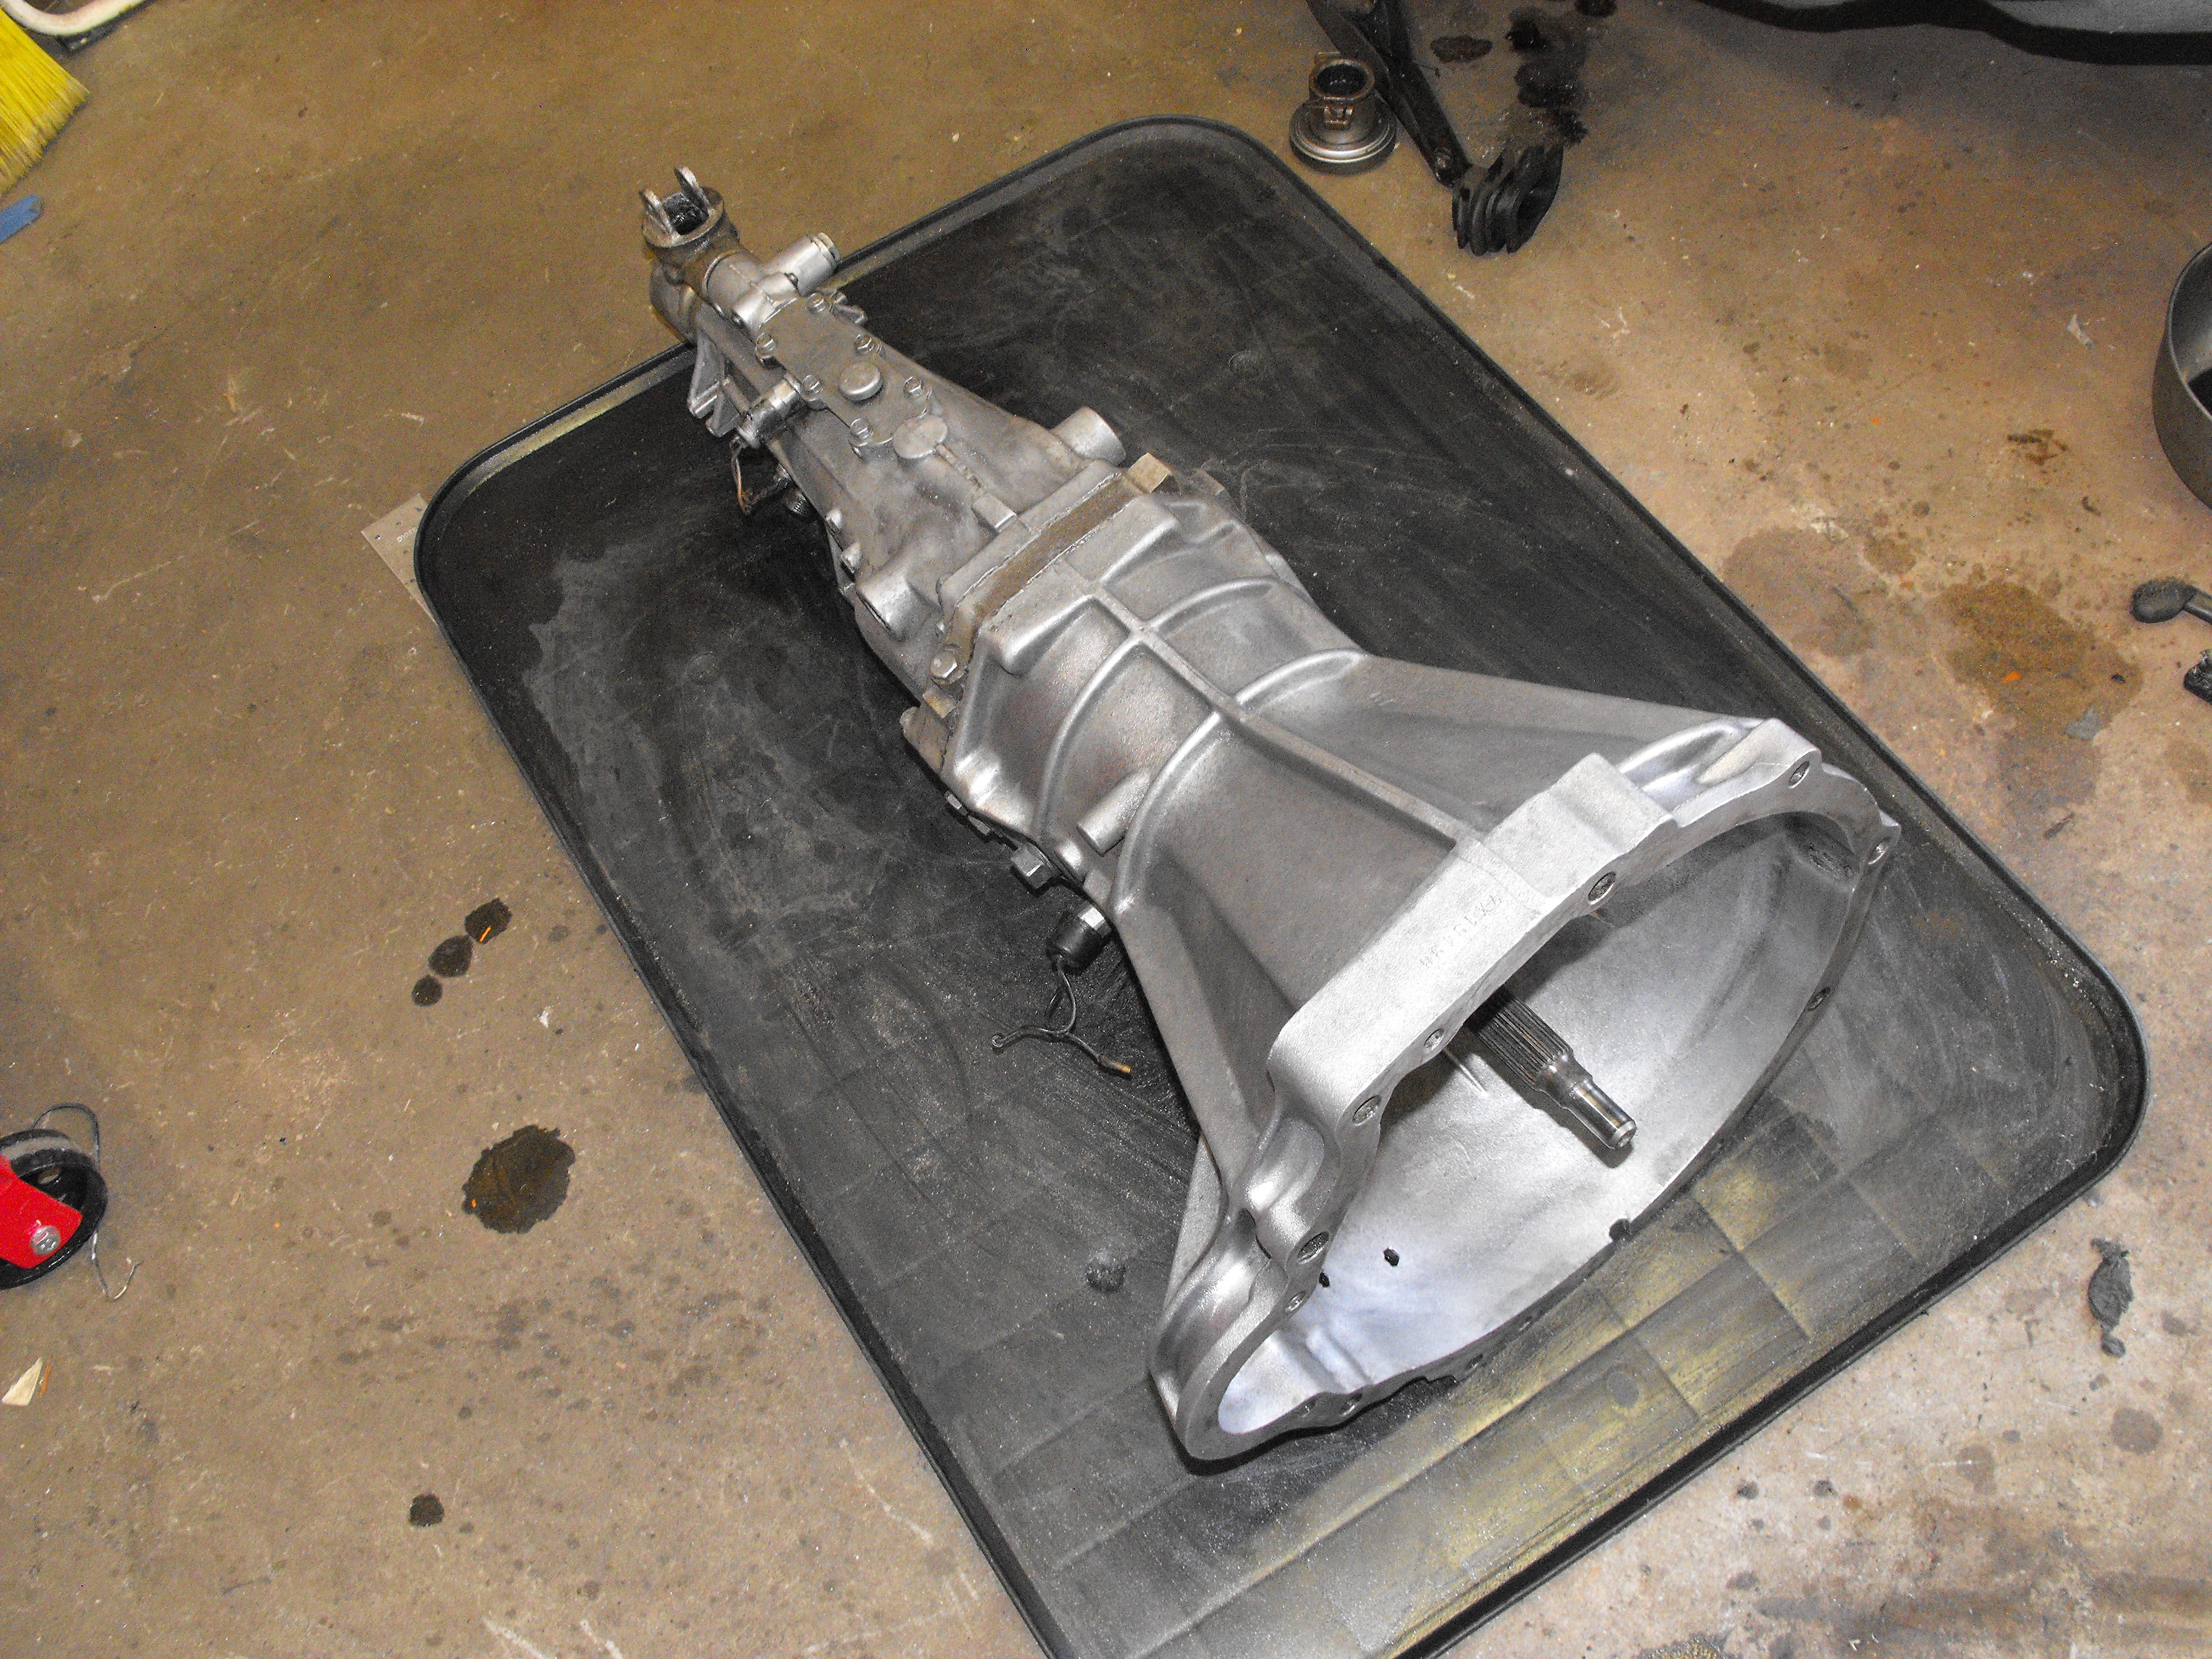
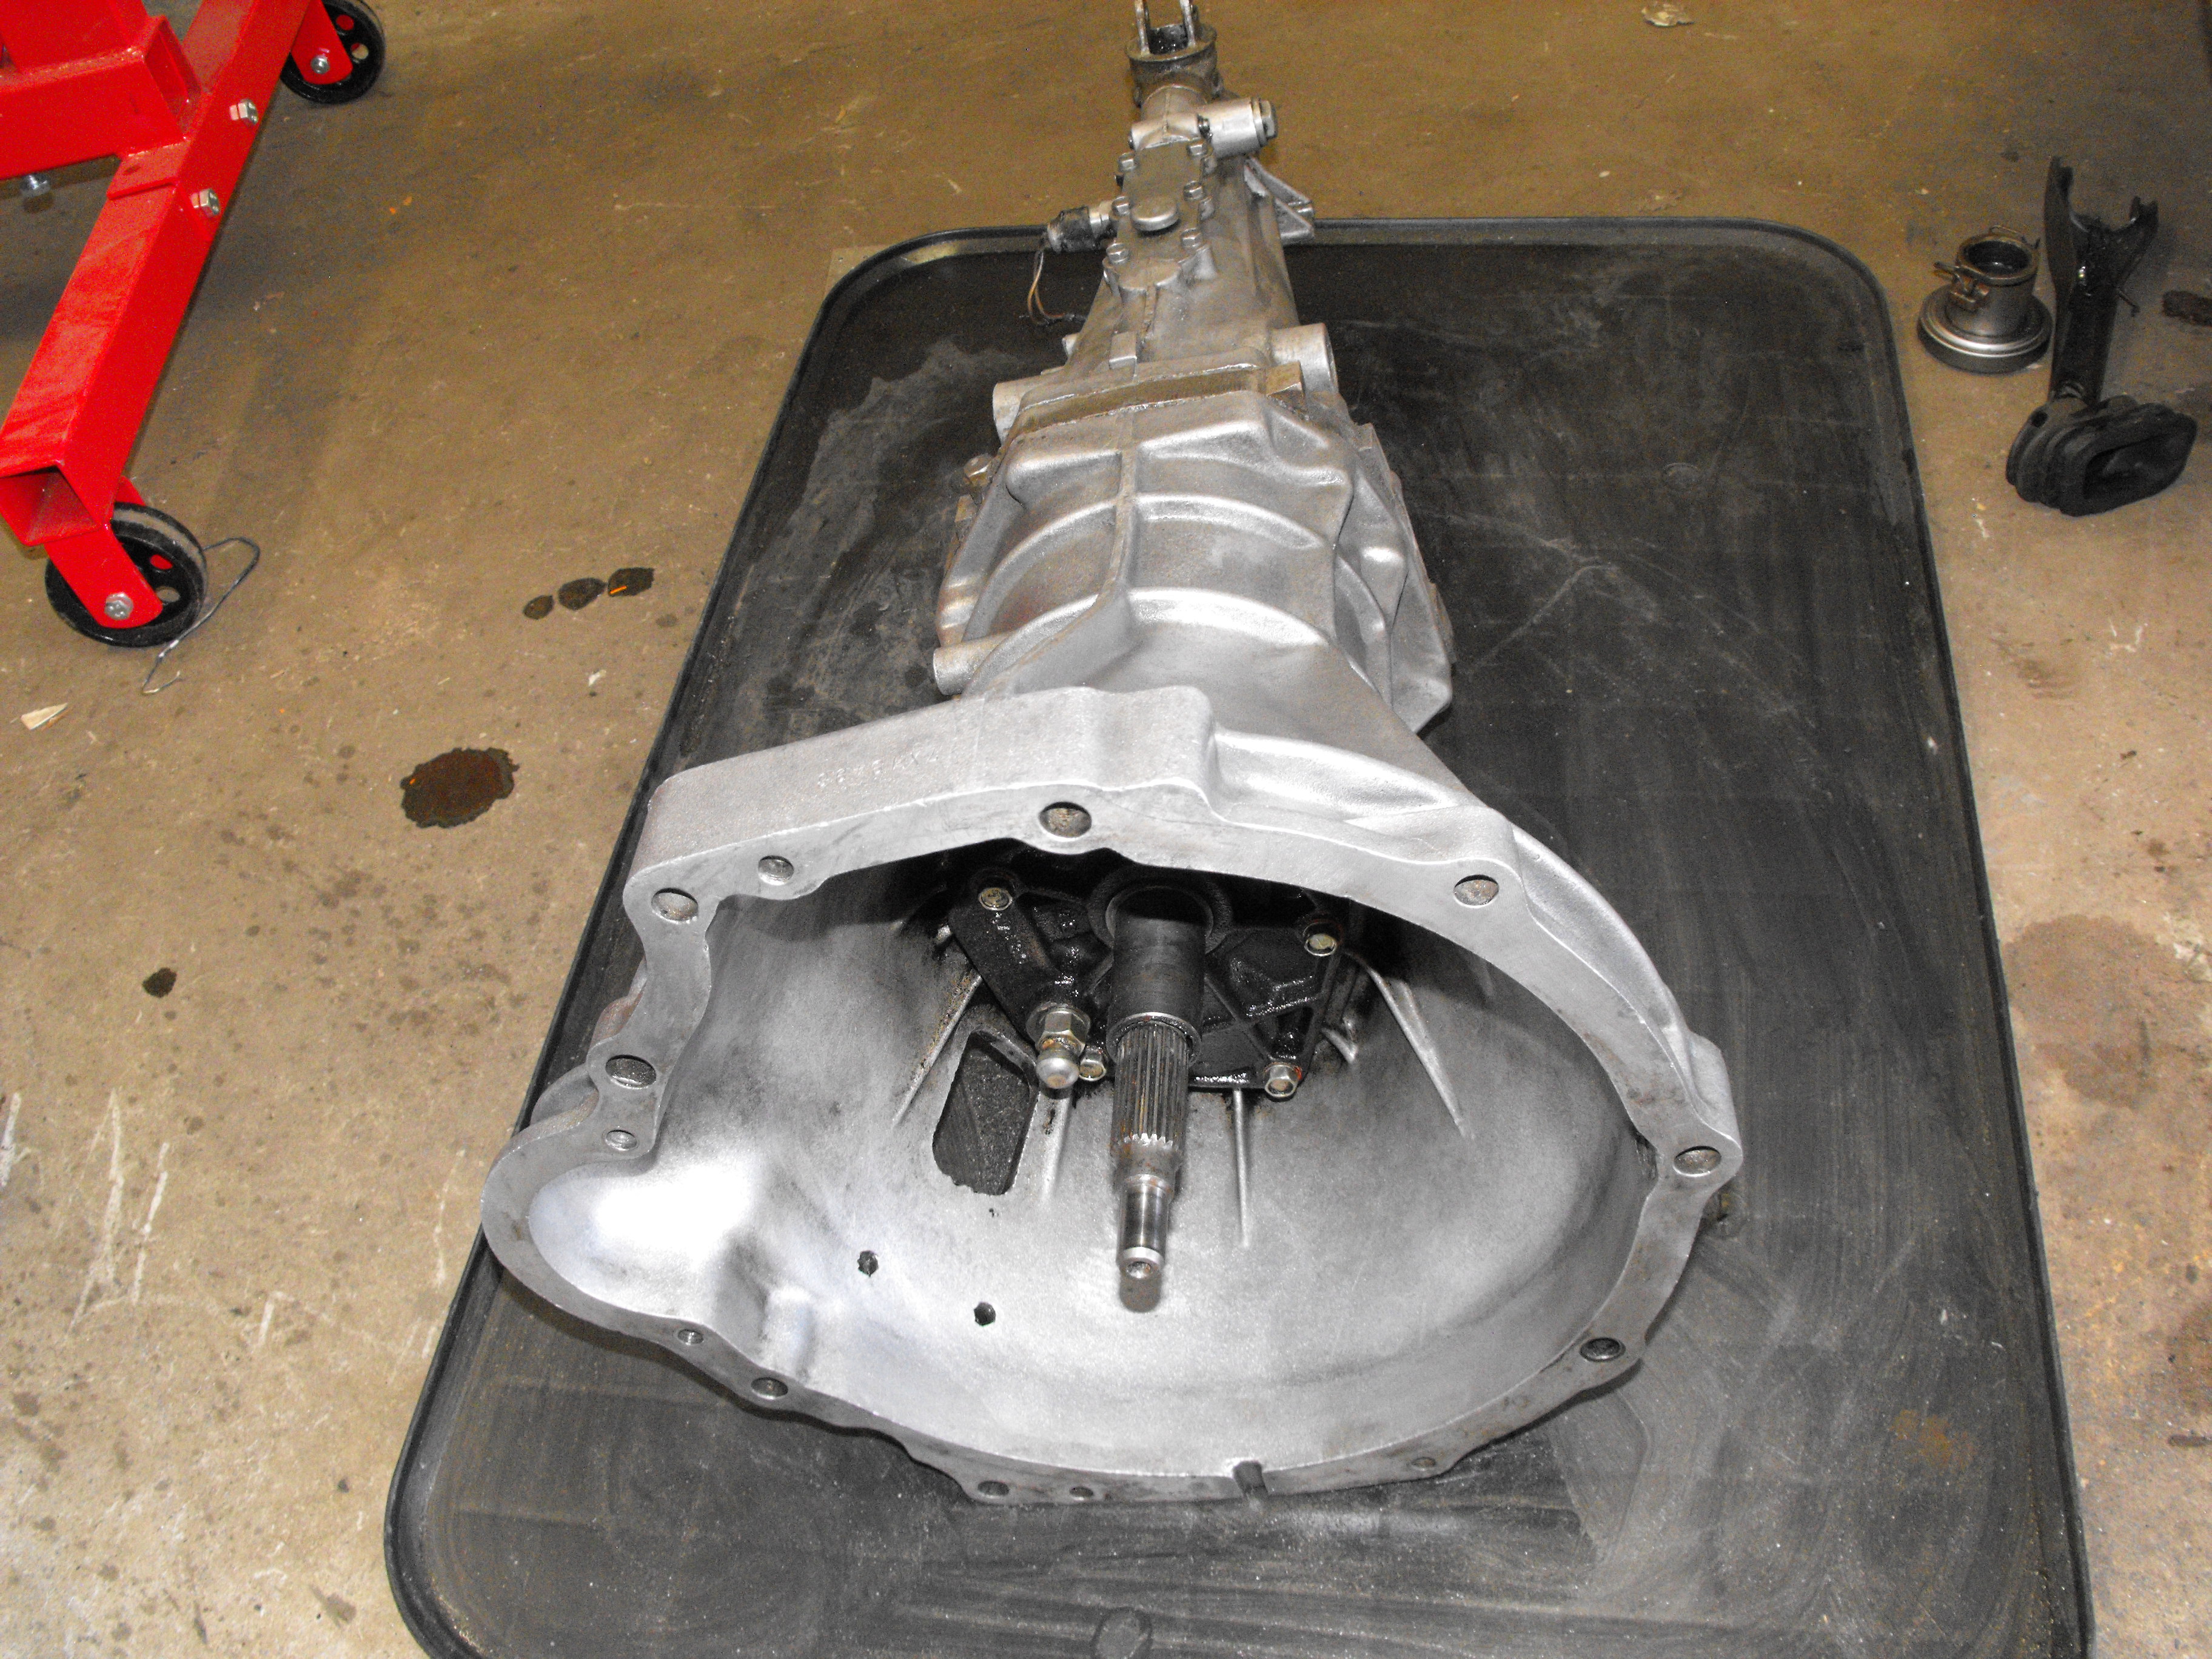
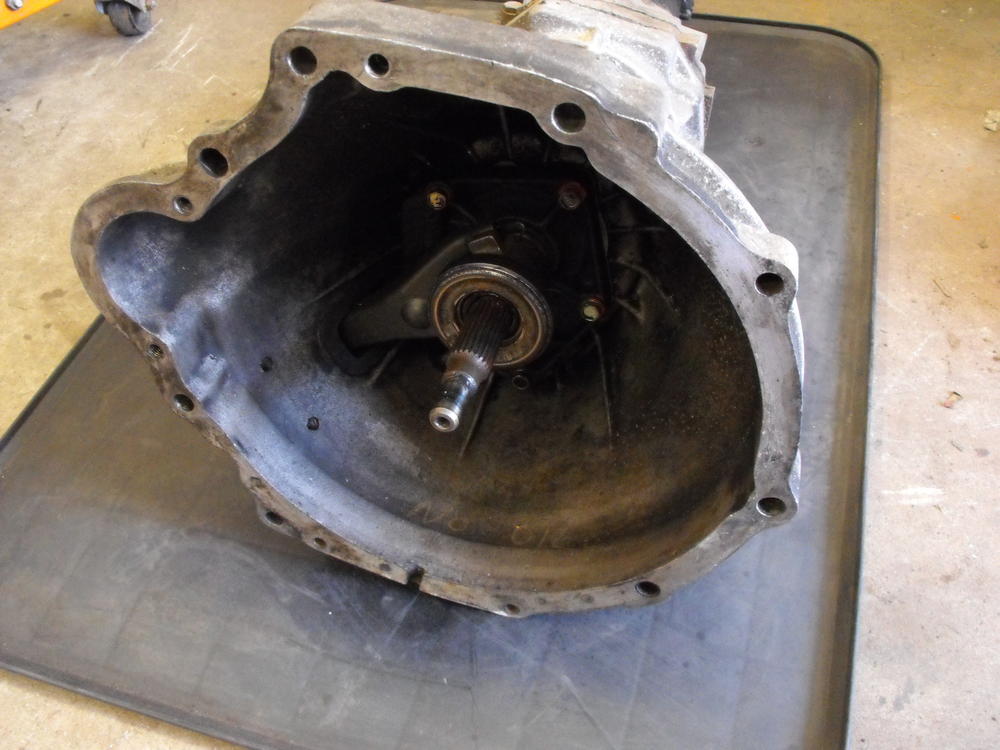
Hi Joe, Pretty much the old fashioned way. I used paint thinner and a parts brush (for crevices) and a wire brush to remove all of the oil. I would clean an area with the brushes and then wipe clean with a towel paper. I think I went through about half a roll of towel paper by the time I was finished. That part took about almost an hour. At this point the transmission is clean, but still fairly grayish. I then took wire wheels and attached them to my drill and used that to pretty things up and make it shiny. After that, I put on a thin coat of high temp gloss clear. I was tempted to use aluminum paint, but that can chip and also looks too 'uniform' which looks funny to me. Bare metal typically has a little character to it.
-
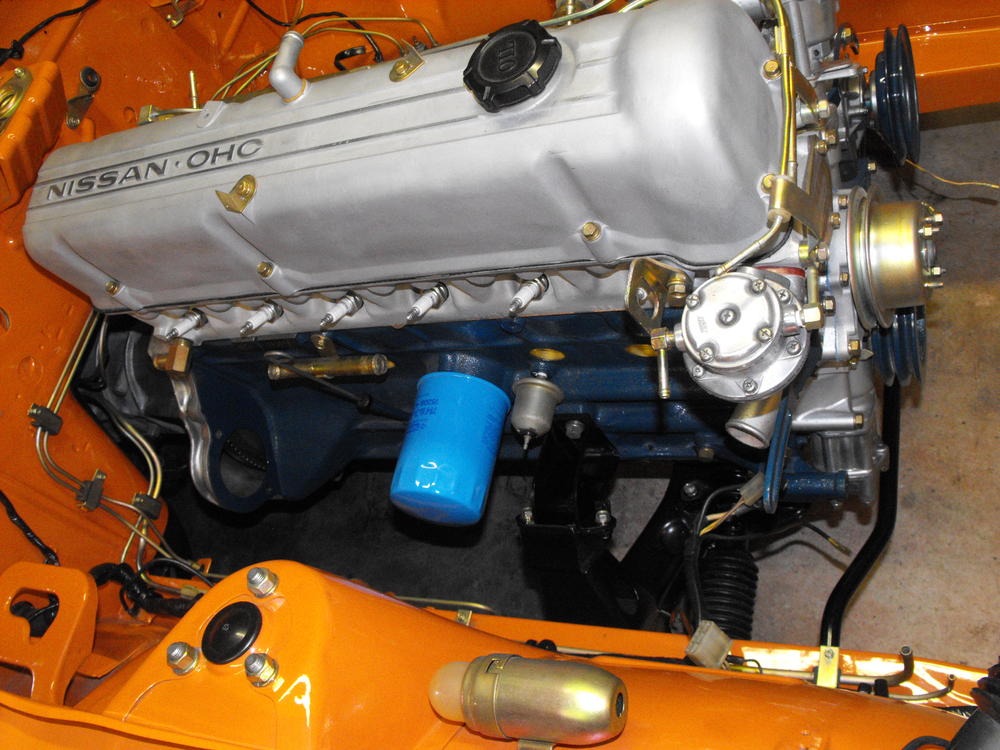
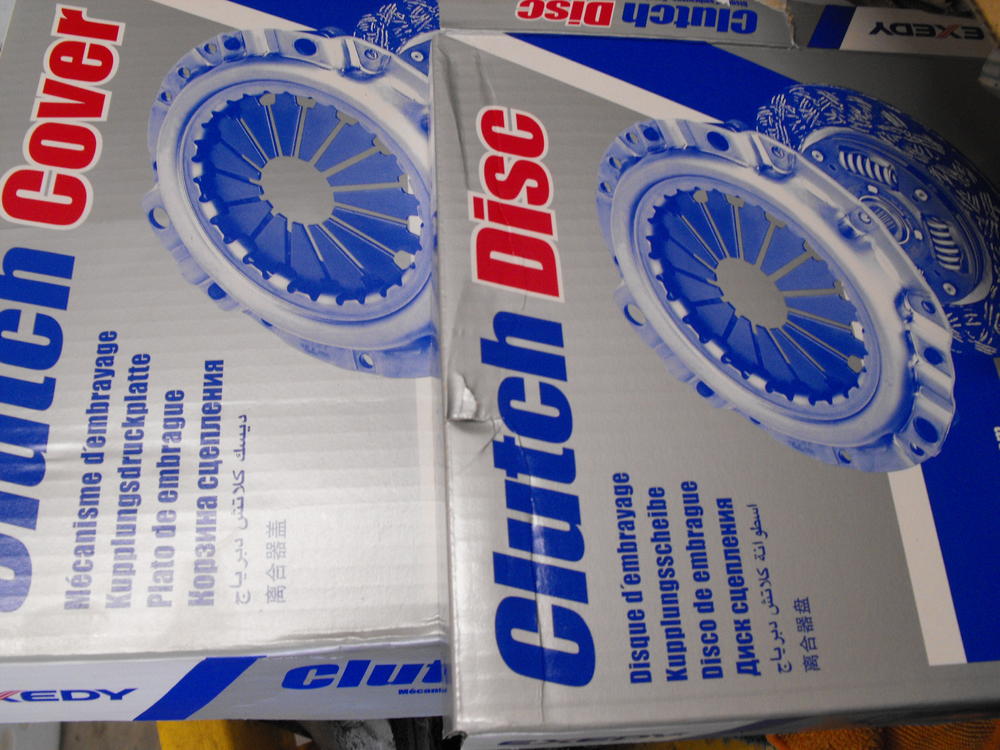
Thanks! Got the transmission cleaned up and installed. I have the transmission mount in and the forward end supported with a scissors jack. I should be able to drop the motor in here soon once I can scrape together a couple hours. I bought the Exedy (made in Japan) clutch kit which included the clutch, pressure plate, throw-out bearing and pilot bushing. Very reasonable from Rock Auto. Also added the before picture which was posted earlier. Also had some nice light for the rear end pics. I love how that came out.


-
That is an absolutely hilarious comment! Never heard brake fluid described in quite that fashion. Makes my want to go home and slather up my hands with it right now.
-
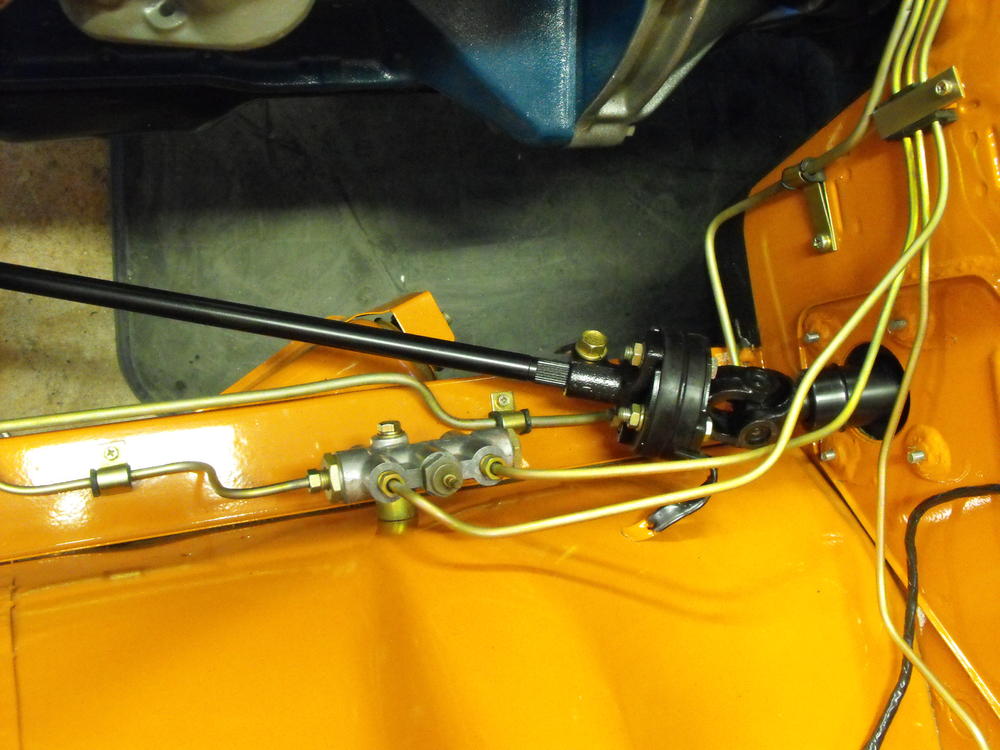
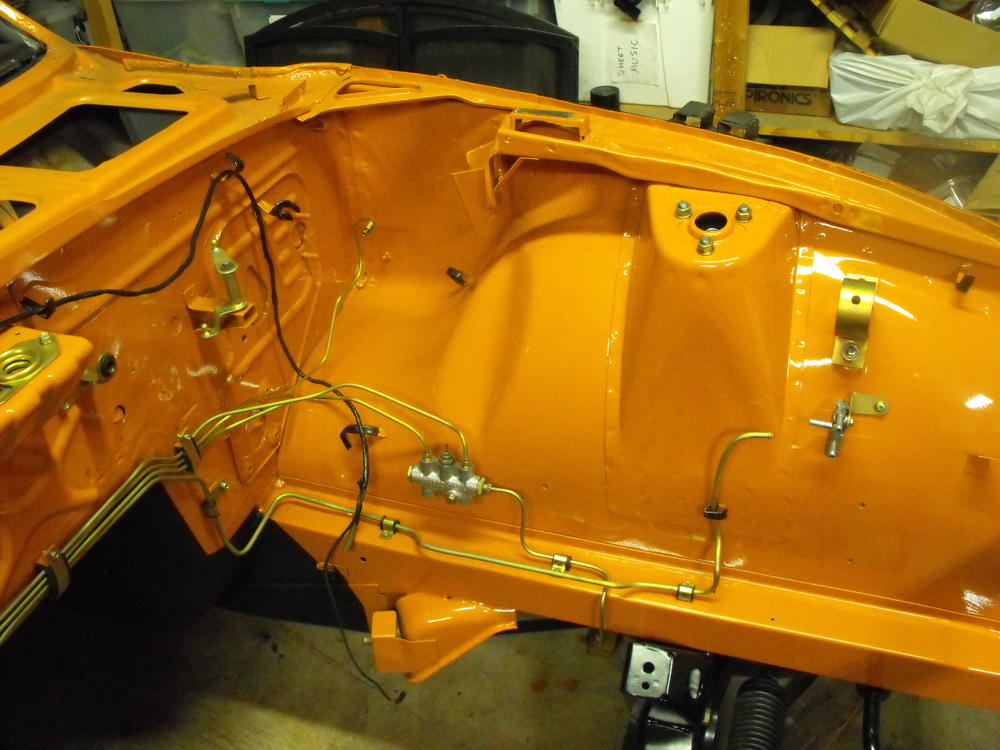
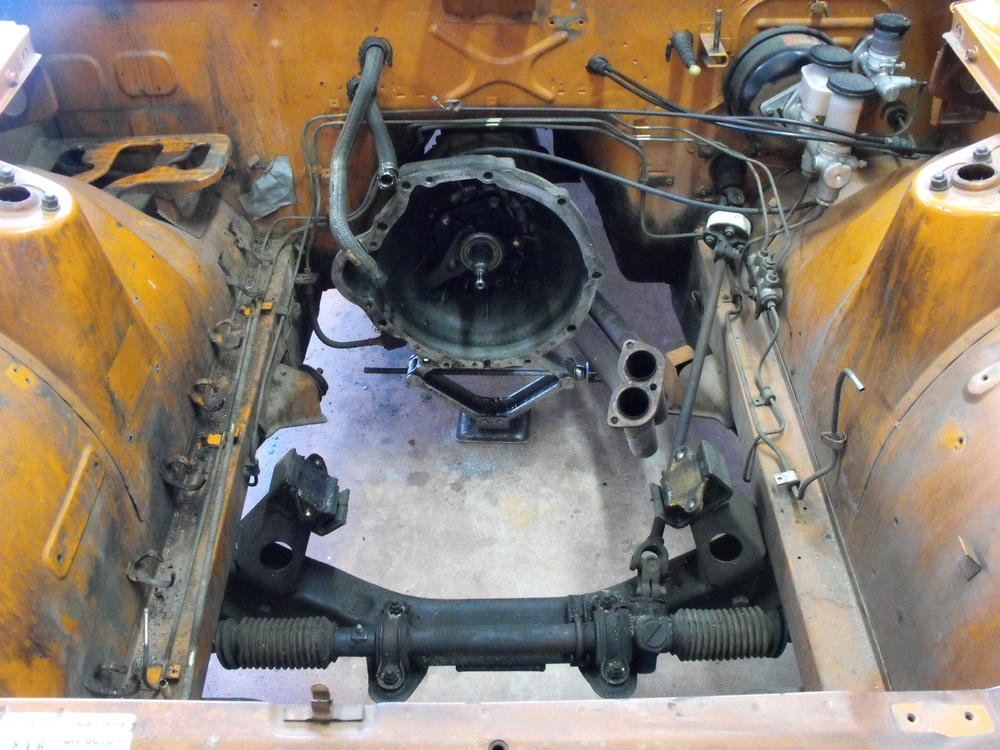
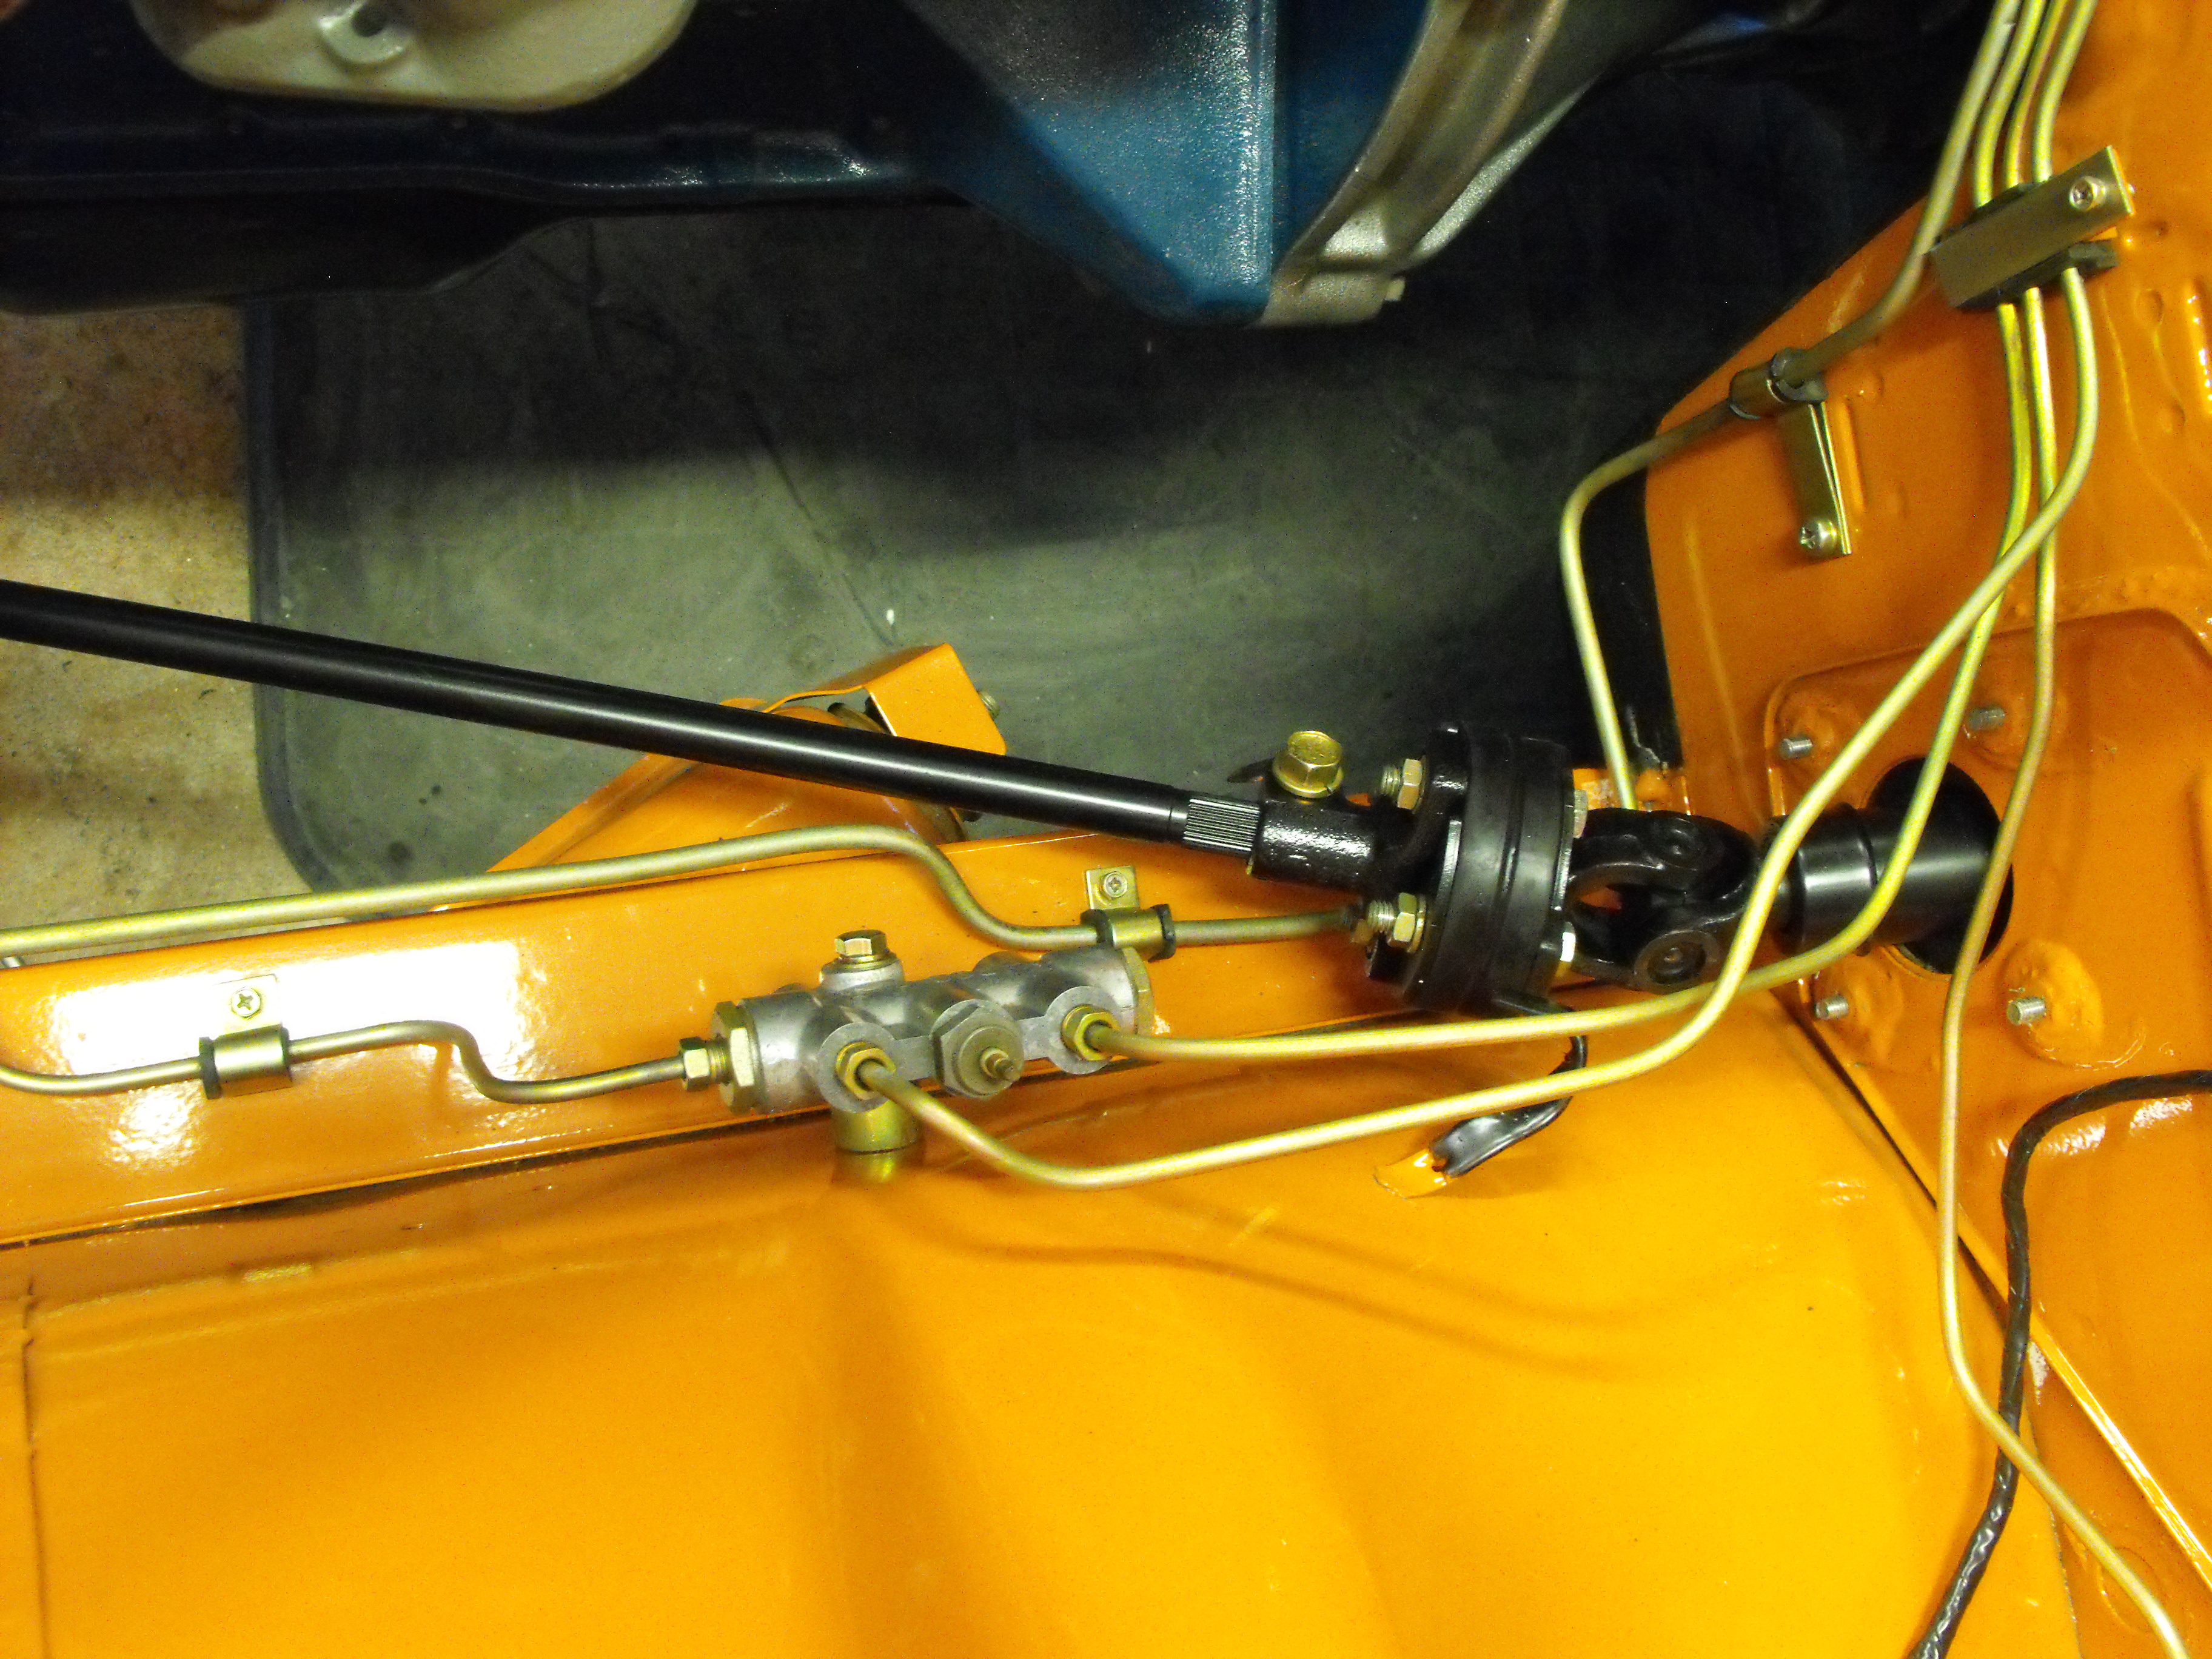
Finished rear brake line install. Now working on engine bay brake lines. Installed brake line manifold and fuel vent manifold. I threw in a before pic just for reference.
-
Looks nice! I get all my 240Z hot wheels on ebay. Nice selection there. The one you are showing is going for about $6 (includes shipping cost). I have a good collection of 240Z hot wheels.


.JPG.821799e9b8edee29d277d057dfaa7634.JPG)