motorman7
 Subscriber
-
Joined
-
Last visited
Everything posted by motorman7
-
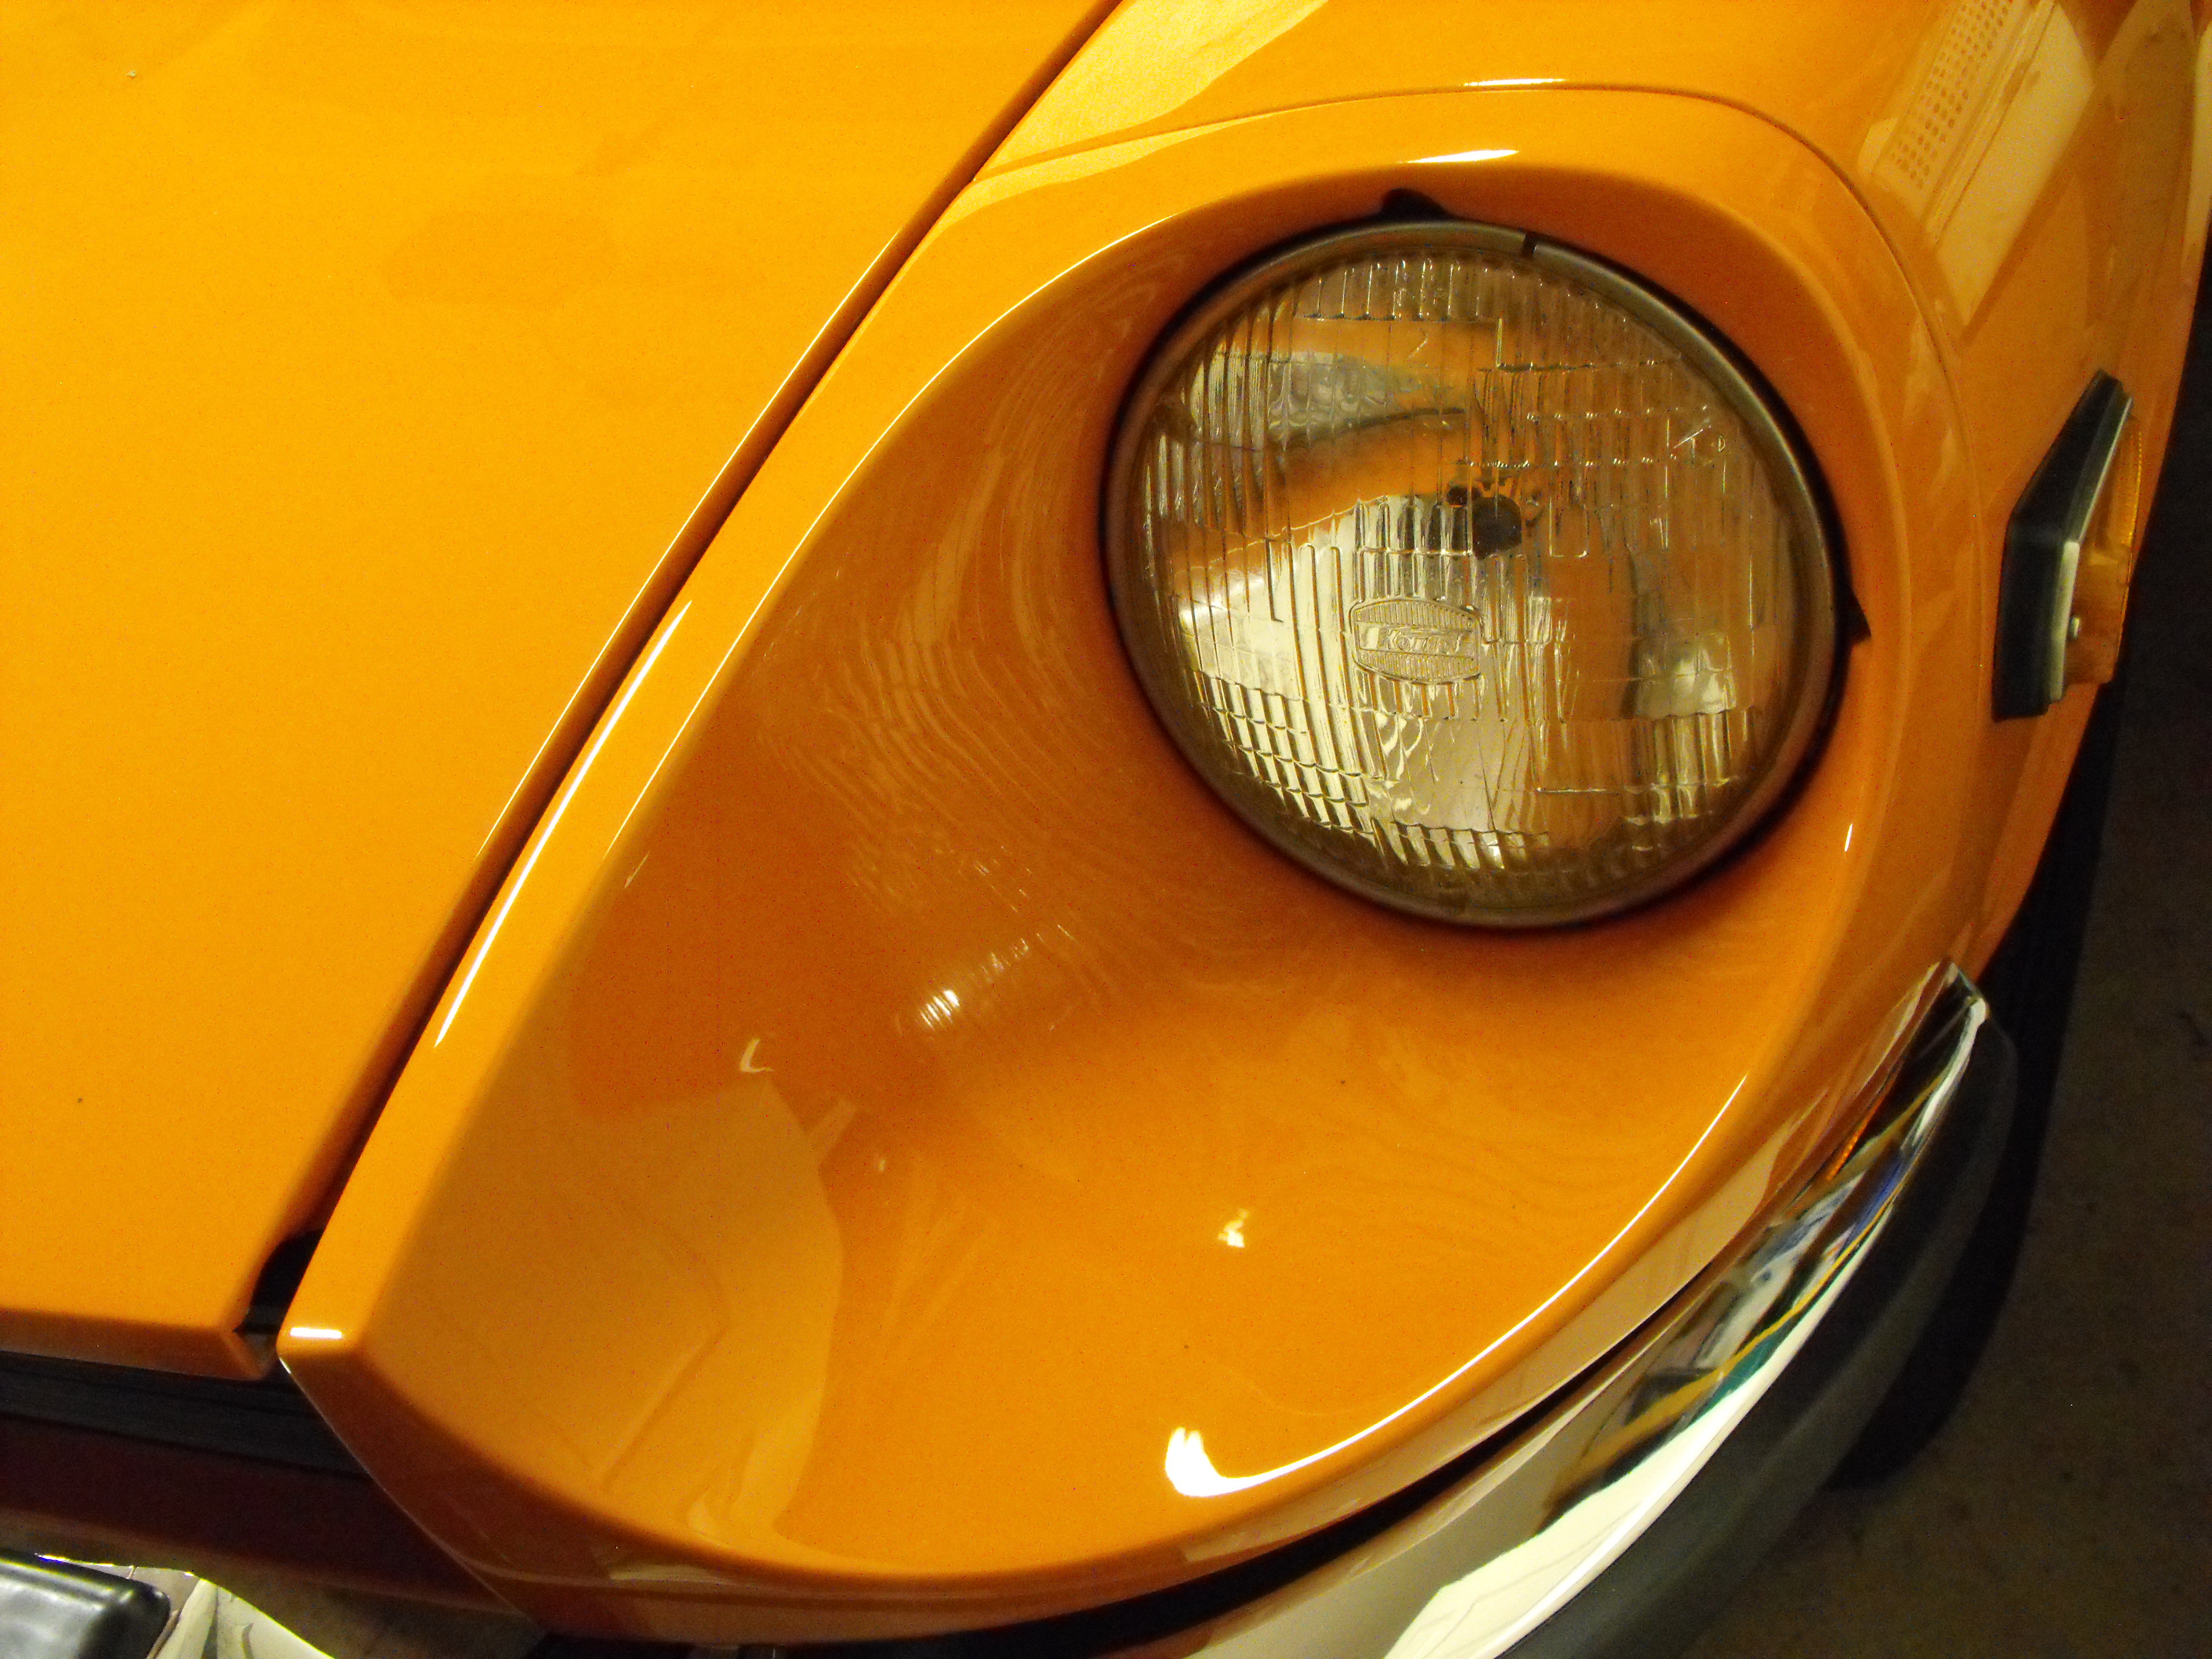
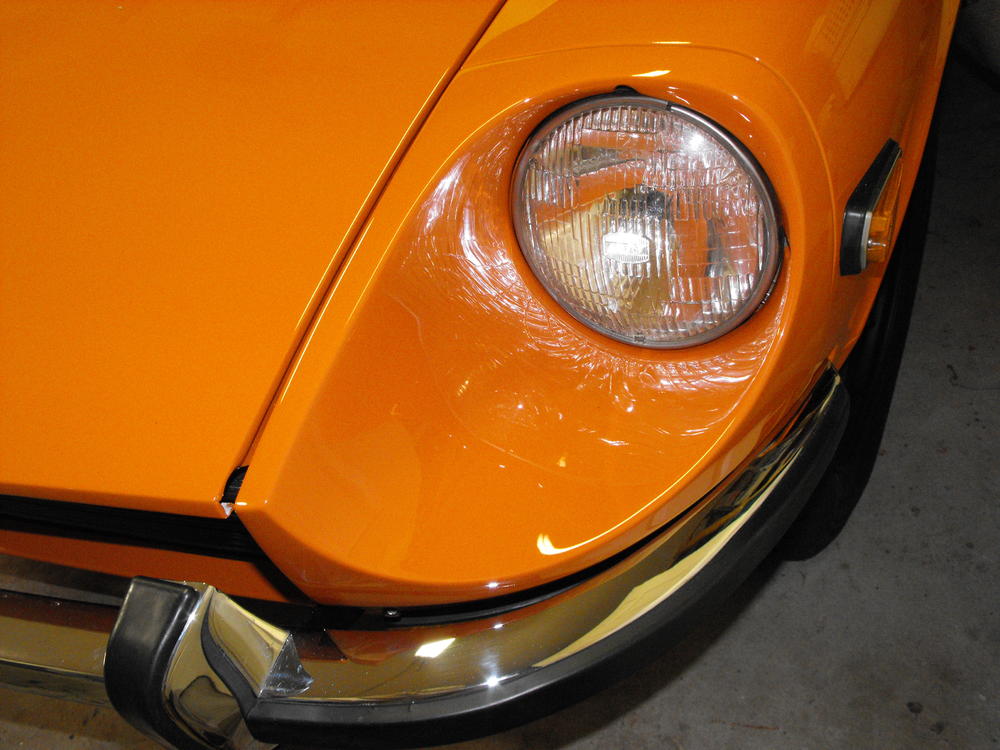
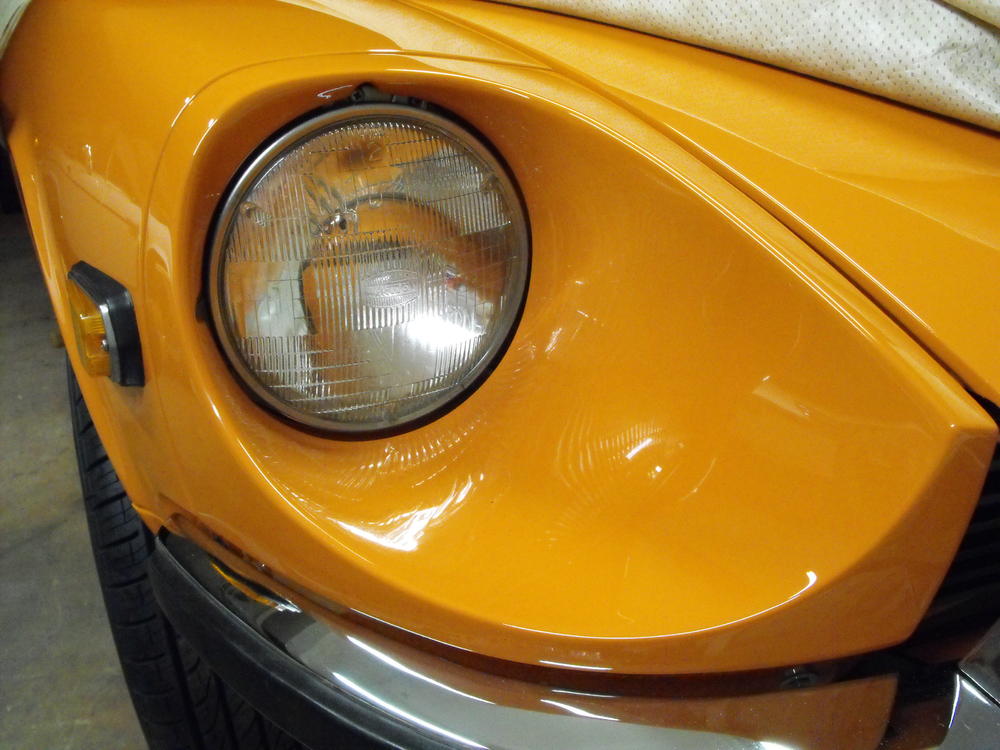
 I cleaned up both head light buckets (a lot of overspray from previous paint job) and installed them along with the Koito headlights. The only problem is the Koito's don't match . The passenger side headlight has a fine glass grid while the Drivers side has a larger glass grid. So, I will have to find a third headlight that hopefully matches one of these. Preferably I find the a fine grid Koito as I beleive that is the correct style. That is what the '70 has anyway. You can see the difference in the pics below.

-
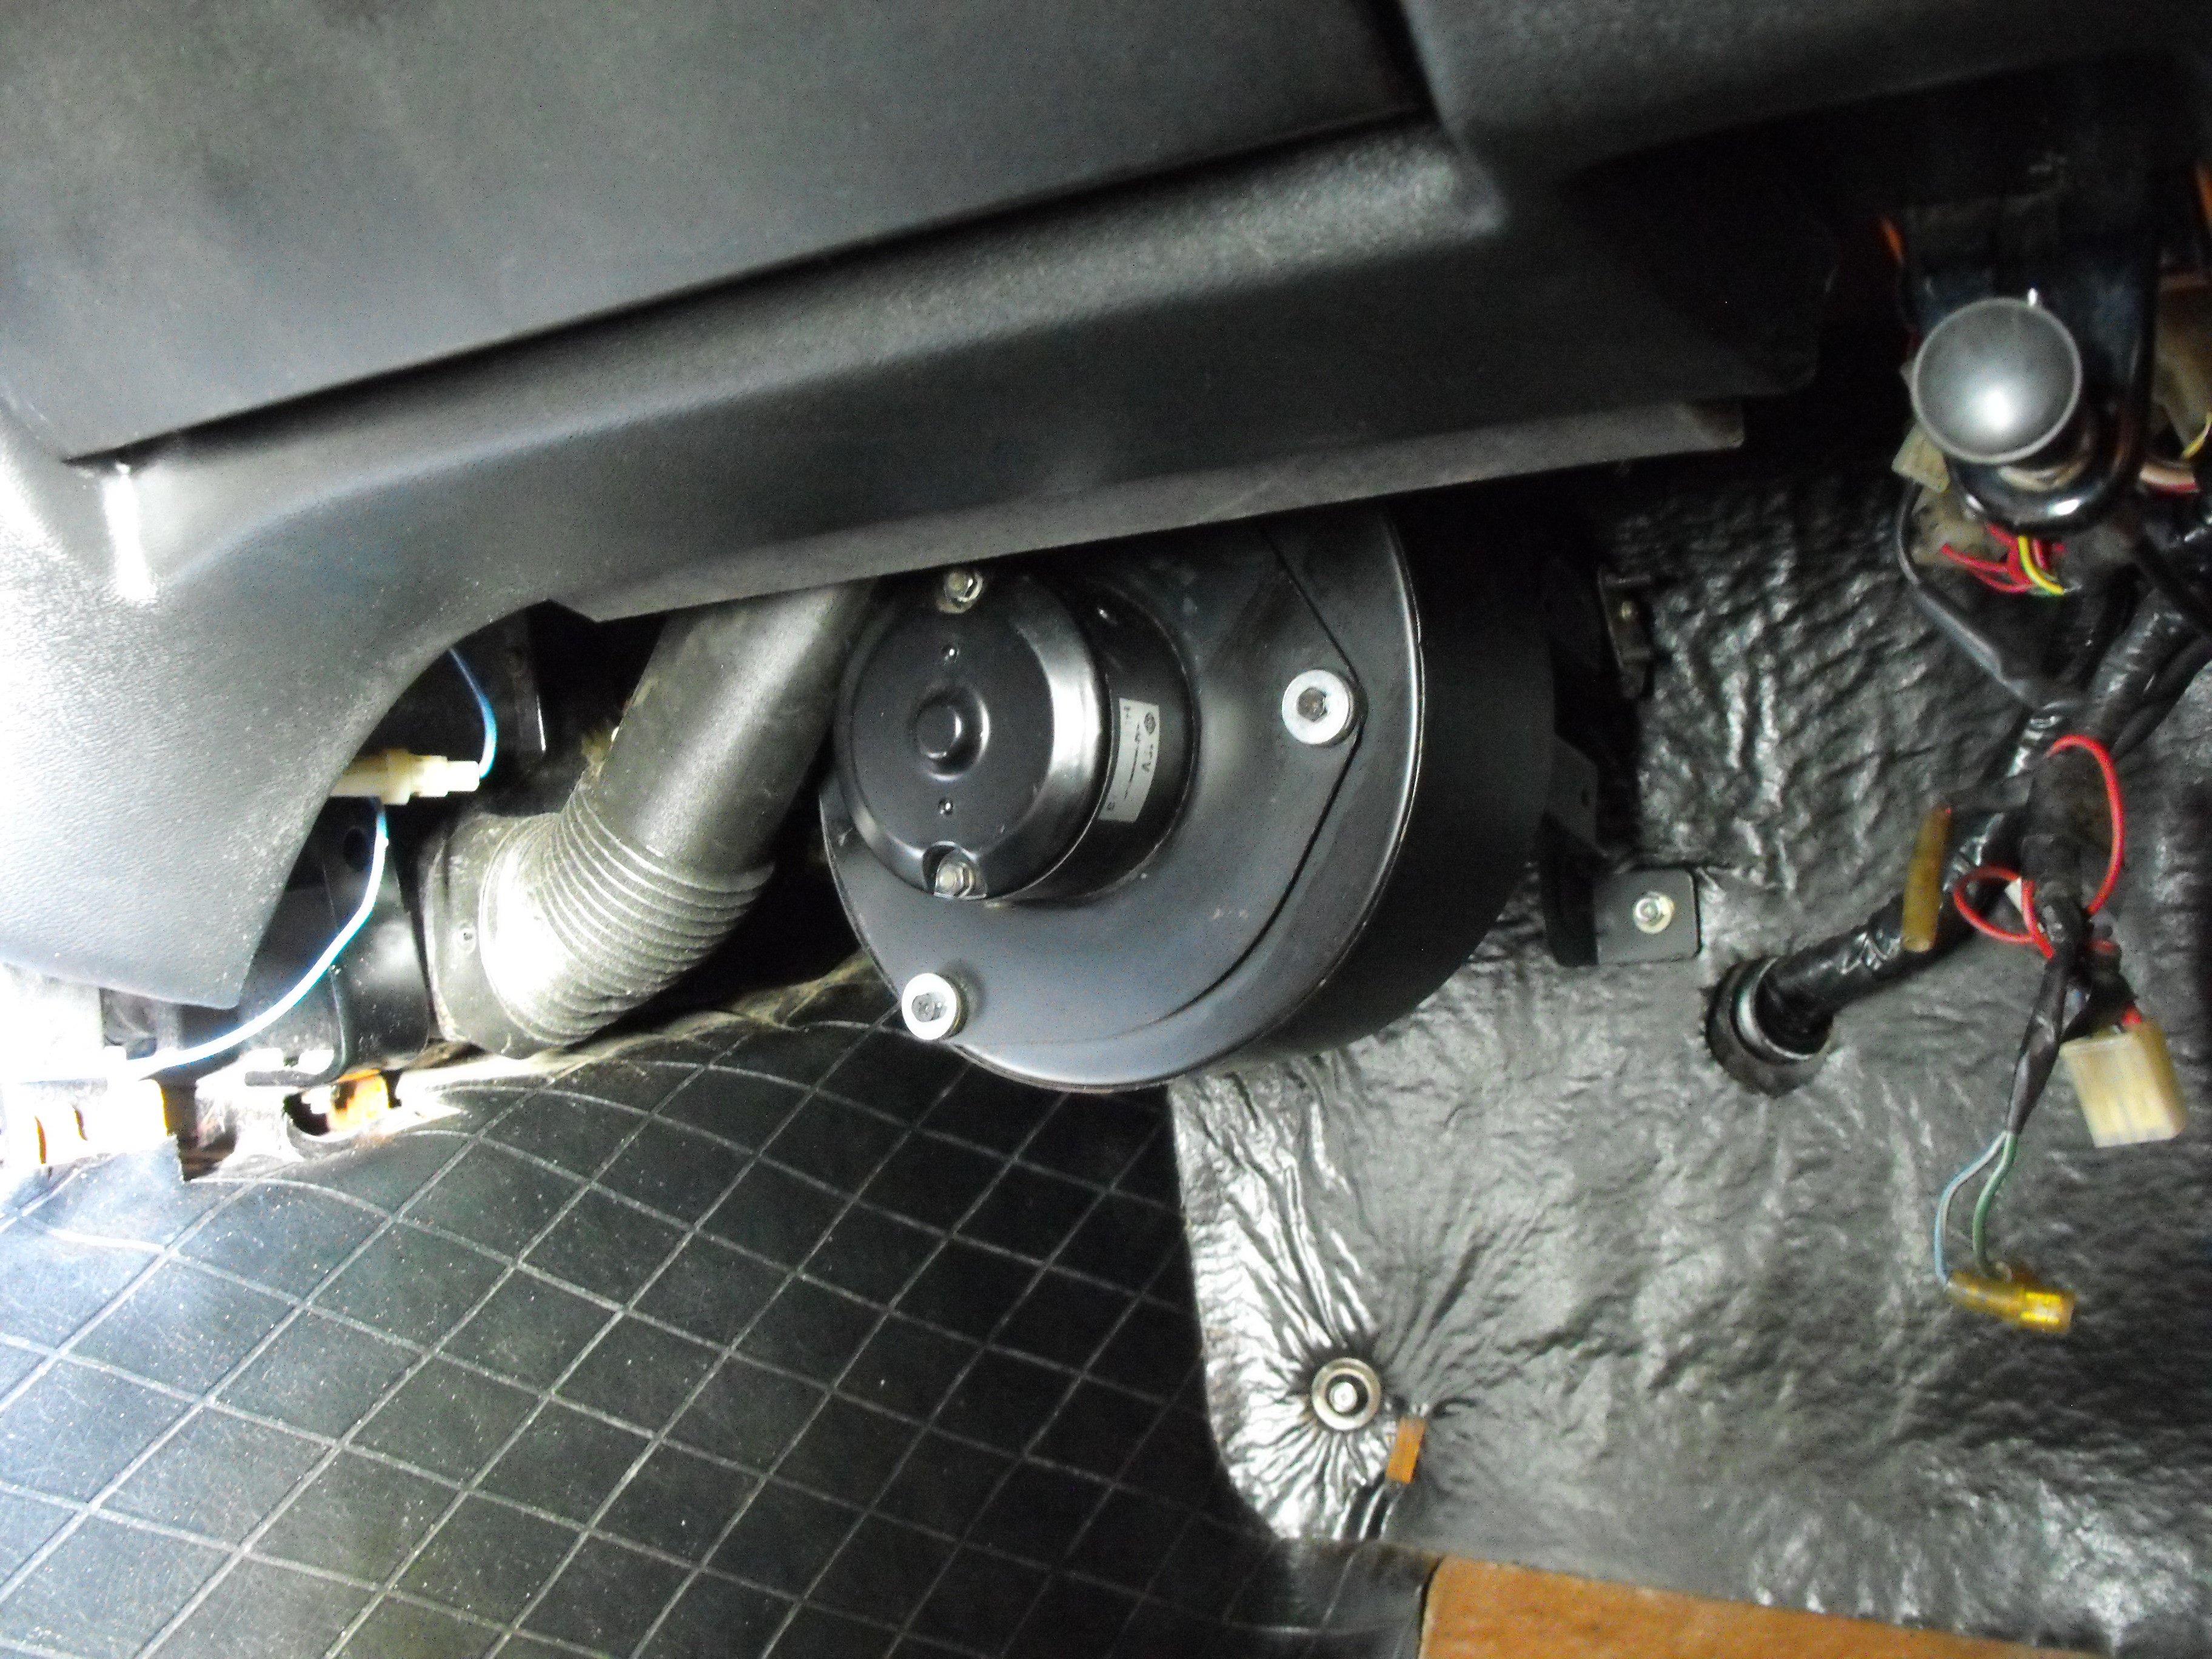
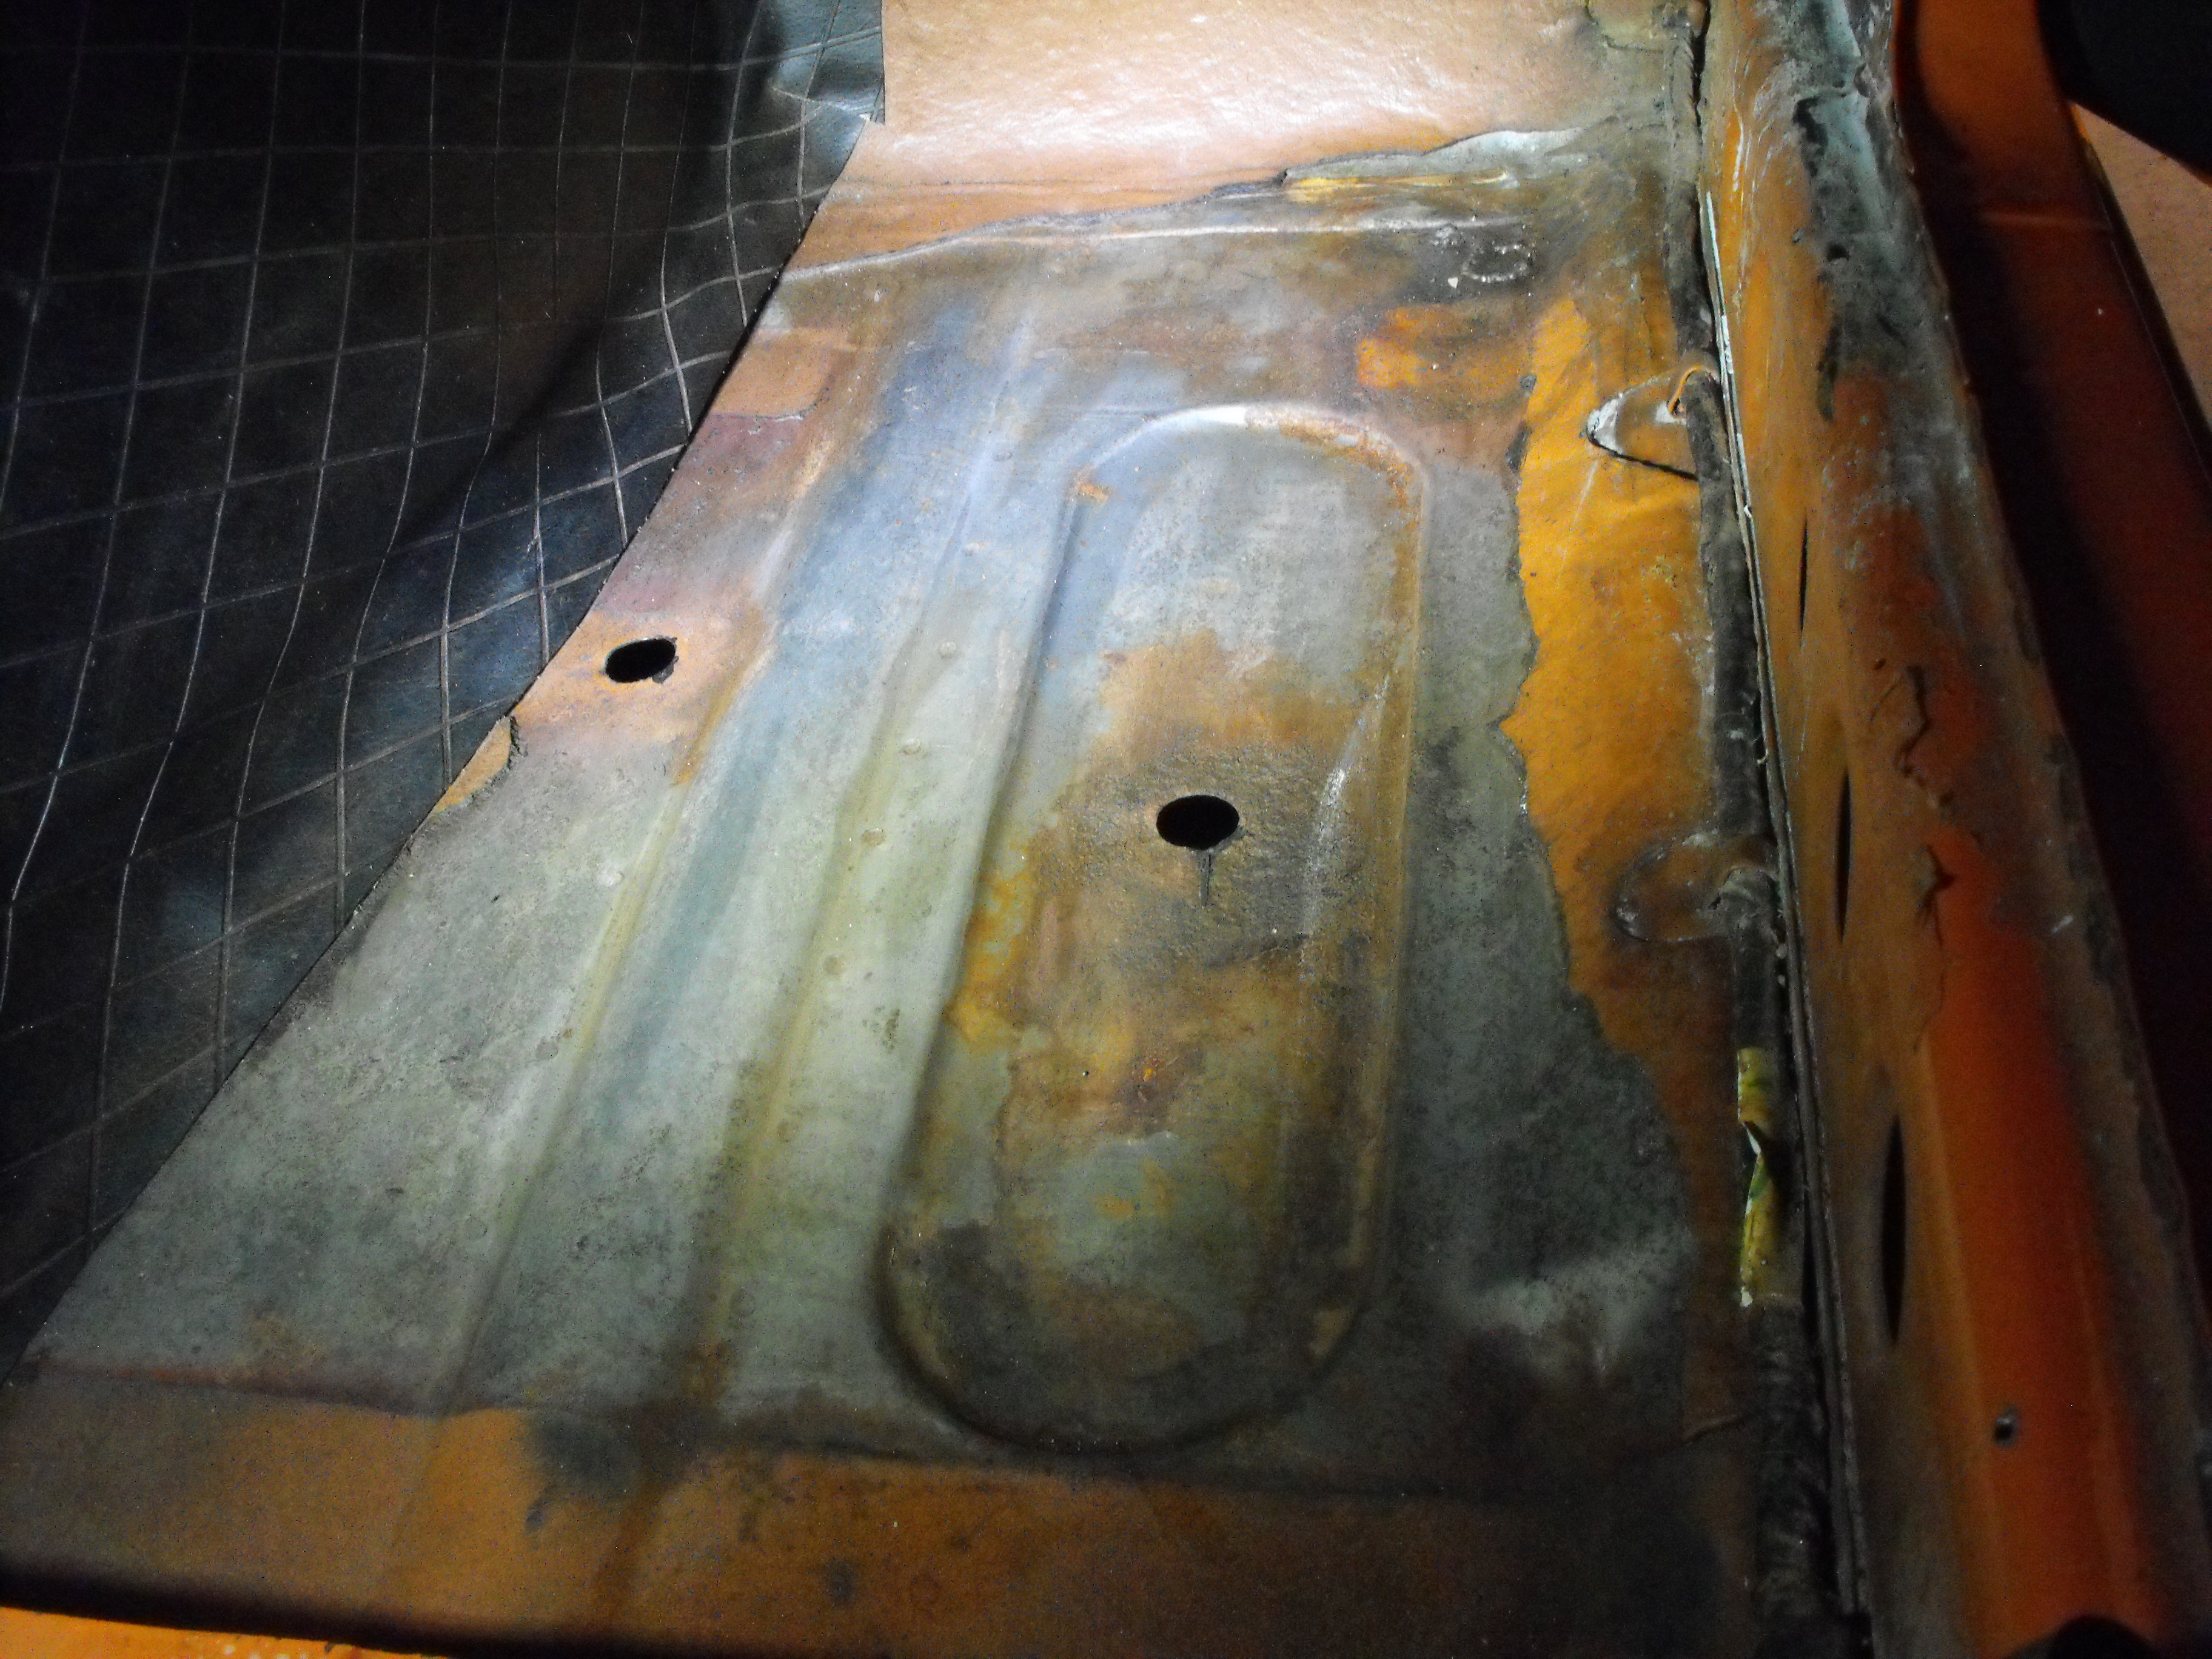
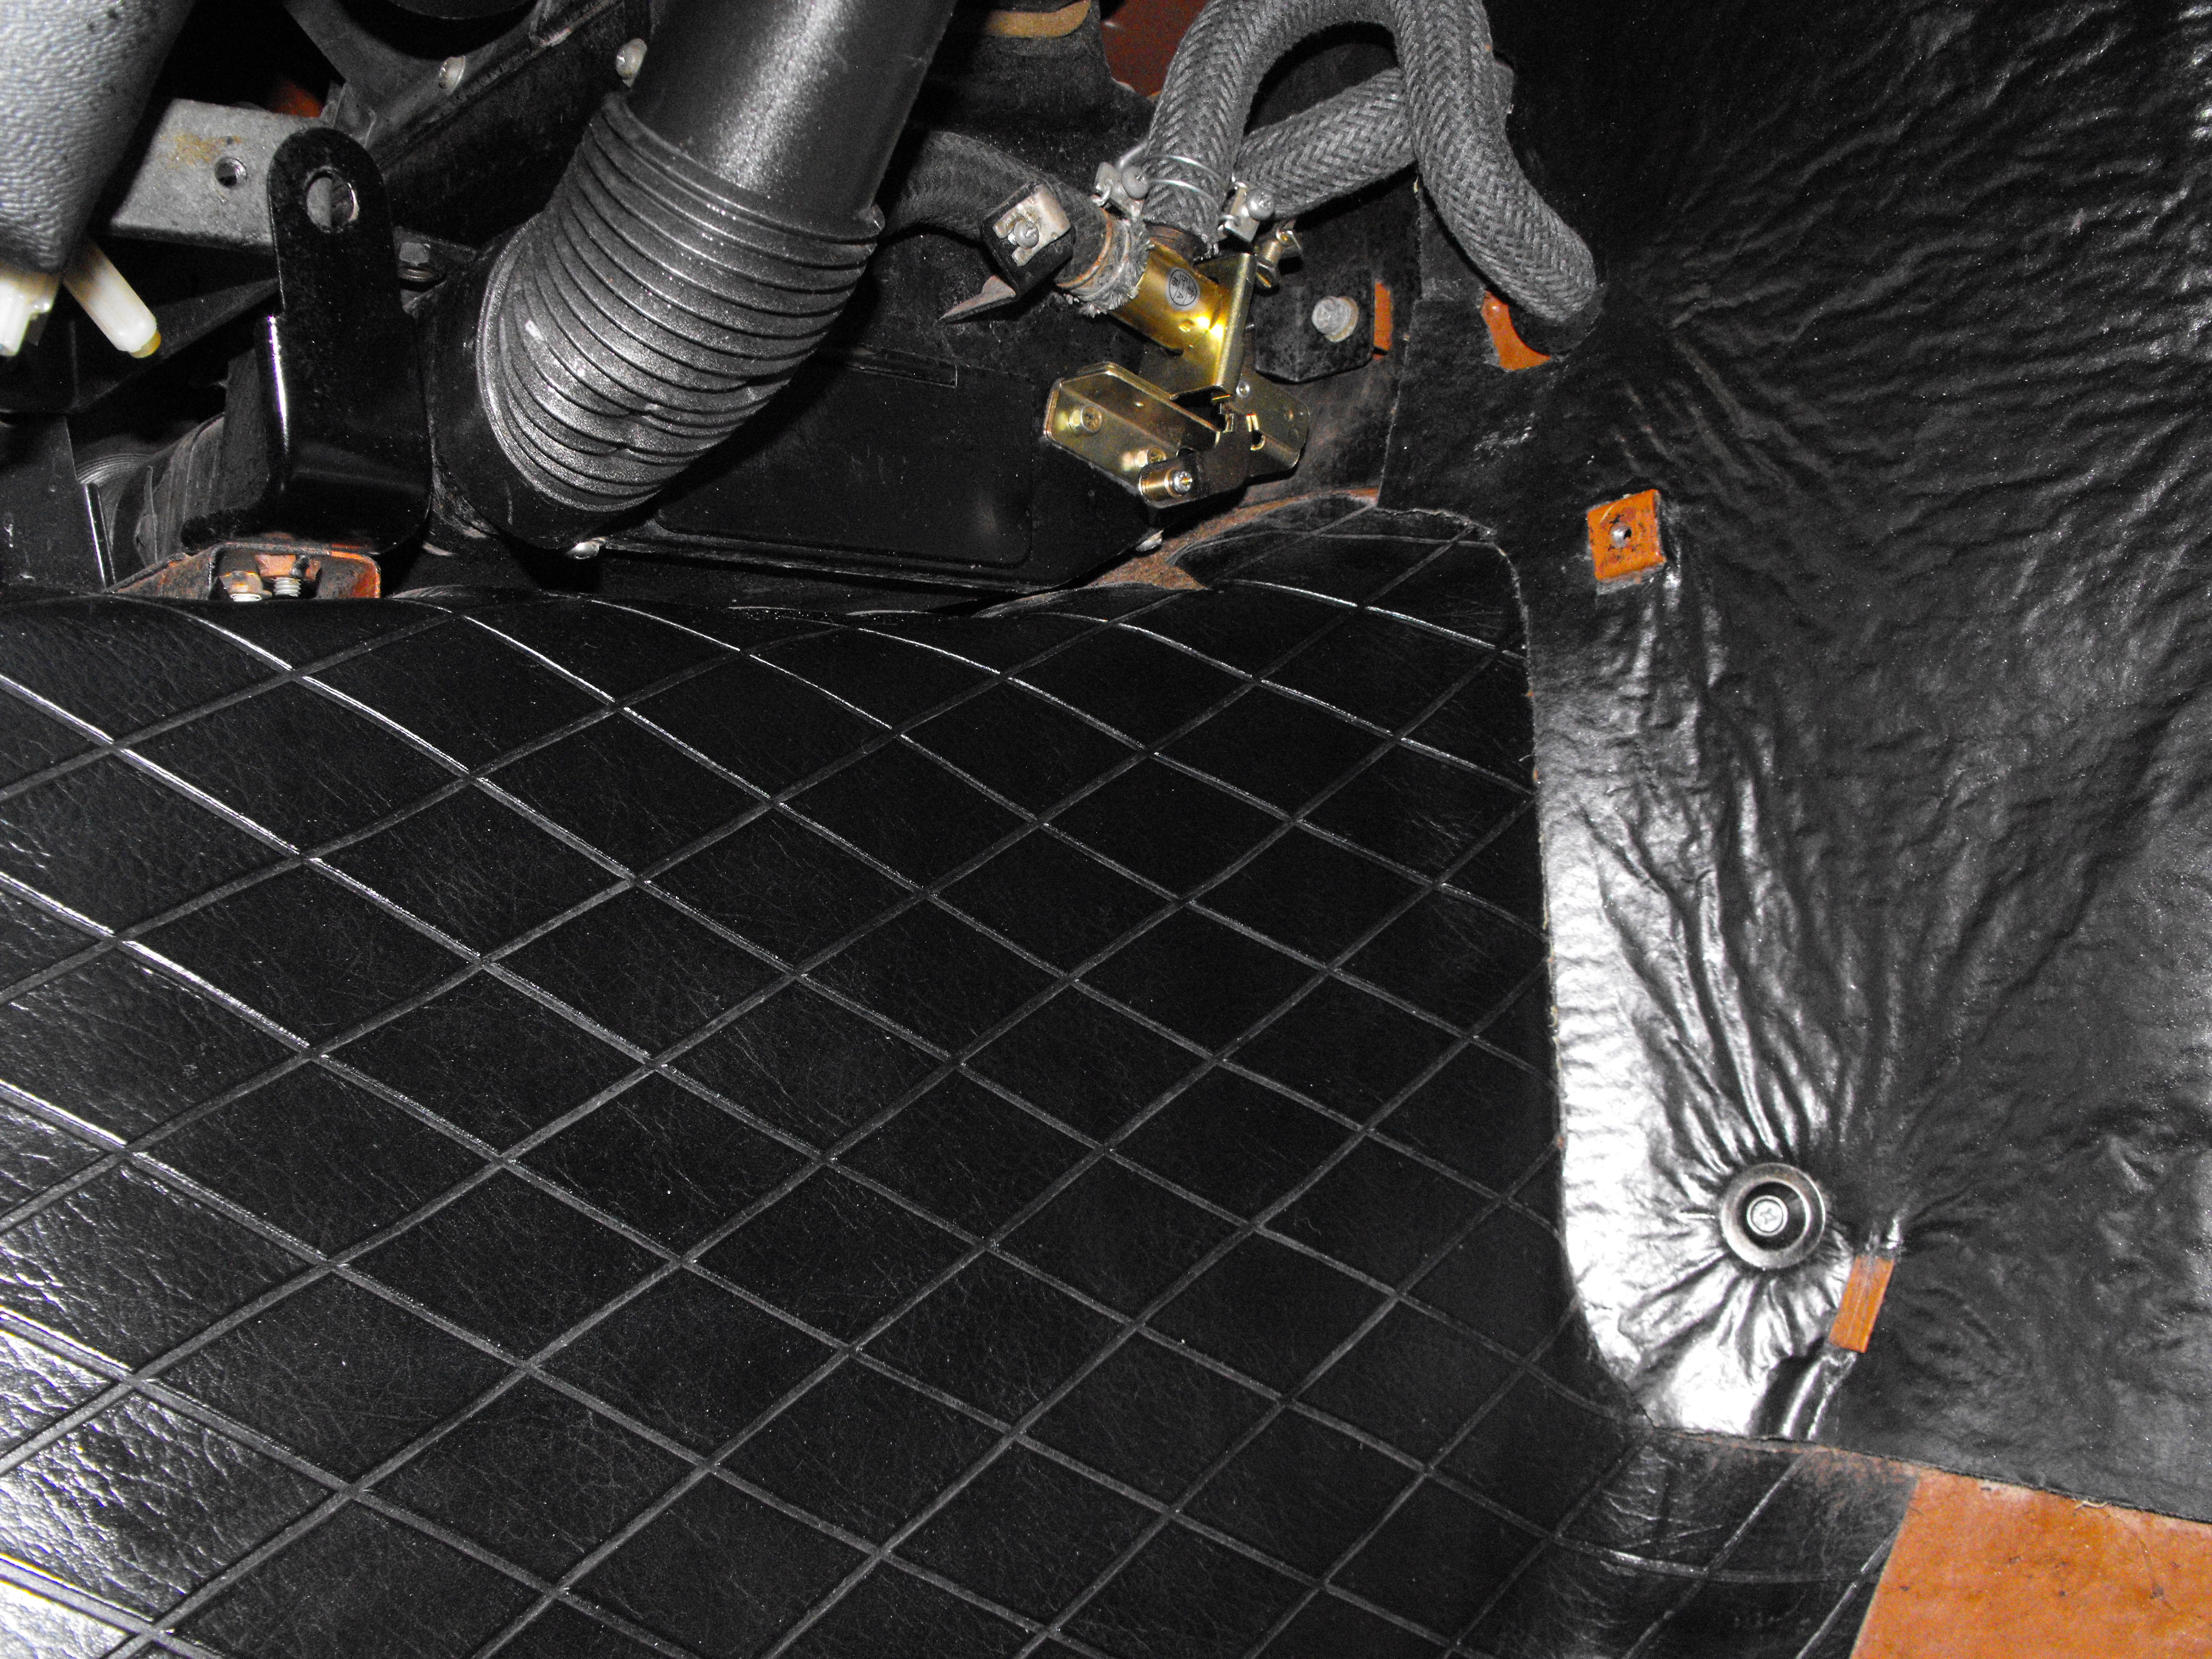
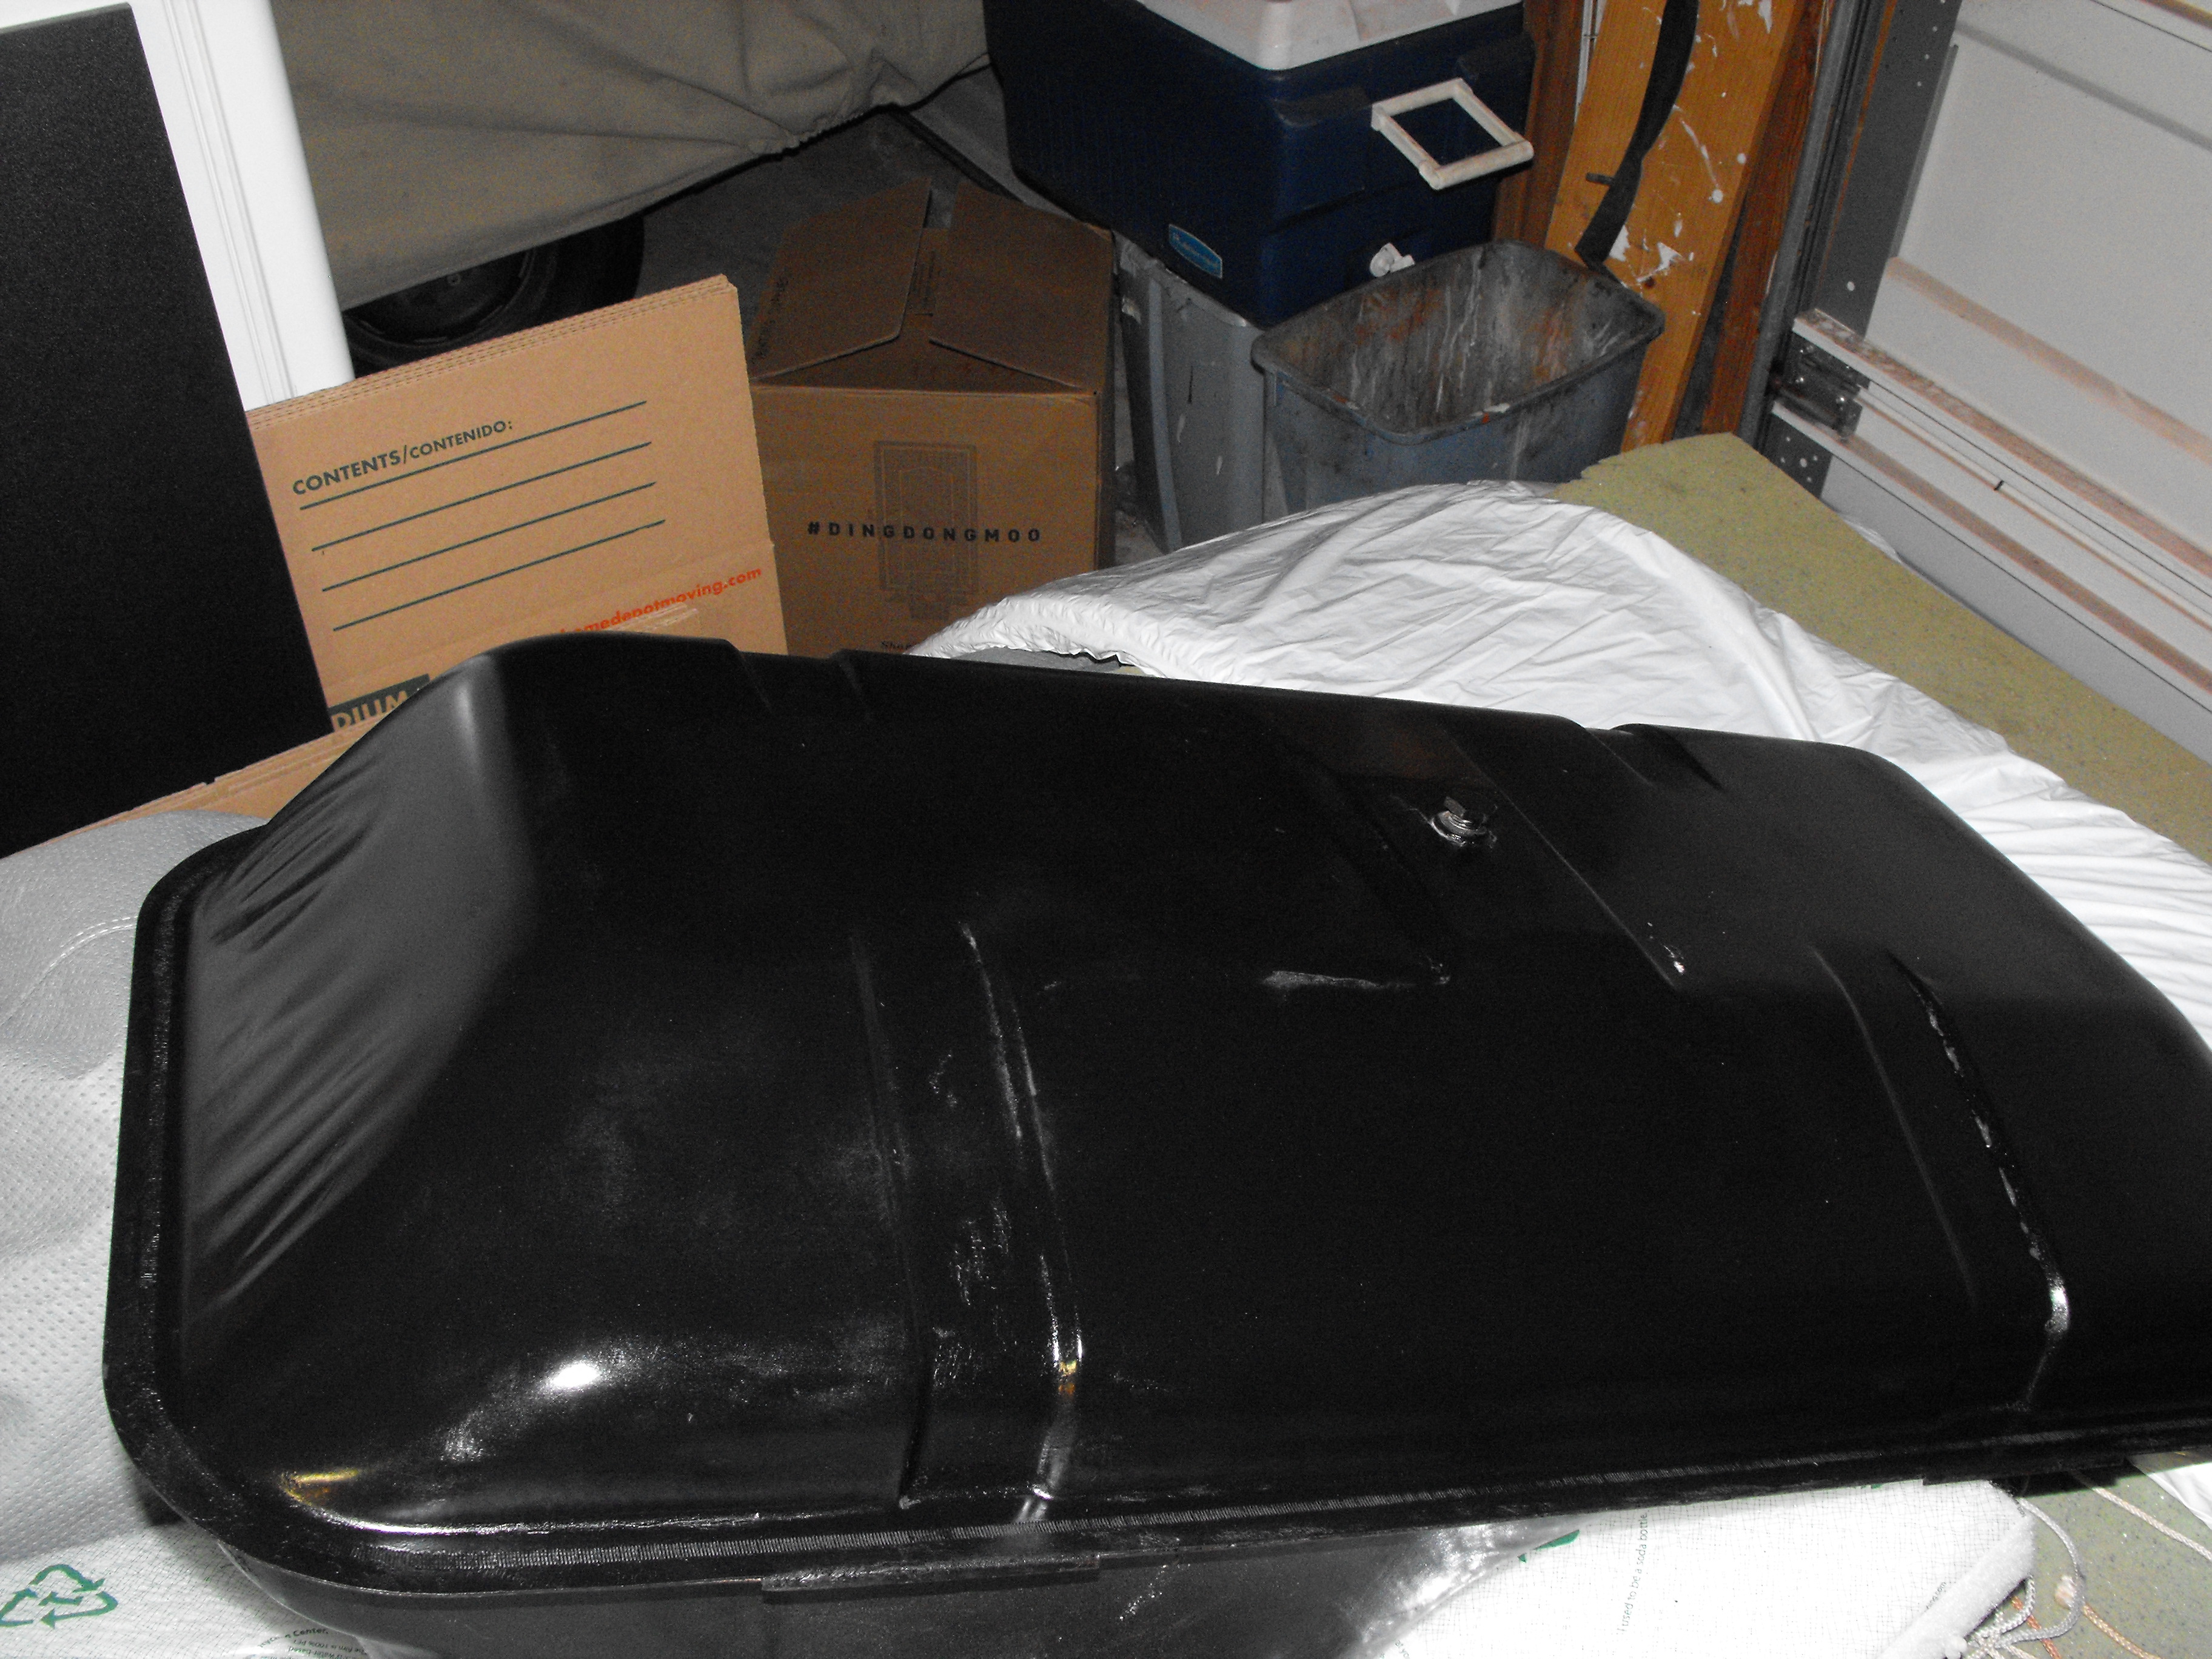
Got the new brake cylinder caps in. Also got the rubber seals for the air filter installed along with the carb gaskets. Got the battery put in. Still need to get a battery cover and cables. Need to put the guts inside the engine light. The original switch toggle was broken off, so I will replace that with a spare that I have. I am still toying with the idea of putting in a metal switch and painting the toggle white. Most plastic switches out there are pretty oxidized. I cleaned up the floor pans, painted with POR-15, and installed the new sound dampening material. I put it where the old material was but will probably extend it aft a bit. I think that will look better (although no one will see it since it is under the carpet) . Seems like it would look better going all the way back to the seat frame. Got the under dash electrical connections made on the passenger side. Also got the heater fan put in. And, got a nice new custom fit car cover from the owner for it


-
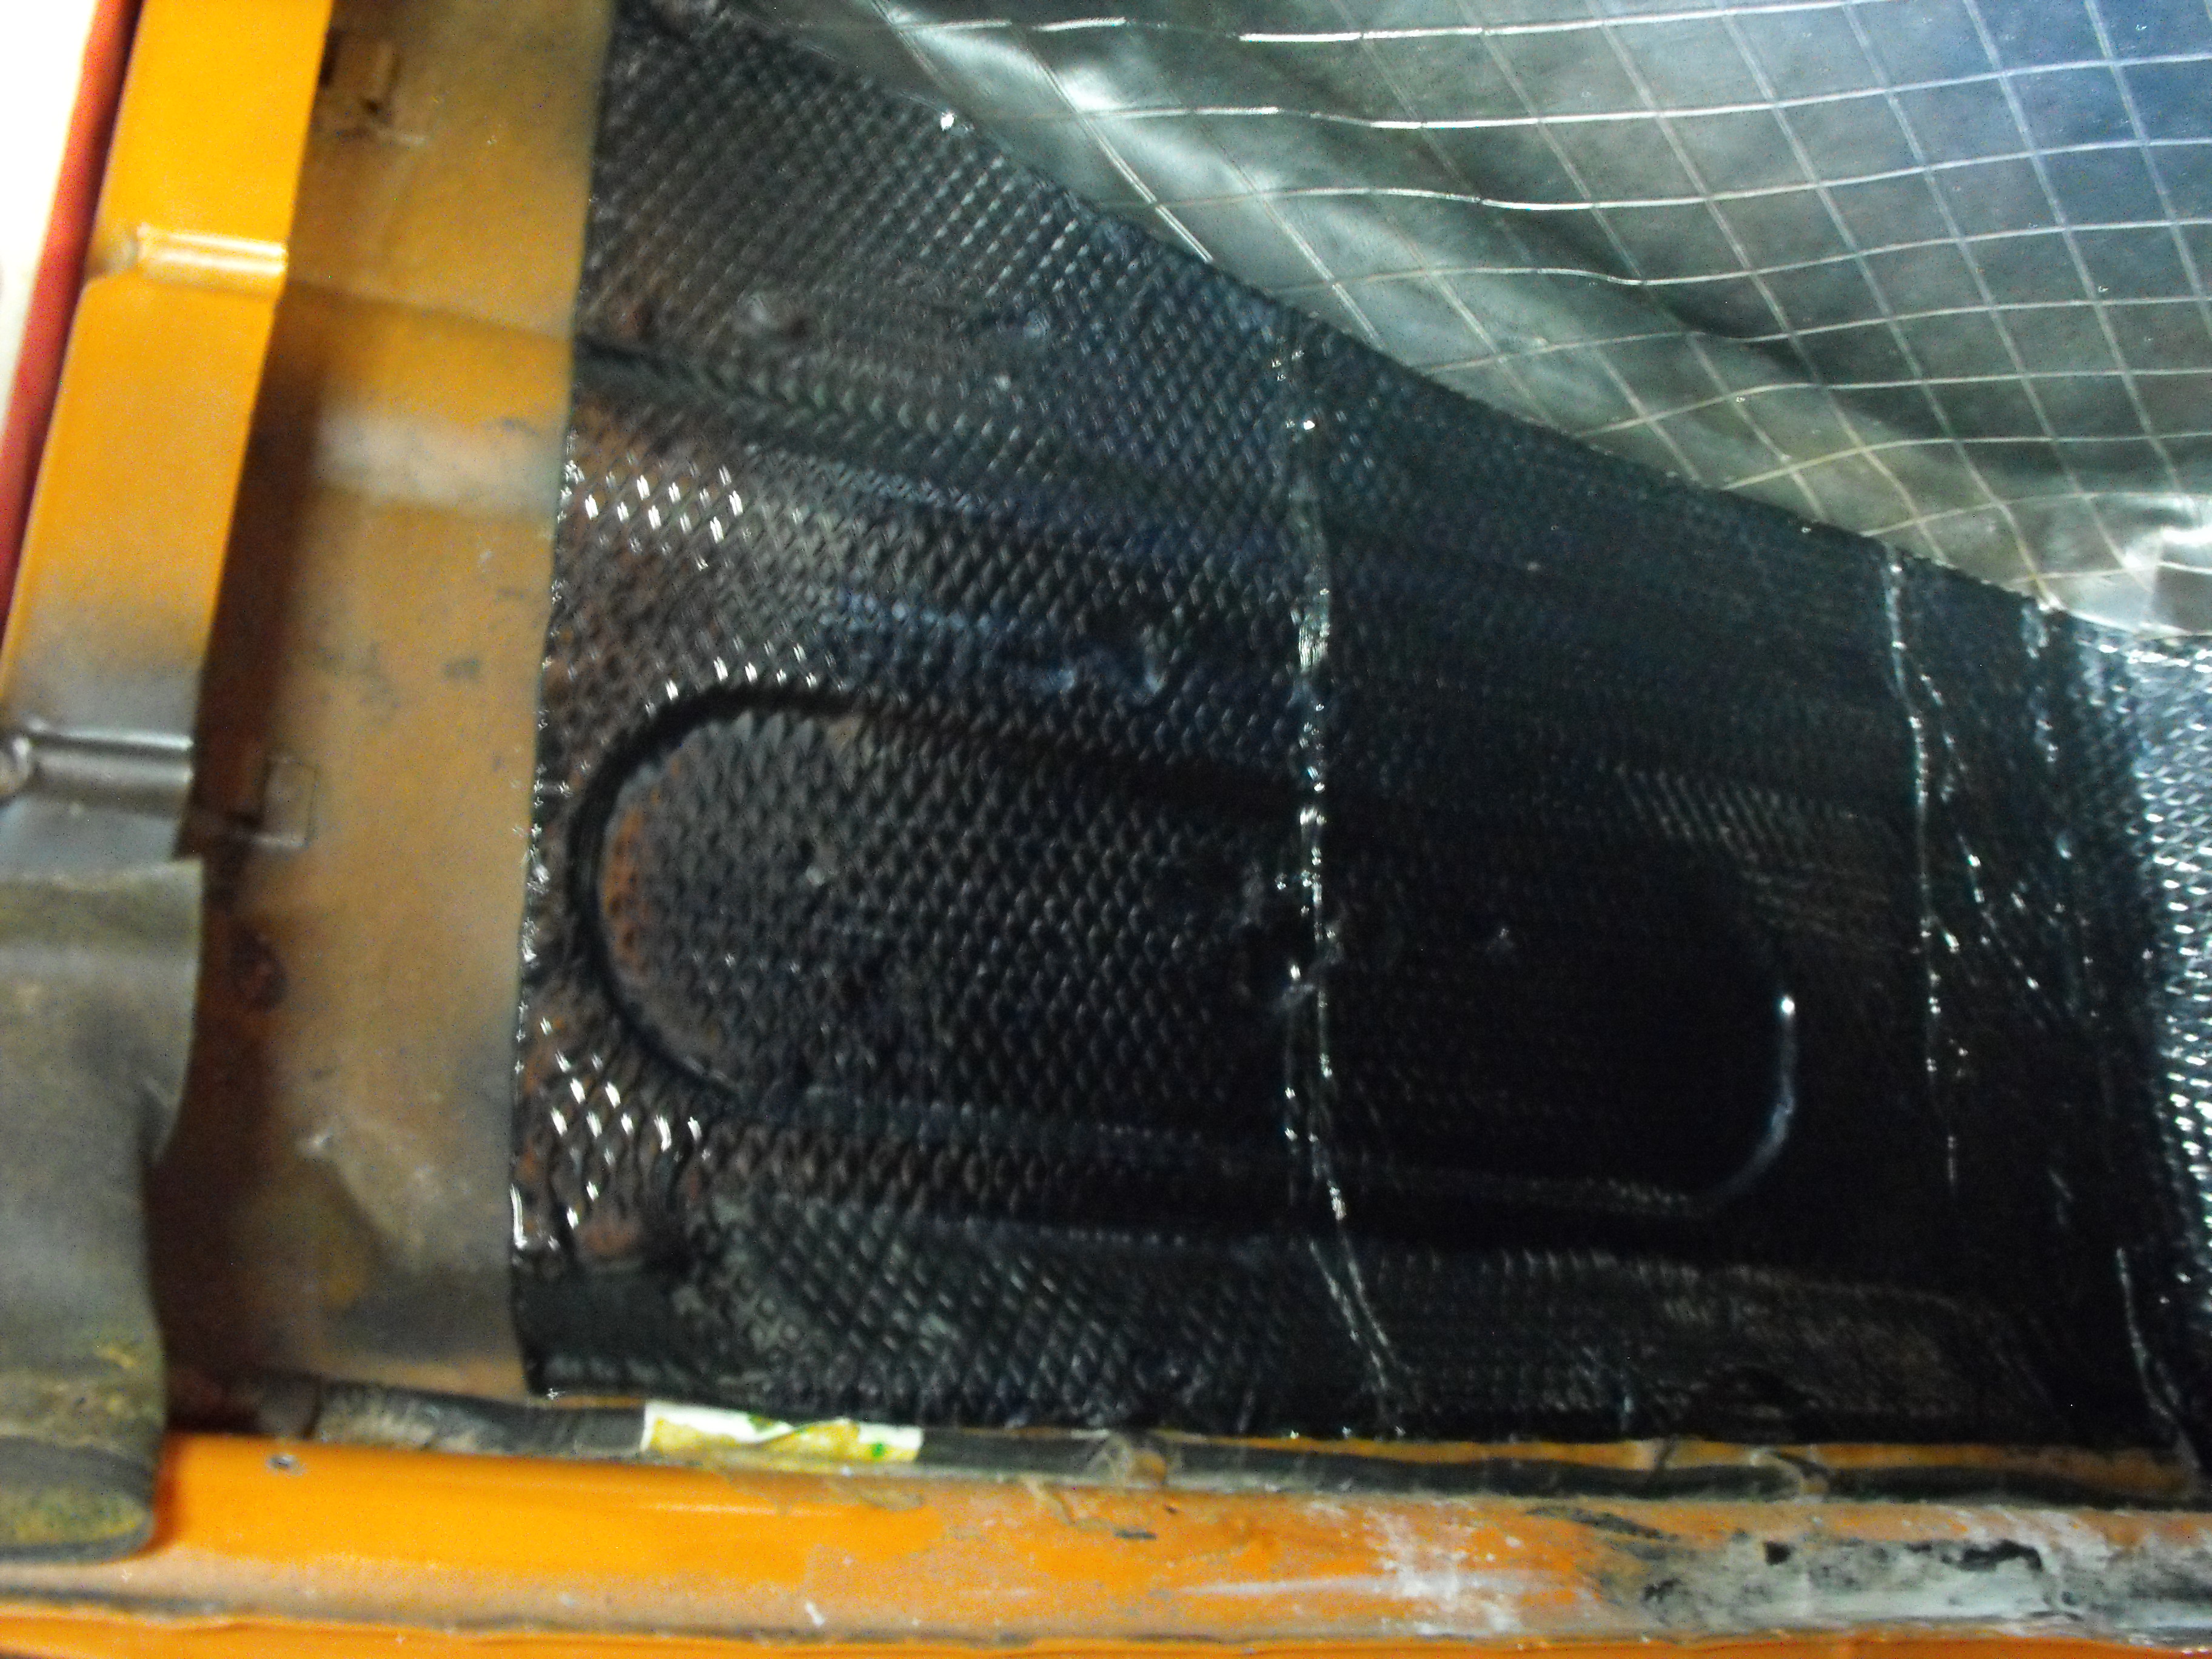
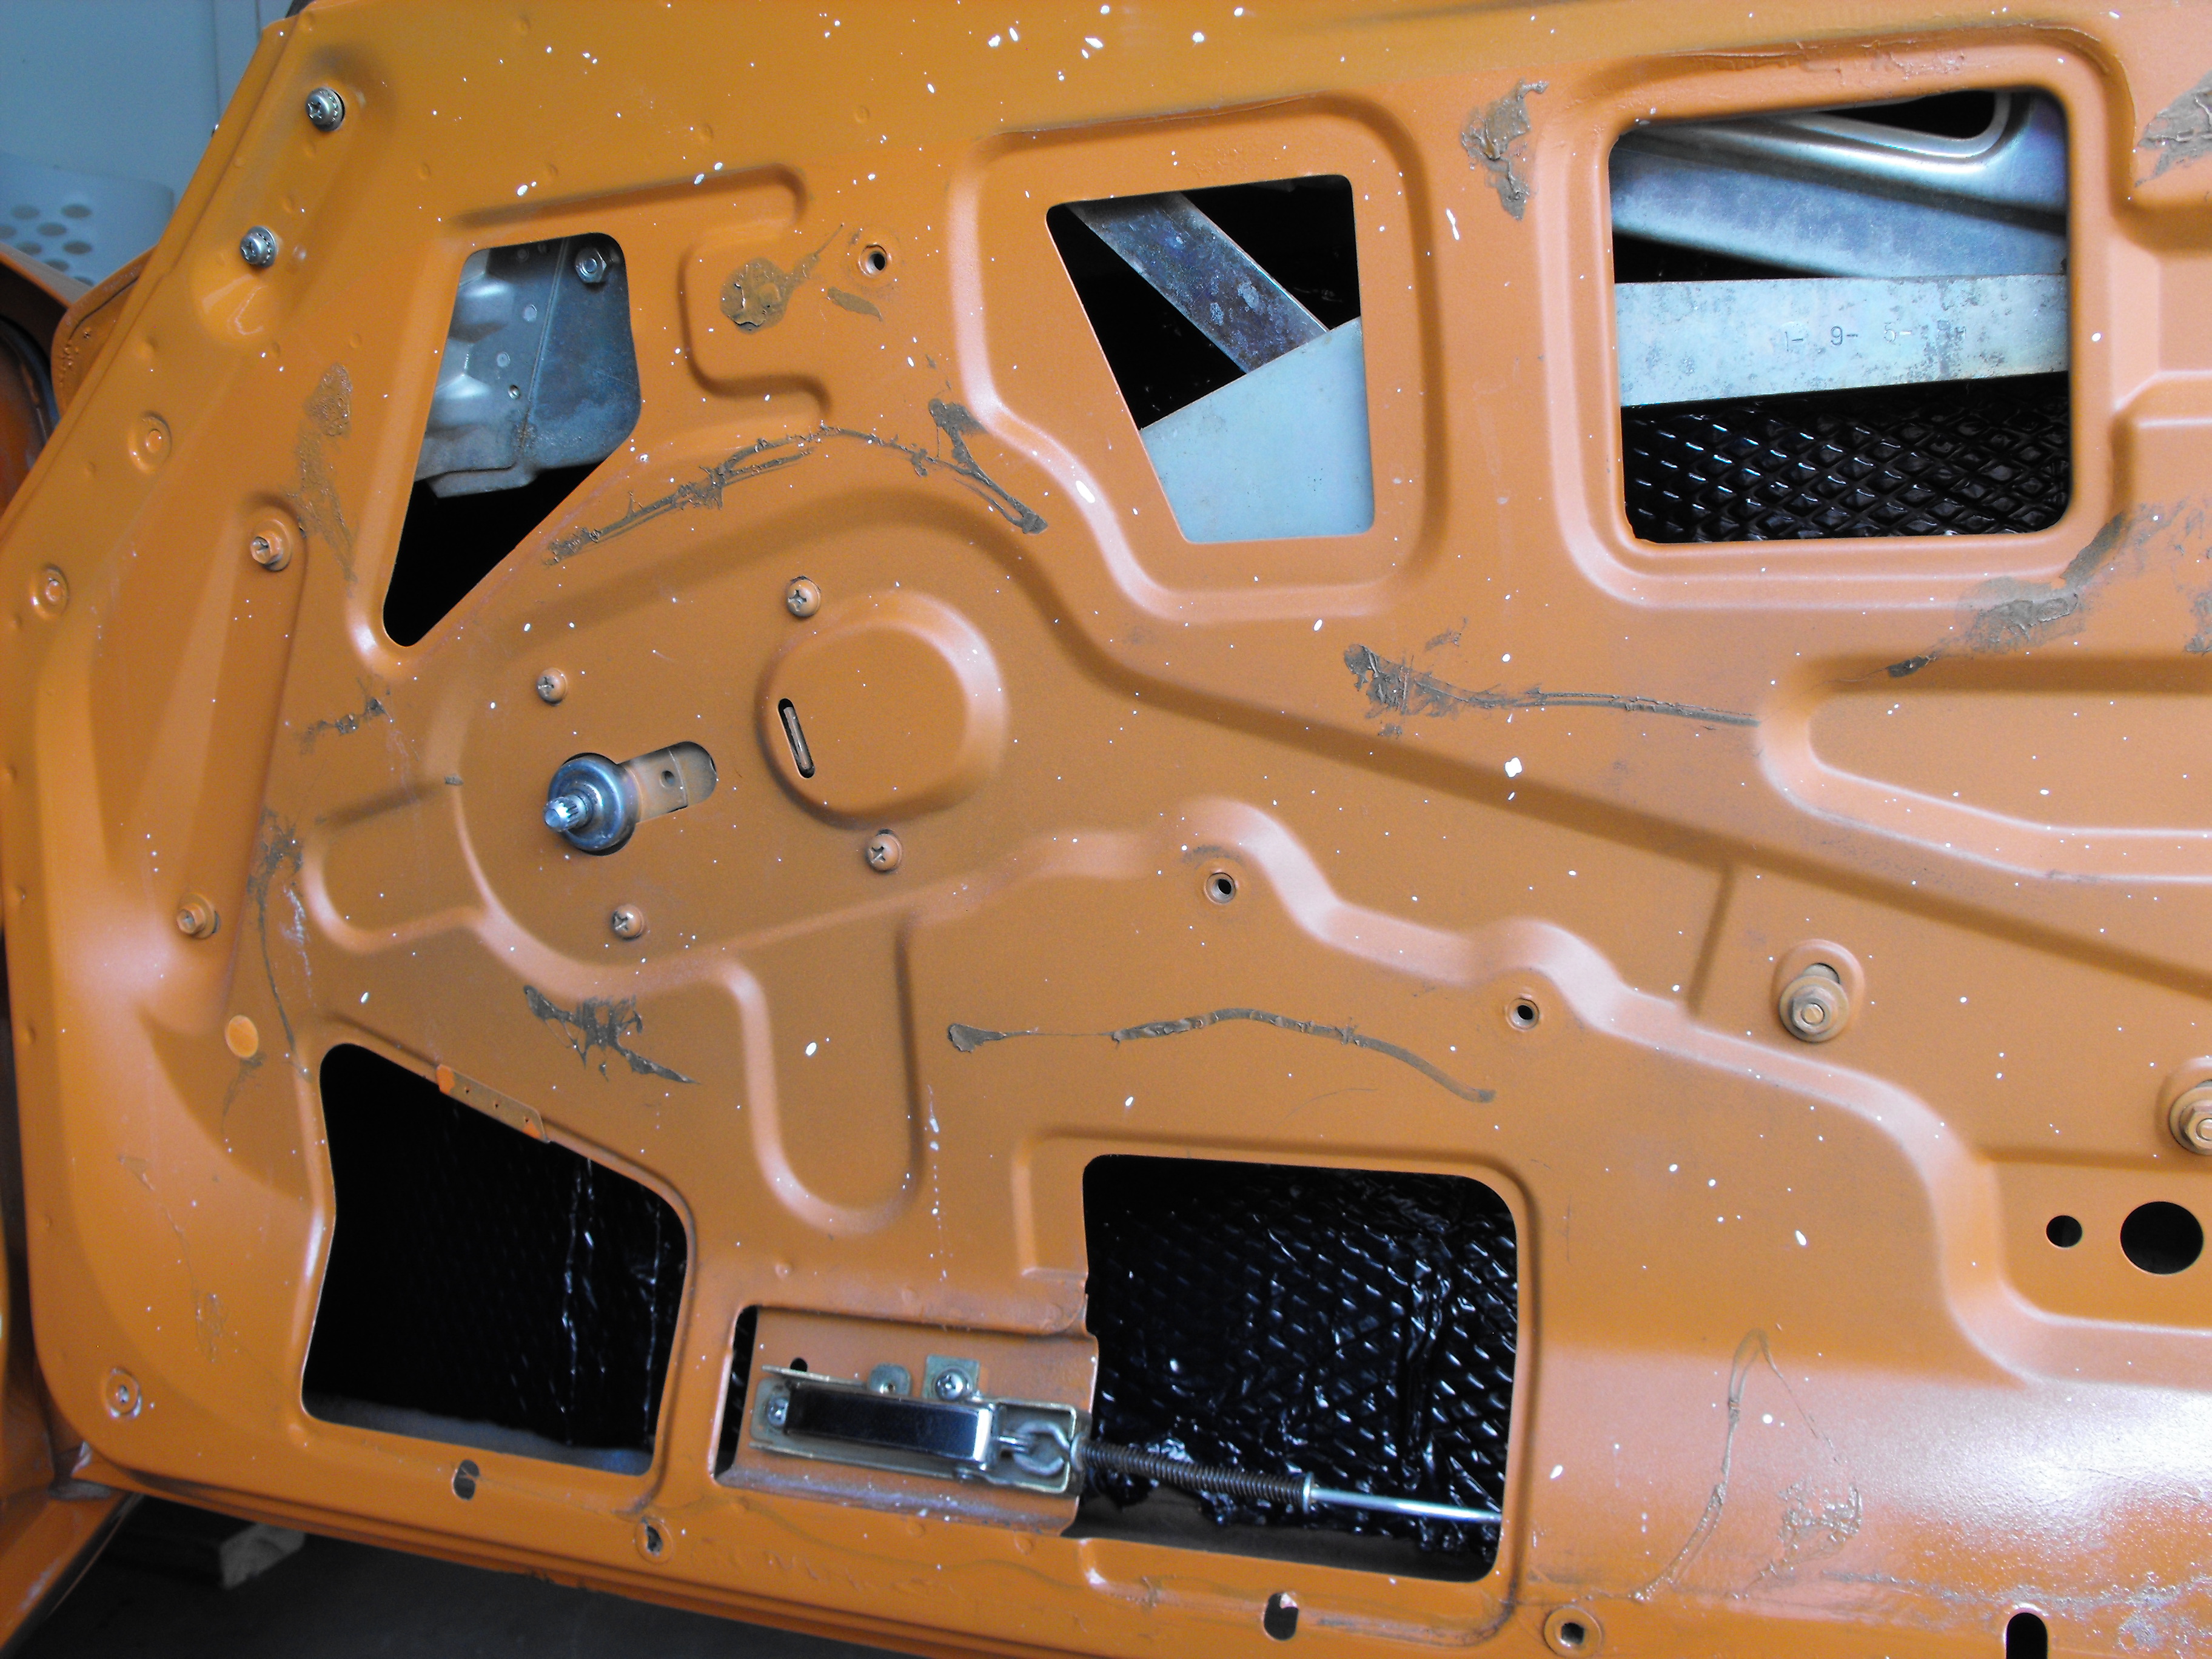
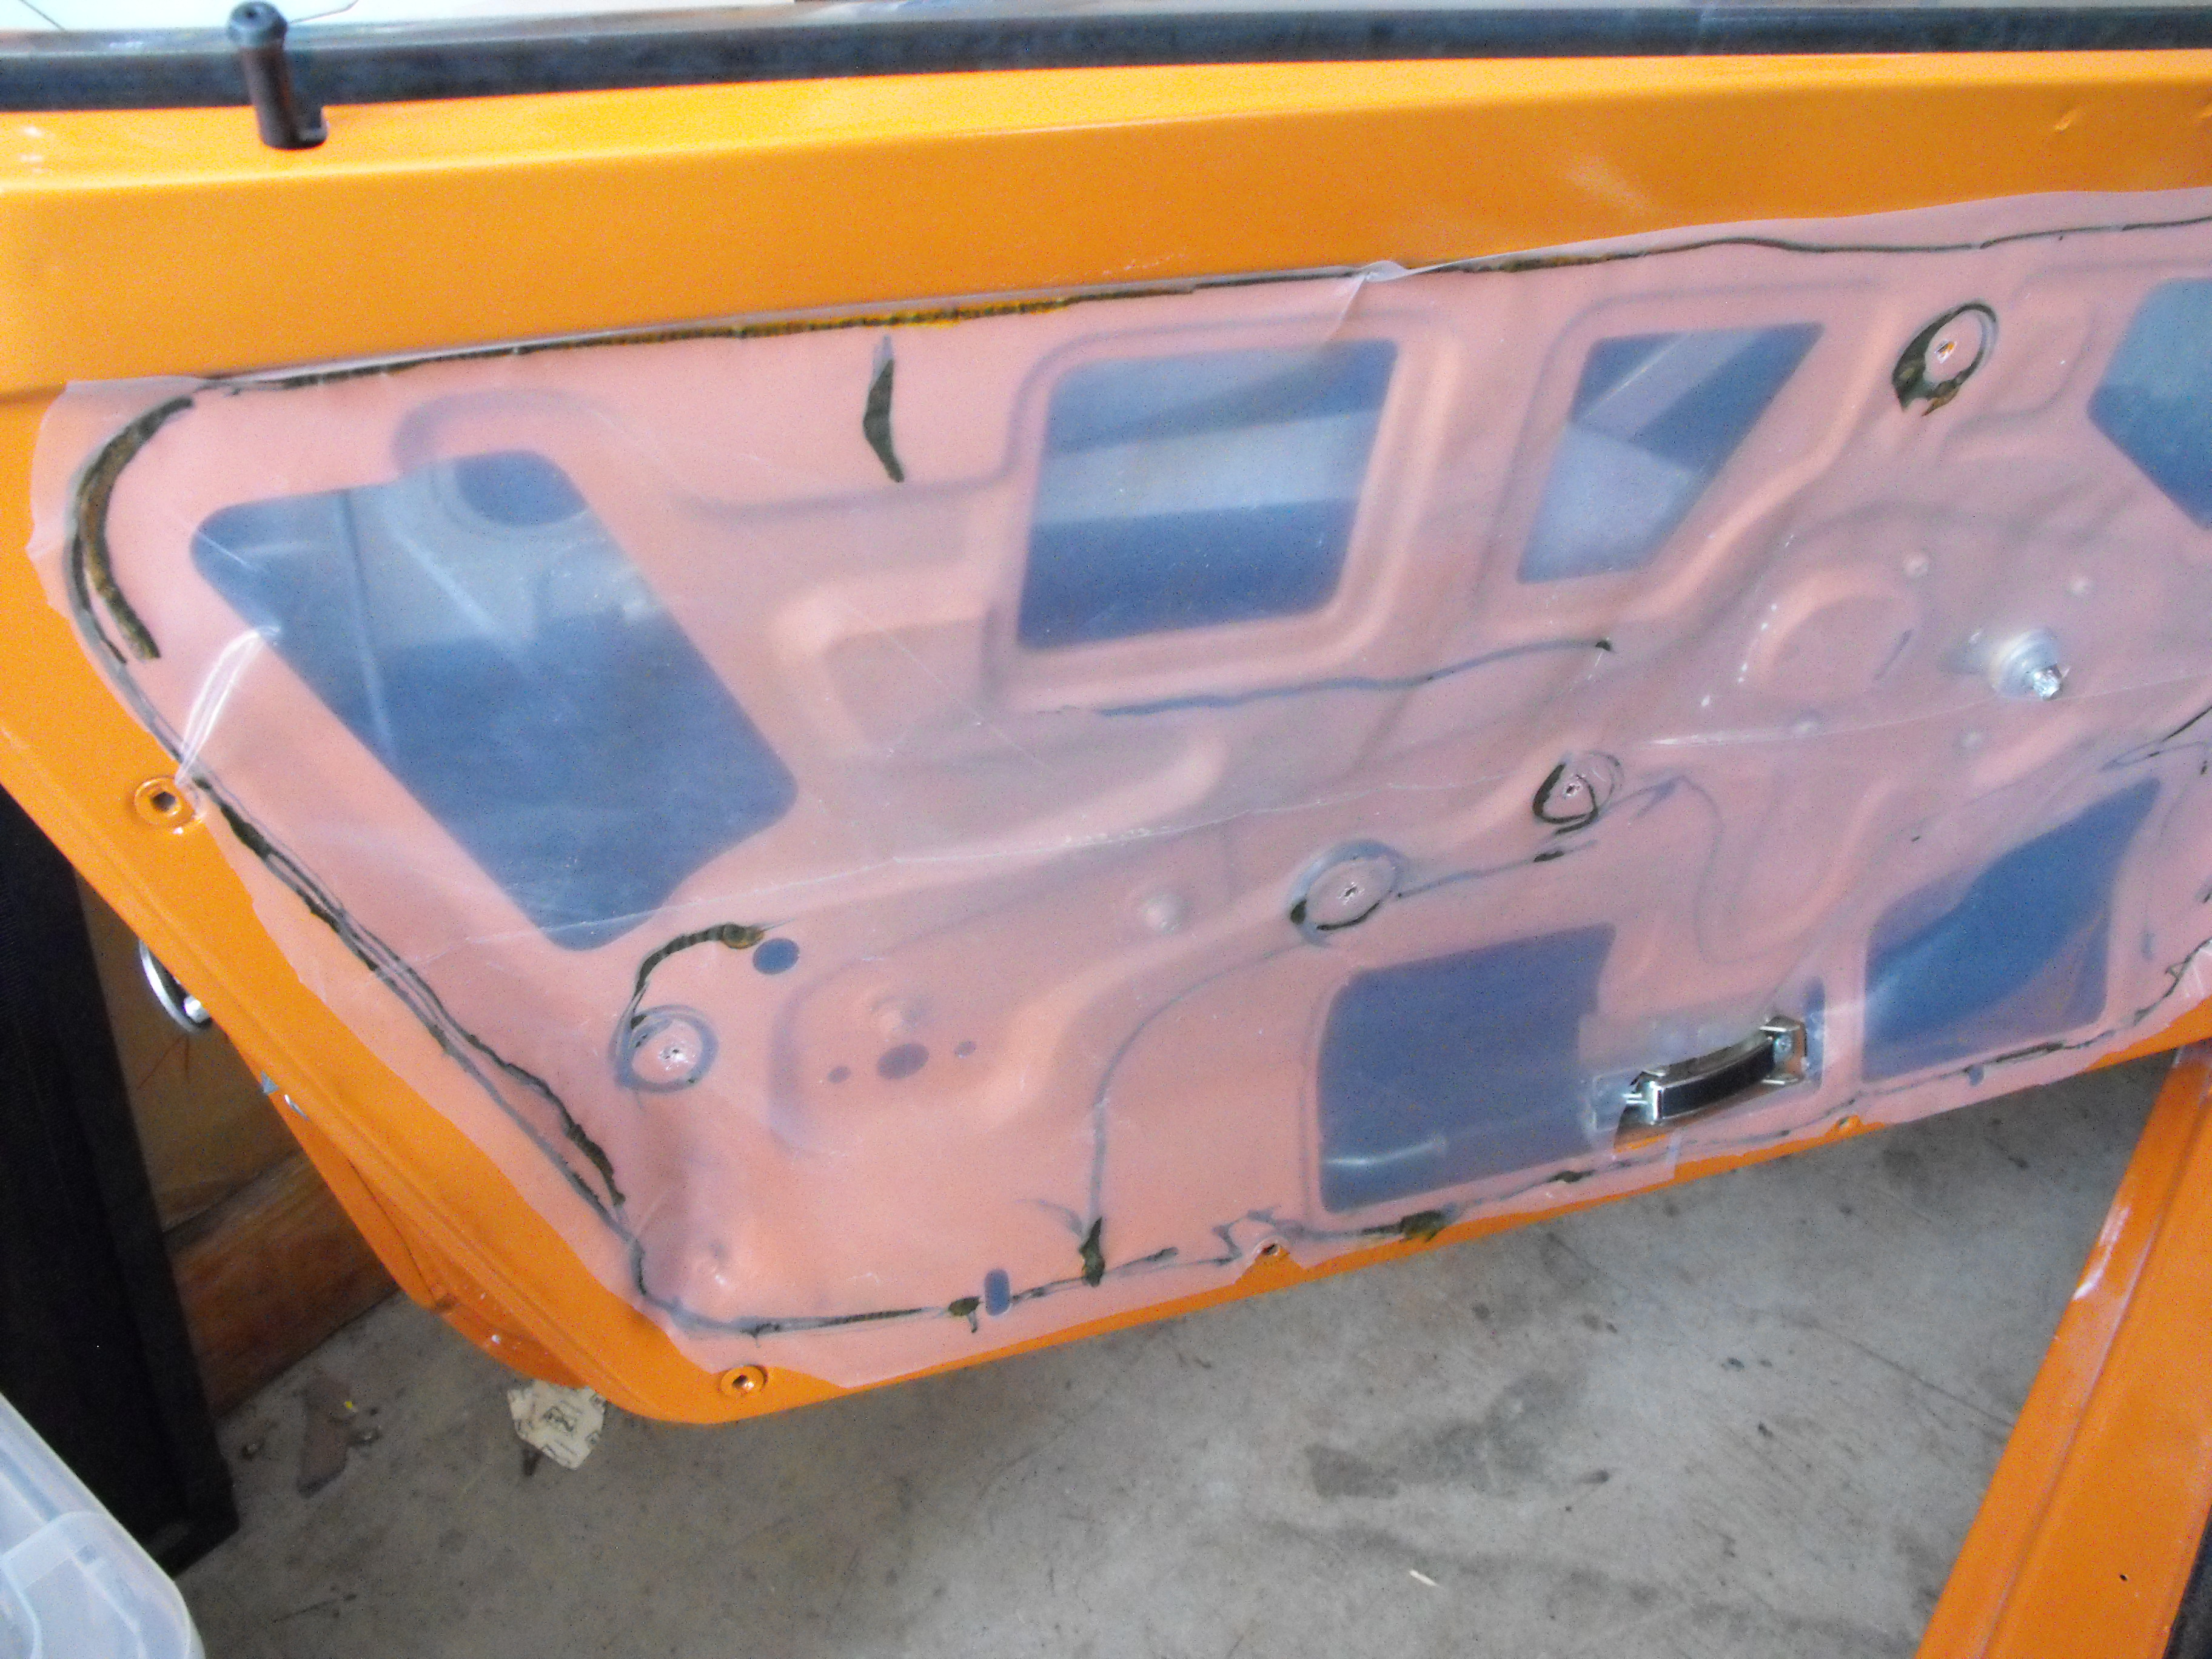
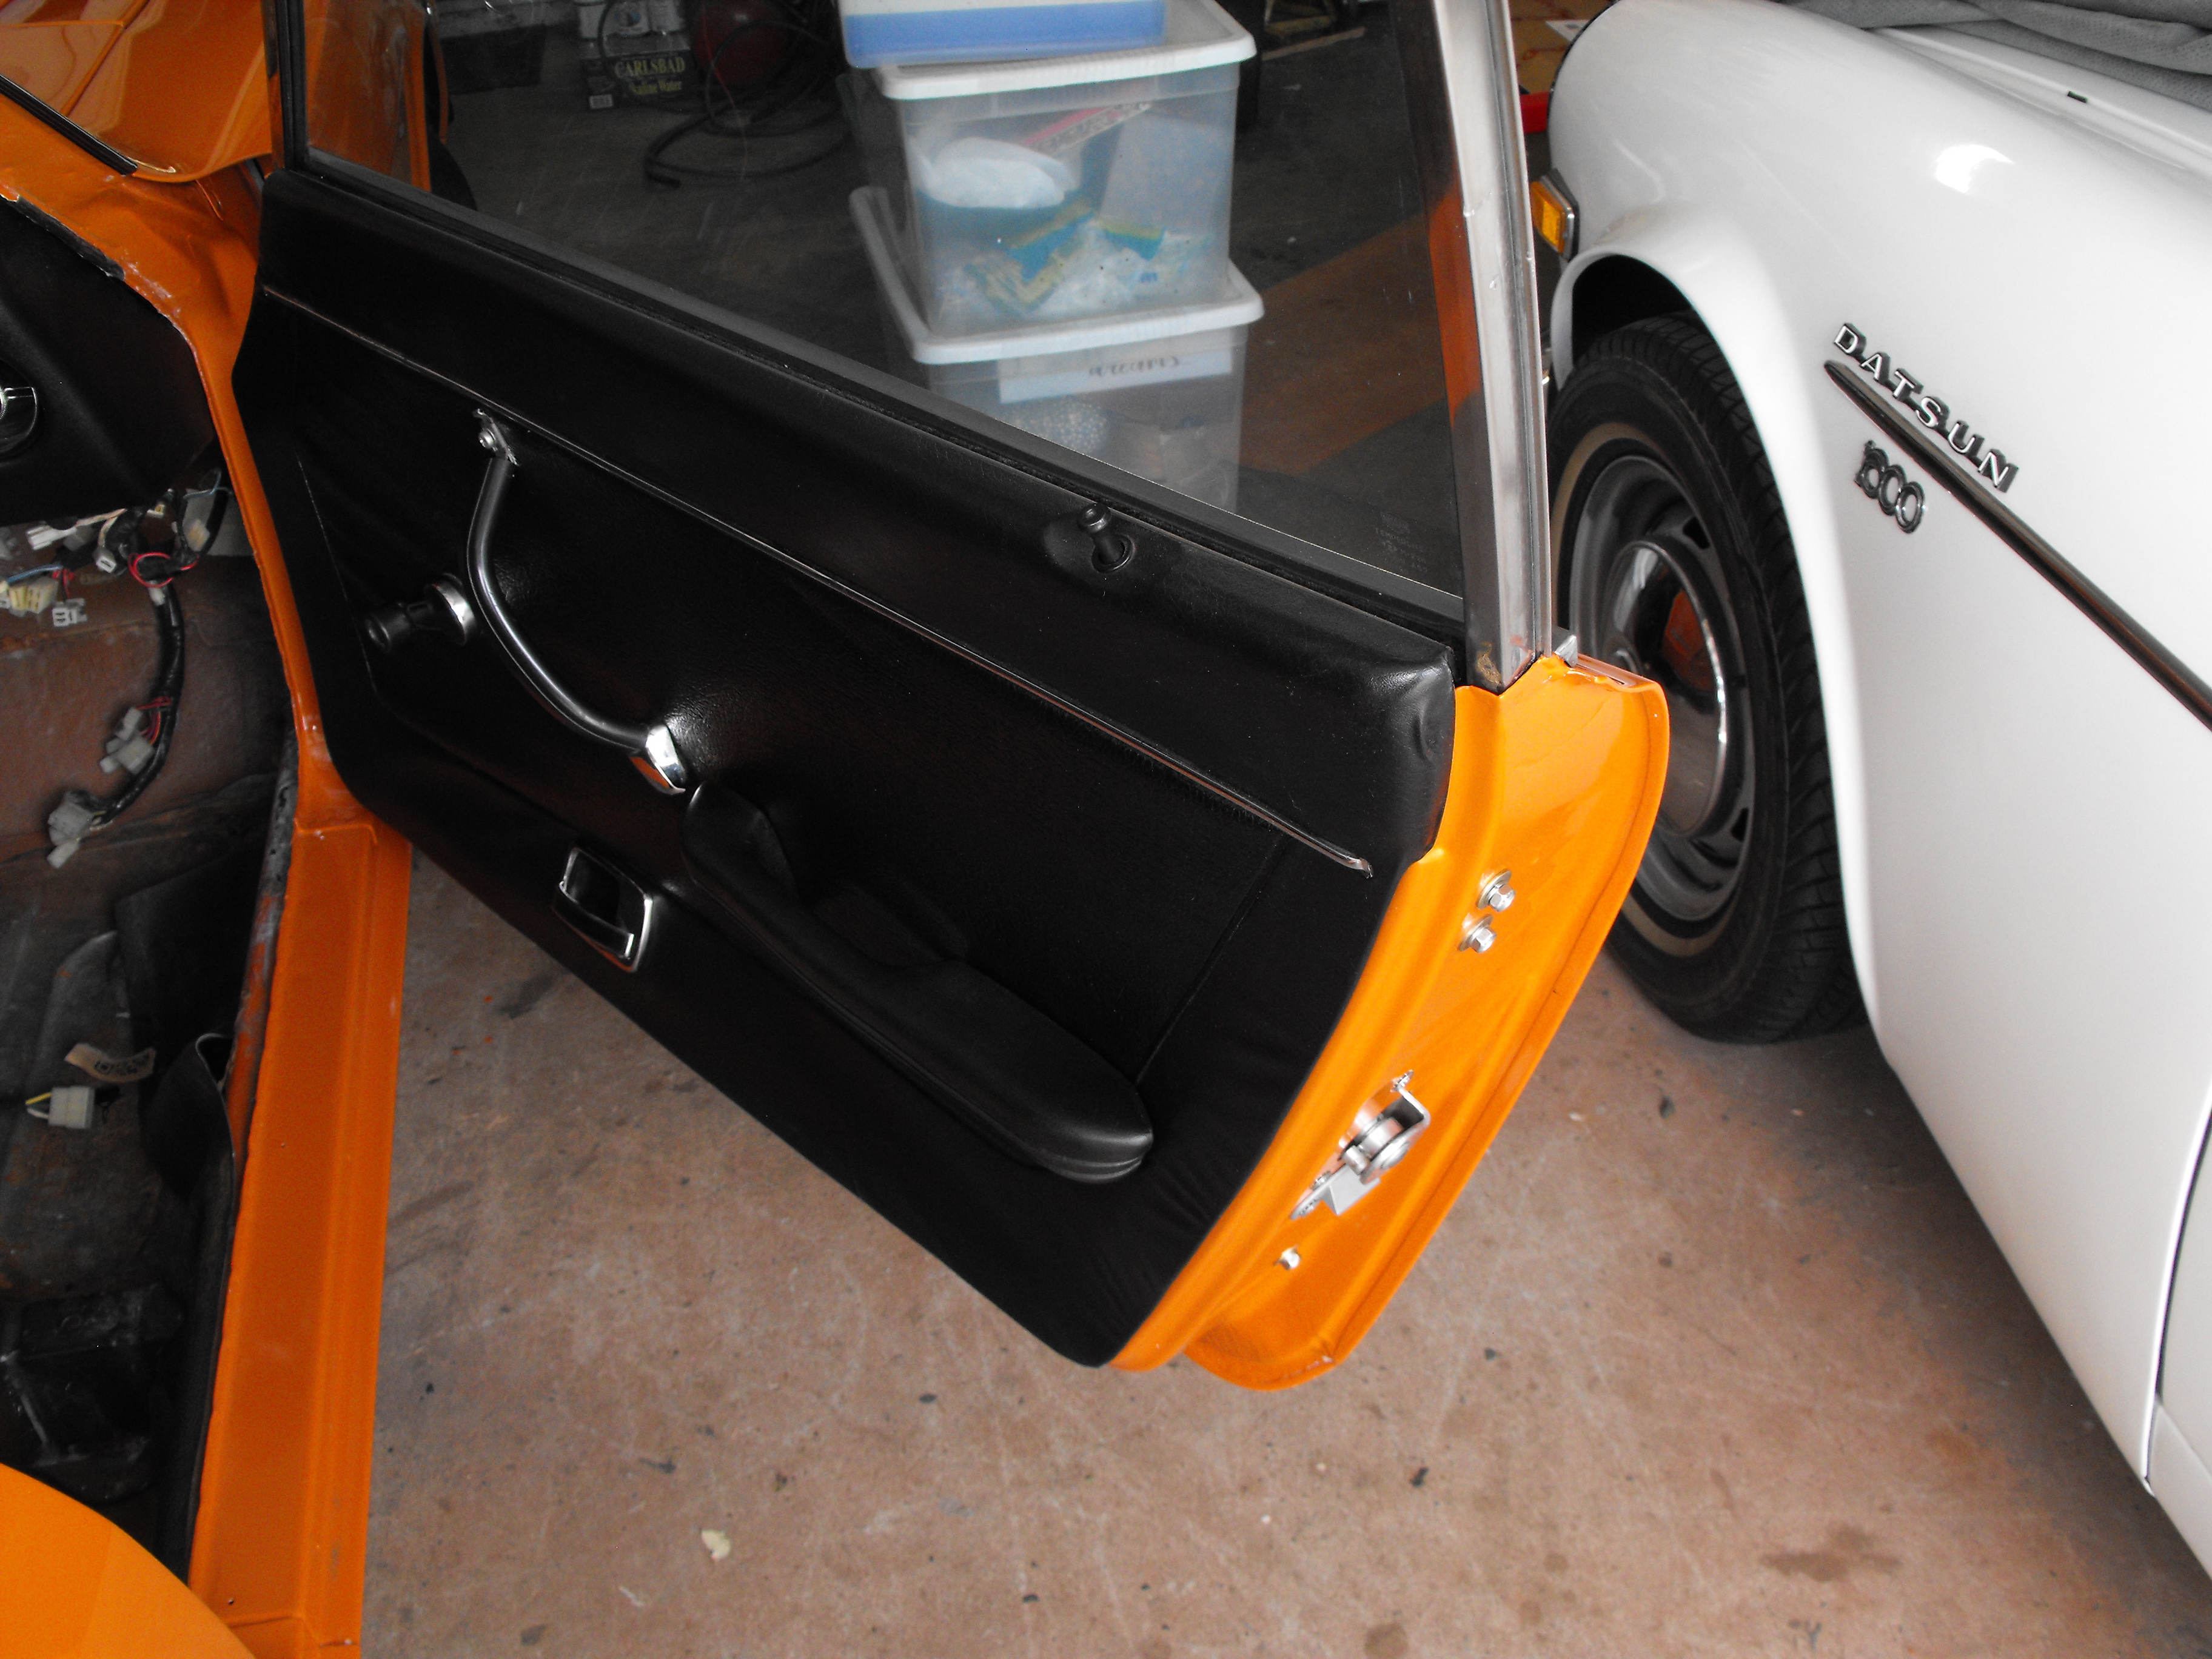
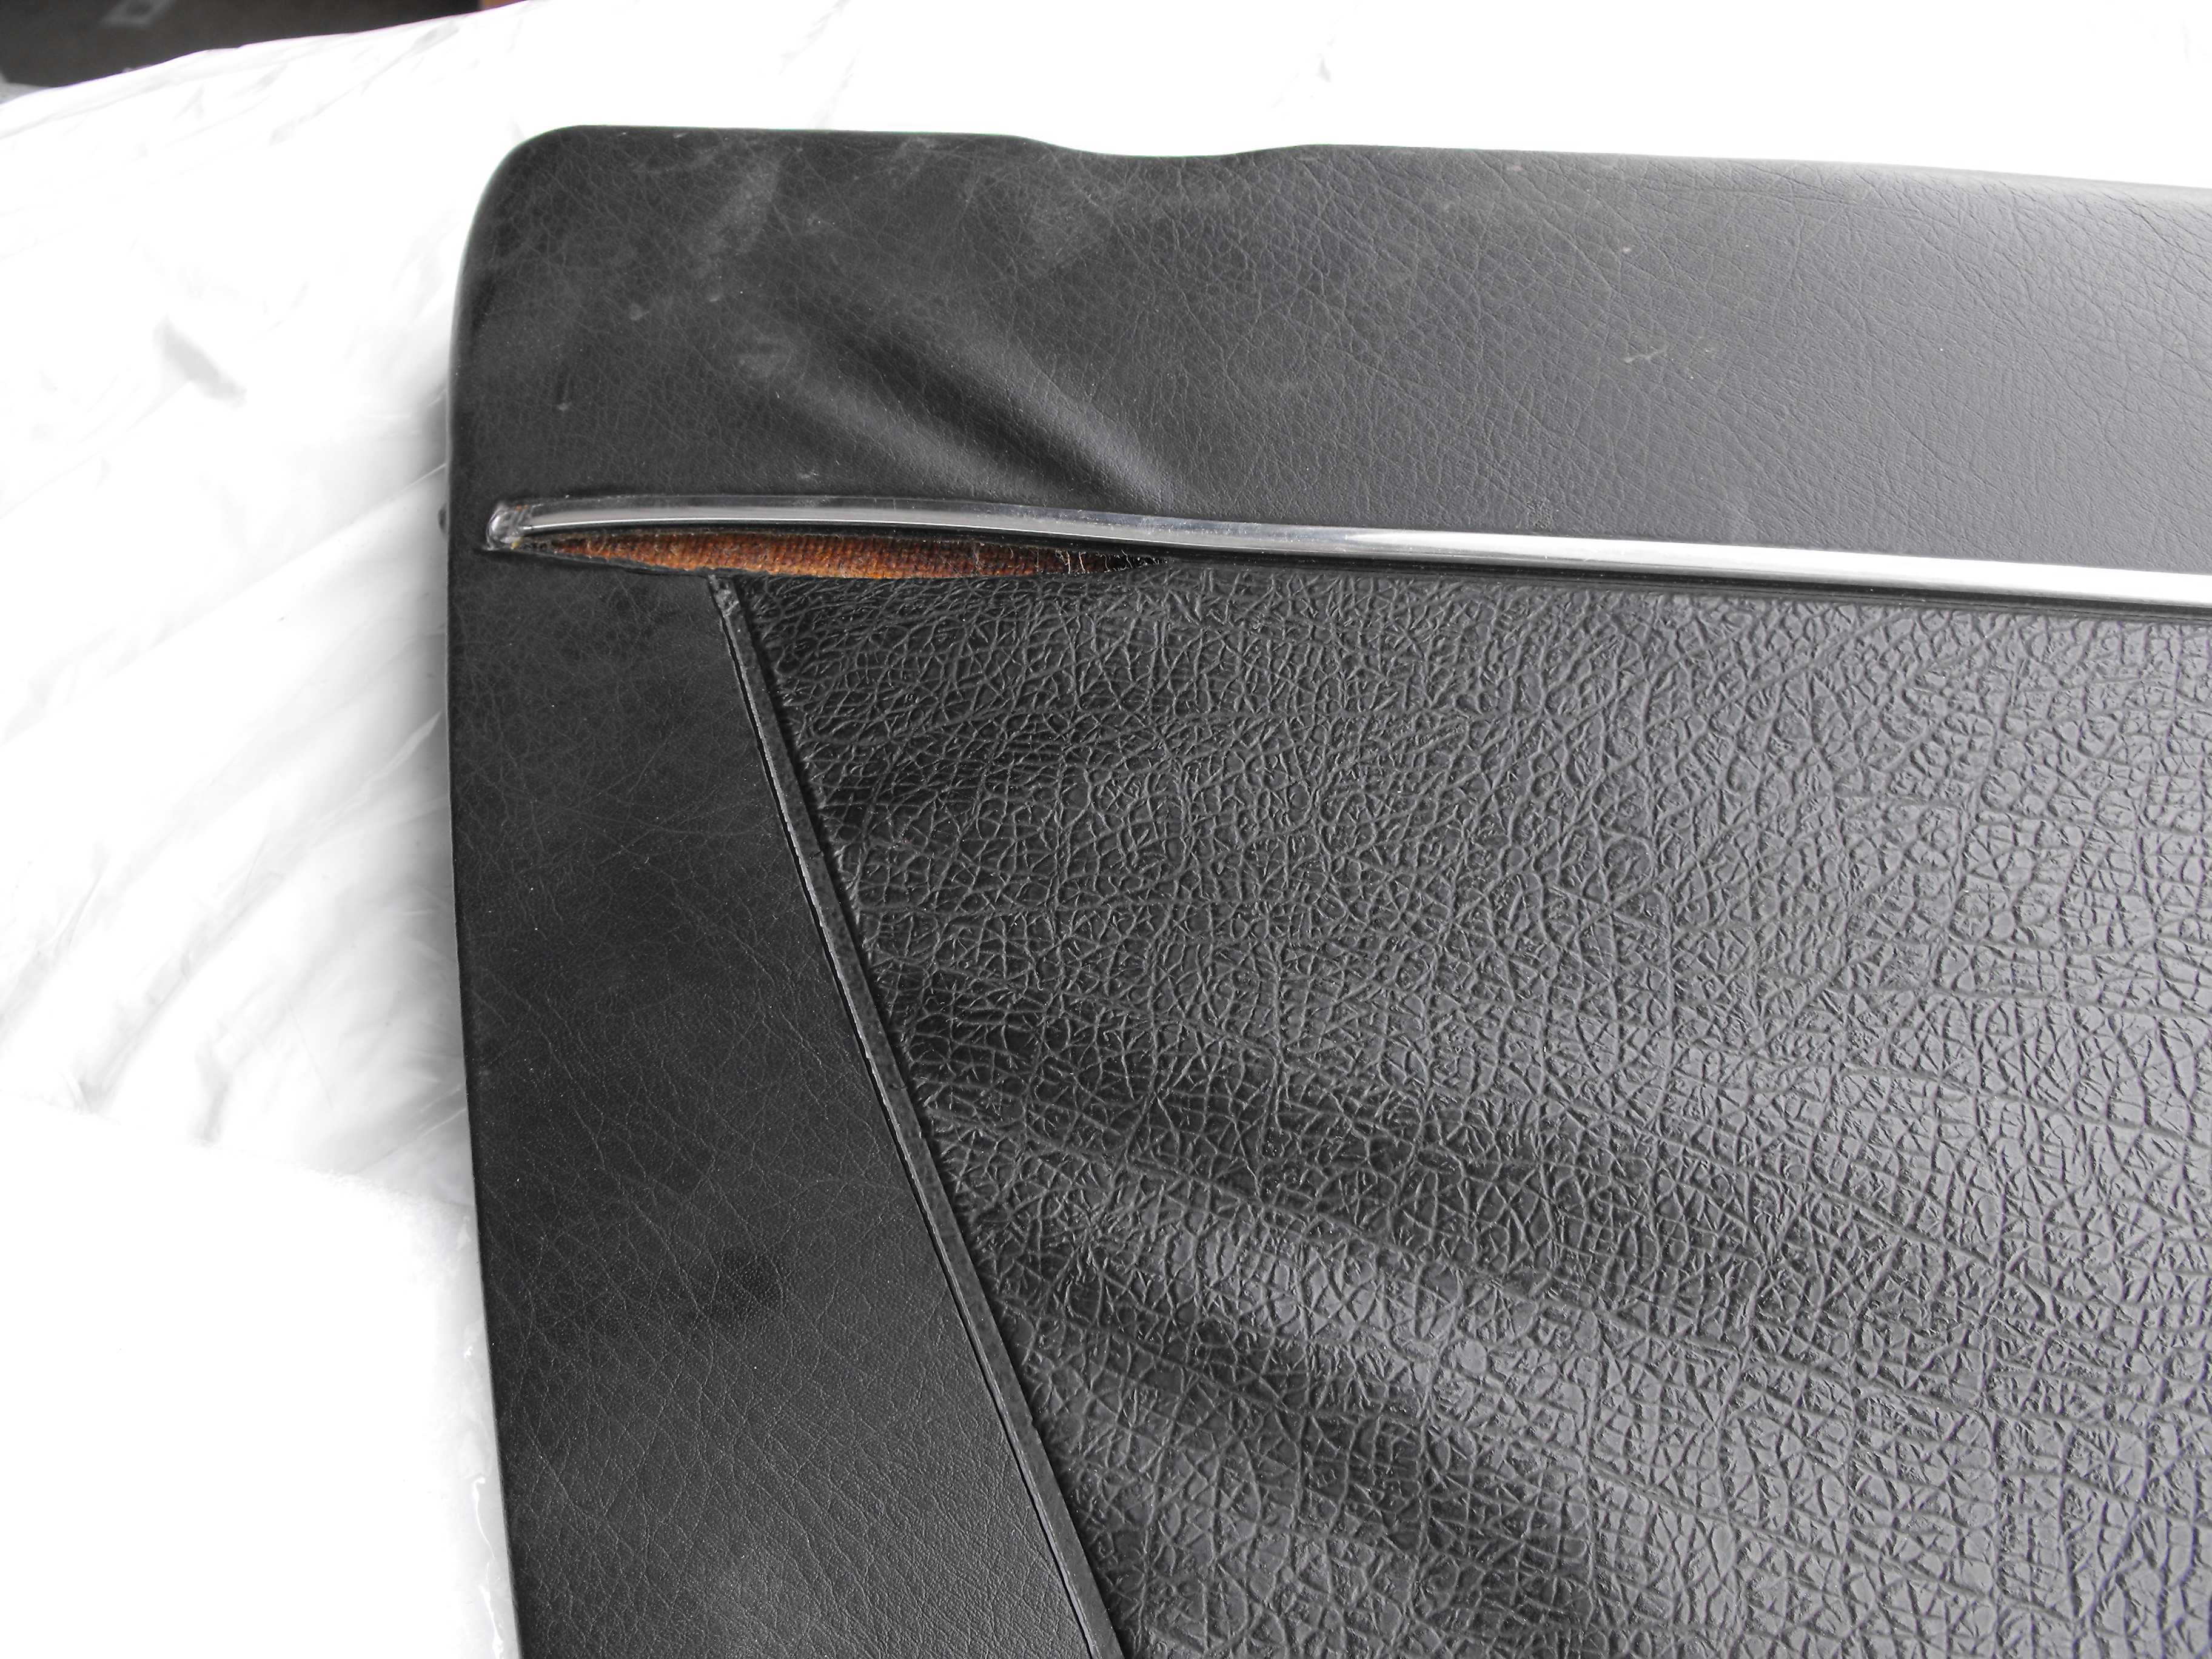
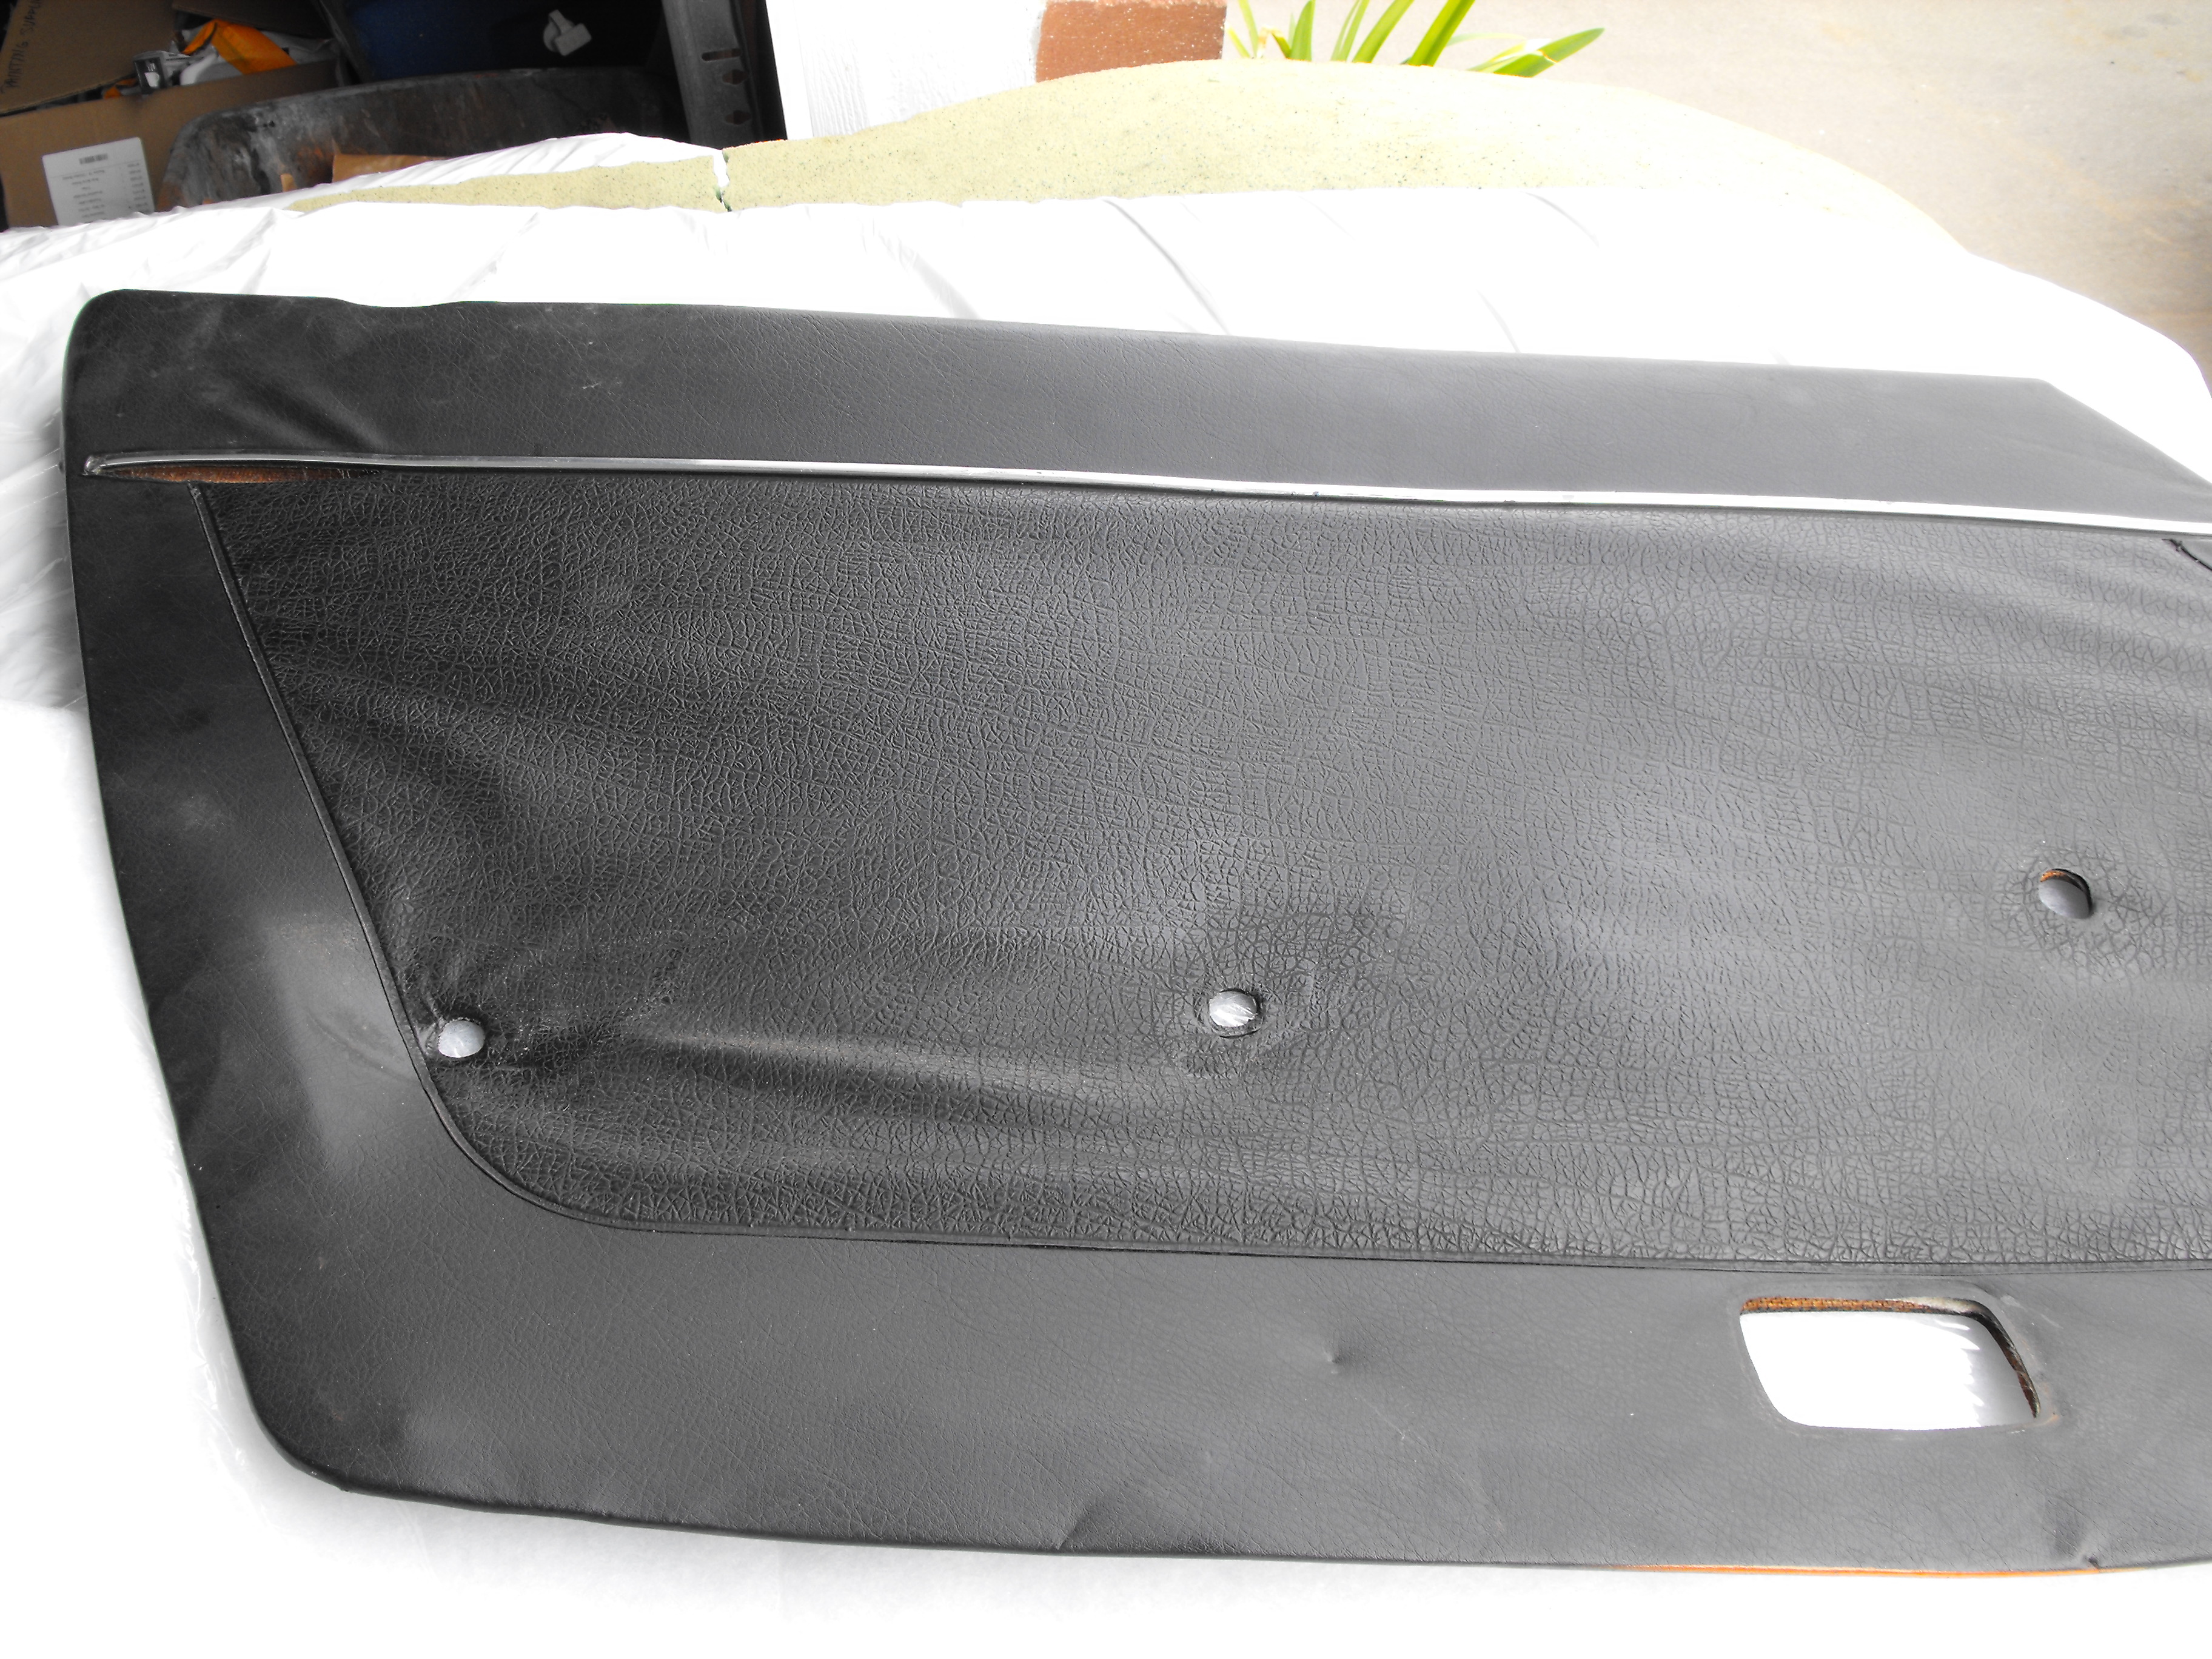
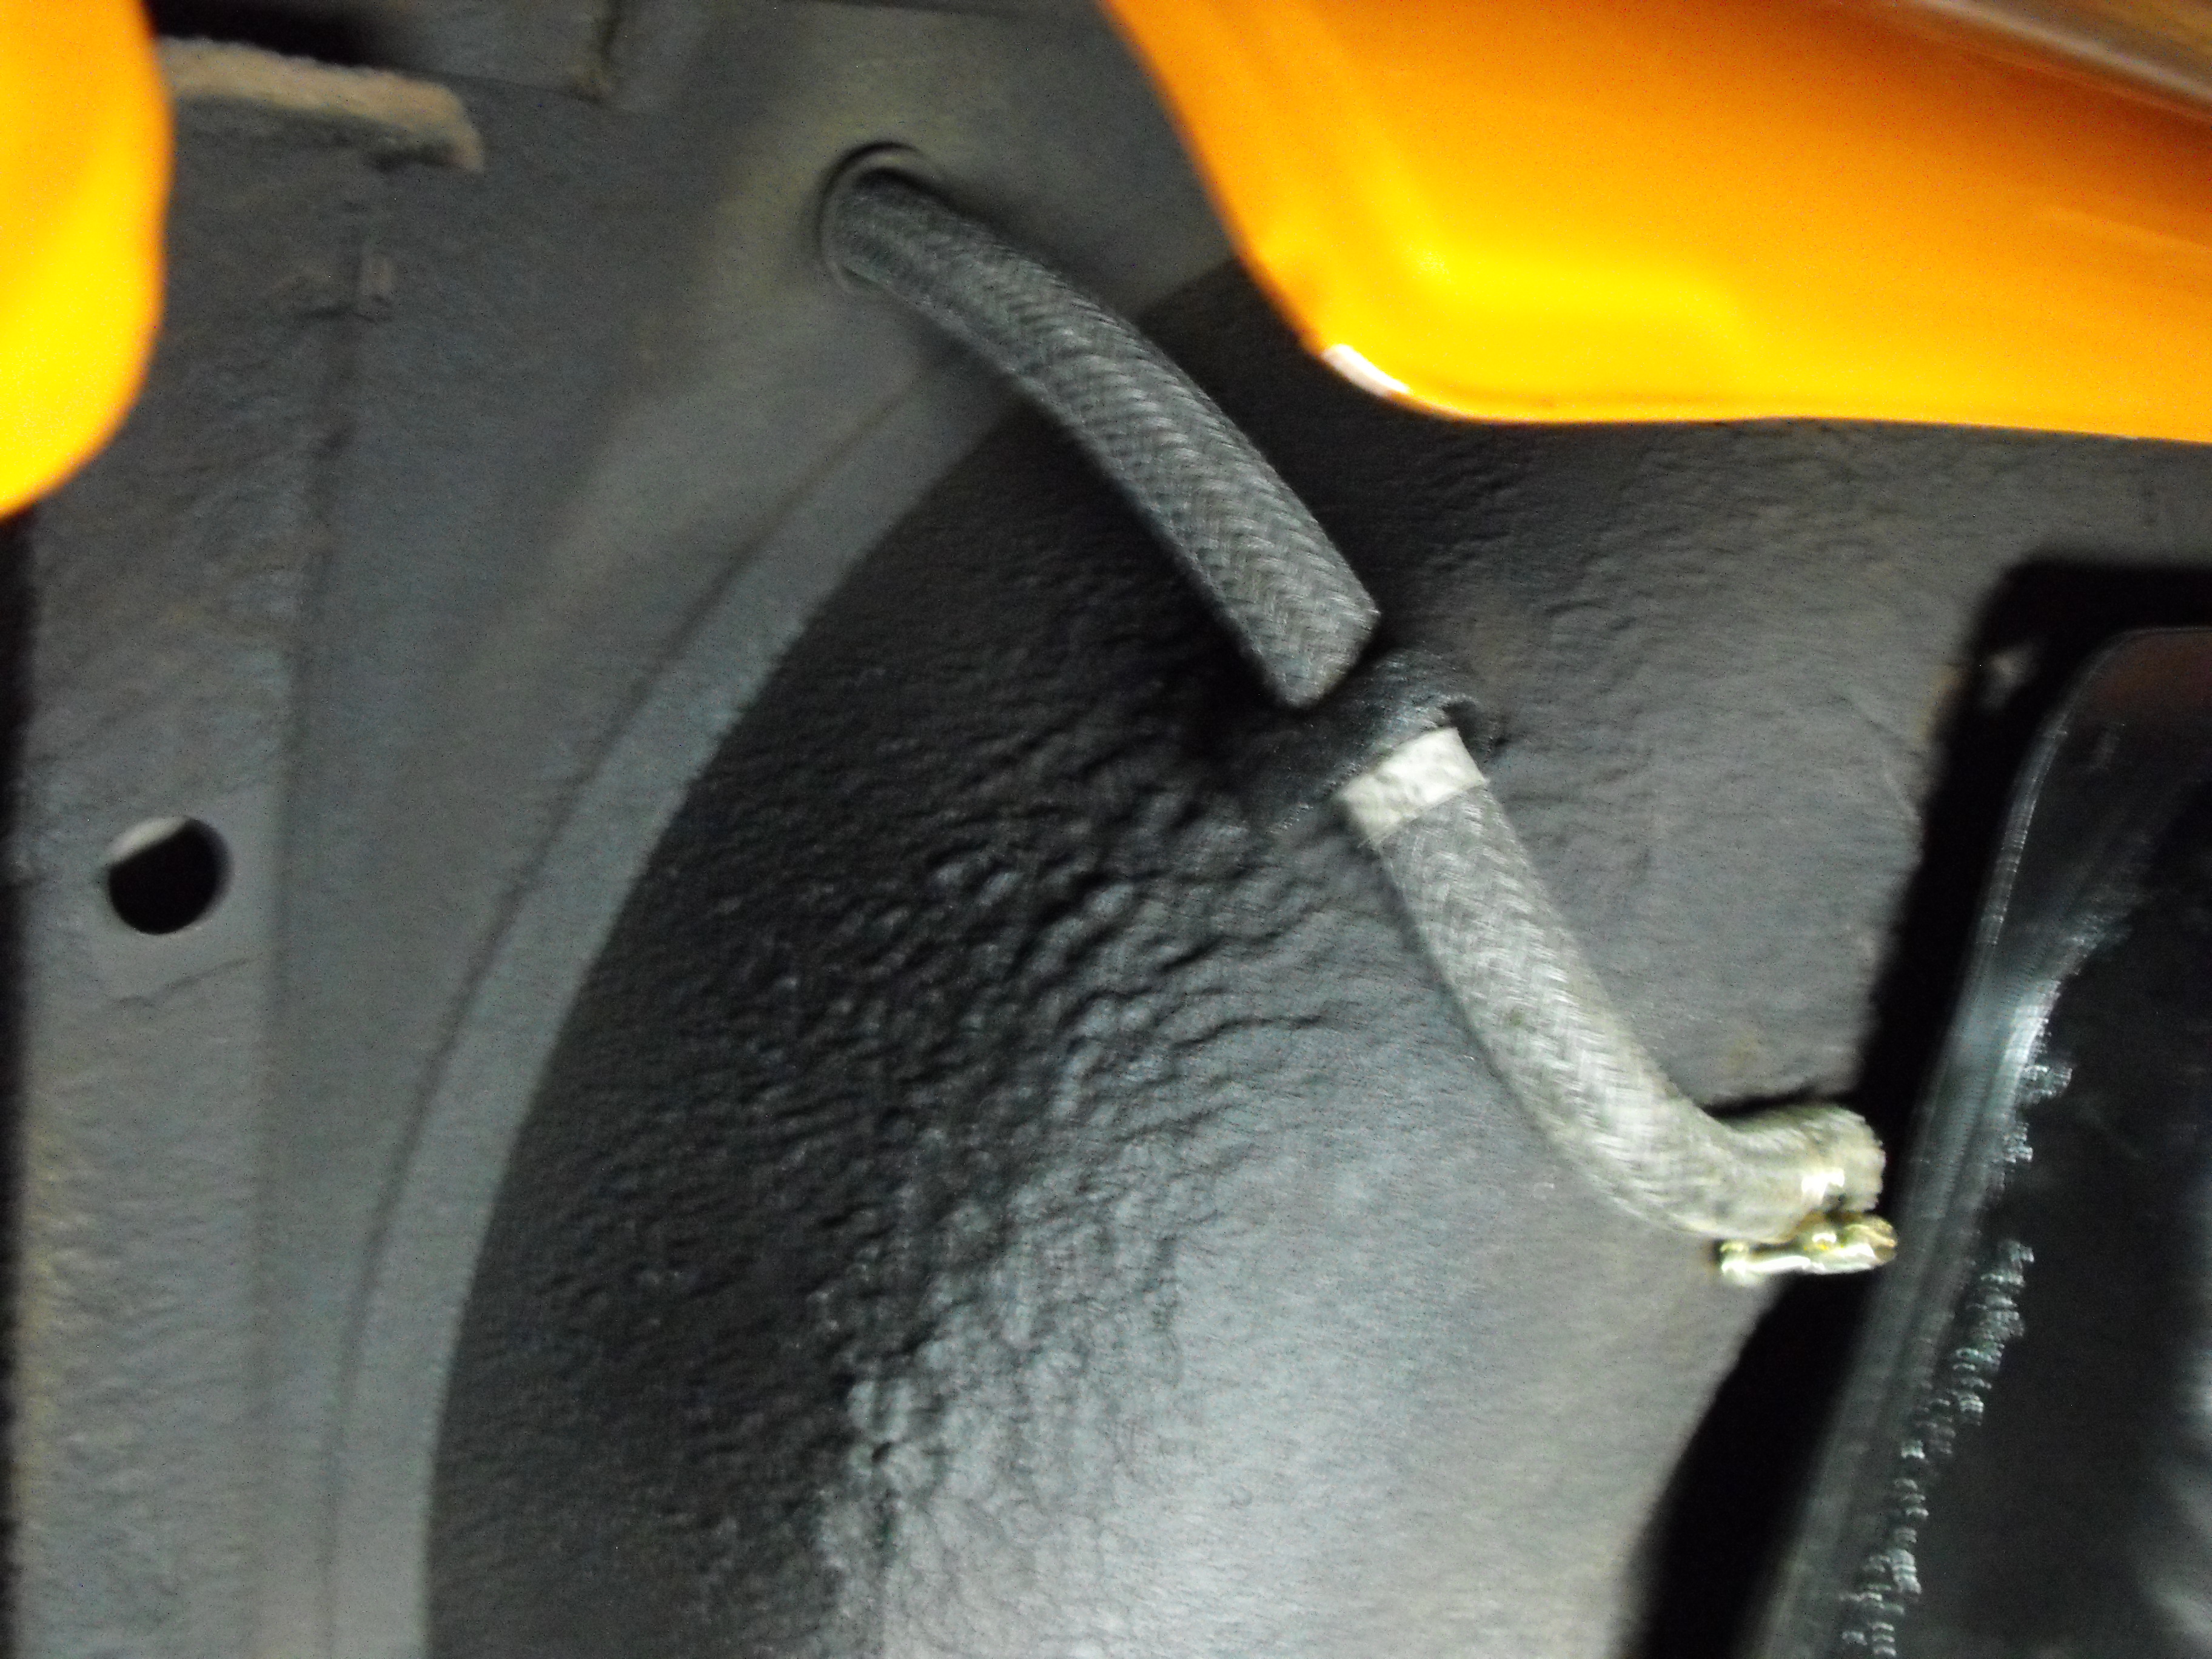
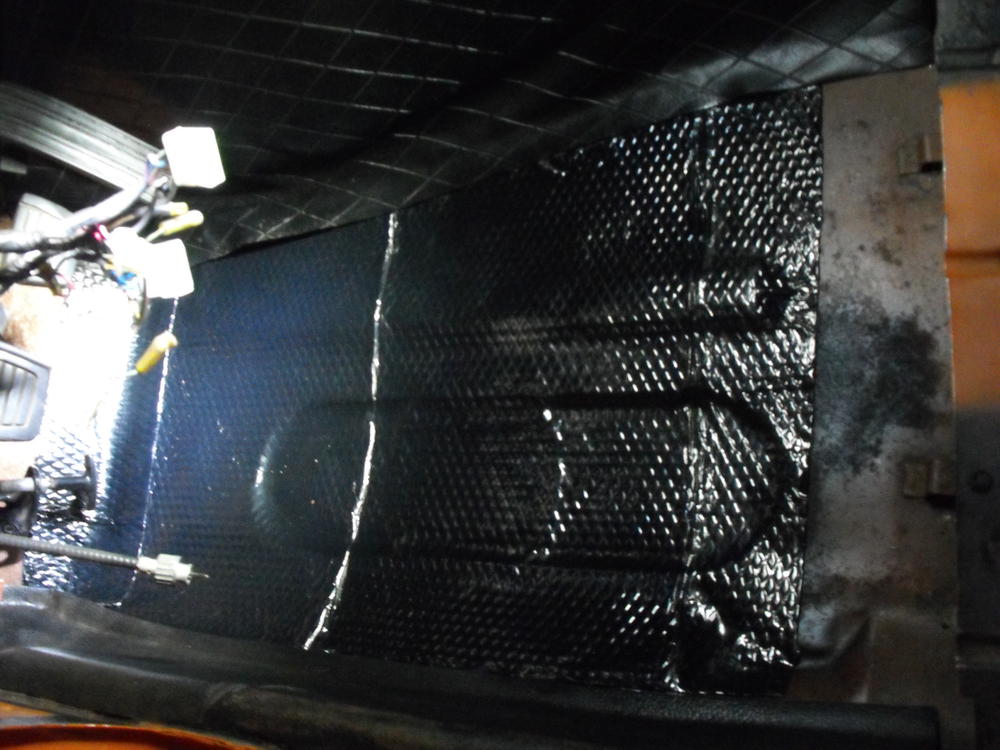
I put the sound dampening material in both the drivers and passenger doors. Wow, what a difference! Without the material, the doors are kind of tinny sounding when they are closed. With the sound dampening, it is a nice solid 'thunk' when they are closed. The added weight also gives them a very nice solid feel. I love it and need to do this to my cars as well. I cut the material into about 7 inch wide strips and attached a piece above and below the door center rail, biased aft. I then put a piece on the forward end that passed over the center rail. Very nice material to work with. I got the passenger door panel and parts installed , except for one missing pull handle screw cover. I know I have one of those laying around some place. I also made a clear plastic cover to seal the door, under the panel. The drivers side panel has small separation on one end. I was thinking about trying to fix this myself, but will most likely take it to an upholstery repair shop. That is a bit of a bummer as I was hoping to have the doors finished off today. I got the interior heater hoses installed along with the new shut-off valve. Also re-attached the vinyl around the windshield frame. It was detached for the paint job and needed to be re-attached before the windshield goes in.


-
Thanks, will post here if things get dicey, but looks like we are OK for now.
-
Yes, I think. As long as the wind continues to blow to the west I am fine. If it shifts to southeast I will be on alert. There is quite a bit of concrete around me so not super worried. Last time it came close I sat in the back yard with my painters breathing mask, goggles and the water hose.
-
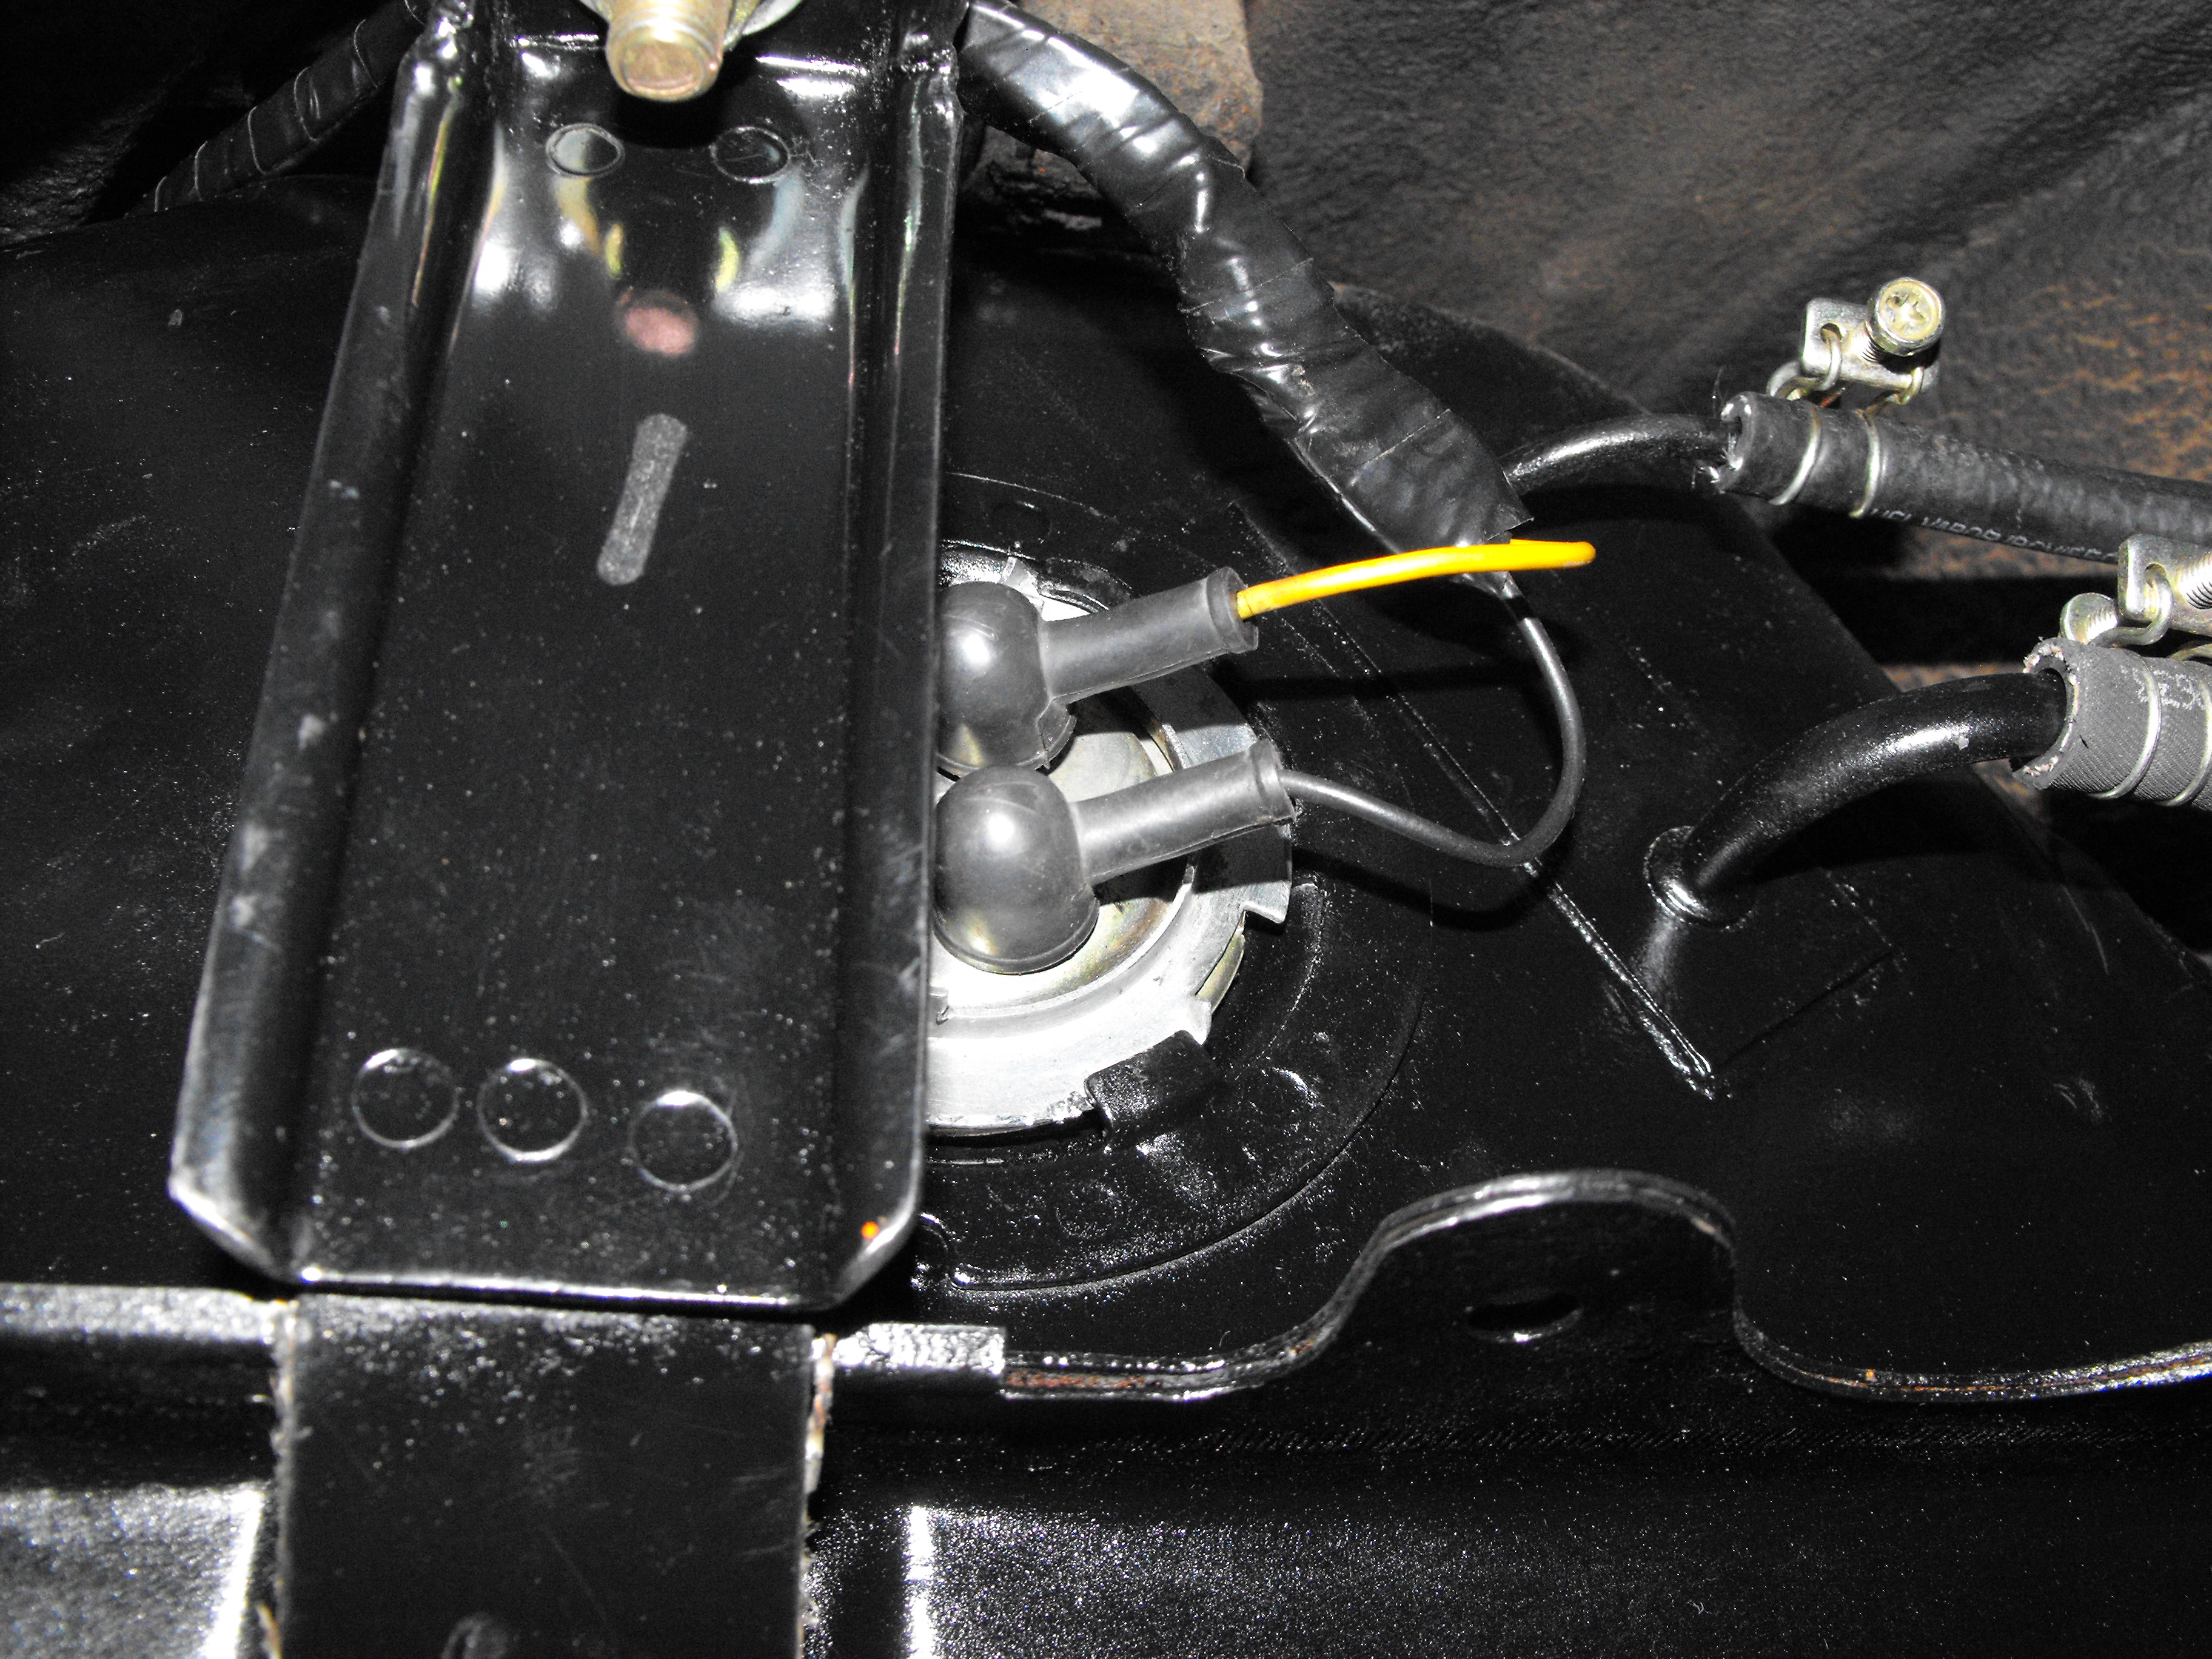
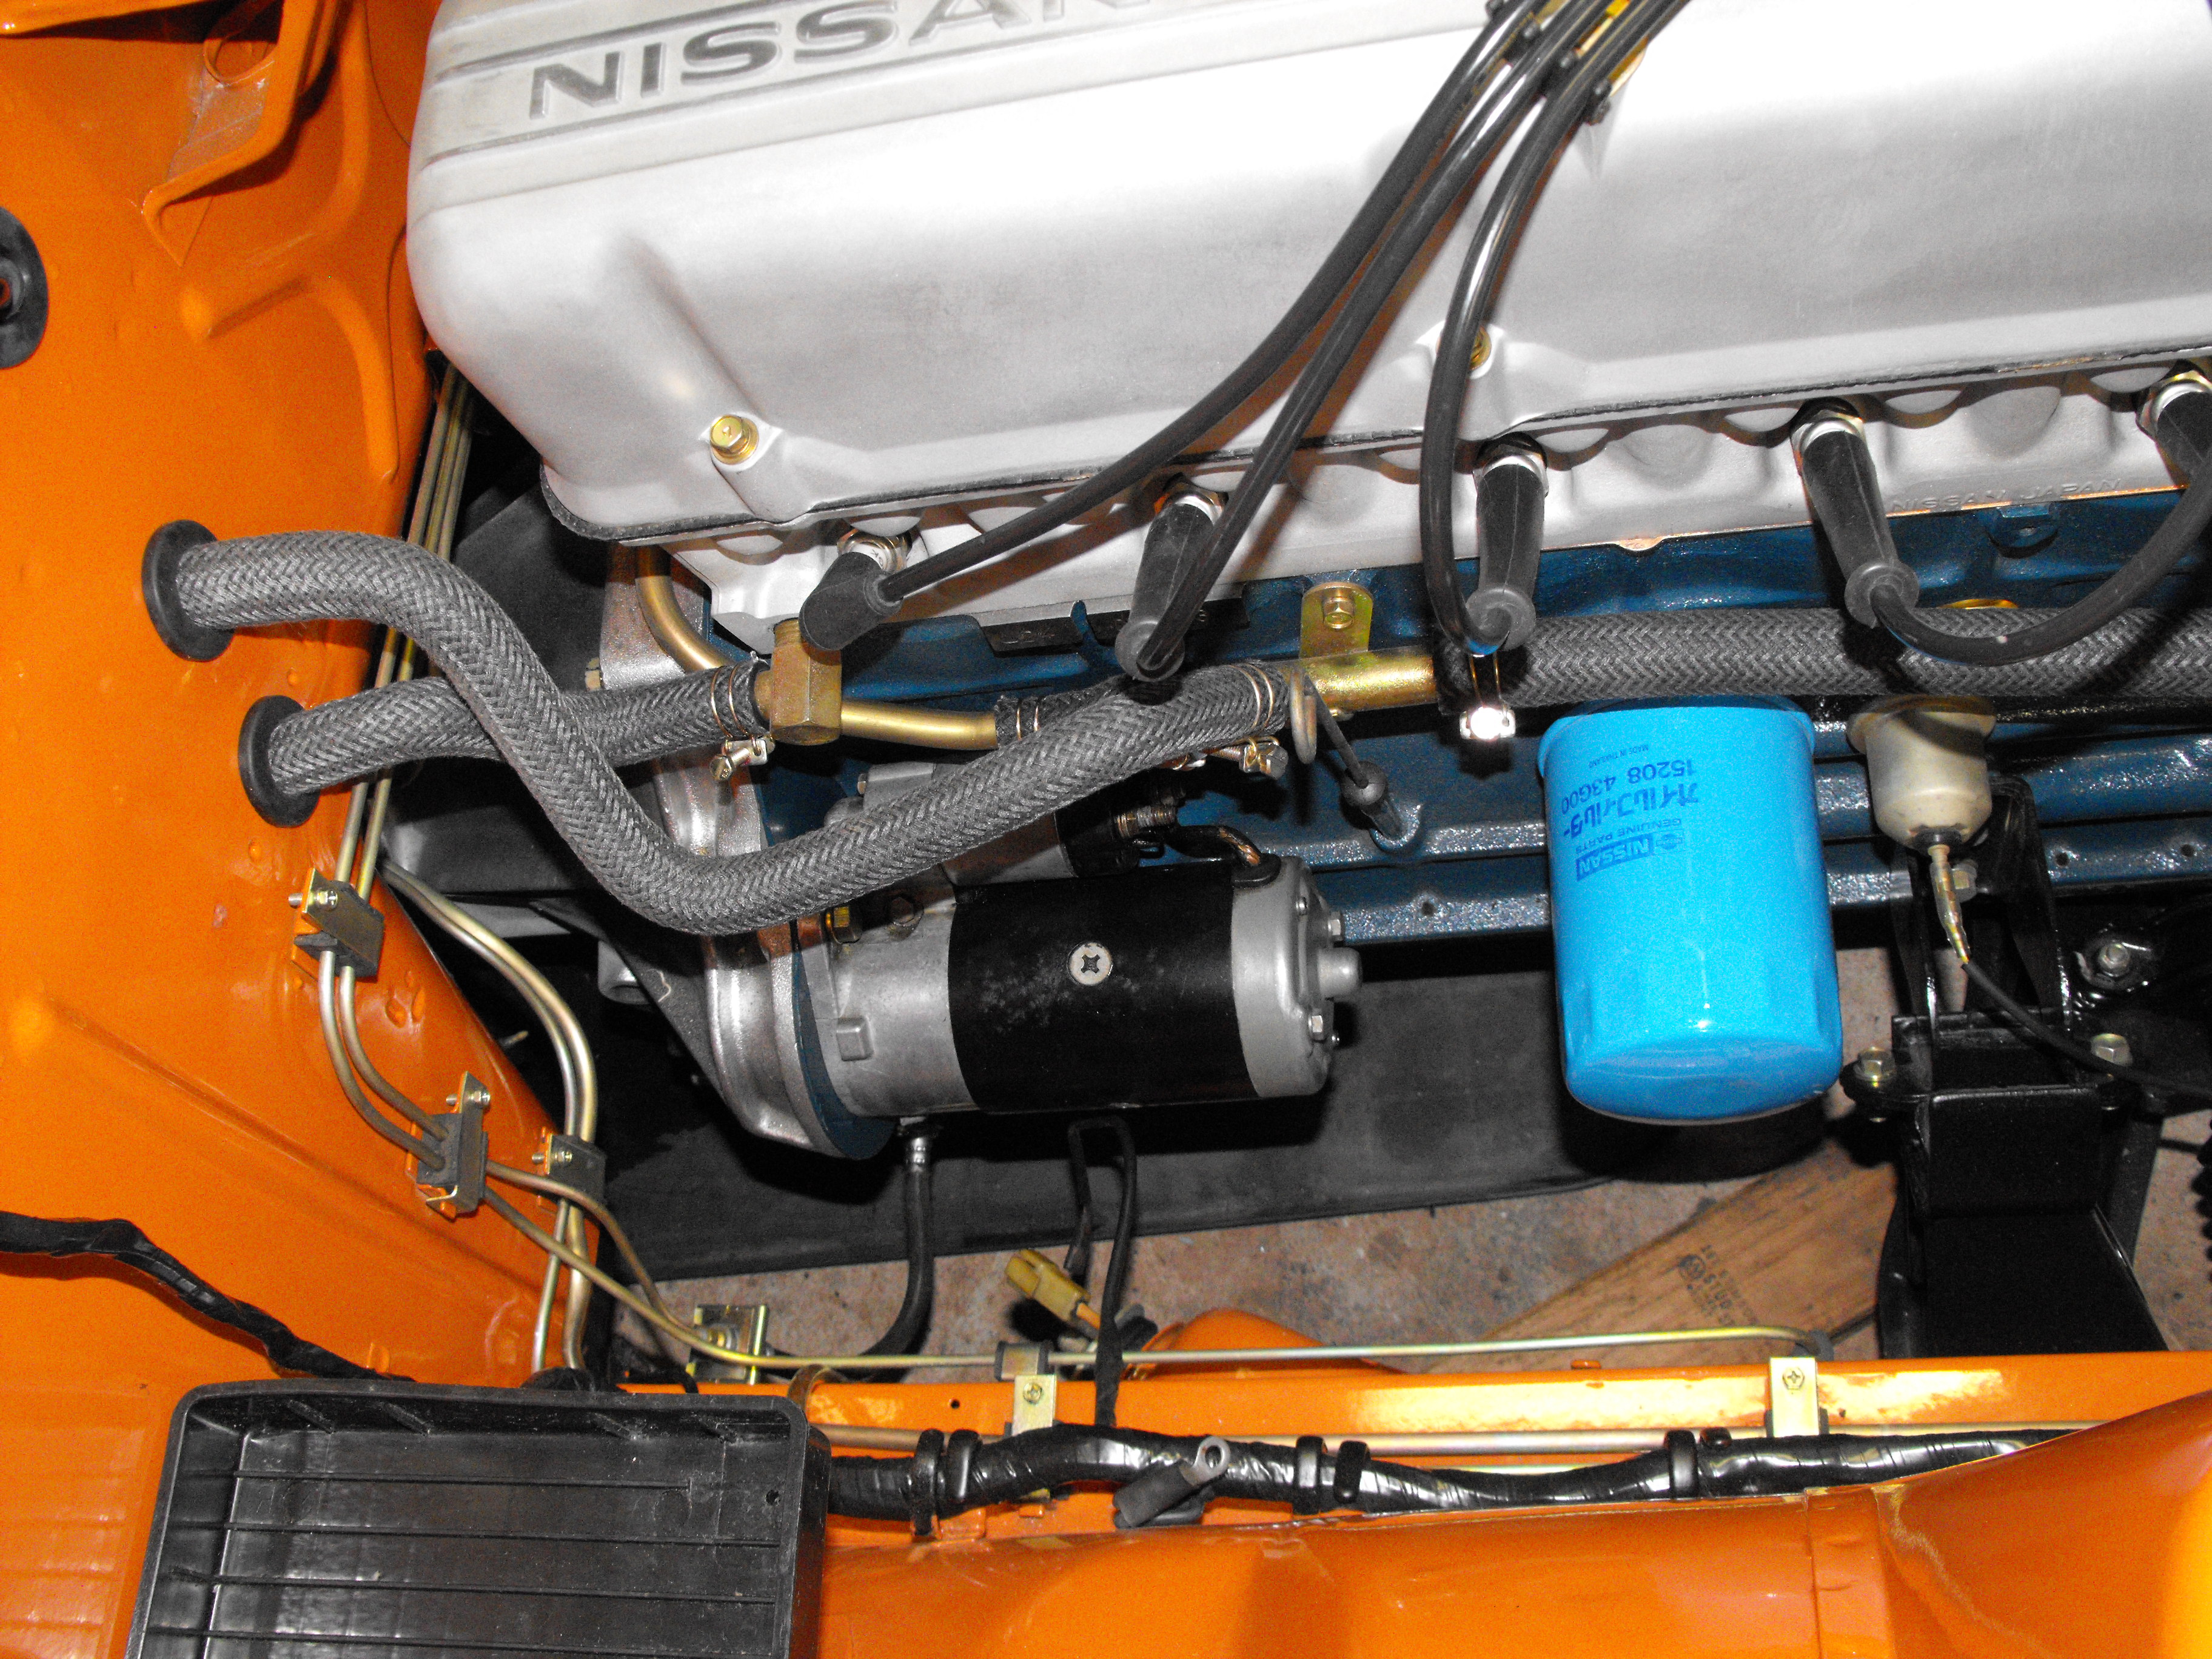
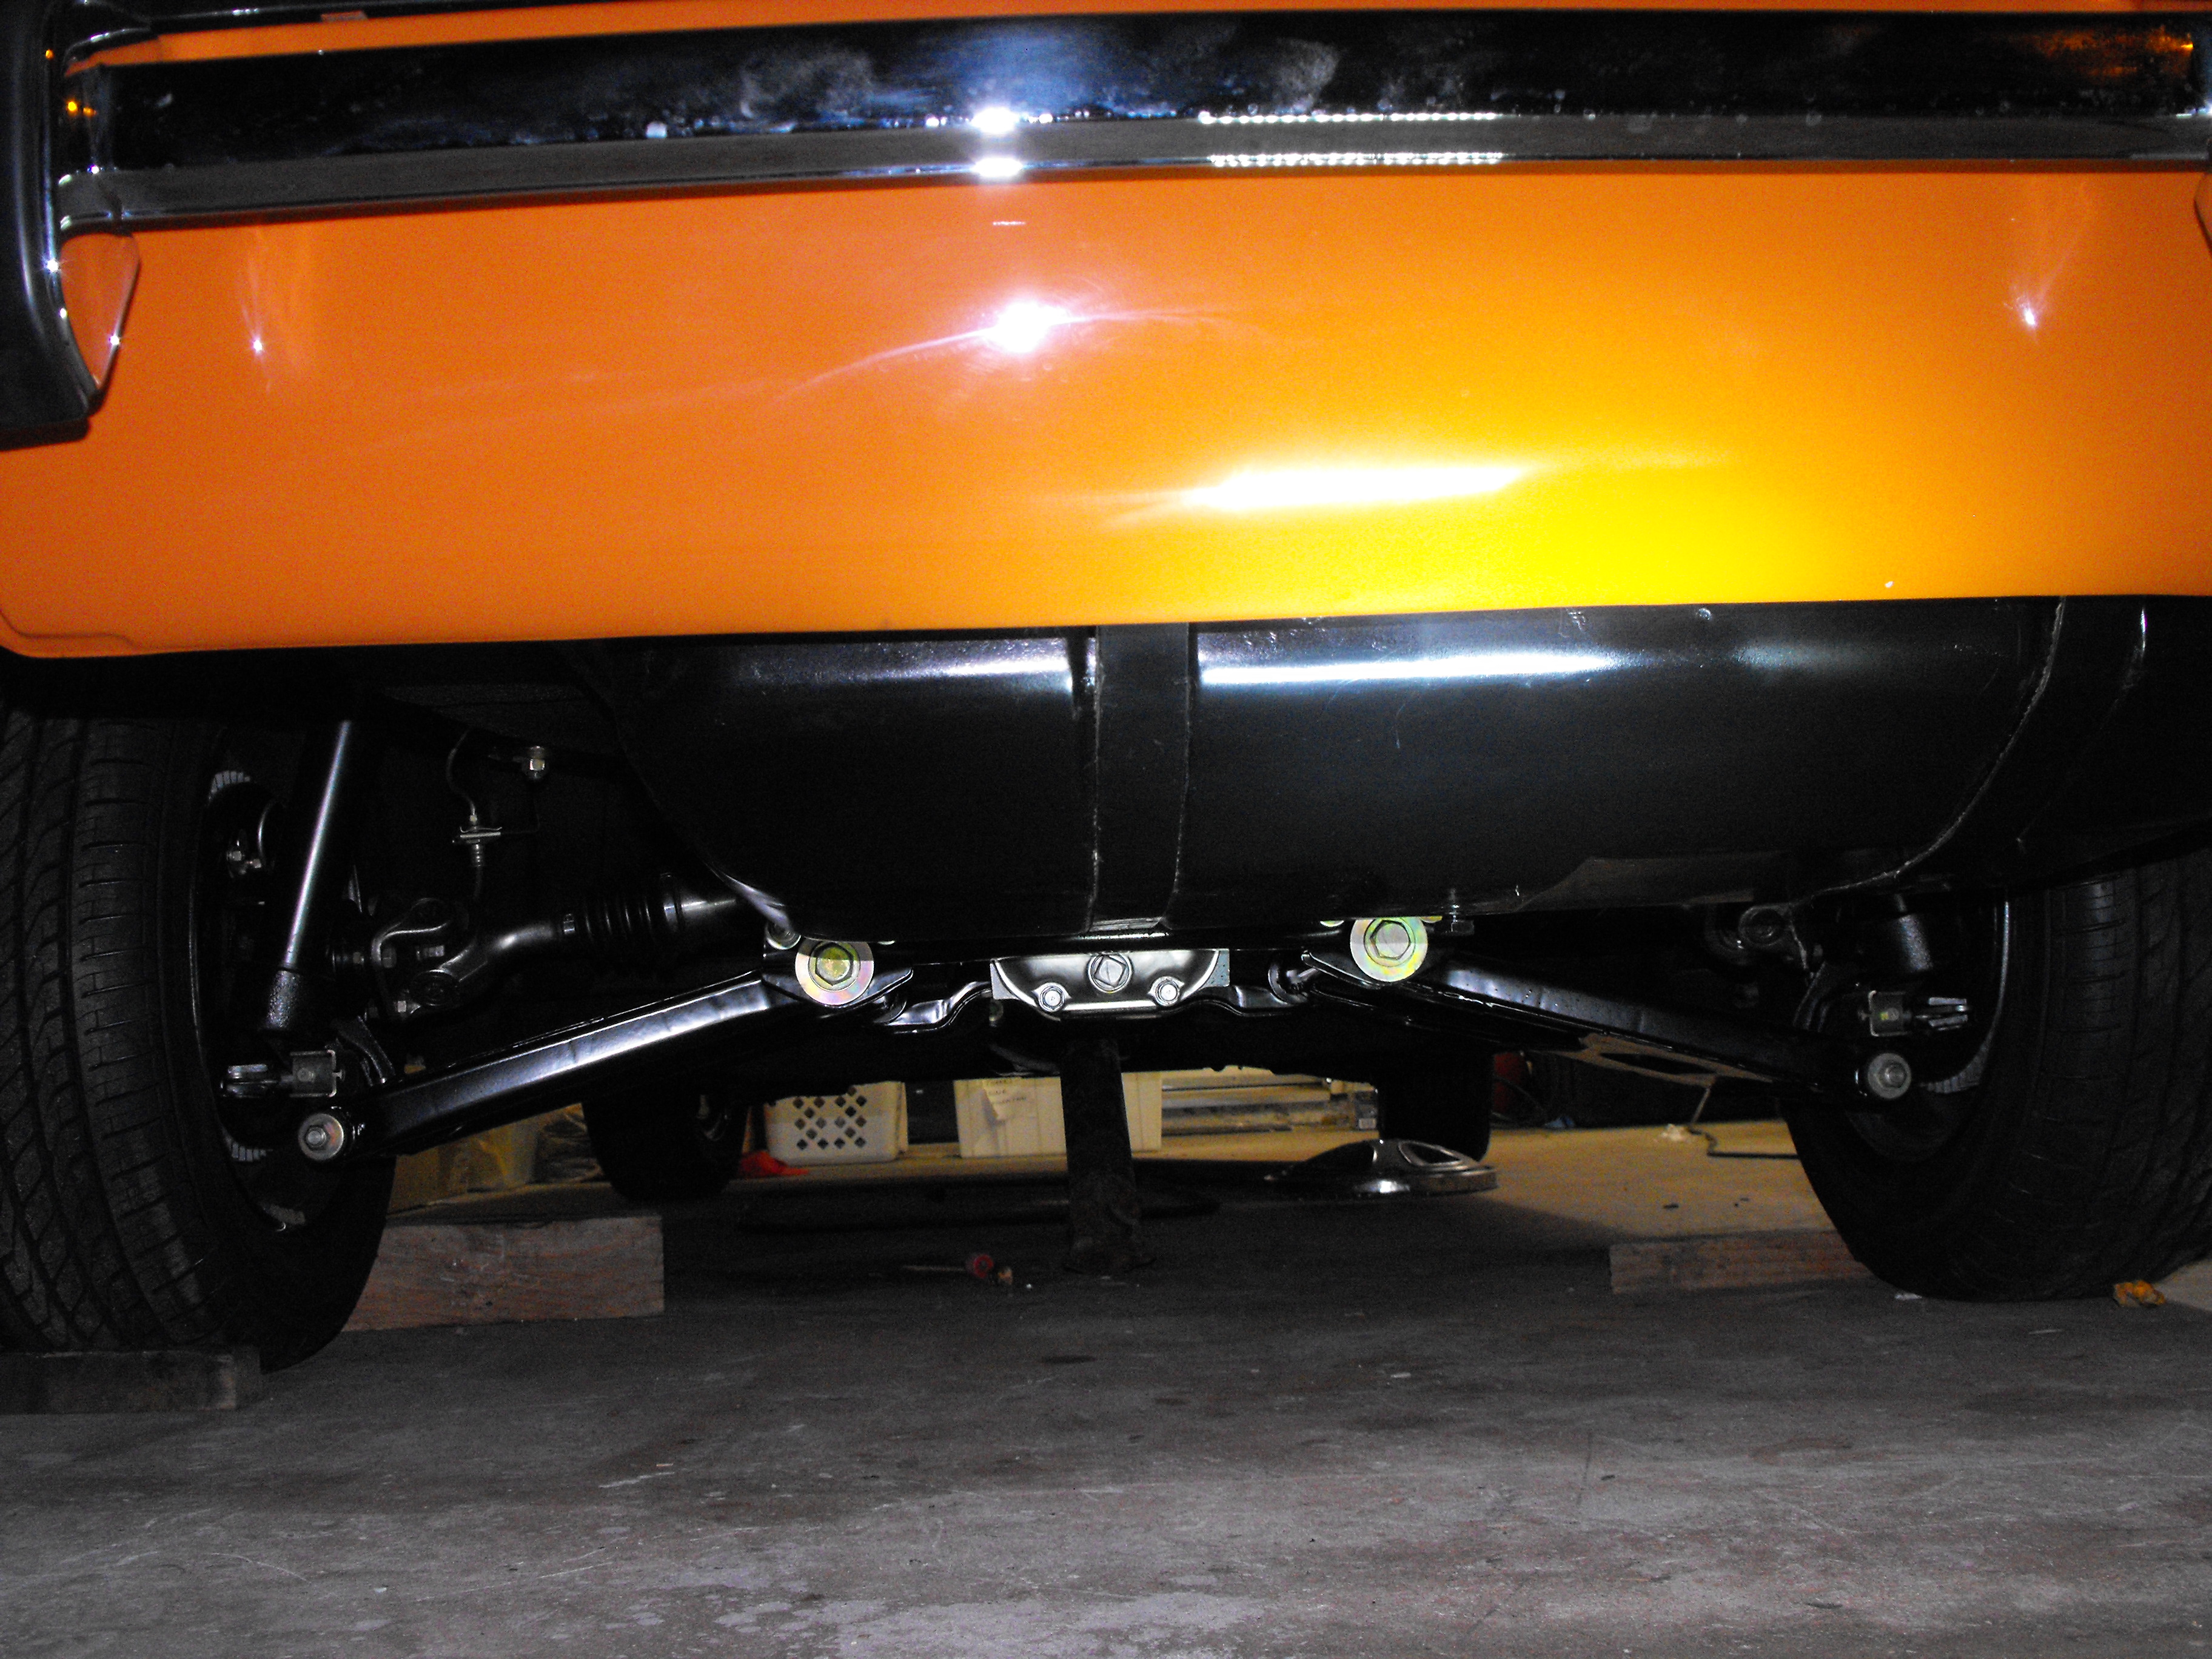
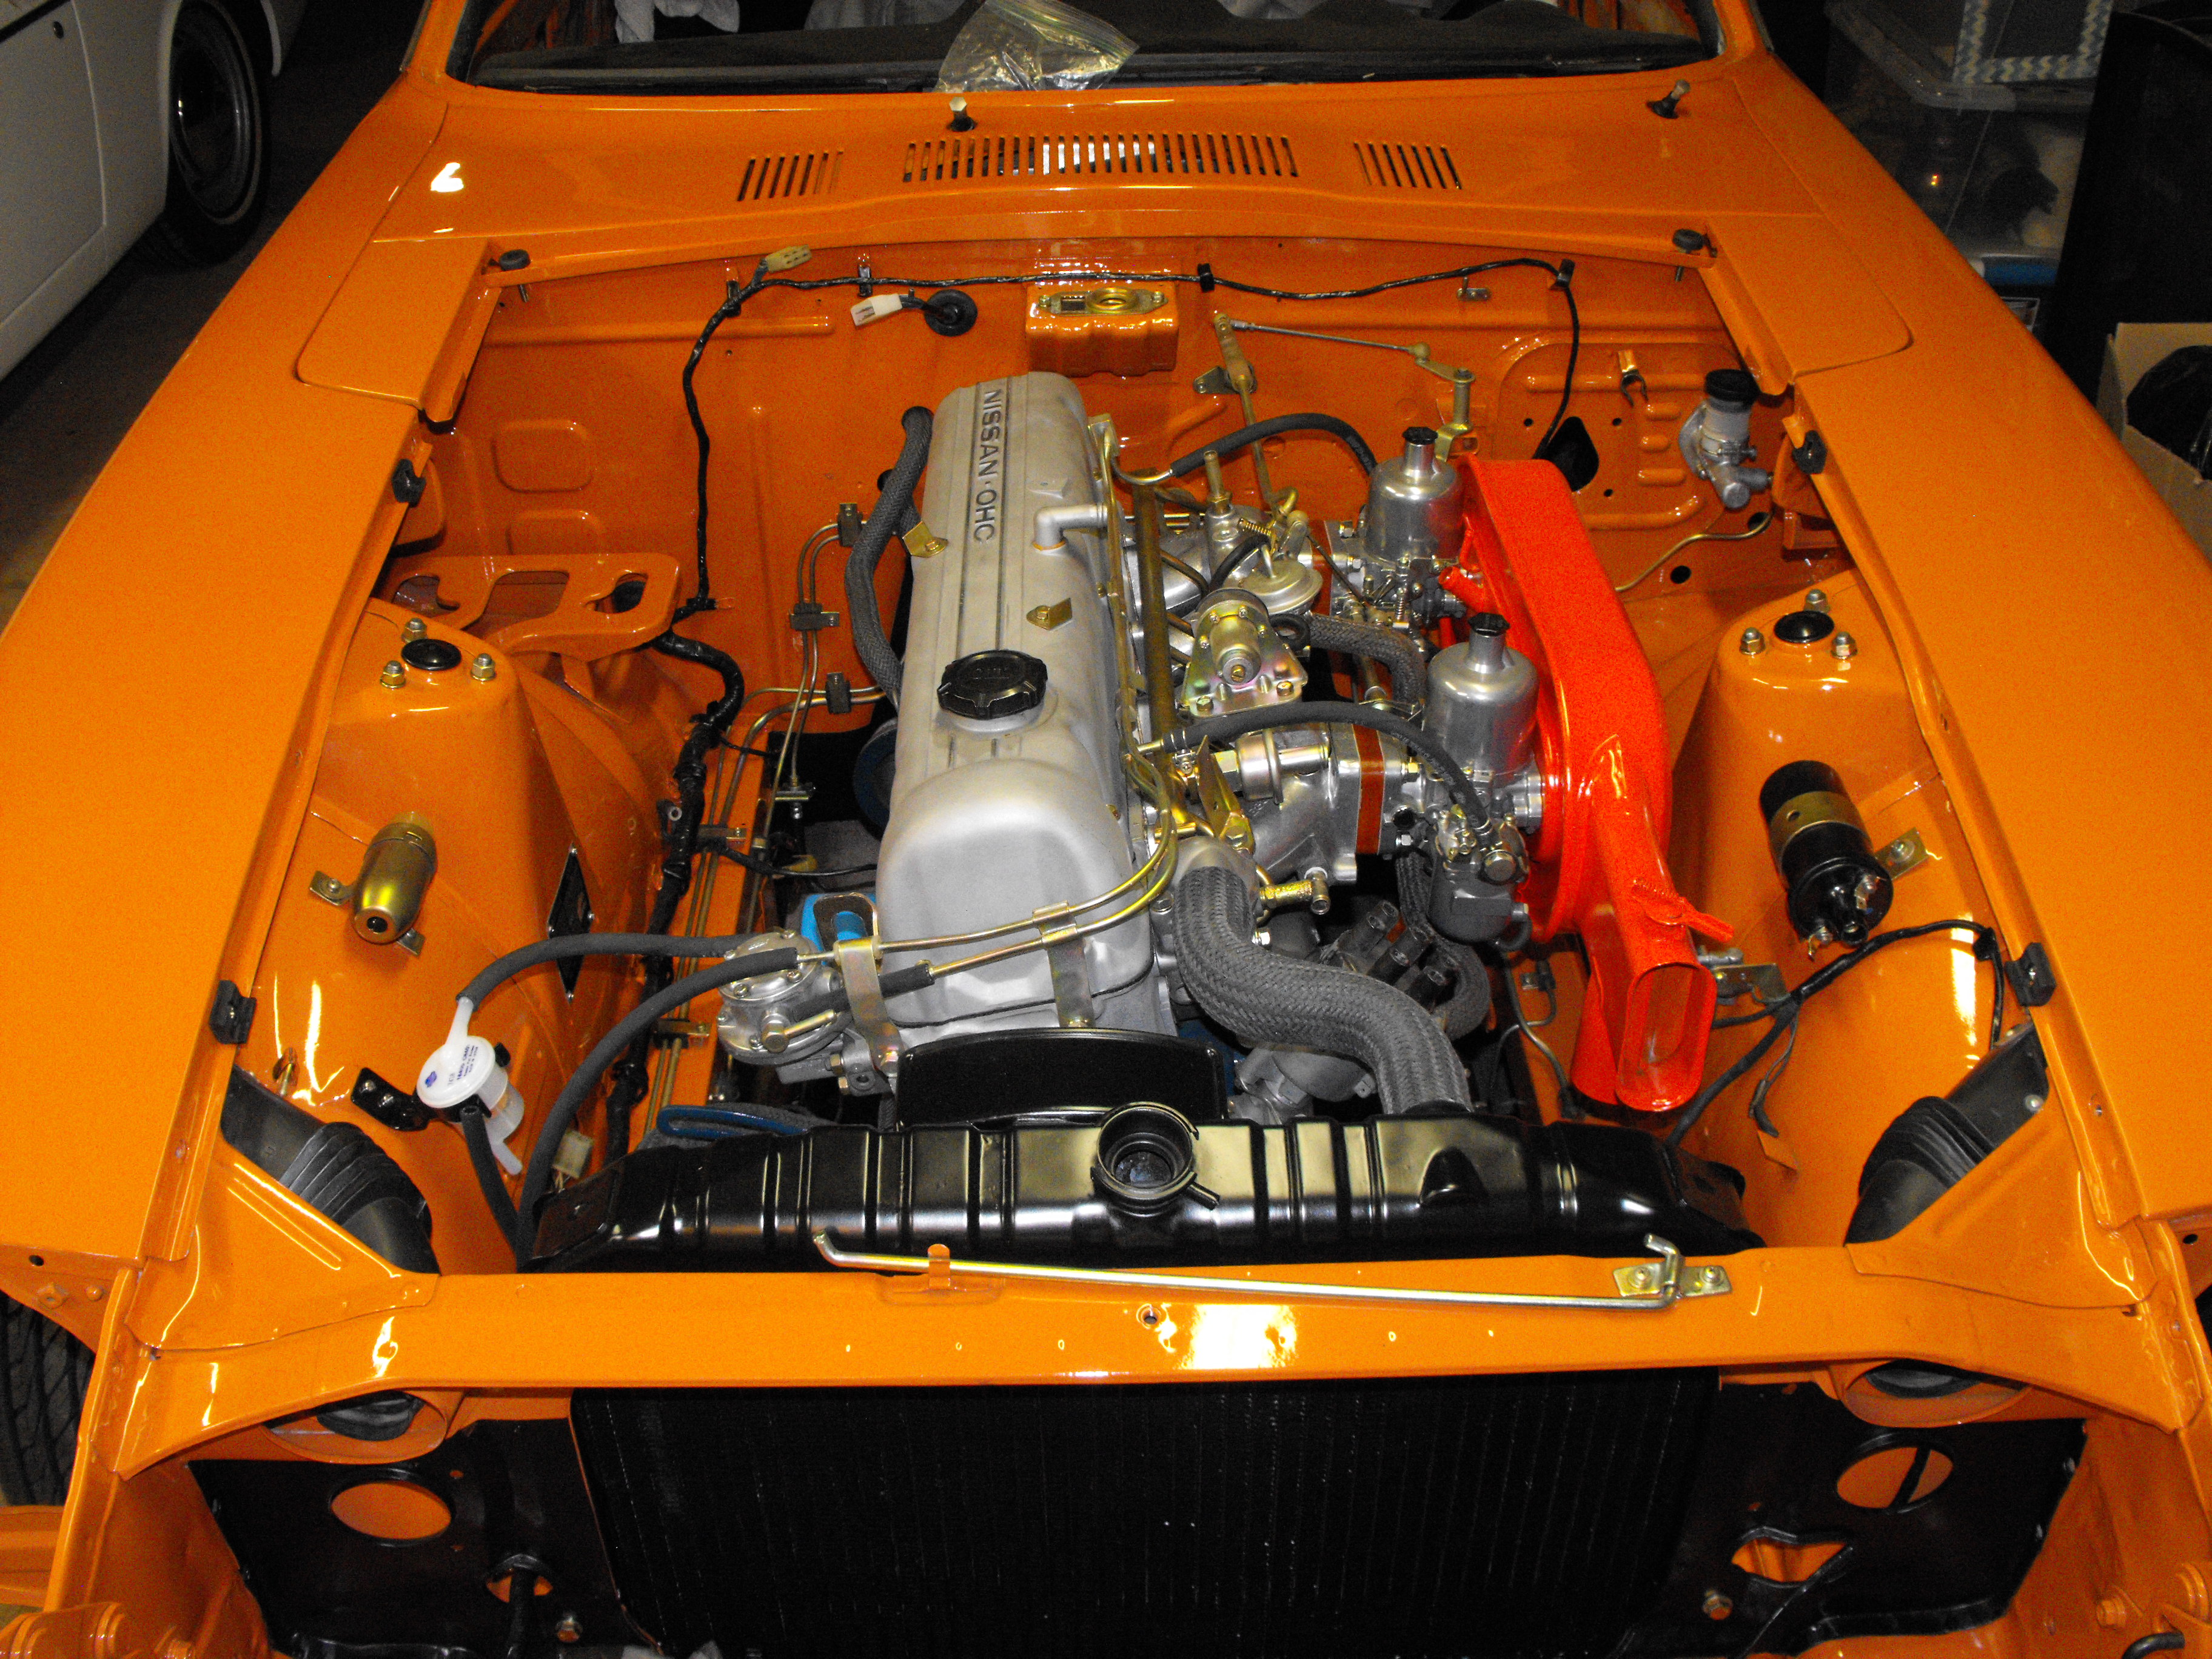
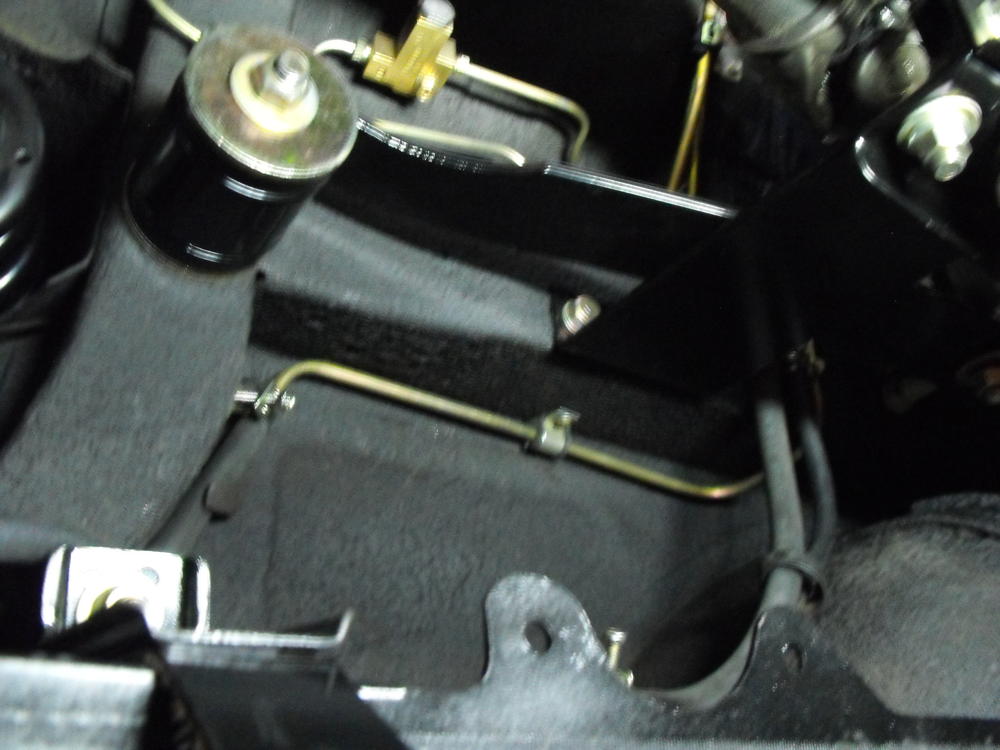
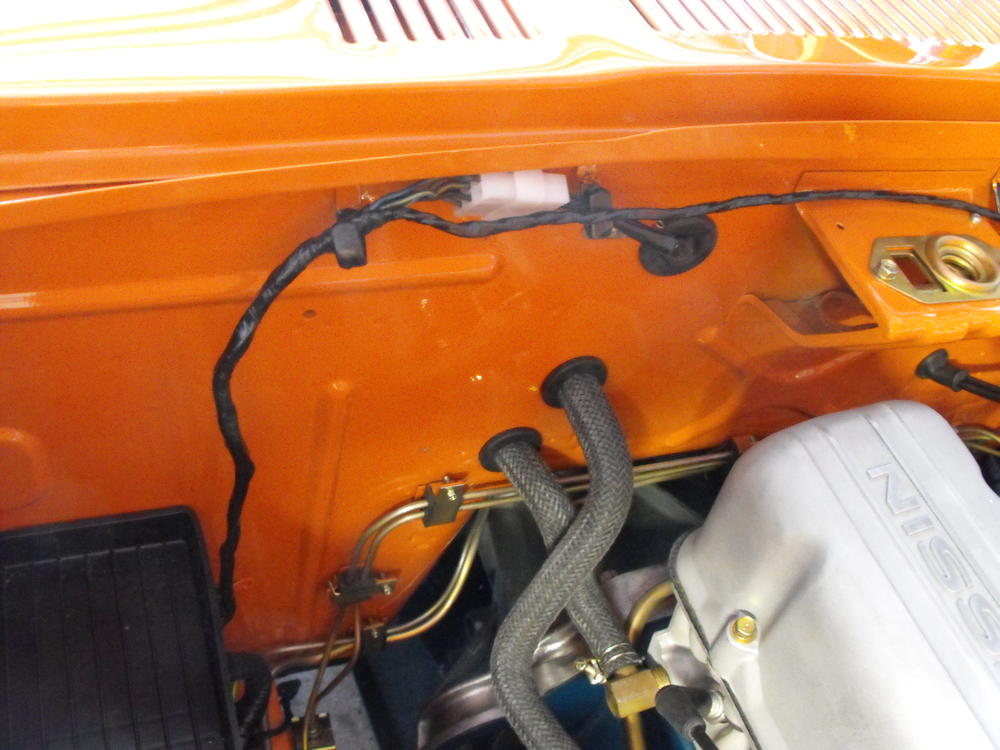
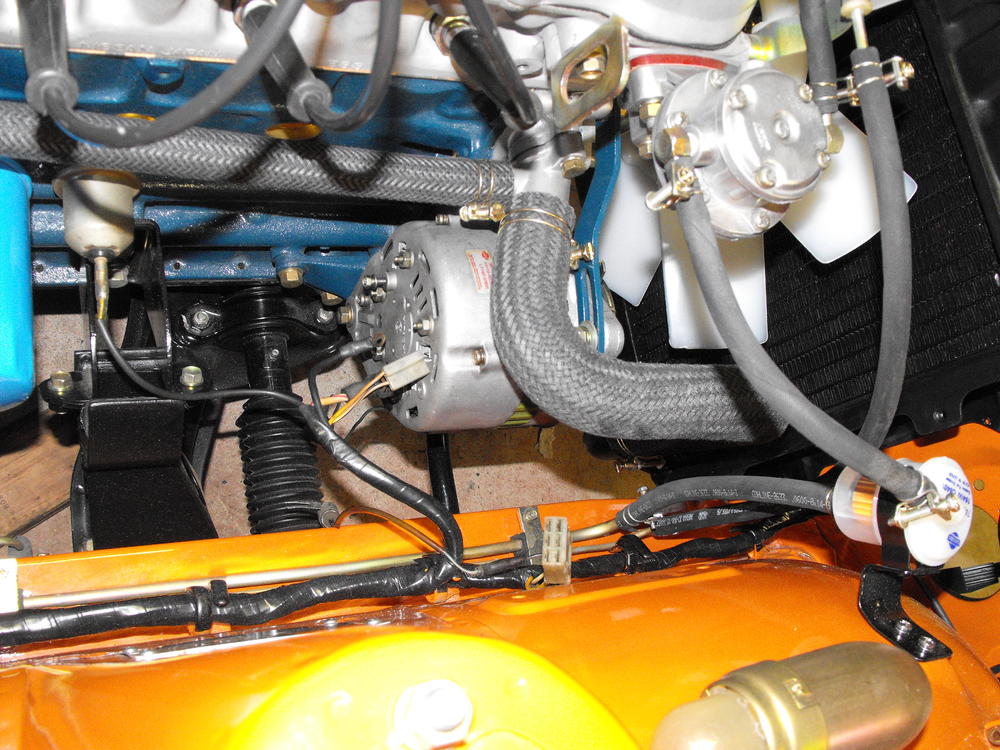
I got all of the connections to the fuel tank completed today. It is pretty much like an octopus under there with all of the fuel vapor/smog hoses. Also got most of the electrical in the back end hooked up. Put a few more hoses on in the engine compartment. So this completes the fuel system which is nice to have done . The brake system, clutch system, suspension, and steering are all complete. The engine compartment is also nearly done. Just a few more details here and then I will tackle the interior. Finding a new windshield has been a bit of a challenge. RockAuto is out of stock and Motorsport has a two month lead time. I called Les at Classic Datsun Motorsports and it sounds like he can set me up there. I would like to get that in this weekend if possible. The current windshield is not OEM and has a couple of significant rock dings so I won't be able to use that. The glass guy said that a repair of the rock dings would most likely be noticeable. A few pics of the gas tank connections are below. (sorry for the poor flash pics)


-
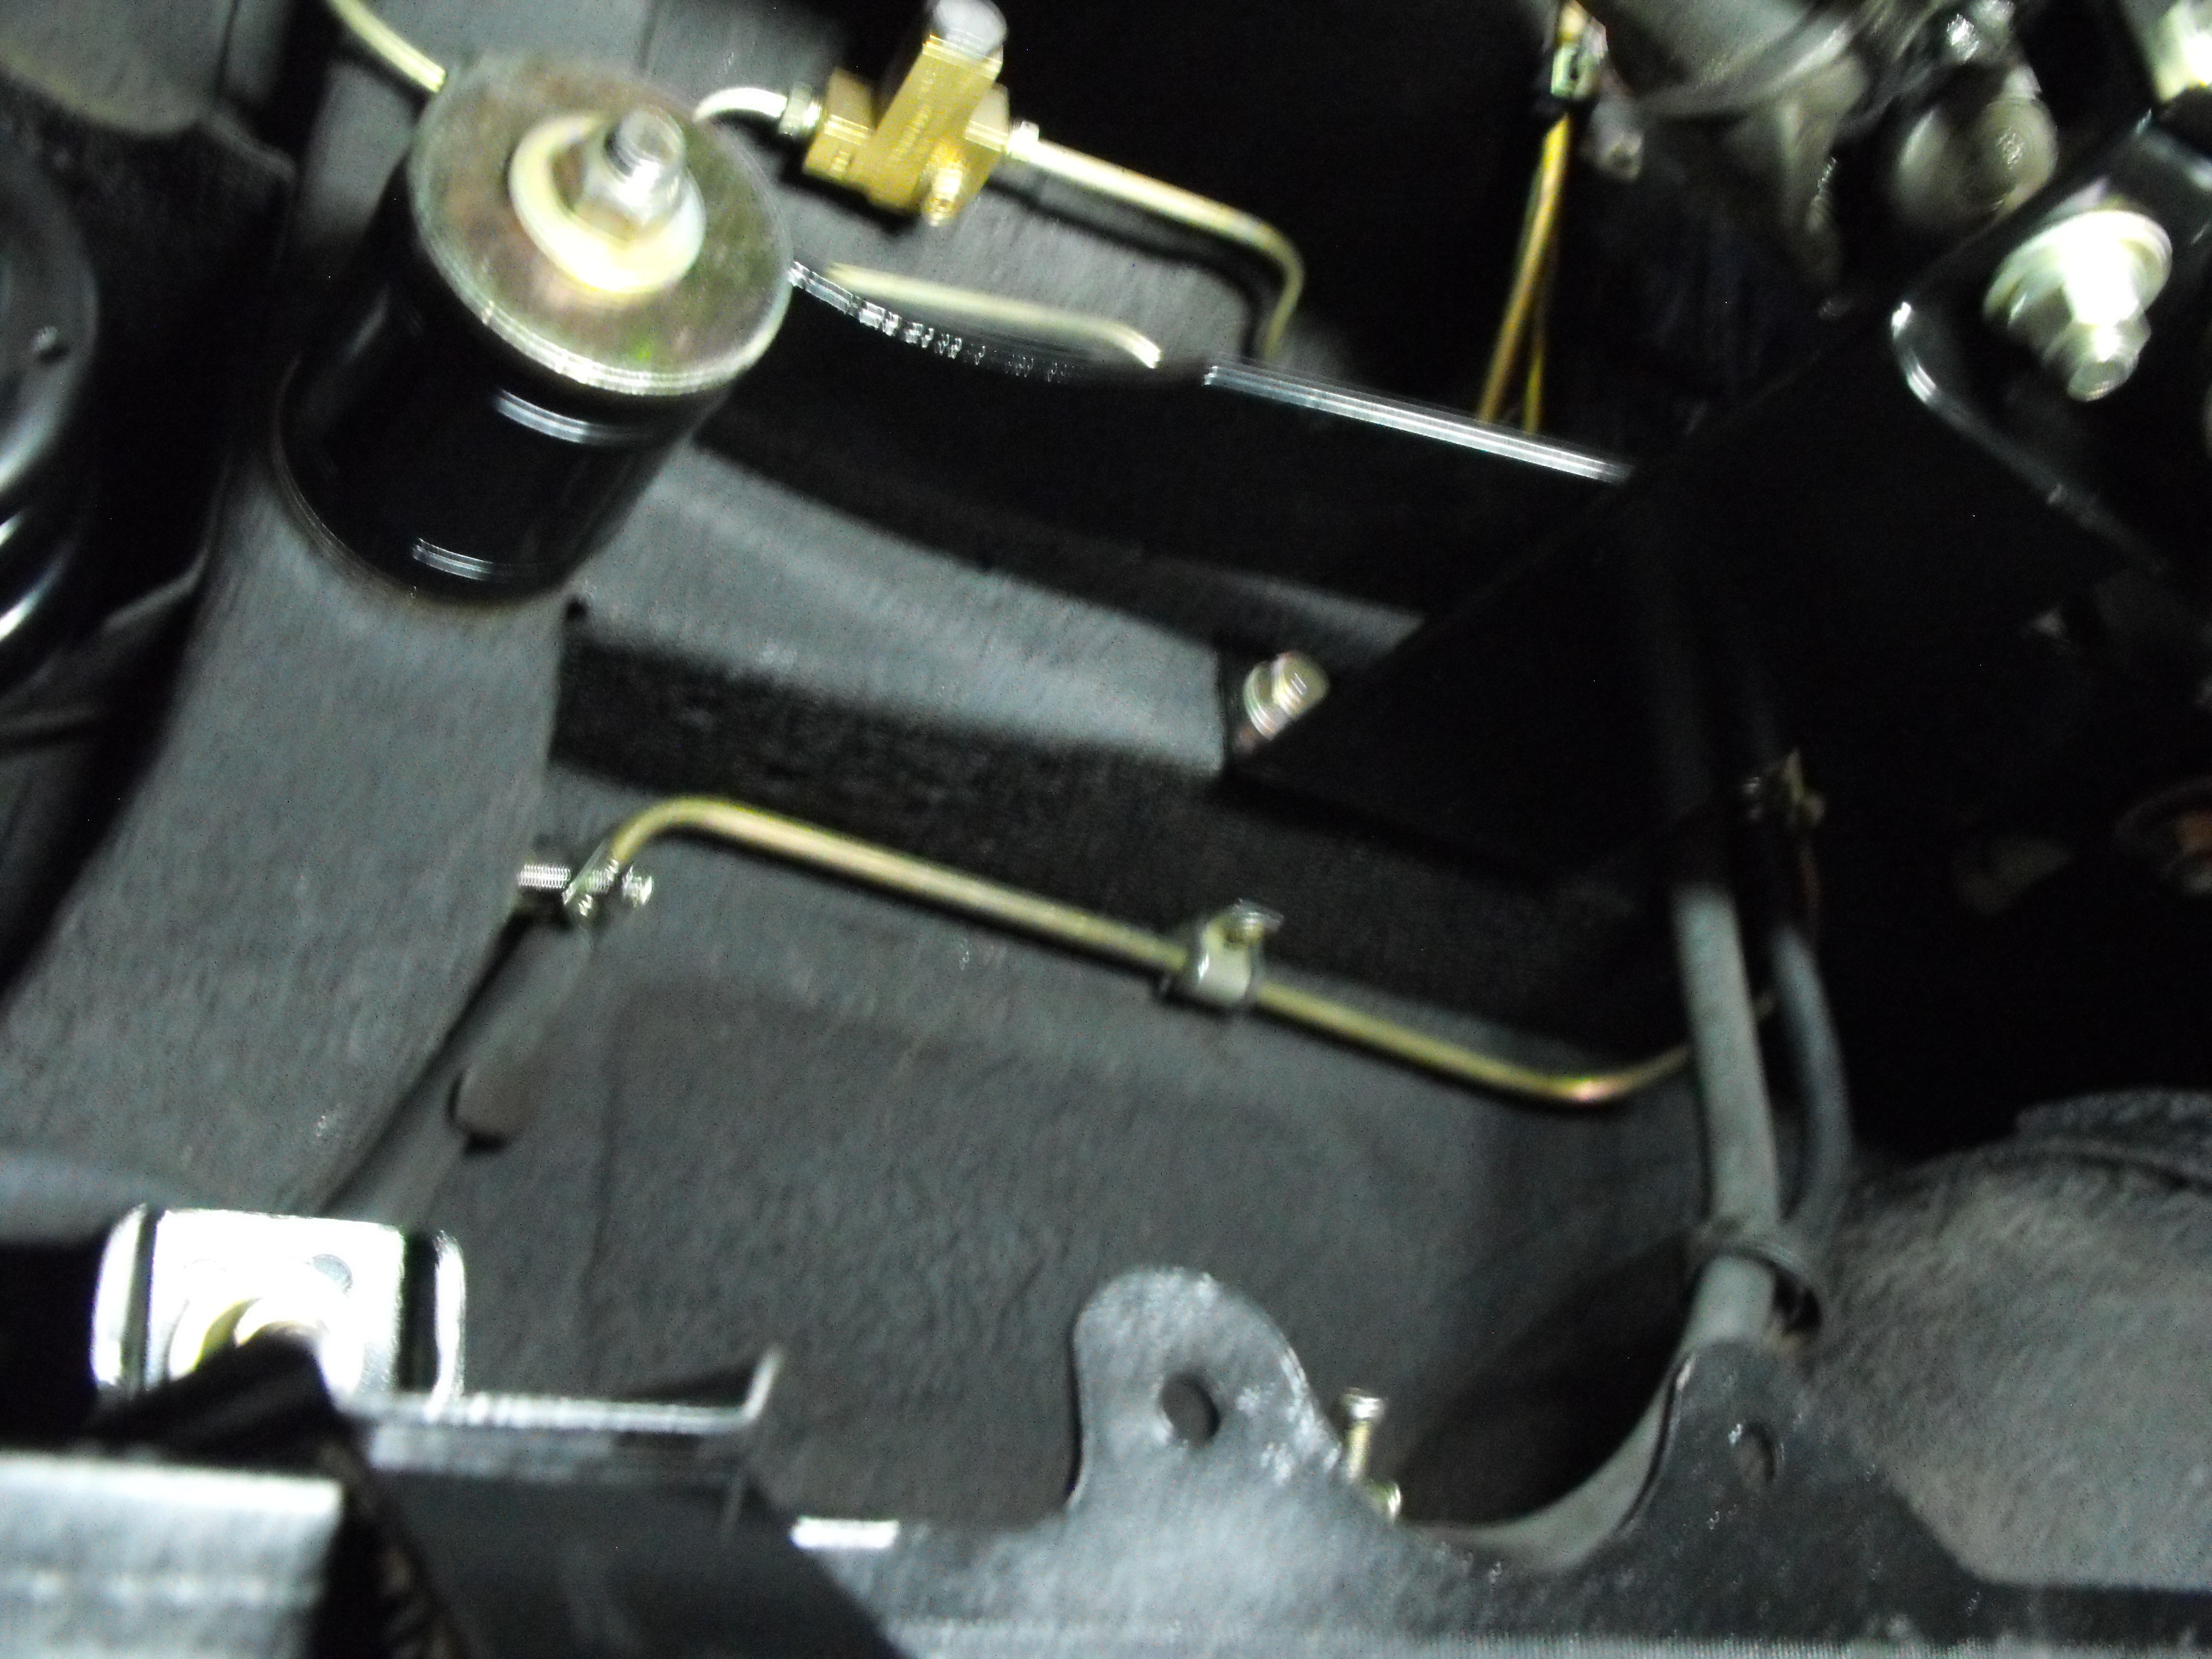
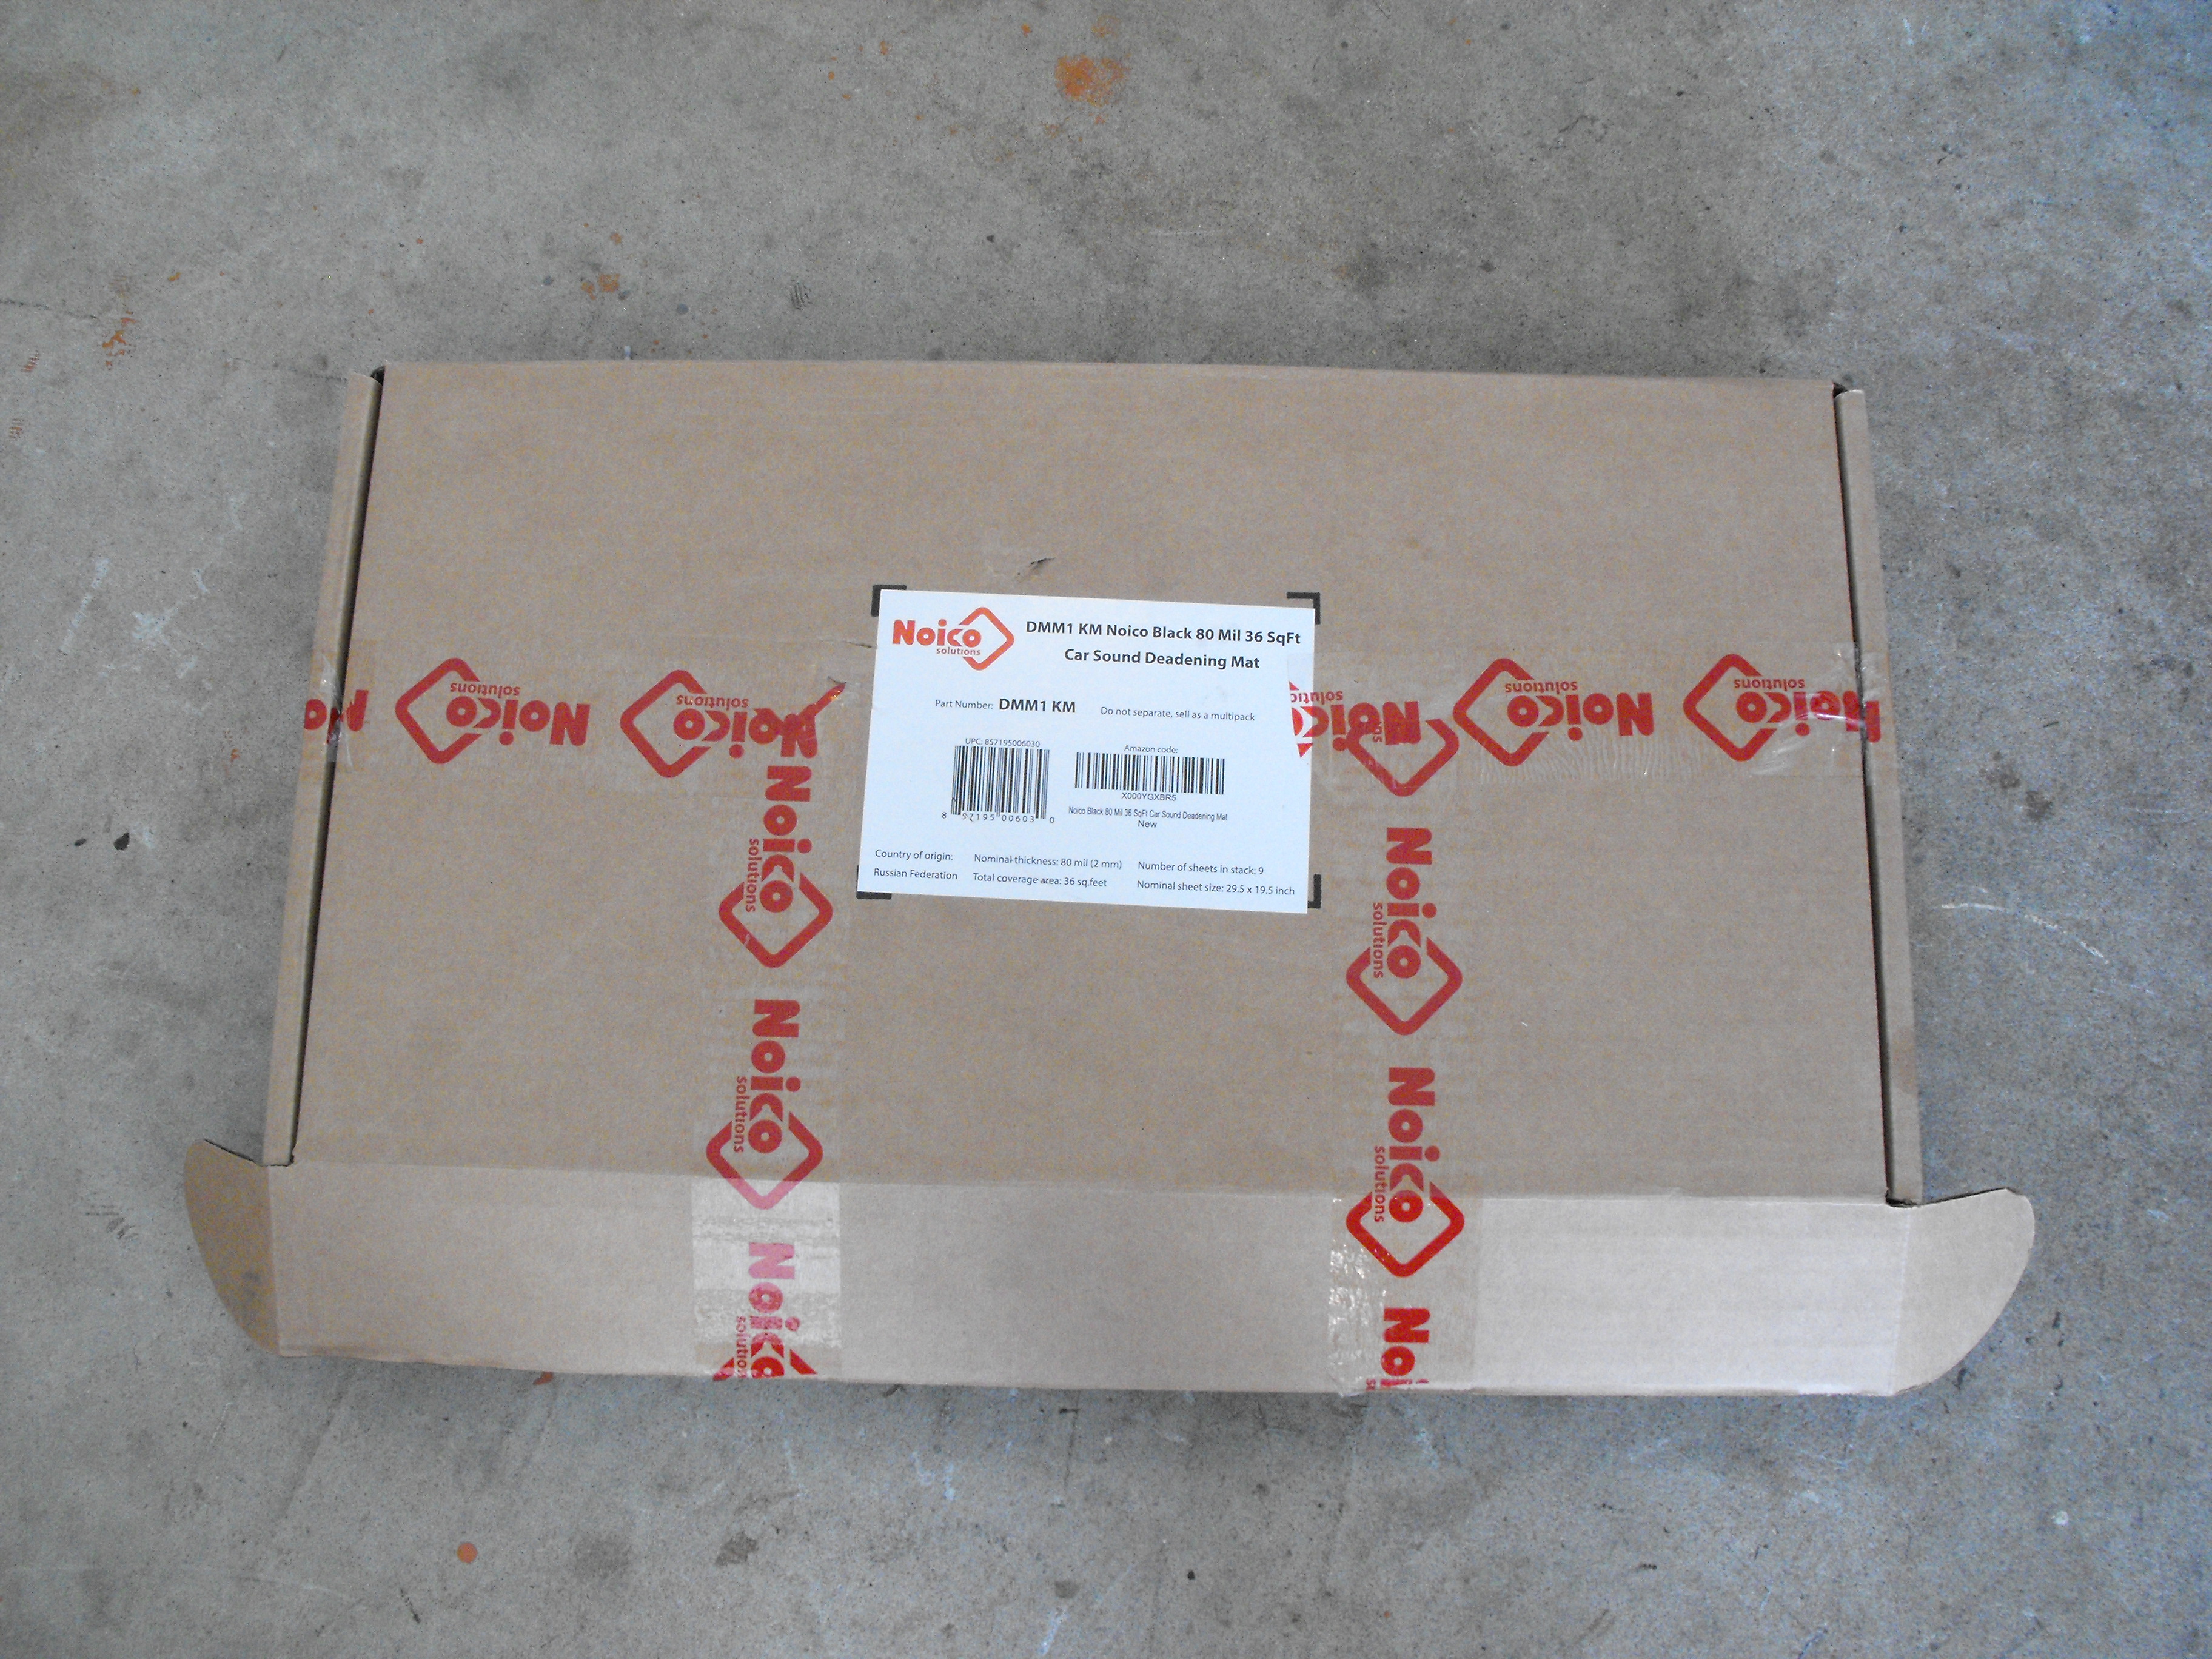
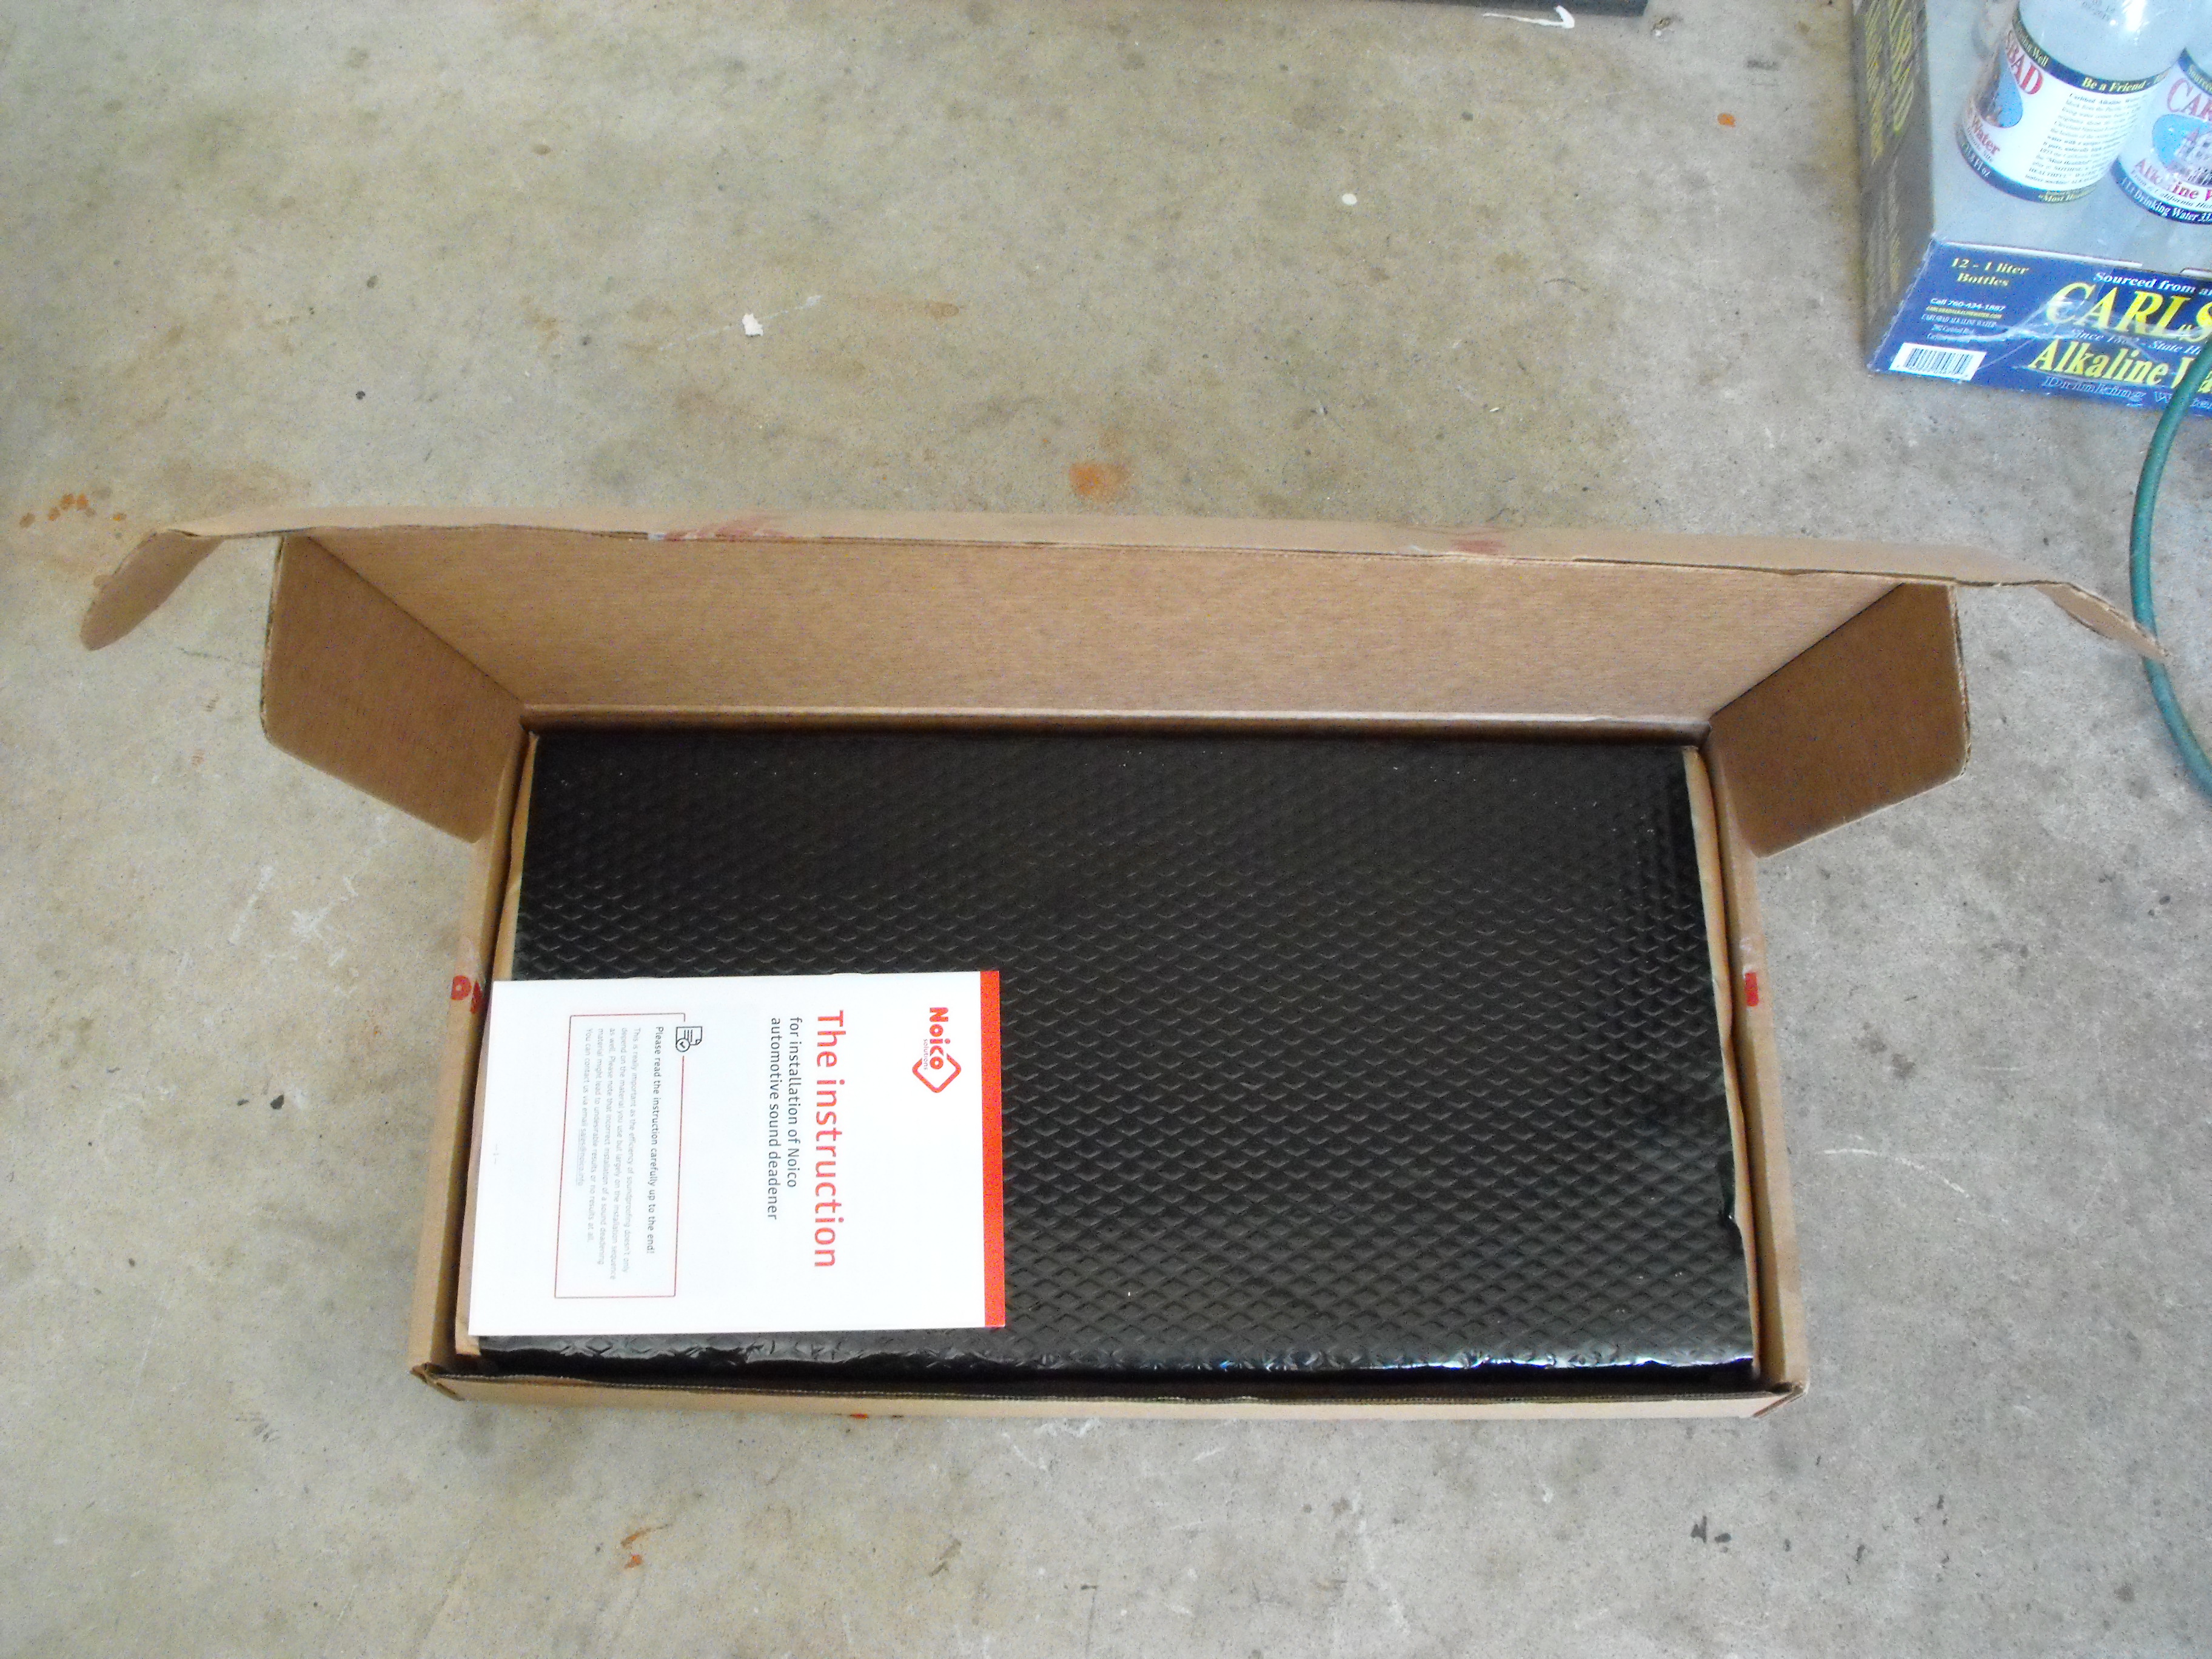
Just had time for a few small items. Seems the Holidays are always the busiest time of the year. I got the sound deadening mat in. This stuff is interesting, like rubber covered led. It is surprisingly heavy for how small it is. I will use this on the floor, in the doors and on the rear section of the car. I know it is not stock but should make the car a bit quieter inside and will not be visible once everything is assembled. Got the speedo cable in and the carb linkage completed. Also spent some time aligning the bumper. I just need to attach a few more hoses (waiting for more clamps;my original order was short the hoses at the fuel tank) and a few vacuum tubes and then I will be about ready to start her up. Oh, after I get a battery. Will go to Costco for that. With a few minor mods, their batteries can look pretty retro and original. Anyway, here are a few pics for now.


-
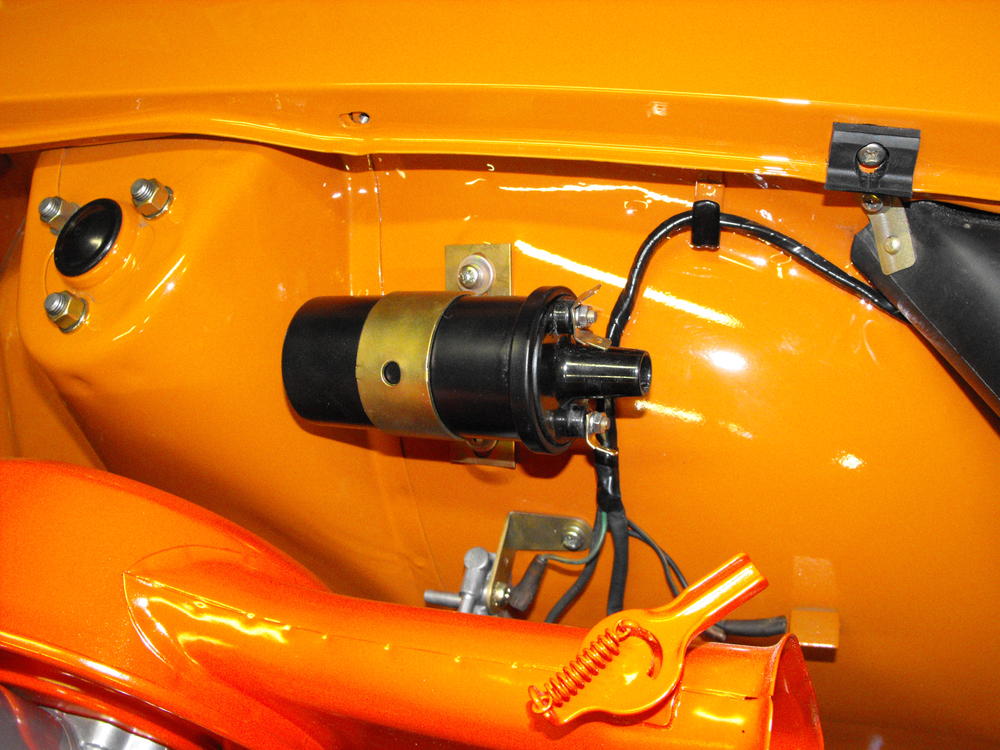
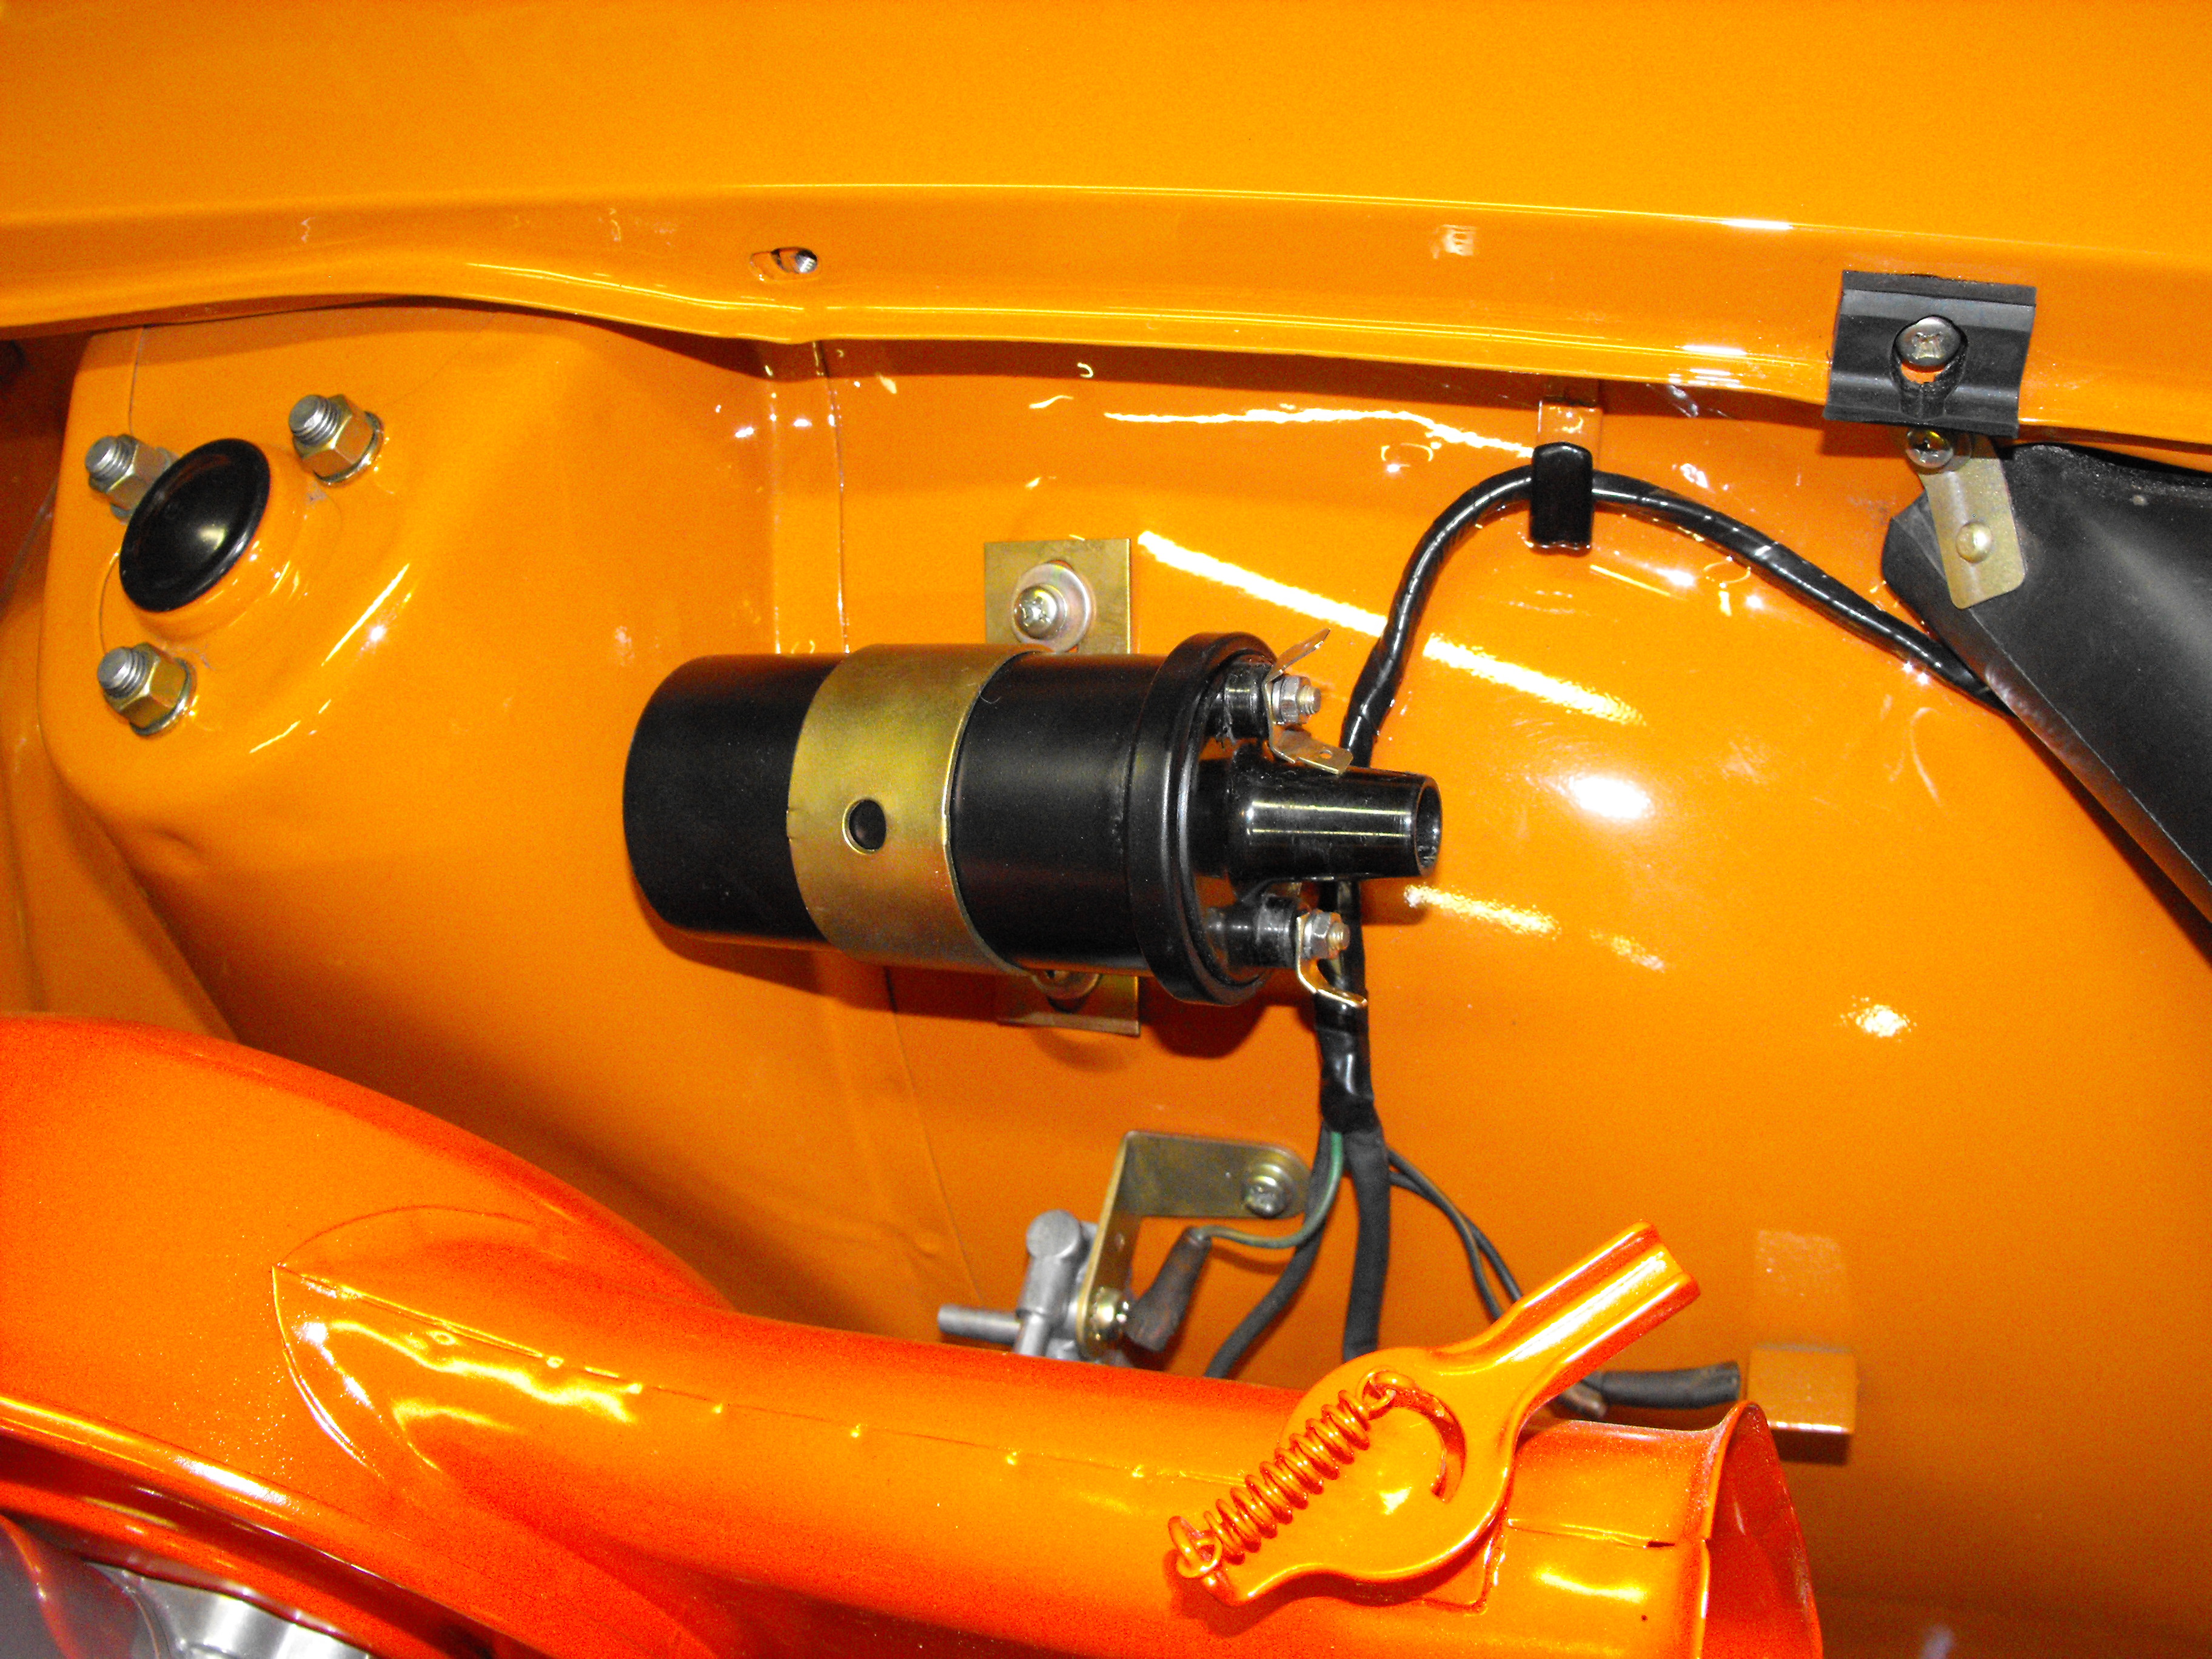
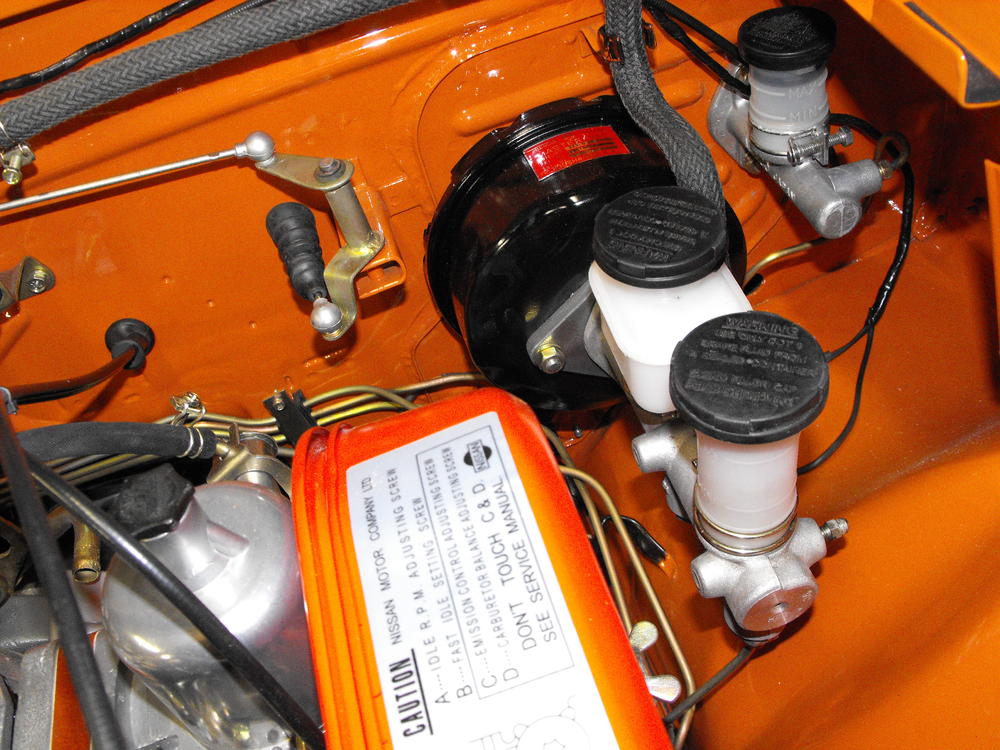
I cleaned up the brake master cylinder, brake check valve bracket and starter. Also installed them. The brake vacuum line looks great. I need to replace the brake cylinder caps with the metal ones, but will leave these on for now. I installed the starter, but am not really happy with it. I cleaned it up as best I could but most of the yellow zinc is gone so it looks kind of old. May look online and see if I can pick up a new one for relatively cheap. Pics are below.


-
...and the soft wire brush. I am guessing that they did not 'prepare' that surface so it came off a bit easier than normal. I do use lacquer thinner a lot, but it was not needed in this case.
-
I soaked them in paint thinner and used a soft wire brush to remove the over spray. Used a parts brush to clean into the crevices on the mechanism side. Finished the visible portion, where needed, with steel wool, trying to minimize the removal of the zinc coating. Both sides came out pretty nice.
-
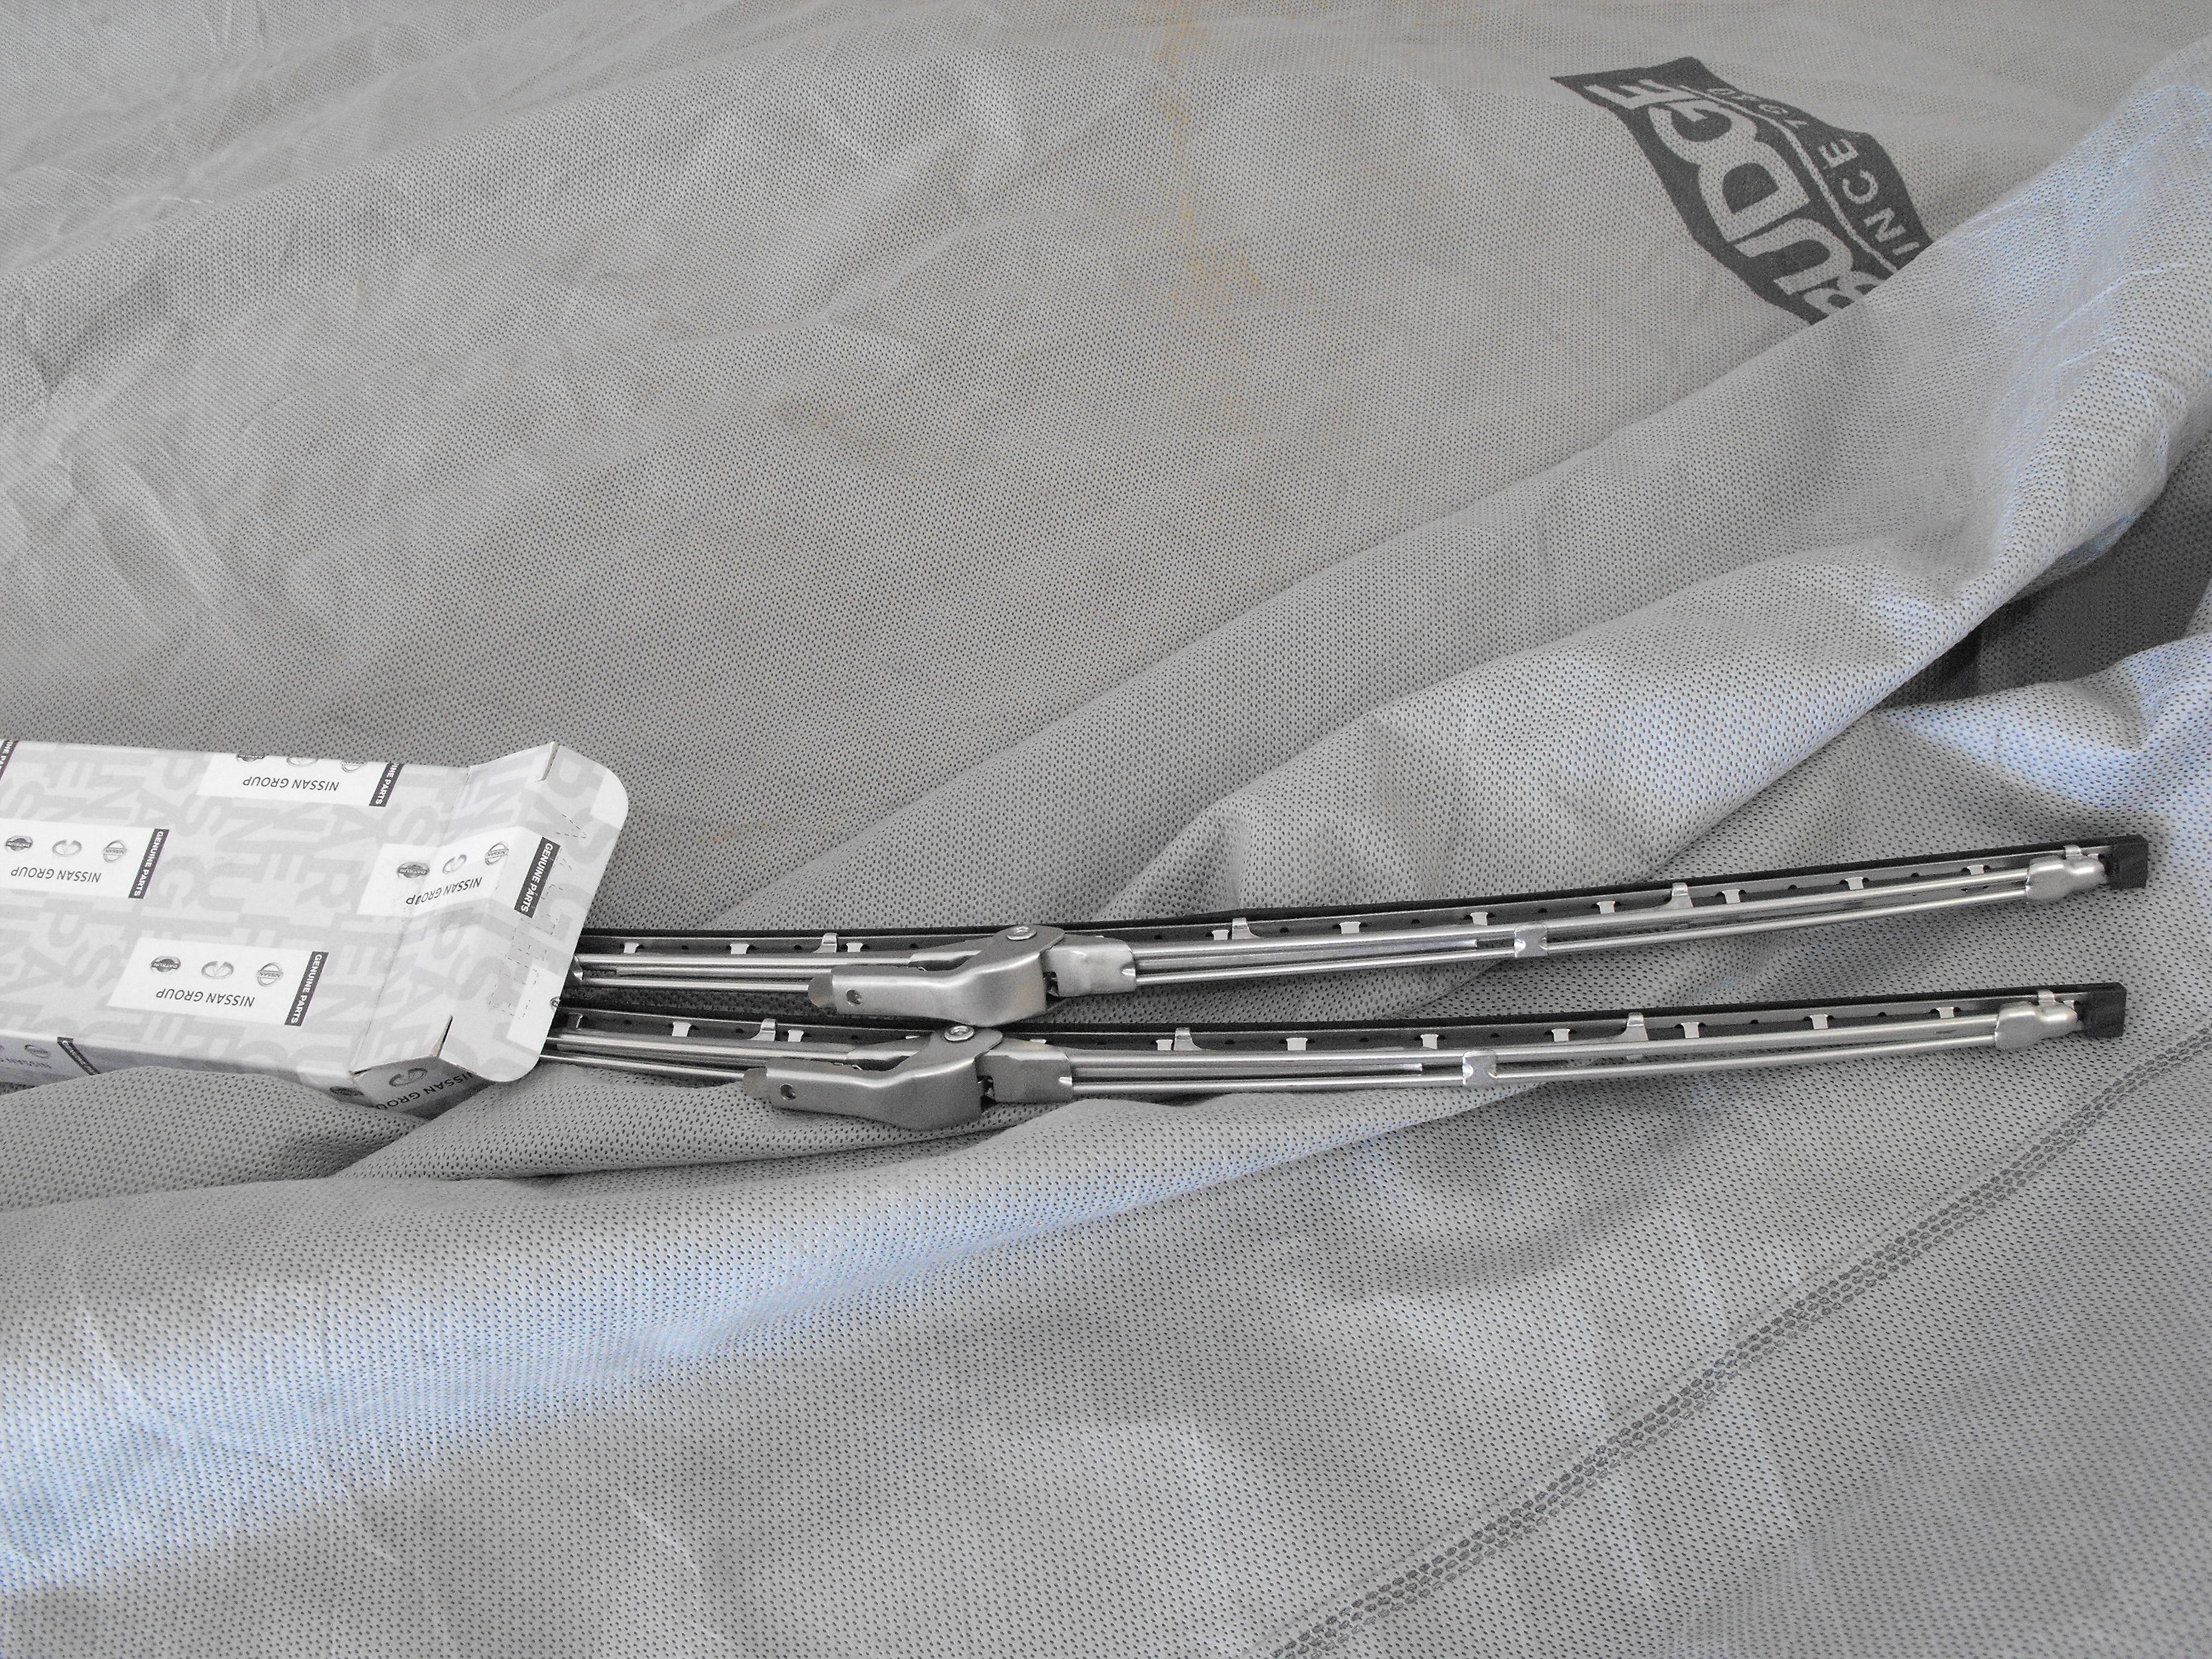
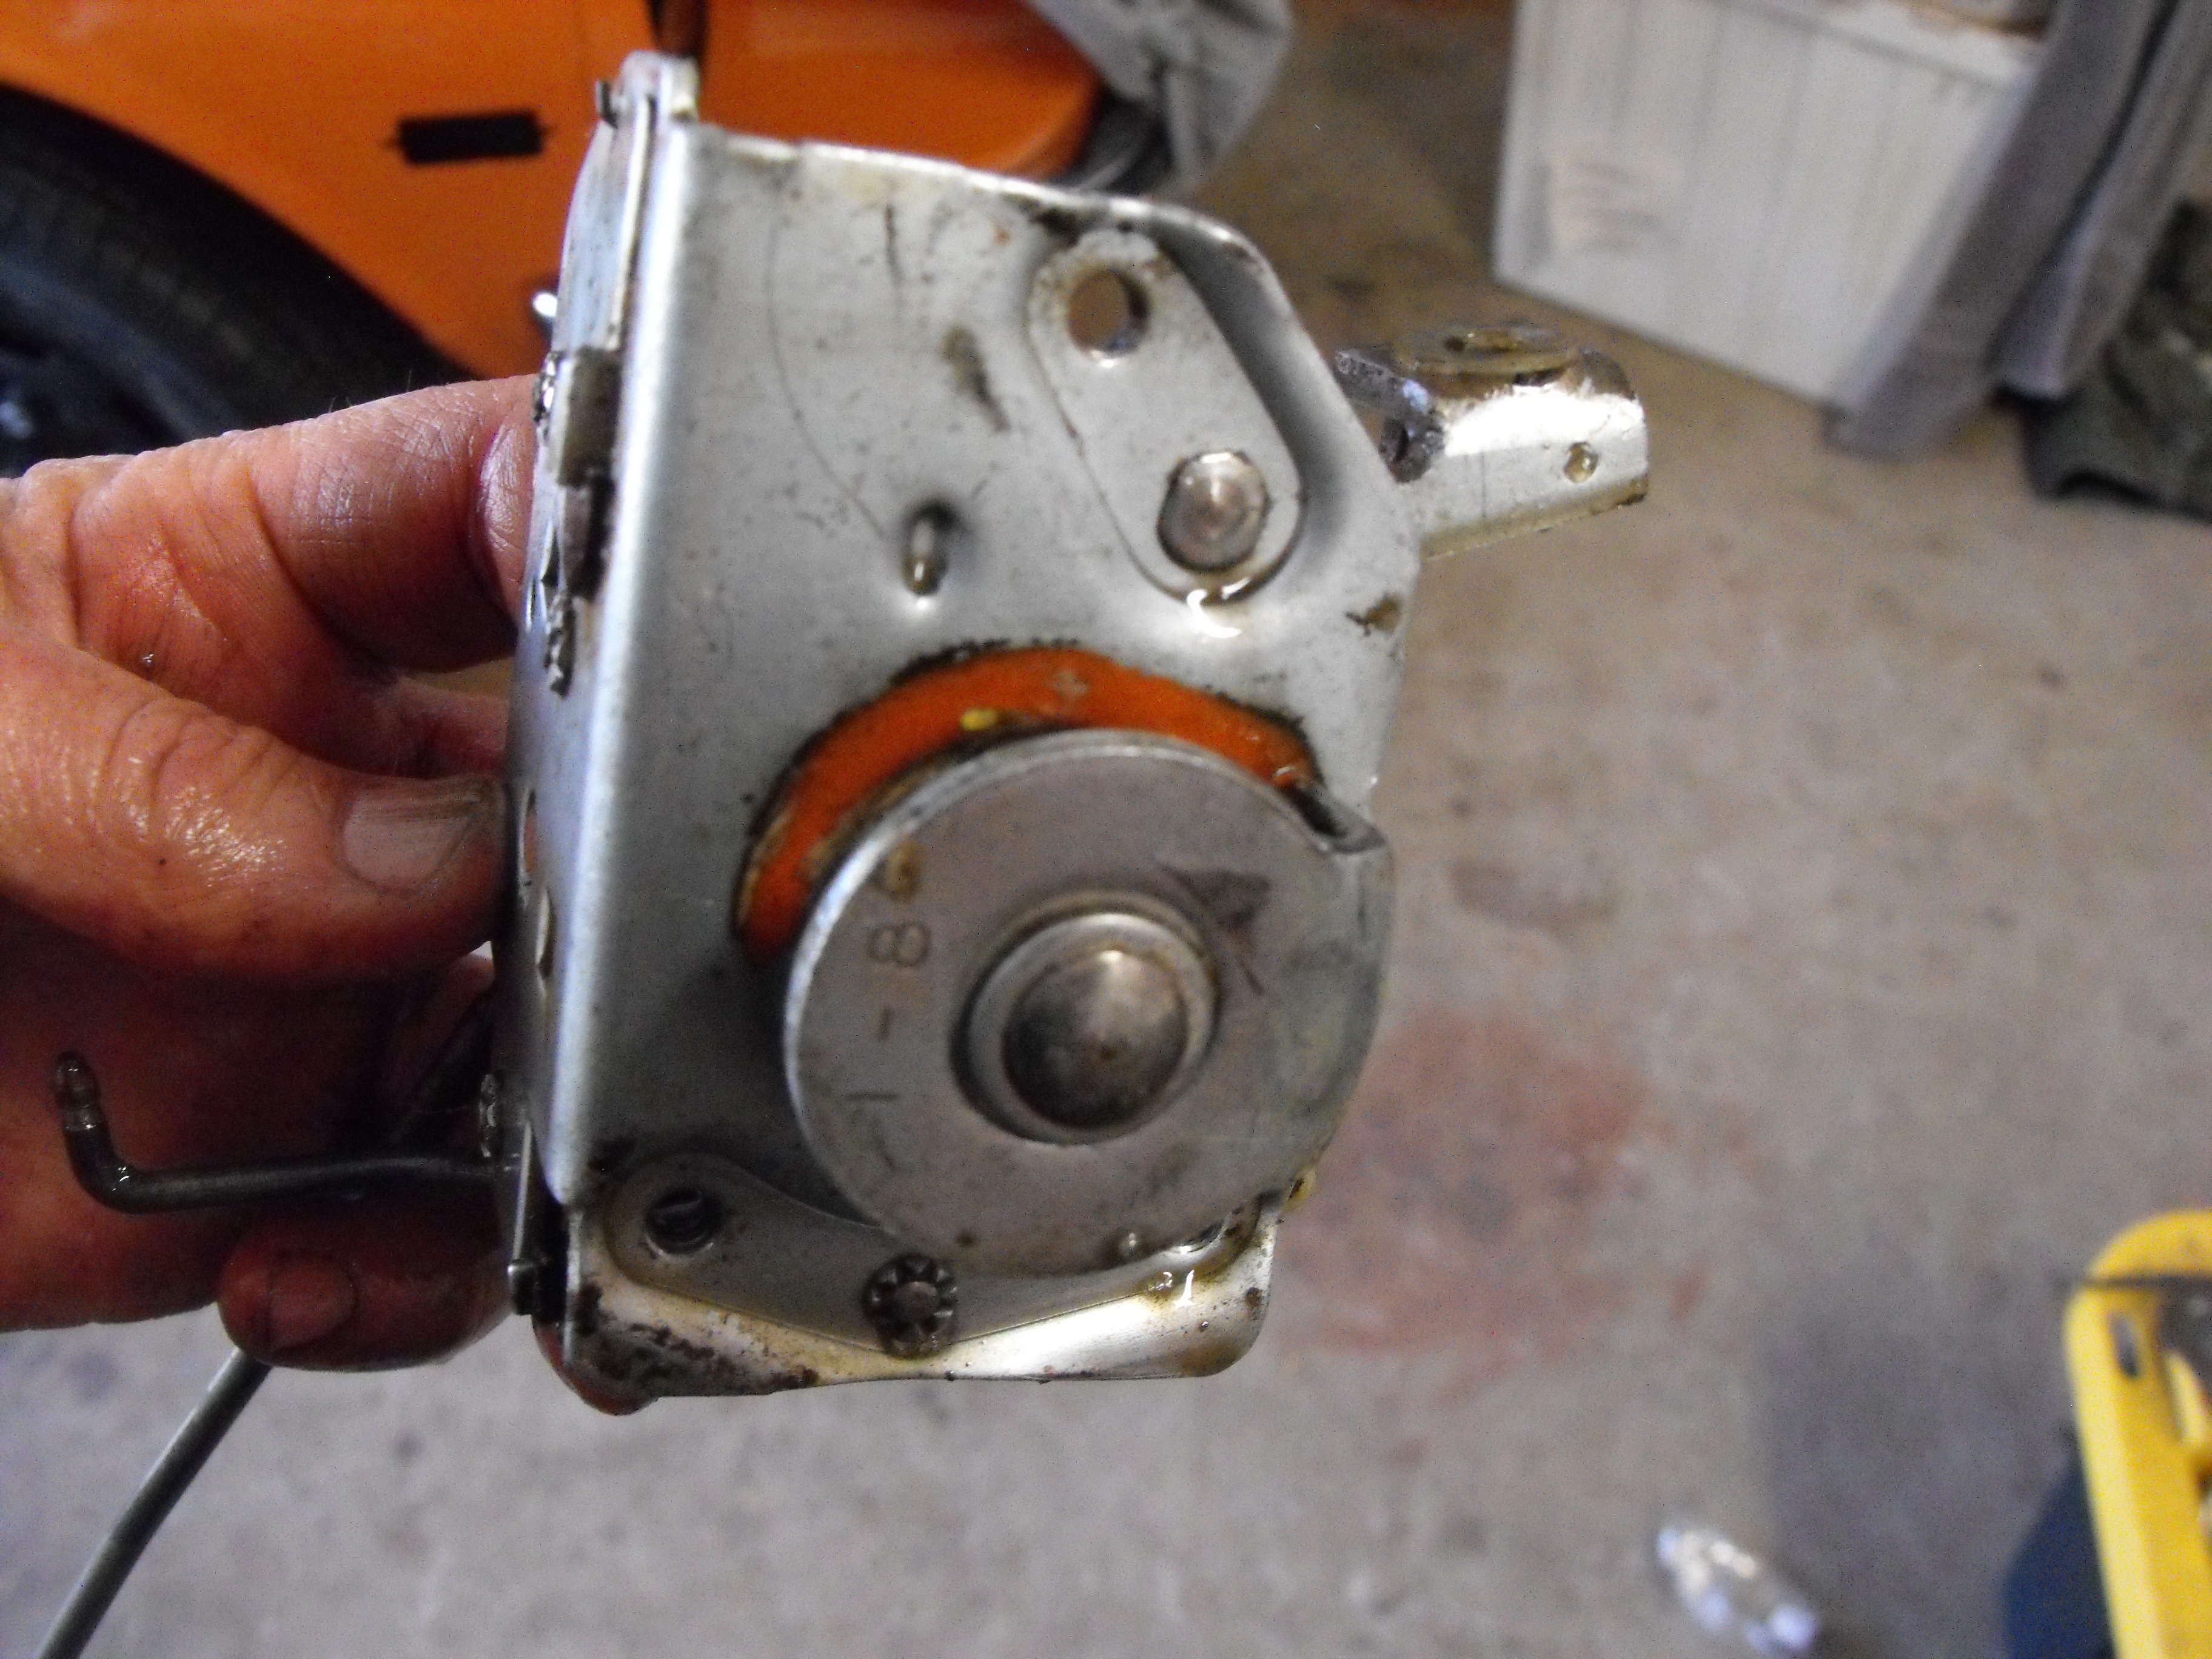
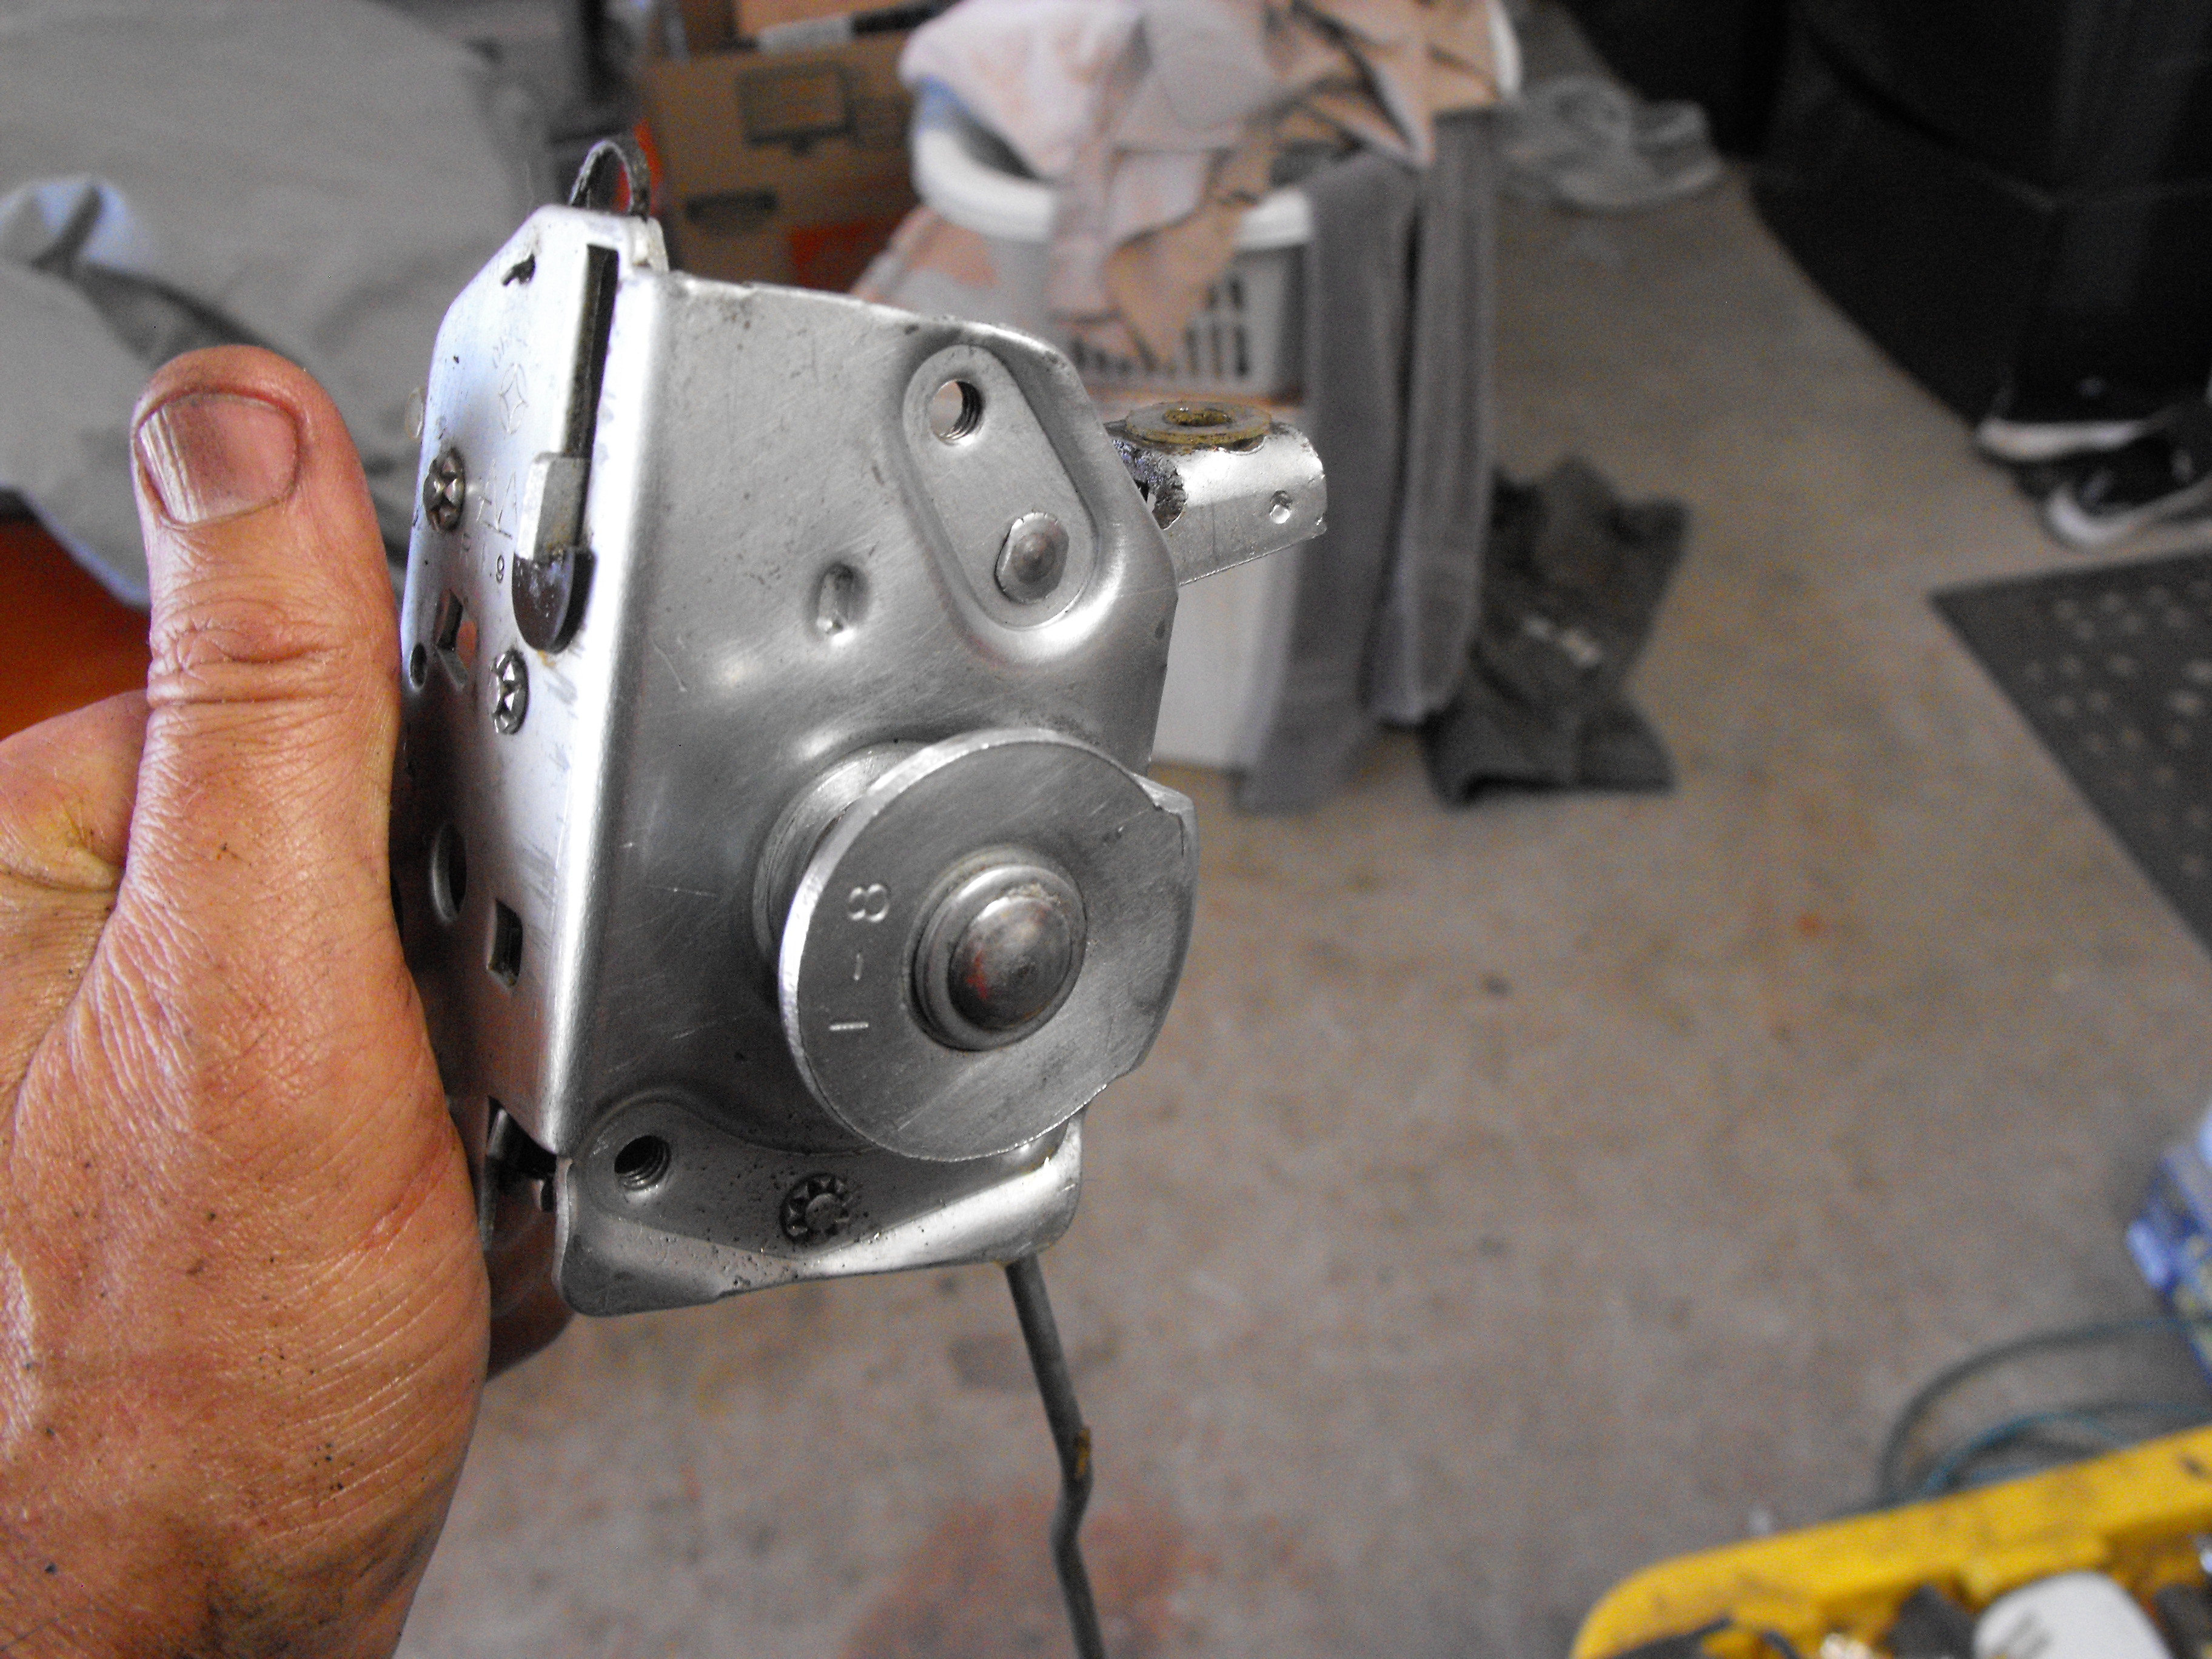
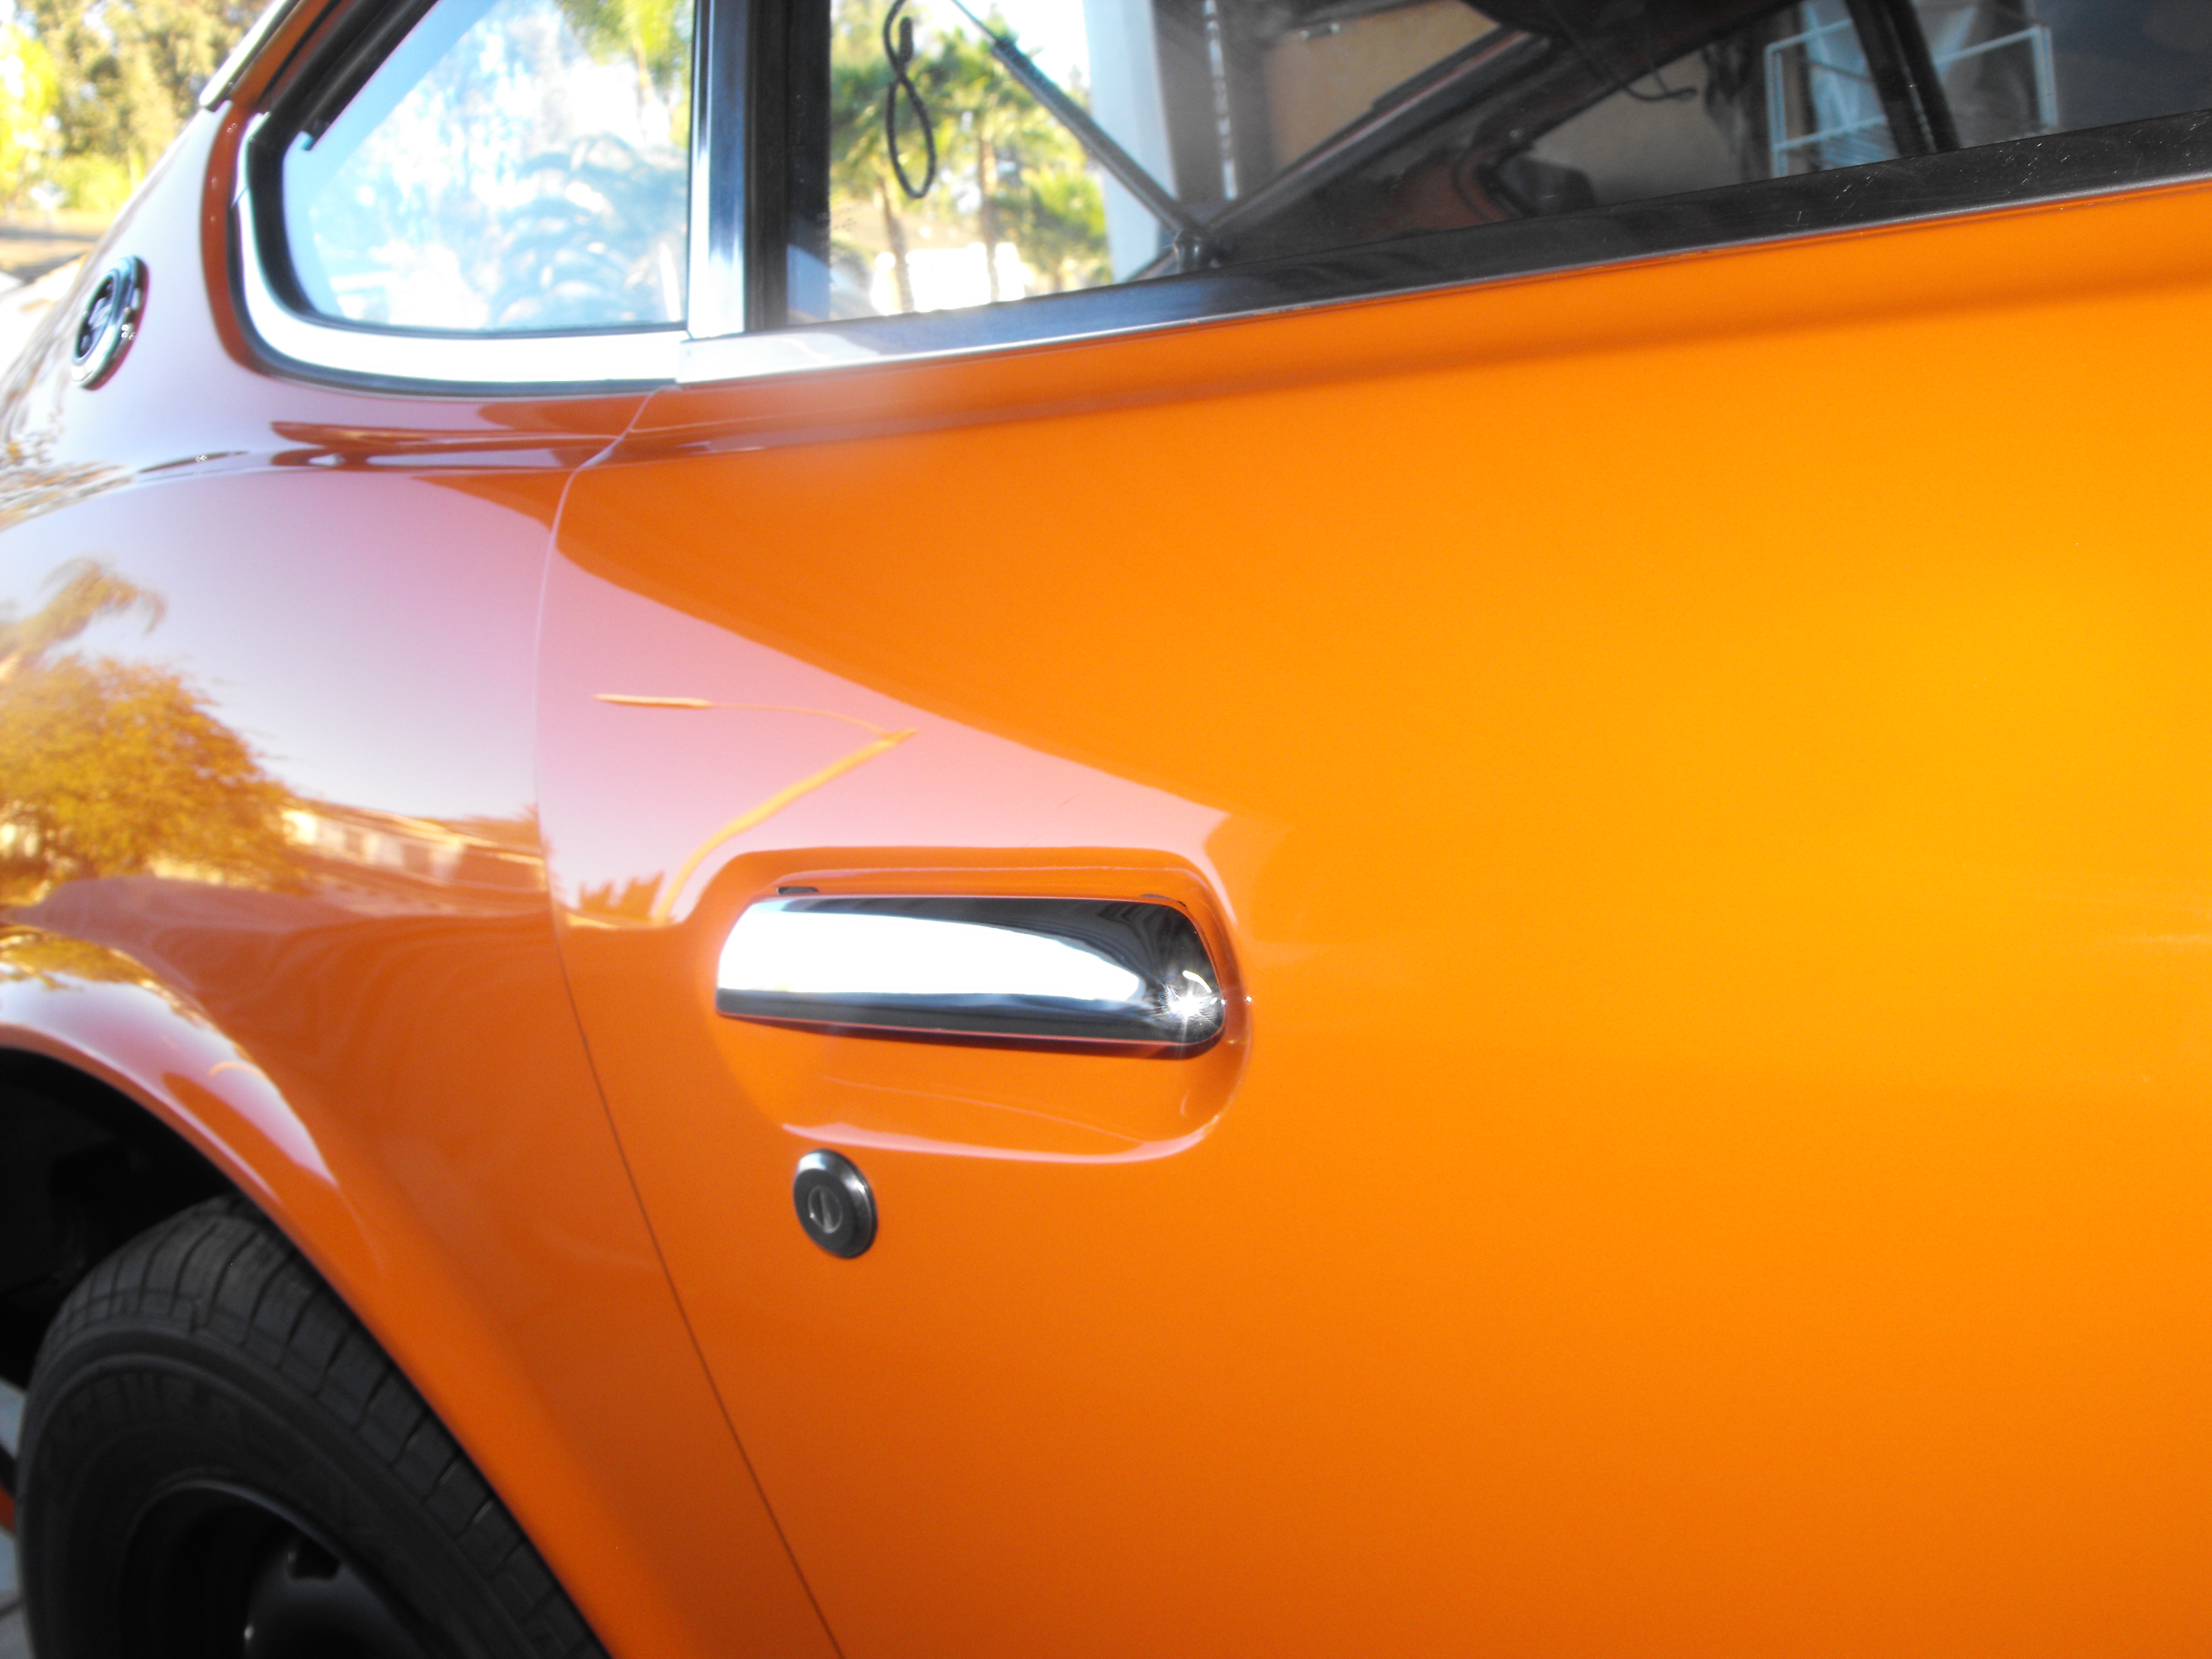
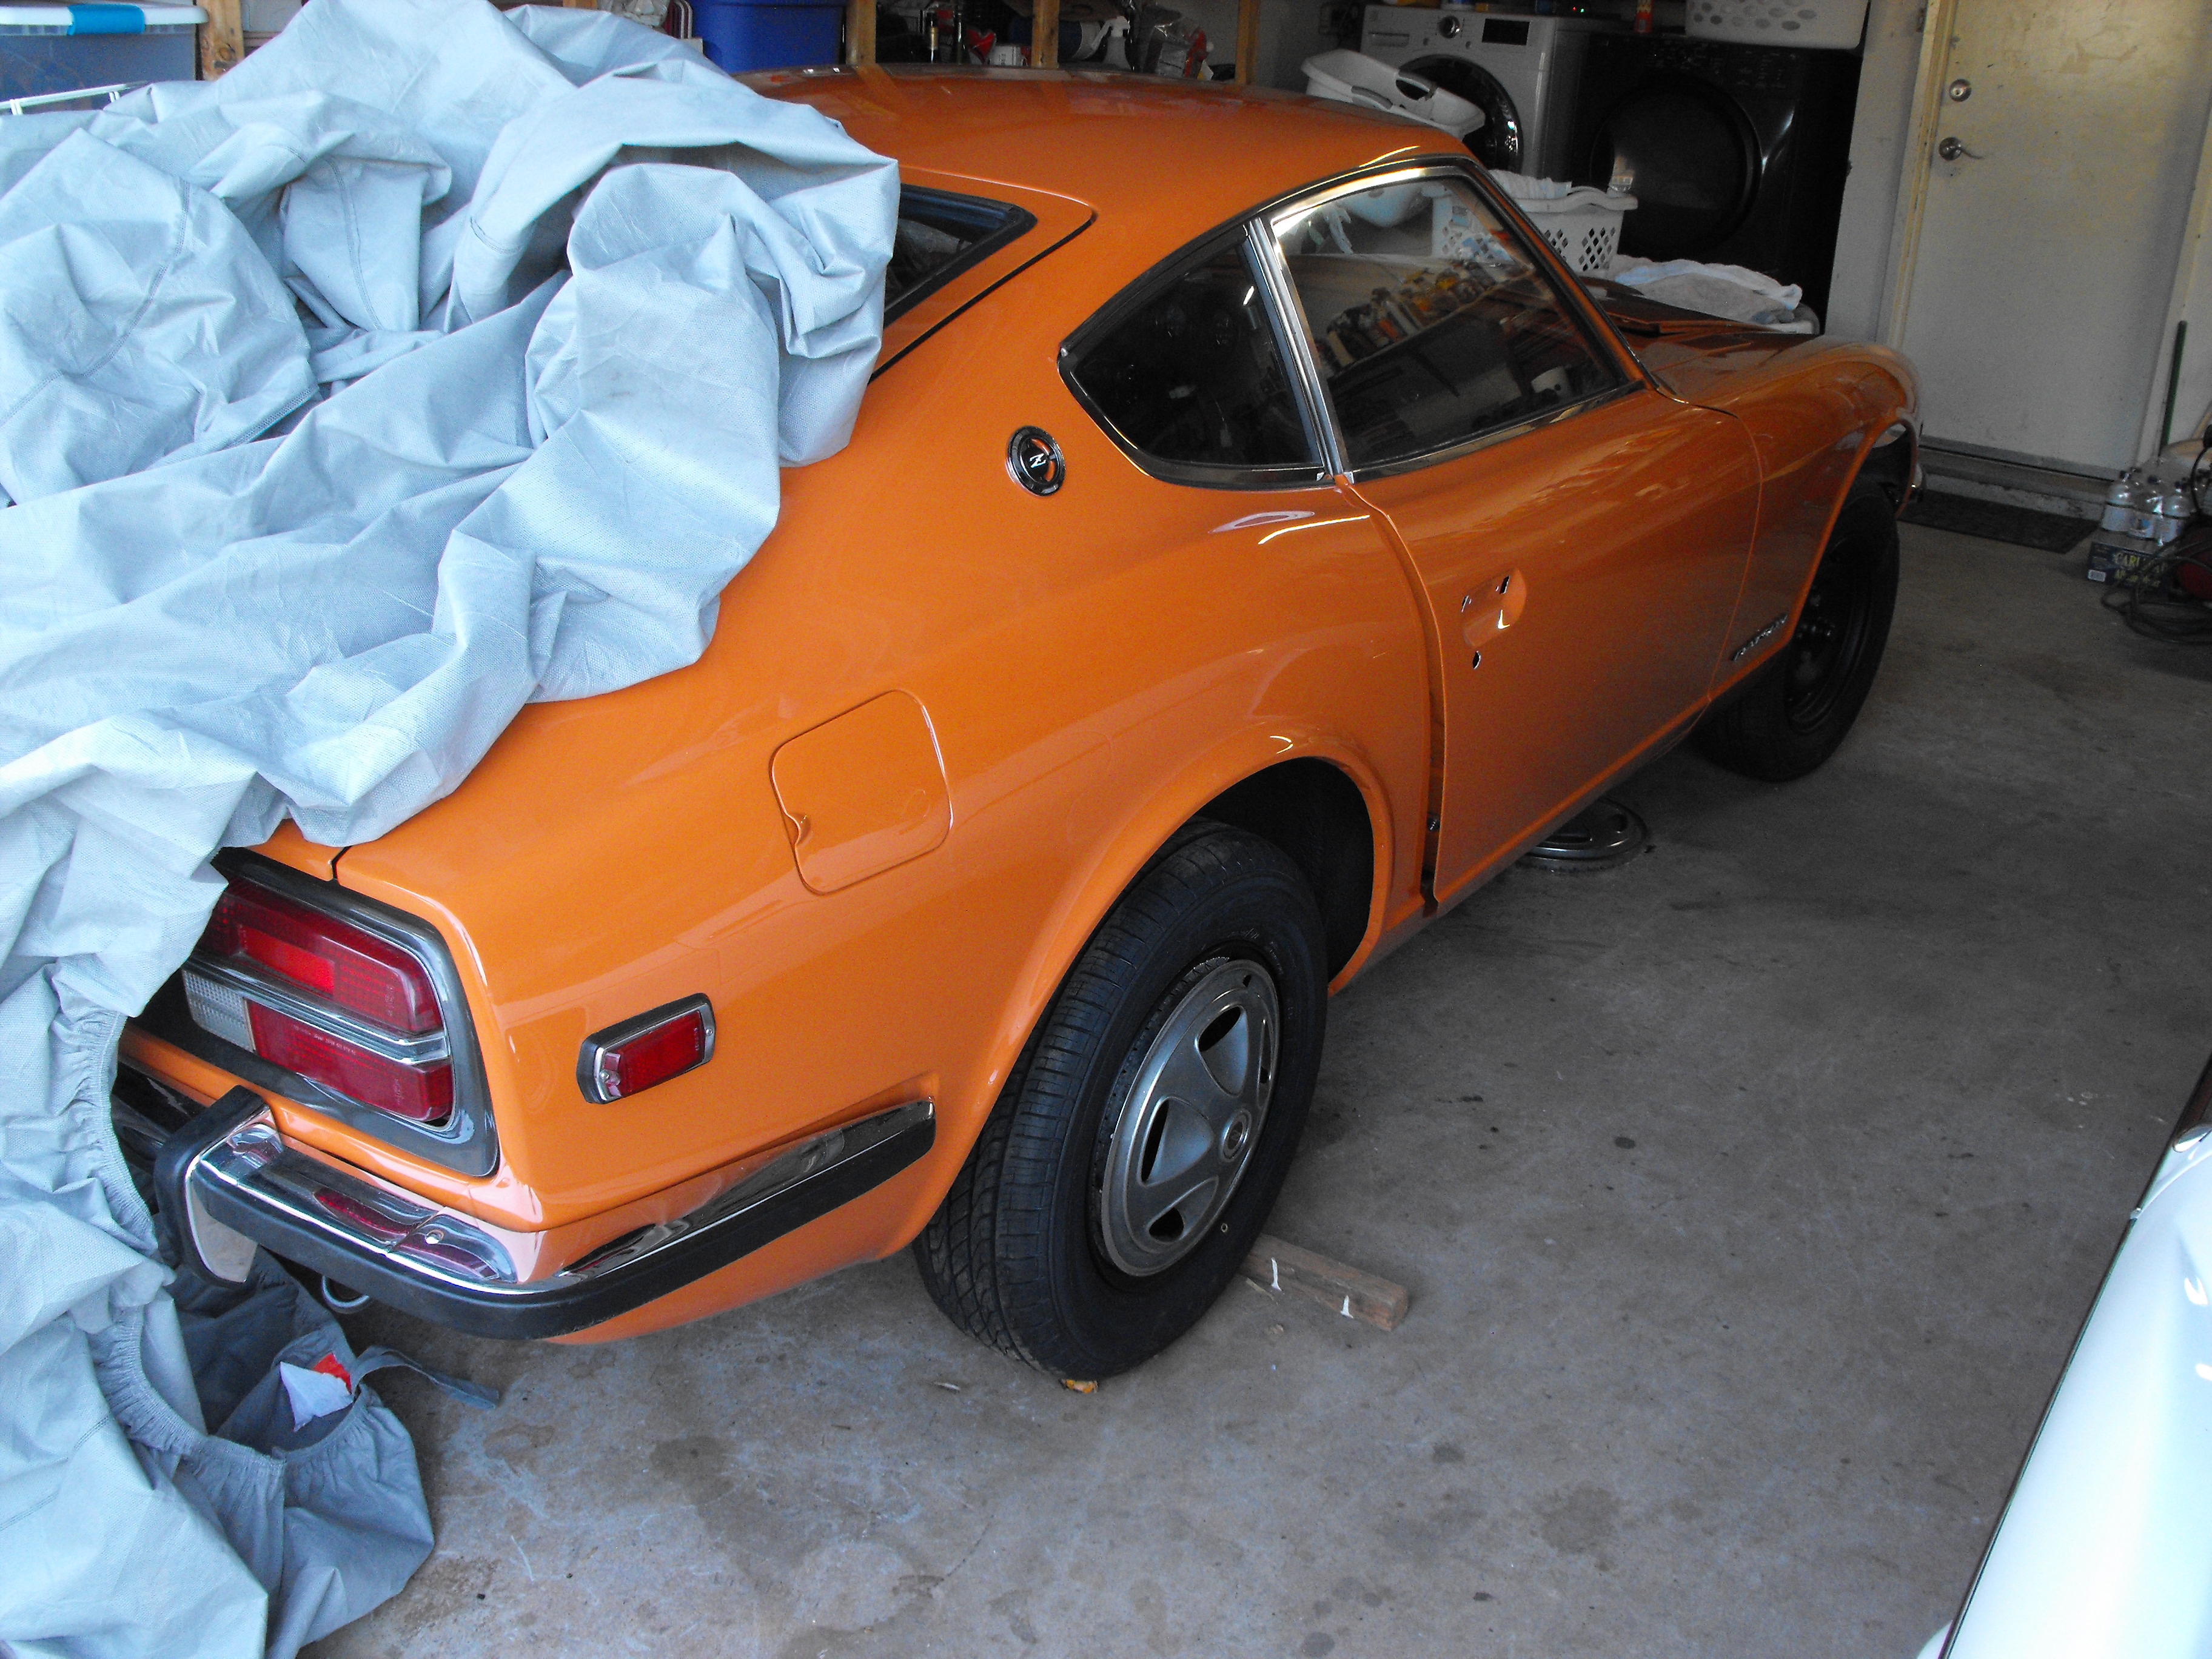
Thanks for the support Carl. Yes, I would love to see this shown at Pebble Beach. It would fit right in. Just got back from a short vacation in Sedona. Time to get back to work on the Z I got the door mechanisms cleaned up and installed. Got the door handles, locks, inside handles all cleaned, installed and working nicely. Had to clean up some over spray from previous paint job. Also got the drivers side mirror buffed out and installed (That was tricky). Got the front turn signals and lights cleaned up and installed. Also got a new pair of OEM windshield wiper supports. The wipers on the car as received were not stock. The OEM design of the wipers is a work of art and a must have. I am about ready to put in the headlights, but would like to put in the original Koito brand lights. I have one and think I can probably get a second one from @Montezuma or Les. I think that would be a nice touch. A few pics are below.


-
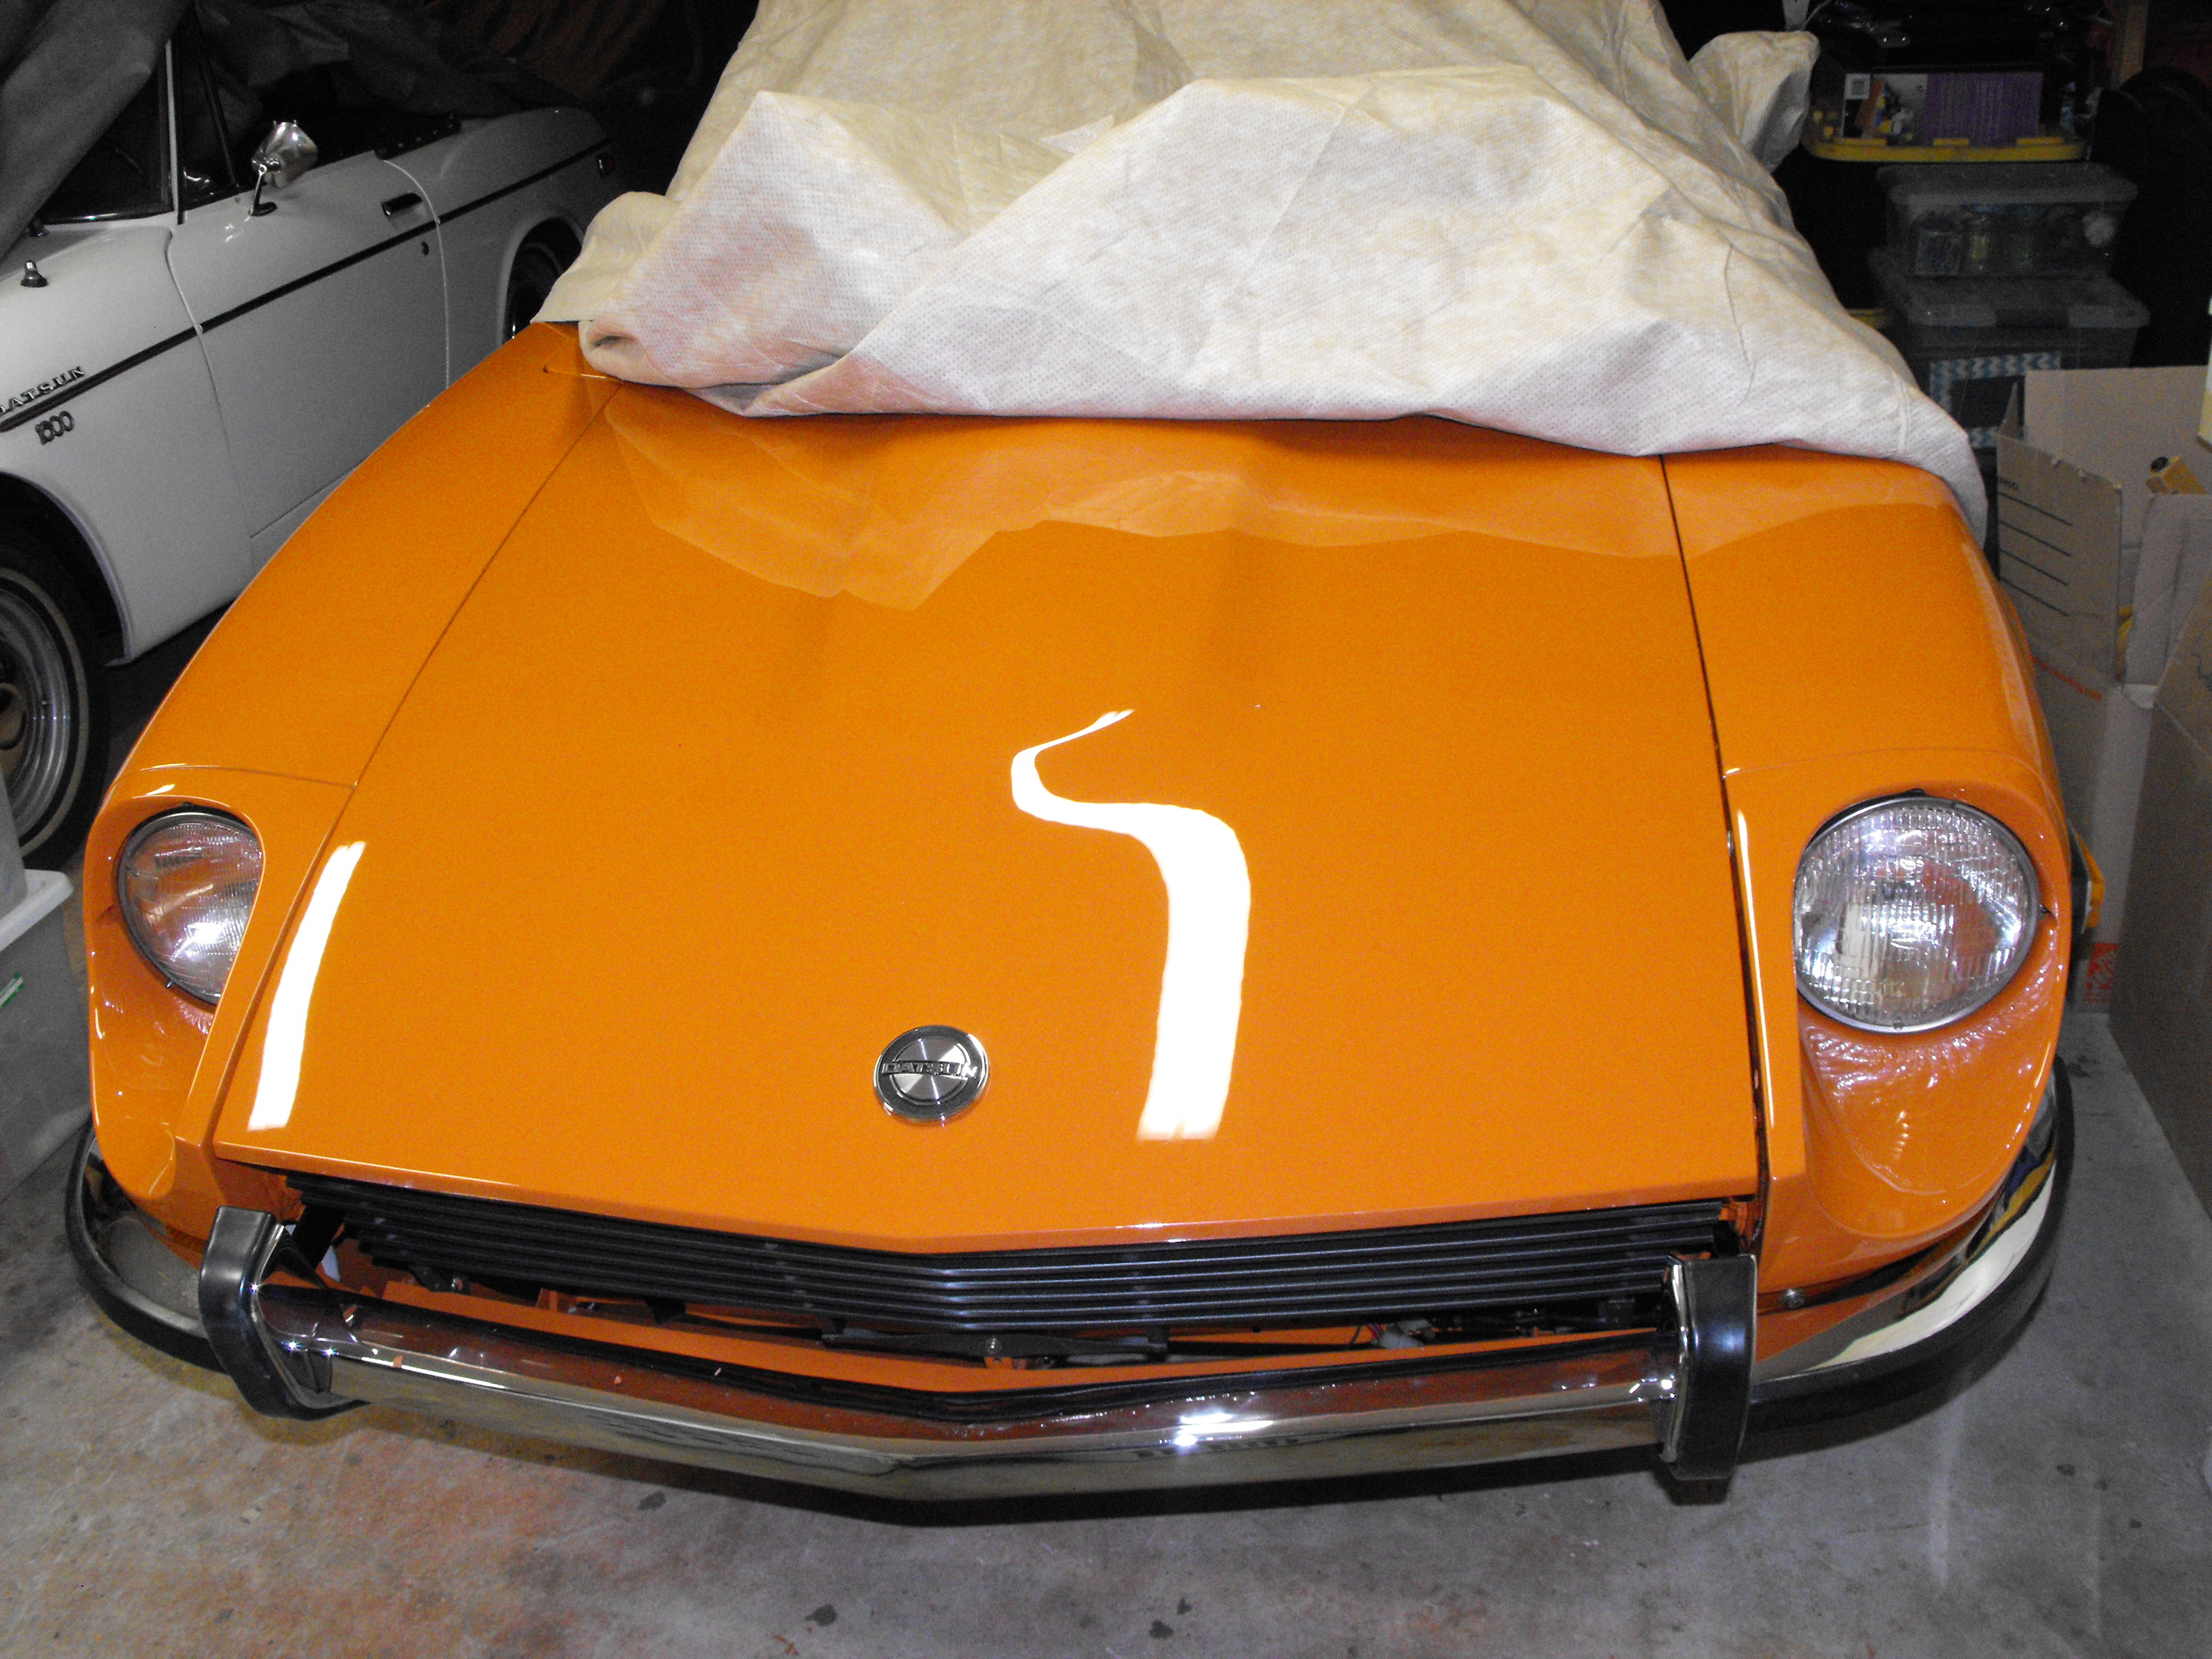
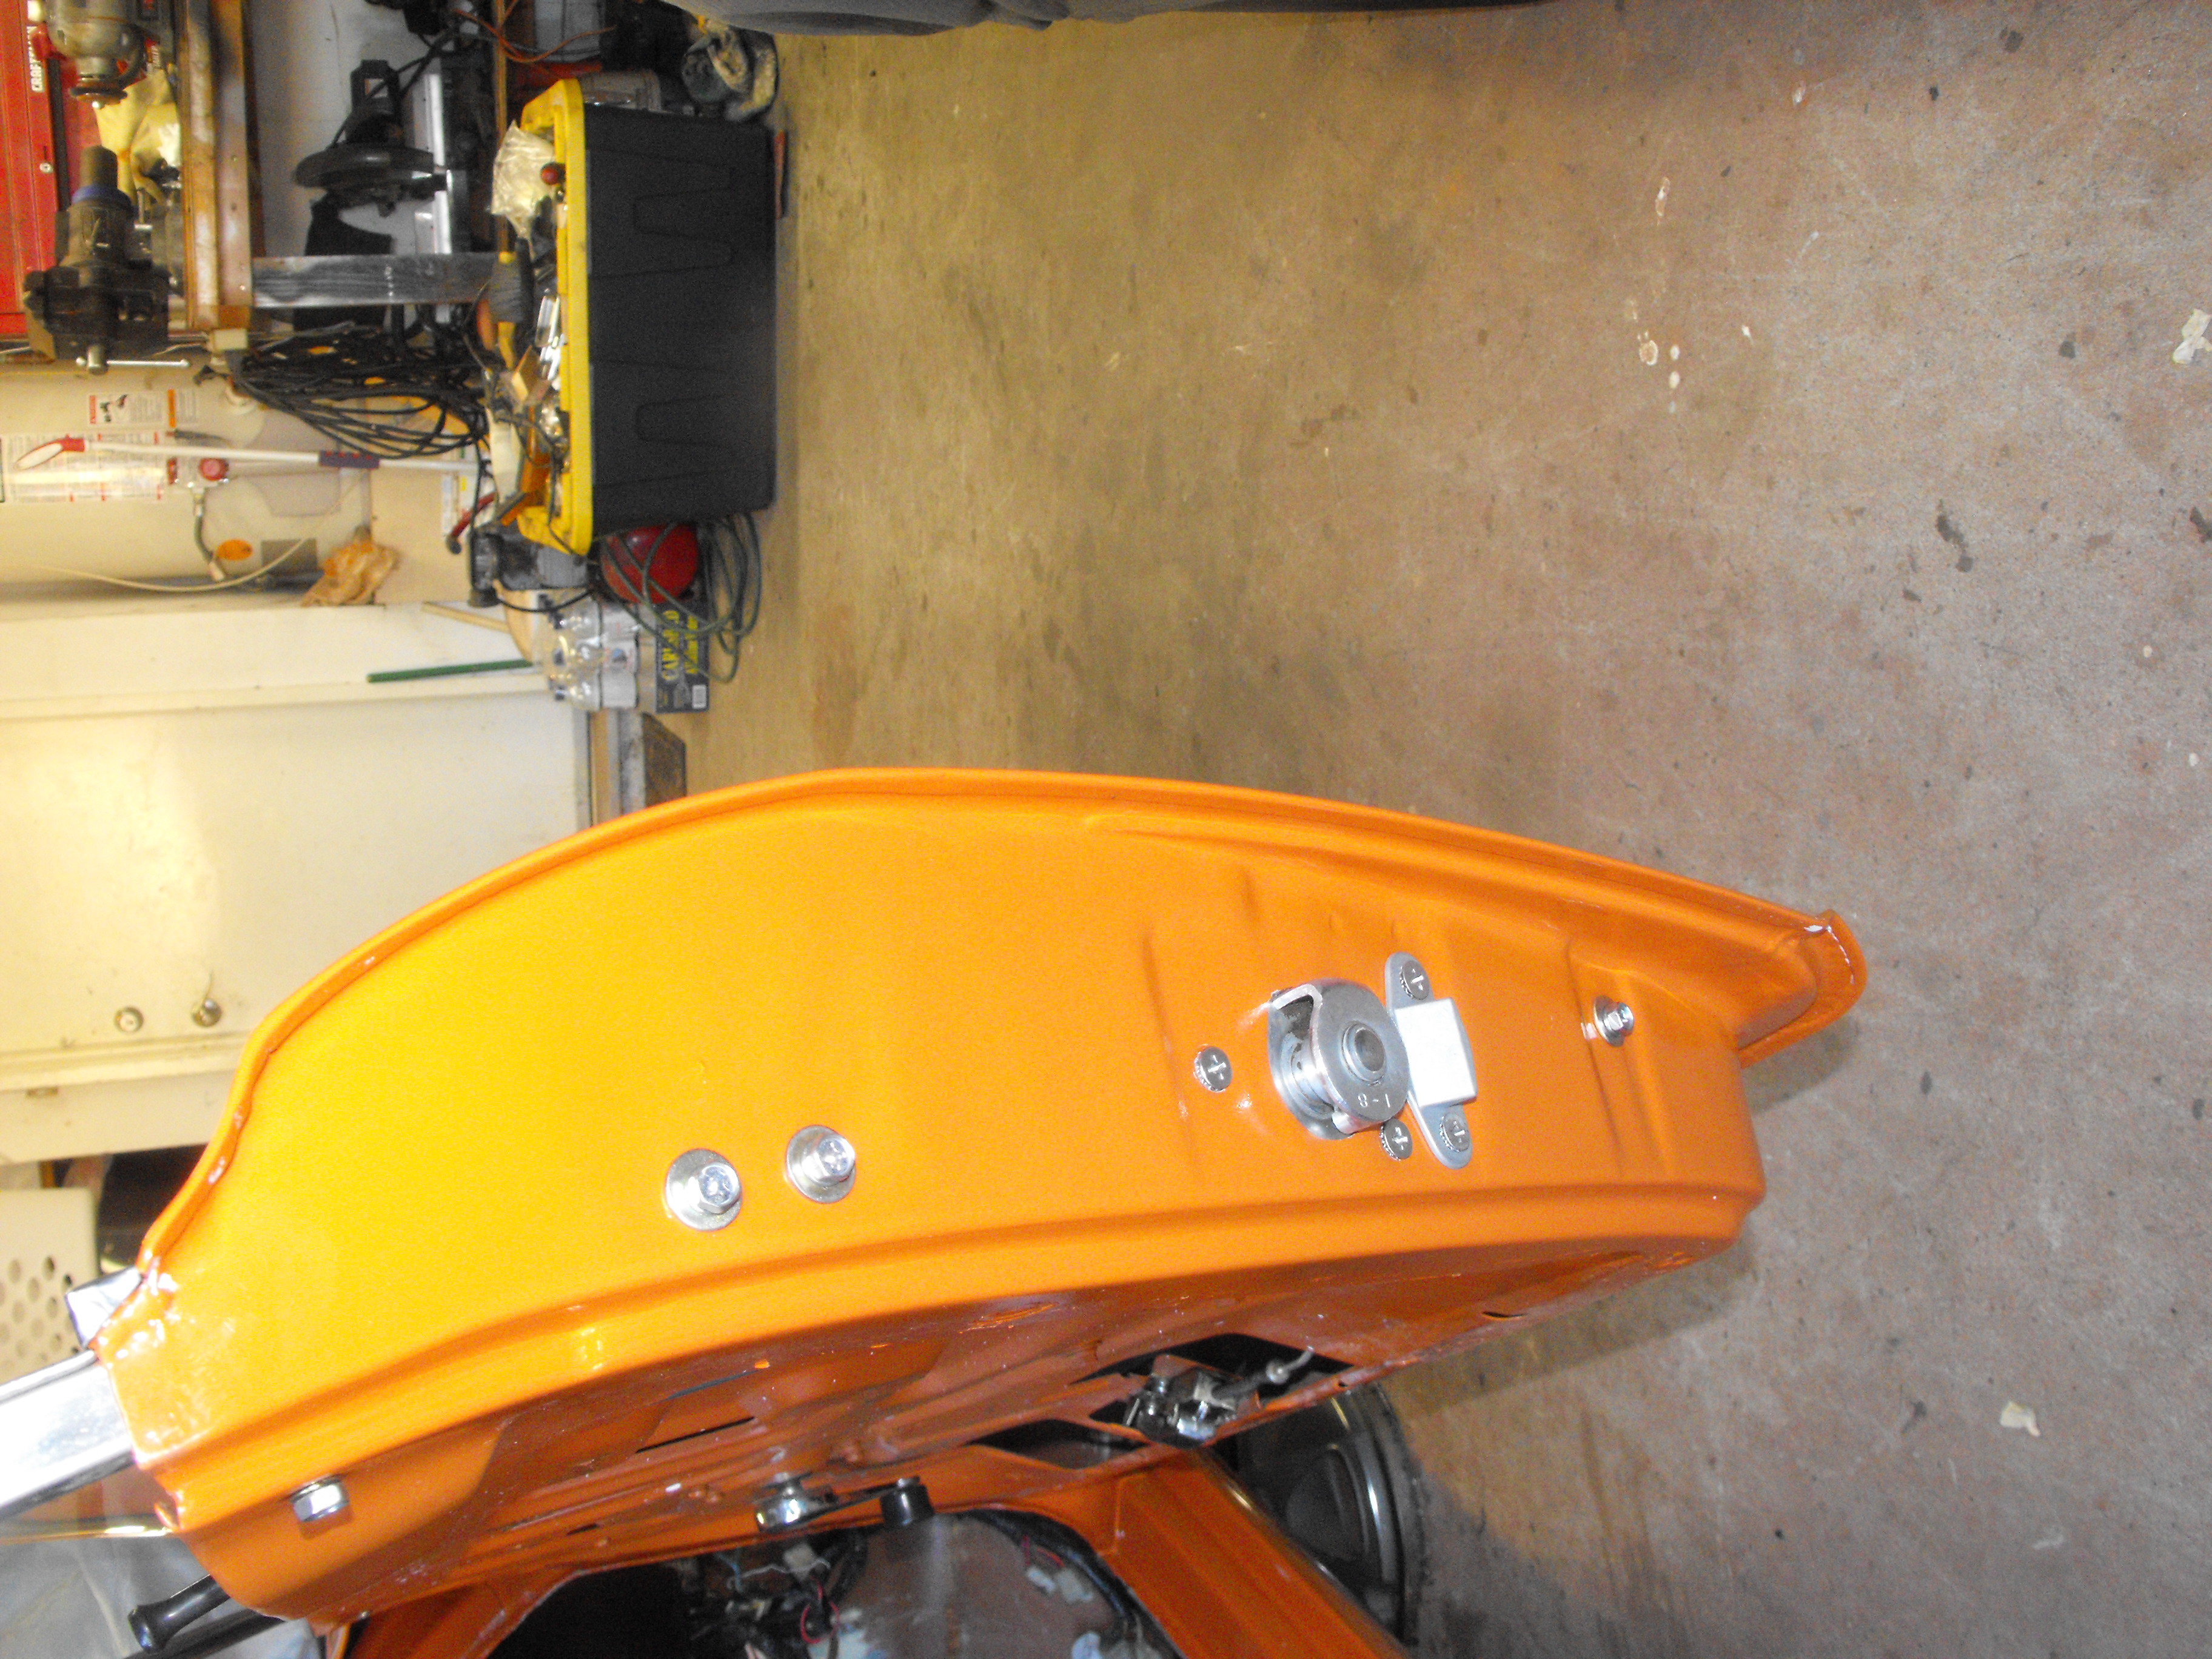
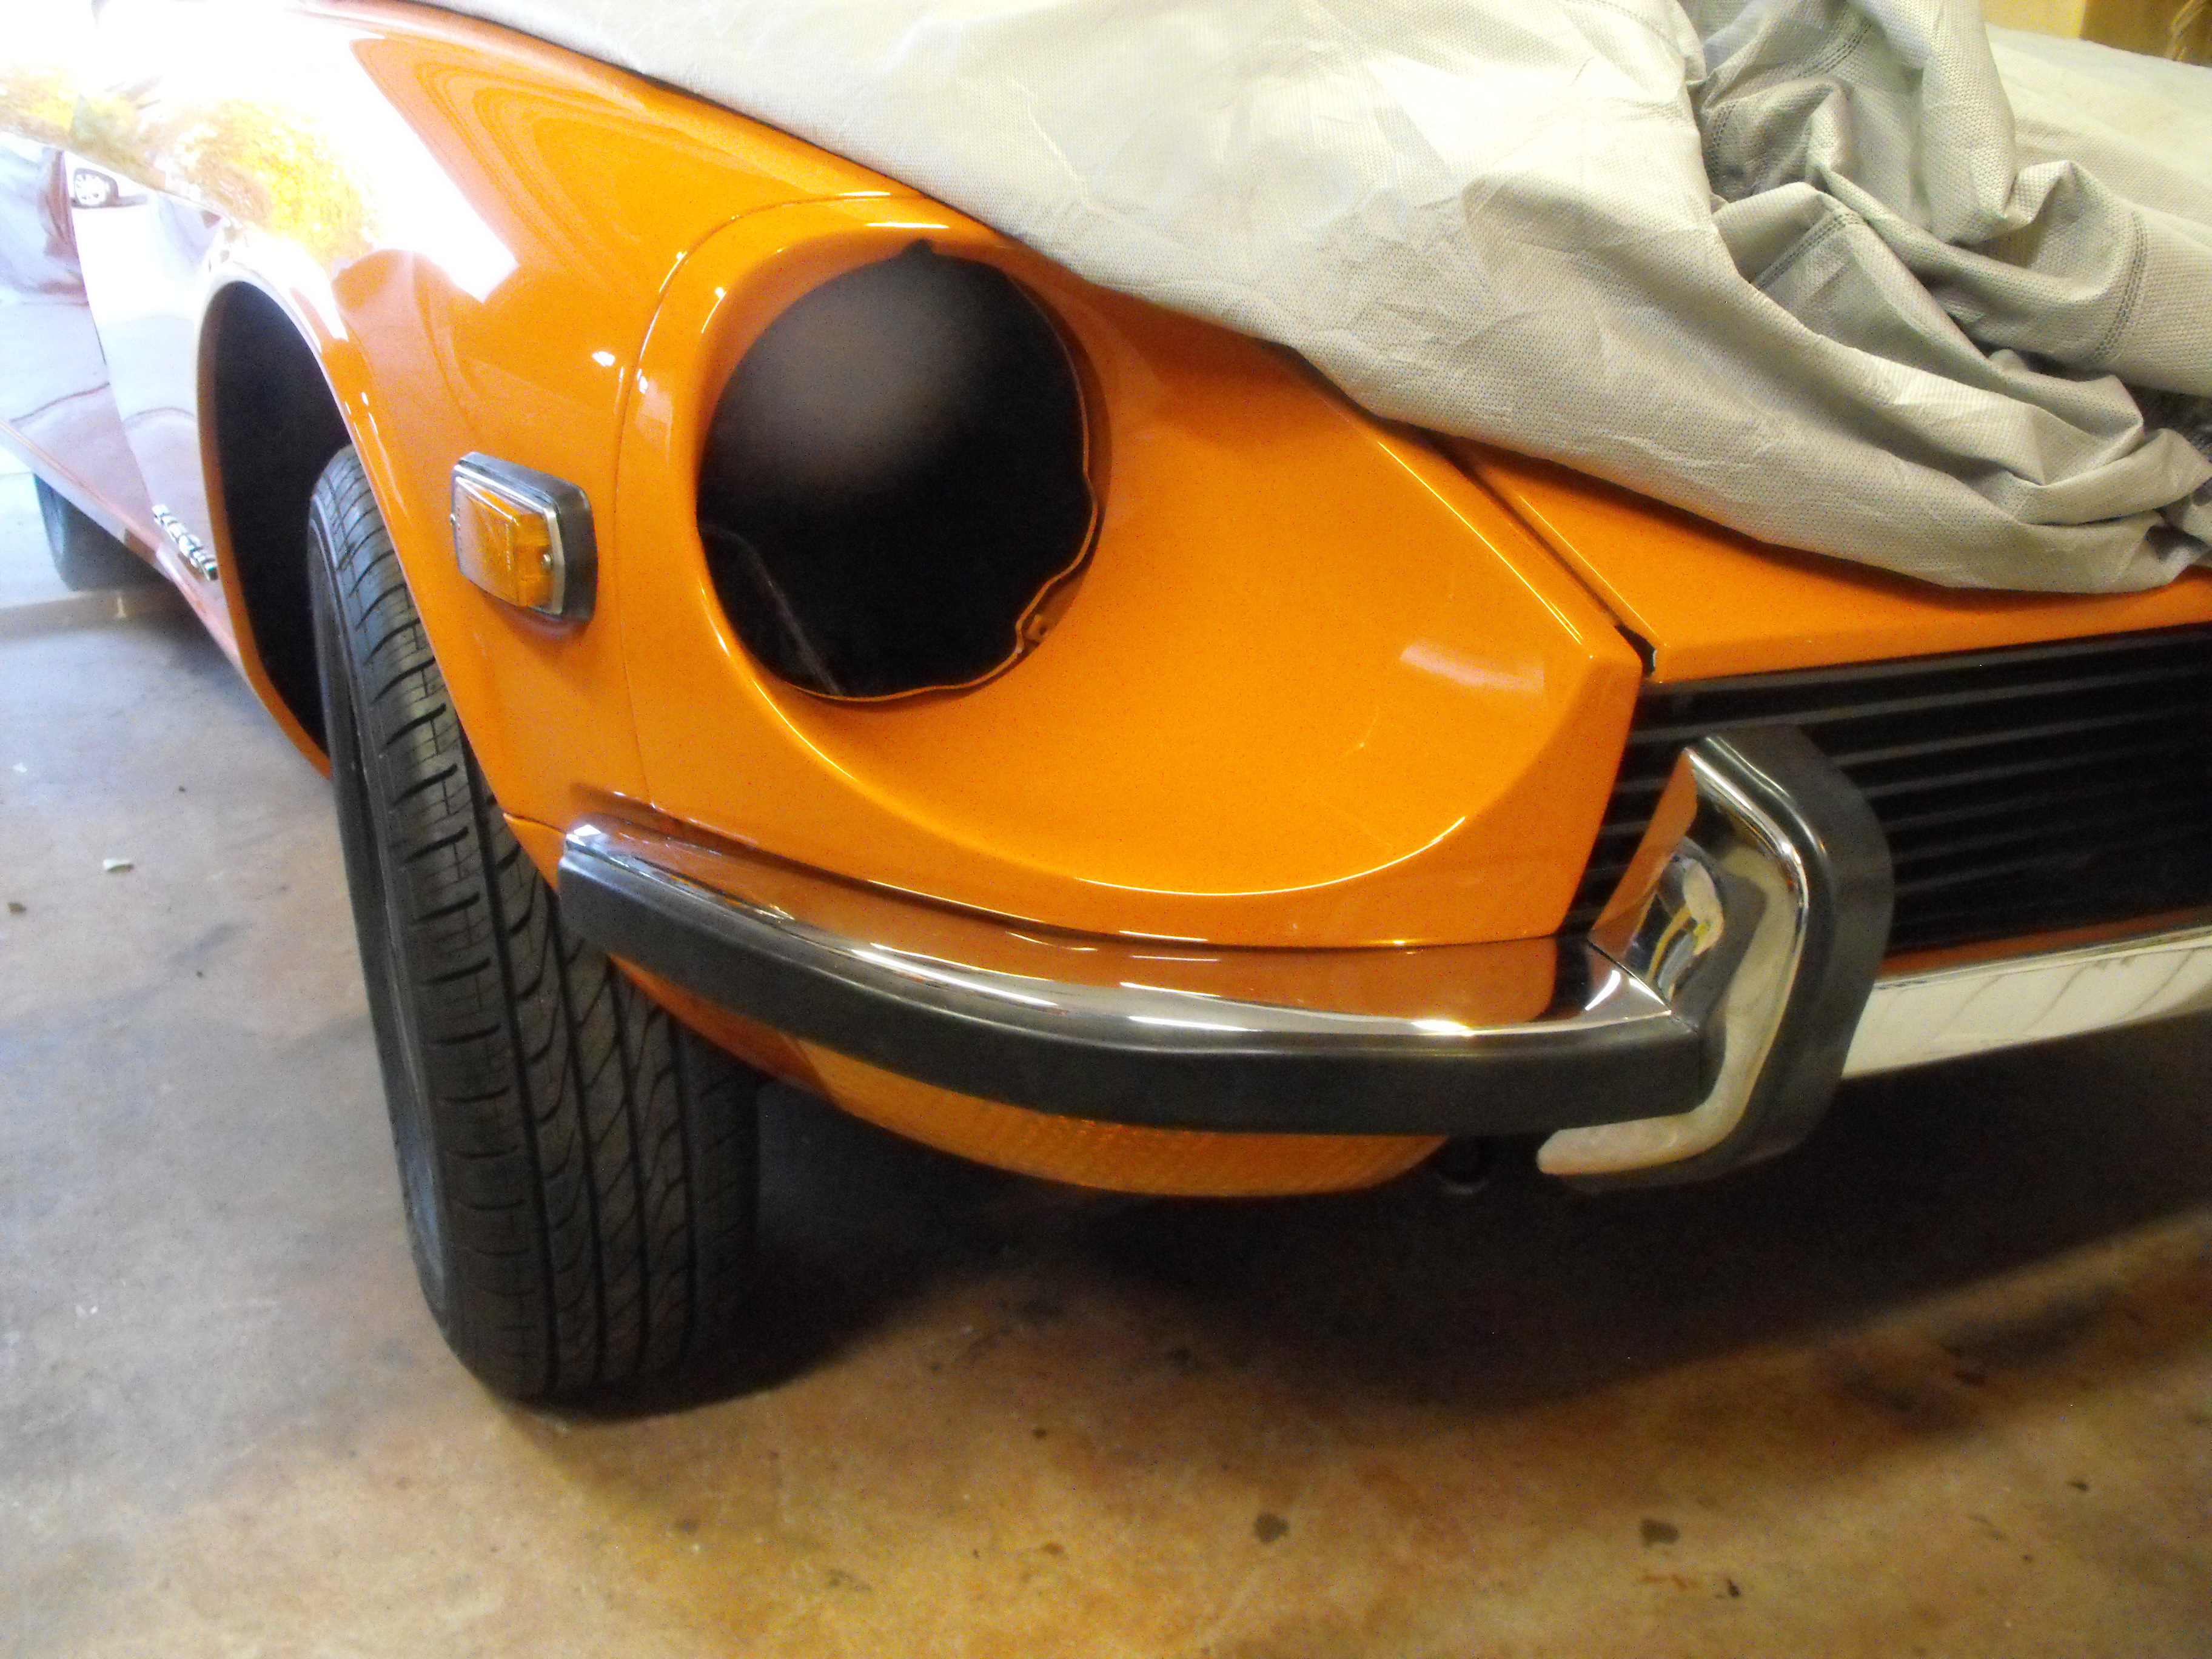
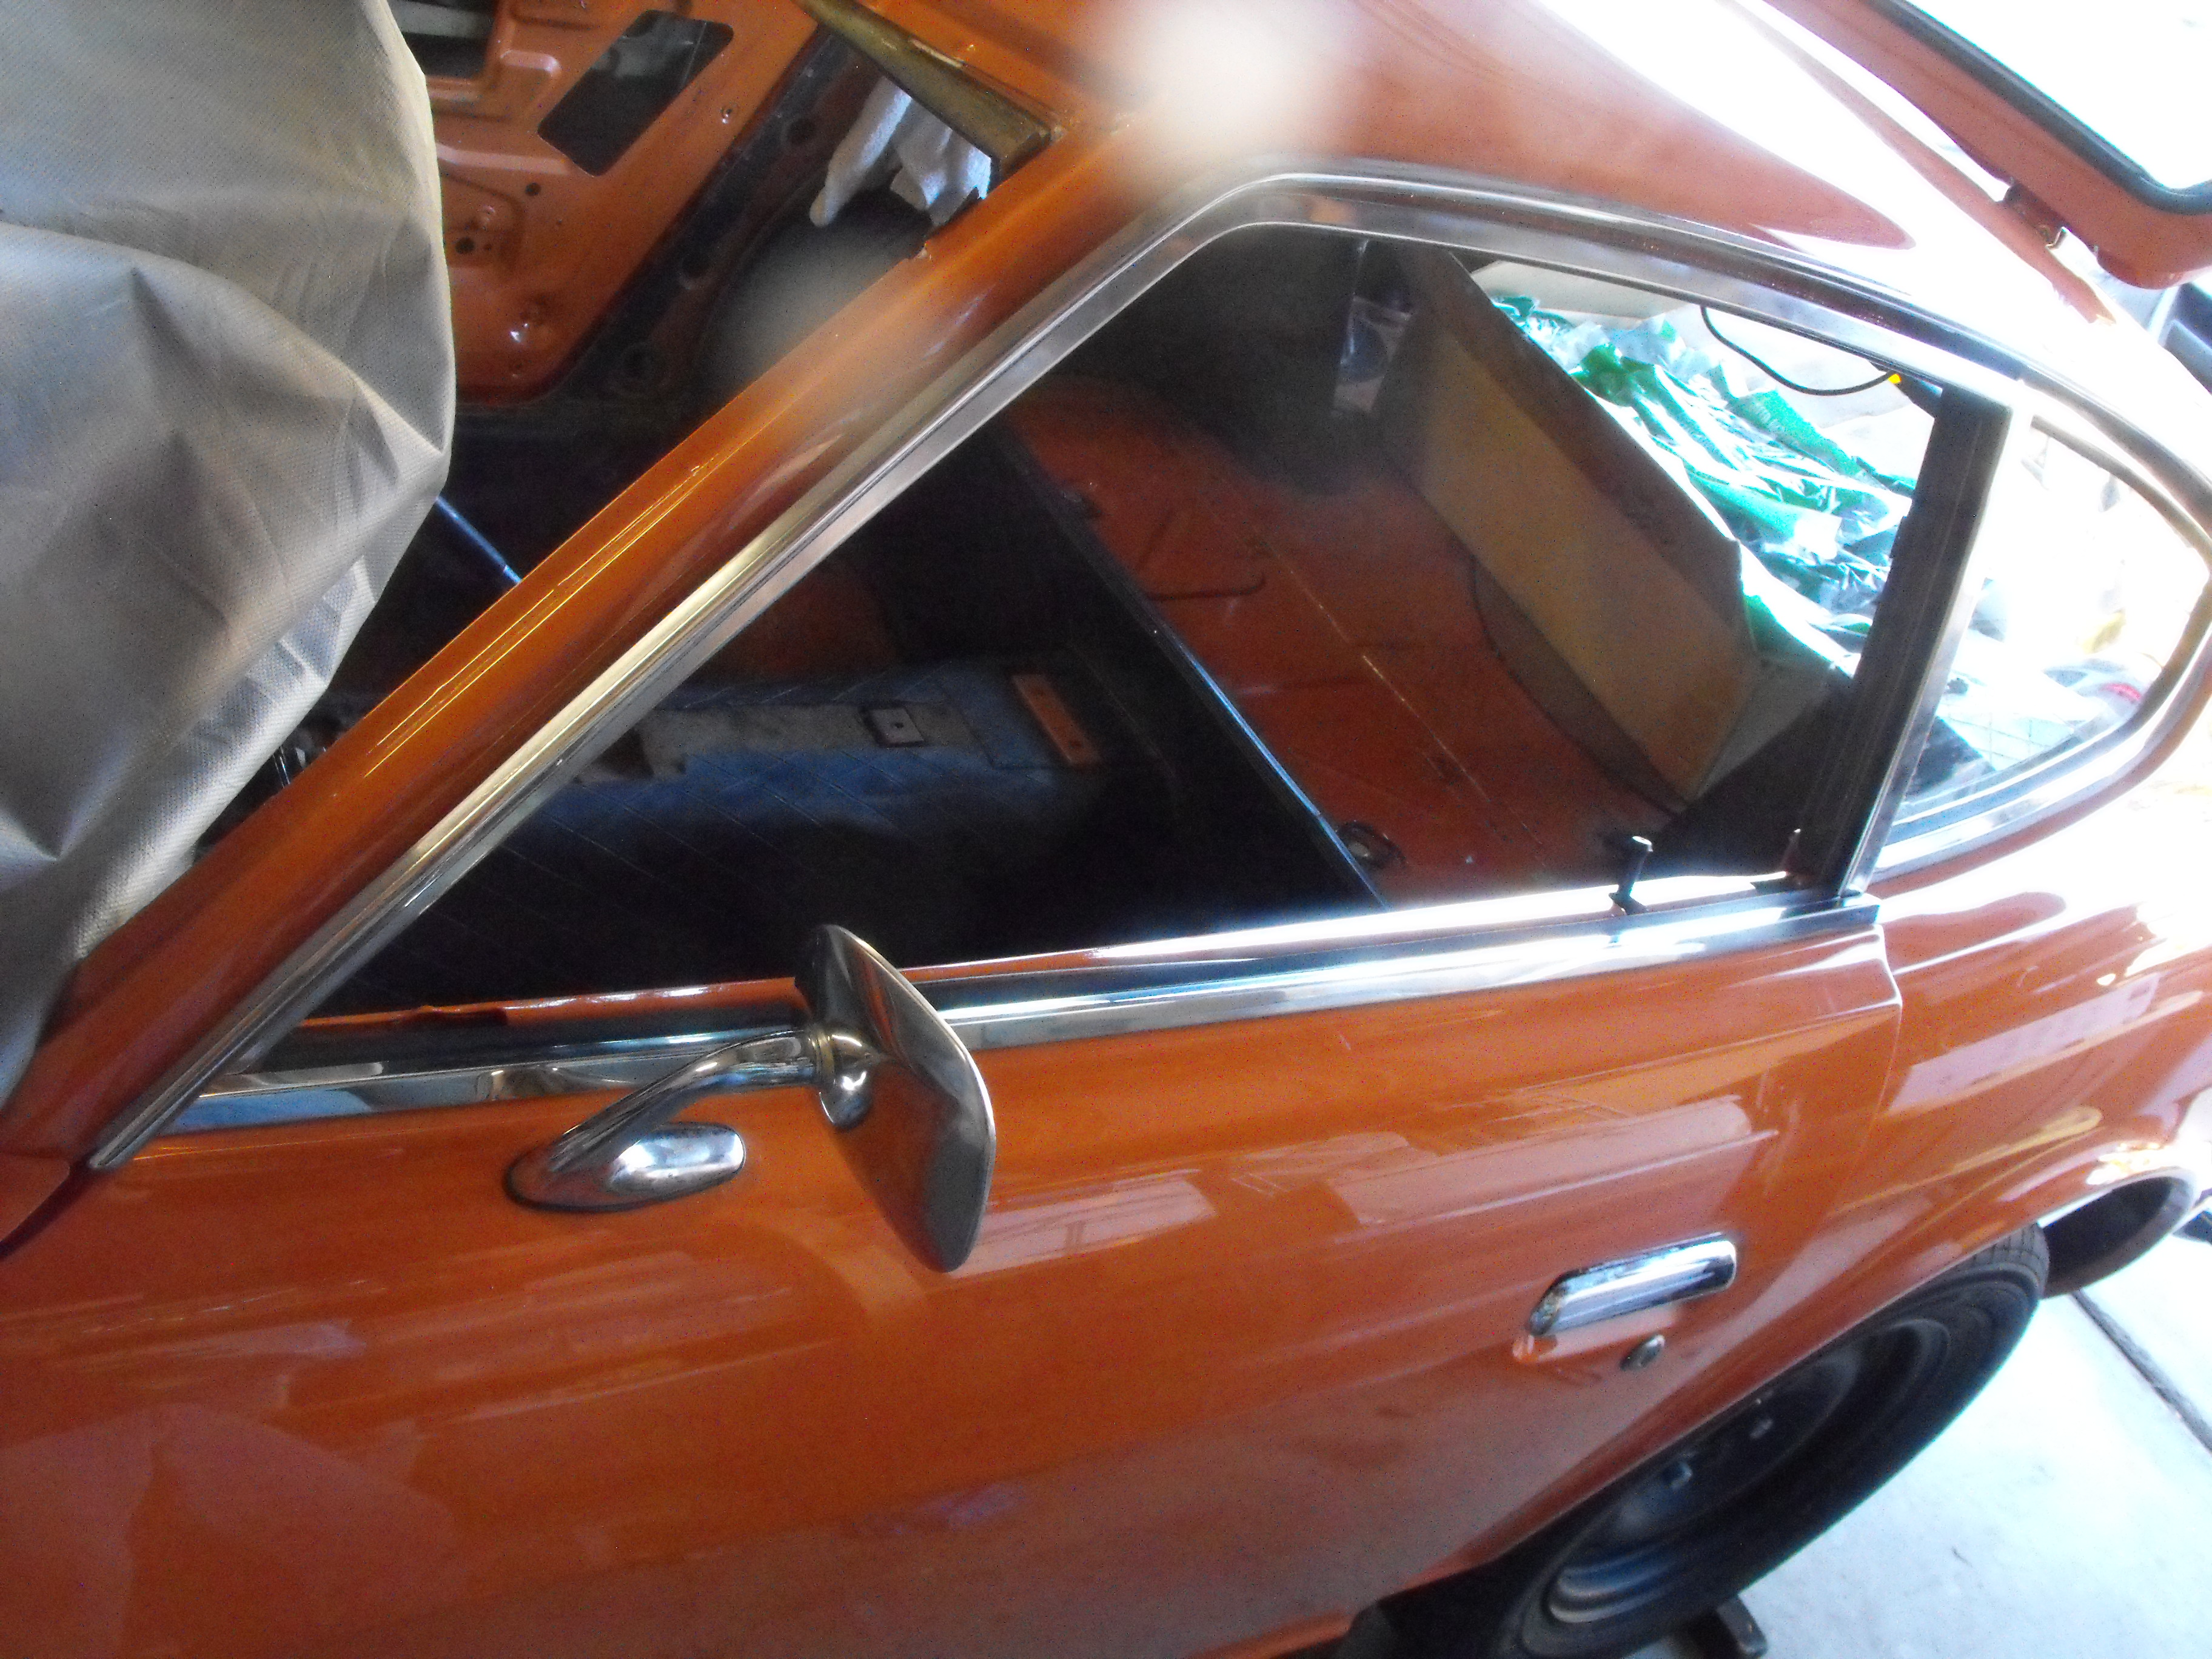
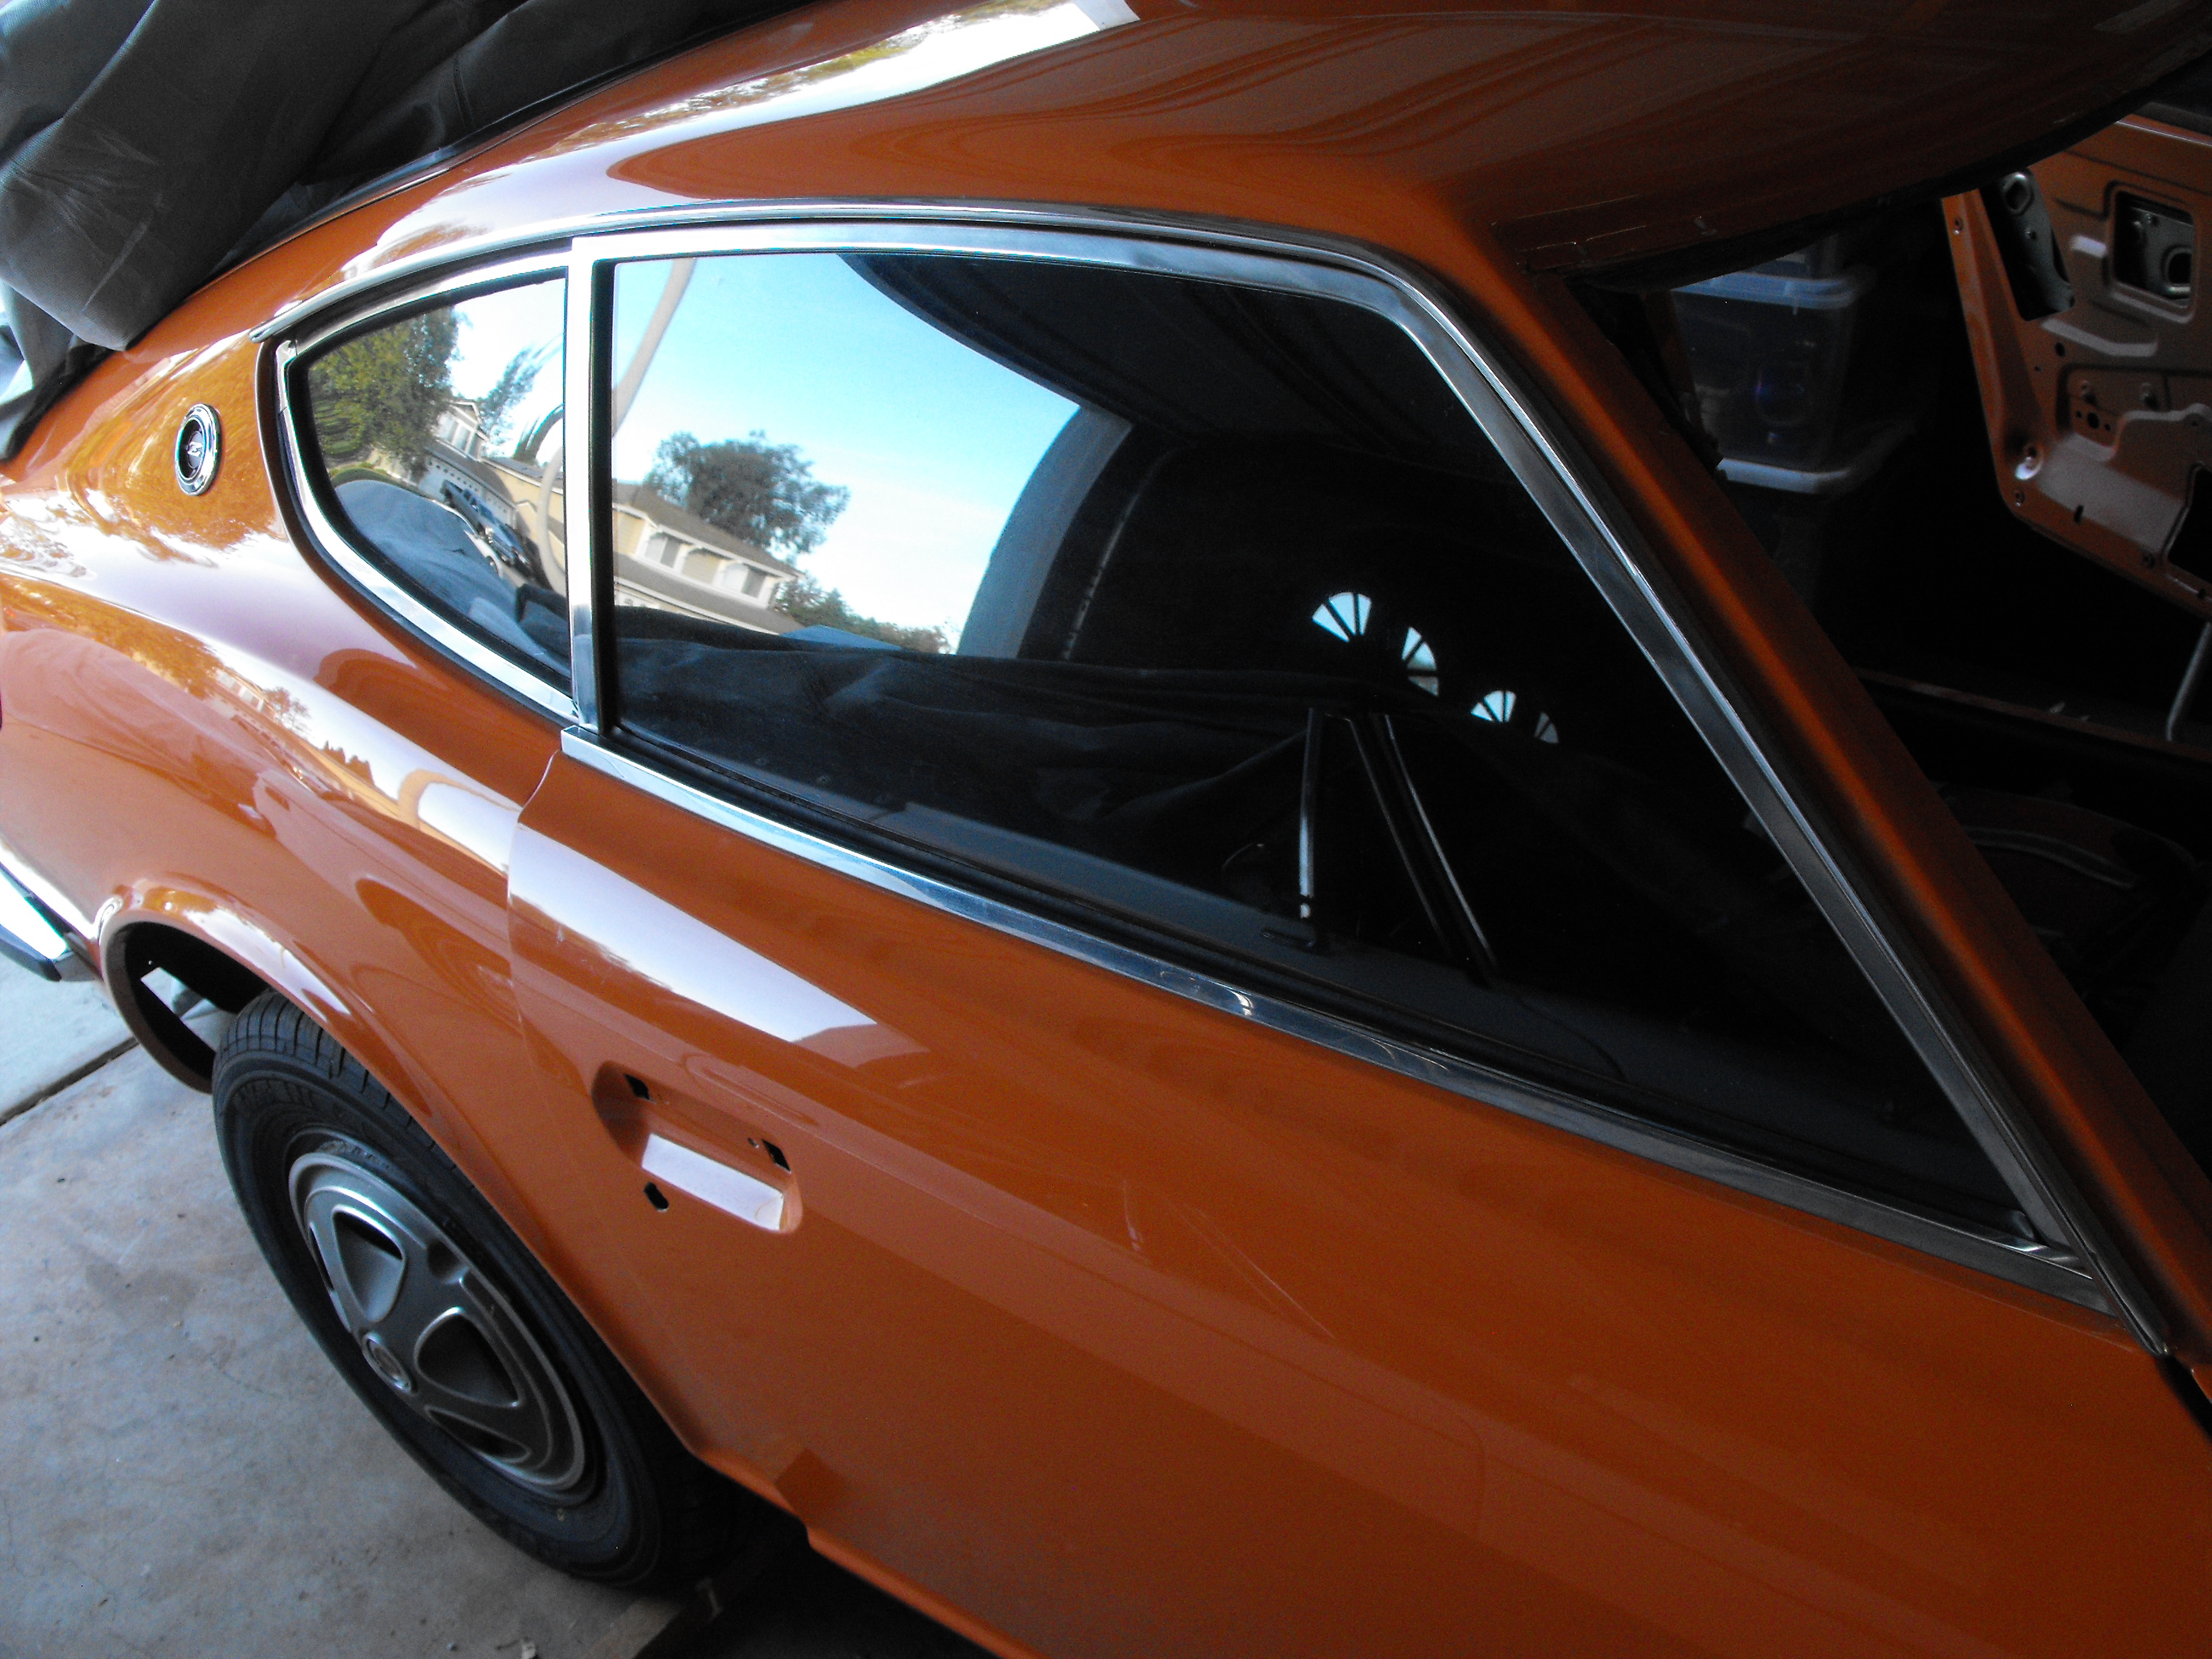
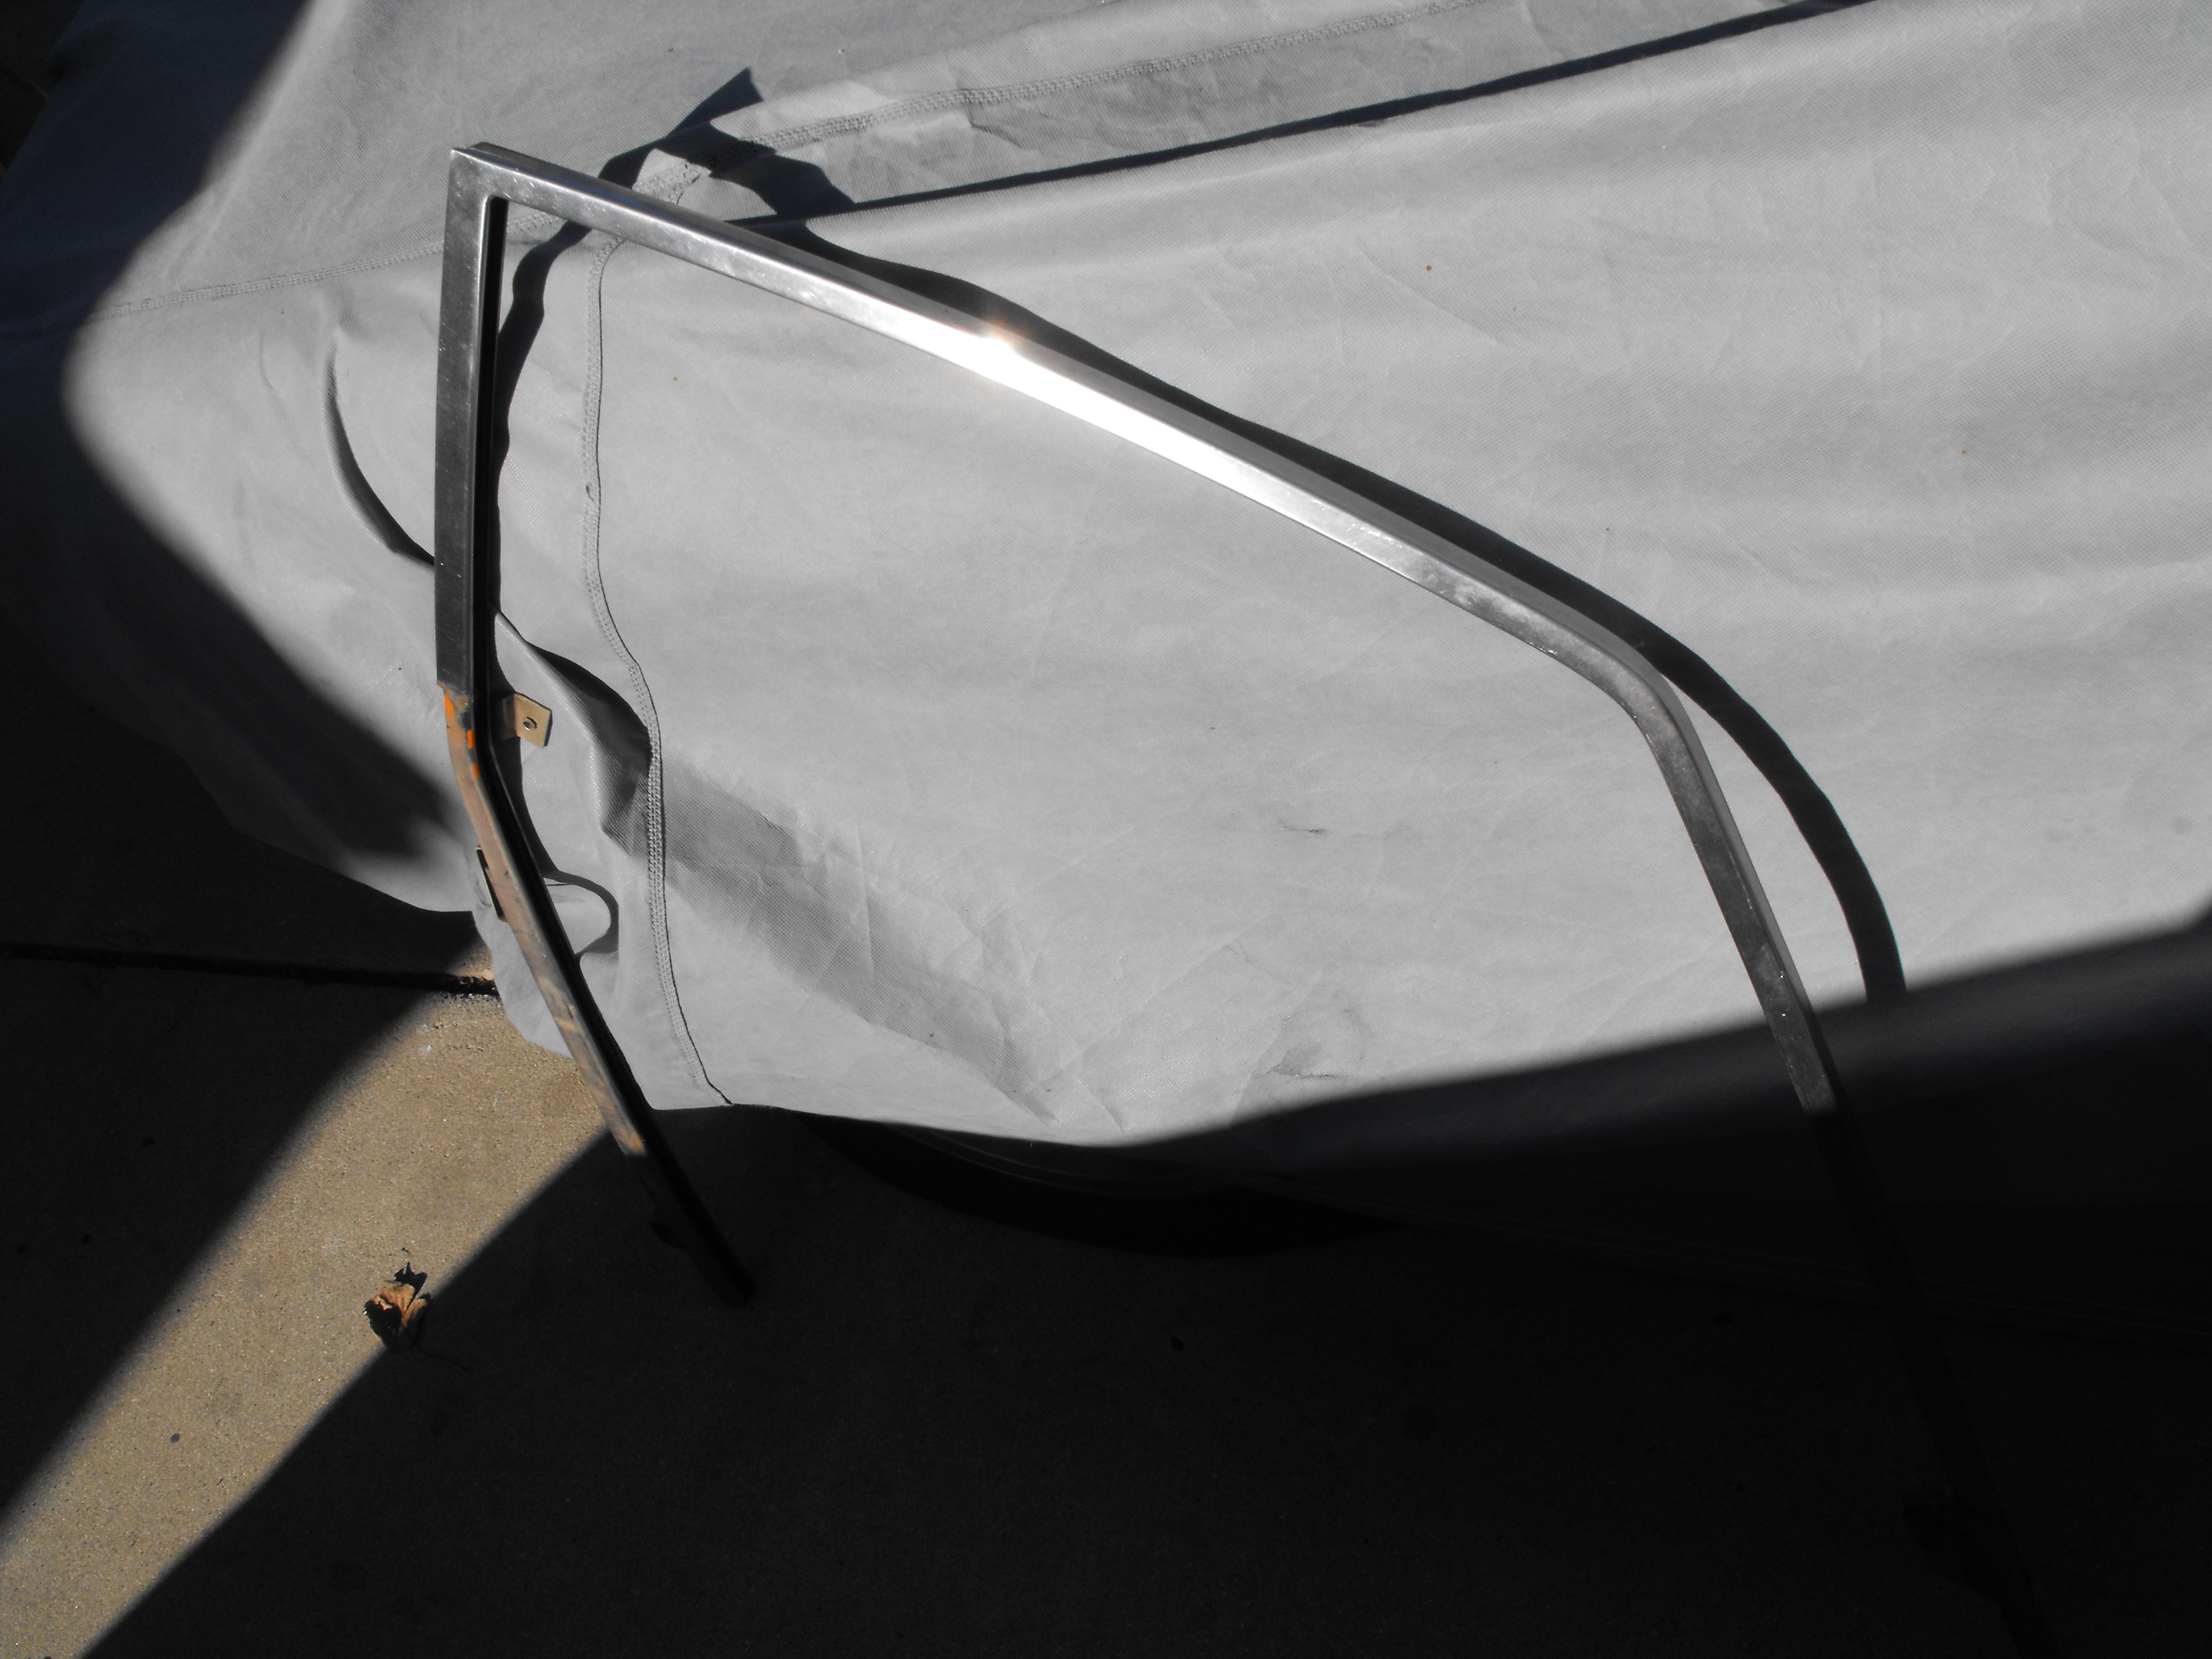
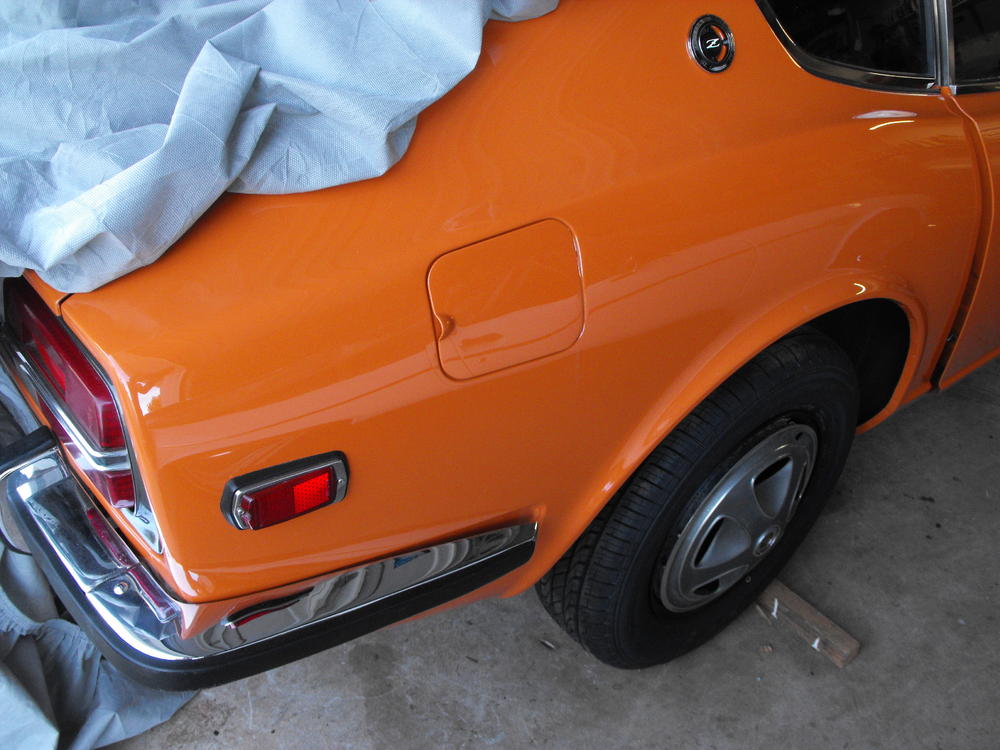
Thanks for the support everyone. it really is pretty fun putting it all together. Got a lot done yesterday and today. Got the door window frames cleaned, polished and installed. Replaced some of the connector housings, got the rest of the smog lines in. Got the headlight buckets on (will probably revisit those, gap is a bit wide. Thinking I may shim the inside lip.) Got the fuel door on. Also, here is a pic of the red coil cap


-
Thanks for the feedback on the coil wire boot. I was not really sure on that one. Oooohh, and I love those flat tops...Wish you would have posted a picture of those babies. Still kicking myself for selling my 73 with the flat tops. I would buy that one back in a heartbeat.
-
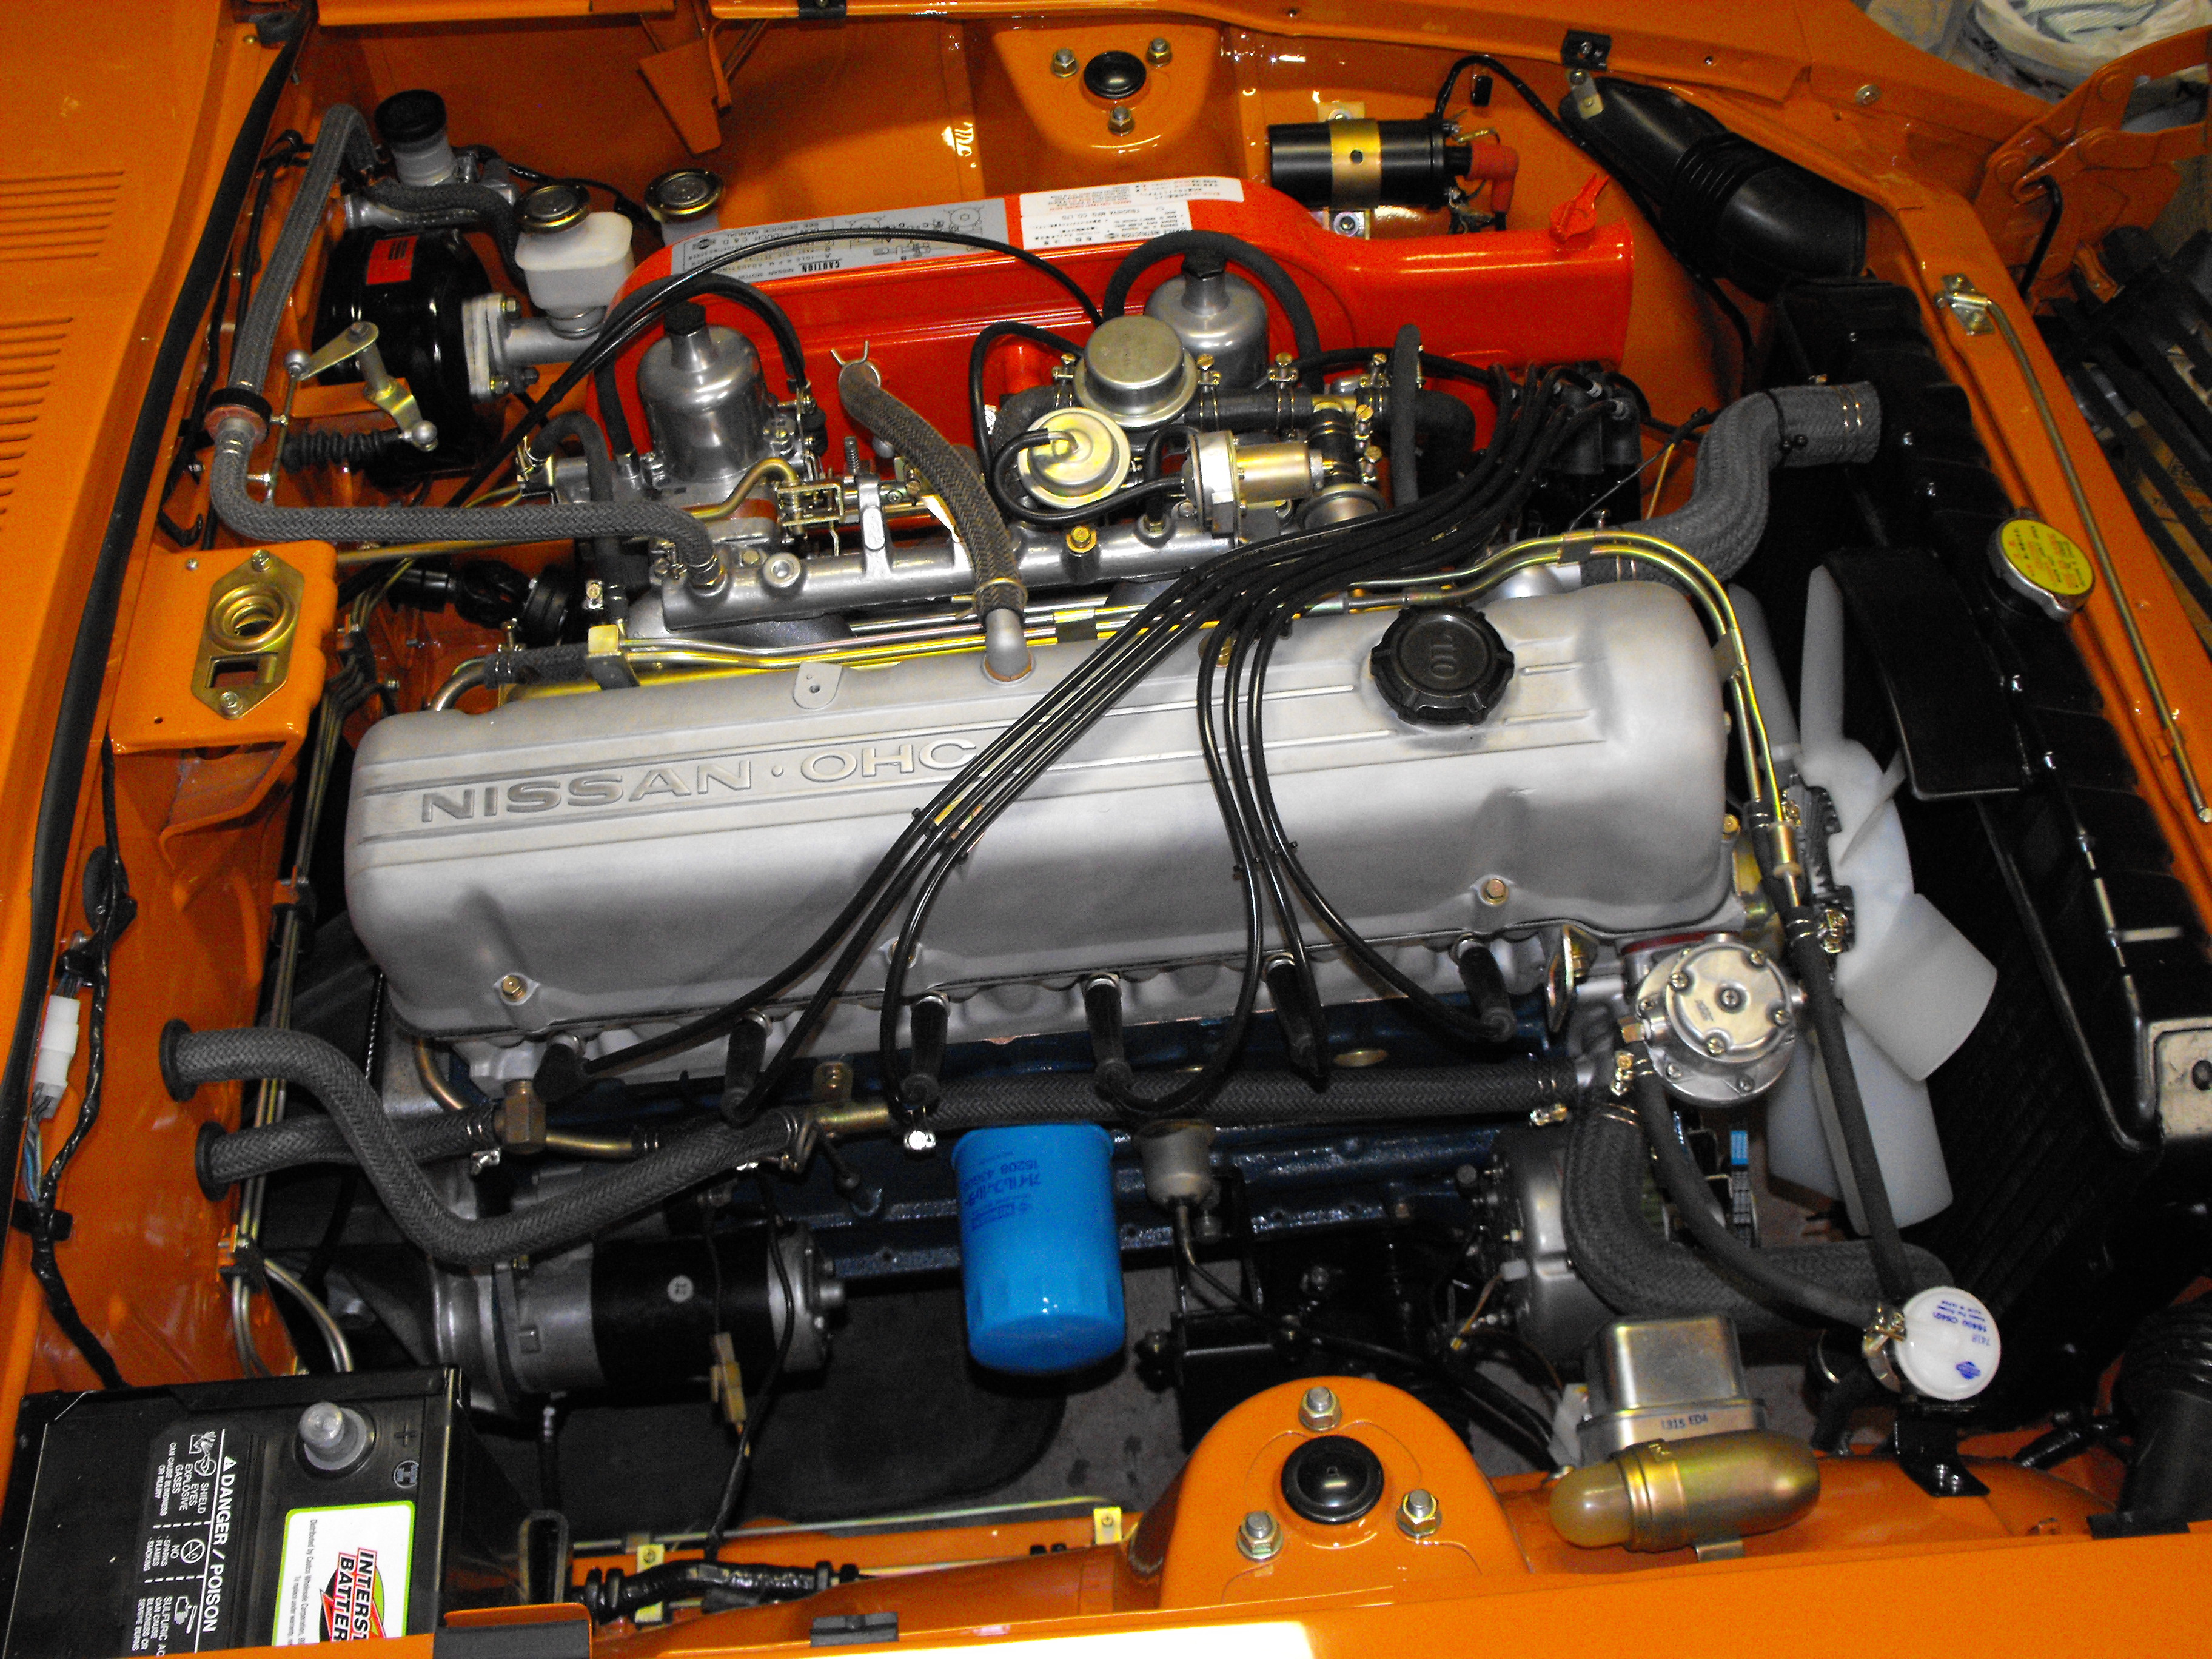
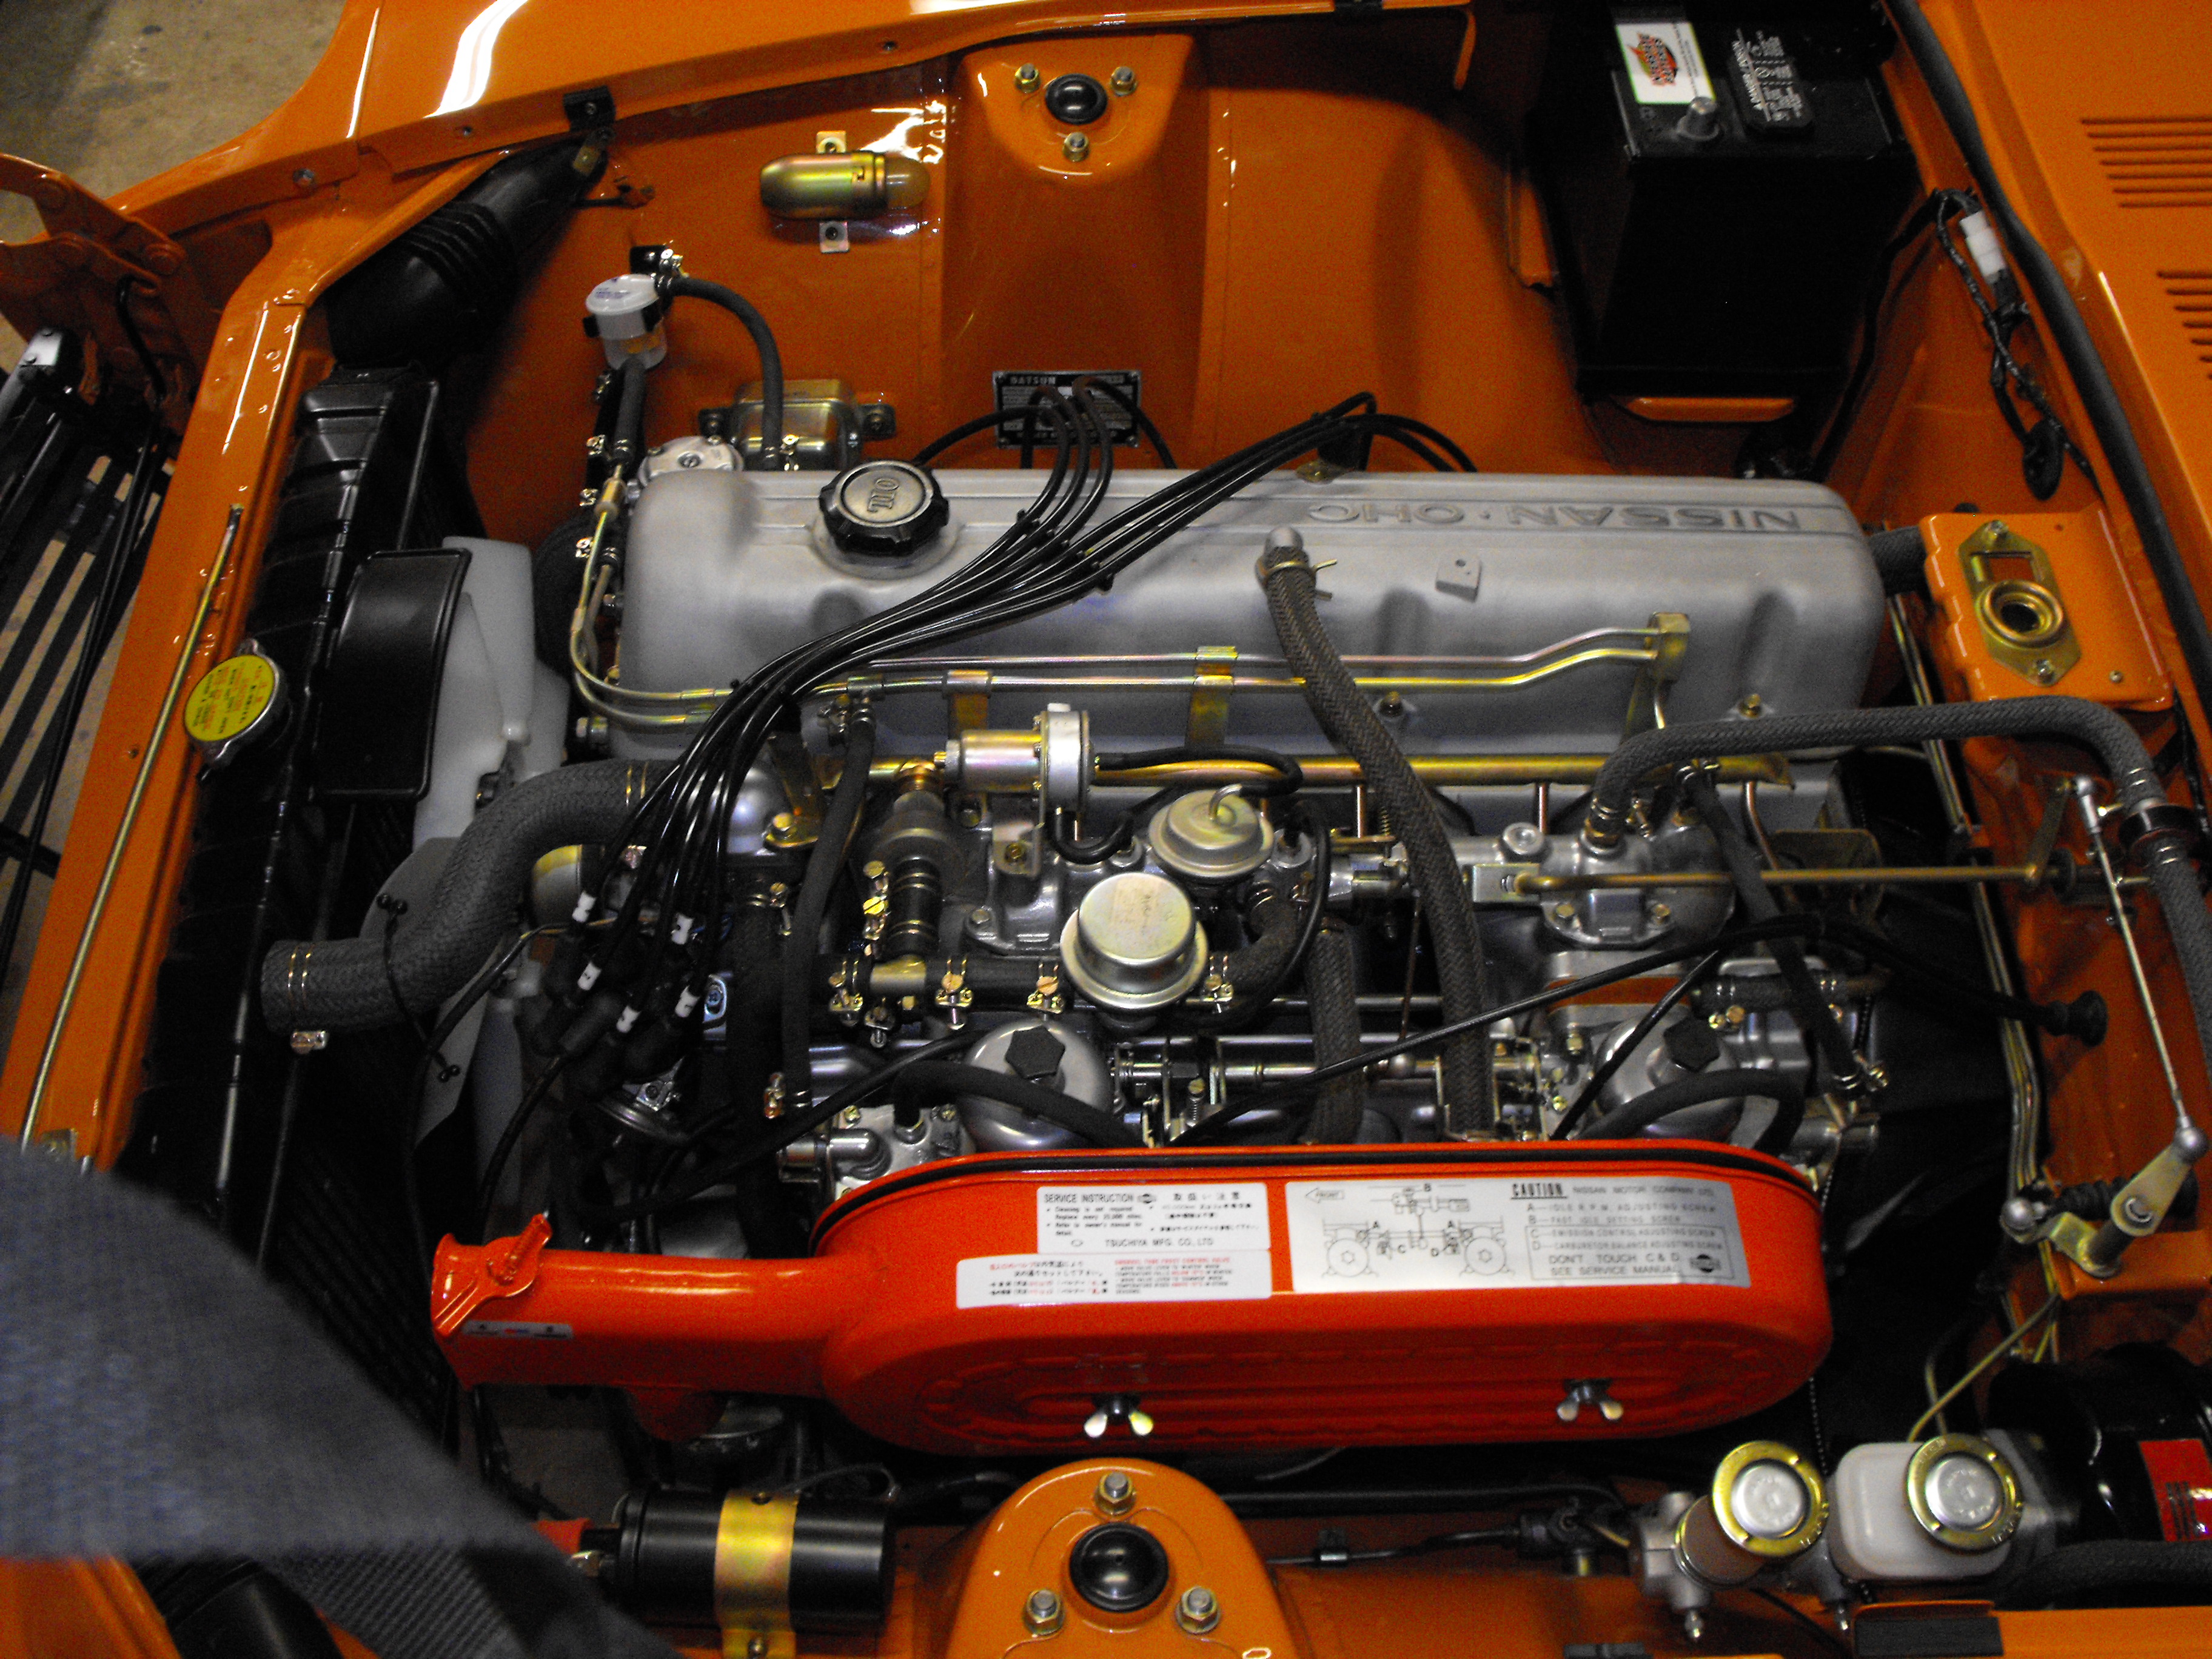
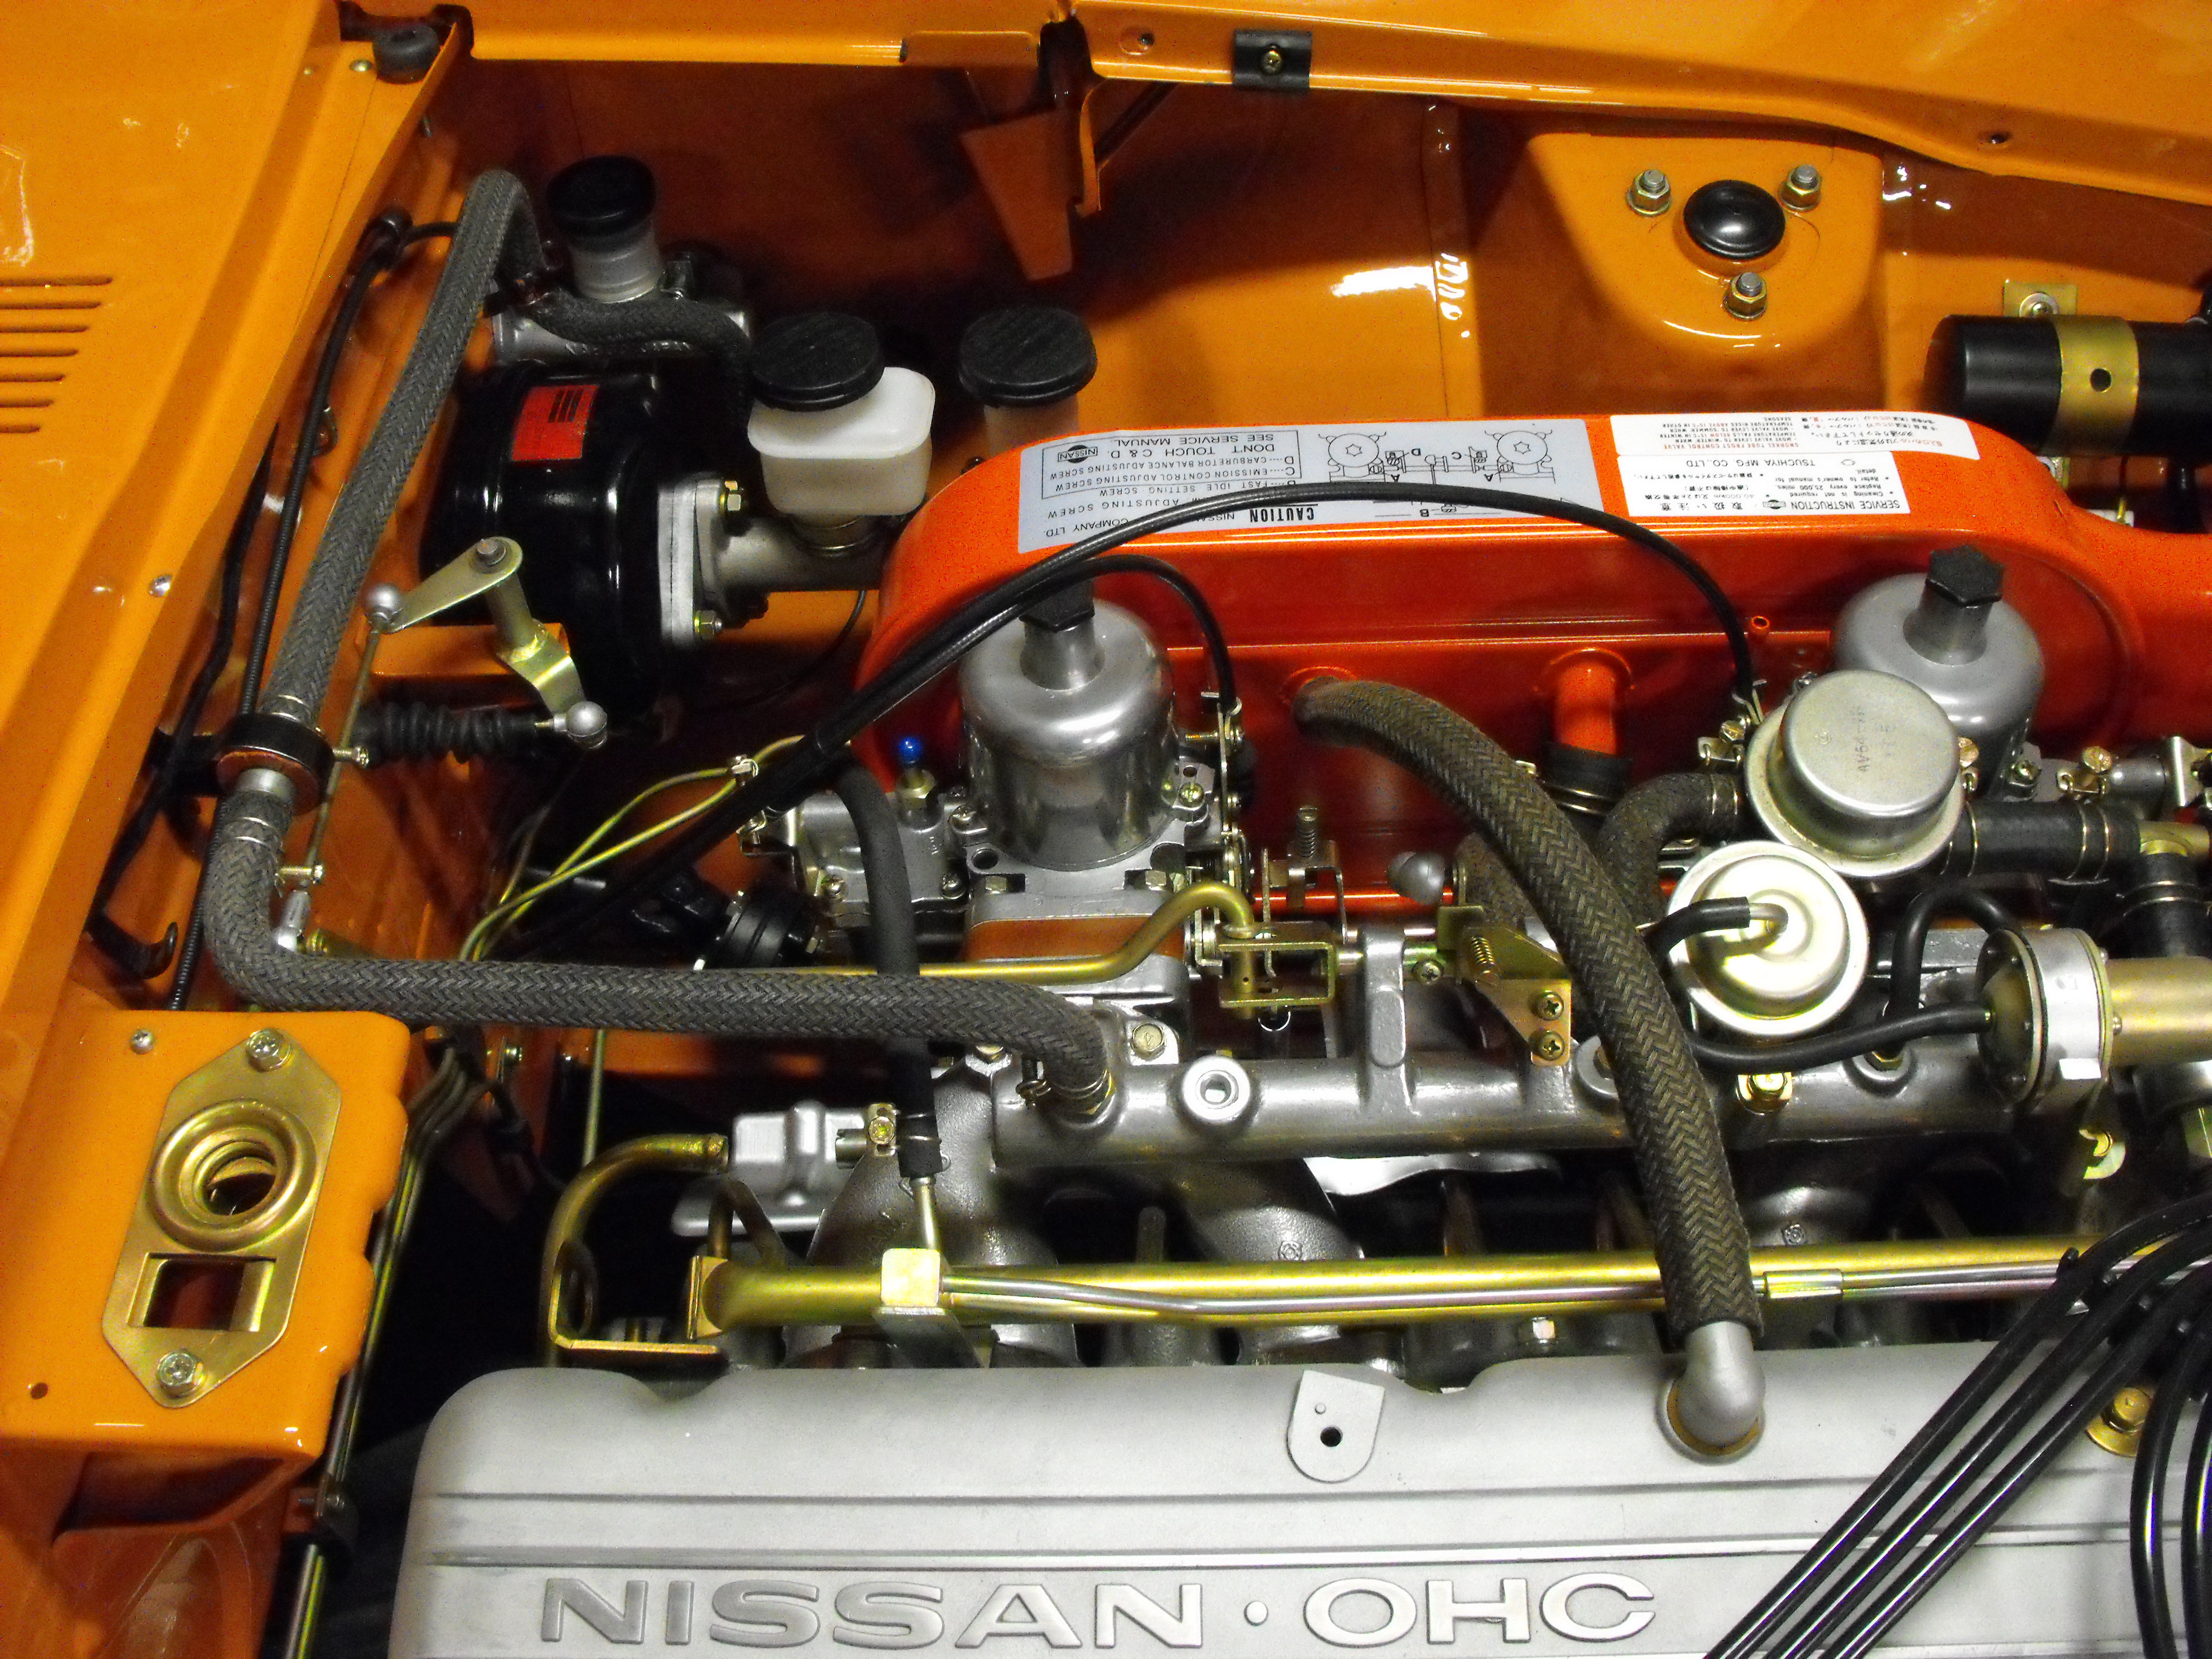
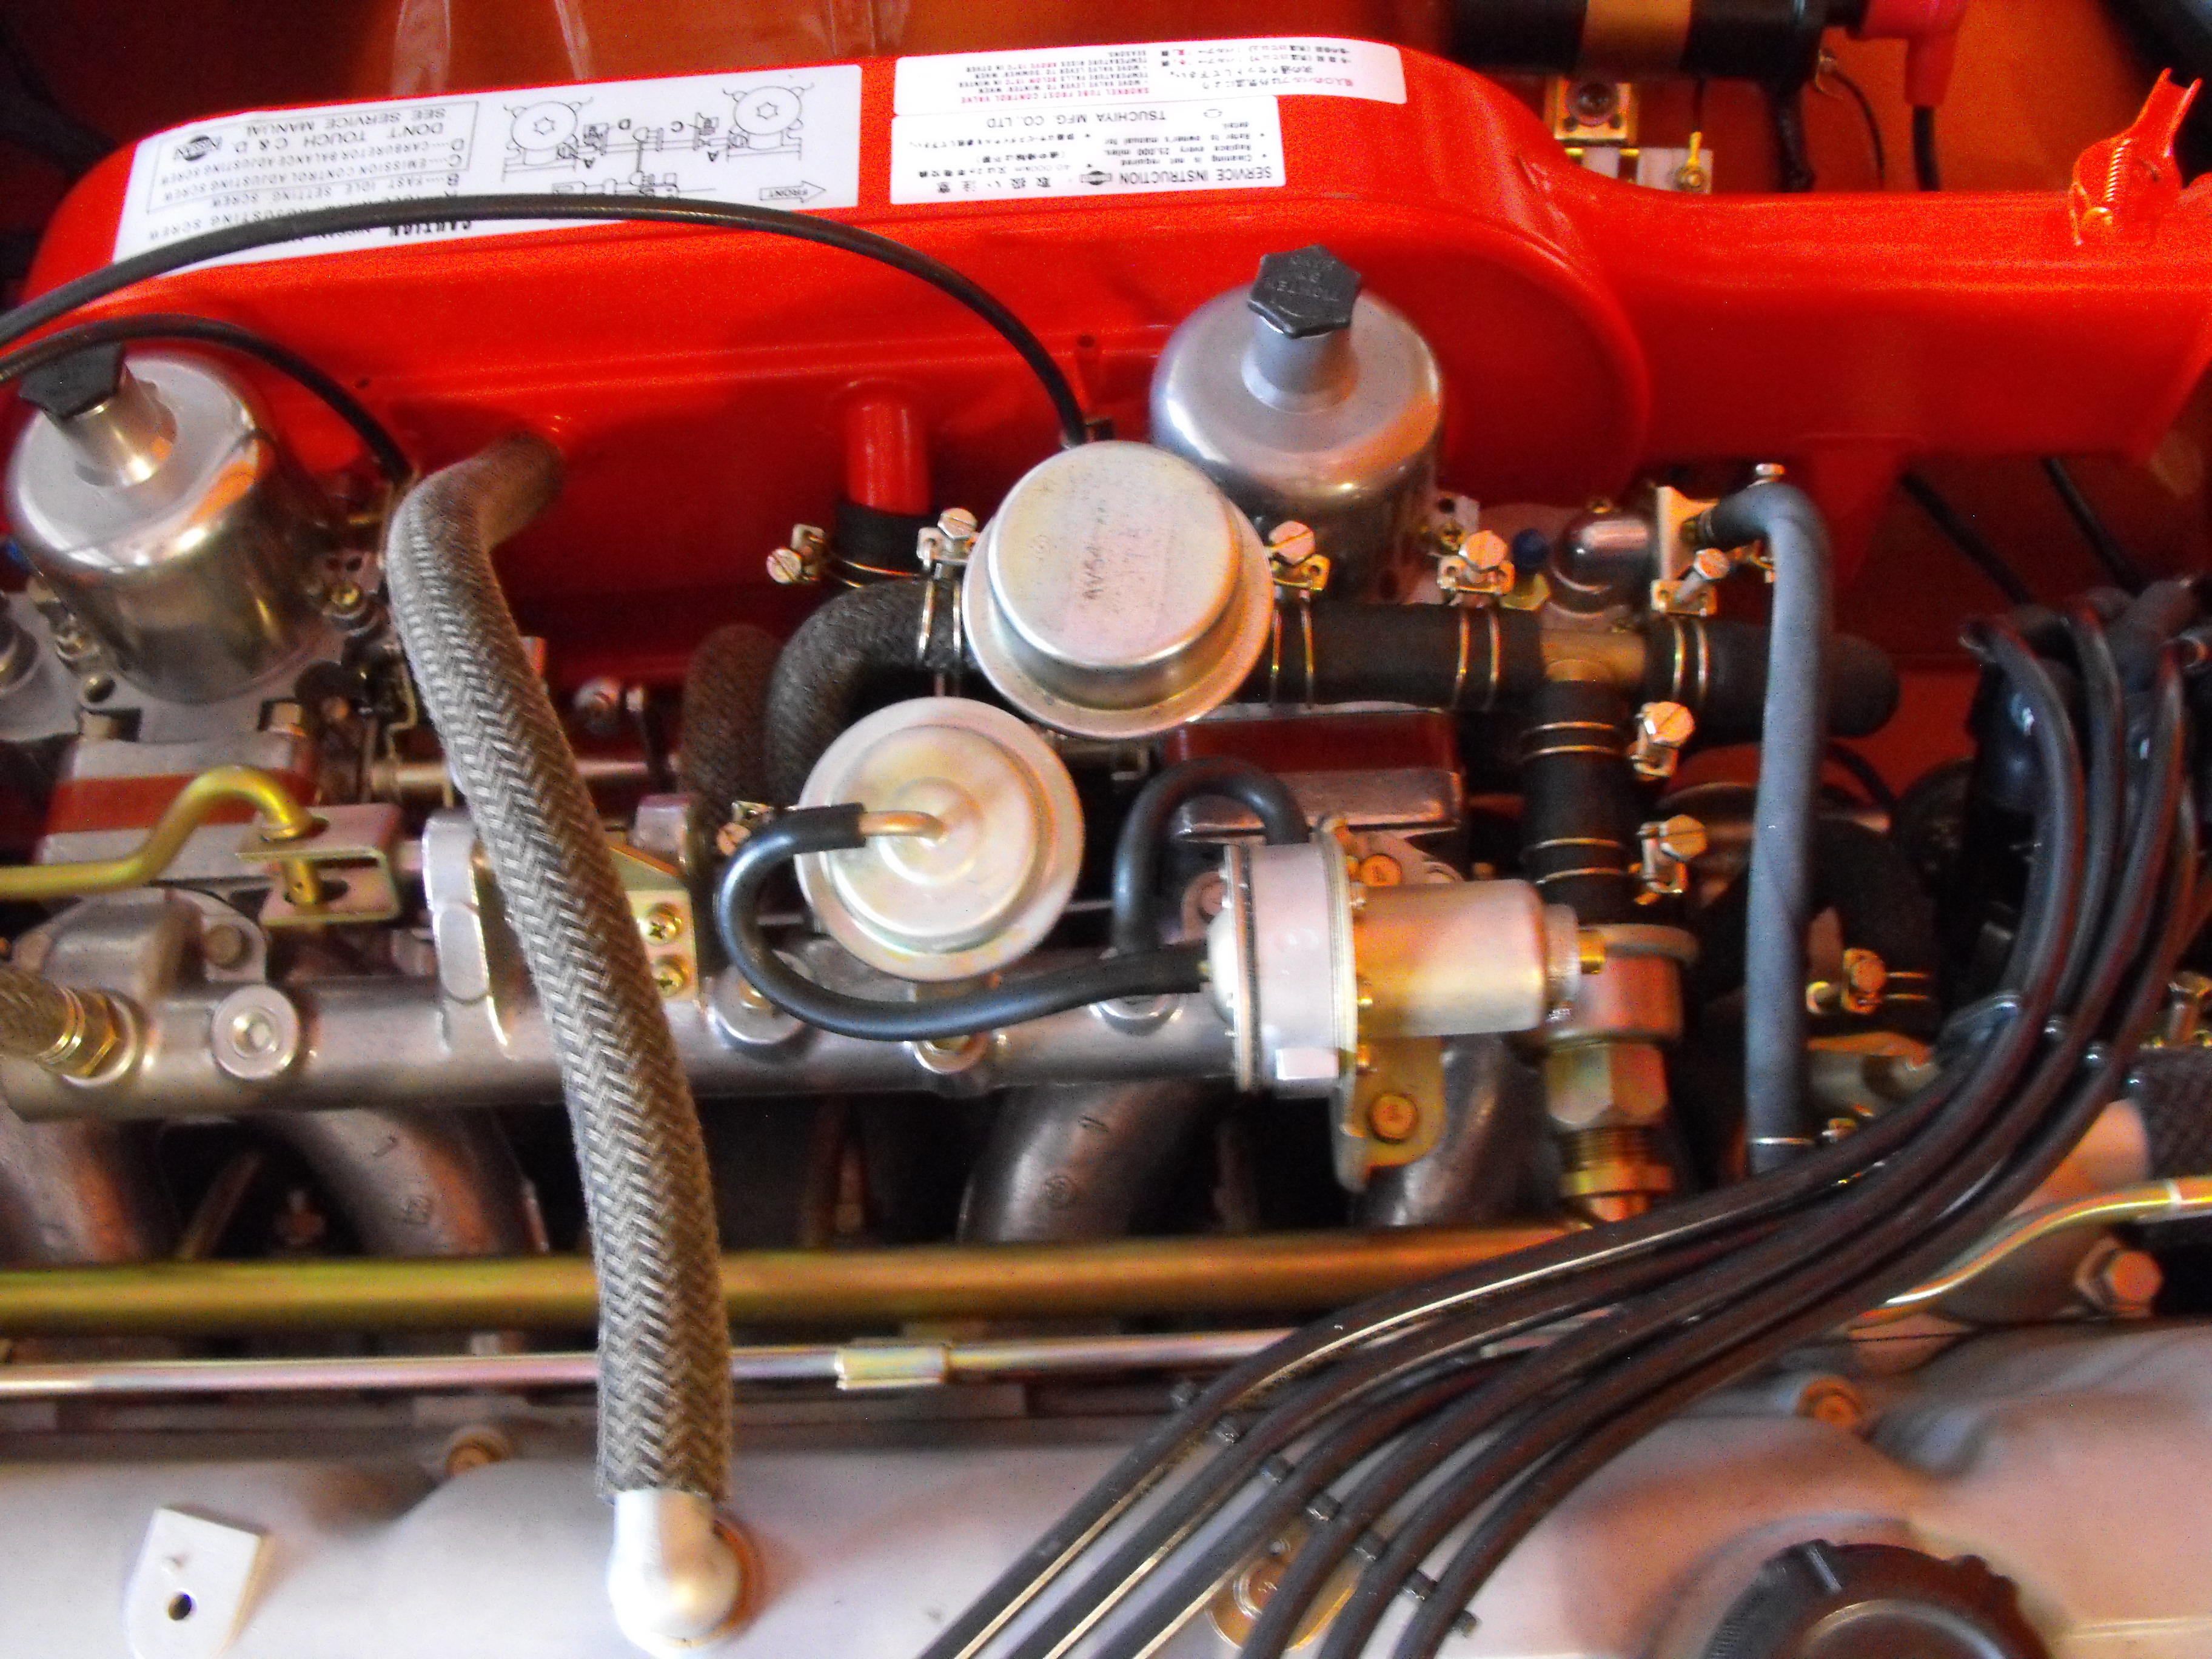
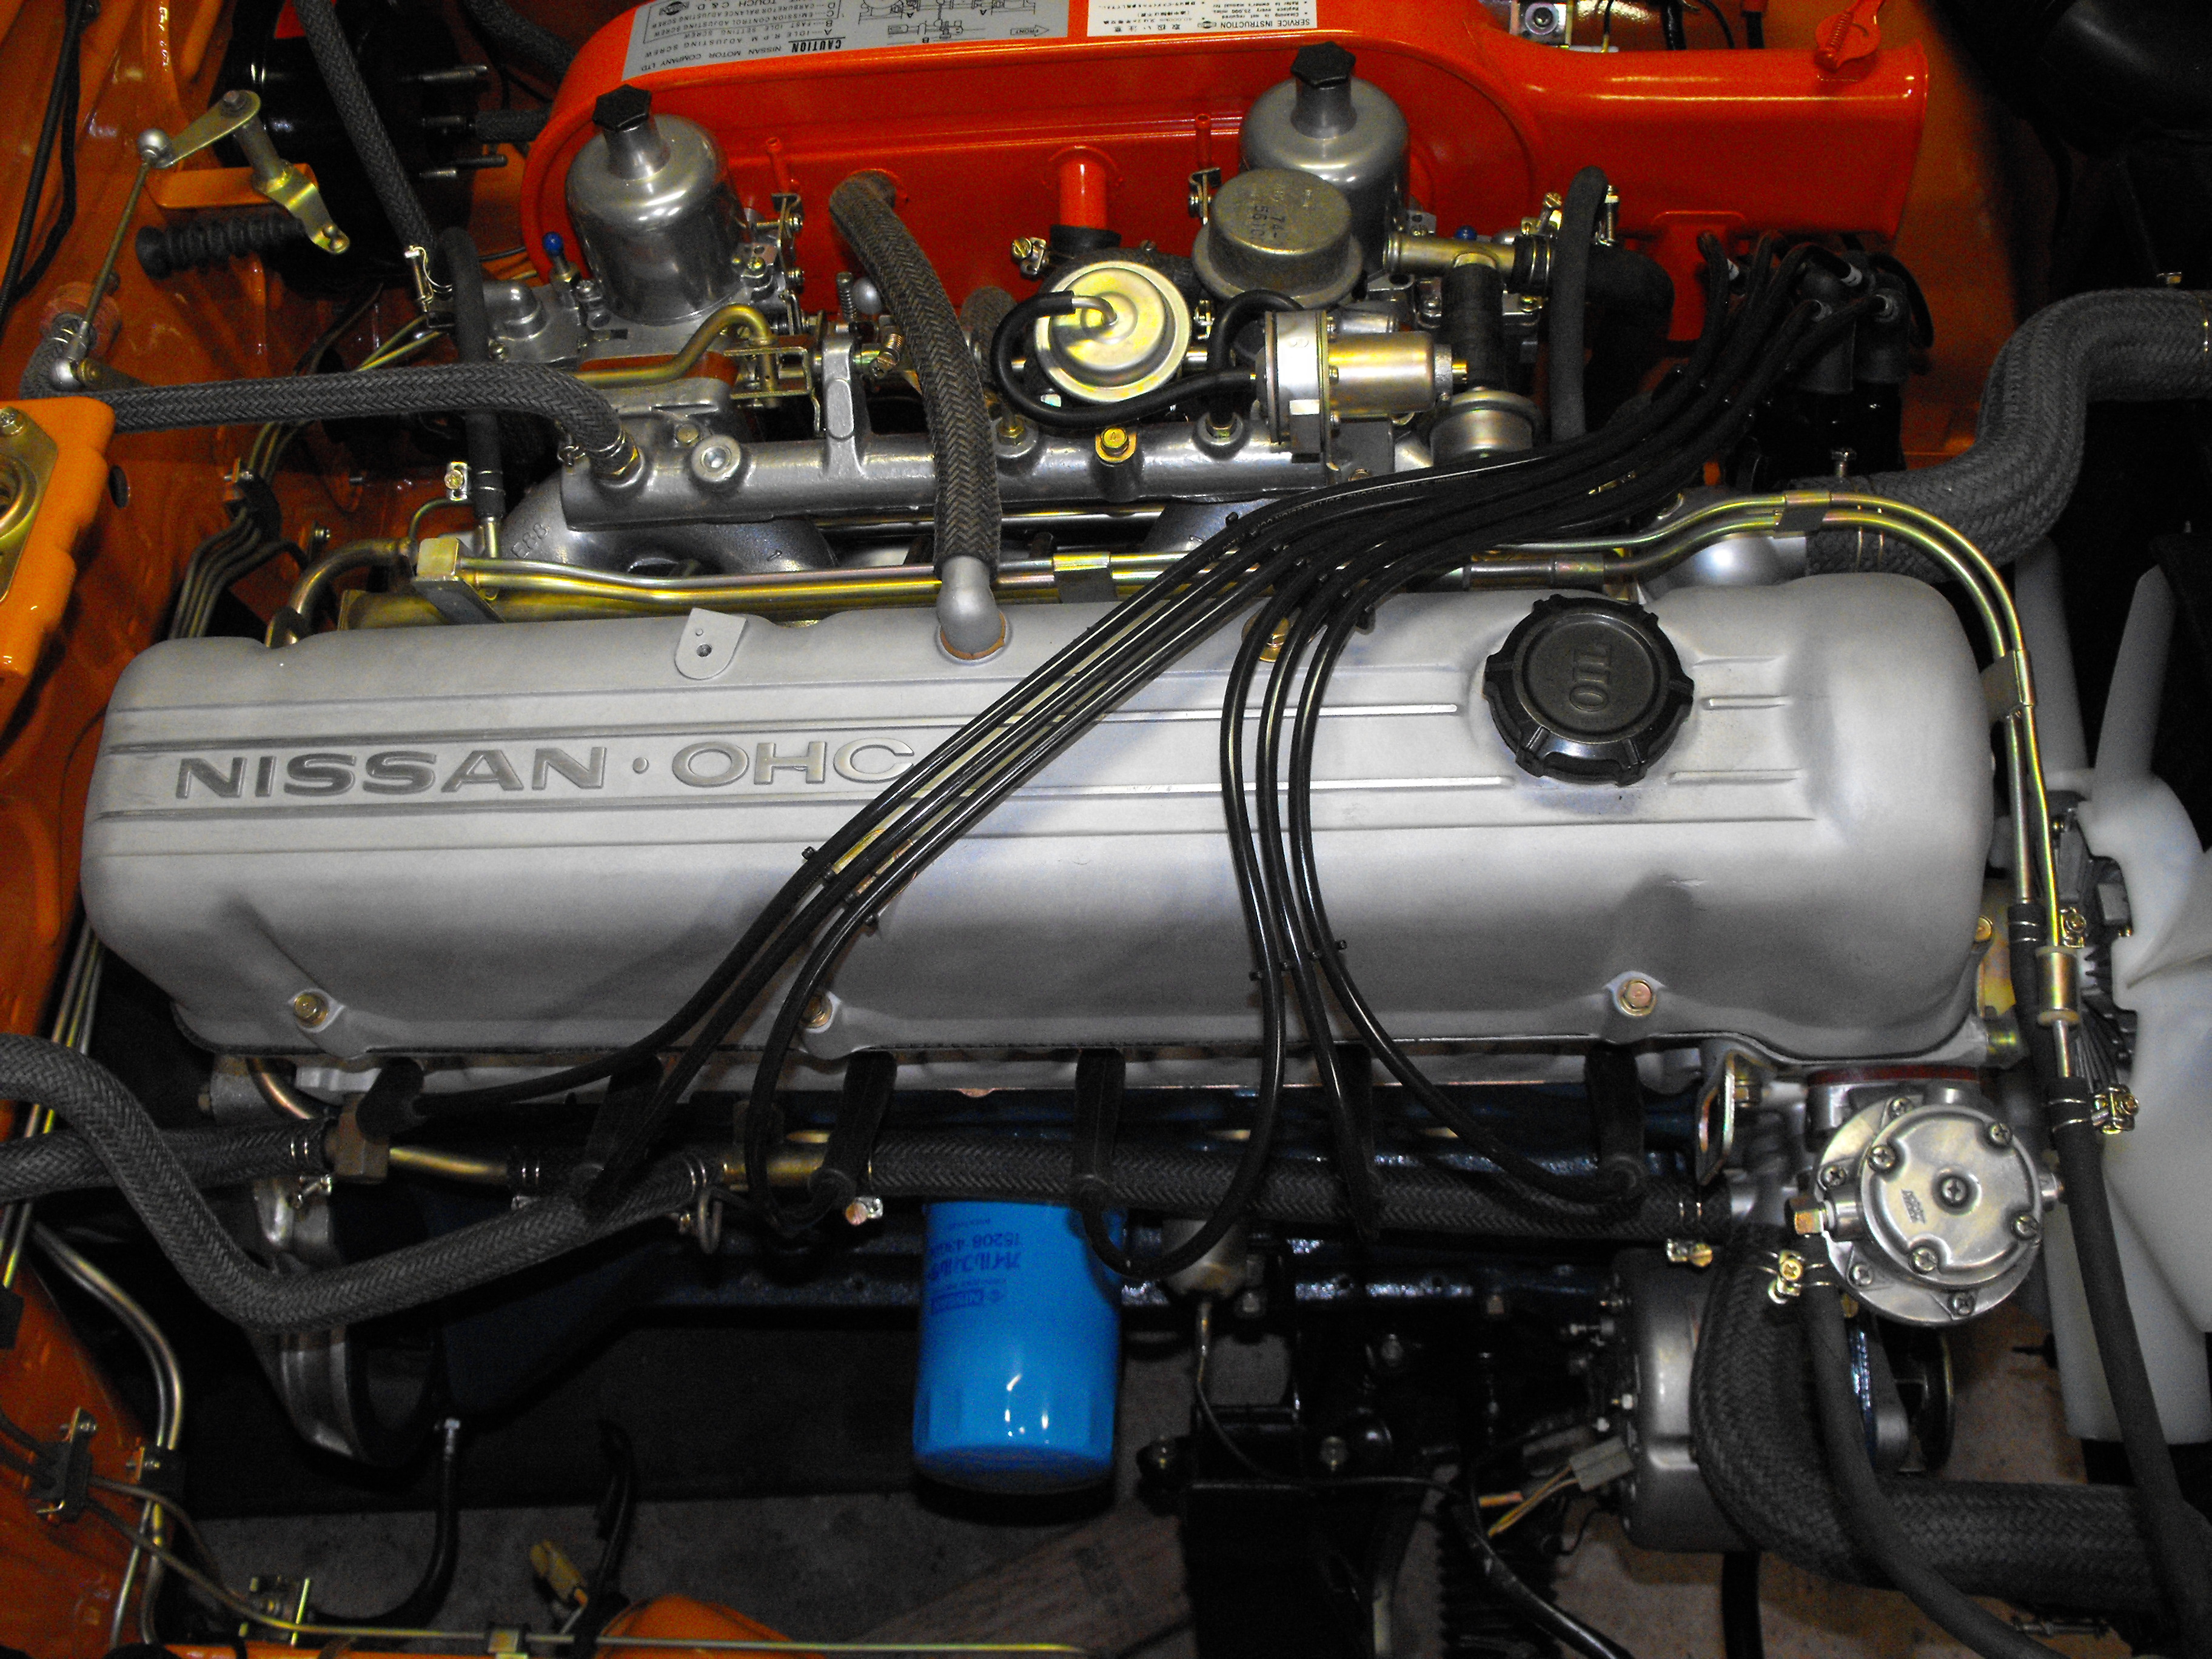
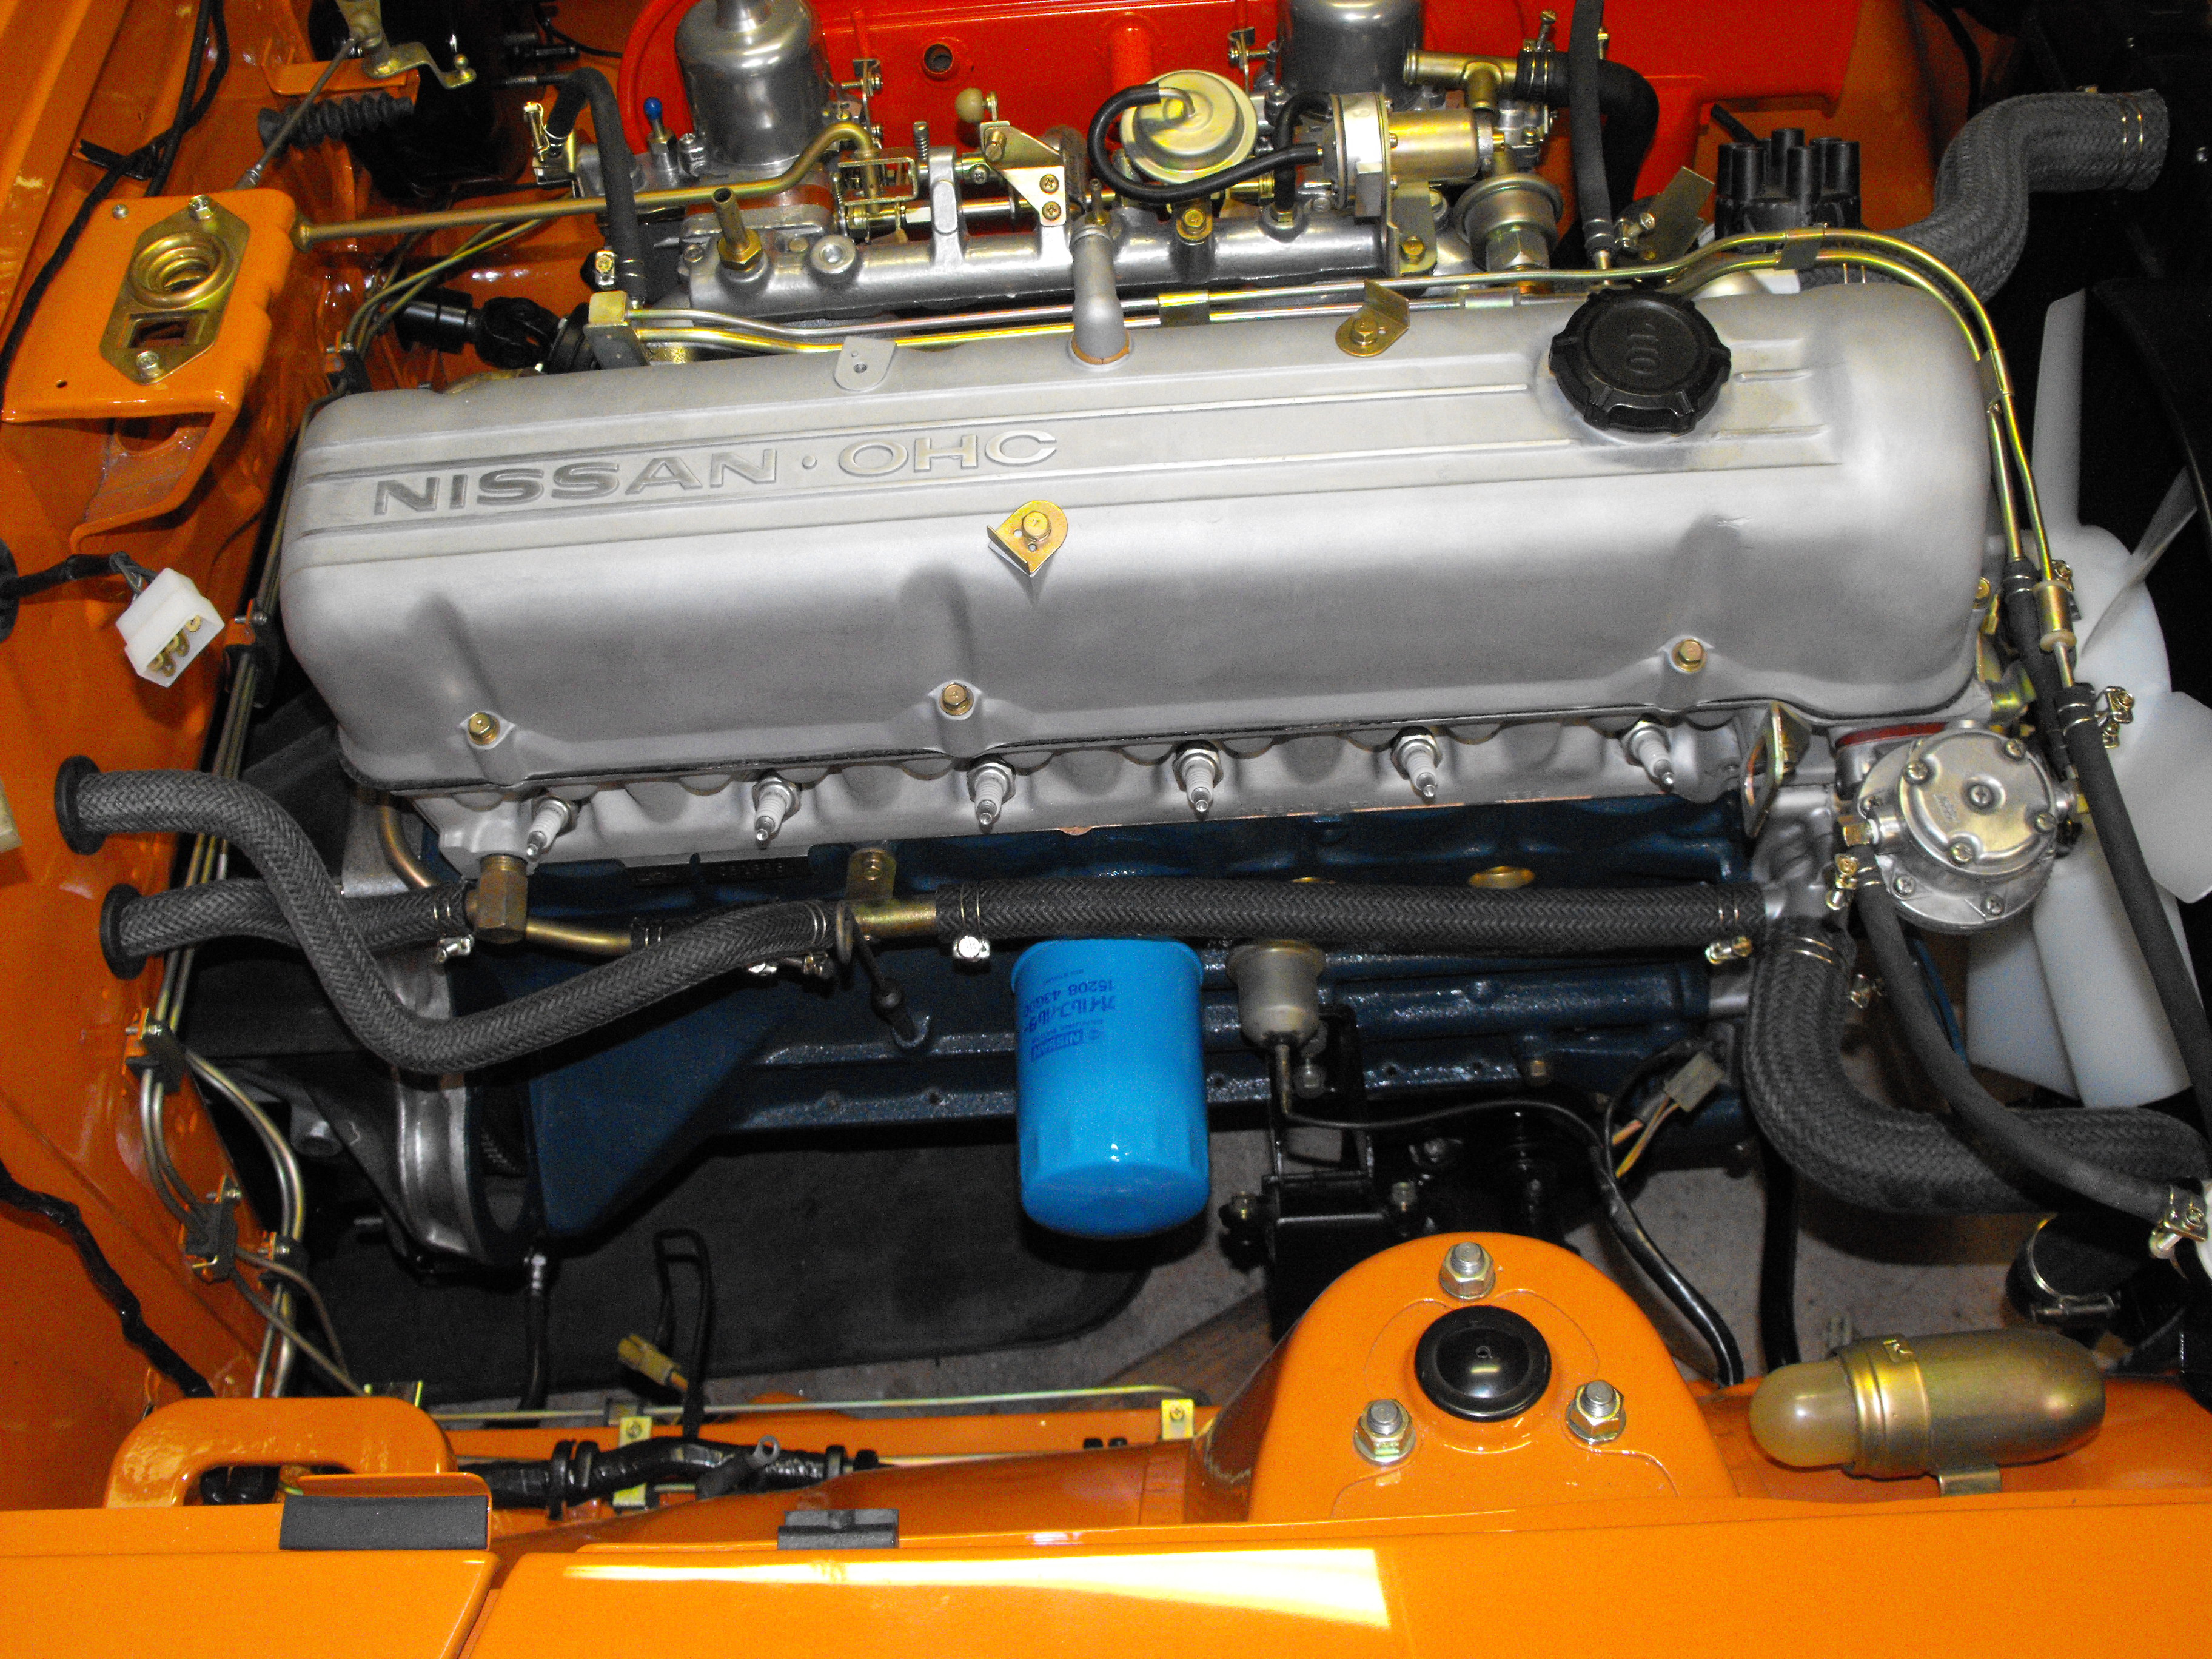
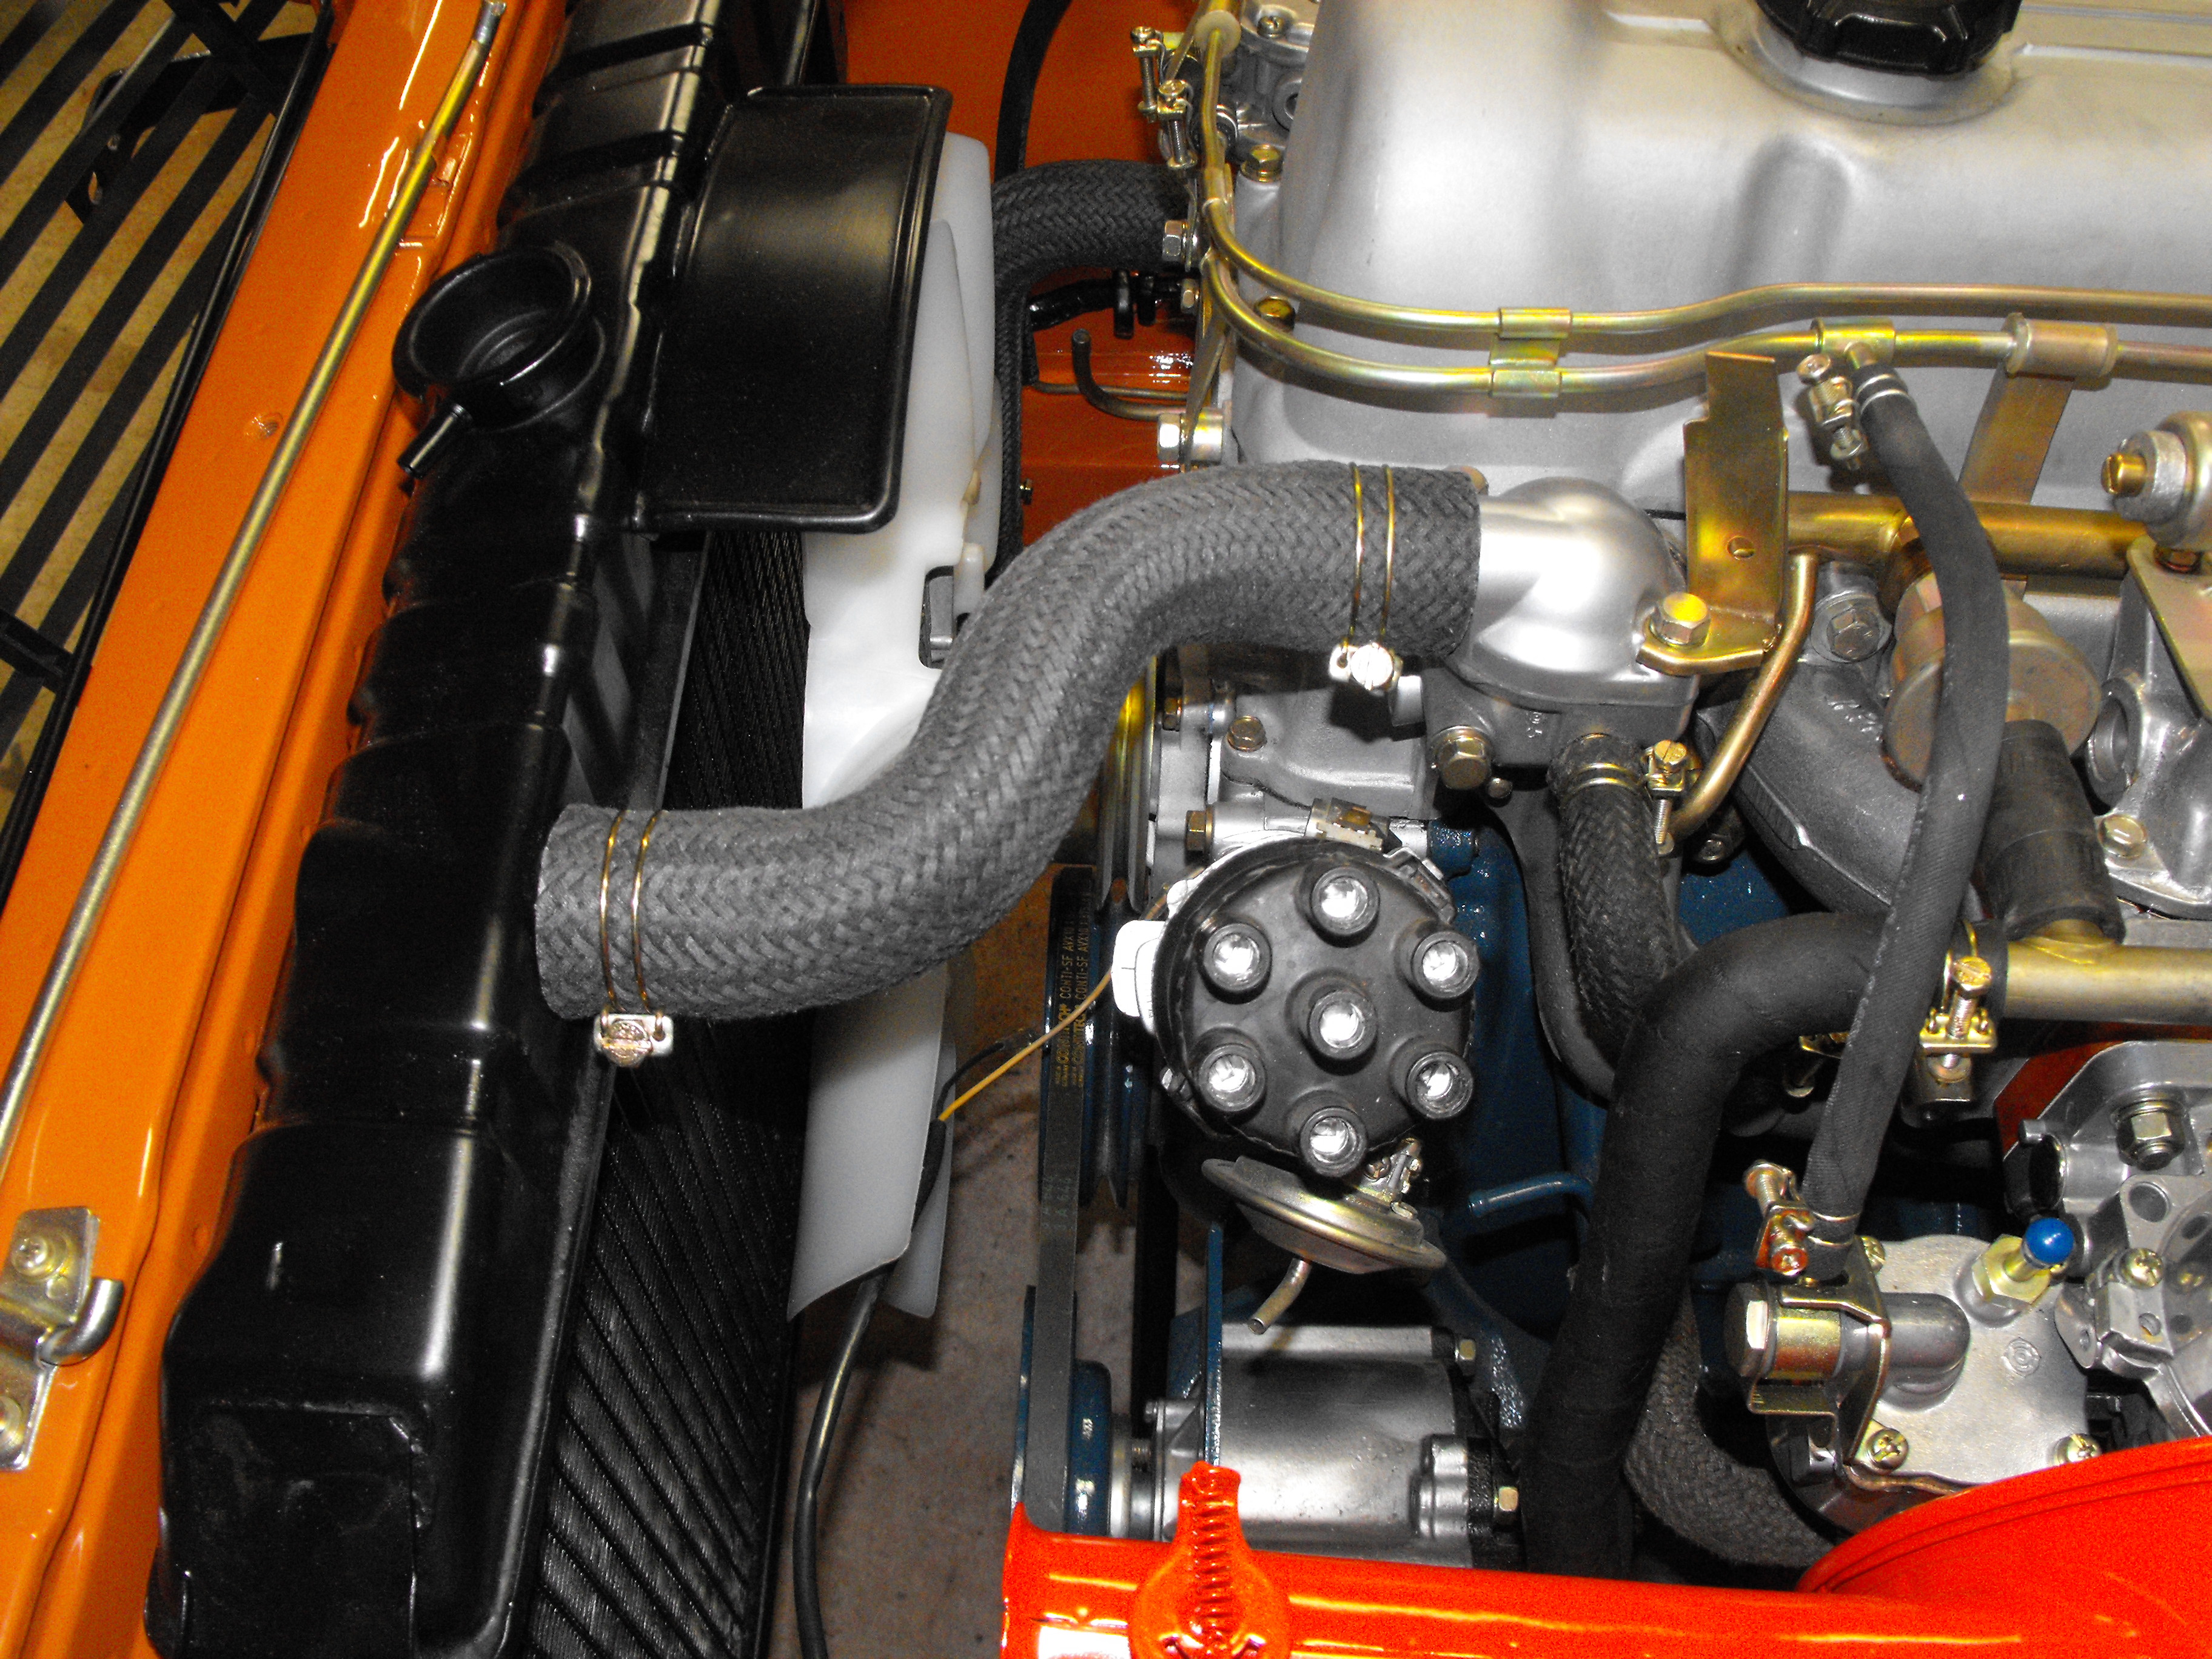
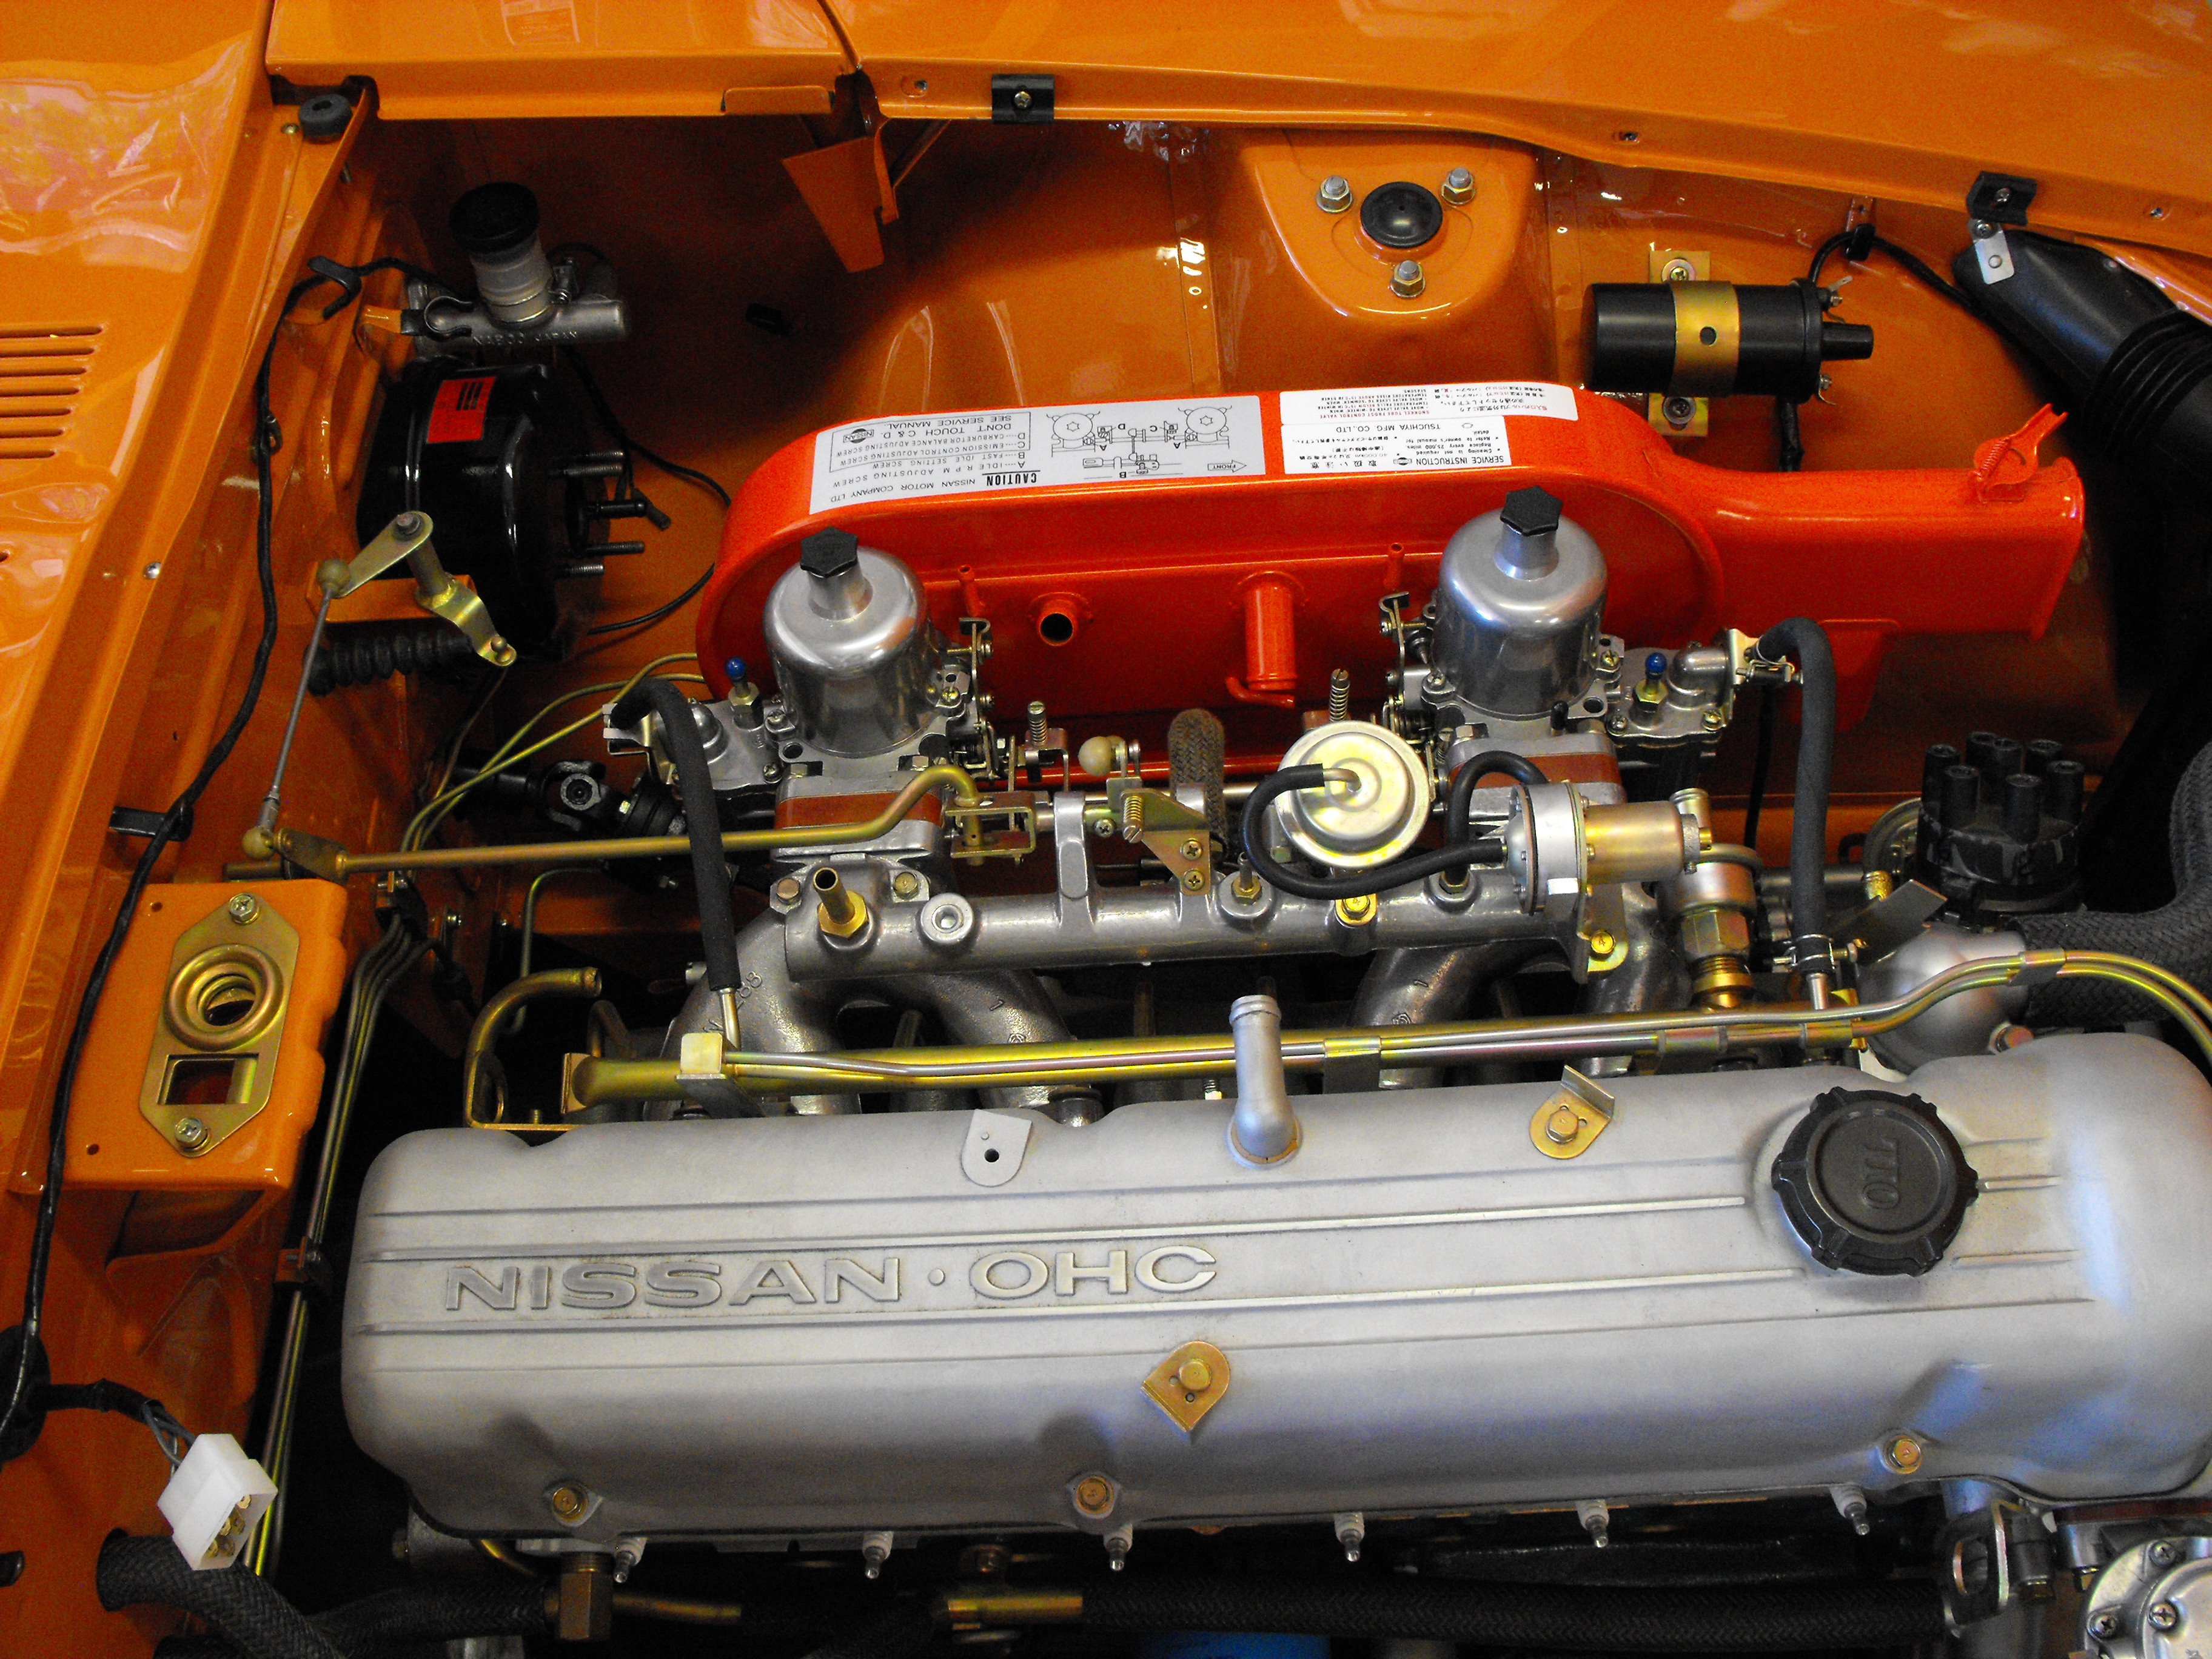
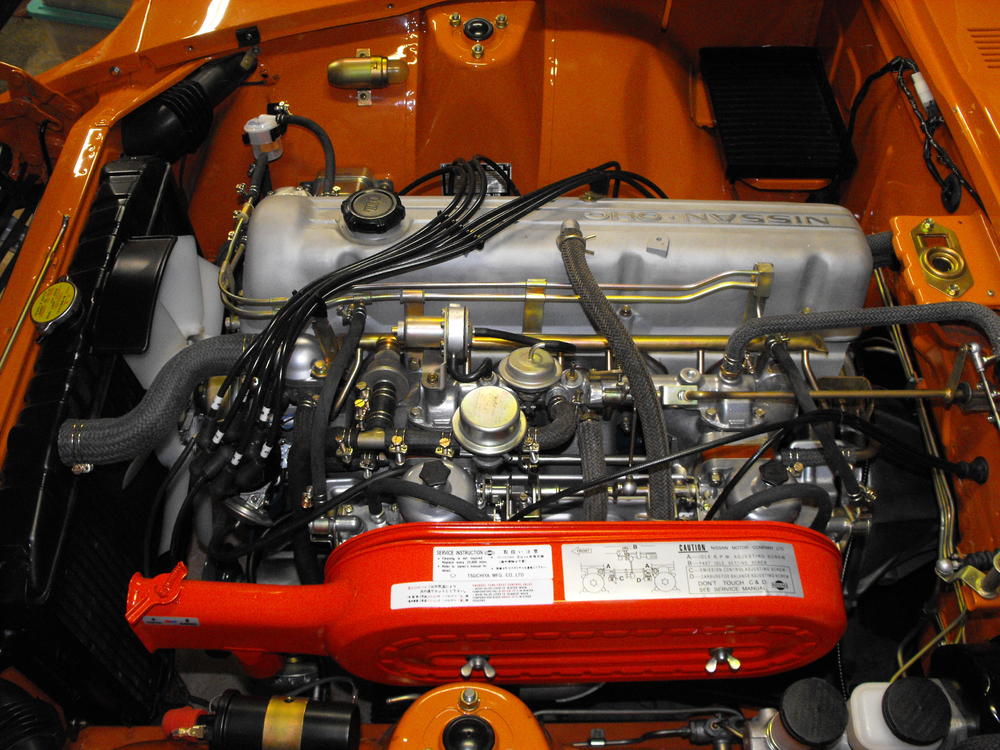
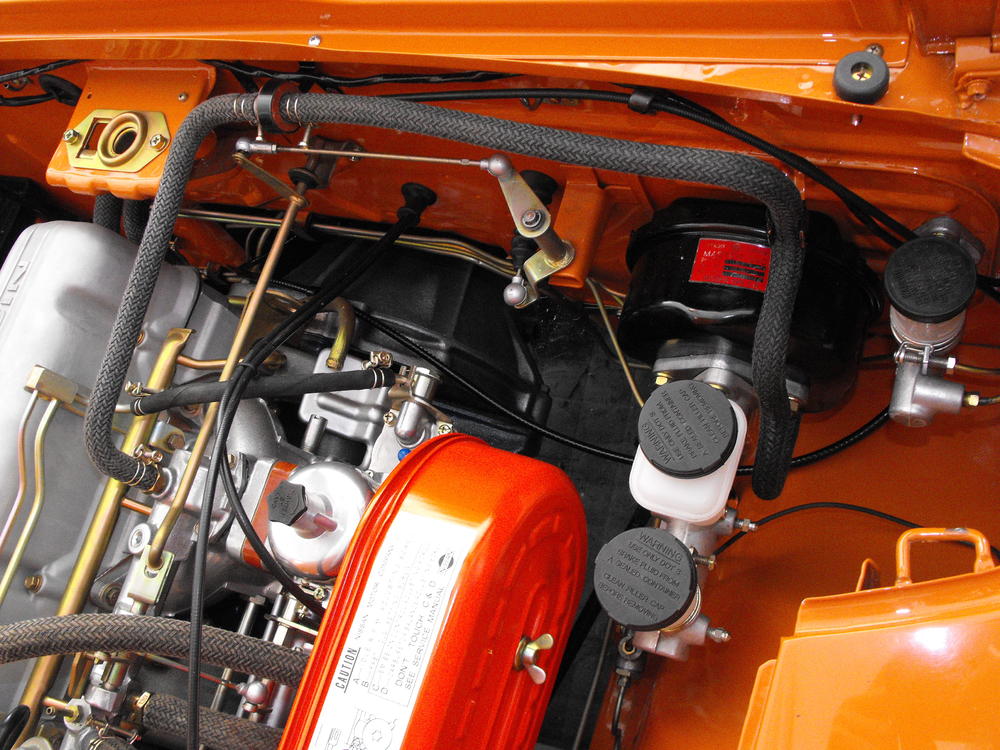
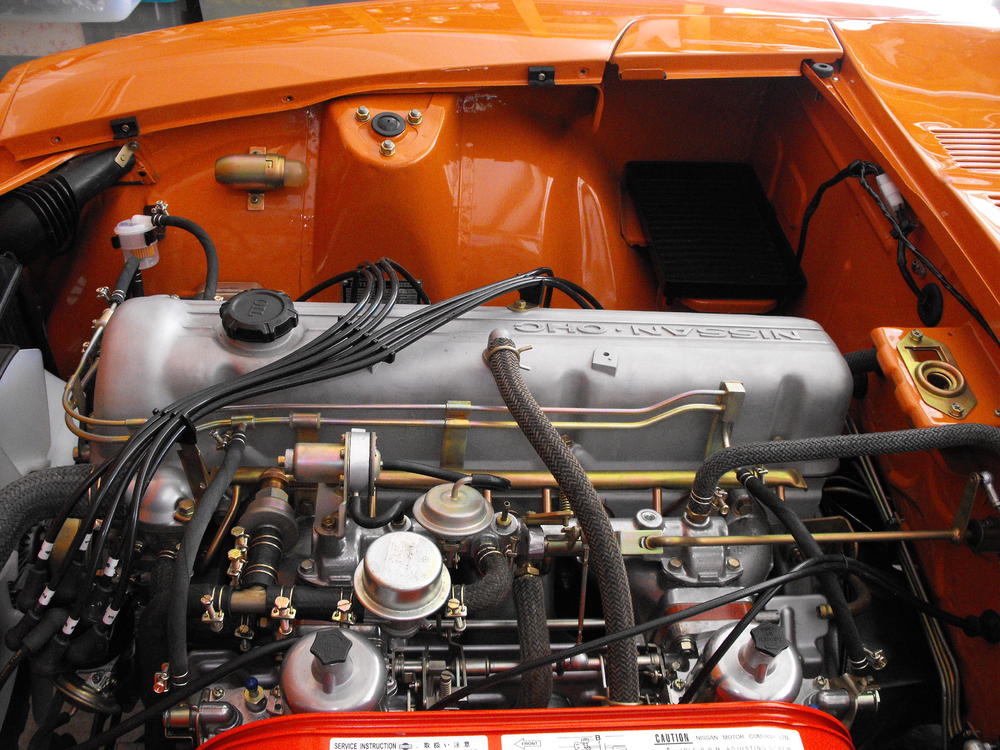
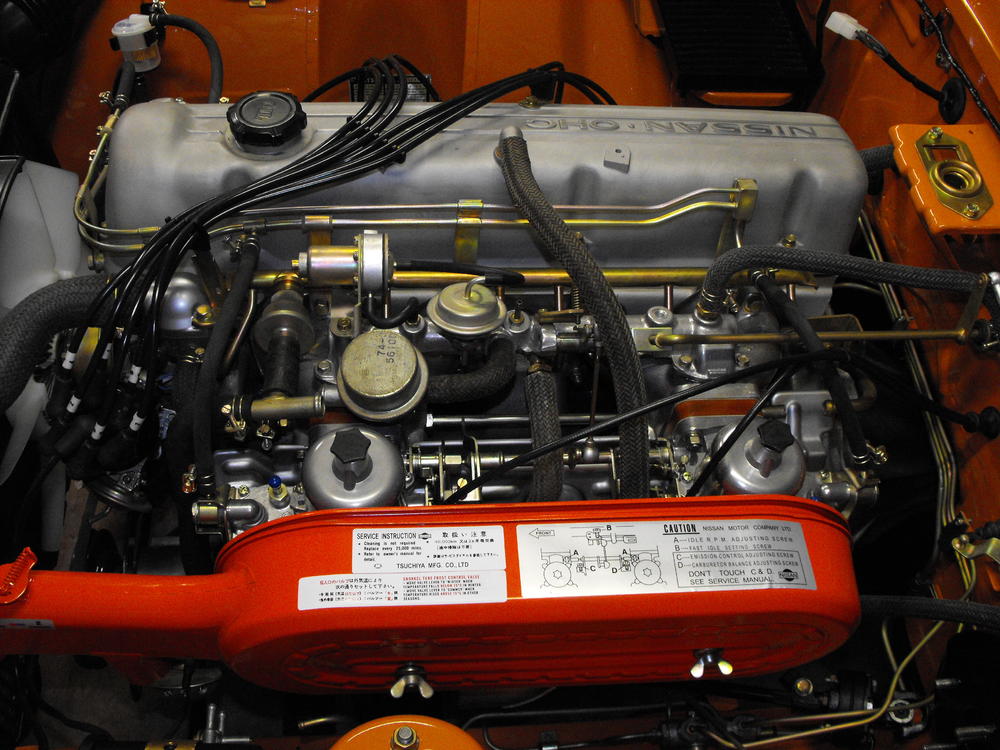
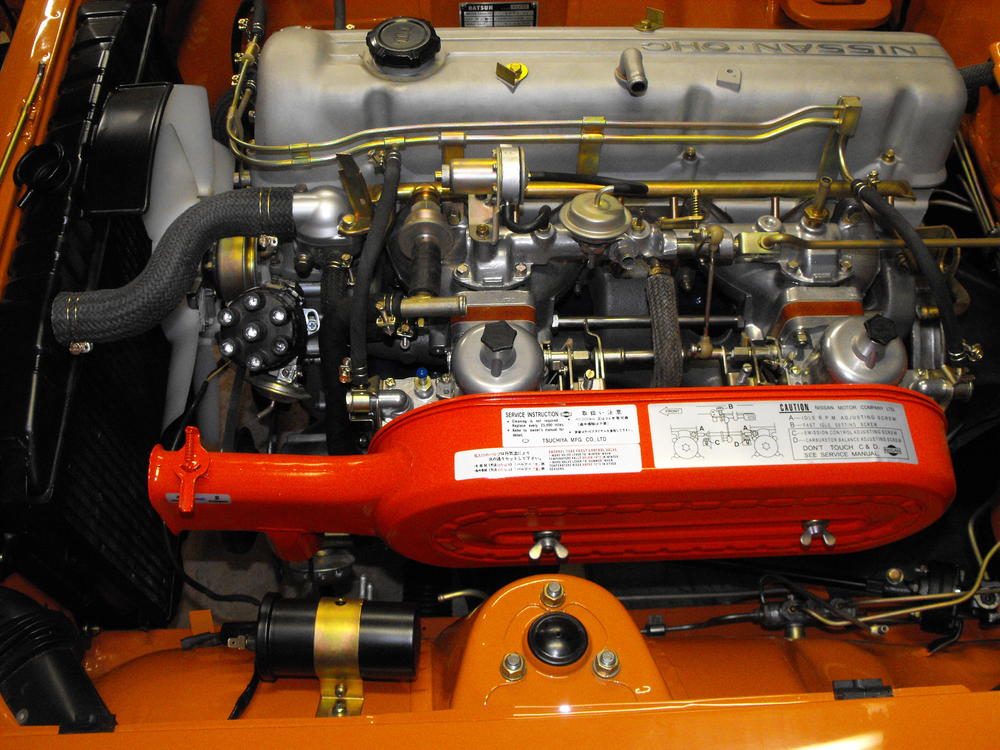
OK, I know your tired of the engine pics, but I got the new spark plug wires in and wanted to show them. Nissan wires are no longer available (several sights listed them but the orders were cancelled with product no longer available) , so I went with the premium Standard Motor Products wires because they were black, cut to correct length, and had the #6 plug with a slight angle. That is about as close to the original as I could find. I am not sure about the red cap on the coil, I do not think that is correct, but everything else is just about right. I also put in the choke cable and alternator. I will make the final connections after I replace the connectors. I should have the engine bay about finished this weekend.


-
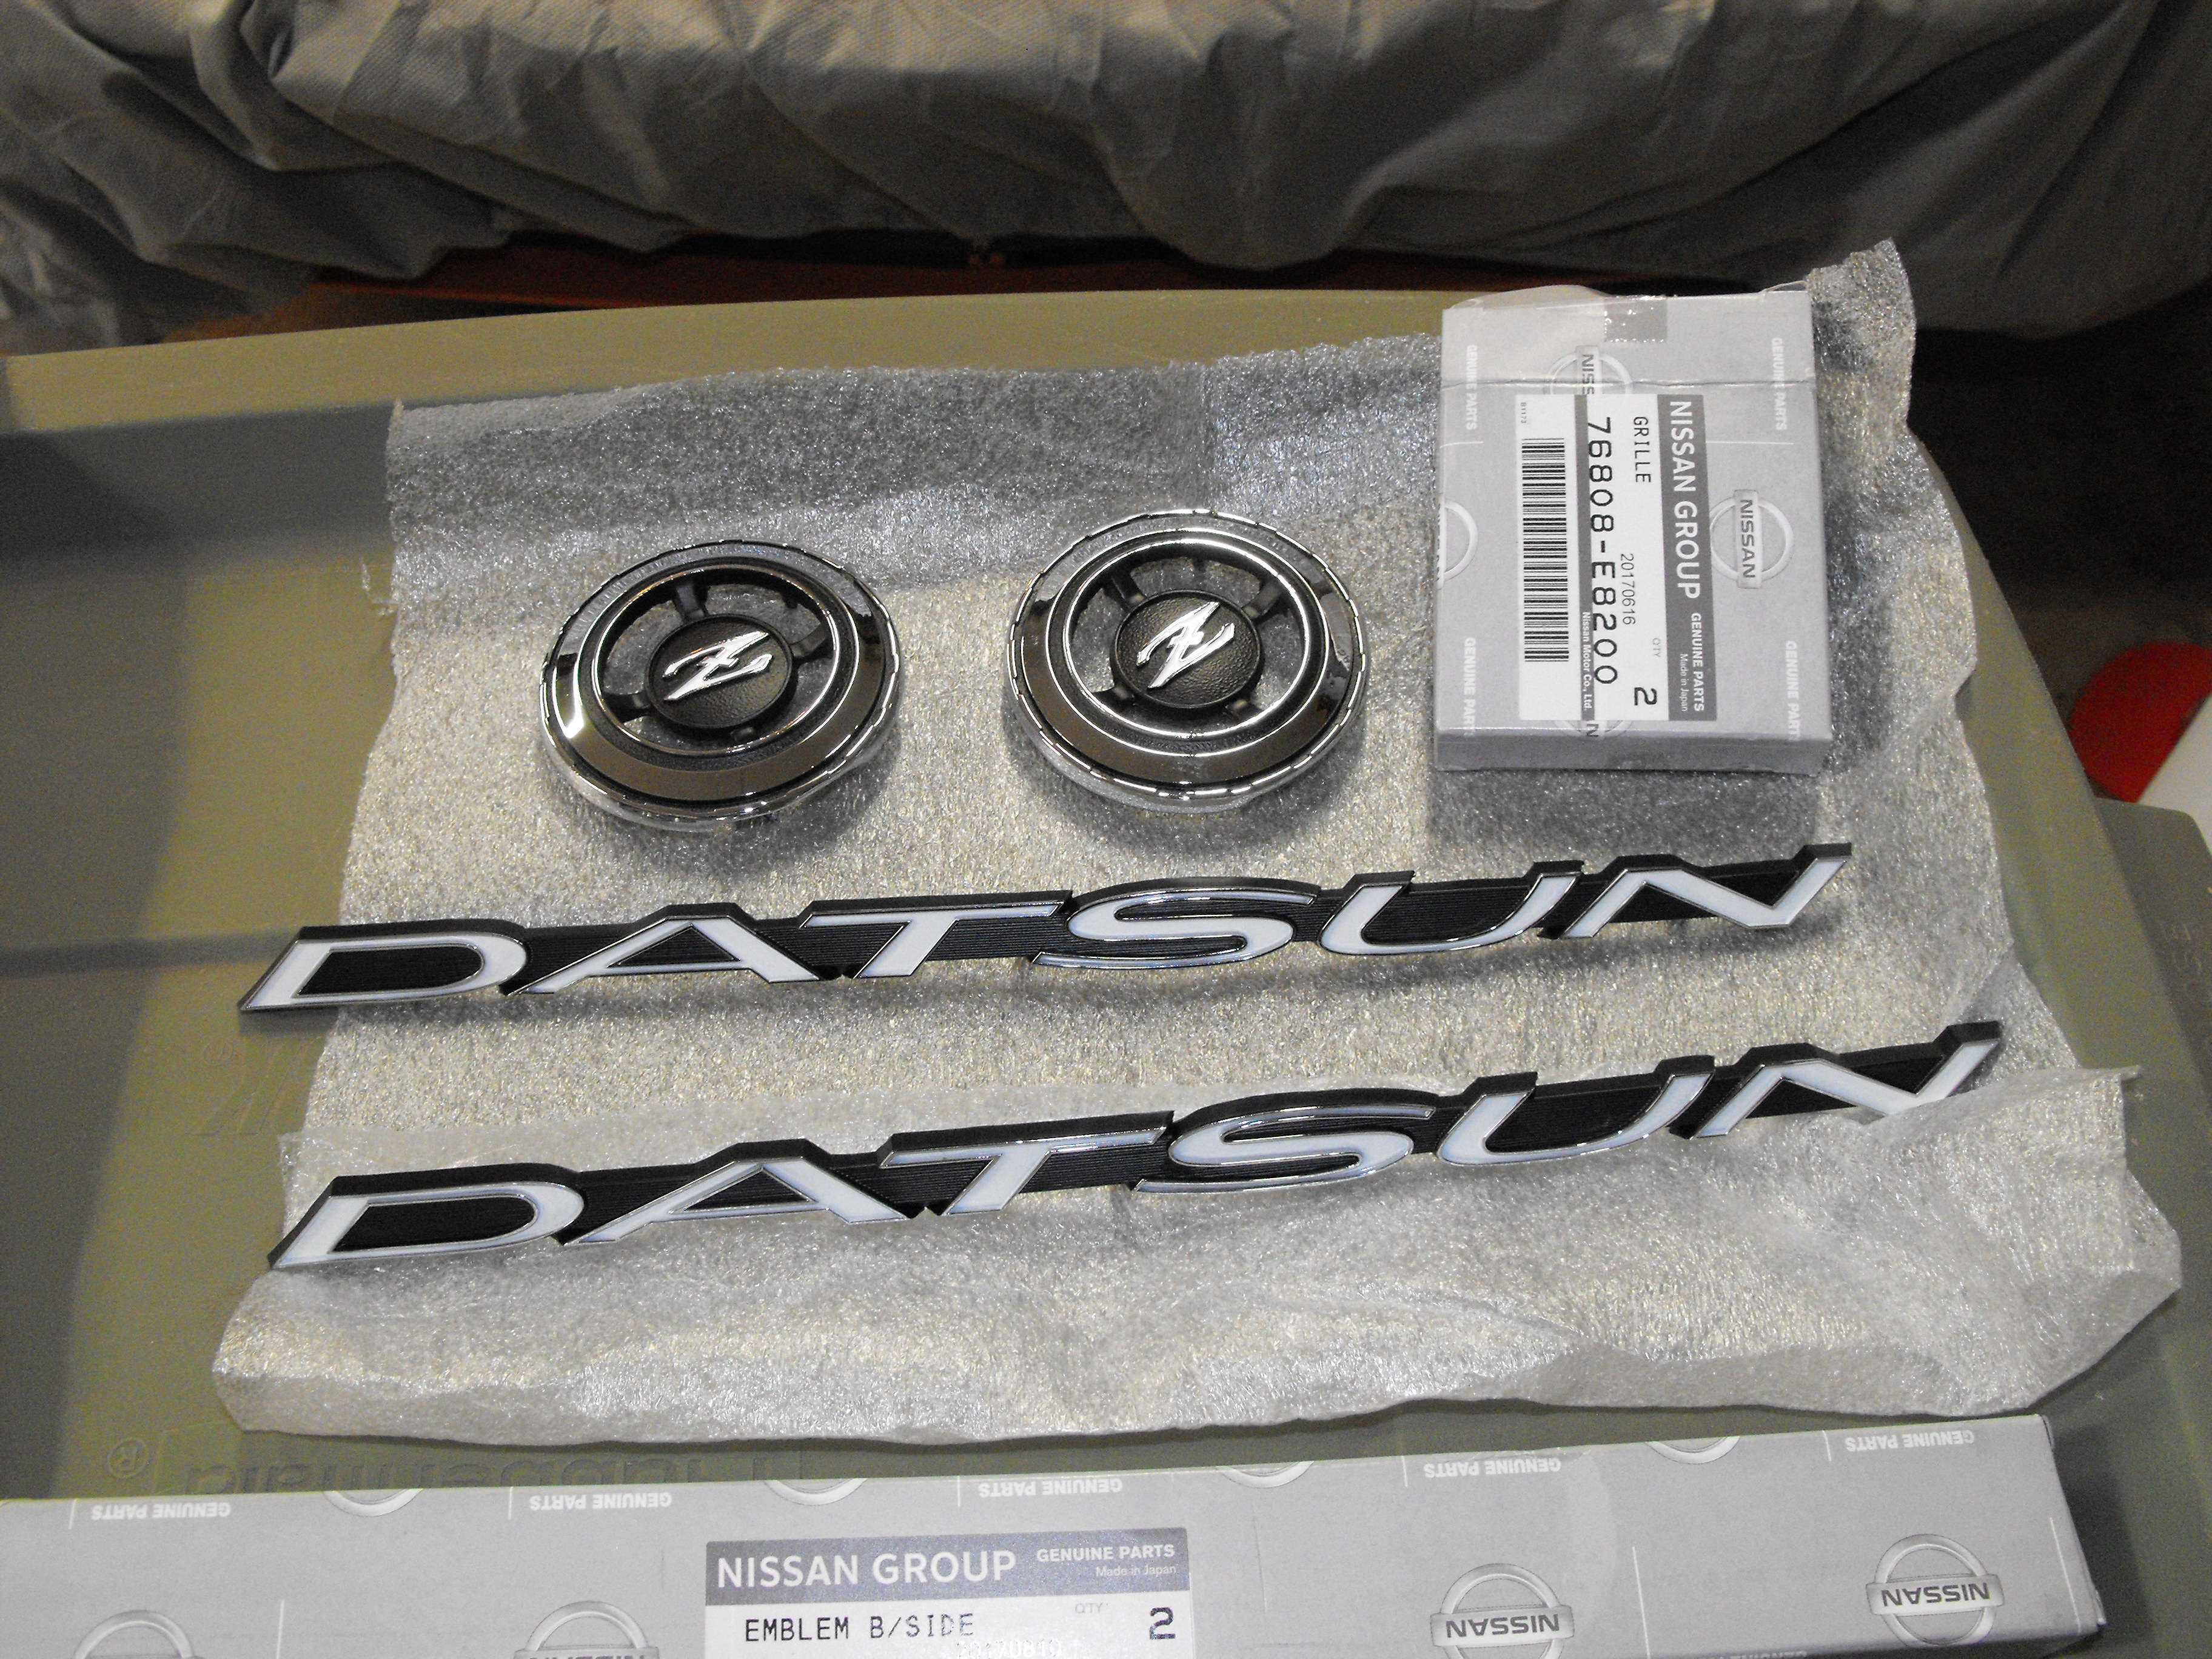
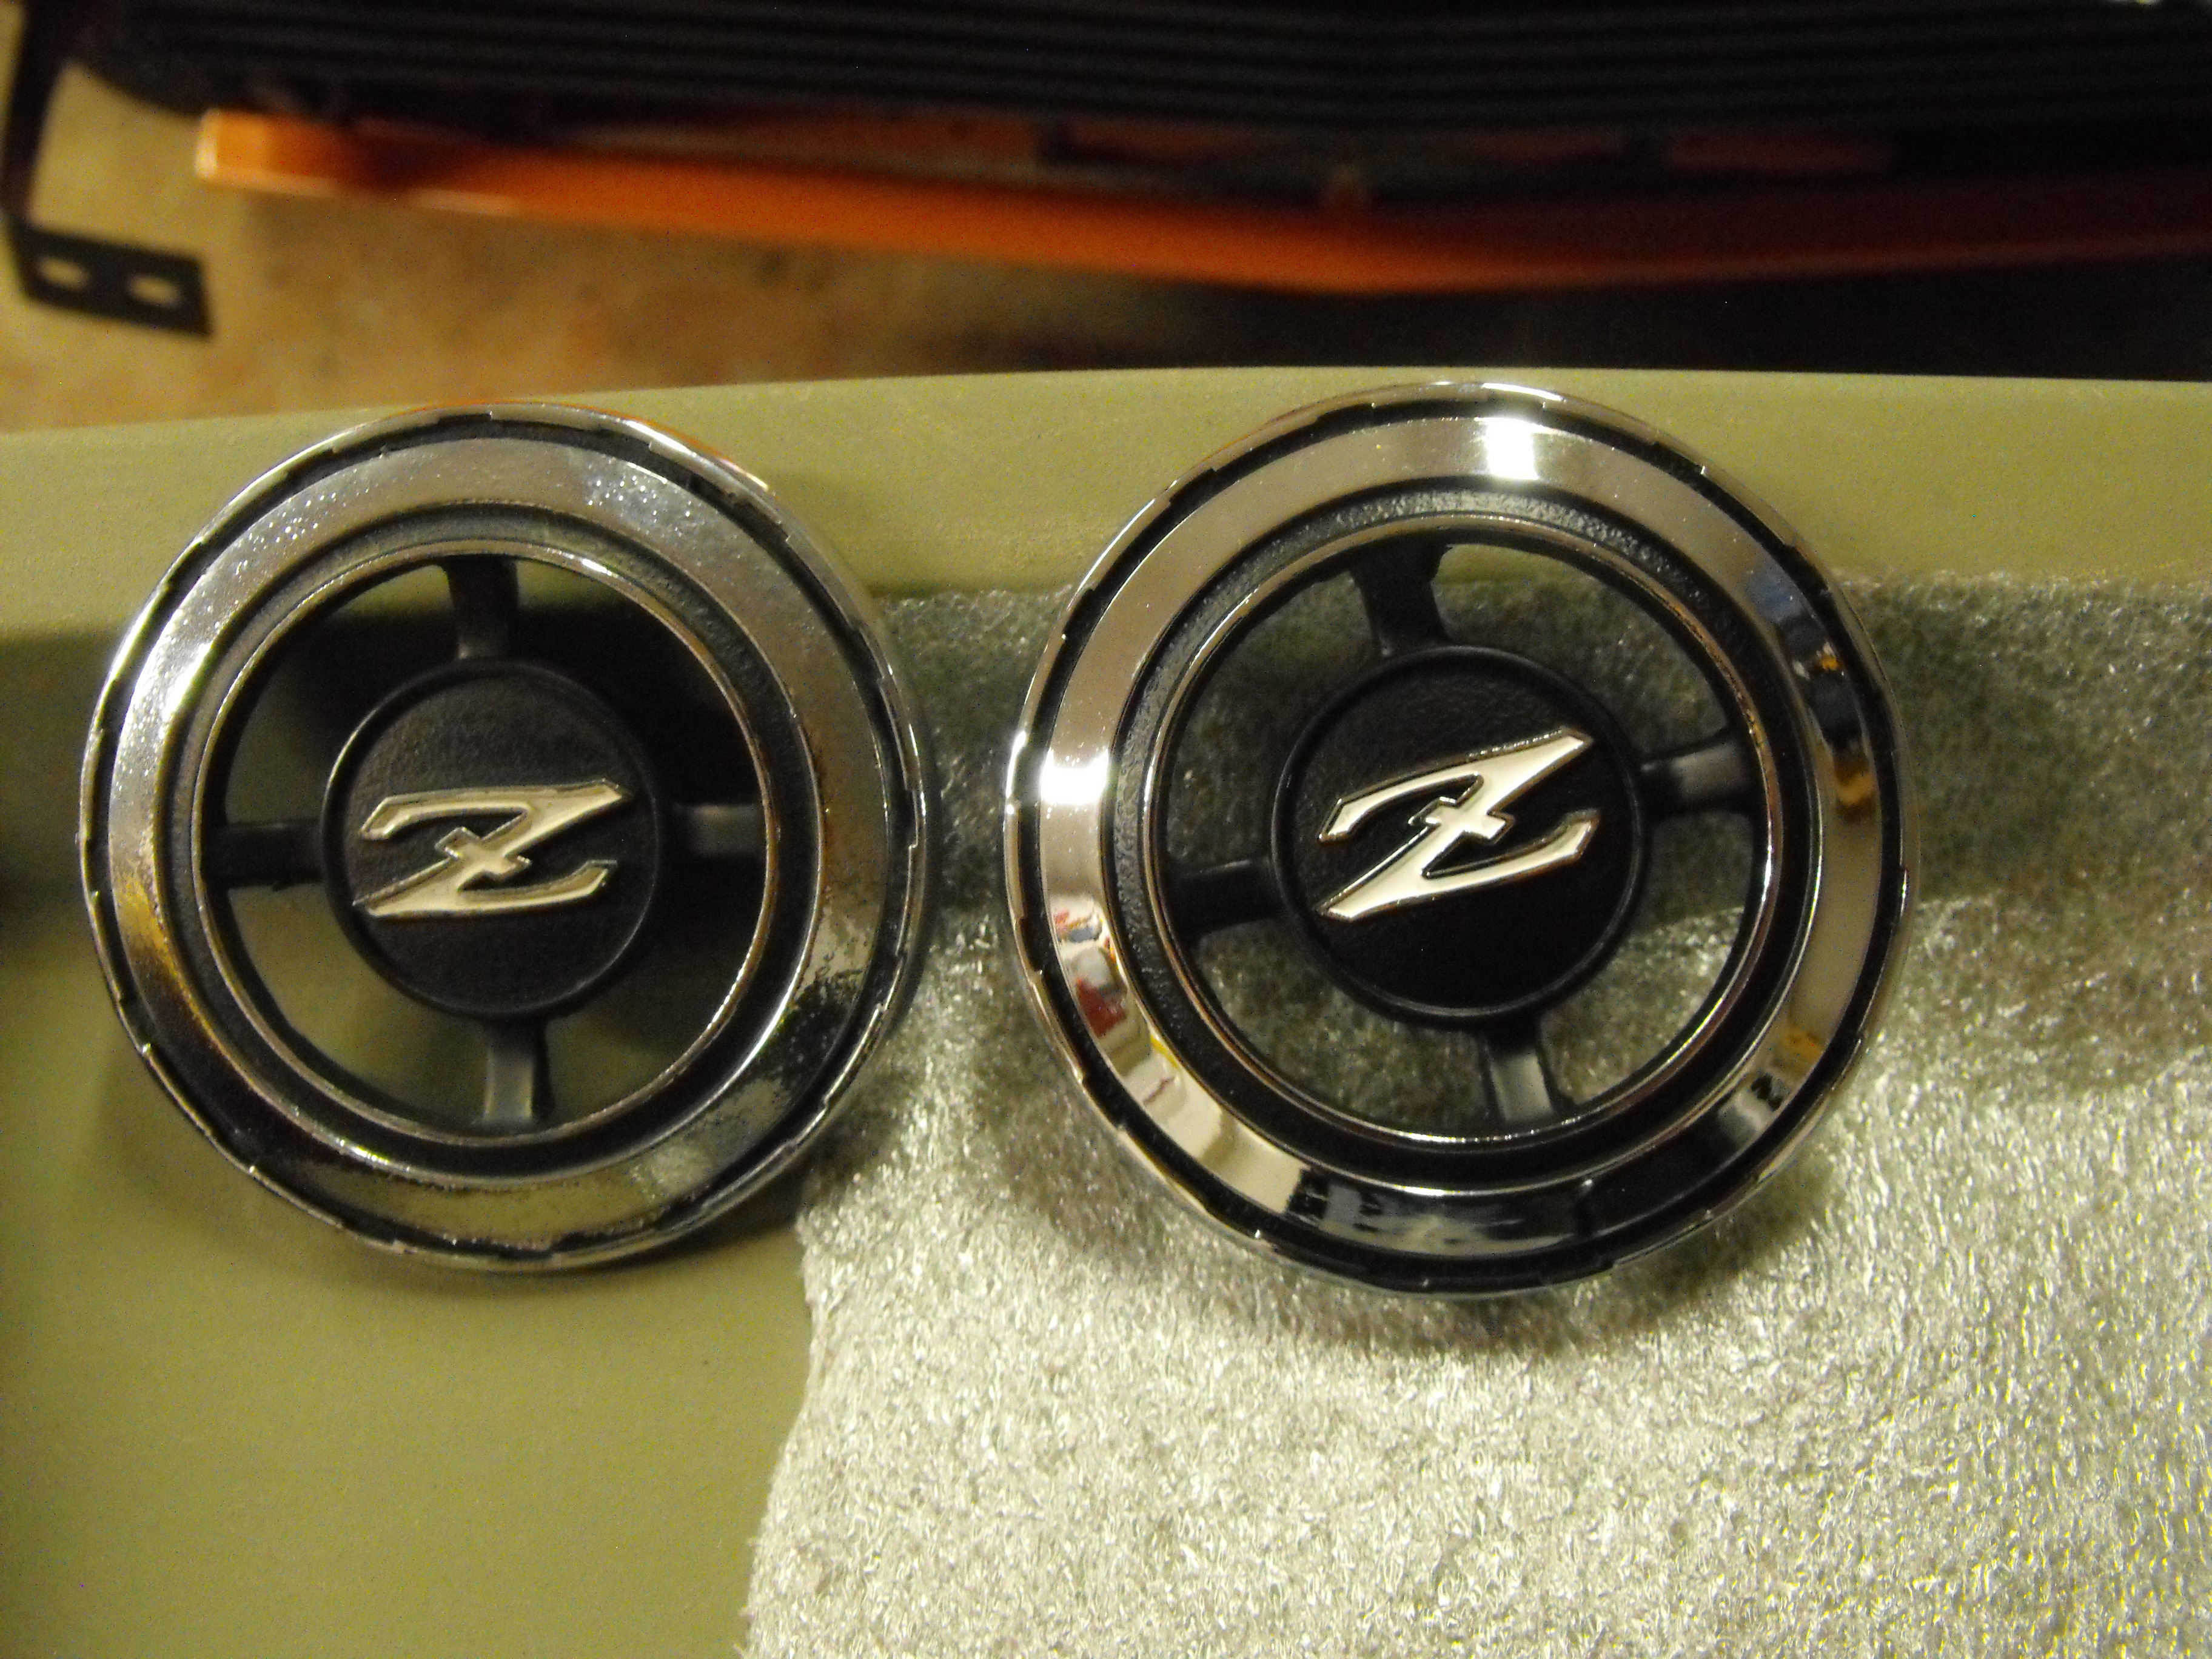
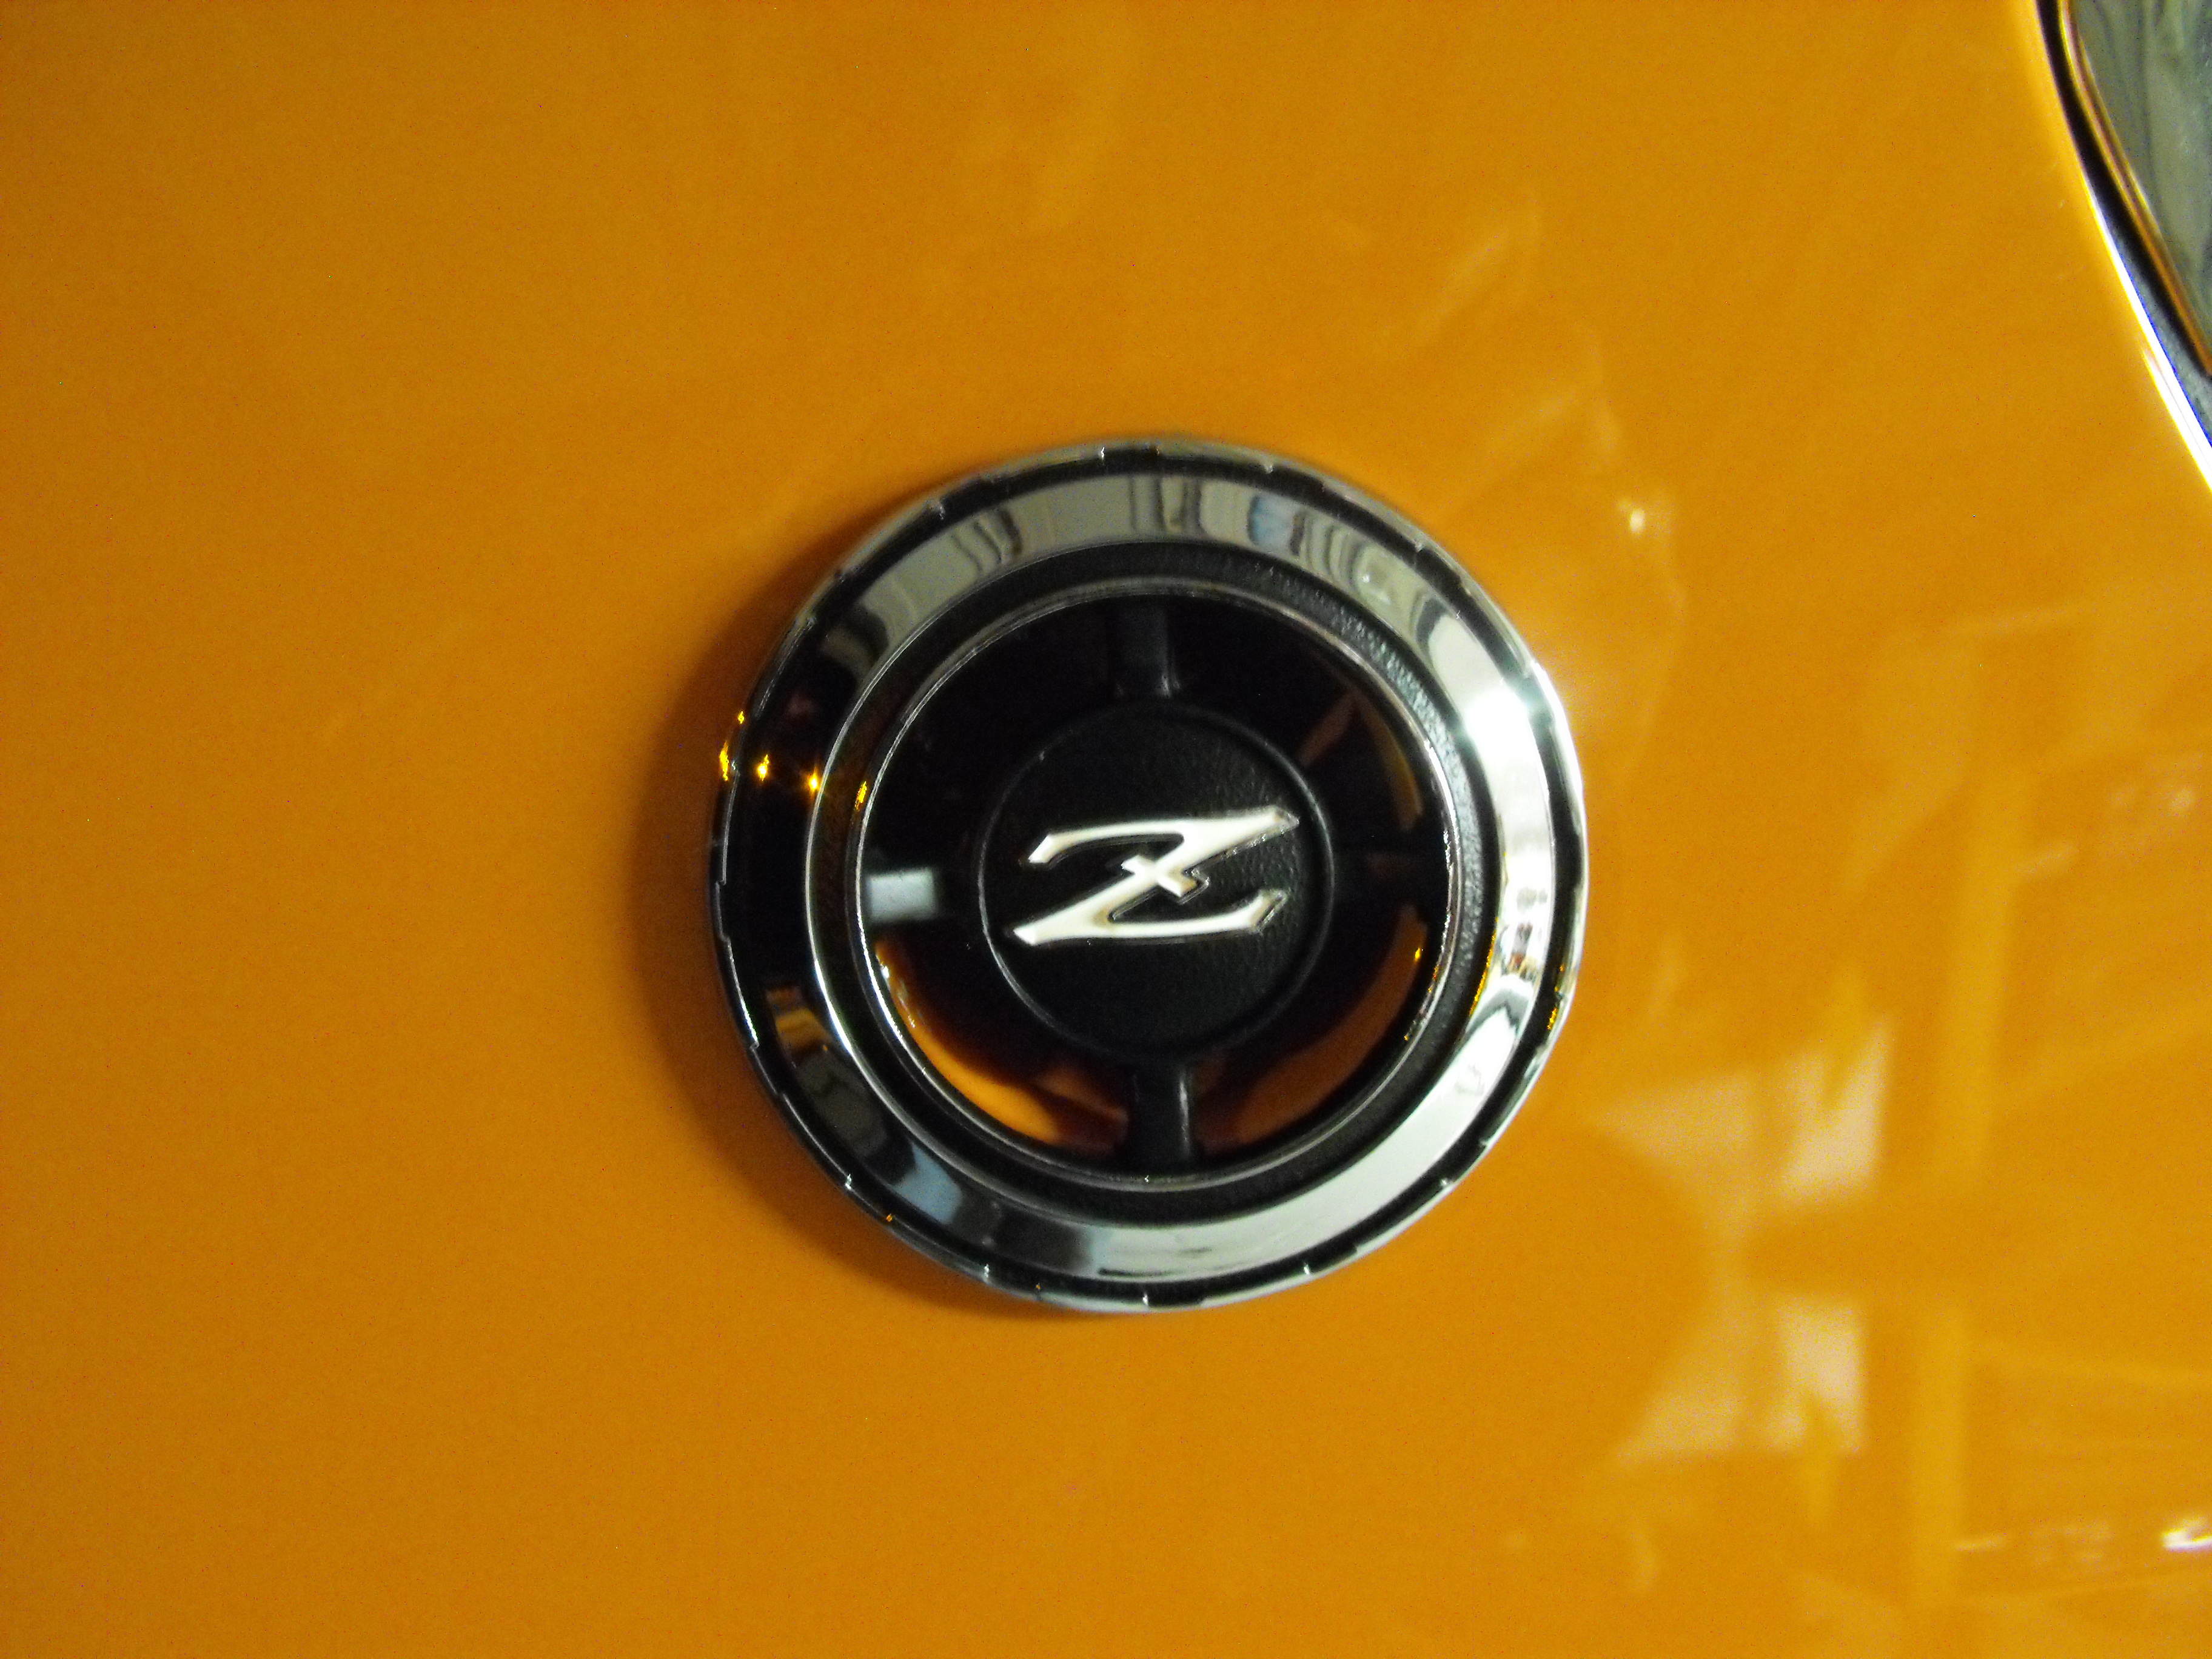
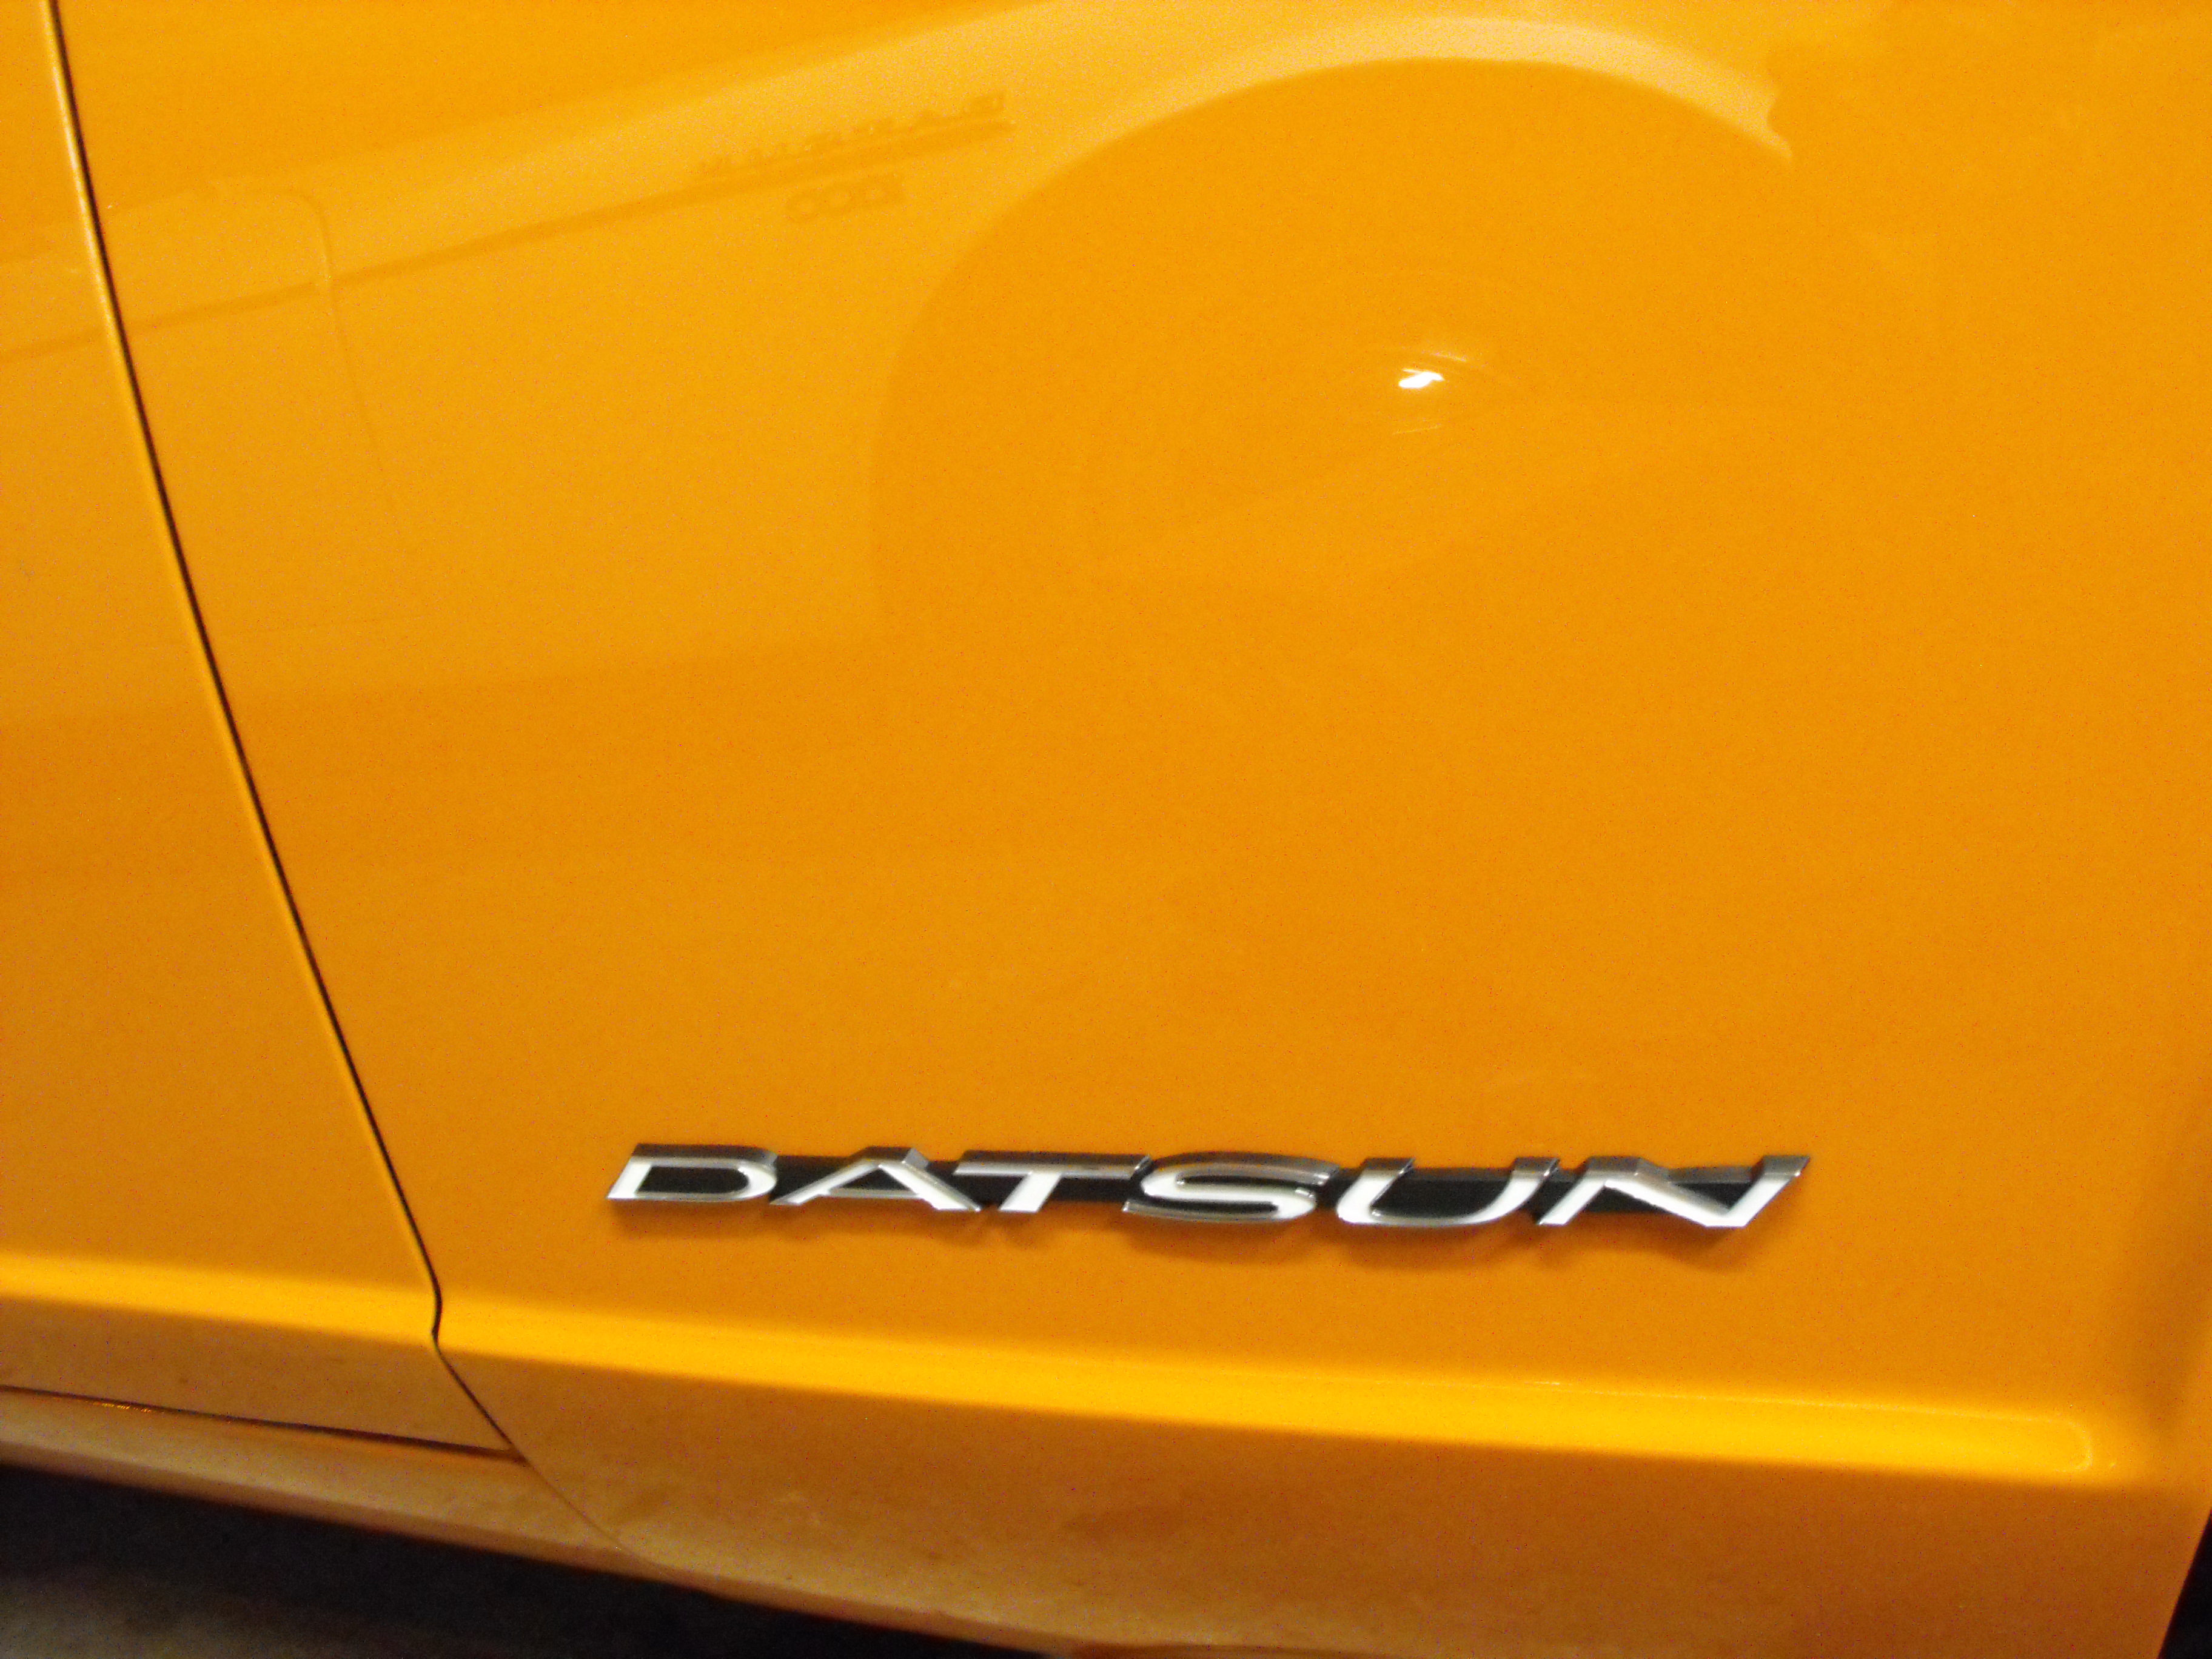
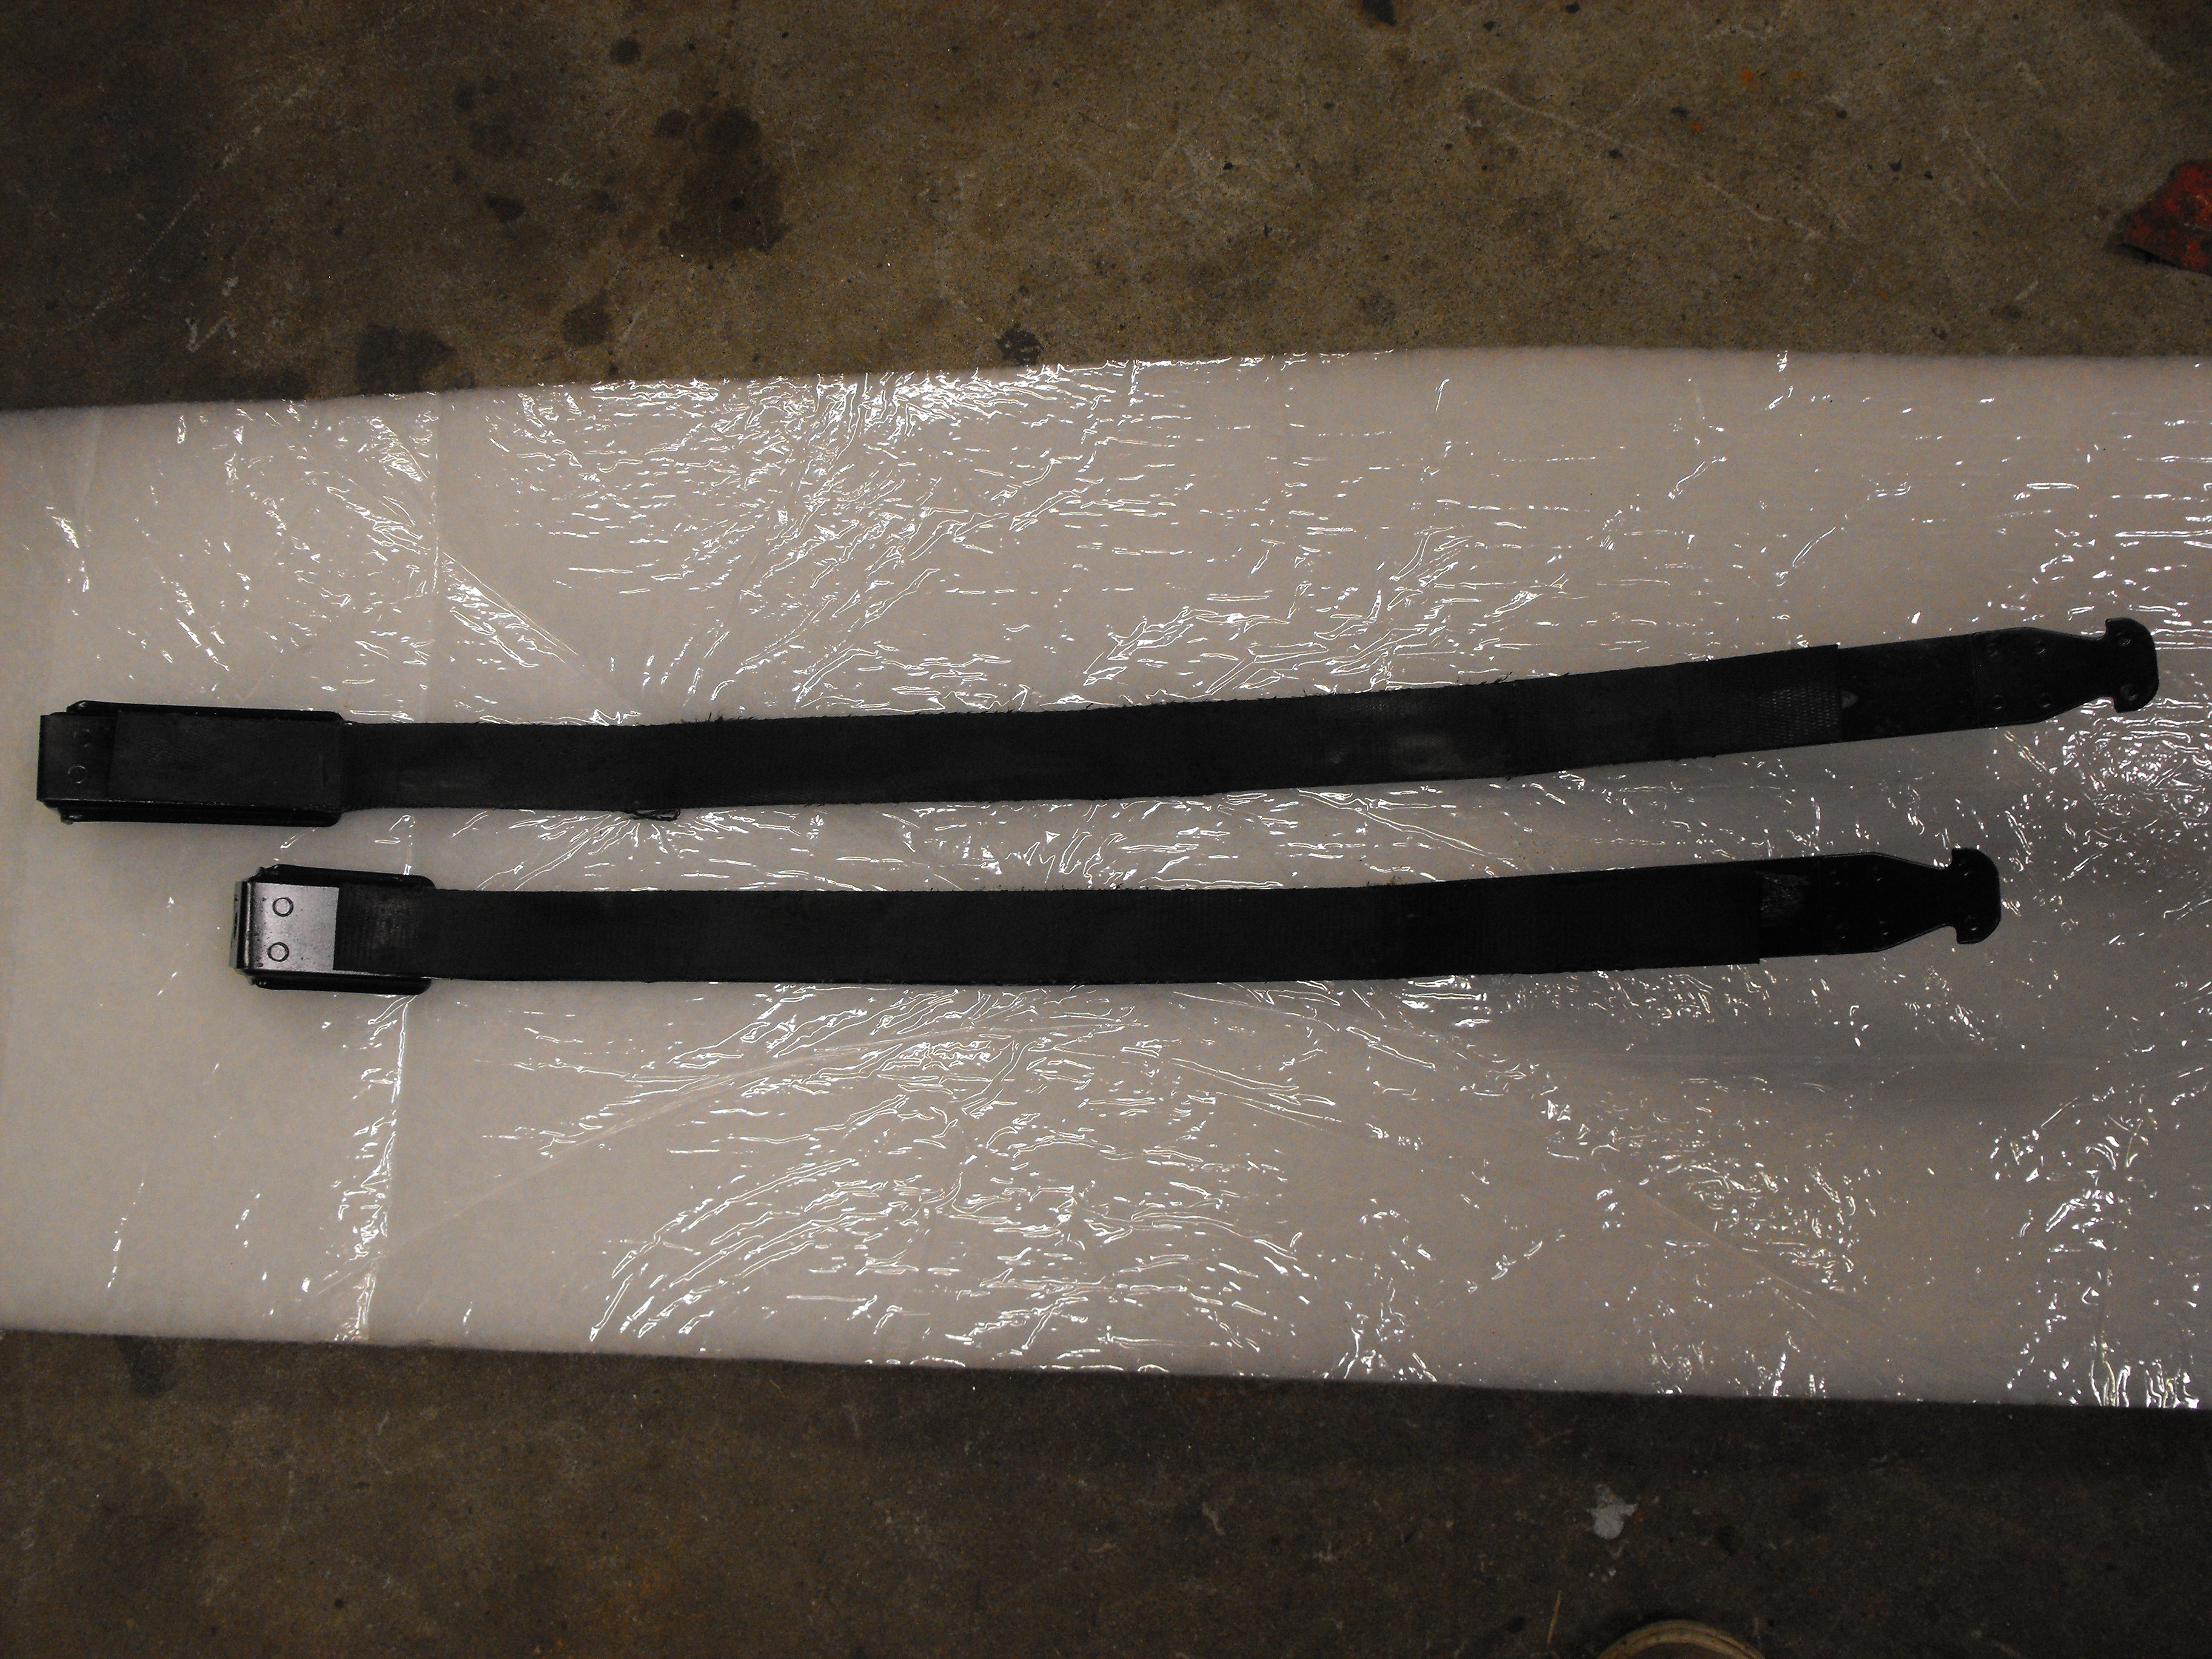
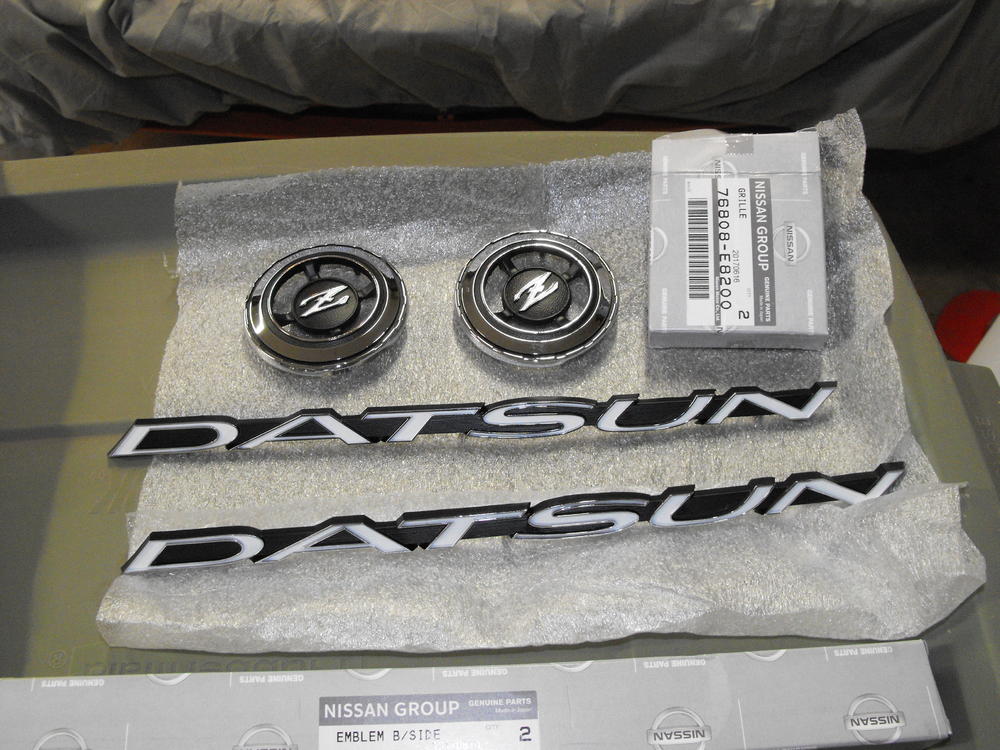
Got the new emblems in so I put those on. Very pretty . The old ones were a pitted as you can see in the one pic. They look nice with the fresh paint. Cleaned up the tank straps and put the cleaned up rubber material on them. Then installed the tank. Nice to have that in. ( I really hate this camera. It takes terrible flash pics. Although, it could be the bad photographer.)


-
Excellent! I look forward to seeing the finished carbs.
-
Yes, I am pretty sure all of the SU attach parts are yellow zinc. The only silver or clear zinc parts on the Z are the door hardware, hatch bumpers and the wire clamps and coil holder of the '70 Z's. There might be some others but the yellow zinc is definitely the dominant color.
-
I got the Heat shield and Exhaust Manifold Air Warmer duct (not sure what the exact name is) cleaned and painted with high temp aluminum paint. Also got the fuel tank straps cleaned and painted and the tank finished. I should have the tank installed tomorrow. Just a few pics below. And I ran a half marathon this AM. Finished in 1:52:05. That is about 8:33 average per mile and my best ever half marathon time. Not bad for a 56 year old man.

-
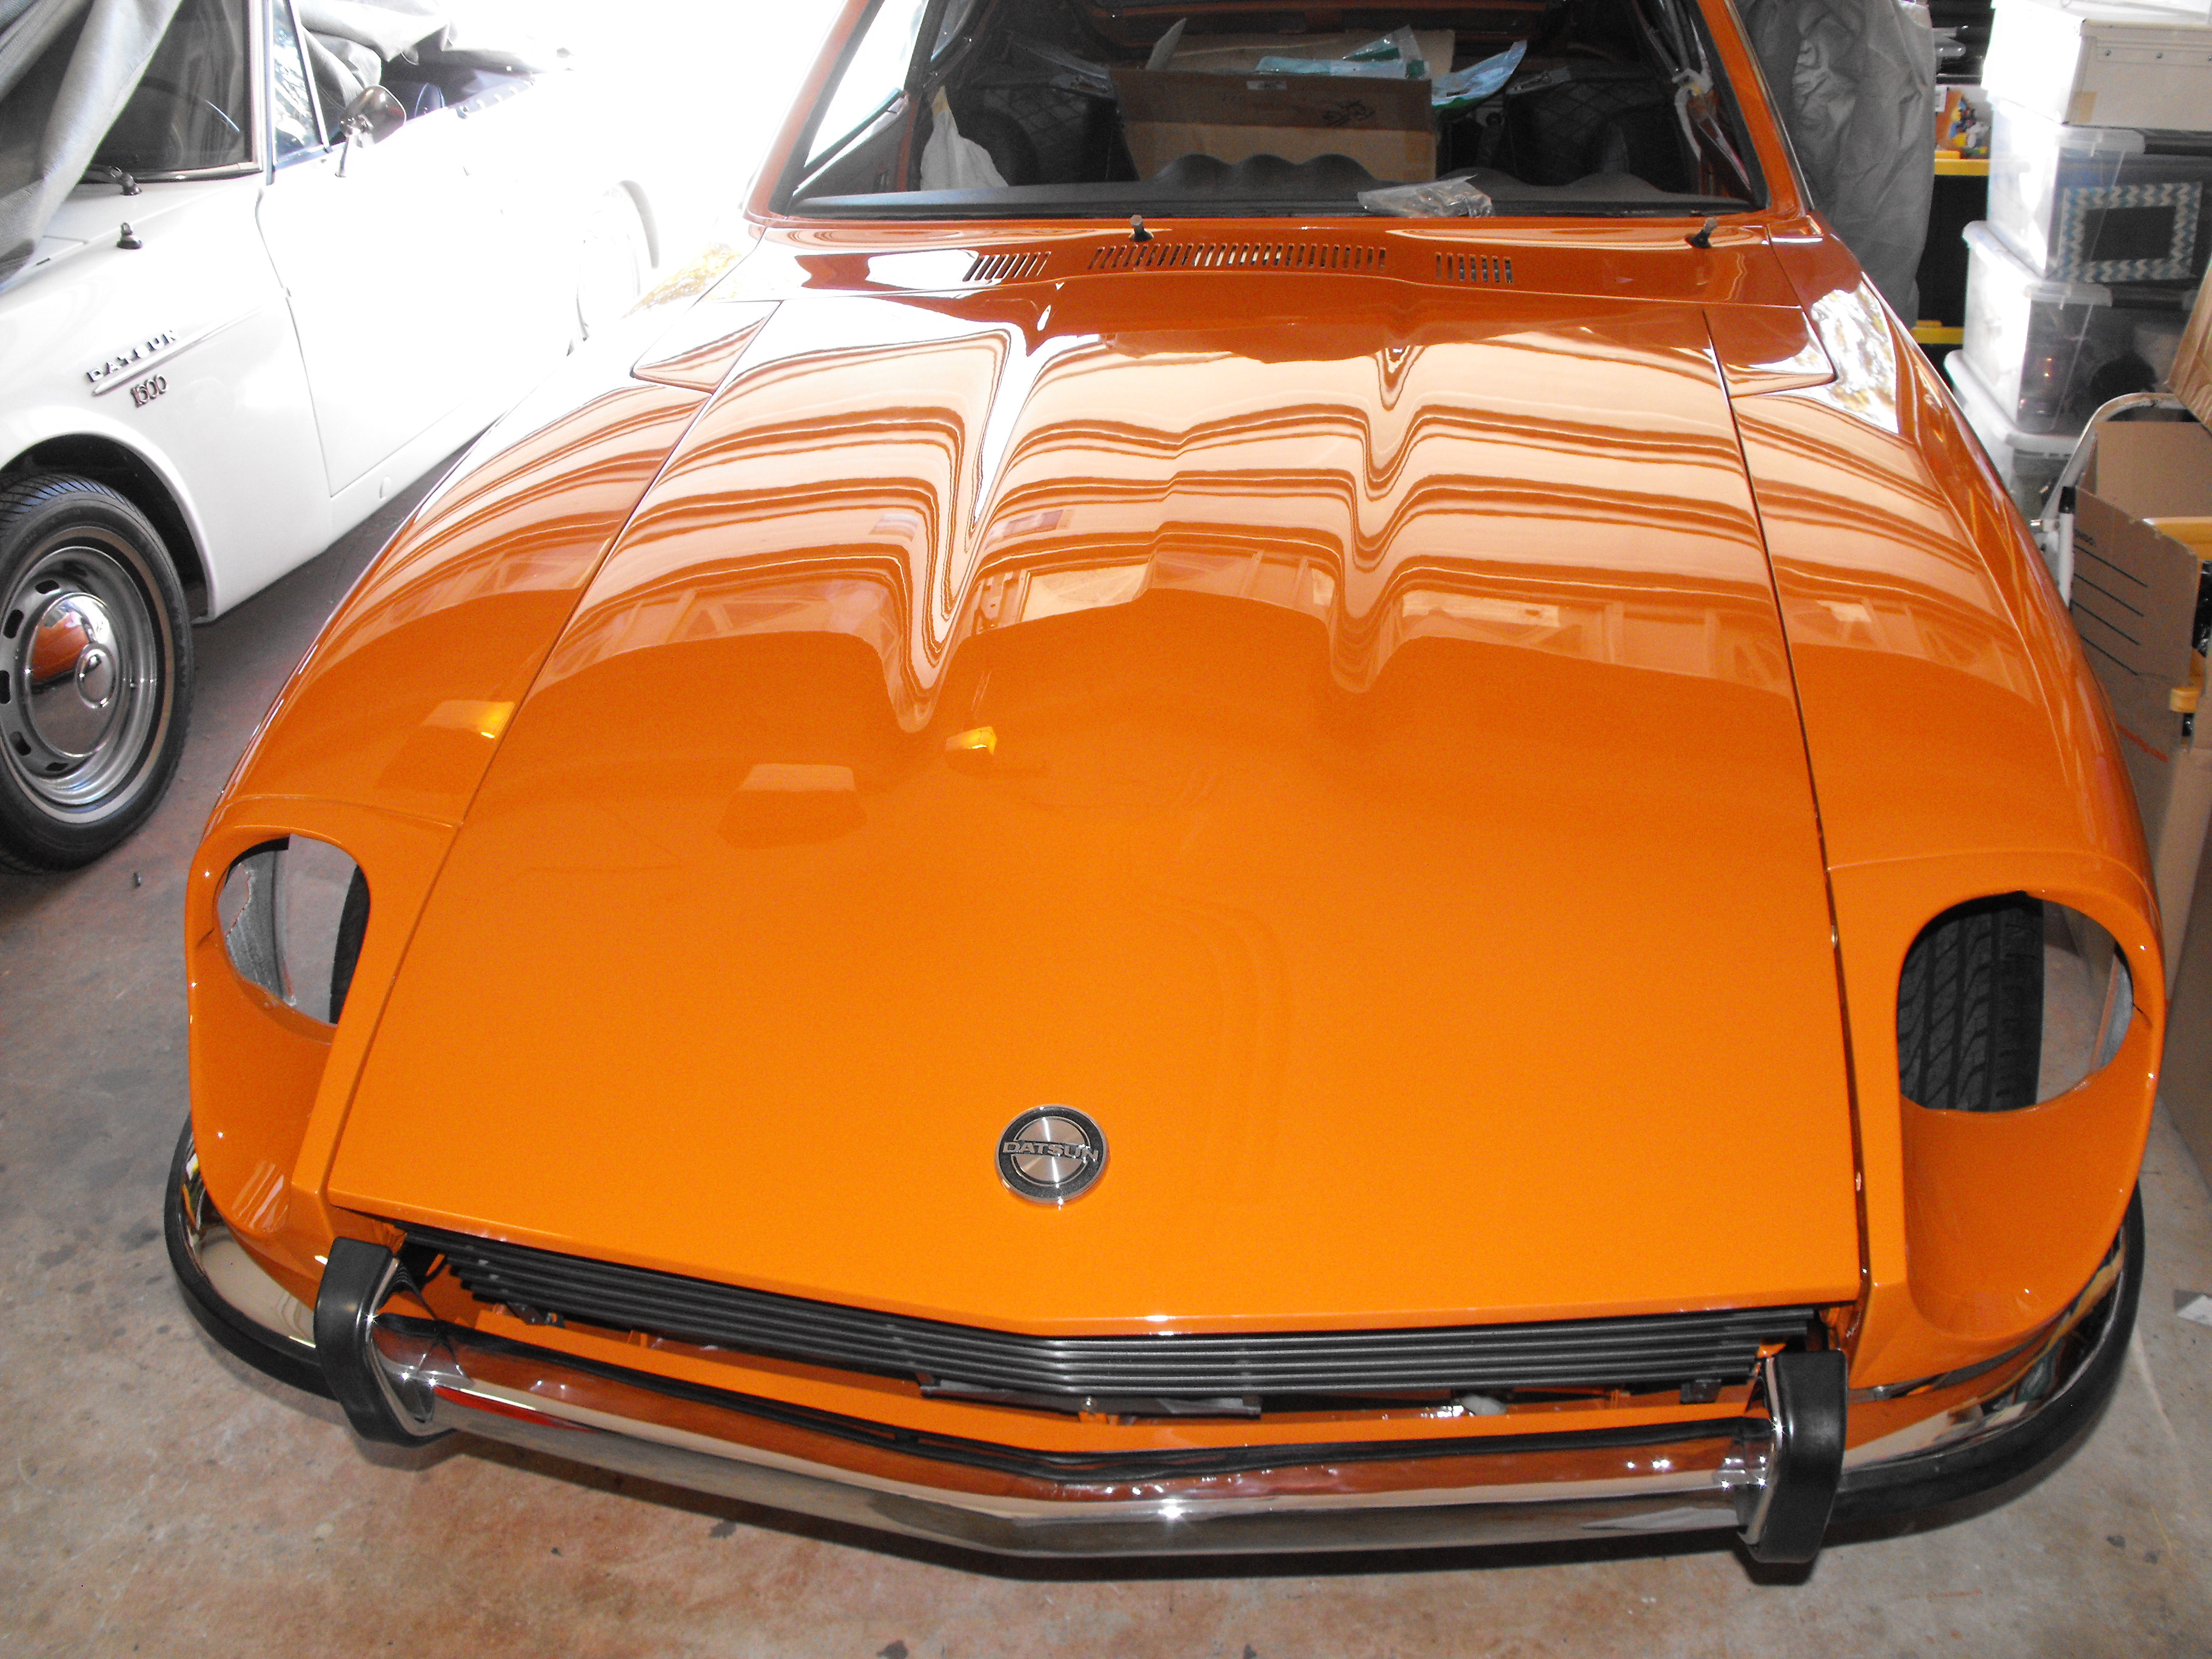
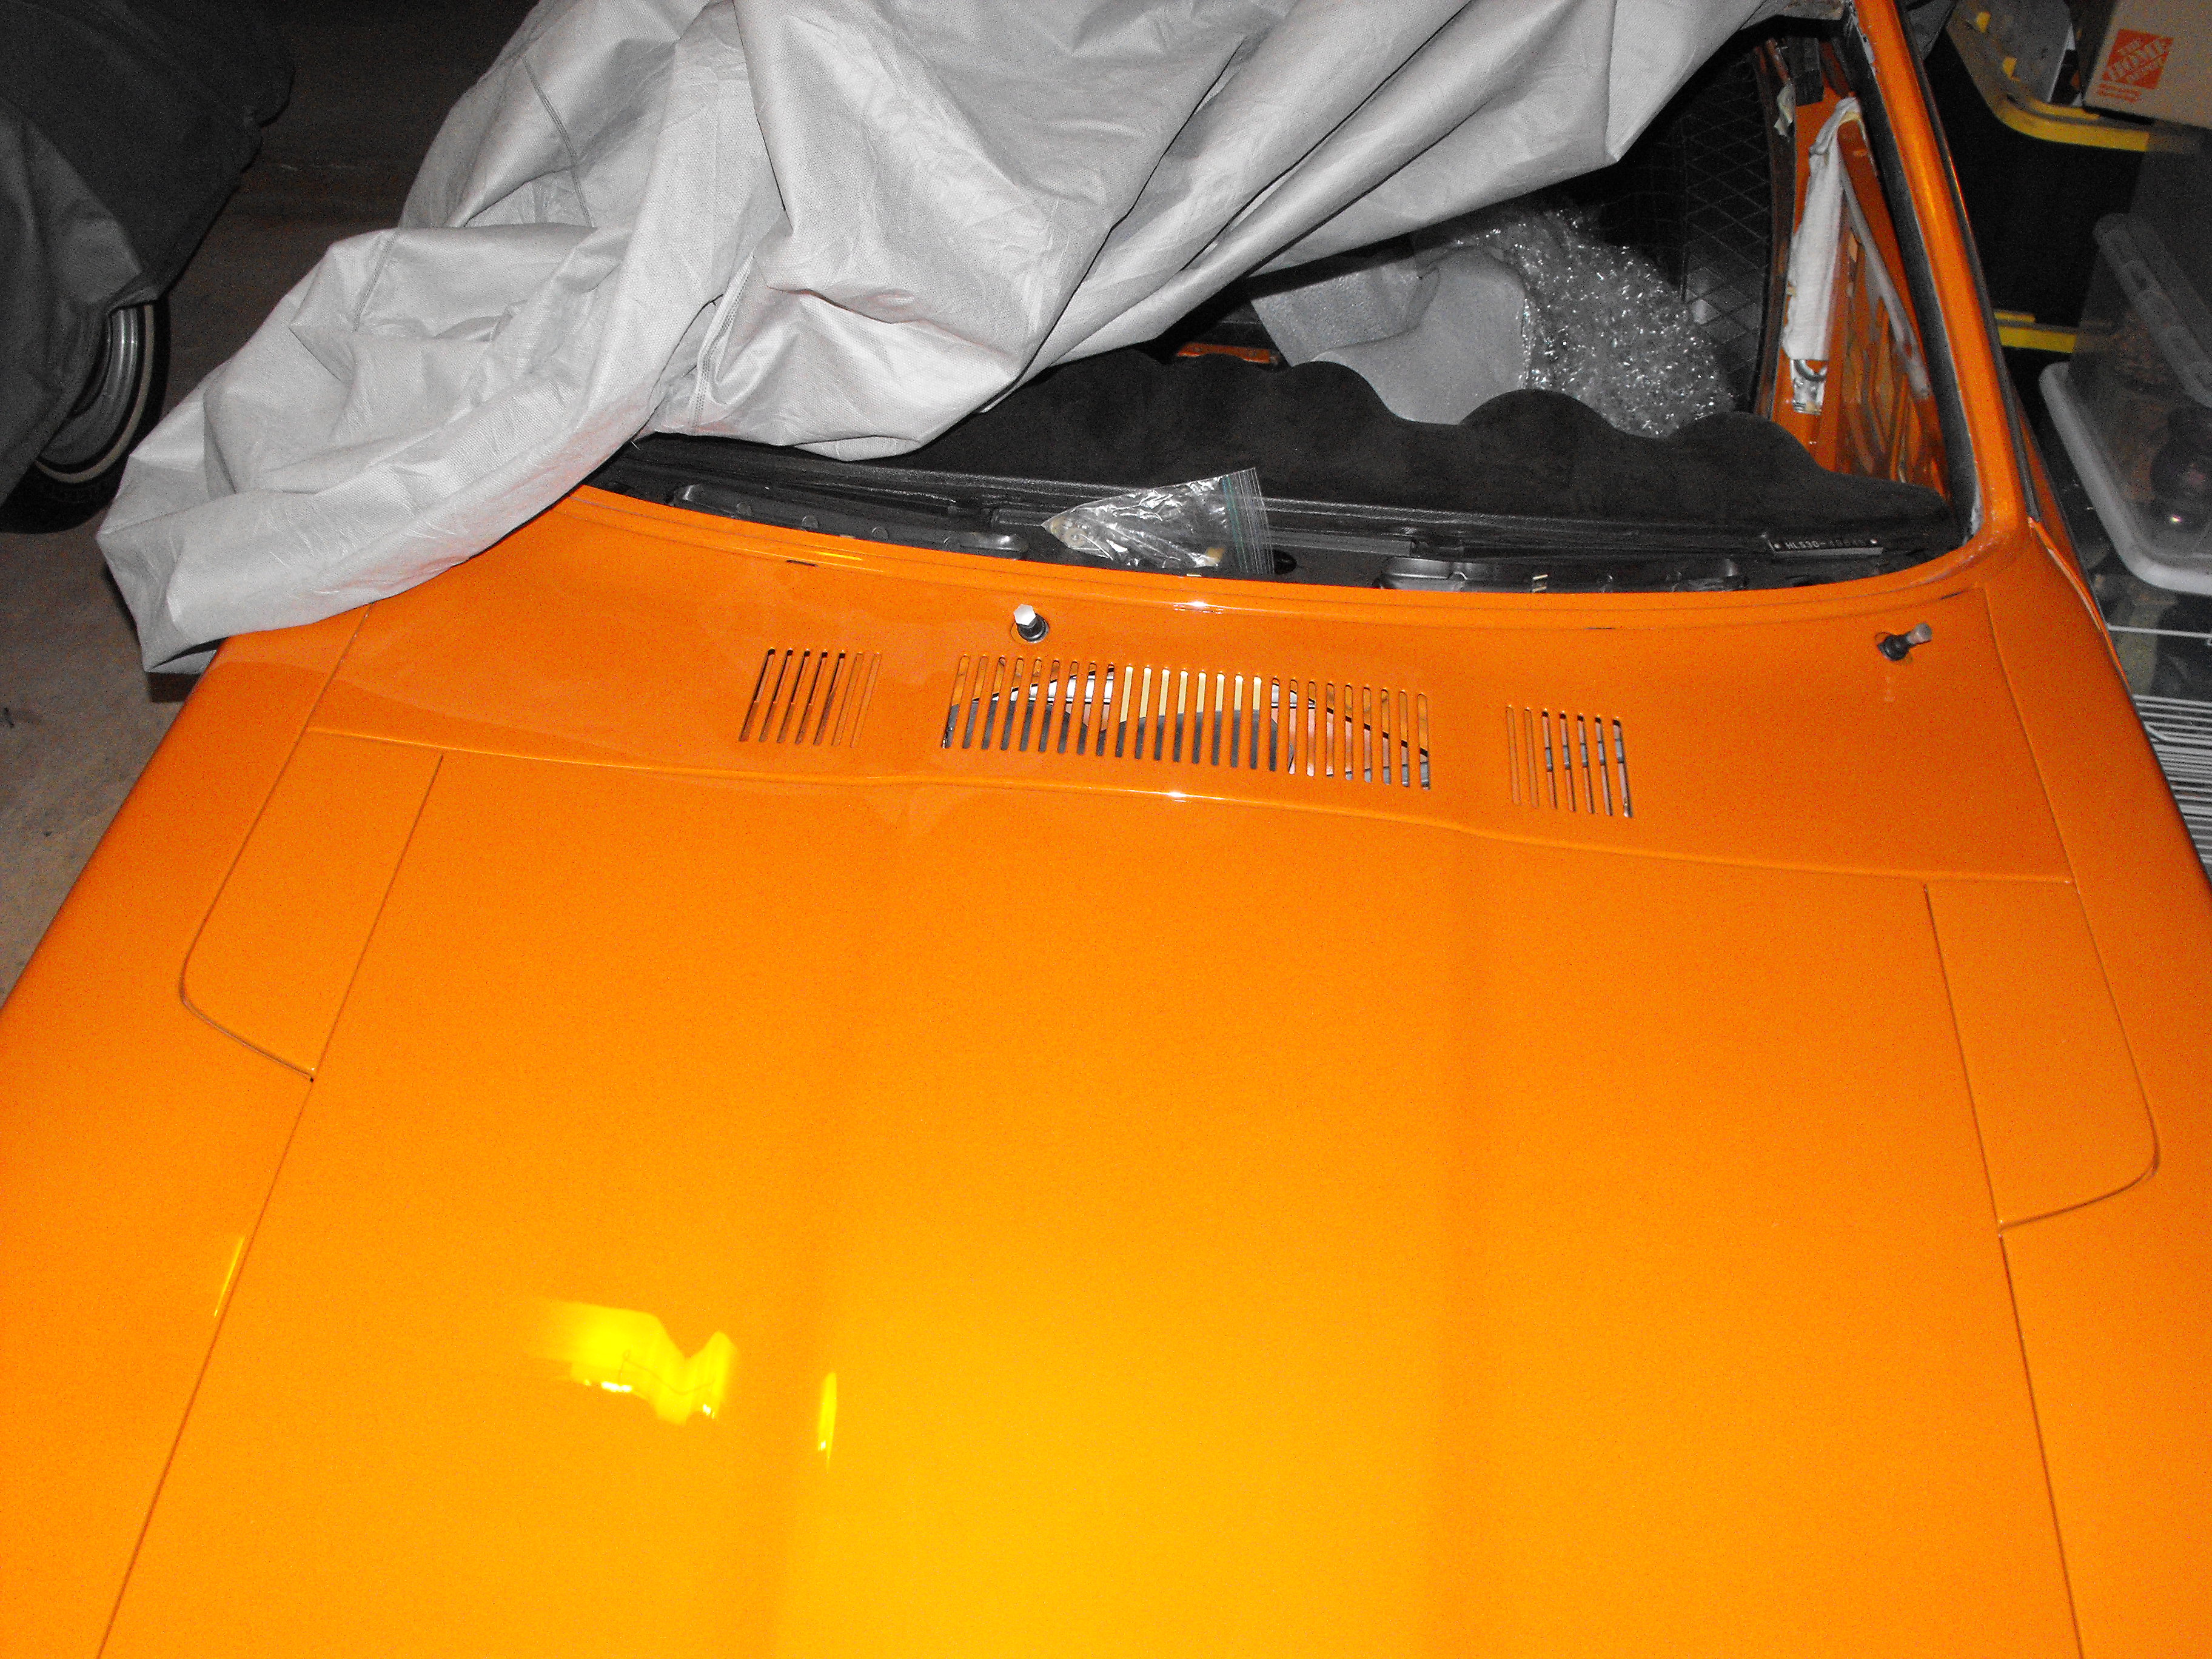
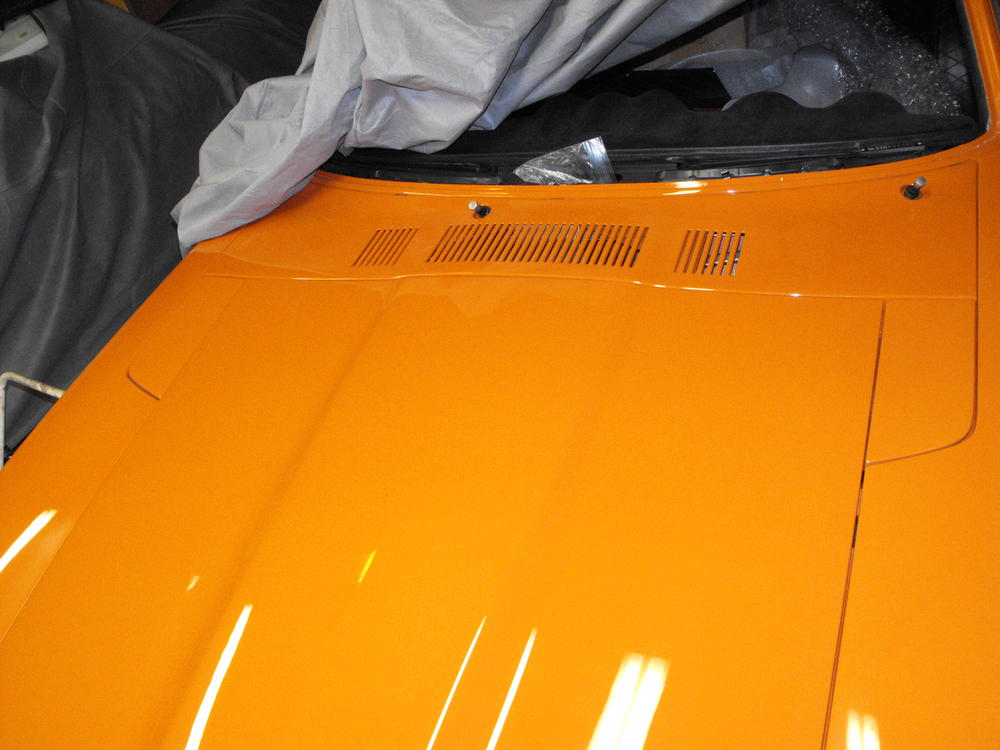
The process end up being a lot of tightening and loosening, shifting, etc. I started with the cowl installation. The cowl is pushed pretty firmly against the windshield frame. Not sure why, but I had to push in that lower flange to install the screw. That insured it was all the way against the windshield frame. Next I put in the access panels. Initially they would not close with without contacting the cowl lip. I pressed the cowl lip in gently with my thumbs until I could rotate the access panels nicely. Then I had to adjust height and gap of access panel near cowl, while aligning straight edge with fender. This just takes a bit of loosen, adjust tighten operations till the access panel edges are aligned to the cowl edge and fender edge. If the gap on the curved side of the access panel is not aligned with fender, you may need a washer shim in between access panel flange and attach flange to straighten. I also had to adjust the small tab on the fender so that forward part of panel was flat with fender. Again, lightly press with thumb to get this just right. After these items were evenly gapped, I put on the hood. The drivers side bolts are in about the middle of the slot on mine and the passenger side is all the way to one end. Again, it took several rounds of loosening, adjusting, tightening to get it to line up well. Fortunately the slot length was sufficient, otherwise I think the only option is to rotate the hood hinge. They do rotate and adjust a small amount. Should be enough to align hood. Hope that helps. Rich
-
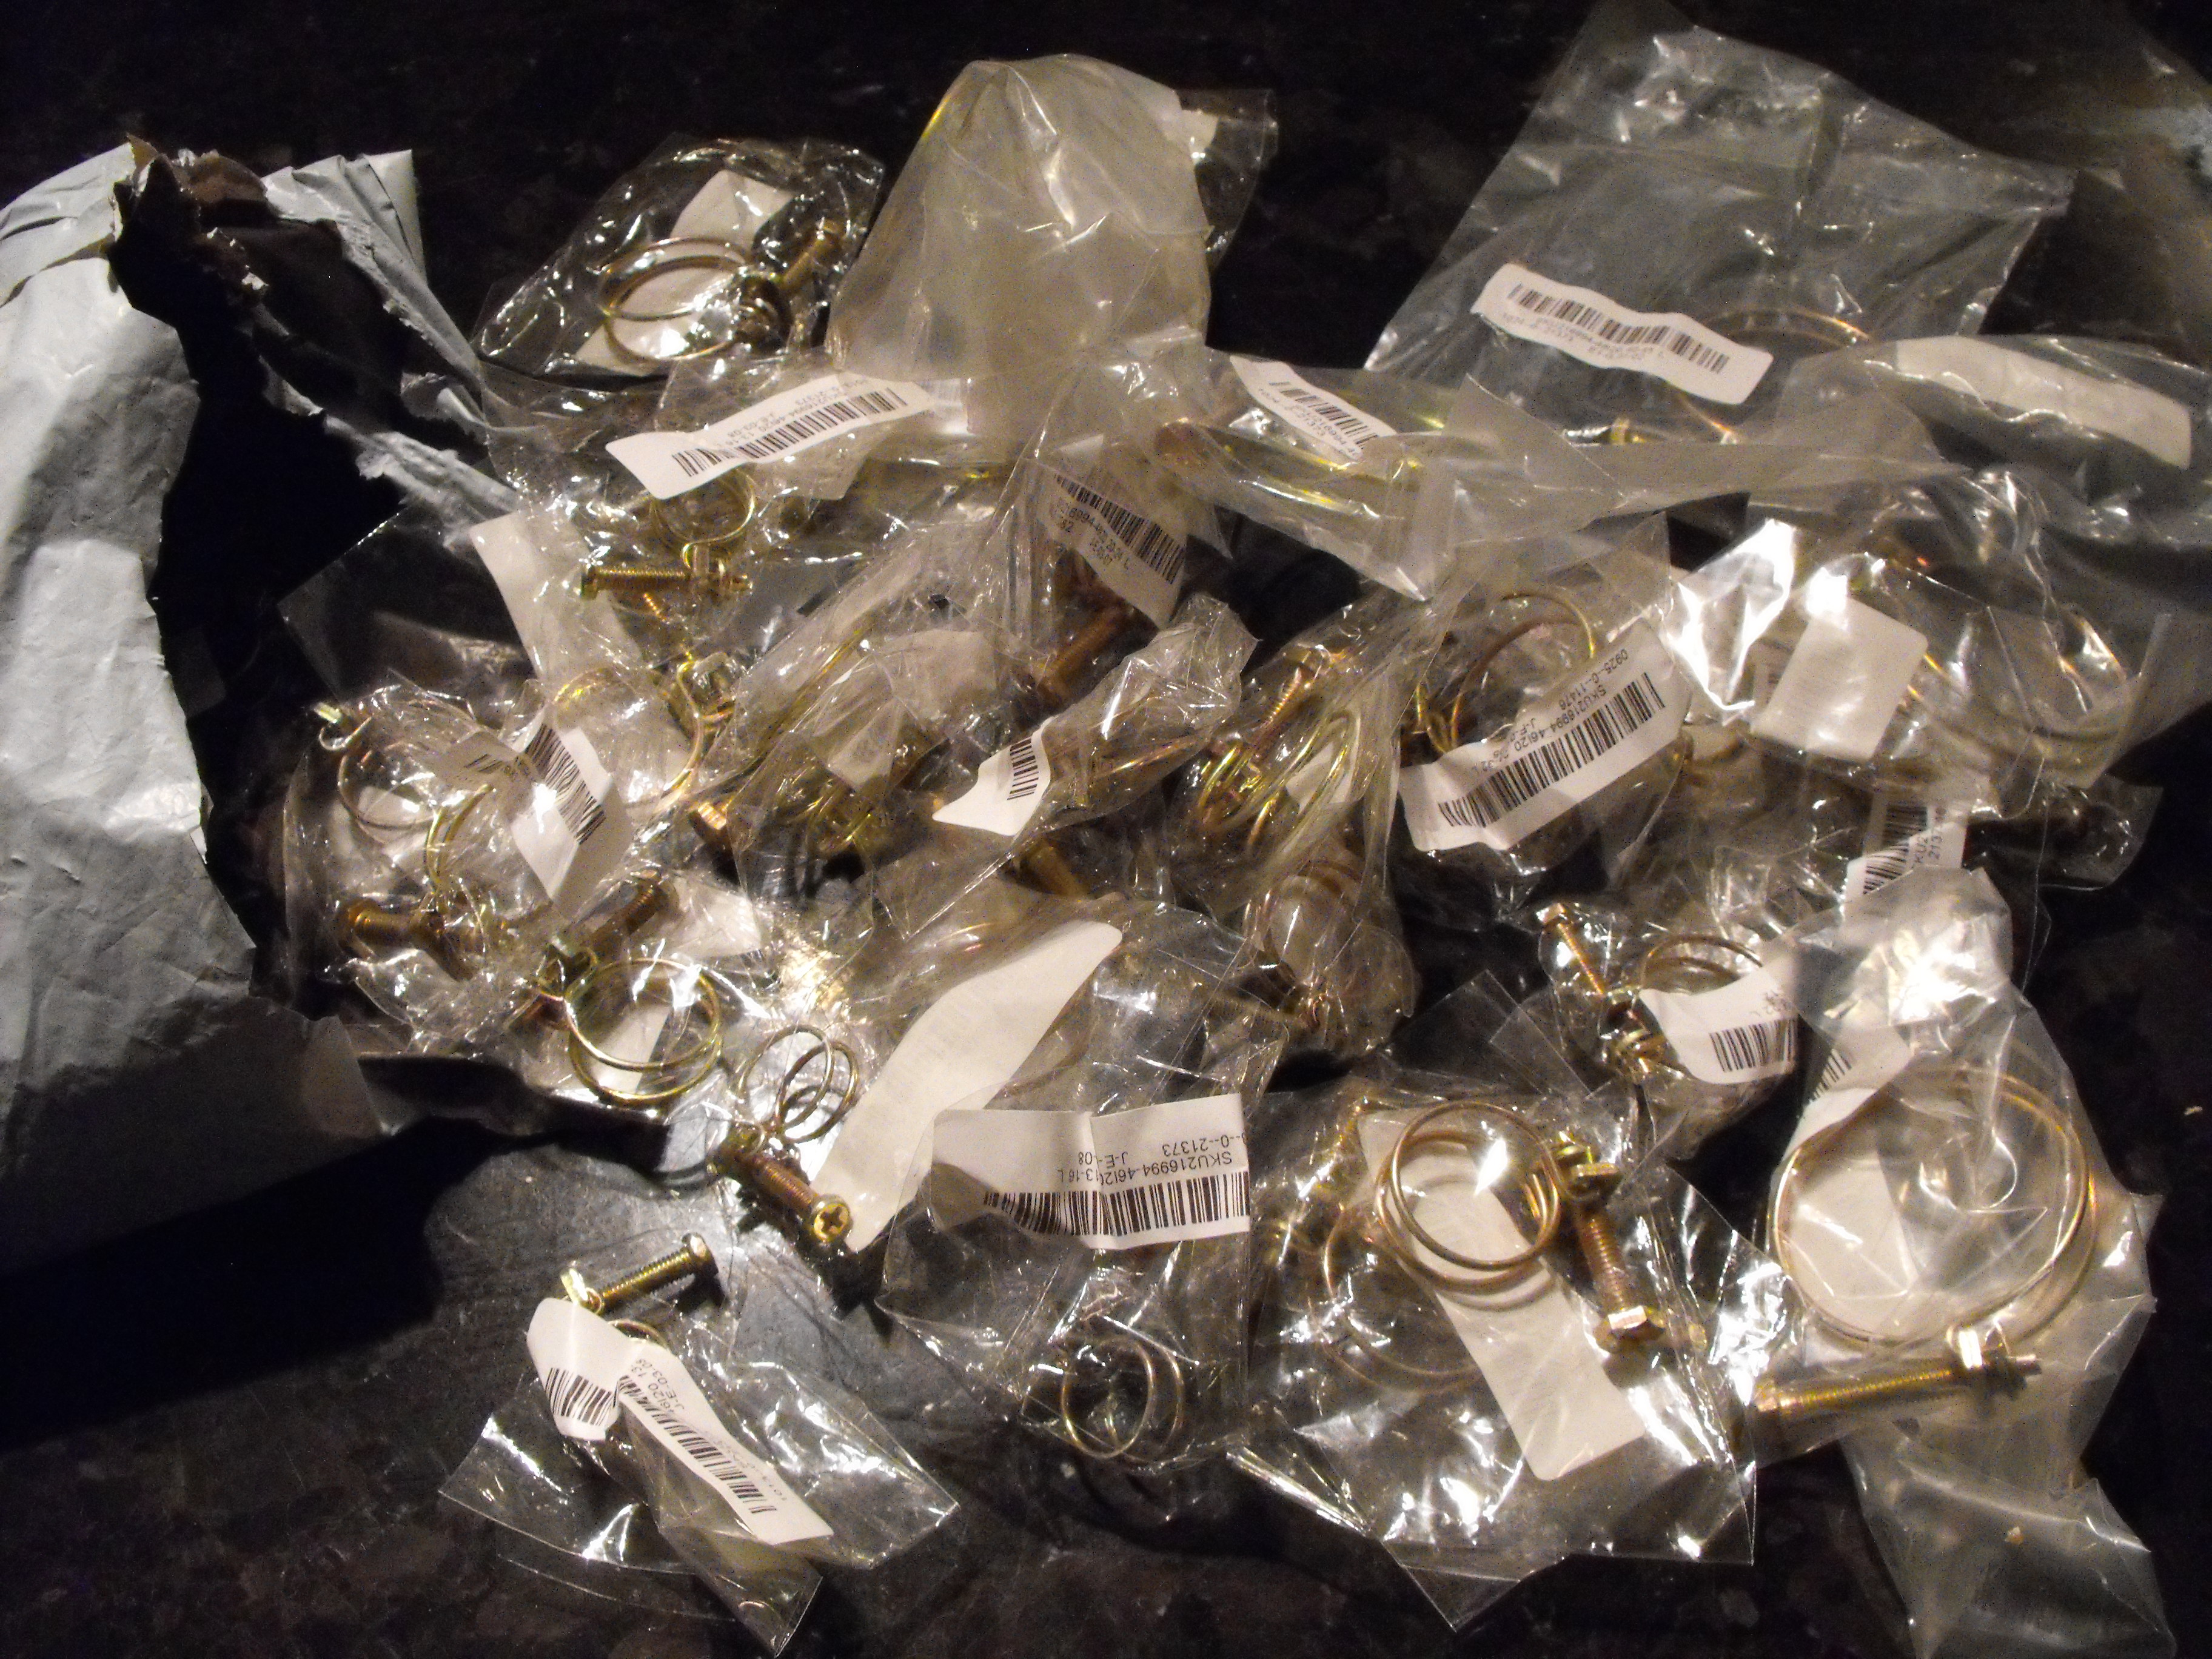
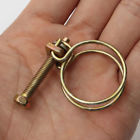
Yes, I noticed that fuel line OD seems to vary between brands and styles. The cloth wrap stuff I am using is a smaller OD than the standard Auto part store tubing. The small clamps will fit the cloth wrap line better. Also, it is fairly simple to make the clamp diameter smaller if they need to be reduced. You can cut off a small portion of the two wires that protrude through the plate and reform the wire into the u-shape, making the overall diameter smaller.
-
The link in blue is where I ordered the clamps from. Cost is a little over $1 each. Not bad.
-
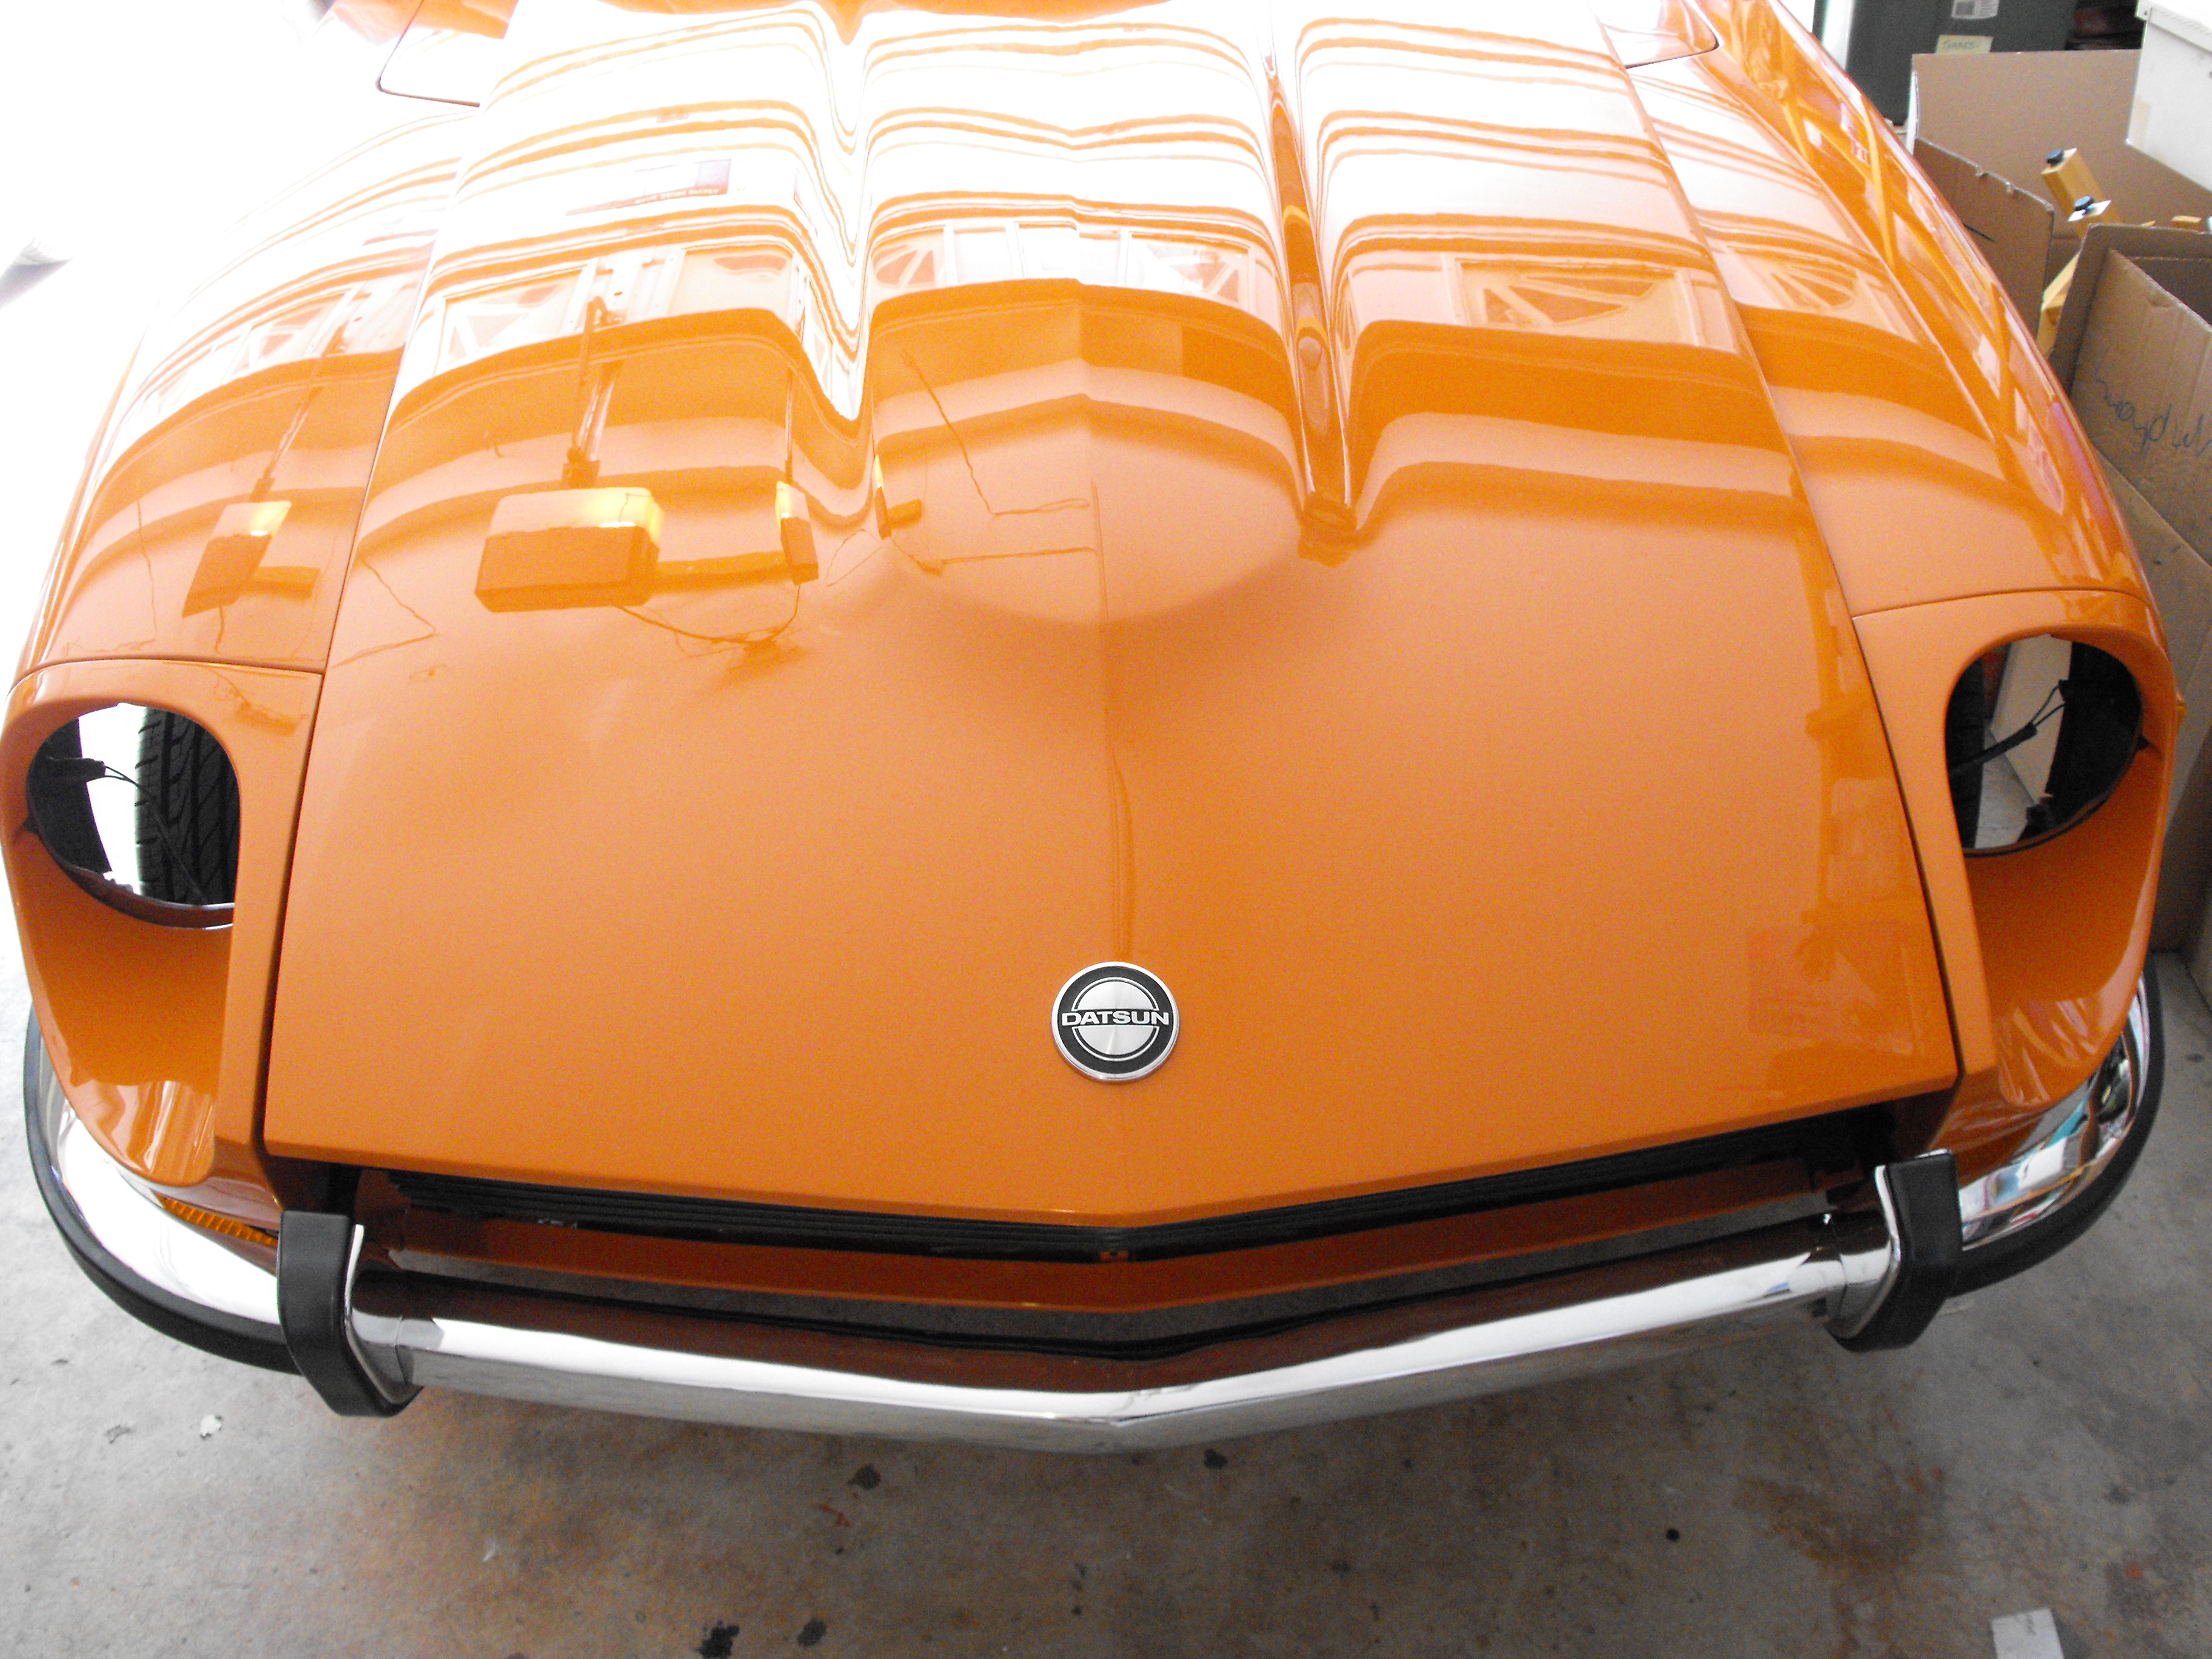
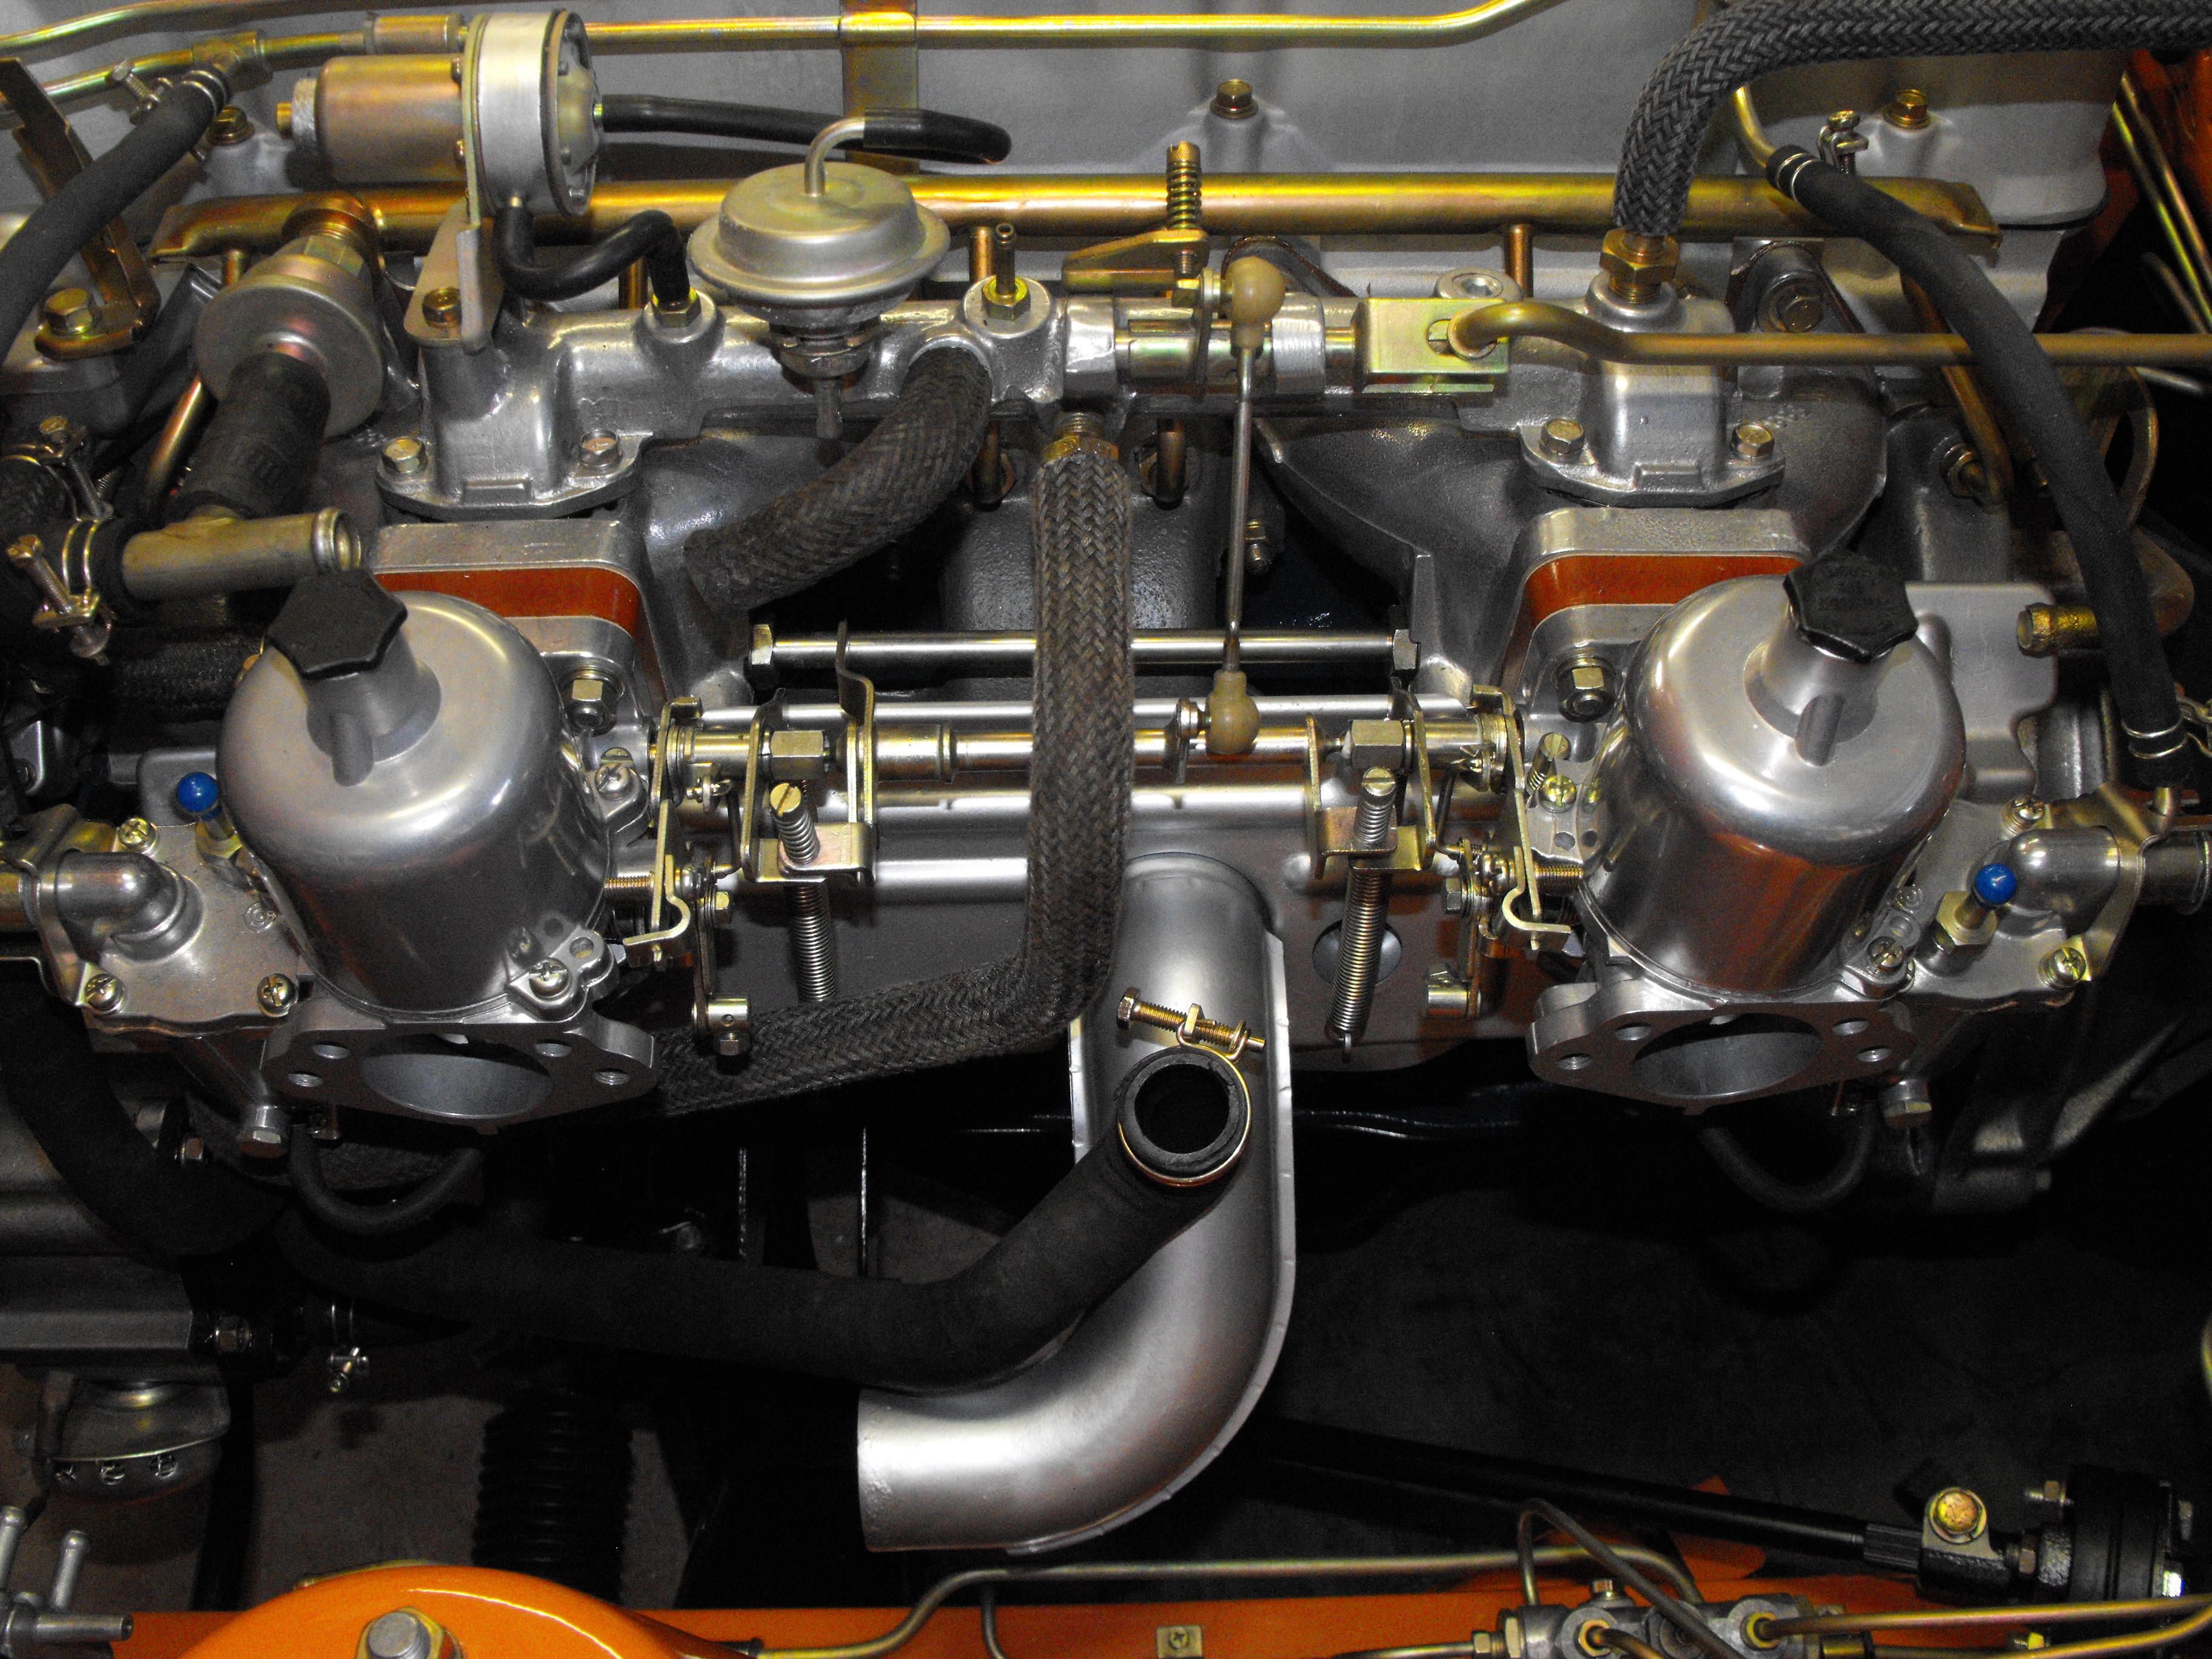
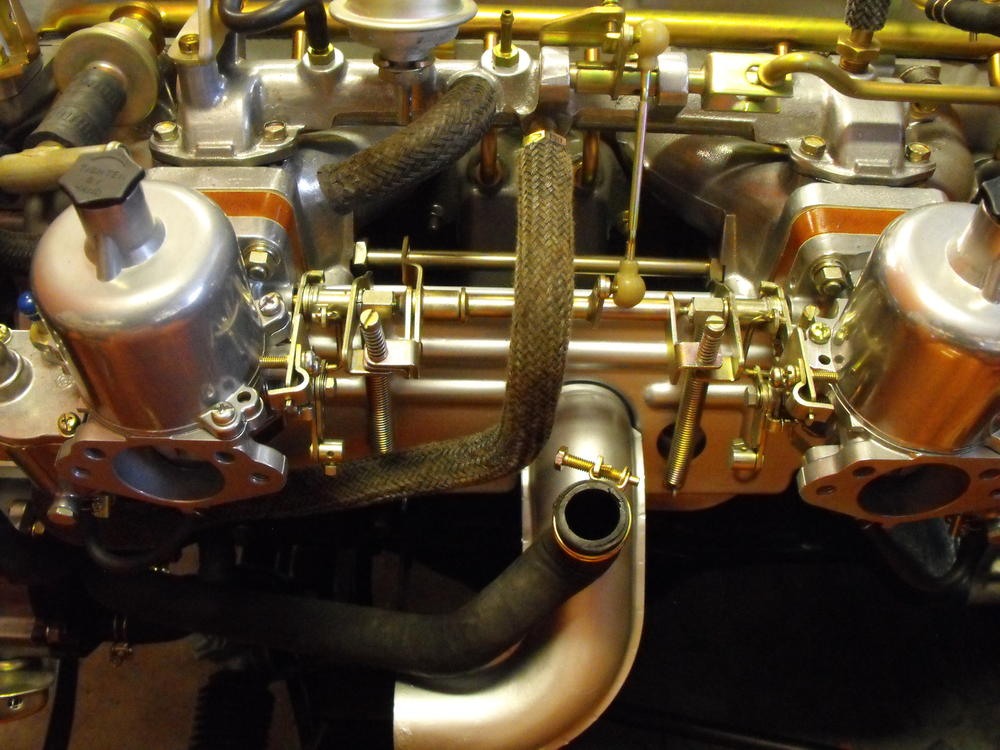
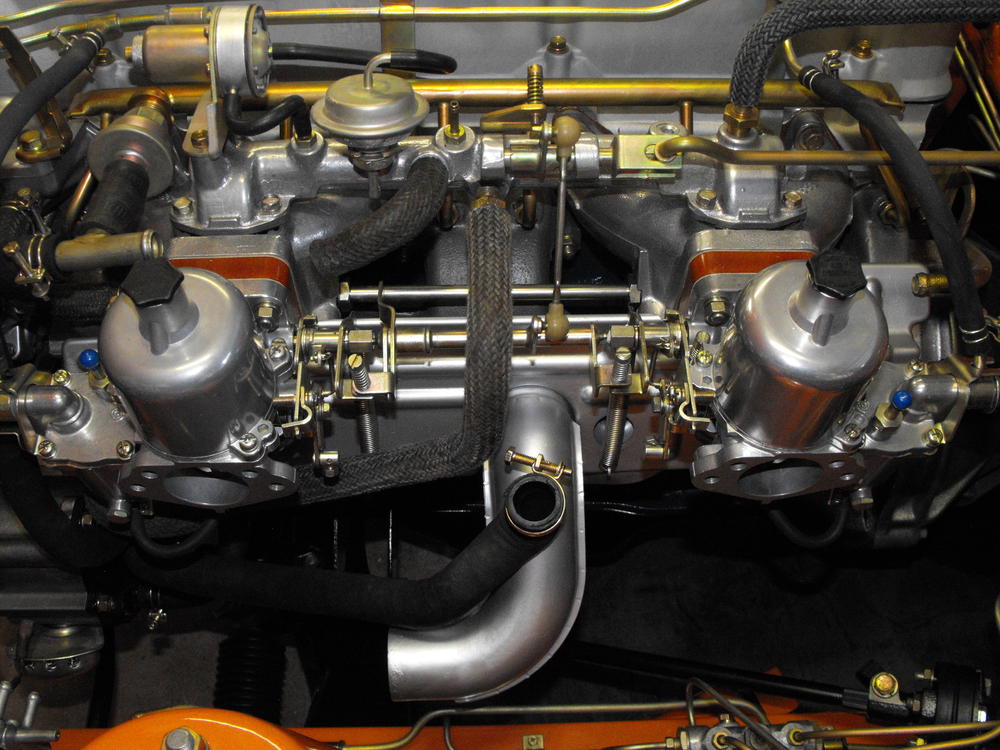
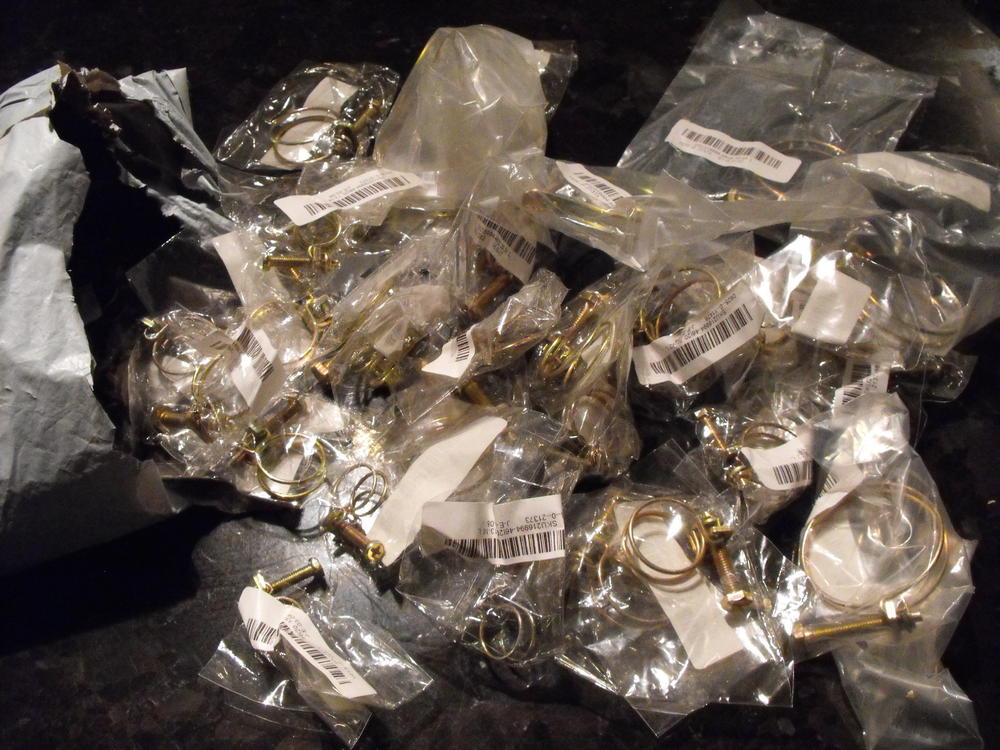
Got the clamps in. Nice engine jewelry. They look nice and are each individually bagged. This really is a good way to go if you want the wire clamps and are not in a hurry. I think the order took about 2 weeks to arrive. I did put a spot of grease on the threads as they seemed to run tight in the little attach plate. Otherwise, the clamps work well. Attached are a couple pics of them installed. Also got the hood aligned. The gaps look very consistent. Pics are below.


-
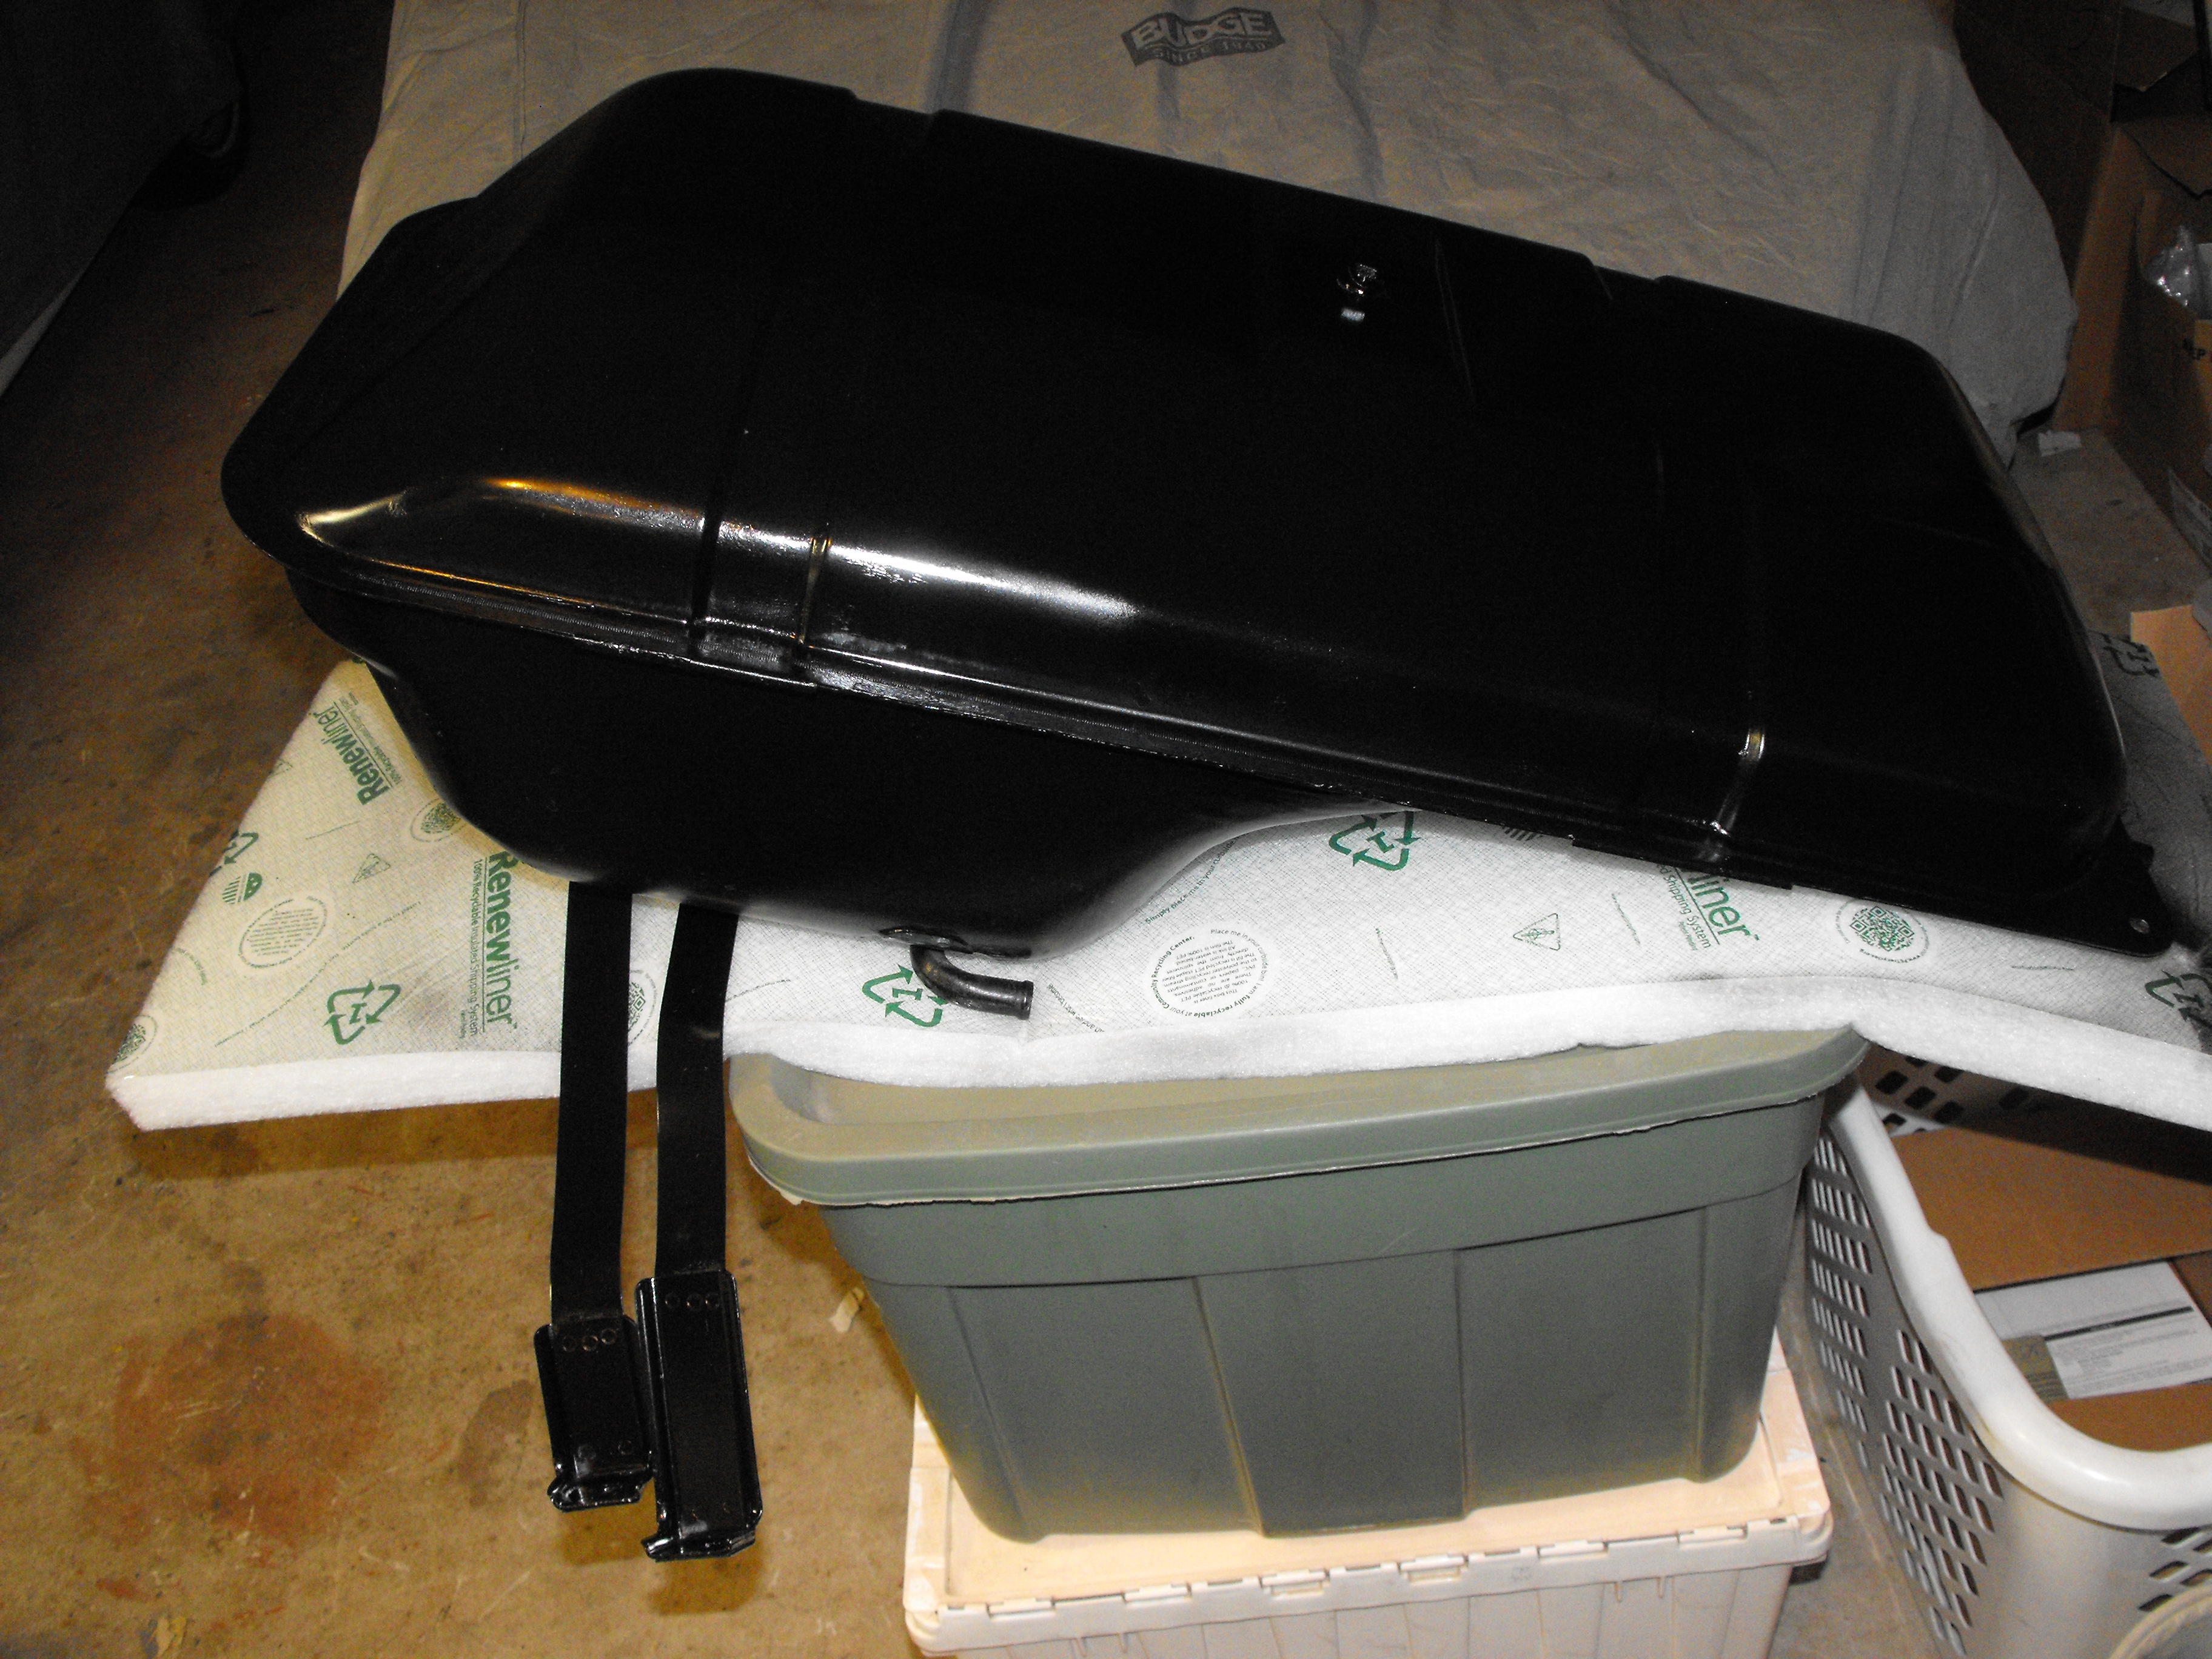
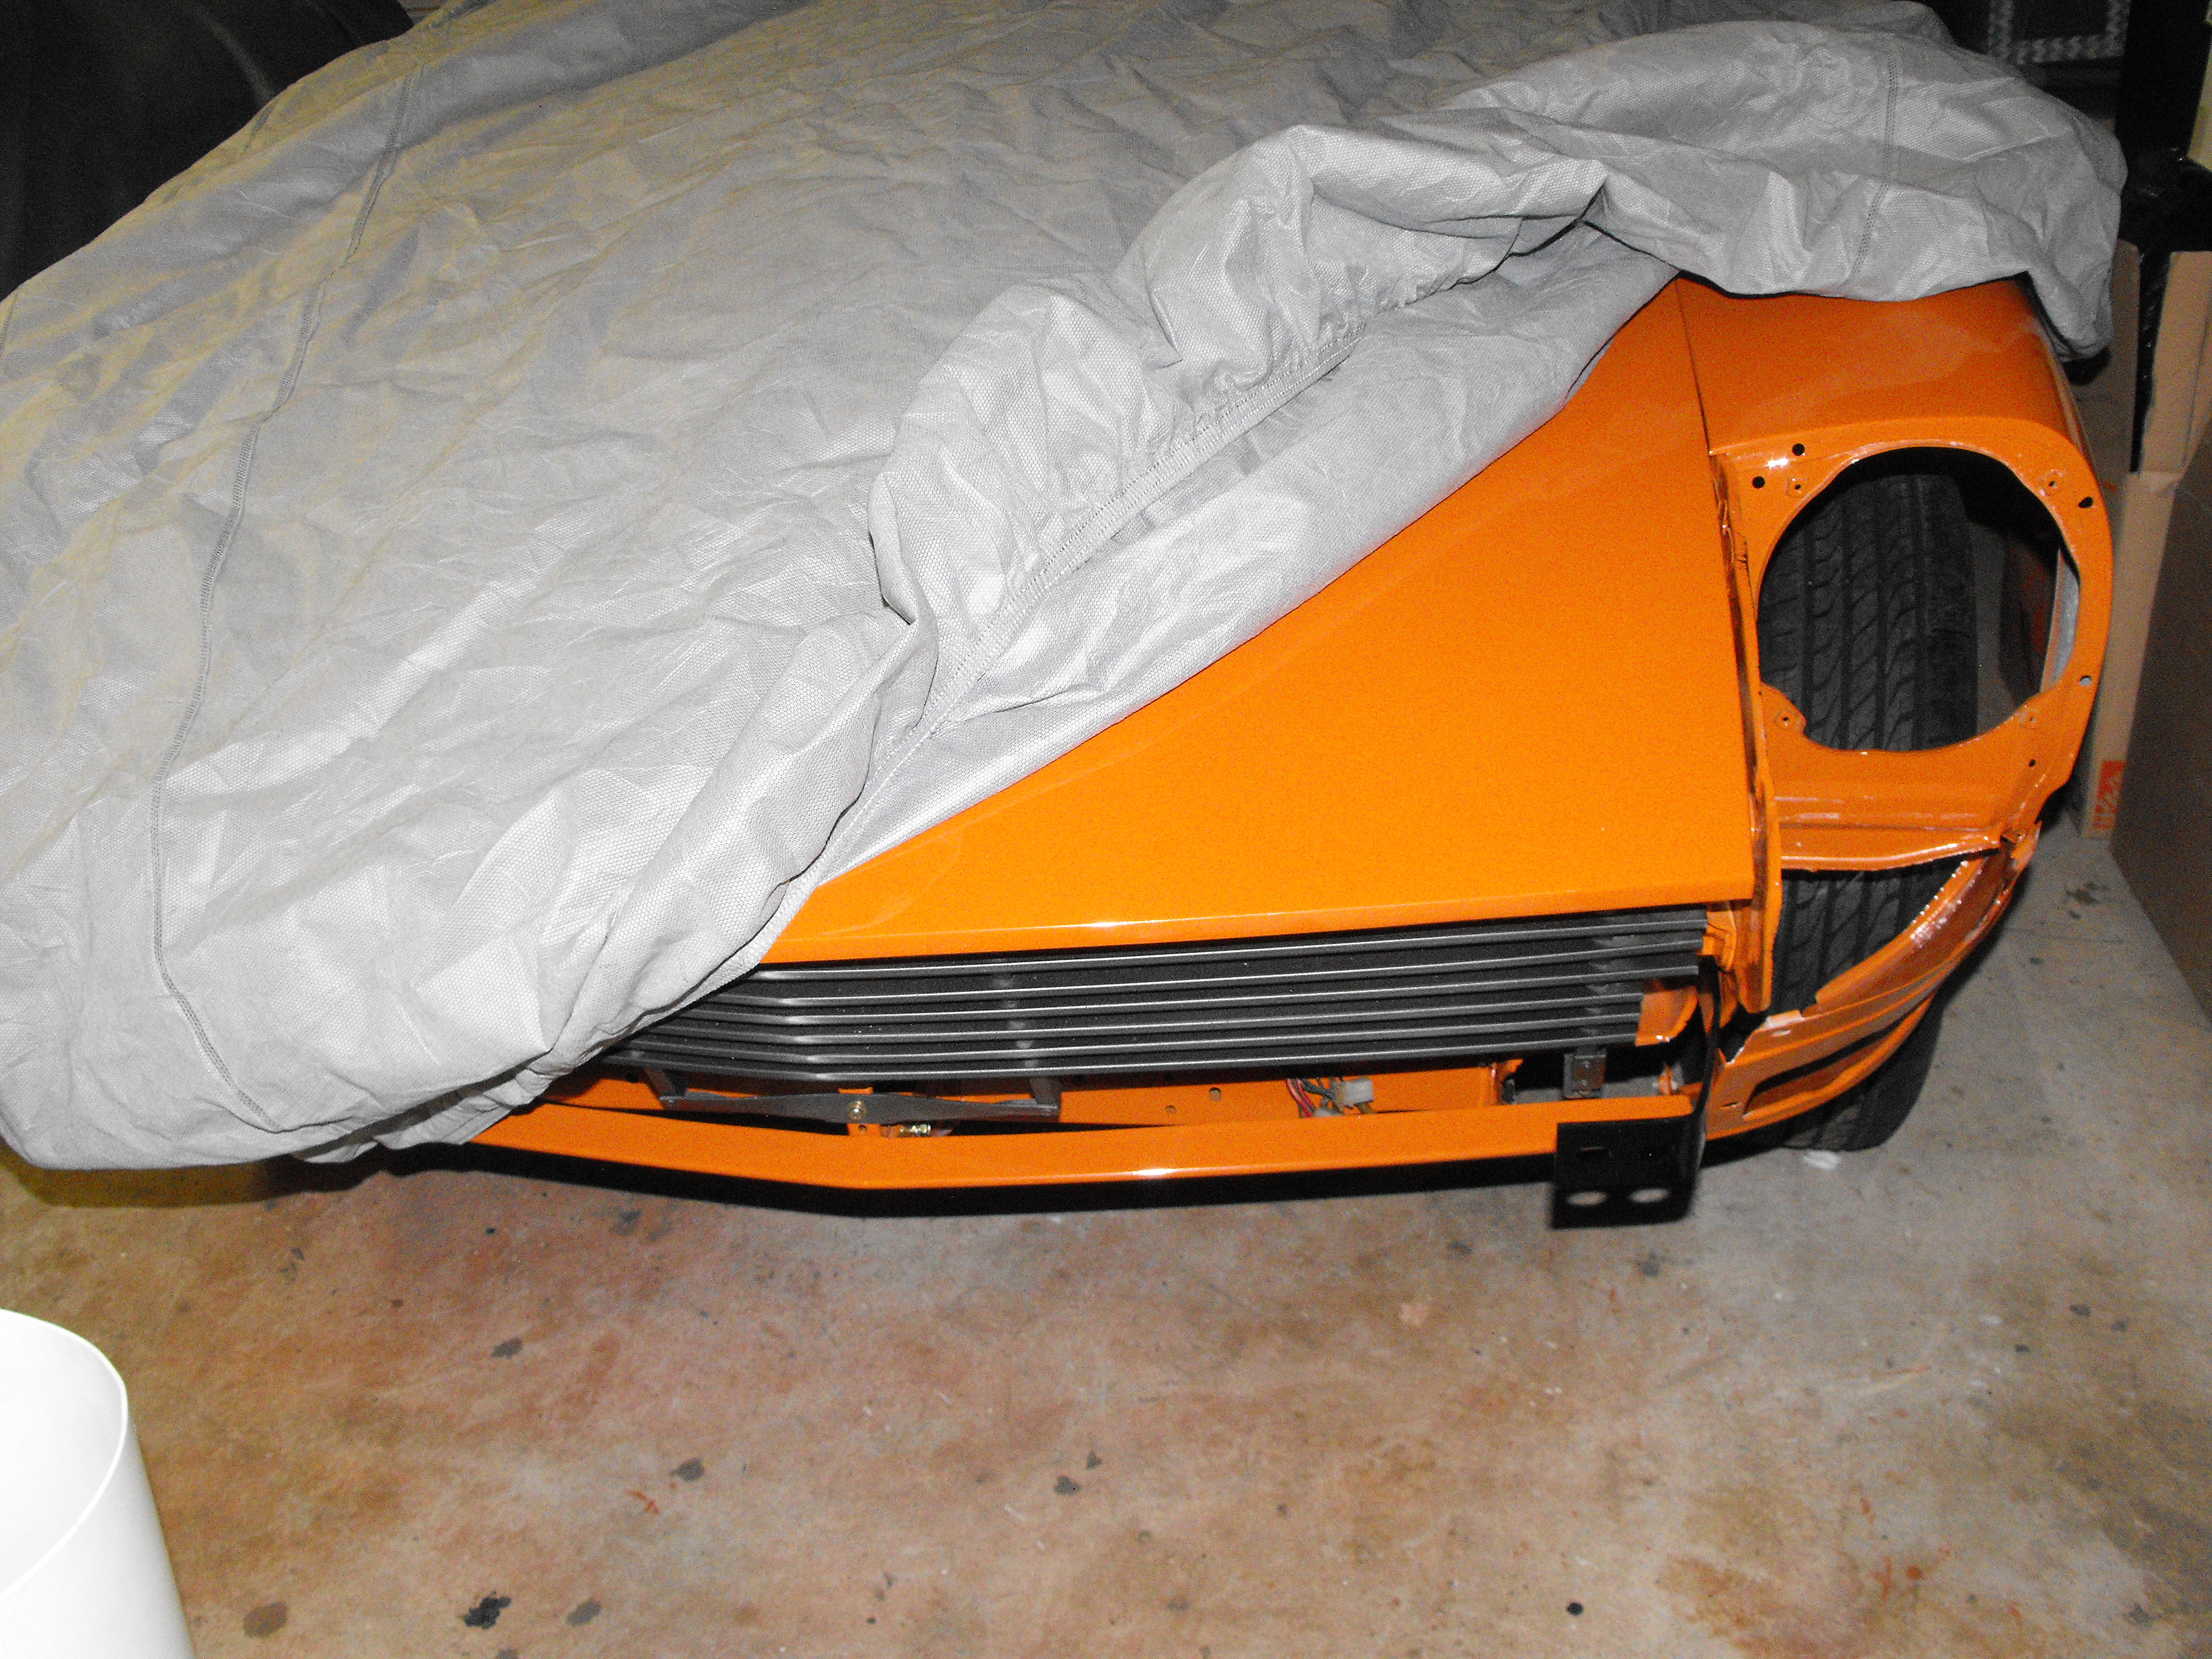
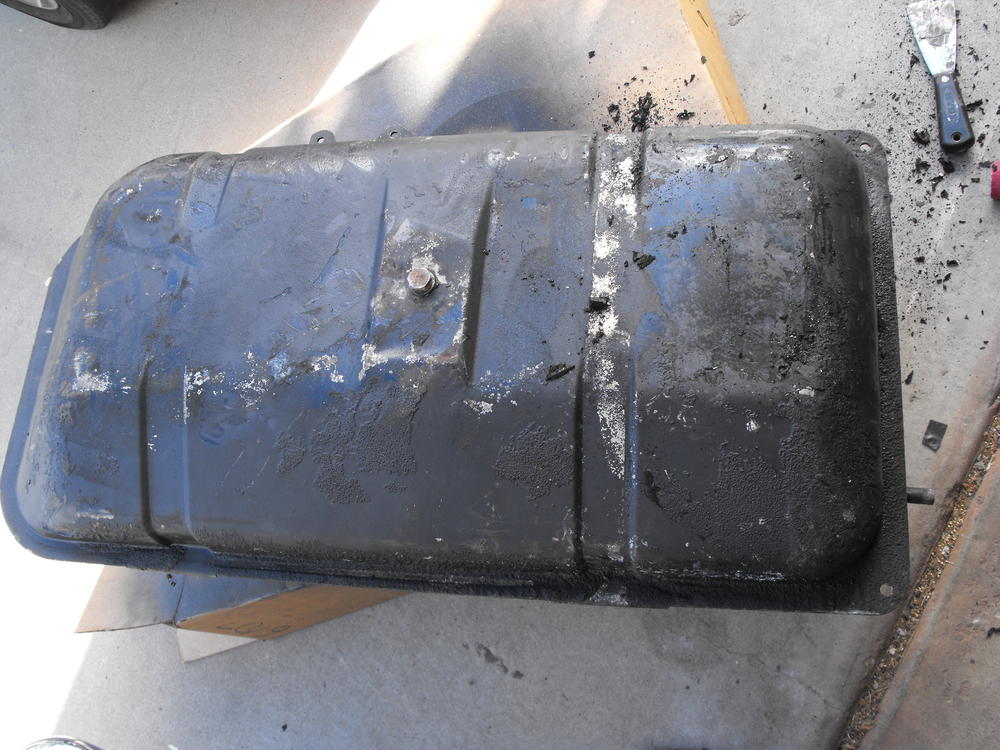
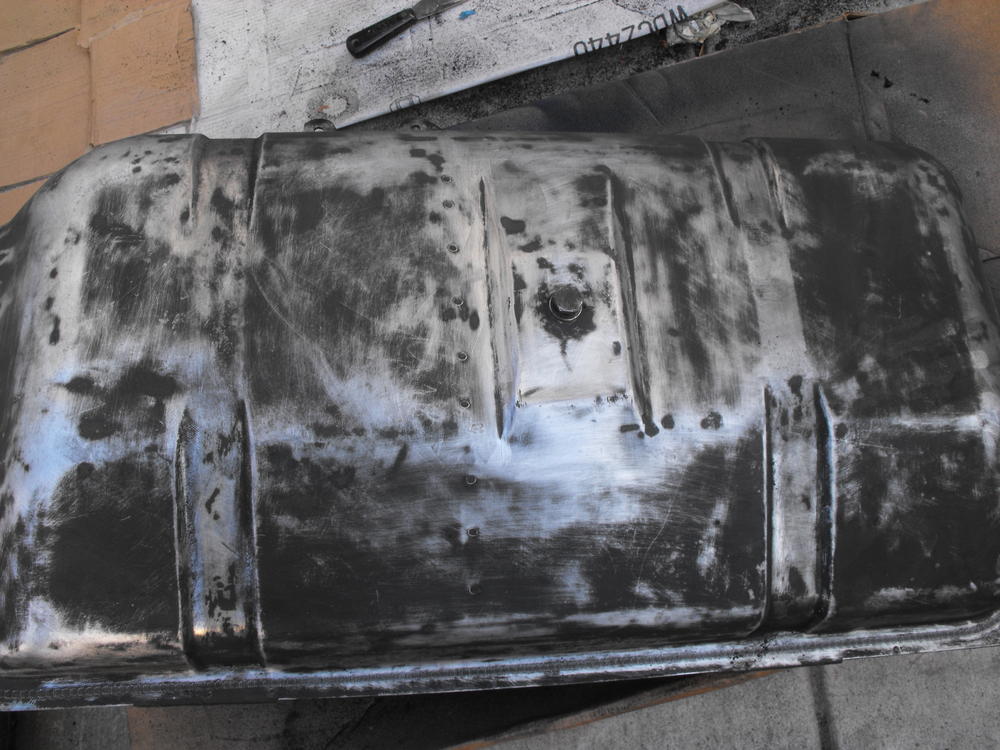
I spent a while cleaning up the fuel tank. It had quite a bit of undercoat covering it so I got rid of that with a putty knife and wire wheel. After that I sanded it. There was a small dent near the flat part of the drain plug so I used filler to make the area flat. I would have preferred to have pushed it out with a rod through the filler port or sensor port, but the baffles were in the way. Anyway, after getting it cleaned up I started painting, but ran out of paint (The tank is pretty large). Will pick up another can tomorrow and finish the paint. I put the flex hydraulic lines in for the front brakes and also put on the left front valence and bumper brackets. I was thinking I could put the bumper on tonight but I wont get the right valence till Friday. That needs to go on first. No fancy pics this time.


-
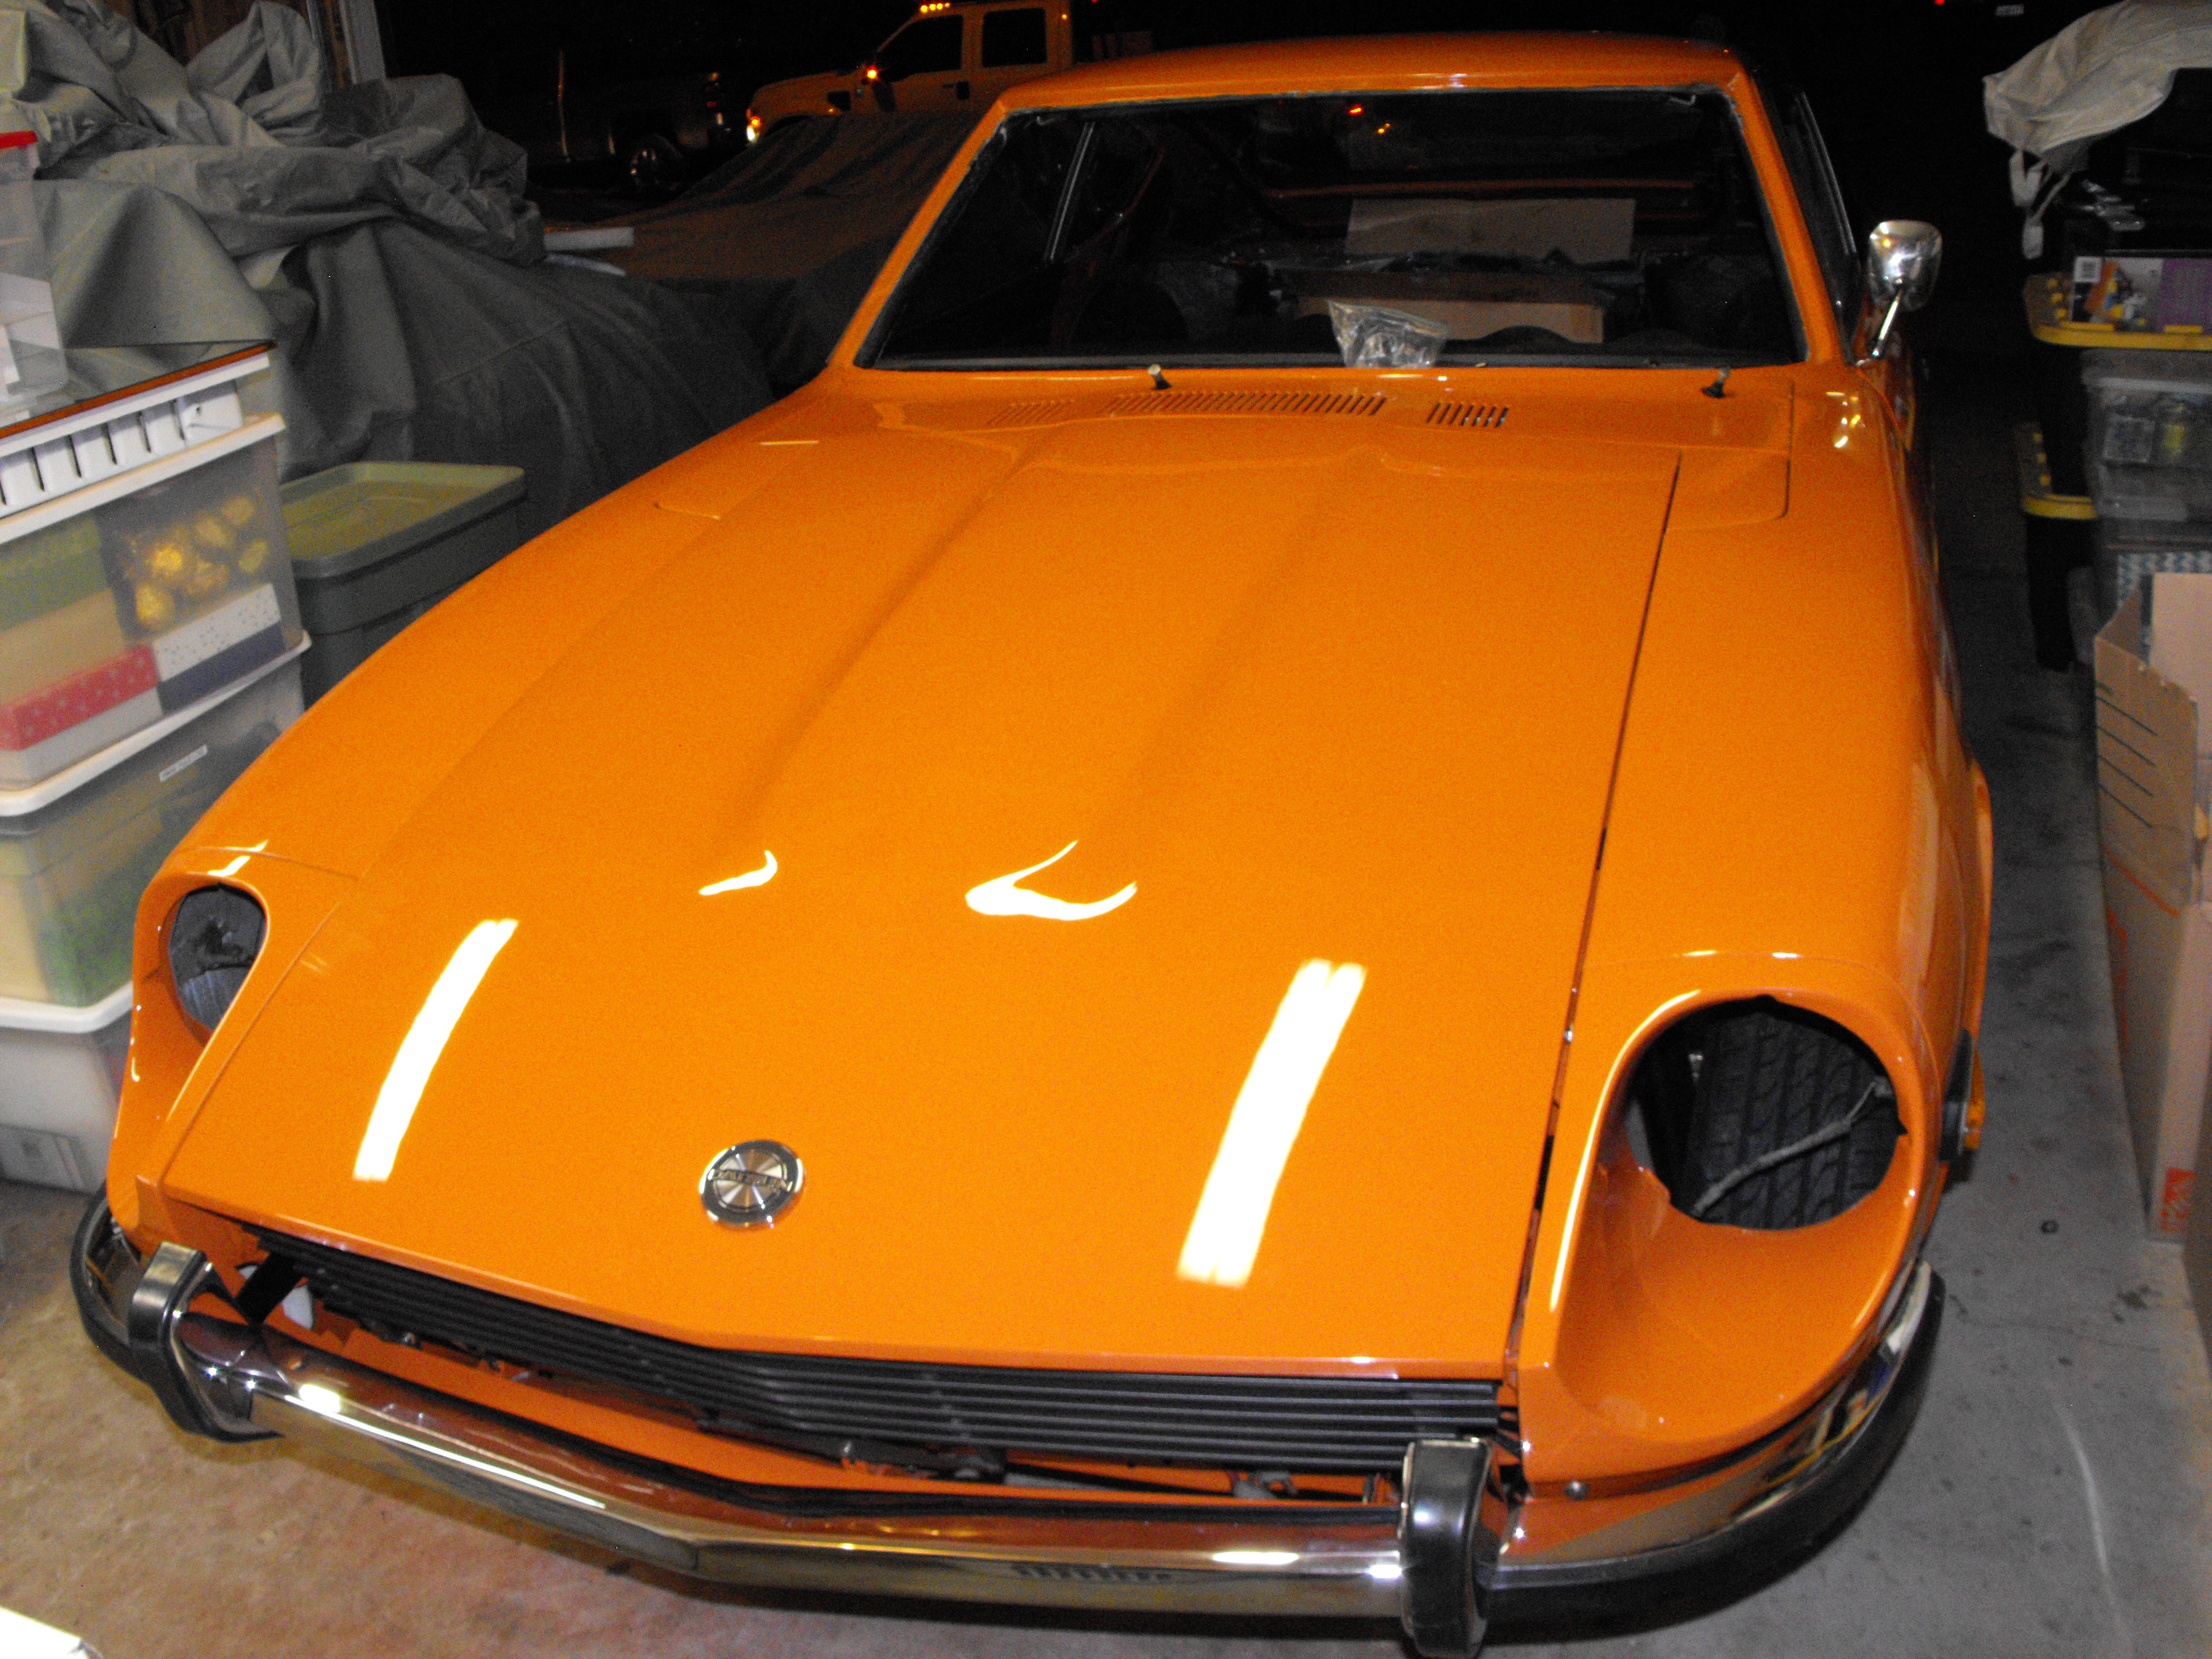
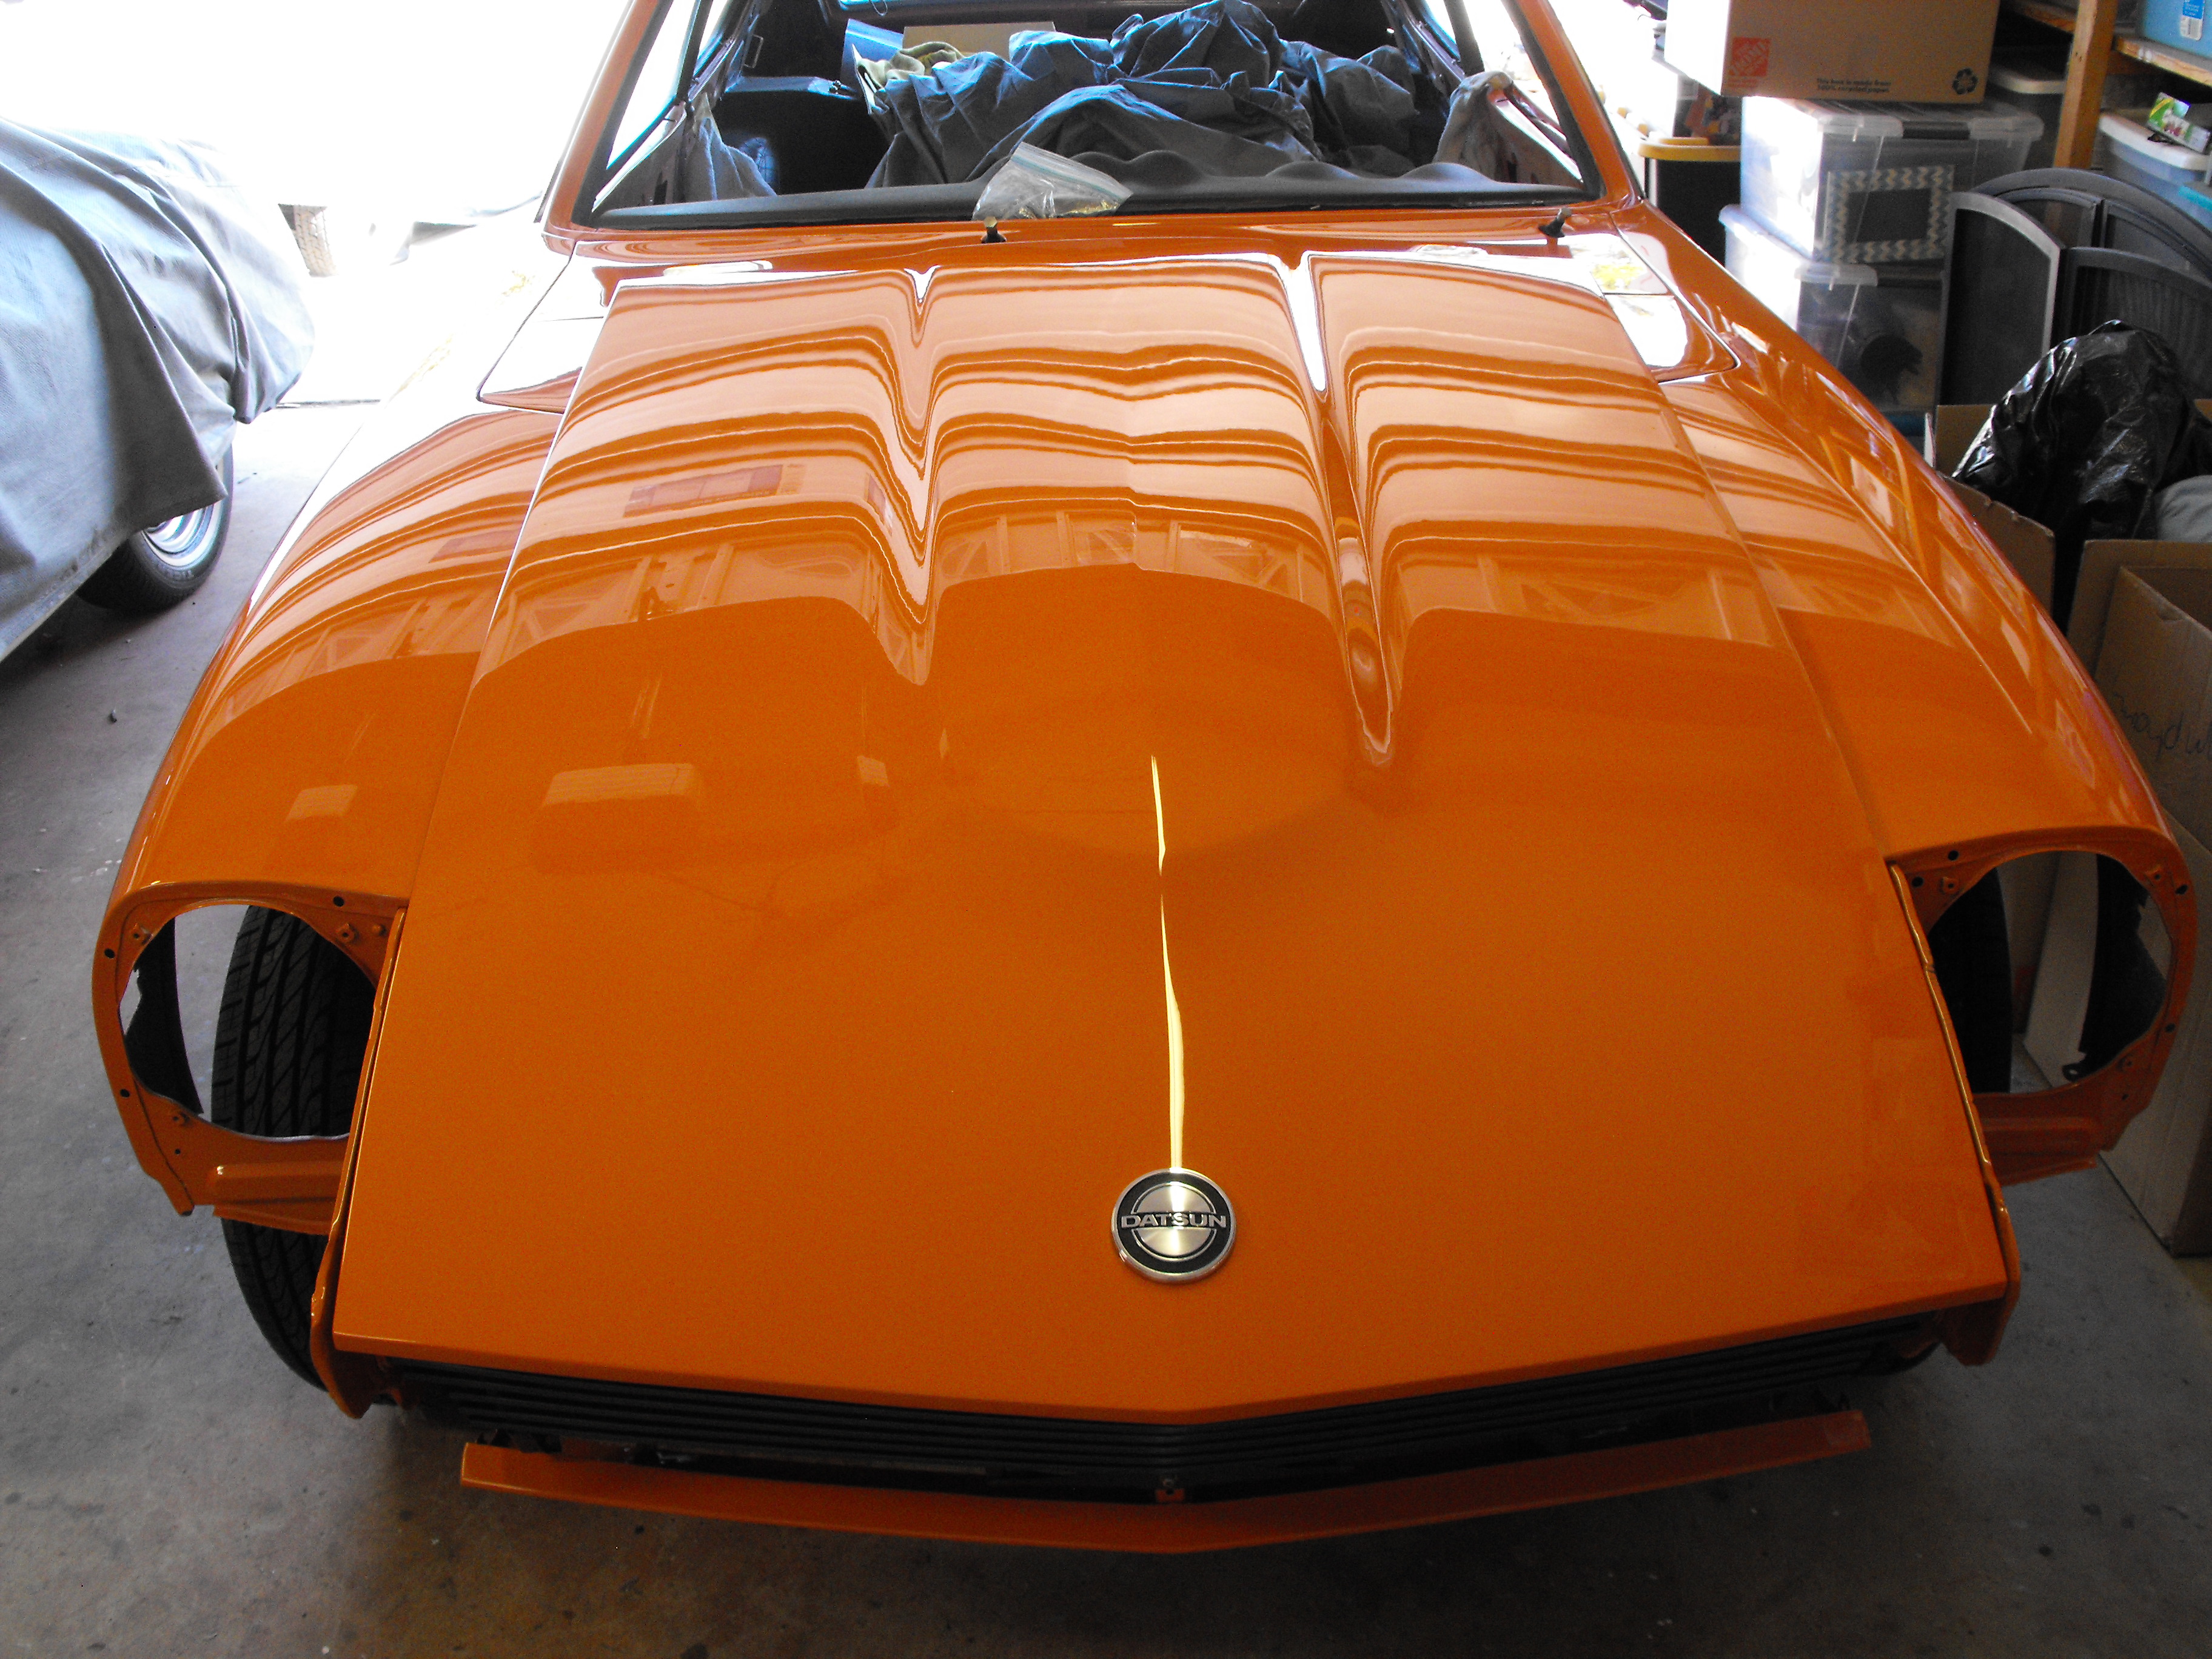
Just a few quick pics. Got the hood and some decals on.


-
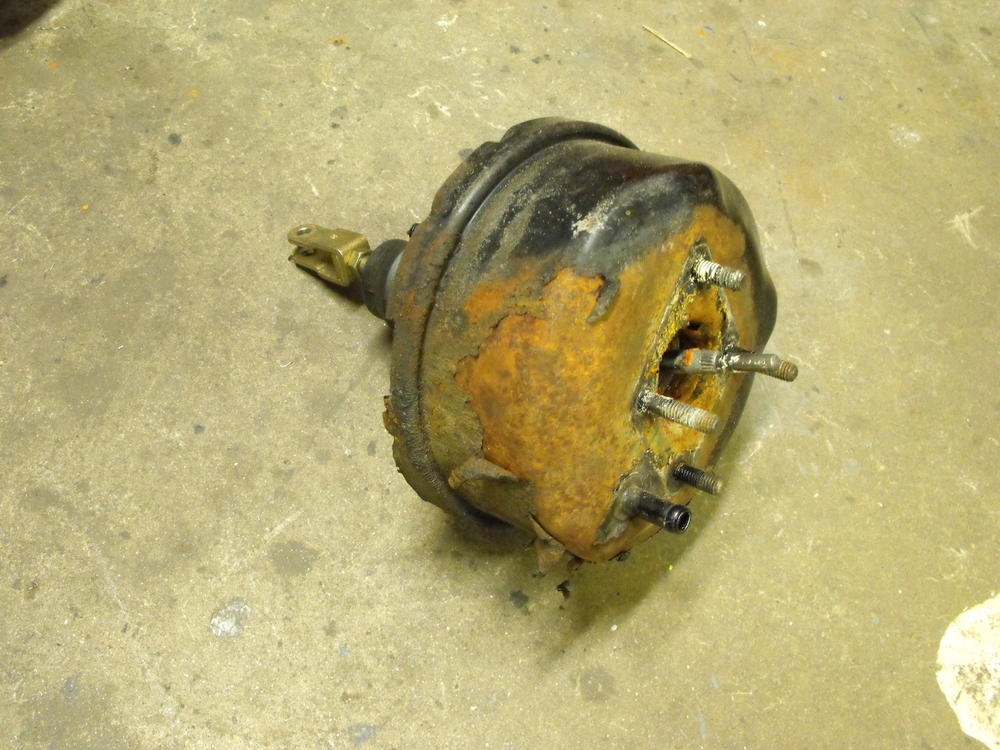
I aligned and secured the fenders. Also installed the two access panels. Will pick up the hood from the paint shop tomorrow and install that. Cleaned up the coil, installed the clutch slave cylinder and started clean-up on the brake booster (Looks like it spent a little time at the bottom of the ocean). Anyway still moving along on this. Should get some time this weekend to make some good progress. Pics below.