motorman7
 Subscriber
-
Joined
-
Last visited
Everything posted by motorman7
-
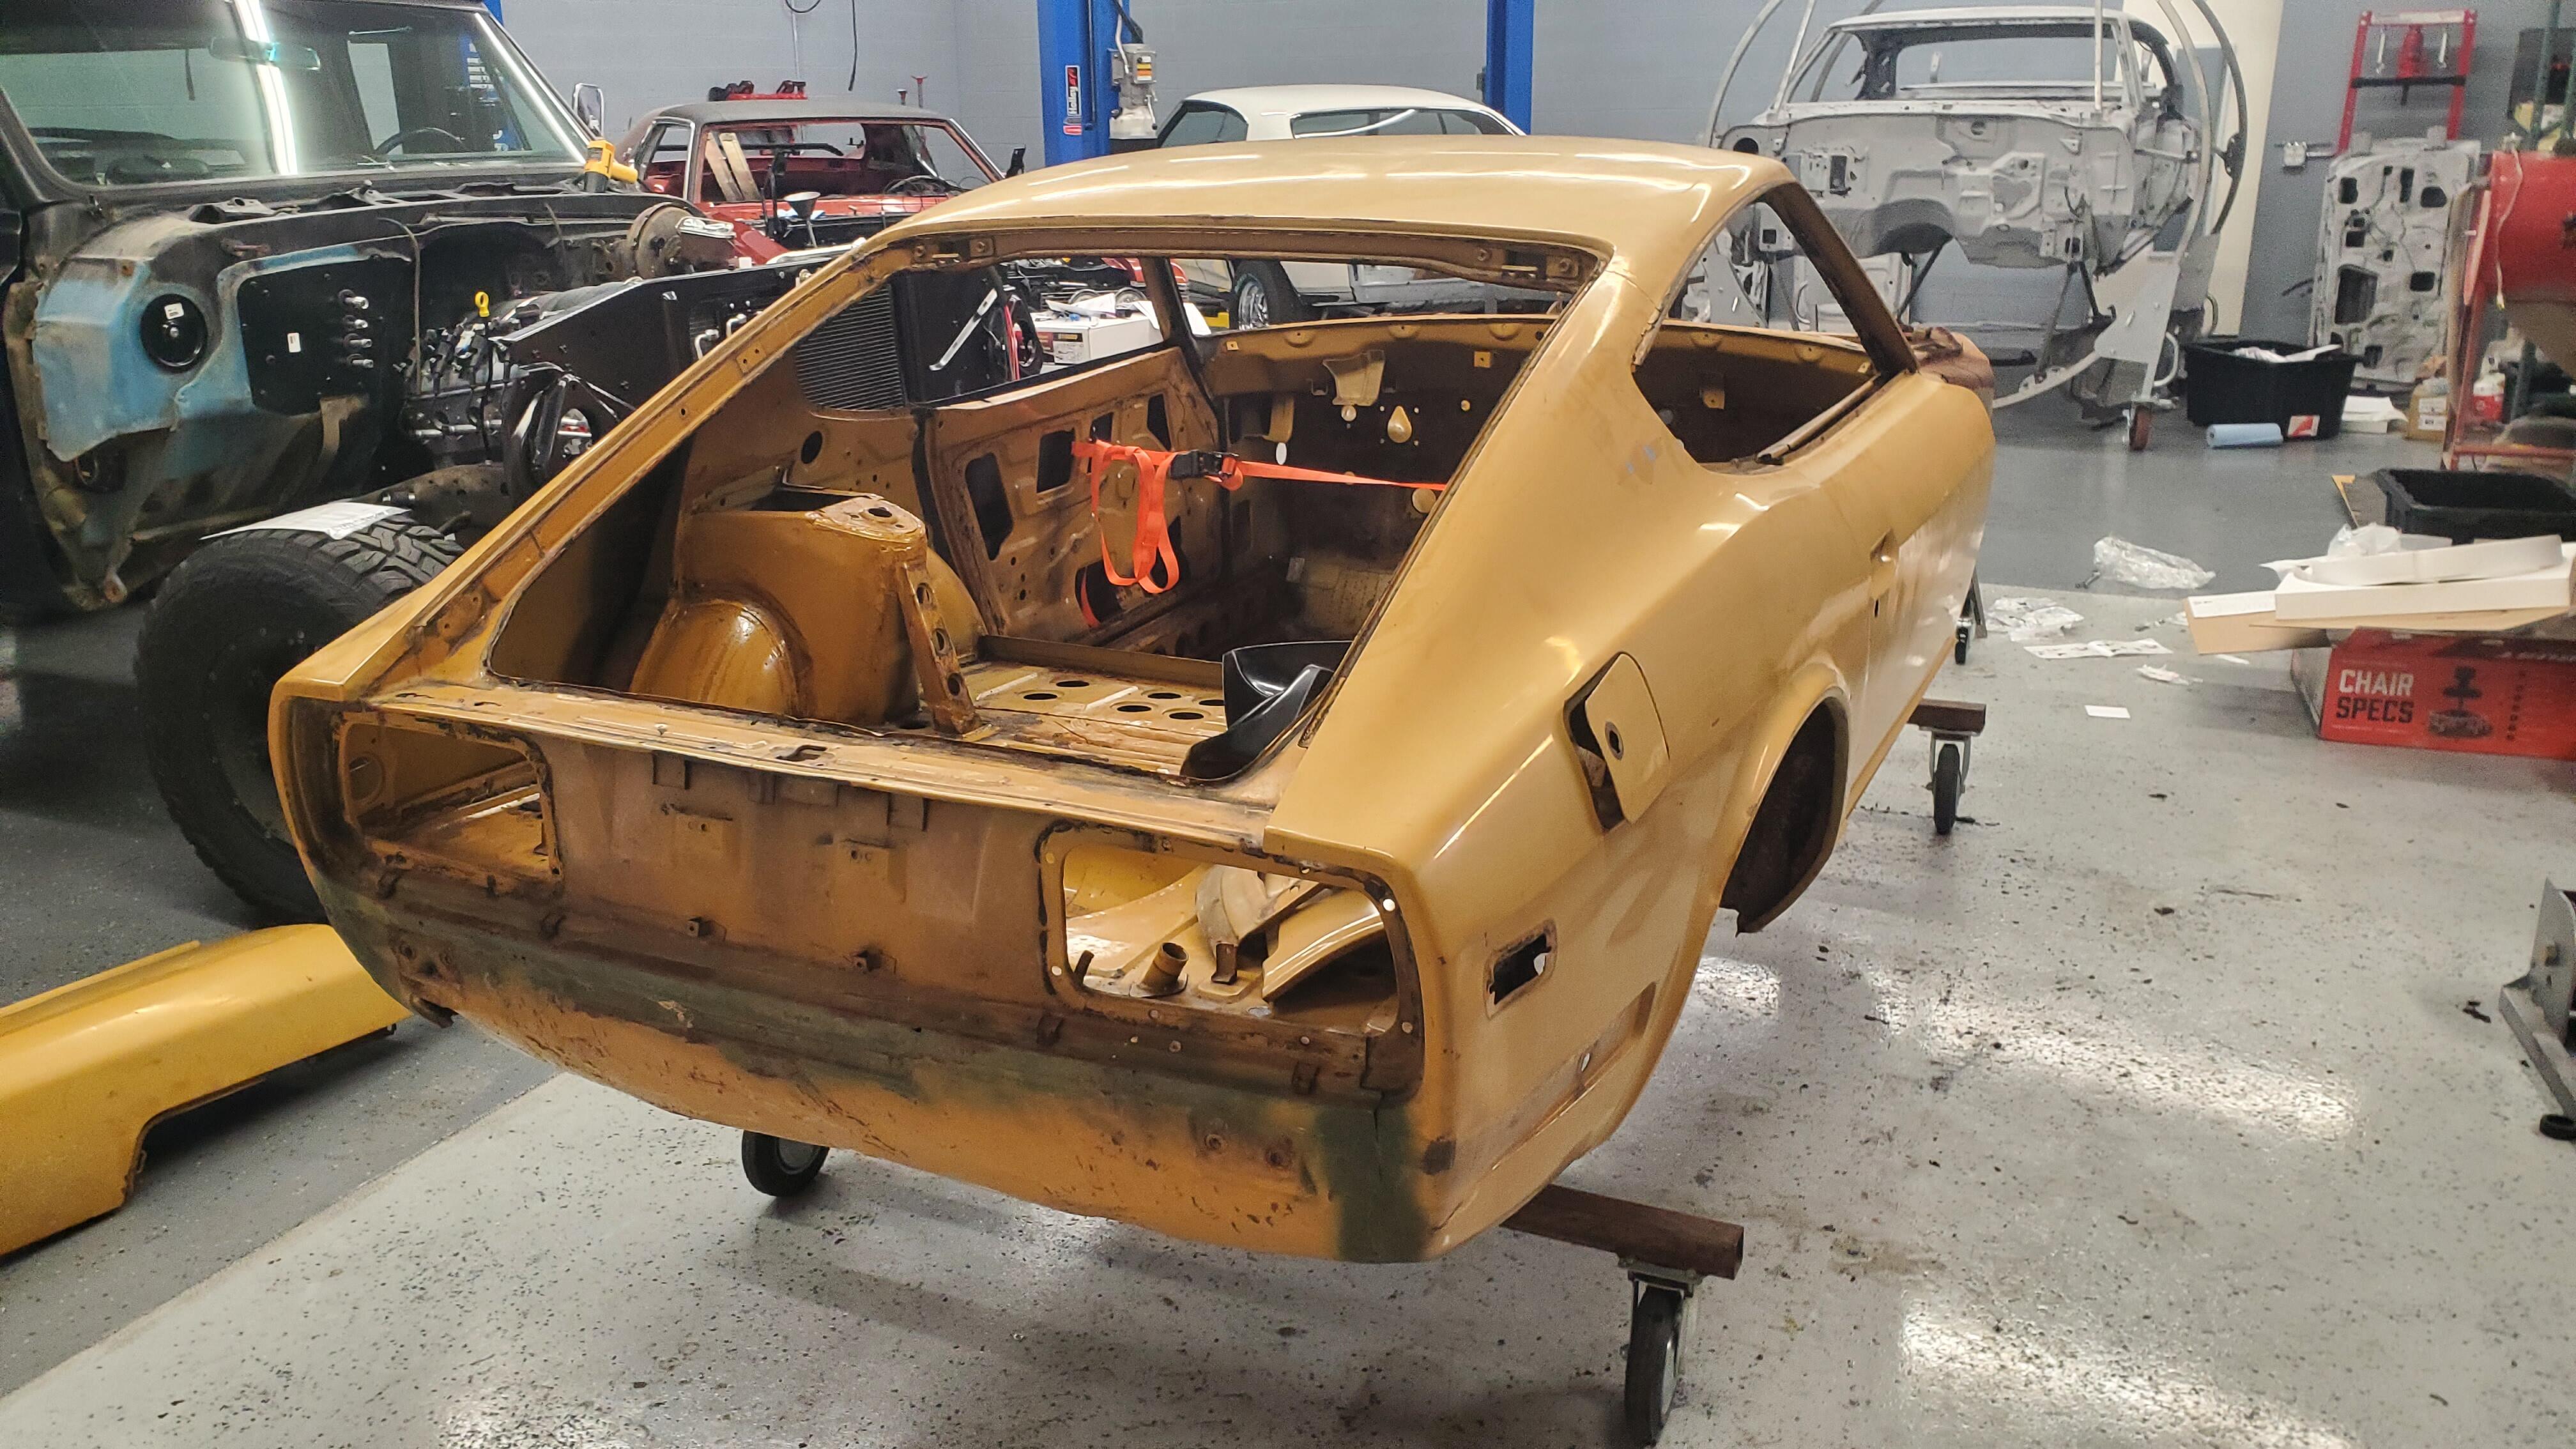
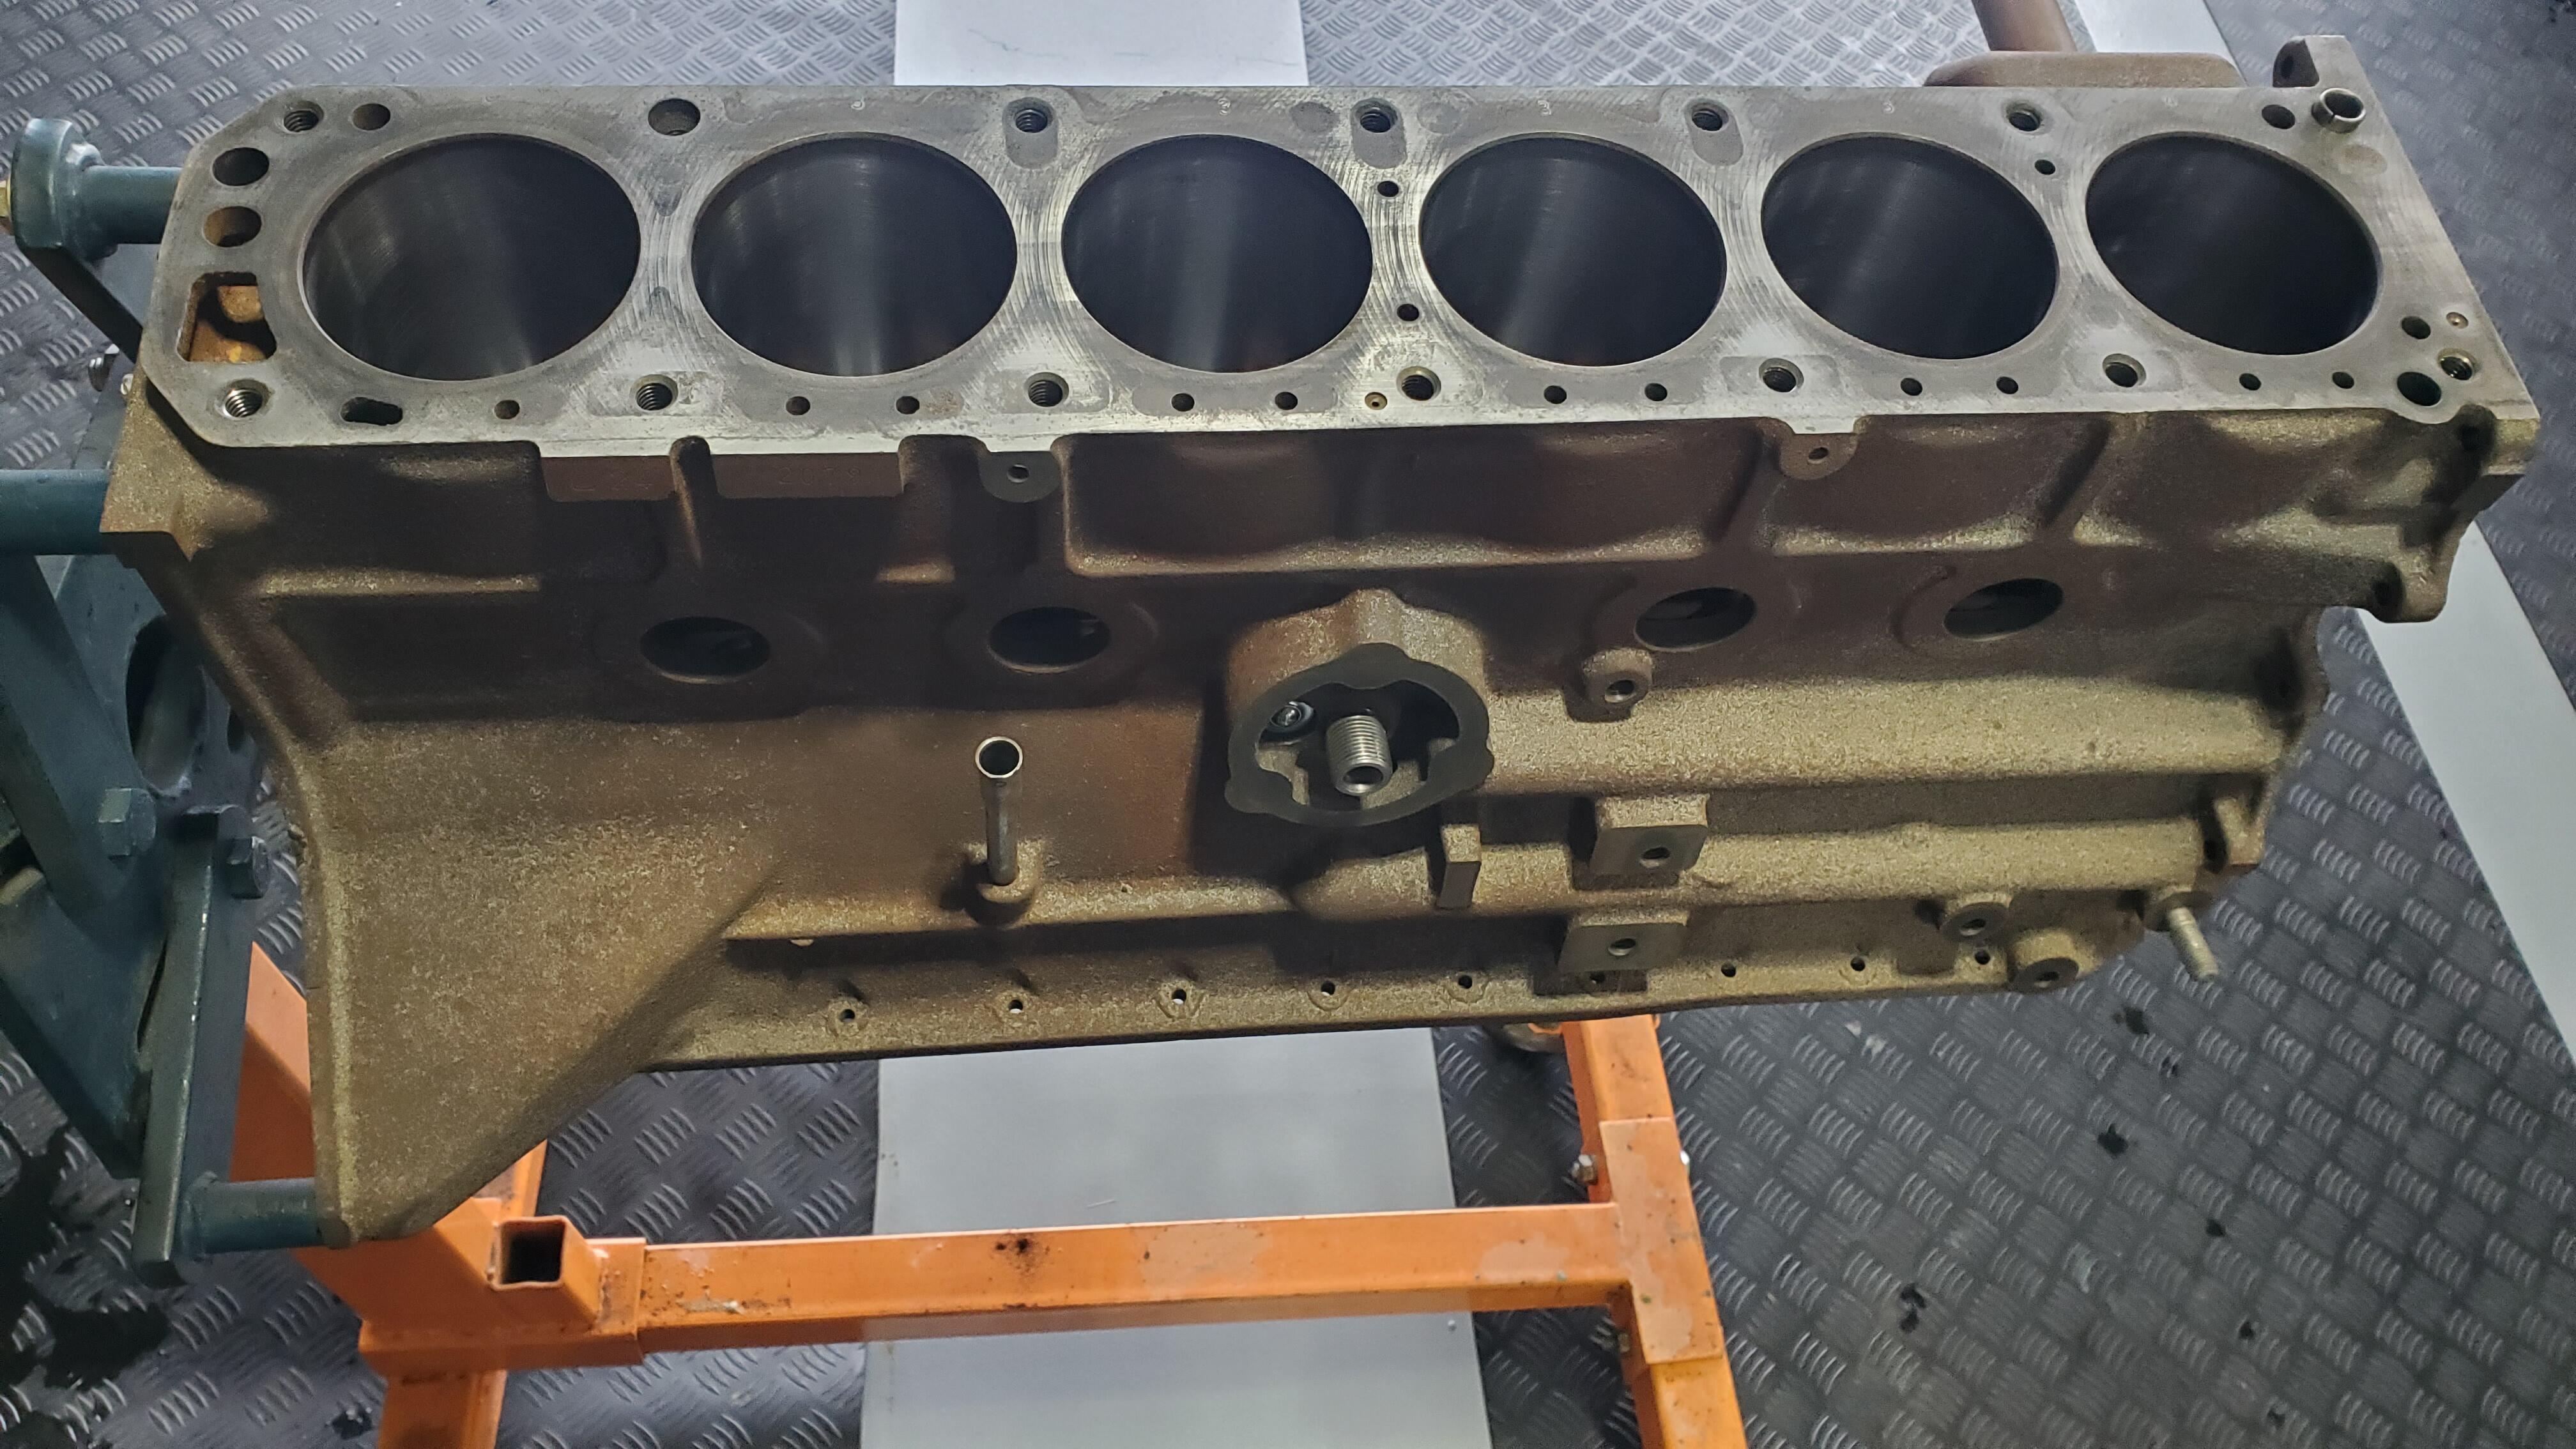
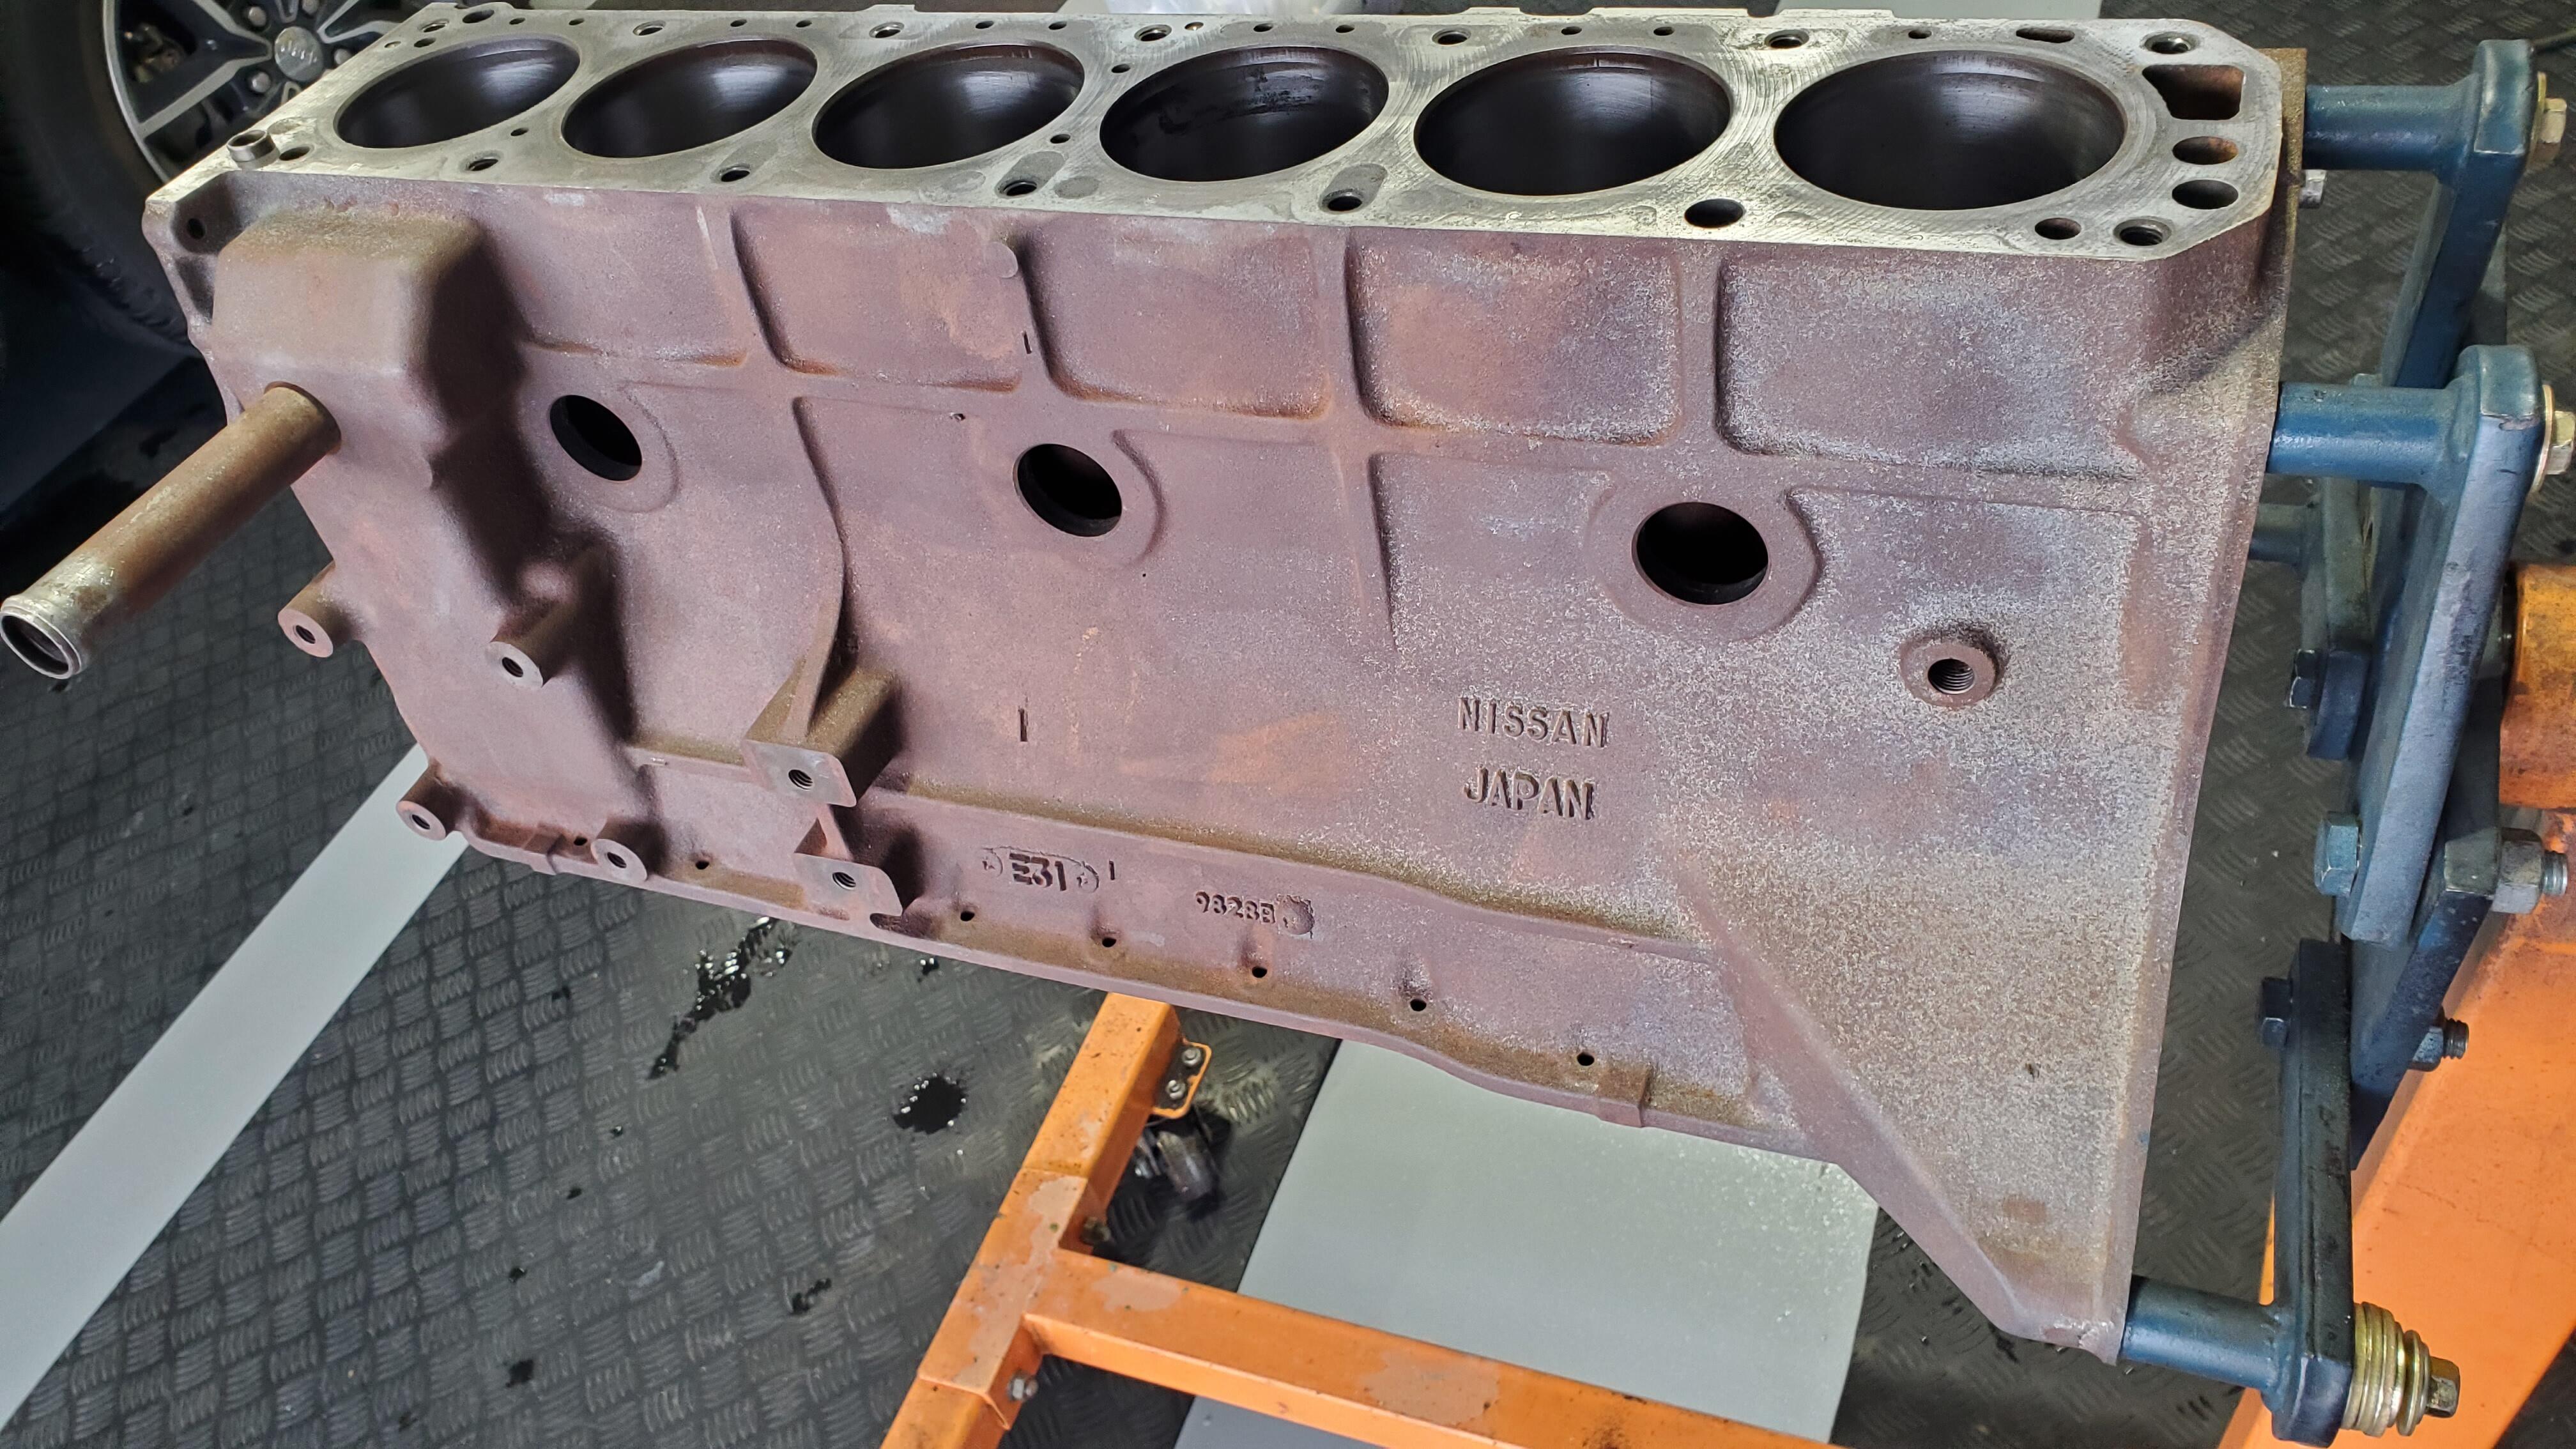
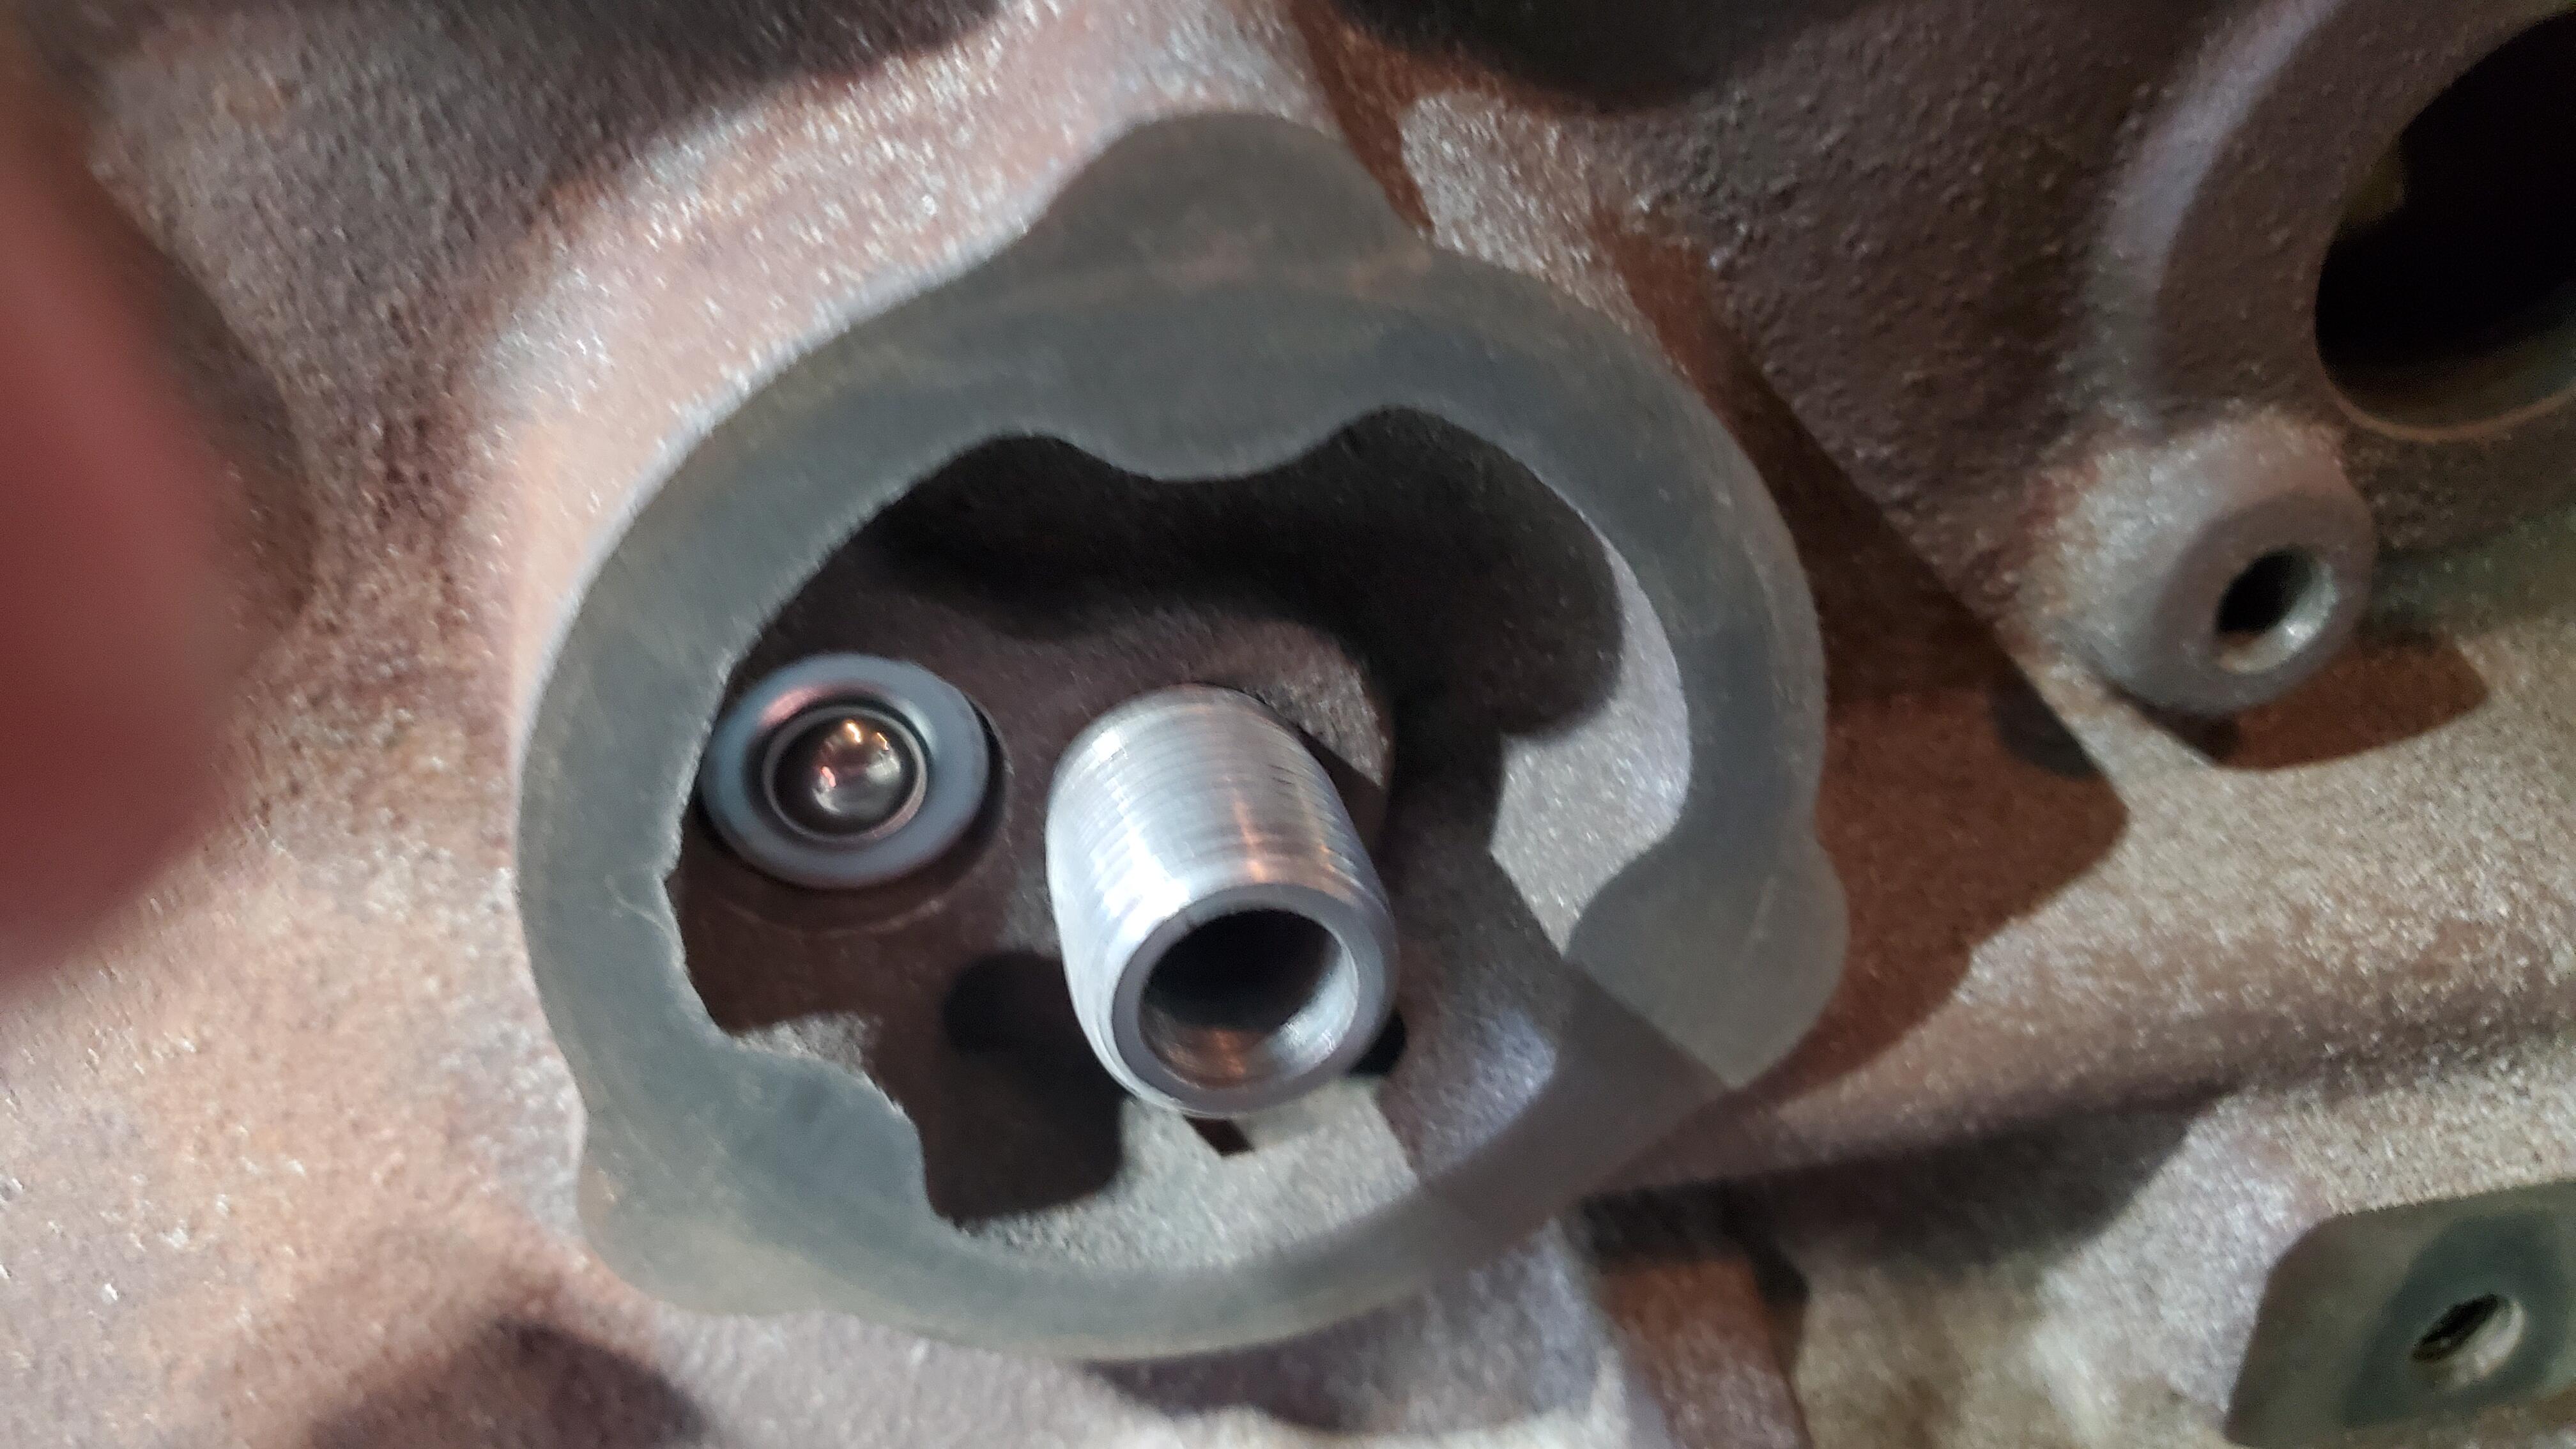
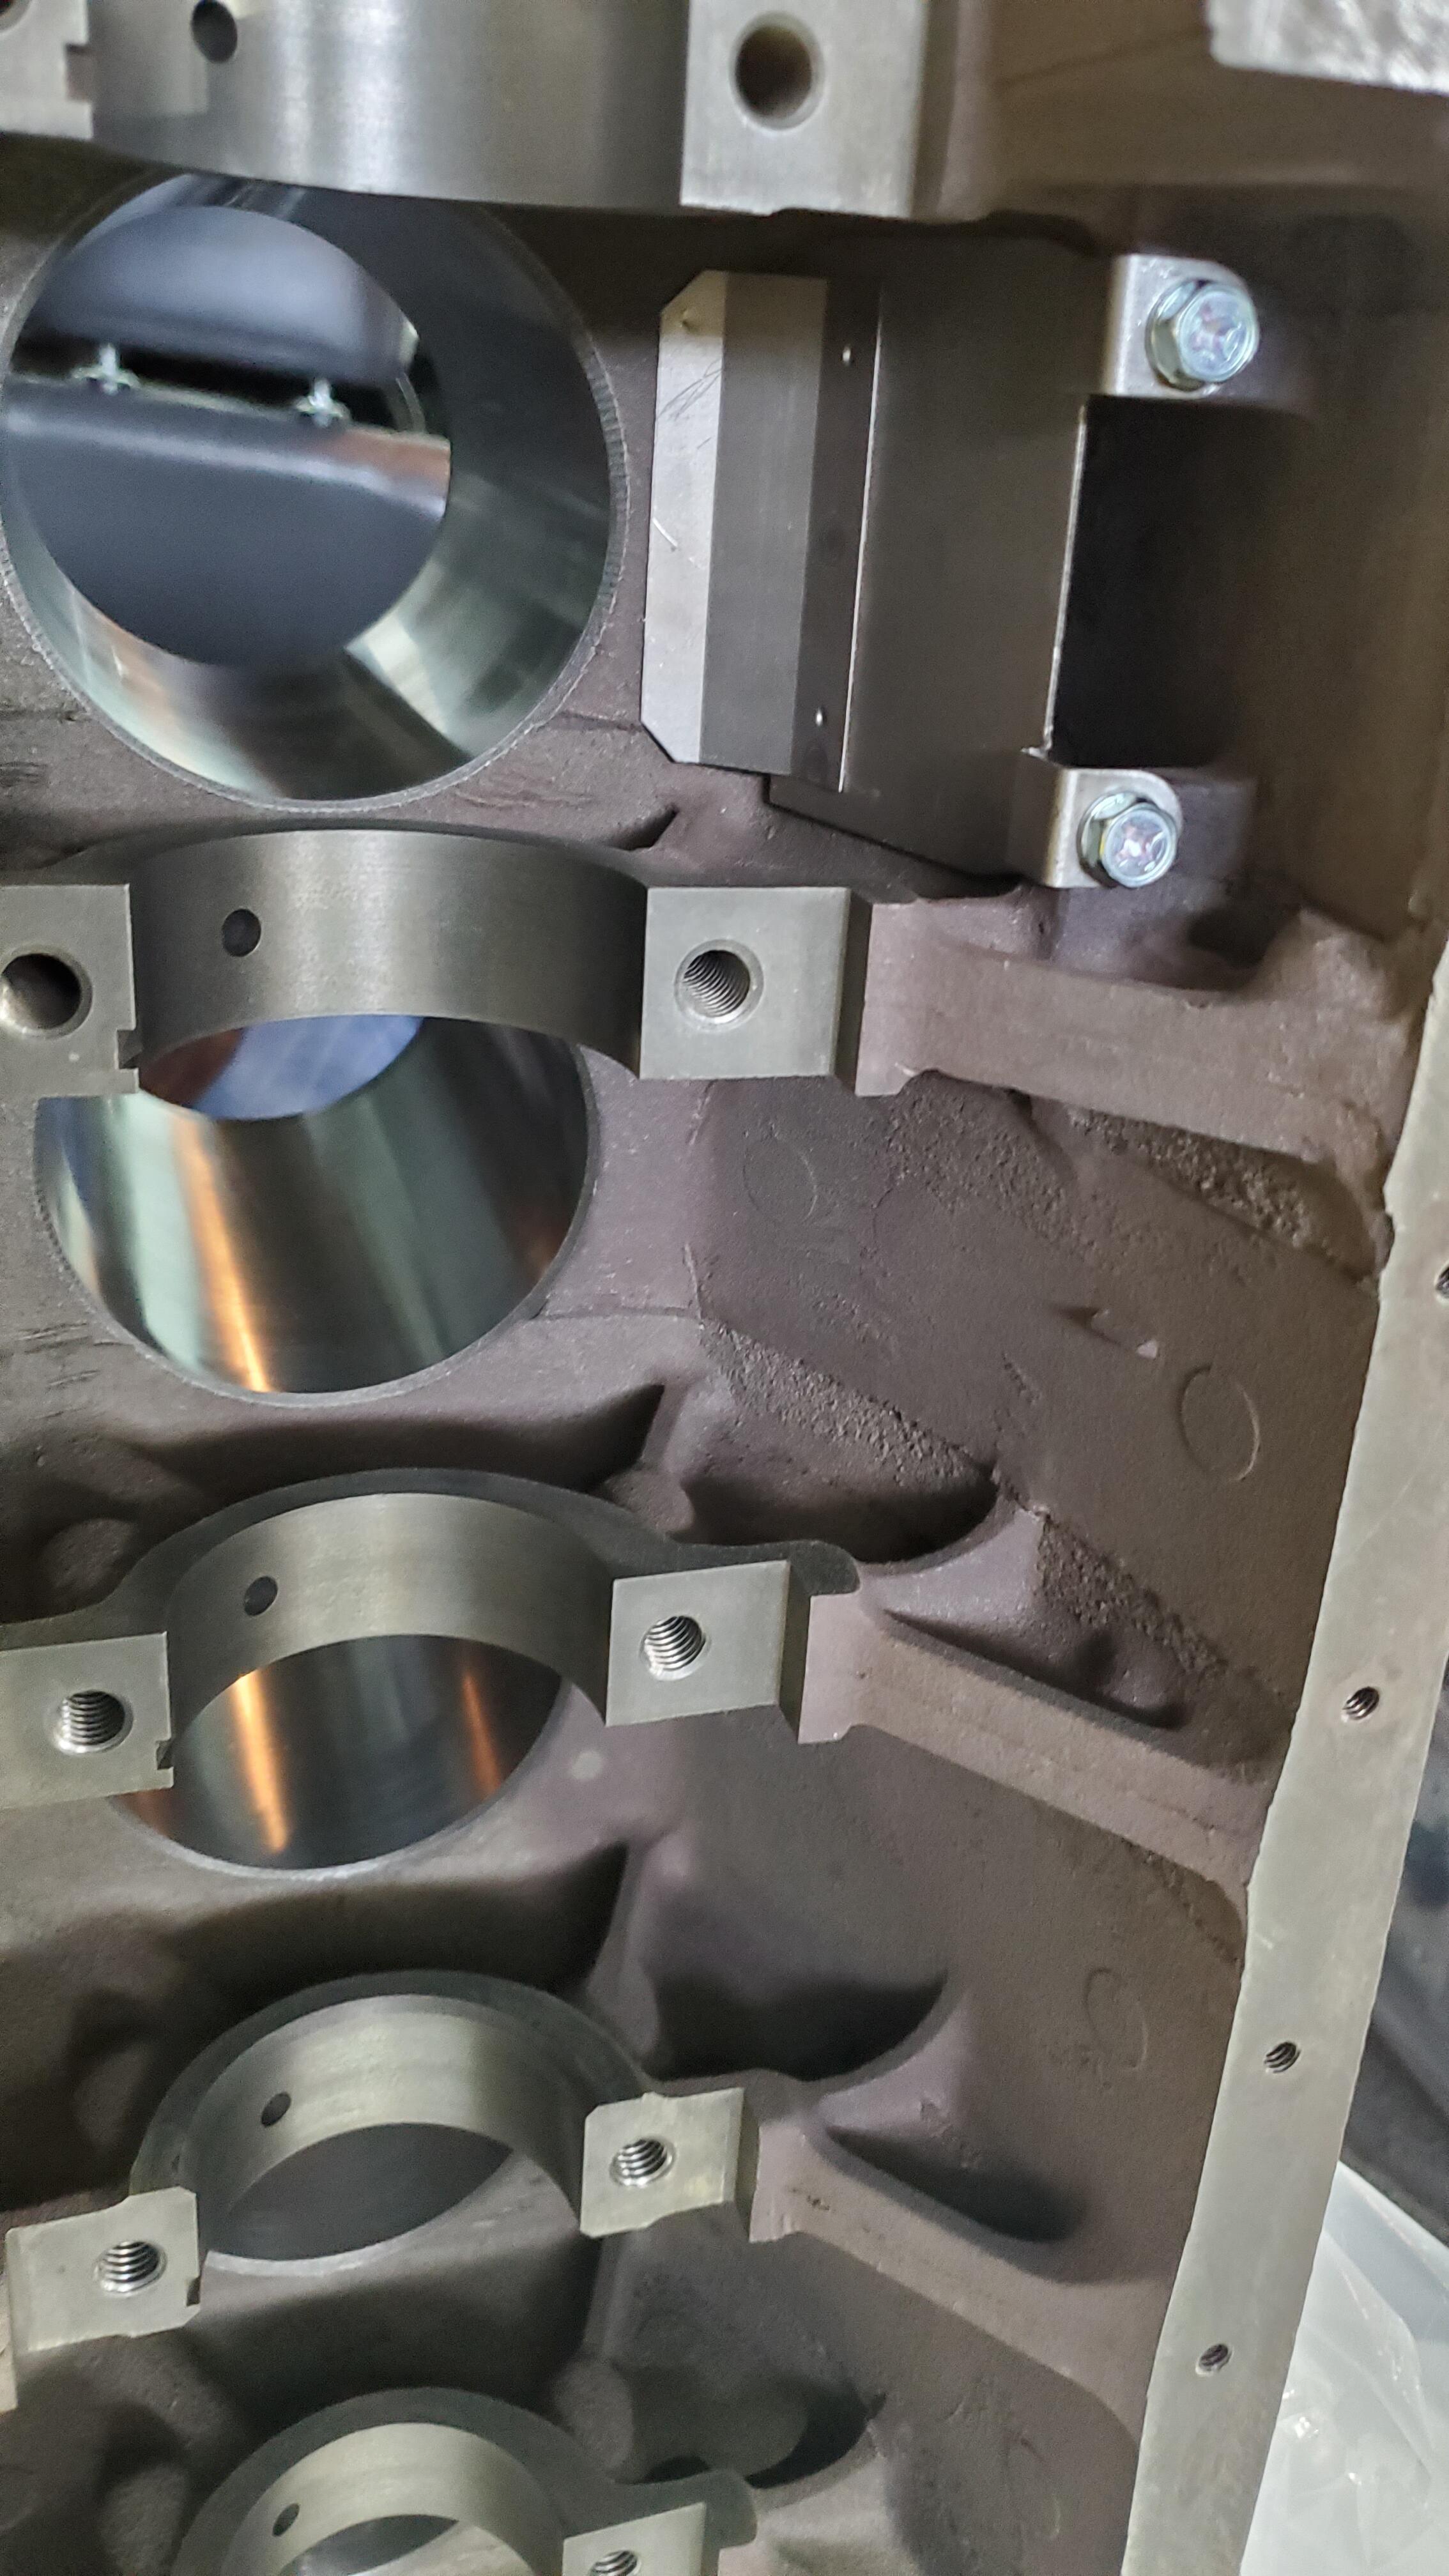
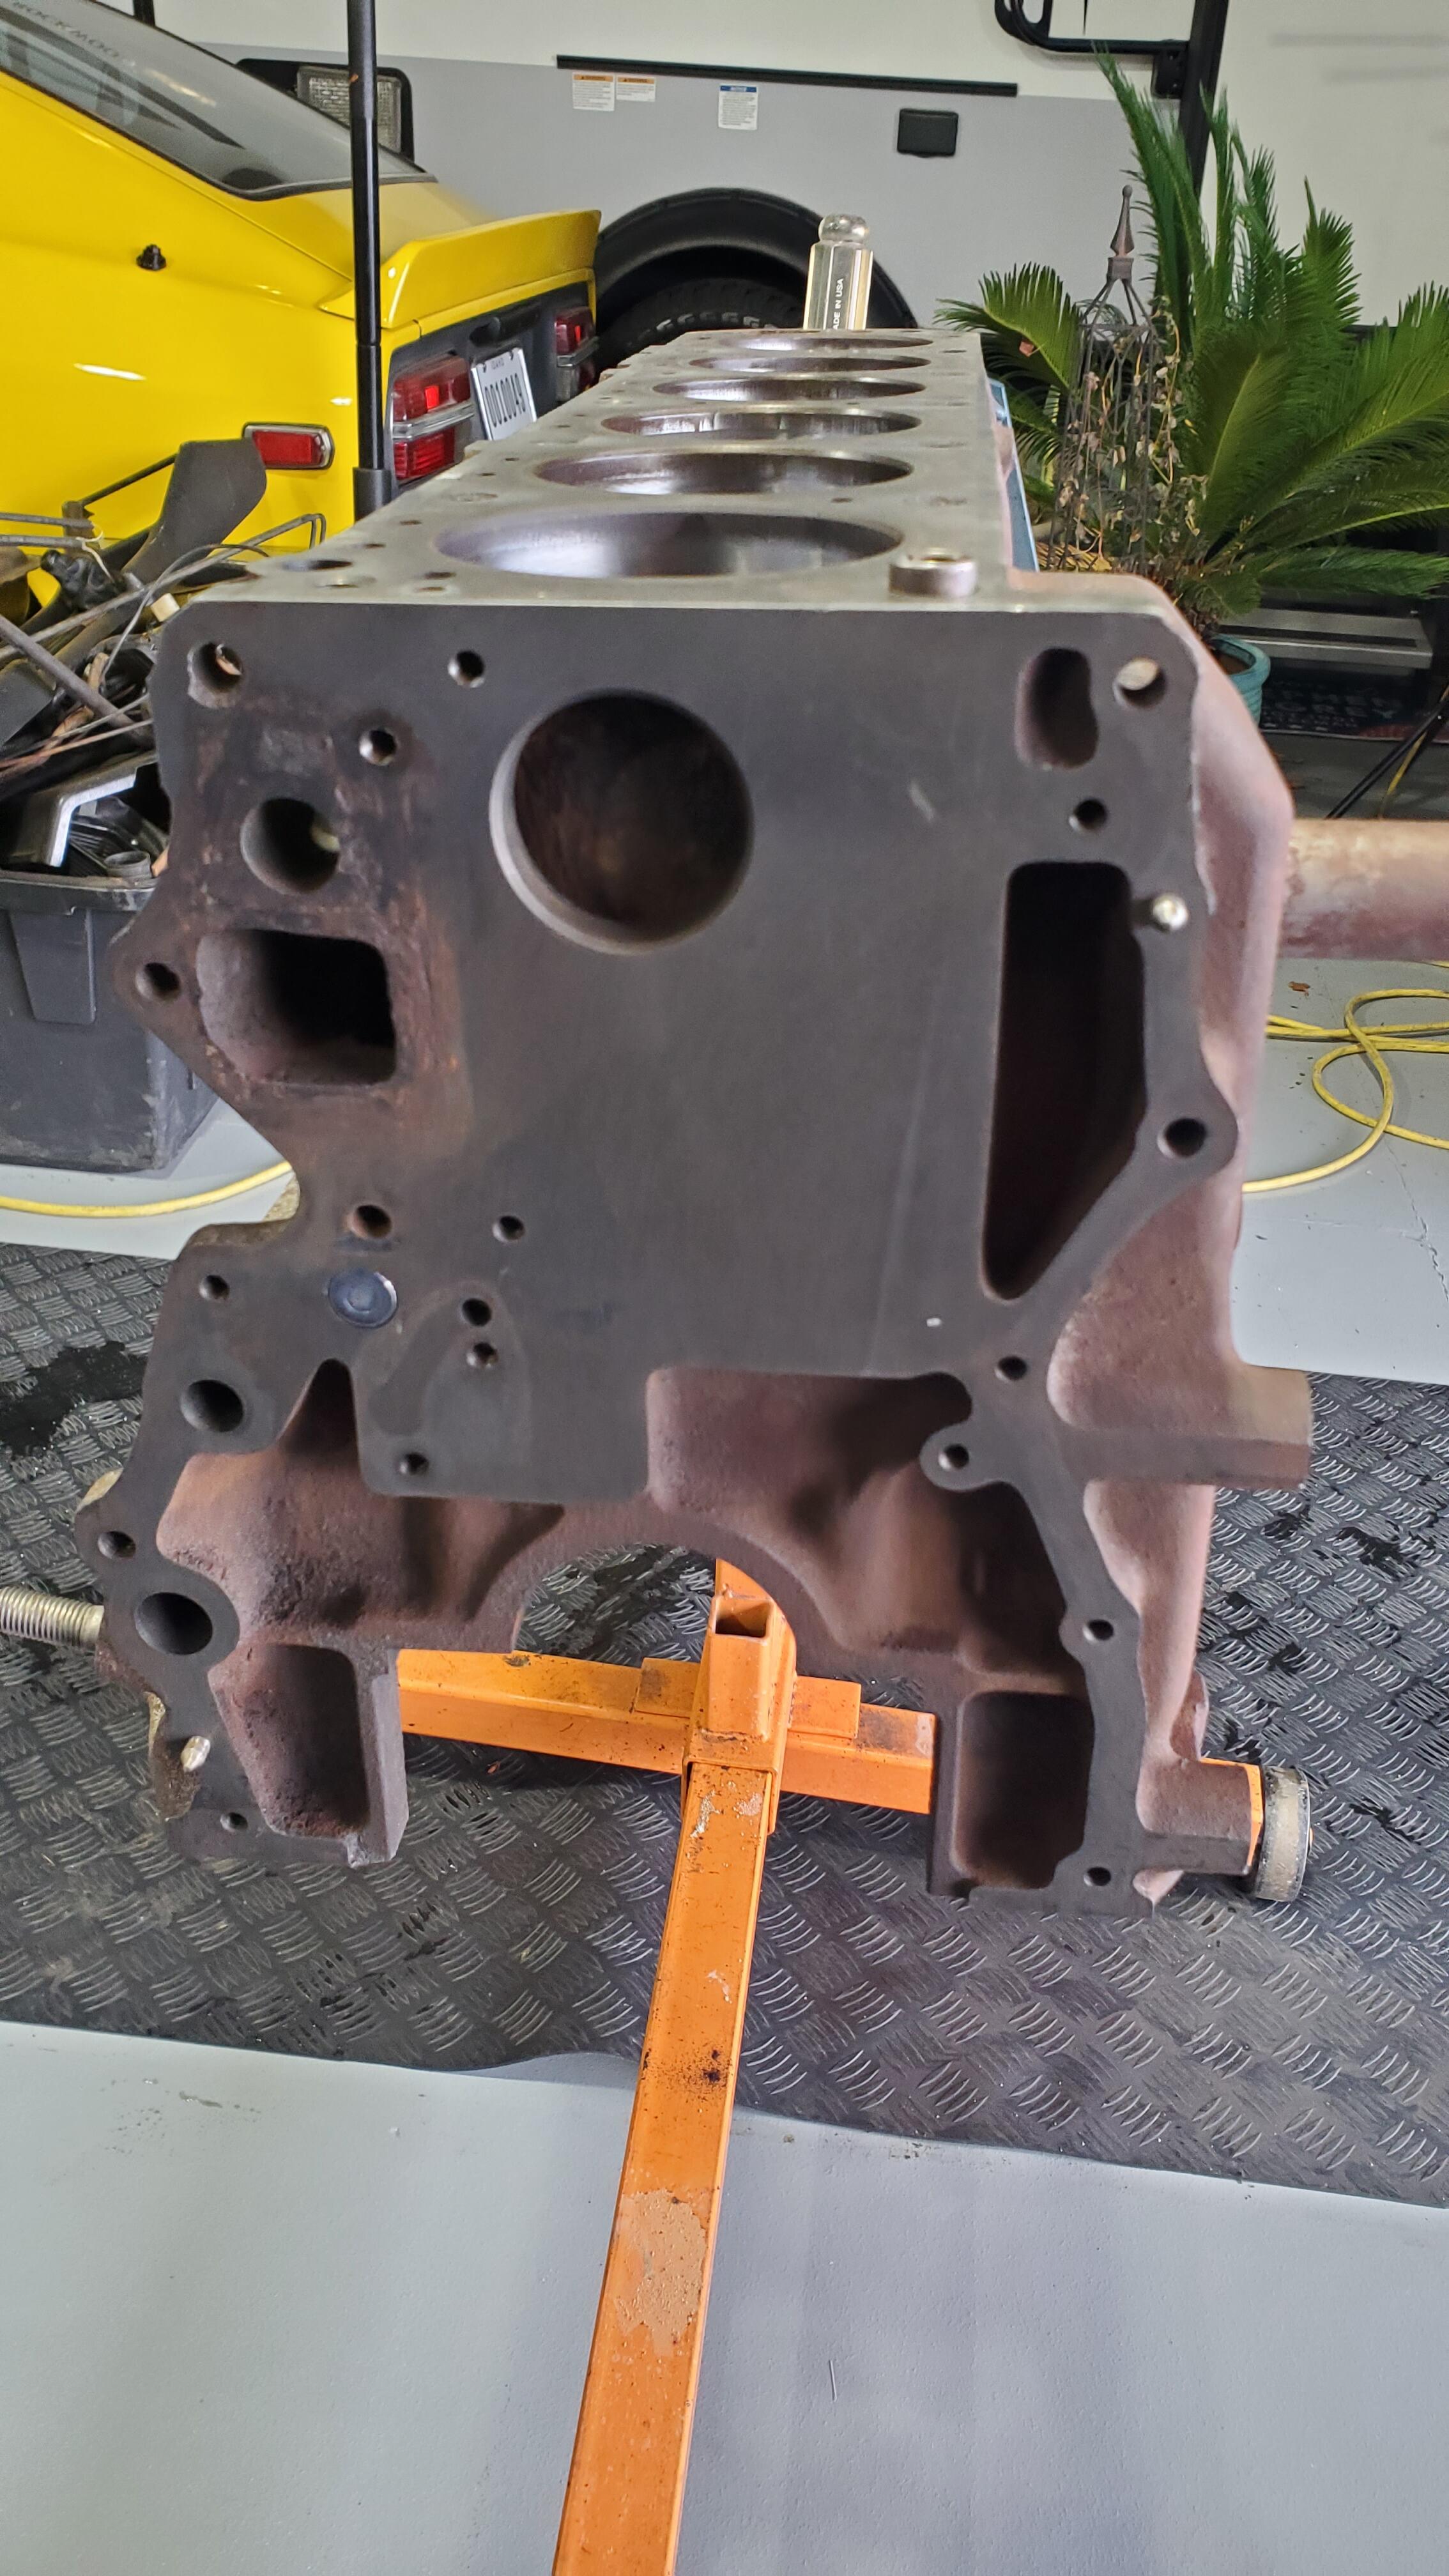
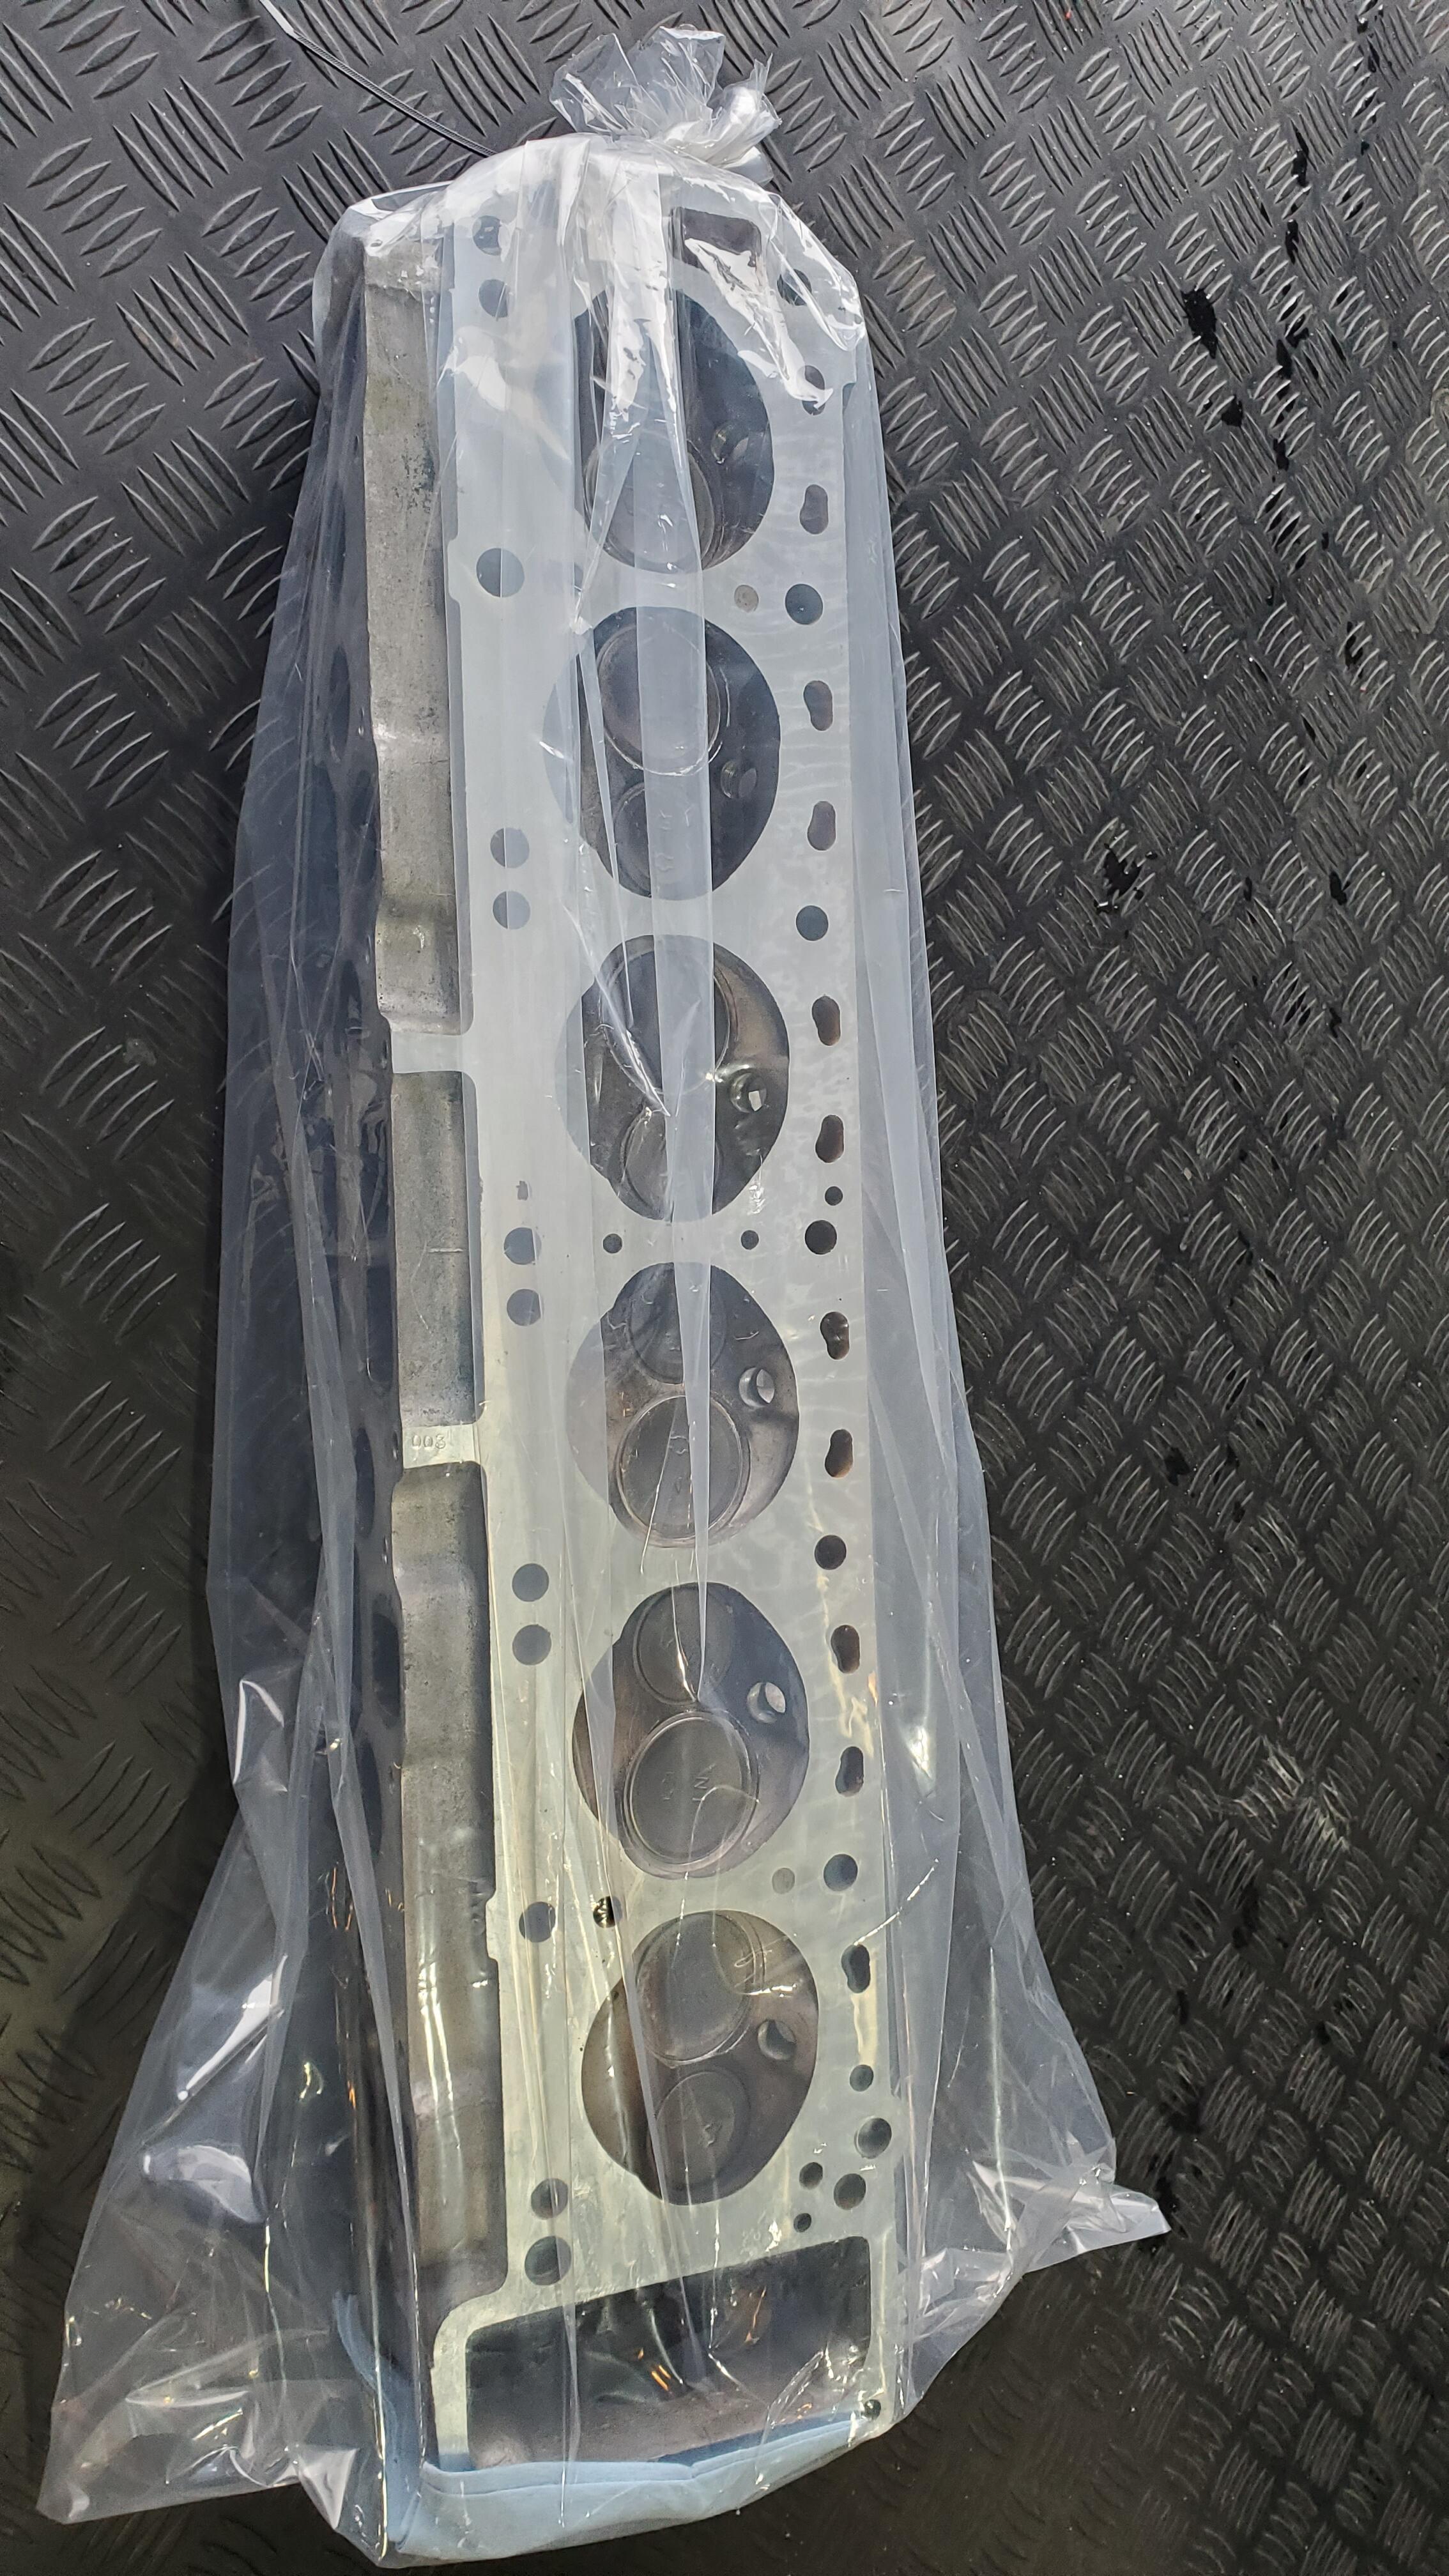
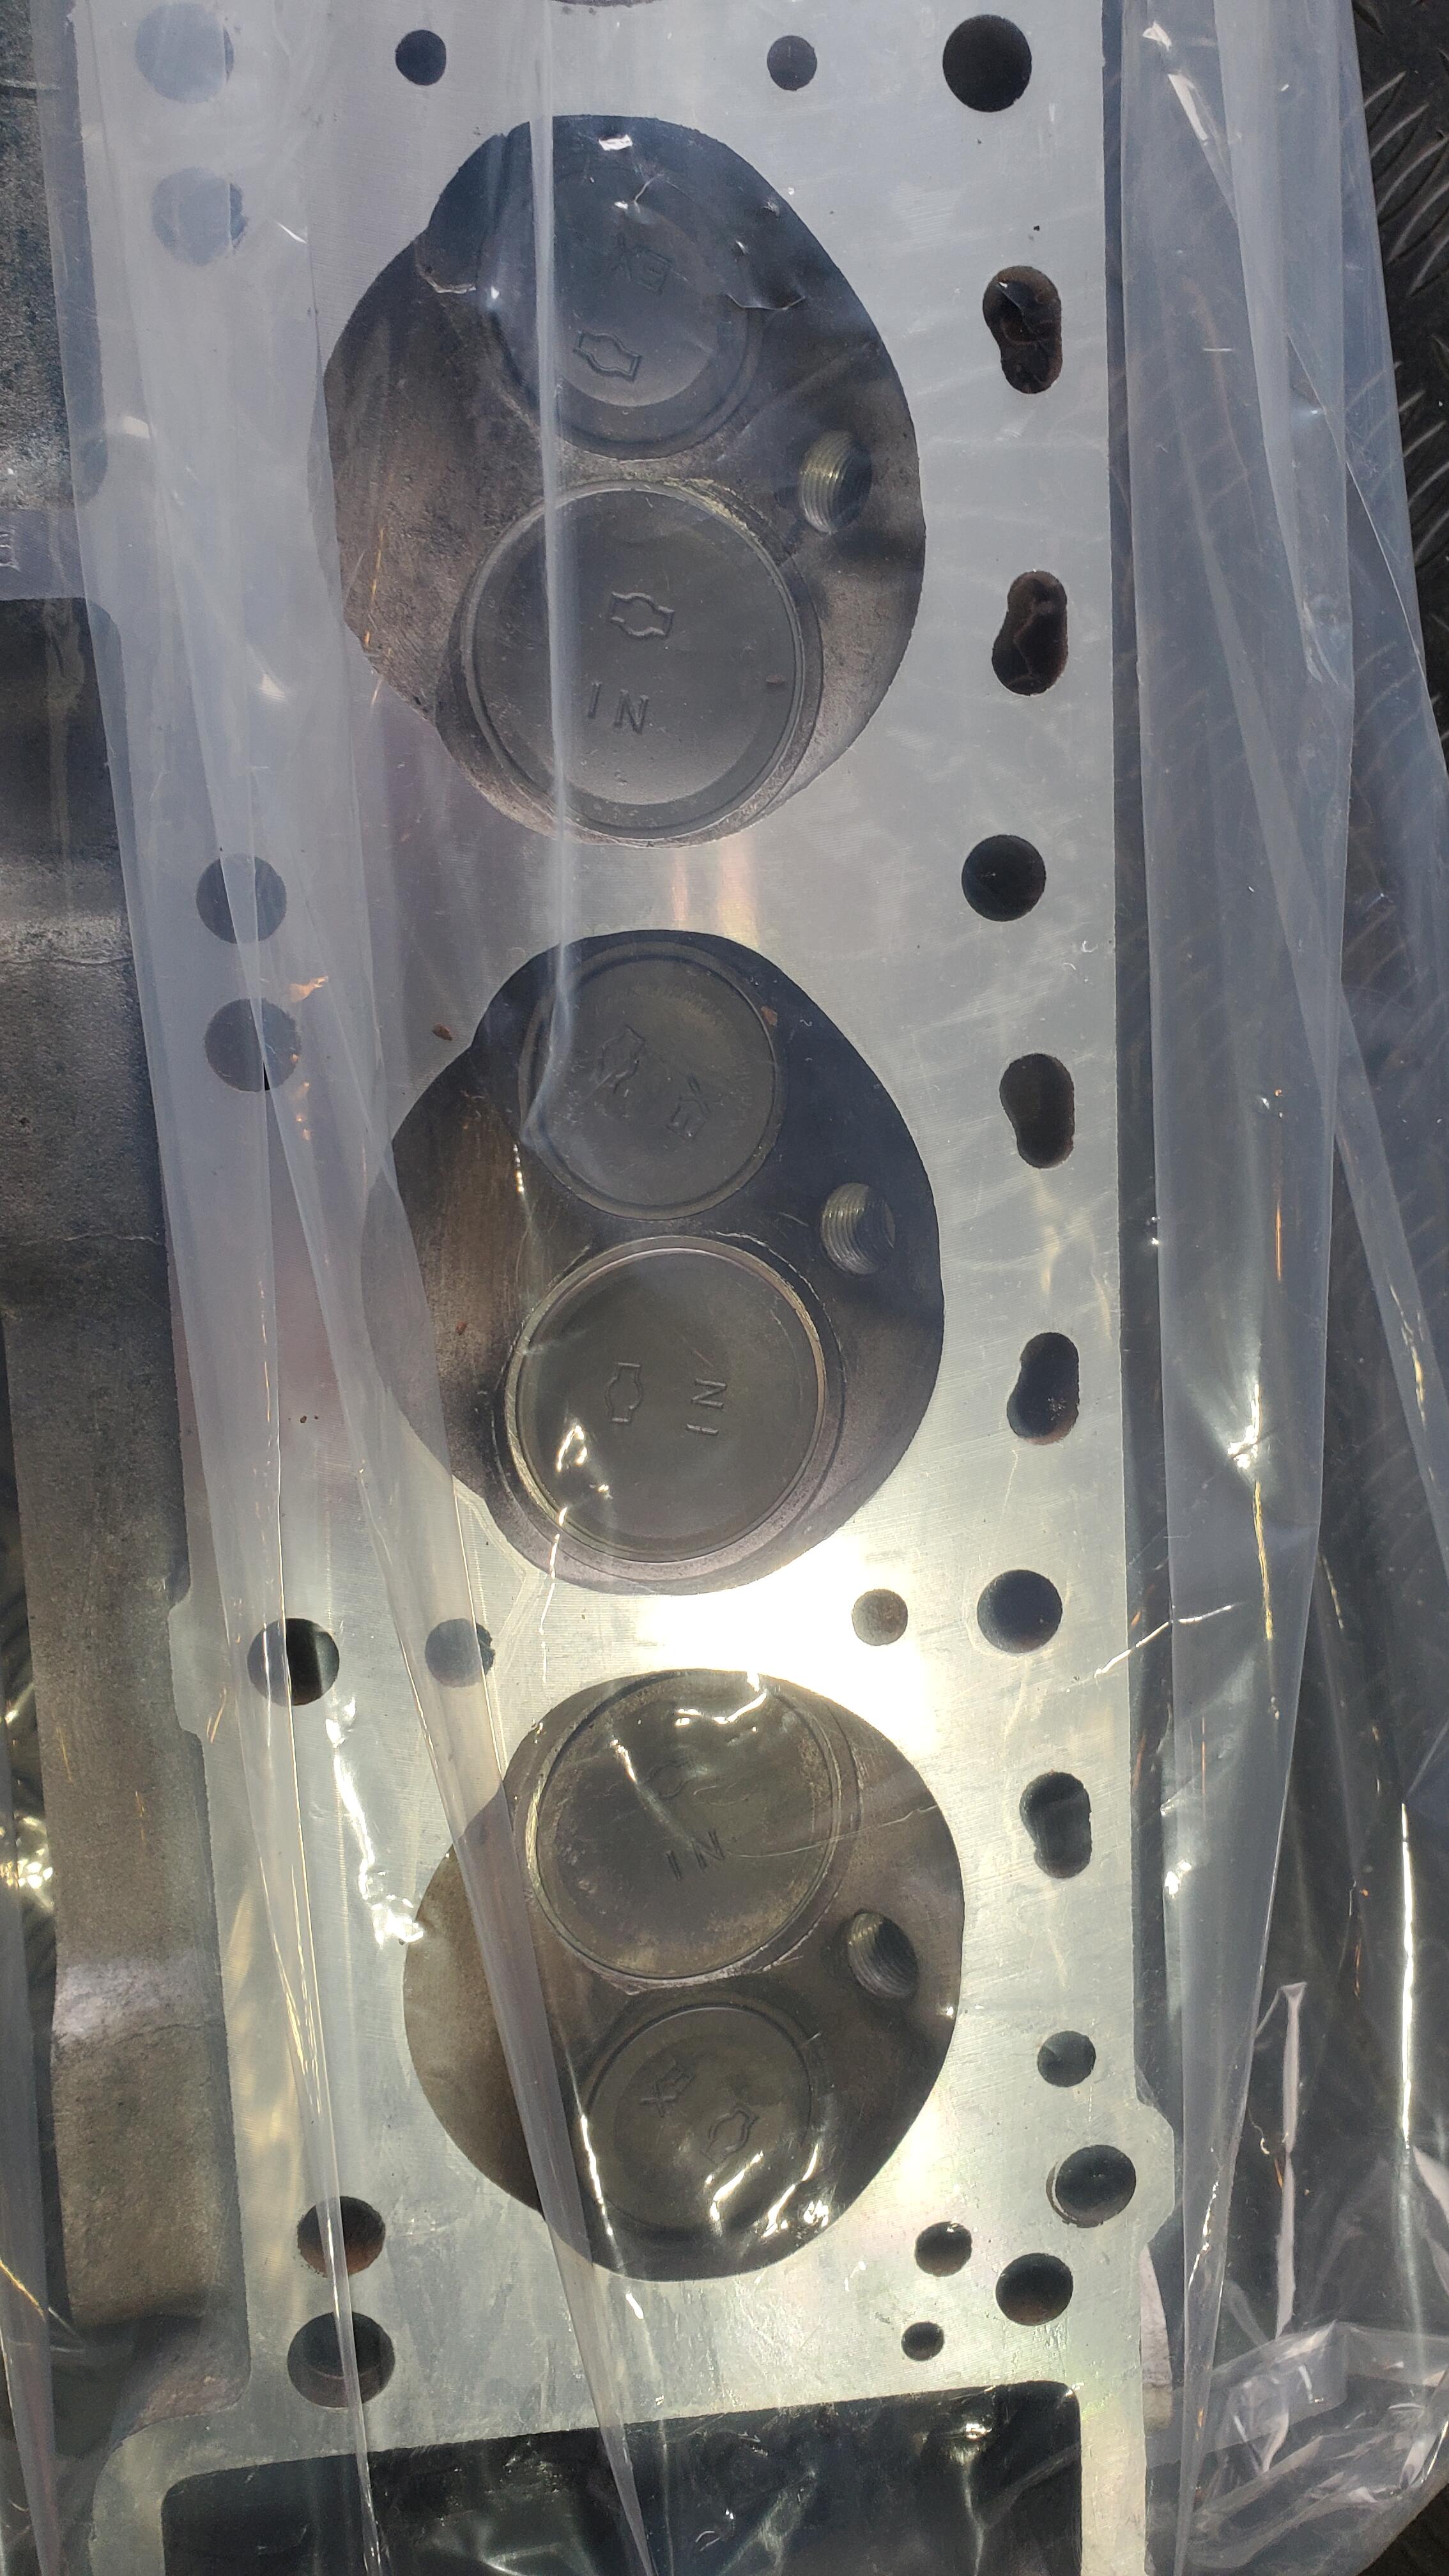
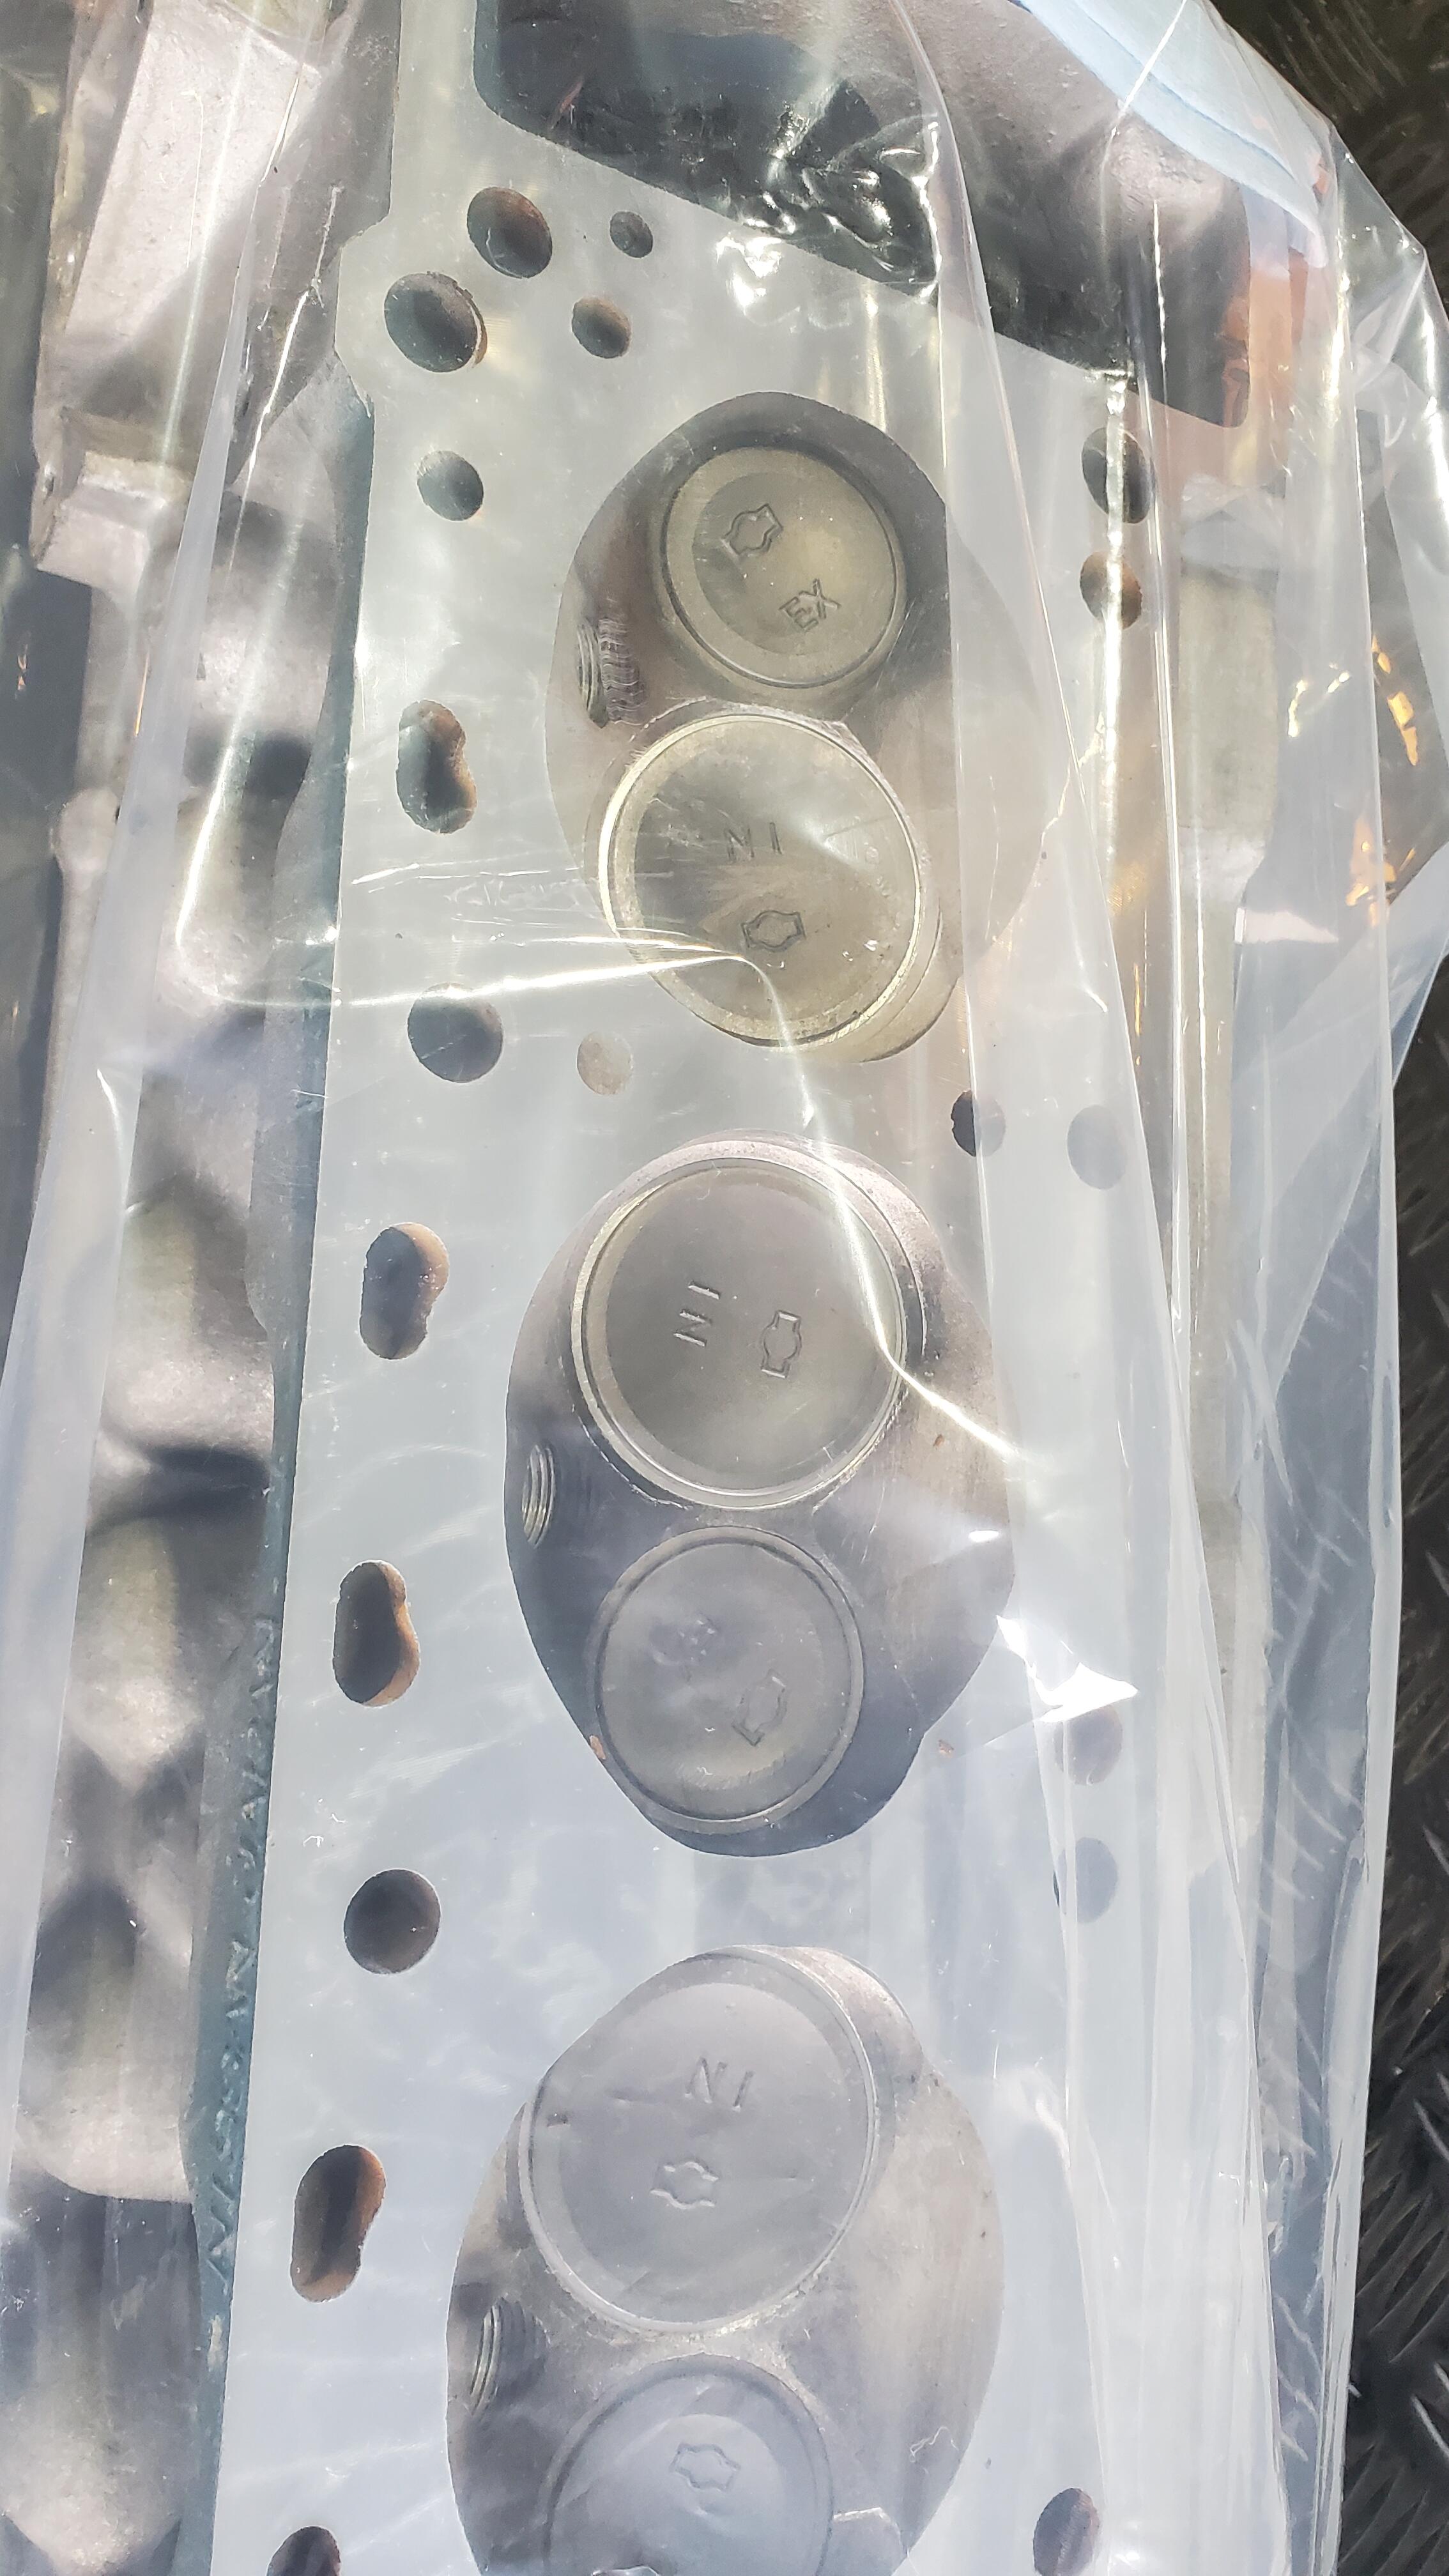
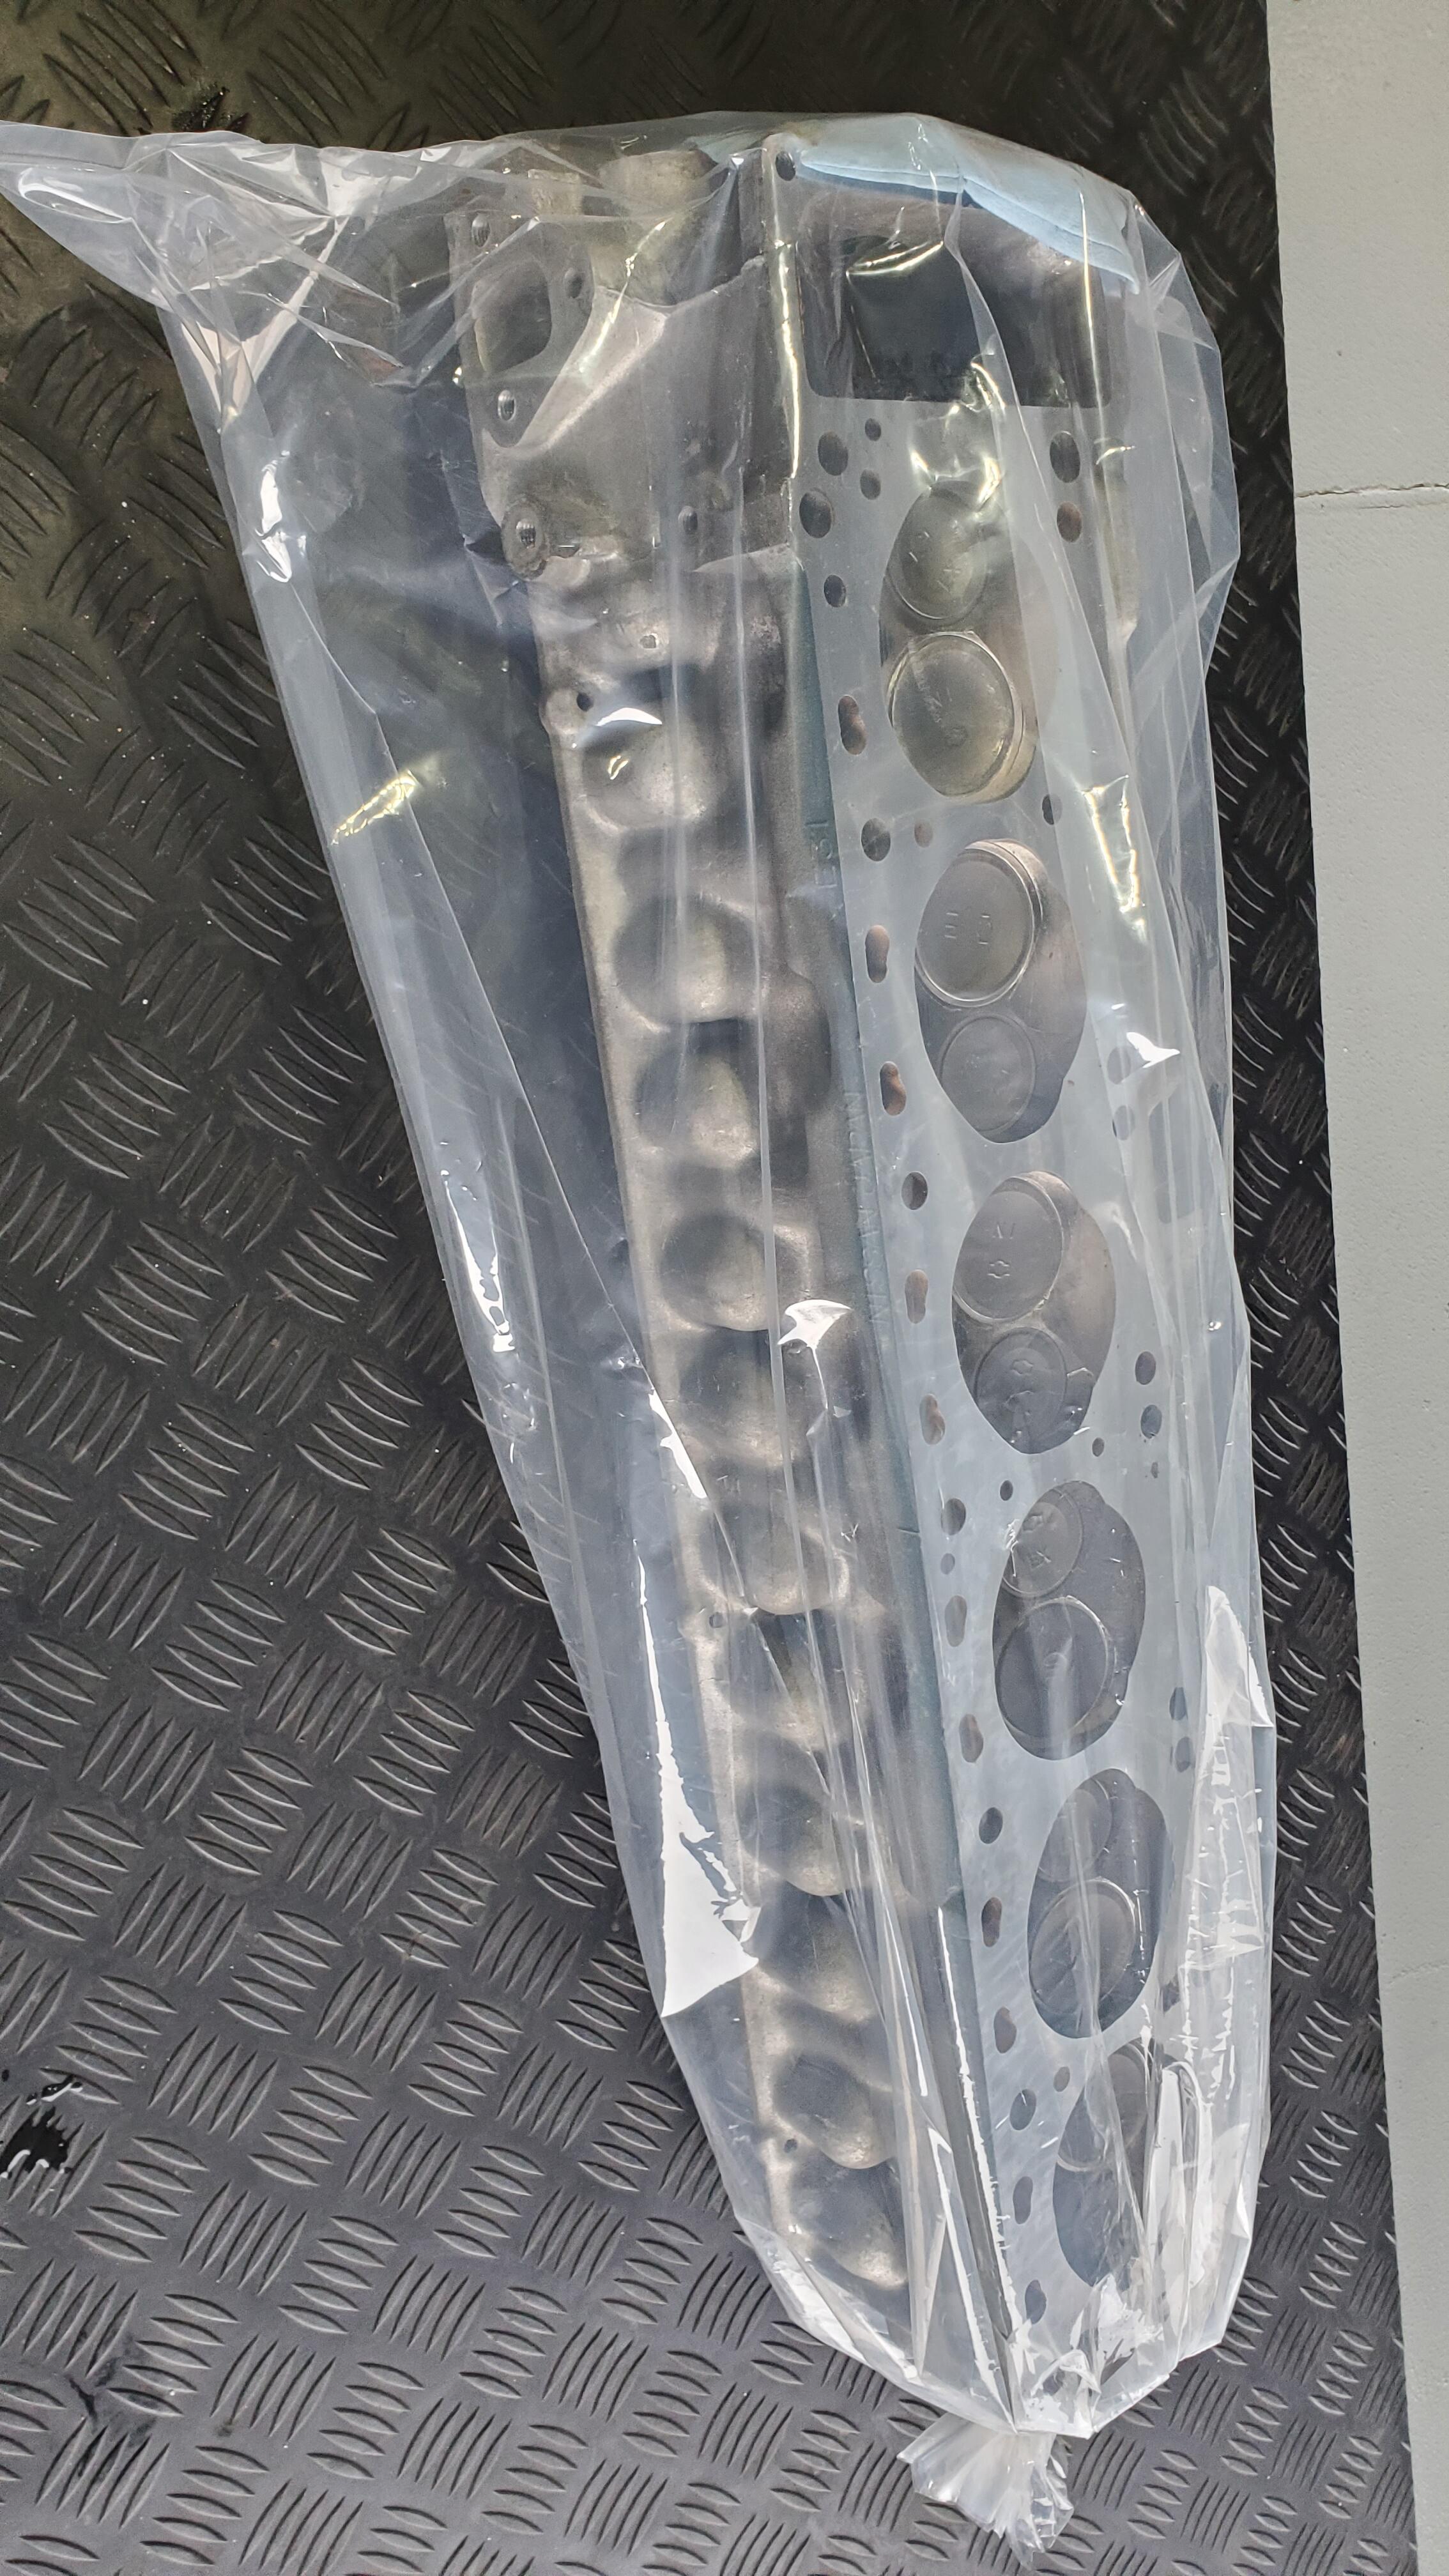
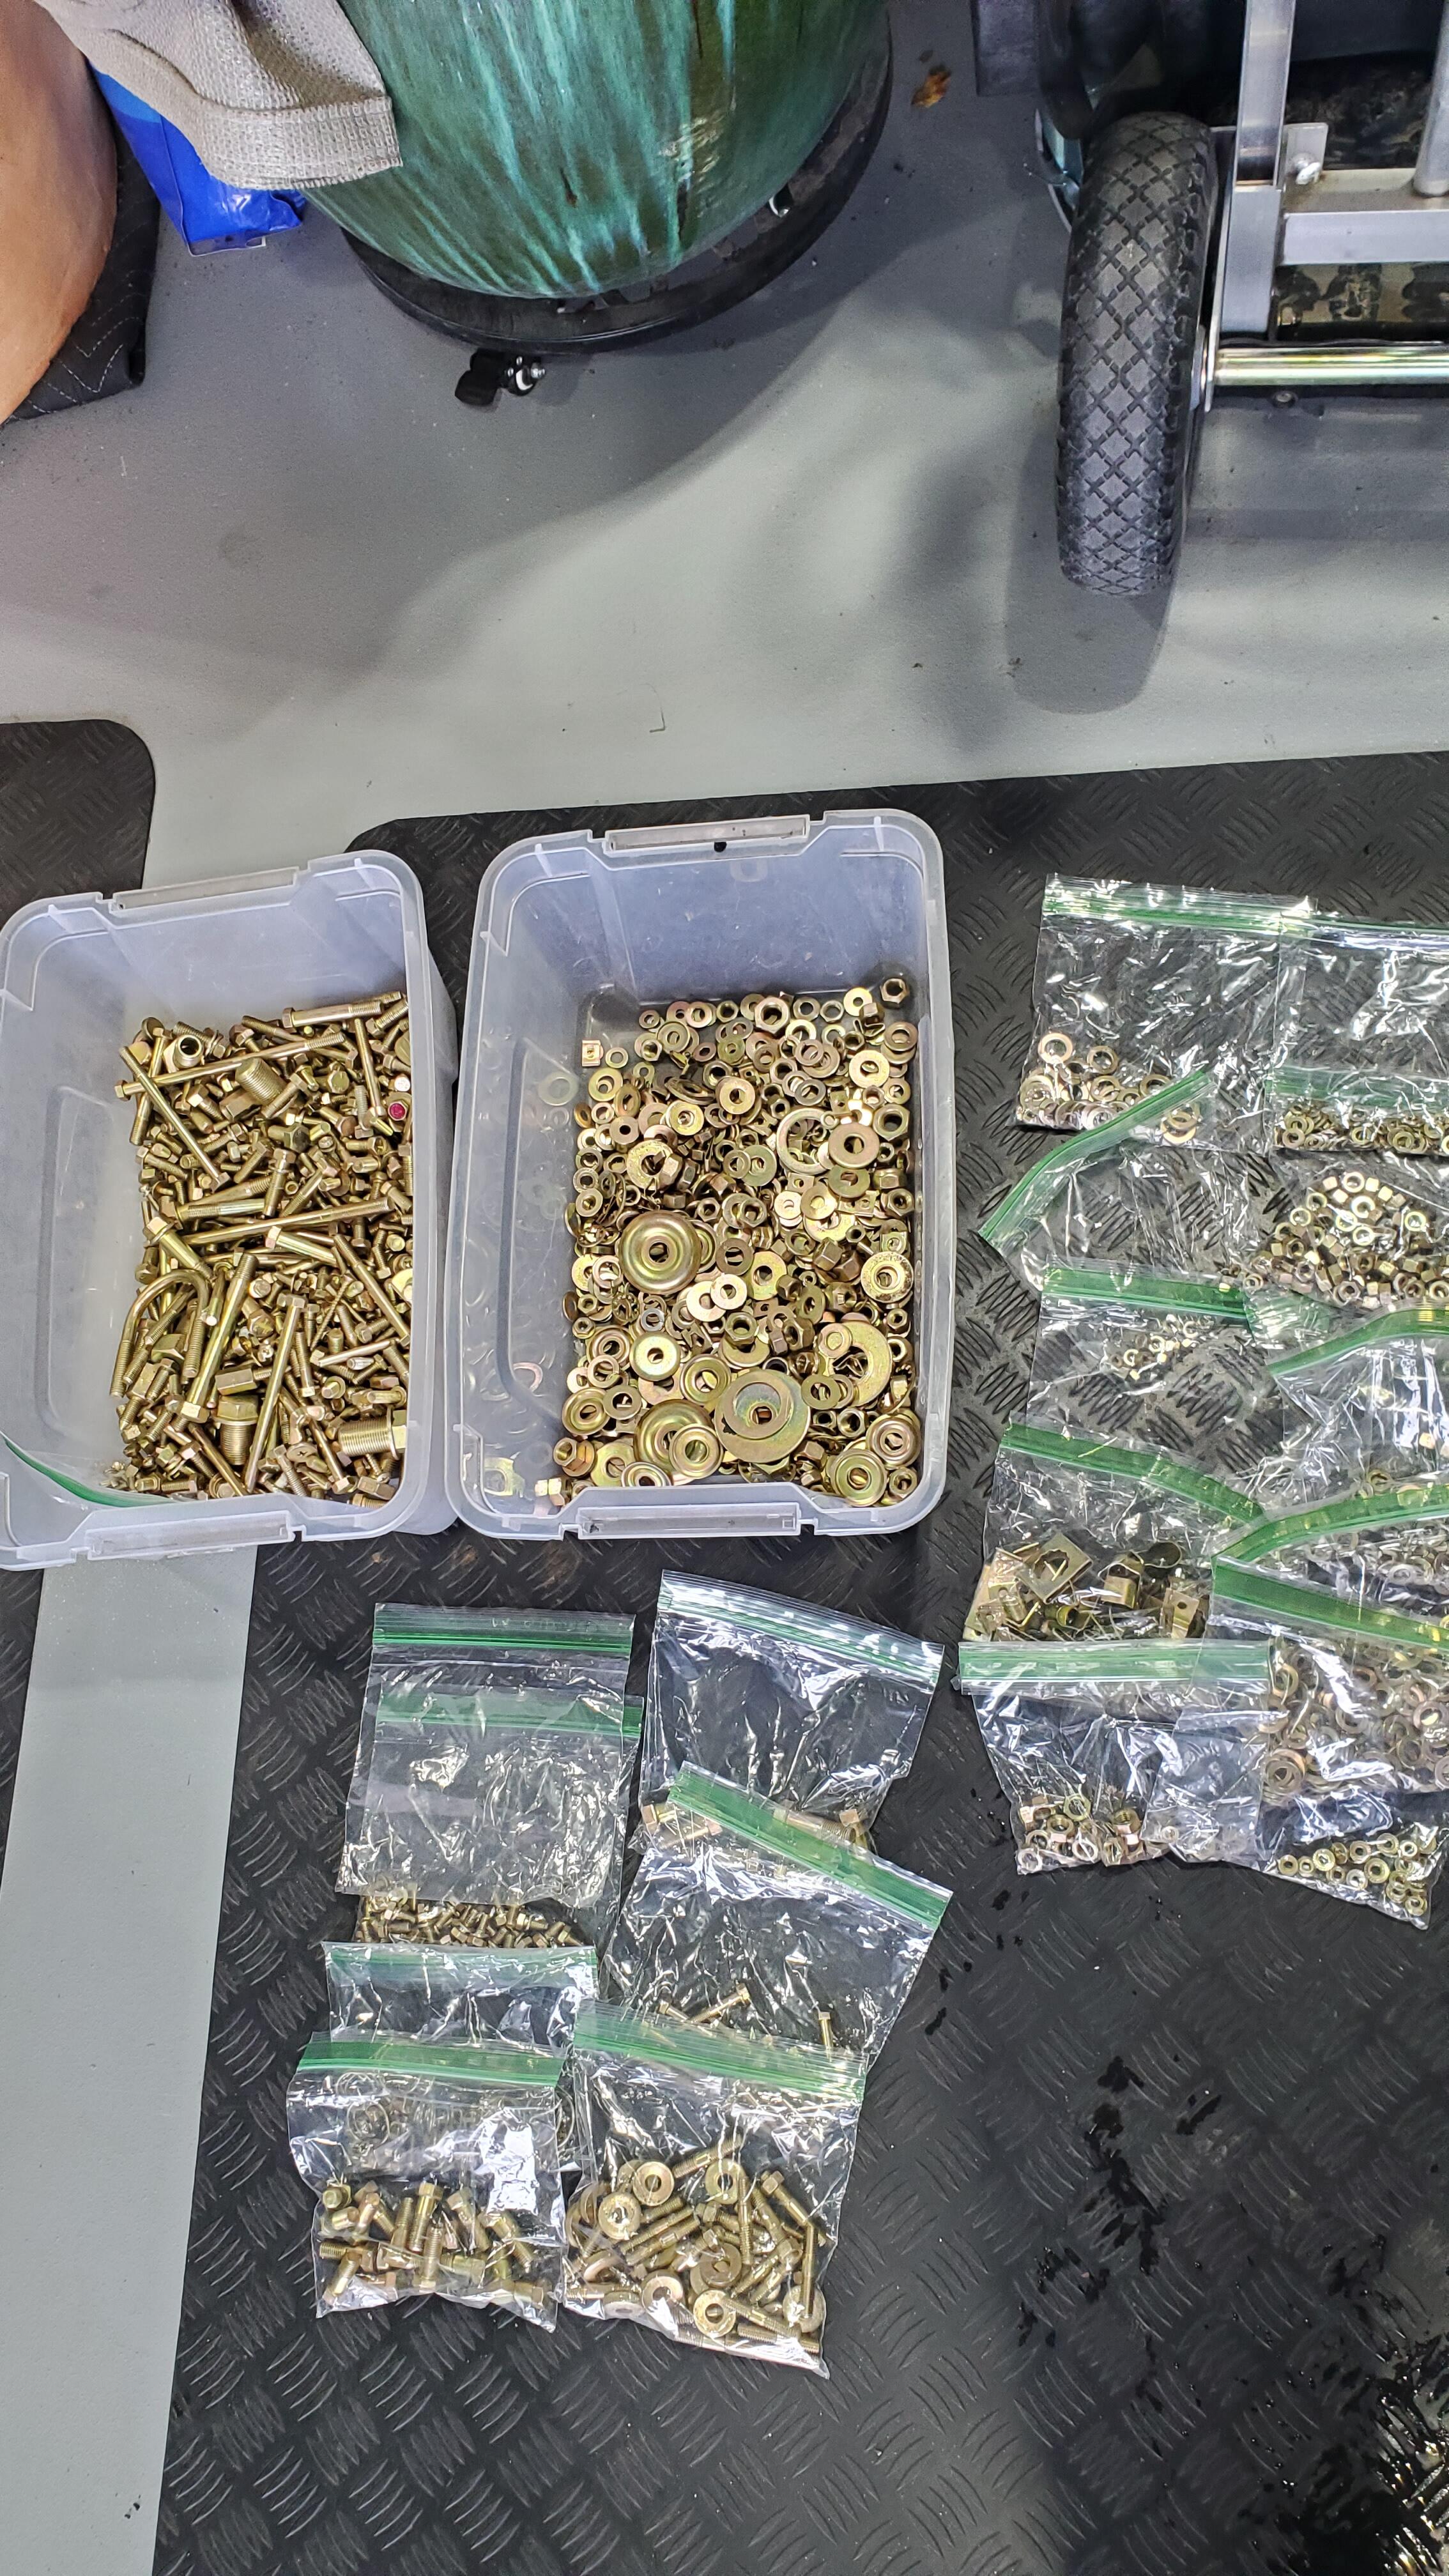
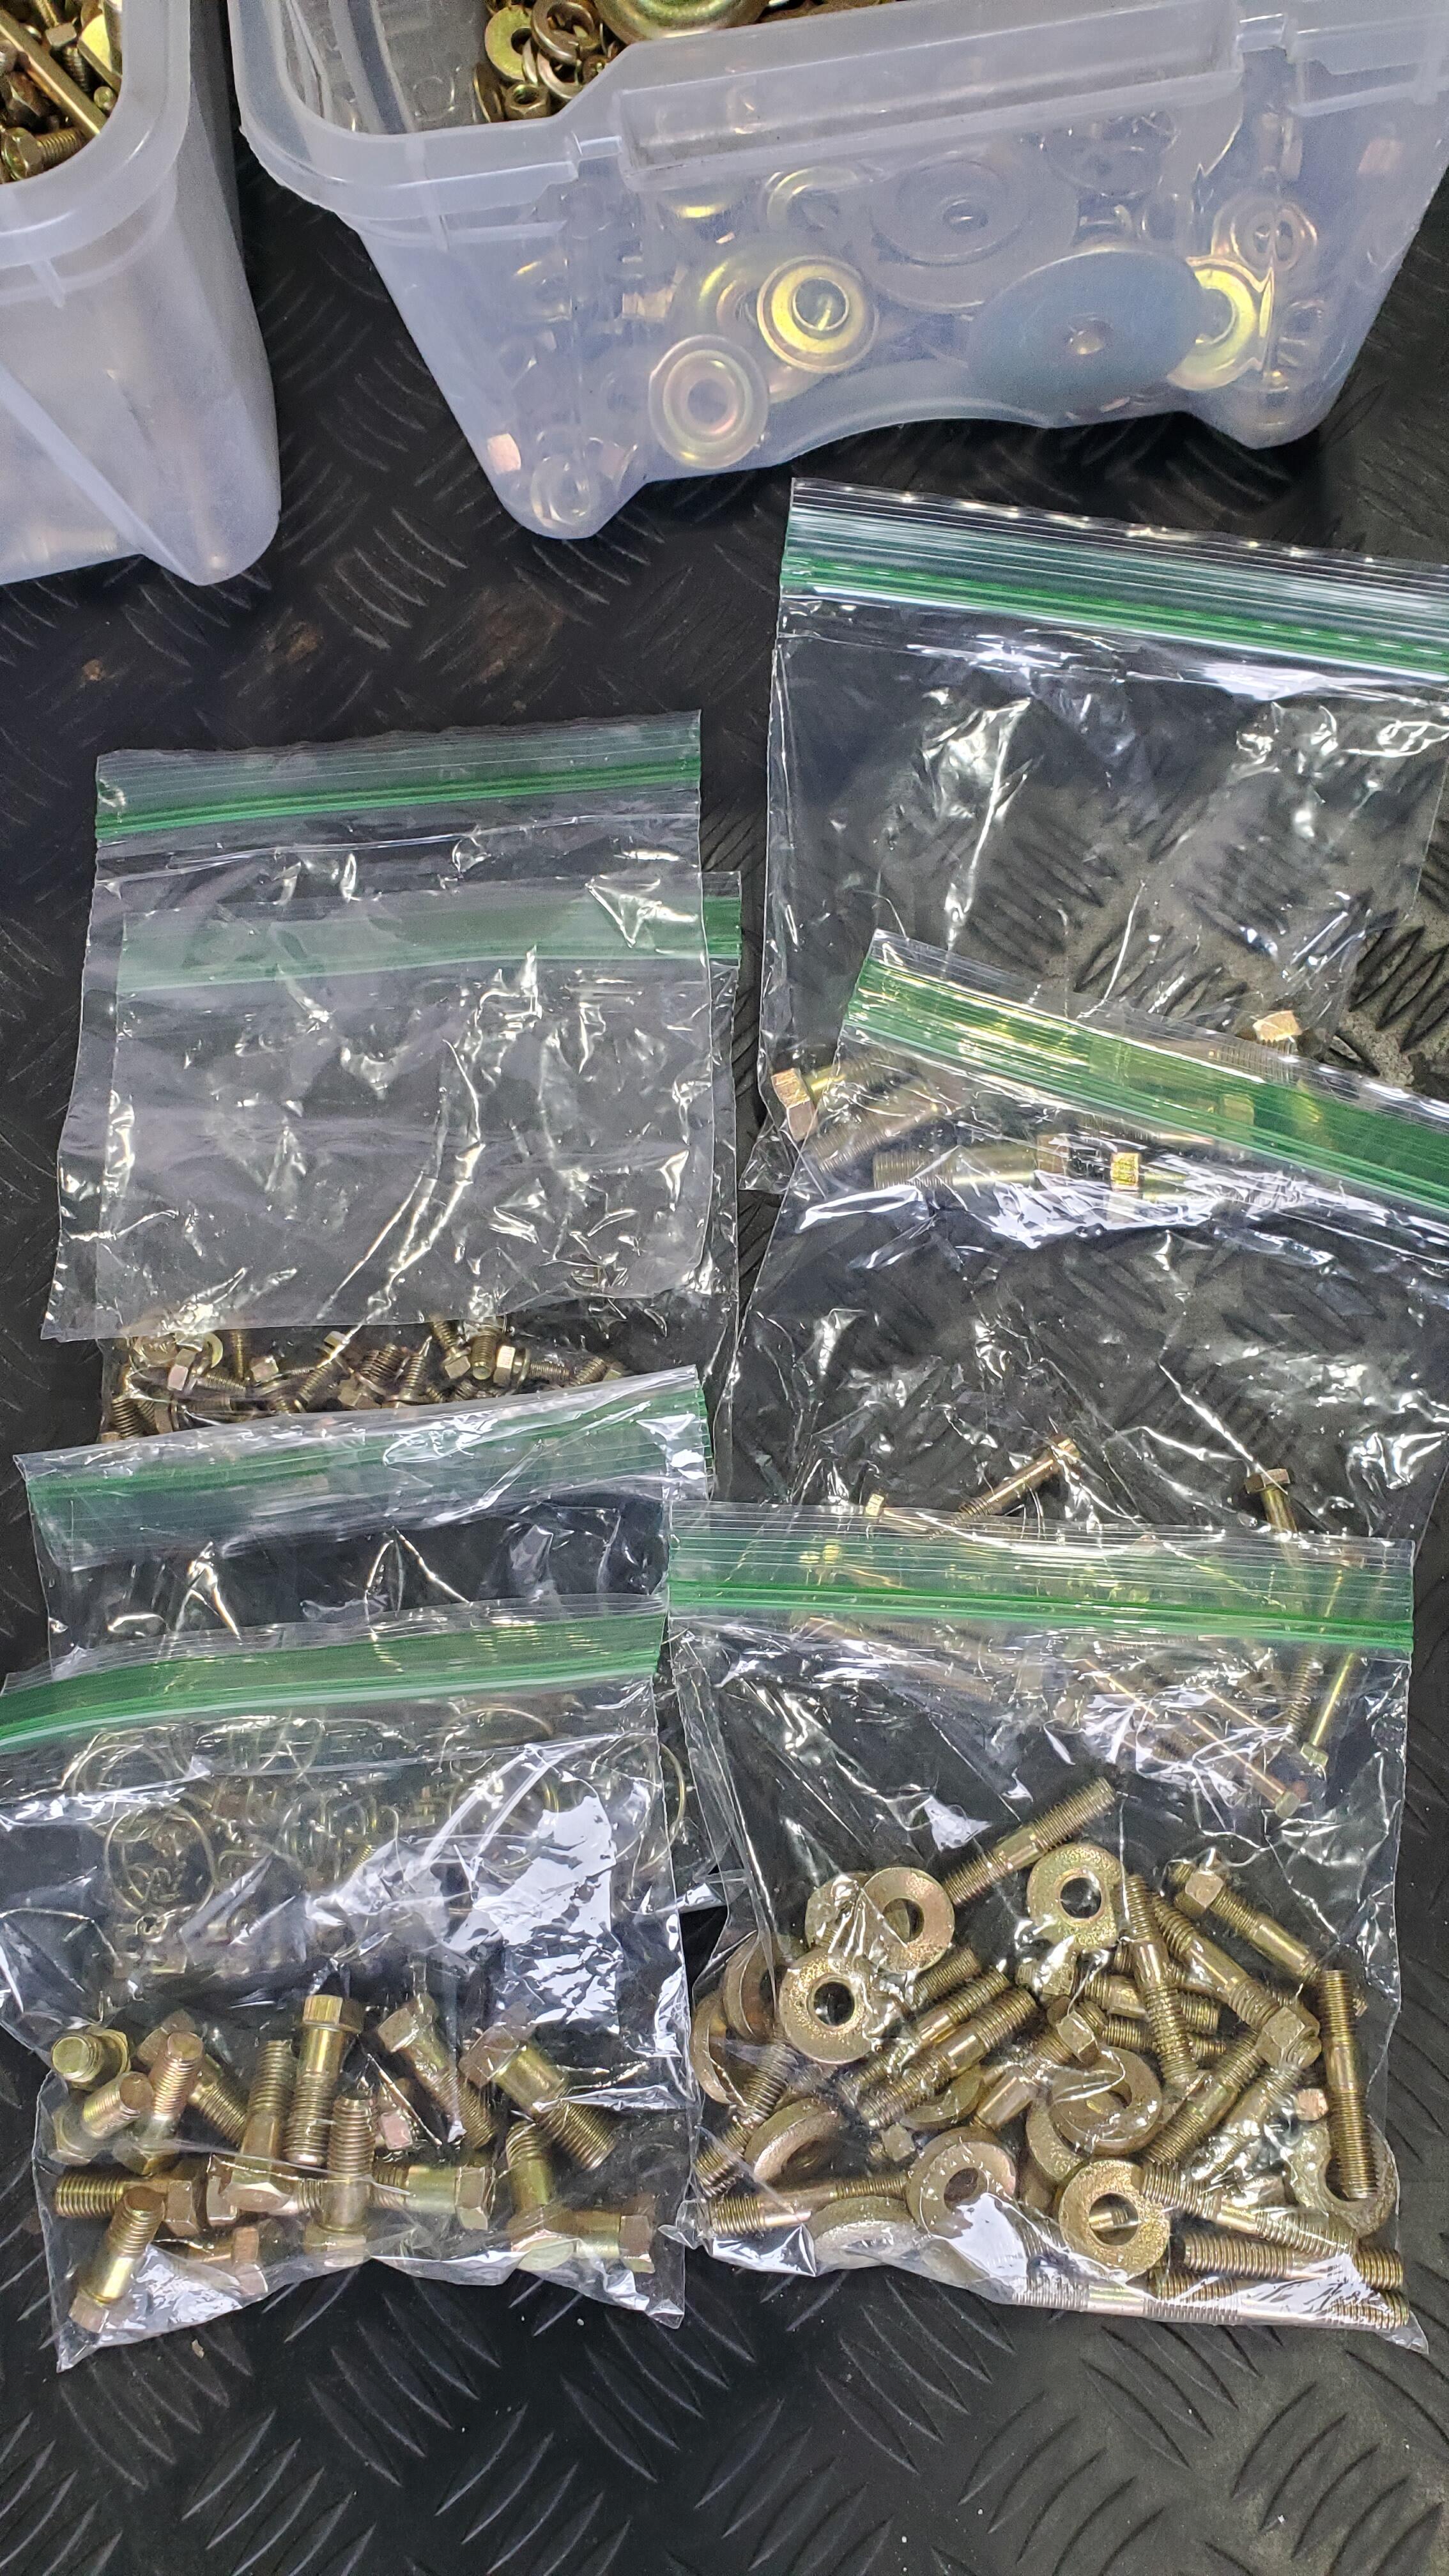
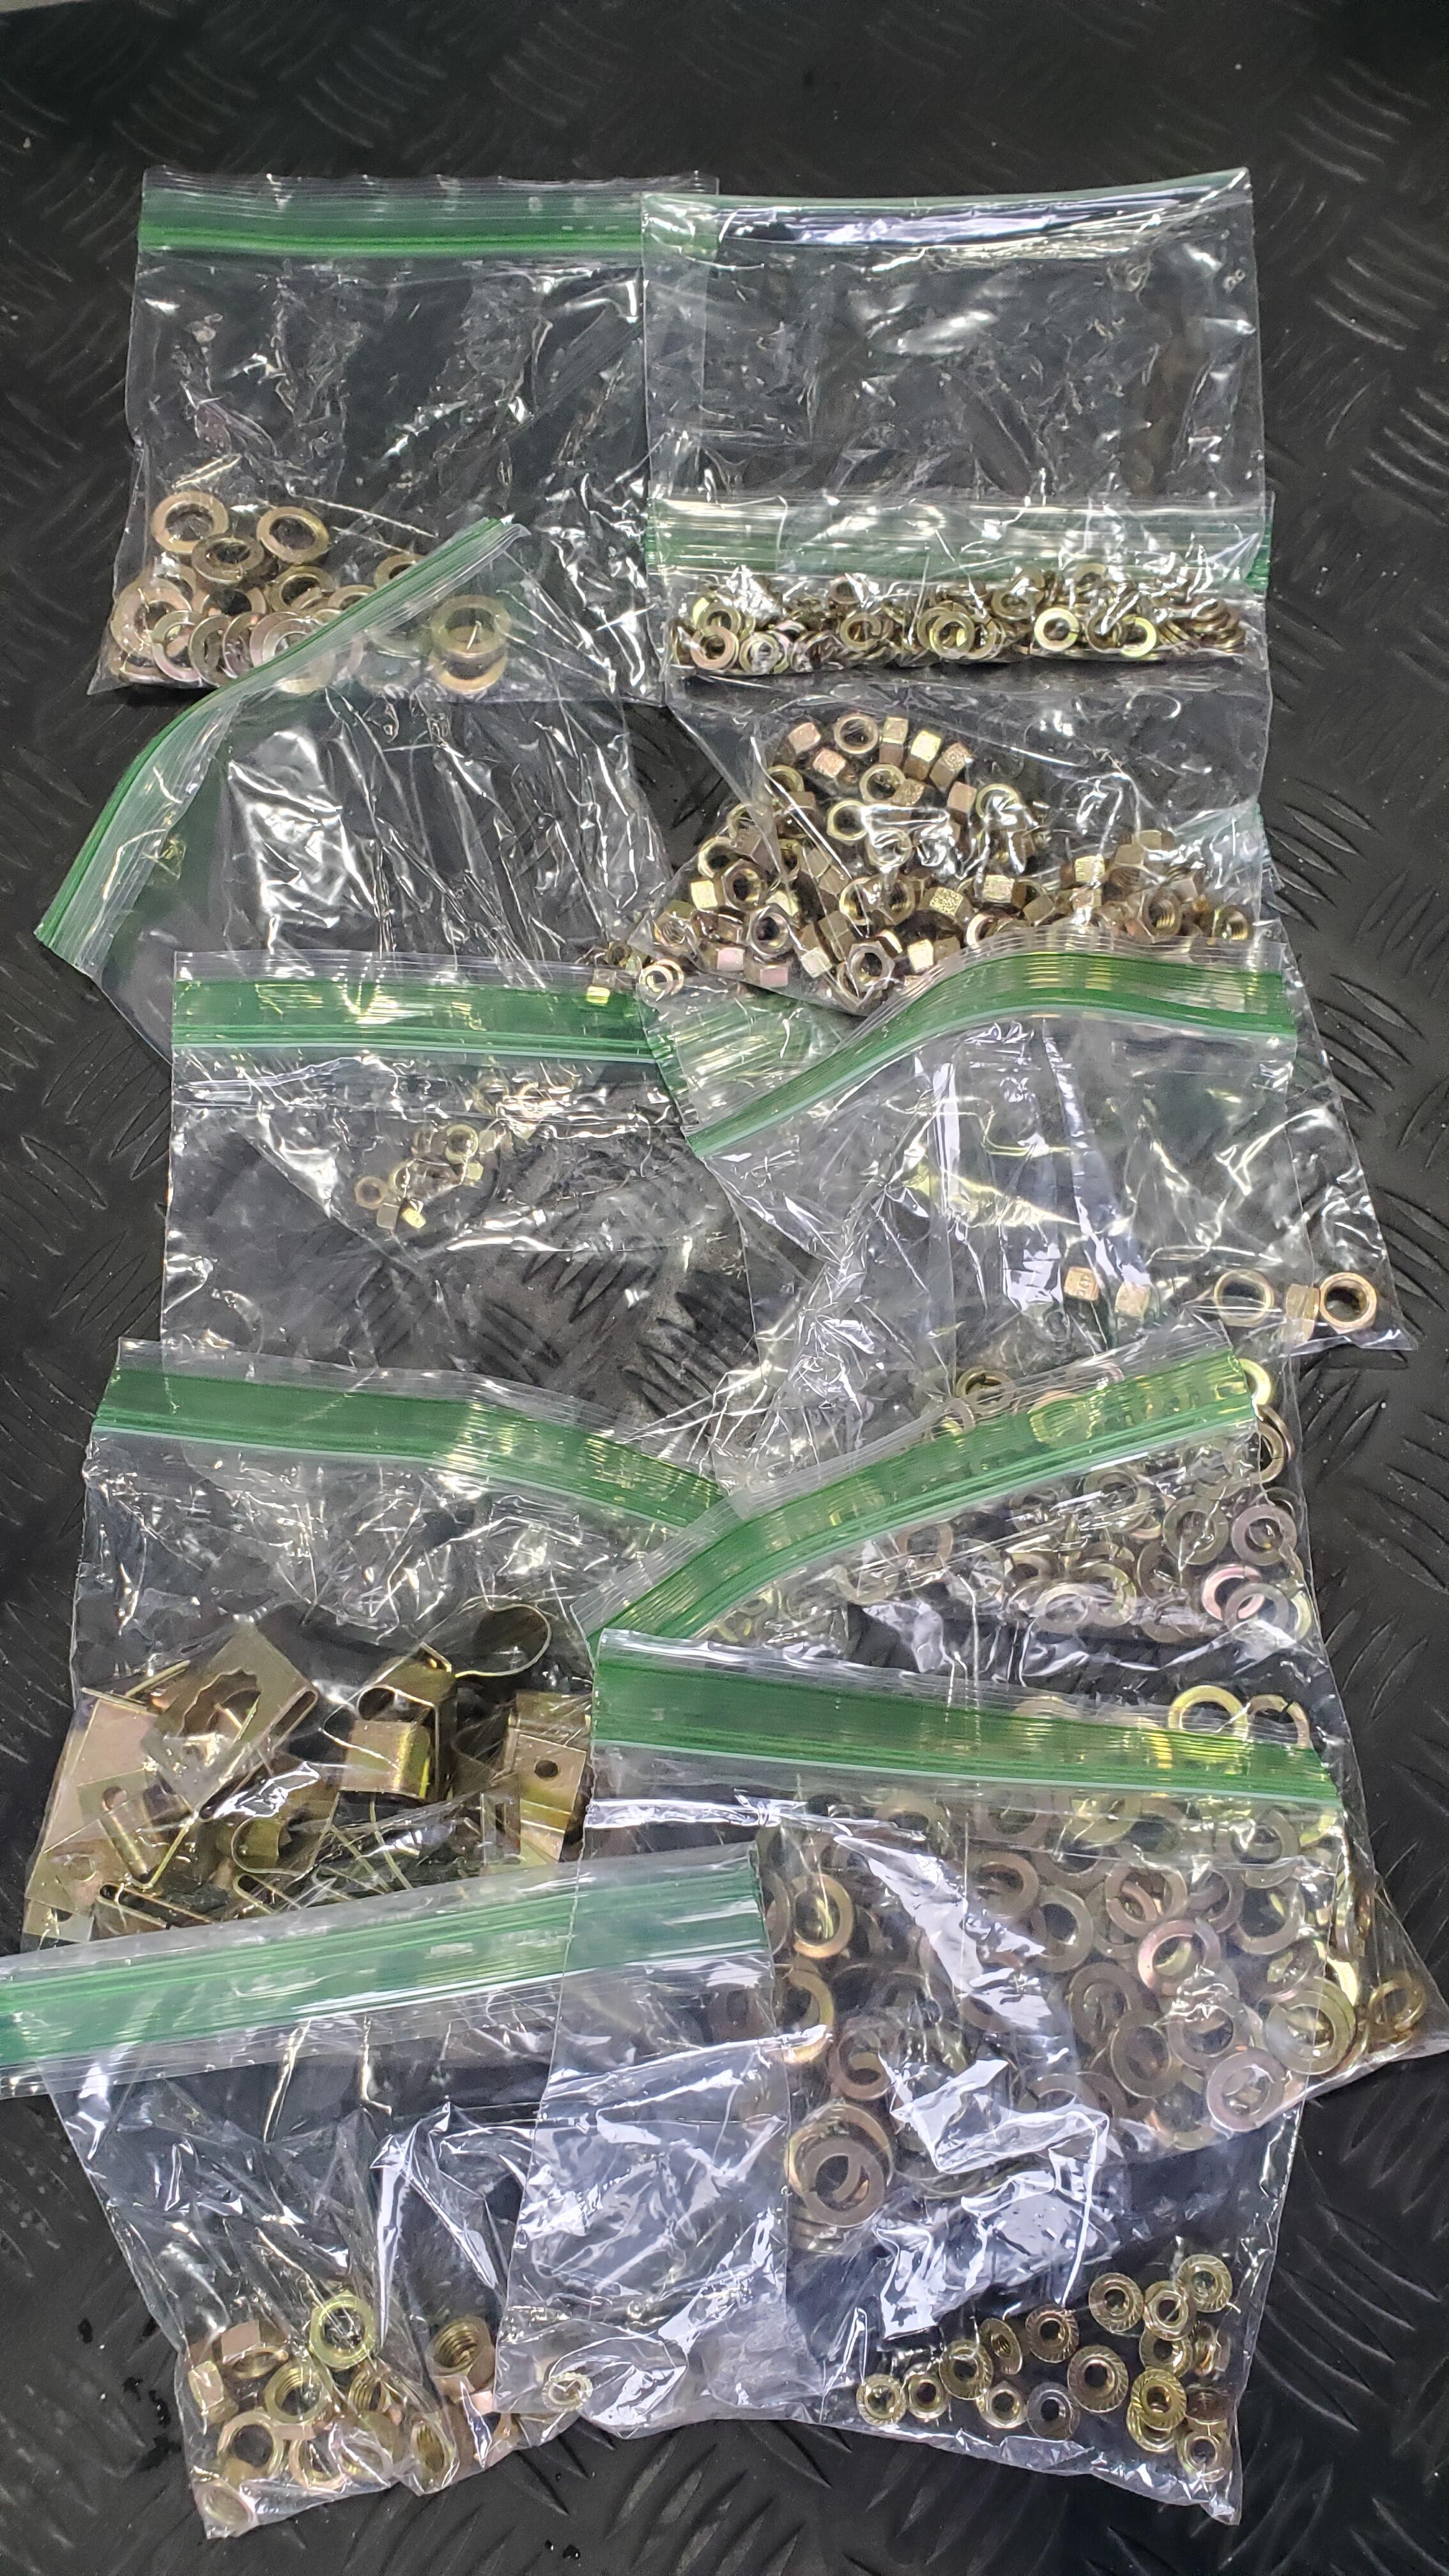
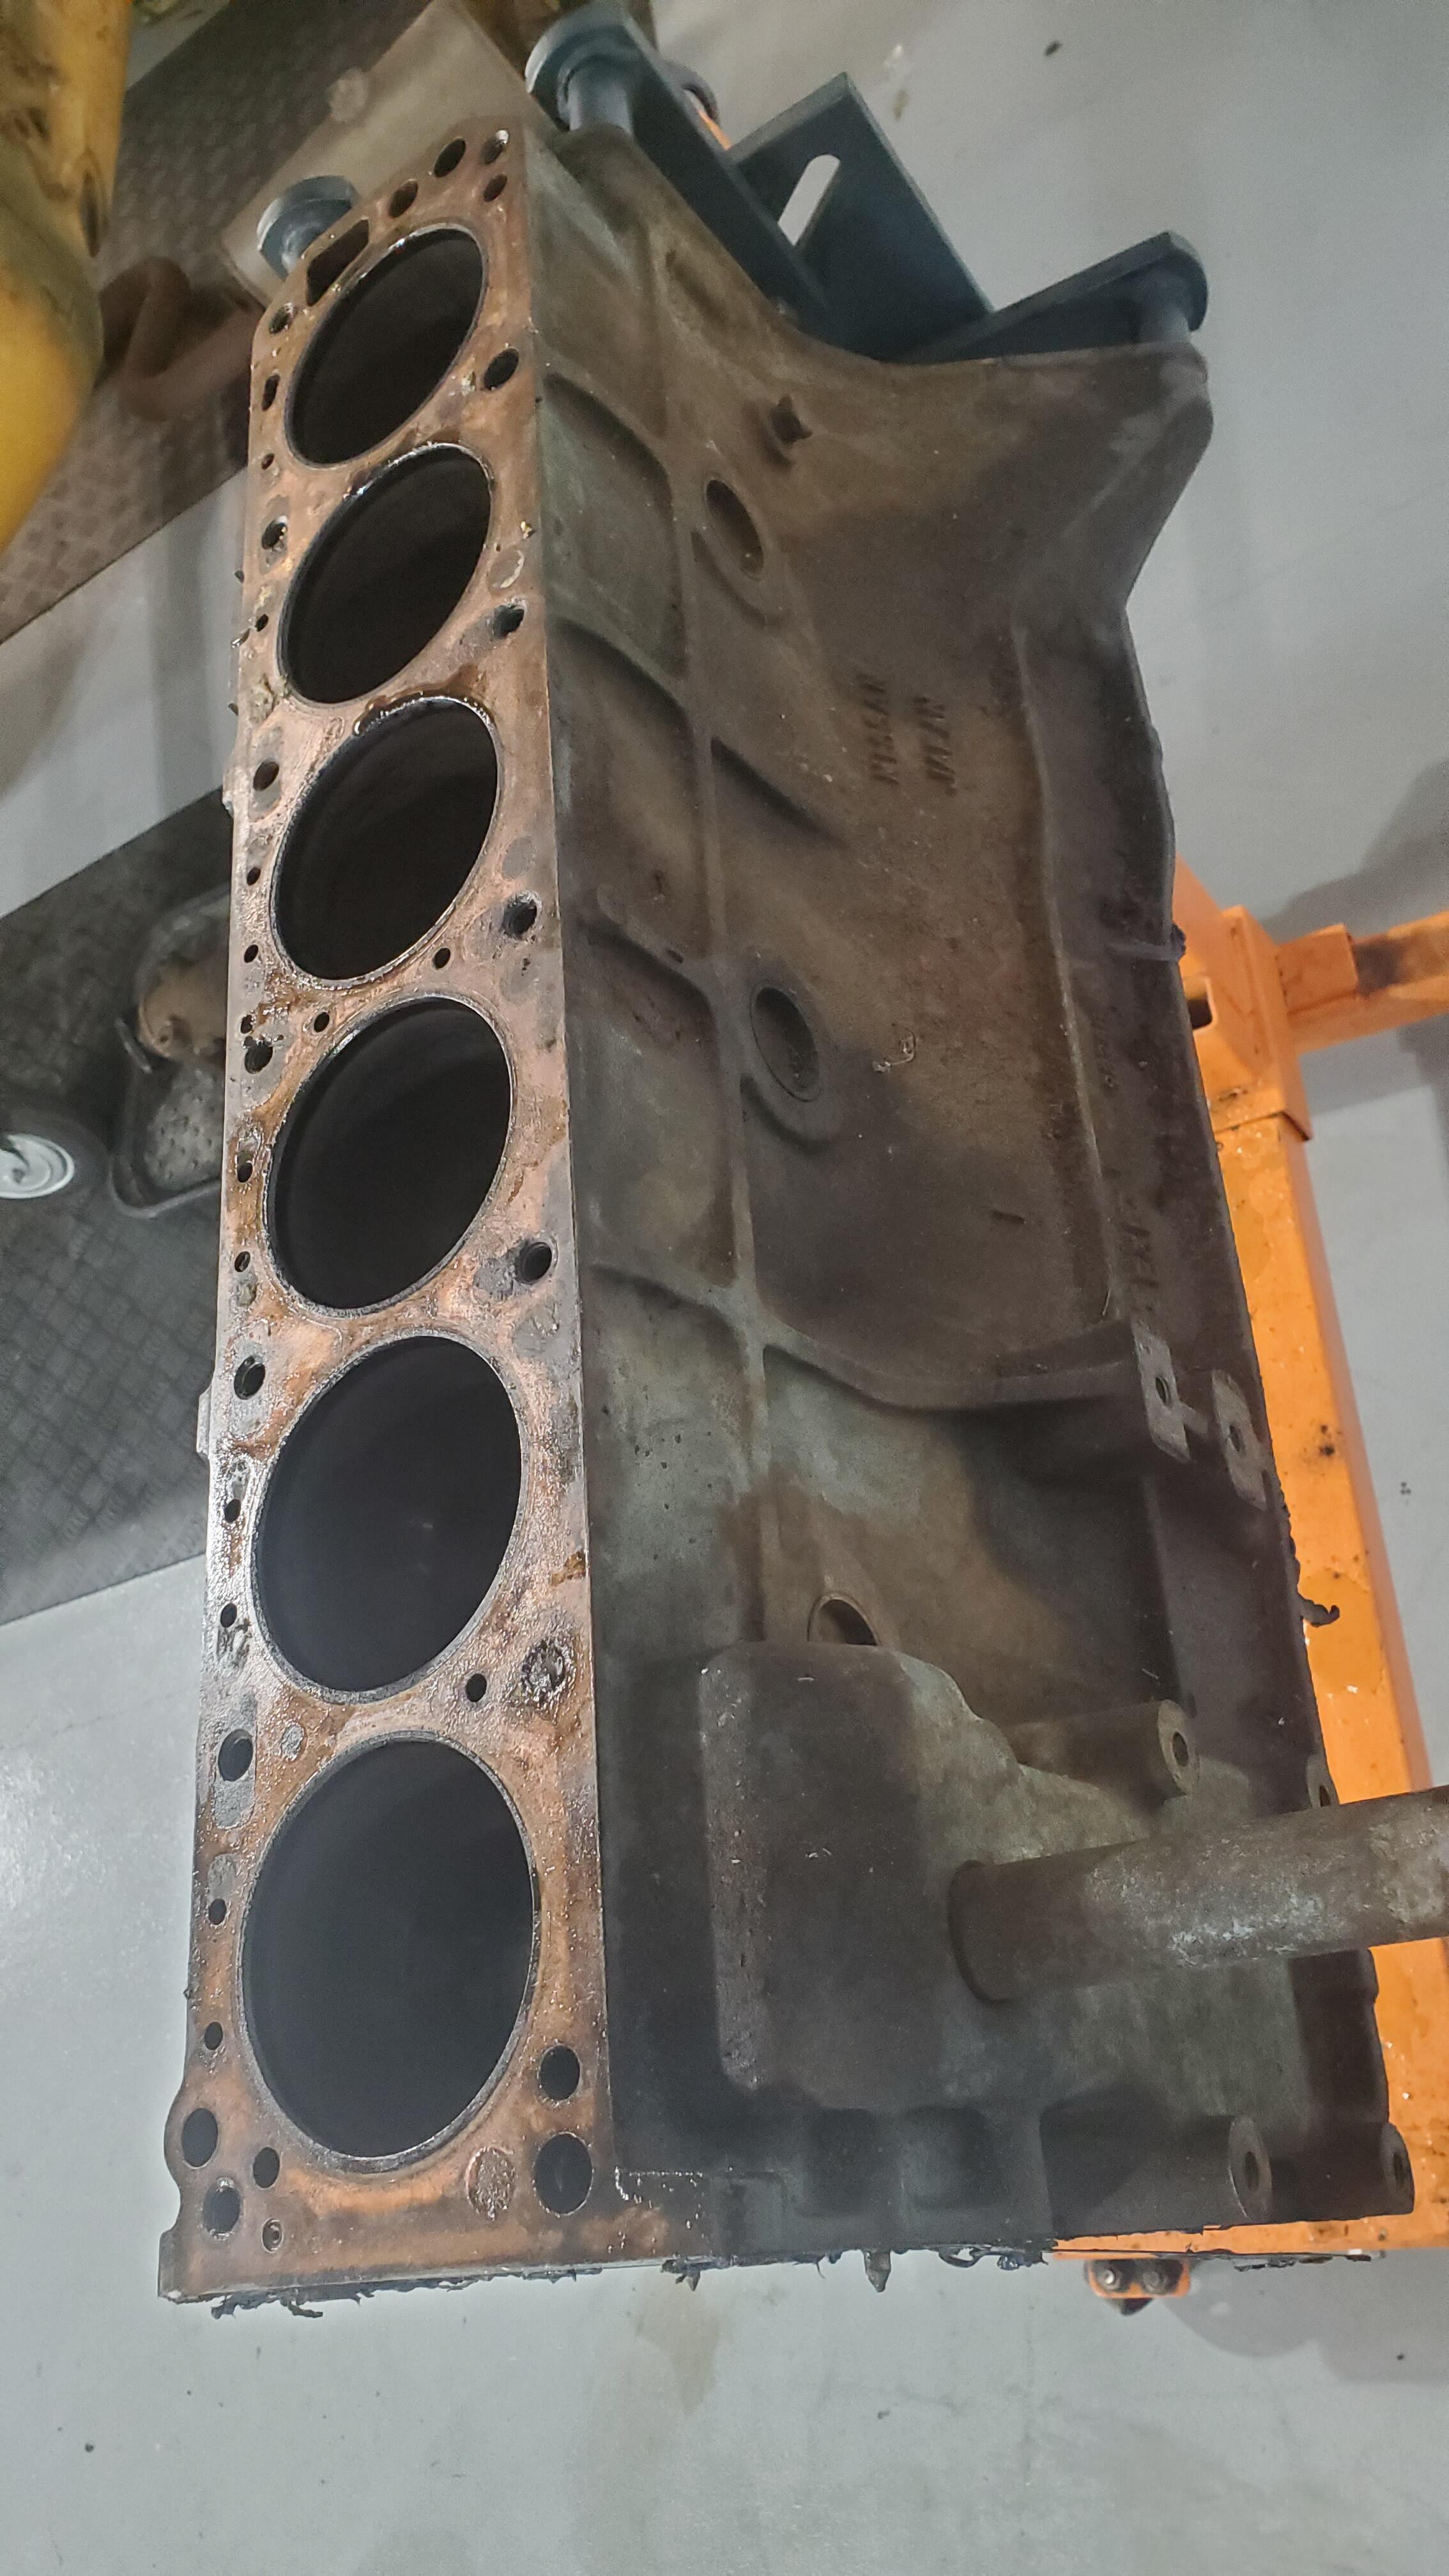
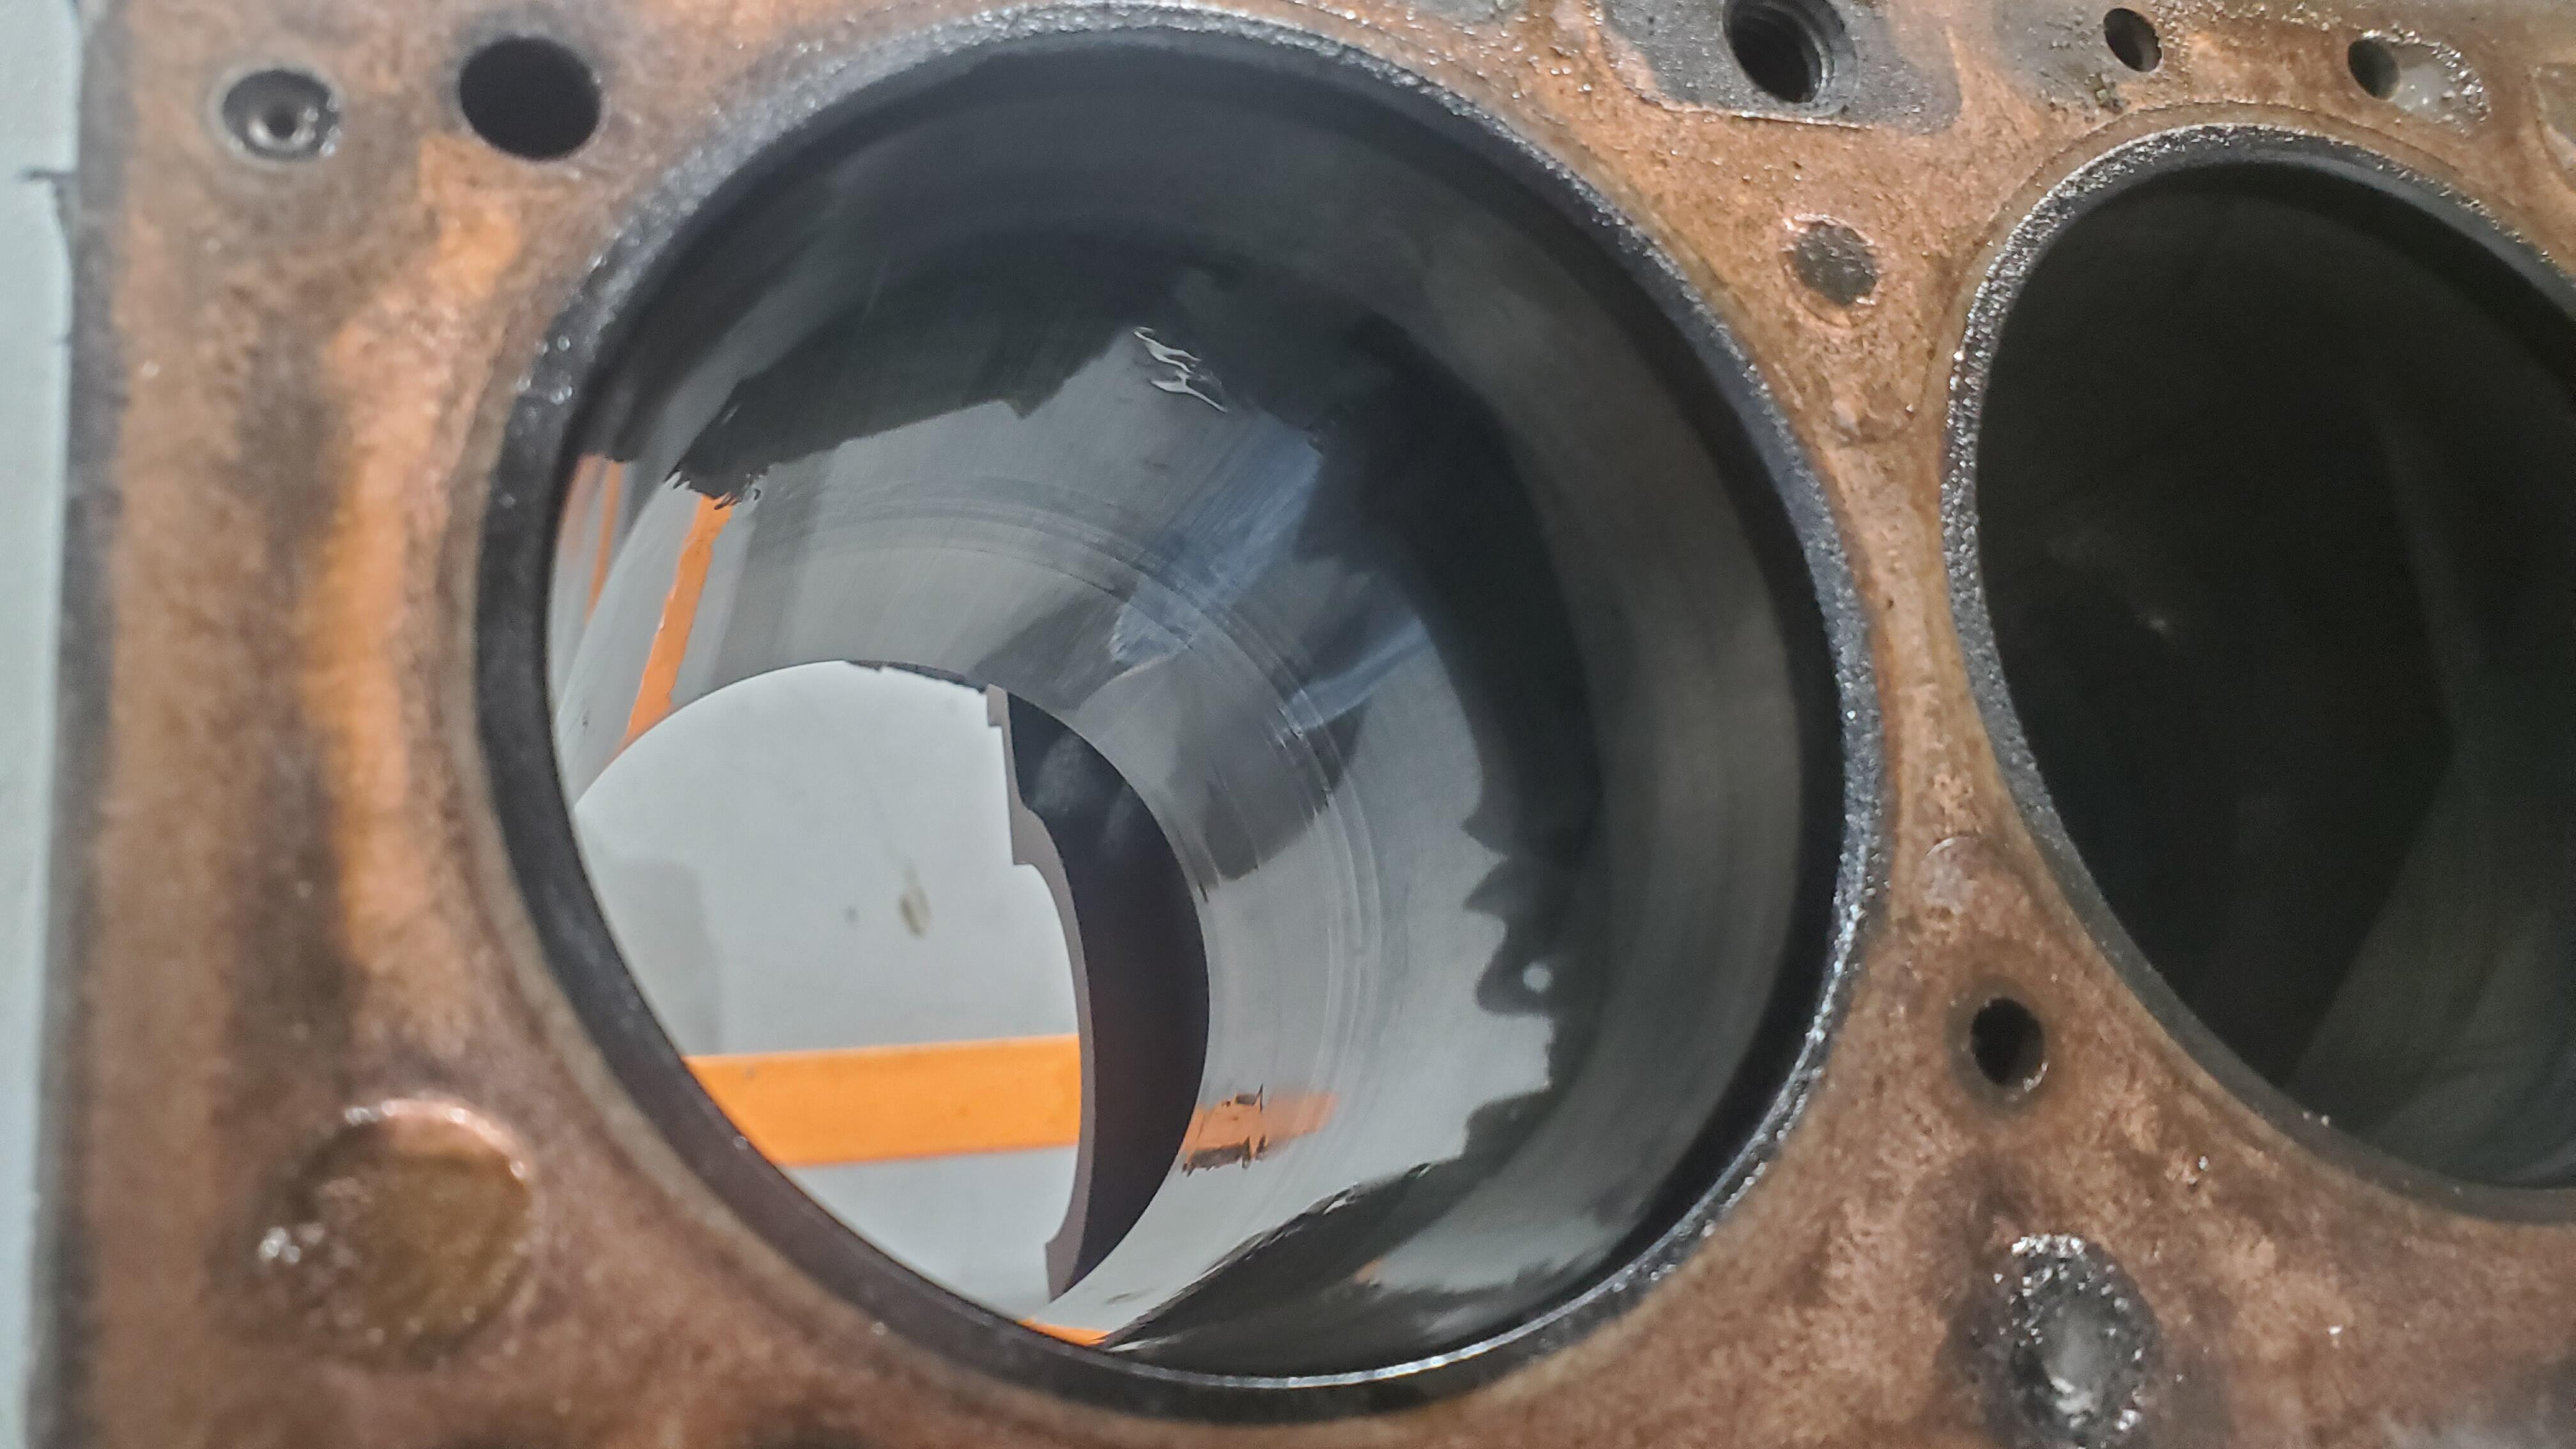
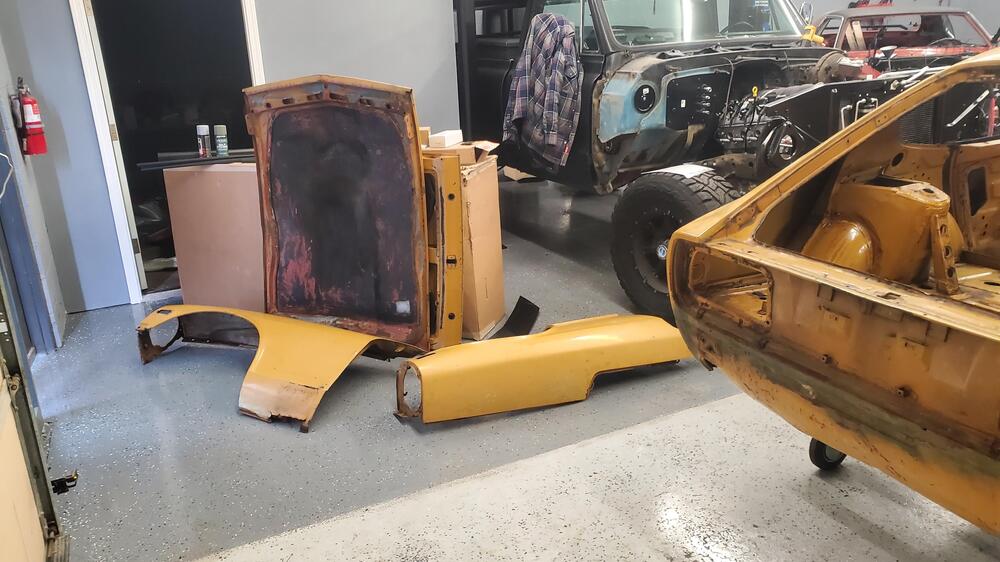
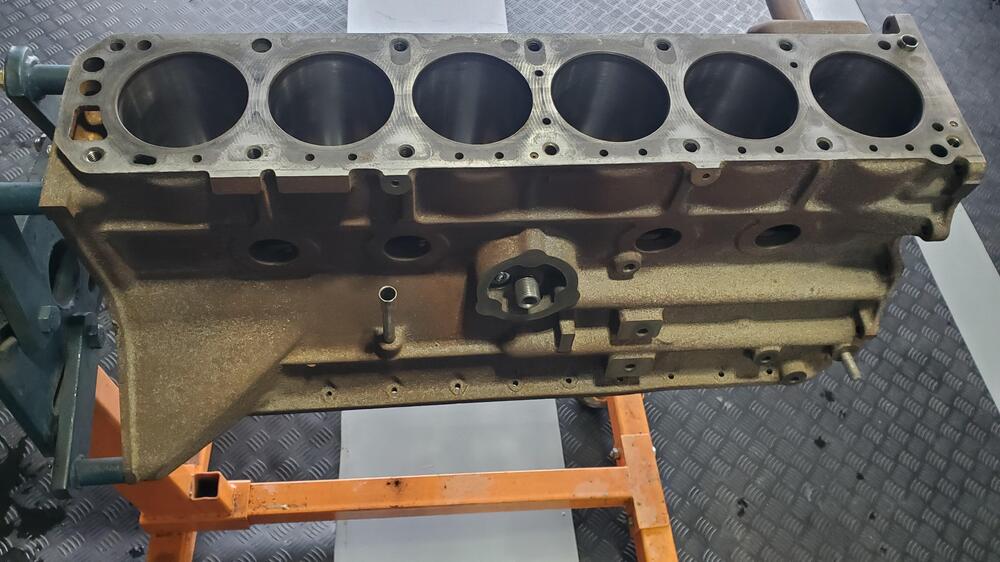
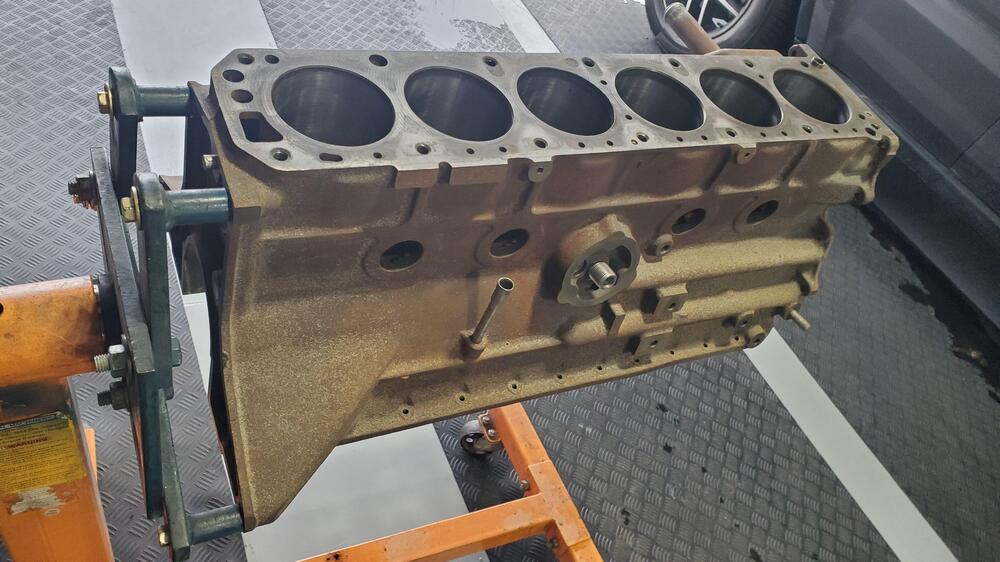
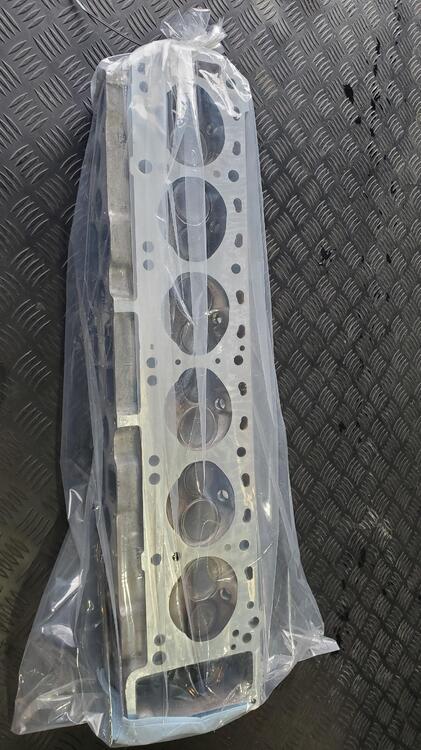
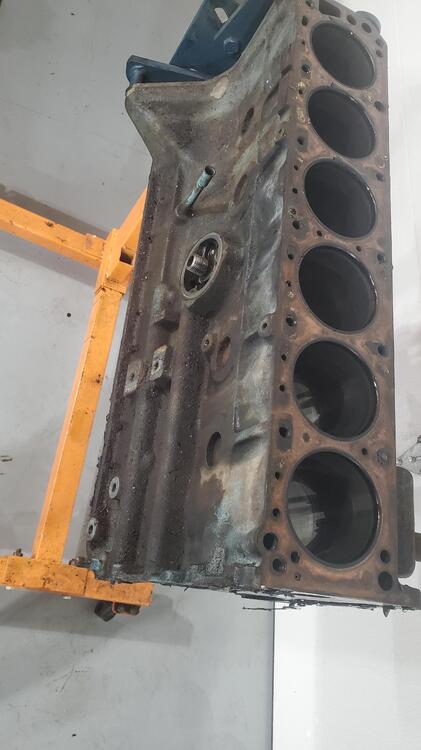
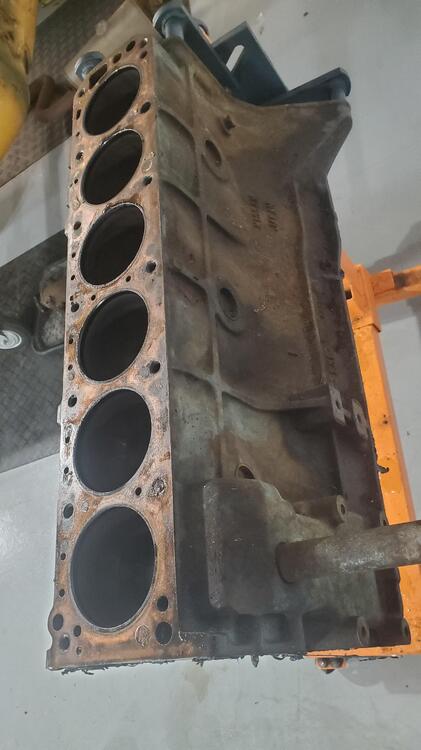
 The body shop finally had room availabe so we brought the car and all the panels down to the shop. The plan is to media blast next week and then determine what panels will need to be replaced. Got the Block and Head back from the machine shop today. Both look great and nicely done. The block only needed a hone which is good, so we can stick with the original stock pistons and just get new rings. Bearings will be replaced with new stock rod and crank bearings. Oil galleys were cleaned and oil filter check valve and filter screen replaced. The head had just one bad valve and all of the intake valve seats were replaced with the modern 'bronze' seats. Valve guides were replaced. The exhaust valve seats had been replaced during previous machine work. I spent a little time sorting some of the plated hardware putting some of the more common parts in bags. This will help things to move along a bit quicker during assembly time. Pics are below


-
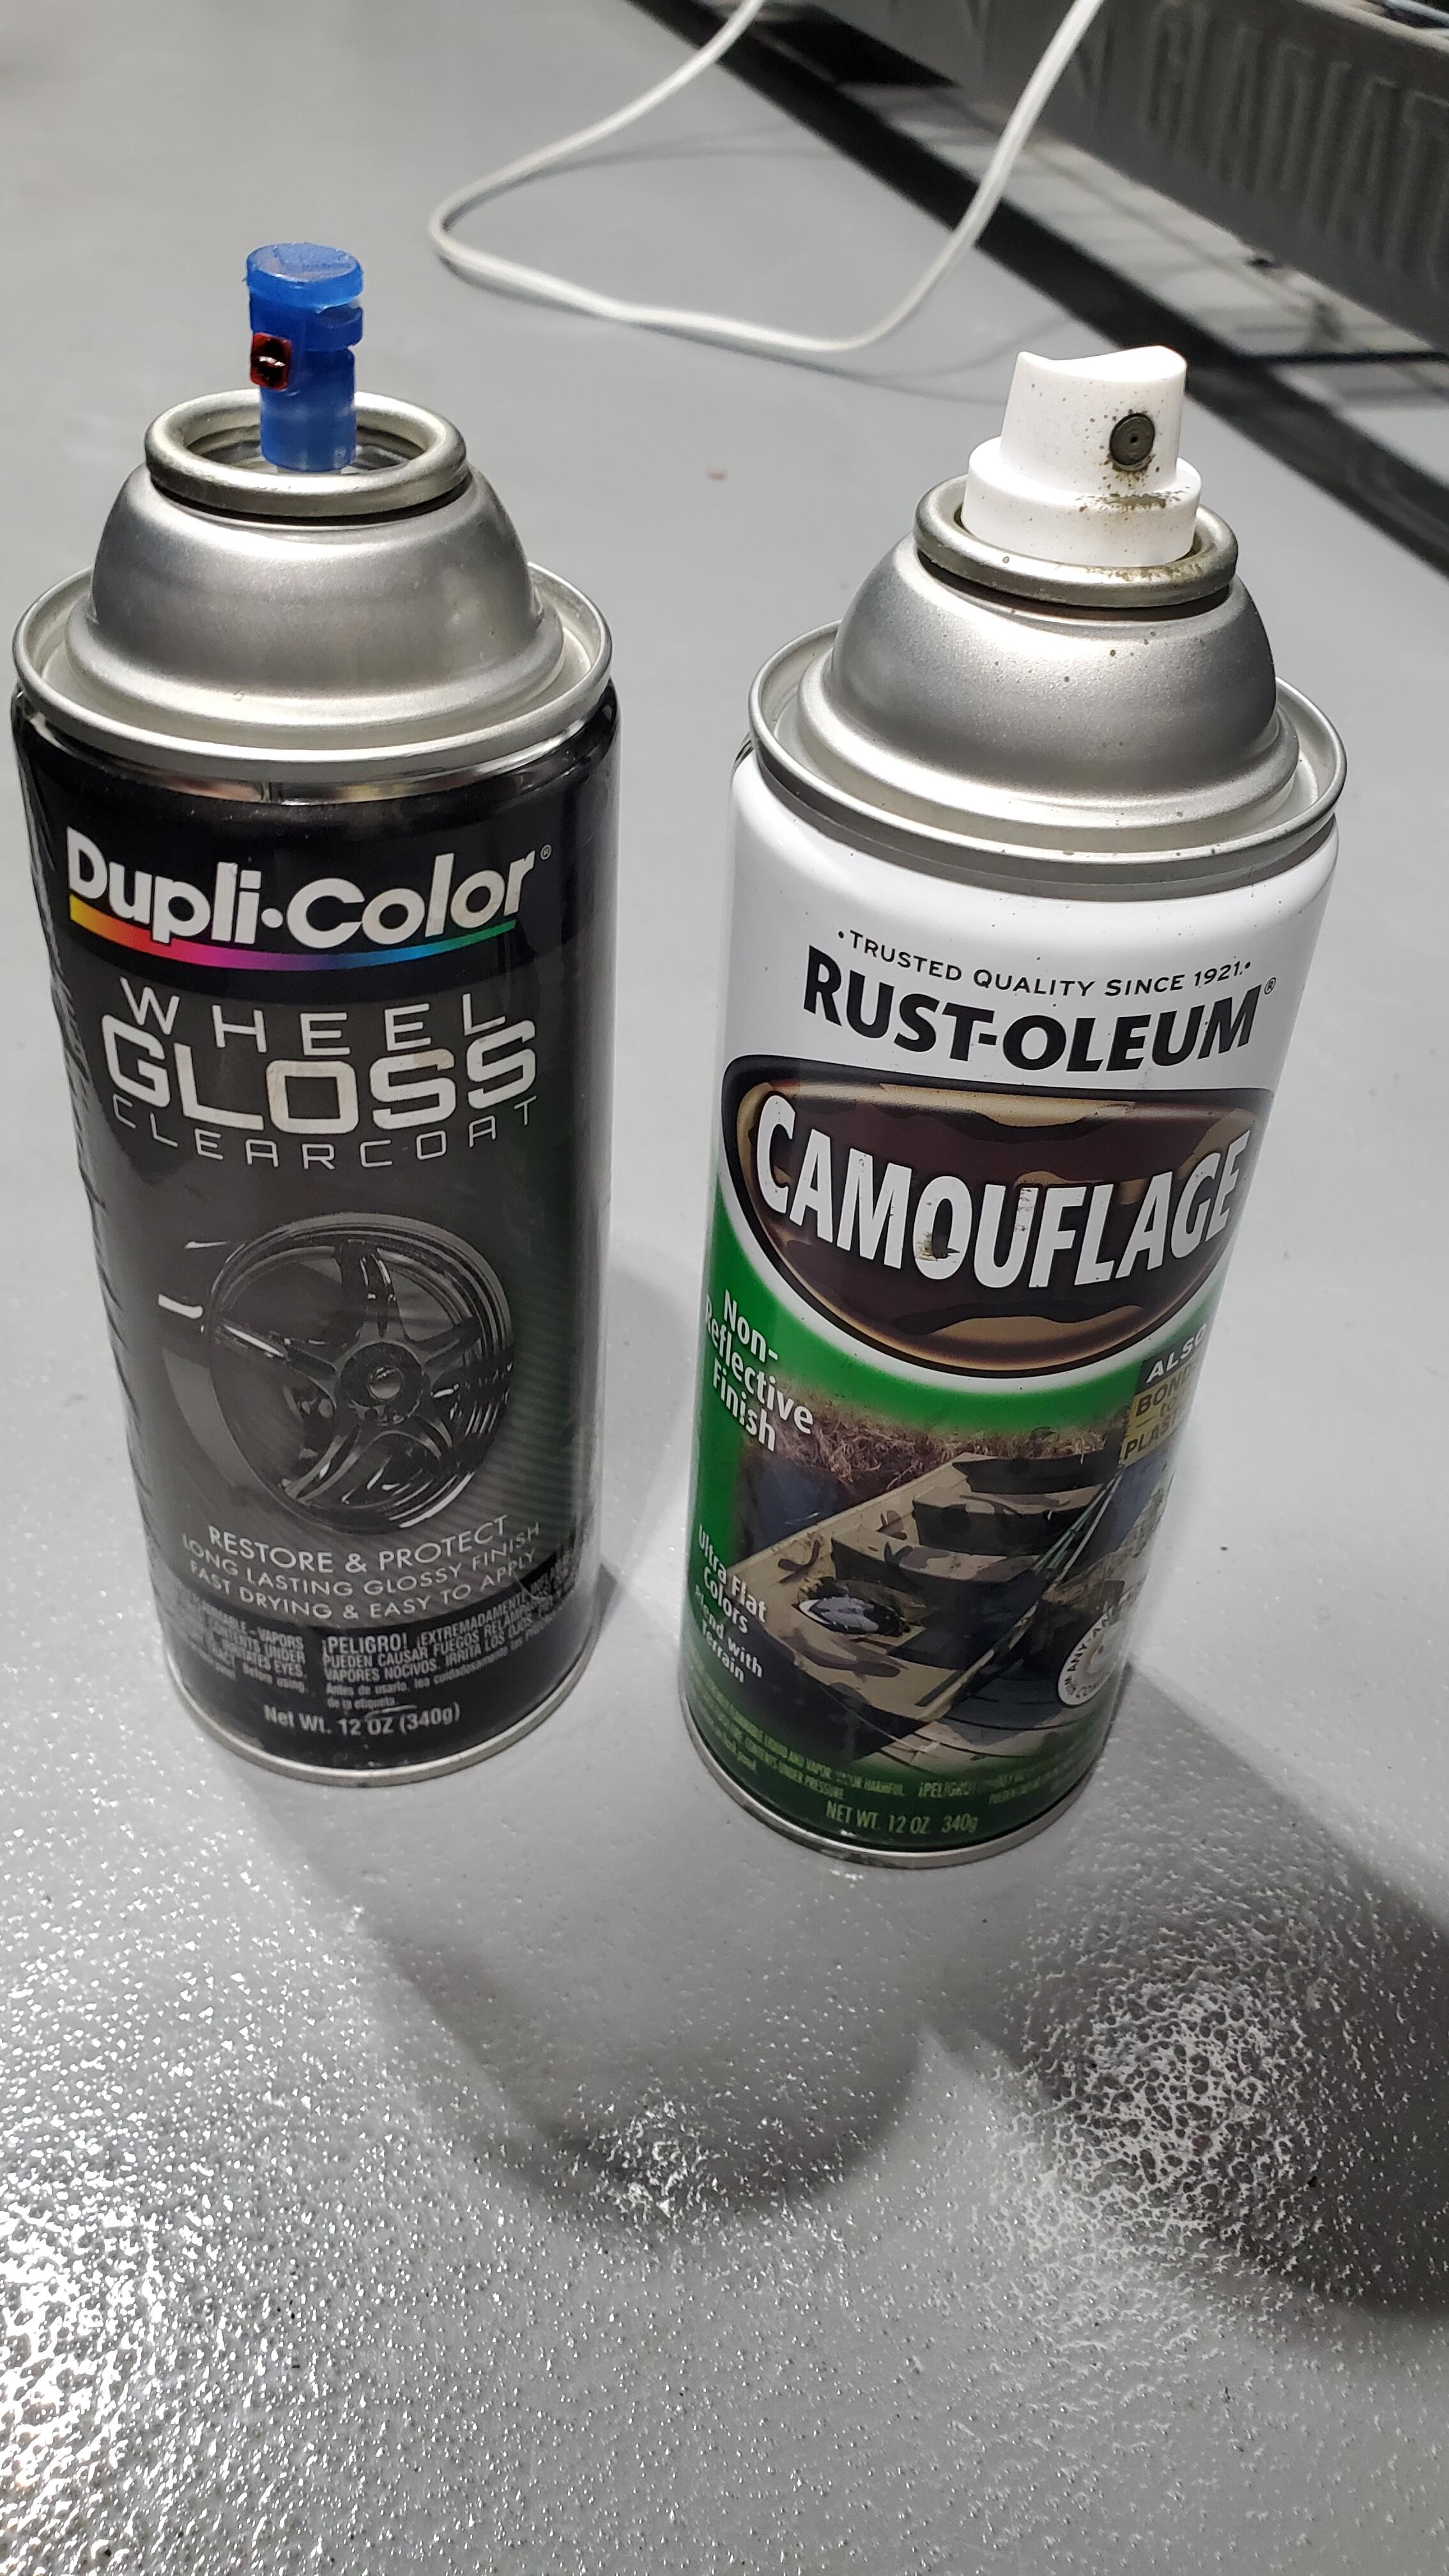
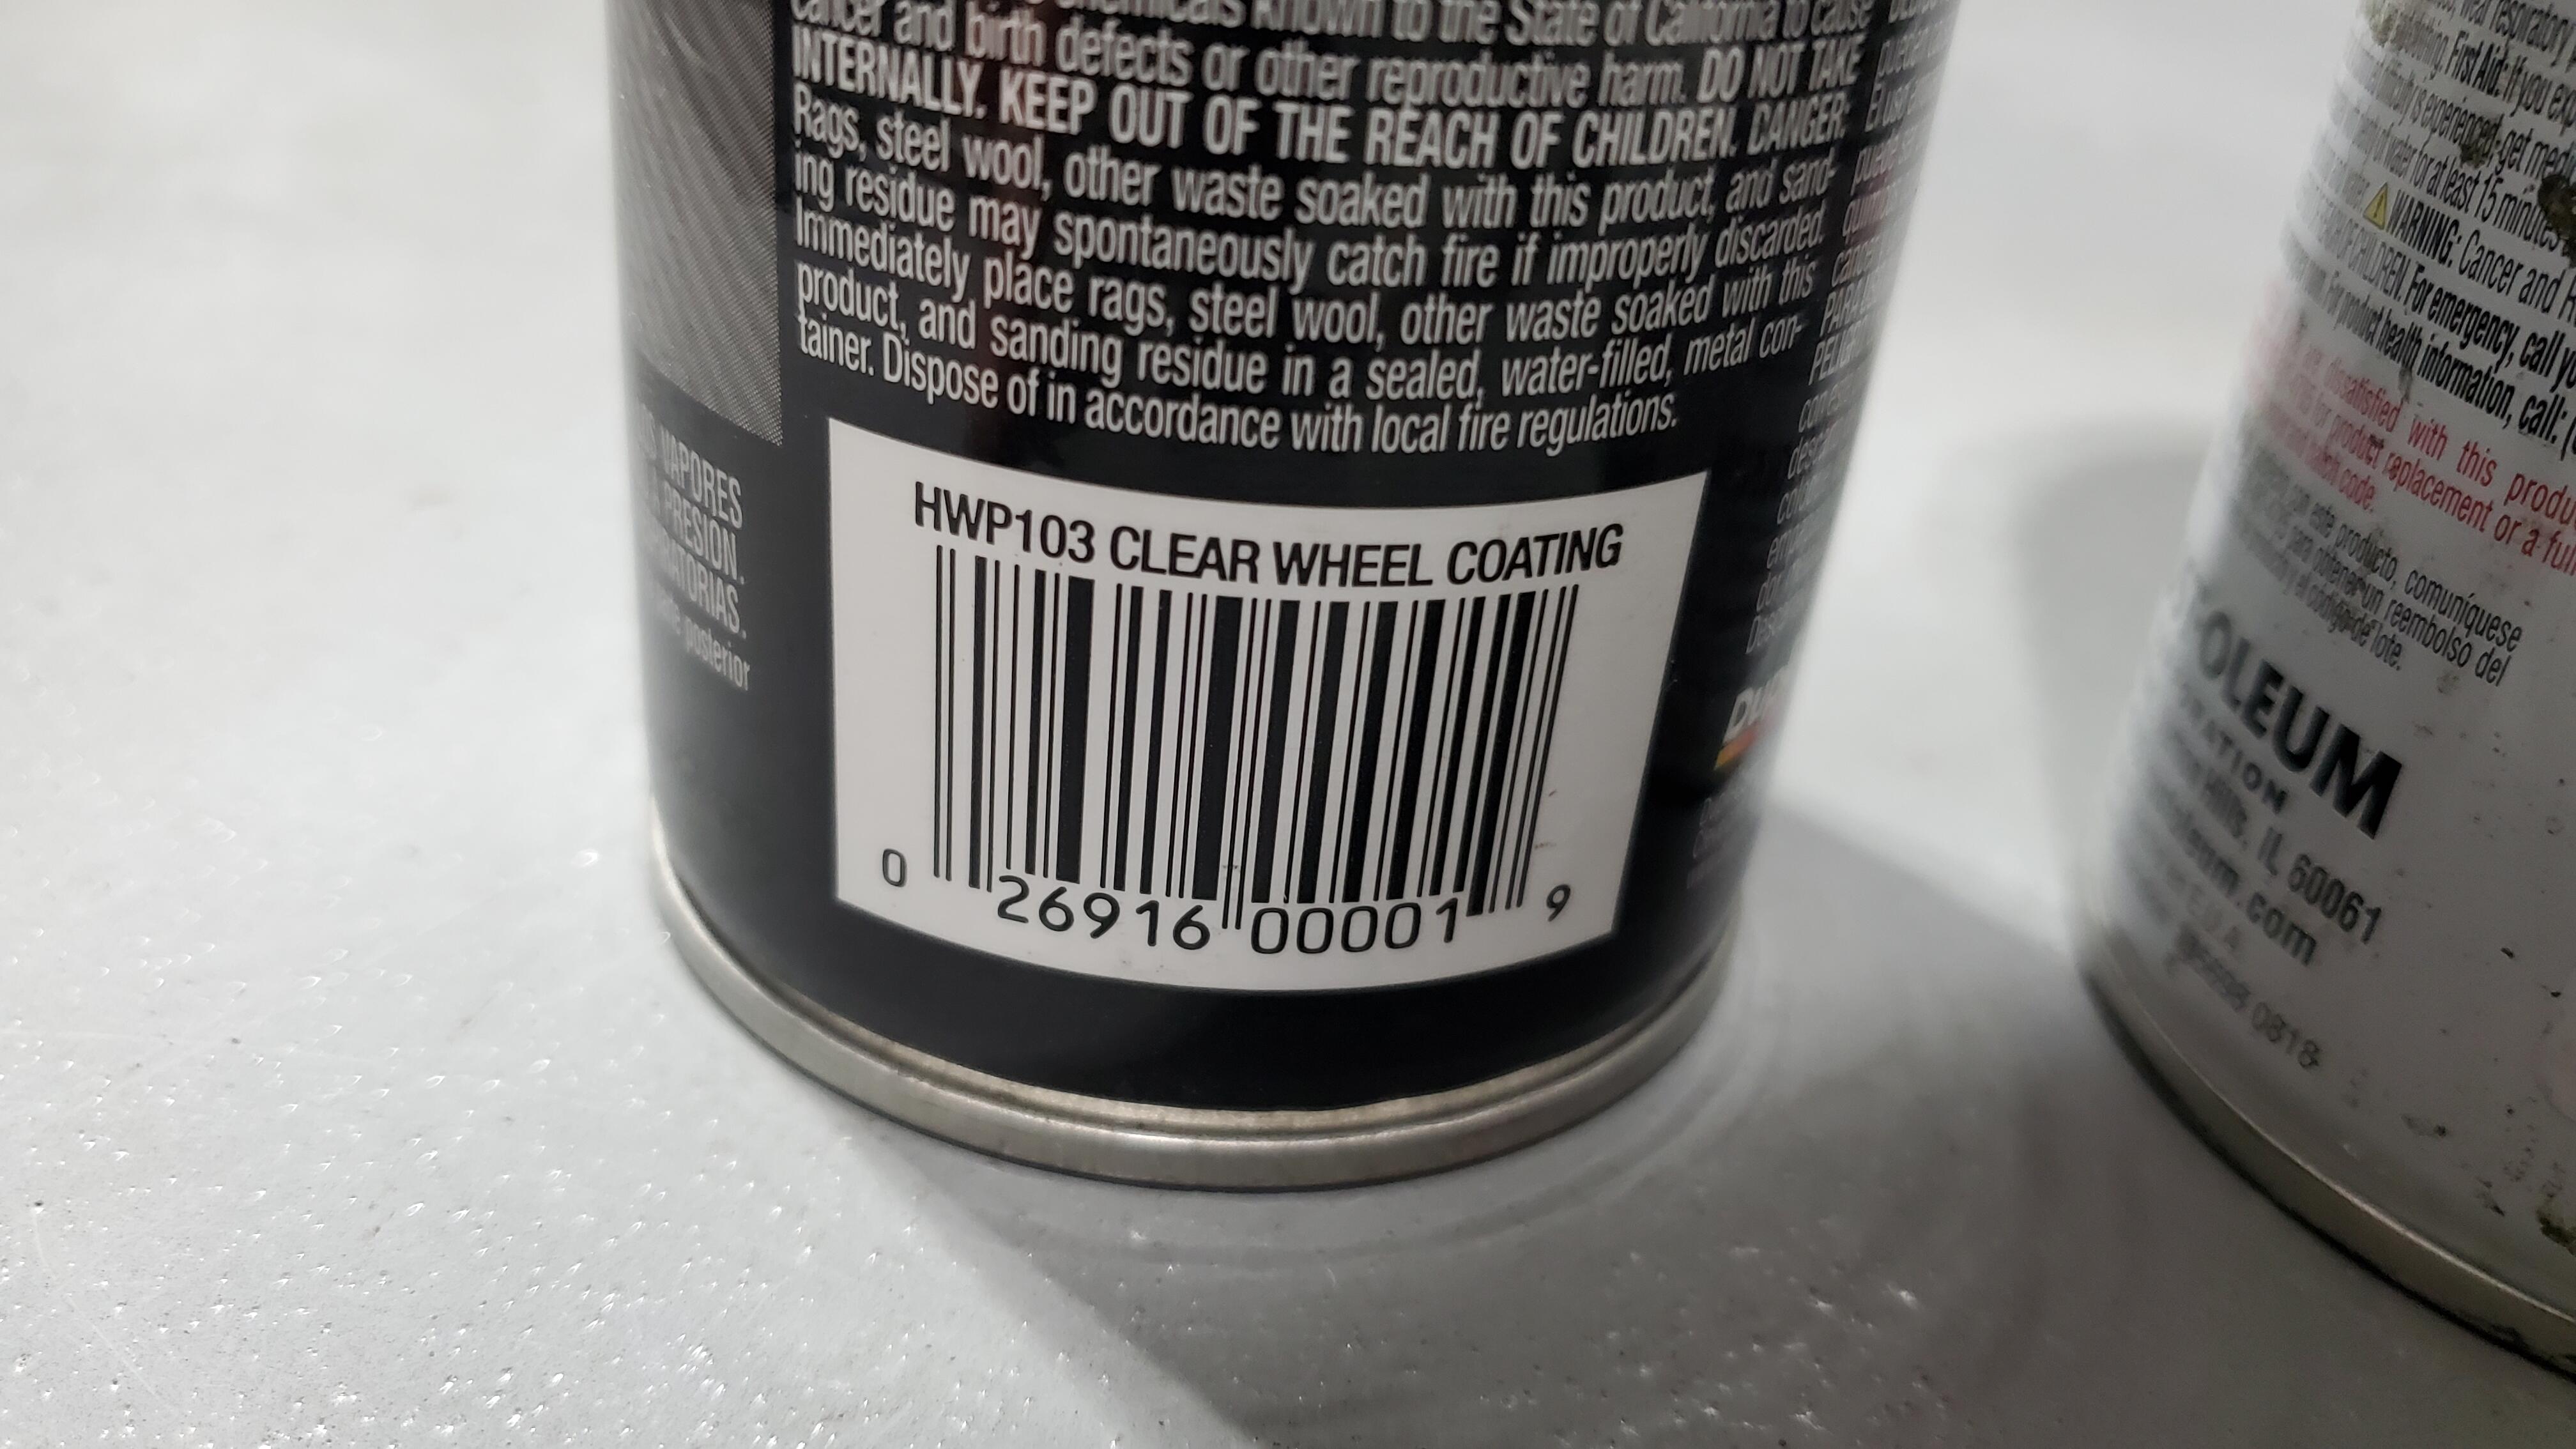
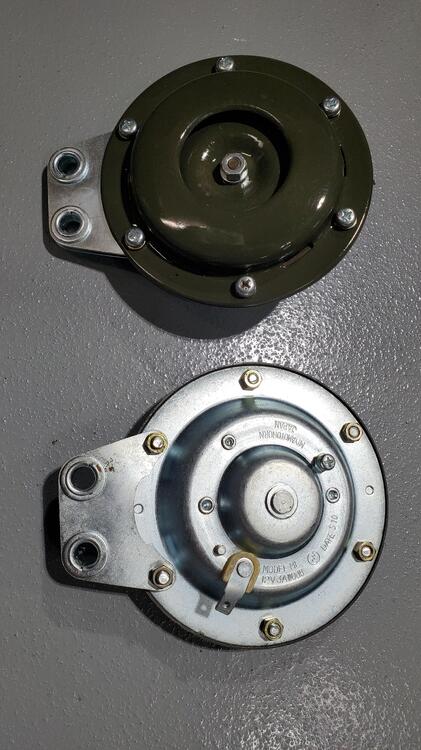
This is what I used. I initially used an Olive green but it was too light, so I went to Ace hardware and got a darker green. I used the center part of the horn as the 'master' as it was in the best condition. The Camouflage paint is flat, so I added the gloss clear. A thin semi-gloss may be a little bit better replication. I think the green is maybe a bit on the glossy side, but they do look pretty doggone close to the original.


-
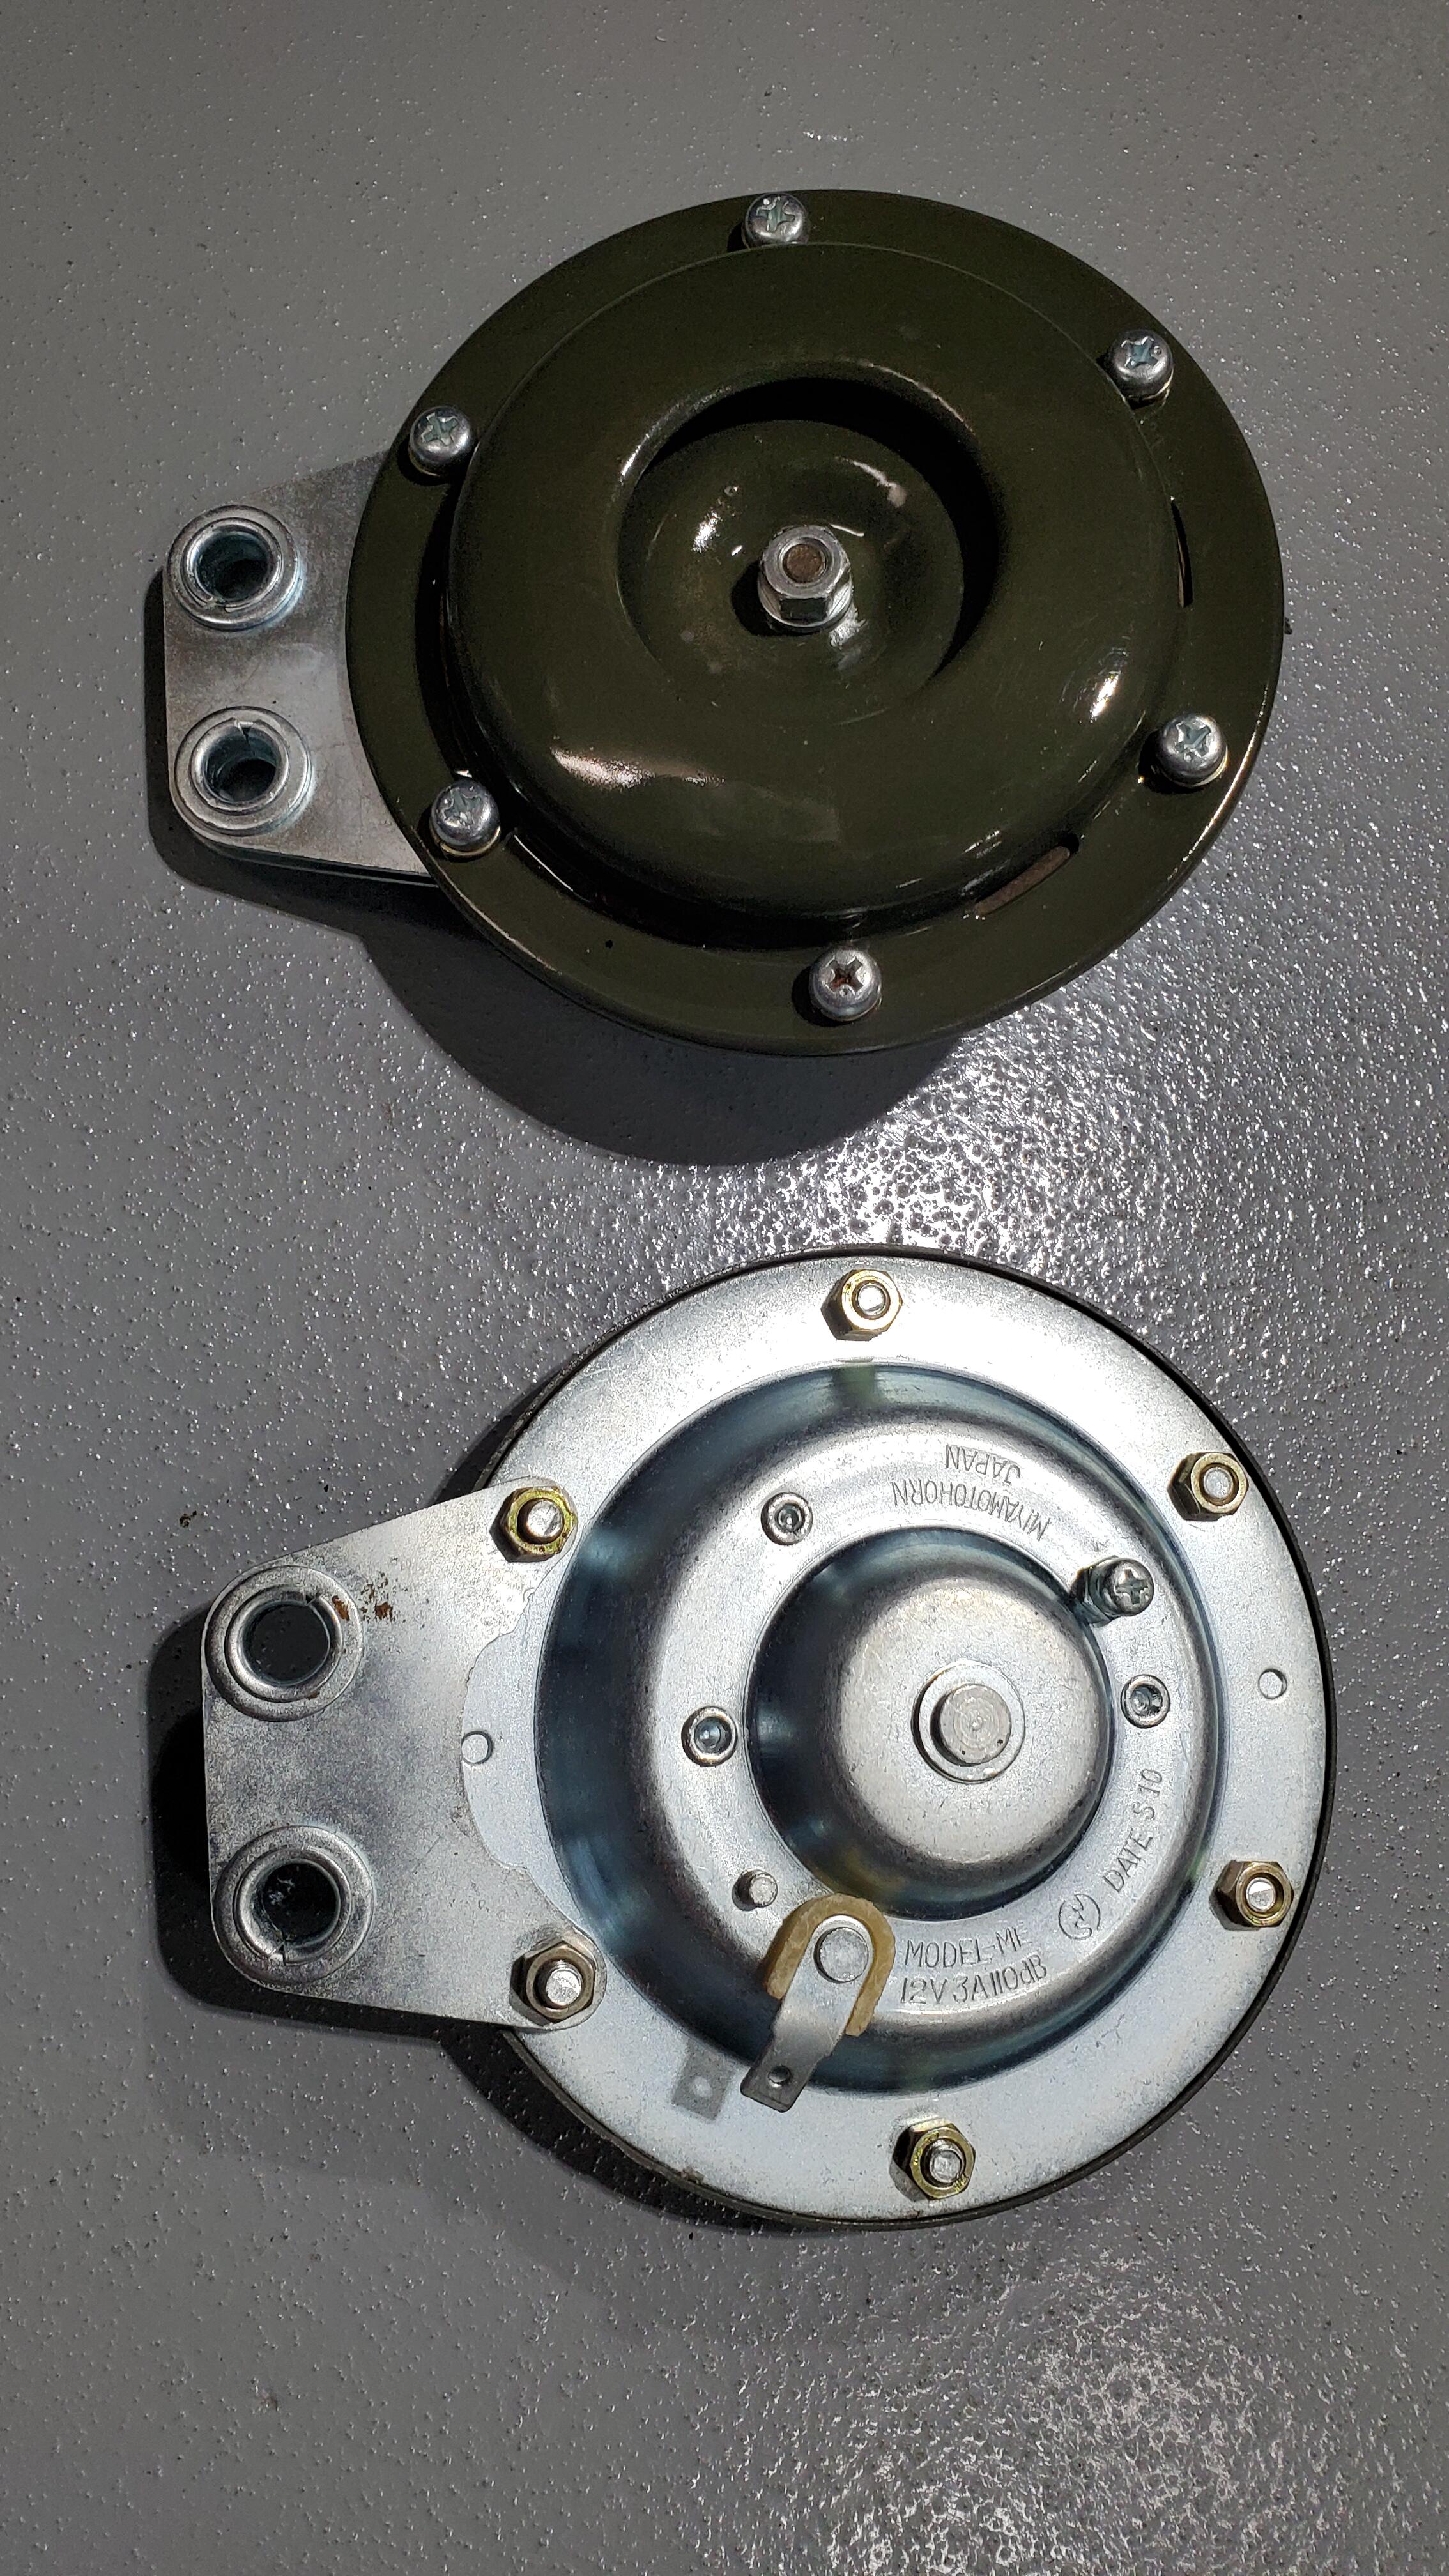
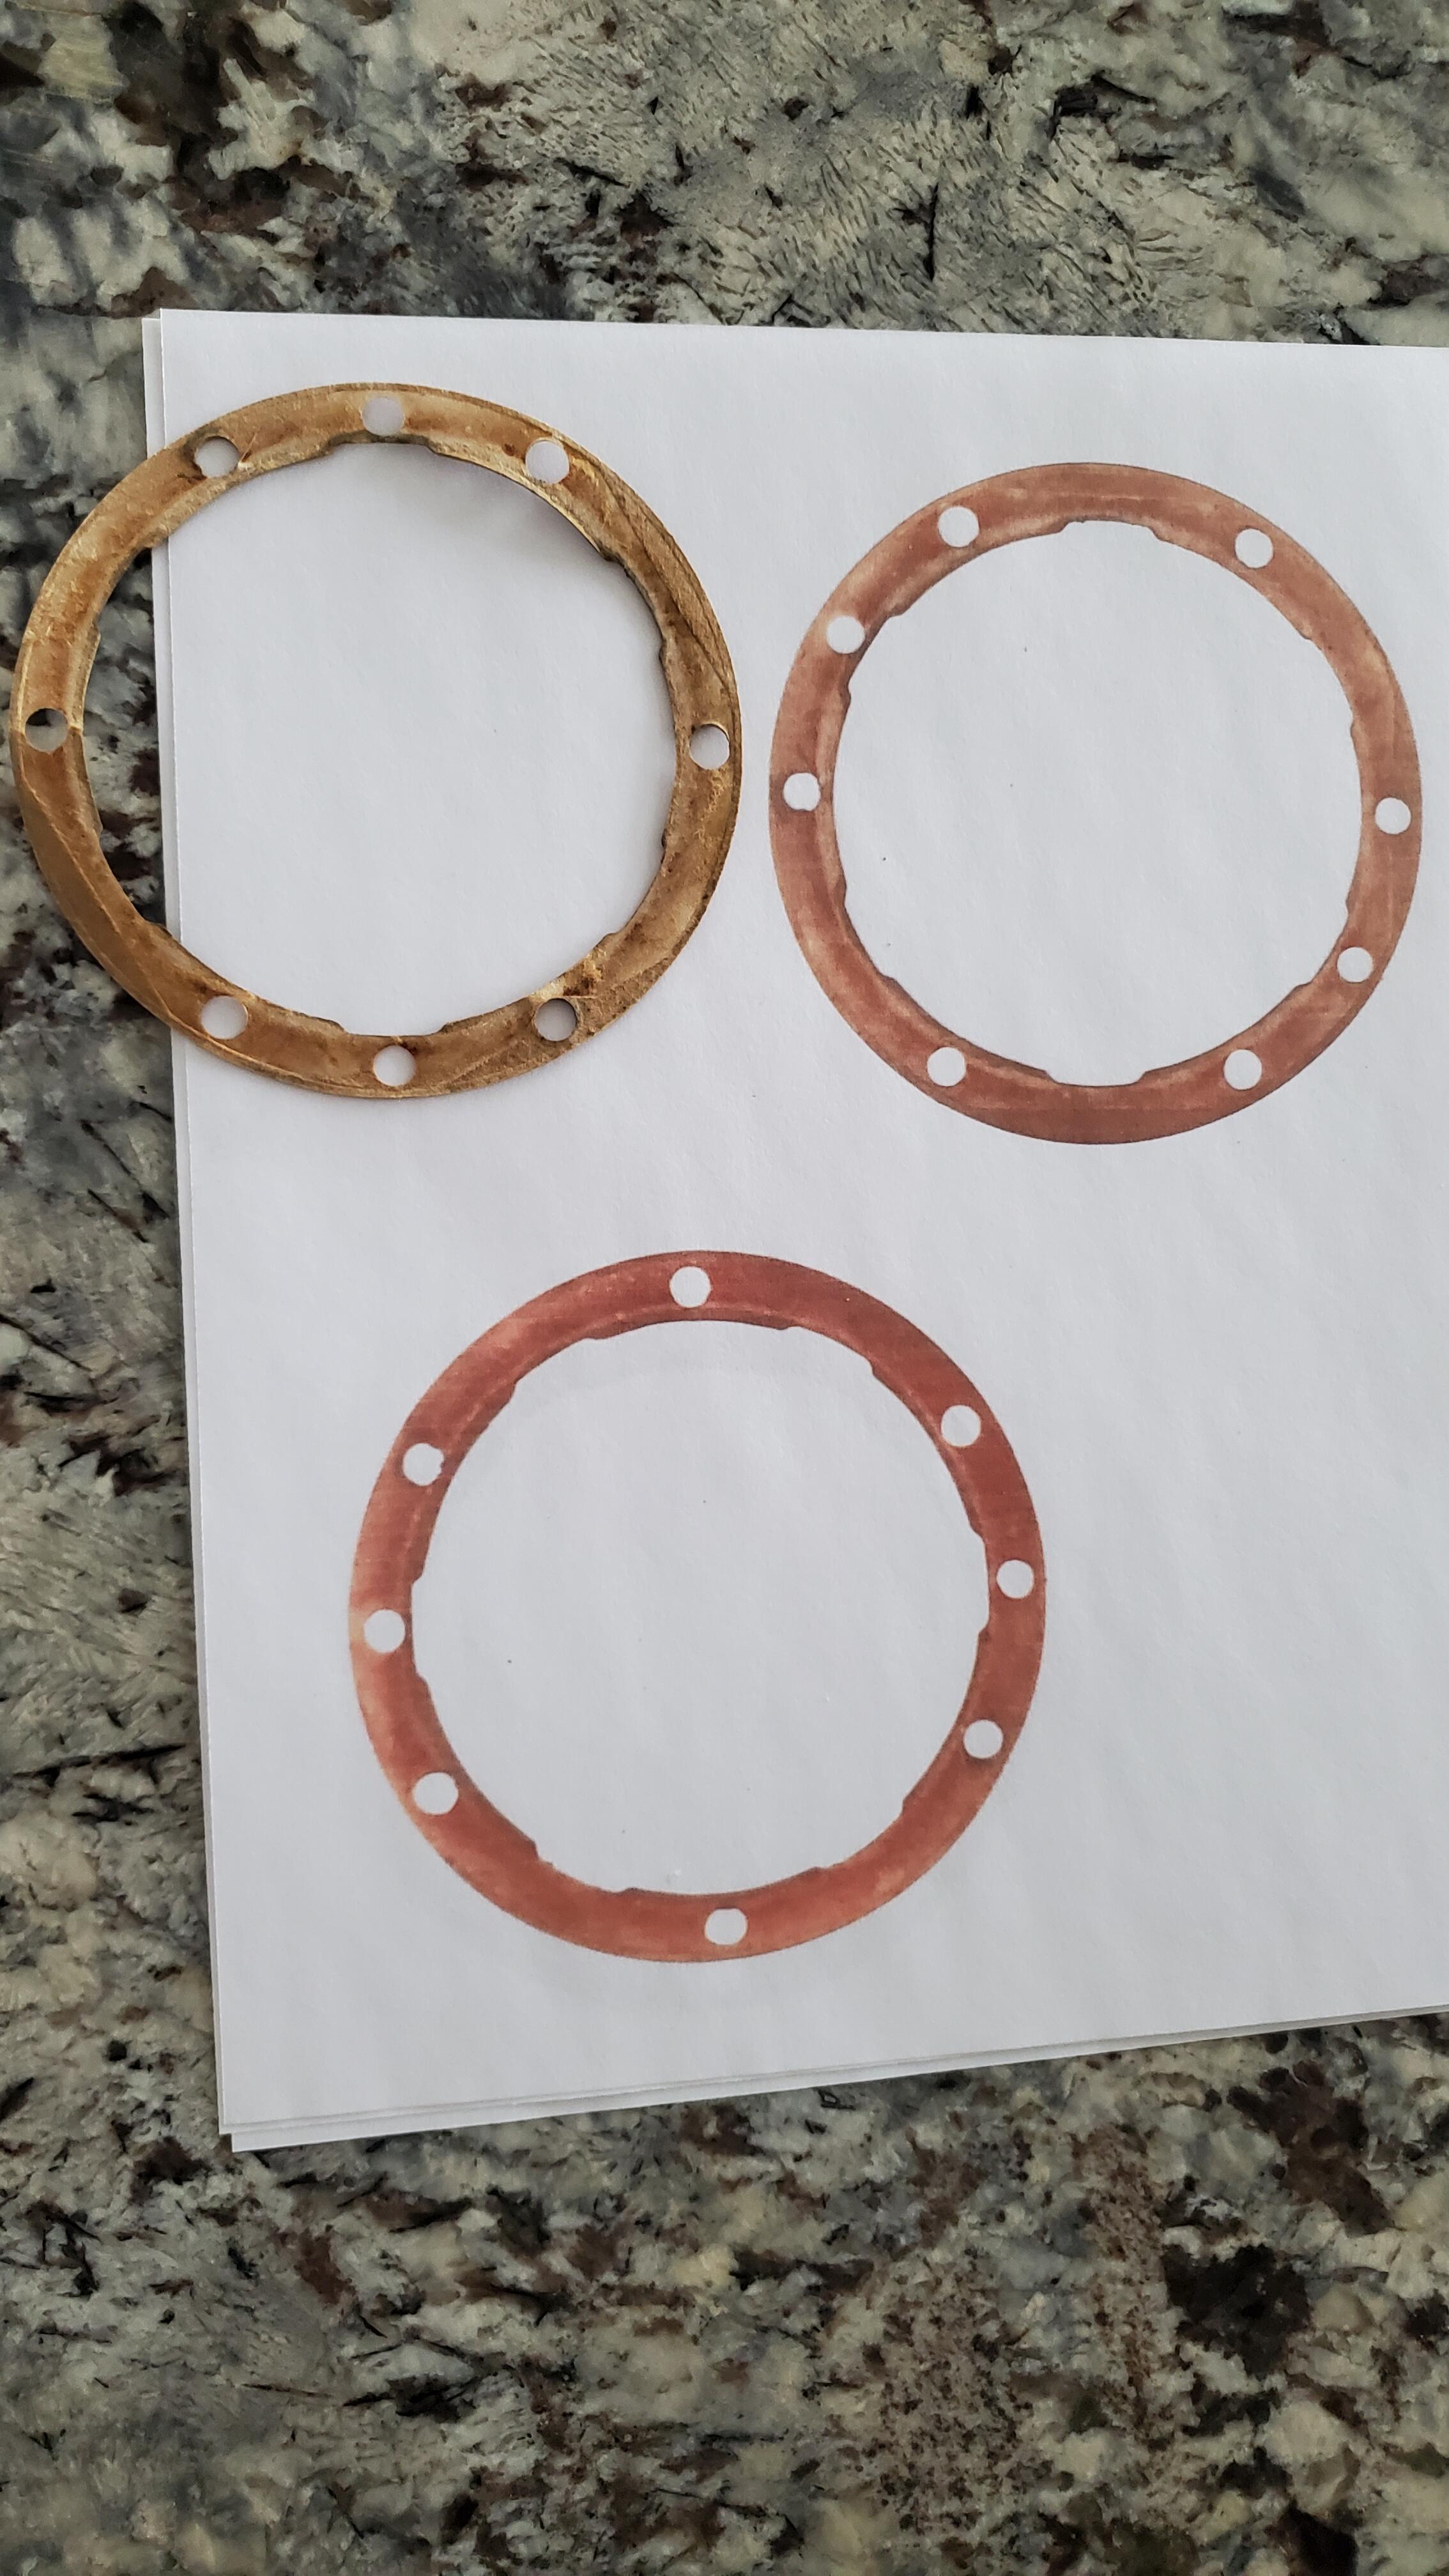
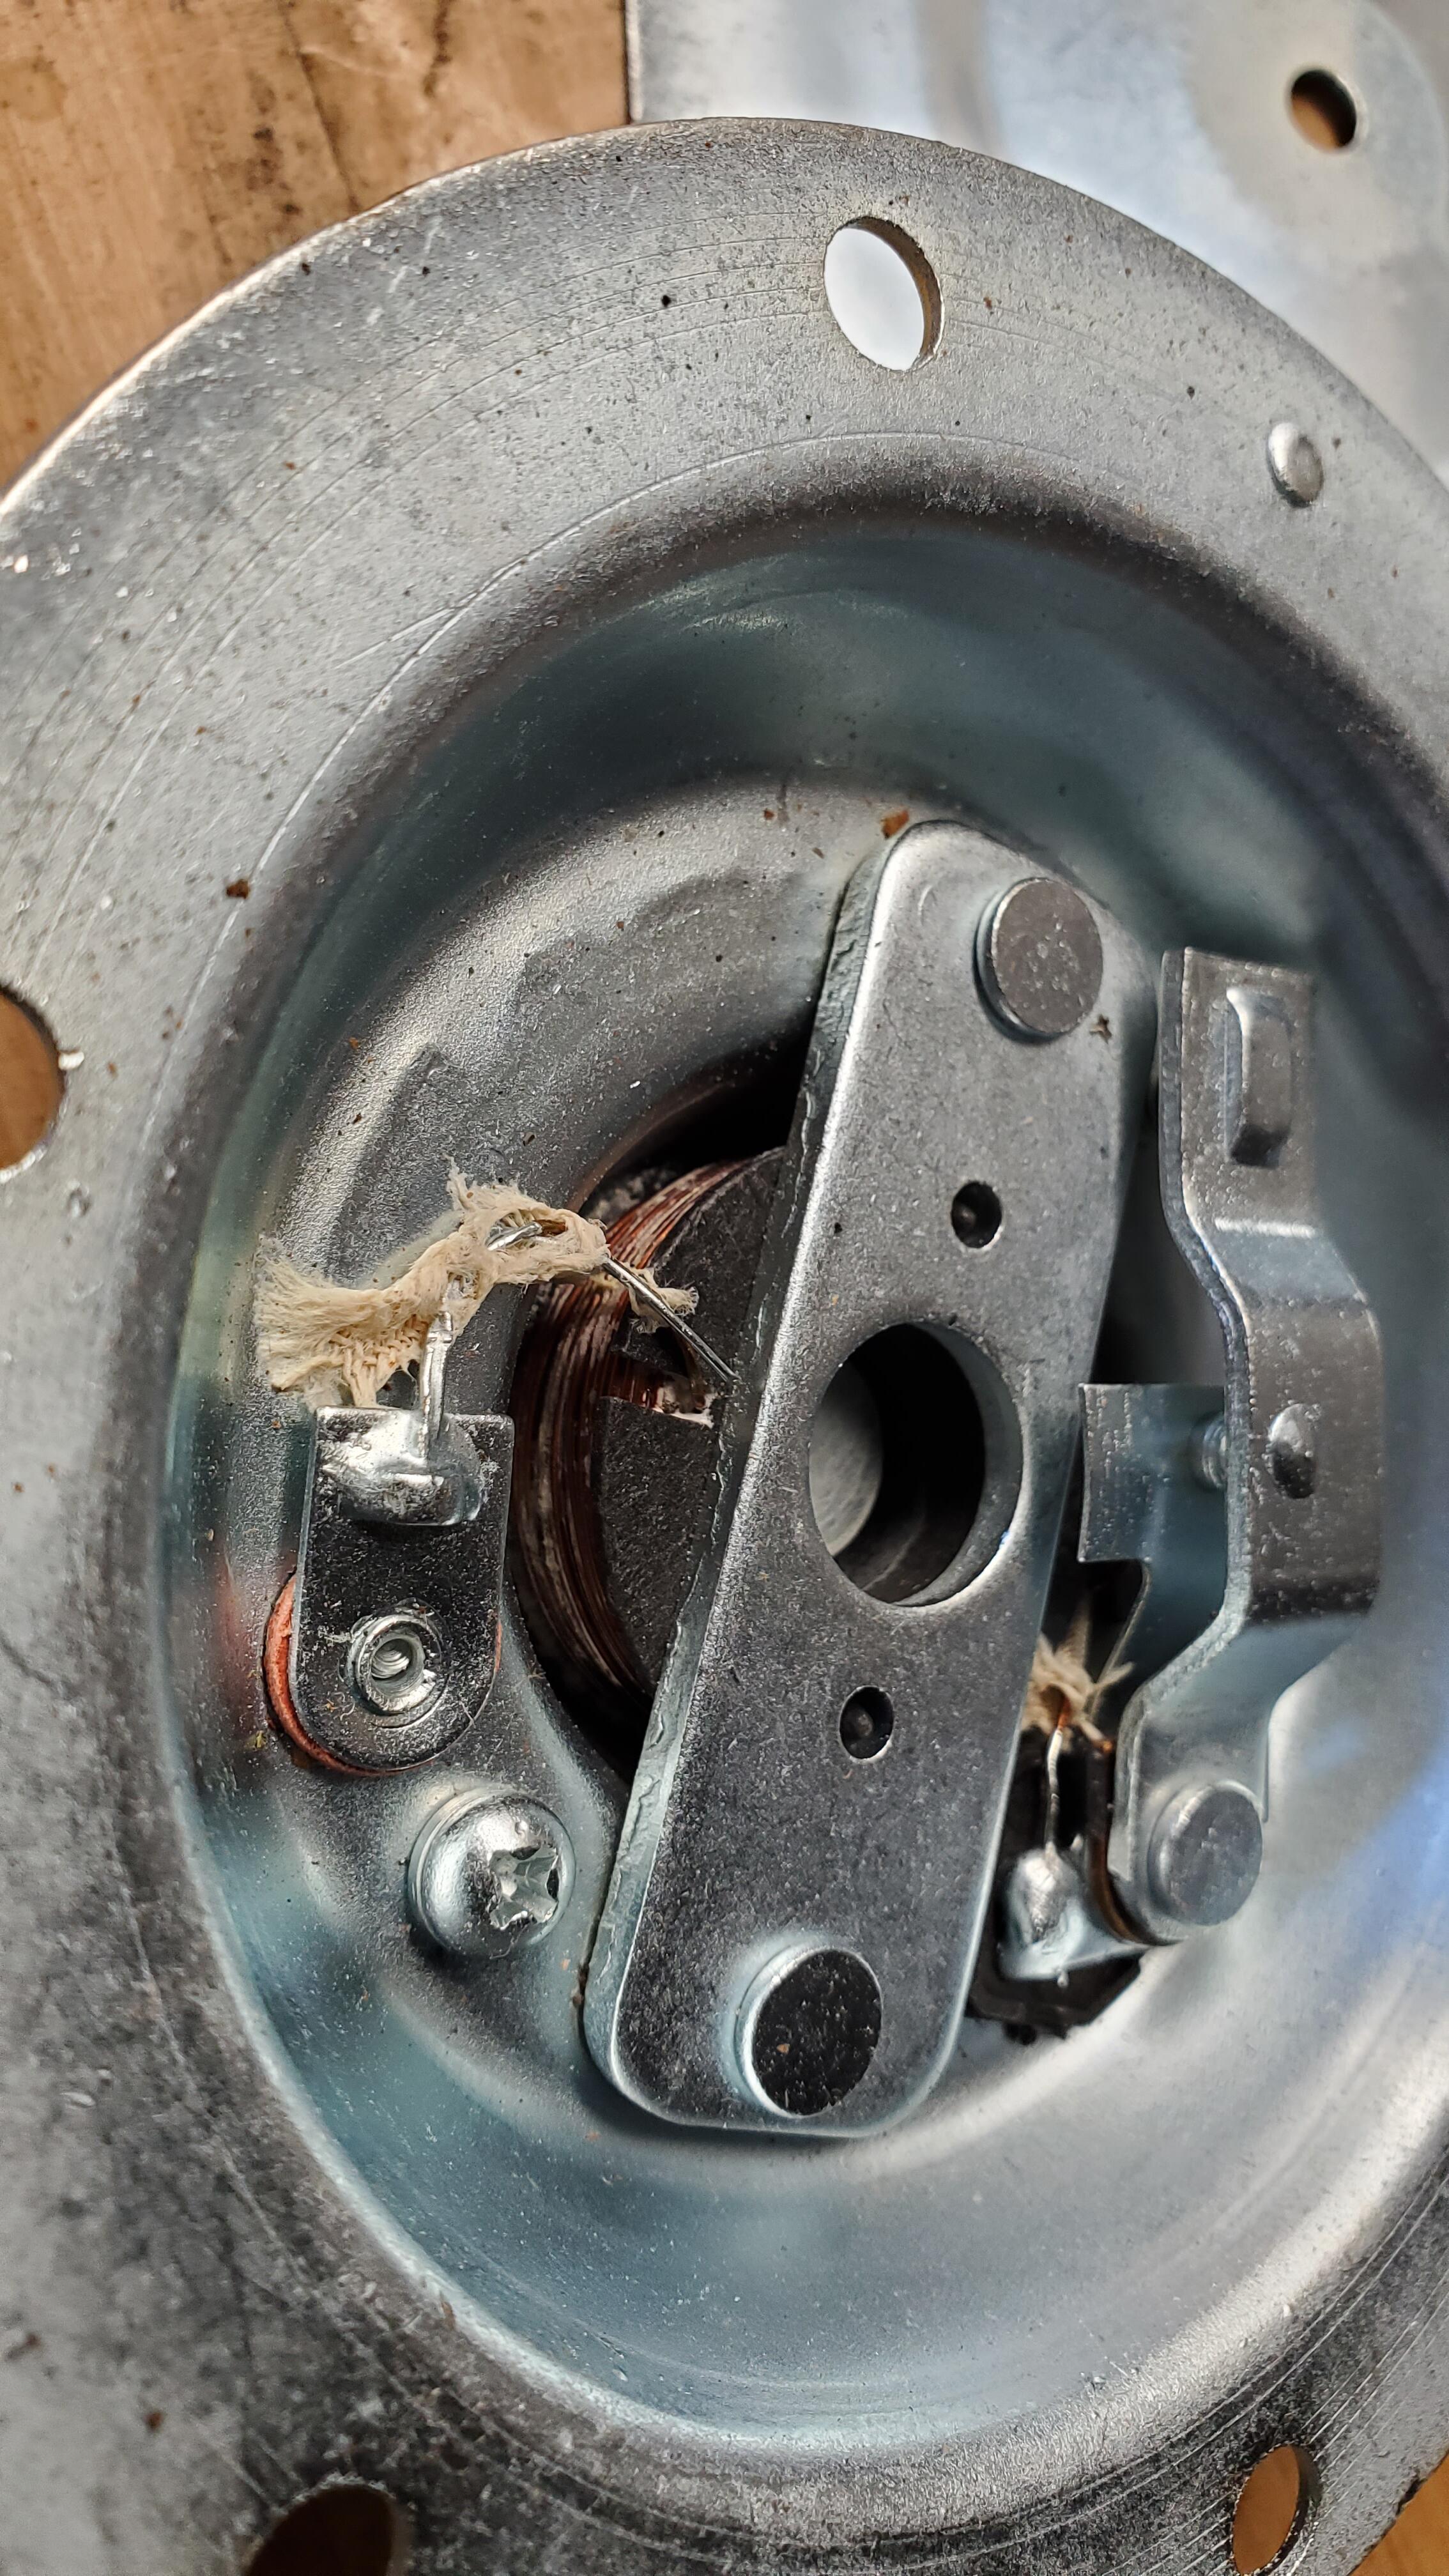
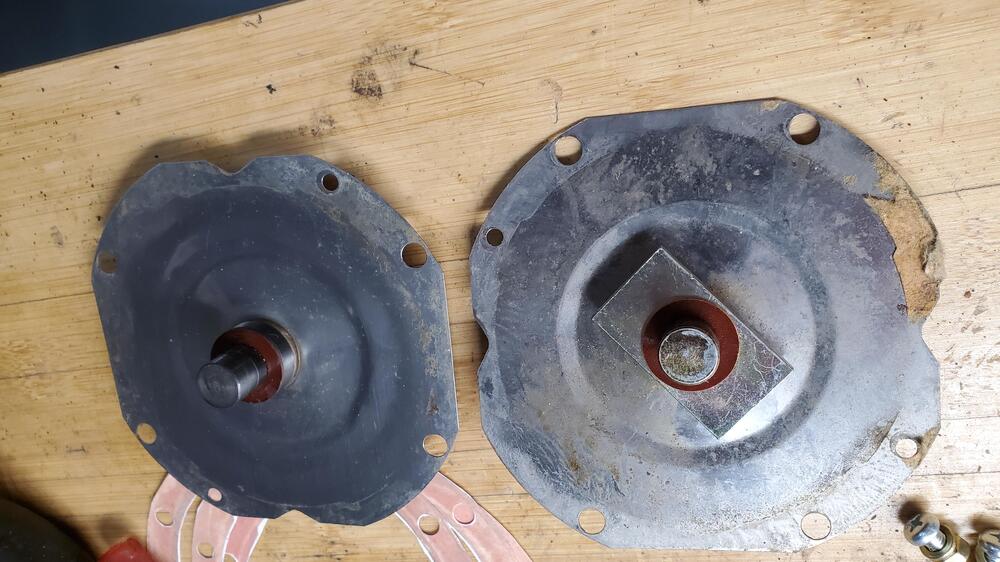
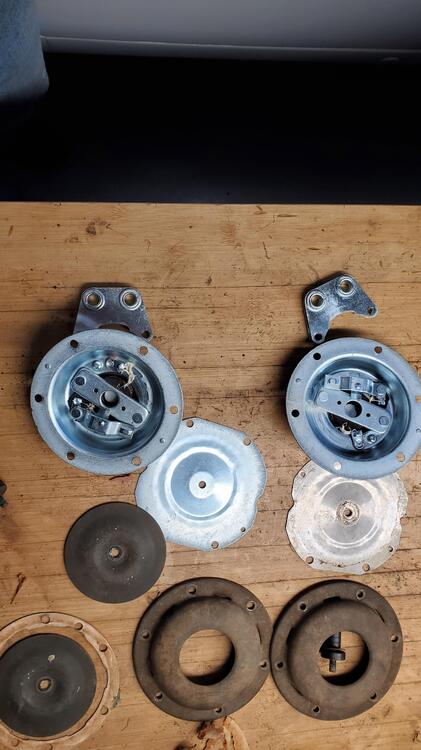
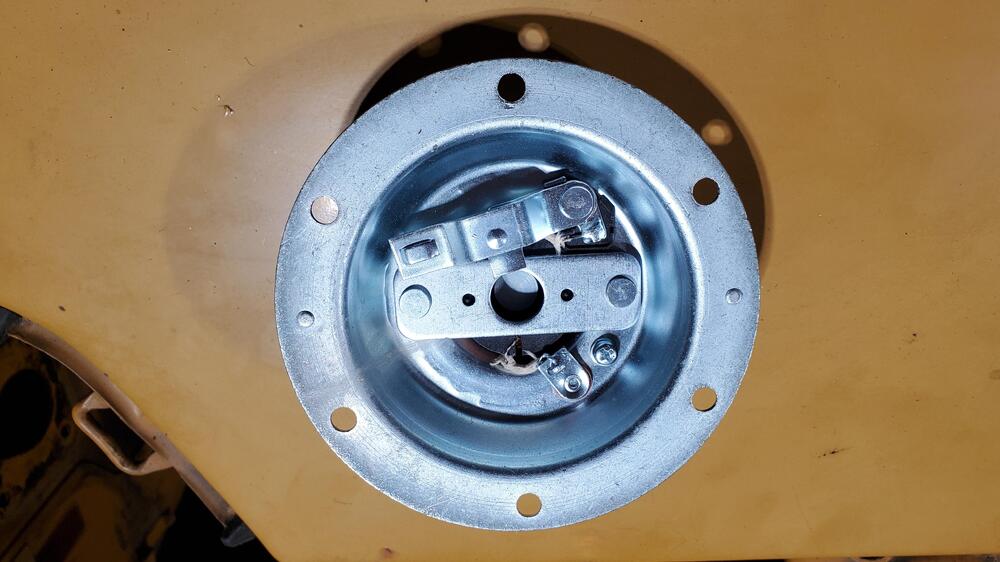
Since we were on the subject of horns, I just went ahead and rebuilt them. Pictures are below. I added a view of the horn coil. You can see that the copper is not plated. (Also, aluminum or any material other than steel will not plate) Also, I noticed the inside of the horn has a round metal part versus the later rectangular part. Maybe that is unique to the early car horns? I am pretty happy with the color of the horn front cover in its match of the original. I used a dark forest green camouflage paint with a clear coat for the color. I was only able to salvage one gasket from the original horns out of four, so I scanned the gasket and made 3 more.


-
No problem at all. I have rebuilt several sets of horns with this plating. No issues.
-
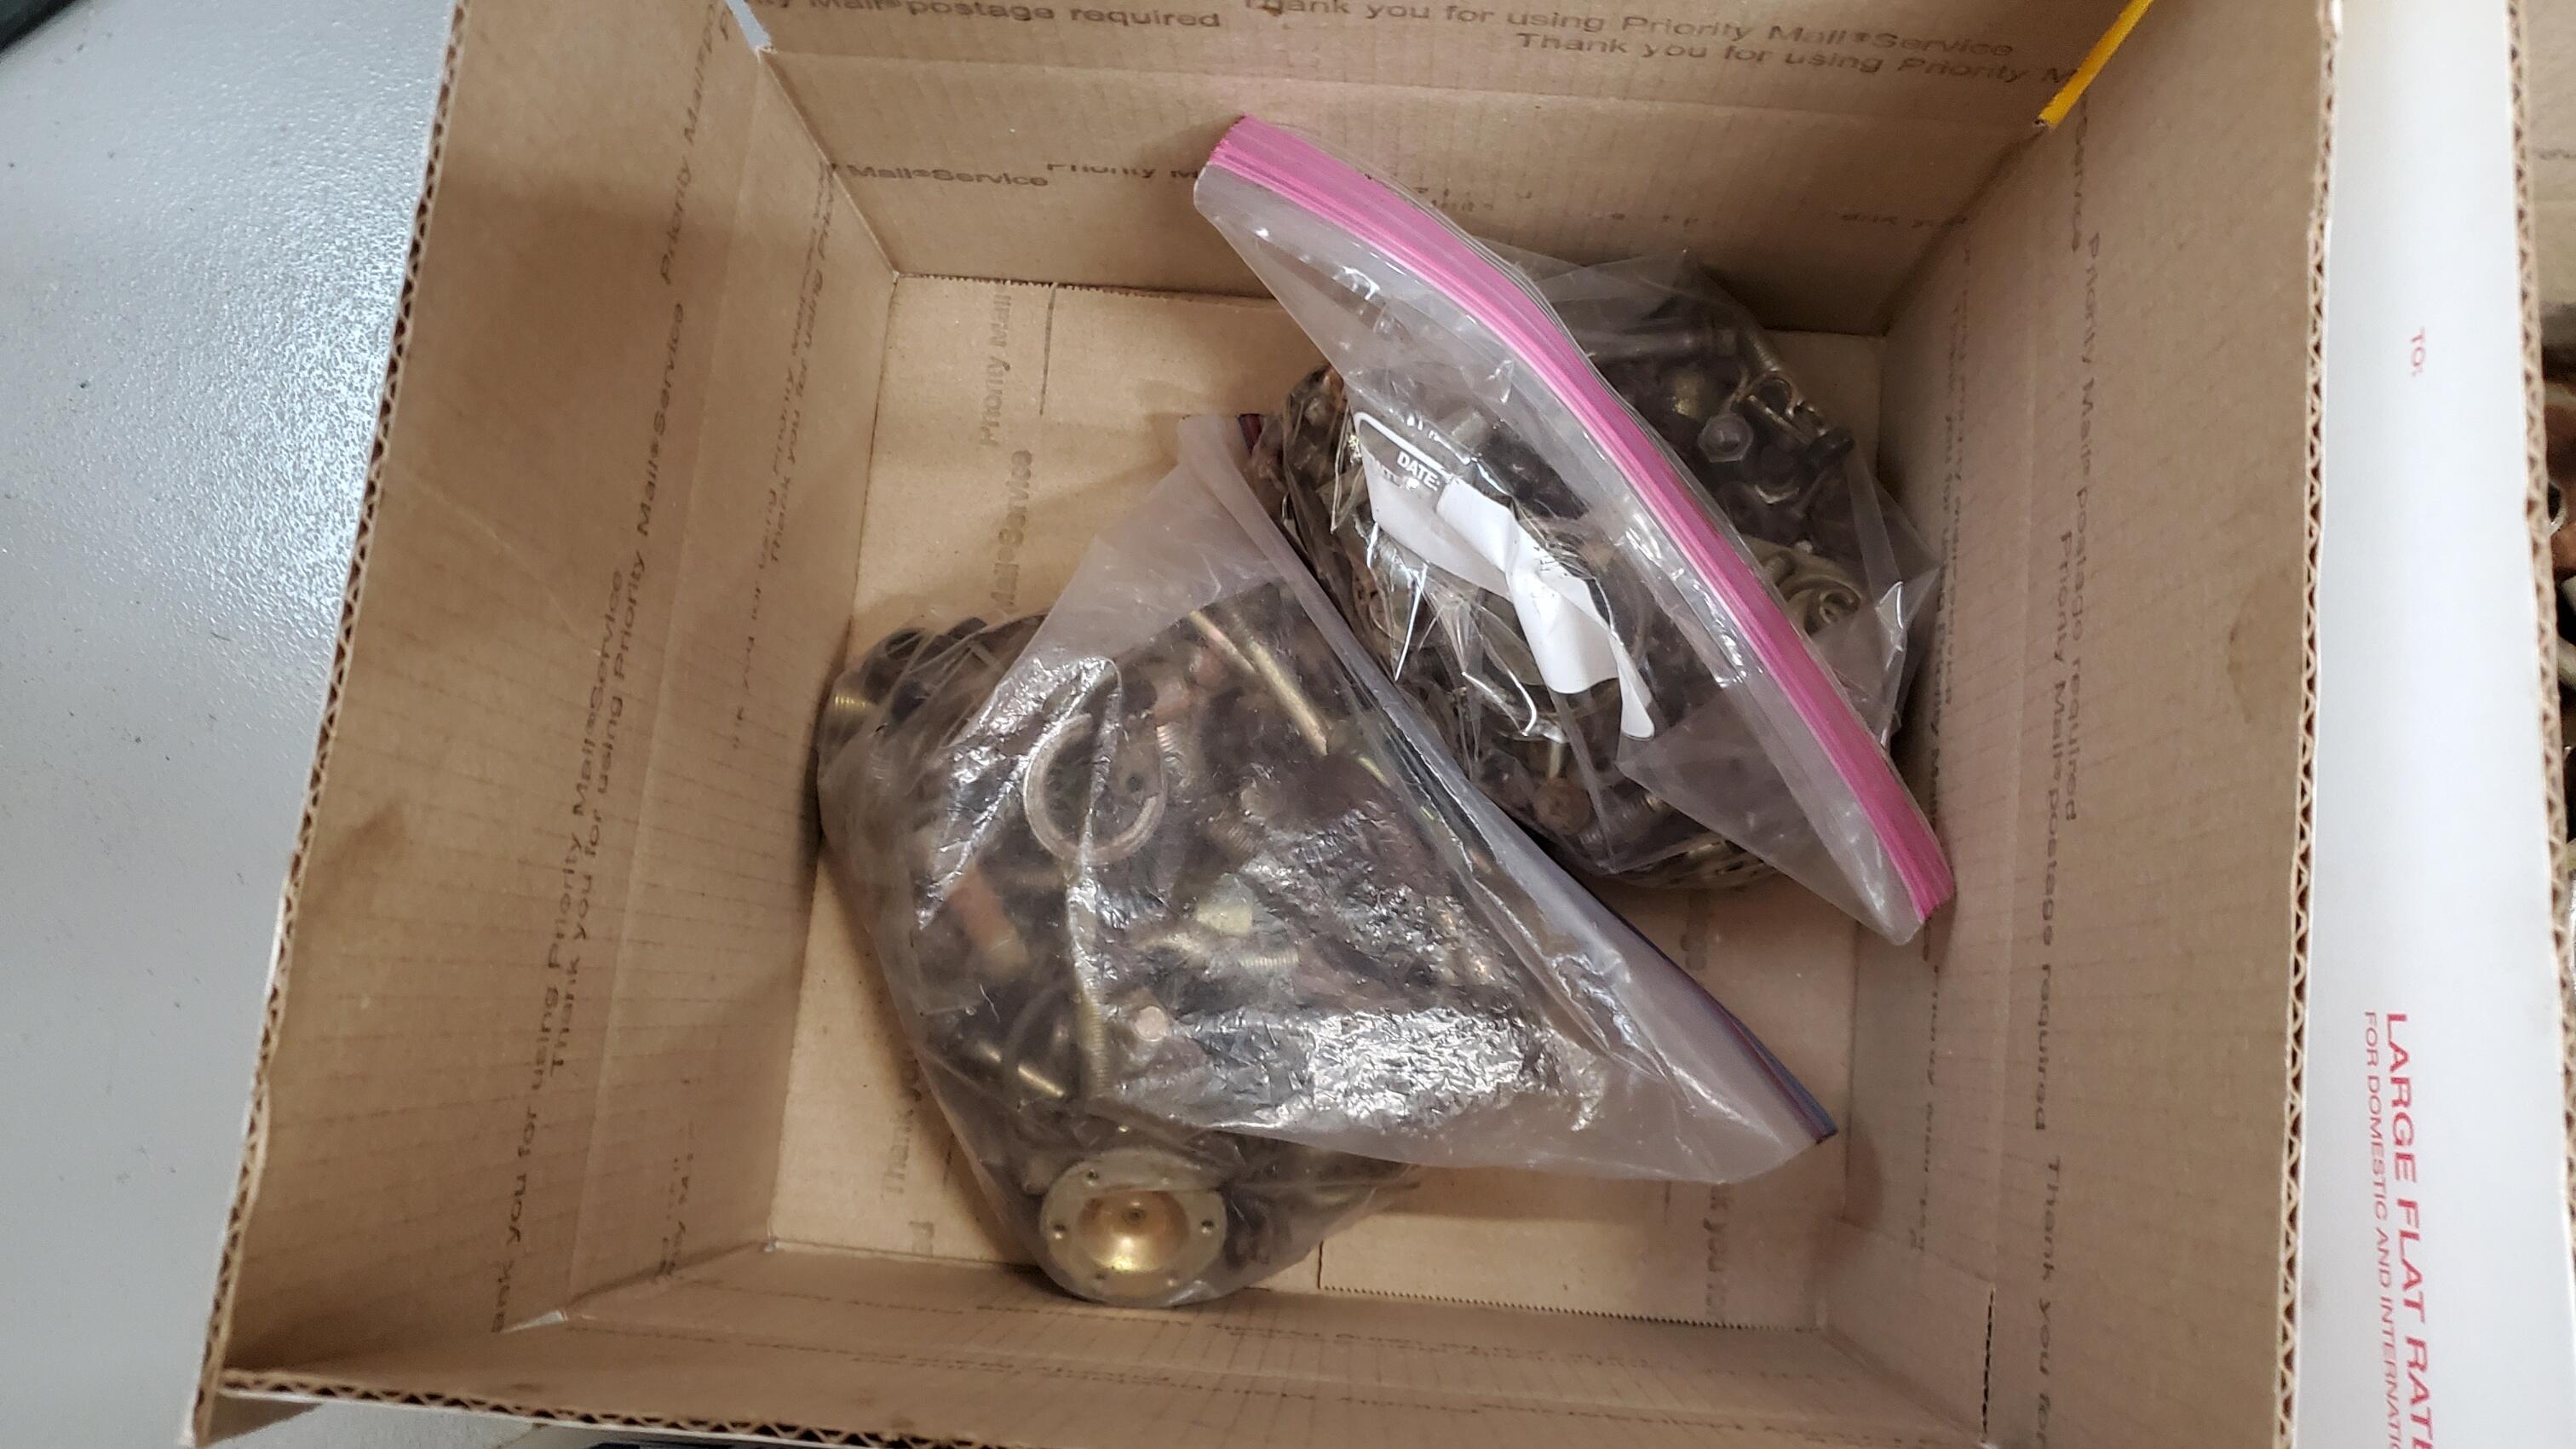
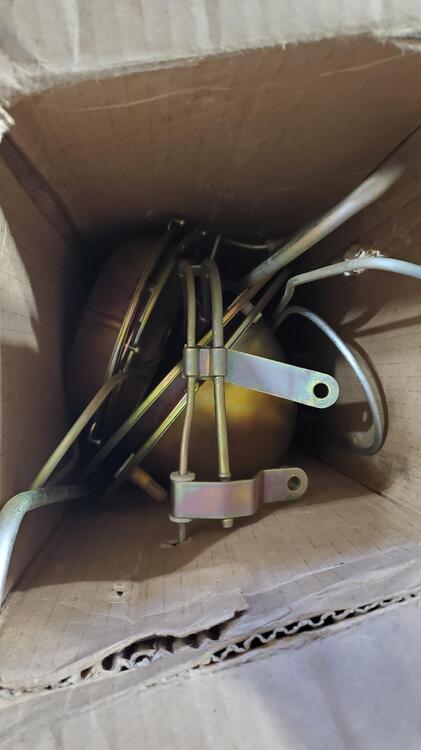
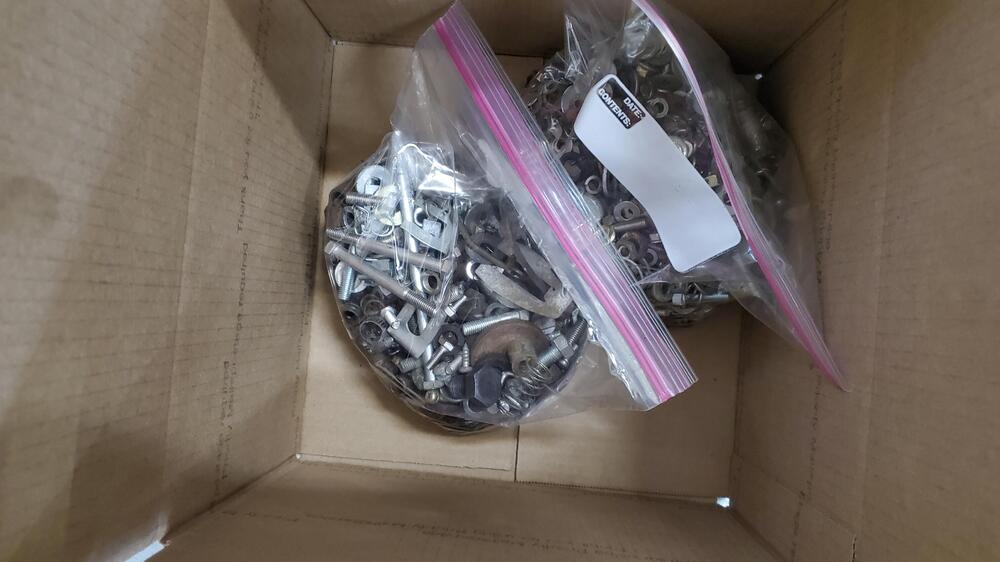
This is the inside. I put the rest of the parts in a zip lock bag

-
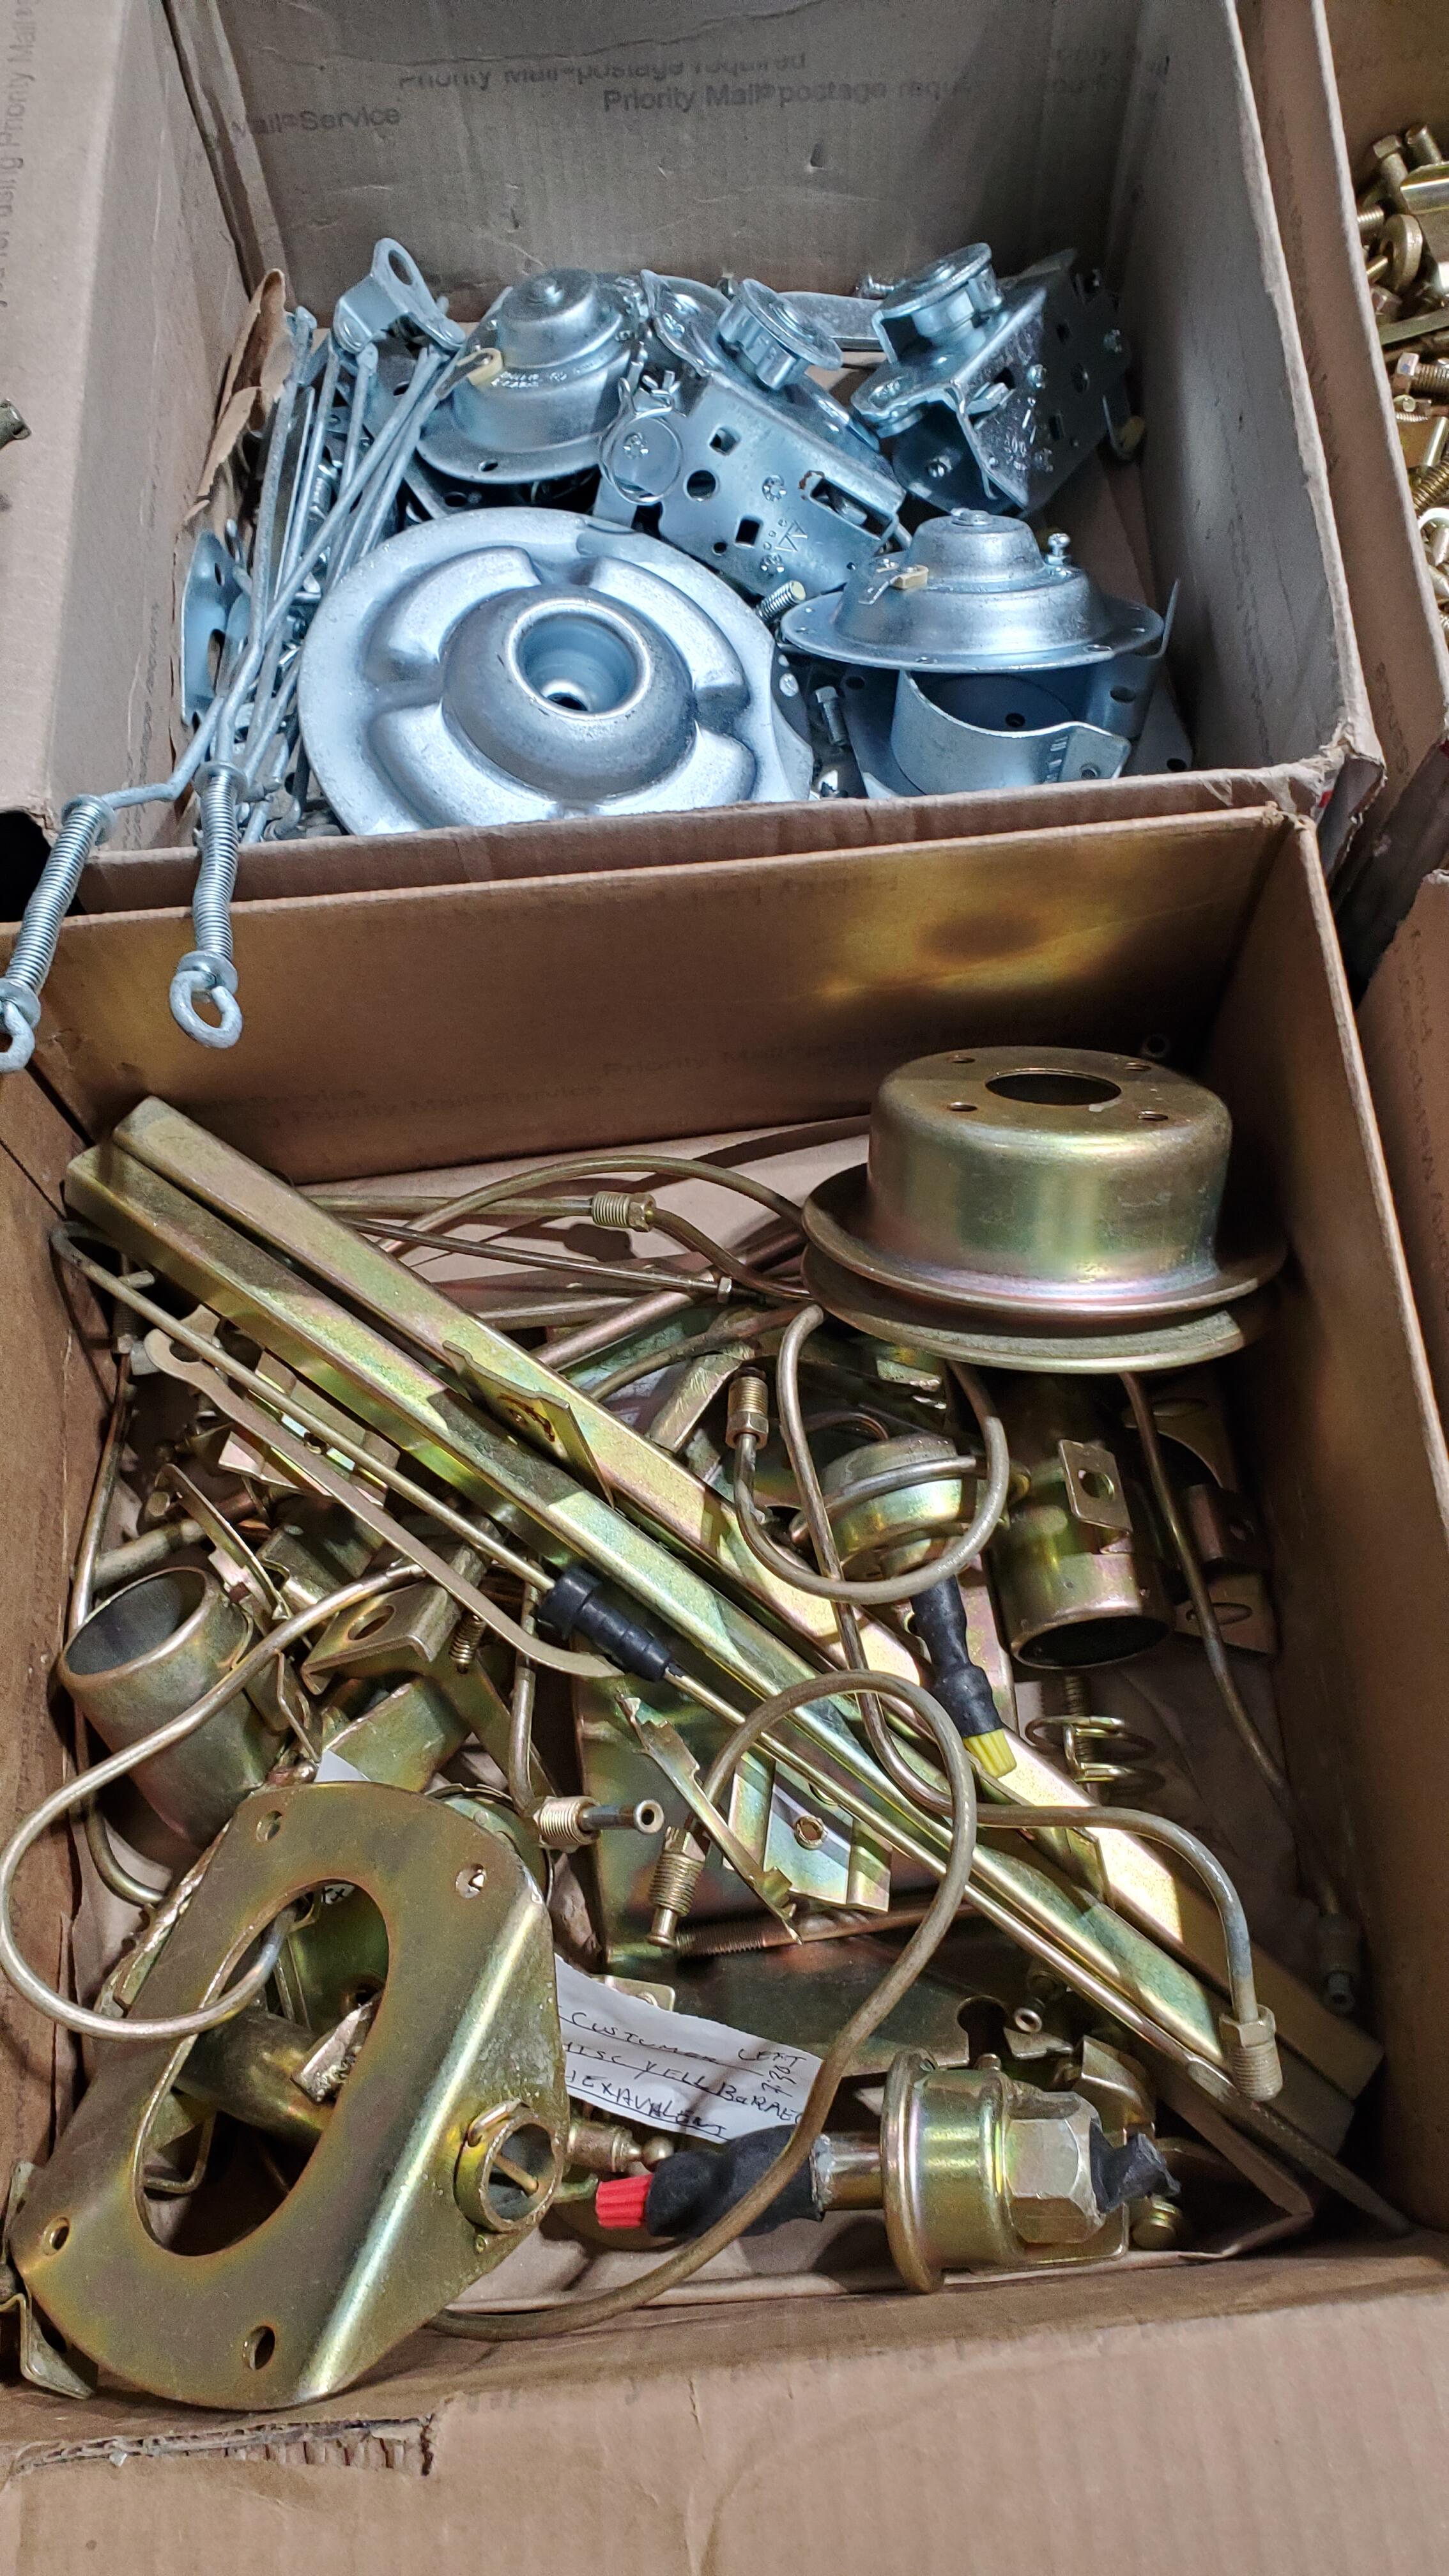
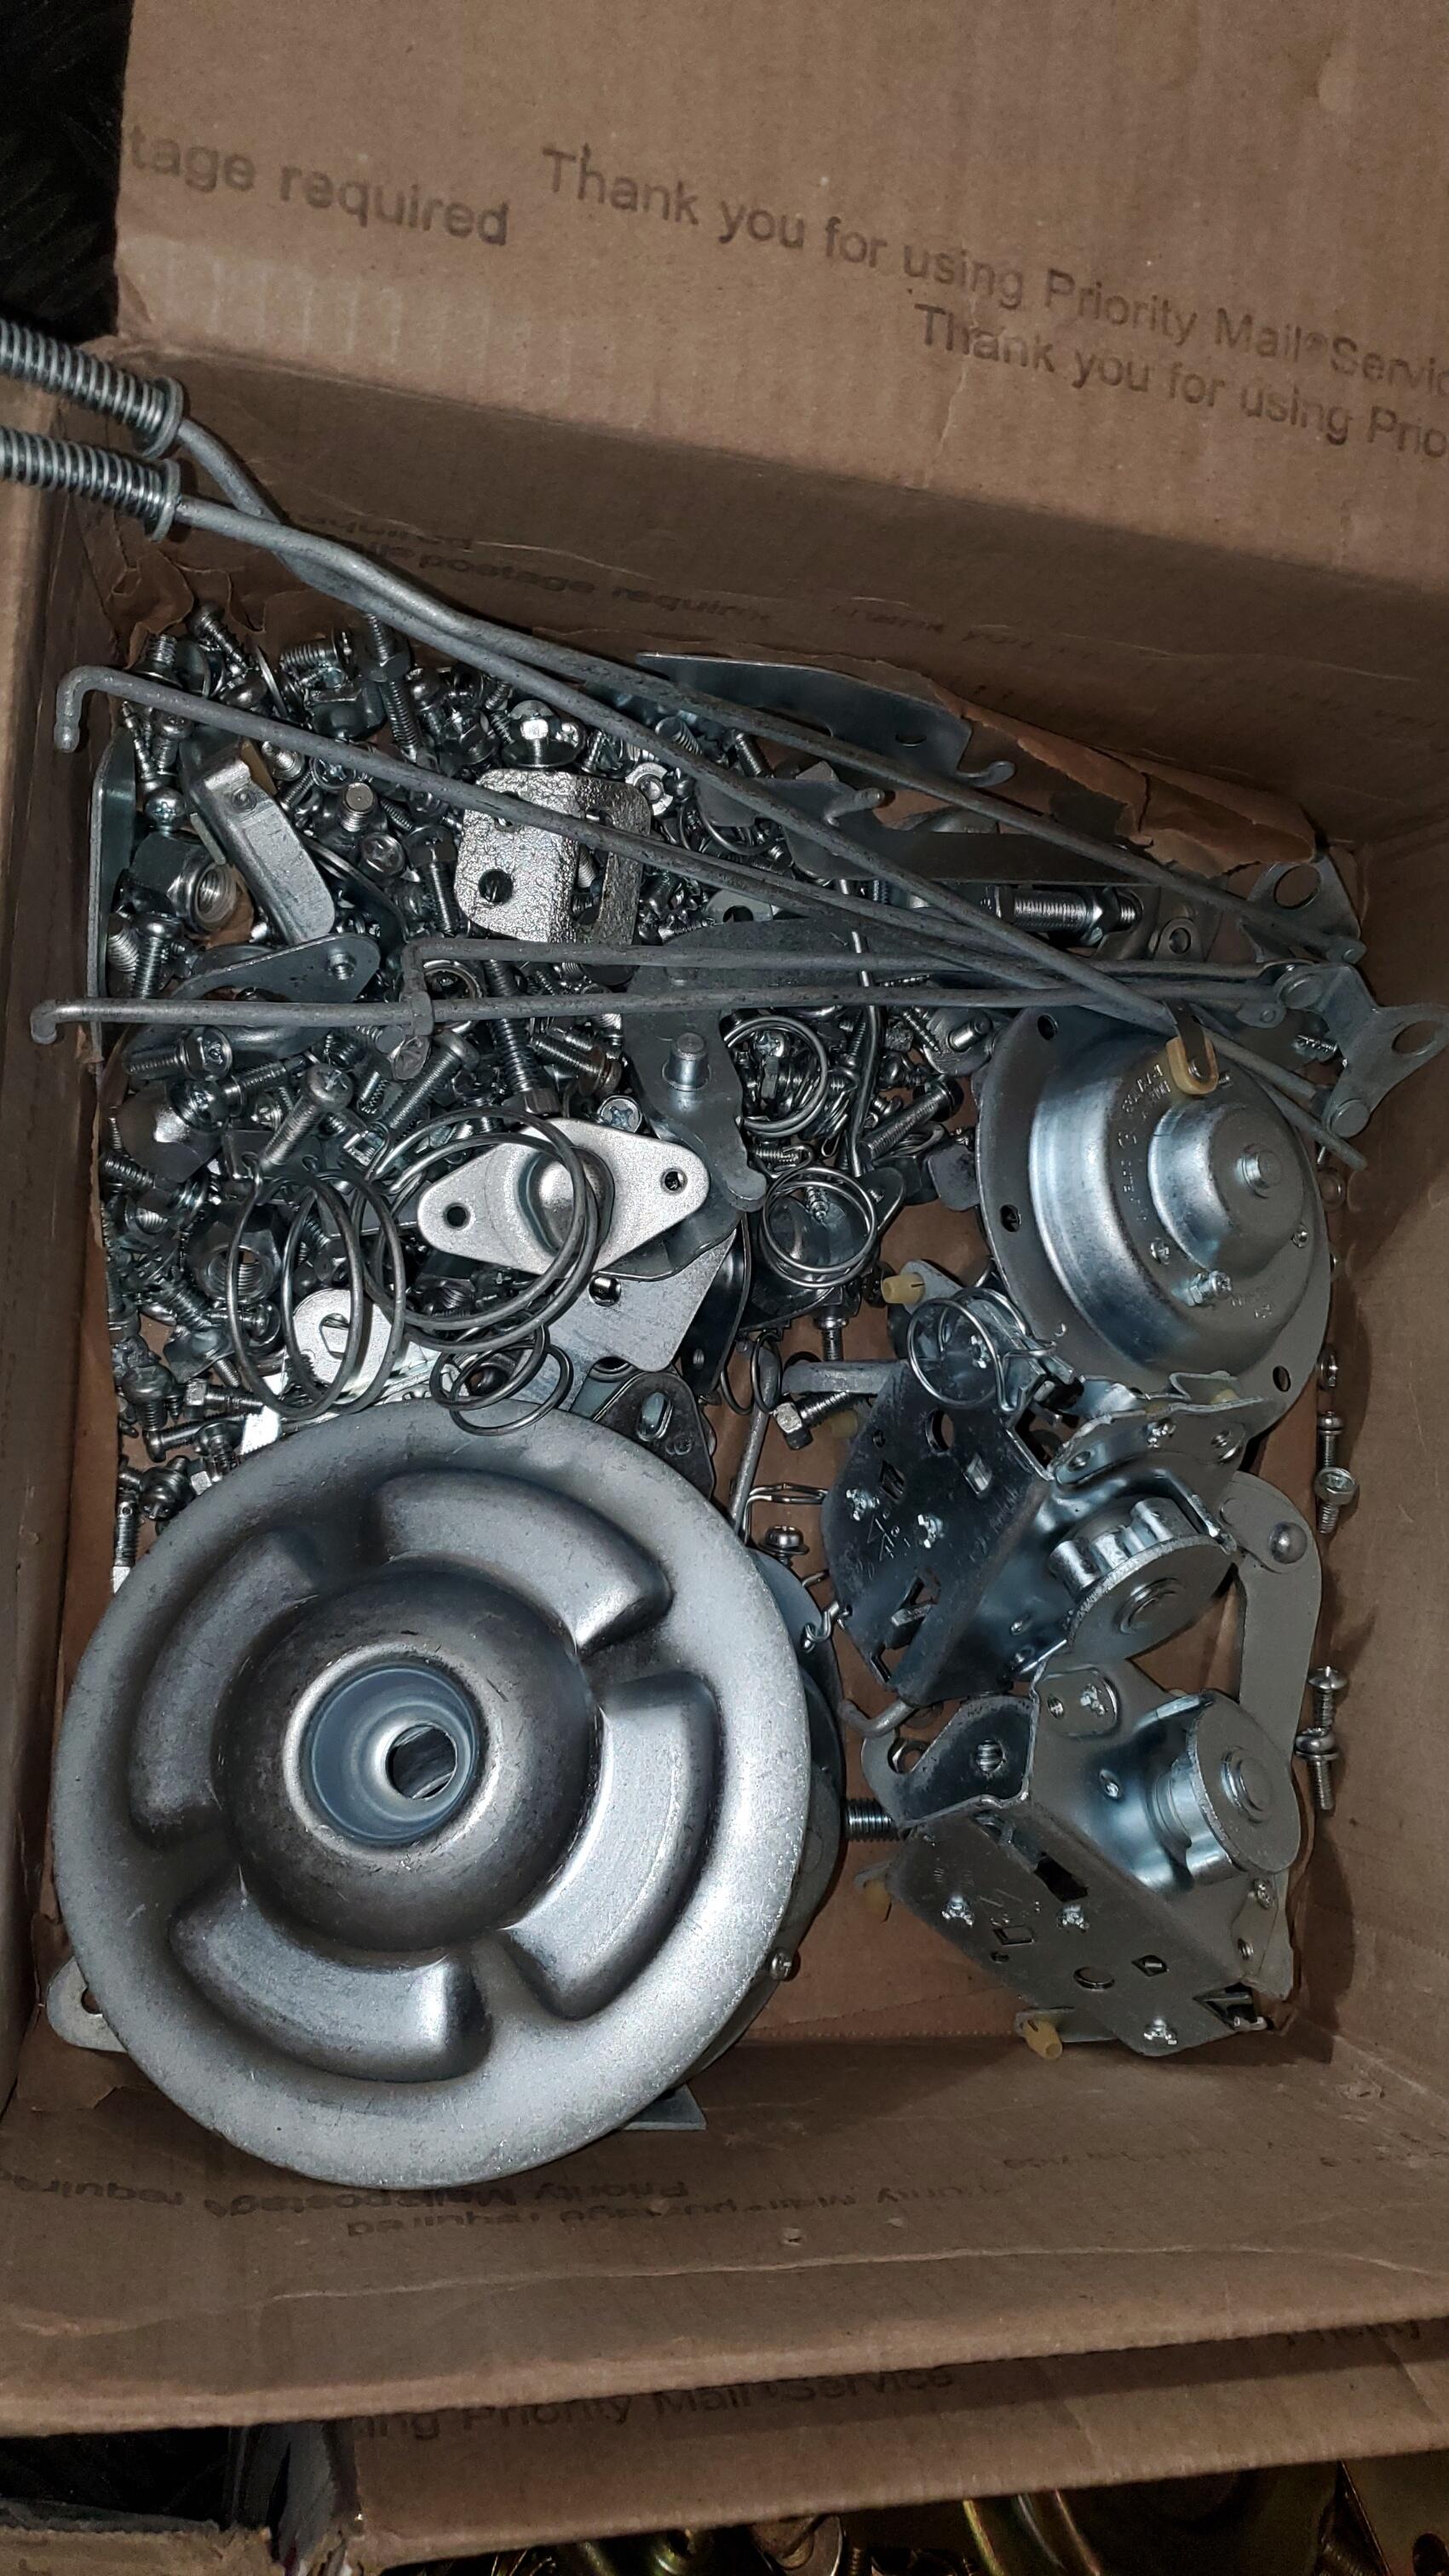
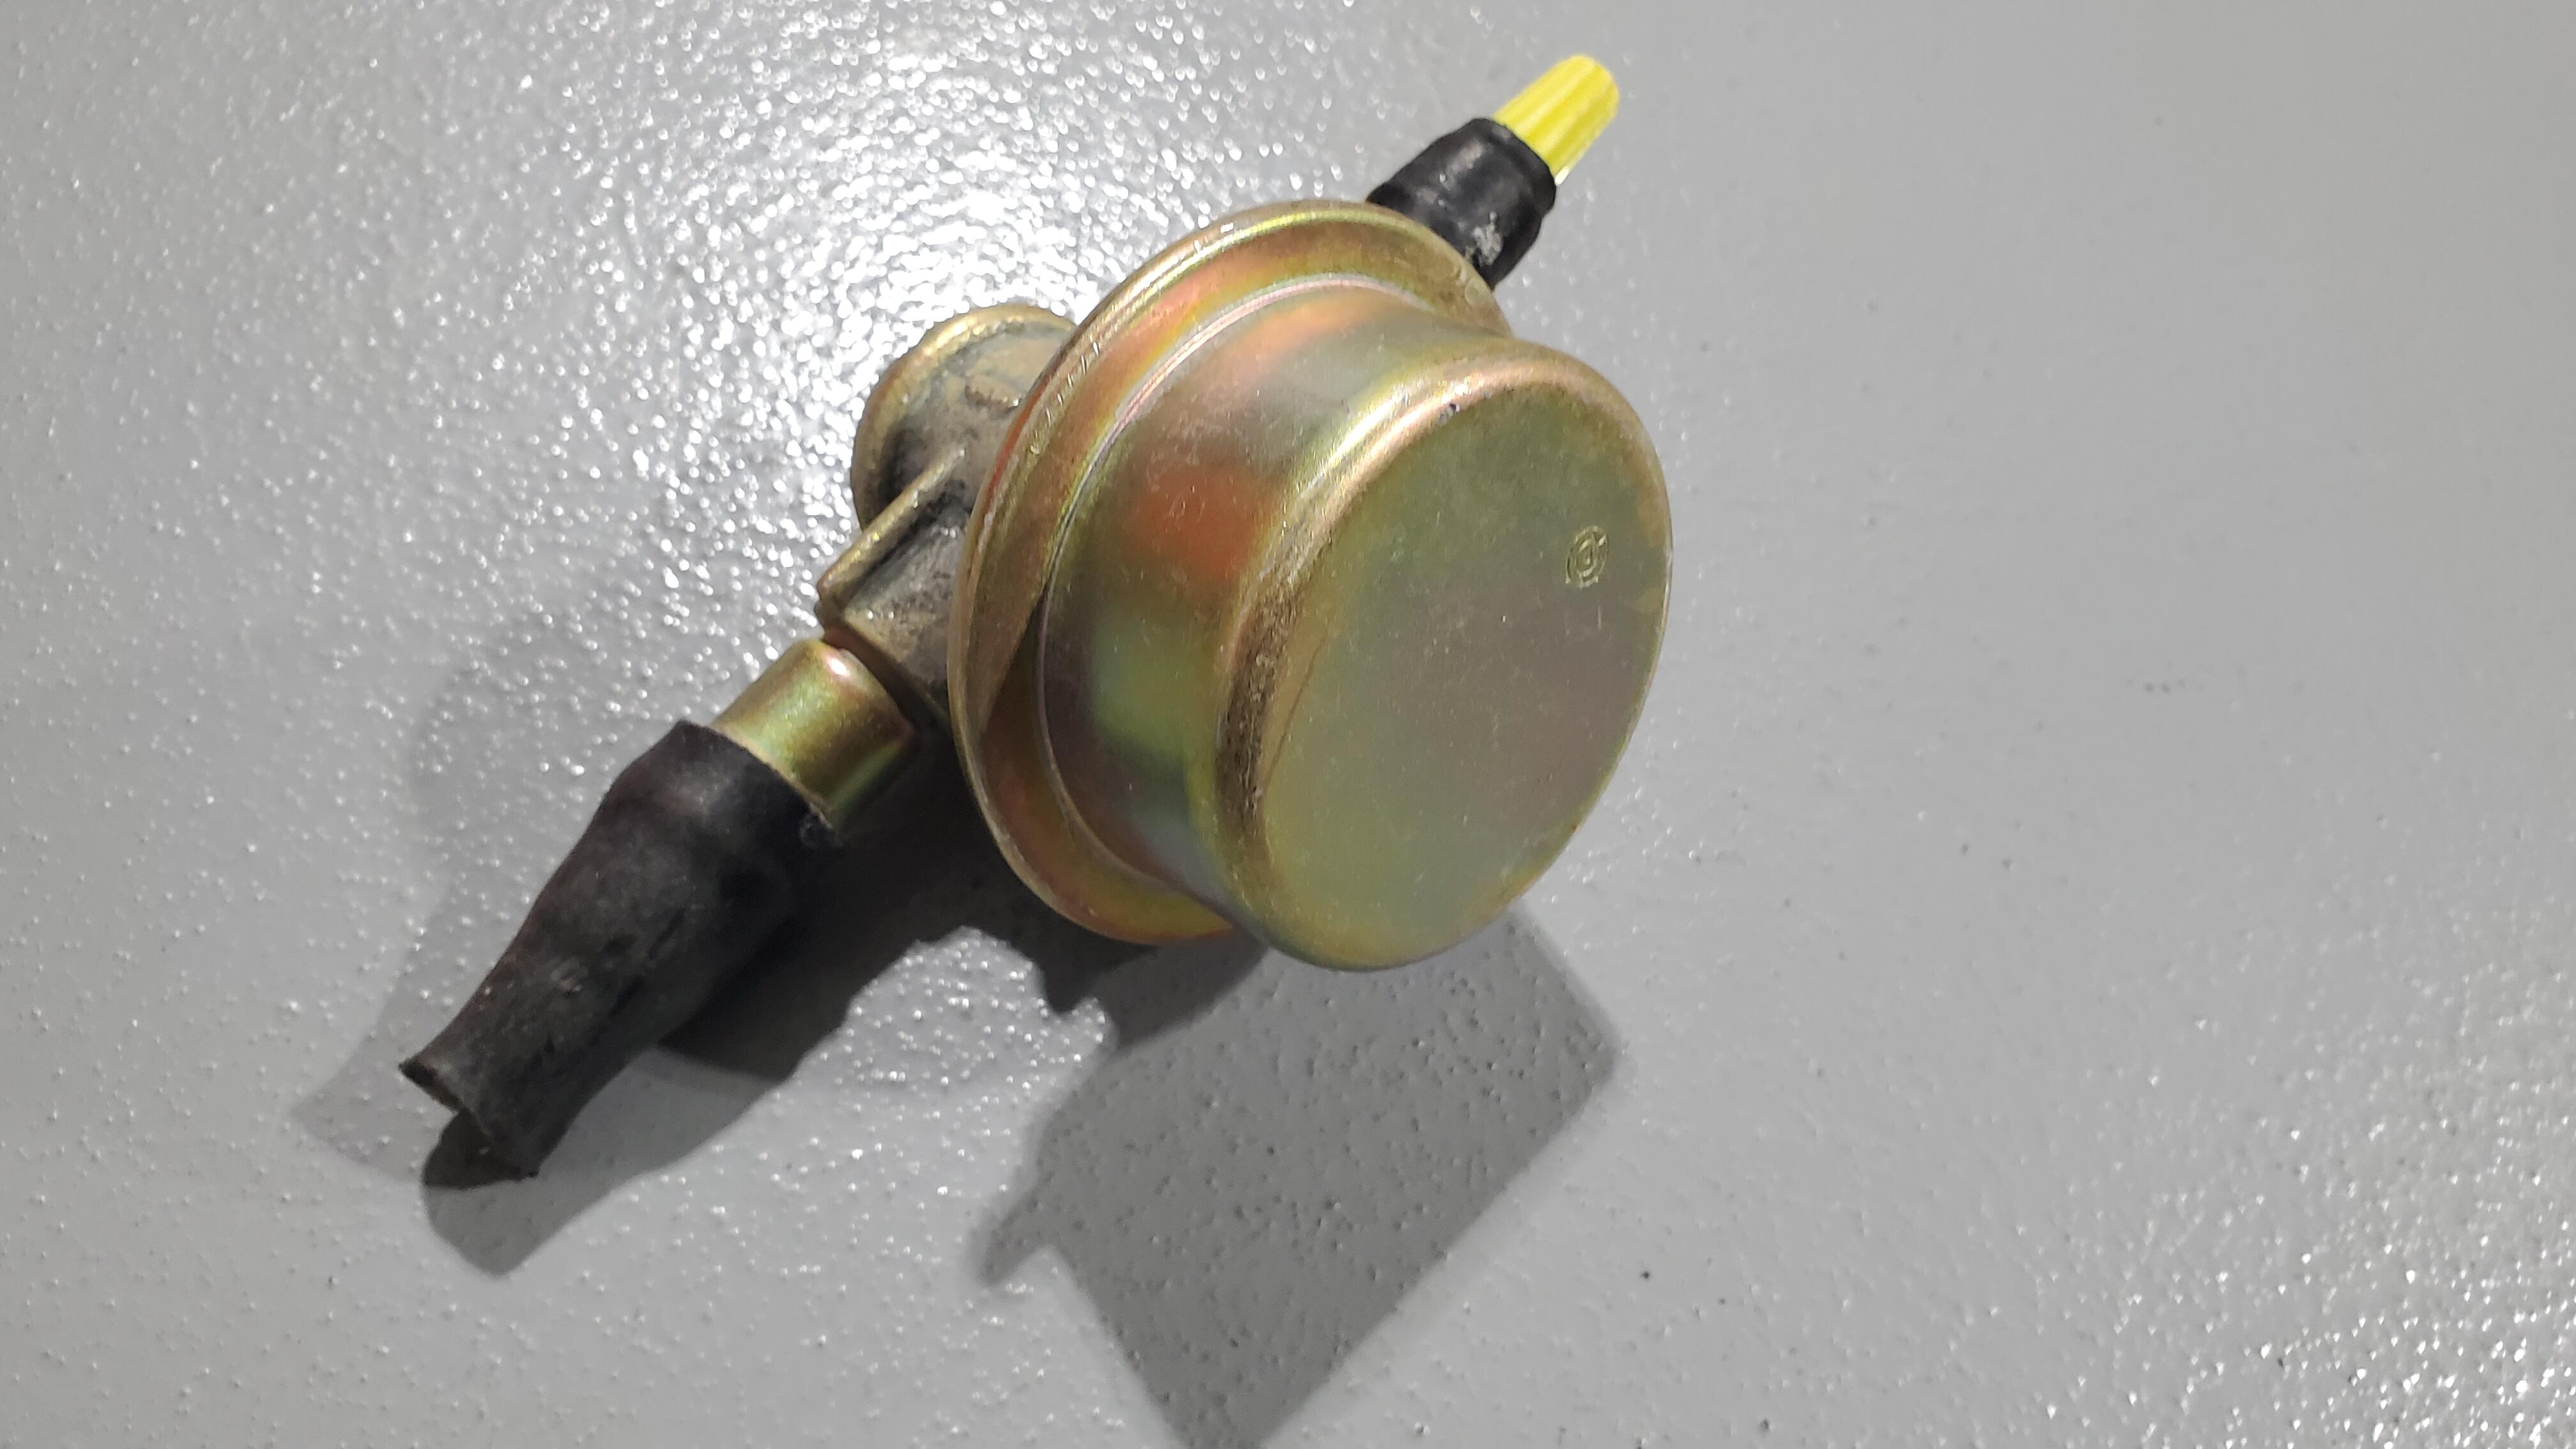
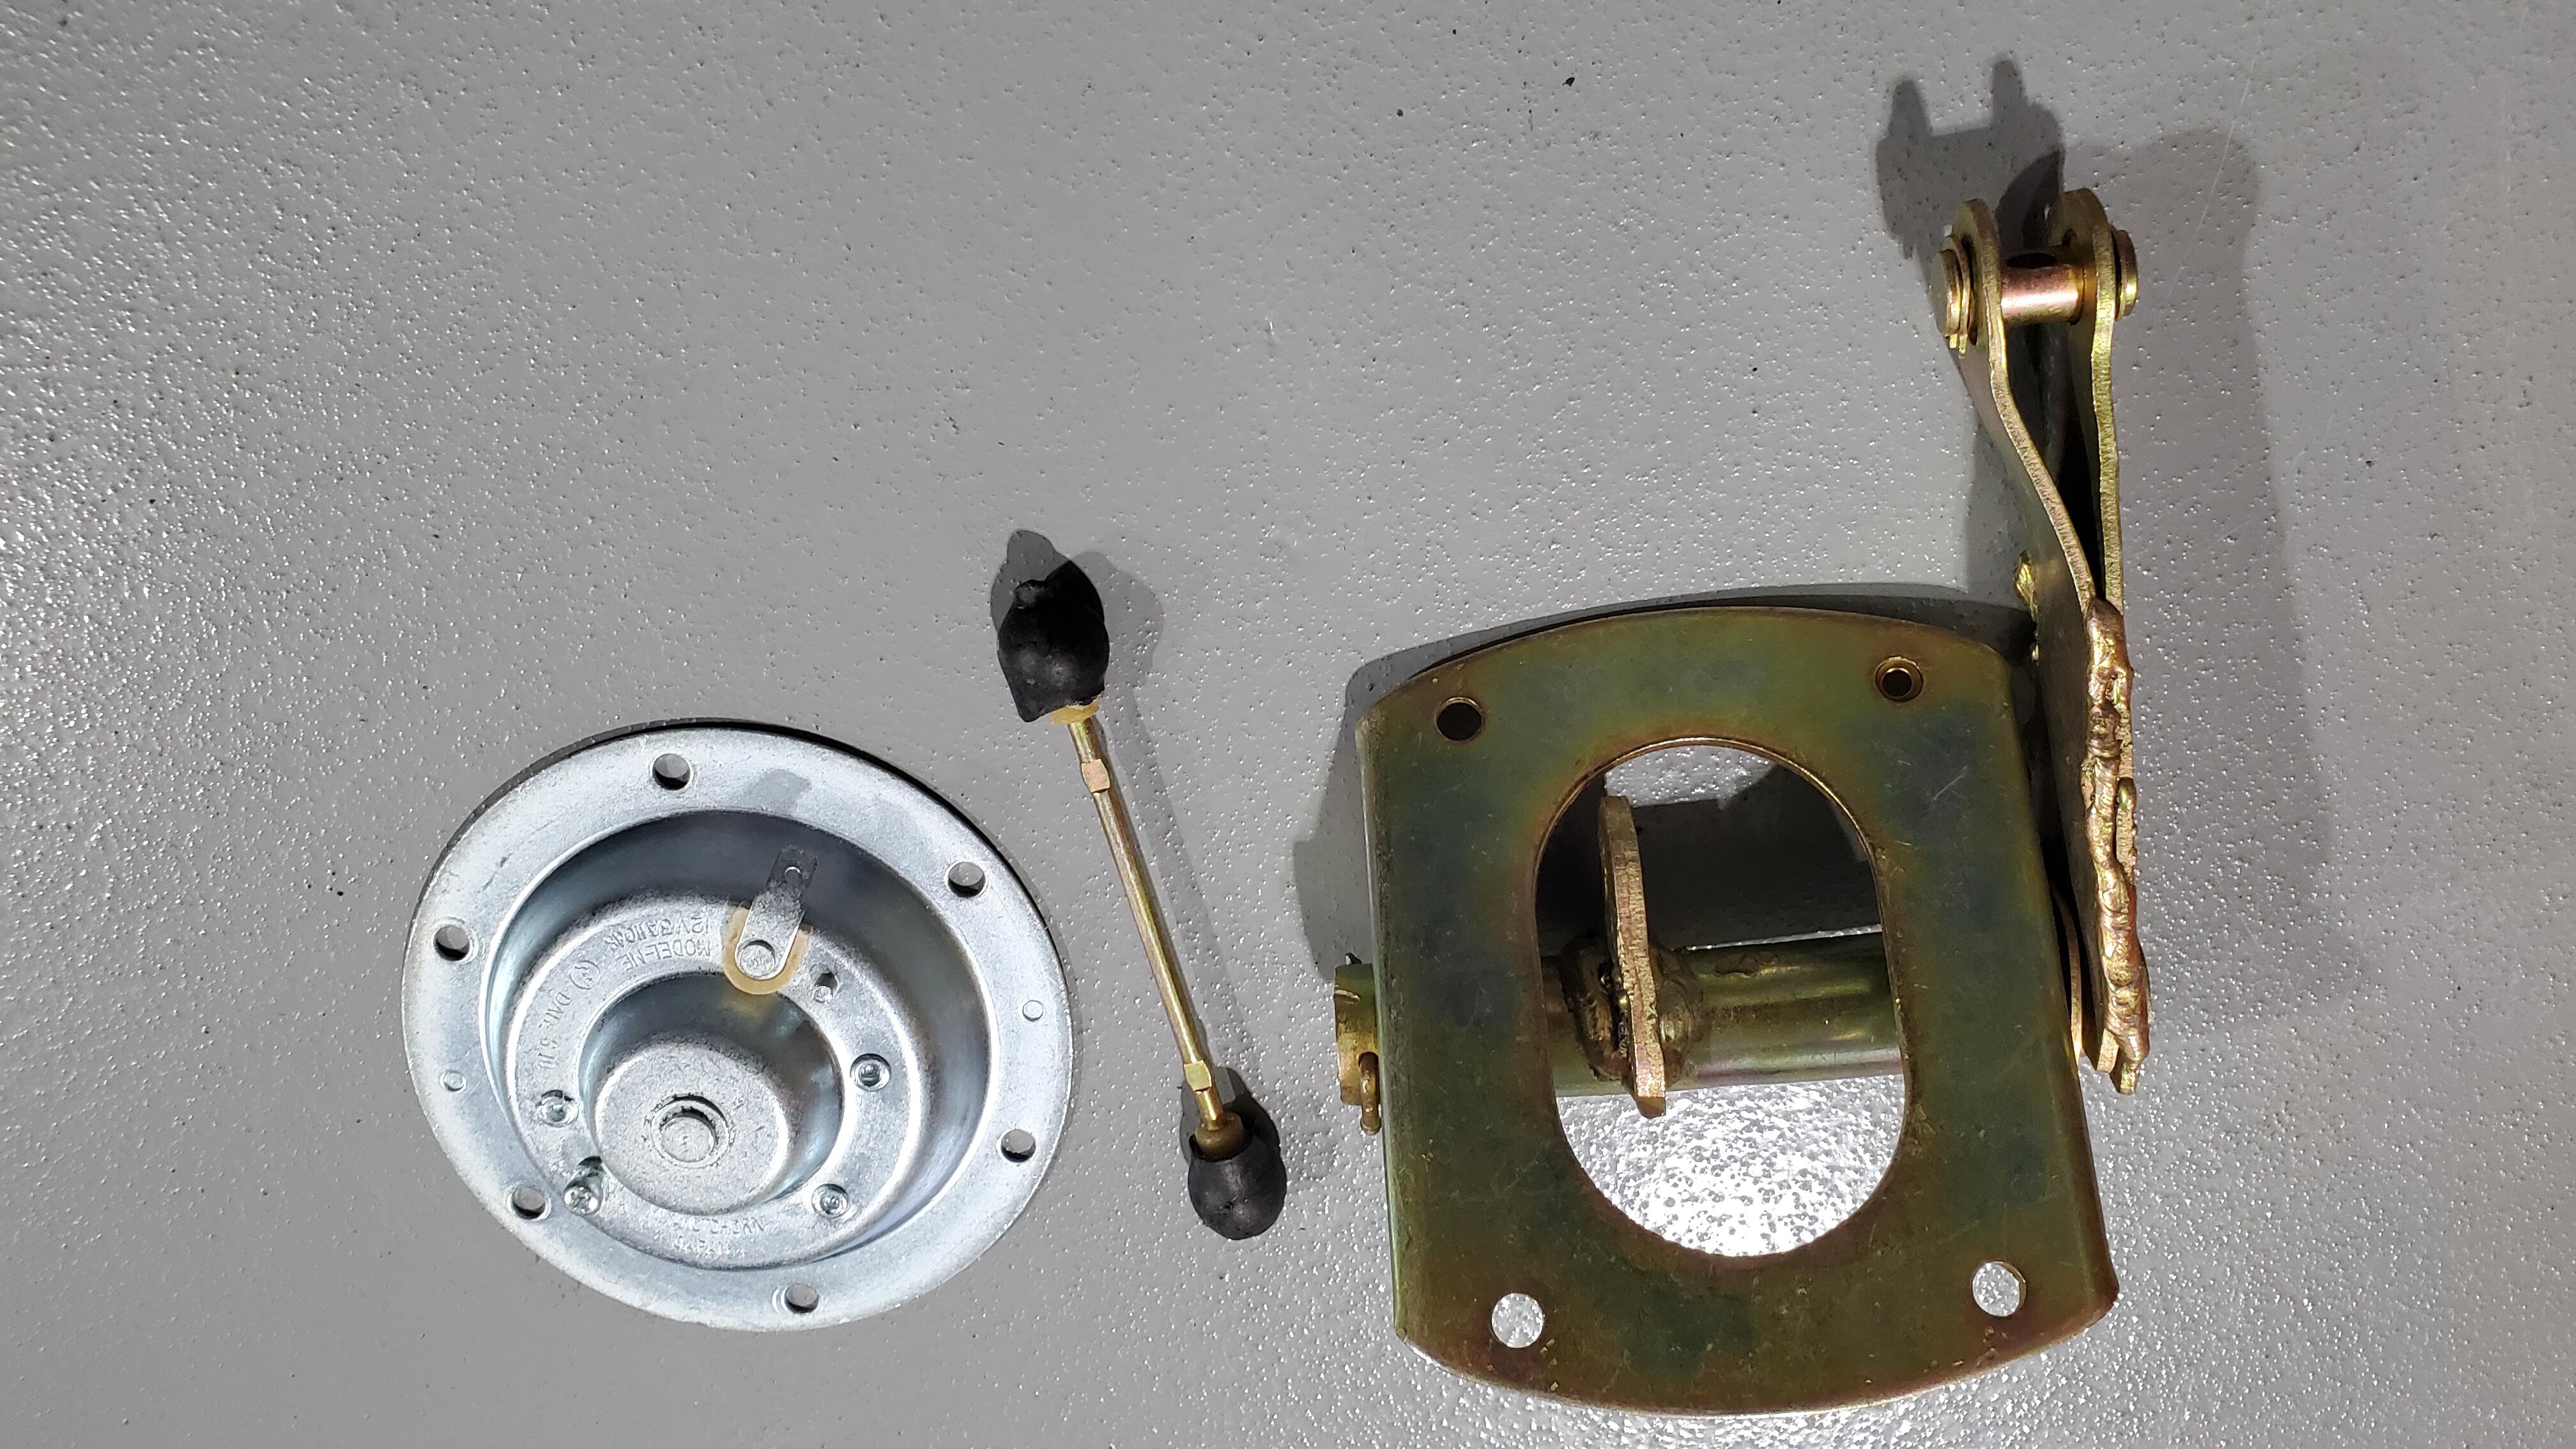
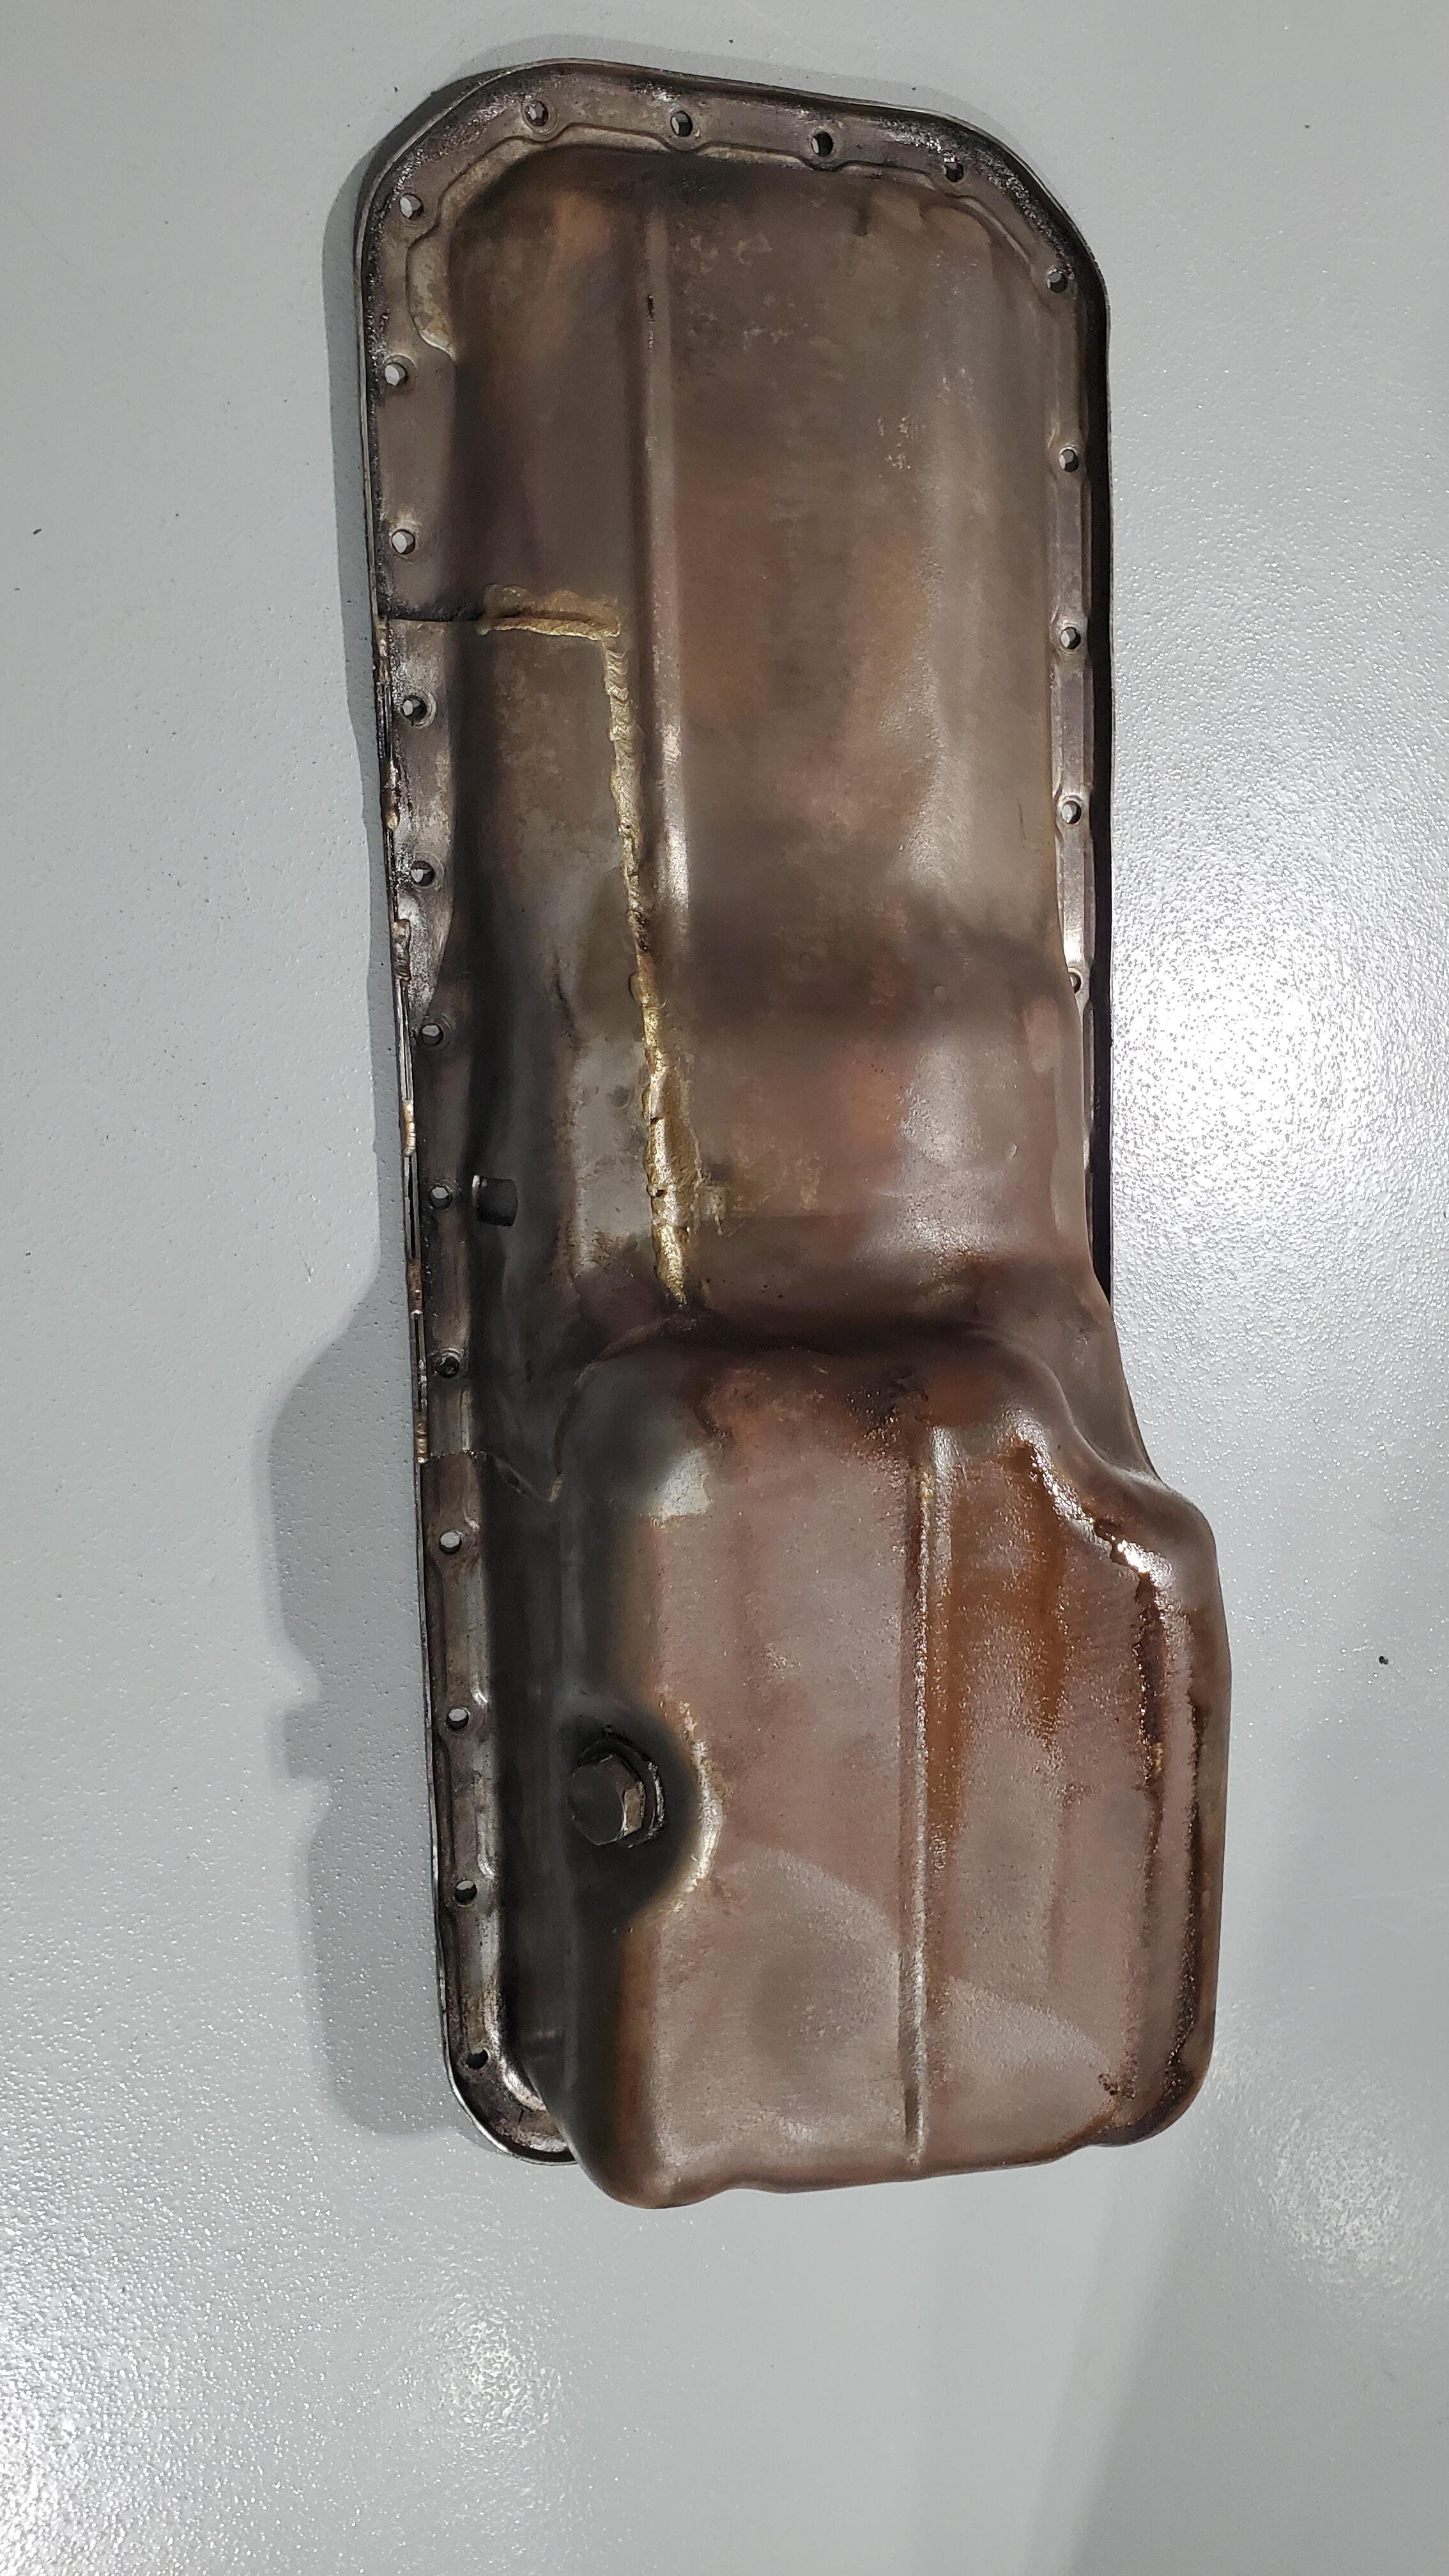
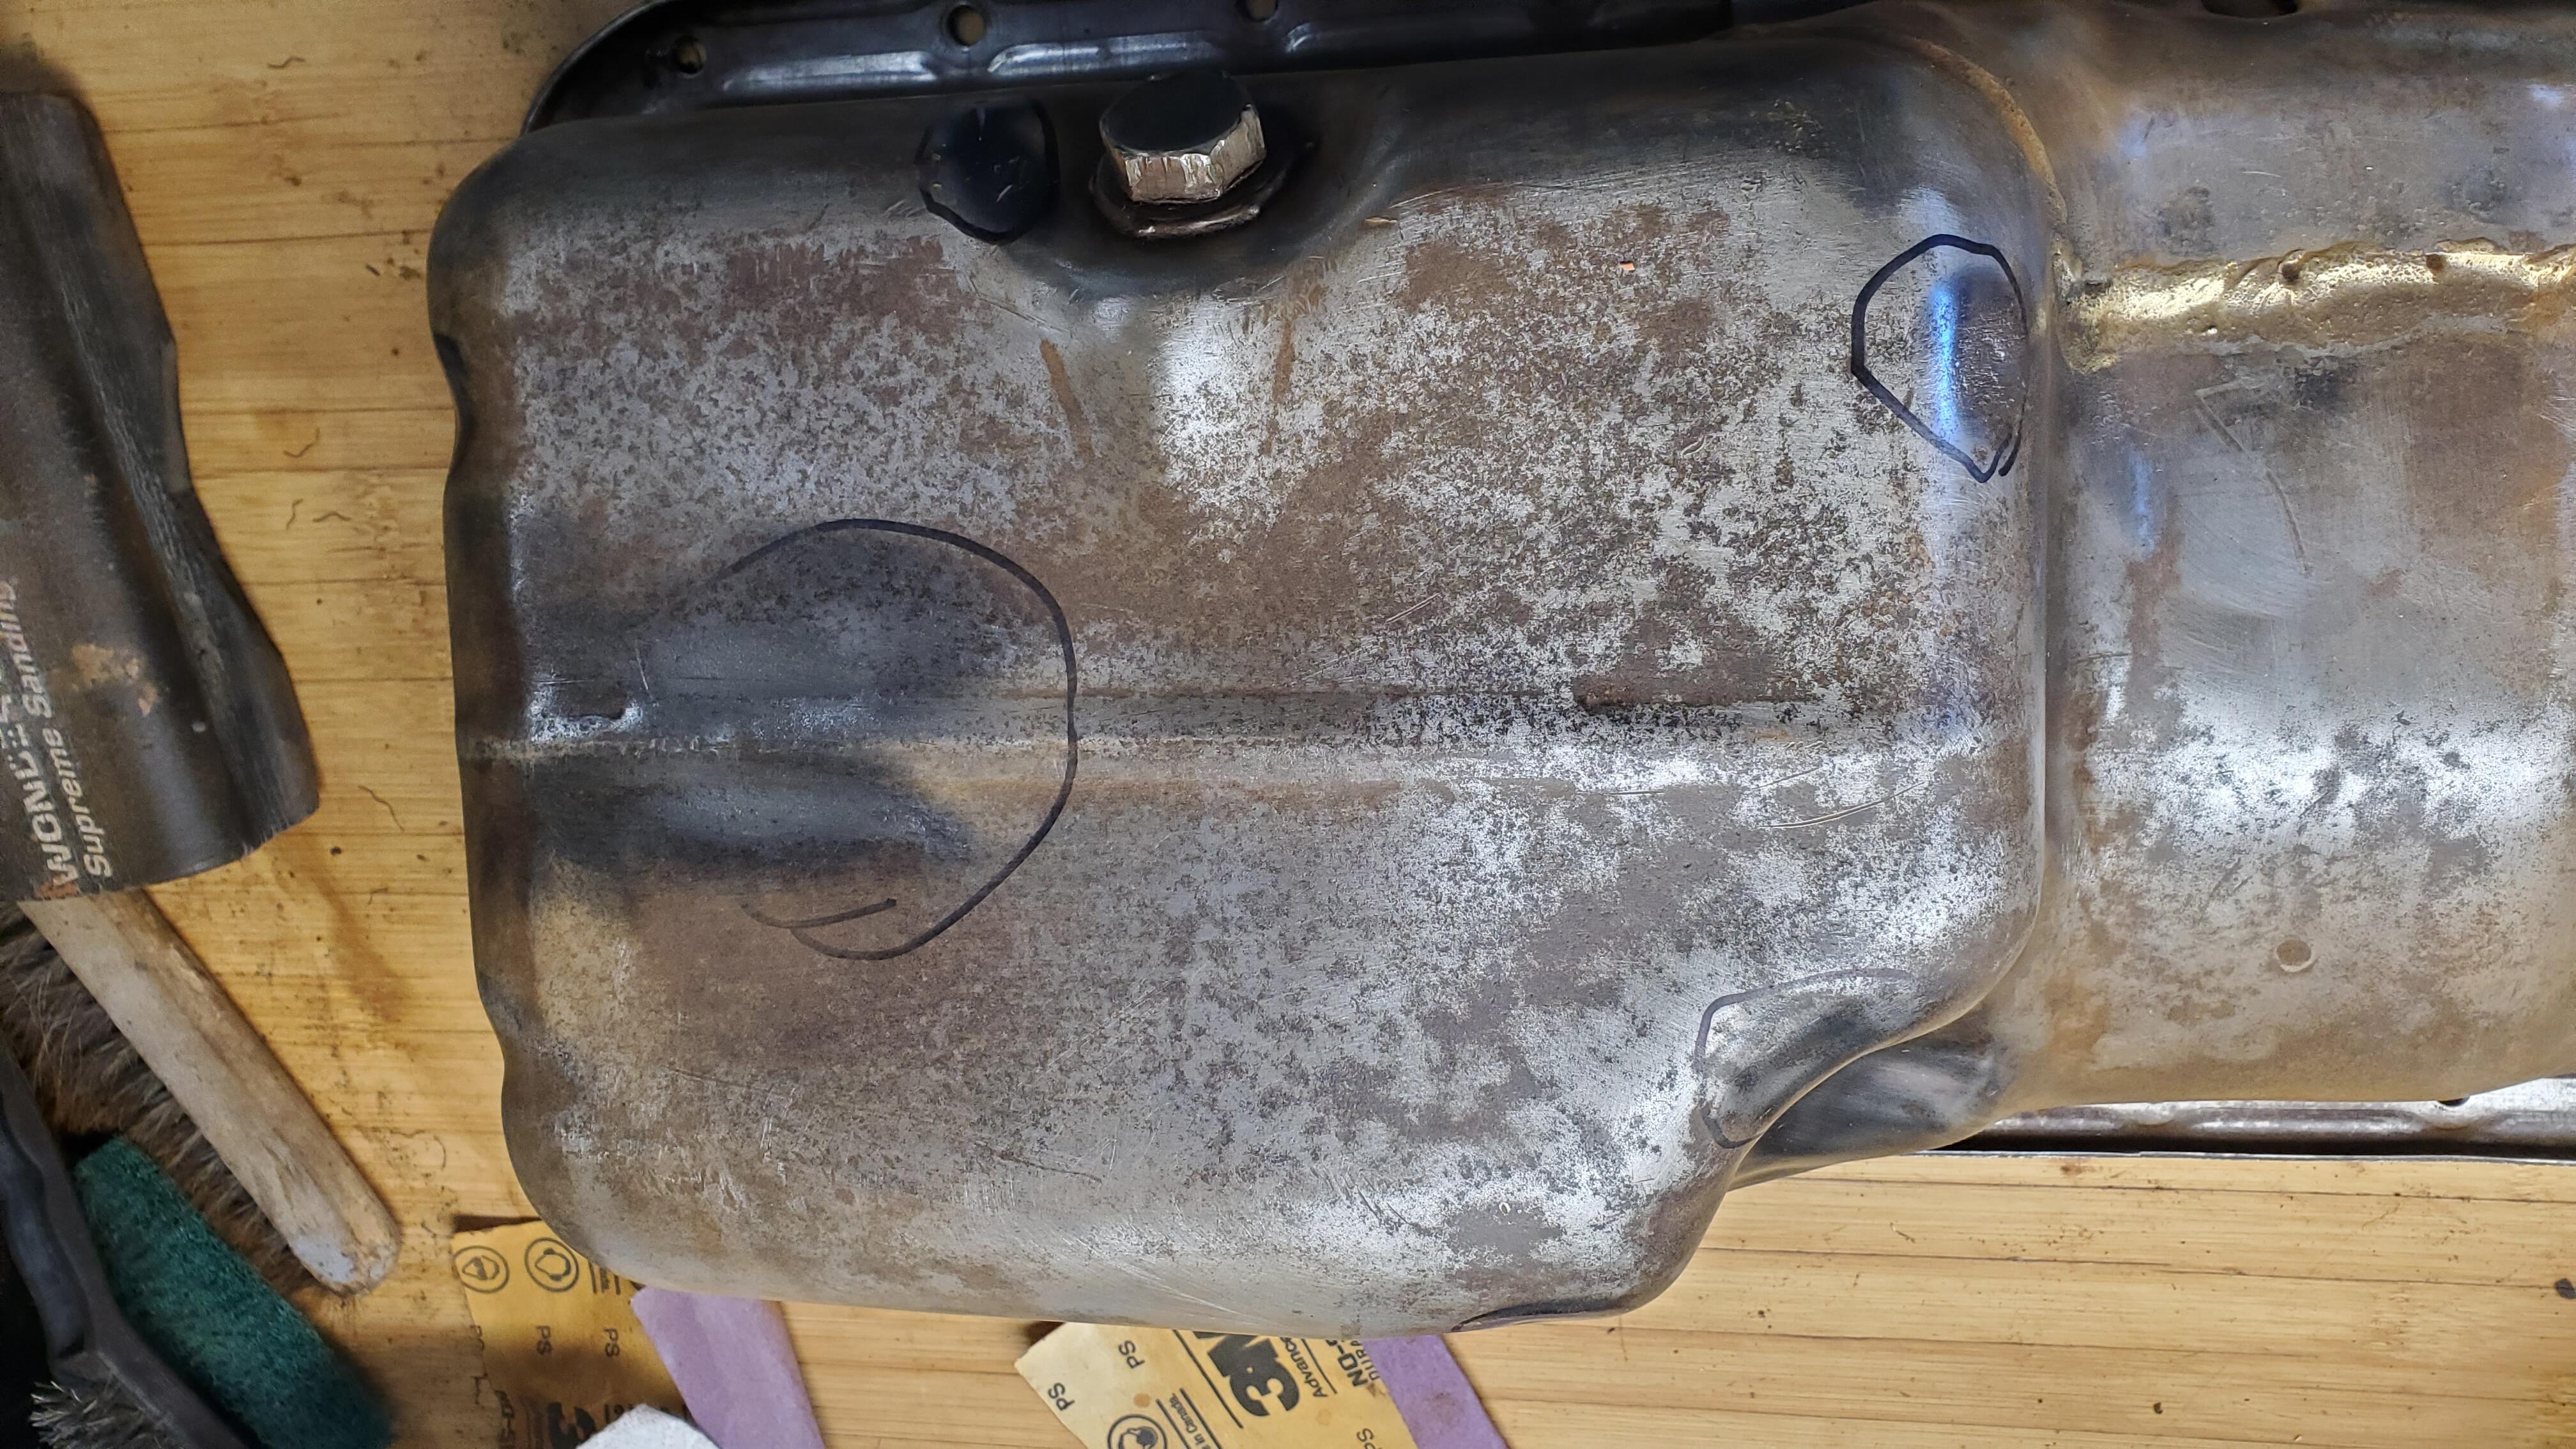
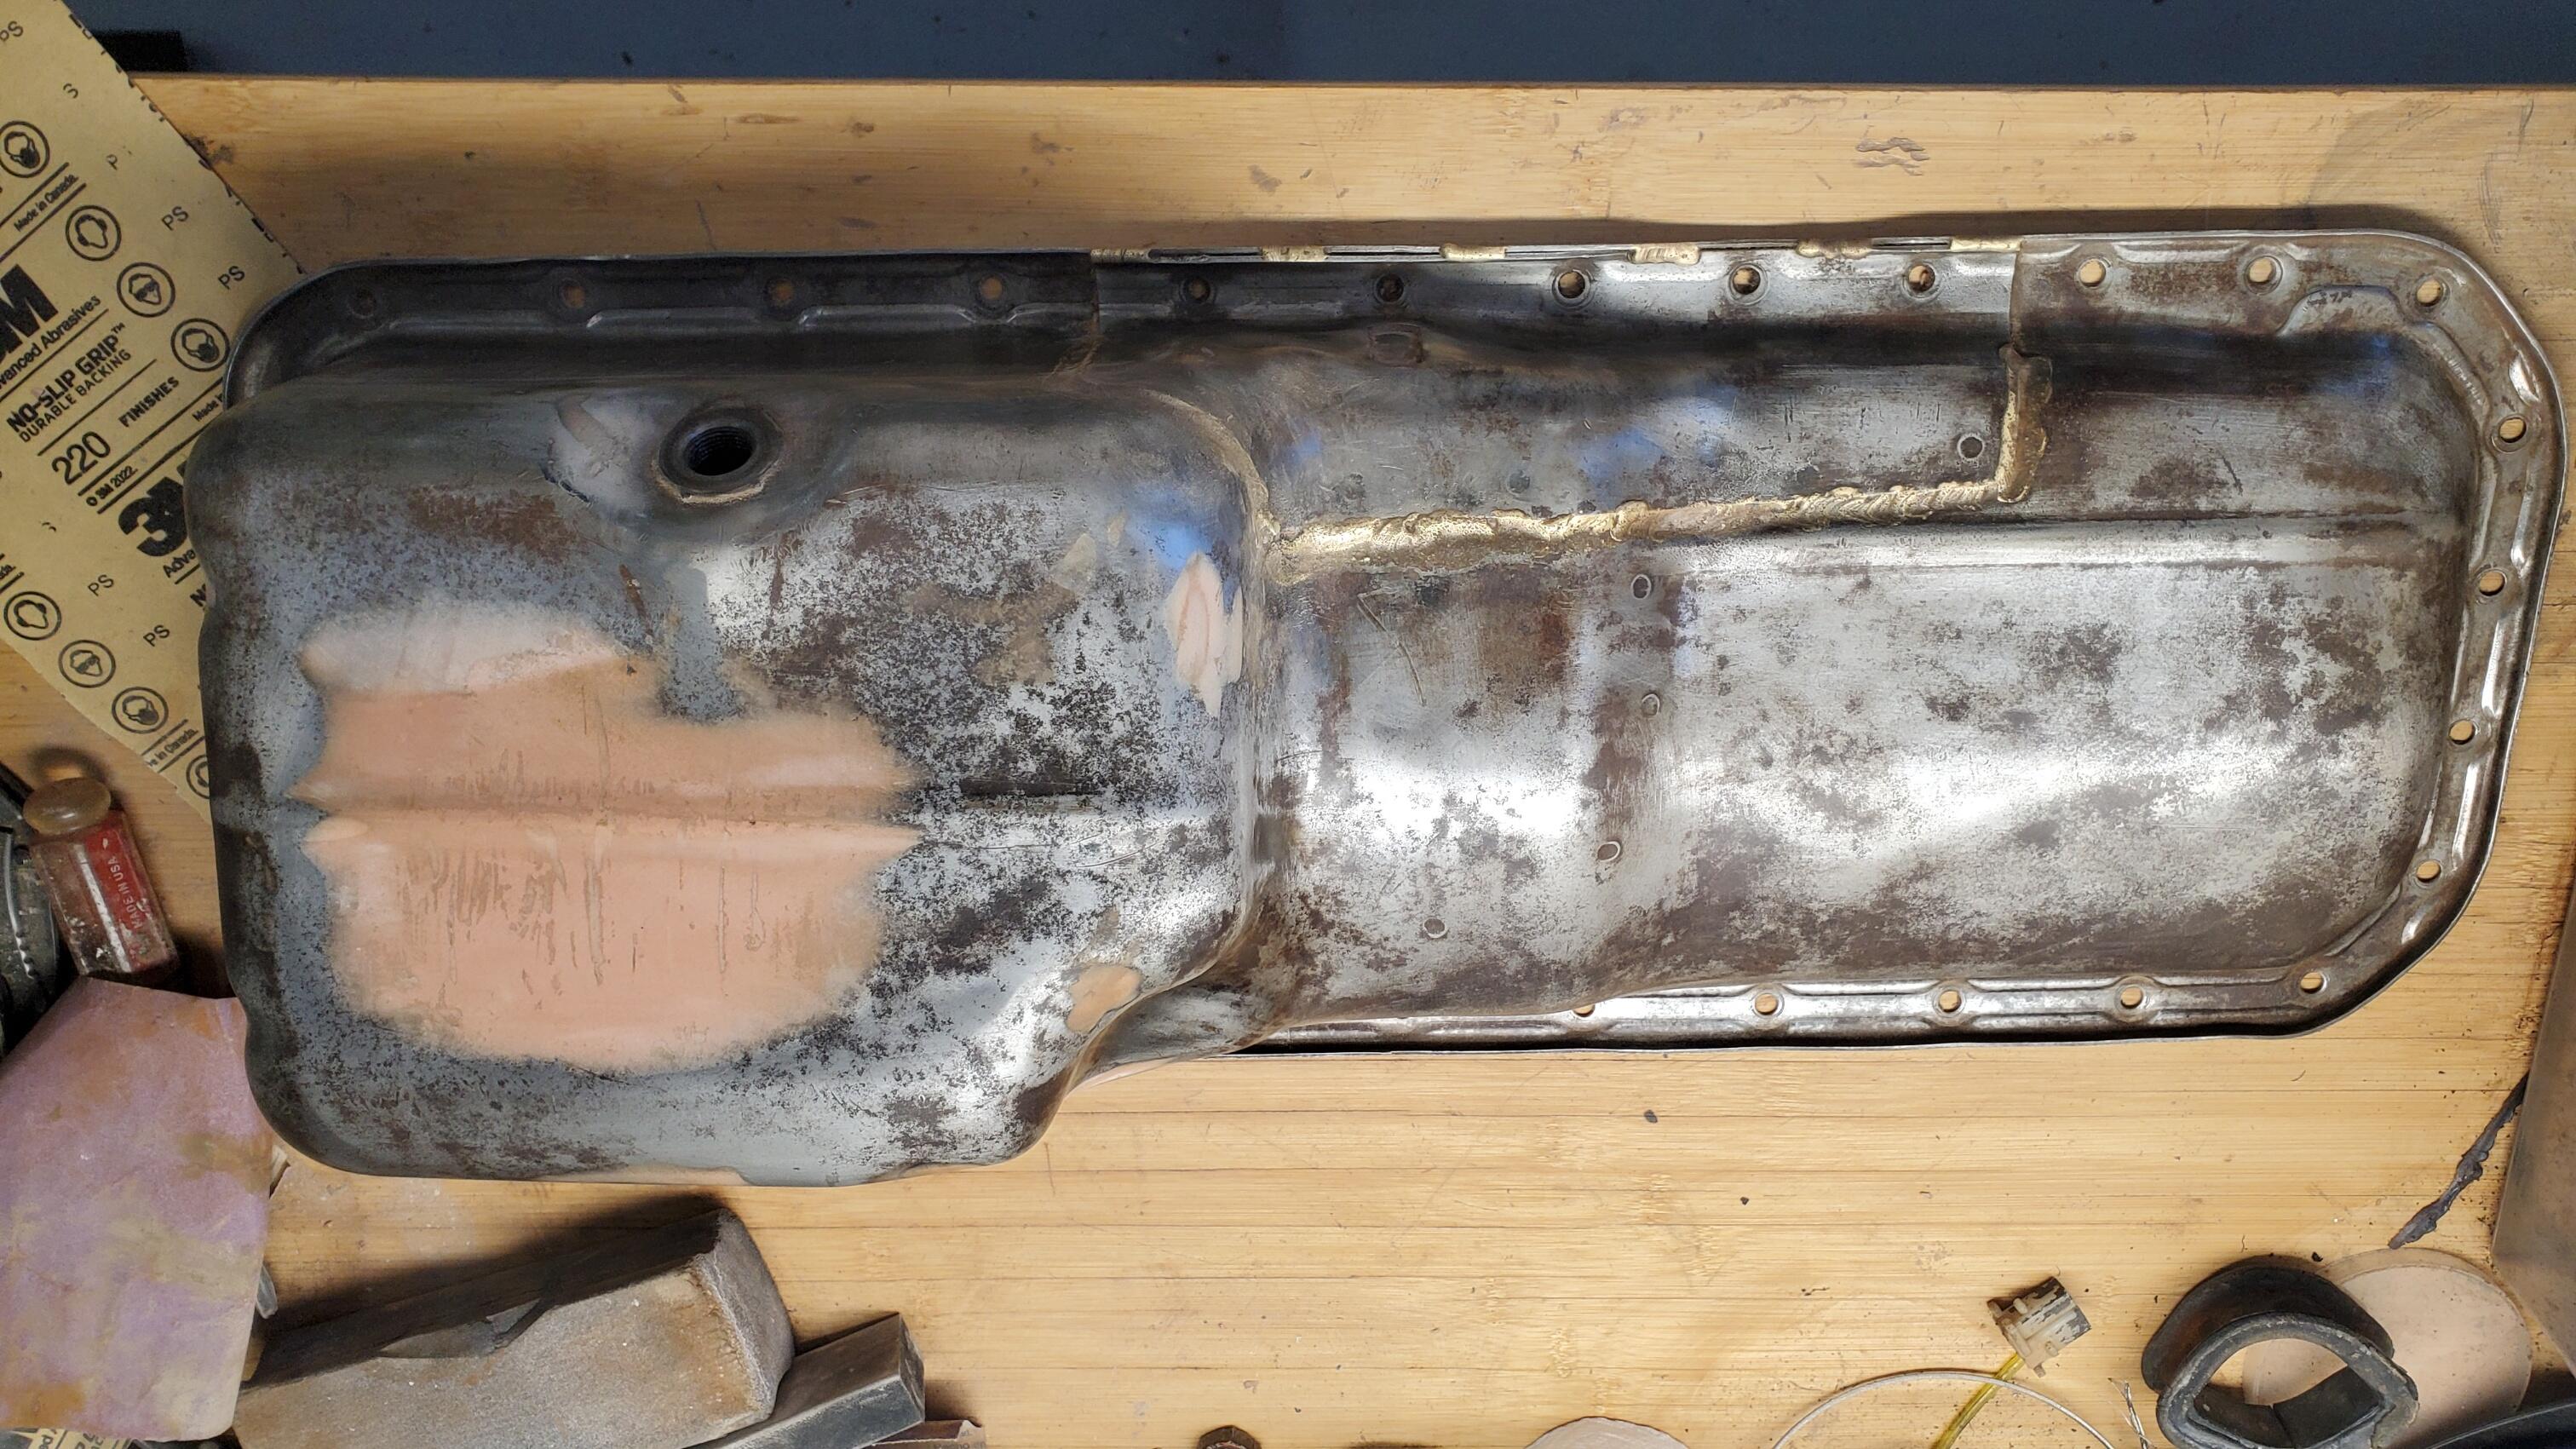
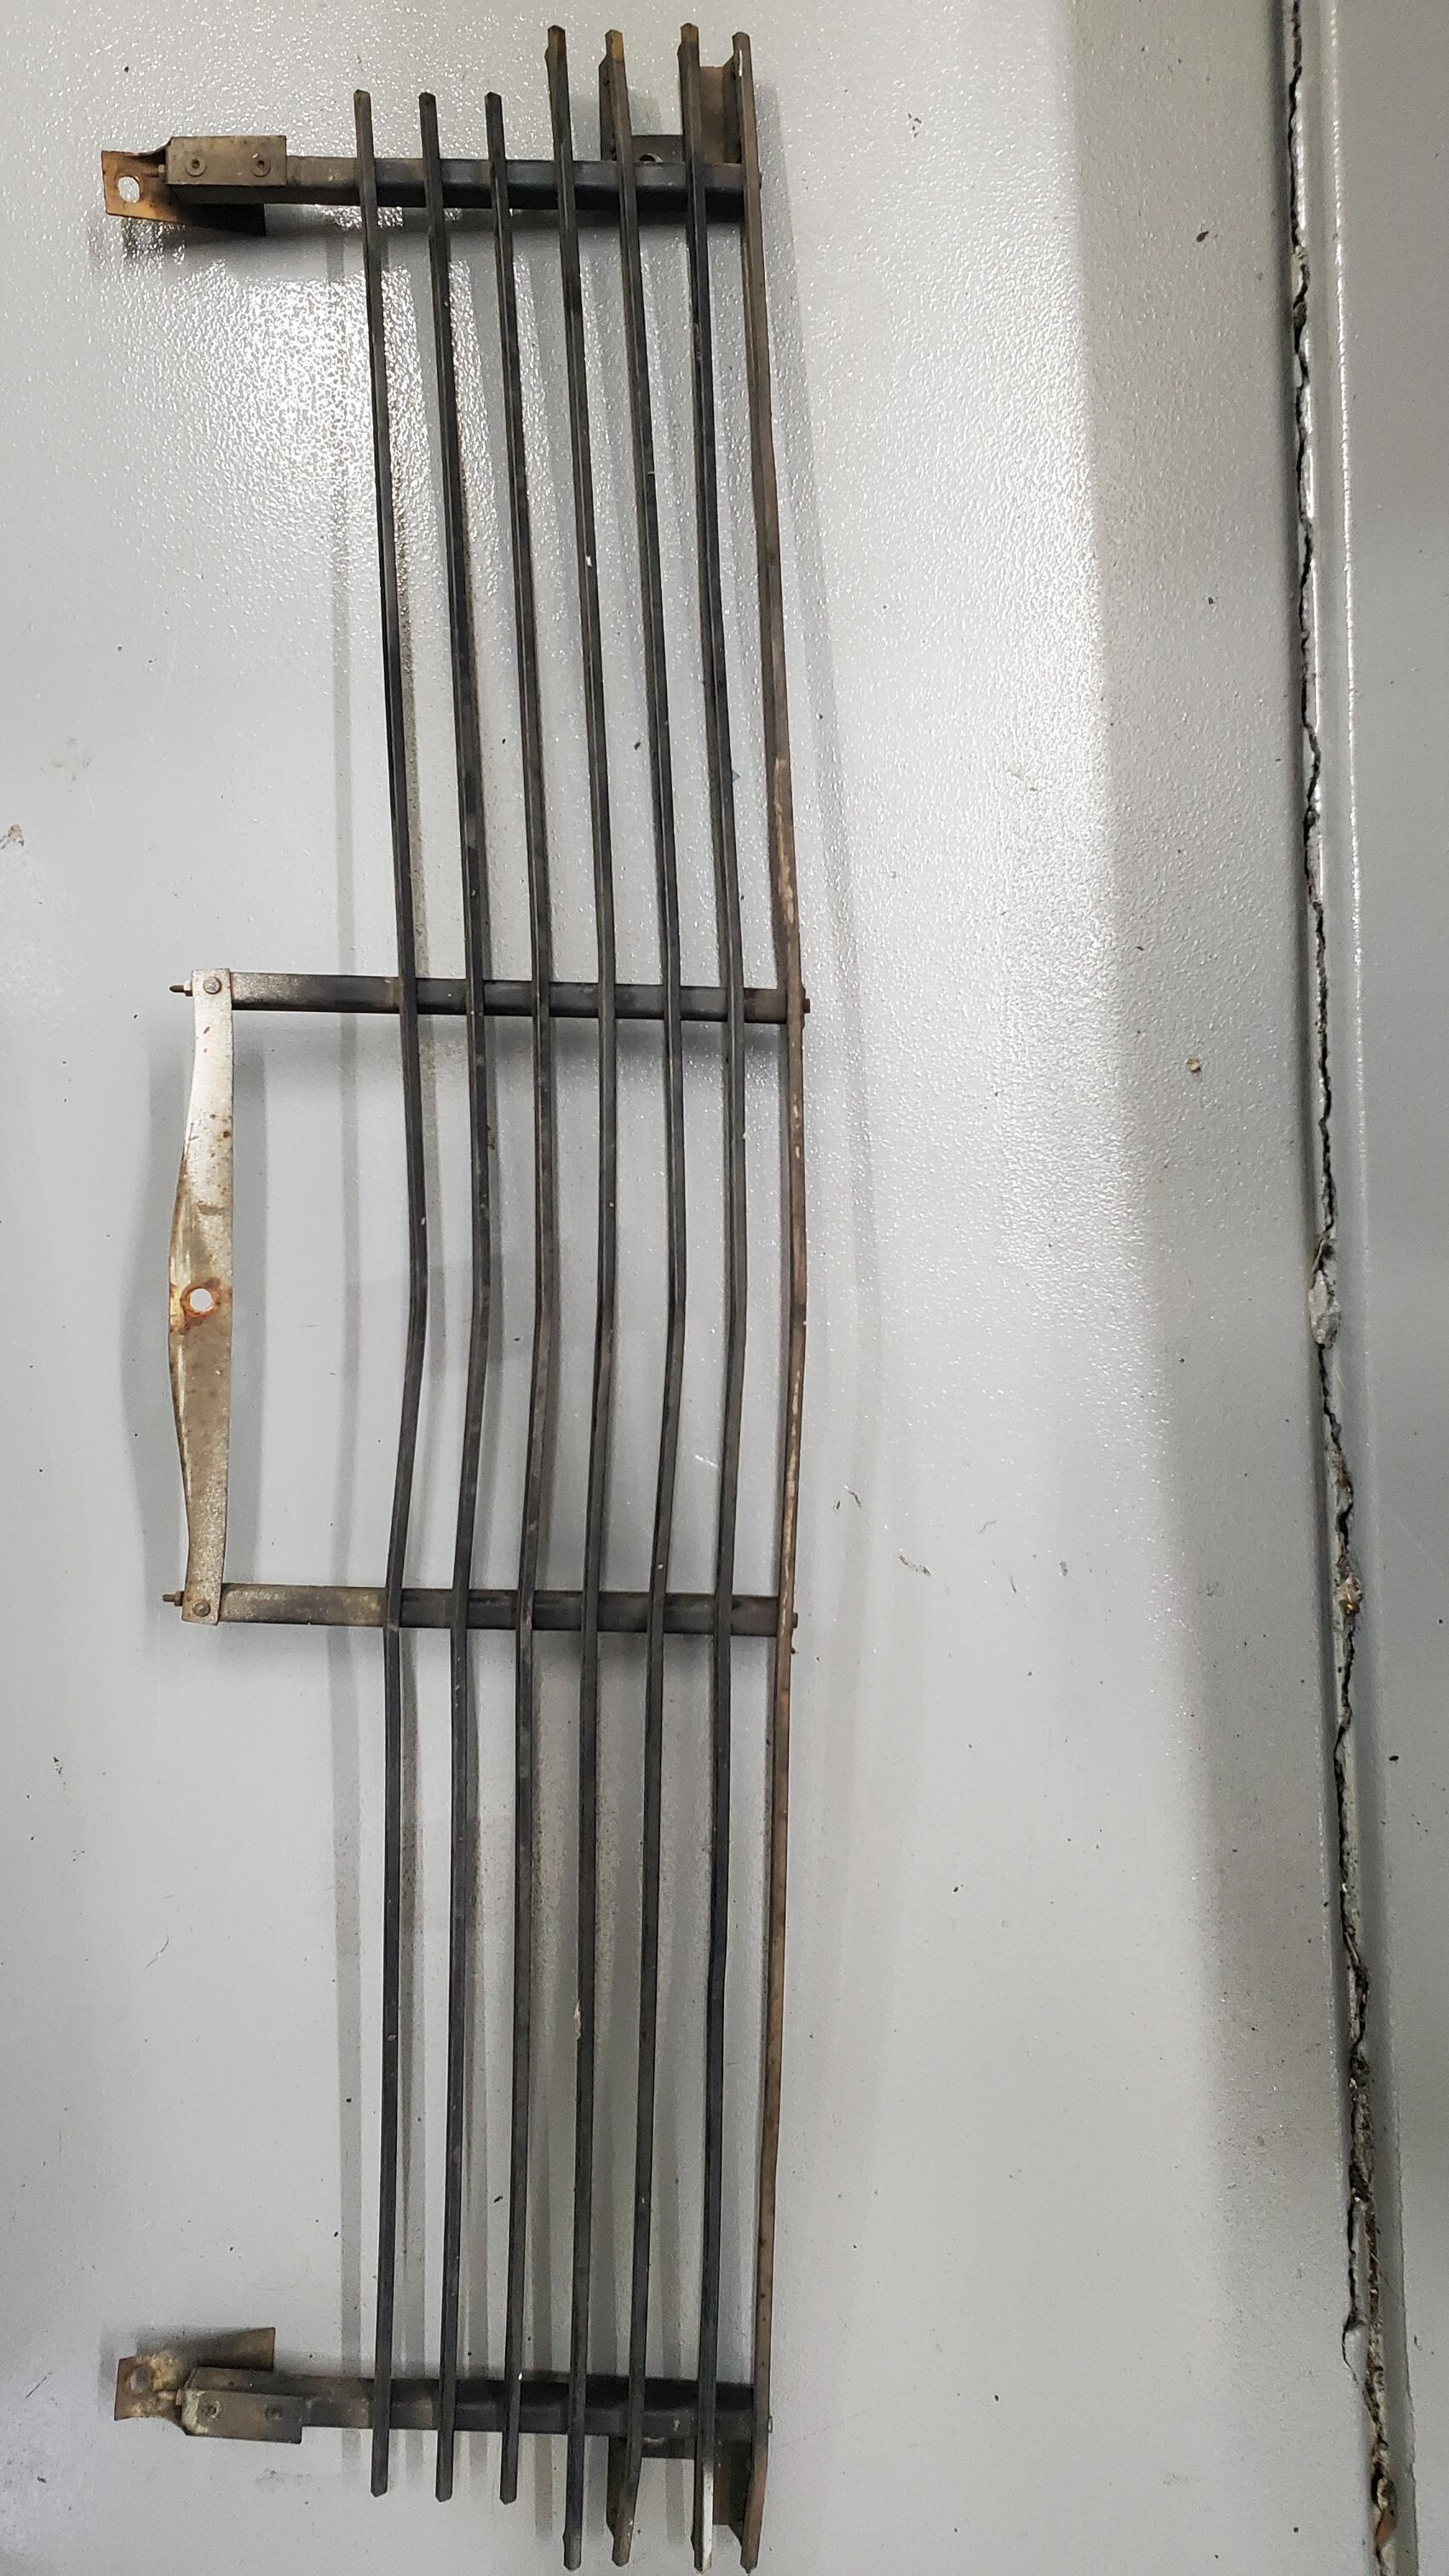
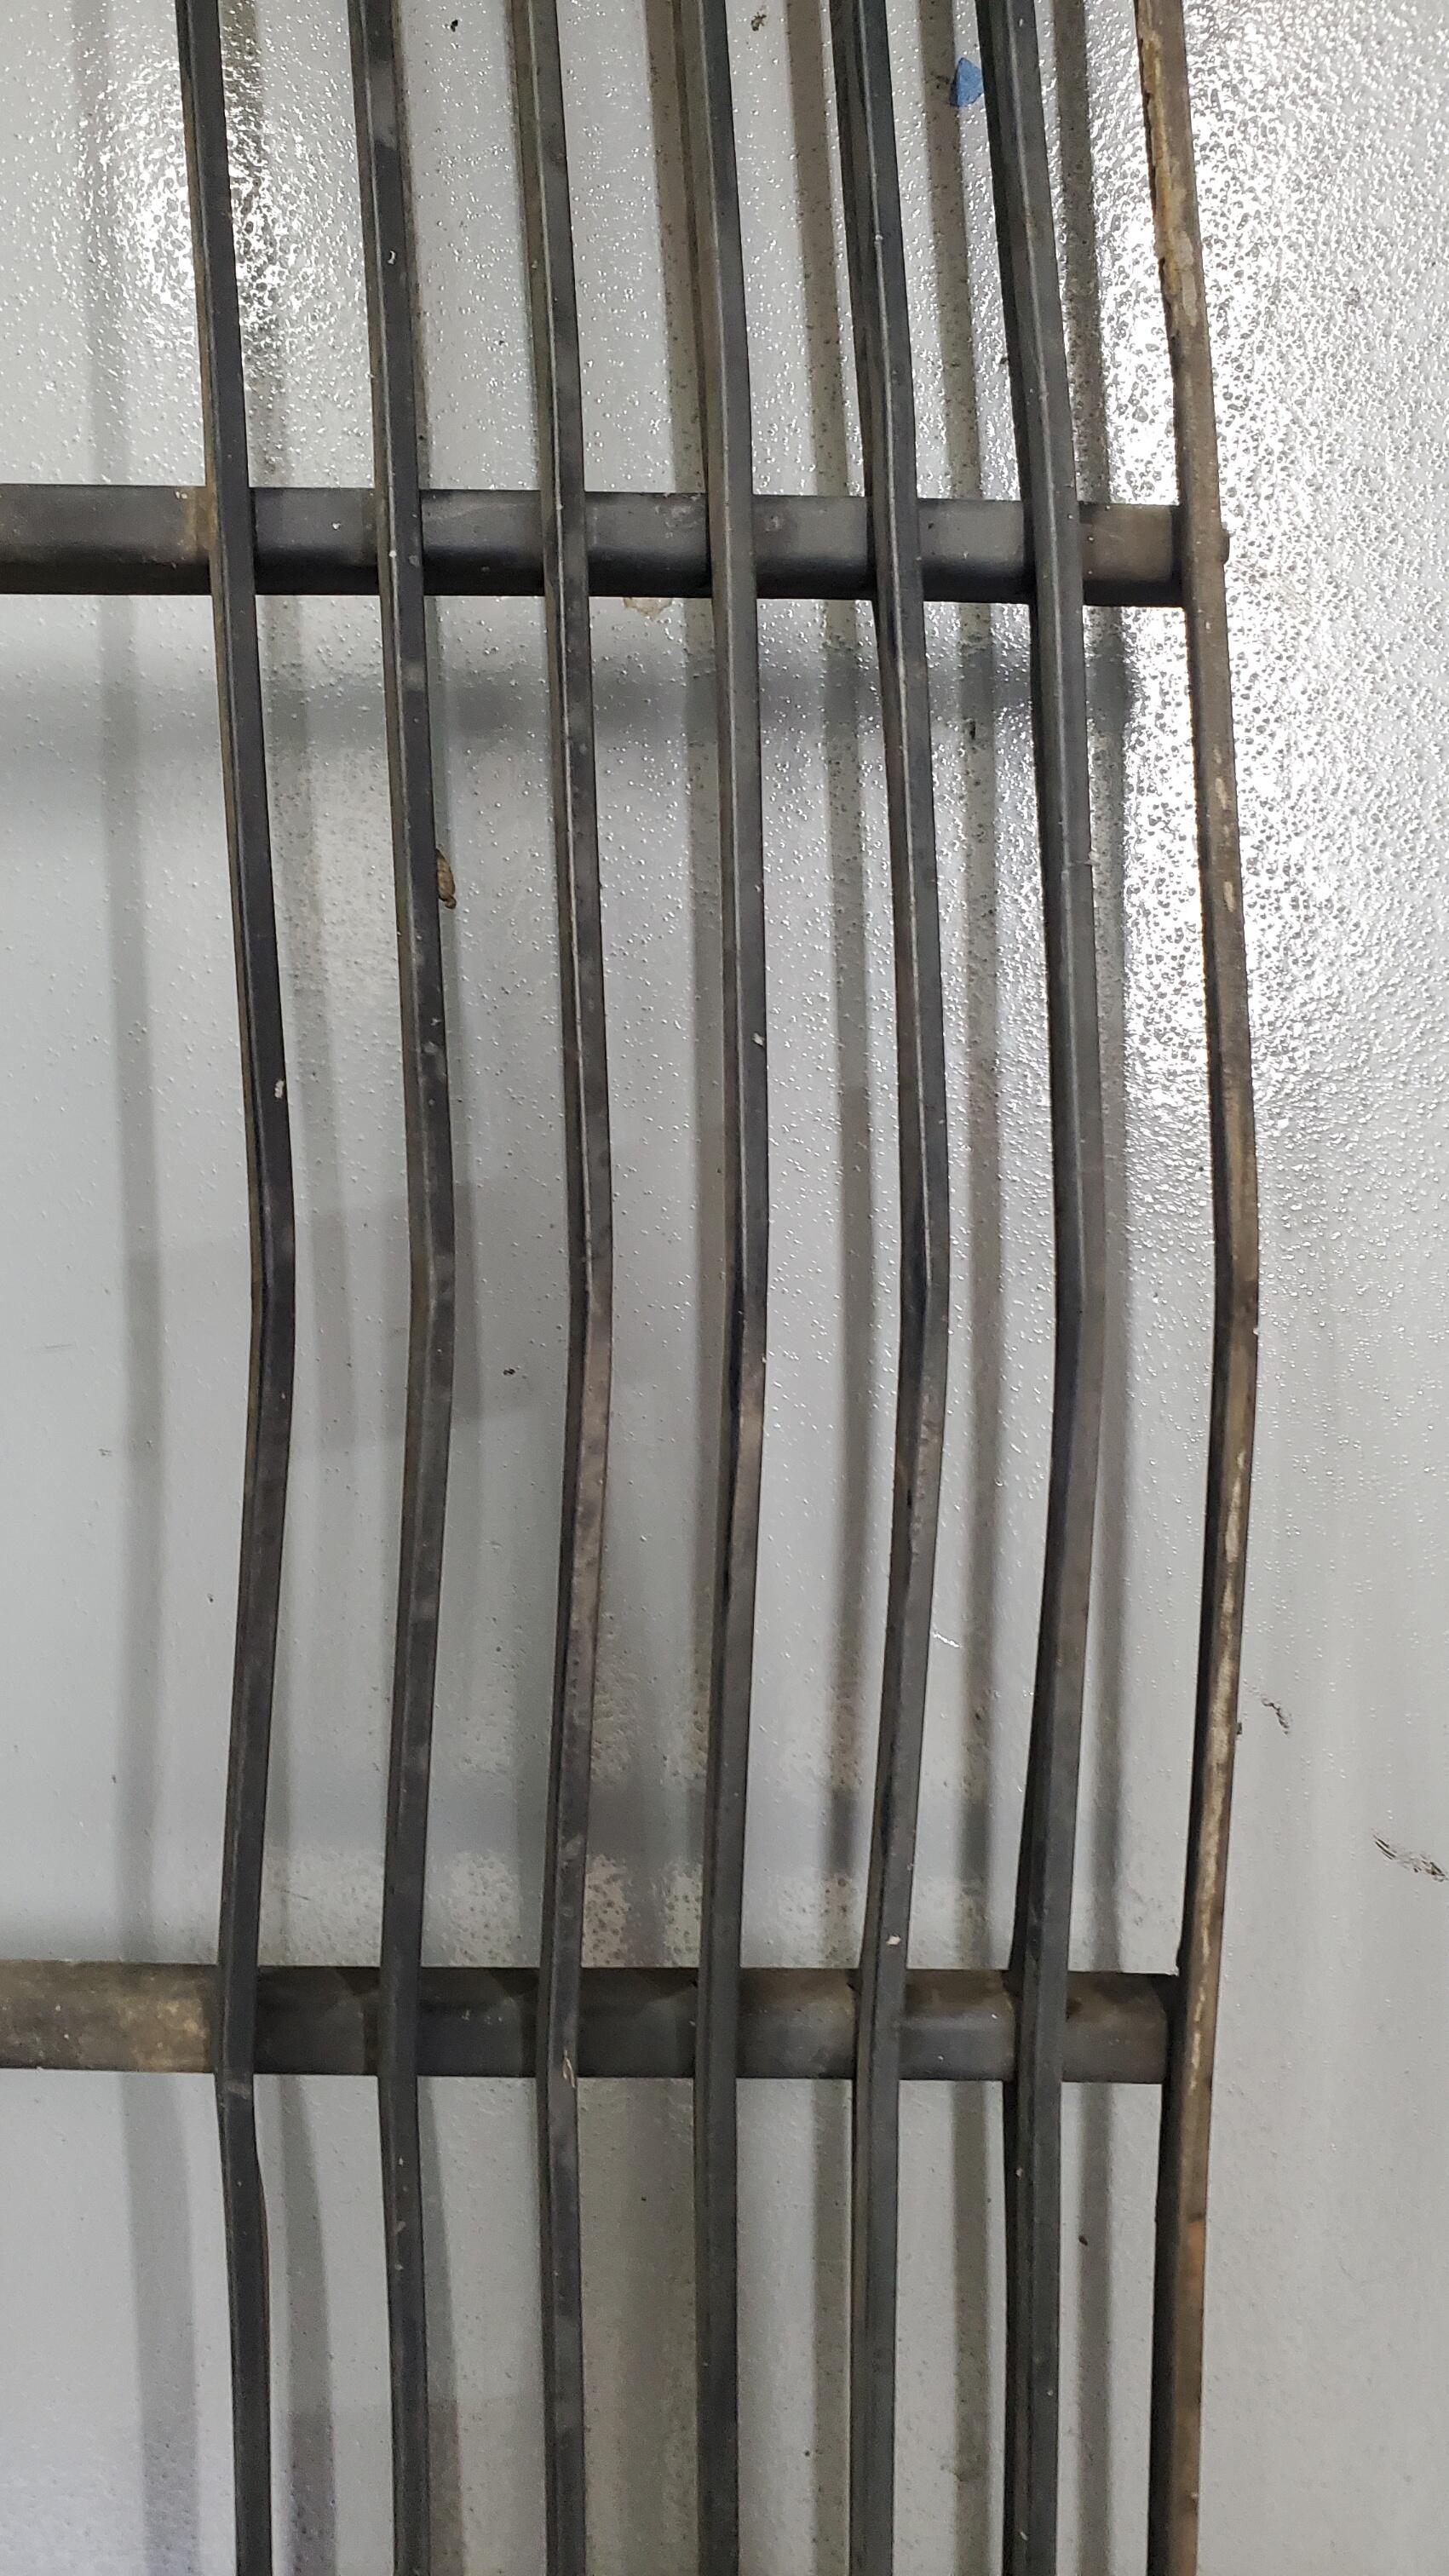
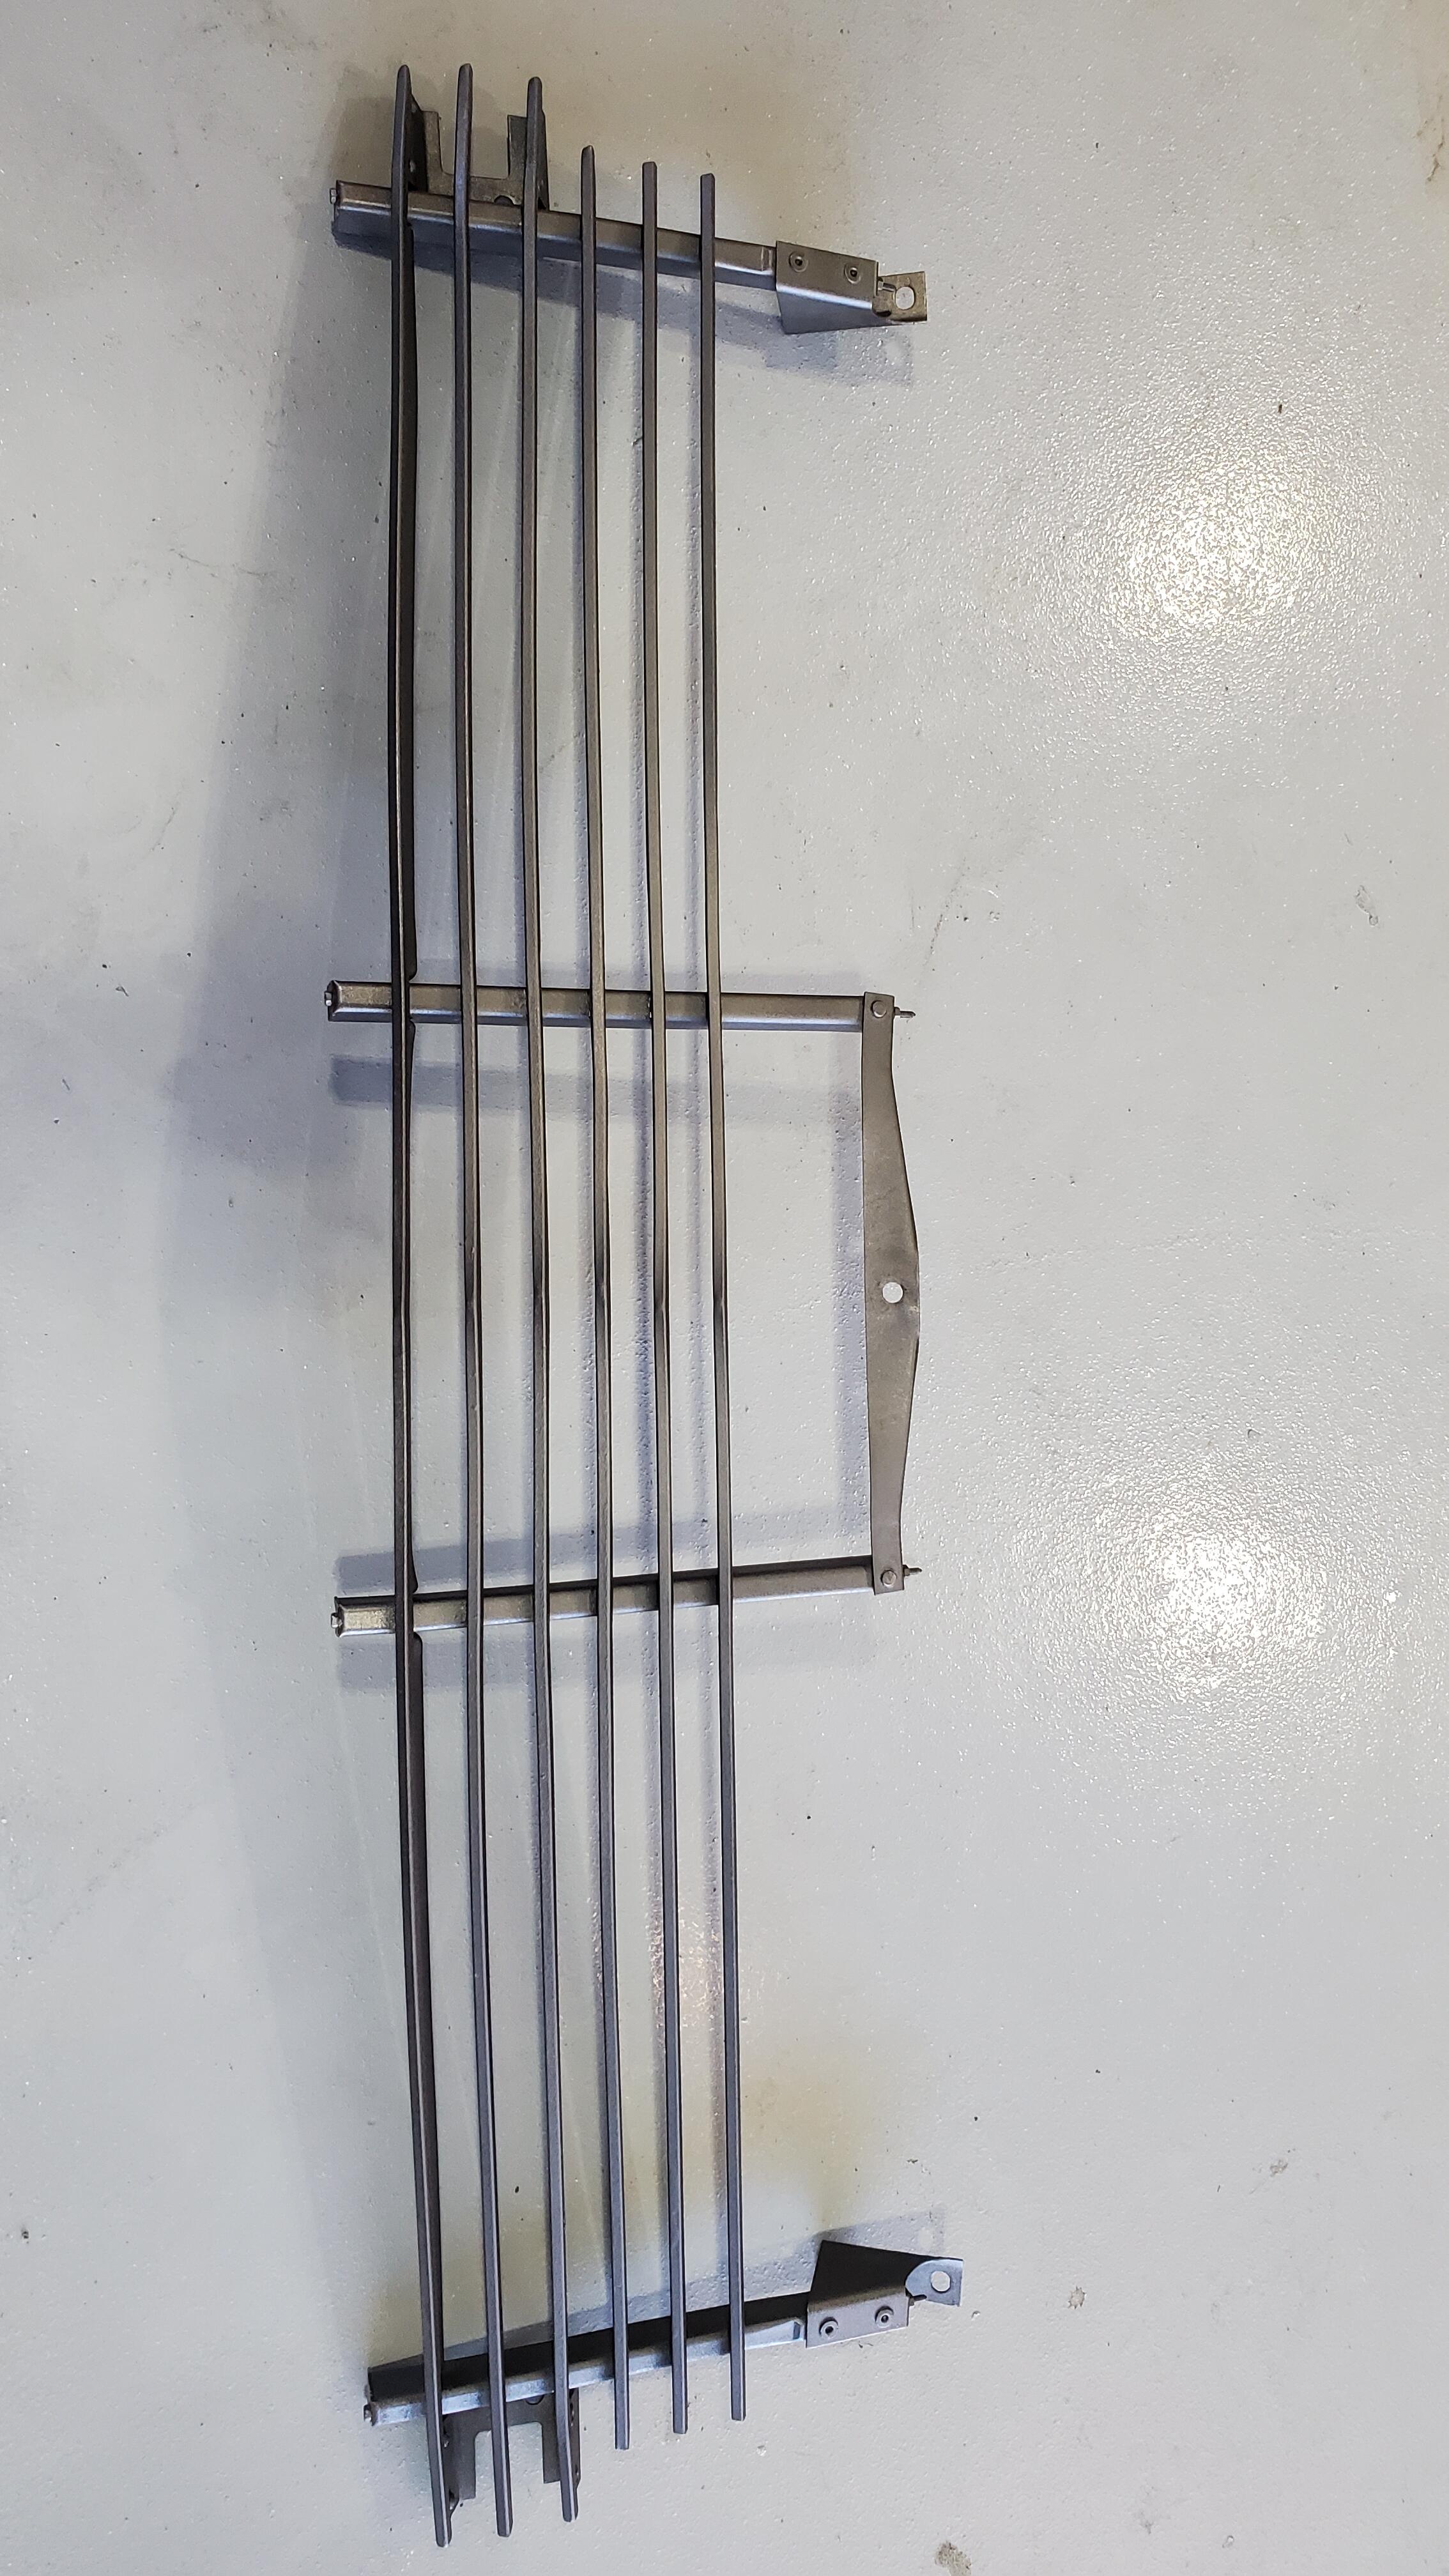
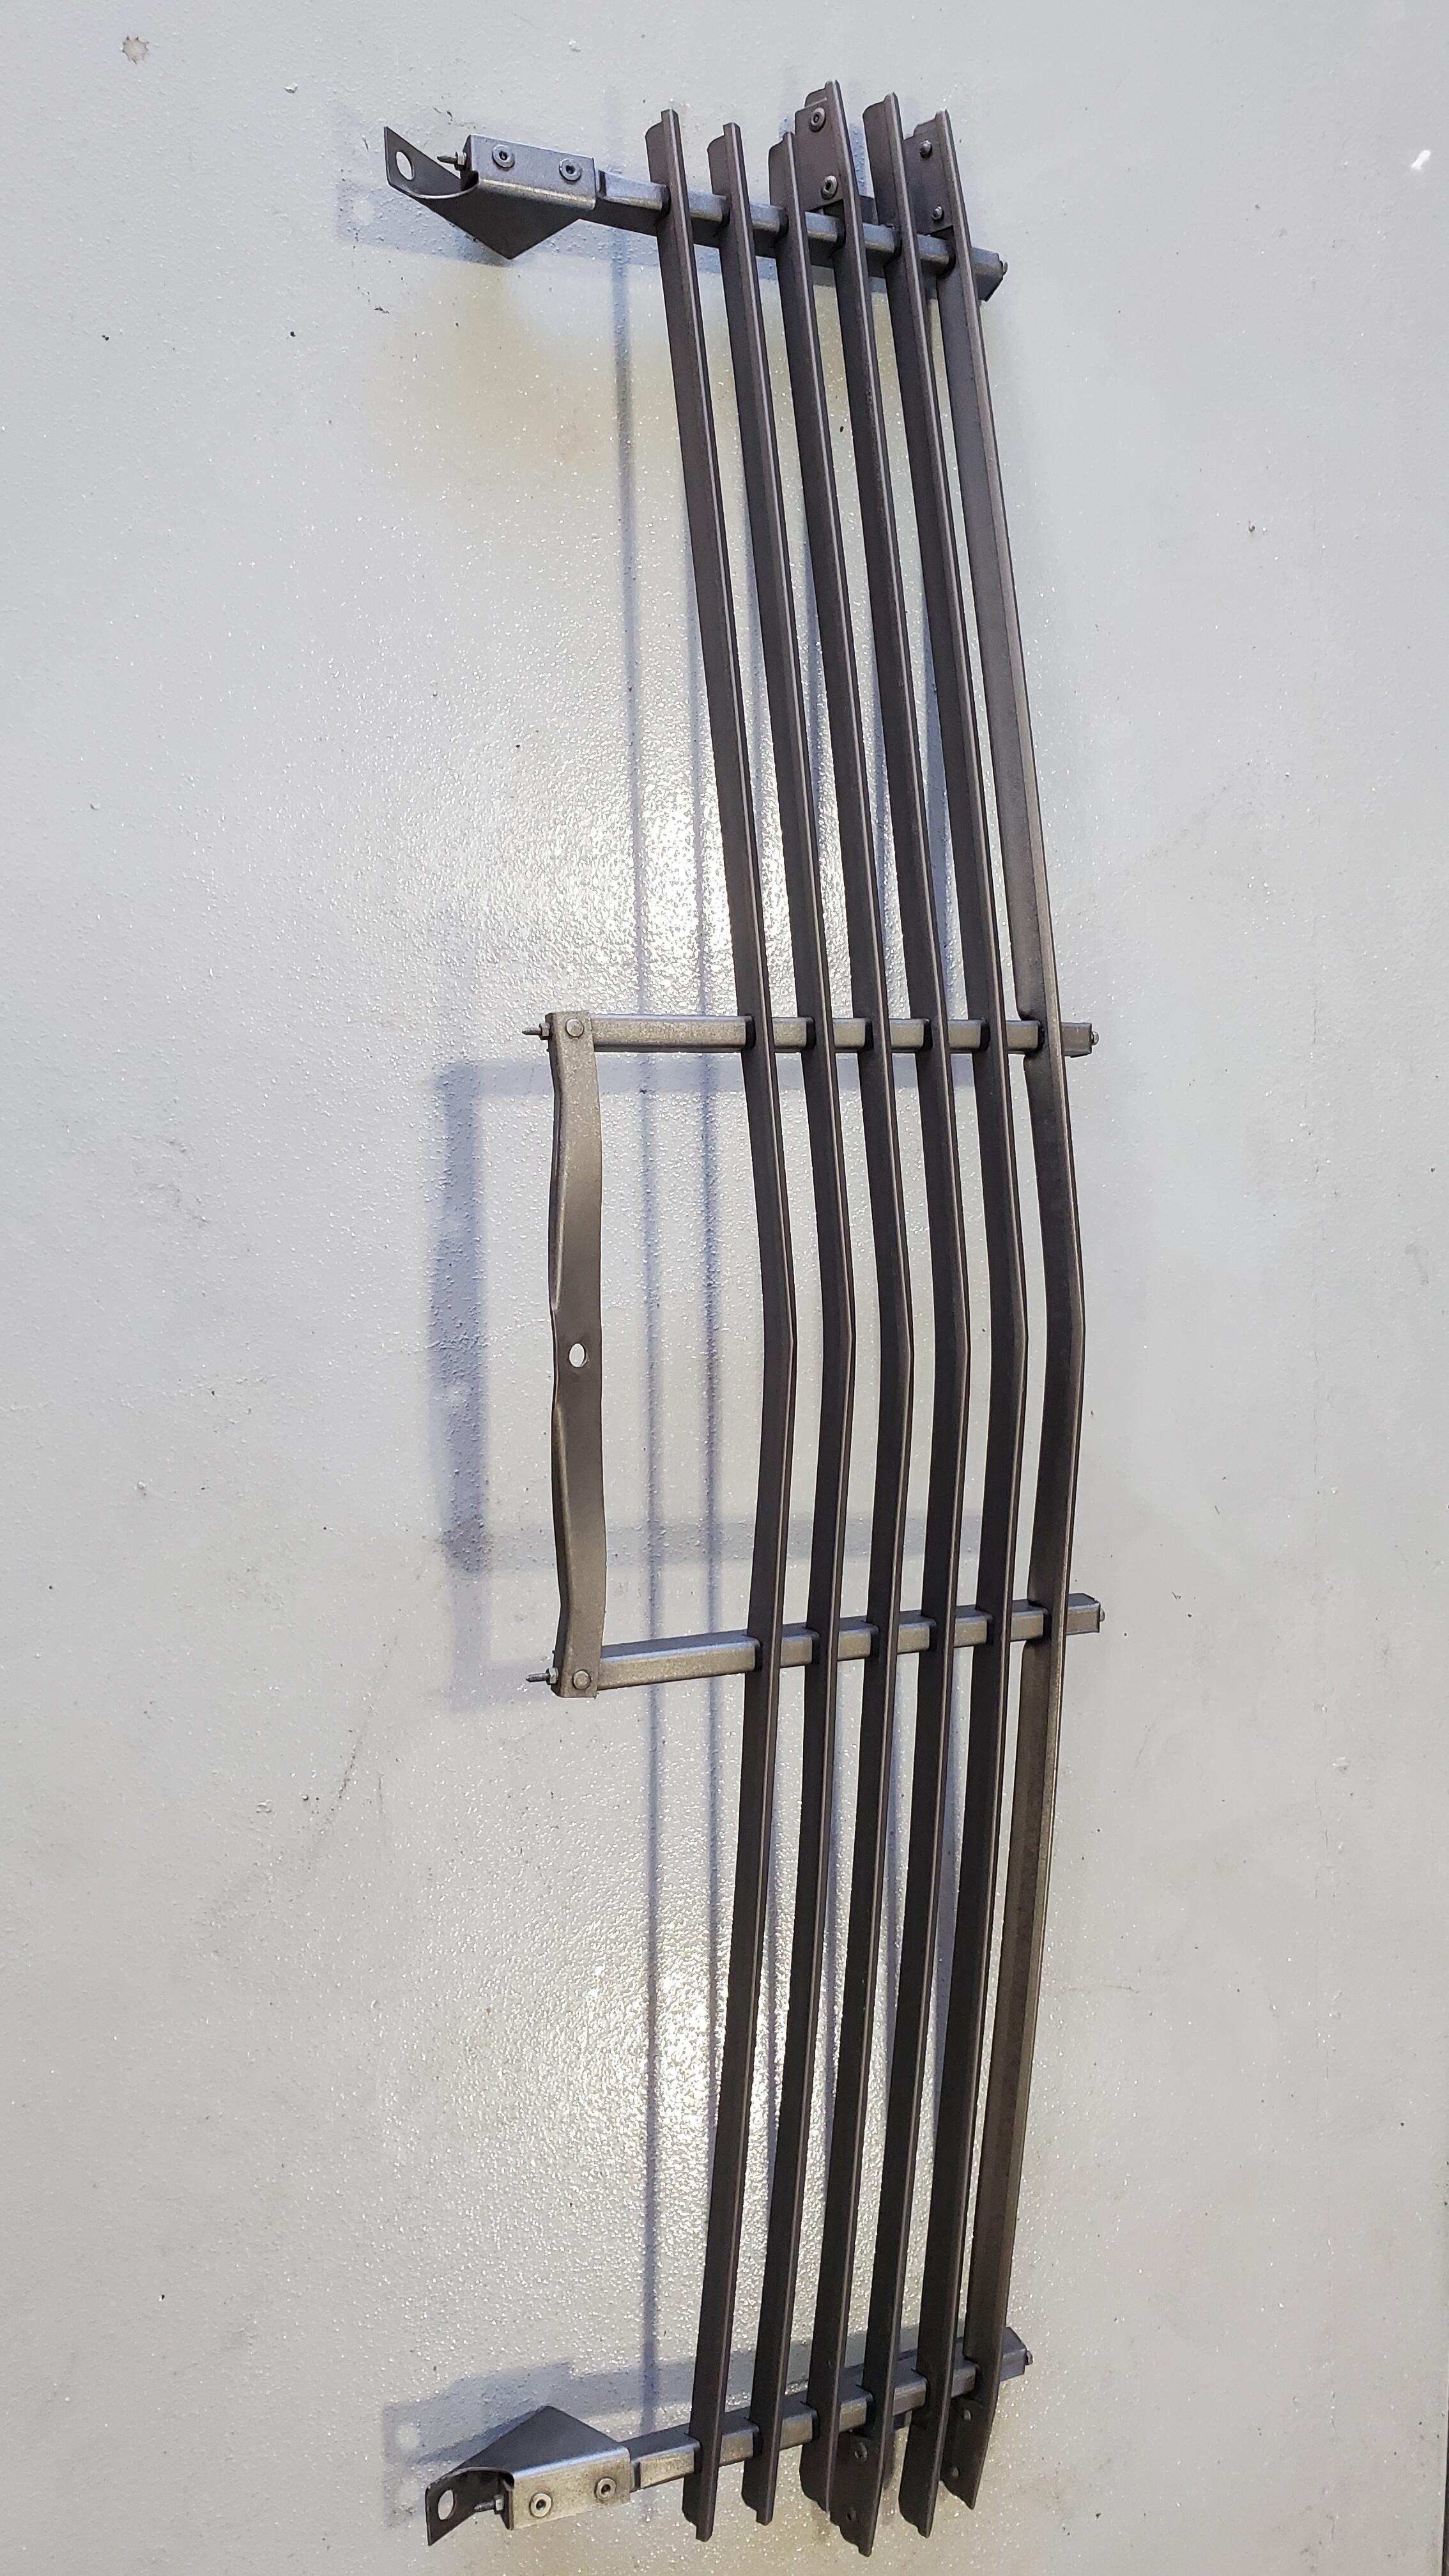
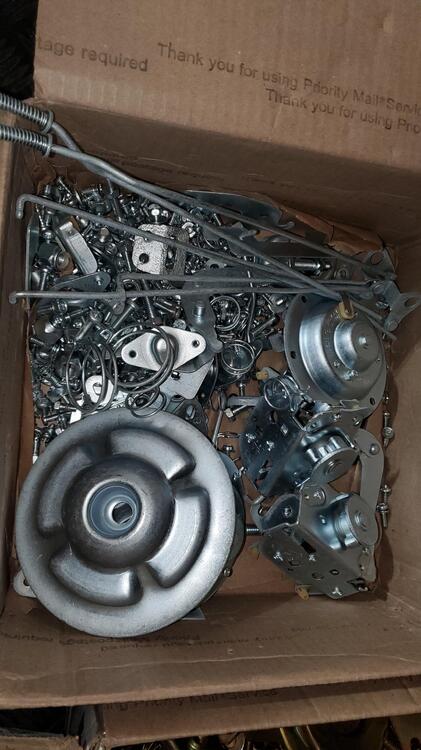
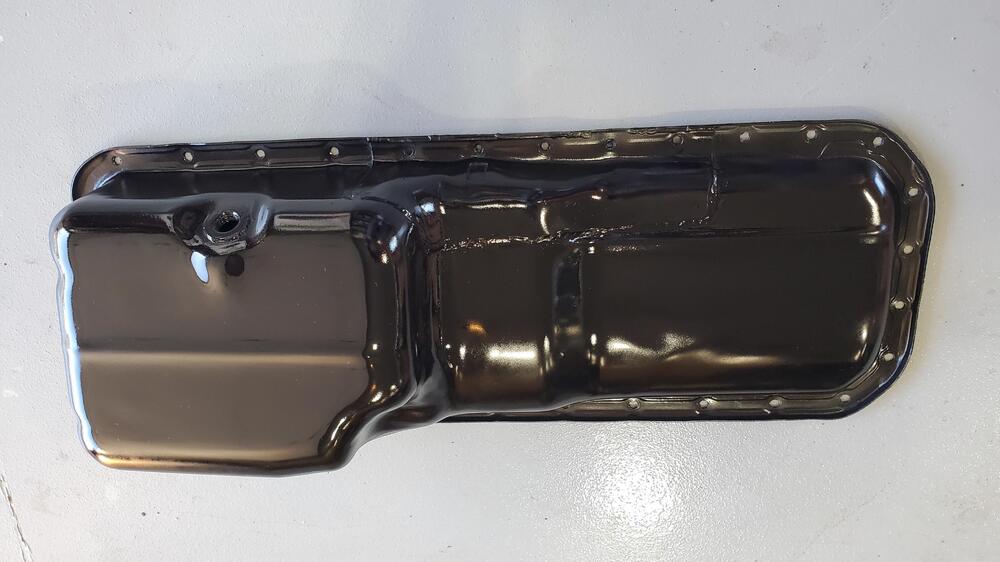
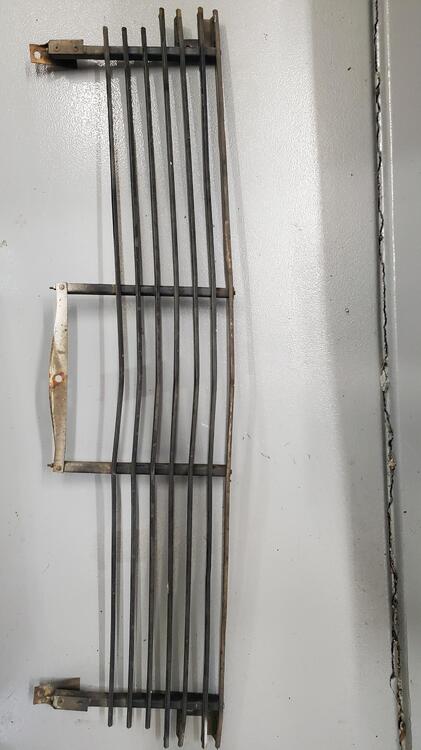
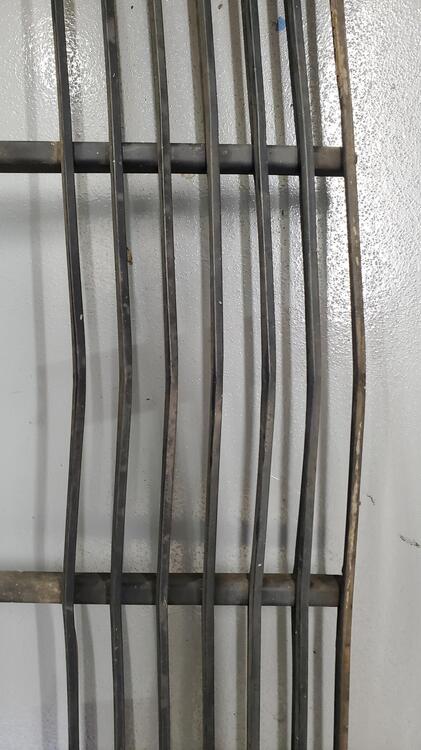
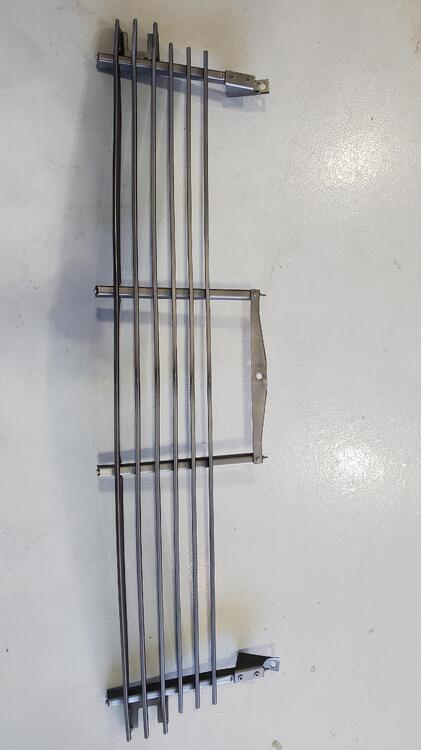
The Zinc parts came back from plating and look great. Pictures are below. Also shown are a couple examples of the shrink sleeve used to protect the plastic carb linkage ends and sealing of the cavities of the anti-backfire valve. The oil pan had a few dings in it so I used a little bondo to smooth those out prior to paint. Front grill was a little tweaked, to I disassembled that, straightened the pieces, then re-assembled and painted.


-
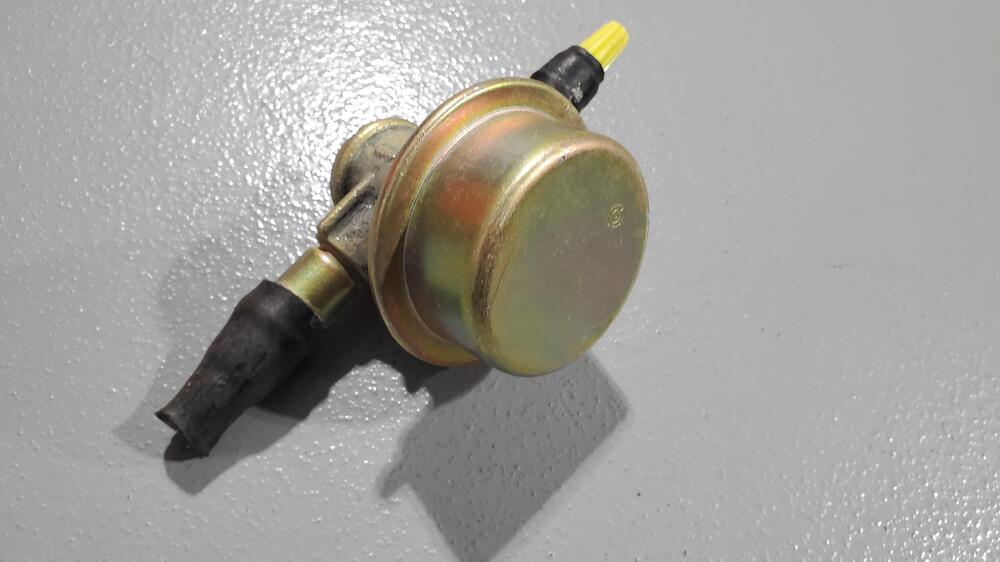
No, I just put everything in a zip lock bag as I know the boxes will get beat up in shipping. Also, I do not overpack the bags, but everything fits comfortably, bags are cheap. I also add a little packing material around the bags. Can't say that I have had any parts lost. Even the small lock washers do fine and are returned nicely plated. Only issue I ever had was a few leaky parts that dripped onto the batch and stained some of the plating on return shipping. (Smog check valve and distributor vacuum chamber are examples of parts that need to be plugged)
-
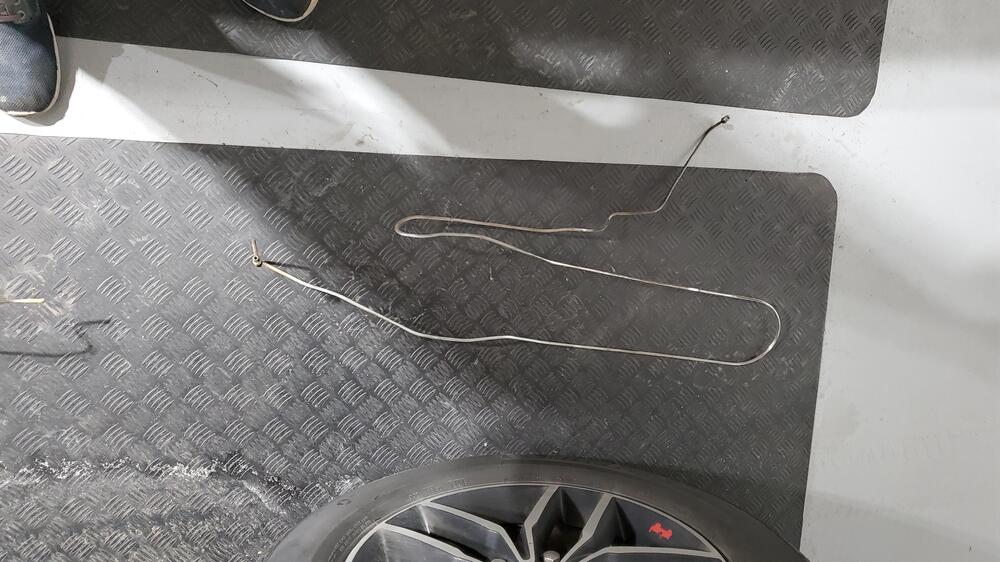
The fuel and brake lines were also sent to Sav-On plating. They were put in the large-long box in the earlier pictures. They will be rack plated. So there will be three plating batches run at the plating shop: one batch of barrel silver/clear zinc, one batch of barrel gold/yellow zinc, and one batch of rack plating gold/yellow zinc for the larger parts. Cost is roughly $250 per batch. The smaller parts are processed in the 'barrel', and Sav-On does a good job of cleaning these. I believe they are tumbled together for cleaning, so plastic portions of parts need protection. (I used shrink sleeve on the carb linkages). Not sure what they do to clean the larger parts and tubing, so I clean these up better using solvents and light sand or steel wool. Also, any parts with cavities need to be plugged or they will retain processing solvent and leak on your parts during return shipping. (Learned by experience).
-
Yes, that is basically what I did, every single nut and bolt. That's why it ends up being so many boxes. The only exception is the carbs and fuel pump. Owner has a pretty set of rebuilt carbs and fuel pump. Horns were disassembled and fasteners sent to plater.
-
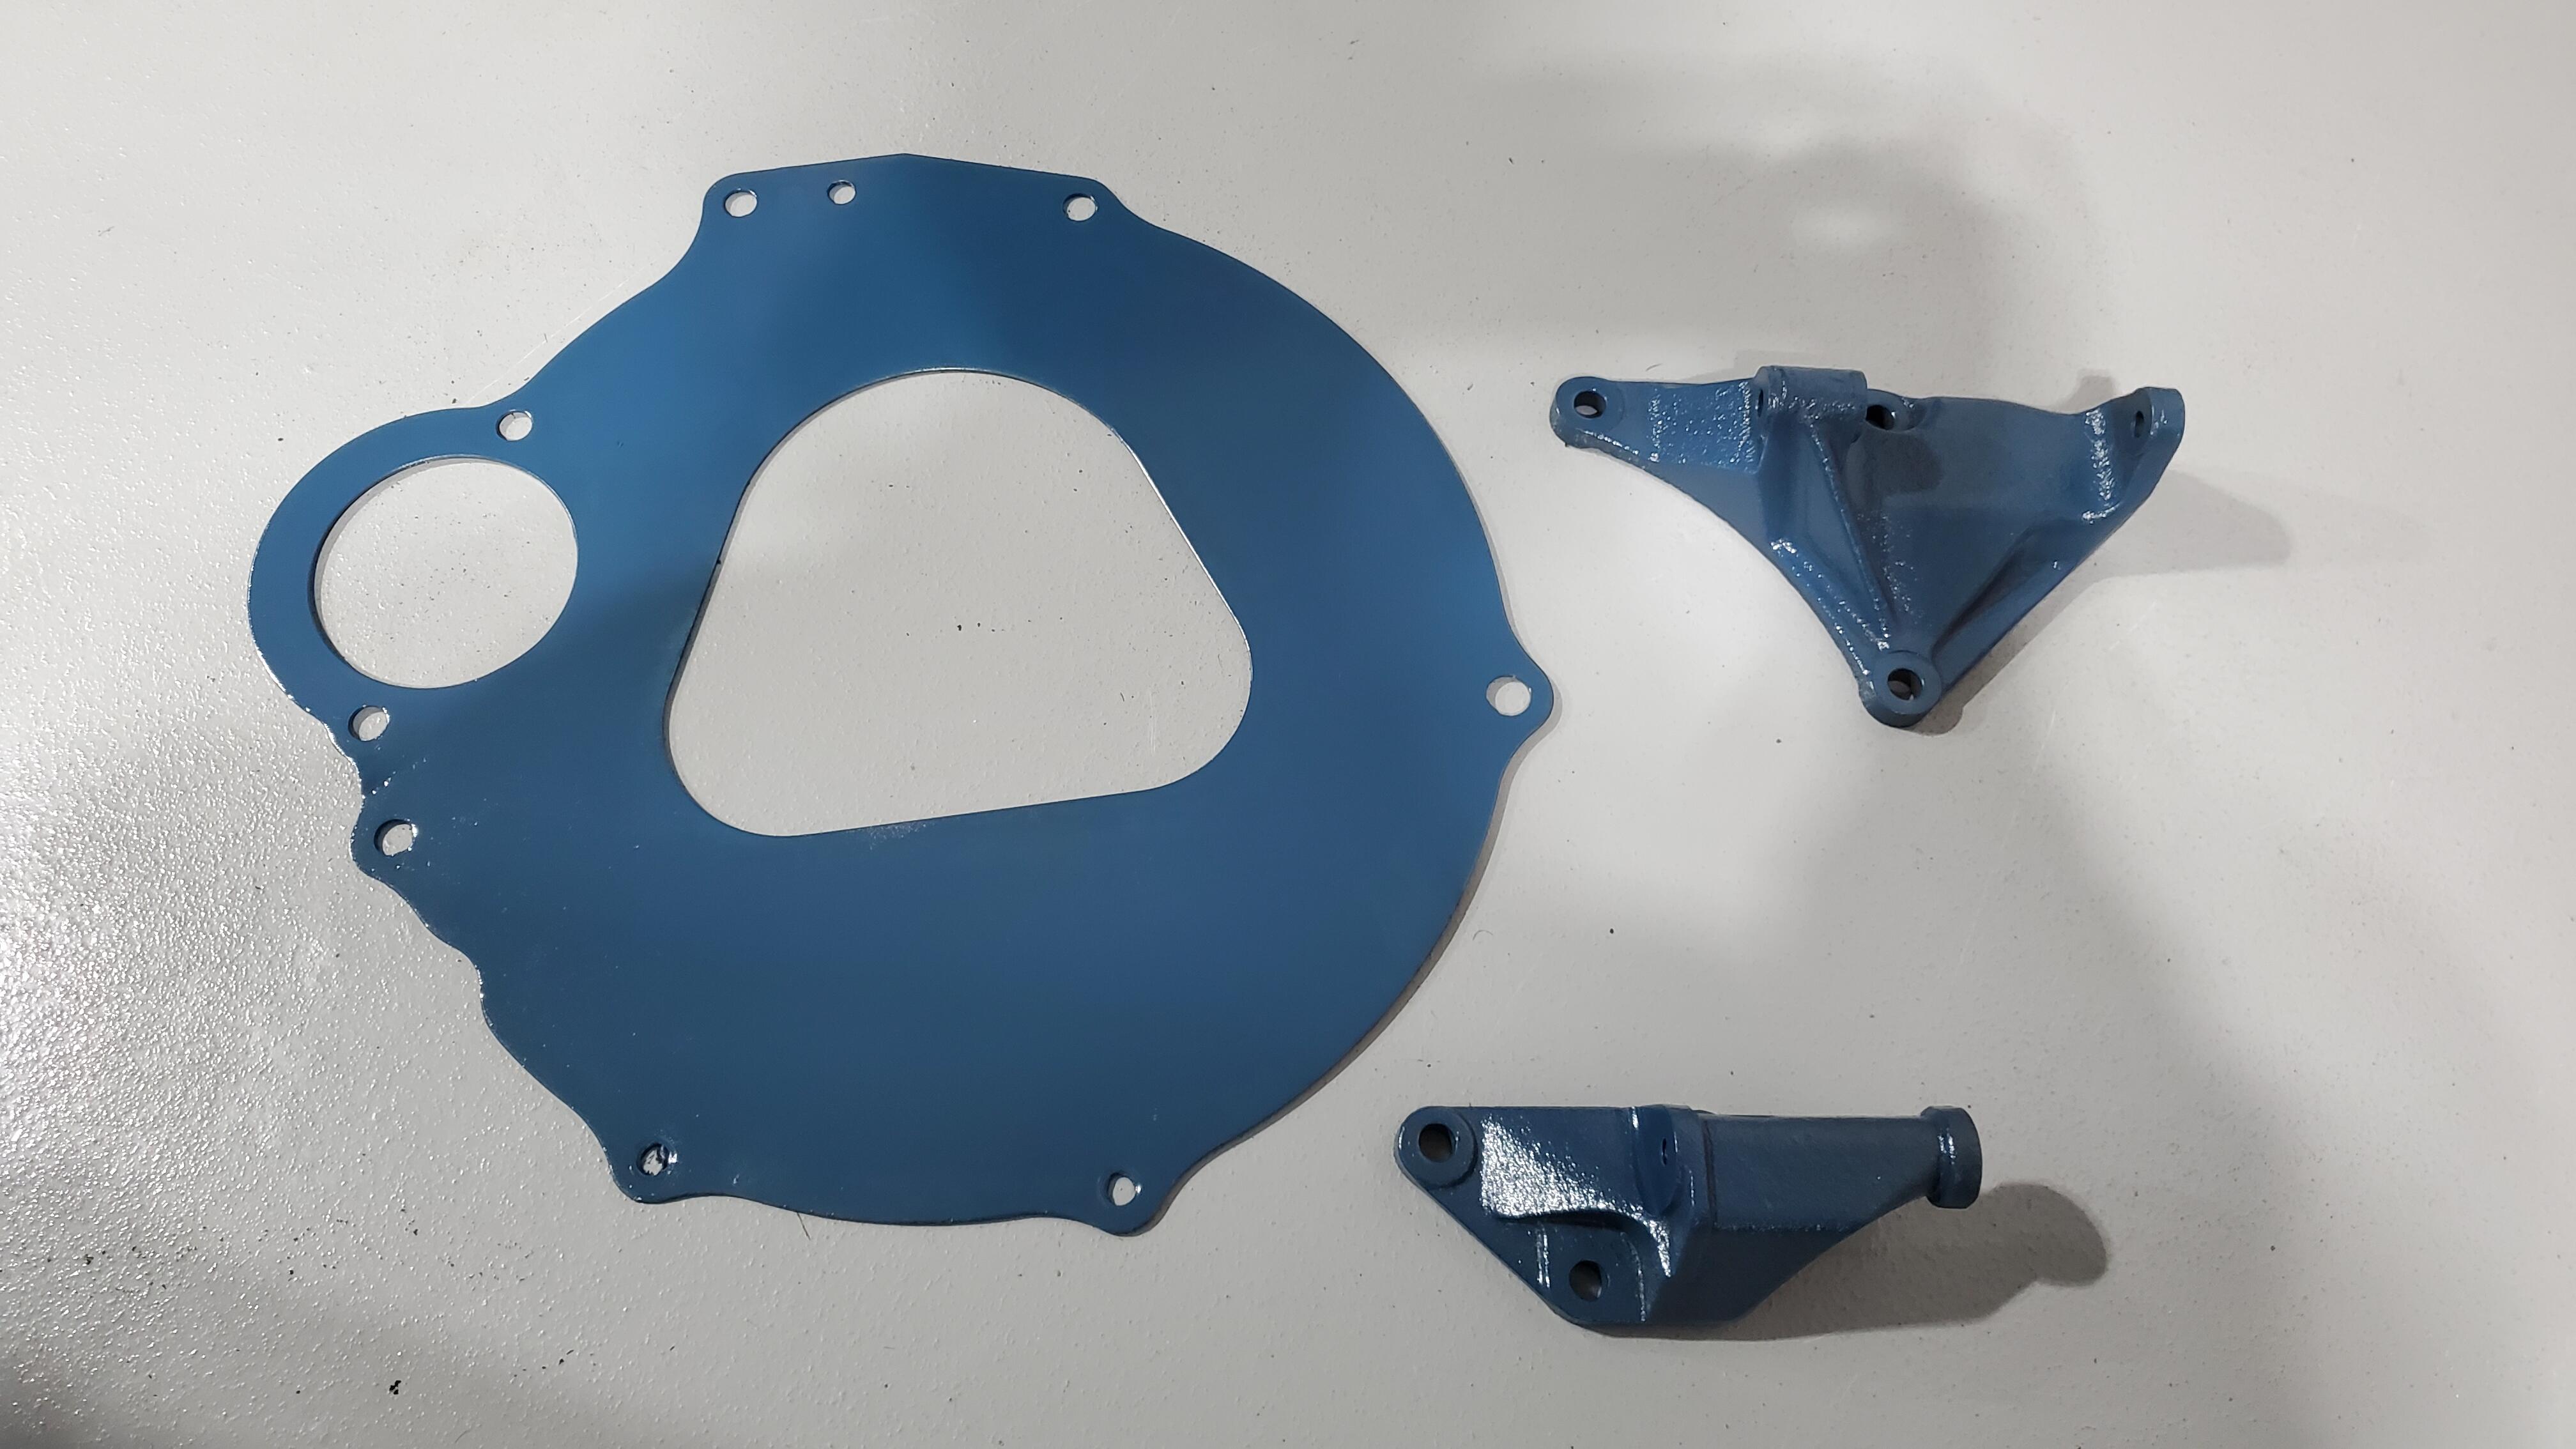
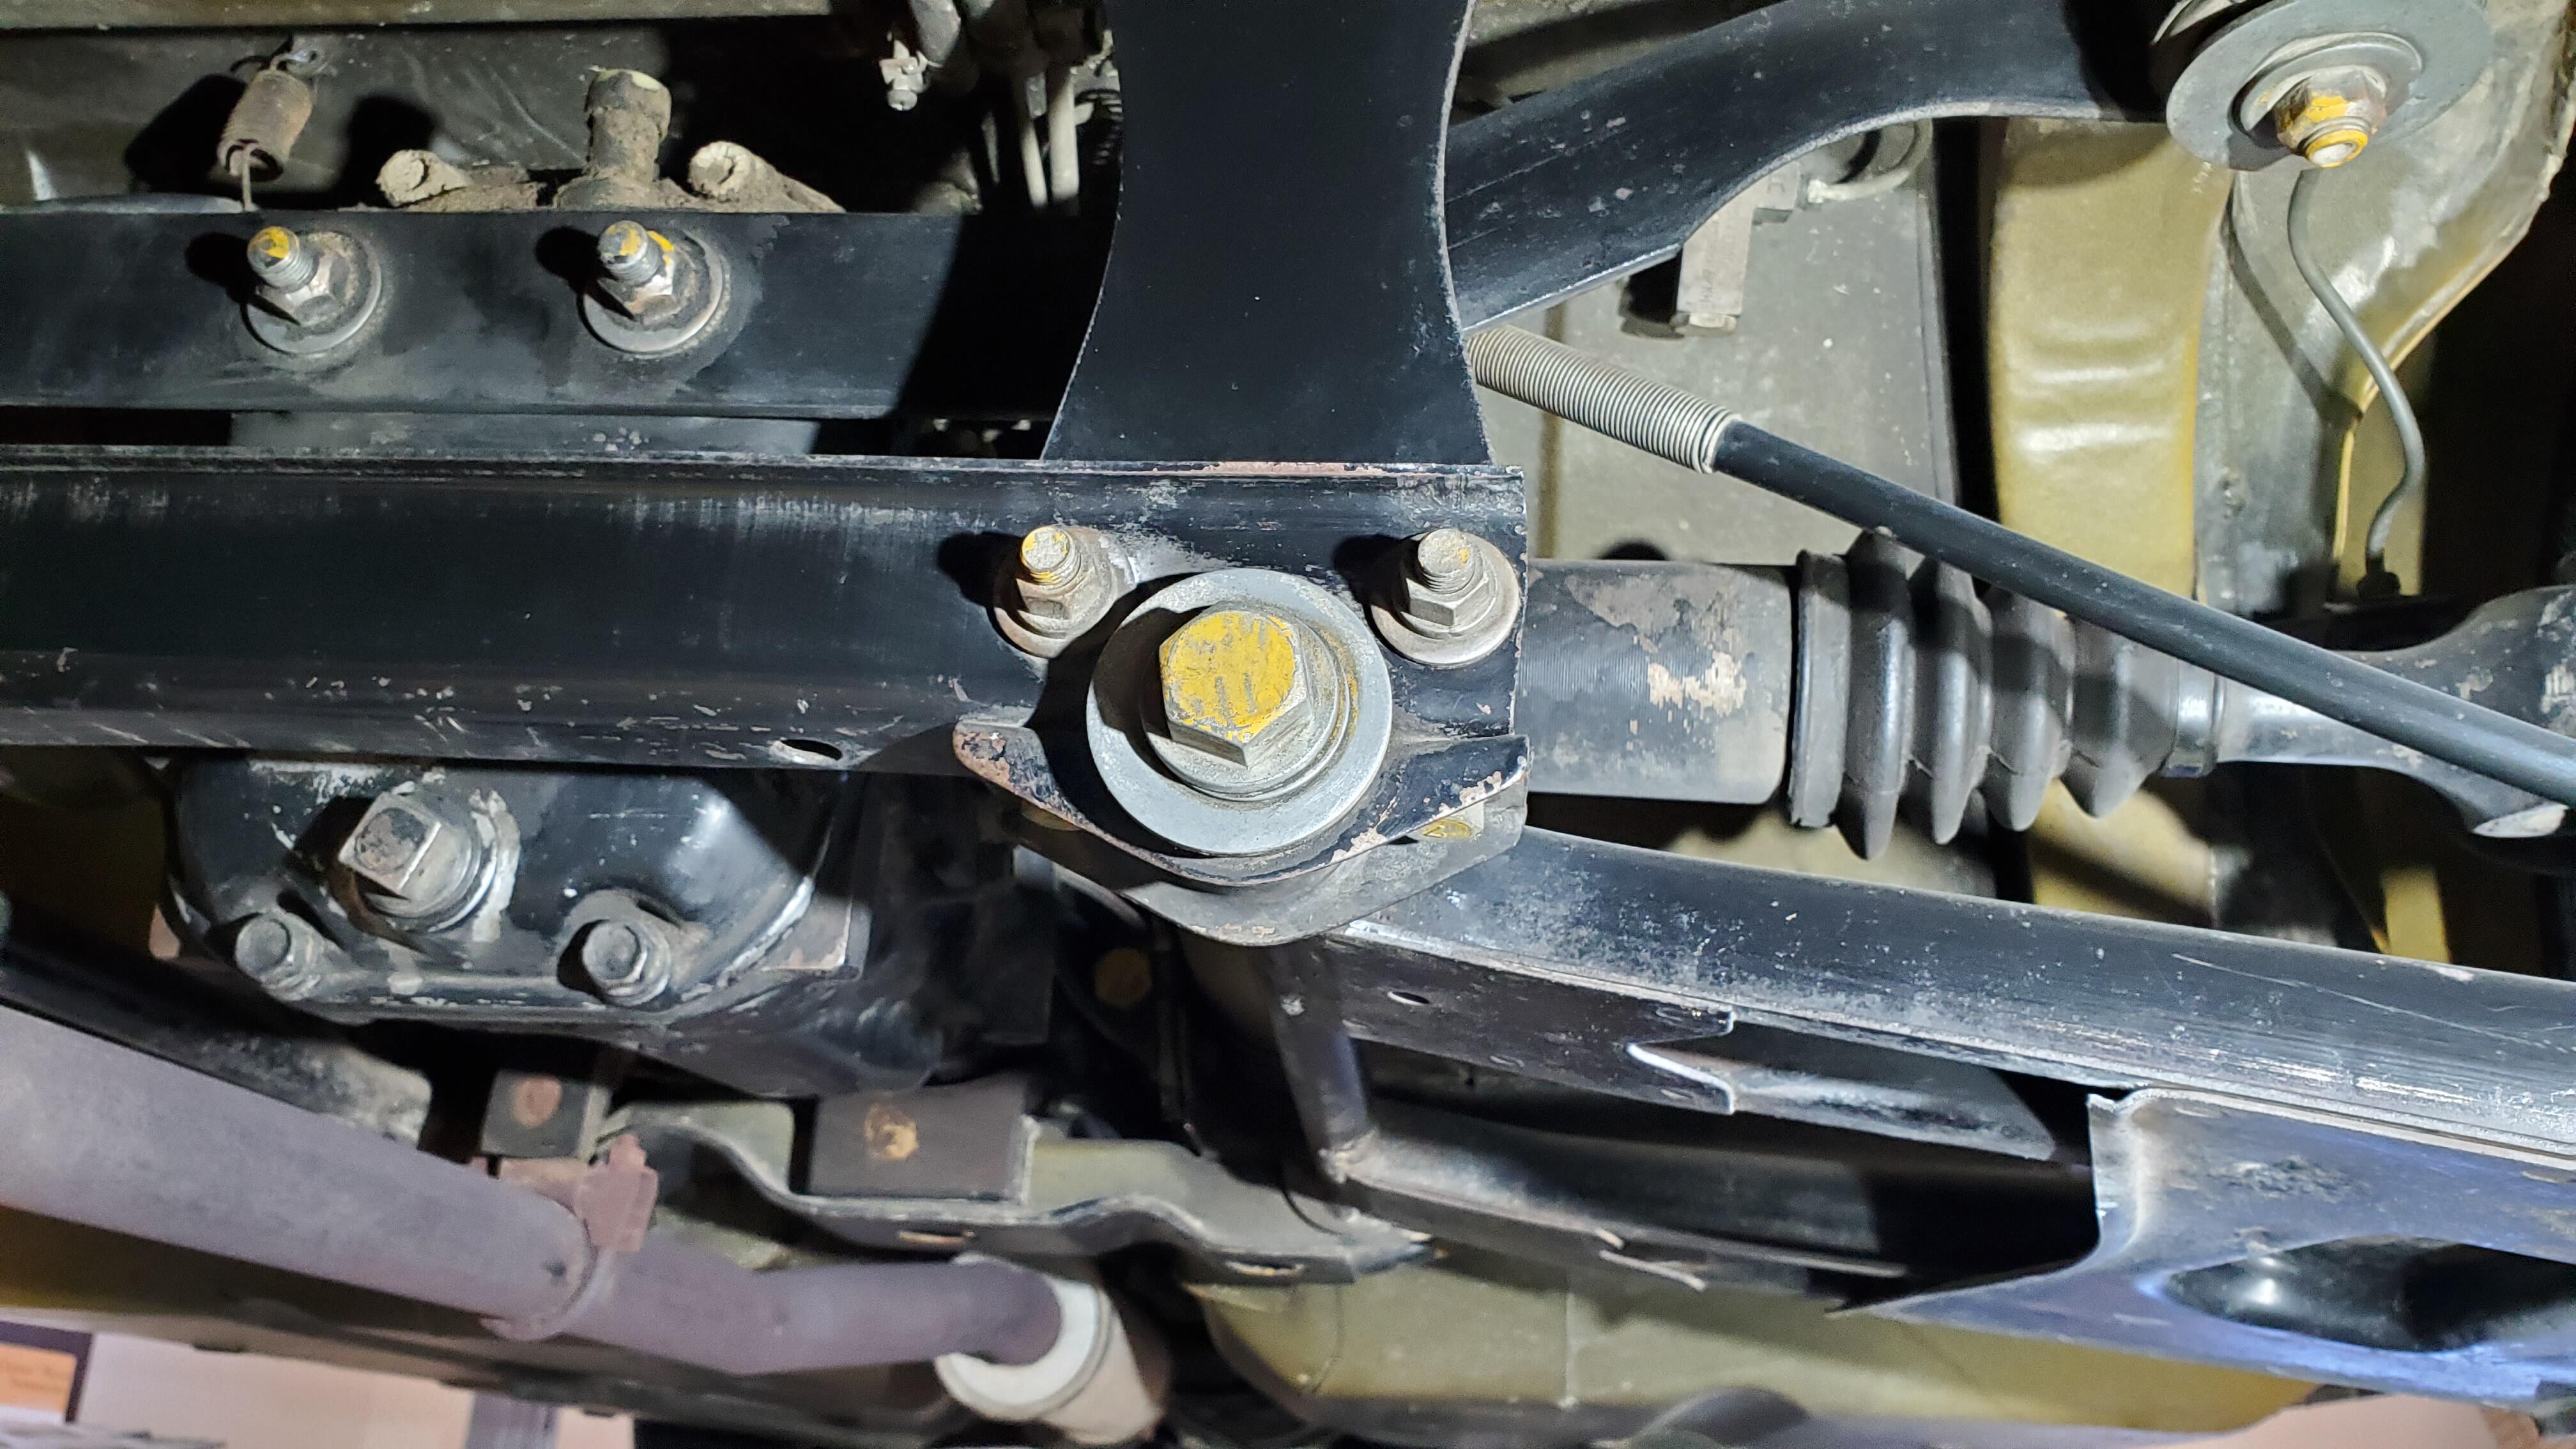
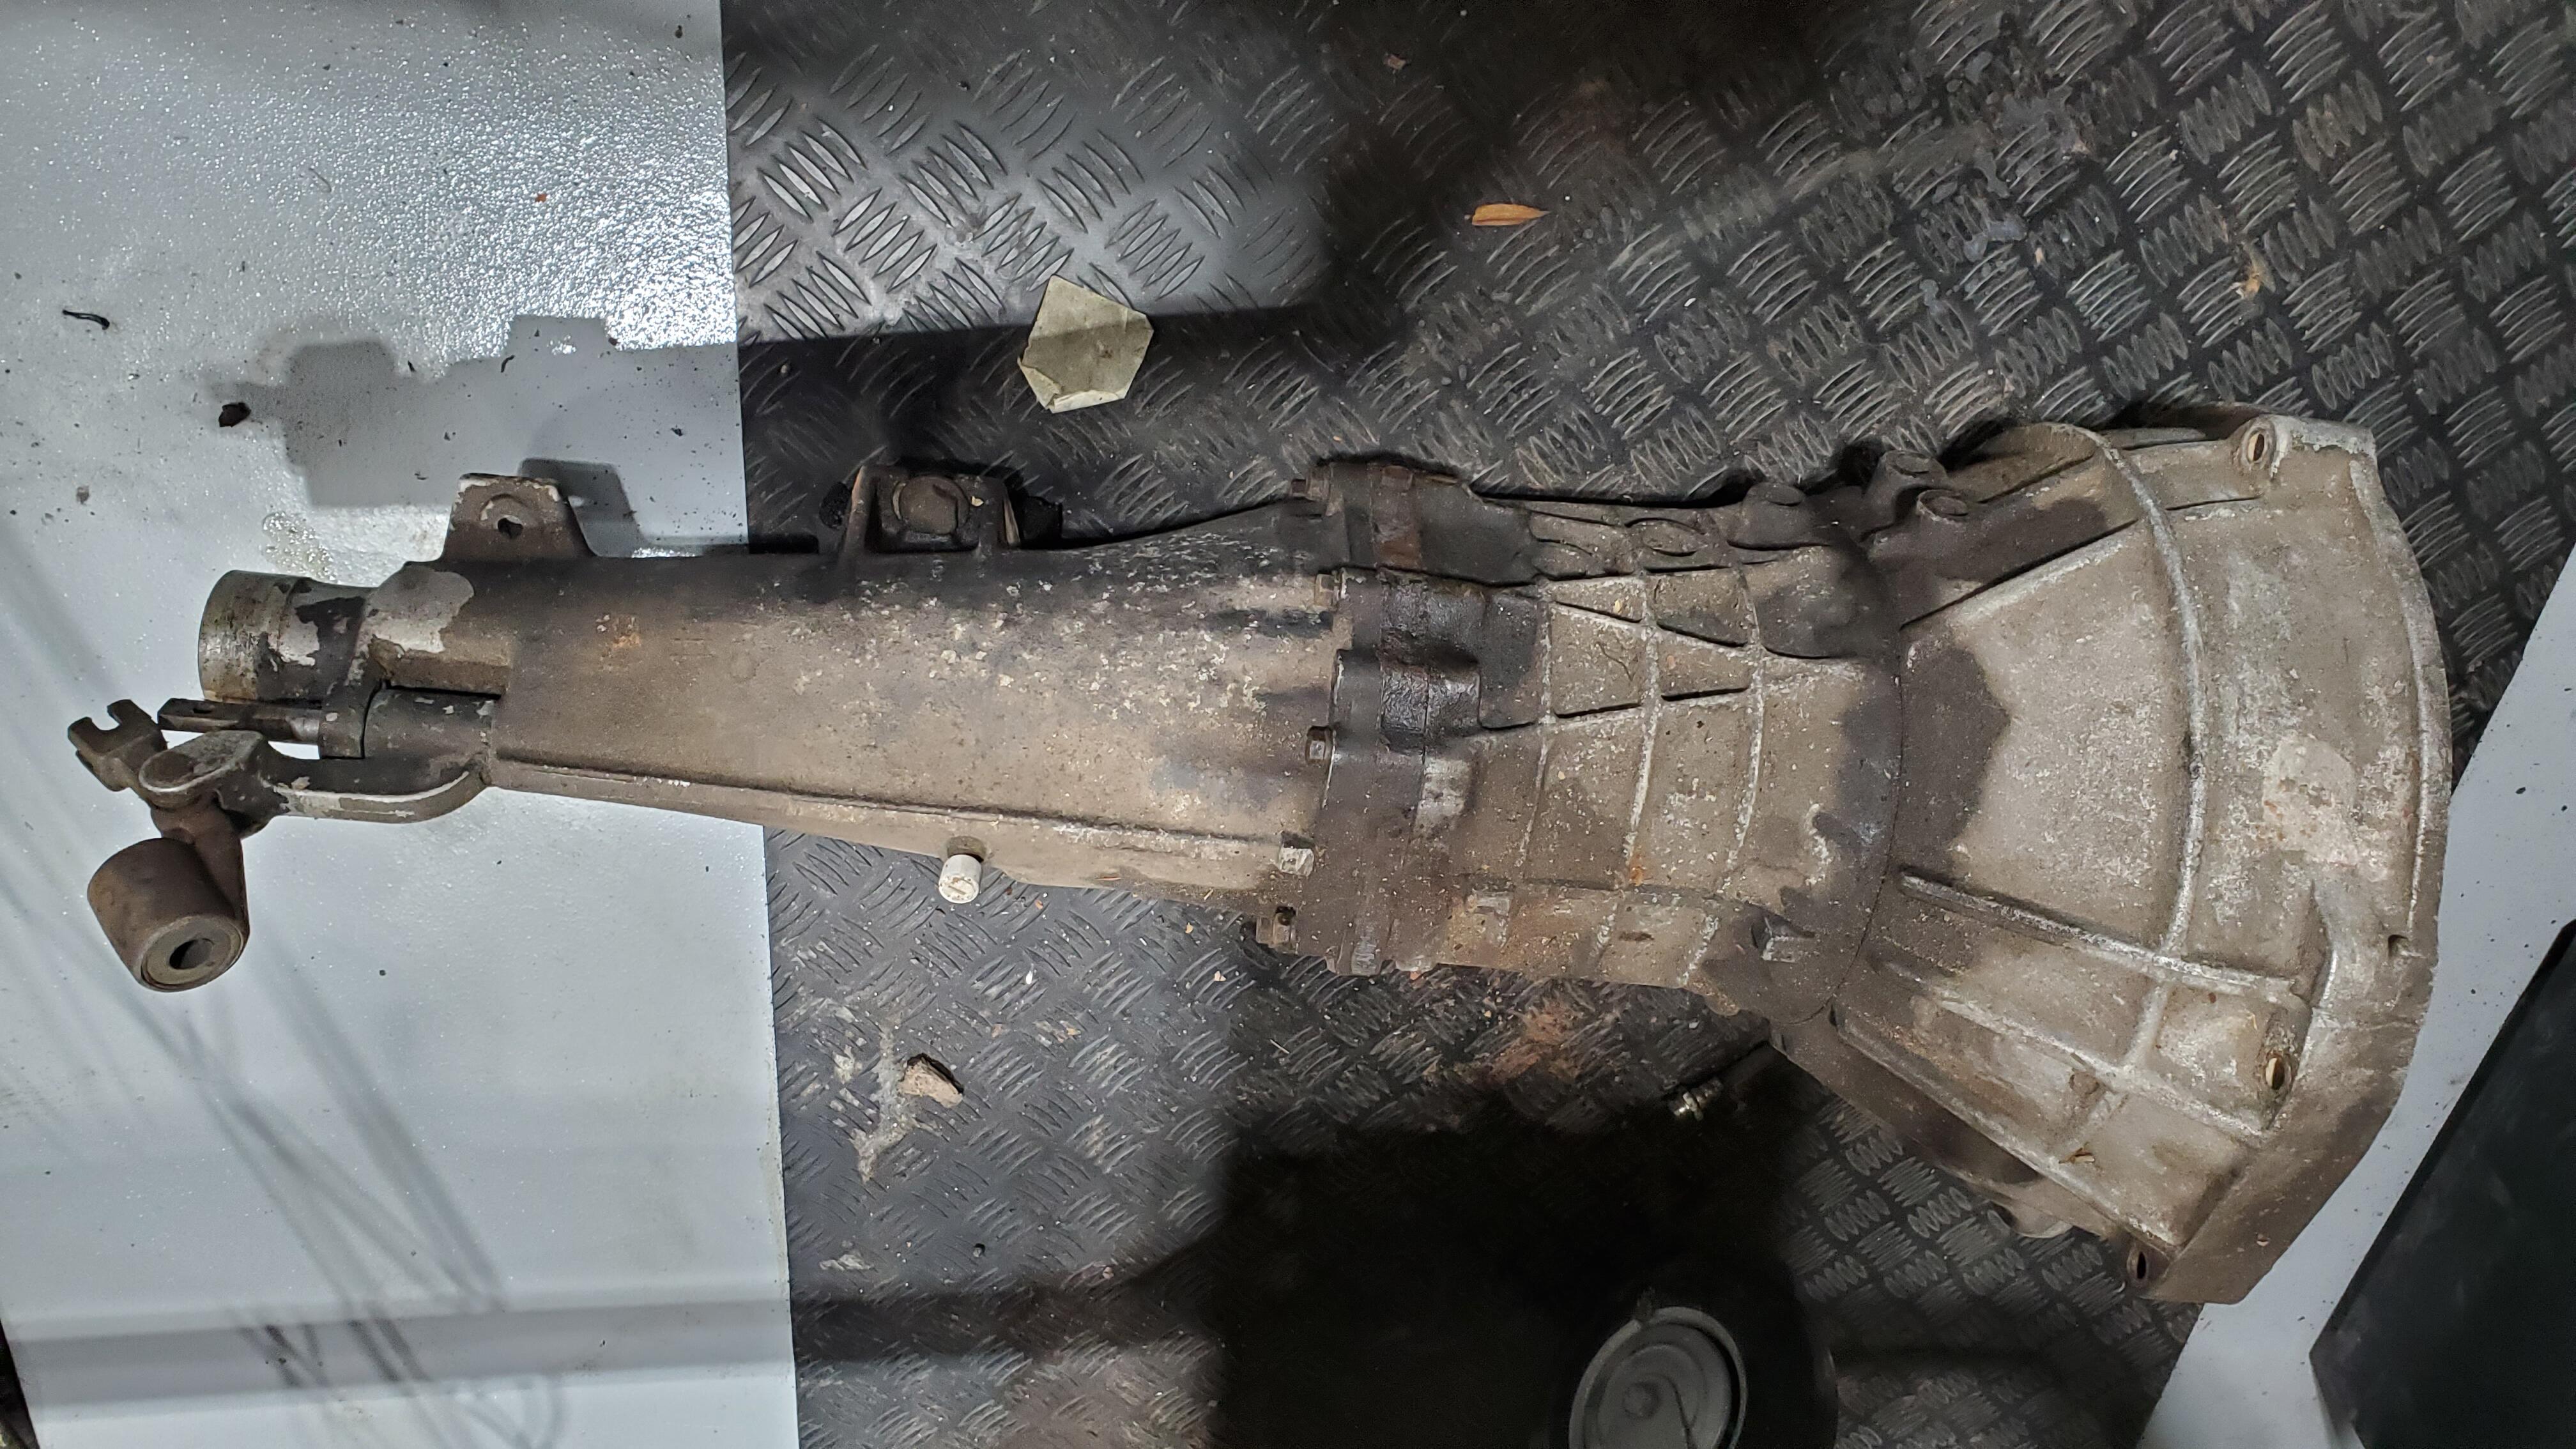
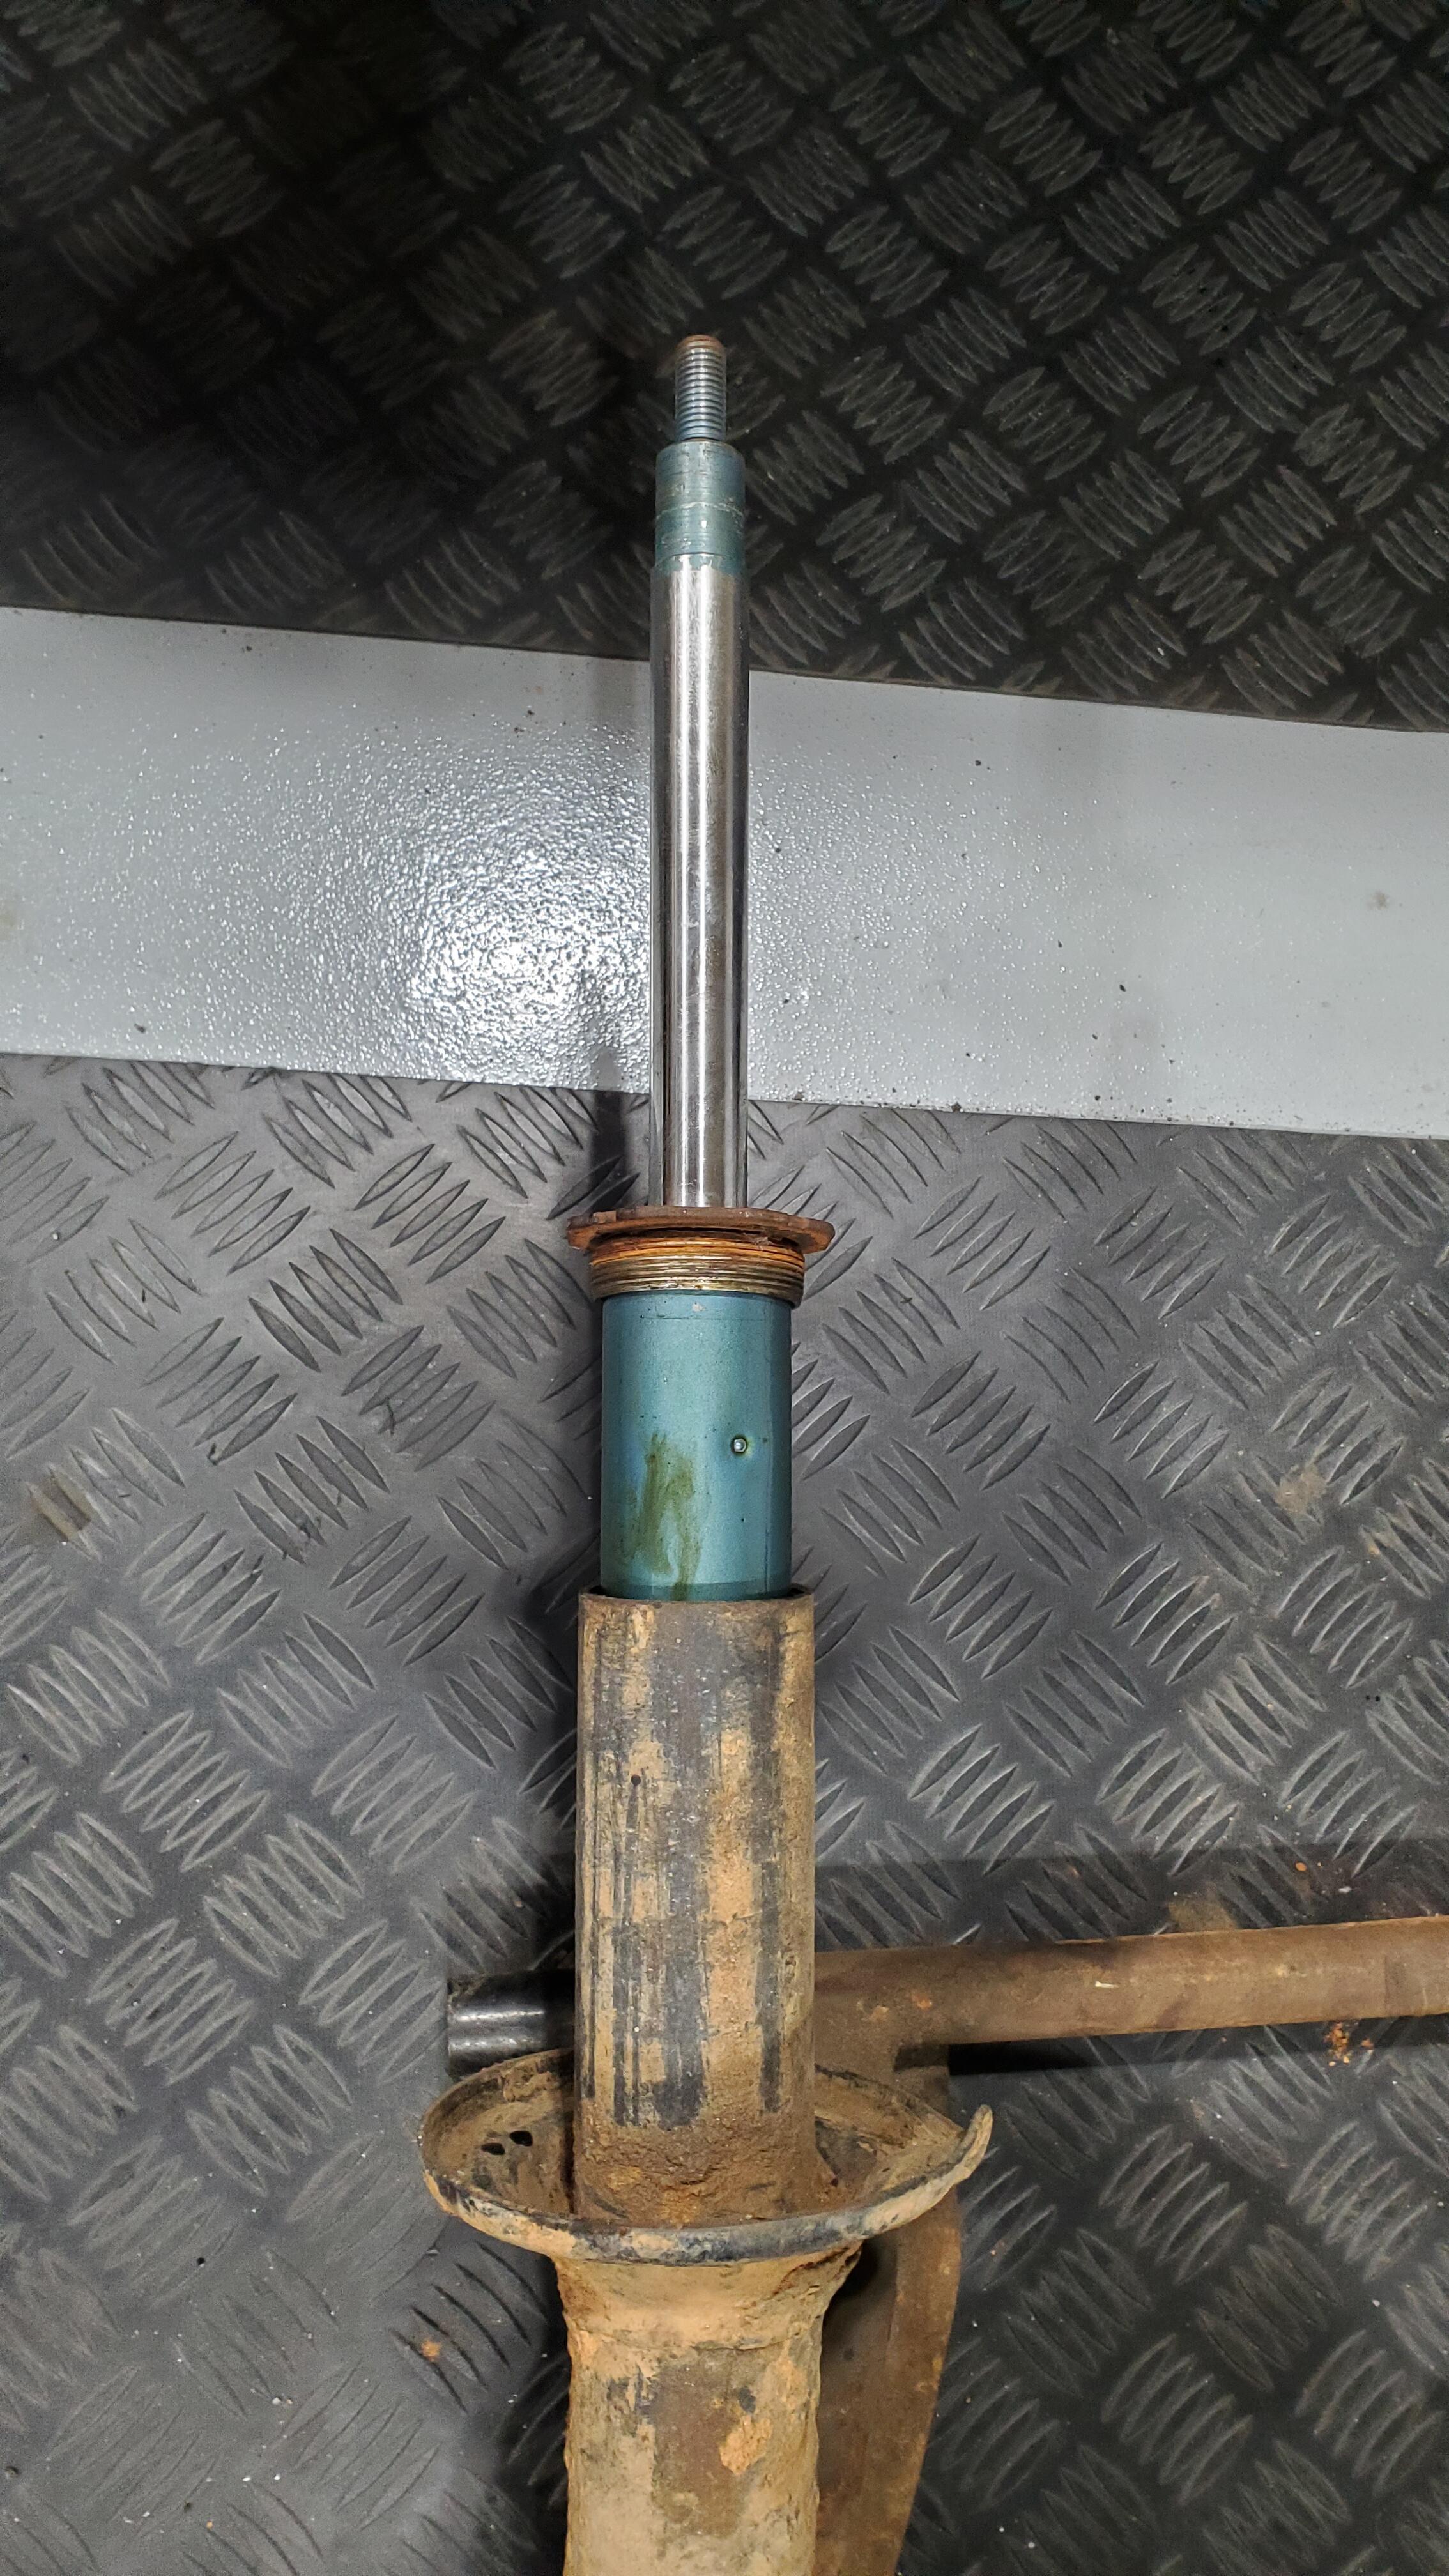
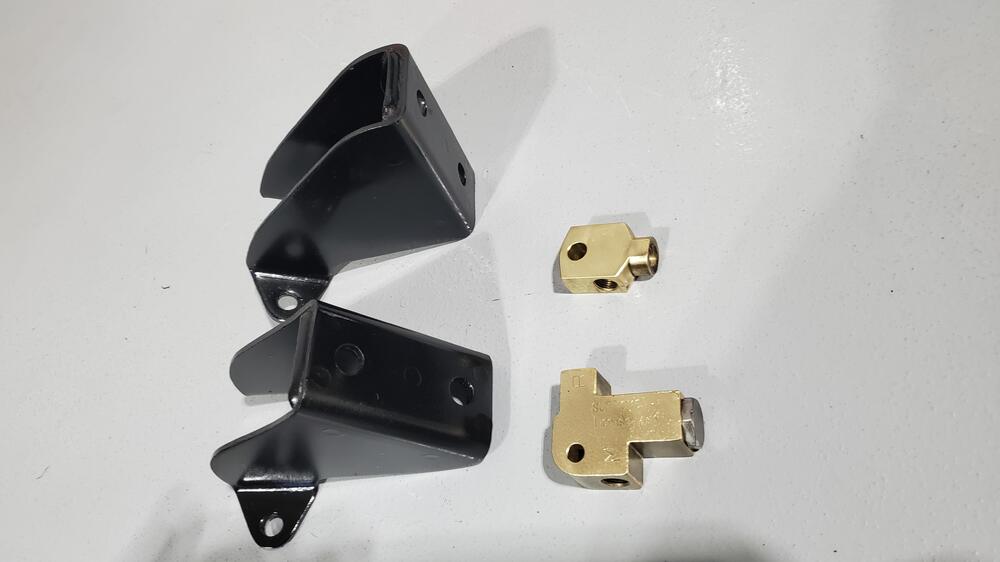
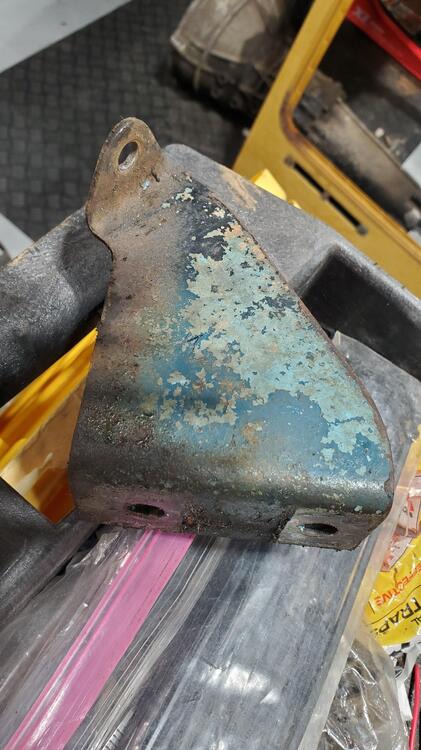
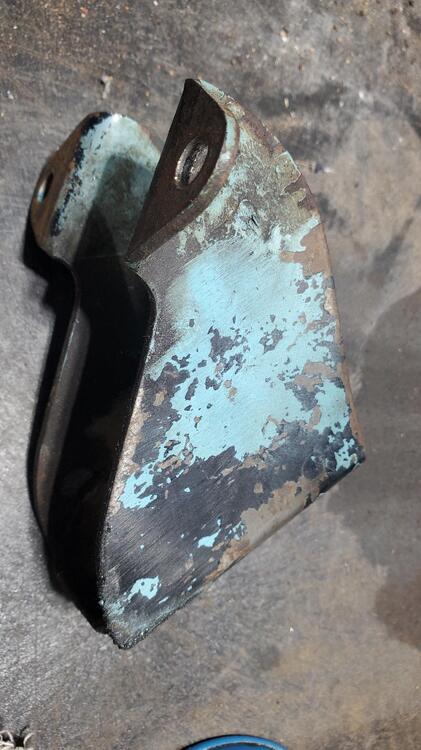
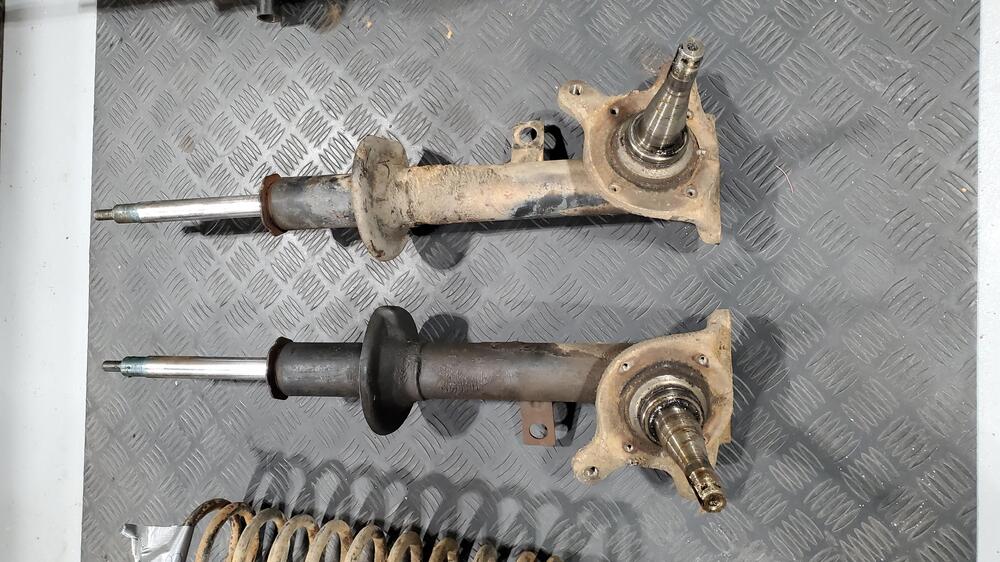
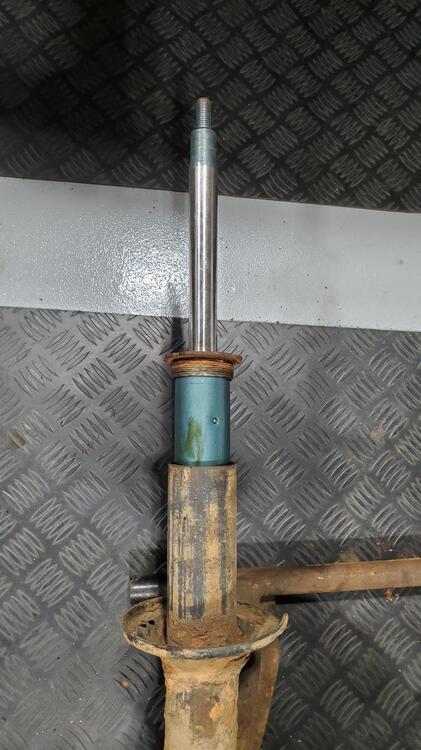
Progress continues on S/N 00042. A number of items are out at vendors and should be returning all before the end of the month. Undercarriage parts will be media blasted tomorrow and then sent to the paint shop. Plated parts are finishing up and should ship either tomorrow (1/17/2025) or Monday. Engine block and head are at the machine shop and should be here before the end of the month. The body will be sent to the metal repair guy before the end of the month, so lots going on over the next couple weeks. At this point, I am most eager to get started on the engine, so I will monitor that one closely. I already have the engine gasket kit and am cleaning up parts so I am ready to go. In the mean time, I have been cleaning and painting some of the different parts. Below are some pics of the finished items. The motor mount brackets were pretty interesting as they were all of three colors. The base color is black. Over that is a light blue overspray. on top of that is a dark blue overspray. I am pretty sure this is all factory, so it must have been an interesting process for these early cars. Since the base color was black for the mounts I went with that,as the blues appeared to just be overspray. I do not think that I will try to replicate the overspray. I cleaned and painted the rear half shafts in the original black. The rubber boots were in good condition so I just cleaned them up. I kept the overspray on the original metal ties intact, although I was tempted to clean that off just to get a little color in the assembly. The half-shafts of S/N 2614 are shown below for color reference.


-
Like this...threaded hole on lower part of wheel well.
-
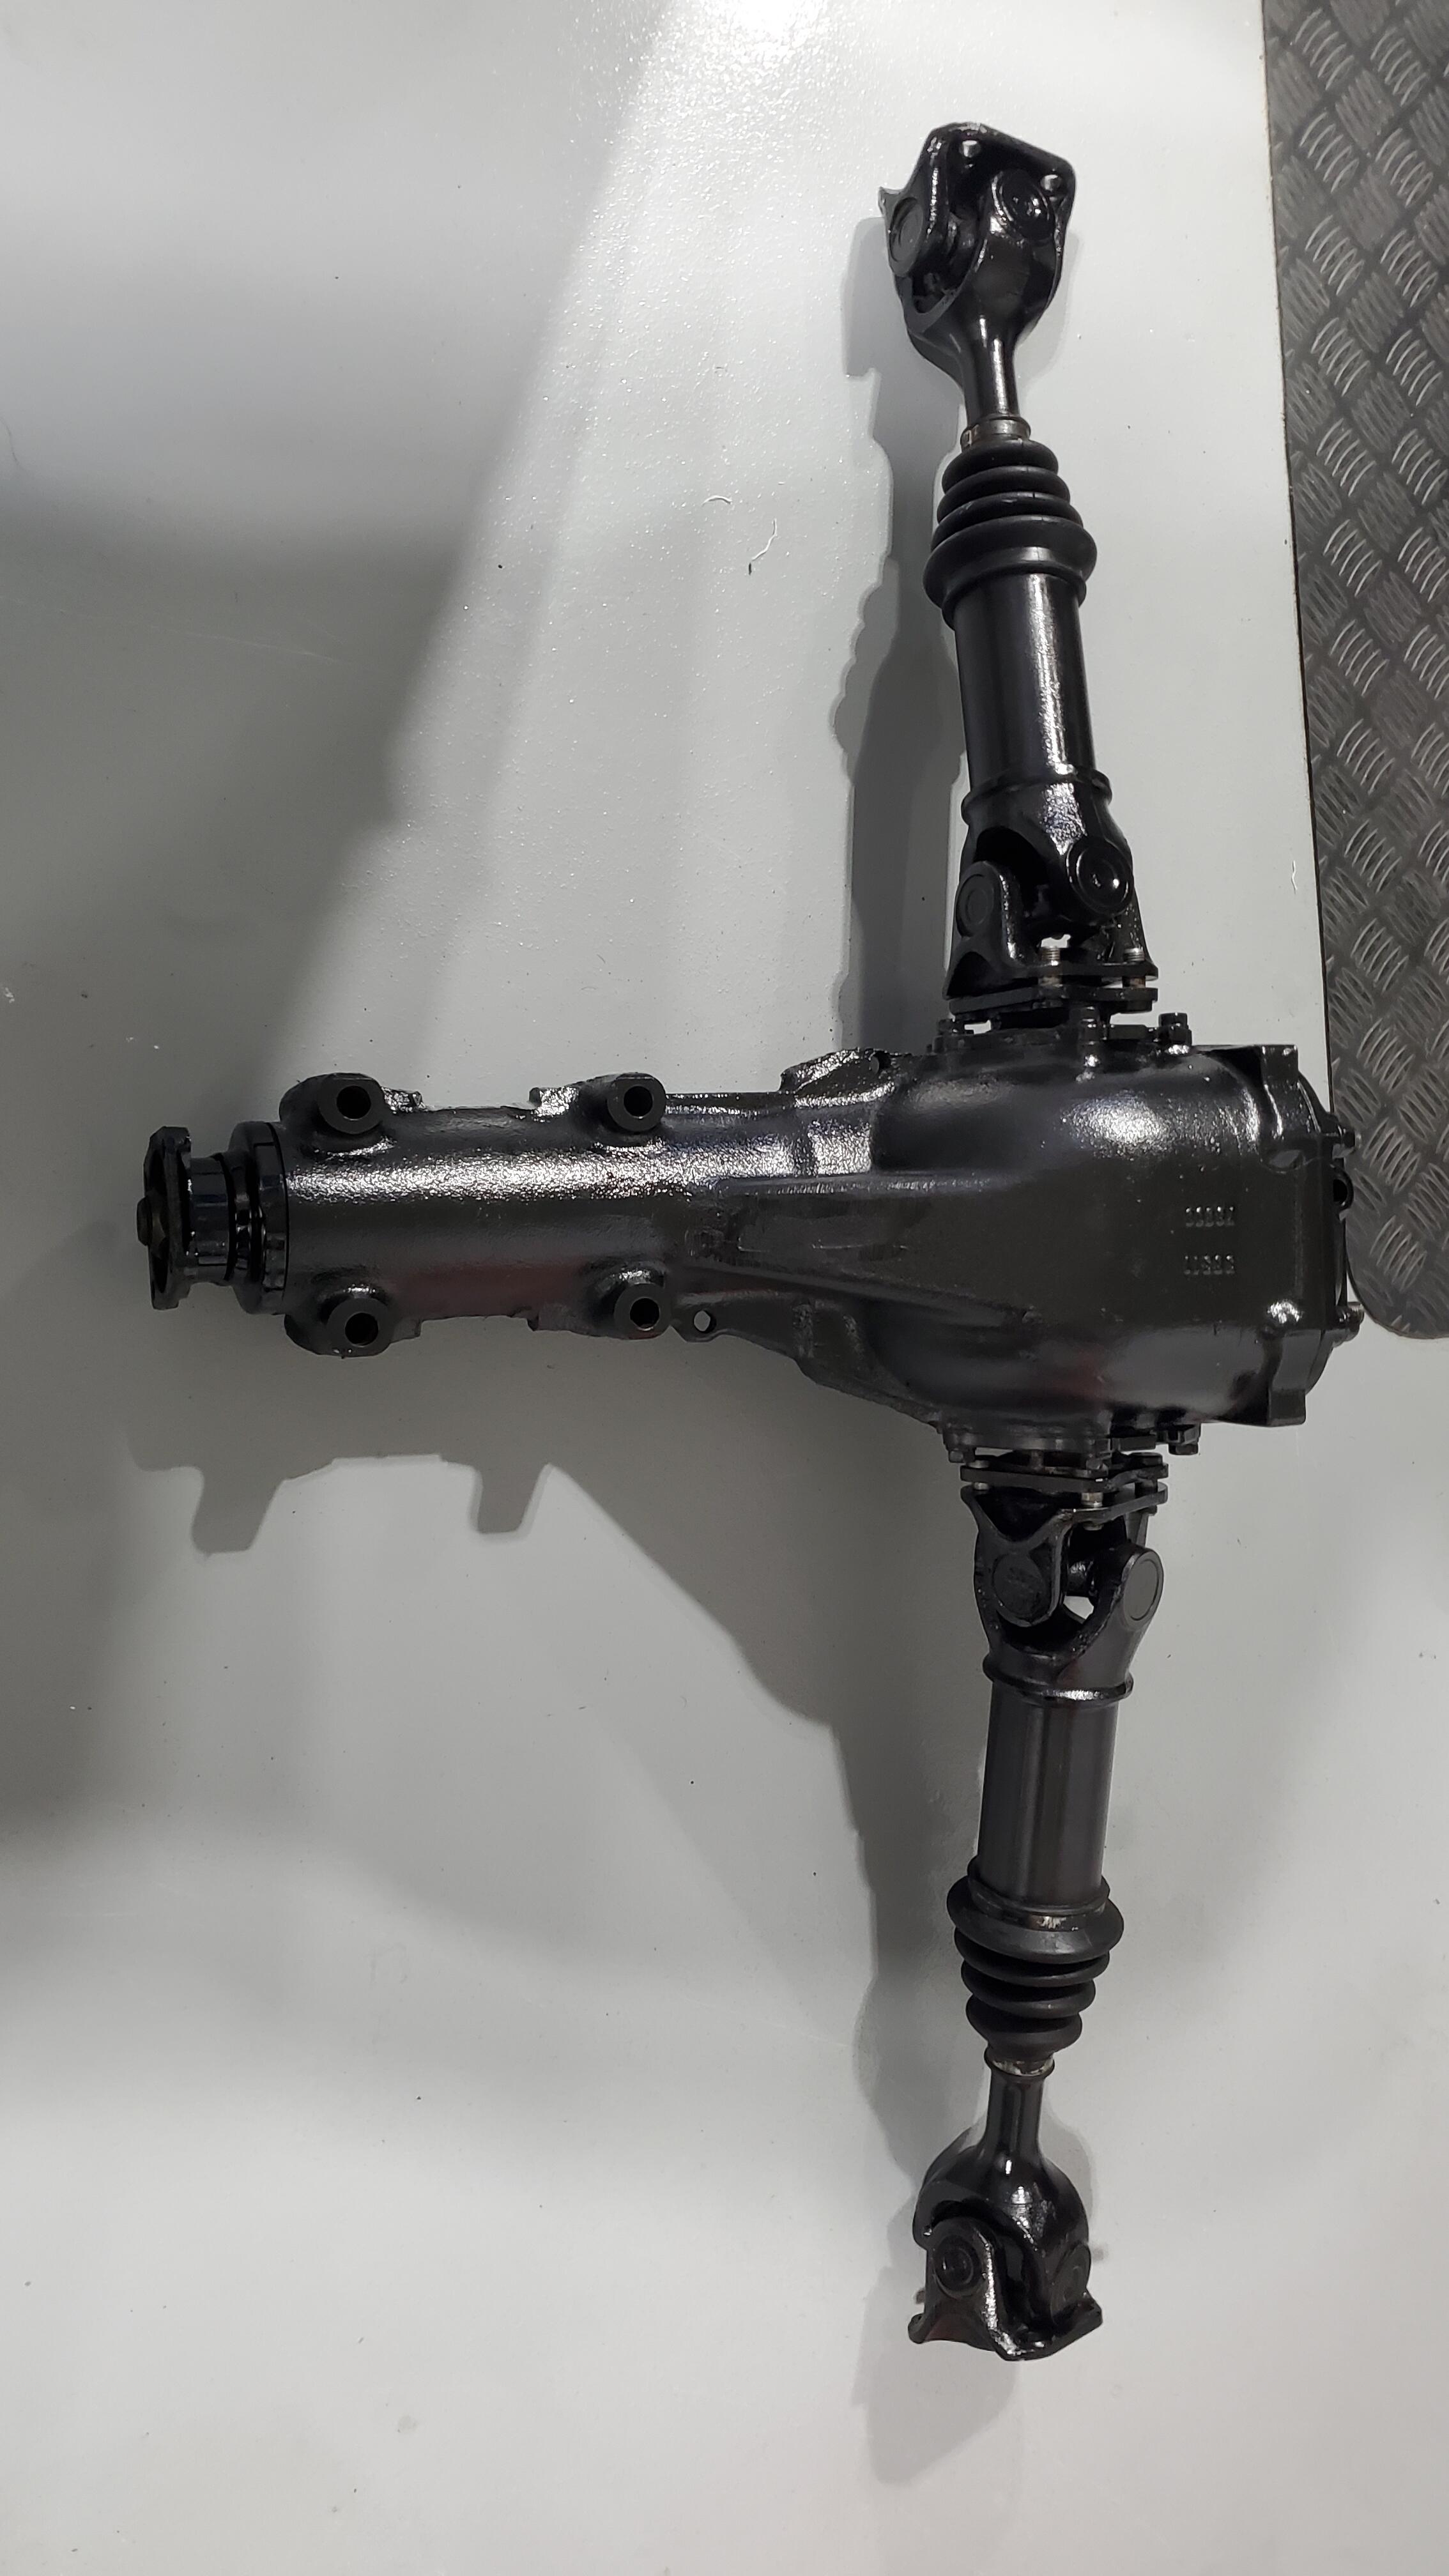
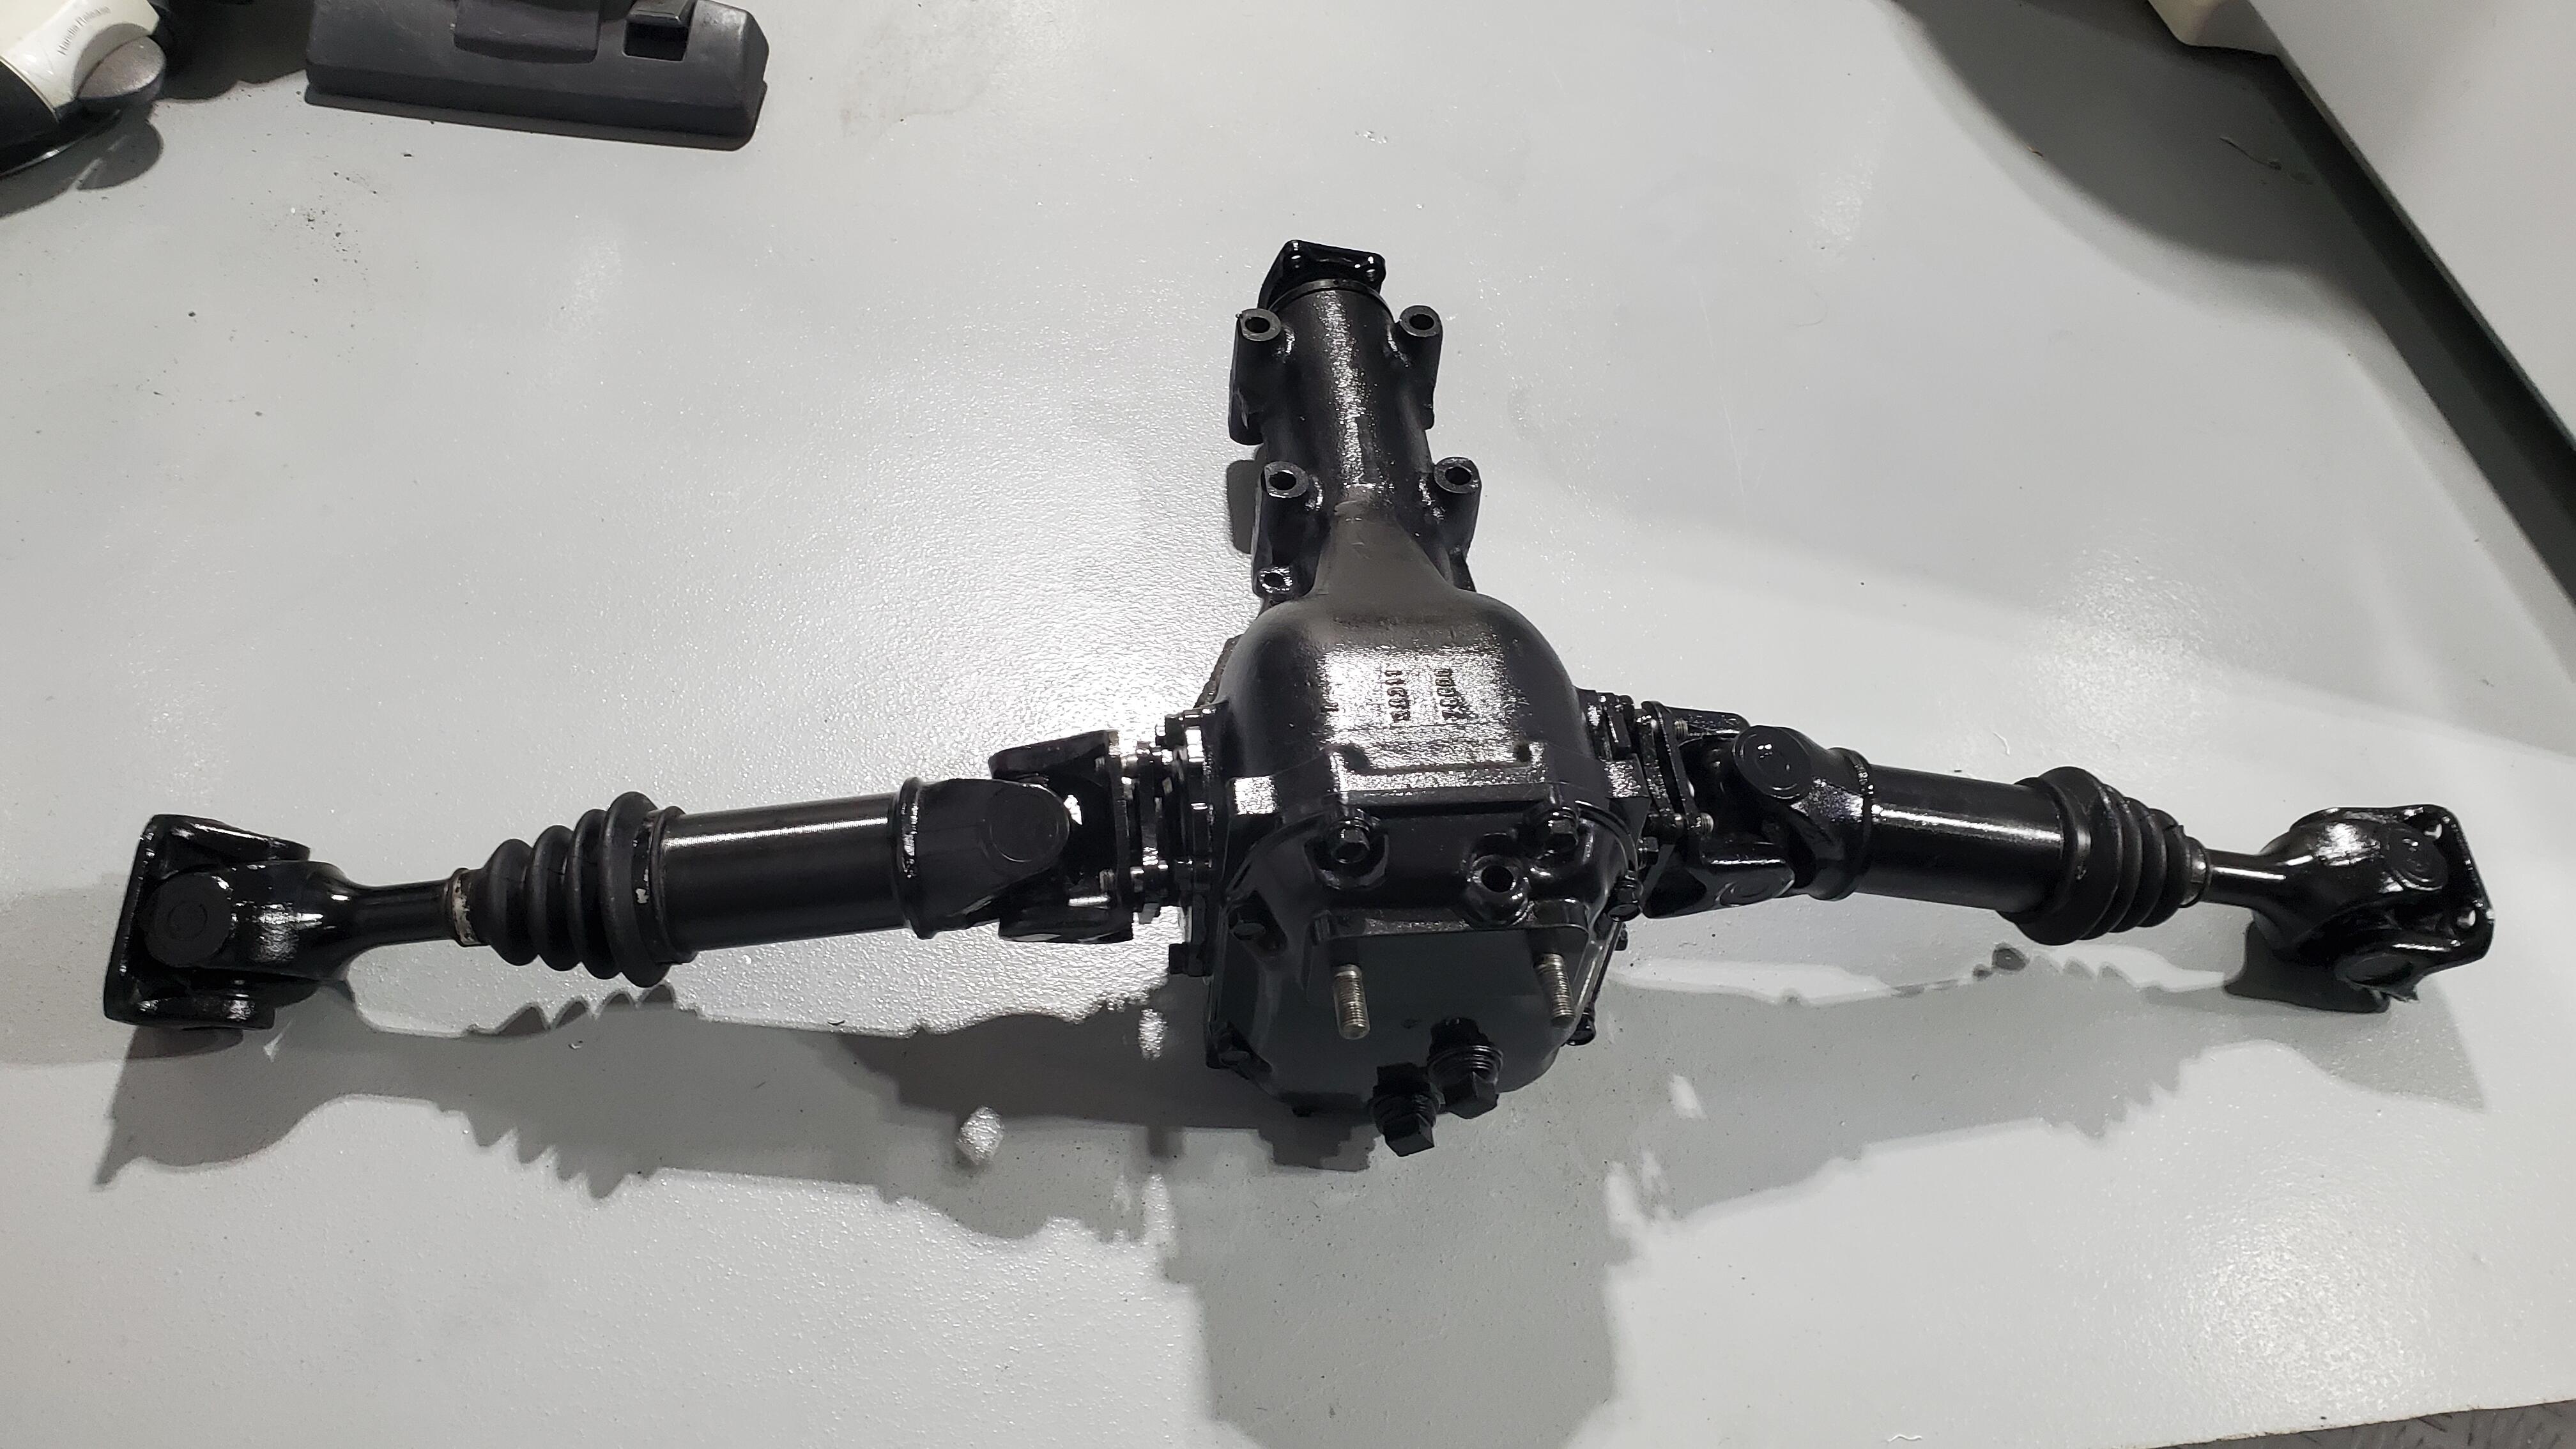
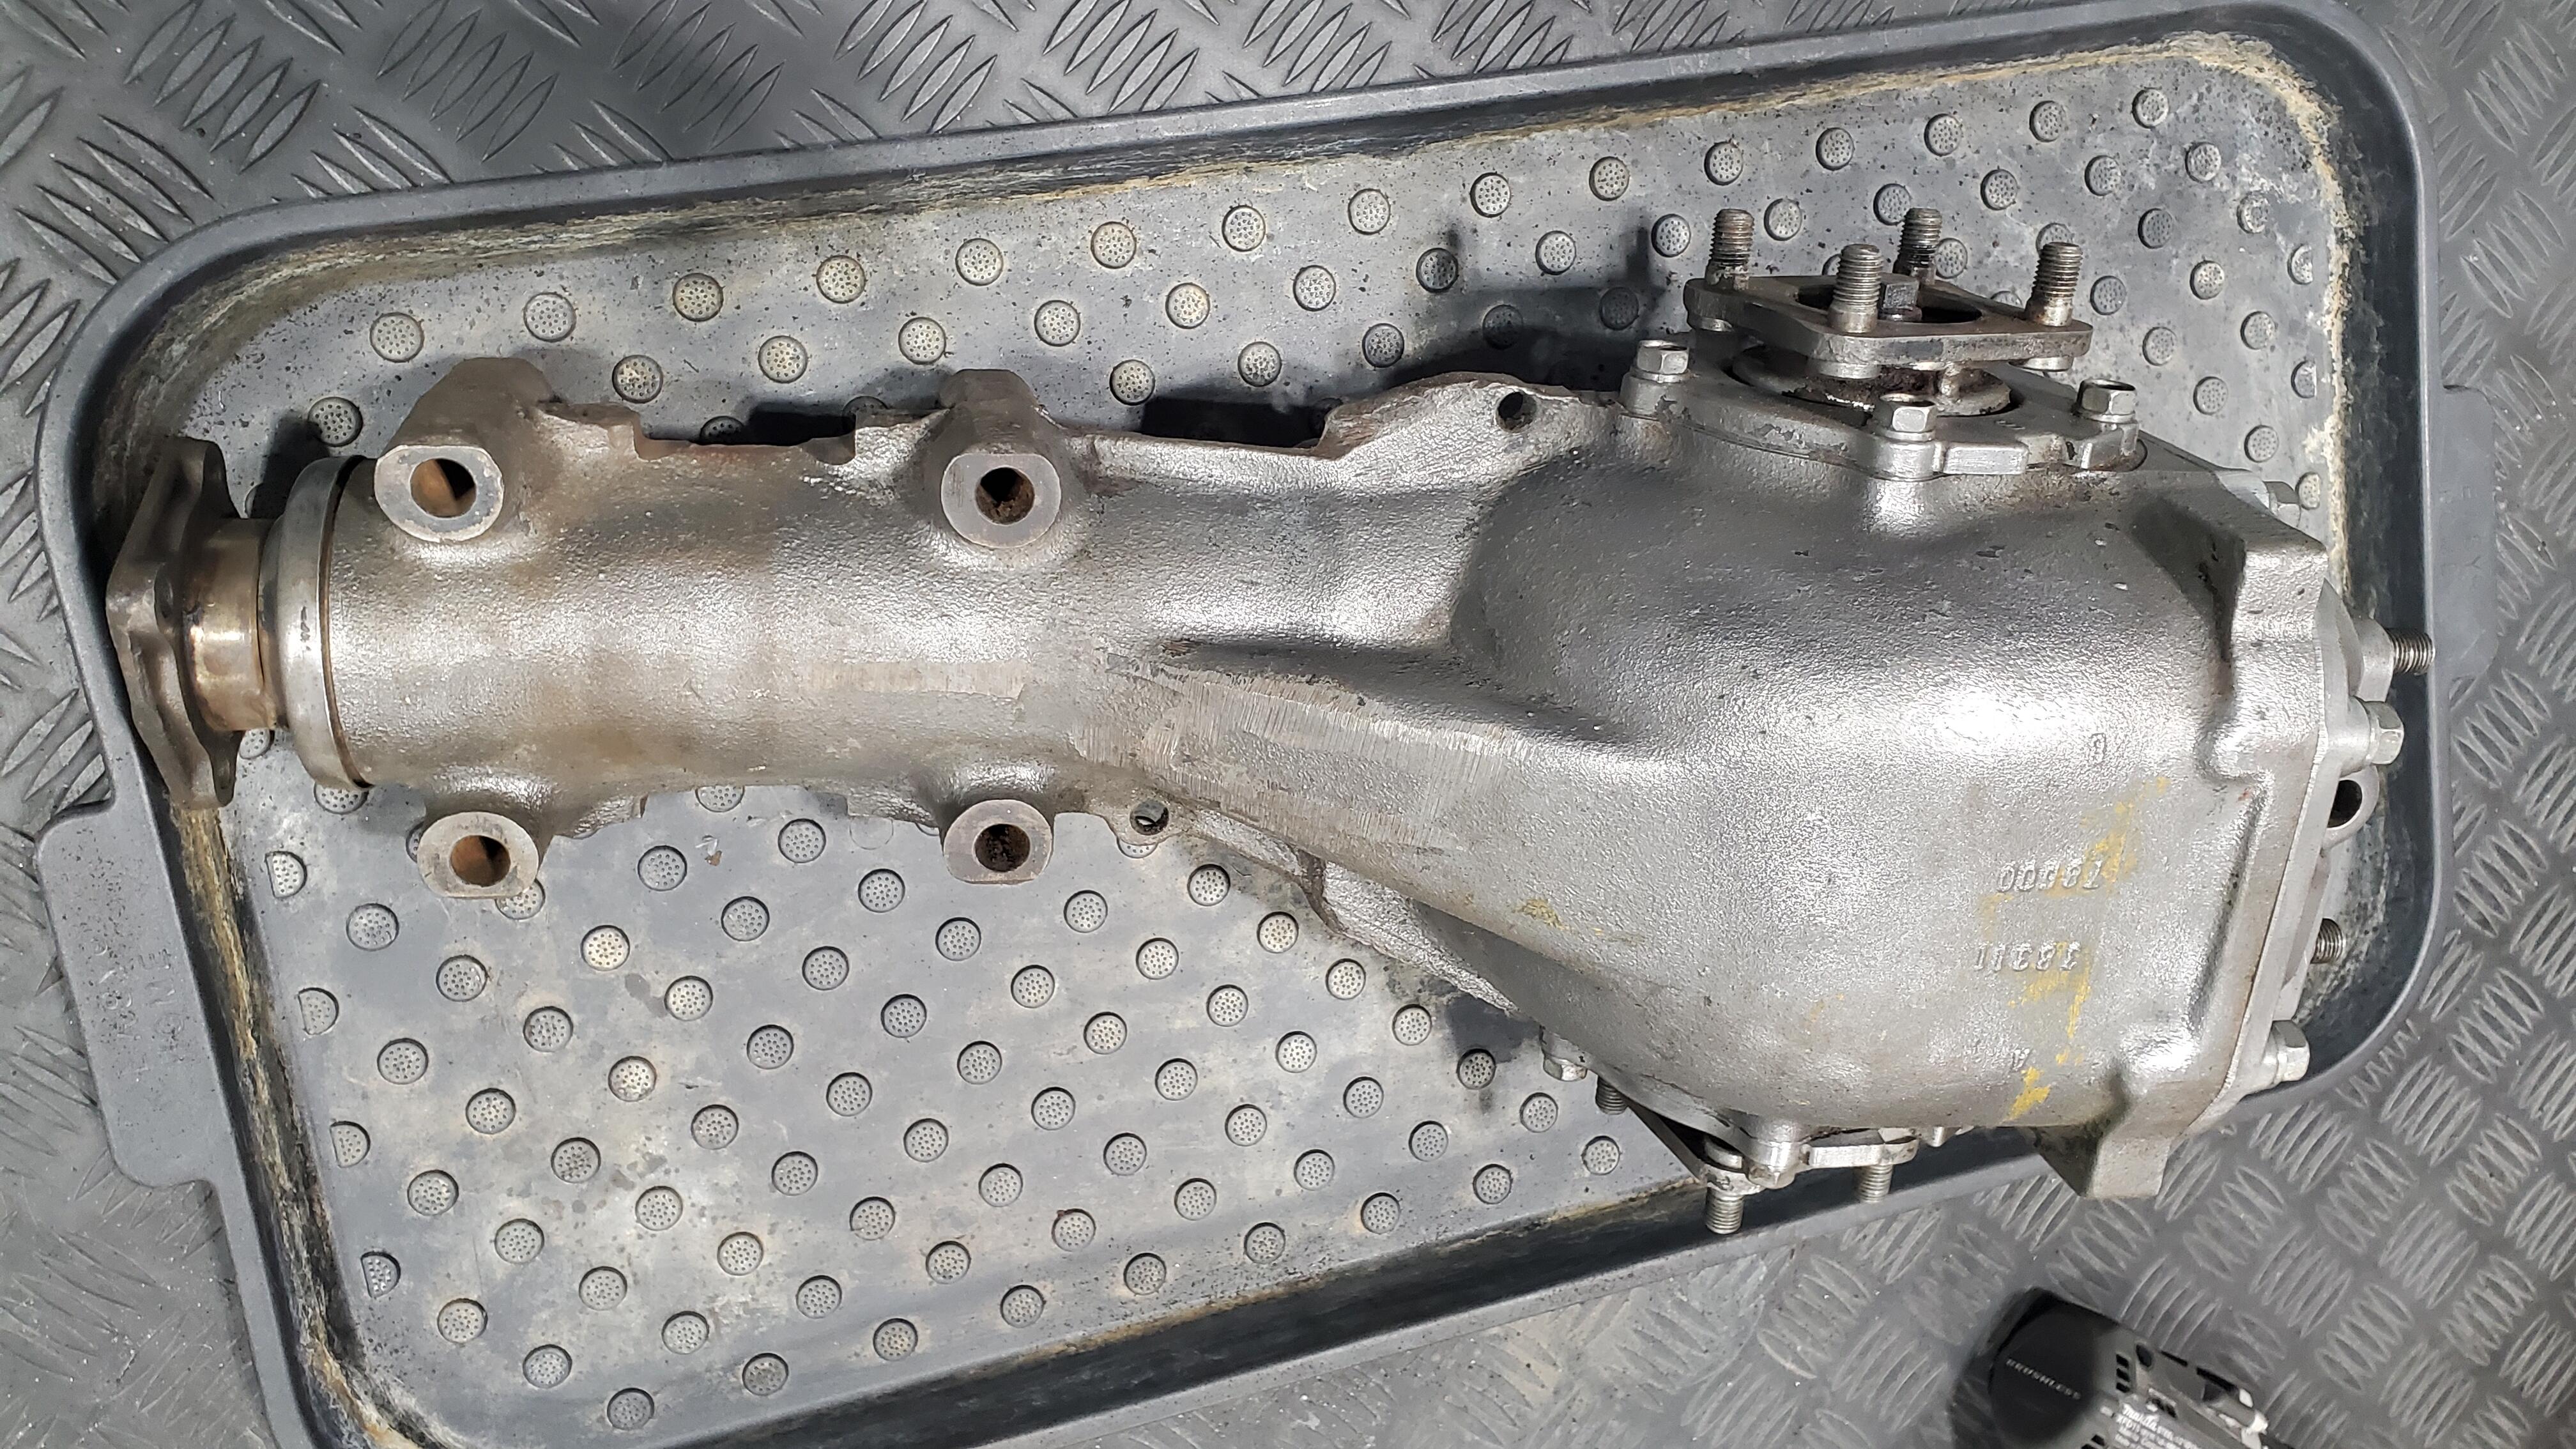
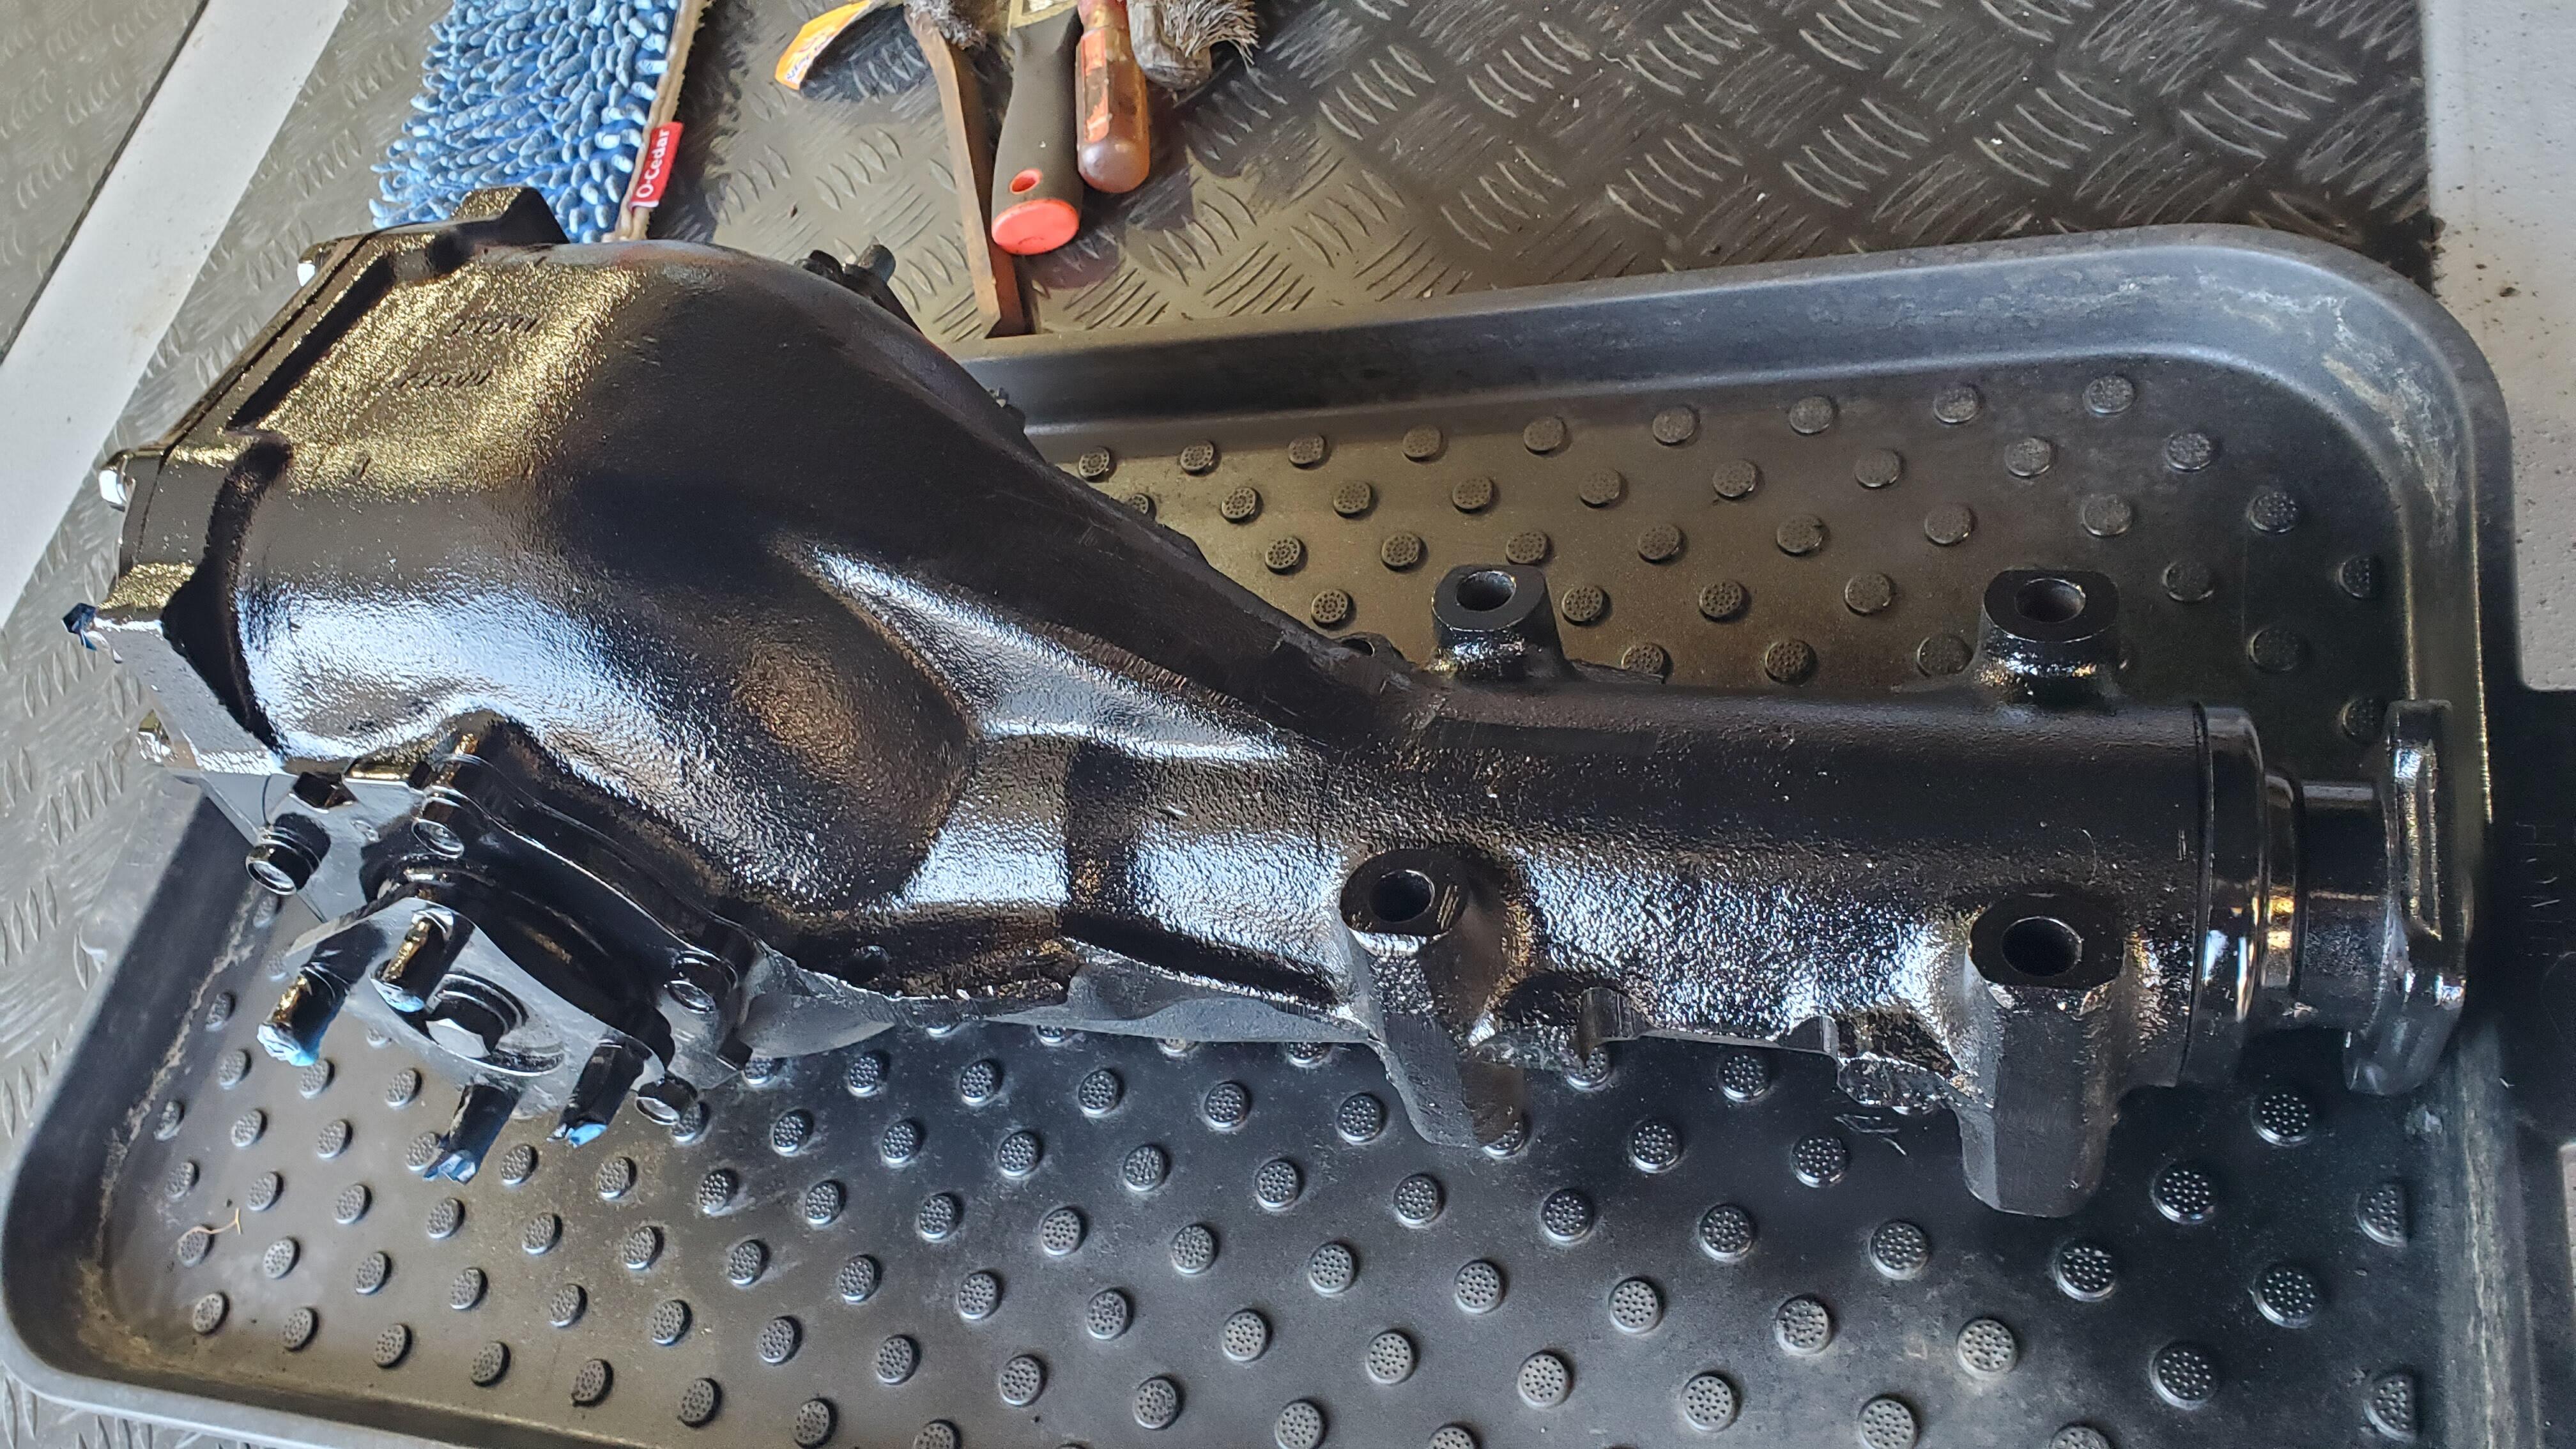
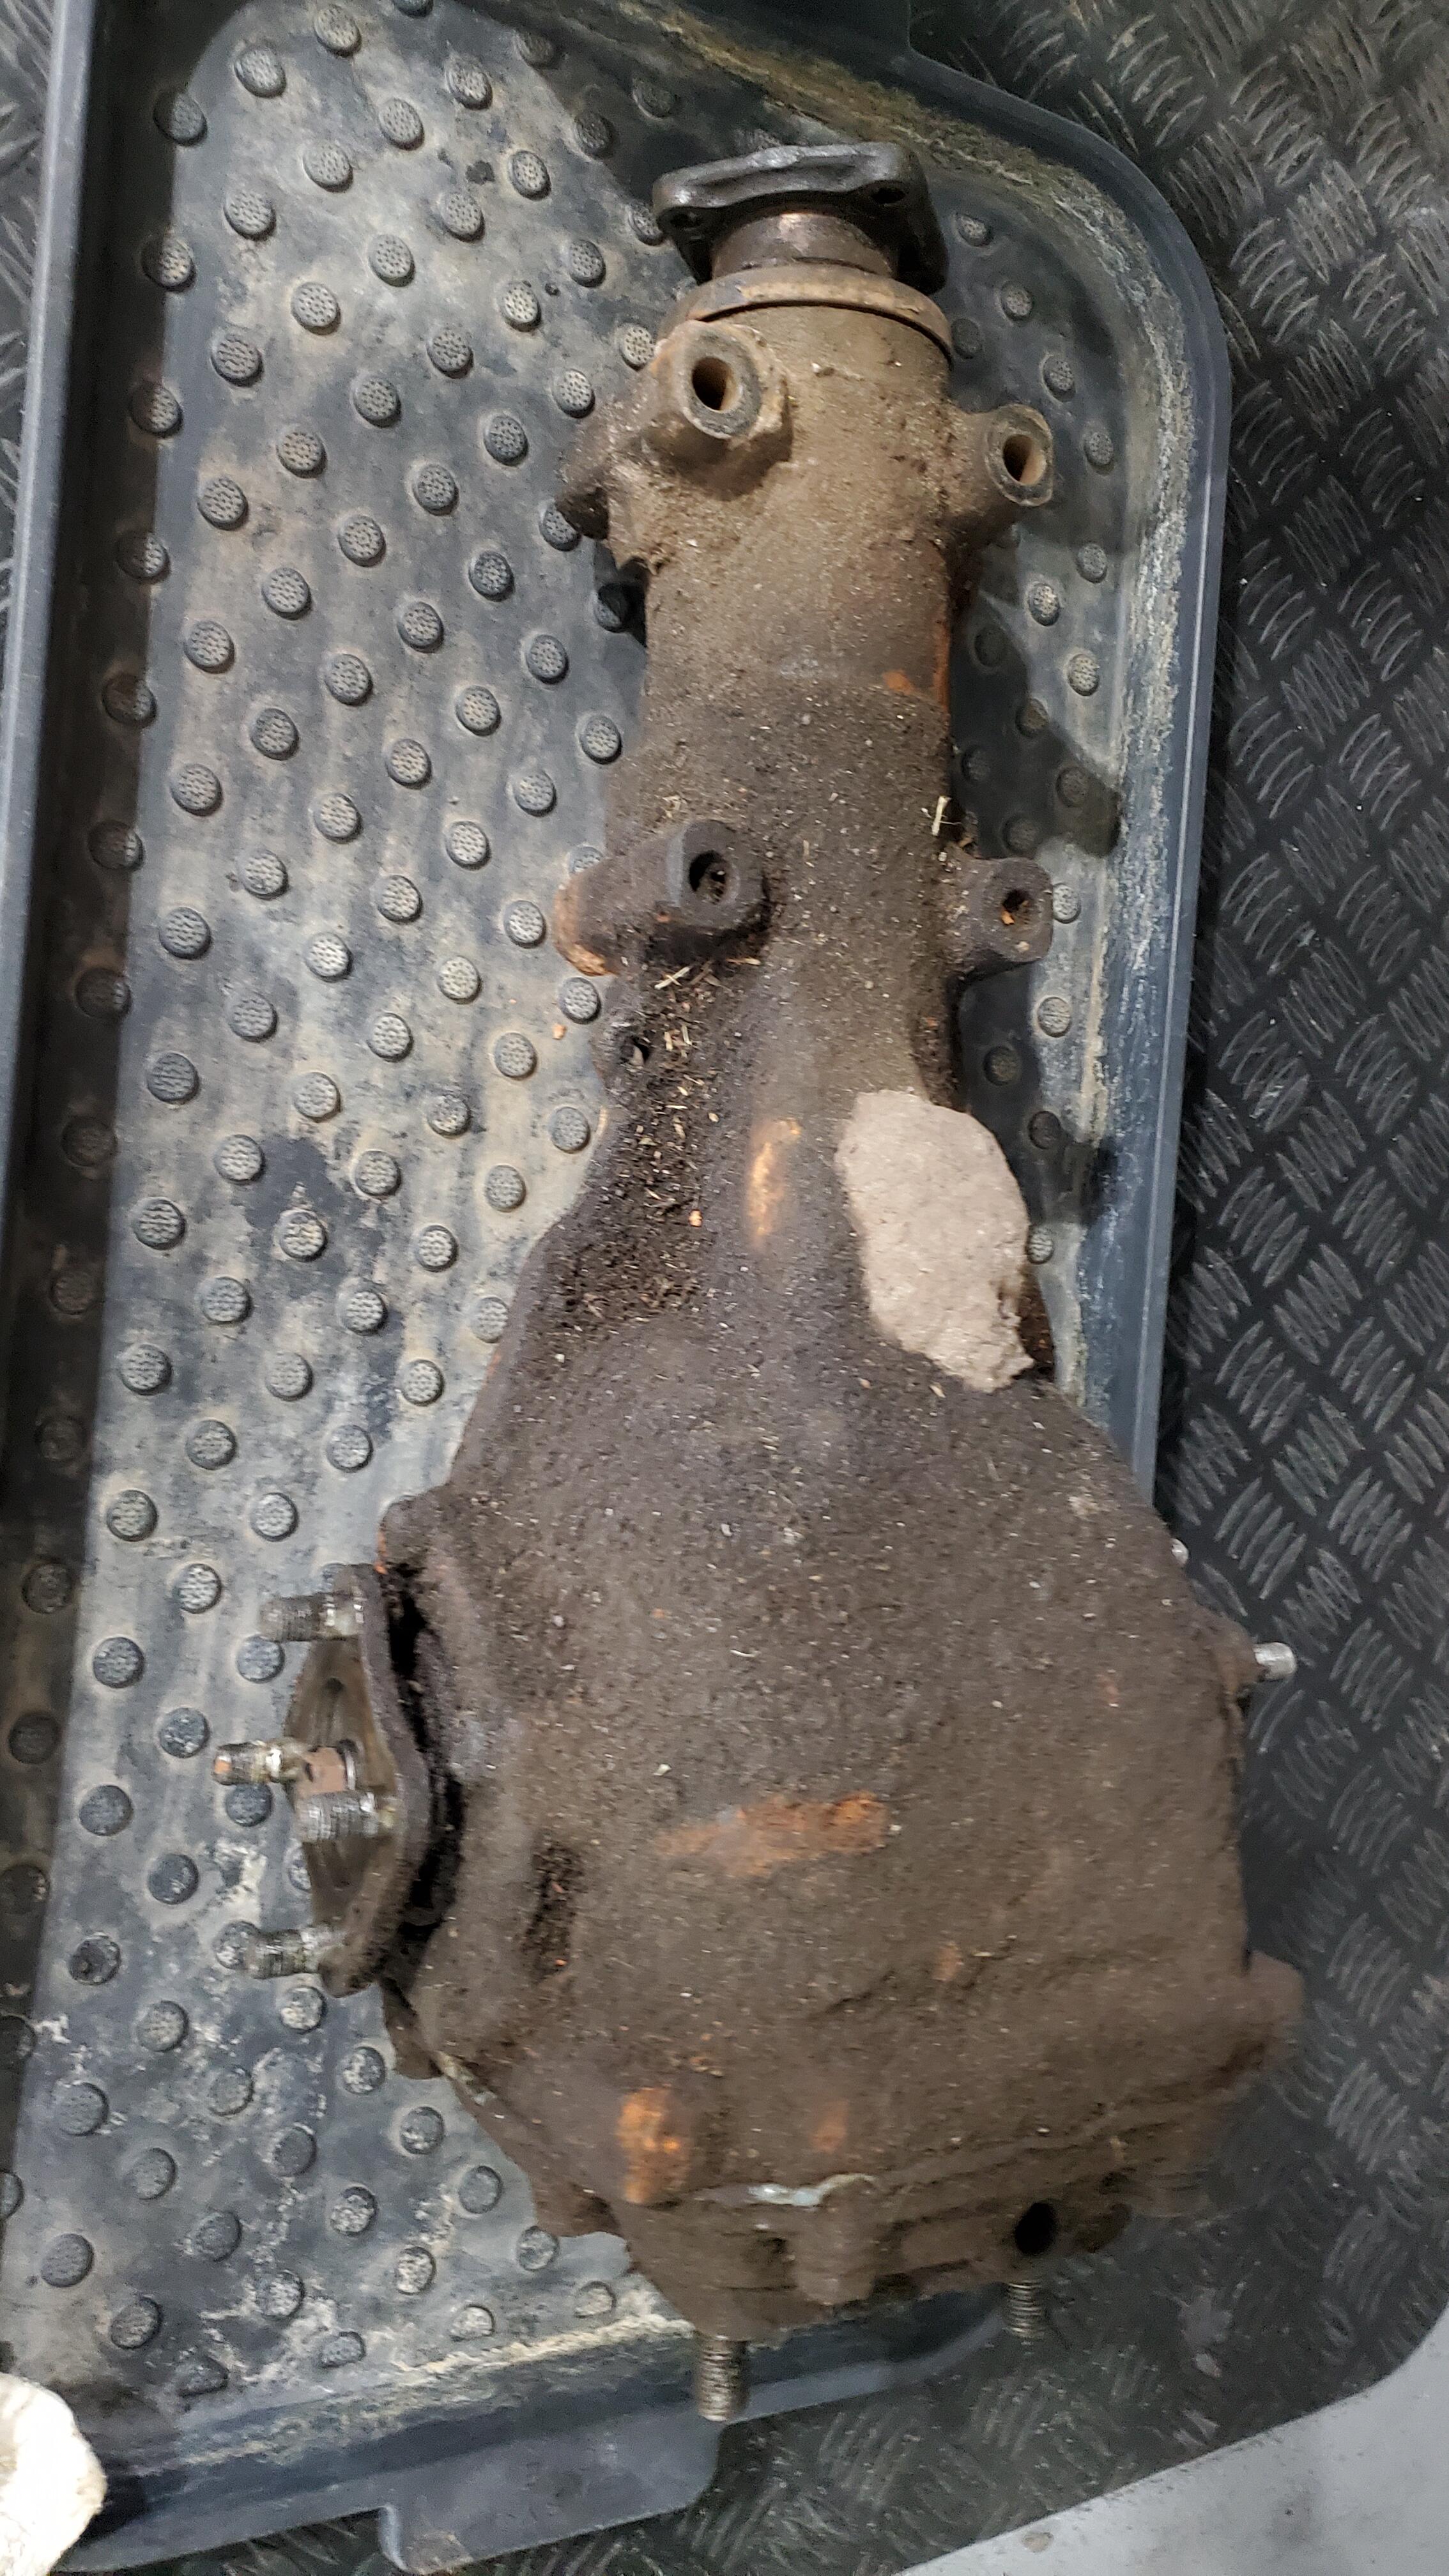
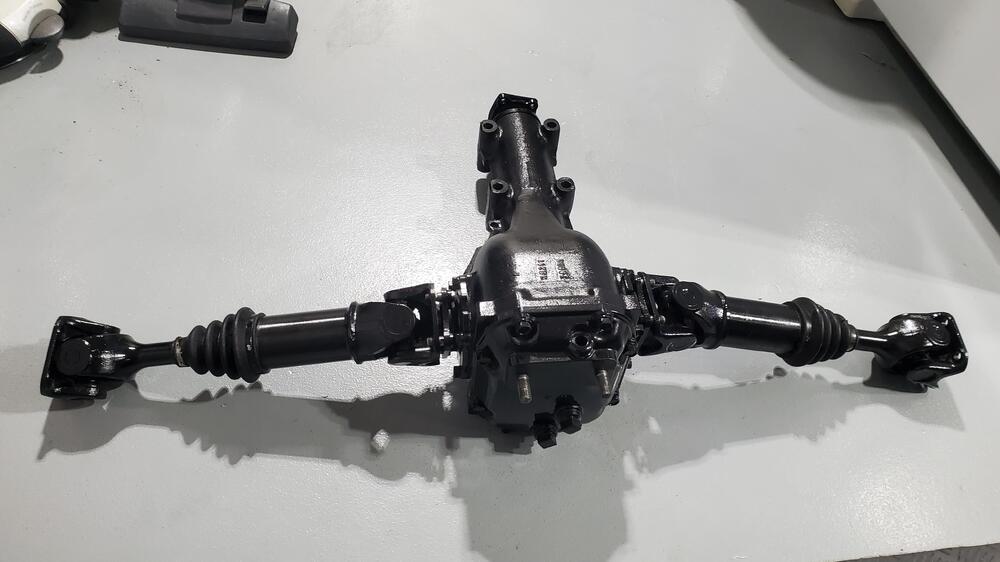
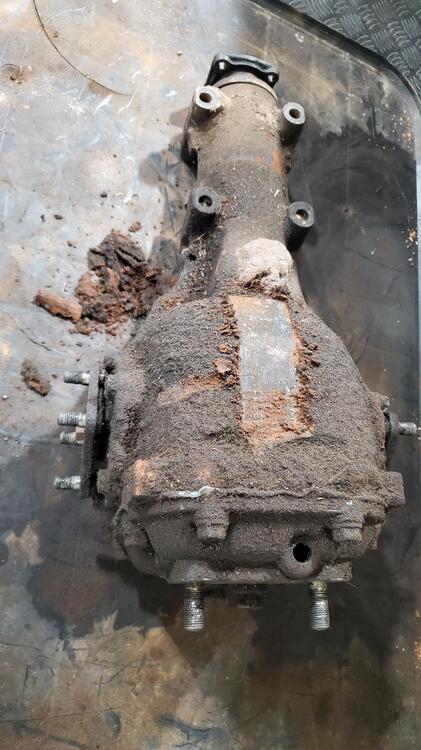
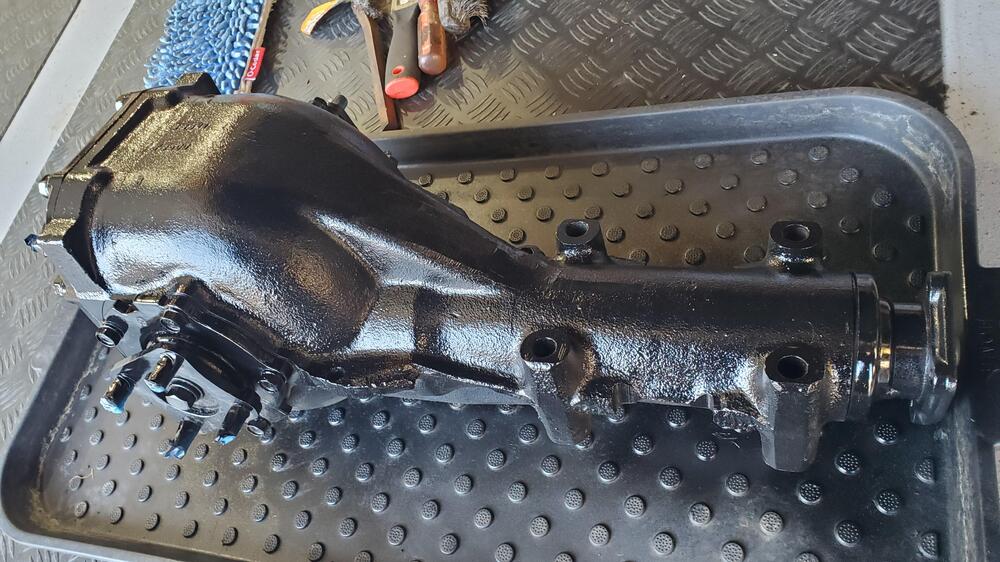
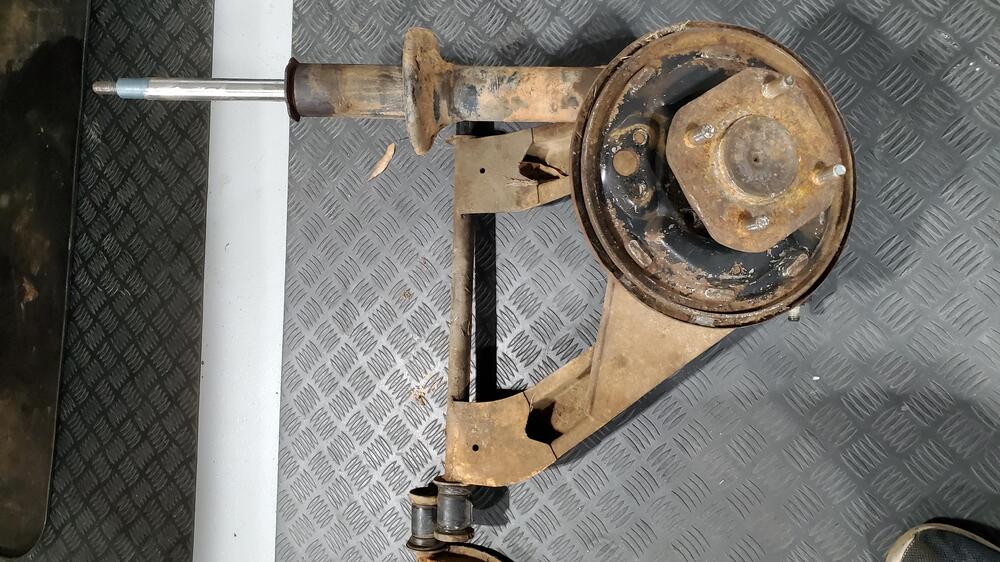
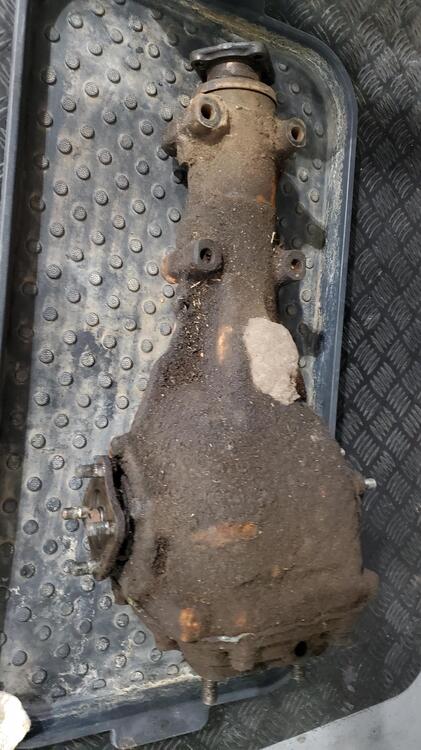
I am starting to clean up parts now, so figured I would start with the differential. A lot of the undercarriage parts have a healthy coating of dirt on them as you can see in the picture of the differential below. I think the combination of dirt and oil on the parts created a nice protective coating as there does not appear to be much rust....just a lot of oily dirt. Typically I would leave the aluminum bare on the differential as I think that looks very cool, however, we are planning on making this as close to the original as possible so the entire diff, except for the stud threads, are painted black. Pics below.

-
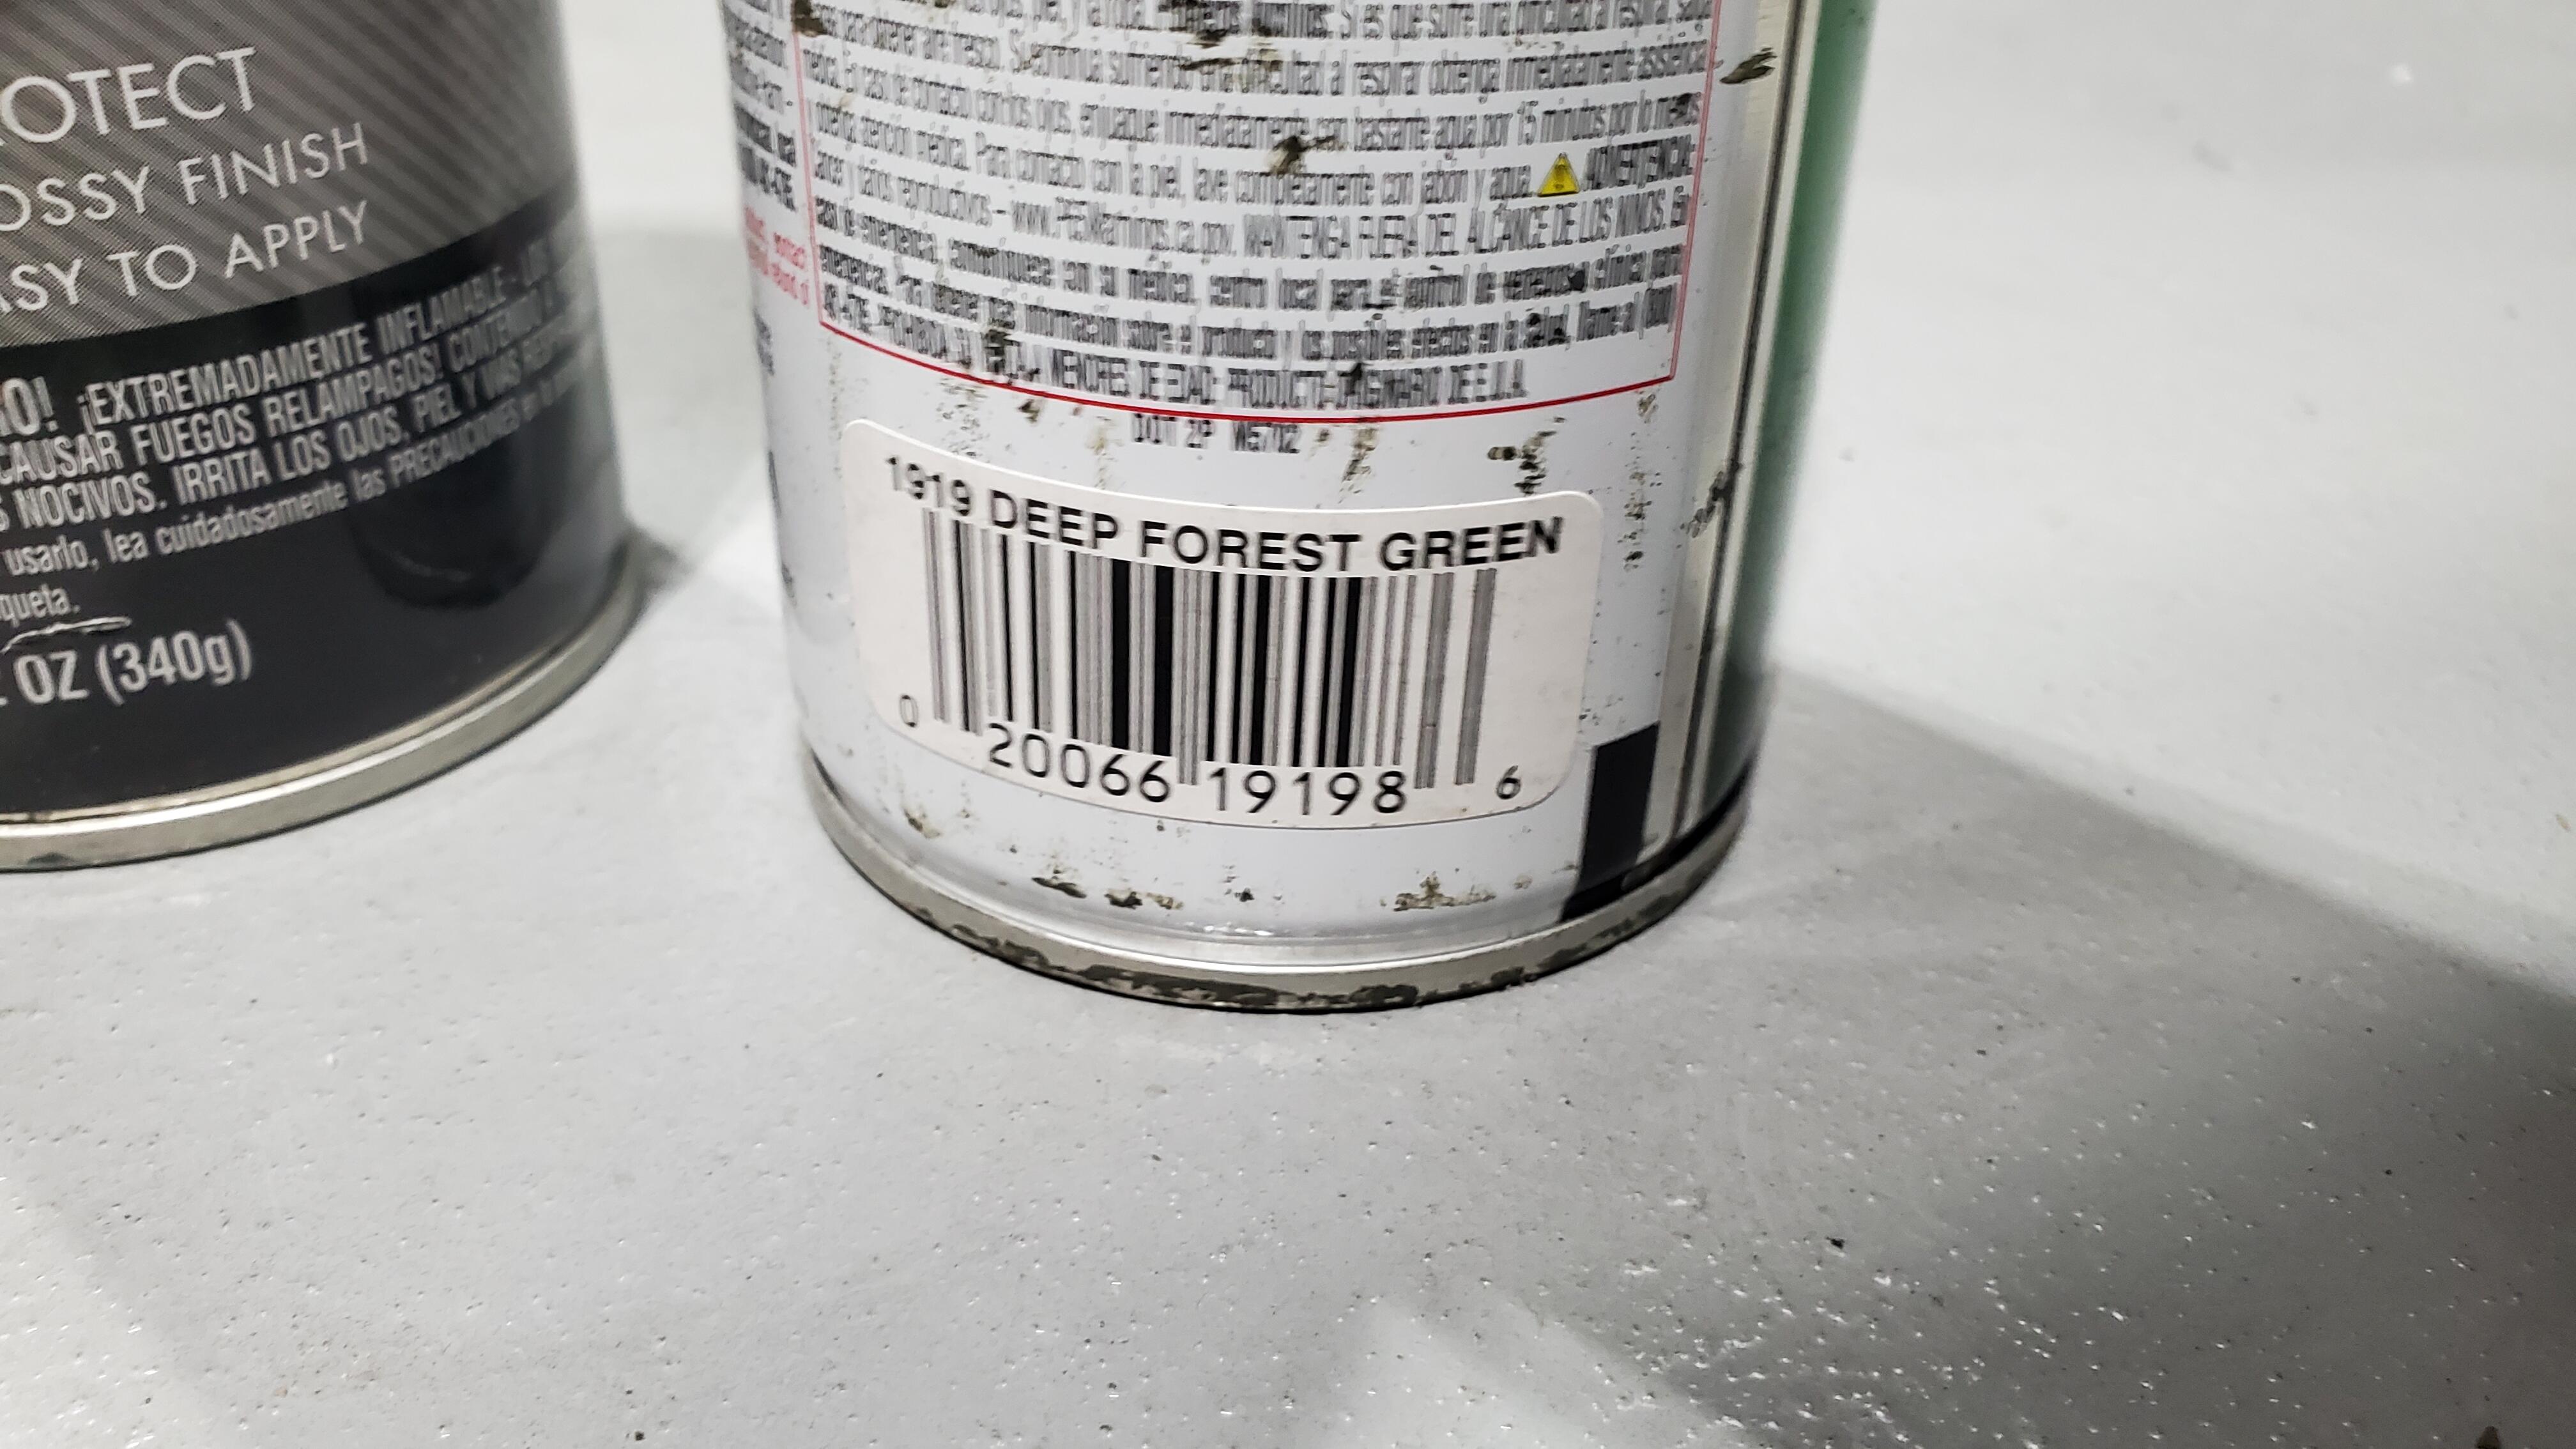
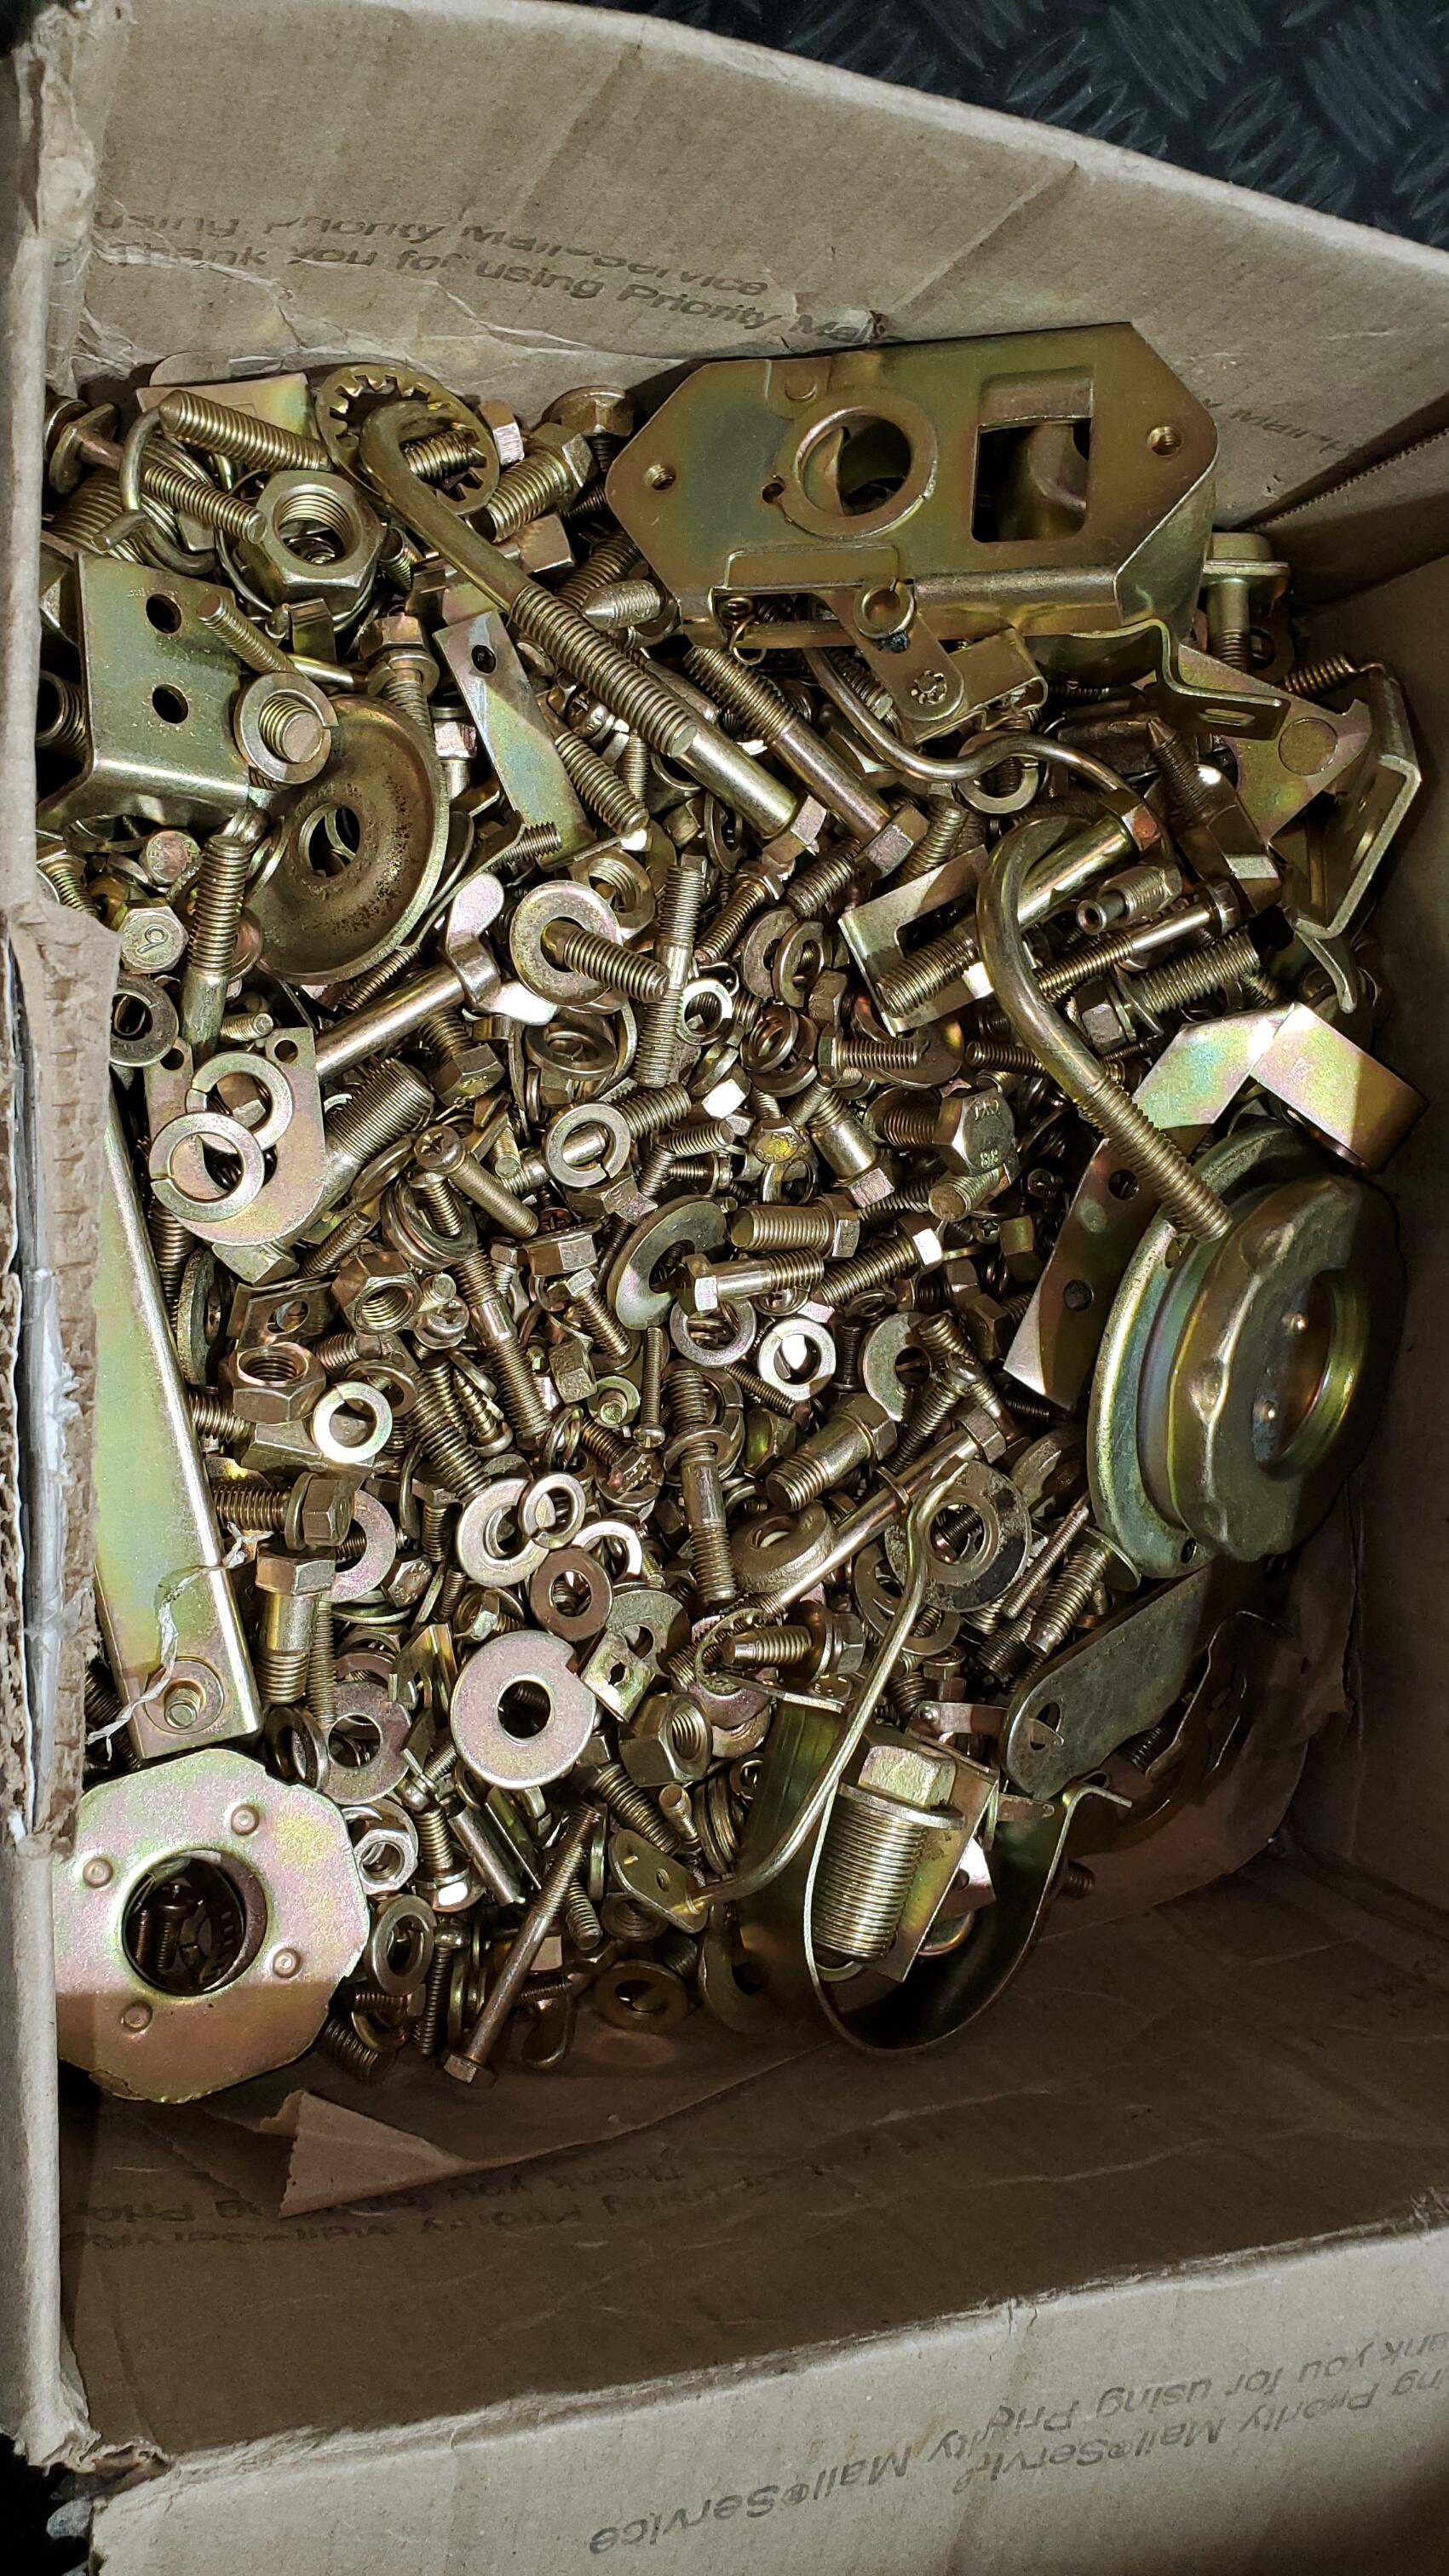
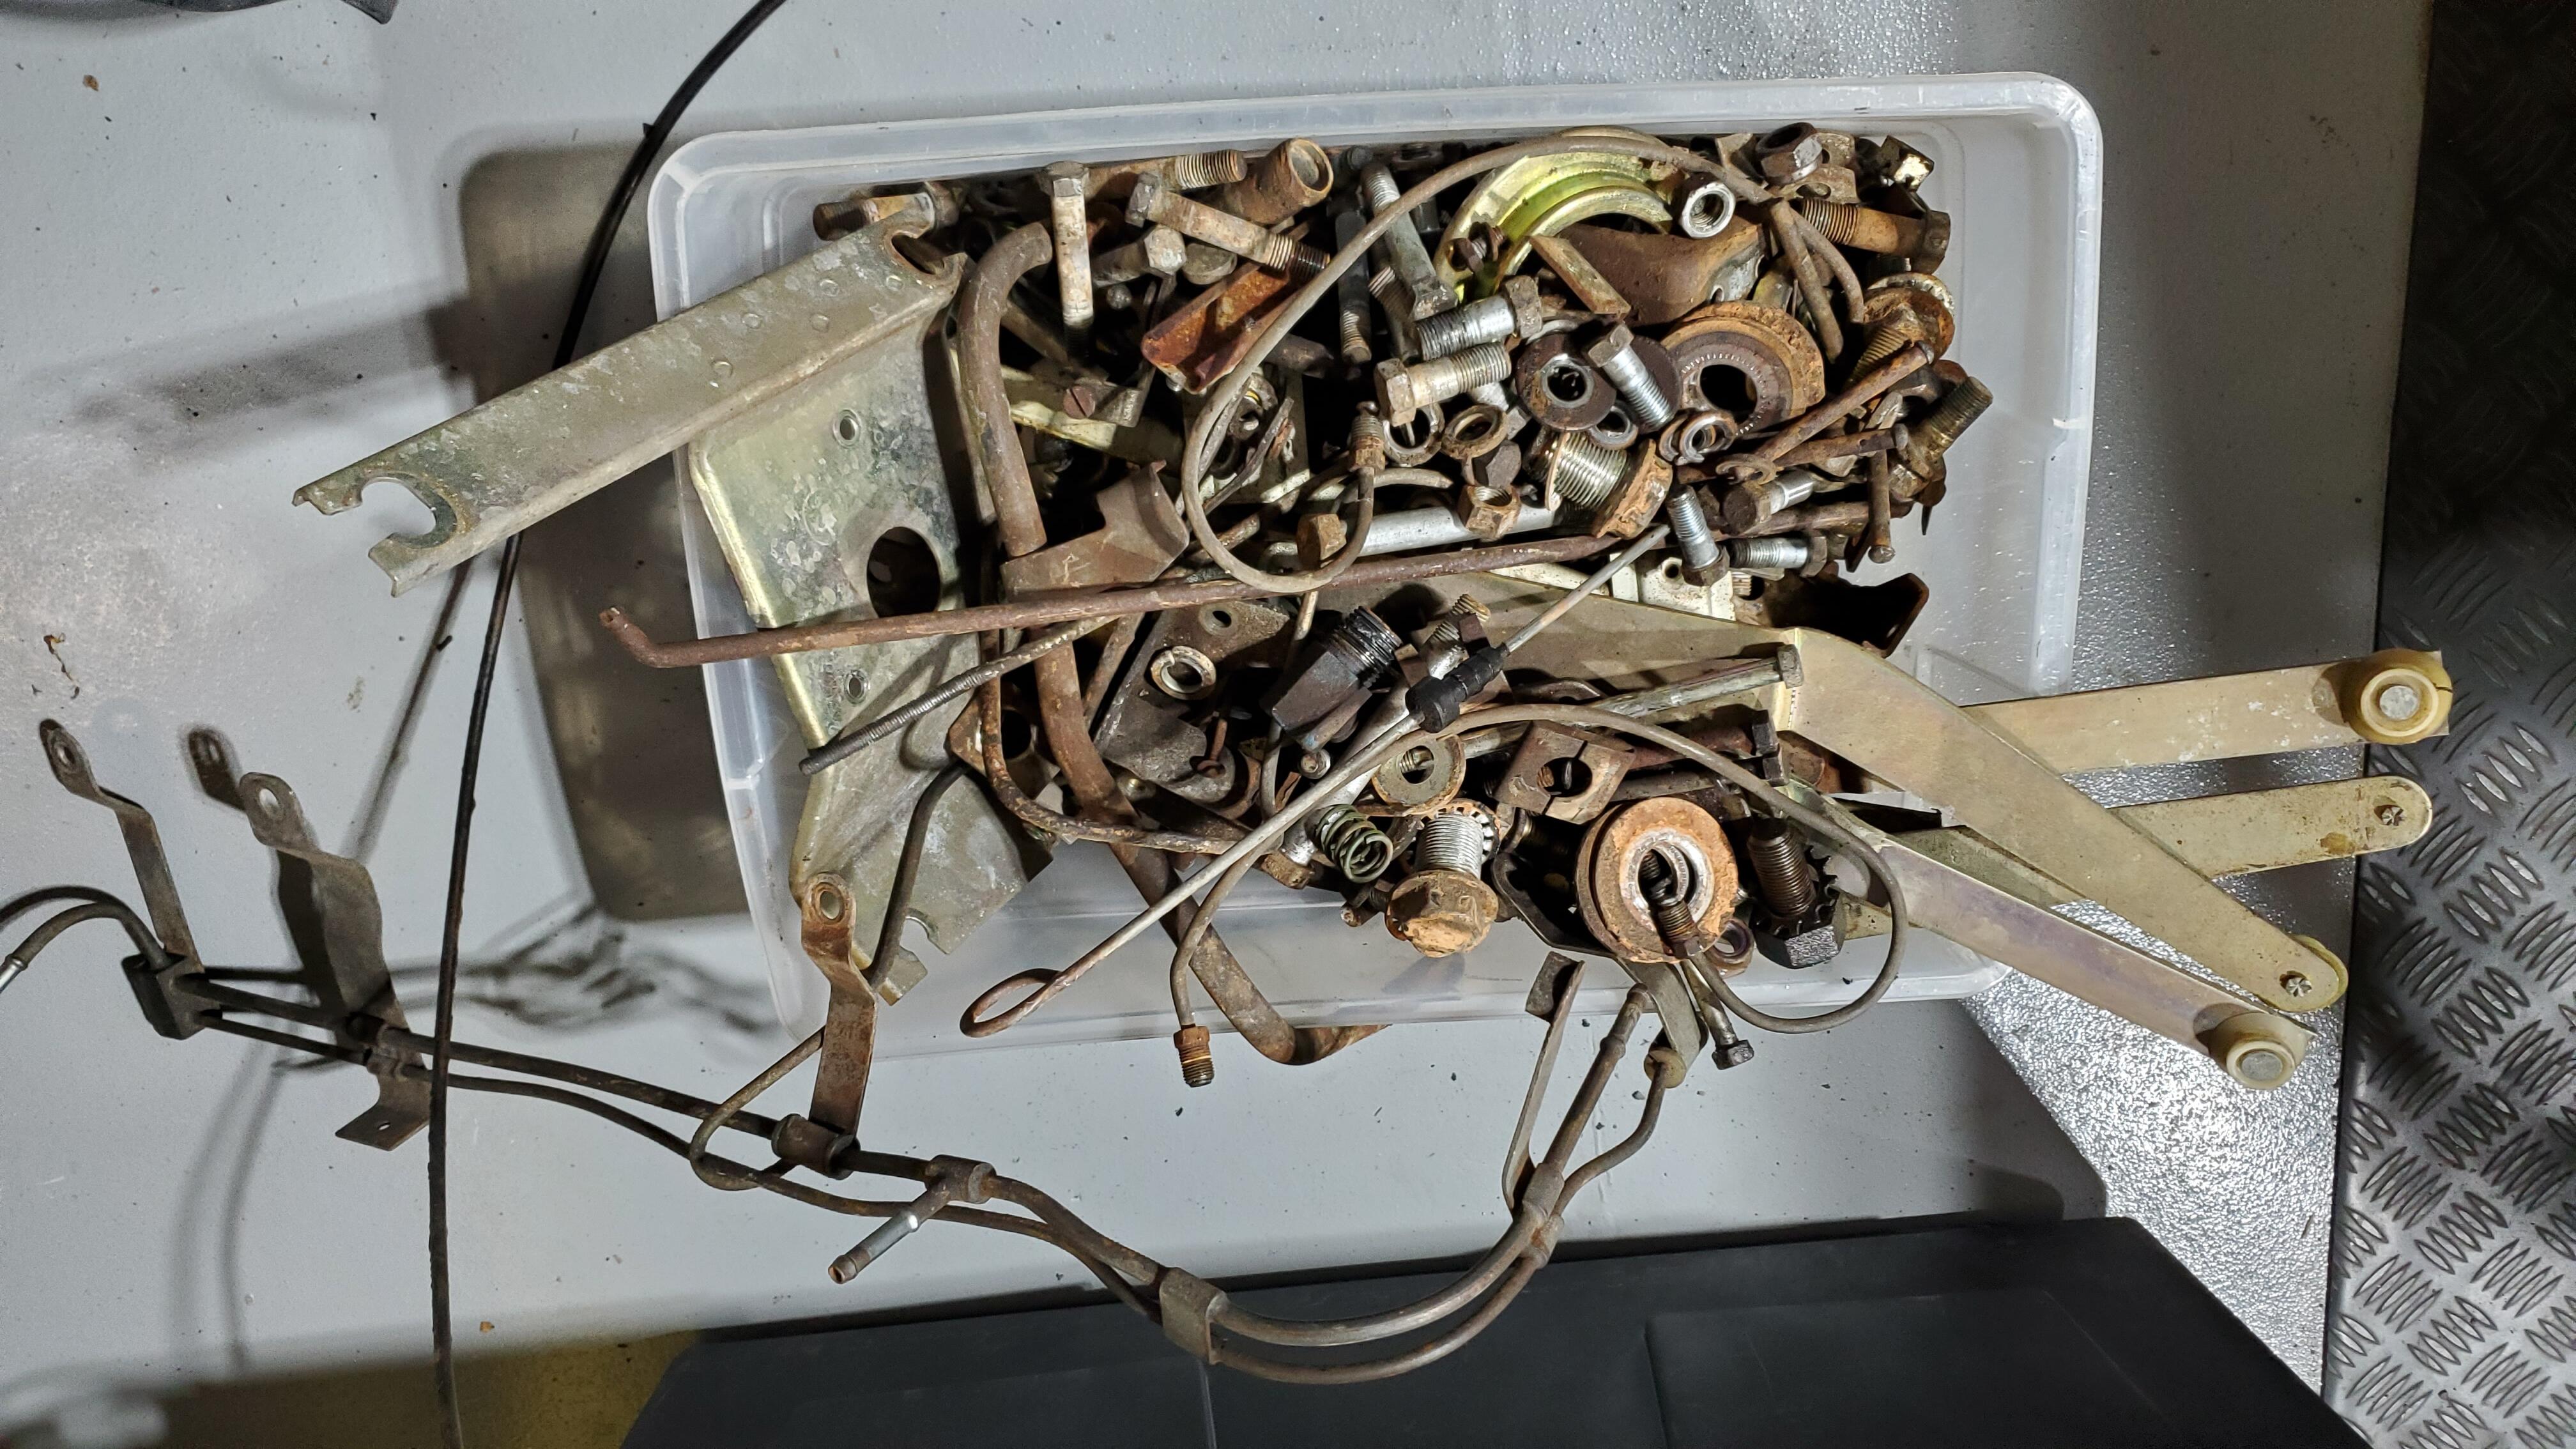
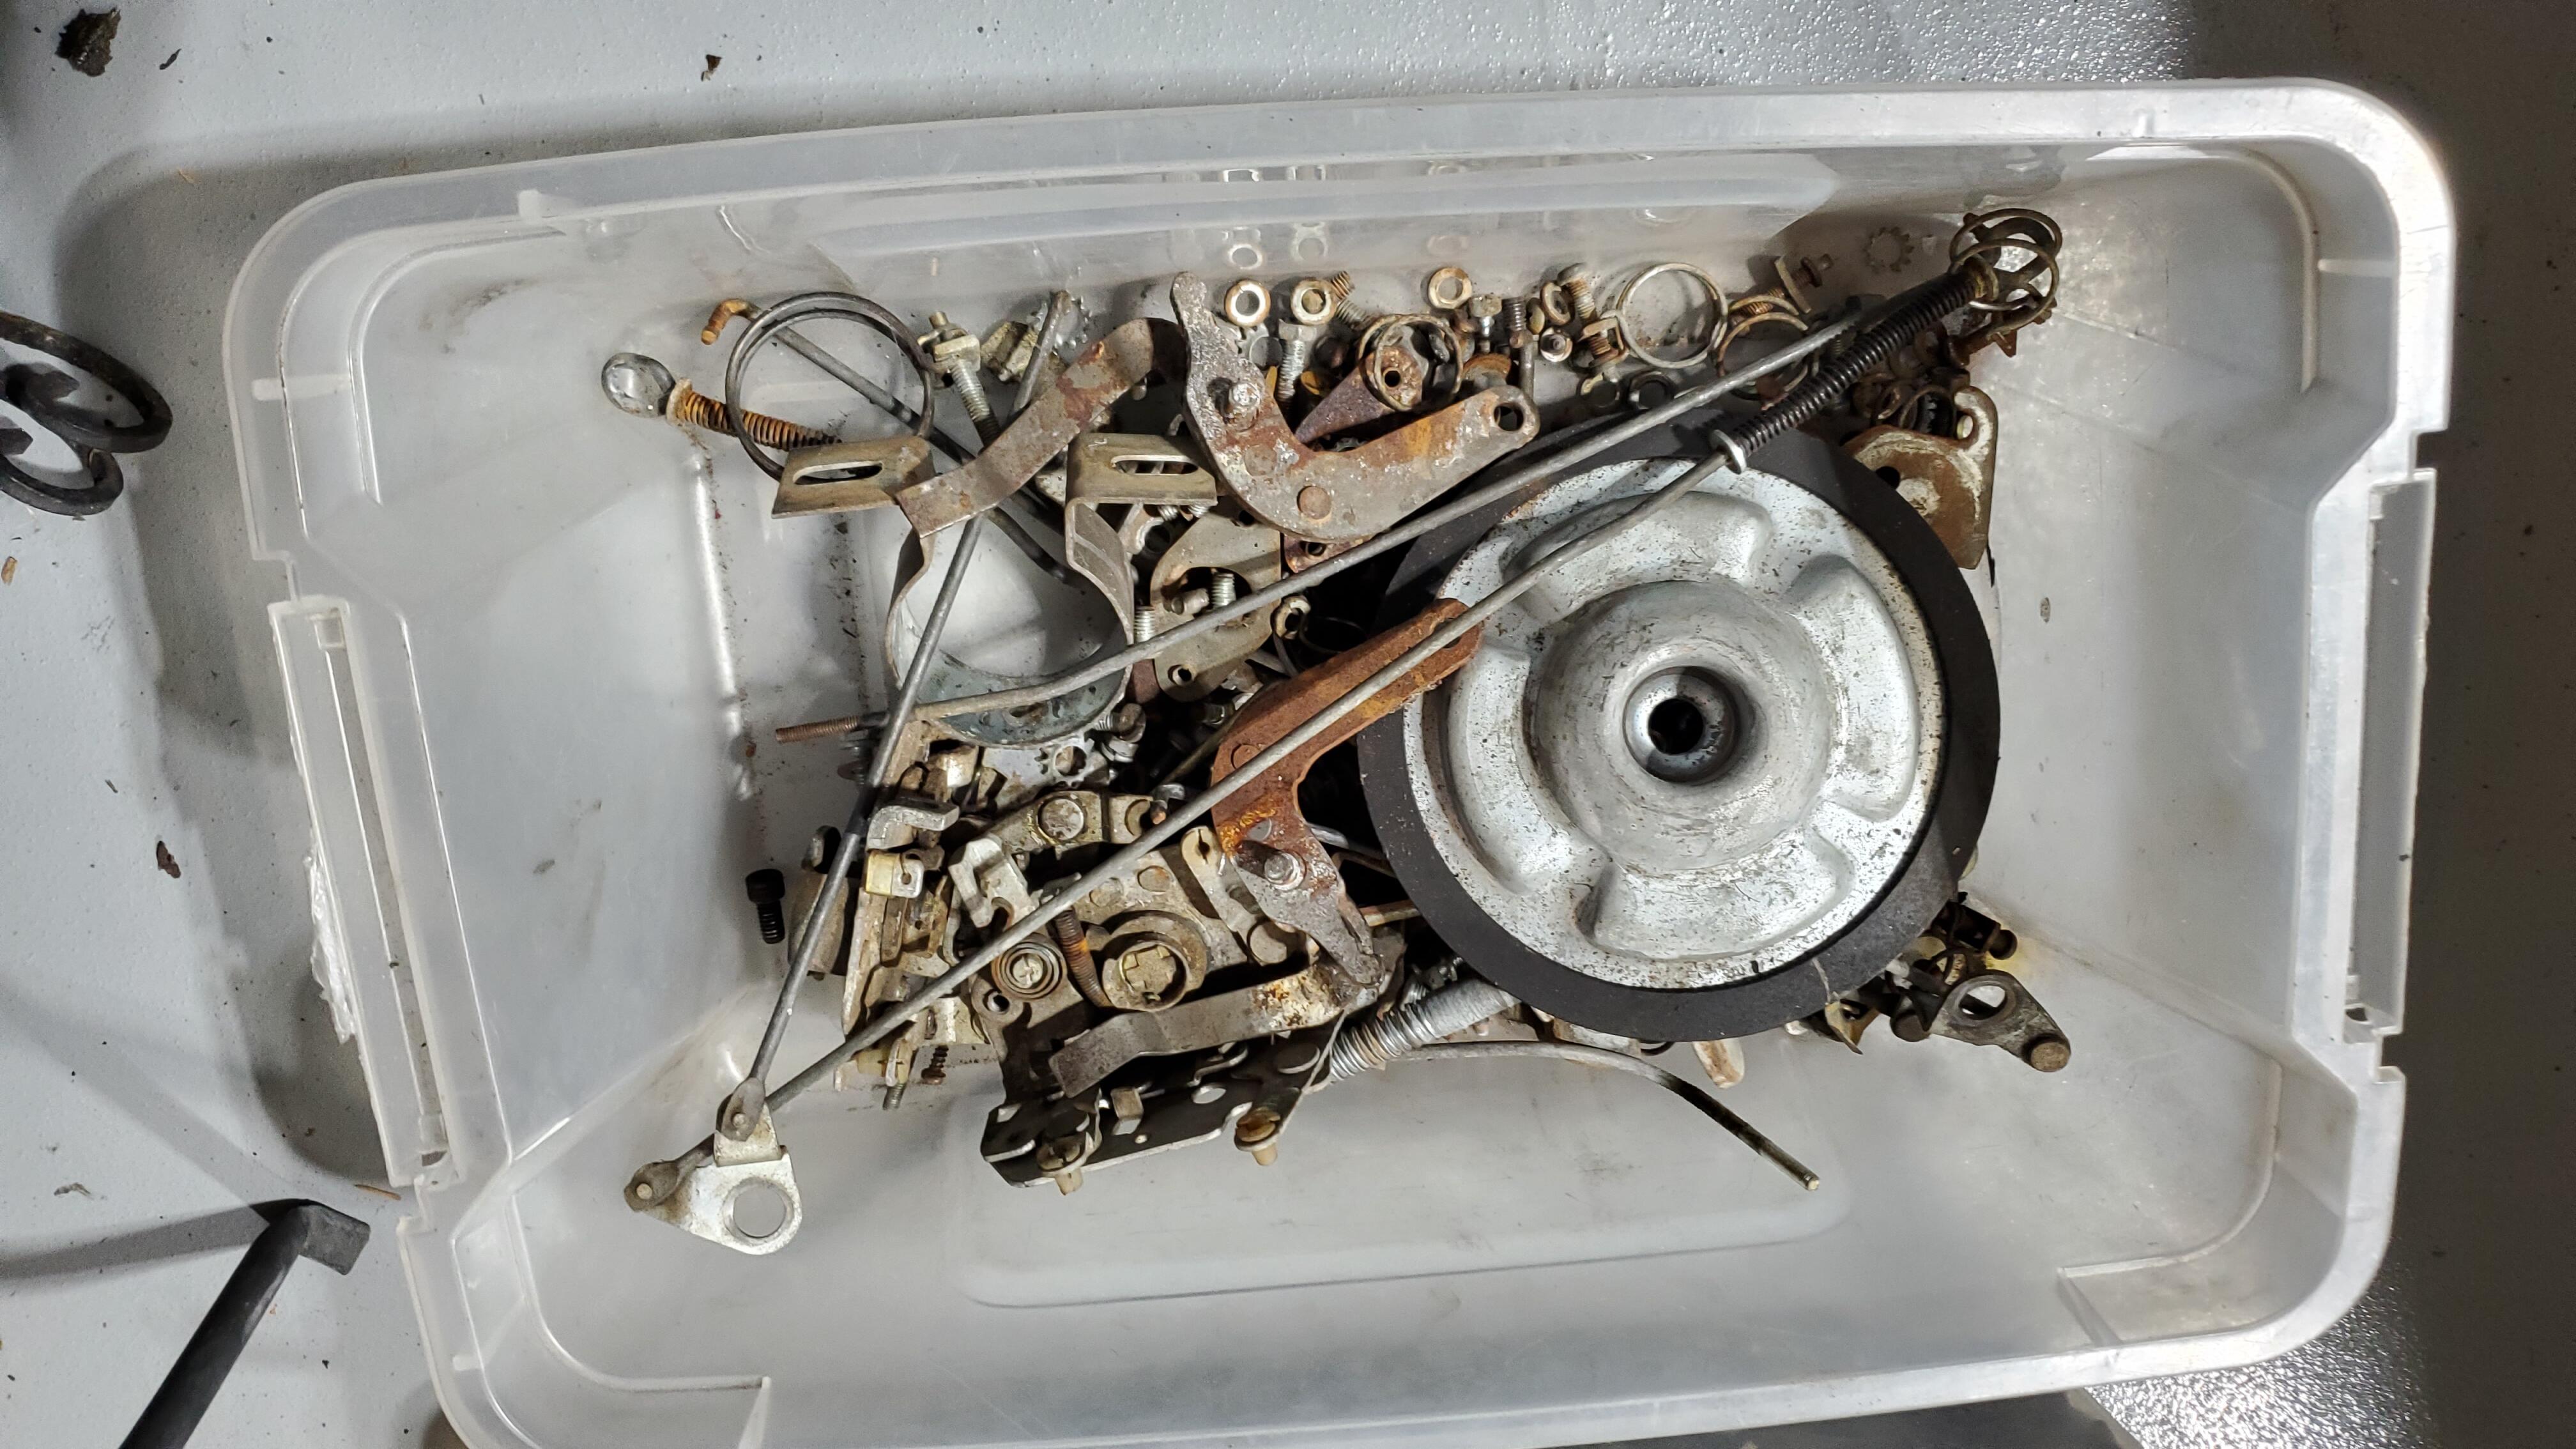
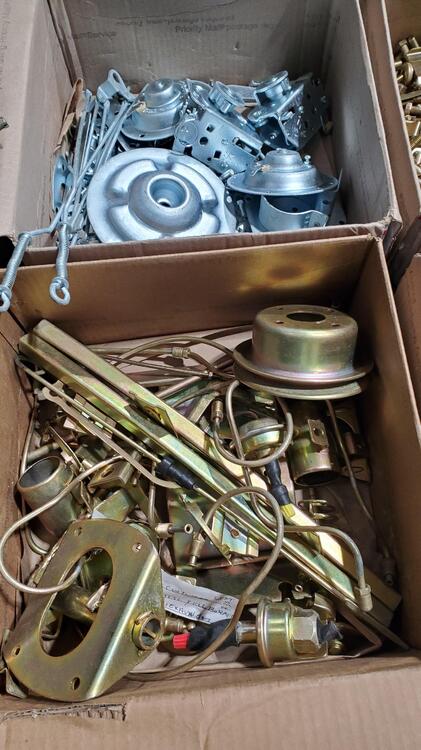
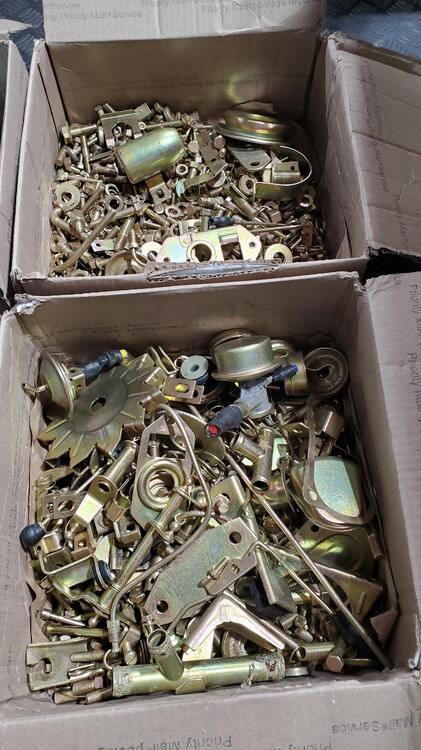
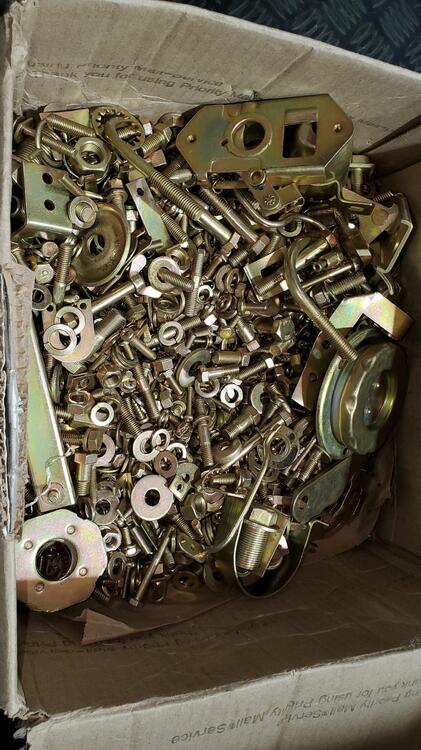
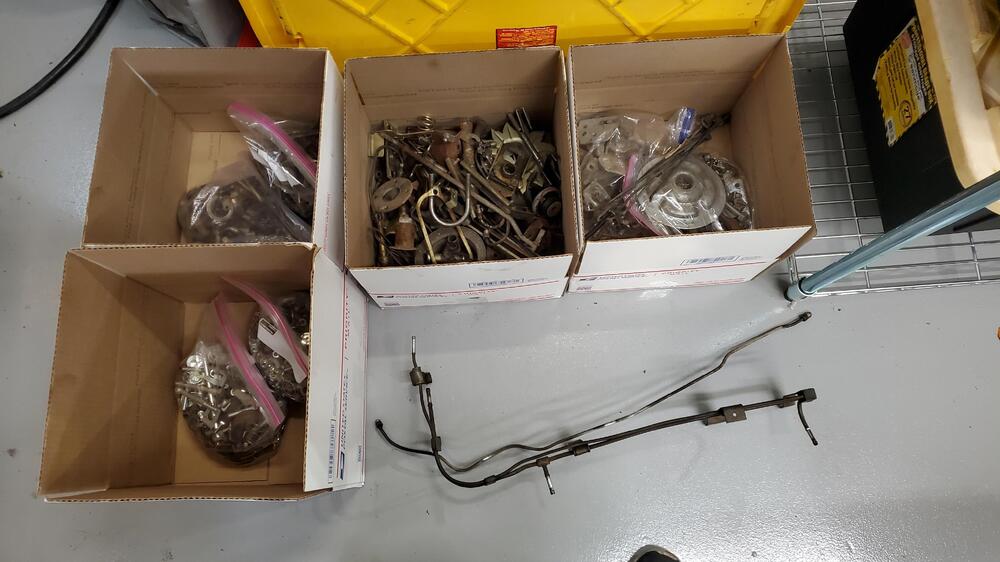
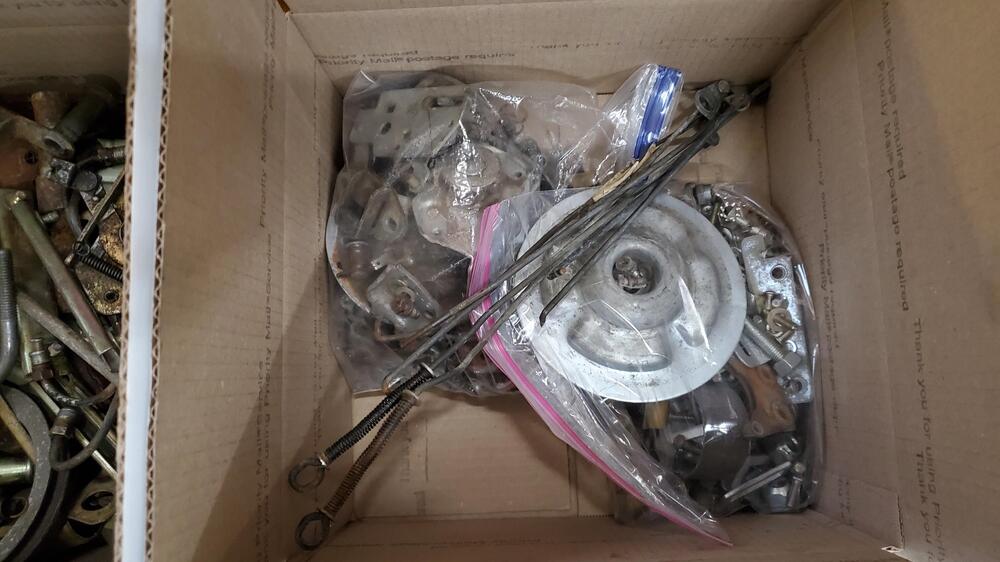
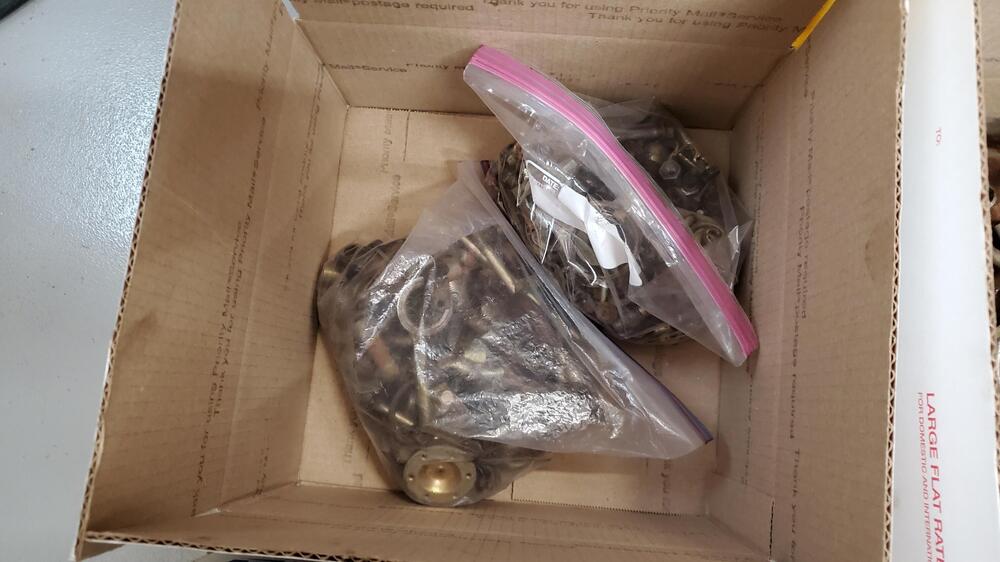
I sorted the parts that need to be re-plated by color, yellow zinc or clear zinc. I did a quick clean to knock off excess dirt and wire wheeled the areas where there was paint overspray from the previous paint job. I put some shrink sleeve over the plastic portion of the carb linkage to protect them during the cleaning process. I also plugged the holes of the carb and smog accessories to prevent the fluids from entering inside. I then put the small parts in gallon zip lock bags. I had one box of the clear/silver zinc parts, and 3 boxes of the yellow/gold zinc parts. I used three boxes for the yellow zinc because of the excess weight (USPS flat rate shipping box). Each box weighed approximately 20 pounds For the plating process, the 3 yellow/gold zinc parts will be thrown into a single barrel, so the charge will be for just one yellow zinc barrel plate. The plating company does a good job of cleaning the smaller parts in their prep process. I am guessing it is either a vibe or tumble process along with a chemical clean that they use to clean the parts to remove dirt and rust. I spent a bit more time cleaning the long tubes and larger parts as they will be rack plated and I do not think they get cleaned as well. On the long tubes I put in a large diameter bend in order get the parts to fit in my 4 foot shipping box. They said they can accomodate parts up to 6 feet in length. All plating is done by Sav-On plating in Phoenix, AZ. They have done a great job with my parts on previous restorations. Pics Below


-
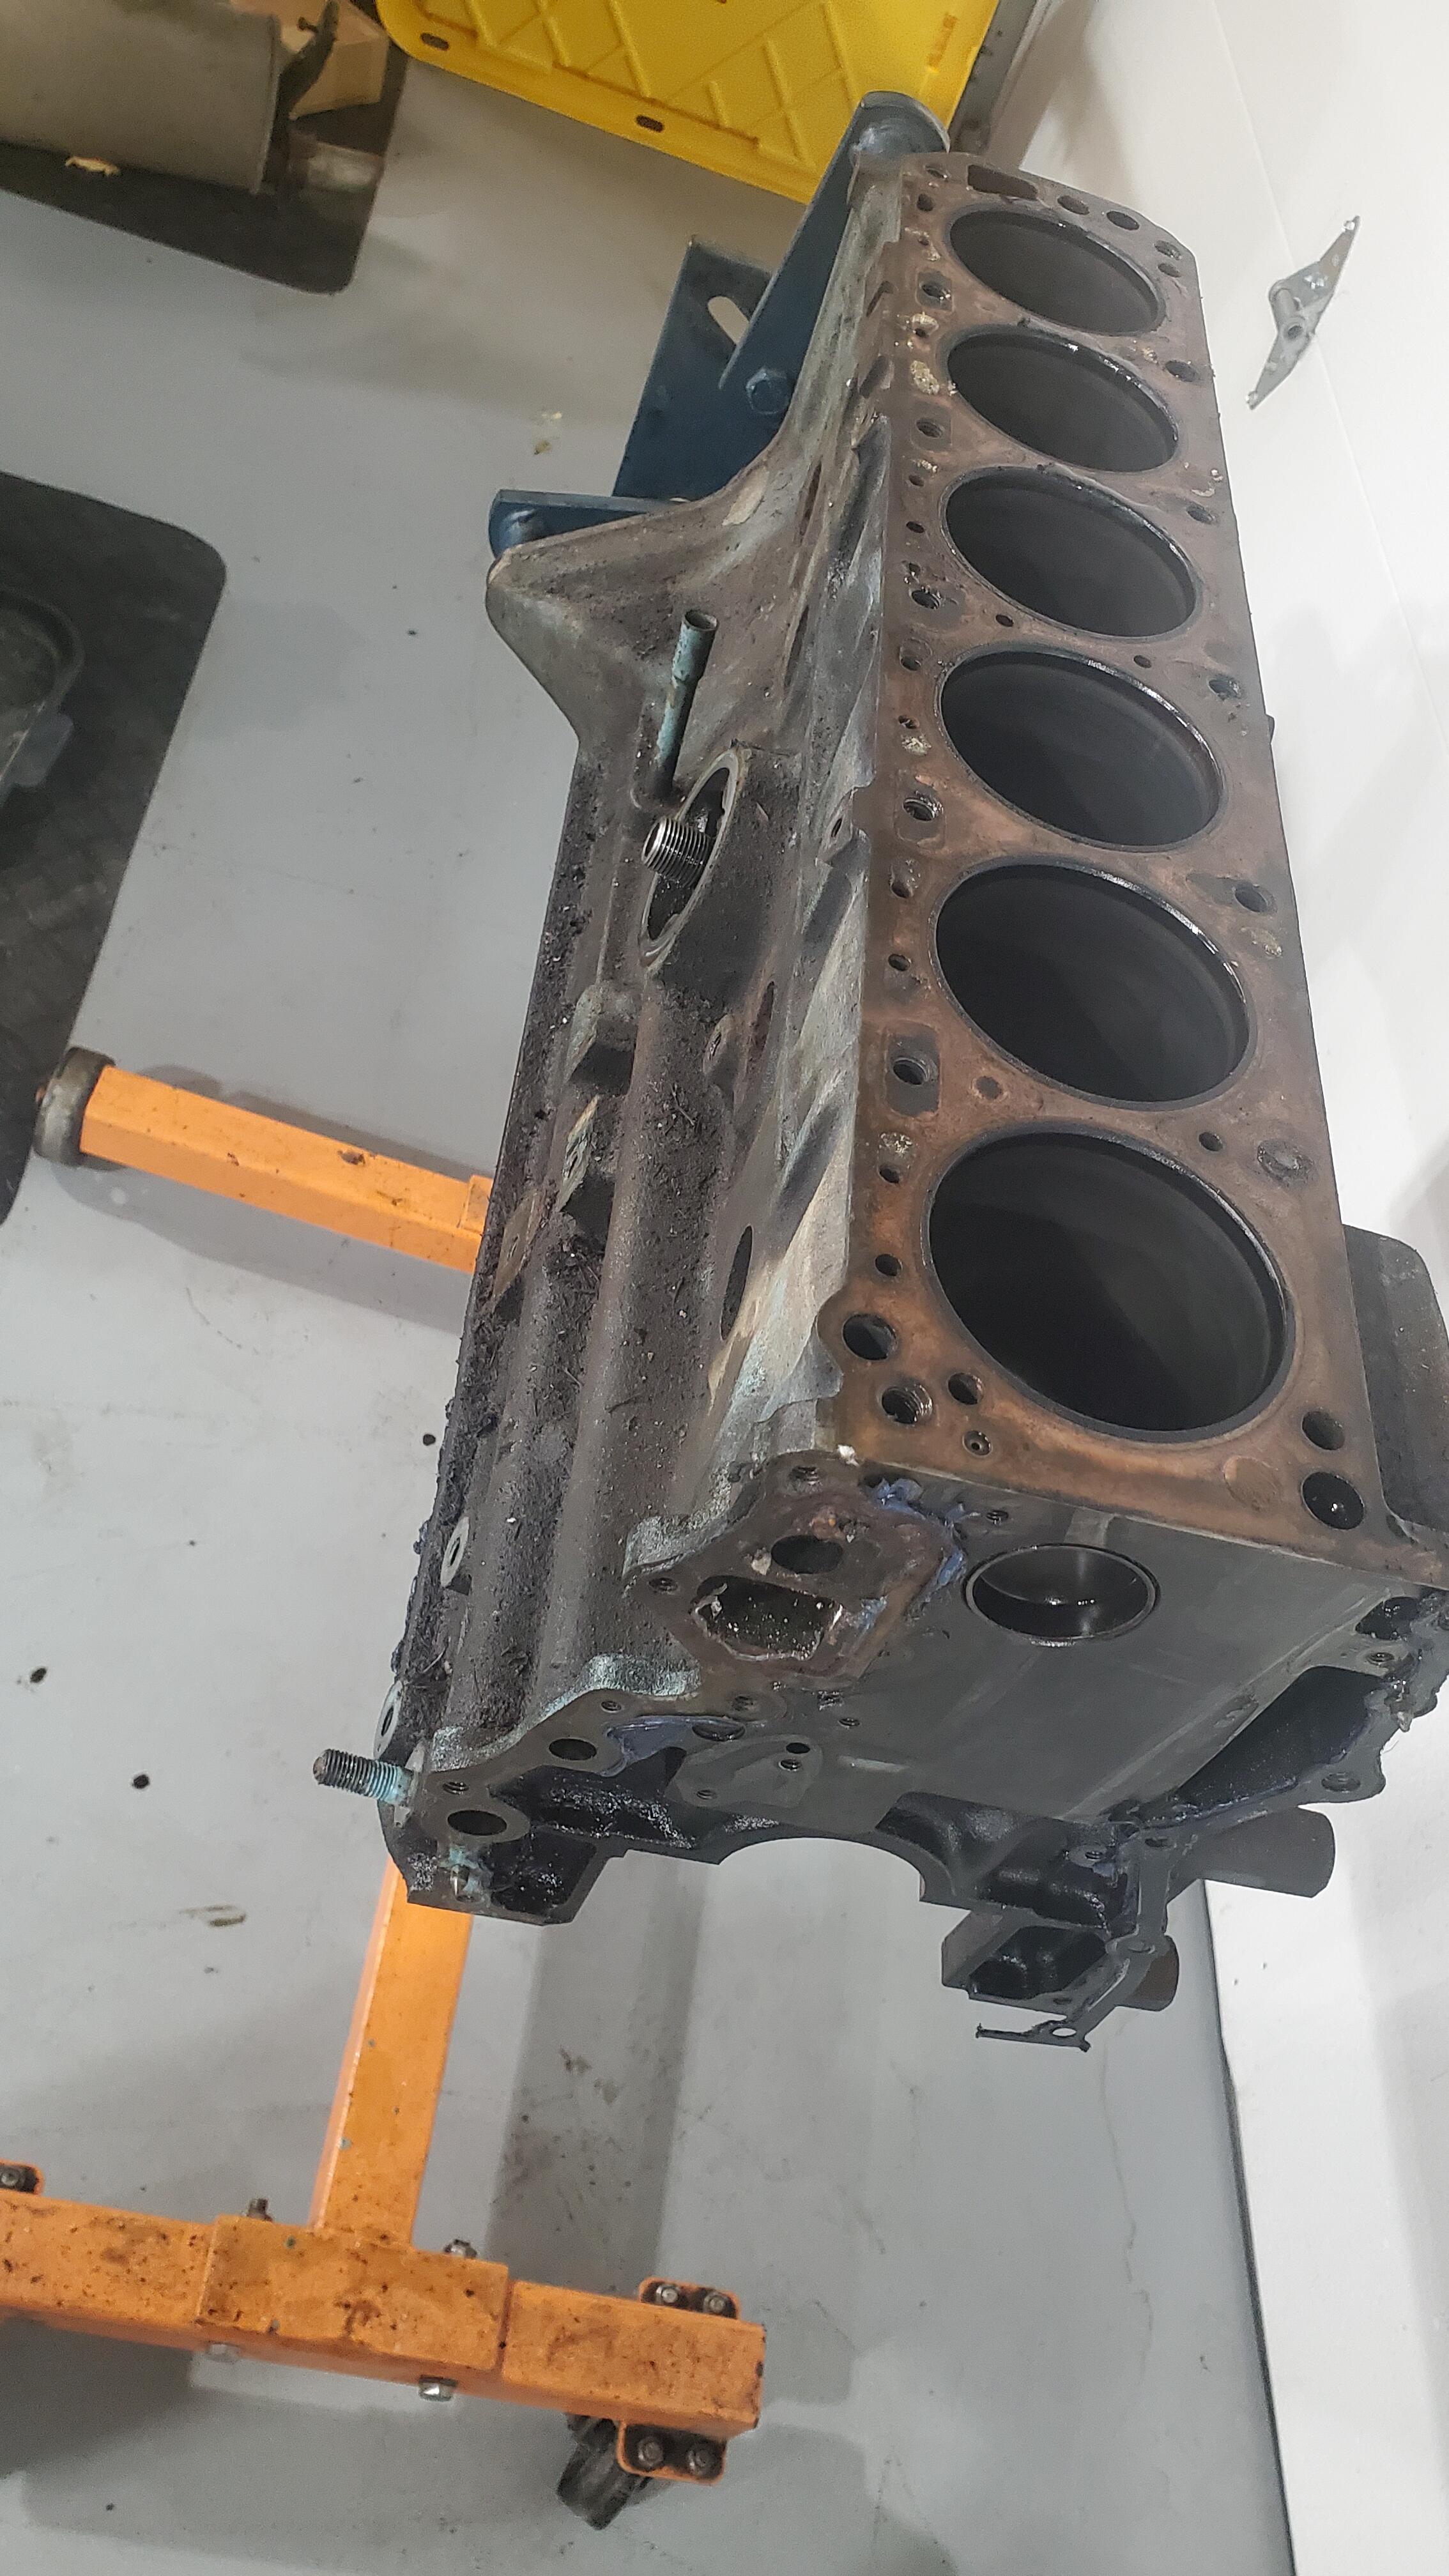
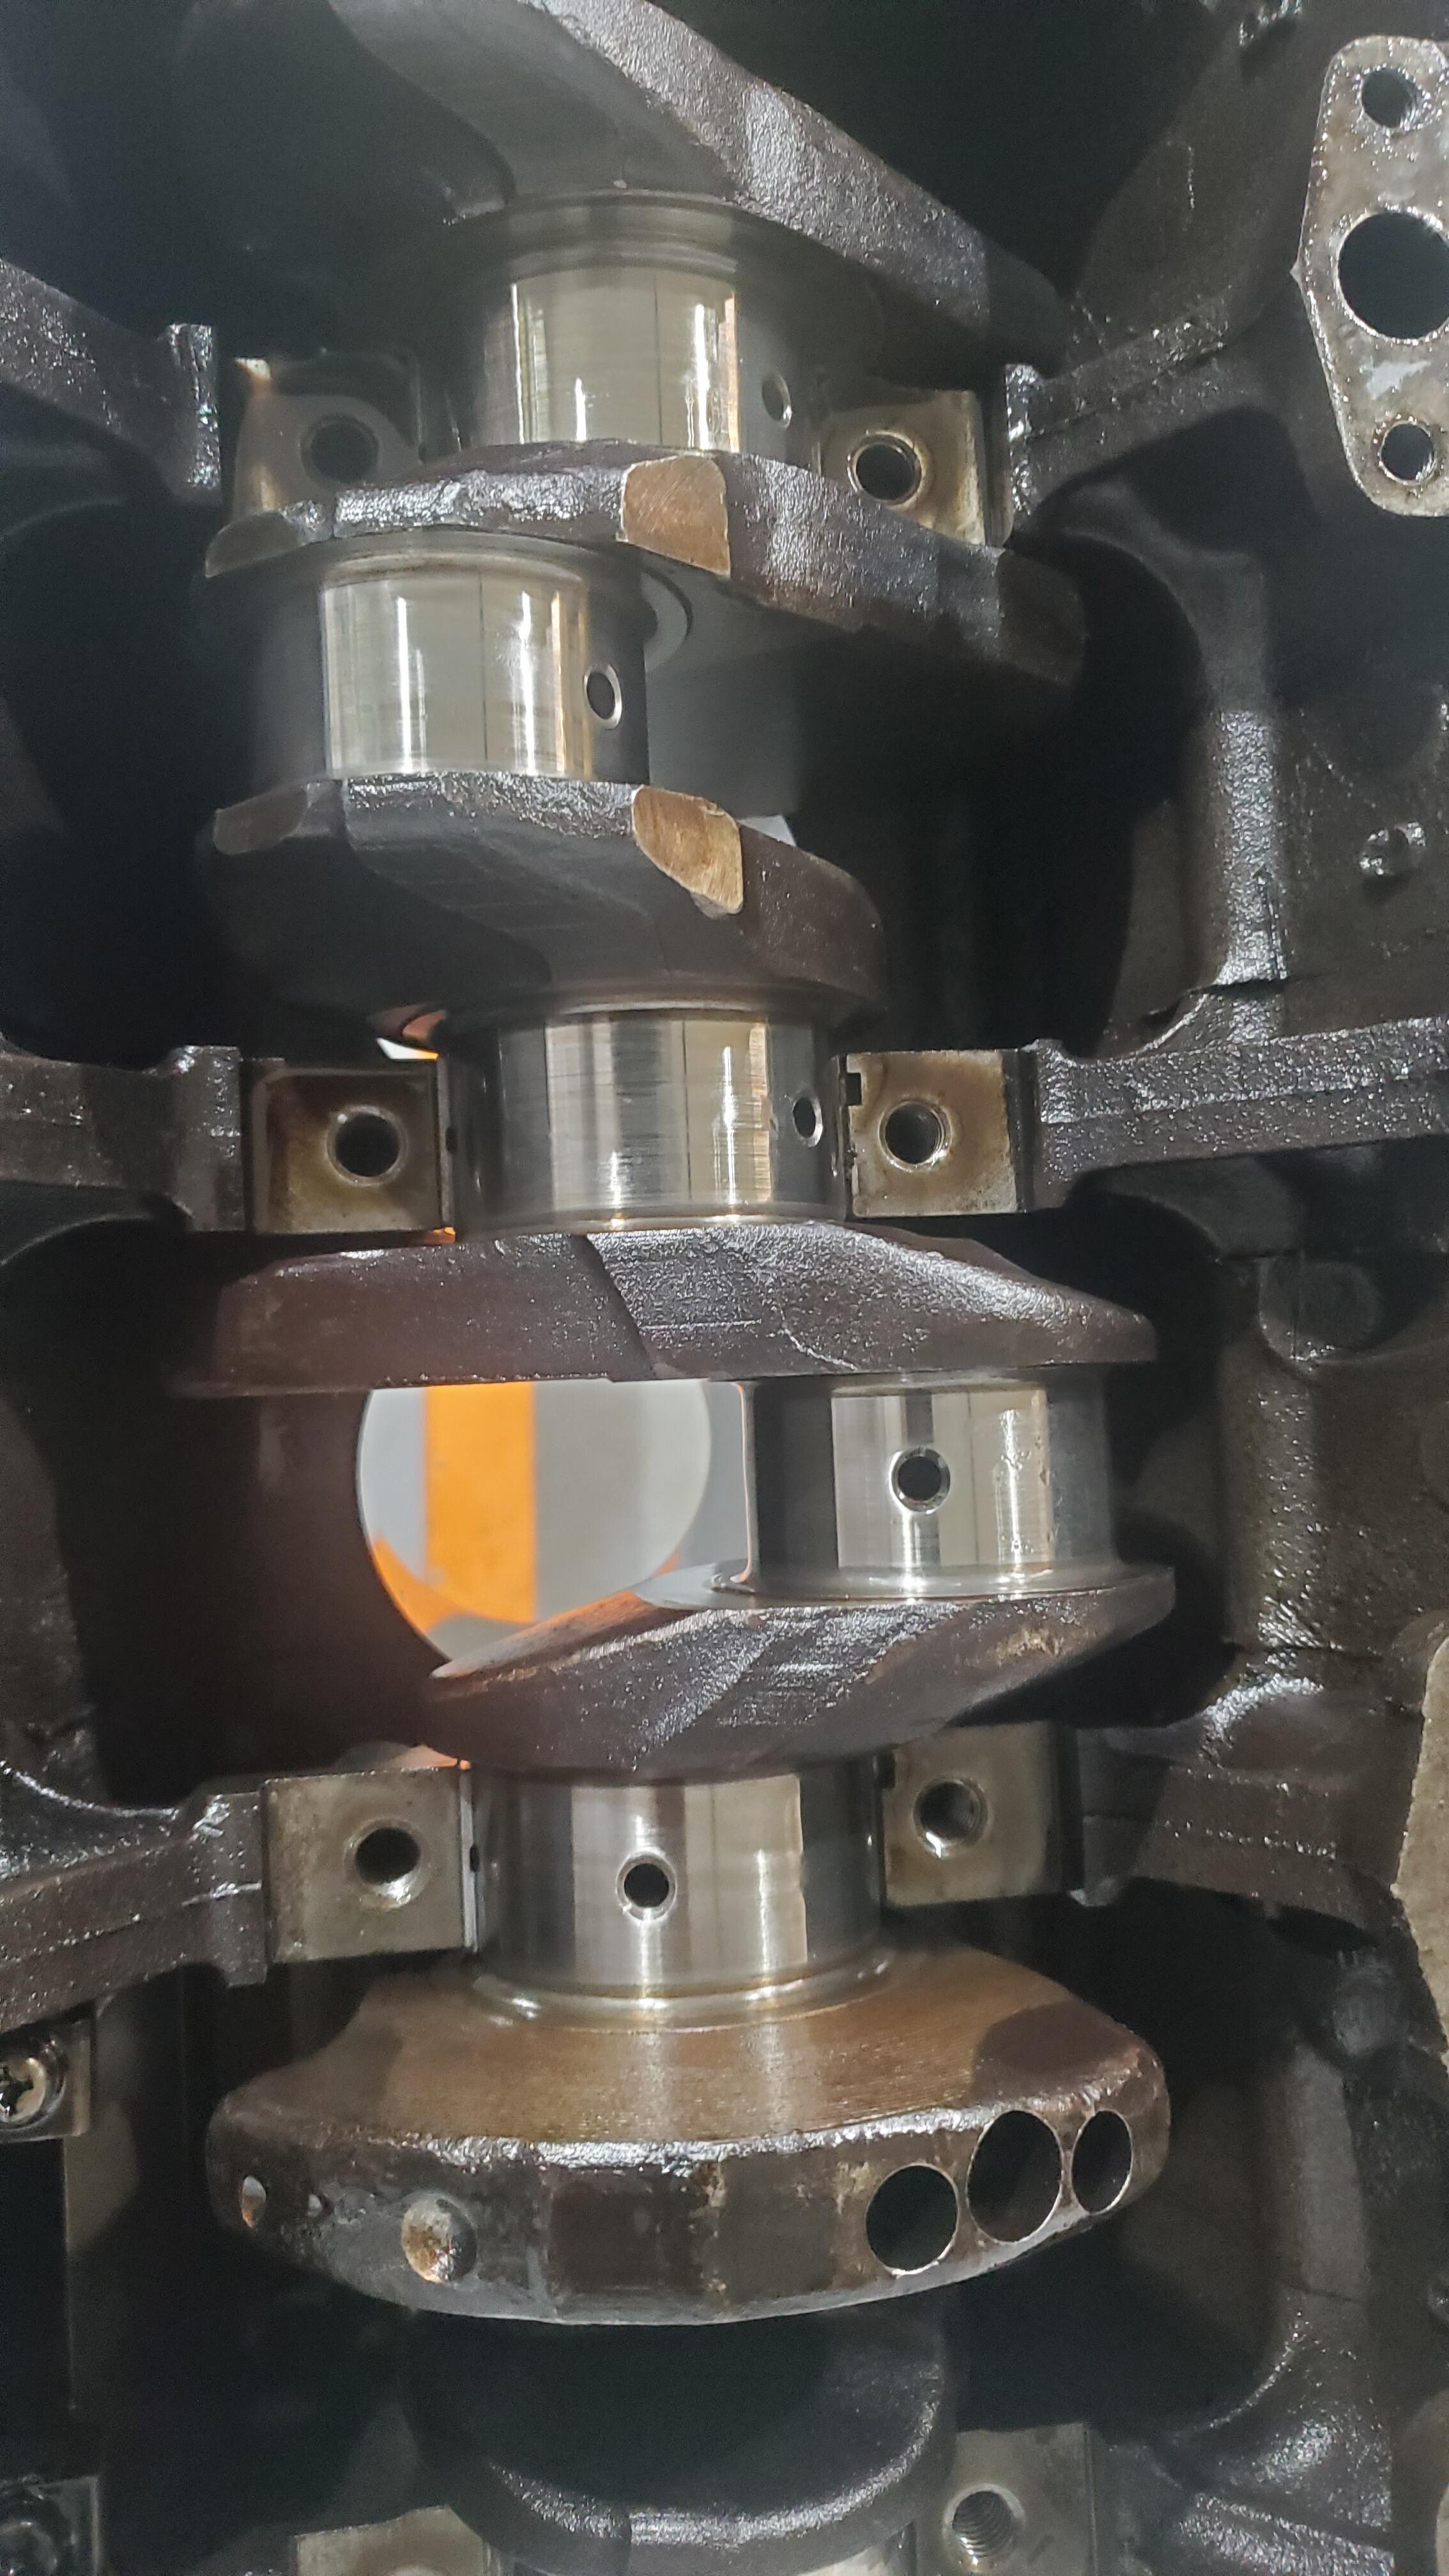
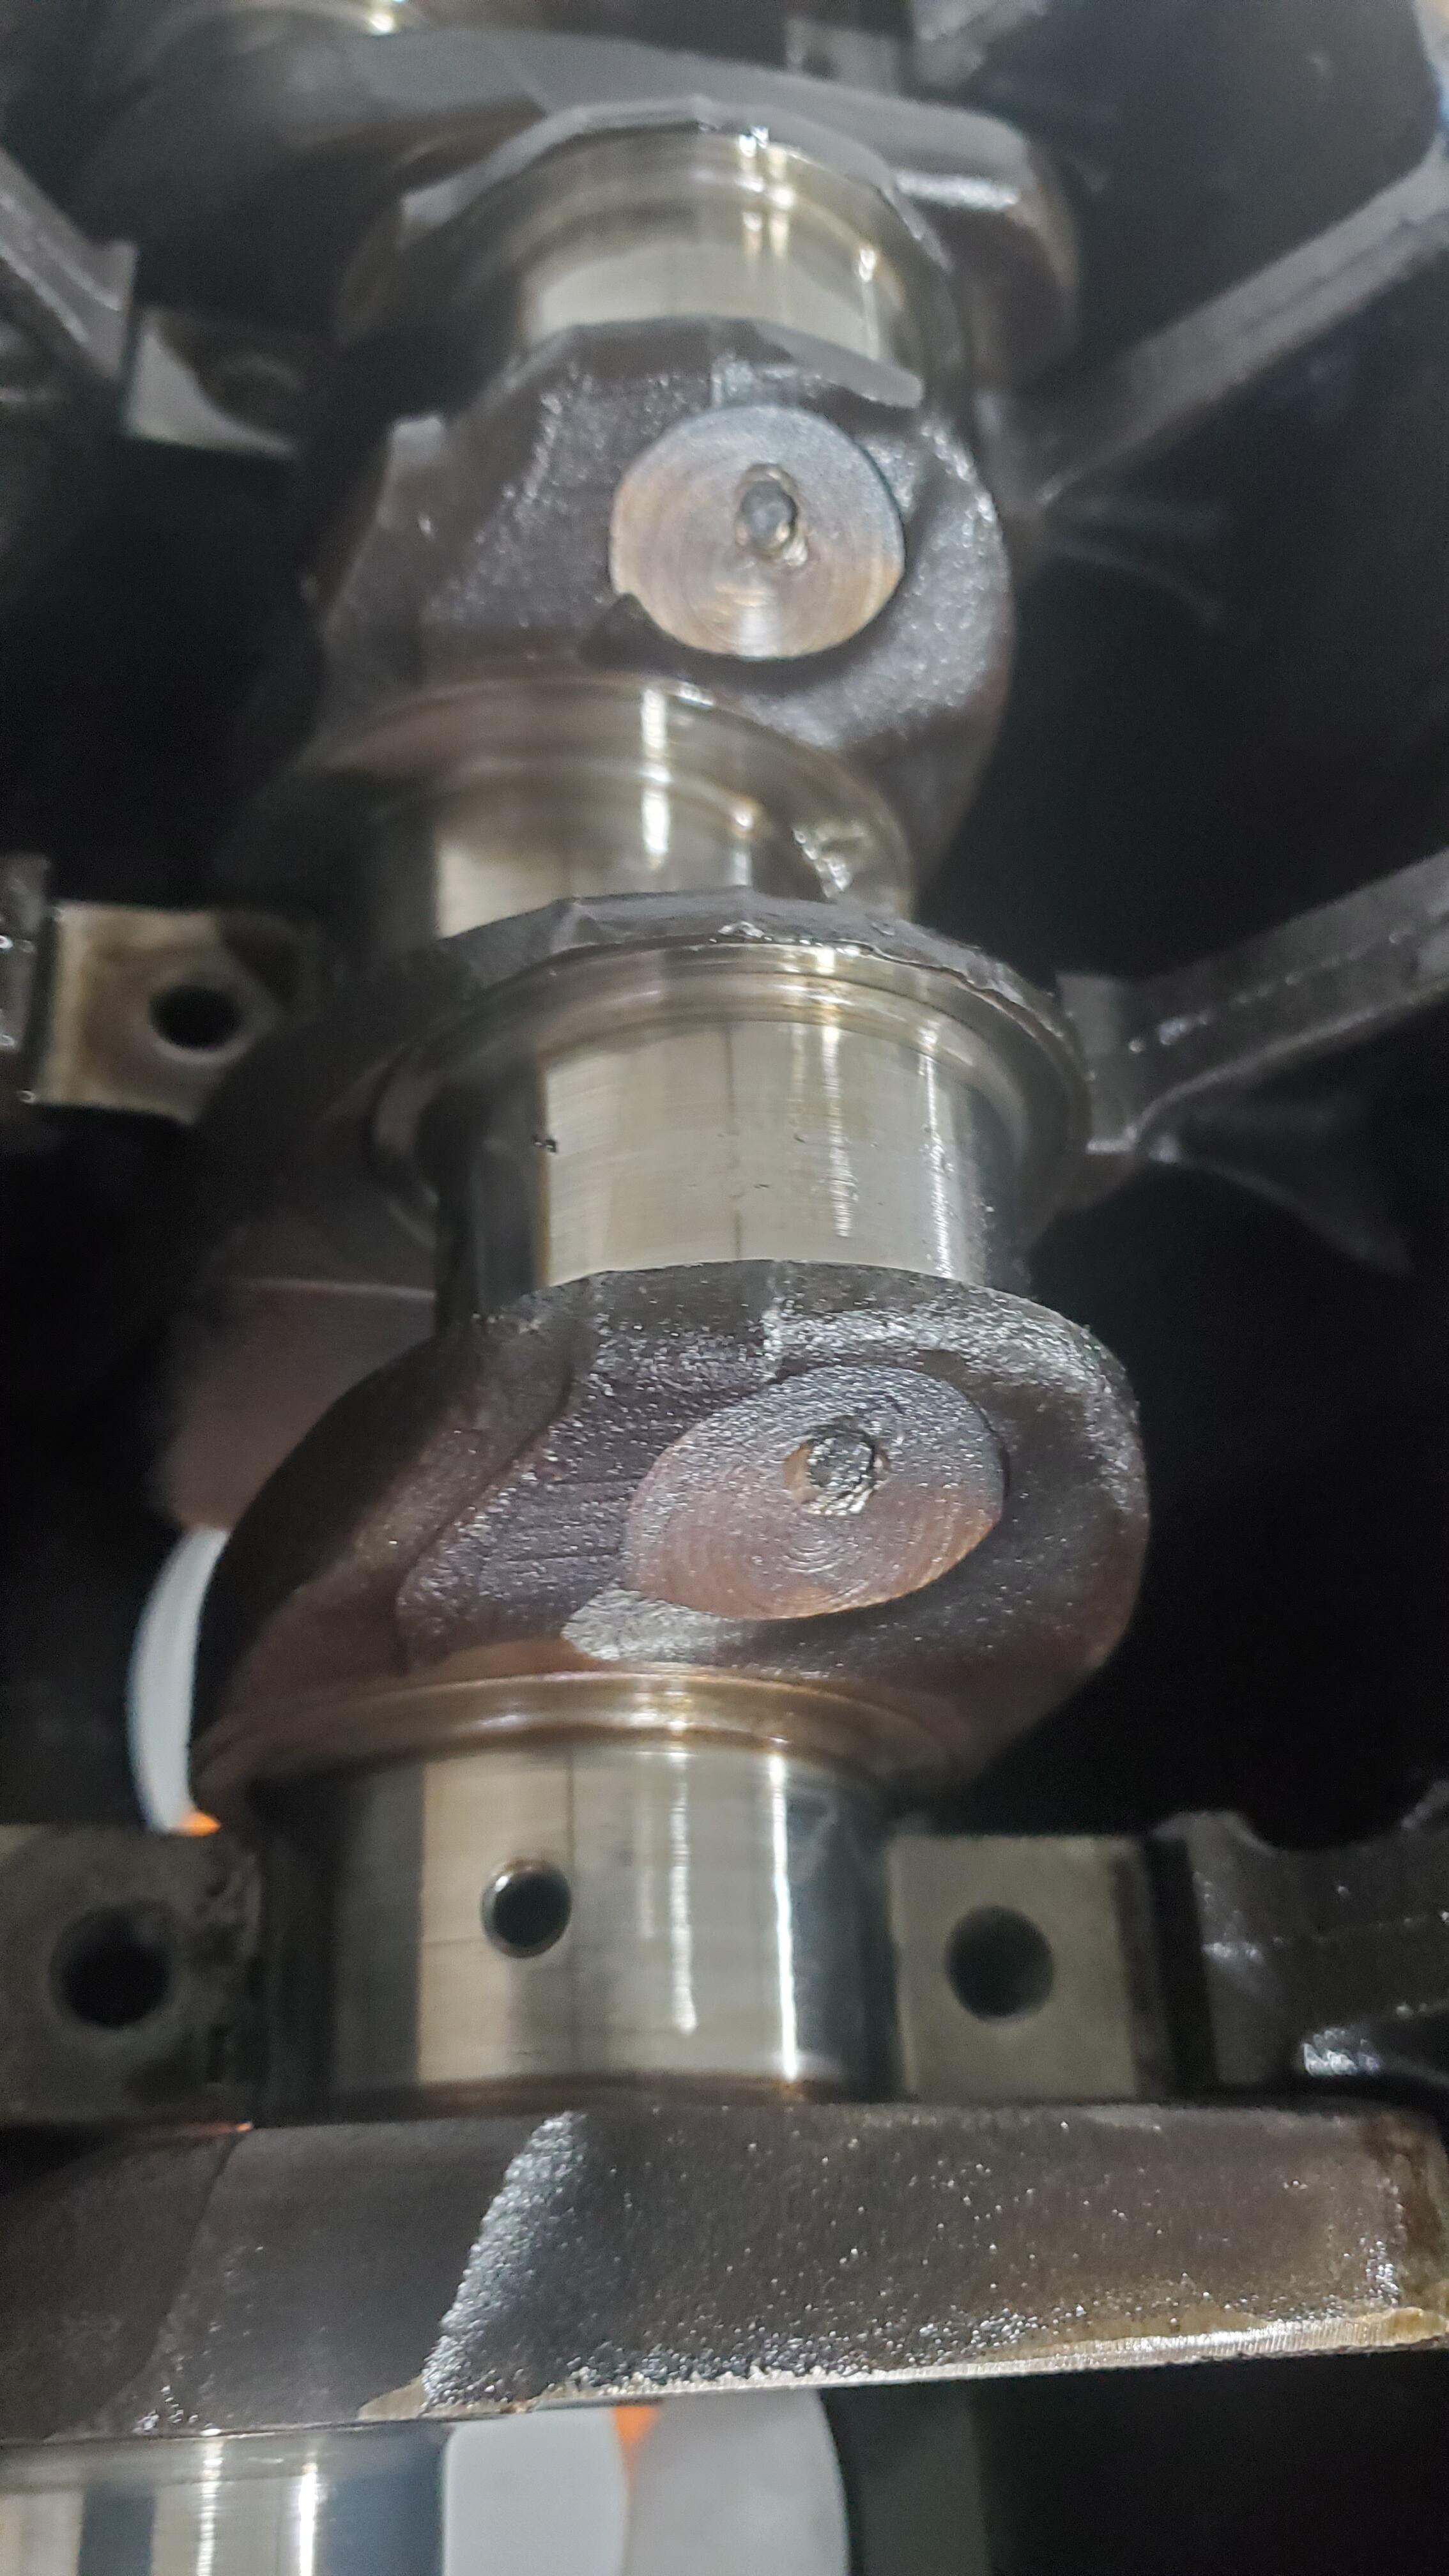
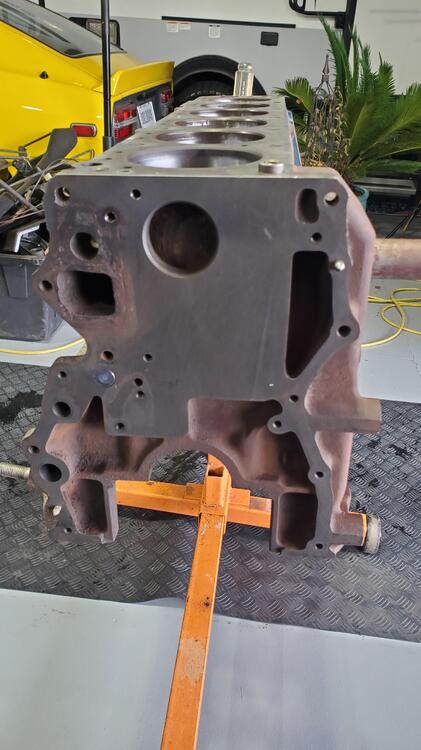
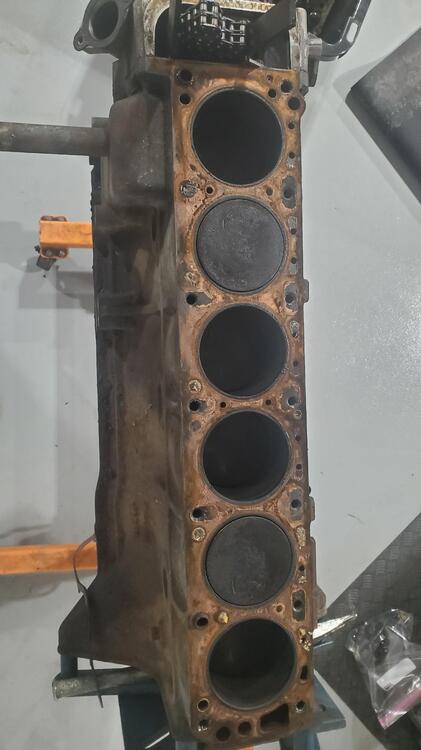
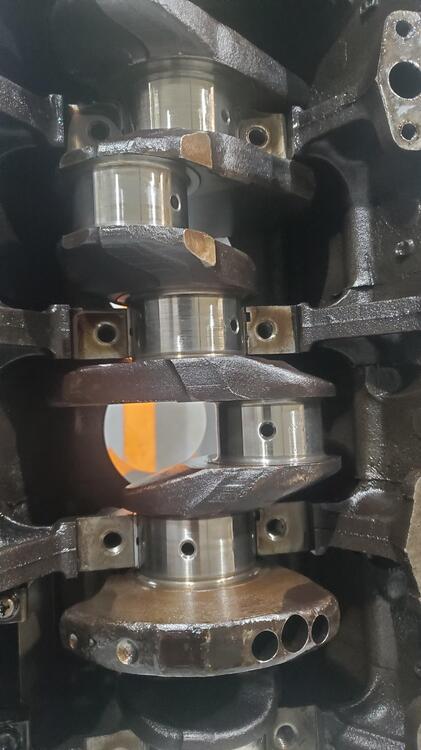
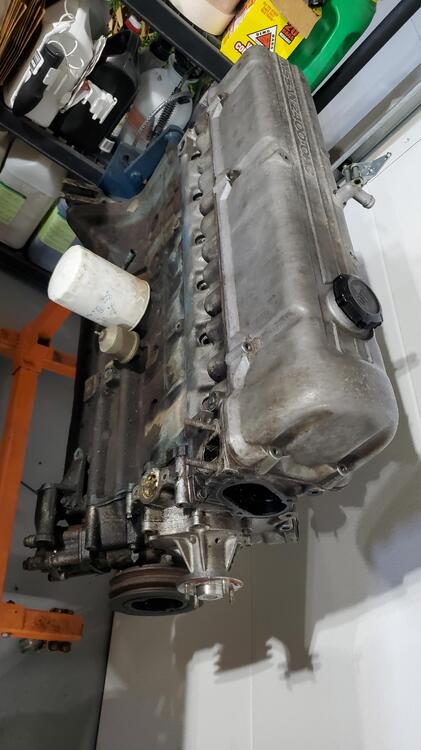
I took the block and head to the machine shop today. The cylinders look pretty smooth with very little ridge on top, so I am hoping that we just need to do a hone on the cylinders so we can keep the standard size pistons. That way we just replace bearings and rings. The head looked to be in good shape and I am guessing that it has had work done on it previously. The head gasket was a standard Fel-Pro, so the head has obviously been off before. Machine shop will look the head over and fix as needed. Also, looks like the crank has been balanced previously due to the holes and light shaving on the crank arms. Will have the machine shop confirm. Pics below


-
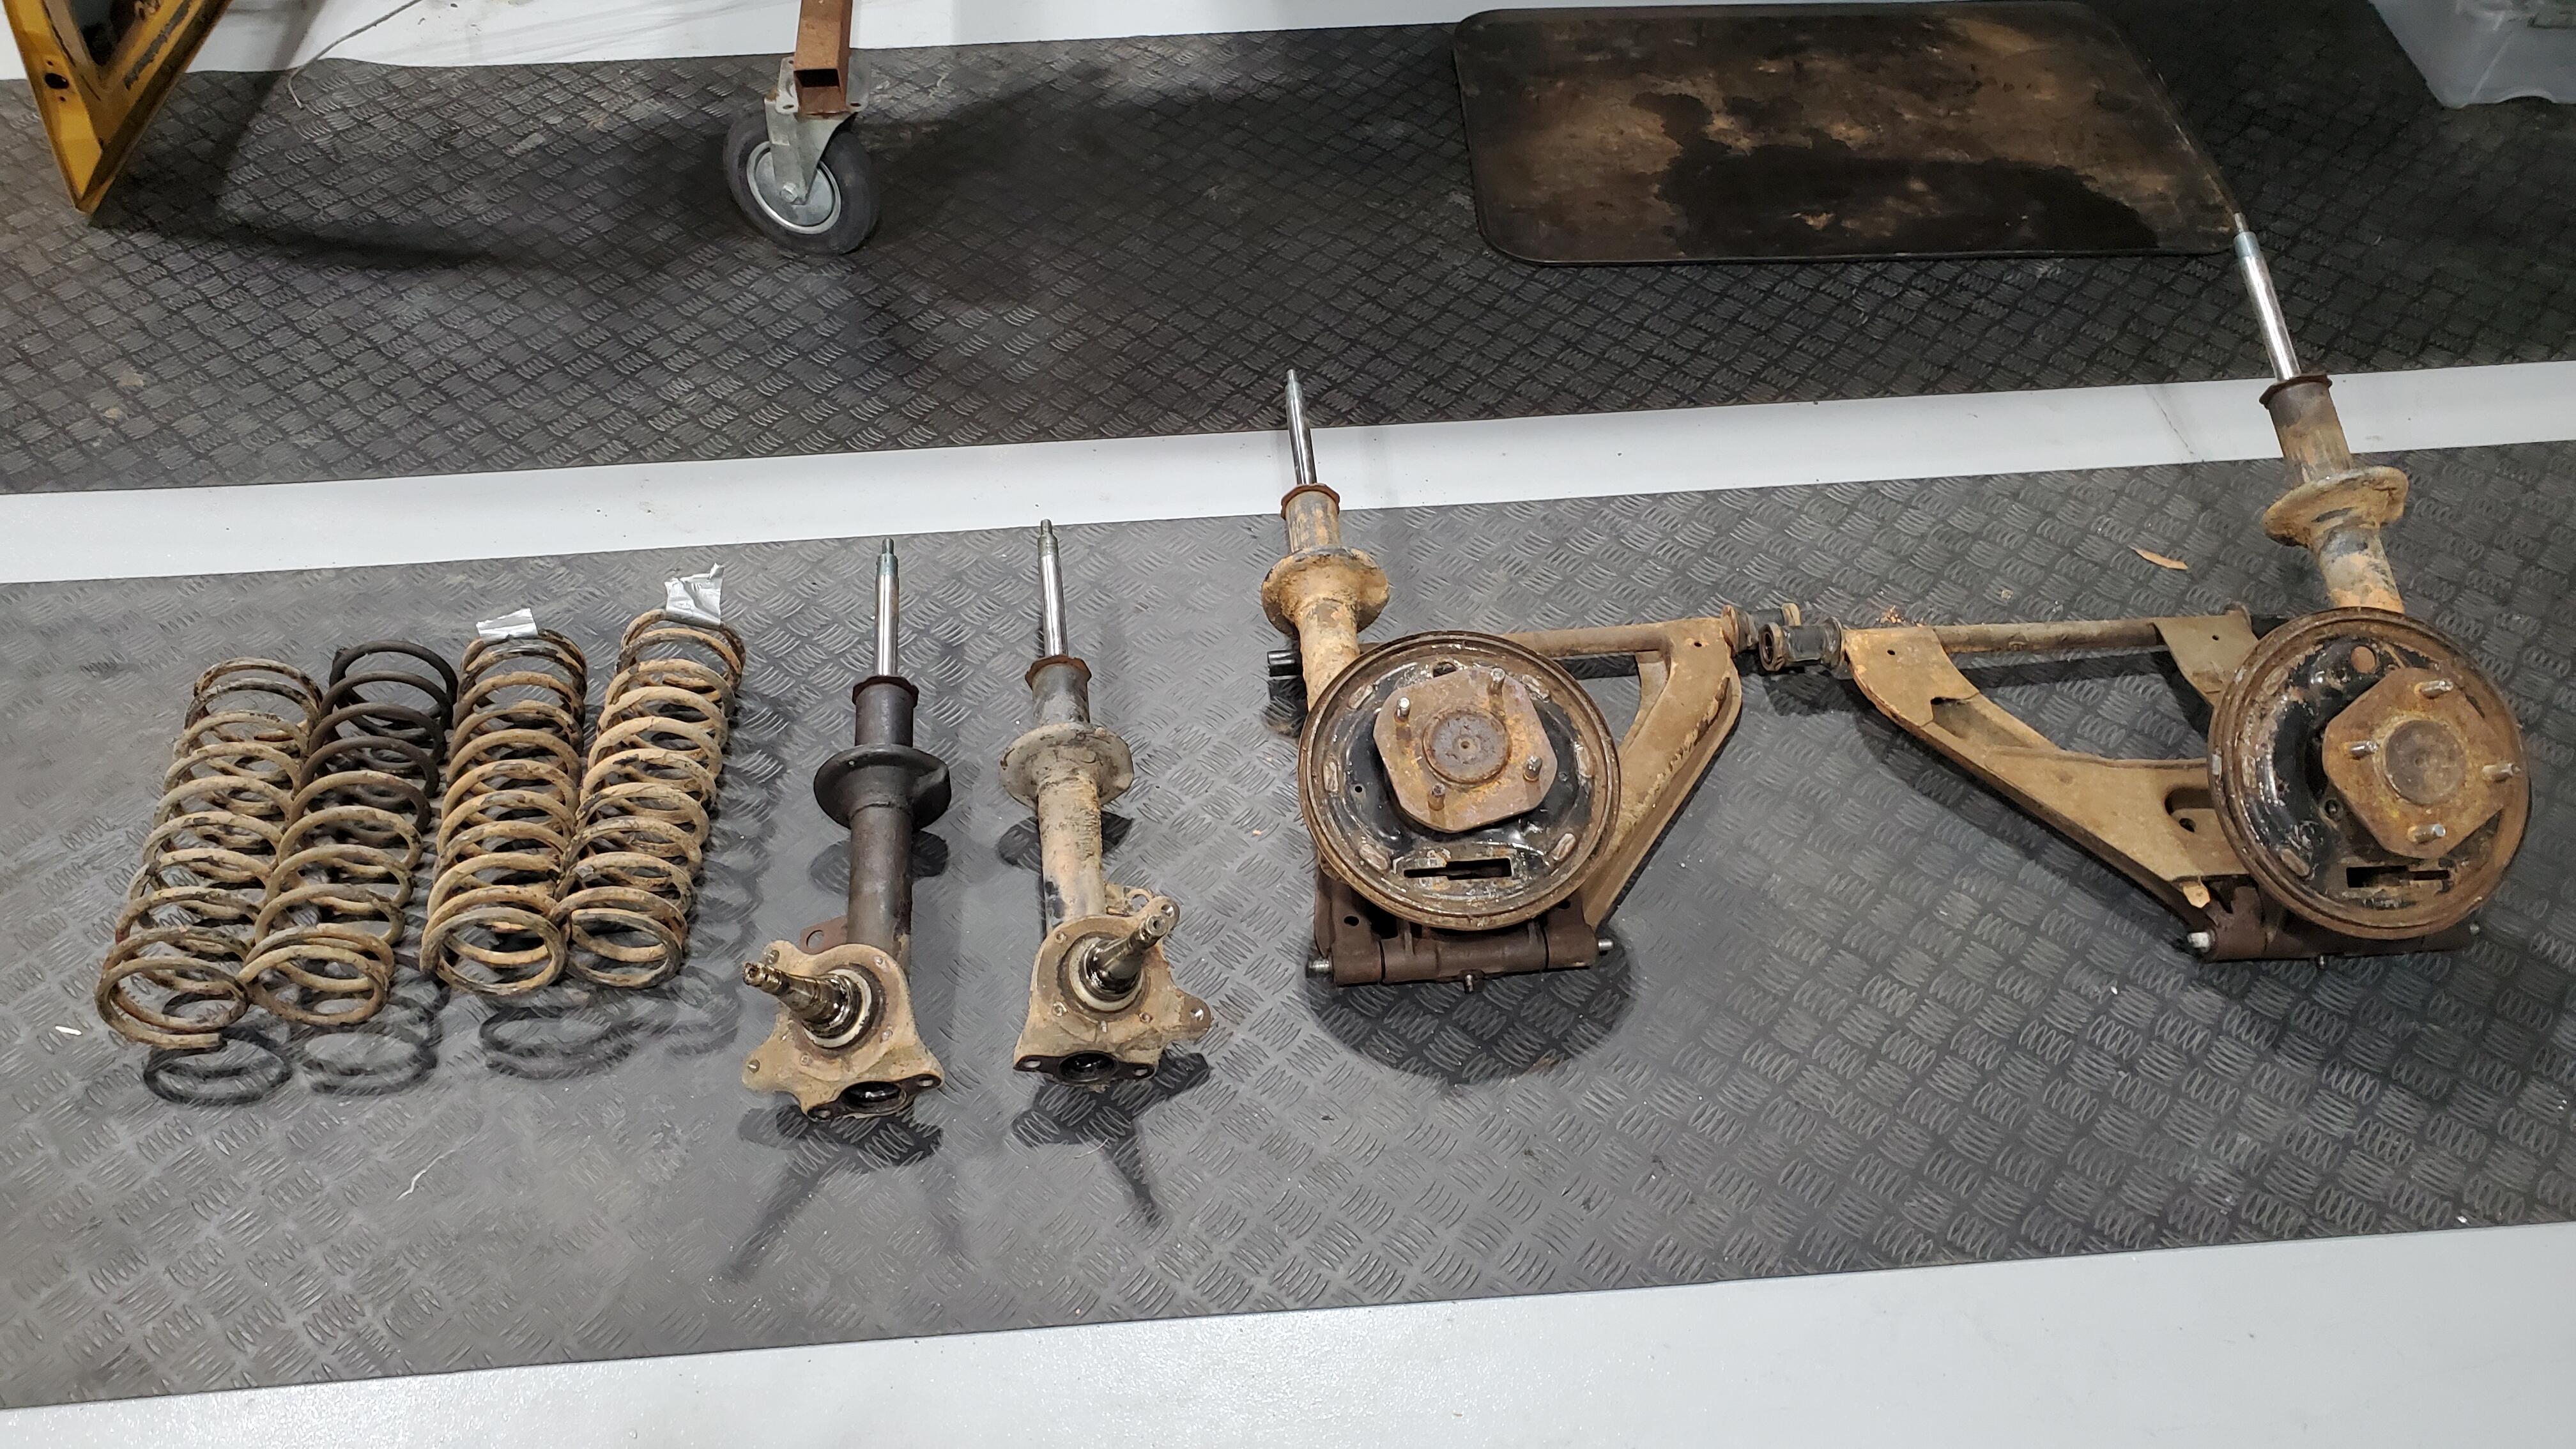
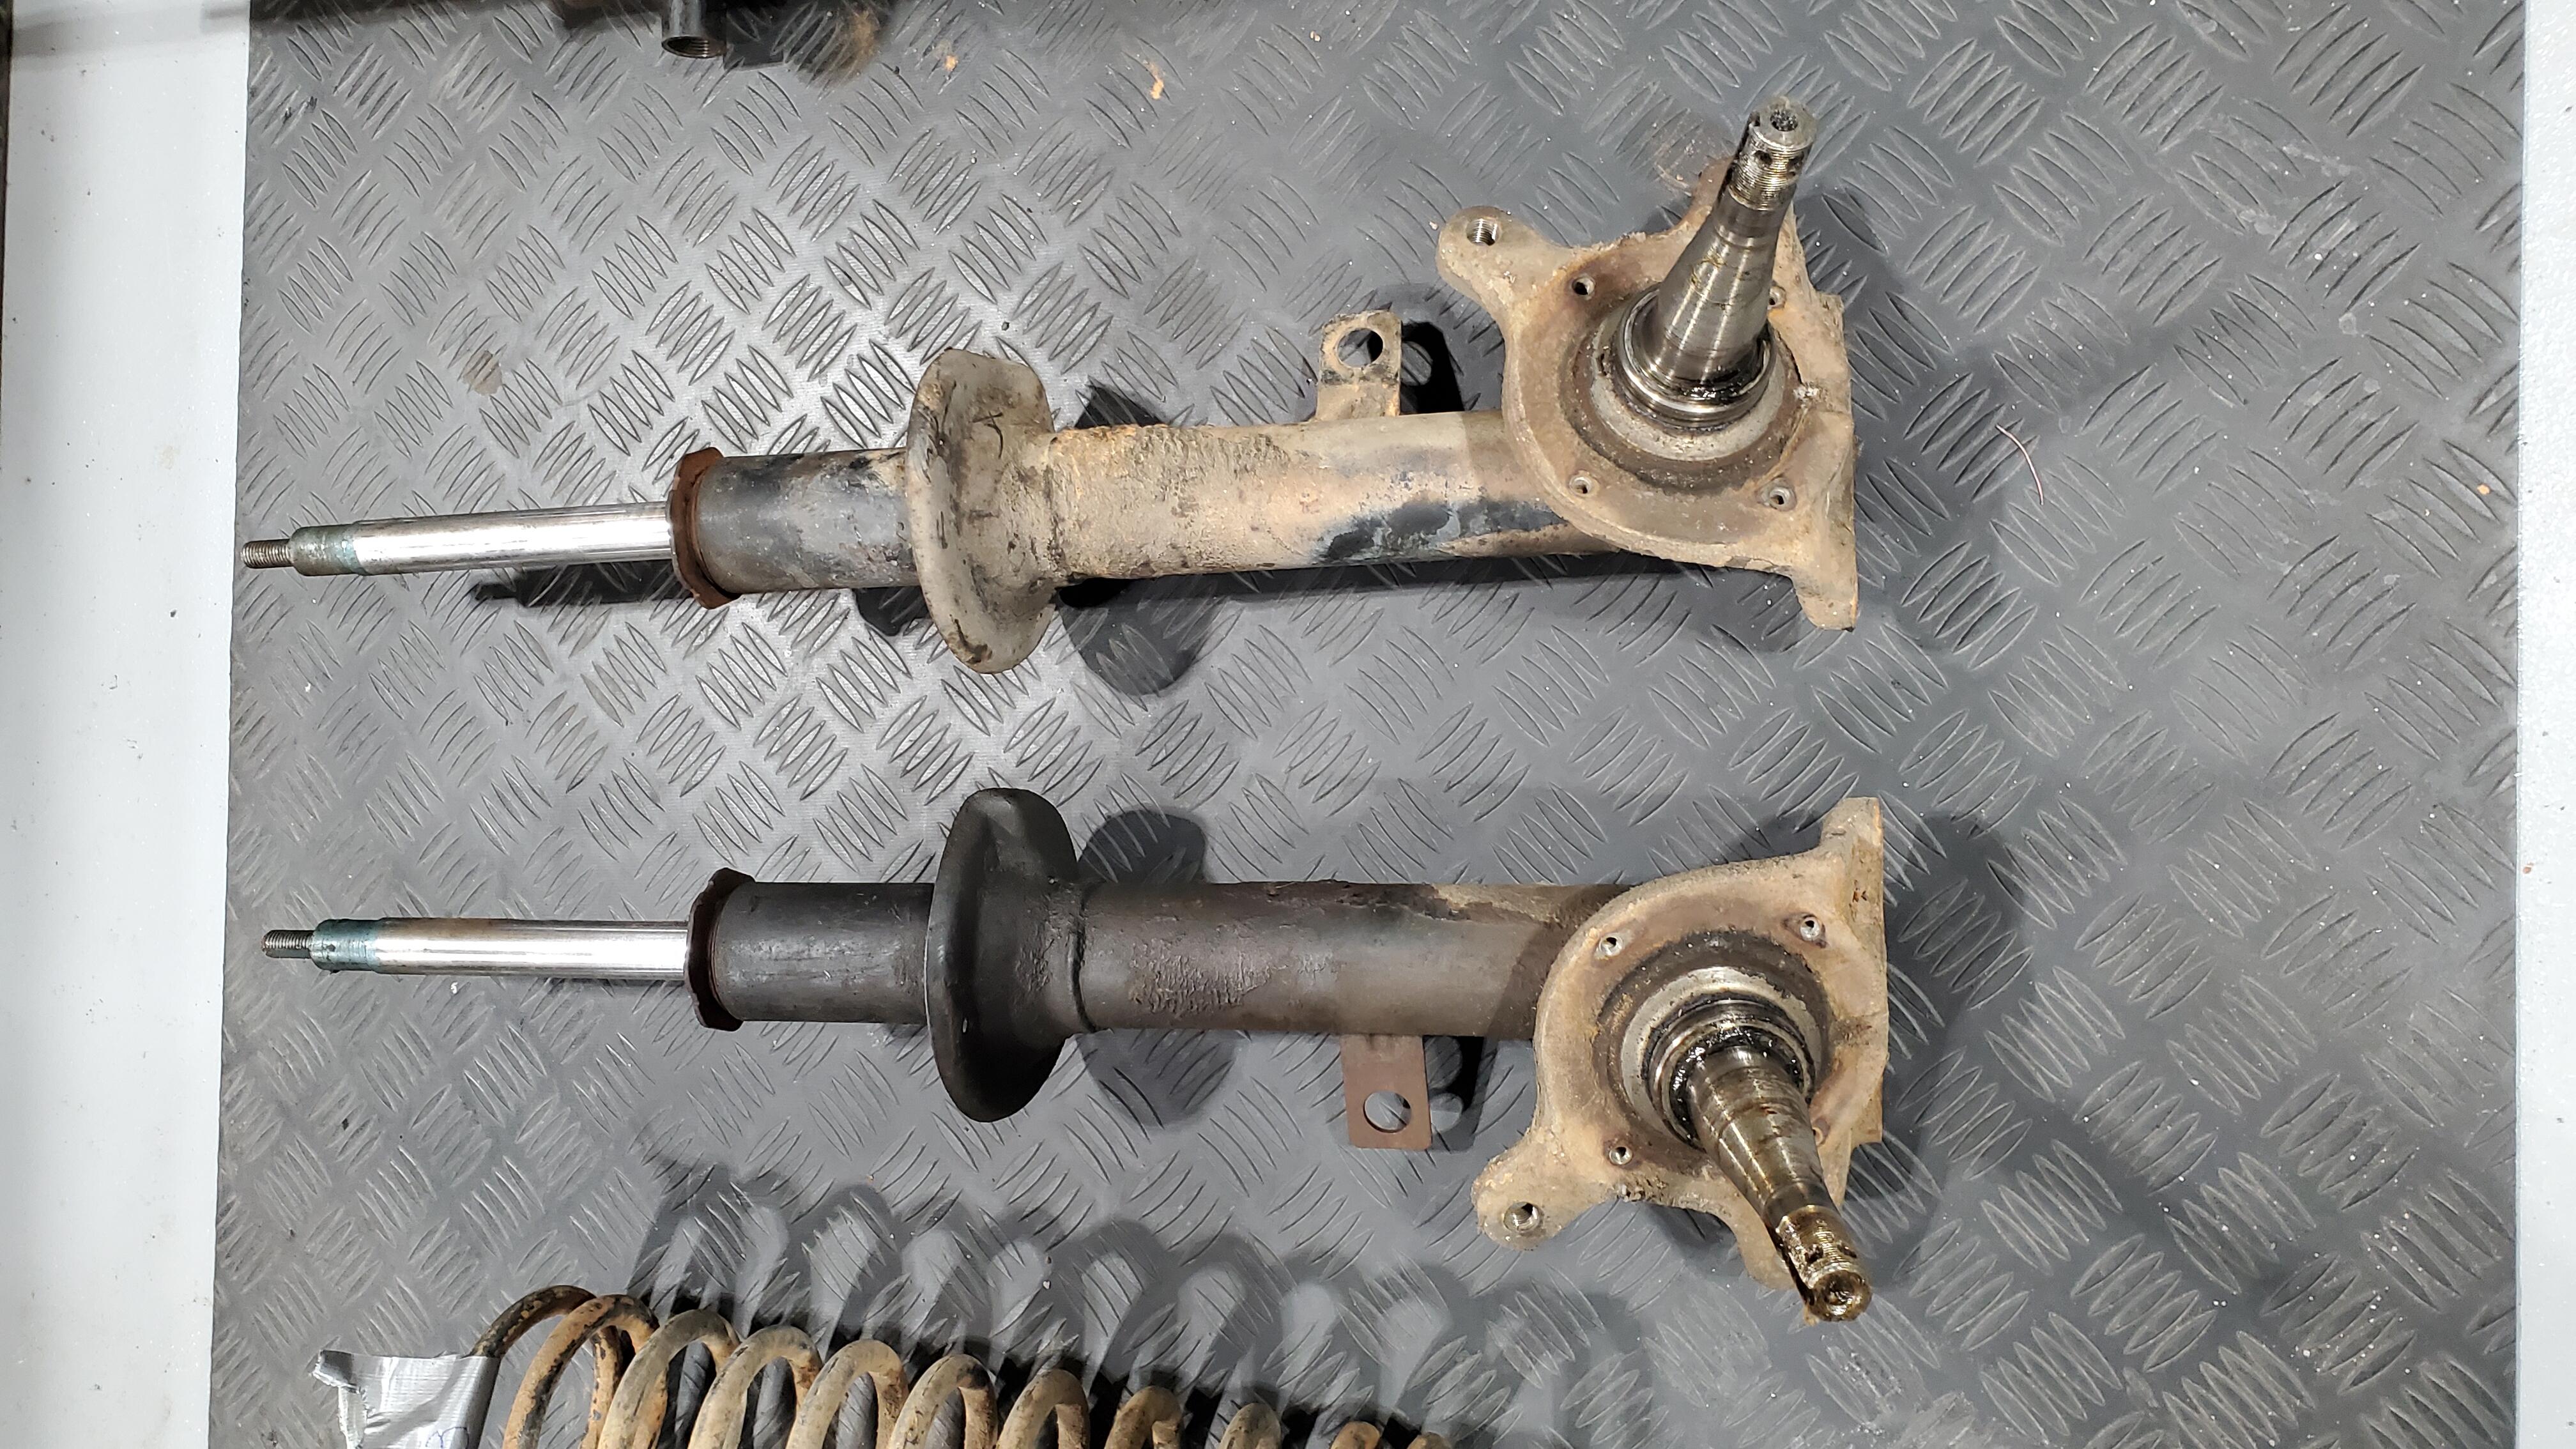
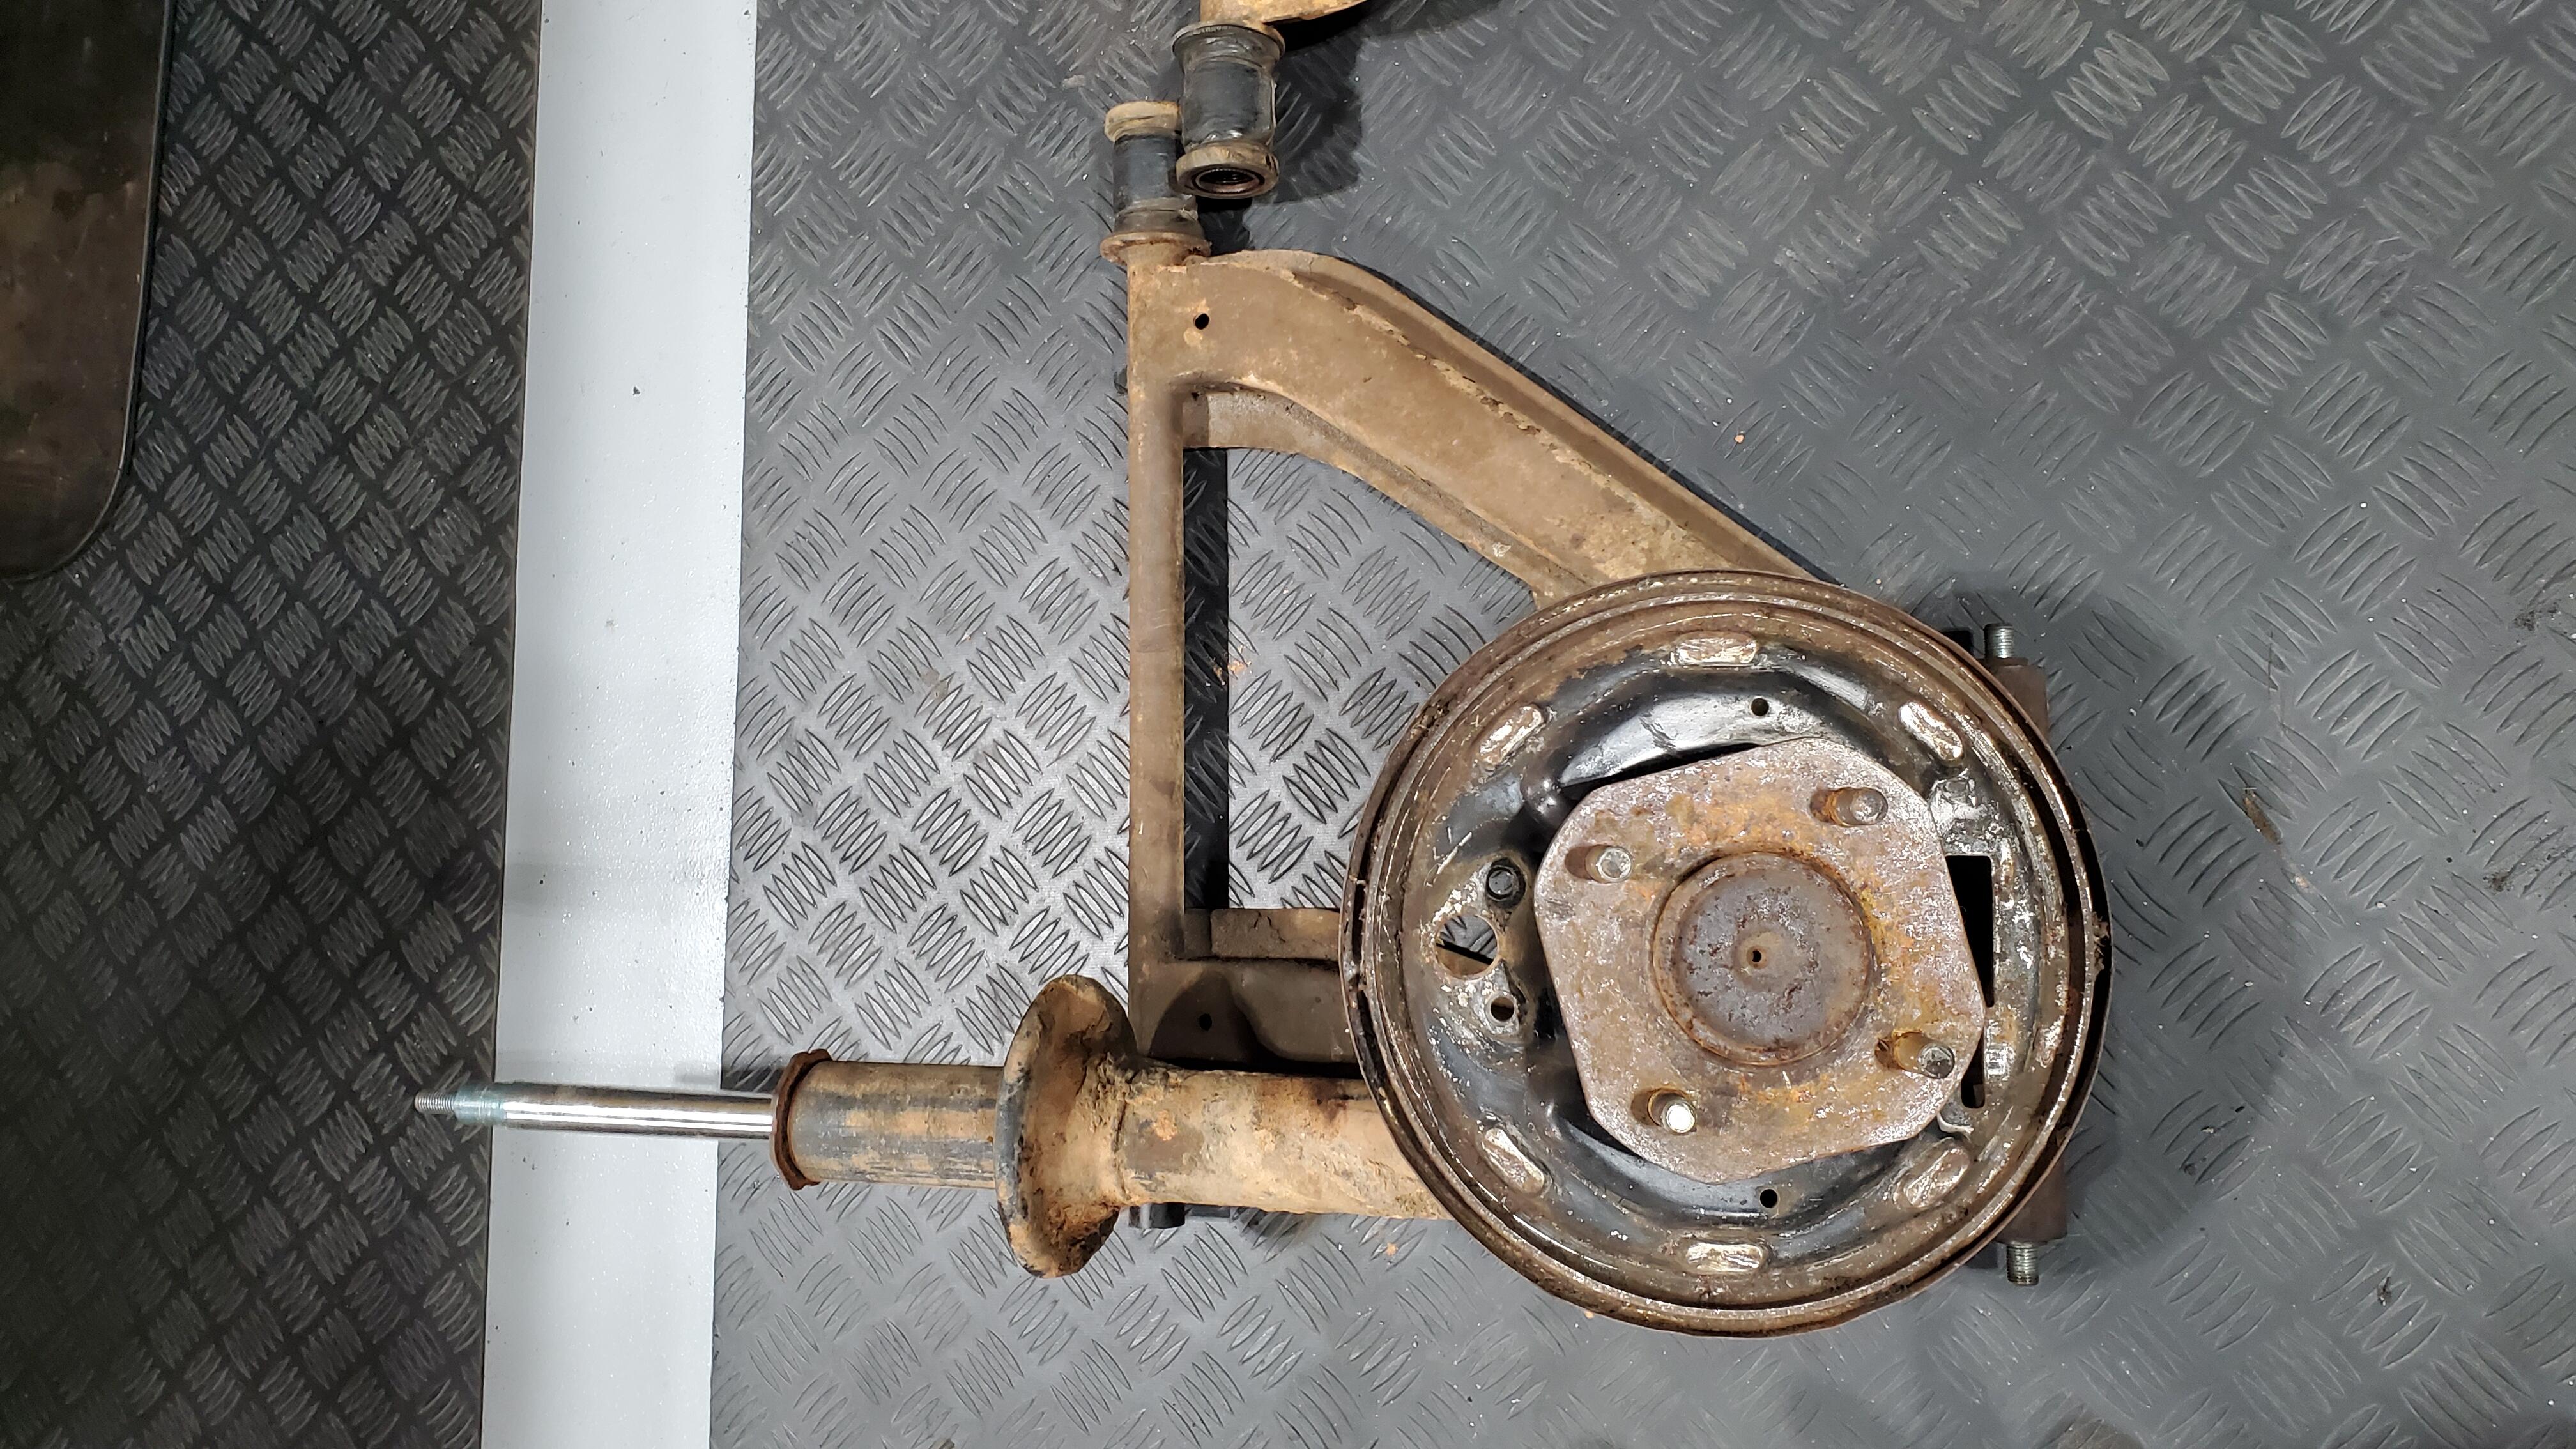
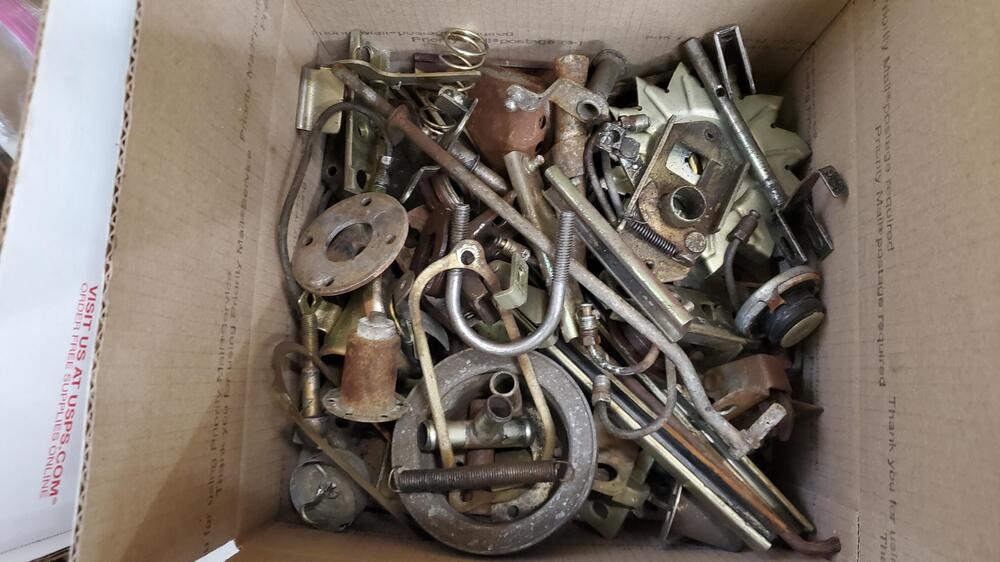
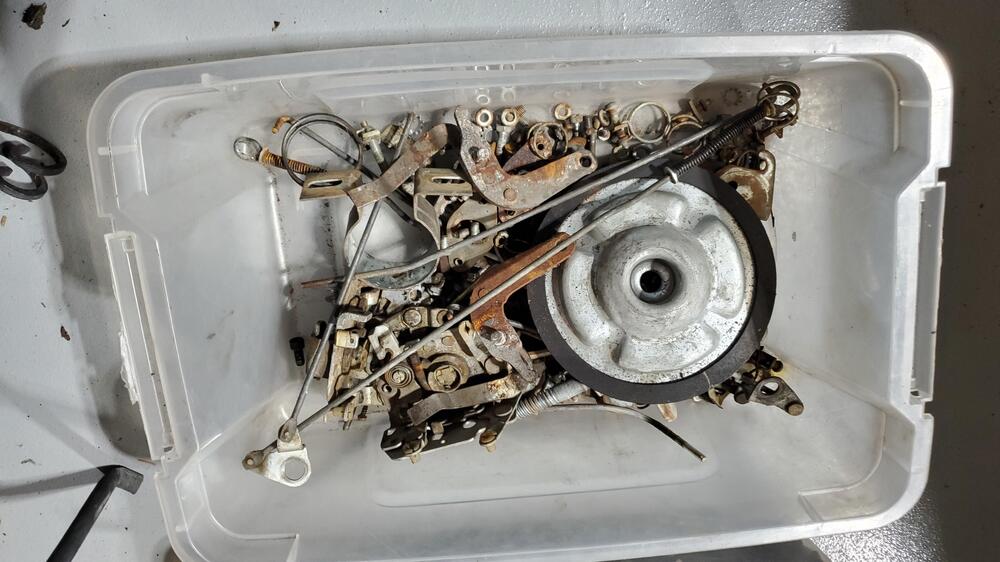
Continuing to break down parts. Also sorting hardware into yellow and silver zinc tubs for eventual plating. This is actually going along pretty well as most undercarriage parts are in good shape, just very dirty. Pics are below.


-
It's powdercoat on all the suspension parts. I only use paint on the differential and CV/half shafts. Also took a little 'artistic license' with rear suspension. Diff rear cover and half shafts should be black.
-
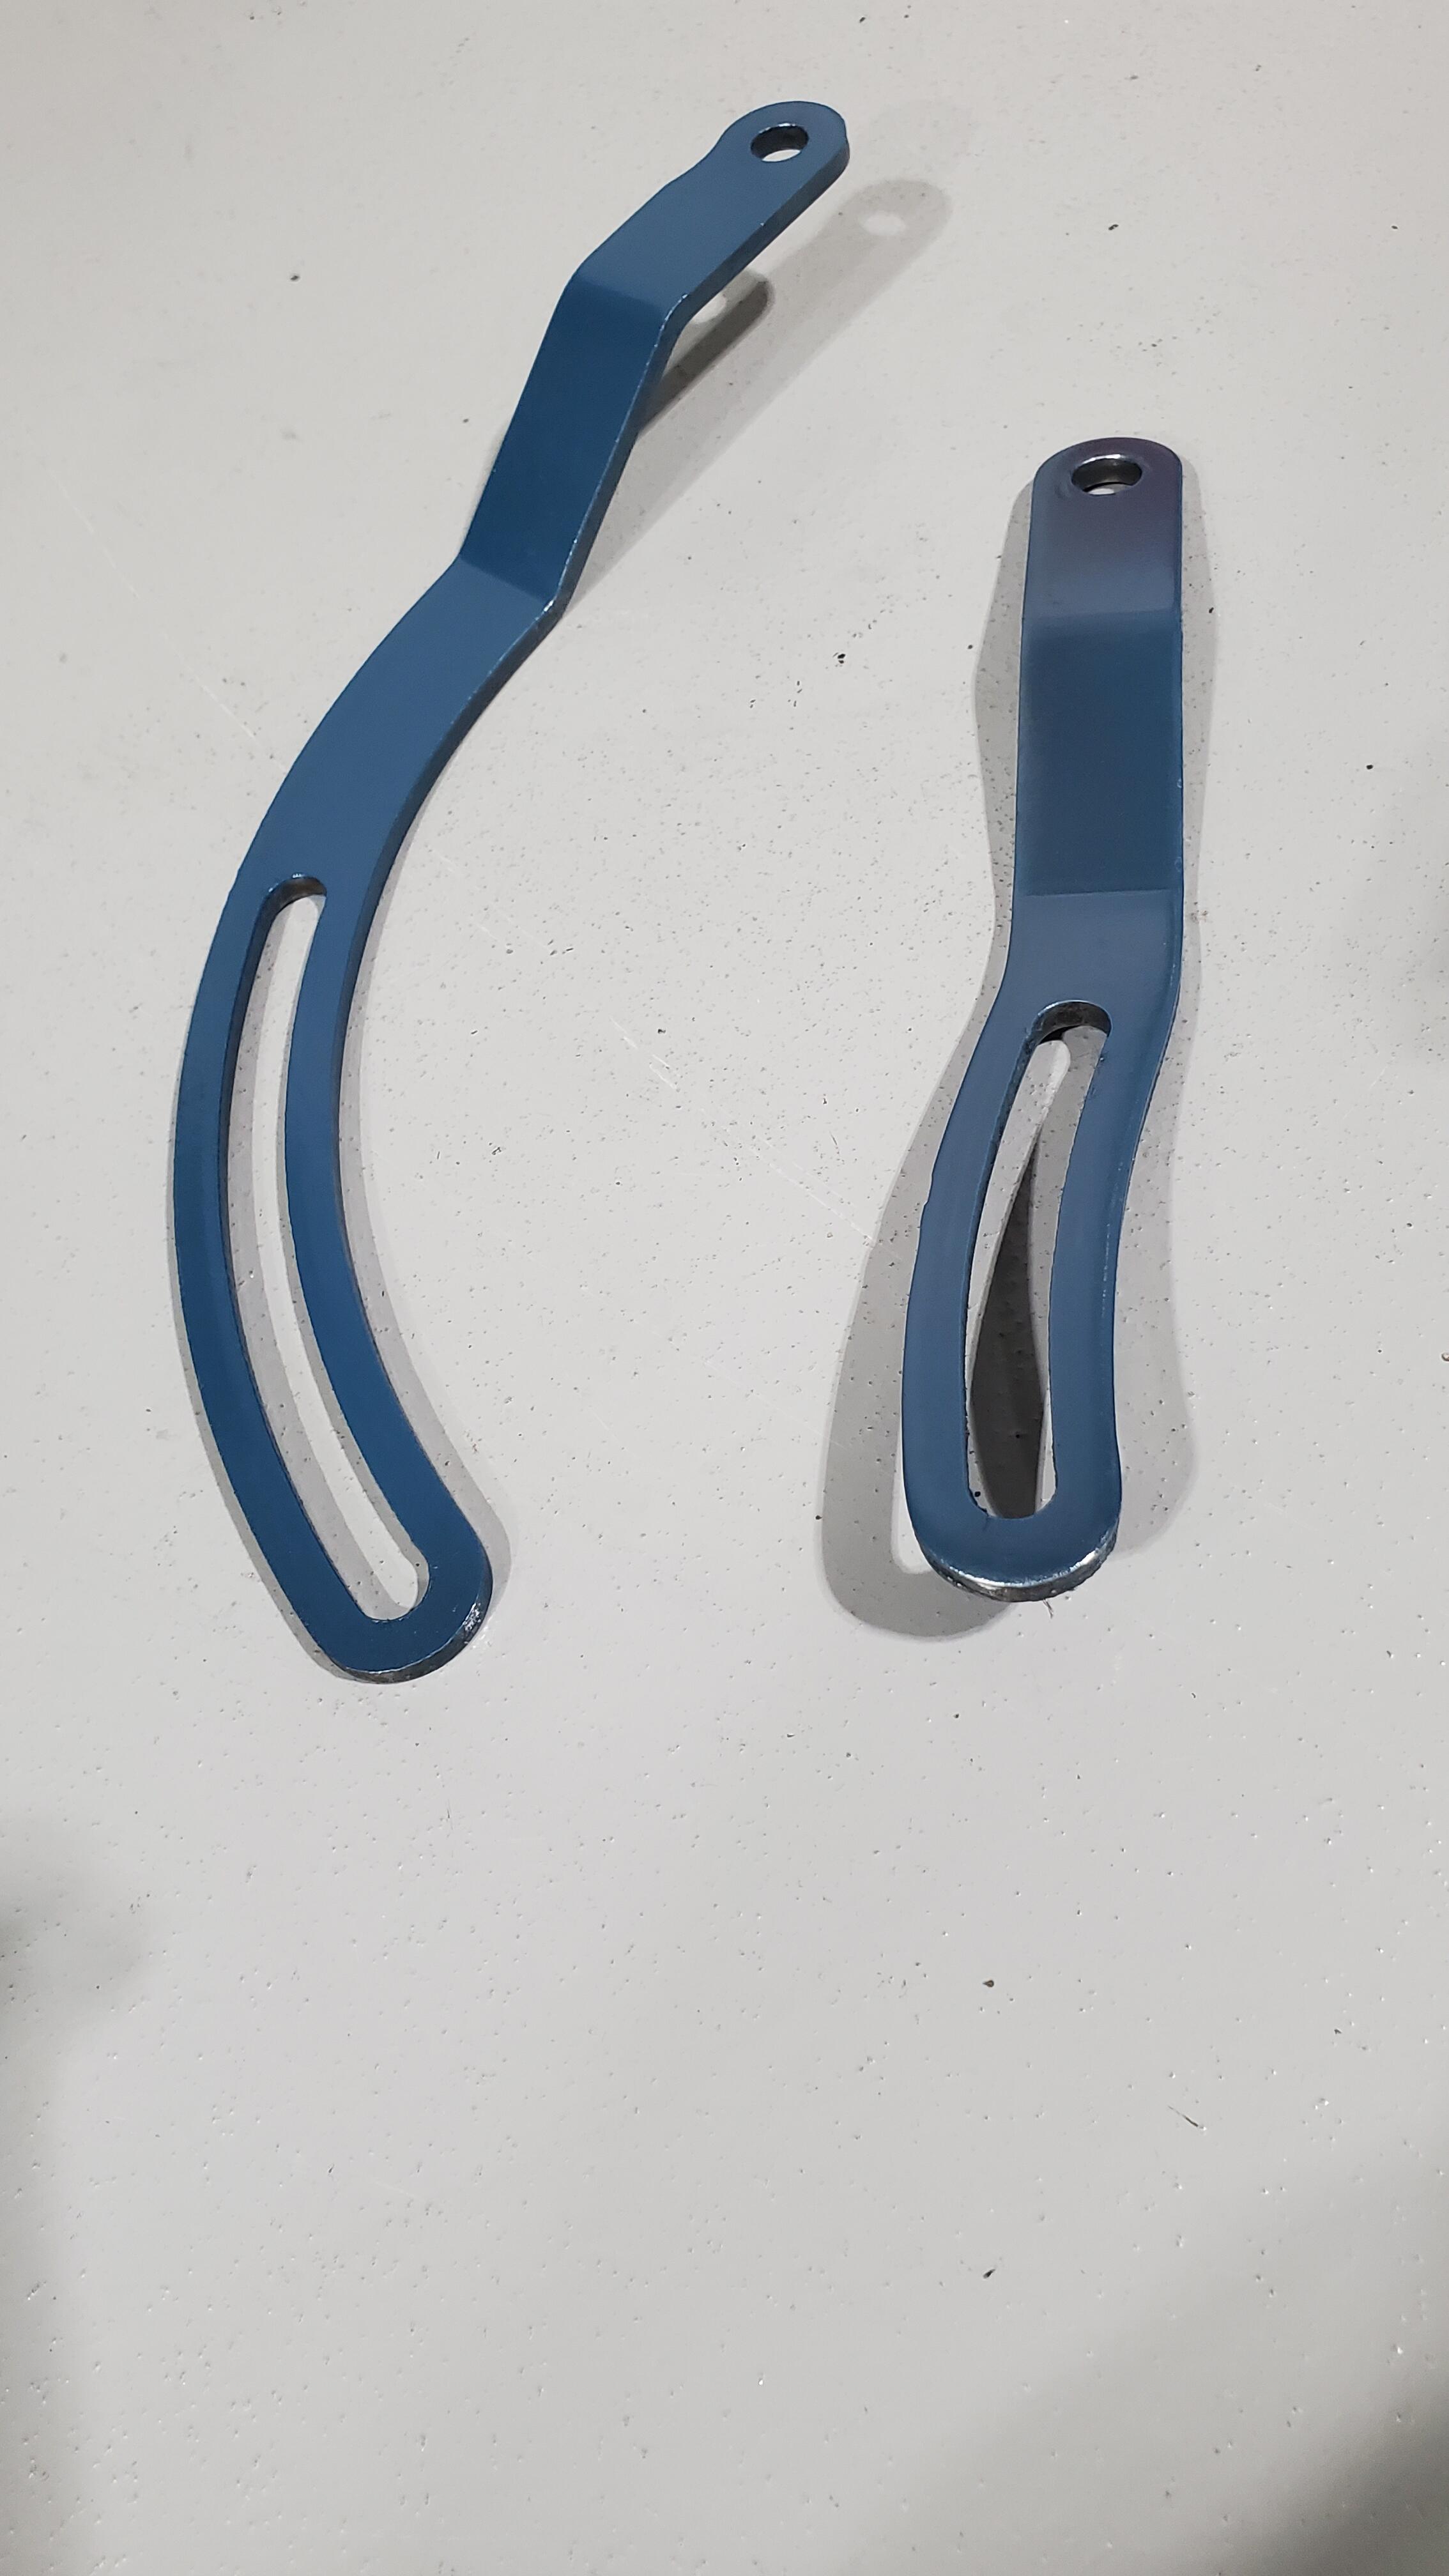
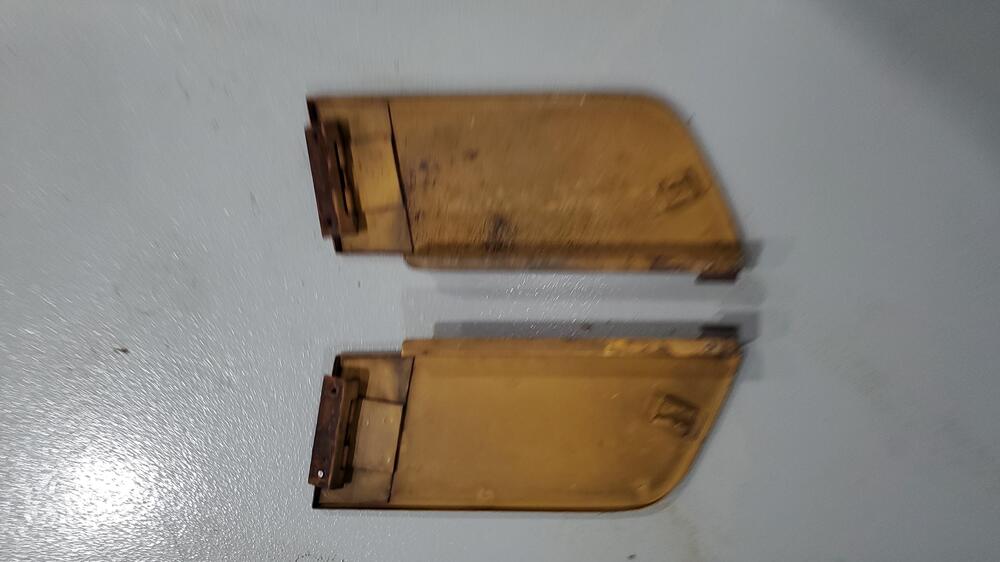
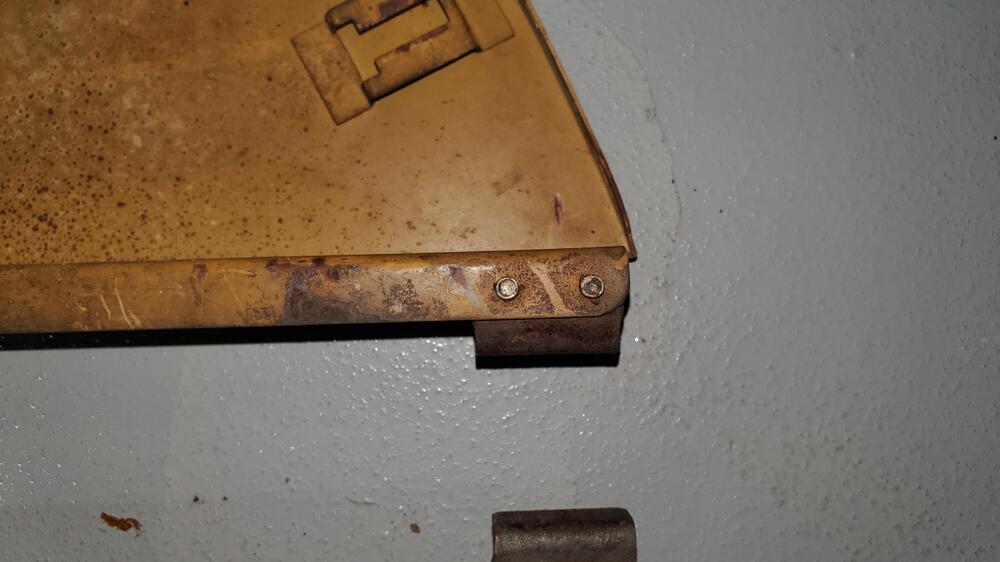
@jayhawk Thanks for the kind words. Not sure if I would support the raised look though 😝. Found something interesting on the two small hood access doors. There is a little tab riveted on the end of the doors. Later models had this all as one piece.
-
Yes, this is always a big question. Previous paint and body work has ranged from $13k to $30k and is pretty much dependent on the amount of body work required. The $13k job did not require extensive body work, whereas the $30k had new floor pans and a number of other patch panels welded in. So I use this as a guideline. Based on the condition of the body, I can estimate what the cost will be within that range. Typically we are just paying for labor and materials versus a set price. Also, my previous body guy would not give me an estimate until the car had been sandblasted. You never know what you will find under there. Regarding paint quality, my San Diego guy was one of the best. If I am not mistaken, @jayhawk received an award at 2023 ZCON for Best Exterior at the show. I think his work on 'The Orange' was even better....like liquid glass. He really is an artist. All paint work was 2-stage paint, color sanded and polished. That being said, the paint on this one will most likely be a little different (need to confirm with owner). As we are going for the as close to original as possible, this paint will be a single stage where I will just do a single final polish with minimal color sand as needed to replicate the original finish. I did this same finish on the orange Z that I previously owned. This finish should save us a couple thousand as there will not be a full color sand. Also, I typically work as the overseer, coordinator and quality control for the paint shop. The customer pays the shop directly. I do seem to notice a bit lower labor rate here in Boise which should help withcost. All things considered, I honestly have no idea what the final cost will be. My best guess is $25k +/- $3k. I am hoping to come under that, but will know more after the sand blast. Hope that helps.
-
Yes, guess I should have thought about that. I am happy though that we will have people familiar with the cars doing the work.
-
So, I got a little education here on finding a body shop. I went to Shawn's shop yesterday and found out that he has 19 cars in his shop and 8 on a waiting list. Only saw 3 employees. He said he wouldn't be able to start work on the car for probably a year and the project would take several years. So that was a 'no-go'. I asked for some recommendations and still haven't received a call back from them. So, I was a little concerned here. This was not working out like my San Diego operation. I eventually called Guy, the 'Z Doctor' here in Boise which in hindsight, should have been my first call, and he was a wealth of information as he has restored a number of Z's here in Boise. Not only did he set me up with a body shop that has done 6 of his cars, but he also set me up with his machine shop for the engine work. What a relief! That being said, I spoke with his body shop yesterday and the guy said he would squeeze me in and should be ready for the car early next week. Will contact the machine shop once I finish the motor tear down.
-
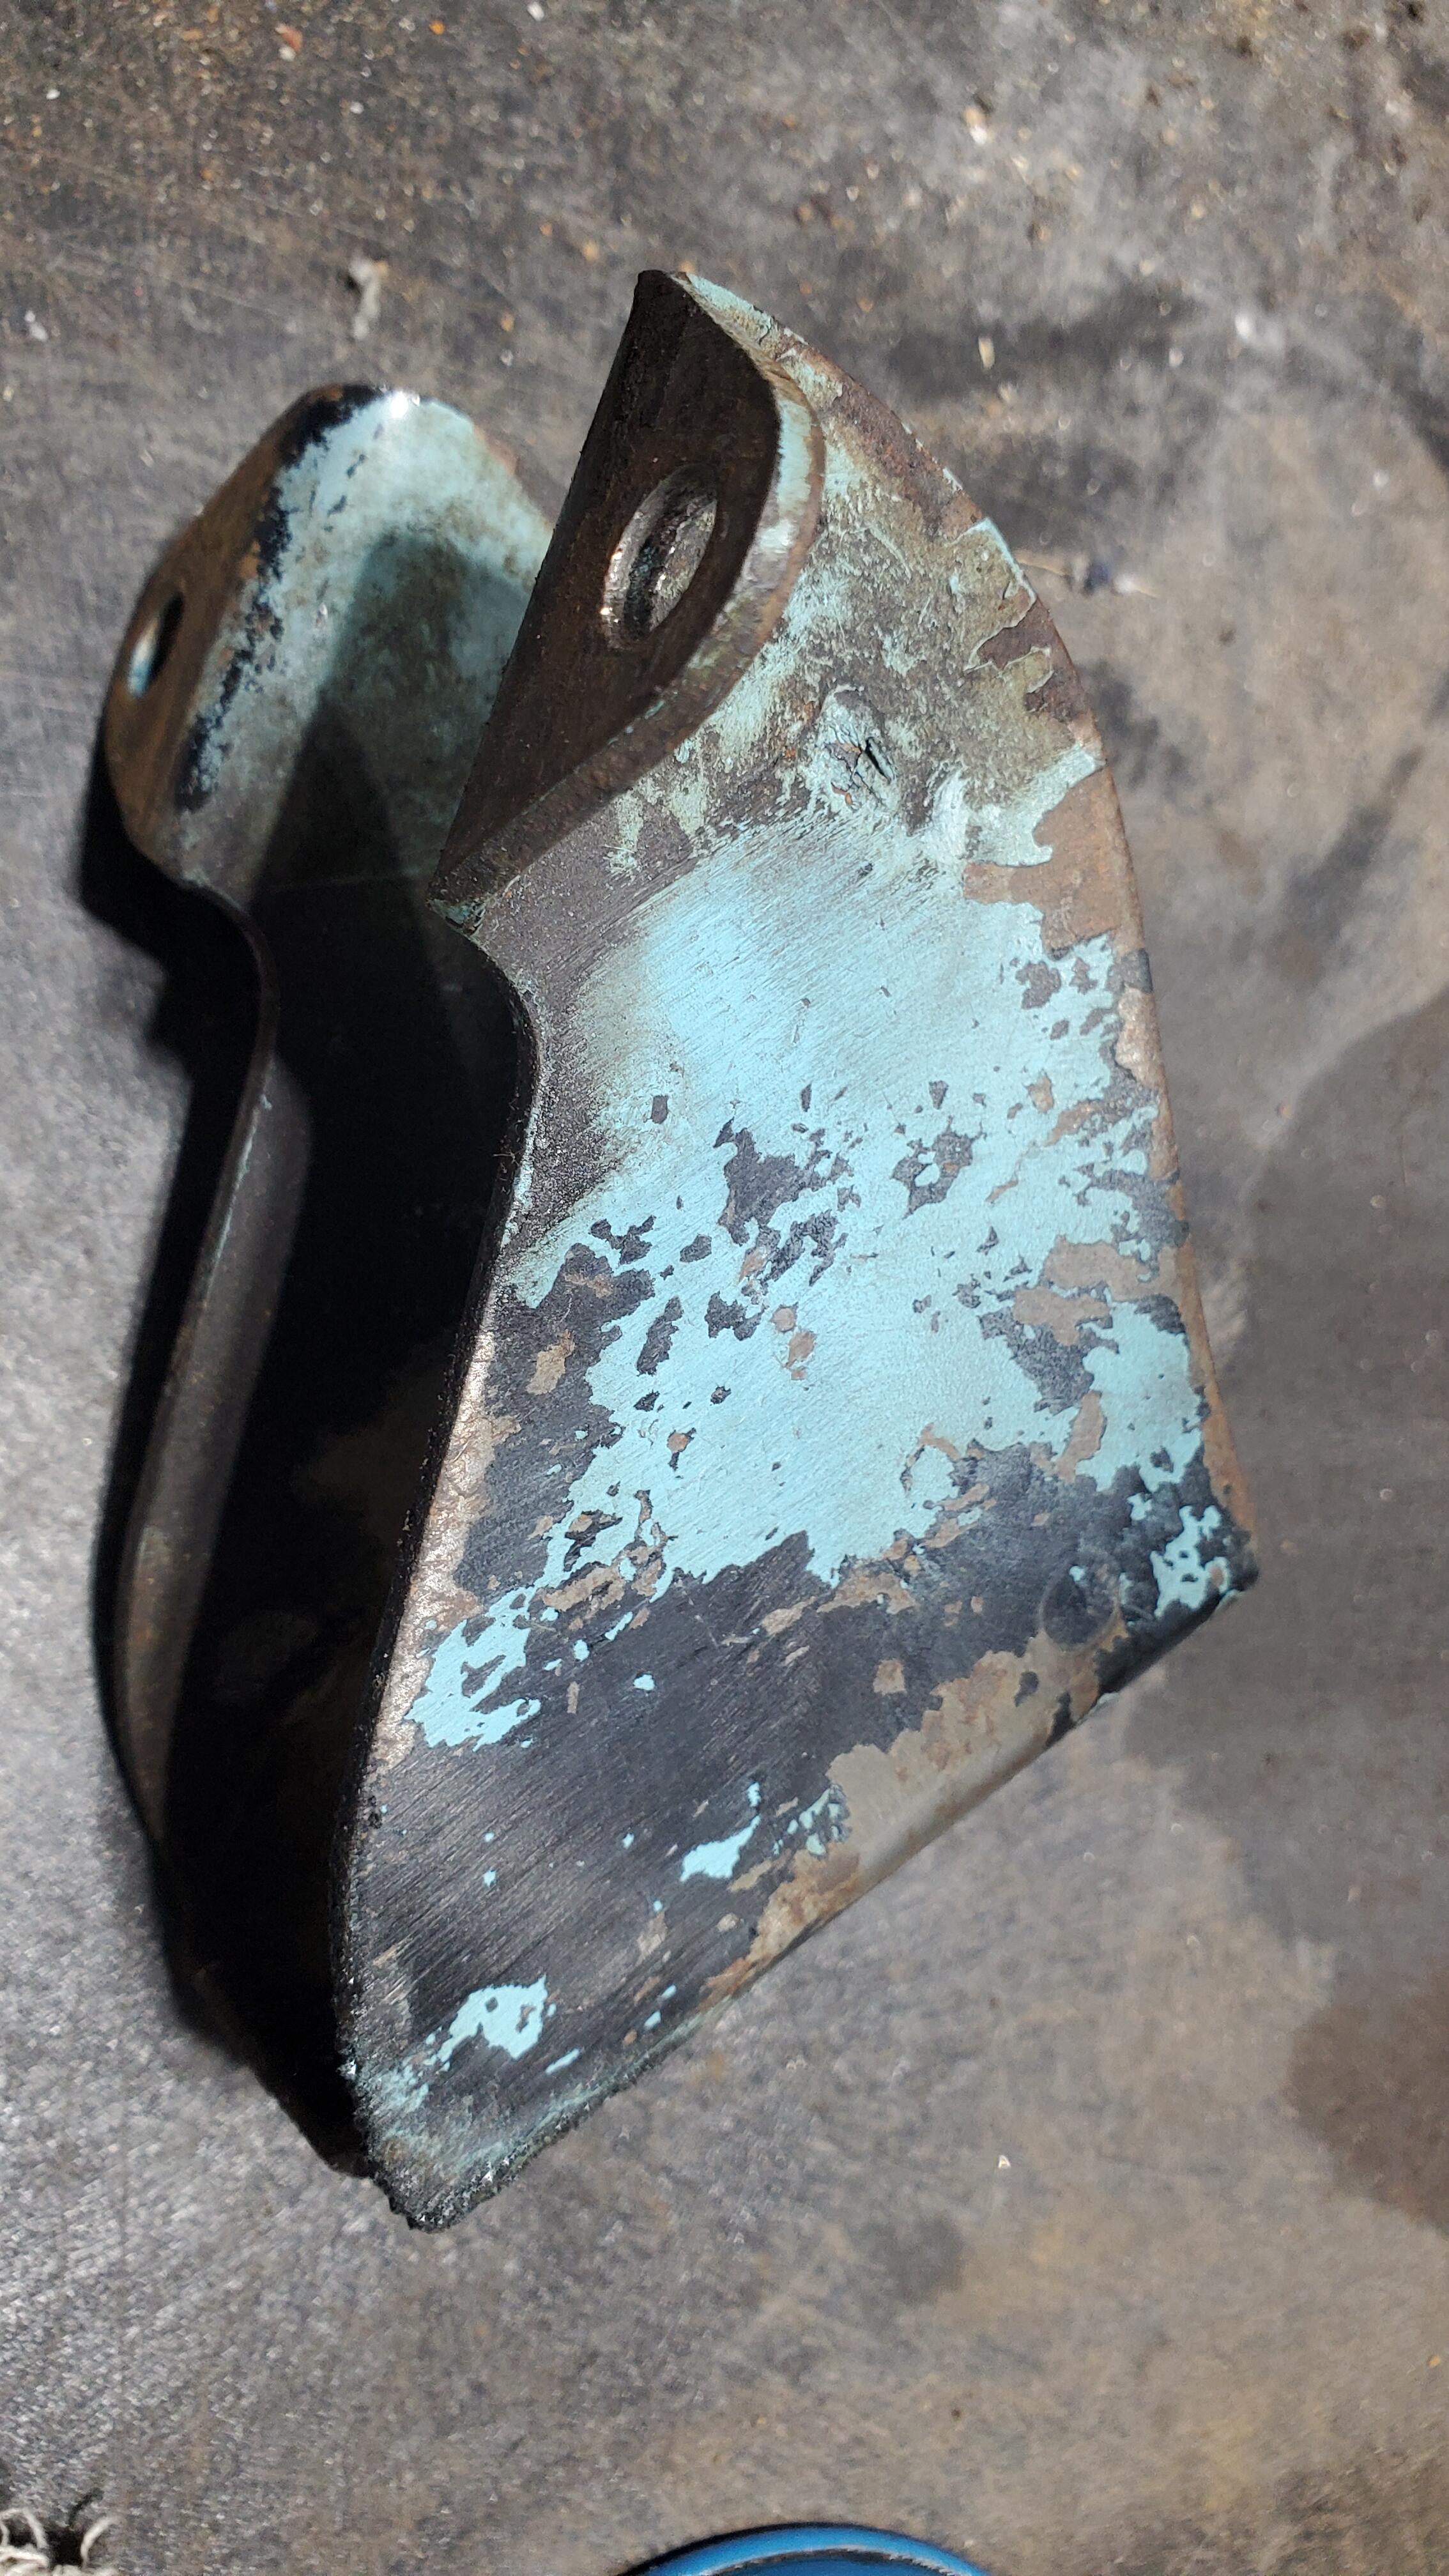
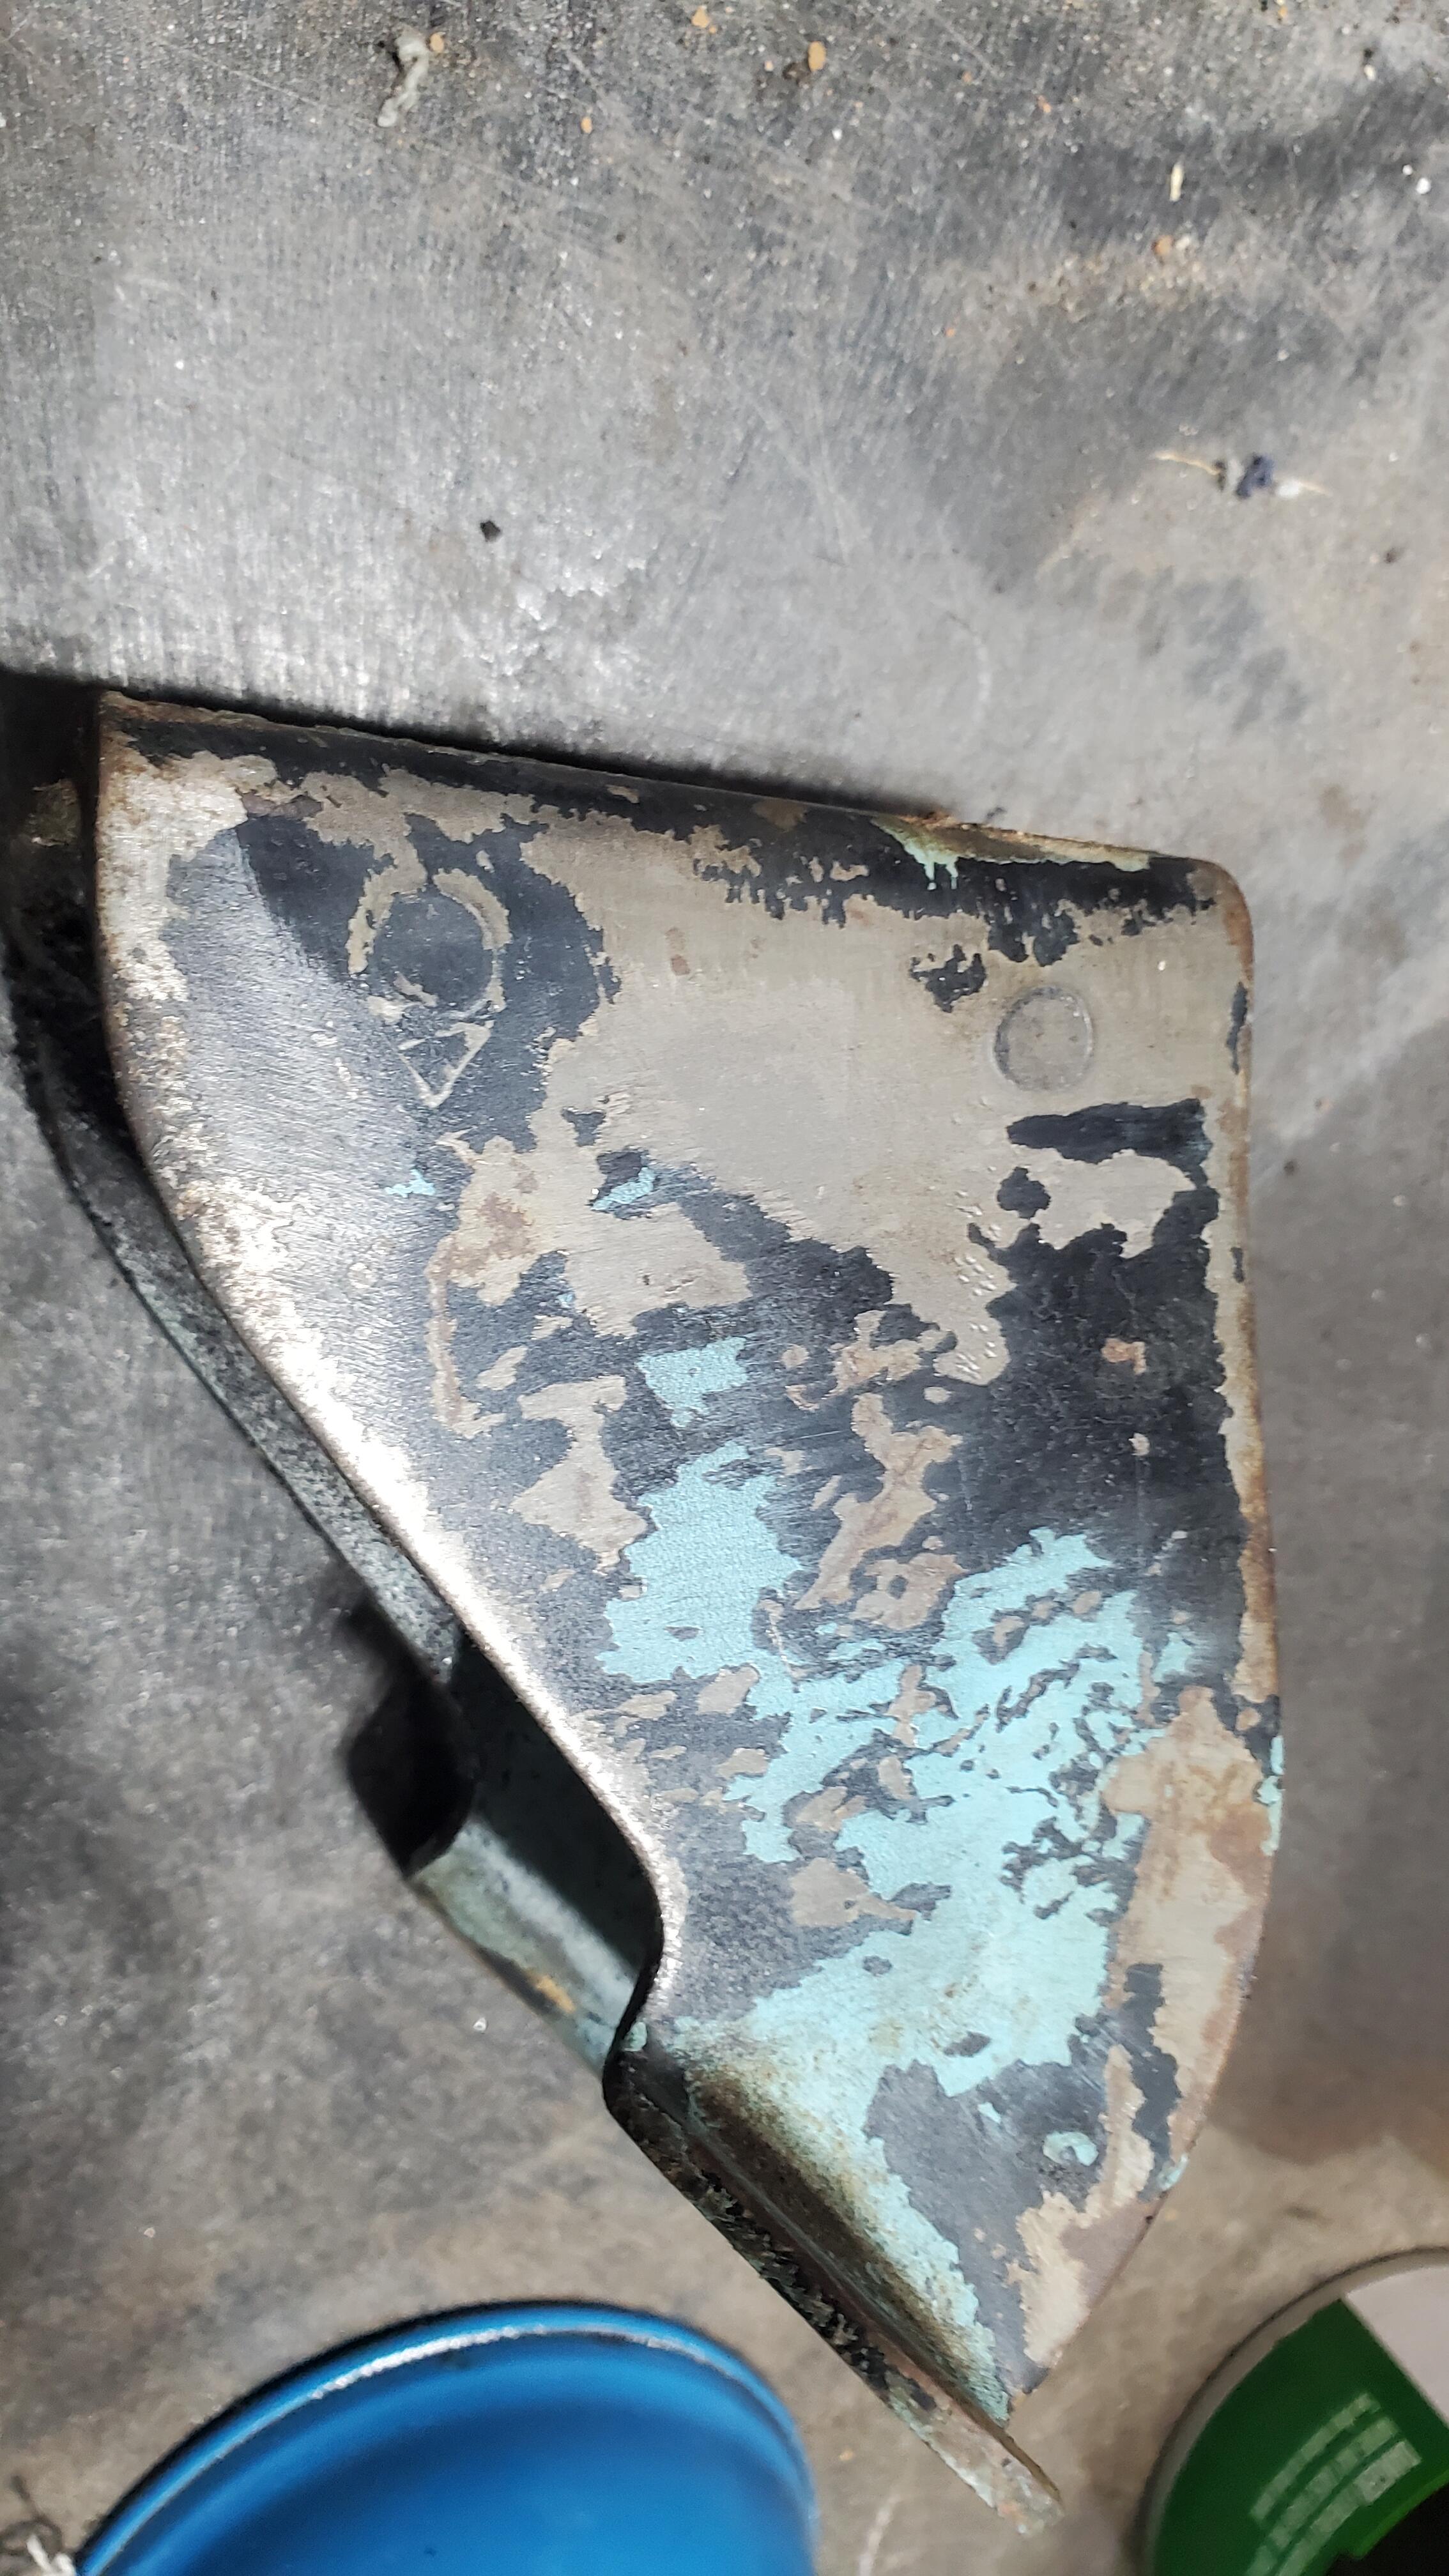
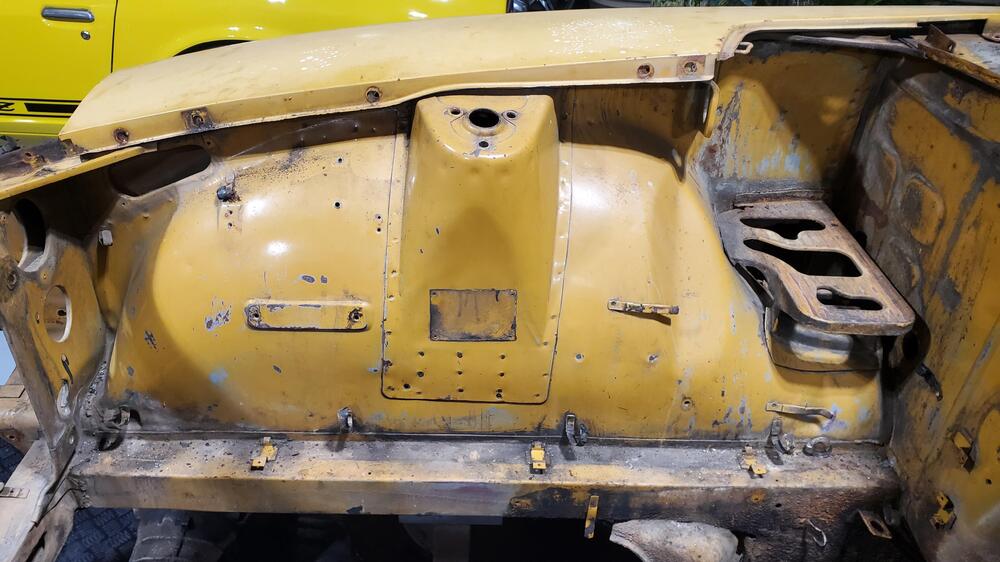
Here are pics of the engine bay. I can't say that I notice anything unique other than the two hood bumpers. Later models have threaded nuts for the hood bumpers. This SN has a sheet metal screw that just threads through the sheet metal, no welded nut underneath


-
I have talked with Shawn several times here at some of the local car shows and he comes highly recommended. I will stop by his shop early this week for a final review before transporting the shell.
-
Shawn McNally is who I am planning on going with here in Boise. Customsbymiguel was my body guy in San Diego.
-
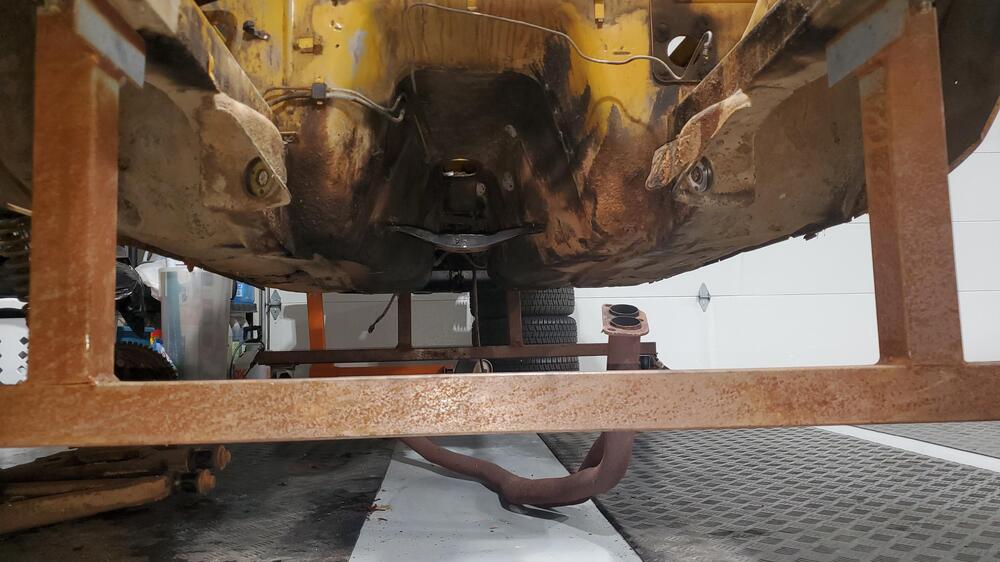
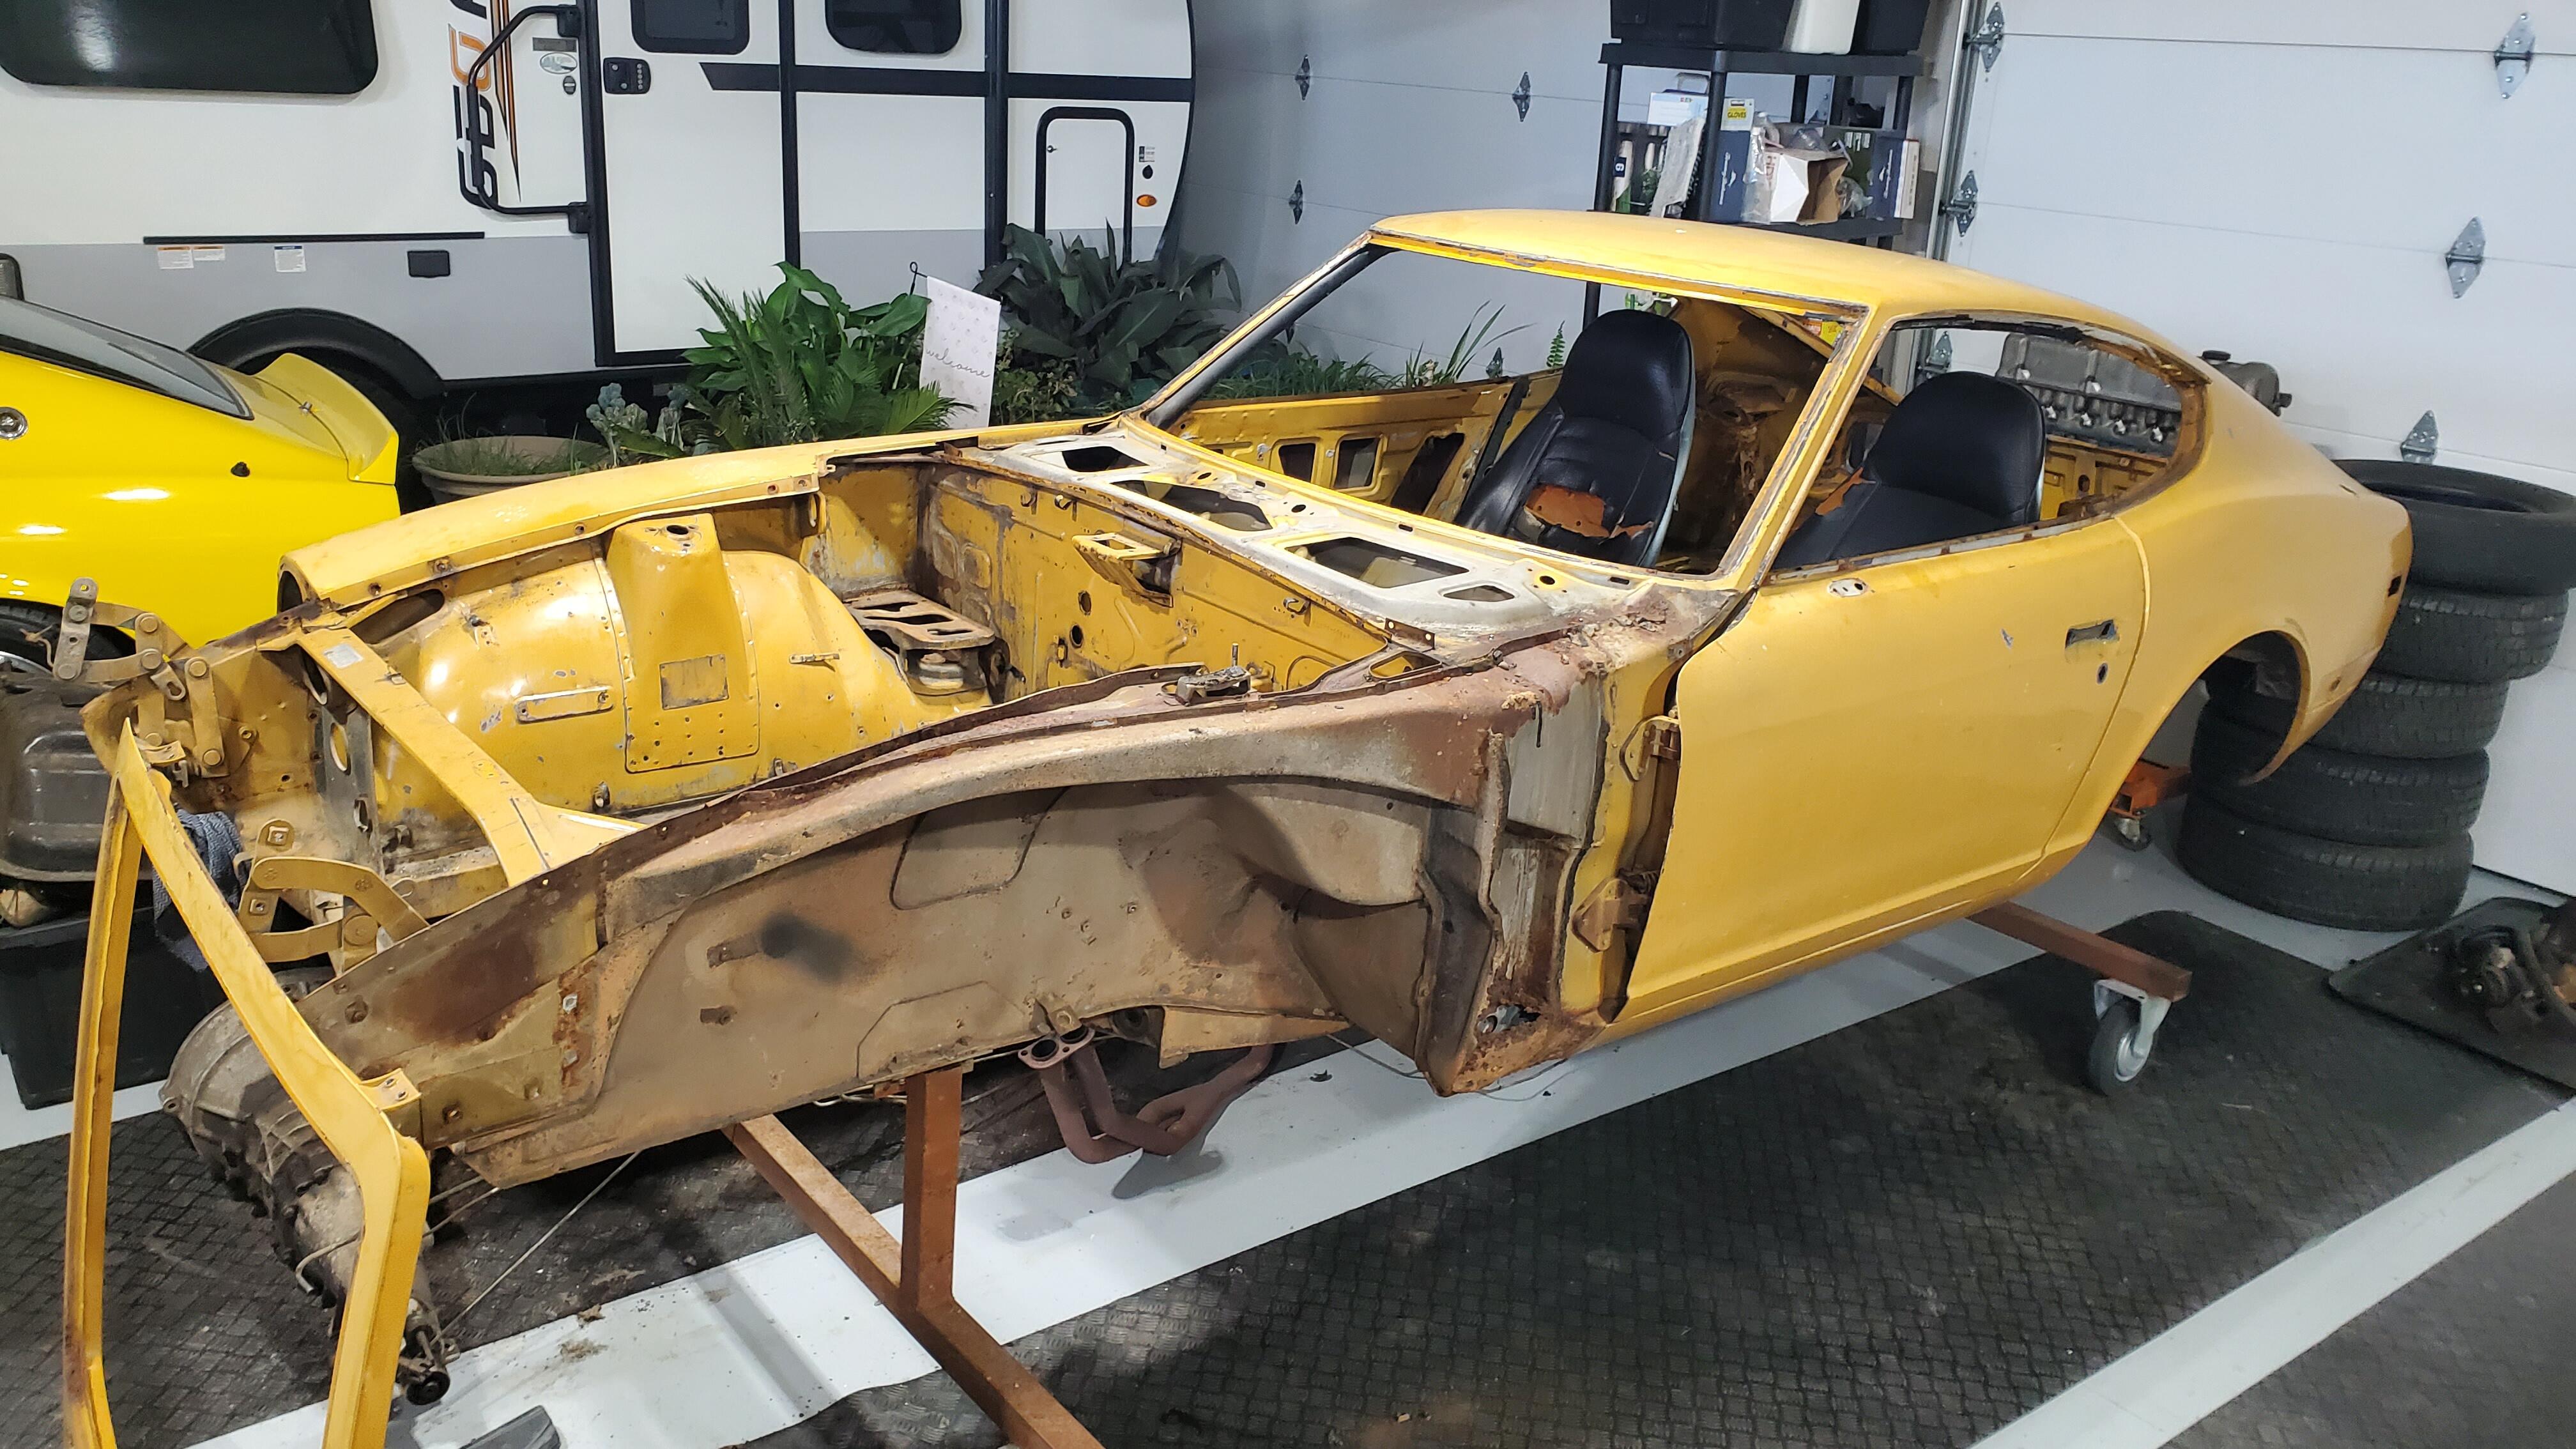
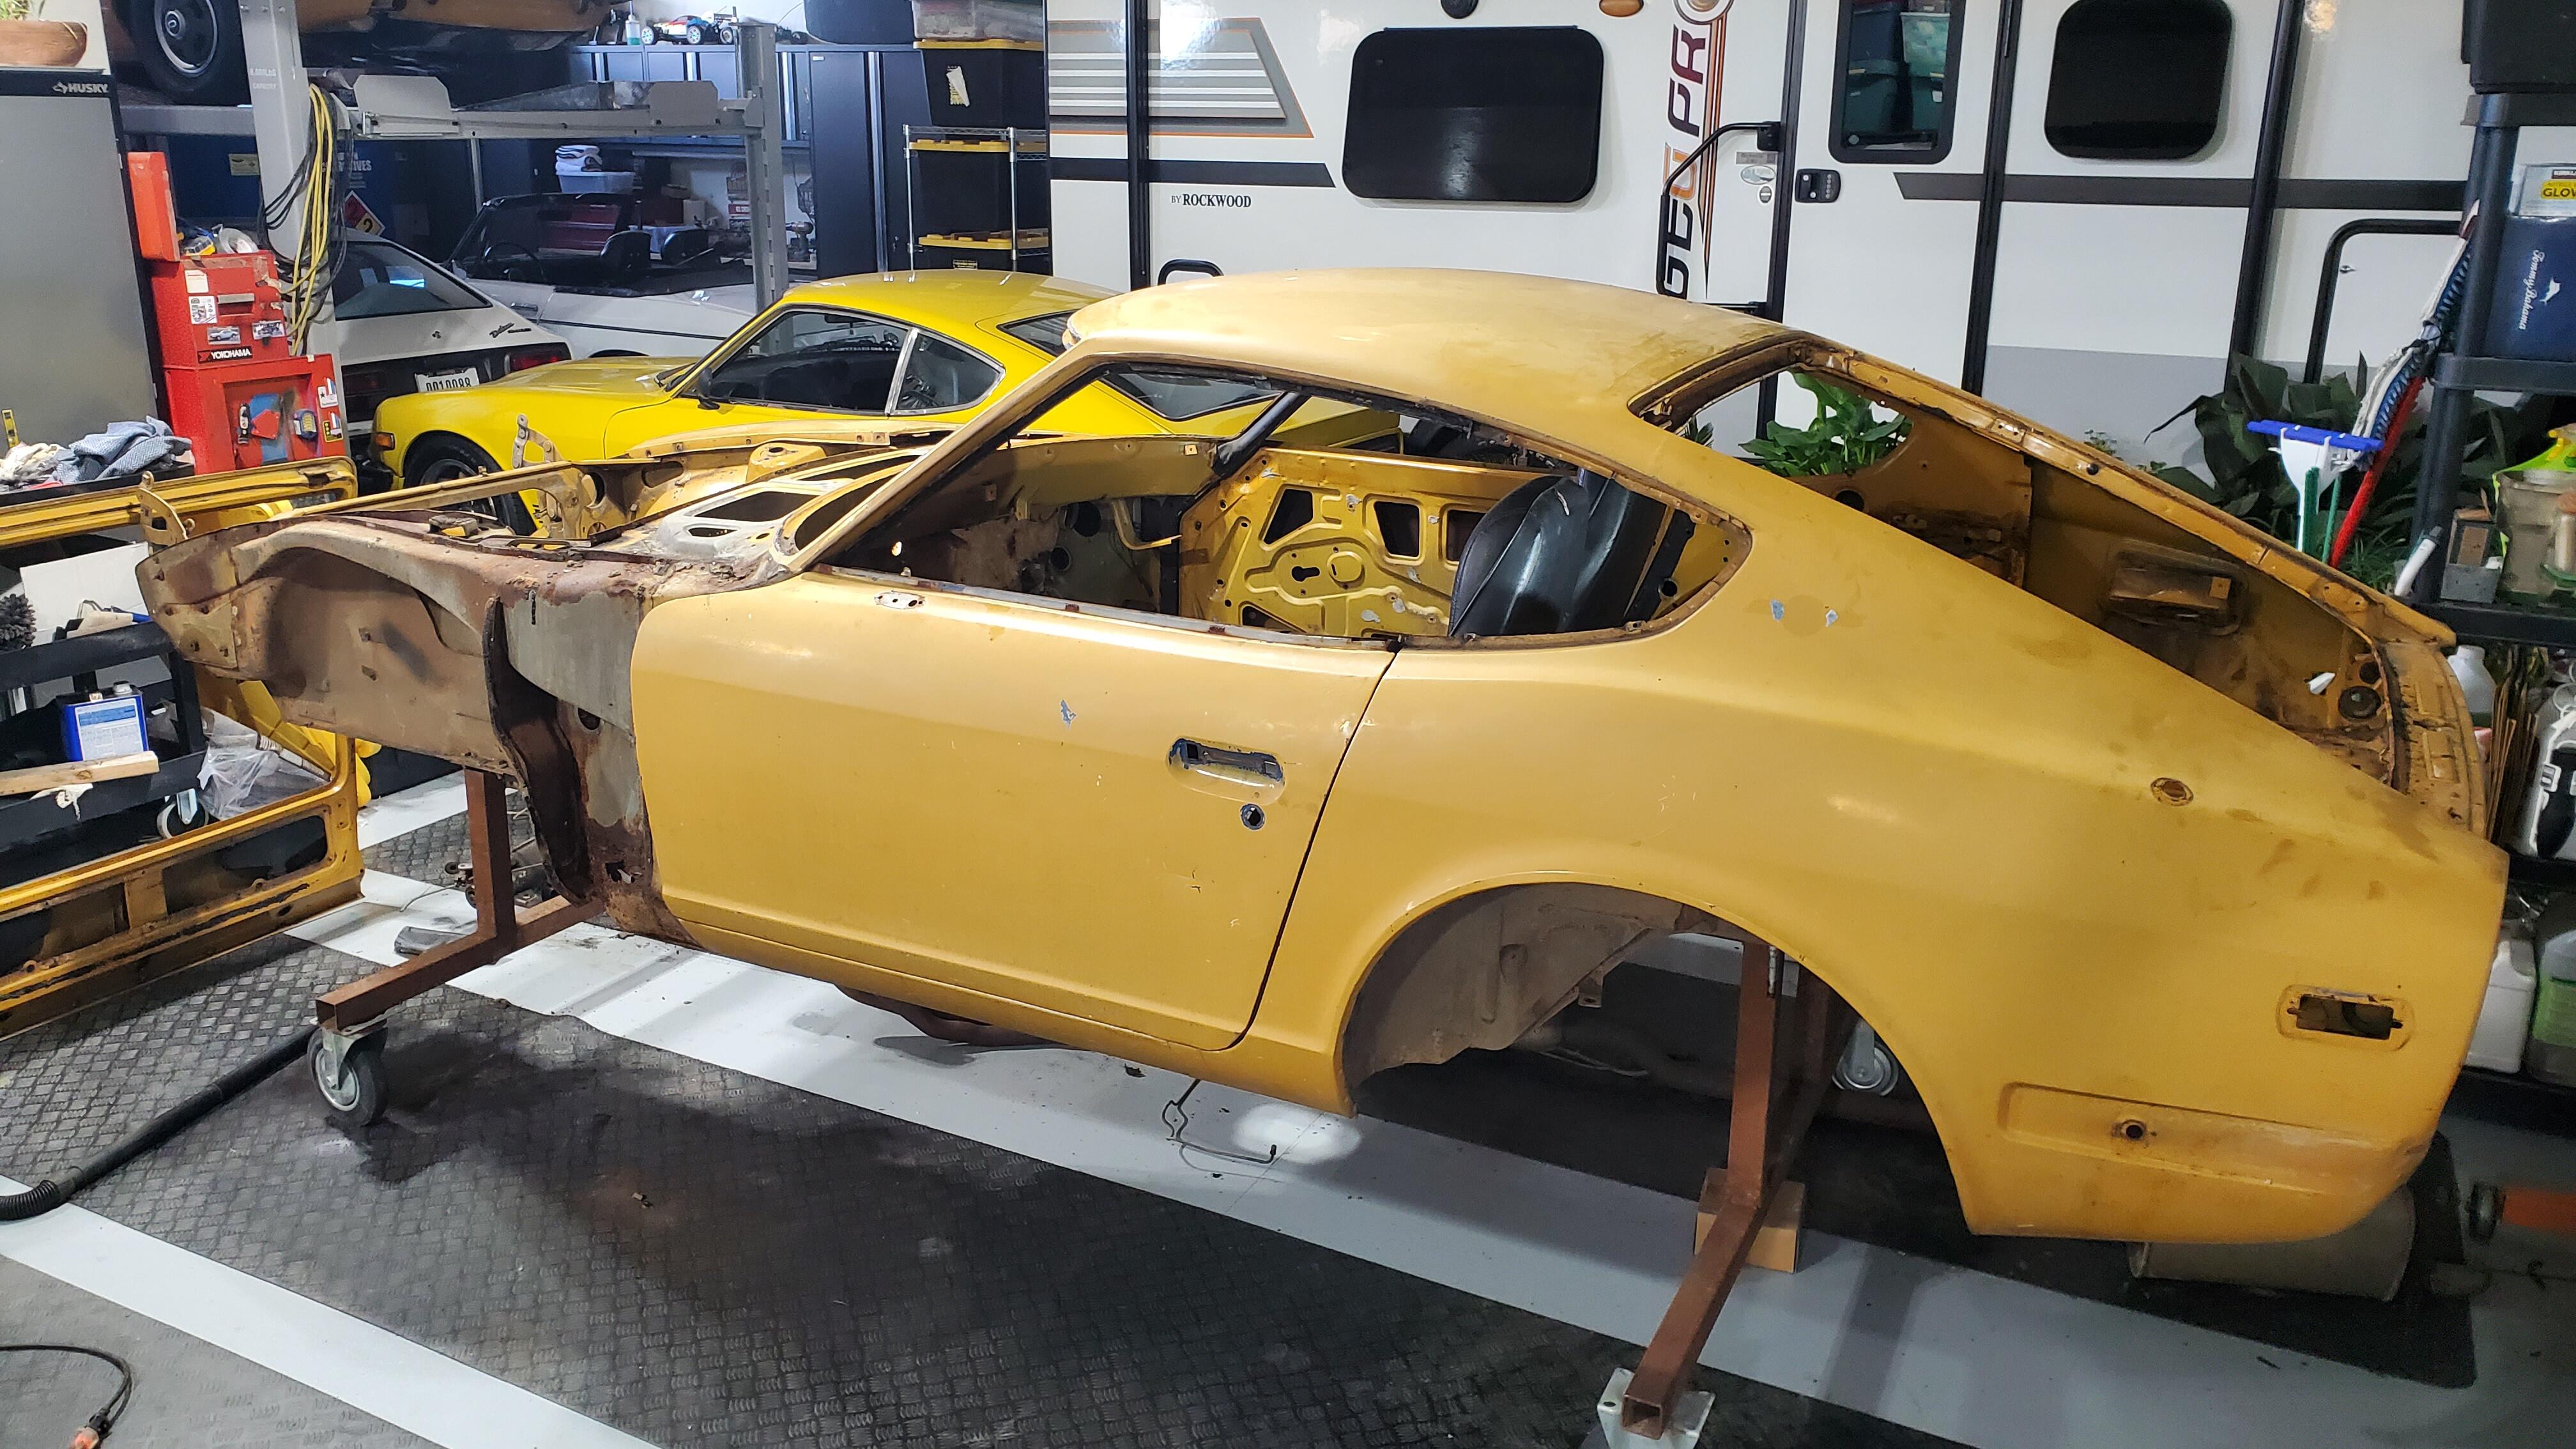
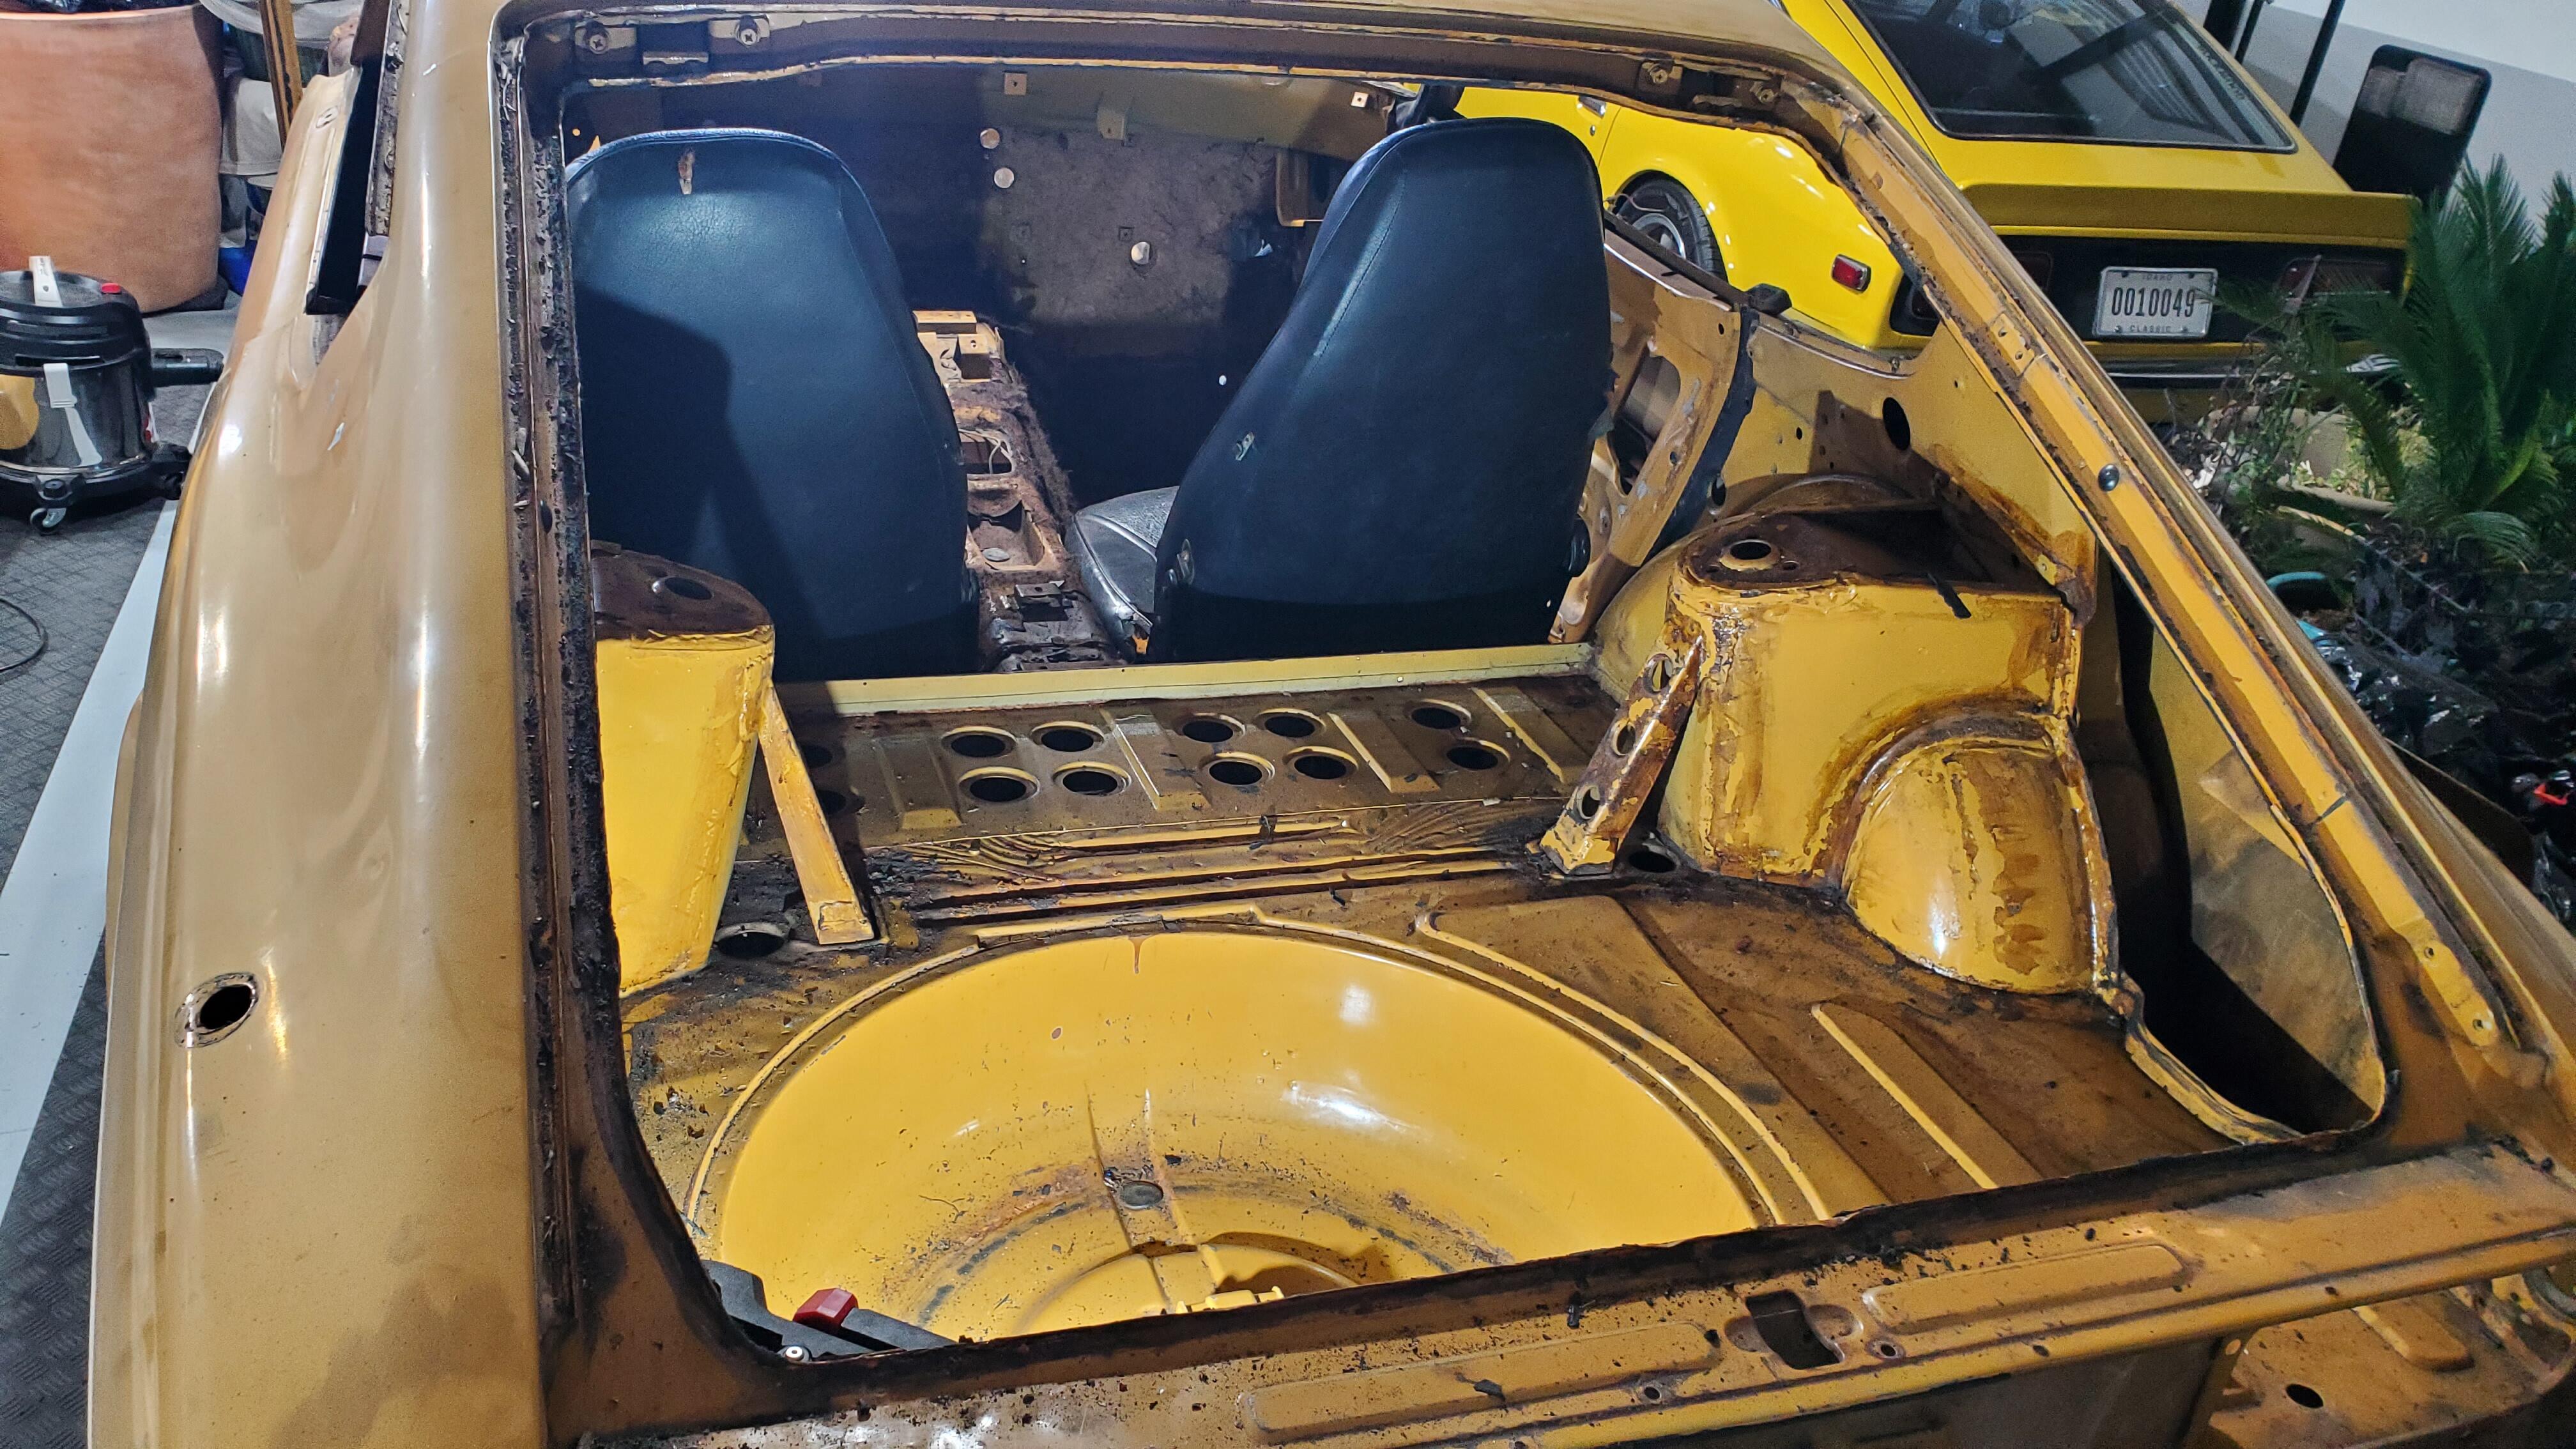
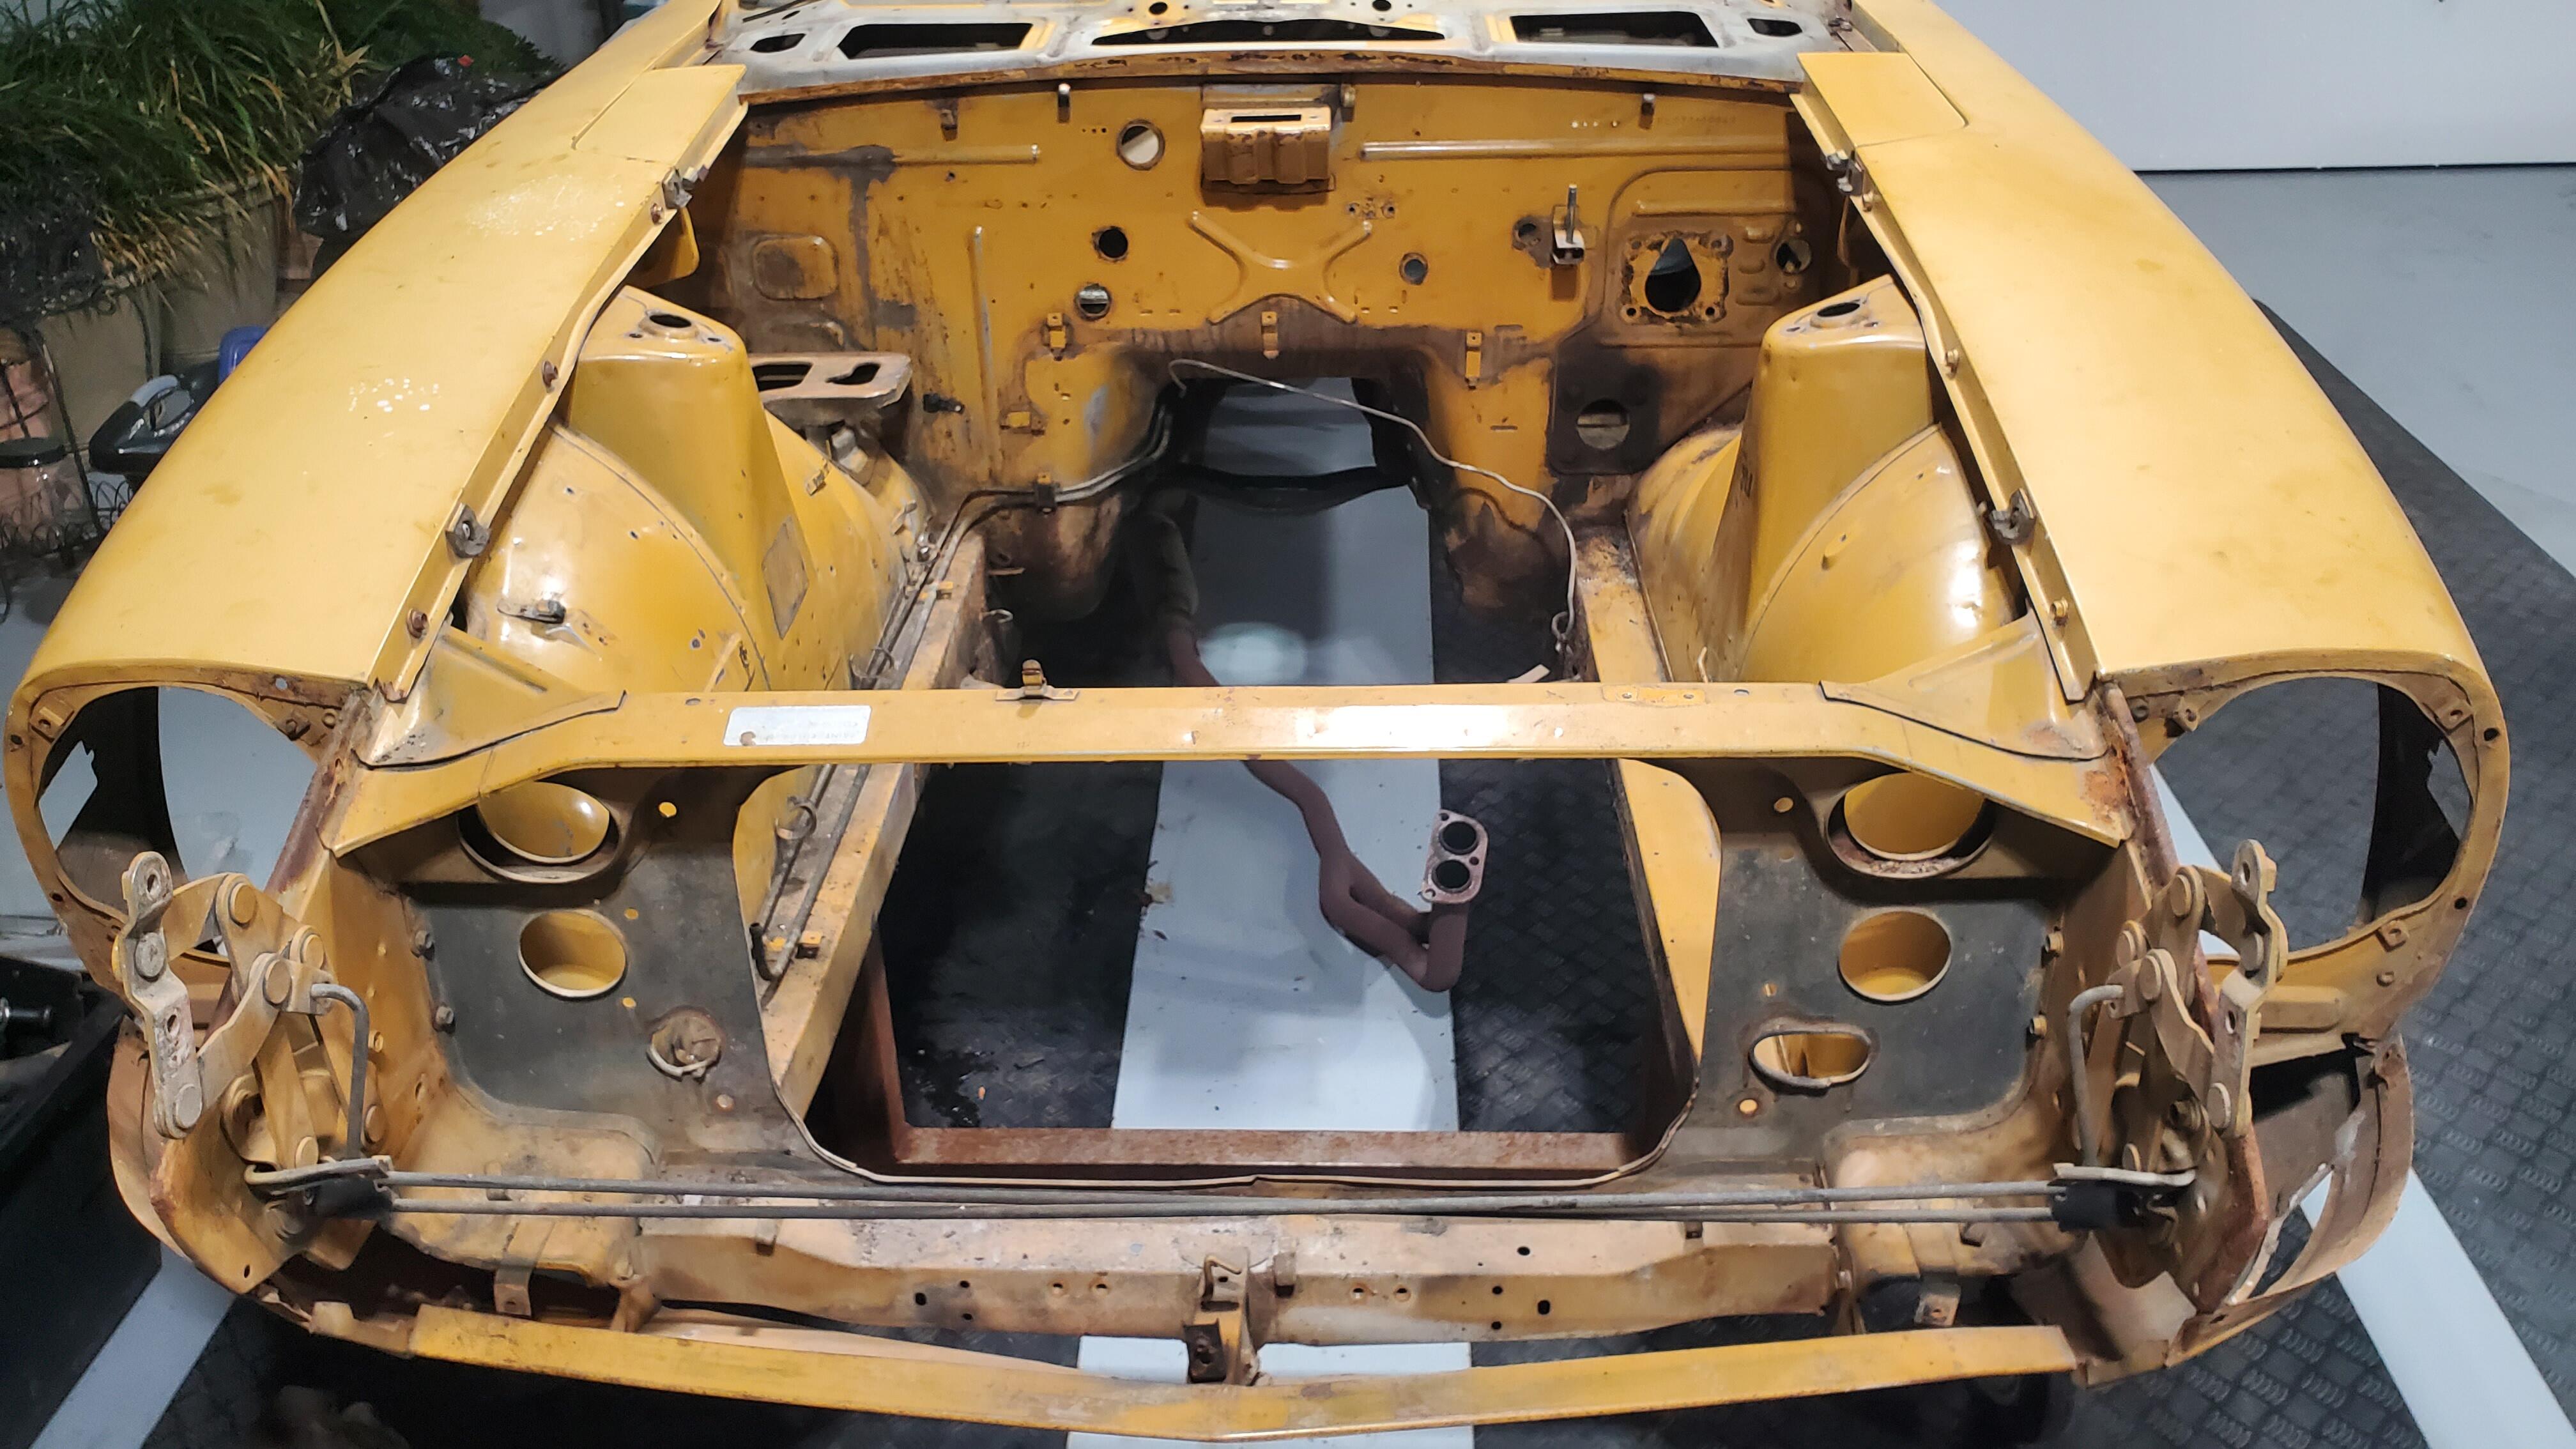
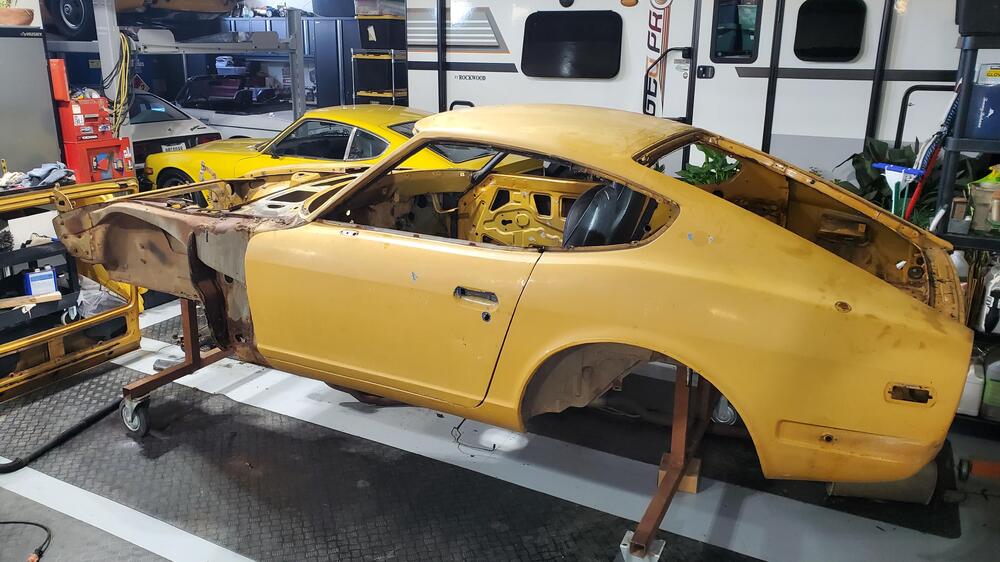
The body is just about ready to send to the body shop. I removed the glass, all items on the underside, and all of the body panels. I scraped off the old weather stripping and am now just doing final cleanup. I still need to drill and tap a few of the rusted out bolts as well. I will make an assessment of which patch panels we will need so shop can weld those in. The nice surprise on the car was the good condition of some of the interior parts. The headliner and A pillar vinyl is perfect as were all of the rear plastic panels, except for the rear panel which a PO had modified for speakers. Also, the doorsill plastic was in good shape and just needs to be cleaned. This will make the interior much easier to restore as some of the aftermarket items for these items are not the best. Often, aftermarket panel holes don't align and I have had headliners where the manufacturer's glue is poor with the vinyl detaching from the foam in hot weather. So, having these items in good condition will be a nice help. Latest photos are below.


-
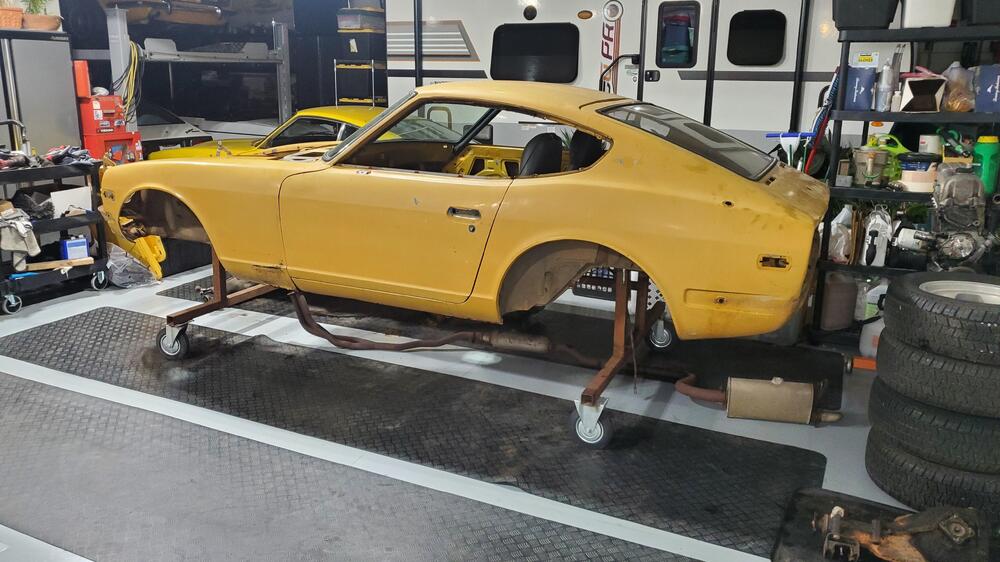
Got the body up on rollers. This will make working on the underside much easier. Should have the final items removed over the next couple days. Pics are below.