Oiluj
Free Member
-
Joined
-
Last visited
Everything posted by Oiluj
-
-
Wow! Tesla better watch out!
-
What Steve said... Sounds more like a battery or power connection problem. The antenna should be switched with the ACC power or by a separate switch connected to the battery.
-
I did use a spring compressor to remove tension from the spring before cutting it. I don't think it would be wise to try to cutting the spring while under compression. Each spring cut took 7-to-8 carbide dremel discs, (because they kept breaking). WEAR EYE PROTECTION!!! Lots of sparks when cutting and shrapnel when the discs break... I dropped the front suspension down as far as possible without stressing the front brake line. I then removed the keeper-nut from the top of the shock and pressed the rod down so I pull the suspension out of the shock tower. This allowed me to remove the spring perch to lift the cut section of spring out. Getting the shock rod back into the strut tower required using a small pry-bar to lever the rod down just enough to get it back into place. A small jack was used to help lift the lower suspension arm to move the strut rod through the hole in the top strut pad. (Remember there is a small flat on the rod that has to align with the flat in the hole in the top strut pad). I suppose you could make two cuts on the spring. Then you would not have to drop the suspension, but it might actually take a little longer to do the job. Since I was reducing the travel in the suspension by about 3/4", I also cut down the bump stop about 1/2". Probably not required, but I figured it couldn't hurt. Working by myself, using manual screw spring compressors, it took about 2 hours for the first side and 90 minutes for the second side to disassemble, cut the spring and reassemble. Could probably do it again in about an hour per side now that I have the process down.
-
Sweet! I need to do that for my neighbor's hubcaps.
-
Quick update on my cutting my springs. The springs are cut and I drove the car tonite after work. She now sits level, (no rake). I did a quick spring calculation. Since the coil I cut was a half-height coil, my thumbnail guess is it got about 7% stiffer. On the road, it feels just a tiny bit stiffer. I pushed it a little on a couple corners, and it seems to make no difference in handling. I'm OK with it being slightly stiffer and sitting level. Now I can adjust the headlights!
-
I just finished cutting one coil from my front-passenger side eibach, and plan to do the driver's side tomorrow night. I think I must have received 280Z springs, because no matter what I did, she still sat too "nose high". Should drop the nose about 1" and I expect she will sit almost flat with a very slight forward rake. I used a Dremel and carbide cut-off wheels to trim the spring. I'll find out later this week how it affects handling.
-
Sorry guys, no pics from the drive. Don't actually remember the name of where we ate lunch. Smaller place on the northern side of the harbor. I'll be driving the Z to Reno in a few weeks with for a "guy getaway" with my best freind. I'll take plenty of pics on that trip. Nice pic of your blue Z biddljj.
-
Though she rode in it once before, this was the first time my wife rode in the Z since the interior was finished. Now it actually feels like a complete car inside. We took Highway 92 west to Highway 1, then headed up the Pacific Coast Highway north of Half Moon Bay. We stopped for very tasty lunch at a seafood place with a view of the ocean. The car ran great and garnered lots of second looks and a few "thumbs up" with smiles. (Former S30 owners I presume). I never pushed it as there was a little traffic in spots, but it sure was fun when I had some open road in front of me. It was very satisfying to feel my little Z hug the corners and climb the coastal hills with grace and plenty of power in reserve. My wife was grinning right along with me. All-in-all a great Sunday drive.
-
Duffman, Your center vent is printing as we speak. Send me a PM with your address and I’ll ship it to you later in the week. Think I need to take the prototype shop guys out for a beer later for allowing me to make use of their tools for my project!
-
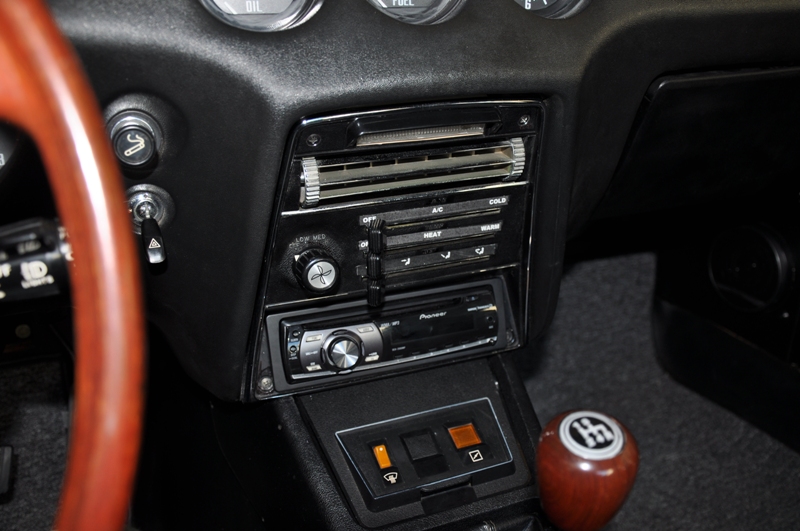
Attached is a pic of the installed "custom" HVAC controls & stereo. The "defrost"sysmbol is hidden by one of the knobs in the pic. Still need to replace one damaged decal, but otherwise it all looks and works as intended.

-
Tomo, Sorry, but my CAD skills aren't good enough to make a decent reproduction of a supermodel. Besides, her head would be empty, though that may not matter... *grin* However, your idea of making cad models of NLA parts for later reproduction is a very good one. Some 3D part models could be easily recreated in Pro/e or Solidworks, but many are complex shapes that would be difficult to model. I don't have acess to a 3D measurement machine used to digitize complex part shapes. Anybody else have access to one of these machines?
-
Since it's not my machine or material, assuming they will let me use the machine to make another one, it wouldn't be ethical to sell it. I'll only want you to pay for shipping. I'll find out if I can get another one made next week.
-
Dave, My next-gen kick plates will also be for 4" speakers, because there is so little room behind them for the magnet. I'm not planning on producing them, just making a set for my car. I'm planning on making mine using paperboard, plywood, (for the ring), and epoxy filler for the radius blend. It's labor intensive, but I can do it in my garage. Then I'll paint them with textured black paint. Once I get the design finalized, I'd be happy to pass it on to you if you want to produce them. I think the best / cheapest way to make "production" parts would be thermoforming, and at $30/set could be profitable. If theormoformed, any suface texture of your choice could be achieved.
-
The abs rapid prototype material is pretty brittle, but the polycard material is very strong, so no issue there. You can now buy a small STL machine for about $10K, so the price is already coming down. I expect to see this process get faster and cheaper in the next 10 years, replacing injection molding for small part runs. Since the machine and material are at my workplace, and I don't control them. I'll see if I can get a couple more center vents made, but can't promise anything.
-
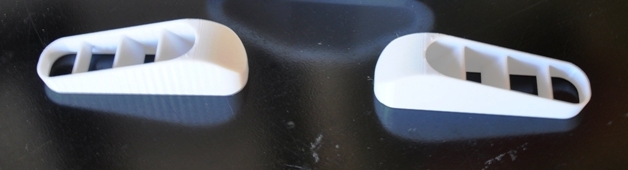
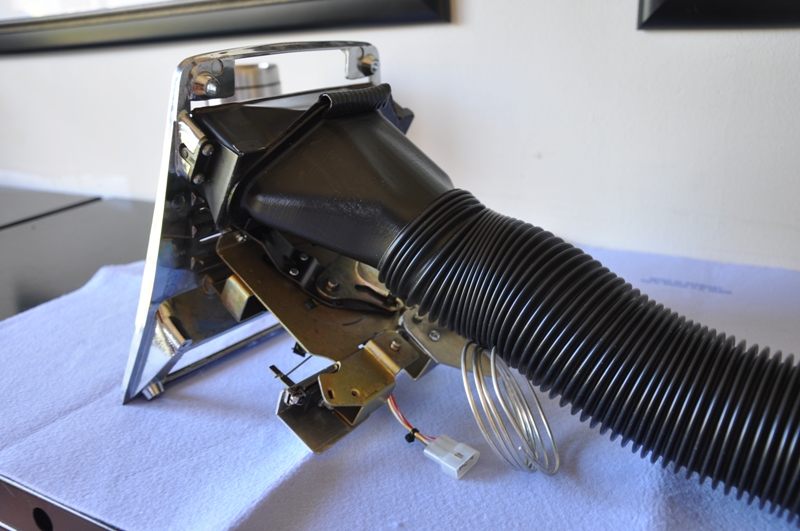
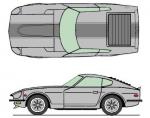
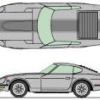
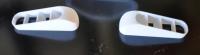
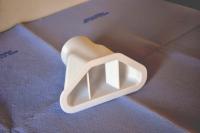
I made floor heater-duct diverters and a plenum for the center vent using a rapid prototyping machine. It’s essentially a 3D printer. You send the 3D CAD file to the printer and 4 to 12 hours later a plastic part emerges. Pretty cool technology. The parts are made of white polycarbonate which I painted black. Attached are pics of the center plenum before paint, and then mounted to the control panel. It’s held on using vinyl covered spring clip taken from my old door seals. The floor duct diverters will be glued to the bottom of the heater box vents. (see attached pic). These will direct the air into the footwells. I plan to install the controls this weekend. Then comes the under-hood stuff later in the month.

-
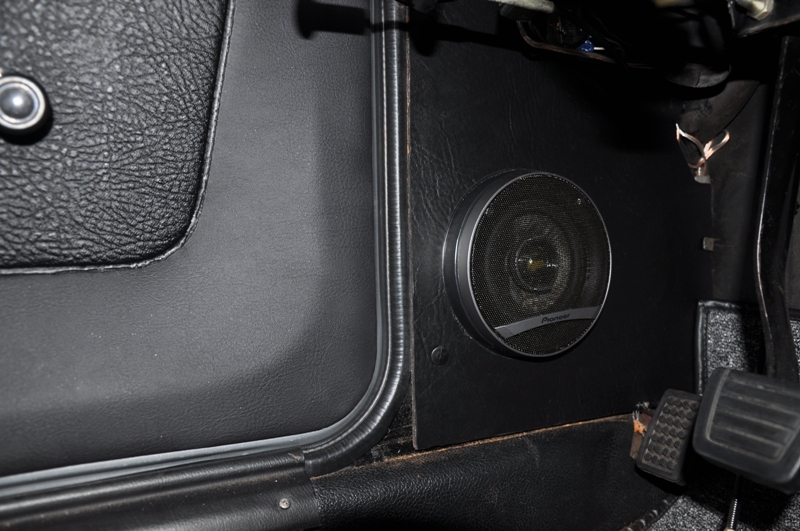
Attached is a pic of my “temporary†front kick panel speaker mounts. (Ignore the sawdust, I was cutting & fitting). They have 4†Pioneer, 3-way speakers mounted on wood spacer rings. The kickboards themselves are made of 1/8†thick paper composite board covered with upholstery vinyl. The wood rings are covered with vinyl tape. My plan for this winter is to make similar kickboards with the speakers on angled spacers that project the sound out & up about 15 degrees from the plane of the kick panel. This will provide better high frequency sound to the driver & passenger. I also plan to add 3/8†radius between the spacer and the kick plate for aesthetics. (See attached 3D model sketch, *not to scale*). In the rear I have 5-1/4†Pioneer 3-way speakers mounted behind the panels in the original location. For the passenger side, I made a mirror image of the stock speaker mount on the driver’s side. While not as good for sound, I like having the cargo area looking “stock†and uncluttered. No sub-woofer, as I’m not a fan of over-amplified bass. I’m not going for premium sound, just something that reproduces the tunes reasonably well. It’s driven by a Pioneer AM/FM/CD/MP3 deck that I’m mounts in the original radio location. Now I just have to play a bit with the equalization and balance to optimize the sound. All-in-all, I was surprised by how good it sounds! kickplate.pdf

-
Yep. You got it right.
-
Saw it Friday at William's Auto Body. Was there with my neighbor getting a quote to have her 72 240Z auto trans painted.
-
Max HP is between 5600 to 5800 rpm. See link below to earlier post with my dyno sheet. http://www.classiczcars.com/forums/showthread.php?t=32222&highlight=rebello
-
The dyno sheet on my Rebello 2.7 upgrade w/ stock carbs, std exhasut manifold and upgraded head/cam combo shows peaks at 212 HP @ 197 ft-lbs torque. Torque peaks at about 210, but not at max HP. The car really performs much better than she did with the stock engine. Given these numbers, I'd guess that 240 hp w/ headers & triples is a reasonable expectation. You'd also need to upgrade the fuel system to provide enough fuel. I'm not at all worried about longevity of the block, pistons & rods. The cam & valve train components will not last as long as a stock head, but they should go 100K as long as I don't get stupid and push the engine beyond it's limits. A couple of things to consider: With the increased compression and the head work, I no longer have that silky-smooth idle for which the the L-series is famous. No major lope, just a bit rough with a very nice, throaty "thump" in the exhaust note at idle... My only complaint is that to avoid pinging, I had to retard the timing a bit more than I like and also need to blend -in some race fuel or add octane boosters.
-
Thanks! Will pick-up a screw tomorrow! Julio
-
Davis, Can you measure the diameter? That should tell me what I size need. You might want to keep that one in case yours ever comes out or is lost... Thanks!
-
Seems I lost the screw that holds on the fan switch knob. Anyone know the size? We don't have metric fasteners that small at work or in local hardware stores, so I can't find out the easy way by "trial fit".
-
Or import a termite colony in the car. They will fight to the death... Just remove the wood shift knob first.