kenz240z
Community Member
-
Joined
-
Last visited
Everything posted by kenz240z
-
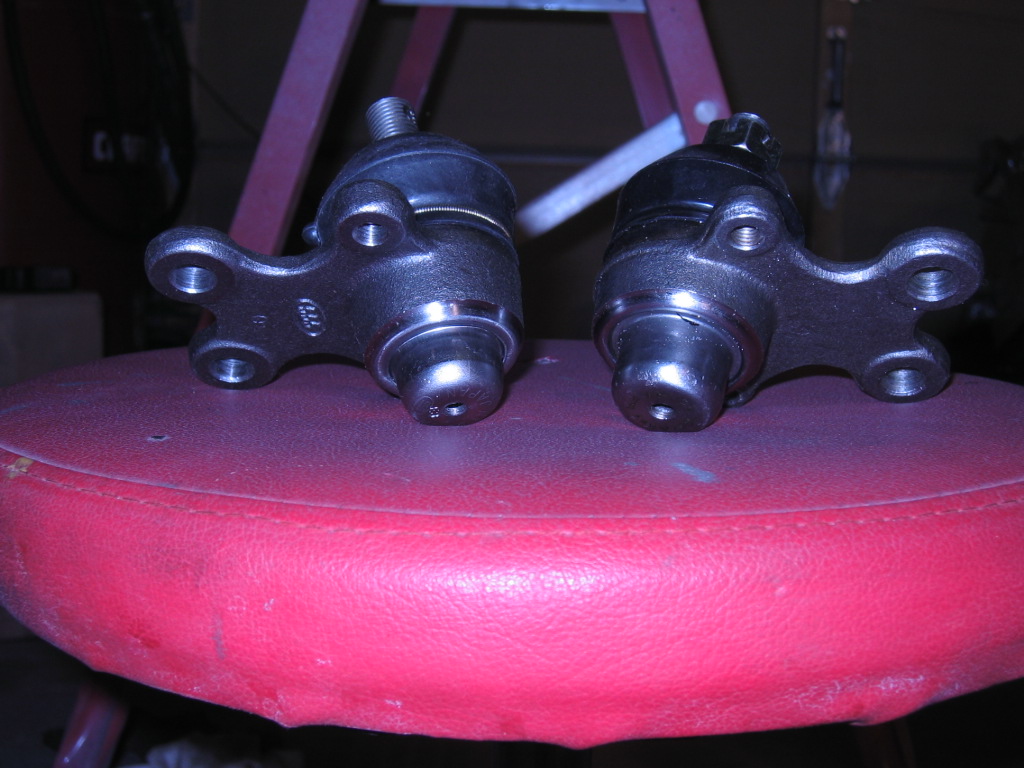
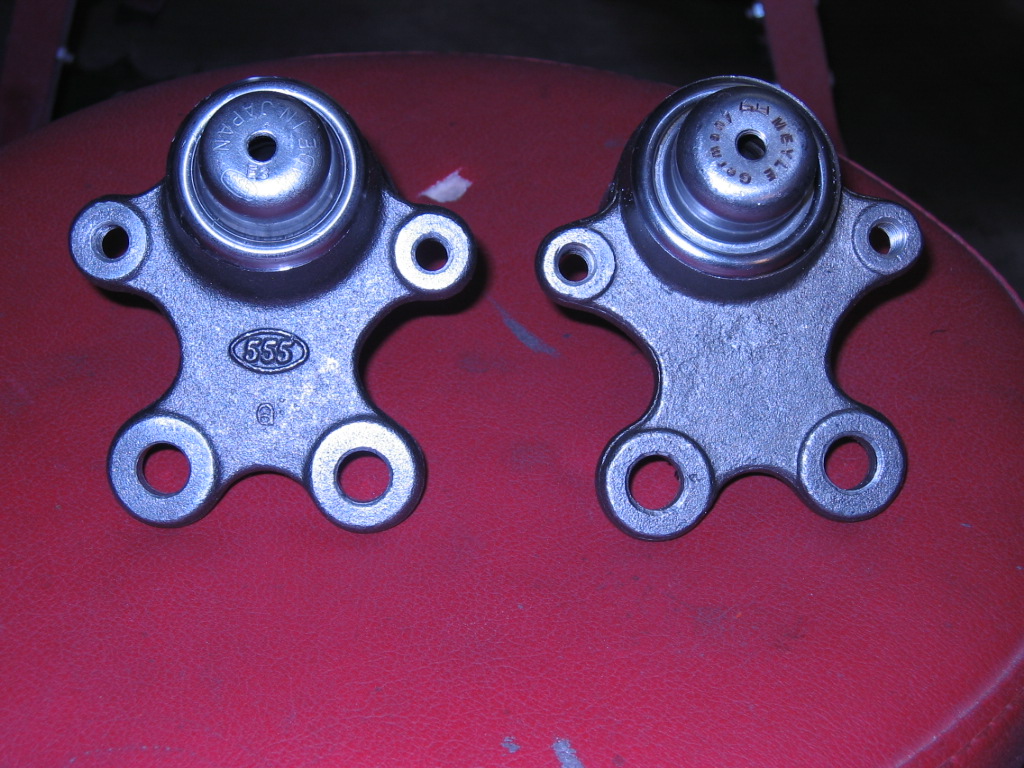
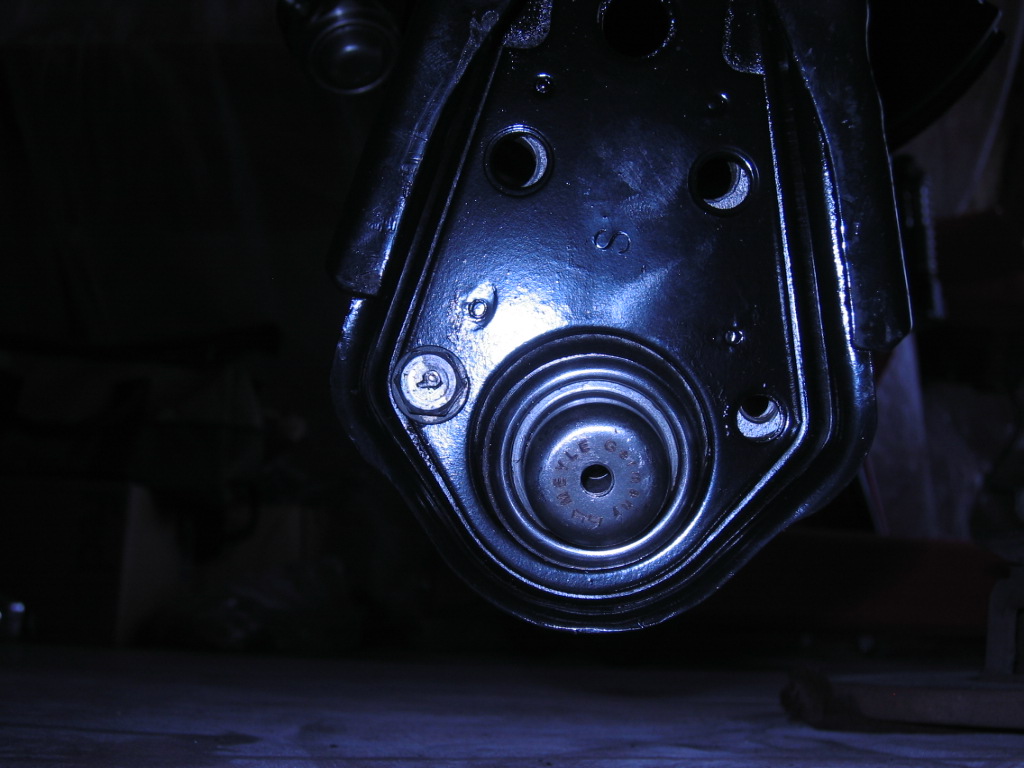
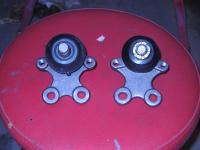
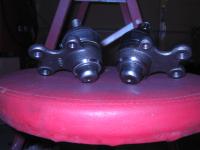
For the front suspension rebuild on my '73 240Z I had purchased a pair of Meyle ball joints on e-bay. At $45 for the pair I thought it was a good deal; however, when I went to install these new ball joints I found that they don't quite fit the transverse links. :disappoin The bolt hole pattern on the ball joint matches up fine with the bolt holes on the transverse link, but the body of the ball joint won't fit into the large round hole on the link. With the ball joint body positioned in the transverse link, I could only get one bolt to thread, the rest of the bolt holes were rotated out of position so that no other bolts could be installed (see exhibit b_4). :mad: So, I visited the local Autozone and purchased a pair of Mcquay-Norris ball joints. They cost me $36.00 each and they fit perfectly (see exhibit b_5). The only major visible difference between the two is the size of the metal housing for the joint. The Meyle has a smaller housing with a longer "pan". The Mcquay-Norris has a larger housing with a smaller "pan". The two are shown side by side in exhibits b_1, b_2 and b_3. The Mcquay-Norris ball joint is on the left, the Meyle is on the right. Has anyone else run into a similar issue with the Meyle balljoints, or any other brand? I thought I'd mention it for anyone else who may be considering these ball joints. Kenny P.


-
Schevets, the conversation is great. It's interesting to see the many different directions this has taken and the good ideas that are being discussed. I agree that the subject of a front suspension rebuild goes hand in hand with discussion on the tools needed for the job. I am confined to working in my garage. Granted, it is a three stall garage, but it is a small three stall garage. Specifically, it is a short garage... I can't close the garage door if I pull my truck in. Right now the center stall is filled with my 240Z, the right stall is filled with the parts I removed from the car, and the left stall is where I work on the parts. One of these days I hope to have a separate garage, preferable 3 or 4 large stalls, to set up as a shop. I could have one stall set up as a paint booth, and the other 3 would give me plenty of room to work. A two stage compressor would be the way to go, with metal piping run throughout with taps conveniently located around the shop to keep air hose lengths short. Big tools would include an engine hoist, a hefty 3 1/2 ton floor jack, a blast cabinet, a large hydraulic press, a MIG welder, an Oxy-Acetylene torch, a large work bench with a good vise or two, a drill press, and a bench grinder. For me, the greatest sense of satisfaction comes from taking something dirty, rusty and ugly (like my Z when I bought it!), and making it look nice again. I think the biggest hurdle to overcome is the fear of doing something that you've never done before, whether it be painting, body work, changing a strut, changing the brake pads, installing a headliner, rebuilding a carburetor or removing an engine. But, once you finish even the smallest project, it encourages you to take on a bigger one next time. All you need is the interest and the desire and you can do a lot of the work for a first rate restoration yourself. Doing the work yourself isn't always cheaper. Mistakes can be expensive... and investing in good quality tools and equipment can be expensive. But, at least the tools tend to pay for themselves over the long run. You've also got to be able to dedicate the time to your project. In the end it is kind of a balancing act, deciding how much work to do yourself and how much to pay someone else to do. It's also a matter of safety, there are plenty of ways to injure or kill yourself when working on your car. Sometimes it's better to pay the pro rather than take a chance of getting hurt. Many of the new paints are highly toxic, welding & grinding equipment can cause a fire if you're not careful, then there are the bruised knuckles, too! It's important to know your limits before hand. Kenny P.
-
If your '72 has an electric fuel pump back by the fuel tank, be sure to check the filter in it. It could be dirty and clogged. My '73 has both the mechanical pump and the electrical pump. I was having fuel flow problems and it turned out to be a dirty fuel filter. Kenny P.
-
Getting the parts clean enough for the rust encapsulator took a couple weeks of cleaning. First I used a scraper to remove the heavy deposits of dirt, grease and grime. Then I used a small pick to get the gunk out of tight spots. One trick I found that really helps is to soak the parts in a hot water detergent bath. I used a product called Super Heavy Duty Degreaser that I bought at a local Harbor Freight store. I mixed it with very hot tap water in a 5 gallon bucket. That allowed me to clean the larger items, like the front struts. I would mix up a bucket of hot water & cleaner and soak the parts over night. What grime that was left was a lot easier to scrape off. Once I had the parts nice & clean I used a wire brush to remove the old paint & surface rust. For large areas I used a cup brush on my hand grinder, for tight areas I used a hand brush. I also got a couple of small, toothbrush sized brushes with brass bristles for cleaning tight areas. For treating rust in hard to get areas I have used a product called Rust Mort that I bought at a paint supply shop. I use a small acid brush (also from the paint supply shop) to apply the Rust Mort to seams, joints & other hard to get areas. I used it extensively in the battery tray area of my Z, since it was hard to get in the tight spots to sand the rust off. I was able to get most of the rust off the suspension parts with the wire brush, fortunately the parts were mostly dirty, not too rusty. I am hoping that the Rust Encapsulator will prevent future problems with any bits of rust I didn't remove. I bought the original Chassis Black. I got the new Eastwood catalog recently and saw that they now have a new, improved version. I'll try that when I refinish the rear suspension parts. As for the hard to disassemble items like removing the gland nut from the strut housing and removing the original bushings from the front transverse links, I decided to pay a shop to do the work. I figured it was money well spent, since I don't have the proper tools to do that kind of work (not yet, anway...someday, when I set up my dream shop!). I also figured it saved me a ton of effort and frustration! Tonight I finished putting the front suspension back together. I still have a few bolts to torque, I should get that done tomorrow night. This weekend I plan to start on the rear suspension rebuild... I'm dreading the removal of the spindle pins, control arm bushings and axle stub nuts. There's a great shop nearby that specializes in Z cars, I plan to check with them about tackling these parts! Kenny P.
-
I am almost finished with the front suspension rebuild on my '73 240Z. I have refinished all of the hardware with Eastwood's Chassis Black paint. It's got about an 80% gloss and seems to be pretty close to the original black. I used Eastwood's Rust Encapsulator as the primer, since I couldn't get into all the nooks and crannies. It's like POR15, and can be thinned for spraying. I've got a few pics of the progress in my photo gallery. So far everything has gone smoothly, I've managed to take the springs off the struts without injury (spring compressors are a must). My hands are turning black, though, from all the repainting! Once I get the front end put back together I can put the engine back in. The cylinder head went bad and was leaking coolant into a couple of cylinders, so I had the engine rebuilt. Then I will tackle rebuilding the rear suspension. :hurt: Hopefully I'll have my Z back on the road by the end of June, I miss driving it! Kenny P.
-
 This shows the crossmember installed back on the car. I also put the anti-sway bar back on. It got a pair of new urethane bushings, too.
 -
 This shows the crossmember installed back on the car. I also put the anti-sway bar back on. It got a pair of new urethane bushings, too.
 -
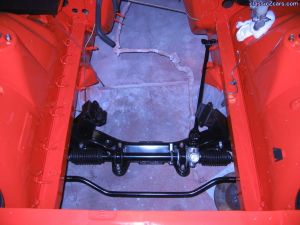
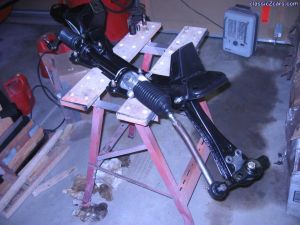 A shot of the support crossmember with the transverse links,steering rack and new rack boots installed. New urethane bushings were used. The crossmember, transverse links and steering rack have been repainted with Eastwood's Chassis Black.
 -
 A shot of the support crossmember with the transverse links,steering rack and new rack boots installed. New urethane bushings were used. The crossmember, transverse links and steering rack have been repainted with Eastwood's Chassis Black.
 -
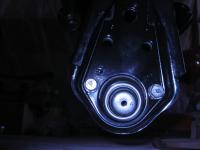
 Here's the refinished strut with the new cartridge and new spring installed.
 -
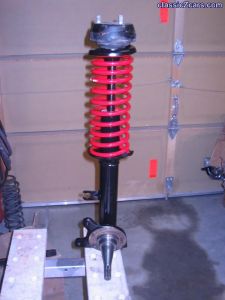 Here's the refinished strut with the new cartridge and new spring installed.
 -
 Installing the new Tokico Blue HP strut cartridge...
 -
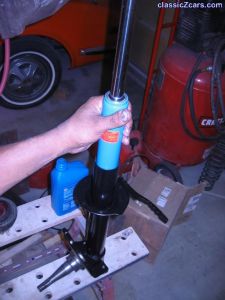 Installing the new Tokico Blue HP strut cartridge...
 -
 Here are the struts with the Chassis Black from Eastwood.
 -
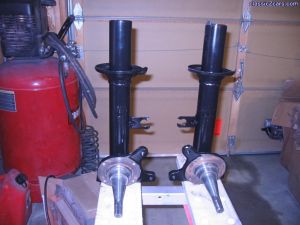 Here are the struts with the Chassis Black from Eastwood.
 -
 Here are several parts which have been sprayed with Chassis Black from Eastwood.
 -
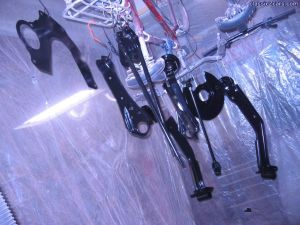 Here are several parts which have been sprayed with Chassis Black from Eastwood.
 -
 I used a product from Eastwood called Rust Encapsulator as the primer, just to be sure that any surviving rust won't cause problems.
 -
 I used a product from Eastwood called Rust Encapsulator as the primer, just to be sure that any surviving rust won't cause problems.
 -
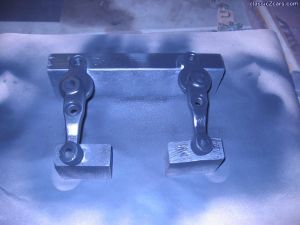
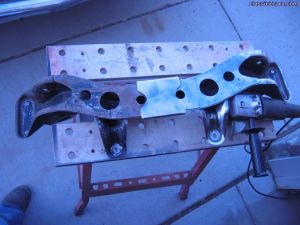
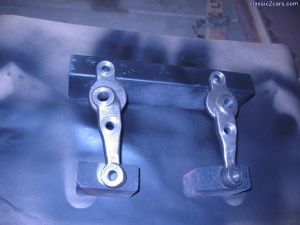 Here are the steering arms after being cleaned. It took a combination of scraping, soaking in a hot soapy detergent bath, and wire brushing!
 -
 Here are the steering arms after being cleaned. It took a combination of scraping, soaking in a hot soapy detergent bath, and wire brushing!
 -
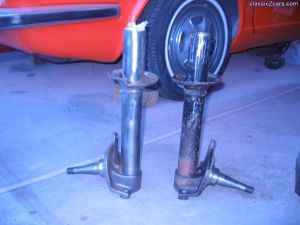 This shows the cleaning process for the struts. The one on the left has been cleaned with the wire brush on a grinder.
 -
 This shows the cleaning process for the struts. The one on the left has been cleaned with the wire brush on a grinder.
 -
 I used a wire brush on a grinder to remove the rust. It makes the job go quicker.
 -
 I used a wire brush on a grinder to remove the rust. It makes the job go quicker.