Everything posted by nowak1981
-
1975 280z Build
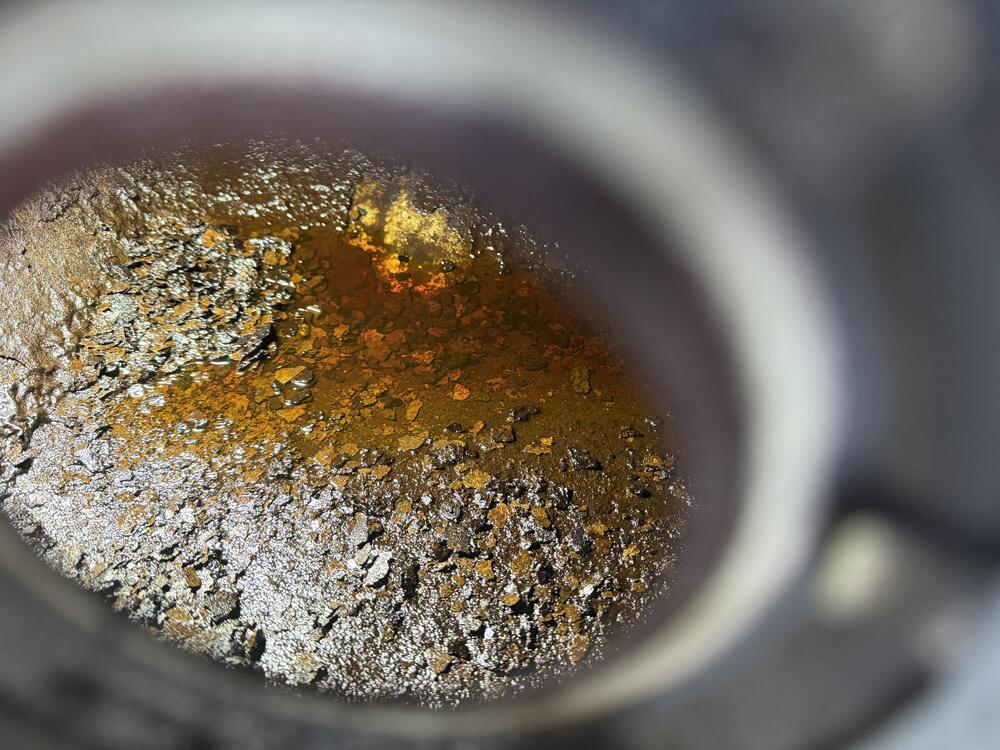
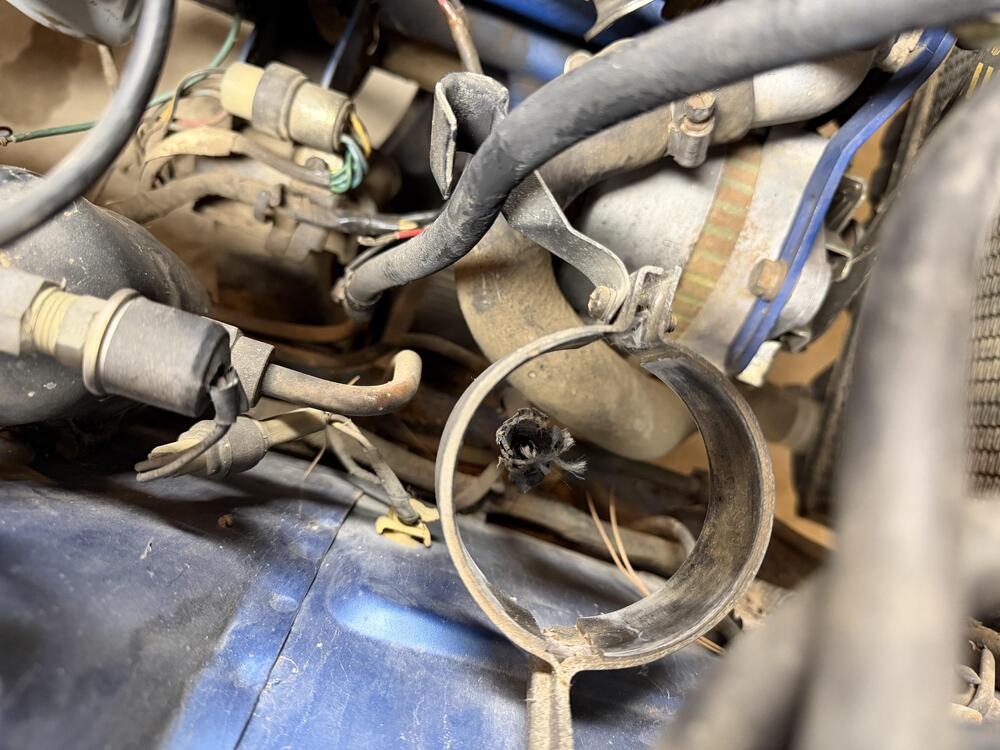
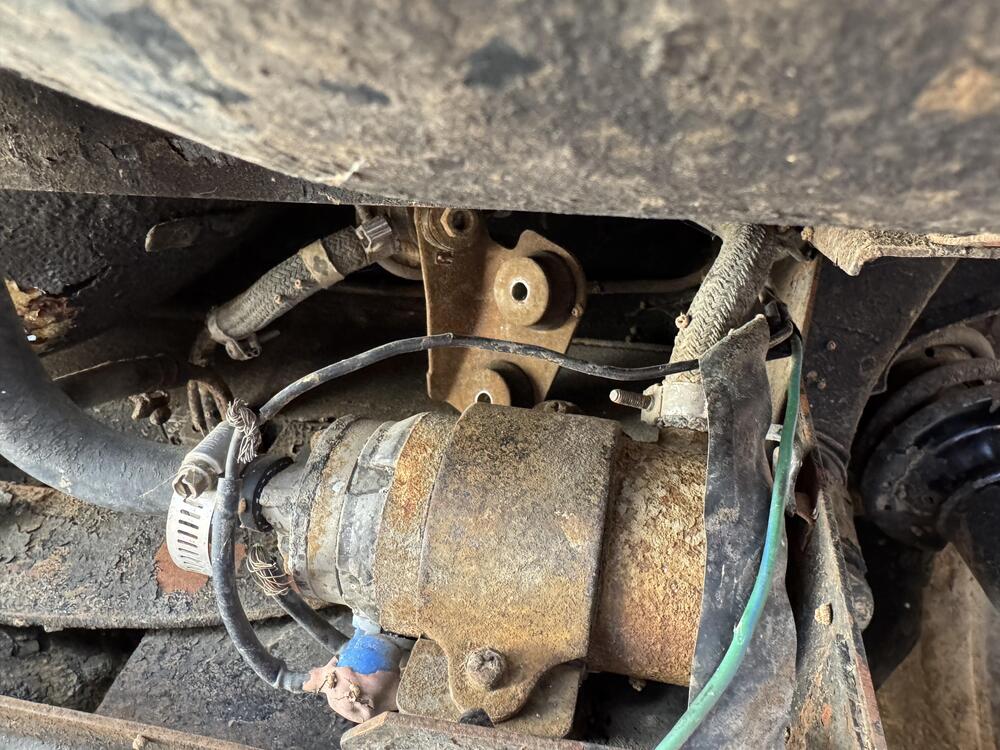
Fuel tank is out, not surprised at what I found. The sending unit is seized and lots of debris in the tank. I put out a few emails to some restoration shops to find out if the tank is salvageable. If I need to get a new one, these were the couple tanks I could find. S30 World $665 Vintage Tank Solutions $750 I also checked The Z Store and Resurrected Classics The car came with a new fuel pump still in the box, but Ill need to source a sending unit, possibly some straps (I haven't looked at the old ones too closely to see if they are salvageable.) At the very least Ill need the J hooks since I just cut out the old ones. And all the hoses. The fill tube rubber is in nice condition though, still soft and was relatively easy to remove. The size of the expansion tank surprised me for sure.
-
1975 280z Build
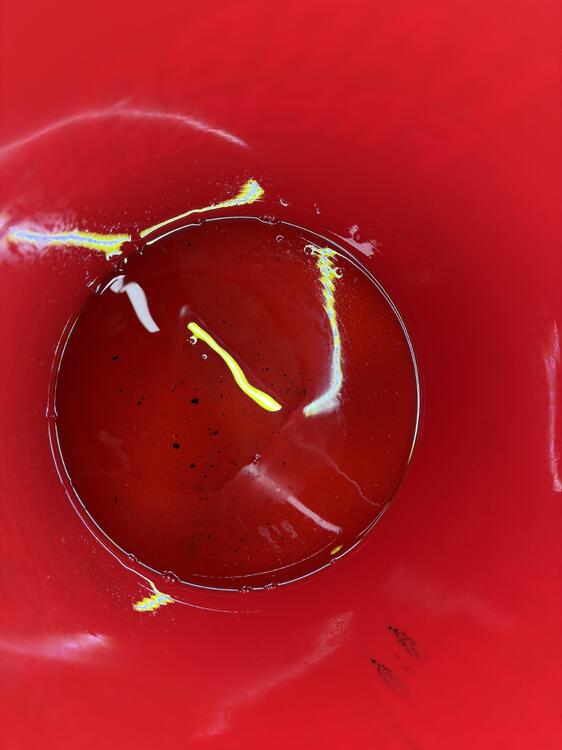
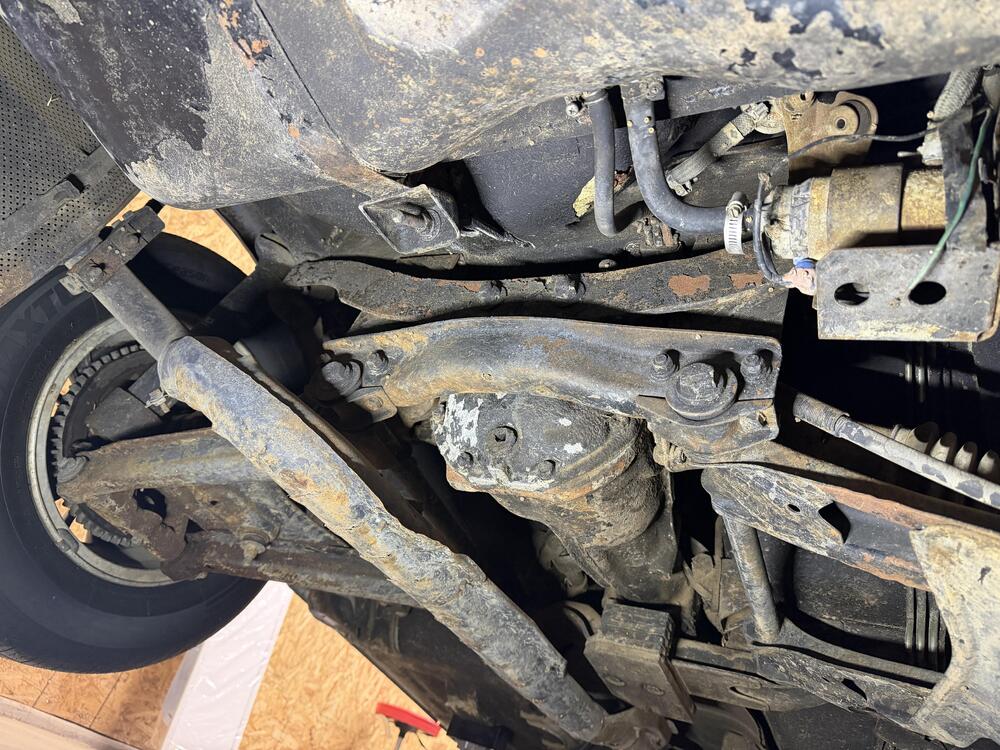
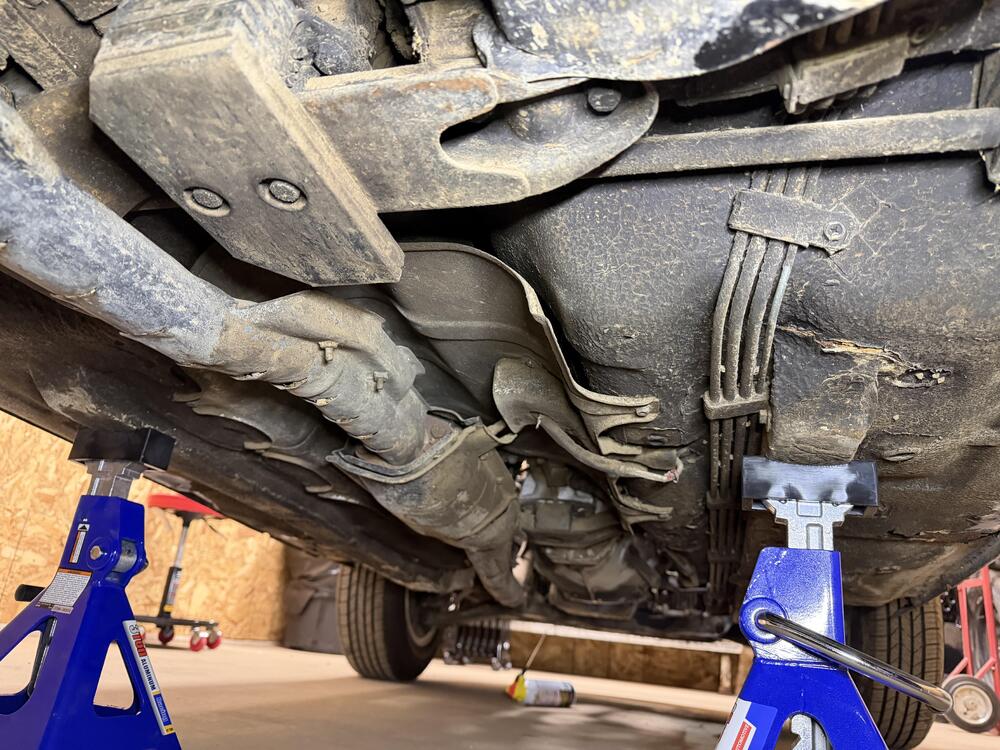
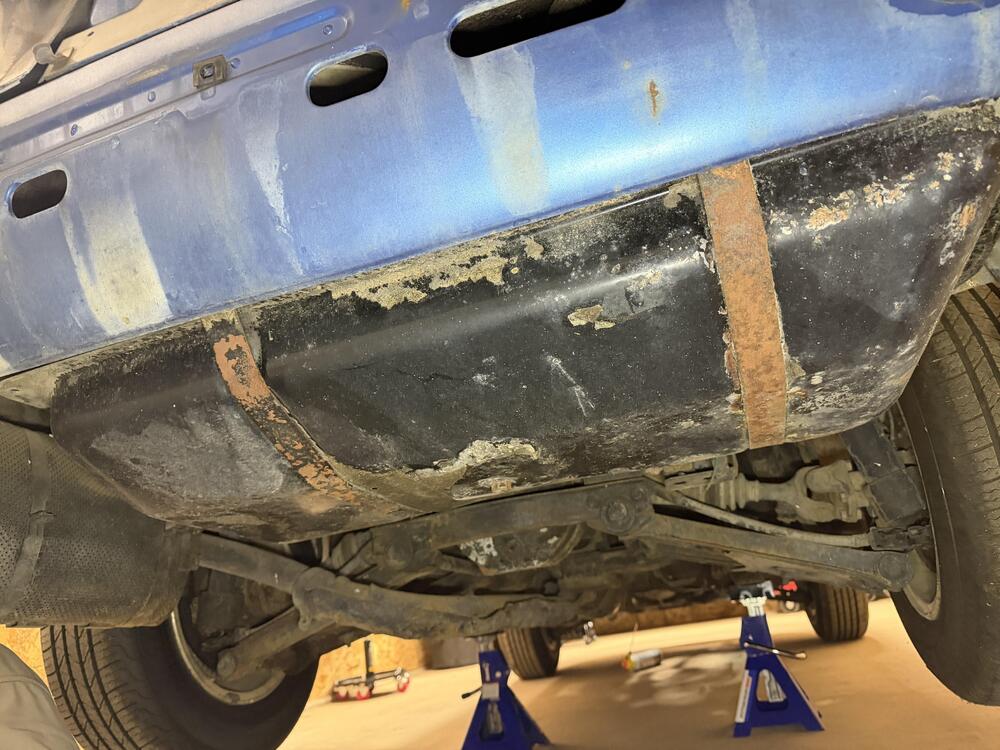
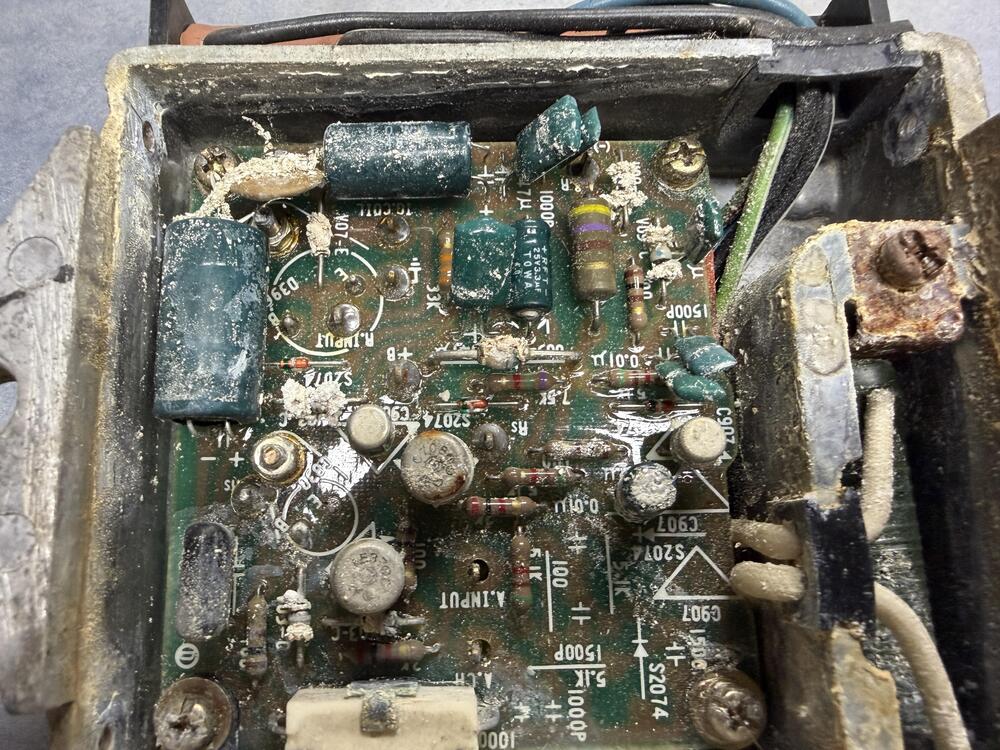
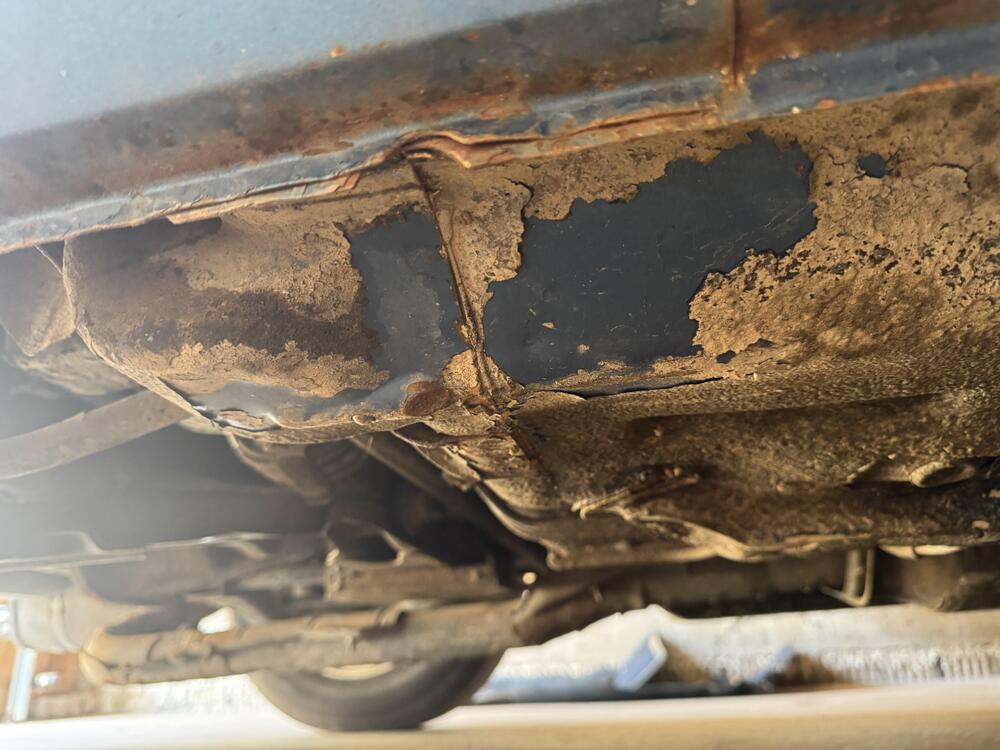
Little more poking around today. I ended up just ordering a HEI module specific heat sink off amazon. I had considered just finding some sheet metal or aluminum, but I didnt have anything laying around and a small chunk from the hardware store was almost as much as the heatsink itself. I think its going to end up on the other side of the strut tower. There is a nice empty space there I can utilize. I don't really want it there, but for the sake of simplicity, thats where I am going to put it. There was a post around that had someone replacing the guts of the old module with the new HEI but I cant find it. I might do that, but mount the box on the firewall or something. I like that it would appear more period correct. I started looking more closely at the fuel system, pretty much all the rubber is dry rotted and unusable. Same with the vacuum lines, so I ended up ordering a bunch of hose and Ill just replace all of it. Im not sure about the hard lines yet. I jacked up and crawled under the car and drained the fuel tank. It was pretty much empty but the stuff that was in there was.......nasty. The fuel was incredibly dark and full of debris. I know there is a place in town where I can get the tank reconditioned, so I'll look into that. While I was under there, I took some pics of the undercarriage. I dont think its too bad. It was a New Mexico car after all.
-
1975 280z Build
Winner winner chicken dinner, we have spark Now im gonna look into some heat sink and stew on where i want to mount it. Time to move on to the fuel system. I know the fuel is toast and the tank will need to be cleaned. I’ll probably start on removing that and see what condition the lines are in. I’m excited!
-
1975 280z Build
This makes 100% sense. As far as the other questions When I tried it last week I had the coil wire attached and one spark plug lead with a spark plug at the end laid on the block, not the best I know. I was mainly looking for any indication to get moving in the right direction. The car came with an inline spark tool. I am cranking the engine with no spark plugs in the block. I am cranking with many full rotations as I am aware that I will only get spark as the rotor makes the connection. Am I missing something? I'm not a legit mechanic and this is the only way im aware of. Is there another procedure that I'm that Im not aware of? The old module is not installed. From the reading I have done, this is the way The module location is definitely temporary and is mounted through the hole with the large ferrule. My initial thought was to cut up the old module housing and is it as a heat sink or perhaps find an old heat sink from a PC. The PC option seems the best solution, but I haven't given it a ton of thought yet. I think they make heat sinks specifically for these modules as well. When you say this, it sounds like I will need it in the future? Is there a reason why I would leave it disconnected for now? Am I correct that the condenser is on the wrong terminal?
-
1975 280z Build
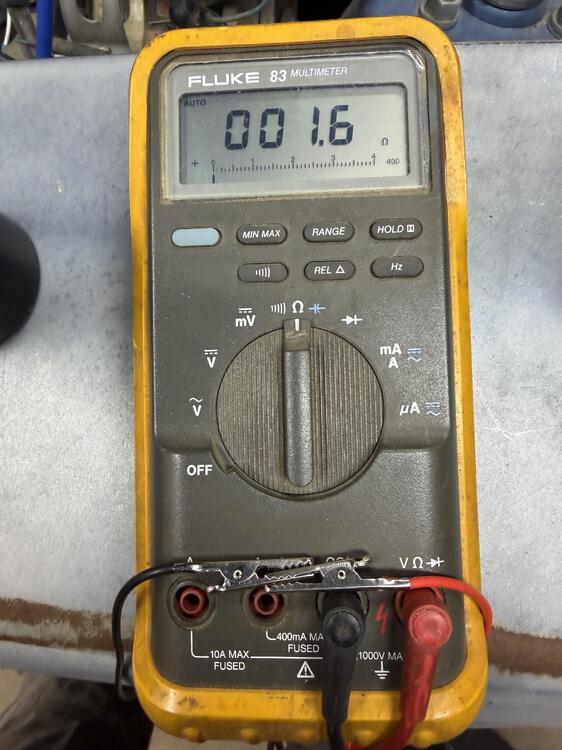
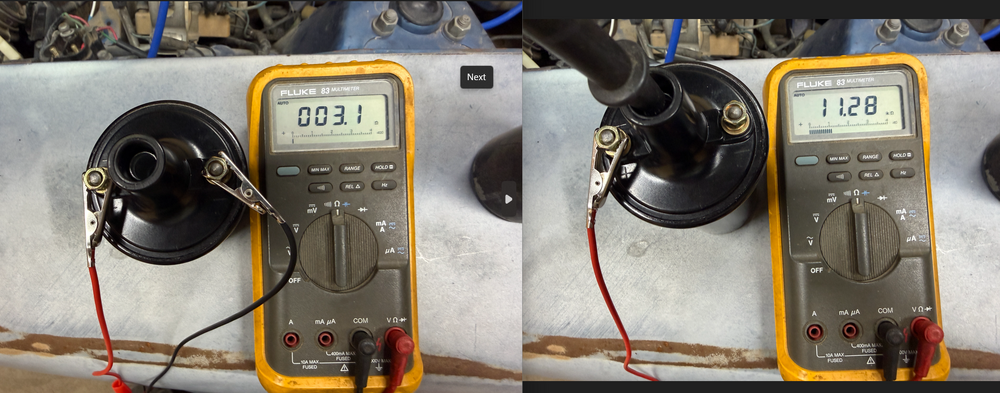
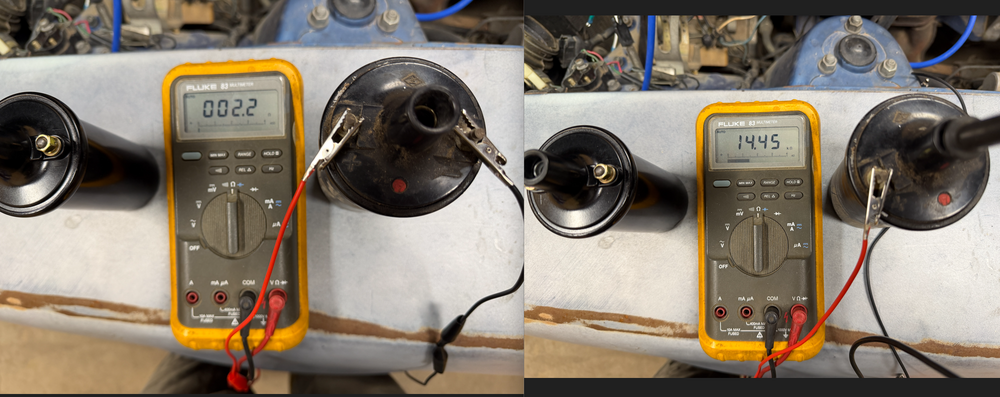
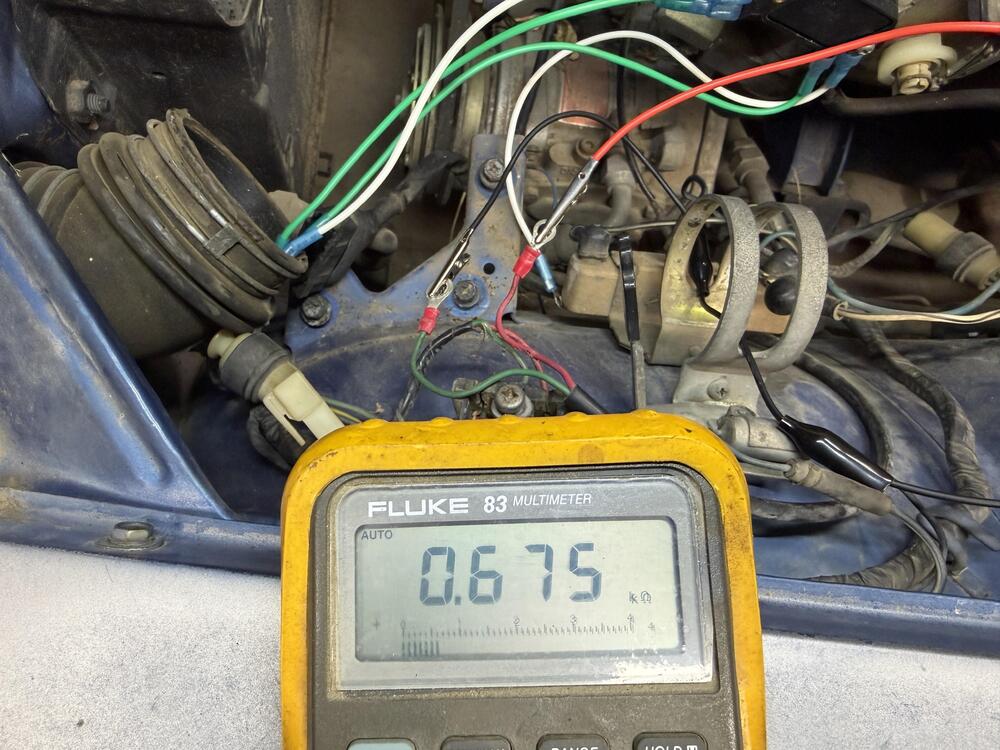
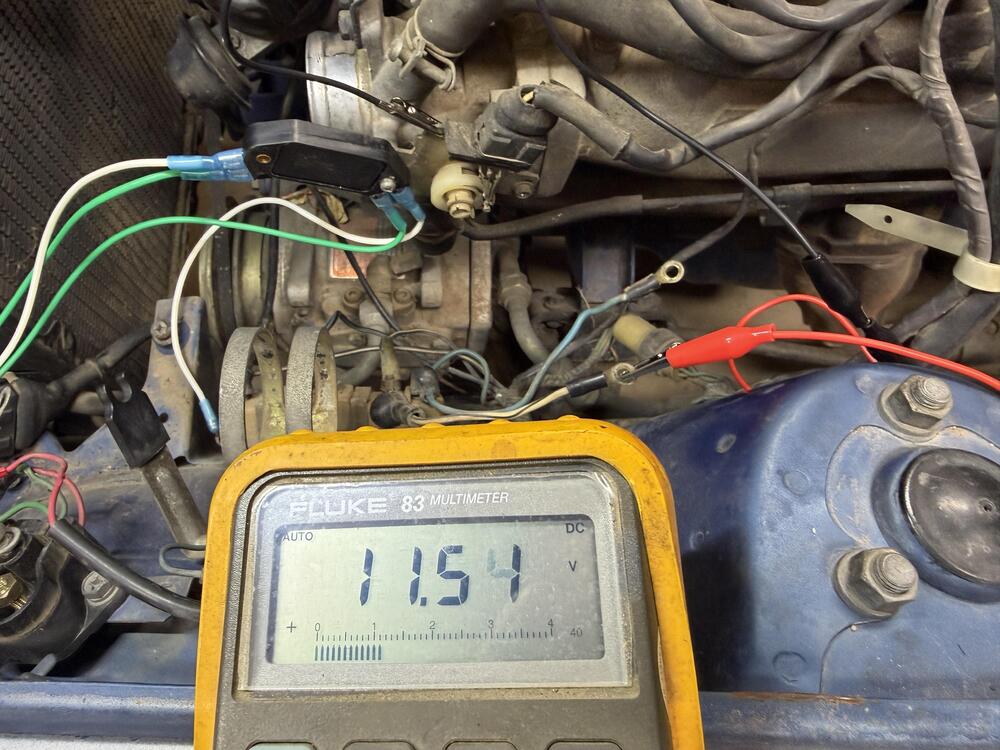
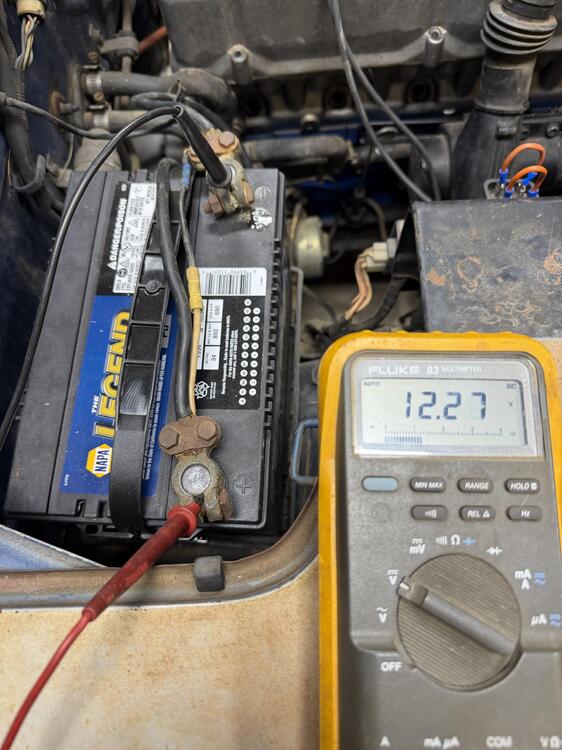
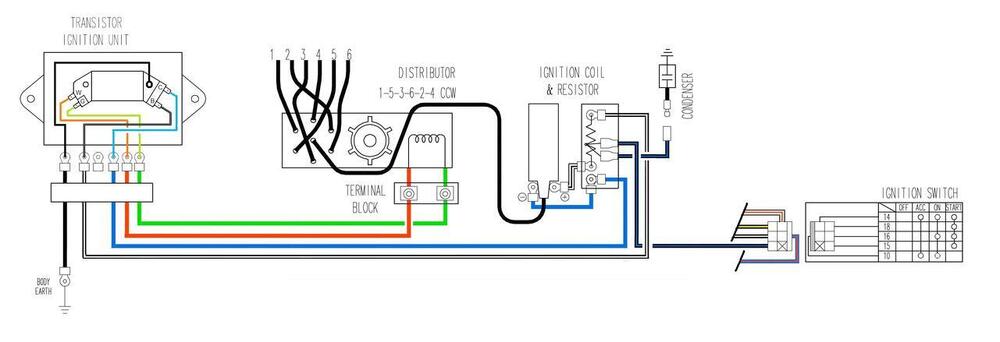
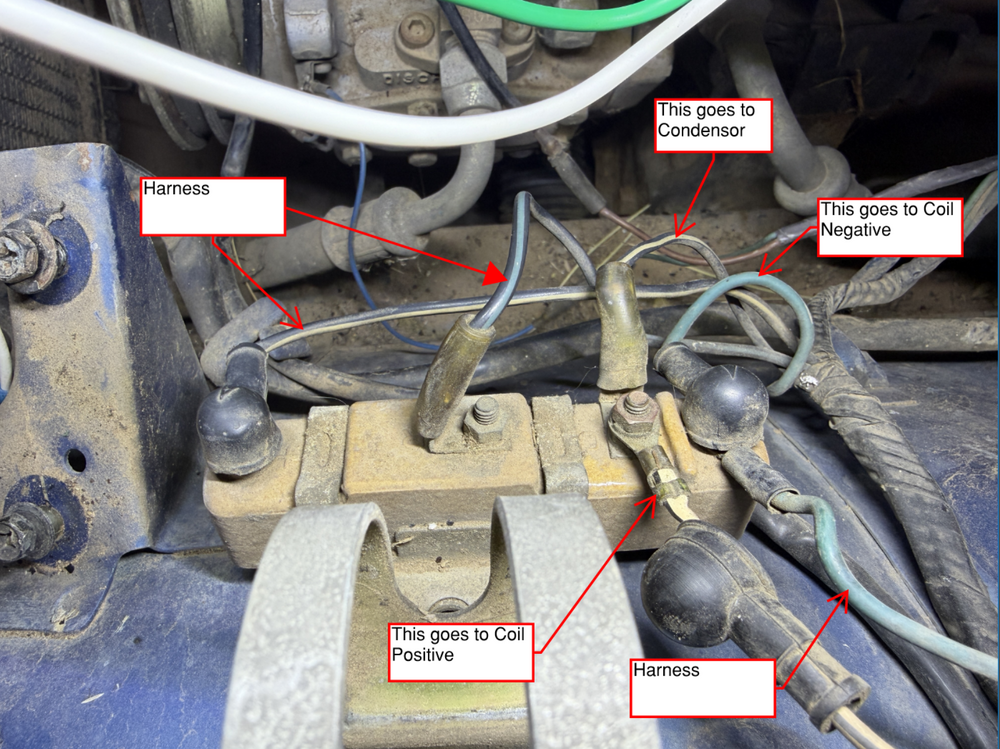
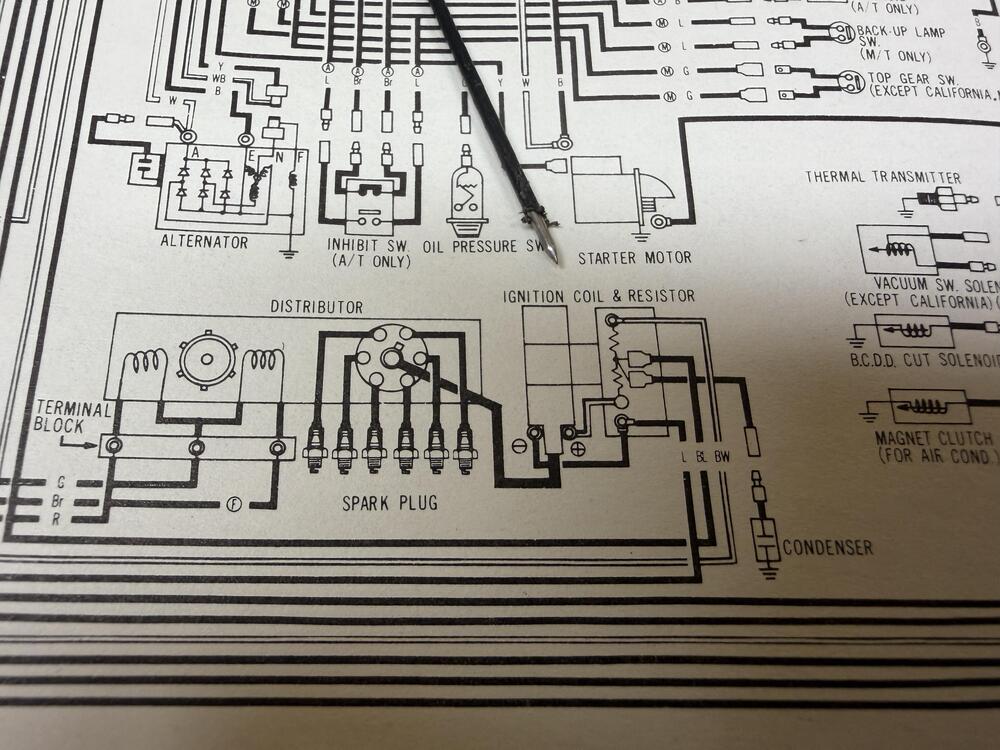
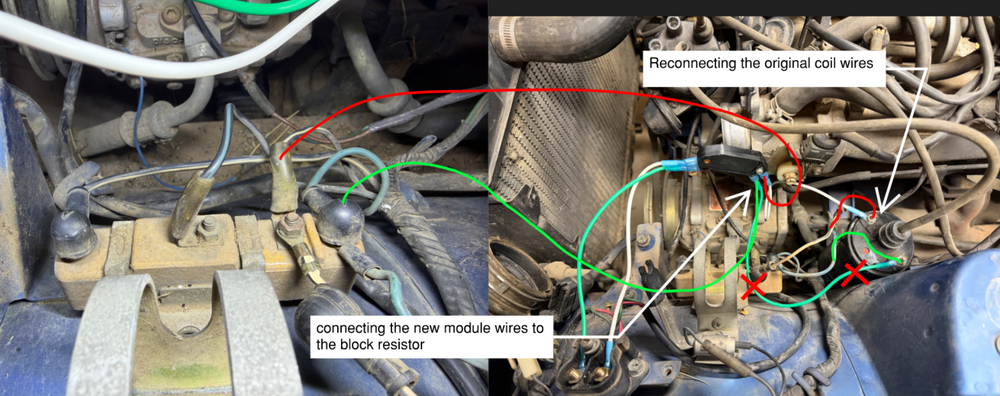
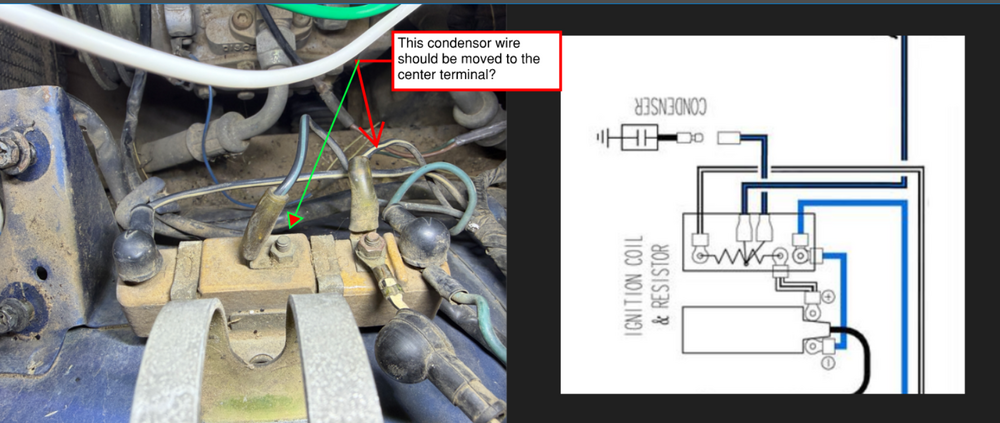
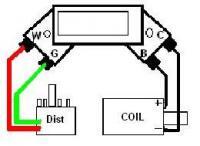
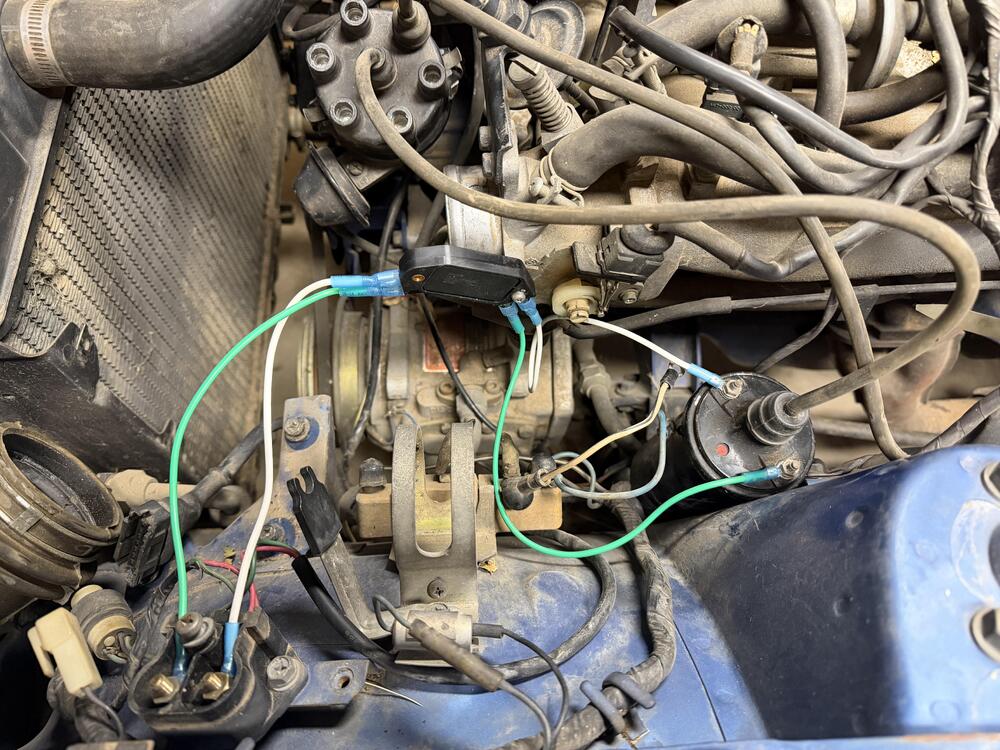
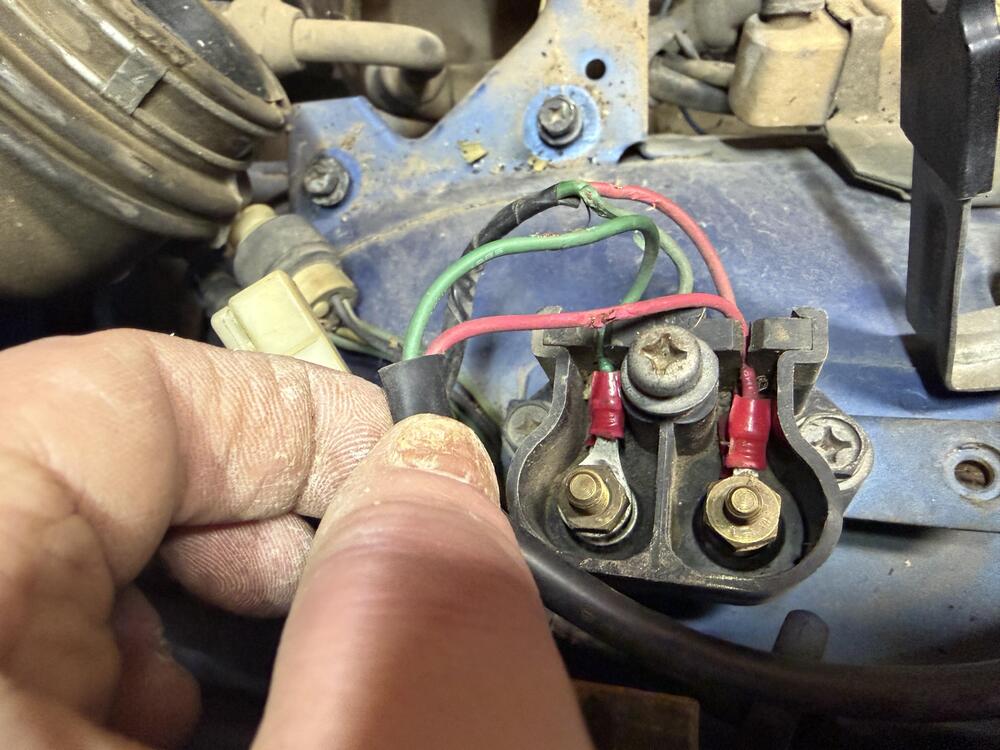
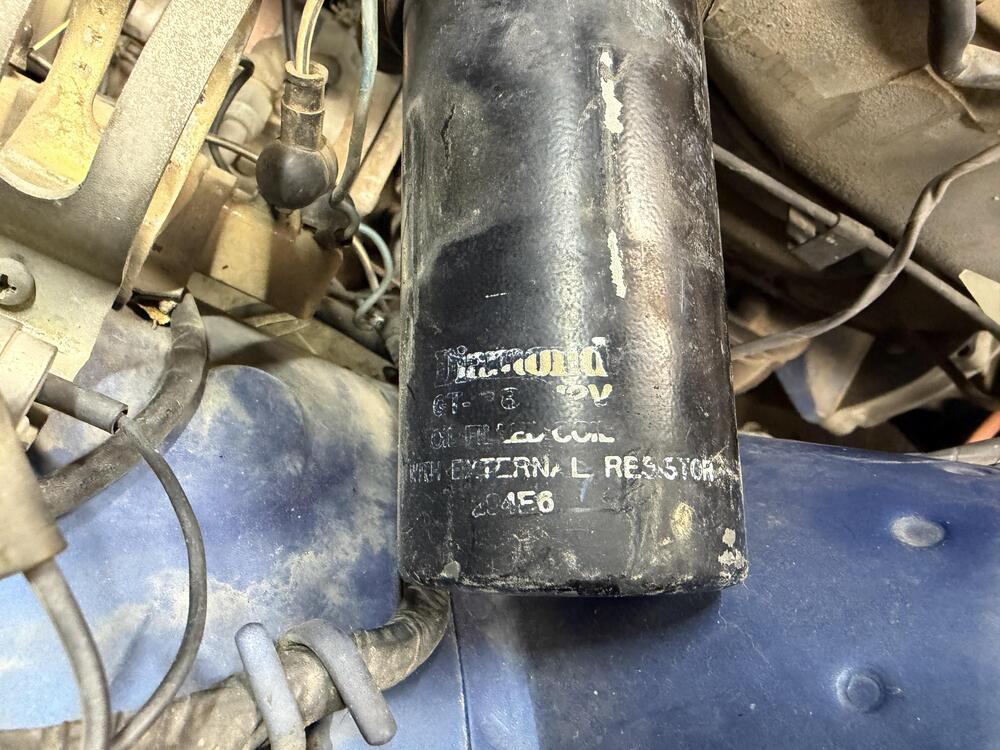
some new updates on my ignition woes and HEI module upgrade. Tested resistances on anything I currently have knowledge of. Near as I can tell, everything is as it should be. I tested both coils that I have using the method listed in the video below. I'm a sucker for detailed documentation and I had a hard time following some of the posts I found. So hopefully this will help others. The initial test was to test the resistance of the tester itself and it turns out mine needs a little recalibration. Not a huge deal as I understand that I just need to subtract the value from the readings that I take. It turns out that I am off by 1.6 ohms. It is a 30 year old meter though that I inherited from my dad. The readings on the new coil. 3.1 ohm (1.5ohm corrected) between the + and - terminals and 11,280 ohms between the positive and center. I purchased this (amazon) coil. It is suppose to be a stock replacement. Pretty similar readings on the old coil. I kinda figured the old was was good, but meh, why not replace it just in case. 2.2 ohm (.6 ohm corrected) between the + and - terminals and 14,450 ohms between the positive and center. Also tested resistance on the pickup coil in the distributor and it reads about 675 ohms. According to this post by Zedhead it should read around 720ohms. I feel like this reading is acceptable. I checked the voltage to the positive side of the coil with the ignition on (white w/ black stripe) as well as suggested by Fastwoman in this post. As well as the battery itself which is new but i have to get a charger on it. The voltages with the ignition on and off were practically identical. With that aside, im now looking into the wiring for the new HEI module. There are tons of articles on this, but it seemed hard for me to find the info I needed, which was wiring the module. Nearly all the posts had the basics, but there was a lot of discussion about using/not using the block resistor and/or a different coil. Couple that with the myriad of wiring diagrams I ran into. It was hard to determine what was proper. At the moment I am attempting to use a stock coil with a HEI module. Here are just a few of the discussions I looked at. GM HEI Module Install by Scanf Fitting a HEI Module in a Transistor Ignition Unit 1977 280z This was the most promising diagram I could find as listed in the second link. My confusion seems to be around what I have vs what is shown here. This diagram is also identical to what I have in the FSM One issue I have with the FSM is that the wire colors don't match. But I am also not 100% this is the original wire loom yet. or maybe Im just not smart enough to decern what the wire color short hand is. Could it be possible that my condenser is on the wrong terminal. Im hesitant to just start moving and trying different wire combinations without some confidence that what I am doing is correct with the fear of making matters worse. Below is what I tried for the ignition module wiring last week. As I am writing this post I just noticed that I have the positive and negative wires backwards. If I am not mistaken, I still should be able to get some kind of spark out of it. There is another issue I'm concerned with. See more below. So now I know that the coil wires are backwards. but my other concern is weather or not I need to run the wires through the block resistor. I feel like by writing this post and working through my explanation, I should be. Instead of wiring the new module directly to the coil as shown in the following diagram that is listed in first link. (also happens to be the same post listed in the knowledge base). I should be unmodifying the existing wiring and attaching the leads to the corresponding terminals on the block resistor as shown below. Assuming I am correct, Now the only unresolved issue is where the condenser is suppose to be. According to the FSM its suppose to be connected to the center terminal? How is my logic so far?
-
1975 280z Build
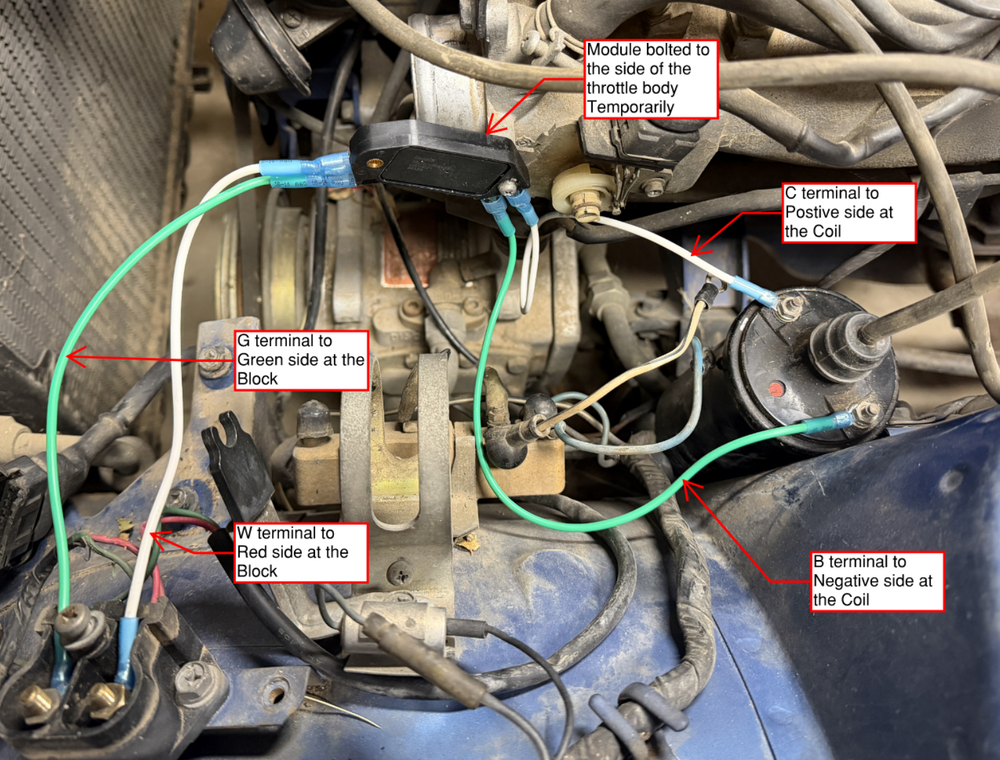
I pulled the computer out and took it apart. It looks really good, so I put it back together and started on the ignition module replacement. I followed this diagram that I got from the knowledge base and tried it out, but no joy. I didnt see anything about needing to run it through the ballast resistor, so I left it out of the new circuit. Im not sure which side is + on the coil so I put the new green wire where the old one was. I found another post that had a resistance measurement for the pickup coil. Looks like its suppose to be around 720ohms. Ill check that next time im out. Im sure im missing something, but im was too tired to really use my brain. The module is bolted to the throttle body temporarily. And I broke out my new plug wires as well. Anyone have any suggestions?
-
1975 280z Build
well, looky what I found.... Some carb cleaner and it will be good as new I guess I ll be having fun with the HEI
-
1975 280z Build
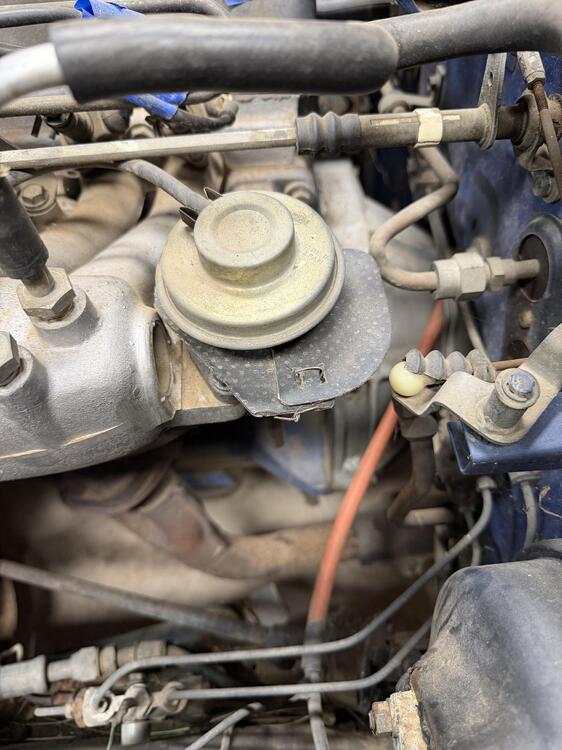
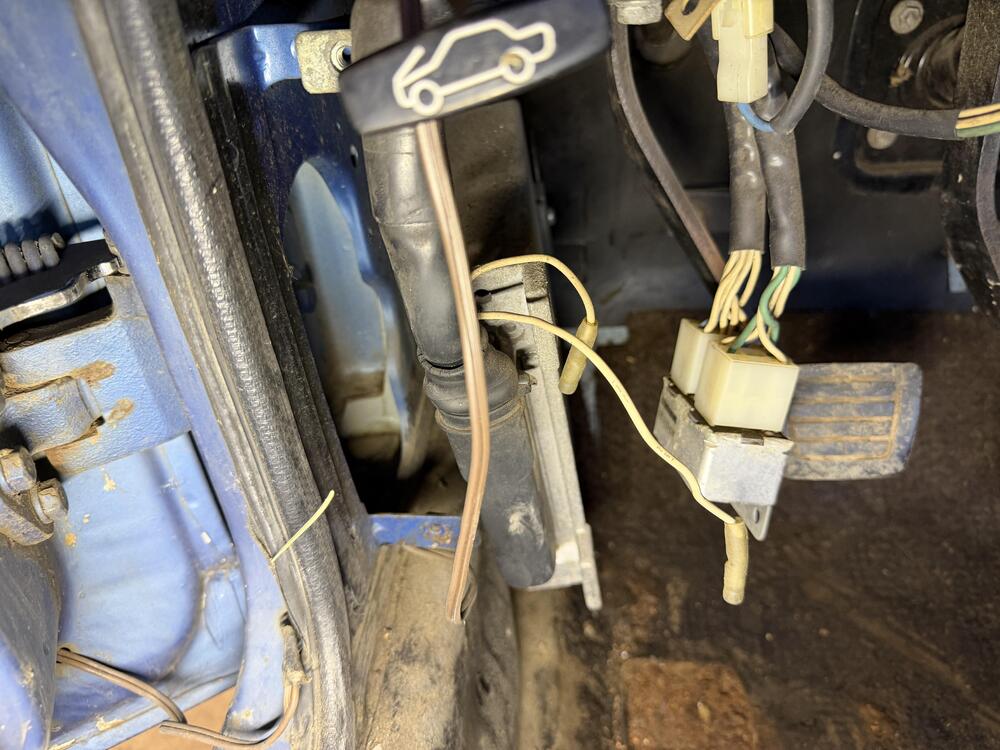
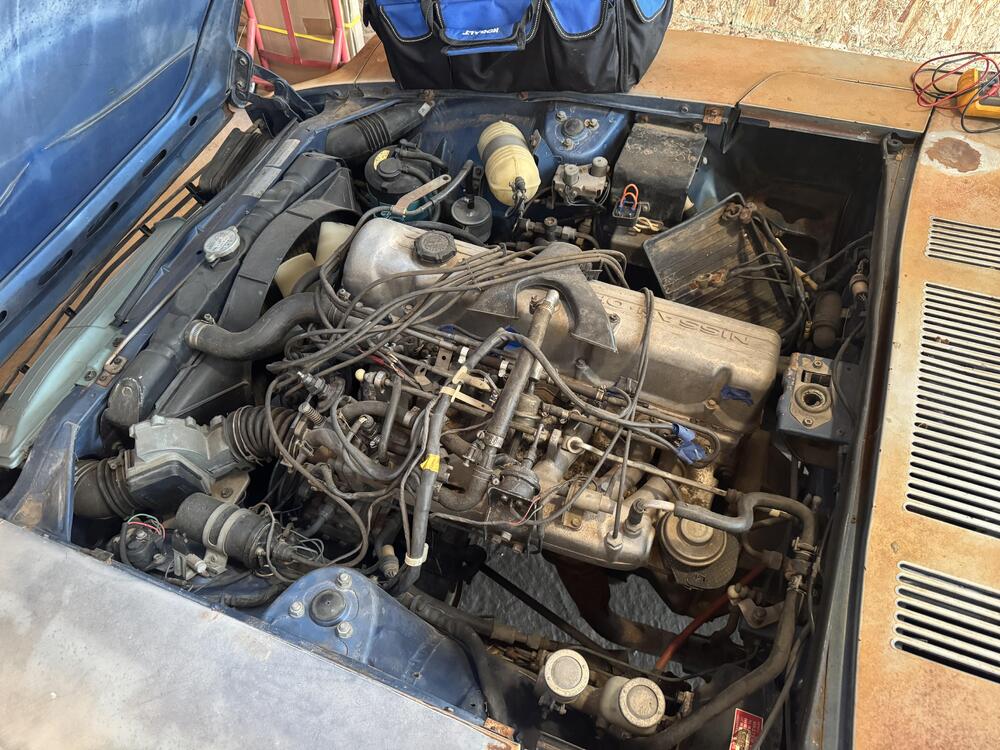
So I got out to the garage a little more today and played around bit more. I read through the post that I found above and tried out a few things. I tried the method Here where I tapped the green wire to the ground to see if I had spark. I had spark at the ground but not at the spark plug. After rereading the post again, I noticed that I didnt disconnect the other terminal. Ill have to try that next time im out. Other than that I just started taking stuff apart to see if I could find anything obvious. I did find that the wires, to whatever this terminal is, are all chewed up. they run to the pickup in the distributor. The other end runs to the front of the car. Im guessing to the other side and into the fuse panel perhaps? Ill have to read up on that. The wires still have continuity. I wonder if the previous owner did this for testing. This coil looks old as hell, Im tempted to just replace the coil, condenser, module, but it looks like I might be able to upgrade to a newer distributor and ditch all that. Need more research on that. Id like to get it running as is, before I start upgrading from OEM. I did find that the wires are fairly hard and stiff, I also lost a cable end on of the cables. so Ill def be ordering a new set of cables. On side note, do these gaskets on the egr look right to you? Its seems weird to me.
-
1975 280z Build
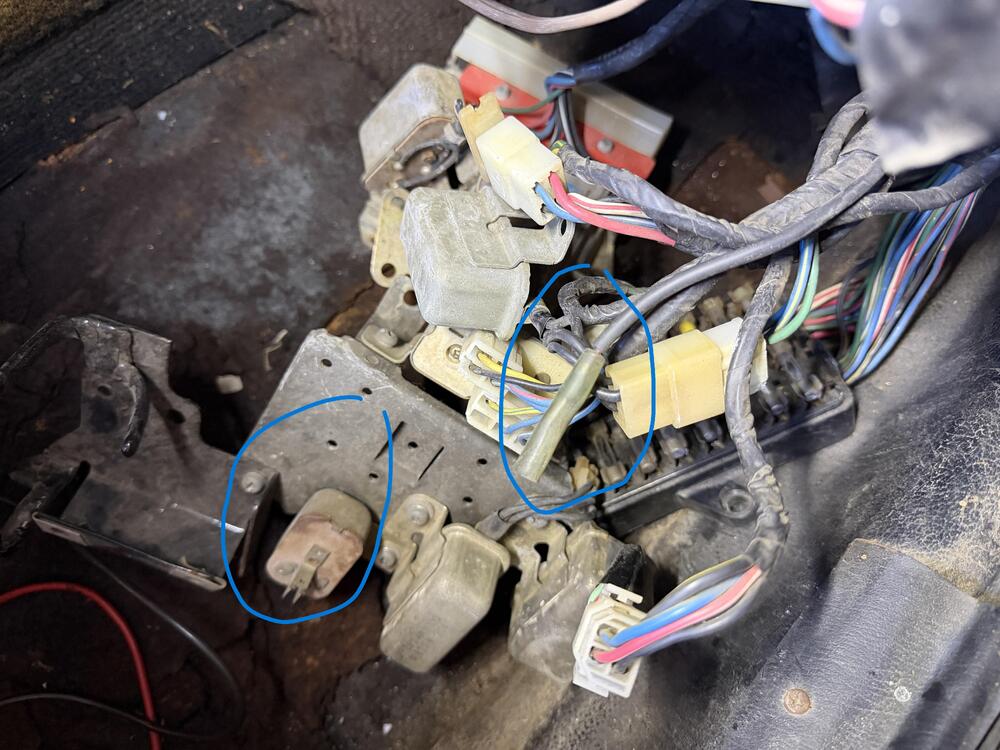
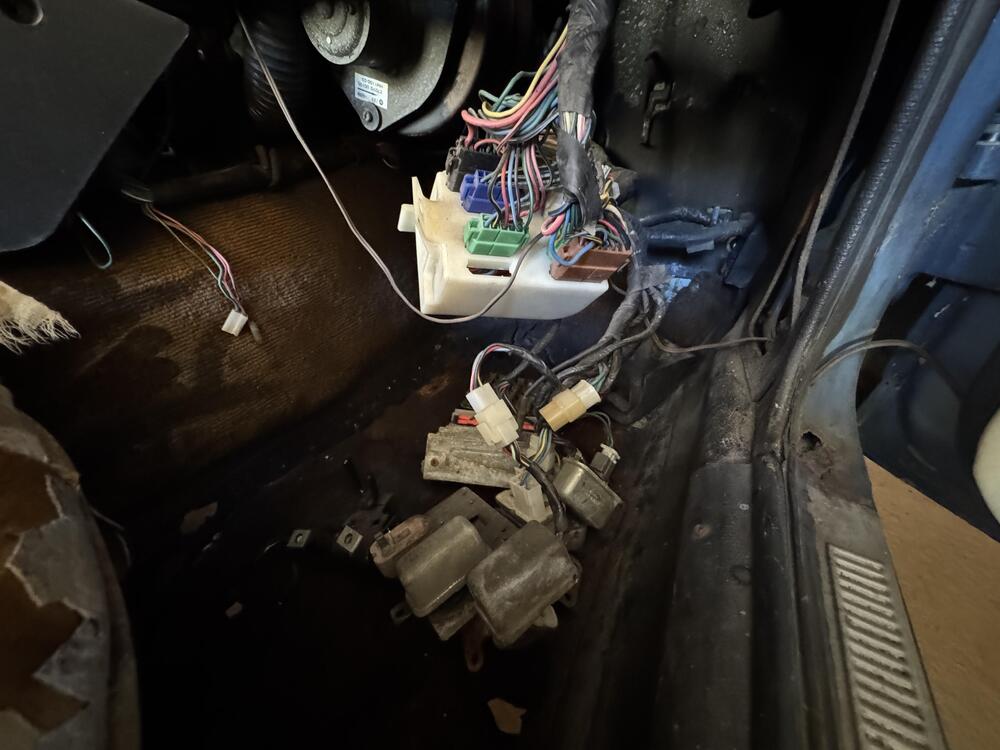
Little more time out in the garage. Checked the coil and near as I can tell, it is ok. Also checked fuses in the panel and those seem ok. I did find a couple things that weren't plugged in, not sure what they are. The more I dig into it, it really looks like this is not the original wiring harness and/or engine. The firewall boot is still sorta there, but there is definitely no membrane in the middle. I didn't look close enough to see if it just dry rotted out. but it does look like someone ran a harness through it. I'm not sure where to move to next. Is there a way to test ignition module? I found this post that has a lot of good info in it. Im going to give some of this a try.
-
1975 280z Build
So got out there yesterday and today for a little bit. Pulled the valve cover and dumped some oil everywhere. Also decided to pull the cooling fan and shroud so I could have access to the front of the engine a little better. I cranked the engine over by hand and felt really smooth. I decided to try the video function of the bore scope and see if I could post it. Mainly wanted to see what the cylinder was doing while I was cranking. I chose cylinder 3 since it was the worst looking. Actually doesnt look that bad. Edit* Appartley this video has to be downloaded, so im uploading to youtube. And lastly, here is a video of the engine cranking over. Sounds like it moves nicely, I hear a little bit of clattering at the end of the cycle. IMG_0026.MOV The borescope is just a cheap Amazon peice. I'm pretty happy with it. I wasnt expecting to use it a lot so I didnt want an expensive one. If I had to do over again, I might look into a four way articulating. The two way is fine, just have to twist the spine to get it where i want. Amazon Teslong Bore-scope While I was at it, I also checked for spark. I have none. Something about this was mentioned when I bought it, but I thought it was just one cylinder. The fuel line was diconnected 'just in case' I know the fuel is bad and the car also came with a new fuel pump. I need to rewatch one of the new 'roadkill' episodes they put out recently to test a coil. I think they are trying to revive the roadkill format via their respective youtube channels. They put out a 4h long episode on Rotsun between the two of them. I could totally just google, but where is the fun in that. Shameless promo, cause this is the car and show format that made me want to get a project. I really enjoy the problem solving.
-
1975 280z Build
Wow! Look how time flies! Its been a while since my last post. Things have been busy. I wasn't happy with my work space. Since I am at an apartment complex my garage was facing the apartments and I dont want to bother people with any noise that I make. I finally managed to switch to a garage on the back side of the lot that's a lot more appropriate. Right after I switched I went back to Montana for the summer and I just got back a few weeks ago. I got to use my shiny new bore scope to check out the cylinders and I'm pretty happy with it so far. You tell me. Here are some highlights. I started with cylinder 6. The one valve I could see had no carbon buildup on the top of the valve and this was the worse rust I could find so far. This is cylinder 5. Cross hatch is perfect. Cylinder 4 was at the top of the stroke, nothing much to see This is cylinder 3, not looking to great, but at least there is oil. Cylinder 2 was clean and 1 was clean with a few small specs of rust. I managed to snake my way down the oil cap and took some pics Obviously in the radiator. This was the fluid level when I got the car. I cant complain too much. That was as far as I got today. I think my plan next is to figure out a way to spritz the cylinders with some fluid and rotate the engine by hand. I don't want to dump a bunch of fluid in there, I highly doubt it is seized.
-
1975 280z Build
-
1975 280z Build
I worked in aviation for 12 years and I have never see that on any kind of aircraft lol, Now, safety wire. Thats on nearly ever nut and bolt. It comes in different thickness and has very high tensile strength https://www.aircraftspruce.com/catalog/pnpages/05-02687.php?utm_source=google&utm_medium=organic&utm_campaign=shopping&utm_term=05-02687&gQT=1
-
1975 280z Build
I went and got some ATF to pour down the cylinders then I’m gonna drain and remove the fuel tank and likely go get it cleaned. I’ll also unbolt the exhaust manifold to see what the runners look like and put it back on. Then I’ll pop the valve cover off and take a look. my plan is to remove as little as possible and then put it back together so I dont forget stuff and just creep my way through it. The cold snap is coming through so it’s gonna be a little bit before I can get back out there. I also need to put up some lighting and figure out how to clean/blow out any hard fuel lines. I can’t have an air compressor, hopefully real estate starts picking up and I can find house.
-
1975 280z Build
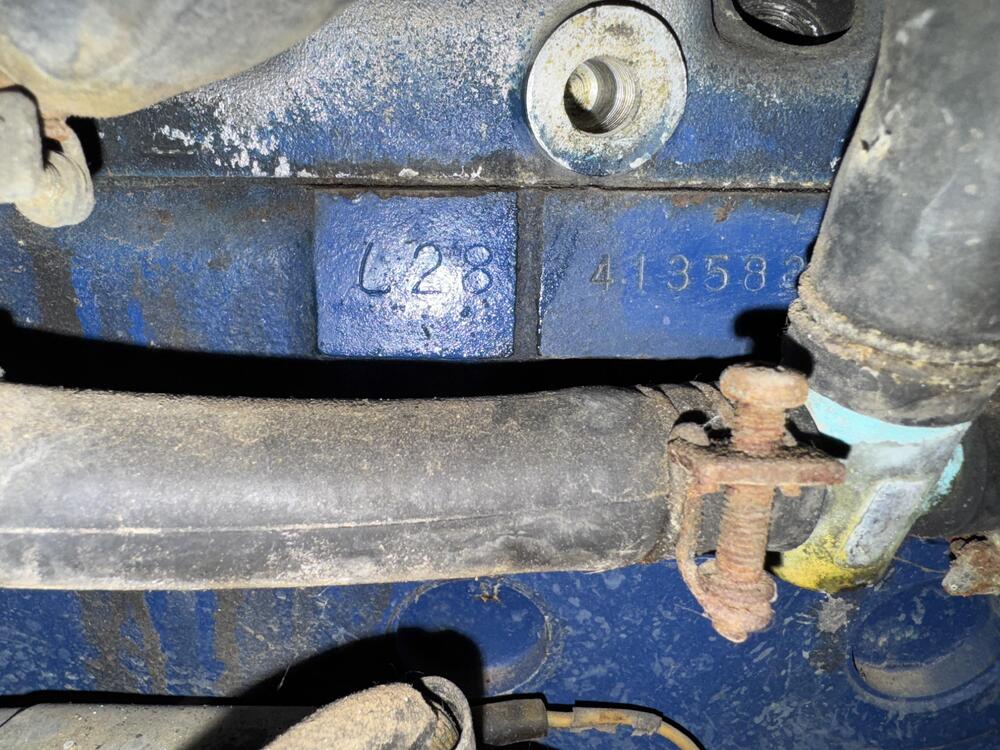
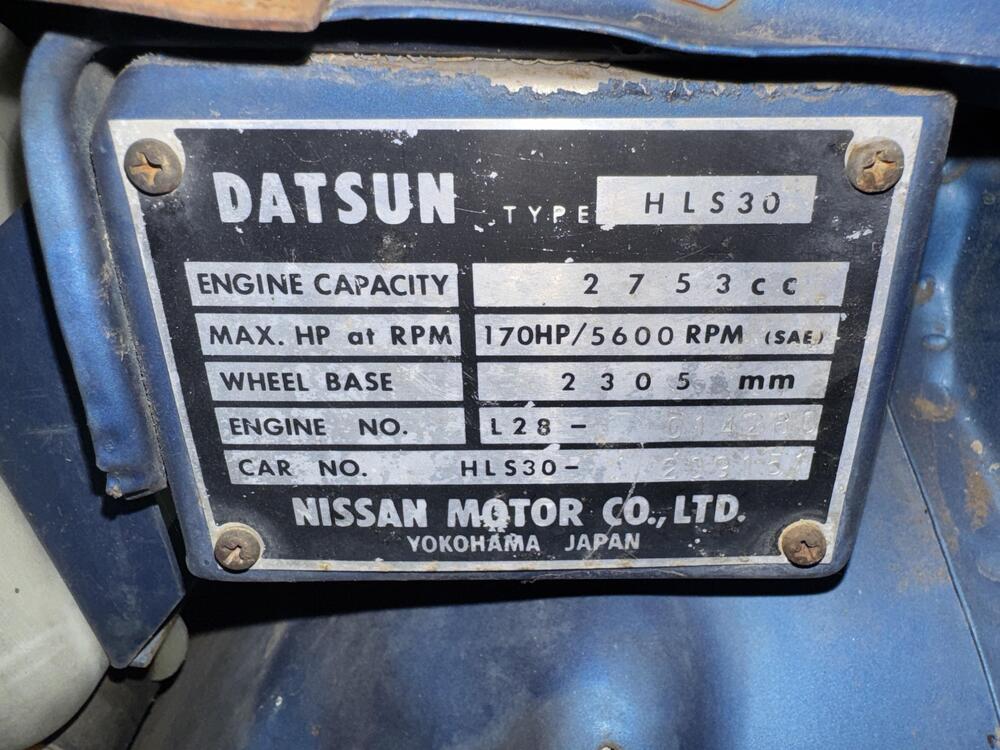
So I had a thought. Look at the picture with the block number. Is that an original paint color? See how it oversprayed onto the head? If it’s a factory color, I don’t think the head has been replaced. Even the rust bubble line up a bit.
-
1975 280z Build
hah, I'm excited and bummed at the same time. Since I don't know a lot about this car, I was hoping for a good original car to have as a baseline and then slowly work my way up as a learn more about what makes it tick, but I'm pretty decent at problem solving once I have a good working knowledge. All this chat has me really motivated to work on it more, and I really appreciate you guys with your conversation and information. Its been a long time since I have found a good forum to socialize. I'm looking forward to learning more and hopefully I can eventually contribute to the community.
-
1975 280z Build
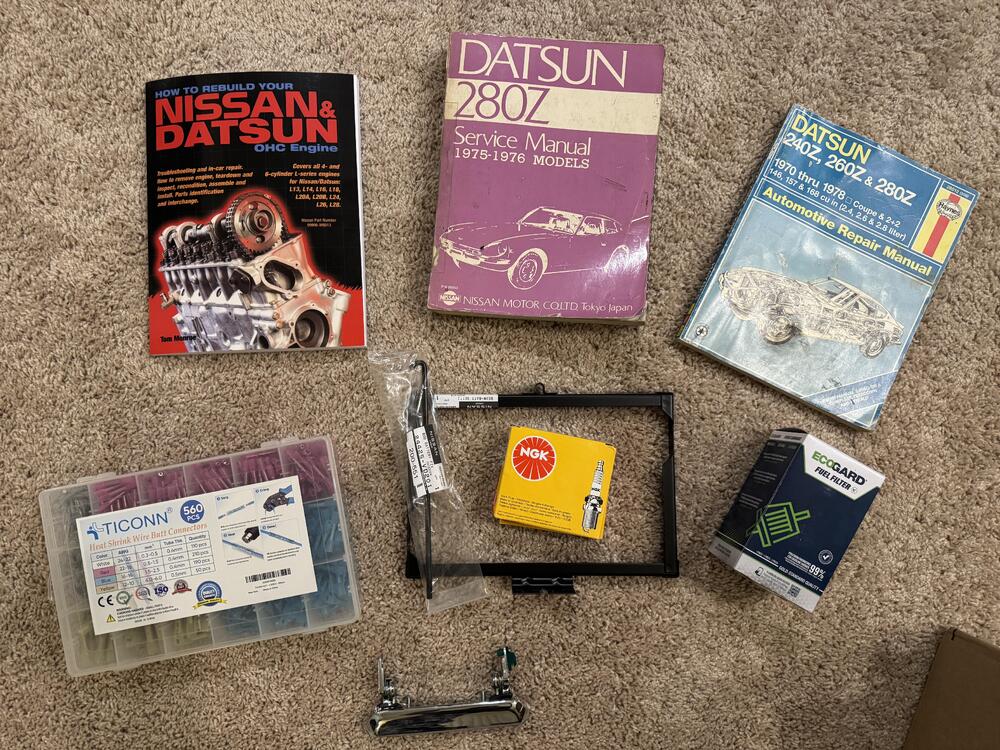
was looking into the manual Siteunseen recommended. I bought that one and found an oem manual on ebay for 90$. Also have an offer out for a haynes manual for $10. That glass peice was on the spark plug wire I pulled from cylinder 2, its a spark indicator. They did mentioned an ignition issue and probably gave up and left it.
-
1975 280z Build
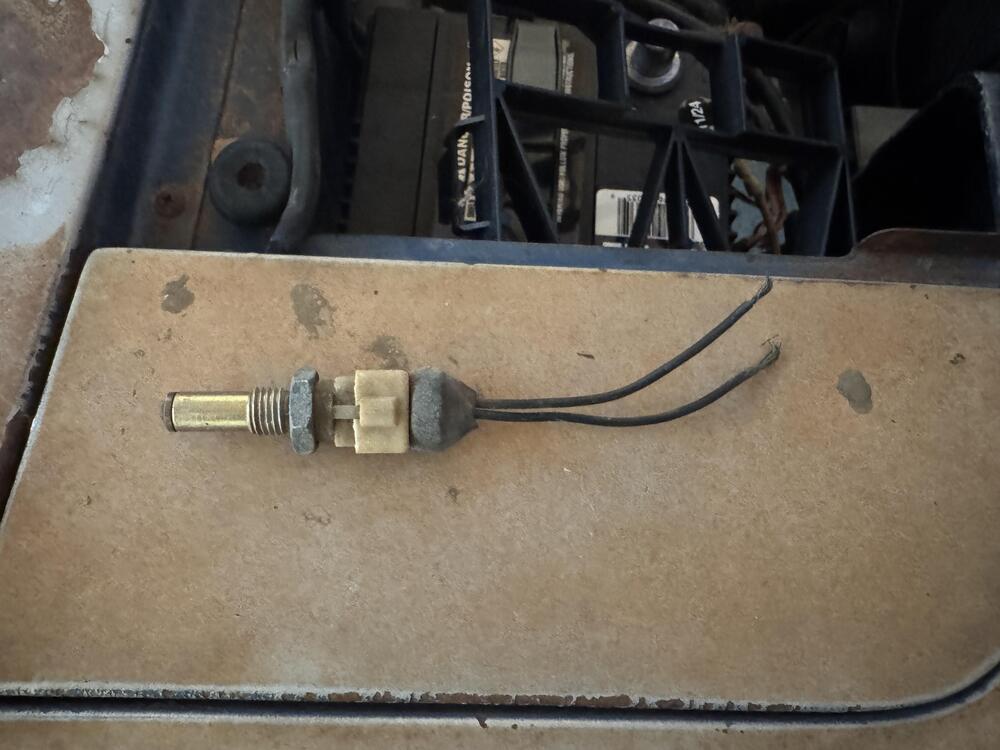
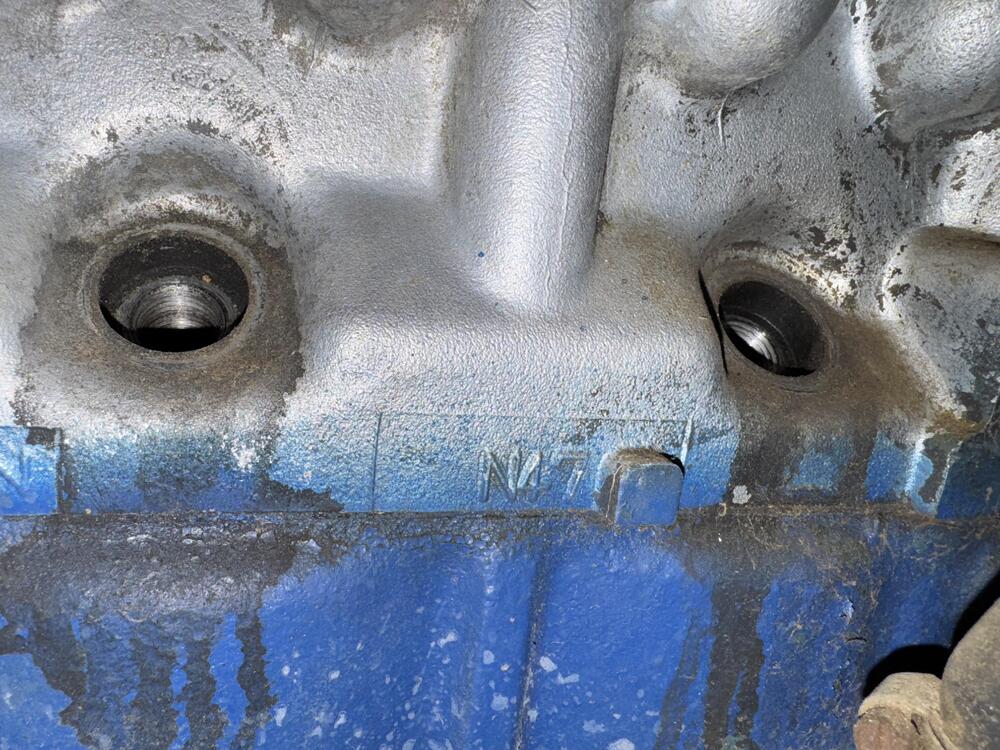
I went out and took a peek at a few things that had me curious. I went poking around for the casting number and found a couple more interesting things. To get a decent picture of the number I had to pull, Im guessing is the coolant temp sensors. but lucky me, they cut the end off. I also removed the spark plug wires to get them out of my way. Look what I found! It took me a bunch of attempts and I had to pry the hose back to get a good picture, but this is what I got so if my reading is correct, xenoncar engines, its entirely possible this could be from a 280zx, It seems those were all the same, the pistons may be different according to the chart. And I hear that the exhaust ports could be different as well? The spark plugs were completly trashed, number 5 was better. The spark indicator was on the 2nd cylinder
-
1975 280z Build
Ill edit the first post with some info about myself, I should have thought of that. When I bought the car the old battery was flopping around, part of the reason was that the battery terminals were backwards and the cables werent long enough, so I opted to order a hold down bracket. At some point I was going to need one anyway. While I was at it I ordered an aftermarket handle. Both from zcar depot. You are absolutely right about the fuel lines, What I might do is bypass the fuel lines altogether and put the put and can up front for the time being. but cleaning out the fuel rail is def a good idea.
-
1975 280z Build
wow, I had no idea. I glad you saw that, I wouldnt have known. Is it a direct swap? I guess I will have to look for some casting numbers. hopefully this wont be a bear to deal with.
-
1975 280z Build
Thanks! I will need it.
-
1975 280z Build
Thanks for having me! I did see those links. Im a paperback guy and Im highly debating on spending the dough on a manual. I didnt notice some odd things with the digital book. The wiring diagrams appear to have some funky text to them that was added digitally. I feel like maybe they were revisions, but their format seems wonky. Thank you for reminding me about the forum post though, I need to go through that. i'd like to do 4-wheel discs
-
1975 280z Build
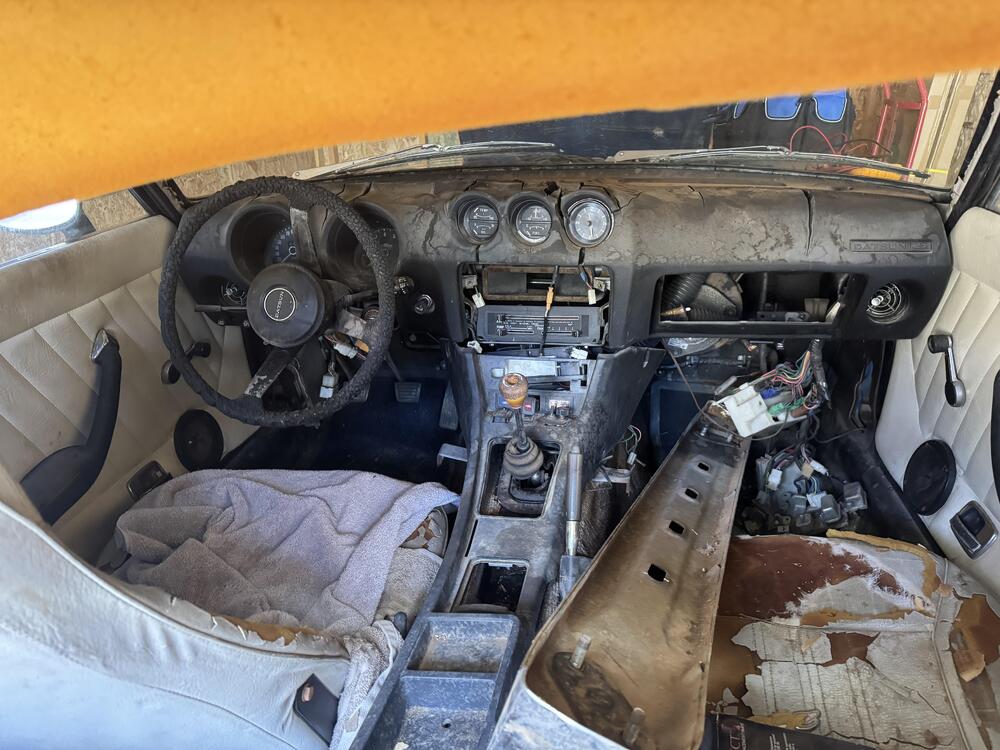
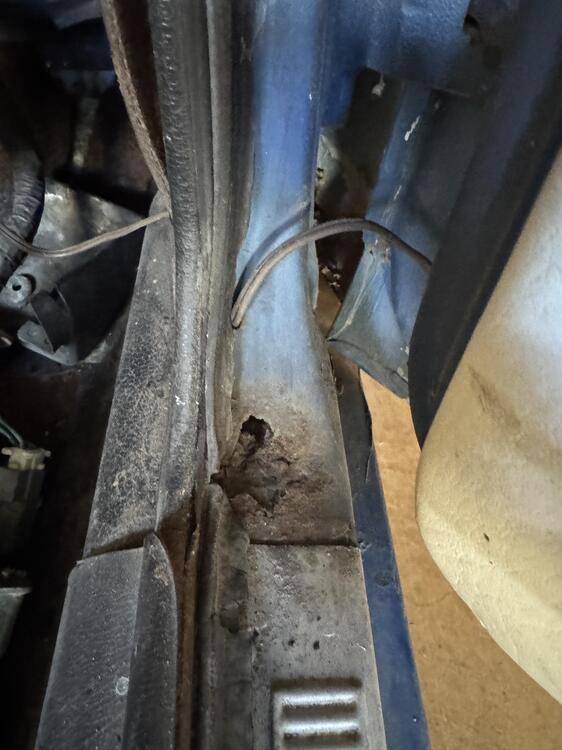
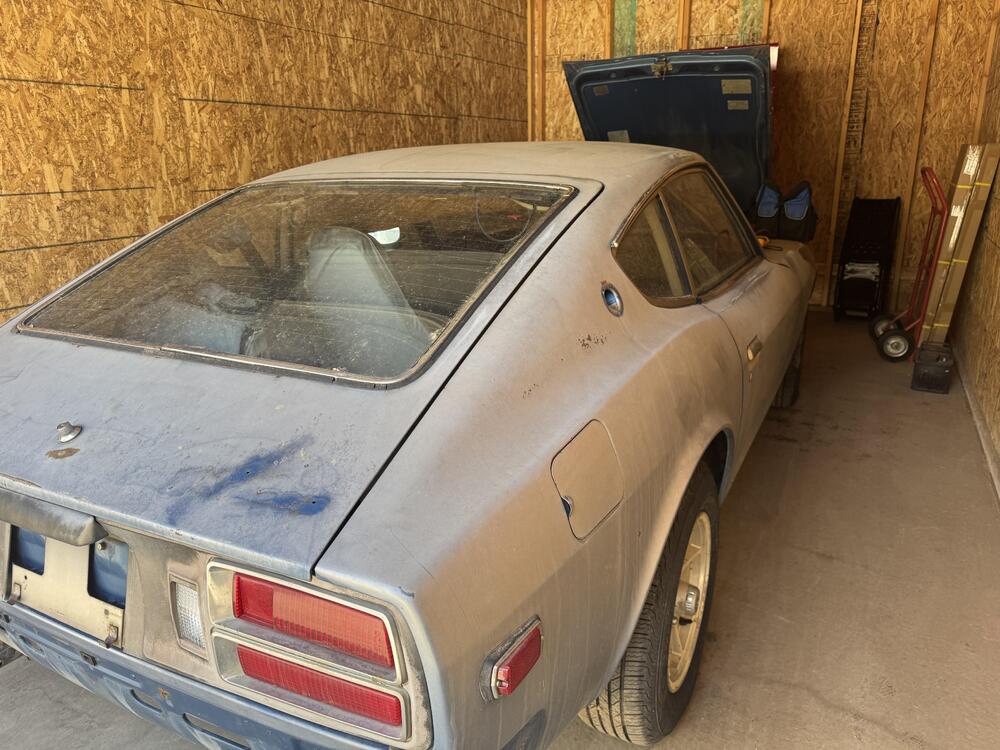
Today, I spent some time with the car. Mostly cleaning out the garbage in the interior and looking more closely at the car. The interior is completely trashed. I knew this going in. I'm fine with it. The driver side exterior door handle is broke and missing. I got a new one on order as well as a battery hold down bracket. The car was sitting long enough that the fuel is bad, I figured as much anyway, So I jacked the car up and peaked under it to see what it was going to take to remove it and get it cleaned. Its not high on my list of things to do. The owner had a brand new fuel pump still in the box sitting on the seat when I got it. I plan on just running a hose to a fuel can until I get the car running. They cut the wires on the fuel pump. I feel like I would have just disconnected the terminals lol. The spare tire was still in the car, and I think its the original tire. The code on it is CXJ9 W6F075. I haven't found a website that can decode it. I didn't look all that hard though. Apparently tires have different codes prior to 2000 and the ones I found only explain the modern ones. I managed to poke some holes through the metal, but for the most part it seems solid. The undercarriage looks pretty rot free. I am able to peel the undercoating off with my finger and the paint underneath and nice and rust free. The struts still function and it rolls nicely. . I did find this hole in the door sill. My guess is that since all the of the rubber seals on this car are roasted, when it rained some of it got and sat. I think this may also be the cause of the floor rot. Ill pull the sill plates off and hope for the best. The door corners look really good though! I checked the fluids and the oil is full, The radiator is mostly full, Those seem to be good signs. I didnt look for transmission dipstick, Im guessing since its a manual, it doesnt have one. The brake fluid is empty, so there is a leak somewhere. I did buy a new battery and turned the key just to see what came on. The fuel and amp meters moved, the fuel level seems dead. About half the lights work. Turn signals work, but the indicator is really gunked up. The wipers dont appear to work, but I do hear the motor. I still a bit cold here and we have a cold snap coming through so it will probably be while before I play around with it. I think my next tasks will be to remove the sill plates and see whats up. I will probably drain the fuel tank and remove it and I will replace the fuel pump with the new one they gave me. Ill just run a hose to a fuel can for the time being. Ill pull the spark plugs and throw some oil down the cylinders, just simple stuff.
-
1975 280z Build
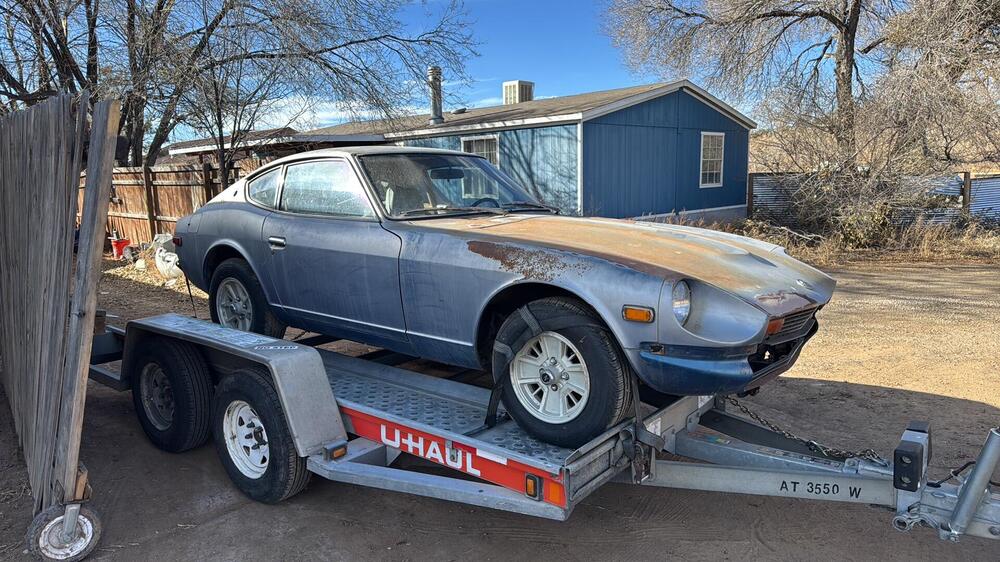
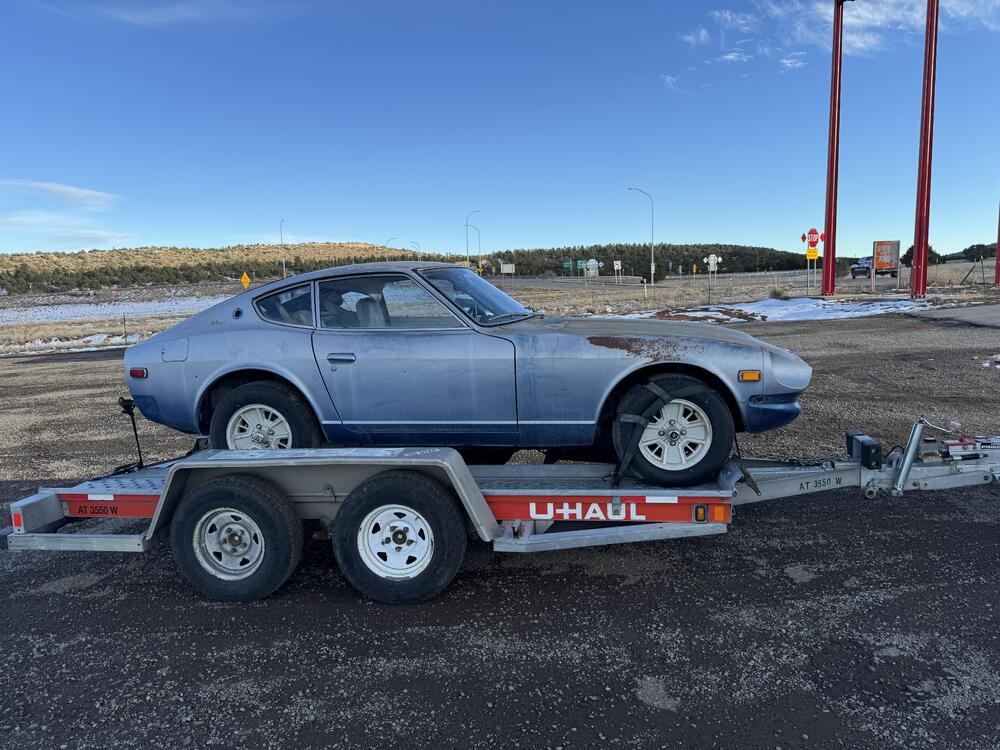
Hello! This will be the start of my build progress for a new to me 280z. This build will take a couple years. As of right now, I don't have a shop to really take it apart. About myself: I've been working on cars on and off my entire adult life. My best friend at the time car me started on one of my very first cars. An 81 Crown victoria. During the late 2000s I had a Ford escort that I did a lot of work too. Between me and my friend we had 7 lol. Later on I wanted to build a V8 miata. I had the miata completely stripped down, every nut and bolt. Refurbished and painted all the chassis parts and zinc coated all the hardware. I was getting ready to start putting it back together when I couldn't bring myself to spend 10k on a drivetrain. I wanted an ls3 which was a common swap and required little effort. I don't have a lot of fabrication experience and I didn't want to fight it at the time. So I ended up selling it and I've been kicking myself since. I paid 1k for it and it had zero rust. I was planning on buying another one, but I just didnt like the exteriors of those cars very much and I really wanted a coupe. So the z car fit the bill. I wanted something I could use to expand my skills on. Id like to learn how to weld, and I figured the floor pan and the tire pan would be an easy start since reproductions are available. I've never owned one of these cars and I have been looking for a project for a while. I found this car in New Mexico for 3500$. It does have a little bit of rust. So far I have found rot on the passenger side floor pan and under the spare tire. It appears that the under carriage was undercoated and the heat managed to bake a lot of it to the point that I could pull chips off with my finger. The original blue paint underneath was very clean. Otherwise, the outside of the car is scorched but straight. The car was apparently stored under a carport for a lot of years but was facing the sun and completely baked the interior. That didn't seem like a big deal to me. I feel like my biggest hurdle with this car is going to be the electrical system. I was told that the ignition system was likely the problem, but browsing around the car, I have found some loose wires and splices. All the fuse panels seem to have been removed from their mounting location. My current goal is to get it running. I don't know much about these cars so I need to get to know the car a bit better before I go to town on it. I'm not sure what I want the end result to be. Once I get my shop built and I've had time with the car. I will stripe it down and rebuild it. It will likely end up mostly stock with reasonable upgrades, like 4-wheel discs and some engine upgrades.


 Subscriber


