nowak1981
 Subscriber
-
Joined
-
Last visited
-
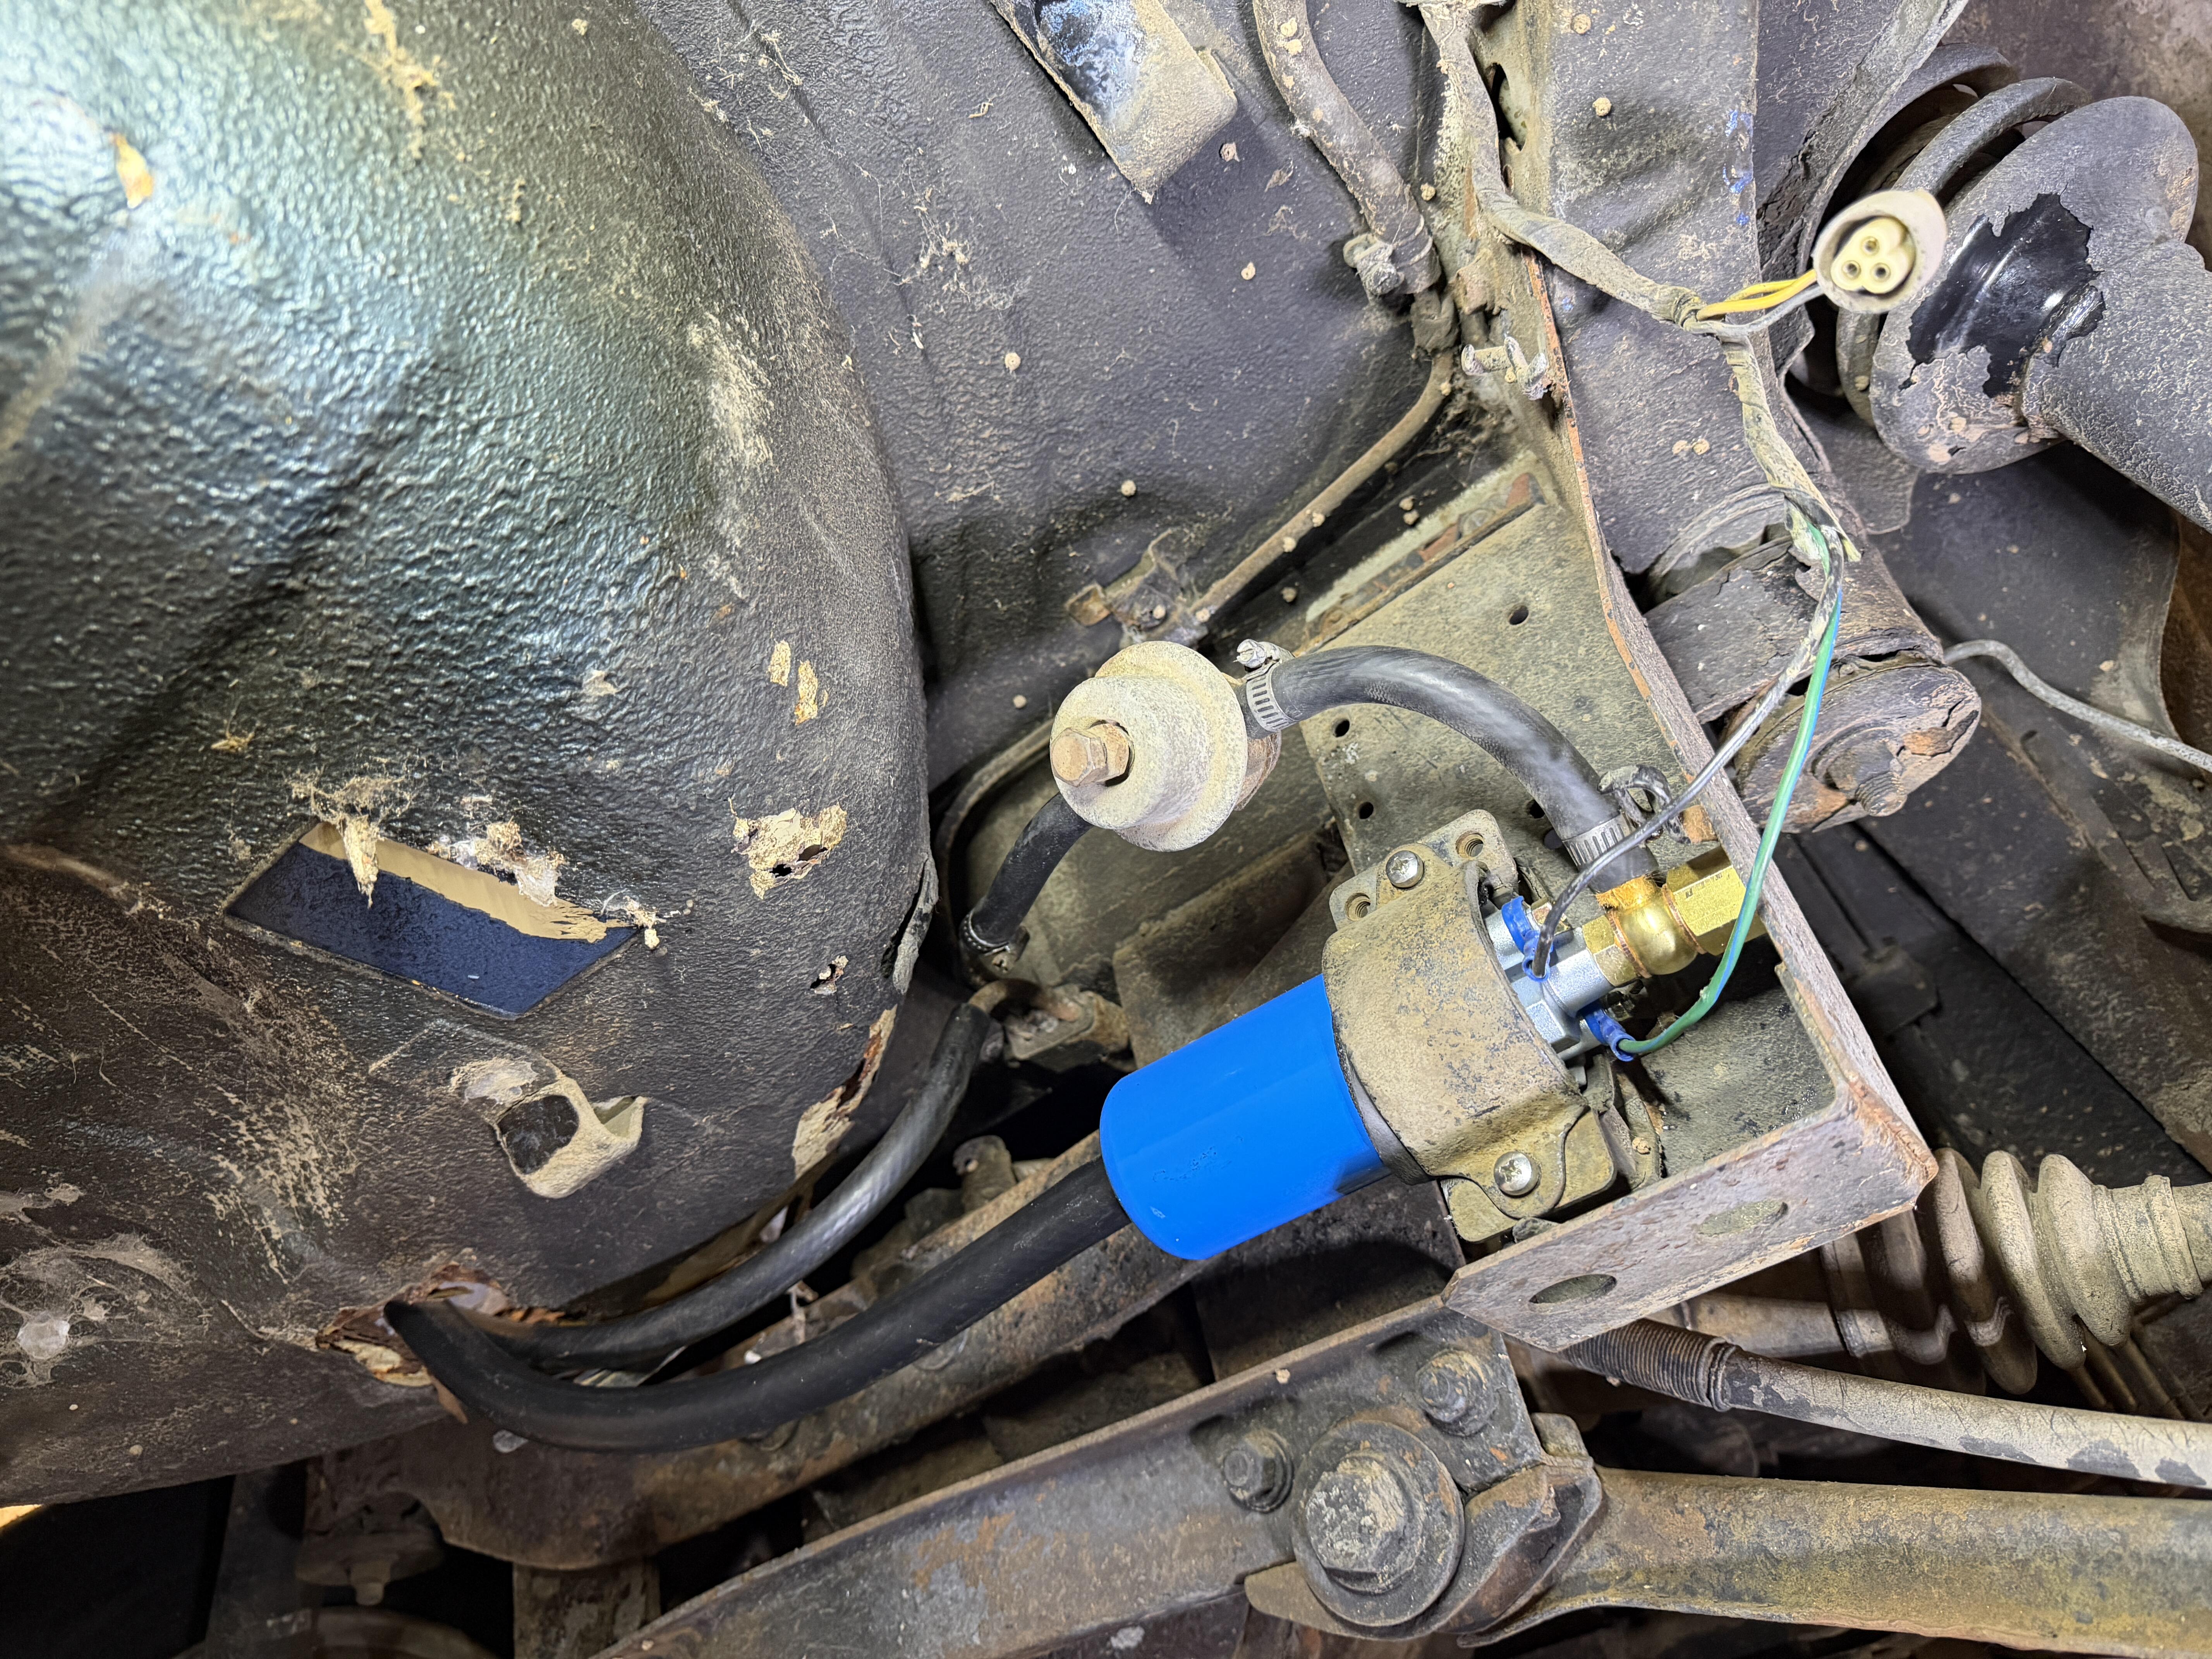
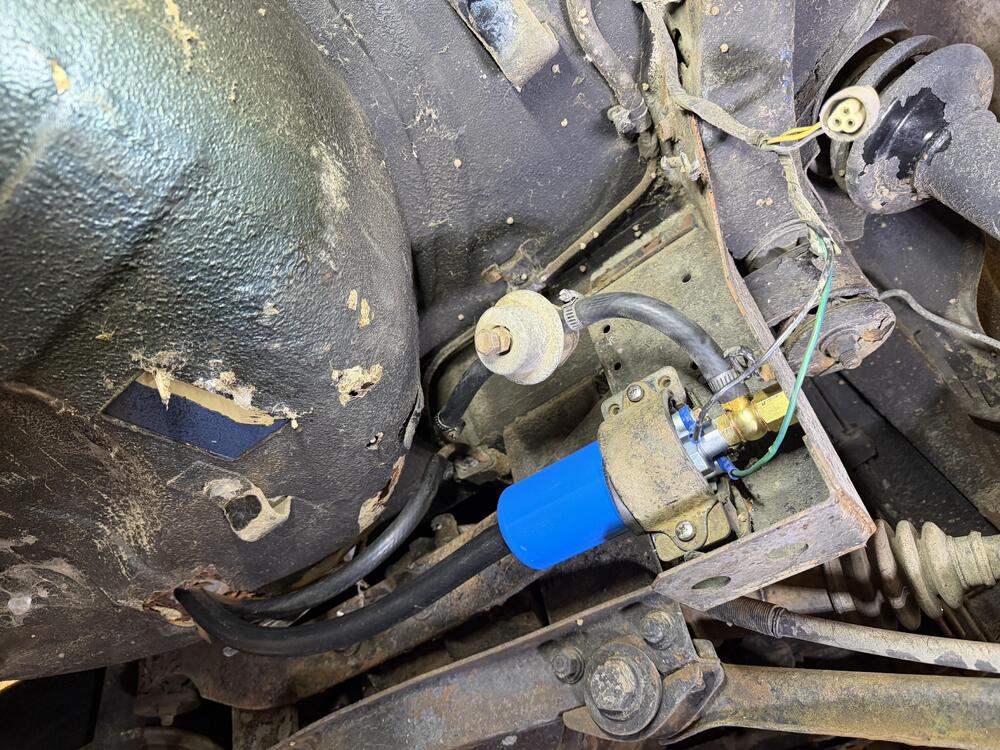
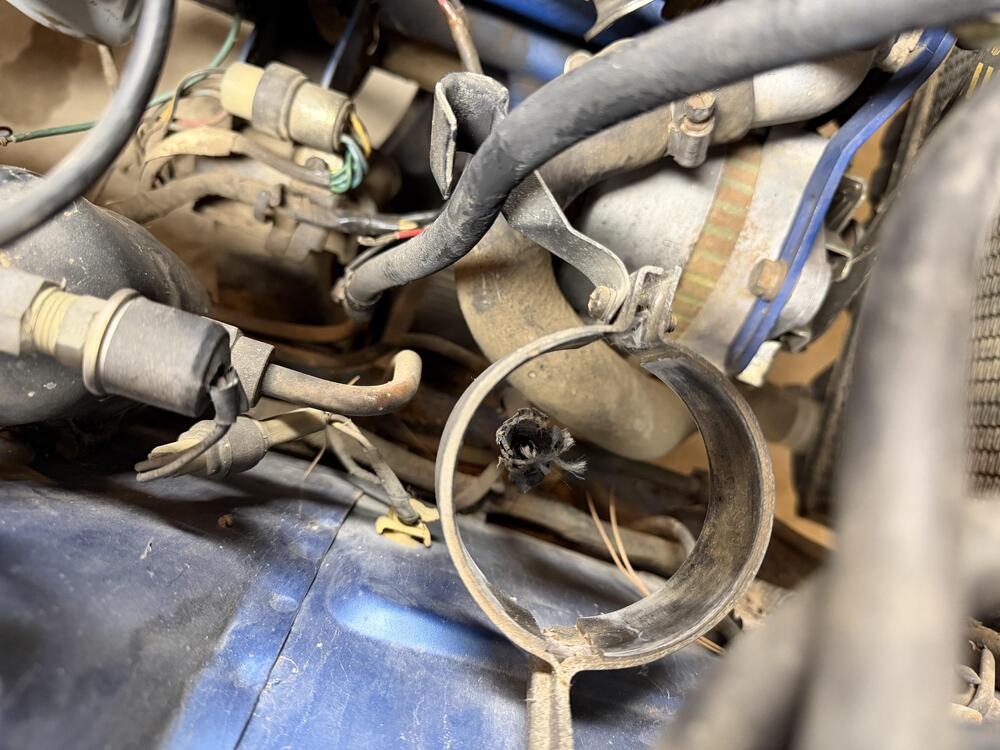
Thats a very good bit to know and it totally makes sense. I'll have to keep that in mind when I finalize the fuel system. Since my fuel tank and mount is currently toast, I'm going to sub in a 3g fuel can for now. I've got the pump installed for now, im not happy with how it mounts so ill have to figure something out. I havent had a chance to look for a right angle nipple that might be able to save me some space. The rusty tire tub came in useful as I was able to run the fuel lines through it. Its just temporary to see if I can get the car running. Since I got the pump wired up I decided to see if pump would run and I got nothing. I dont think it has power. I didnt spend any time diagnosing it, I was happy to accomplish the little bit I did. I'm going to flip through the FSM and see what testing procedures they have. Obviously the fuse and maybe a fuel pump relay are at the top of my list. On a side note, I am having a really hard time with my shrink tube terminal connectors and I was wondering if you guys can suggest some better ones. I purchased these amazon terminals and I just cant get them to crimp for a damn. I have 3 different types of crimpers. The old fashion ones and two of the ratcheting kind. I had a couple of the normal terminals and they crimp really nice and tight, but for some reason the shrink tube ones just wont bite. Maybe I just have the wrong jaw. Can anyone also suggest some decent vacuum line? Im not a fan of the silicon ones and all the line I can find is super thick.
-
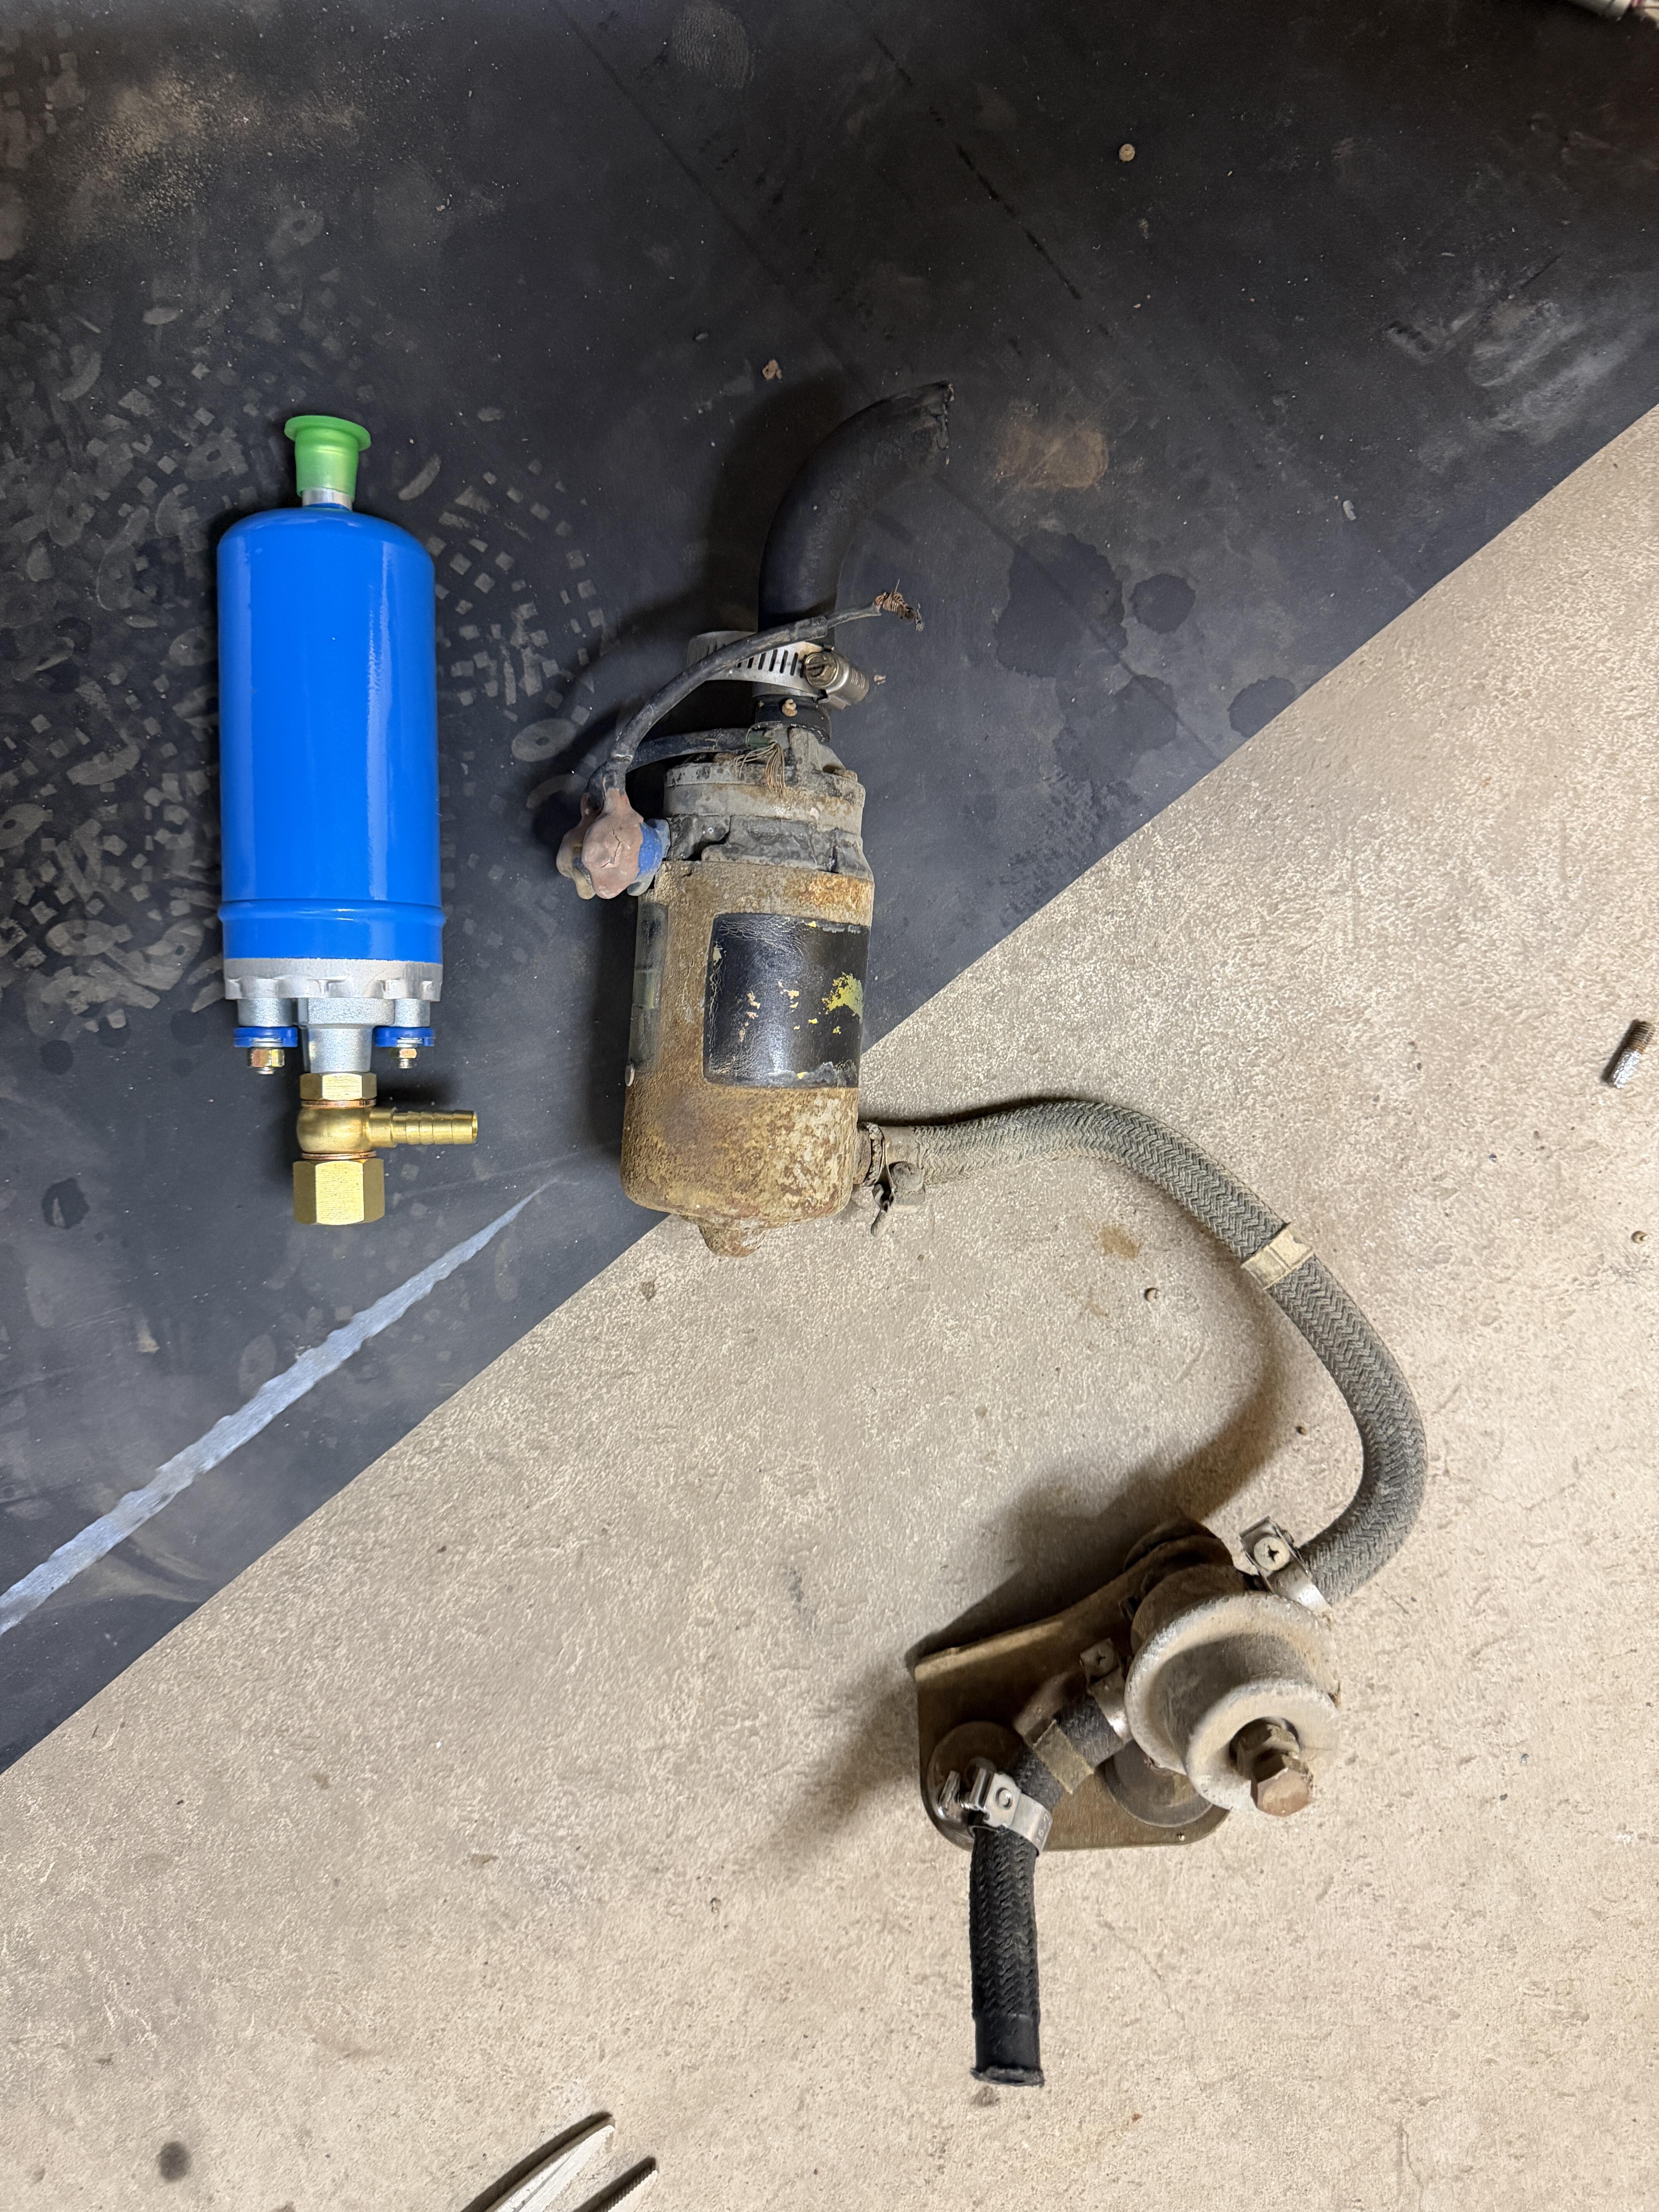
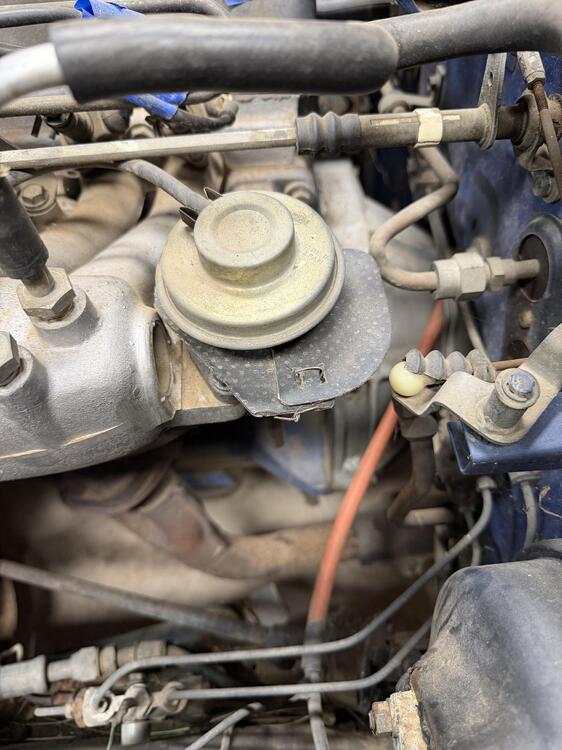
worked on the fuel system and a couple other little things today. The phillips screw stripped out so I had to drill the heads. Once I had the pump removed I had plenty of thread left over to pull them out with vice grips. I feel like this is the original pump since it had the goop on the terminals, however, I'm not sure why the wires were cut and just twisted together. Maybe an old replacement pump came this way. I'm having trouble identifying this part. I'm dont think its a fuel pressure regulator. I know there is one on top of the engine. The new pump doesnt have the outlet on the side, but it does come with a brake line style fitting.. Overall it just ends up longer. It will still fit in the bracket but I think I will look for a one piece elbow when I go to the hardware store for new screws. The part number on the box is E16078, it appears to be an O'reillys part and it appears to be correct for the vehicle. Rock auto also shows a carter pump that is identical. Has anyone put one of those cheap clear fuel filters after the fuel pump? I'd like to have one up in the engine as a prefilter for the OEM filter. I dont have a good way to clean out the hard lines and I would like to see if there is any crude in there I need to worry about.


-
These are gold!! Thank you! I had considered trying to clean it myself, but i am in an apartment building for now and I'm not really keen on using that stuff and leaving it unventilated. Besides, I'm pretty sure I'm going to have to get the wheel well replaced before I can put the tank back in. I don't think there is enough metal left in that area to support it for long. I'm not far from Denver so there are a few restoration shops around and I'm sure they will have a better idea if its salvageable or not.
-
Fuel tank is out, not surprised at what I found. The sending unit is seized and lots of debris in the tank. I put out a few emails to some restoration shops to find out if the tank is salvageable. If I need to get a new one, these were the couple tanks I could find. S30 World $665 Vintage Tank Solutions $750 I also checked The Z Store and Resurrected Classics The car came with a new fuel pump still in the box, but Ill need to source a sending unit, possibly some straps (I haven't looked at the old ones too closely to see if they are salvageable.) At the very least Ill need the J hooks since I just cut out the old ones. And all the hoses. The fill tube rubber is in nice condition though, still soft and was relatively easy to remove. The size of the expansion tank surprised me for sure.


-
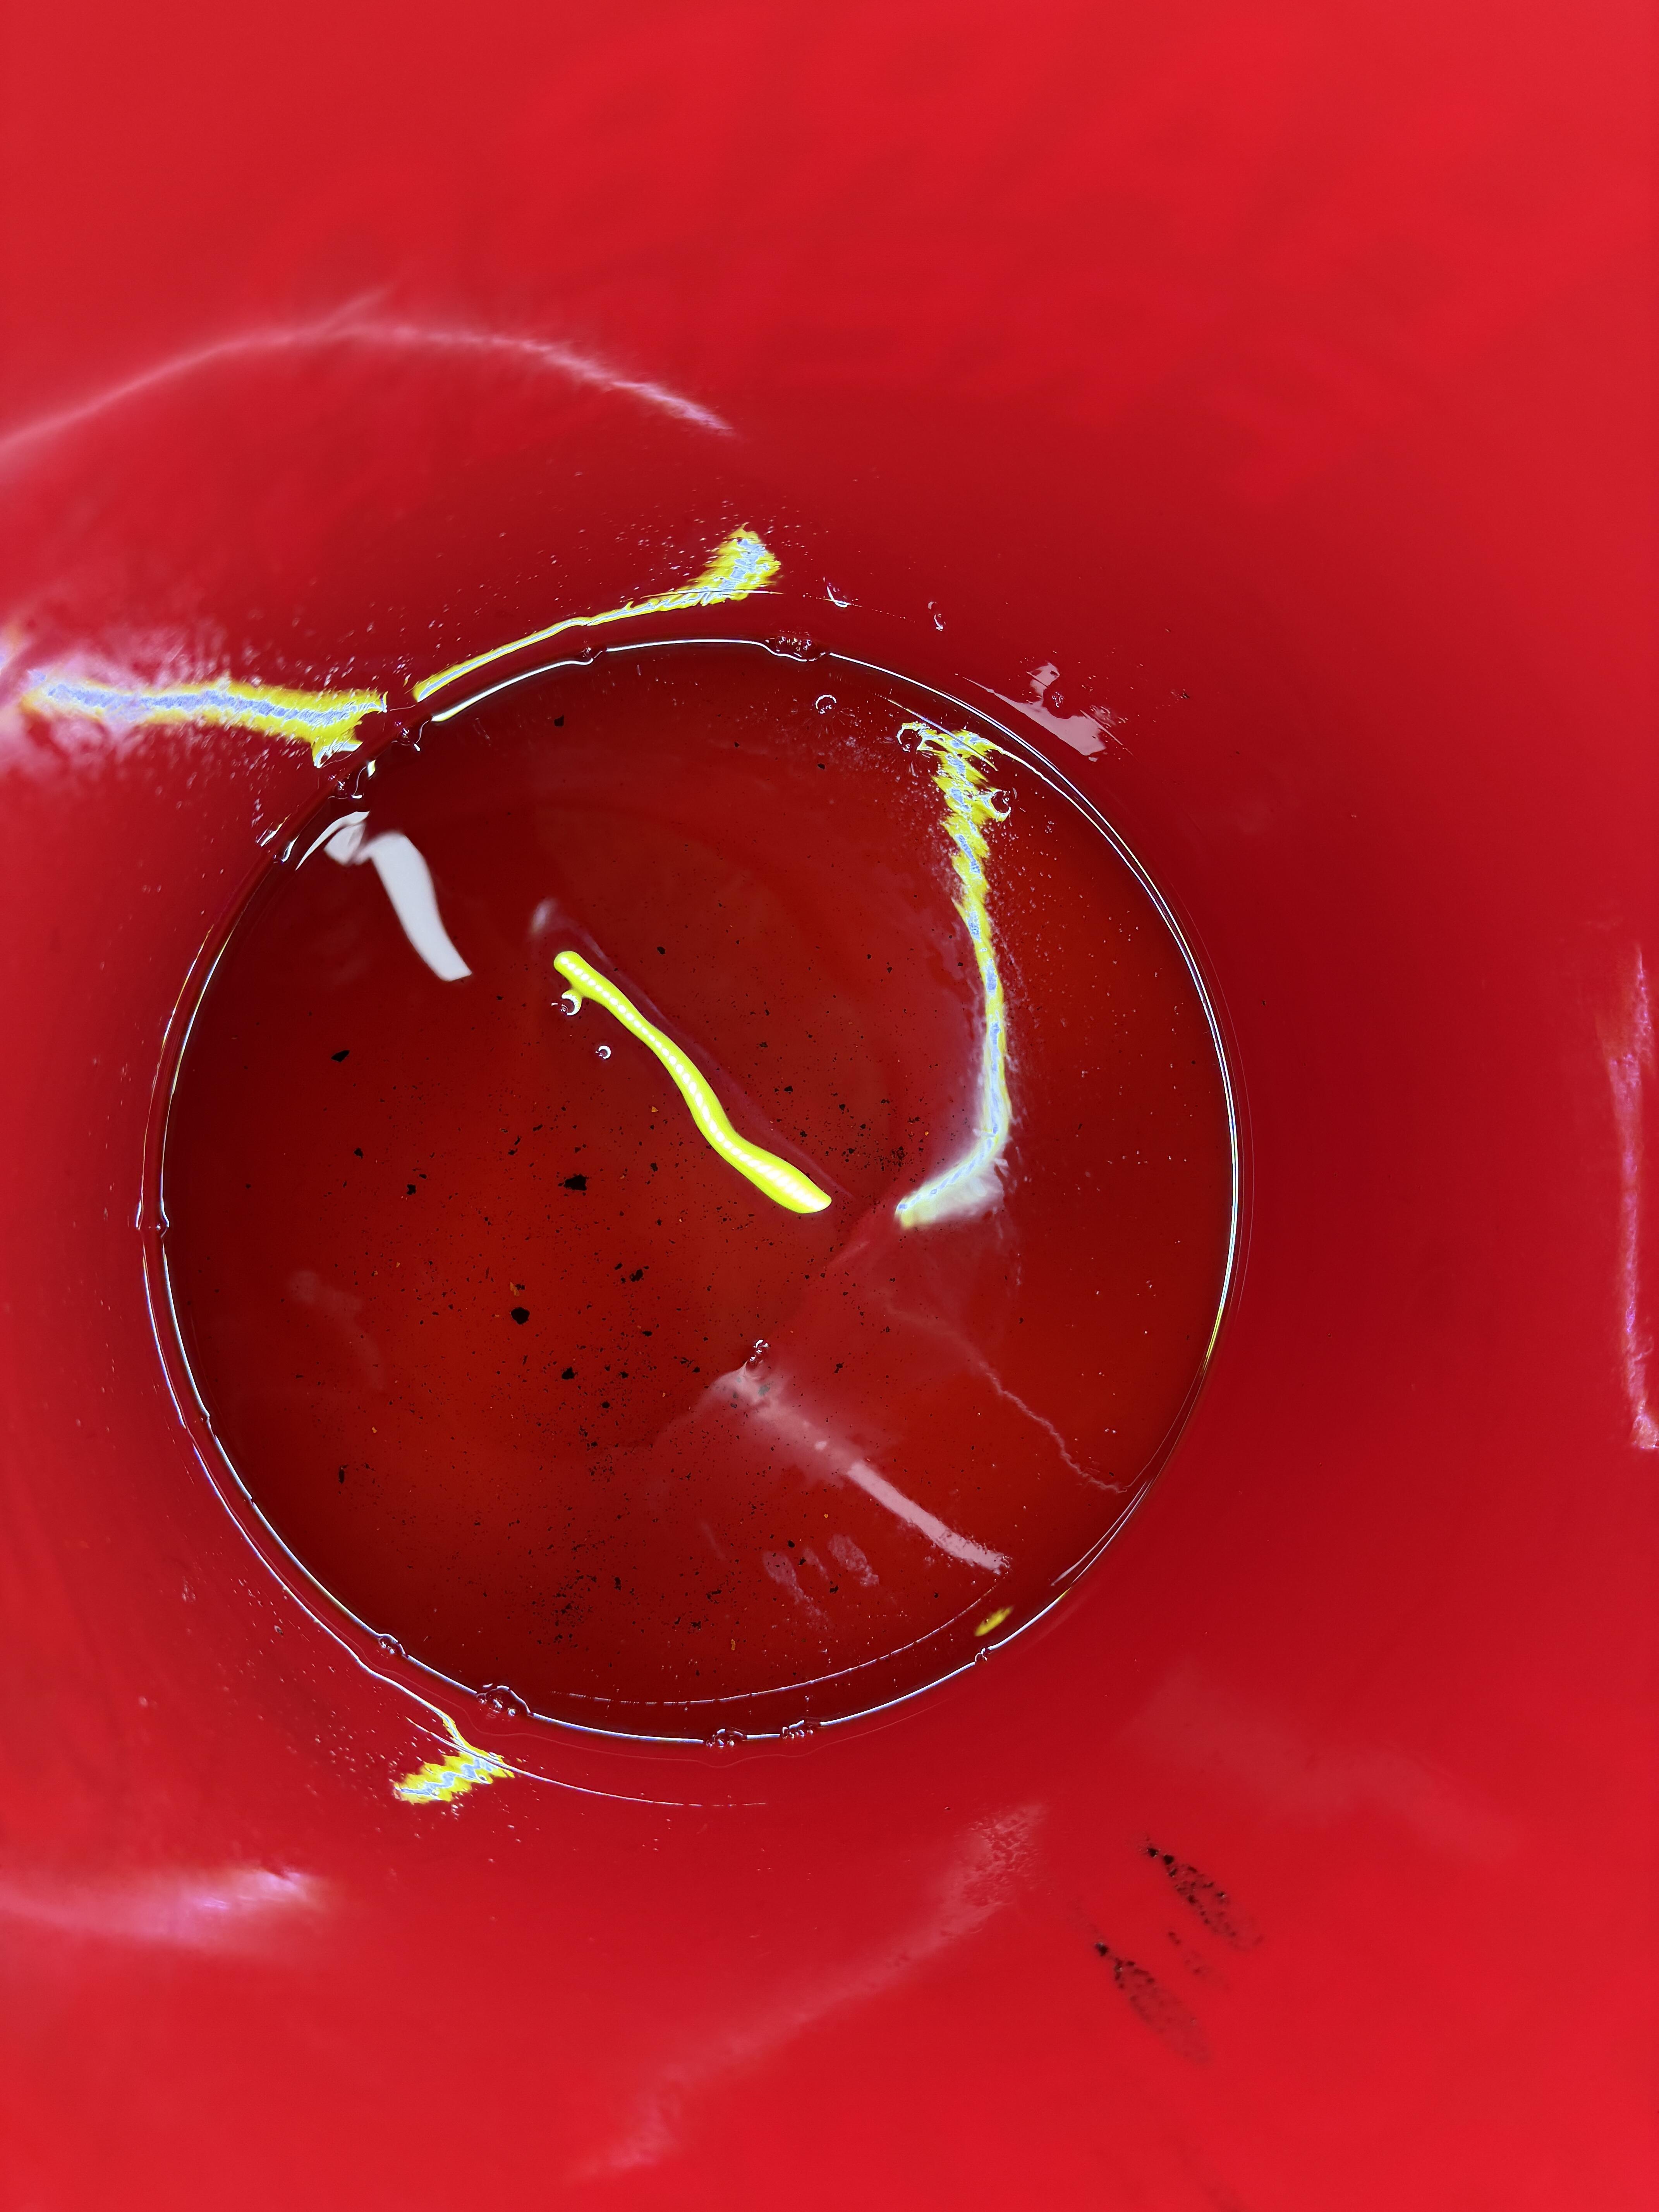
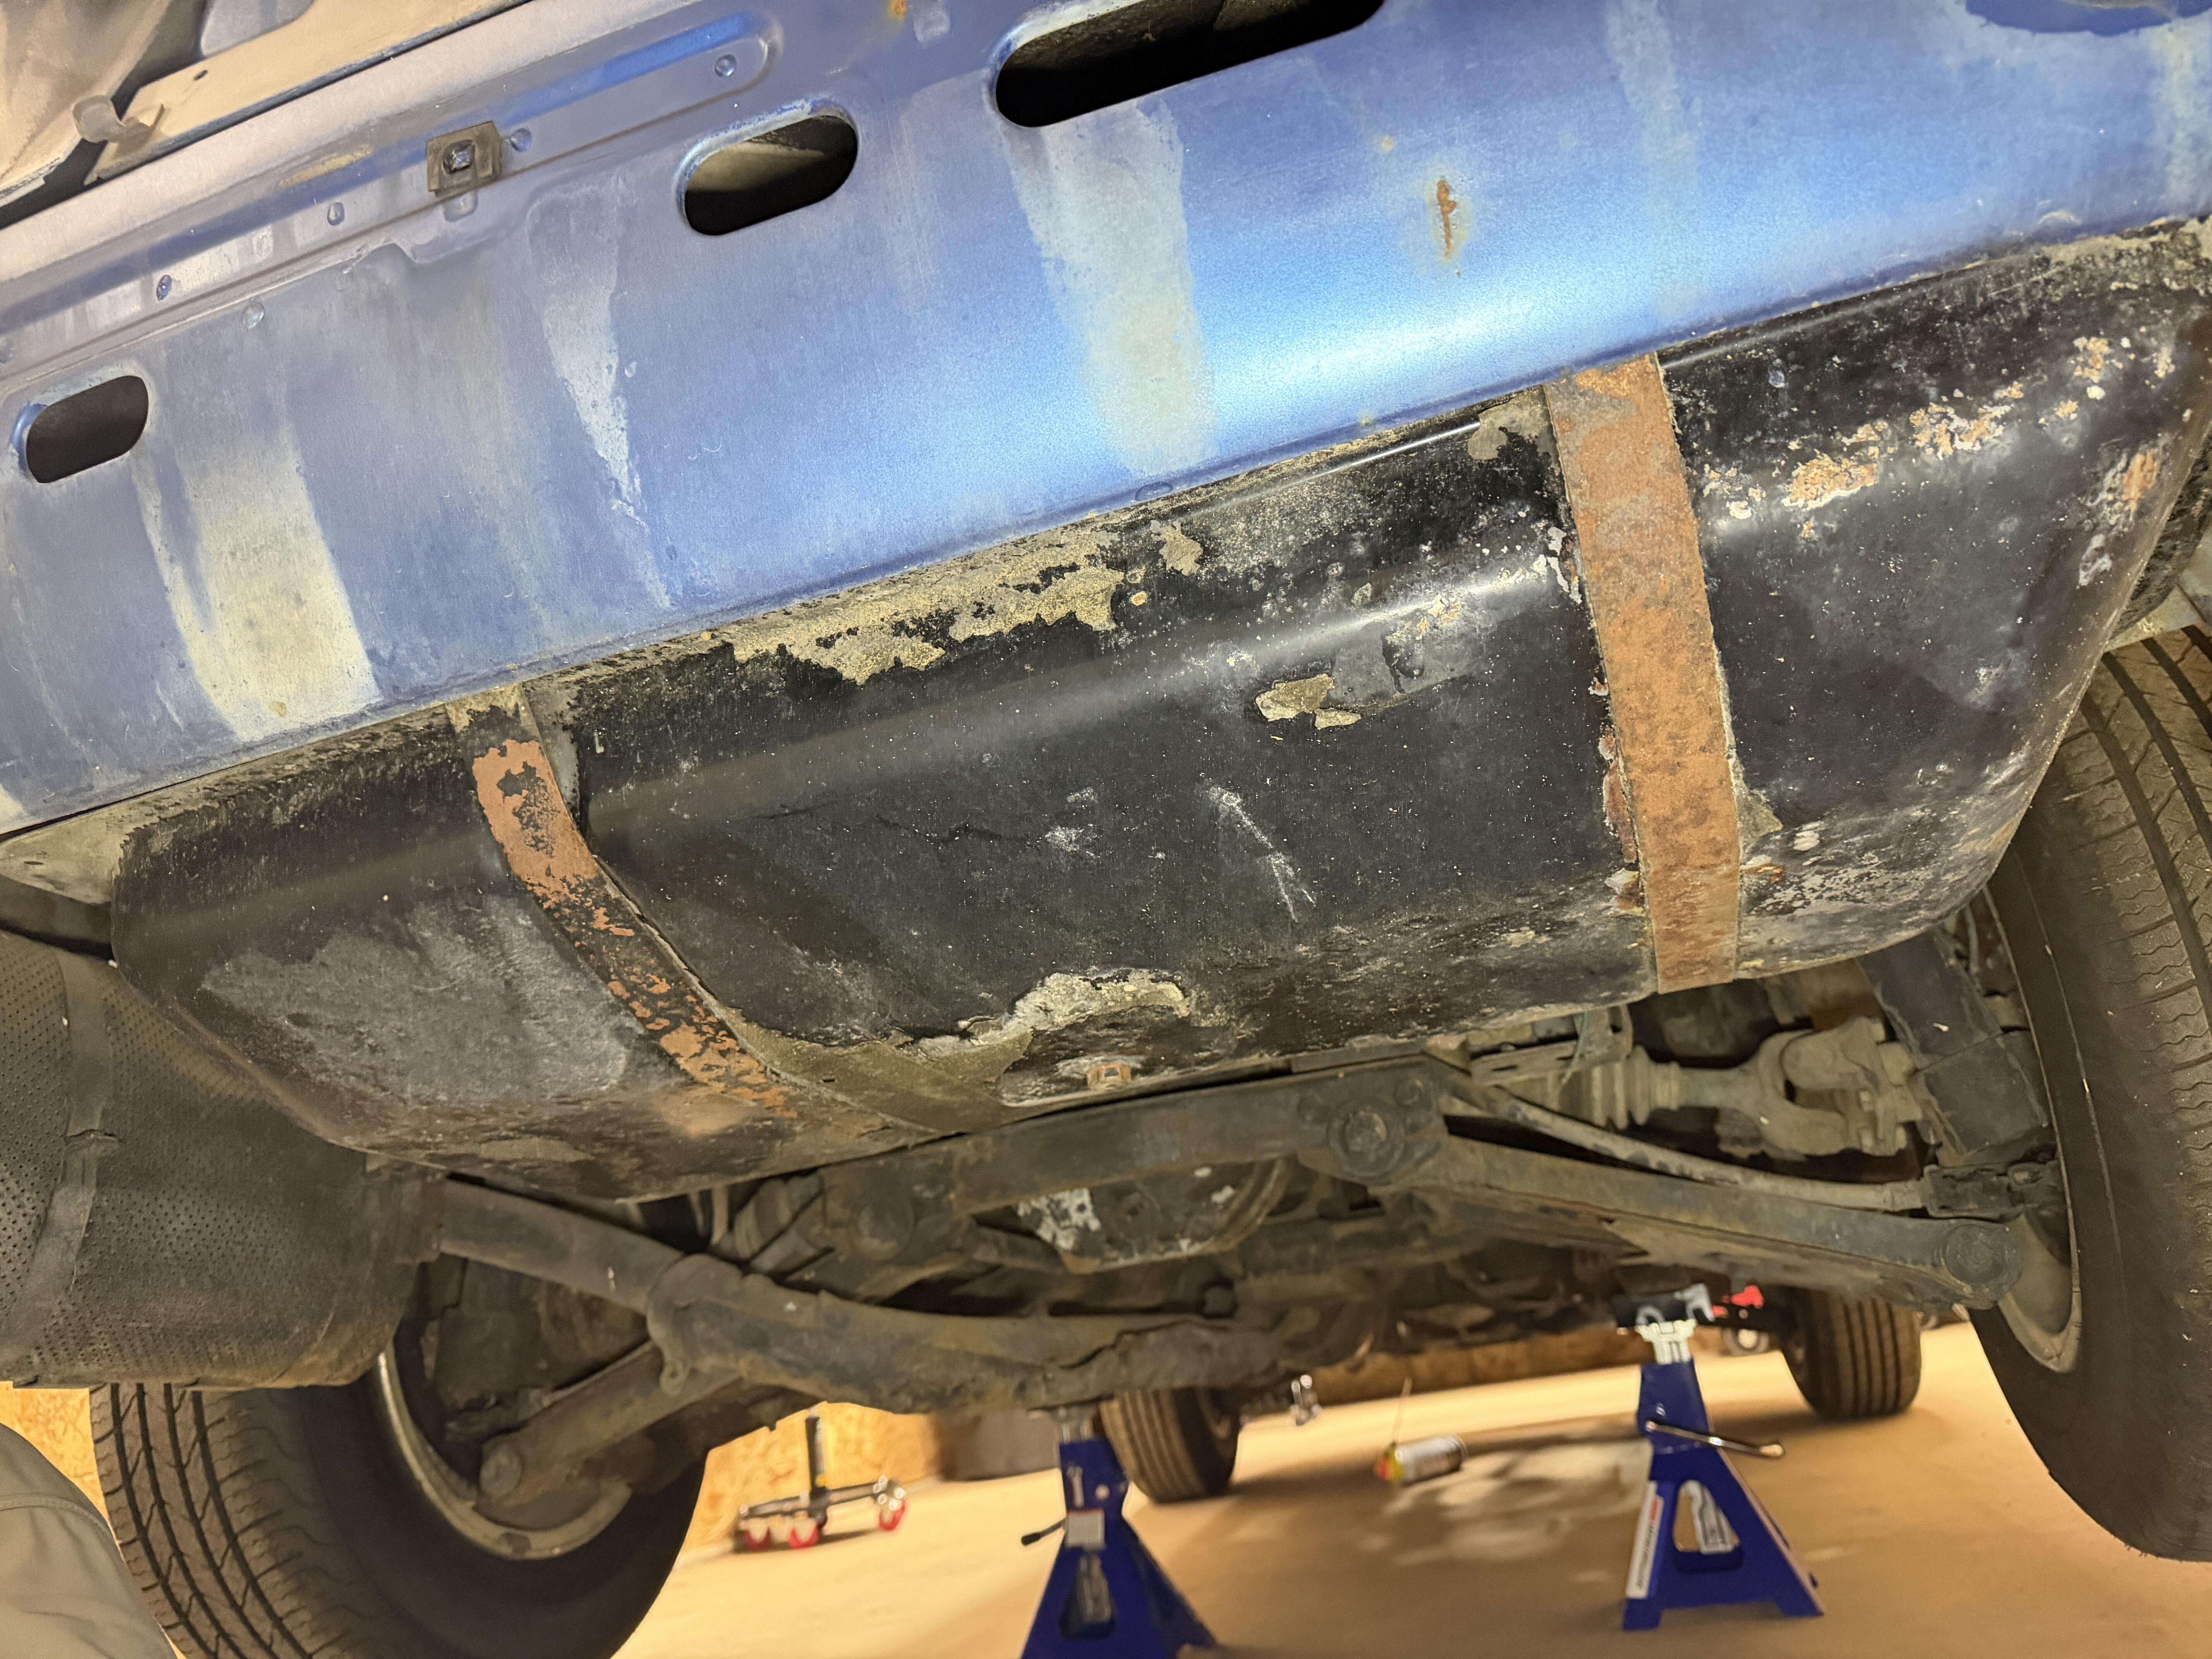
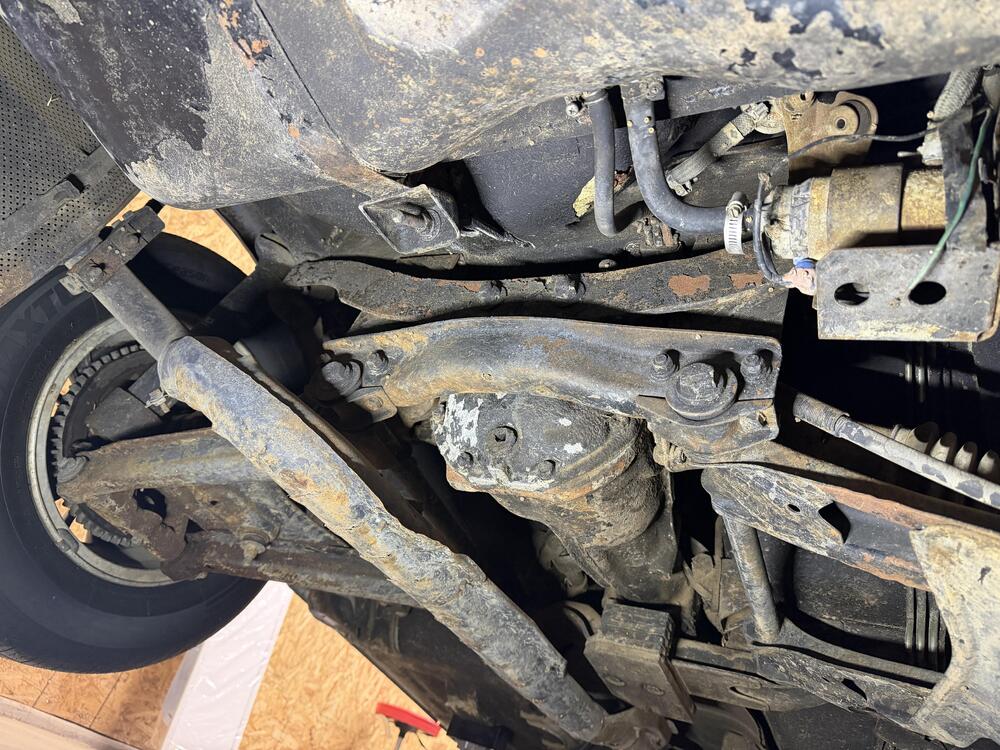
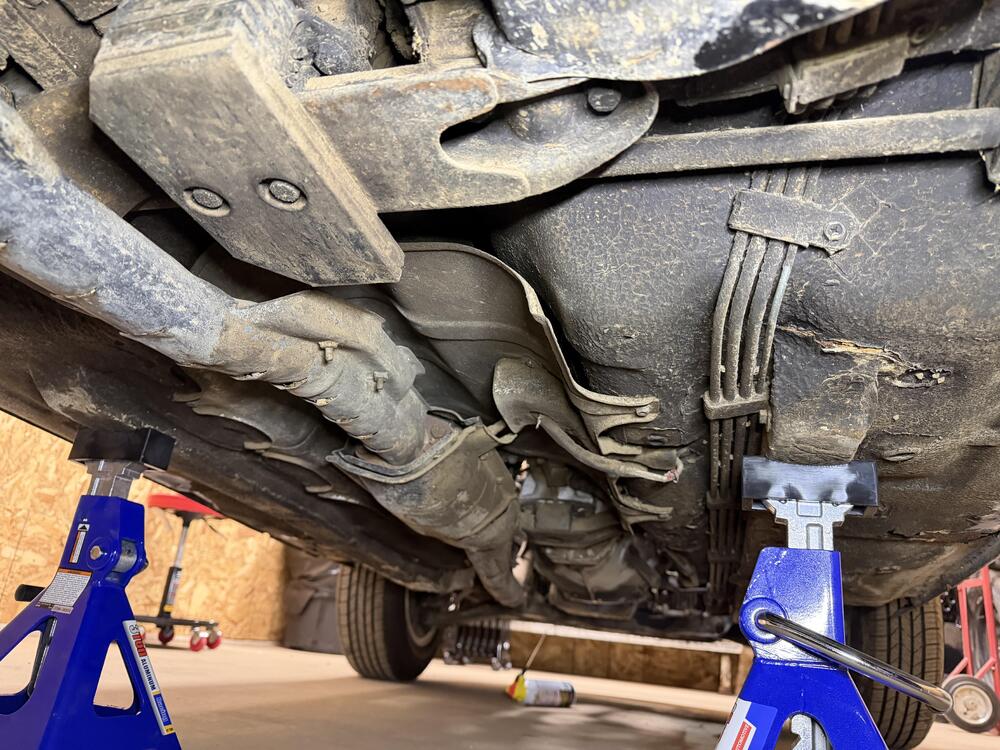
Little more poking around today. I ended up just ordering a HEI module specific heat sink off amazon. I had considered just finding some sheet metal or aluminum, but I didnt have anything laying around and a small chunk from the hardware store was almost as much as the heatsink itself. I think its going to end up on the other side of the strut tower. There is a nice empty space there I can utilize. I don't really want it there, but for the sake of simplicity, thats where I am going to put it. There was a post around that had someone replacing the guts of the old module with the new HEI but I cant find it. I might do that, but mount the box on the firewall or something. I like that it would appear more period correct. I started looking more closely at the fuel system, pretty much all the rubber is dry rotted and unusable. Same with the vacuum lines, so I ended up ordering a bunch of hose and Ill just replace all of it. Im not sure about the hard lines yet. I jacked up and crawled under the car and drained the fuel tank. It was pretty much empty but the stuff that was in there was.......nasty. The fuel was incredibly dark and full of debris. I know there is a place in town where I can get the tank reconditioned, so I'll look into that. While I was under there, I took some pics of the undercarriage. I dont think its too bad. It was a New Mexico car after all.

-
Winner winner chicken dinner, we have spark Now im gonna look into some heat sink and stew on where i want to mount it. Time to move on to the fuel system. I know the fuel is toast and the tank will need to be cleaned. I’ll probably start on removing that and see what condition the lines are in. I’m excited!
-
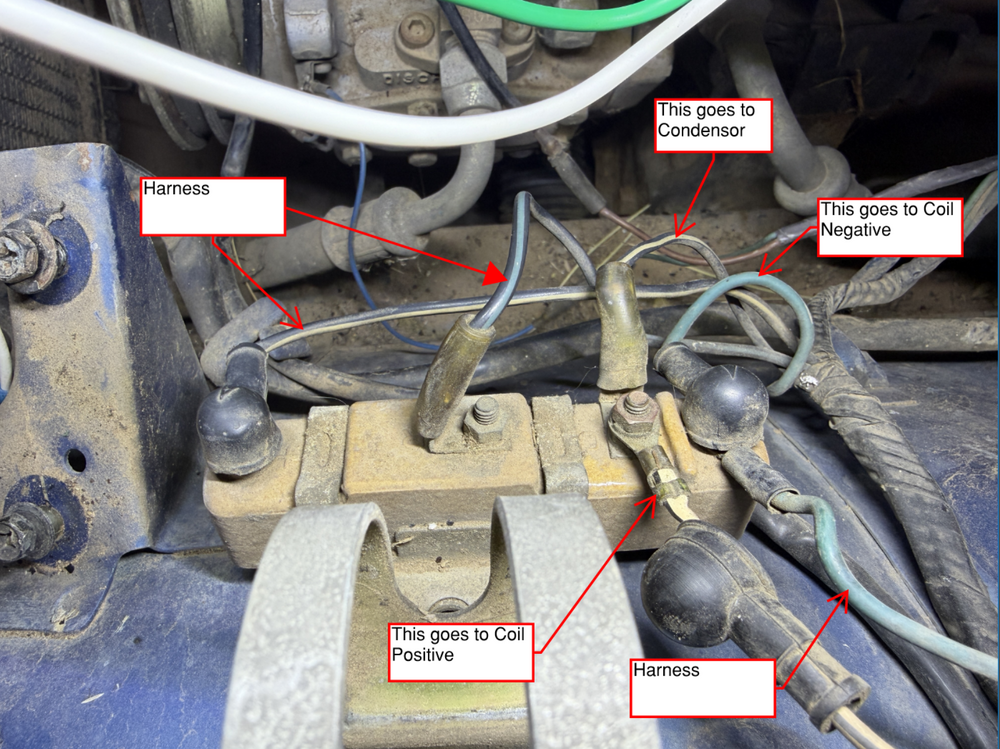
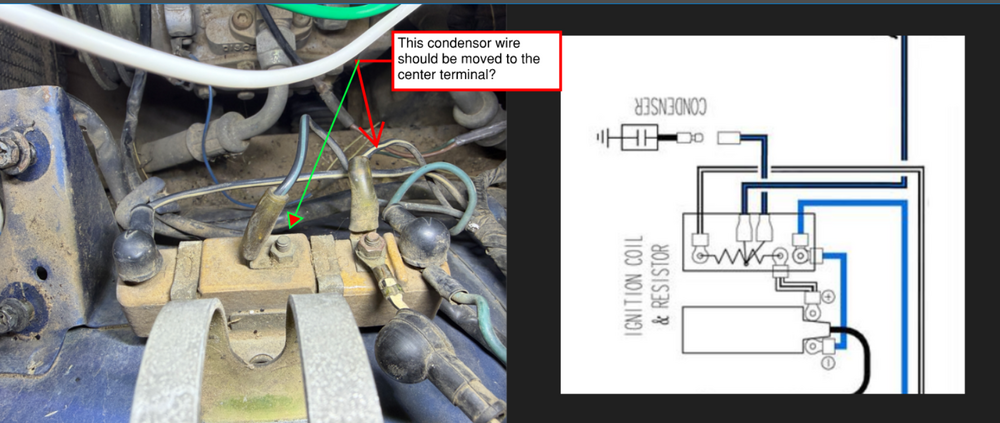
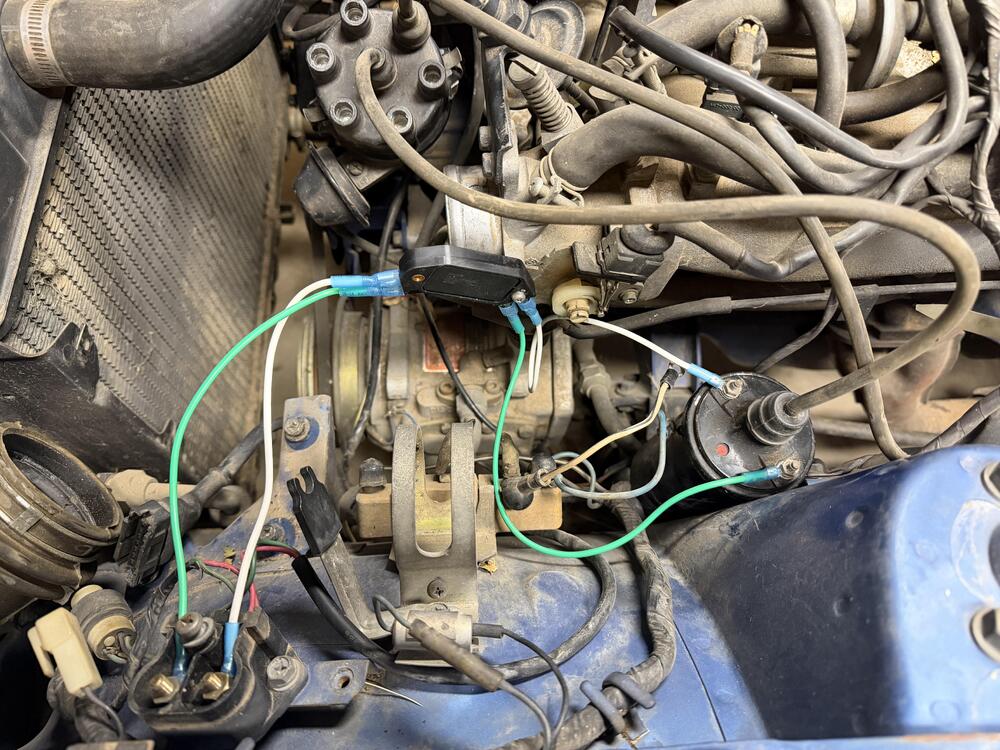
This makes 100% sense. As far as the other questions When I tried it last week I had the coil wire attached and one spark plug lead with a spark plug at the end laid on the block, not the best I know. I was mainly looking for any indication to get moving in the right direction. The car came with an inline spark tool. I am cranking the engine with no spark plugs in the block. I am cranking with many full rotations as I am aware that I will only get spark as the rotor makes the connection. Am I missing something? I'm not a legit mechanic and this is the only way im aware of. Is there another procedure that I'm that Im not aware of? The old module is not installed. From the reading I have done, this is the way The module location is definitely temporary and is mounted through the hole with the large ferrule. My initial thought was to cut up the old module housing and is it as a heat sink or perhaps find an old heat sink from a PC. The PC option seems the best solution, but I haven't given it a ton of thought yet. I think they make heat sinks specifically for these modules as well. When you say this, it sounds like I will need it in the future? Is there a reason why I would leave it disconnected for now? Am I correct that the condenser is on the wrong terminal?
-
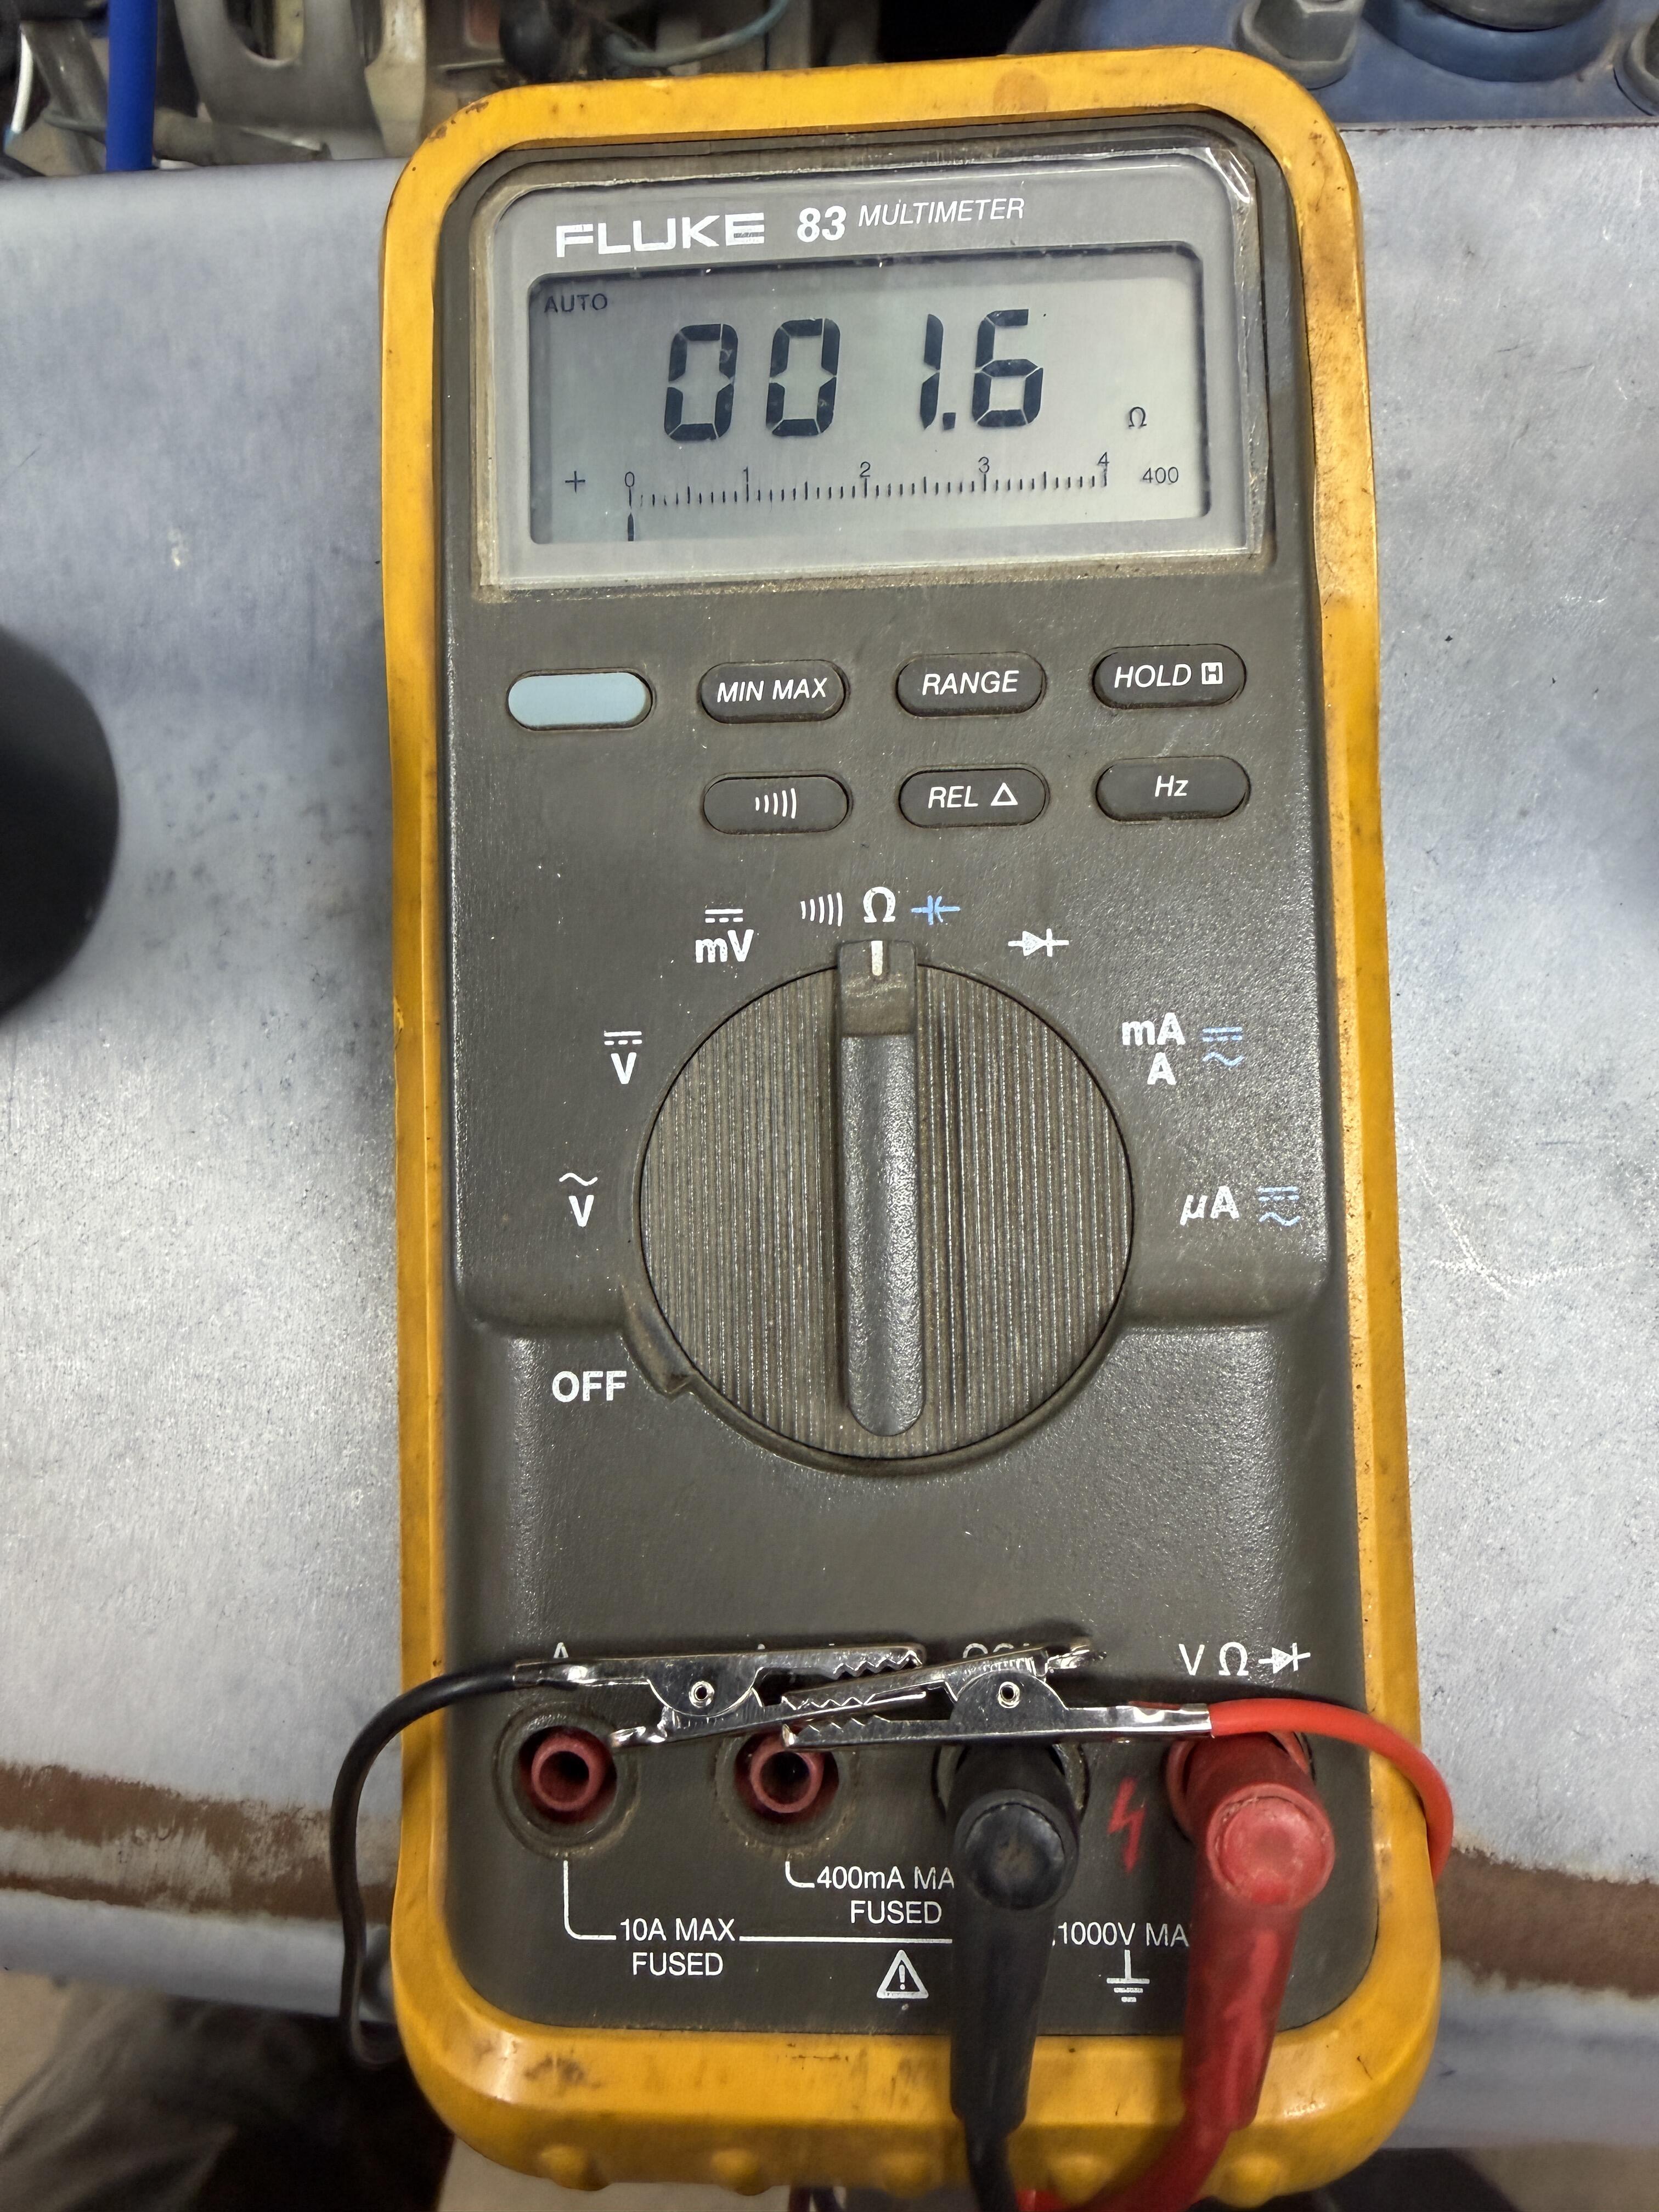
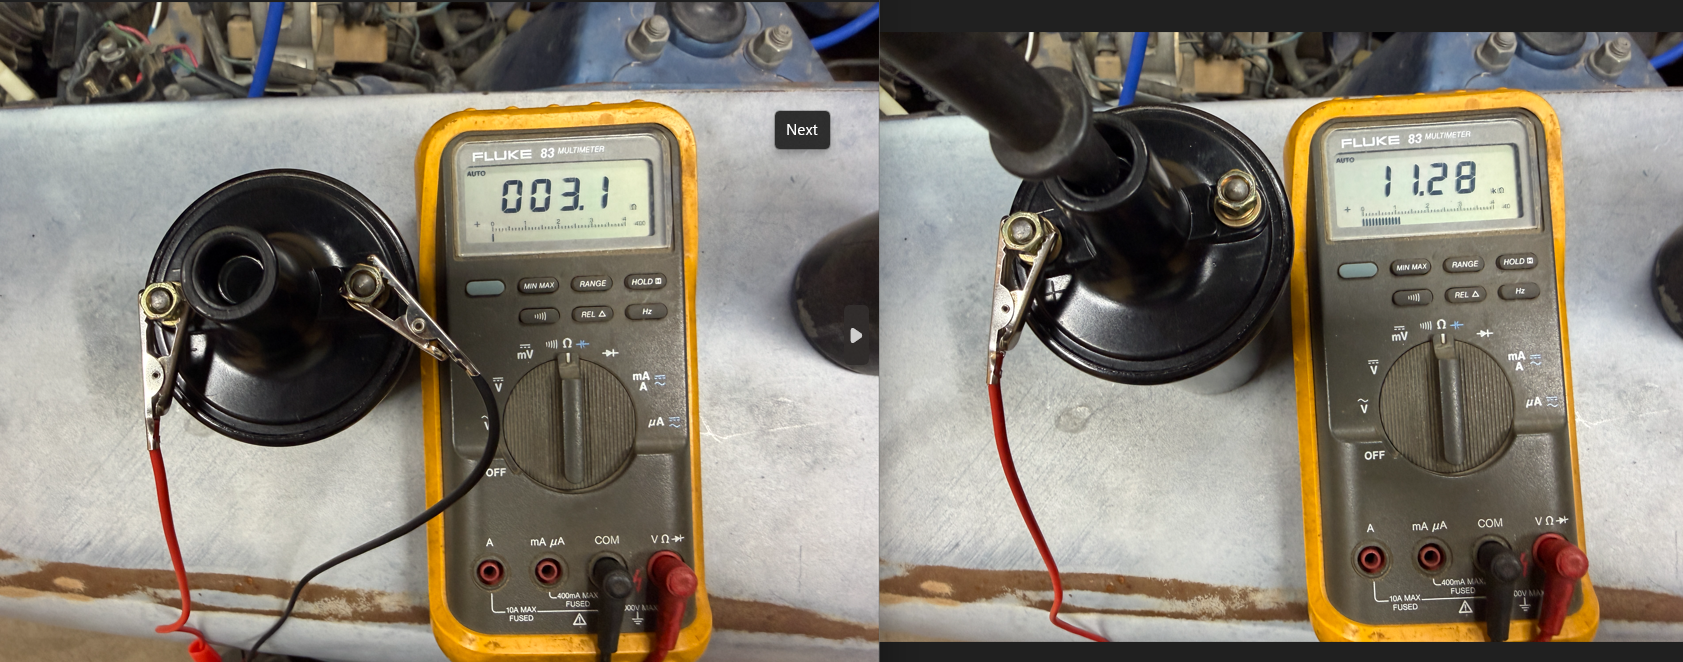
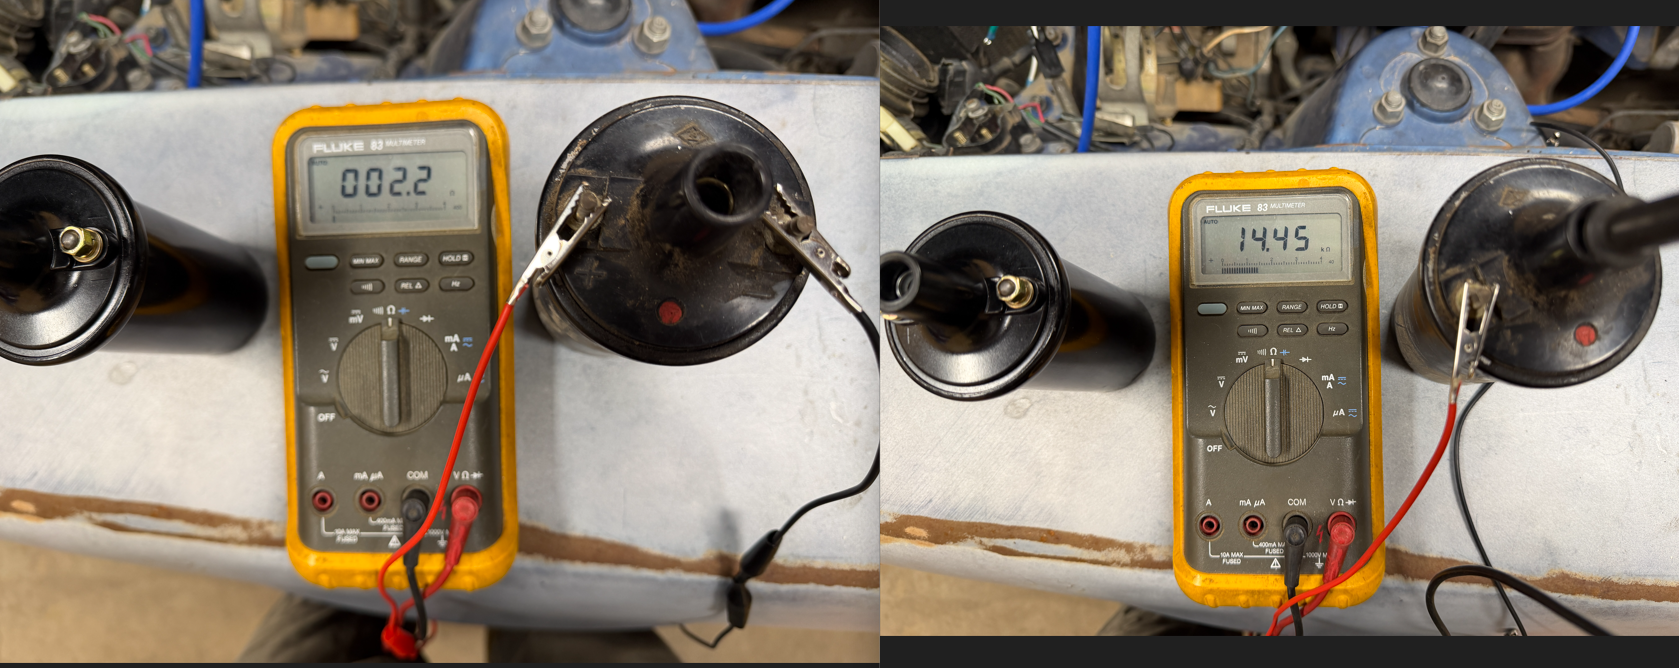
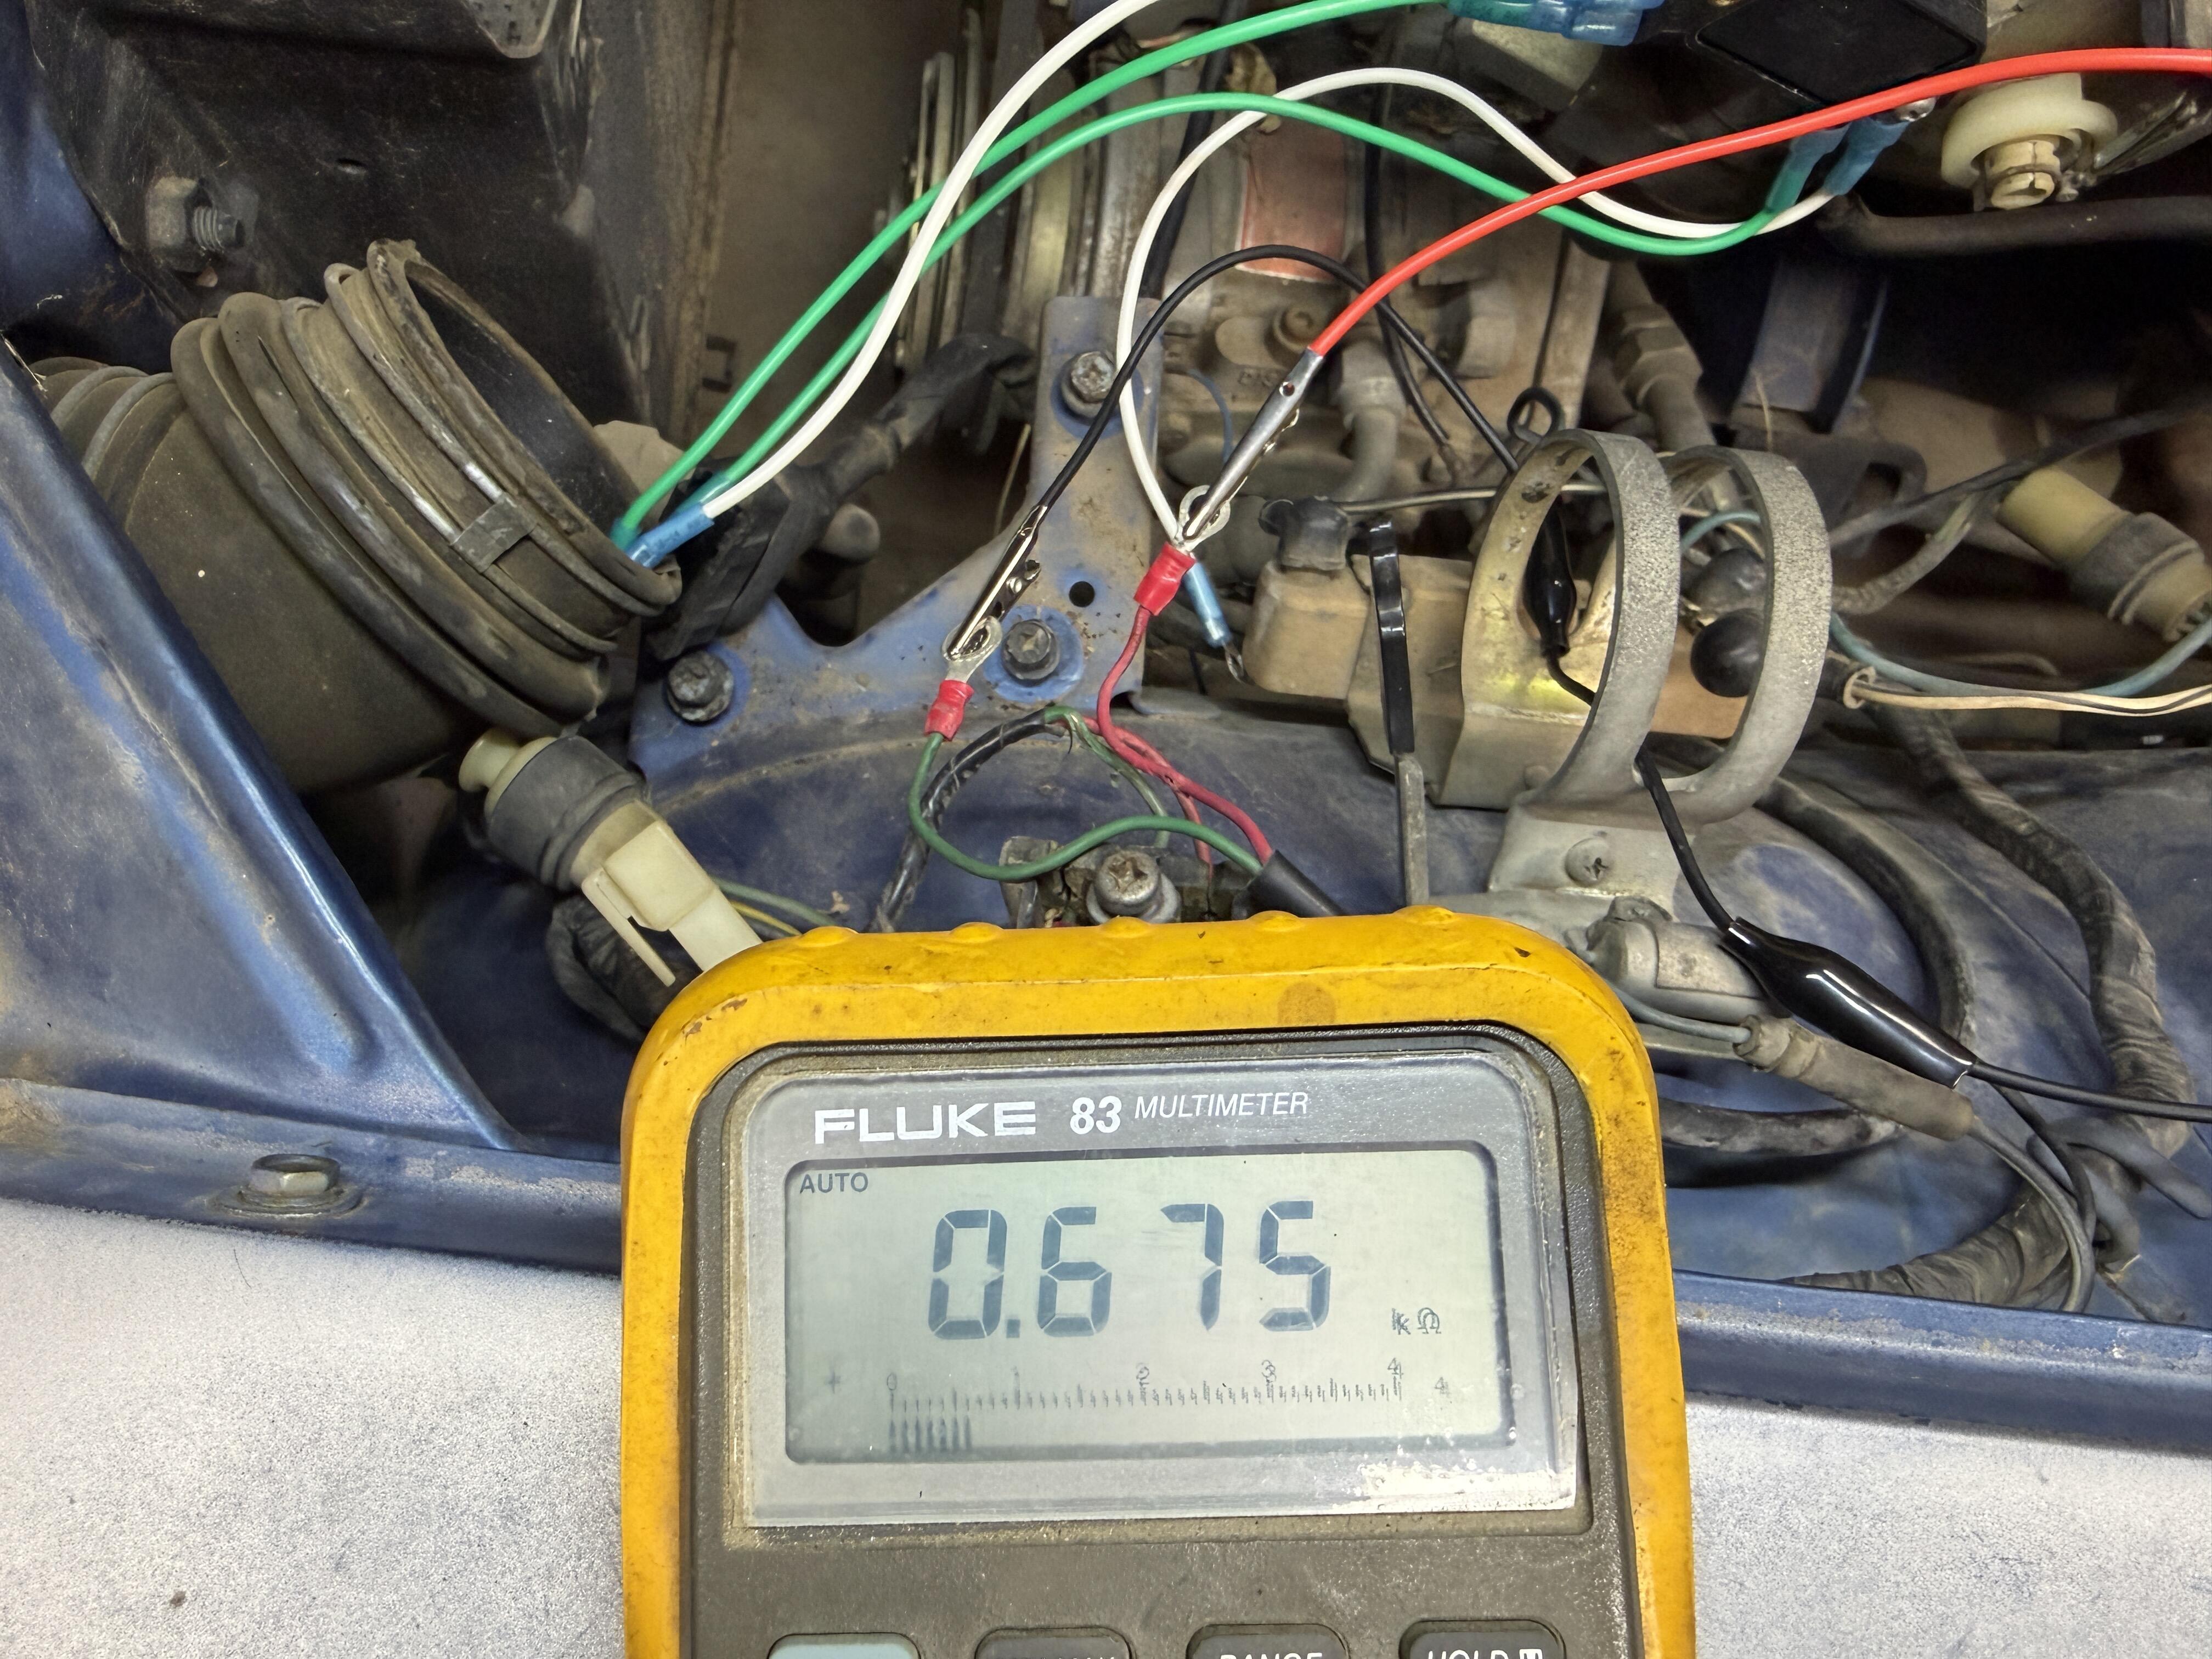
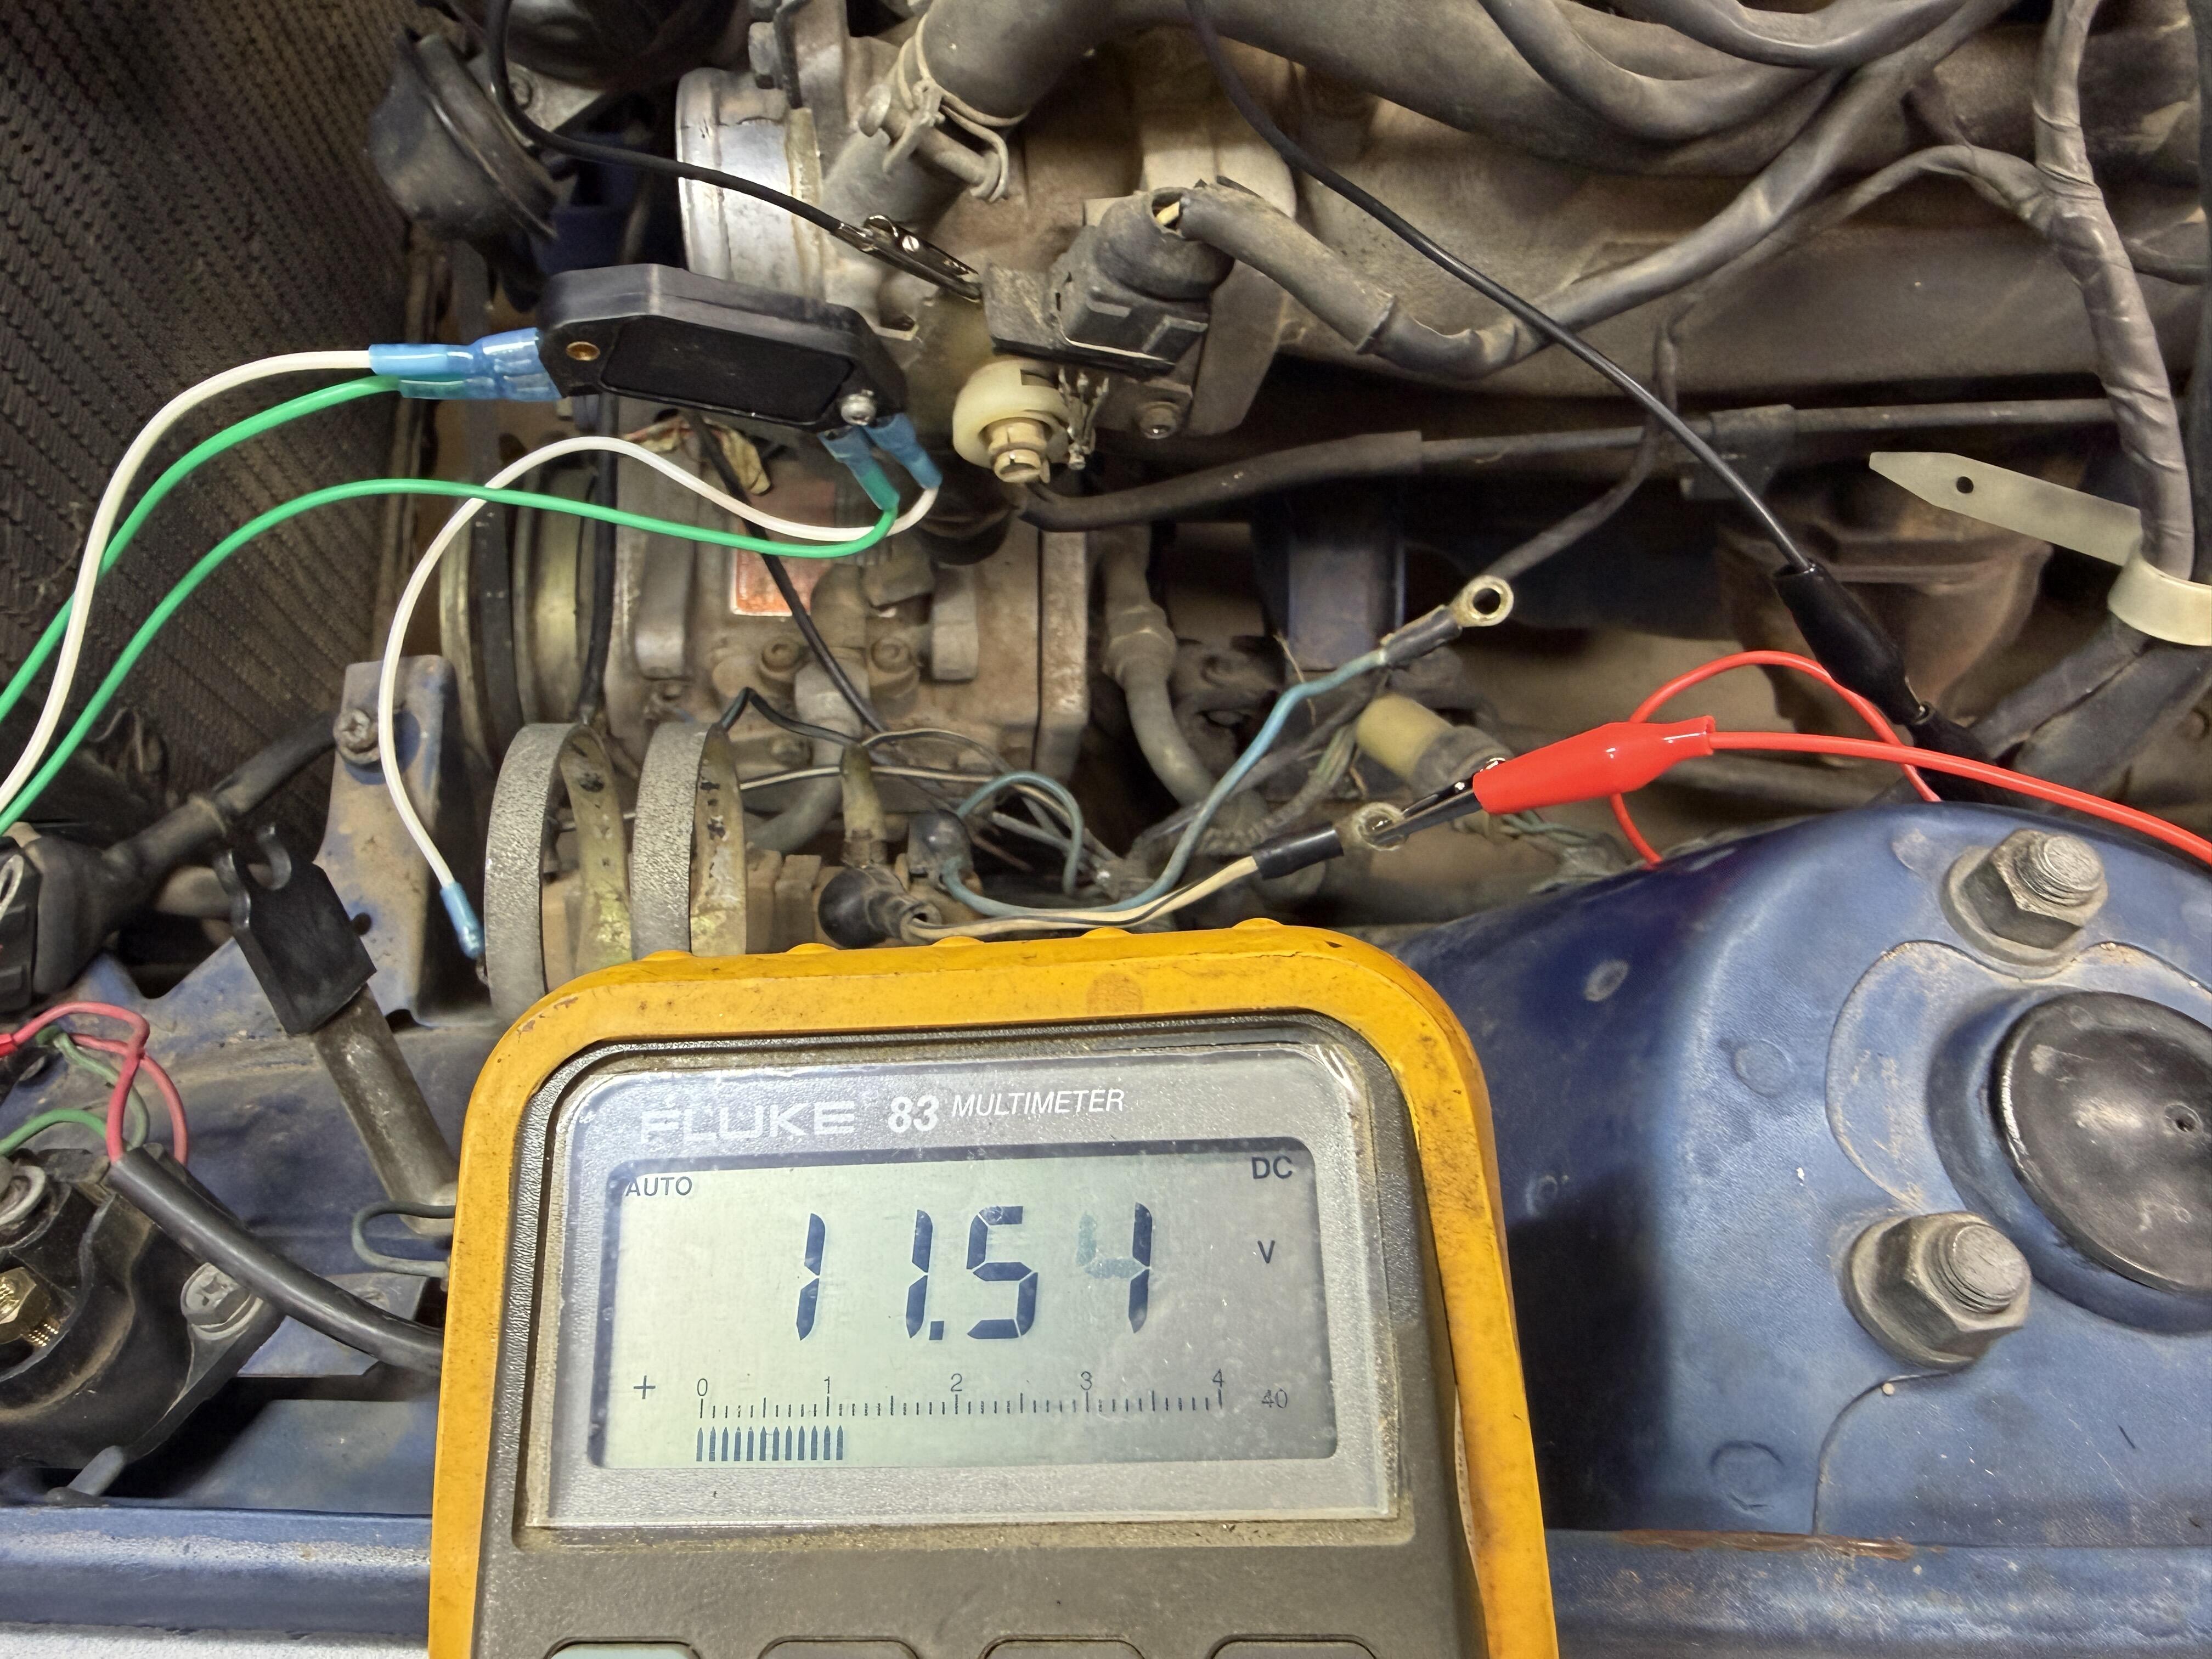
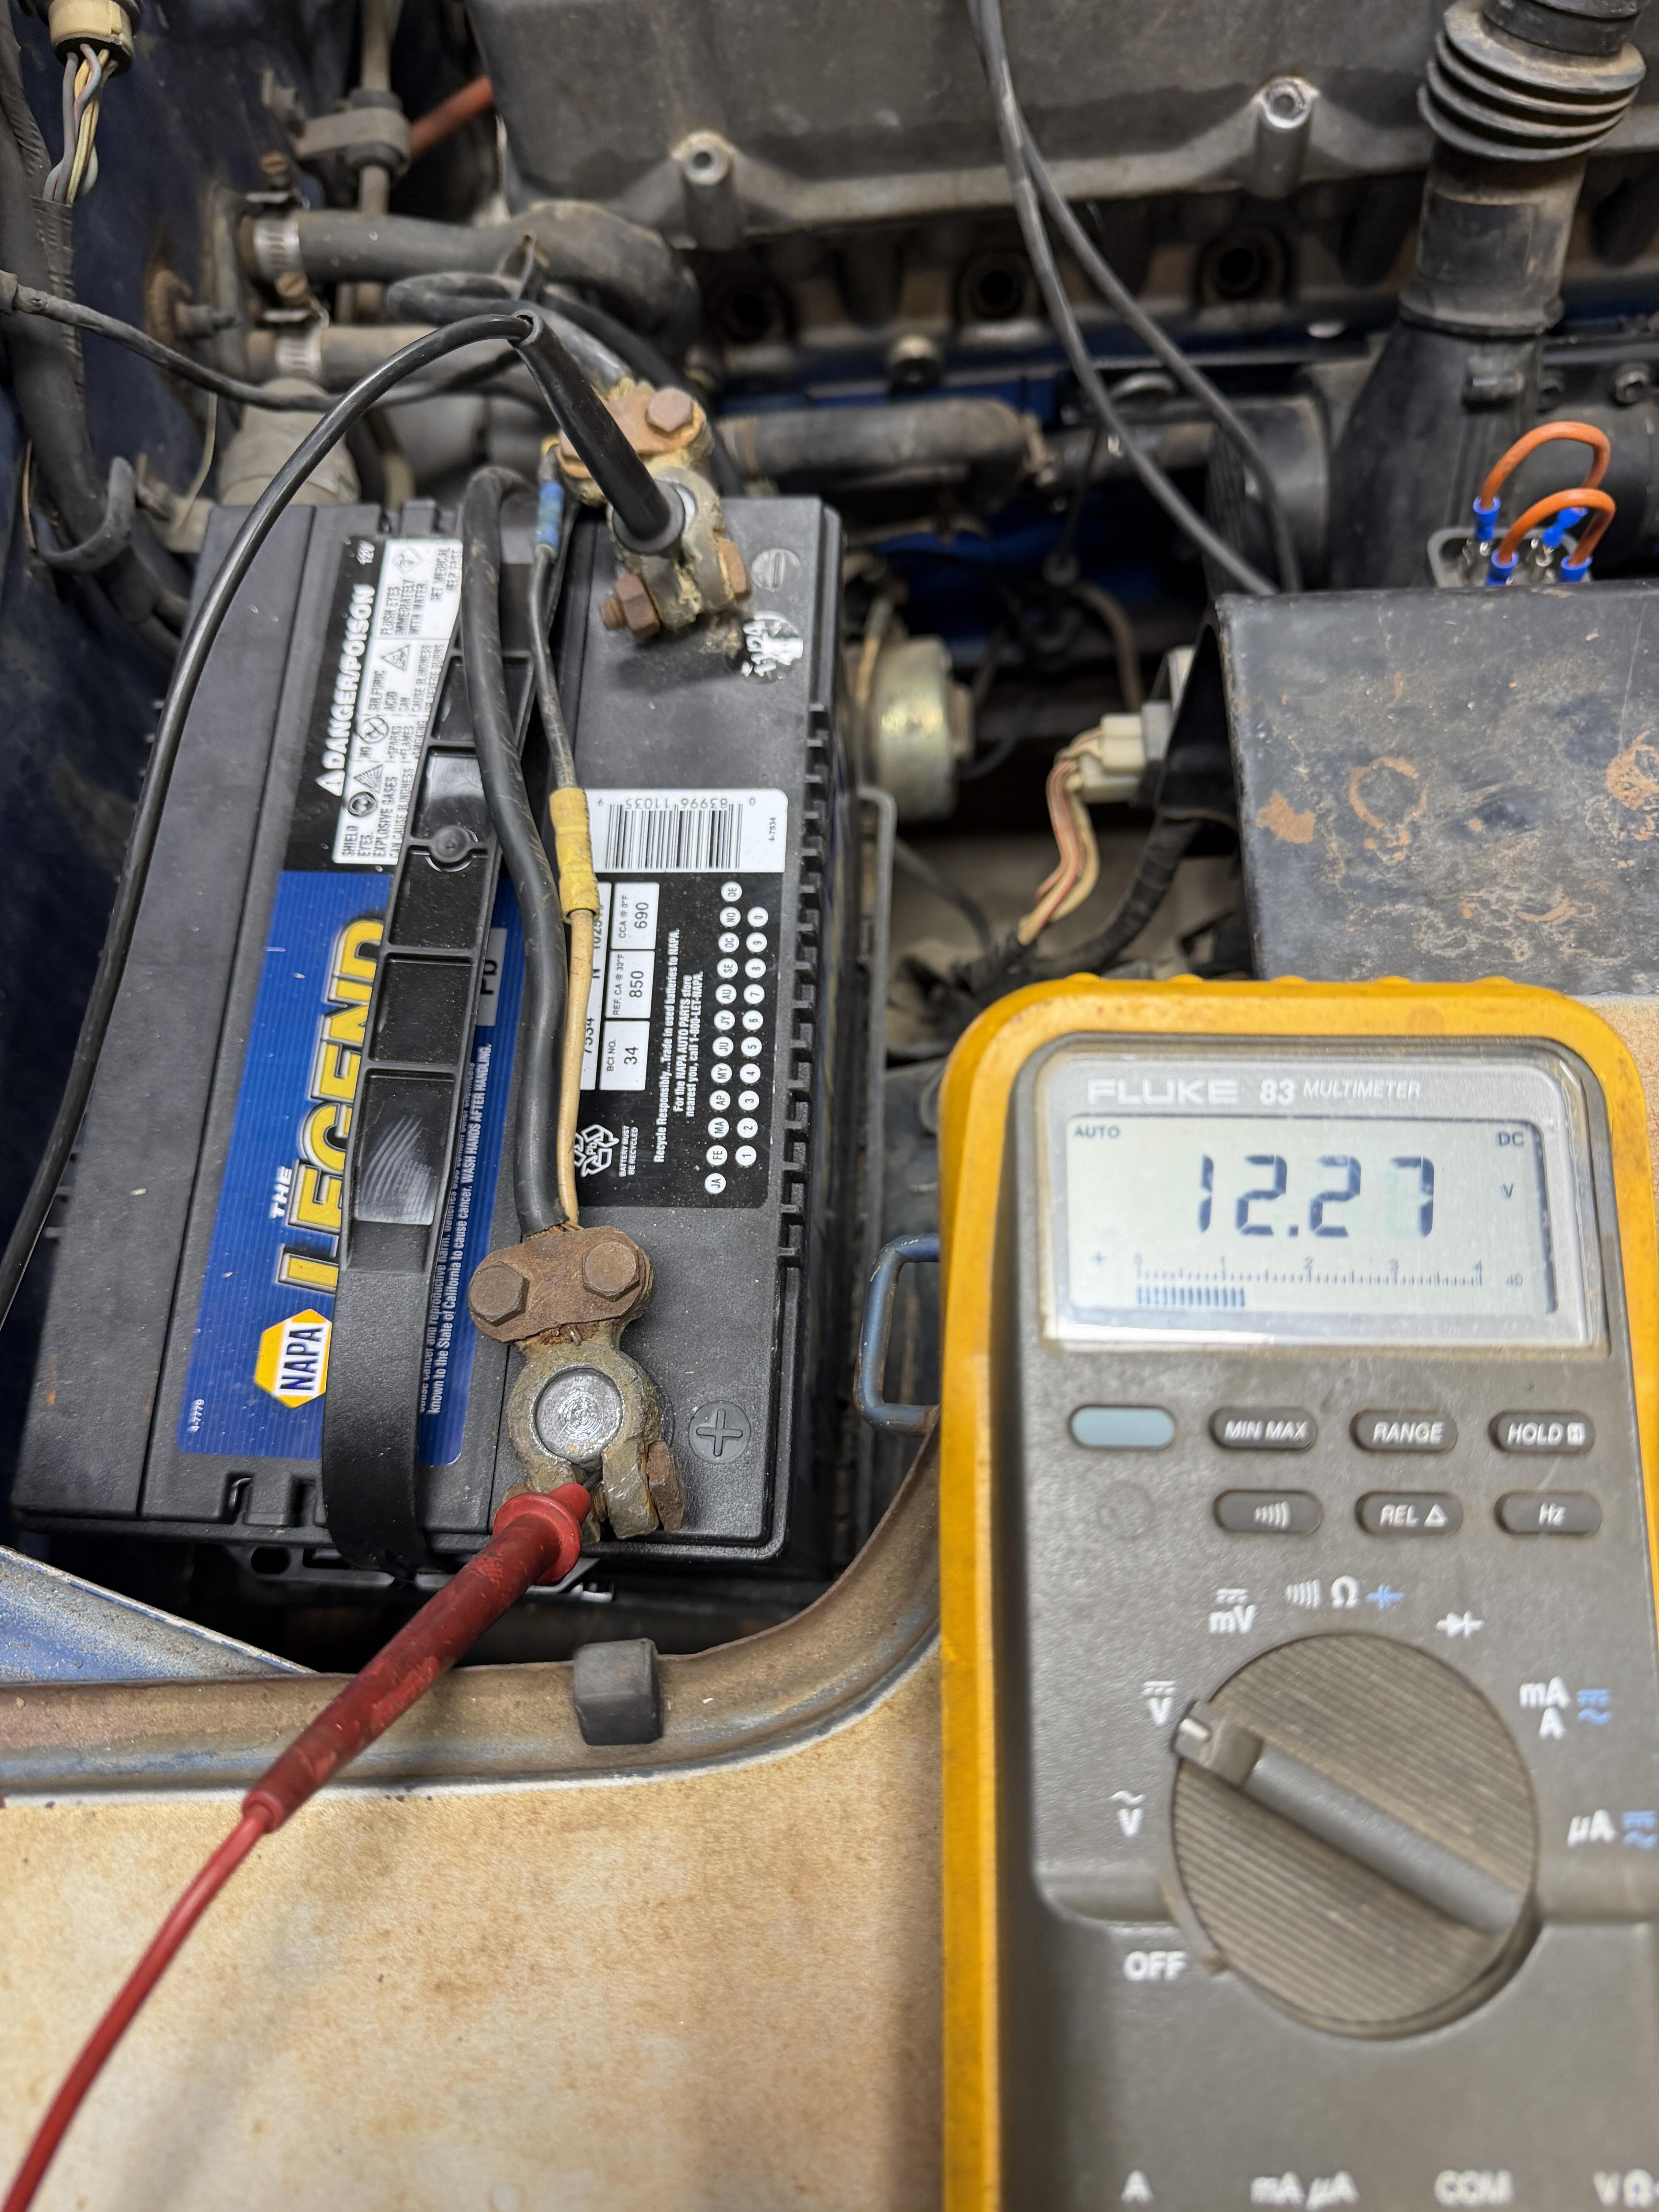
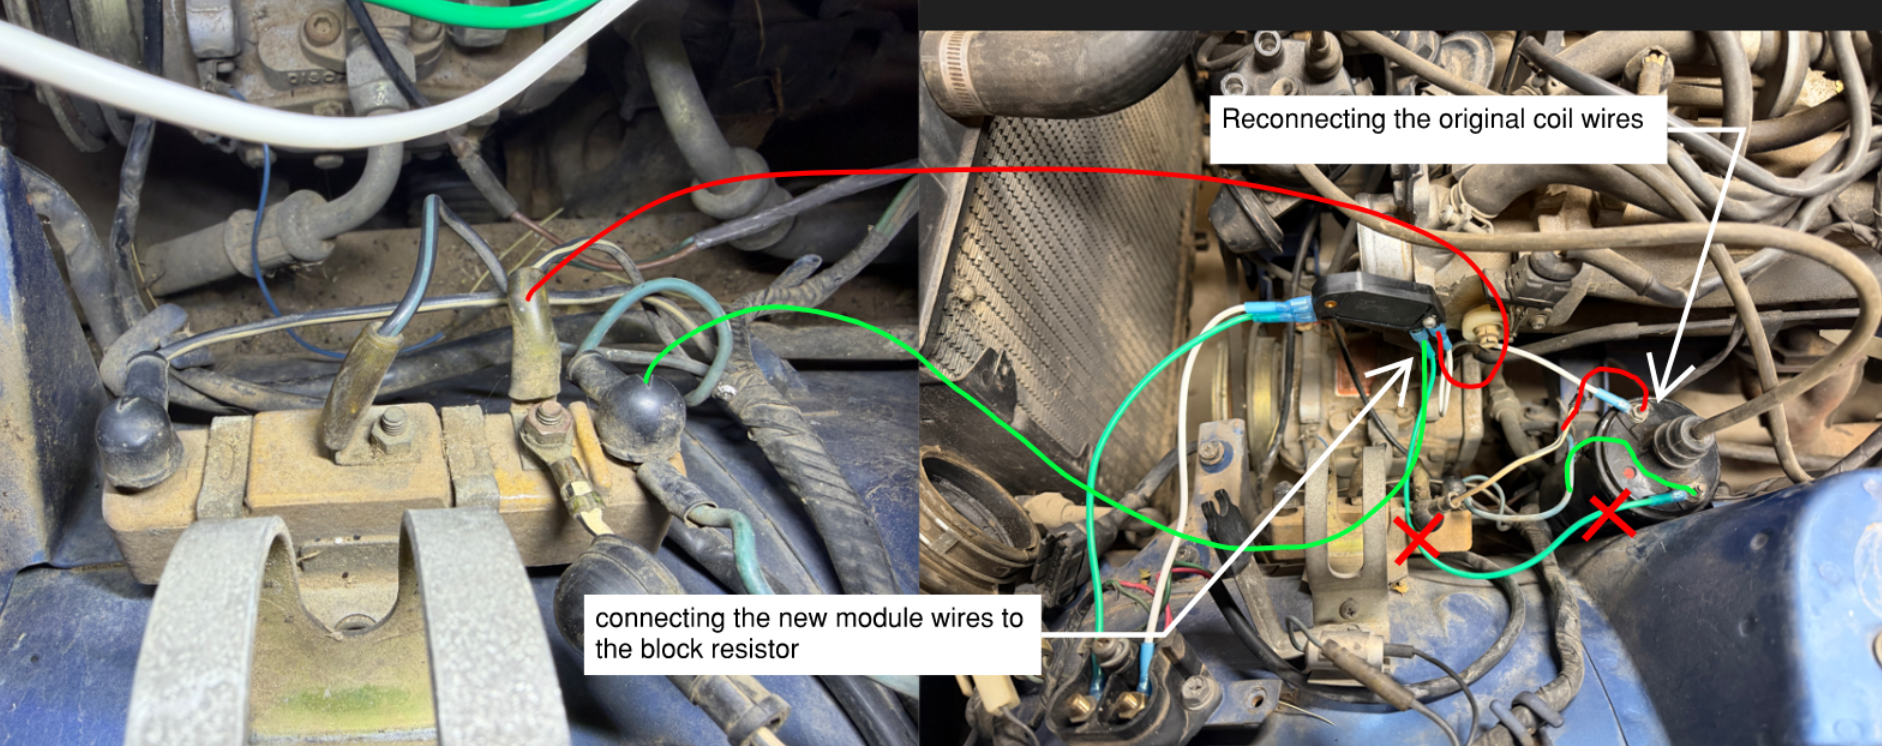
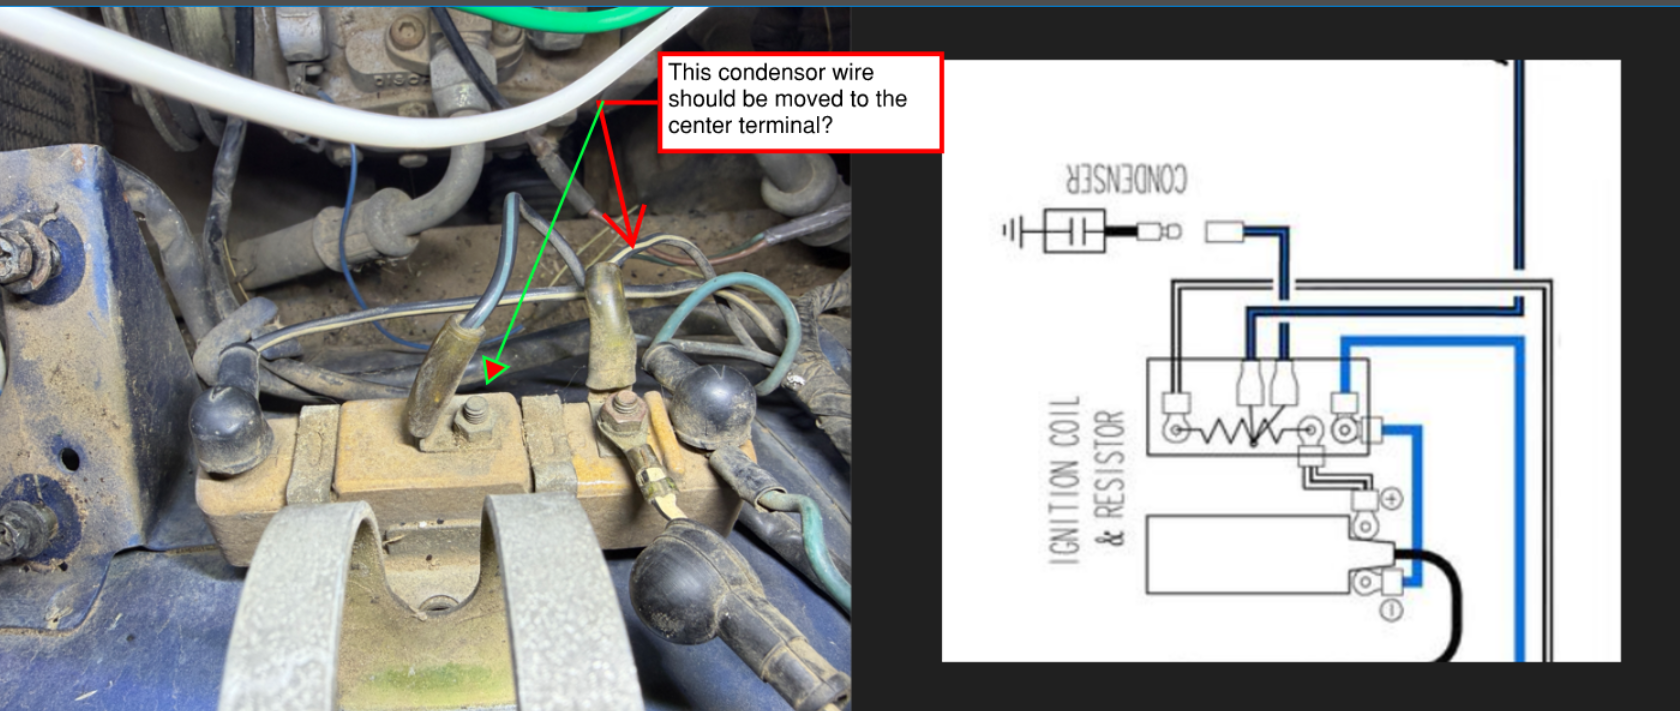
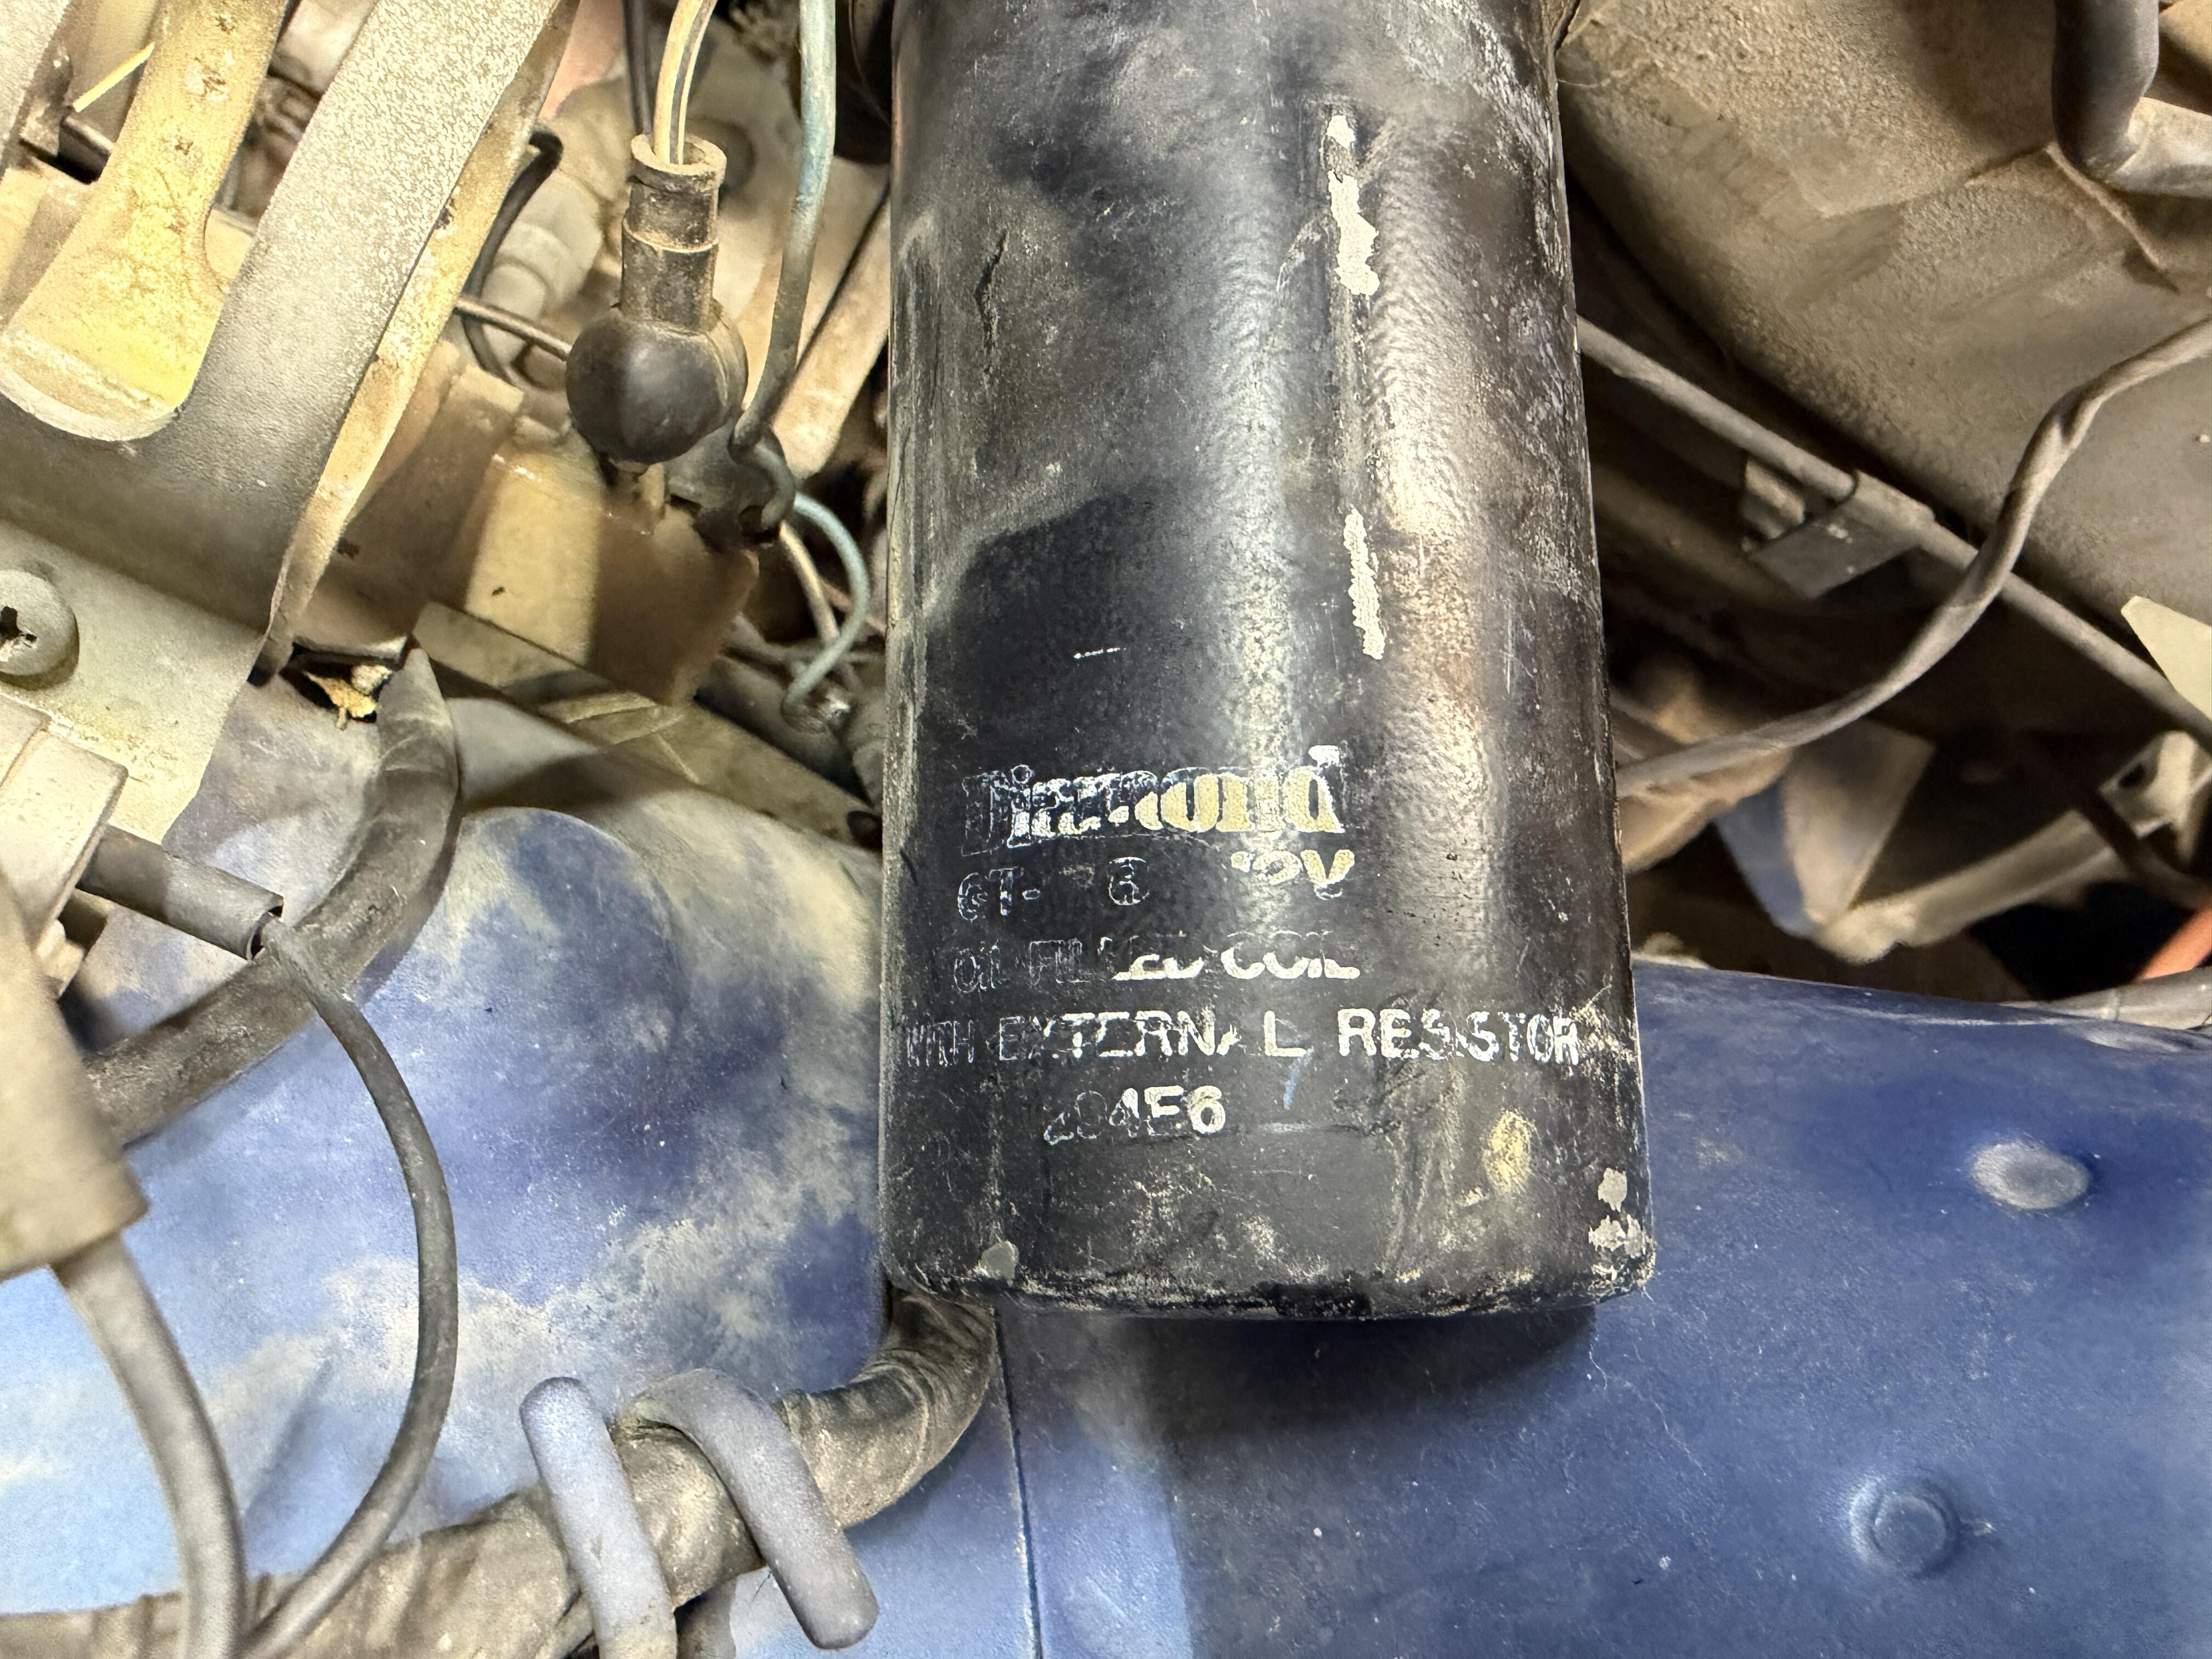
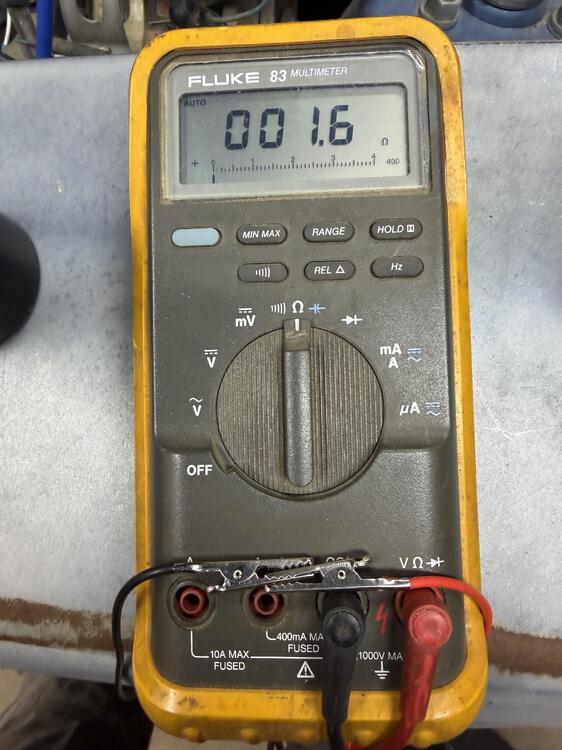
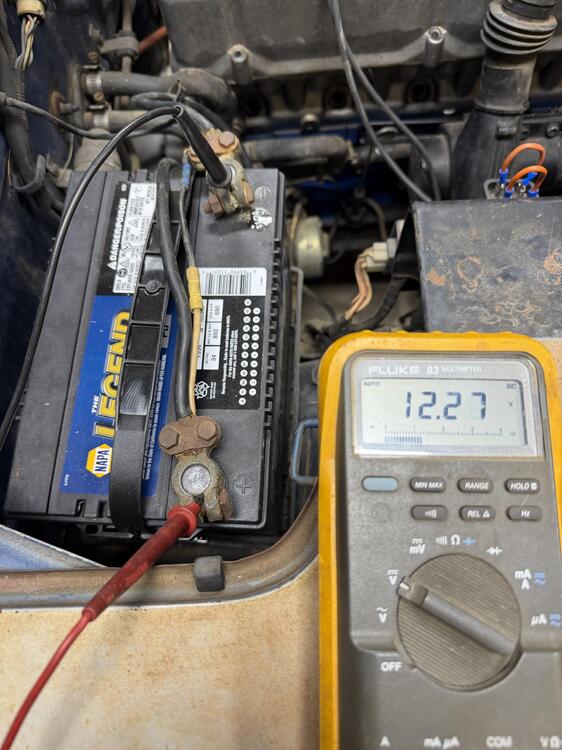
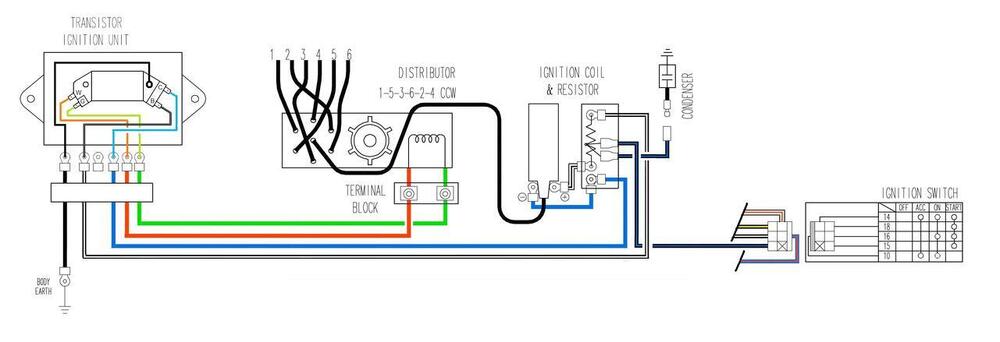
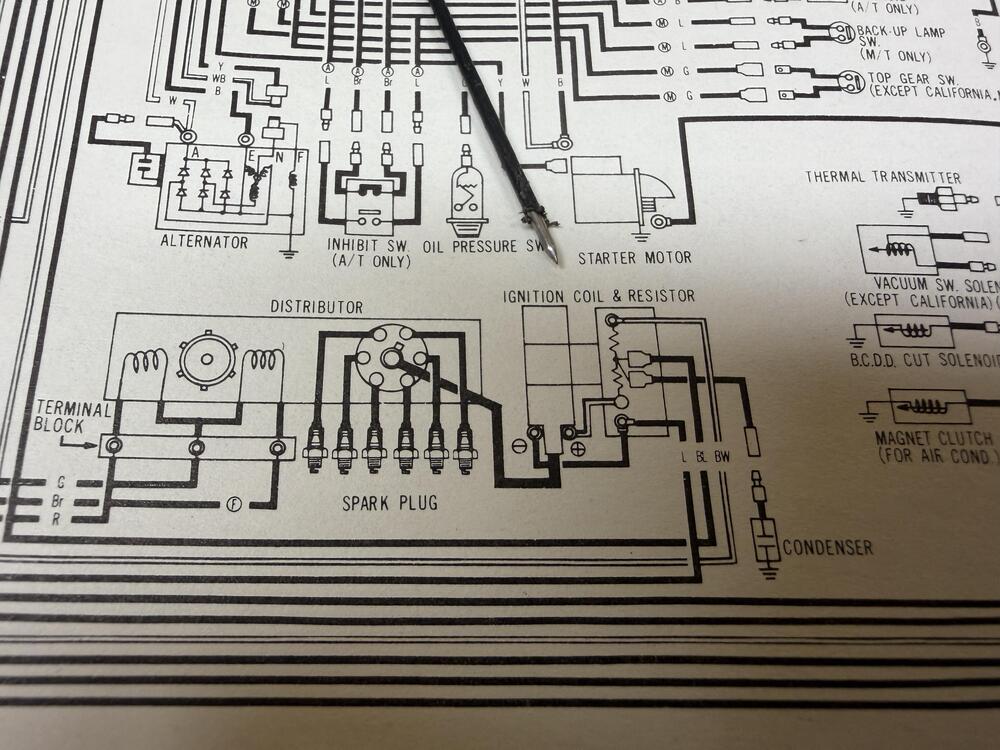
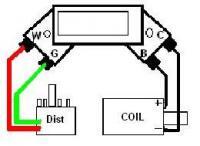
some new updates on my ignition woes and HEI module upgrade. Tested resistances on anything I currently have knowledge of. Near as I can tell, everything is as it should be. I tested both coils that I have using the method listed in the video below. I'm a sucker for detailed documentation and I had a hard time following some of the posts I found. So hopefully this will help others. The initial test was to test the resistance of the tester itself and it turns out mine needs a little recalibration. Not a huge deal as I understand that I just need to subtract the value from the readings that I take. It turns out that I am off by 1.6 ohms. It is a 30 year old meter though that I inherited from my dad. The readings on the new coil. 3.1 ohm (1.5ohm corrected) between the + and - terminals and 11,280 ohms between the positive and center. I purchased this (amazon) coil. It is suppose to be a stock replacement. Pretty similar readings on the old coil. I kinda figured the old was was good, but meh, why not replace it just in case. 2.2 ohm (.6 ohm corrected) between the + and - terminals and 14,450 ohms between the positive and center. Also tested resistance on the pickup coil in the distributor and it reads about 675 ohms. According to this post by Zedhead it should read around 720ohms. I feel like this reading is acceptable. I checked the voltage to the positive side of the coil with the ignition on (white w/ black stripe) as well as suggested by Fastwoman in this post. As well as the battery itself which is new but i have to get a charger on it. The voltages with the ignition on and off were practically identical. With that aside, im now looking into the wiring for the new HEI module. There are tons of articles on this, but it seemed hard for me to find the info I needed, which was wiring the module. Nearly all the posts had the basics, but there was a lot of discussion about using/not using the block resistor and/or a different coil. Couple that with the myriad of wiring diagrams I ran into. It was hard to determine what was proper. At the moment I am attempting to use a stock coil with a HEI module. Here are just a few of the discussions I looked at. GM HEI Module Install by Scanf Fitting a HEI Module in a Transistor Ignition Unit 1977 280z This was the most promising diagram I could find as listed in the second link. My confusion seems to be around what I have vs what is shown here. This diagram is also identical to what I have in the FSM One issue I have with the FSM is that the wire colors don't match. But I am also not 100% this is the original wire loom yet. or maybe Im just not smart enough to decern what the wire color short hand is. Could it be possible that my condenser is on the wrong terminal. Im hesitant to just start moving and trying different wire combinations without some confidence that what I am doing is correct with the fear of making matters worse. Below is what I tried for the ignition module wiring last week. As I am writing this post I just noticed that I have the positive and negative wires backwards. If I am not mistaken, I still should be able to get some kind of spark out of it. There is another issue I'm concerned with. See more below. So now I know that the coil wires are backwards. but my other concern is weather or not I need to run the wires through the block resistor. I feel like by writing this post and working through my explanation, I should be. Instead of wiring the new module directly to the coil as shown in the following diagram that is listed in first link. (also happens to be the same post listed in the knowledge base). I should be unmodifying the existing wiring and attaching the leads to the corresponding terminals on the block resistor as shown below. Assuming I am correct, Now the only unresolved issue is where the condenser is suppose to be. According to the FSM its suppose to be connected to the center terminal? How is my logic so far?


-
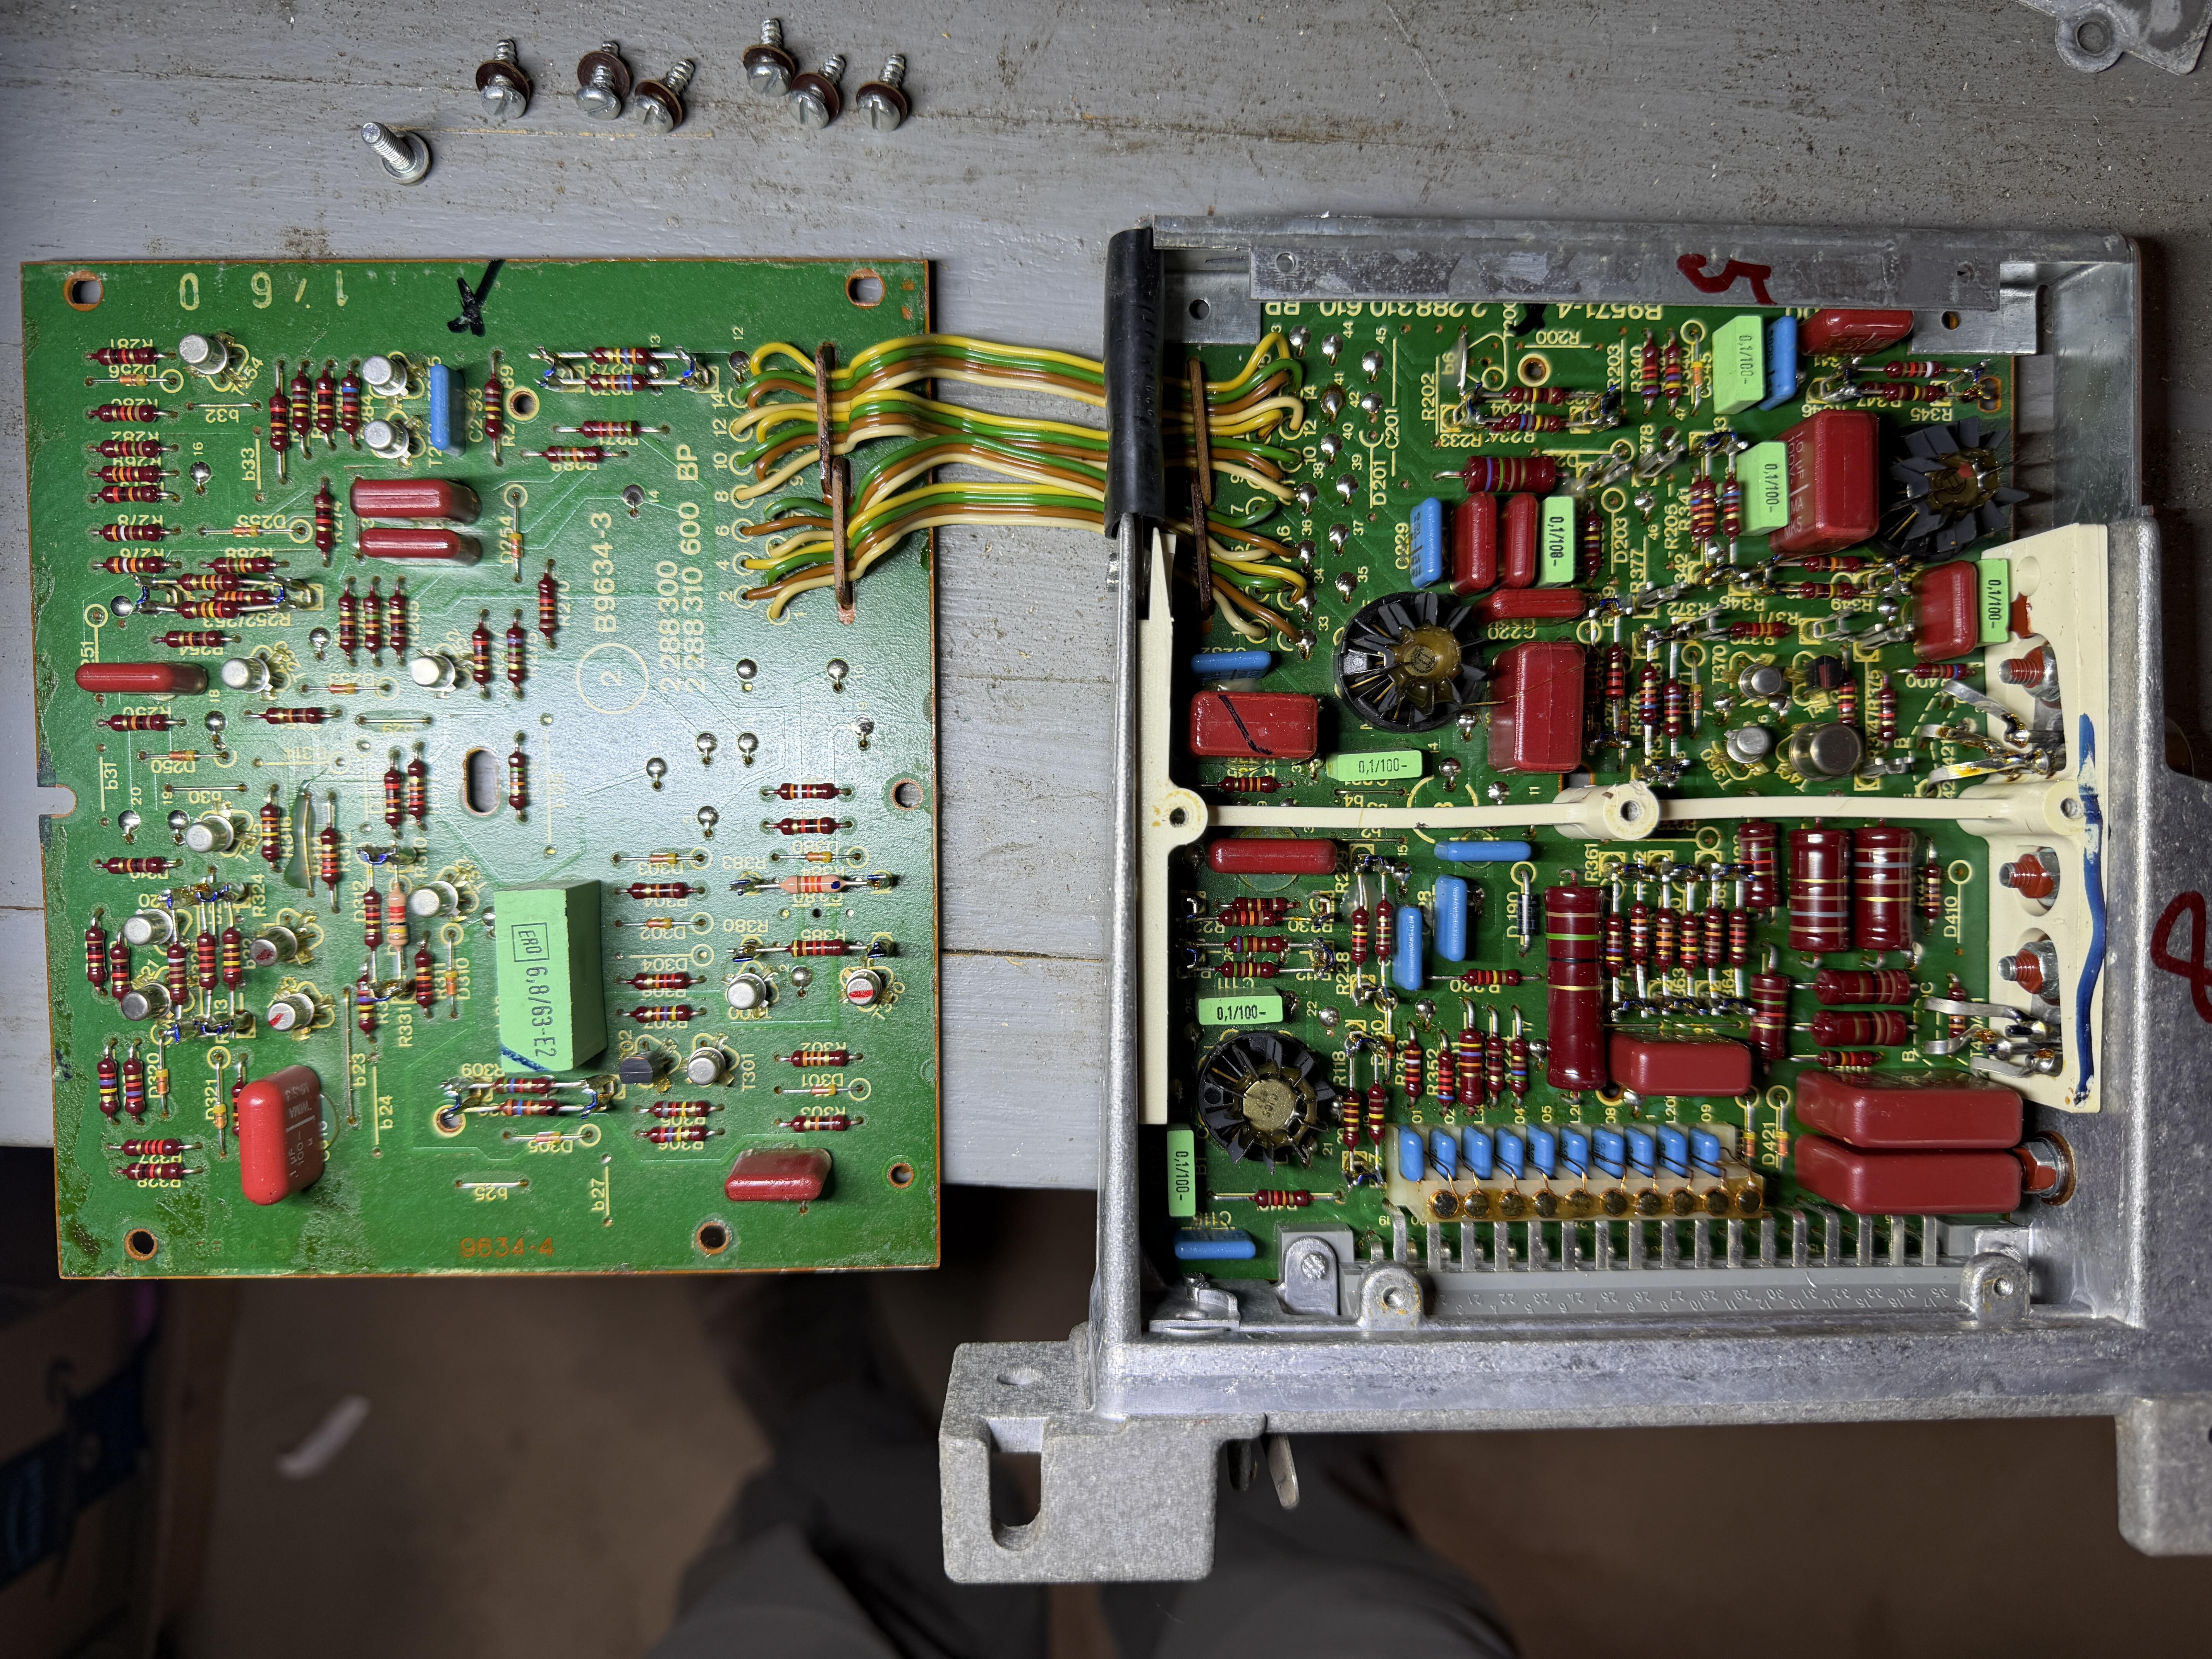
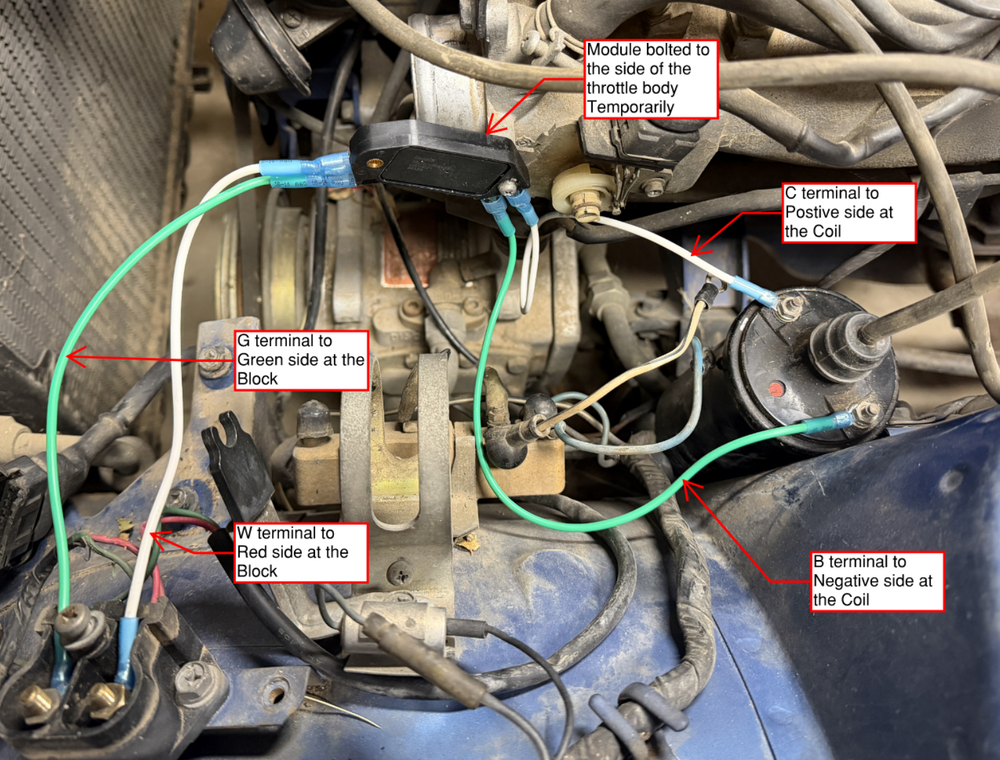
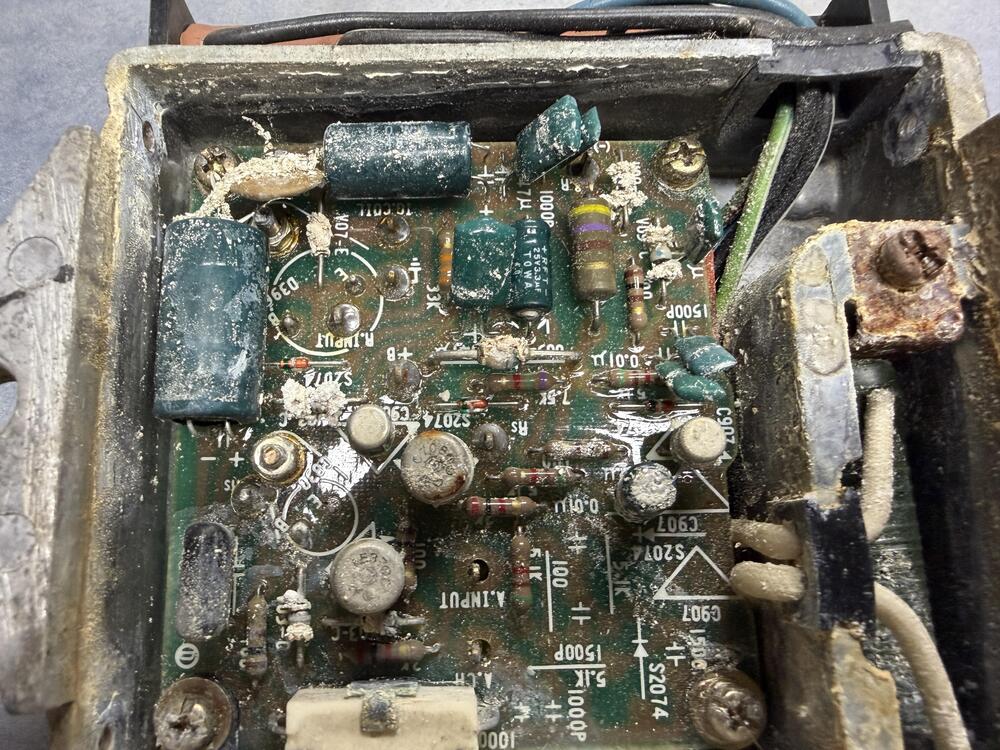
I pulled the computer out and took it apart. It looks really good, so I put it back together and started on the ignition module replacement. I followed this diagram that I got from the knowledge base and tried it out, but no joy. I didnt see anything about needing to run it through the ballast resistor, so I left it out of the new circuit. Im not sure which side is + on the coil so I put the new green wire where the old one was. I found another post that had a resistance measurement for the pickup coil. Looks like its suppose to be around 720ohms. Ill check that next time im out. Im sure im missing something, but im was too tired to really use my brain. The module is bolted to the throttle body temporarily. And I broke out my new plug wires as well. Anyone have any suggestions?


-
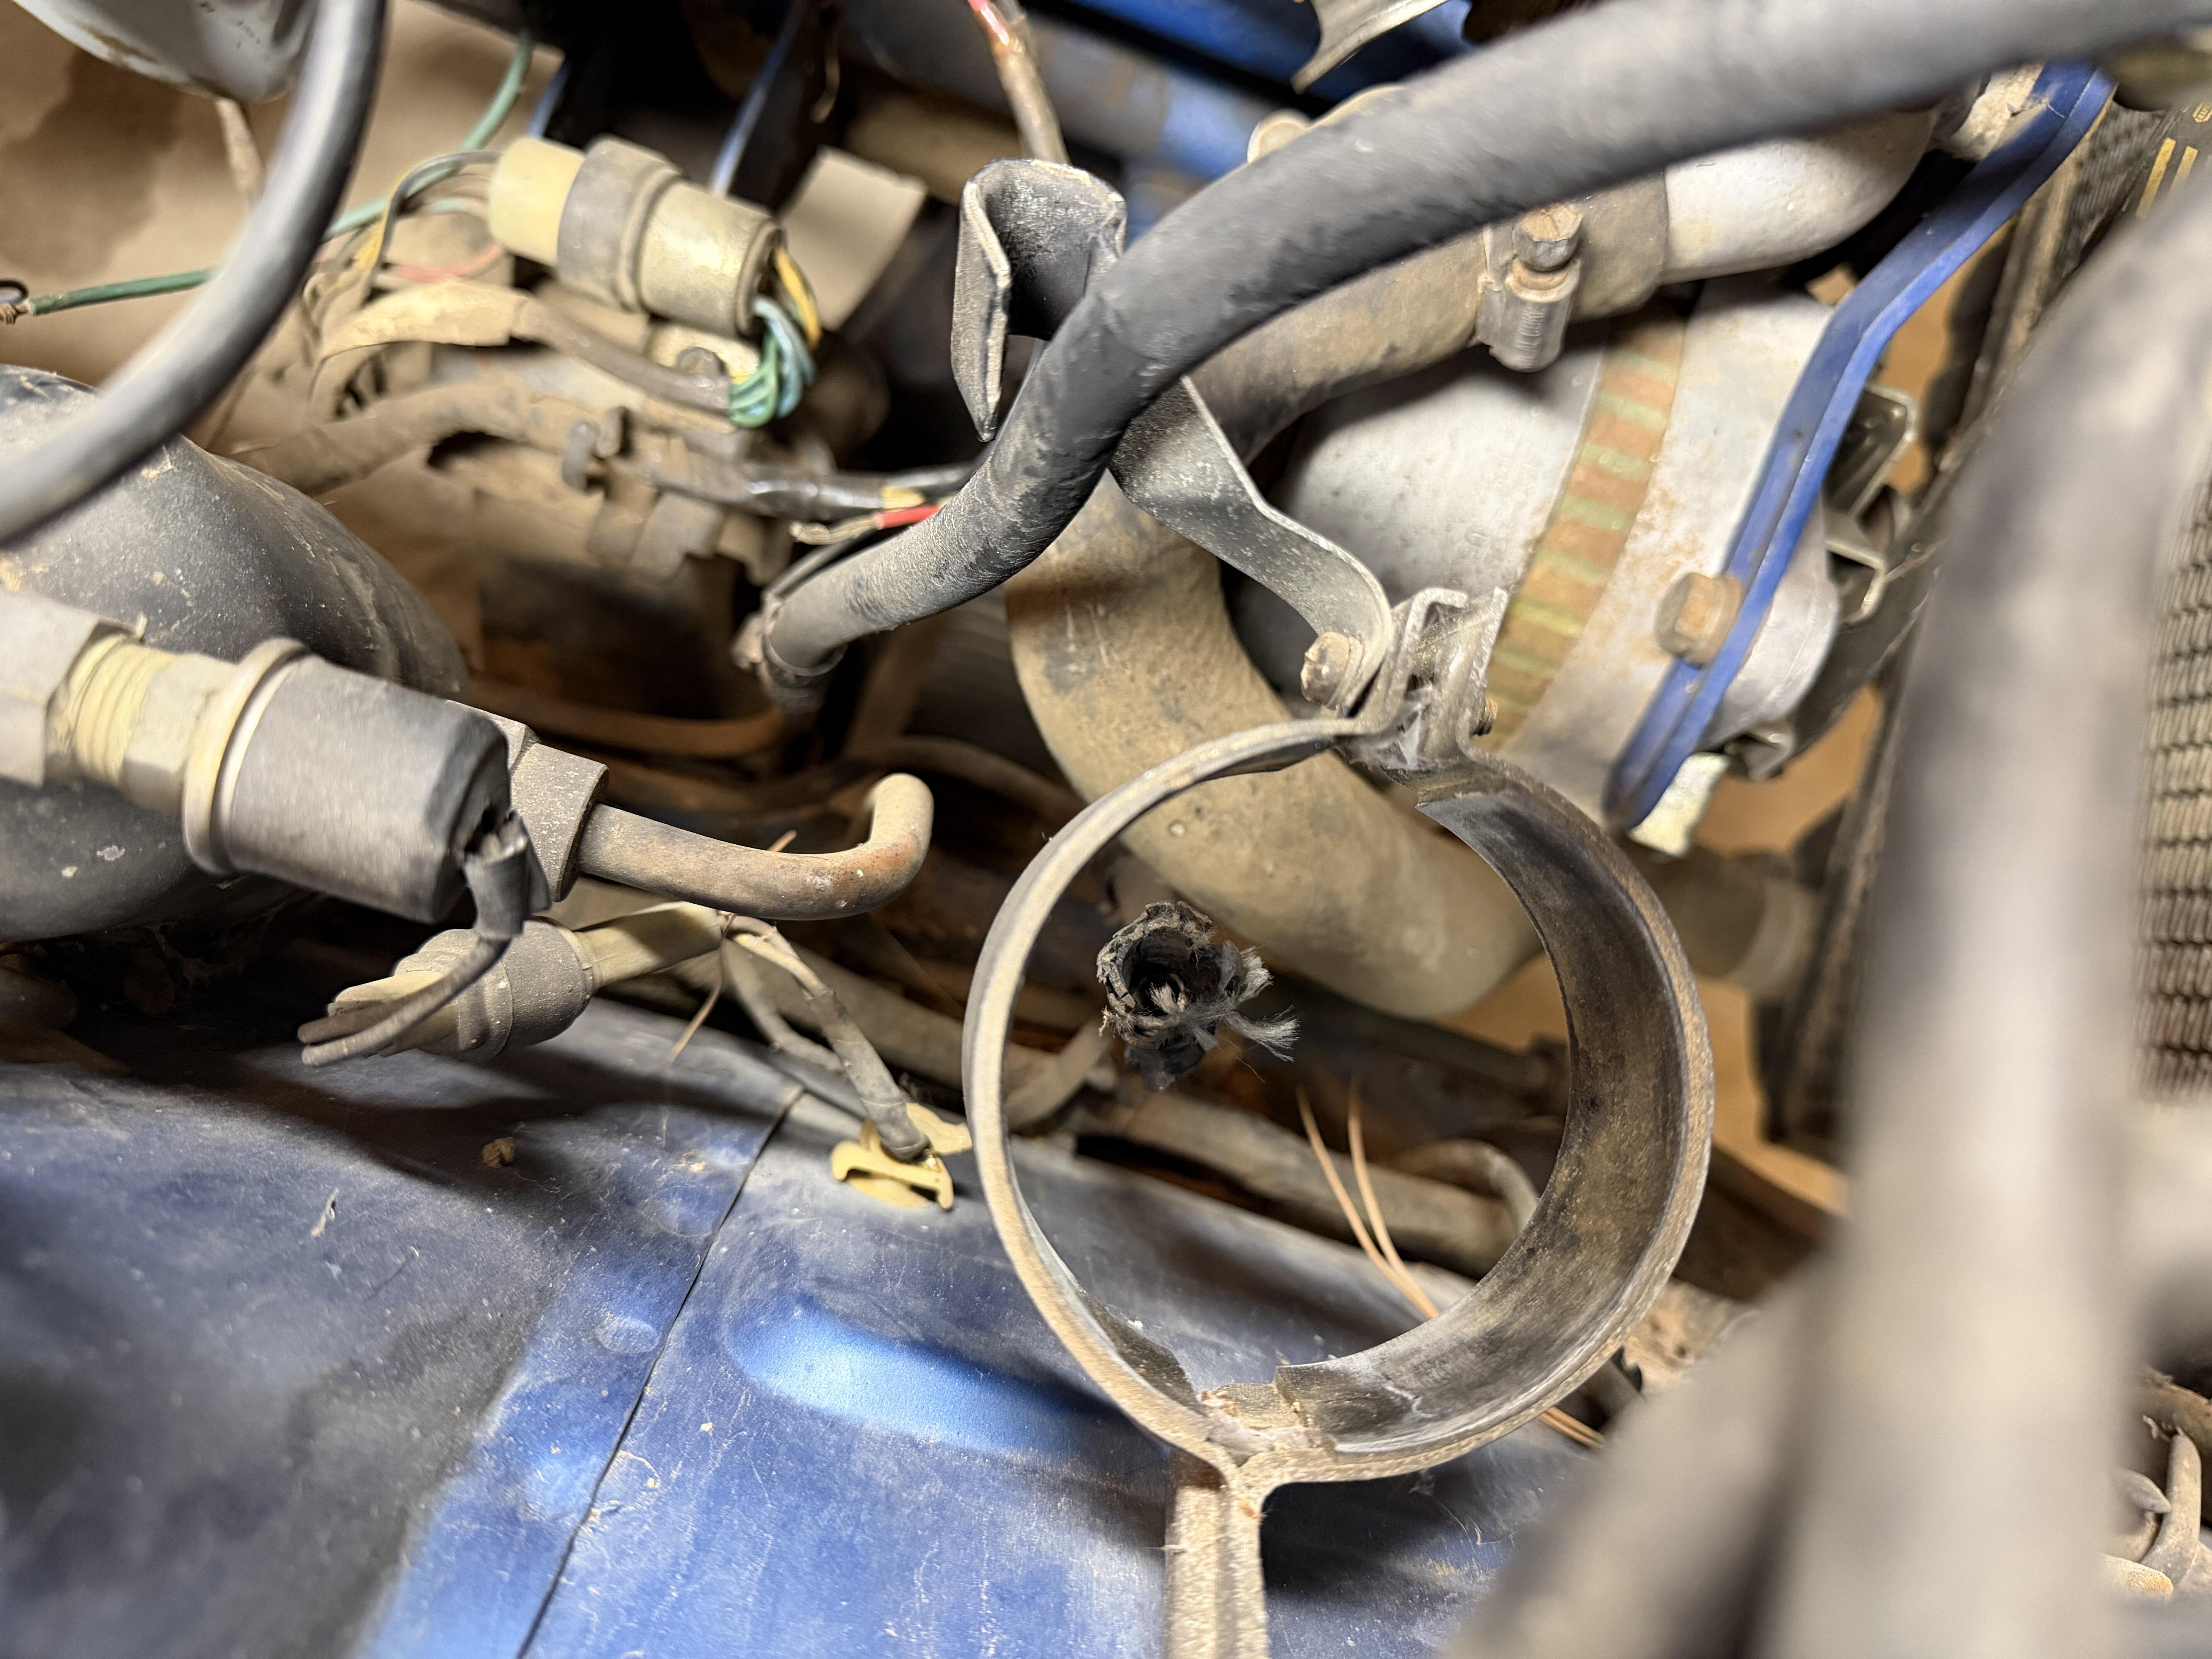
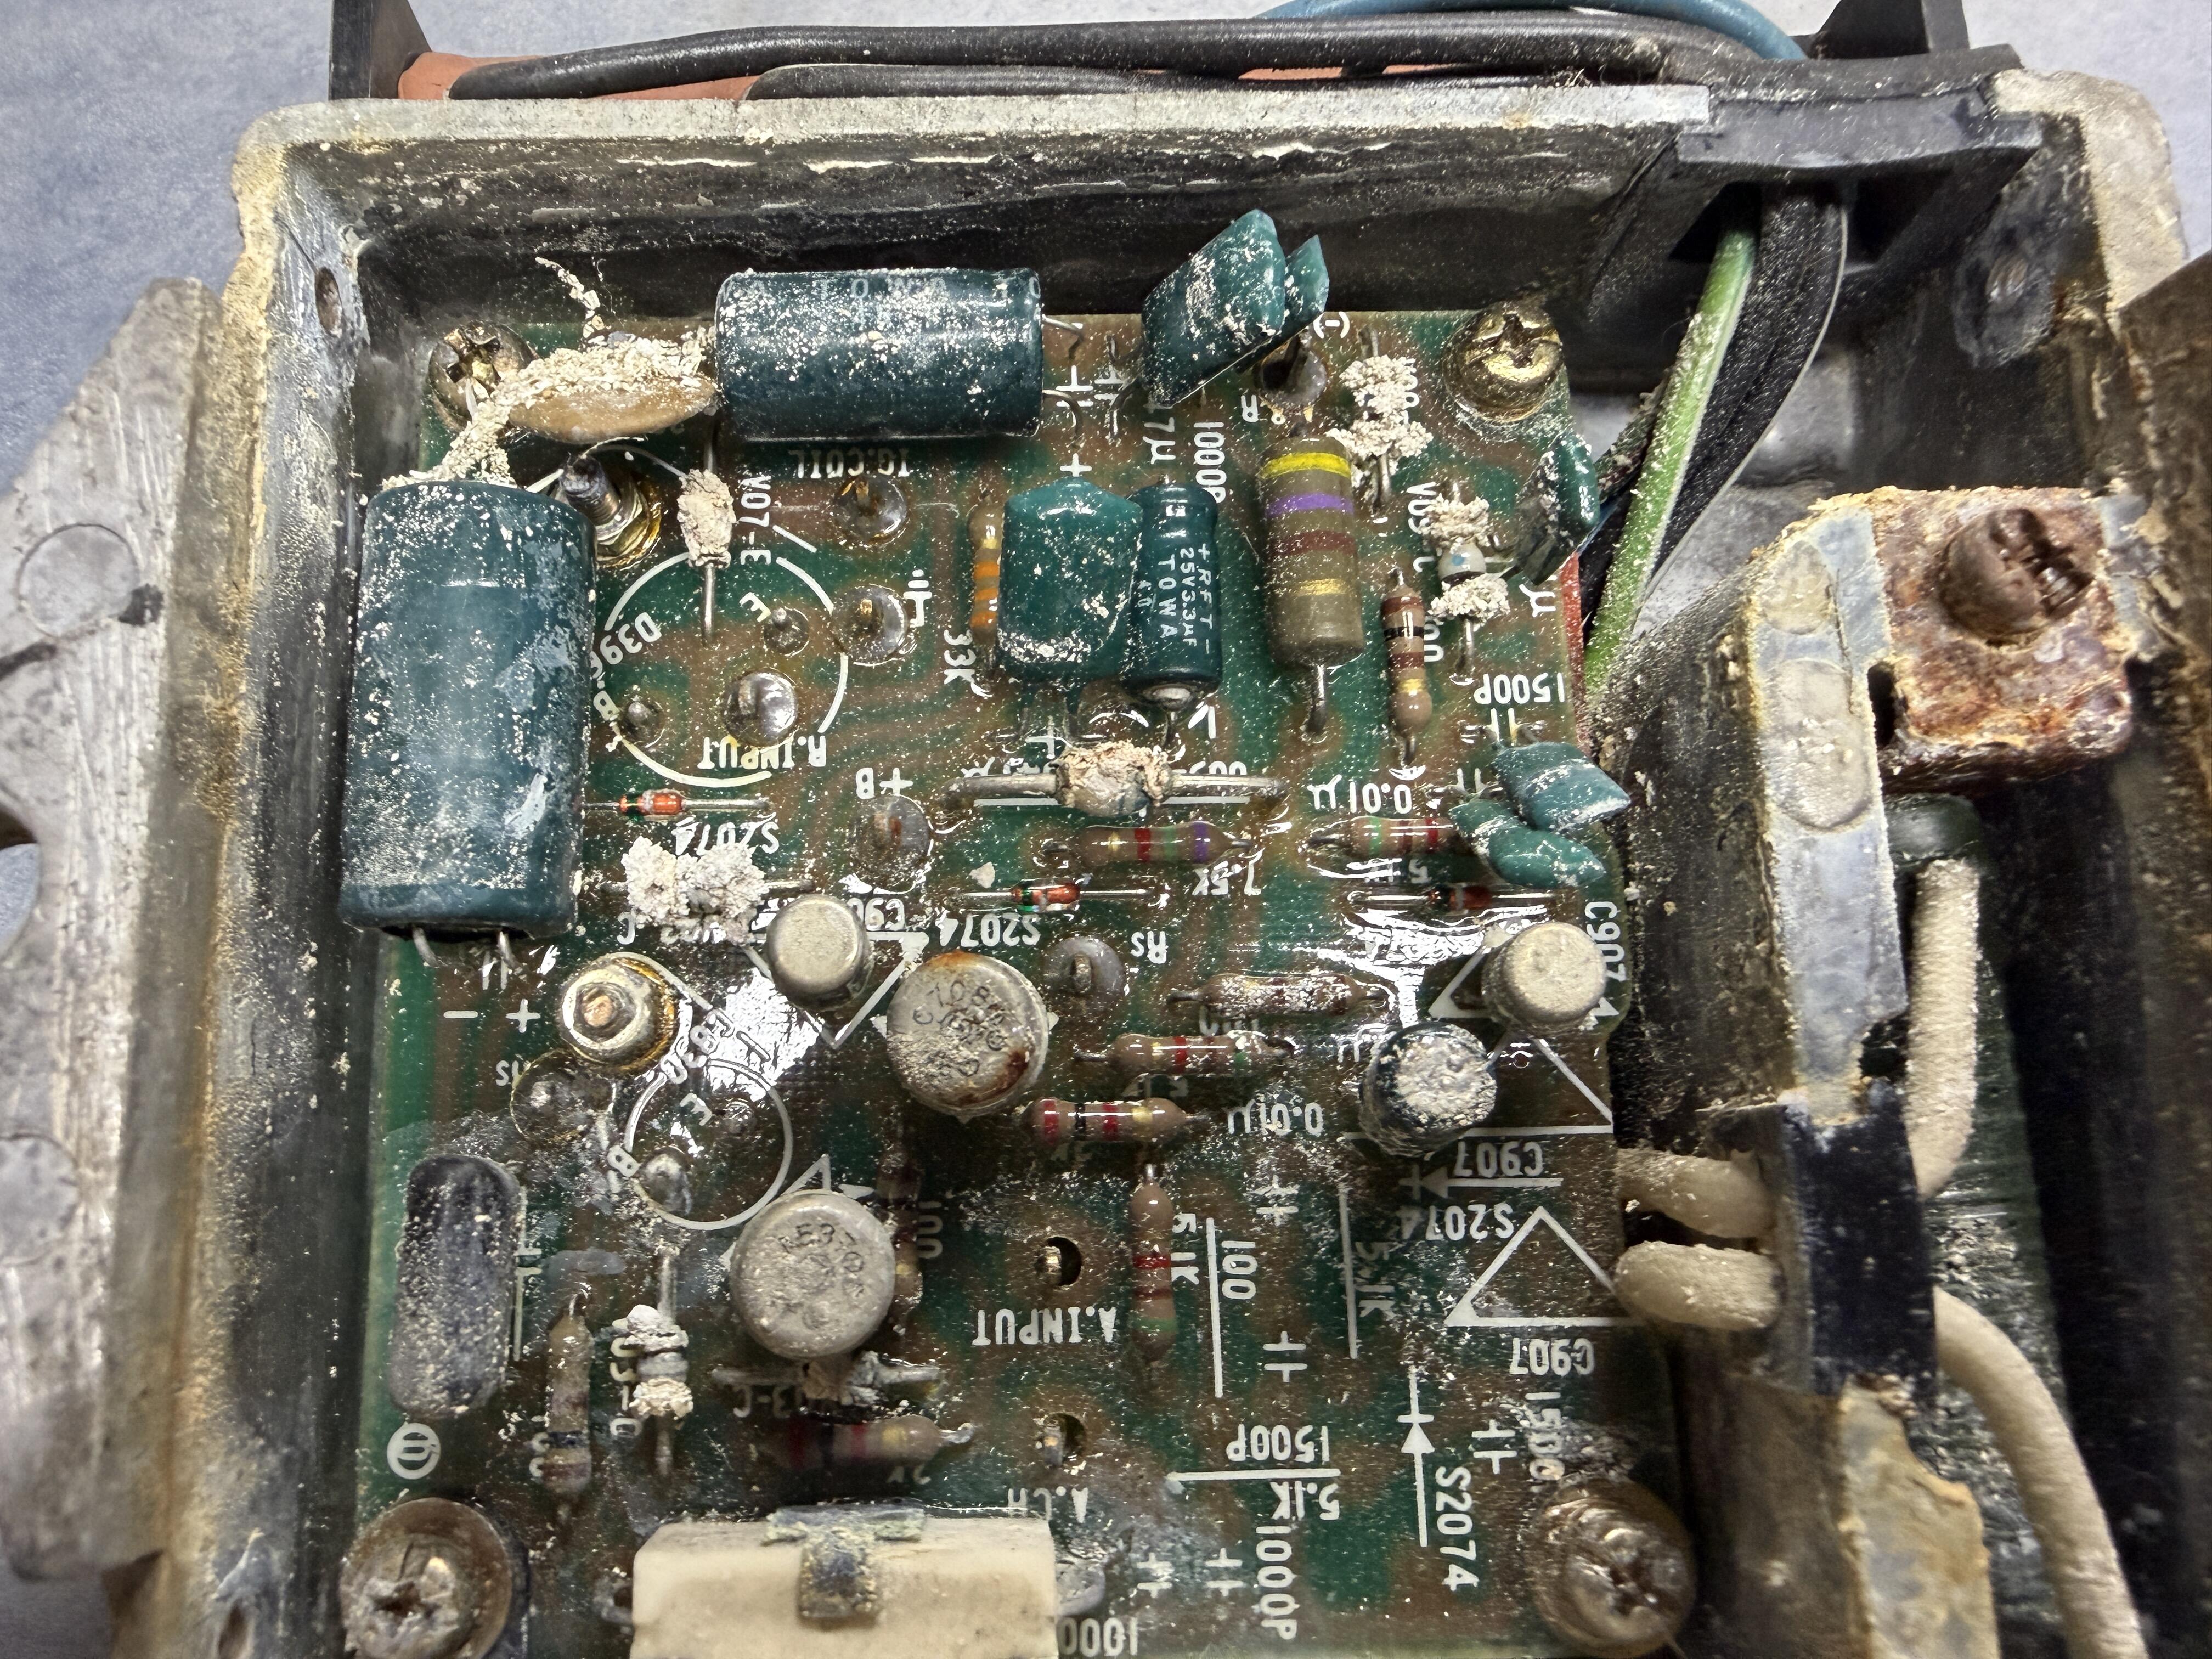
well, looky what I found.... Some carb cleaner and it will be good as new I guess I ll be having fun with the HEI
-
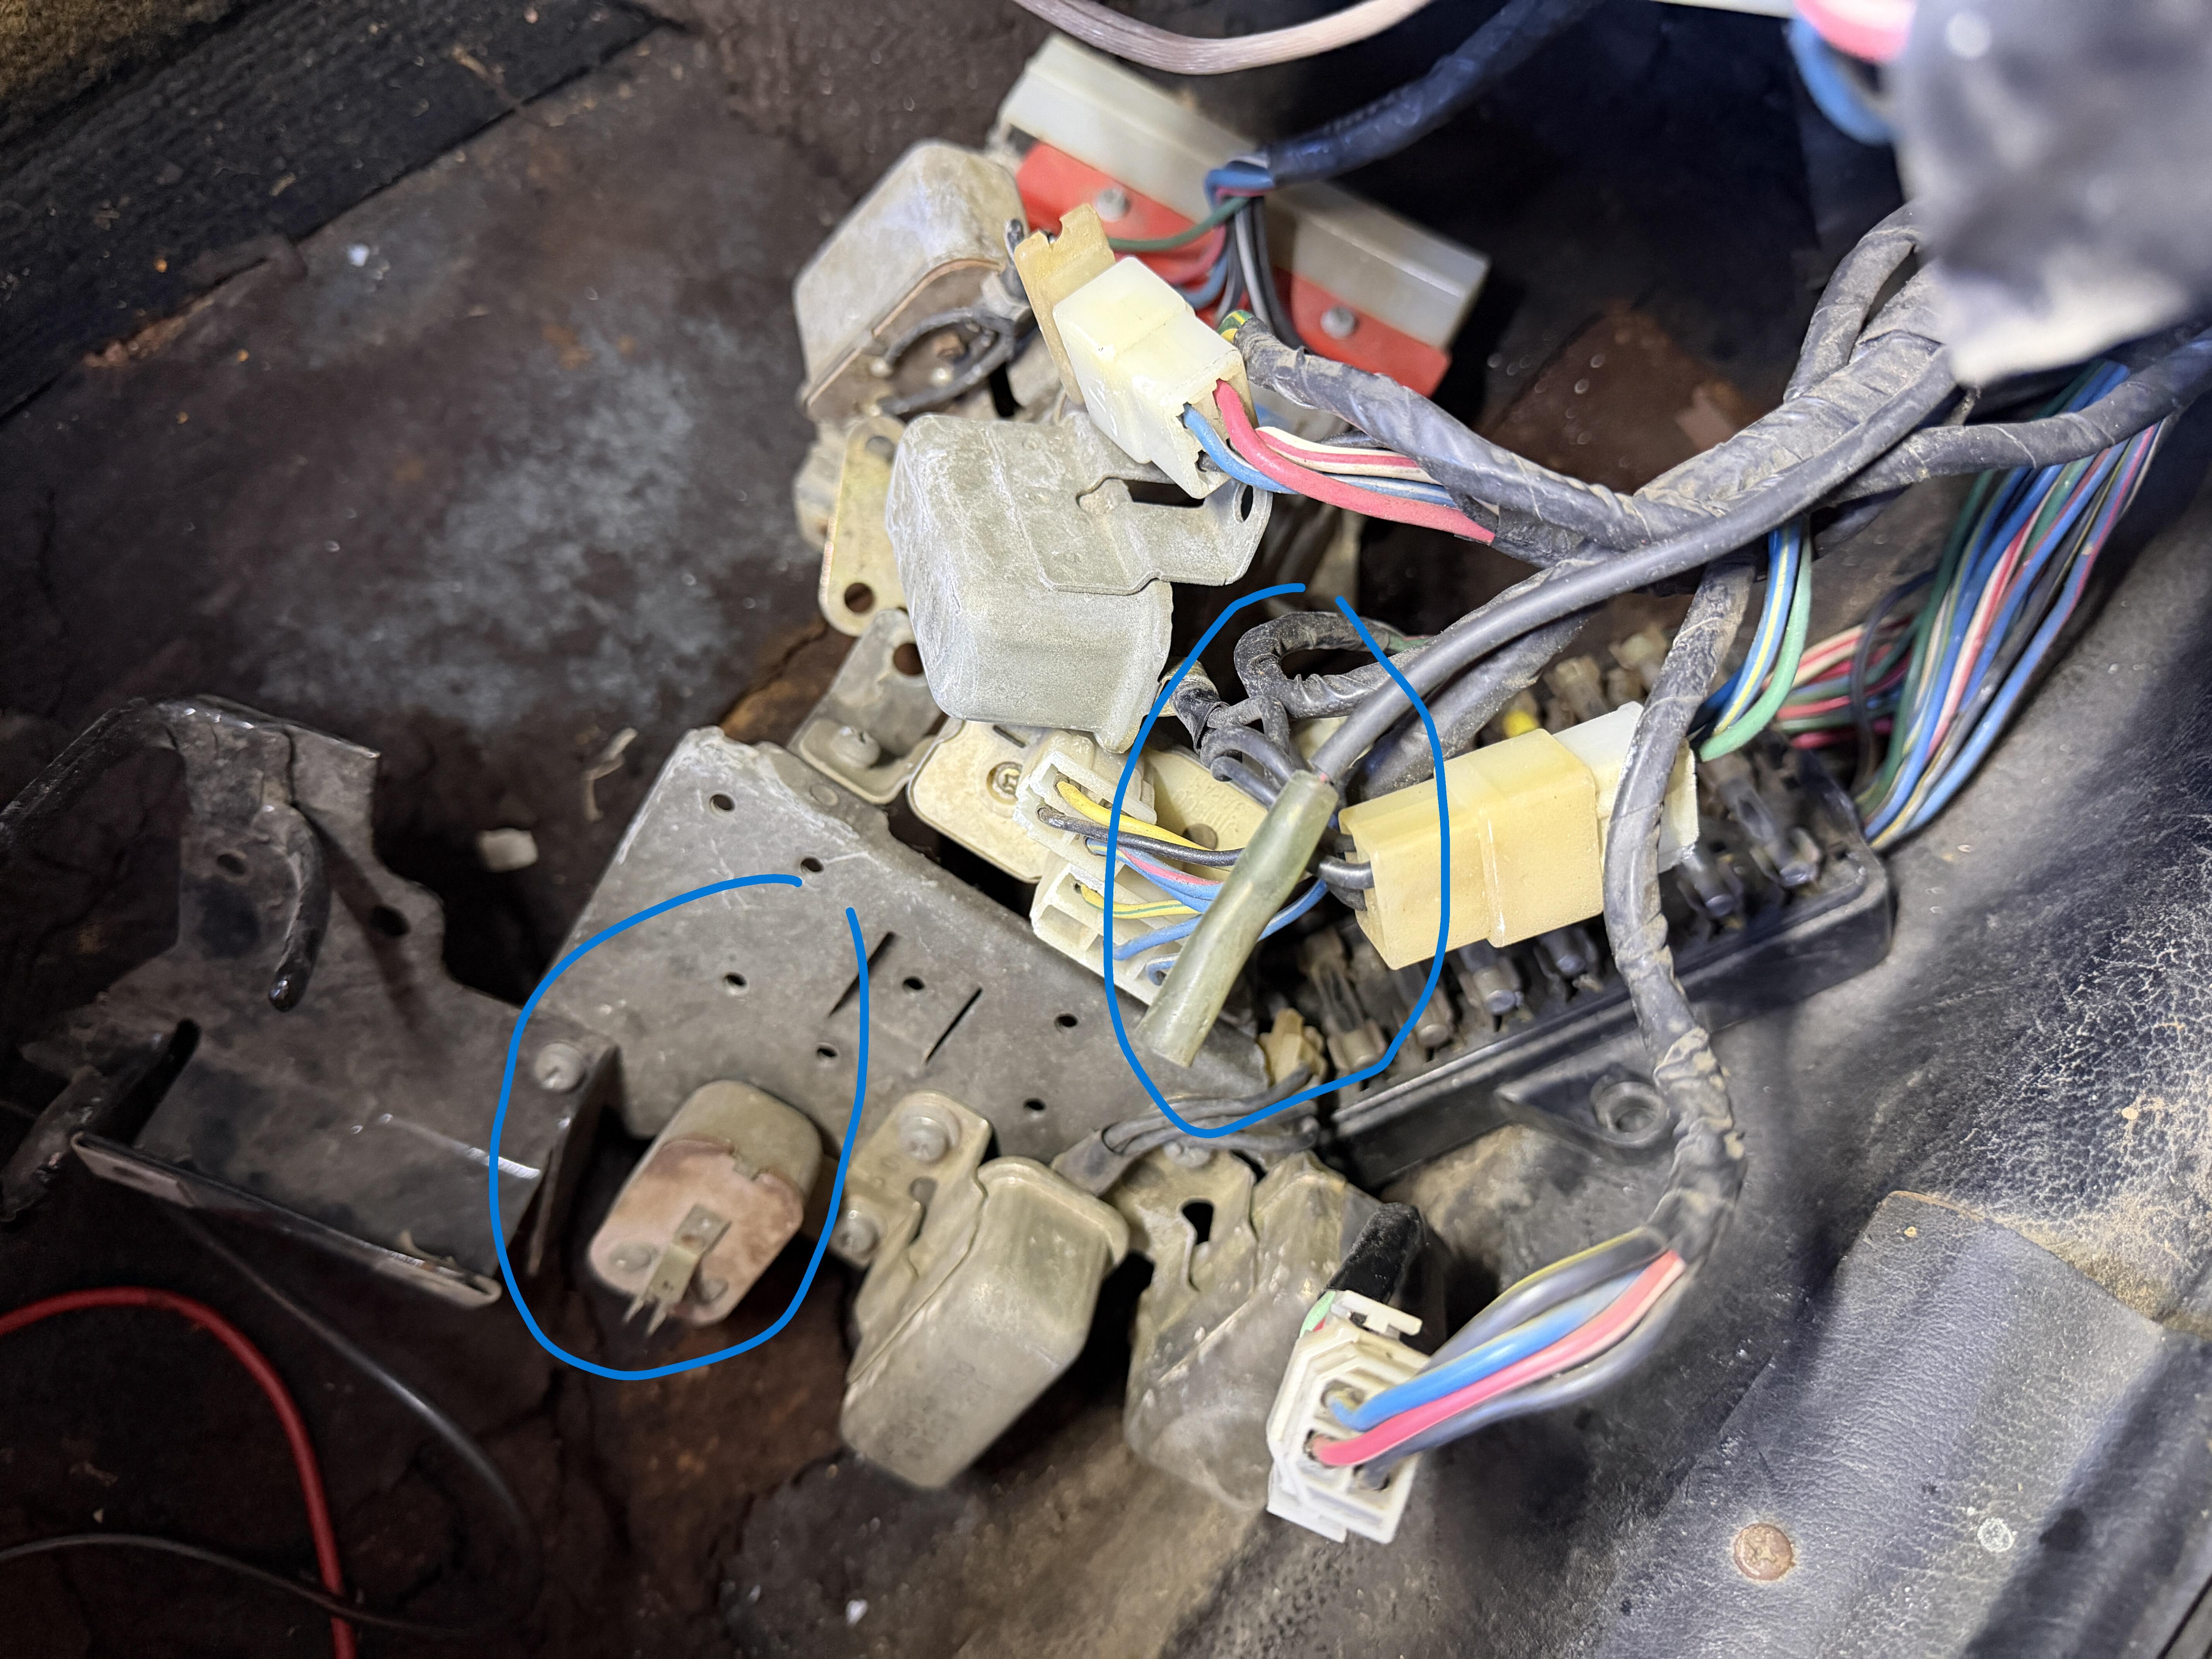
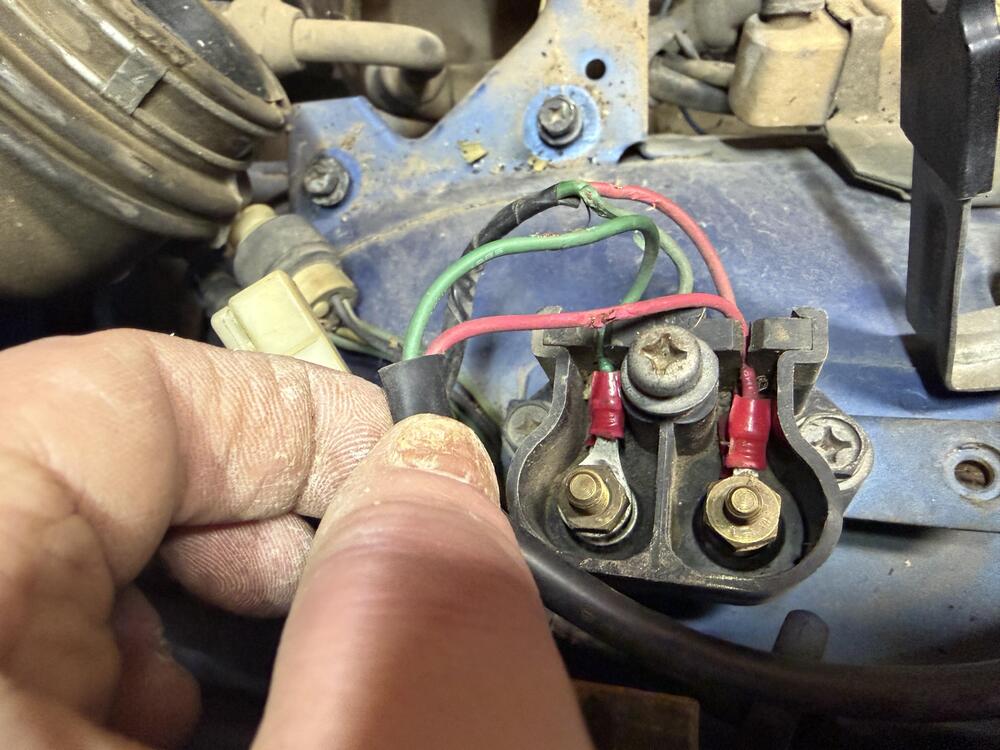
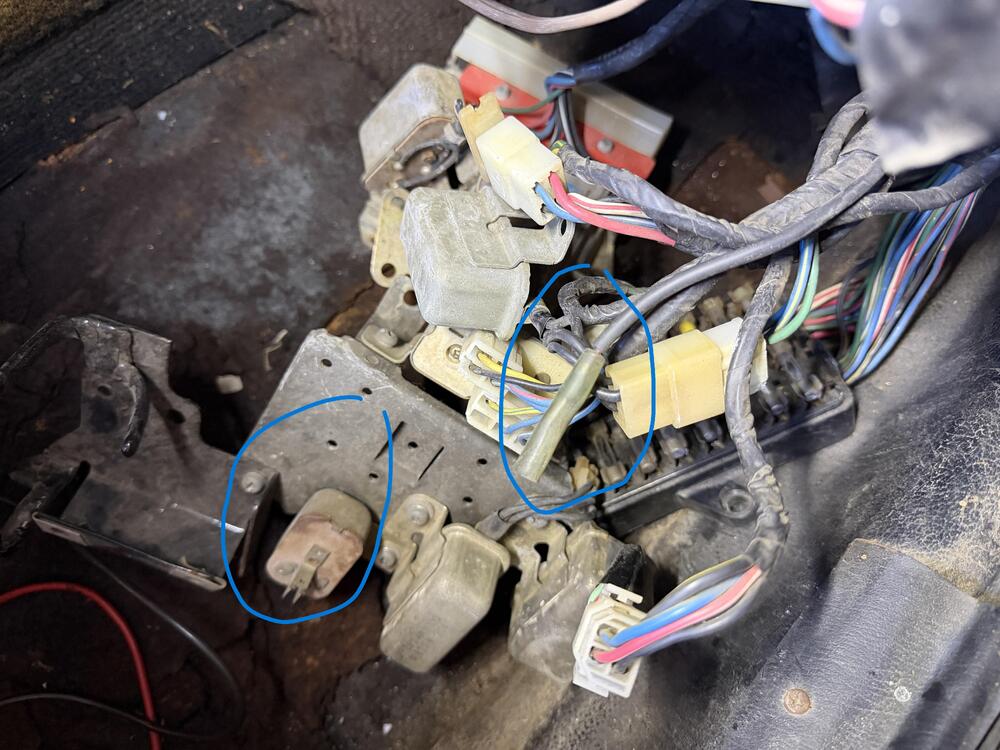
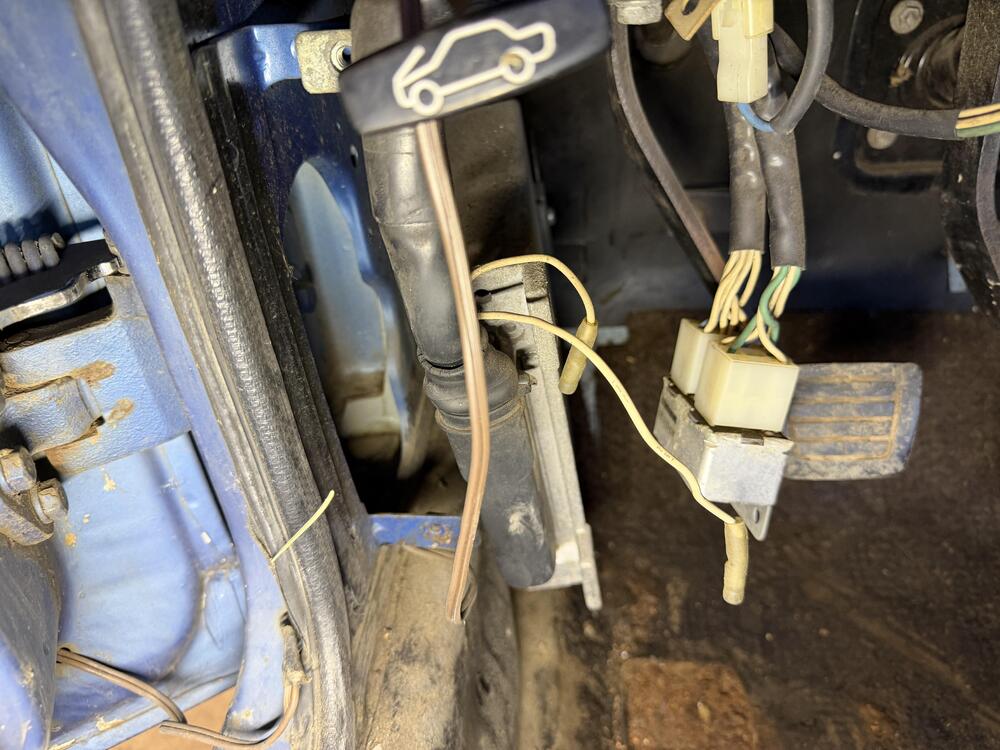
So I got out to the garage a little more today and played around bit more. I read through the post that I found above and tried out a few things. I tried the method Here where I tapped the green wire to the ground to see if I had spark. I had spark at the ground but not at the spark plug. After rereading the post again, I noticed that I didnt disconnect the other terminal. Ill have to try that next time im out. Other than that I just started taking stuff apart to see if I could find anything obvious. I did find that the wires, to whatever this terminal is, are all chewed up. they run to the pickup in the distributor. The other end runs to the front of the car. Im guessing to the other side and into the fuse panel perhaps? Ill have to read up on that. The wires still have continuity. I wonder if the previous owner did this for testing. This coil looks old as hell, Im tempted to just replace the coil, condenser, module, but it looks like I might be able to upgrade to a newer distributor and ditch all that. Need more research on that. Id like to get it running as is, before I start upgrading from OEM. I did find that the wires are fairly hard and stiff, I also lost a cable end on of the cables. so Ill def be ordering a new set of cables. On side note, do these gaskets on the egr look right to you? Its seems weird to me.

-
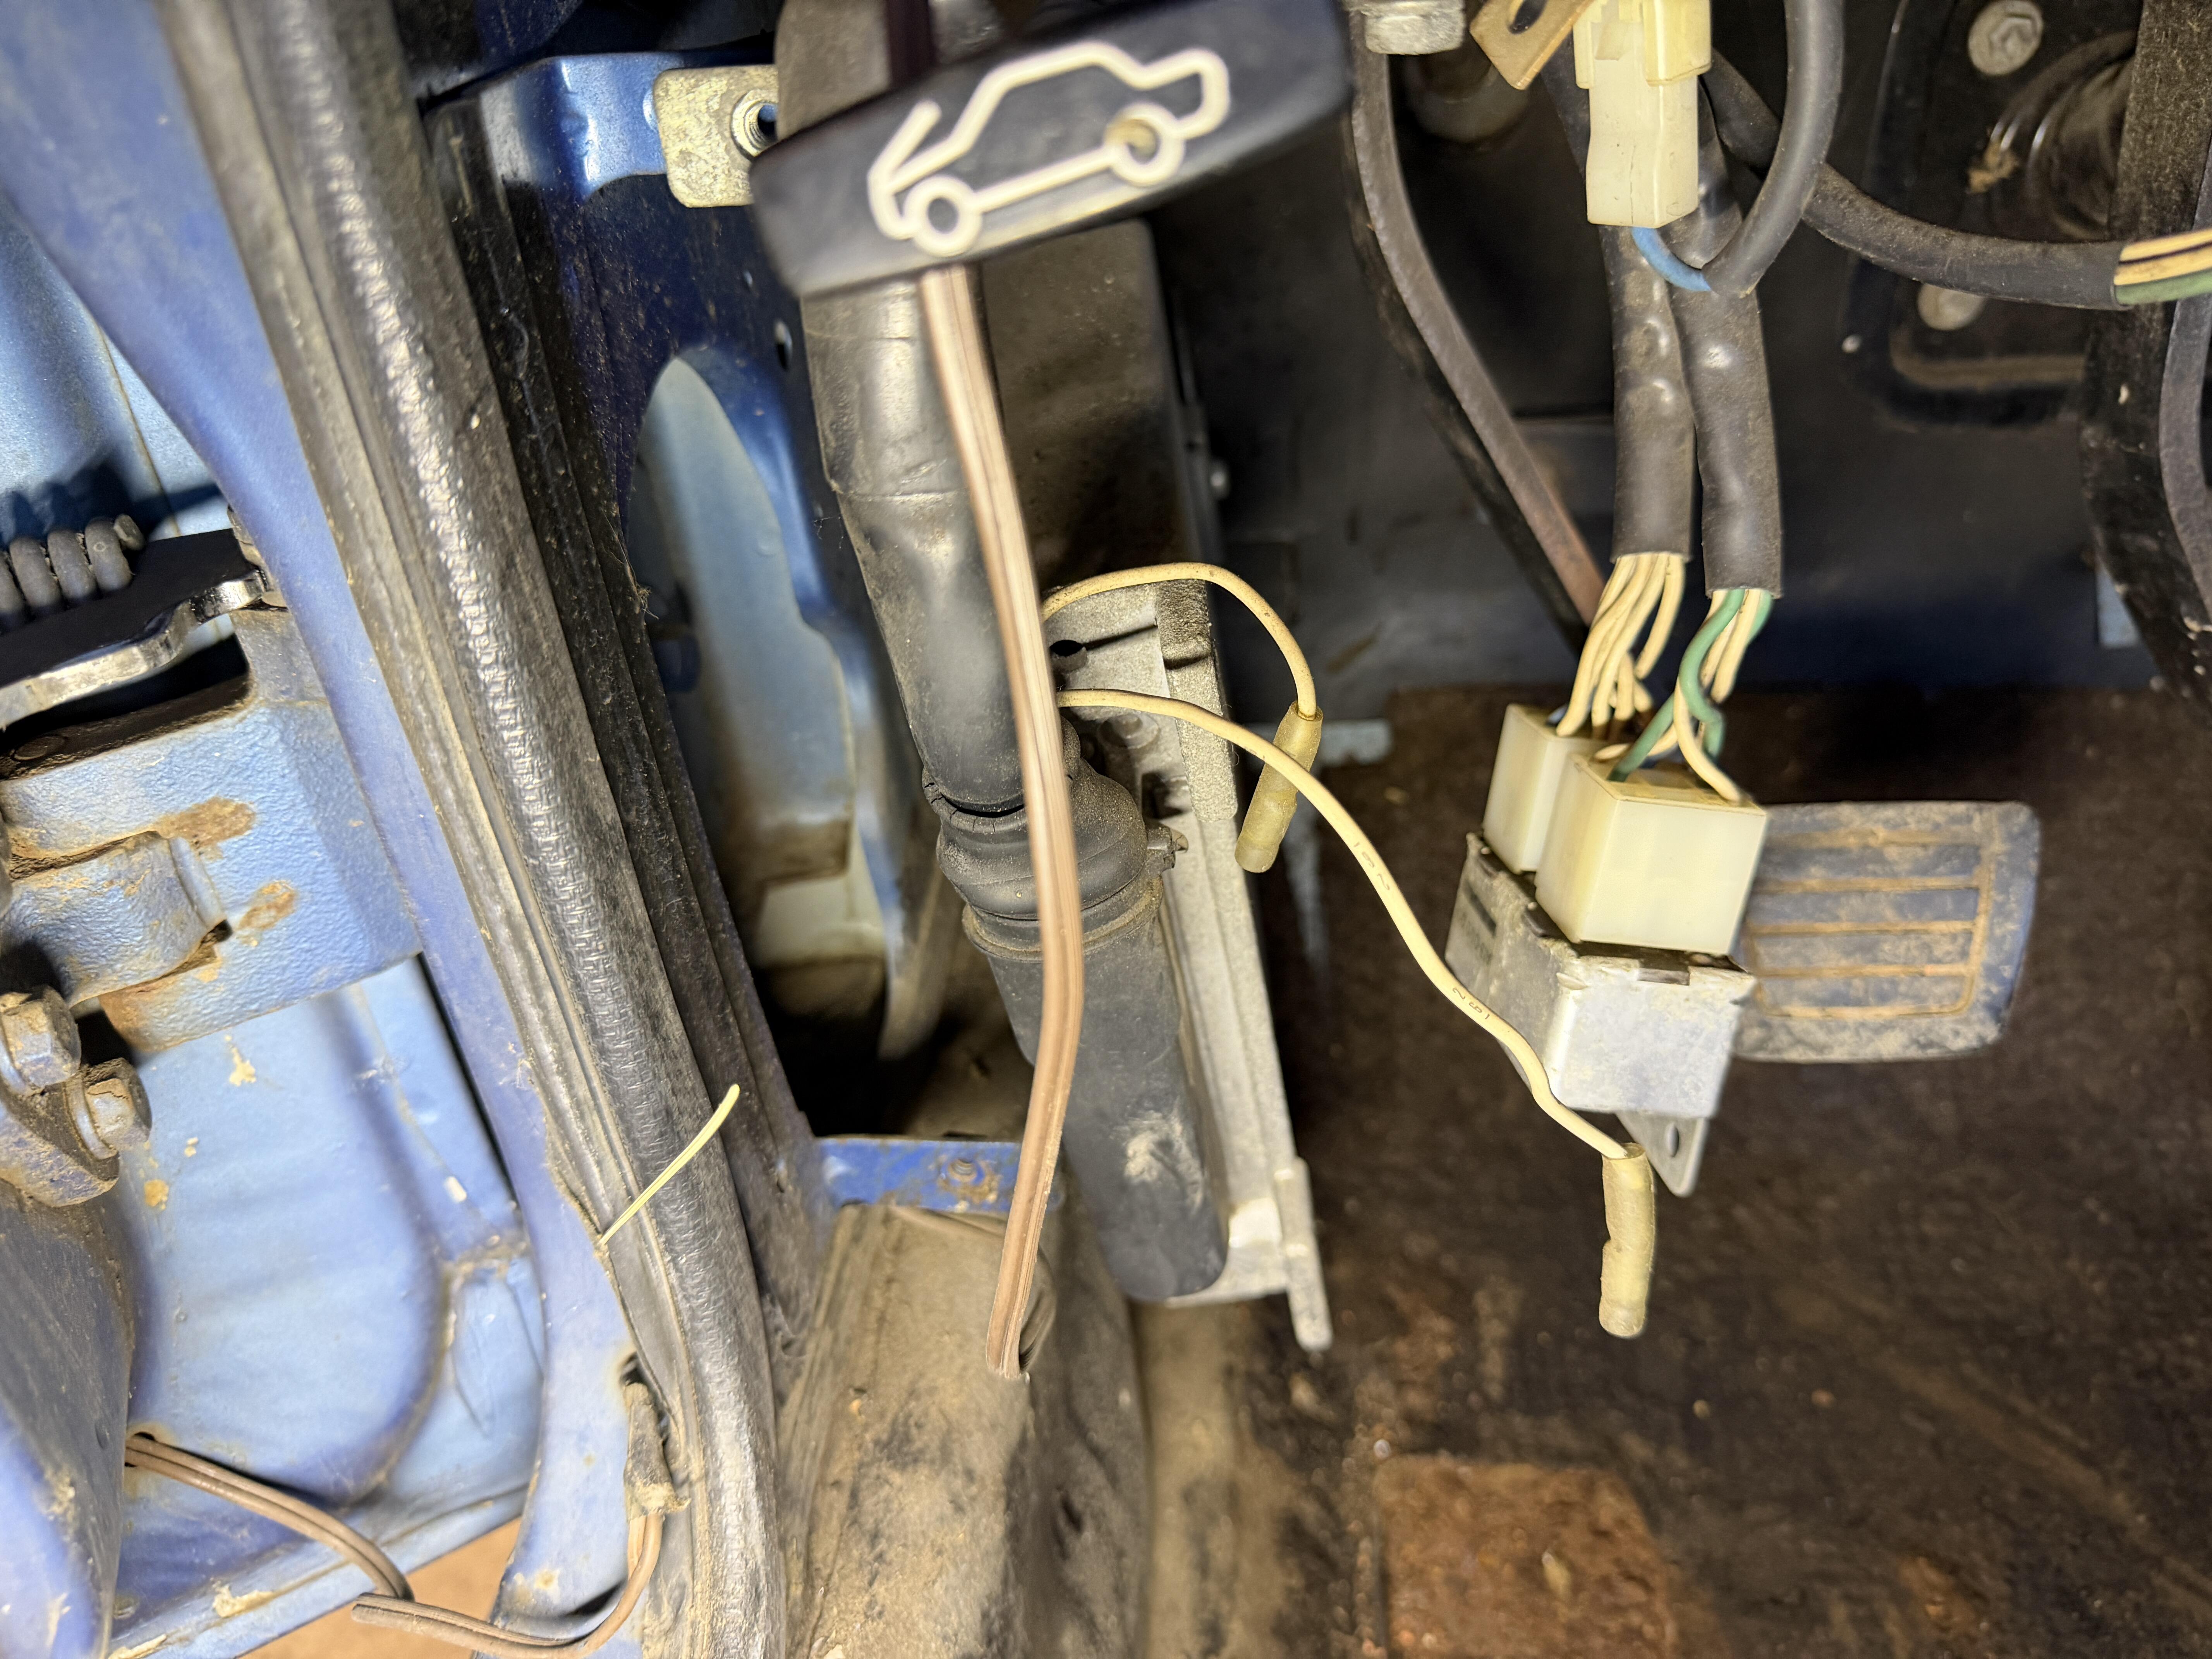
Little more time out in the garage. Checked the coil and near as I can tell, it is ok. Also checked fuses in the panel and those seem ok. I did find a couple things that weren't plugged in, not sure what they are. The more I dig into it, it really looks like this is not the original wiring harness and/or engine. The firewall boot is still sorta there, but there is definitely no membrane in the middle. I didn't look close enough to see if it just dry rotted out. but it does look like someone ran a harness through it. I'm not sure where to move to next. Is there a way to test ignition module? I found this post that has a lot of good info in it. Im going to give some of this a try.
-
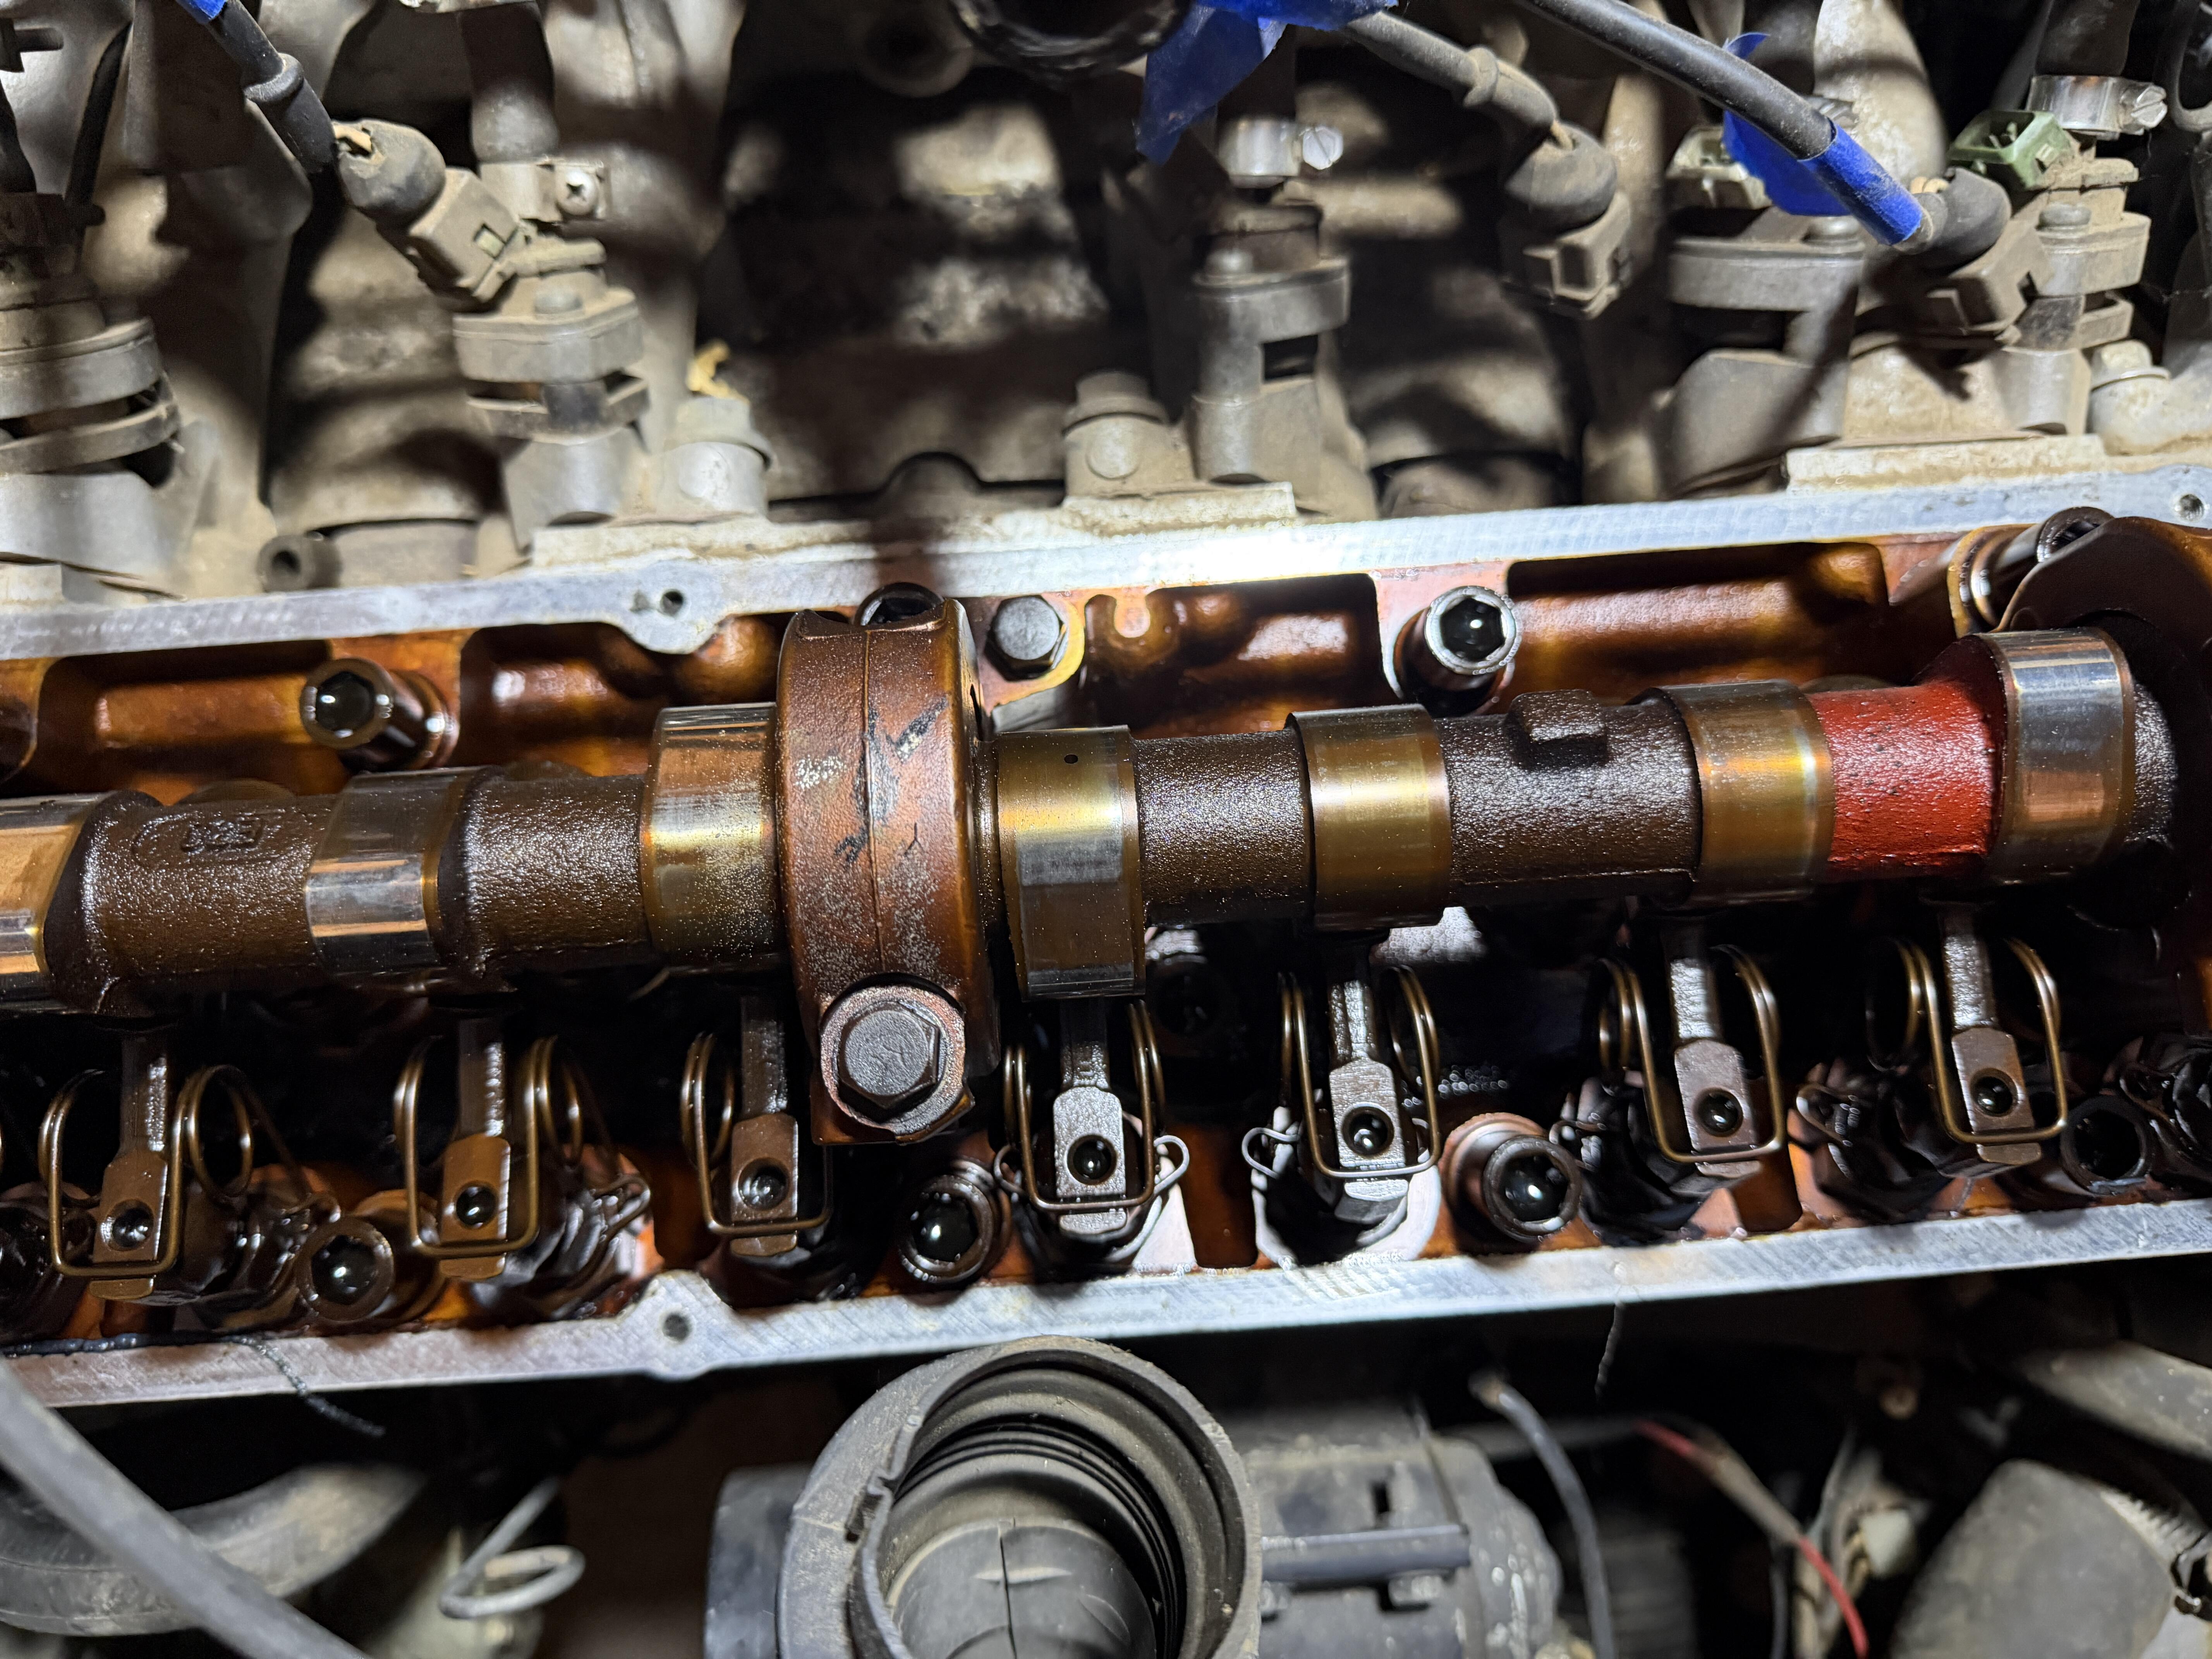
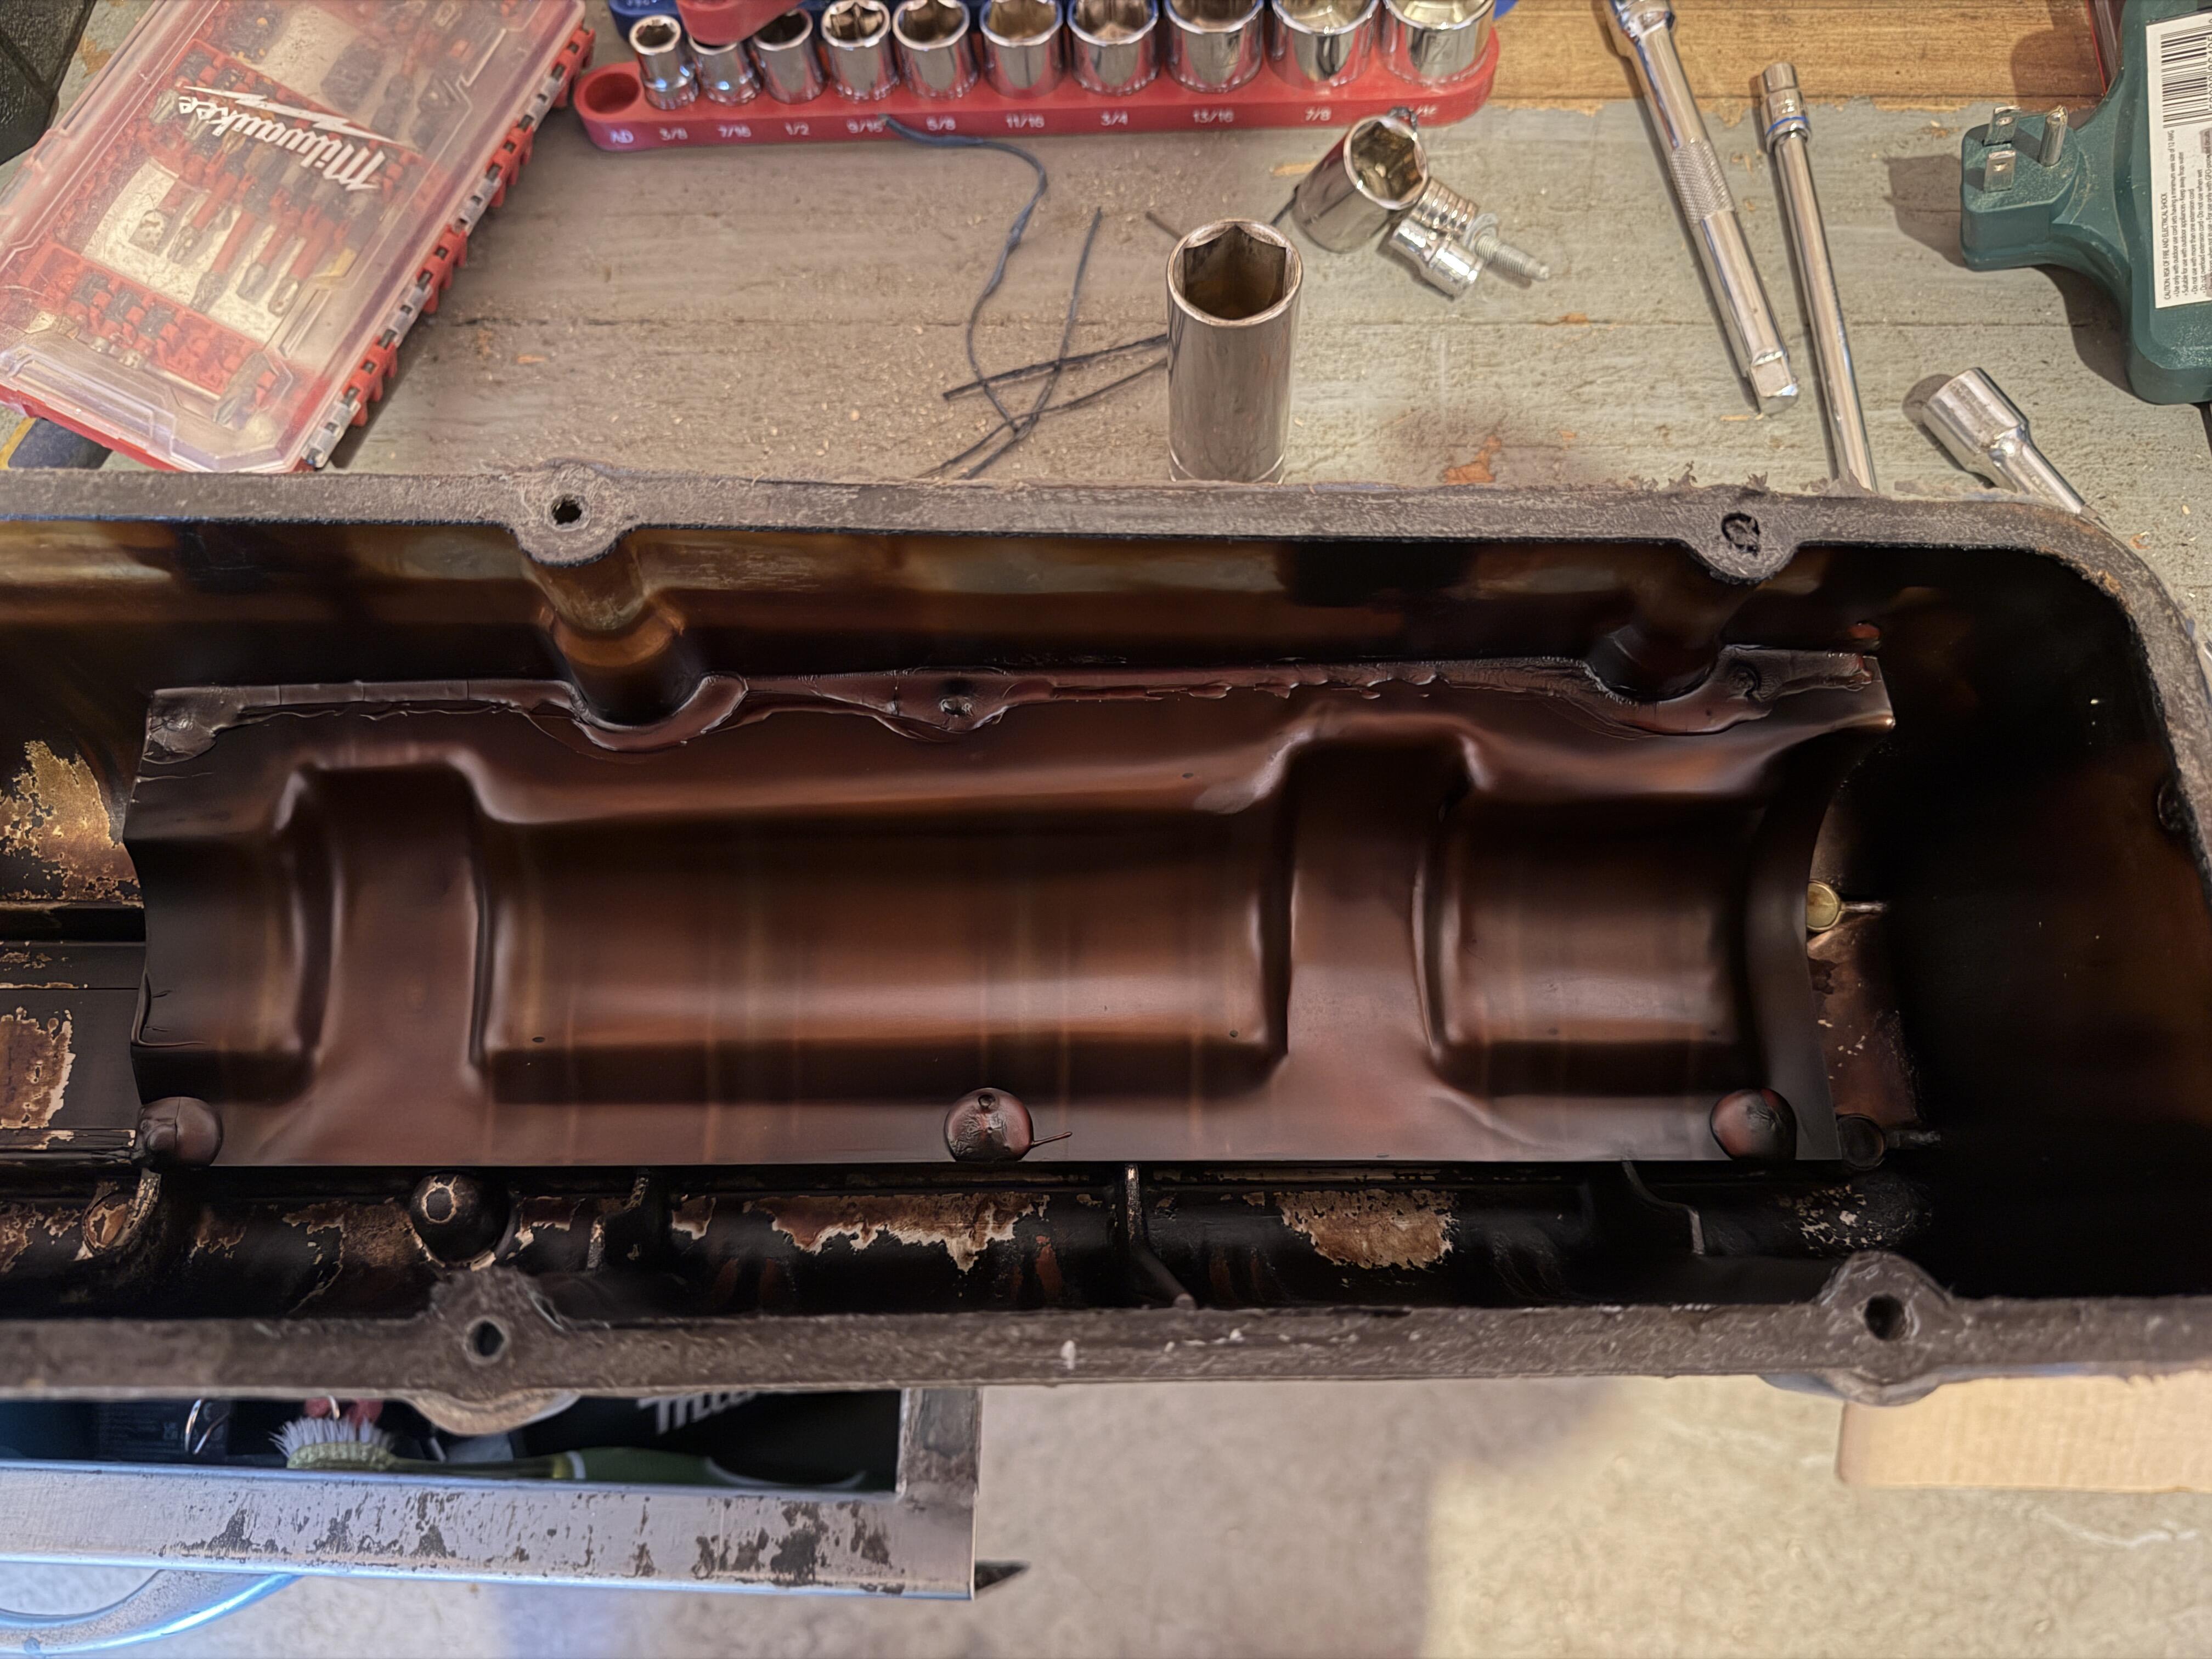
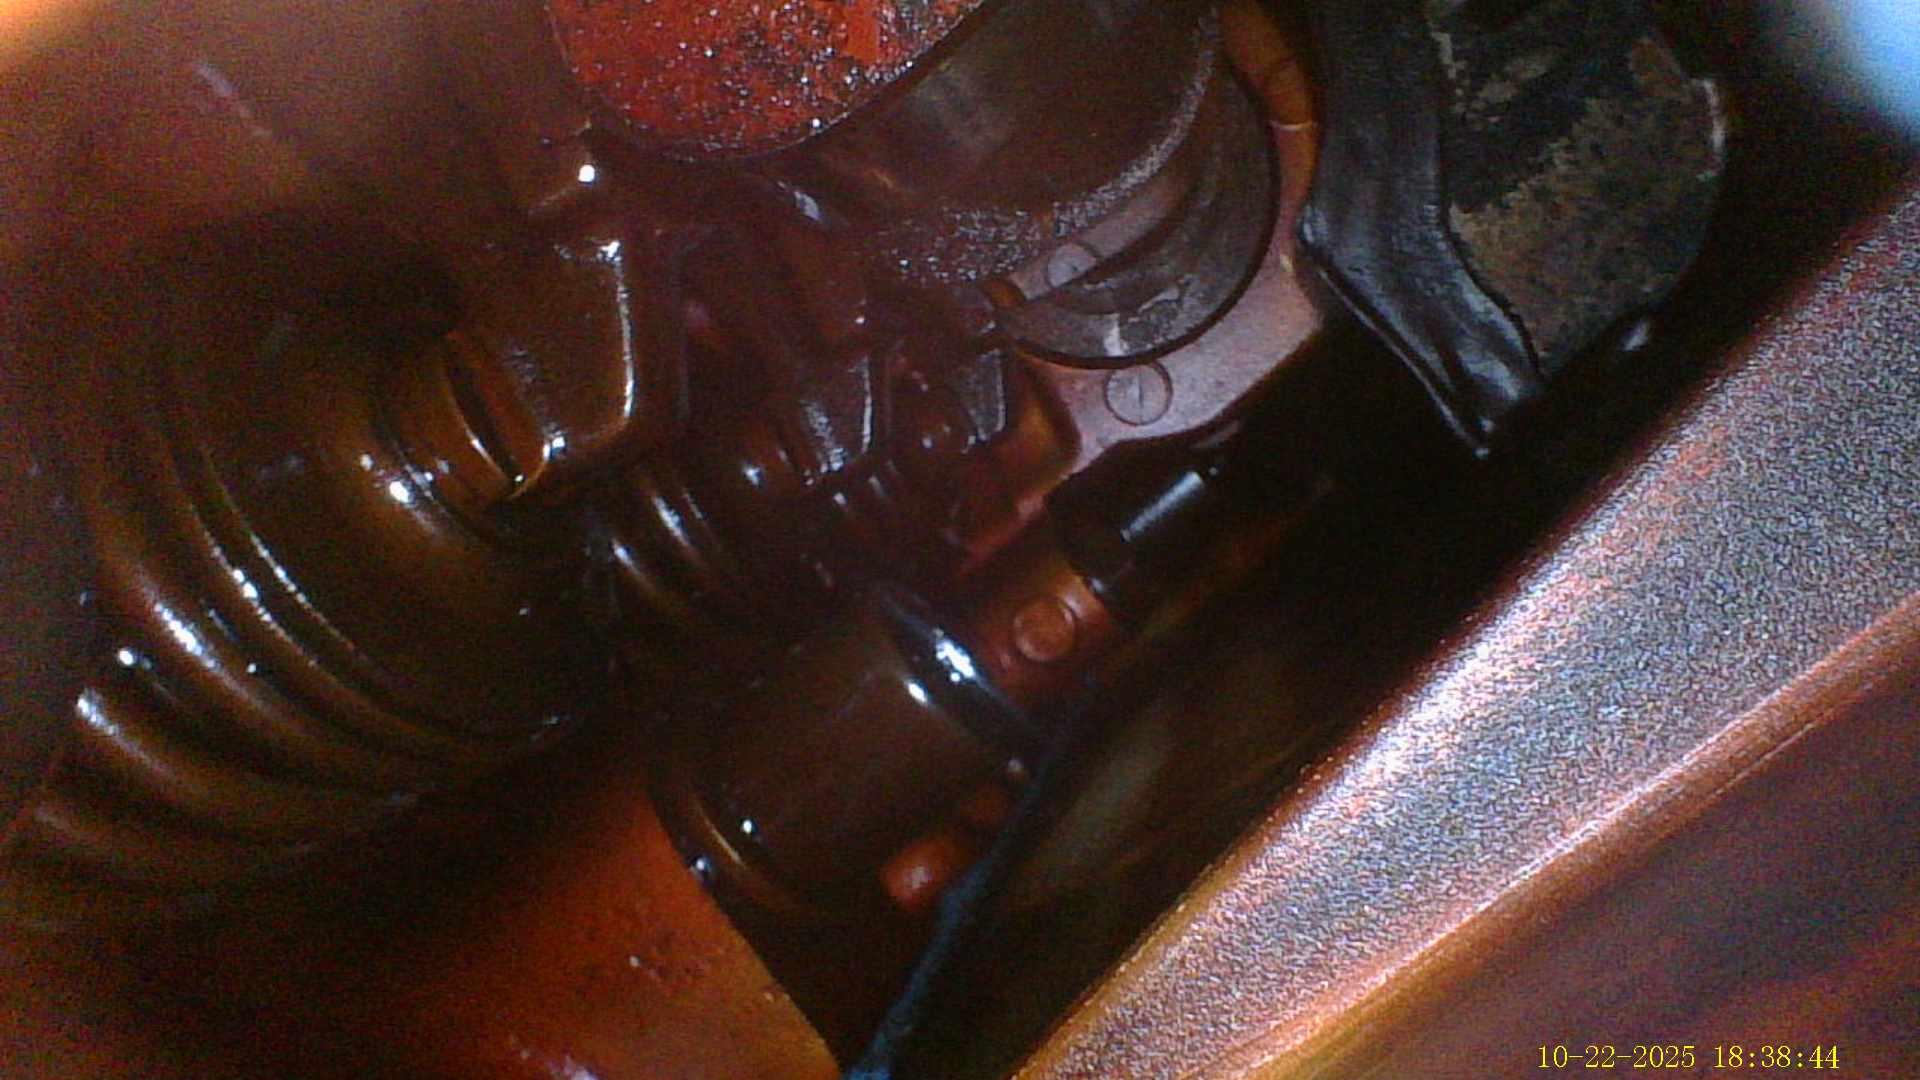
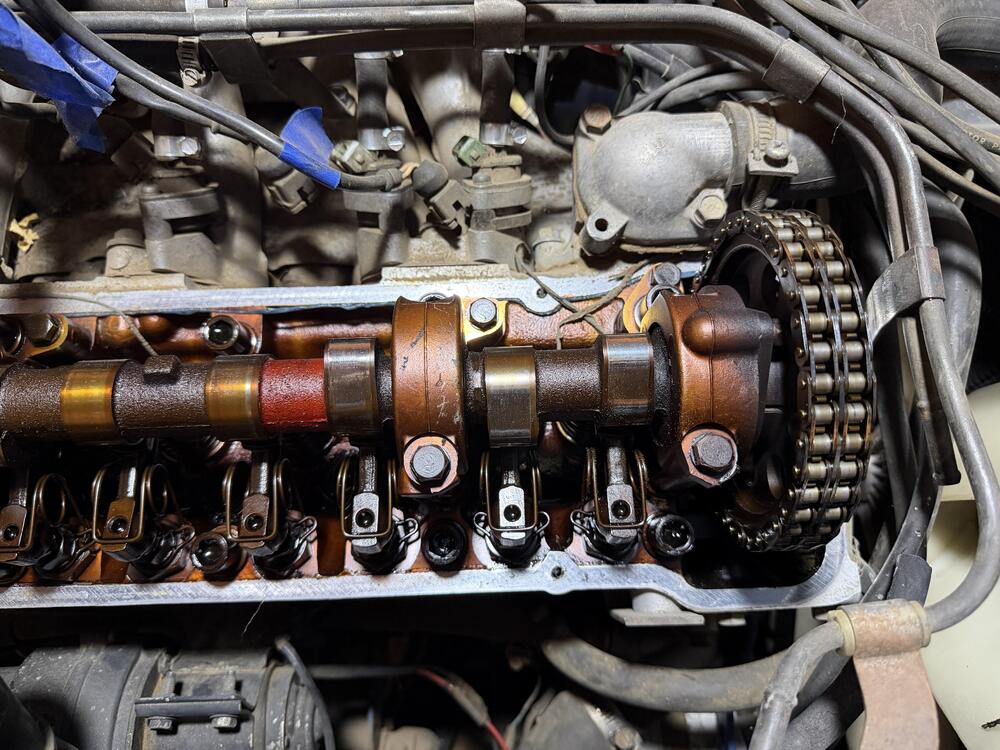
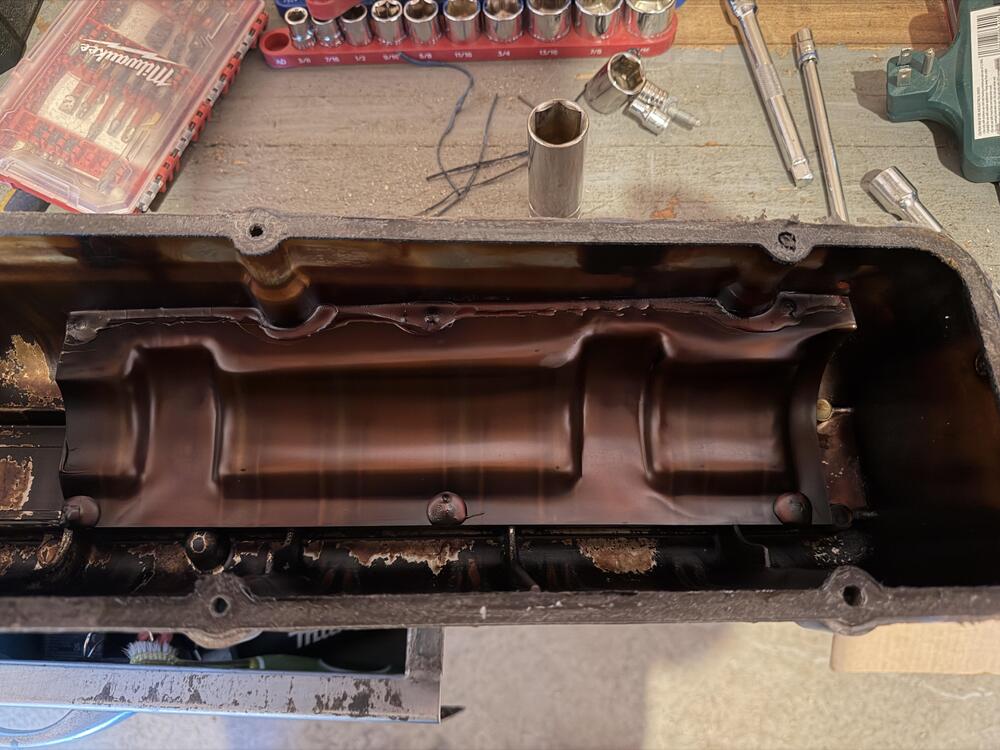
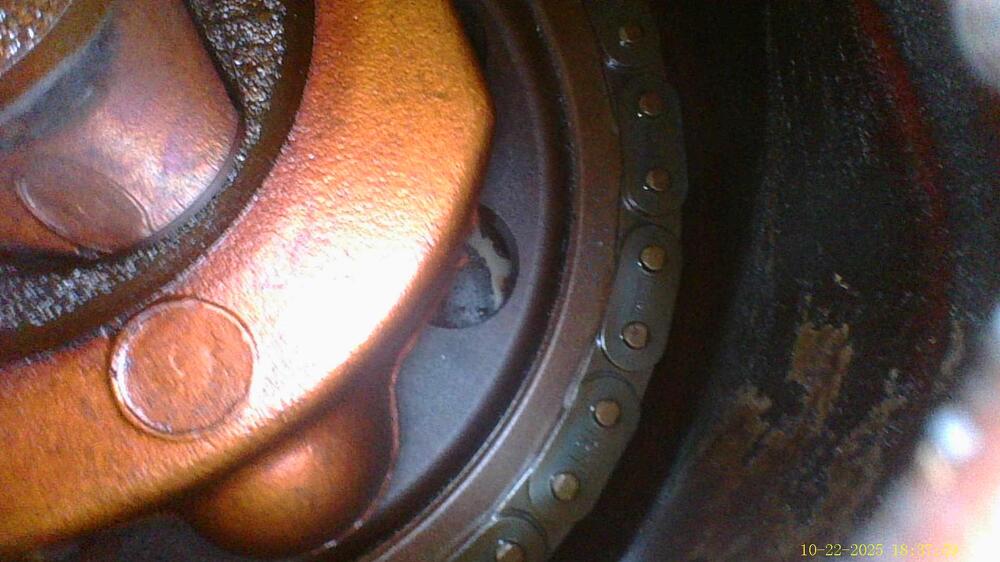
So got out there yesterday and today for a little bit. Pulled the valve cover and dumped some oil everywhere. Also decided to pull the cooling fan and shroud so I could have access to the front of the engine a little better. I cranked the engine over by hand and felt really smooth. I decided to try the video function of the bore scope and see if I could post it. Mainly wanted to see what the cylinder was doing while I was cranking. I chose cylinder 3 since it was the worst looking. Actually doesnt look that bad. Edit* Appartley this video has to be downloaded, so im uploading to youtube. And lastly, here is a video of the engine cranking over. Sounds like it moves nicely, I hear a little bit of clattering at the end of the cycle. IMG_0026.MOV The borescope is just a cheap Amazon peice. I'm pretty happy with it. I wasnt expecting to use it a lot so I didnt want an expensive one. If I had to do over again, I might look into a four way articulating. The two way is fine, just have to twist the spine to get it where i want. Amazon Teslong Bore-scope While I was at it, I also checked for spark. I have none. Something about this was mentioned when I bought it, but I thought it was just one cylinder. The fuel line was diconnected 'just in case' I know the fuel is bad and the car also came with a new fuel pump. I need to rewatch one of the new 'roadkill' episodes they put out recently to test a coil. I think they are trying to revive the roadkill format via their respective youtube channels. They put out a 4h long episode on Rotsun between the two of them. I could totally just google, but where is the fun in that. Shameless promo, cause this is the car and show format that made me want to get a project. I really enjoy the problem solving.

-
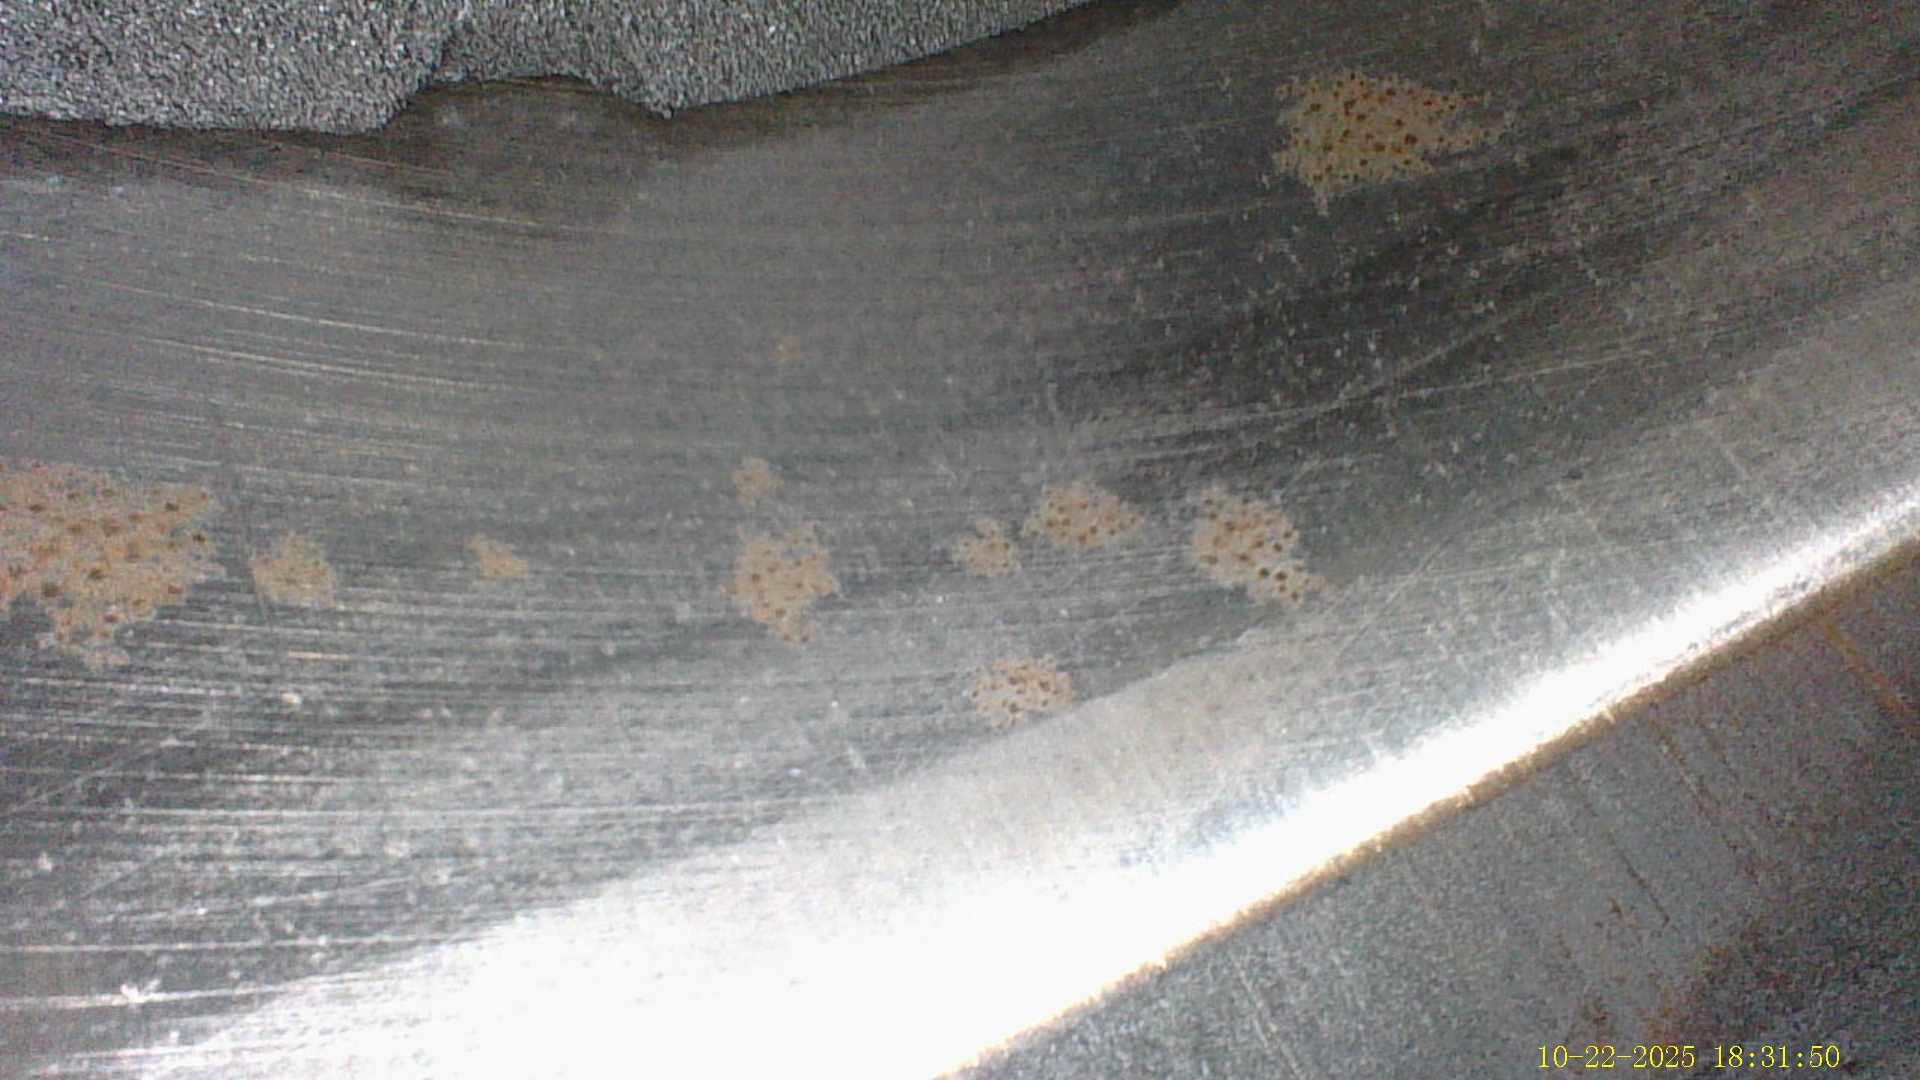
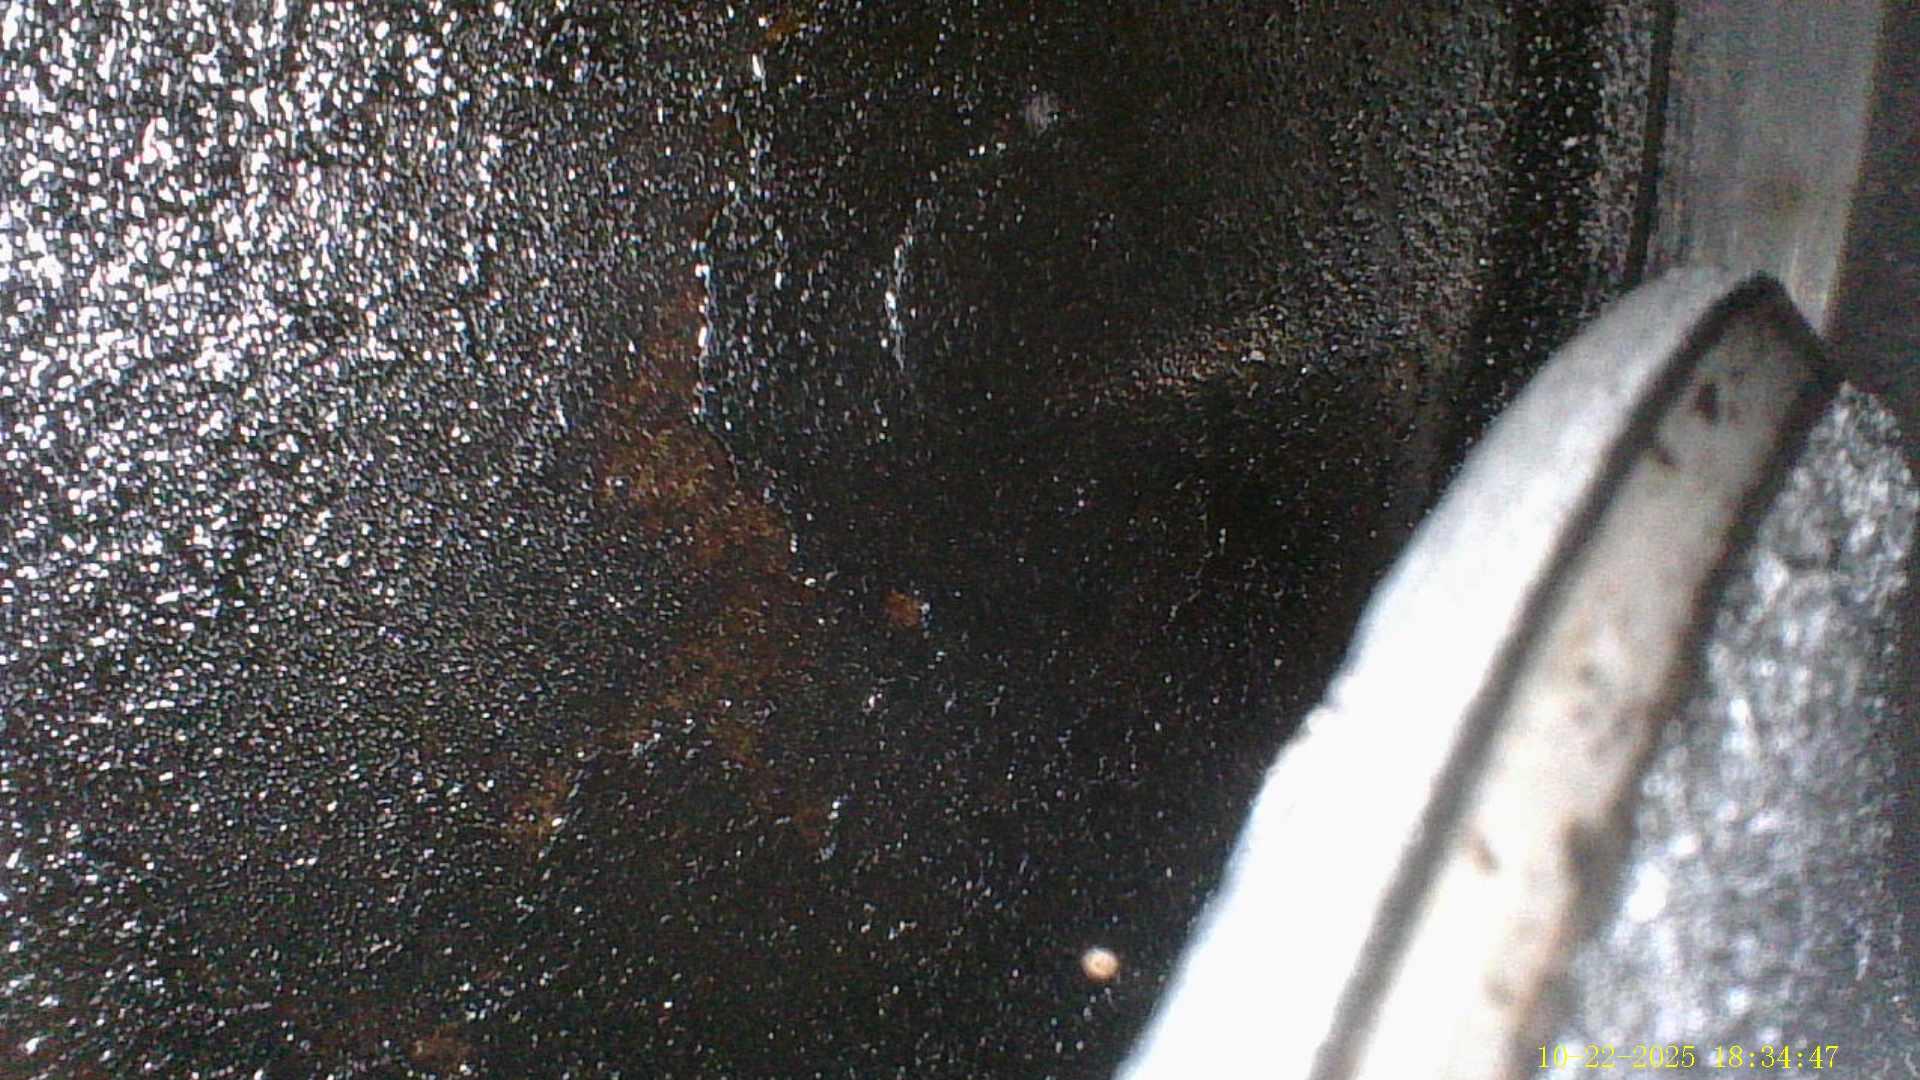
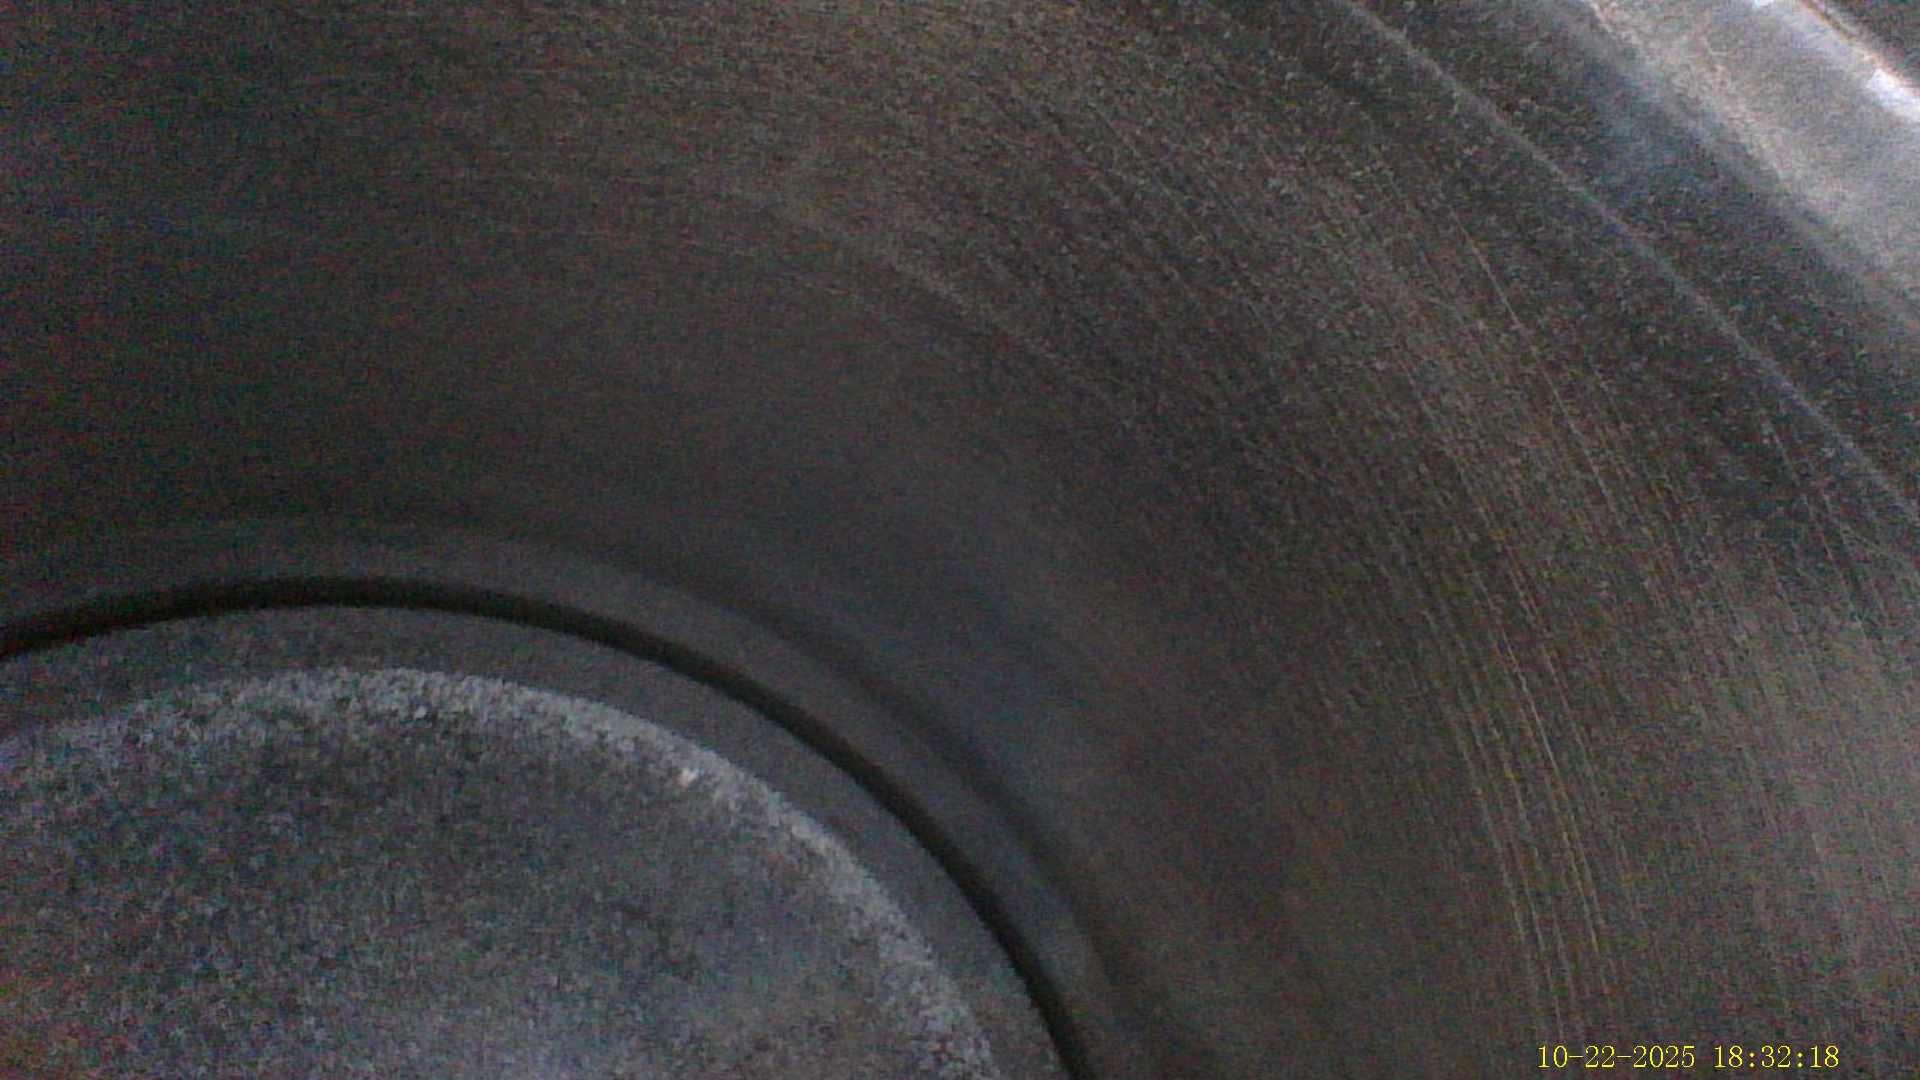
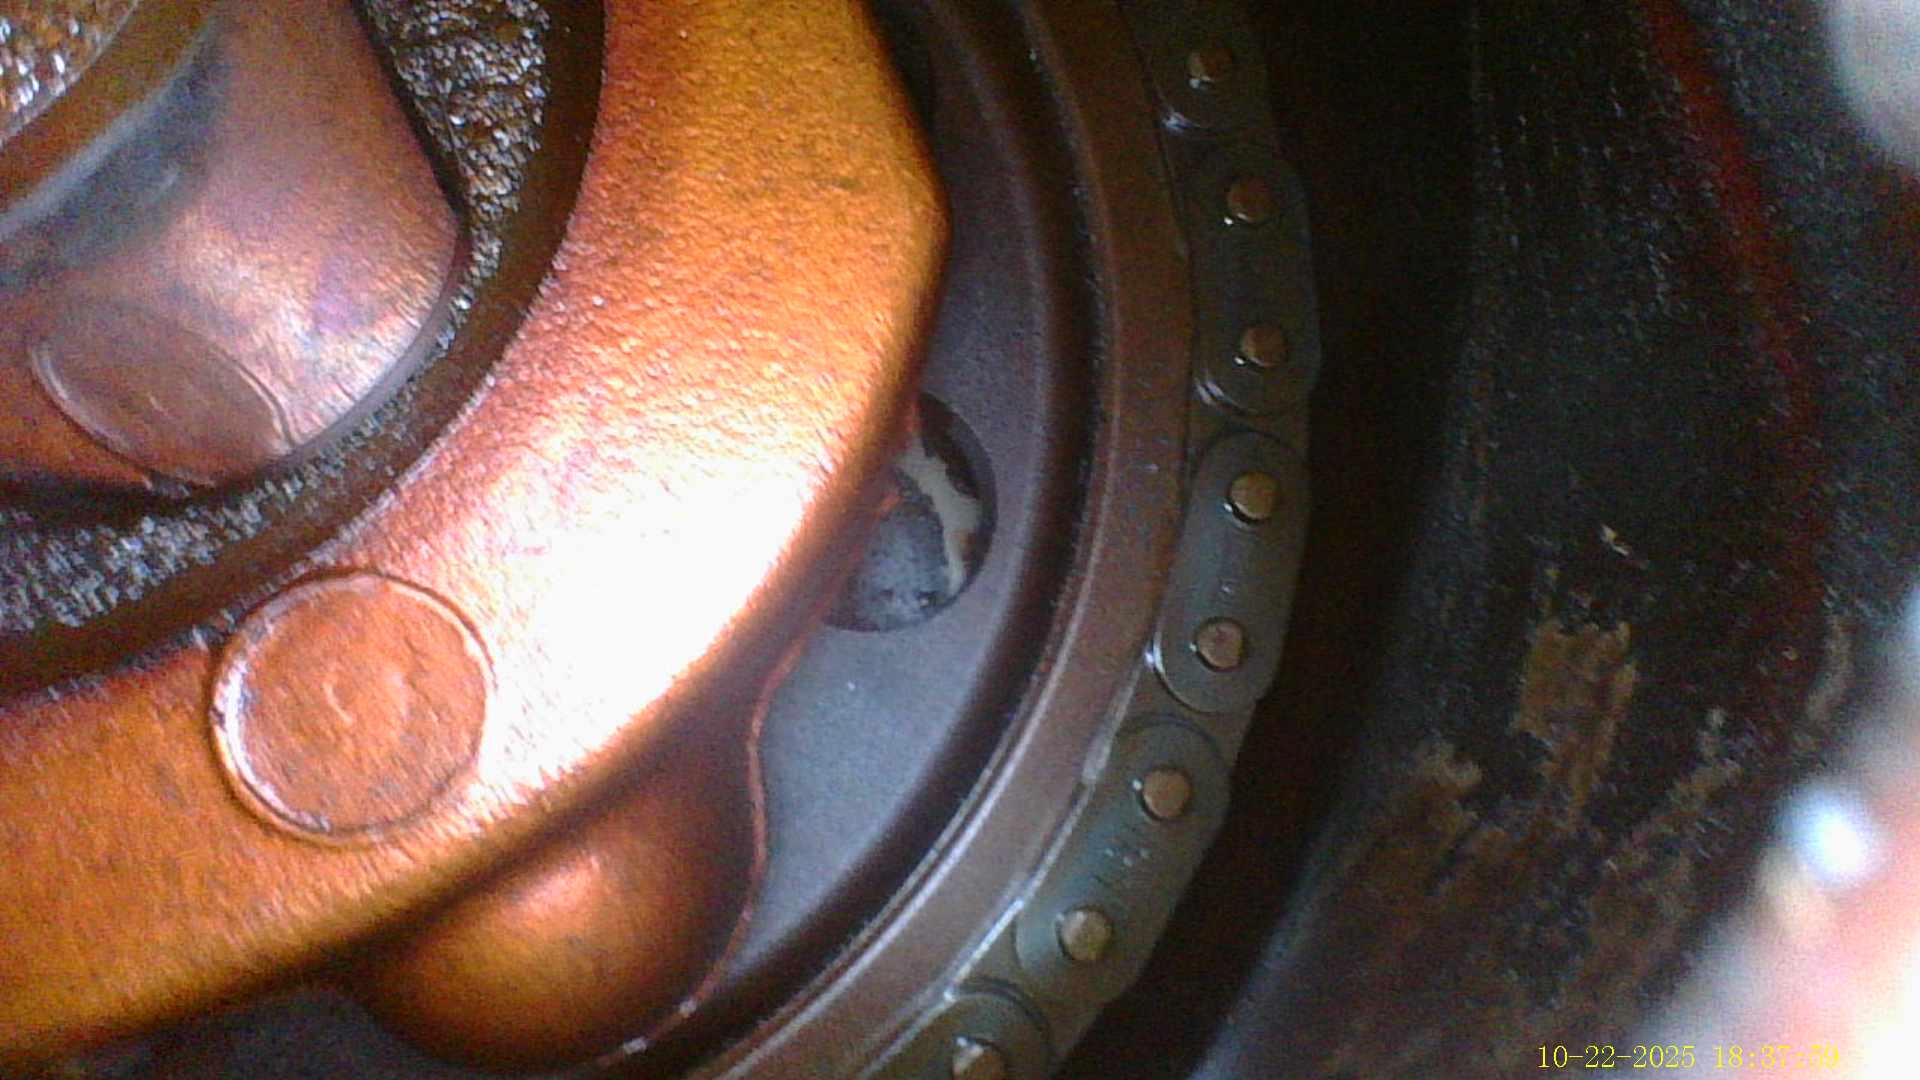
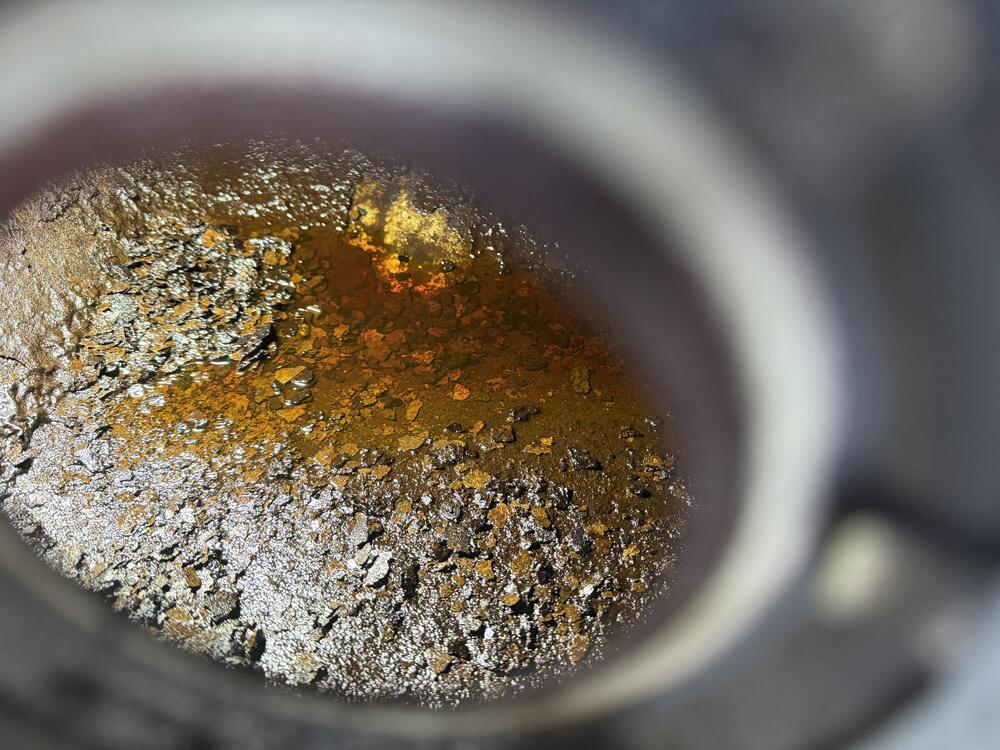
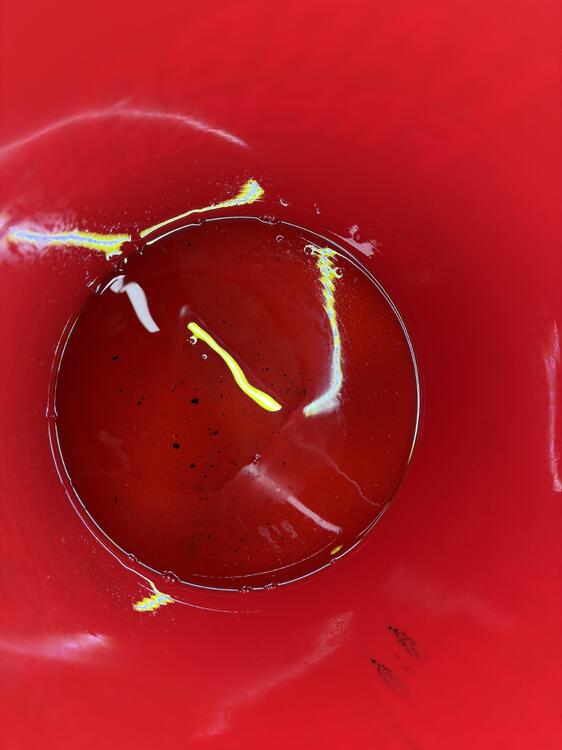
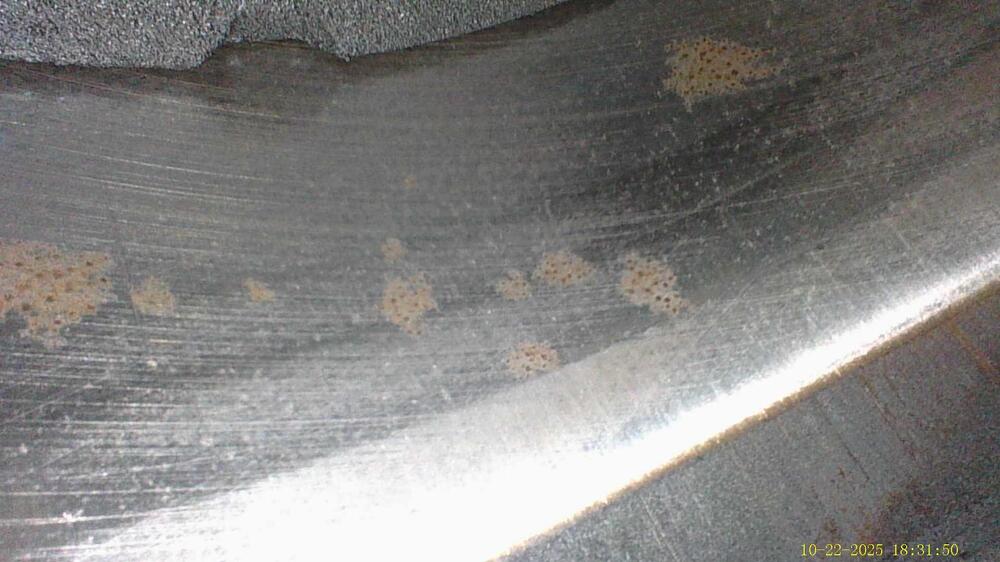
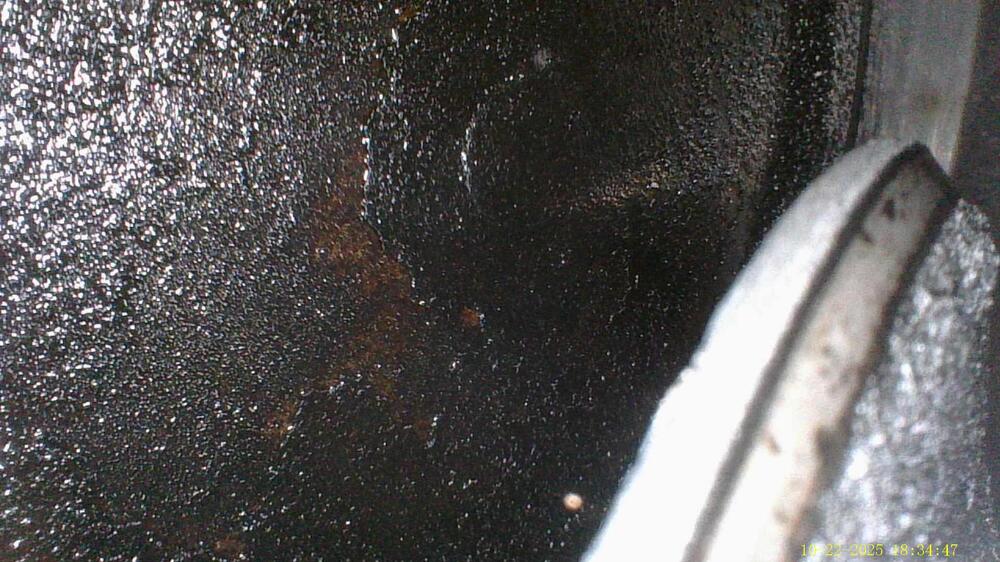
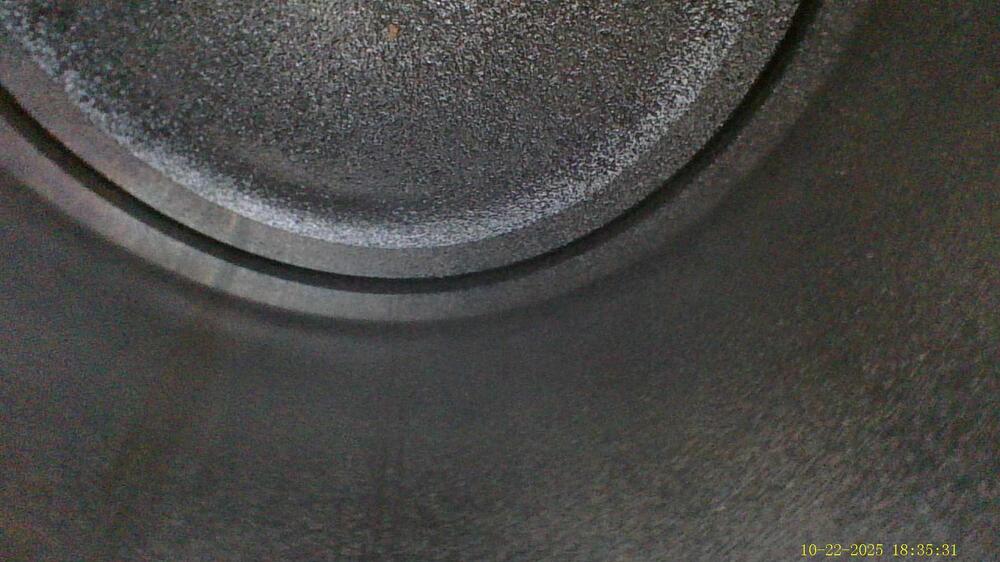
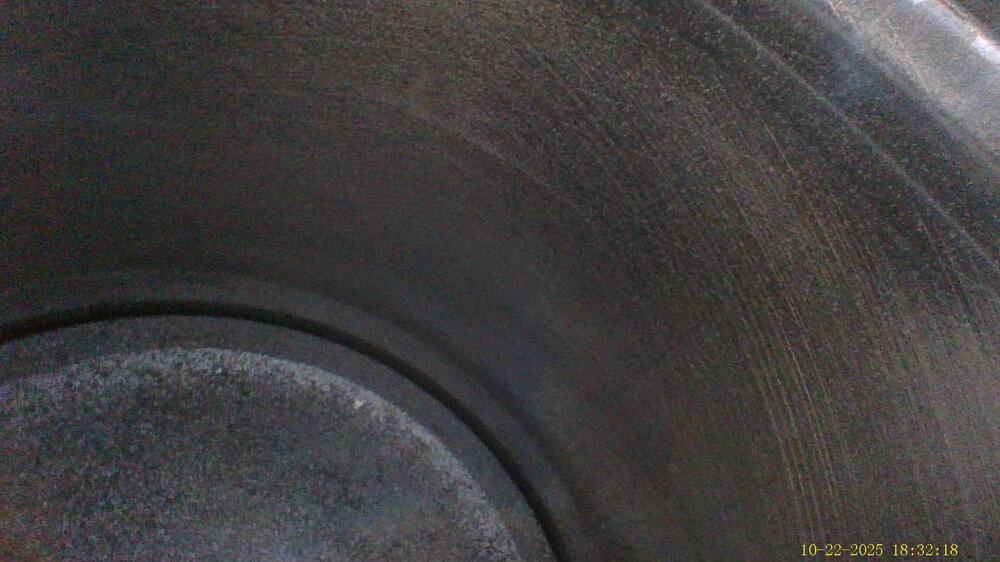
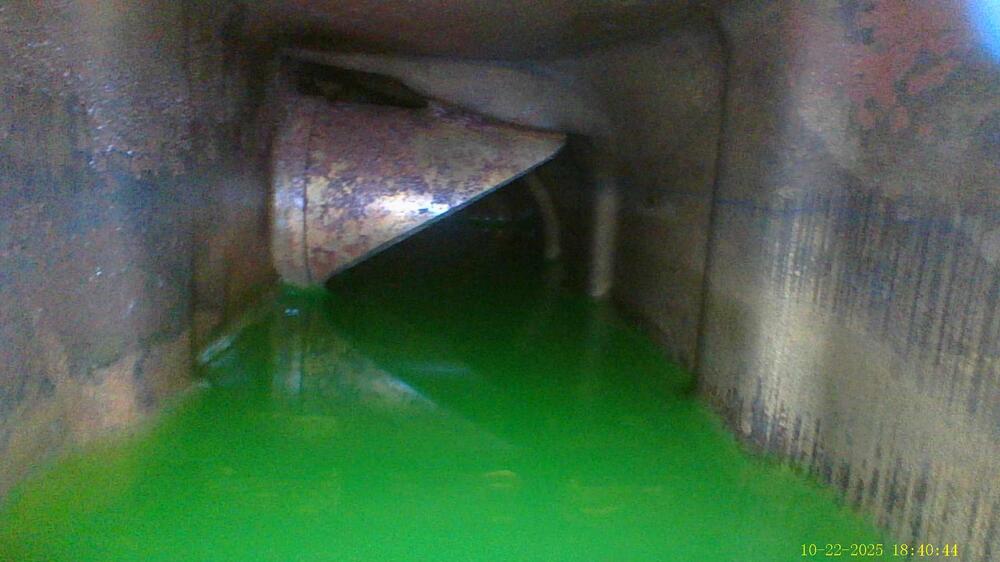
Wow! Look how time flies! Its been a while since my last post. Things have been busy. I wasn't happy with my work space. Since I am at an apartment complex my garage was facing the apartments and I dont want to bother people with any noise that I make. I finally managed to switch to a garage on the back side of the lot that's a lot more appropriate. Right after I switched I went back to Montana for the summer and I just got back a few weeks ago. I got to use my shiny new bore scope to check out the cylinders and I'm pretty happy with it so far. You tell me. Here are some highlights. I started with cylinder 6. The one valve I could see had no carbon buildup on the top of the valve and this was the worse rust I could find so far. This is cylinder 5. Cross hatch is perfect. Cylinder 4 was at the top of the stroke, nothing much to see This is cylinder 3, not looking to great, but at least there is oil. Cylinder 2 was clean and 1 was clean with a few small specs of rust. I managed to snake my way down the oil cap and took some pics Obviously in the radiator. This was the fluid level when I got the car. I cant complain too much. That was as far as I got today. I think my plan next is to figure out a way to spritz the cylinders with some fluid and rotate the engine by hand. I don't want to dump a bunch of fluid in there, I highly doubt it is seized.

-
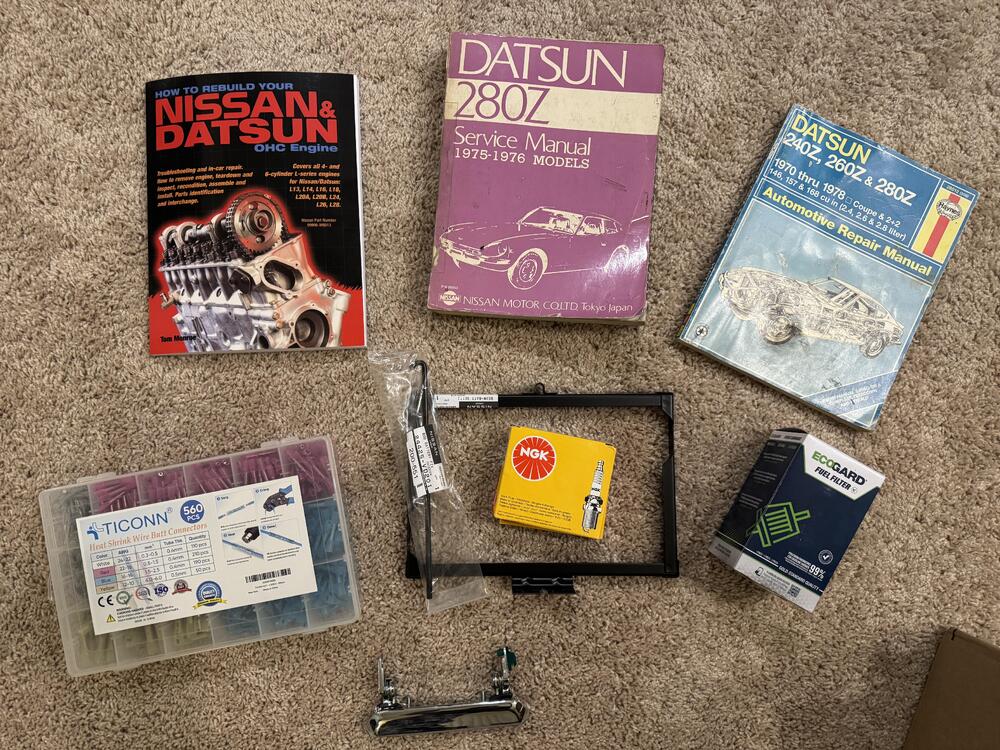
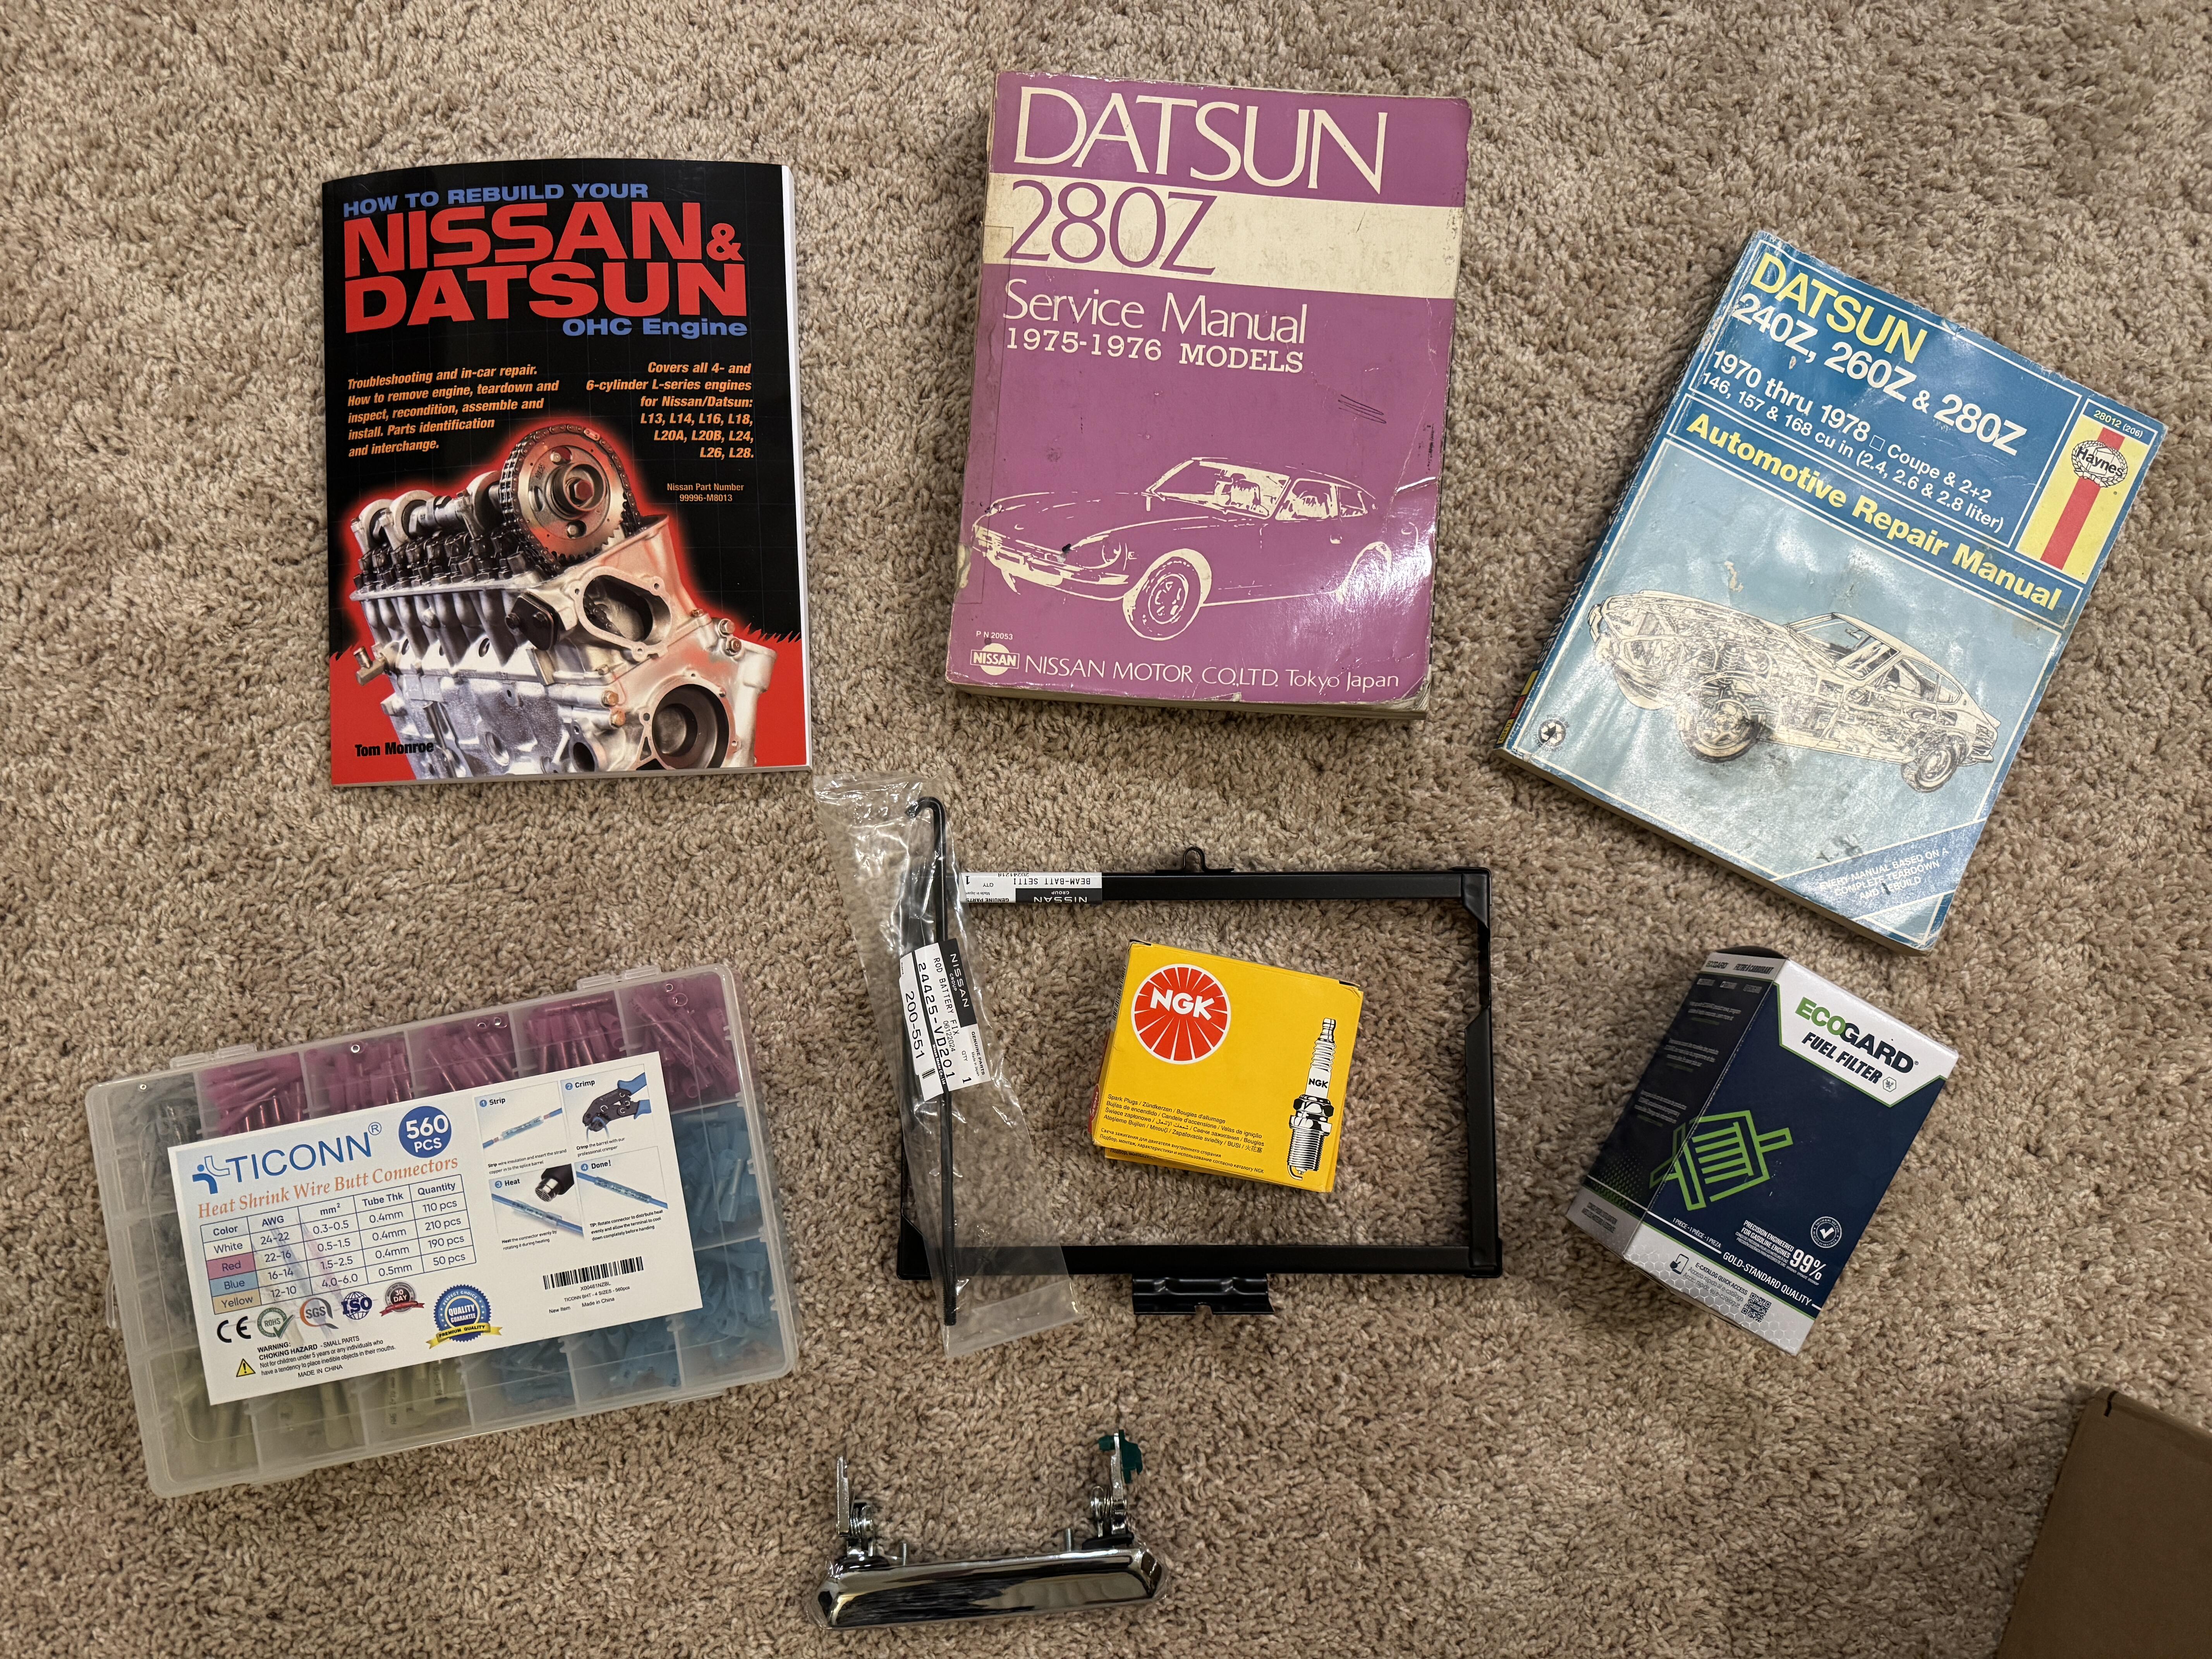
got me some shiny new tools, looking forward to some warmer weather!