HusseinHolland
Free Member
-
Joined
-
Last visited
Everything posted by HusseinHolland
-
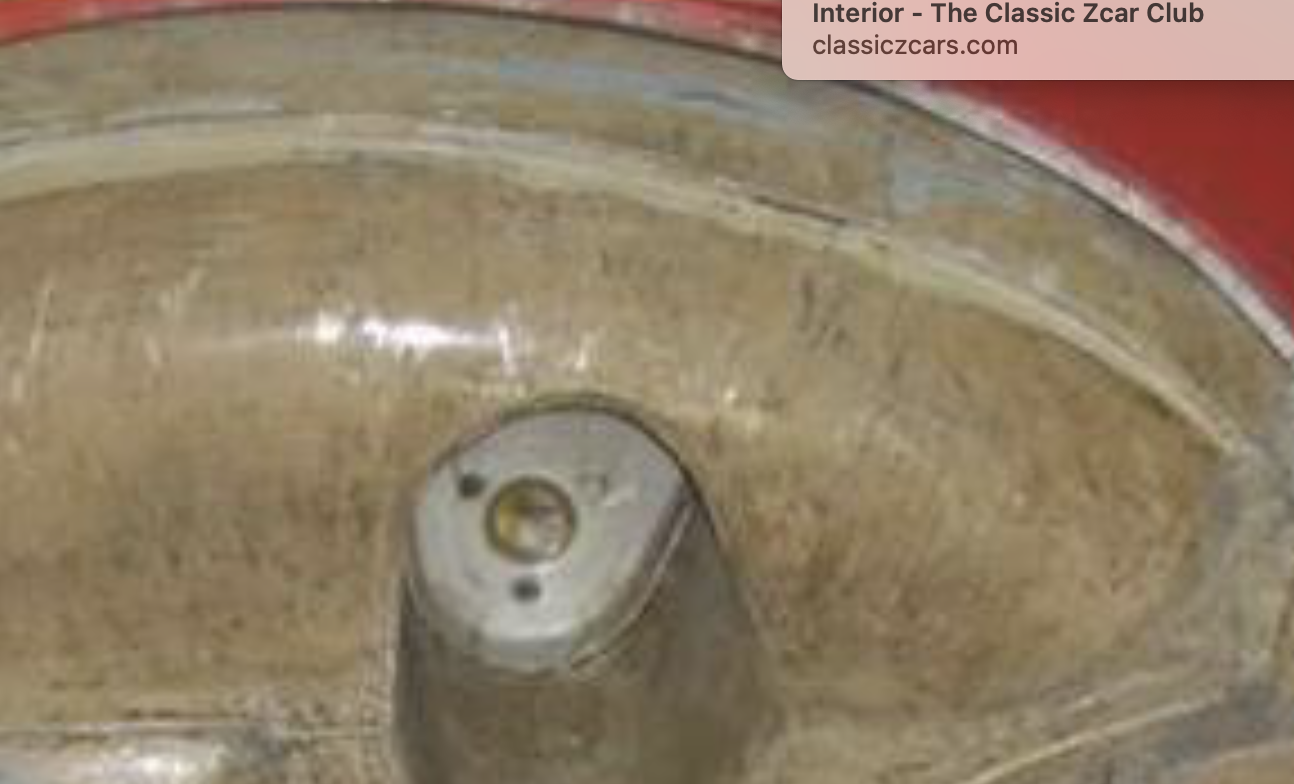
 Thank you - from that angle it does appear that the area where your belt reel mount holes are, is accessible from the underside. In which was I can add a nut-plate from beneath
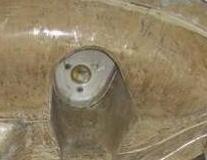

-
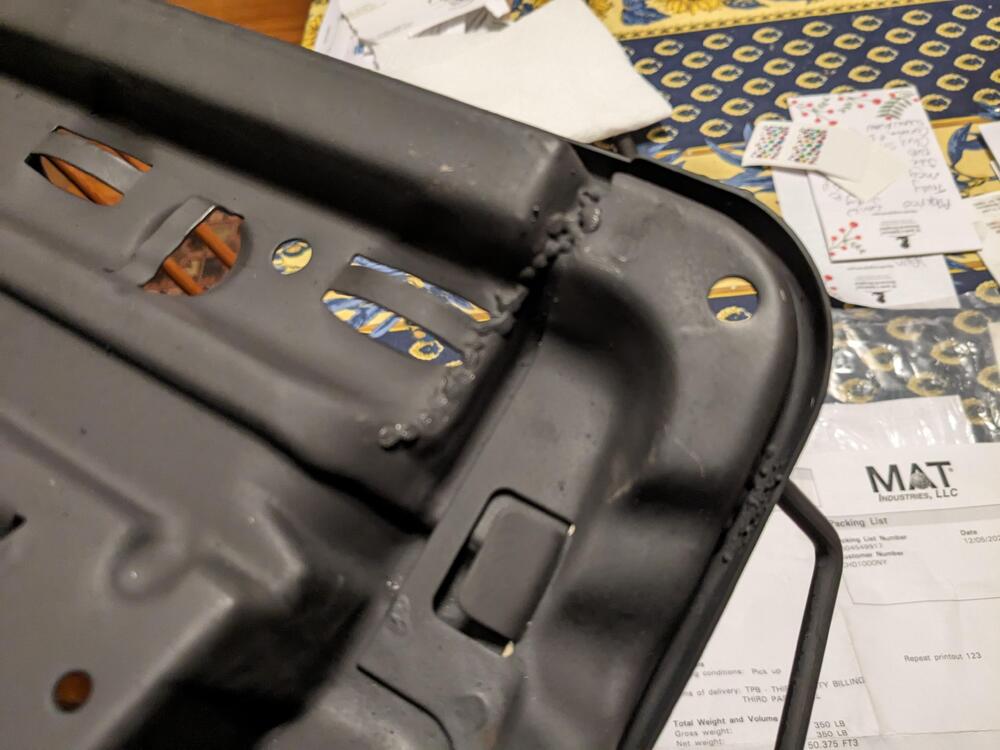
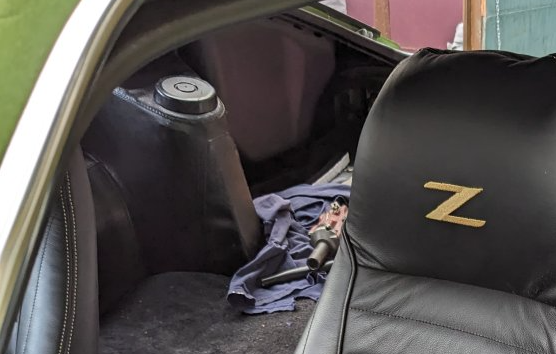
Trying to figure out if anyone has done this. I want to move the new seat belts to the towers if possible. I don't see how or if I can access the underside of the outer strut tower area where the seat belt reels attach on the 77-78 MY. It looks like that is a closed off area. Pic courtesy of CO My wheel arch - don't recall there being a way to reach into the outer section from below

-
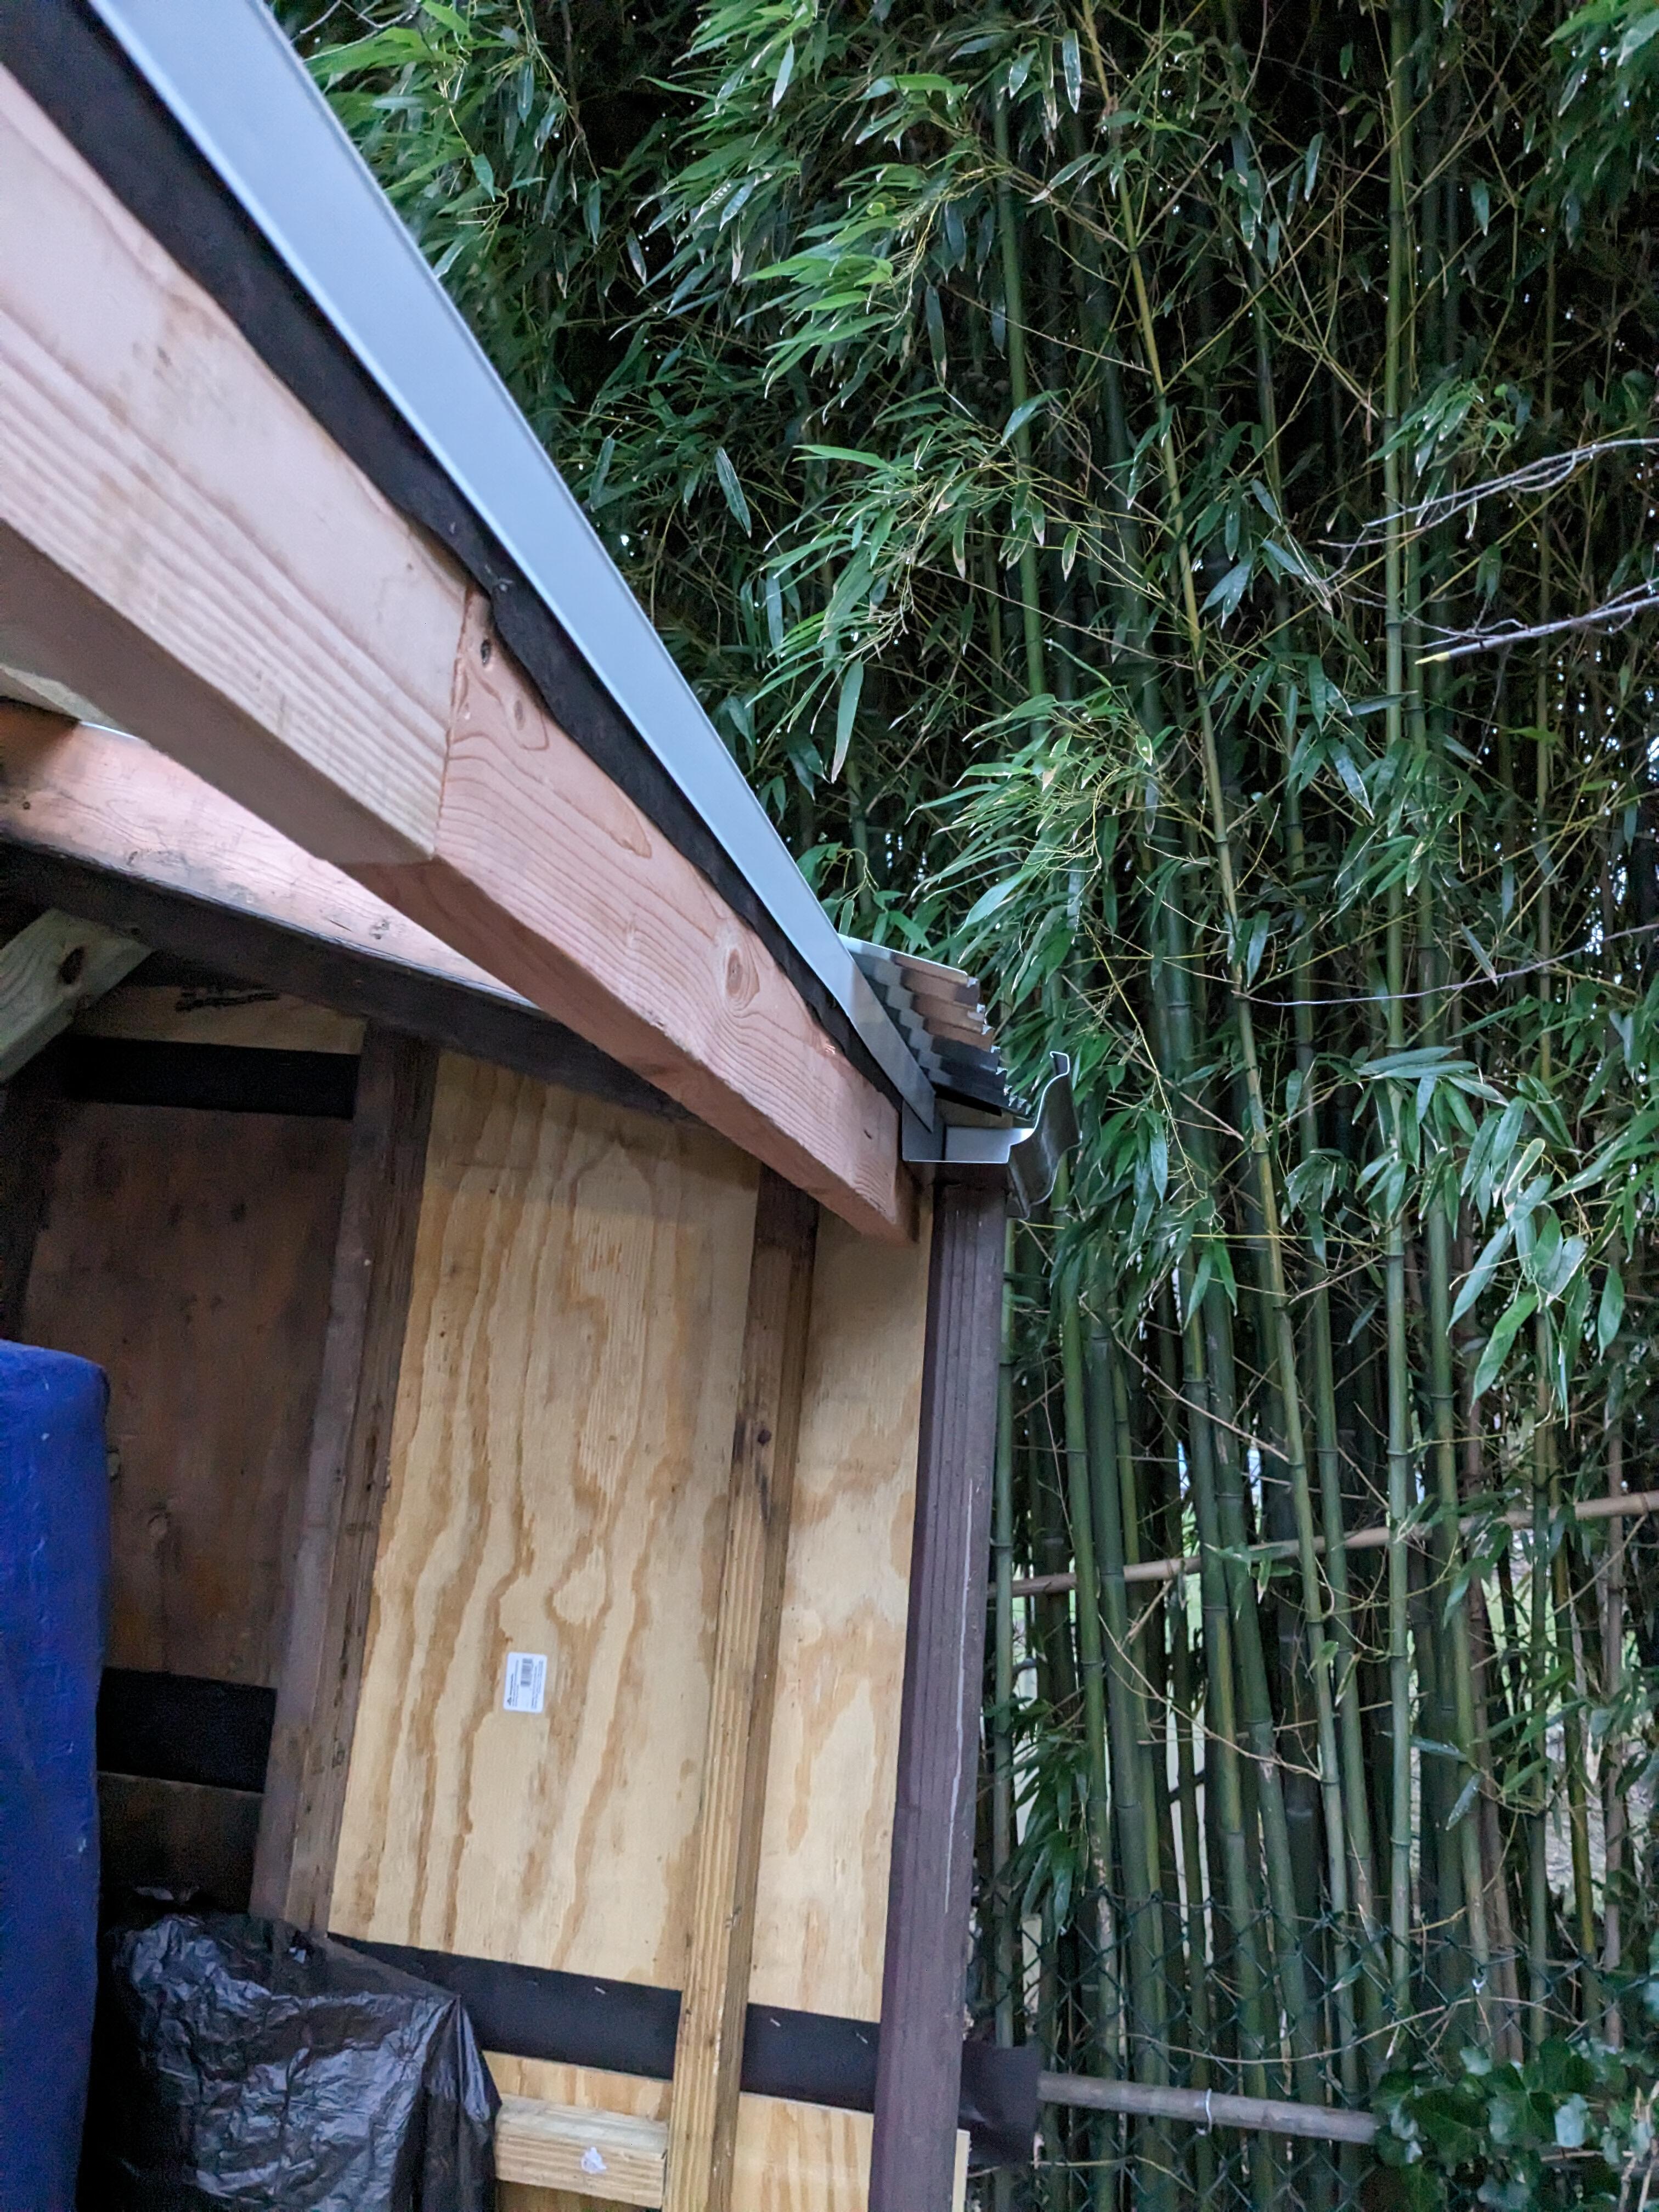
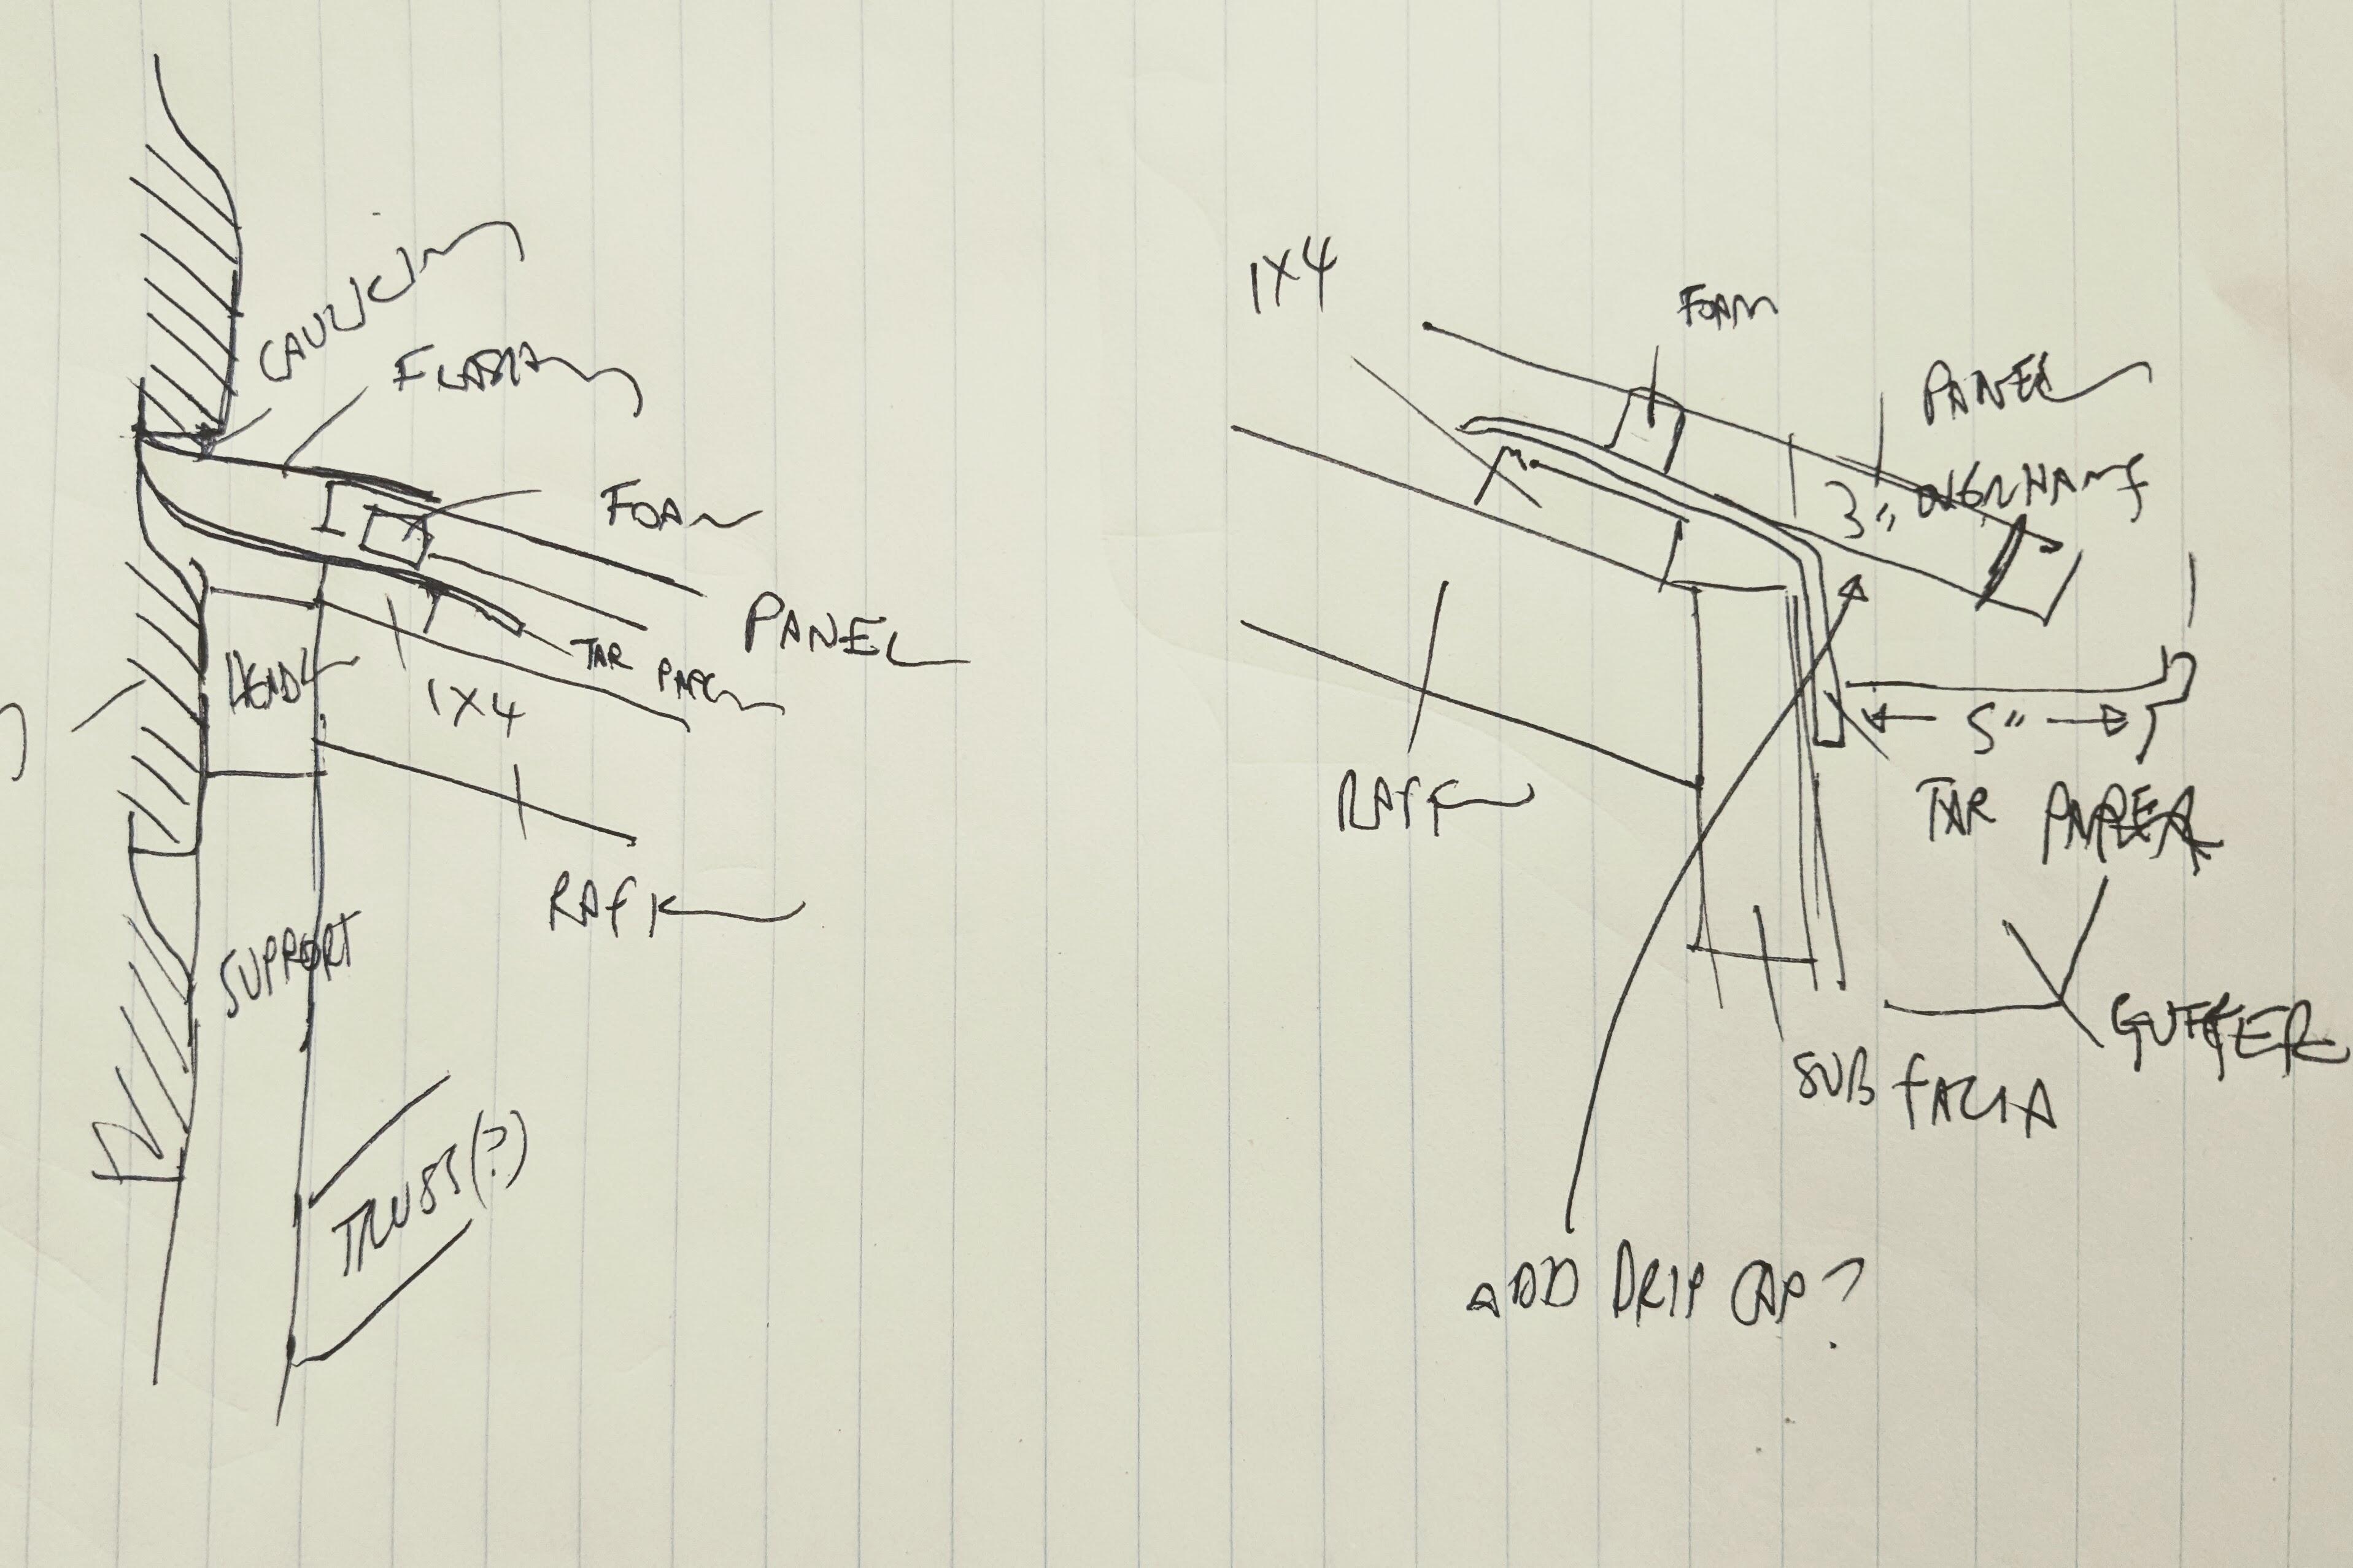
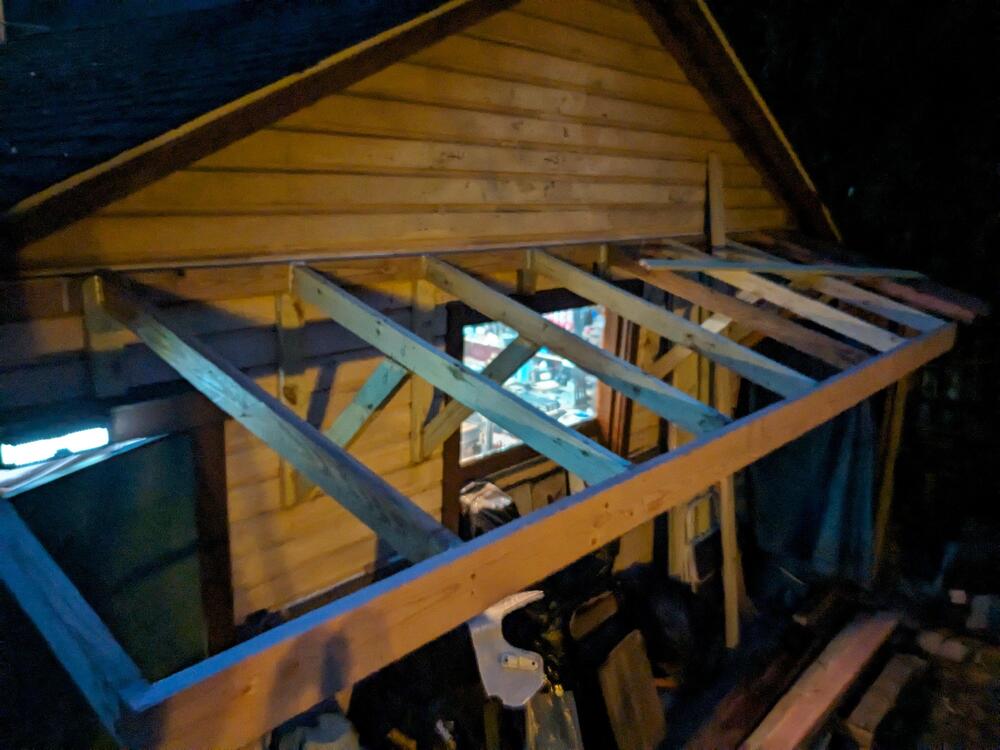
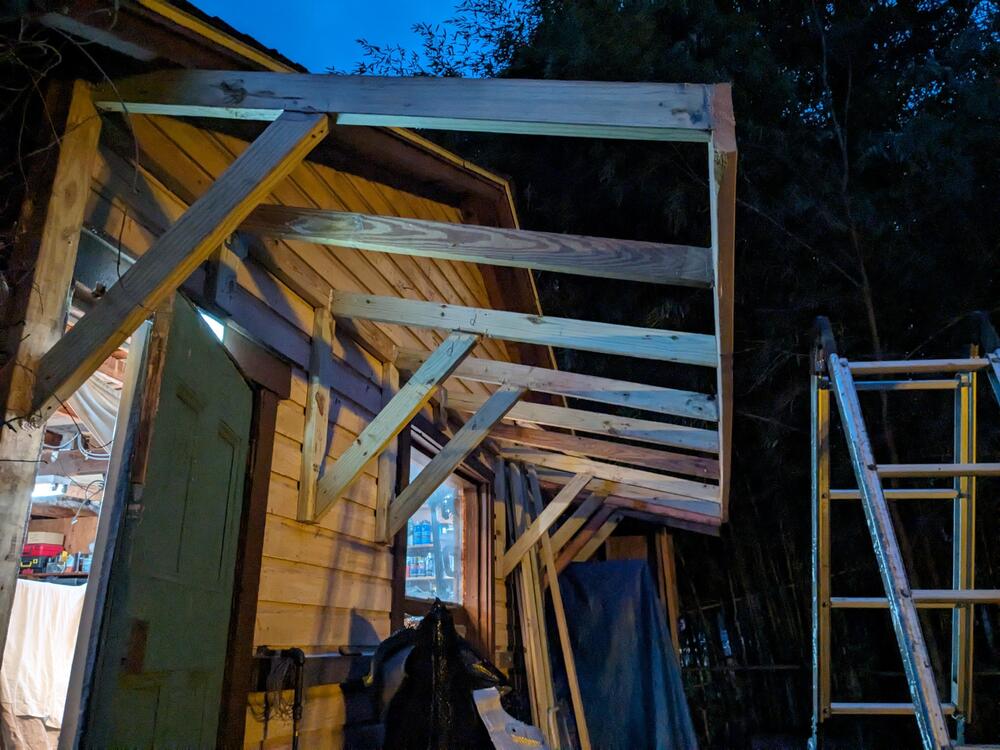
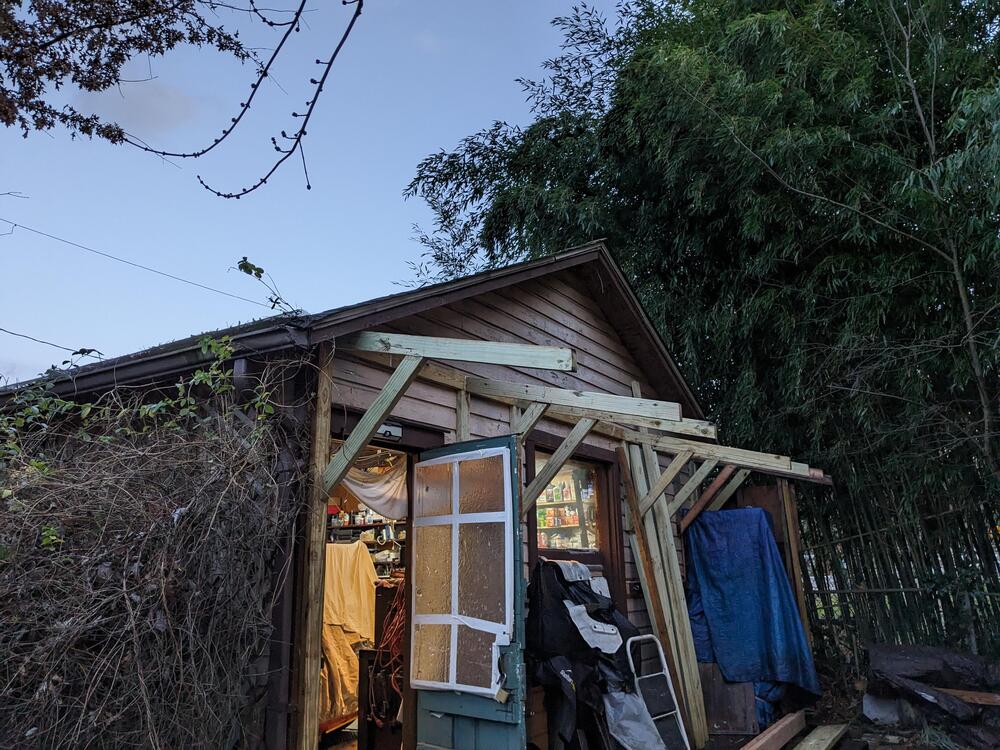
To address the flashing, I cut a 1/4" groove in the siding for the 1/4 lip on the flashing, which I will fill with a urethane sealant & then nail the vertical below the groove, with sealant behind that. Added joist hangers to the rafters at the subfacia. Added a stud, and finished out the paneling behind the press to a depth of 58". Going to add another 2x10 plank for the platform to make it deep enough to easily walk on & move the heavy equipment around, which will even it out with the end panel depth. The universal foam I bought from Home Depot is supposed to expand to up to 1", to seal the gap in the corrugation valleys. I don't think it's going to happen - I've left it unwrapped for over 24 hours, and 1/2 of it is just as uneven thickness as it was wrapped Gutter will sit along these lines

-
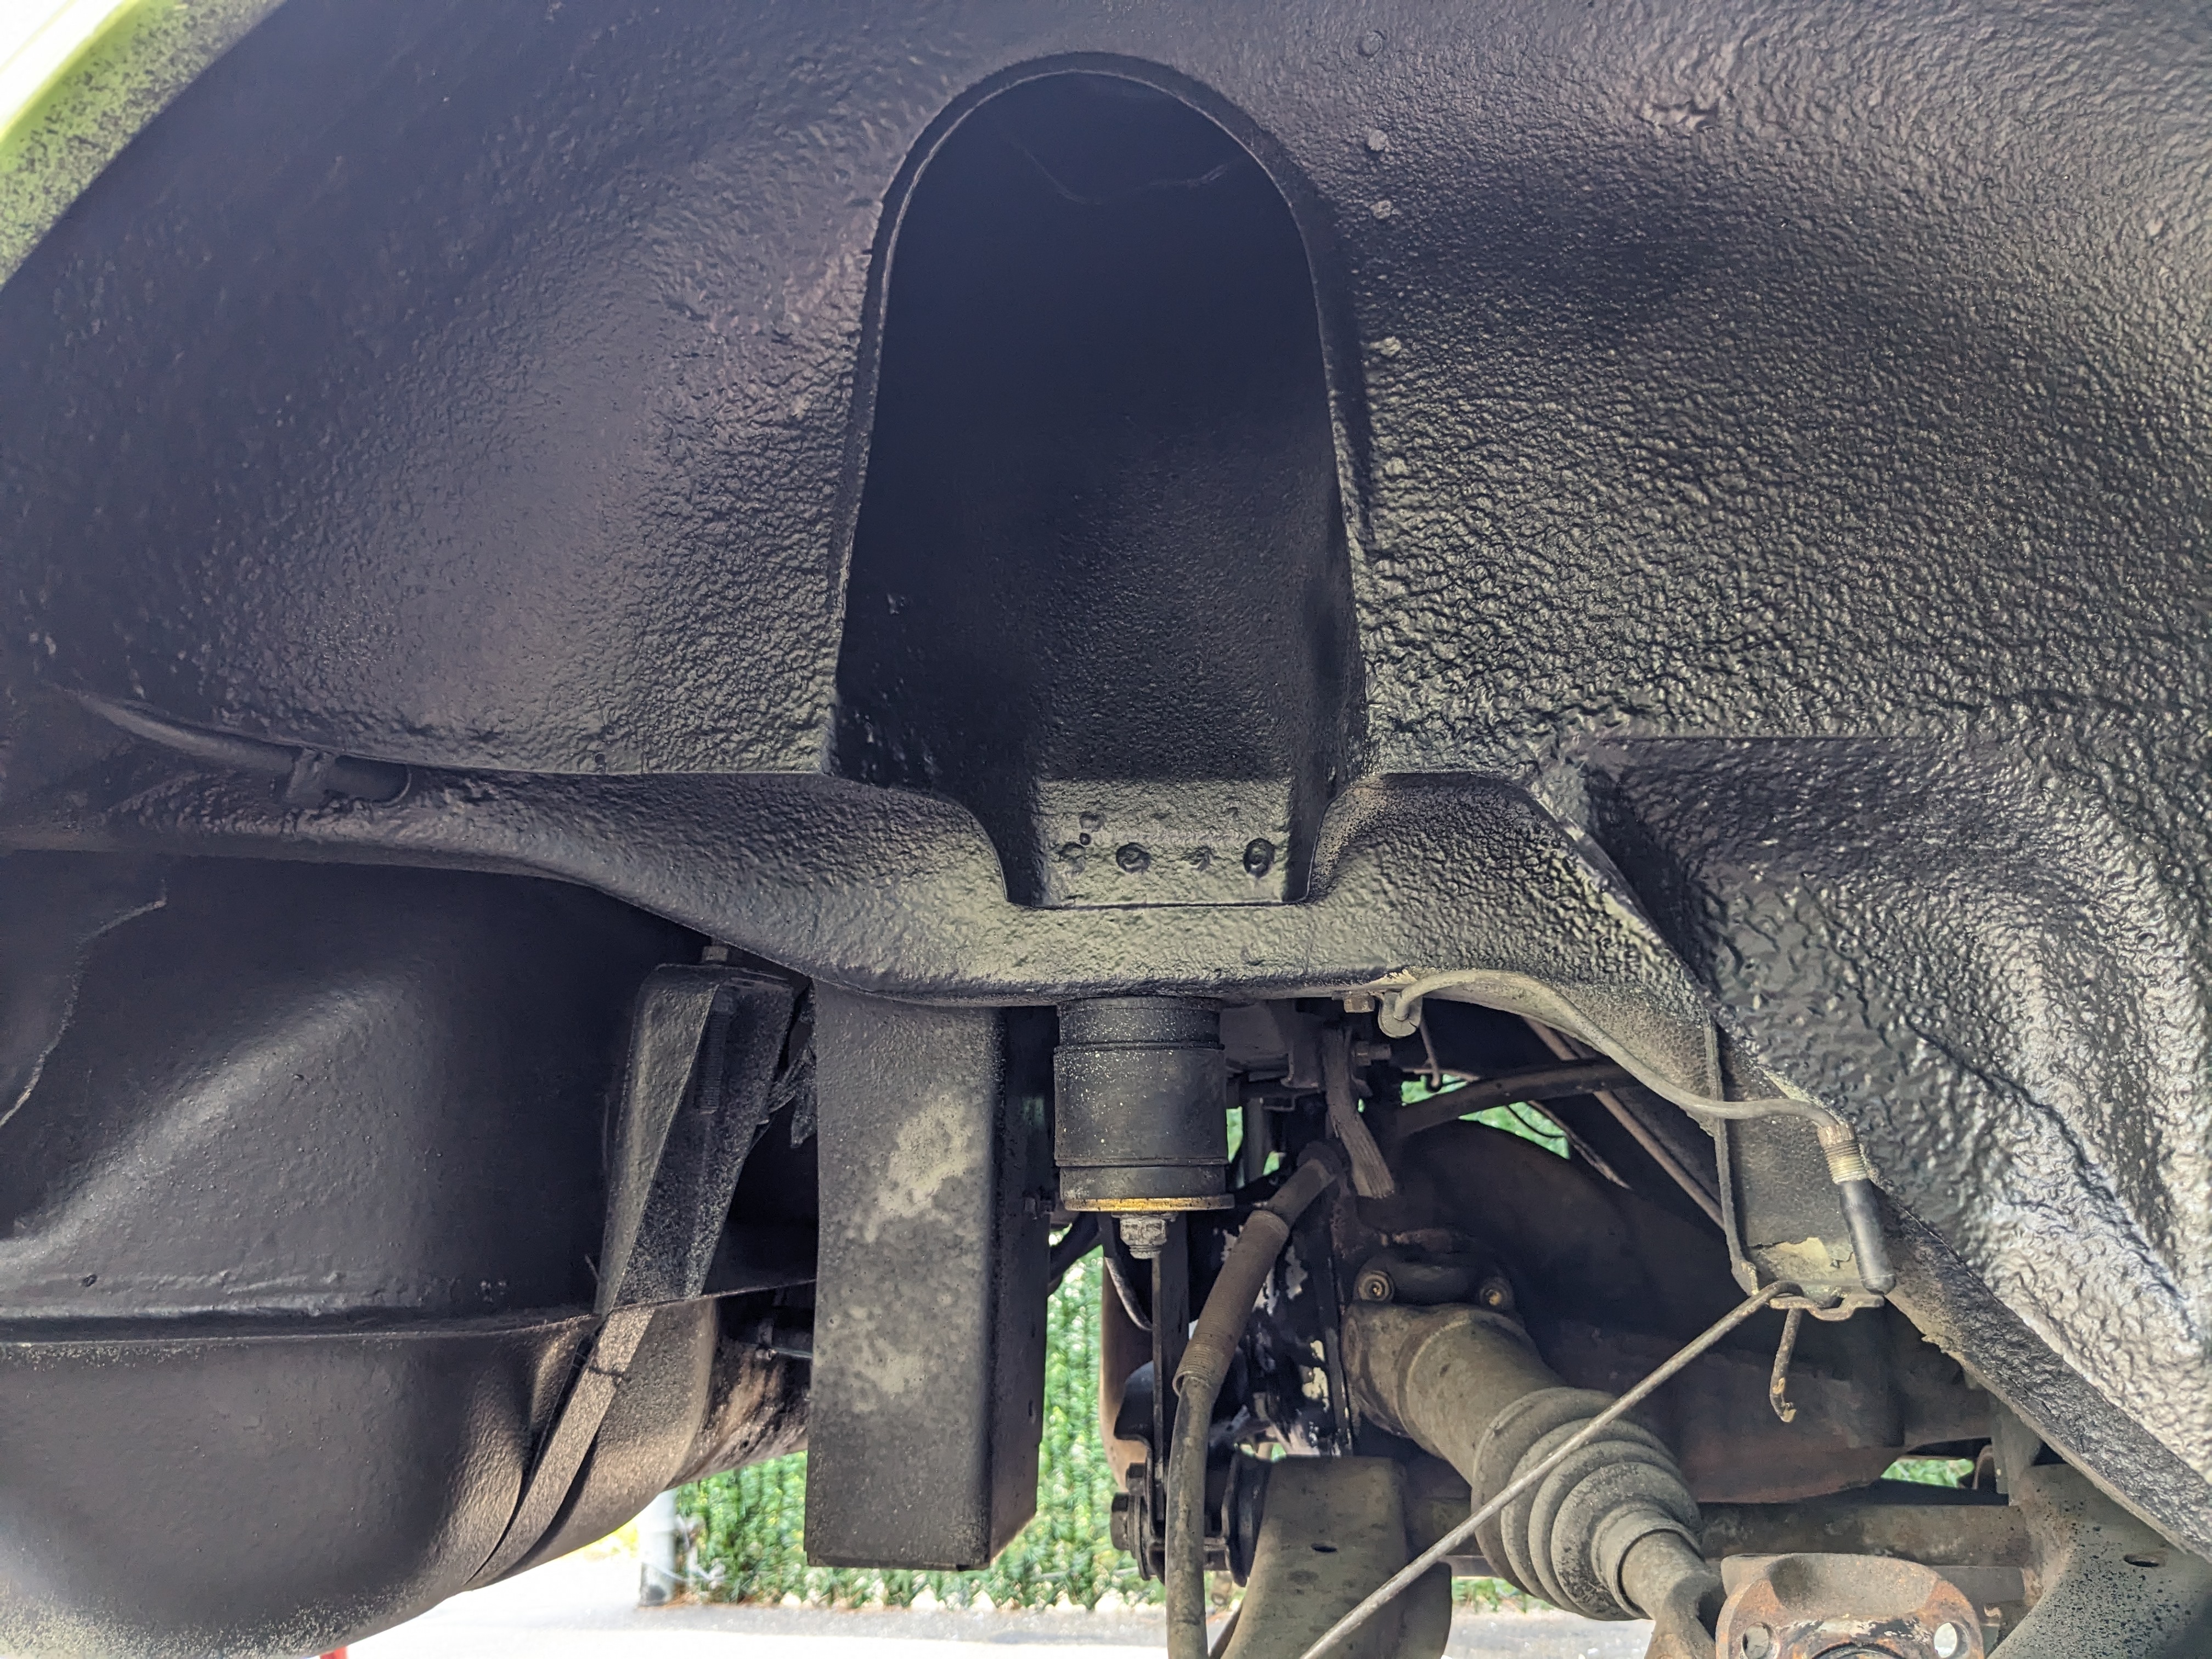
Ion addition to the above, your DS rocker appears to be rotted through at the front (pic4) - which means the various inner sections are likely in need of repair/sectioning. If you haven't already, look at Dave 71/240Z thread for clear pic of what the repair work will look like
-
Added the center 1x4 run & started figuring out the upper 2' corrugation overlap & flashing at the siding. Overlap roofing will have butyl seal, and foam seal at the flashing. Waiting for the short screws for the overlap risers Added a drip seal along the siding recess after this - since the flashing cannot fit behind the siding, I need to figure out an alternative sealing method for that. Secured the two outer panels temporarily to check alignment & fit
-
Yes - the metal 90 degree drip cap / edge flashing. I'll ditch the foam at the bottom, didn't seem to make sense, just what I've seen looking online - probably referencing closed structures. At some point I'm going to extend the garage footprint rearward, so all this really only has to last a few years Edit- I do have the butyl type wide seal tape that I used for the frame openings on the new window installs I did some years back. I can use that instead of the tar paper, just have to heat the wood somewhat, it doesn't act very sticky in 30 degree weather
-
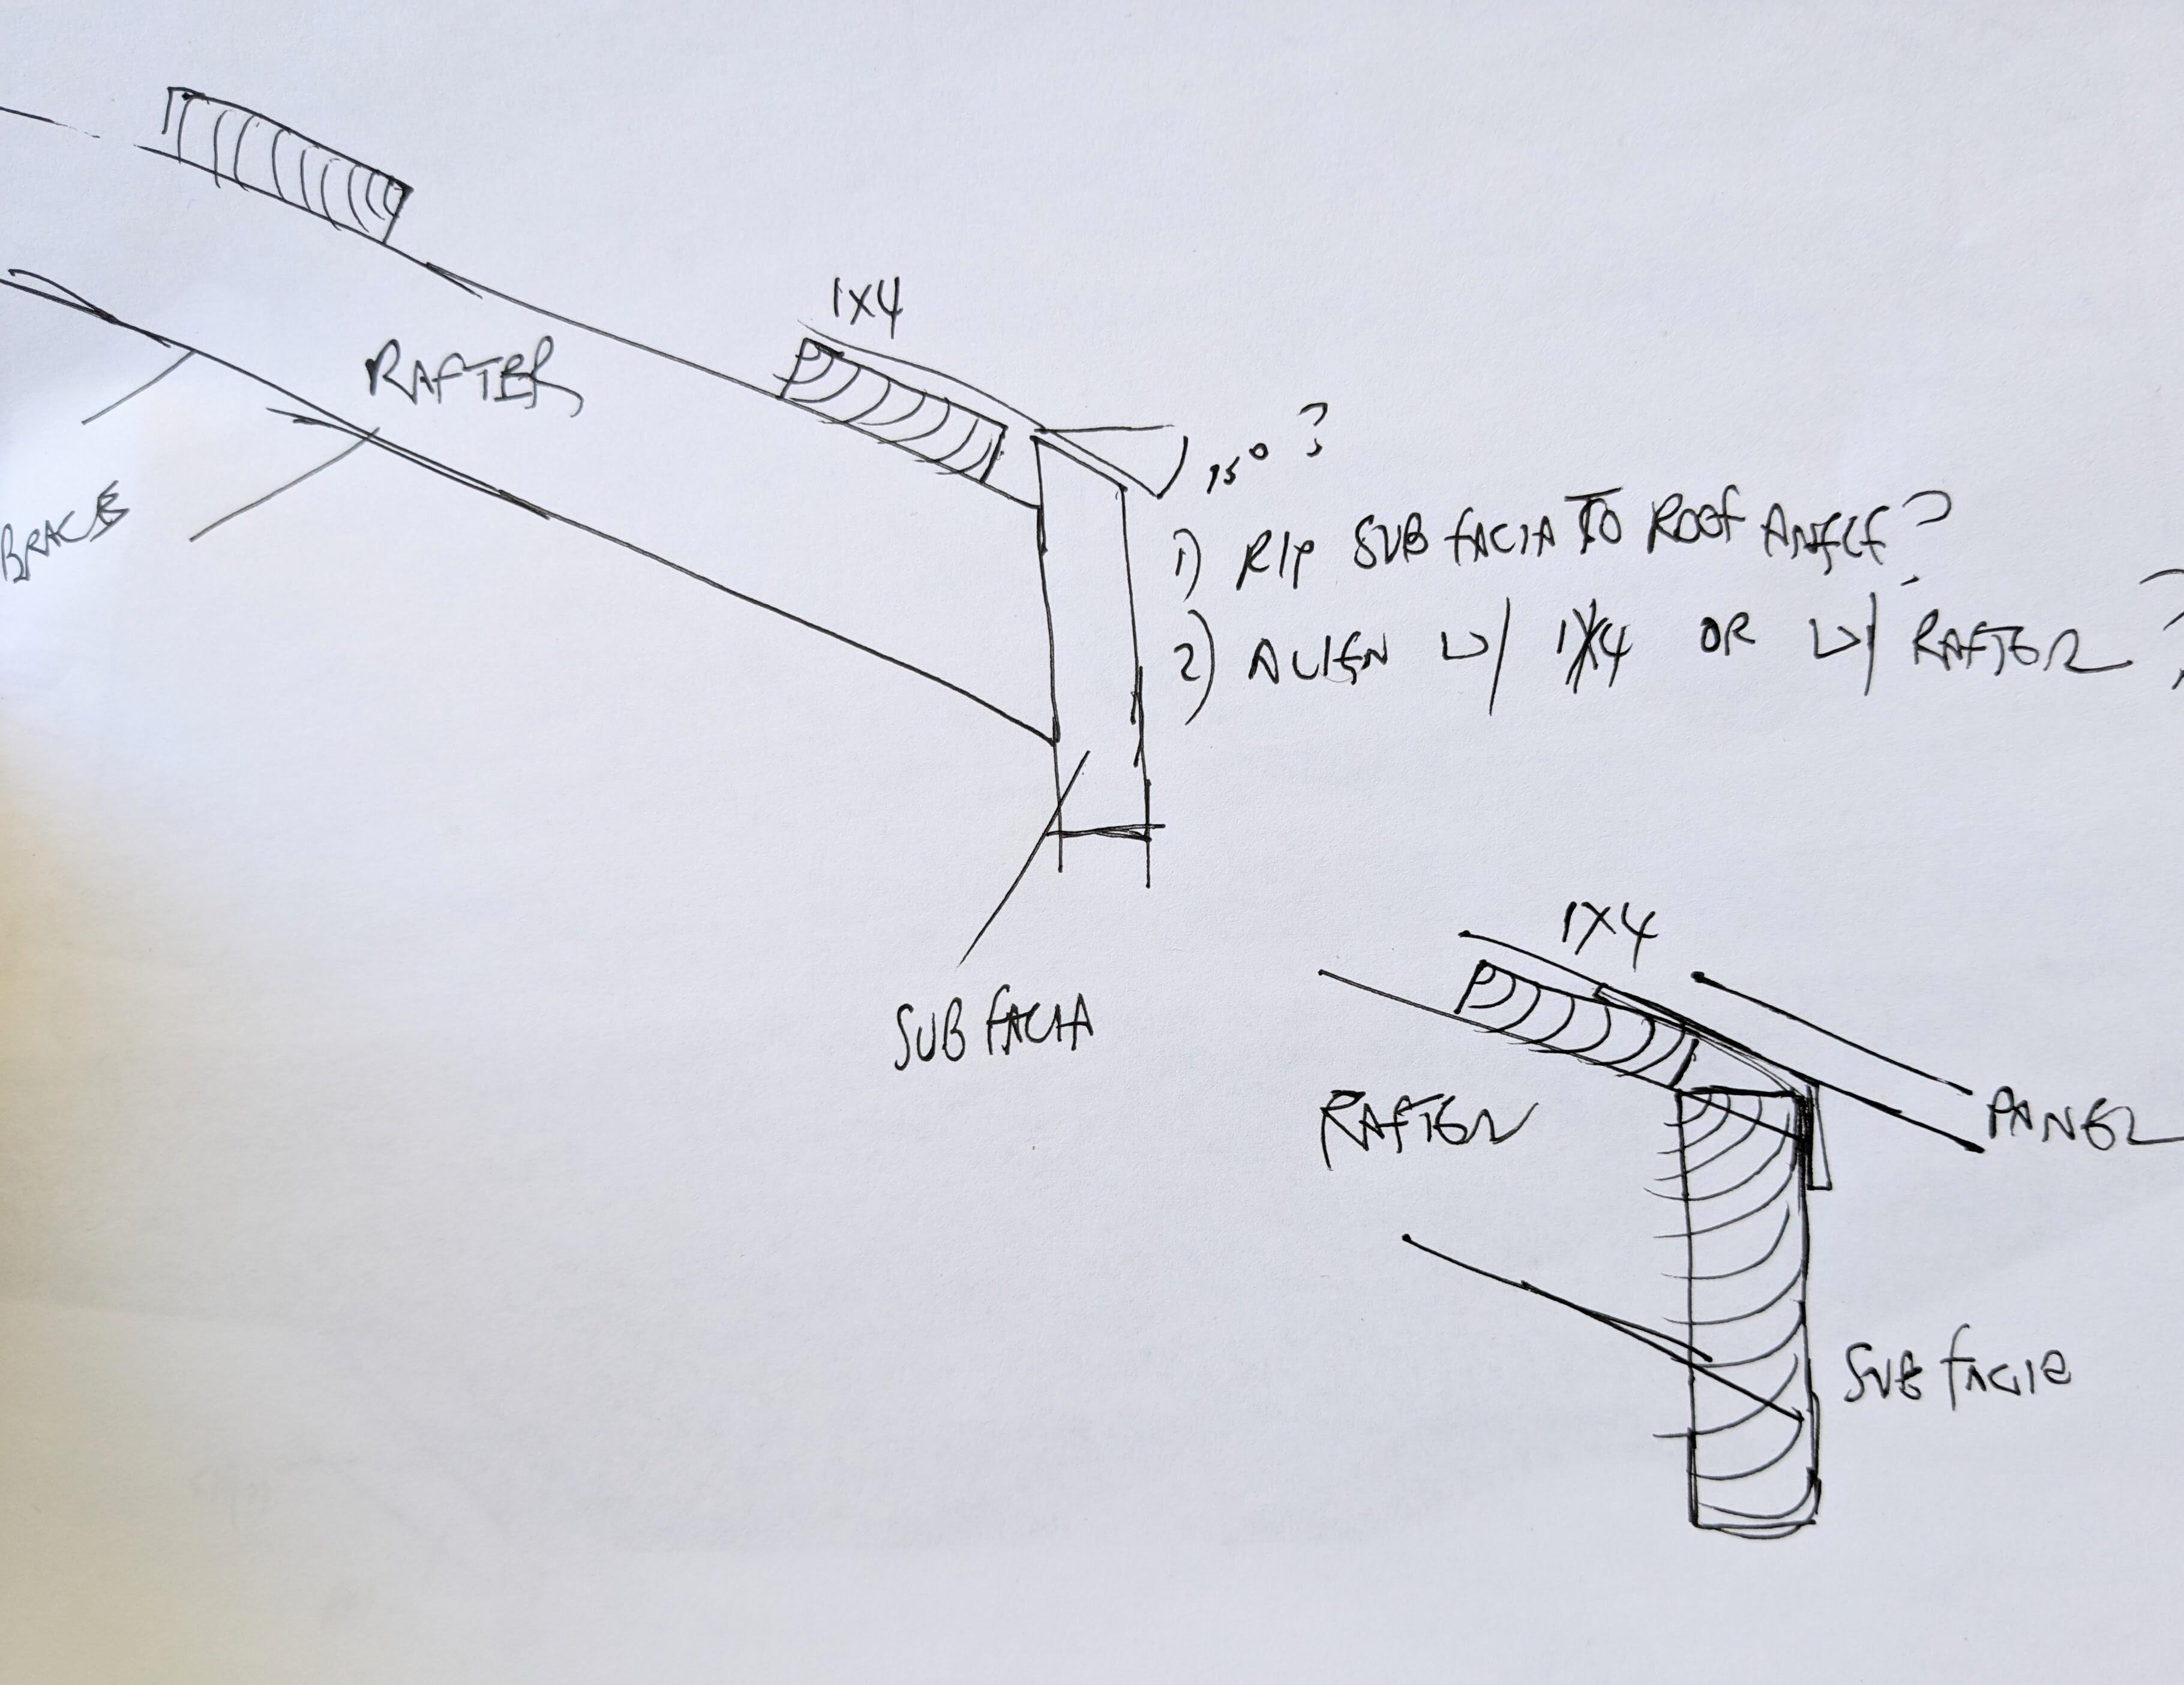
Thank you again. I will scrap the J channel idea. I can't find flashing that is corrugated for steel panels, or foam 'wave' closure that conforms to the panel contour, which was the main reason I was considering the J channel. I did find a 1" foam tape that is meant for metal panels, so I'll get that to use under the flashing, over the panel at the siiding, and at the facia end . Finding angle flashing besides drip edge seems to be problematic. I'll have to see what I can find. I got 1x4's along the top & outer edge of the rafters, along with another strip when the upper & lower roof panels will need to overlap. I still need to add another length of 1x4 in the middle of the span. I put tar paper along the outer 1x4 overlapping the sub facia. I will see if I can pry up the siding to tuck flashing under. I wedged tar paper up under the siding ridge as it stands, I can seal flashing up against that if not under. Test fitting the lower section of the roofing, with 3" overhang. I found that the 4th rafter from the right is not 24" OC, so I need to add a sister(?) rafter at 24" OC. Still have to buy the gutter. I had bought 1x6 to use as facia, not sure I need to bother with that now I have the 2x6. I could add drip edge, but I don't know if that's a requirement with a guttered awning.


-
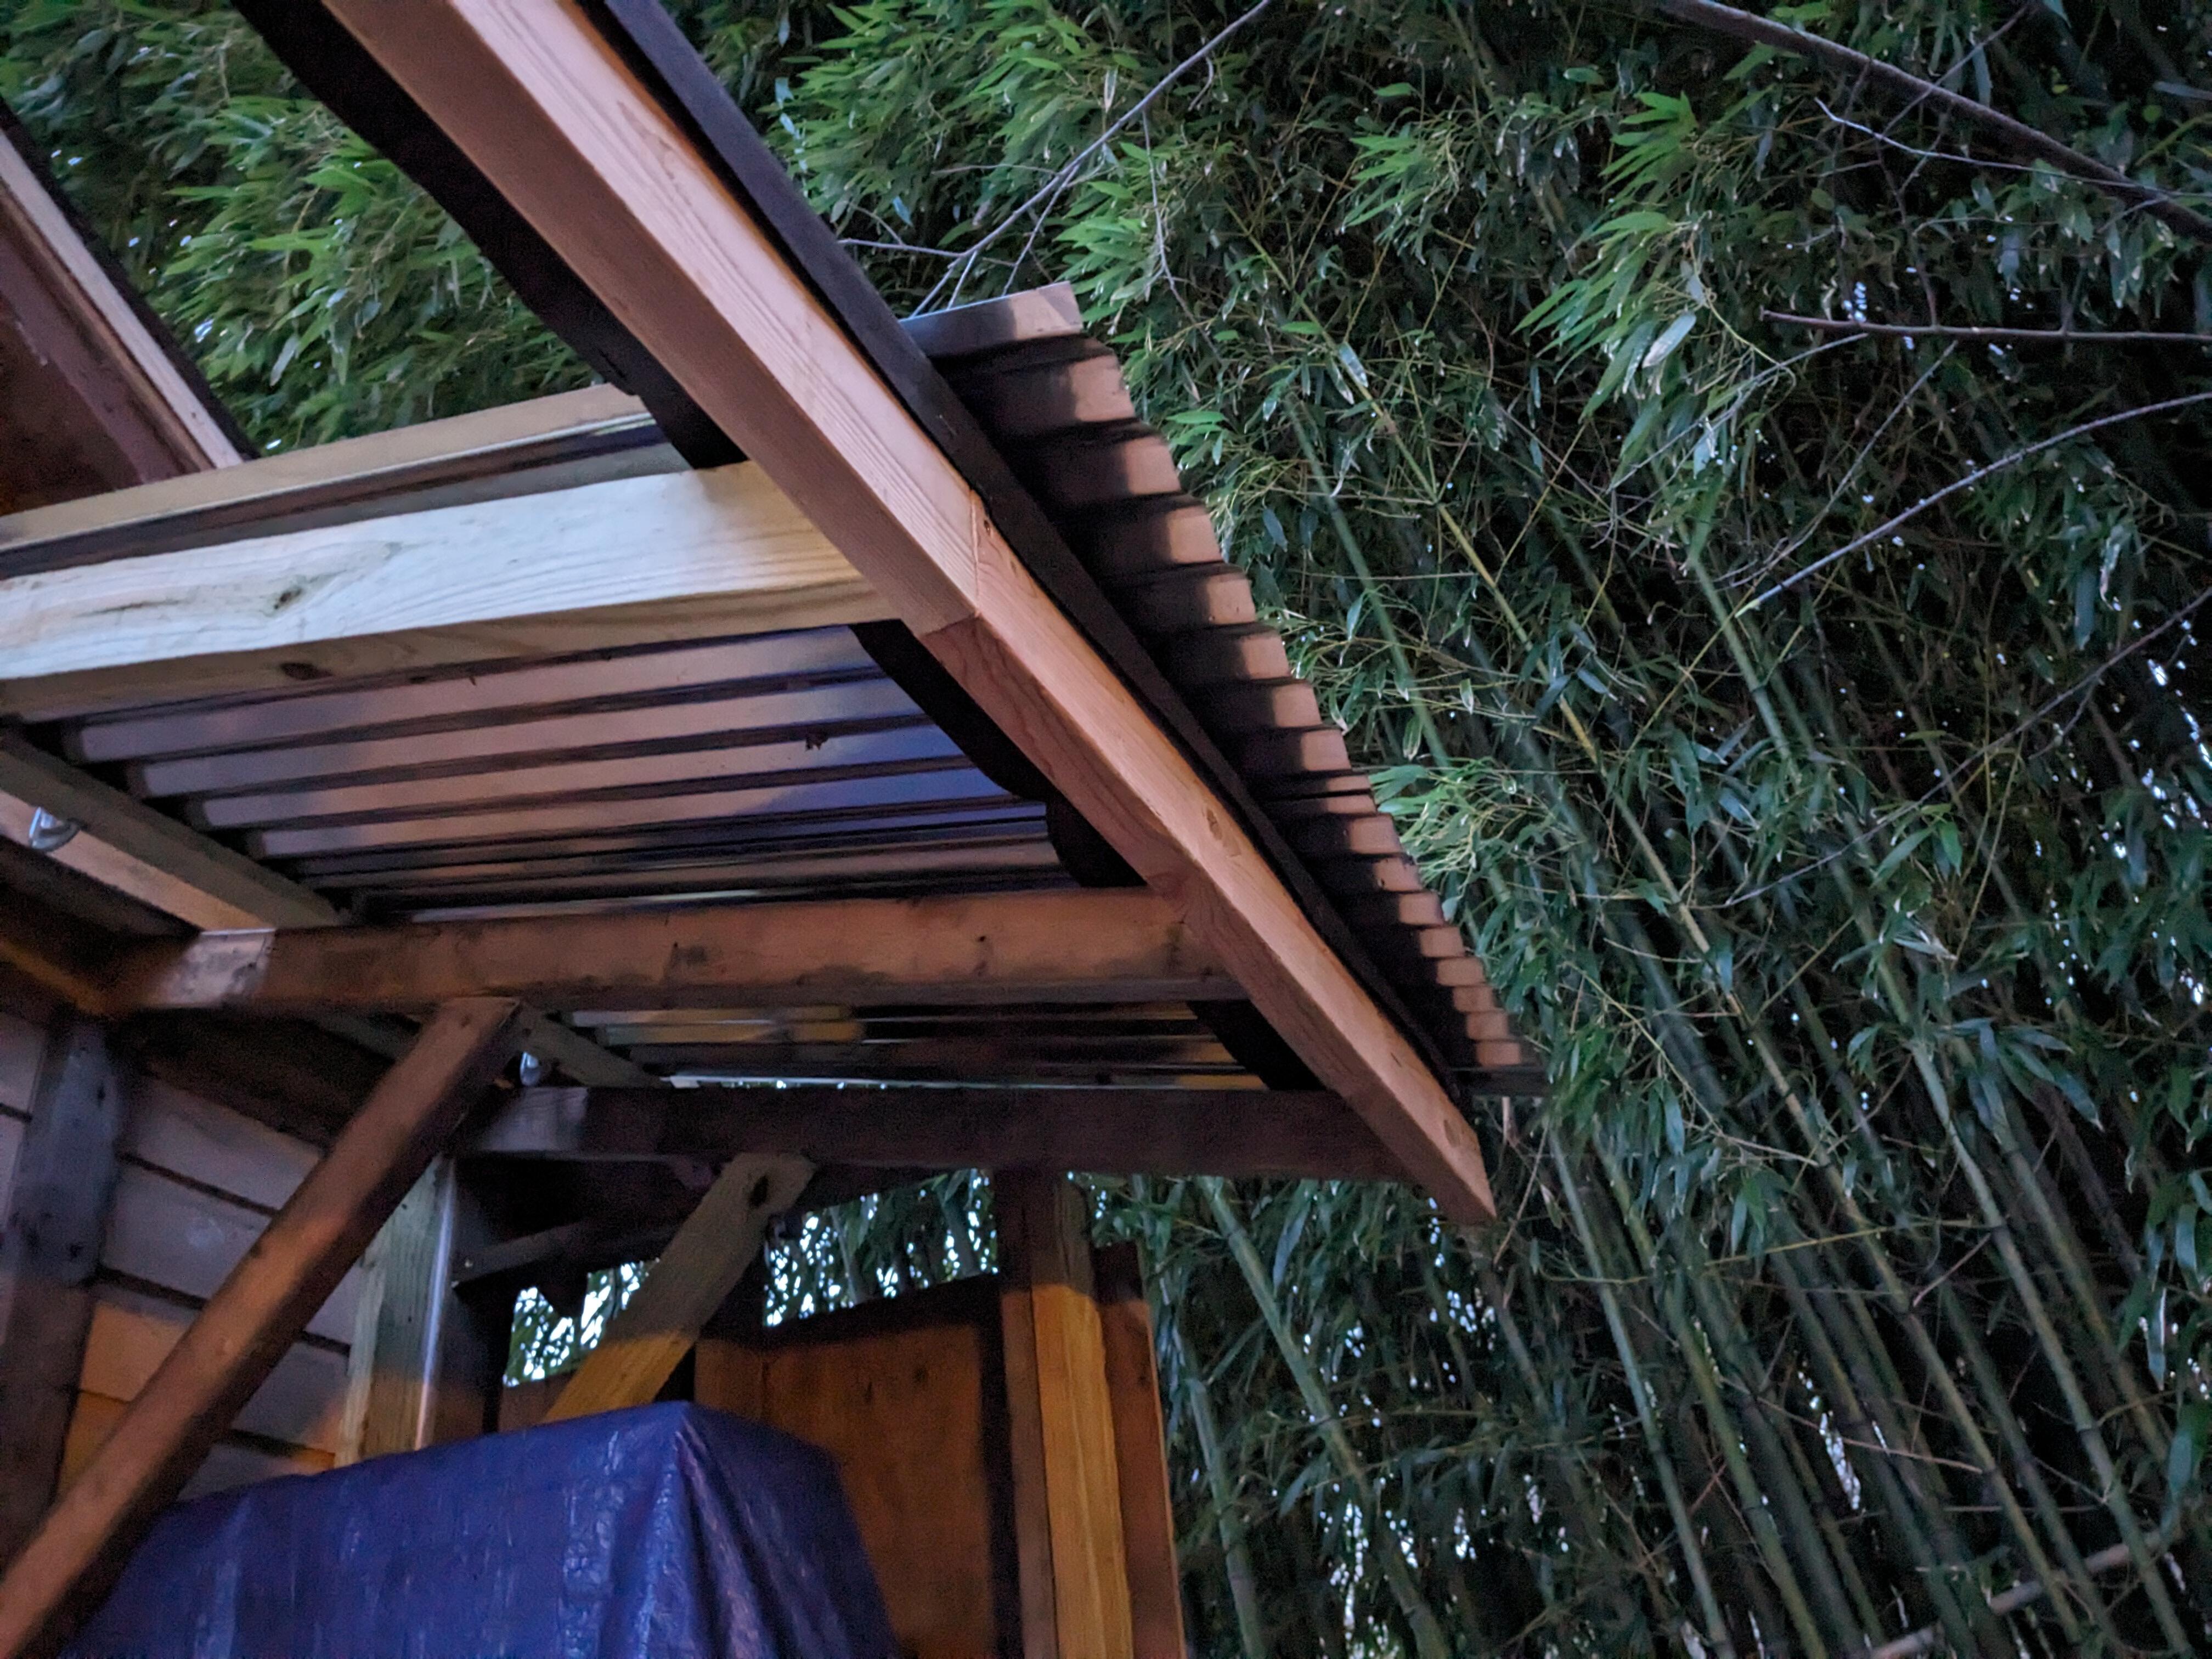
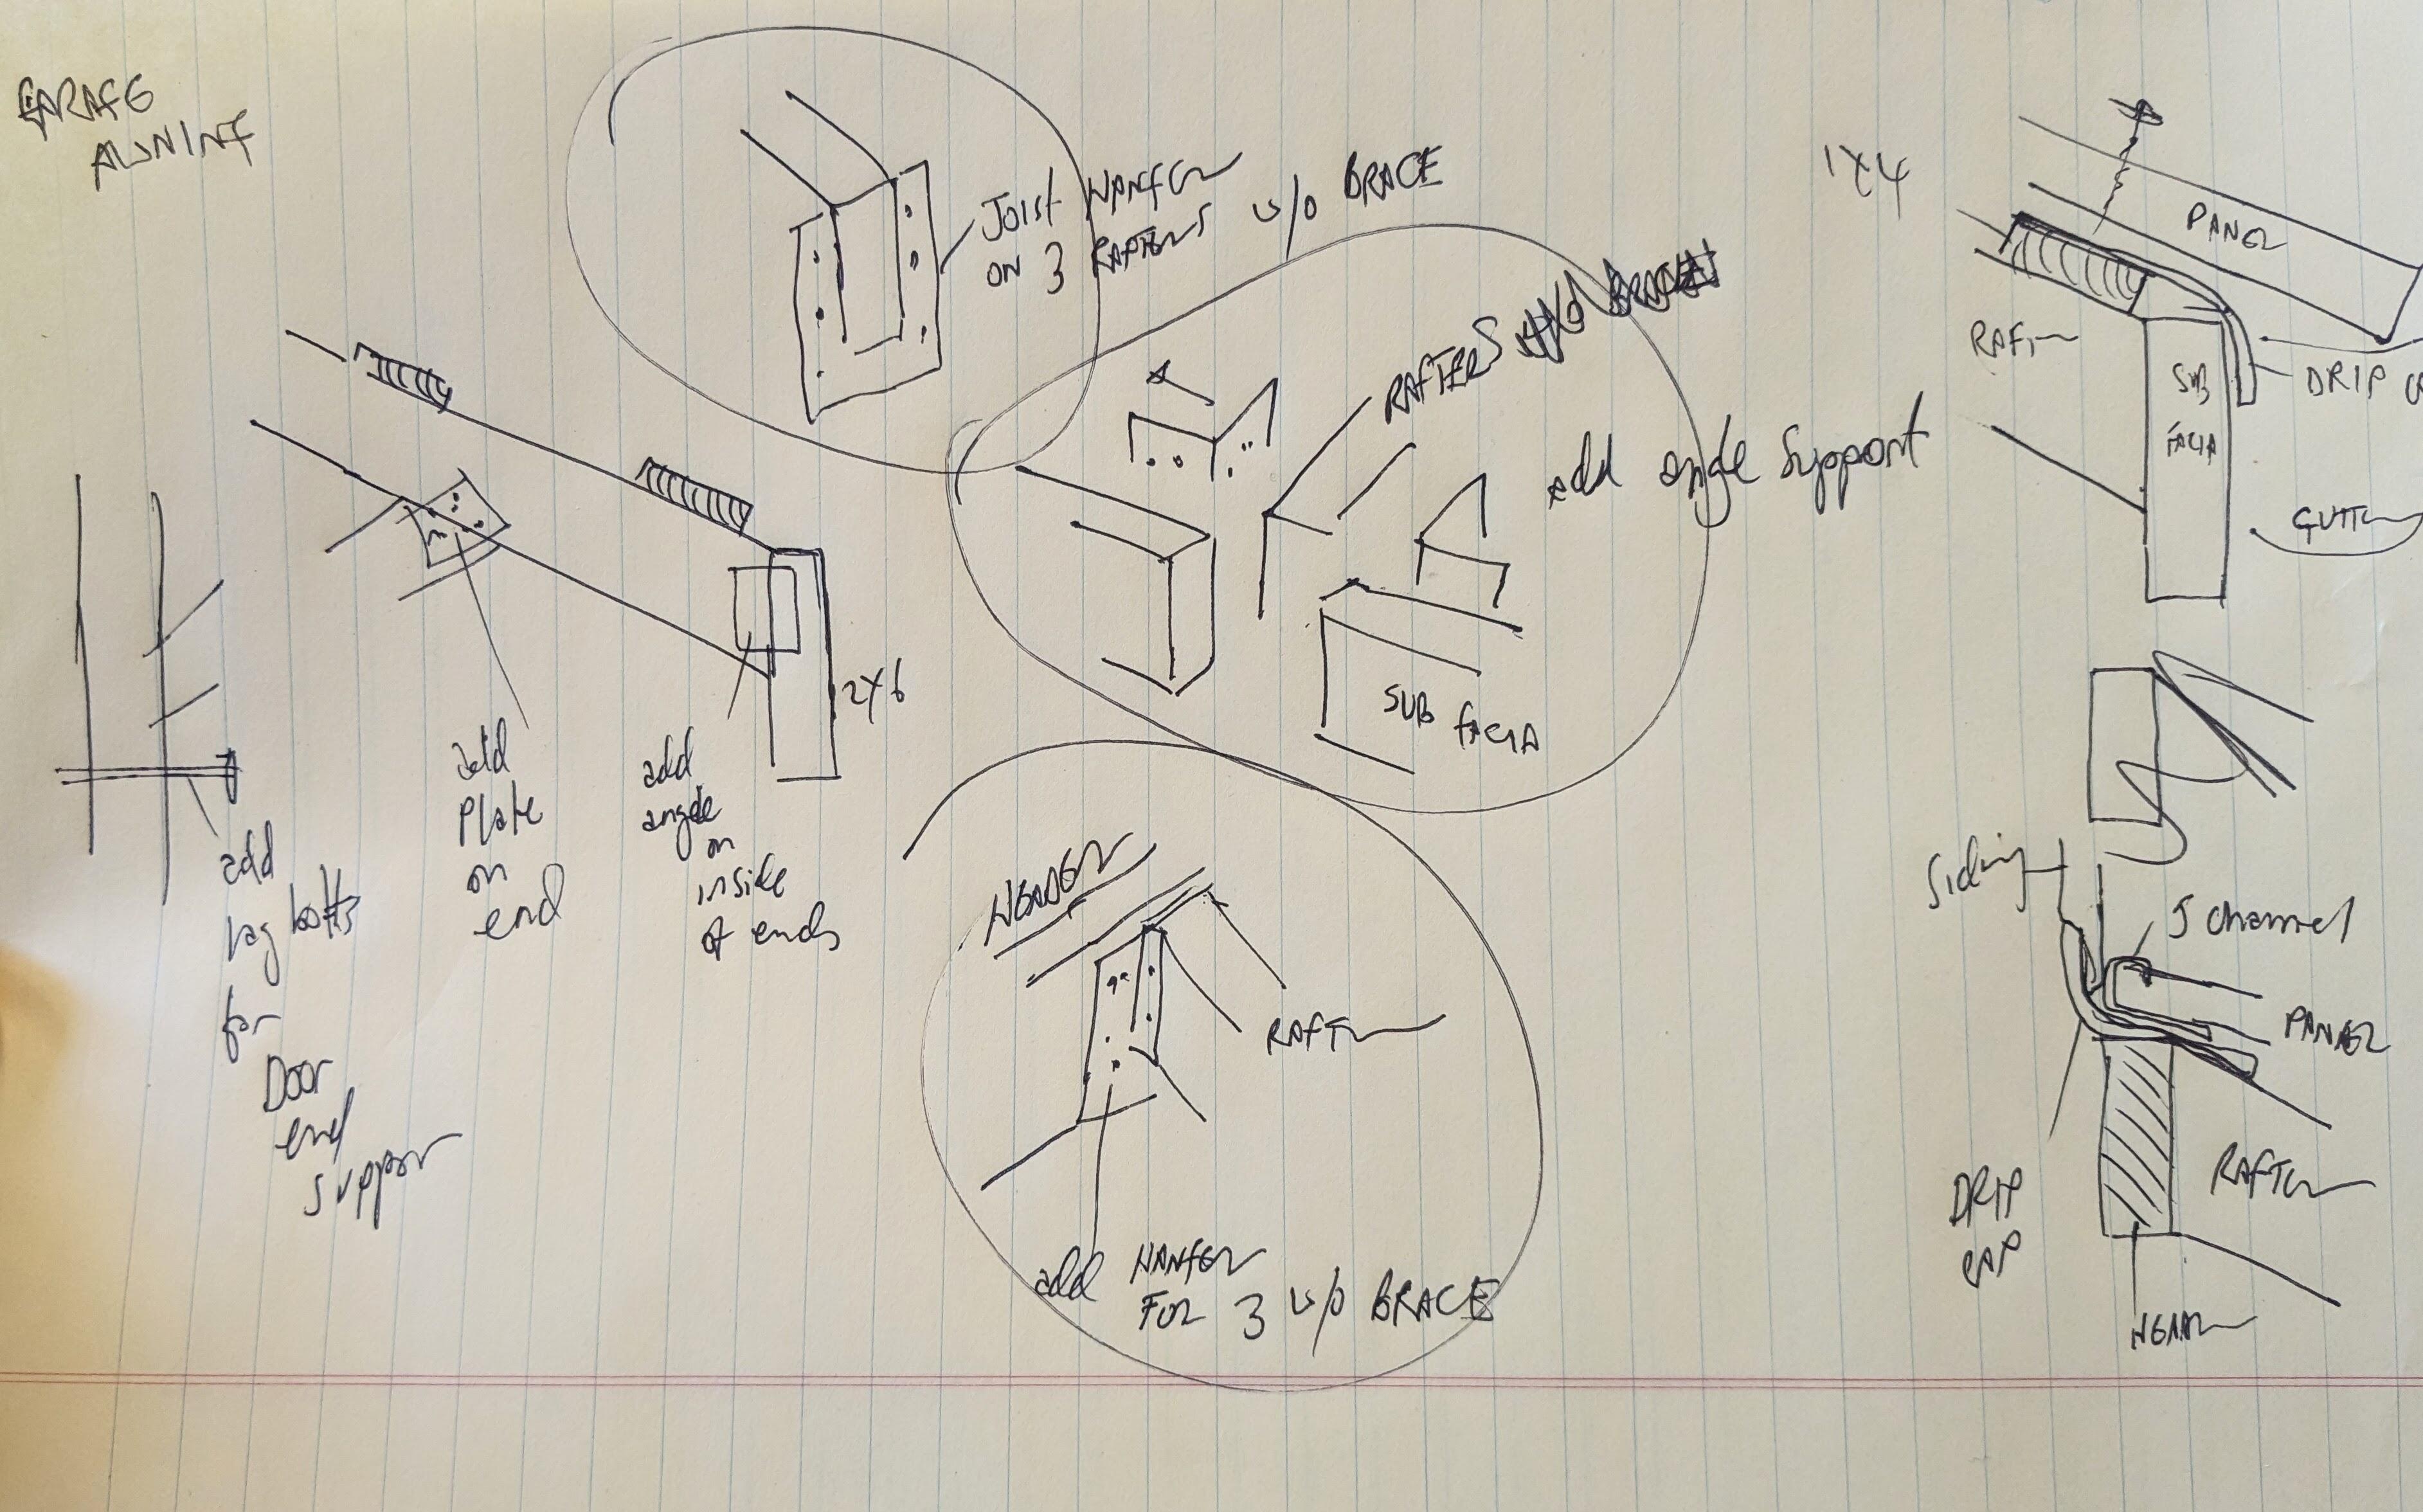
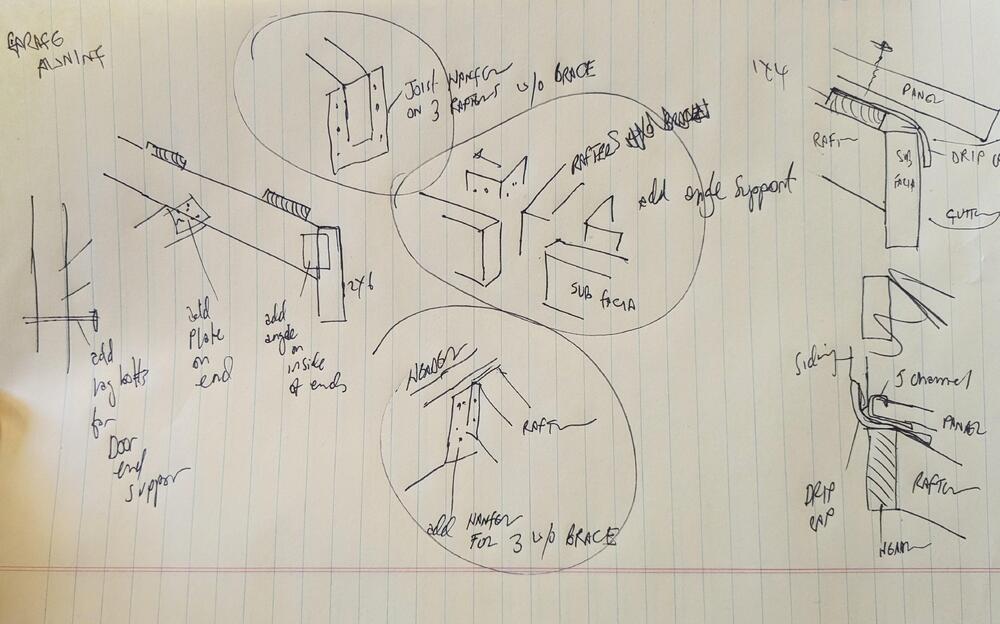
Had time to add the sub facia, at least the 14" section. I used joist hangers on the 3 rafters without braces, at the header @Patcon - wondering if I should add hangers on the same 3 rafters at the sub facia, for additional support. I have to add a 4' sub facia on the end - I figured I should add angle brackets to tie the 2 sub facia sections to the rafter, since they sit midway on the rafter end

-
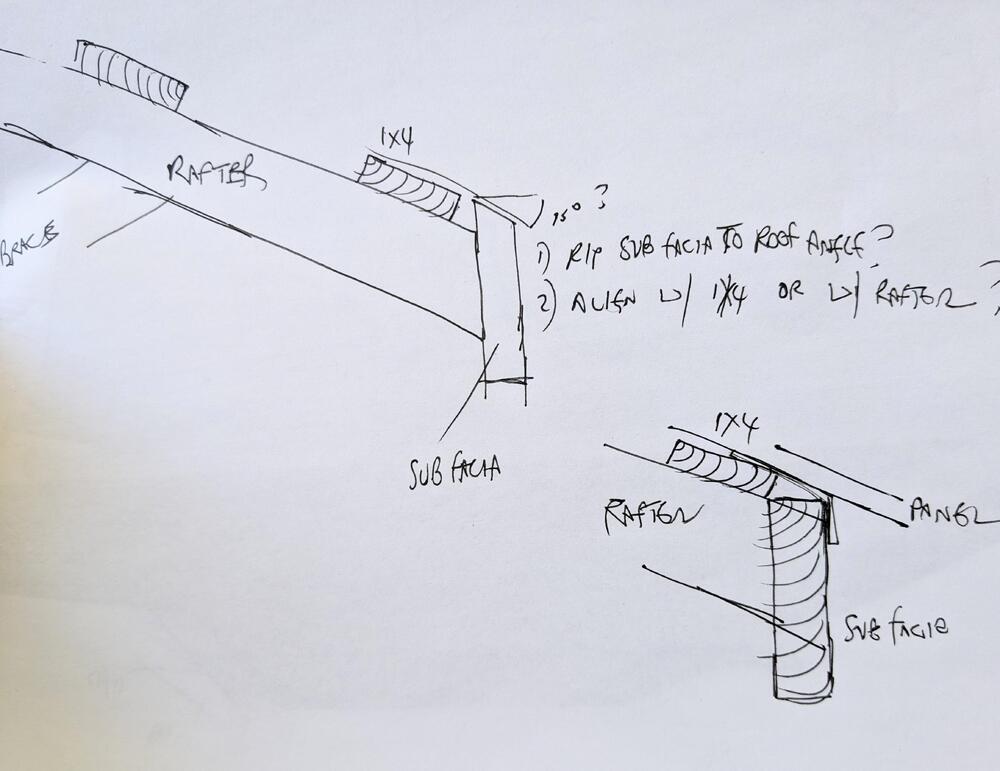
@Patcon - can't find the answer to this online - should I cut the subfacia @ 15degrees to match the rafter & set it at the level of the 1x4, or leave it be & align with the rafter top? TIA
-
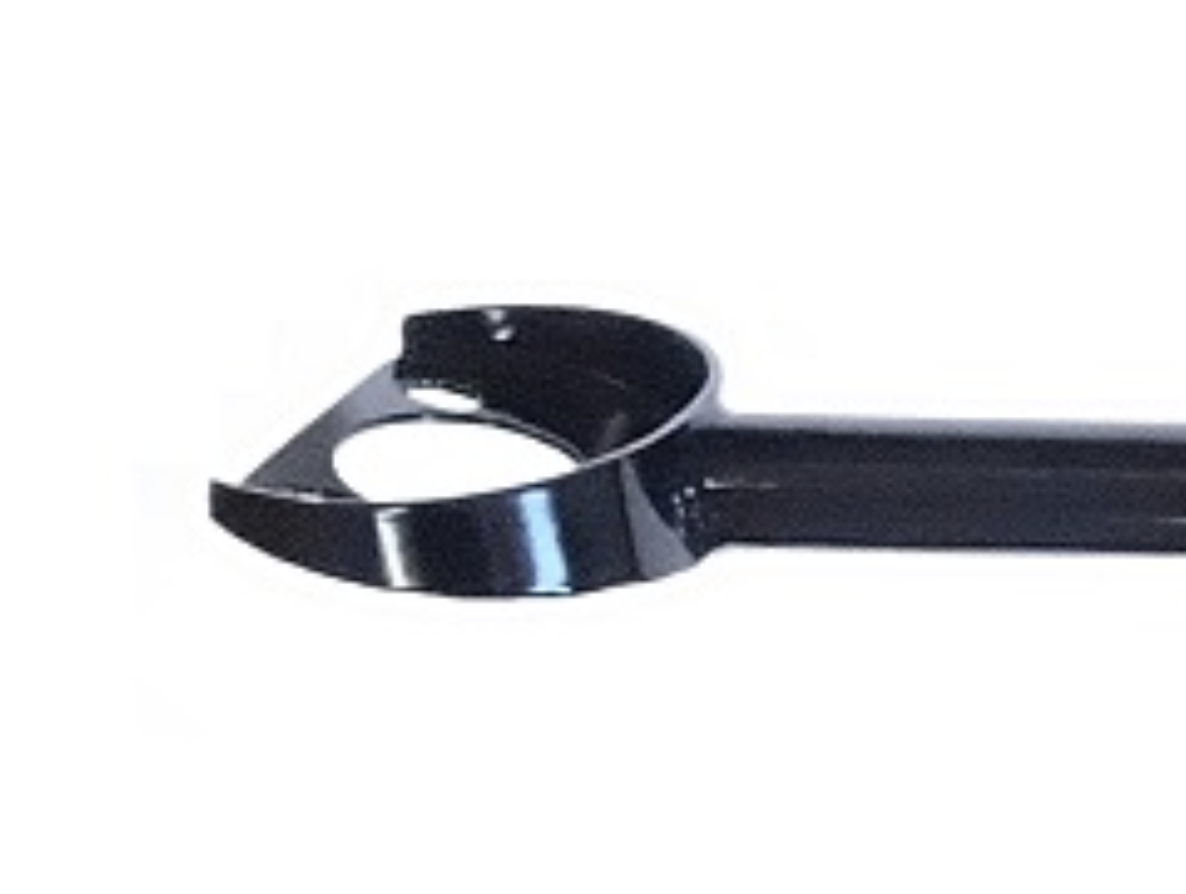
Bar stock, I rolled it in the vice
-
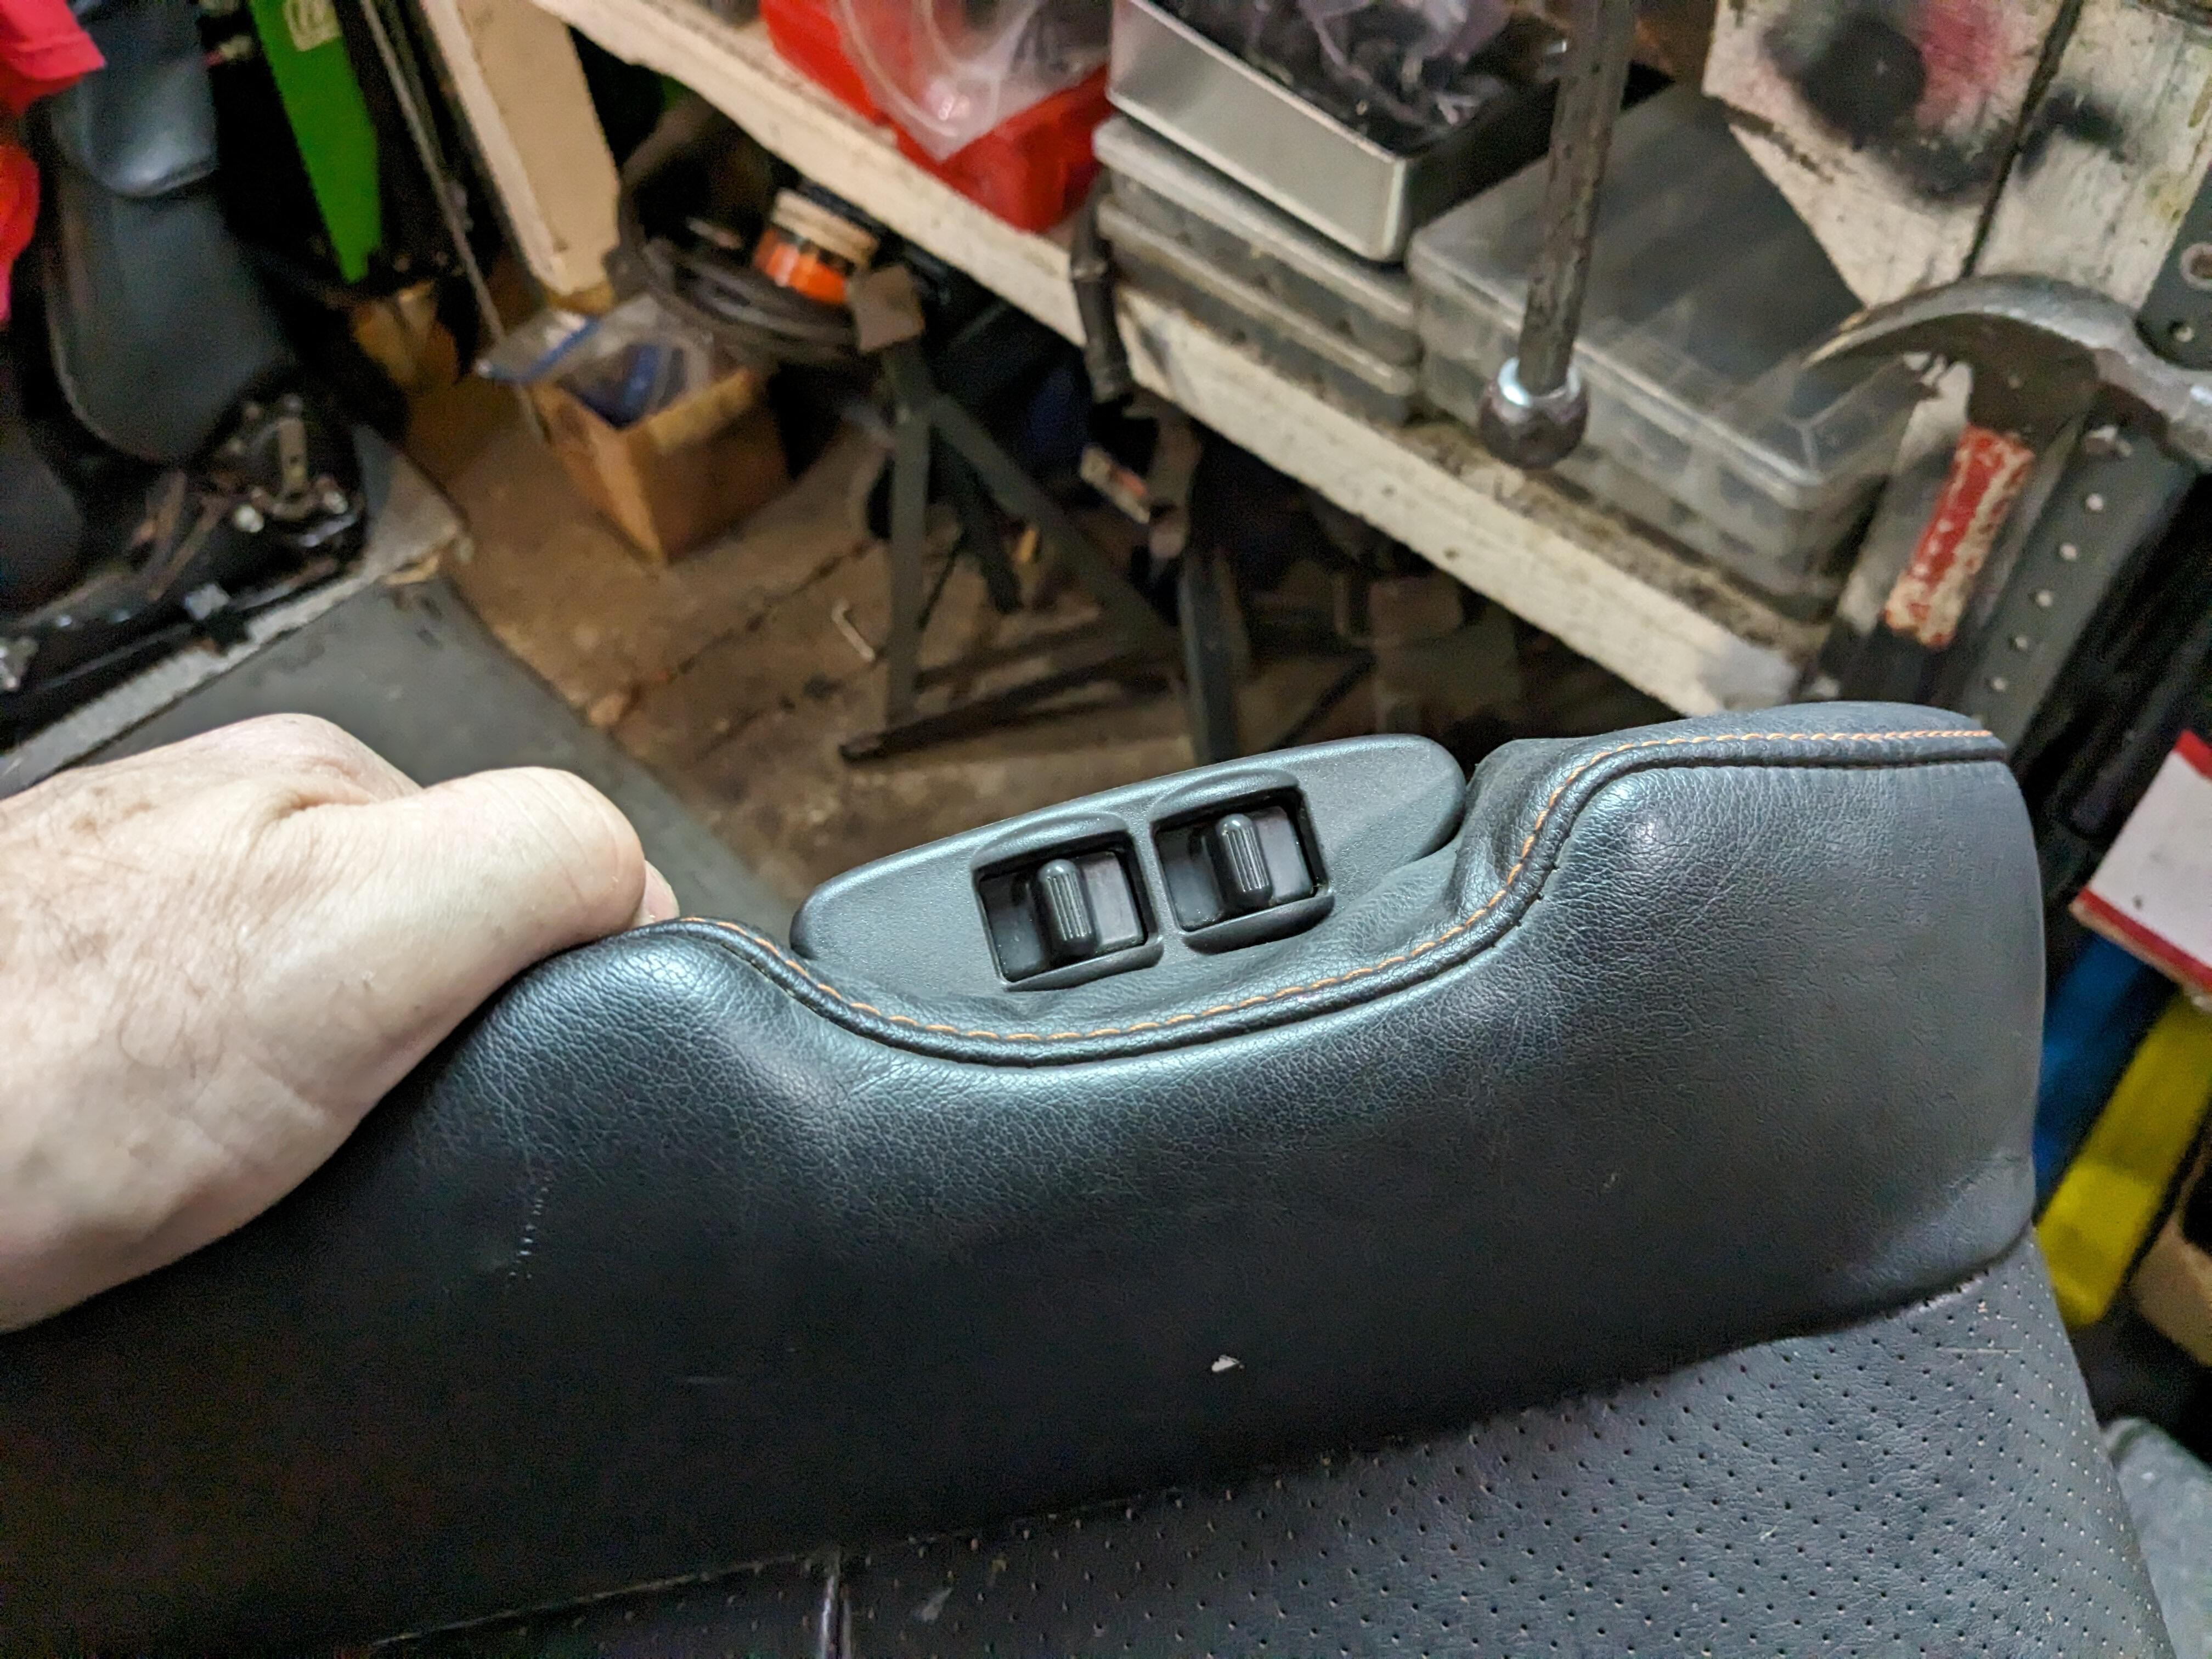
Modified the passenger seat switch mount point, to accept the driver's switch. The pas switch is $$$, vs. the cheap & plentiful driver's version. I don't care if it has 2 toggles

-
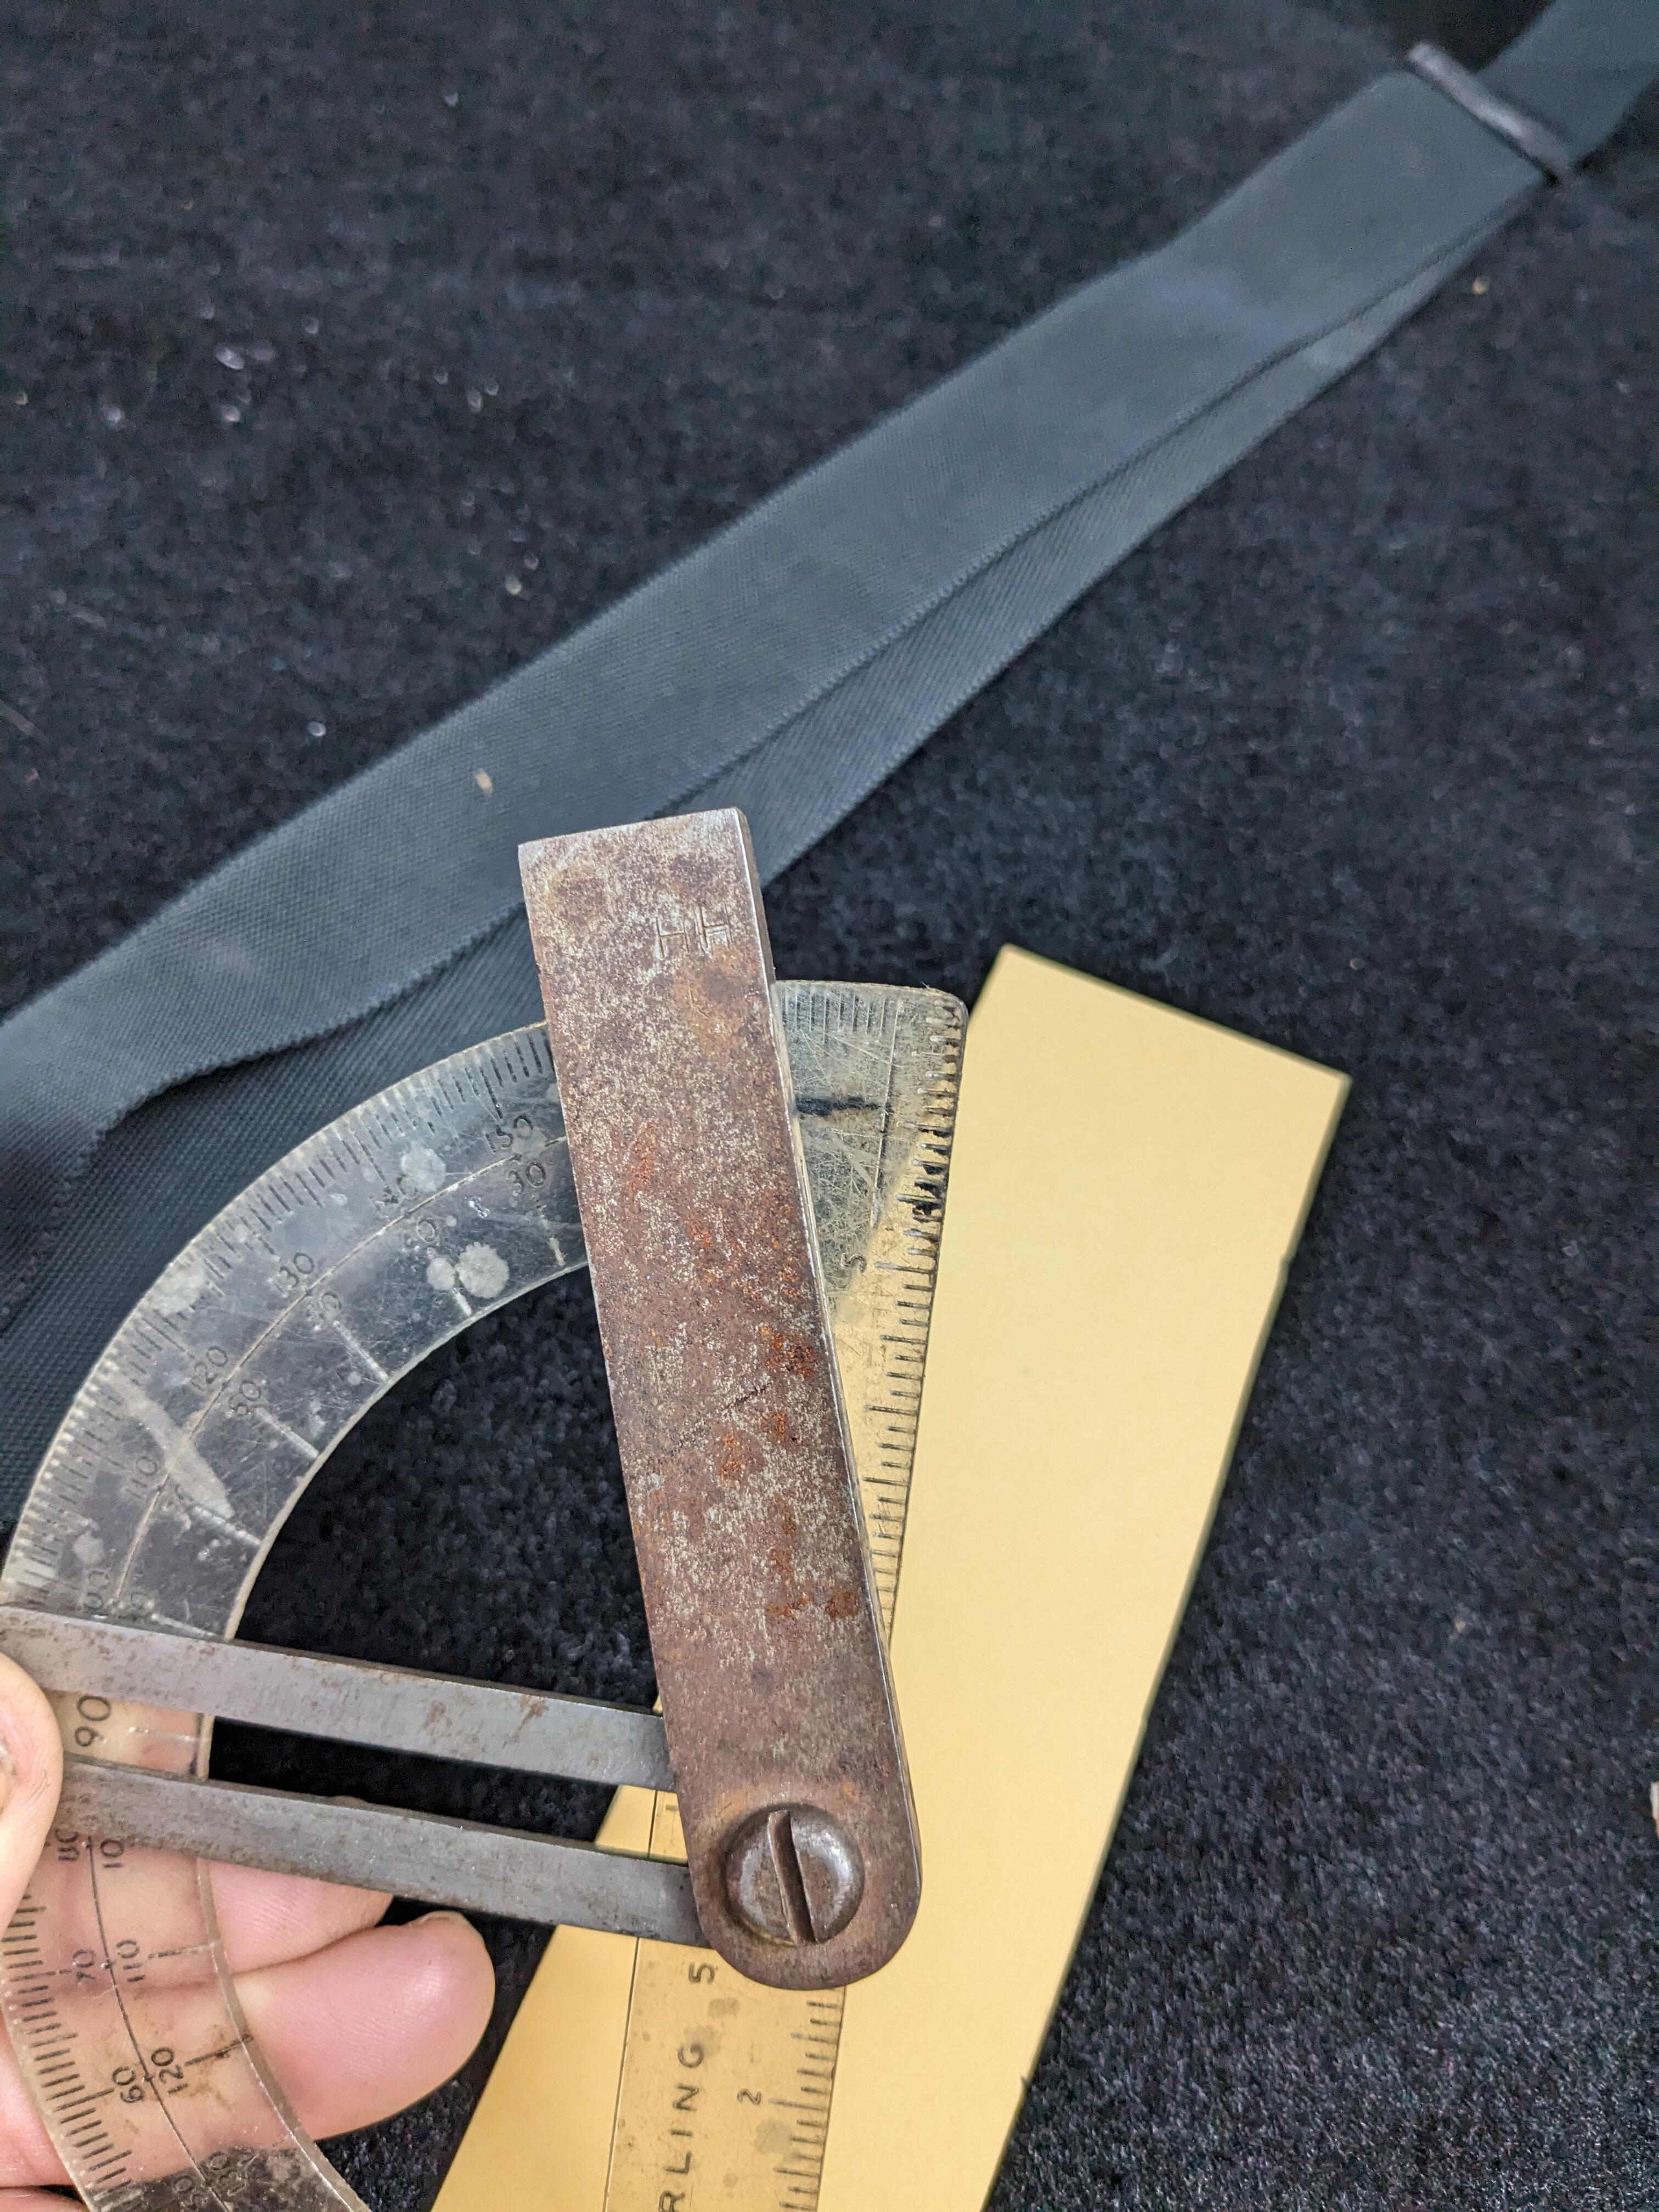
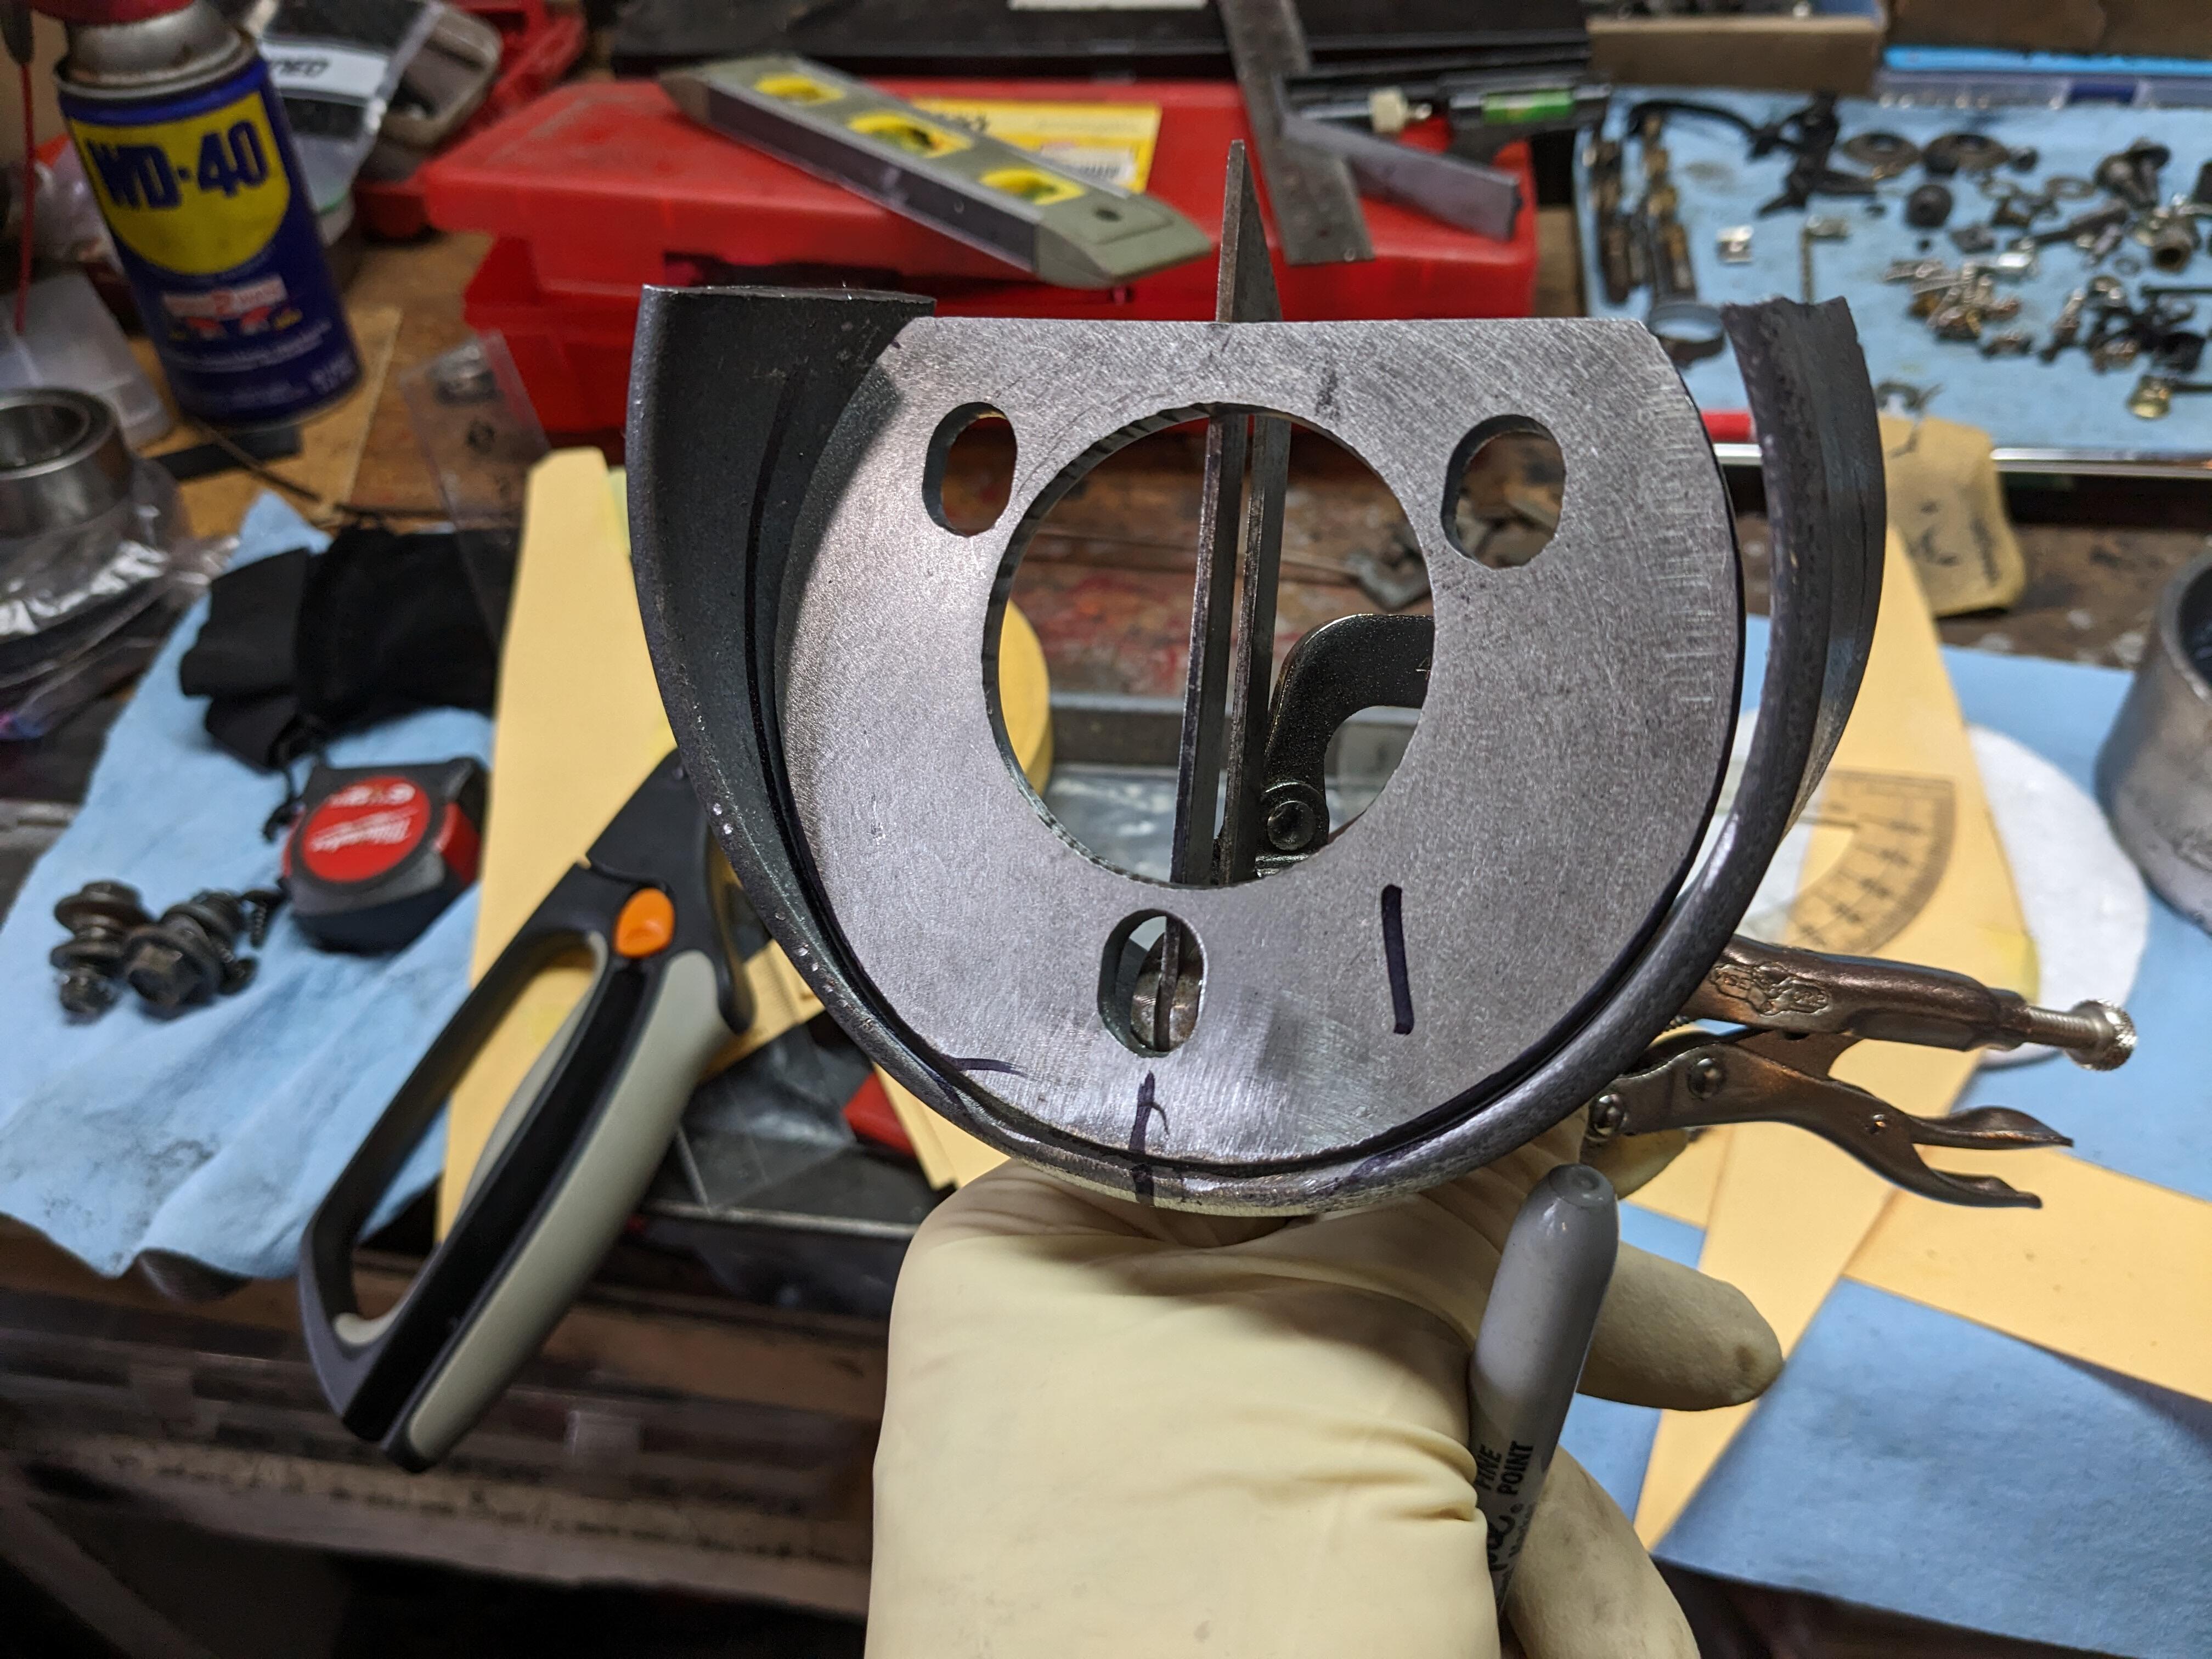
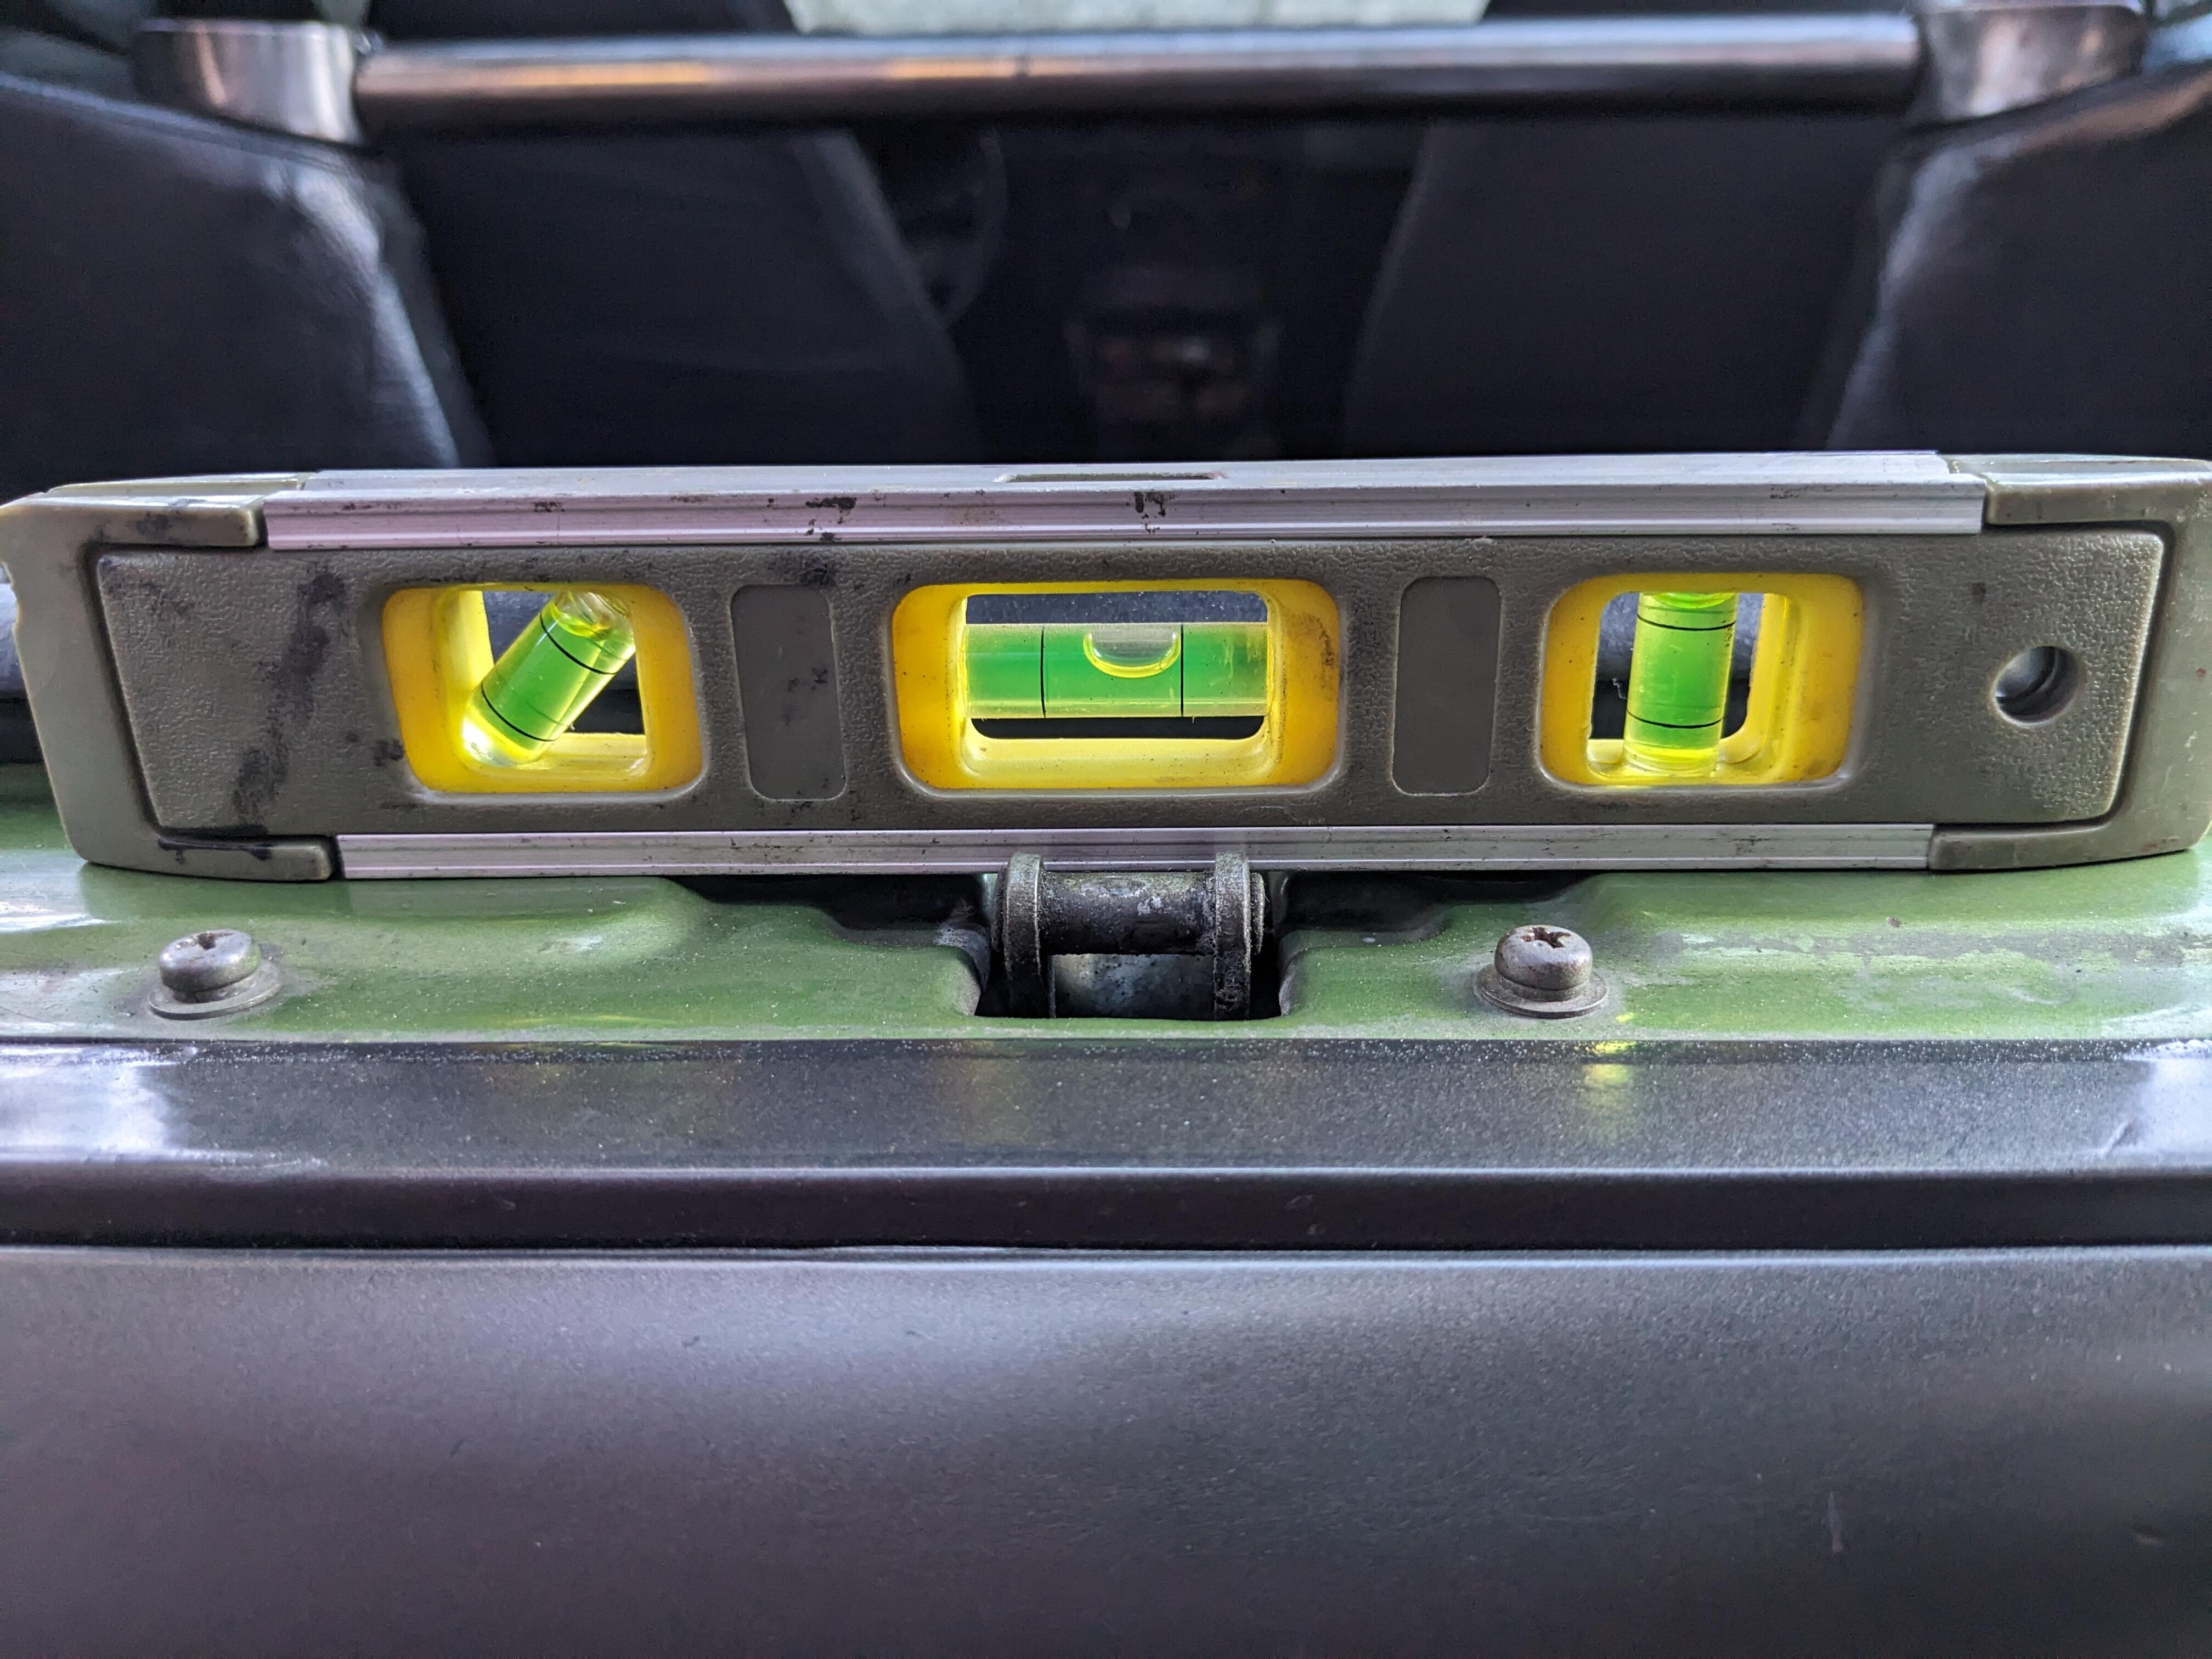
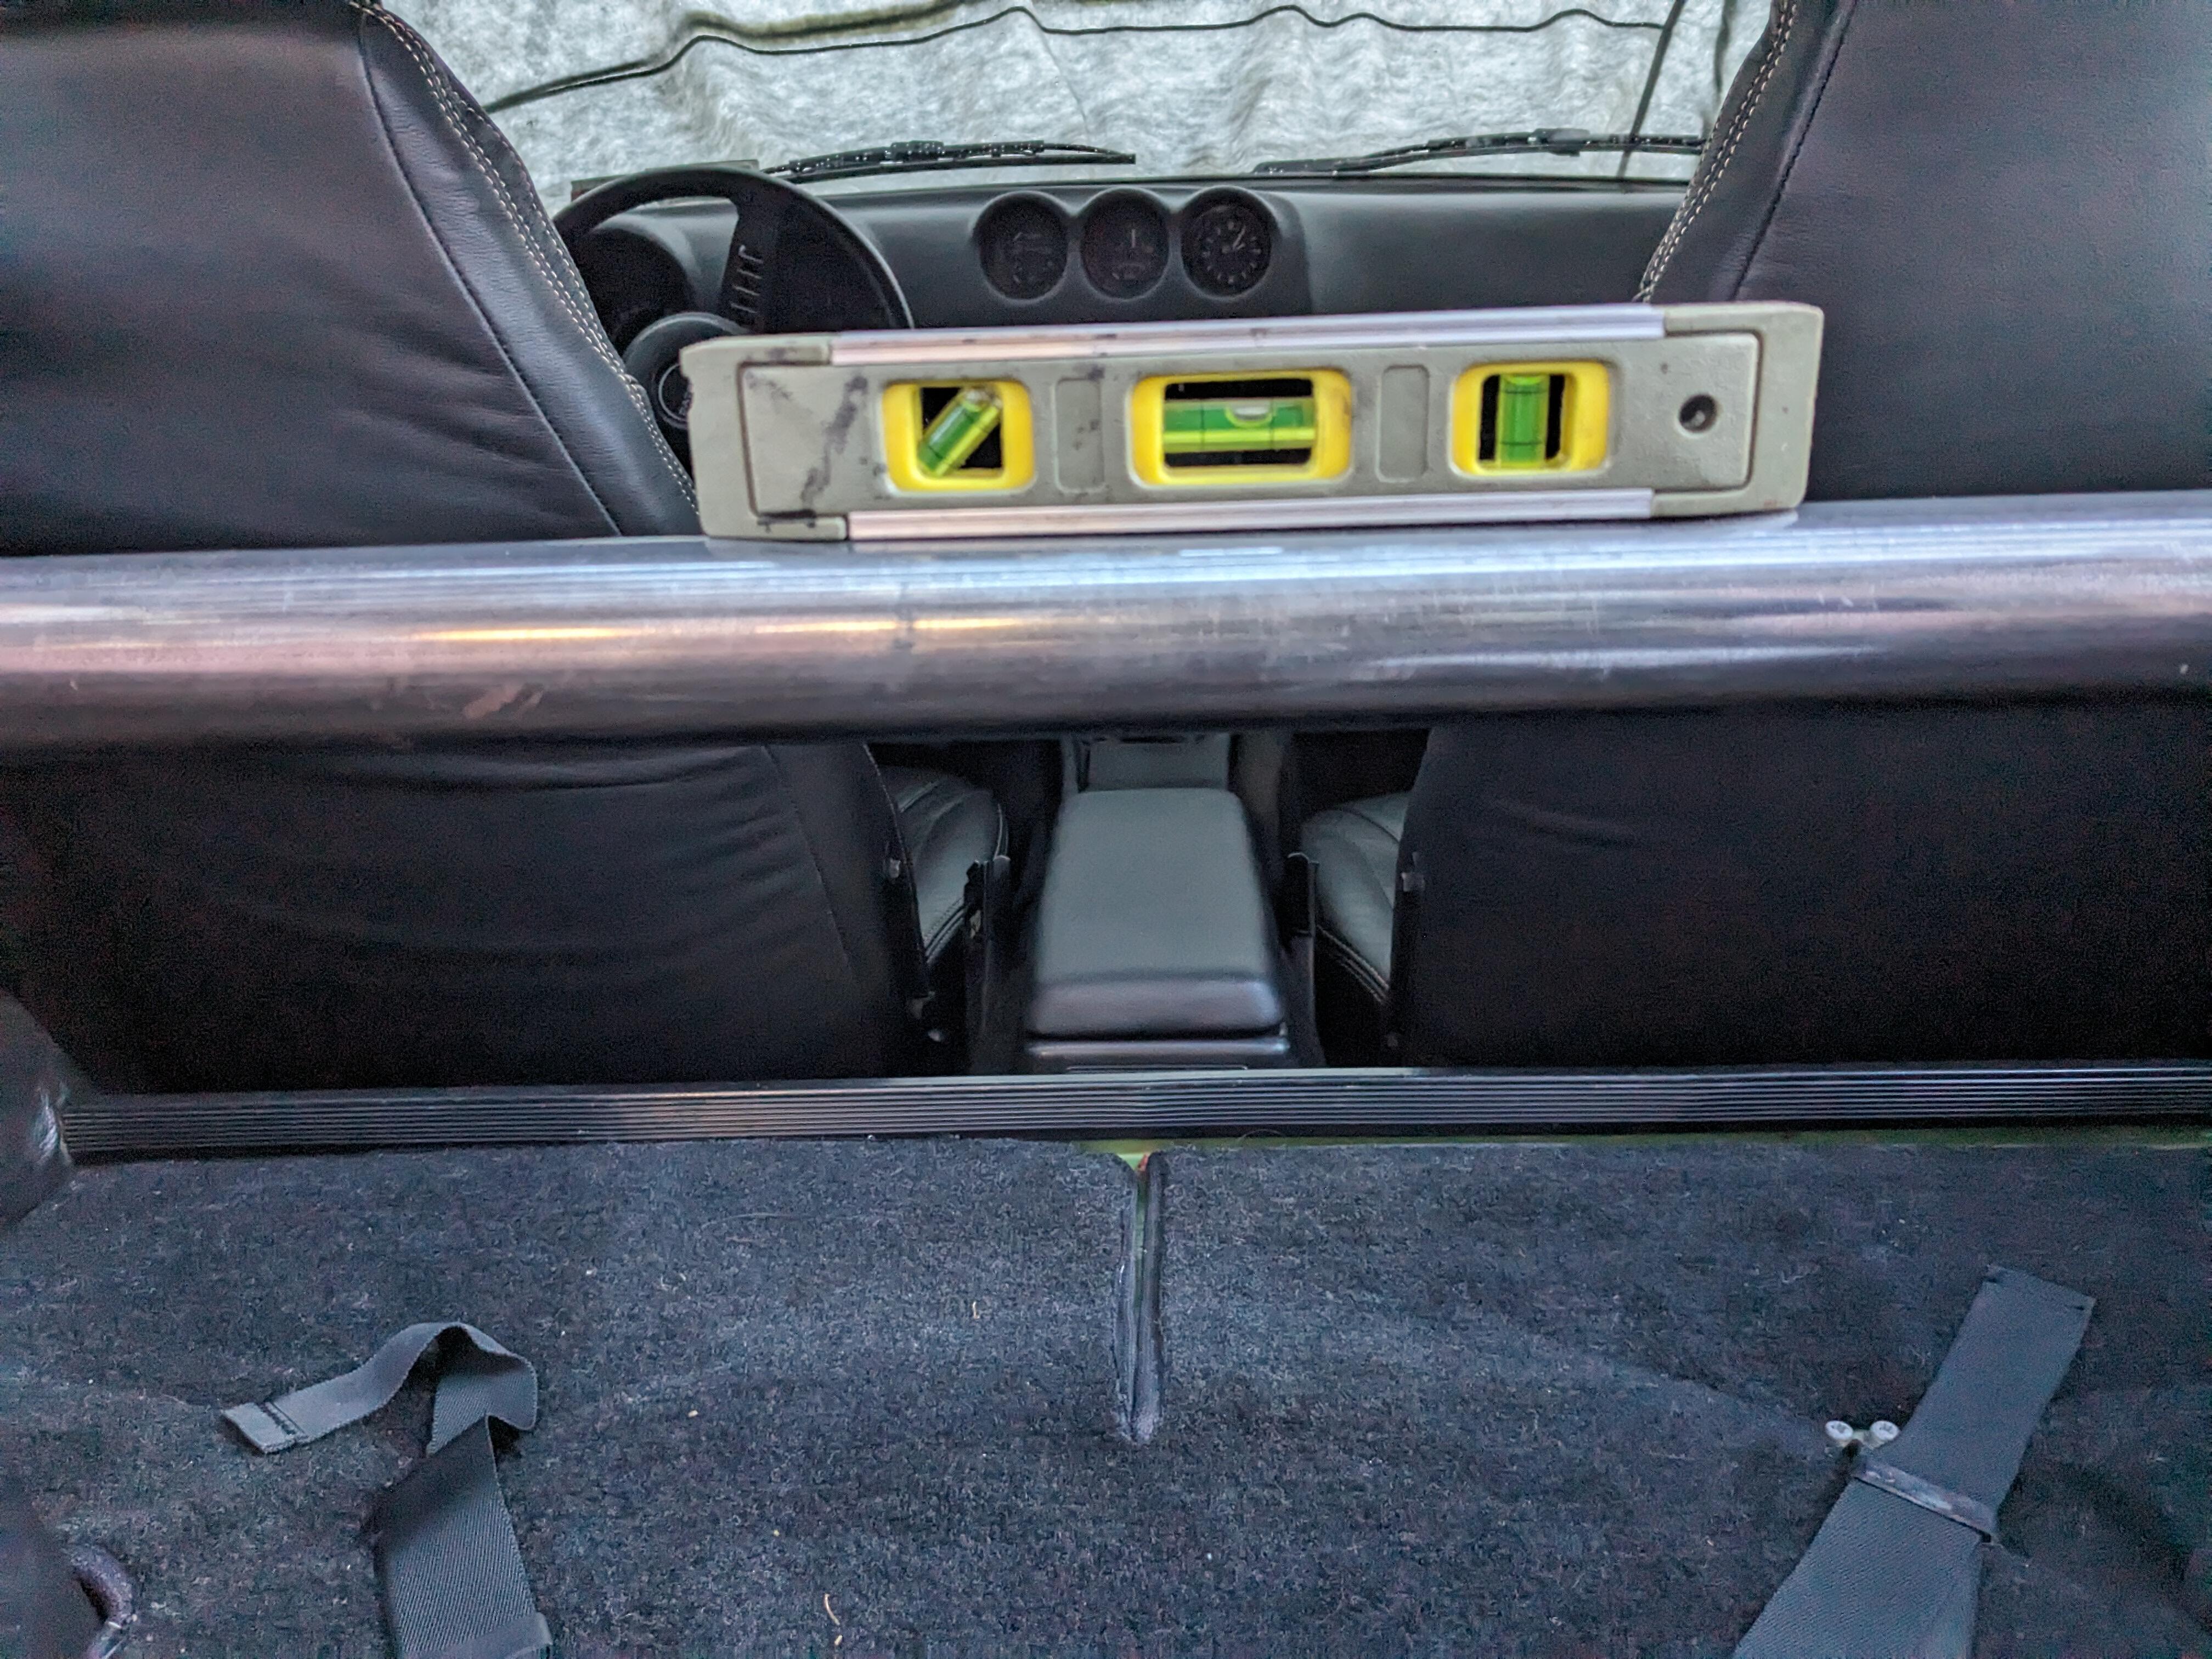
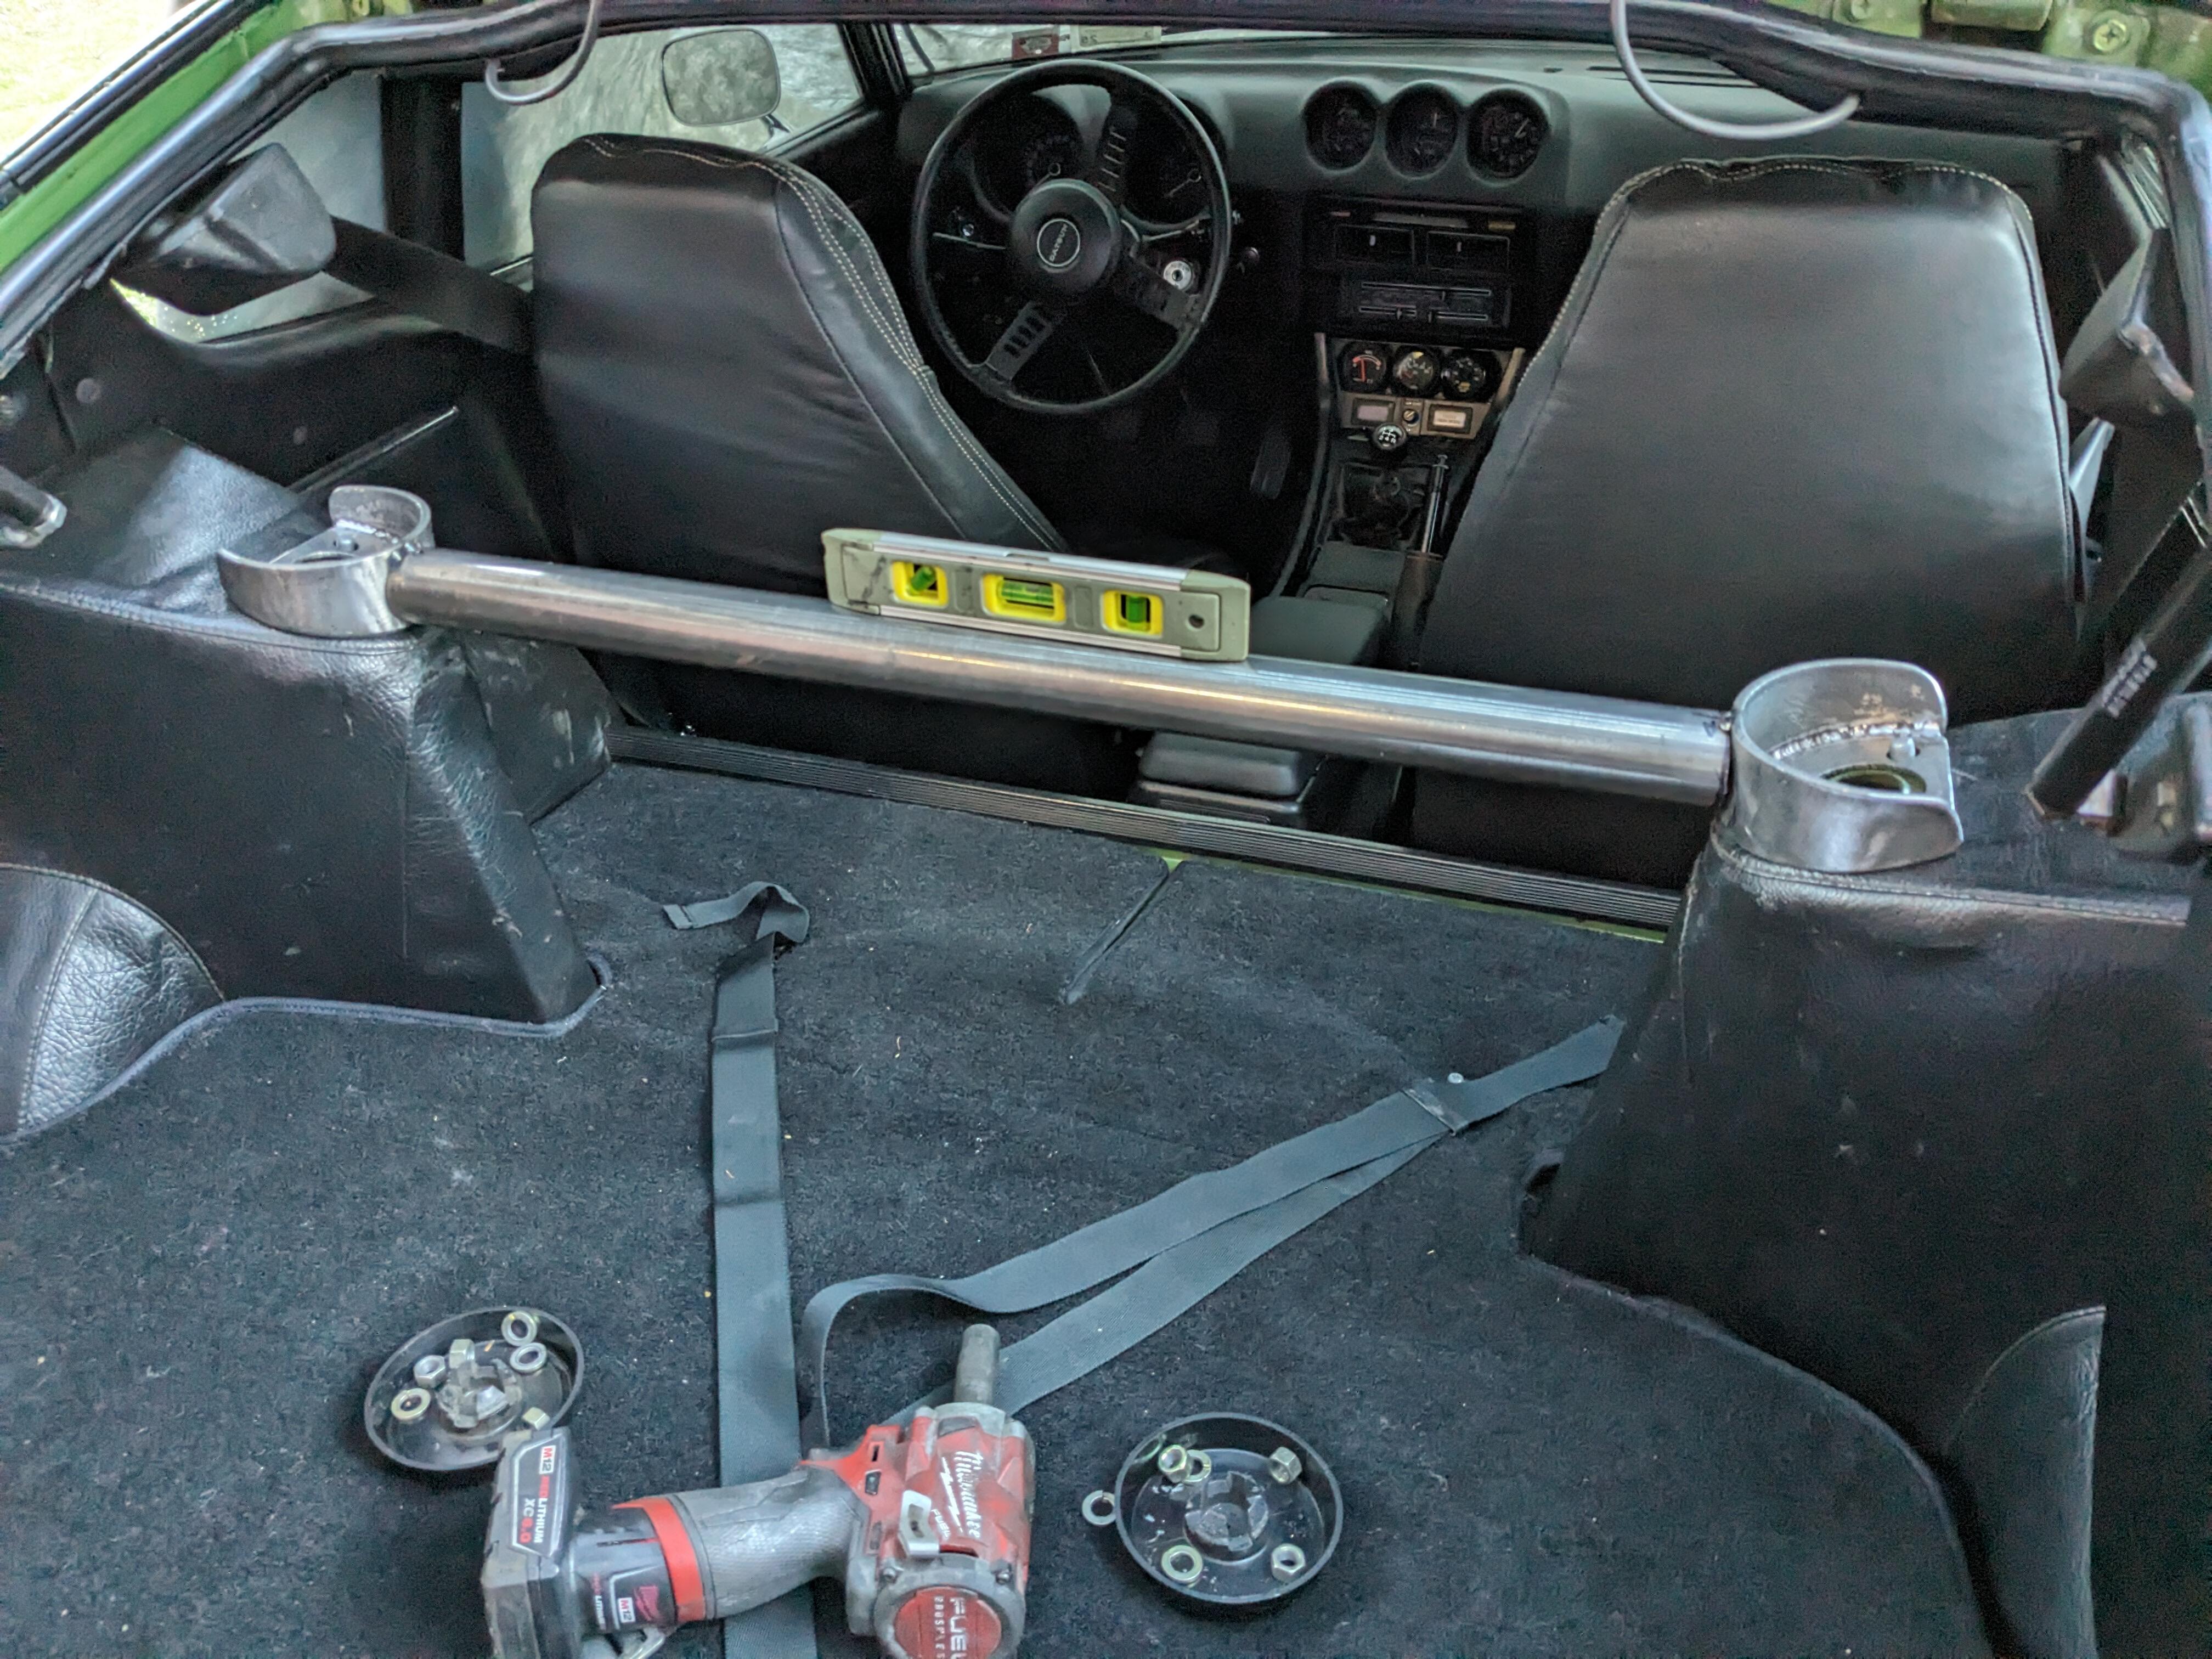
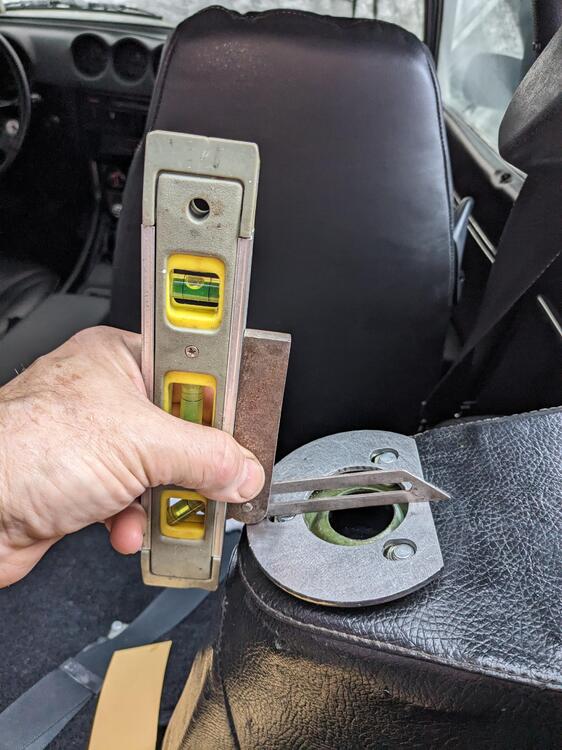
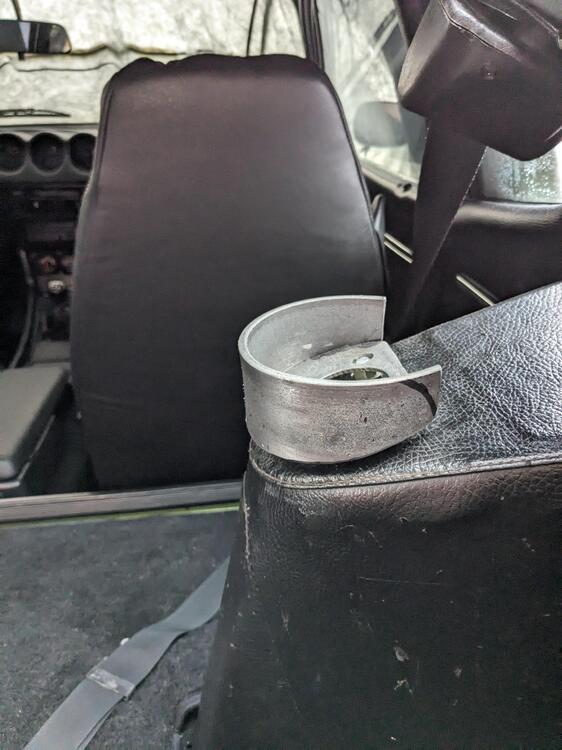
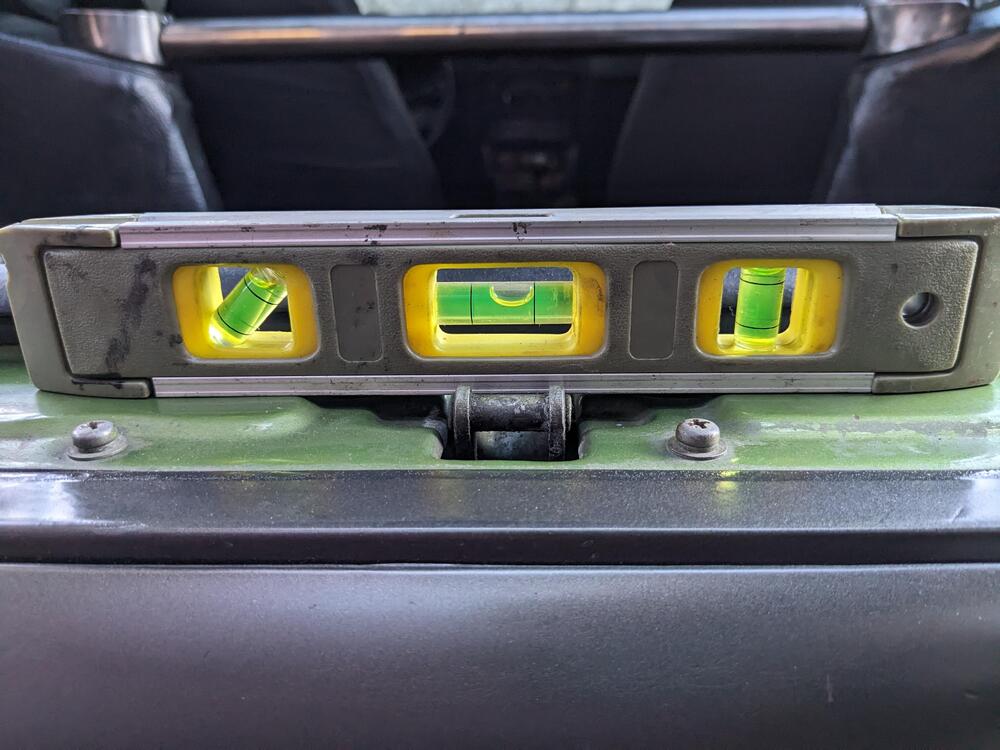
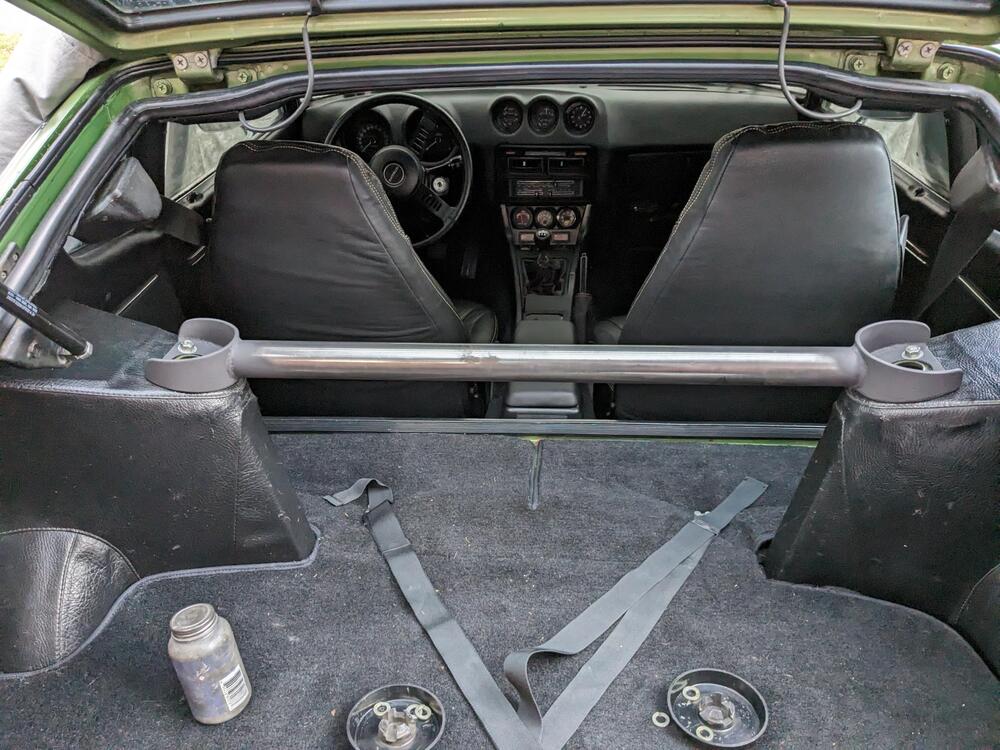
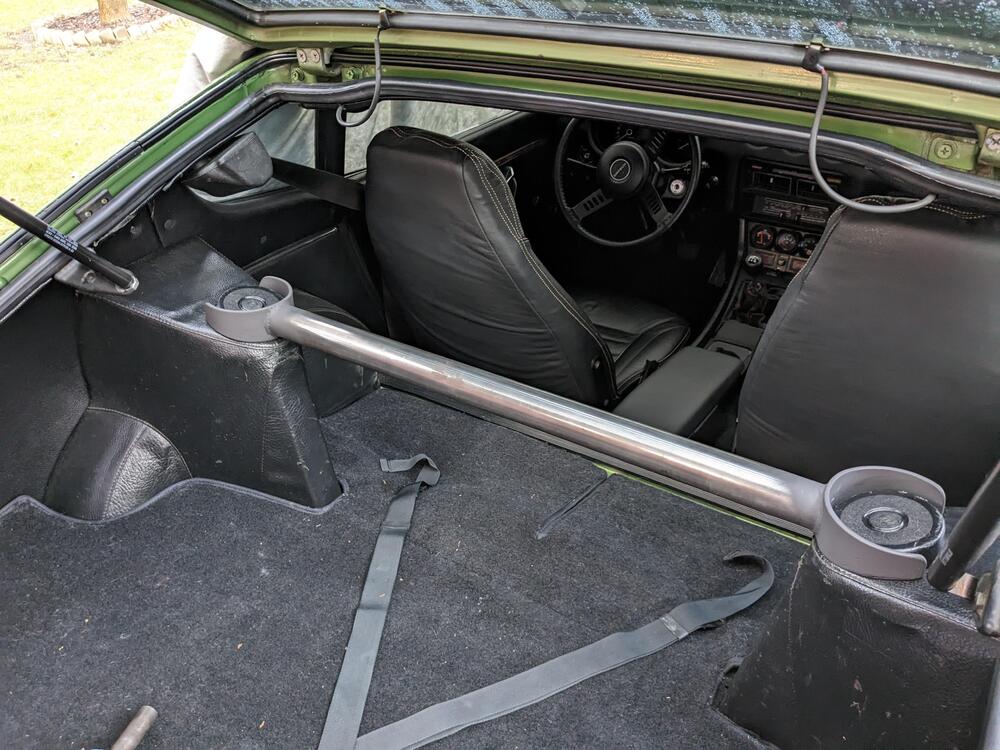
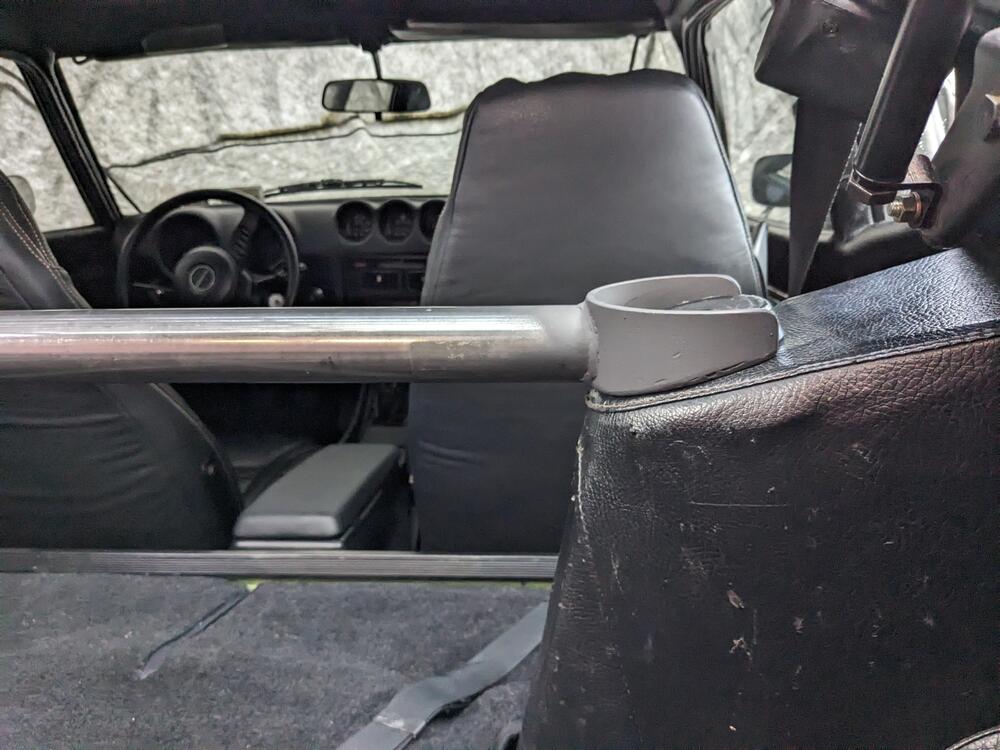
Got the rear strut brace done this afternoon. First I figured out the angle I needed to set the strut plate at Probably 15º, I measured it closer to 16º with my rudimentary tools I futzed around trying to make a card template, but my geometry skills suck, so I just clamped my angle tool to the support Tacked both & checked the fit then I welded them fully Then I fitted them & measured the span at 29.75". I cut the 1.75" tube to just over that, then shaved a dip in the ends to fit snug on the vertical plates, checked that it is level (same as car) After that I fully welded the tube to the supports. Deep socket still clears support wall original caps still fit


-
Worked on the rear strut brace this afternoon, then the rain stopped long enough for me to get the outer rafter up. During the week I'll try to finish it up
-
OK. Thank you for your experience with construction. I'll get non-treated pine or fur to run for the sub facia. I used treated pine for the supports as there is not much sun on the backside there with all the tall bamboo & trees along the bank of the easement around that side of my property. It tends to be on the damp side. I'm not concerned about obstructing the window though, so I could always add braces for the rafters, if it turns out to be an issue. I wasn't sure how much overhang would be appropriate - I do want a gutter along there so around 3-4" overhang would make seem to make sense, thank you.
-
Thank you for the input! I planned on adding 1x4's across the top to support the panels. I was only going to use a 1x6 facia for securing a gutter. With only the weight of the corrugated panels (flutes aligned with slope), I hoped that would suffice. I assumed the weight of a 2x6 or 2x8 sub facia would be too much weight hanging over the braces. The only place I won't have a properly supported rafter will be over the door, after I make the two stud supports in the window recess. I've used construction screws throughout w/construction adhesive on the joins (I don't have a framing nail gun, and I will want to remove this at some point DTR). I bought the panel screws w/EPDM washers for securing the panels to the rafters.
-
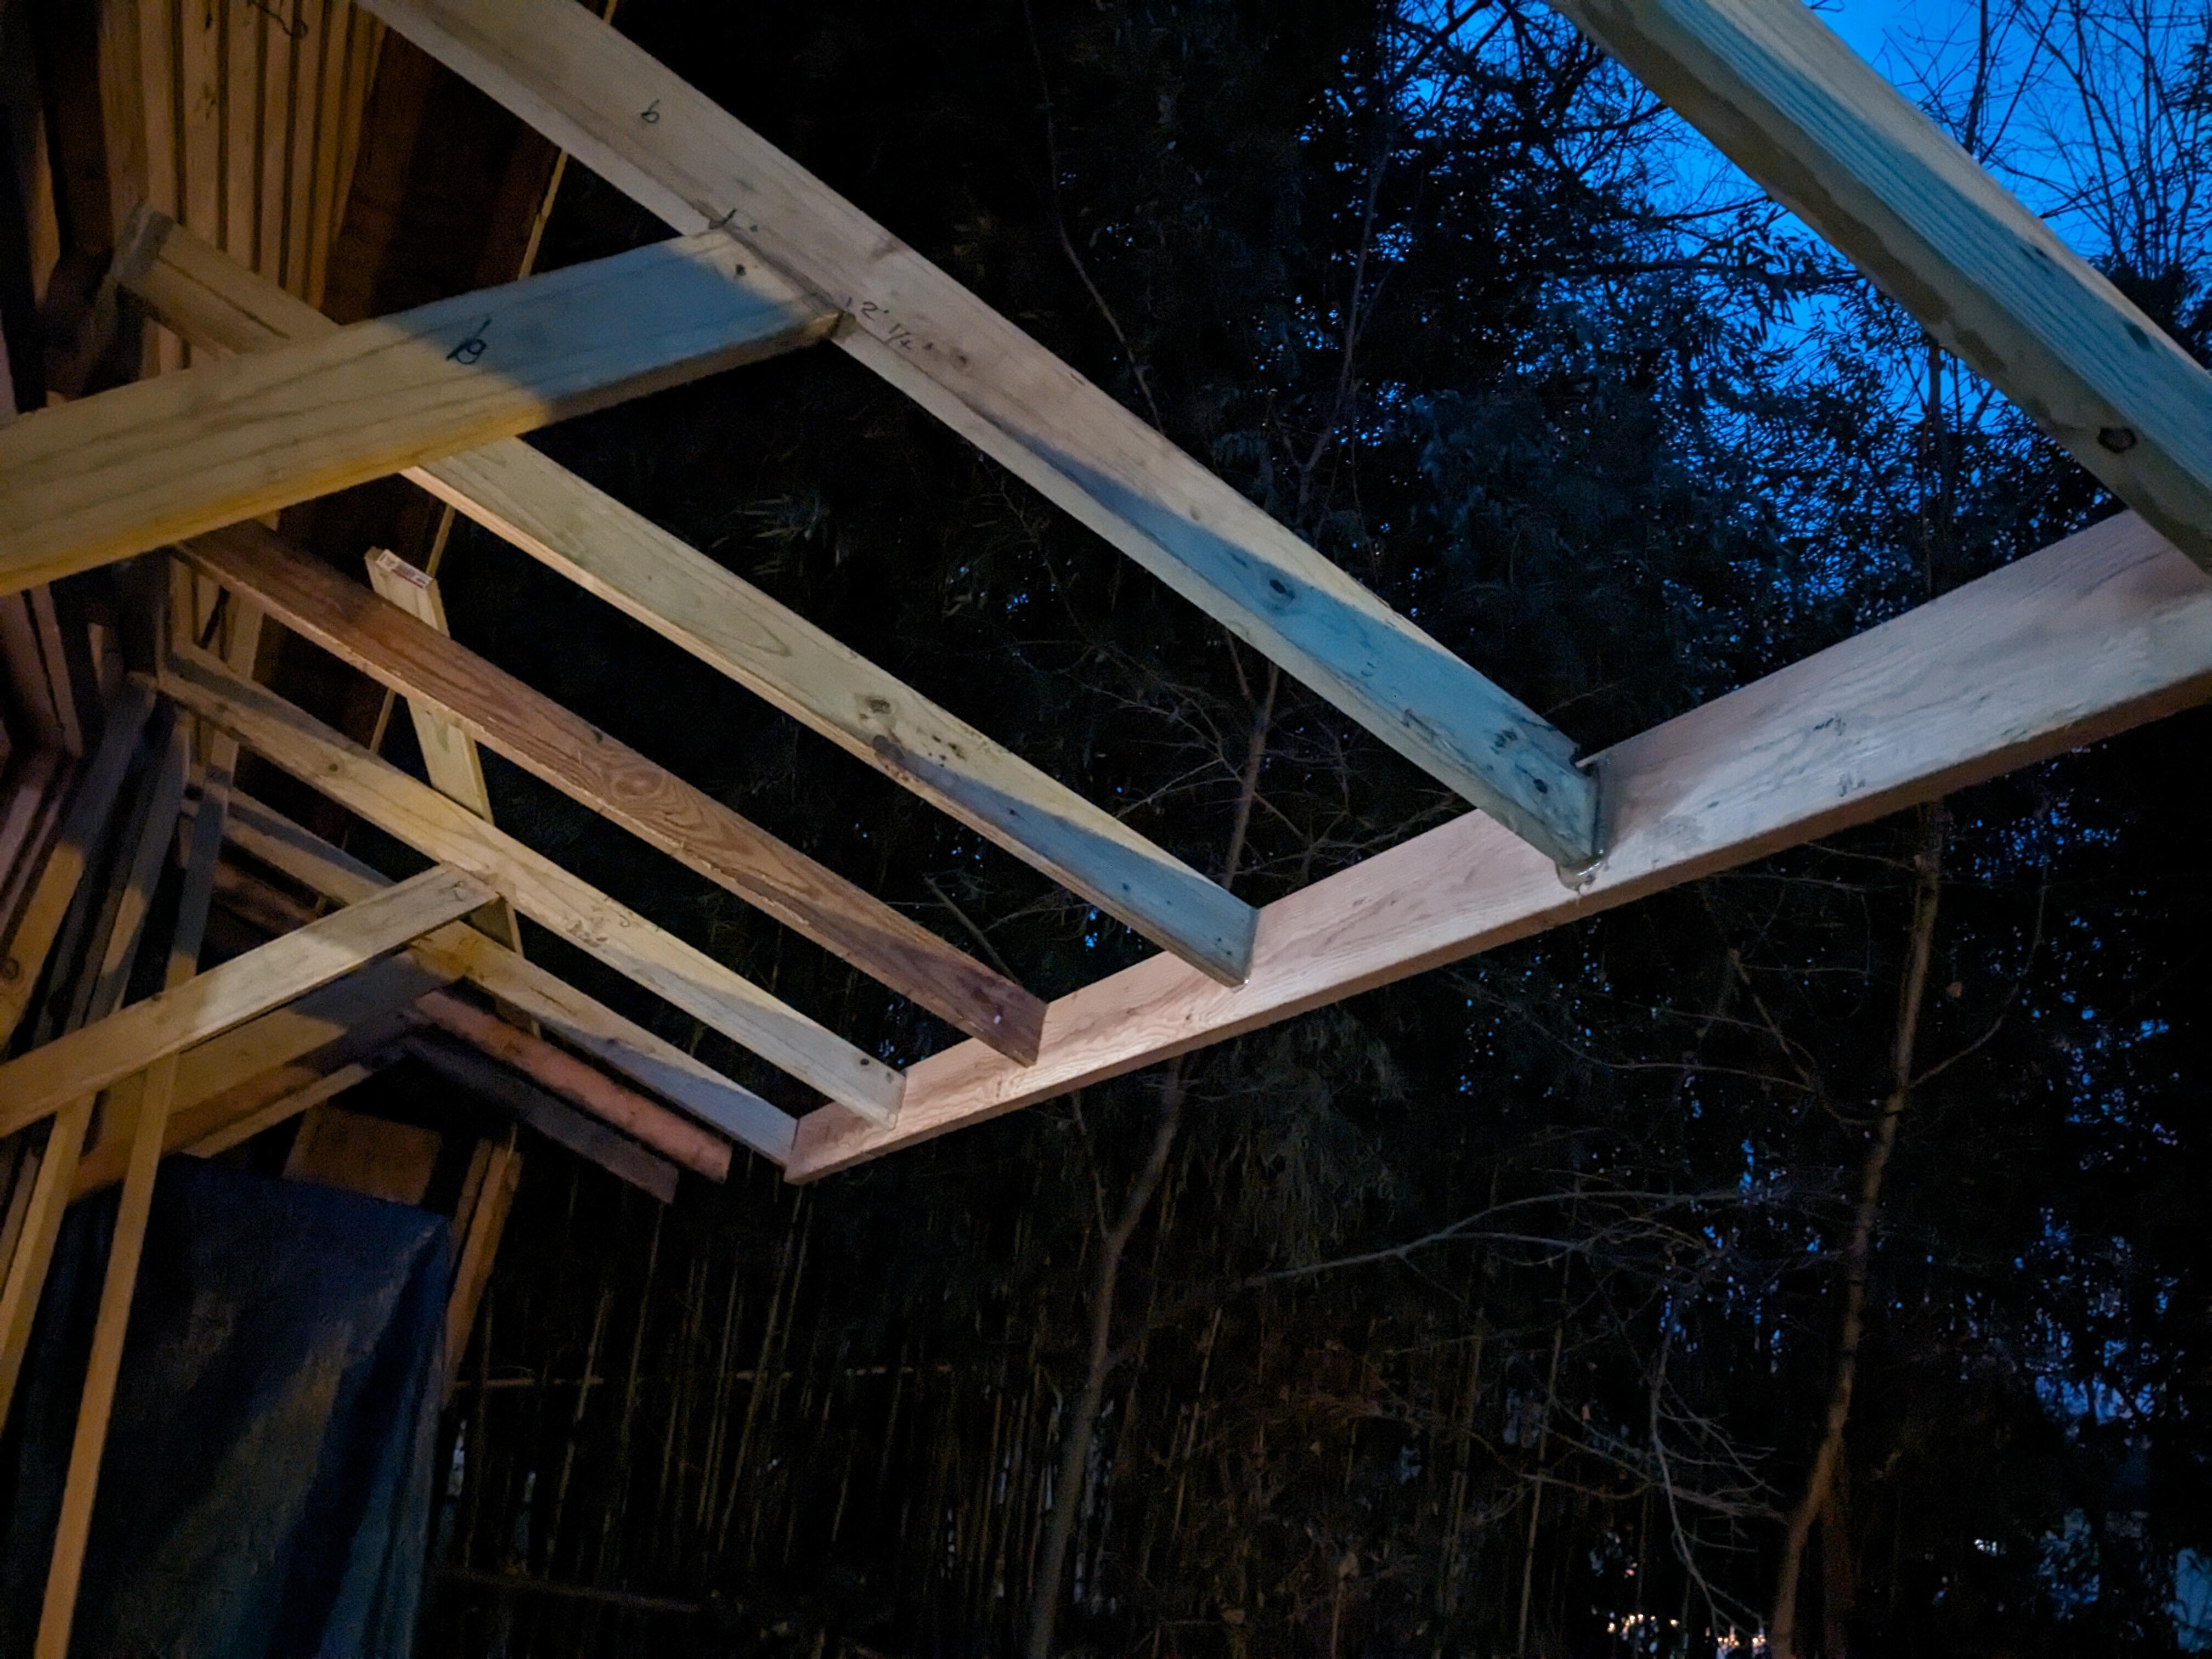
Figured out a way to deal with the rafter supports in the window space . I'll add studs to provide a support. Still need to figure out the one over the door Added two more rafter braces before the rain came in this morning, covered up my equipment
-
Anyone know offhand what the offset angle of the strut housings is?

-
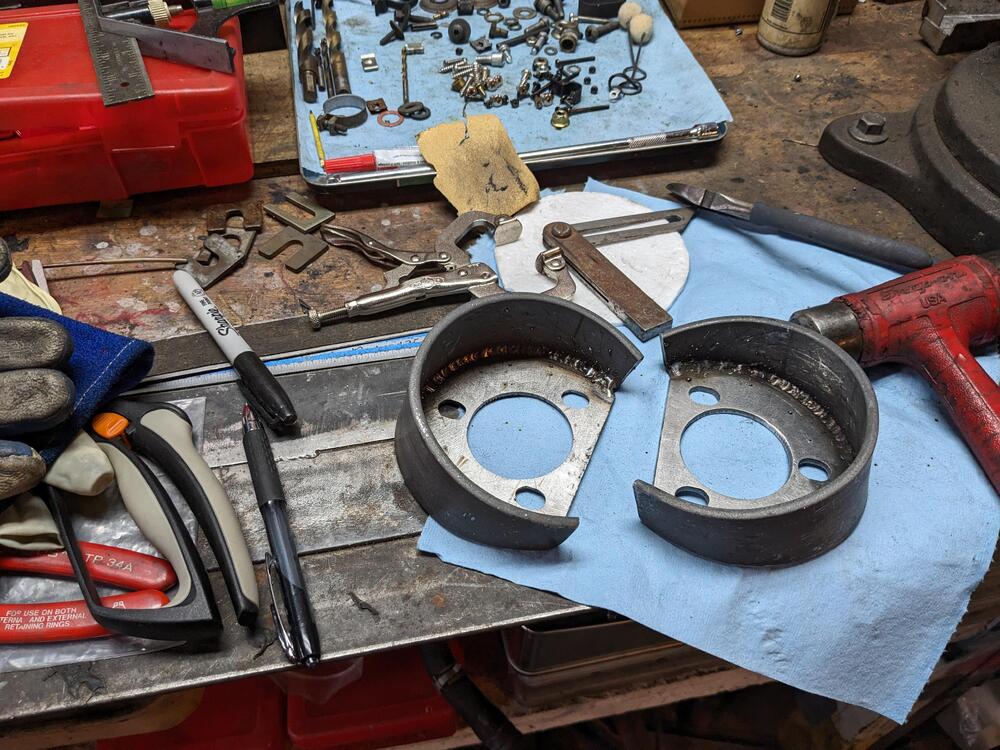
Since it's pouring rain now, I started working on the rear strut brace. Strut weld plates came from ZcarDepot making the vertical support for the tubing from 2" x 3/16" bar stock started curling the plate in the vice tried to use this 4" tube to squeeze the plate around for refining the circle, doesn't work So I used the strut plate to bring it into shape have to contour the tube end to mate with the weld plate 1.75" x.095" tubing
-
Replacement cushion (2007) came - looks better than the auction indicated. Cushion & seat heater in great shape. Frame is also painted, - unlike my 2006 version.
-
Started talking about the back of the garage in this thread - making room for heavy equipment that I need to have outside, to make room for the 80gal compressor inside Today I added a header, and an end rafter - looked online for a guide to appropriate pitch for the awning. Basic minimum rule seems to be 1/4" for every foot. I made the awning end rafter 50" deep, with a 6" drop - so well over minimum spec - "looks' reasonable to me. picked up some lumber & corrugated panels To get the pitch, I cut 15º on the rafters, then 45º & 30º for the 3' angle section, that put the brace around 1/2 way out the rafter. It's only carrying the weight of the corrugated panels, so I think it will be fine. The plan is to put the rafters/braces 24" on center, since that aligns with where the studs are in the garage wall. The corrugated panels are 26" W, I'm planning on about a 4" overlap Had time to make & put up 4 supports before I had to pack up, and caulked the header at the wall, since I don't have time to do the drip rail, etc, before the rain forecast for all day tomorrow & Monday I realized the one by the garage entry dropped when I mounted it to the stud, the pitch angle is obviously off in this pic So I corrected that when I got home from the party we were attending, was only a couple hours, so the construction adhesive had not set yet The problem Is I need to figure out a way to attach rafters over the window, otherwise I will not have rafters to support the central roof panels Outside the door on the frame, I need to add a support to hold the outermost rafter & brace. Have to cut off some of the existing door overhang
-
EDIT - not a bad idea to leave it on the pallet, I could just cut it down & put the rubber pad under as you said. I was going to bolt it to the floor with isolator pads, but that does create issues with drainage. I painted my Fiat in my driveway (in a canopy) 5 years ago using the Husky & a even smaller pump in tandem - I want to be able to paint without worrying about pressure drops mid-spray , which happened several times. I'm retiring from my day job this summer, so I'll have more (uninterrupted) time for projects. I'll probably want to repaint the Z at some point in the future, along with the pickup truck I made.

-
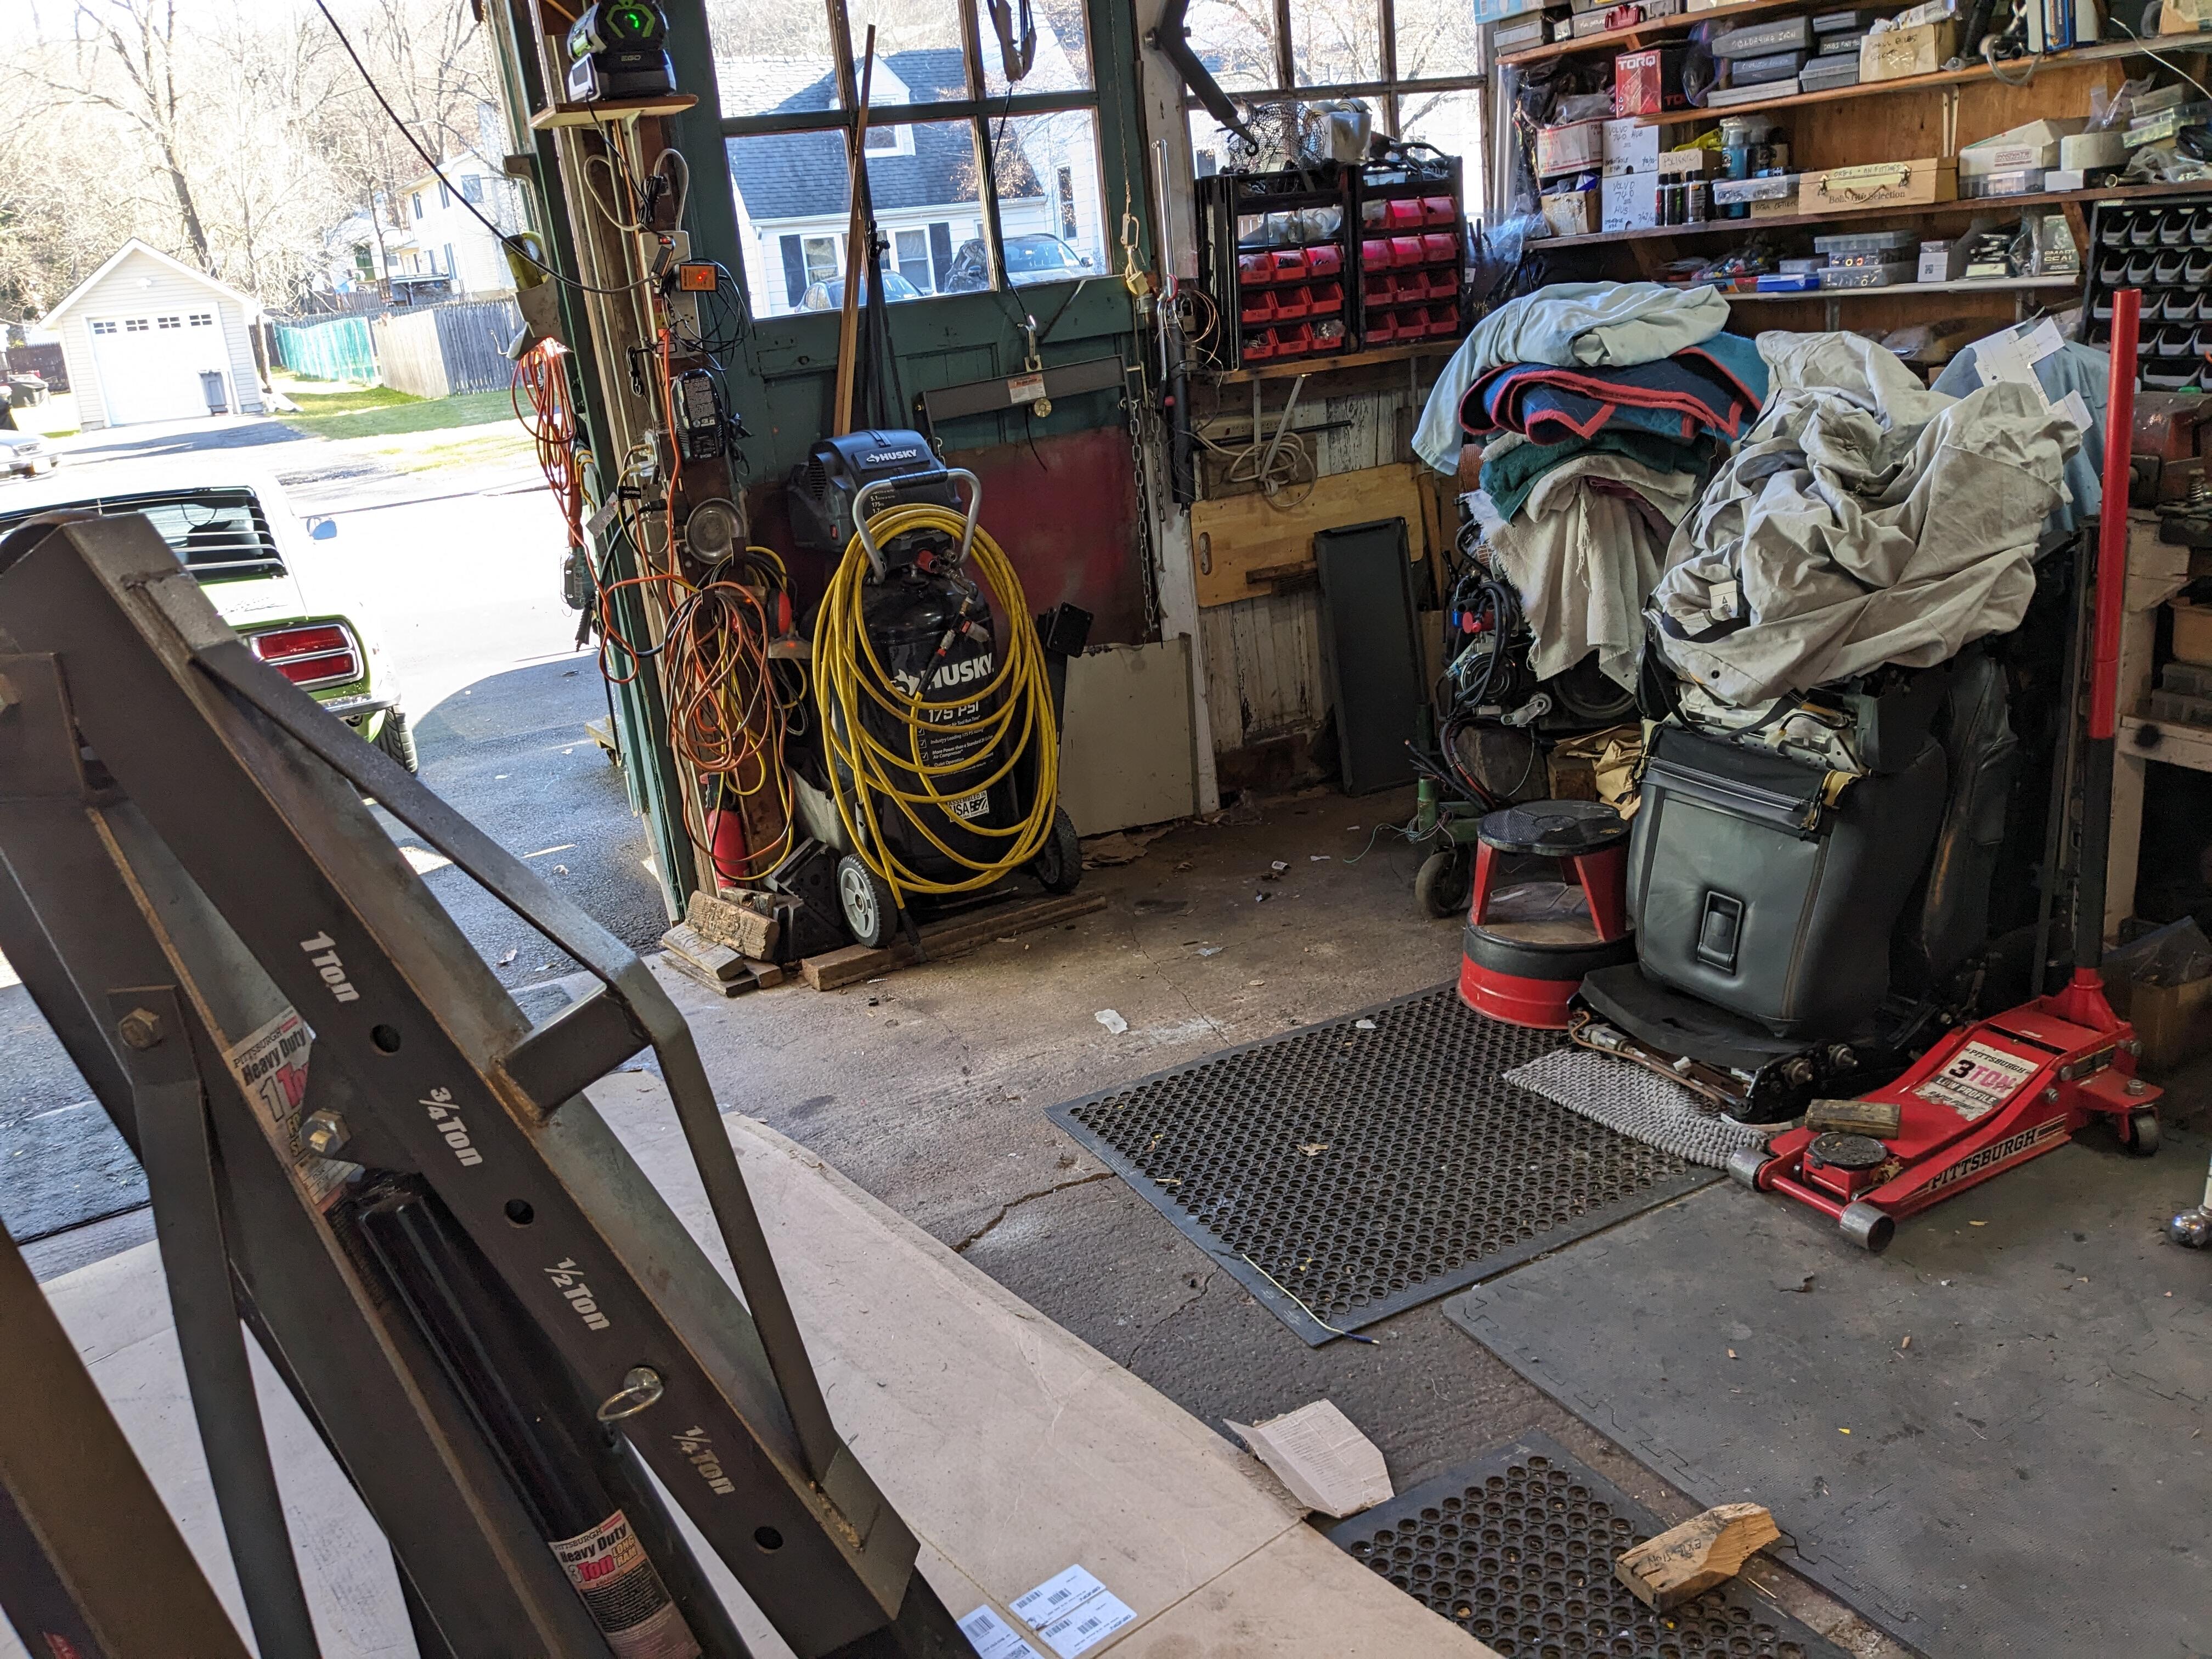
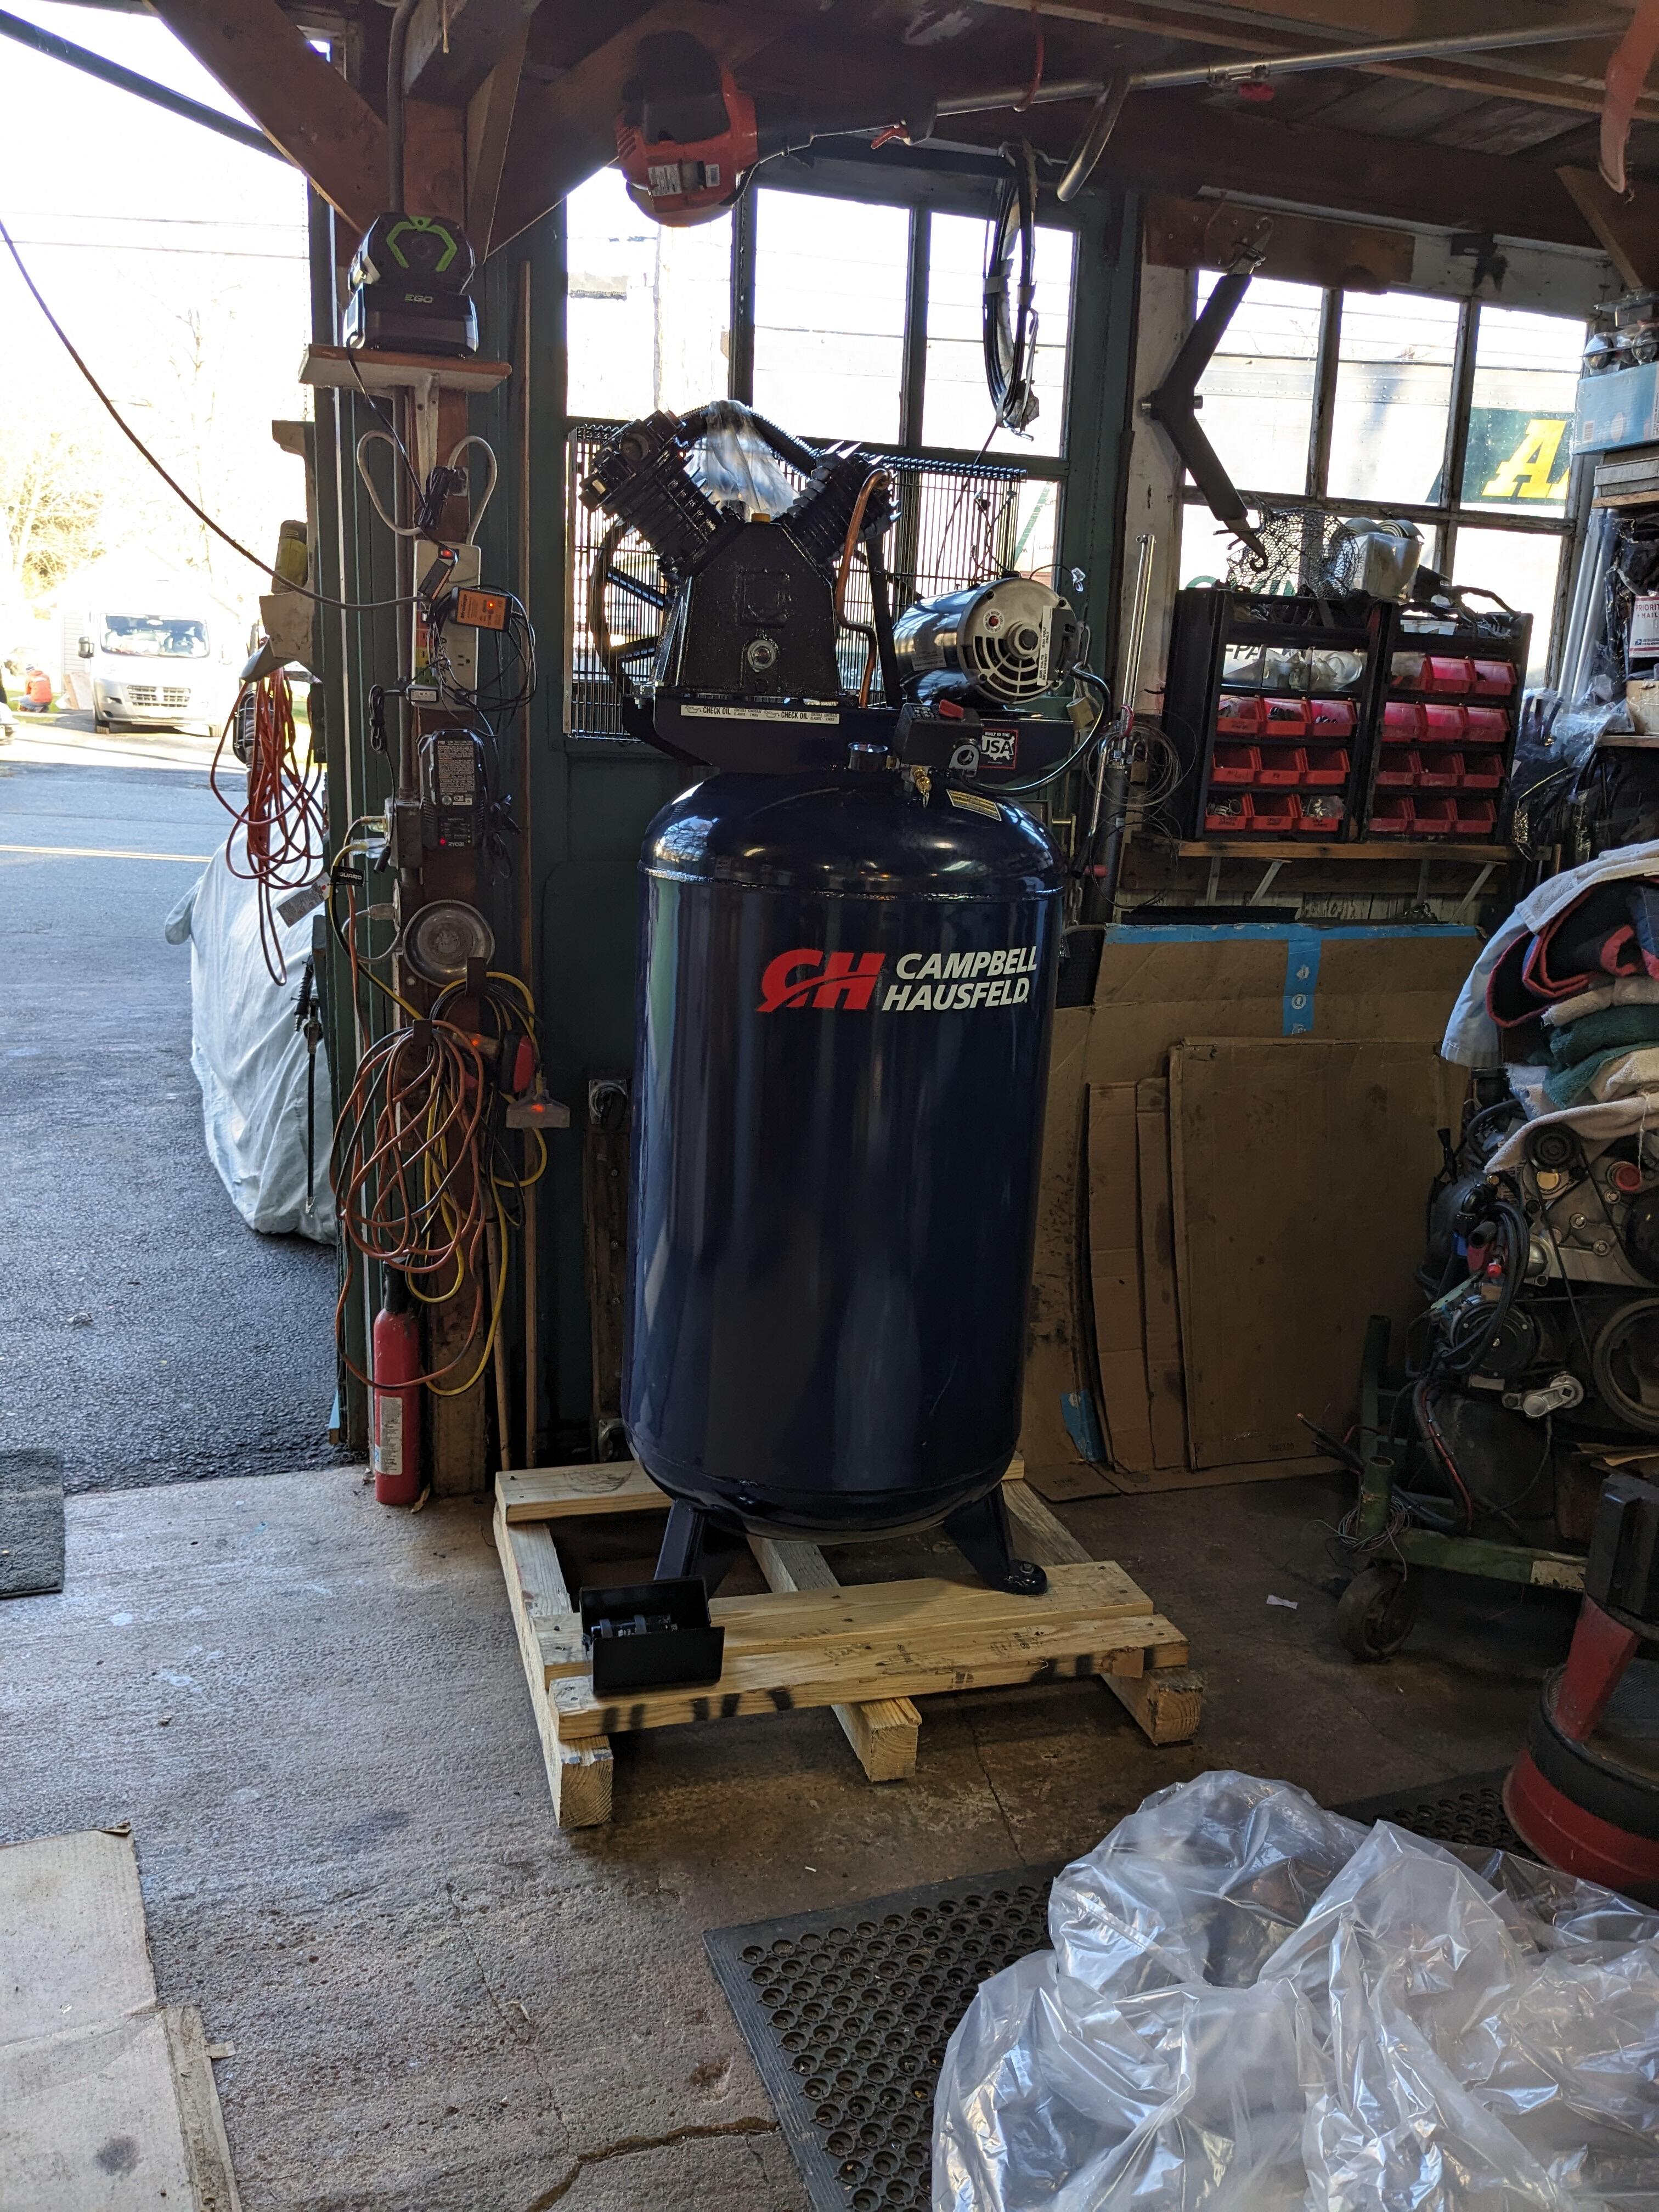
So, Home Depot is going to replace the compressor - what that actually means I have to buy another & return this one to get the refund. Kind of a PITA. The rep I spoke with was very apologetic & helpful though. I said that I felt an additional discount was in order for all the aggravation, wasted day off for the delivery (was supposed to come Tuesday, not Wednesday), etc. She discounted the compressor, and added their 'white glove' service (normally a $200 fee) which apparently is intended to make sure that an item is clear of damage prior to shipment, and again at point of delivery. So, all in all, once I get a good unit, it will be over $400 off the retail price. All I got done after work was setting up the press & anchoring it to the platform I made behind the garage. I'm thinking I'll make an awning/ overhang the width of the garage (about 18') to make the platform more user friendly. I should have room to keep a number of larger items out here, albeit under tarps or covers.
-
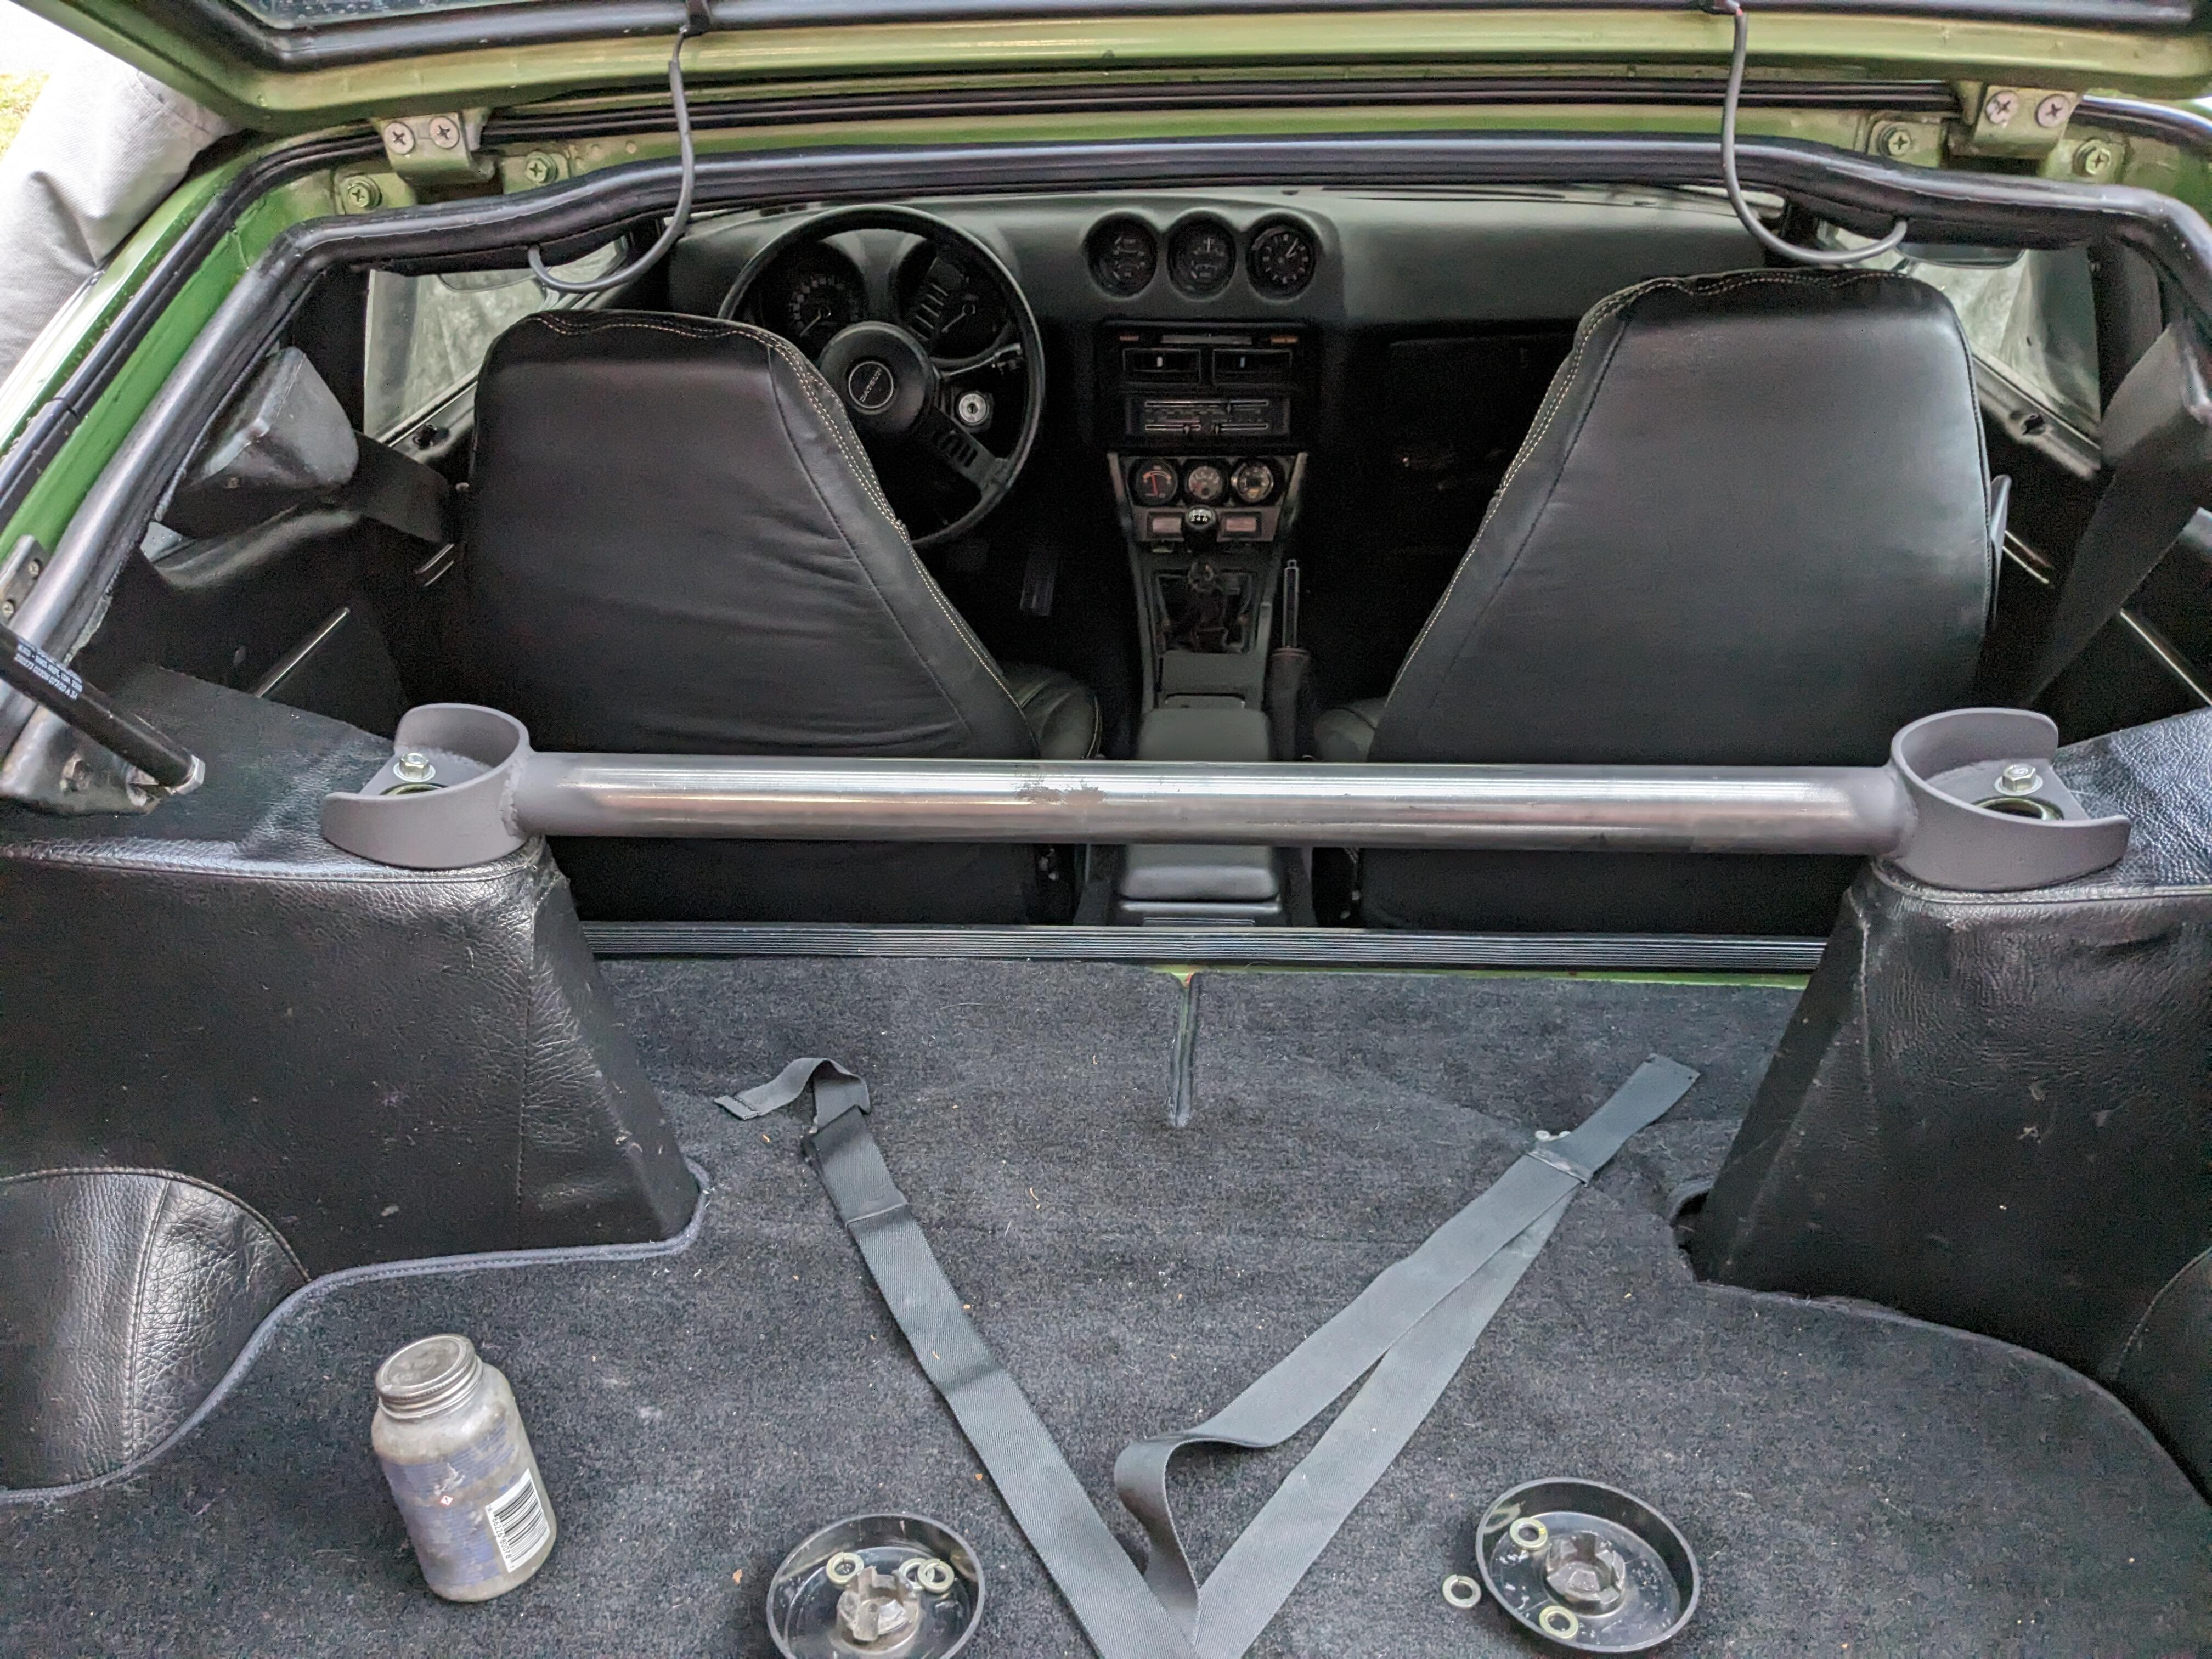
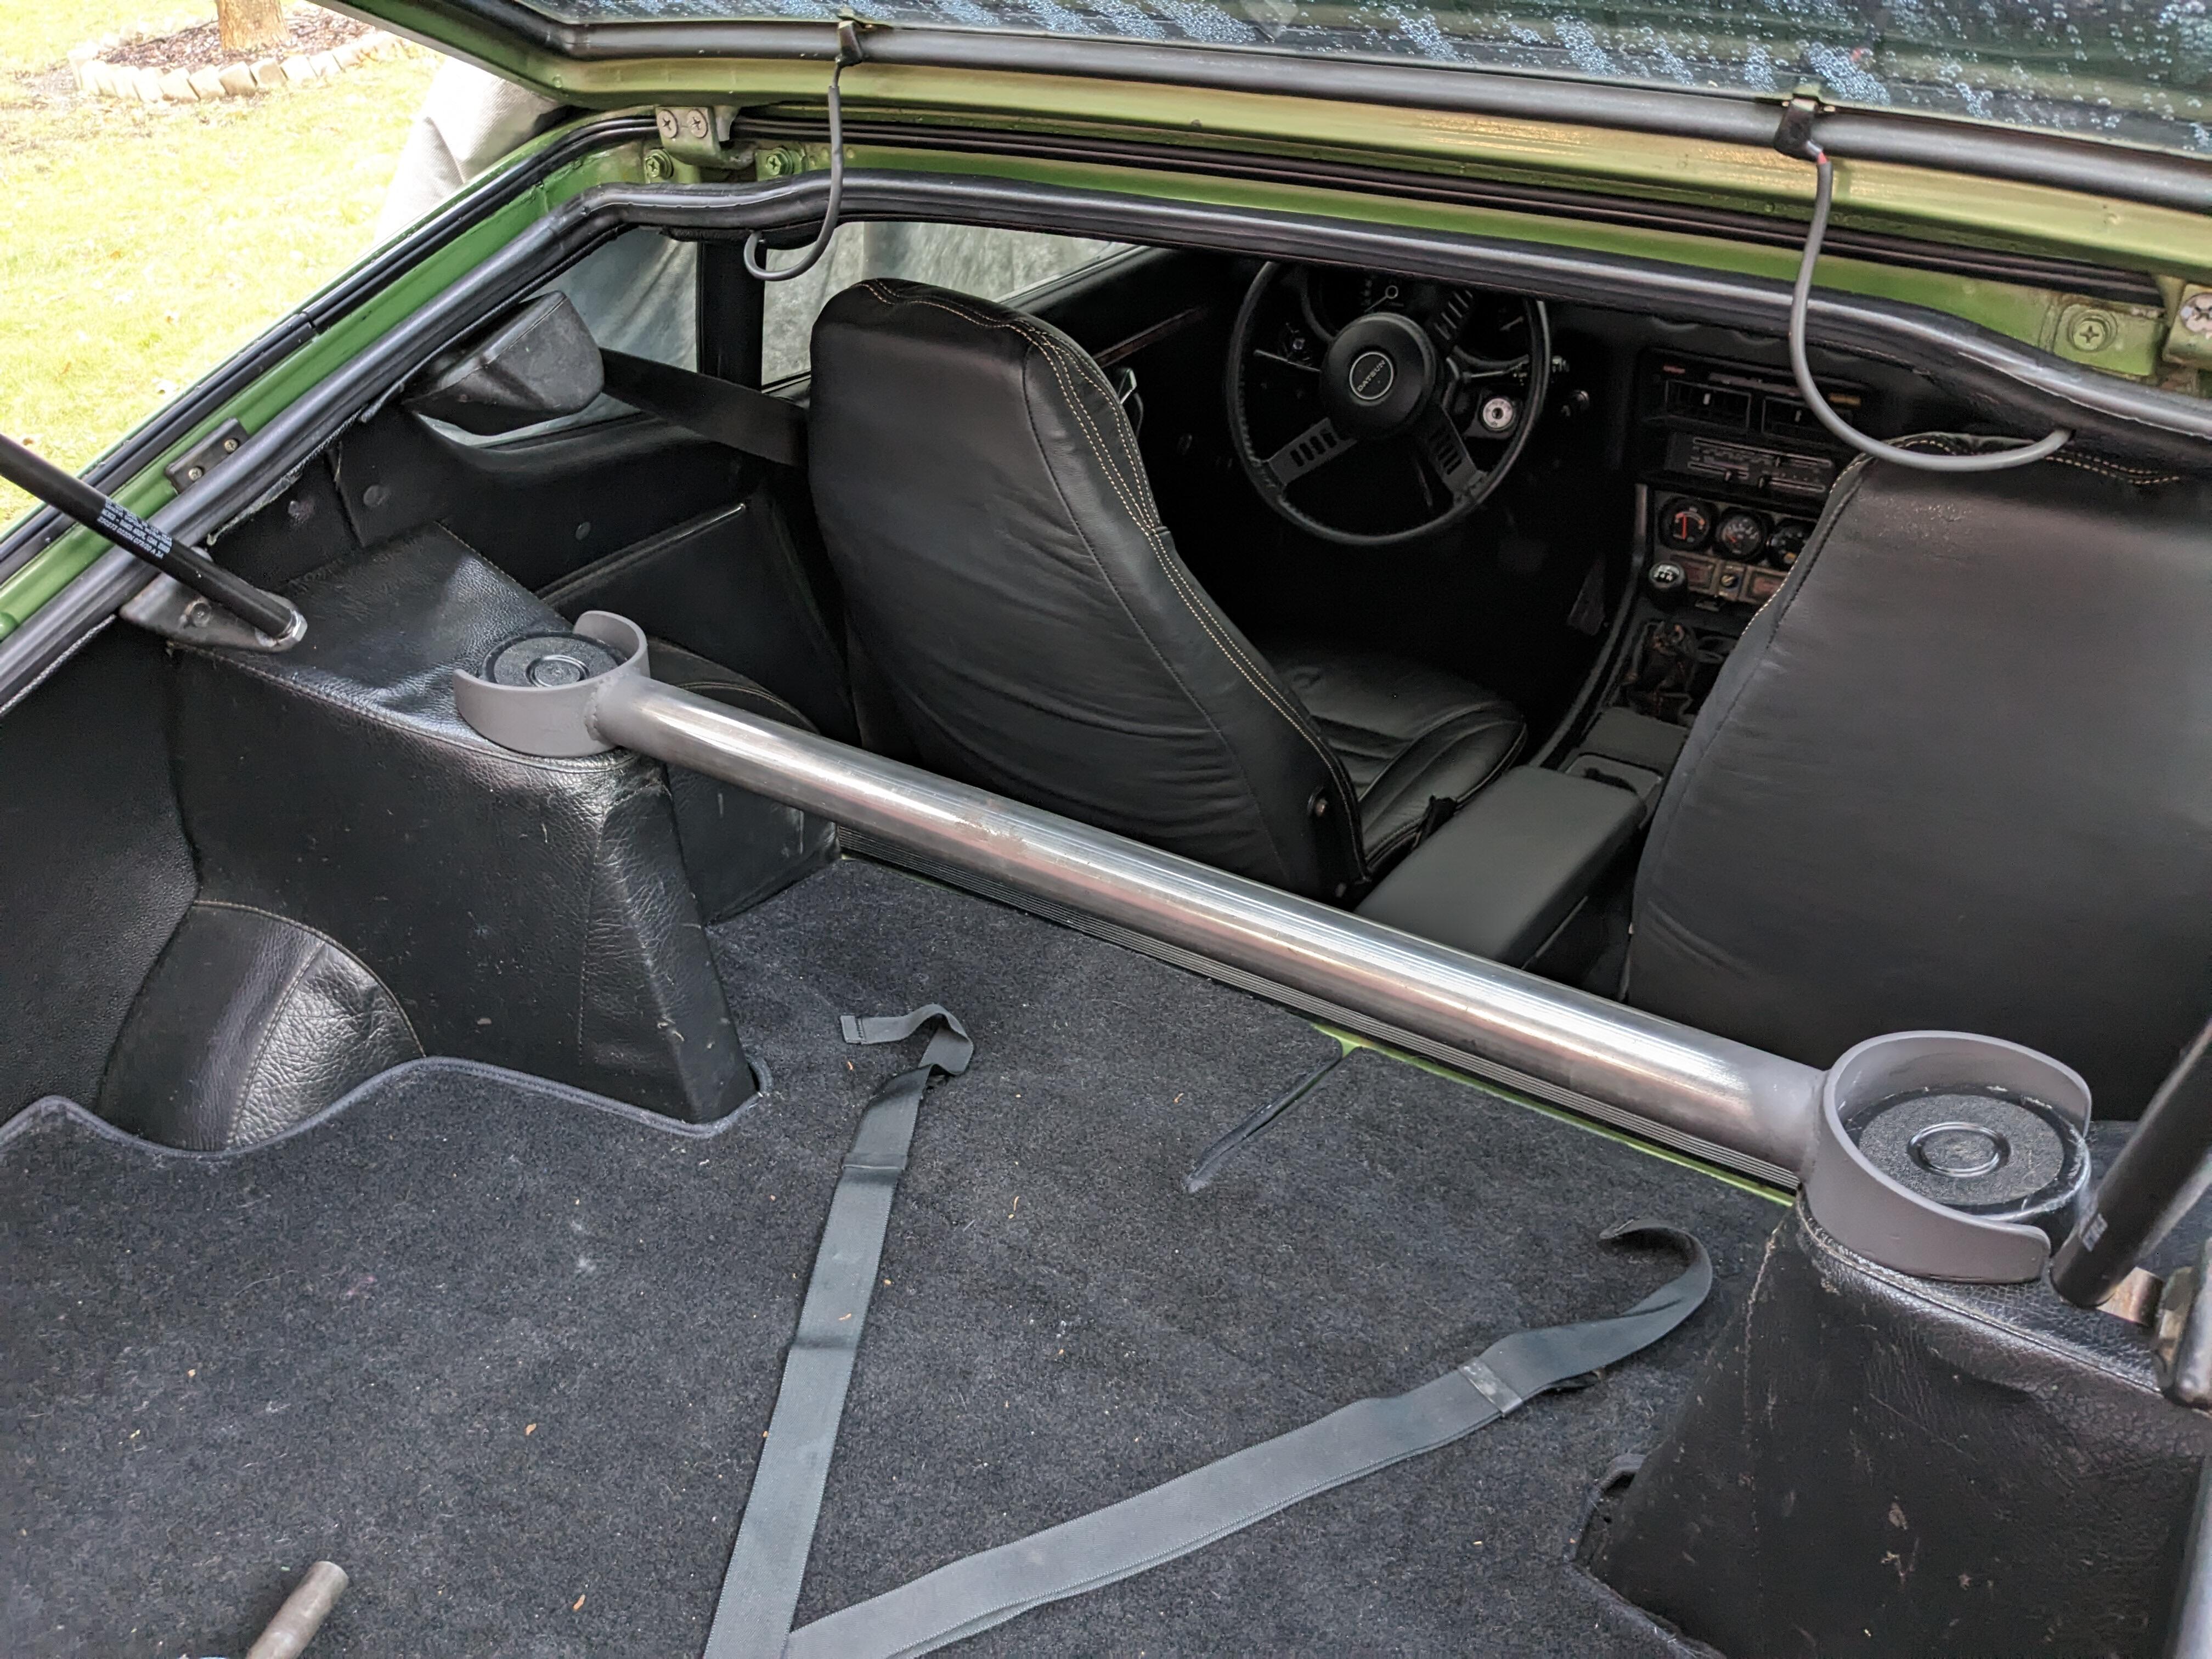
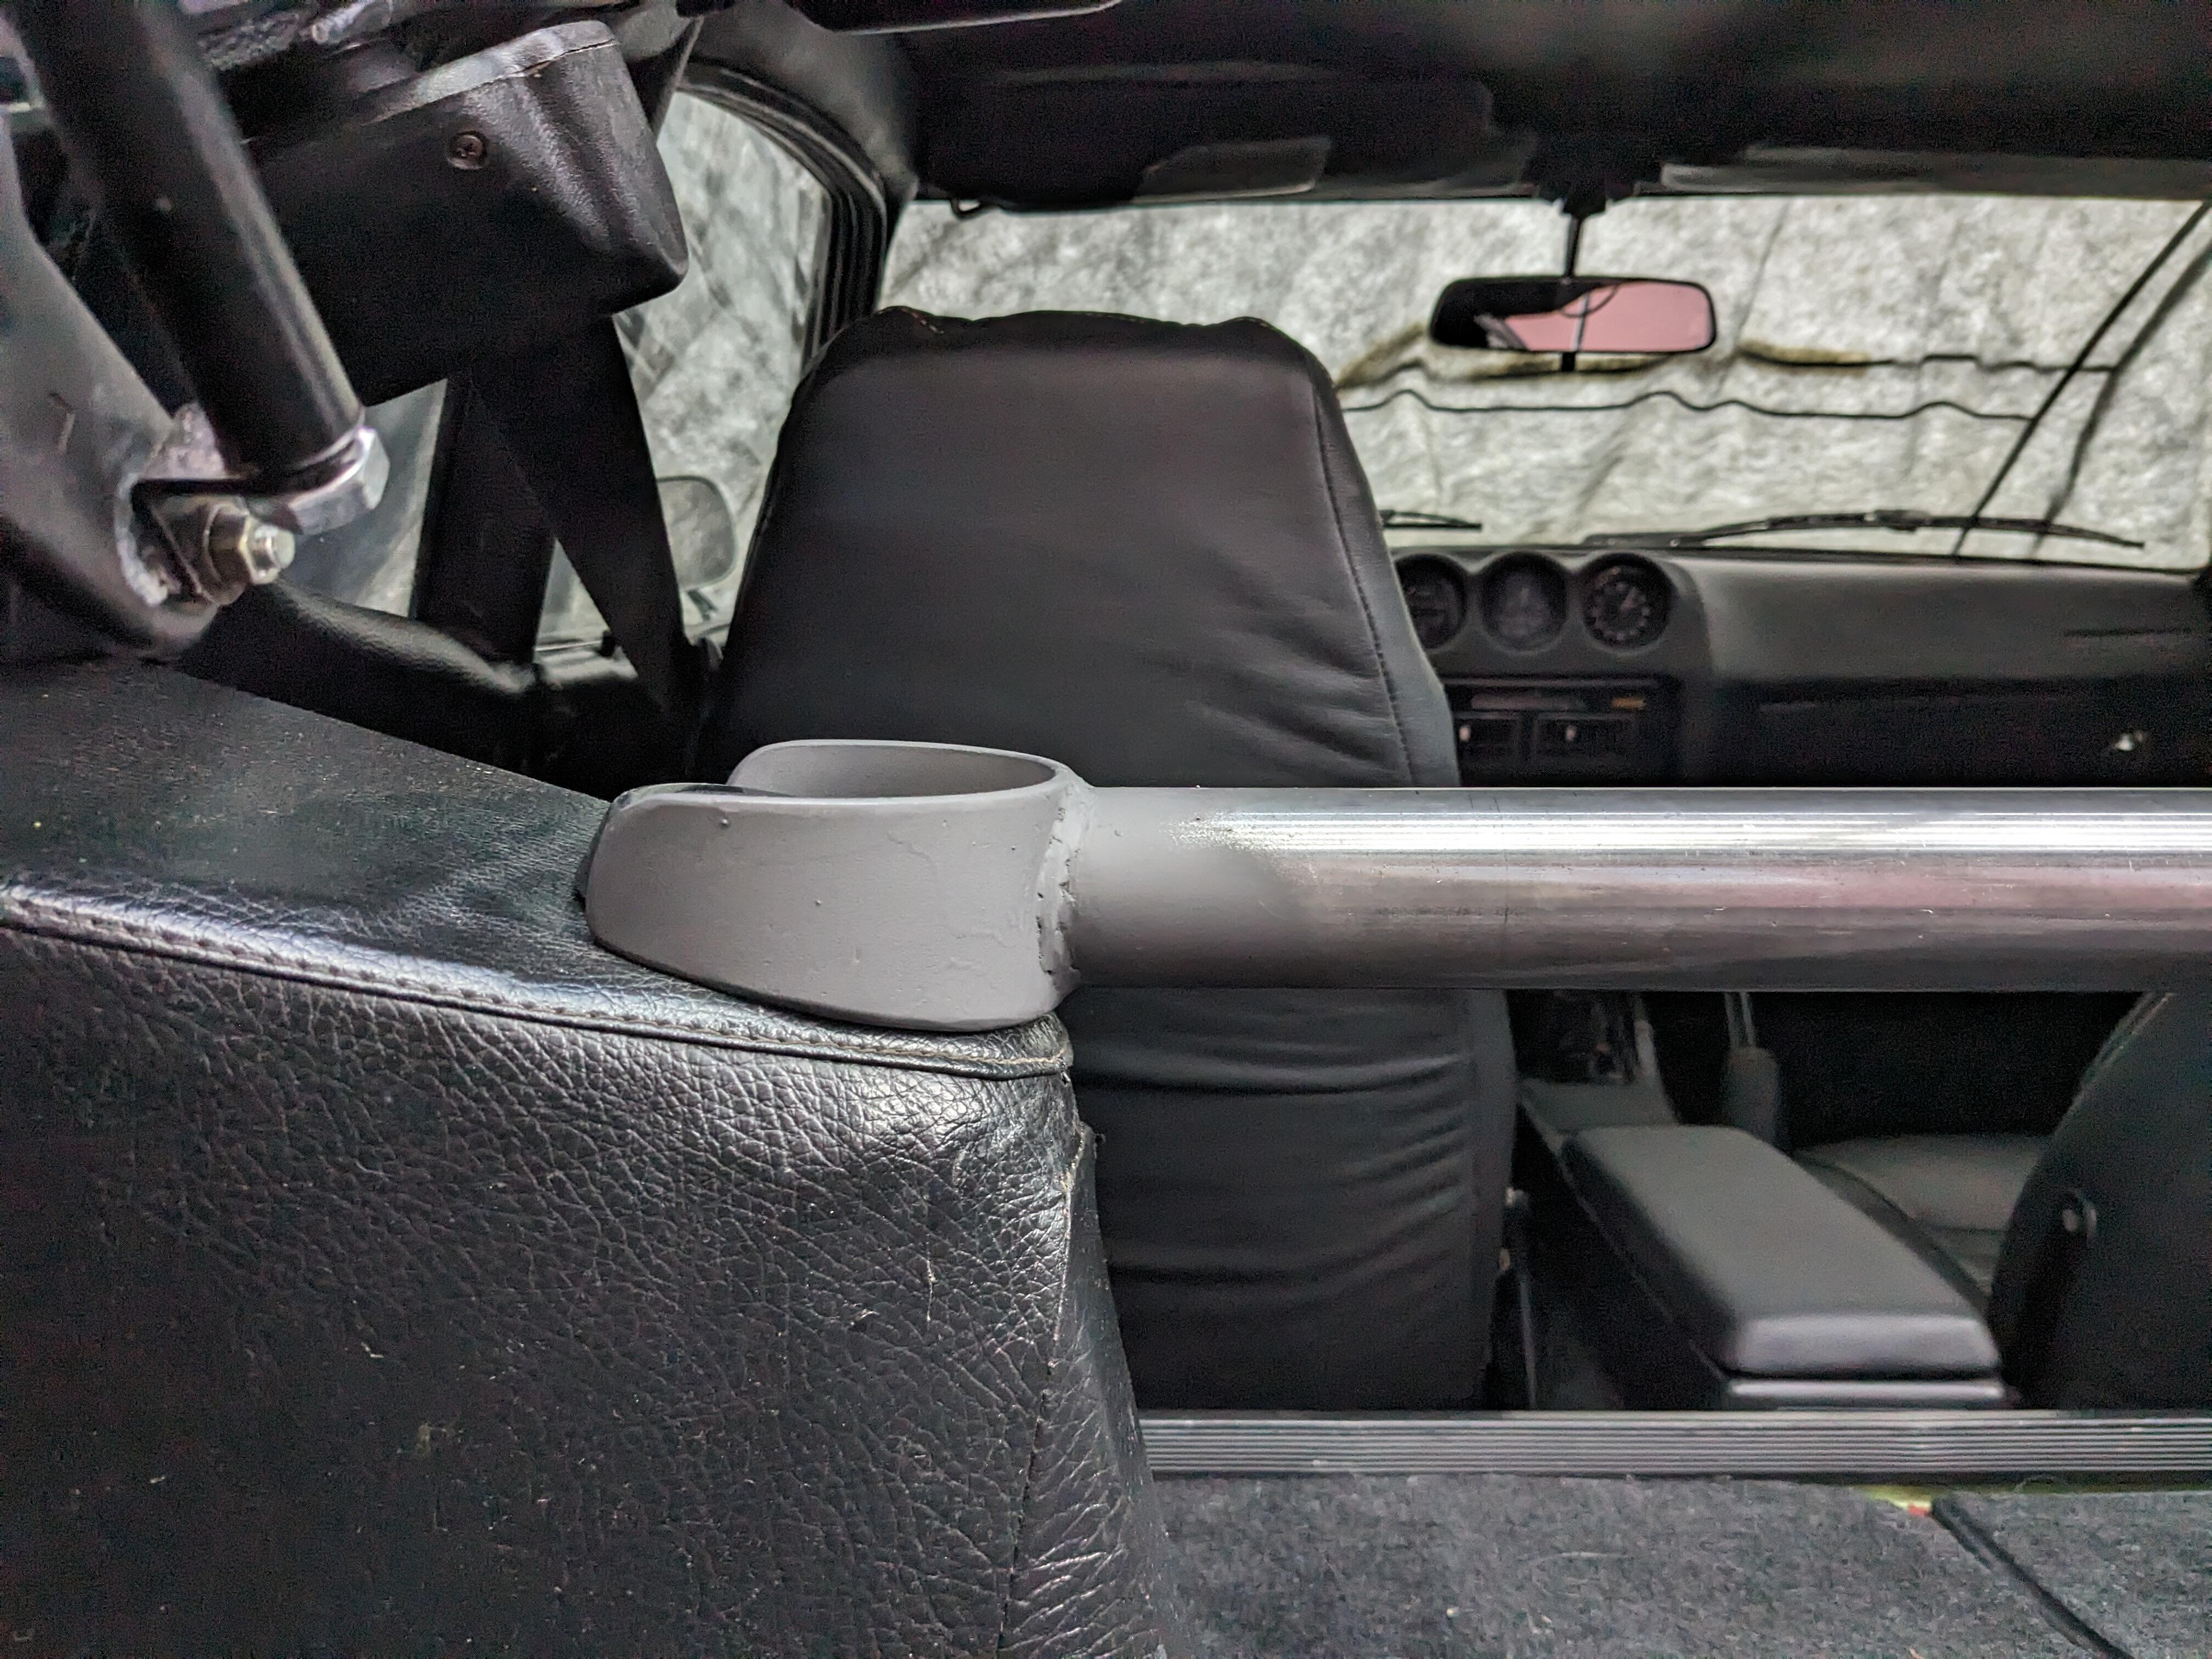
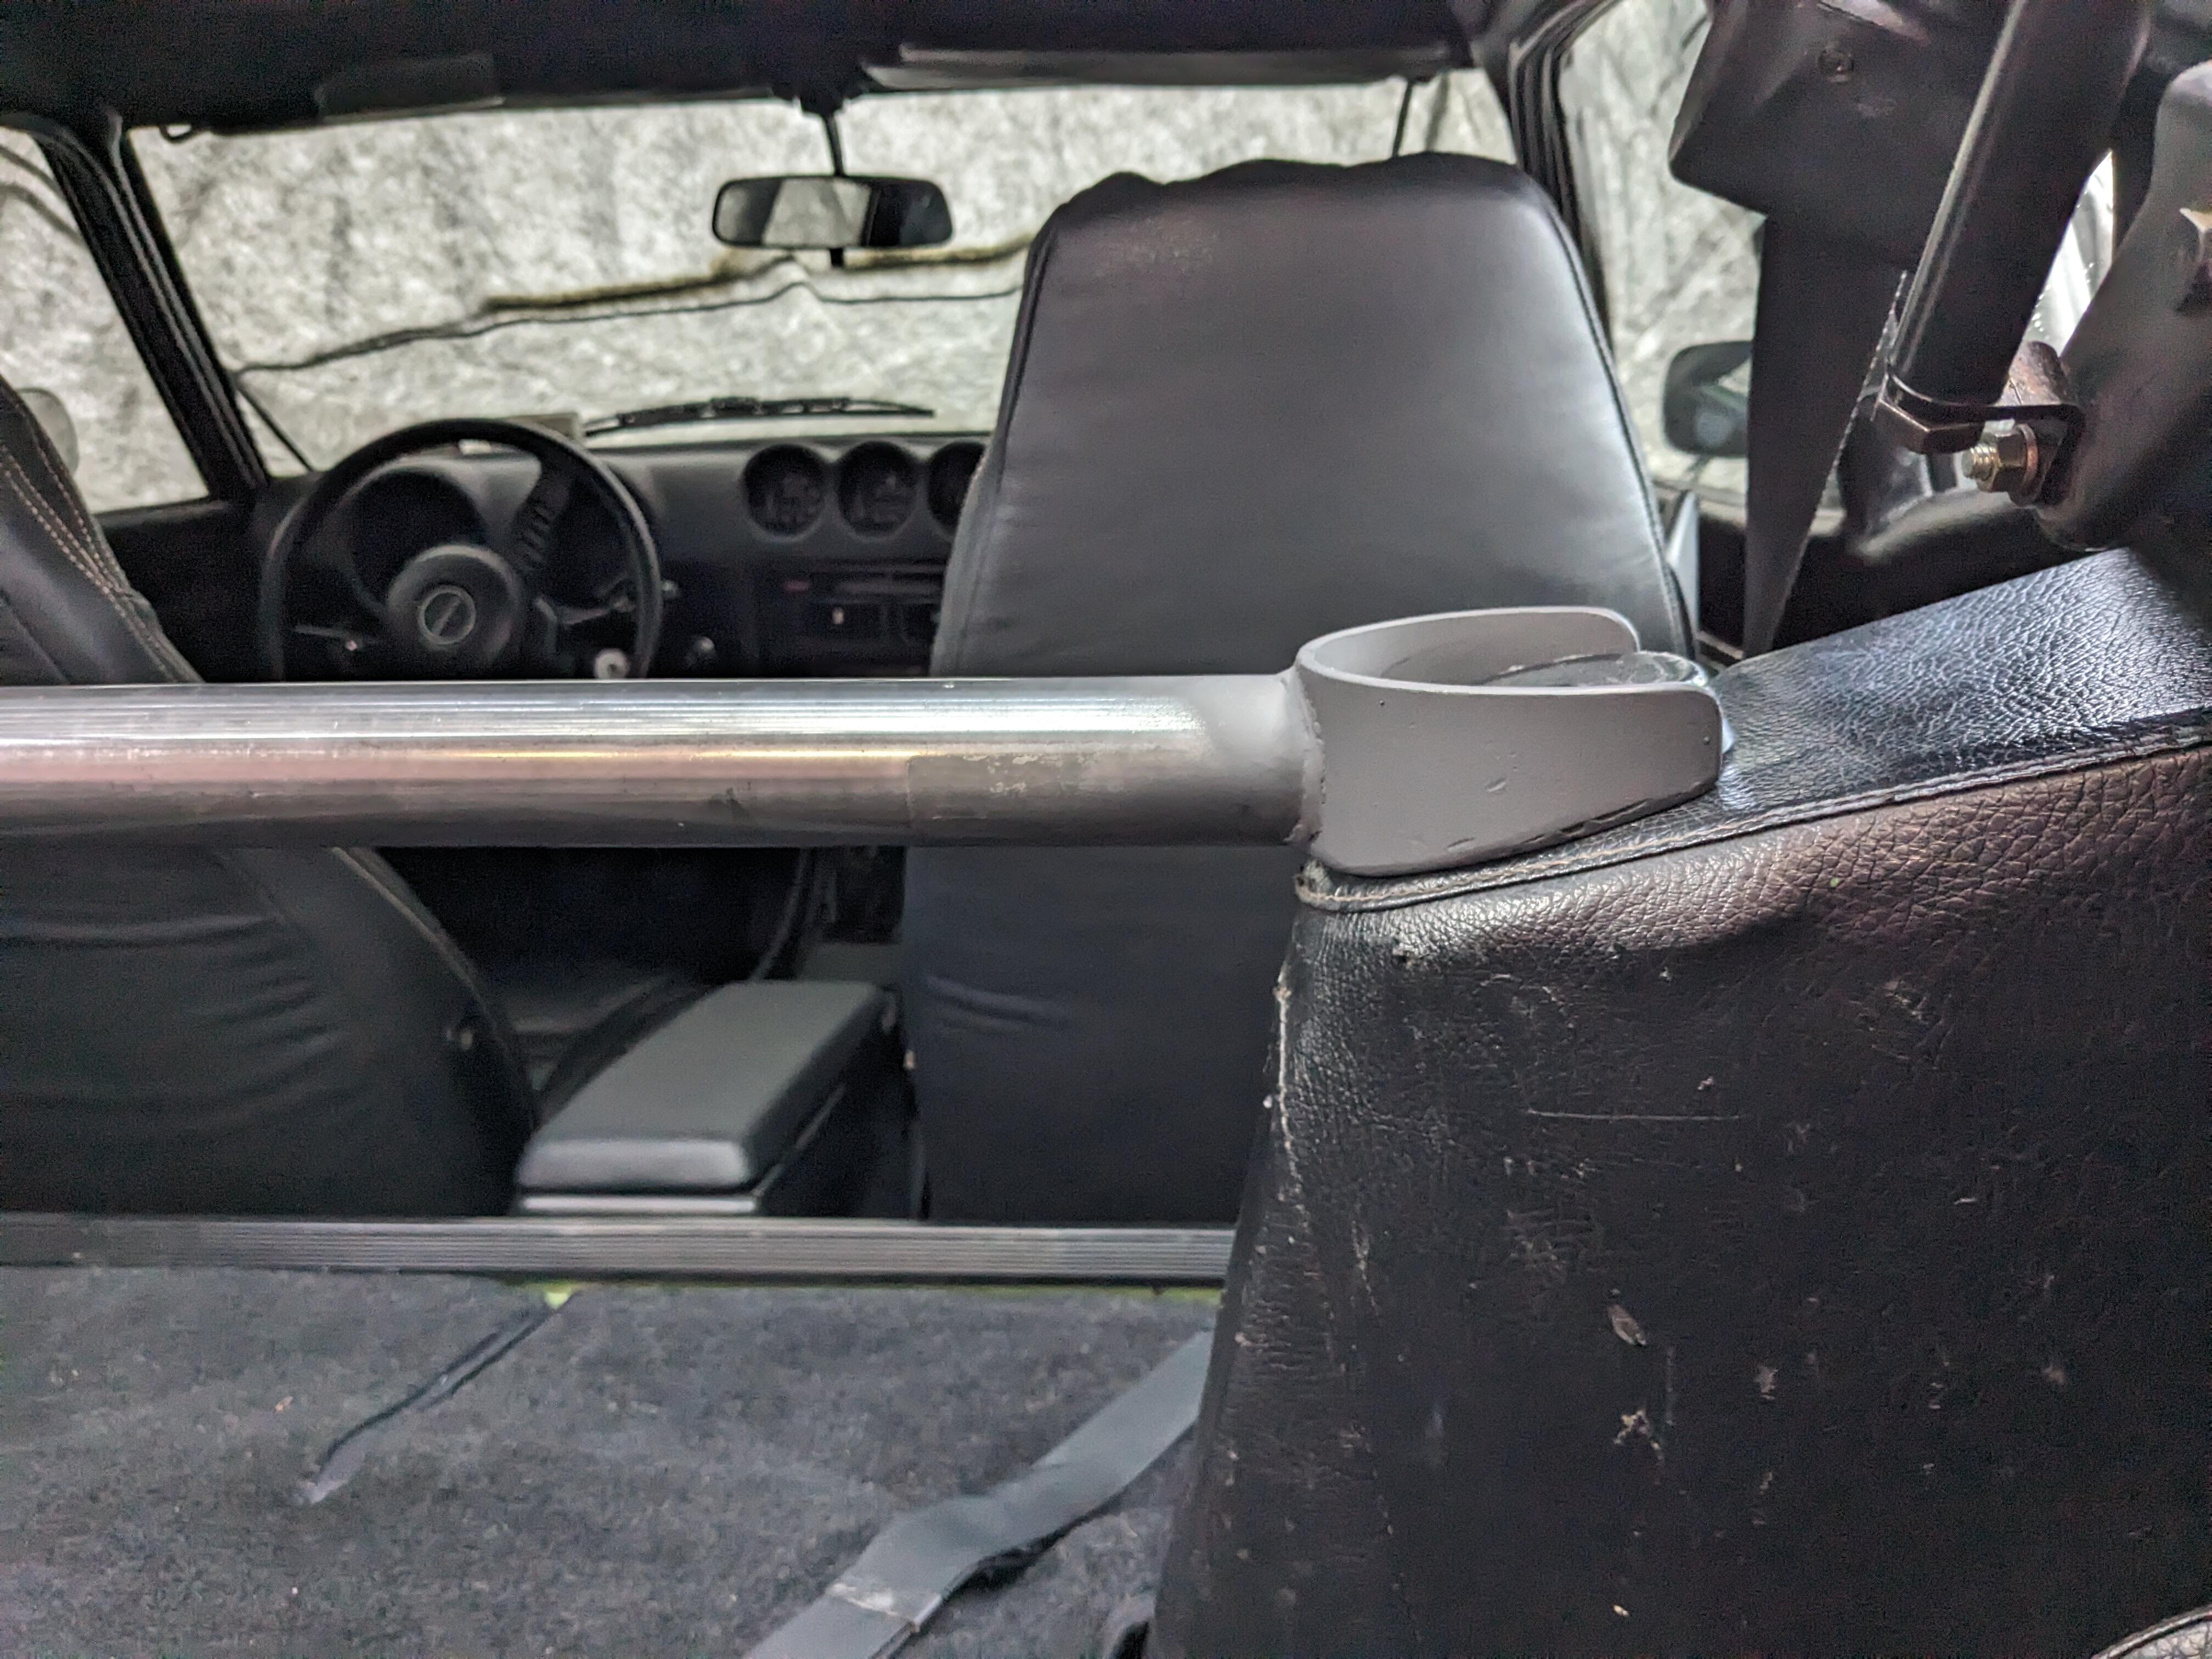
Thanks CO! I didn't realize there was already a tower brace of sorts in place, I looked back at some interior shoots of mine, and it appears I also have those
-
Actually has to go back - they damaged it in shipping, looked fixable at first, then noticed the motor mount plate is bent, pump tube is bent, the drive belt doesn't align, and a fin is broken off one cylinder head.
-
Crack went pretty far. Been sided tracked on other stuff - I ordered a better sized compressor for the garage, so I can do my own paint again if I choose. Problem is, there is just too much stuff in my small garage as it is, so I had to make a platform on the back of the garage to house my engine hoist, press & other stuff that I don't need on a daily basis should work out, eventually