Site will be going down for maintenance today

inline6
 Subscriber
-
Joined
-
Last visited
Everything posted by inline6
-
 Thanks for the info. Got me looking again at this today. After looking around for information about stock head gasket thickness, I am still not sure I can know with certainty which of the available gaskets will work. In this case, I am focusing only on those head gaskets for a 2.4 L engine. I have a Fel-Pro on hand which came in an engine gasket kit with the car. I measured it a .045" thick for the most part, but at .052 across the fire rings. I am unsure if that gasket compresses when installed - perhaps it compresses at the fire rings only... It appears to be made out of a very hard substance as opposed to the OEM stock gaskets, which appear to have a soft coating which can compress. .045" would be a problem with .025" piston pop up, at least as I understand it. Minimum piston to head guidance I have seen before is .022". There are a few different part numbers for OEM 2.4L head gaskets, but availability (right now) looks pretty sketch. 11044-27L01 appears to be discontinued. There is one on ebay right now. And you might be able to source this gasket from overseas. It was apparently replaced by 11044-27LX1 which I just bought on ebay. It shows 1.42 mm for thickness, but who knows how accurate that is. And I expect this one will compress with installation. How much, I am not sure, but from looking around online today, I found people indicating .12 mm to .15 mm compression after installation of stock gaskets, which is 5 to 6 thou. I figure the gasket I just bought has a chance to work for me if the 1.42 mm and .15 mm is accurate. That puts the gasket at .050" compressed (again, in theory), which would give me .025" piston to head clearance. I think I will have silly putty on hand to check head to piston as well as valve to piston clearances.
 -
Do you mean with the stock head gasket? That is about .019" piston to head clearance. That will work?
-
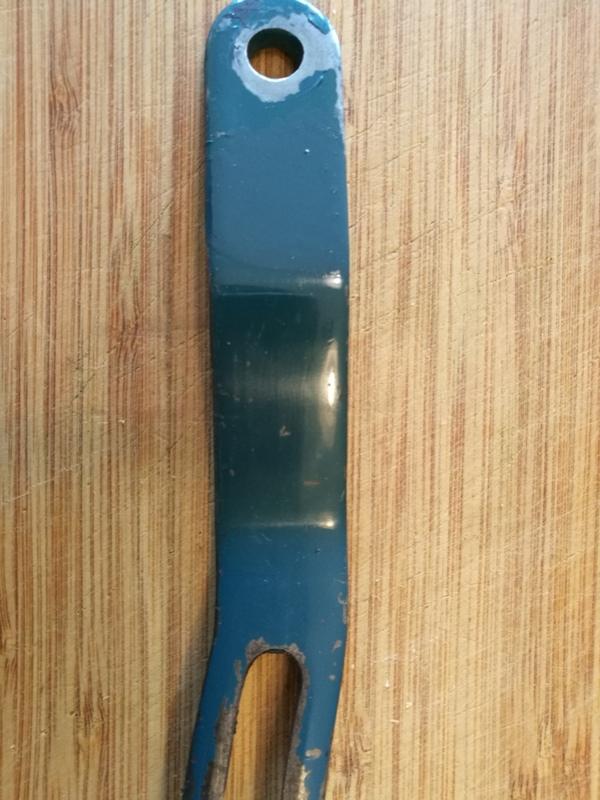
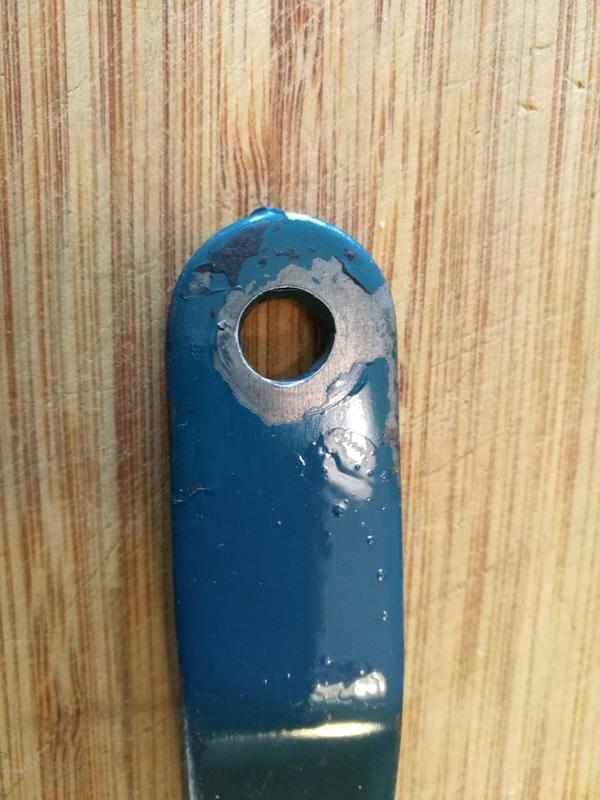
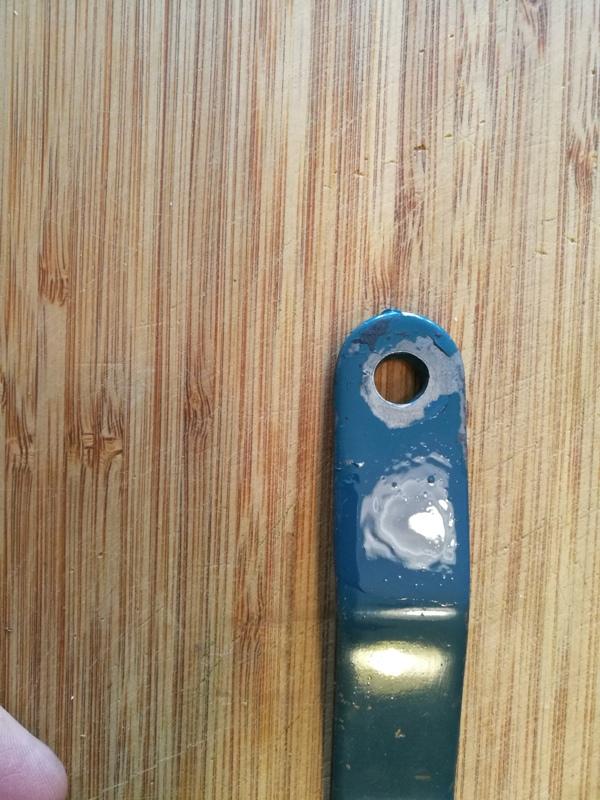
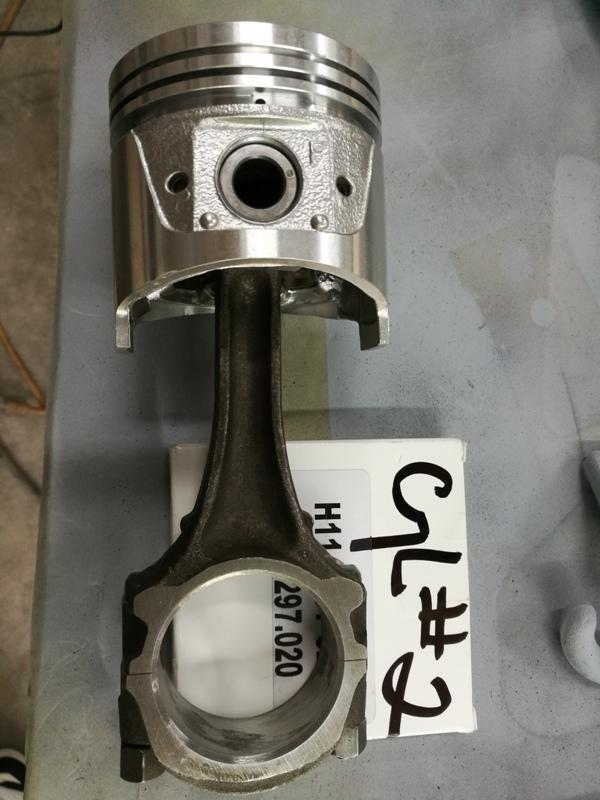
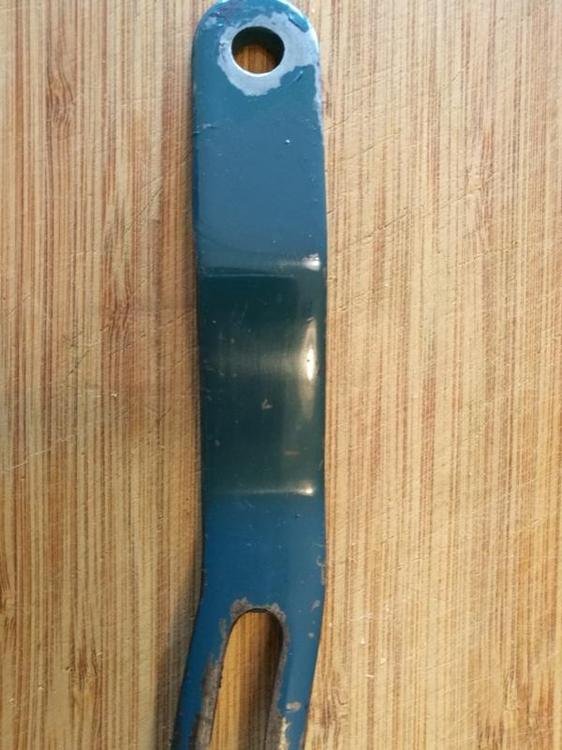
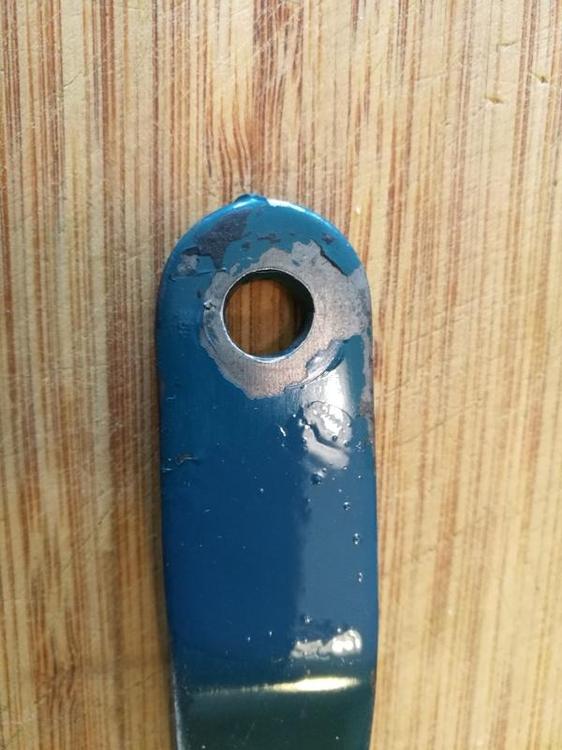
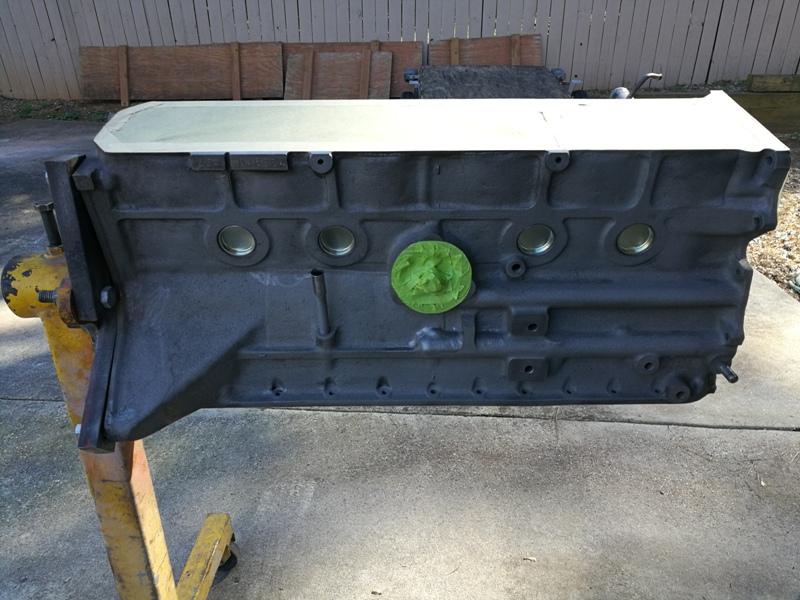
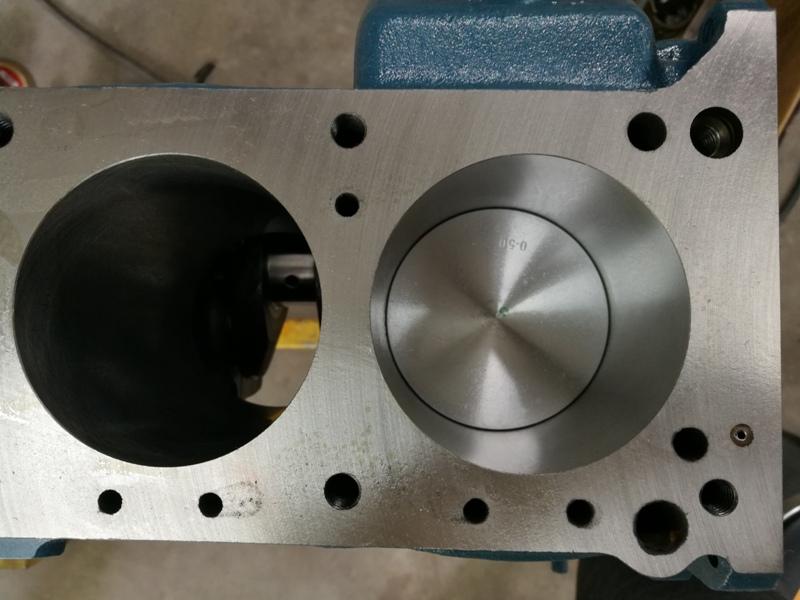
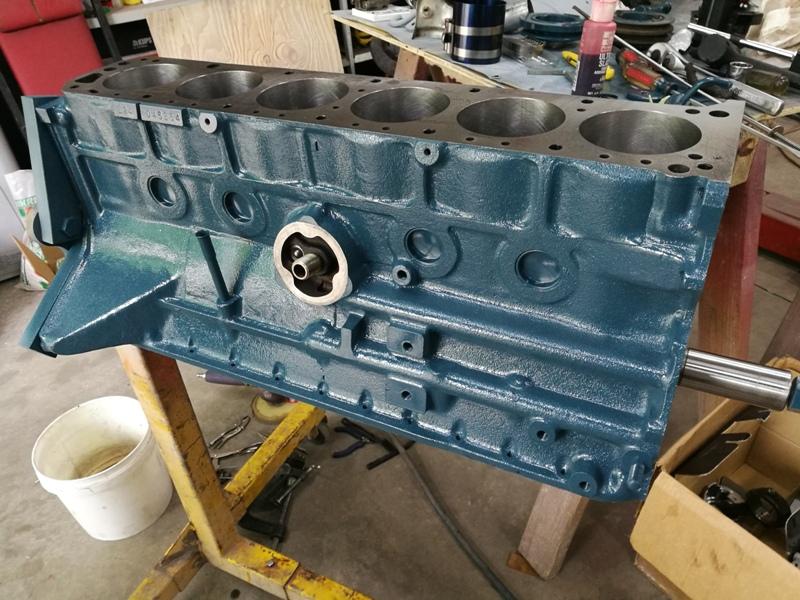
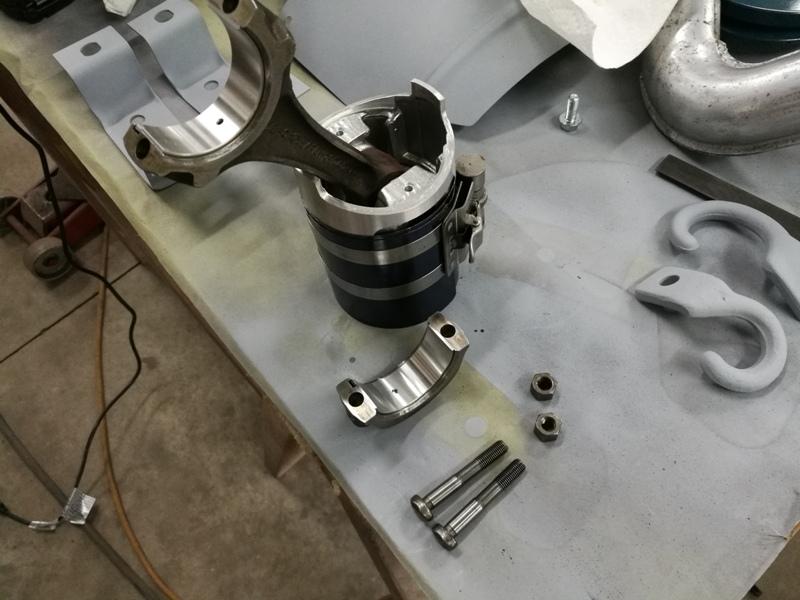
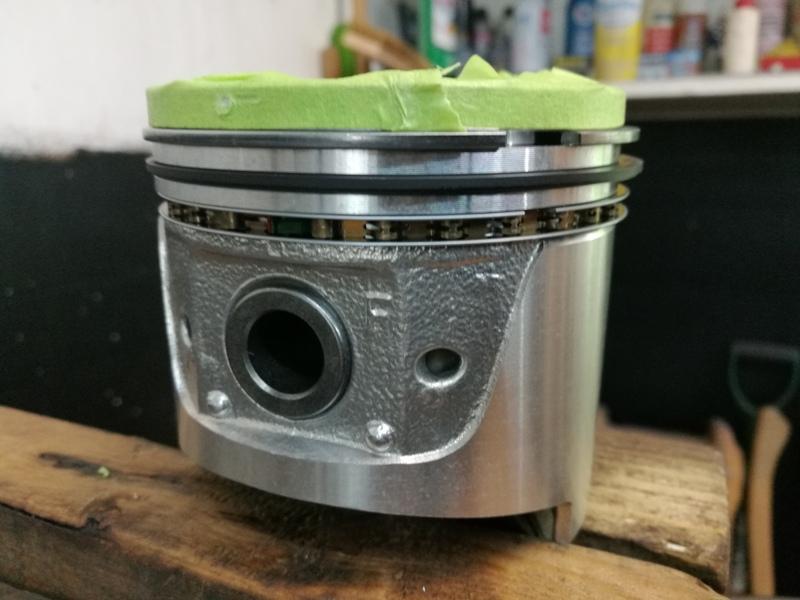
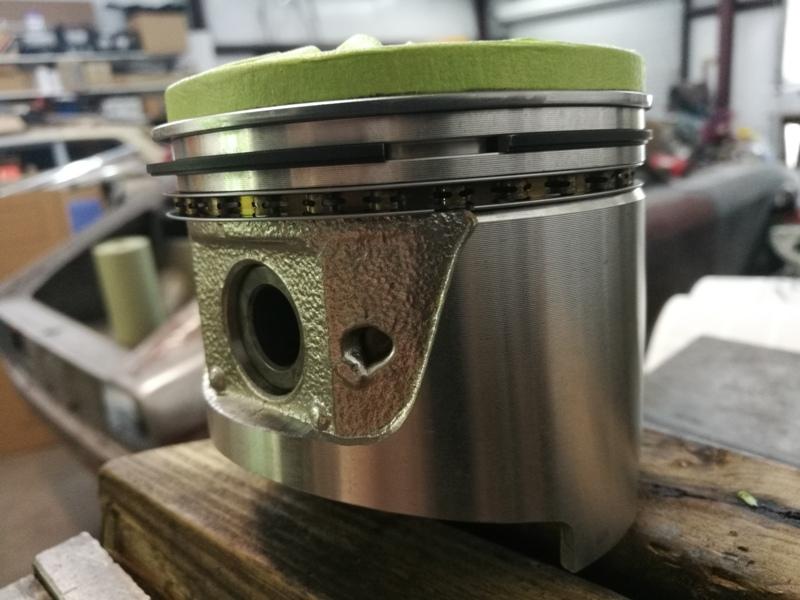
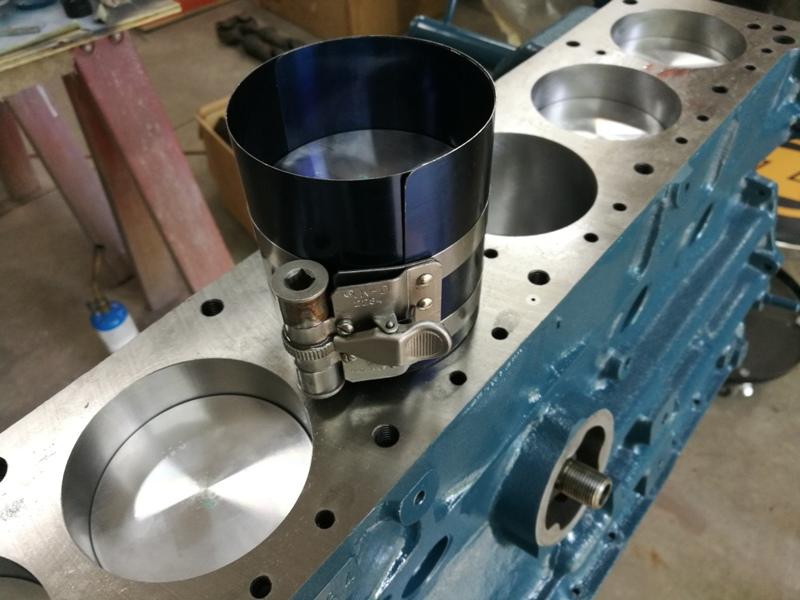
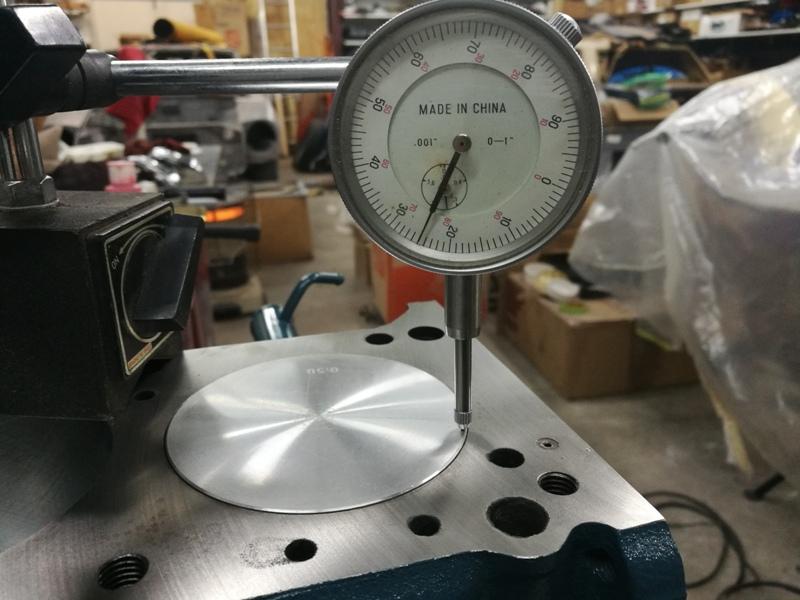
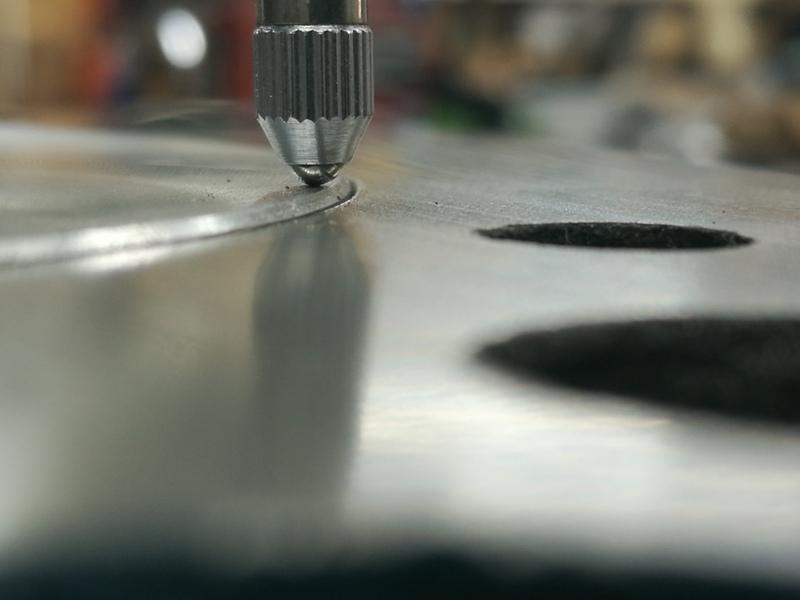
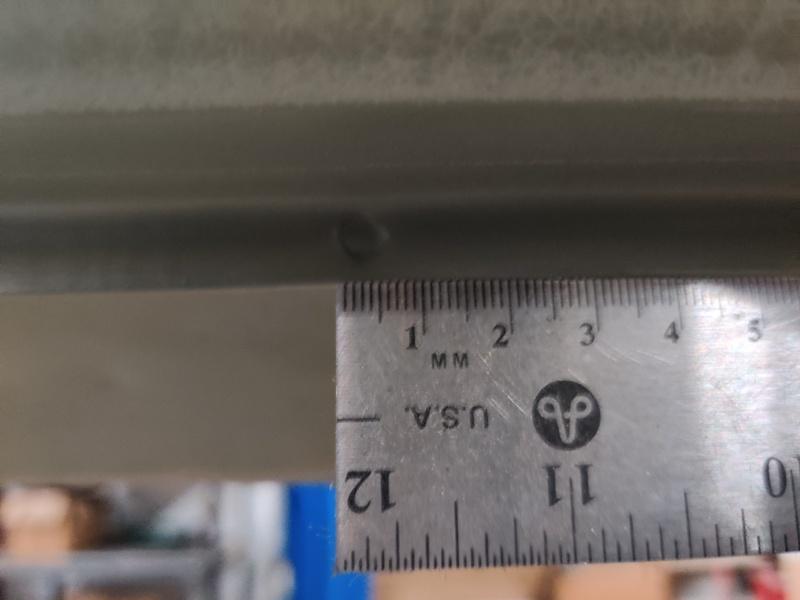
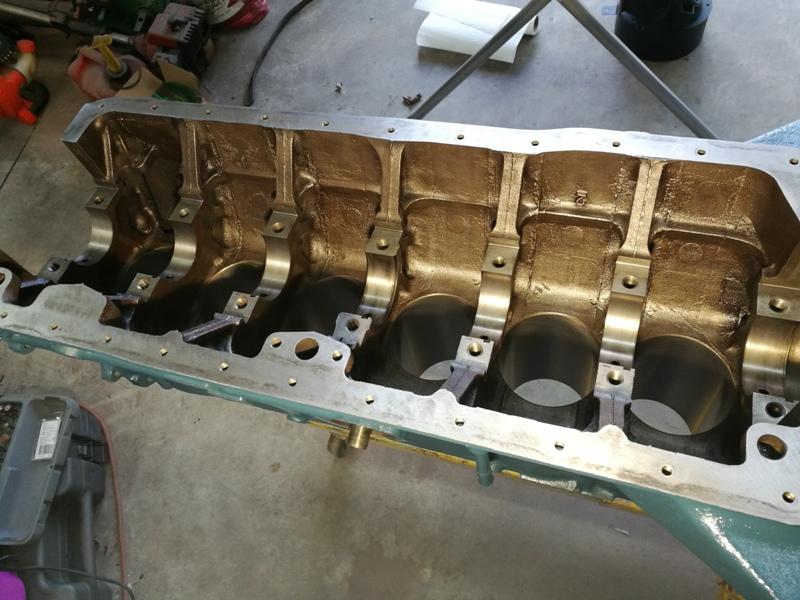
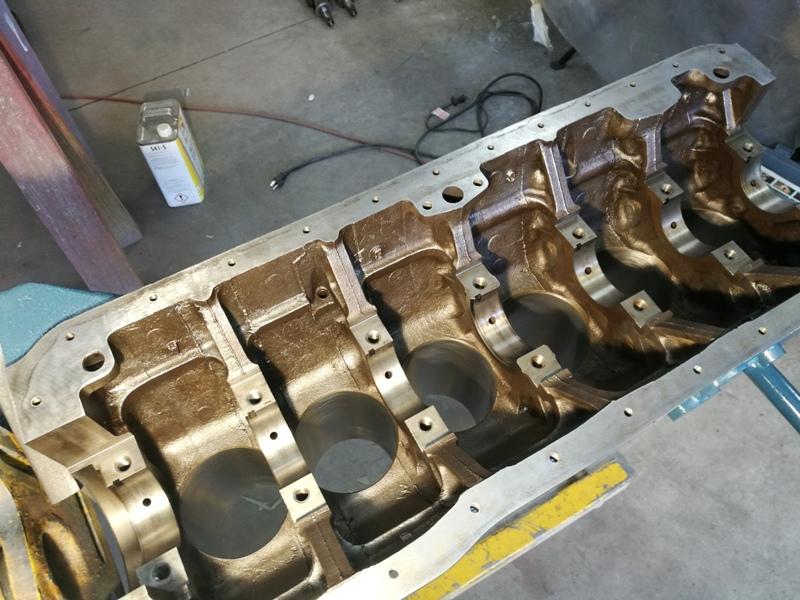
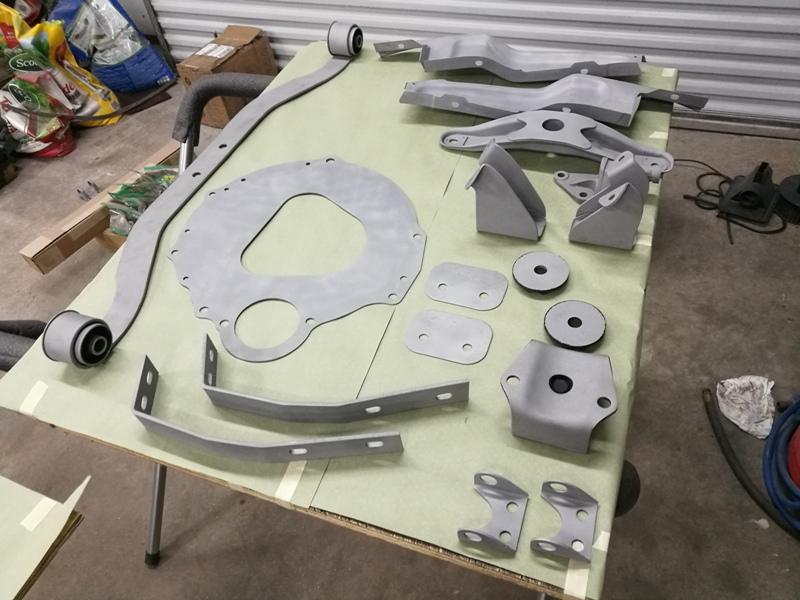
Next step on the engine block was to install the freeze plugs. I know some people paint the block first, but I wanted to do this like the factory. I do draw the line at fully assembling the engine and then spraying the blue/turquoise/green color with over spray landing on the head and oil pan though! For paint match, a few parts on the engine still had original paint. For example, the upper alternator bracket still had original paint on it. I was able to get that scanned at my local paint supplier and have them mix up some Nason enamel. Here are a few pics with the newly mixed up paint dabbed onto the part. I let the paint dry before taking the pics: I think it is a pretty good match, as I find it hard to see in the pics. I put it on the flat portion of the arm just below the bolt hole. You can see the raised up area in the third pic pretty well. Next, I masked up the blocks upper, front, and lower surfaces, and the oil filter location: After painting and letting it dry, I started assembly of the short block: After the crankshaft was installed, I put the rings on the pistons, and put the piston and rod assemblies in the block (Front and back of piston showing ring groove orientation): I used high quality masking tape to protect the pistons during ring installation. I had to be careful, as I do not own a ring expander. With the amount that was removed from the top deck, I was sure to measure the amount that the .030" ITM pistons extend up out of the deck. The reading is .025". This means gasket selection will likely need some special consideration. Instead of stock, I think I will need to go with a Cometic MLS... probably from Whitehead Performance as they have a listing of many sizes that I haven't seen elsewhere.


-
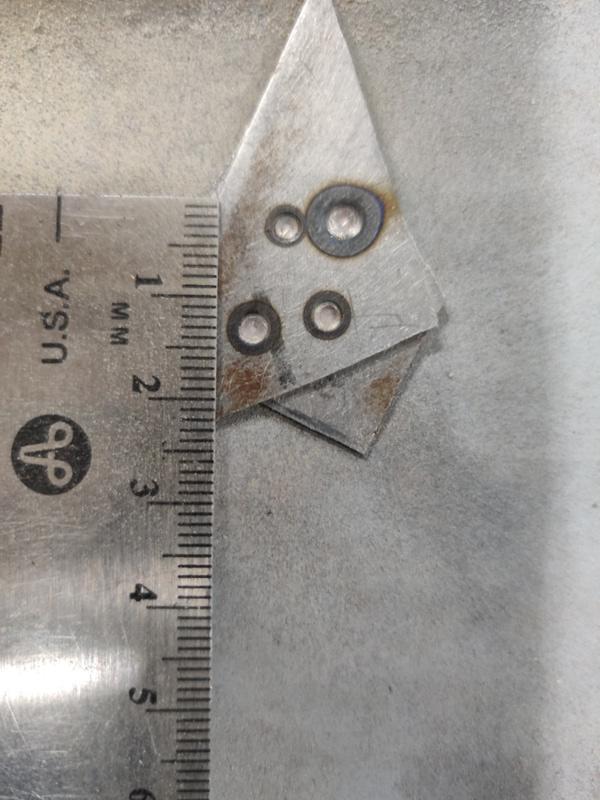
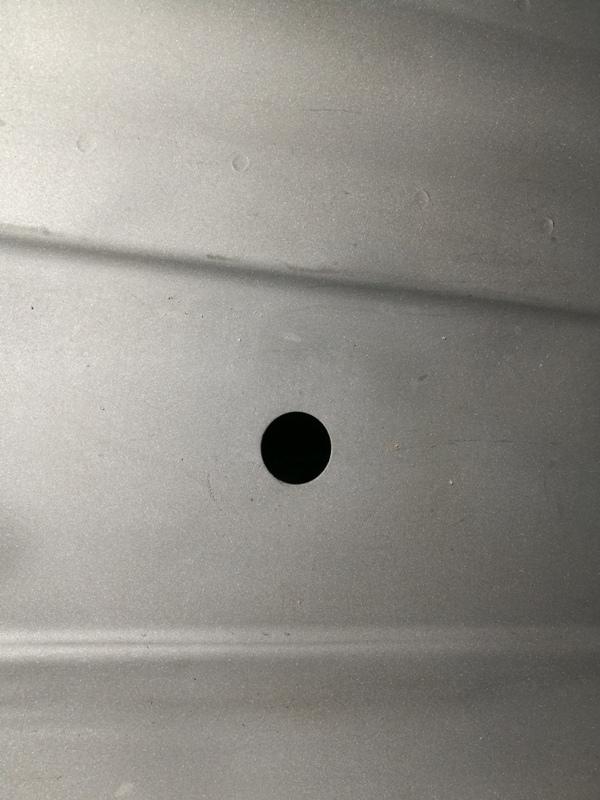
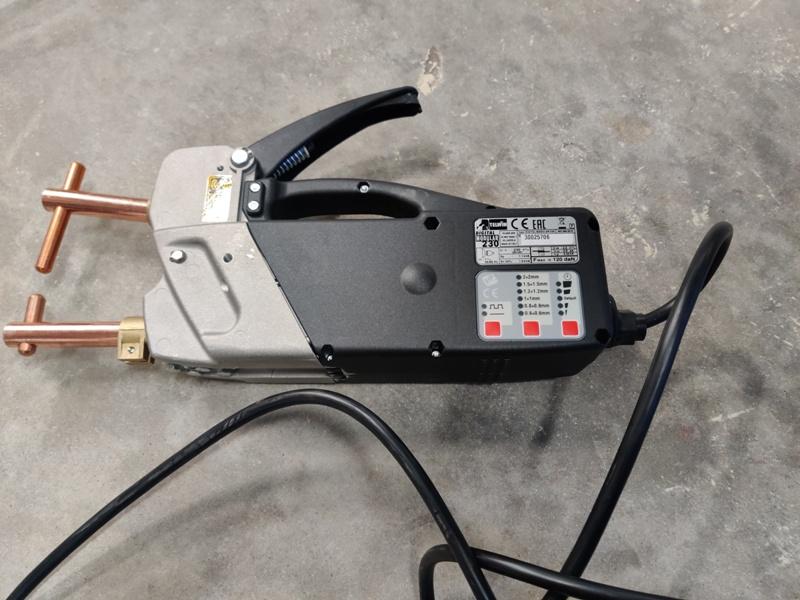
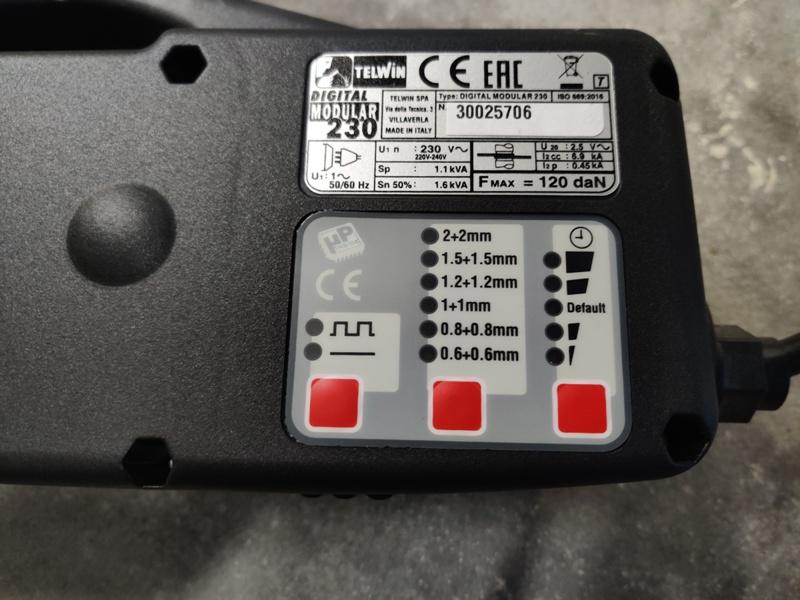
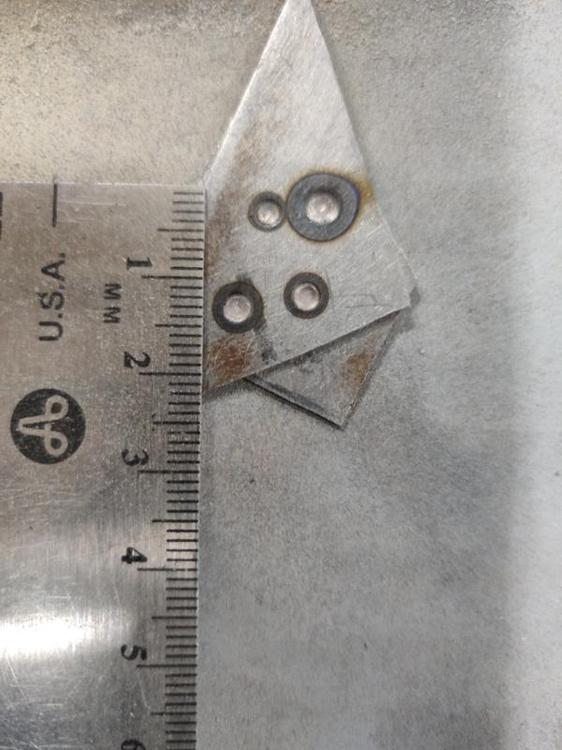
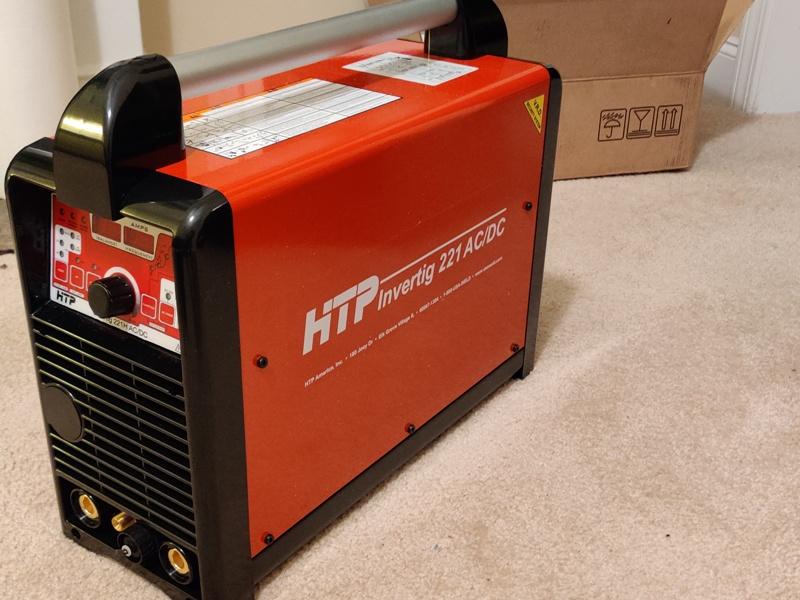
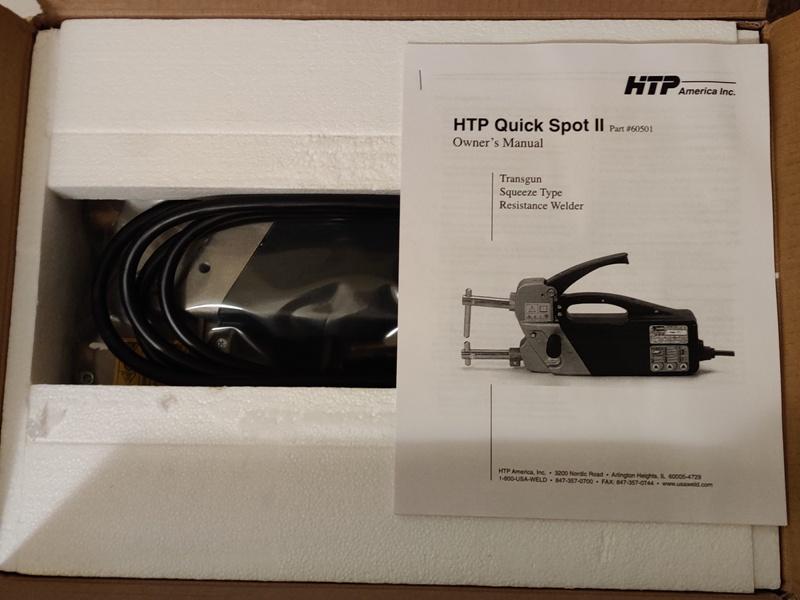
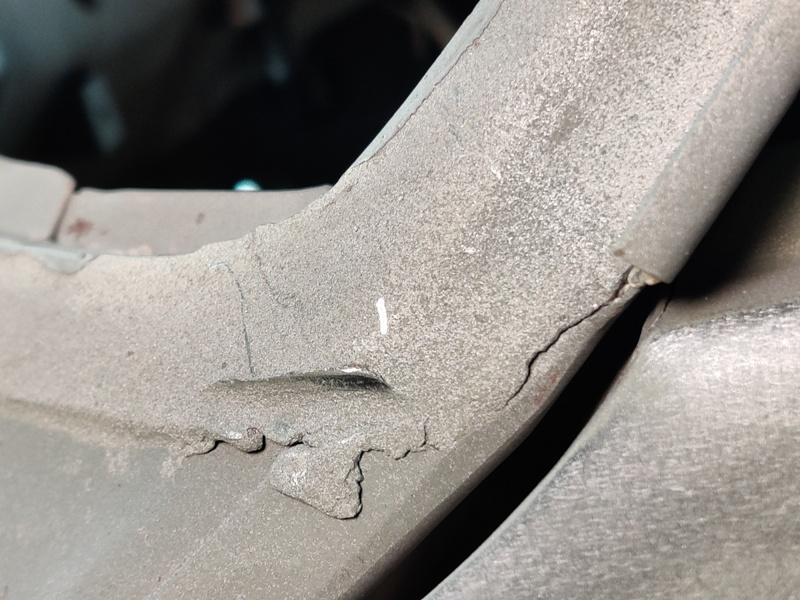
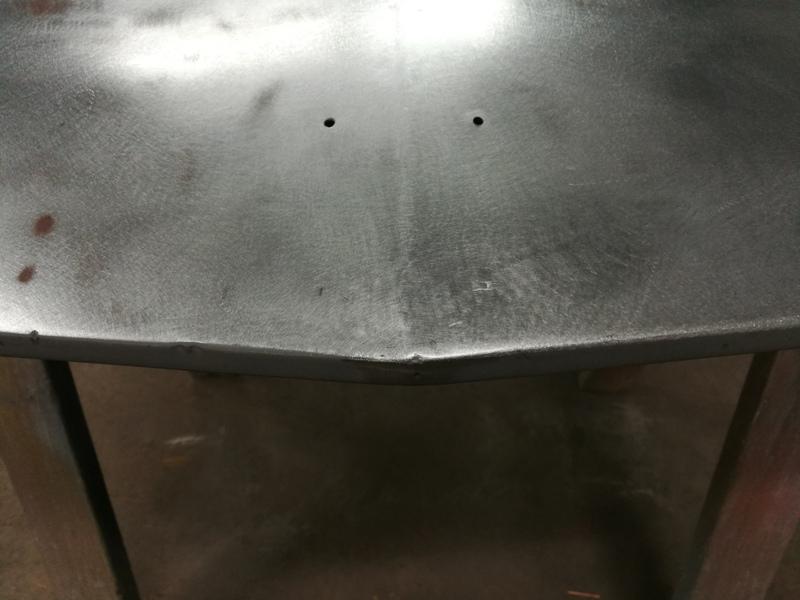
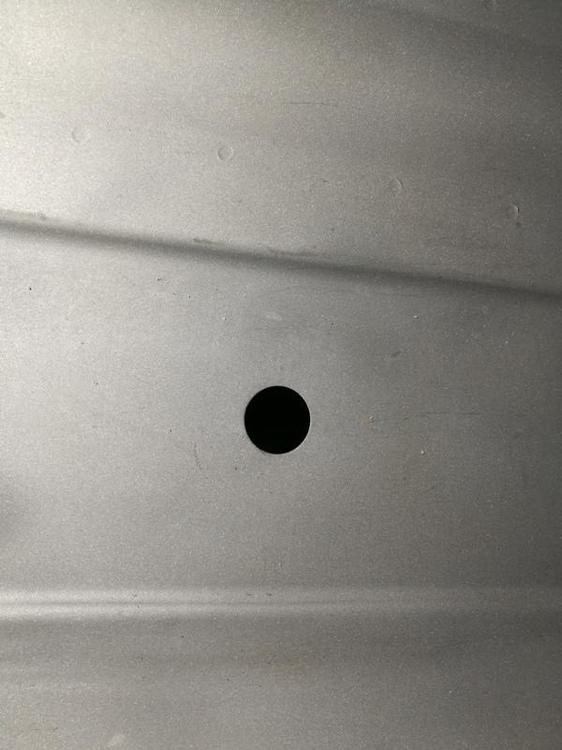
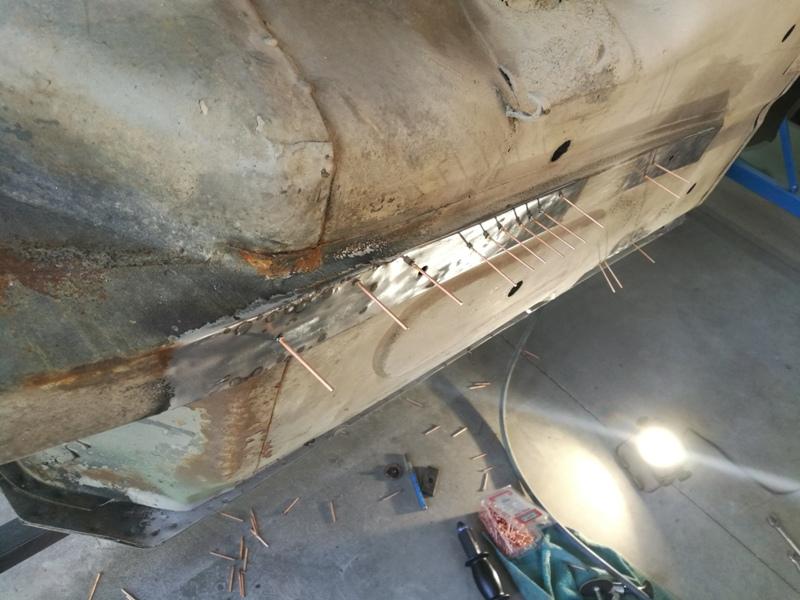
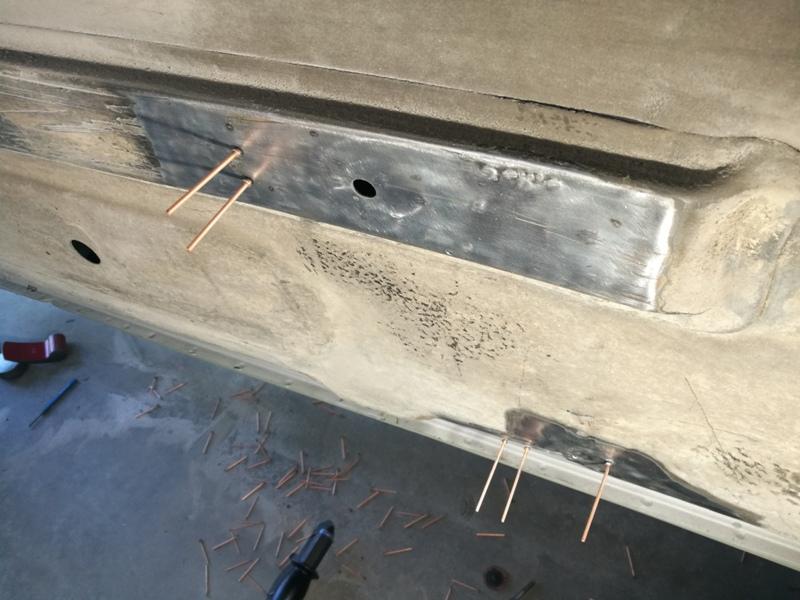
Hi, I bought a spot welder: a HTP Quick Spot II spot welder (along with a Tig welder) over the Black Friday time period (sale still going on now fyi) and was asked by someone reading my "bringatrailer" 240z build thread to share some information about it after I got it up and running. Well, here goes: Here is the spot welder. The special offer is currently $300 off on qualifying products when you buy the Tig welder. This spot welder counted as a qualifying product, so that is nice... It comes with the copper arms and tips you see in the pic. These are good to get you started with making spot welds in basic configurations. USAWeld sells other tip configurations if you need to spot weld different areas that these tips won't reach. There is a control panel which allows you to choose parameters for different welding situations. The settings from left to right in the picture below are basically "on/off pulse power" vs. "continuous" power, selection of thickness of metal being welded, and fine tuning of the duration of weld operation. There is also a pressure setting, which adjusts the amount of pressure the two contacts close upon the sheet metal with. The pulse operation can be used for high strength low alloy, galvanized, or weld thru primer coated metals according to the manual. It uses time between heat pulses to burn away contaminants for a better weld. Continuous can be used for clean metal. You follow the guidance in the manual and set the second setting based on the total thickness of the panels being welded. In the next pic (I only did one sample piece) the welds correspond to the following settings: Weld order from top left to right to bottom left to bottom right is: 1, 4, 3, 2: Weld 1: (top left): 175 lbs, continuous, 1 mm + 1 mm, and default duration Weld 2: (bottom right): 265 lbs, continuous, 1 mm + 1 mm, and default duration Weld 3: (bottom left): 265 lbs, continuous, 1 mm + 1 mm, and 1 step up from default duration Weld 4: (top right): 265 lbs, pulse welding, 1 mm + 1 mm, and maximum duration If it isn't apparent, you should notice that the size of the spot welds is quite small. That is, the diameter of the "divot" is much smaller than that of the factory spot welds on our Datsuns. Here is a reference image: The factory spot weld on the lower edge of this rocker of my 240z (apologies if it is hard to see) is about 5 mm in diameter. The largest of the example welds done above on the test piece is about 4 mm. Here is another reference photo: So, a ready made observation is that the HTP Quick Spot II isn't going to replicate the 240z's factory spot welds. However, it's kind of close... and if the performance is as good as shown in the video below, then maybe getting factory "performing" spot welds is a box that can be checked with this welder. And perhaps making them look factory is pretty easily done with a bit of creativity? I'll be exploring that coming up in the new year in my 240z build thread, if your interested in checking that out. Hope this helps someone. Garrett

-
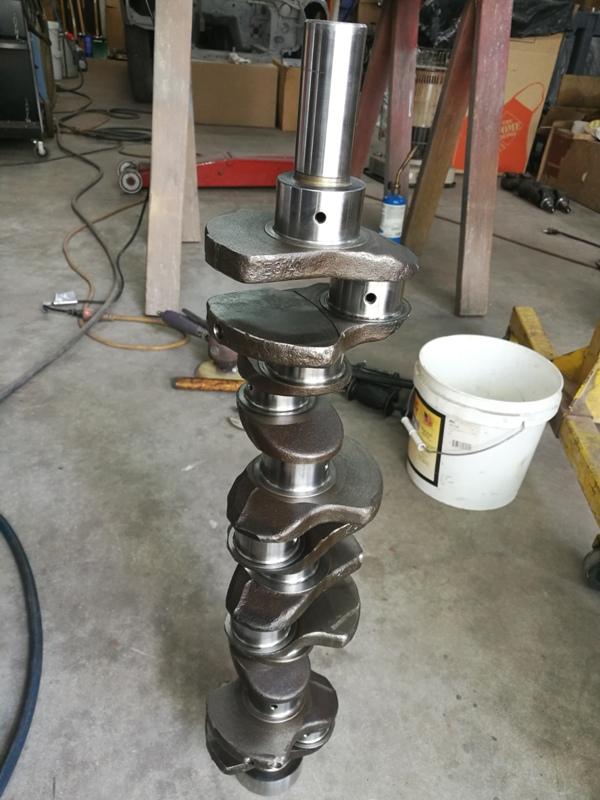
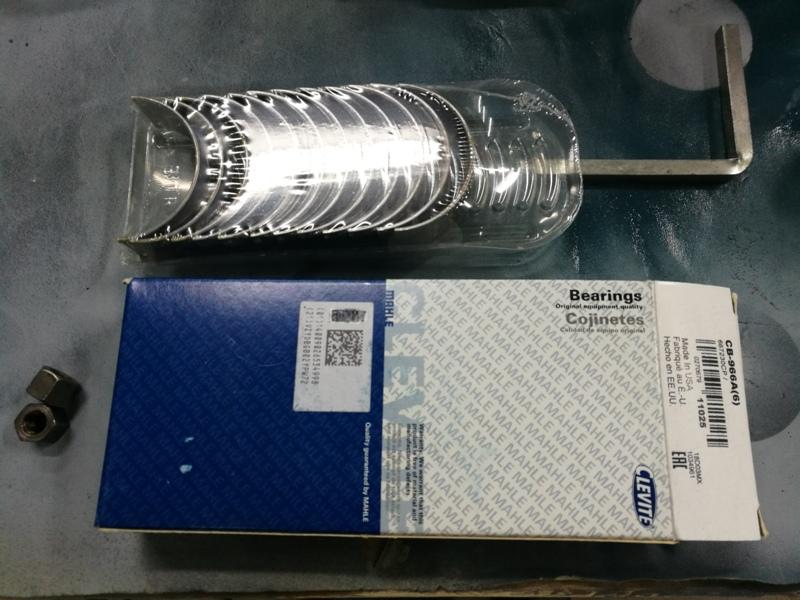
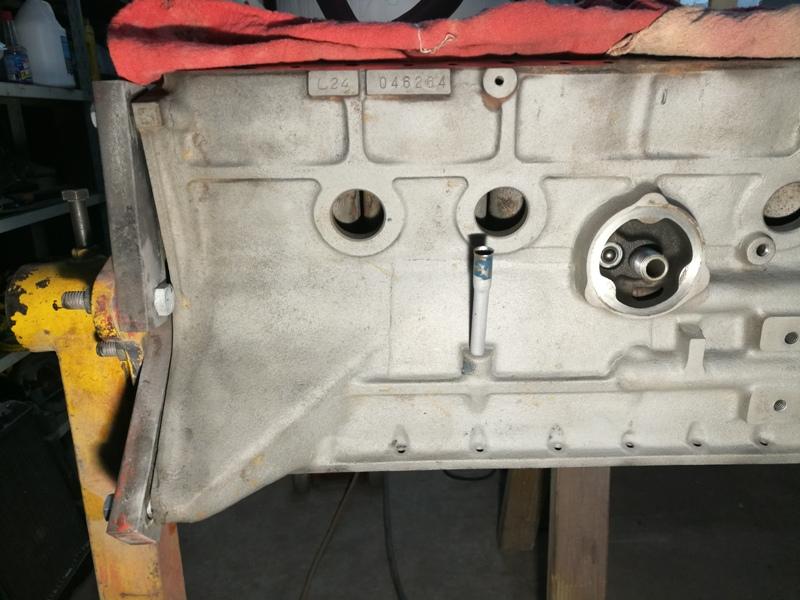
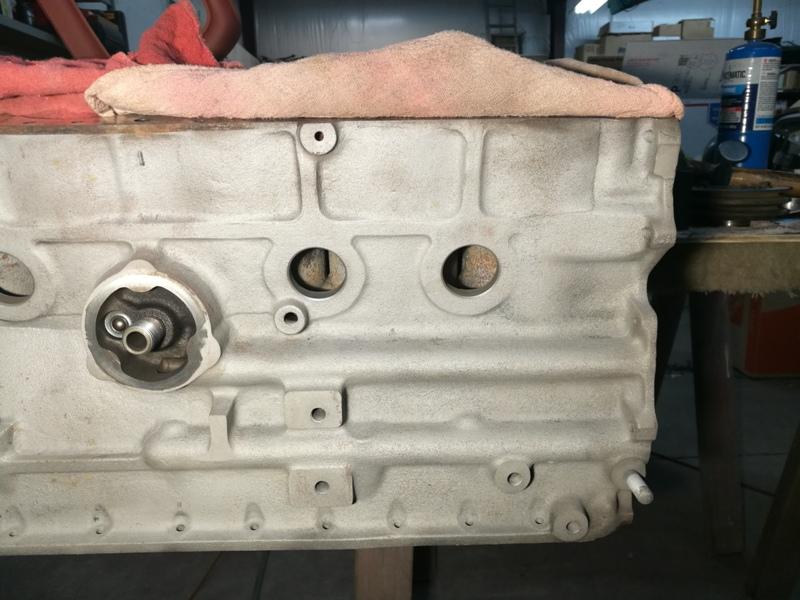
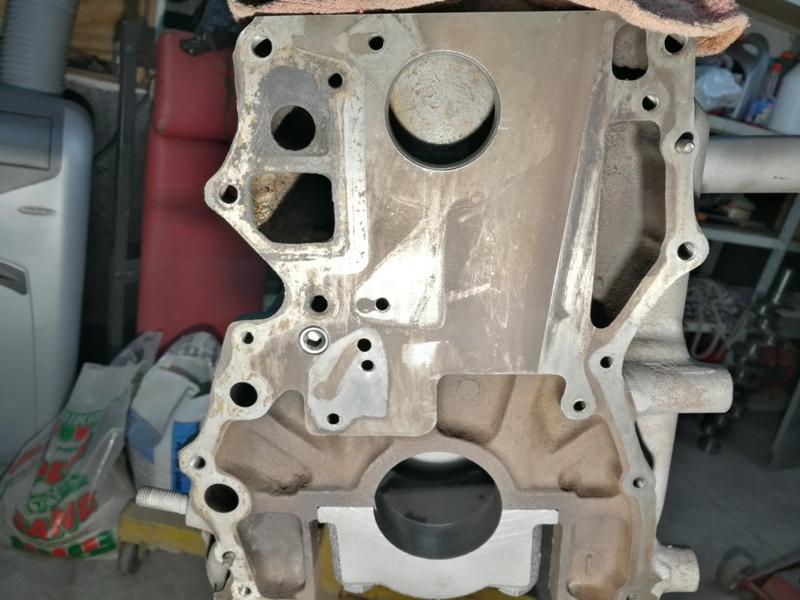
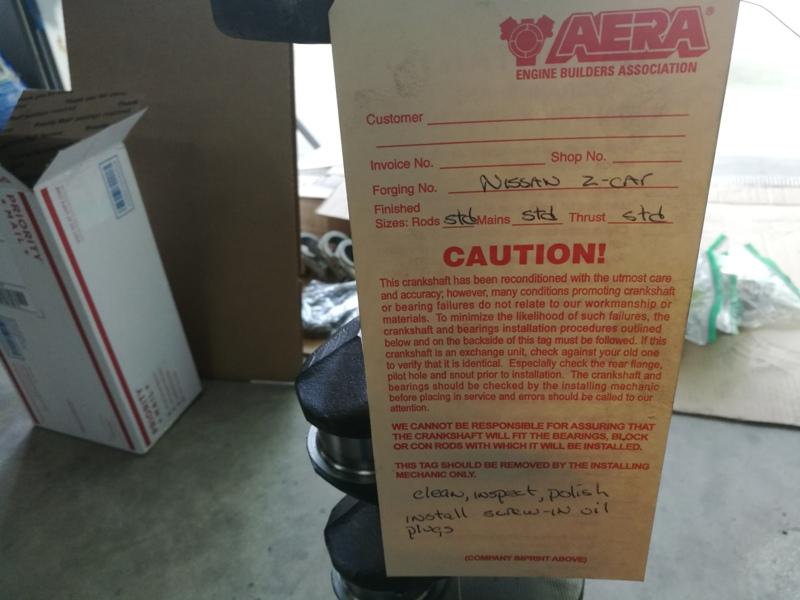
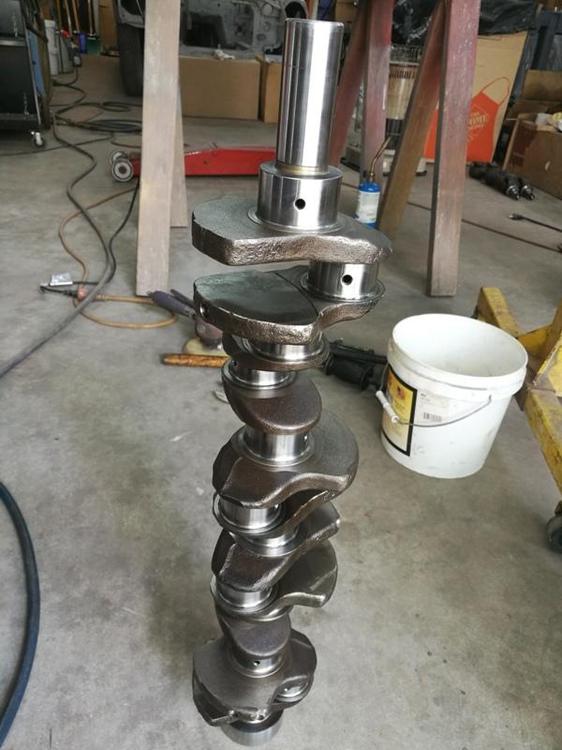
Got the spot welder working today. I will post some pics soon. In the meantime, thought I would change gears and put some engine related content the build thread. After the leak down and compression tests were complete, I started disassembly of the engine. Here is a 1 minute long video of the crankshaft condition before removing from the block showing the condition of the rod journals. The engine most likely has 130k miles on it, if I recall the odometer value correctly (and if the odometer hasn't spun over twice!). Also, I took another video showing the crank rotating in the block before removal. Always nice when the crank rotates this freely, an indication that the block is as straight as it was when it left the factory. The cam rotated very easily in the cylinder head also indicating the head is straight, not warped or bowed. The block was dropped off at Will's Auto Machine Shop, Inc in Chamblee, GA. They've done a lot of Z car stuff over the years and know there way around the L-series. I dropped off the .030" oversize ITM pistons, the crank and rods. They bored the block and honed for the pistons, polished the crank, (still standard on rods and mains), cut the deck to clean things up, installed the pistons in the rods, and sized the piston rings. Here are some pics of the block. I used the sand blaster to get in between the bores and clean out loose rust and corrosion. There was a substantial amount of sediment in the block when I first took it apart. I suspect the previous owners didn't protect the cooling system as well as they could have with the appropriate amount of anti-freeze. I cleaned the inside of the block with a brass wire brush (after the hot tanking done by Will's Auto Machine) Here is the prepped crank and one of the piston and rod assemblies:

-
Sure. I've got to sort out the electrical hook up for it and the Tig welder in the garage, so it may take a week or so. I will do a separate thread when I do the testing. I will cover the job in detail in the build thread later as well.
-
Bought a couple of toys to use on the restoration... and other car projects! Tig welder: Spot welder: usaweld.com is running a promo right now. The spot welder counted as qualifying products for discount ($300 off), and I got free shipping. The tig welder that I got is the 220 volt version and not water cooled. Should be a lot of fun to learn how to use it well. I've got an aluminum radiator for my other Z (highly modified) that needs some brackets welded onto it and some other welding jobs in line for that car as well. I'm also interested to see how well the spot welder does on the rocker panel repair for the restoration Z.
-
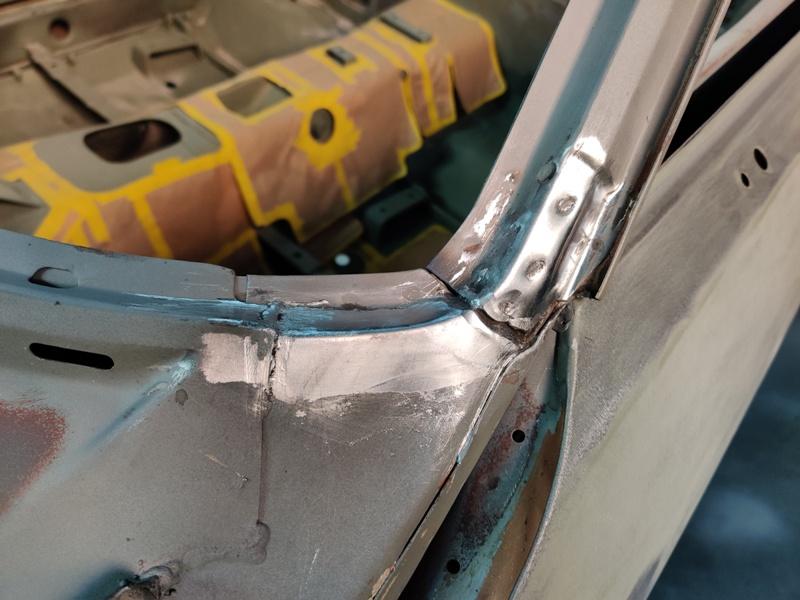
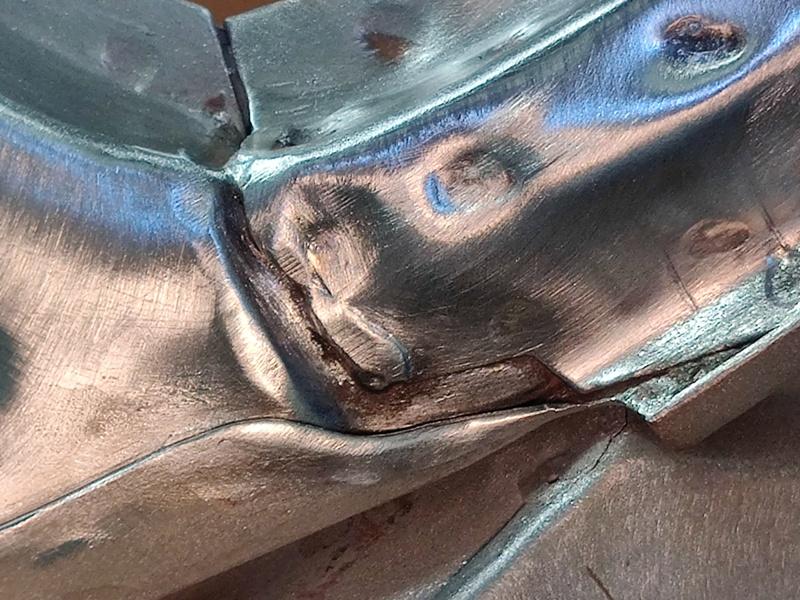
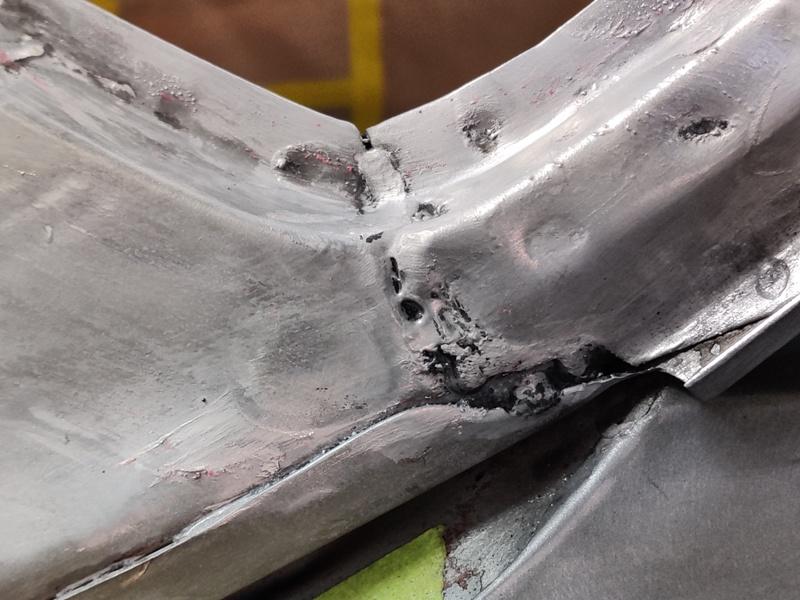
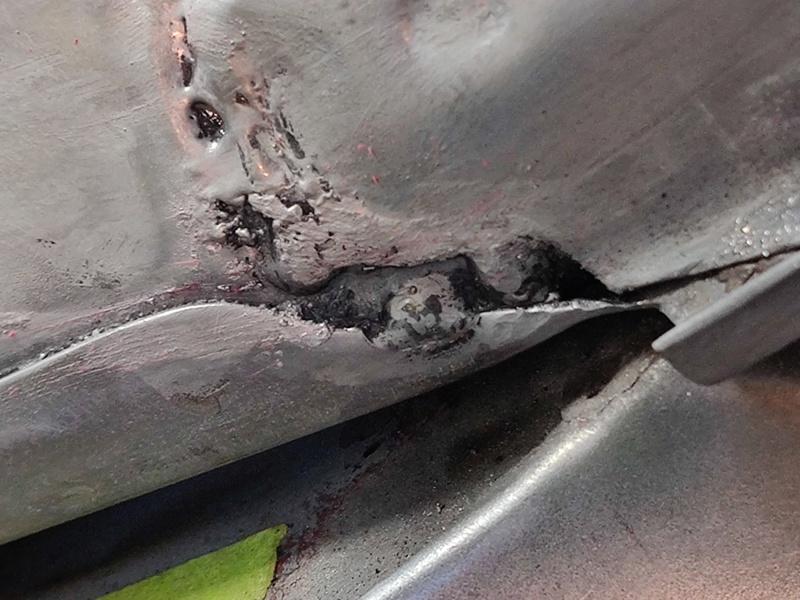
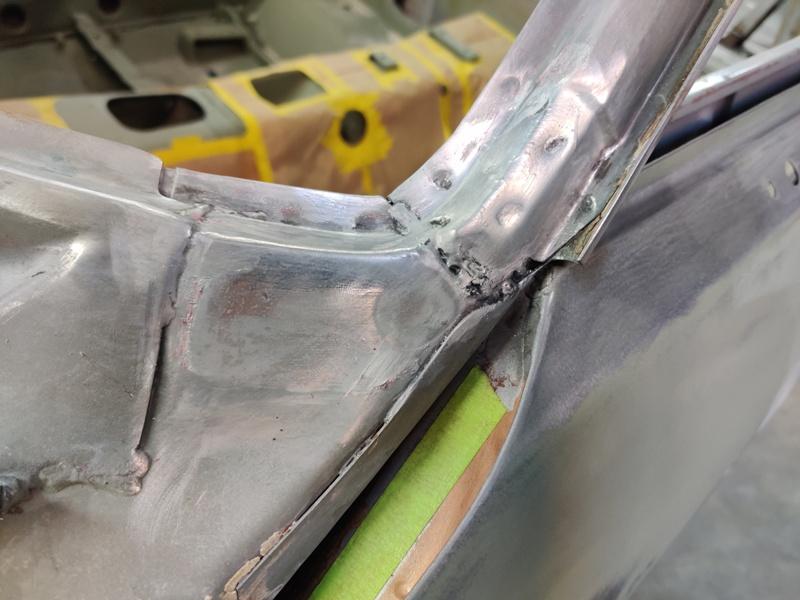
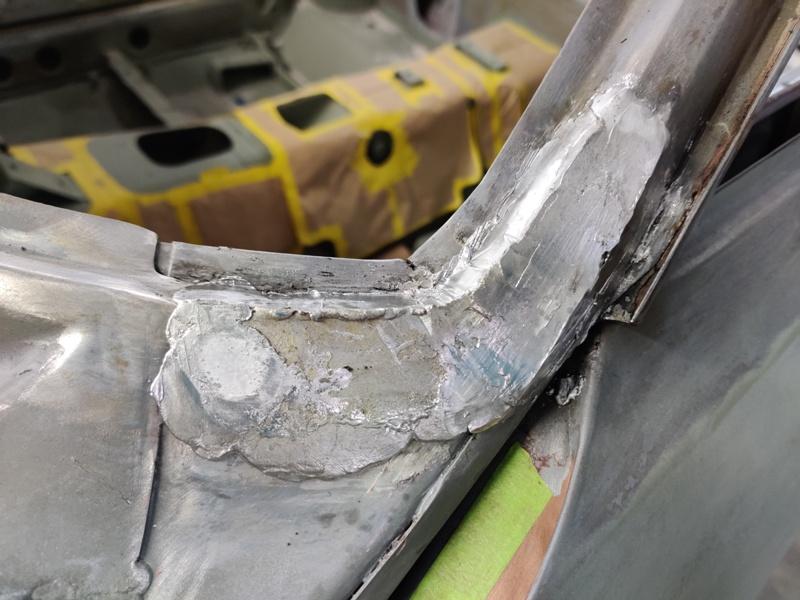
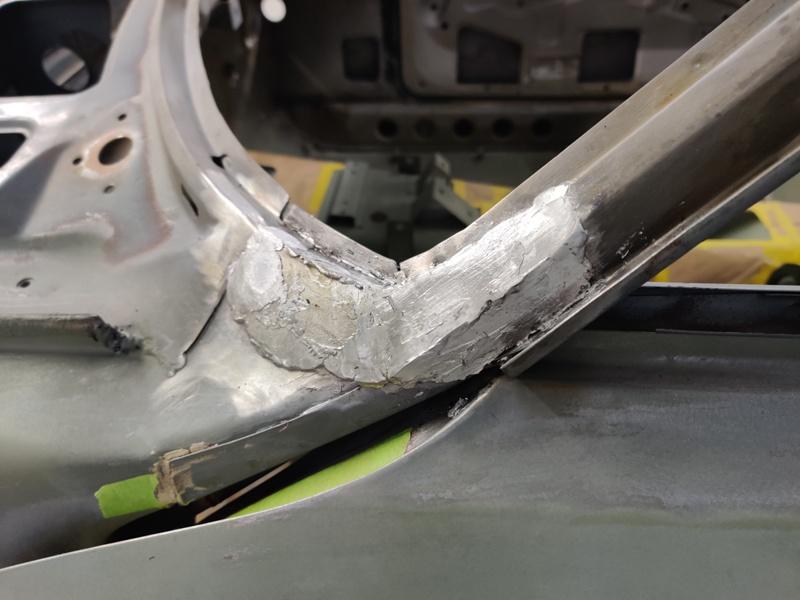
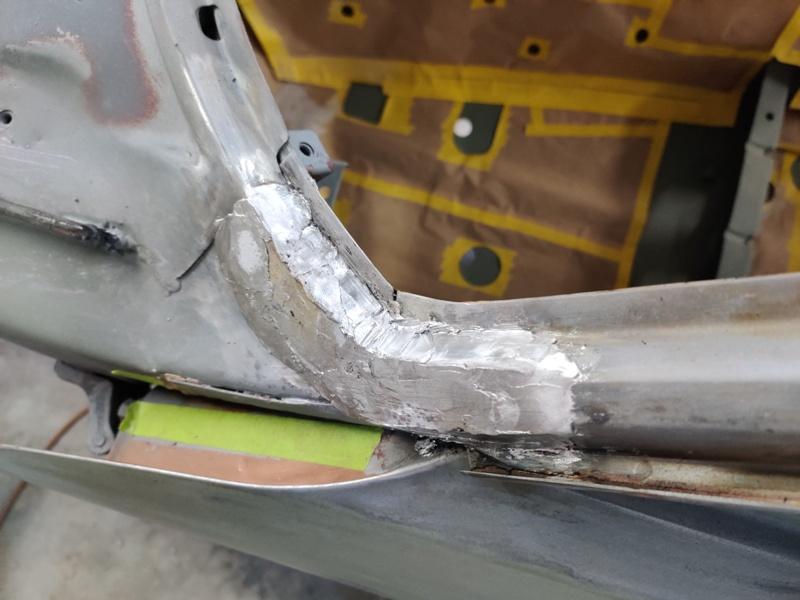
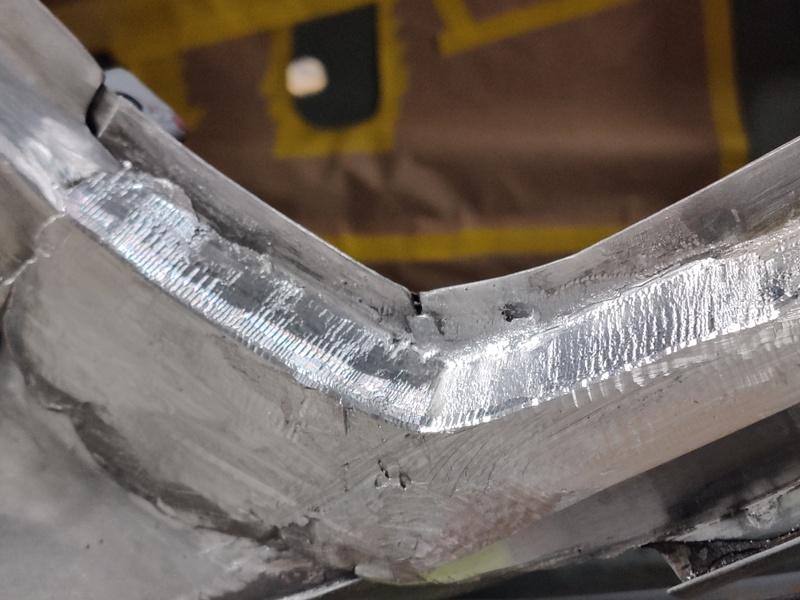
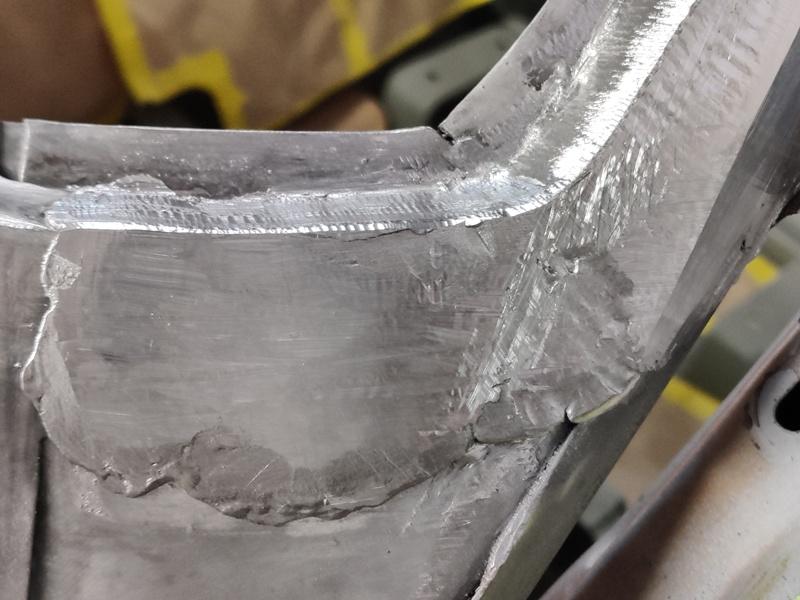
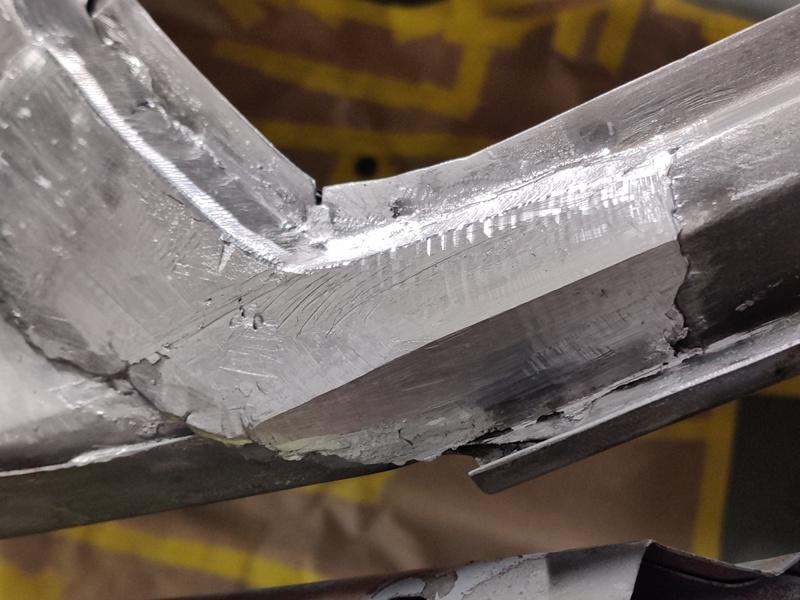
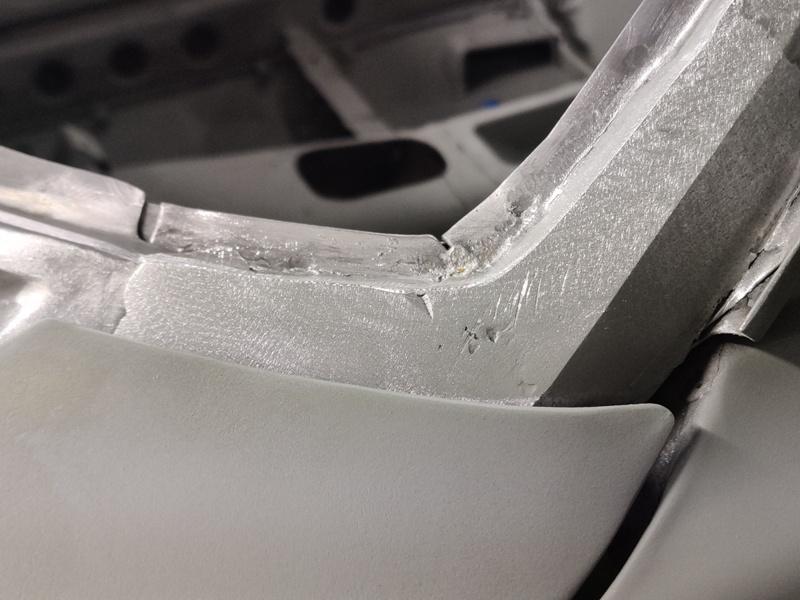
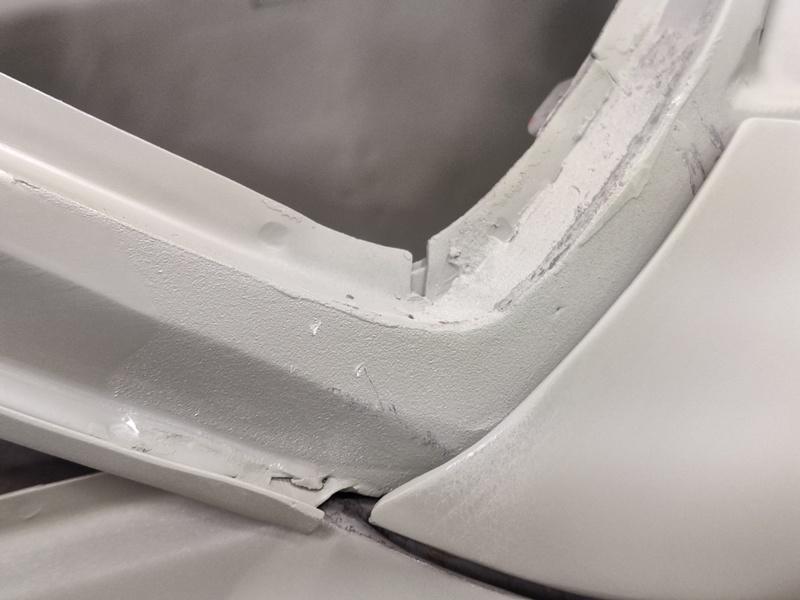
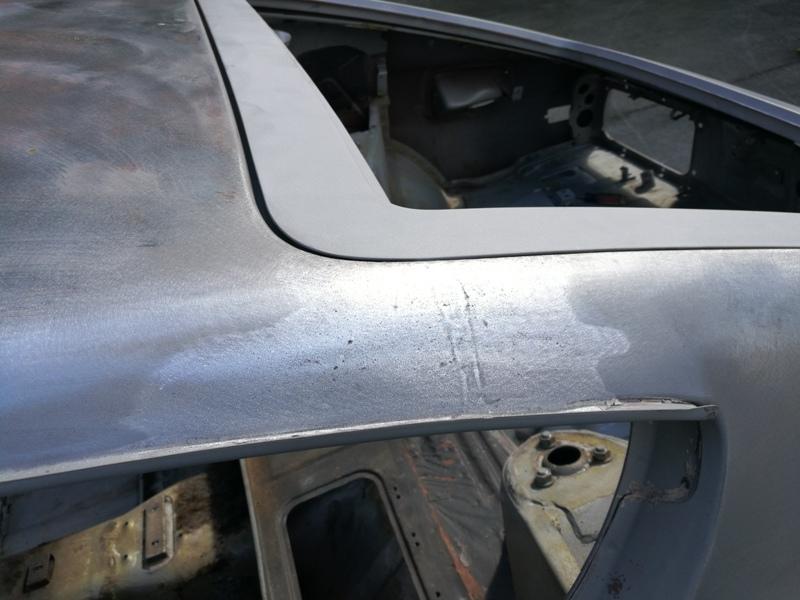
Next up to share is a repair to the A pillar where it attaches to the unibody. Evidently there was some flexing going on here at some point. Looking at the unwelded seam (inside edge of the corner), it seems obvious why this happened. Pics show that aligns with the crack in the lead body filler: Also, note the indentation/impression made by the back edge of the fender. Is that how it came from the factory, or is that unusual. The driver side fender did have slight accident damage just behind the wheel well opening, above the body line. Maybe a slight side impact there caused the back edge of the fender to bump the lead? I used a propane torch to heat the old lead and watch it run off onto the floor. Then I used a blue stripping wheel to clean up the surface of the metal, followed by liberal use of the torch and compressed air to blow the old lead out of the crevices... followed by use of a stainless wire brush. Given the lack of welds here, I strategically set a couple of tacks and a bead with my MIG welder for good measure and ground the ones in the inside corner down flush: Next came the tinning. I watched a Youtube video to get a reminder of how to tin. An Eastwood lead kit from my restoration of my other Z back in 1993 was put back into action. The tinning "butter" did pretty well considering it was 26 years old. At least, I think it did... I neutralized the acid with some water and baking soda mixed together. Then went over the area with a wire brush. Next came the lead filler. Again, I used a standard propane torch: I think it came out pretty well. Next, I started shaping with a file as well as a die grinder: More filing and some sanding with a DA and 80 grit. Looking closely at the passenger side (3rd pic), I see that the body line is altered before it meets the back edge of the fender. I will replicate for the driver's side.


-
Yeah, I am trying to do a high quality restoration (as best I can) and leaving that the way it is would bug me. Going to be a bit of a project. Maybe I will consider buying a spot welder like the Quick Spot II!
-
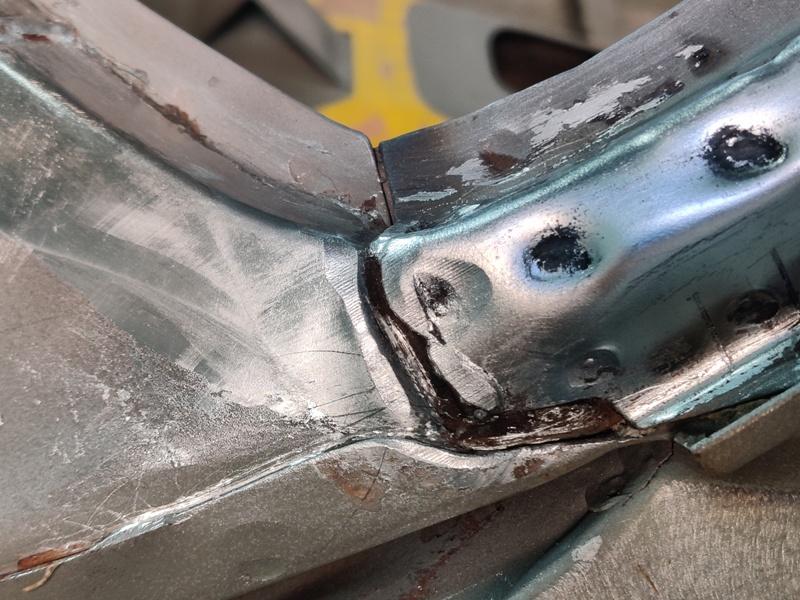
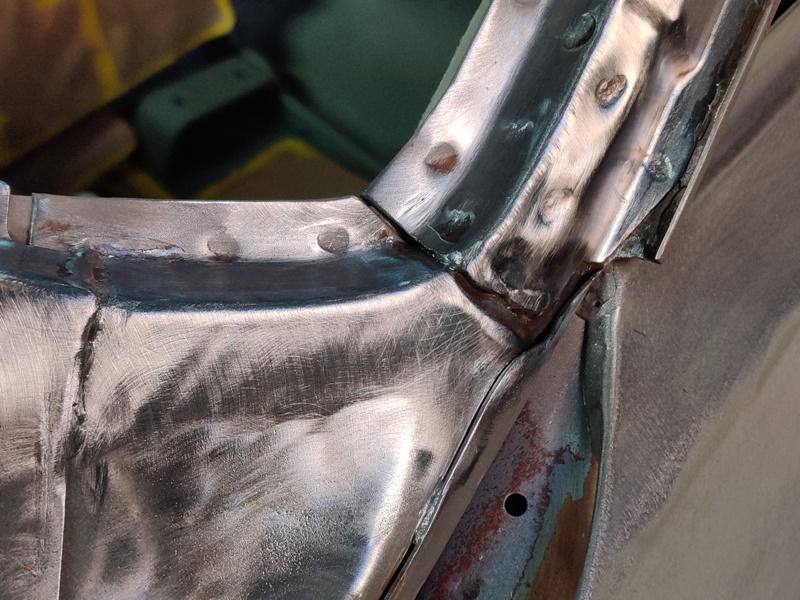
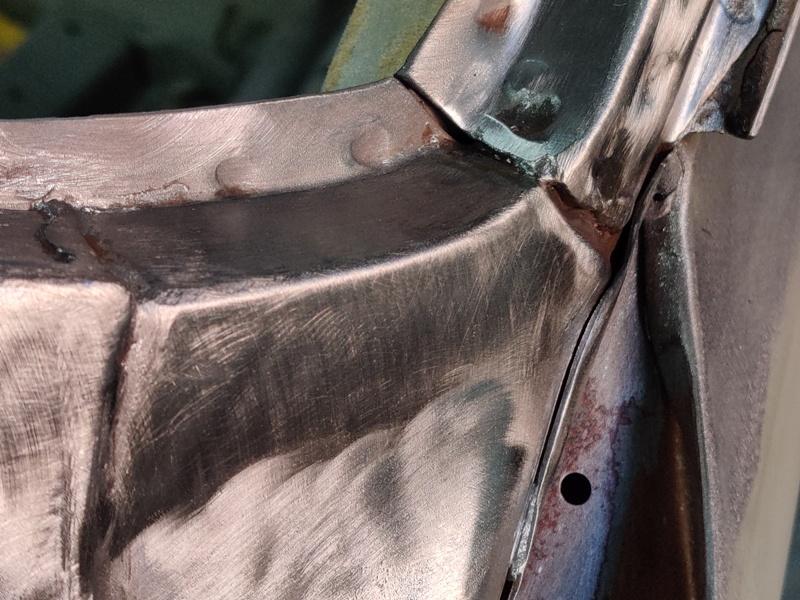
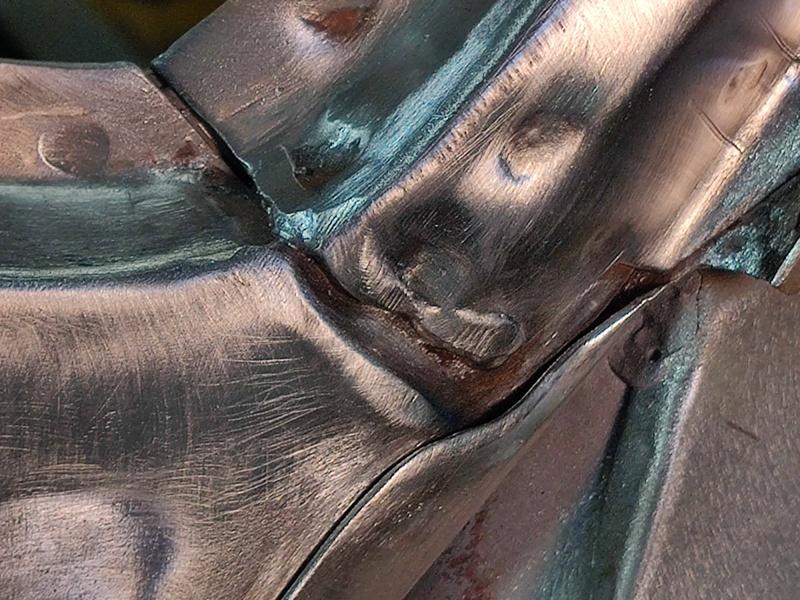
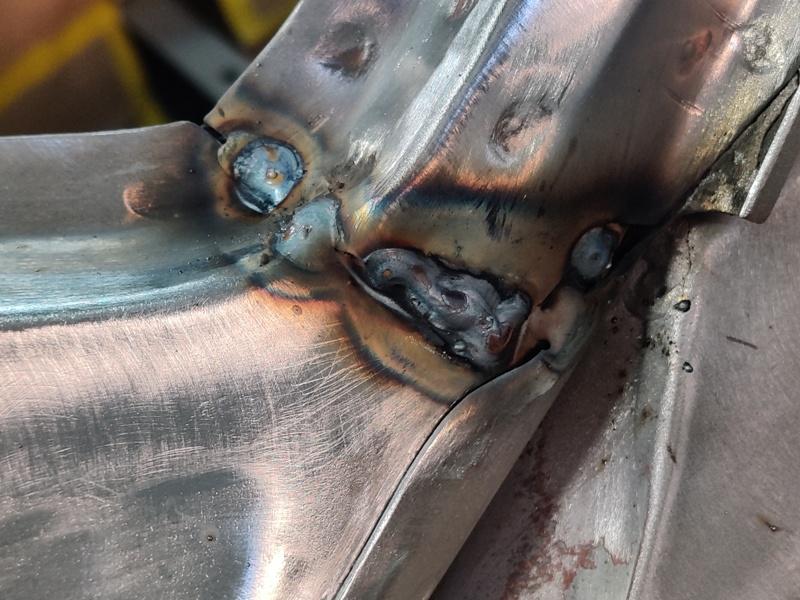
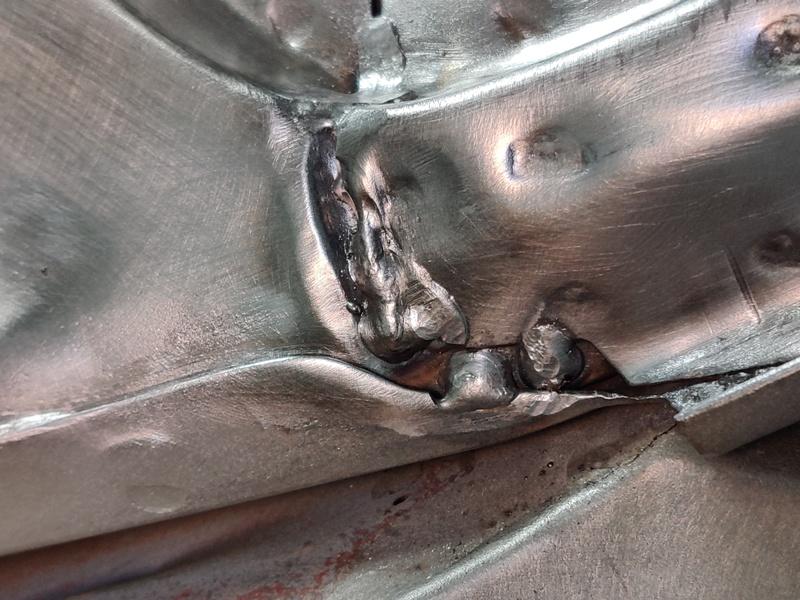
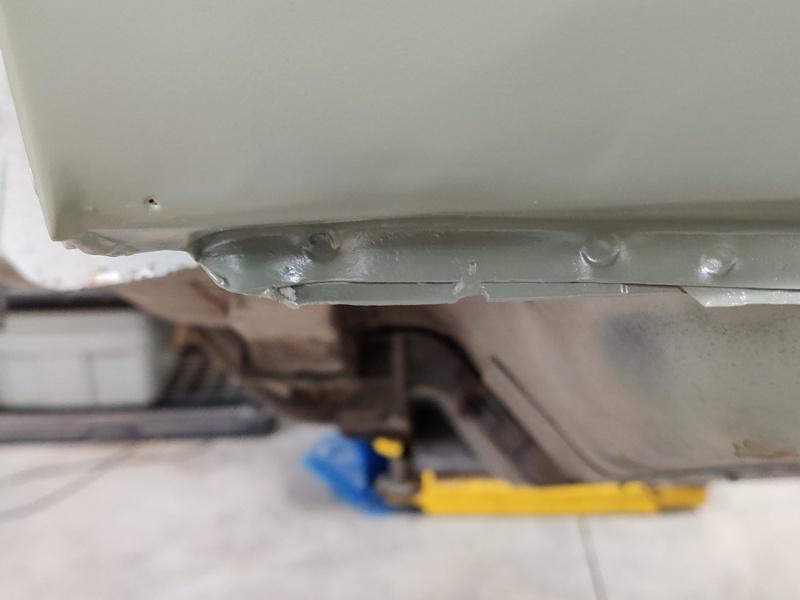
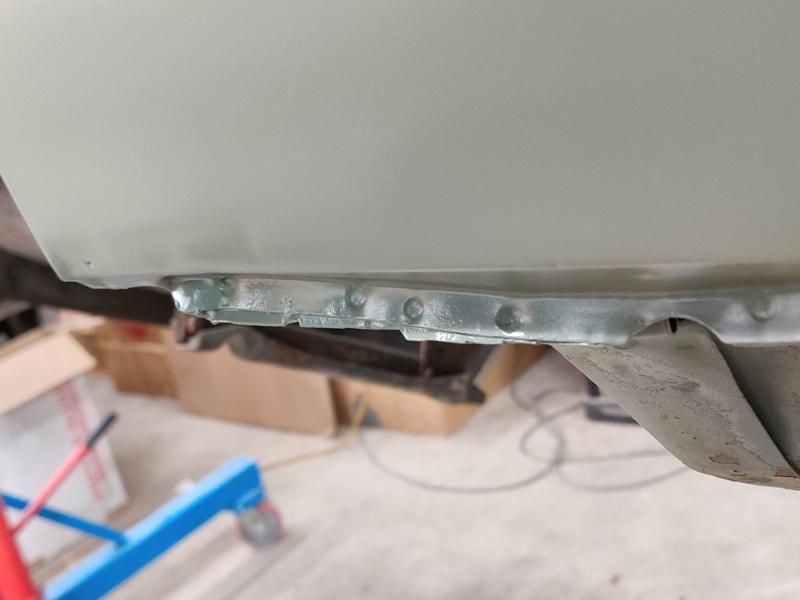
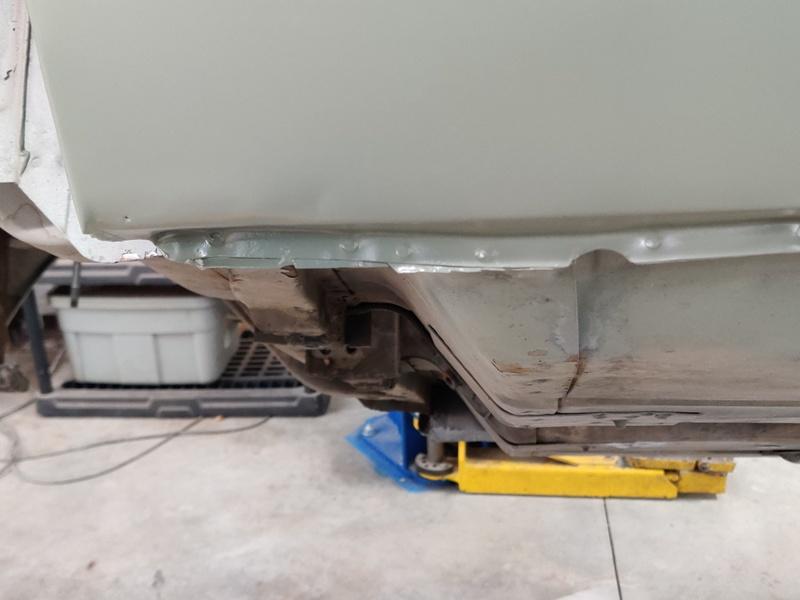
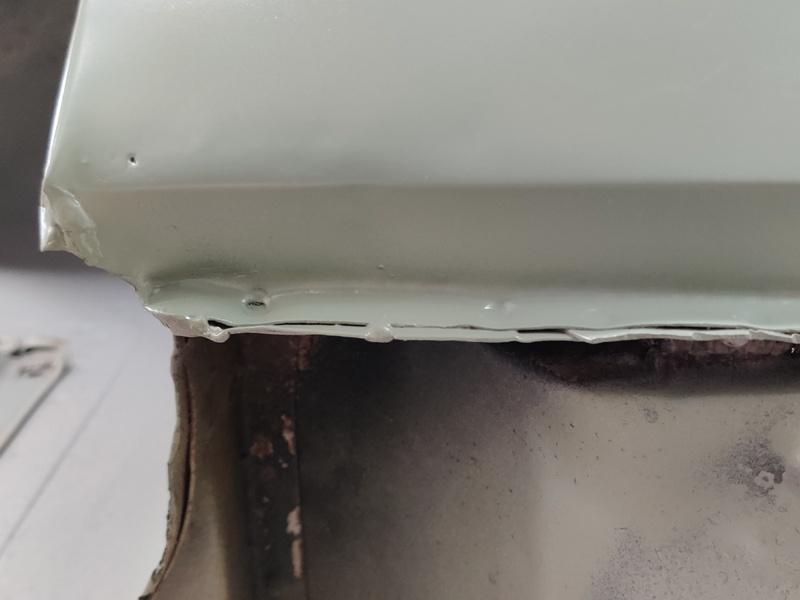
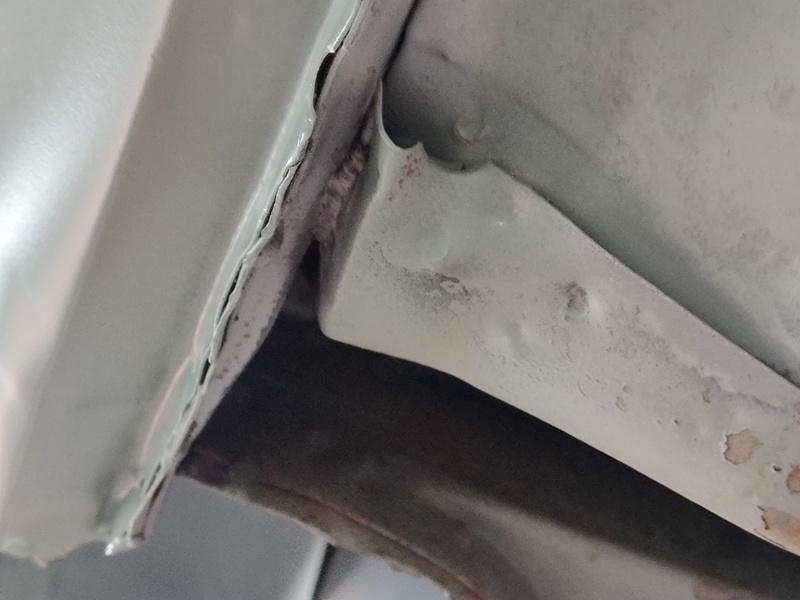
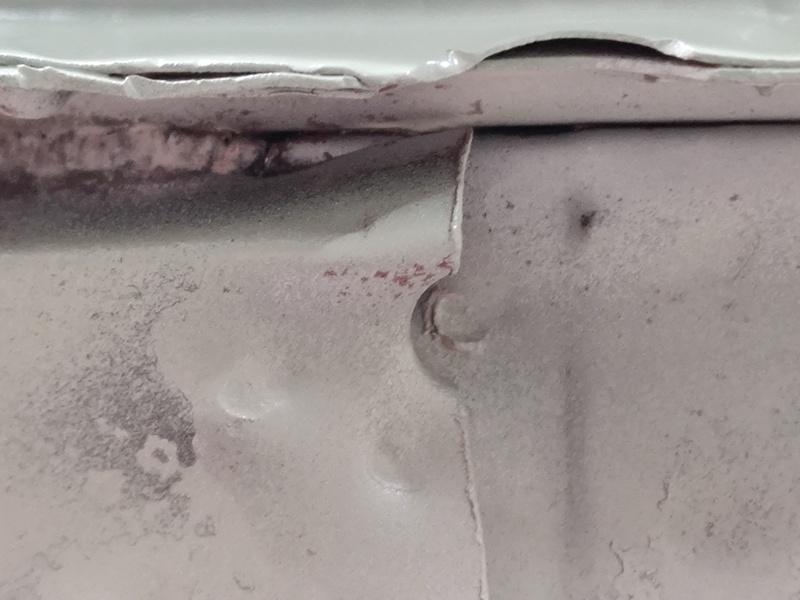
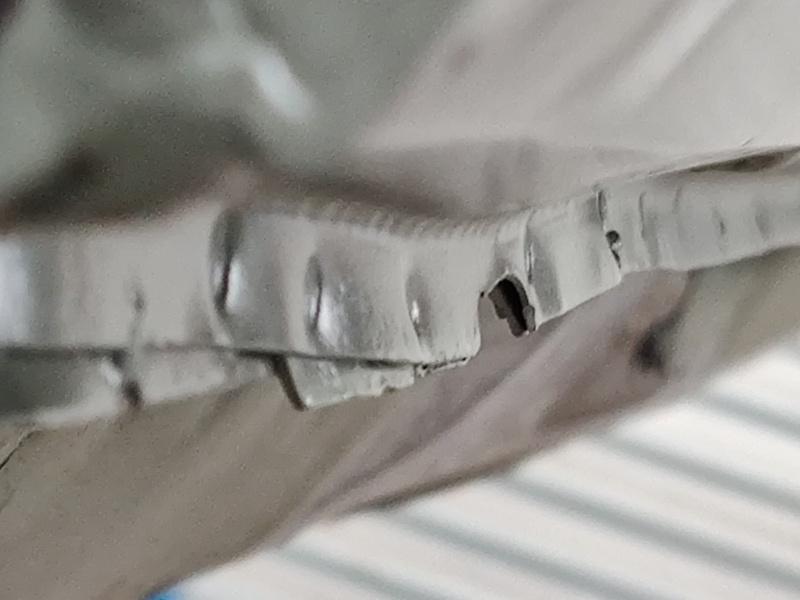
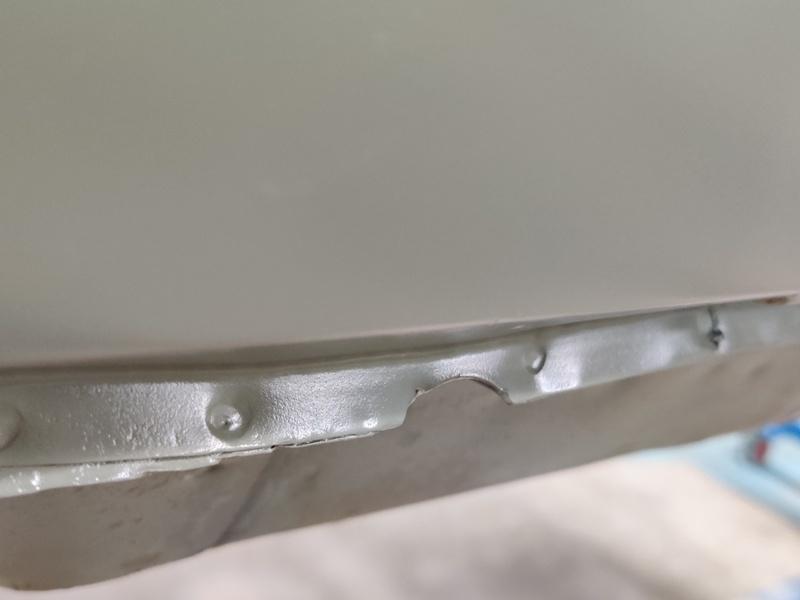
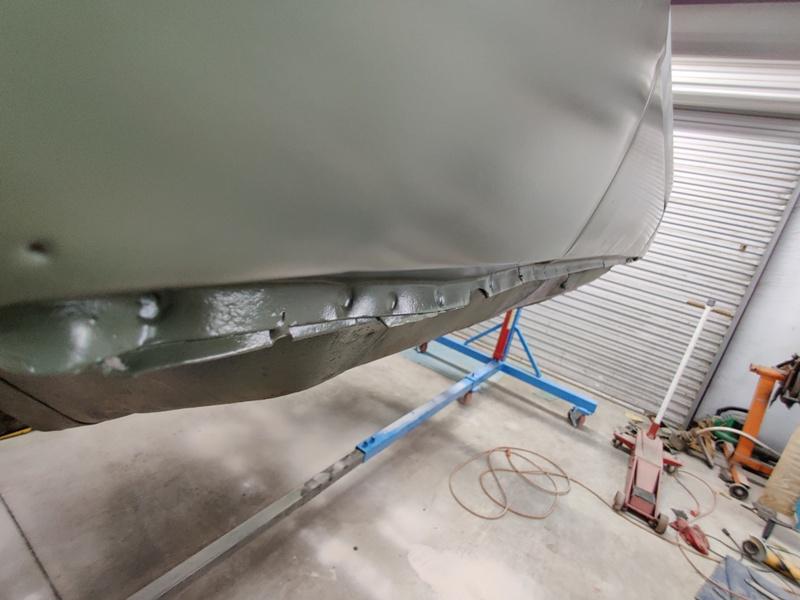
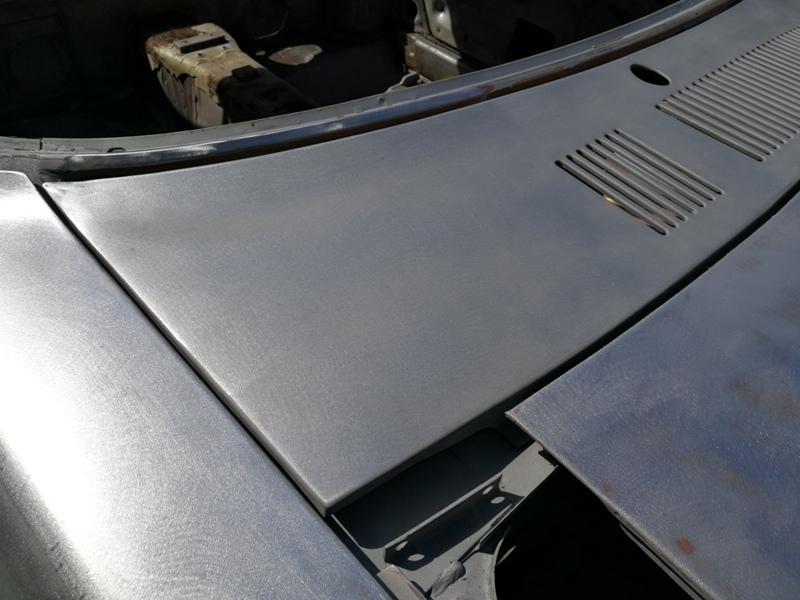
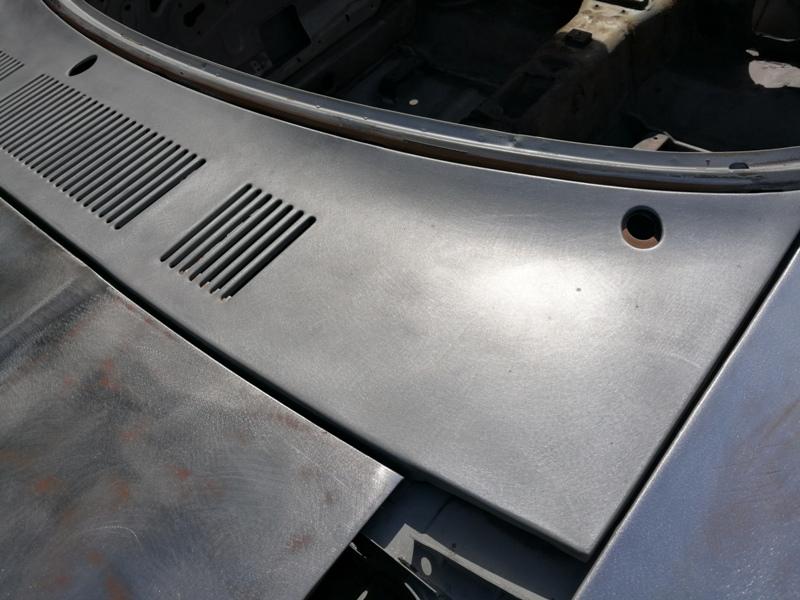
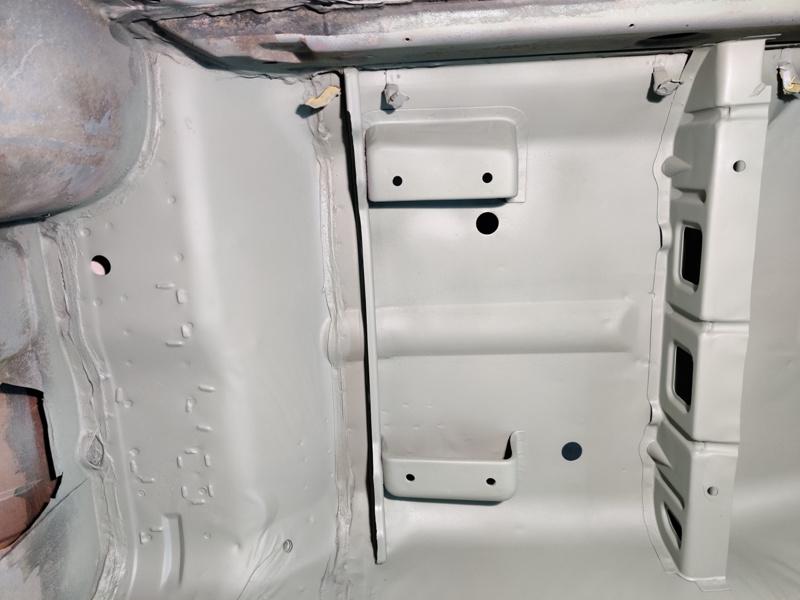
Speaking of the cars not being perfect off the assembly line, I have a bit of a dilemma. It seems that as it came from the factory, this car has a less than perfect fit where the right rear quarter panel over laps the rocker. I'm kind of inclined to go at this corner and make it right, which would entail dissecting at the spot welds and some miner reshaping. Here are some pictures of how it looks from the factory: Note the middle picture here, where the floor panel is supposed to meet up with the panel that makes the tool door compartment. The attempted spot weld couldn't pinch the parts together because the tool door compartment panel was misaligned at the bottom edge. In the third picture here, you can see that a factory worker appears to have used a MIG welder to fill in a bead in the crevasse. Note gap caused by poor fitment. From the factory there was a bunch of seem sealer in the hole (first pic). Middle pic shows the jack point of the rocker. It is not flat as it should be for proper jack fitment. Seems a shame to leave it like this, but I will have to drill out spot welds and it won't look factory any more.

-
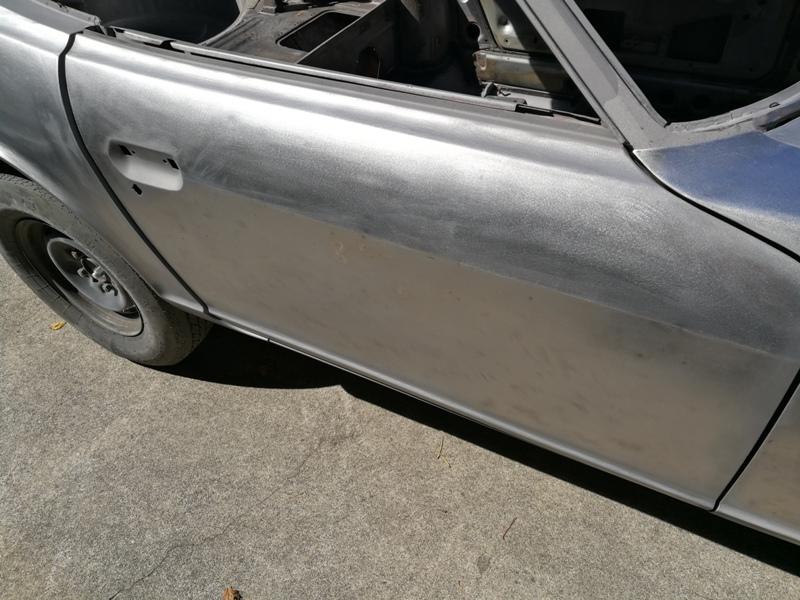
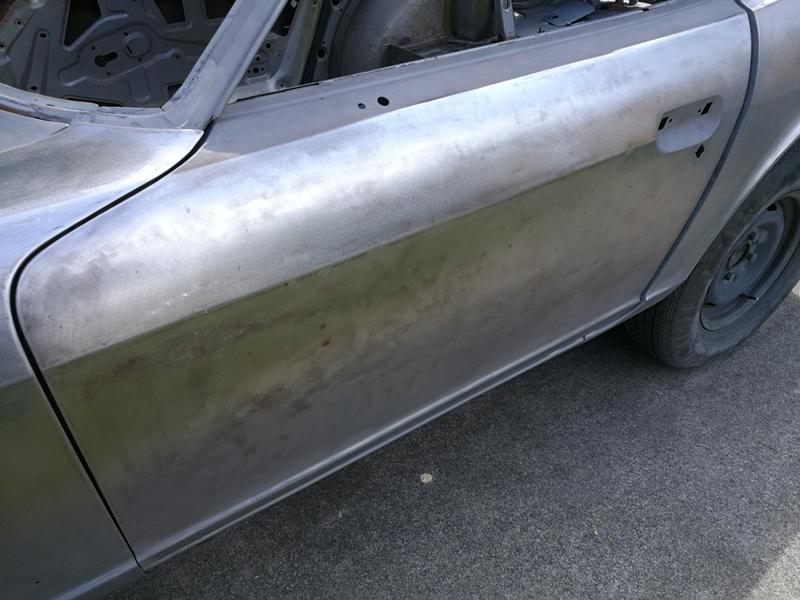
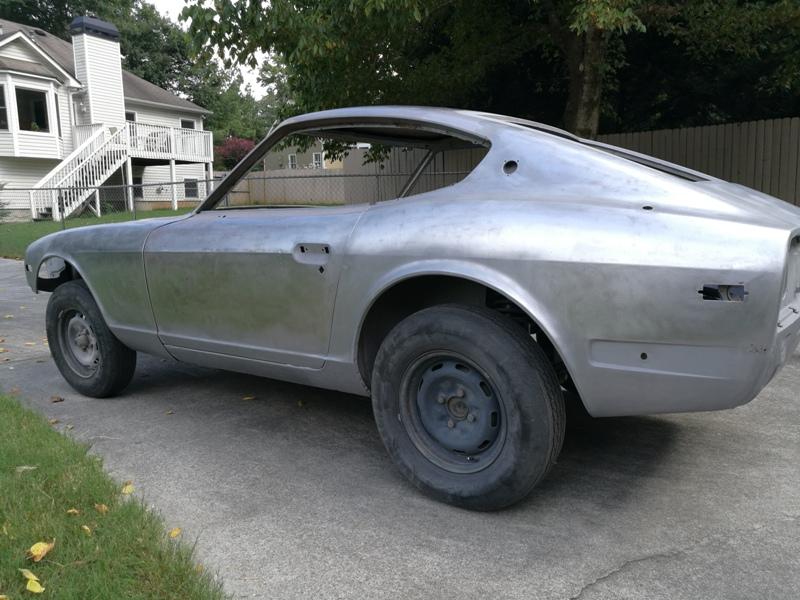
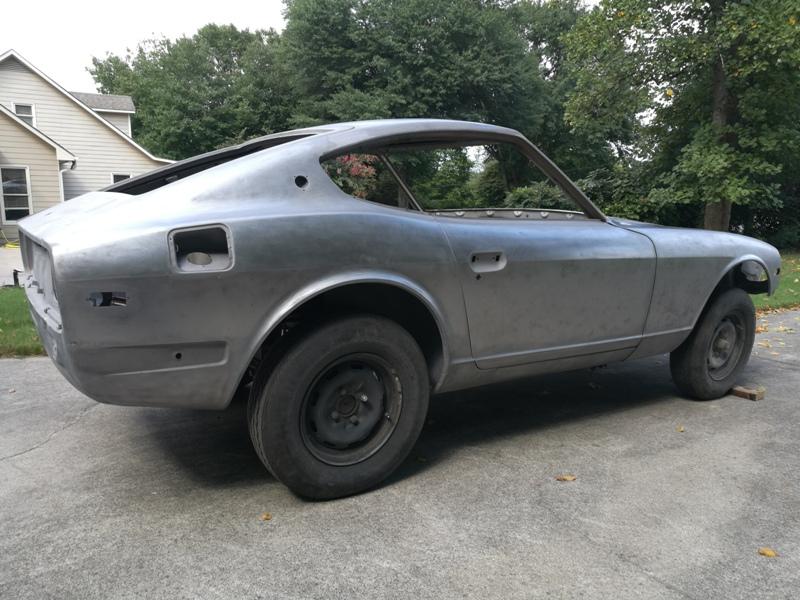
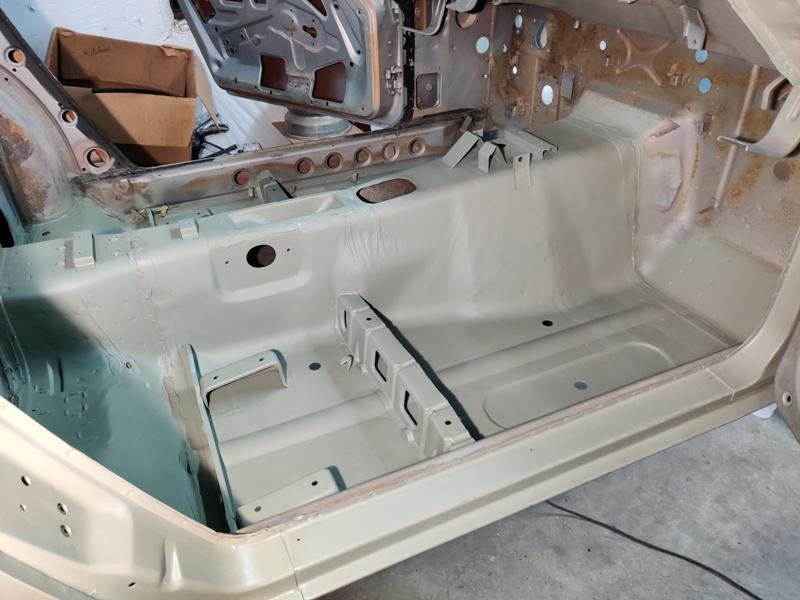
Thanks. Many people make their own and I looked at a bunch of videos on Youtube of their modded engine stand, as well as custom creations. I looked on craigslist on and off for about 8 months without luck before finally taking the plunge, spending what many would call a lot of money on this one. I justified it by telling myself I have three cars that will go on it, and I can sell it for a good bit when I am done. In case anyone is curious about the model, it is an Autotwirler Pro. I am very happy with the condition of the body as I found it under the paint. There were many small dents and the minor damage to the rear end, but thankfully, nothing surprising. I am at that stage of body work where I am epoxy priming, applying and sanding plastic filler, and will be appying high build primer shortly. Not much bondo is going on the car. Mainly, it is taking a small amount along the belt line... just below the body line that runs down the sides of the car. It received lots of door ding hits along the side of the car over the years it was on the road.
-
I've been documenting fasteners in a spreadsheet because I will be sending them off to get them plated and figured they will all get mixed together. I want the right fastener in the right location. The ways discussed so far would require looking up all the fastener part numbers, yes? That may be totally sufficient but I could share what I have if desired. Here is a sample: front sway bar bracket 4 yellow zinc hex head bolts (7 on head) M8 X 1.25 - 20 mm under head - fully threaded 4 yellow zinc M8 split lock washers left rear bumper bracket 2 yellow zinc nuts M10 X 1.25 2 yellow zinc split lock washers - M10 2 yellow zinc flat washers - 22mm od - 10.5mm id right rear bumper bracket 2 yellow zinc nuts M10 X 1.25 2 yellow zinc split lock washers 2 yellow zinc flat washers - 22mm od - 10.5mm id Rear bumper 2 yellow zinc hex head bolts (4 on recess in head) M10 X 1.25 - 25mm under head - fully threaded 2 yellow zinc nuts M10 X 1.25 2 yellow zinc split lock washers - M10 2 yellow zinc flat washers - 22mm od - 10.5mm id 4 special chrome bolts - M6 X 1.0 4 yellow zinc split lock washers - M6 4 yellow zinc flat washers M6 - 14mm od - 6mm id 4 yellow zinc hex nuts M6 X 1.0 8 yellow zinc nuts with locking serrations - M6 X 1.0 Rear hatch latch assy 2 clear zinc phillips pan head machine screws with captive split lock washer - M6 X 1.0 - 15 mm under head fully threaded 2 yellow zinc flat washers M6 - 14mm od - 6mm id
-
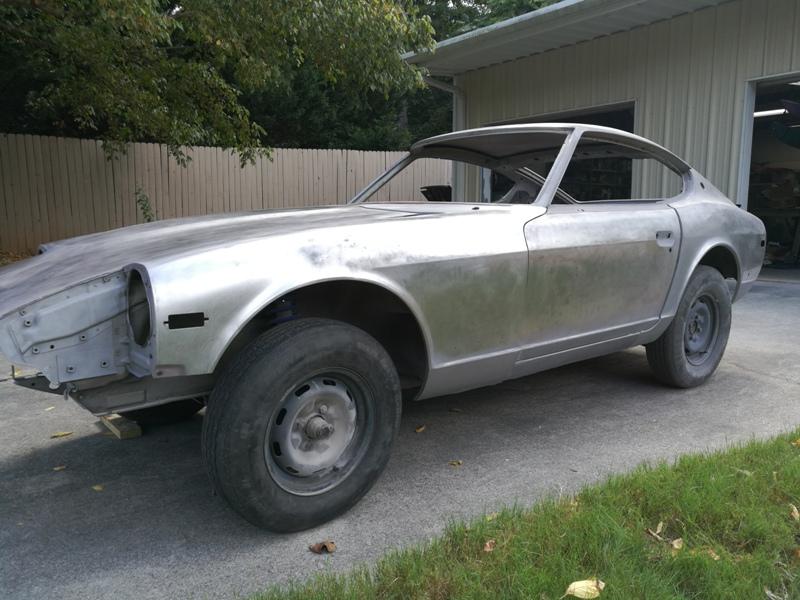
Good to know. It seems copper slag and coal slag are pretty aggressive compared to play sand. But much safer, I am sure. Once the outside of the car was stripped to that point, I mounted it on a rotisserie:
-
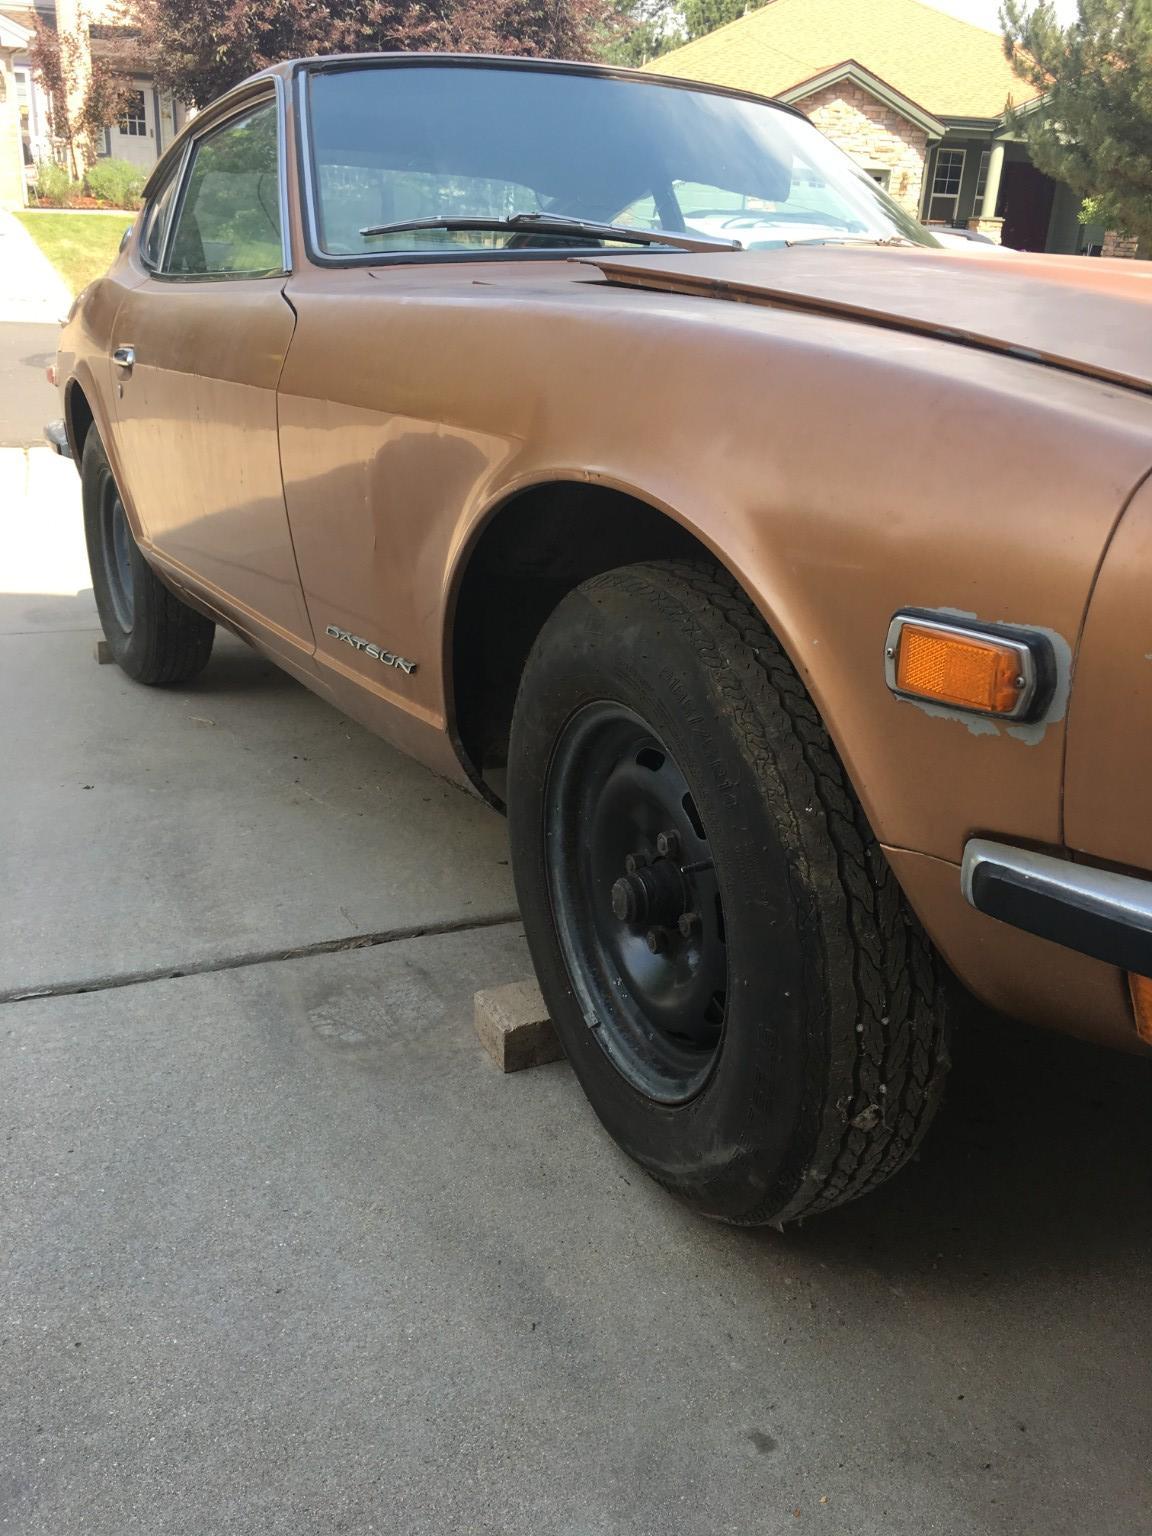
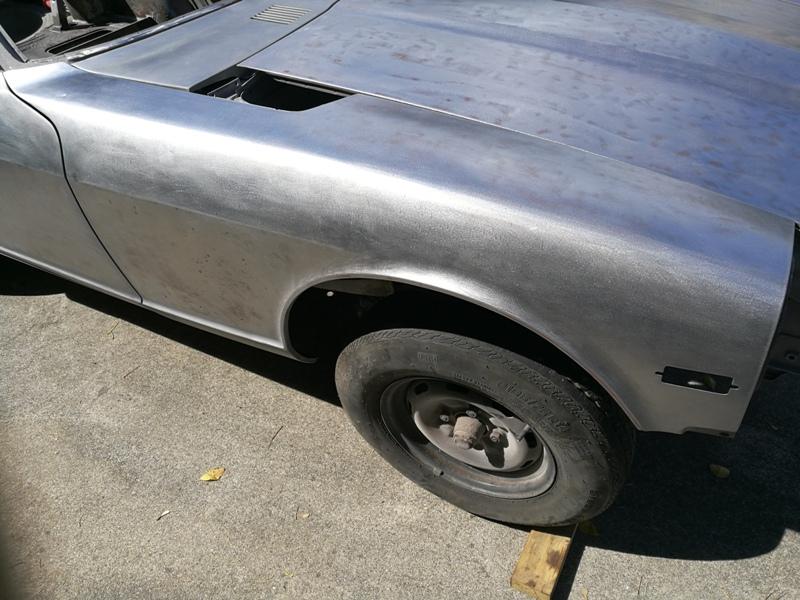
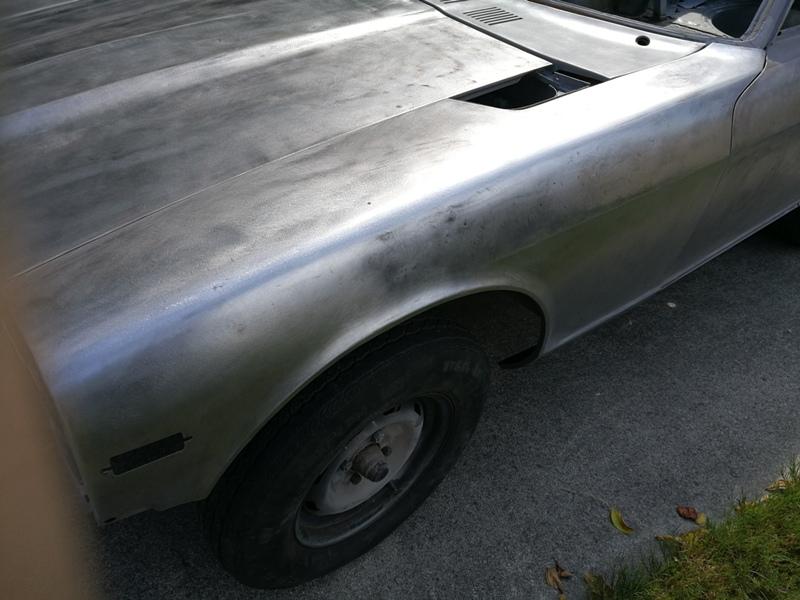
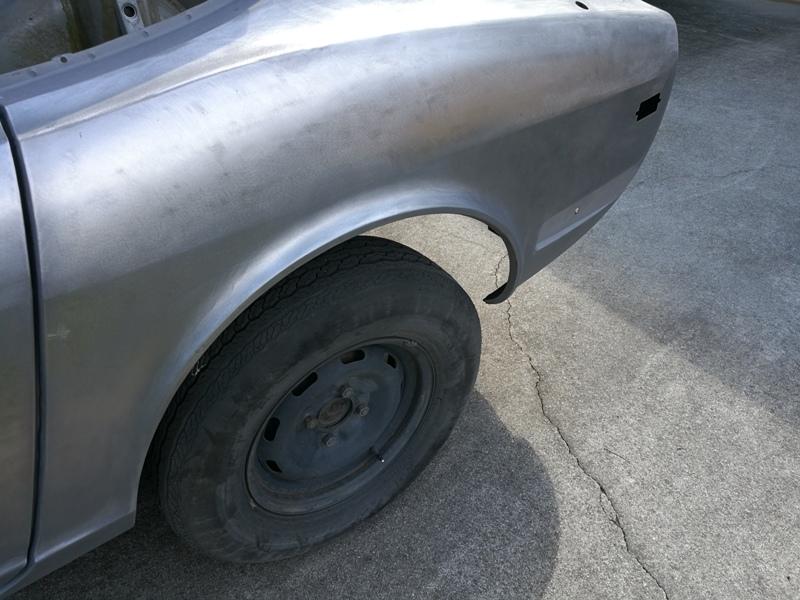
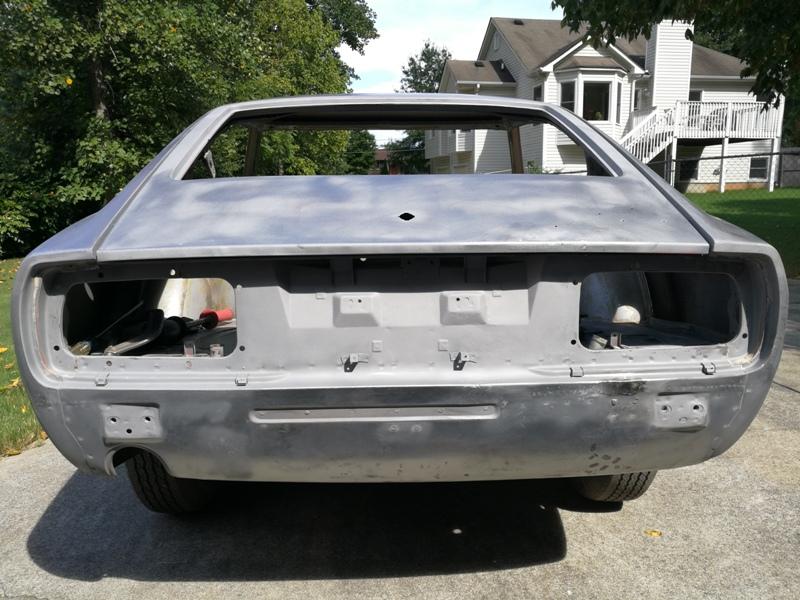
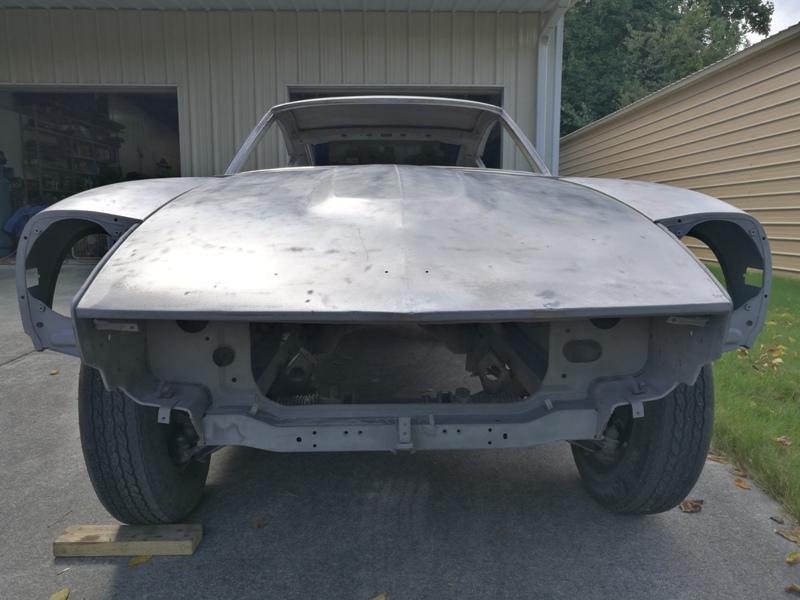
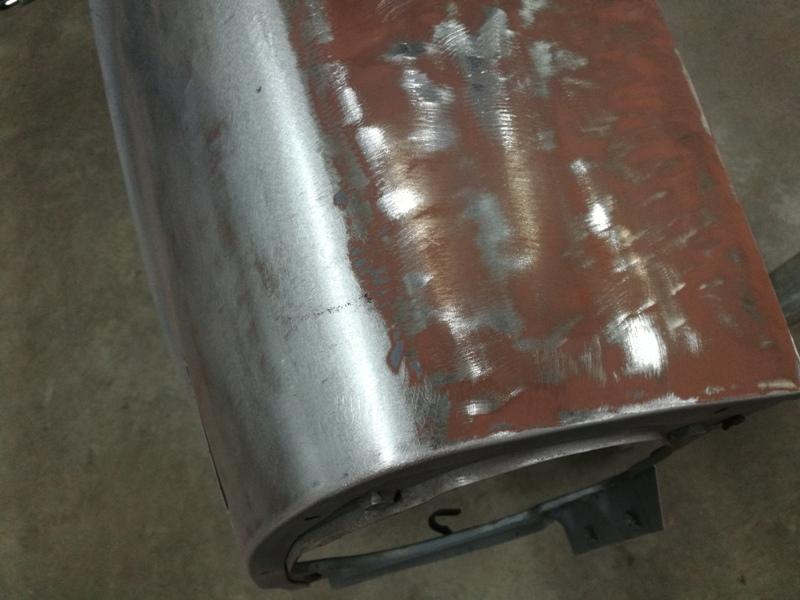
The car with most of the exterior stripping and metal work complete. The hood got some more work after this pic which can be seen in pics I already shared. The tail light panel and rear apron received a lot of hours because of the light tap that the car took at some point in its life. Also, the front passenger side fender was damaged as you can see in the bring a trailer pic at the bottom of these: Some rust through on the lower corner of passenger fender. Also more metal work to be done on fender (middle pic) Shrinking and stretching was necessary to get this area in good enough shape to require only a skim coat of bondo. BAT pic:


-
Did some searching and reading today. Interestingly, I don't see anyone selling copper slag in the US. I see shopping suggestions of other abrasives in Google Shopping when I search for copper slag. Coal slag is available. Both have descriptions that typically refer to applications which are thick metal (truck frames, trailers, etc.) I see Black Diamond is available in fine and medium. It's pretty cheap. I think I will get some and try it. I have a bunch of suspension parts and other similar items that need to be done, so if this is too aggressive for body panels, I still should get use out of it for these other items.
-
I'm thinking about making a video of sand blasting with play sand just for entertainment purposes. I'm sure that courser and sharper sand is more effective, but much like glass beads, I believe play sand to consist of smaller grains, overall, and thus, more similar to glass beads. They have less weight, and less momentum for a given air pressure, and in my opinion, do not impact with the same force, and do not cause the same level of distortion on thin sheet meal that bigger grains can. That said, the more I read about silica being harmful to health, the more I think everyone should avoid using sand for blasting. Glass beads or coal slag would be better. Where do you get that? I tried looking with Google and found no where to buy it.
-
Some of the smaller panels after dent straightening and sand blasting: And other parts getting stripped. Lots of stripping!
-
Whoops, yeah, Patcon. I am using play sand from Home Depot. Once it has been used and recycled a couple of times, it is very fine. As you can see in these pics, I was removing the repaint layer first and then the original paint and primer. Varying distance, and being careful with "used" play sand works at keeping distortion minimal.
-
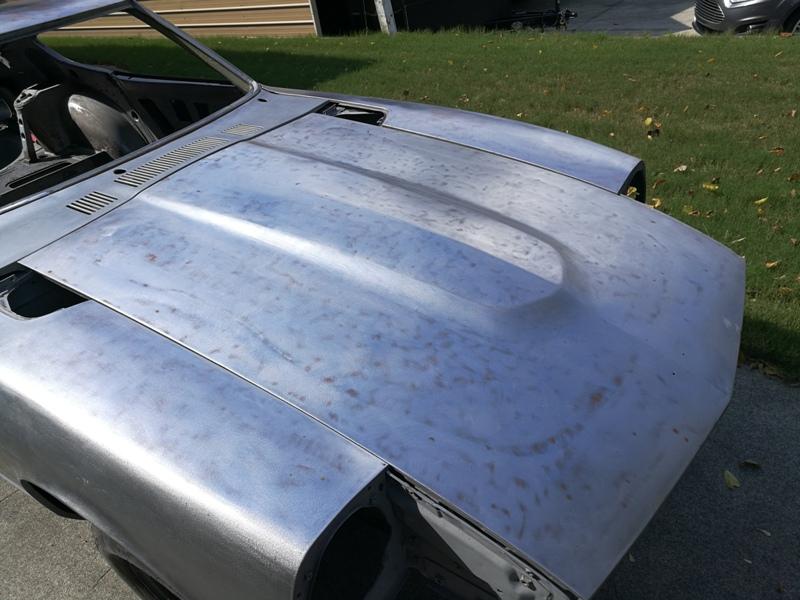
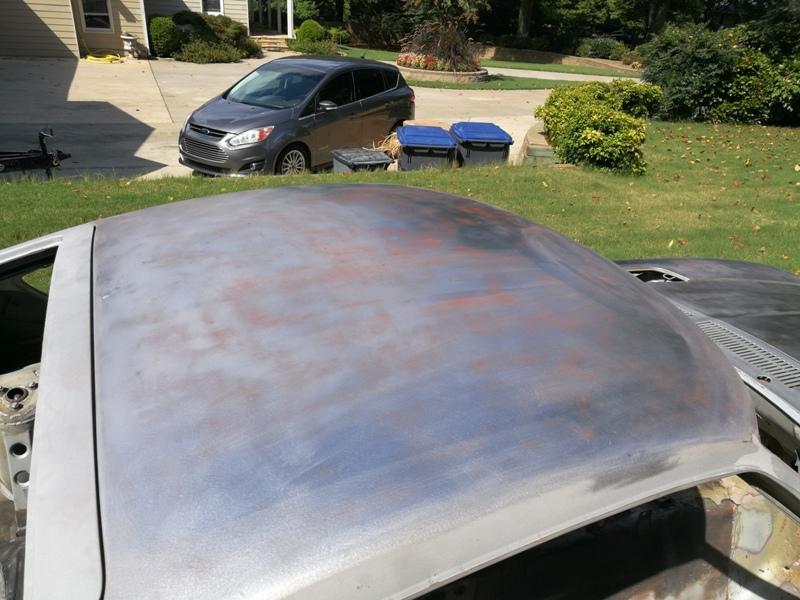
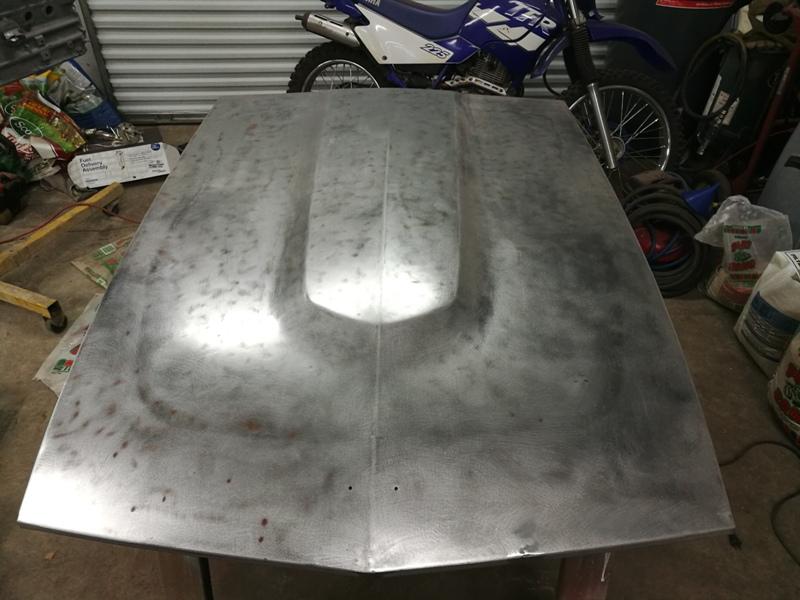
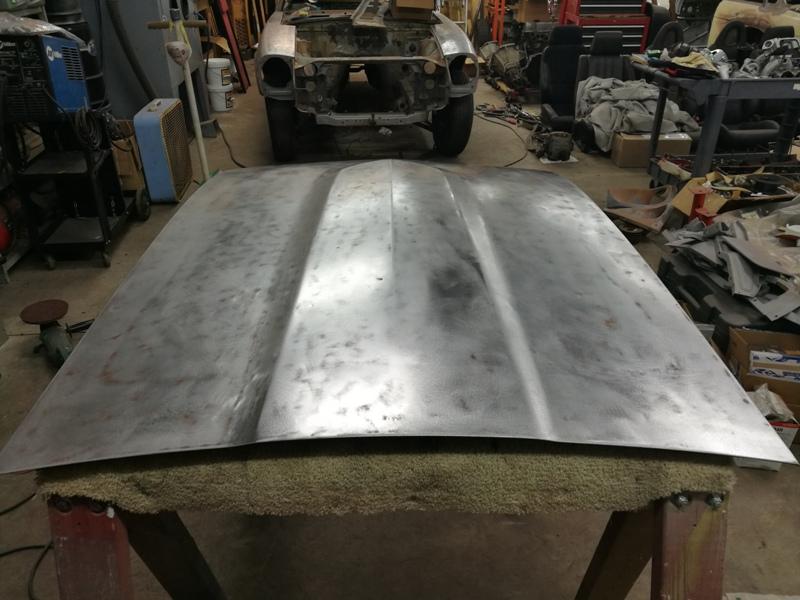
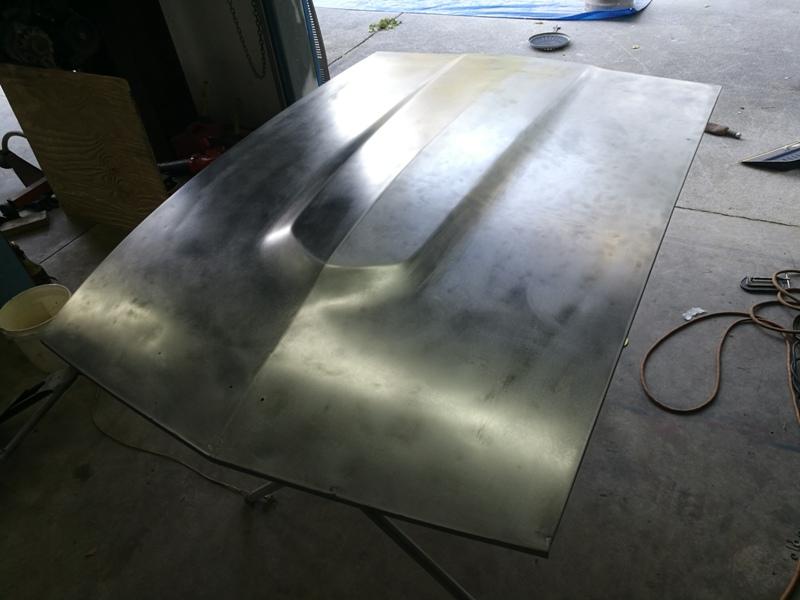
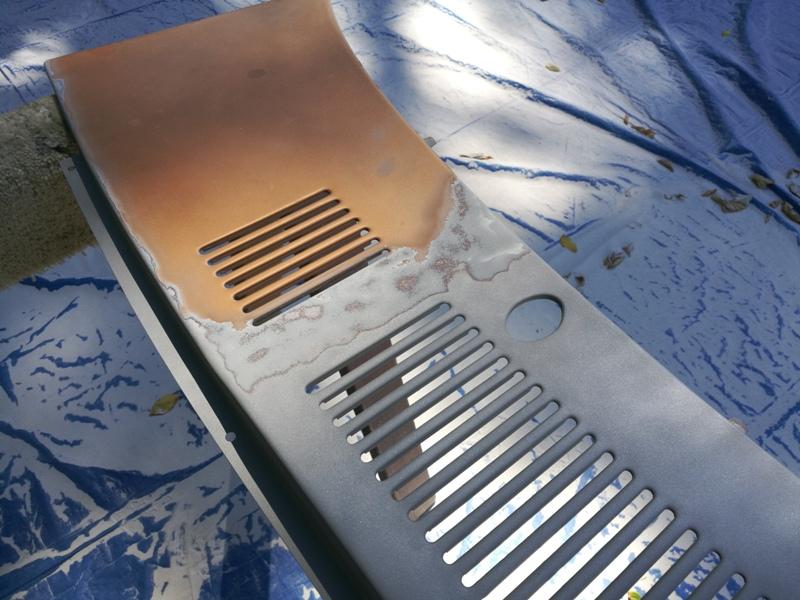
Here is the hood stripped inside and out to bare metal. The sand blaster was used on the inside frame parts. The high speed sander was used on the large, flat areas. There was some hammer and dolly work on some minor dents, and some stud pulls on the pointed nose at the front. 80 grit on the DA was used to get it ready for epoxy primer: These pics show the sandblasting the cowl panel. As mentioned by Grannynot, you have to be careful about sand blasting thin panels such as this one.


-
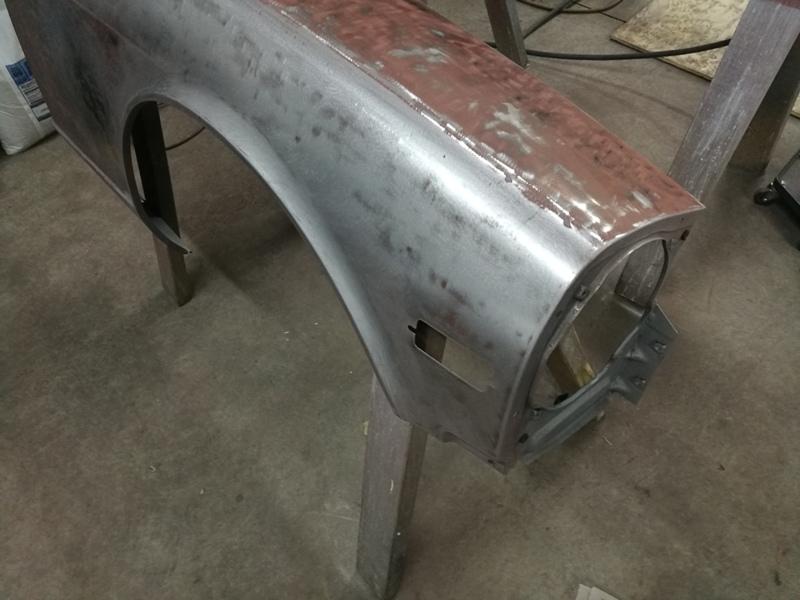
Sticking with paint removal for now, I found that one of the bigger jobs was removing paint from the exterior panels. Certain areas, I was ok with sandblasting after some testing. But for the large surfaces, I switched over to a high speed sander similar to this one, and some 36 grit paper with supporting, backing disc. Interestingly, the disc removed the one layer of repaint, the factory silver, and the factory top coat of primer (dark grey I think - I am colorblind) and left the red (oxide?) primer behind for the most part. I then used a DA sander and 80 grit paper to remove that. It was helpful the way it worked out because the red primer stayed where there were dings and dents. This gave me a visual aid for hammer and dolly work, and hammer and flat punch work. I found some of the dents were best handled by locating the flat punch on the inside of the panel and tapping with the hammer. Here are some representative pics of this work, done on the fenders:


-
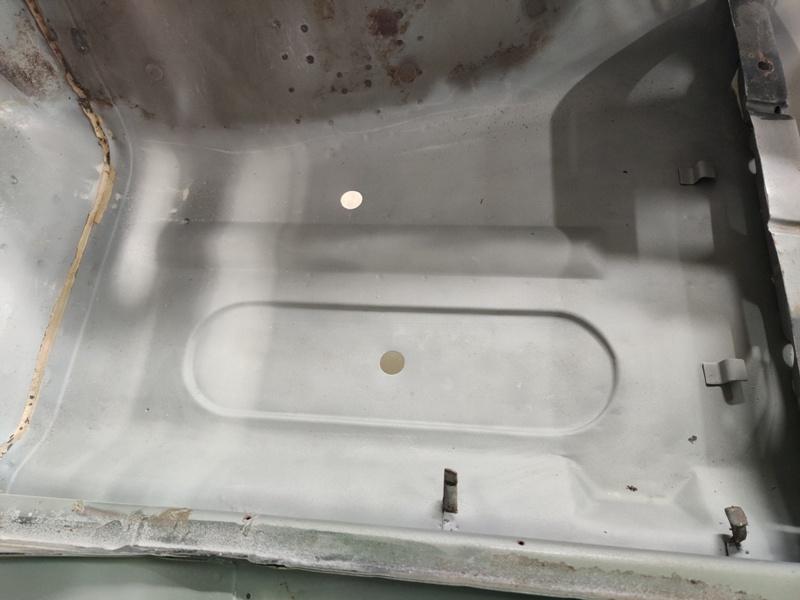
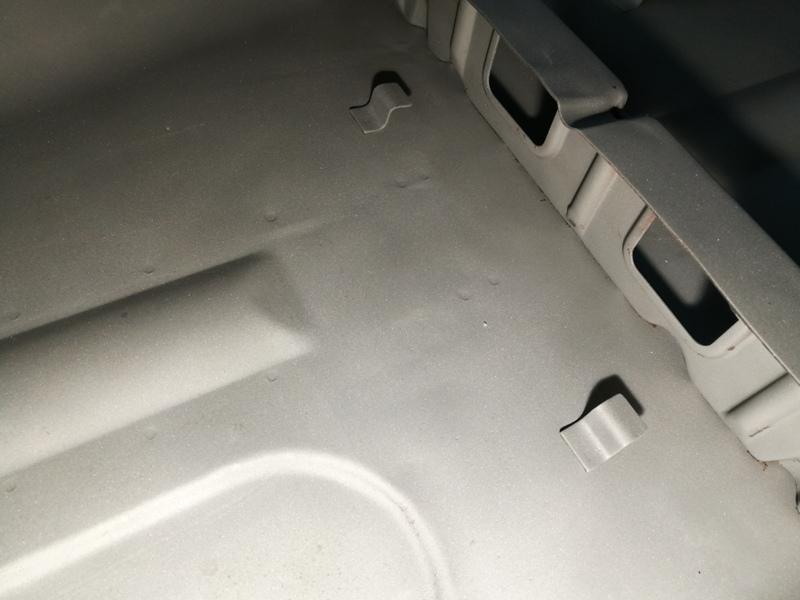
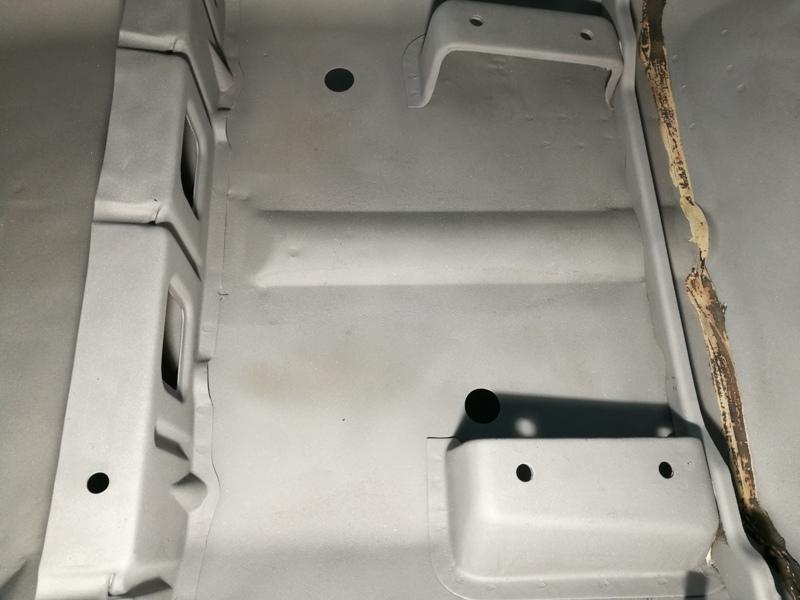
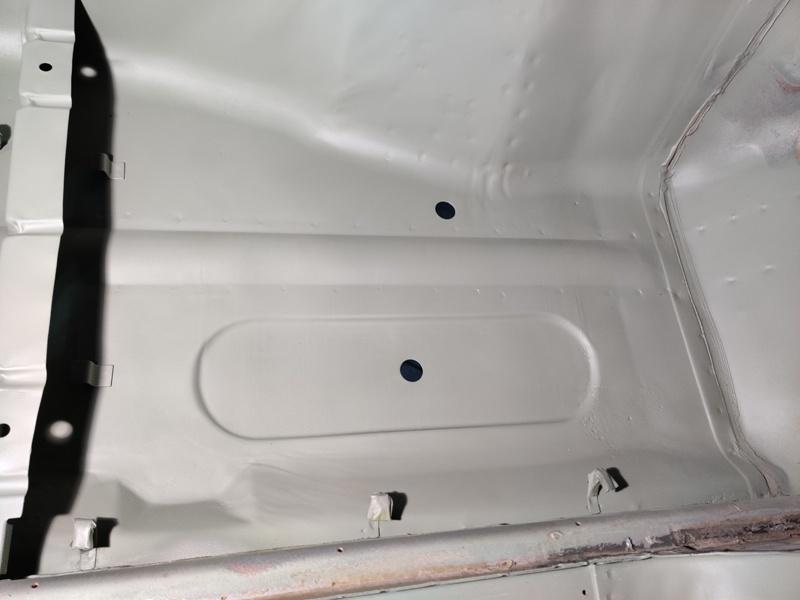
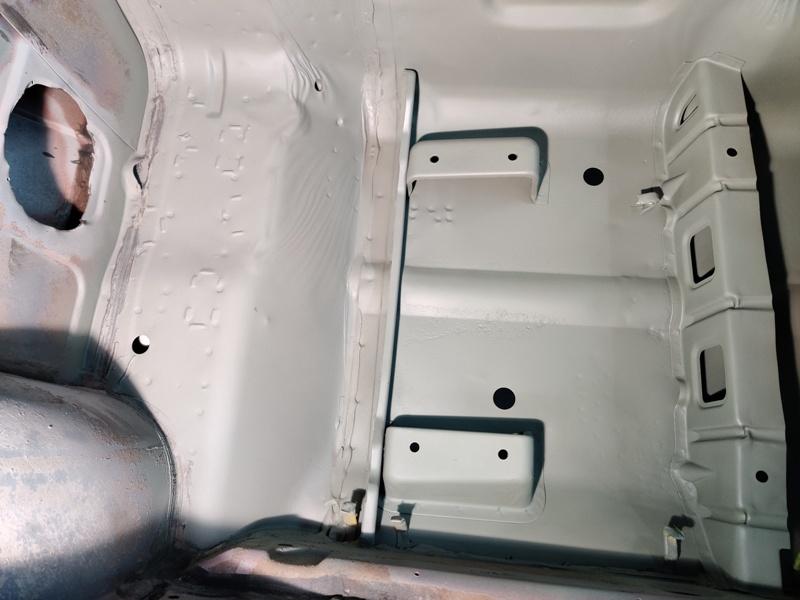
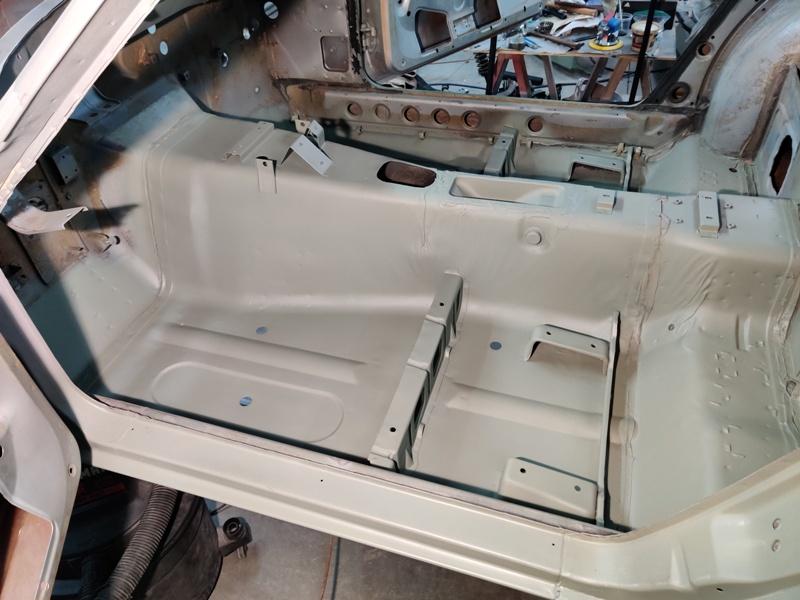
After finishing the work to straighten the floors, I sandblasted them, careful to avoid hitting the wiring clips. I followed that with a coat of epoxy primer the next day. If you don't prime quickly where I live in GA, rust will start developing again, typically in the pitted areas where rust was before. Epoxy primed:


-
Yes, I have some previous experience, mainly, what I learned came from restoring my other 240z back in the 90's. With that car, I got lots of experience with cutting out rust and welding in new metal! However, using a stud welder and pins is new to me. No, I put the end of the 2 X 4 section (section was about 12" inches long) on the inside floor, with the 3 and 1/2" side right up against the edge of the hump which runs over top of the rail. And then I hit the other end of the 2 X 4 with the 5 lb hammer. Doing that transfers the force directly onto floor where the weld flange from the frame rail attaches - where it is spot welded to the floor. It is double thick there - floor panel and frame flange. Hitting it repeatedly along the sides of the hump where needed is quite effective at removing the arch (that developed during the cars active driving life) from the front floor section.
-
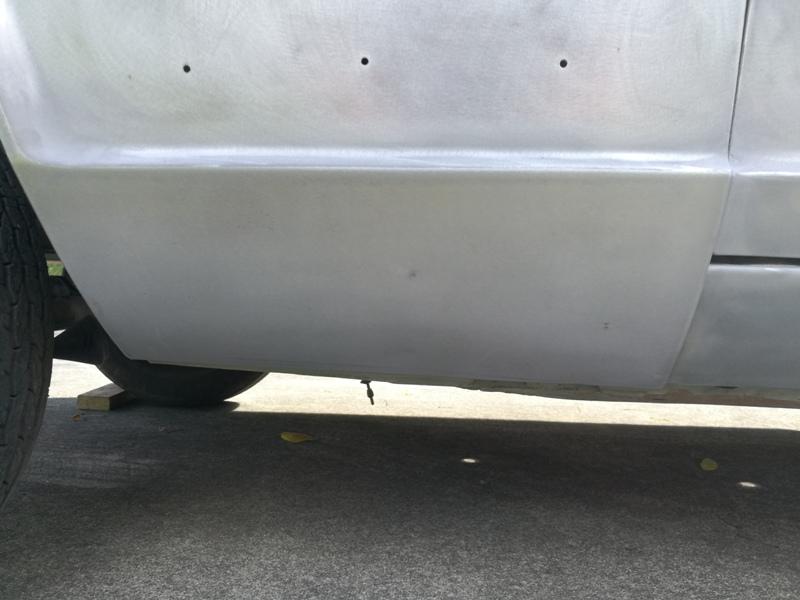
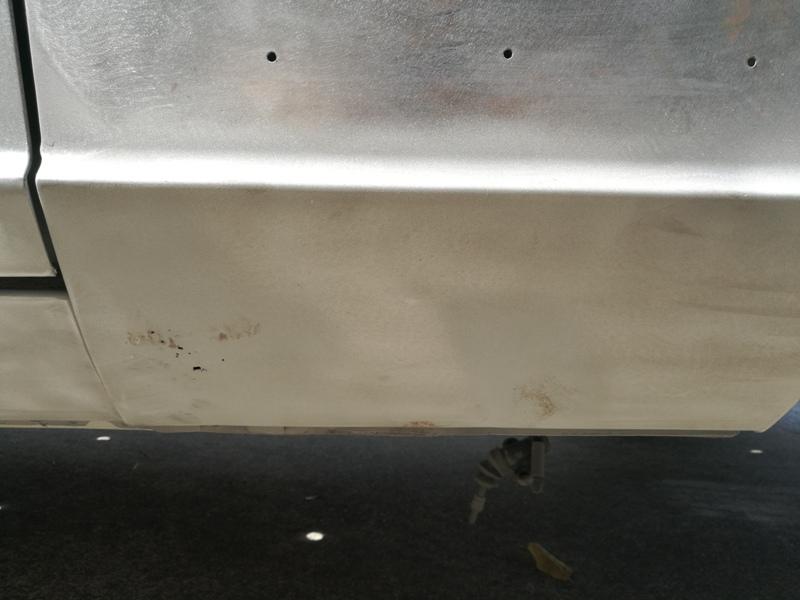
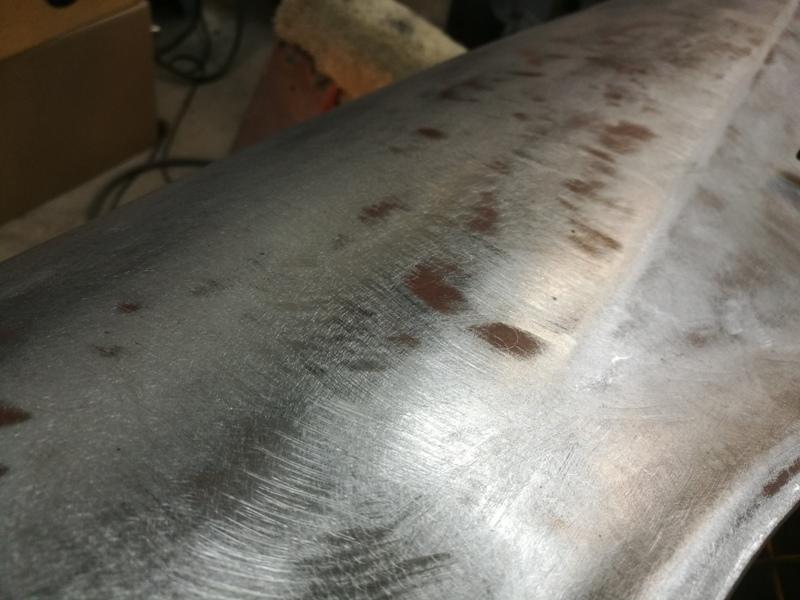
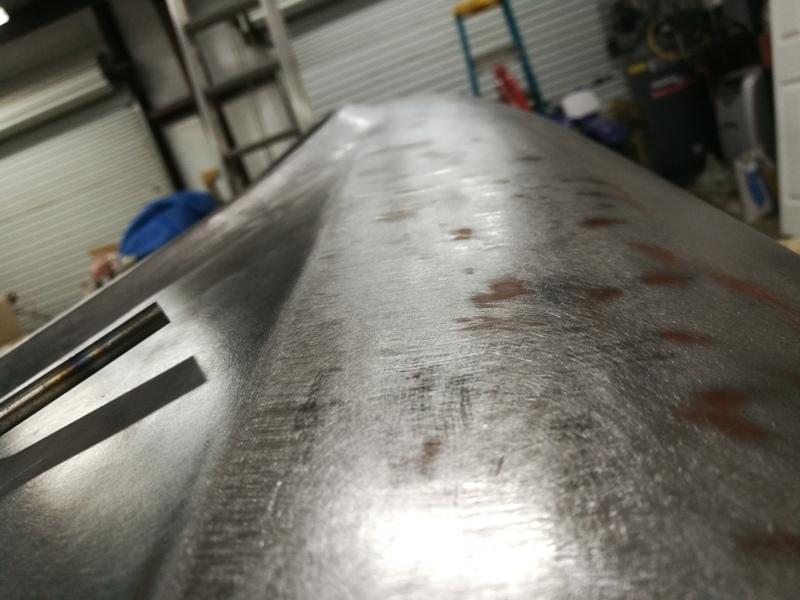
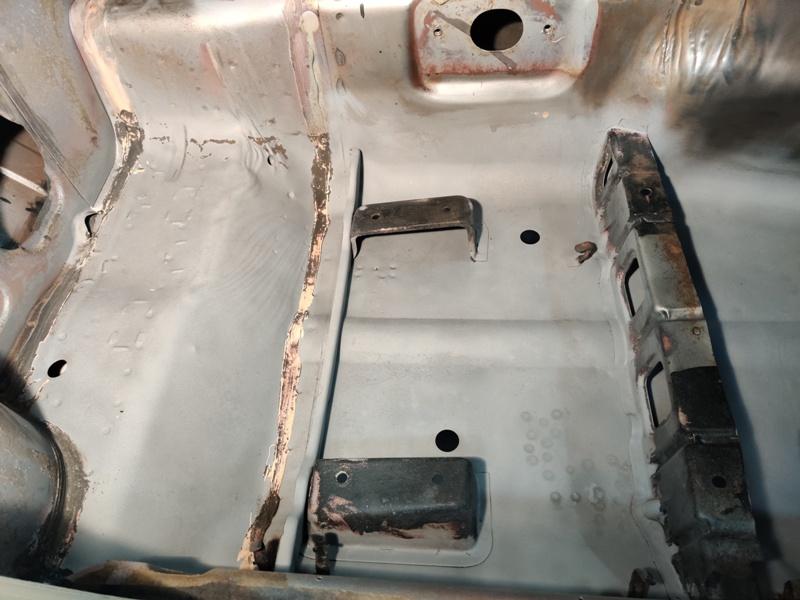
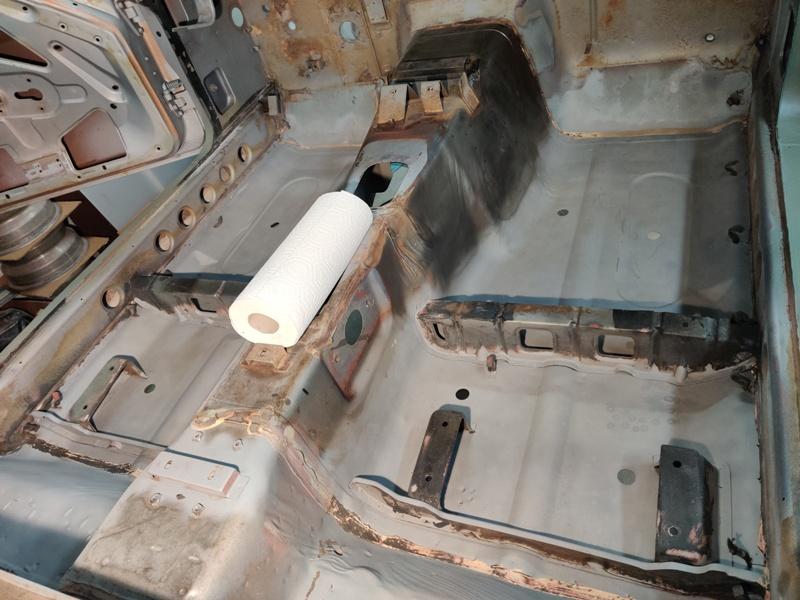
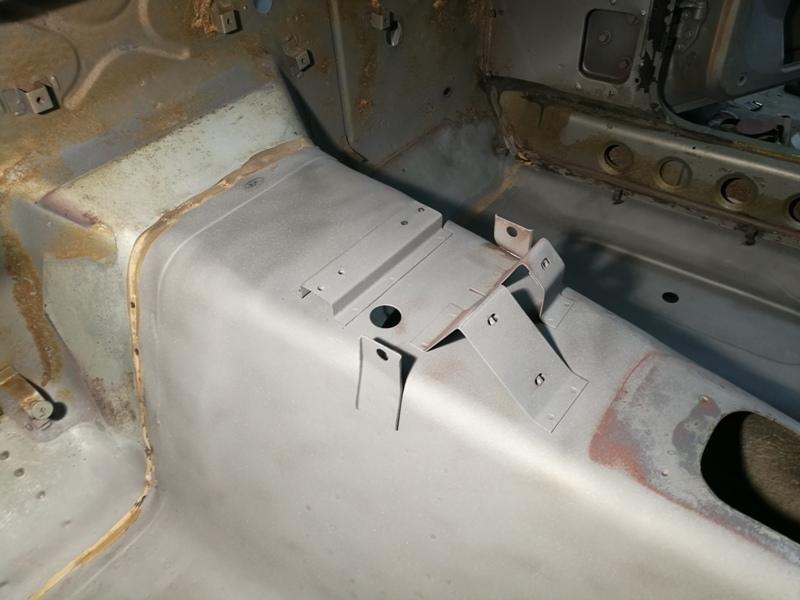
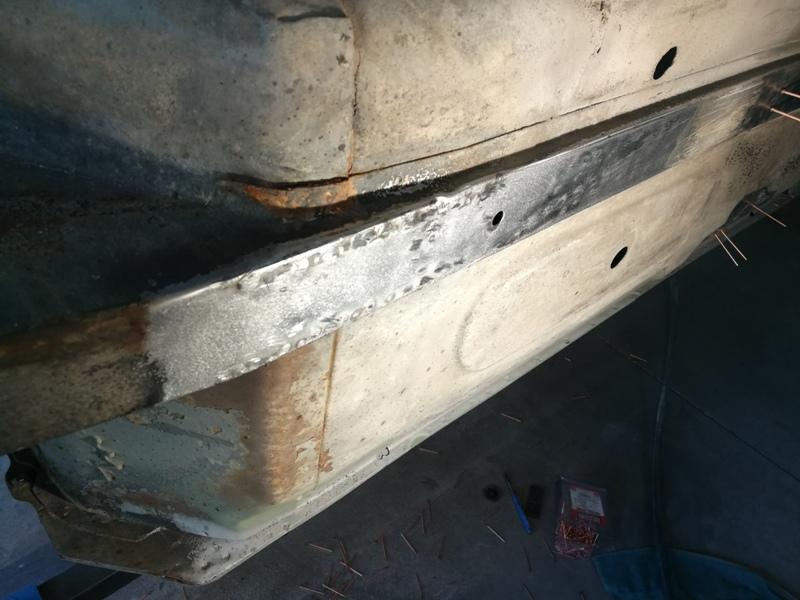
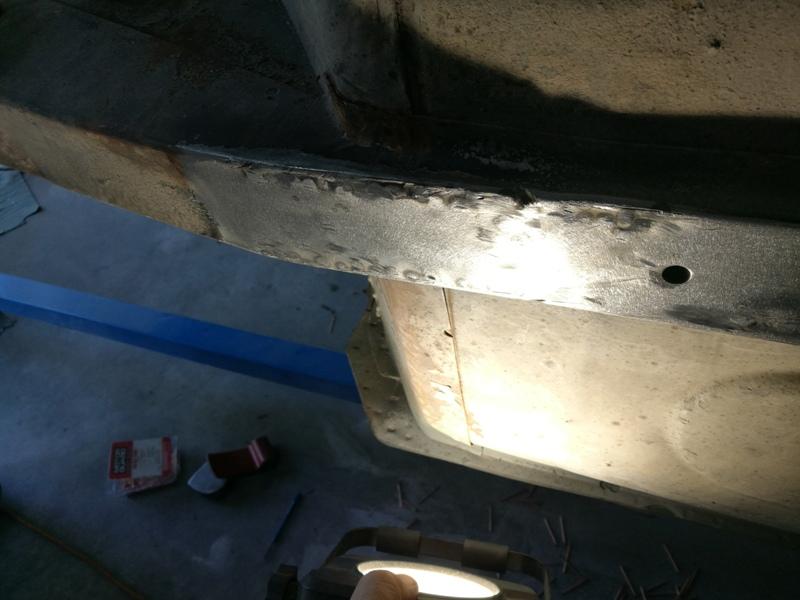
Here are some more pics showing work done with the stud welder. The frame rails and floors typically take a fair amount of abuse on these cars. To straighten the dents in the rails, I used the 2.5 mm pins a fair amount. The 2.0 mm pins also got used in this application, but only for areas toward the center of the rails, away from the side walls. Dented areas on or near the edges require more pulling force. Also, the floors often get bowed from the impacts to these rails over the years the car is on the road. They should be flat. So, when looking front to back and side to side at the lowest surface of the frame rail, they should be flat. A section of 2 X 4 and a 5 lb hammer used judiciously will set things "straight". ? Placing the 2 X 4 strategically on the inside surface, I hammered hard against the wood to move the floor surface downward. There were also a few areas like this which received impacts. I spent two week ends shining a bright light at sharp angles onto both the inside and outside surfaces of the floor to find dents and imperfections. Welding studs and pulling, hammer and dolly work, and using flat punches and hammers, I straightened every imperfection I could find. Then did final clean-up with the sand blaster on the inside surface and sprayed epoxy primer.

-
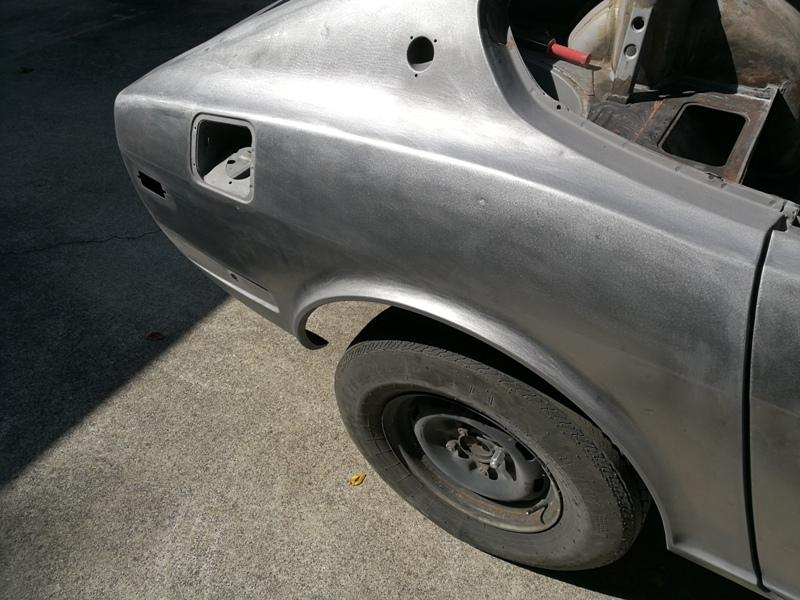
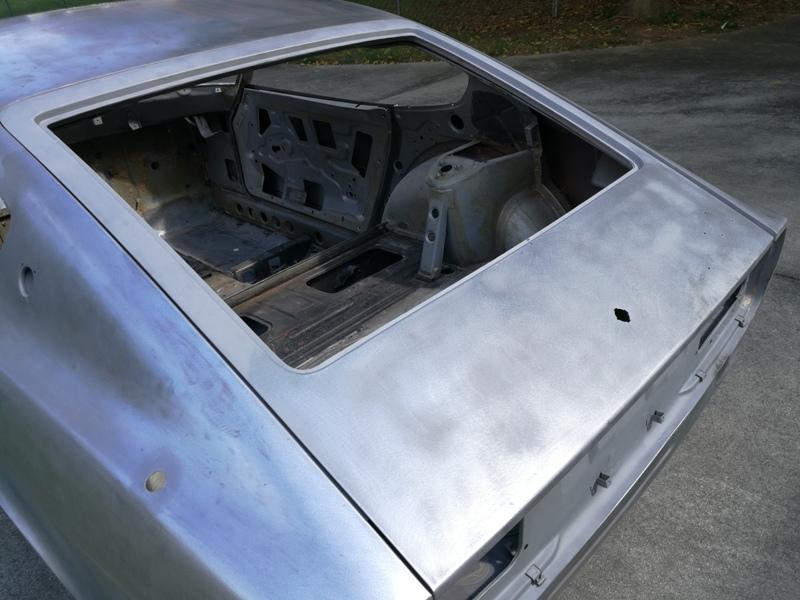
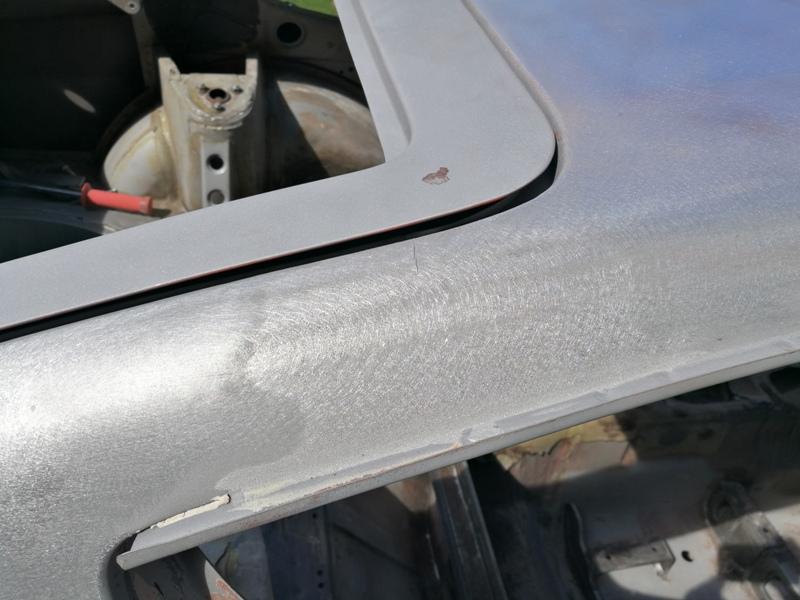
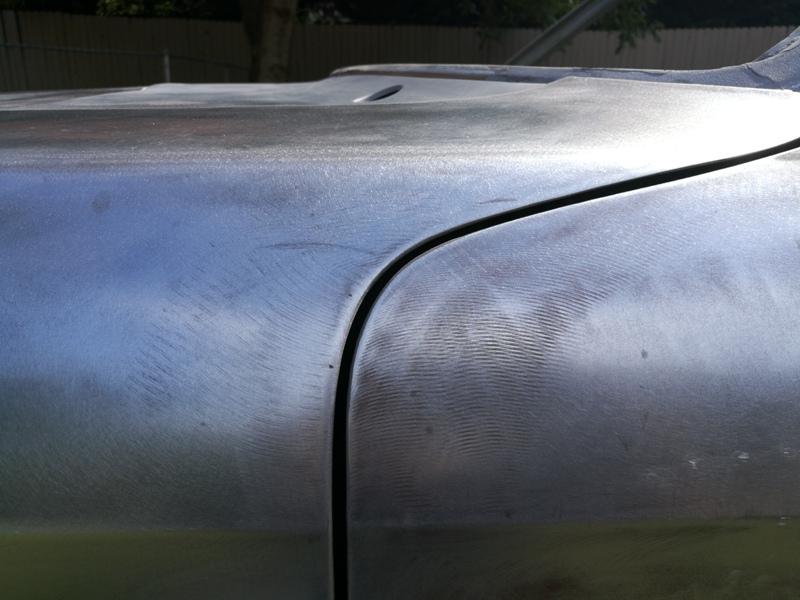
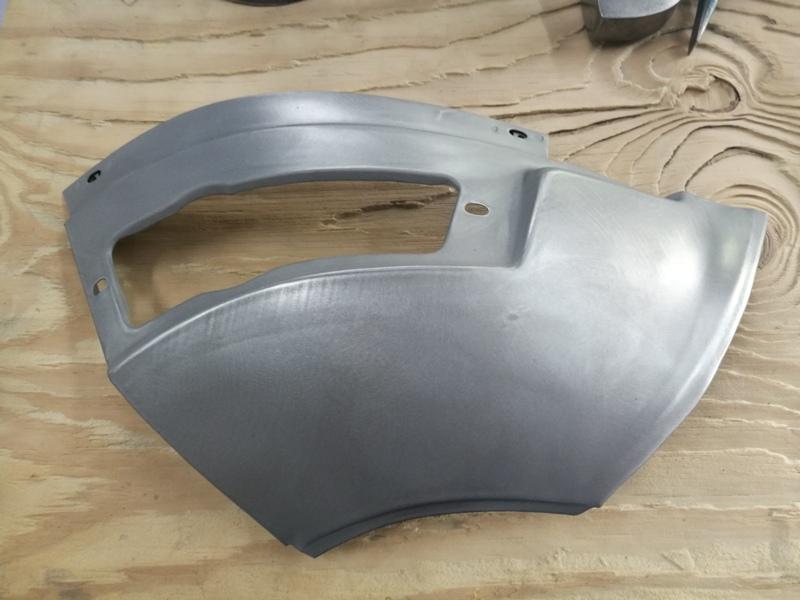
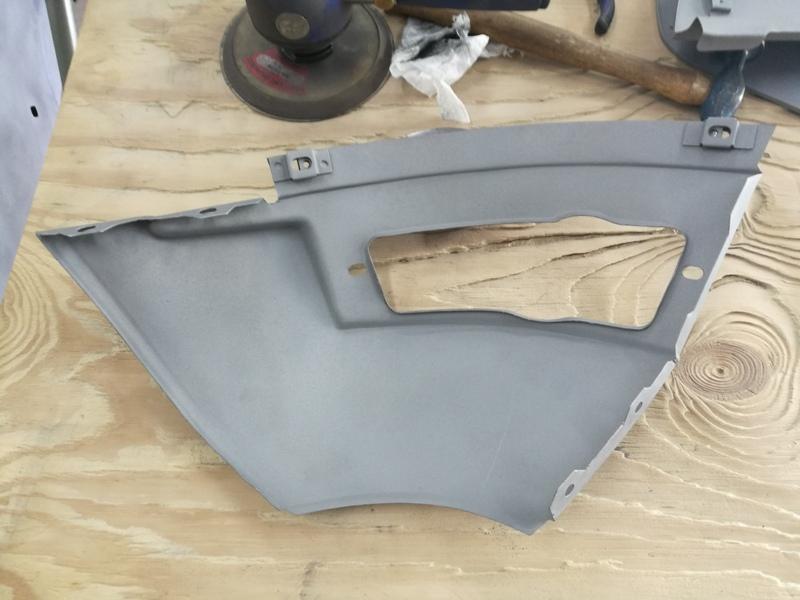
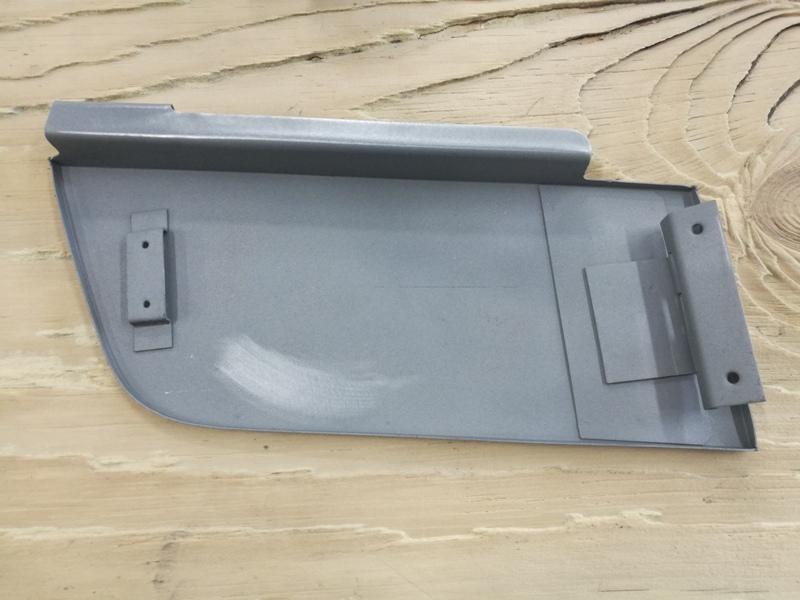
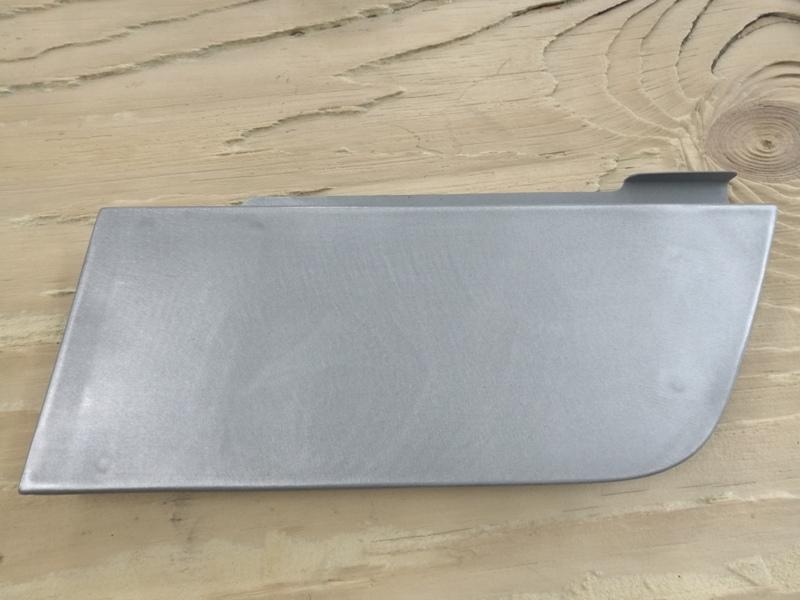
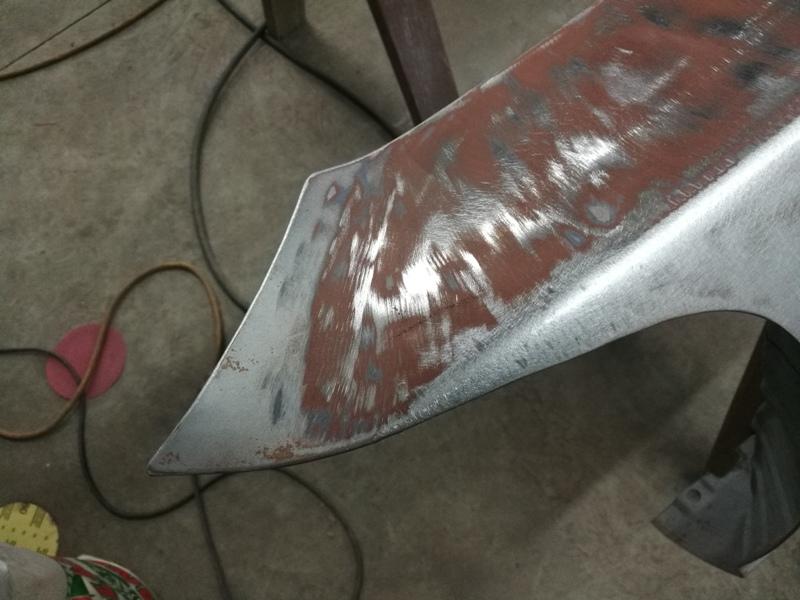
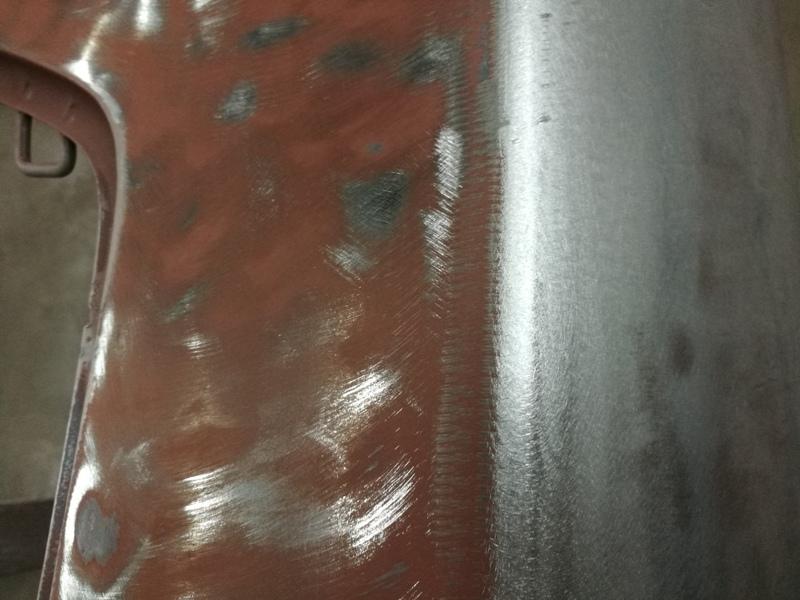
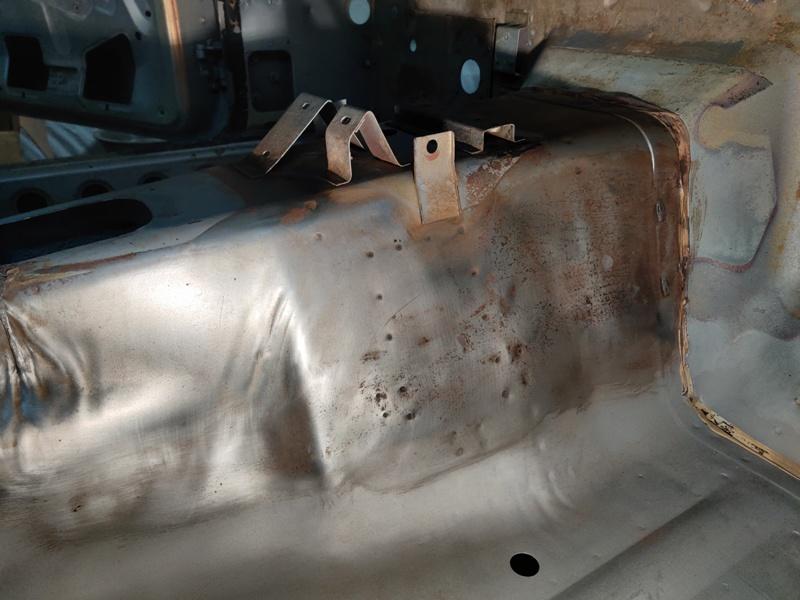
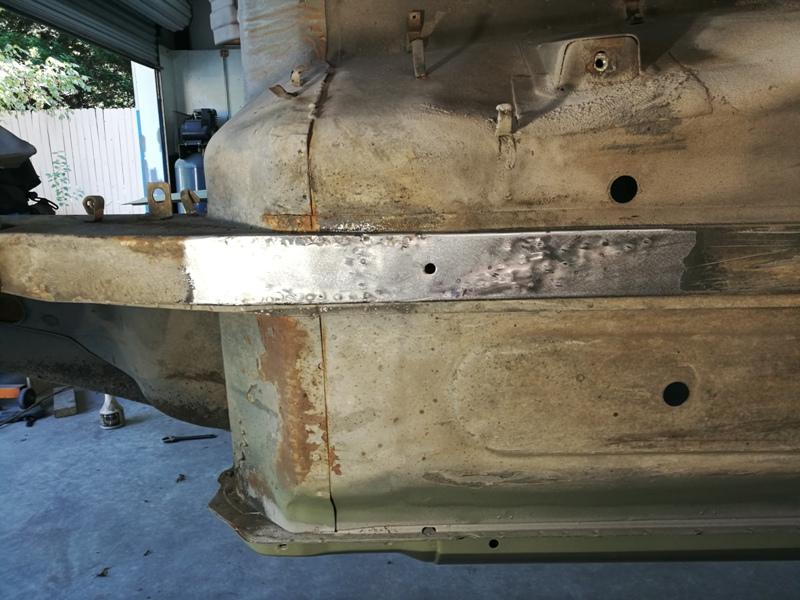
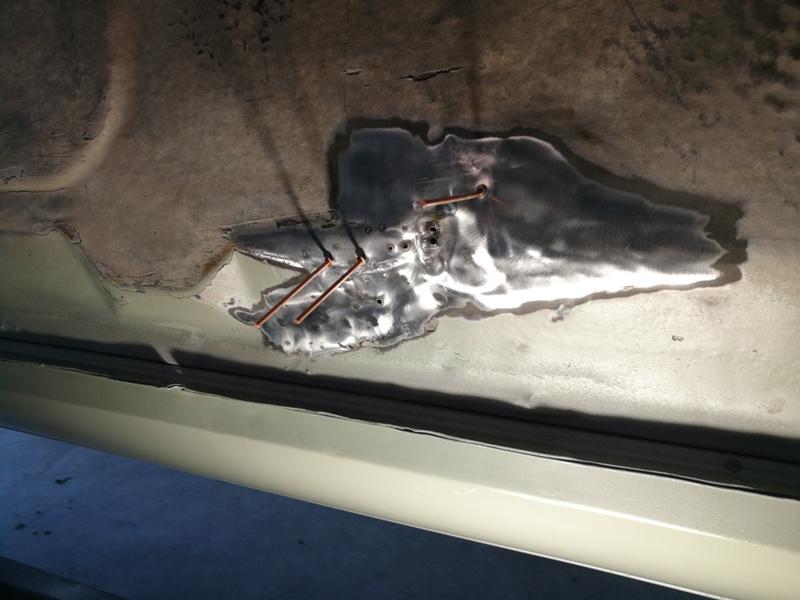
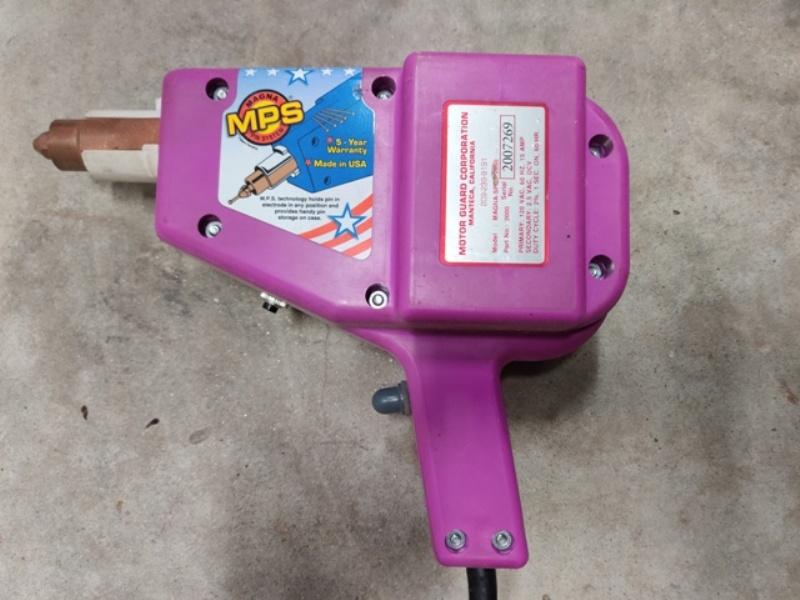
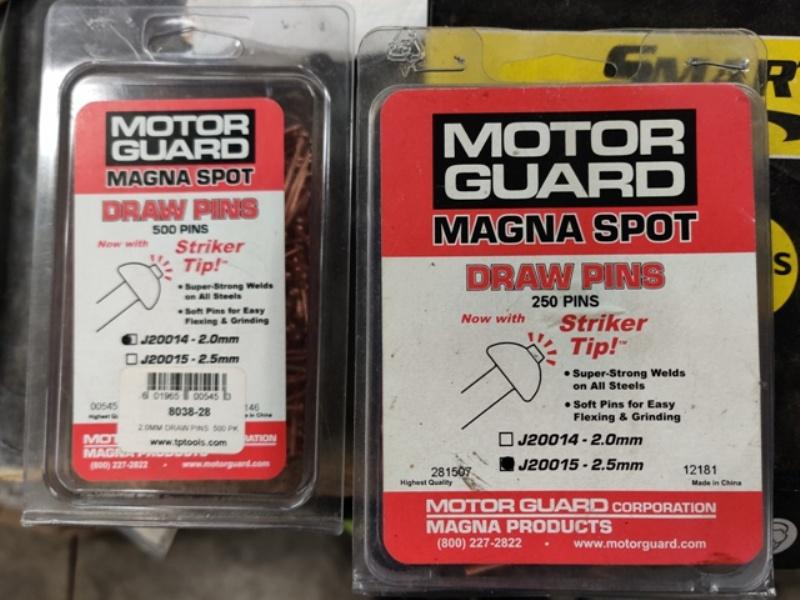
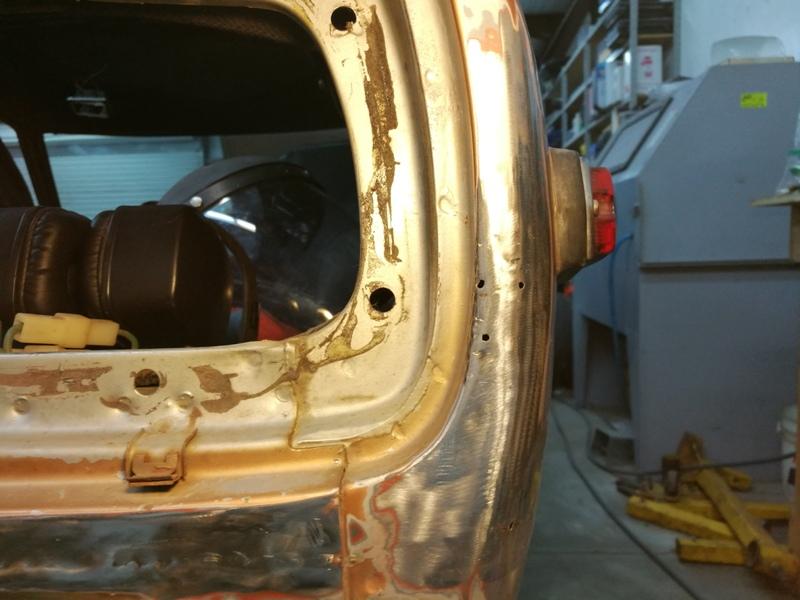
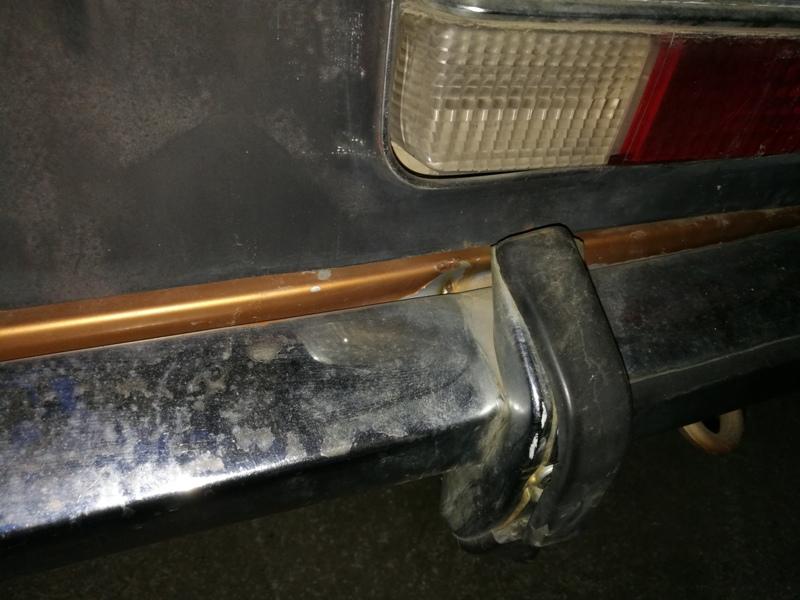
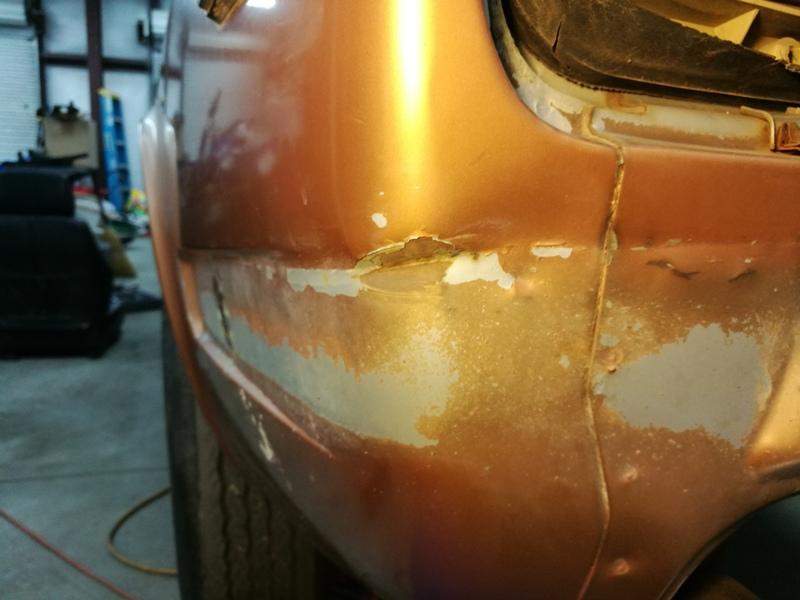
One of the new tools I bought to utilize with this restoration is a stud welding gun: I also got two sizes of pins, 2.0mm and 2.5mm: I had never used one before and was looking forward to learning how to use it well. It's important to me to improve skills and to become good at doing a thing because it becomes much more enjoyable when you can spend a 1/4 of the time (than you used to) to get results that are twice as good as your original efforts. Here was the one of the first dents that I worked on at the rear edge of the right quarter panel. Note that the metal is pushed in enough to bulge outwards on the left side into the tail trim panel opening area. As I welded pins on and used a slide hammer to pull on them, I had to work that area back flat as well. Here is after my efforts. Three of the pins broke loose causing the small holes. I think I could do it better, without making holes, now that I have more hours of experience behind me. A touch up with the welder will fix these holes up. If you look closely, you can see other areas that have been worked with the stud welder and pins: This car was hit lightly in the rear, and the bumper caused some indentations in the tail panel and quarter panels: A couple of in progress pics:


-
Interesting. What do you think of using a rust converter liquid and brushing it on and soaking that part of the battery tray? I don't want to alter the cosmetic look - I want to keep the factory spot welds.