sscanf
Free Member
-
Joined
-
Last visited
Everything posted by sscanf
-
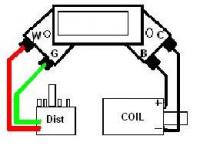
 Something to think about since you are replacing the distributor anyway: You can get a remanufactured 280ZX distributor which includes the ignition module from Rock Auto for $90 and a new OEM coil that goes with it for another $15. The conversion is dead easy. In a nutshell: 1. Discard/disconnect the old ignition module, coil, and ballast 2. Install in the new distributor and coil 3. Connect two wires from distributor to coil 4. Connect EFI sensor wire/tach (blue wire) to negative side of new coil 5. Connect two 12V wires (black/white stripe) to positive side 6. Profit! Full instructions are here Not sure if it has come up in this thread but does the tach work in this car? Mine was very jumpy and sometimes just didn't work at all. It turns out that this behavior is related to ignition module problems on this car (and they seem to be common problems). There is also a related discussion here which ends, for now, how I started this posting and includes the part number.
 -
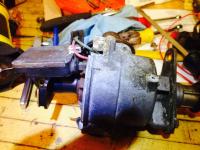
So I have learned what not to do with these modules: Don't replace a Z coil made to work without a ballast with a GM coil that is made to work with a ballast. Result: Dead HEI module after about 4 seconds of engine run time. An example of a GM coil that can kill your HEI module in this configuration is the DR35. I hated that it was not running, so, in my haste to verify that this was the error in my ways, I checked Rock Auto and found that they sell a rebuilt 1979 ZX distributor (A-1 CARDONE Part # 31619) with the ignition module included for $90 and and OEM coil for $15. I installed them over the weekend and it works great: tachometer is rock solid with this module - maybe even better than with the GM module. I have no idea if the built in ignition module on this unit is a fully functioning original unit or if it has been somehow updated by Cardone. I doubt the latter. Their web site states that they test and update electronics as necessary during the rebuild process. Once I have two known good distributors, I'll pry the cover off of this unit to see what, if anything , has been done in there. At the same time, I also ordered a new GM ignition module and am planning on using it to do a cleaner retro-fit with my old distributor. Stay tuned.
-
It looks to me like the same procedure would work with either of those modules. At the moment I'm happy to have a working ignition system. Not even close yet to going above 5K RPM but who knows, maybe some day. Nice to know there is a drop-in replacement if I have trouble in the future.
-
-
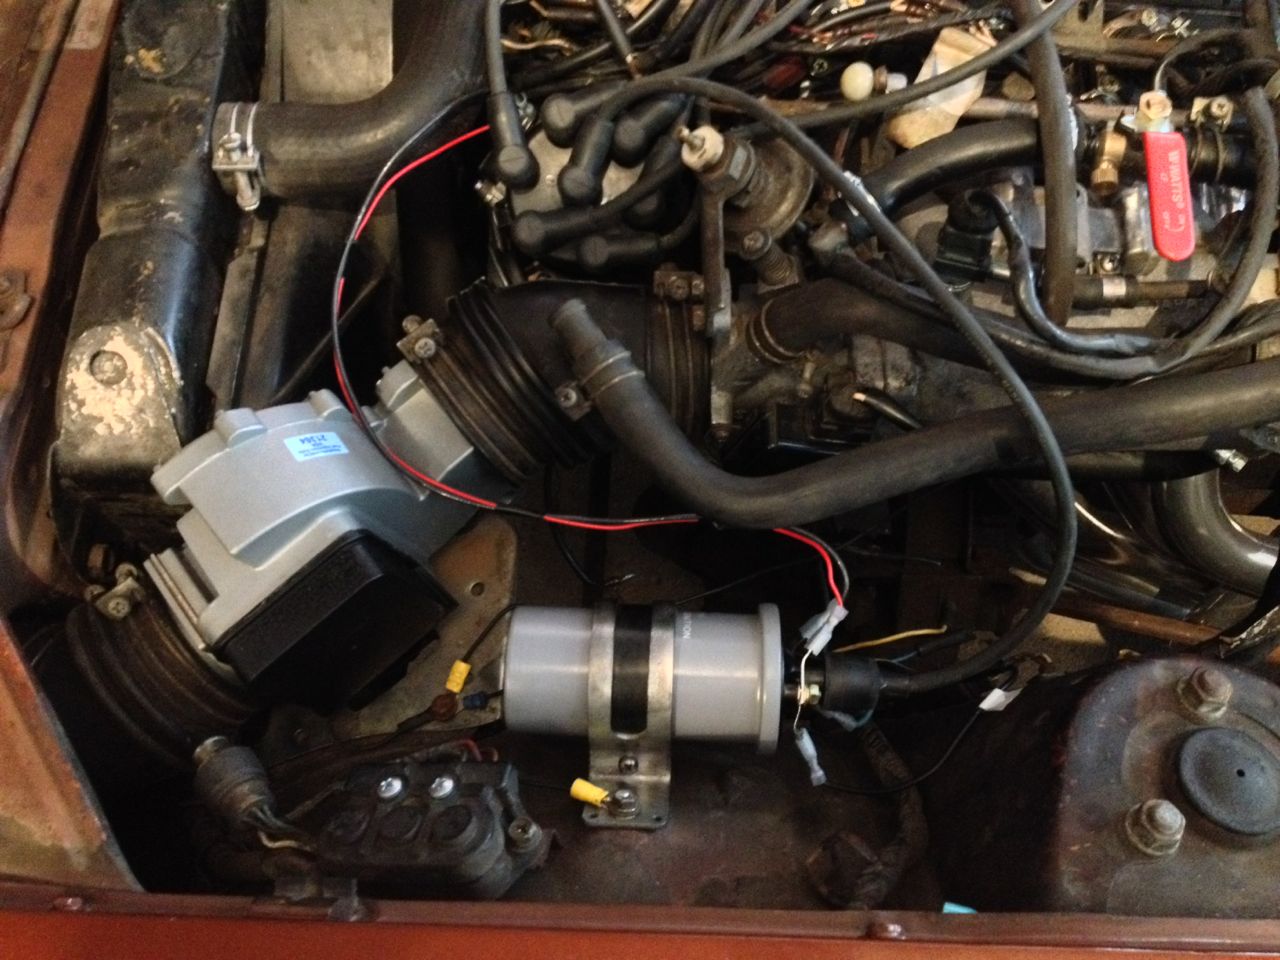
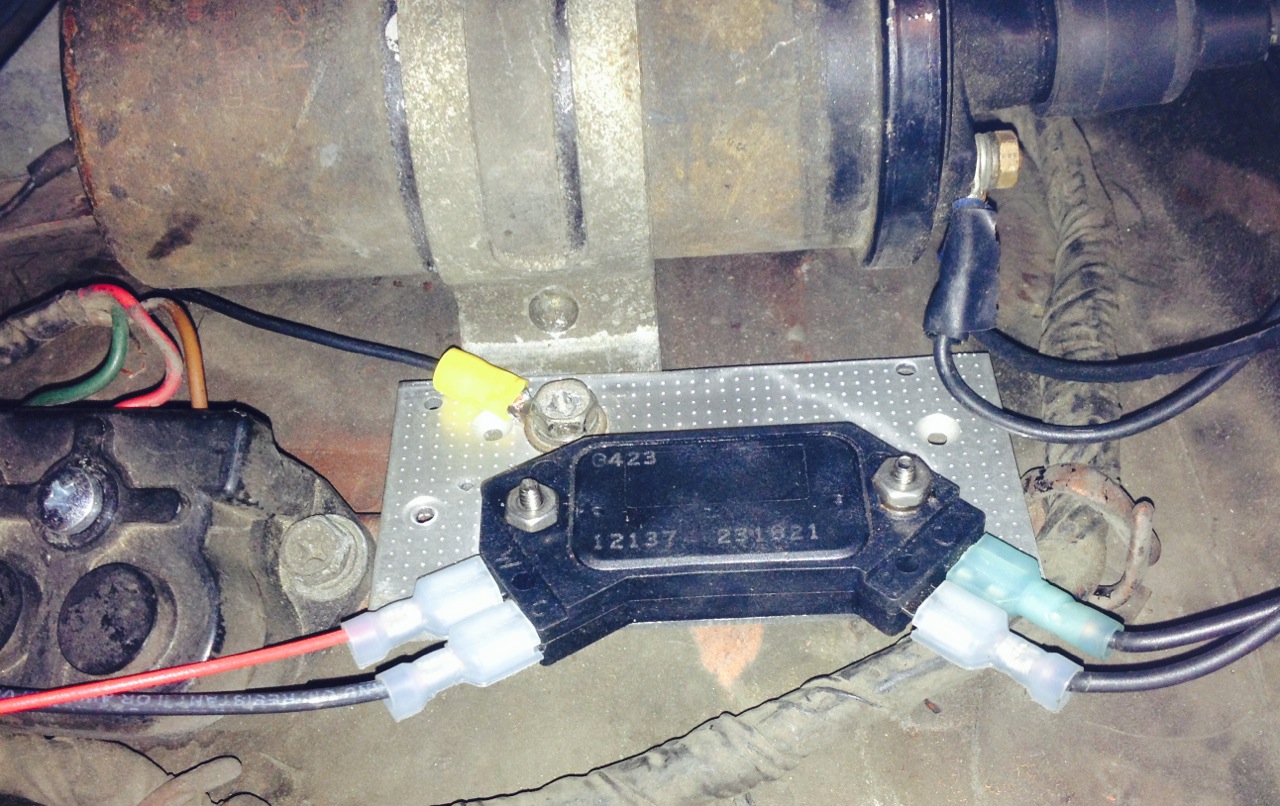
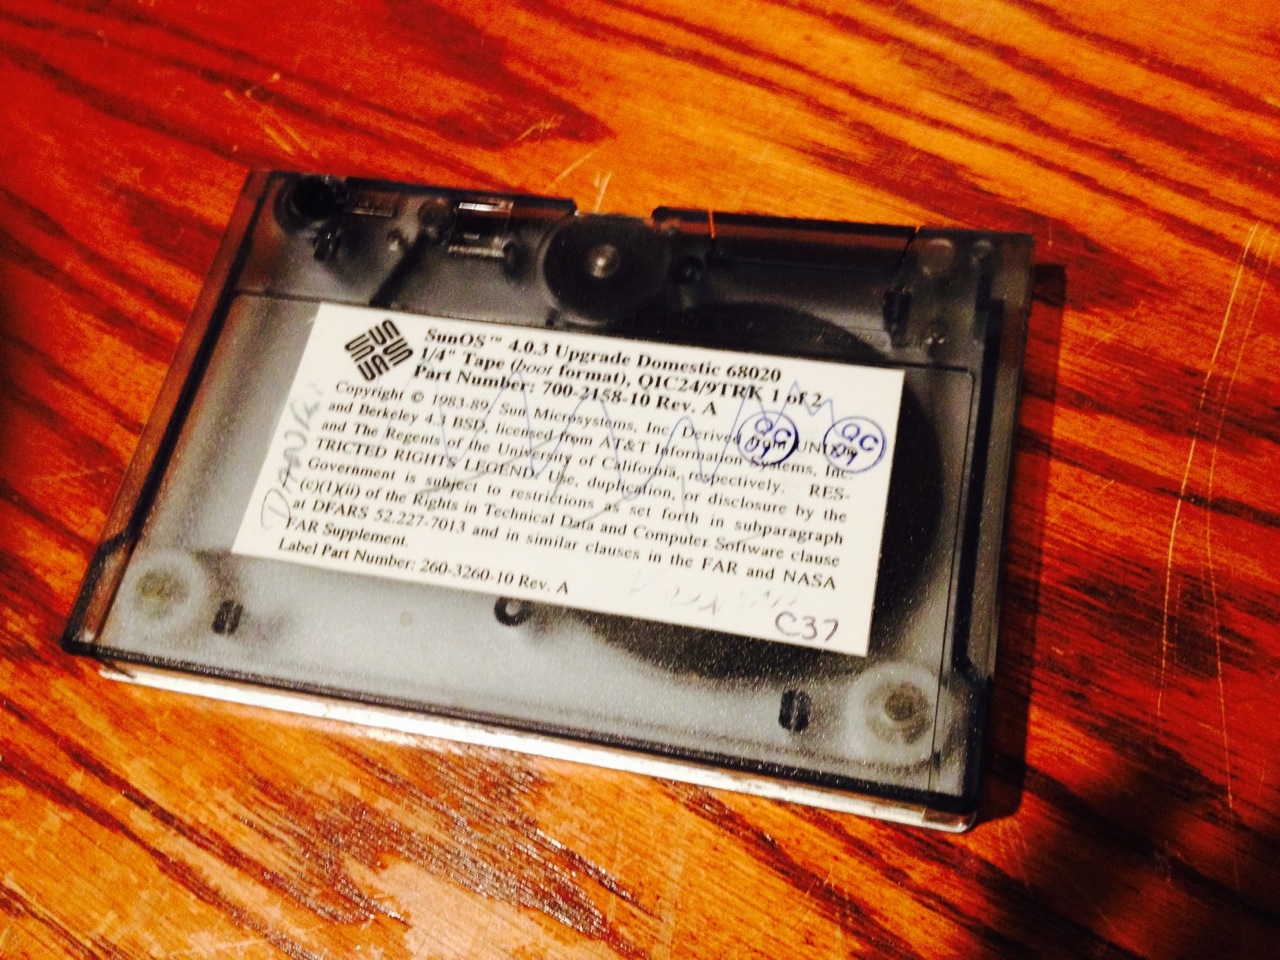
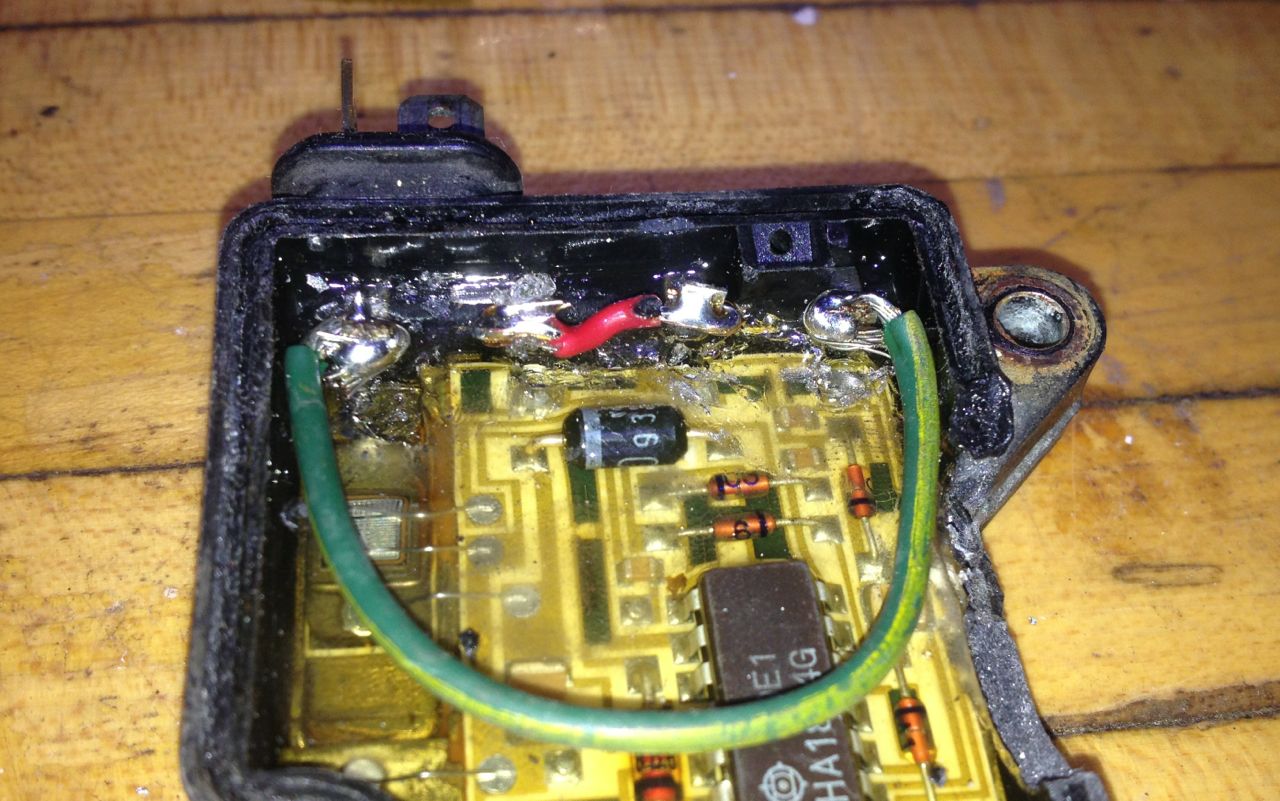
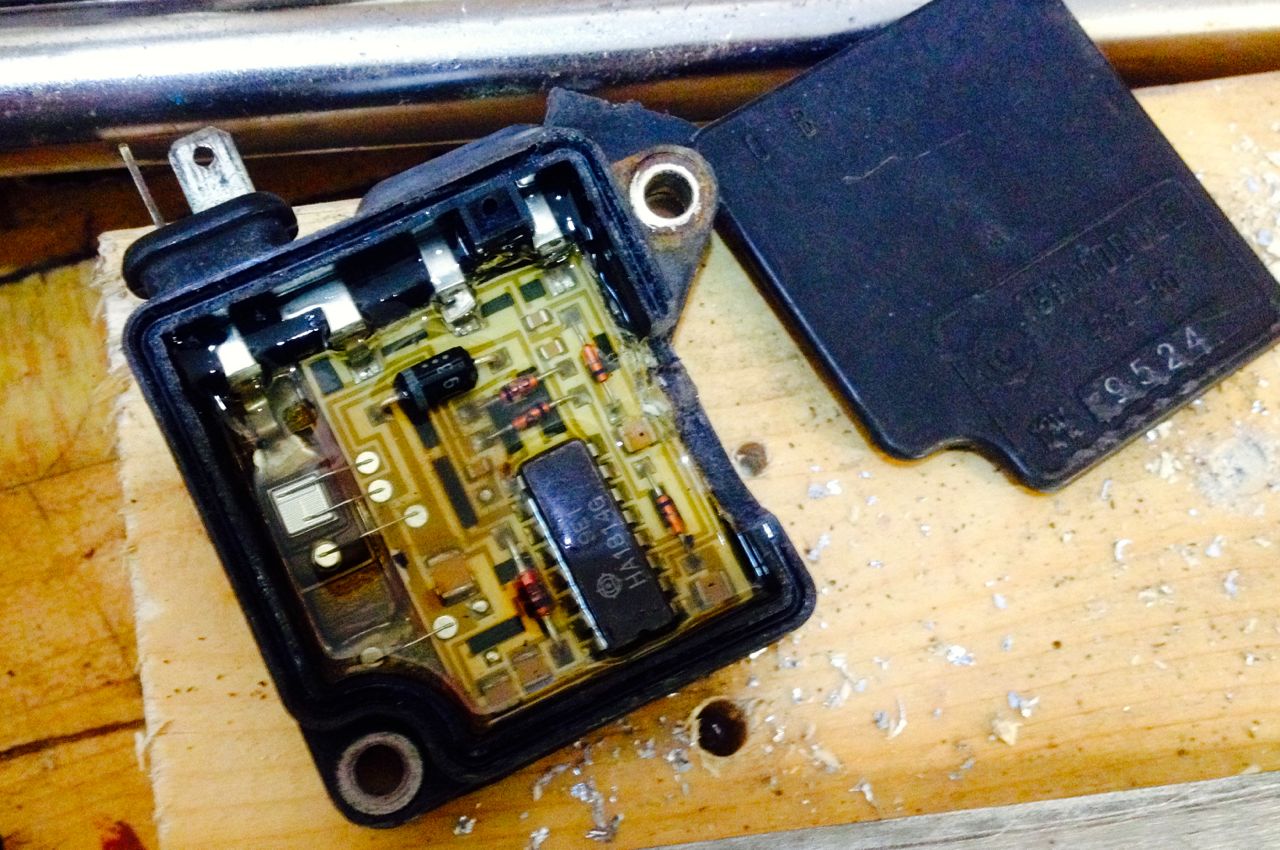
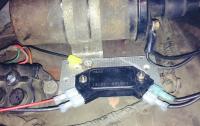
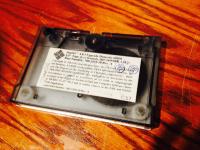
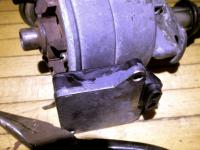
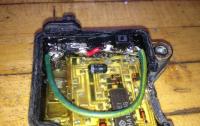
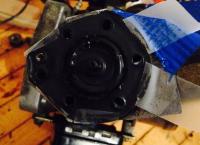
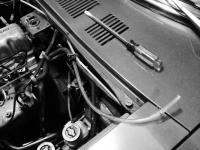
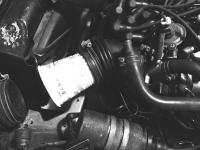
Installing a GM HEI Ignition Module into a 1976 280Z (which already had a ZX ignition) This article describes how to upgrade a ZX ignition module to a GM HEI module. In this particular case, the ZX ignition module happened to be installed in a 1976 280Z which had been upgraded to a ZX distributor/ignition module using the Atlantic Z Club instructions. The purpose of the HEI install was to fix a sudden engine cut-out problem and a jumpy tach problem. Heat Sink The first thing I needed was a nice heat sink and, afters scouring the basement and considering attacking an old Western Electric telegraph test set with a hack saw, I laid eyes on a stack of these: Which is an old tape format from the 80's/90's (we called the streamer tapes back in the day). I still have a SCSI drive that can read/write these things (but haven't tried in at least 10 years)... Anyway, these tapes are build like tanks, the back plate is .1 aluminum - I knew I saved them for a reason. The following pictures illustrate the transformation of one of these tapes into a nice heat sink for this HEI conversion project. Add some quality time with a hack saw and drill to get a nice heat sink... Don't forget to use heat sink compound (I used the stuff my module came with). Note to self: add part numbers here. Disconnect the old Ignition Module Pull the distributor and yank the old ZX module (this 76 280Z had been given a ZX upgrade by PO). I figured the neatest way to do the job was to open the old ignition module case, cut the connections, and jumper the distributor wires to the external connections (note that I misapplied some opening force to the old module and had to glue it back together - this was not necessary - observe that access to the guts is not at the bottom but at the top - see photos). Pull the distributor then disconnect the distributor wires from the old ignition module: two spade connectors - a gentle yank with some plyers should do it - clean the connectors/terminals while you are there - I sprayed a little DeoxIT and worked them on/off a few times. Pay attention to which side the wires go to (but the rubber boot they plug into is marked red/green if you forget). Remove the two screws that hold it to the distributor. Disconnect the old module and crack it open (I did this a little too literally) Clip off the connections to the board, then jumper the posts as shown. Clean the posts then you will need a lot of heat (I used an 800 deg F iron, nicely tinned and laid into the post and wire for a good 10 seconds before applying rosin core solder). What is that goop in there? Don't forget to check your work. Make sure you have continuity where you should and that nothing is crossed. Fixed the case with some super glue and JB weld. Wire it up Wire up like this (note: the left image was stolen from another thread): Profit! This post has been promoted to an article


-
-
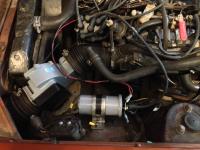
As I said last night, I got the HEI module installed. It was really easy after the prep work was done. The first thing I needed was a nice heat sink and, afters scouring the basement and considering attacking an old Western Electric telegraph test set with a hack saw, I laid eyes on a stack of these: Which is an old tape format from the 80's/90's (we called the streamer tapes back in the day). I still have a SCSI drive that can read/write these things (but haven't tried in at least 10 years)... Anyway, these tapes are build like tanks, the back plate is .1 aluminum - I knew I saved them for a reason. The following pictures illustrate the transformation of one of these tapes into a nice heat sink for this HEI conversion project. Add some quality time with a hack saw and drill to get a nice heat sink... Yank the old ZX module (this 76 280Z had been given a ZX upgrade by PO): Wire up like this (note: the left image was stolen from another thread): Profit! I do need to make a more permanent job of the wiring yet but its proven out as a nice, easy, inexpensive solution to my ignition module problem. Thanks again for all the help.


-
Hey All ... First off thanks again for all the help. I did manage to get it all put back together tonight, including a new GM HEI module. It is now running really really nicely once its warmed up. Smooth and idles perfectly at 800 RPM which I can now set with my perfectly functioning tachometer! The new HEI module certainly fixed the jumpy tach problem. I had no cut outs when I took it for a spin around the neighborhood (though that was a very intermittent problem). The HEI module is a super easy install. I'll post some photos in the morning. I think all my vacuum leaks are now fixed (but the BCDD is not connected). I'll post some pics in the morning. My only complaint is that it still runs a little rough when cold - not terrible but not great either. Maybe an aux air problem. I still need to check the timing too. Anyway, I'm really pleased with the progress and I LOVE that the tachometer is rock solid now.
-
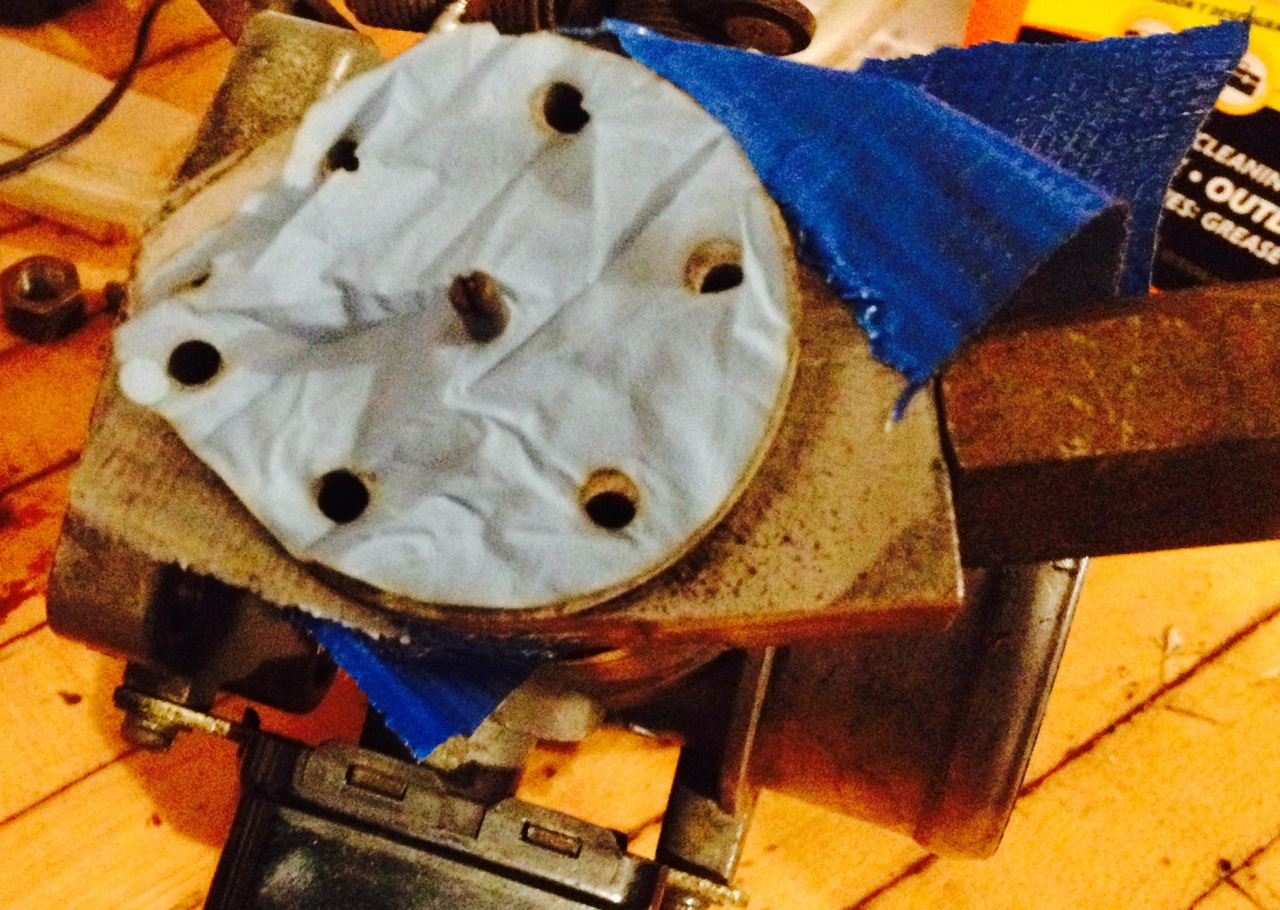
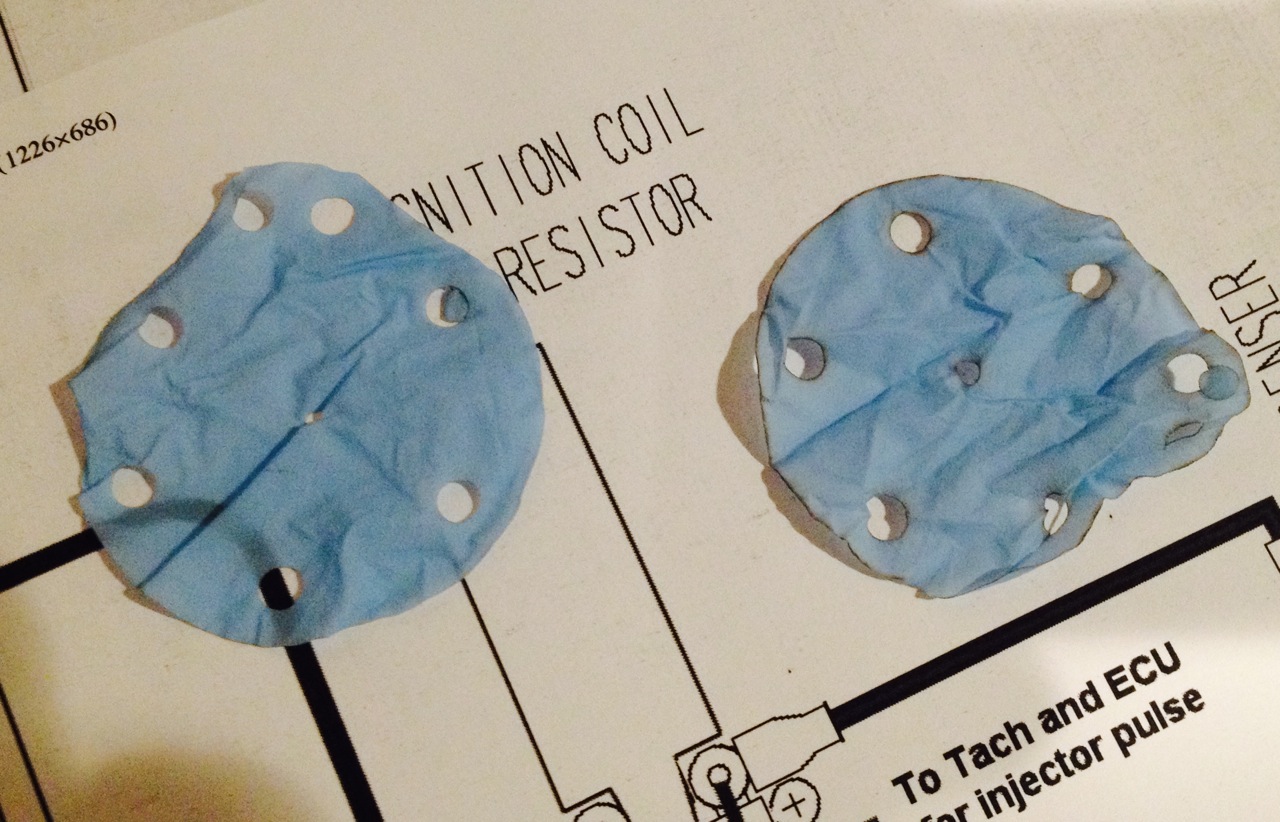
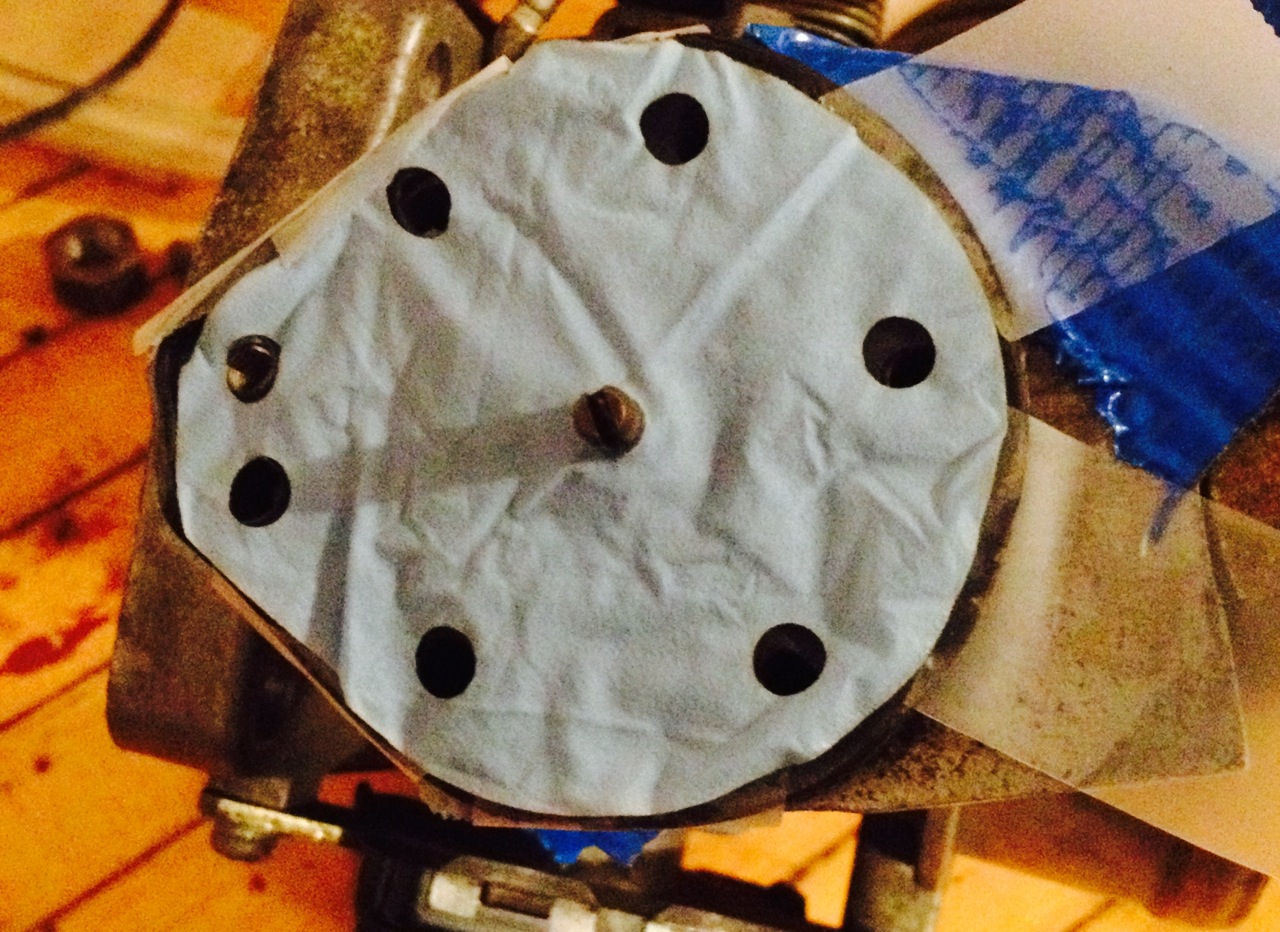
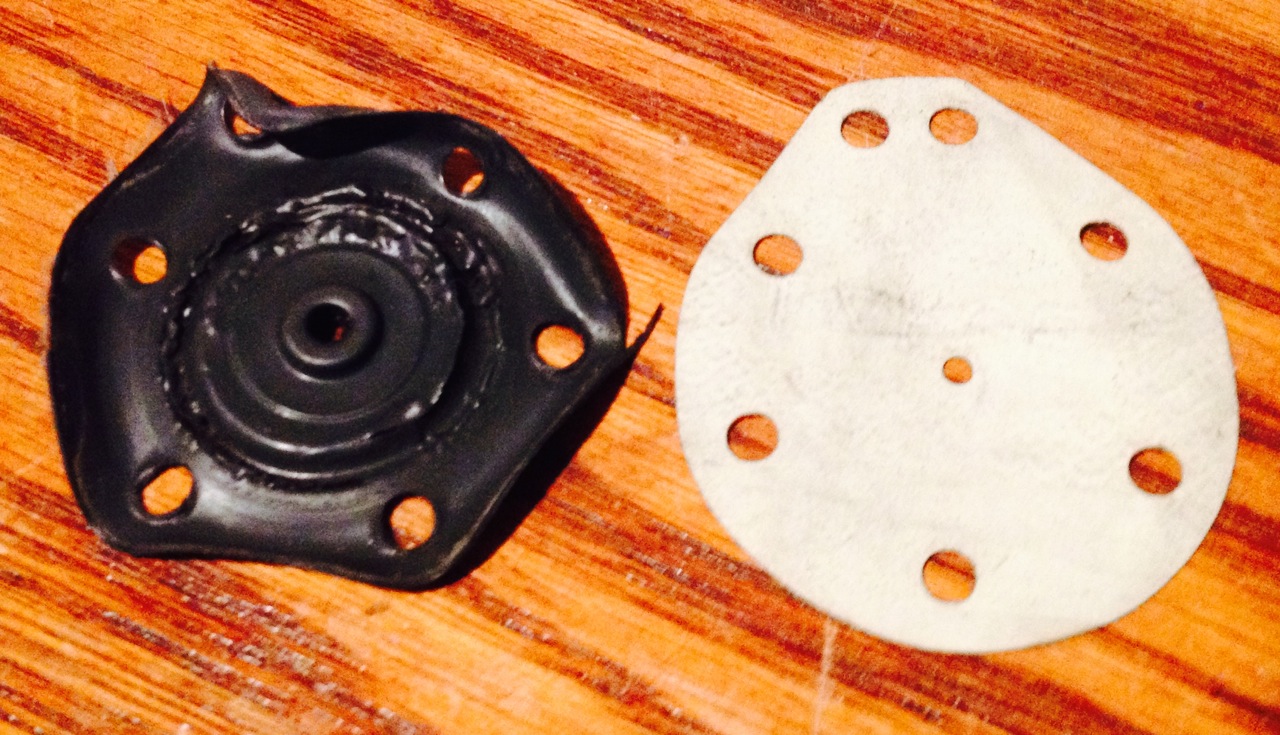
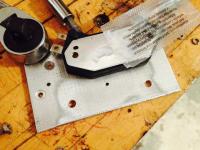
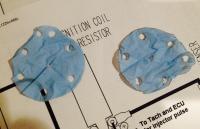
Last night I did find the time to cut new diaphragms from nitrile gloves and install them in the BCDD. I sandwiched the old, torn diaphragm between the two new ones. I kept the old because it has a rubber washer in the middle that I can't really replicate. The plan is that the new diaphragms act as a patch to the old one. I have no idea if this will work as a BCDD but it fixed the BCDD leak: My yoghurt cup test now goes well! New Diaphragms Jelly Side Original Peanut Butter Side Mmmm.... My Yoghurt Cup Test Setup While I'm at it, here is my setup in case anyone is looking for photos of this test (notice that mine is actually a sour cream test):


-
-
After I did the art work for the diaphragm, I glanced about the office for rubber or similar and used the first thing I laid eyes on. From the manufacturer's web site: "Playtex Living Gloves are trusted to provide the highest quality and protection for indoor and outdoor household chores. Premium gloves specially blended with natural rubber latex and durable synthetic Neoprene for greater resistance against harsh household chemicals. Playtex Living Gloves are strong more durable than ordinary latex gloves. Made with 4 layers to provide added protection against tears and punctures. Excellent protection from hot water. Super soft cotton, absorbent lining keeps hands dry and comfortable. Extra long Drip-Catch cuffs provide extended protection to forearms or can be folded up to stop water from dripping onto your arms. Deep palm pattern for added grip and control." Hopefully the Z is not latex sensitive.
-
Here is a crack at it. Cut from a rubber glove (I have a laser :classic: )... I'm not going to replace it but sandwich it with the broken diaphragm. The center has a thick rubber washer that I would need to replicate. I'm going to run with the bcdd disconnected for now. I just want to get the leak plugged and everything running right then come back to this. Probably will not get to the install until next weekend but who knows, I might get back to it before then.

-
-
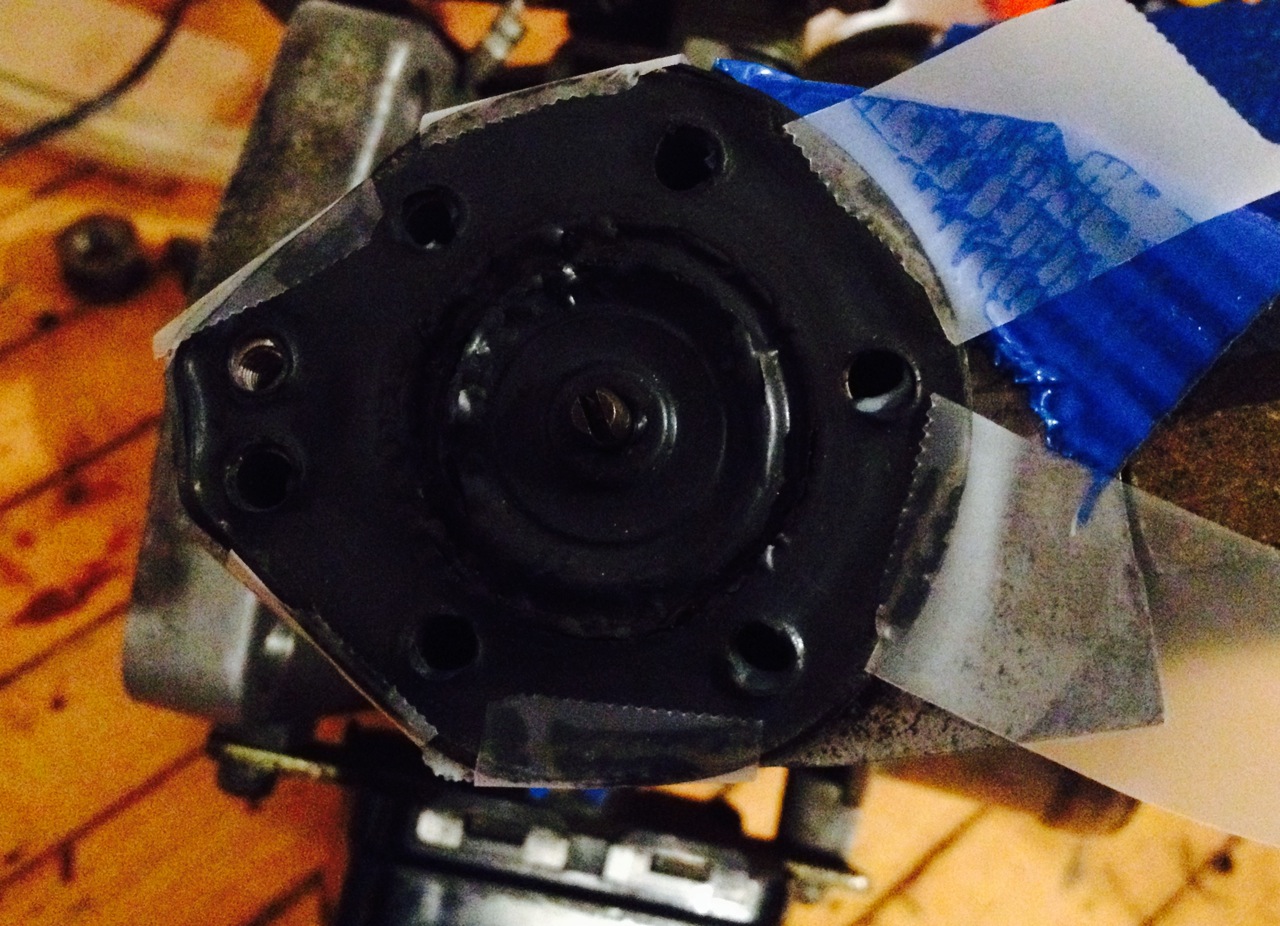
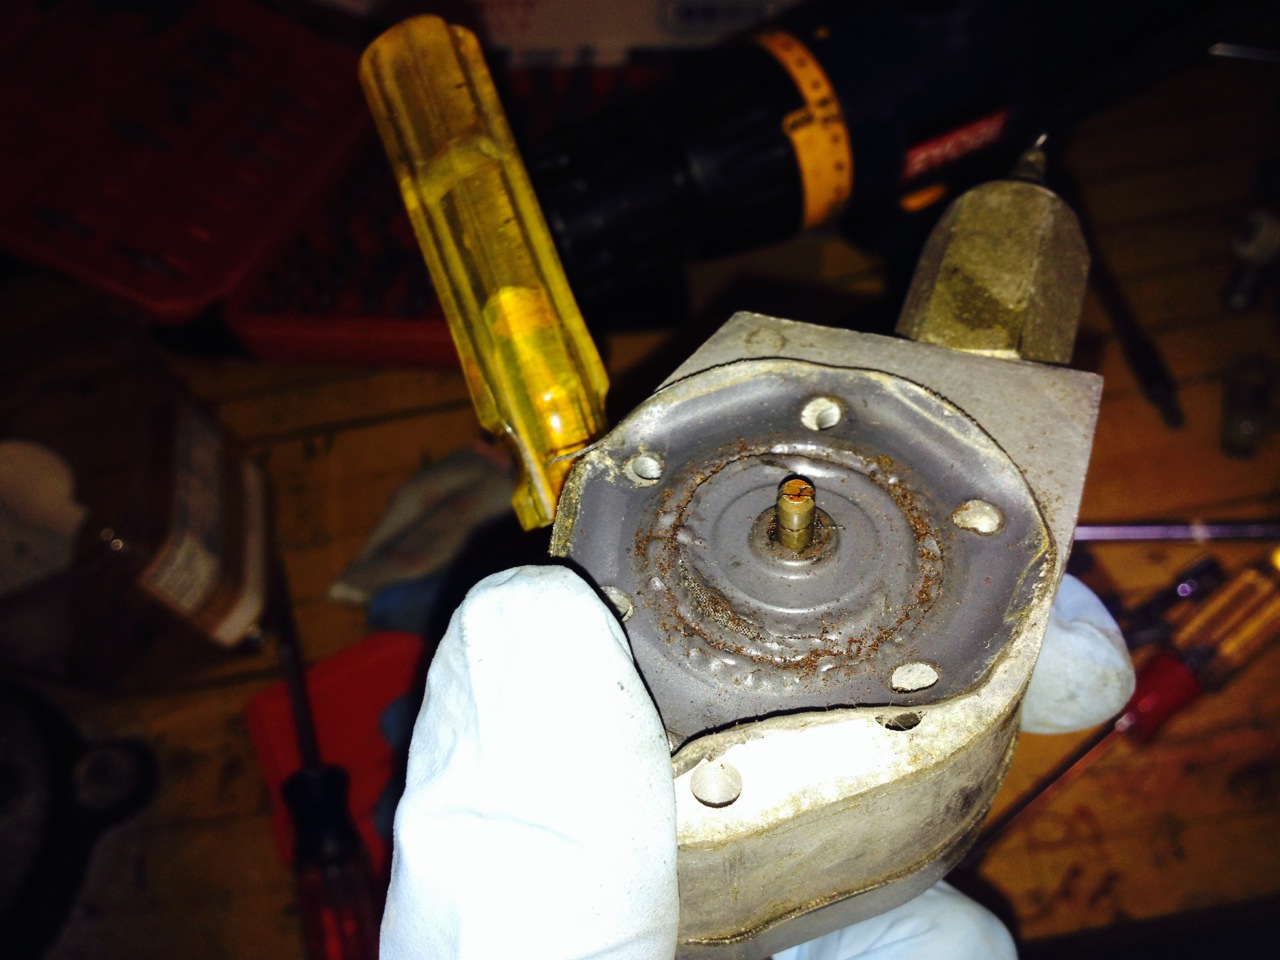
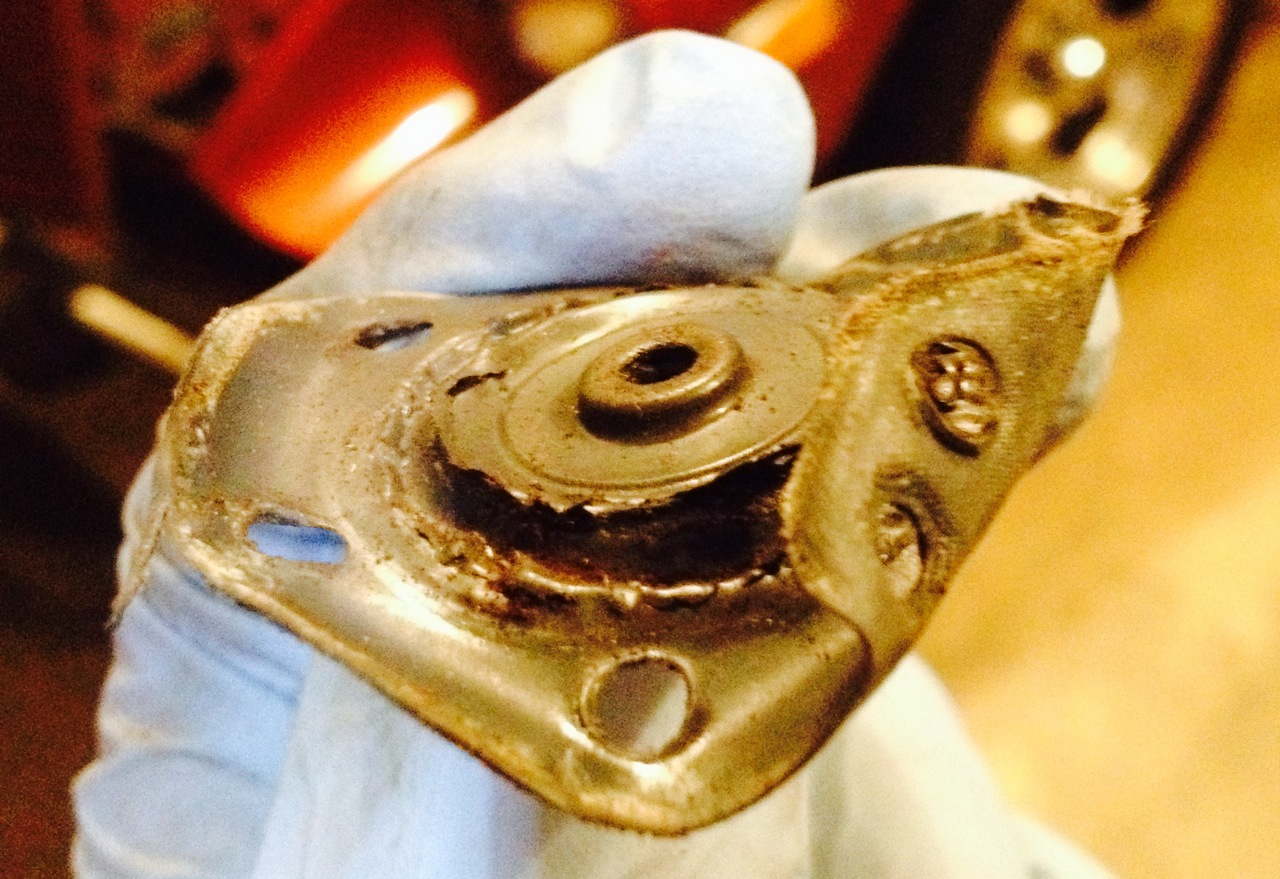
I just did the yogurt cup test and I have a leak. I didn't need any smoke to find it, I could hear it and feel it and it was in an unexpected place: There is a little hole on the side of the BCDD and air is leaking out of that hole. If I cover that hole, the test seems to go as it should - very slow leak down. For now I am hoping that a little duct tape over that hole will help but it seems that I need to do something about it. Either fix it or eliminate it? Suggestions. Dan
-
Planning a yoghurt cup test over thanksgiving. FastWoman is the gift that keeps on giving (thank you). A keen observation. That behavior was with the old AFM which had the pin bent such that the fuel pump was always on when the key was on. I did not listen for the fuel pump since the replacement. I'm sure now that I wouldn't hear it. It has a zx distributor in it. I'm quite sure the prior owner followed the Atlantic Z Club instructions. I need to check his work but I assume its an all or nothing proposition (either its hooked up correctly and we have ignition or its not and we don't). I do think, though, that it is possible that the tach might not work properly as a result of this upgrade. After that I'm going to pull the existing ignition module and see if I might have a replacement transistor for it on my bench (my other hobbies provide me with some bench stock of 70's/80's era transistors - does anyone know what that big TO3 transitor is on that board). I will also shotgun the board with anything else I might have on-hand. From the photos I have seen on the web it looks like an easy board to work on. Previous owner also replaced the fusable links with fuses. Finally, I just picked up a GM HEI module - one way or another I'll get this thing done over the long weekend. Thanks for all the help.
-
I have a feeling this is the case (i.e. I forgot what the 70's smelled like). It definitely does not smell as rich is it did before the AFM. Much more subtle. I'm going to put new/clean plugs in it (my old ones were always sooty) and see how they go. So - I did get a chance to run it a little over the weekend. It starts and idles really nicely and idles nicely once warmed up but the idle was set high. I took it for a spin around the neighborhood and it ran really well. Lots of power, sounds great and ran great but there are three concerns: I had a sudden cut out for a split second somewhere along the line - I have a feeling this is associated with the fuel pump - a replacement installed by the previous owner with questionable looking wiring. Very occasionally when I turn on the ignition switch (without cranking), I don't hear the fuel pump. Off and on again and its good. I once had to smack it with the handle of a screw driver but I'm not sure that really is what fixed it. I think I will uninstall it, inspect it, then re-install properly (for some reason he ran the ground wire all the way from the battery). When I went to adjust the idle (by ear), it consistently stalled. It sounds to me like its at something like 1200 RPM but running really well there. I need to put a tach on it (the dash tach has problems - see next point) - maybe its just my ear. It was also really cold out yesterday (25). The tach is very jumpy, especially at low RPM. Sometimes it just reads 0. Could be the tach itself or the ignition module or something to do with the distributor upgrade done by the previous owner. I need to figure this out. I'll do exactly that. It does have a new temp sensor. Thanks!
-
Unfortunately, given the giant core charge that MotorSport charges for the AFM ($400!!!!), I had to get it right into the mail for them so no longer have it available to check. But I don't know if the AFM I had was original. It looked to me like it had new electronics but the rest looked old (unlike the beautiful AFM I received from MotorSport). I have a feeling someone put a kit into it and messed it up - either abused (and cracked) the board or somehow messed it up. MotorSport did ask for the part number on my existing AFM and the new one came with the same part number so it should be an exact match - I can check this one if it helps your cause. Just let me know what to look for. Thanks!
-
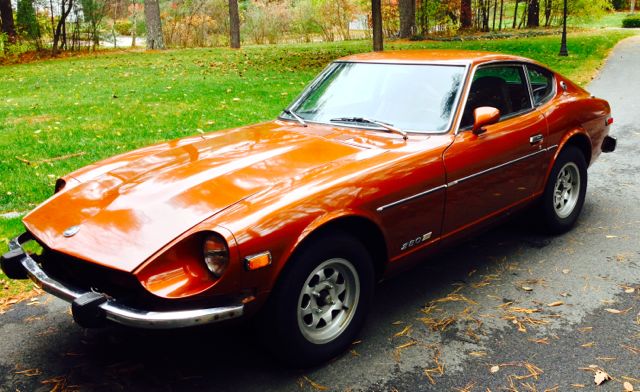
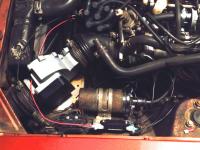
Quick update: New AFM arrived from MotorSport yesterday. Really nice looking rebuilt unit - the body is cleaned and coated - looks better than new! I put it on the bench and quickly ran through the tests - everything is to factory specs. Installed and fired up and the car now runs MUCH better, including a smooth idle when cold (and it was really cold last night, something like 30 degrees). I have not adjusted anything else but it did seem a little rich still after warm up (based on smell) but I need to go over everything again now that it has a properly functional AFM. It does already have a new coolant temp sensor and fuel pressure is good (I installed a gauge permanently) I also replaced the aux air unit (because I damaged it while attempting to adjust it - don't go there its not pretty - I was running it with a ball valve from my plumbing spares for a while - manual but effective). I didn't run it for very long either so it might have sill been cold. I should be able to spend some time with it over the weekend. I just put new wheels on it too:

-
I have a feeling that the application of a voltage to the system changed the electrical properties enough that it conducted better than when not loaded. Once warm, it actually ran pretty well though I don't really know how well it could run. I chalked up some less than smooth operation to the header and free flow exhaust. Anyway, this is part of the reason I want to bench test the new one first. I want to see what a good one looks like and might try to tweak up the old one before I give up on it. Maybe it doesn't really matter that it measures open when the flapper is closed. It actually costs $169. I get the $400 back when I return the core. I also ordered wheel center caps while I was at it. If I manage to rehab the old one, I'll take a look at that. I went over all of that. It appeared that the contracts on the wiper were in touch with the trace. I tried pressing on the wiper while taking a measurement (no help on the dead spots). I also took measurements from inside the case rather than at the pins (to take them out of the equation). I also checked continuity from the wiper to the arm that the pivot point (good). I think there is a tiny crack or two somewhere along the carbon trace. I tried taking a measurement from end to end on the trace and it measured open. Anyway, thanks for taking an interest in this. I really appreciate the help. I have been working on this car off and on for the past two years. Its time to finish it!
-
I pulled it out again last night and found that it still read as an open circuit when the flap was closed but could get some readings out of it when I moved the flap (which jives with the voltage readings I was getting for the powered test). It was very jumpy so I cleaned it with deoxit. Made no difference at all. I also noticed that the fuel pump shut off switch actuator arm was bent. I straightened it and it seemed to be right but I have come to the conclusion that this AFM has been messed with. I just ordered a rebuilt one from the Z store. $400 core charge - ouch! I am going to bench test it before I install it and and will post the readings from a new one here for future reference. Thanks for the help. Dan
-
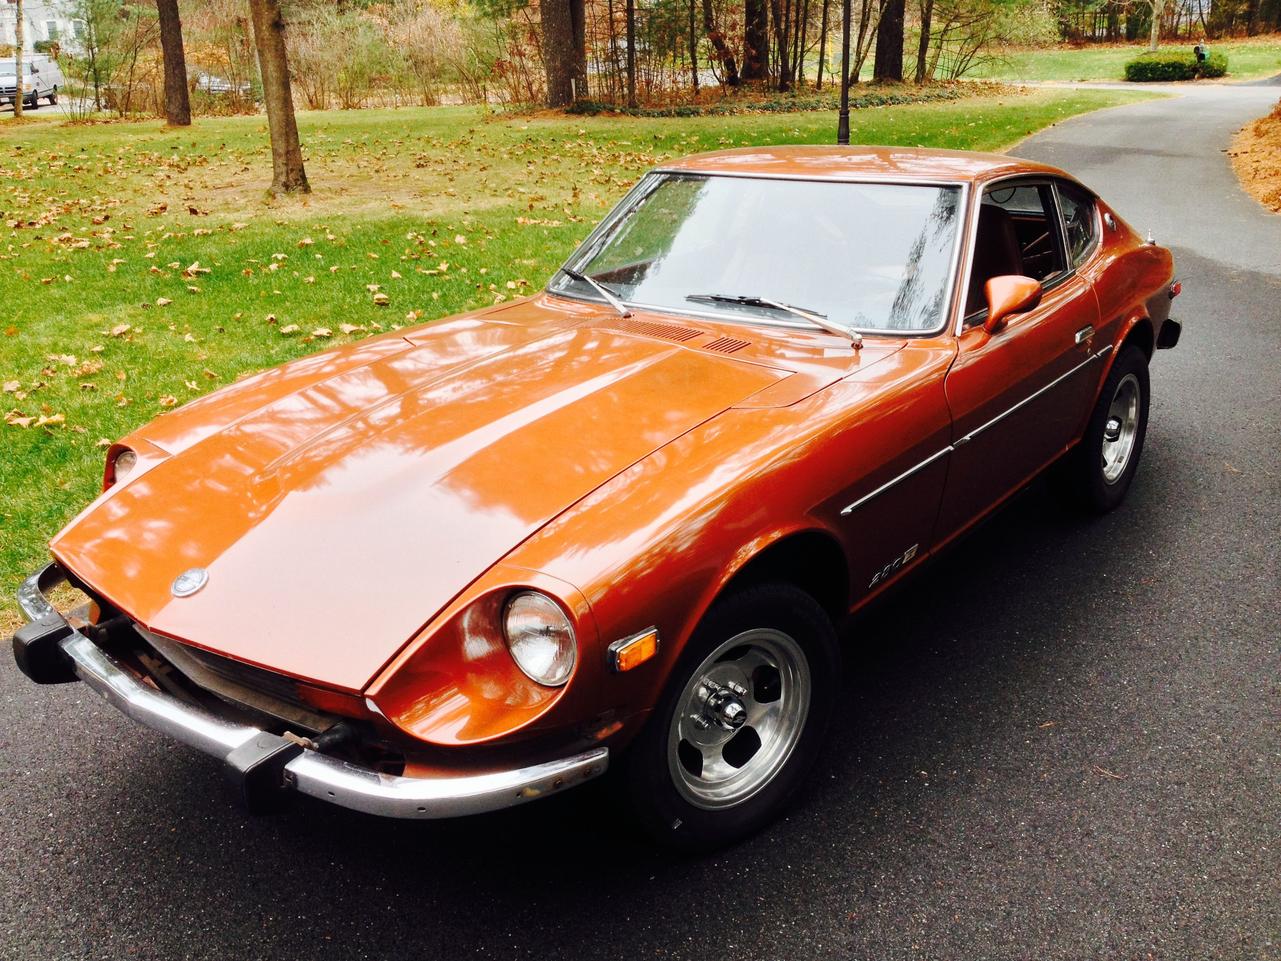
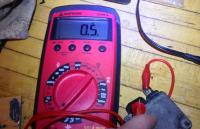
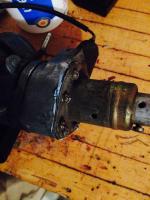
HI All, I haven't been here in a long time but I have been gradually working on my 76 280z. Lots of new parts including all new injectors (this car came to me in pieces and with some missing pieces, including the entire exhaust system). Anyway, it runs but runs rough when cold, not bad when warm but still seems like it should be smoother. I was running through some of the resistance checks in the EFI manual. I had suspected the air/water temp sensors because it is running pretty well when warmed up but those checked out OK, at least the cold measurments did. Anyway, I was surprised to find problems when checking the AFM as it looks like the guts are new. Here is what I am getting: Pins 6/8 - 230 ohms. Good, I think (spec says approx 180 ohms) Pins 7/8 - open. Out of spec, should be "small resistance" Pins 8/9 - 120 Ohms. Good (manual says "approximately 100 ohms). Pins 7/8 - Voltage tests seem OK as I vary the opening of the flap. No Jumps. Good. Pins 36/39 - Continuity always. Out of spec but I don't think this matters. 6/7/8/9 to body all open. Good. Given that it runs pretty well when warm, are the out of spec measurements of any consequence here? It seems like the pins 7/8 being open are the only really problematic issue but I have no idea if this is really a problem. The AFM looks like someone put a kit into it or something. The little board in there looks brand new could it have been installed incorrectly? Let me know if you have any suggestions. Thanks, Dan Here she is:

-
Its been a while.... So here is what happened: April gets busy around my house. The grass starts growing, I have to mow it. The house needs painting, I have to paint it. The wood needs stacking, I have to stack it. etc. The mower is now put away. The house is painted. The wood is stacked. The Z awaits. So, here is what happened: I did get the EFI wiring hooked up in April and tried to start it. I used a combination of labels provided by previous owner, manuals, and wire memory to figure it out. Once this was done, the engine cranked just fine but there was no ignition at all, it didn't even try. A short investigation revealed that the fuel pump wasn't running. I put a meter on it. No (well, very low) voltage. That's when I was over-run with all the homeowner stuff. Finally, two weeks ago, I drag out the EFI manual and turn to the most basic wiring diagram. Within 5 seconds I knew what my first problem was. The previous owner had removed the AC and there were a few dangling wires. Basically any wire I saw without a mate I assumed was part of the AC. This was not quite true. The EFI ground wire (red!) had been removed by the previous owner (and he did mention it but i recalled it as he had disconnected the fuel pump - and there was a dangling wire at the fuel pump that I reconnected). So, I sort through the "leftovers box" and, sure enough, I find the snipped off EFI ground wire. I take my time and nicely splice it back in. Roll the car out on the driveway, turn the ignition on (but don't crank it) and I hear the fuel pump! I leave it and inspect the fuel lines - its all good. I crank it for about 30 seconds and it fires! It ran pretty rough for a few minutes but not awful after that. It did not like to start at all, always took 30 seconds or so. I decided to replace the cold start valve (the only injector that had not been replaced). Now it fires instantly every time. Still runs rough when cold. Pulls strong after warm up. What I have done so far All (7) new injectors (with new hold down bolts, not screws!) and thorough throttle body cleaning. New vacuum hoses. New motorsport header and exhaust (not sure I like it - sounds like a truck to me) All new brakes (drums, shoes, cylinders in back, calipers, pads in front - rotors were in good shape. Old calipers leaked. New master cylinder) Wires, plugs, cap were new via previous owner. Fuel pump new via previous owner. New lug nuts (it was an adventure getting the old locking lug nuts off without a key - broke lots of craftsman sockets). New fuel filter Lots of other misc small stuff. Plan on checking valve clearance and timing next. Then back to the trouble shooting section of the EFI manual.
-
Quick update - I have the header and the EFI on. Now trying to figure out how to hook up everything. I am getting most figured out and the previous owner did mark many of the leads. Its taking some patience though...
-
I just called the Z store and they had no problem sending me out a new gasket. I asked why an OEM gasket was no good and they told me it was because it had metal facing on the manifold side that causes a heat problem with the header.
-
A little more info on installing new studs - I found the following info at Auto Service Professional In the majority of cases, screw the studs into the block FINGER-TIGHT ONLY, or with a very slight amount of pre-load (specific manufacturers may recommend as much as about 8 to 10 ft.-lbs. of pre-load). Do not double-nut the stud and tighten severely. Remember — the torque value given for the installation refers to the tightening of the nut only, not the stud itself! If you desire a “fixed” installation (locking the studs in place for future servicing ease), the studs may be chemically adhered to the block threads. If stud removal is required in the future, the application of heat will break the compound down. If a locking compound is used, be sure to immediately install the main cap before the compound sets, to avoid any possible misalignment of the studs in relation to the cap. This means installing the cap and tightening the nuts to specs, before the thread compound hardens. This allows the necessary preload to be placed on the stud-to-block thread engagement before the compound hardens. Remember: The use of a locking chemical really isn’t necessary, unless you want to ensure stud position during repeated and hurried main cap changes. When installing the studs, simply make sure that full thread engagement has been achieved. In other words, make sure the studs "bottom-out," with all threads engaged. I will be installing them dry (but with anti-cease on the nut threads).