.JPG.51e80f79d93a77e0045673b165973860.JPG)
moritz55
Free Member
-
Joined
-
Last visited
Everything posted by moritz55
-
 Yes... the old plates were bent. Having them bent back to a 90degree postion won't do much but further weaken the angle. Driver side plate was bent backward slightly while the passneger side was bent forward slightly due to the rear end torque as a result of acceleration over 37+yrs. I thought of swapping mounting the driver side with the passenger side to reverse this troque deformation, but my car would daog track the other way. So I just decided to prevent this opportunity again and had new one built. Went with slightly thicker steel, a slightly wider plate tapering it to fit properly into the transverse bracket while also adding the gusset to prevent bending. I think if you take the old ones off and have them straightened and add a gusset - you may be okay. Only thing is I'd slot to top holes a bit to allow sliding the aft transvere links left or right for squaring up to prevent dog-tracking. That's why mine are wider at the top to allow for a larger slot to give me plenty of aft movement in case my body was a bit out of square. Anyway - hope this helps.
 -
I spent a lot of time on my 73 240z thinking the same - were my rear-control(transverse link) arms bent because they are old and the same part design for both sides. Just flip the driver side over and it will work on the passenger side. So after replacing my Differnetial Mount and straigthening my Mustache bar and putting in new bushings which helped get rid of vibrations and noise - I noticed my rear vertical braces that hold the aft transverse link rear ends in place were bent. The driver side was bent back and passenger side bent forward reflecting the typical torque the 240z rear sees upon accelerating (driver CV drives the car, then through backlash/traction, the spider gear in the Differential transfers torque to the passenger side). So rather than having them bent back to true position I had new brackets fab'd up with some slots on the top mounting surface and lower point where the transverse bracket attaches to make some minor rear adjustments. Here's an article with some Rear alignment data and modifications that I made. It's a long article but scroll down to 87 & 88. I had the custom Vertical Brace plates that the Transverse bracket mounts to in helping correct a Rear Toe problem and daog-tracking. http://www.classiczcars.com/forums/showthread.php?t=33630&page=4&highlight=alignment My goal was to get my rear toe in total under 0.50 and evenly split between driver side and passneger to prevent dog-tracking. As of this past summer - I had the alignment checked again after adding new coils and shocks which increased my car to stock height in the rear and my rear wheels were: Driver 0.21 toe-in and Passenger 0.22 toe-in for a total Toe of 0.43. I've added about 2000 miles since doing the rear end rebuild last year and my Rear Toe-In hasn't moved or changed. I just put the car away for the winter - and will re-torque the bolts to assure they haven't moved in the spring. Good luck and happy driving.
-
Your Total rear Toe is just a little High. It should equal or less than 0.50" . so it also looks like your passenger side rear rotated forward a bit and this is exactly what my car had after 38yrs - and your dog-tracking a bit. What happens over time is since the drivier side axel really drives the car if you have an R180 or R200 rear end differential - and then through the spider gear it translates to the passenger side so it's natural that over 38yrs of accelerating you'll get a slight rotation (driver side less toe-in, passenger side more toe-in). Your only option is to jack the car up on jack stands so it's almost level relative to the floor - such as a concrete drive way and remove the rear wheels. Drop some plumb line marks to the floor (put tape on the floor for easy marking) from transverse link points that are the same from driver and passenger side of the car. I used the rear transverse link brace and bolts, the outer transverse link bolt center (both rear and forward). You'll need to use some Trigonometry to estimate how much you'll need to move the Passenger side rear innerward toward the center of the car. I think in my case for 1/8 inch move inward - reduced the Toe-In by 0.40"(sin = 1/8inch divided by 18inch(transverse link pivot length) = 0.40degrees). Anyway so in your case you may need to .. Then you loosen the rear transverse link bolts slightly and tap with e 2-3lb mallet to pull inward the rear. It was hard for me to do this so I had new vertical plates made with slots to allow me to move easily slight the them. Here's an article with some Rear alignment data and modifications. Look at article 87 & 88. I had custom Vertical Brace plates that the Transverse link bracket mounts to help correct a Rear Toe problem. http://www.classiczcars.com/forums/s...ight=alignment Once you've move it some - retighten and confirm the change in position. Someitmes you have to do it several times since the tigthening process moves the braces somewhat. Anyway - good luck and keep us posted..
-
Here's an article with some Rear alignment data and modifications. Look at article 87 & 88. I had custom Vertical Brace plates that the Transverse bracket mounts to help correct a Rear Toe problem. http://www.classiczcars.com/forums/showthread.php?t=33630&page=4&highlight=alignment As Jon says, your rear Toe data is pretty good as is the camber. Any total toe-in on the rear of less than 0.50 is good and as long as it's split 50/50 between each side to assure it tracks straight - I'd leave it alone. Good luck and happy driving.
-
Hello, I just wanted to share how I finally resolved my weatherstrip / door slamming problem. I instaleld orginally the Precision Weatherstripping (that requires the separate Welting from MSA) and my doors were terrible to close. The rubber never softened up nor stayed compressed along the front fender area. I called MSA and inquired about their Nissan OEM weatherstripping (the type that requires welting to also be added). They only had the passenger door so I ordered 2 sets and wanted to compare the rubber softness to the Precision ones. MSA's PN is: 76801E41 and Nissan's PN is 76801E-4100). Here is the link to MSA's site for the Nissan OEM Passenger Door Weatherstripping: http://www.thezstore.com/page/TZS/PROD/76801E41 When they came, immediately I noticed it was much softer and compressed nicely without much effort. So anyway - how did I convert a Passenger Door weatherstrip to fit on a Drive Door? Well it was pretty simple but must measure the Long & Short lengths from the 90degree corner first. I cut the Long run at proper length to now make it the Shorter run. Then took the left over material and attached it to the Original Short leg. I noticed there was actually a seam at this length so this is how these must be made at the factory. Anyway I used Contact Cement and added it to both pieces prior to attaching allowing the cement set for 5mins. Once attached the Original Shorter run now becomes the Longer run for the Driver Side door. This converted the Passenger weatherstrip to a Driver weatherstrip for installation., it spliced superbly - looks like a factory seam. Now both my doors close very nice without slamming and no air leaks - in fact I could pull the doors in closer to the body for a better fit. Just wanted to share this .. hope it also helps. Many thanks,
-
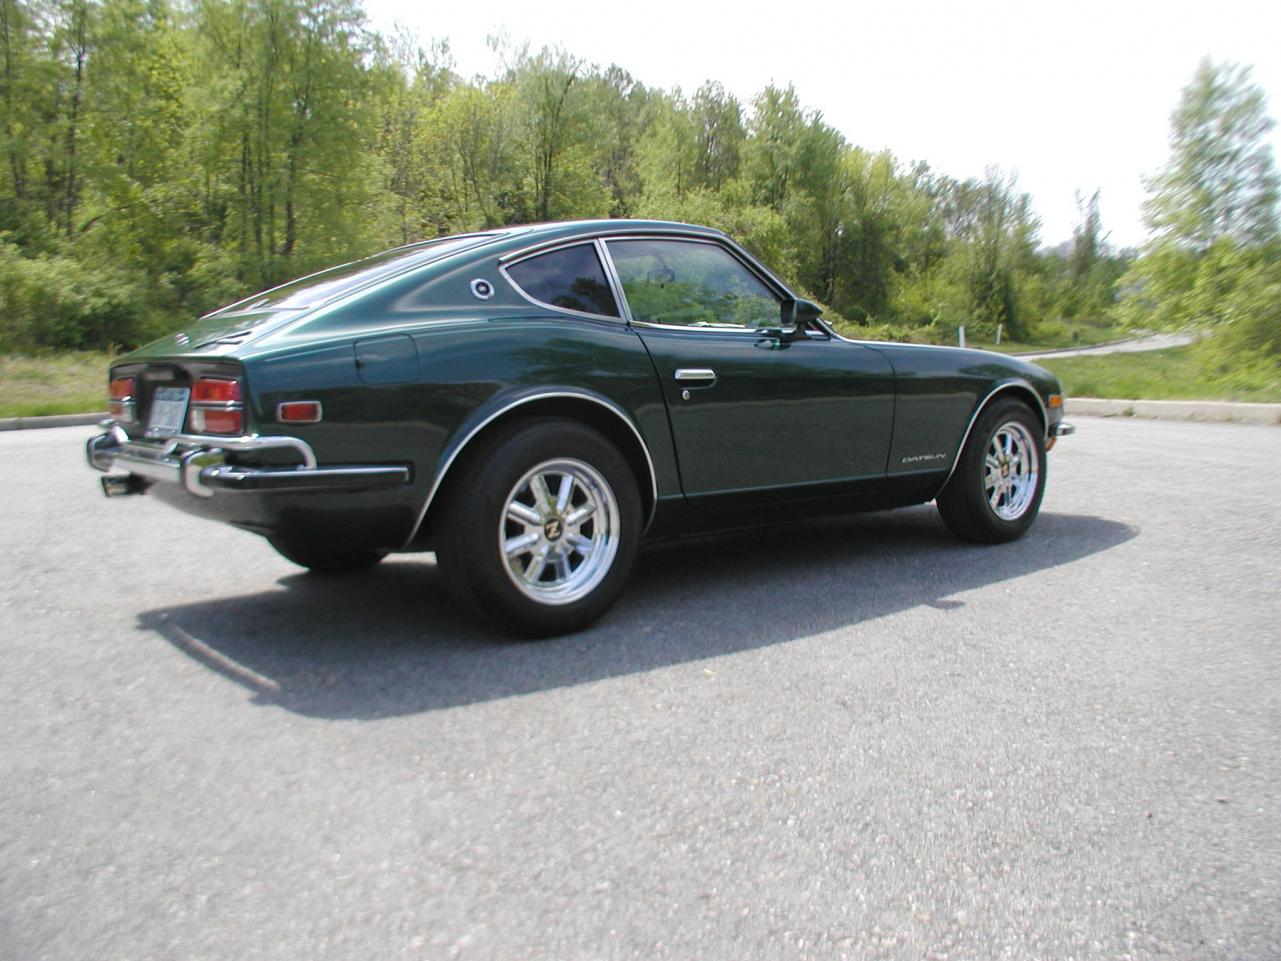
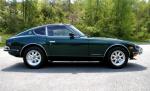
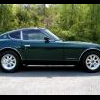
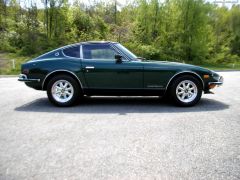
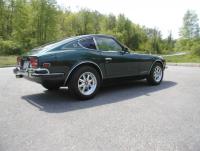
 Just finished painted, applying clear coat and buffing out the orange peel on the rear quarter panel. When I removed the body side modeling - I had 2 different colors and needed to repaint and blend the colors. I also applied the Xpel / 3M Film for Paint Protection on the rockers.
 -
 Just finished painted, applying clear coat and buffing out the orange peel on the rear quarter panel. When I removed the body side modeling - I had 2 different colors and needed to repaint and blend the colors. I also applied the Xpel / 3M Film for Paint Protection on the rockers.
 -
 Just finished painted, applying clear coat and buffing out the orange peel on the rear quarter panel. When I removed the body side modeling - I had 2 different colors and needed to repaint and blend the colors. I also applied the Xpel / 3M Film for Paint Protection on the rockers.
 -
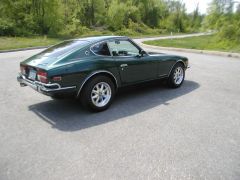 I removed the body side molding and found 2 different paint colors. So I had to repaint and clear coat the passenger rear Quarter Panel. Used 2 stage paint, 1000 and 2000grit wet sanding and a lot of buffing to remove orange peel.
 -
 I removed the body side molding and found 2 different paint colors. So I had to repaint and clear coat the passenger rear Quarter Panel. Used 2 stage paint, 1000 and 2000grit wet sanding and a lot of buffing to remove orange peel.
 -
 I removed the body side molding and found 2 different paint colors. So I had to repaint and clear coat the passenger rear Quarter Panel. Used 2 stage paint, 1000 and 2000grit wet sanding and a lot of buffing to remove orange peel.
 -
 Repaired, Painted and Clear Coated the Rockers, prior to applying the Xpel / 3M Film Paint Protection.
 -
 Repaired, Painted and Clear Coated the Rockers, prior to applying the Xpel / 3M Film Paint Protection.
 -
 Repaired, Painted and Clear Coated the Rockers, prior to applying the Xpel / 3M Film Paint Protection.
 -
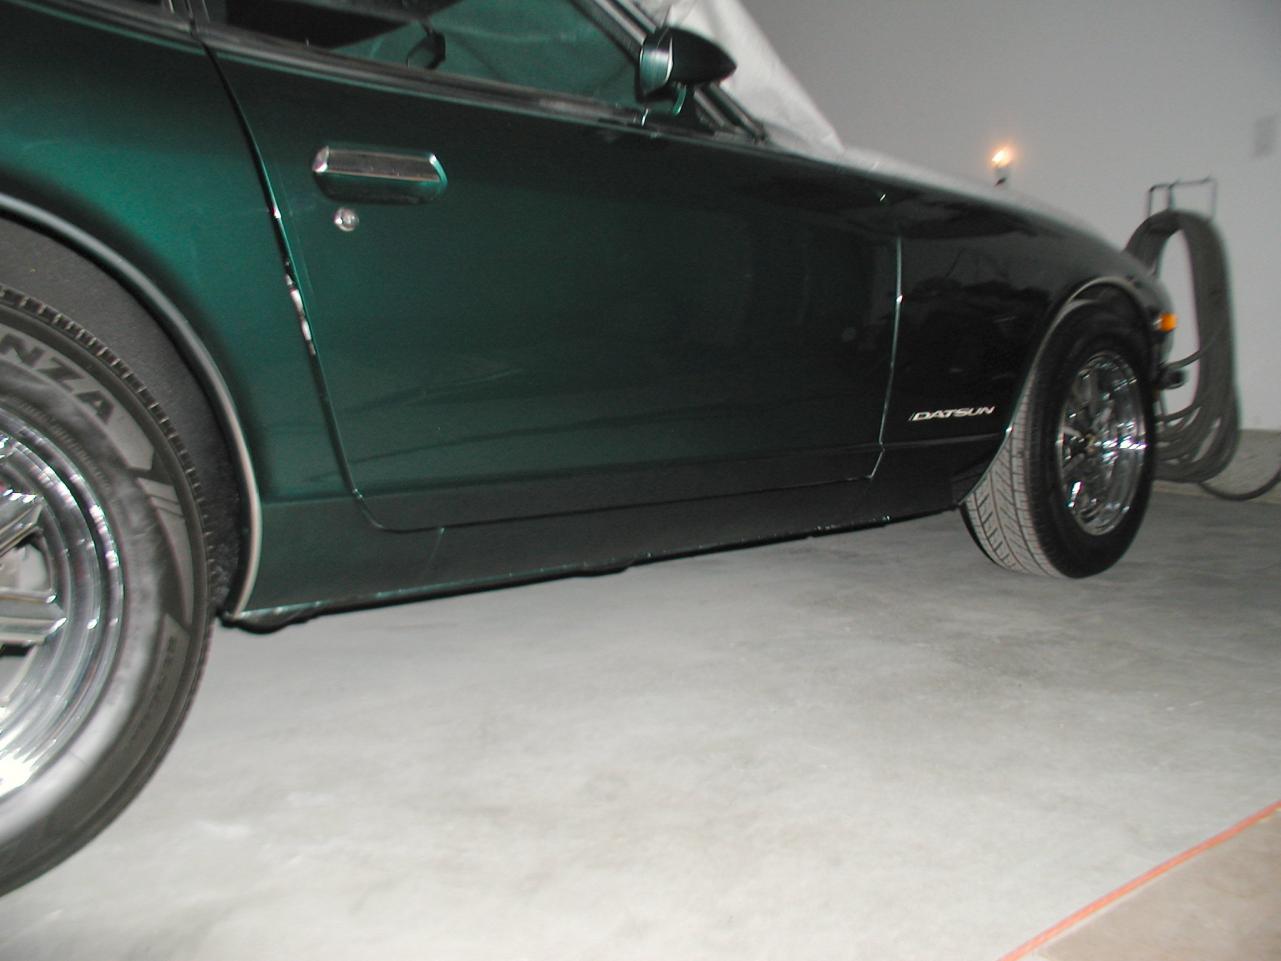
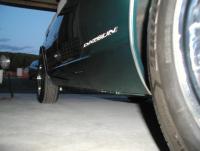
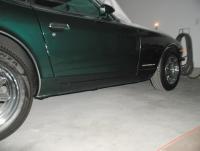
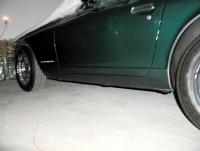
 I repaired and painted the rocker panels and lower part of the door. Applied Xpel Paint Protection Film. The Xpel Film makes it look slightly darker - but adds quite a nice shinse.
 -
 I repaired and painted the rocker panels and lower part of the door. Applied Xpel Paint Protection Film. The Xpel Film makes it look slightly darker - but adds quite a nice shinse.
 -
 I repaired and painted the rocker panels and lower part of the door. Applied Xpel Paint Protection Film. The Xpel Film makes it look slightly darker - but adds quite a nice shinse.
 -
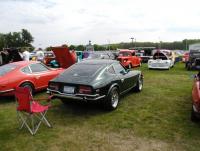
Update .. here's a couple of pictures at Saturday's Rhinebeck Car Show. The Xpel Paint Chip Guard Film showed pretty well. I did got quite a few compliments on the results and look of it so I was pleased..

-
Well, Alan from A&B Mobile Installers - Mobile Service finally came and we finished adding the Xpel film to the rocker panels this past weekend. It took much longer than I would have planned as we had to scrap our 1st pass due to poor adhesion on my rear fenders. It was good that I had plenty of material .. this is a key point. Xpel kit had two, 9 inch x 15 foot pieces. Anyway - we used one piece for the entire rocker and lower door running the straight edge just up to the crease in the fender and door. Al (Installer) used his alcohol/water mix and cleaned the surfaces 3 times including the inside lips where the film gets wrapped around. He also has in own brew of soapy solution using baby shampoo, liquid soap and water becuase it minimizes bubbles and is real slippery. Once the piece was cut he soaked up the entire piece with soapy water and removed the entire backing. I helped hold the long piece for the rocker panel as he then soaked up the car with soapy water. 1) He started lining up the top edge squarely just behind the front wheel leaving 1 inch extra hanging into the wheel well(we made sure at least 1 inch extra long to over hang into the rear wheel well). 2) Continued spraying soapy water downward and toward the rear as we "floated" the film into place along the top edge of the door and fenders lightly by hand. 3) He then used his own larger squeegy (about 4 inches - the one with the Xpel kit was about 2 inches) swiping it up first then from the top down and top down toward the rear working out the soapy water and air bubbles constantly spraying the surface. Did this until the entire piece was put into place while not fully wrapping the lowest edge around the under body yet. 4) After he had it positioned on the full rocker and lower door as 1 piece, he used an Exacto knife (with a new sharp blade) cutting the film along the center gap of the door. 5) With the door now cut, he finished wrapping the lower part of the rocker under the body of the car allowing a good 1/2 inch extra to attach securely as he trimmed off excess. He used alcohol and his heat shrink blow dryer to accelerate curing and setting up of the film adhesive. 6) He then moved upward to finish tucking and wrapping the door edge and rocker edge using a lot of soapy water pushing the edge around the bottom of the door. He used the heat gun to get the material tacky for better bonding and worked it constantly pushing it into place as it tacked itself. Must have taken more than an 1hr to get the entire piece set and trimmed once it was on the car. He actually started the other side getting that film placed and the door trimmed so it can be opened so he could work the edges alternating between passenger and driver side as the material set up. Anyway, it must have taken almost 4 hrs or so to do both sides and he came back the next day - Sunday to finish heating and stretching the film into the body seams where he could. Spent about 2 hrs working it and finishing up any minor trimming and also putting on the small rear pieces. He actually had to slit the film where front rocker body seam is under the front door jam and folded it into the body line crack. Overall it looks pretty good with a nice shine, I included some photos. I did buy the Xpel Protection Film Sealant ($19.95 plus shipping) and will apply that before driving it. Supposedly every 6mos it's good to apply this to seal the film surface and keep it looking like new. If anyone is interested in A&B Mobile Installers info let me know (NY, Dutchess/Putnam Counties) - I would definitely recommend him (his email is: alannyas@me.com ). He also has a shop in New Jersey and works on new cars there also. It was well worth it, I ended up giving him $120 since it took so long and he came back Sunday.... many thanks all for the advice and recommendations!


-
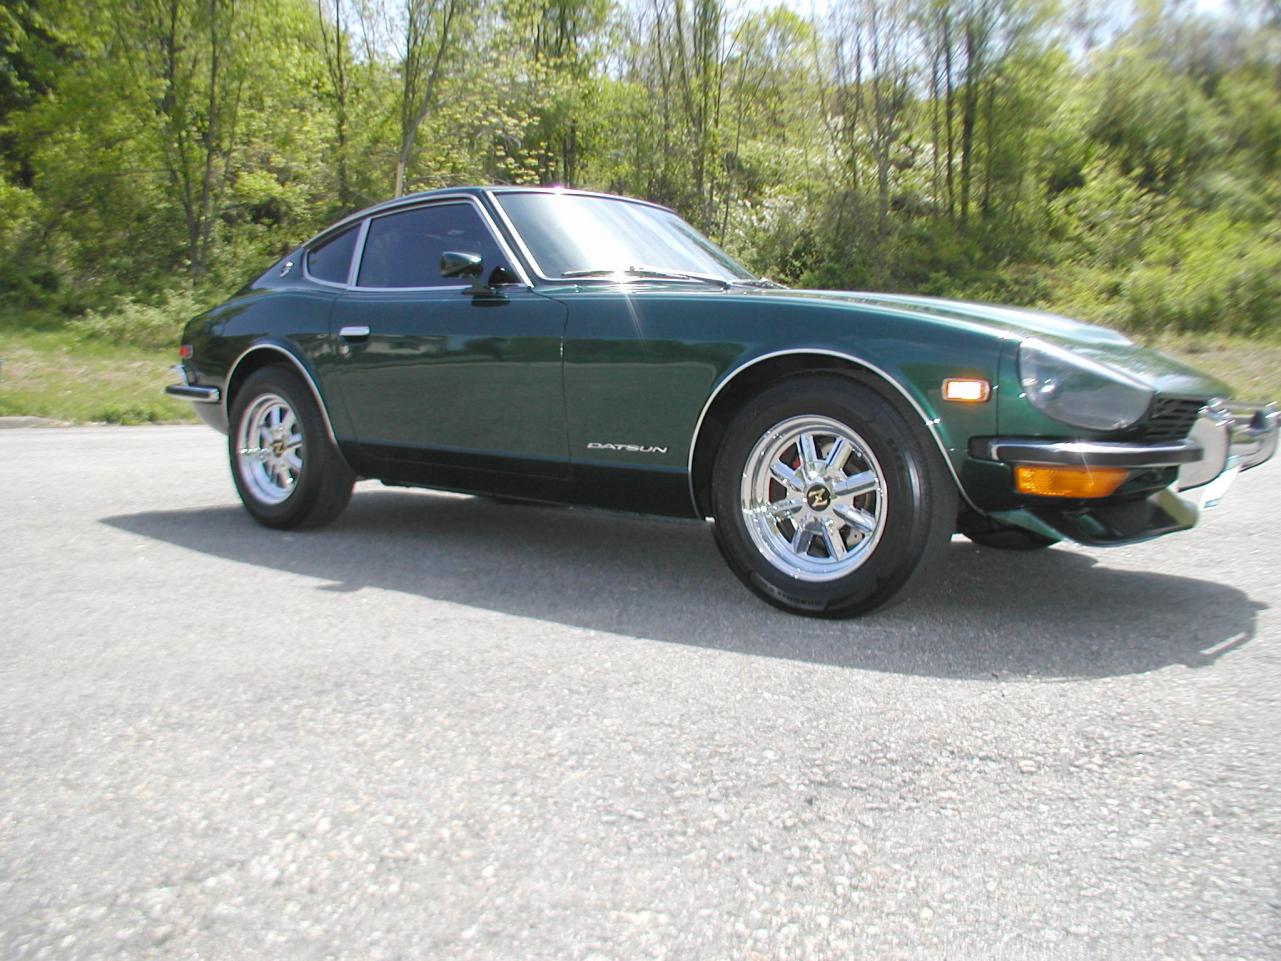
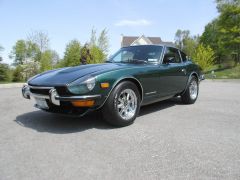
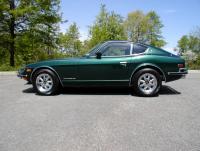
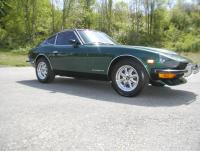
Just a great looking car , the wheel rims & color combo look terrific !! Great work on restoring it to true beauty .... Enjoy the ride...
-
Just wanted to update you all on the status here. 1) Xpel Chip Guard material came in. Took about 8 business days for delivery as I ordered it off the internet and went with the cheapest shipping. It was in stock. Two(2) 15ft rolls - 30ft total x 9inches wide. Cost $211 .. 2) I called www.Xpel.com to find out who is an expert installer locally close to me in Dutchess/Putnam County NY. They pointed me to A&B Mobile Installers - Mobile Service; located 12miles away from me. I called the owner Alan - he actually came out to look at my car this past Sunday. When I told him it was a 1973 240z over the phone, he knew these cars were "rust buckets" so he wanted to be sure the surface was cleaned up nice, fully cured, extremely smooth and ready to accept this Chip Guard Film before making any commitments or estimates. He said Paint/Clearcoat Surface defects will "bleed through" so he said SEM Chip Guard Paint will tend to hide them slightly more for surfaces already dinged up, but is less transparent and much more noticeable than the 3M or Xpel Chip Guard Film. Also SEM Chip Guard is not as durable.. where as 3M & Xpel Chip Guard Film will actually tolerate a Key Scratch and not leave any marks !! ==> He'll do the installation for $100 in my garage this weekend with me helping him. He'll bring all his equipment and materials. Said if I'm not happy with the install look we can take it off before it starts to dry and cure very easily. Since I have plenty of material .. I felt I can't go wrong and will learn from him. Hopefully .. next post will show the finished job. Many thanks....
-
Many thanks ...palosfv3 ! I'm compiling all my notes while I wait for the clear coat to cure and the film to come in.
-
Well , just an update .. Thanks to Dave's advice (cygnusx1) I ordered the 9" x30ft Clear Paint Protection Film from .... www.xpel.com . For the 30ft roll it's $199 so with shipping it came to $211 . The video and Dave's instructions make it sound doable by anyone that's got a good eye and steady hands. Key points are cleaning the surface properly and keeping it very wet contstantly till in position with soapy water from a spray bottle. xPel's - 8mil film has an 7year guarentee and can be removed carefully without pulling paint off. Their website shows how to do it: http://www.xpel.com/care/ Sounds comparable to 3M's Protective Film. Anyway .. next update will be when the time comes to tackle the Chip Protection Film. Take care...
-
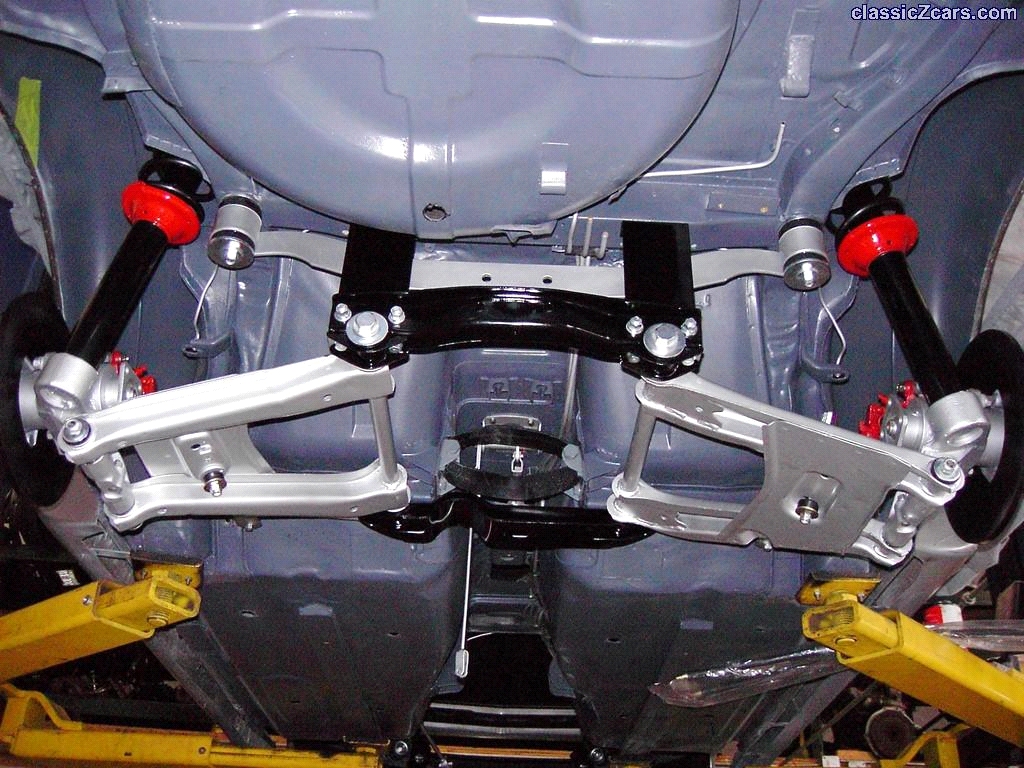
It sounds like your vertical braces (the 2 black plates in the photo in my prior post above) which come down from the body and attach to the cross member are bent. Your driver side may be bent forward and your passenger side is bent back causing the rear to be slightly rotated to the right. Also for the R200 - the mustach bar is reversed such that the space between it and the black vertical braces I referenced is barely 1/4 inch .. maybe a little less. Check this to see how bent they may be. If you are handy ... drop some plumb lines to your garage floor (plumb line I used was twine with weight on it like such as a fishing 2oz or 3oz sinker). I put tape down on the floor so I can mark the plumb points easily. If you also have a Carpenter Square or Tee Square it will help so you can get some right angles off your plumb marks on the floor from the car body/frame and compare it to your rear transverse link left and right bolt positions. Just be symetrical on where you make your plumb drops off the body - from the same position on right vs left side. Two good body plumb reference points are the left and right mustach bar bolts since they attach to the body. If you drop them down to the floor... and connect the two points with a line.... Then .. drop two plumb points from the center of the rear bolts on transverse link that attaches to the two vertical braces... connect these two points with a line also .. Now with these 2 lines... if your rear end was square they should be parallel (have equal distance between them)... if they are not - you can calculate the rotation angle and toe-in differences using the Carpenter Square and simple Trigonometry. Here's some easy trigonometry info: http://wright.nasa.gov/airplane/trig.html Here's a sine table: http://wright.nasa.gov/airplane/tablsin.html Here's a tangent table: http://wright.nasa.gov/airplane/tabltan.html Hope I didn't make it to complex... but you should be able to diagnose how much out of square your rear end is... Good luck.....
-
WW2Winger is correct... I observed the same when looking under mine prior to bushing, coils/shocks were being planned to be replaced....and since my steering wheel was always turned slightly to keep the car going straight down the road. I knew it was dog tracking slightly.... I've attached a photo from this website of a New Rebuilt stock 240z. It may help you better understand the suspension. Here's my rear end rebuild and dog-tracking fix. Read post #77 and beyond as it's my experience on what I did to correct the dog-tracking. My rear end also is much more quite as I'm sure I was dragging the tires: http://www.classiczcars.com/forums/showthread.php?t=33630&page=4 What I found was that my rear end was twisted such that the driver wheel (-0.01 degree, toe-out) was 3/8 inch further back than the passenger wheel (+0.46 toe-in). After all my work they are now square and my toe-in for both rear wheels is in spec and equal for each rear wheel.... around 0.21 degrees toe-in for each wheel if I recall. Hope this helps....and good luck.